Tags
Introduction
Tags are labels or keywords assigned to data, files, or pieces of content to facilitate categorization, search, and retrieval. Tags are typically short, descriptive terms or phrases that help identify the characteristics or attributes of the tagged item. Tags can be user-generated, allowing individuals to assign tags that make sense to them personally. Alternatively, they can be predefined or standardized, providing a predetermined set of tags to ensure consistency and facilitate efficient search and retrieval across a system.
How to Manage Your Tags
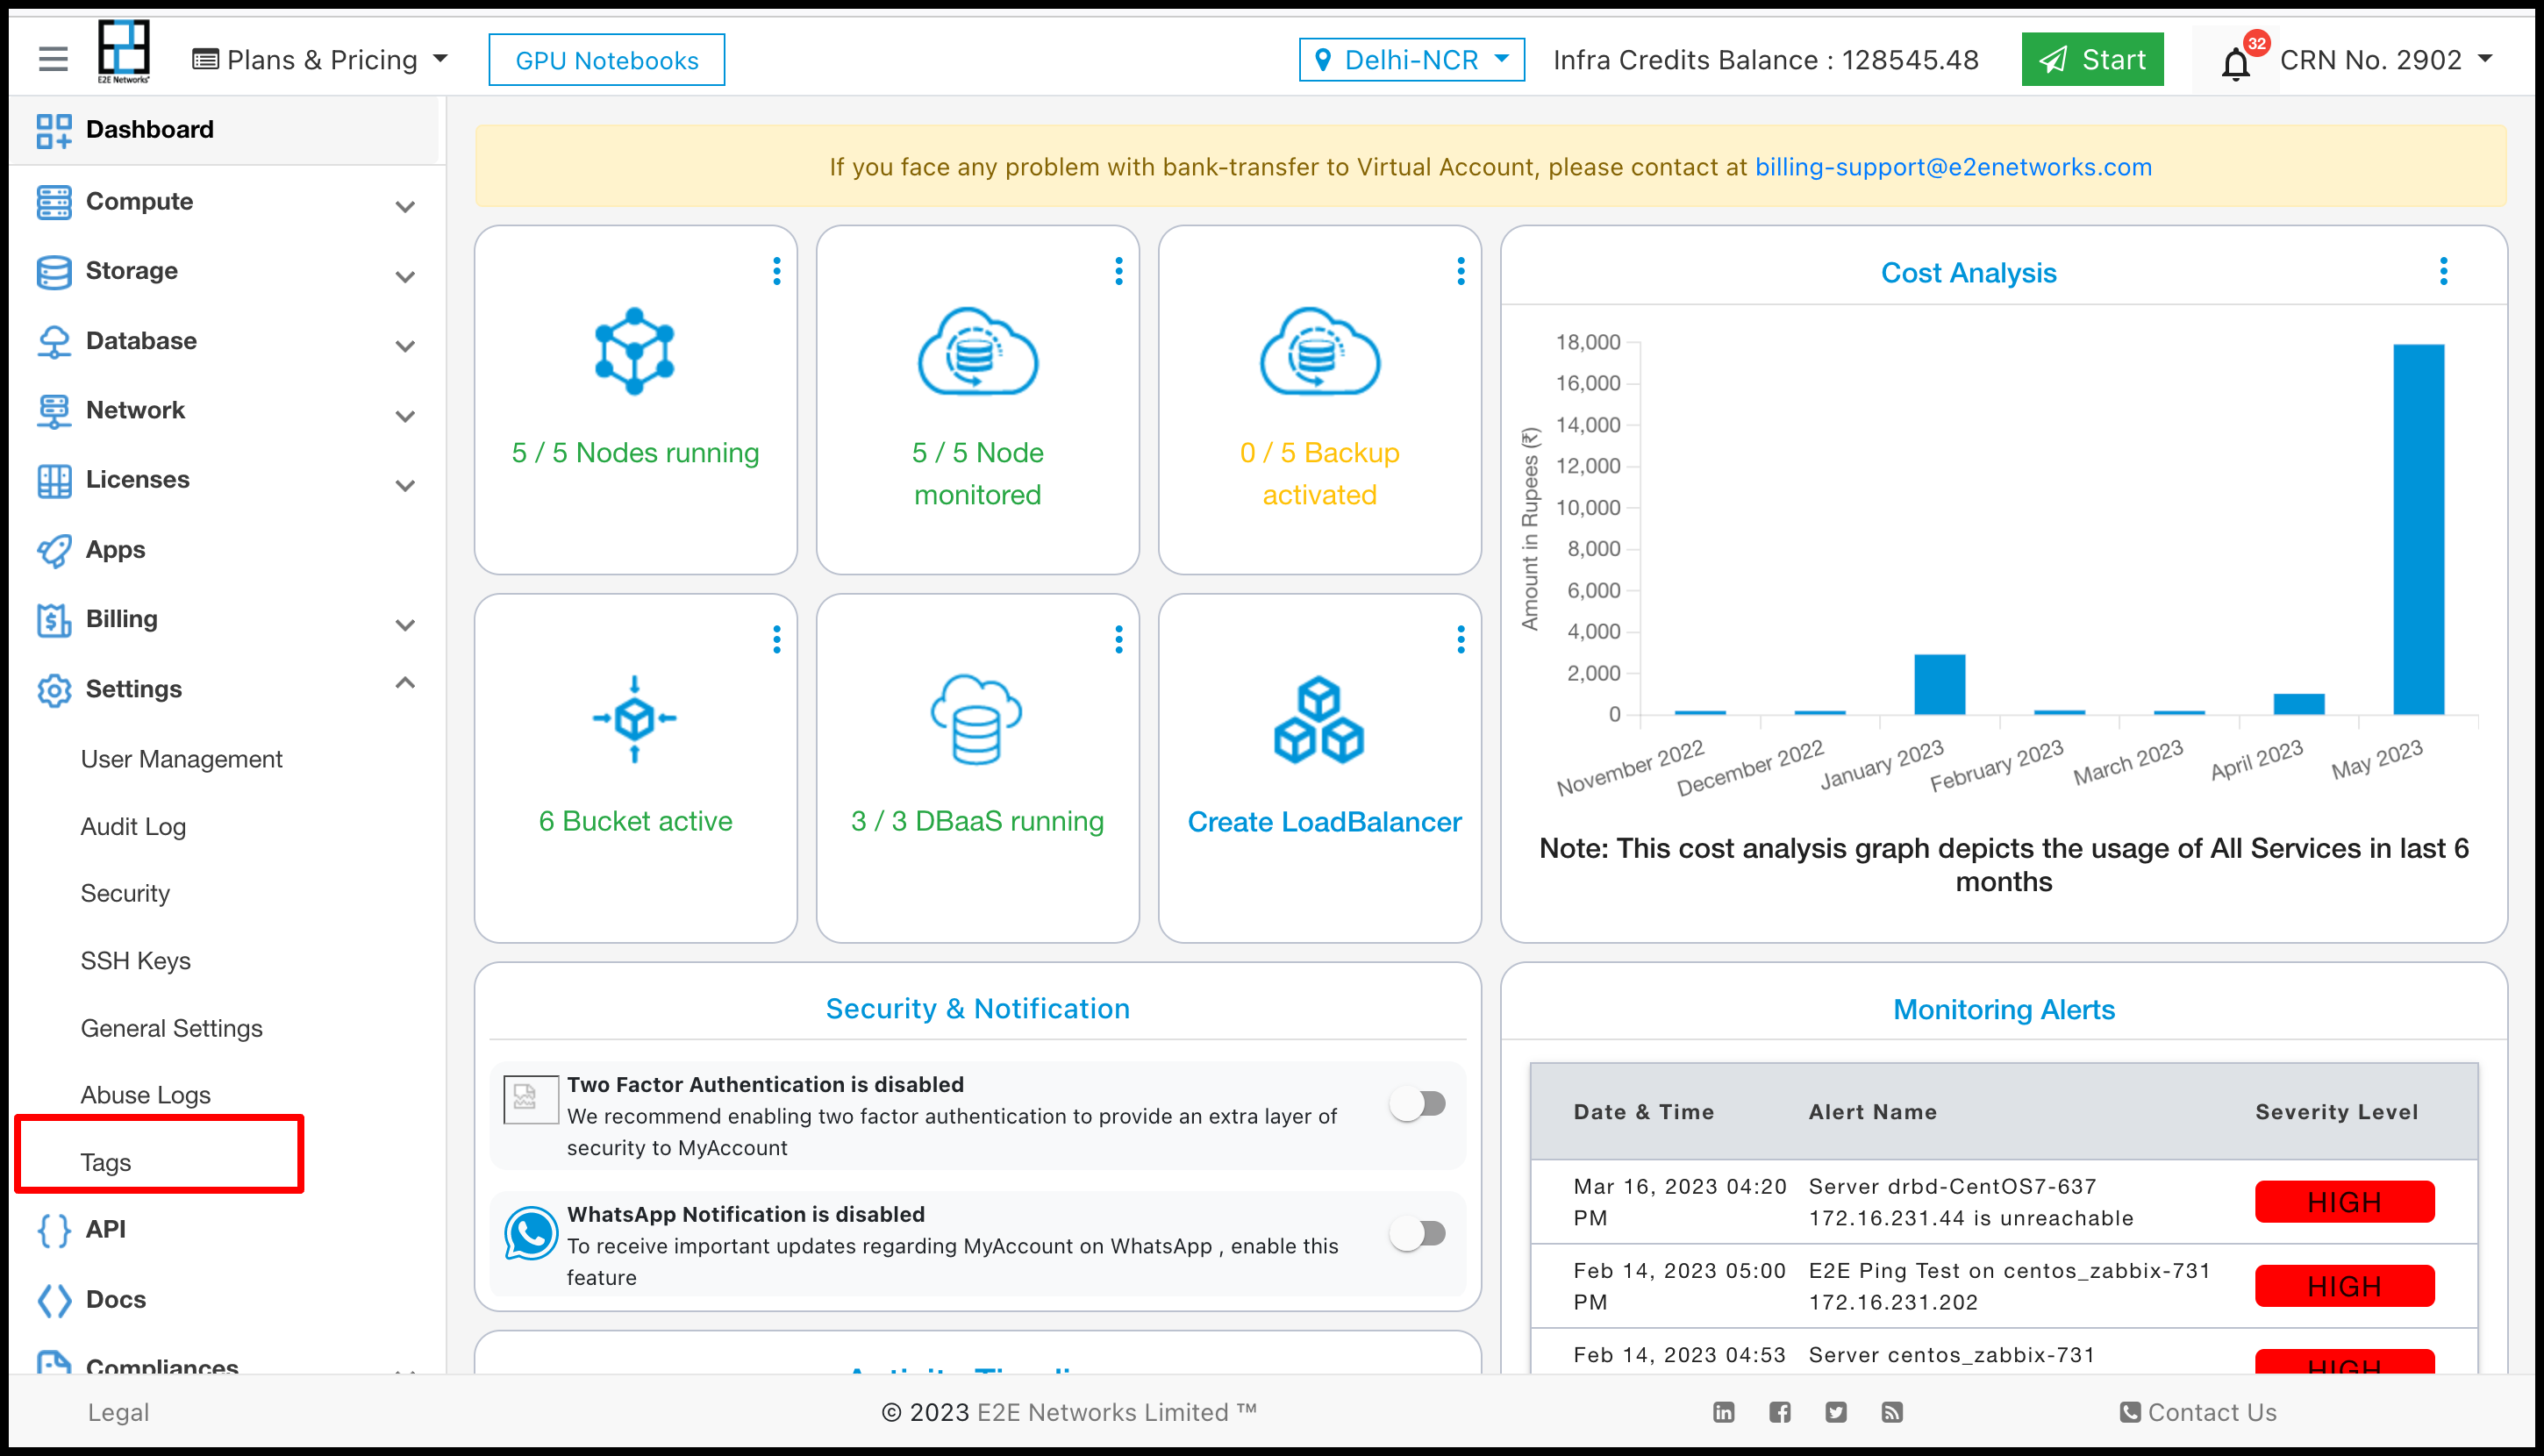
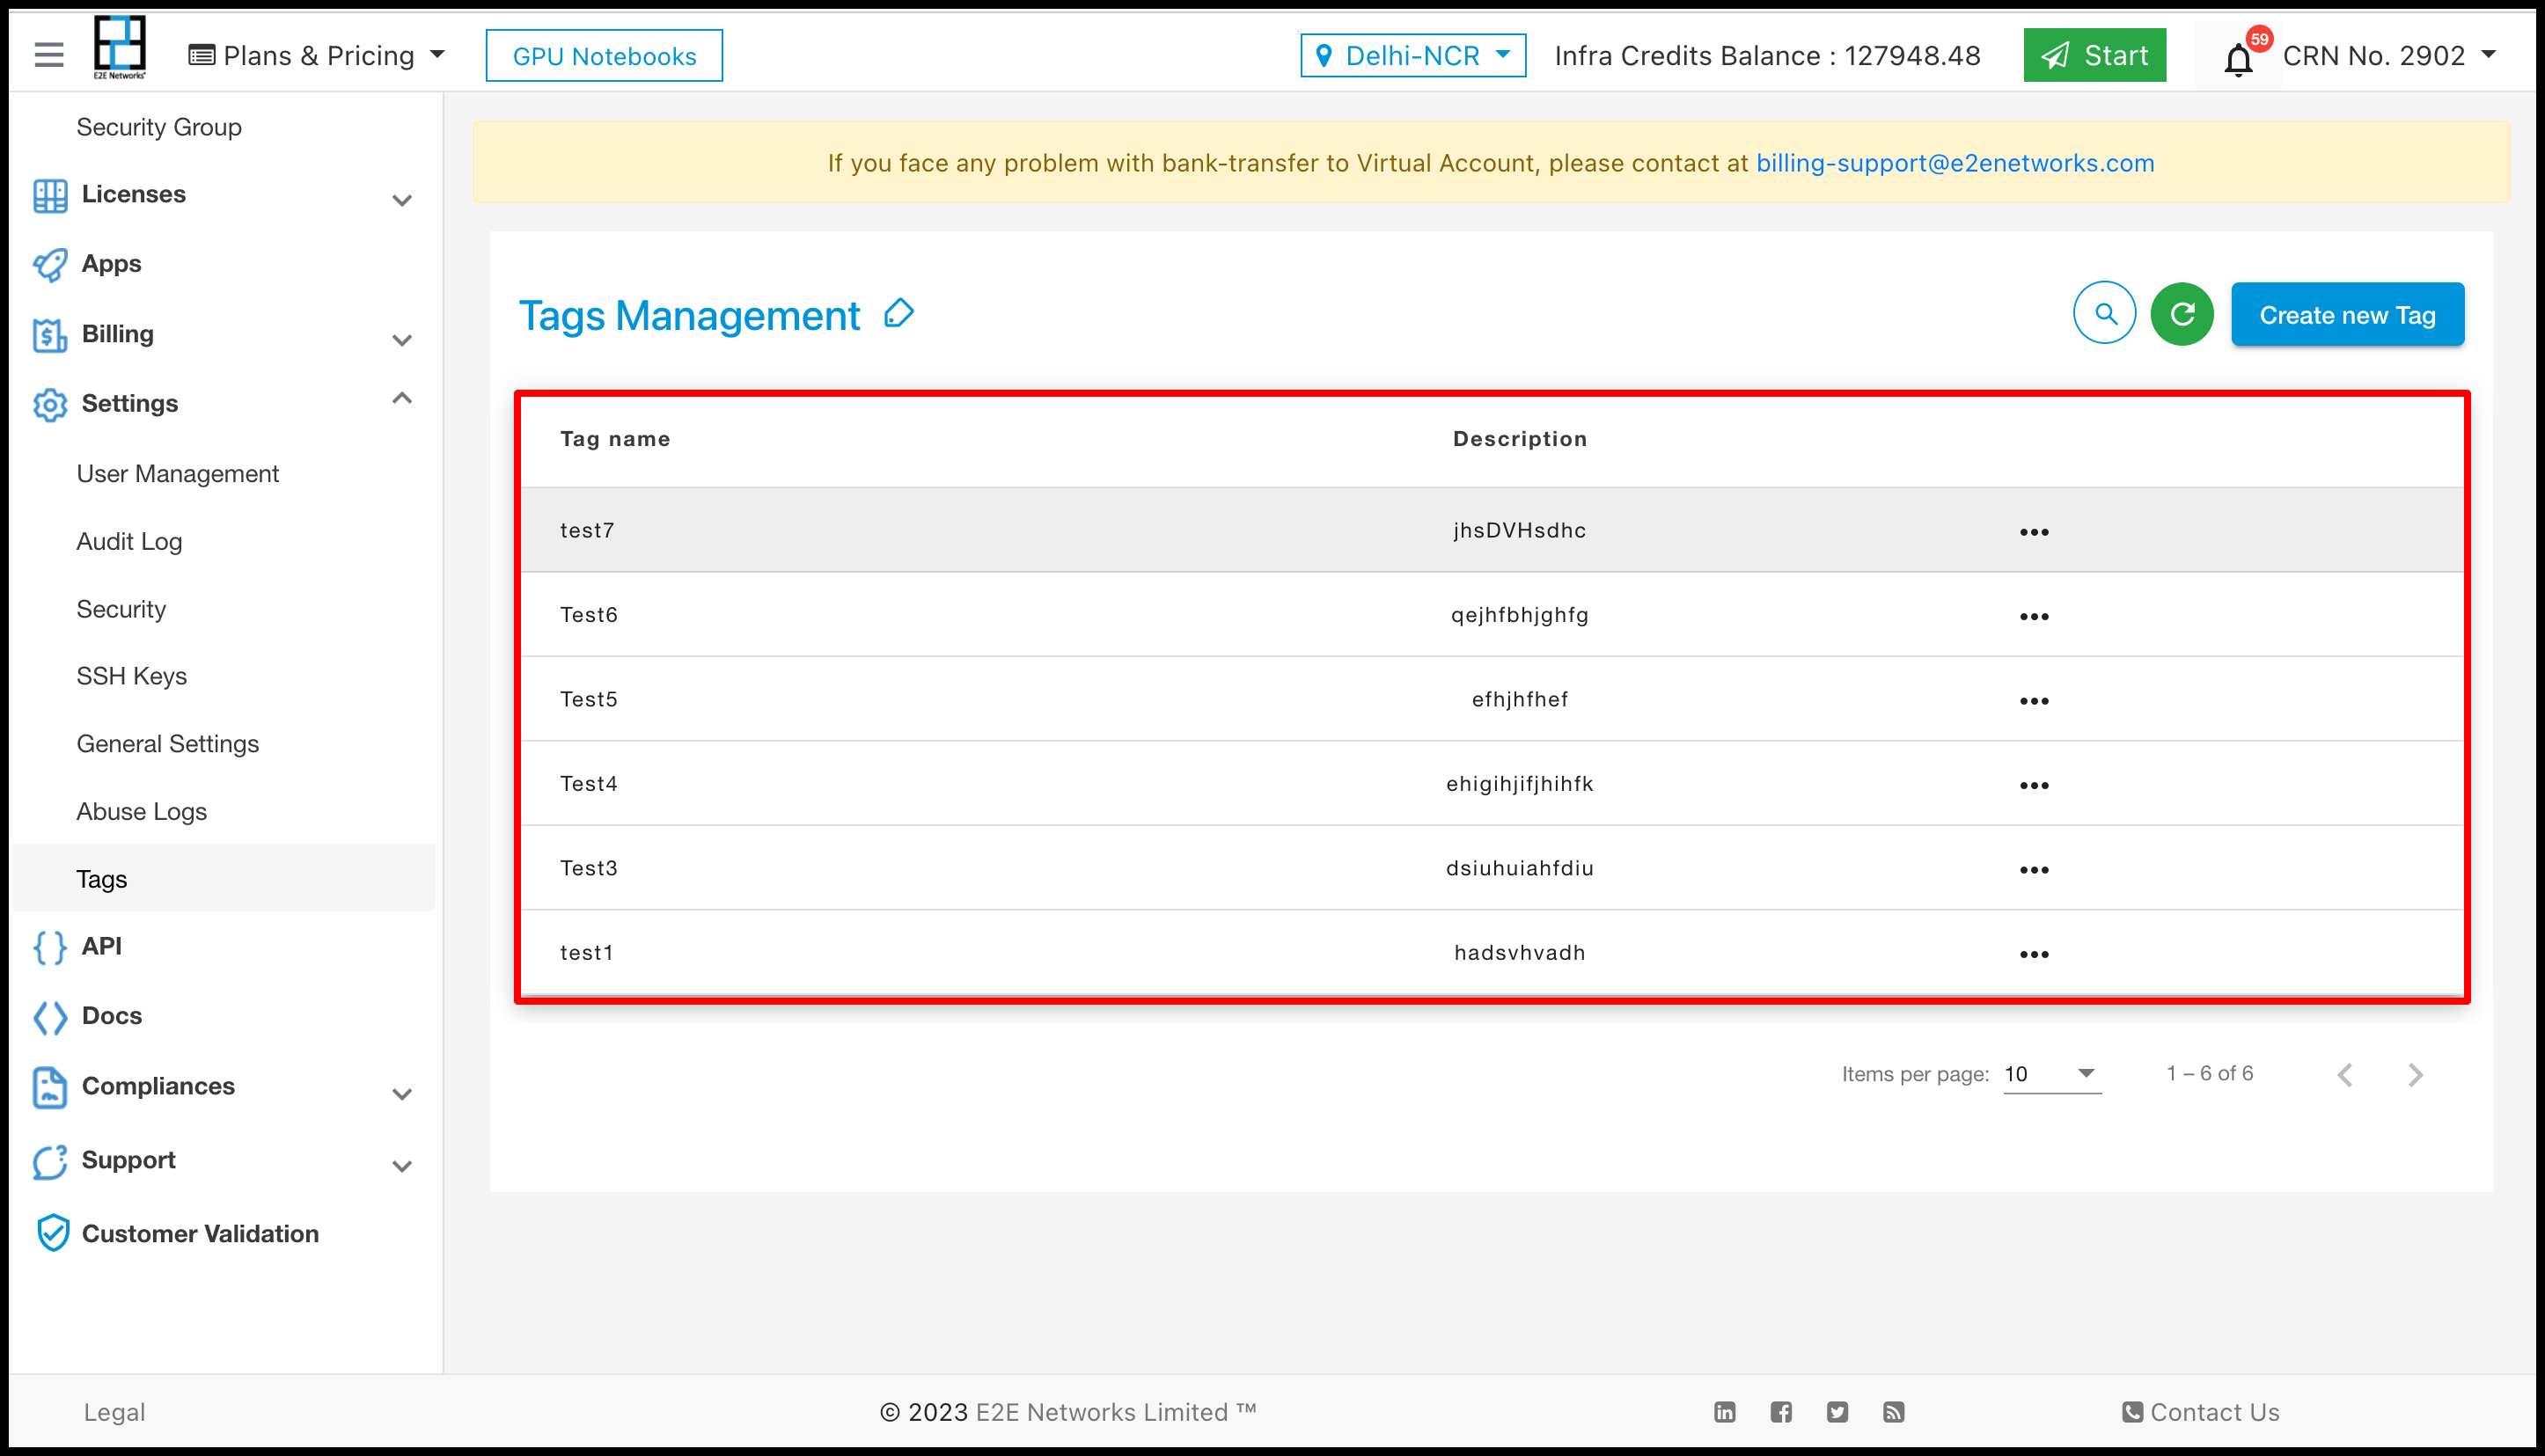
After you log in to the E2E Networks ‘My Account’, you can click on the “Tags” sub-menu available under the “Settings” section. You will be routed to the ‘Tag Management’ page where you can create new tags, and also see all your tags already created in the list.
Navigate to the Tags page
Create New Tags
- Click on the ‘Tags’ sub-menu available under the Settings section.
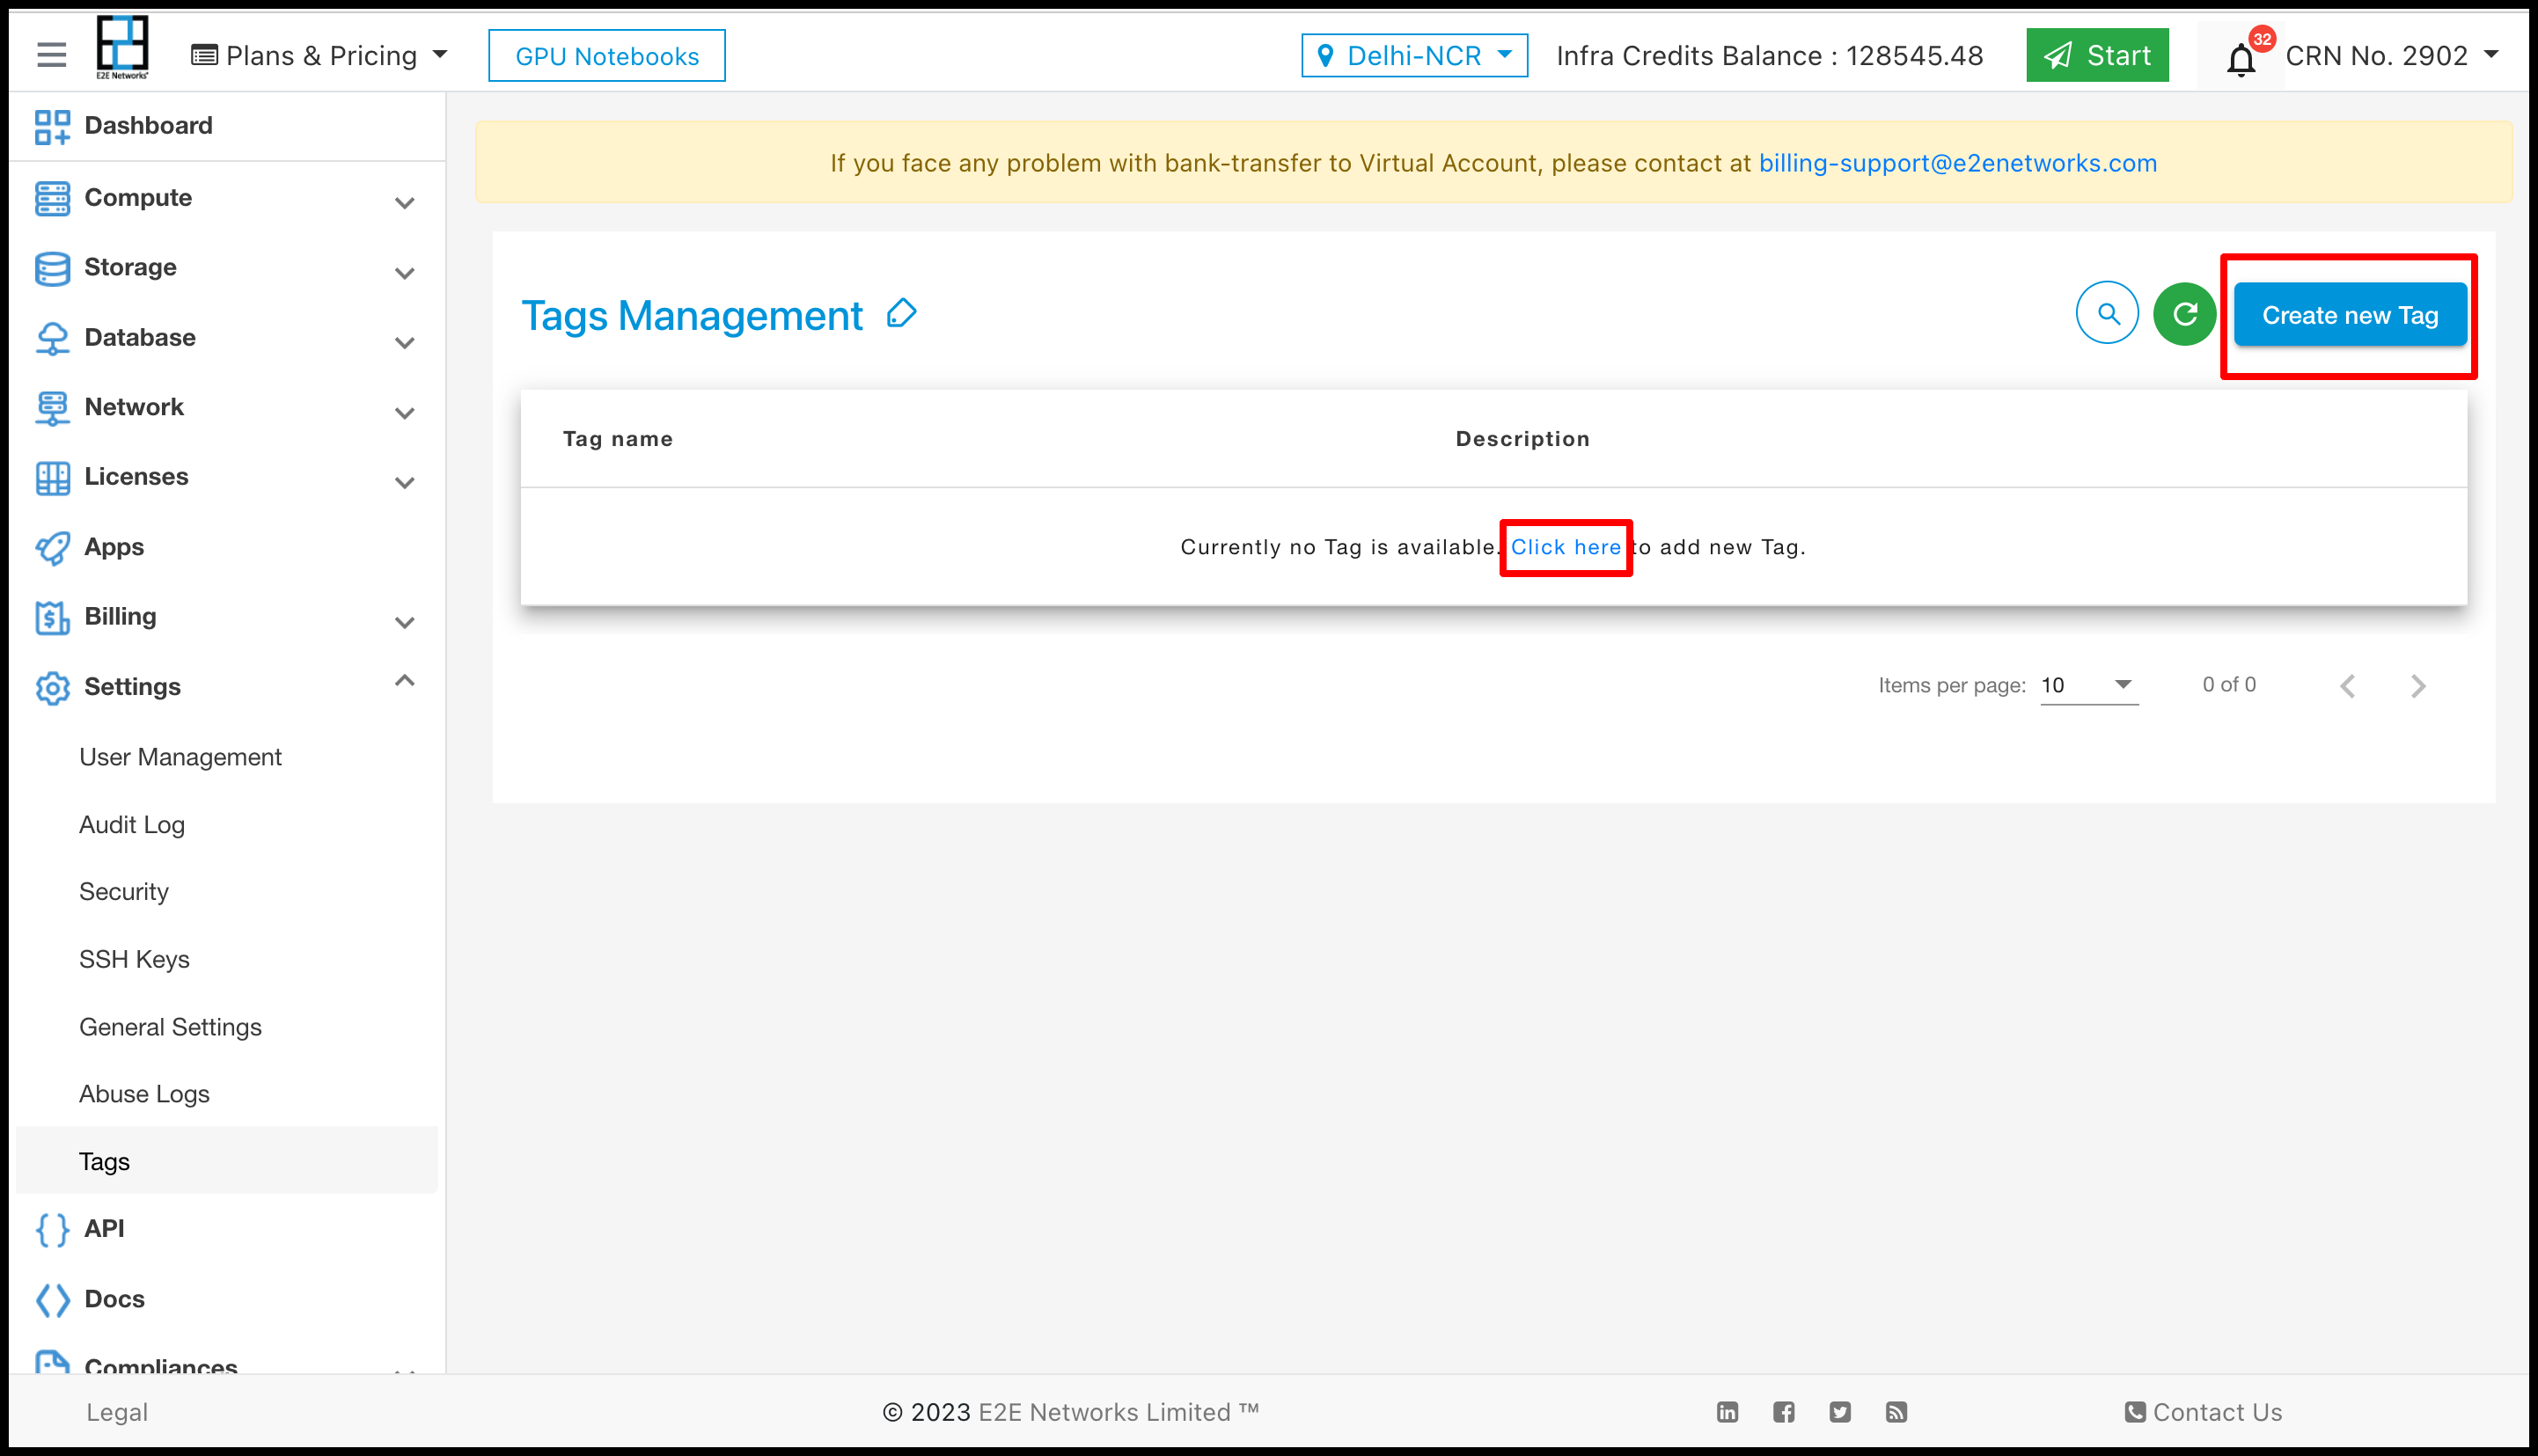
- You will be directed to the ‘Tags Management’ page.
- Click on the “Create New Tag” button.
- After clicking on ‘Create new Tag’, a new page will open in which you have to provide the tag name and description of the Tag.
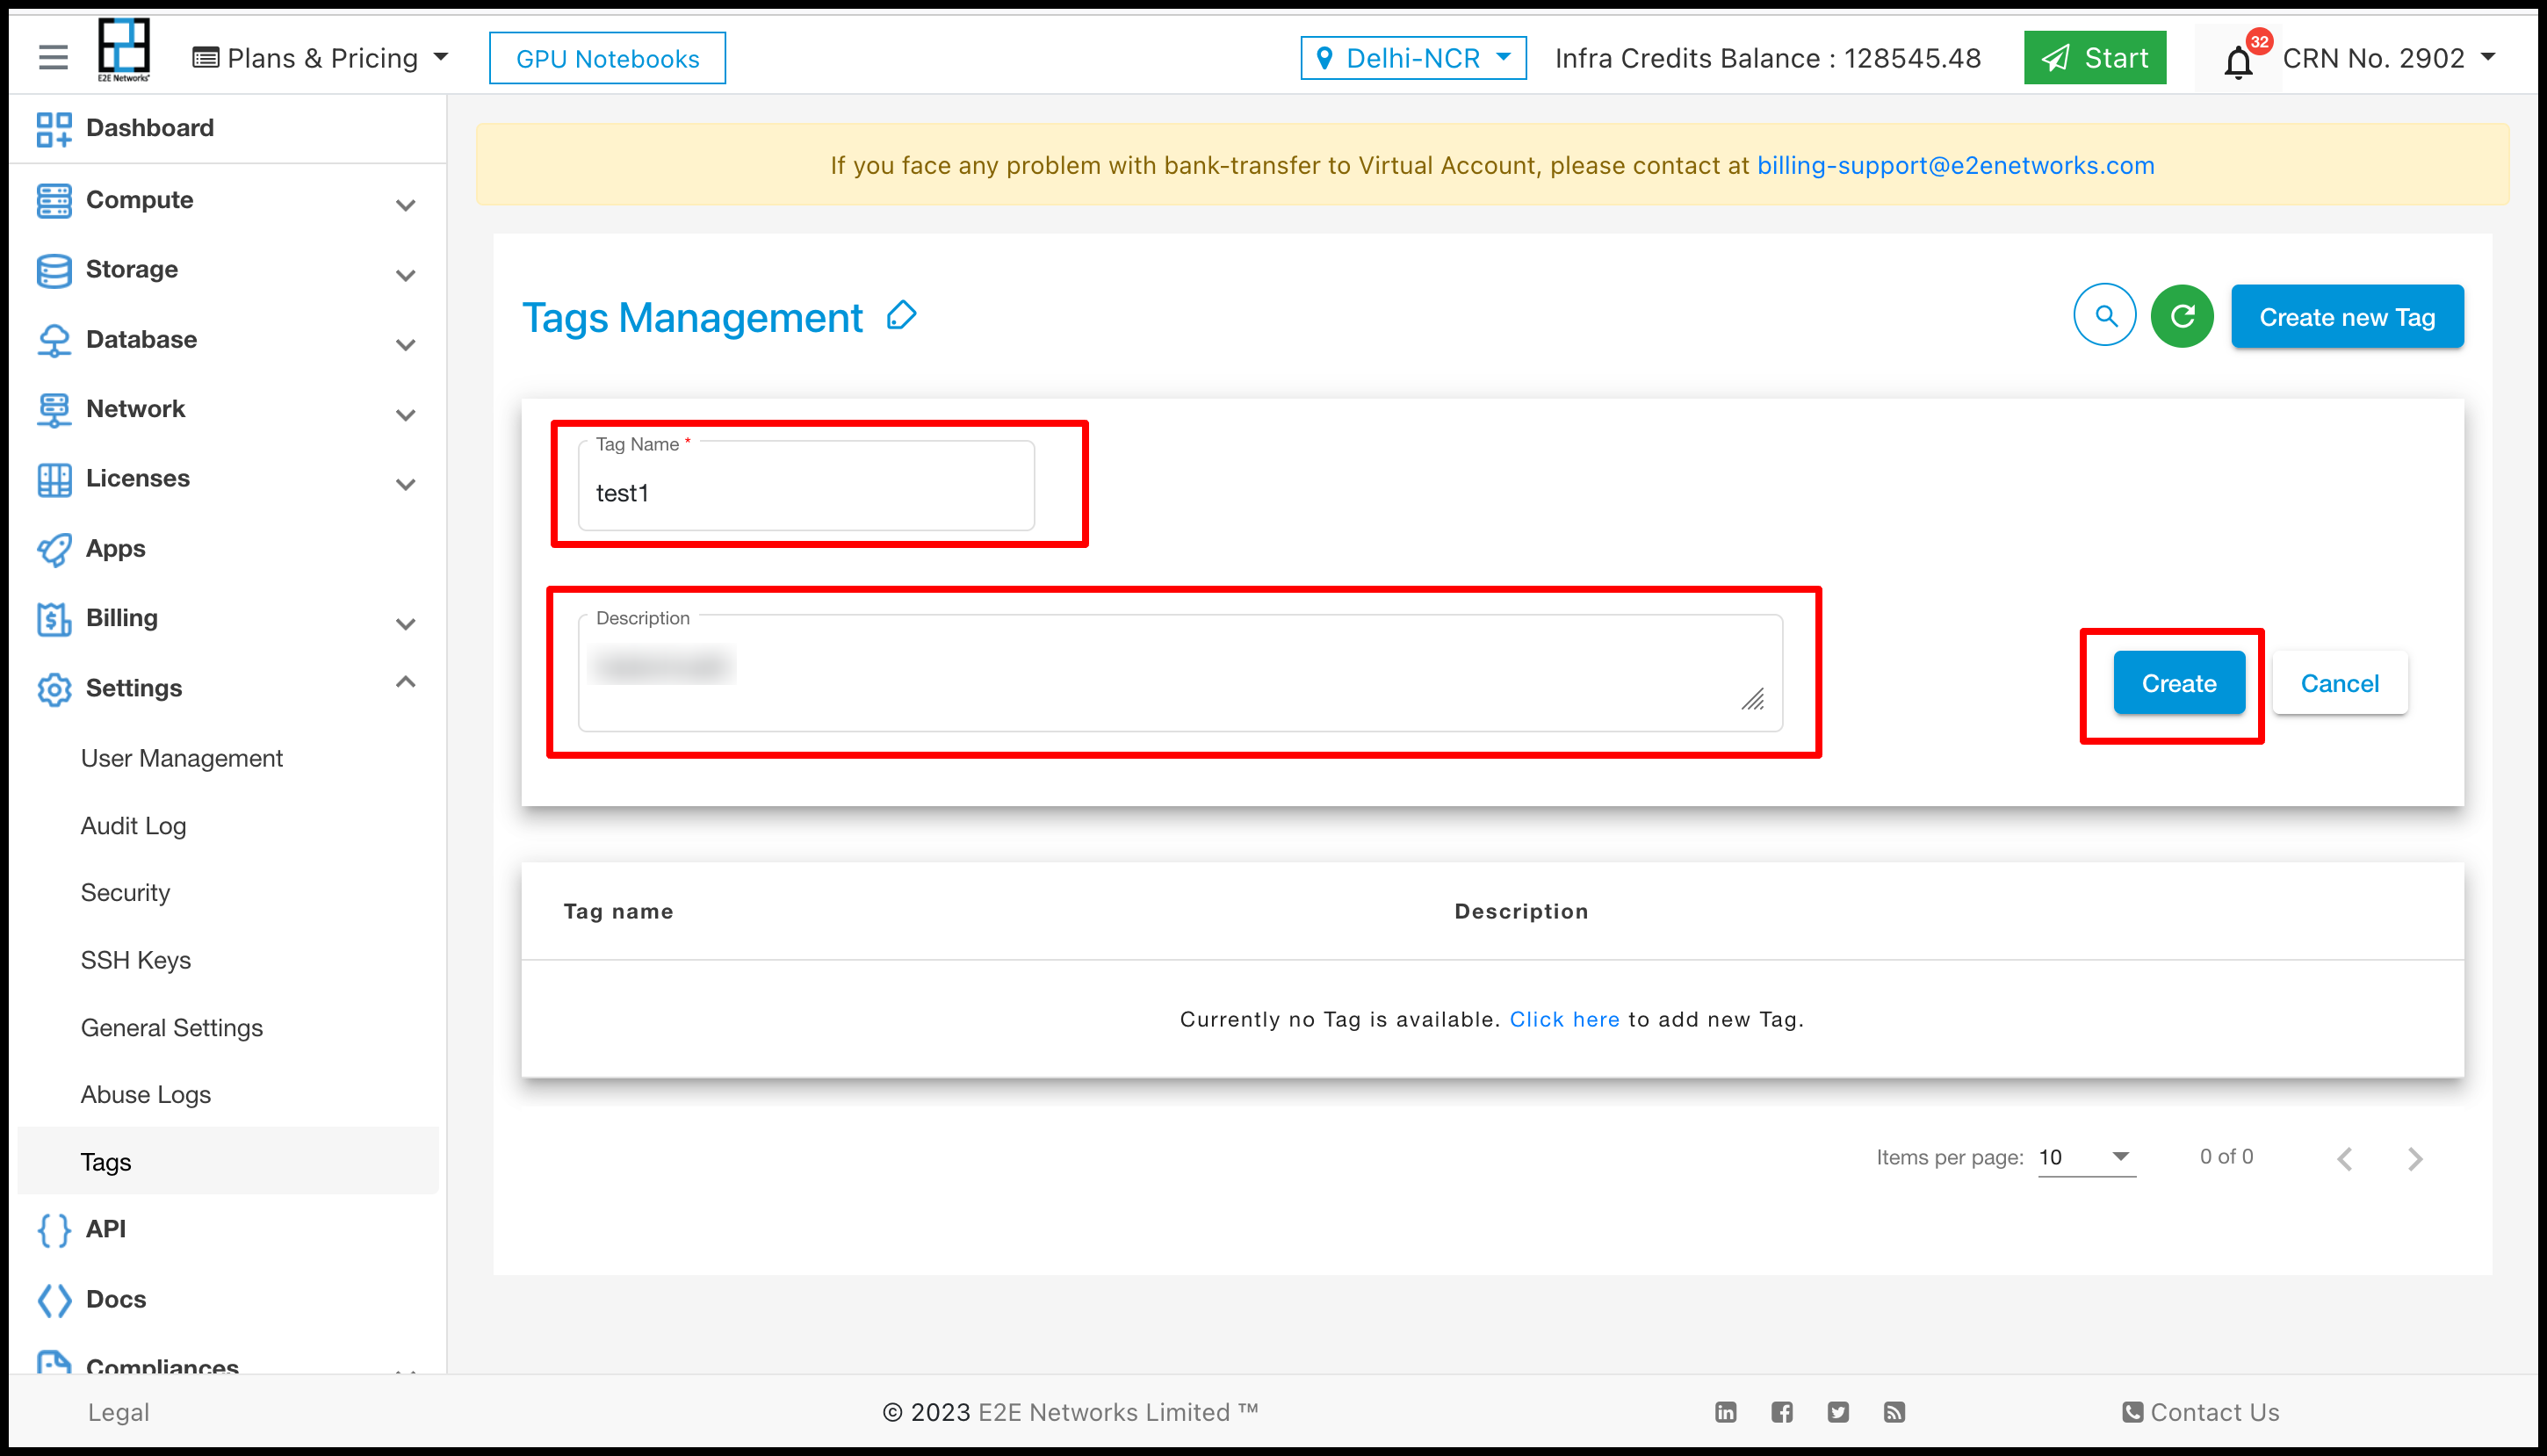
- Then click on the ‘Create’ button, and it will be shown in the list.
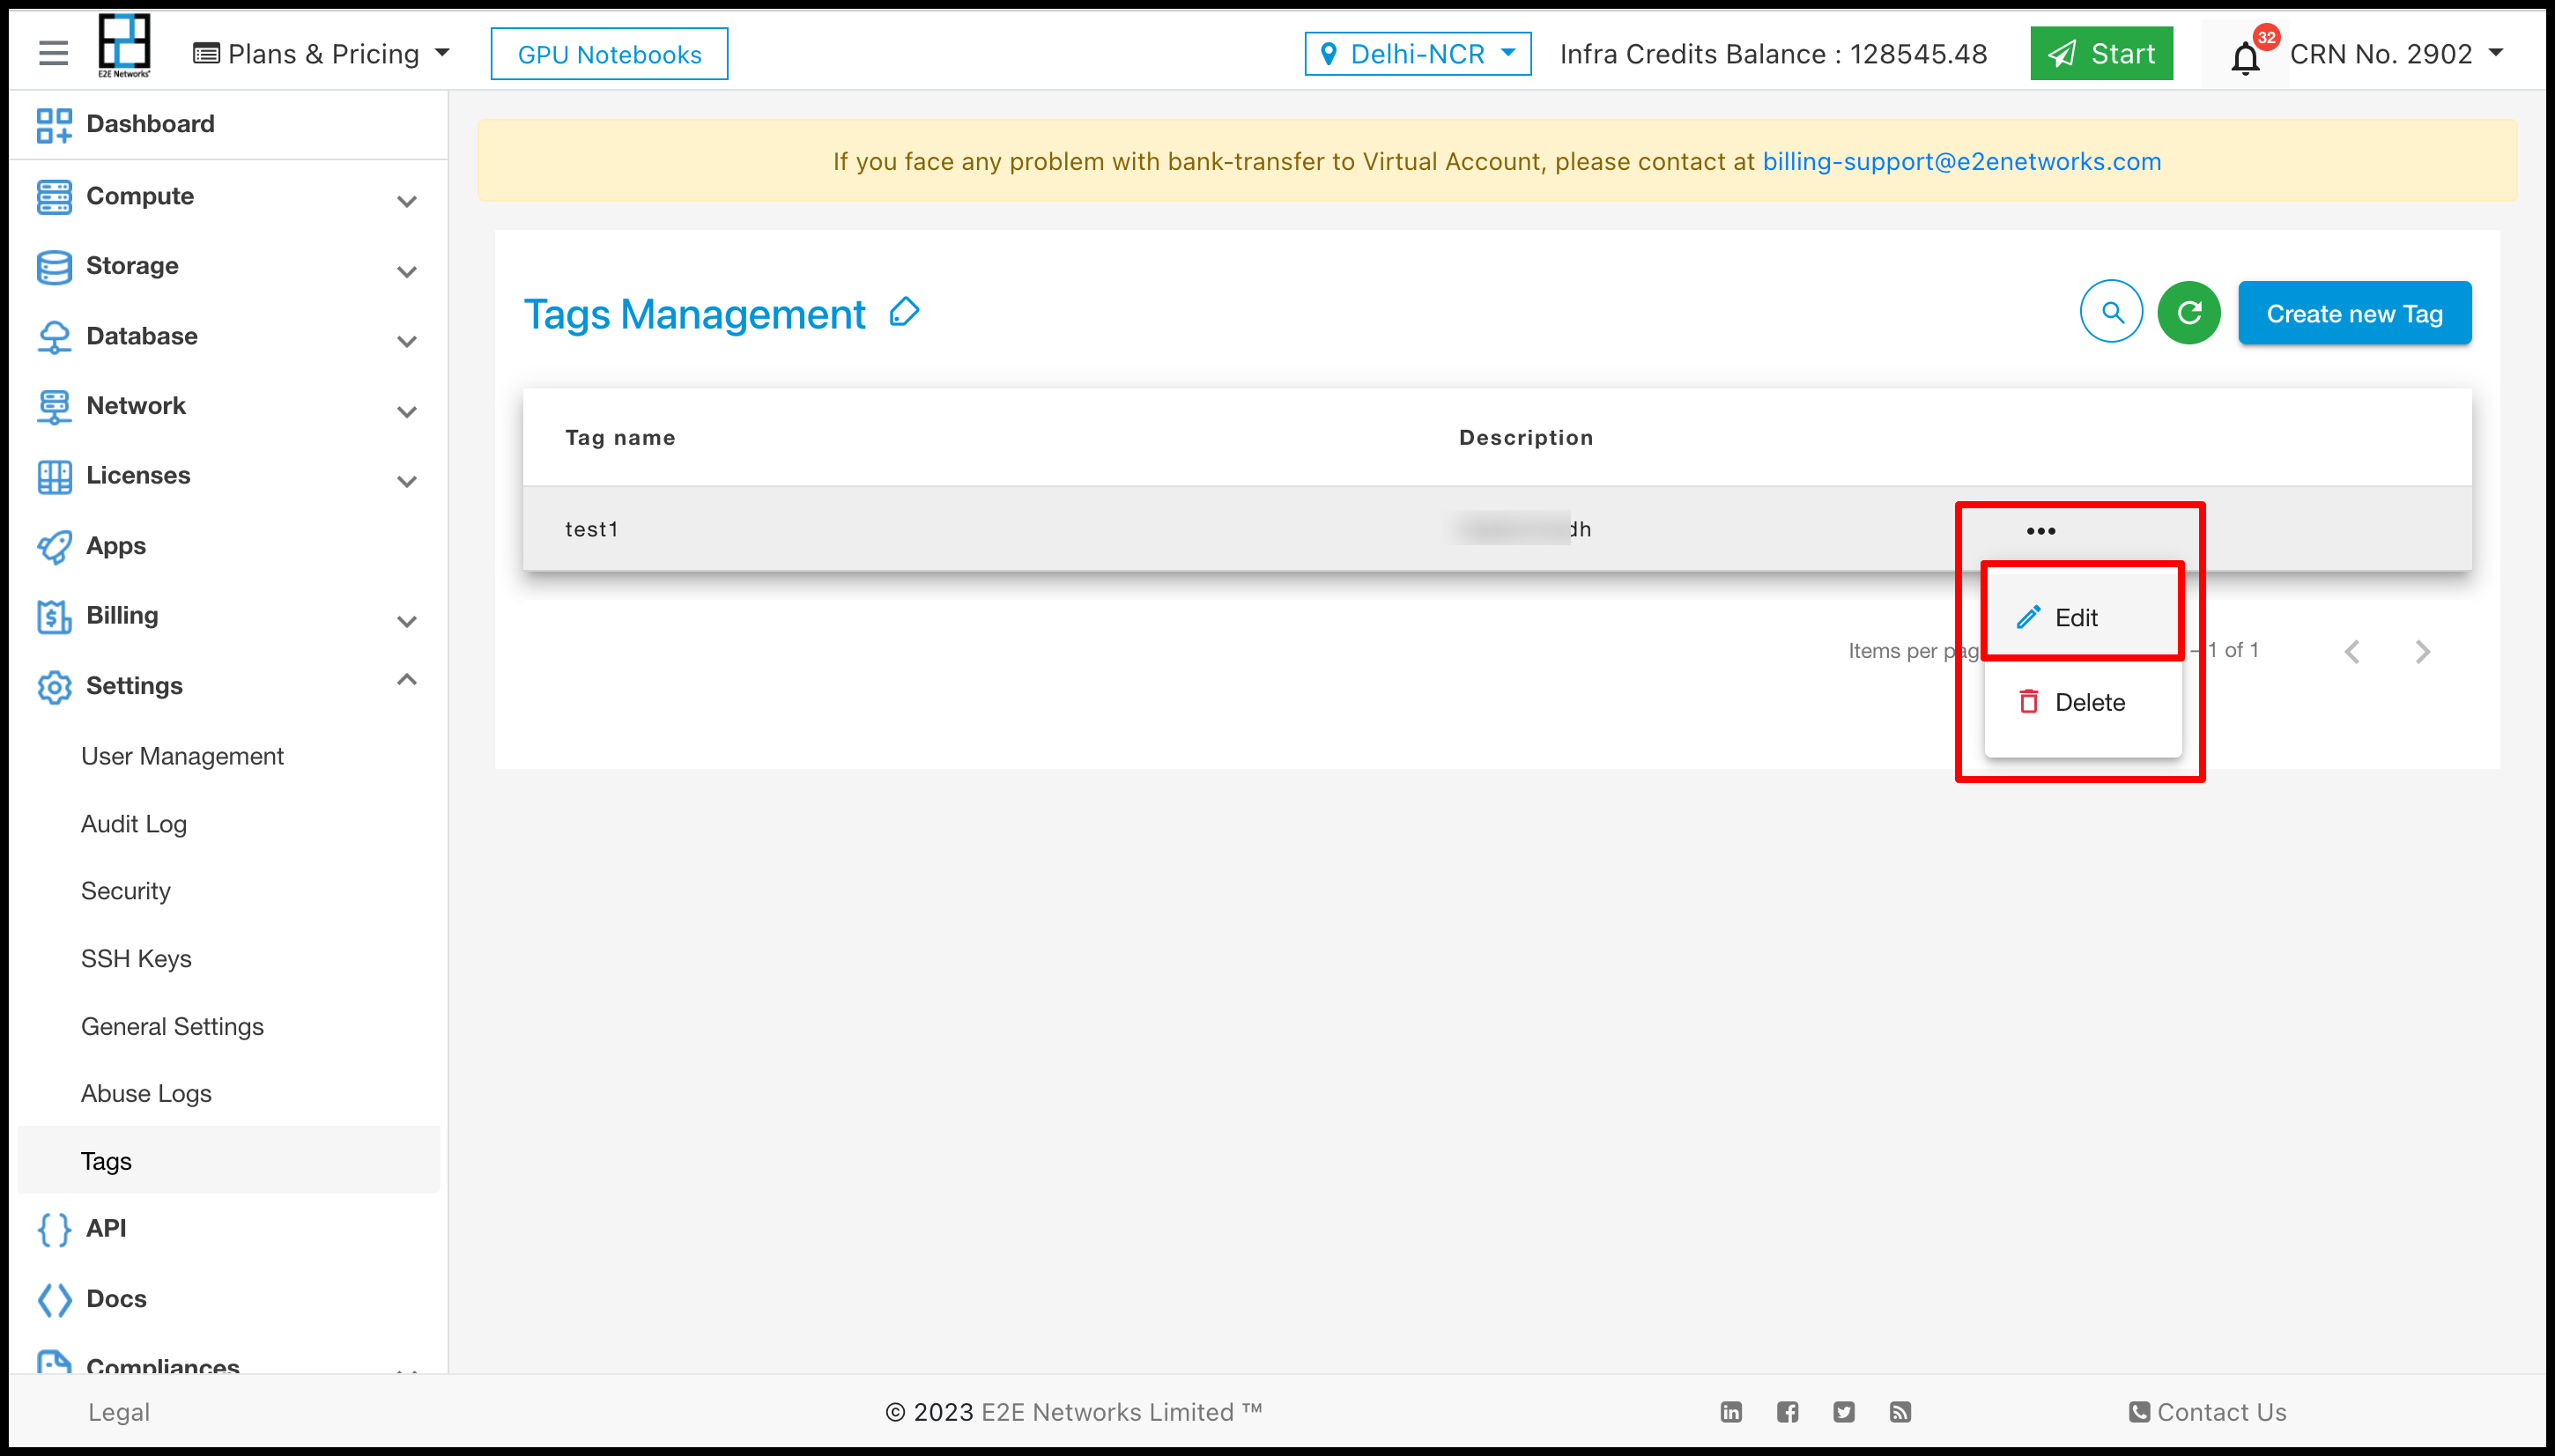
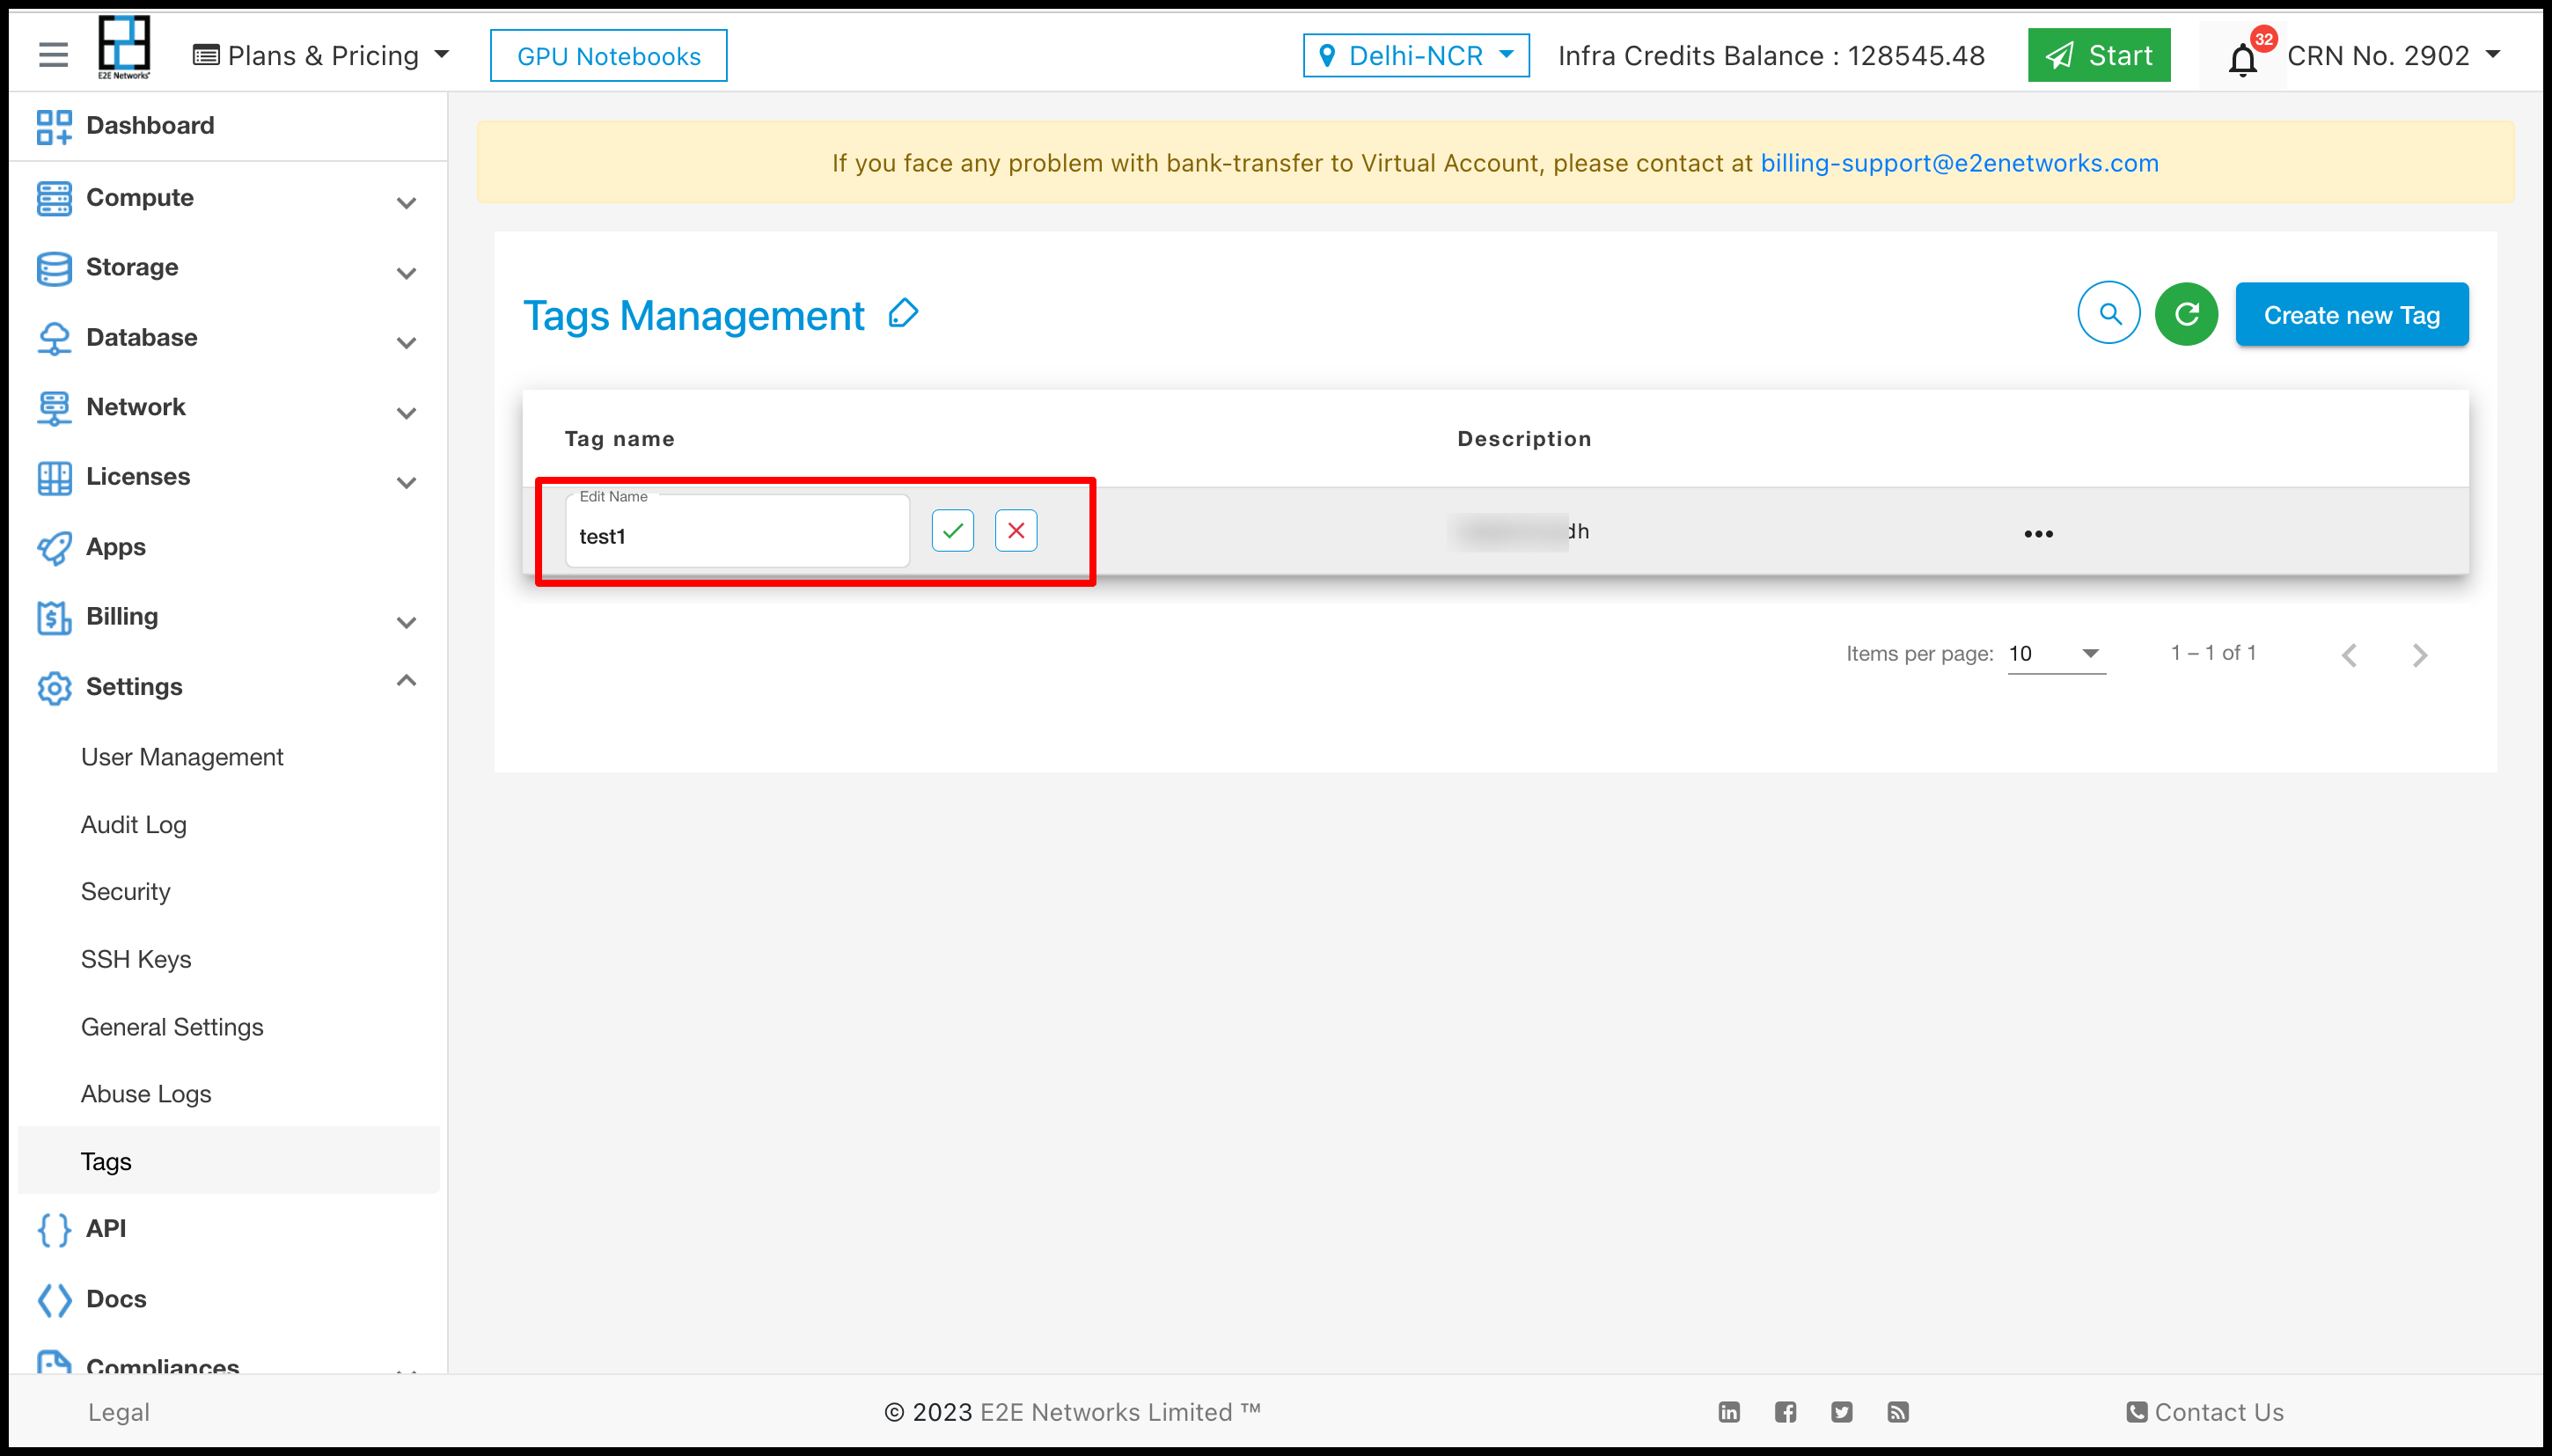
- Click on the three dots of the tag to Edit and Delete the tag. If you want to change the name of the tag, click on the Edit button.
- If the customer wants to delete their tags, then click on the Delete button.
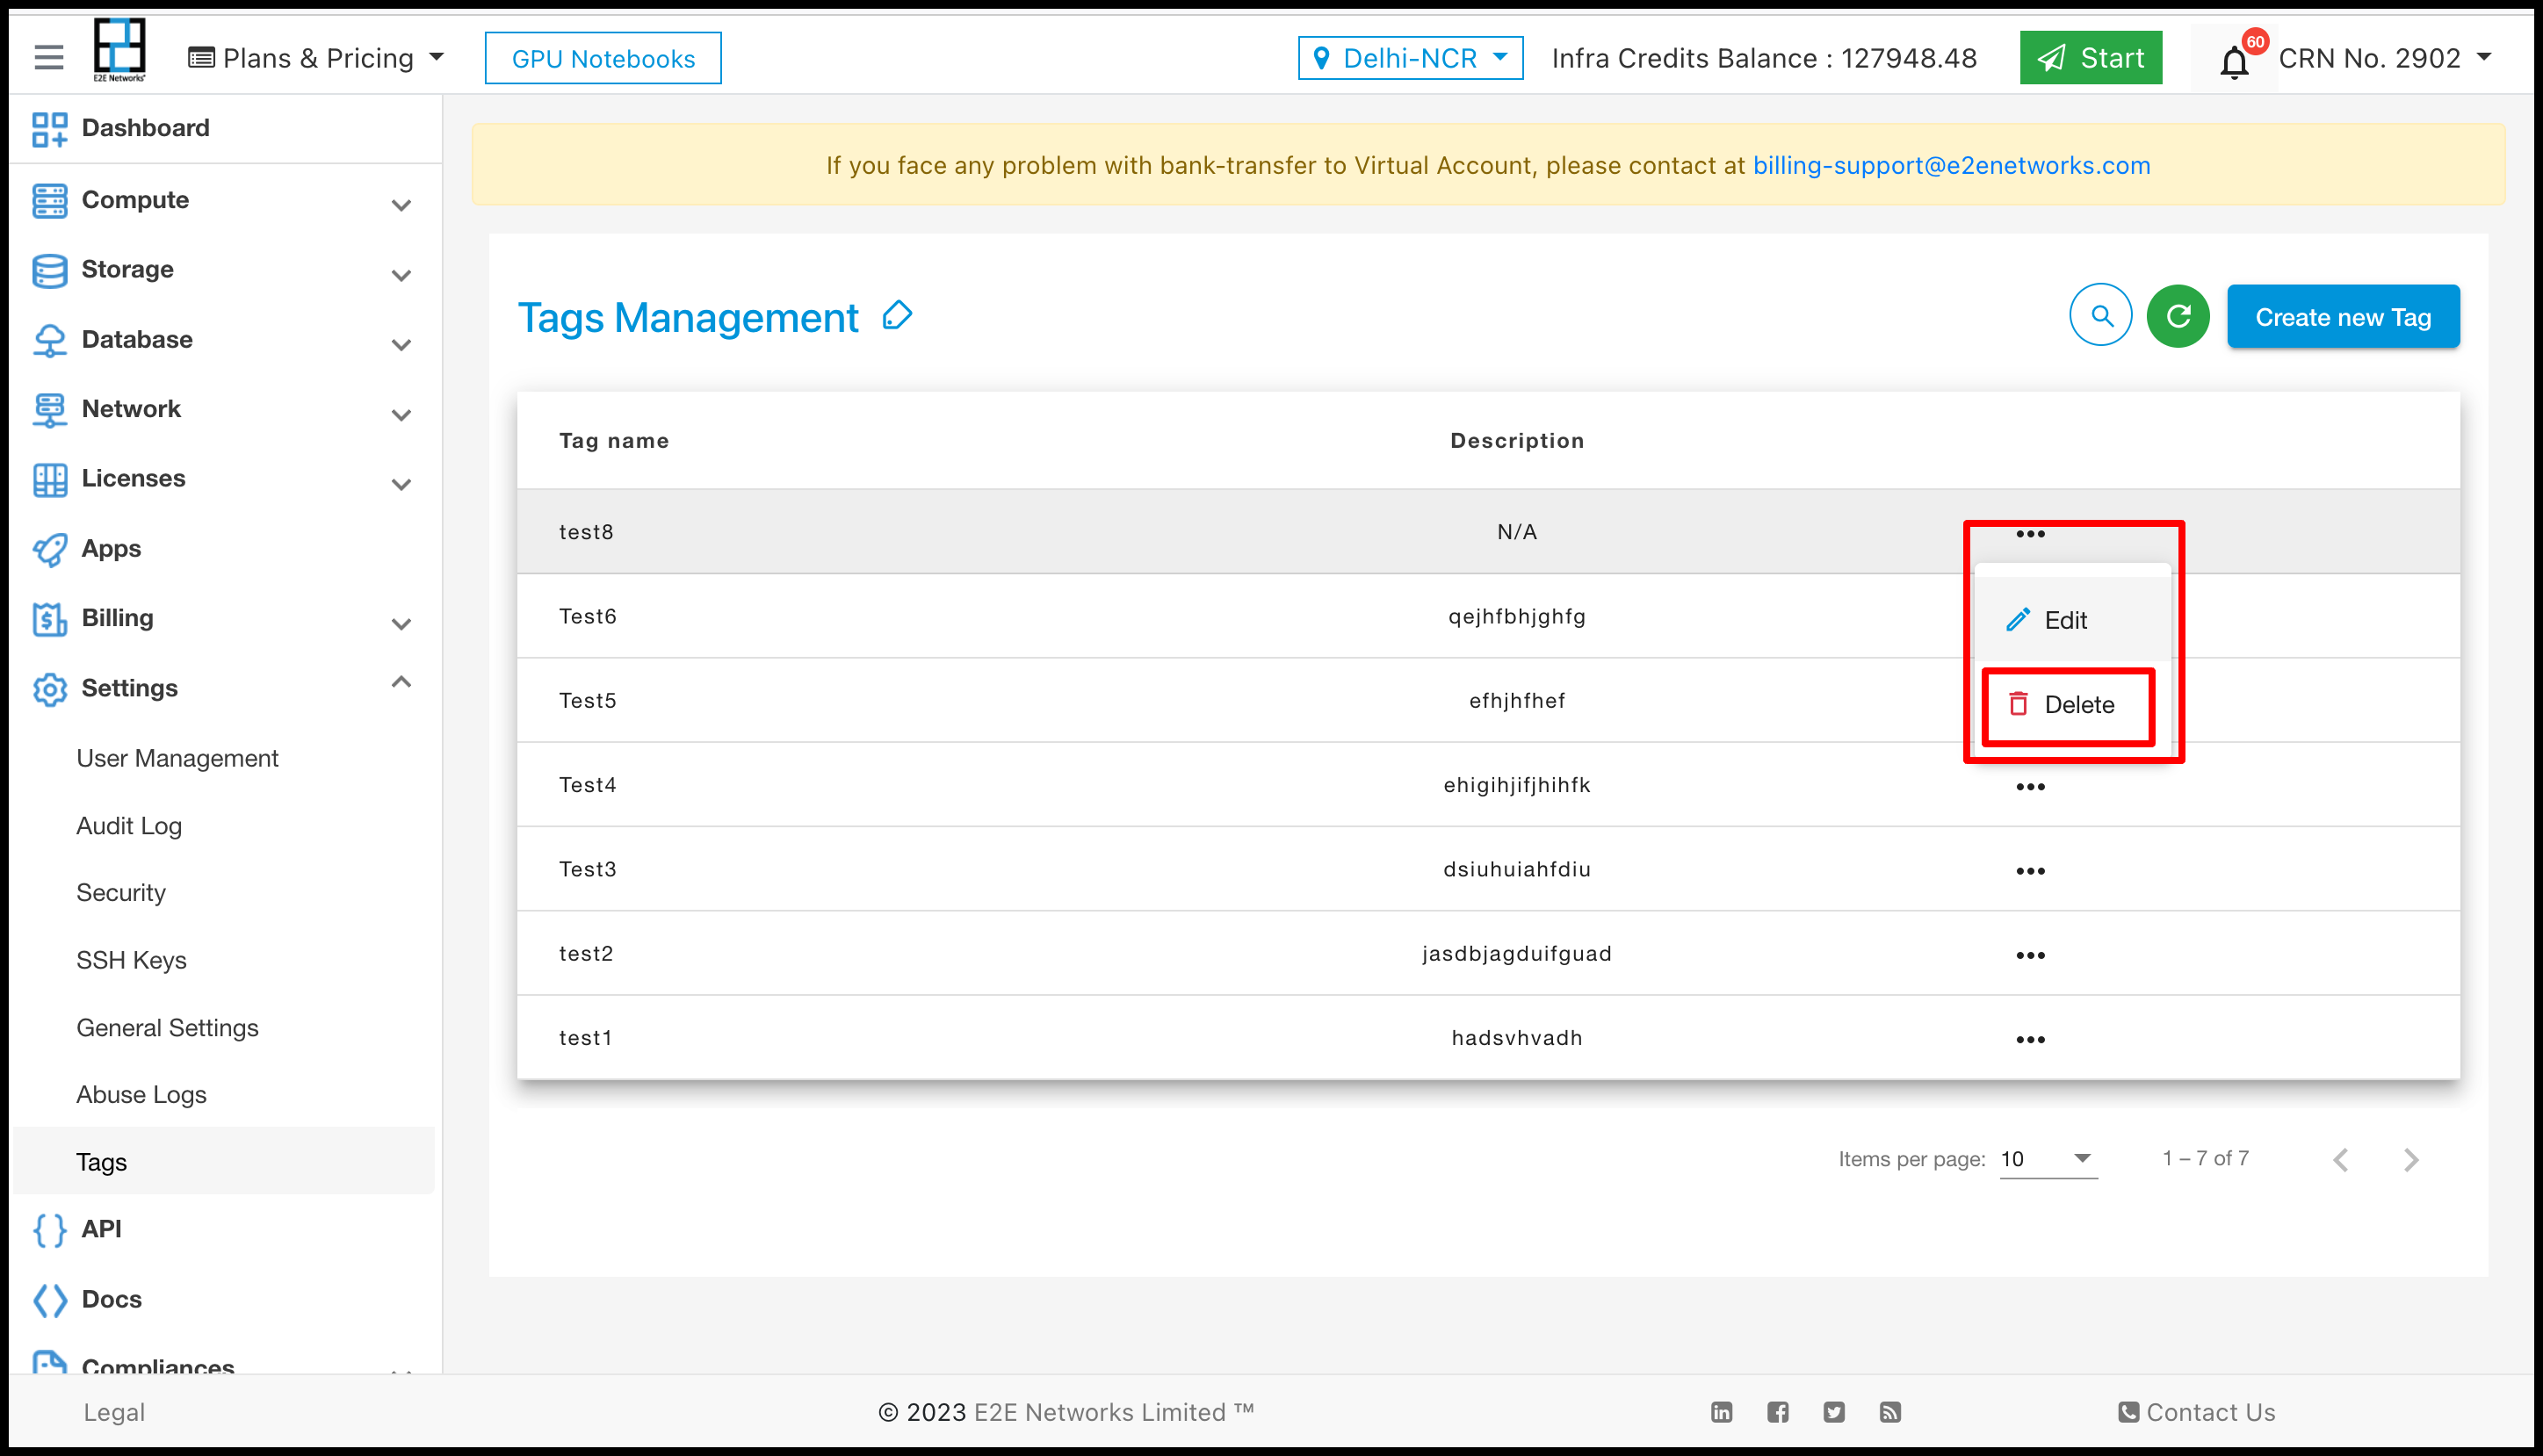
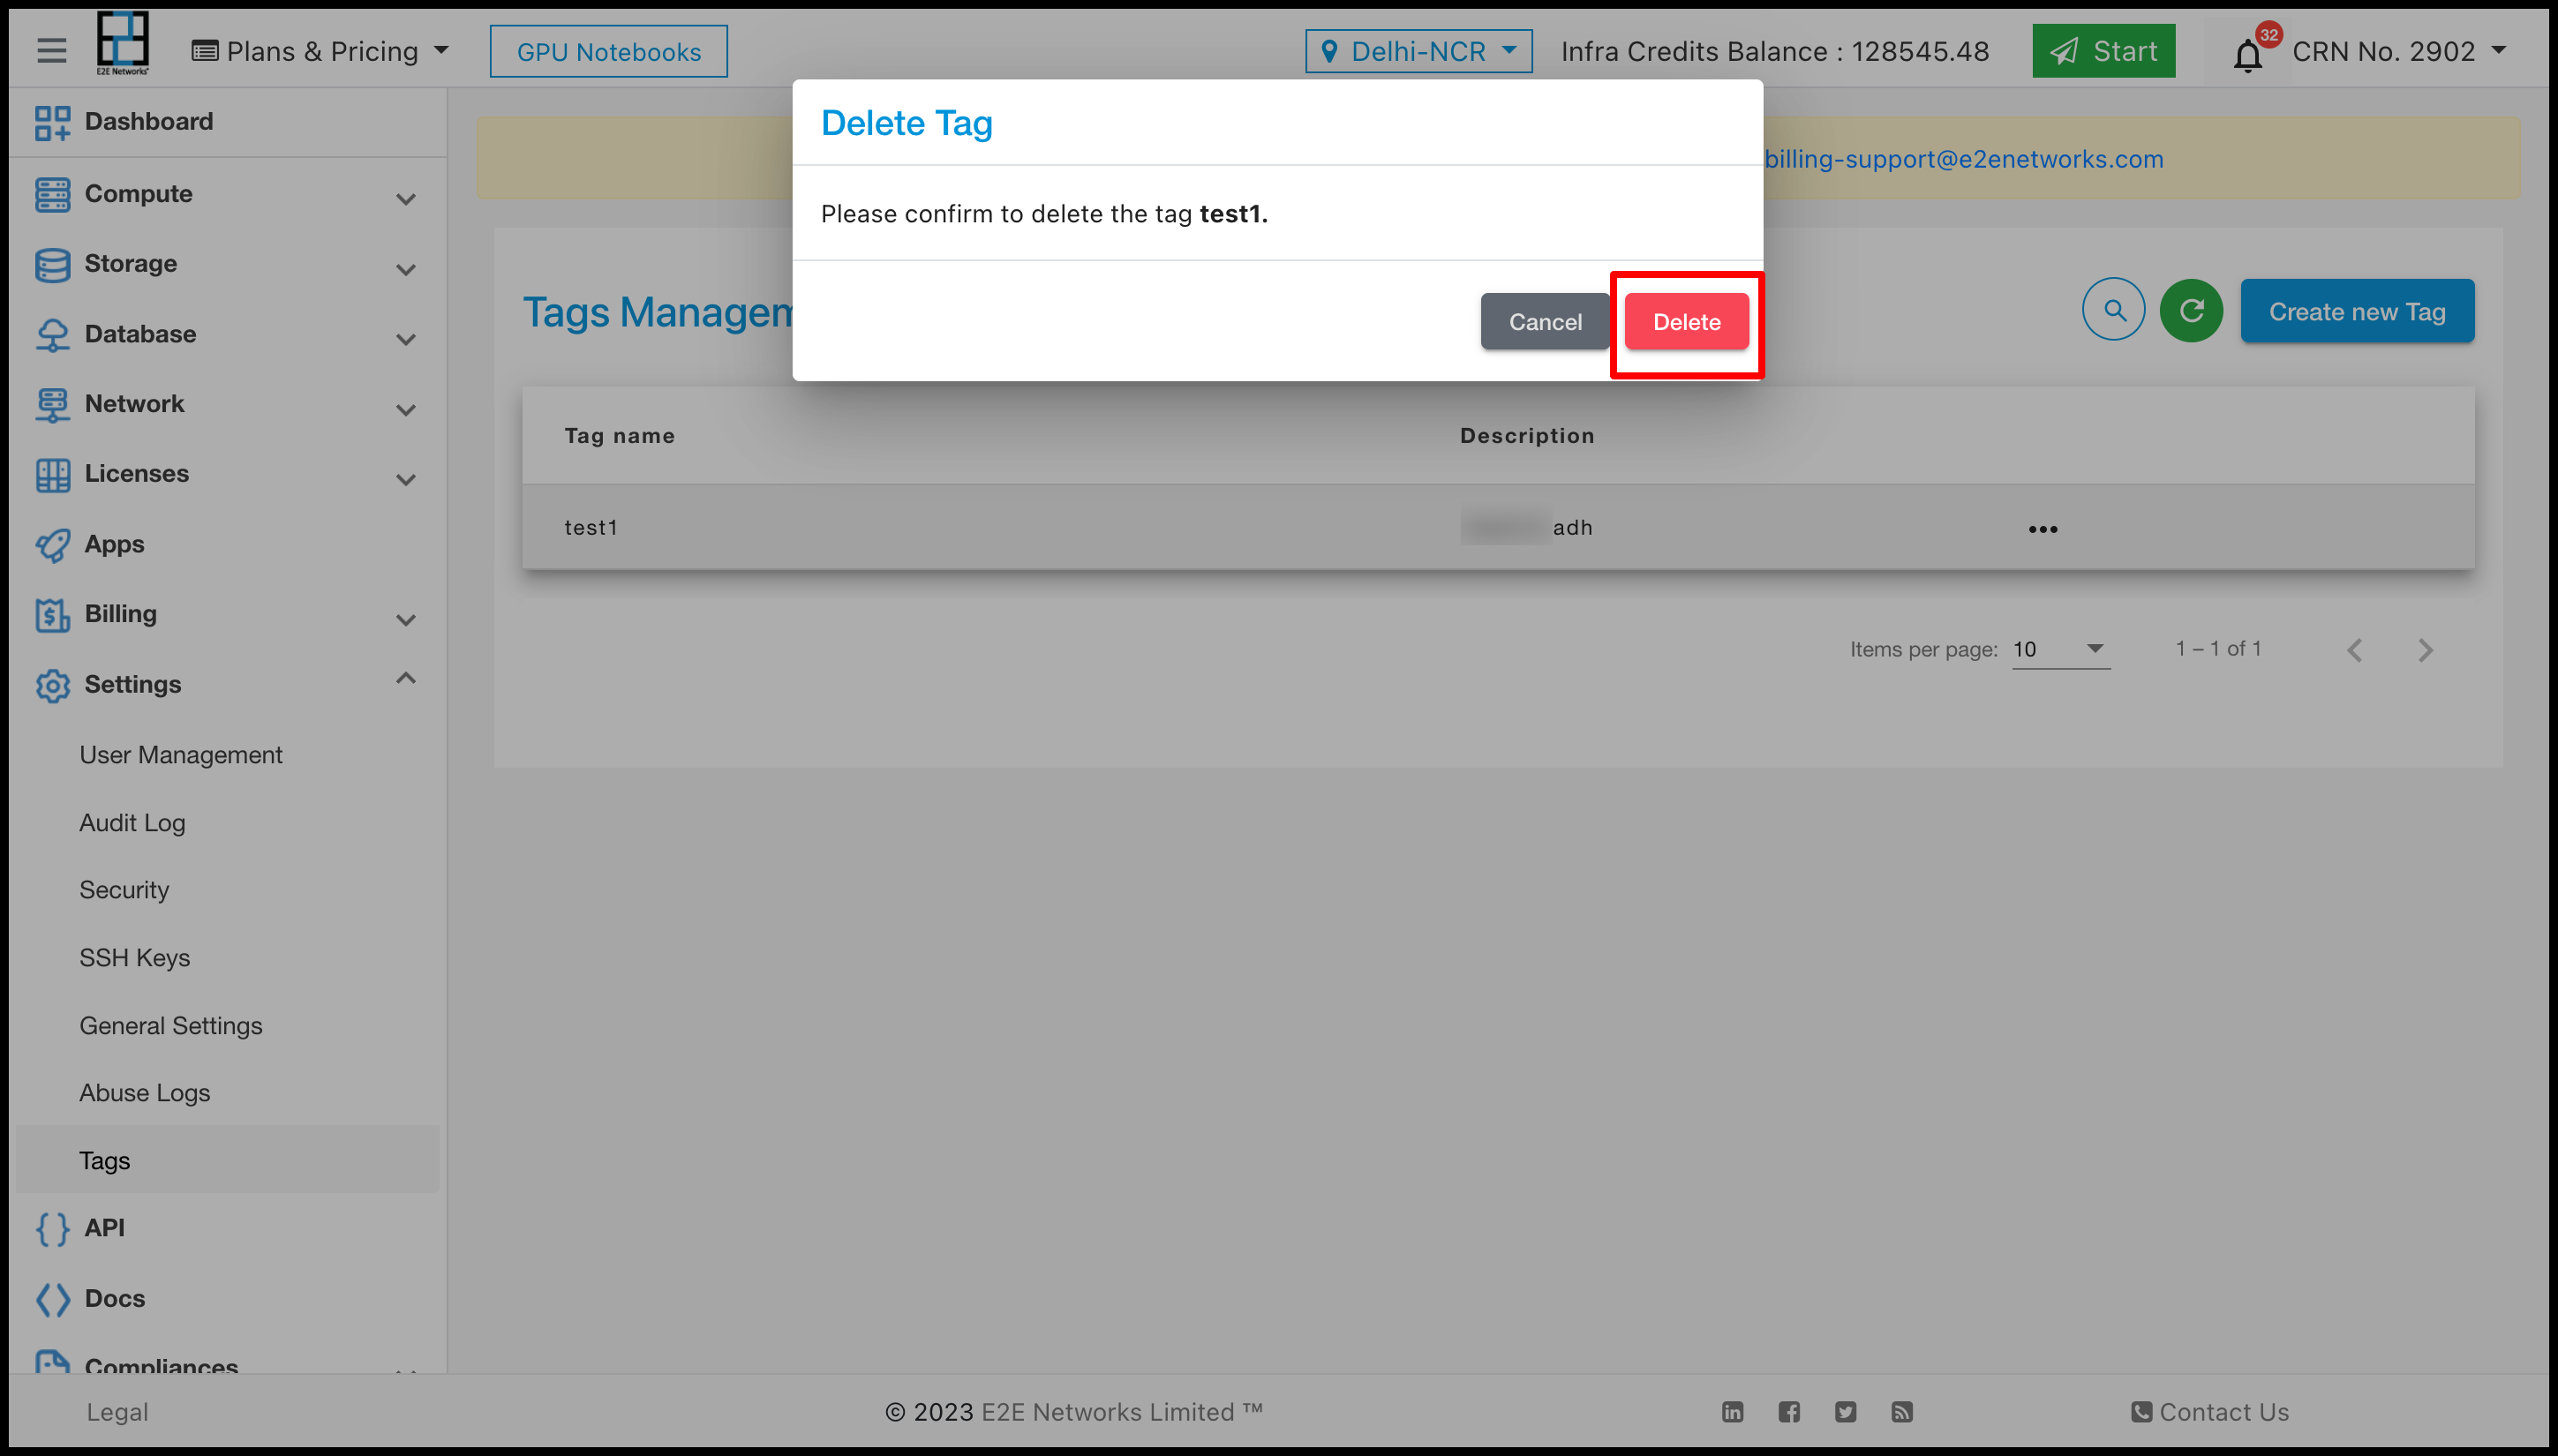
- After clicking on the delete button, the tag will be removed from the list.
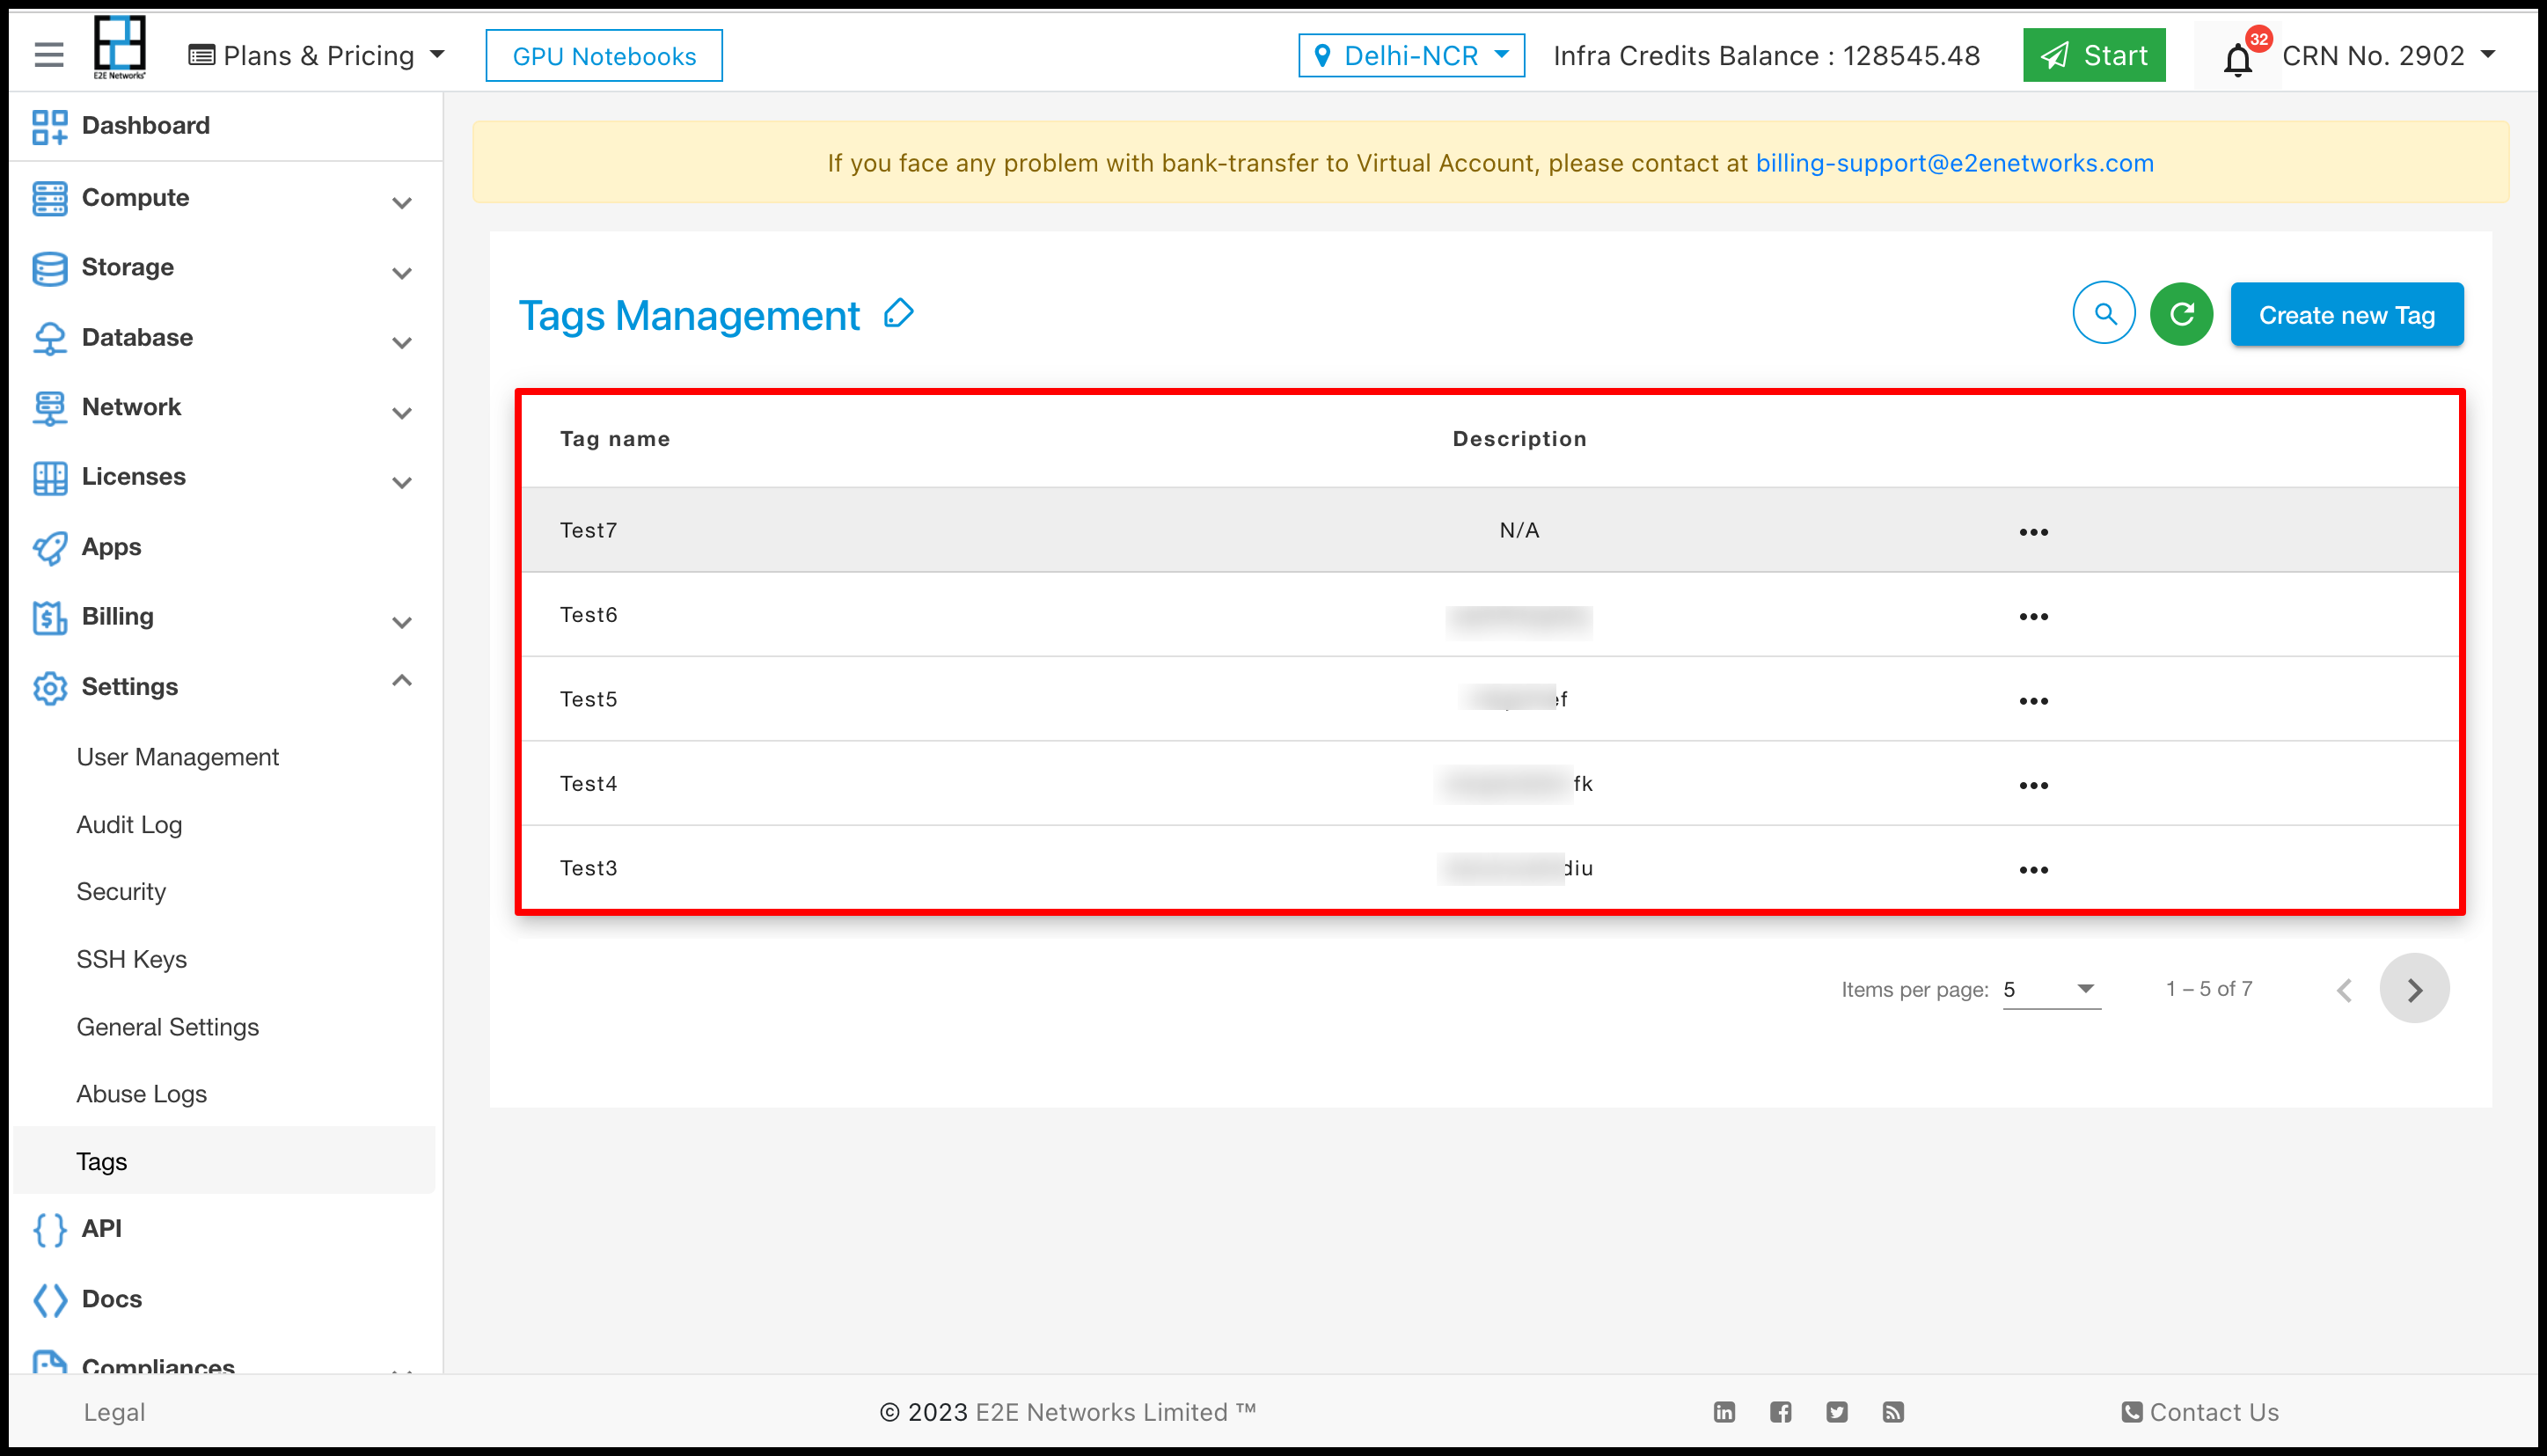
- The created tags you can see in the list as shown in the above screenshot.
Node With Tags
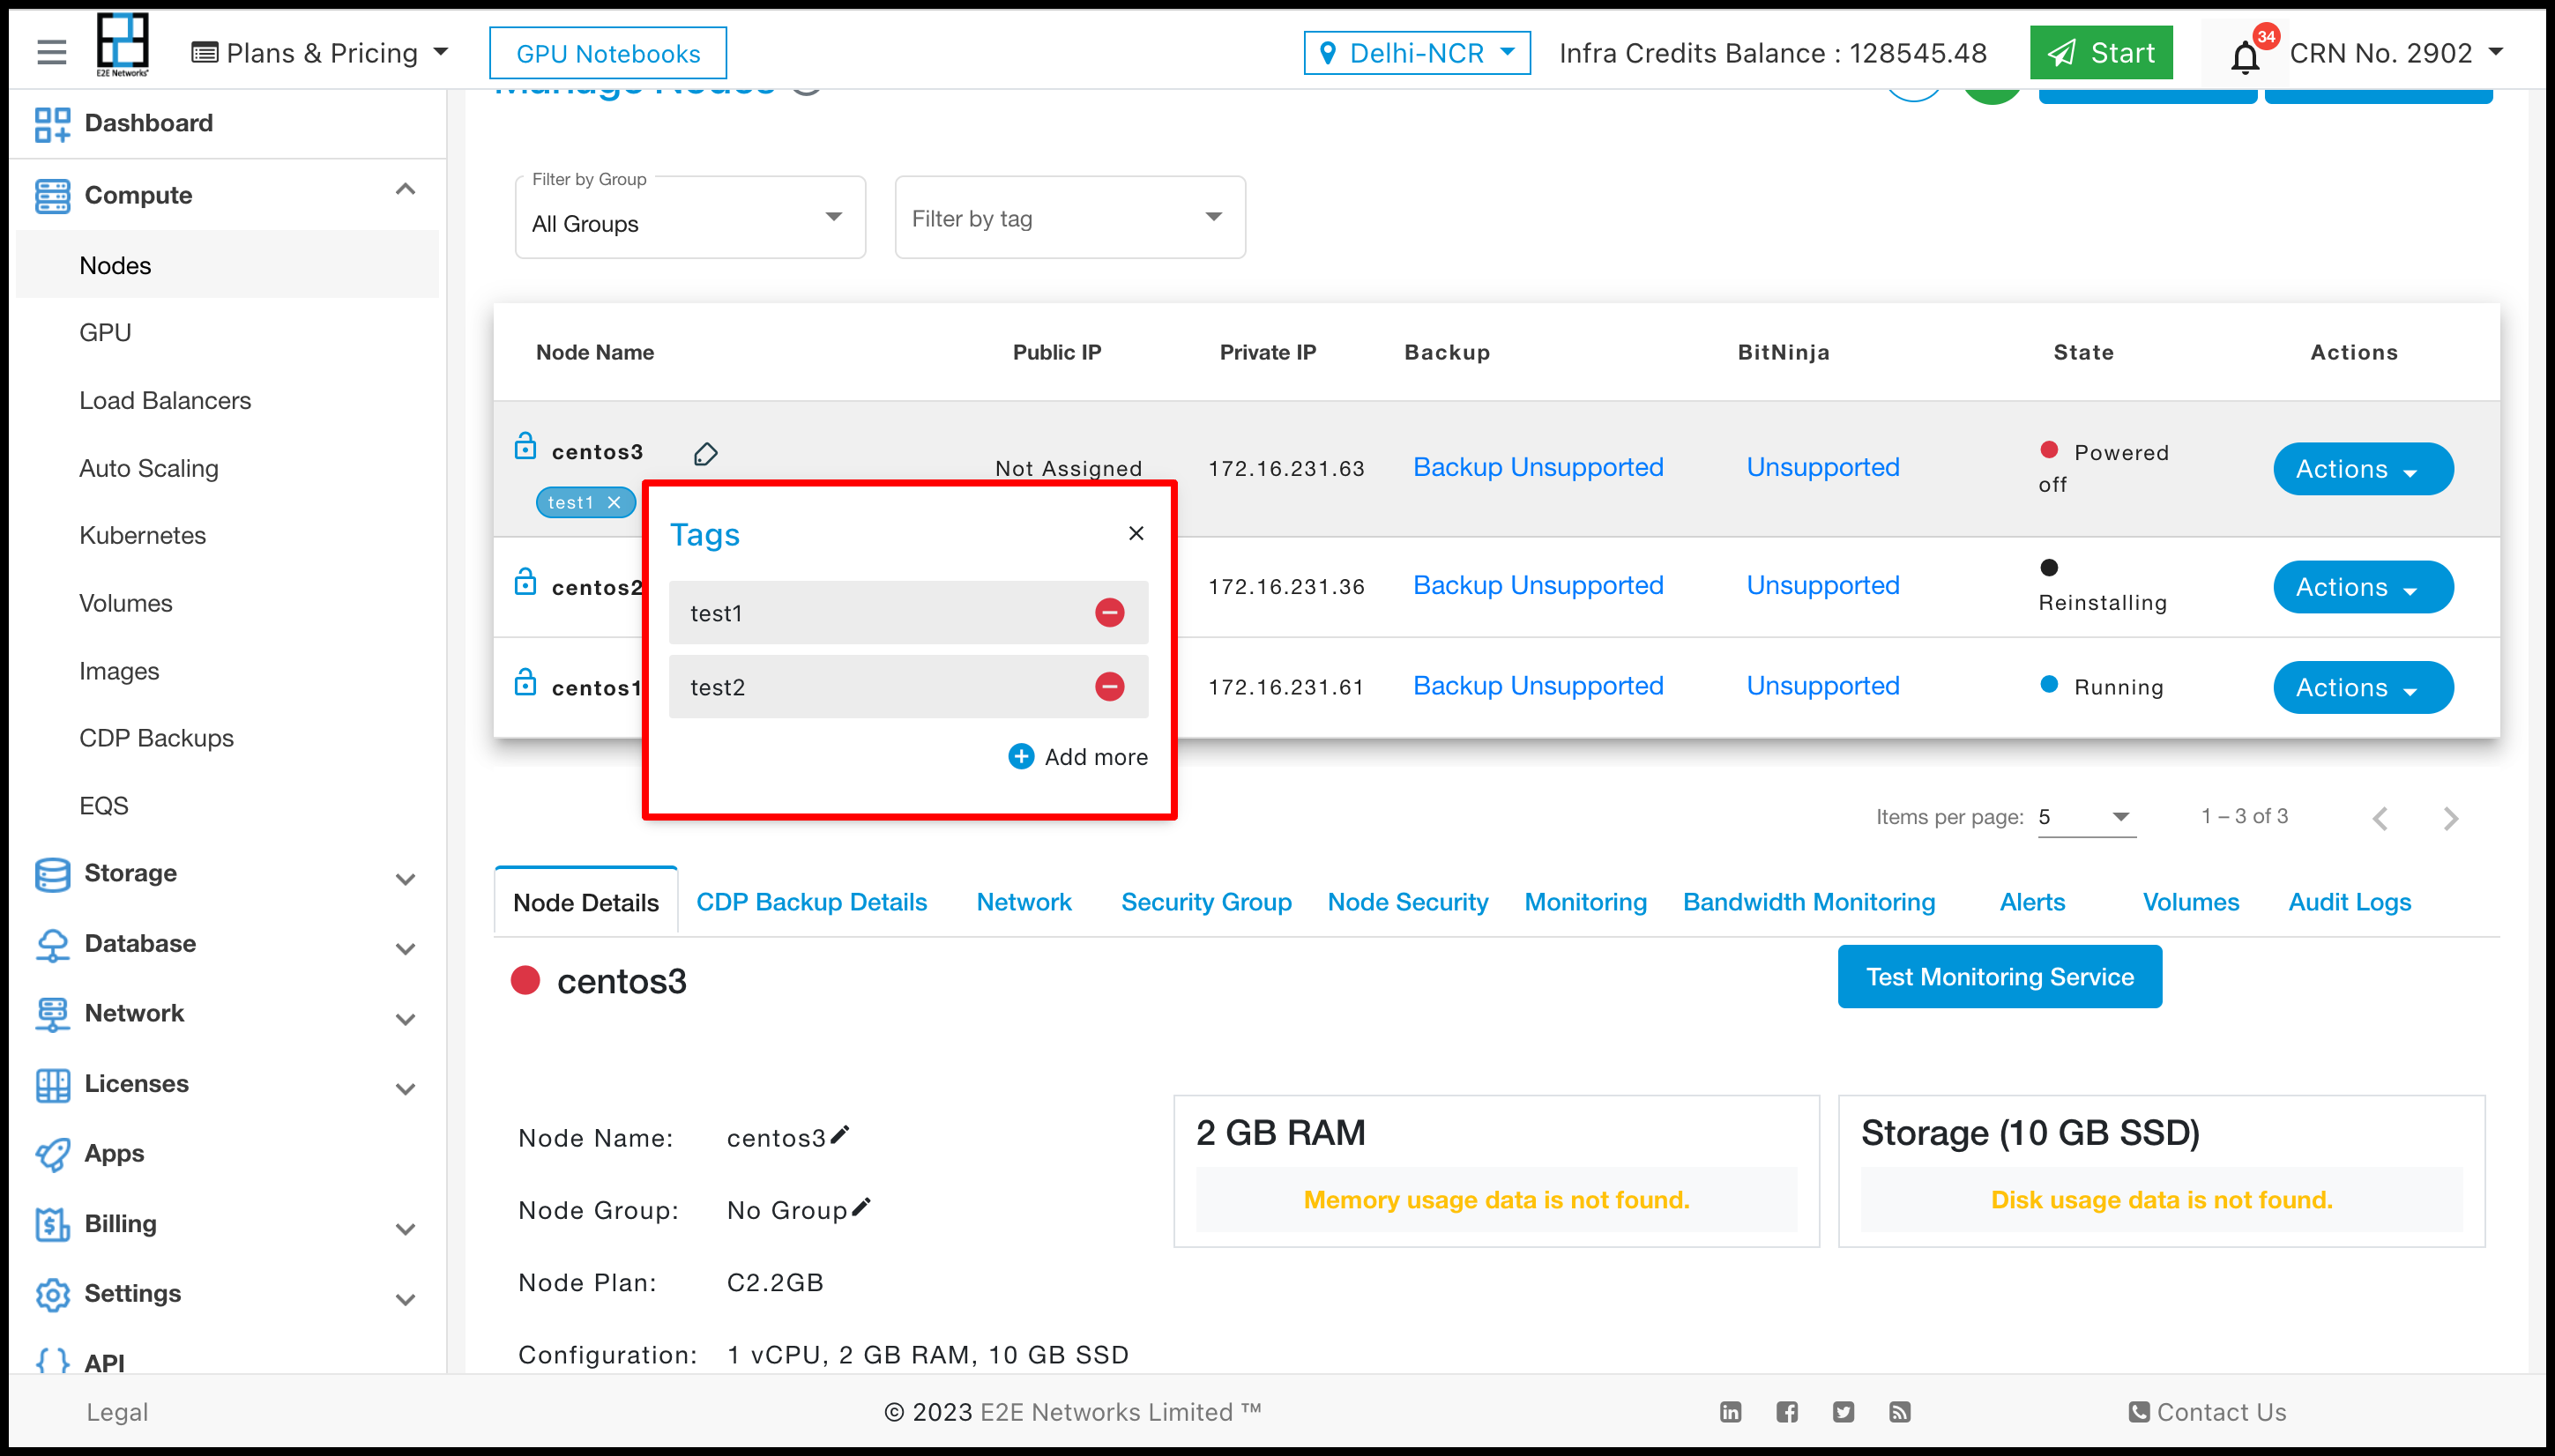
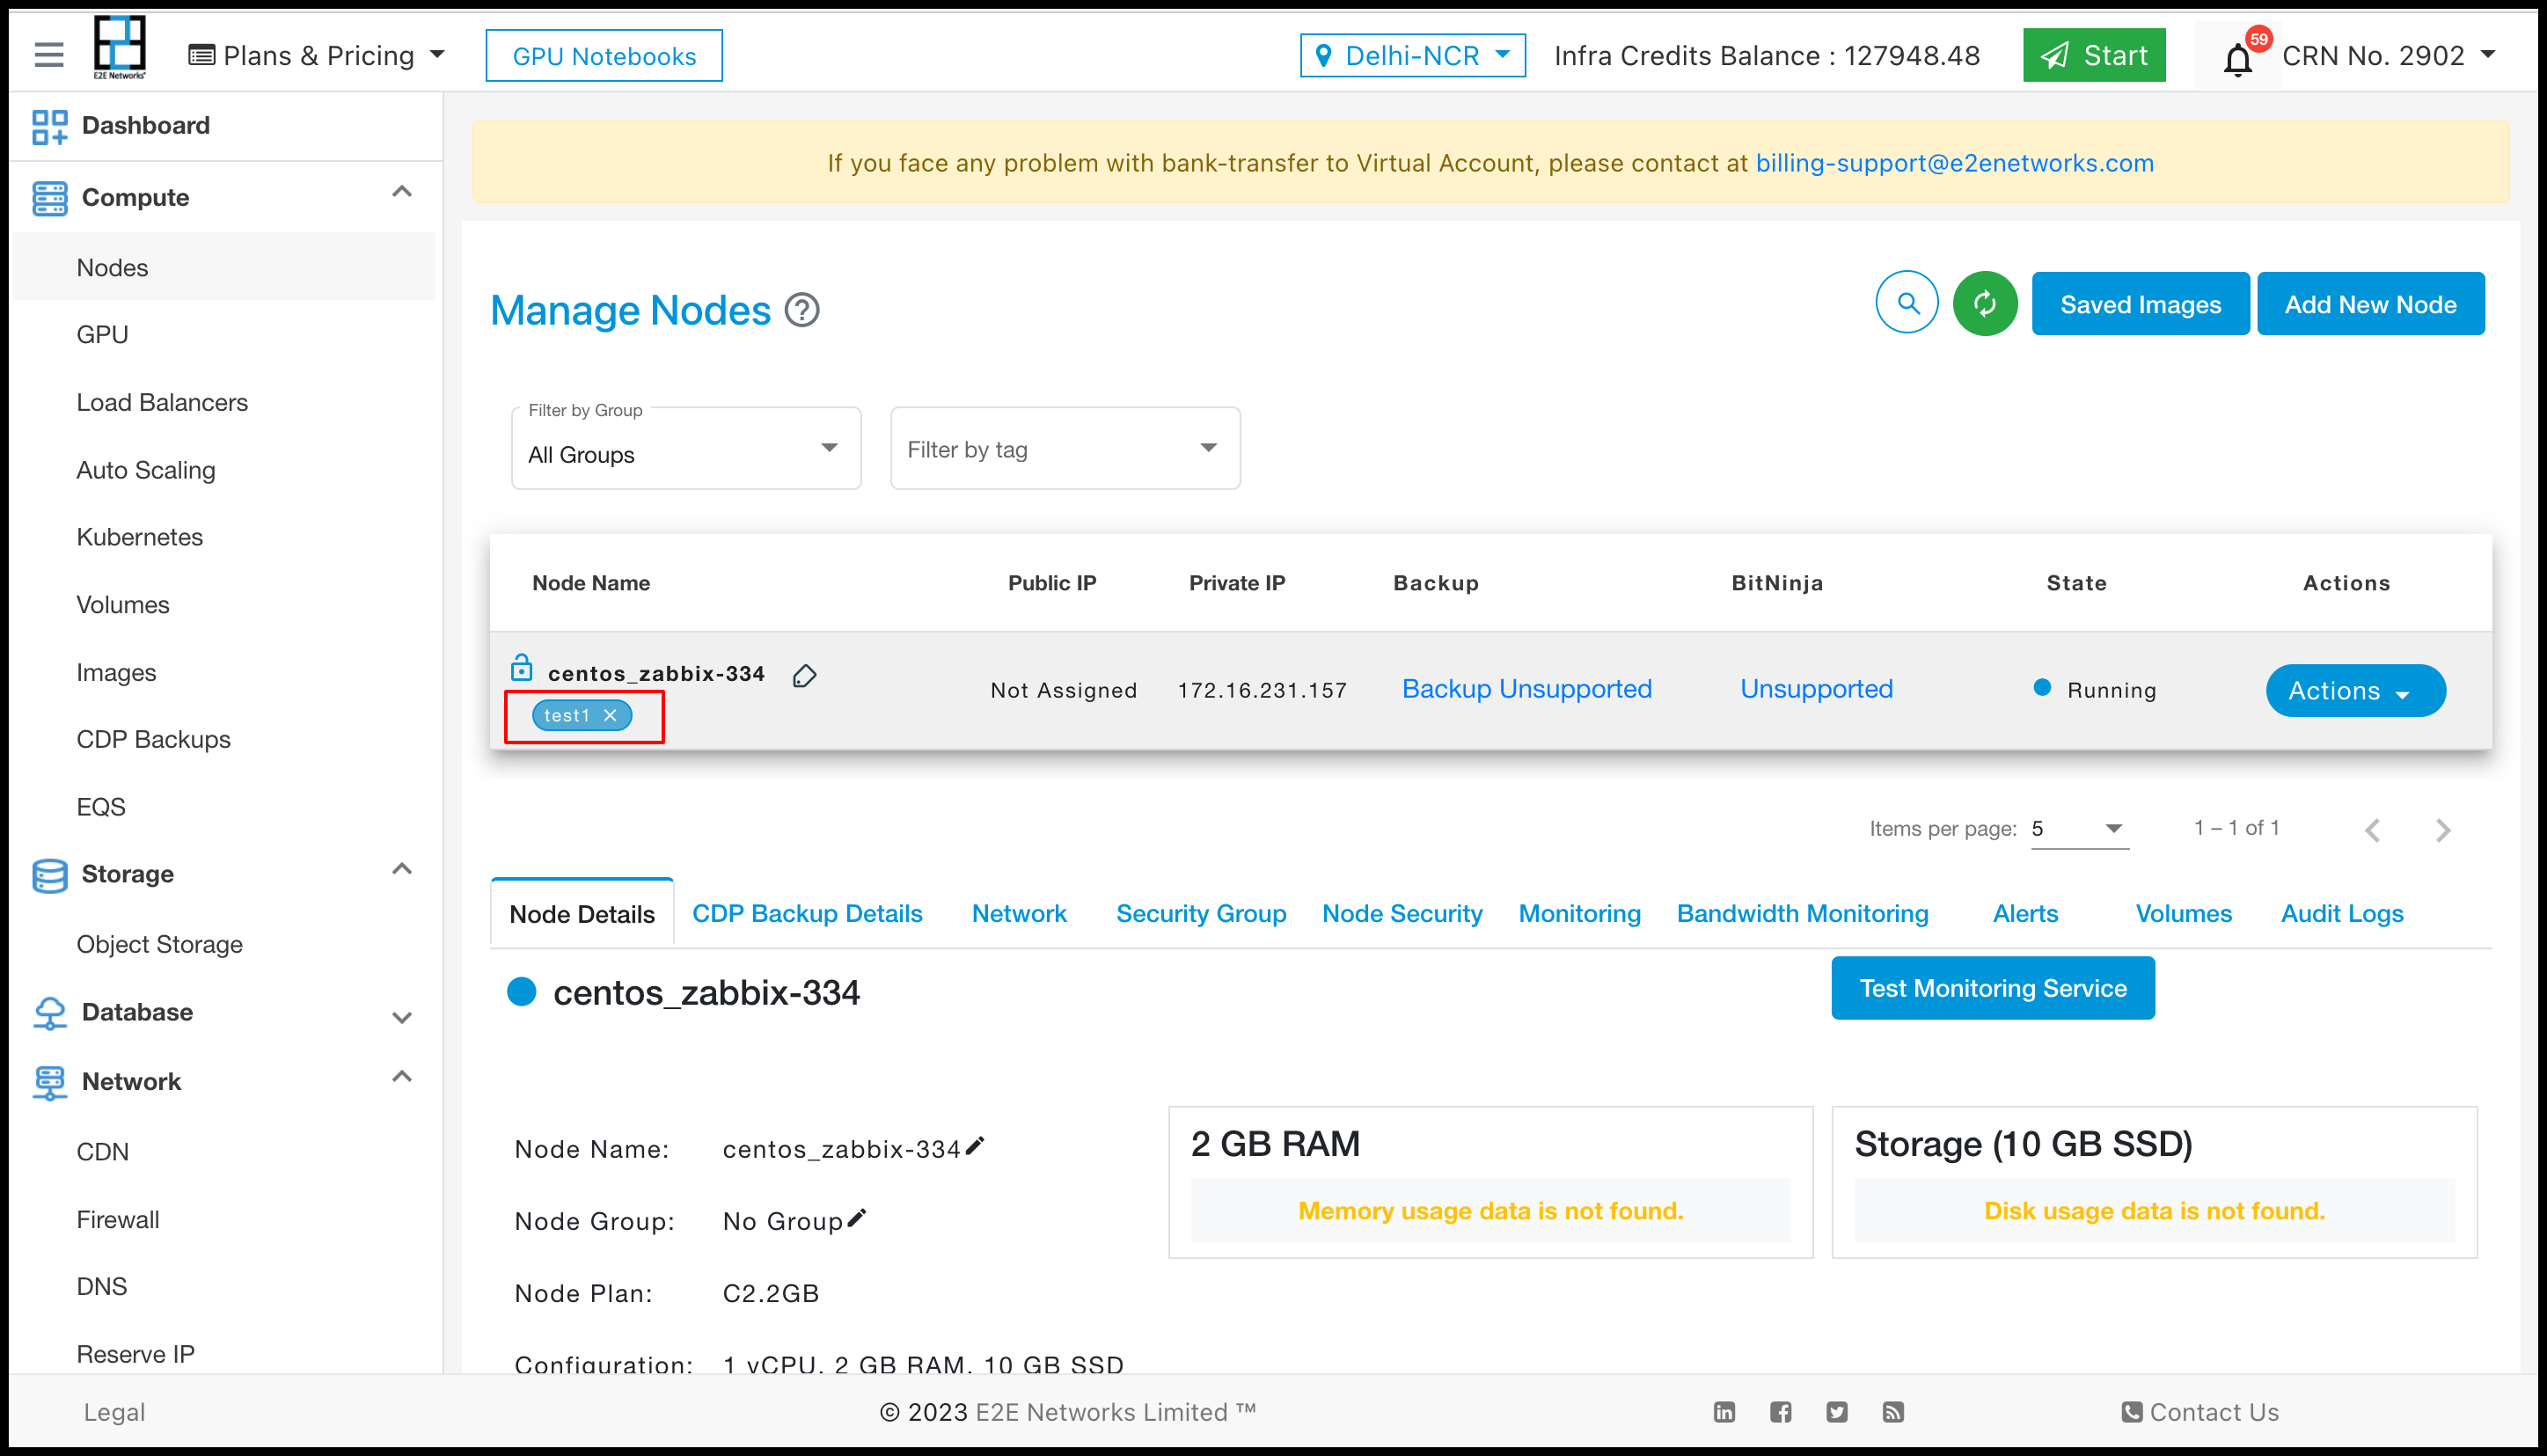
- After selecting the Tag and clicking on the create node button, the Tag attached to a node is shown below.
- Customers can also manage the tags from Nodes as shown in the image below.
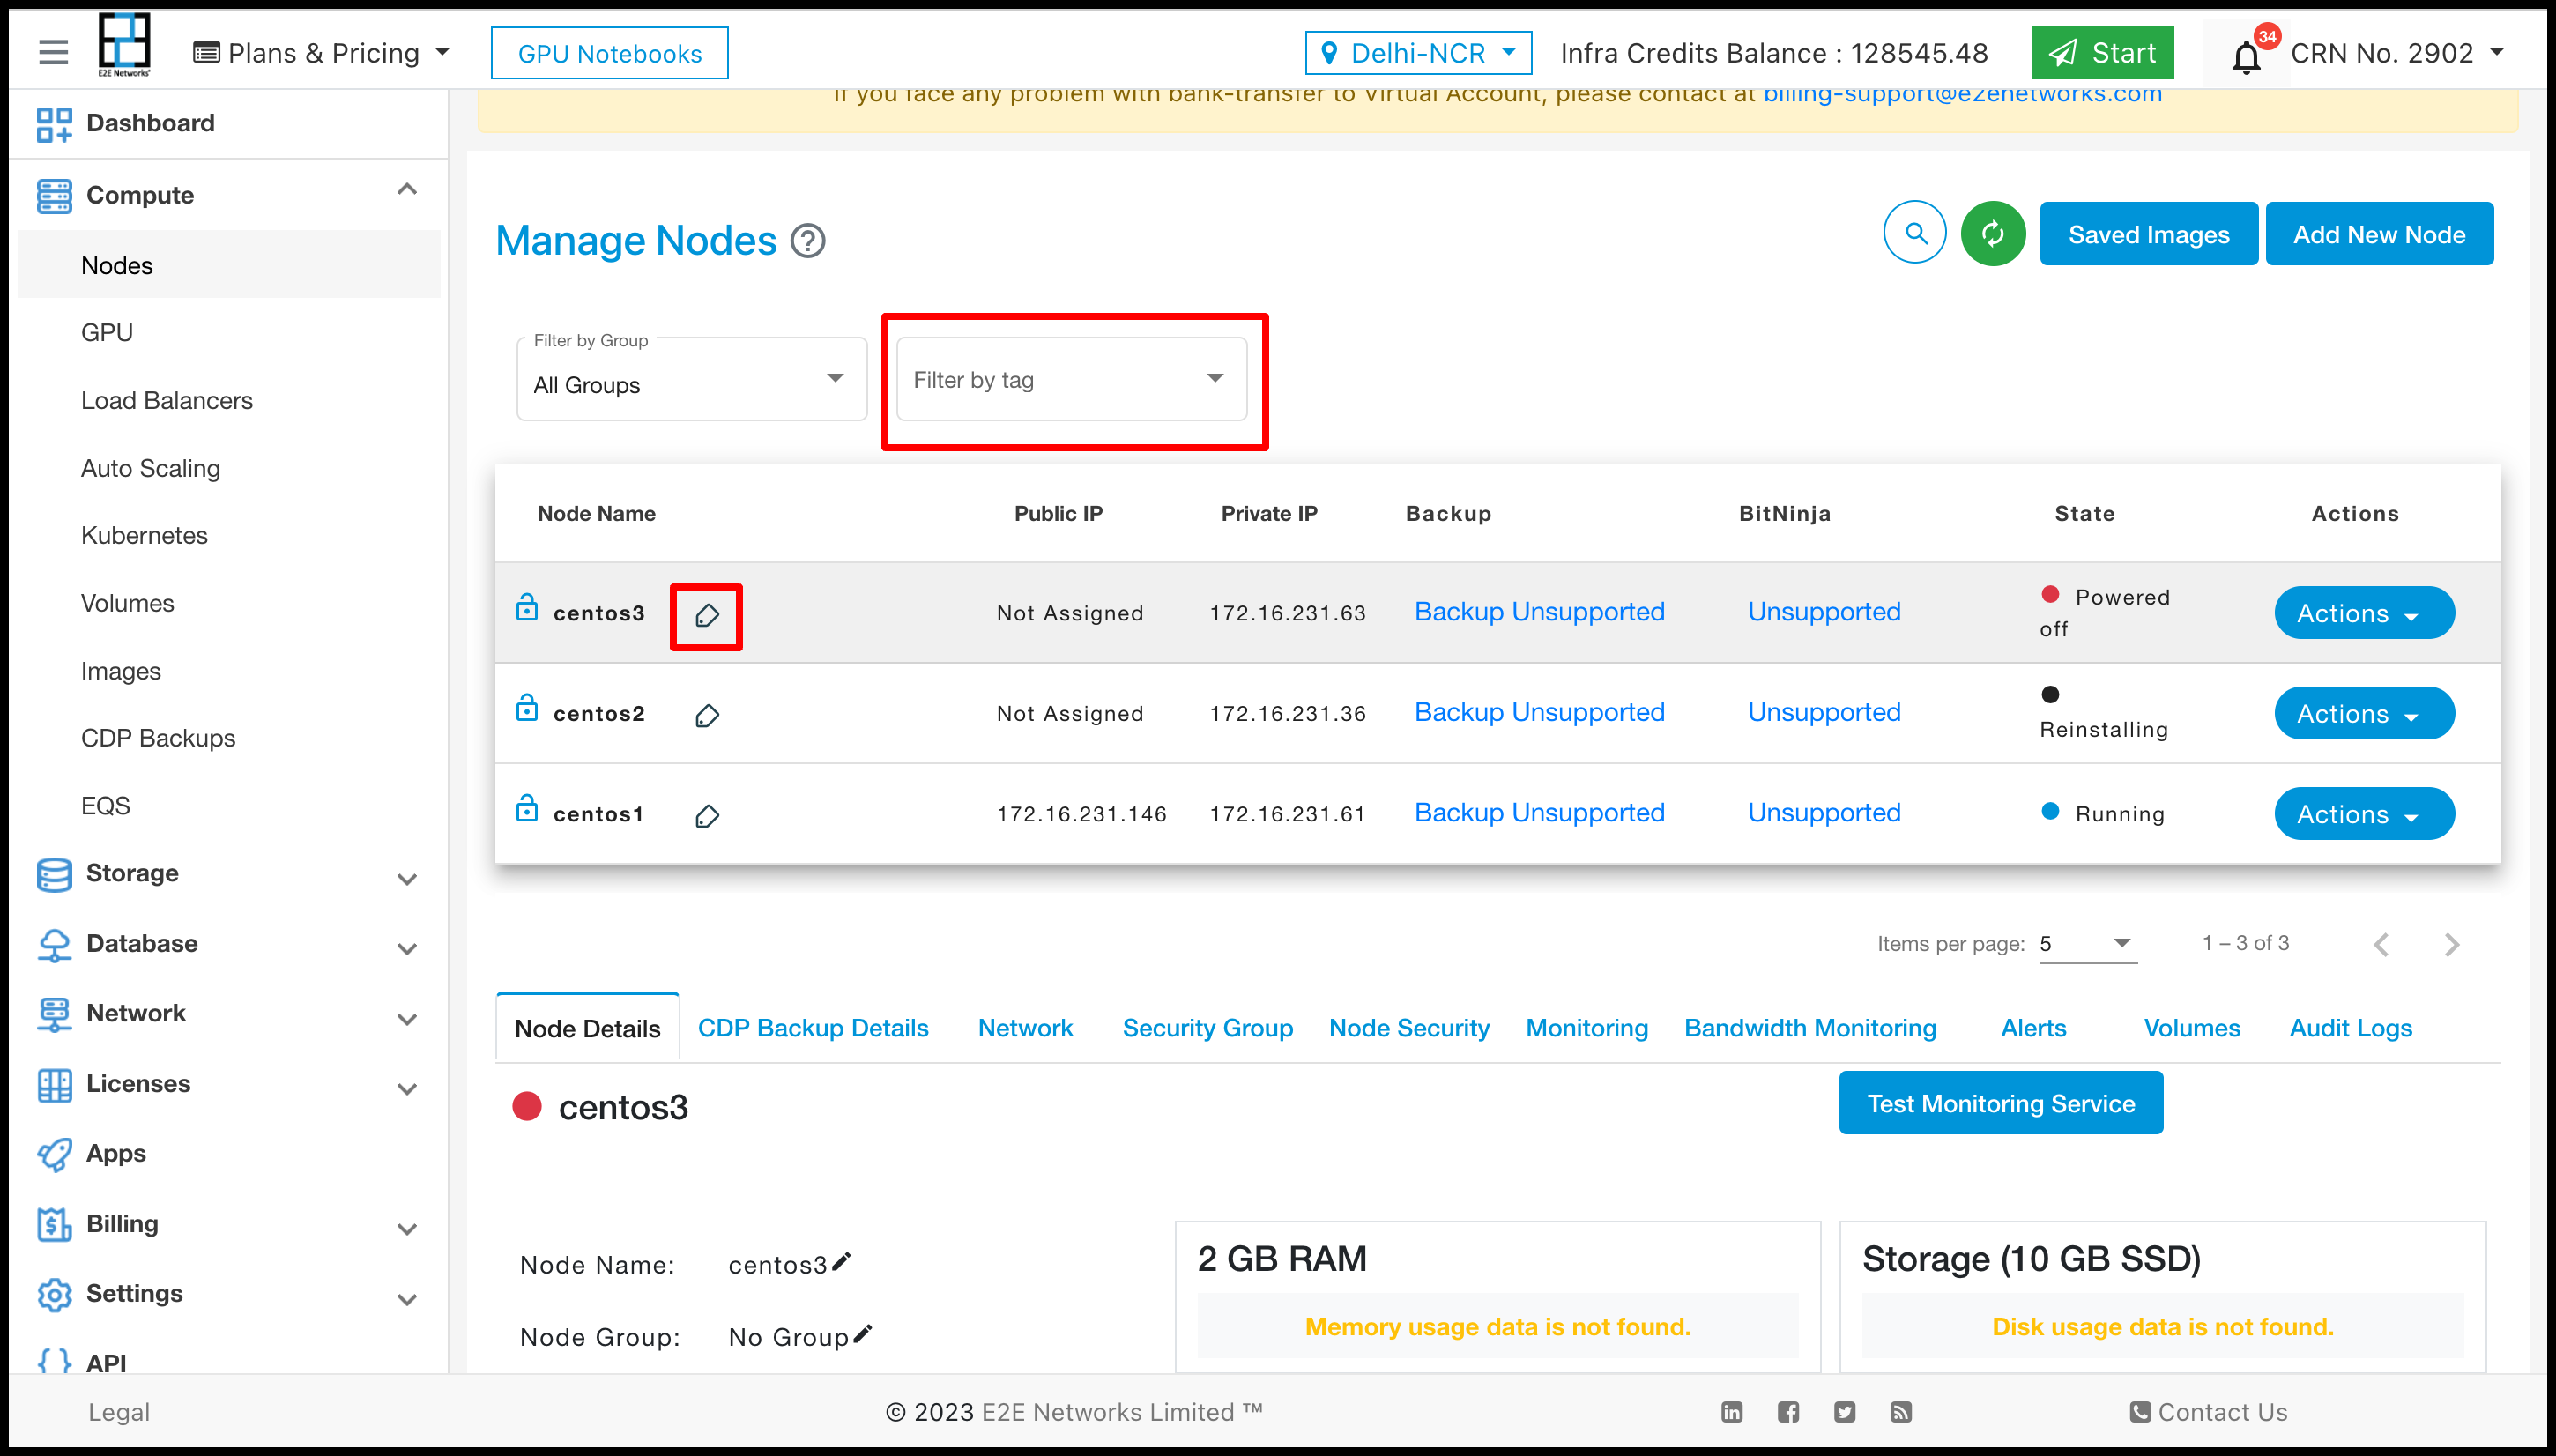
- When the customer clicks on the Tag, they can see the ‘Add a tag to your Node’.
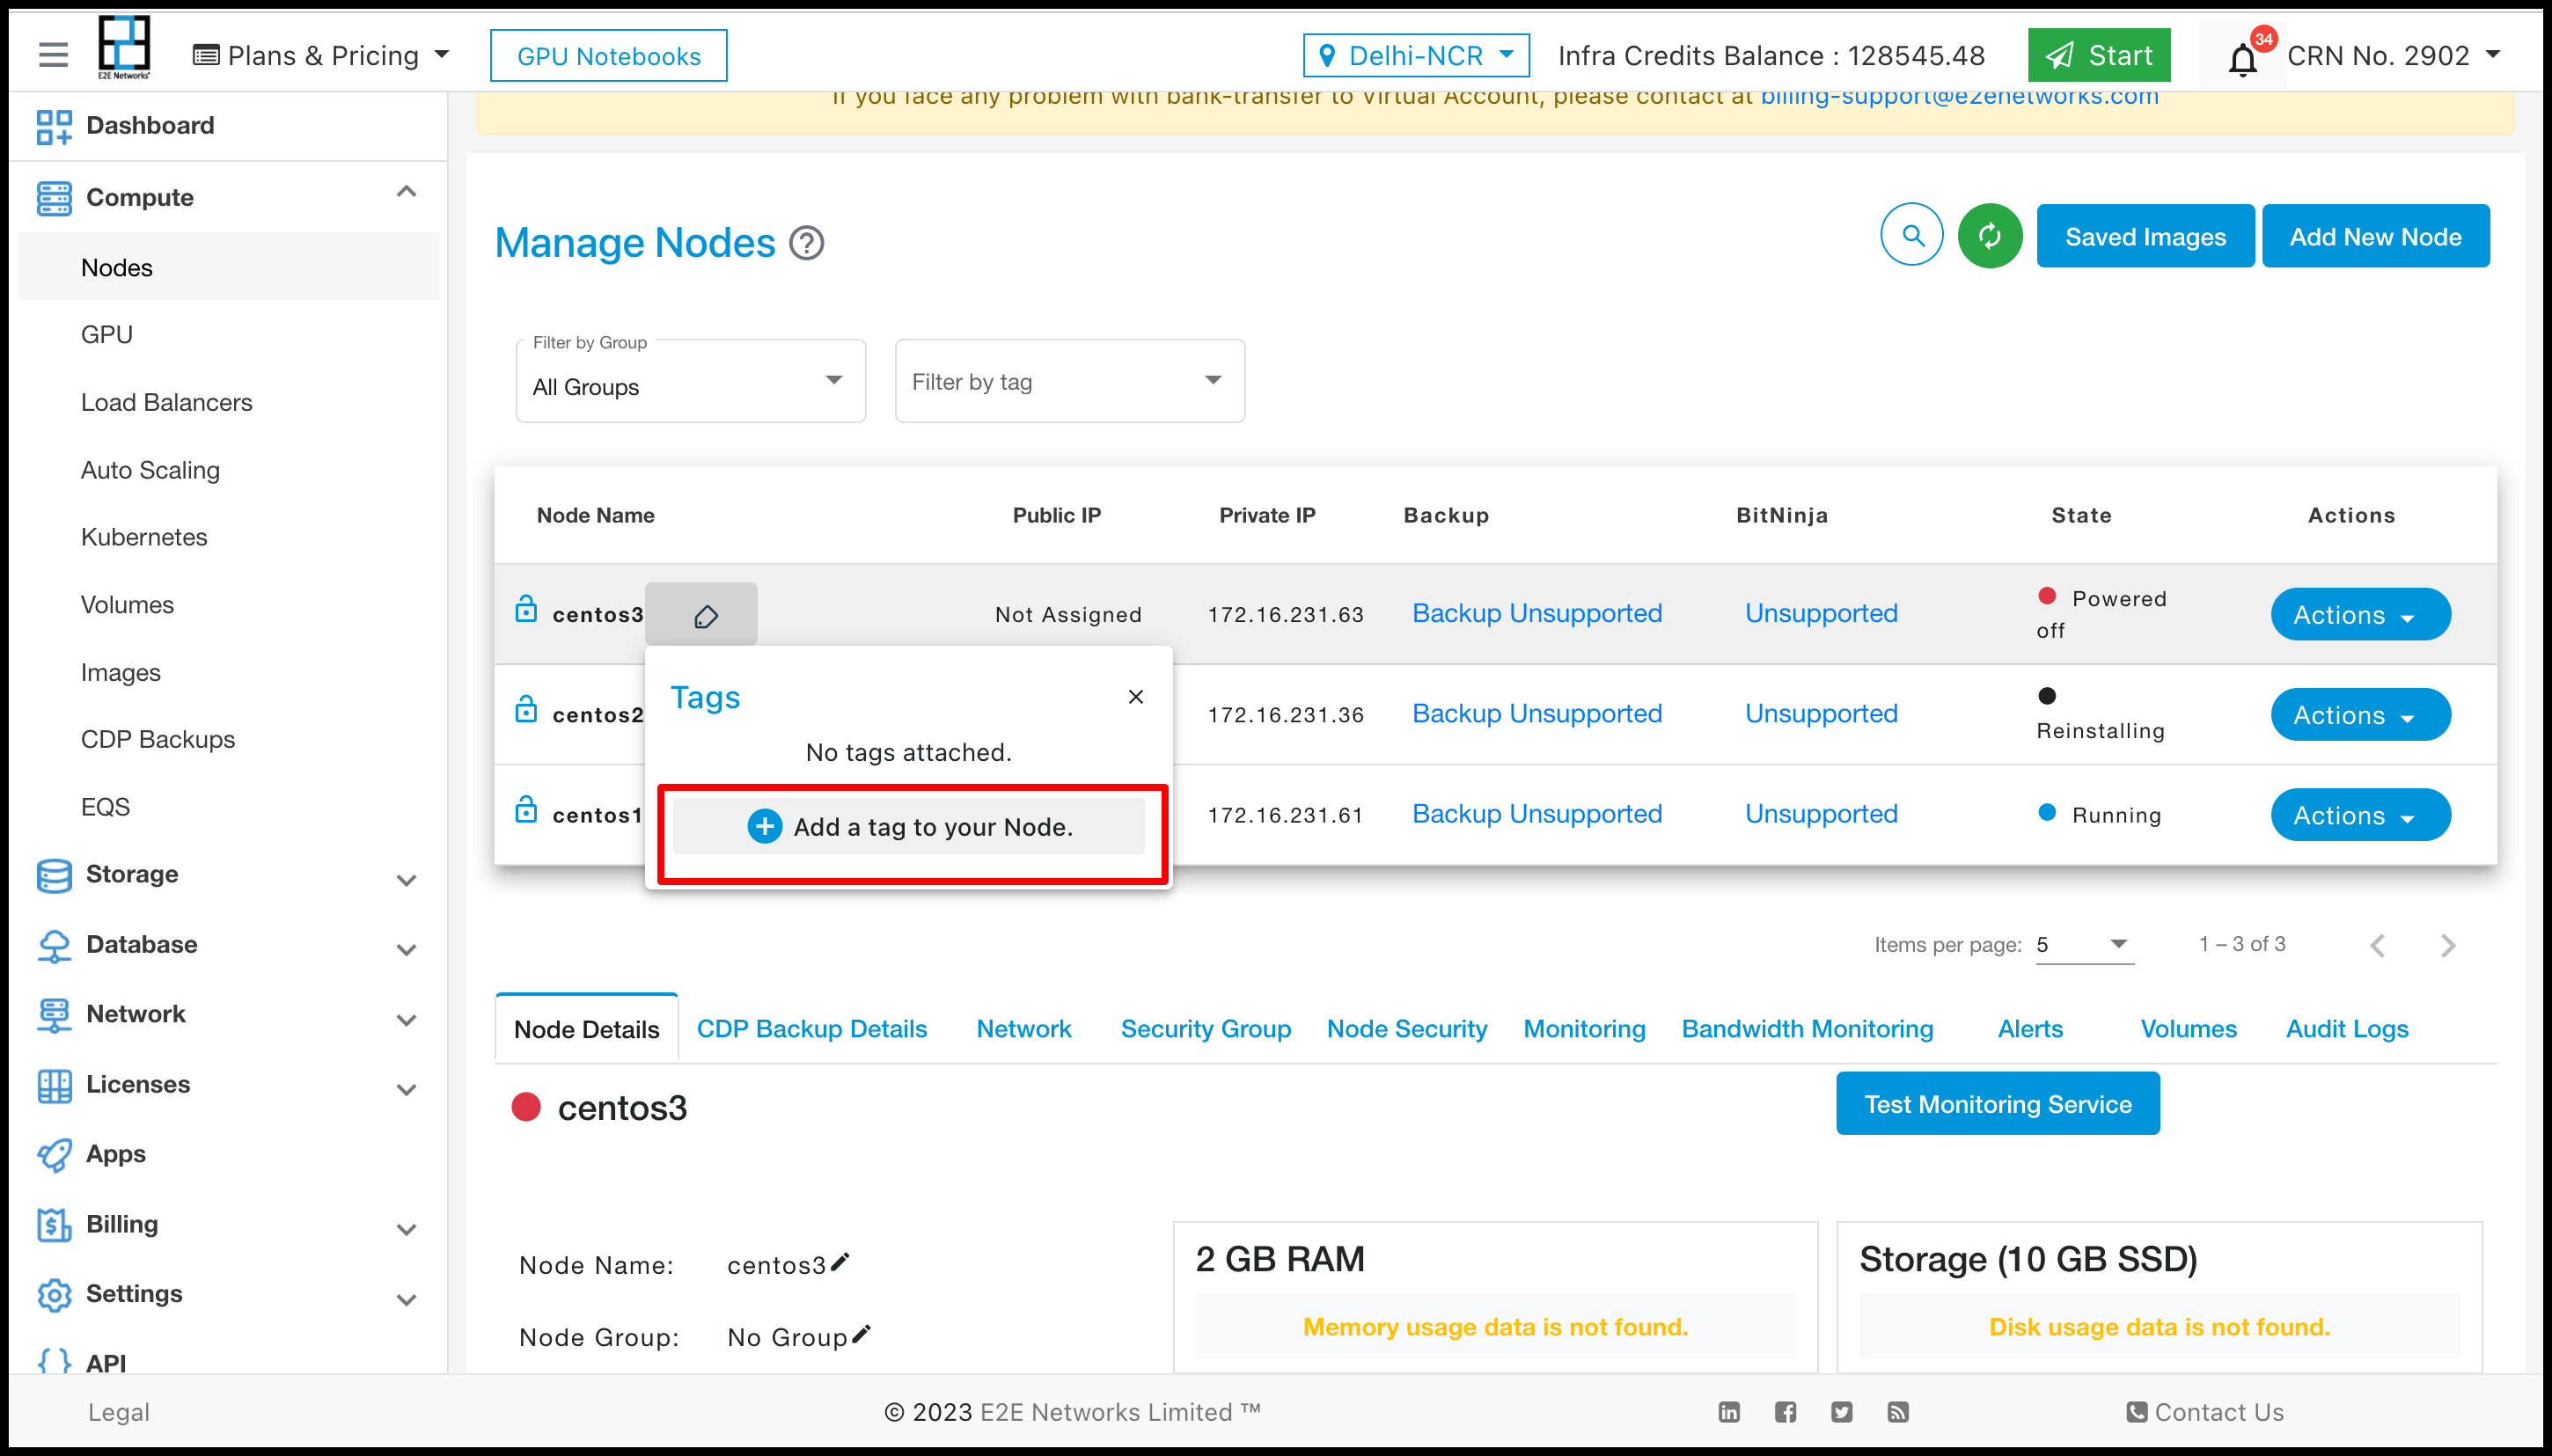
- After clicking on the ‘Add a tag to your Node’, the list of tags is shown from which the customer can add a tag to the node. They can also add multiple tags to one Node, and can remove and create new tags.
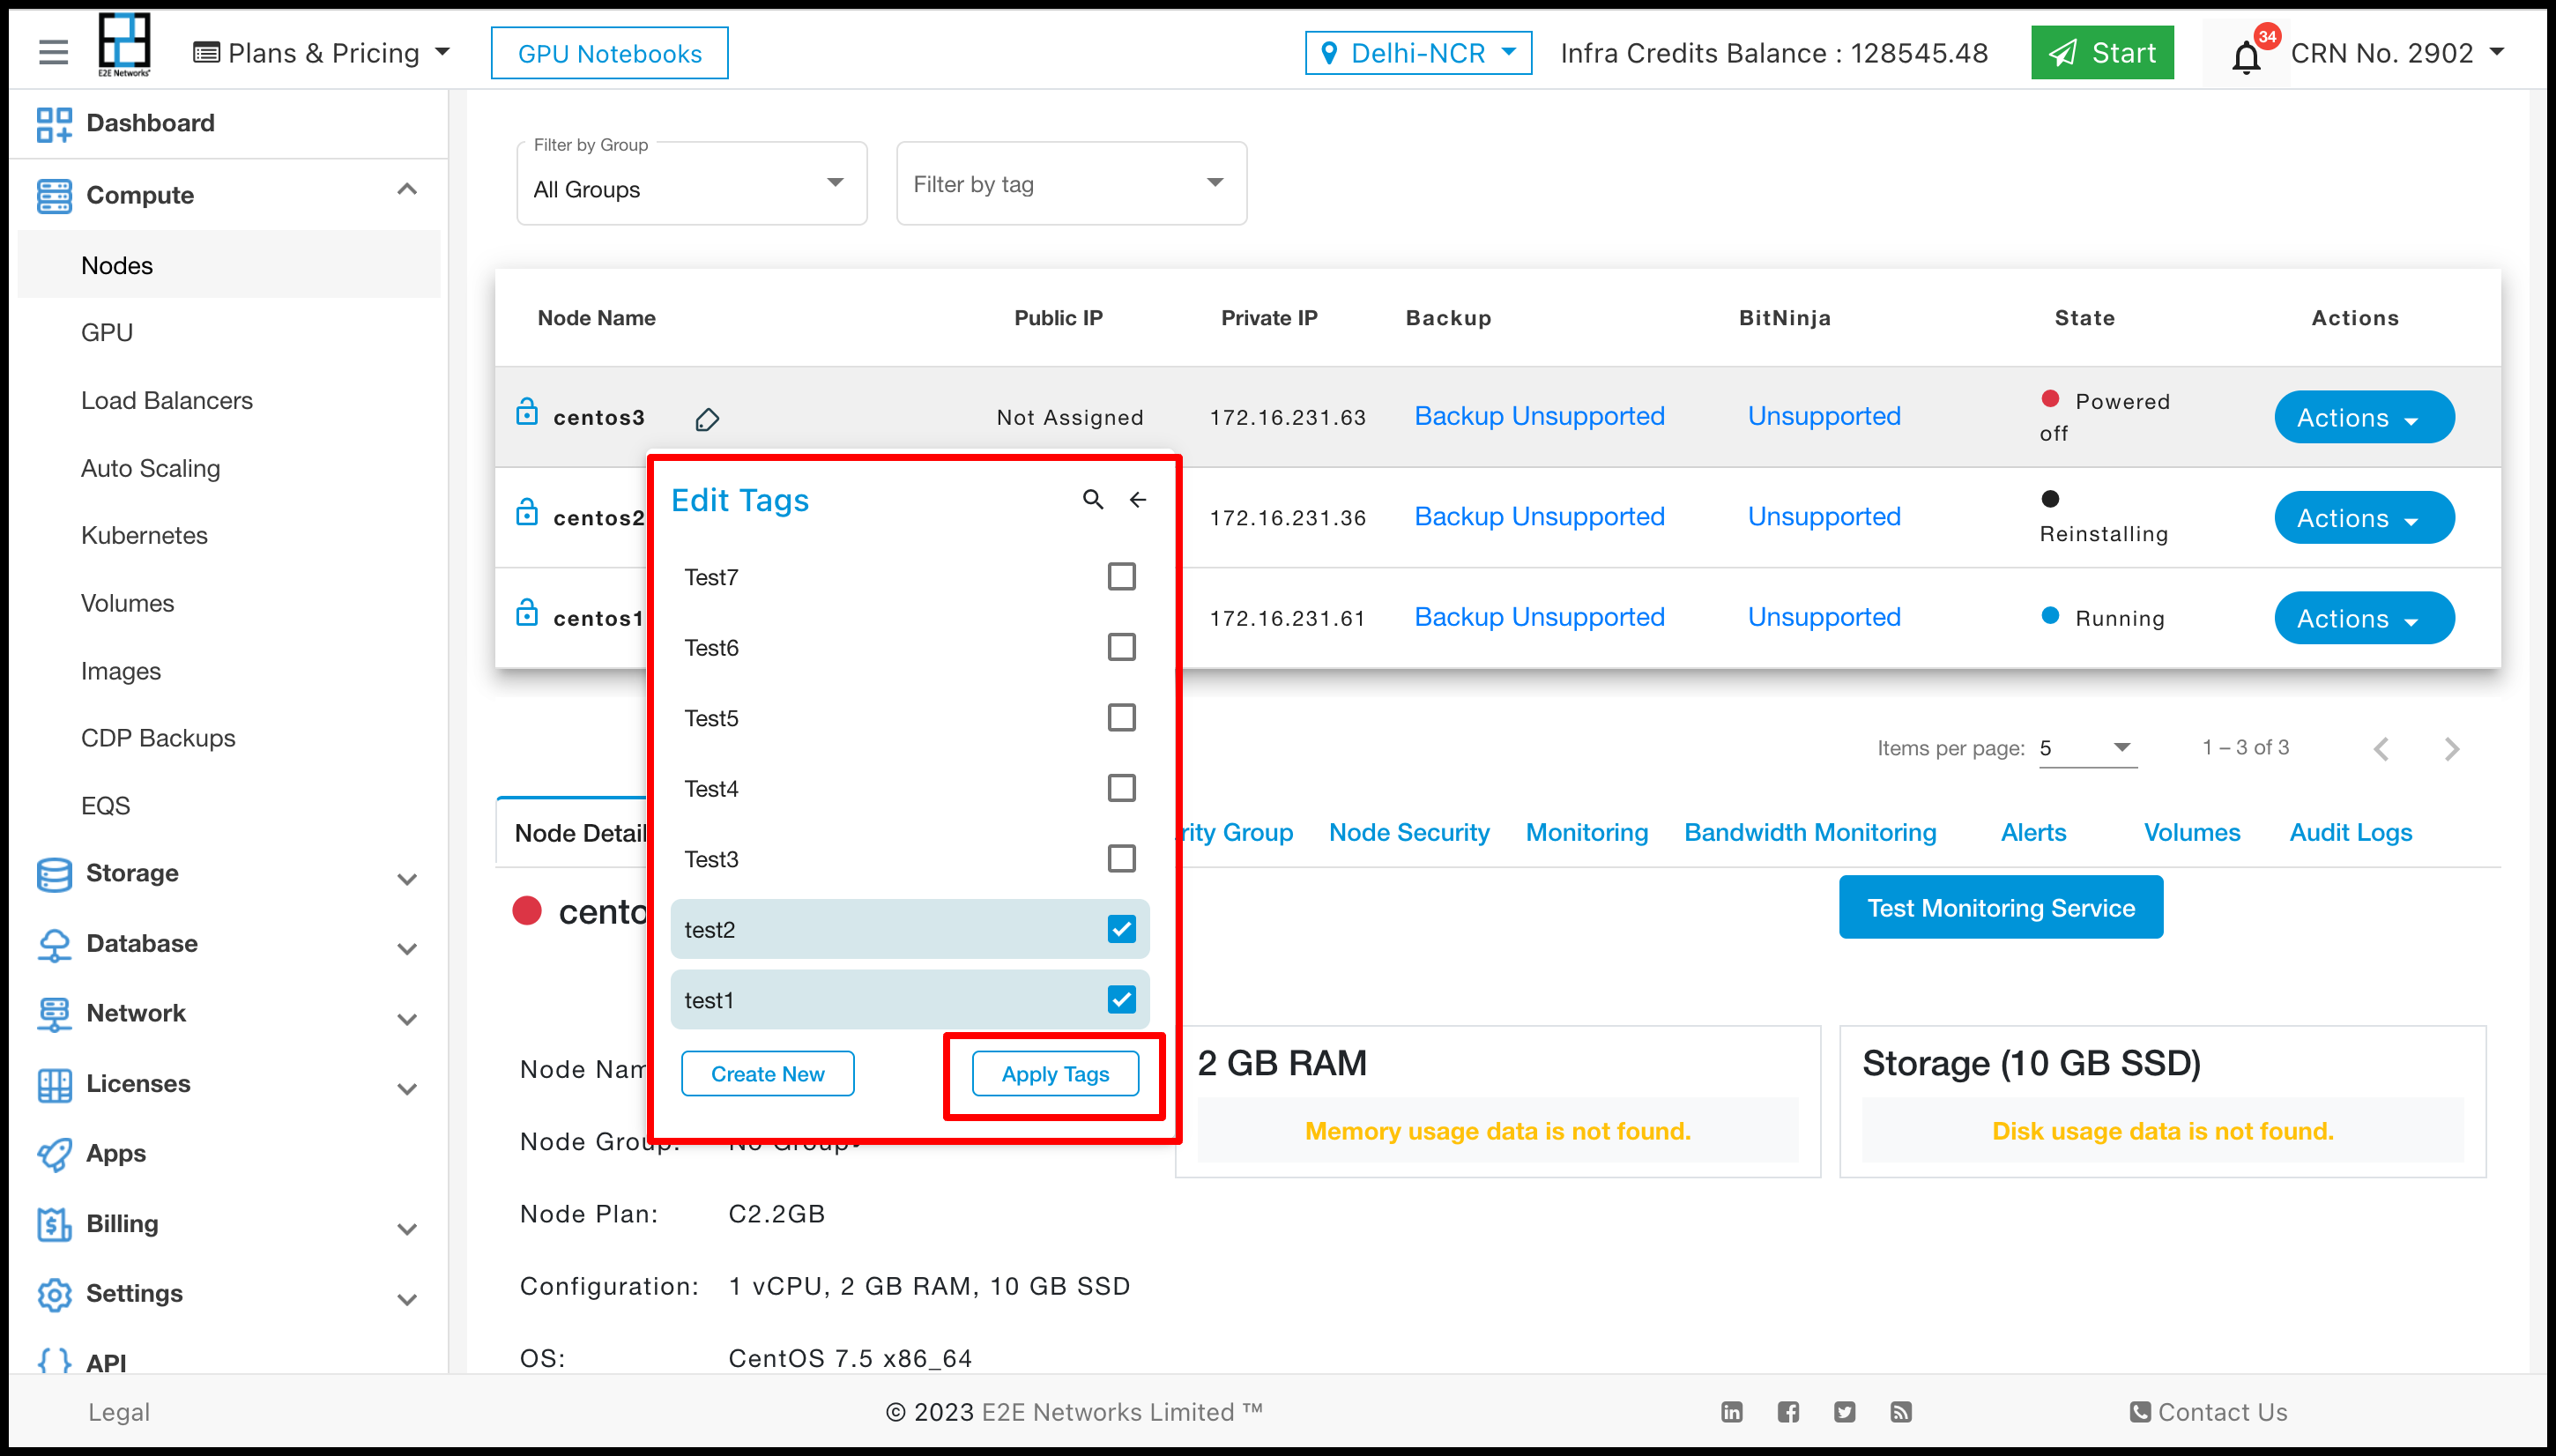
- After selecting the tags, click on ‘Apply Tags’; then it will show how many Nodes are attached to the Node.
