Datasets
Datasets allow you to organize, share, and easily access your data directly within your notebooks and training code. Currently, TIR supports datasets backed by EOS (Object Storage) and PVC-backed datasets with Disk Storage.
How to Use Datasets
- 1. Mount EOS Storage Buckets:
- You can mount your EOS storage buckets, making them accessible like a local file system.
- This setup allows you to interact with the data in your buckets as if it were on your local machine.
- 2. Access Data from Multiple Sources:
- You can load training data from your local machine or from other cloud providers and access it through your notebook.
- All mounted datasets will appear under the
/datasetsdirectory, allowing you to read and manipulate data using standard file operations.
Define datasets to manage and control your data, even if you don’t plan to use it to mount it for use on notebooks or training jobs.
Dataset SDK
Datasets allow you to organize, share, and easily access your data directly within your notebooks and training code.
Benefits of Using Datasets
- Shared Team Access: You can create a shared EOS bucket for your team’s training data. Using common data sources across your team helps improve the reproducibility of results and ensures consistency in training workflows.
- Minimal Configuration Overhead: When you create a dataset through TIR, we automatically handle the creation of a new storage bucket and access credentials. You can immediately copy and execute the
mc(MinIO CLI) commands displayed in the UI to upload data from your local machine or hosted notebooks. - Simplified Data Access: Access your training data directly in your hosted notebooks or training jobs without needing to configure access credentials.
- Data Streaming: Stream training data in real-time instead of downloading it all to disk. This is especially beneficial for distributed training jobs where loading large datasets at once can be inefficient.
Storage Type
1. EOS Bucket
WebUI: Allows you to create, browse and upload files to the Dataset.
SDK: The TIR datasets are compatible with the following SDKs, which can be used to transfer data to and from the datasets:
- Minio Client SDK (https://github.com/minio/mc)
- S3cmd tool (https://github.com/s3tools/s3cmd)
In case you have data with other cloud providers, you can use Data Syncer to migrate your data to TIR.
2. Disk
WebUI: Allows you to create a dataset.
For disk storage type data can only be transferred after mounting it on TIR nodes.
Getting Started
Prerequisites
- Install MinIO CLI: Install the MinIO CLI (mc) on your local machine from the MinIO website. If
mcis already installed, you can skip this step.
Create a new dataset
- 1. Log in to the TIR AI Platform:
- Ensure you are logged in and working within the correct project. If needed, you can create a new project.
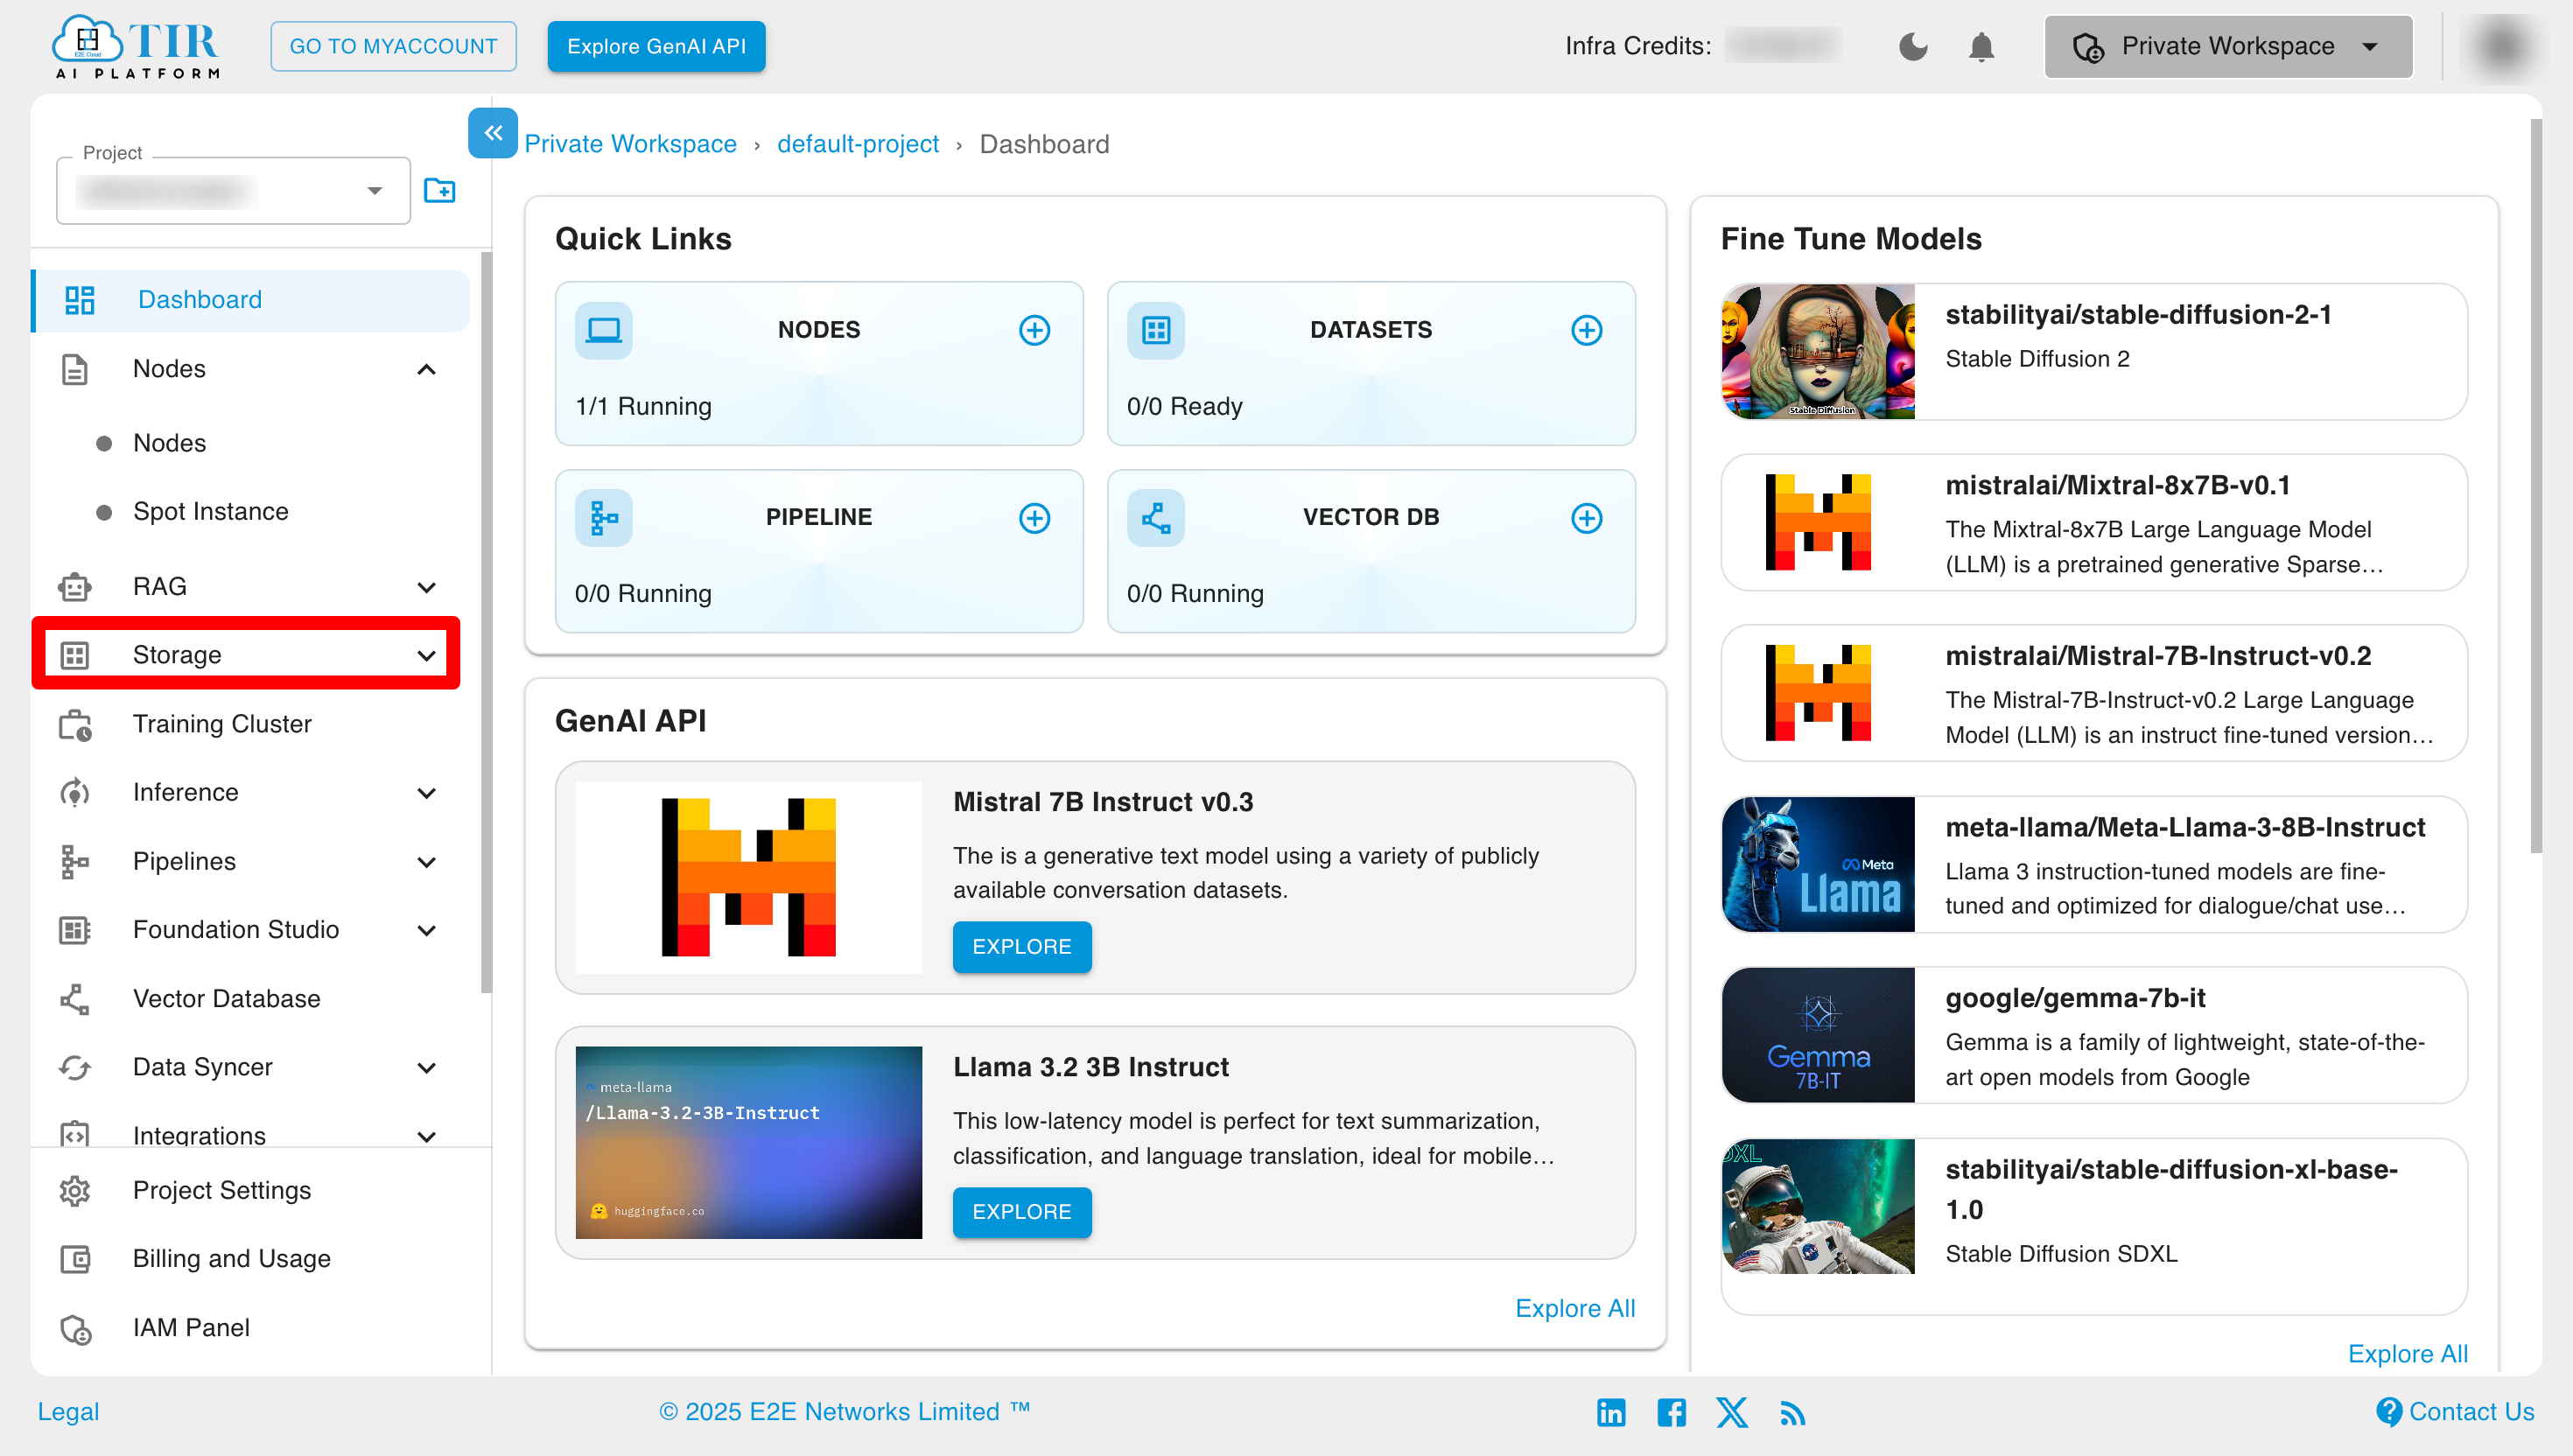
- 2. Navigate to the Datasets Section:
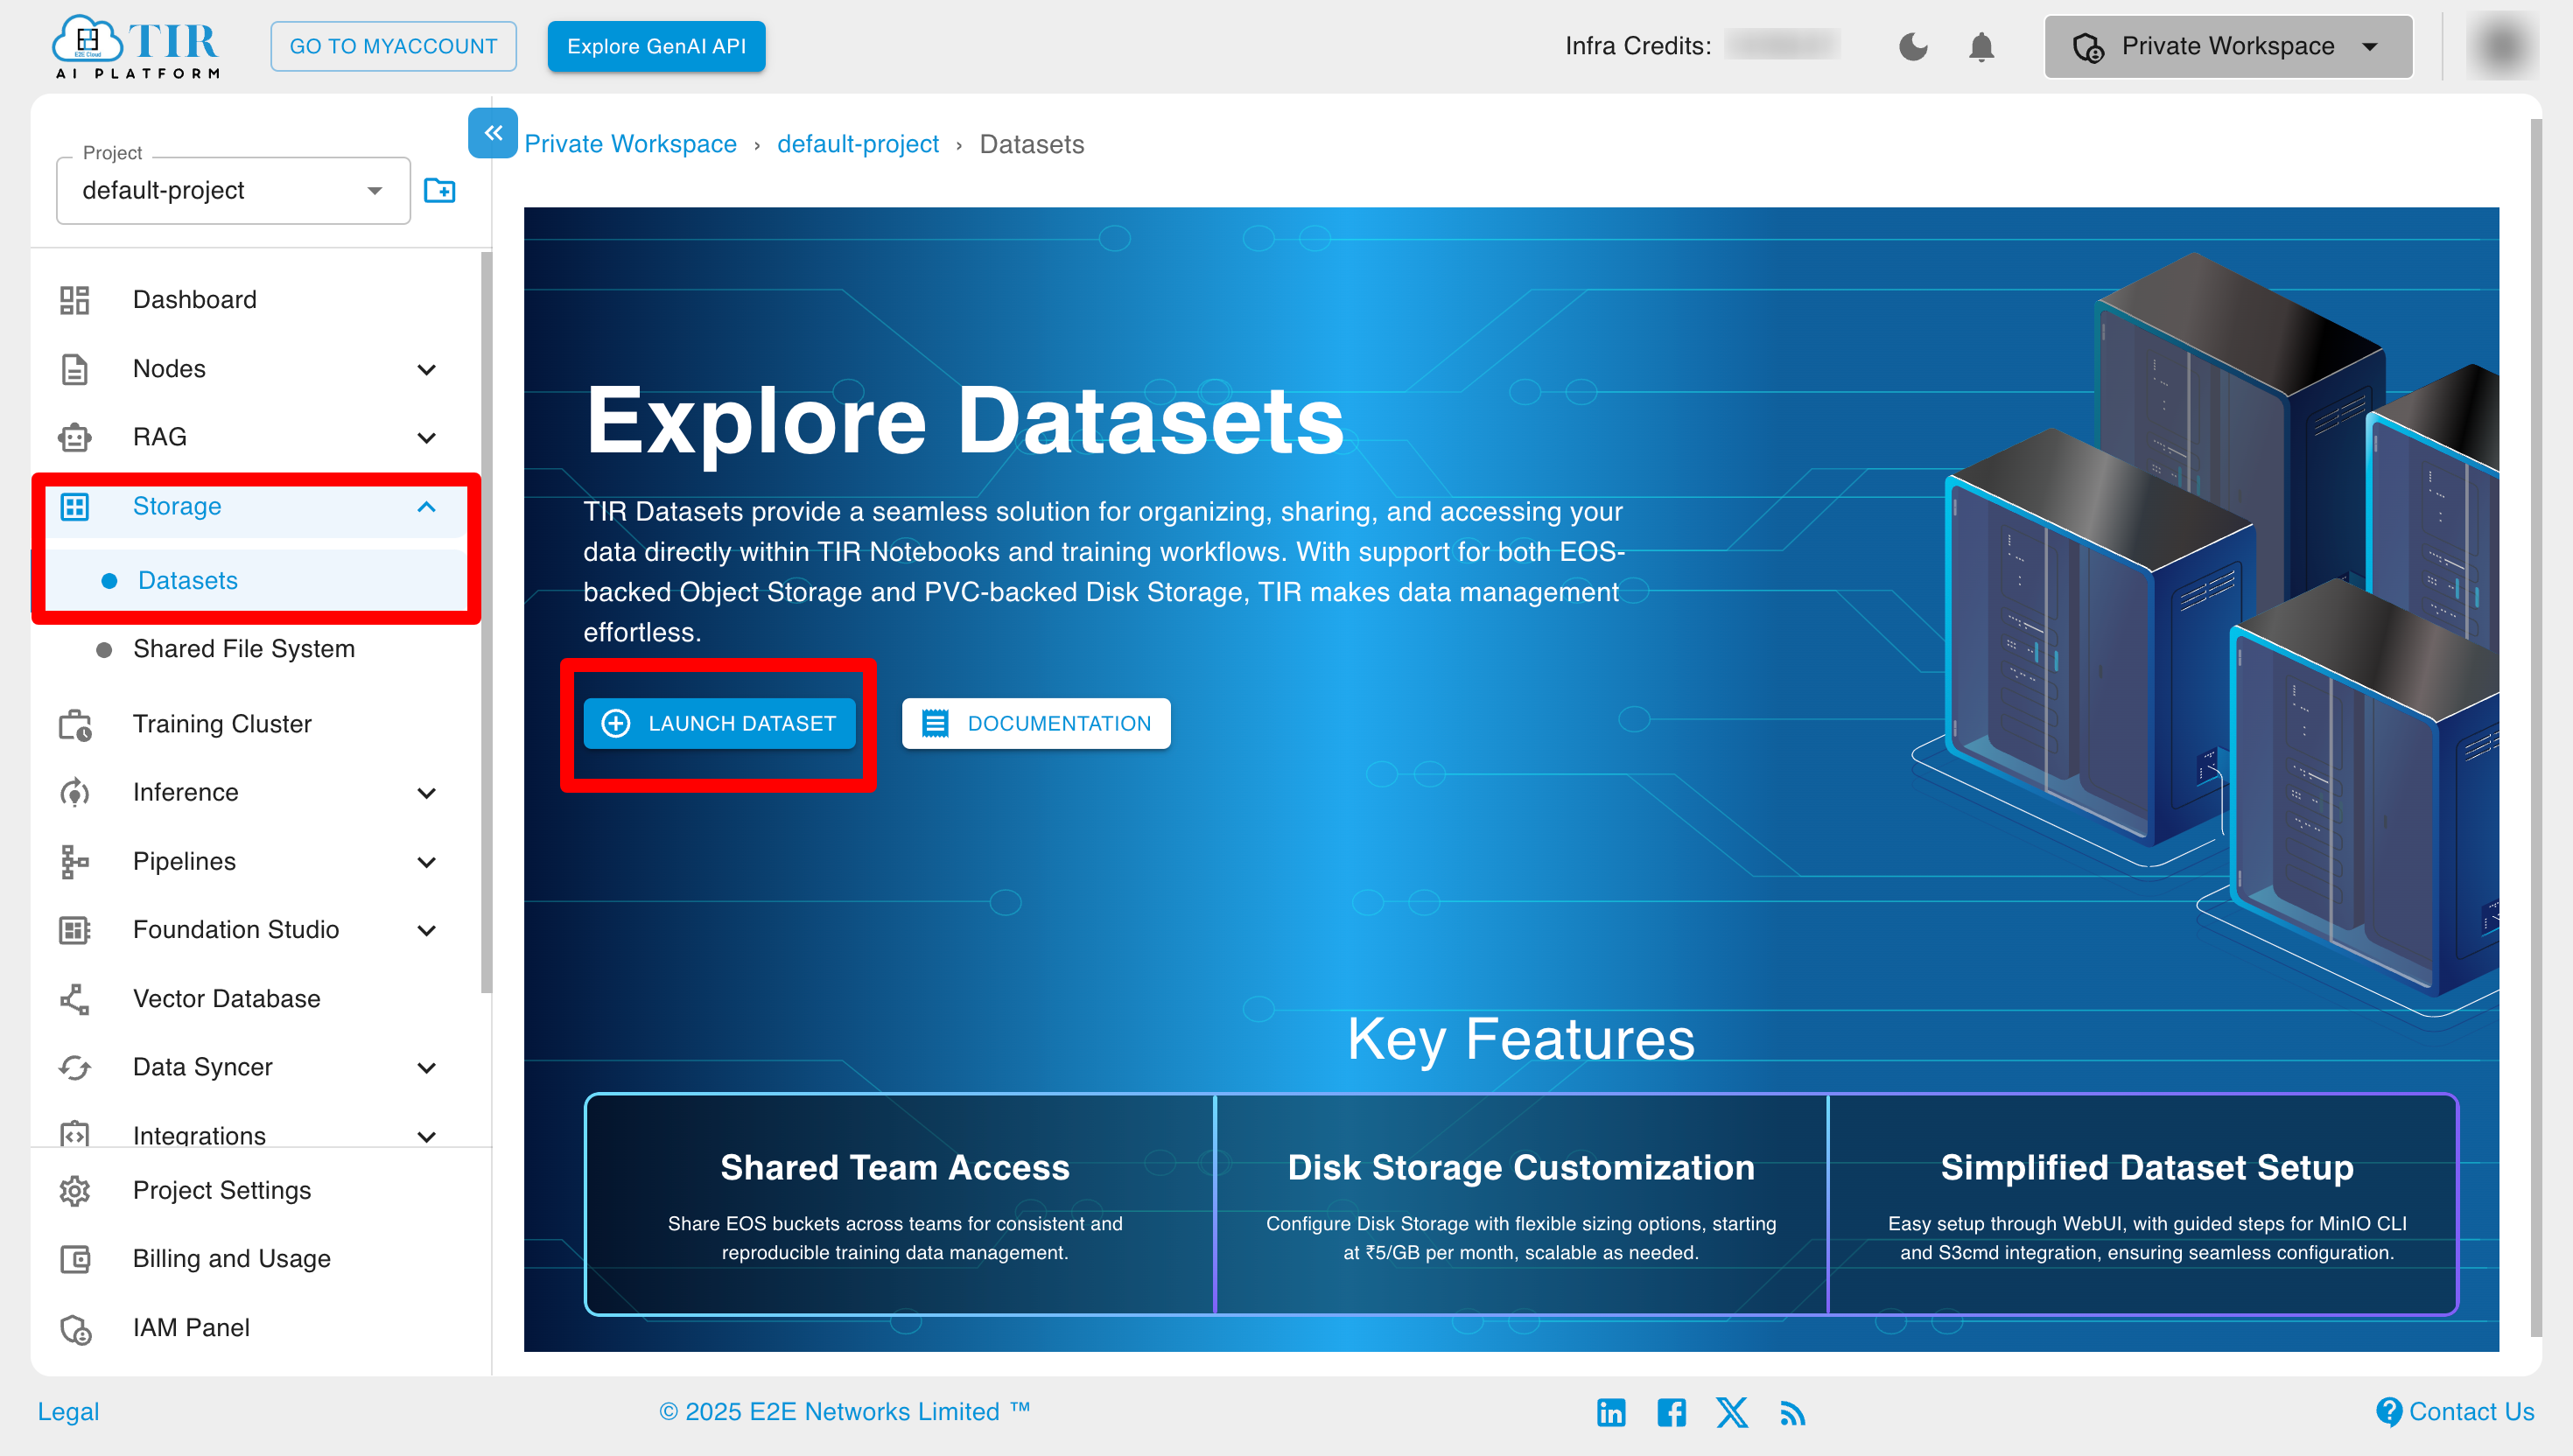
- From the TIR dashboard, go to the Datasets section present inside Storage section.
- Click on the LAUNCH DATASET button.
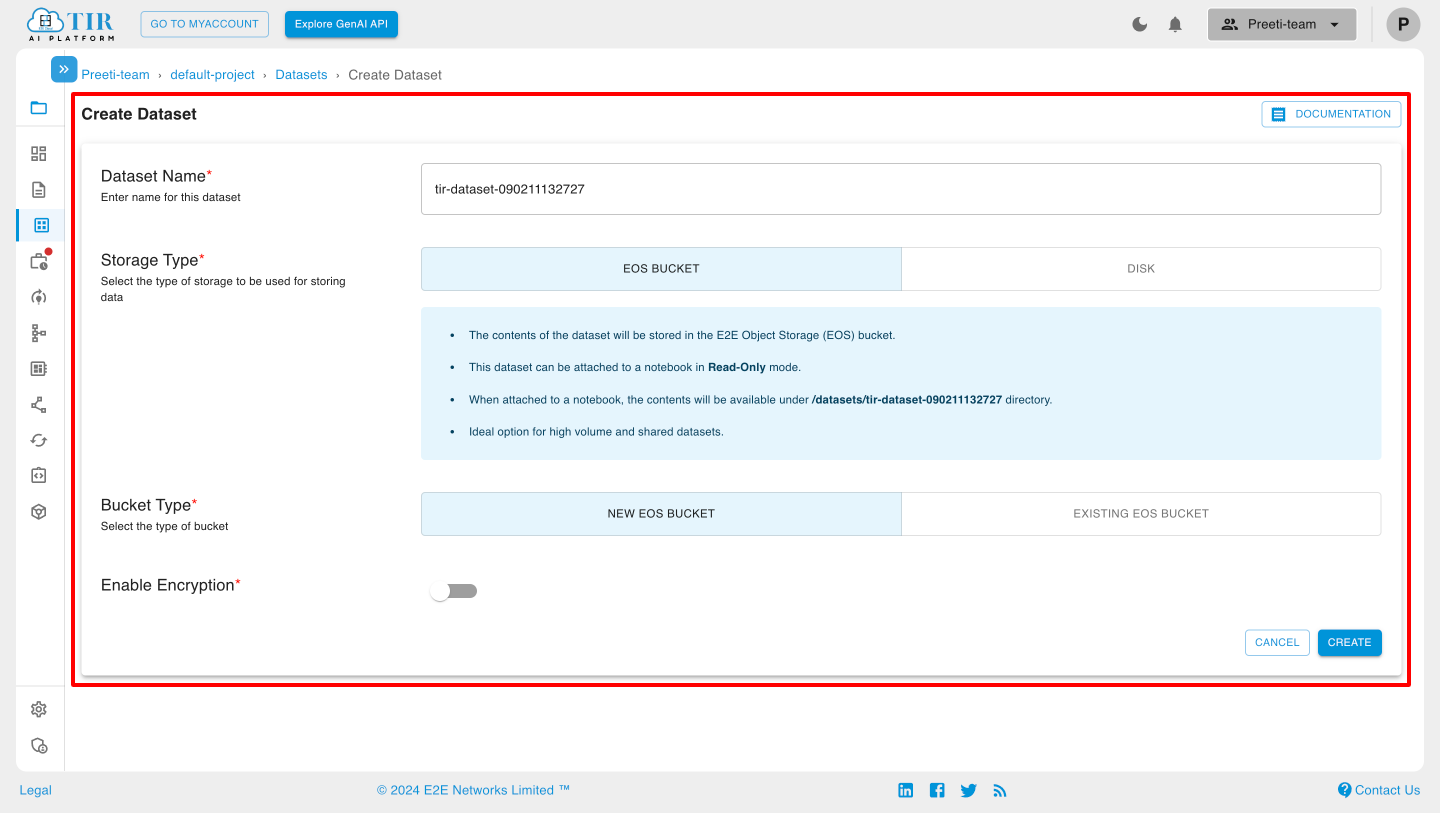
- 3. Choose Your Storage Type:
- You will see two options for storage type:
- EOS Bucket
- Disk
- You will see two options for storage type:
1. EOS Bucket
-
In EOS BUCKET storage type, there are two options for creating your dataset:
-
New EOS Bucket: This option creates a new EOS bucket tied to your account, along with access keys. You have the option to create a New EOS bucket with Enabled Encryption. If you enable encryption, you have two options to encrypt:
- E2E Managed: In this type of encryption, Server-Side Encryption (SSE) is provided at rest, with encryption keys being generated and fully managed end-to-end by E2E. This ensures that the encryption process is seamless and secure.
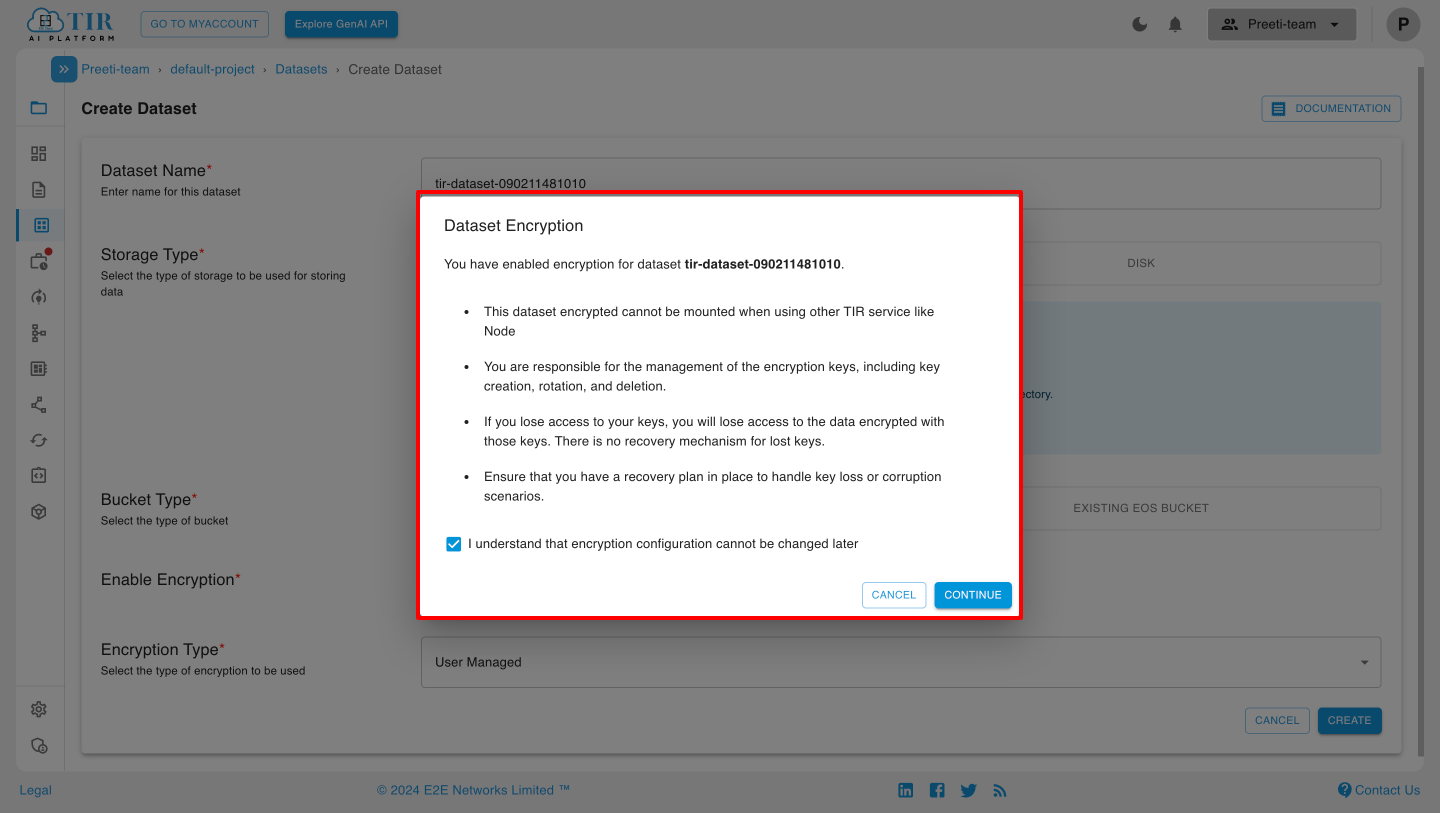
- User Managed: In this type of encryption, Server-Side Encryption (SSE) is provided at rest. As a user, you are responsible for generating encryption keys and enabling encryption for uploaded objects. When using this type of encryption, keep the following points in mind:
- You cannot mount the encrypted dataset when using other TIR services like Node.
- You are responsible for the management of the encryption keys, including key creation, rotation, and deletion.
- If you lose access to your keys, you will lose access to the data encrypted with those keys. There is no recovery mechanism for lost keys.
- Ensure that you have a recovery plan in place to handle key loss or corruption scenarios.
- Encryption configuration cannot be changed later.
-
Enter a name for your dataset and click CREATE.
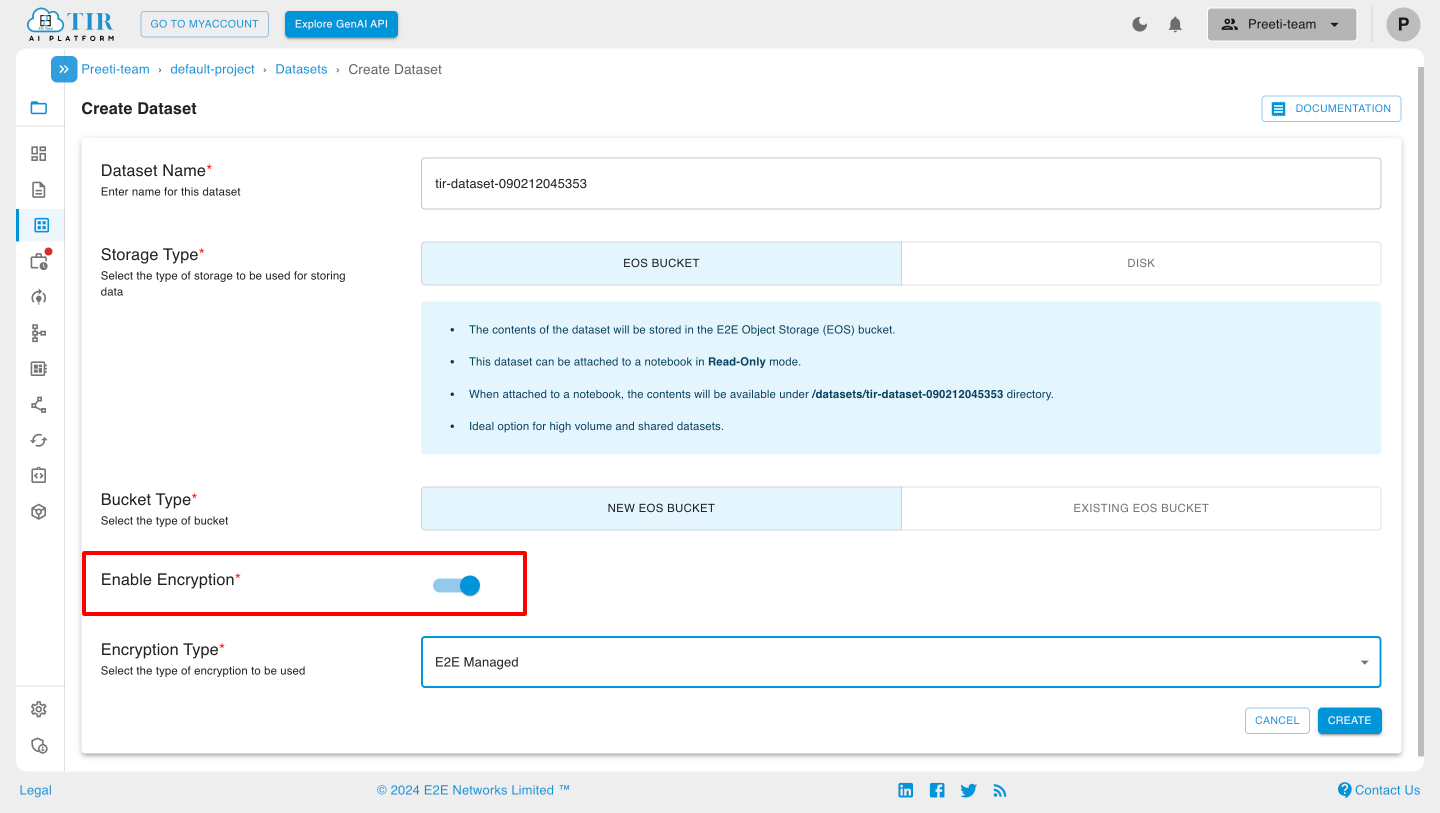
Encryption Type: If you Select Encryption Type E2E Managed.
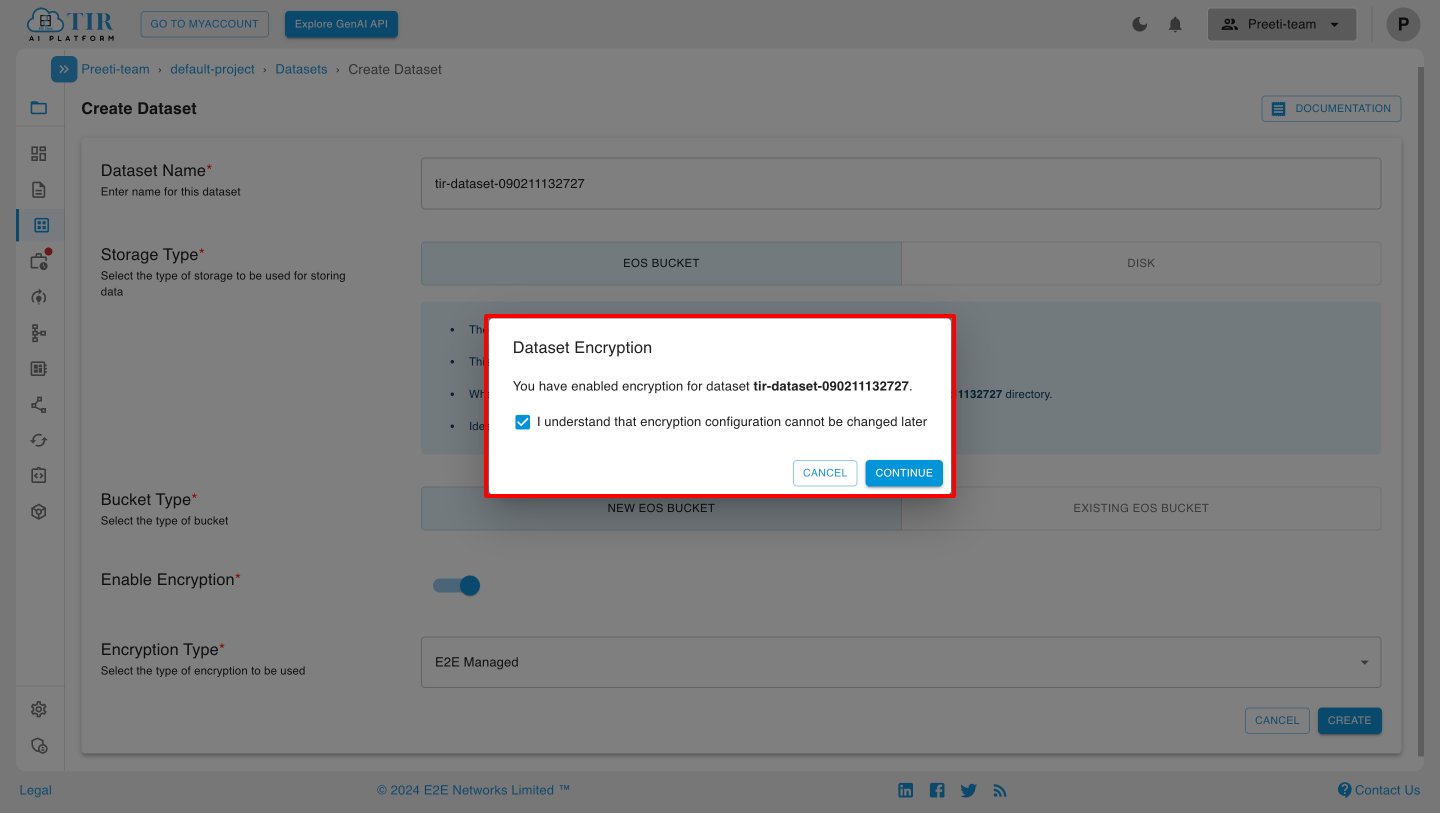
- You will see a screen to configure EOS bucket to upload data. In that screen, you will get Setup Minio CLI, Setup s3cmd, and Dataset Details.
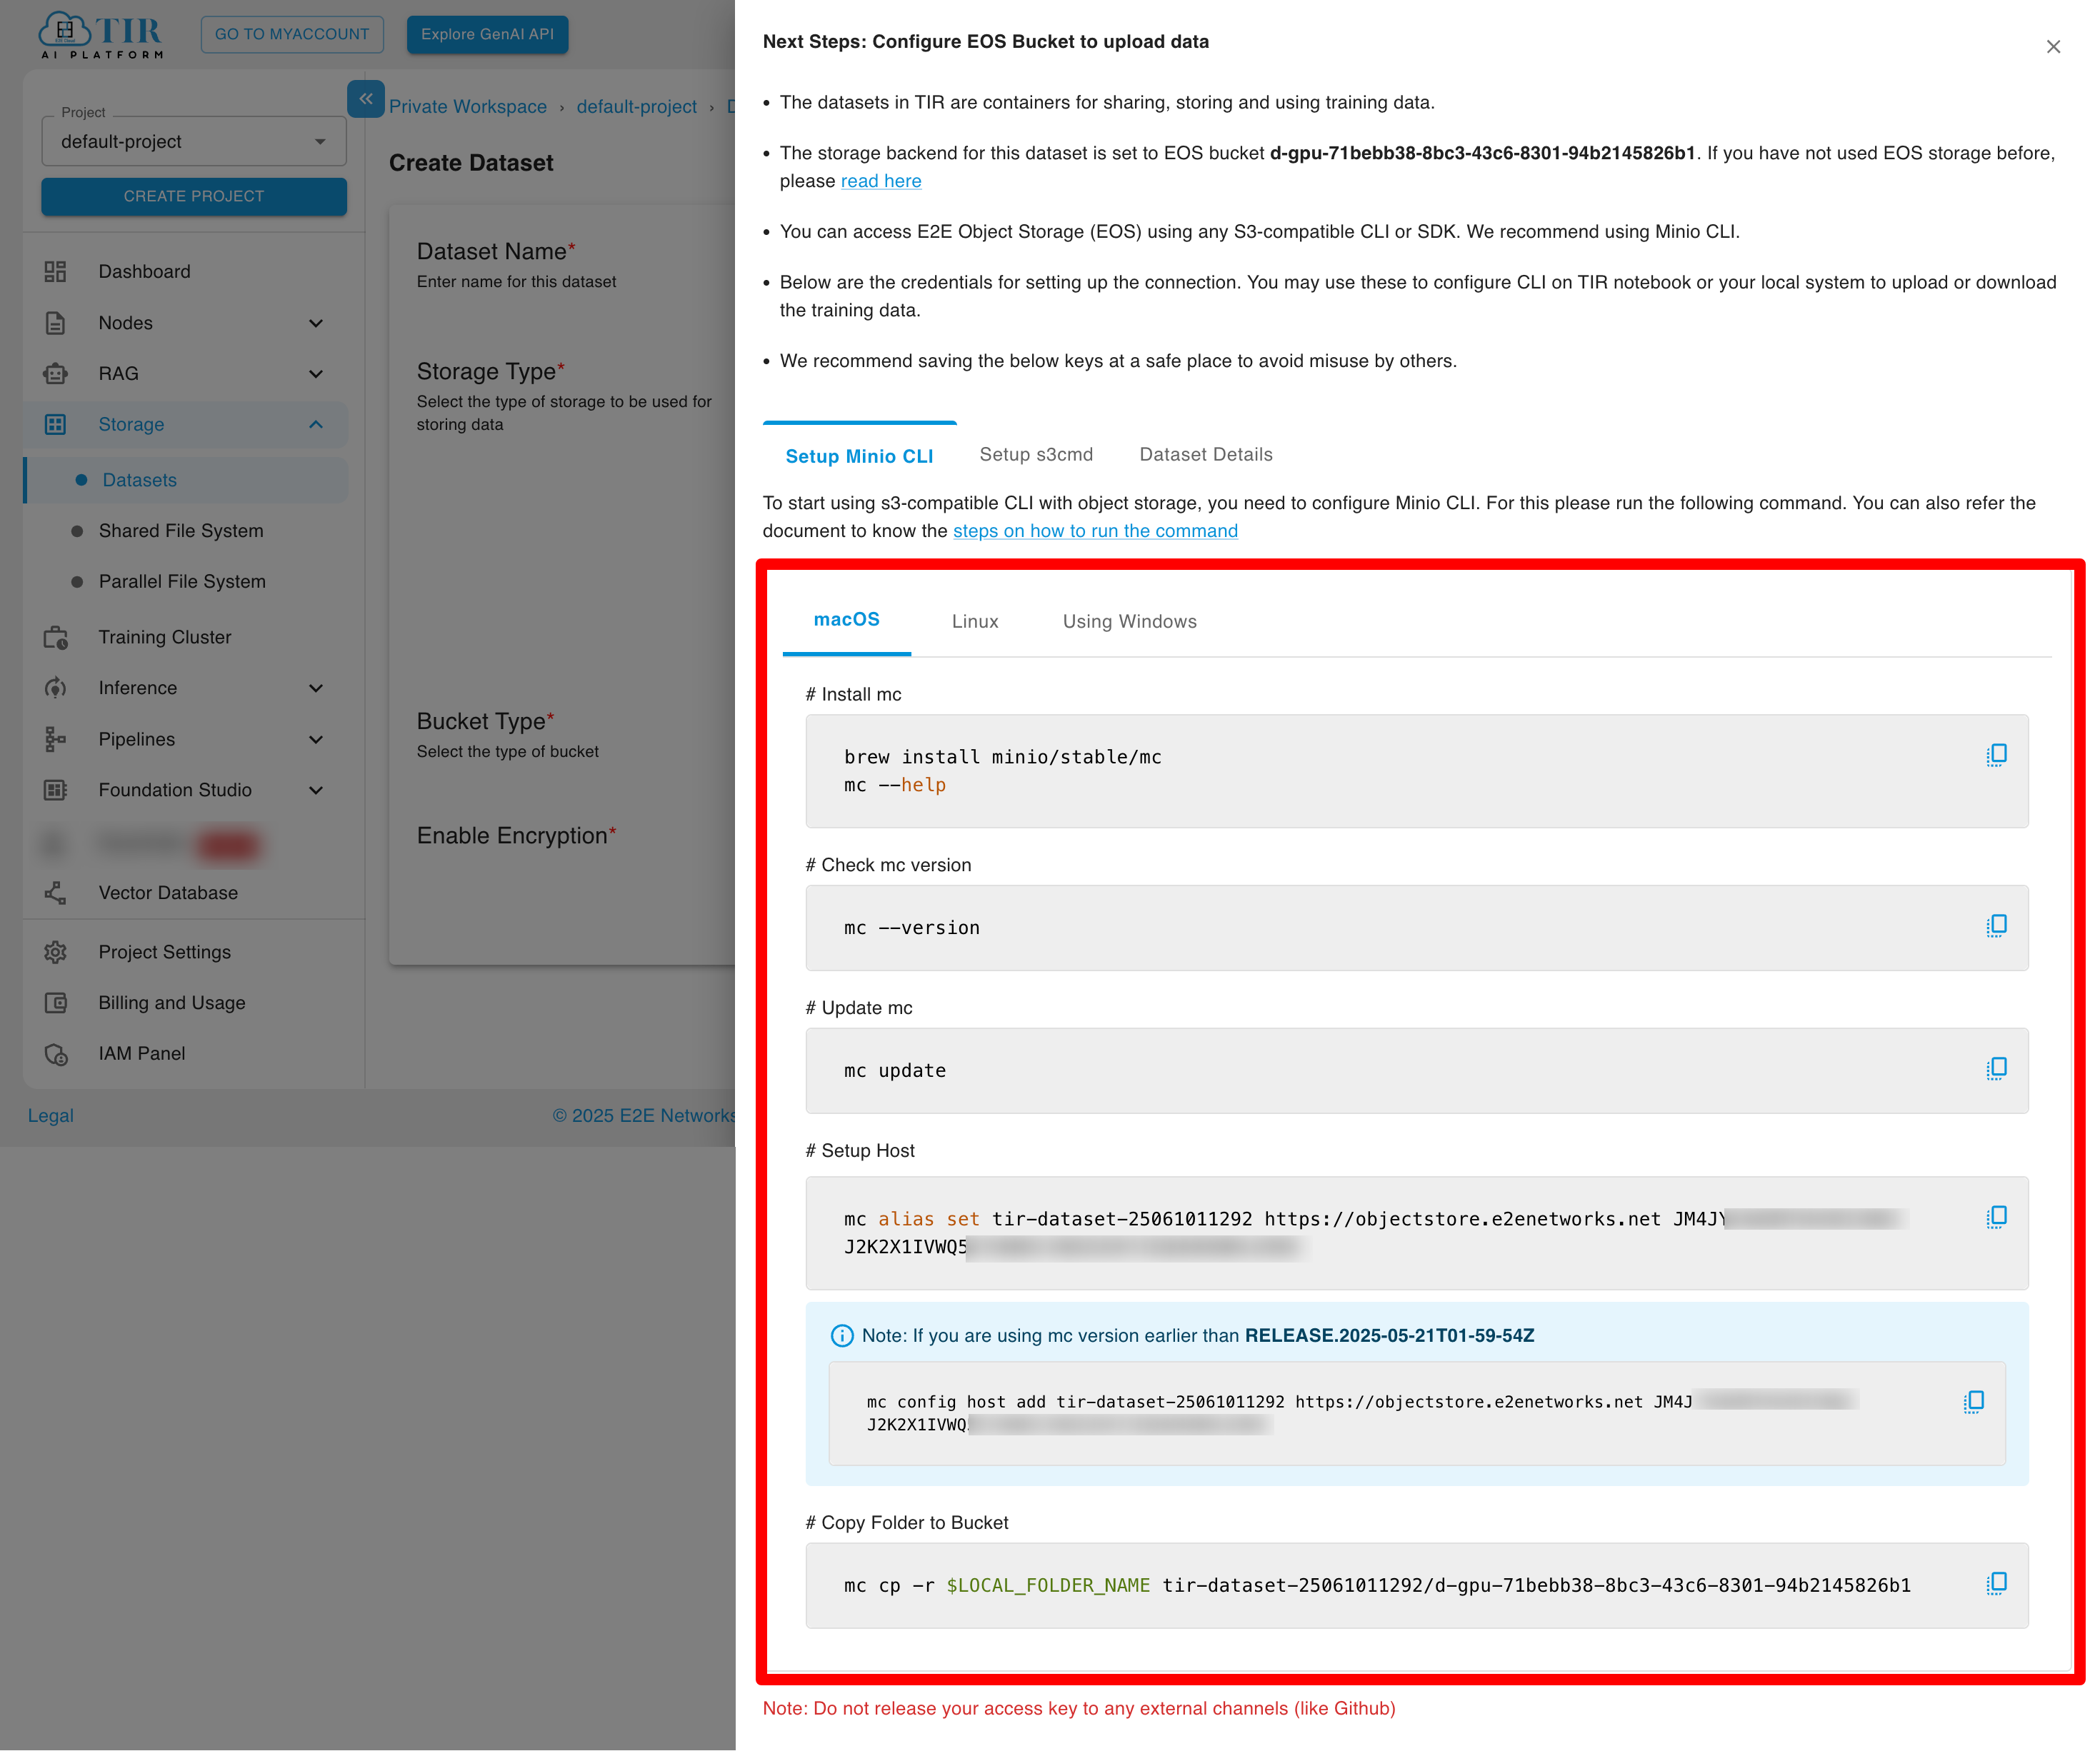
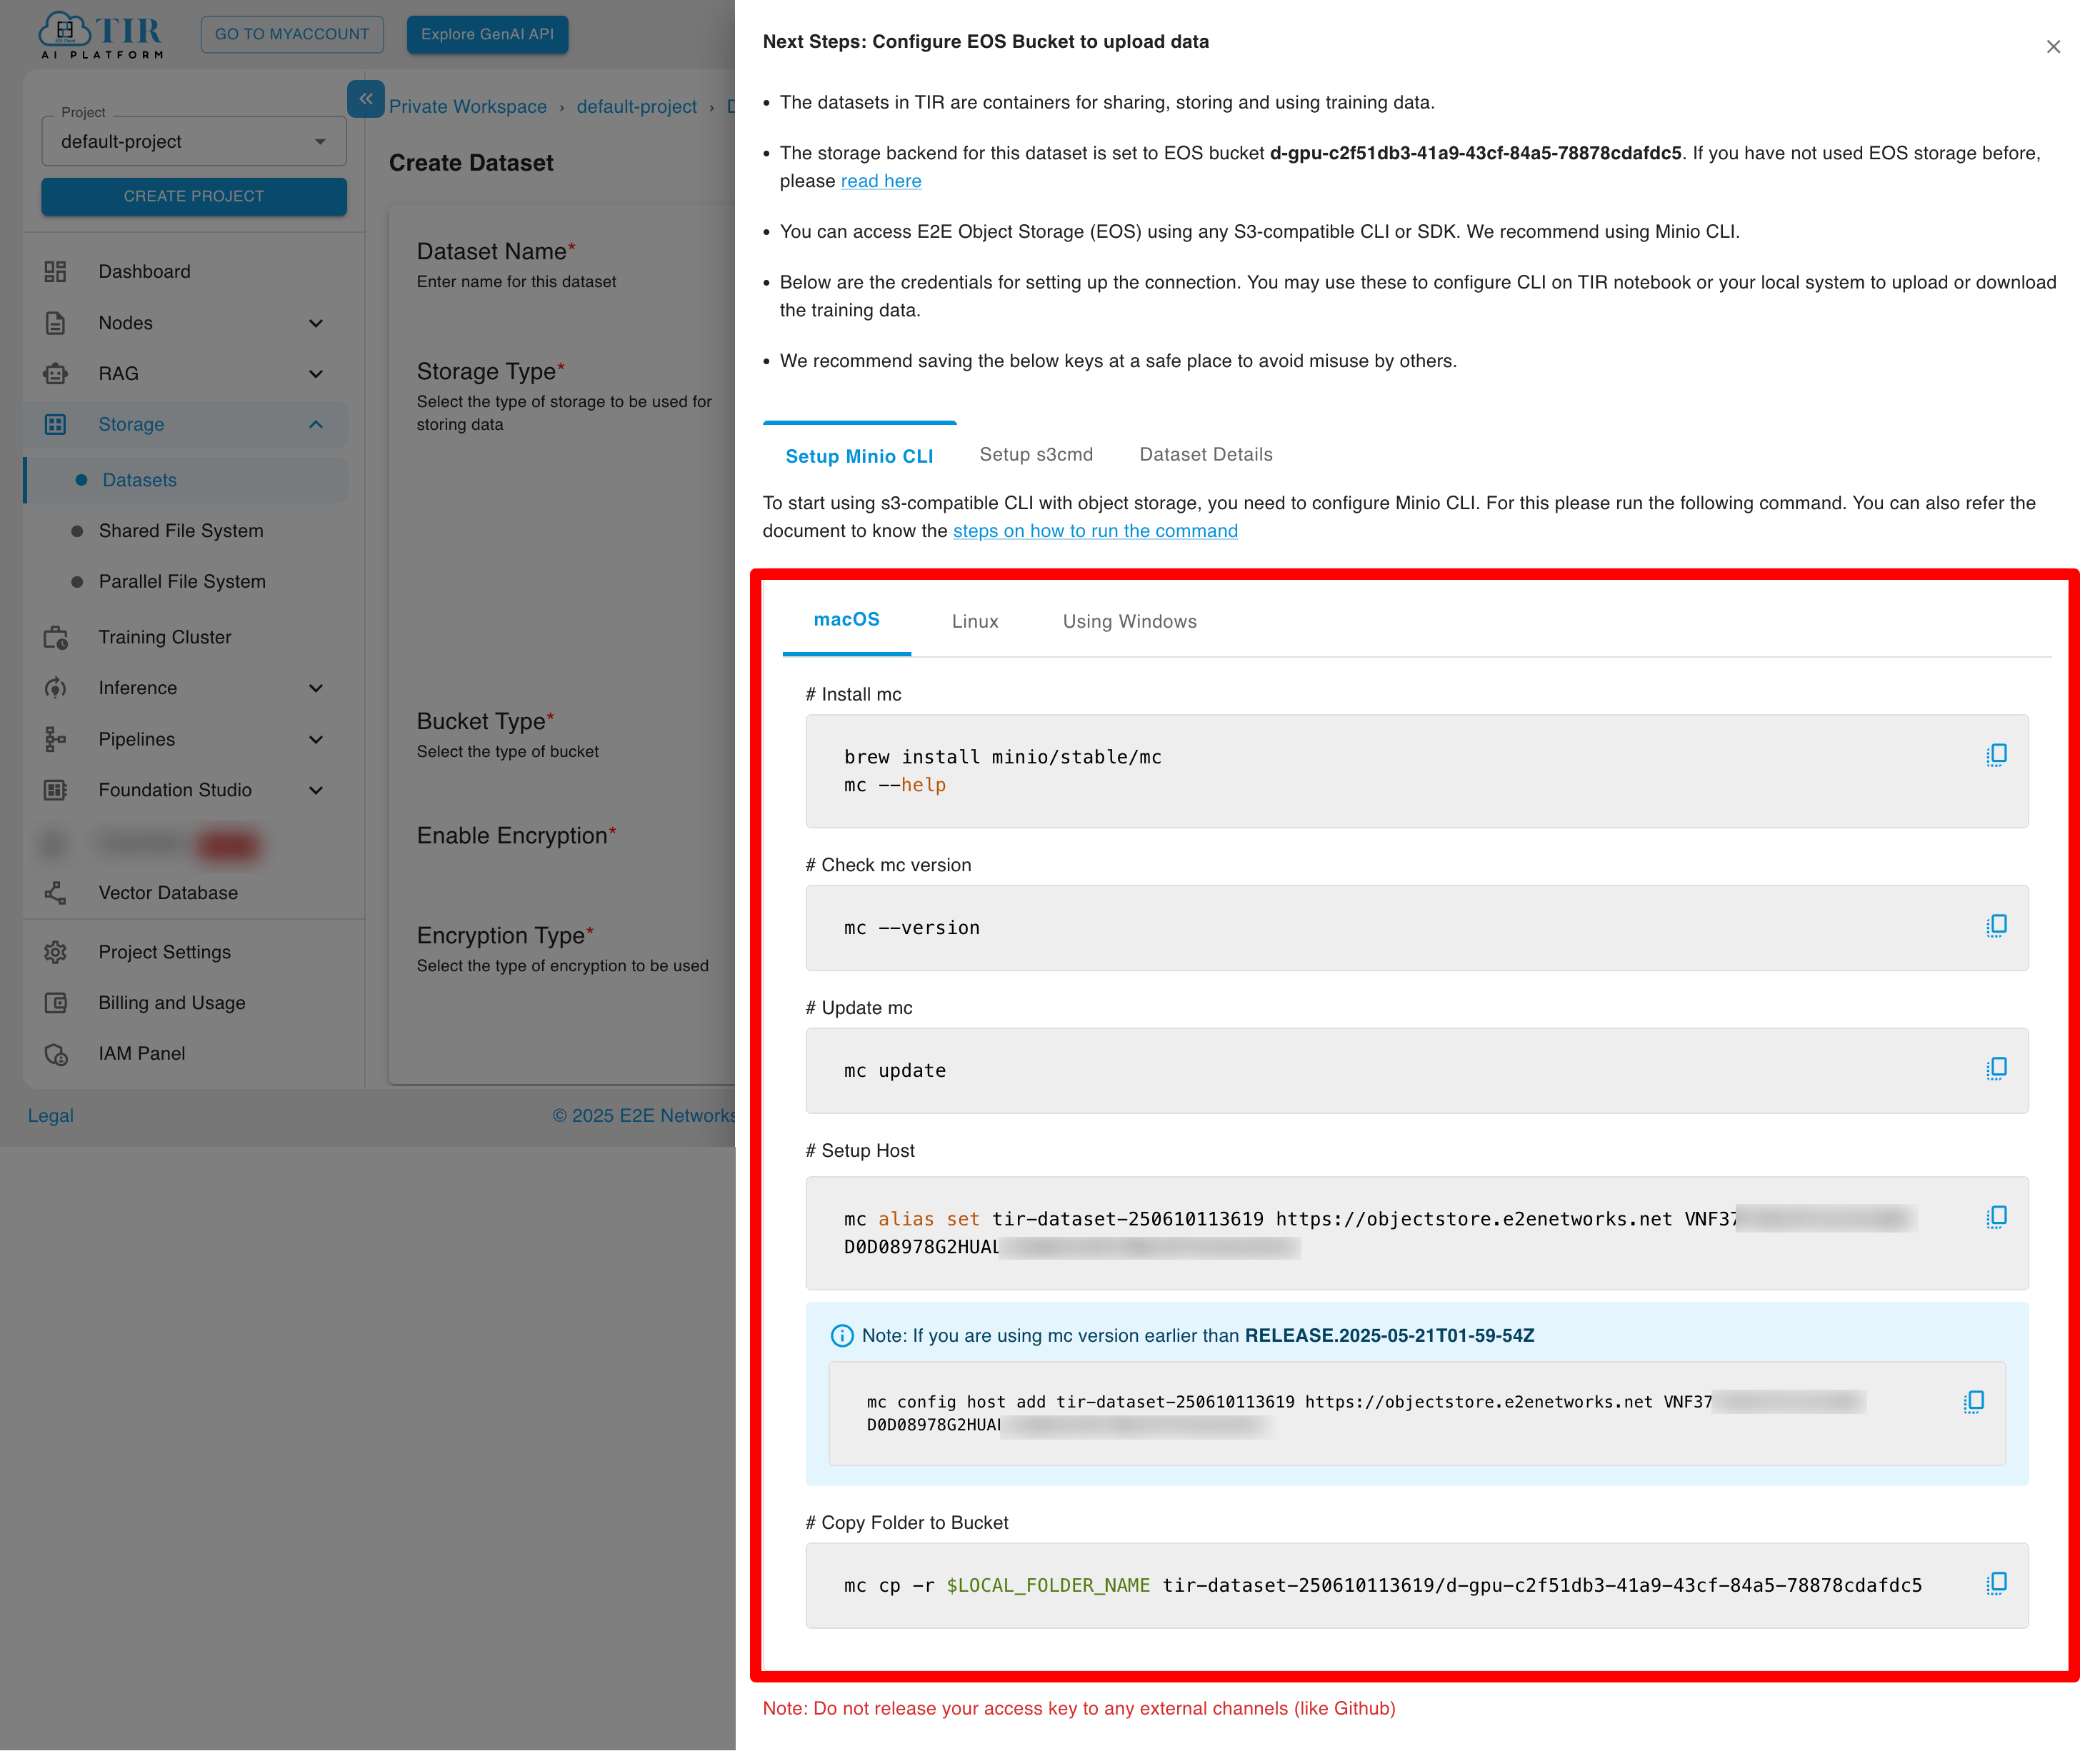
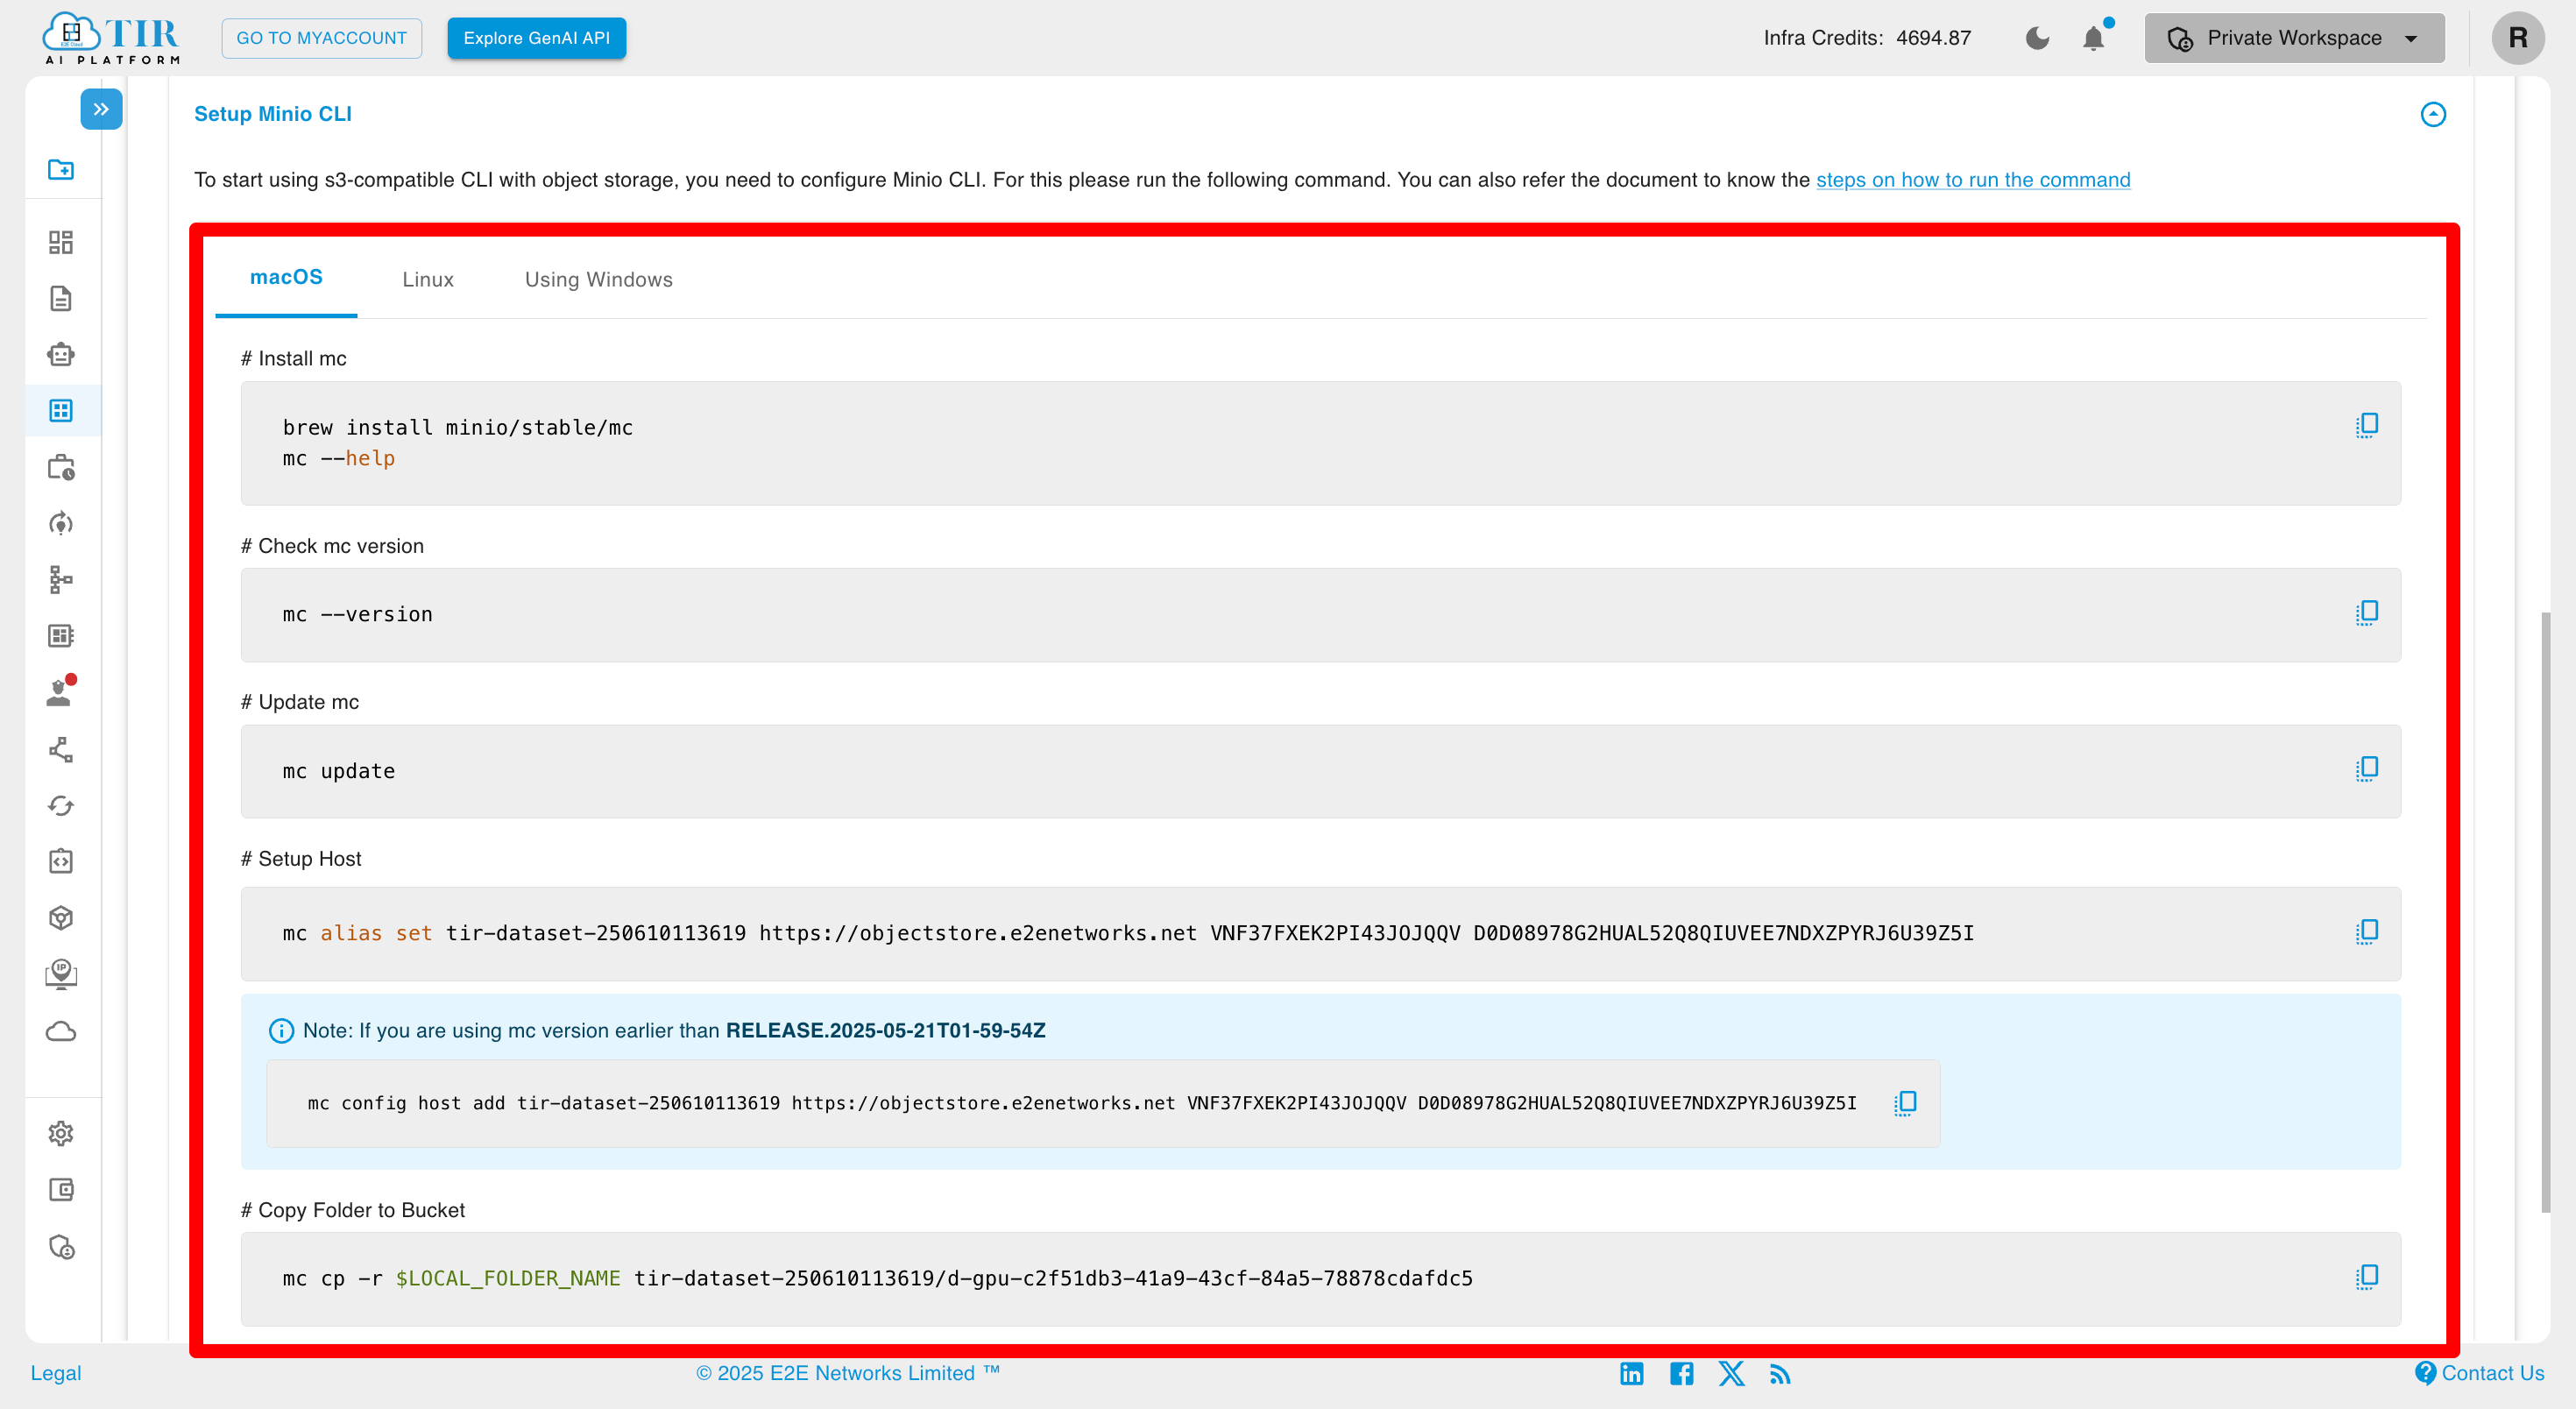
Setup Minio CLI
In the setup Minio CLI tab, you will get the setup host command and a command to copy the folder to a bucket.

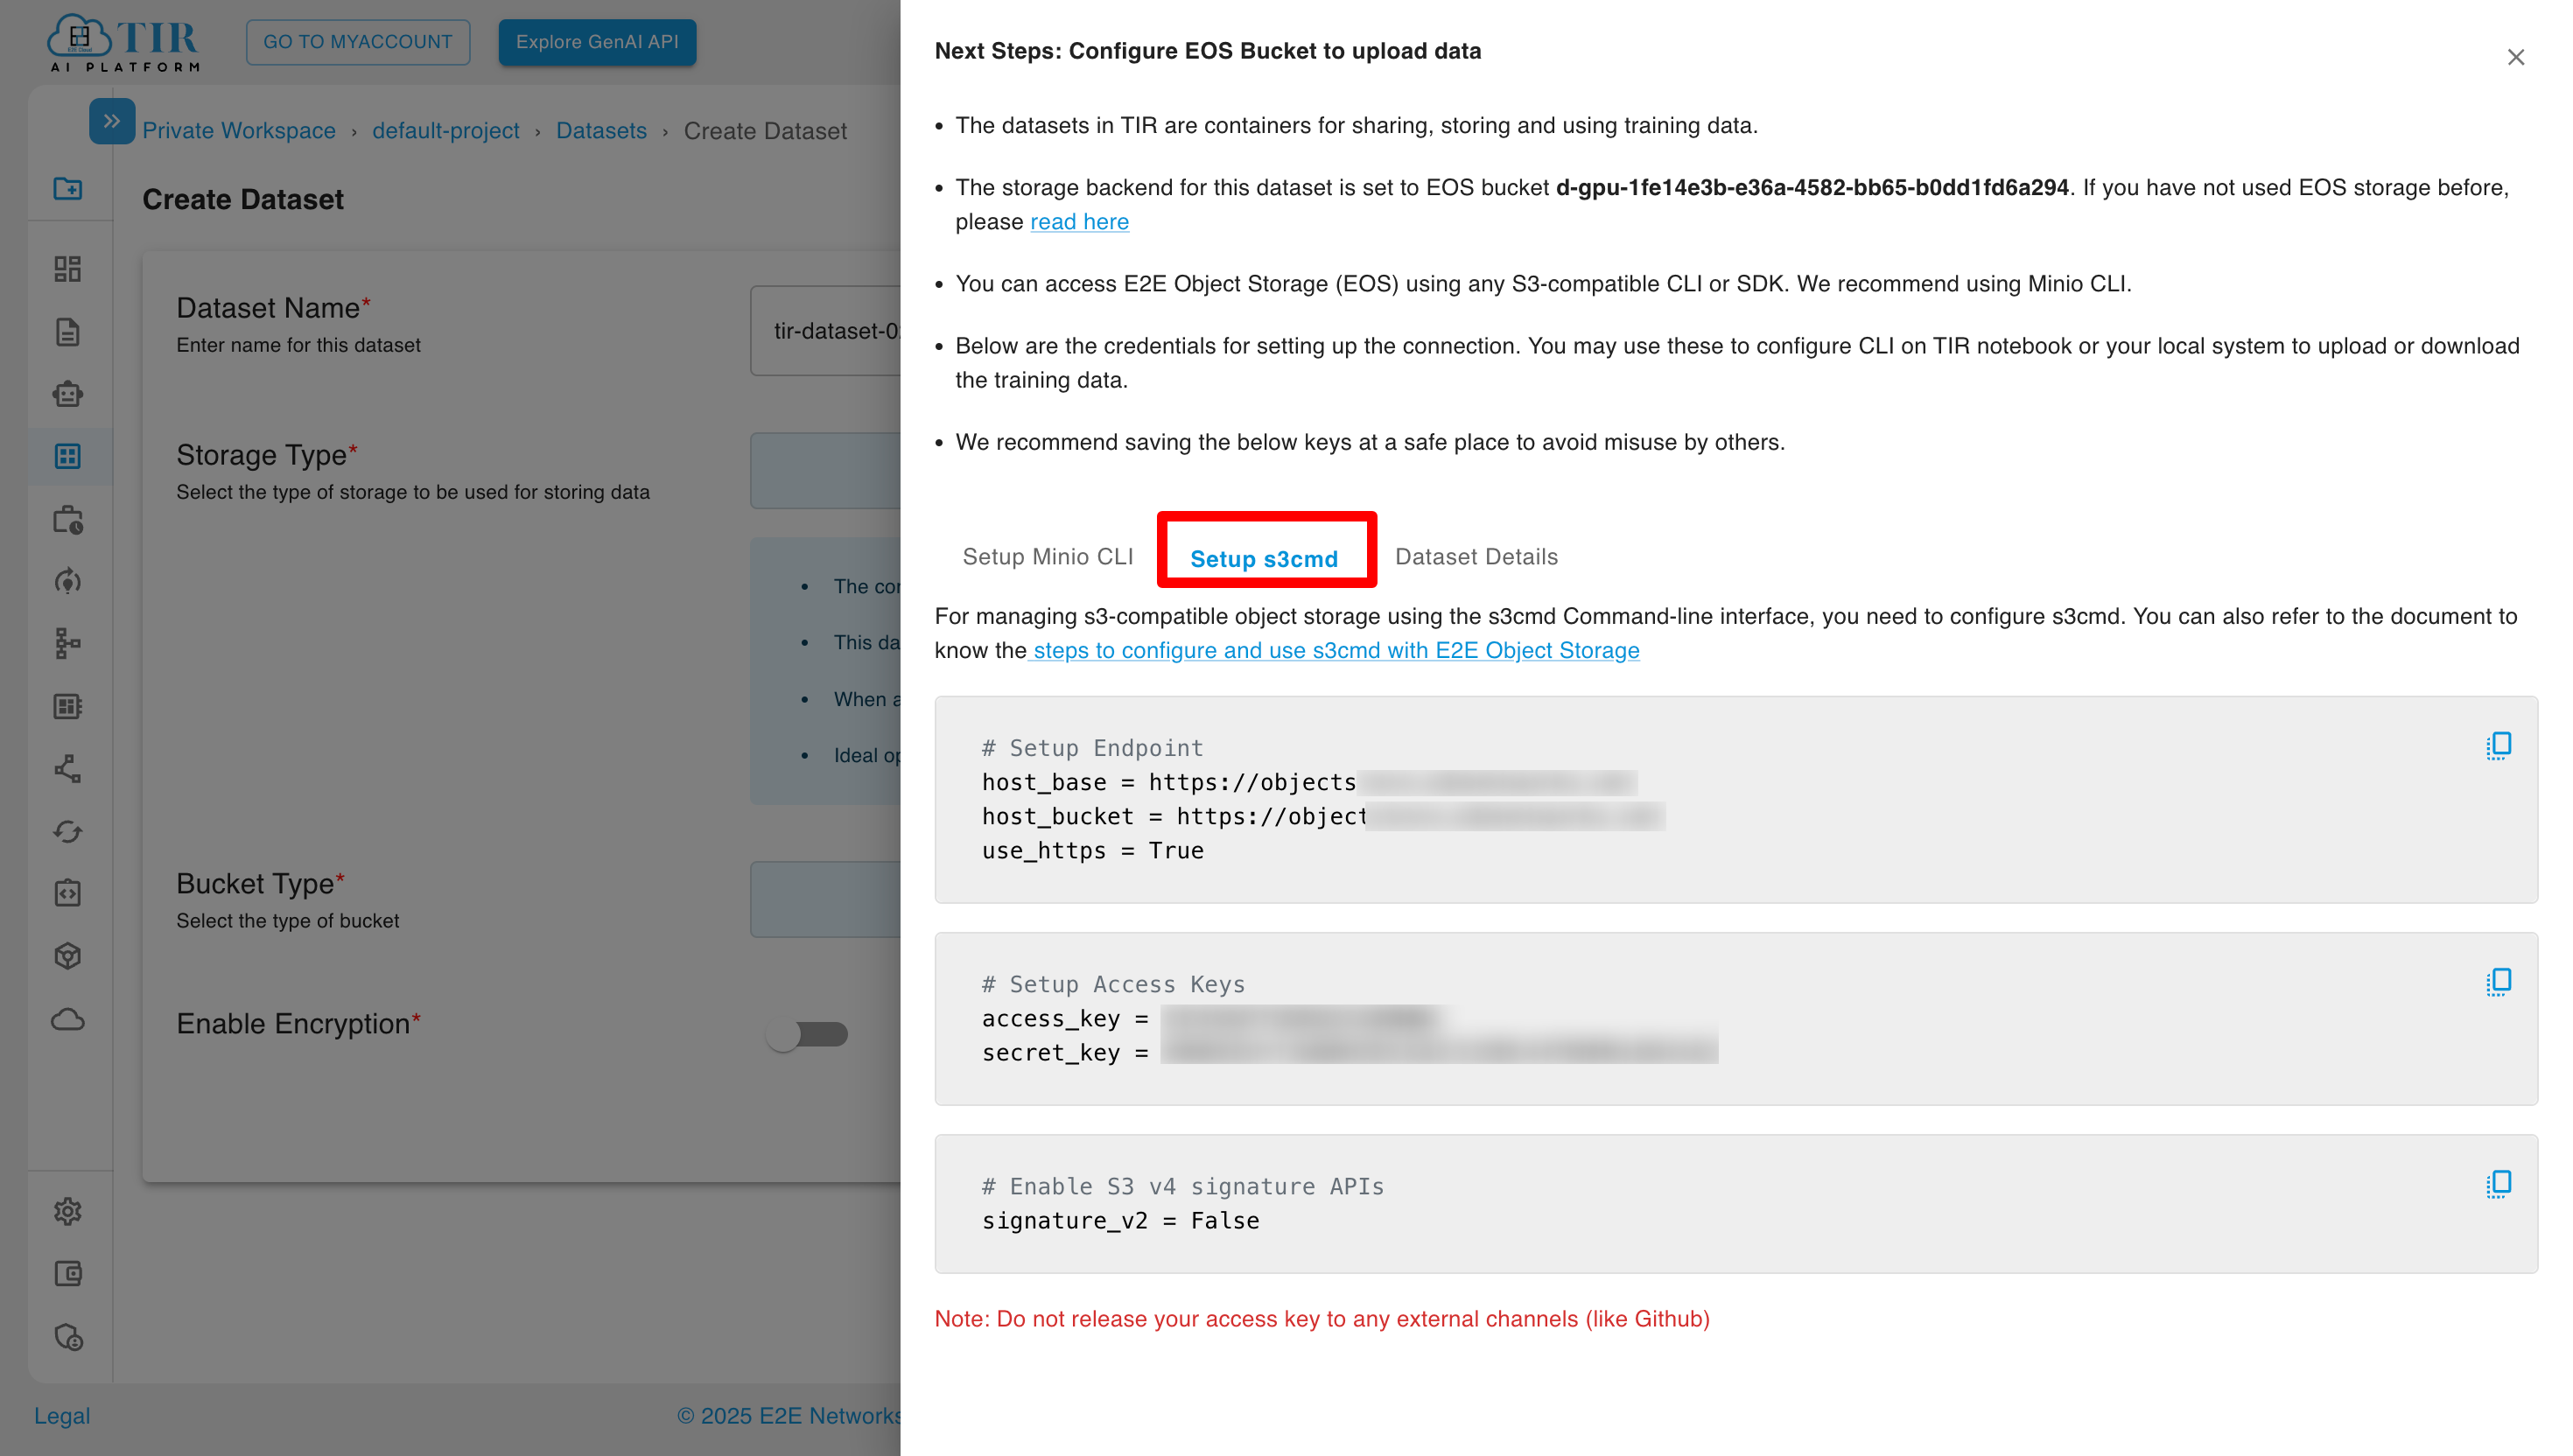
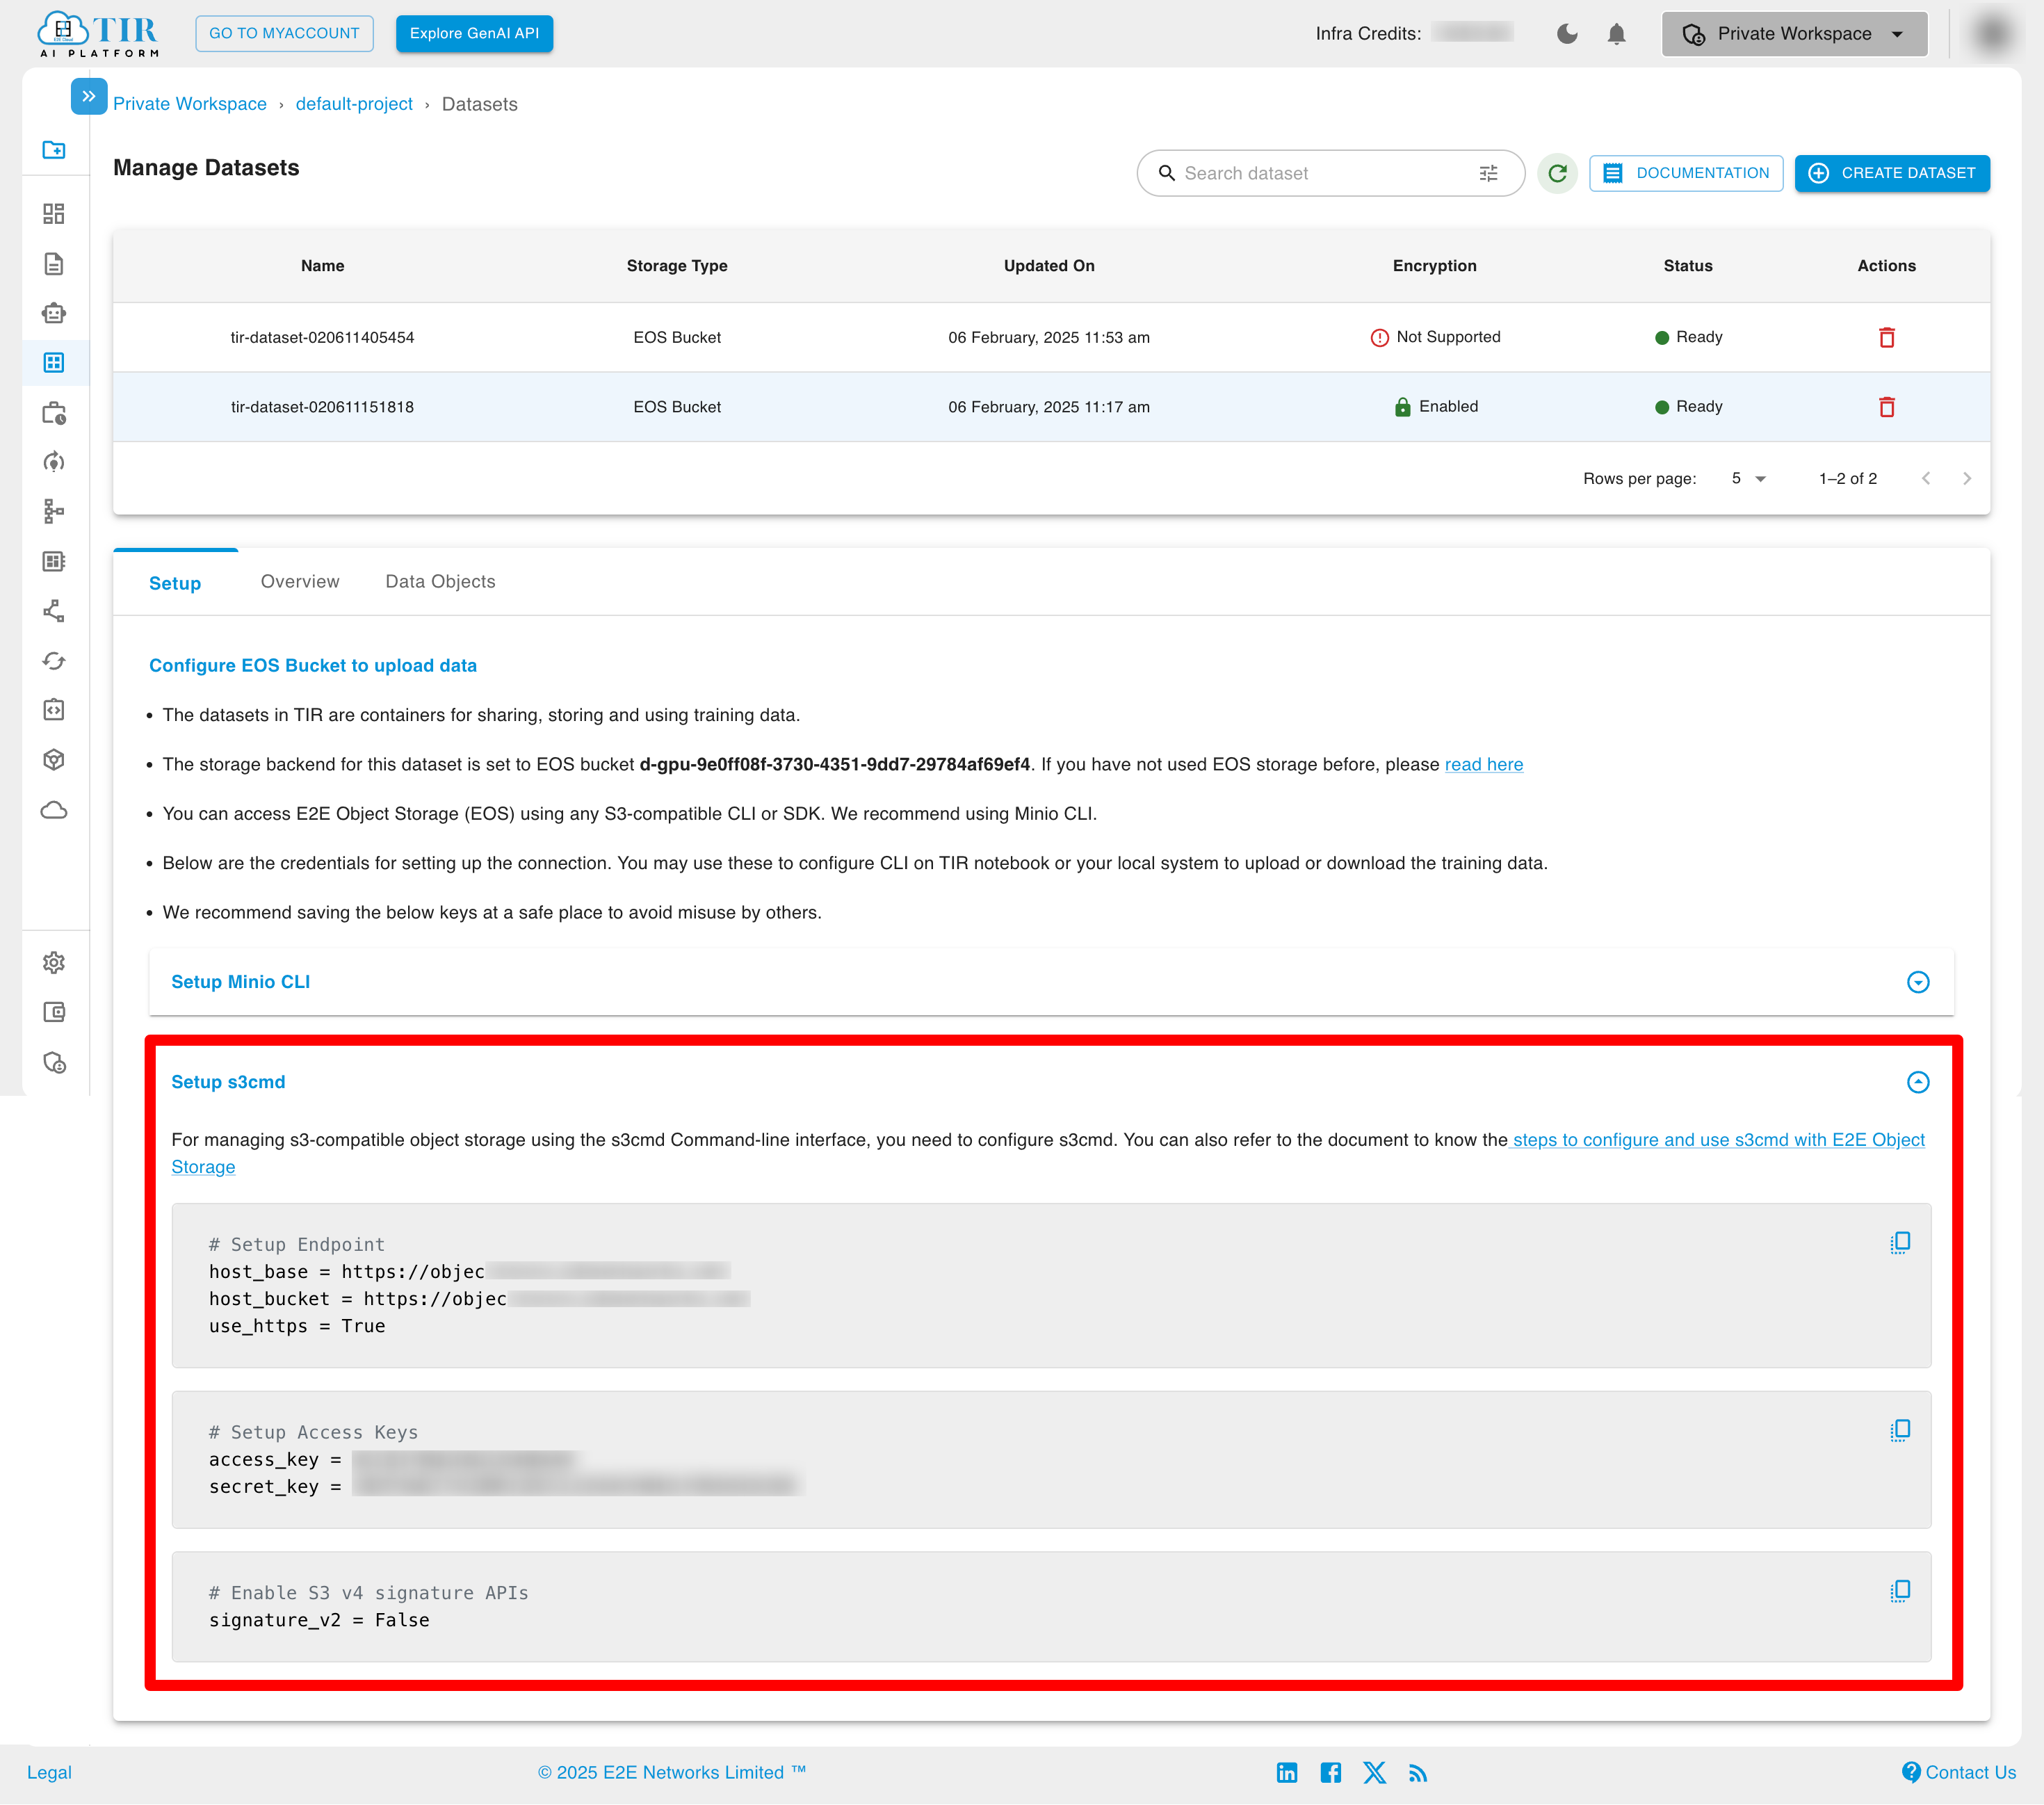
Setup S3cmd
In the setup S3cmd tab, you will get commands for setting up endpoints, setup access keys, and enable s3 v4 signature APIs.
Dataset Details
In the Dataset Details tab, you will get dataset details and bucket details.
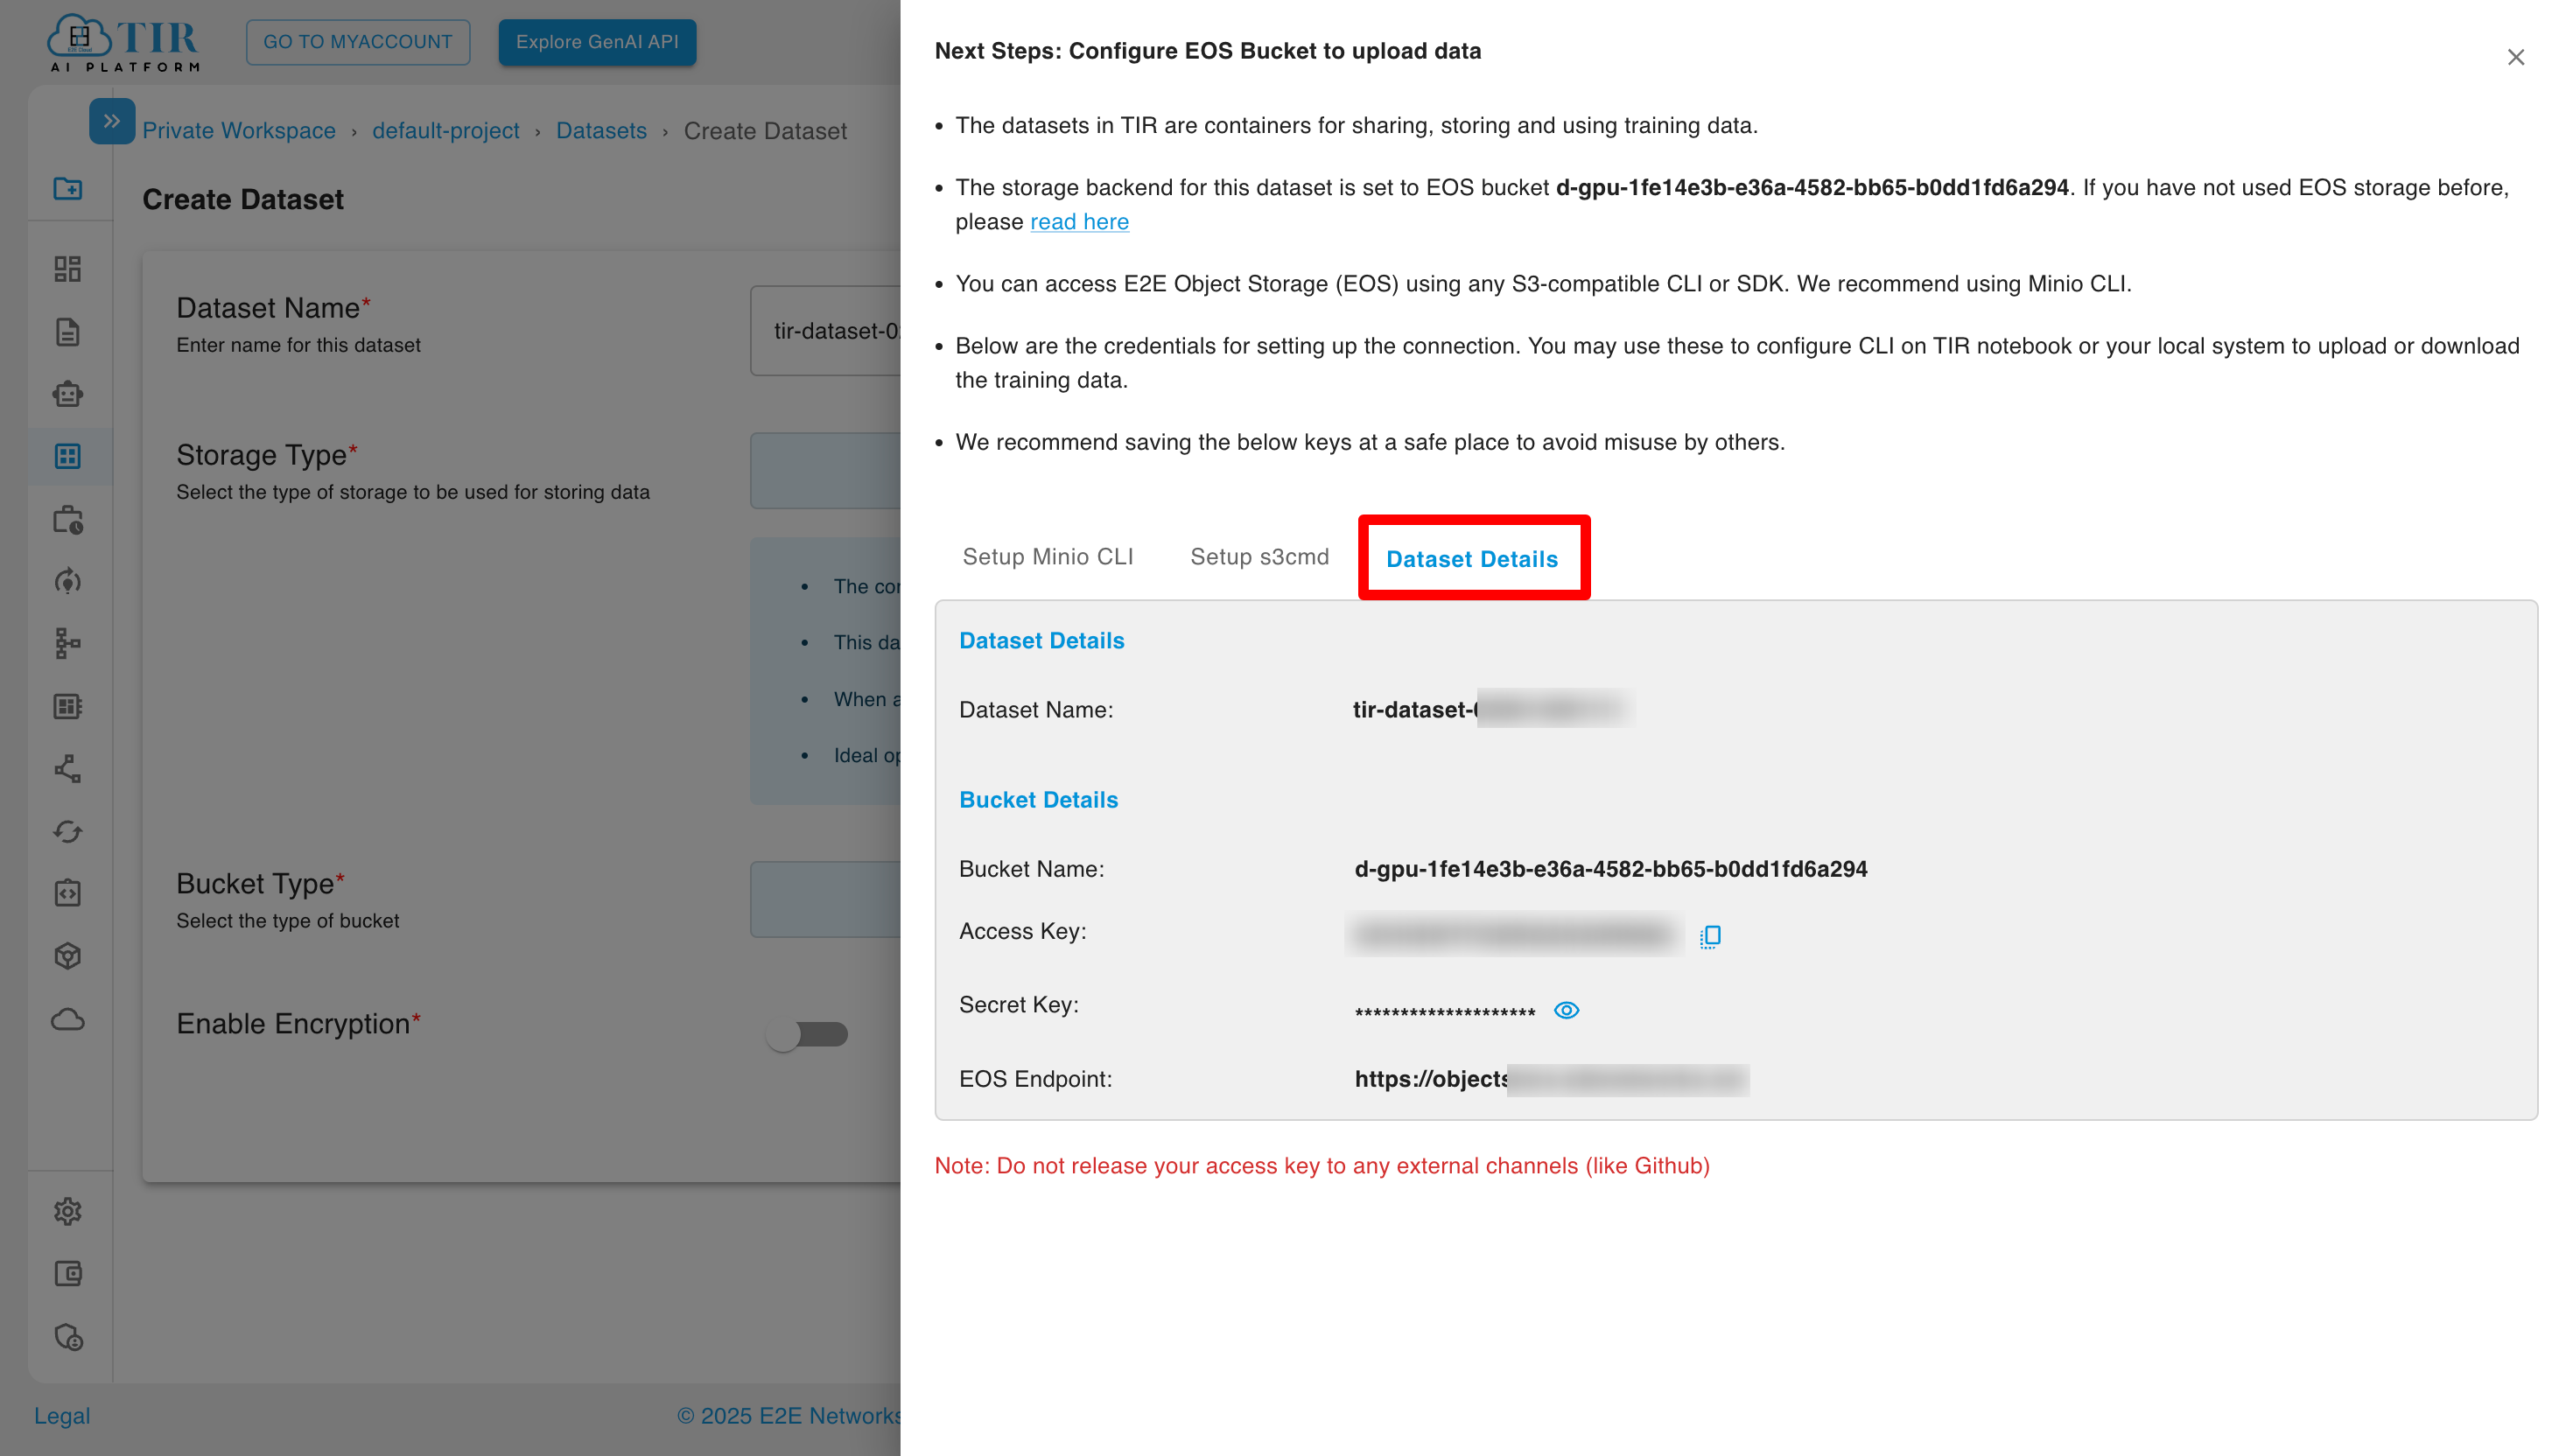
After creation of EOS Bucket with encrypt E2E Managed, you will see the below screen.
User Managed: If you create a dataset with User Managed encryption, you can securely upload data. To do so, you'll need to generate an encryption key.
Below are the commands to generate an encryption key and securely upload data.
After creating an EOS Bucket with User Managed encryption, you will see the following screen.
2. Existing EOS Bucket:
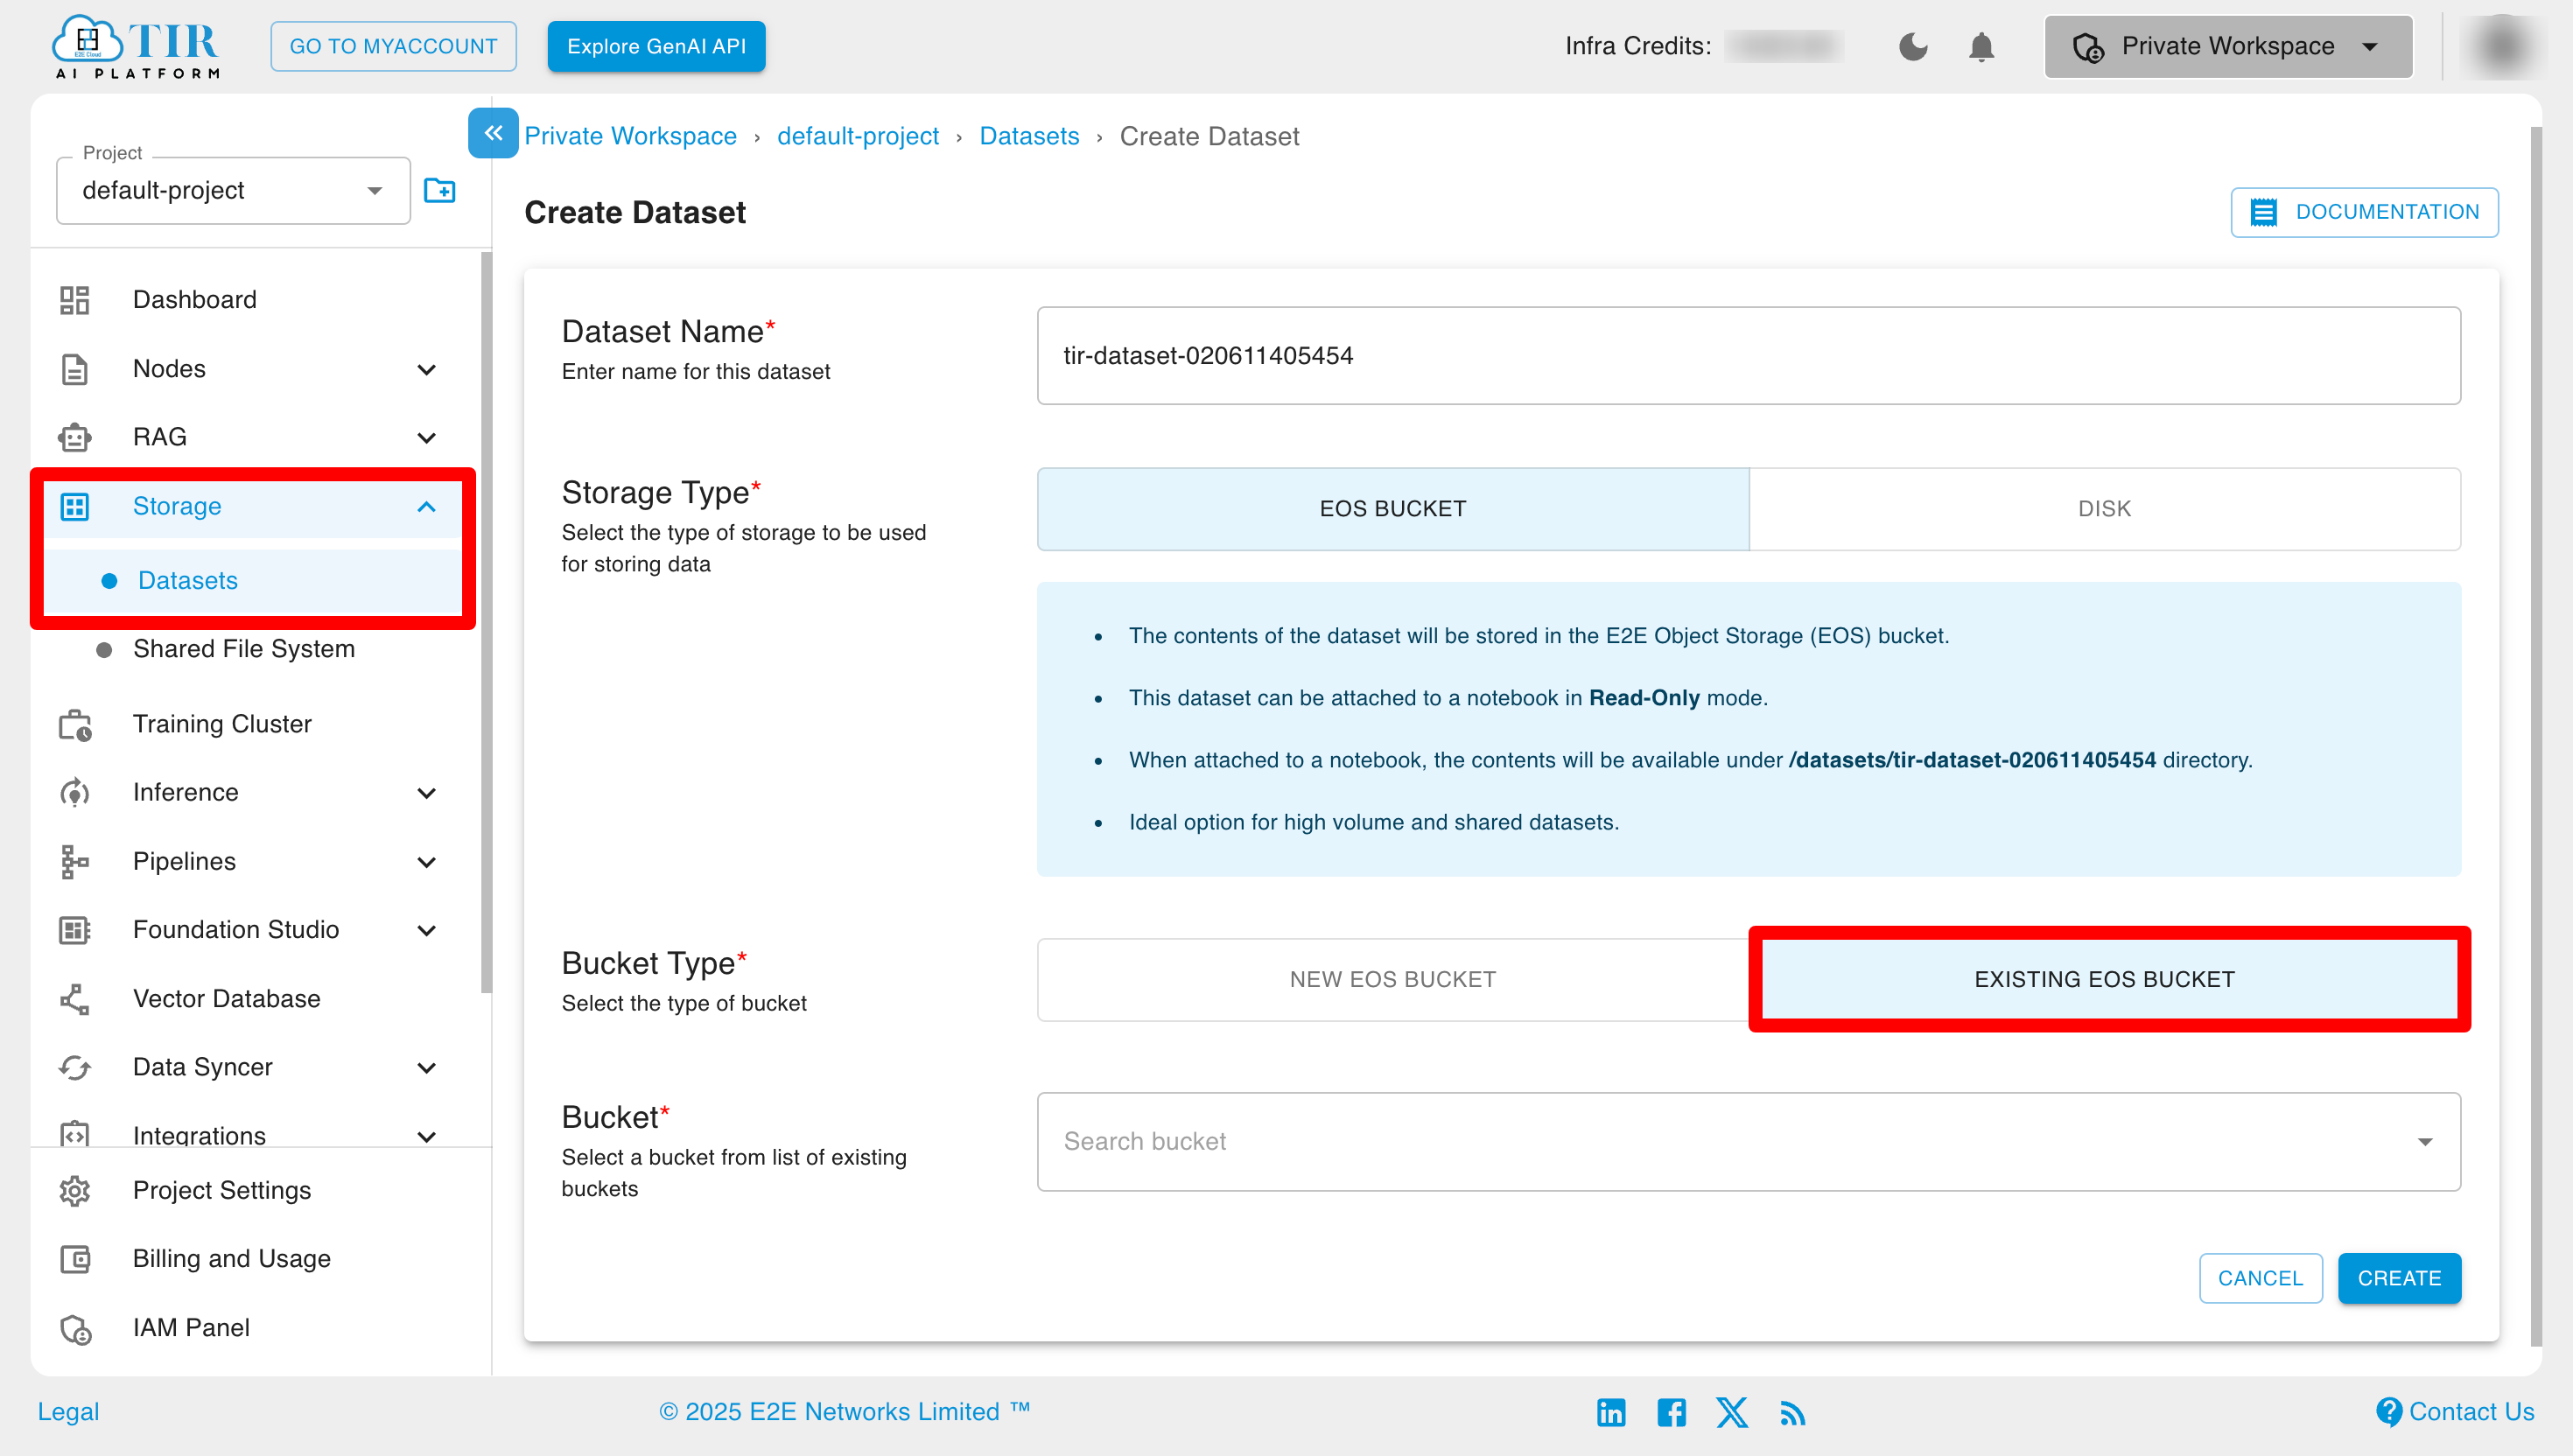
- Select an existing EOS bucket to use for your dataset.
- Enter a name for your dataset (e.g., paws) and click CREATE.
- Similar to the new EOS bucket option, you'll see configuration tabs for Setup MinIO CLI, Setup S3cmd, and Dataset Details.
2. Disk
If you select Disk as the storage type, you will need to specify the disk size. Each GB of disk space will be charged at ₹5 per month.
Disk size cannot be reduced later, but it can be increased at any time.
-
Enter a name for your dataset (e.g., paws) and click CREATE.
-
After successfully creating the dataset, you will see the following sections:
- Setup: This tab provides details for configuring the EOS bucket, MinIO client setup, and S3cmd setup.
Setup MinIO Client
Setup S3cmd
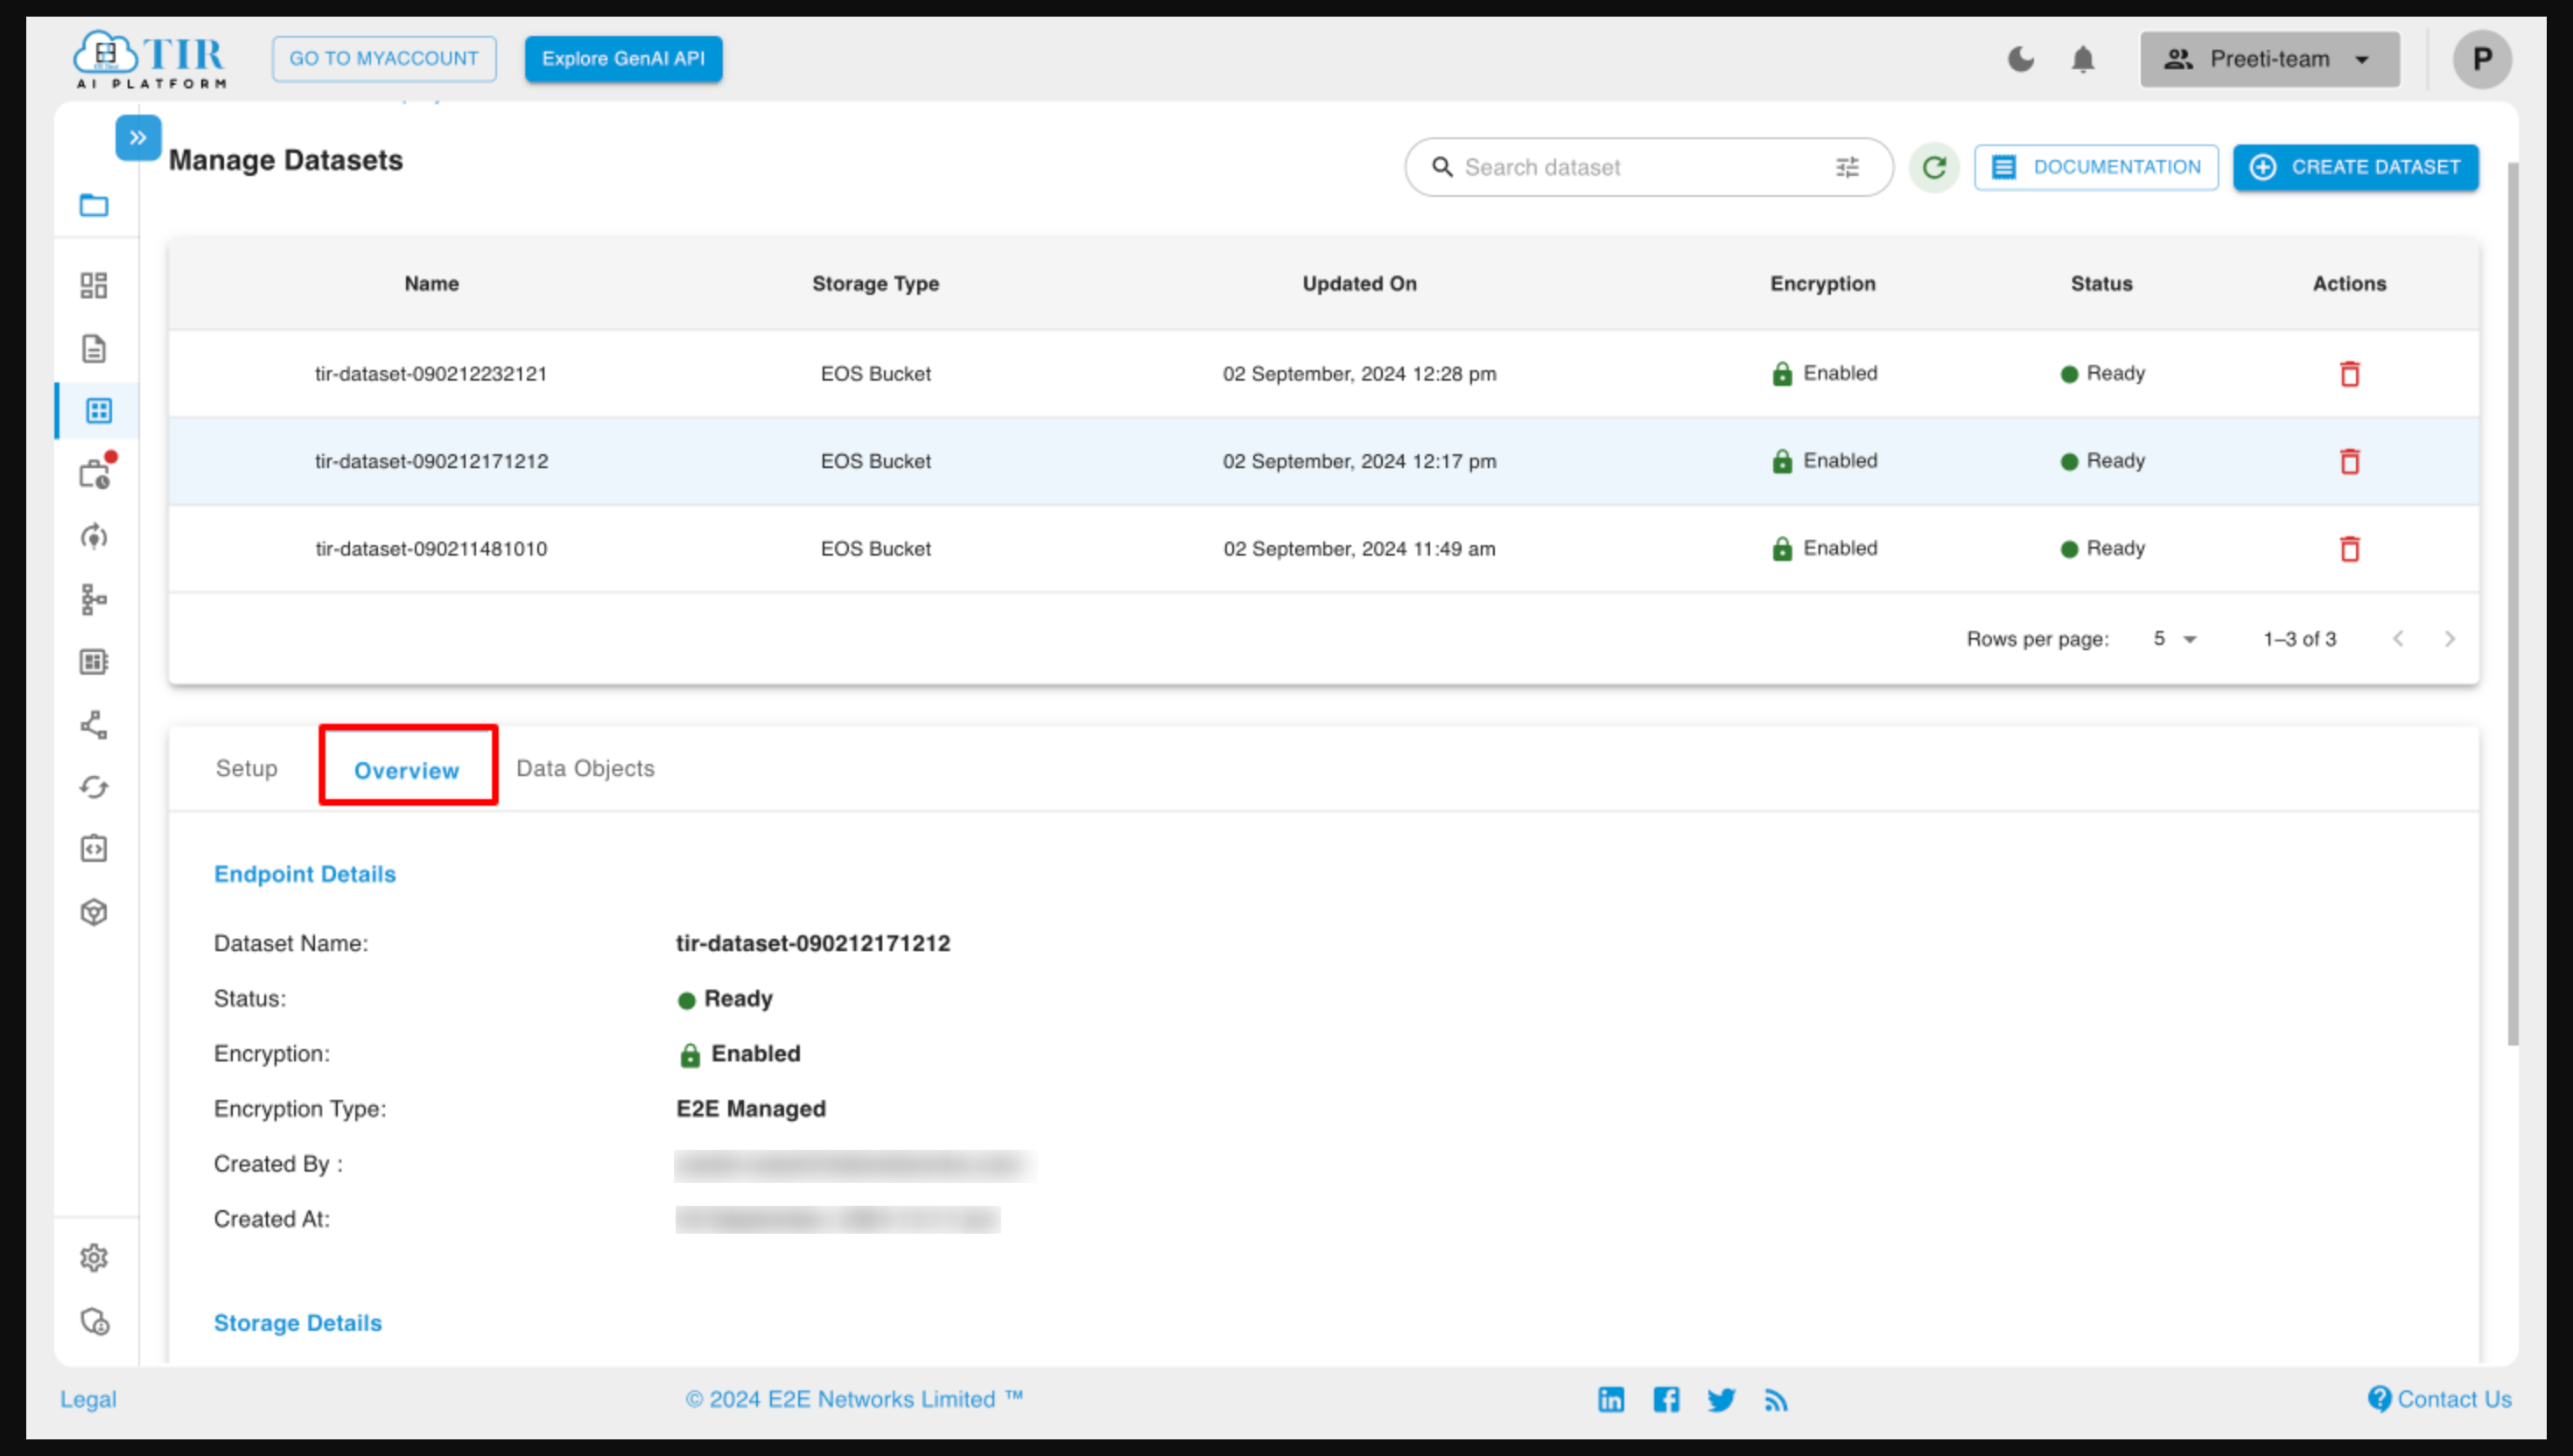
Overview
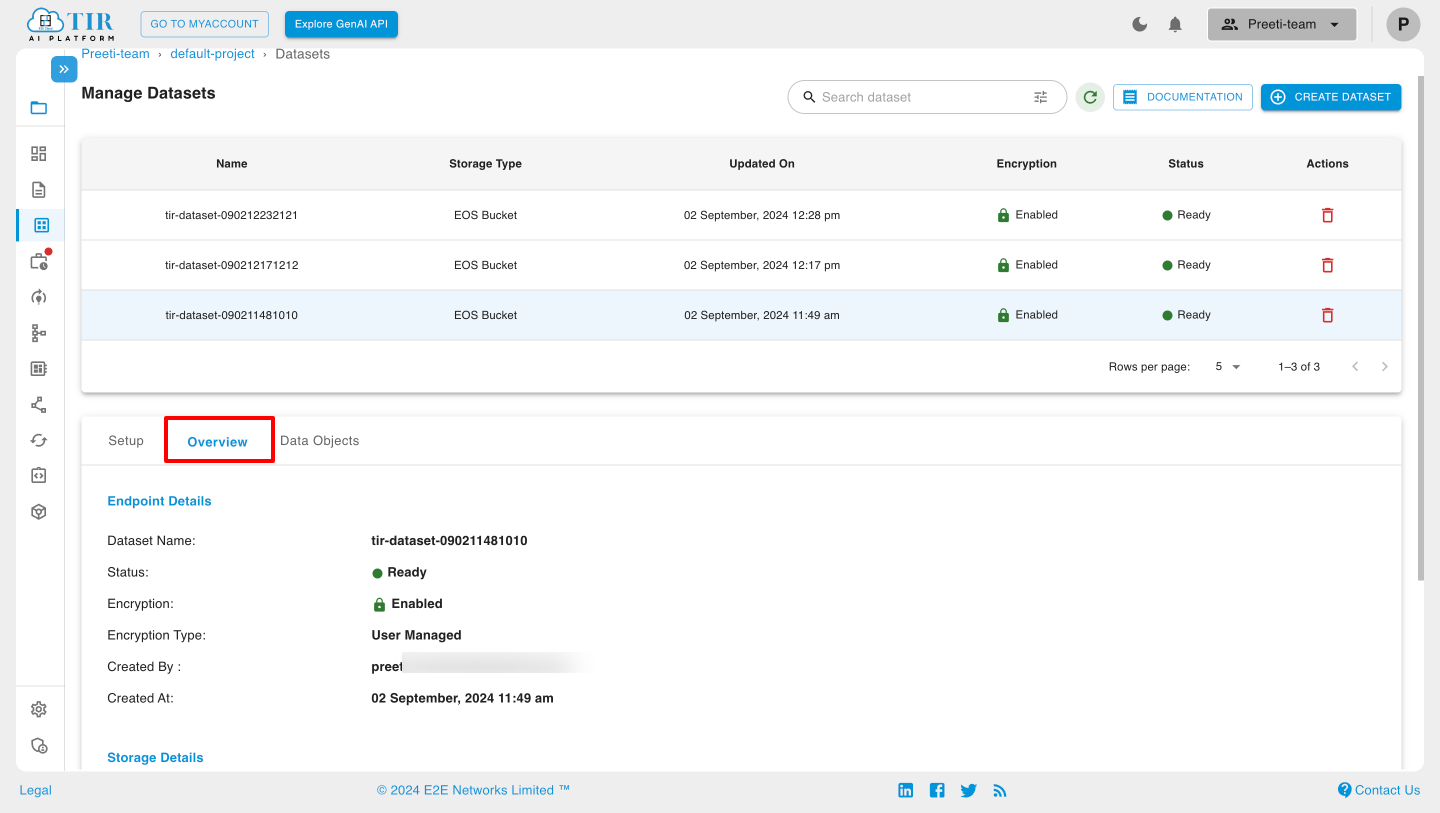
This section displays information about the dataset, including the dataset name, creator details, storage type, bucket name, access keys, and EOS endpoints.
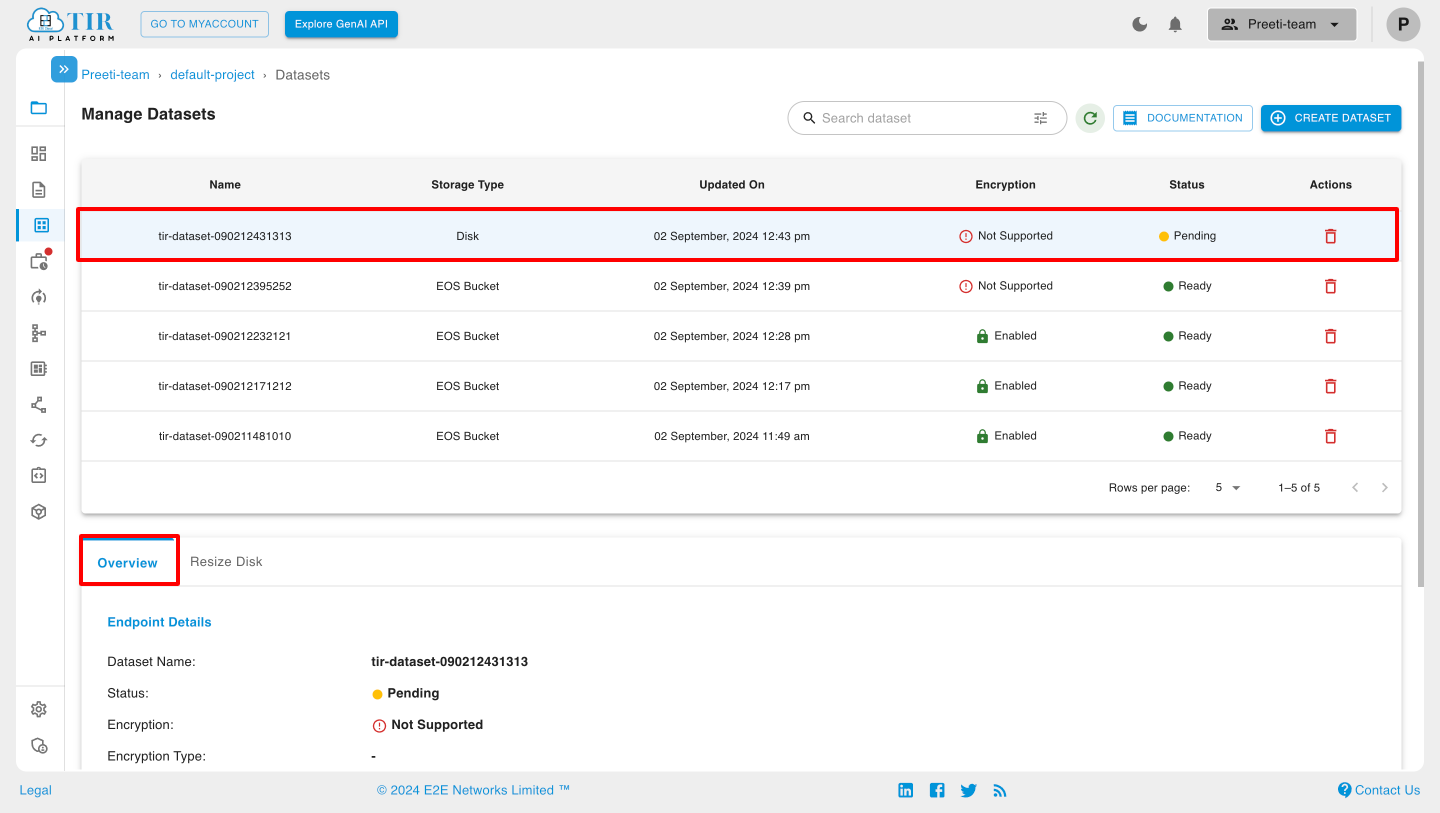
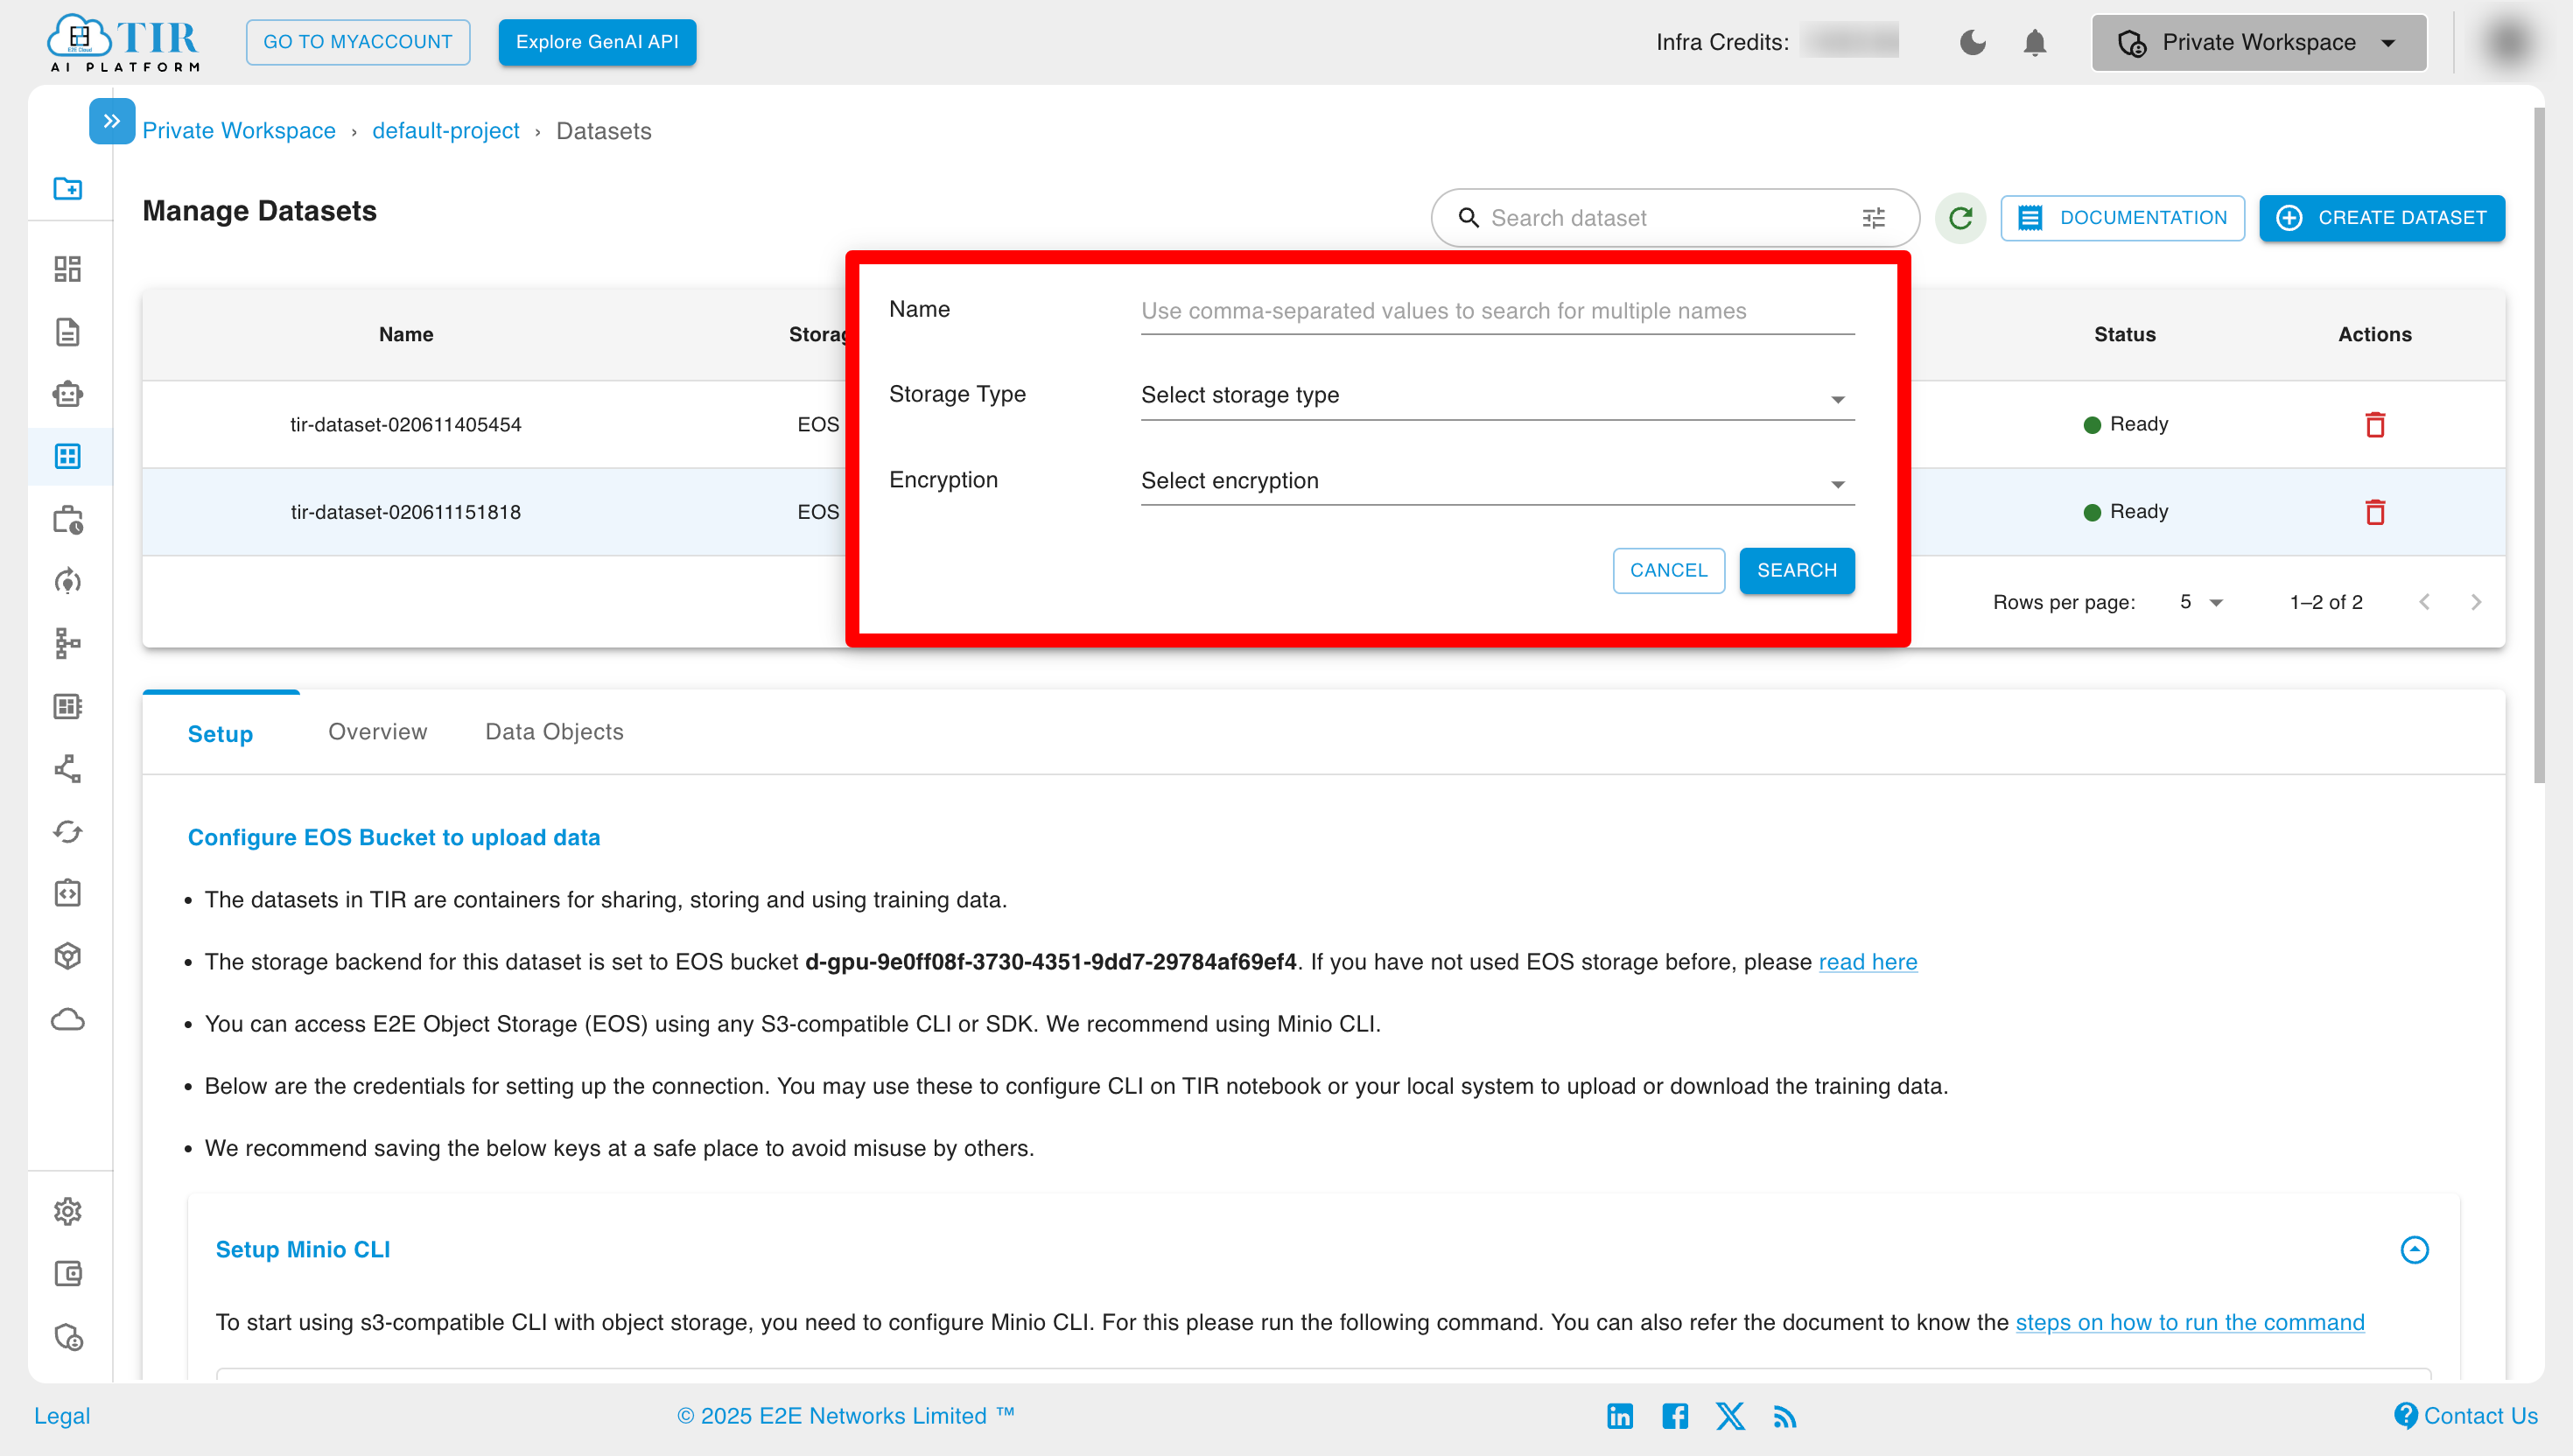
Dataset Management
- Dataset Filtering: Users can filter datasets based on their name and storage type (EOS/Disk) using the dataset search function.
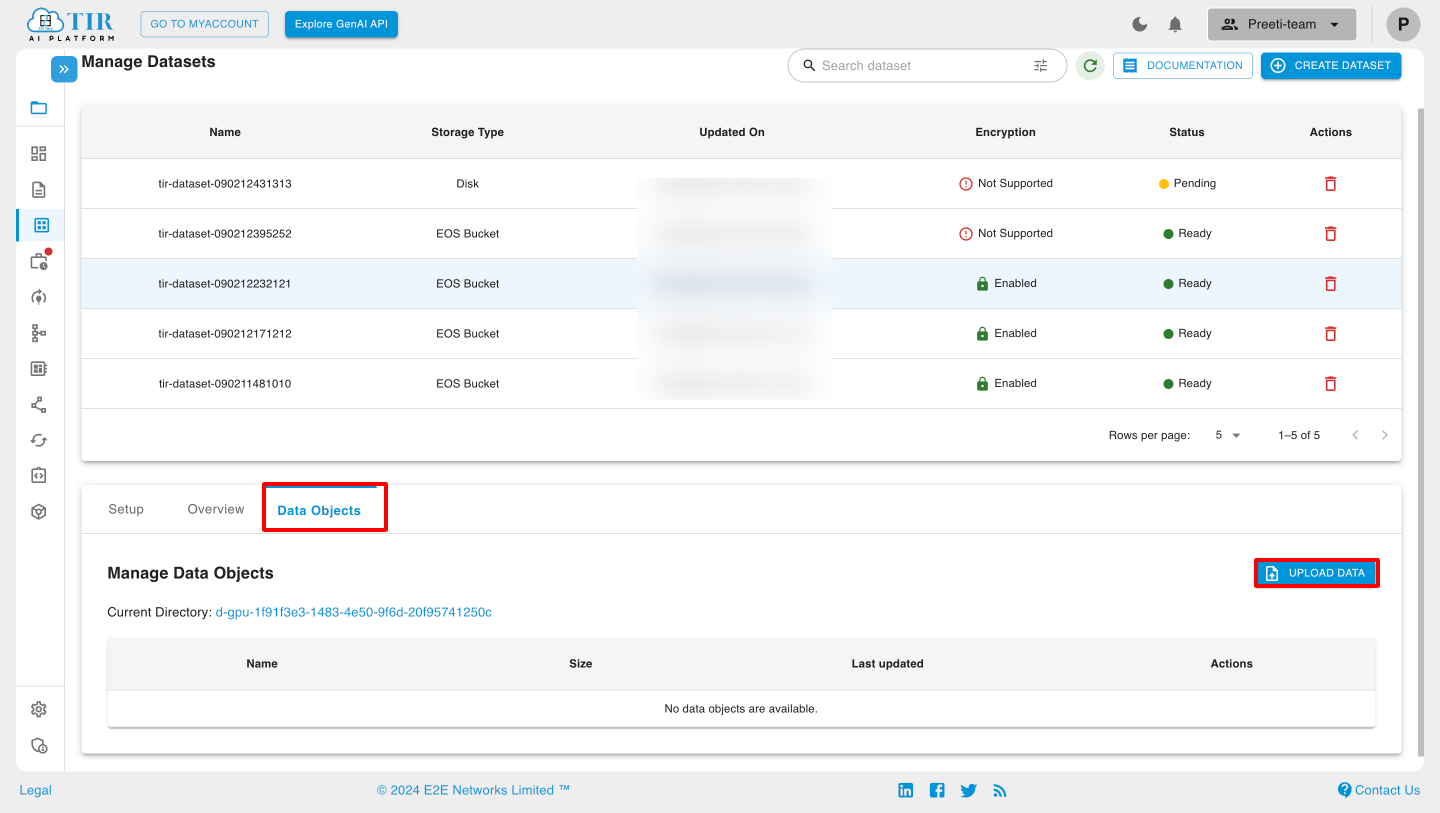
Data Objects
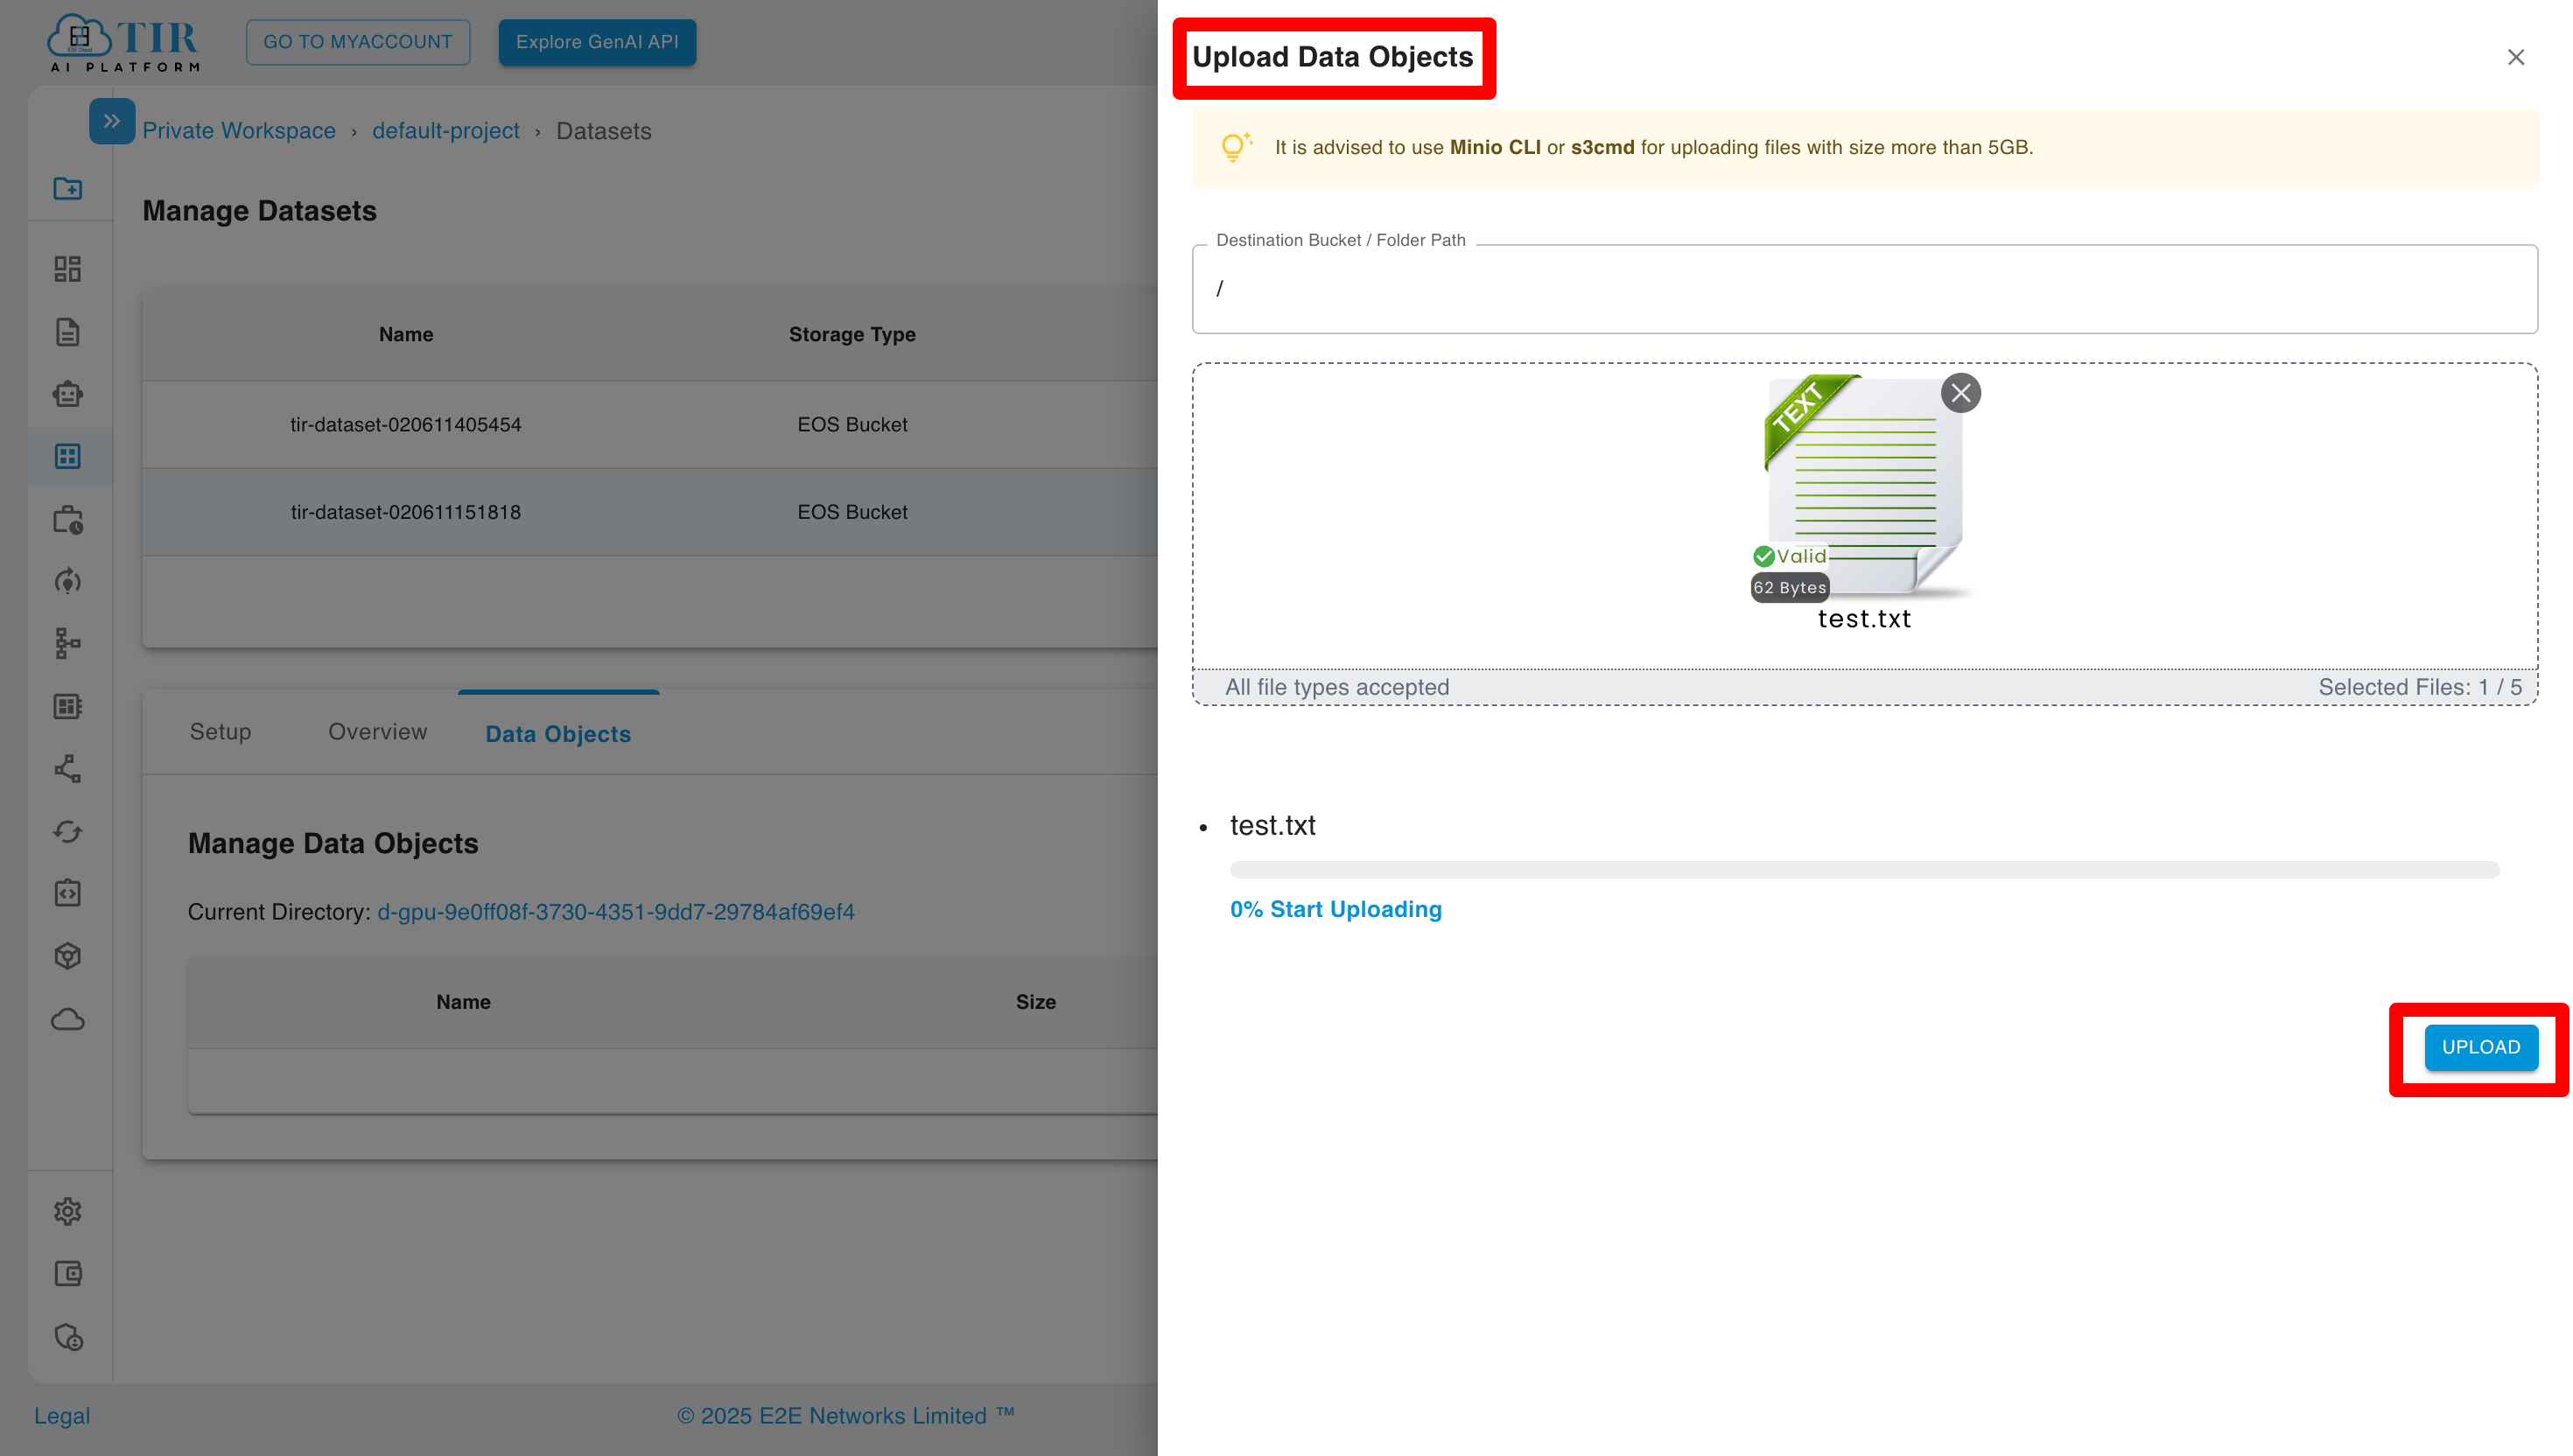
In Data Objects, you can upload data in your bucket by clicking the UPLOAD DATA button.
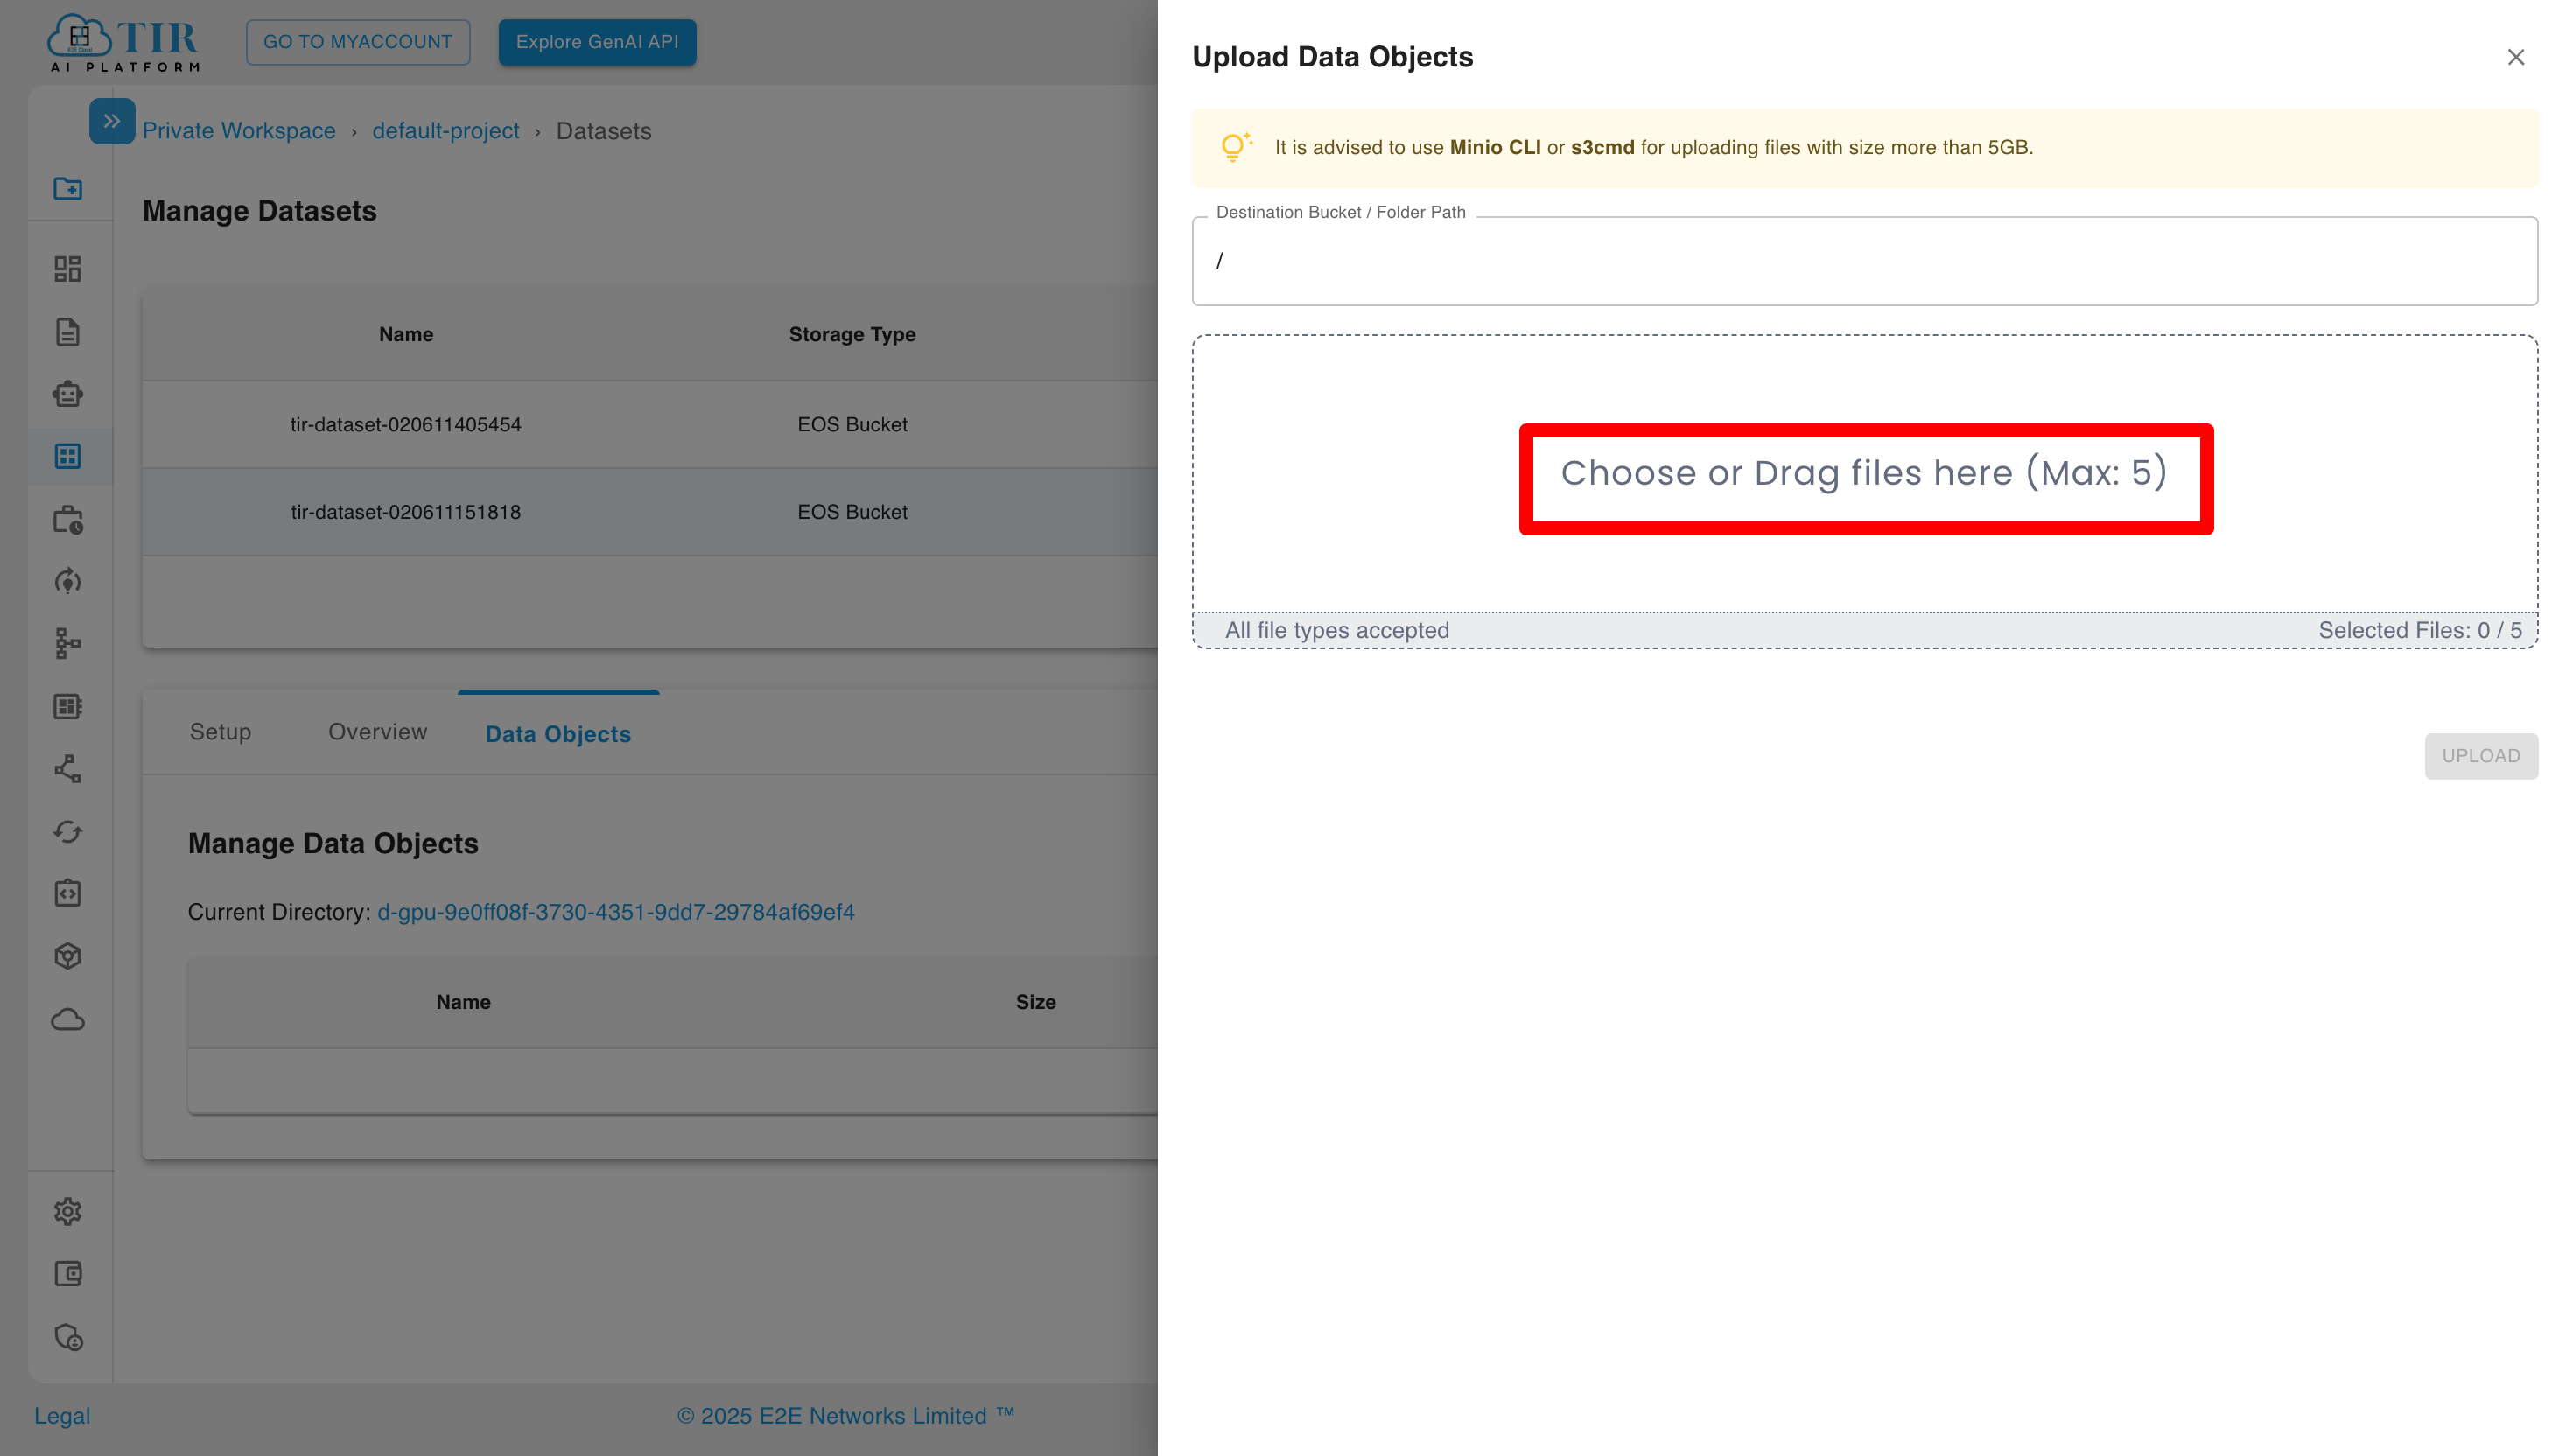
After clicking on the upload data button, you can choose or drag files from your system and click on the UPLOAD button.
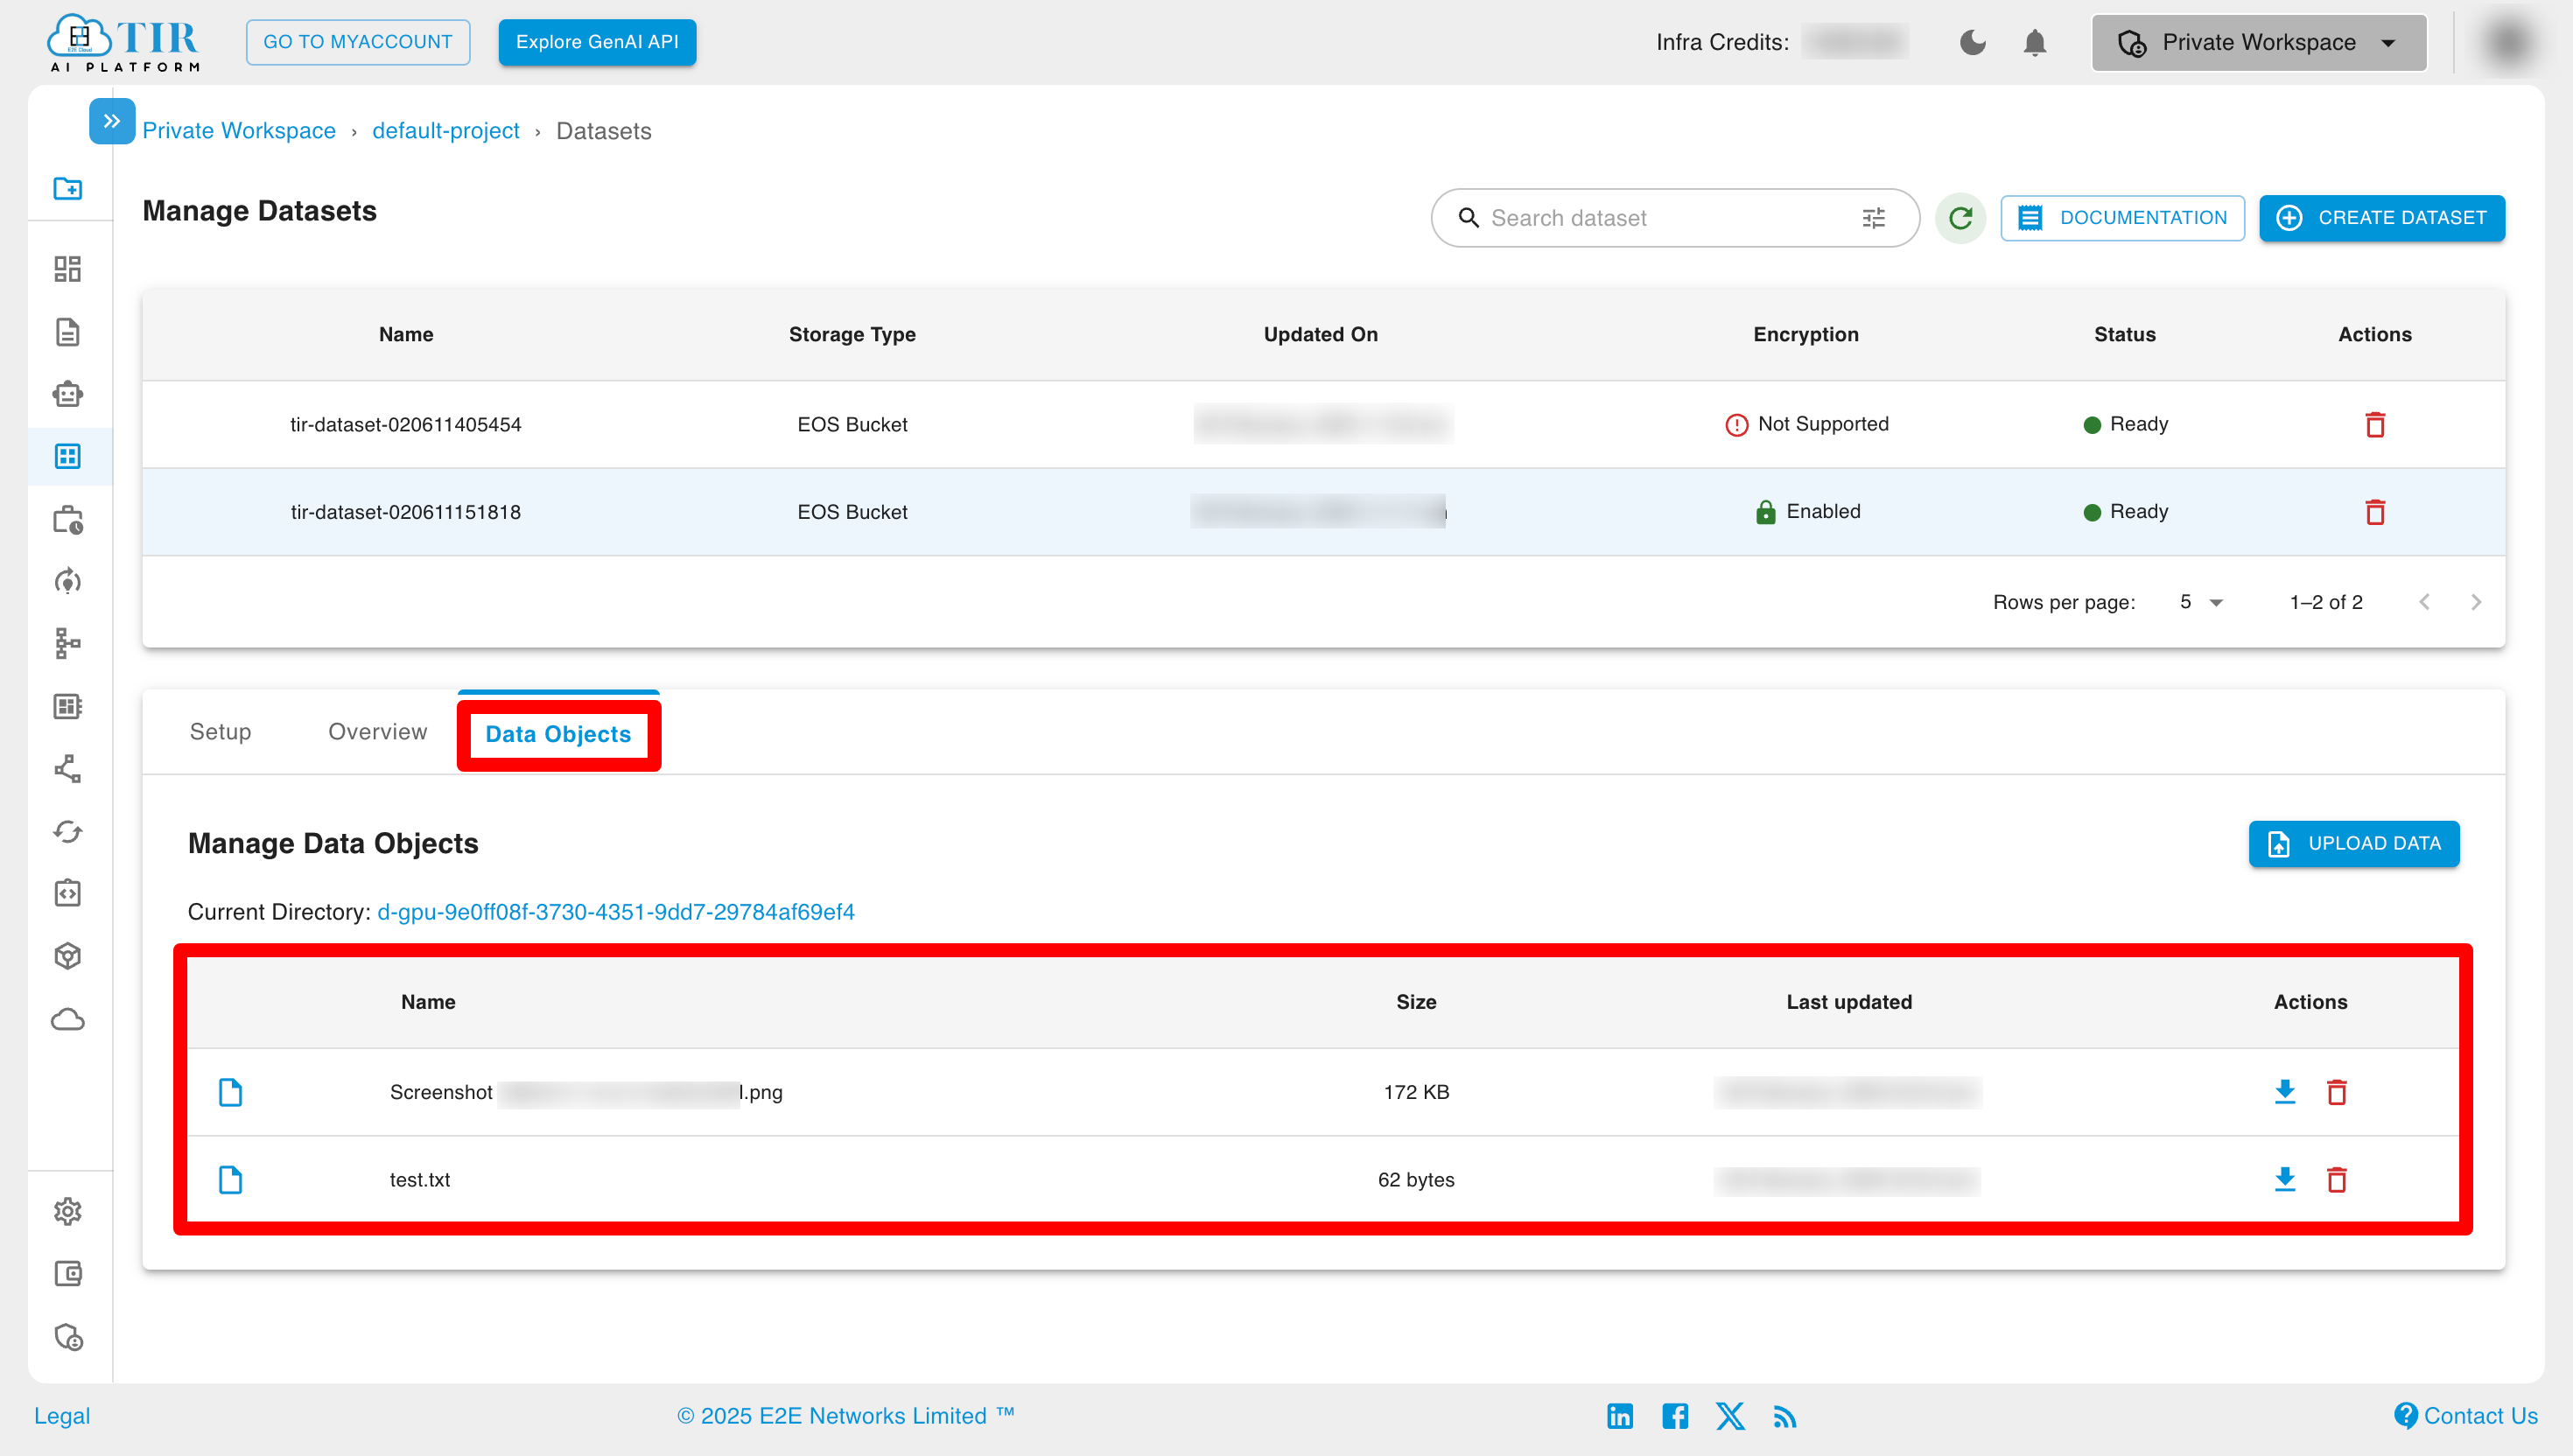
After successfully uploading files, you can see the list of files/data in the list.
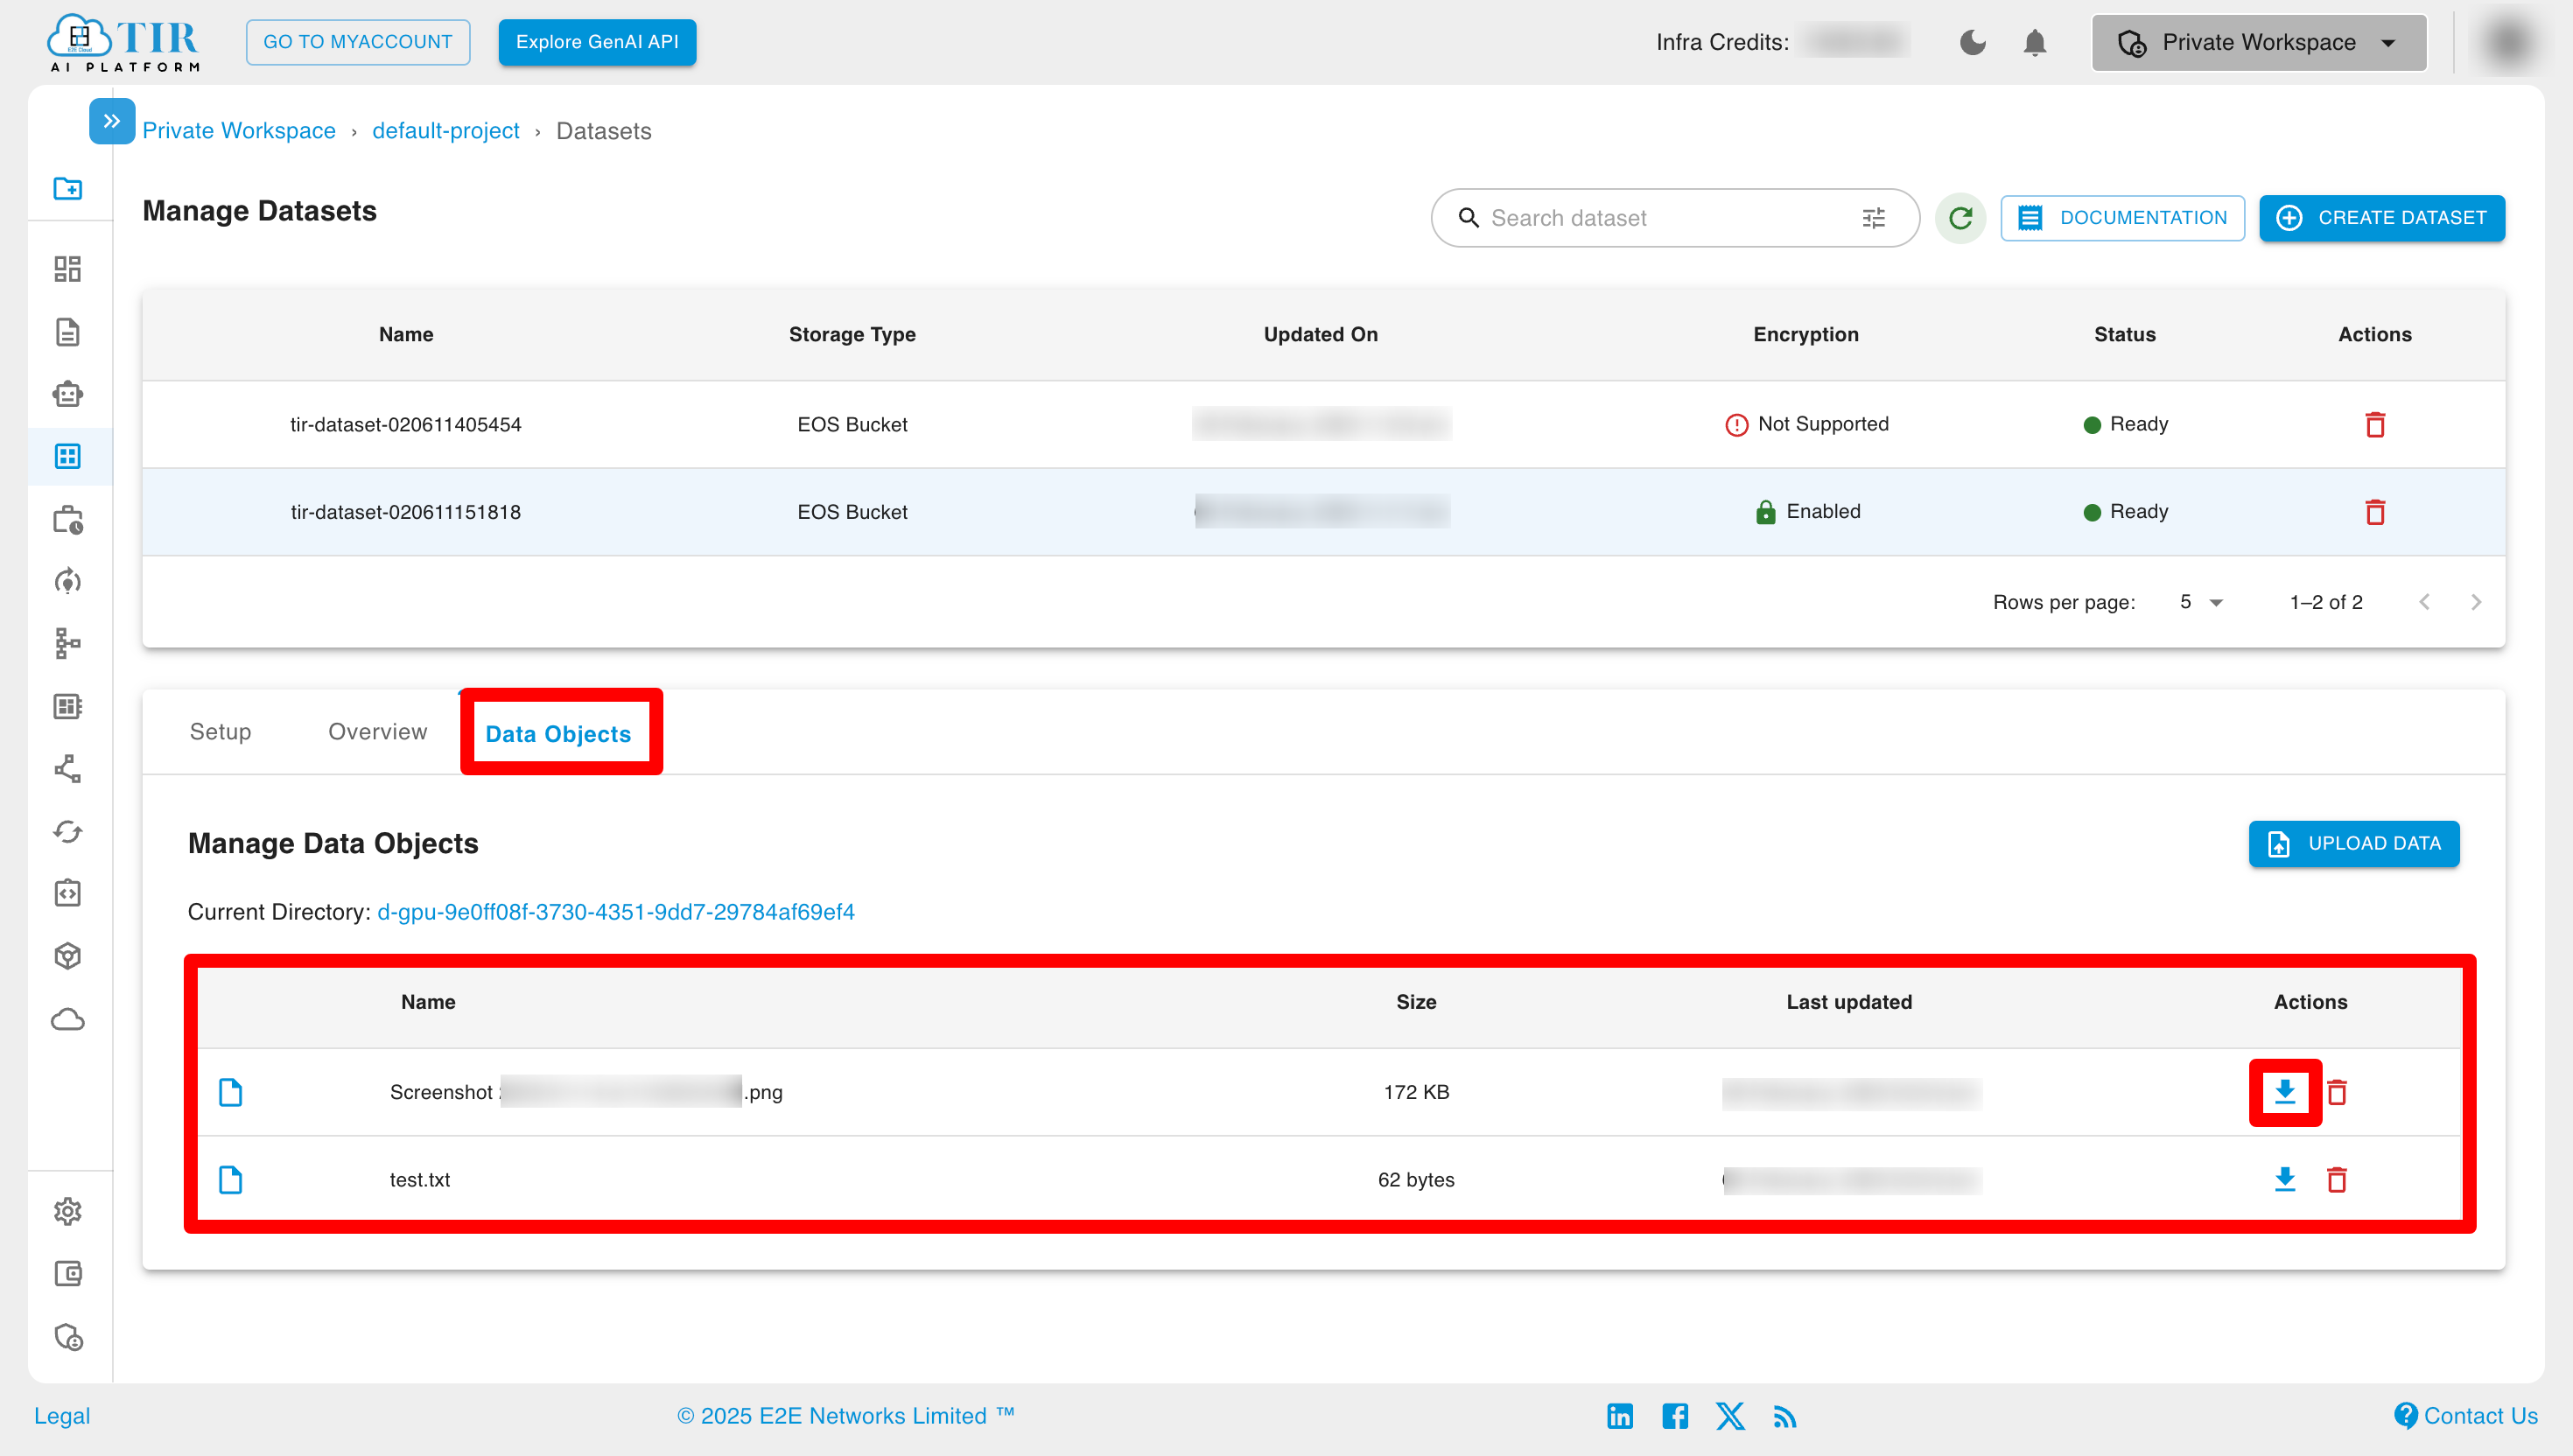
You can download files/data by selecting the particular file and then clicking the download button.
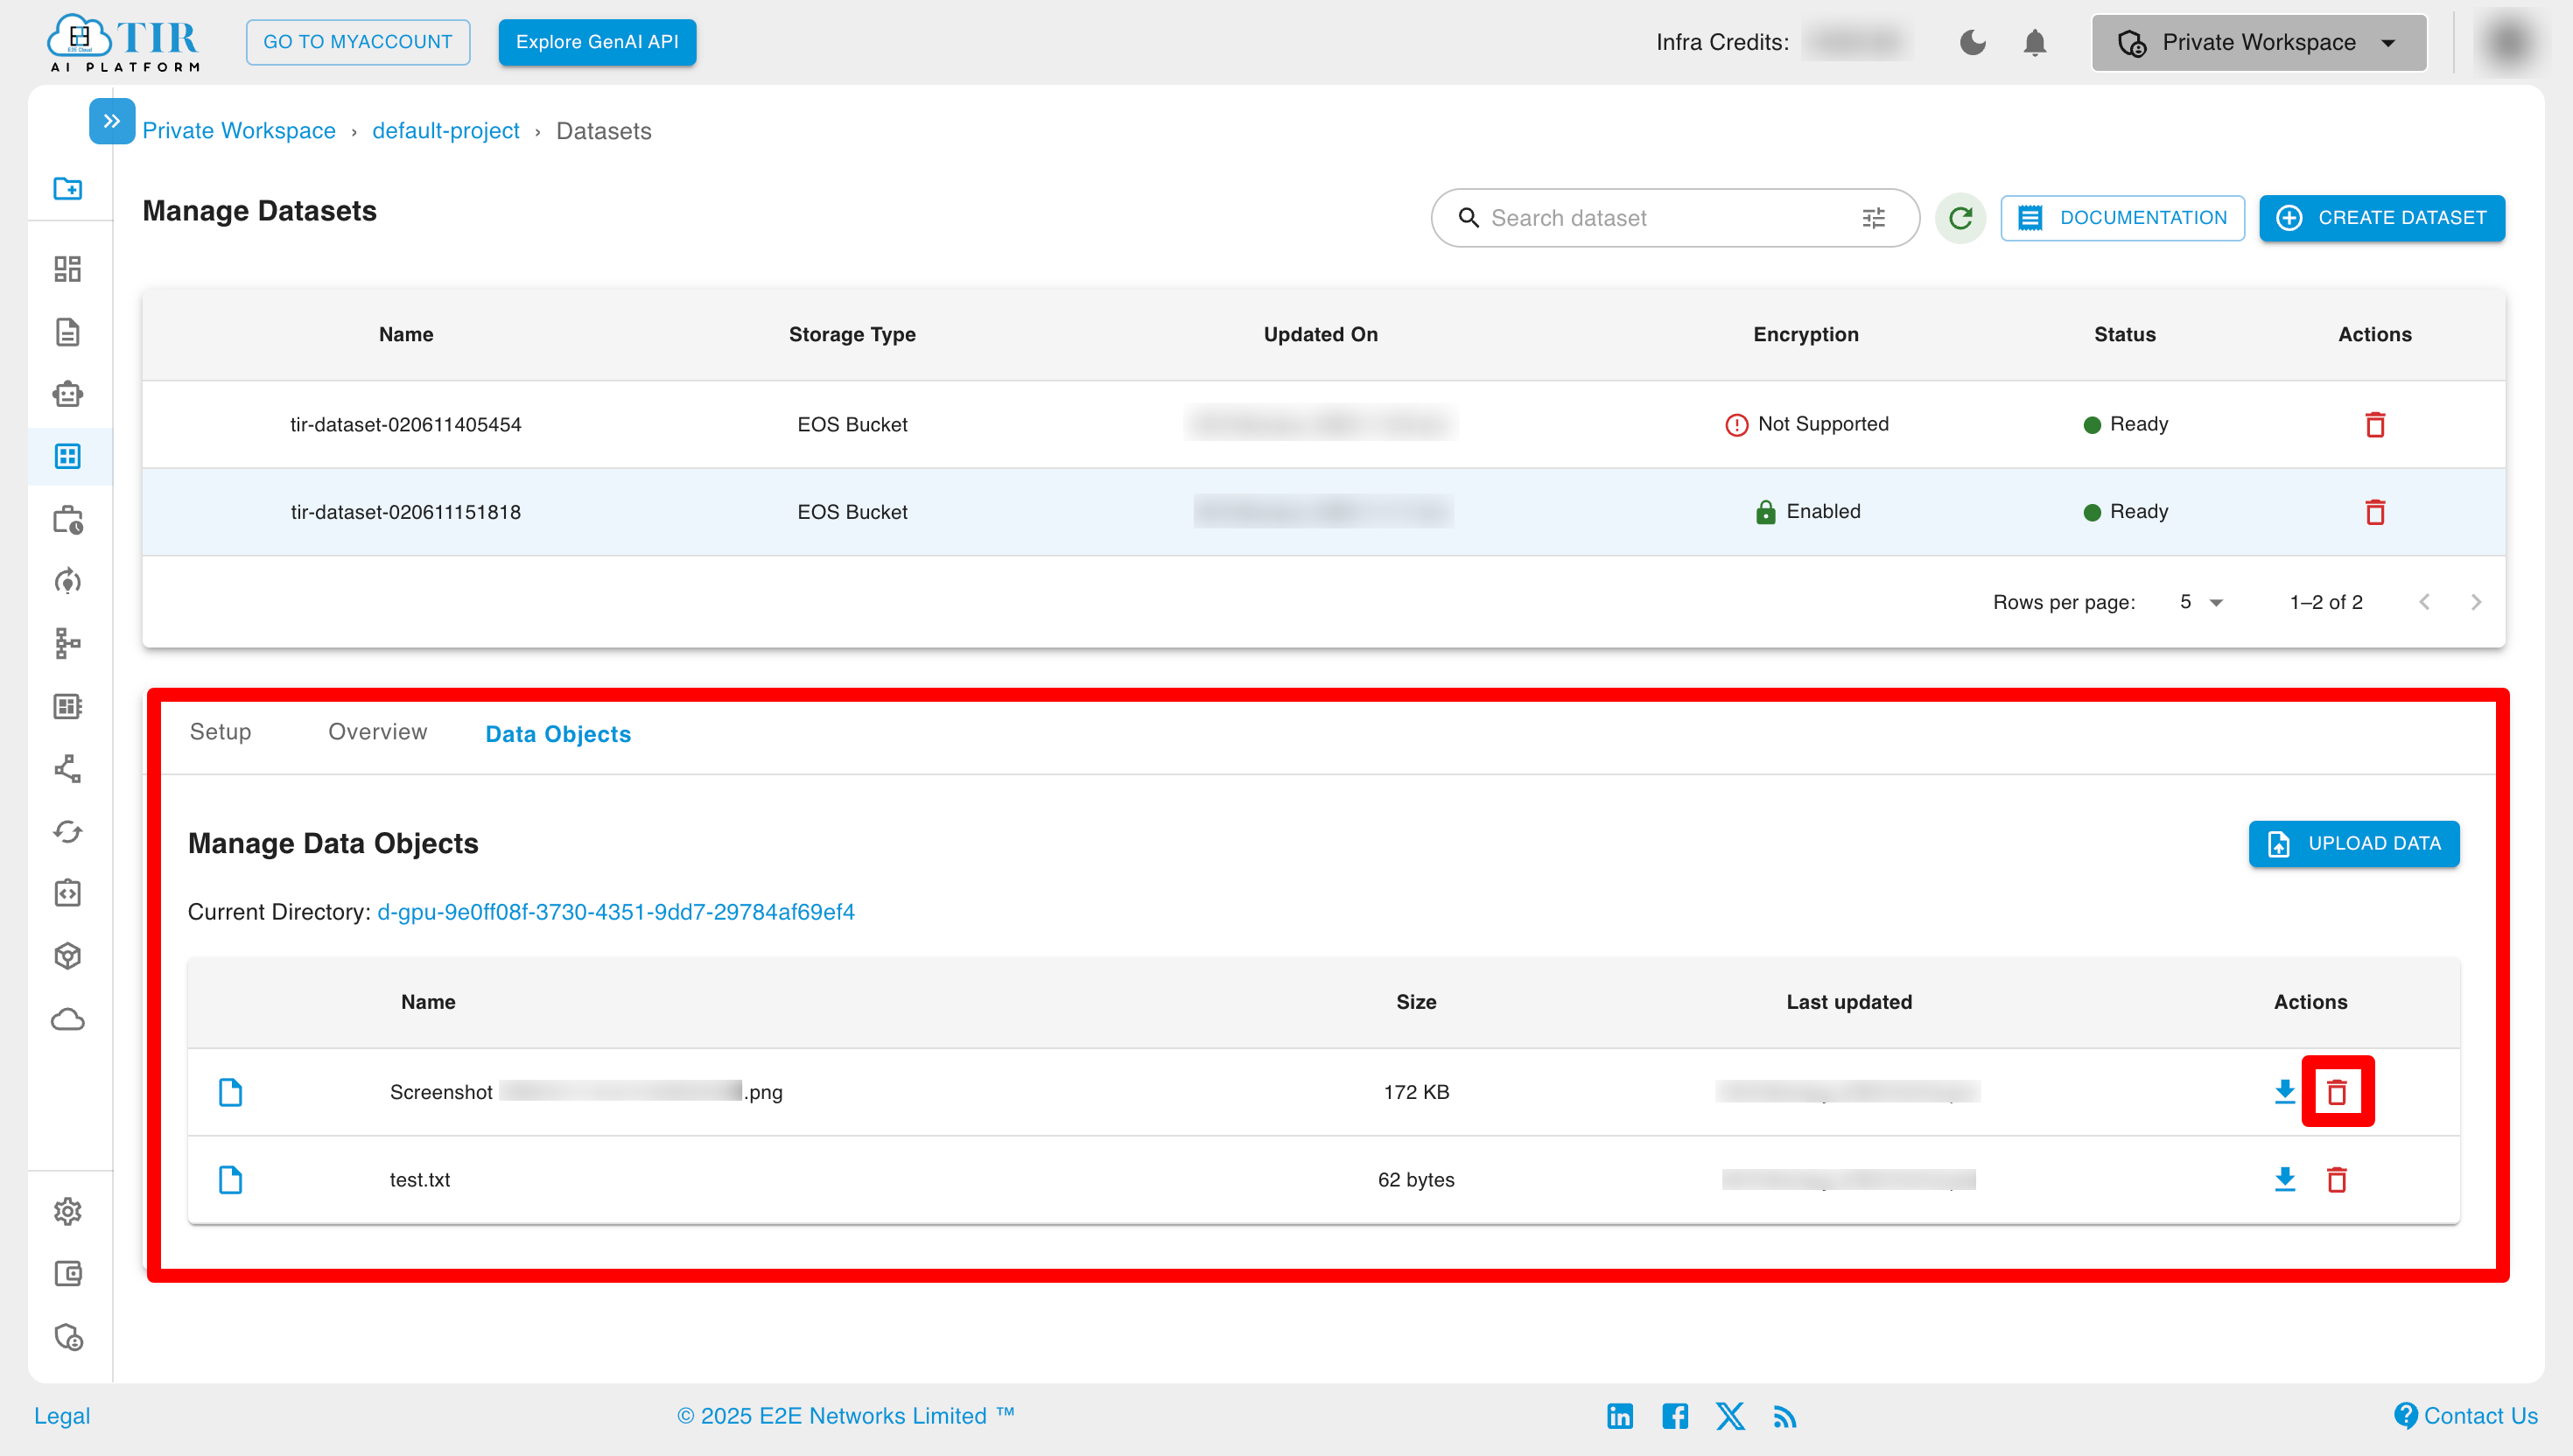
You can delete files/data by selecting the particular file and then clicking the delete button.
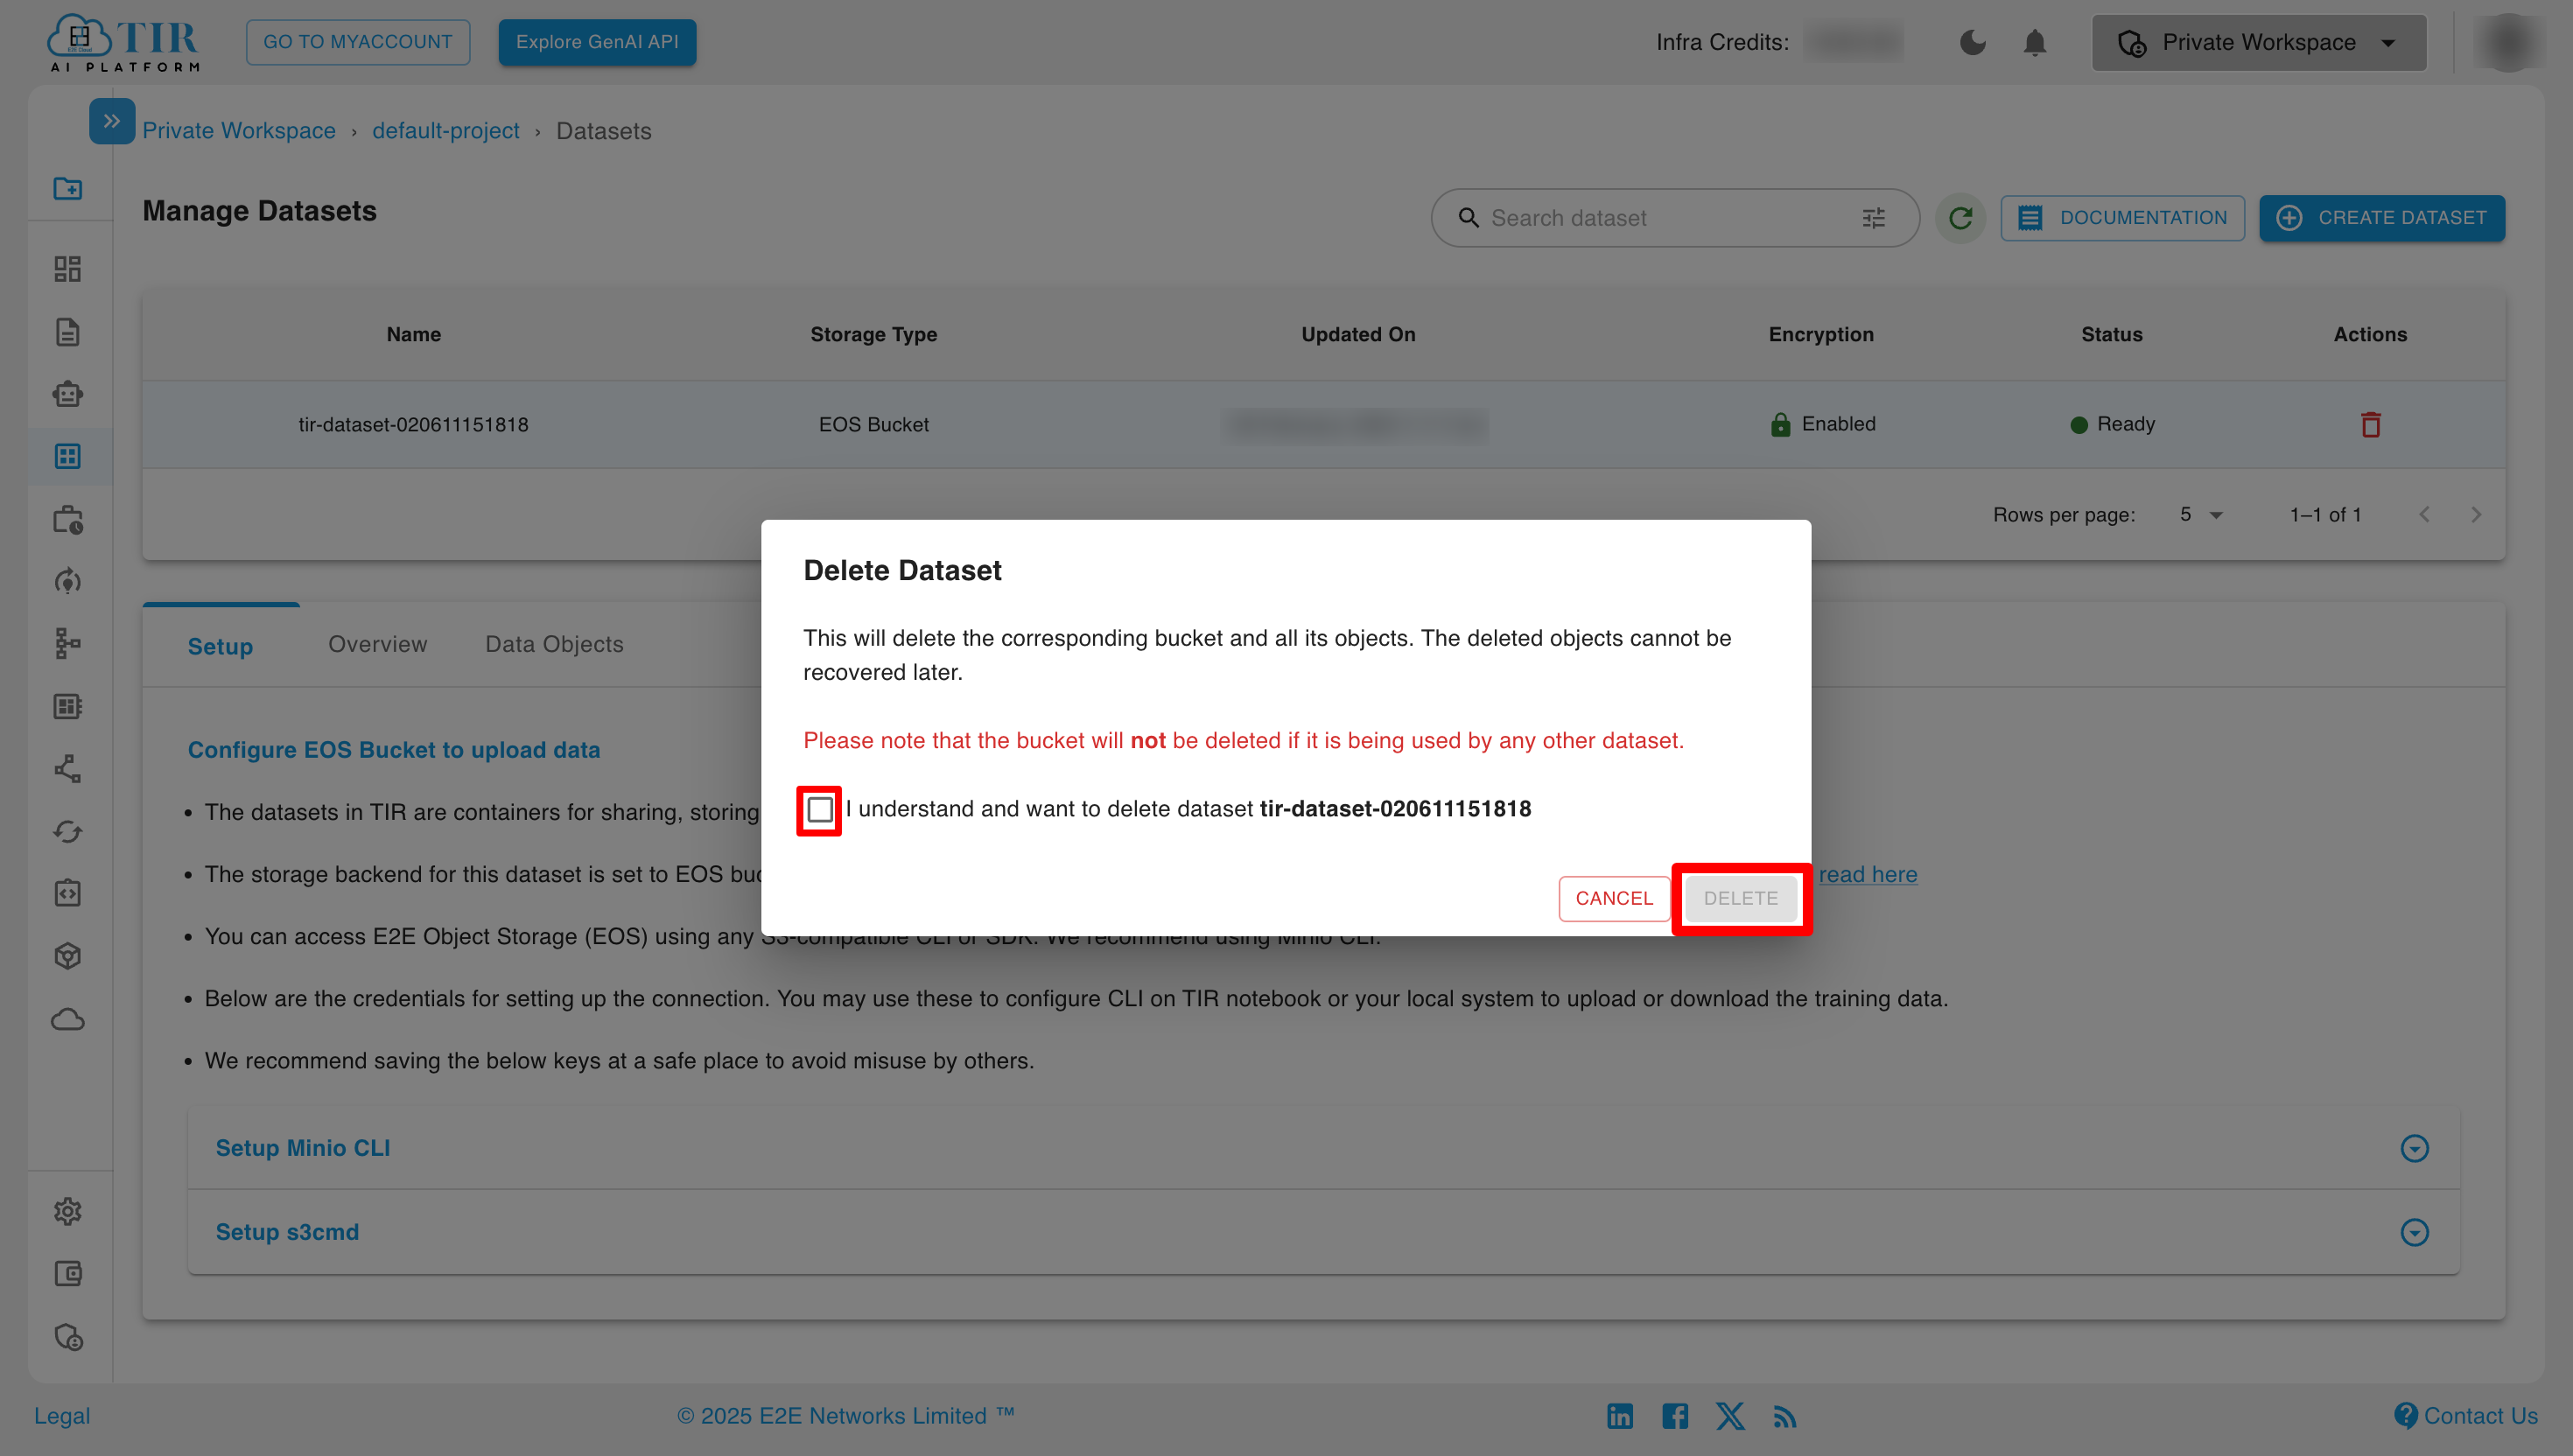
Delete Dataset
Select the particular dataset from the list and click on the Delete button to delete the dataset.
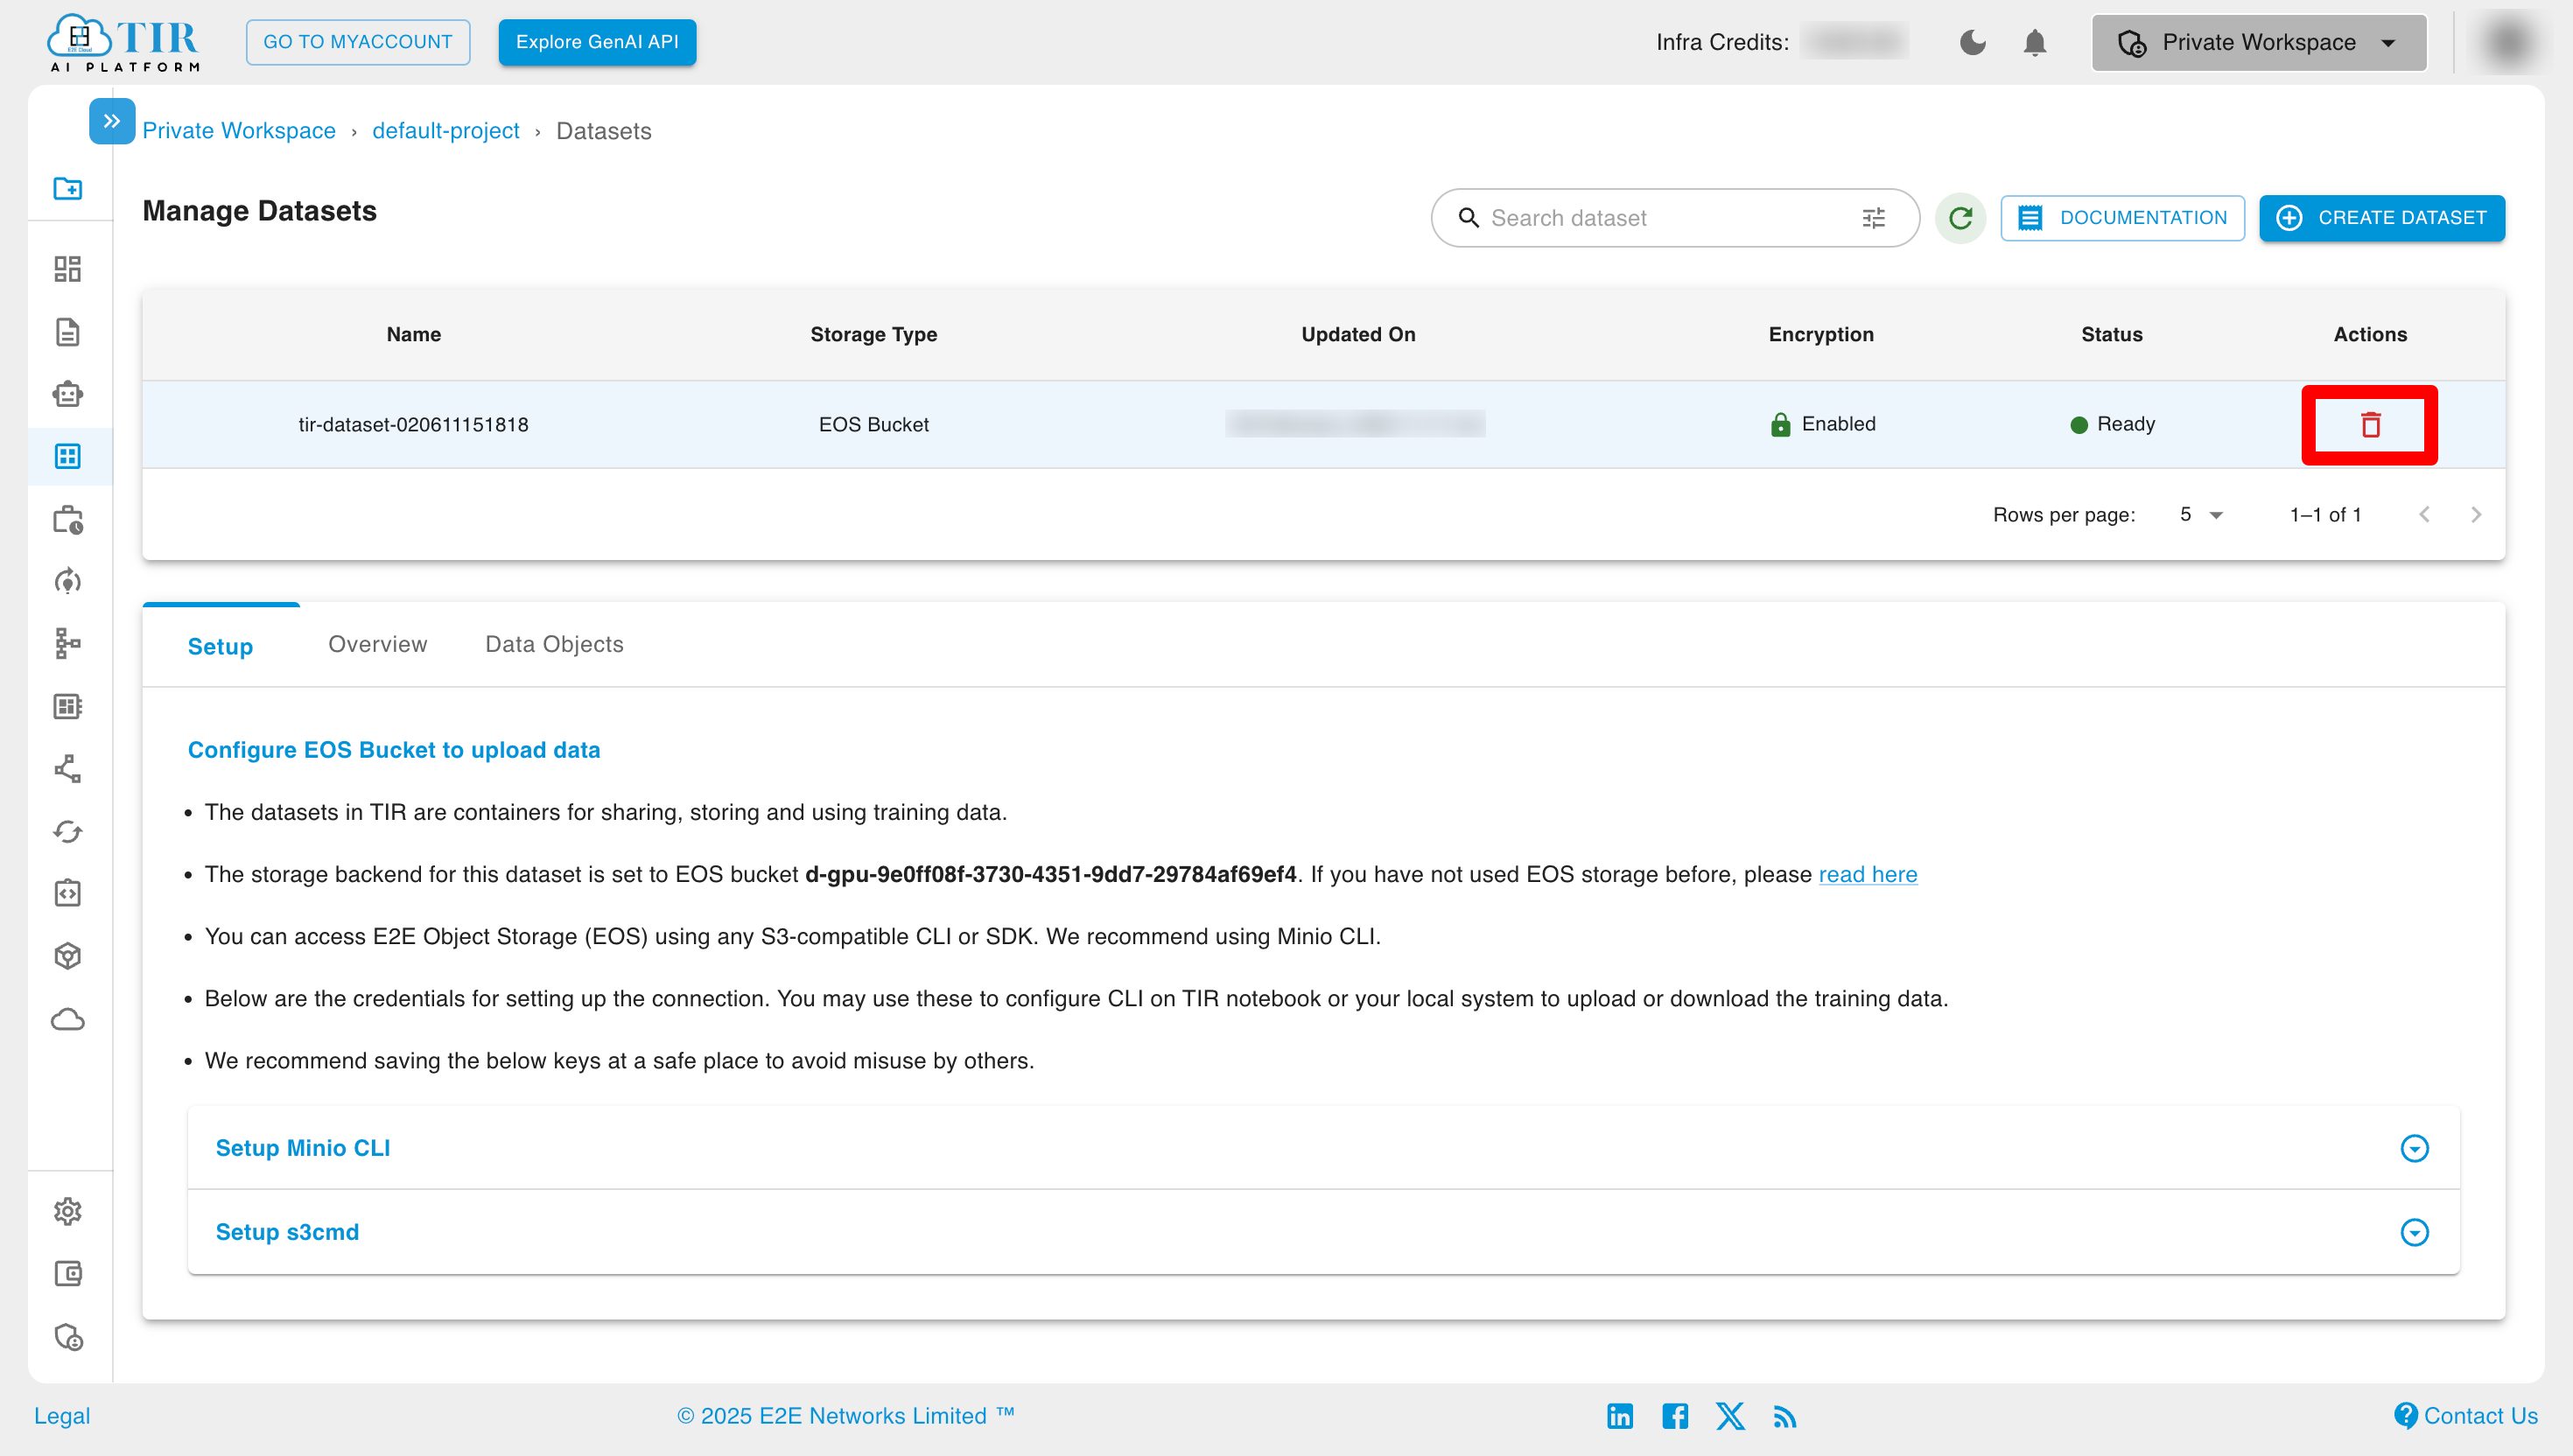
After clicking on the Delete button, it will show a popup to delete the dataset. You can click the delete button to delete the dataset.
