Step by Step Guide to Fine Tune Models
Introduction
Fine-tuning a model refers to the process of taking a pre-trained machine learning model and further training it on a specific task or dataset to adapt it to the nuances of that particular domain. The term is commonly used in the context of transfer learning, where a model trained on a large and diverse dataset (pre-training) is adjusted to perform a specific task or work with a specific dataset (fine-tuning).
What is Fine-Tuning?
Fine-tuning refers to the process of modifying a pre-existing, pre-trained model to cater to a new, specific task by training it on a smaller dataset related to the new task. This approach leverages the existing knowledge gained from the pre-training phase, thereby reducing the need for extensive data and resources.
In the Context of Neural Networks and Deep Learning:
In the specific context of neural networks and deep learning, fine-tuning is typically executed by adjusting the parameters of a pre-trained model. This adjustment is made using a smaller, task-specific dataset. The pre-trained model, having already learned a set of features from a large dataset, is further trained on the new dataset to adapt these features to the new task.
Fine Tune SDK
The Fine-Tune SDK simplifies training and deploying models, allowing users to fine-tune models. It is a highly efficient tool for managing machine learning workflows.
How to Create a Fine-Tuning Job?
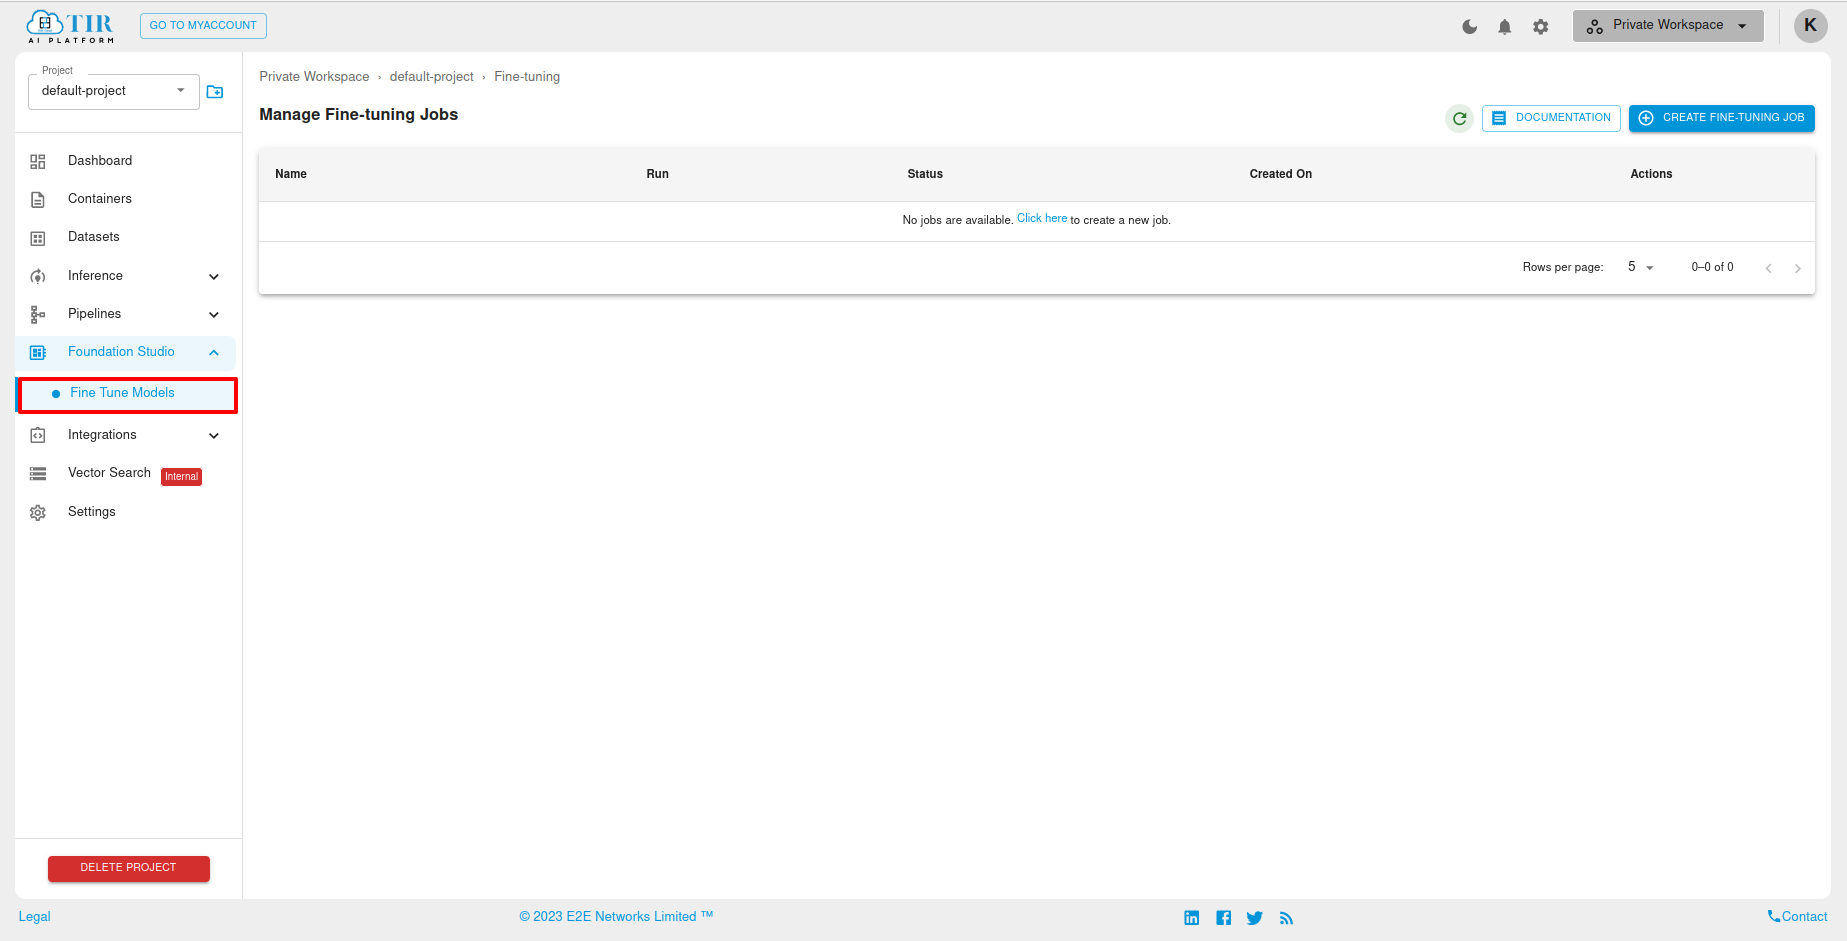
To initiate the Fine-Tuning Job process, first navigate to the sidebar section and select Foundation Studio. Once selected, a dropdown menu will appear with an option labeled Fine-Tune Models.
Upon clicking the Fine-Tune Models option, you will be directed to the Manage Fine-Tuning Jobs page.
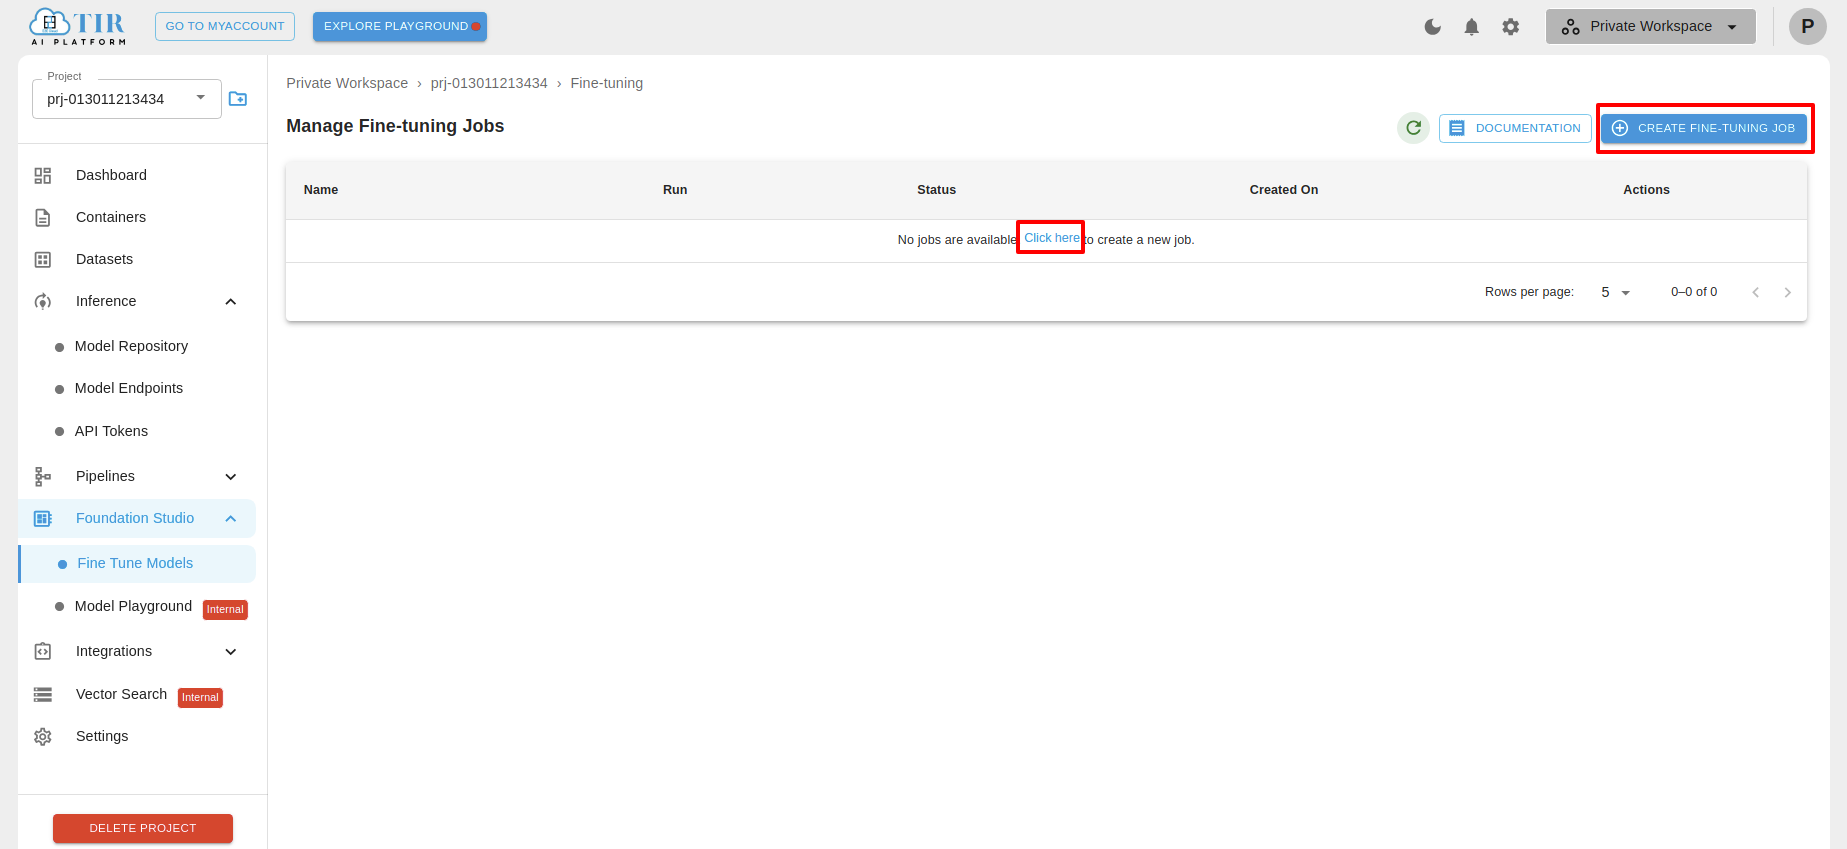
On the Manage Fine-Tuning Jobs page, locate and click on the Create Fine-Tuning Job button or the Click Here button to proceed with creating a fine-tuning job.
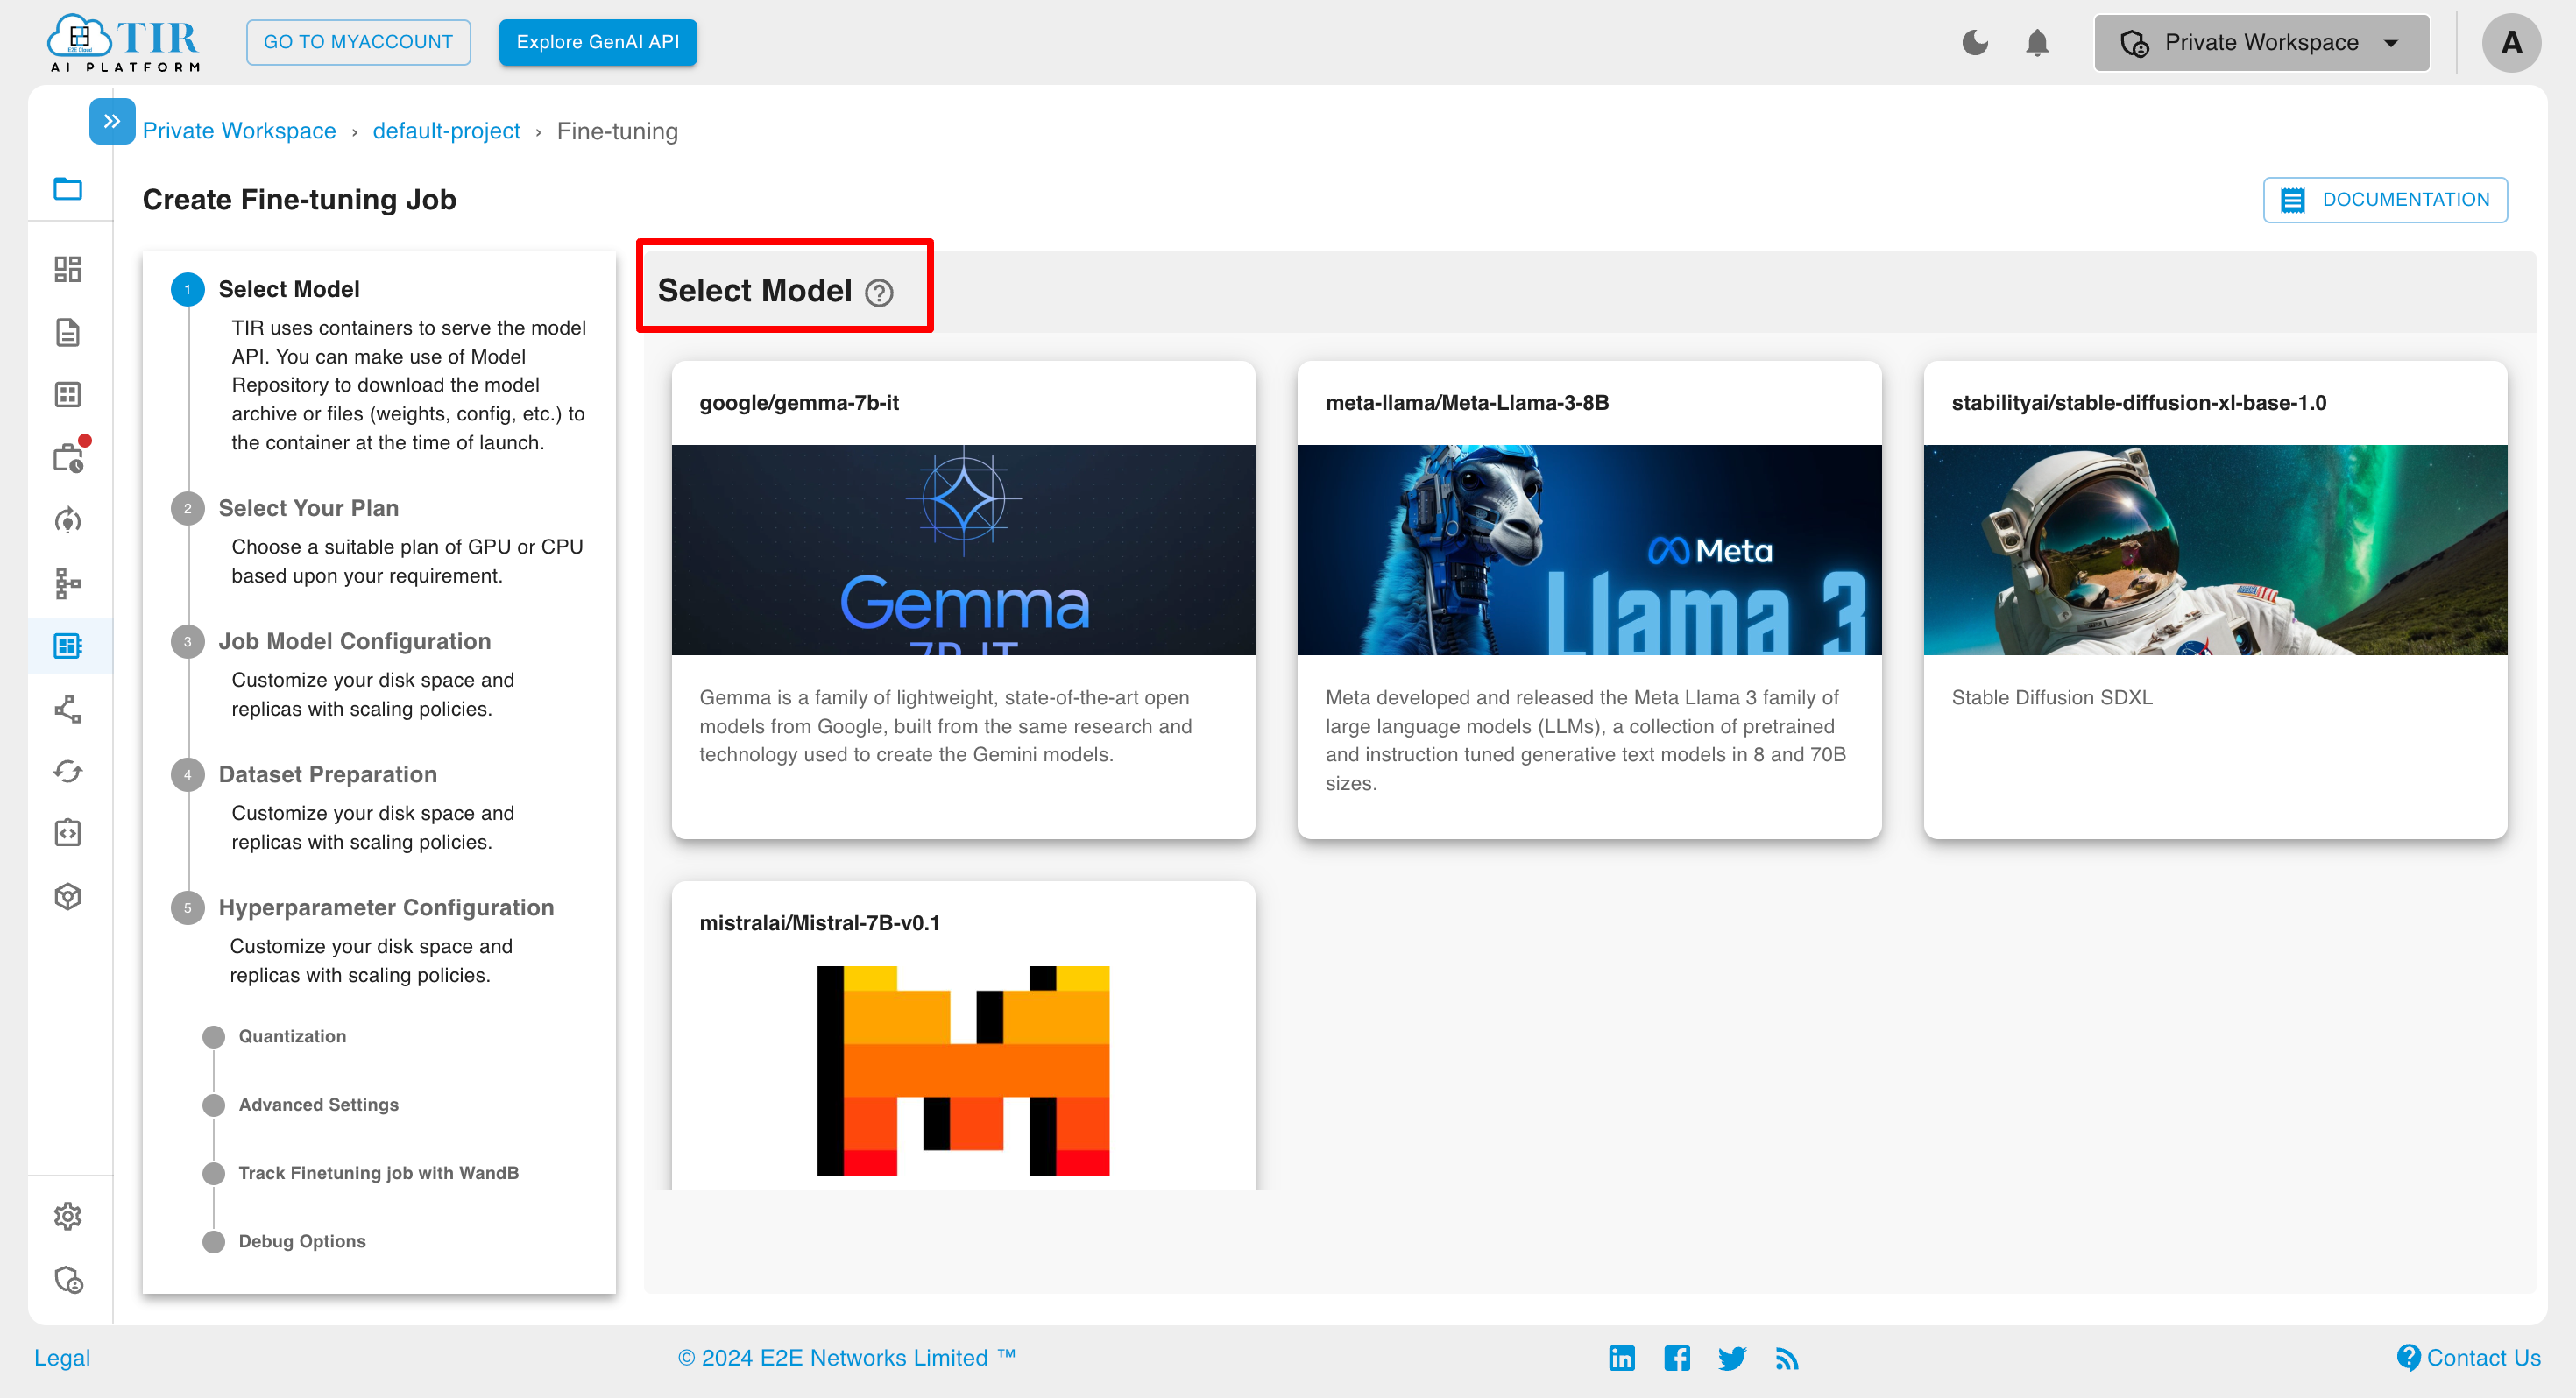
After clicking the Create Fine-Tuning Job button, the Create Fine-Tuning Job page will open. From there, choose the appropriate model from the available options.
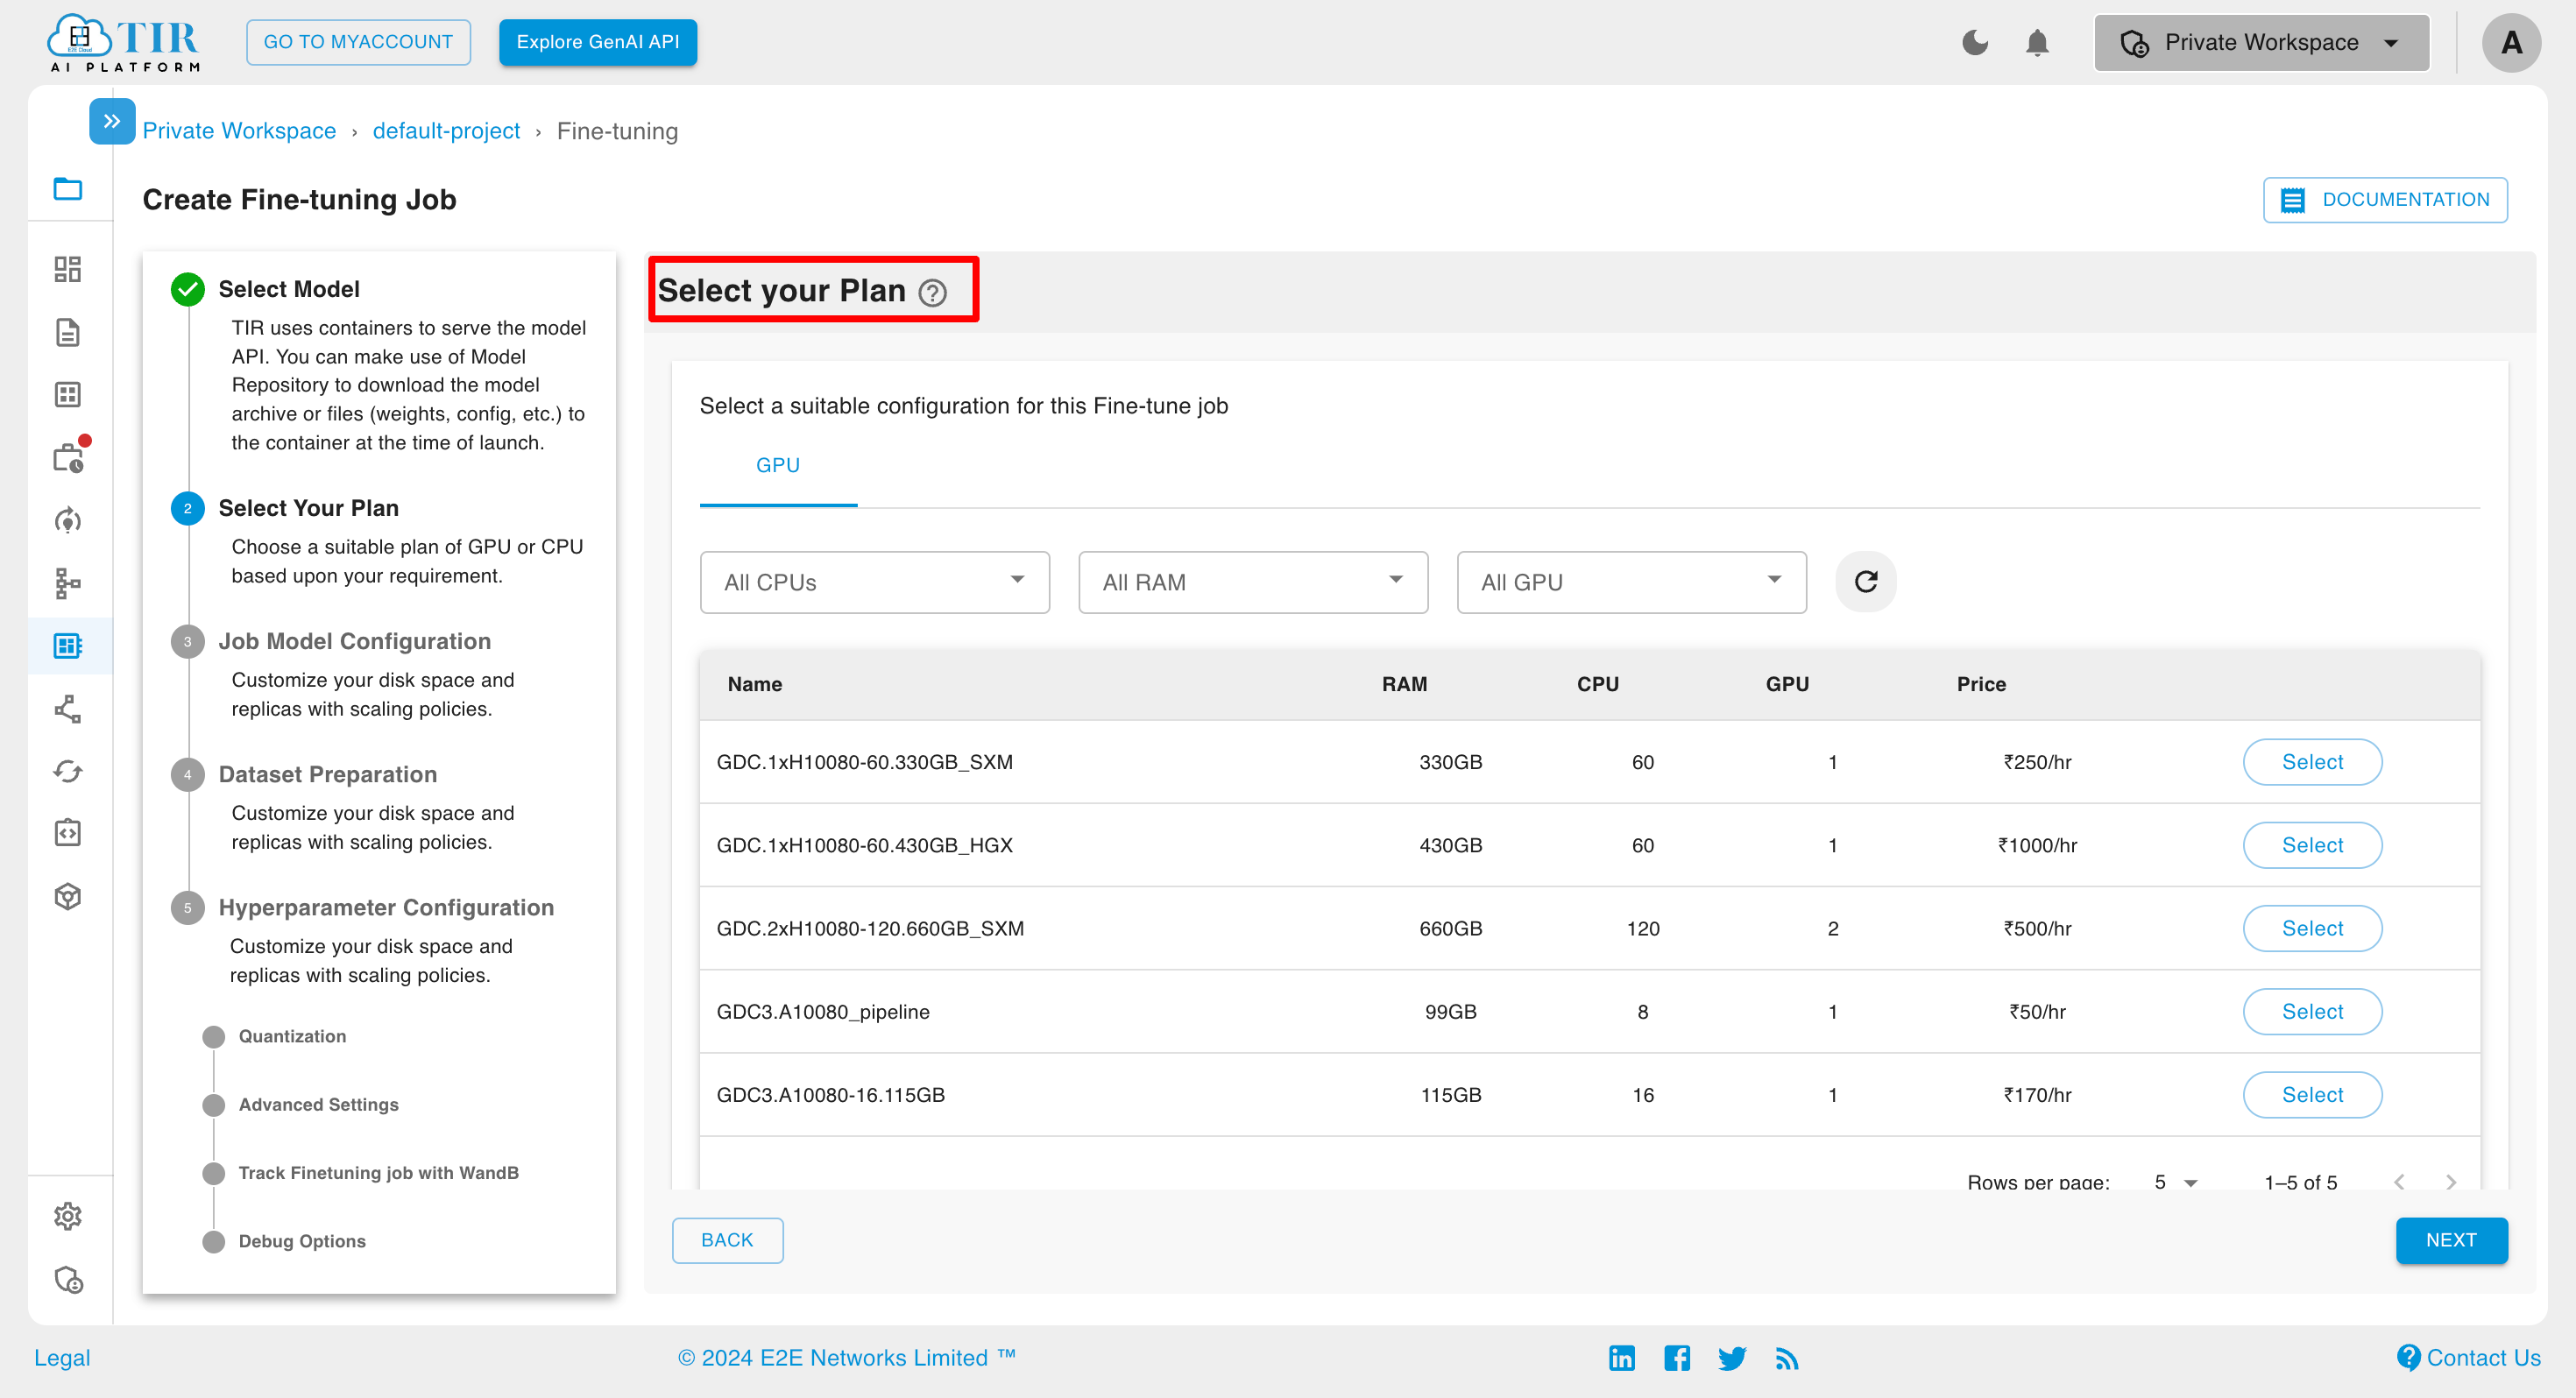
Next, choose the desired plan from the available options. To ensure fast and precise training, a variety of high-performance GPUs, such as Nvidia H100 and A100, are available for selection. This allows users to optimize their resources and accelerate the model training process.
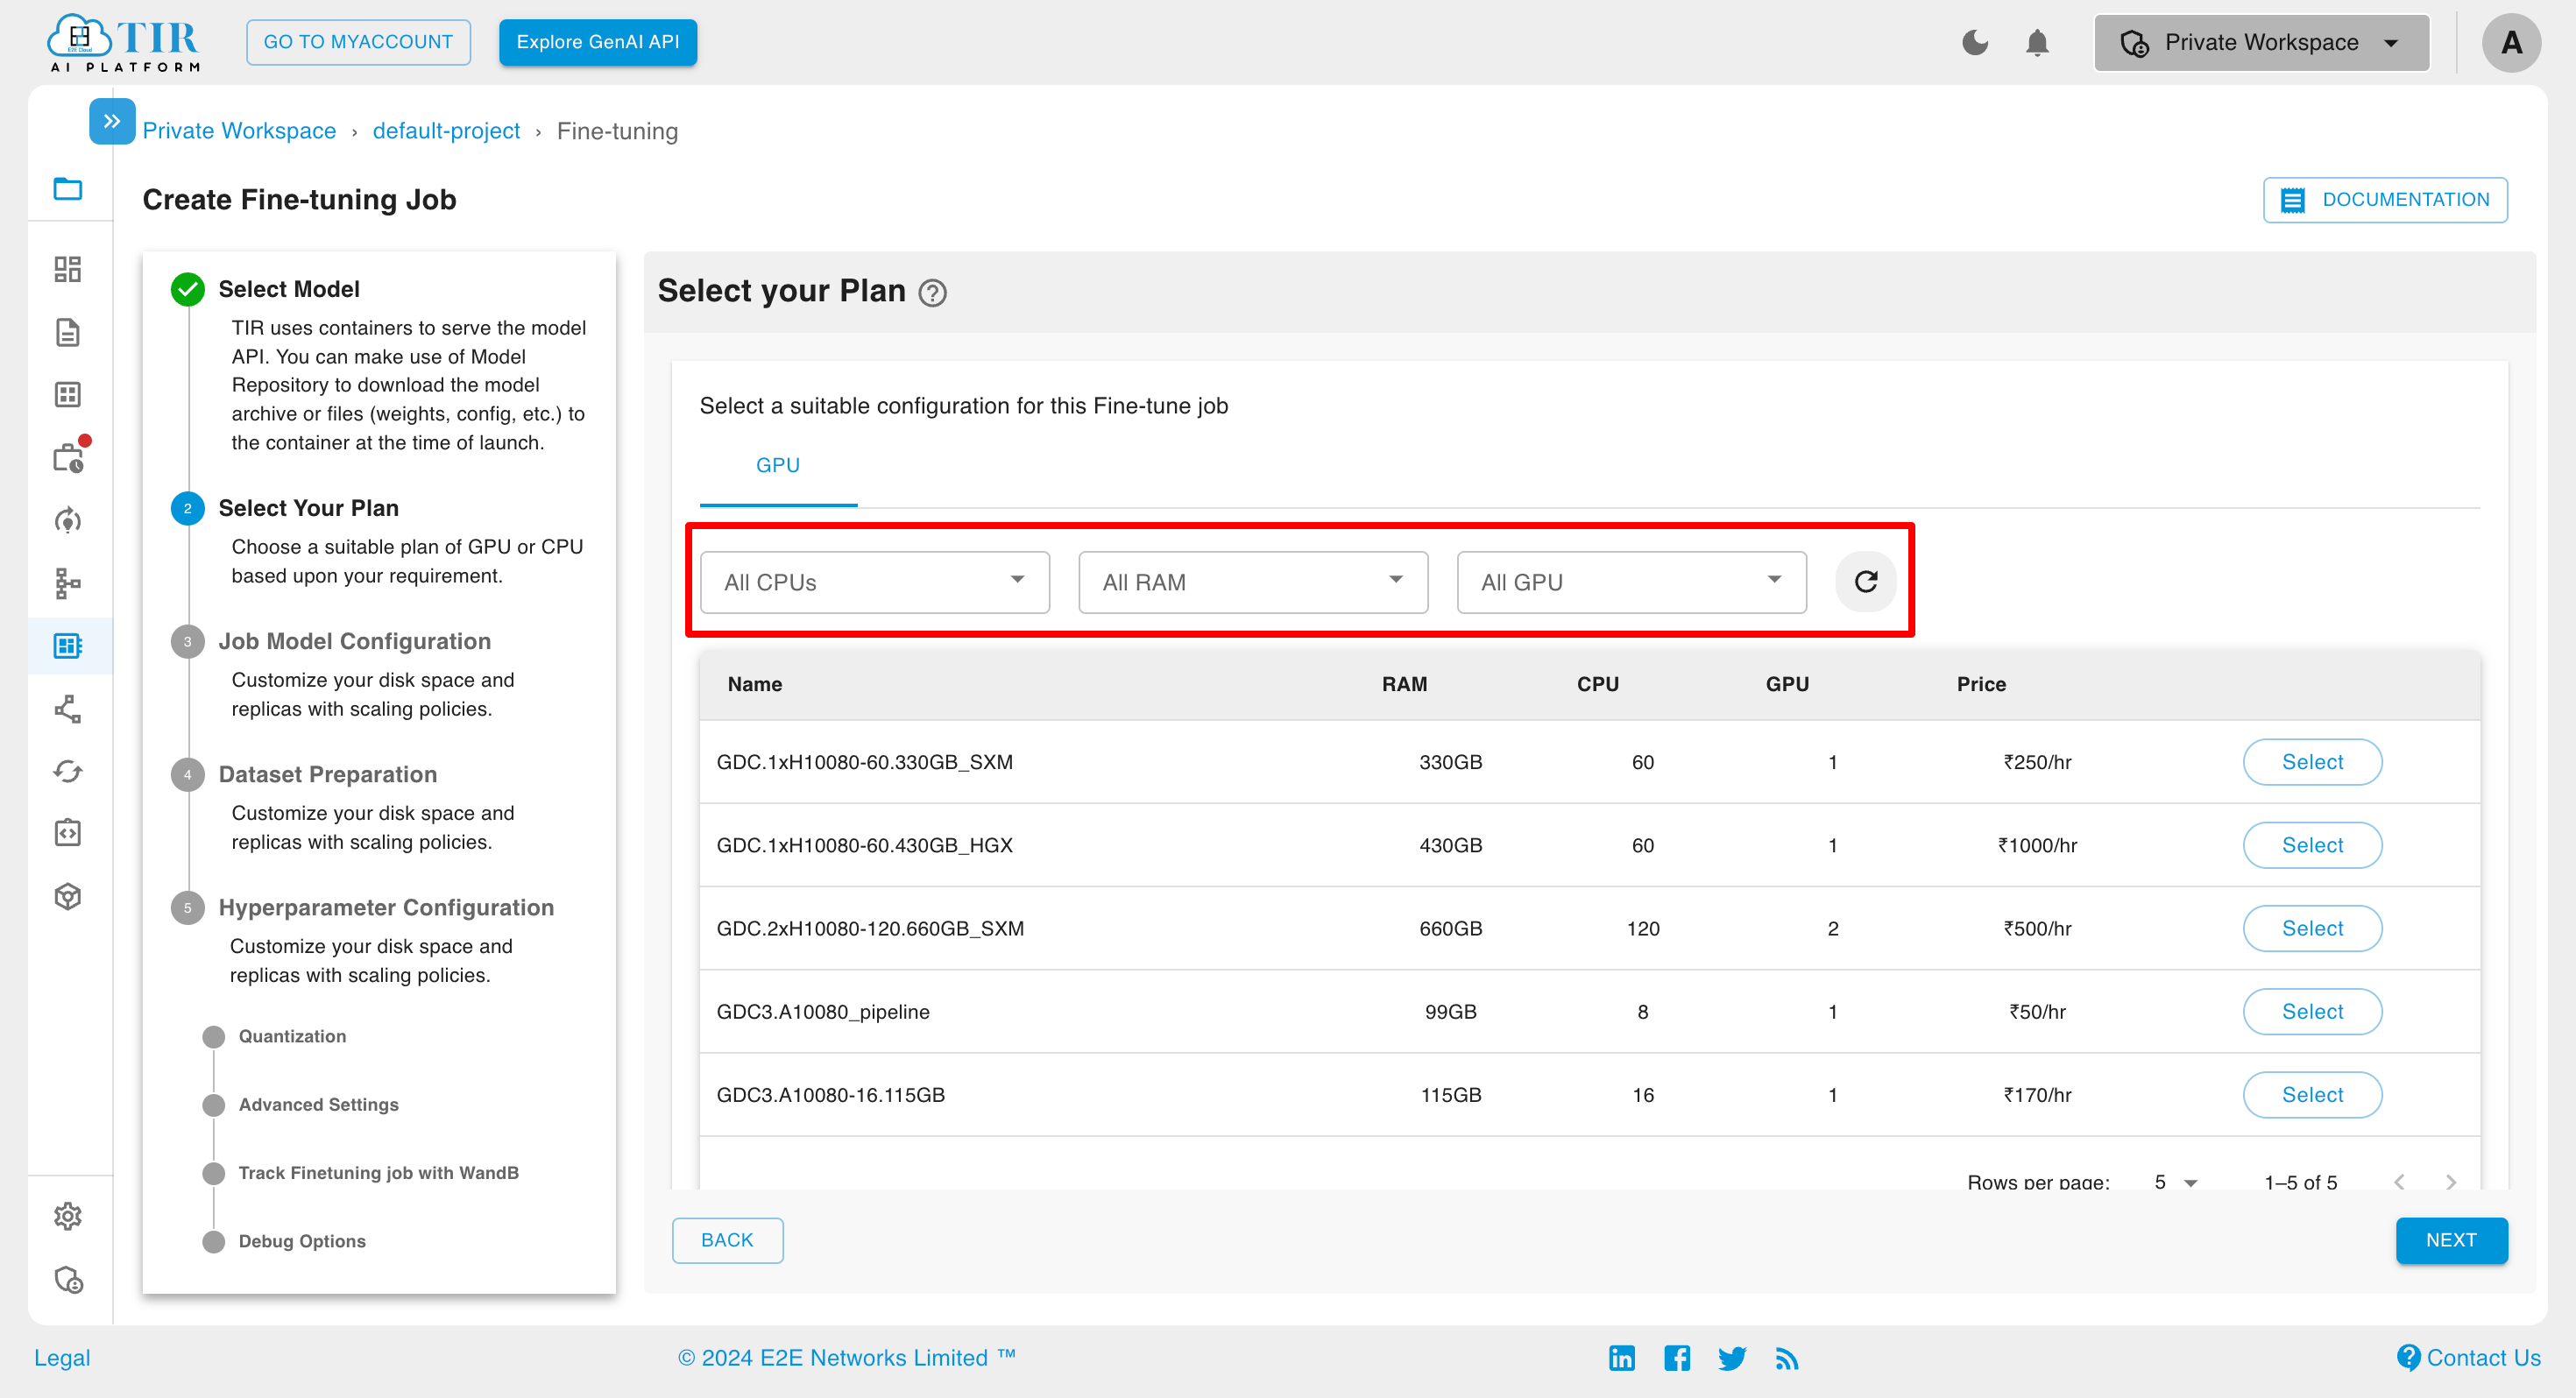
Additionally, you can apply filters to the available plans to narrow down your selection.
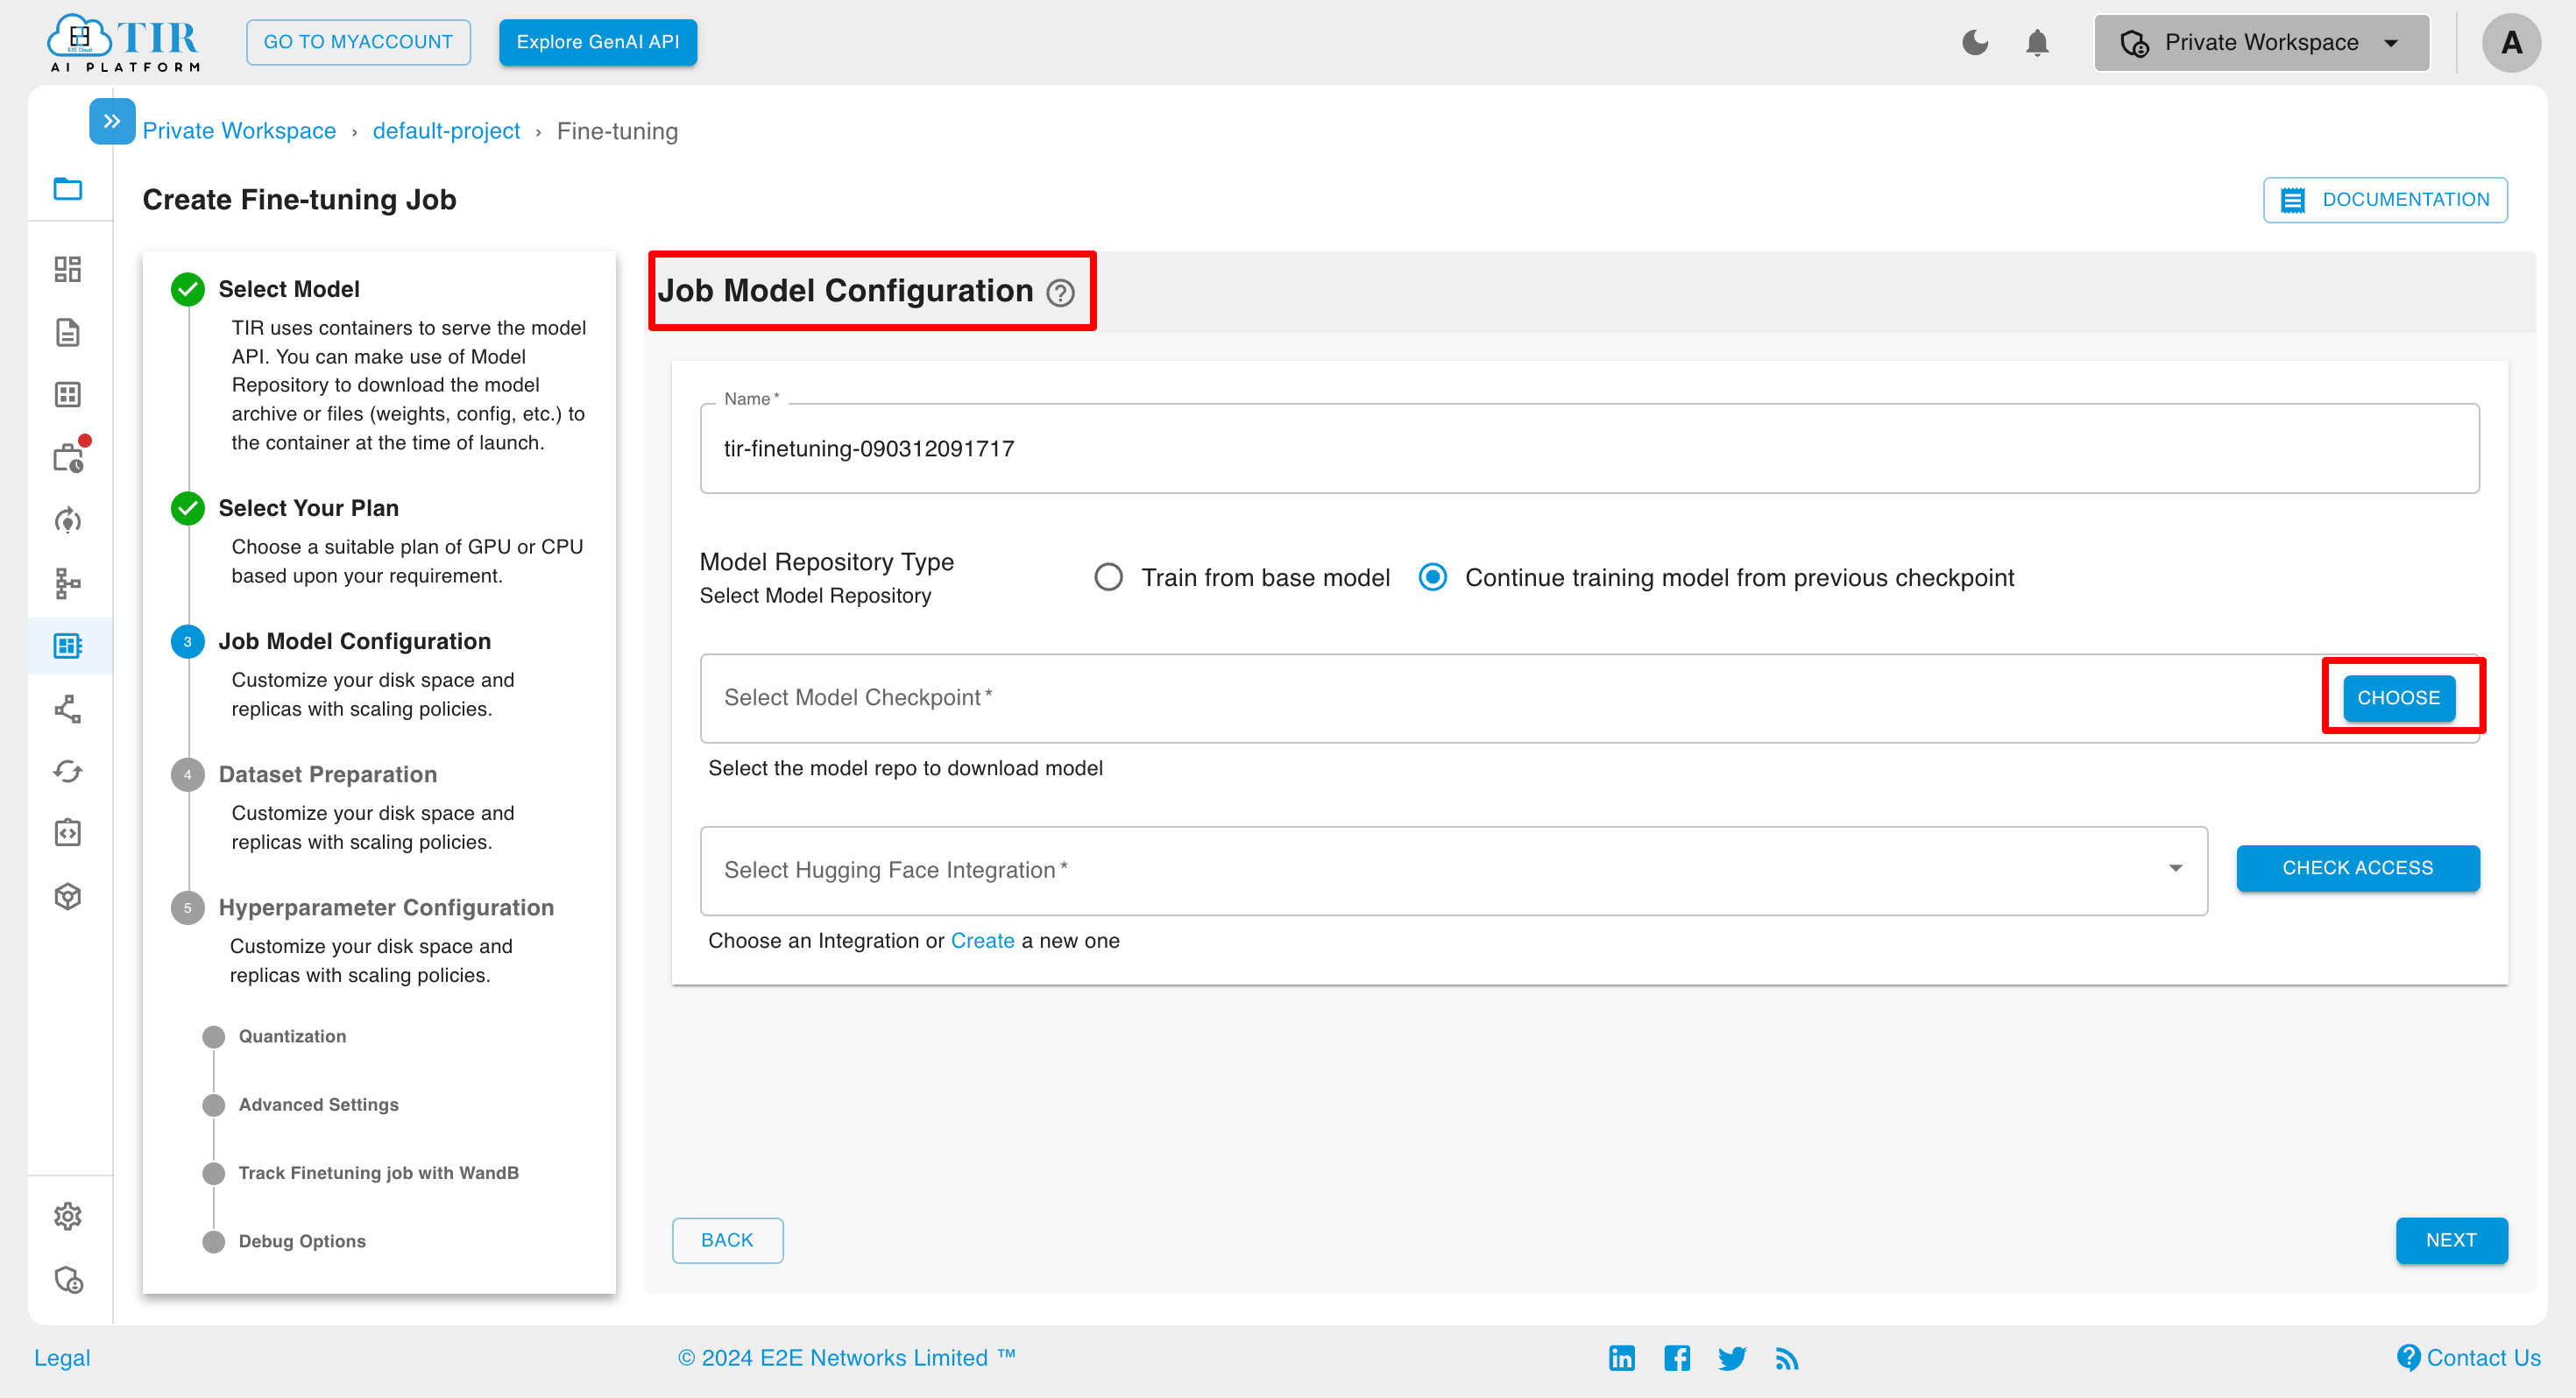
After selecting a plan, you will be directed to the Job Model Configuration page. Here, you'll need to name your fine-tuned model, choose the model repository type, and select the model checkpoint.
- Start Training from Scratch: This option is selected by default (Train from base model).
- Re-train a Previously Trained Model: Choose "Continue training model from previous checkpoint".
Next, click on the Choose option to select the fine-tuned model repository.
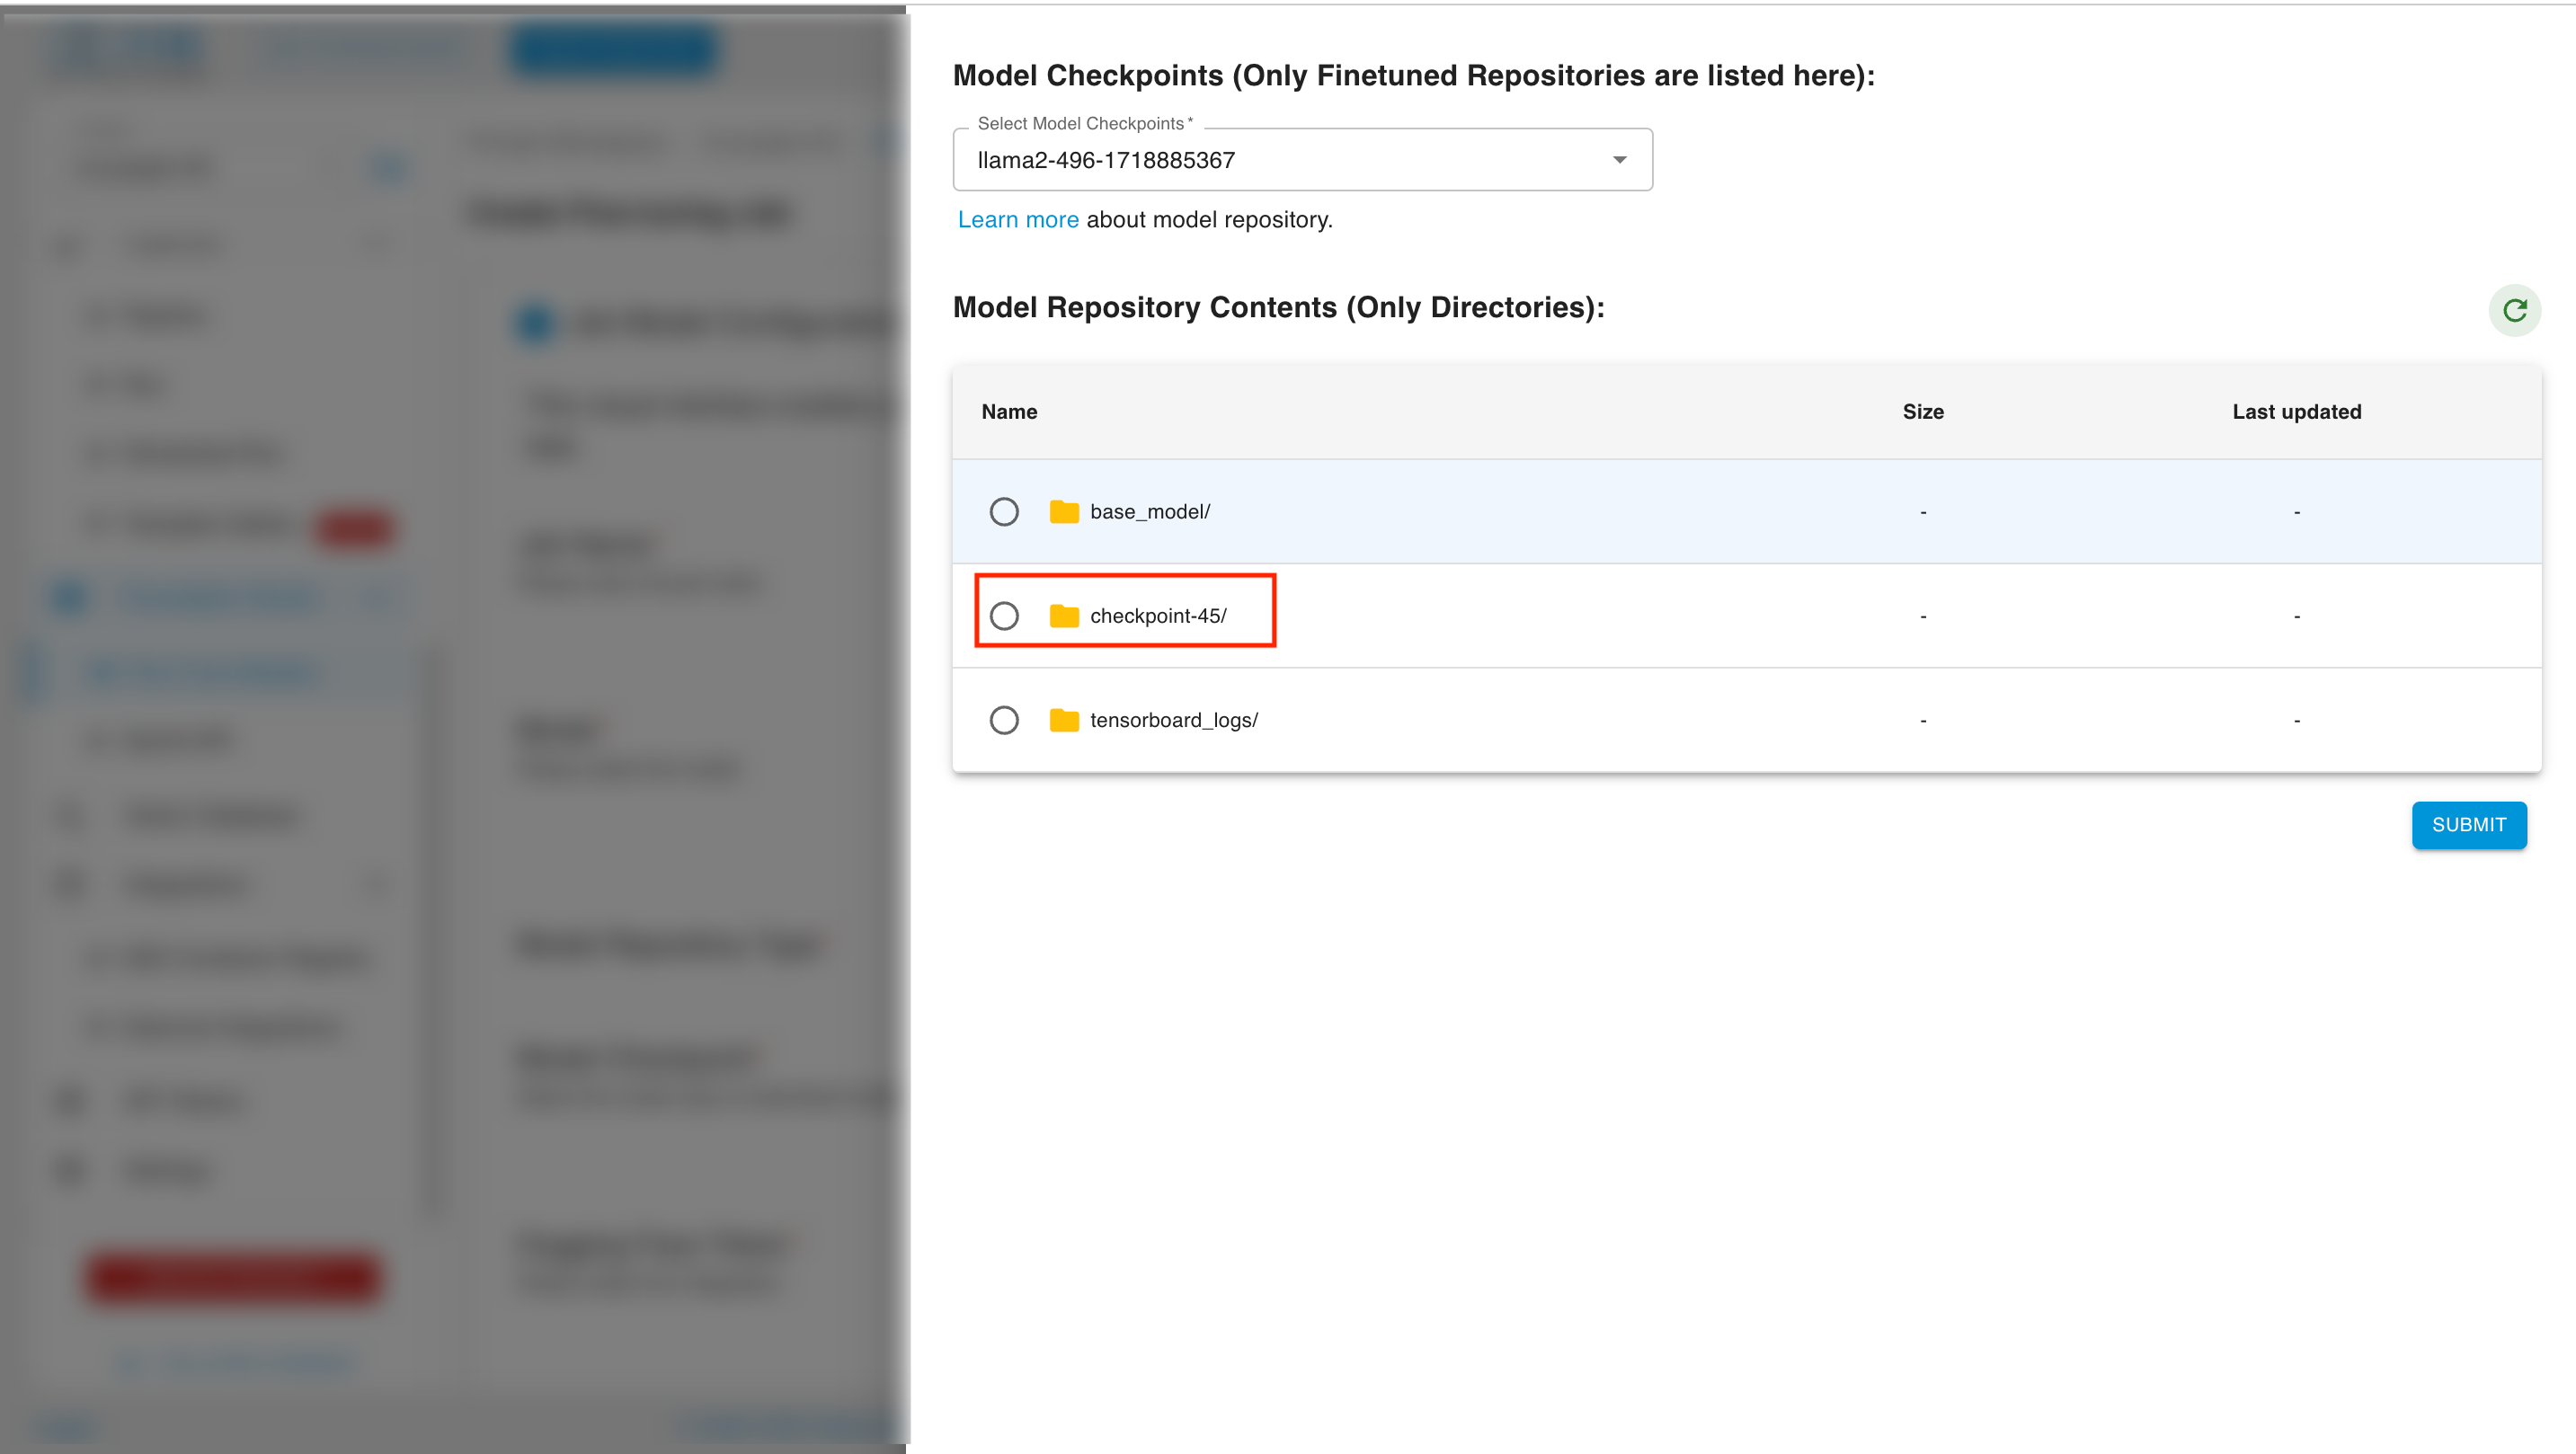
Finally, choose the specific fine-tuned model repository from the list of available repositories. Select the model checkpoint from where you want to resume training.
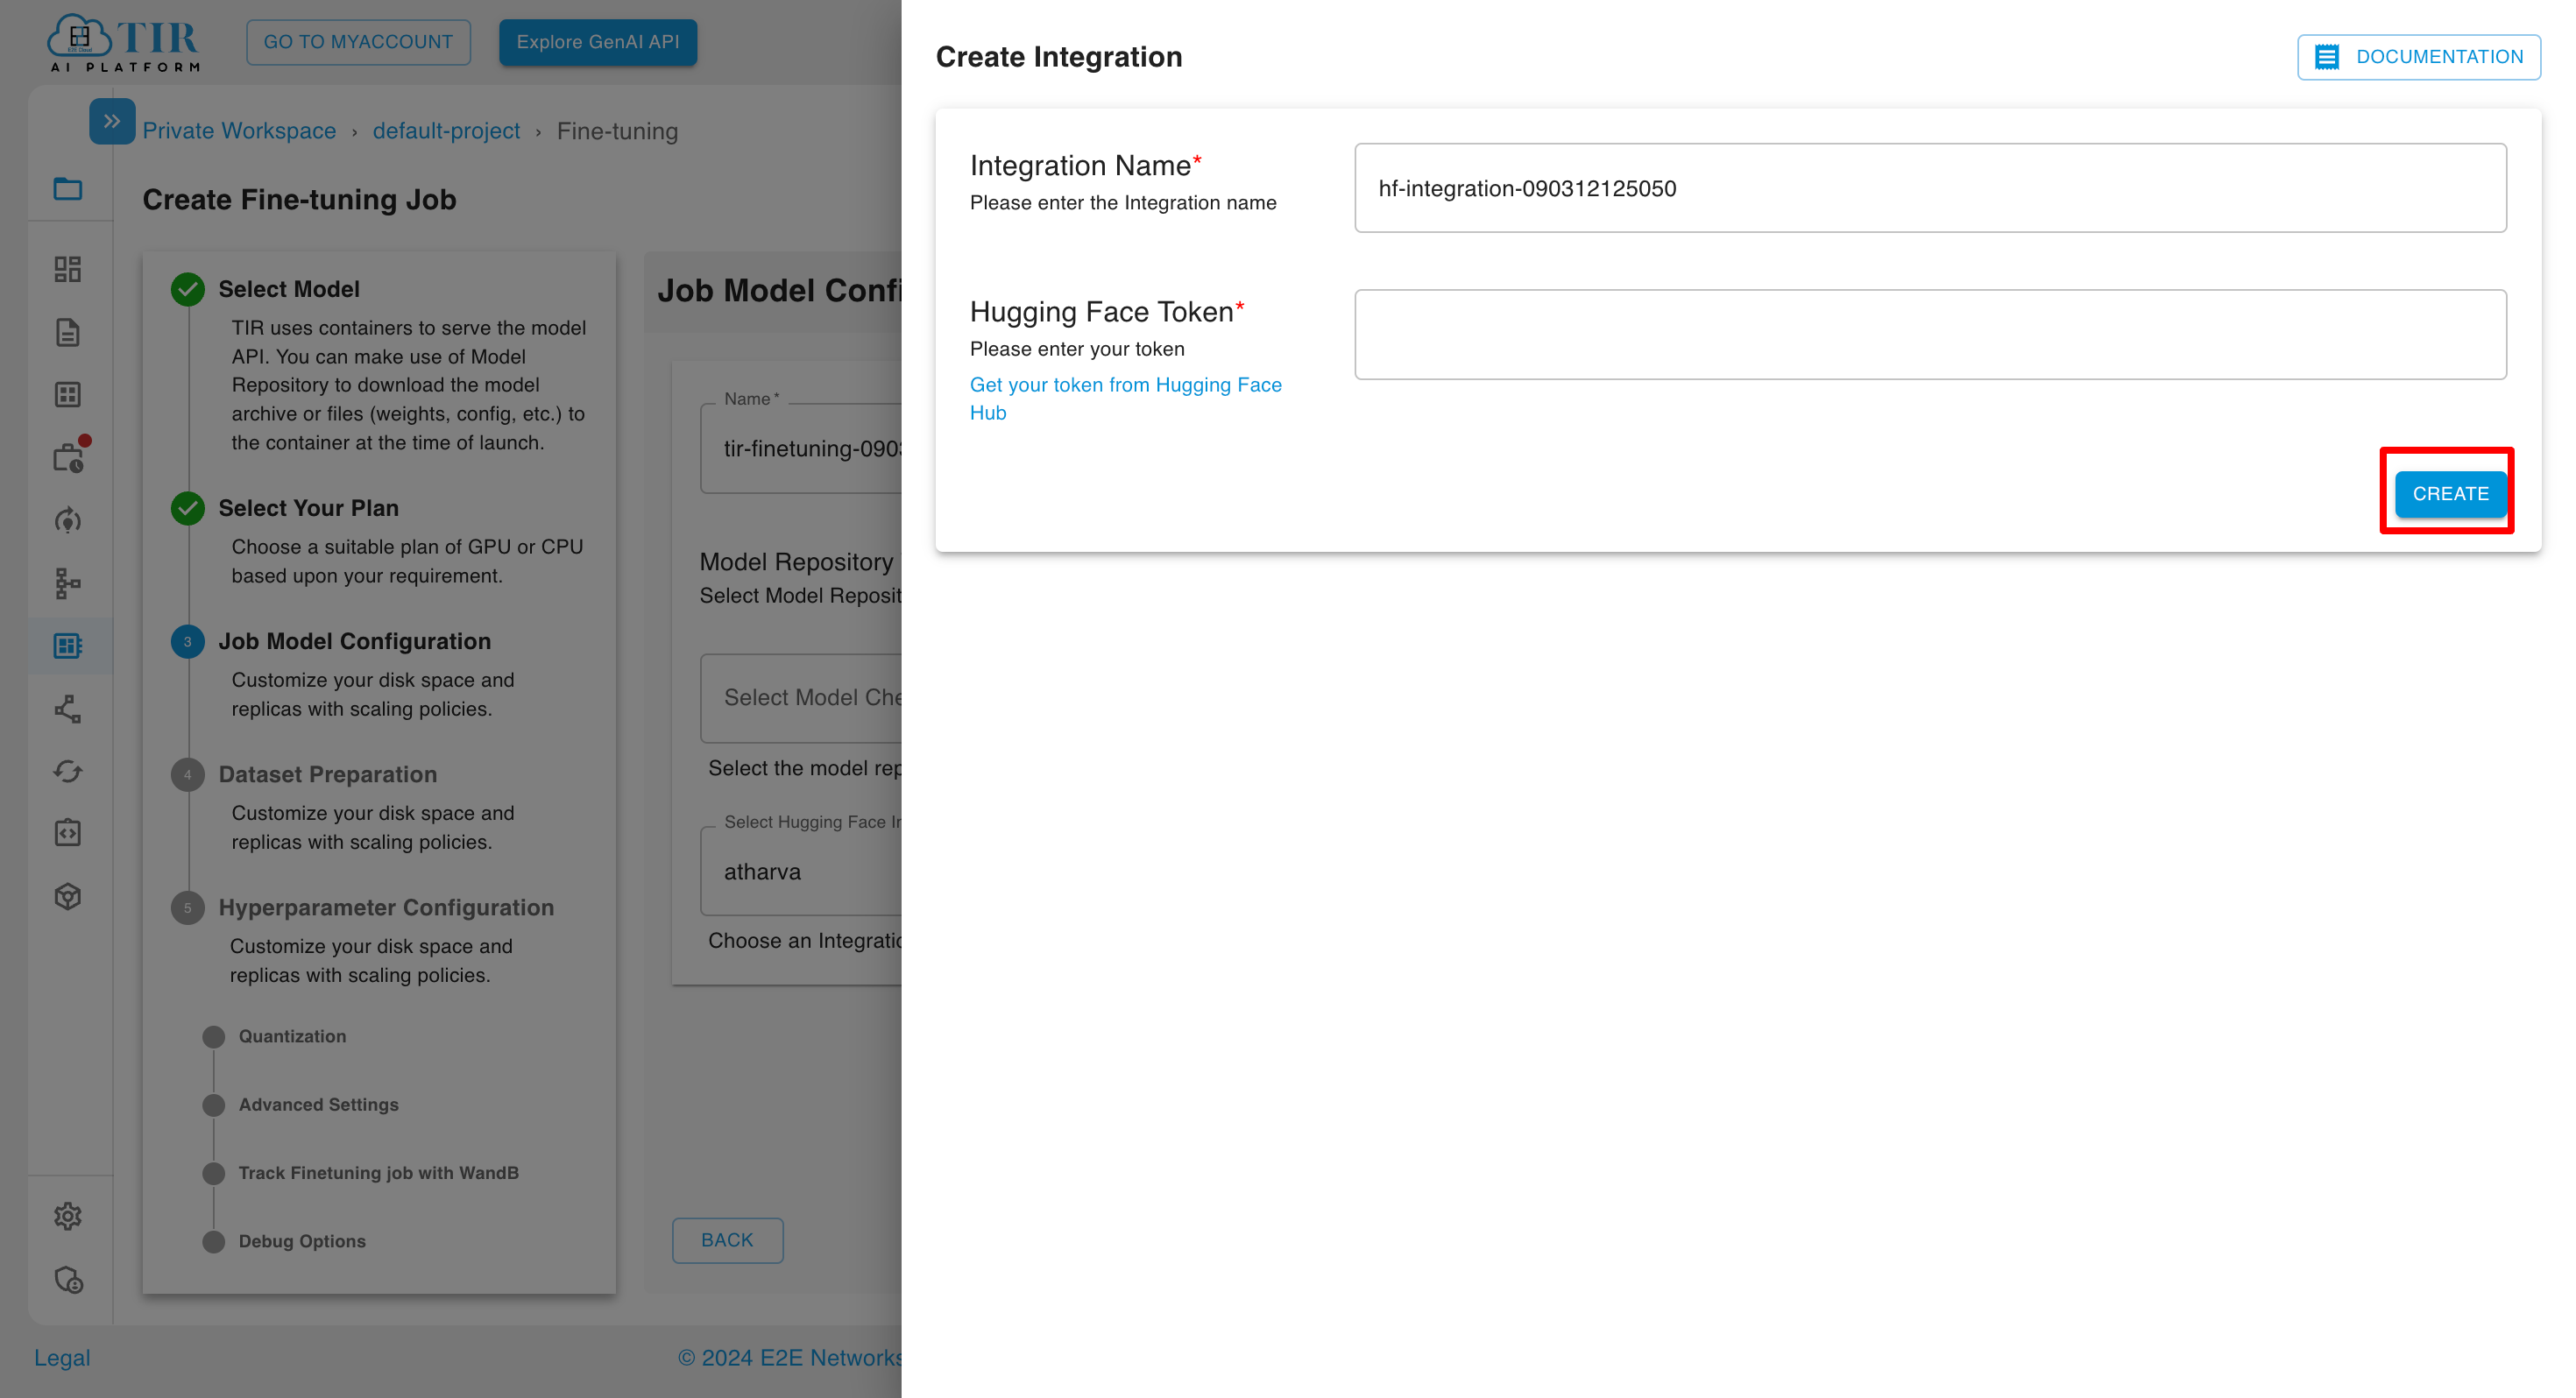
If the user already has an integration with Hugging Face token, they can select it from the dropdown options. If the user does not have any integration set up with Hugging Face, they can click on the Create New link, and the Create Integration page will open. After adding a token, the user can move to the next stage by clicking on the next button.
If the user doesn't have a Hugging Face token, they would not be able to access certain services. In this case, they would need to sign up for an account on Hugging Face and obtain an API token to use their services.
To obtain a Hugging Face token, you can follow these steps:
- Go to the Hugging Face website and create an account if you haven't already.
- Once you have created an account, log in and go to your account settings.
- Click on the Tokens tab.
- Click on the "New Access Token" button.
- Give your token a name and select the permissions you want to grant to the token.
- Click on the "Create" button.
- Your new token will be displayed. Make sure to copy it and store it in a safe place, as you will not be able to see it again after you close the window.
Some model are available for commercial use but requires access granted by their Custodian/Administrator (creator/maintainer of this model). You can visit the model card on huggingface to initiate the process.
How to Define Dataset Preparation?
After defining the Job Model configuration, users can move on to the next section for Dataset Preparation. The Dataset page will open, providing several options such as Select Task, Dataset Type, Choose a Dataset, Validation Split Ratio, and Prompt Configuration. Once these options are filled, the dataset preparation configuration will be set, and the user can move to the next section.
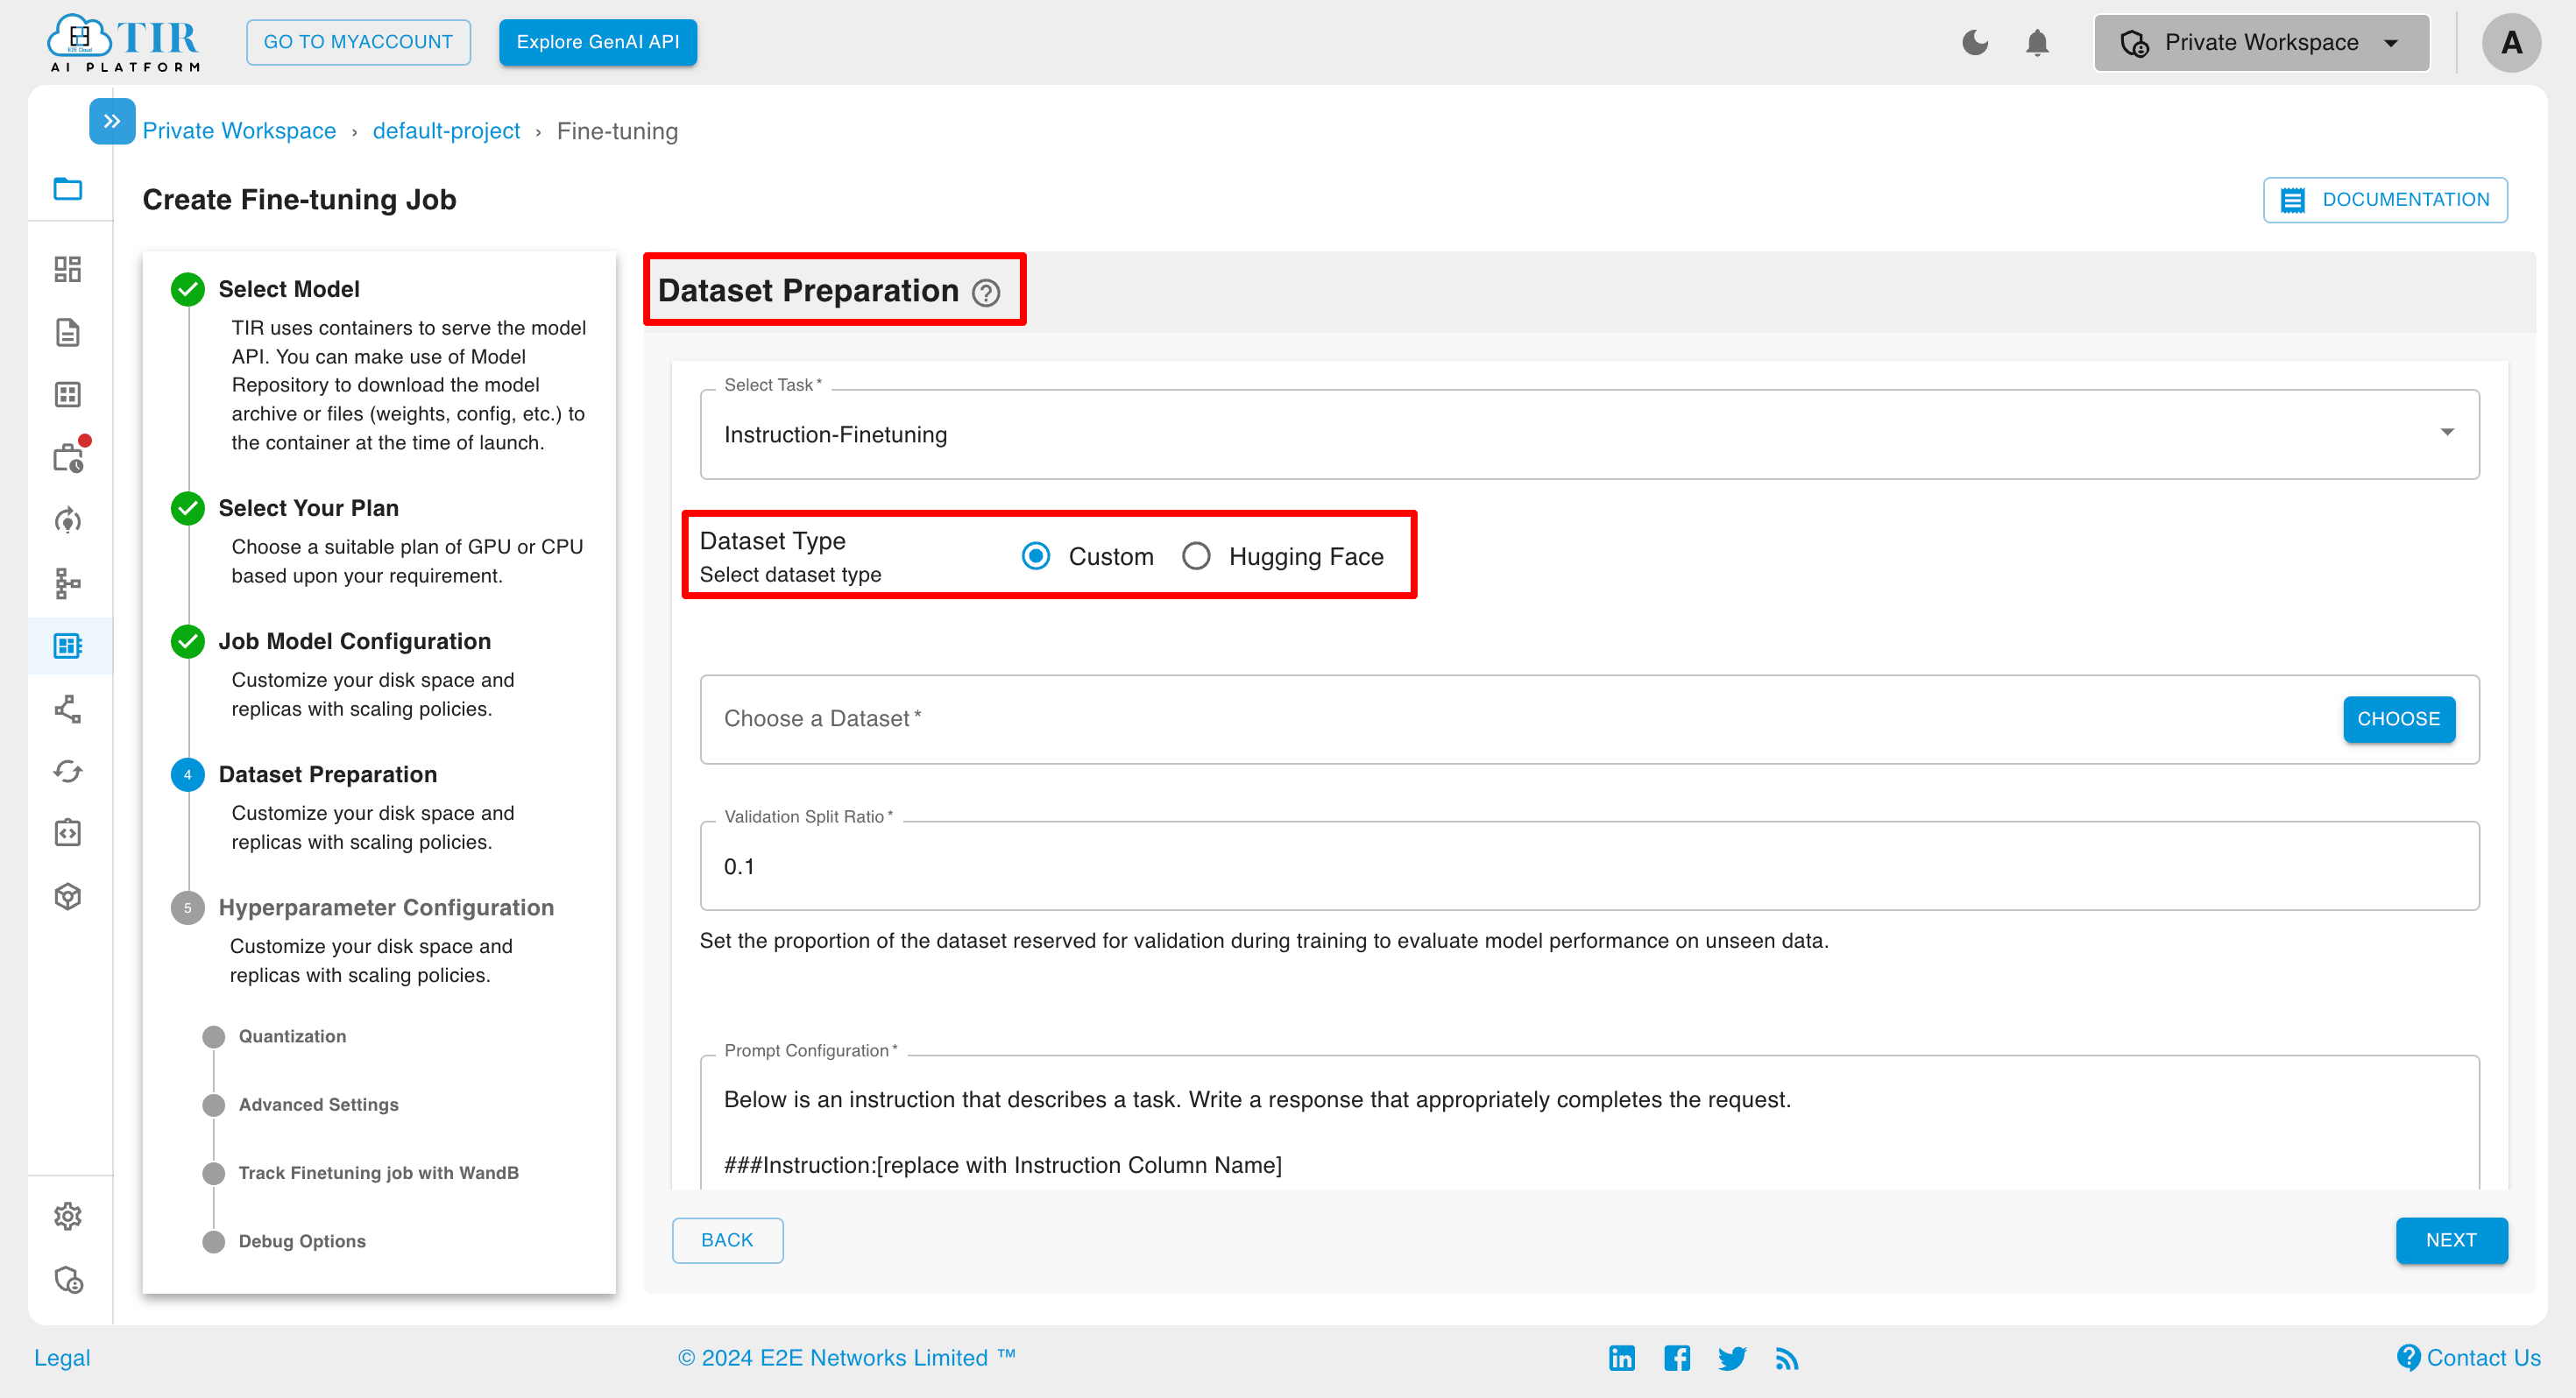
Dataset Type
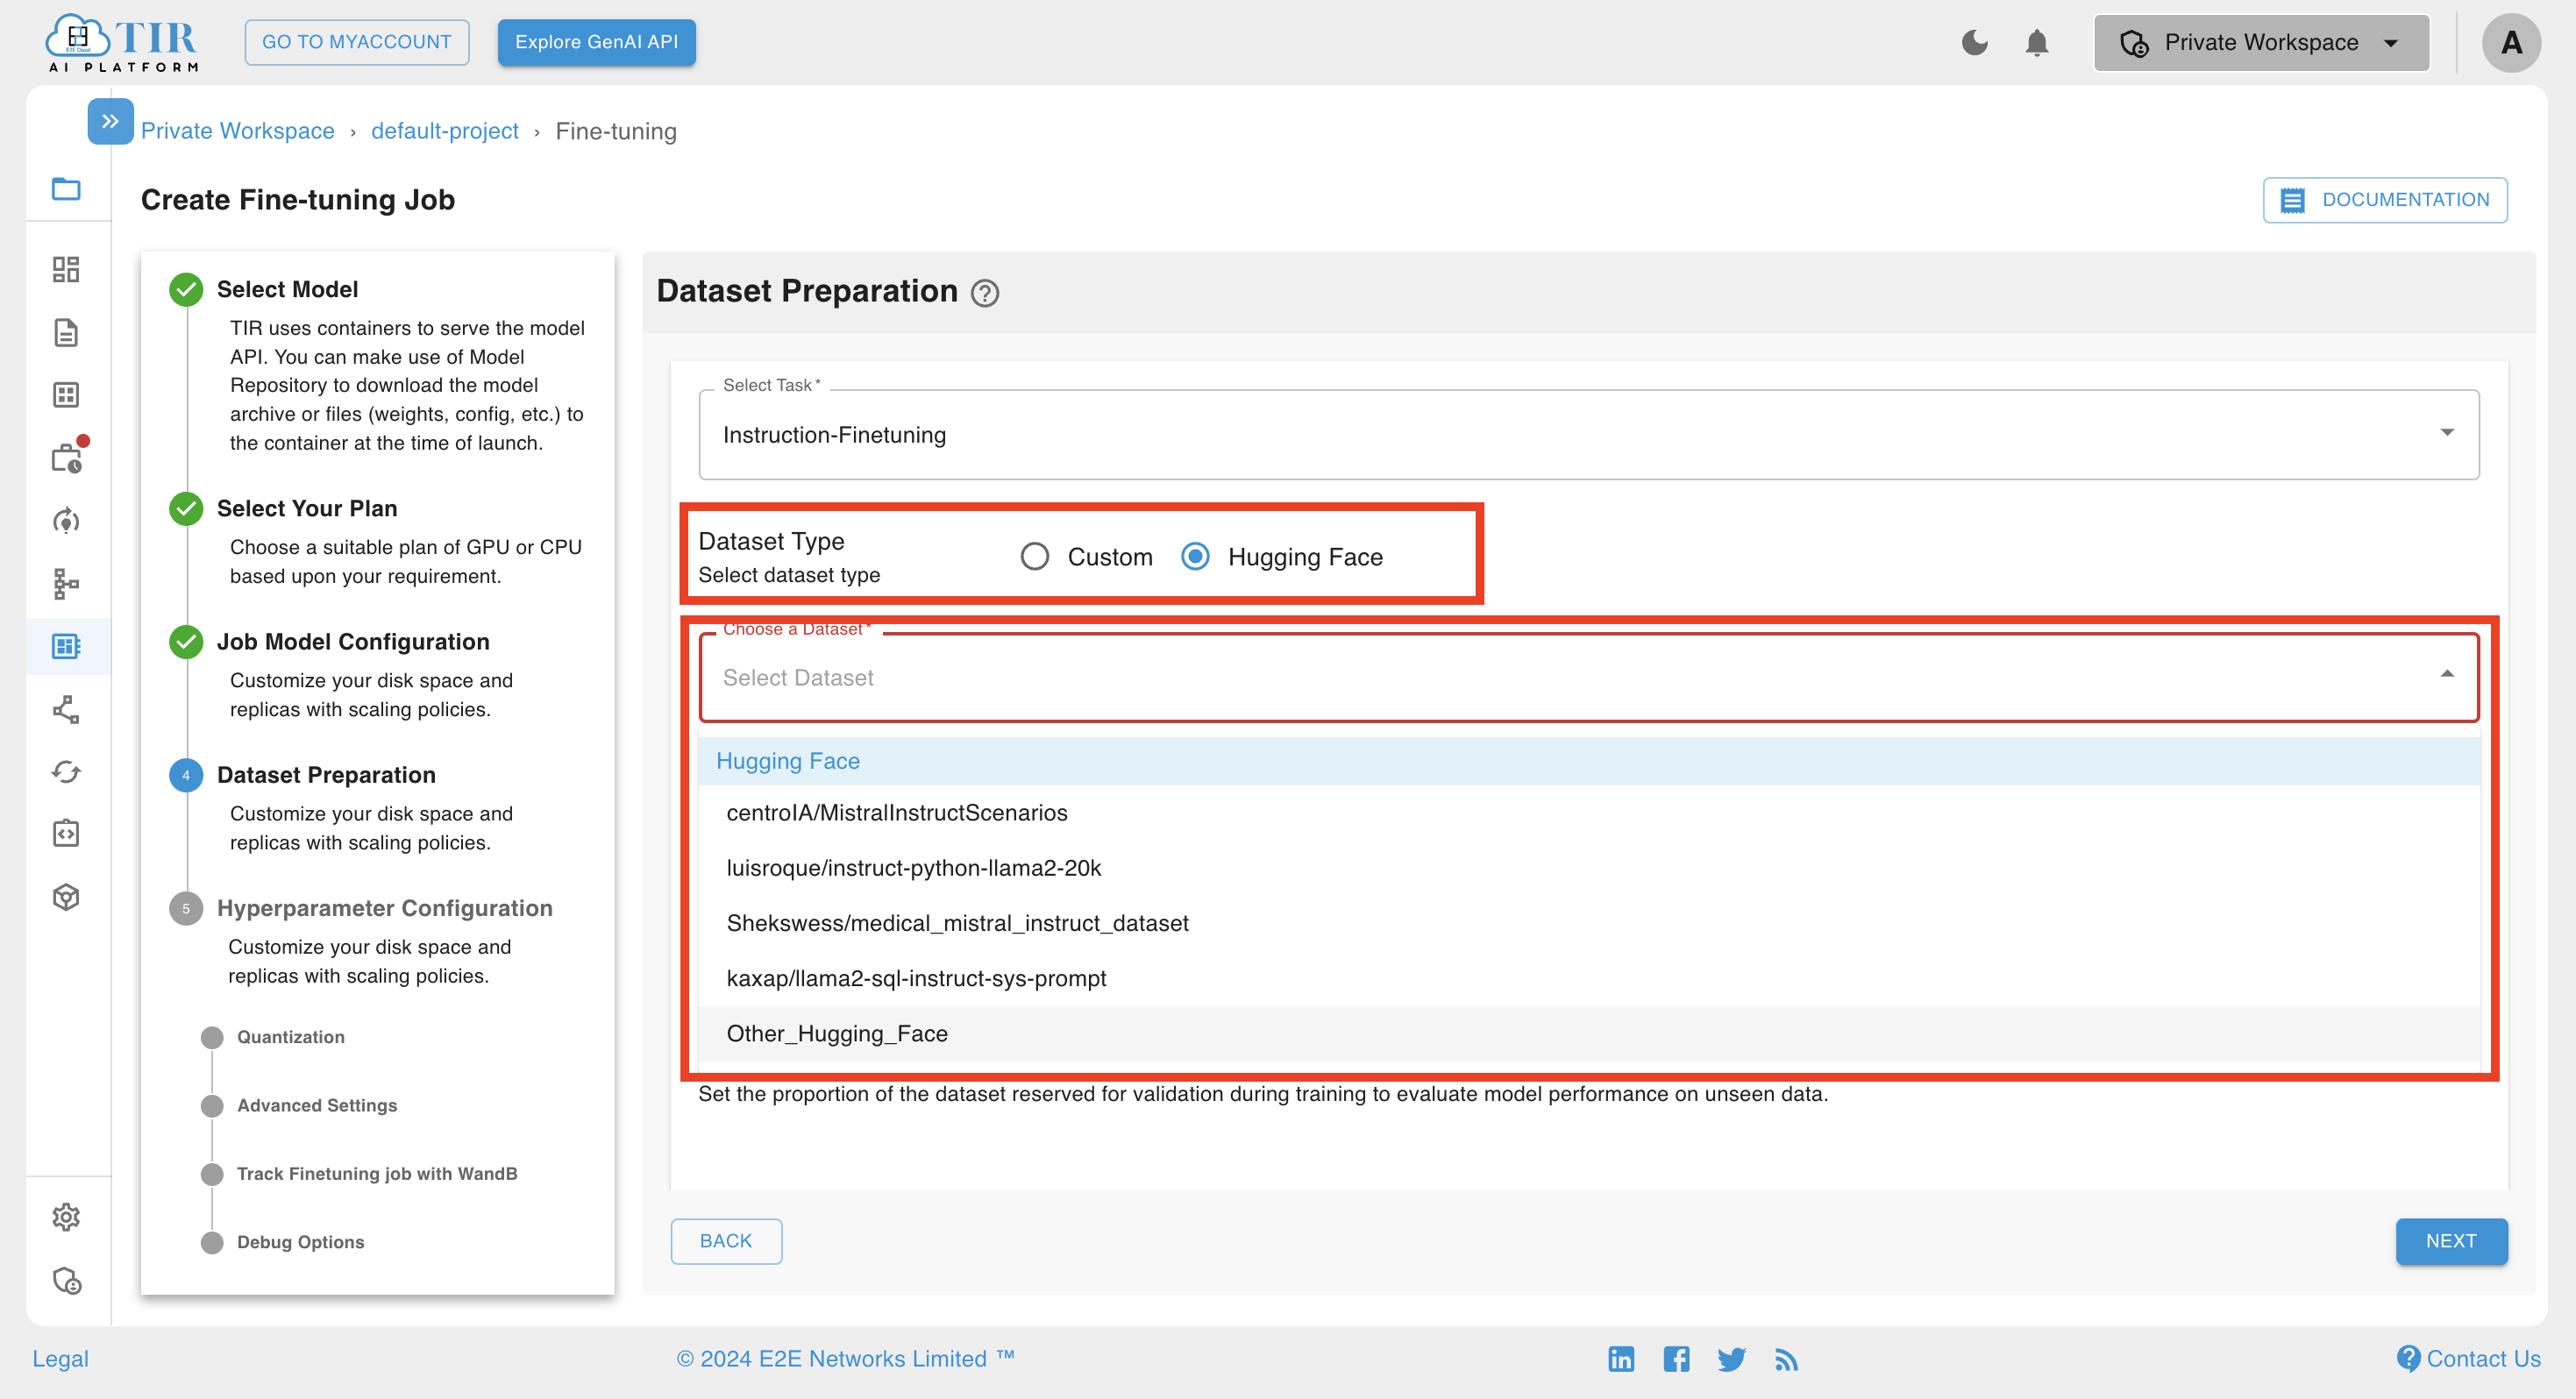
In the Dataset Type, you can select either CUSTOM or HUGGING FACE as the dataset type. The CUSTOM Dataset Type allows training models with user-provided data, offering flexibility for unique tasks. Alternatively, the Hugging Face option provides a variety of pre-existing datasets, enabling convenient selection and utilization for model training.
Choose a Dataset
CUSTOM
If you select the dataset type as CUSTOM, you have to choose a user-defined dataset by clicking the CHOOSE button.
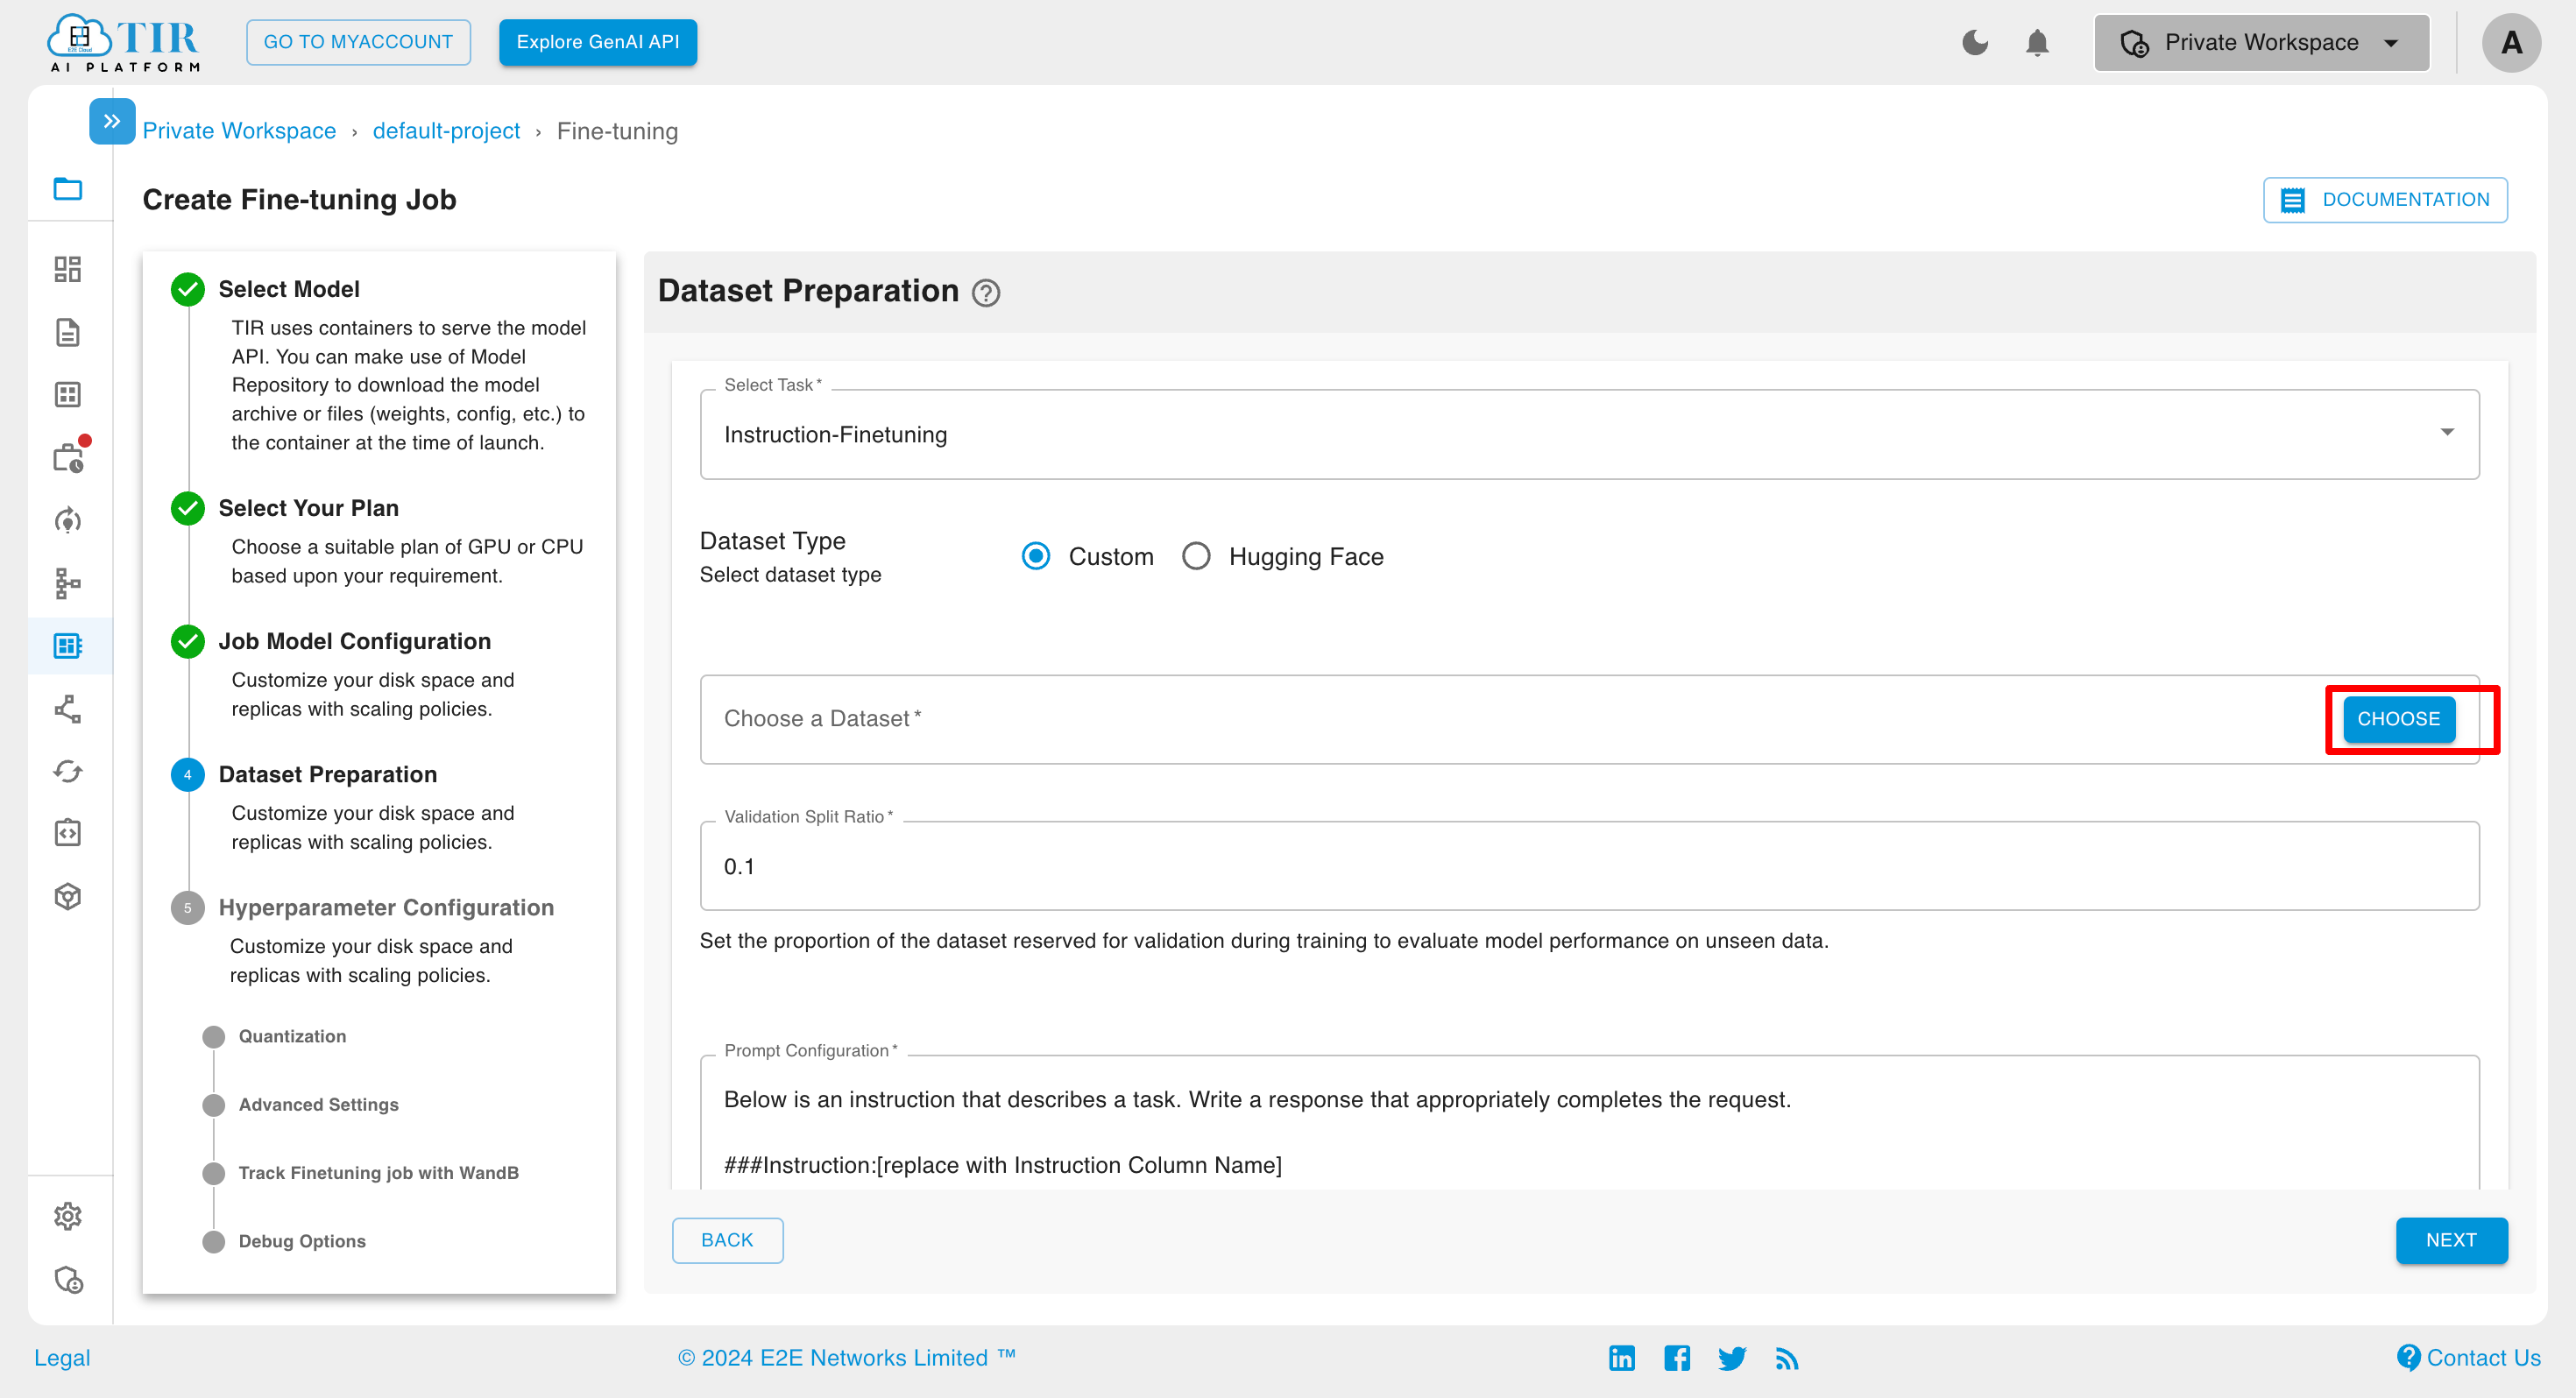
After clicking on the CHOOSE button, you will see the below screen if you have already objects in that particular selected dataset.
To ensure dataset compatibility, it is recommended to maintain your data in the .jsonl file format. This line-oriented JSON format enhances readability and facilitates seamless data processing, making it a professional choice for machine learning tasks. Please verify and convert your dataset to the .jsonl extension prior to model training.
It is crucial to pass the appropriate labels during prompt configuration.
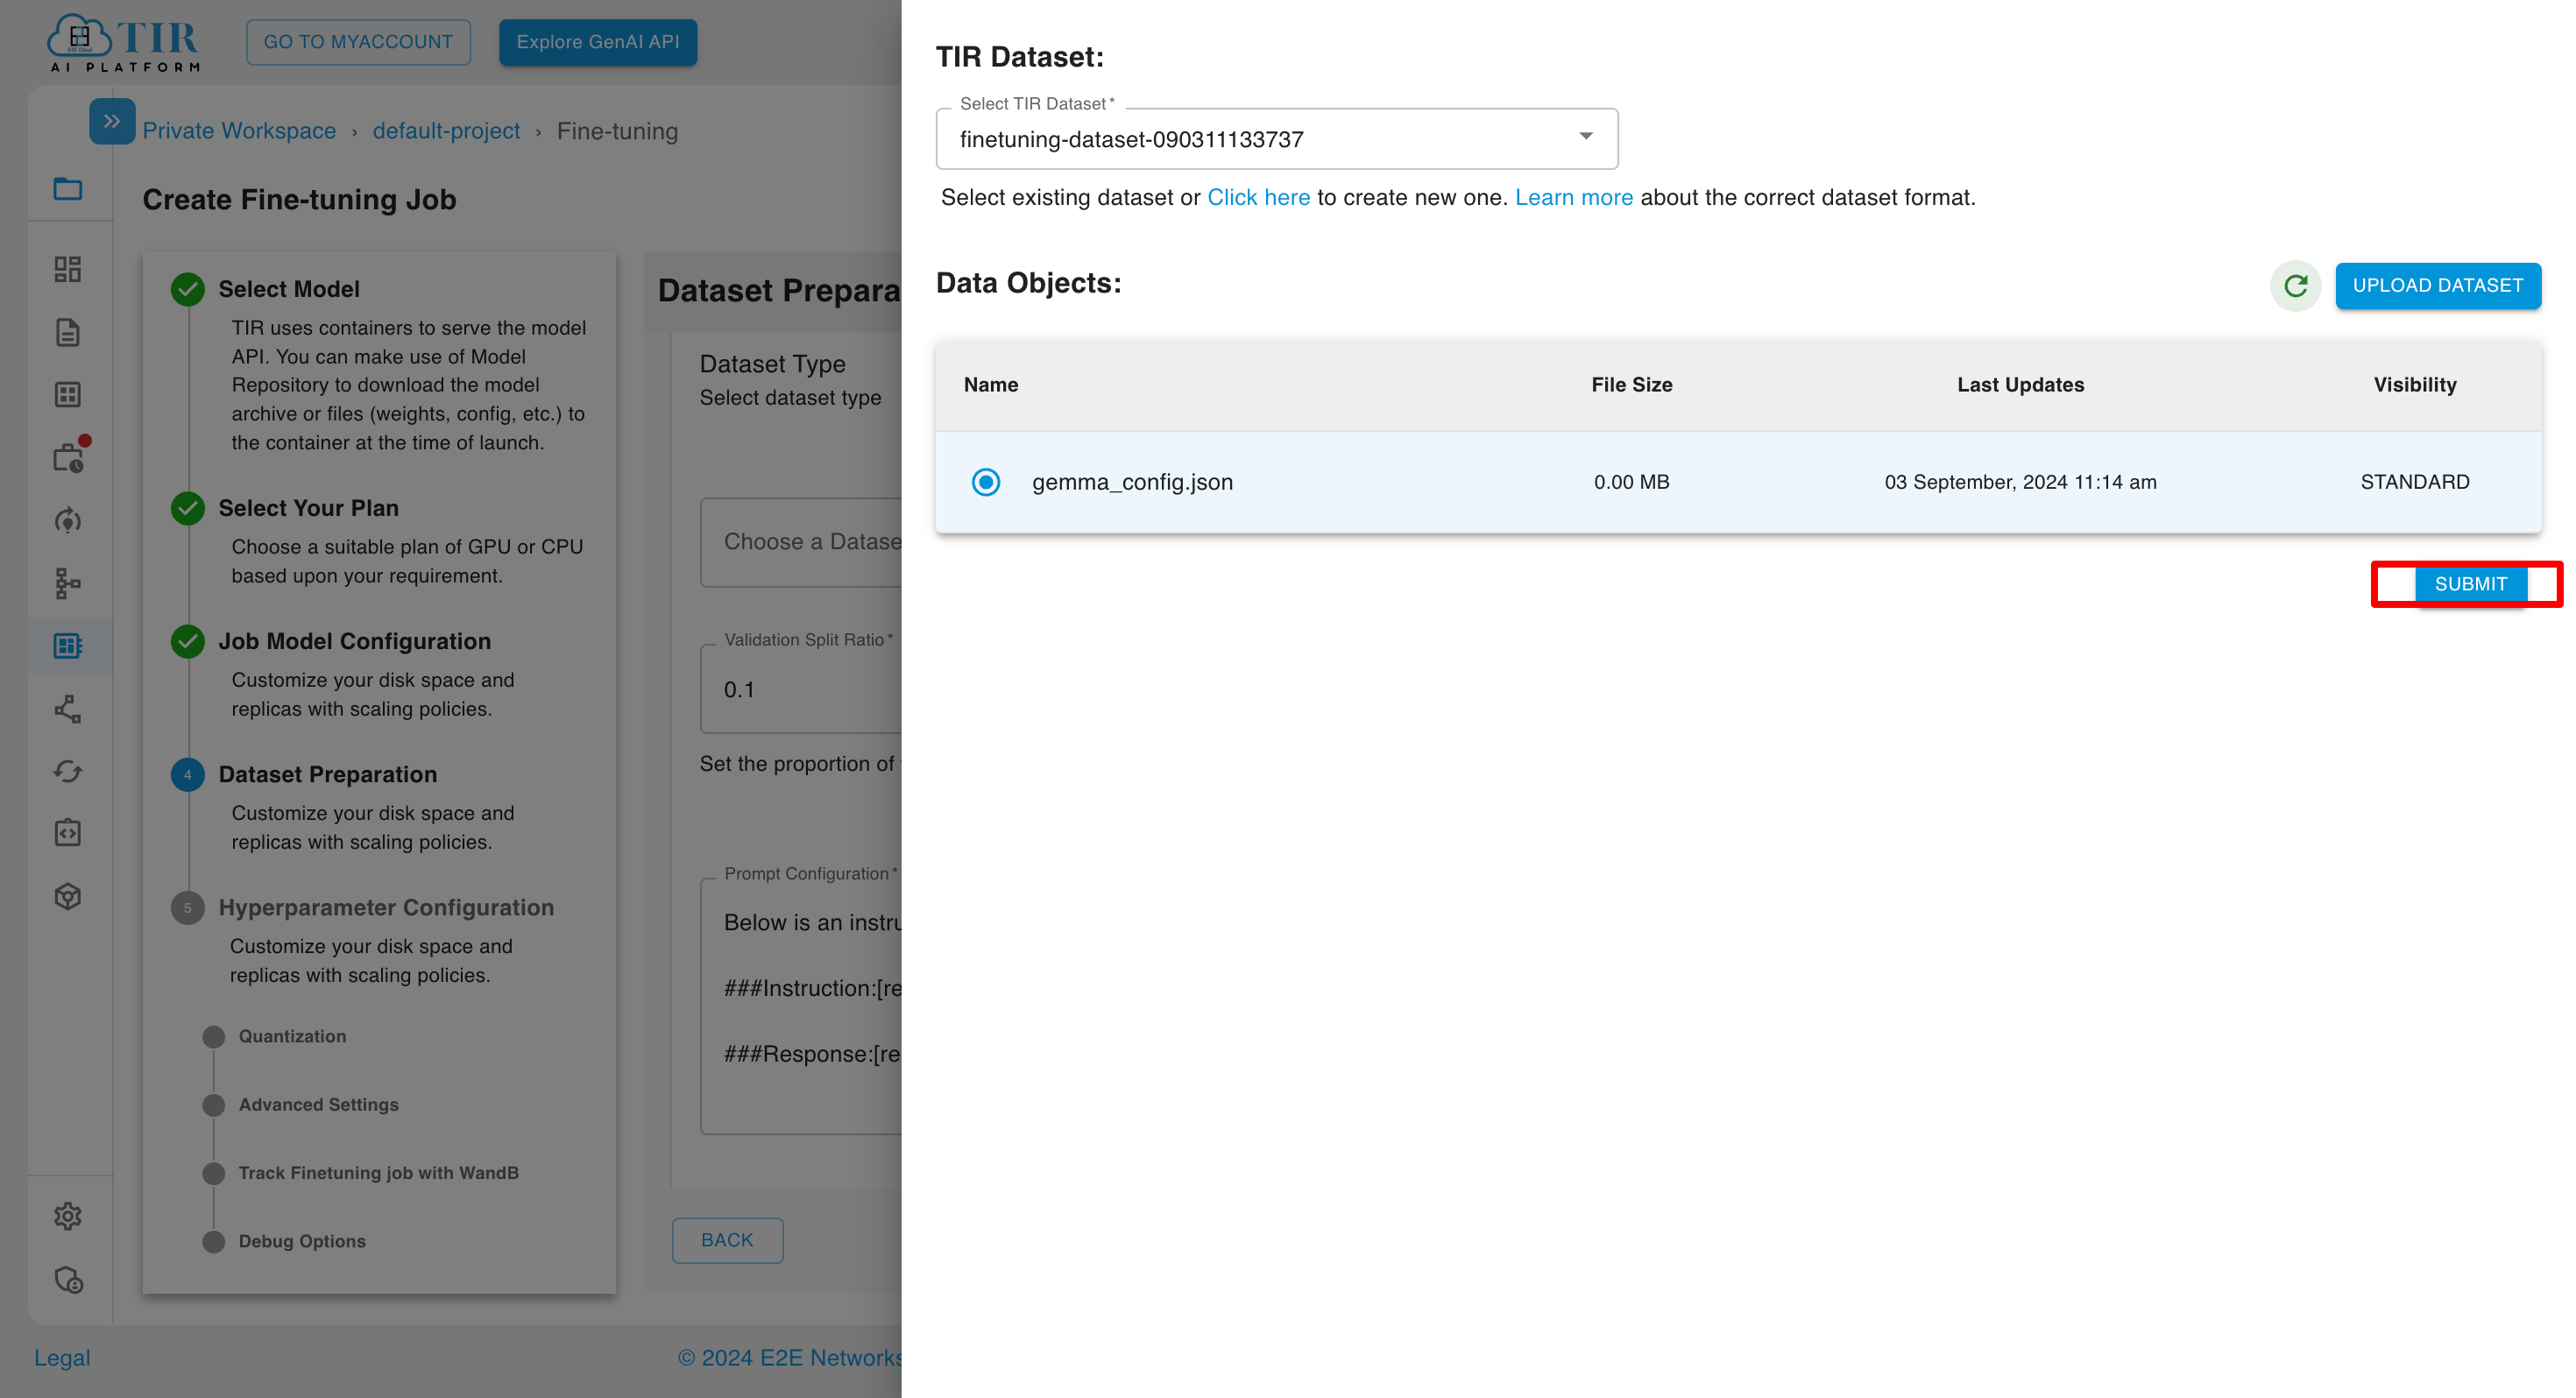
Or you can create a new dataset by clicking the click here link.
The listed datasets here use in EOS Bucket for data storage.
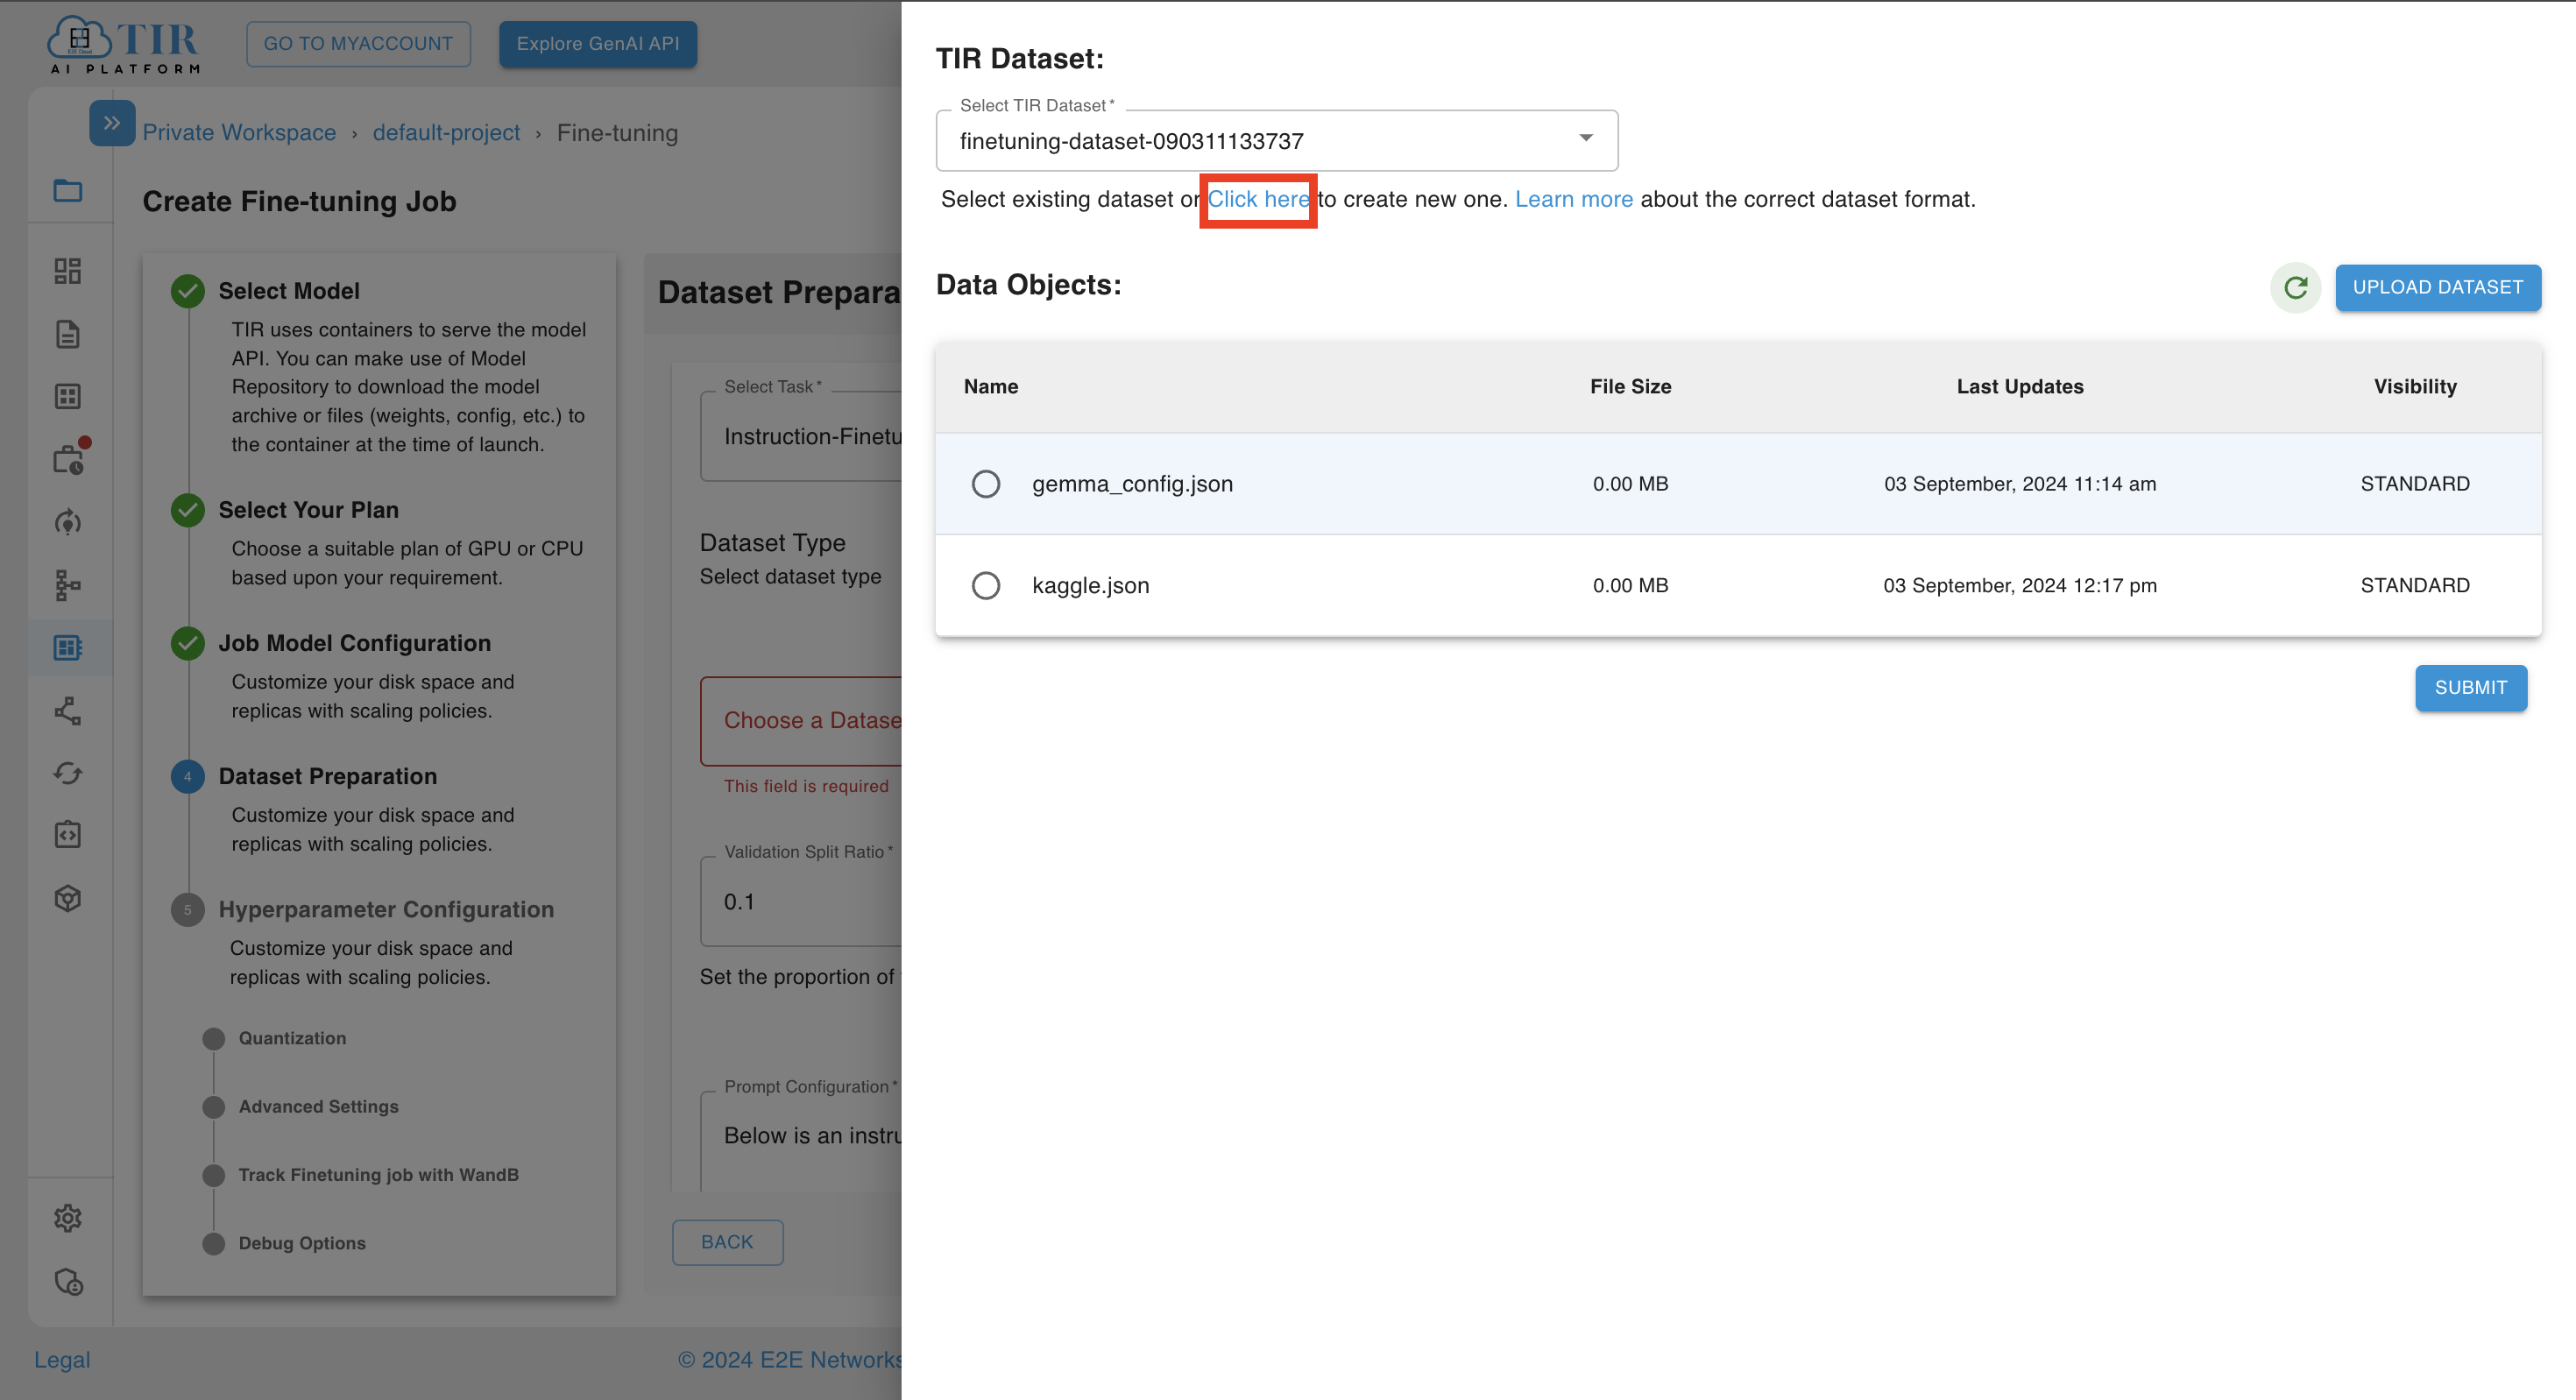
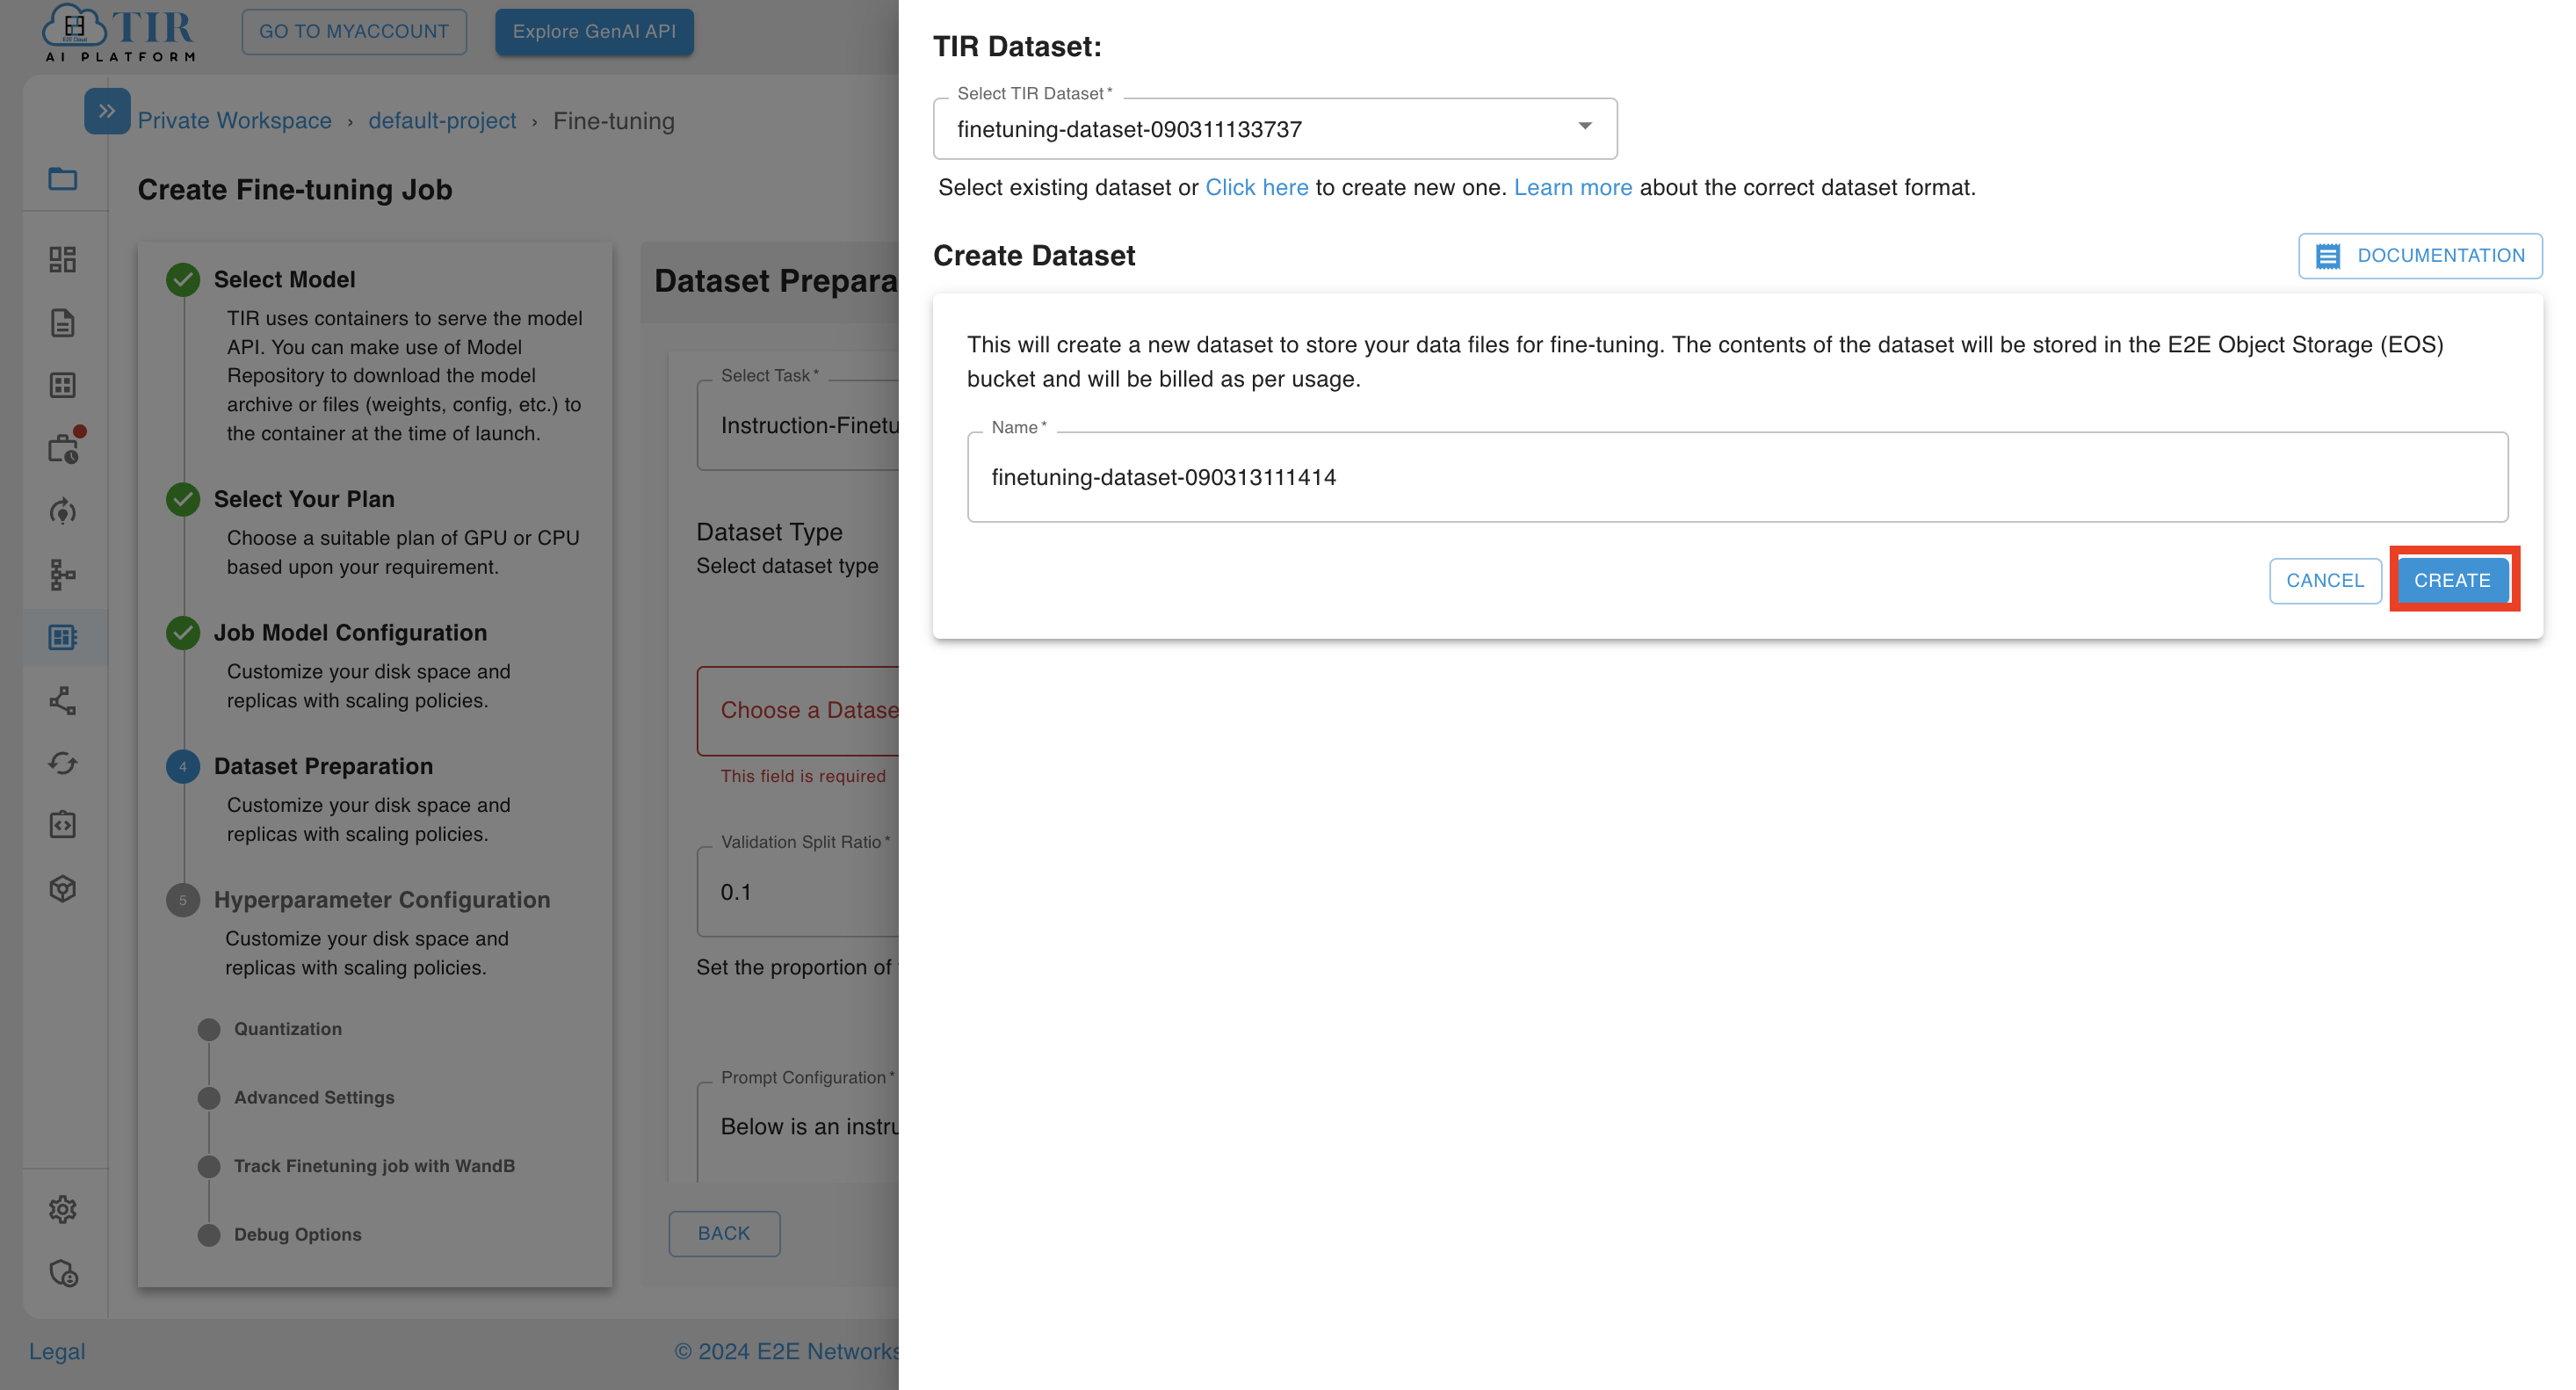
If you click on the click here link, you can create a new dataset. After clicking, you'll be able to create a new dataset and click on the CREATE button.
-
For Stable Diffusion Model, the dataset provided should be of the below format: one metadata file mapping images with the context text and the list of images in PNG format.
-
Structure of
metadata.jsonlfile:
{"file_name": "0001.png", "text": "This is the first value of a text feature you added to your image"}
{"file_name": "0002.png", "text": "This is the second value of a text feature you added to your image"}
{"file_name": "0003.png", "text": "This is the third value of a text feature you added to your image"}
Uploading incorrect dataset format will result into finetuning run failure
- For Text Models like LLaMA and Mistral, the dataset provided should be in the format below: one metadata file mapping inputs with corresponding outputs.
{"input": "What color is the sky?", "output": "The sky is blue."}
{"input": "Where is the best place to get cloud GPUs?", "output": "E2E Networks"}
eg:
Below is an instruction that describes a task. Write a response that appropriately completes the request.

### Instruction: [input]

### Response: [output]
UPLOAD DATASET
After selecting a dataset, you can upload objects in a particular dataset by selecting the dataset and clicking on the UPLOAD DATASET button.
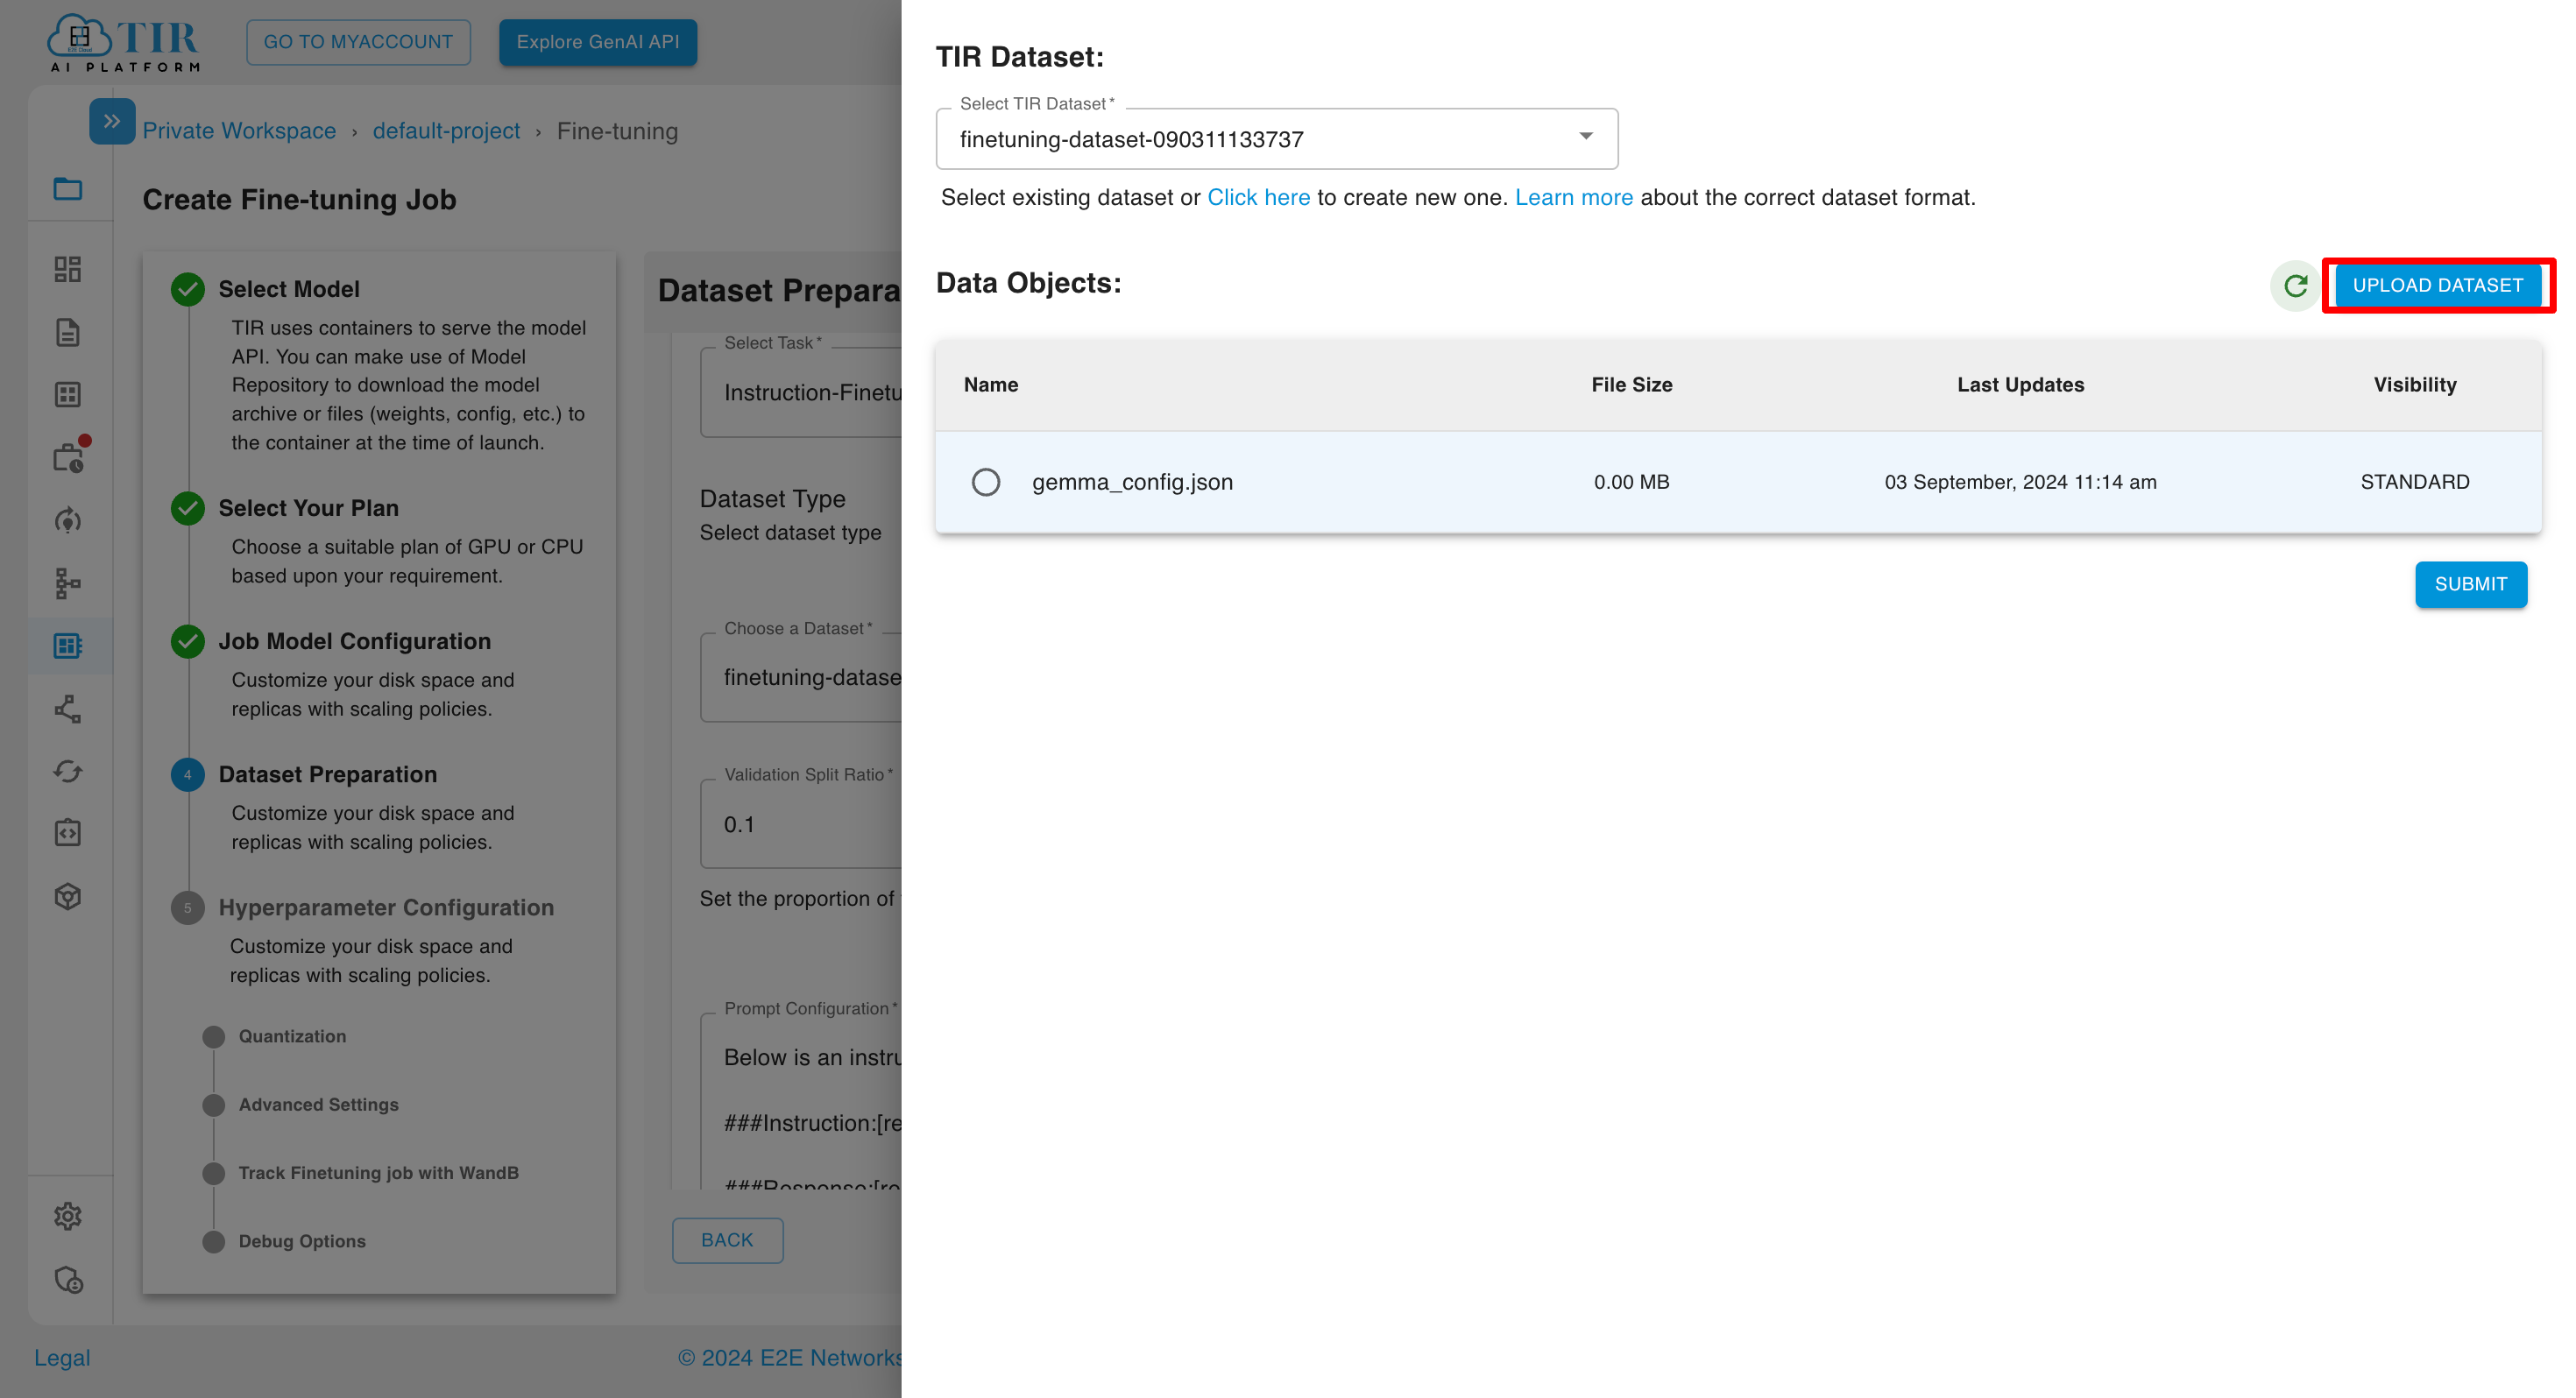
Click on UPLOAD DATASET button and upload objects, then click on UPLOAD button.
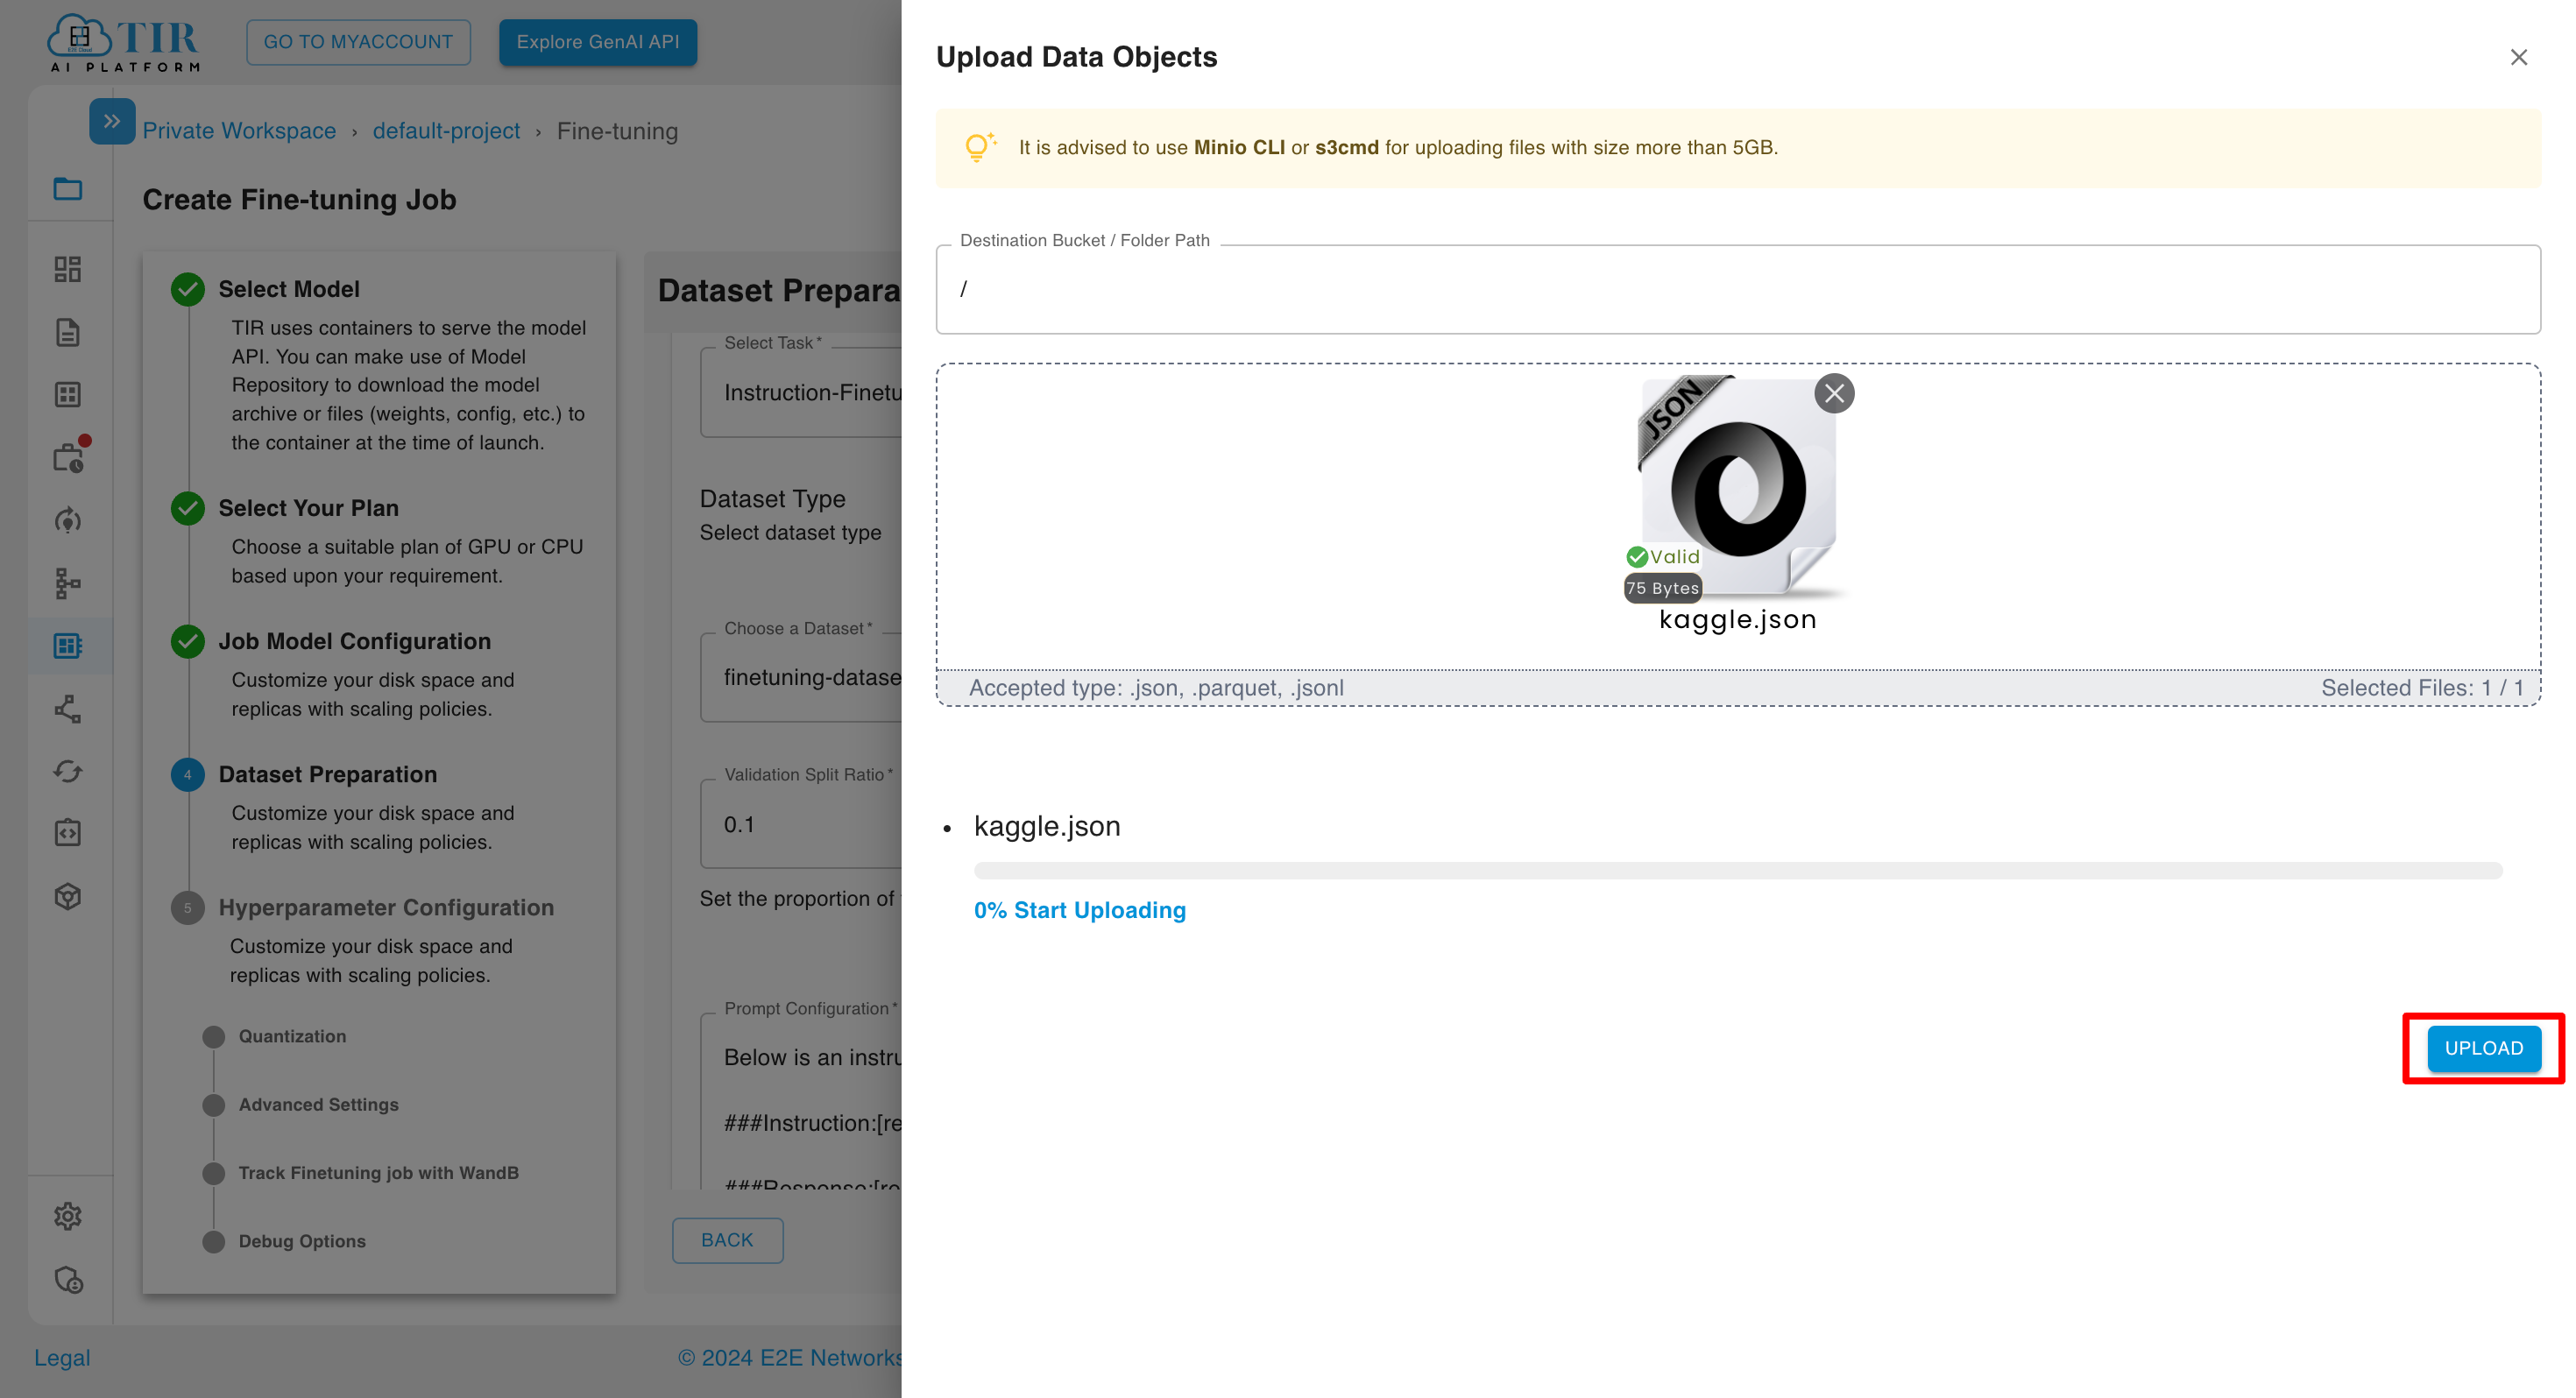
Click on OK button.
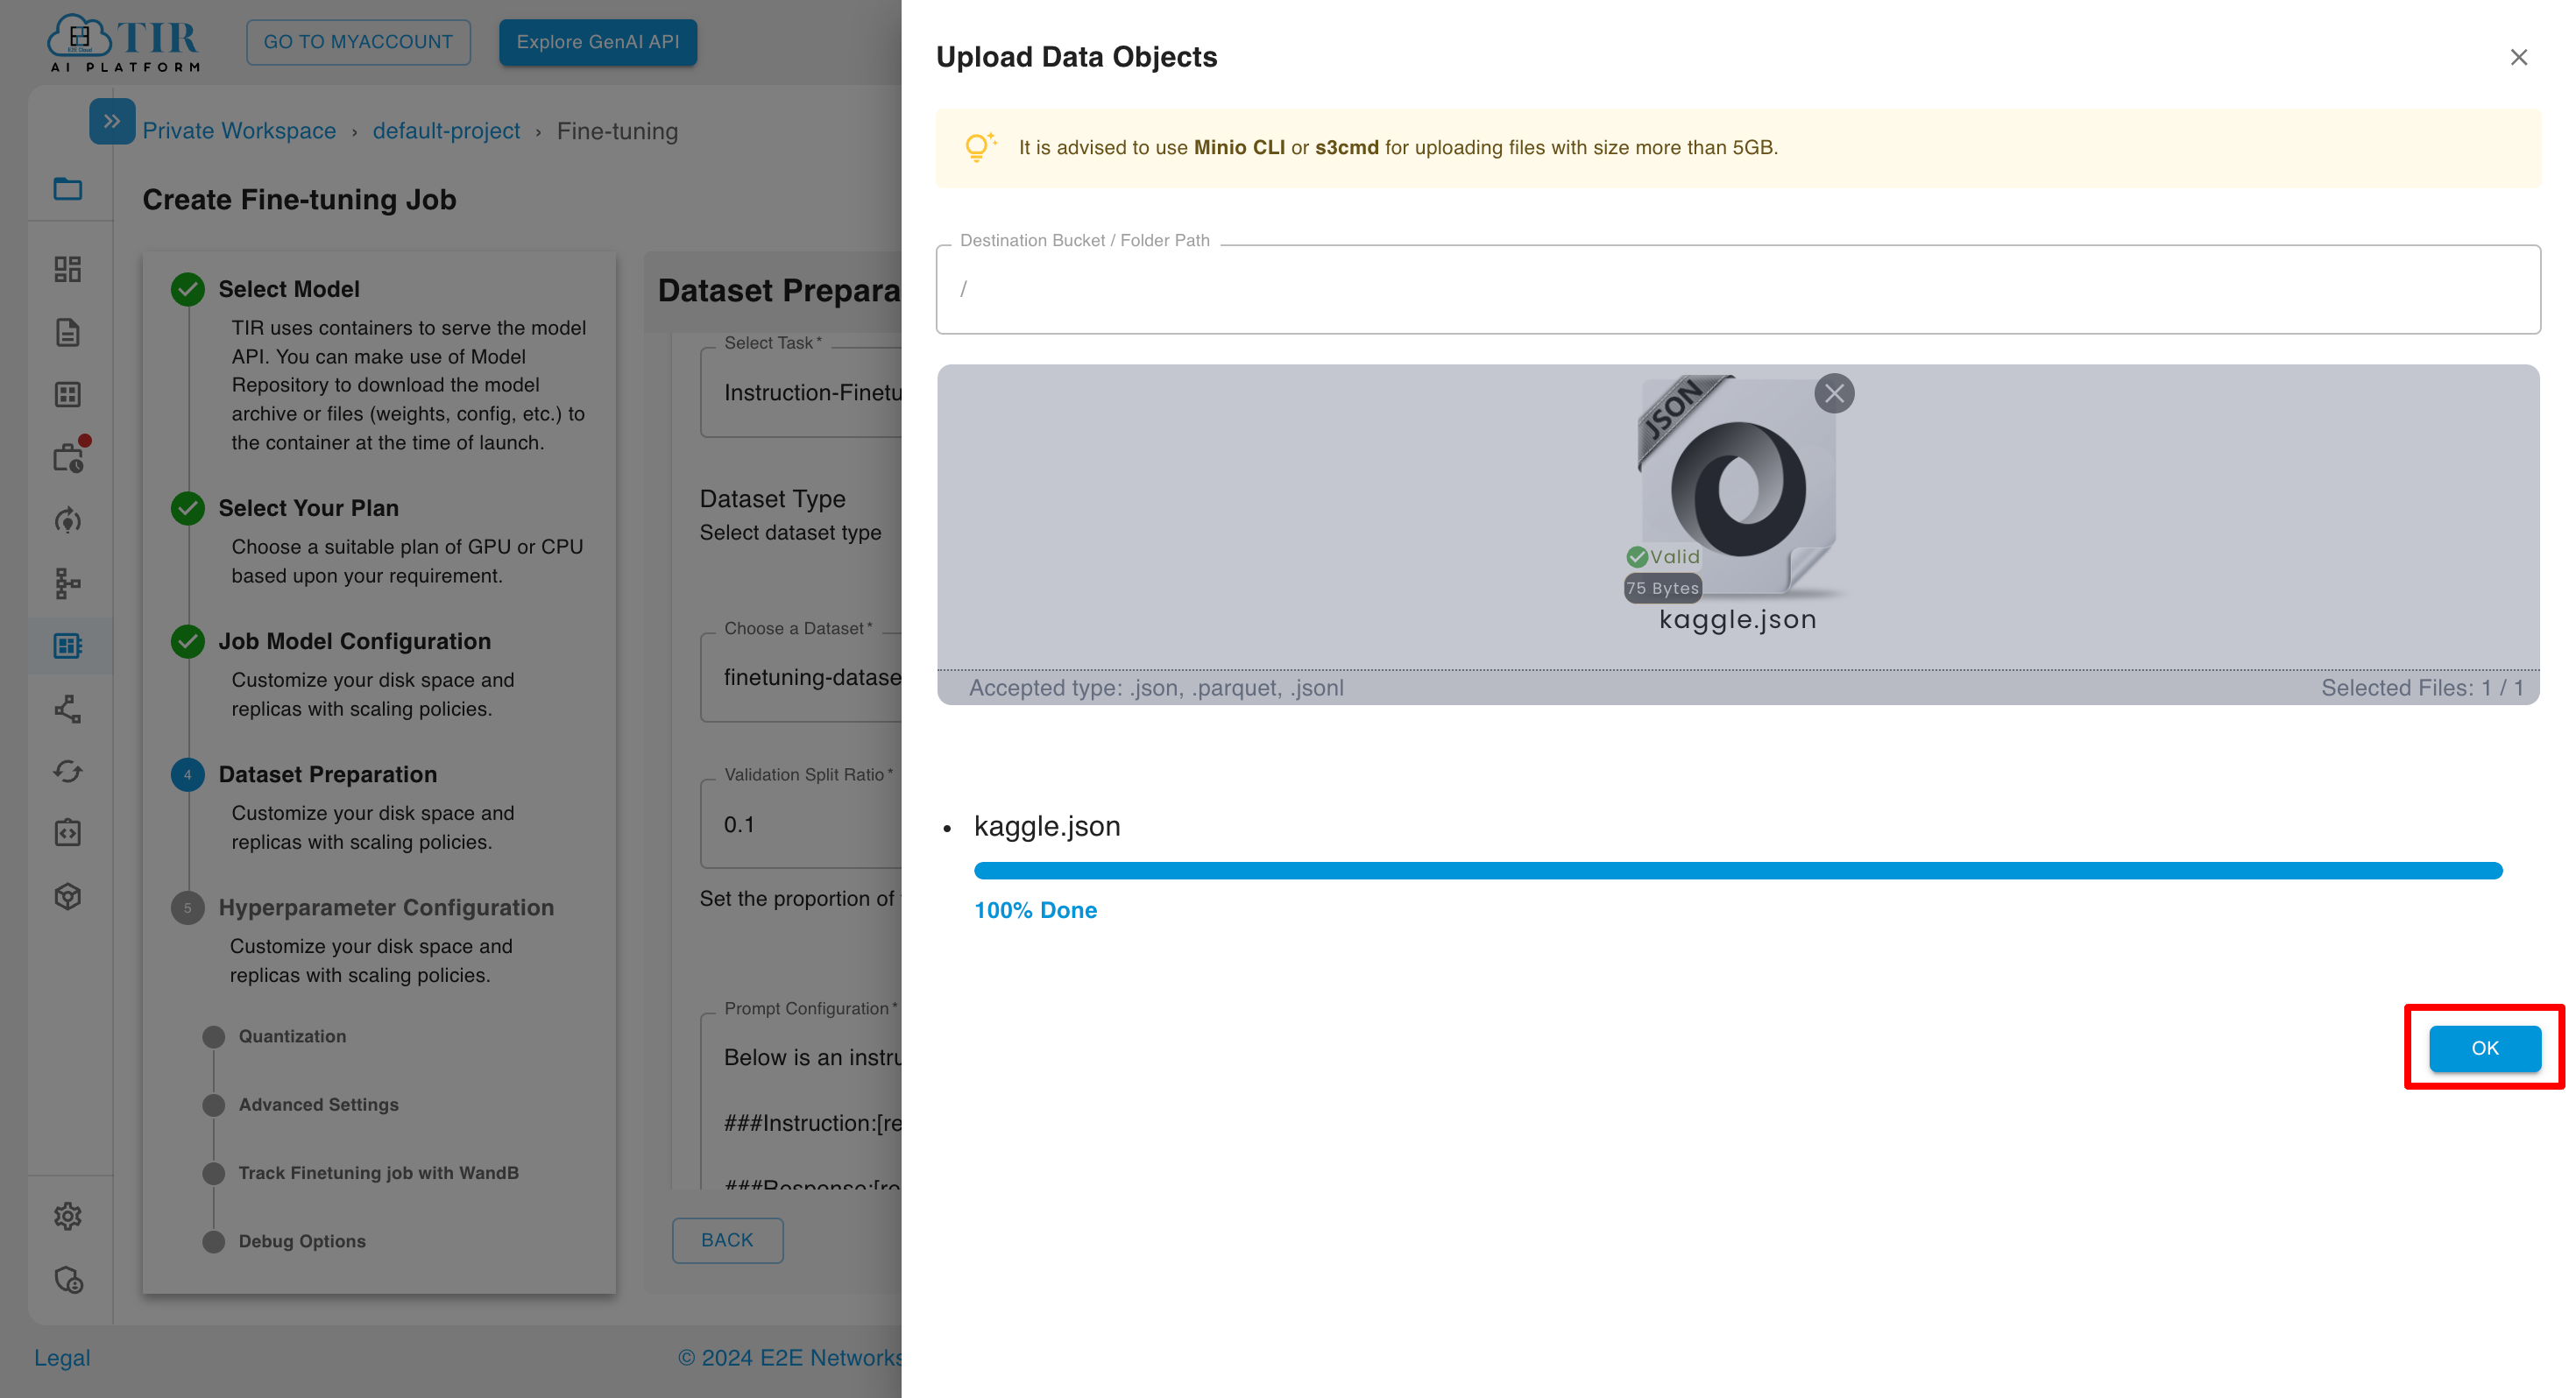
After uploading objects to a specific dataset, choose a particular file to continue and then click on SUBMIT button.

HUGGING FACE
When opting for the predefined dataset type HUGGING FACE, users can conveniently select a dataset from the available collection. Subsequently, the model training process can be initiated using the chosen dataset, streamlining the workflow and enhancing efficiency.
How to define a Hyperparameter Configuration?
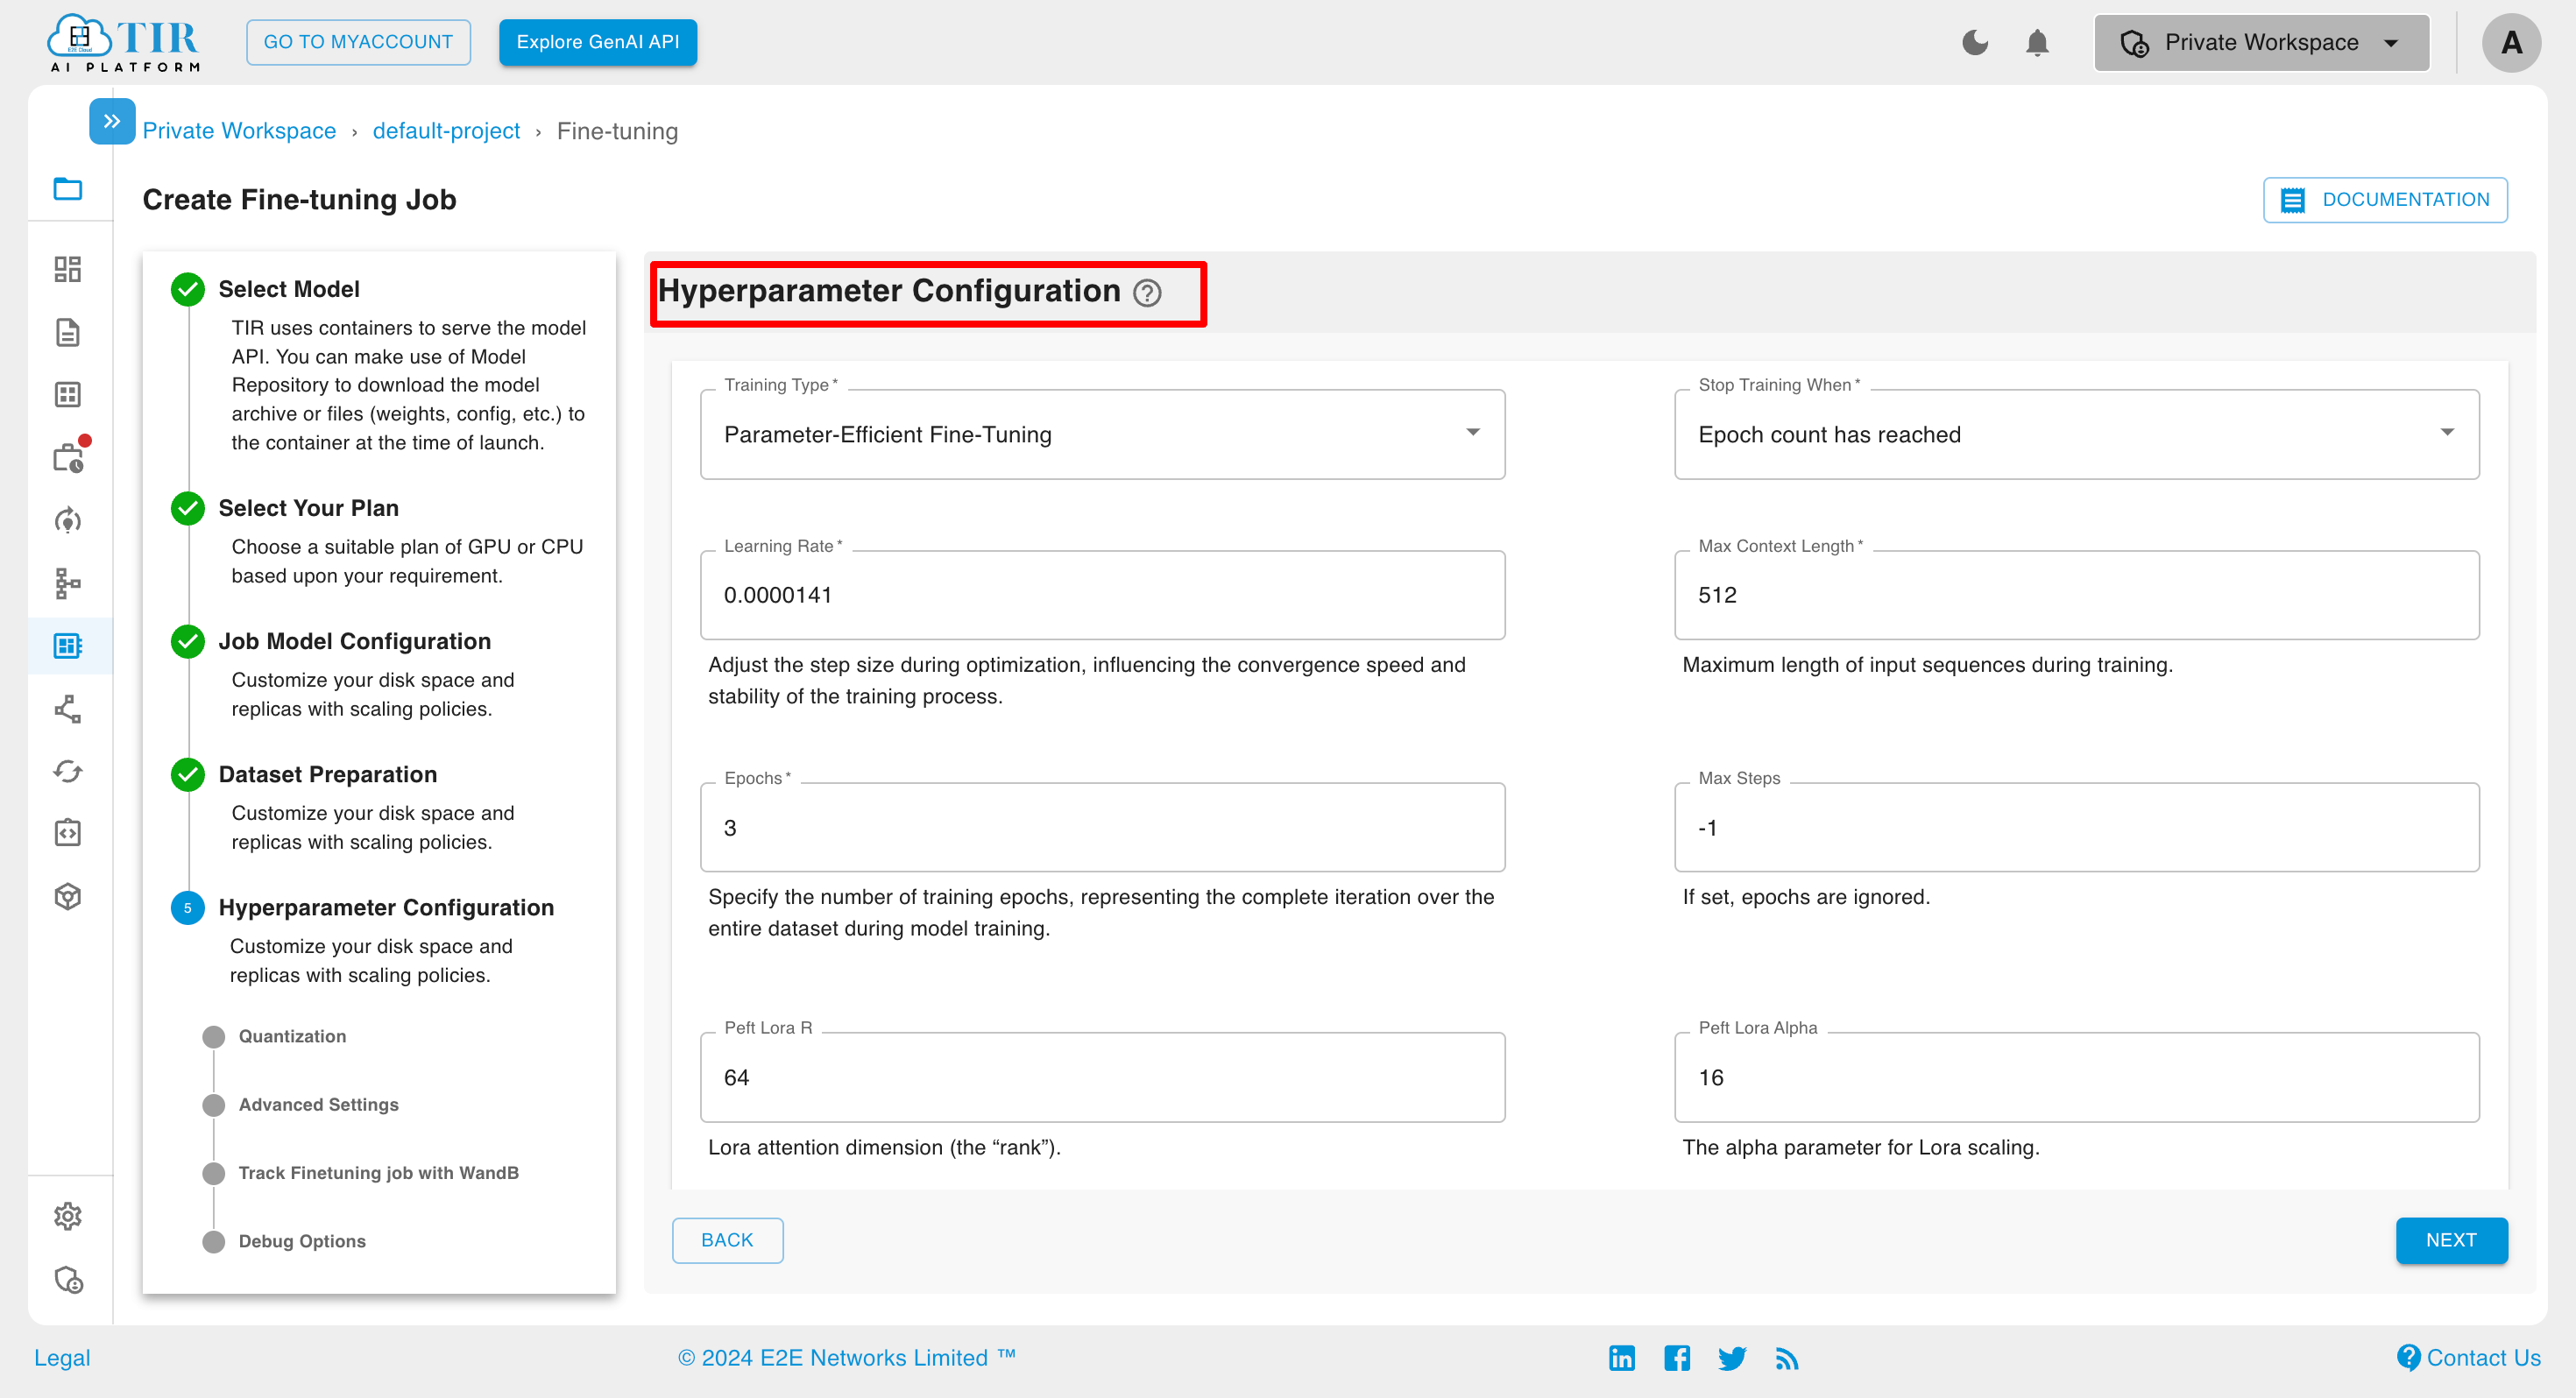
Upon providing the dataset preparation details, users are directed to the Hyperparameter Configuration page. This interface allows users to customize the training process by specifying desired hyperparameters, thereby facilitating effective hyperparameter tuning. The form provided enables the selection of various hyperparameters, including but not limited to training type, epoch, learning rate, and max steps. Please fill out the form meticulously to optimize the model training process.
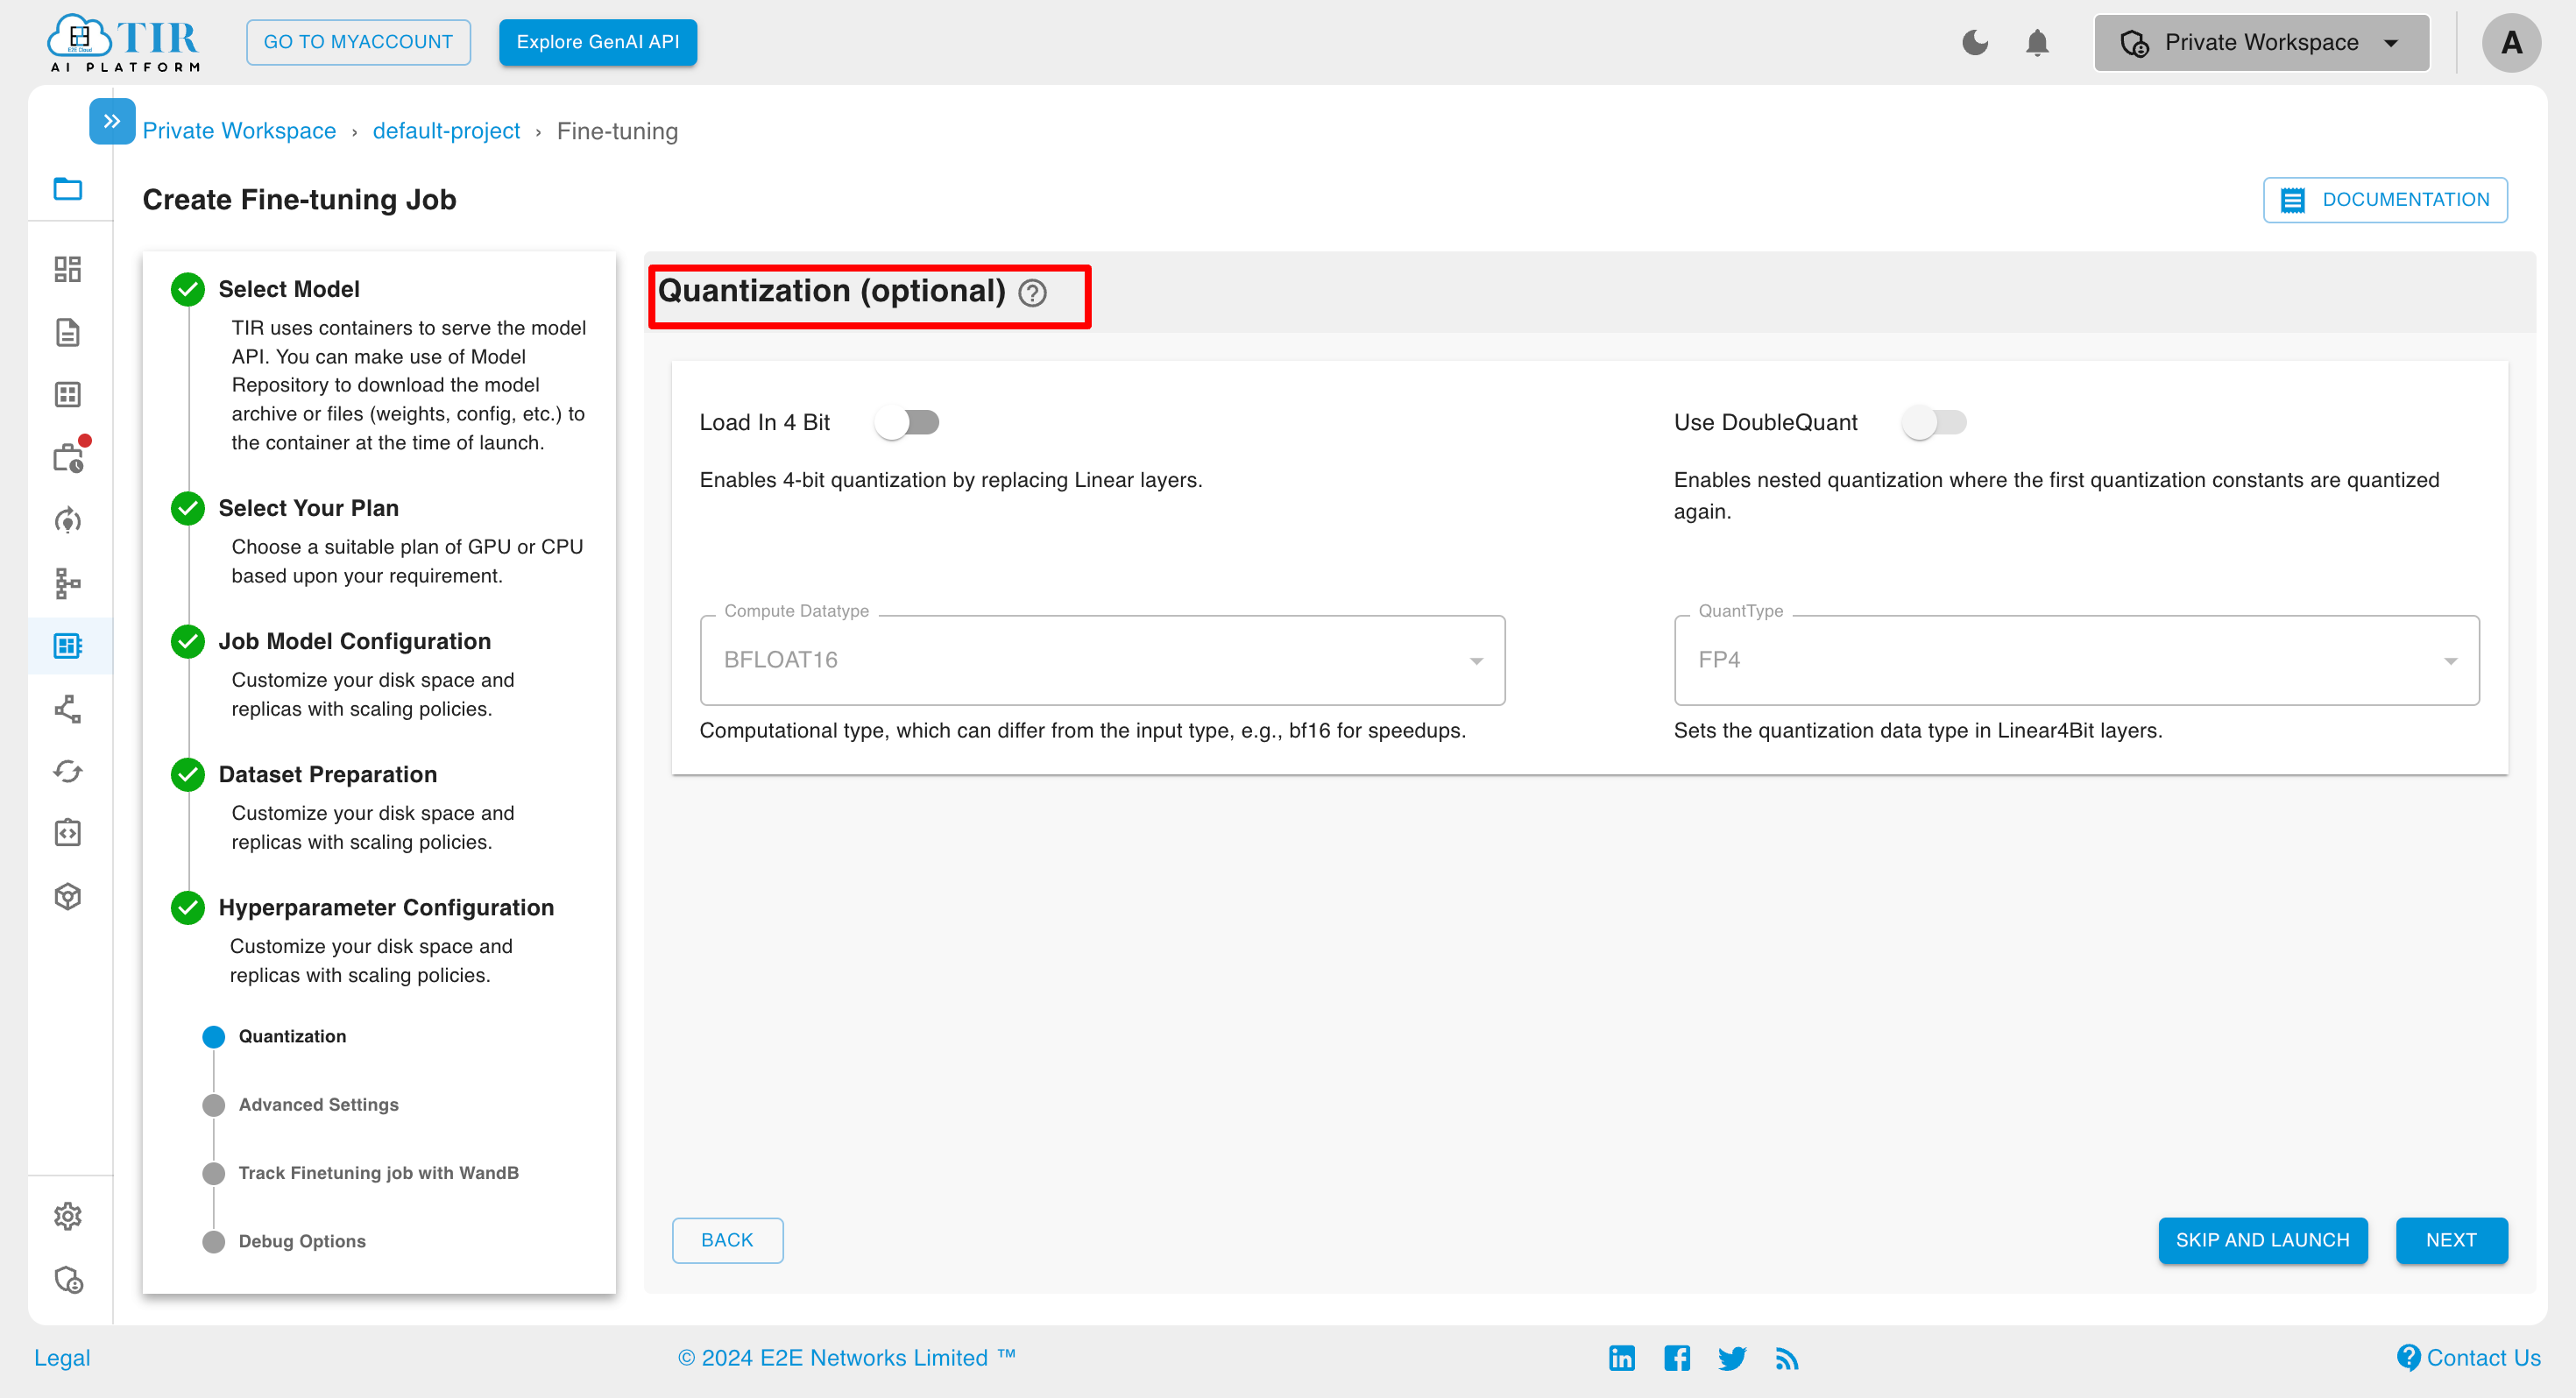
Quantization (optional): The configuration page offers quantization options such as Load in 4Bit, Compute Datatype, QuantType, and use DoubleQuant. The bnb quantization option helps reduce model size and training time.
In addition to the standard hyperparameters, the configuration page offers advanced options such as batch size and gradient accumulation steps. These settings can be utilized to further refine the training process. Users are encouraged to explore and employ these advanced options as needed to achieve optimal model performance.
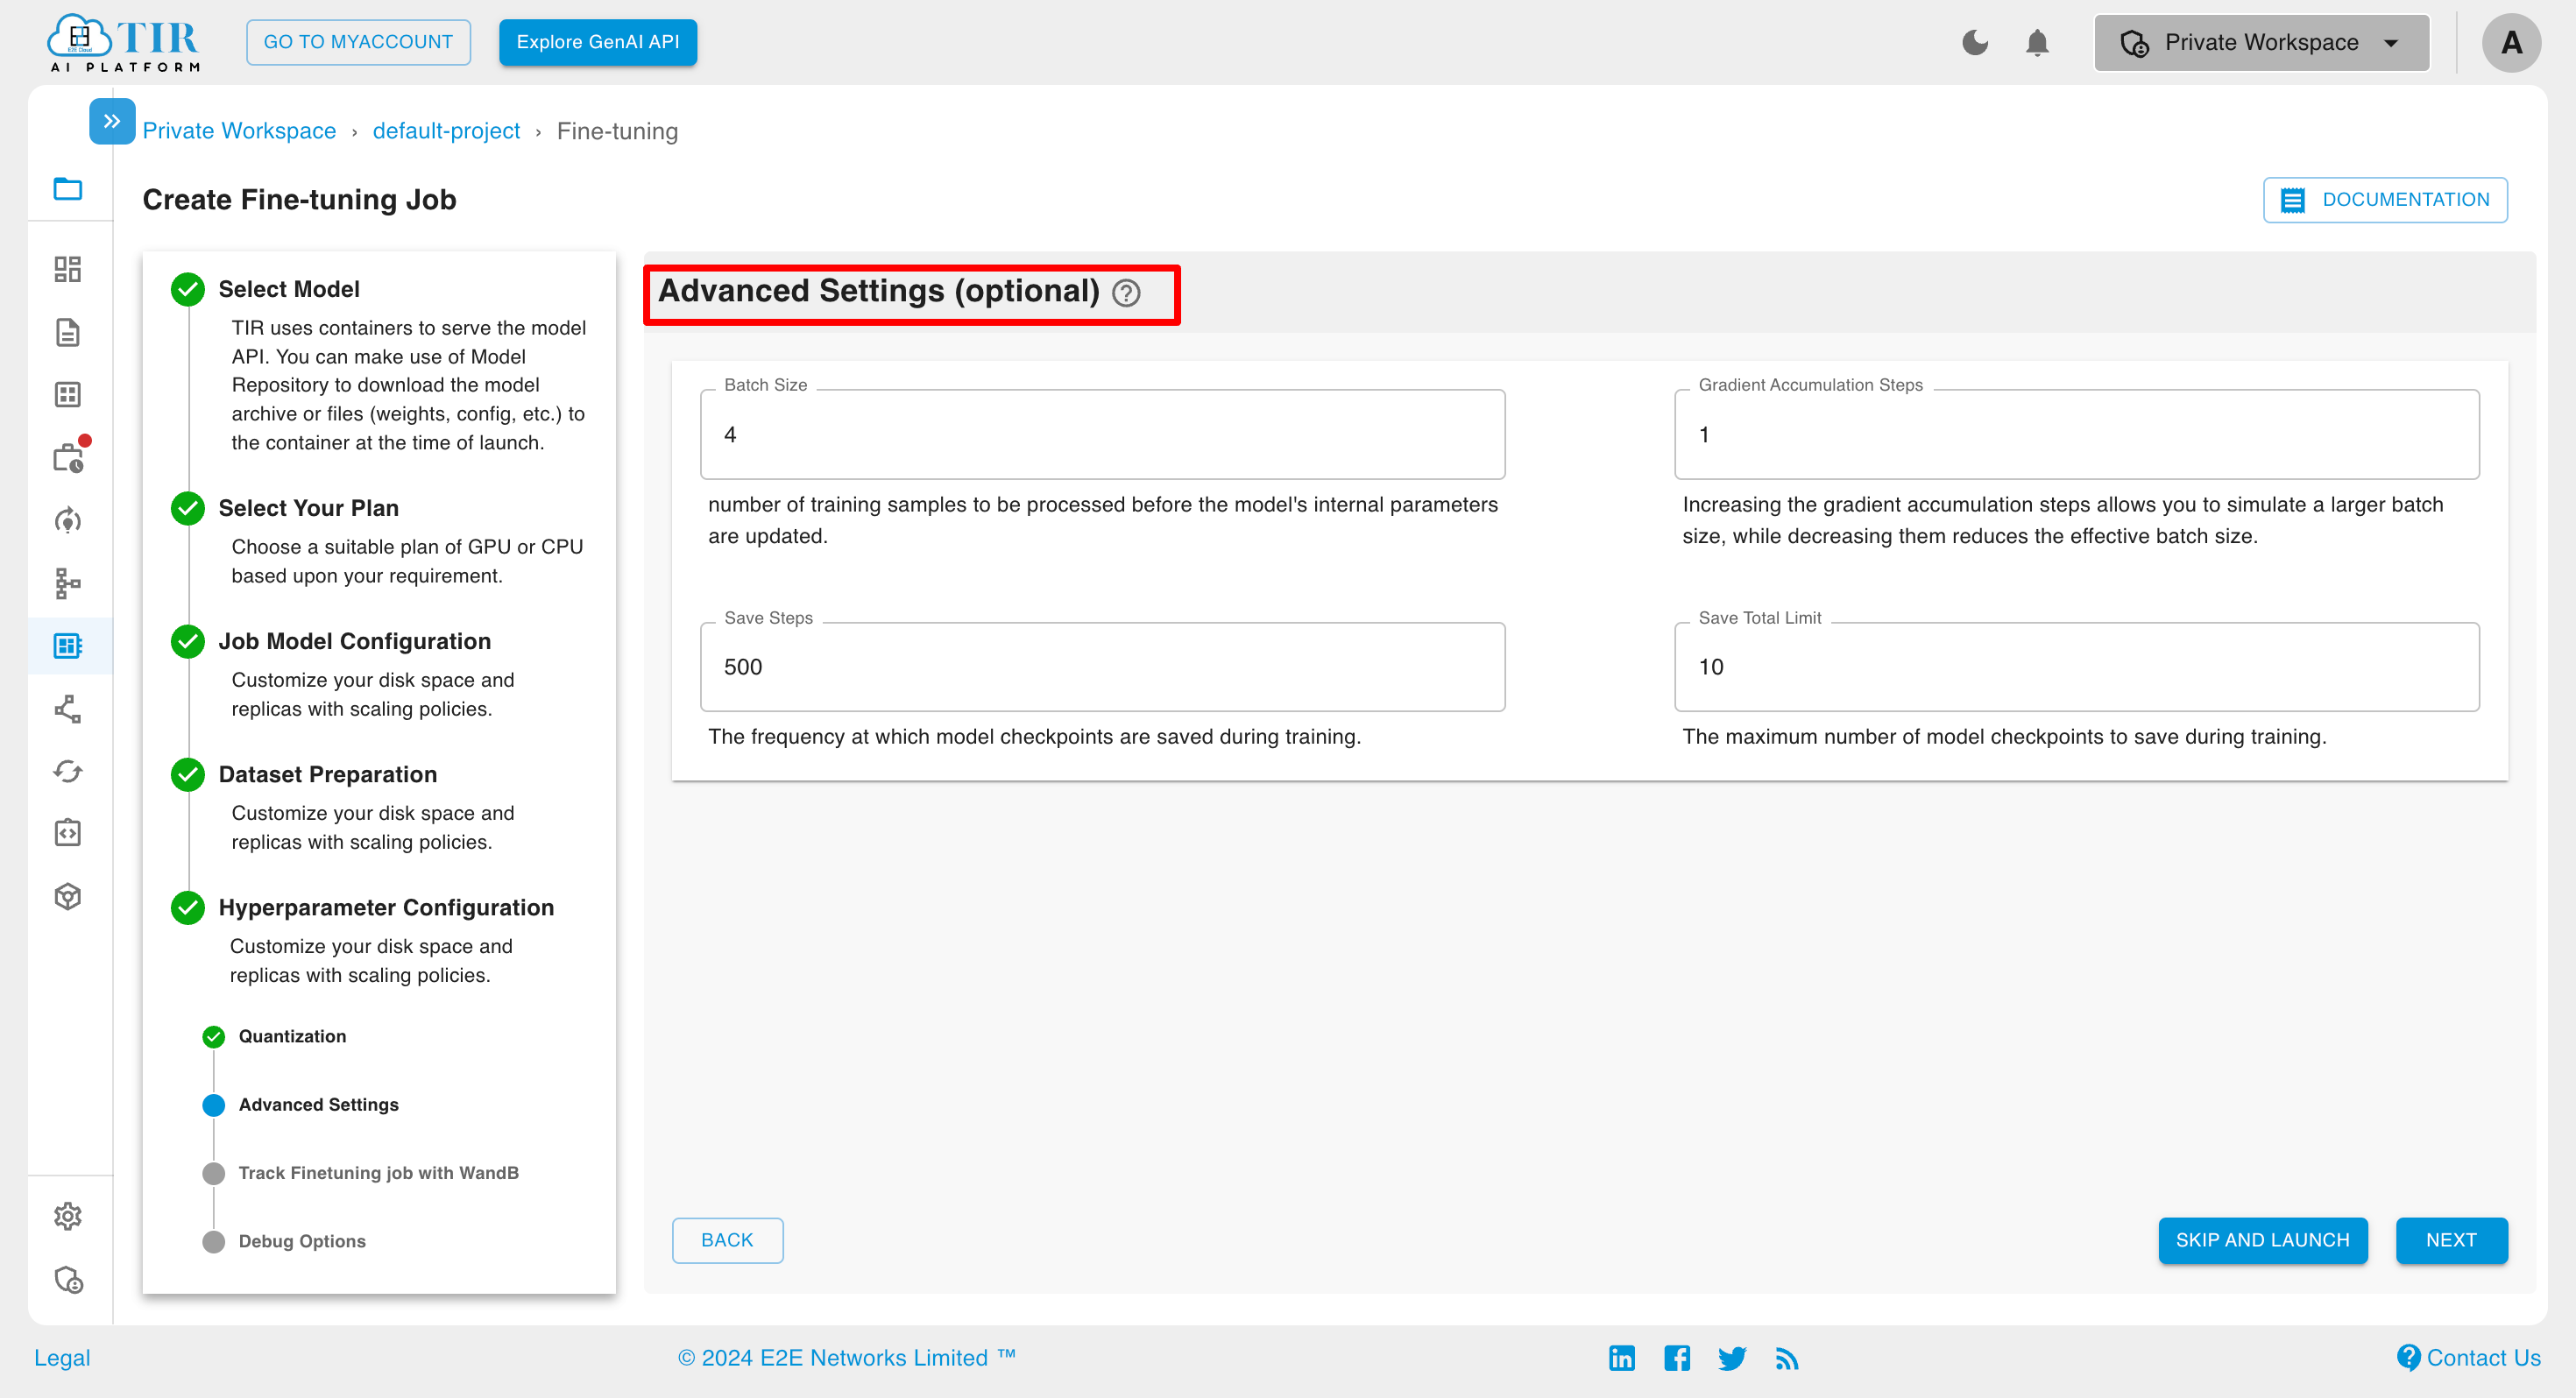
Upon specifying the advanced settings, users are advised to leverage the WandB Integration feature for comprehensive job tracking. This involves filling in the necessary details in the provided interface to effectively monitor and manage the model training process, ensuring transparency and control throughout the lifecycle of the job. Users can also describe the 'debug' option as desired.
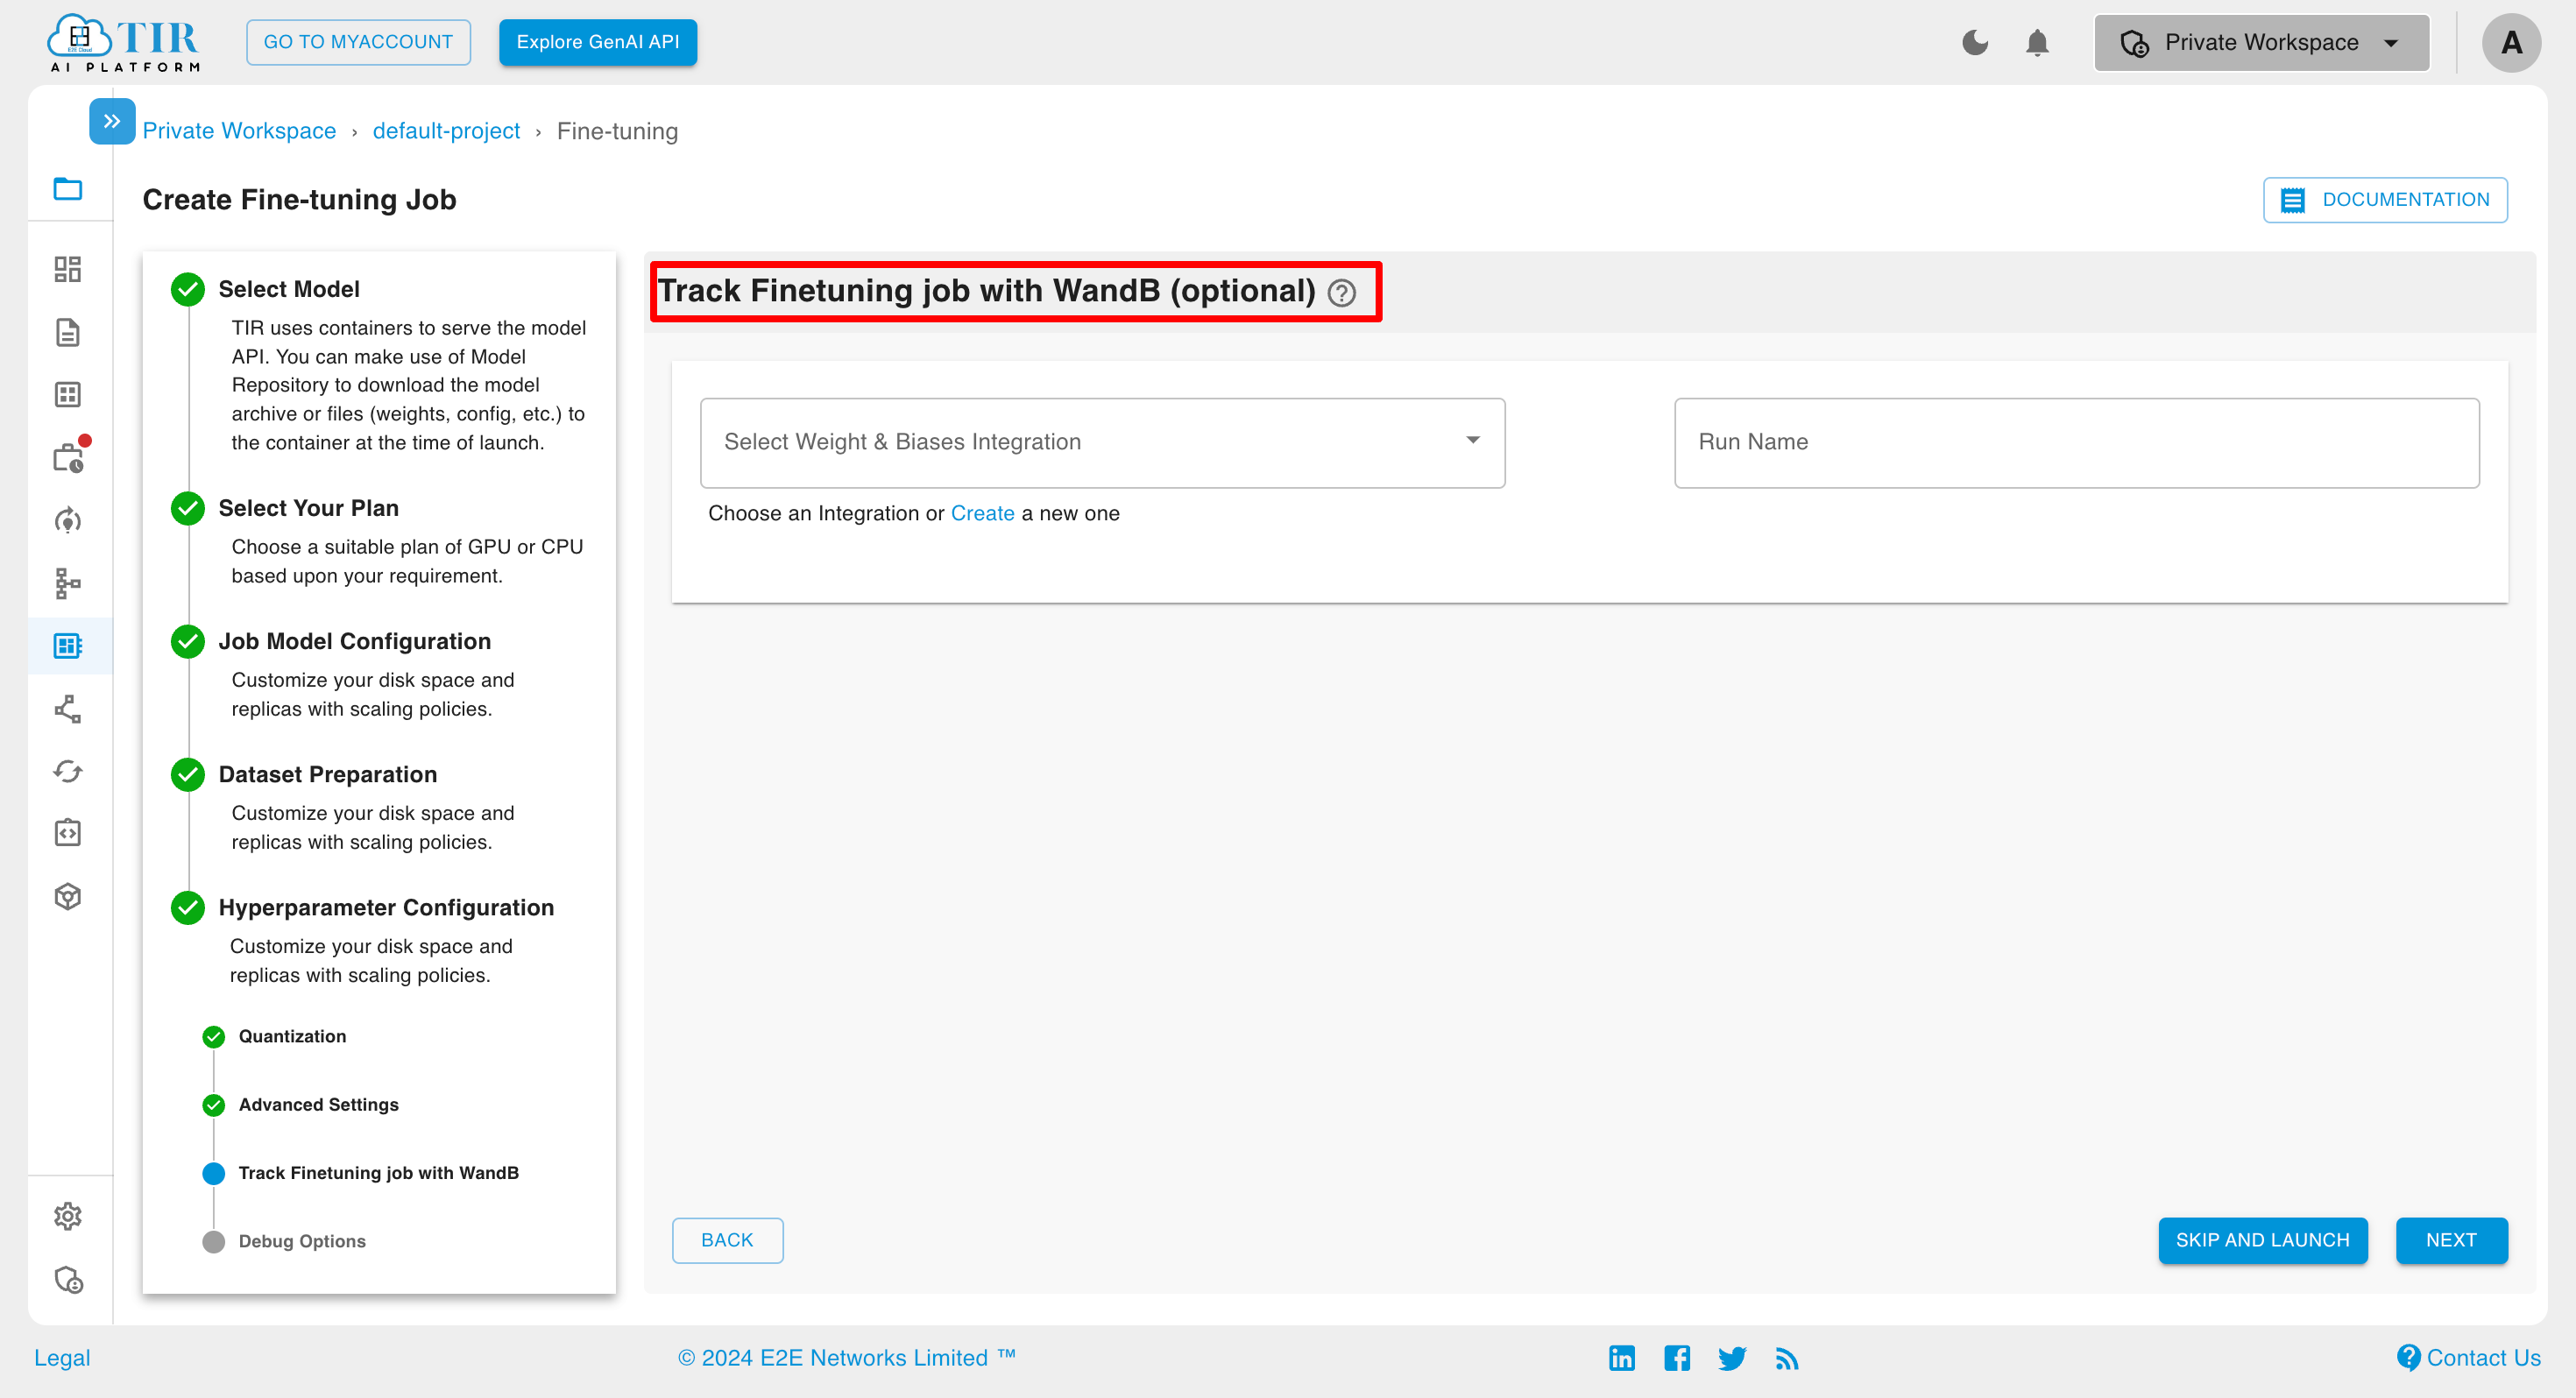
To create WandB Integration, kindly follow the document Wandb Integration.
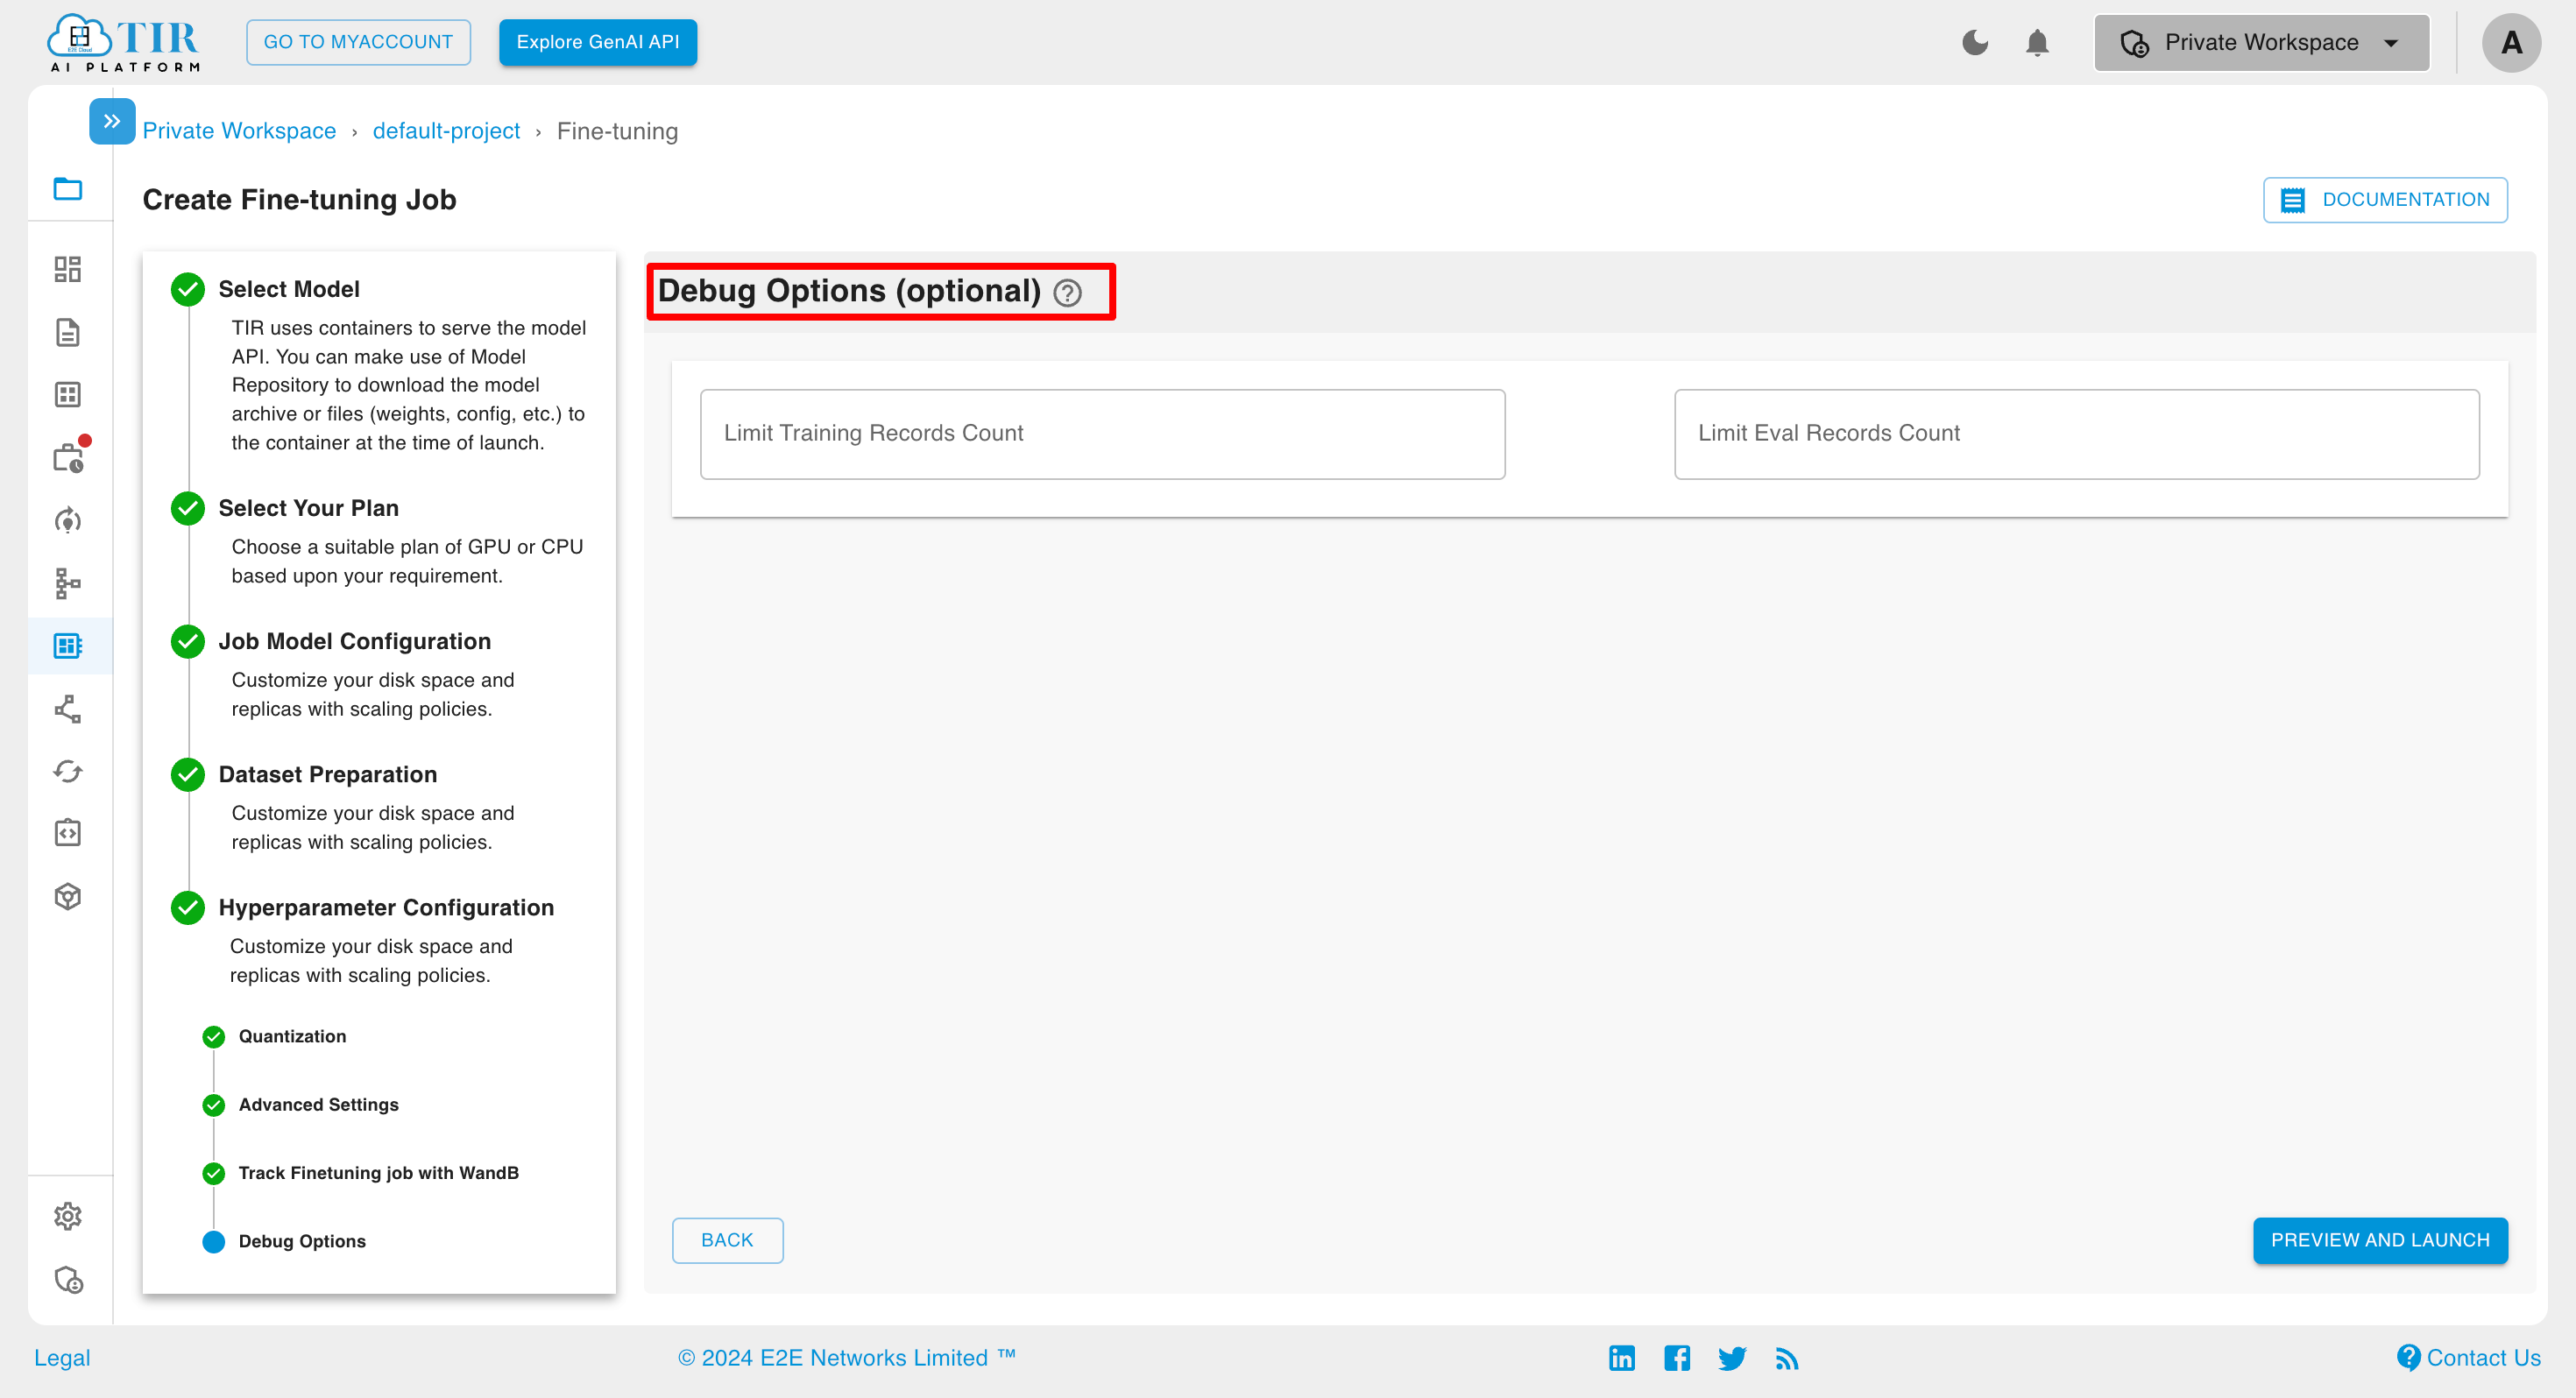
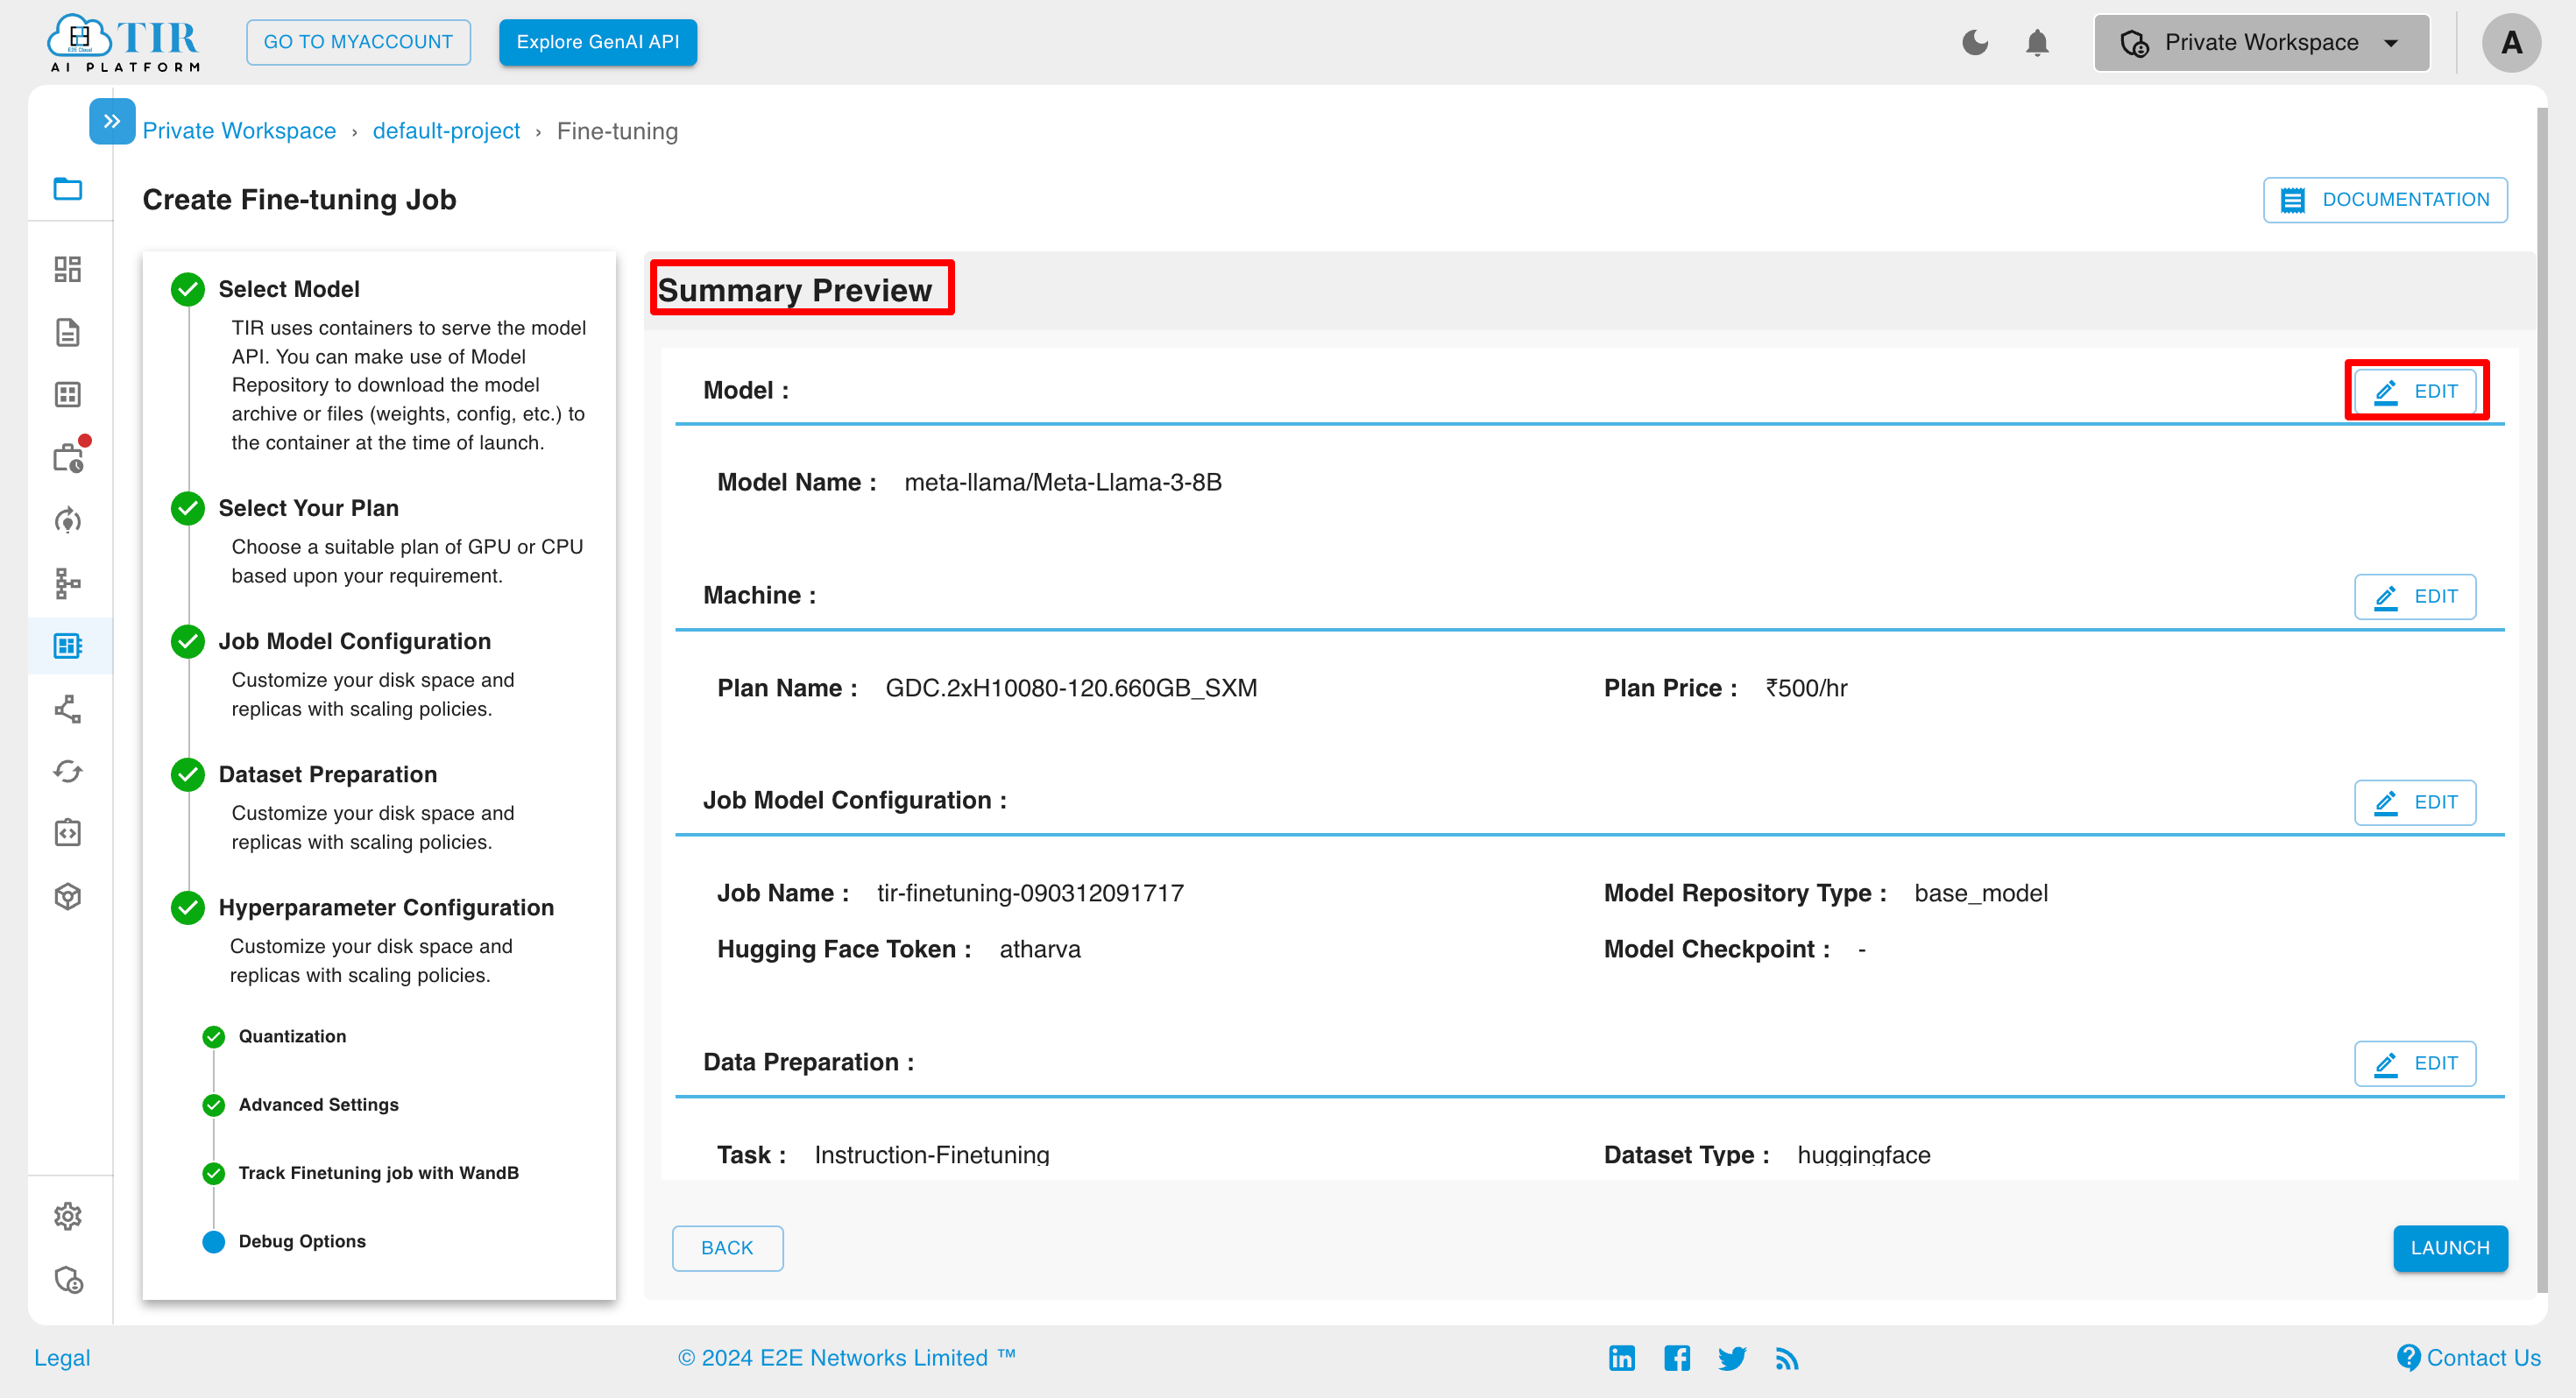
Once the debug option has been thoroughly addressed, users are required to preview their selections on the summary page.
Viewing Job Parameters and Fine-Tuned Models
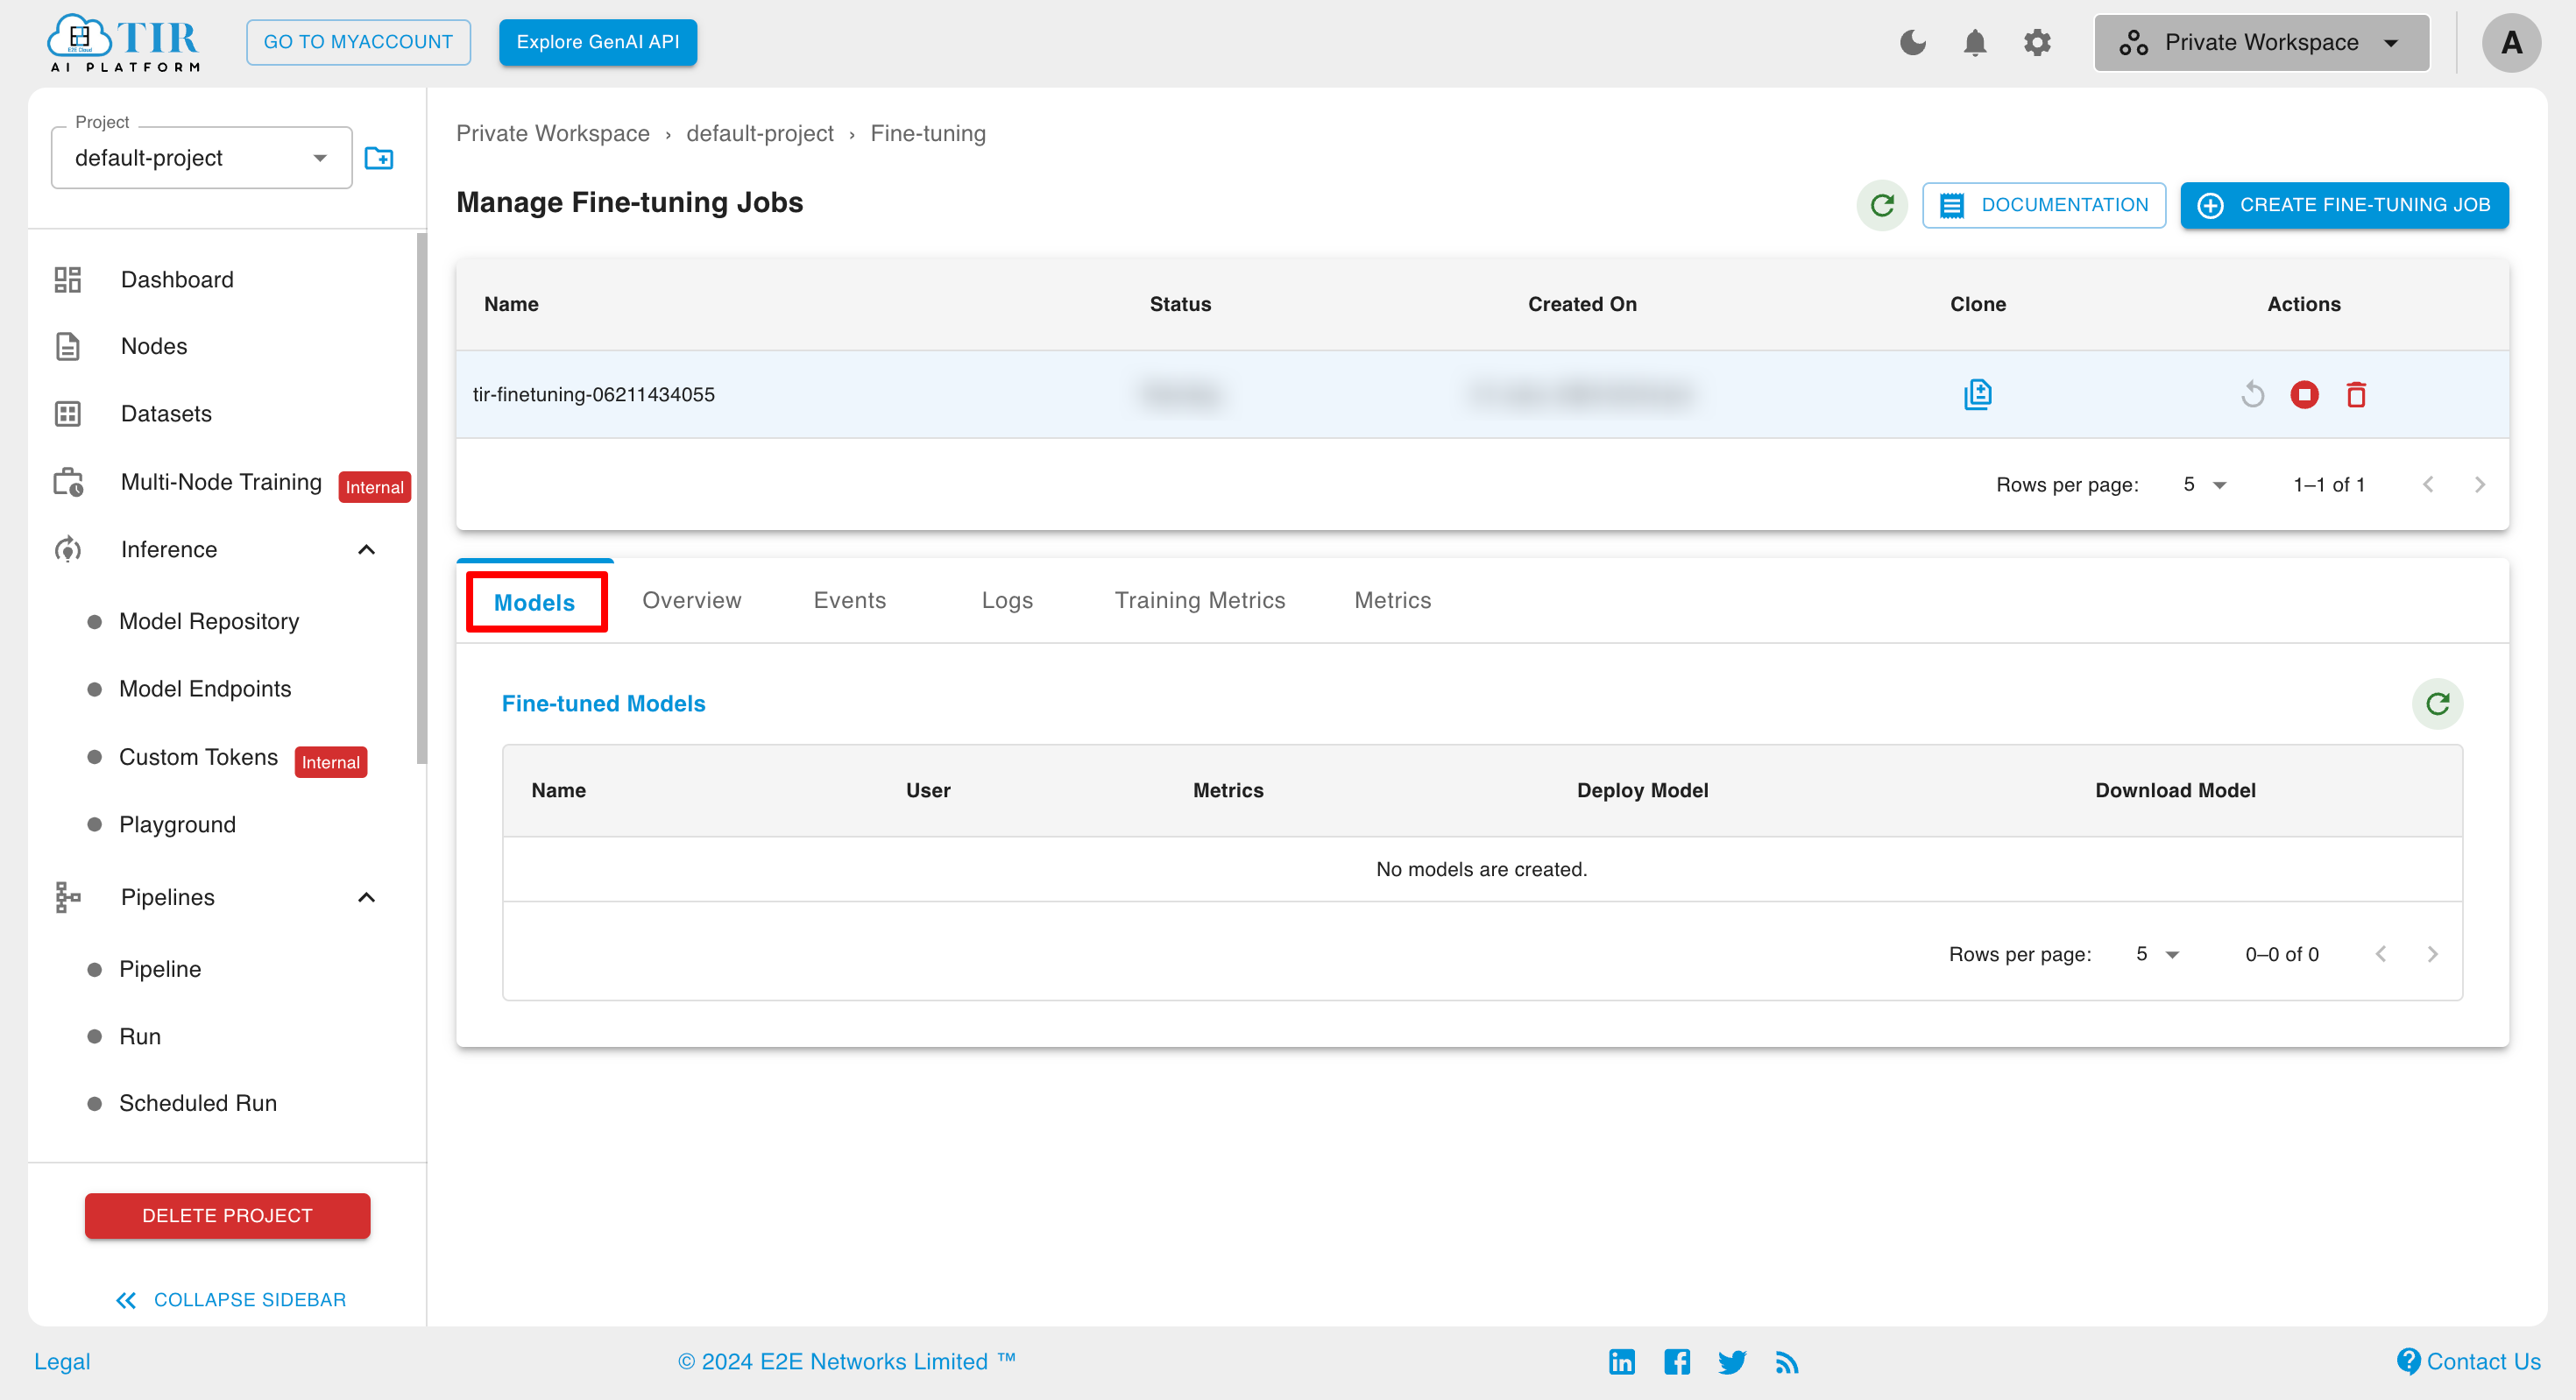
Upon completion of the job, a fine-tuned model is created and displayed in the "Models" section at the bottom of the page. This fine-tuned model repository contains all checkpoints from the model training process, as well as any adapters built during training.
If desired, users can navigate directly to the model repository page under "Inference" to view detailed information about the fine-tuned model.
Models
To view the fine-tuned model, click on the "Model" section.
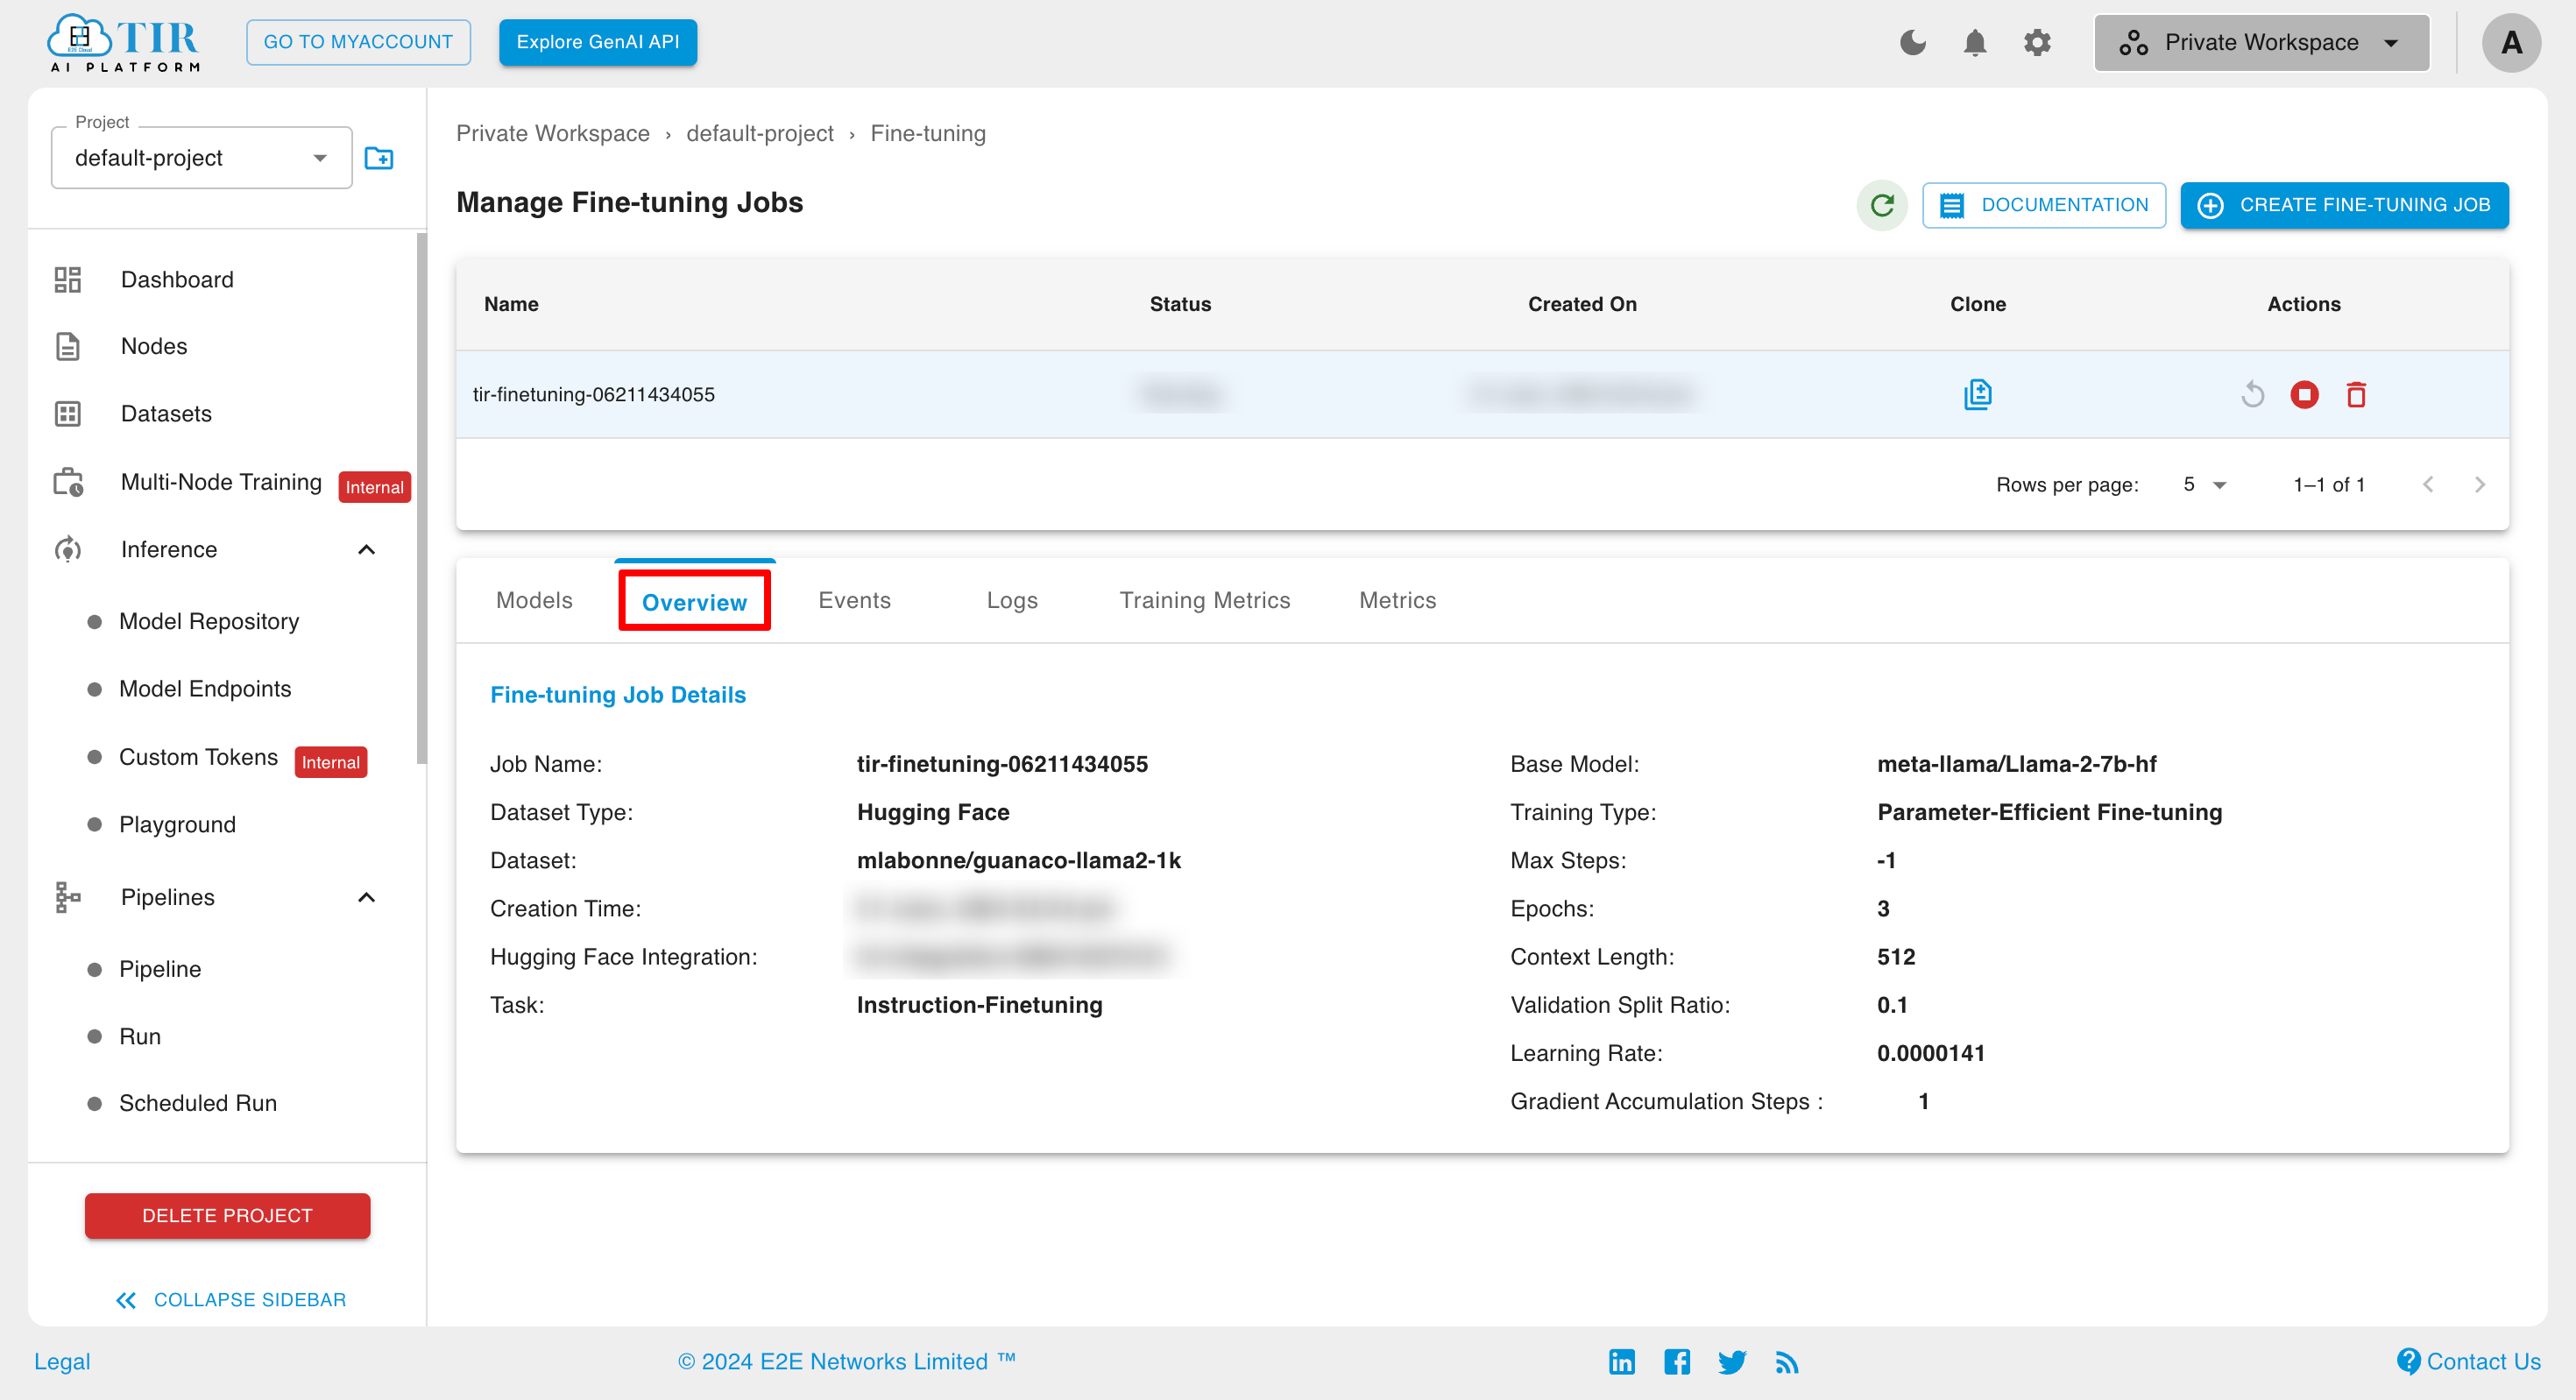
Overview
In the Overview section, you can review the details of the fine-tuning job.
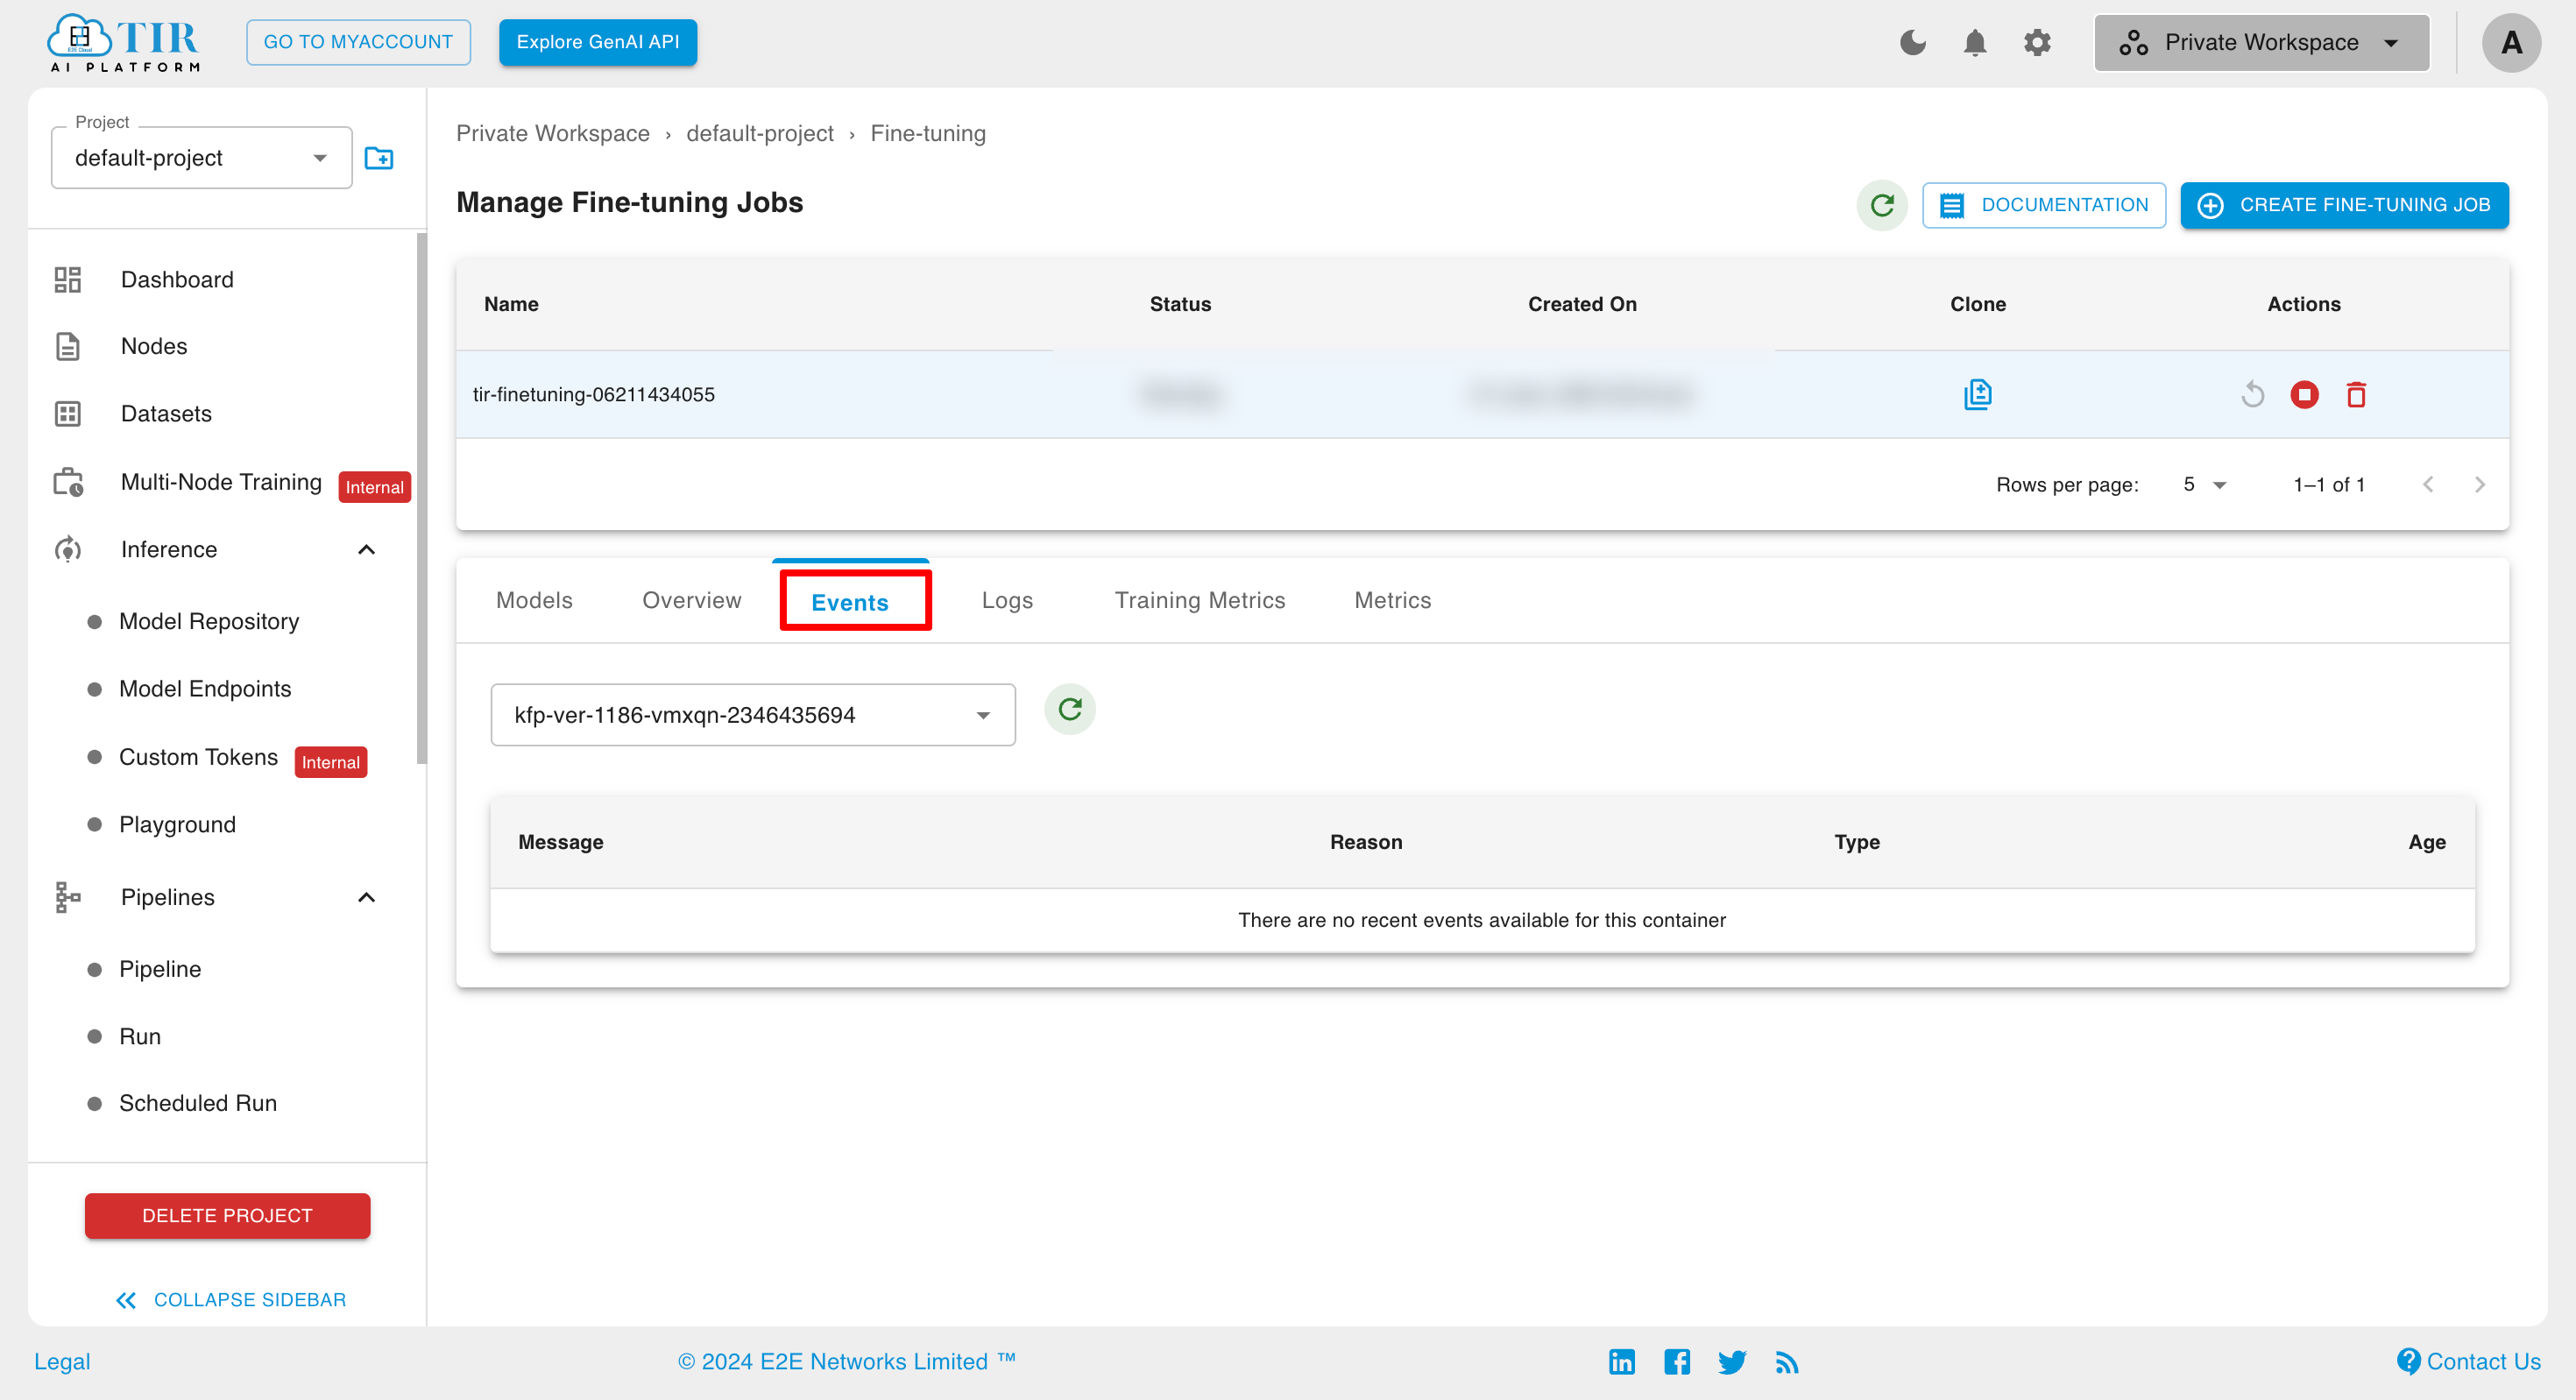
Events
In the Events section, you can monitor recent pod activities such as scheduling and container start events.
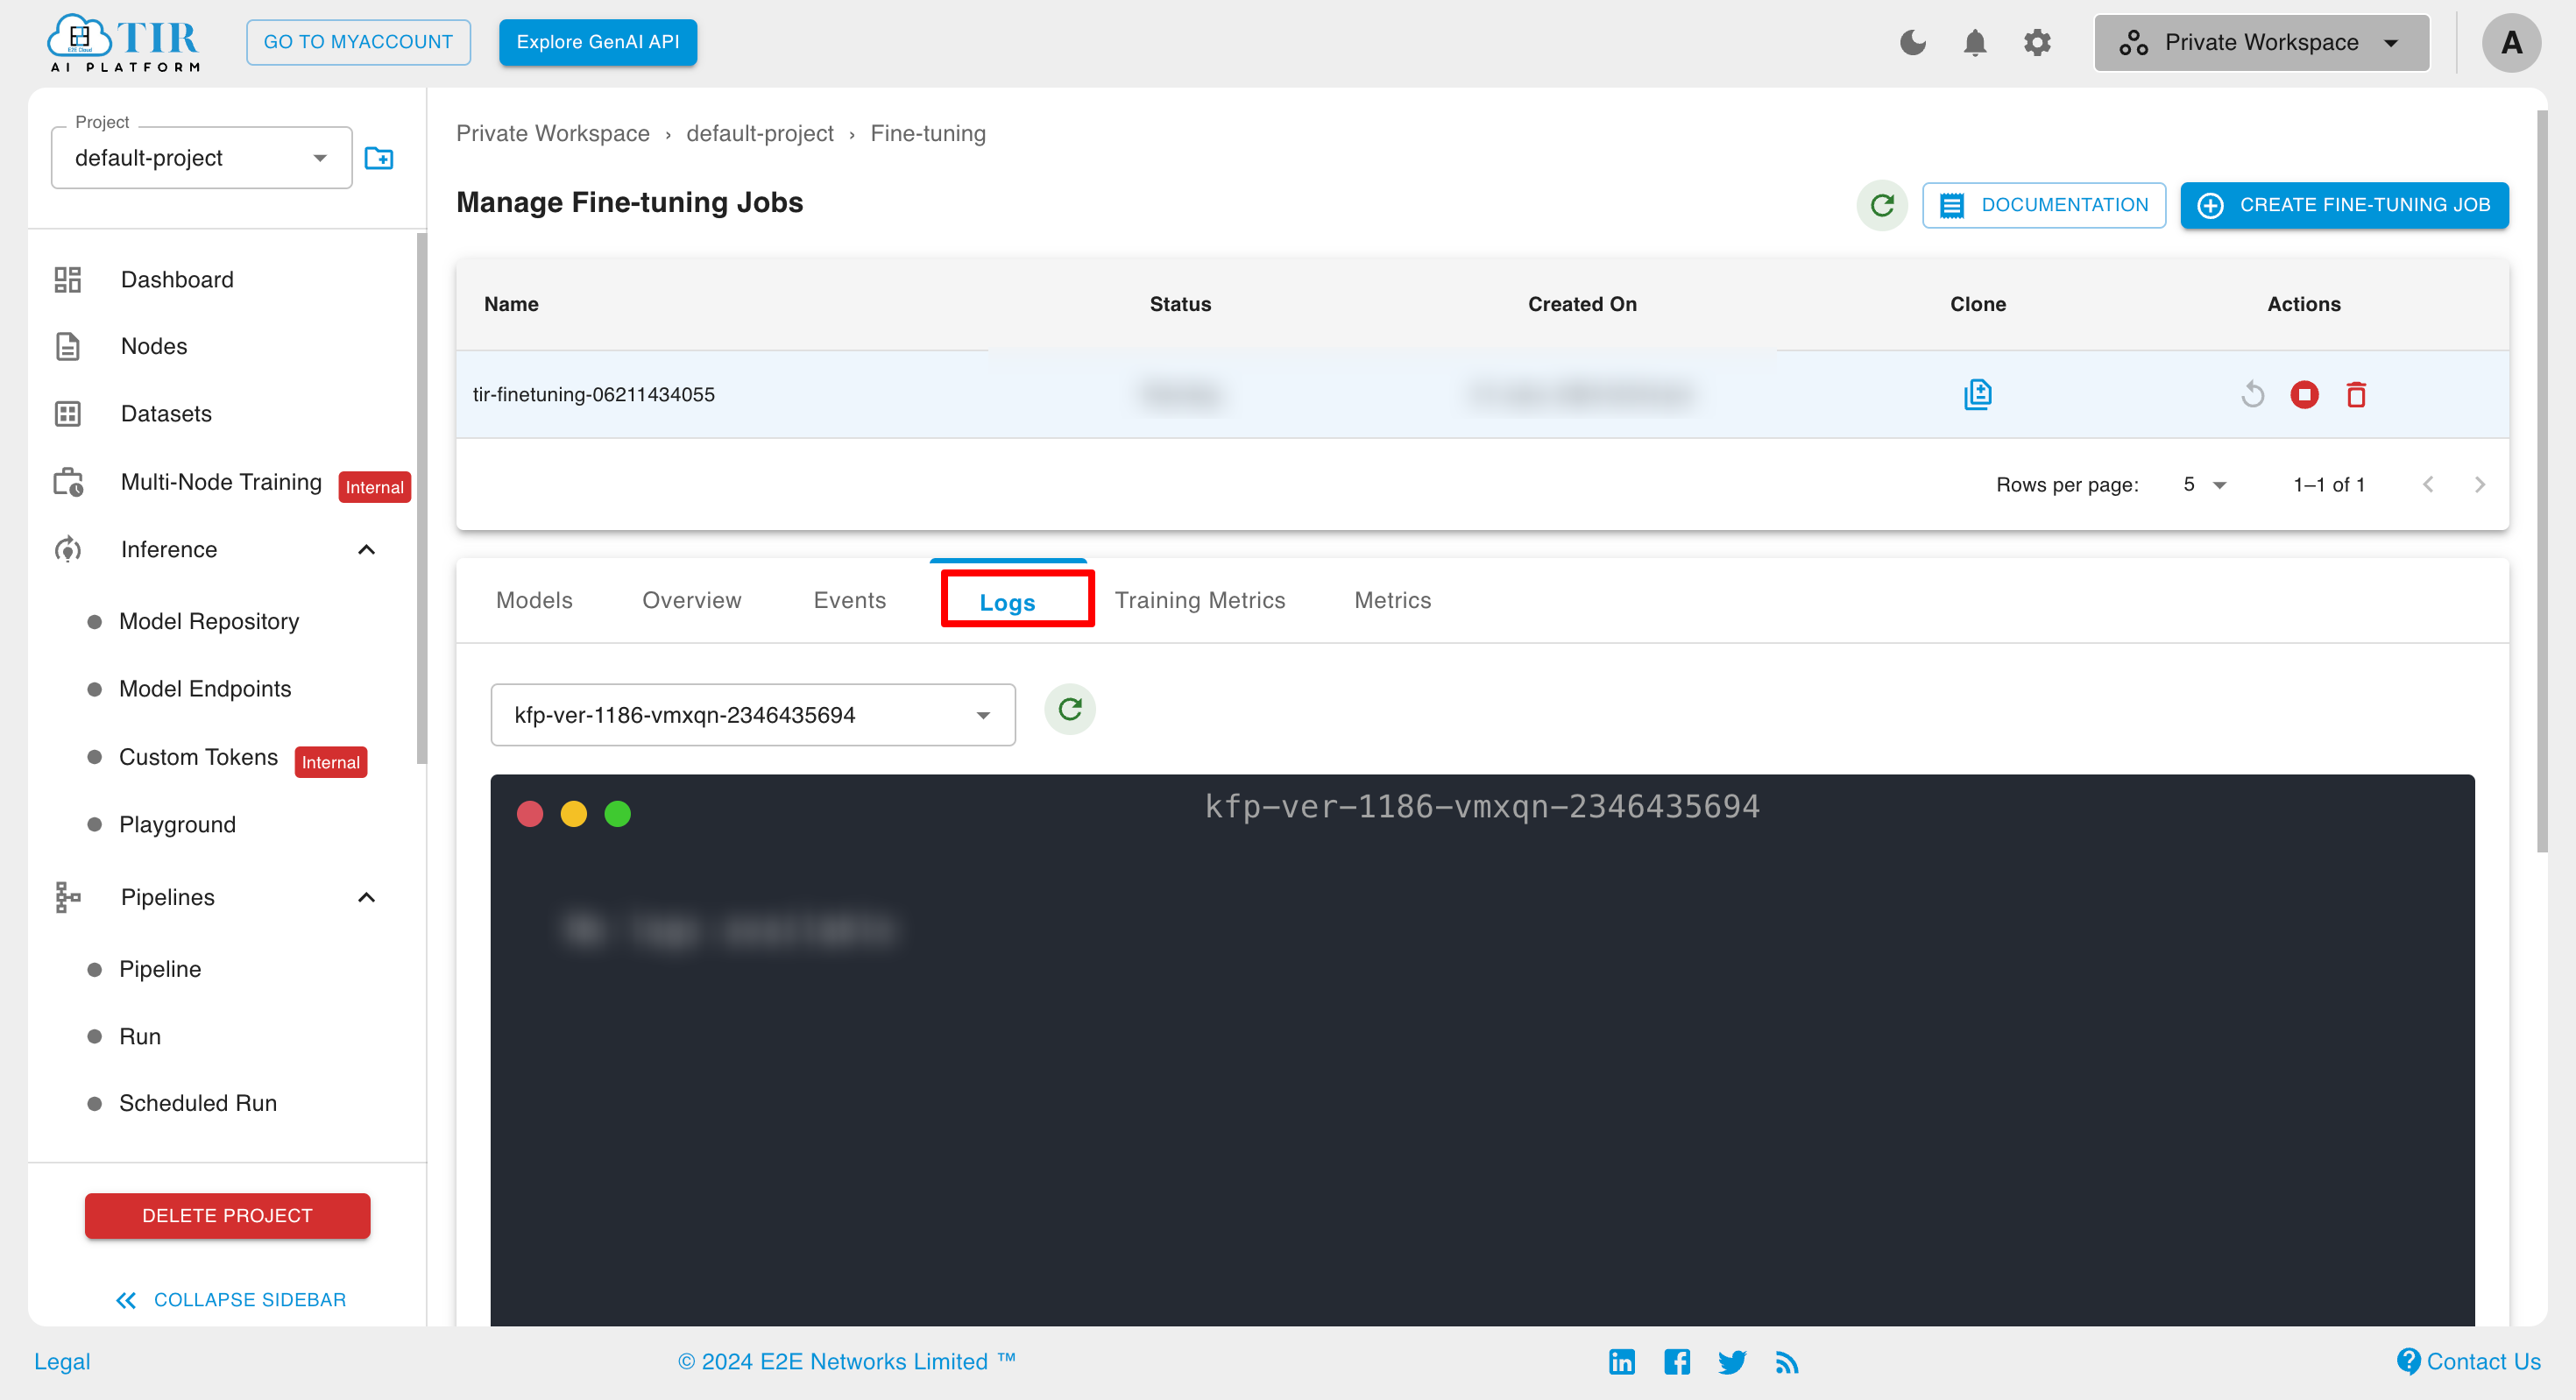
Logs
Fine-tuning logs provide detailed information about the training process, allowing users to monitor progress, diagnose issues, and optimize performance effectively. They serve as a comprehensive record of the training process.
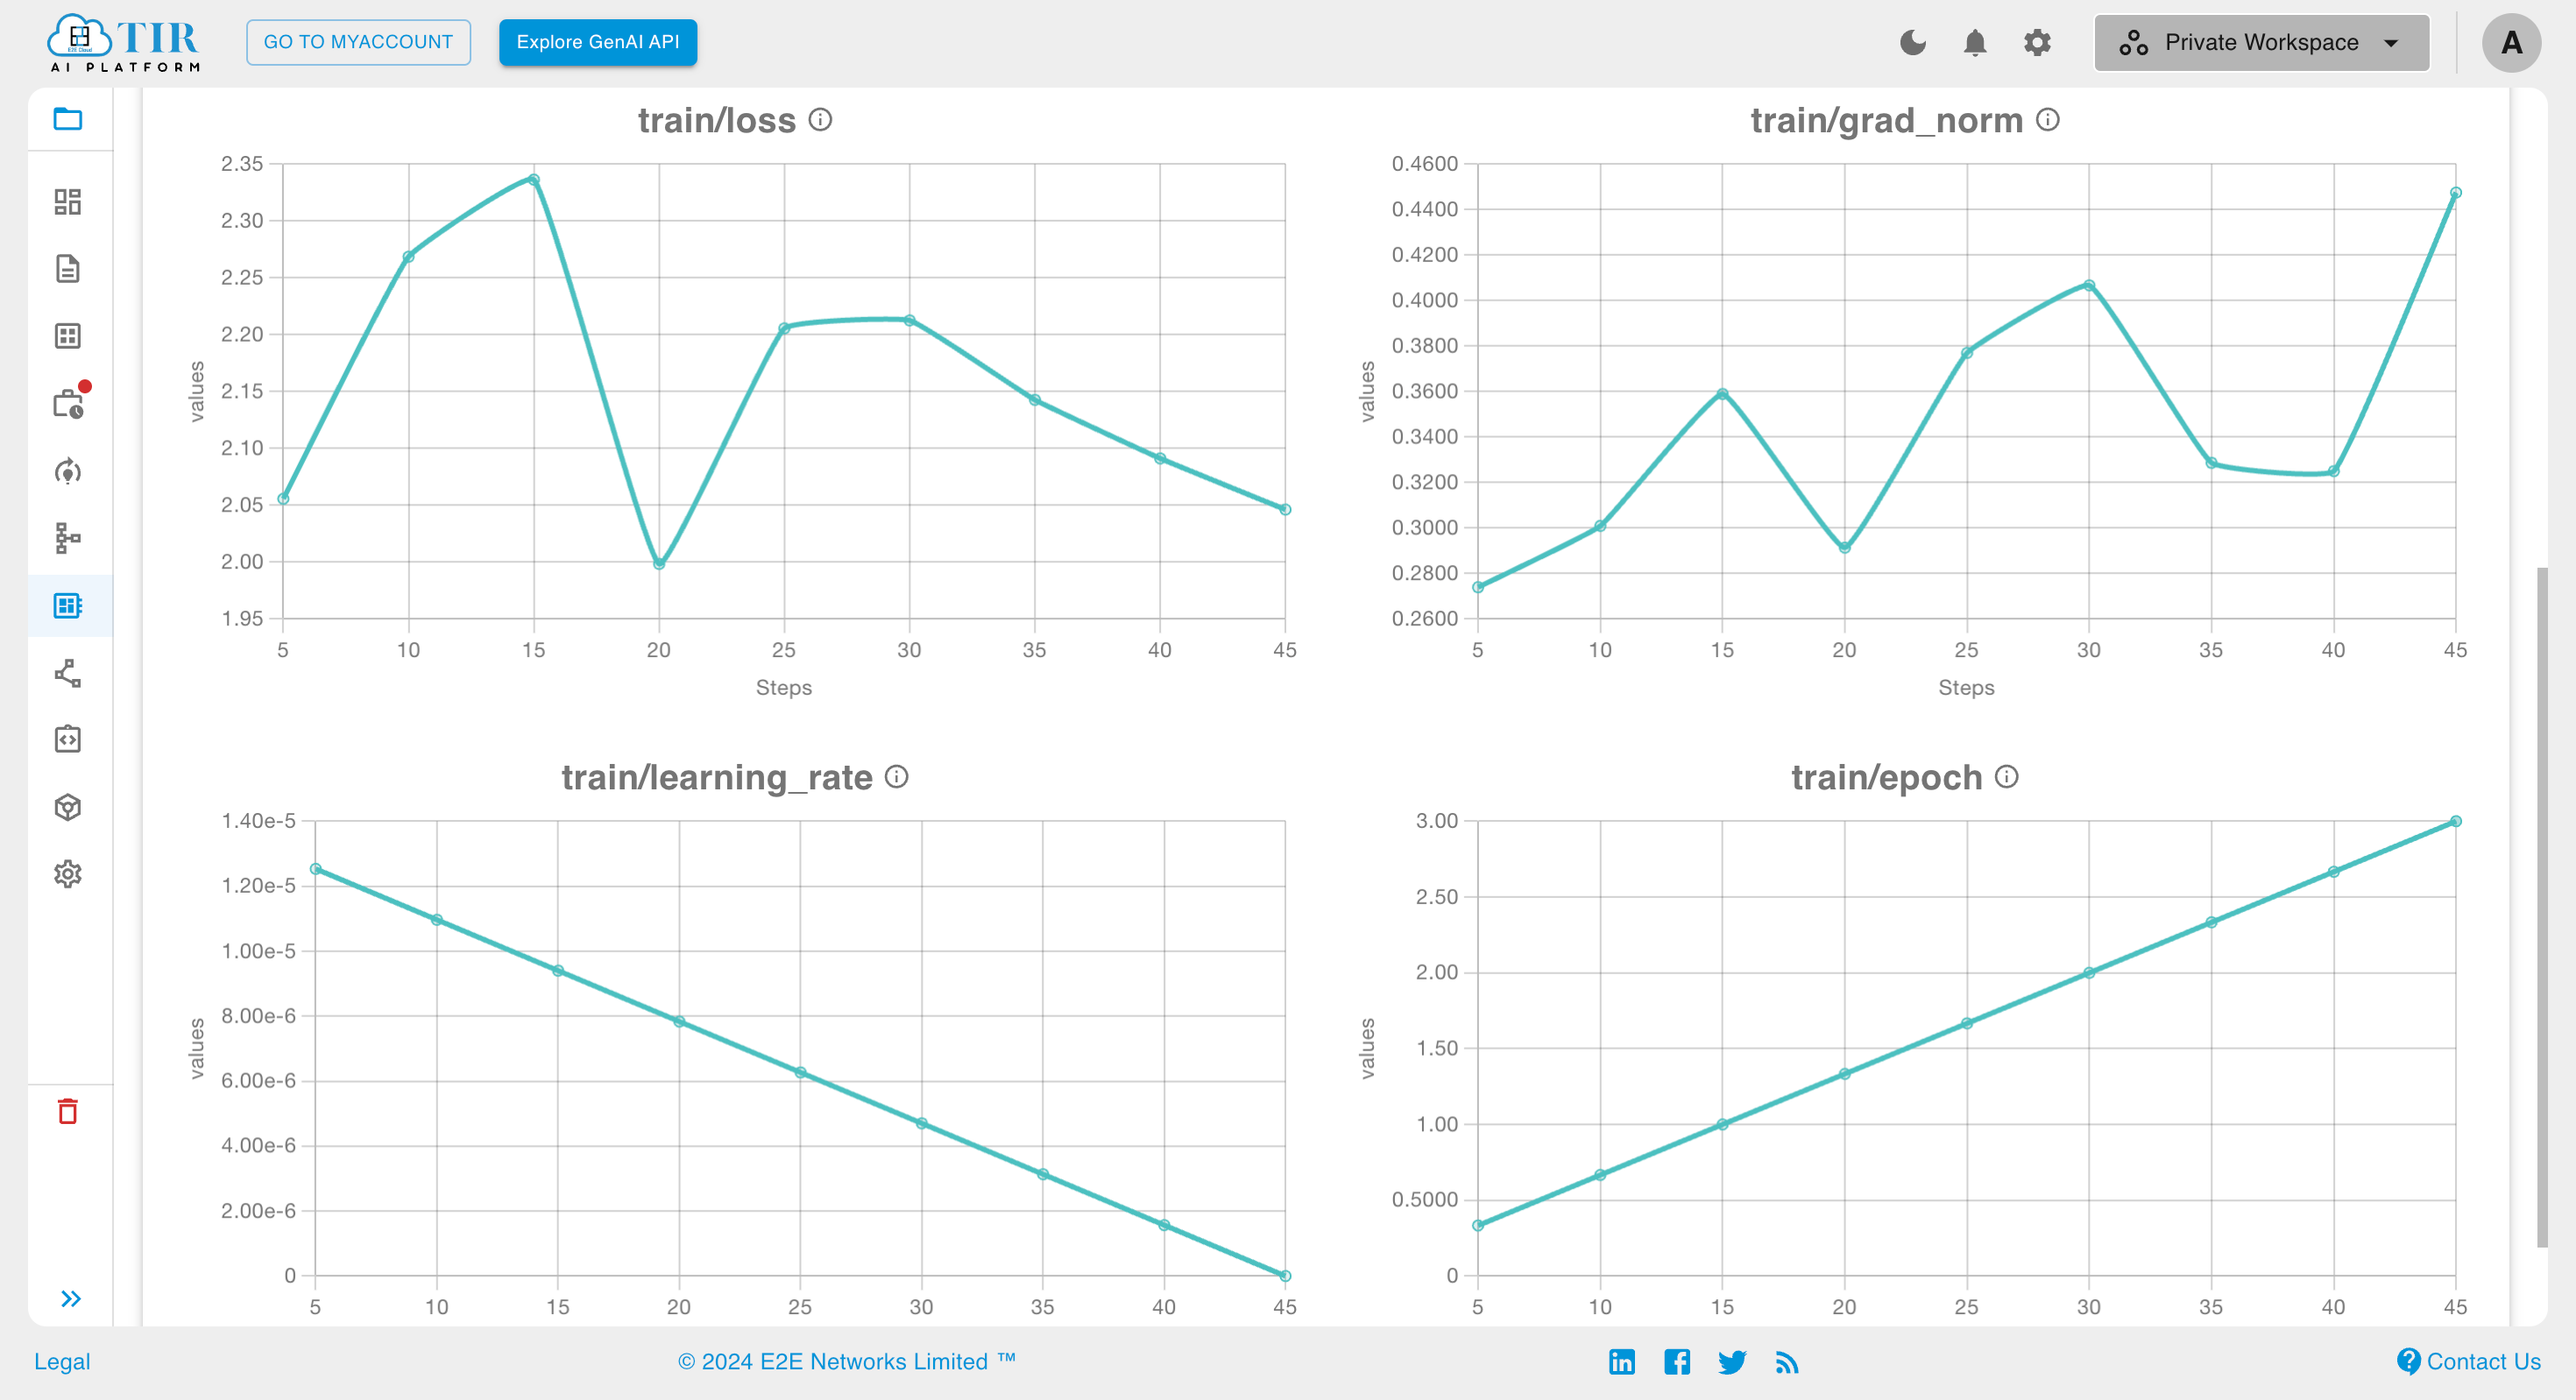
Training Metrics
In the Training Metrics section, you can view metrics that offer insights into the training process, helping you monitor and optimize your models effectively.
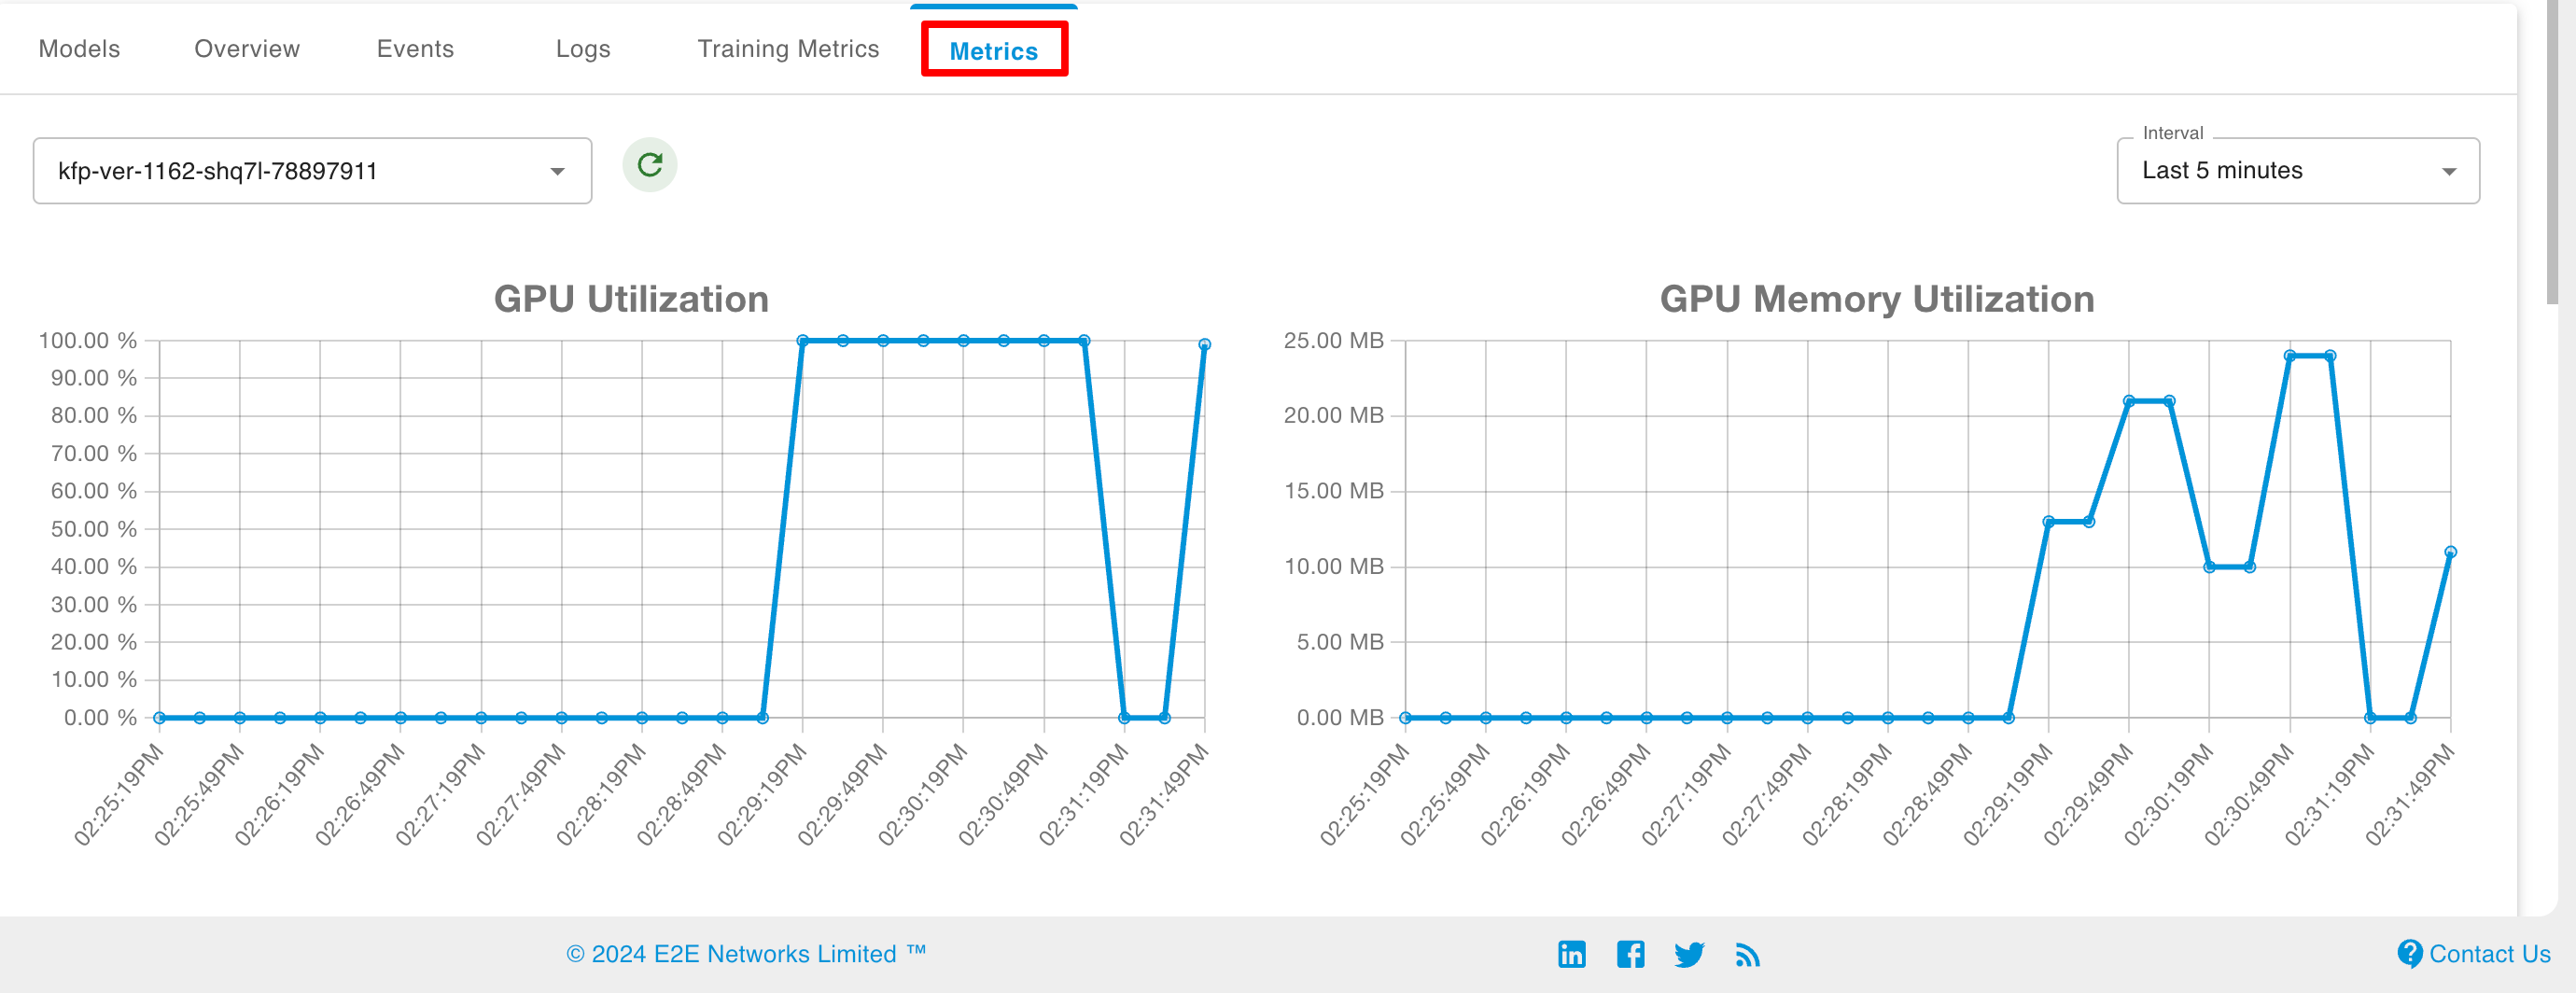
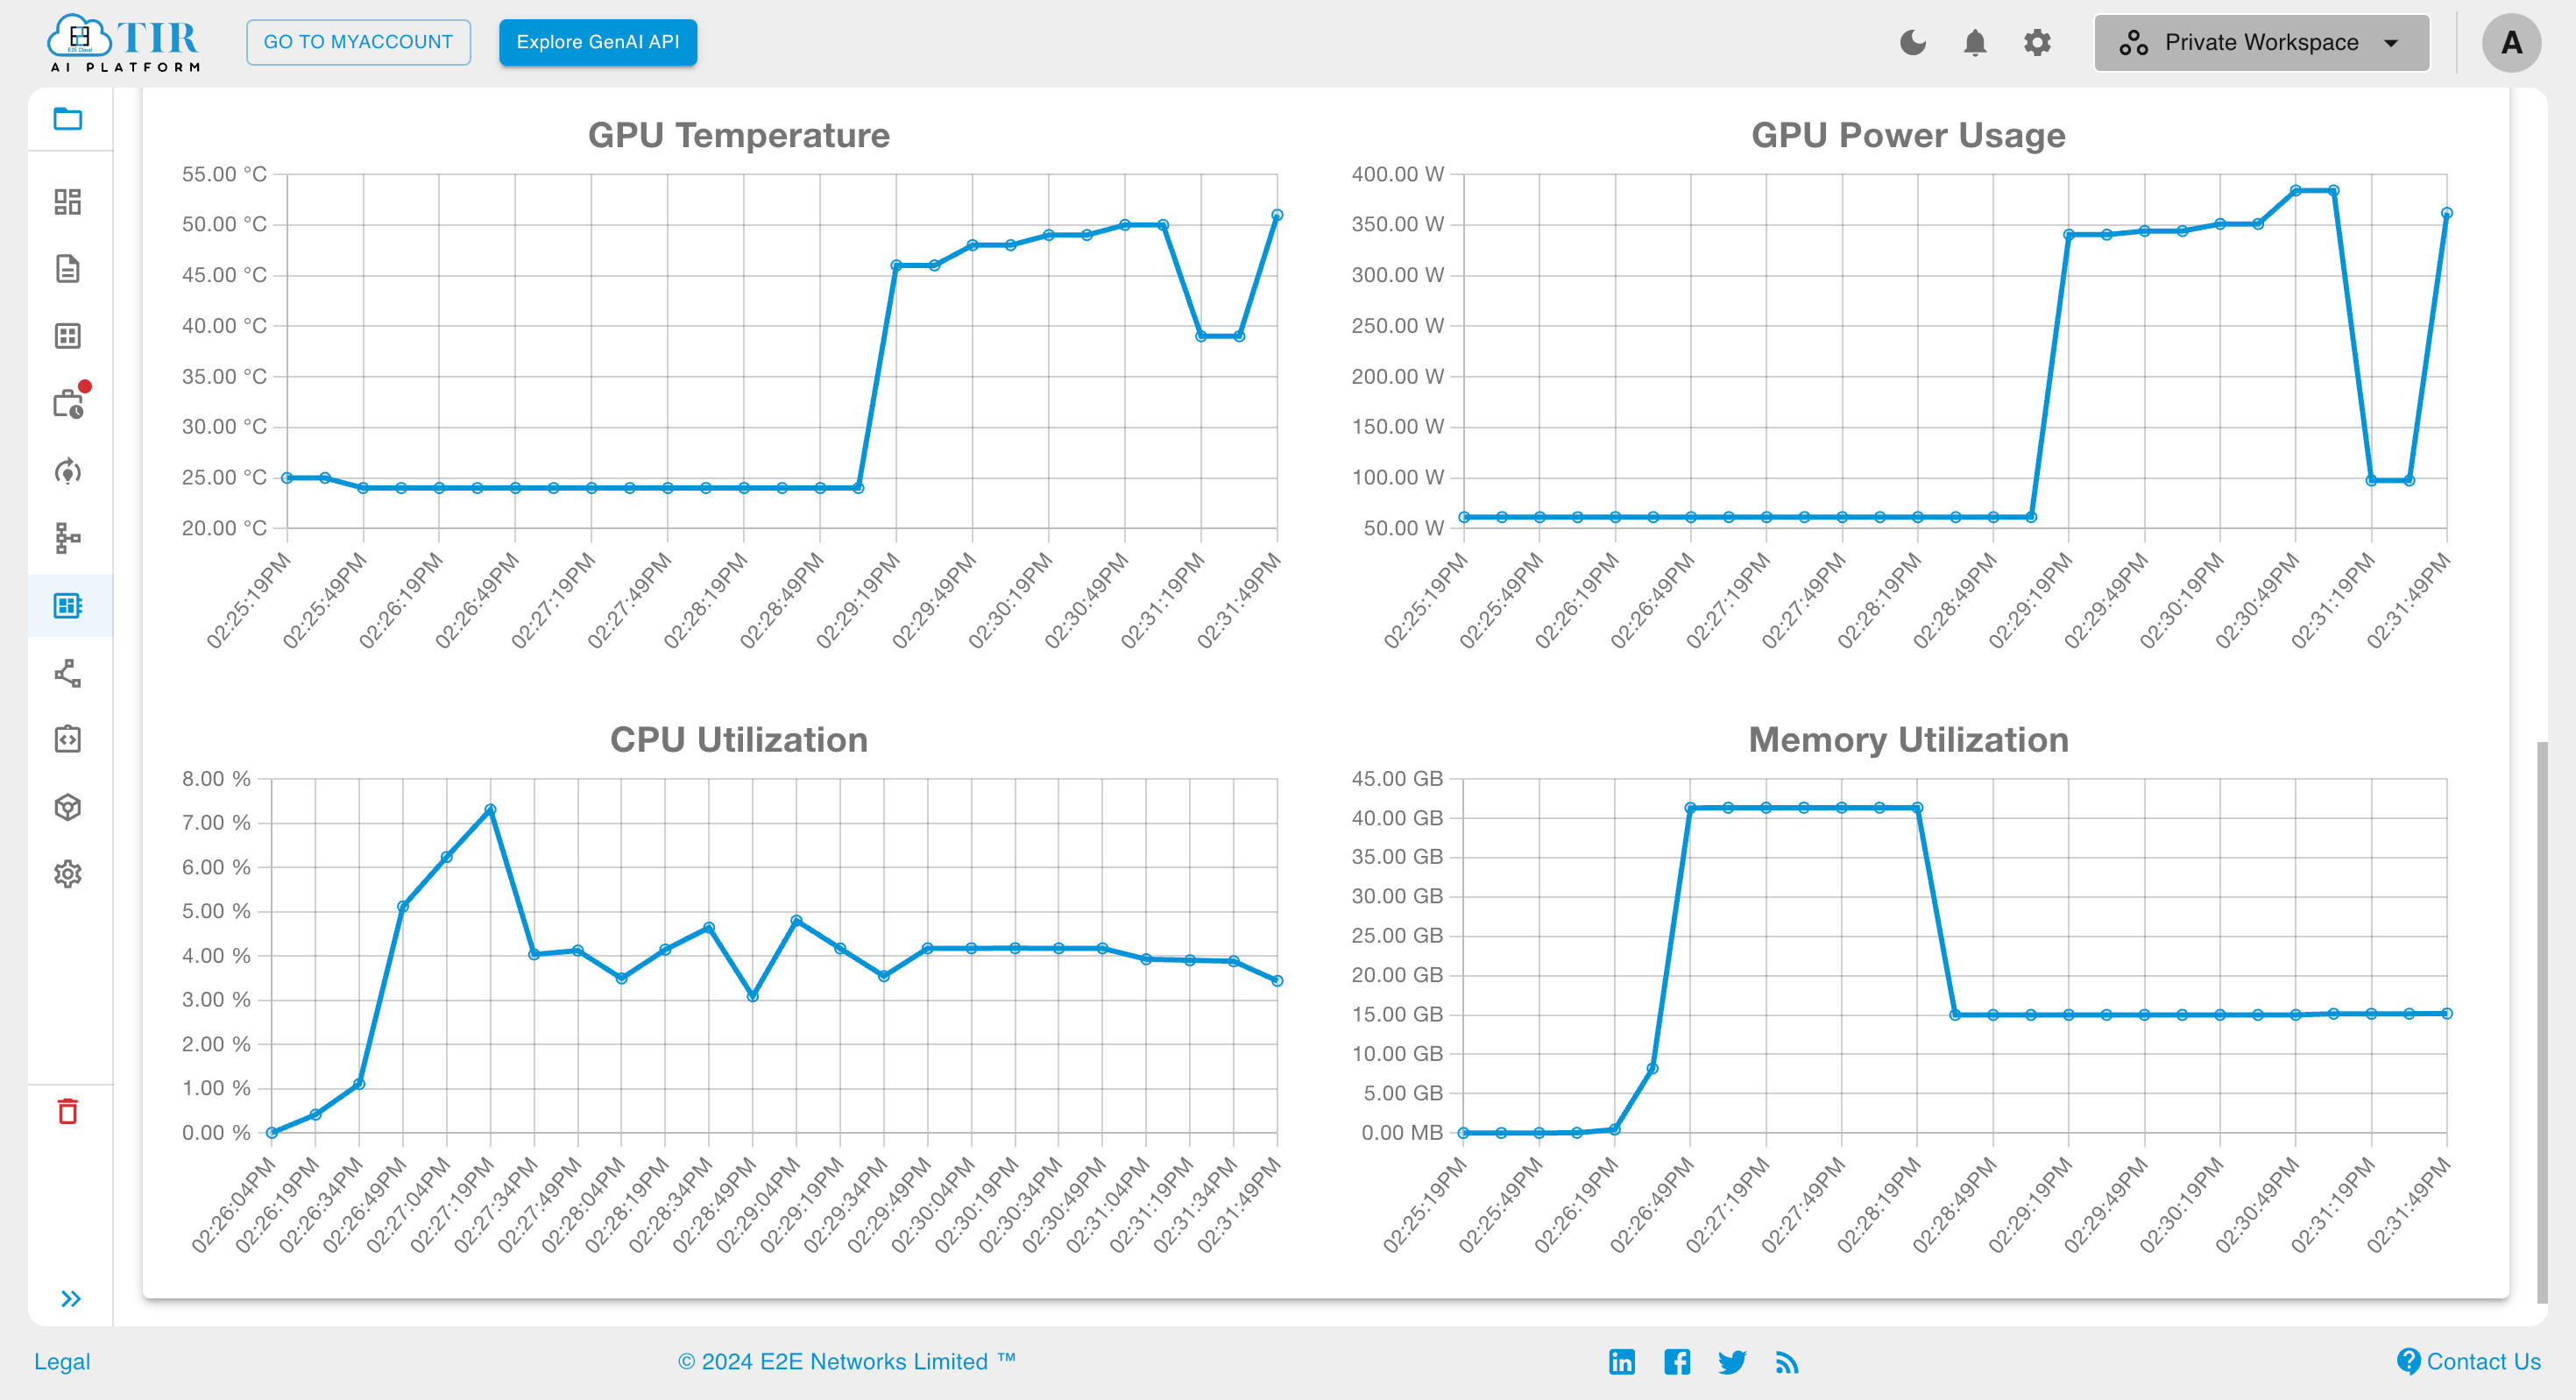
Metrics
In the Metrics section, you can monitor resource utilization metrics of the pod, such as GPU utilization and GPU memory usage.
Various Actions on Fine-Tuning Jobs
There are several actions that can be performed on fine-tuning jobs, all of which are described in the following sections.
Clone
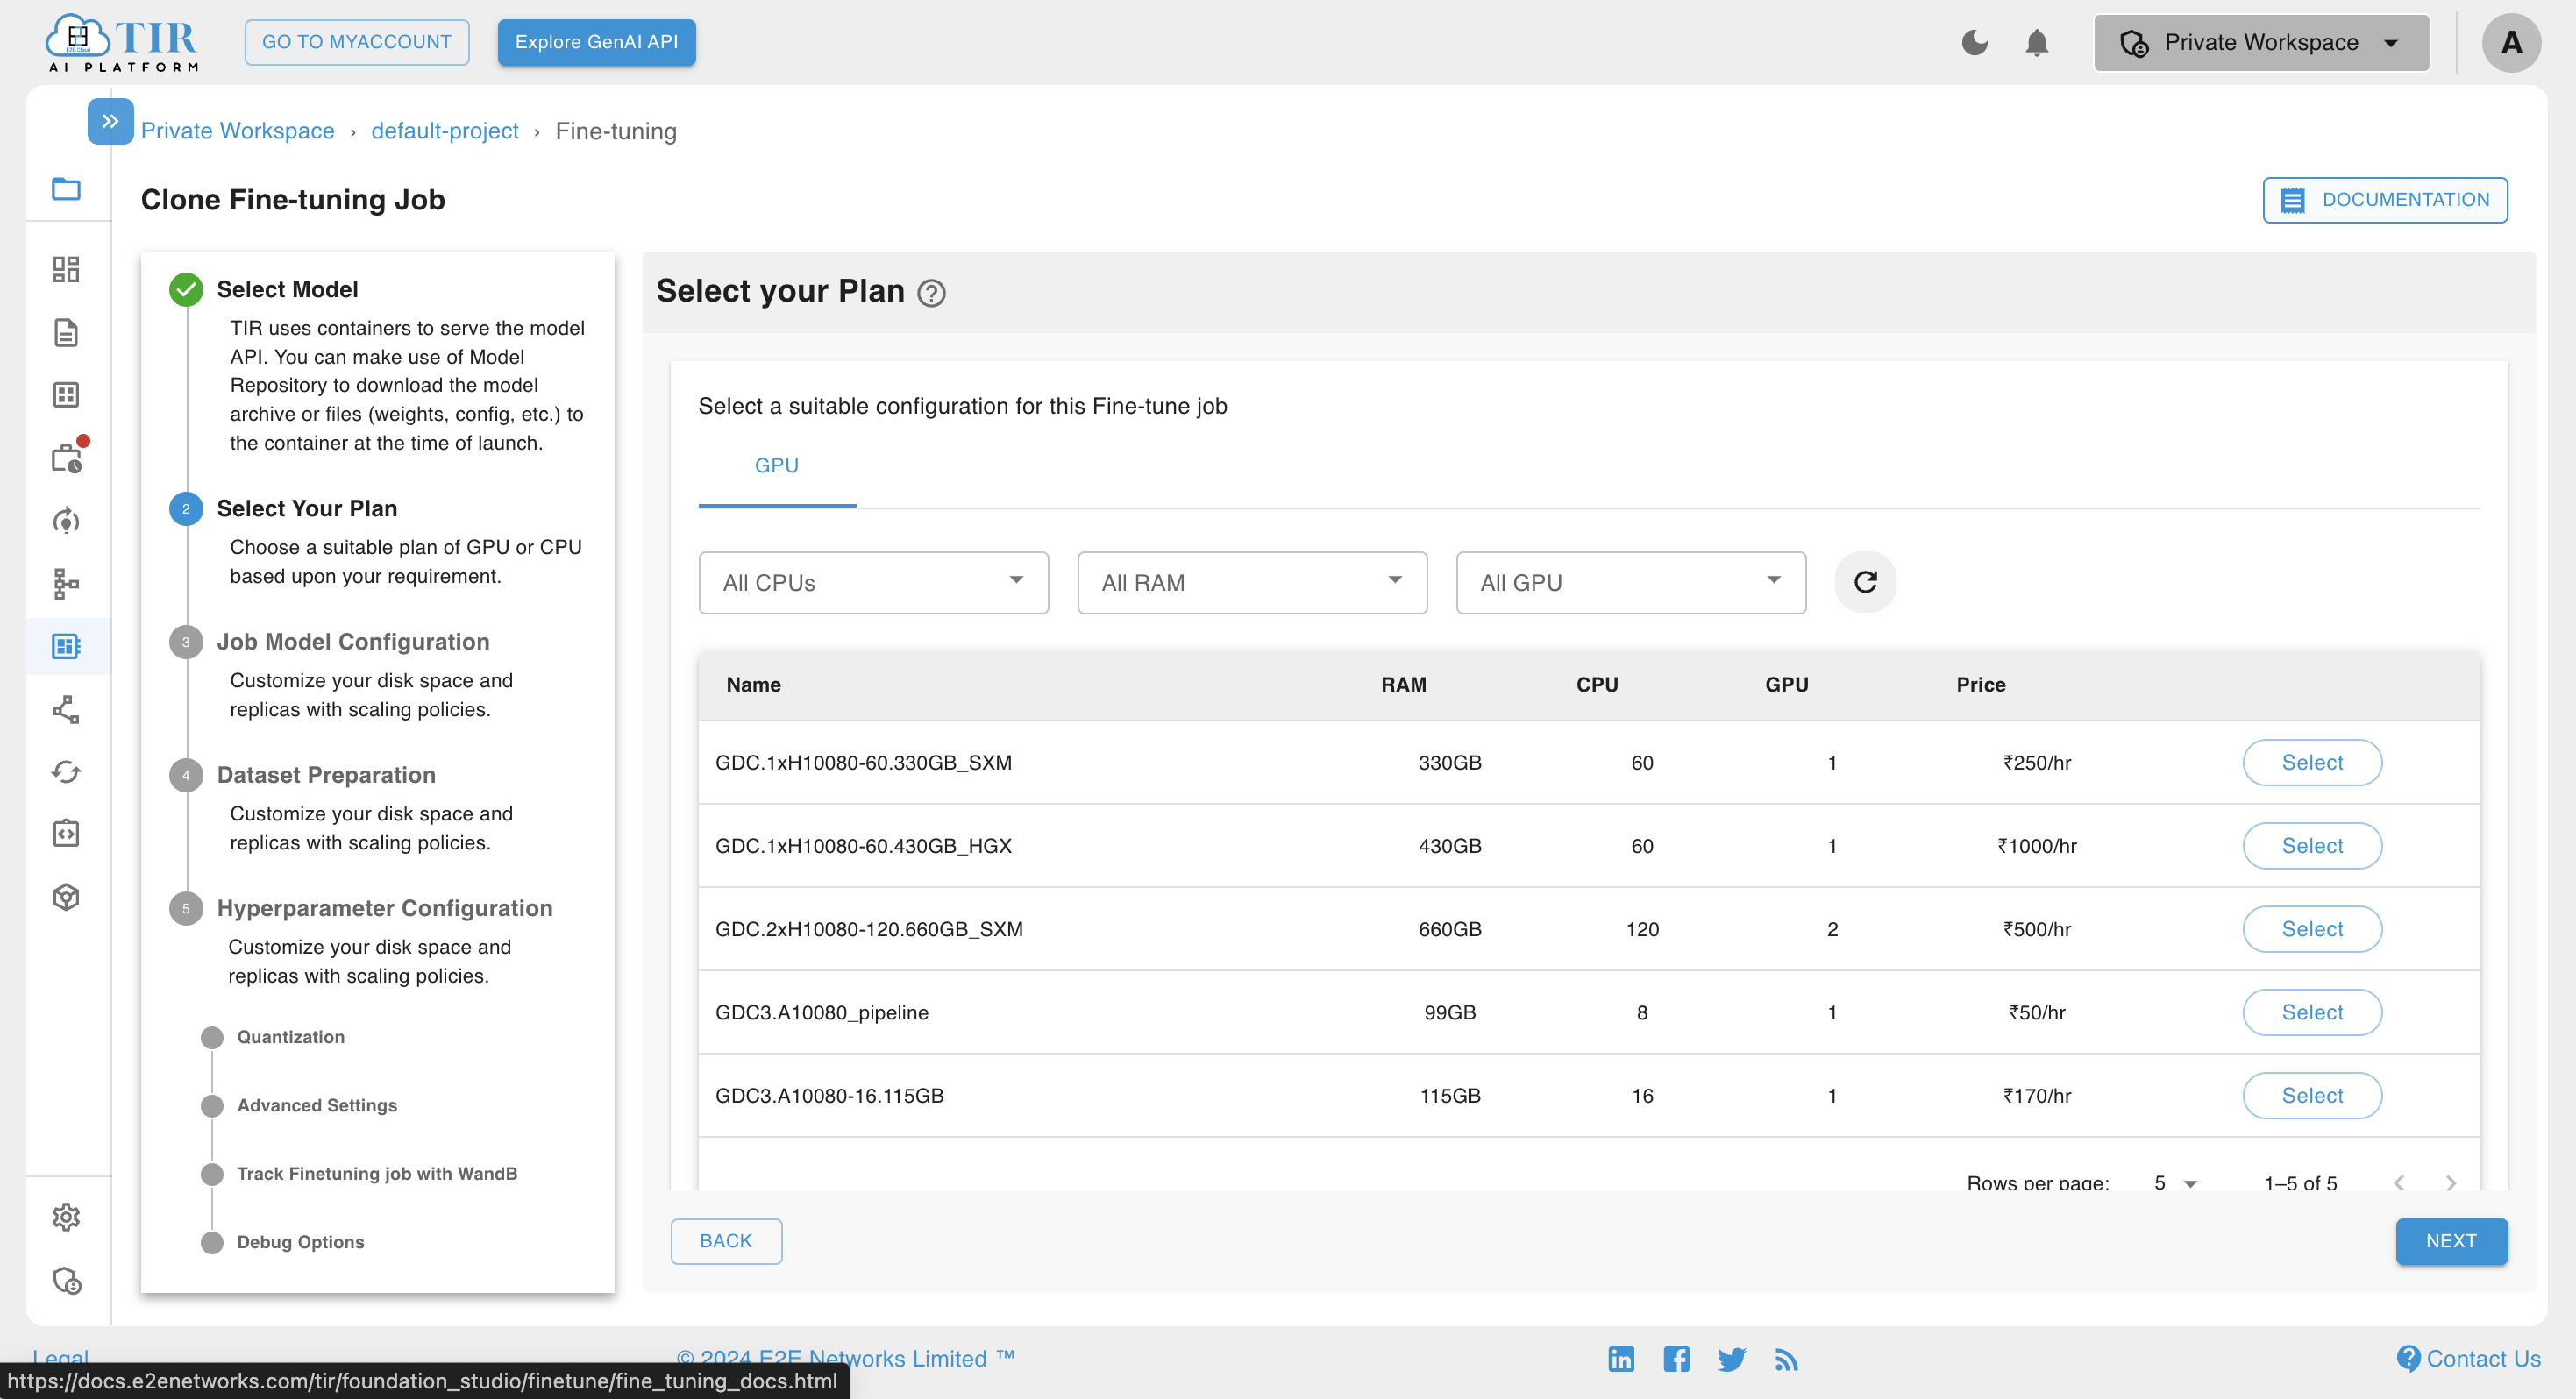
If you want to create a fine-tuning job with the same parameters and configuration as an existing fine-tuning job, you can use the clone option. This option also allows you to edit the parameters and configuration of the selected fine-tuning job.
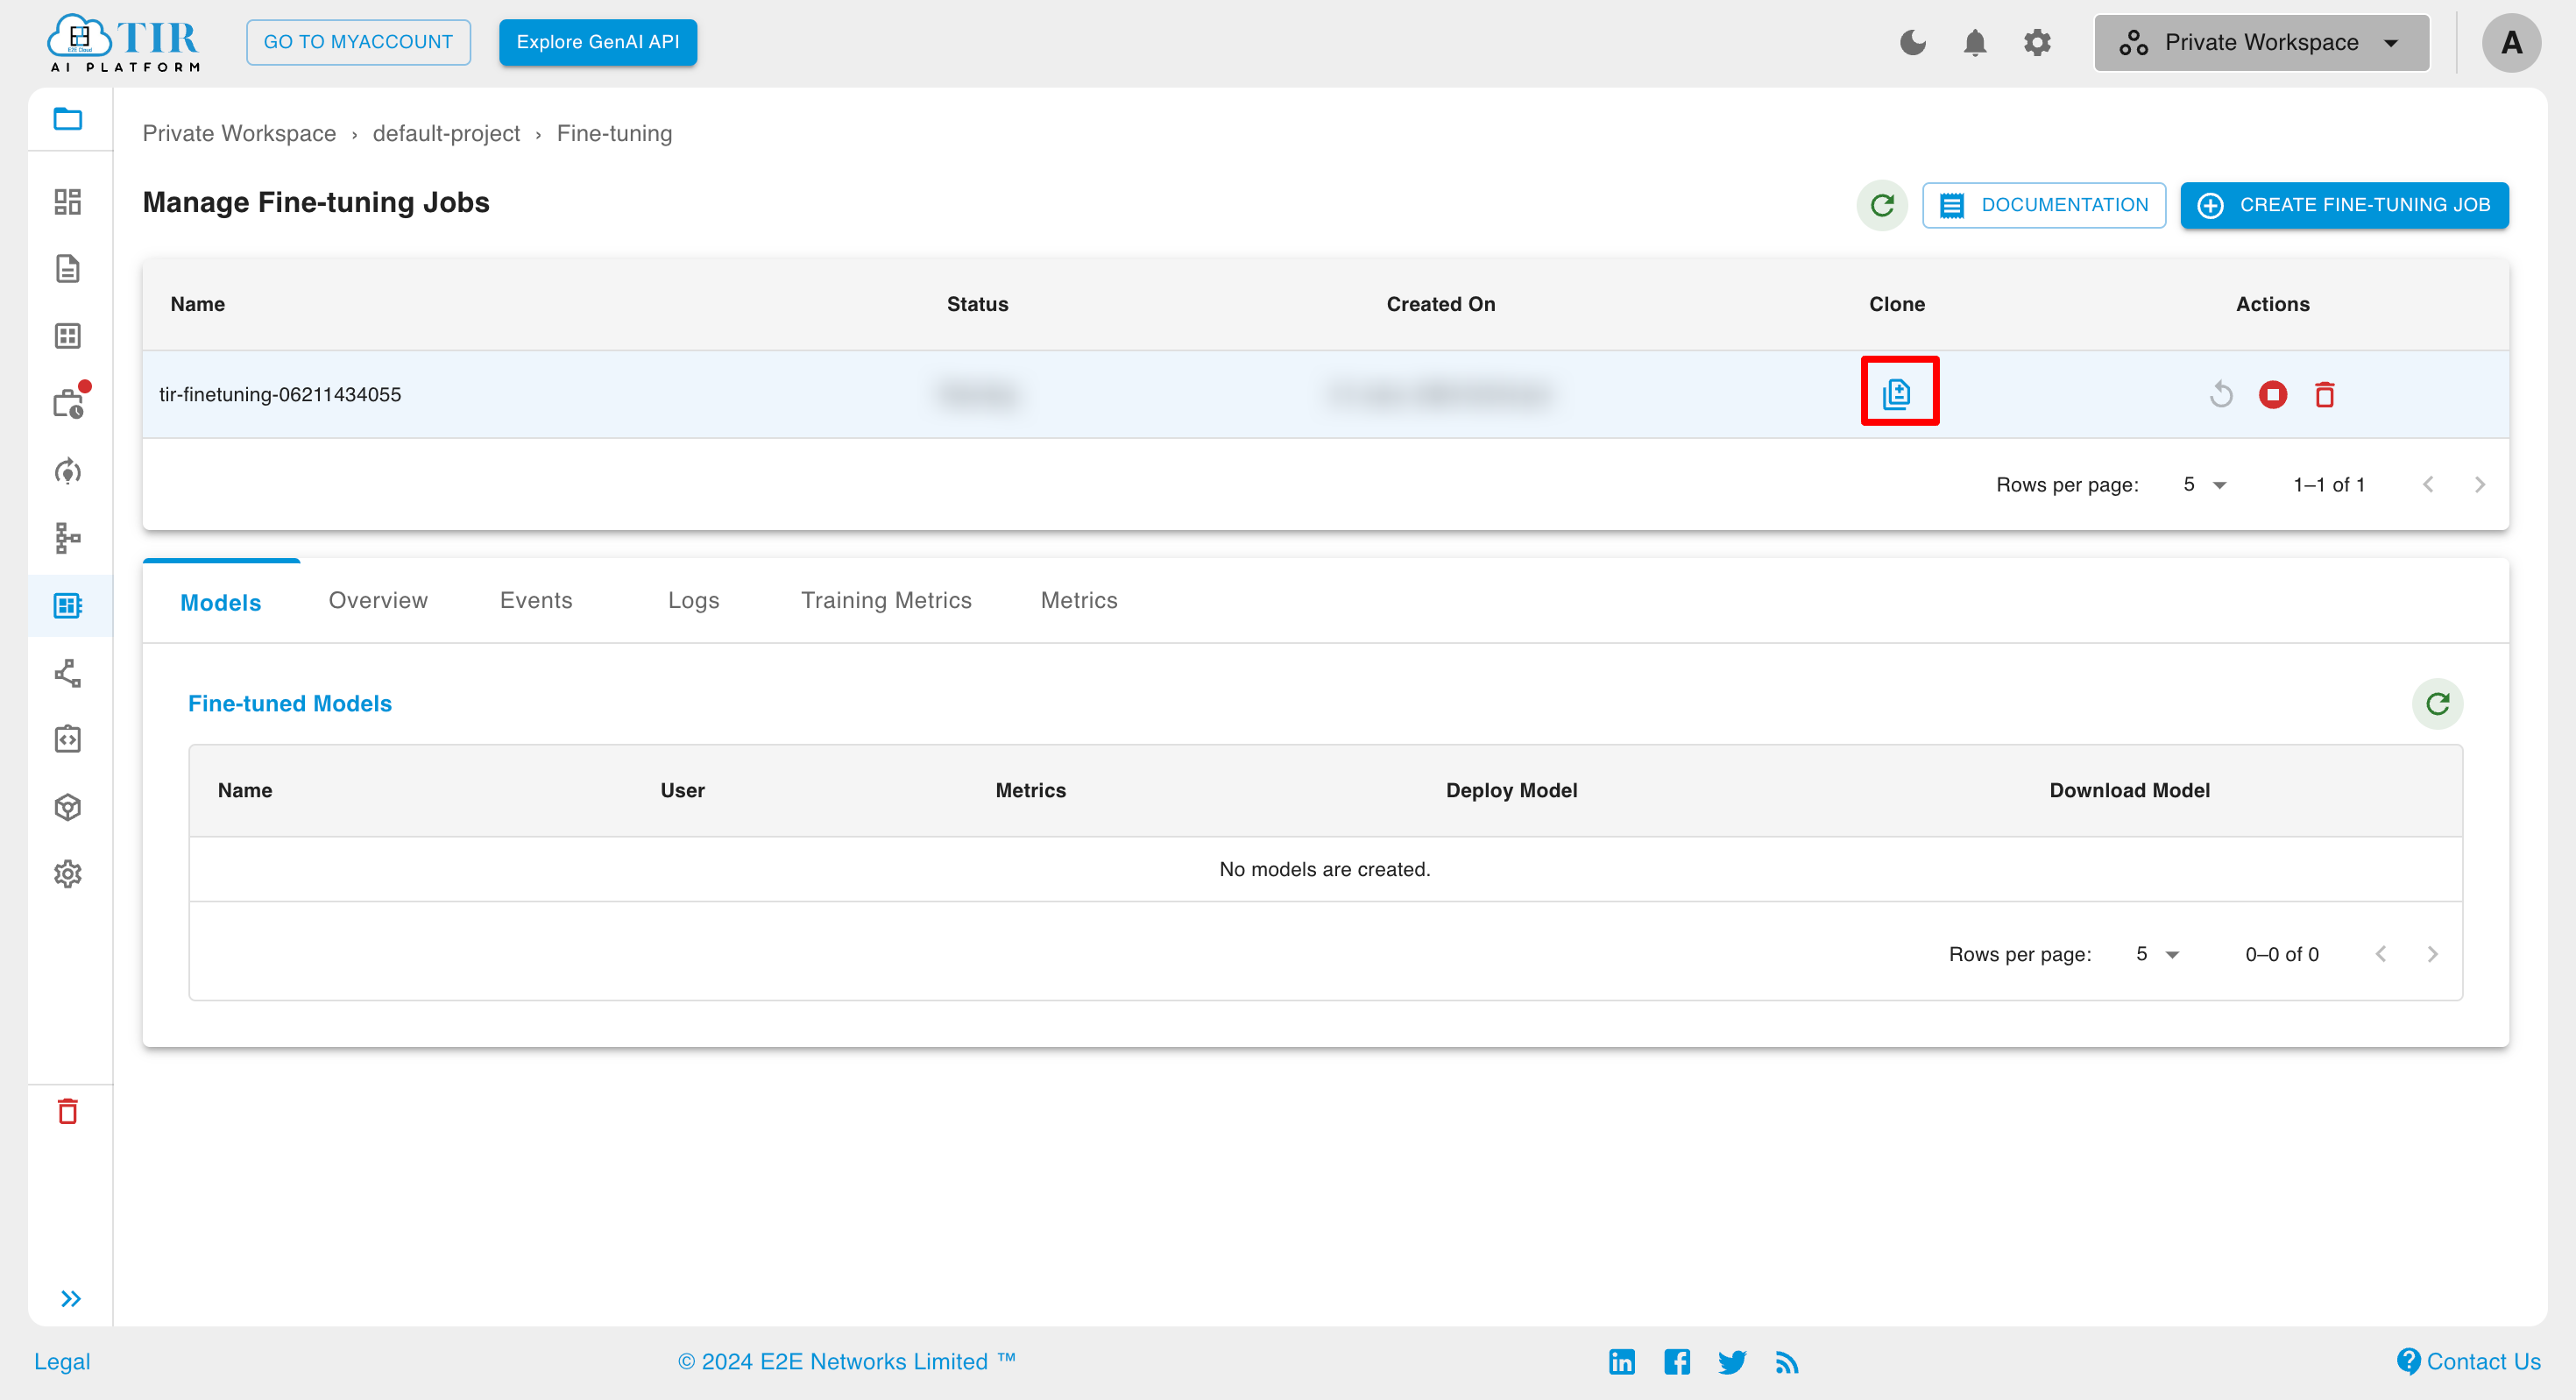
After clicking on the clone icon, you can further modify the parameters for your new fine-tuning job by adjusting the default settings.
Retry
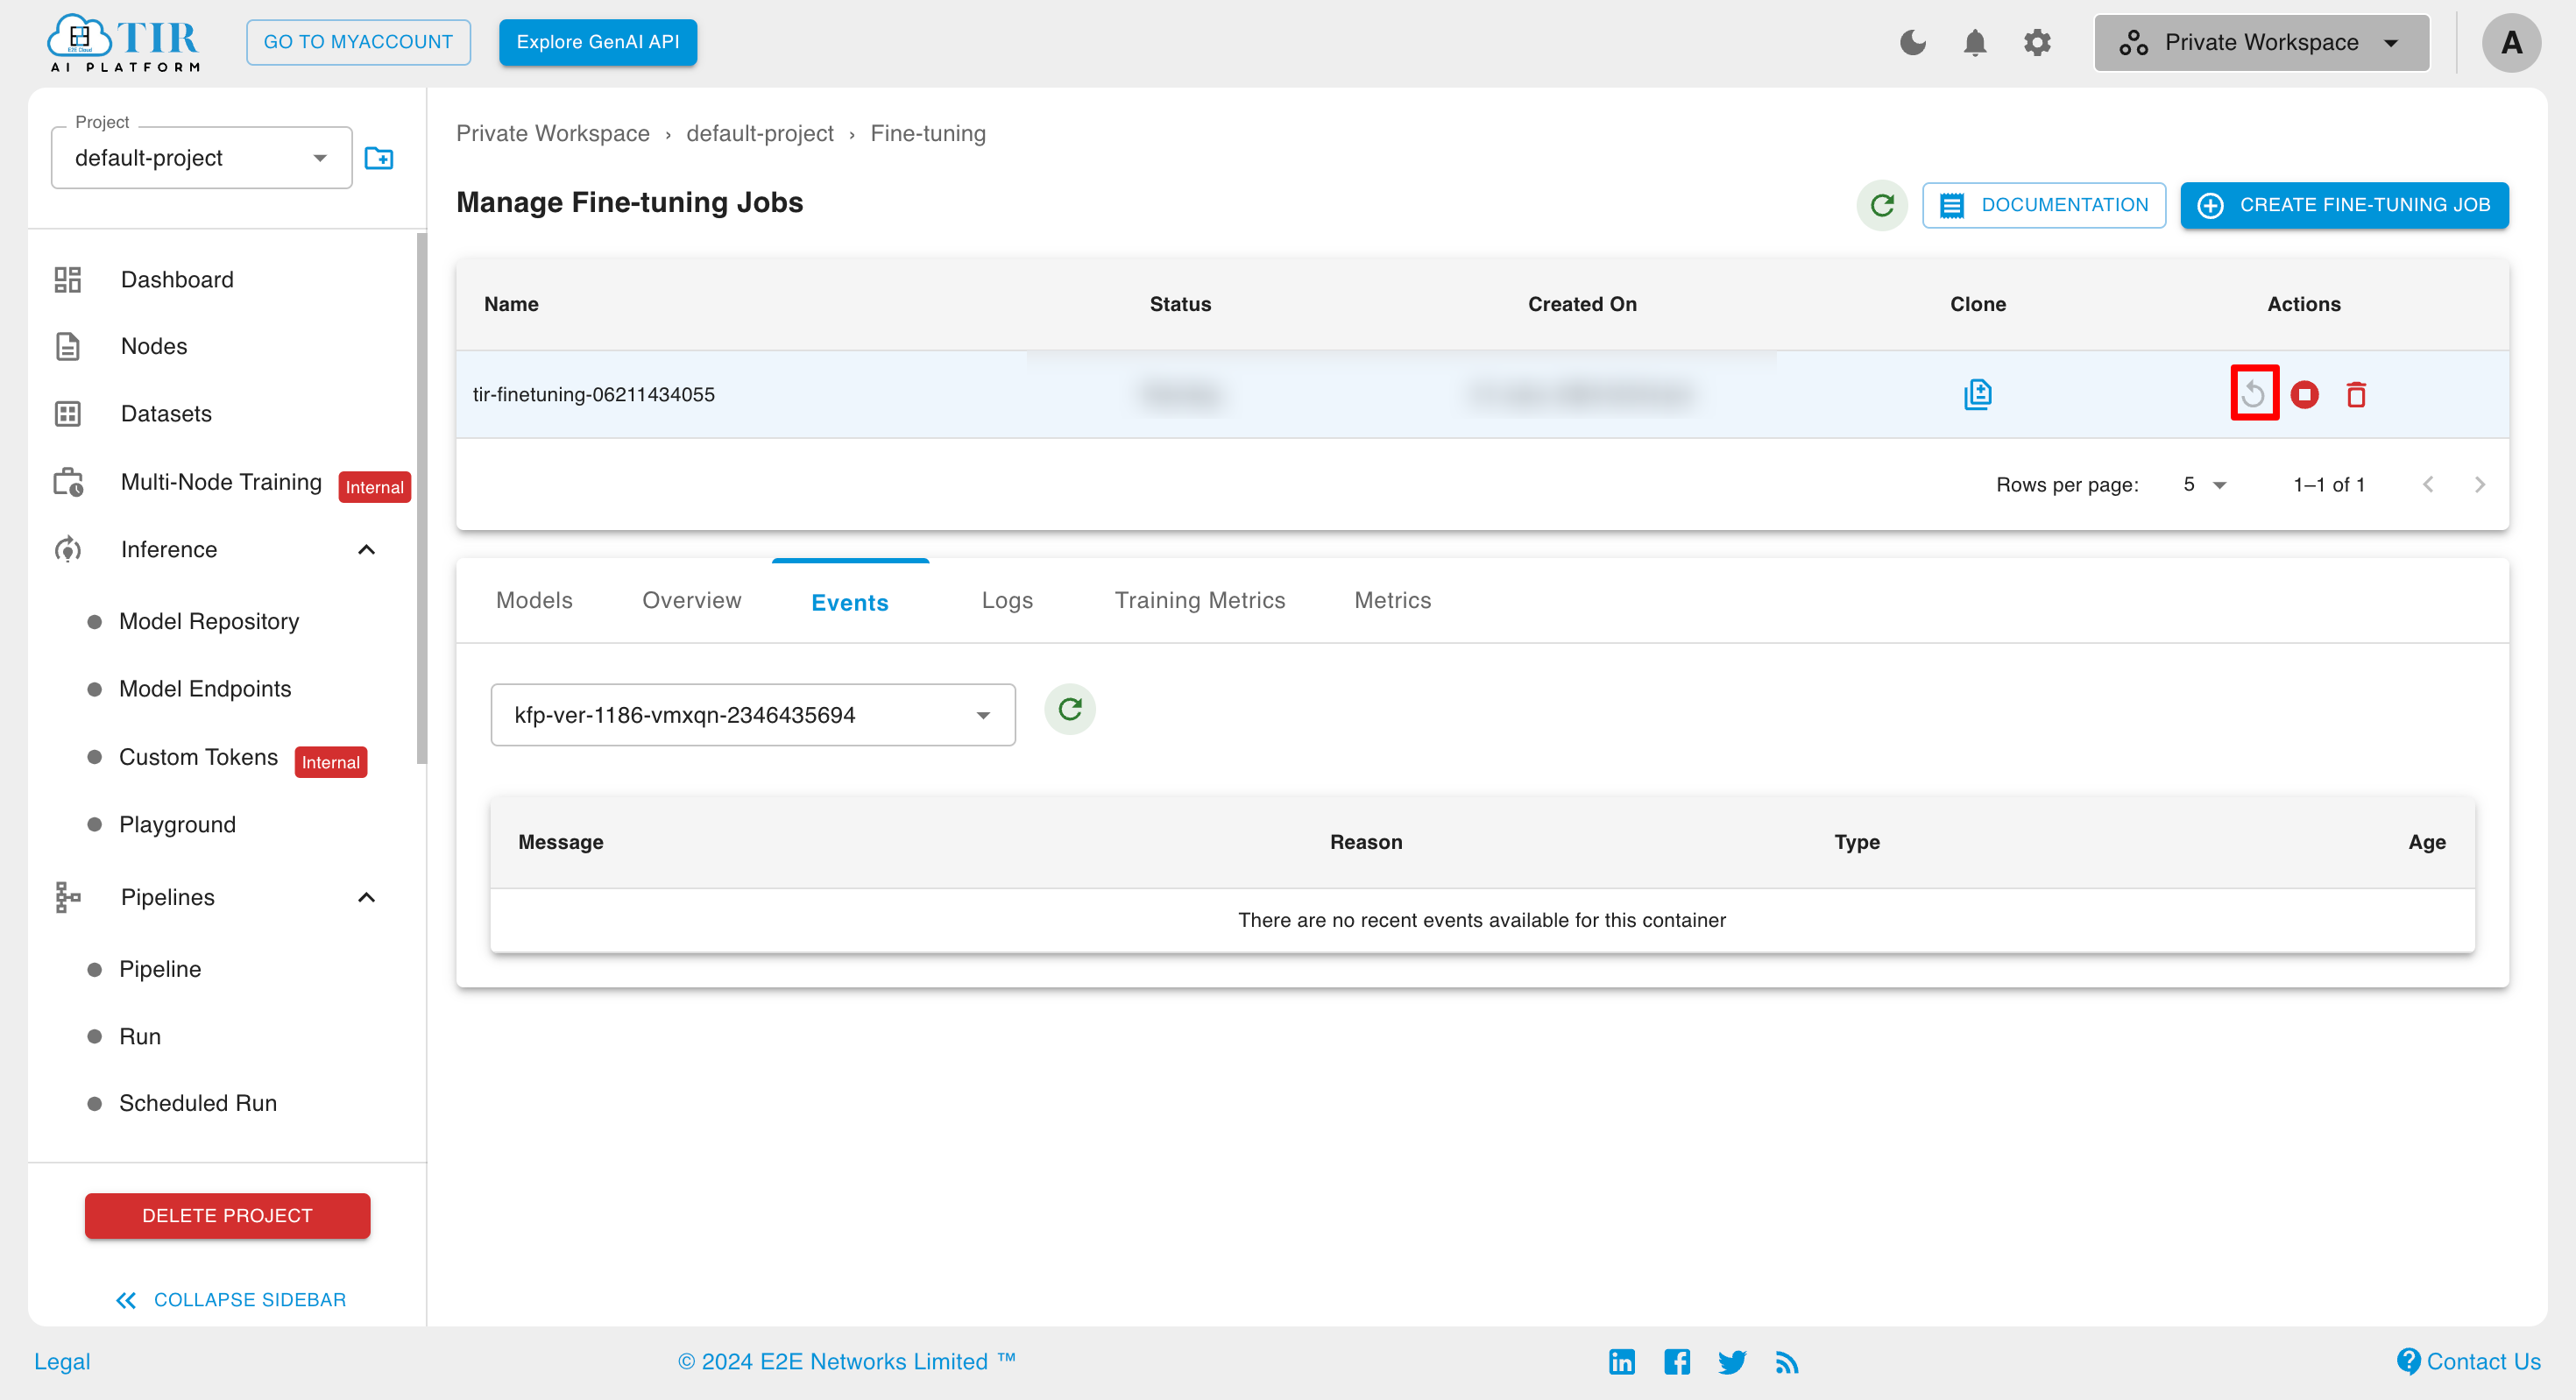
If your fine-tuning job fails, you can use the retry option to restart the fine-tuning process.
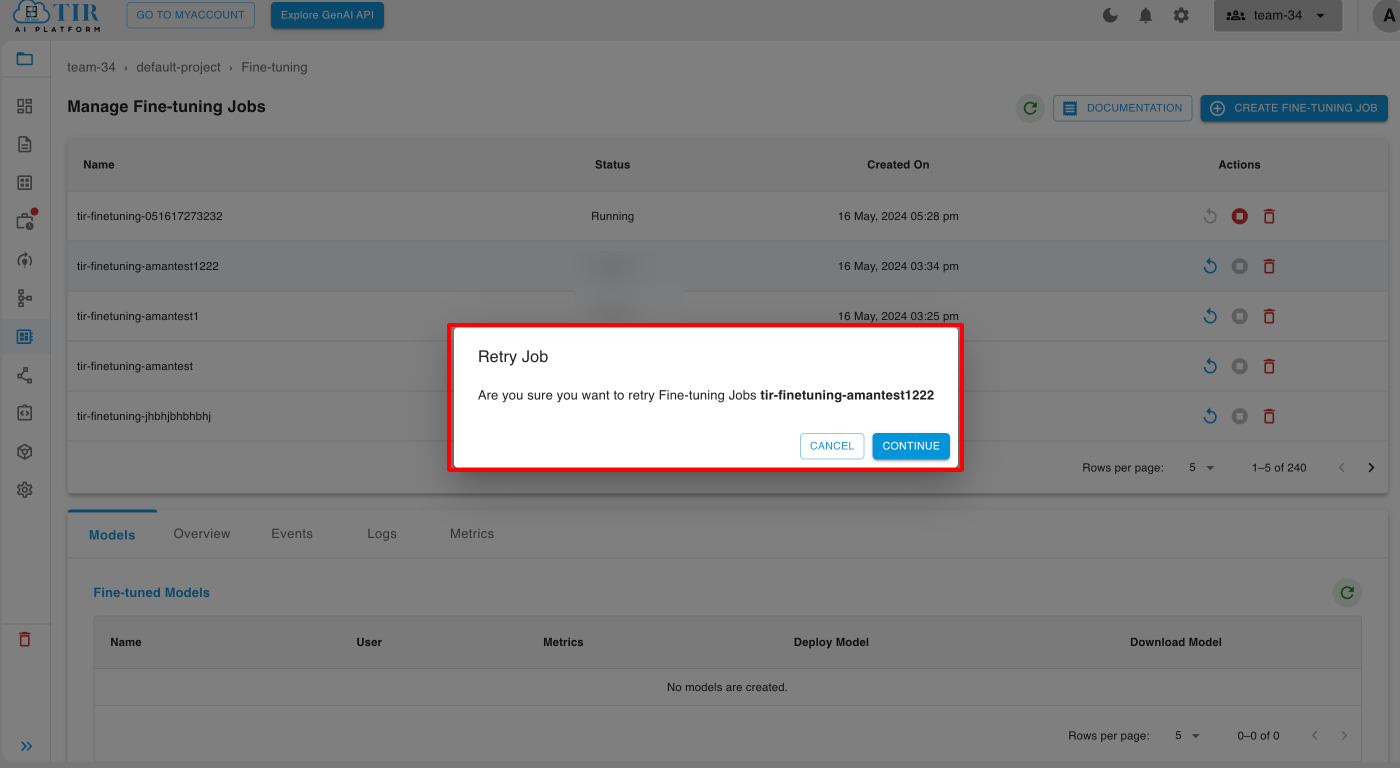
After clicking on the retry icon, a retry popup will appear. Click on the continue button to restart the process.
Terminate
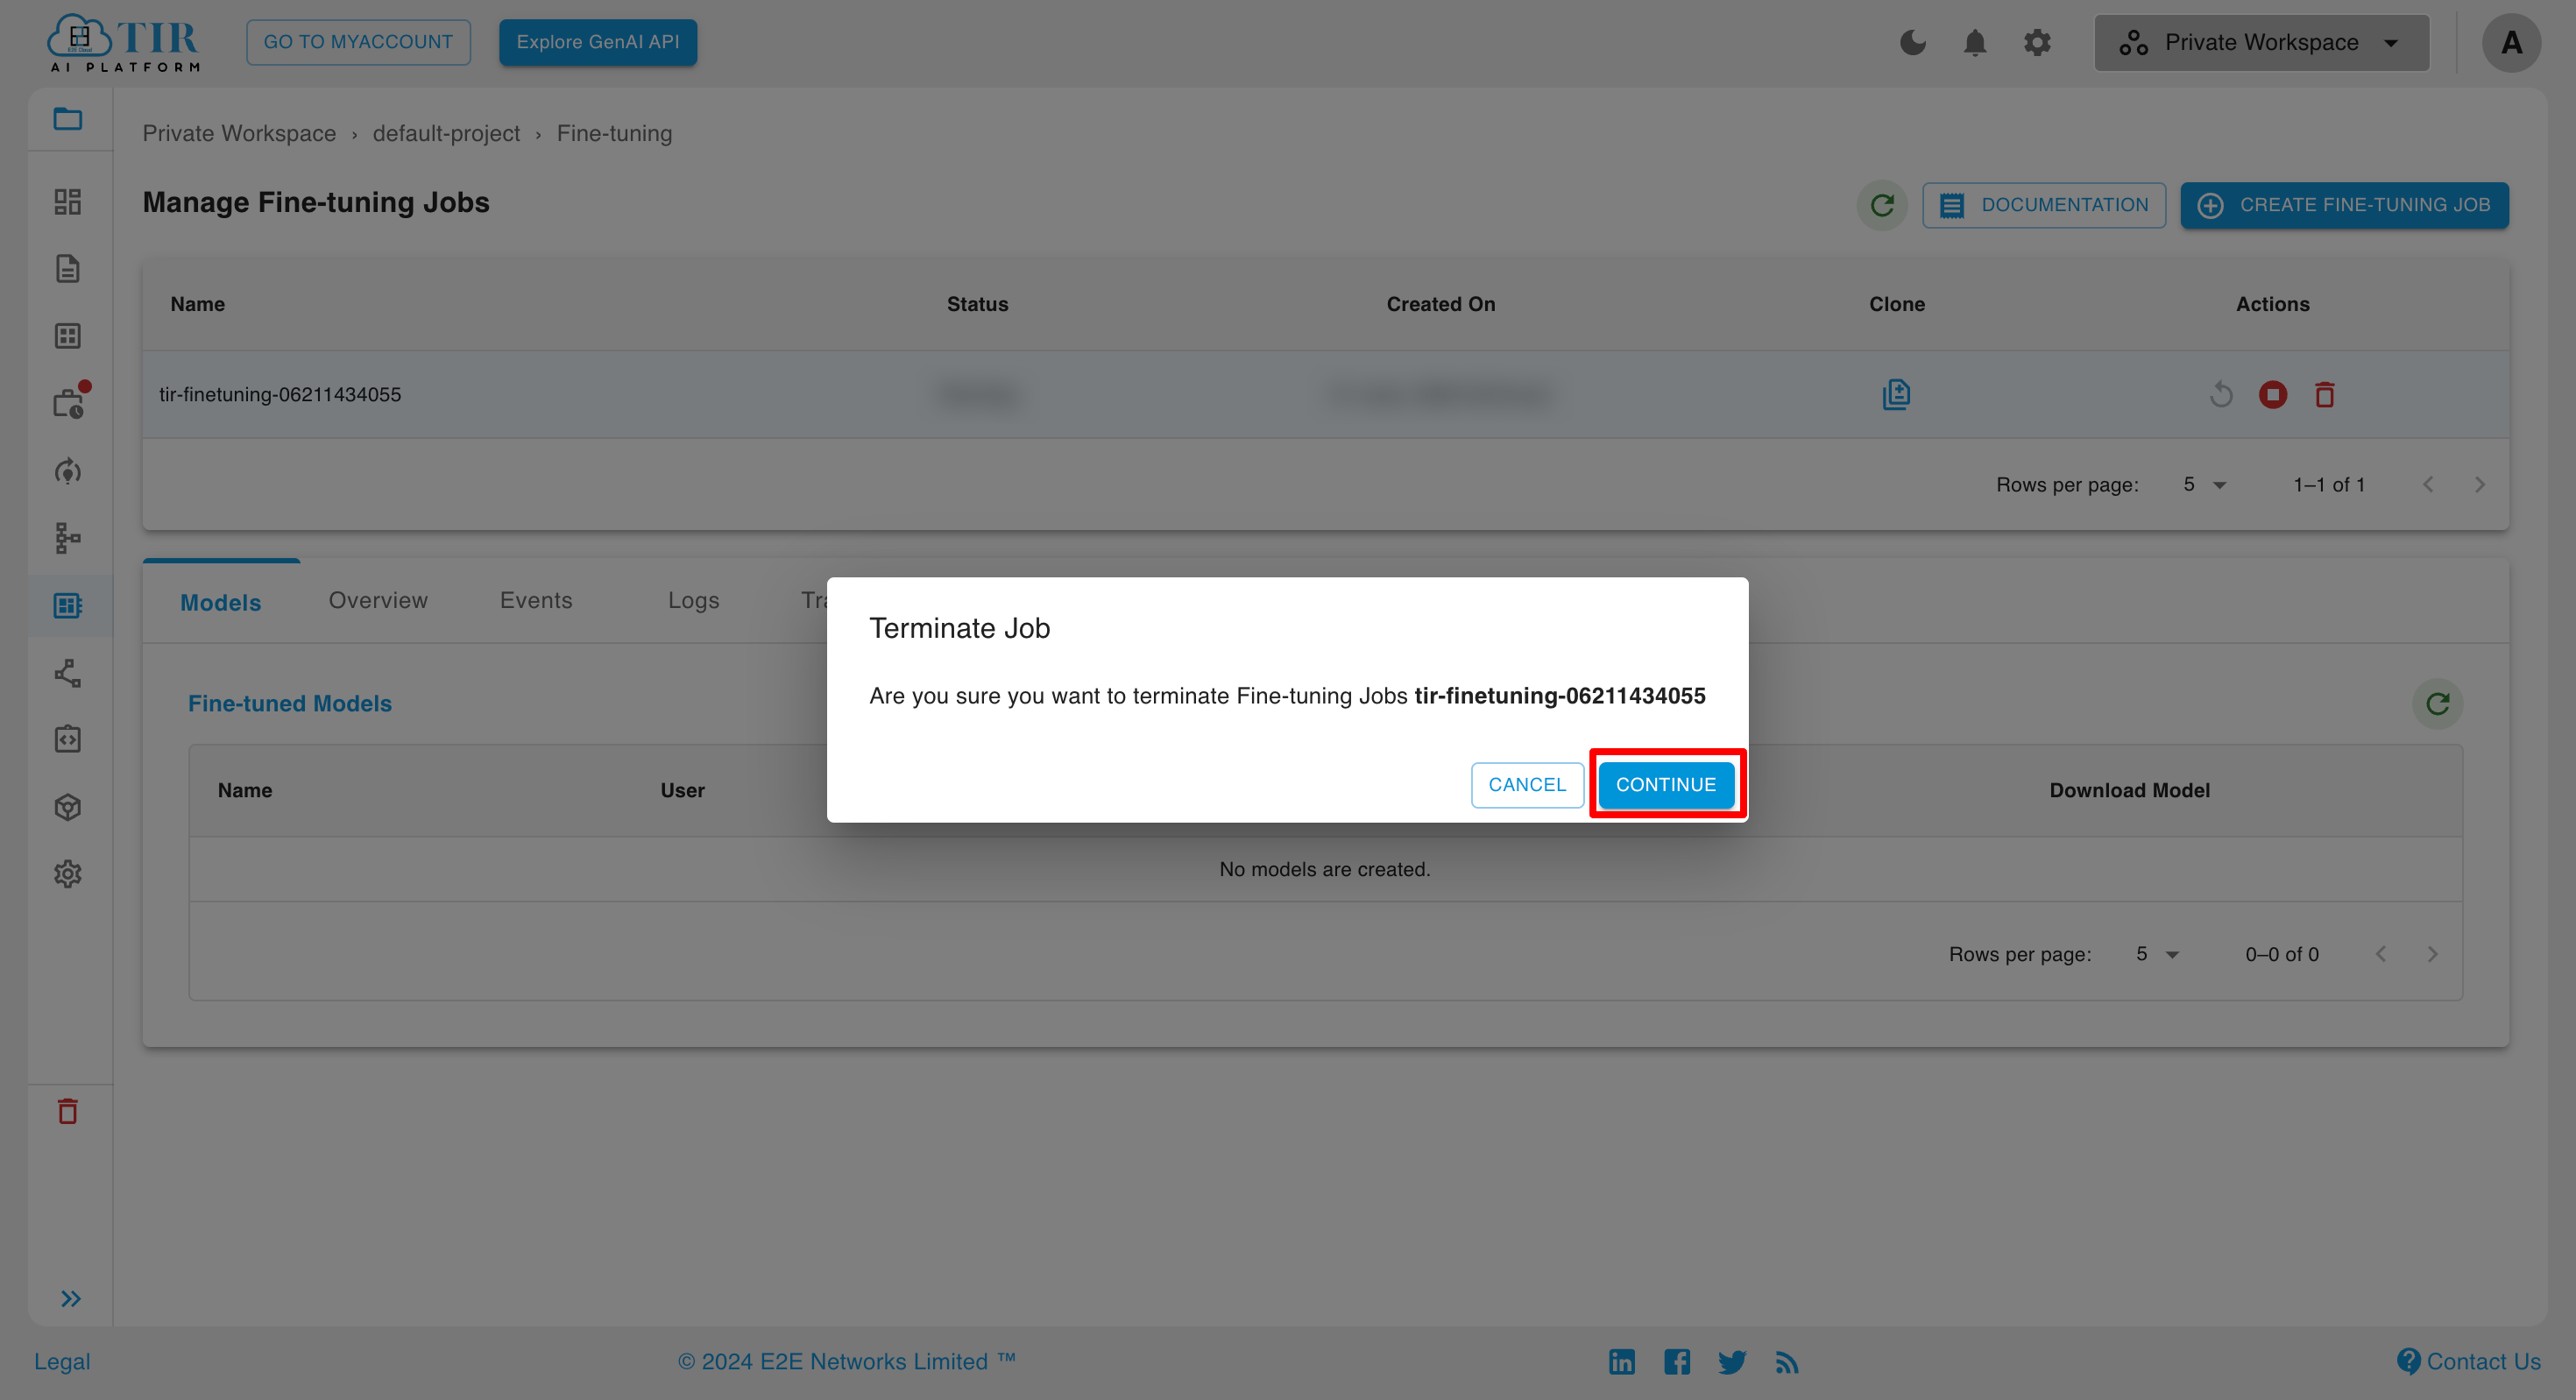
To terminate a fine-tuning model, select the model from the list and click on the Terminate button.
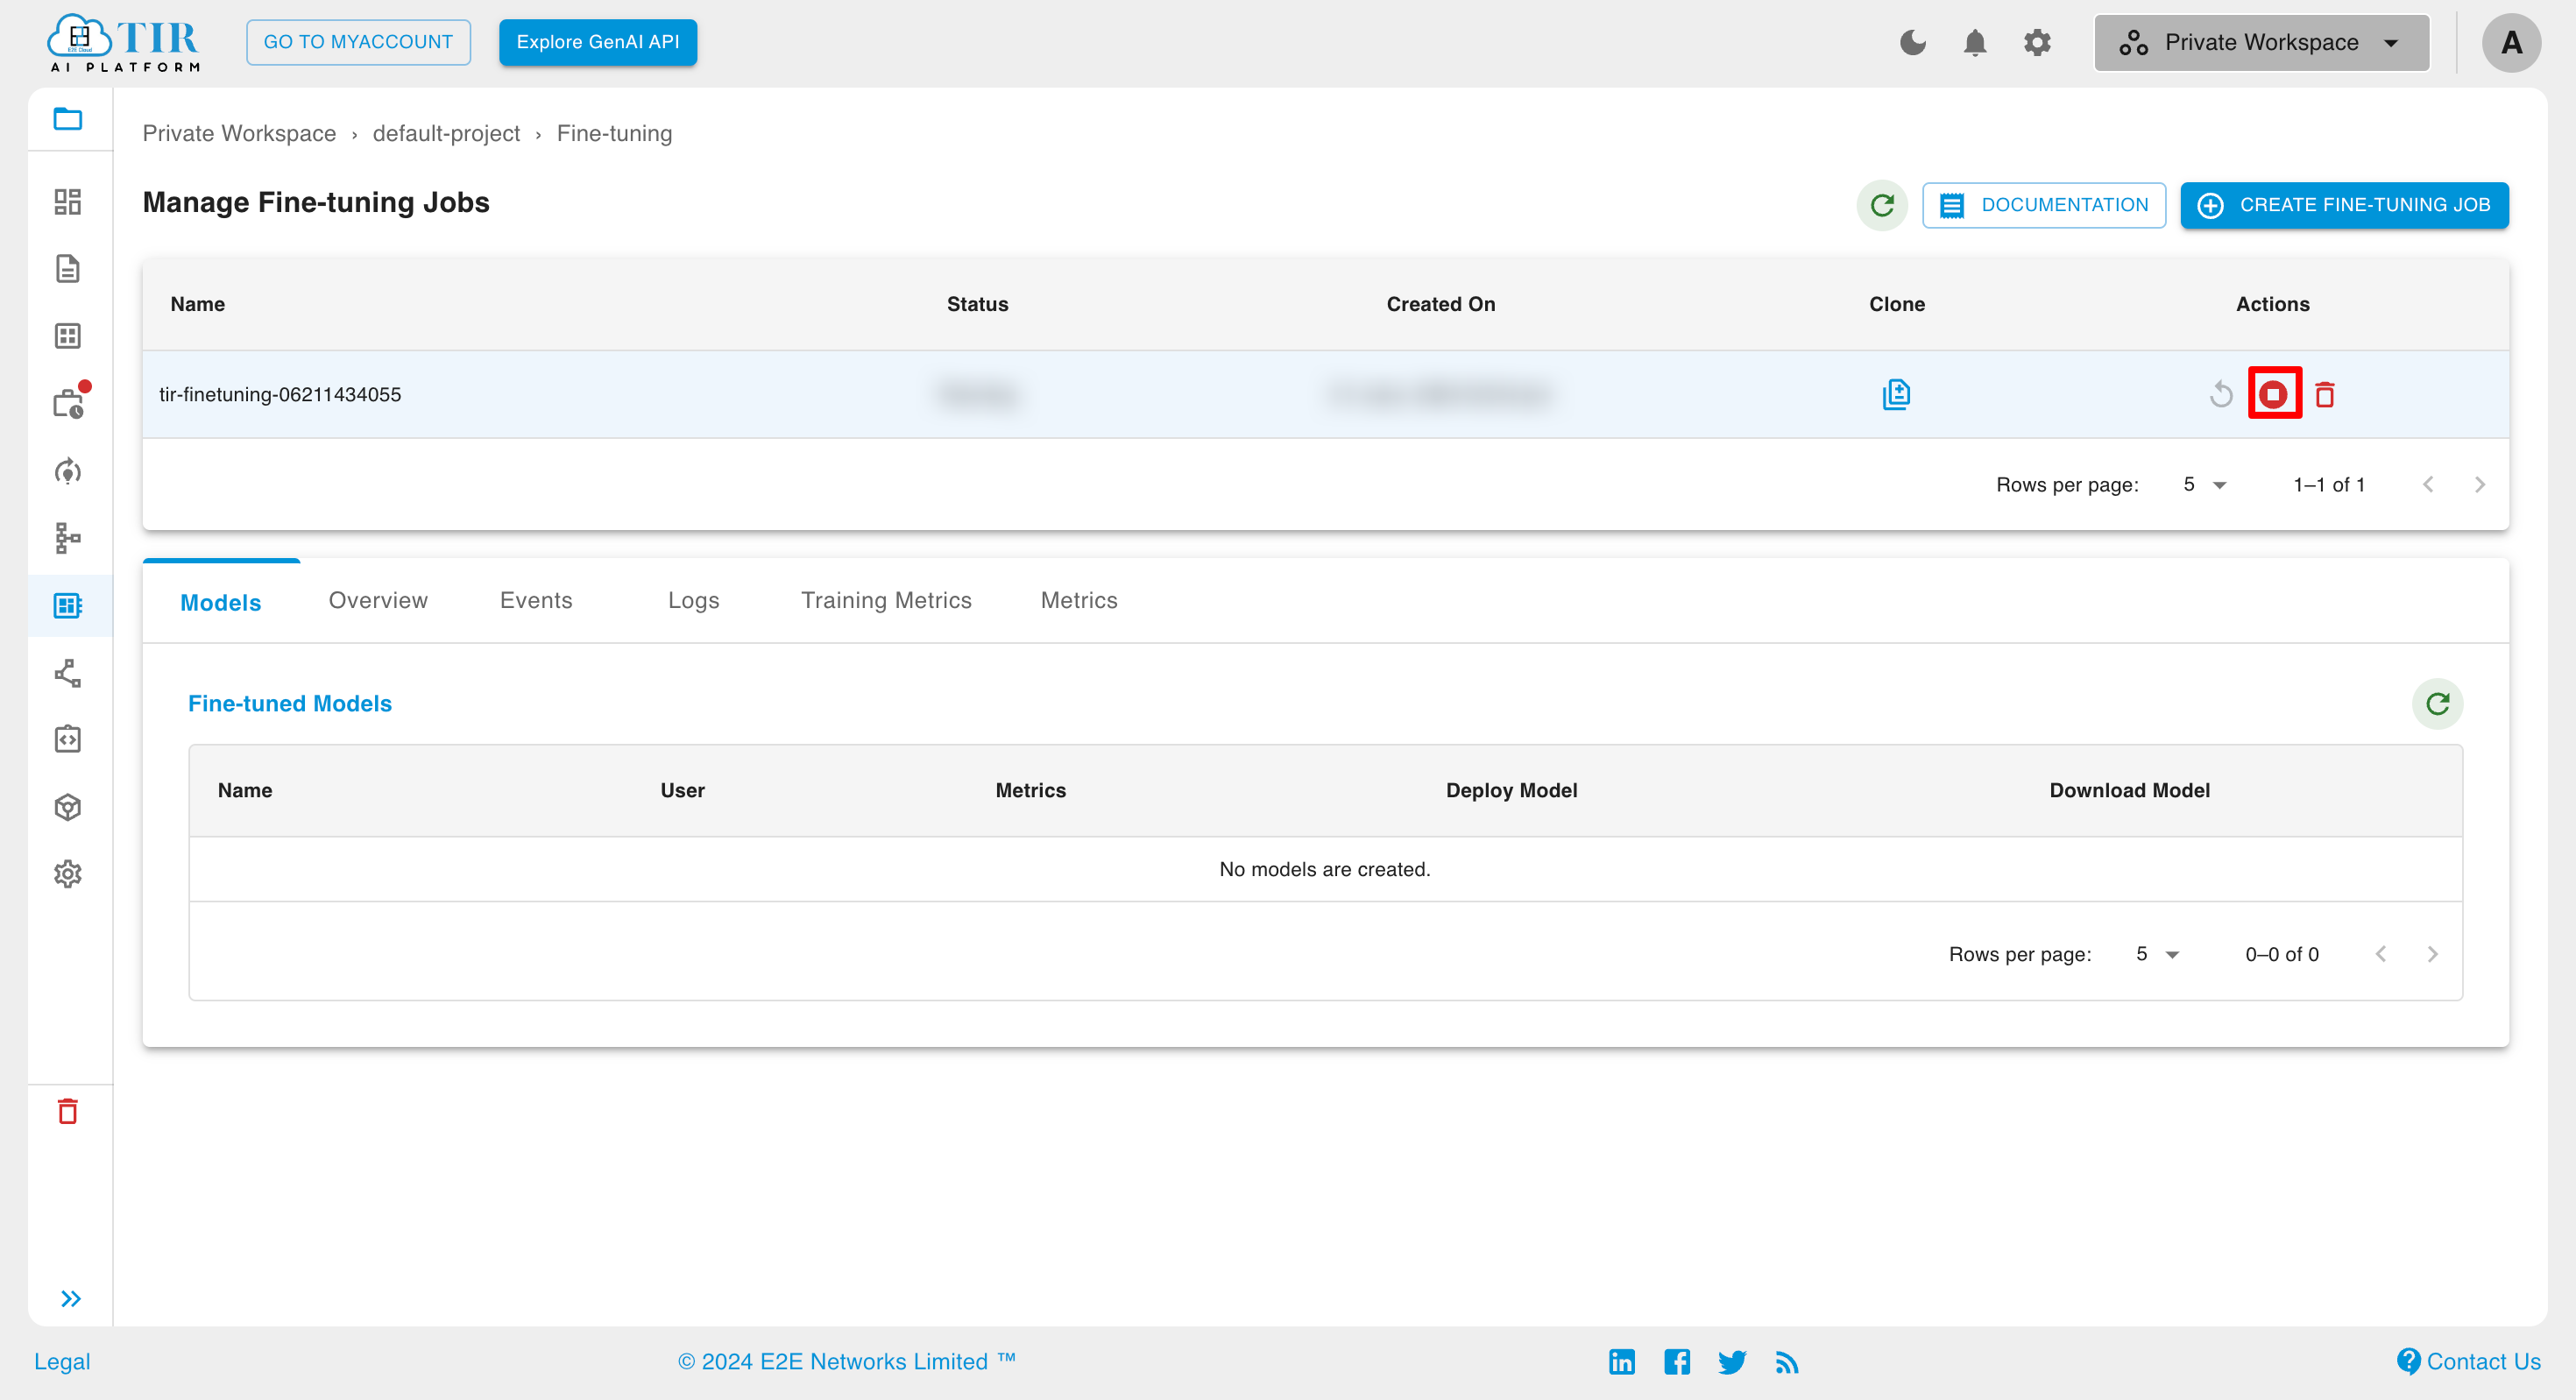
After clicking on the Terminate button, a popup will appear to confirm the termination of the fine-tuning model. Click on the continue button to proceed with the termination.
Delete
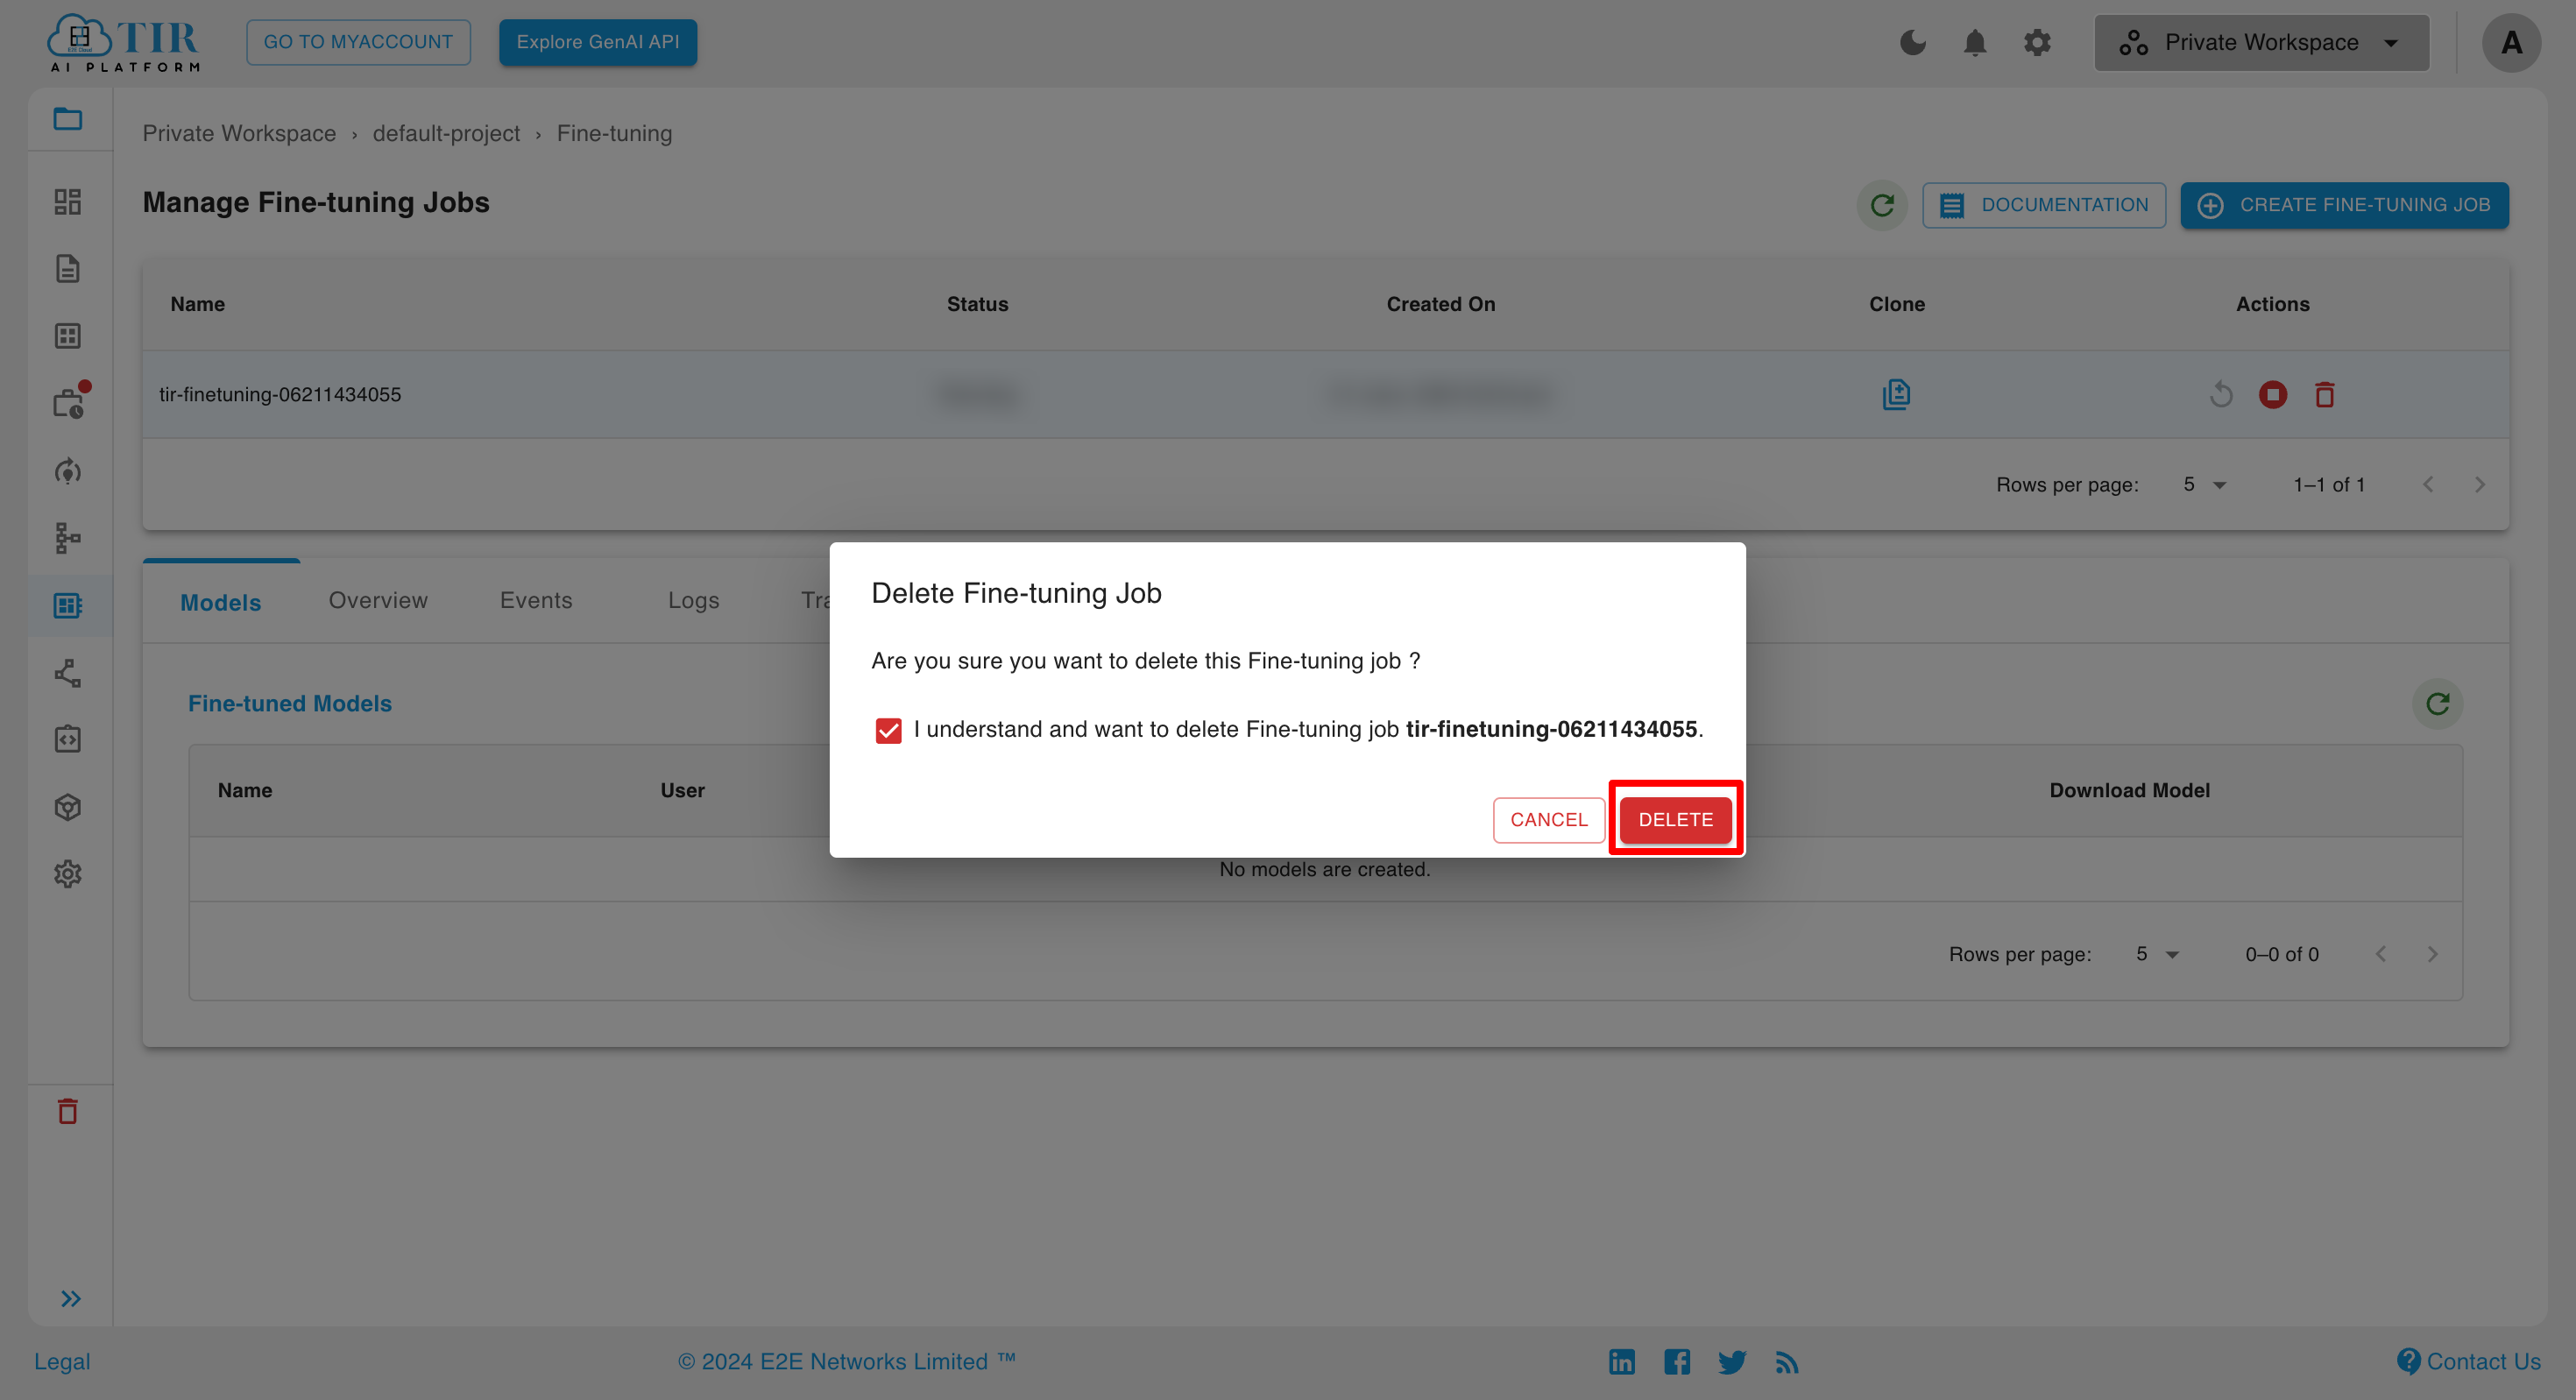
To delete a fine-tuning model, select the model from the list and click on the Delete button.
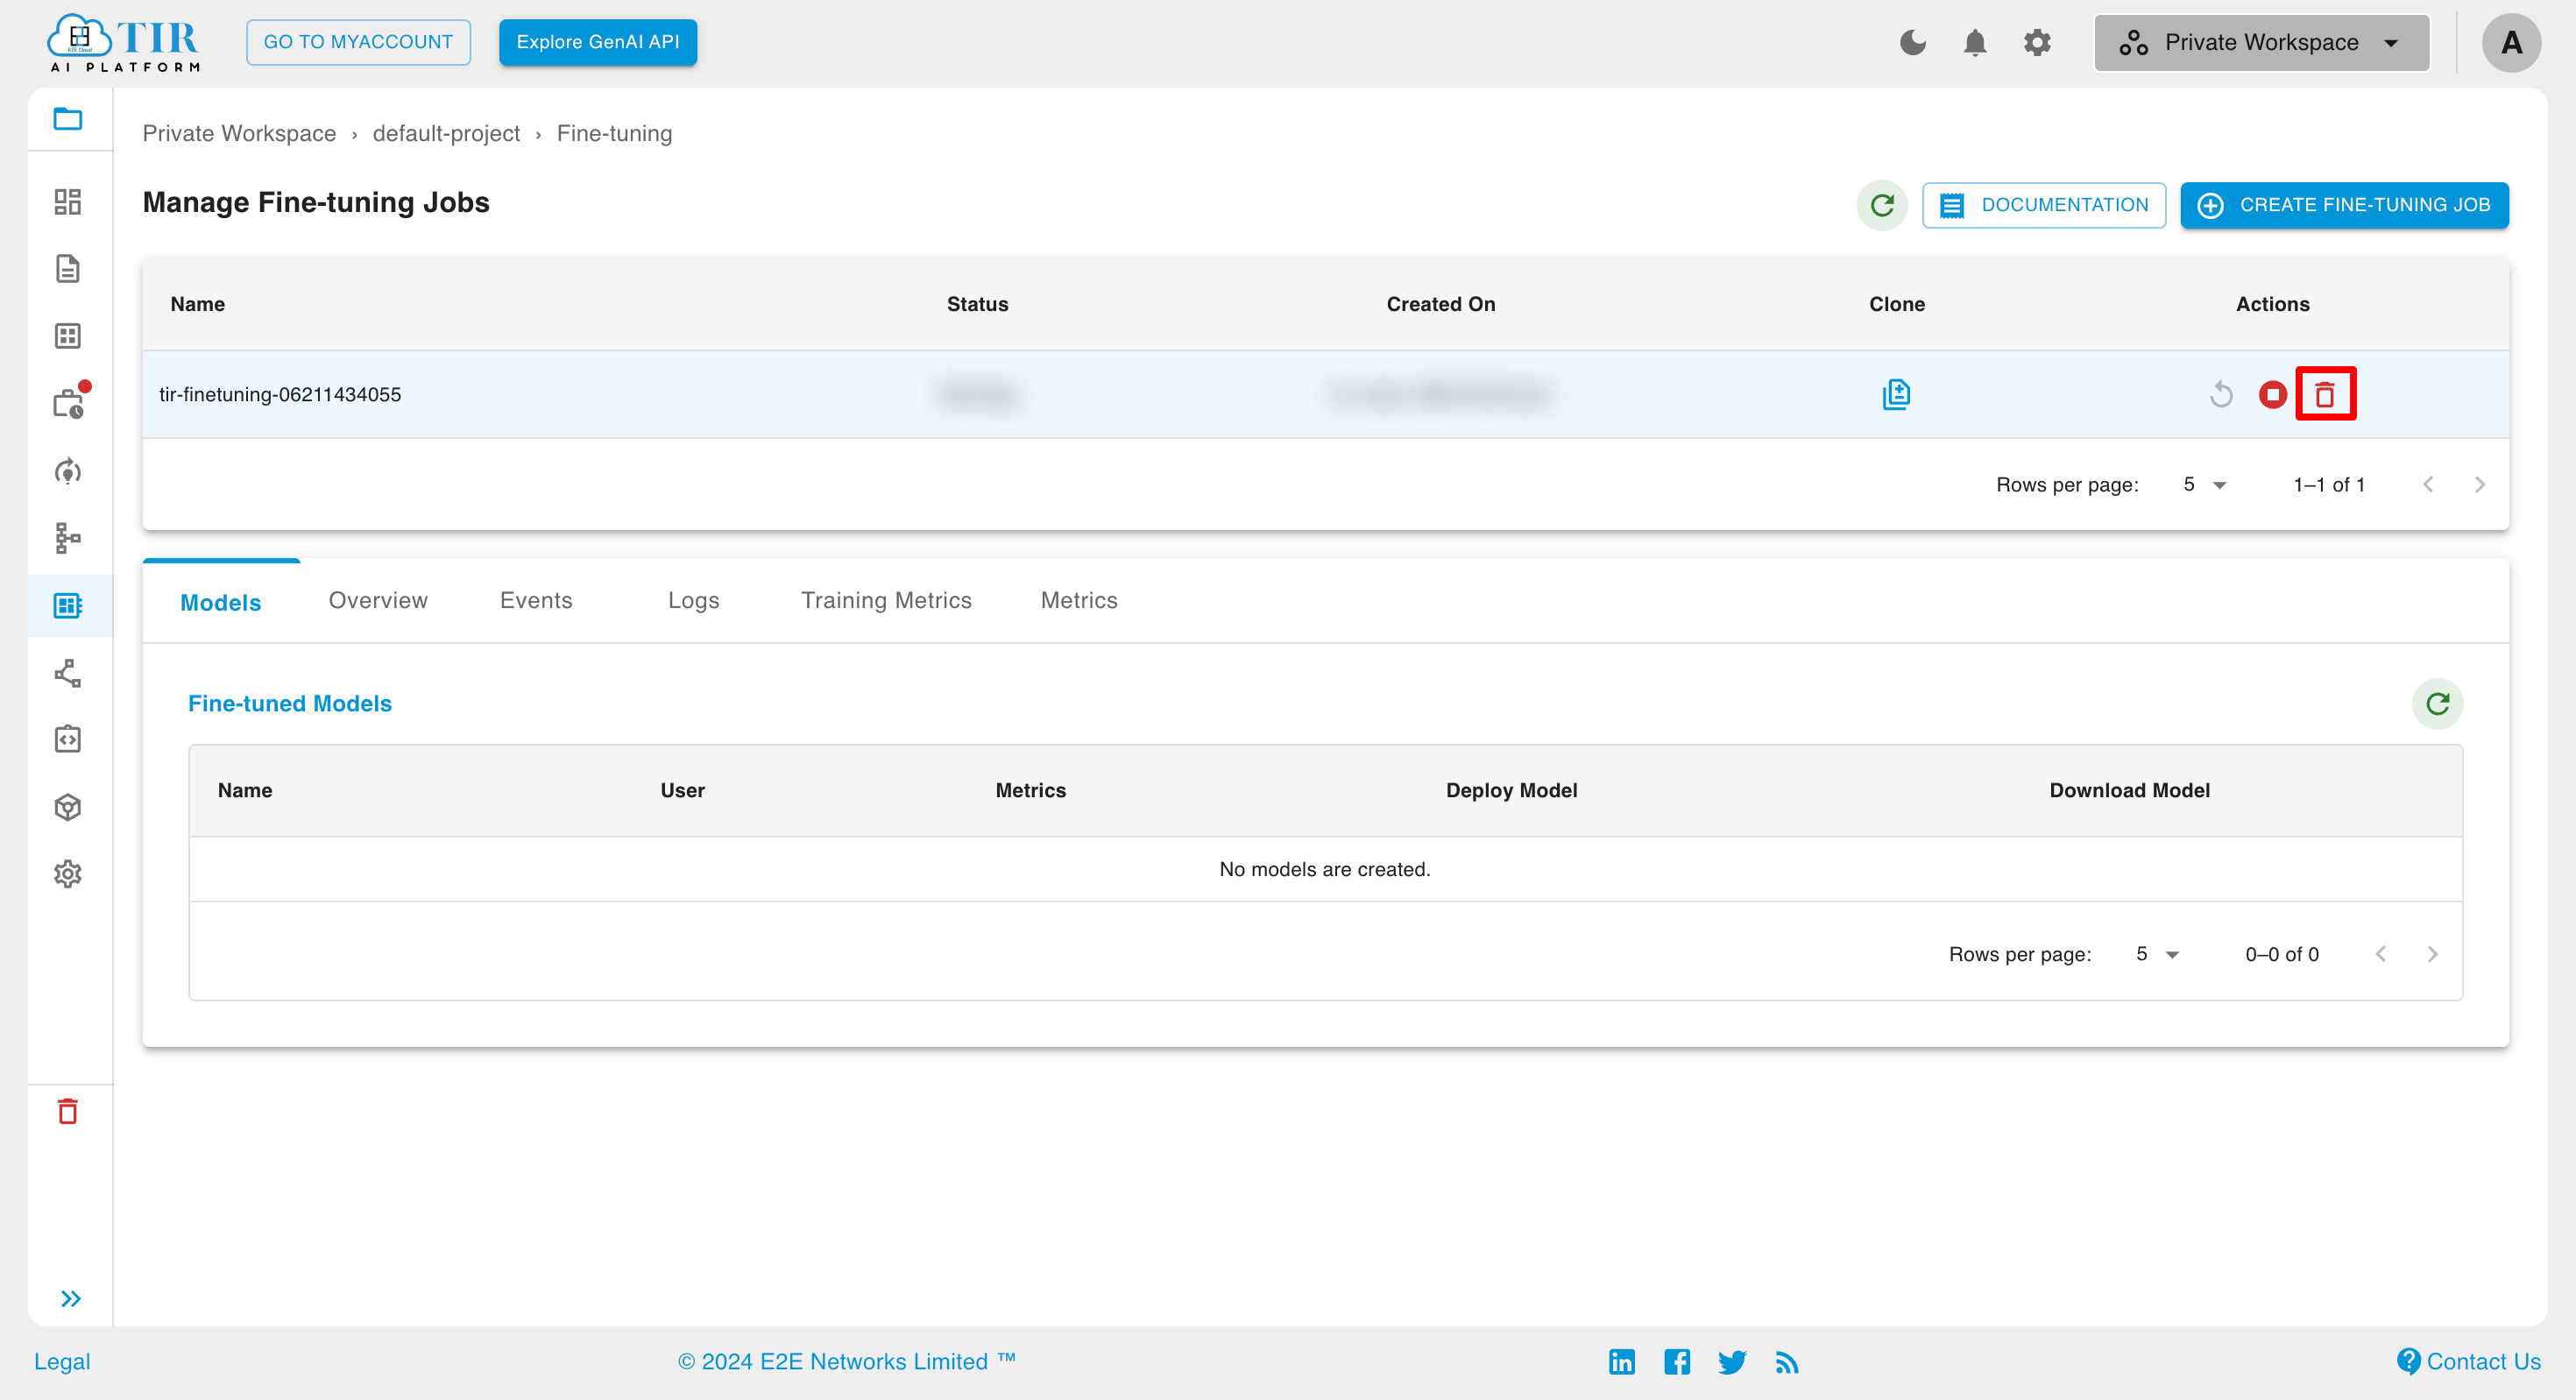
After clicking on the Delete button, a popup will appear to confirm the deletion of the fine-tuning model. Click on the delete button to proceed with the deletion.
