Learner
Dashboard
The Dashboard provides learners with an overview of their active resources, notifications, and courses.
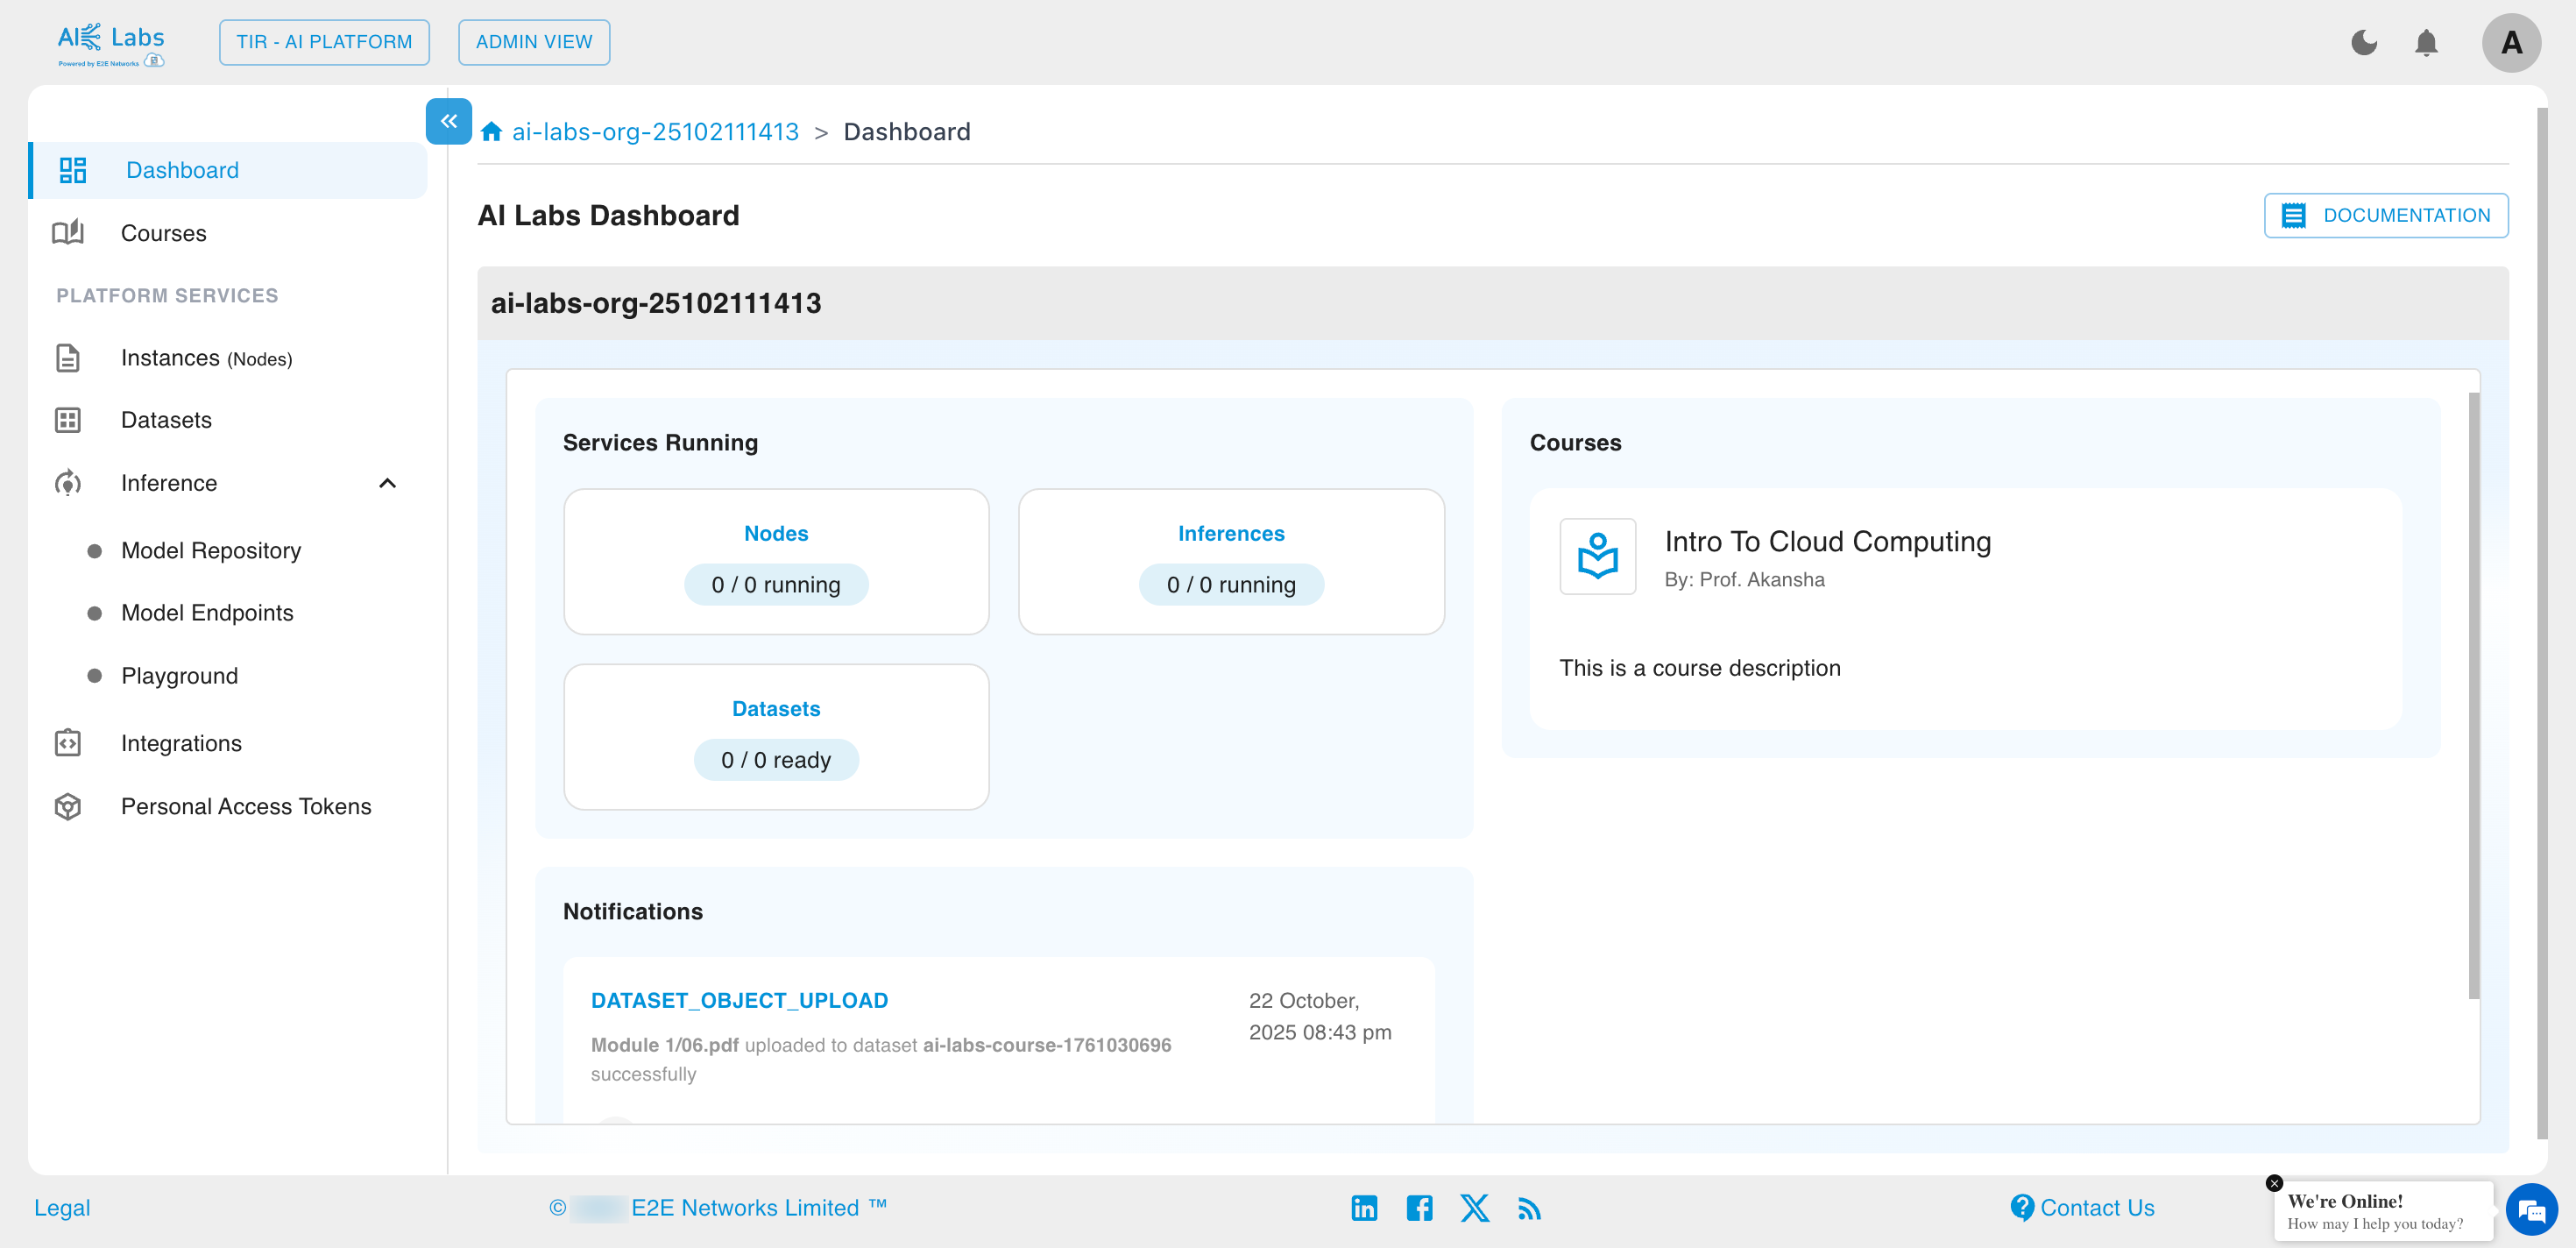
Services Running
Learners can view the status of services associated with their account, including:
- Nodes
- Inferences
- Datasets
Each service displays the count of active and total resources.
Courses Overview
All available courses under the learner’s Organization are displayed here.
Each course card includes:
- Course title
- Instructor’s name
- Short description
Learners can click on any course to explore the detailed course modules and materials.
Courses
Learners can access their enrolled courses by clicking on the Courses option from the left-side navigation menu.
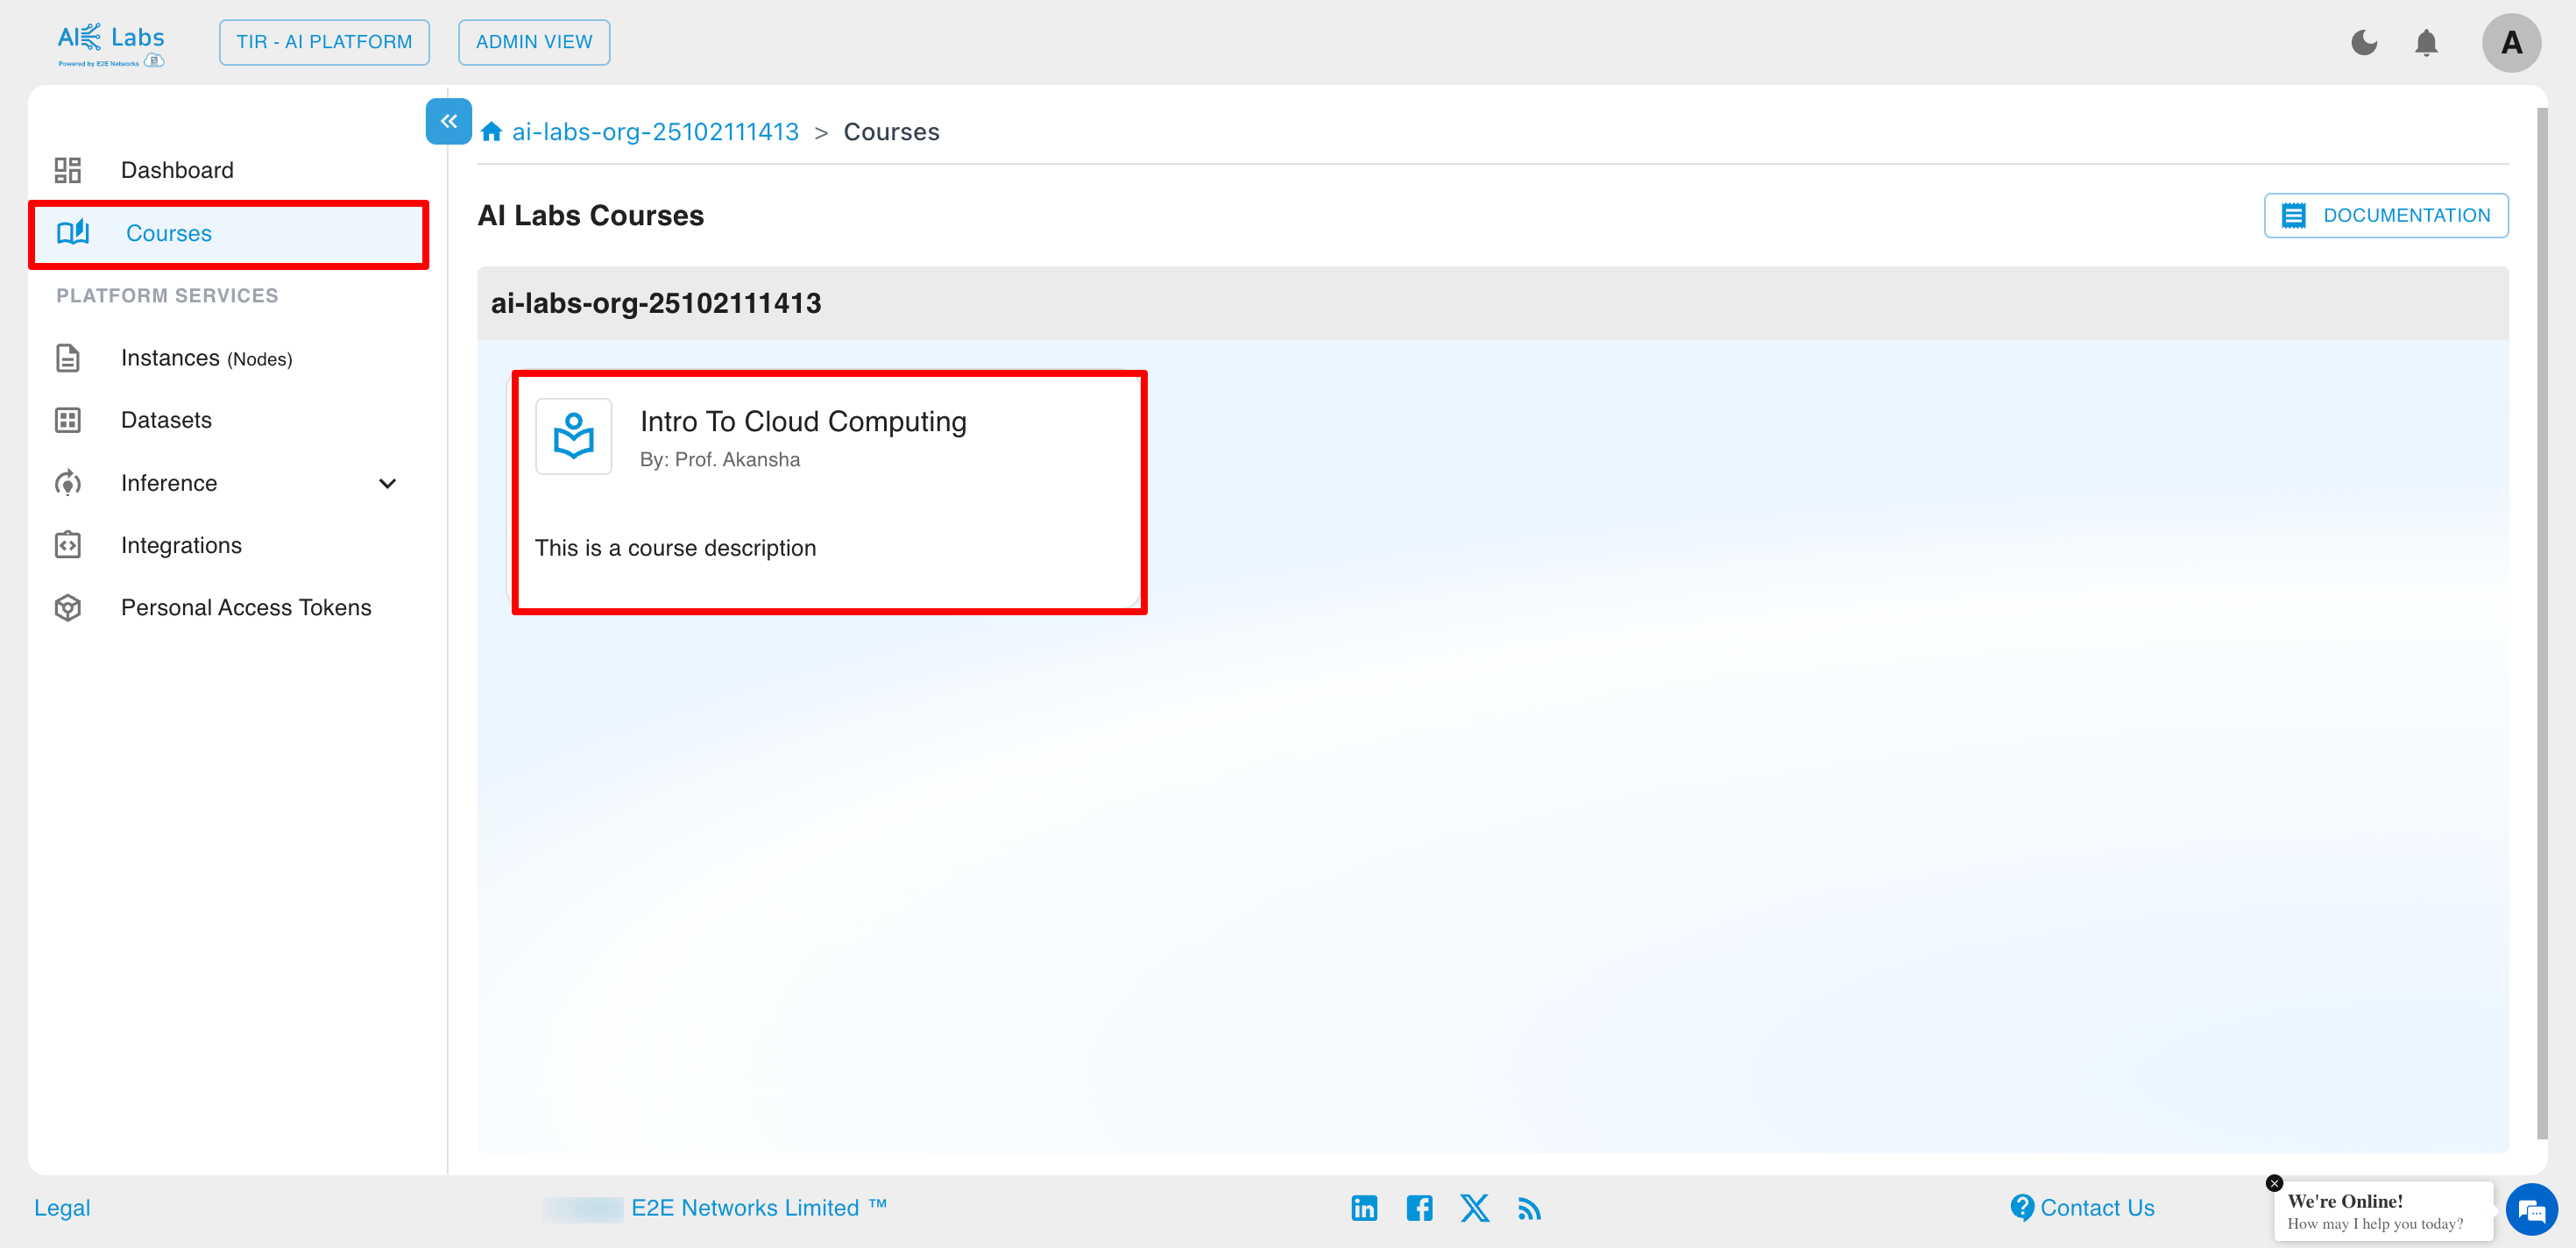
Each course card displays:
- Course Name
- Instructor Name
- Course Description
Learners can click on the course card to open detailed course content.
Courseware and Modules
After selecting a course, learners are directed to the Courseware page, which displays all course modules and study materials.
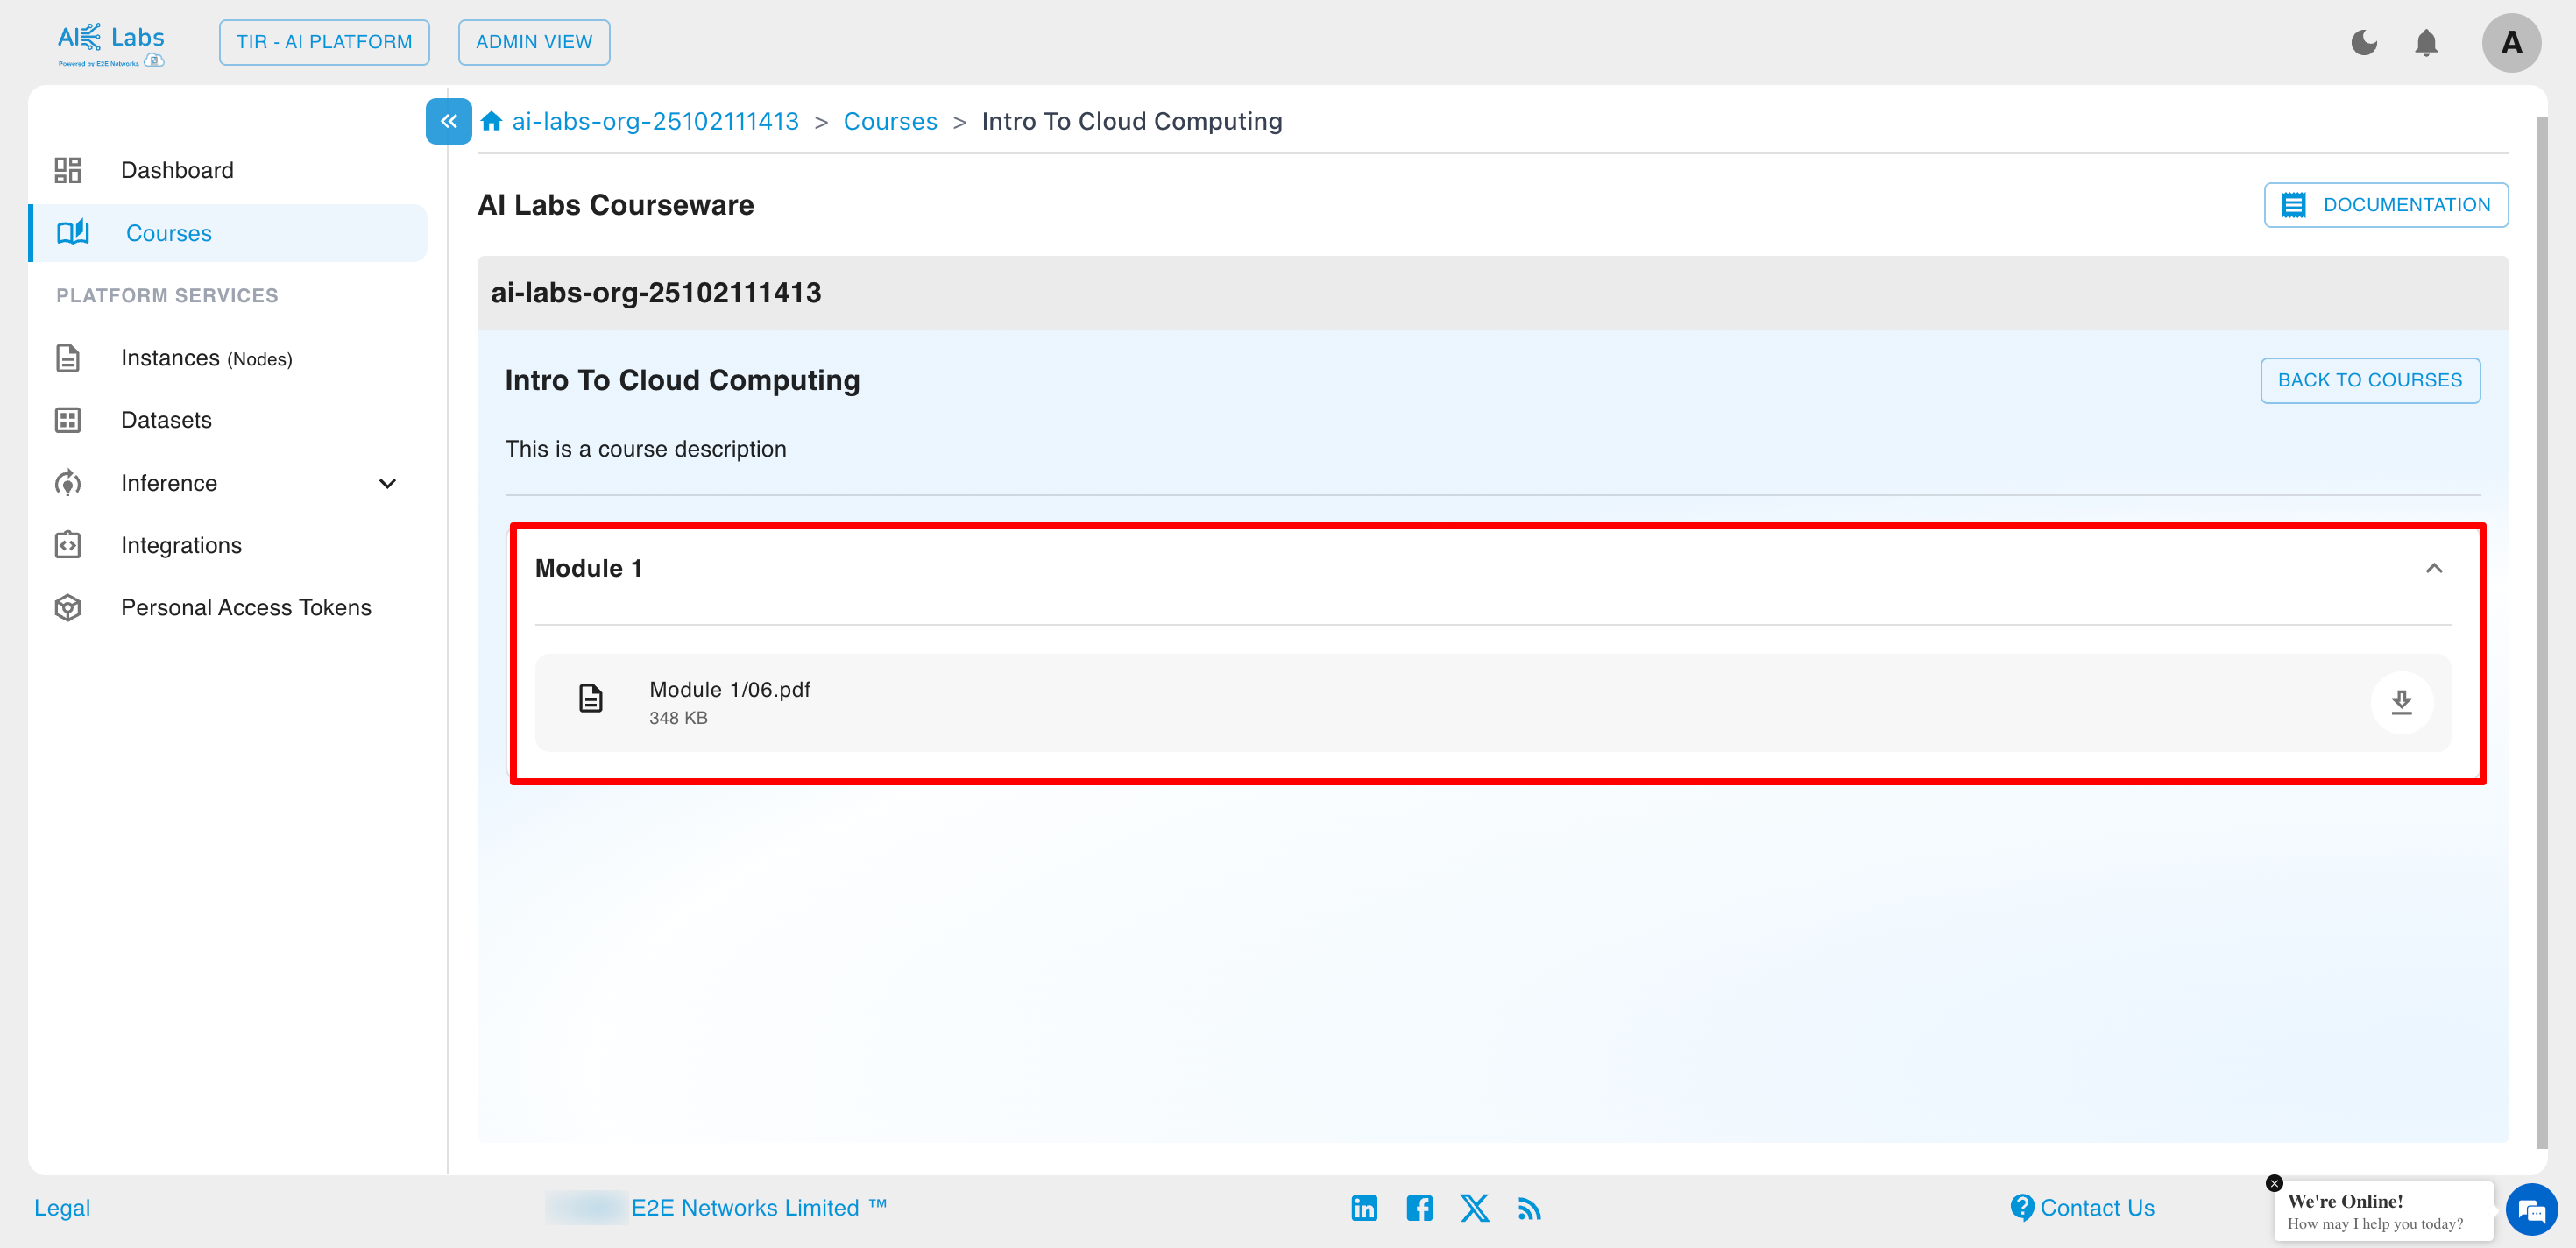
Each course is divided into modules, and every module may contain downloadable files such as PDFs, slides, or notes.
Learners can:
- View all available Modules
- Download attached learning materials (e.g., lecture PDFs)
Example
For the course Intro to Cloud Computing, learners can access Module 1 and download materials like Module 1/06.pdf.
Access Permissions
- Learners can view and download course materials shared by the instructor.
- Learners cannot upload or modify course content.
- All courses and materials are managed and updated by the Admin or Professor.
Platform Services
Instances (Nodes)
Instances provide collaborative, ready-to-use environments for AI and ML development. Each instance brings together containers, JupyterLab, and popular AI frameworks—giving you and your team a powerful workspace that works out of the box.
Steps to create an instance
Navigate to Instances section from the sidebar and then click on Create Instance button.

Select the desired image and then click on Next button.

Select the plan according to your need and then click on Next button.
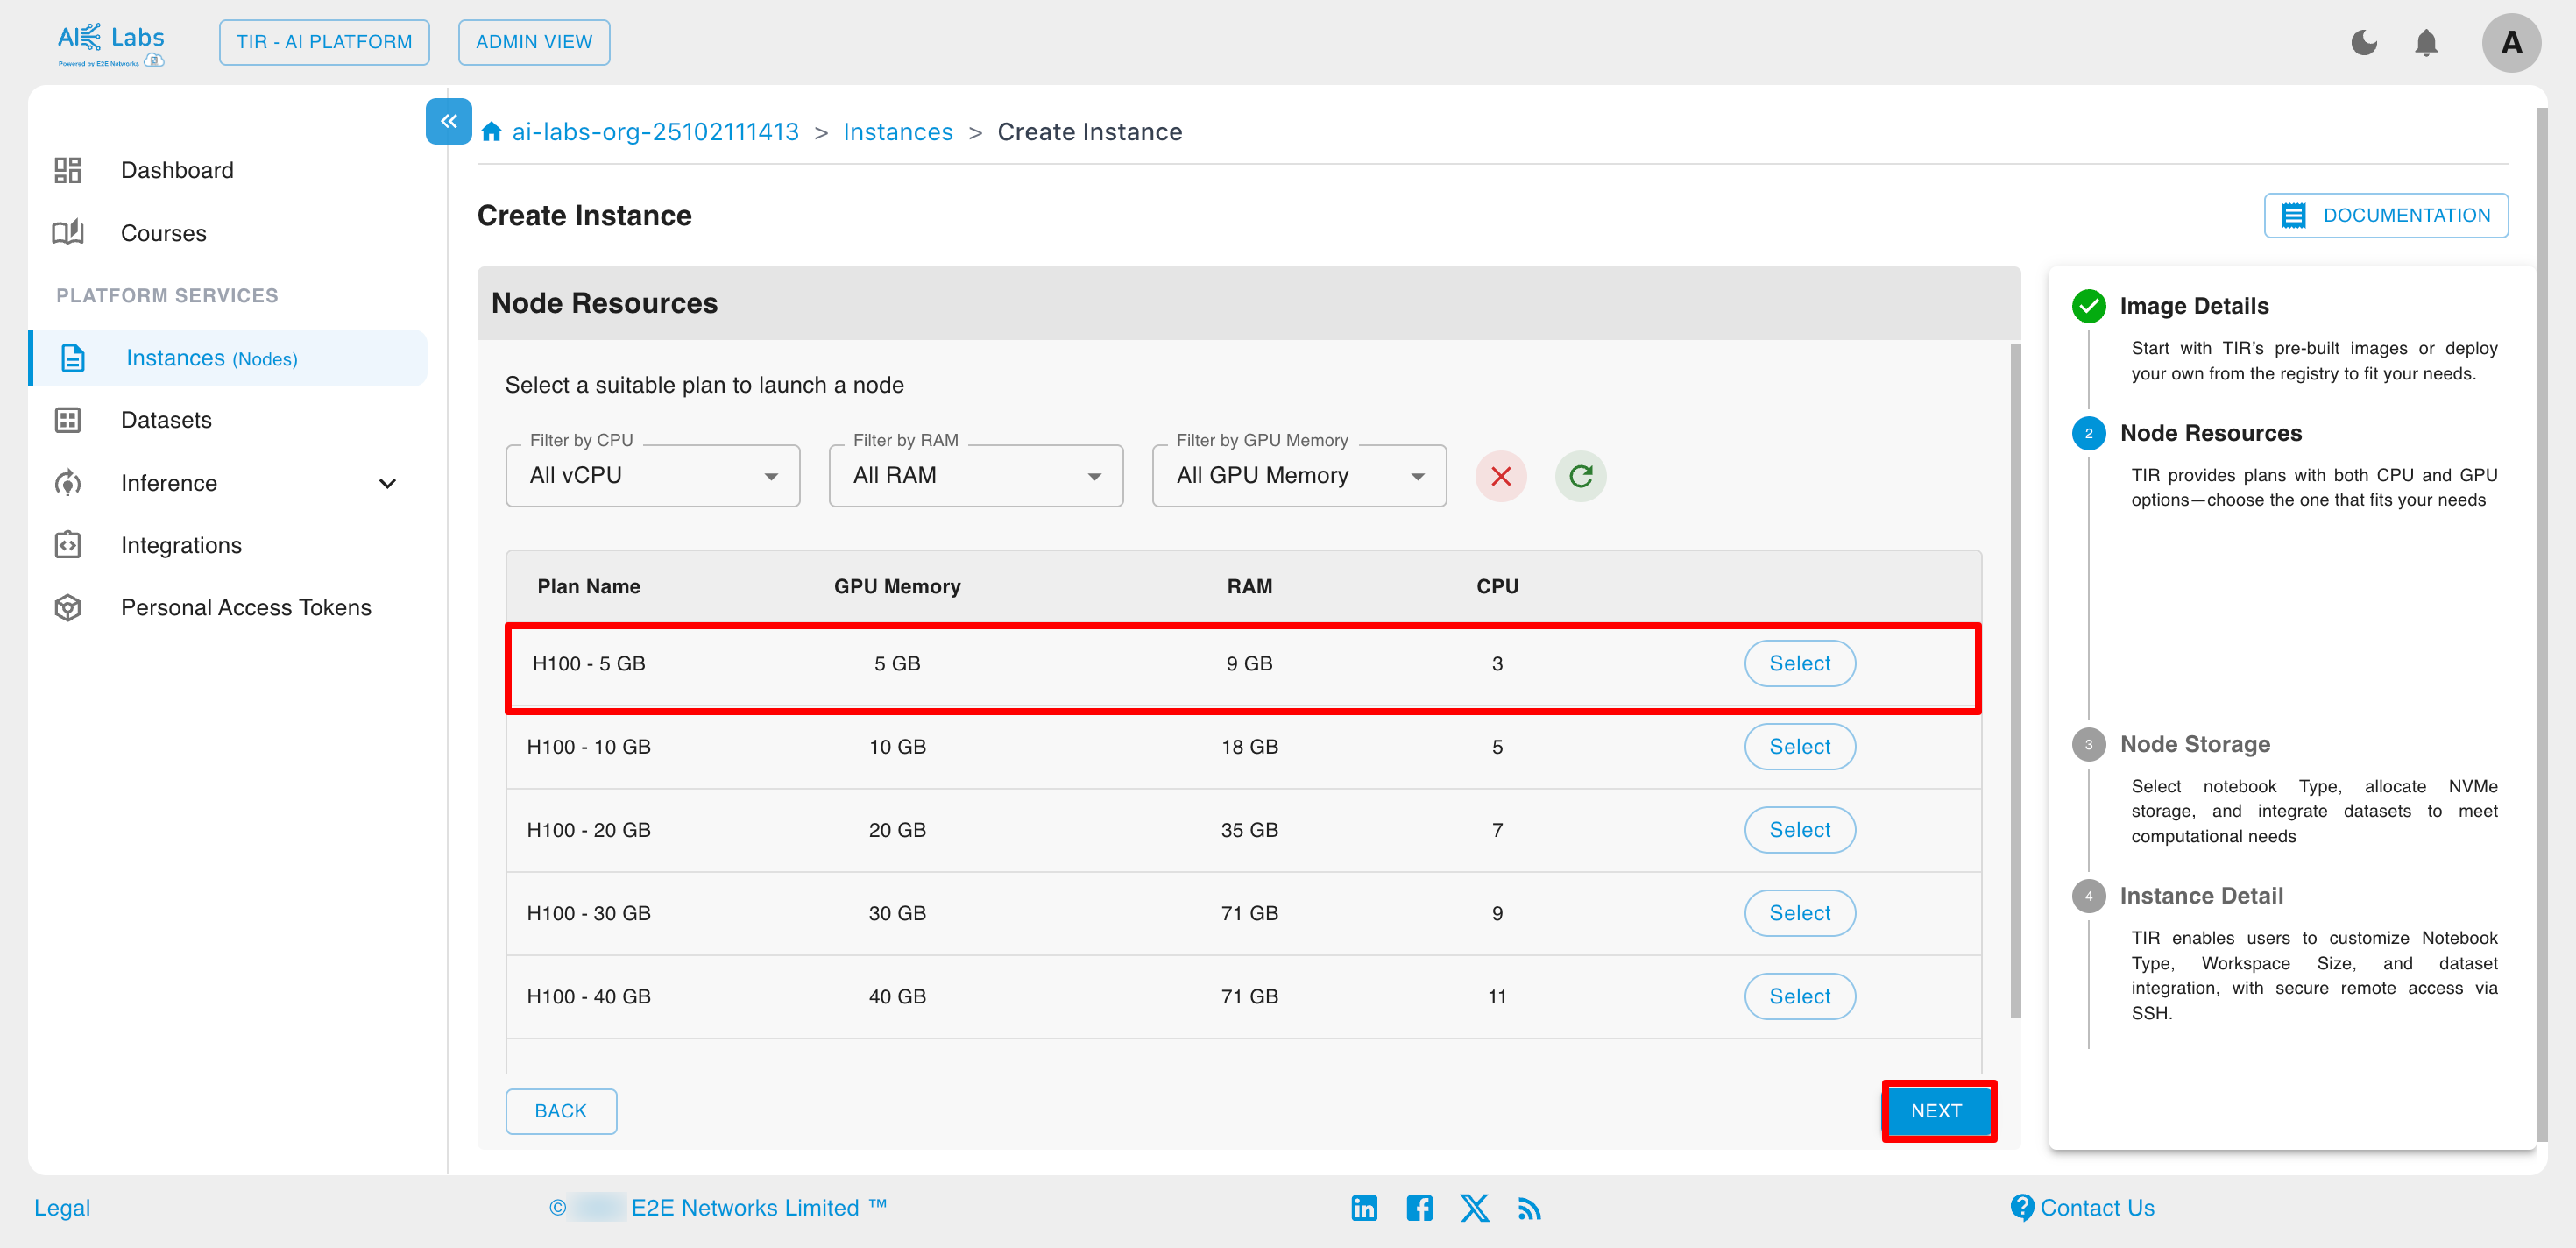
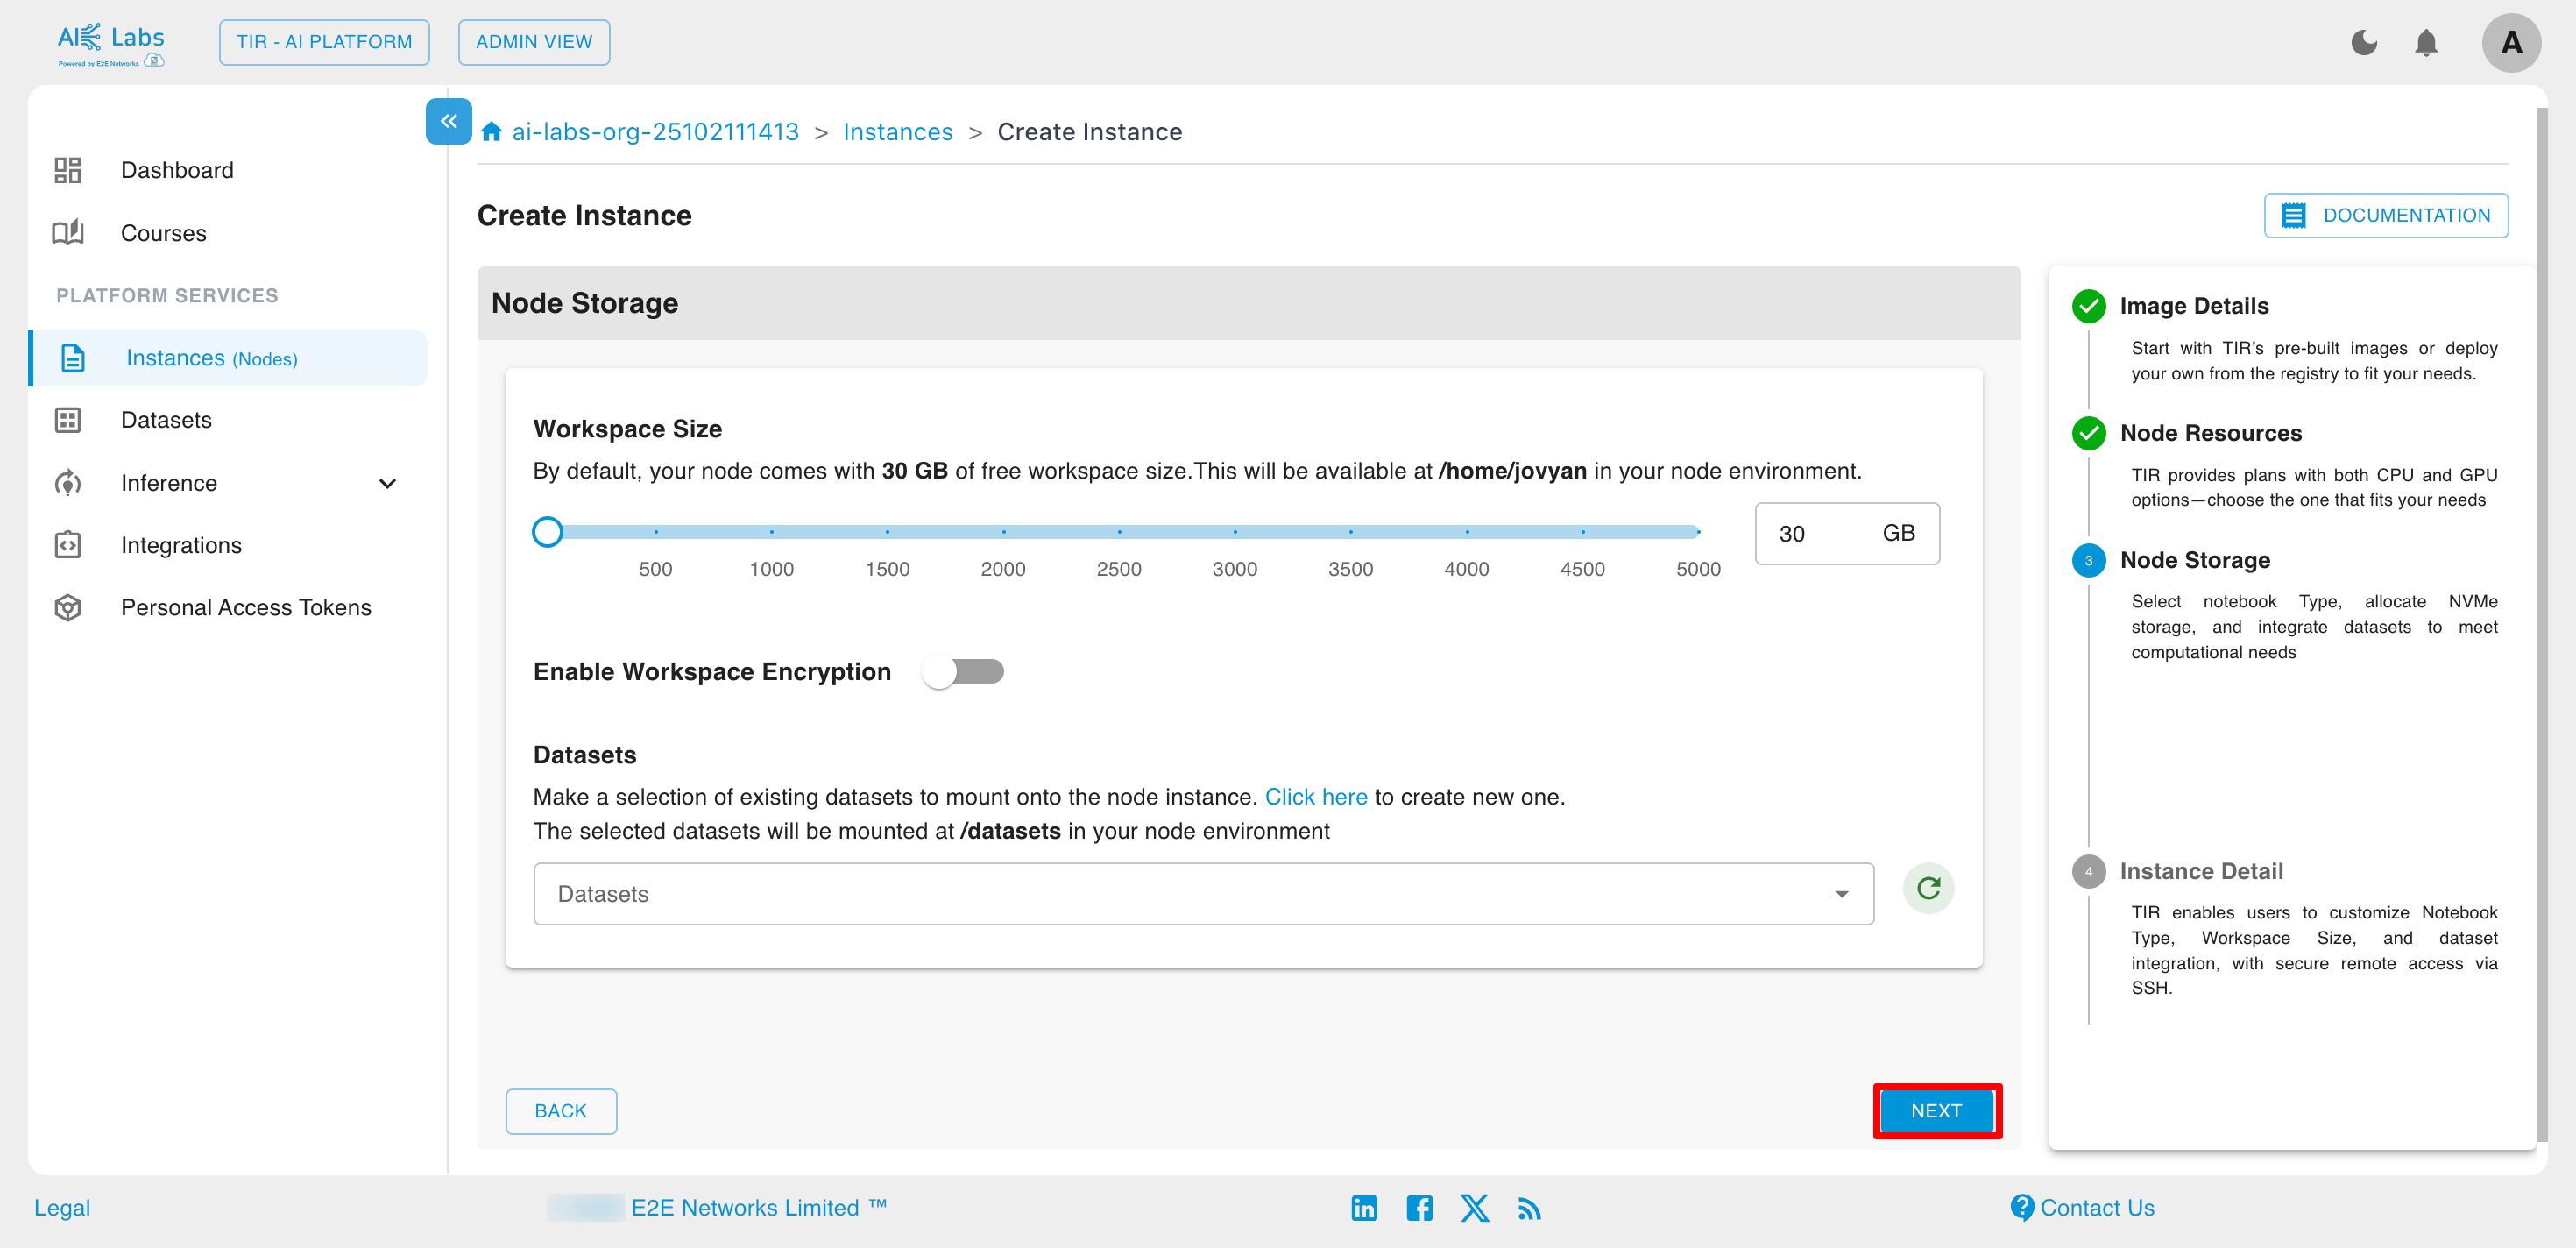
Select the workspace size based on your needs, and either choose an existing dataset or create a new one as required.
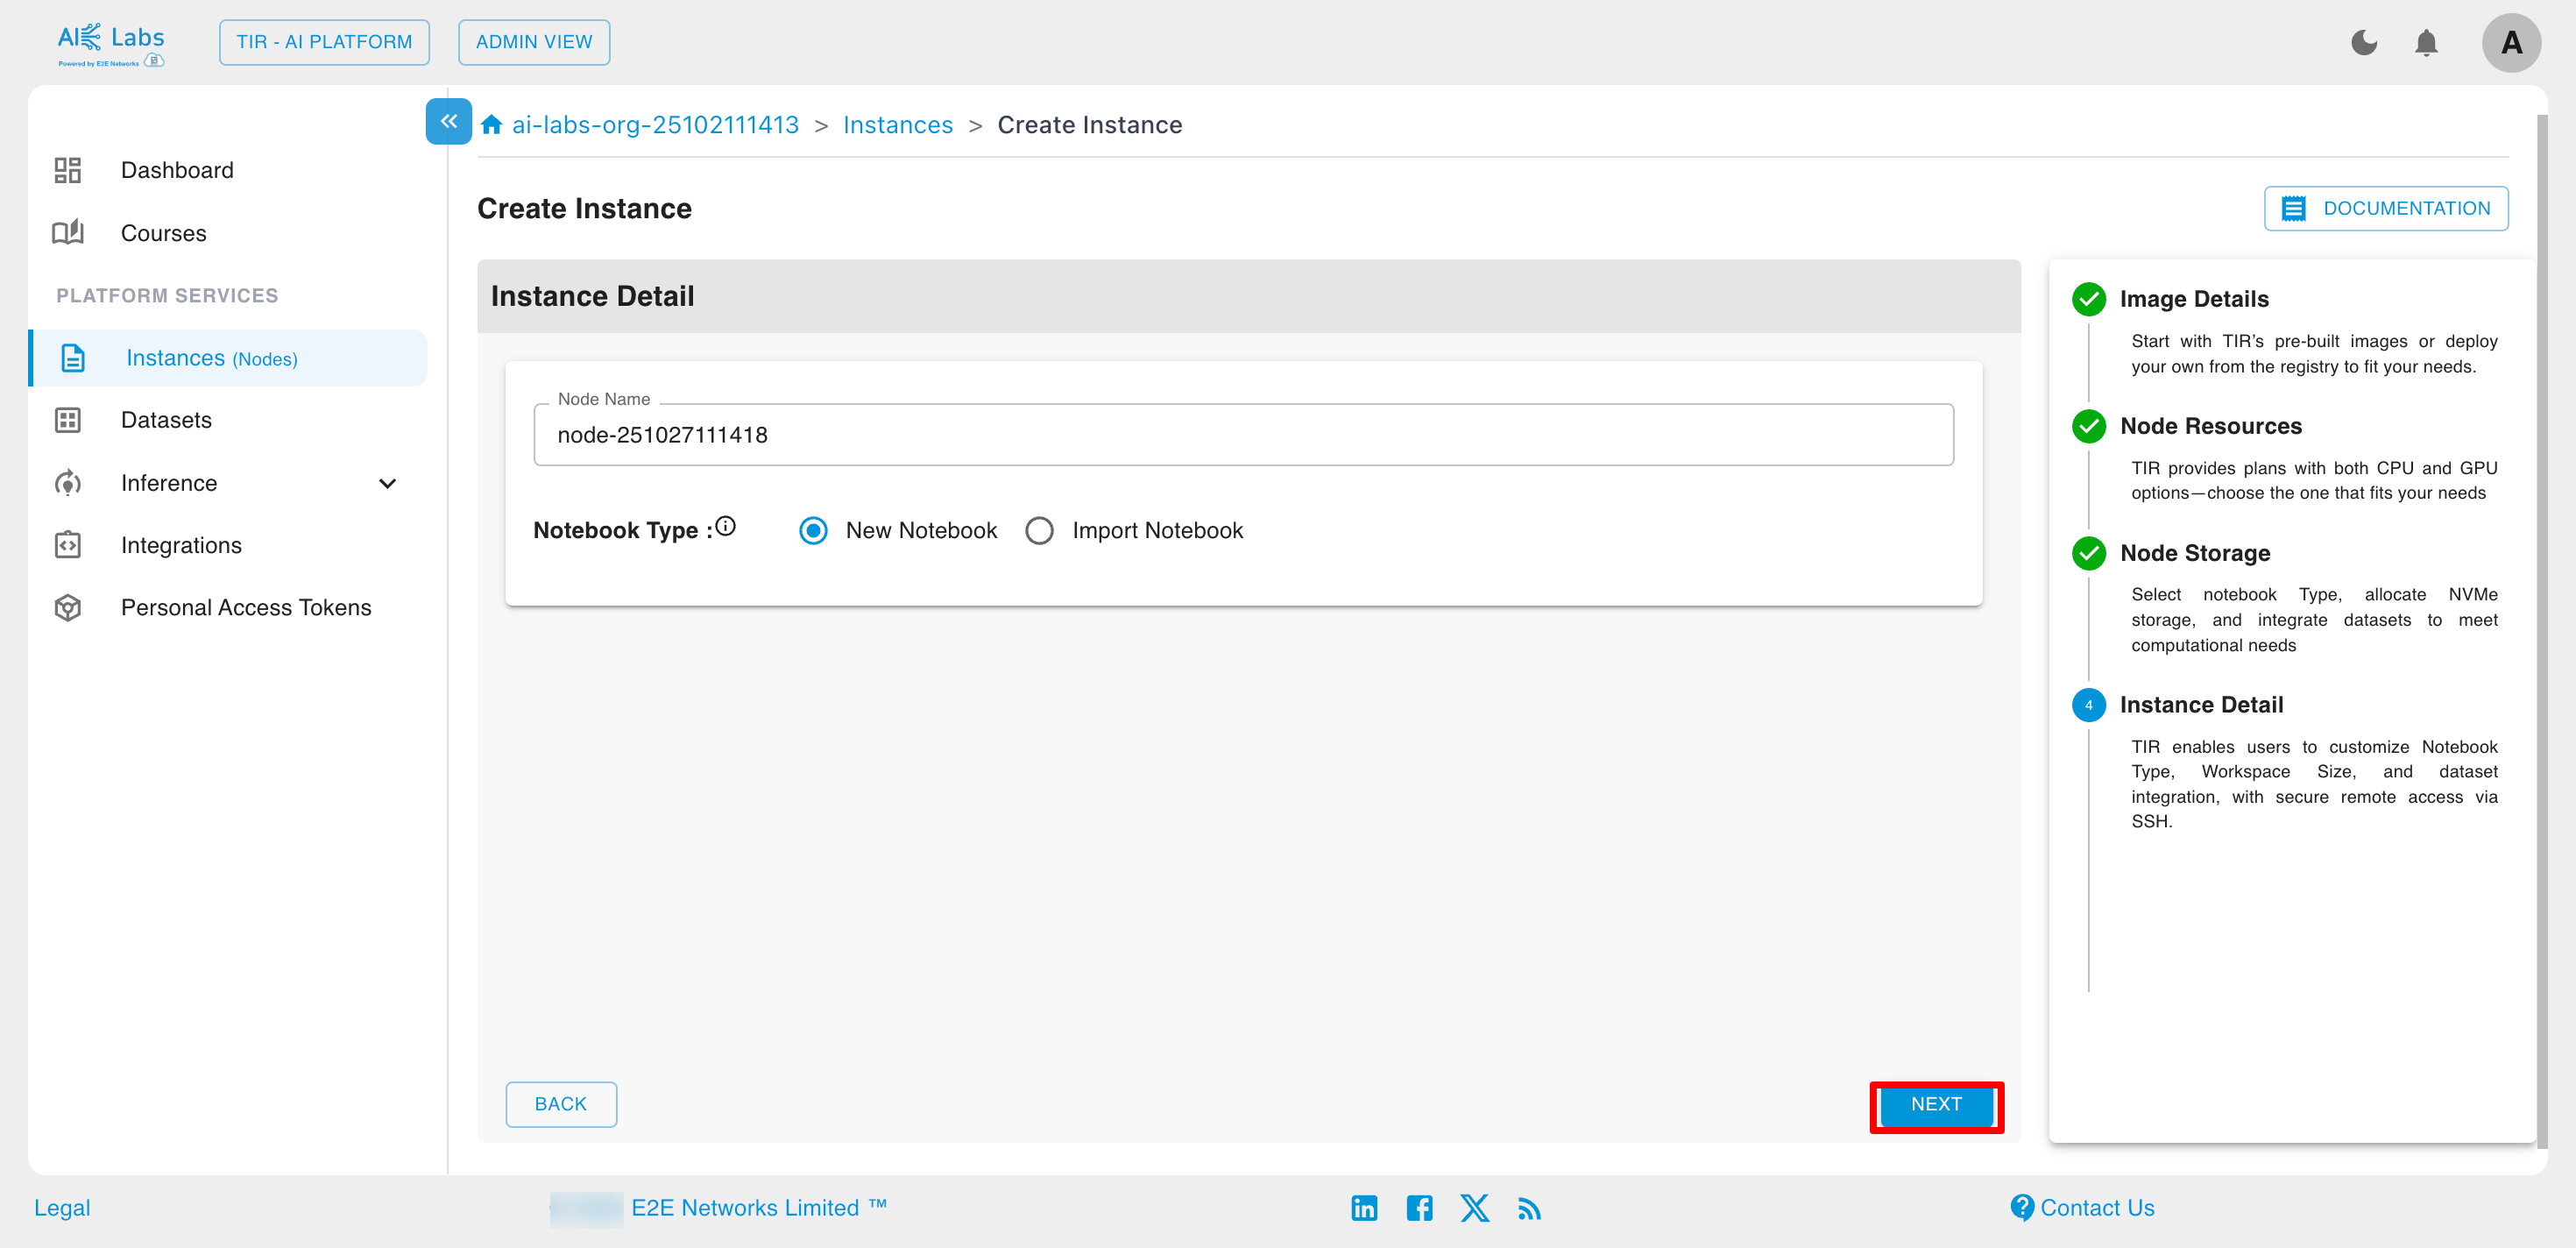
Enter the desired name for your instance and then click on Next button.
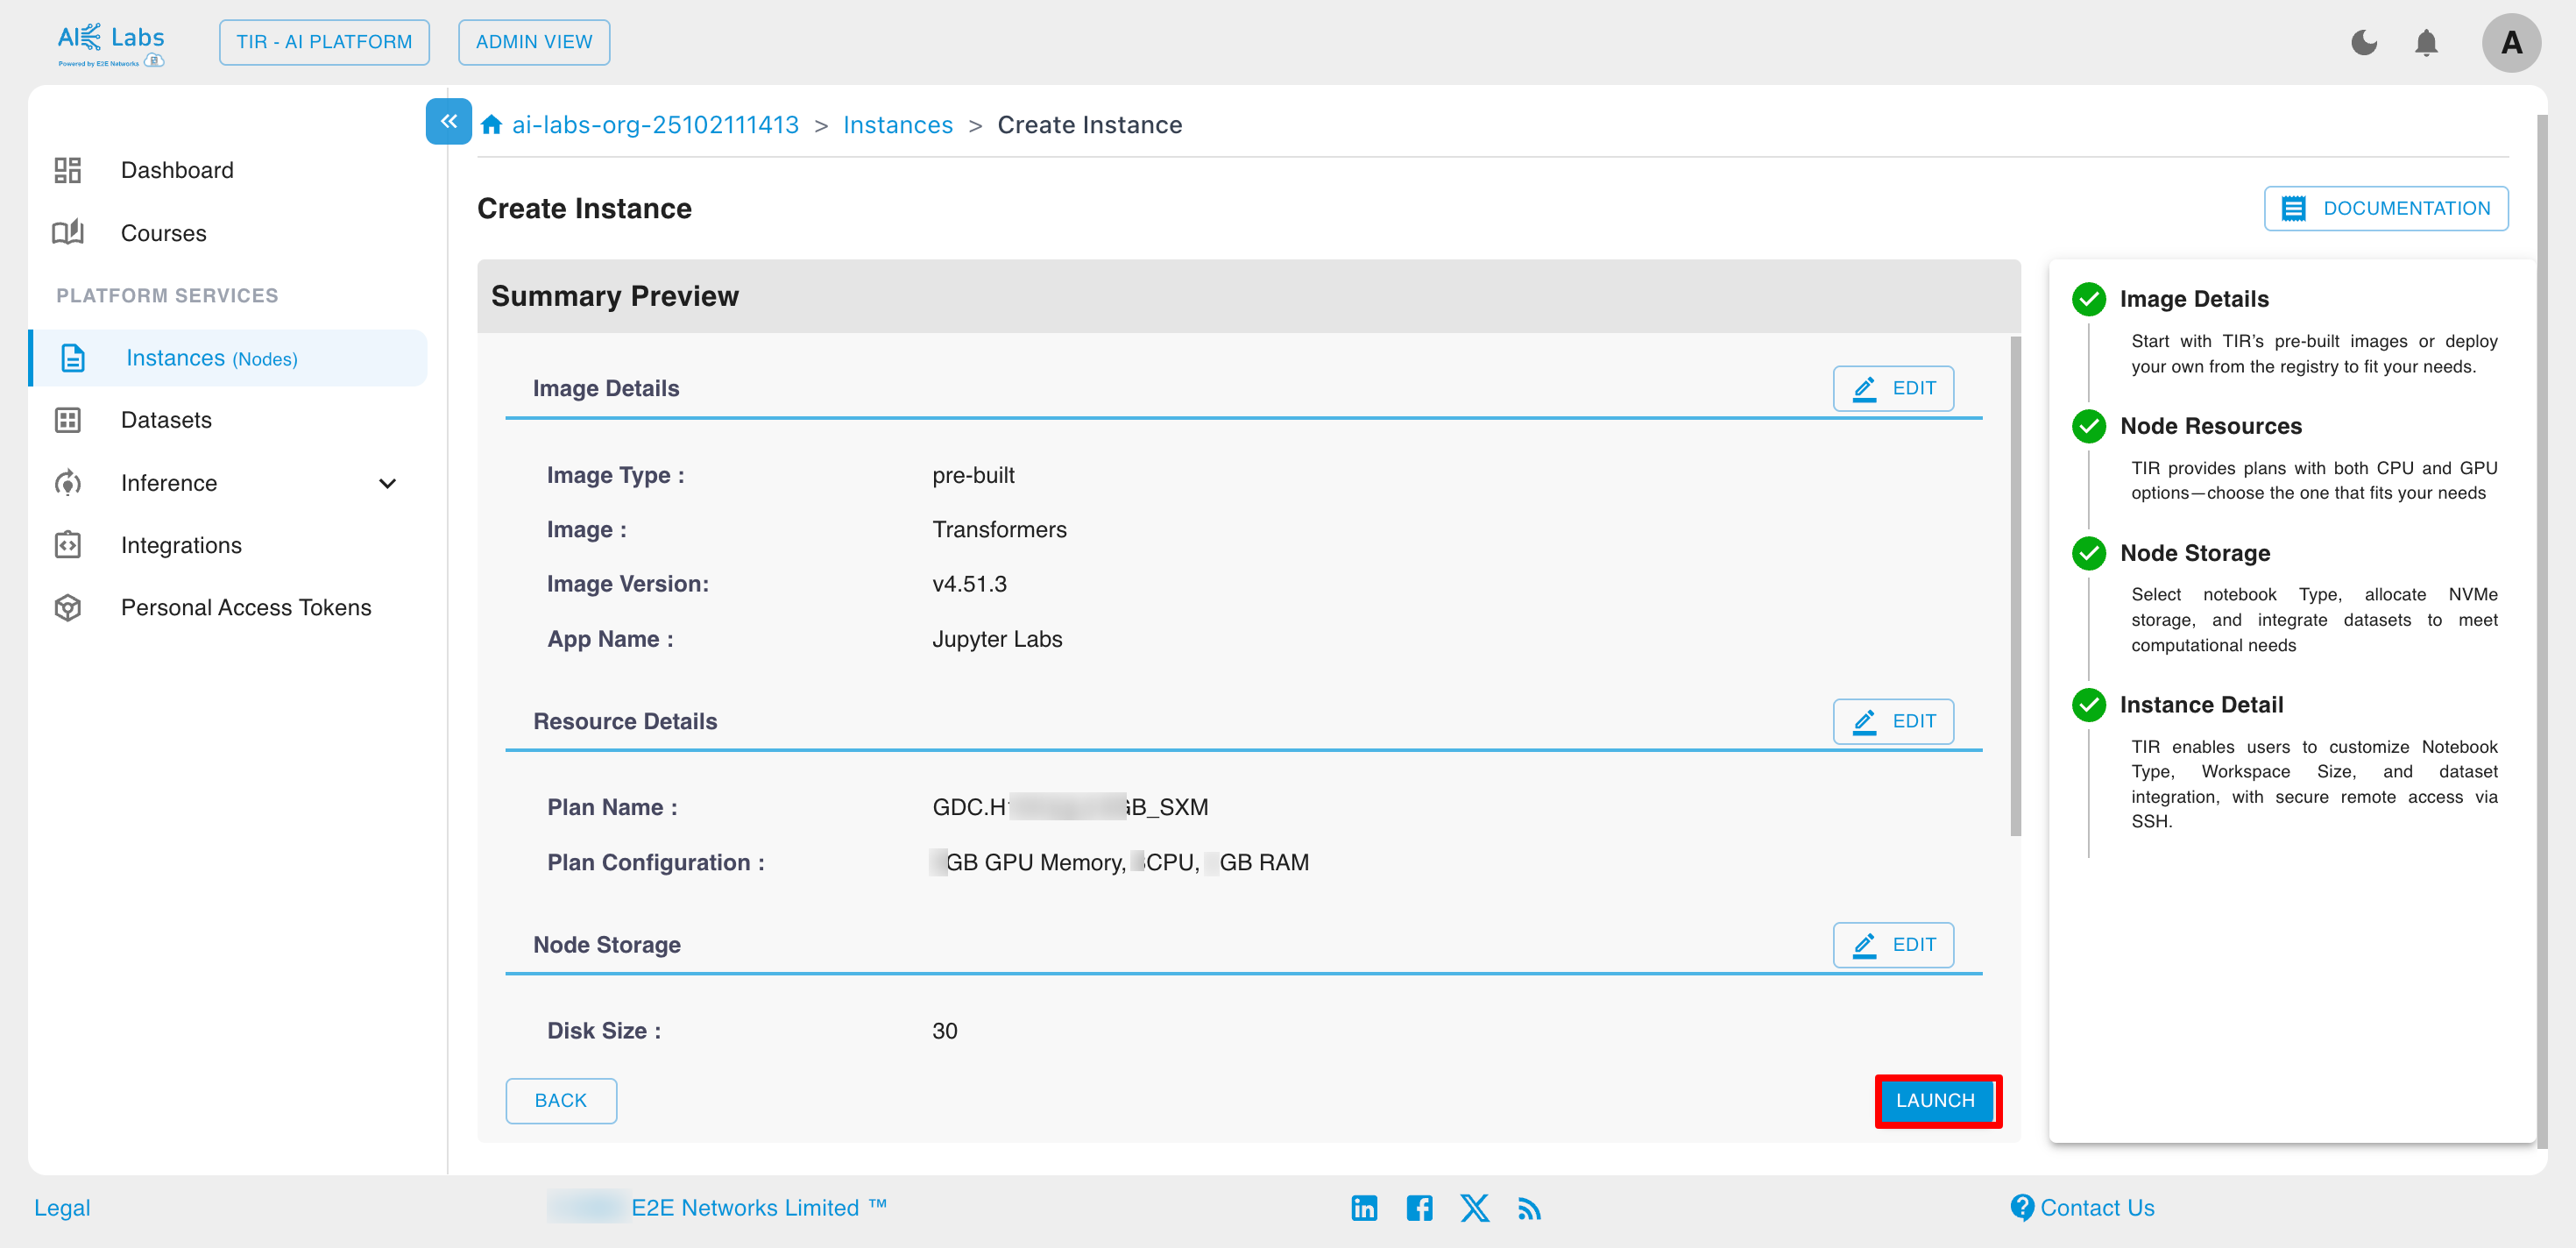
Click on Launch button to launch the new instance.
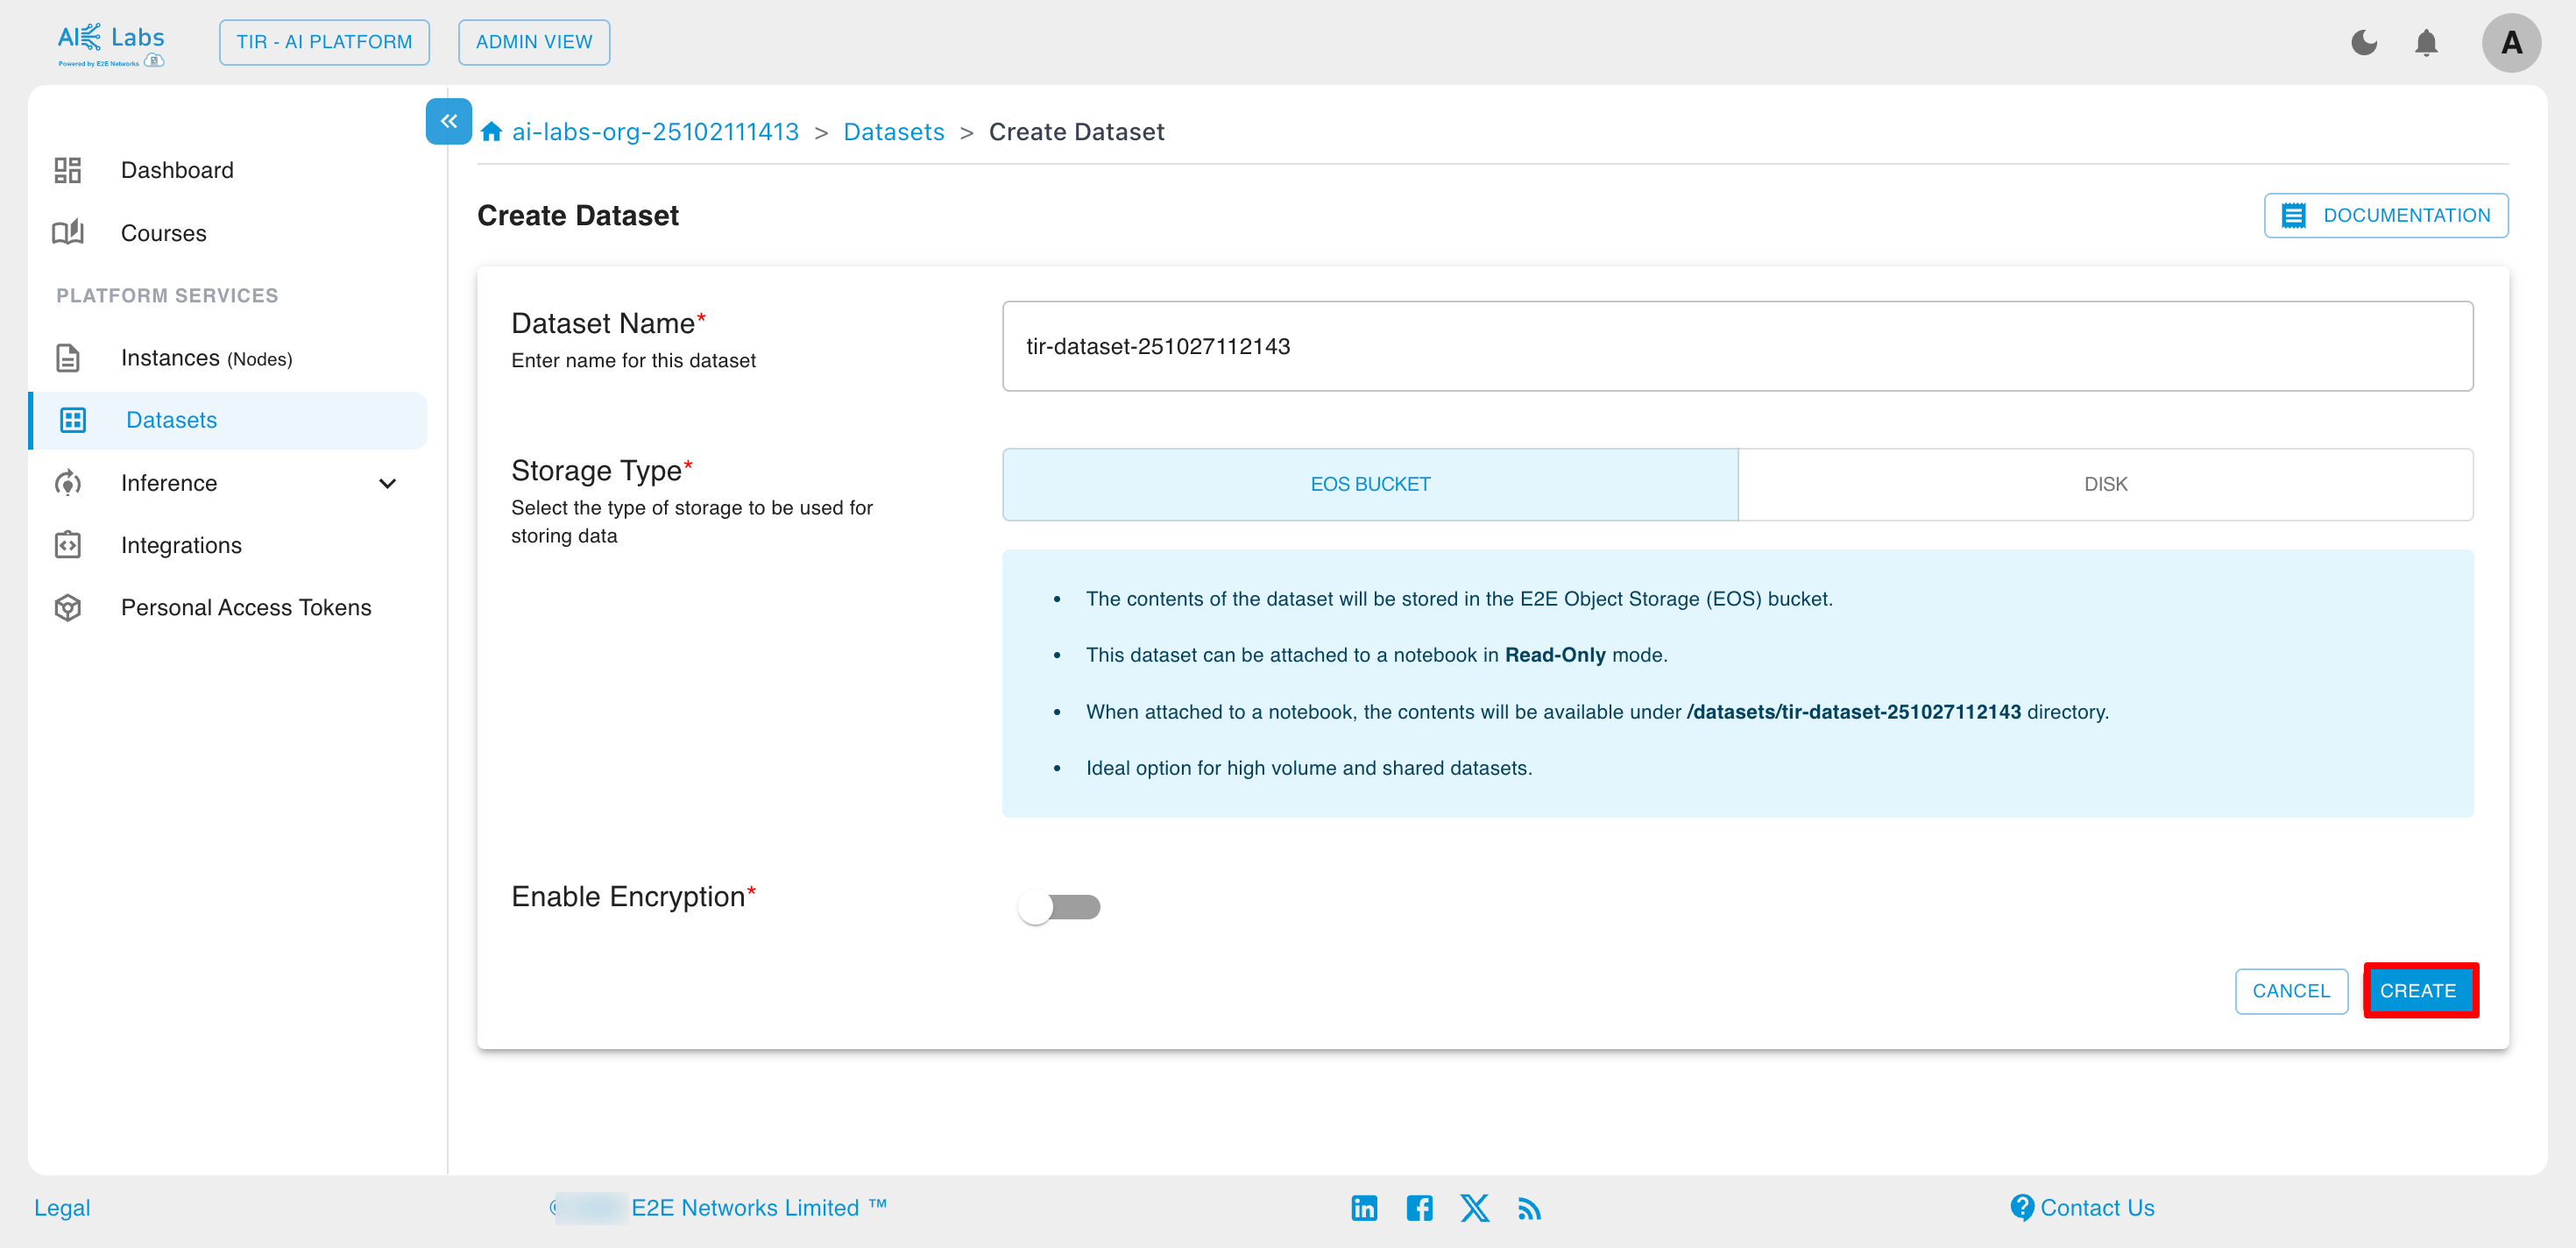
Datasets
Datasets allow you to organize, share, and easily access your data directly within your notebooks and training code. Currently, TIR supports datasets backed by EOS (Object Storage) and PVC-backed datasets with Disk Storage.
Steps to create dataset
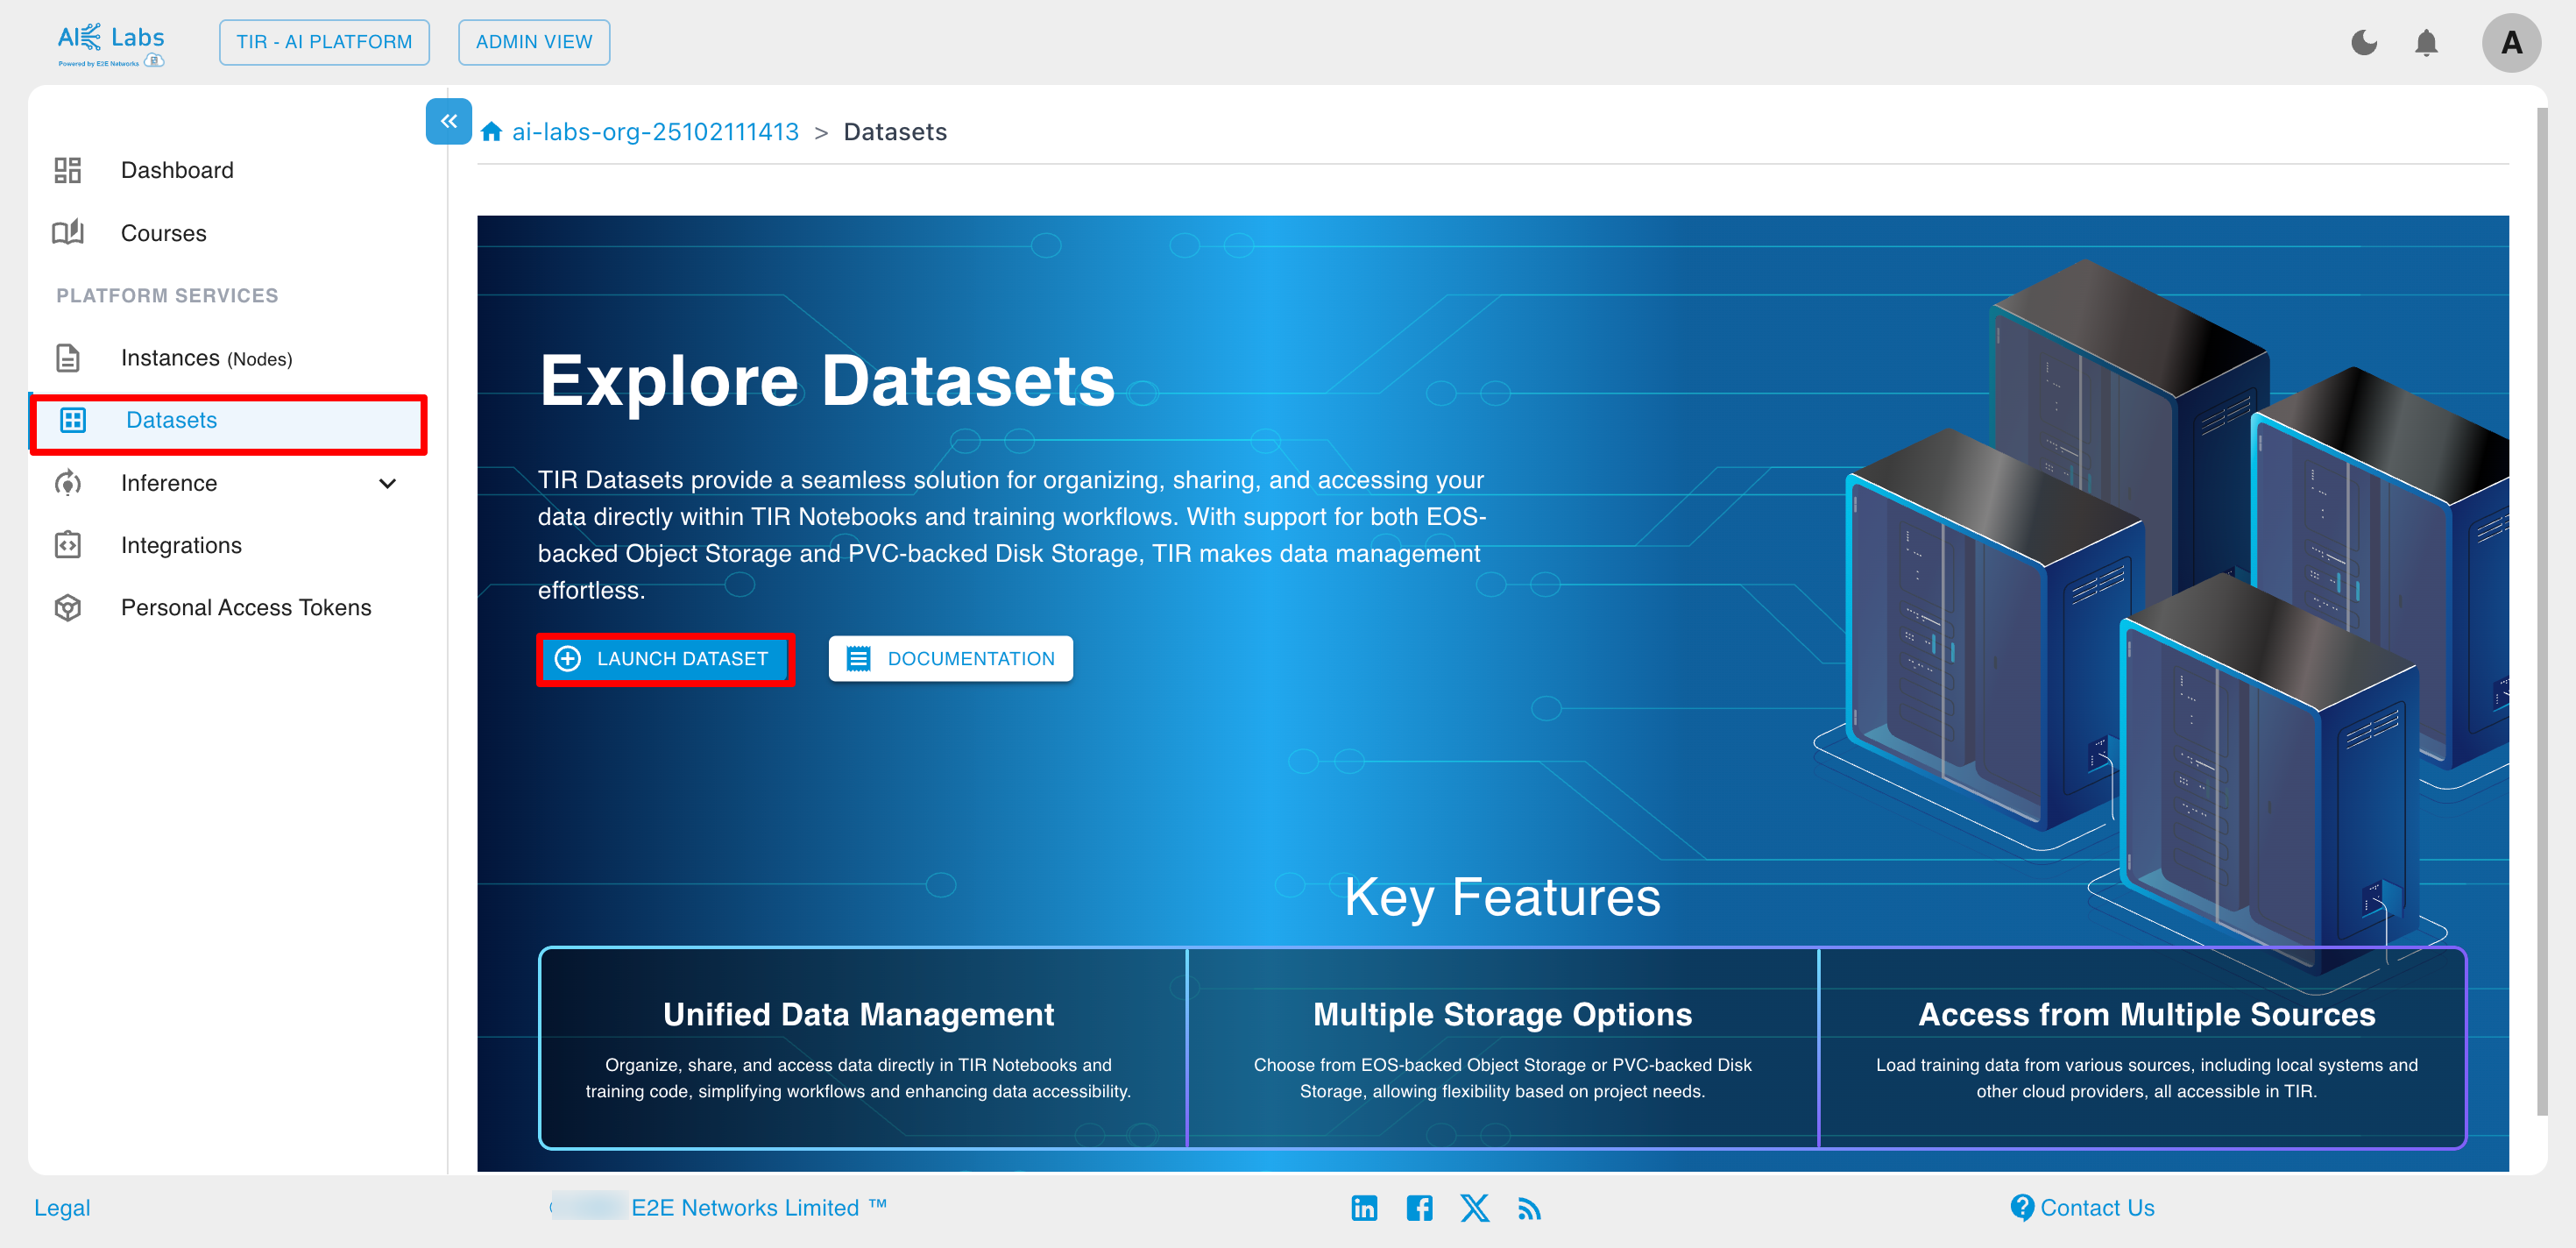
Navigate to Dataset section from the sidebar and then click on Launch Dataset button.
Enter the dataset name, select the storage type, and then click the Create button.
Inference
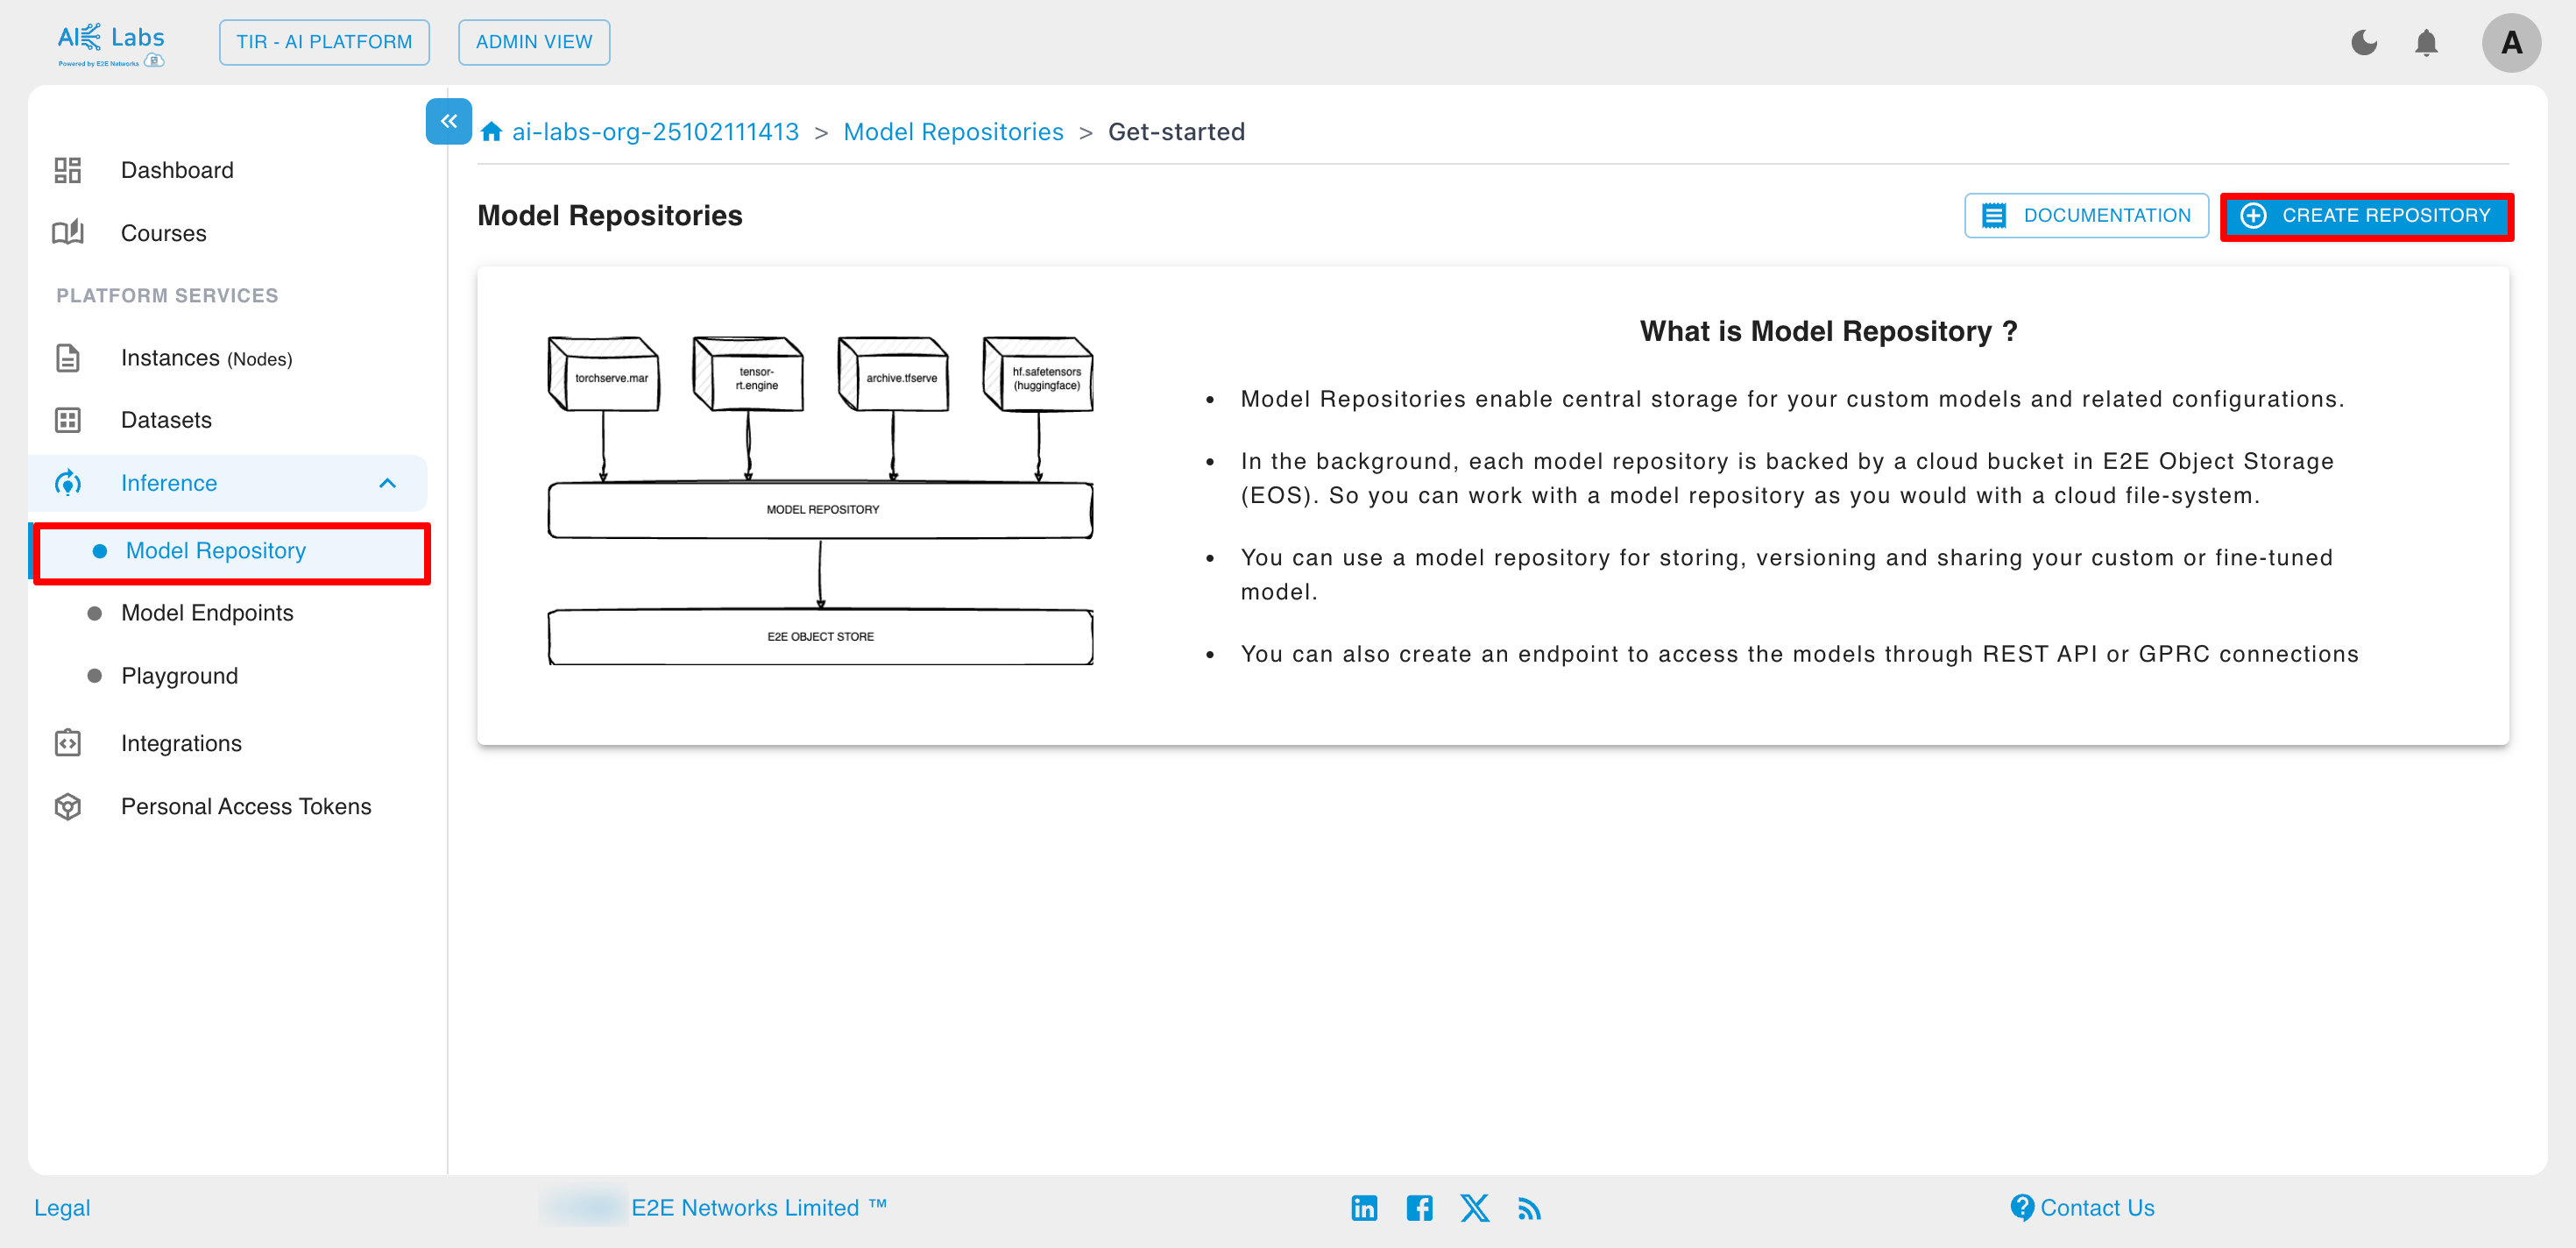
Model Repository
TIR Model Repositories are designed to store model weights and configuration files. These repositories can be backed by either E2E Object Storage (EOS) or PVC storage within a Kubernetes environment.
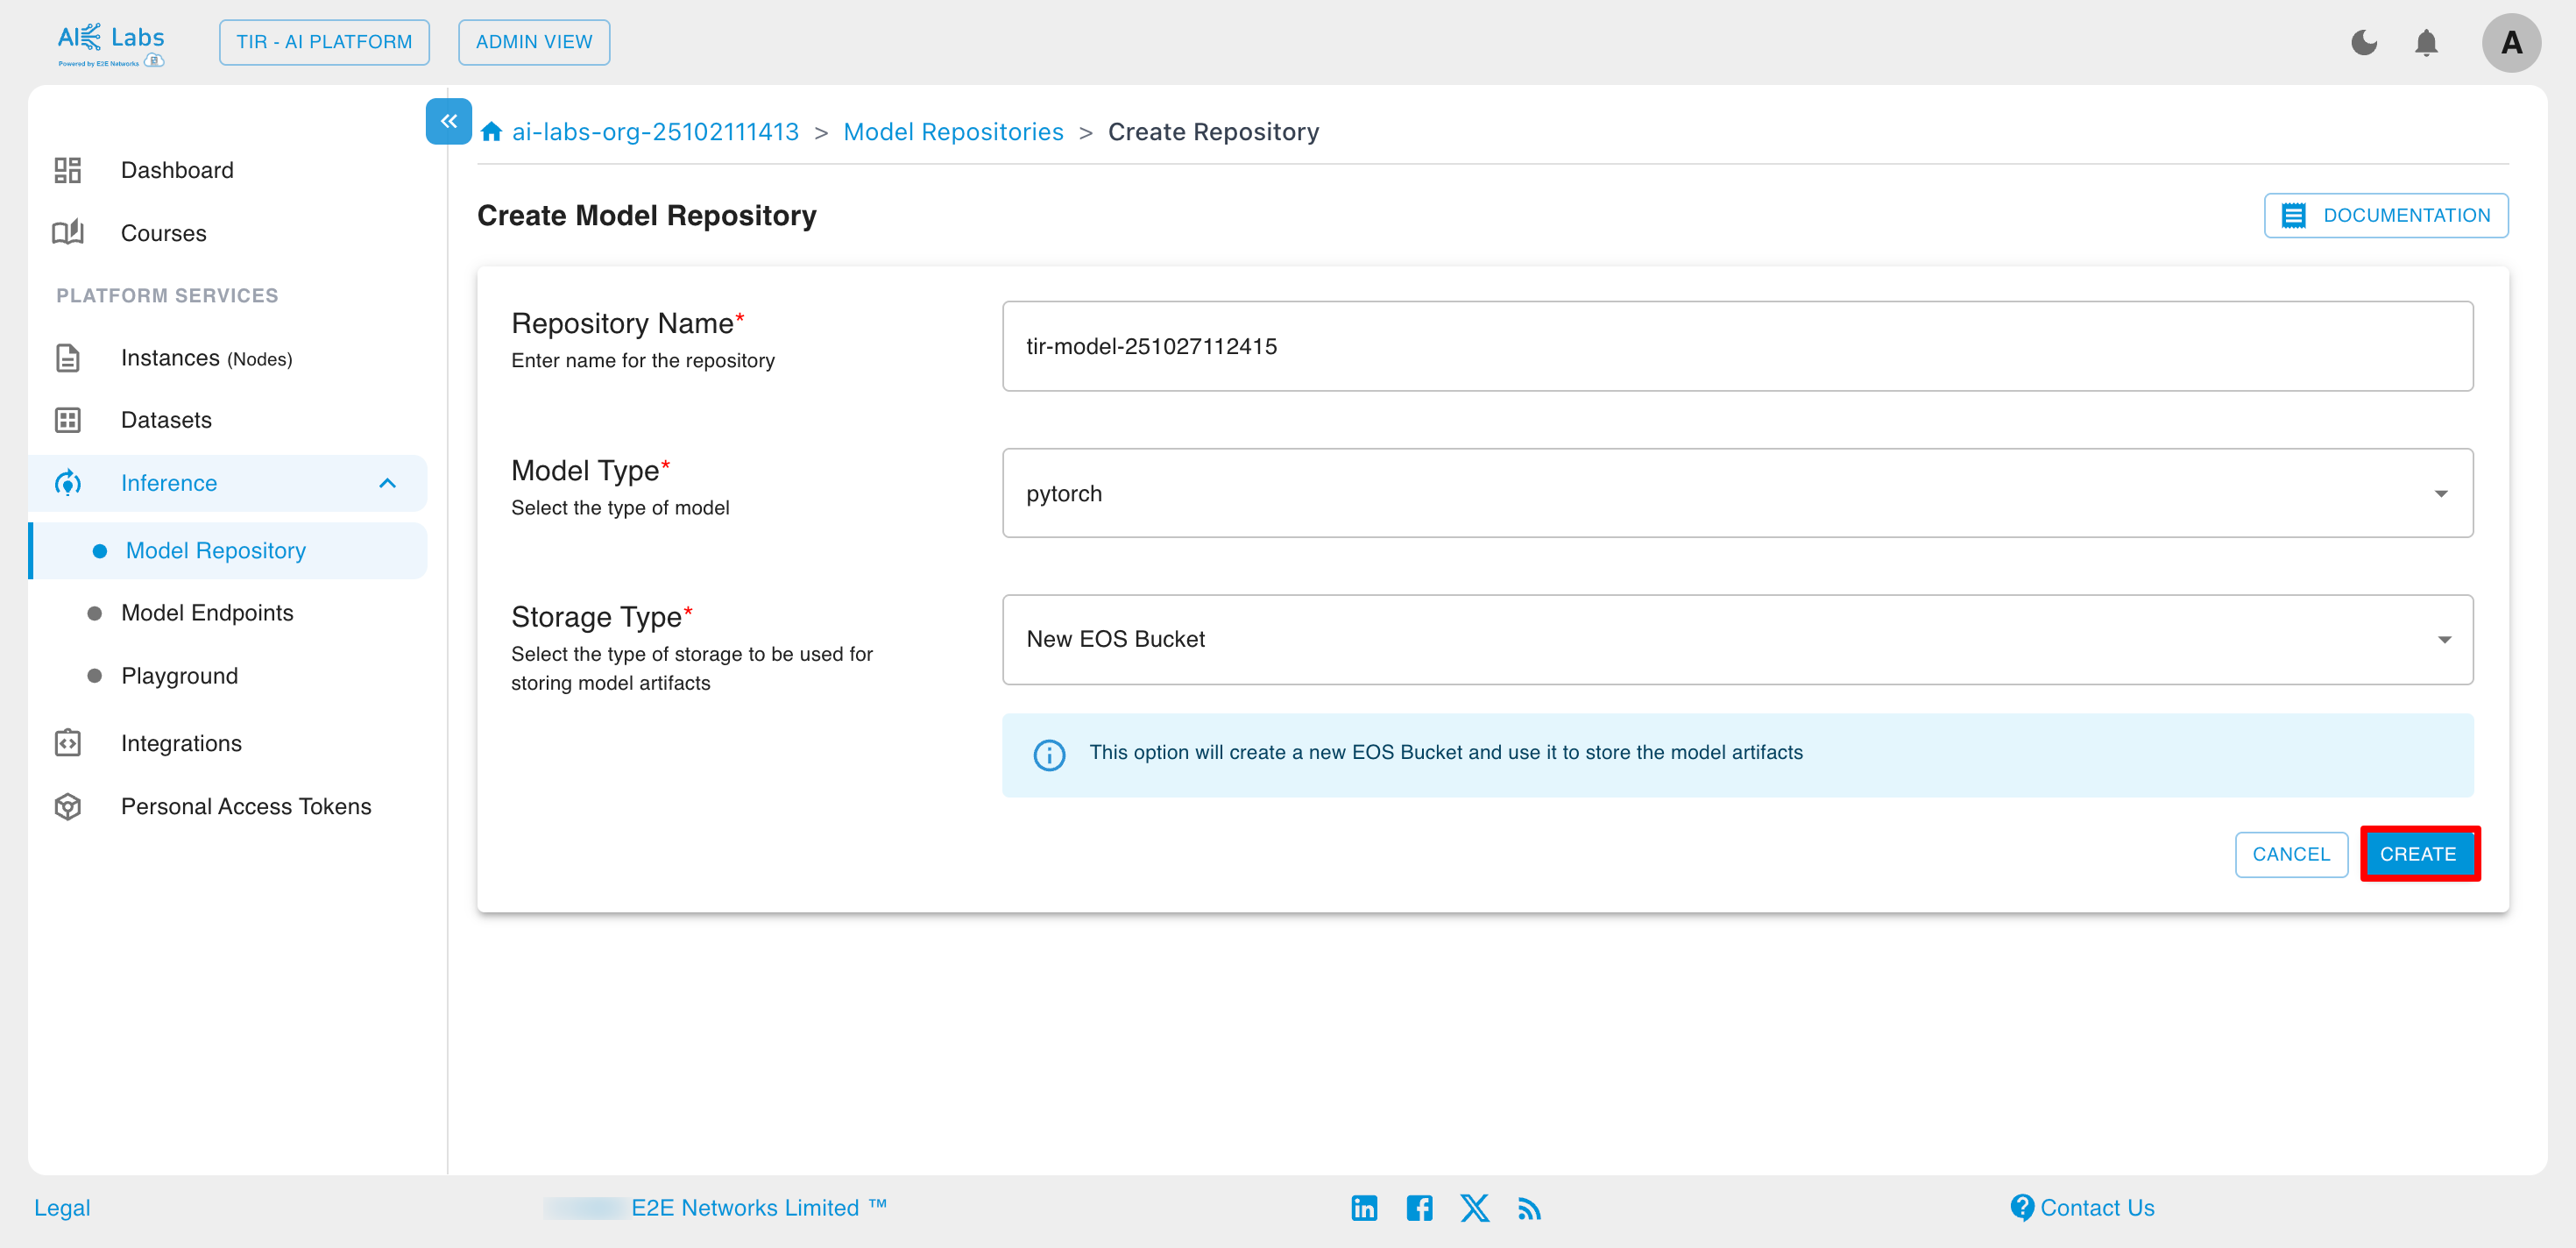
Steps to create Model Repository
Navigate to Inference section from the sidebar and then select Model Repository. Then click on Create Repository button.
Enter the repository name, select the model type and storage type, and then click the Create button.
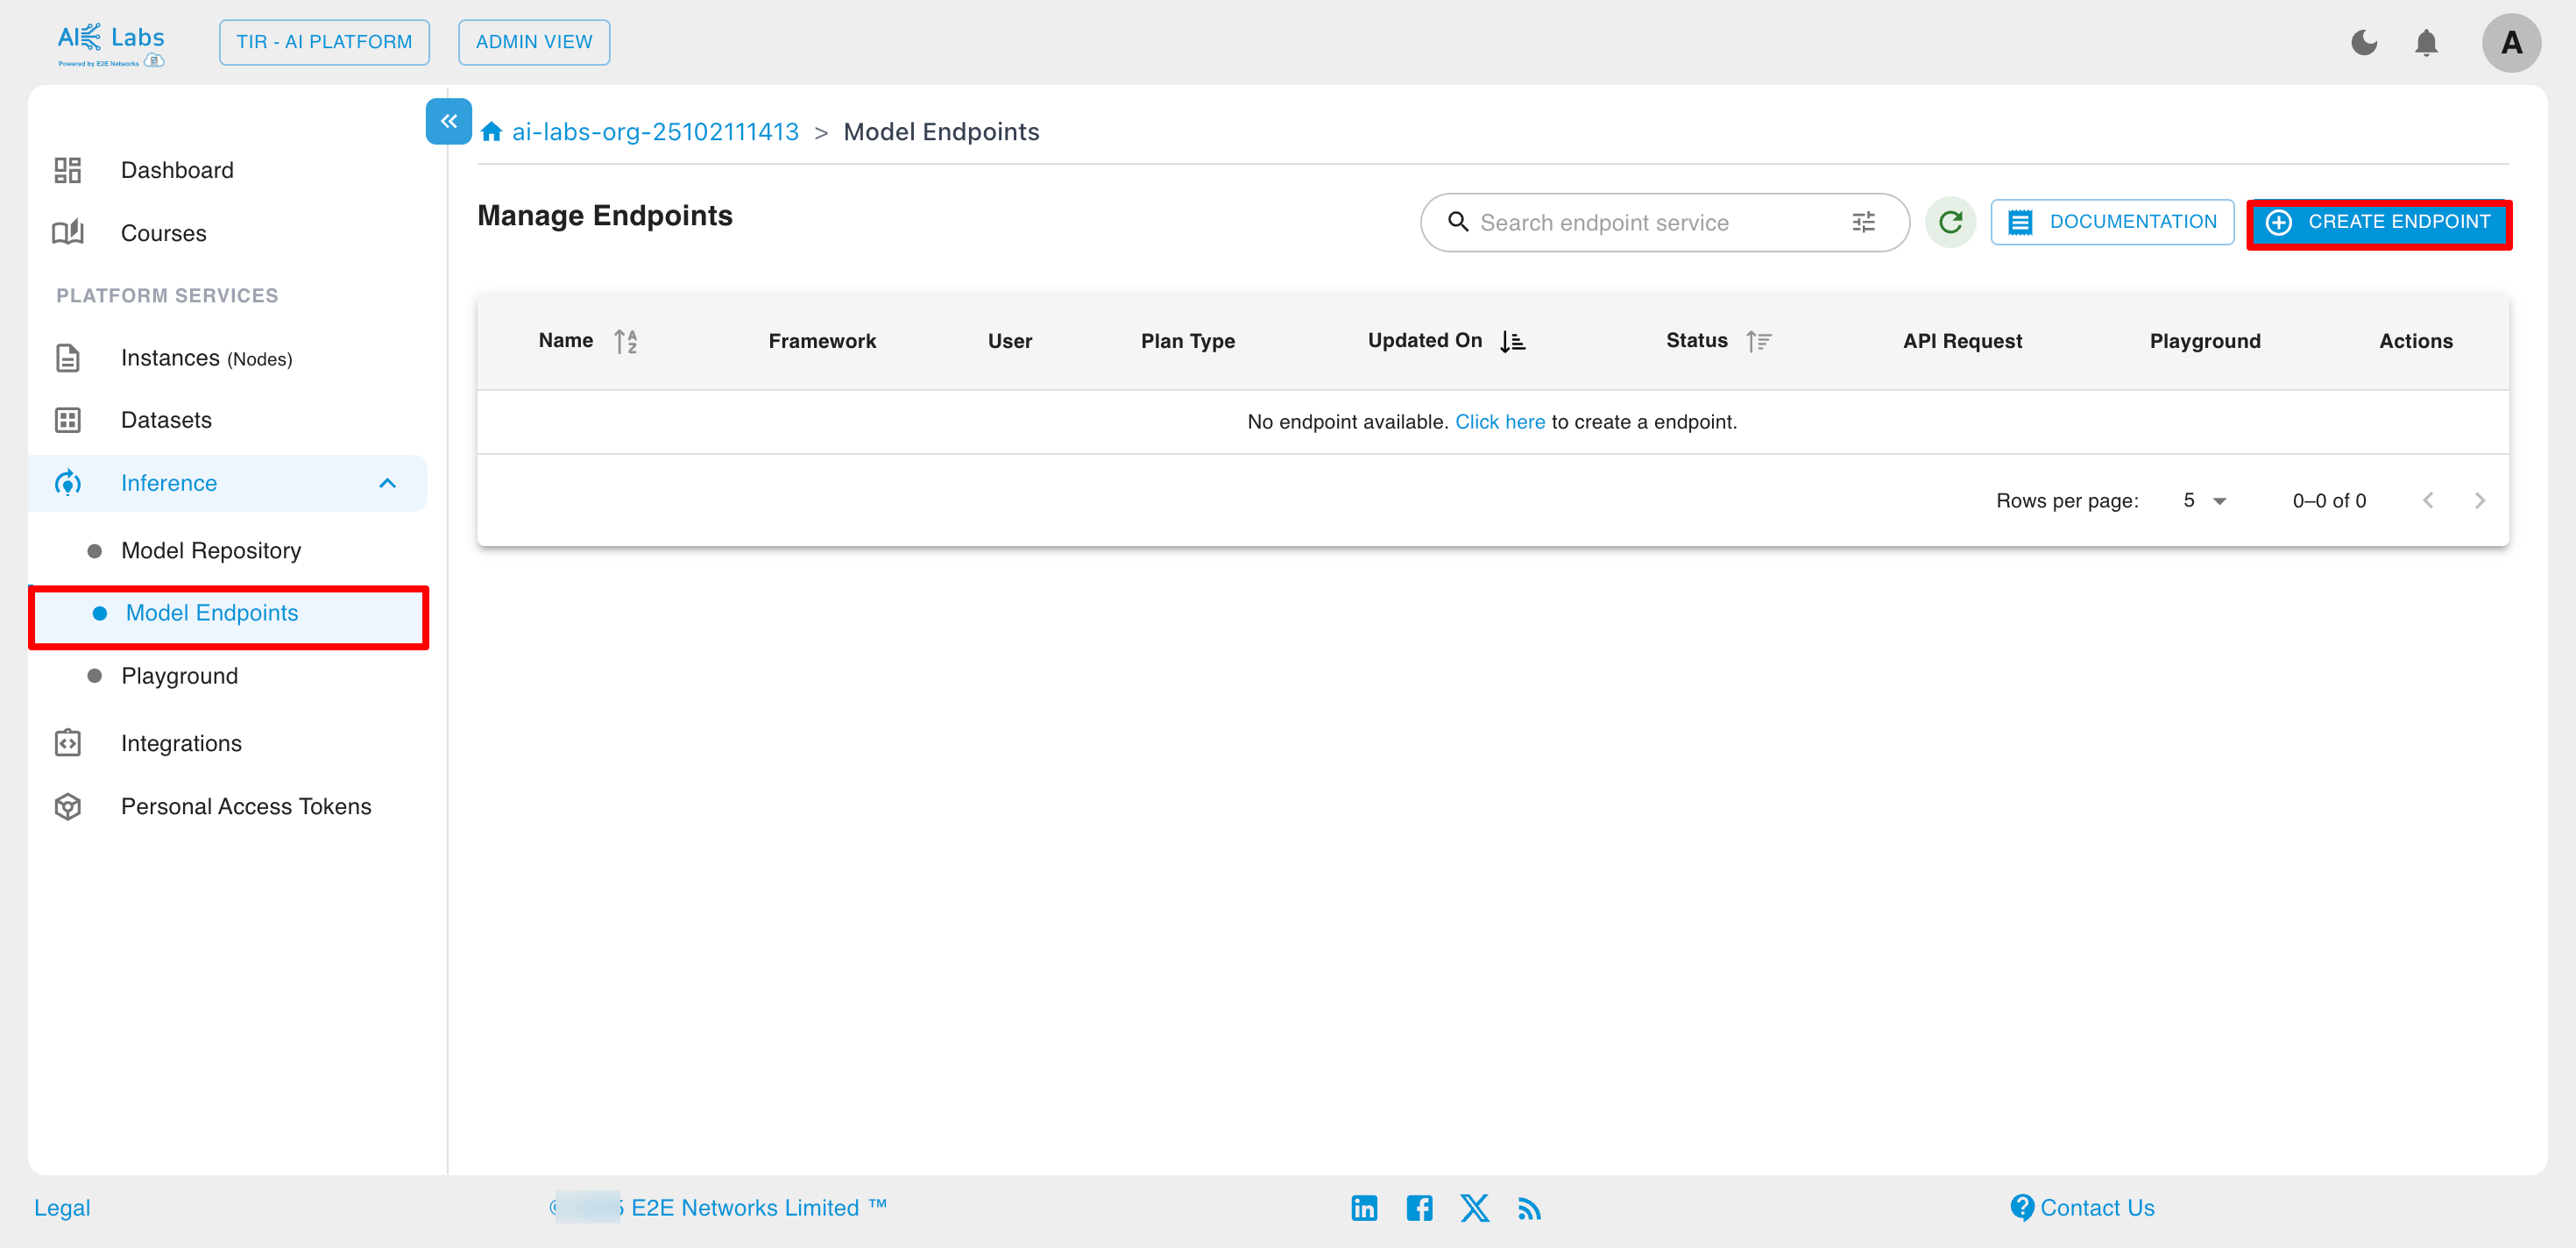
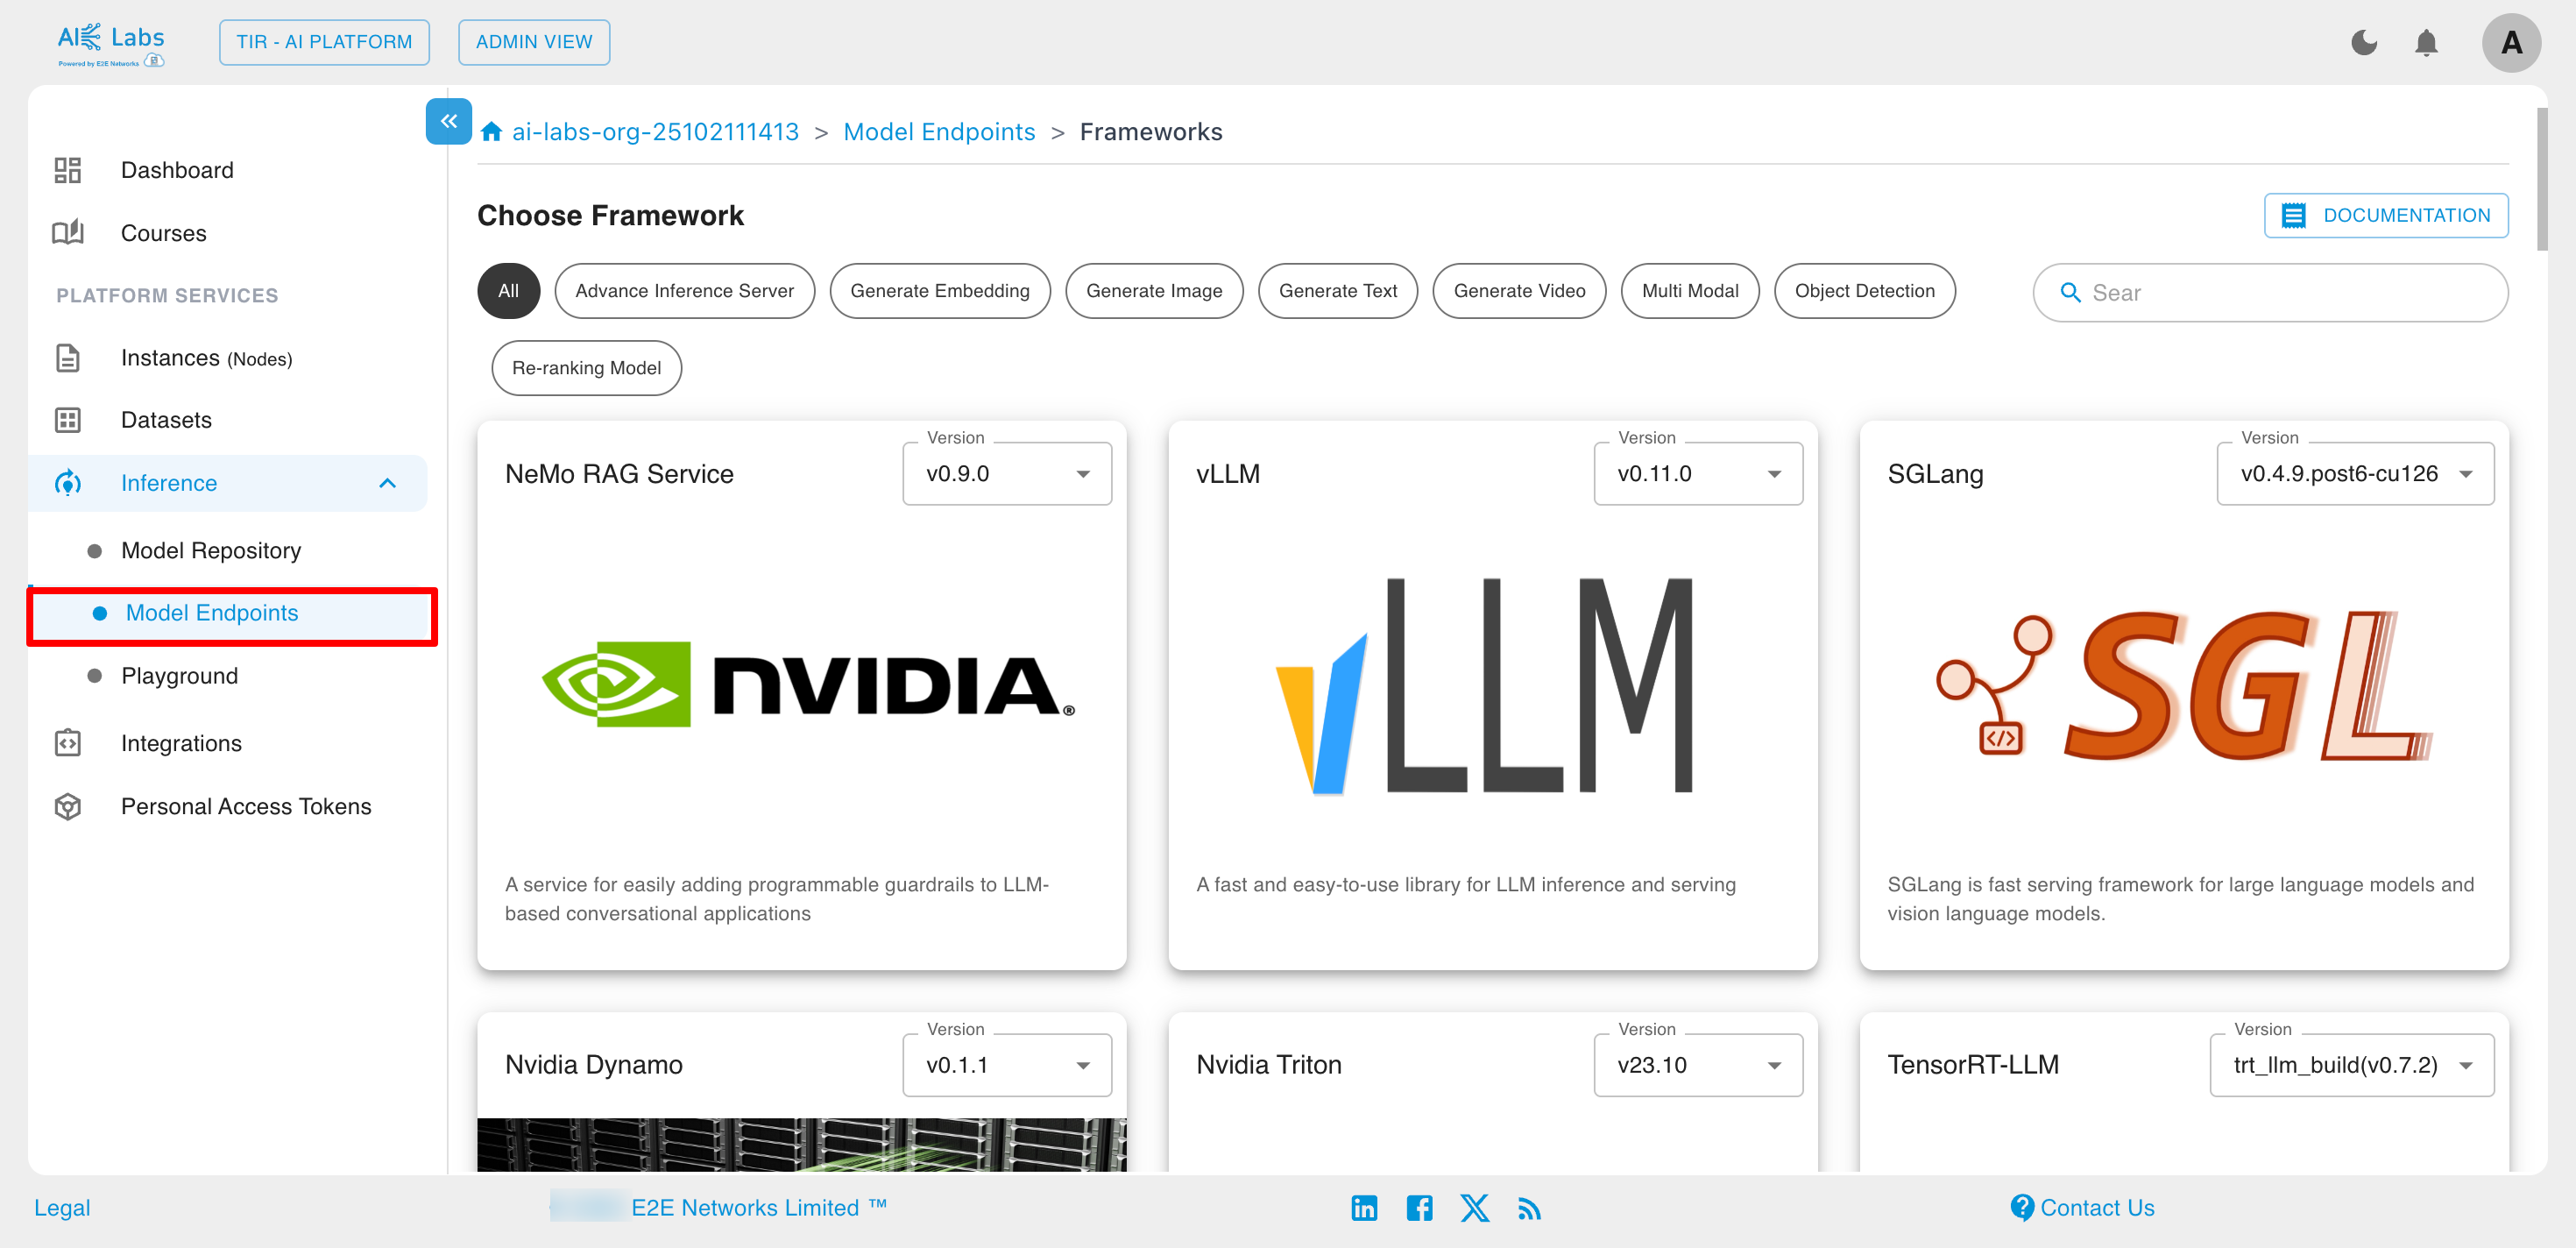
Model Endpoints
Model endpoints are dedicated API interfaces that allow applications to send data to a deployed AI model and receive inference results in real time. They serve as the bridge between your trained model and external systems, enabling seamless integration of AI predictions into your applications or services.
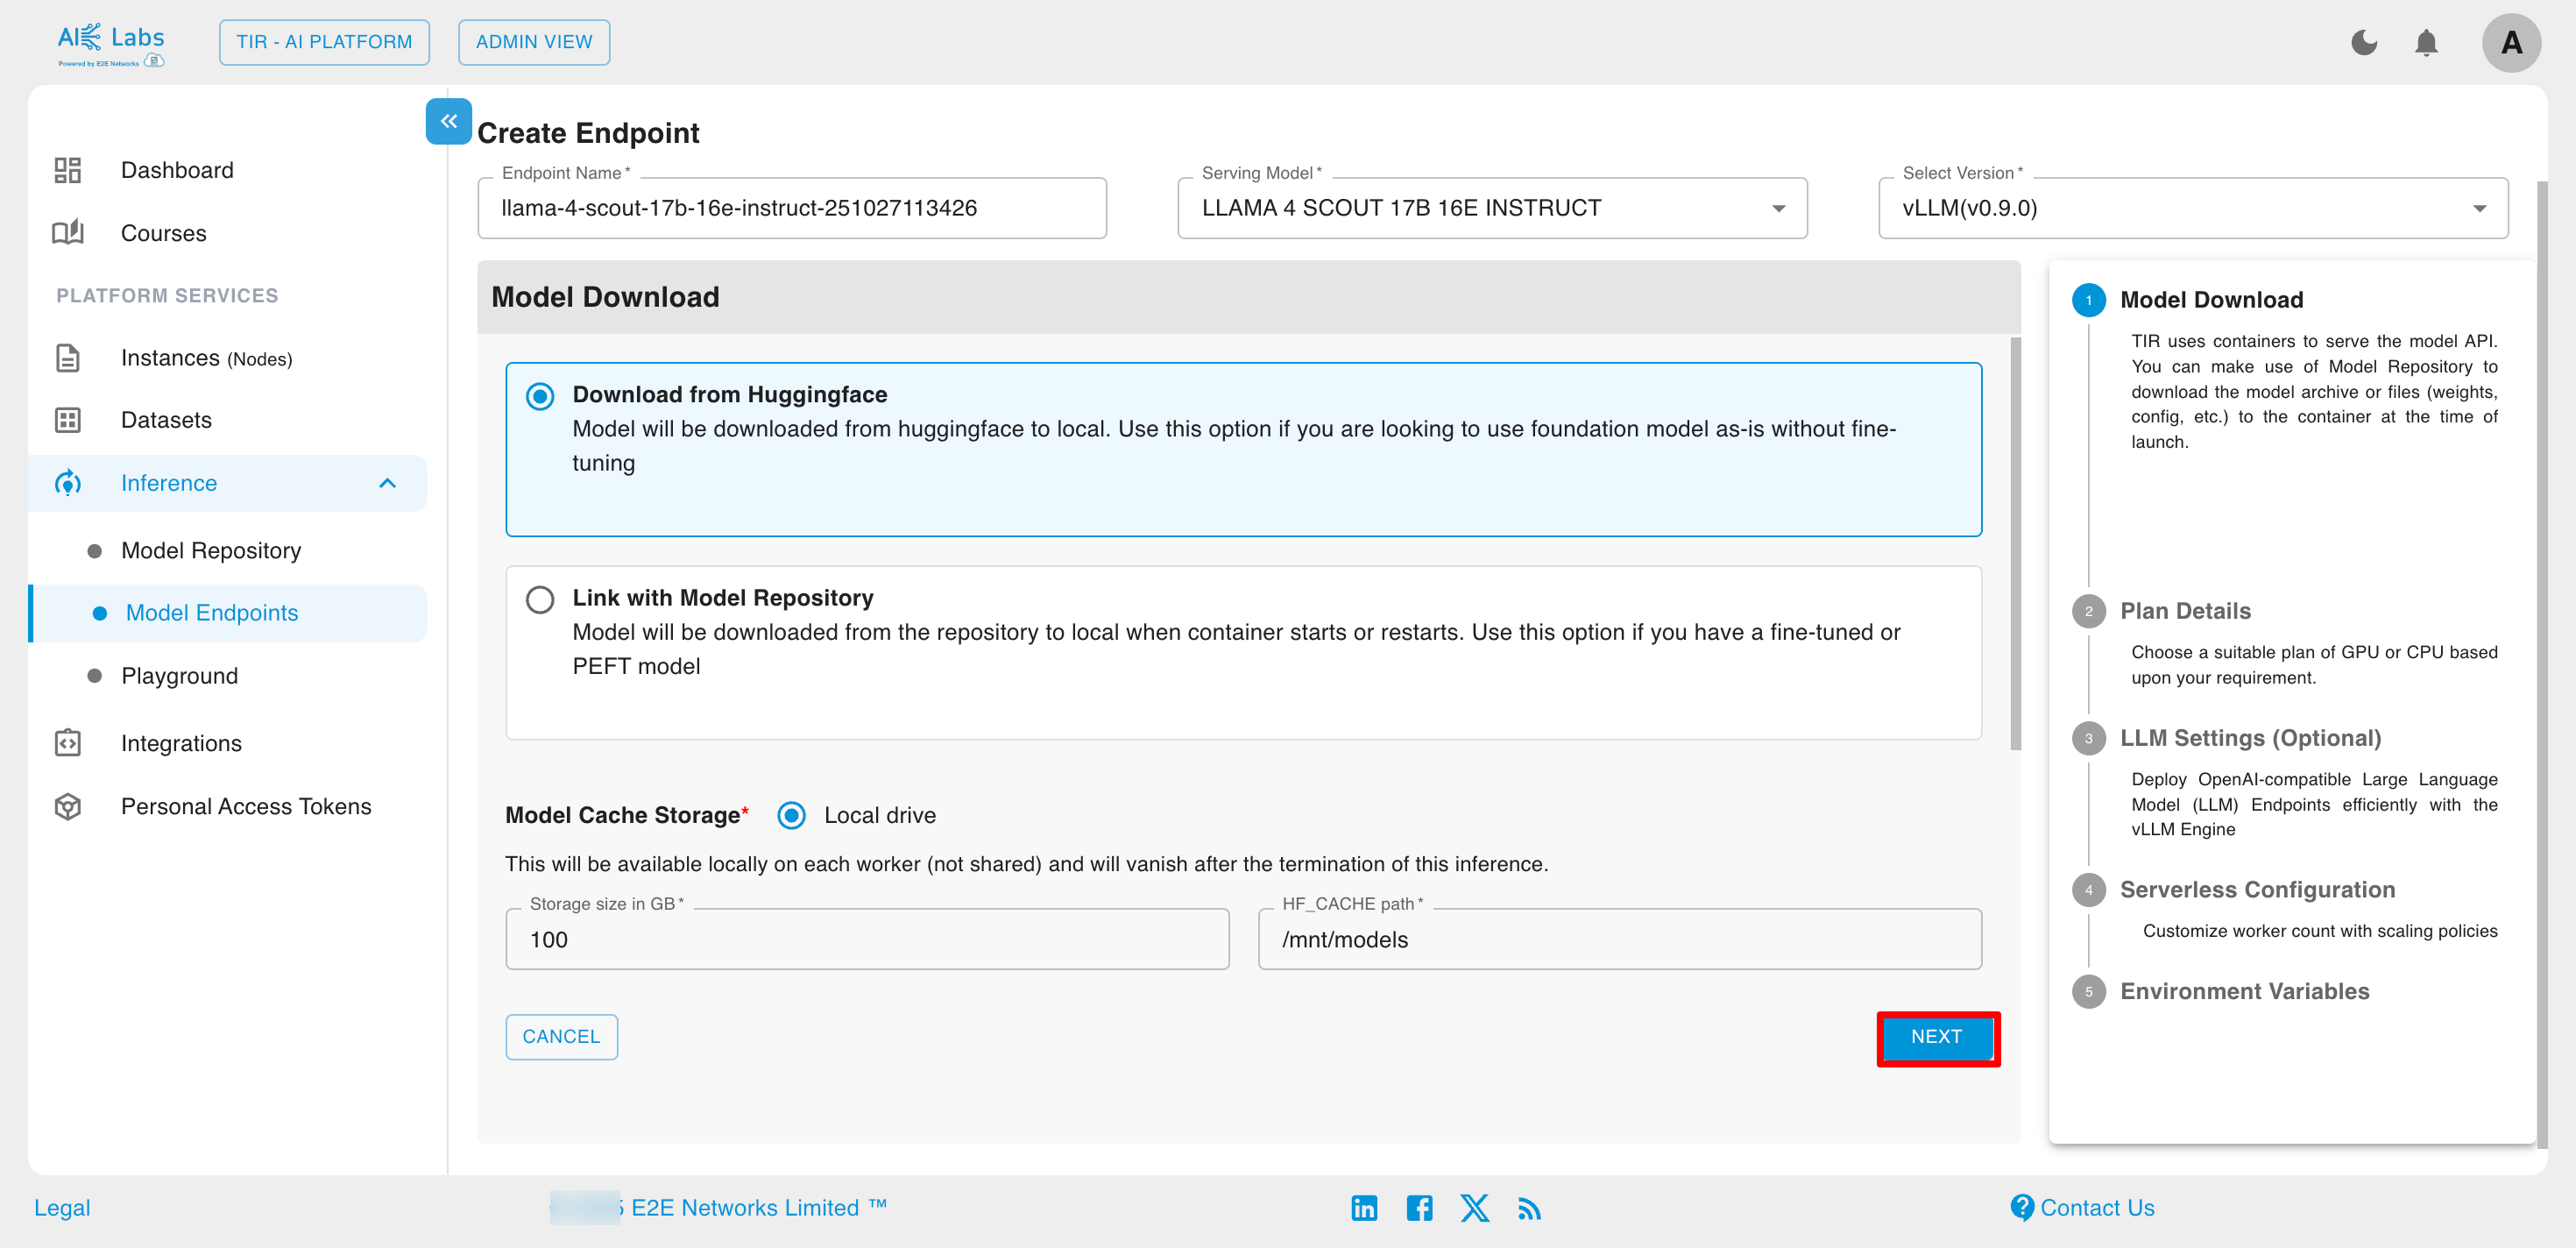
Steps to create Model Endpoints
Navigate to Inference section from the sidebar and then select Model Endpoints. Then click on Create Endpoint button.
Choose the desired framework.
Click on Link with Model Repository and select from Model Repository.
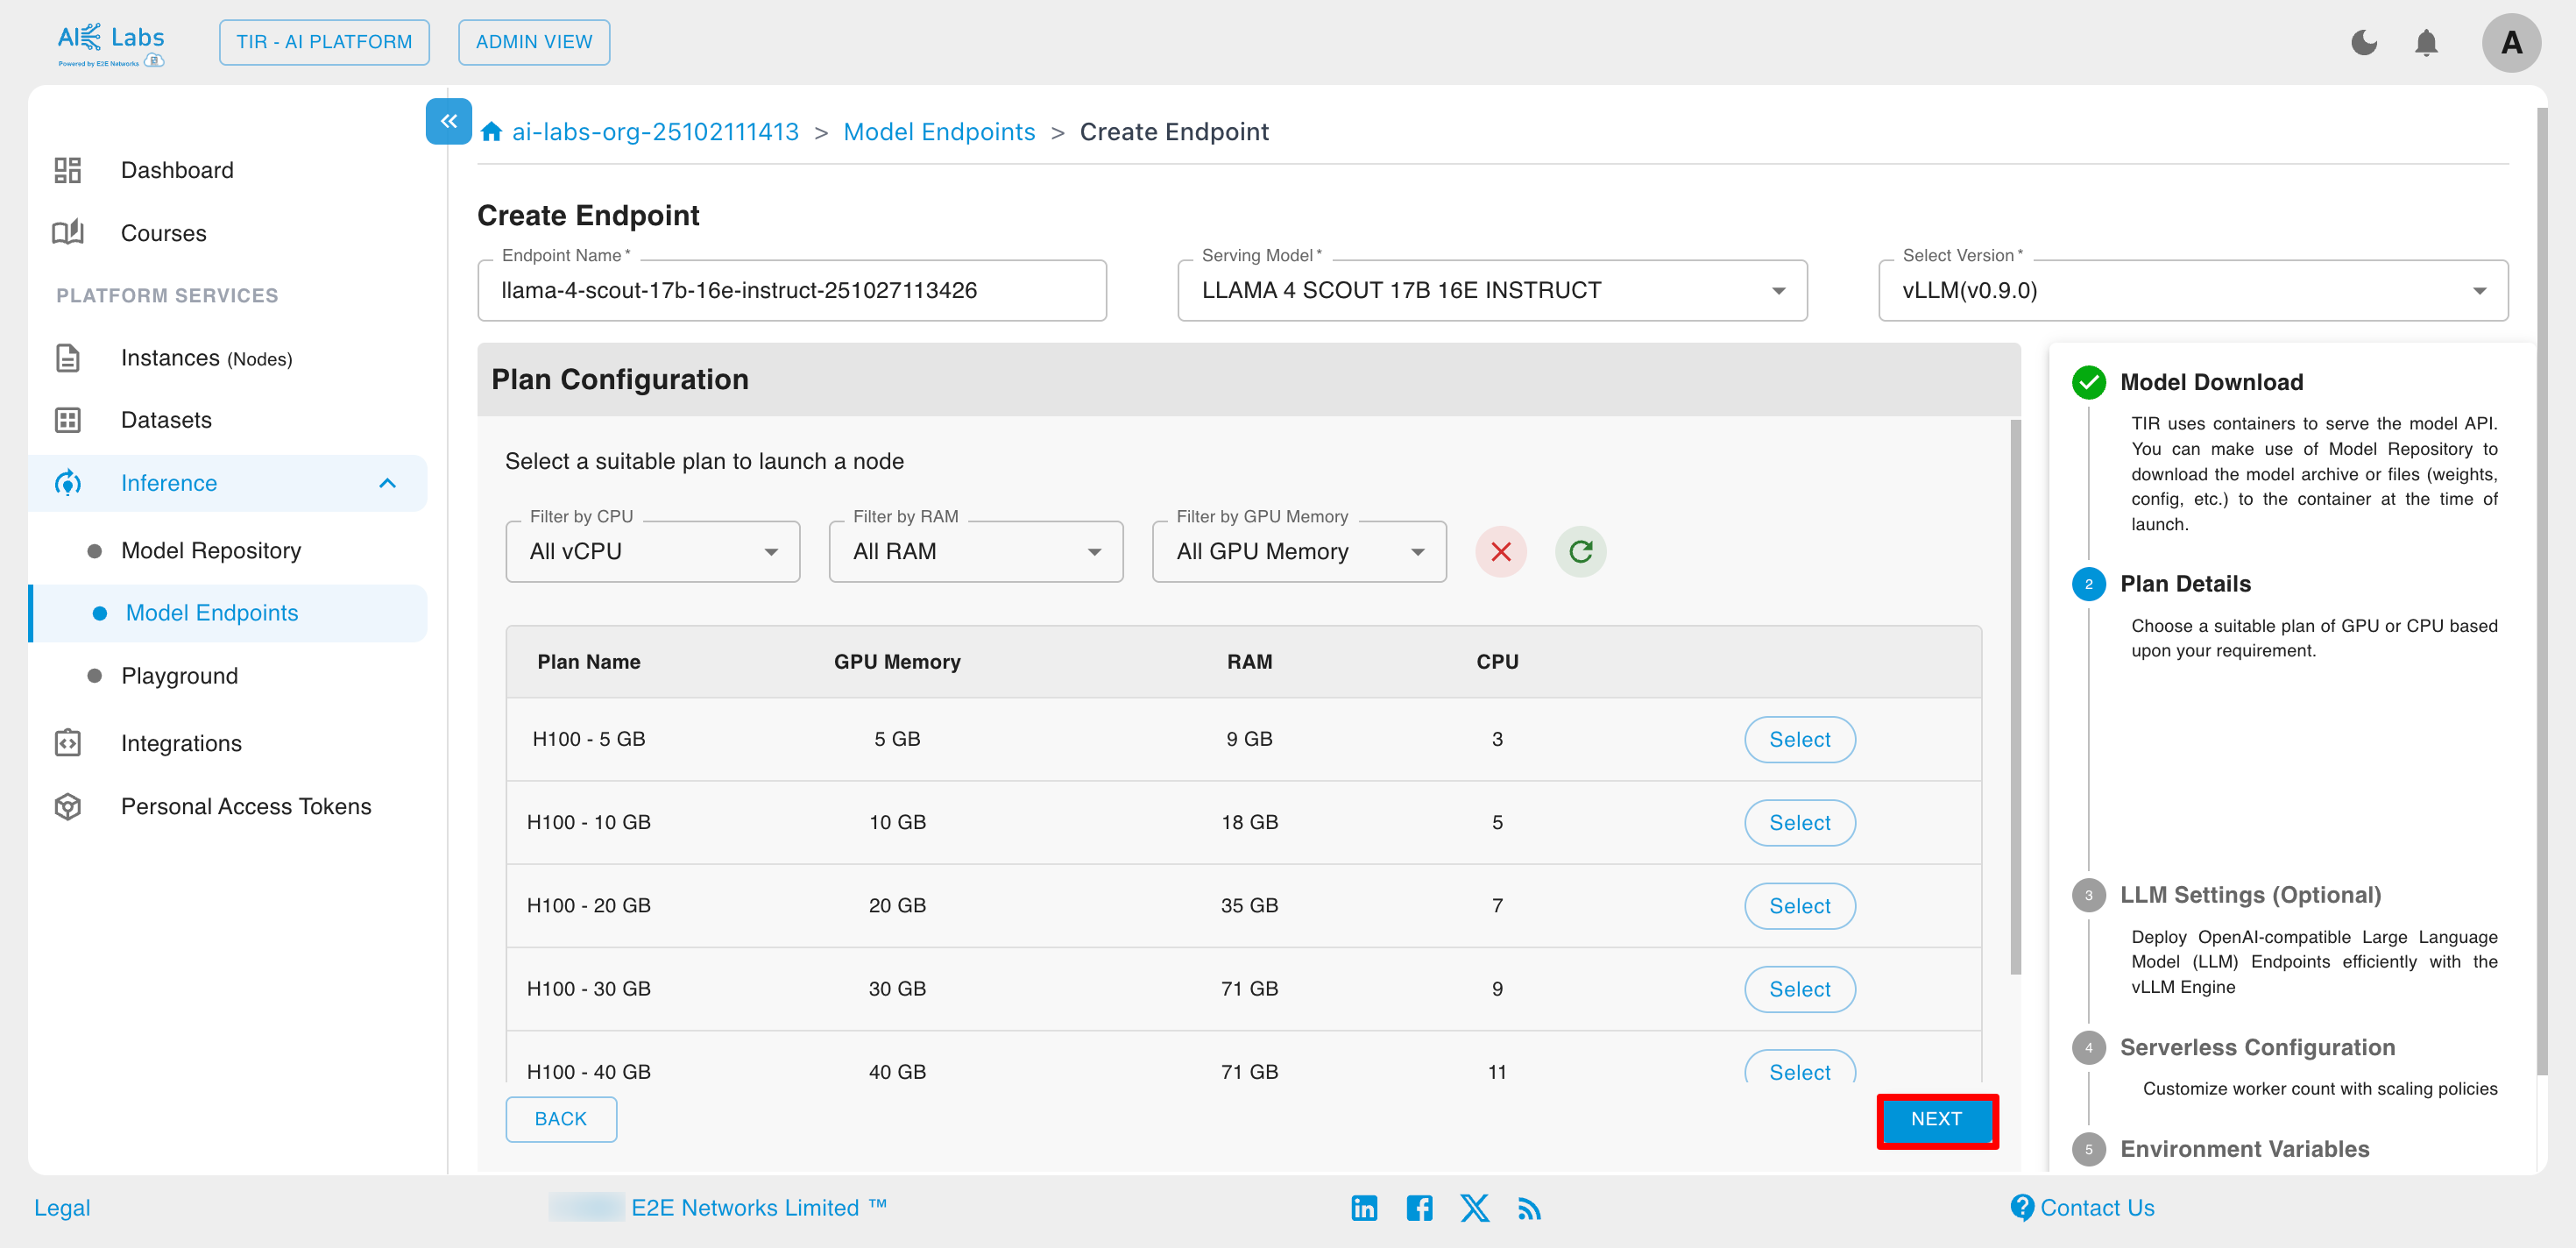
Select the desired plan and then click on Next button.
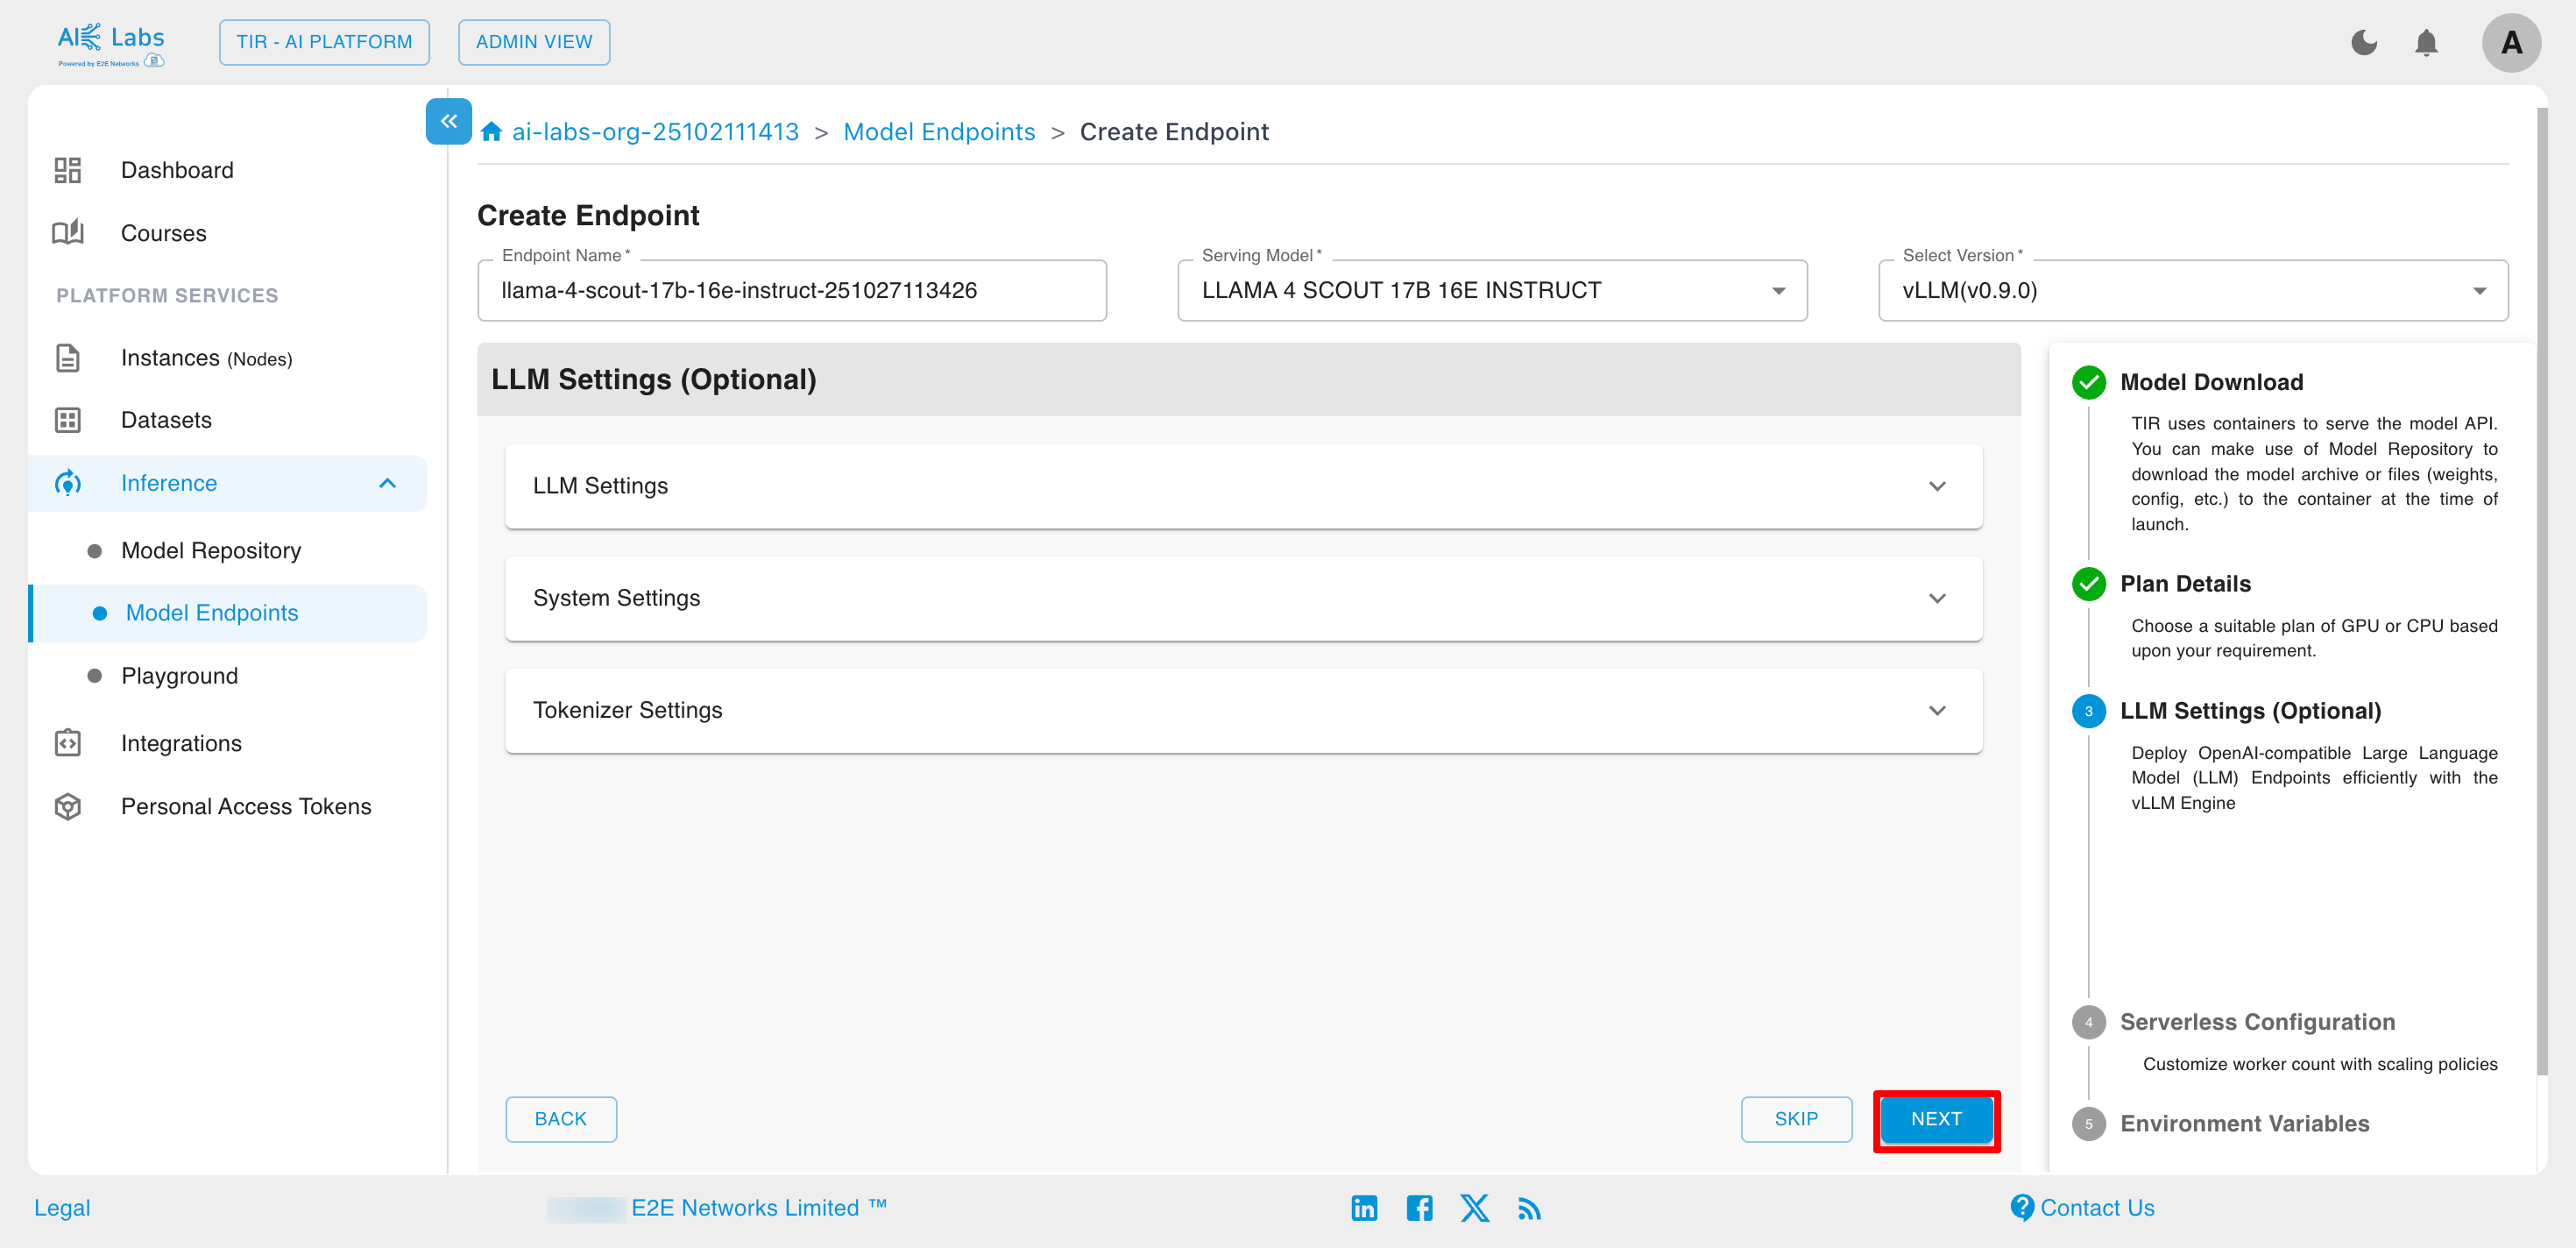
Configure the LLM settings if you want.
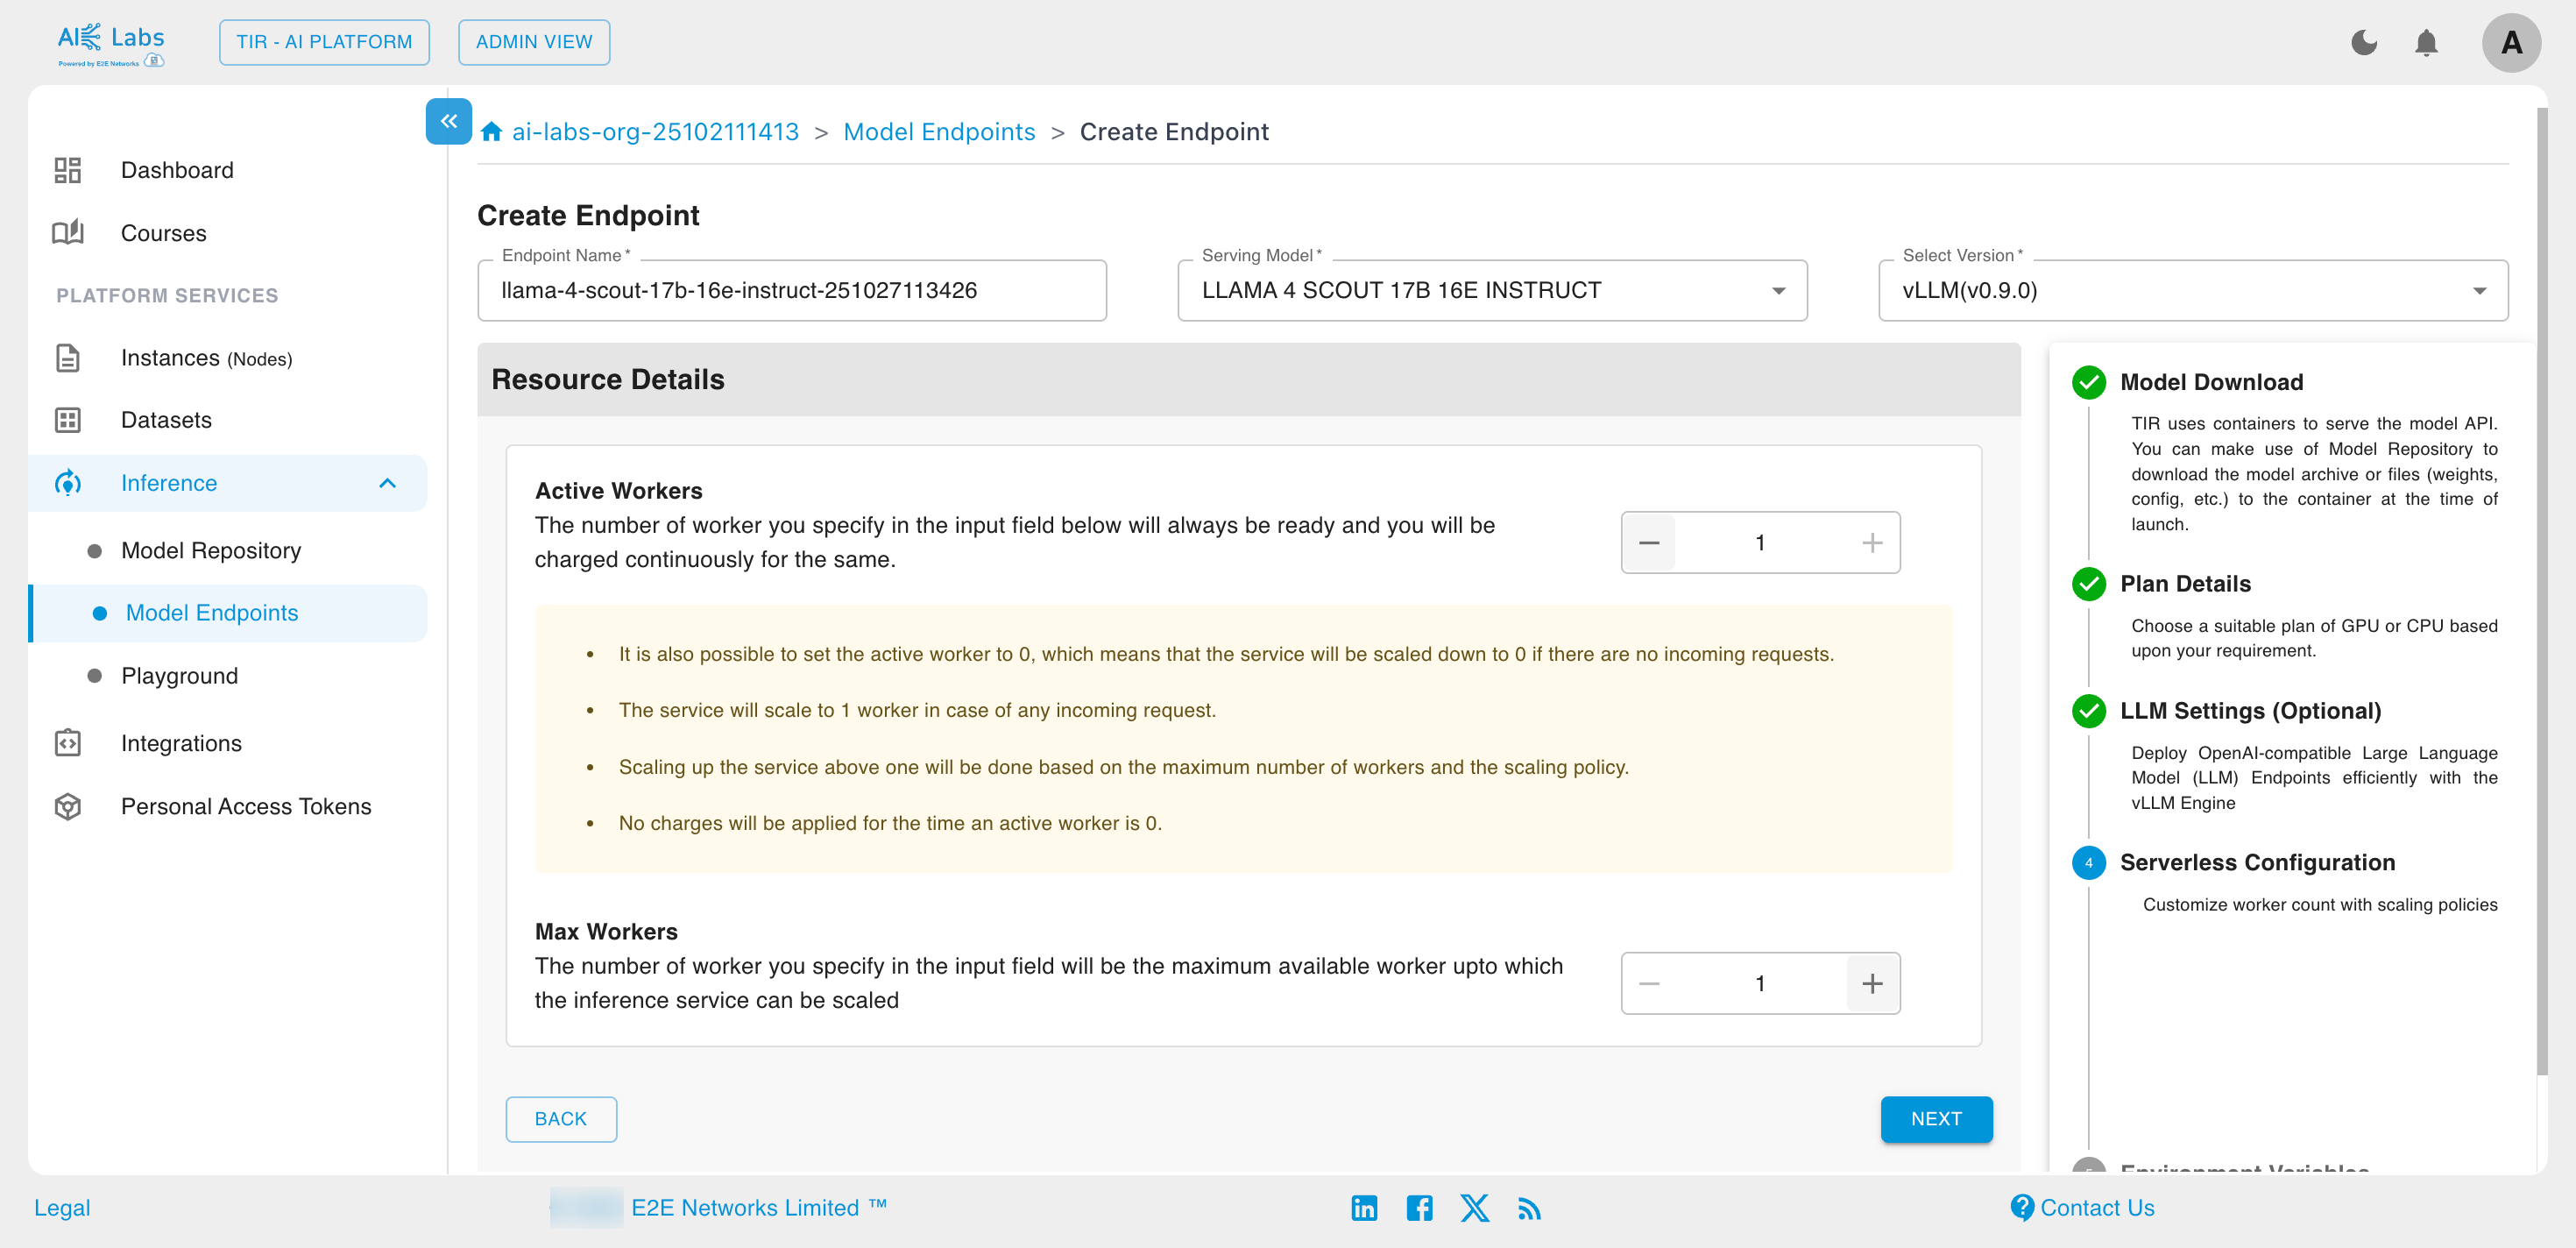
Select the Active Workers and Max Workers count according to your need. Then click on Next button.
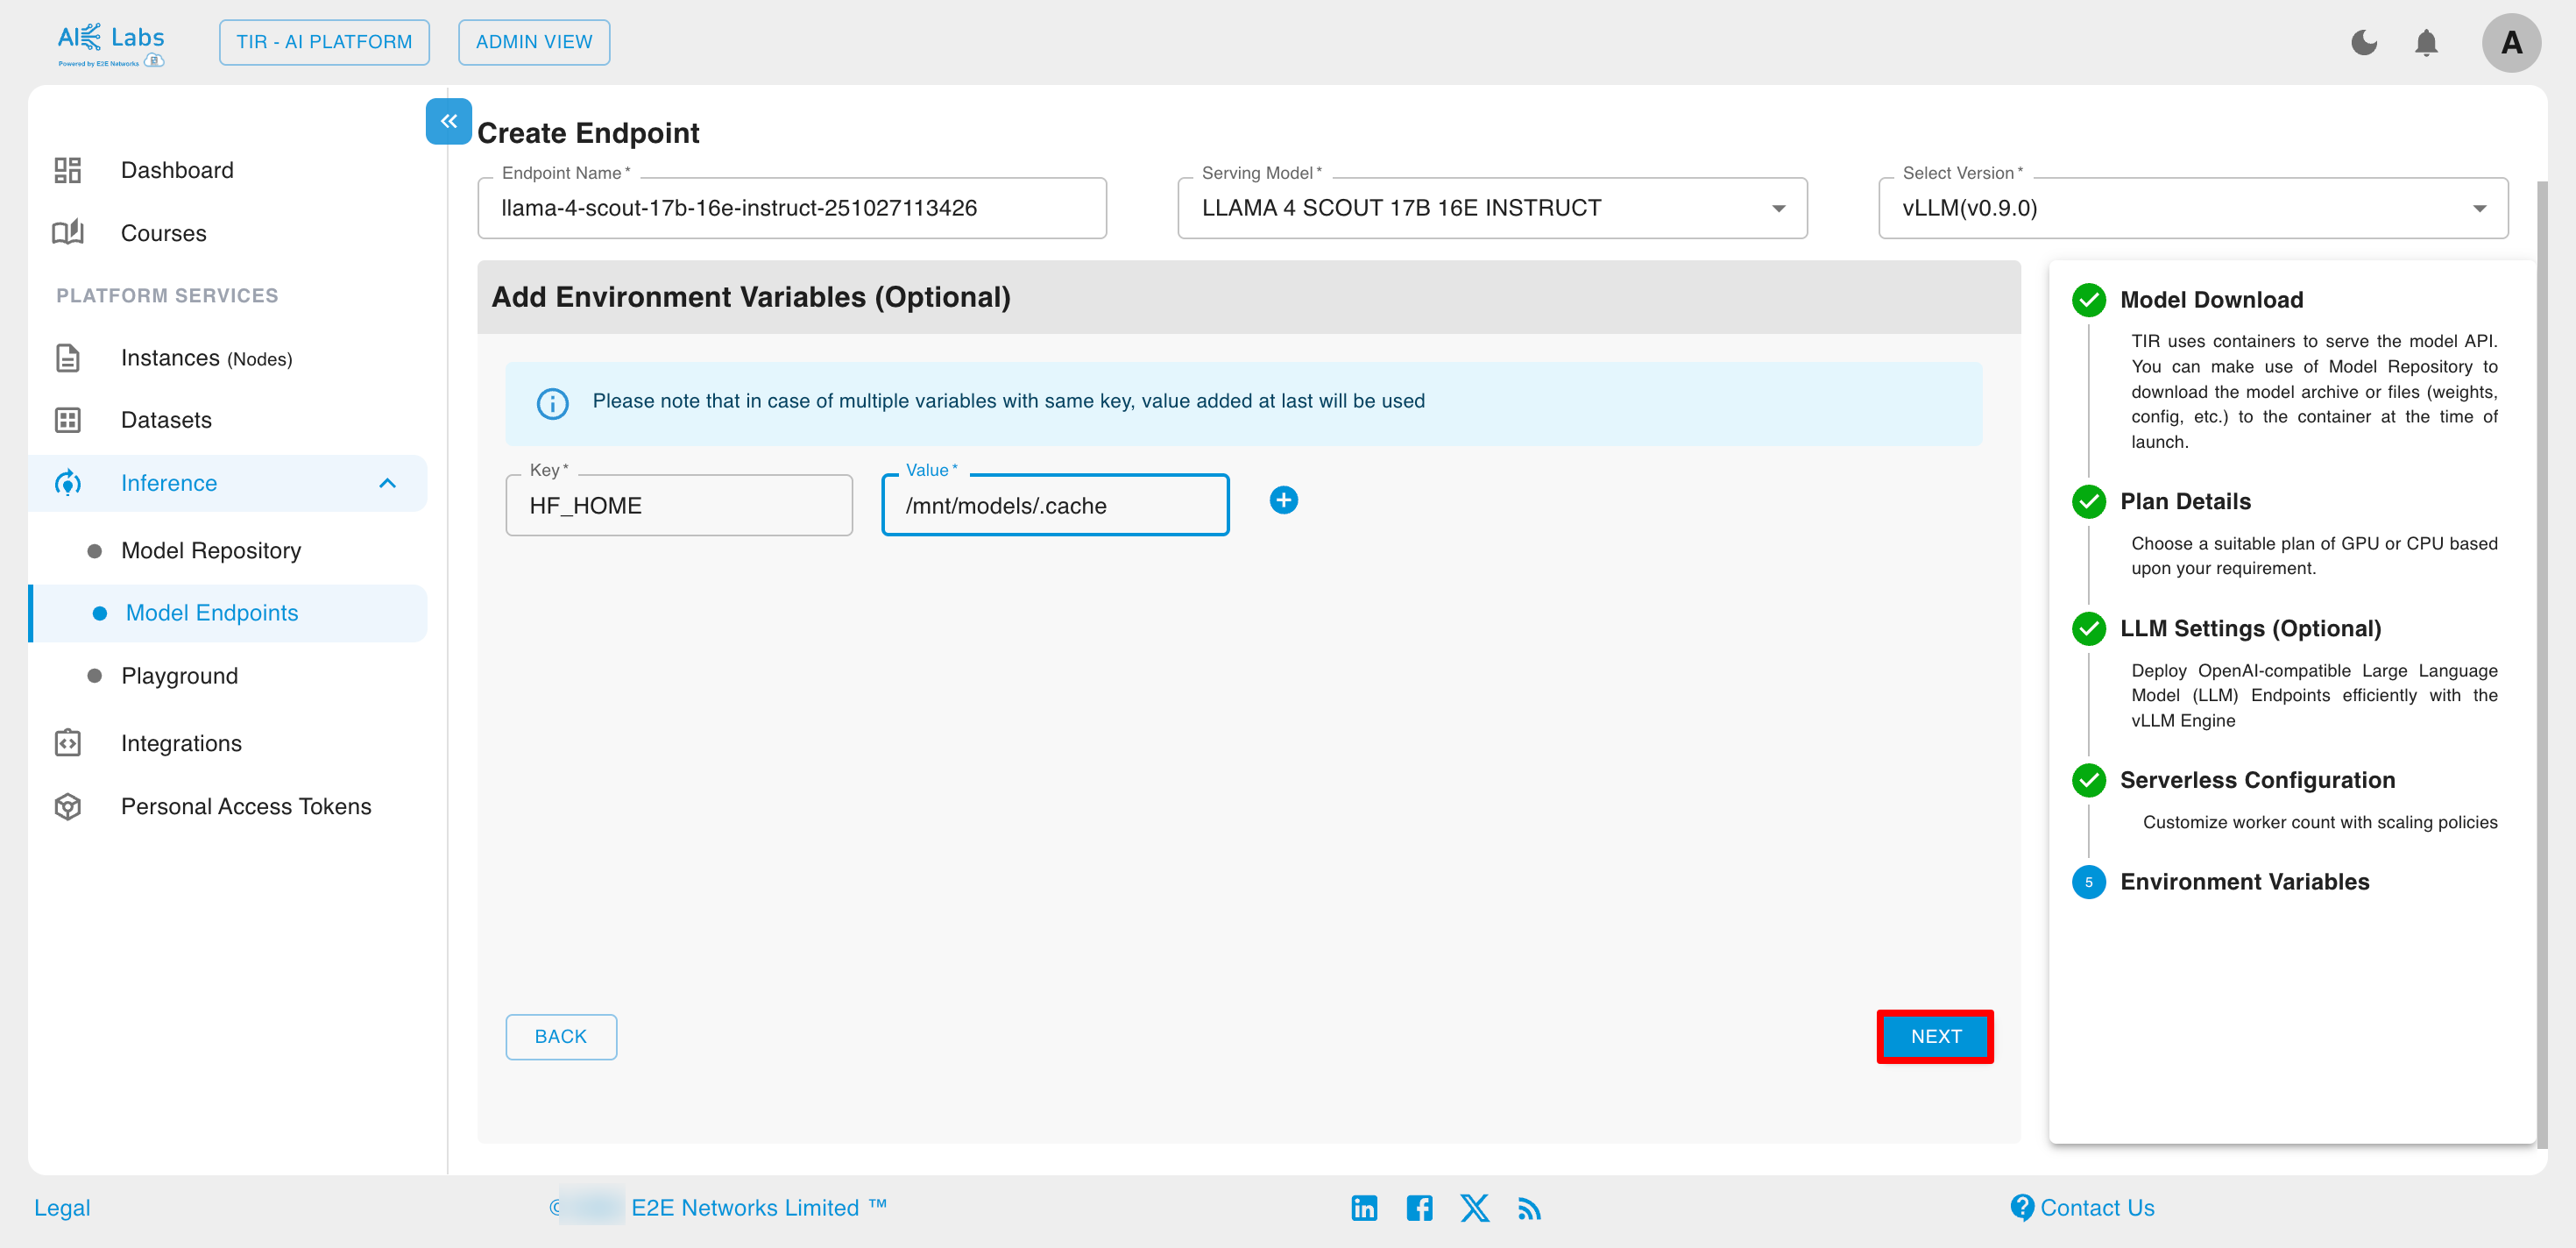
Add environment variables if you want. Then click on Next button.
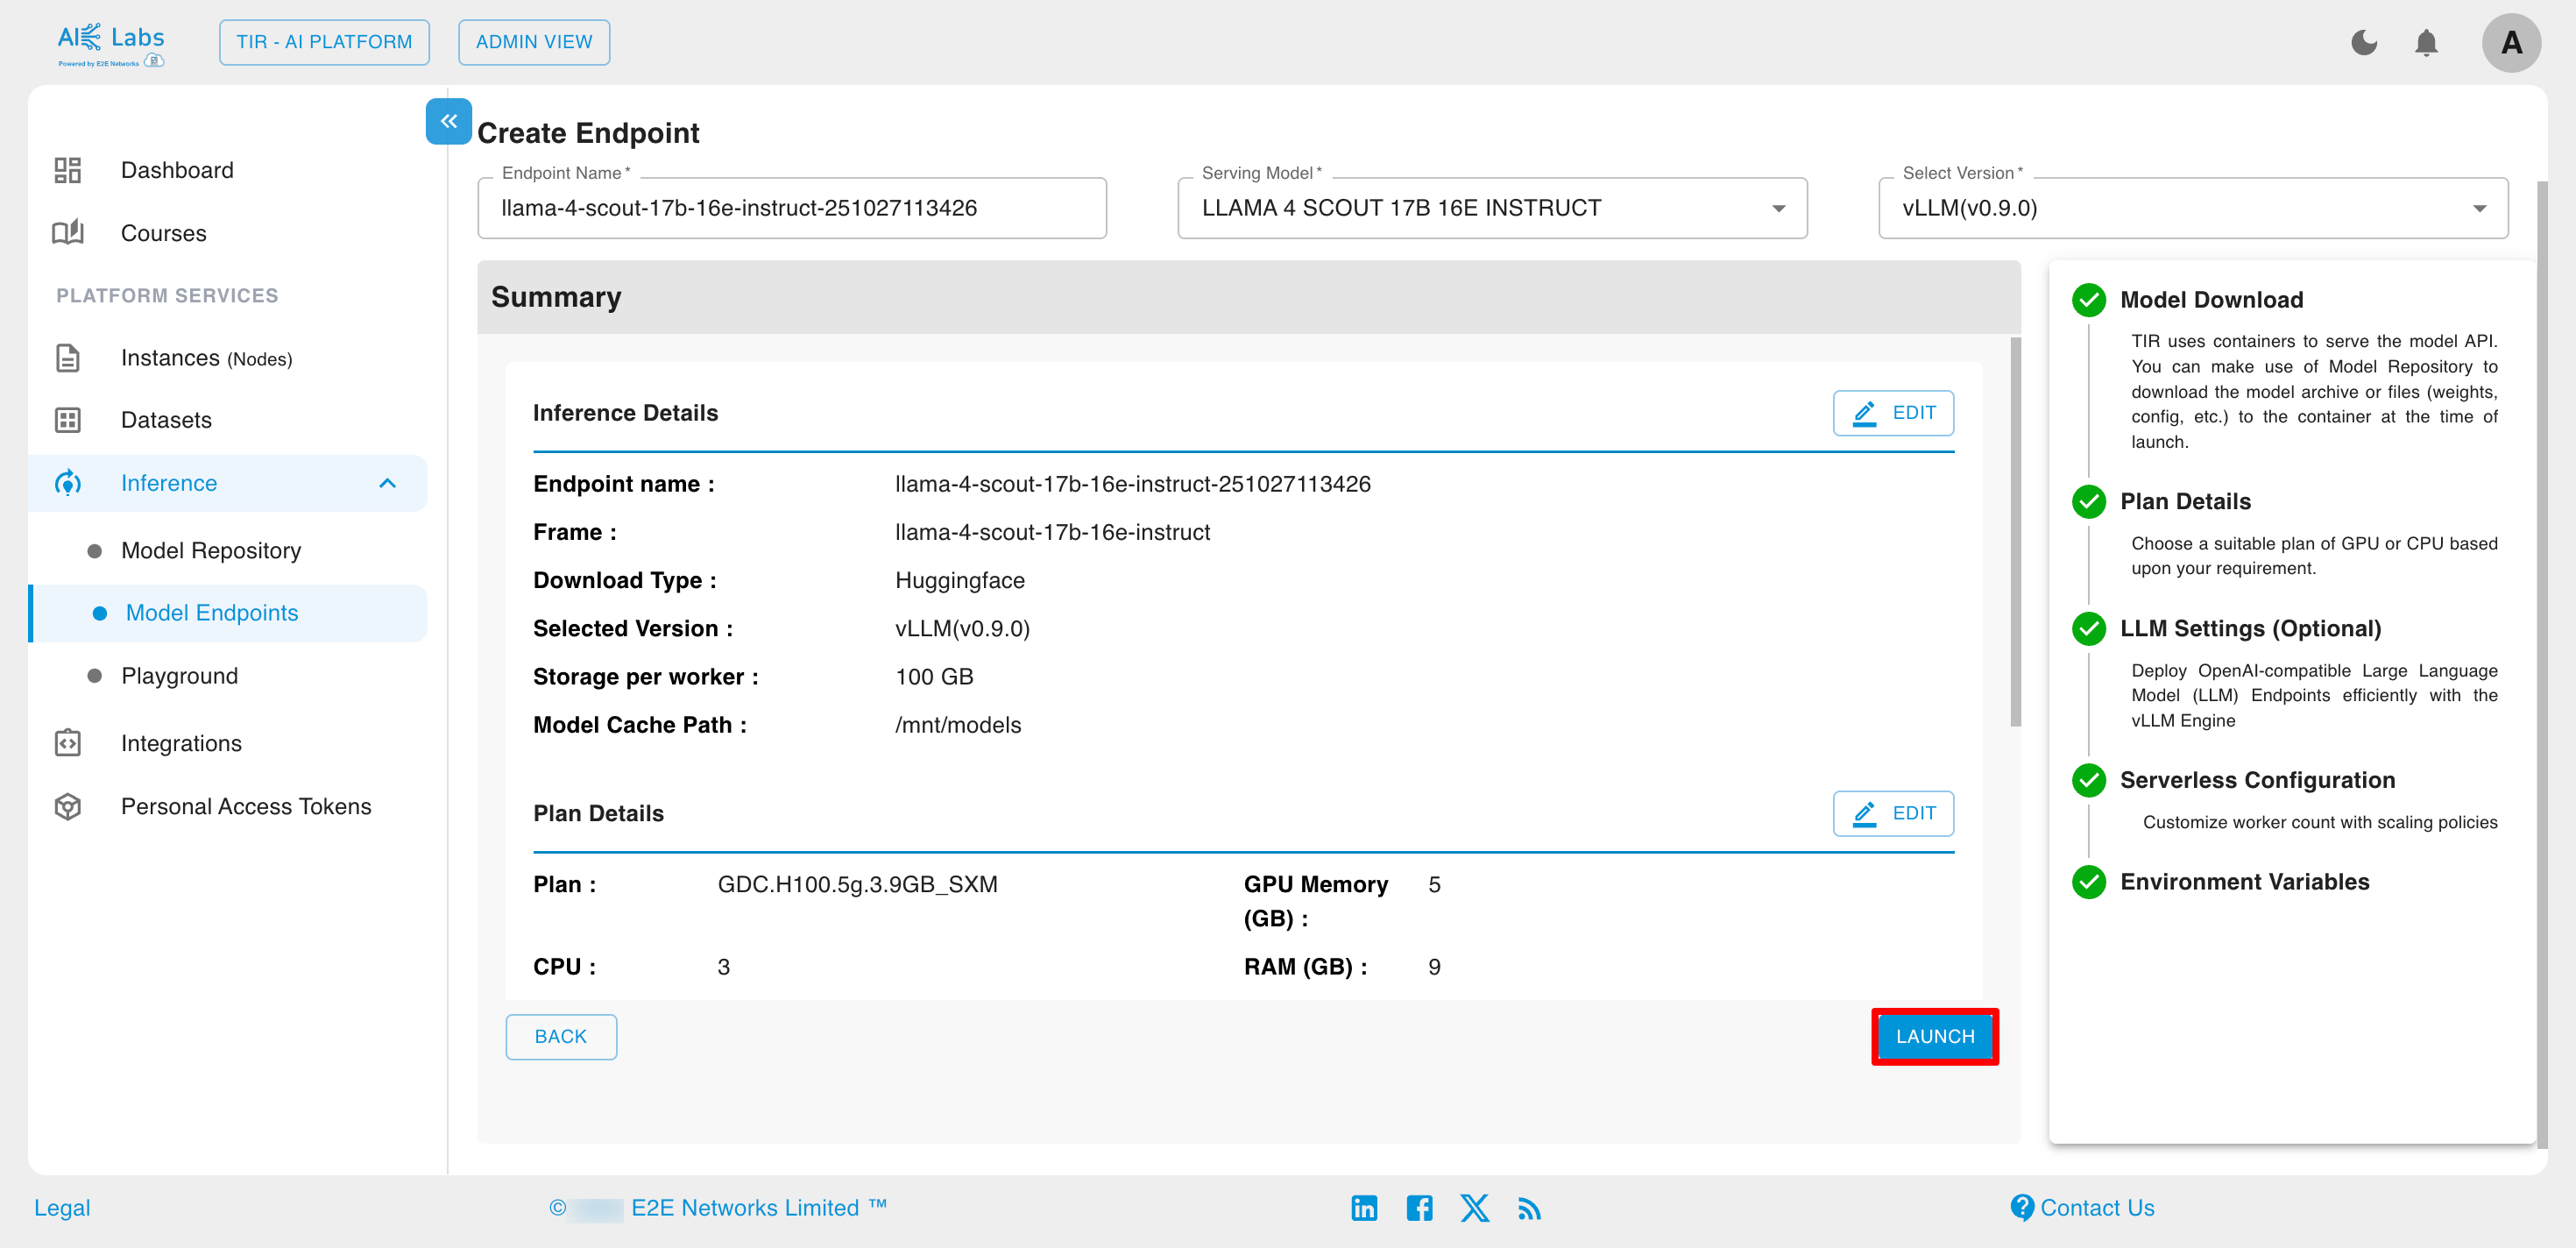
You can view the endpoint summary on the summary page, and if needed, modify any section of the inference creation process by clicking the edit button. Click on Launch button.
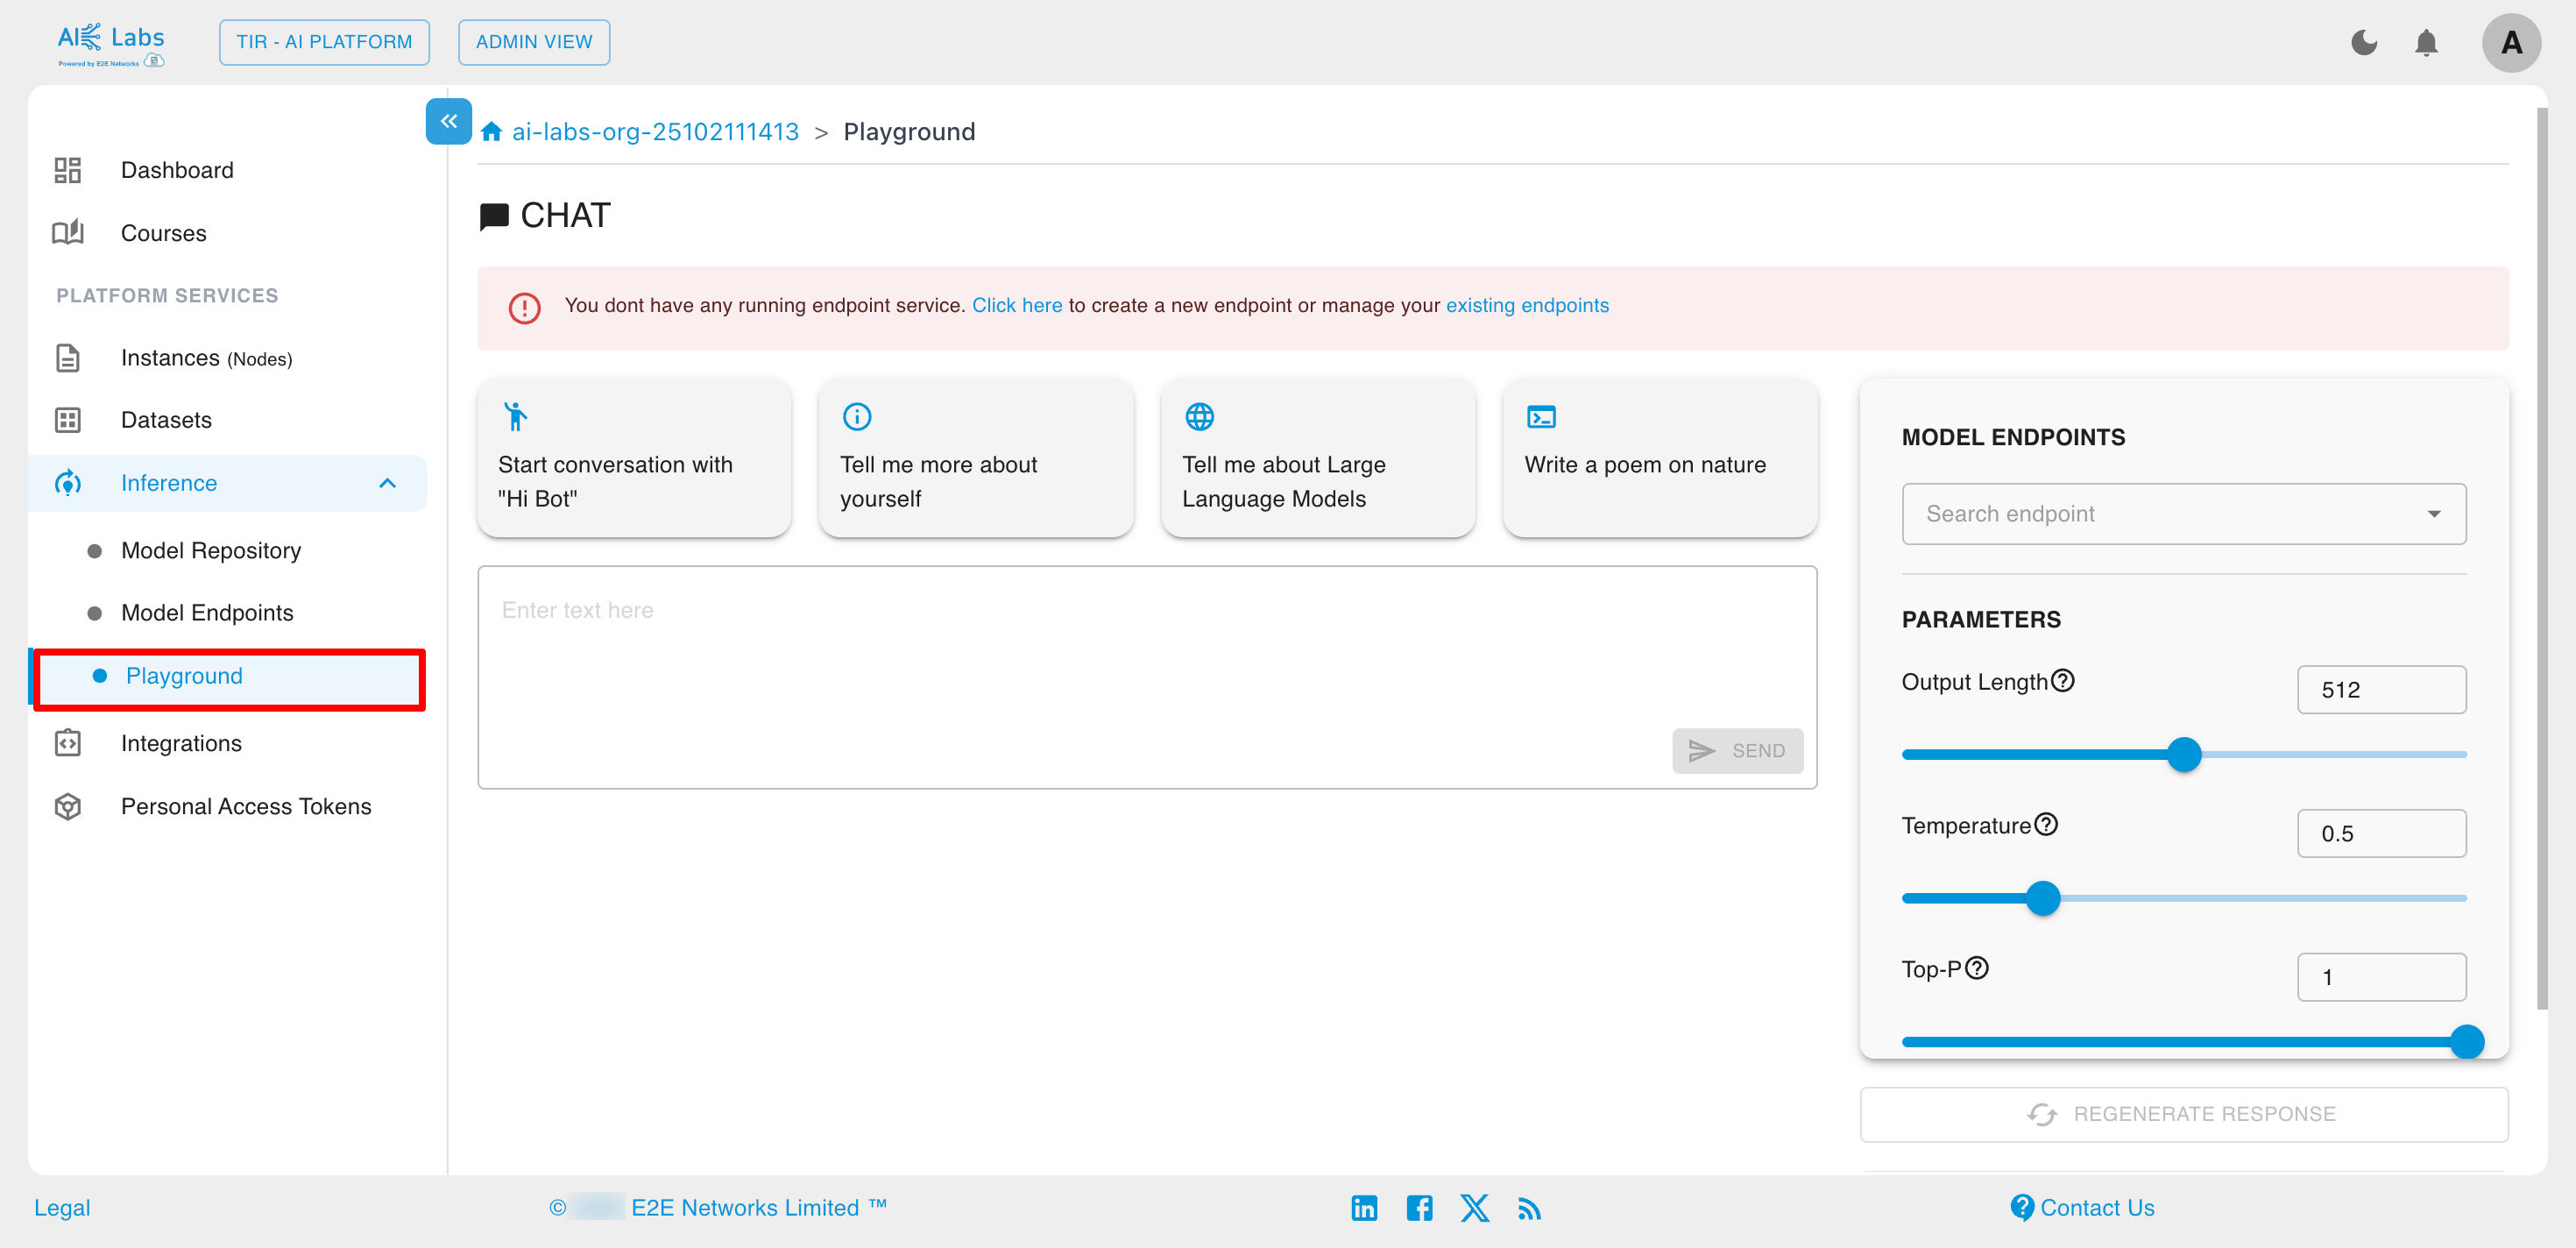
Playground
You can interact with our chat models directly via the Playground. Select a model, configure the parameters, and start generating responses.
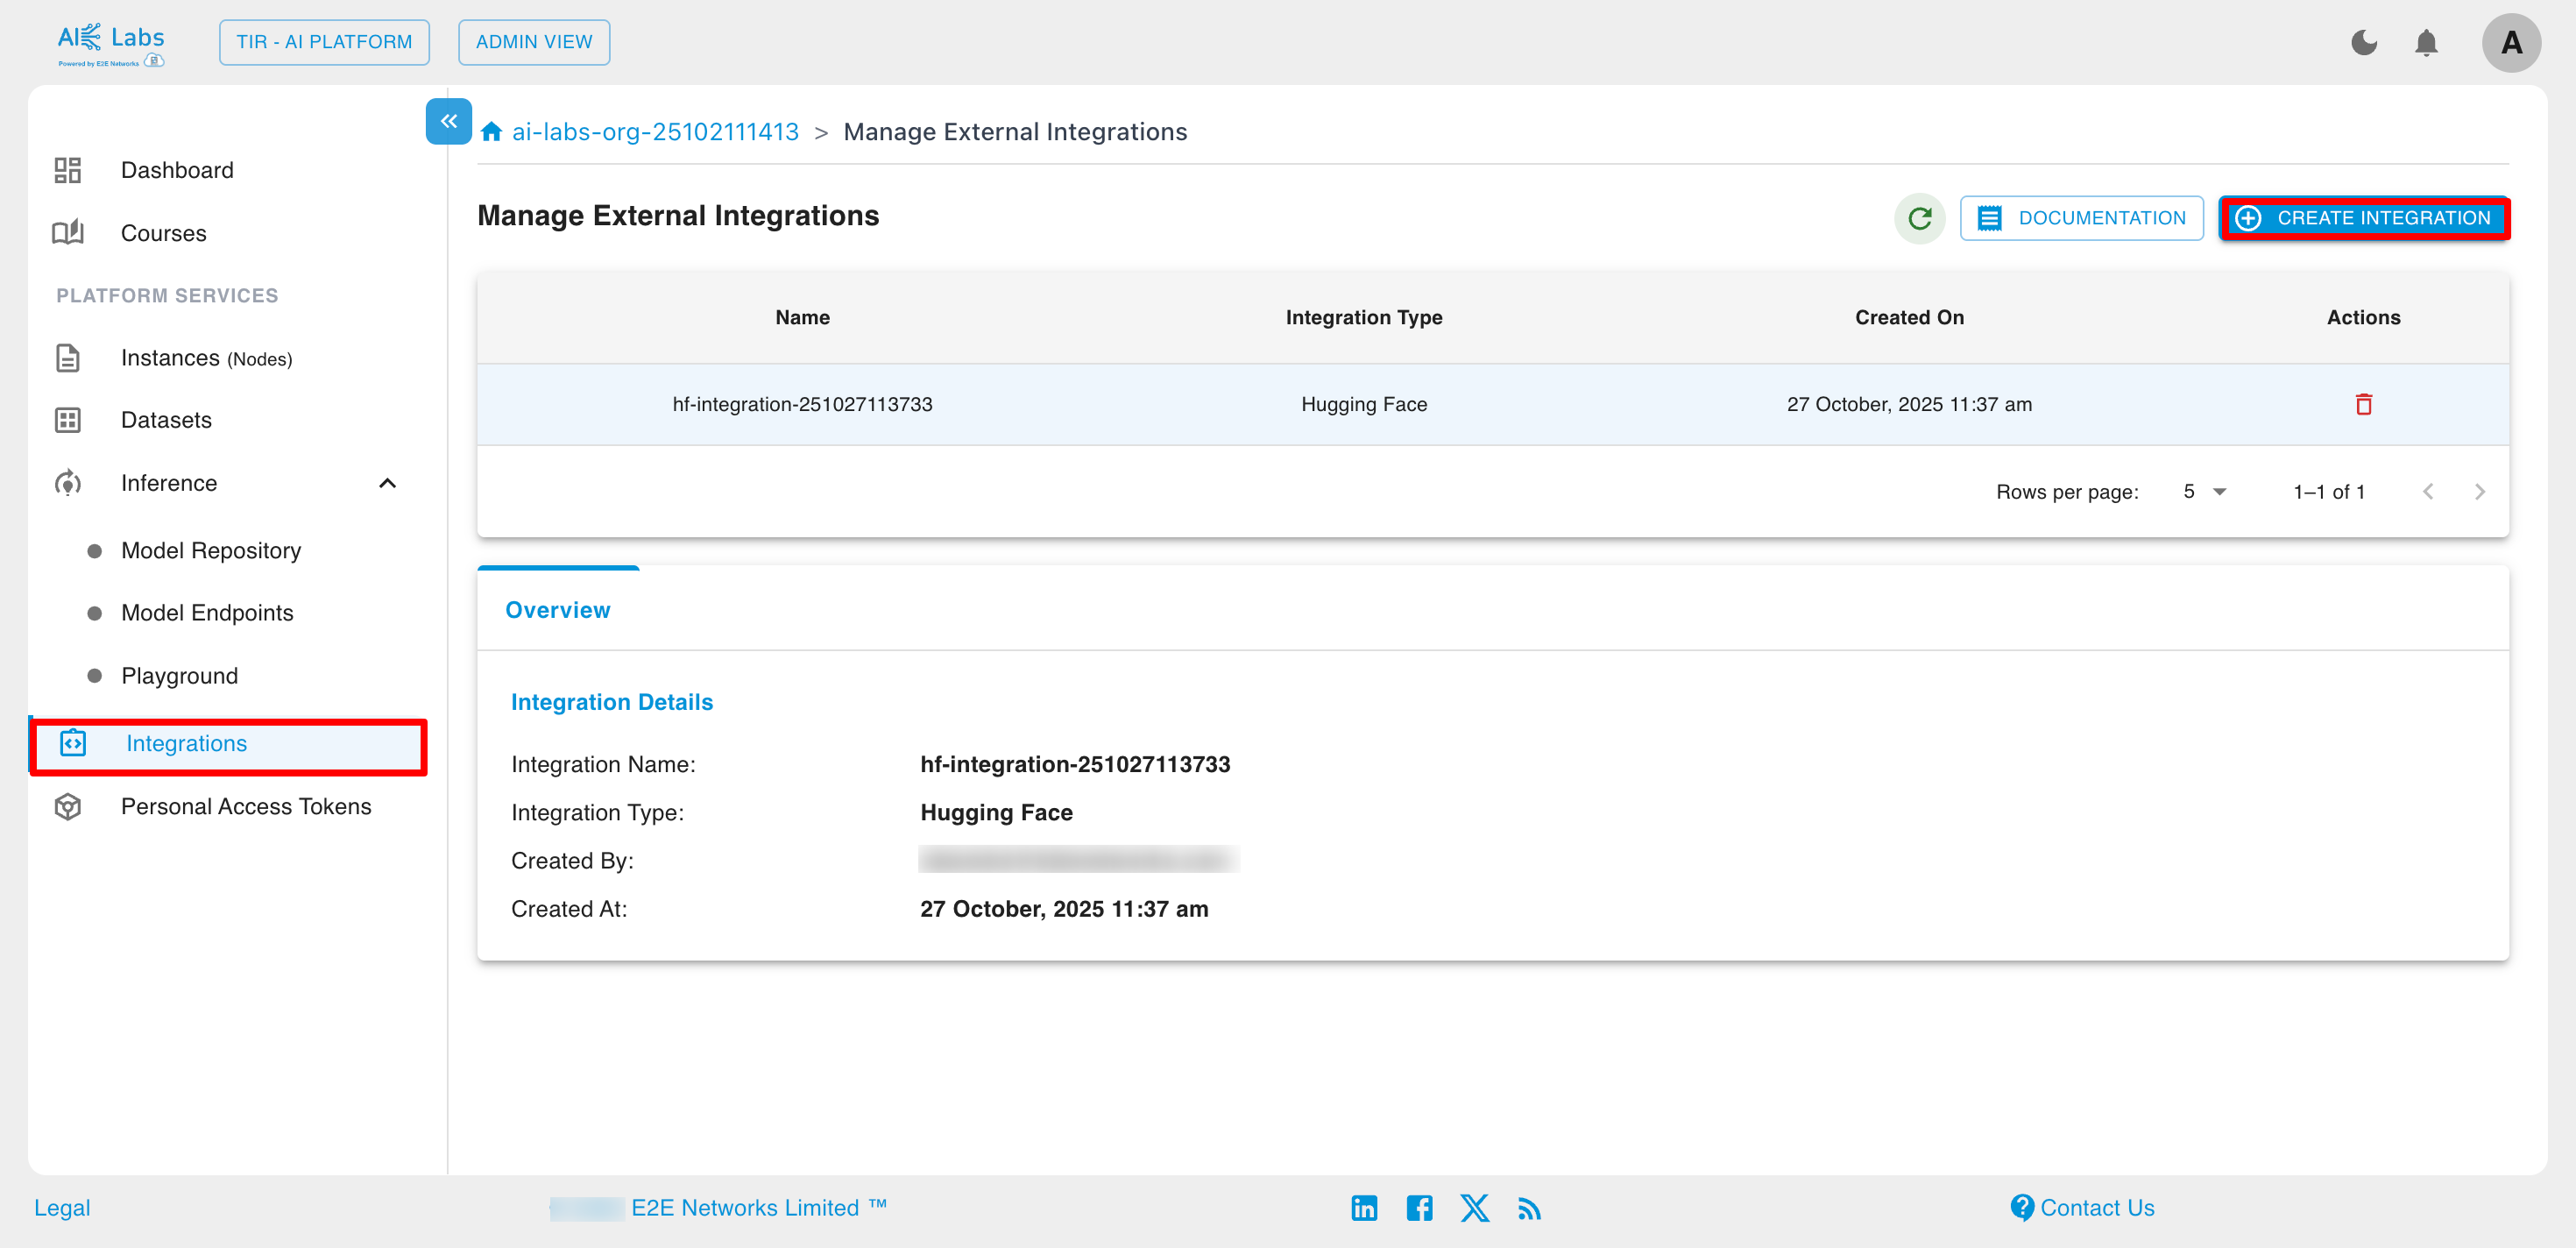
Integrations
E2E Cloud supports integration with popular ML platforms like Hugging Face and Weights & Biases, enabling users to easily connect external tools for model training, tracking, and deployment. These integrations help streamline AI workflows, improve collaboration, and enhance experiment management on GPU-powered E2E instances.
Steps to create Integrations
Navigate to Integrations section from the sidebar and then click on Create Integration button.
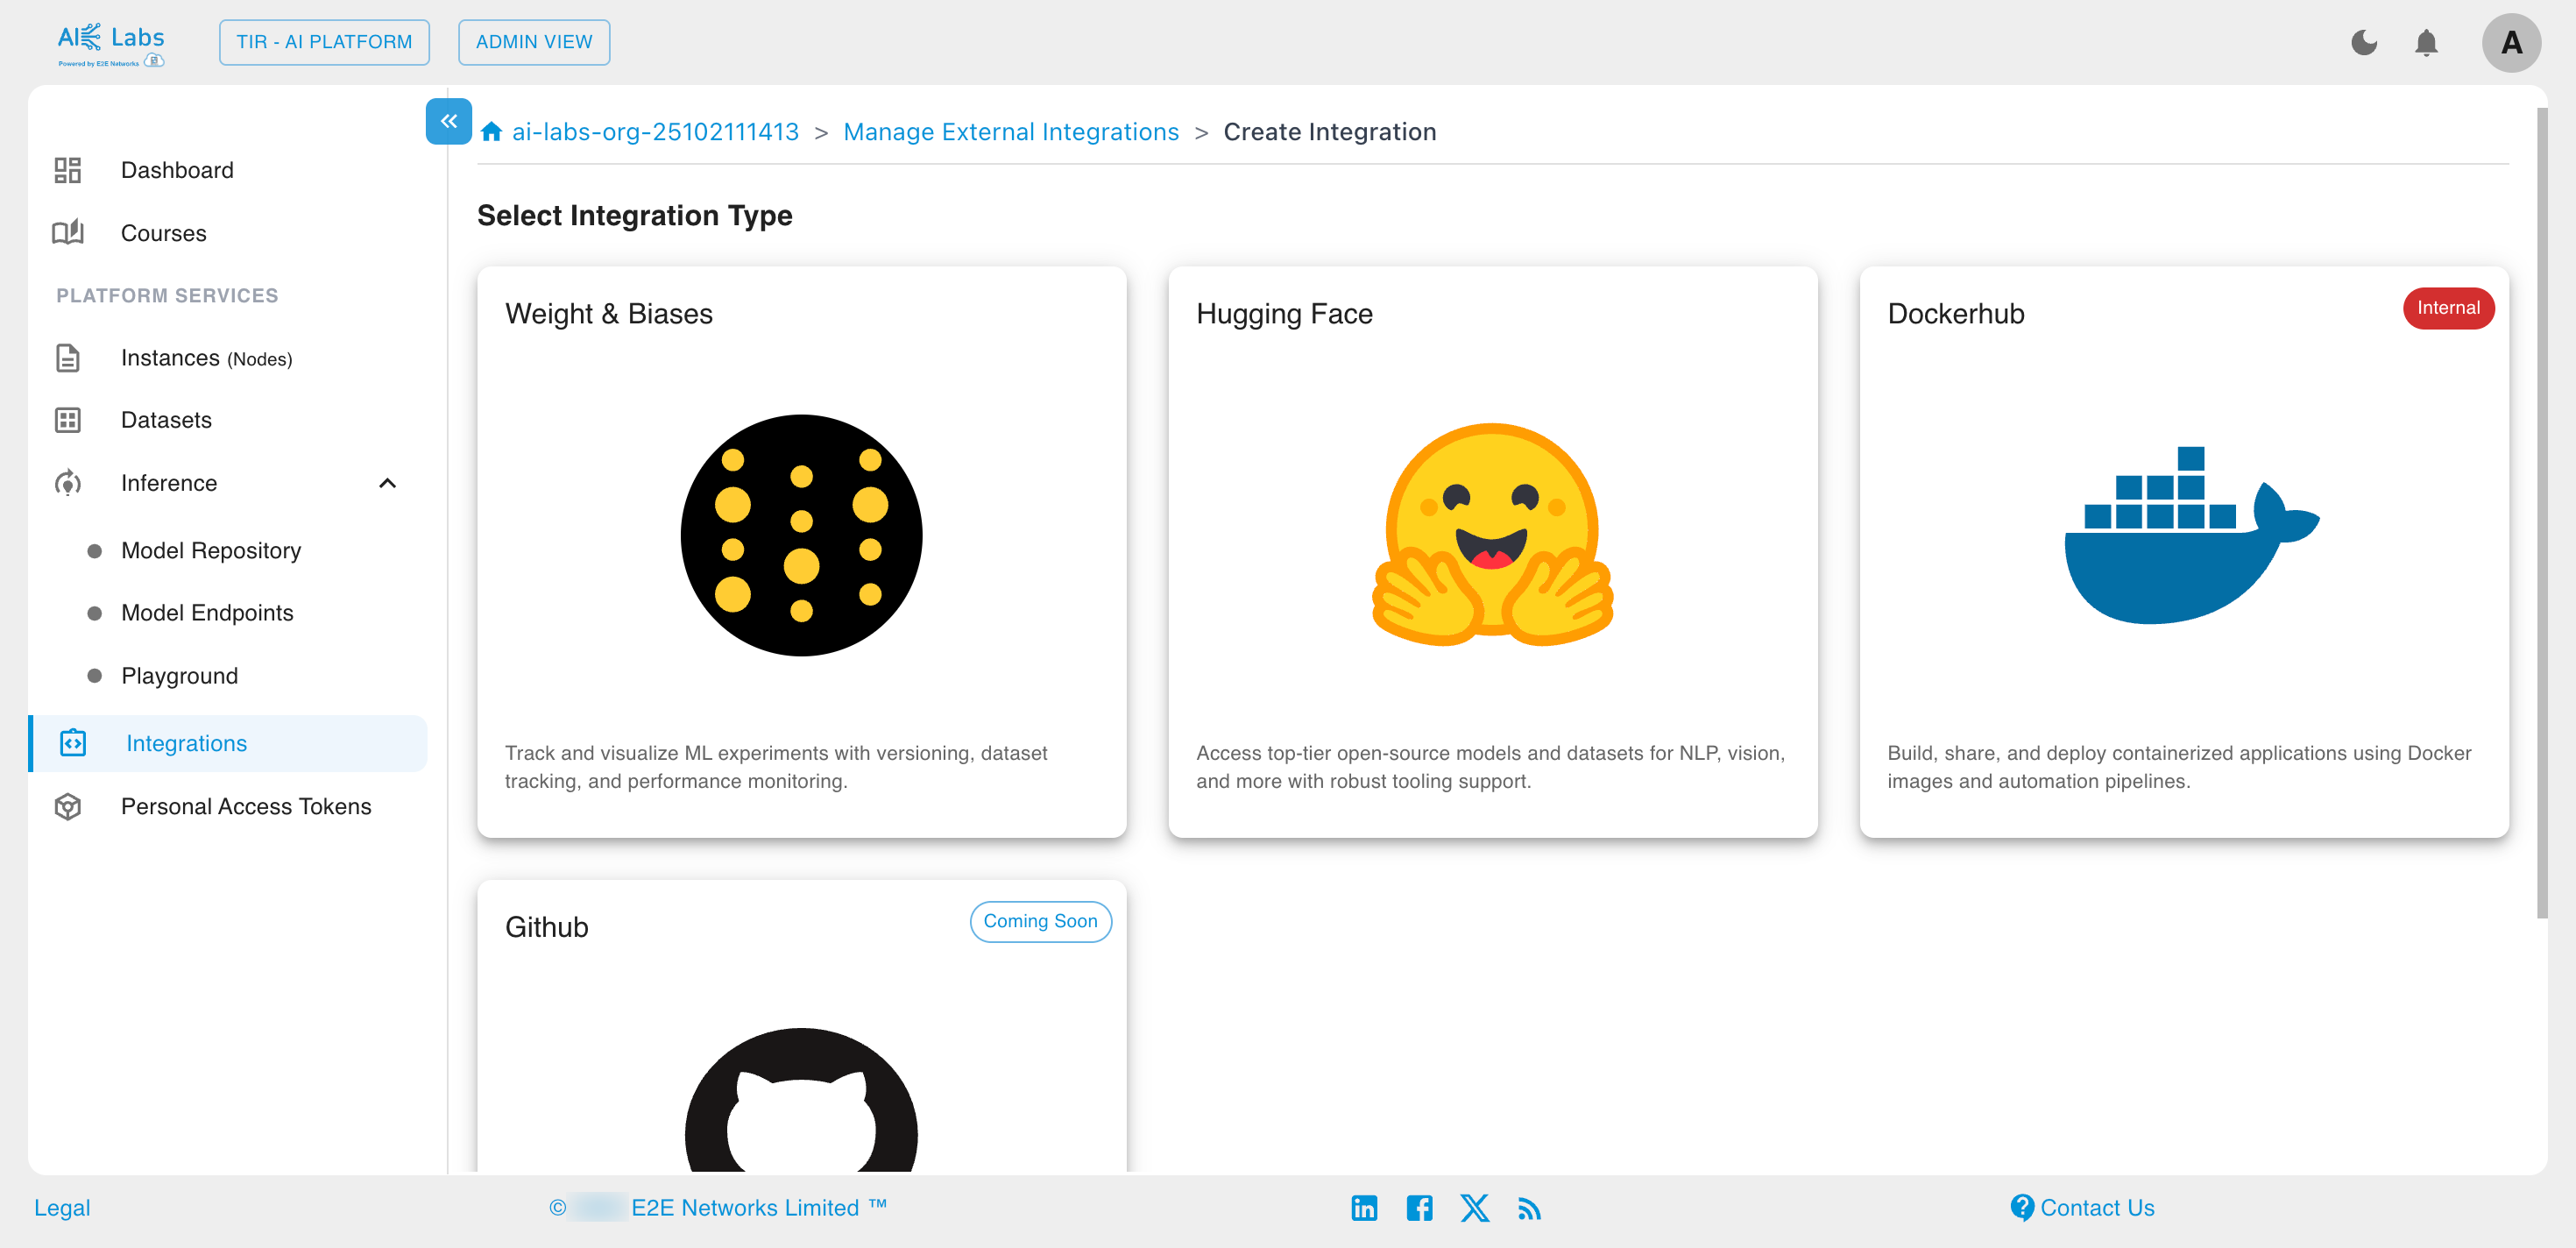
Select the Integration Type from the given list.
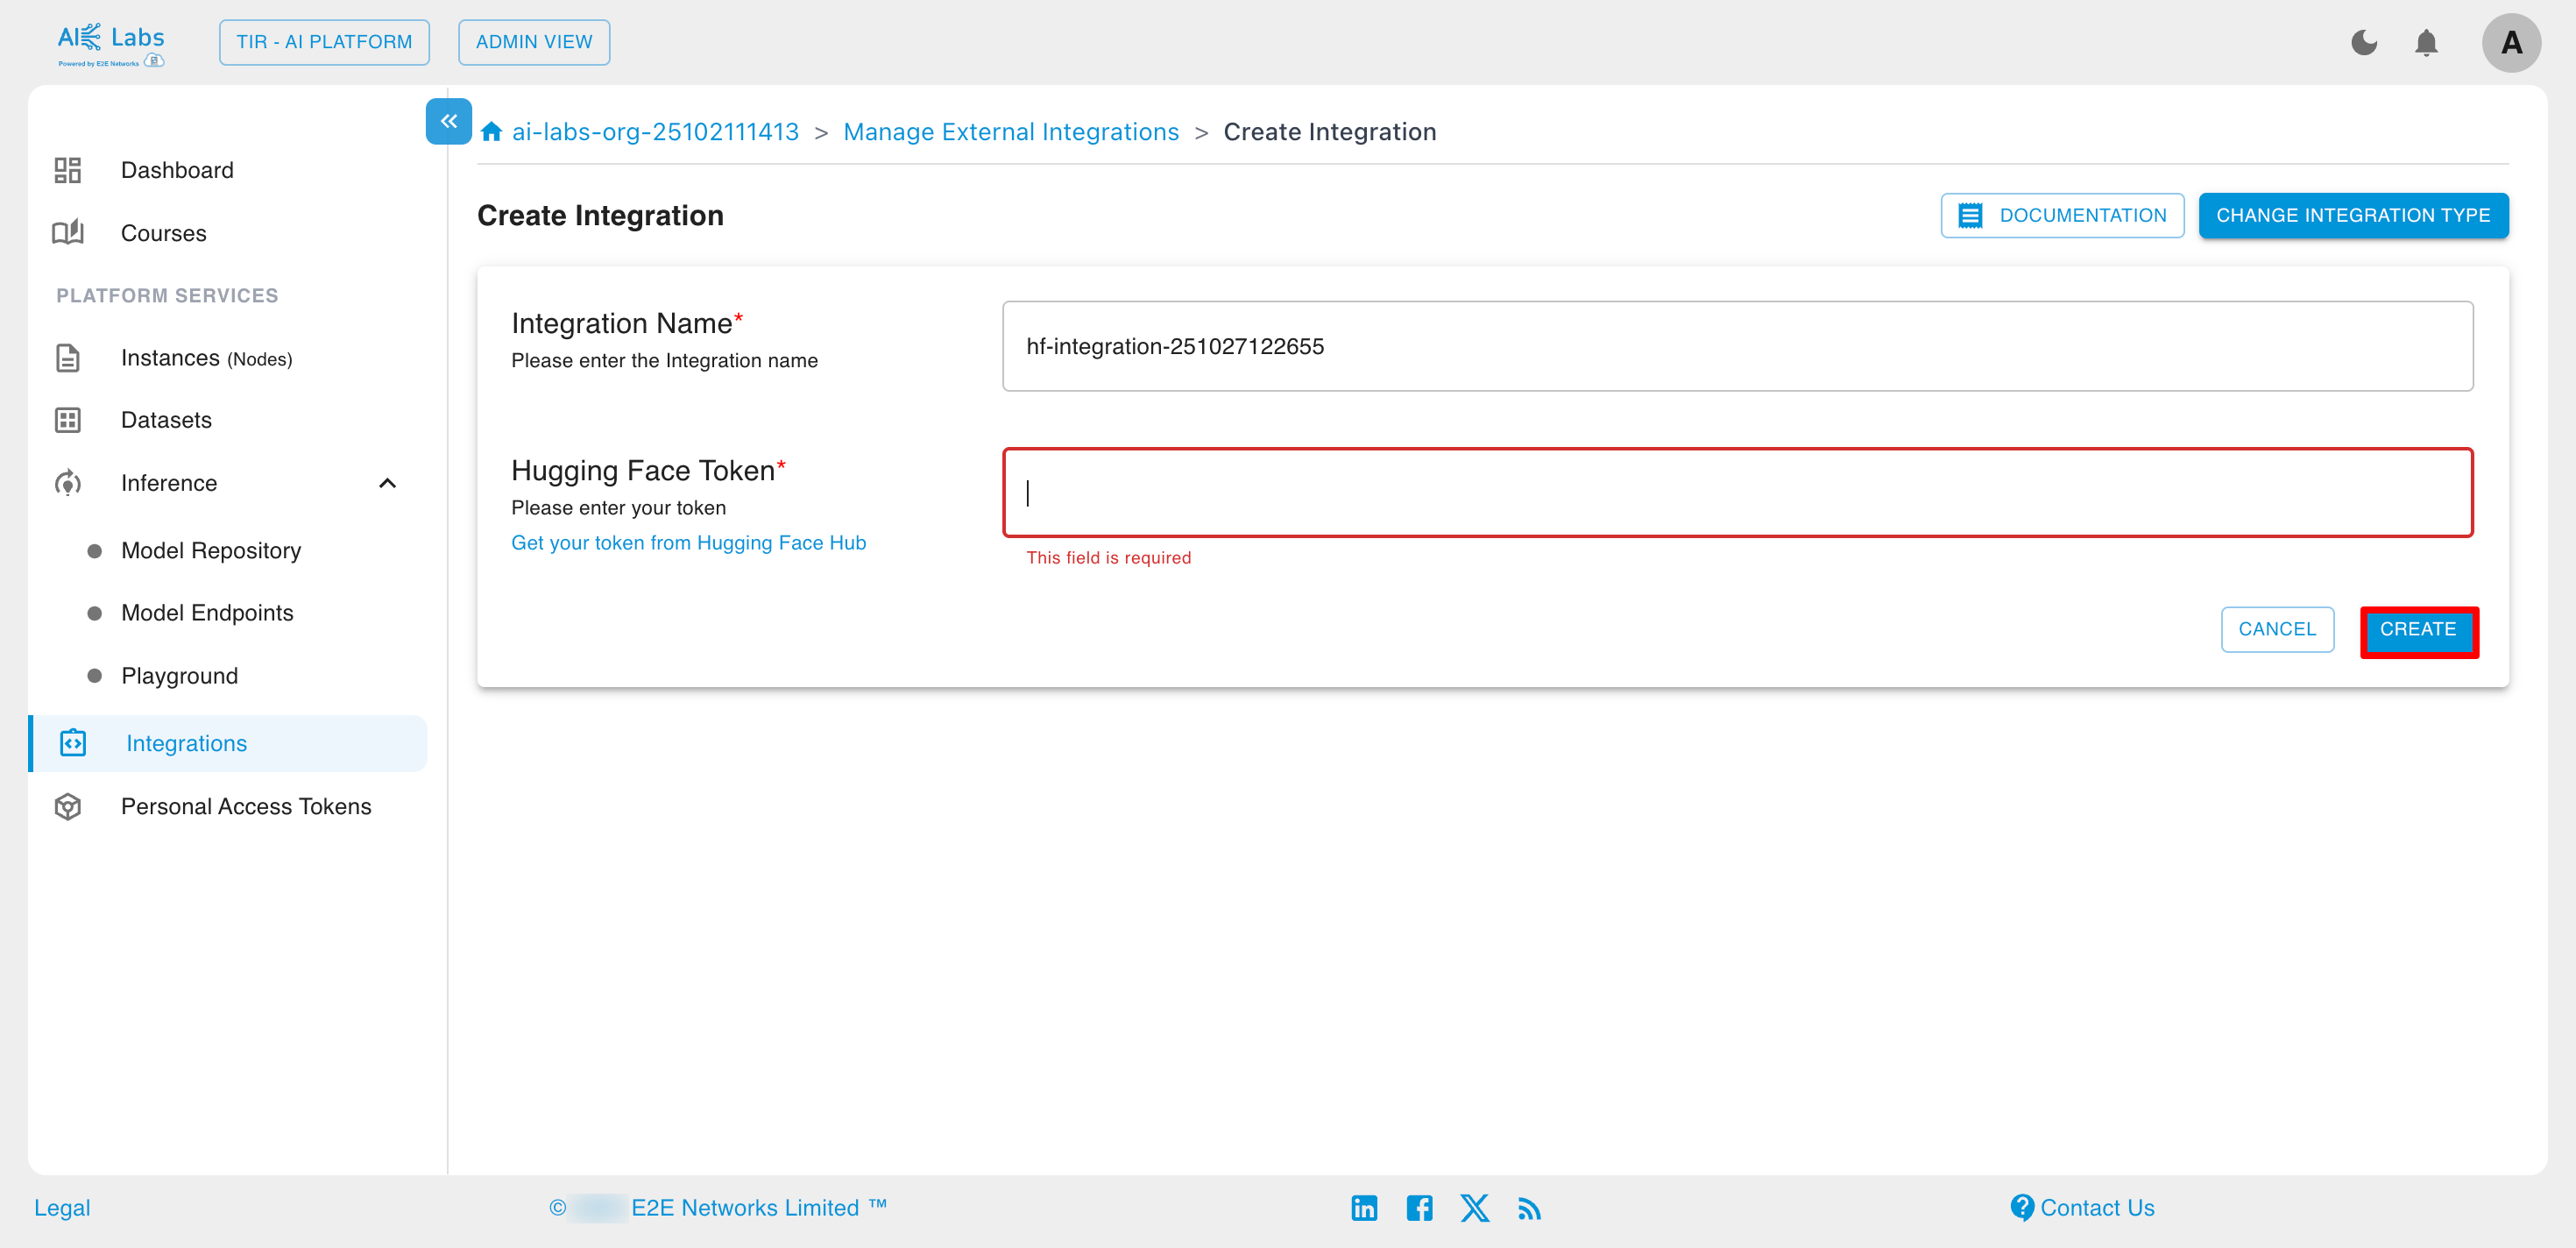
Enter the Hugging face token and then click on Create button.
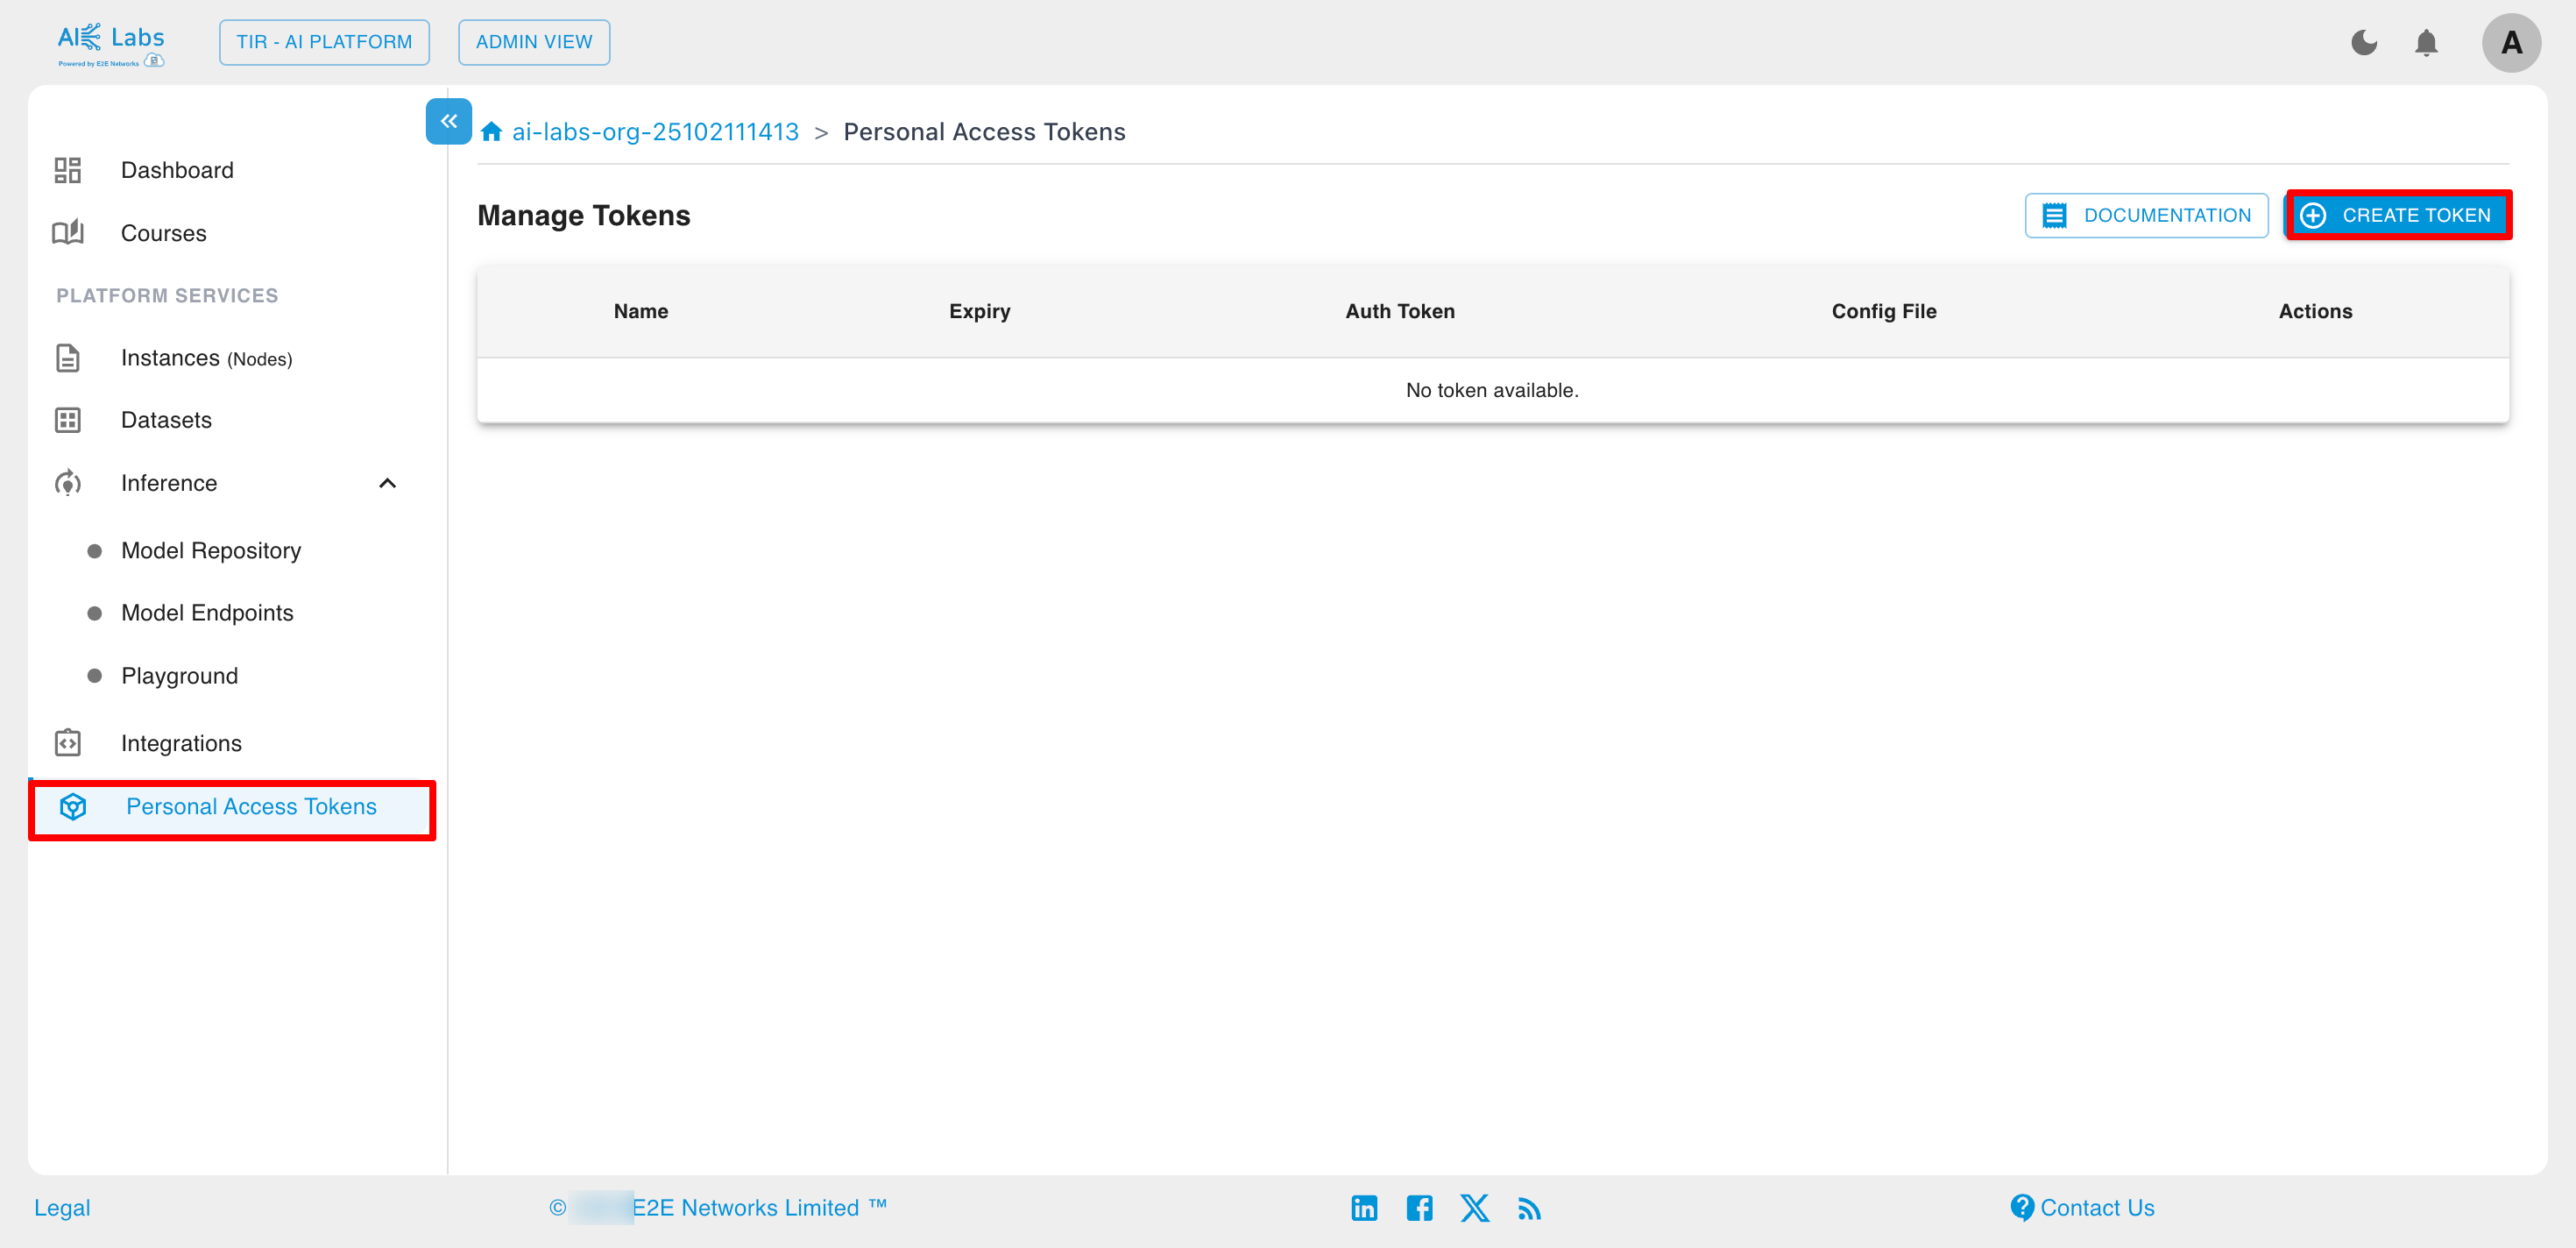
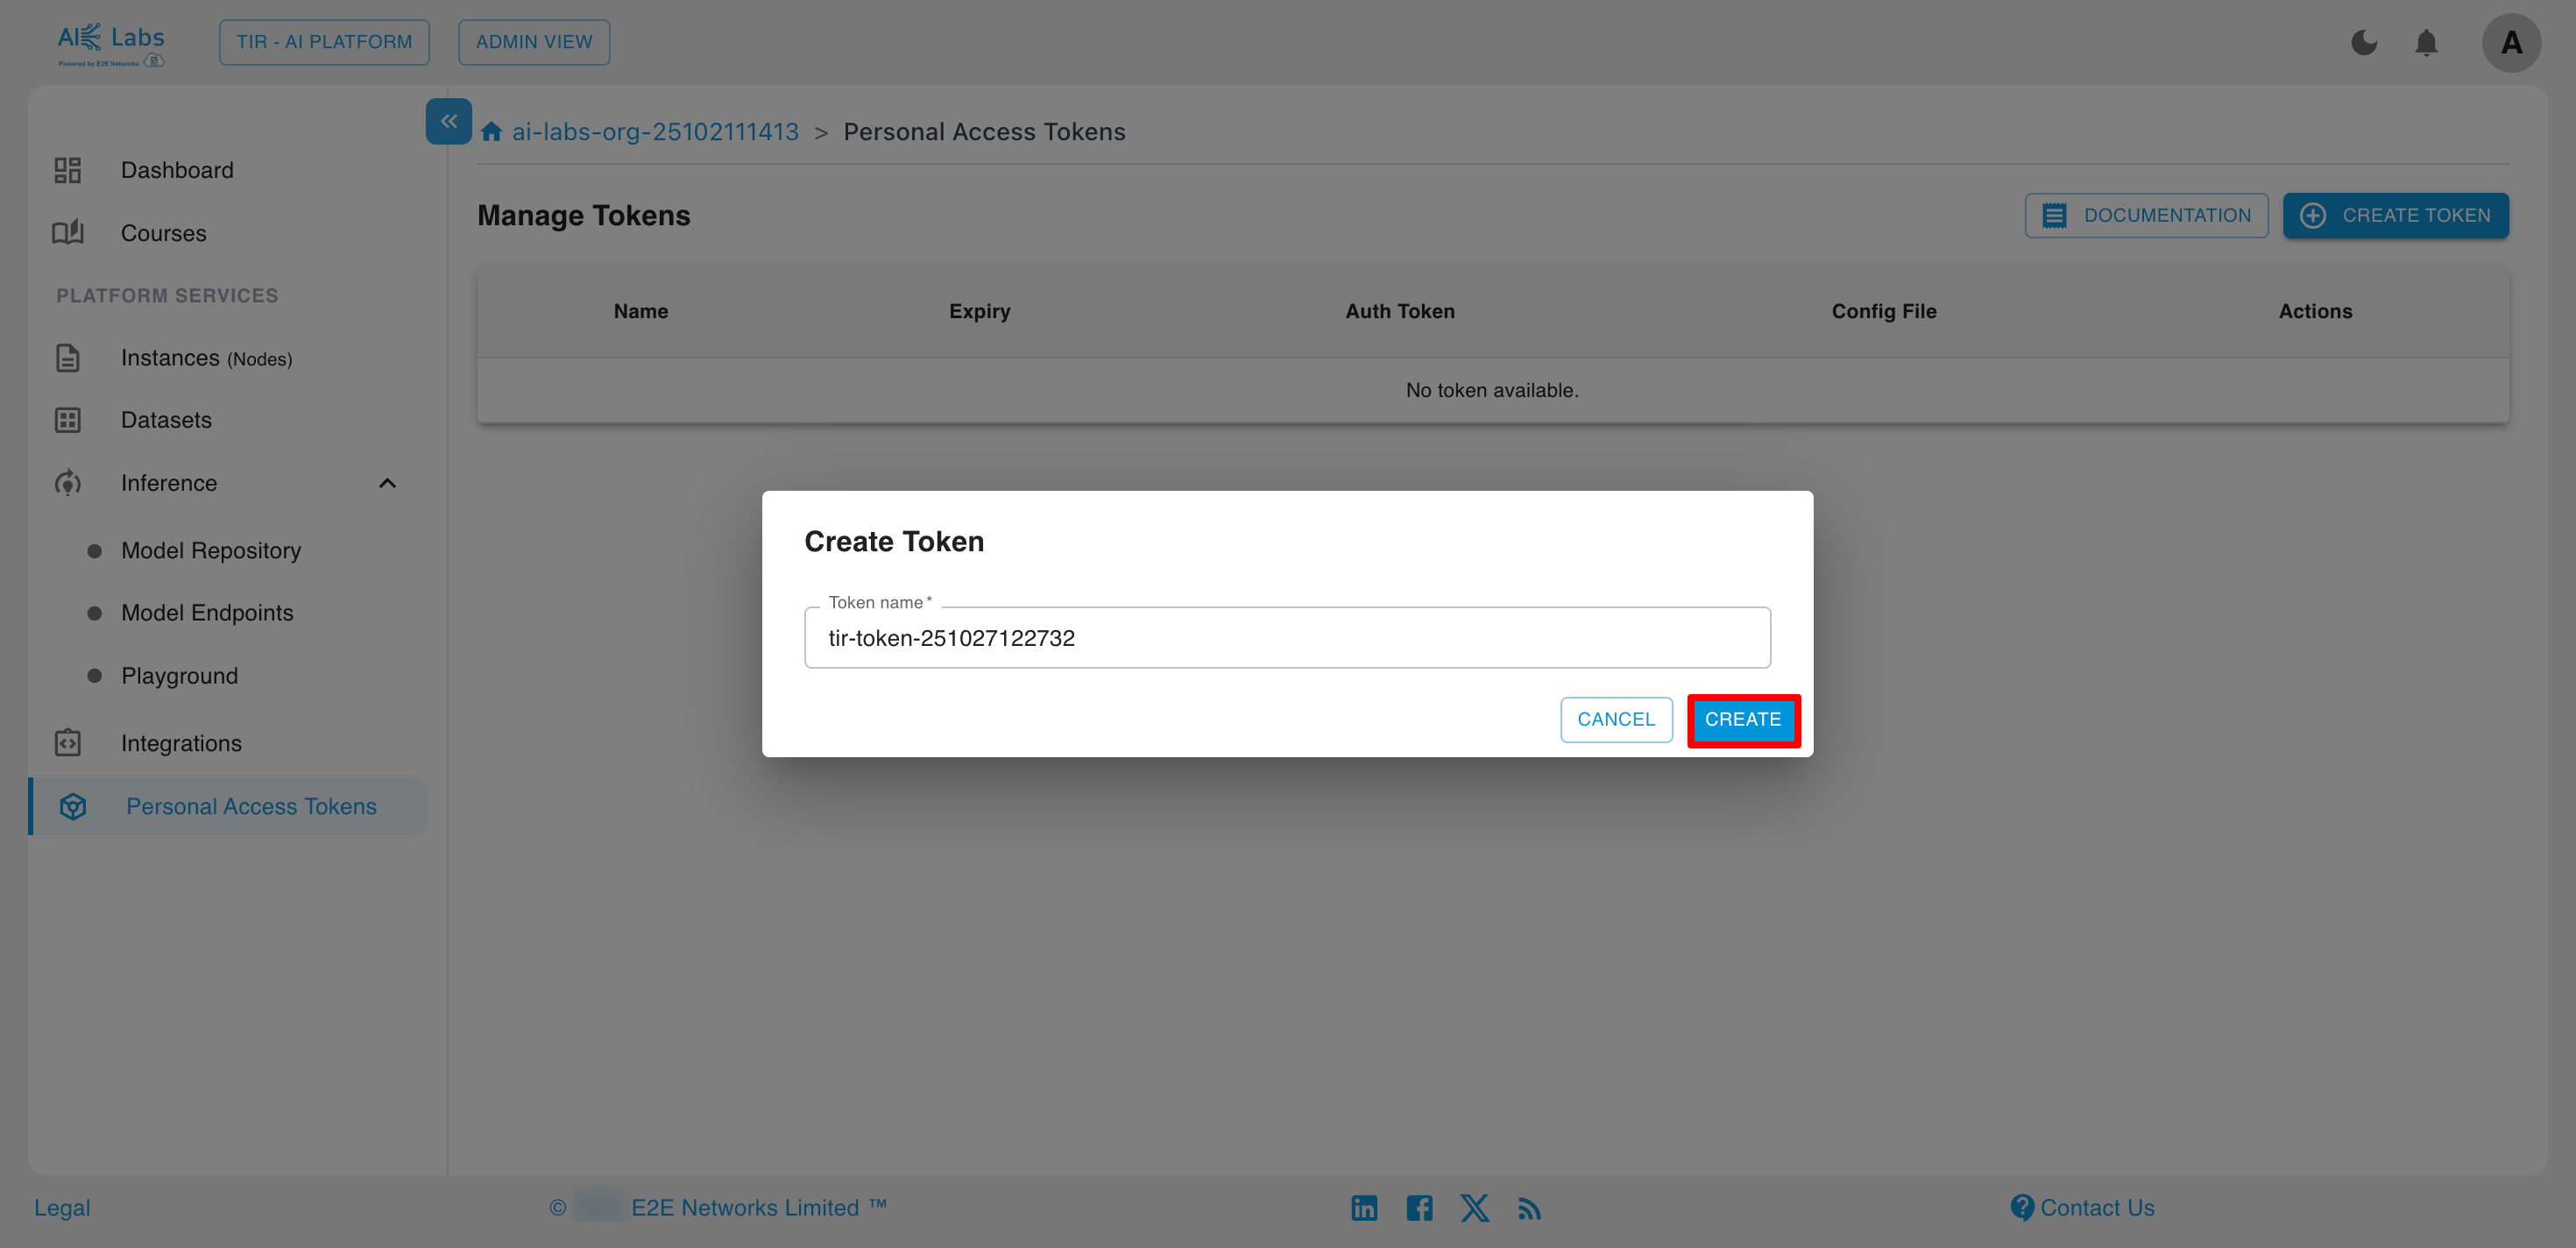
Personal Access Tokens
Steps to create Token
Navigate to Personal Access Tokens section from the sidebar and then click on Create Token button.
Enter the token name and then click on Create button.
Summary
Through the Learner View, students can:
- Access their Dashboard for quick insights
- Explore assigned Courses
- View and download Course Materials