Admin
Creating an AI Labs Organization
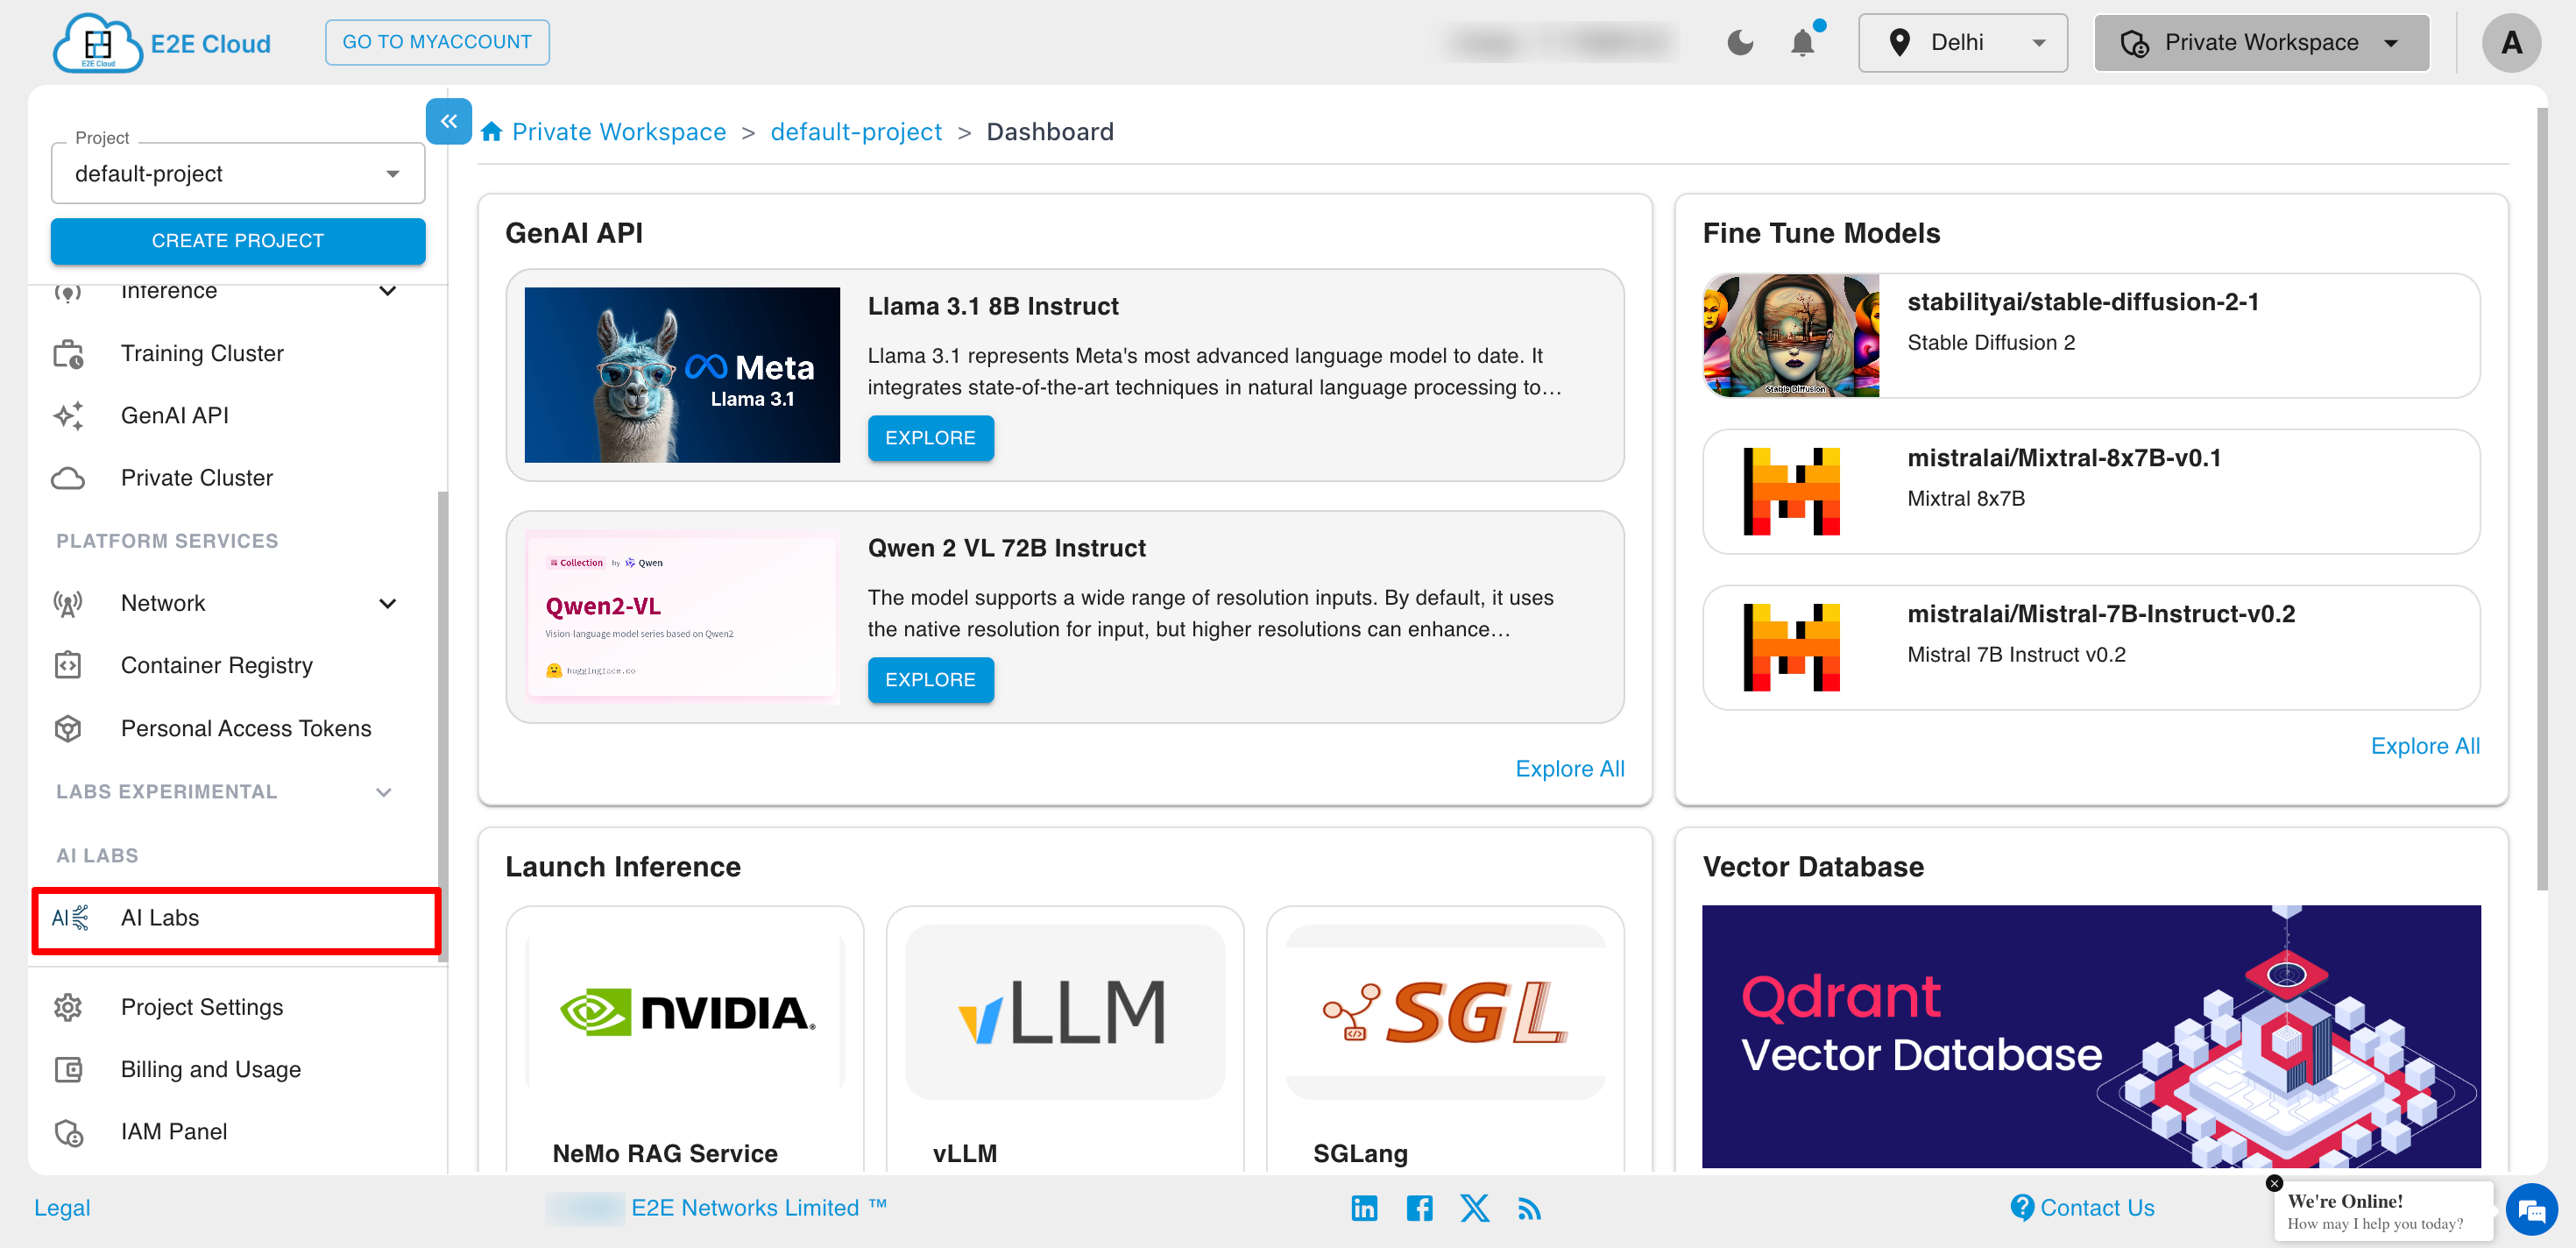
Admins can initiate the creation of a new AI Labs Organization directly from the AI Labs section available in the sidebar.
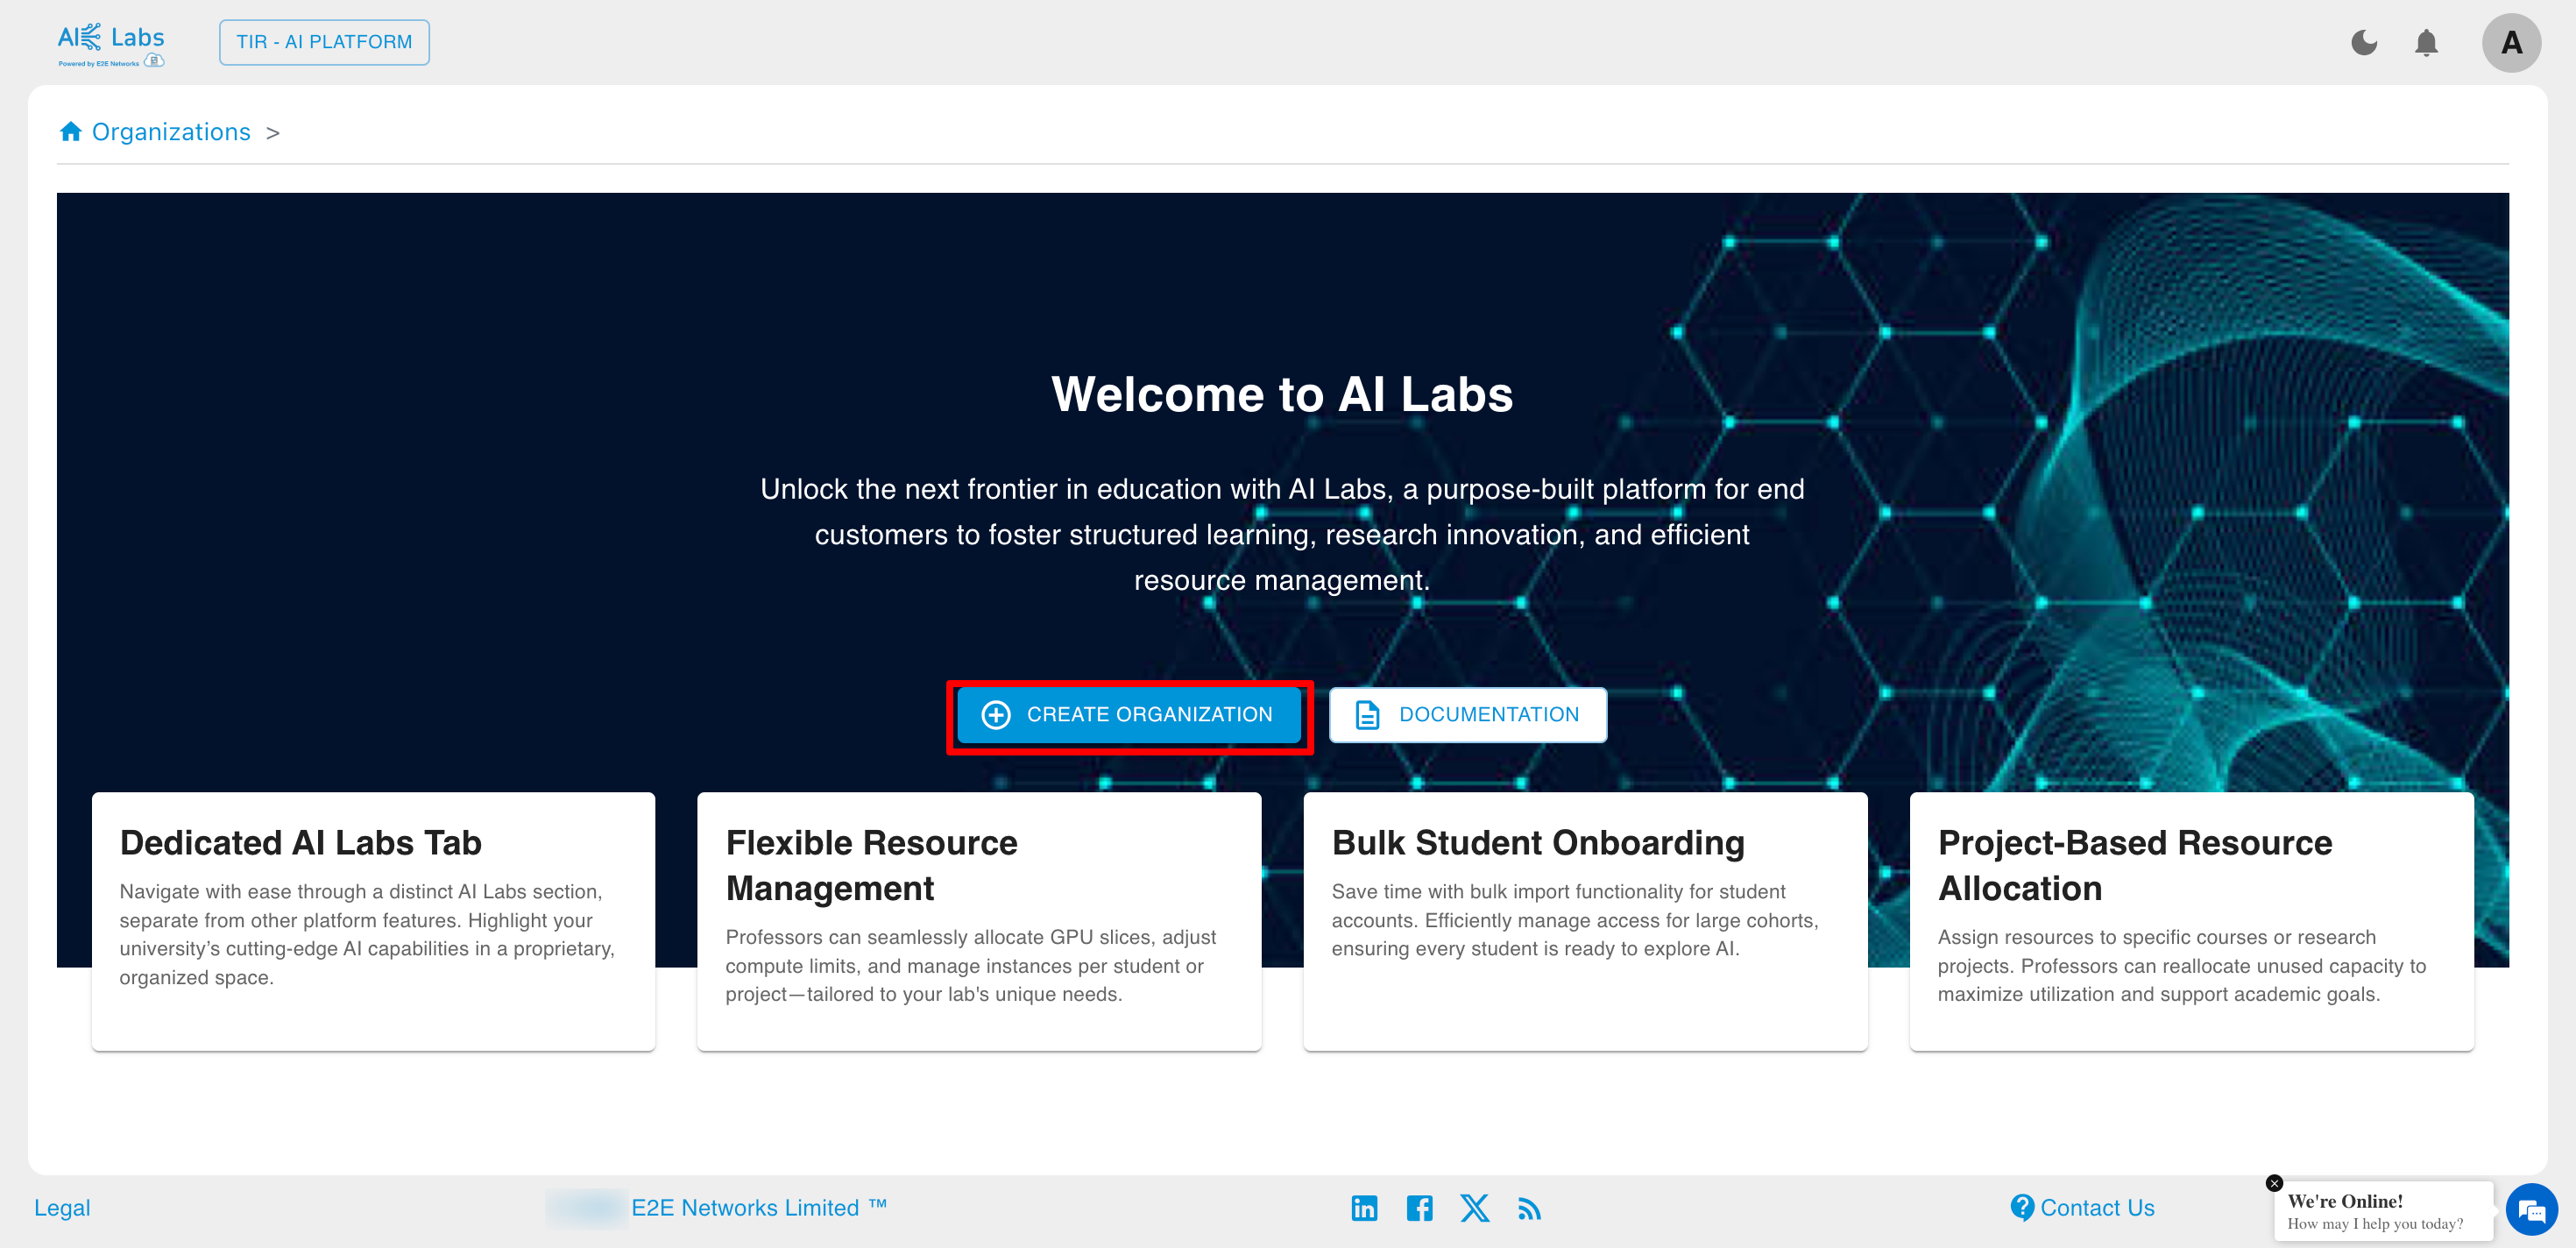
Click on the Create Organization button to begin the setup process.
Configure Organization Details
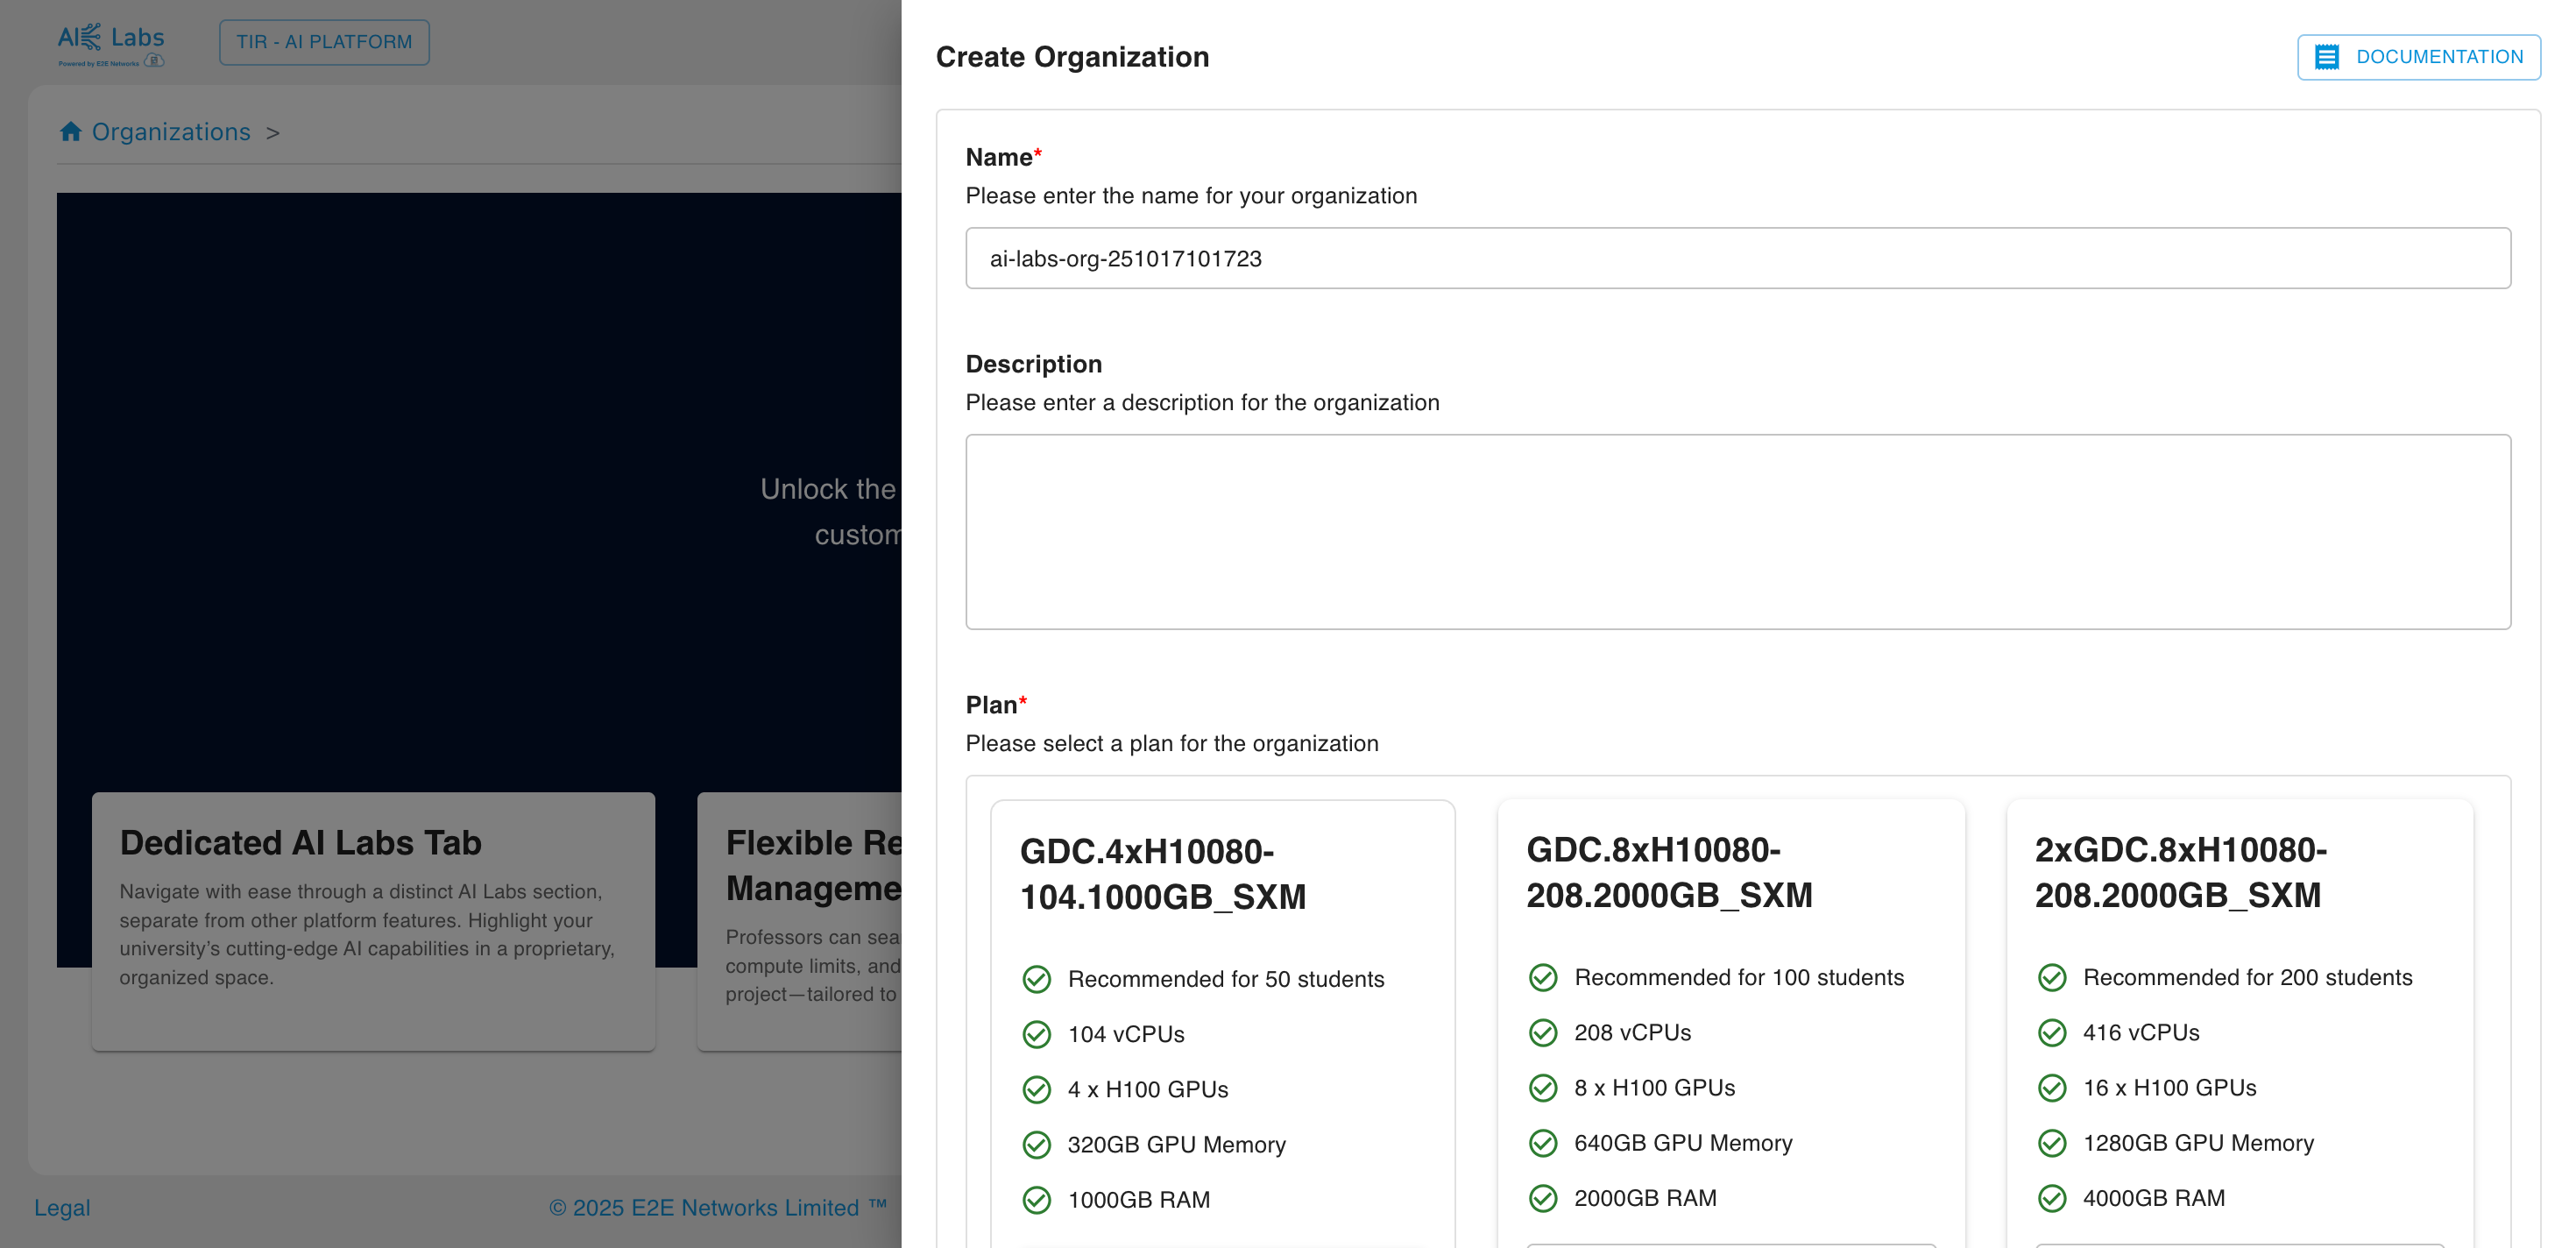
Admins must provide the following details:
- Organization Name
- Description
- Select a Plan Type (Committed or Hourly)
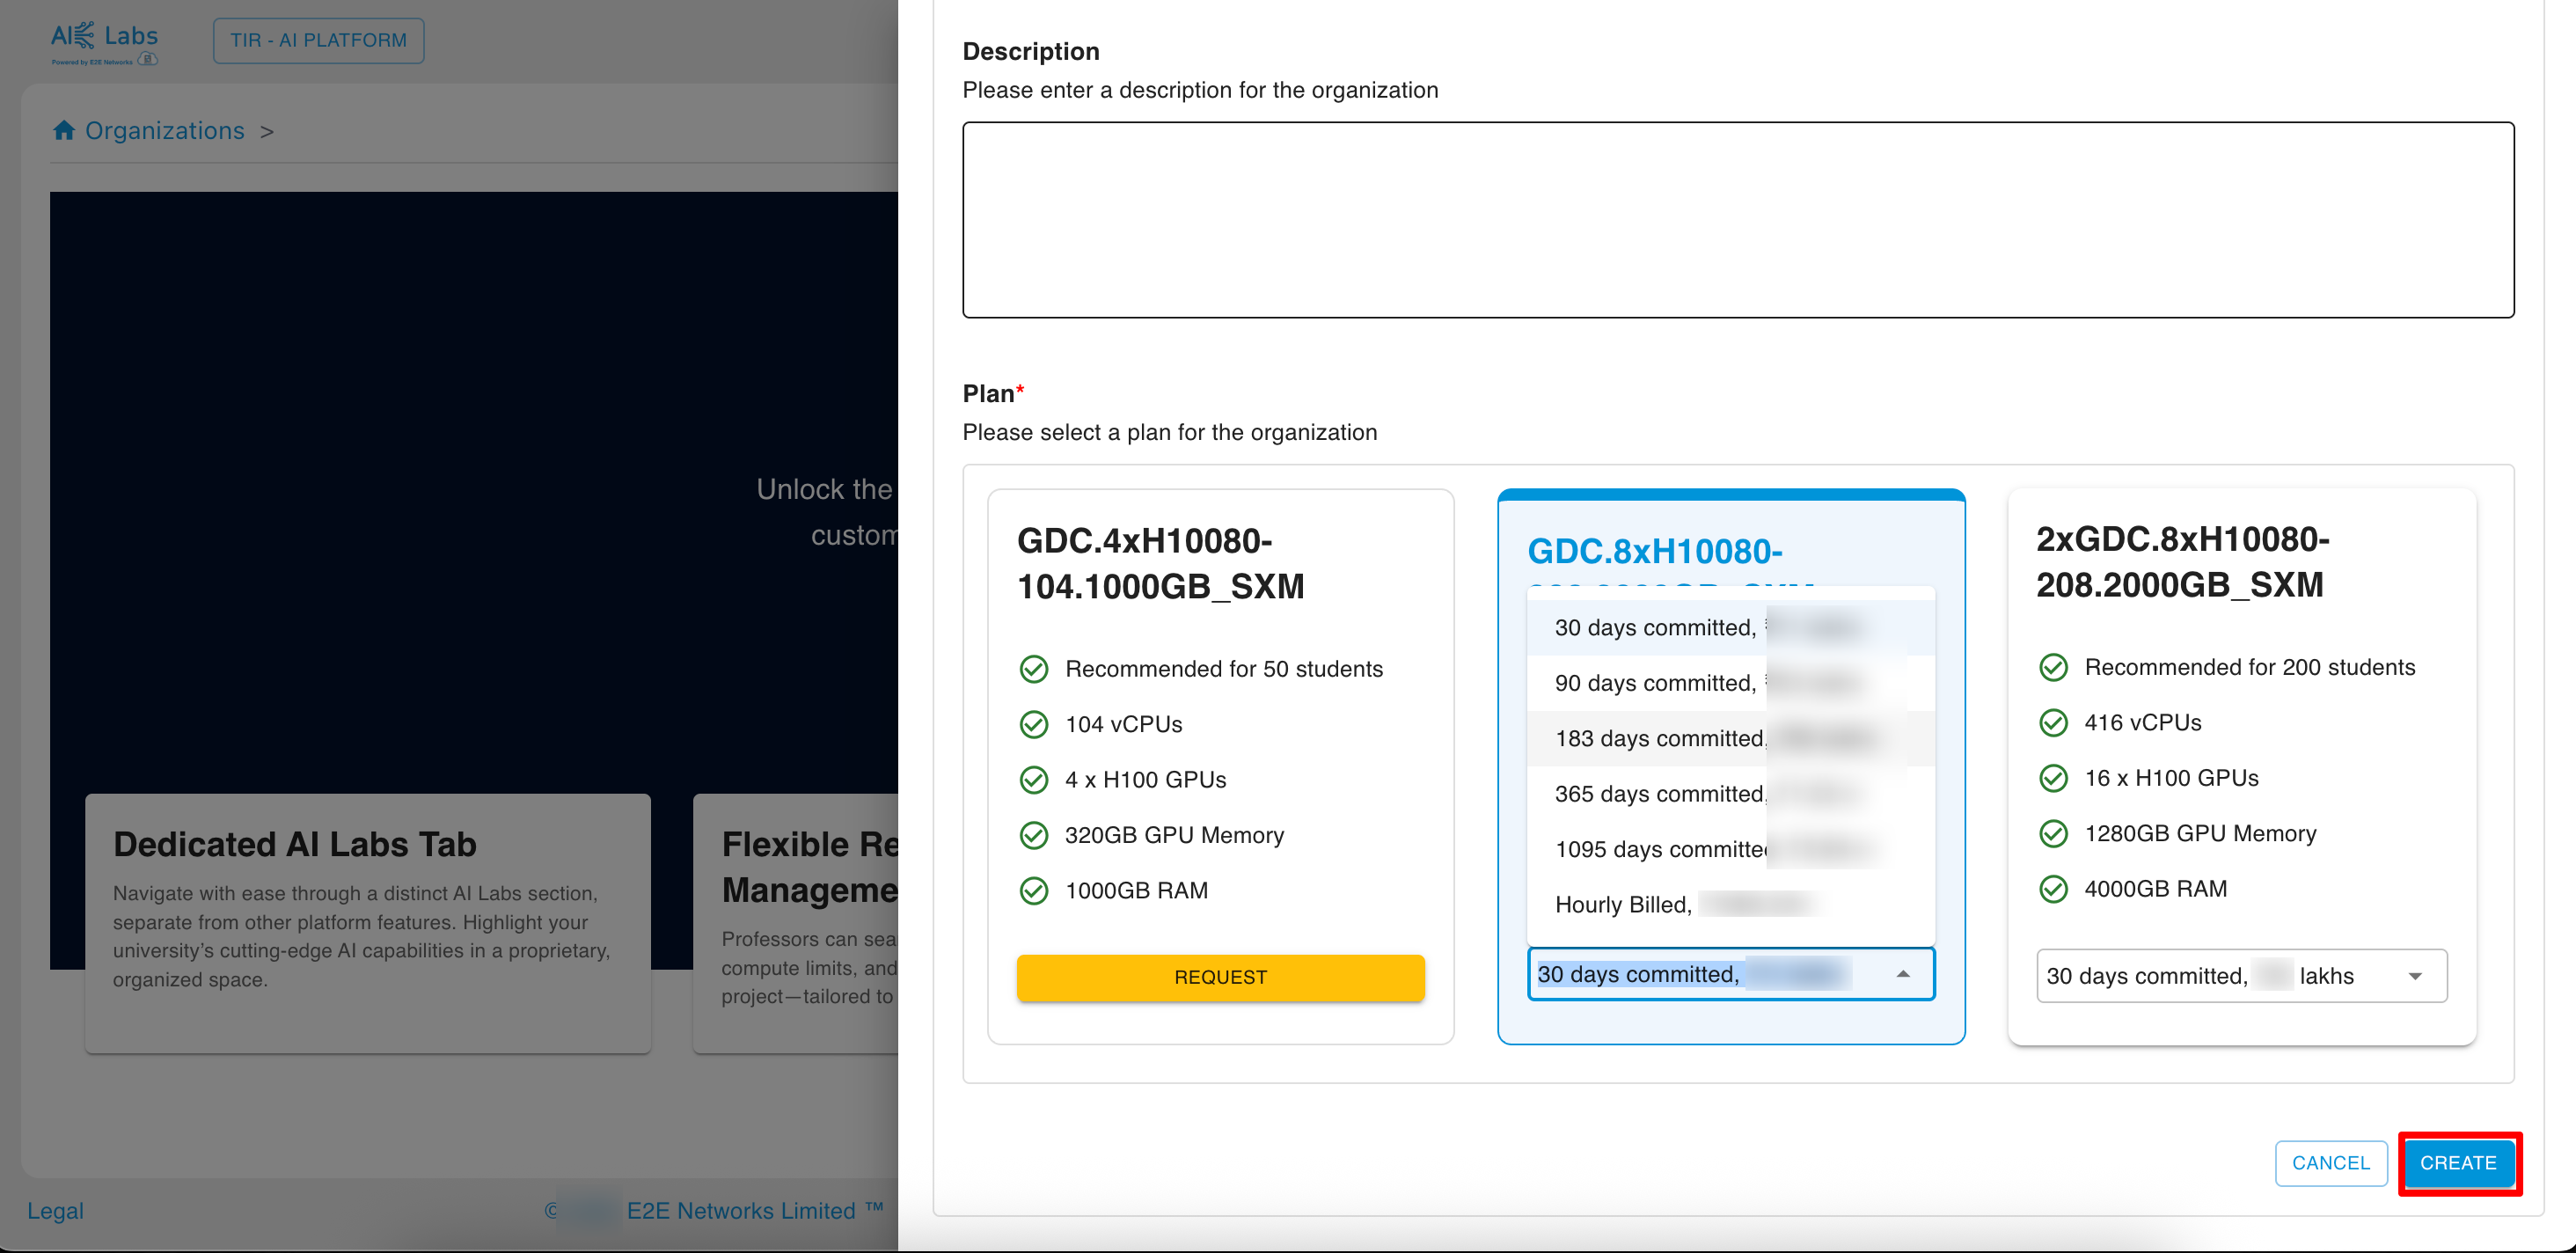
Plan Selection
Admins can choose between:
- Committed Plan – For long-term, fixed-duration usage with discounted pricing.
- Hourly Plan – For flexible, on-demand usage billed hourly.
After selecting the desired plan, click Create to proceed.
Organization Dashboard
Upon successful creation, Admins are redirected to the Organization Home Page, where they can manage:
- Courses and Members
- Resource Monitoring and Utilization
- Organization Settings
Only Admins have permission to create and configure an AI Labs Organization.
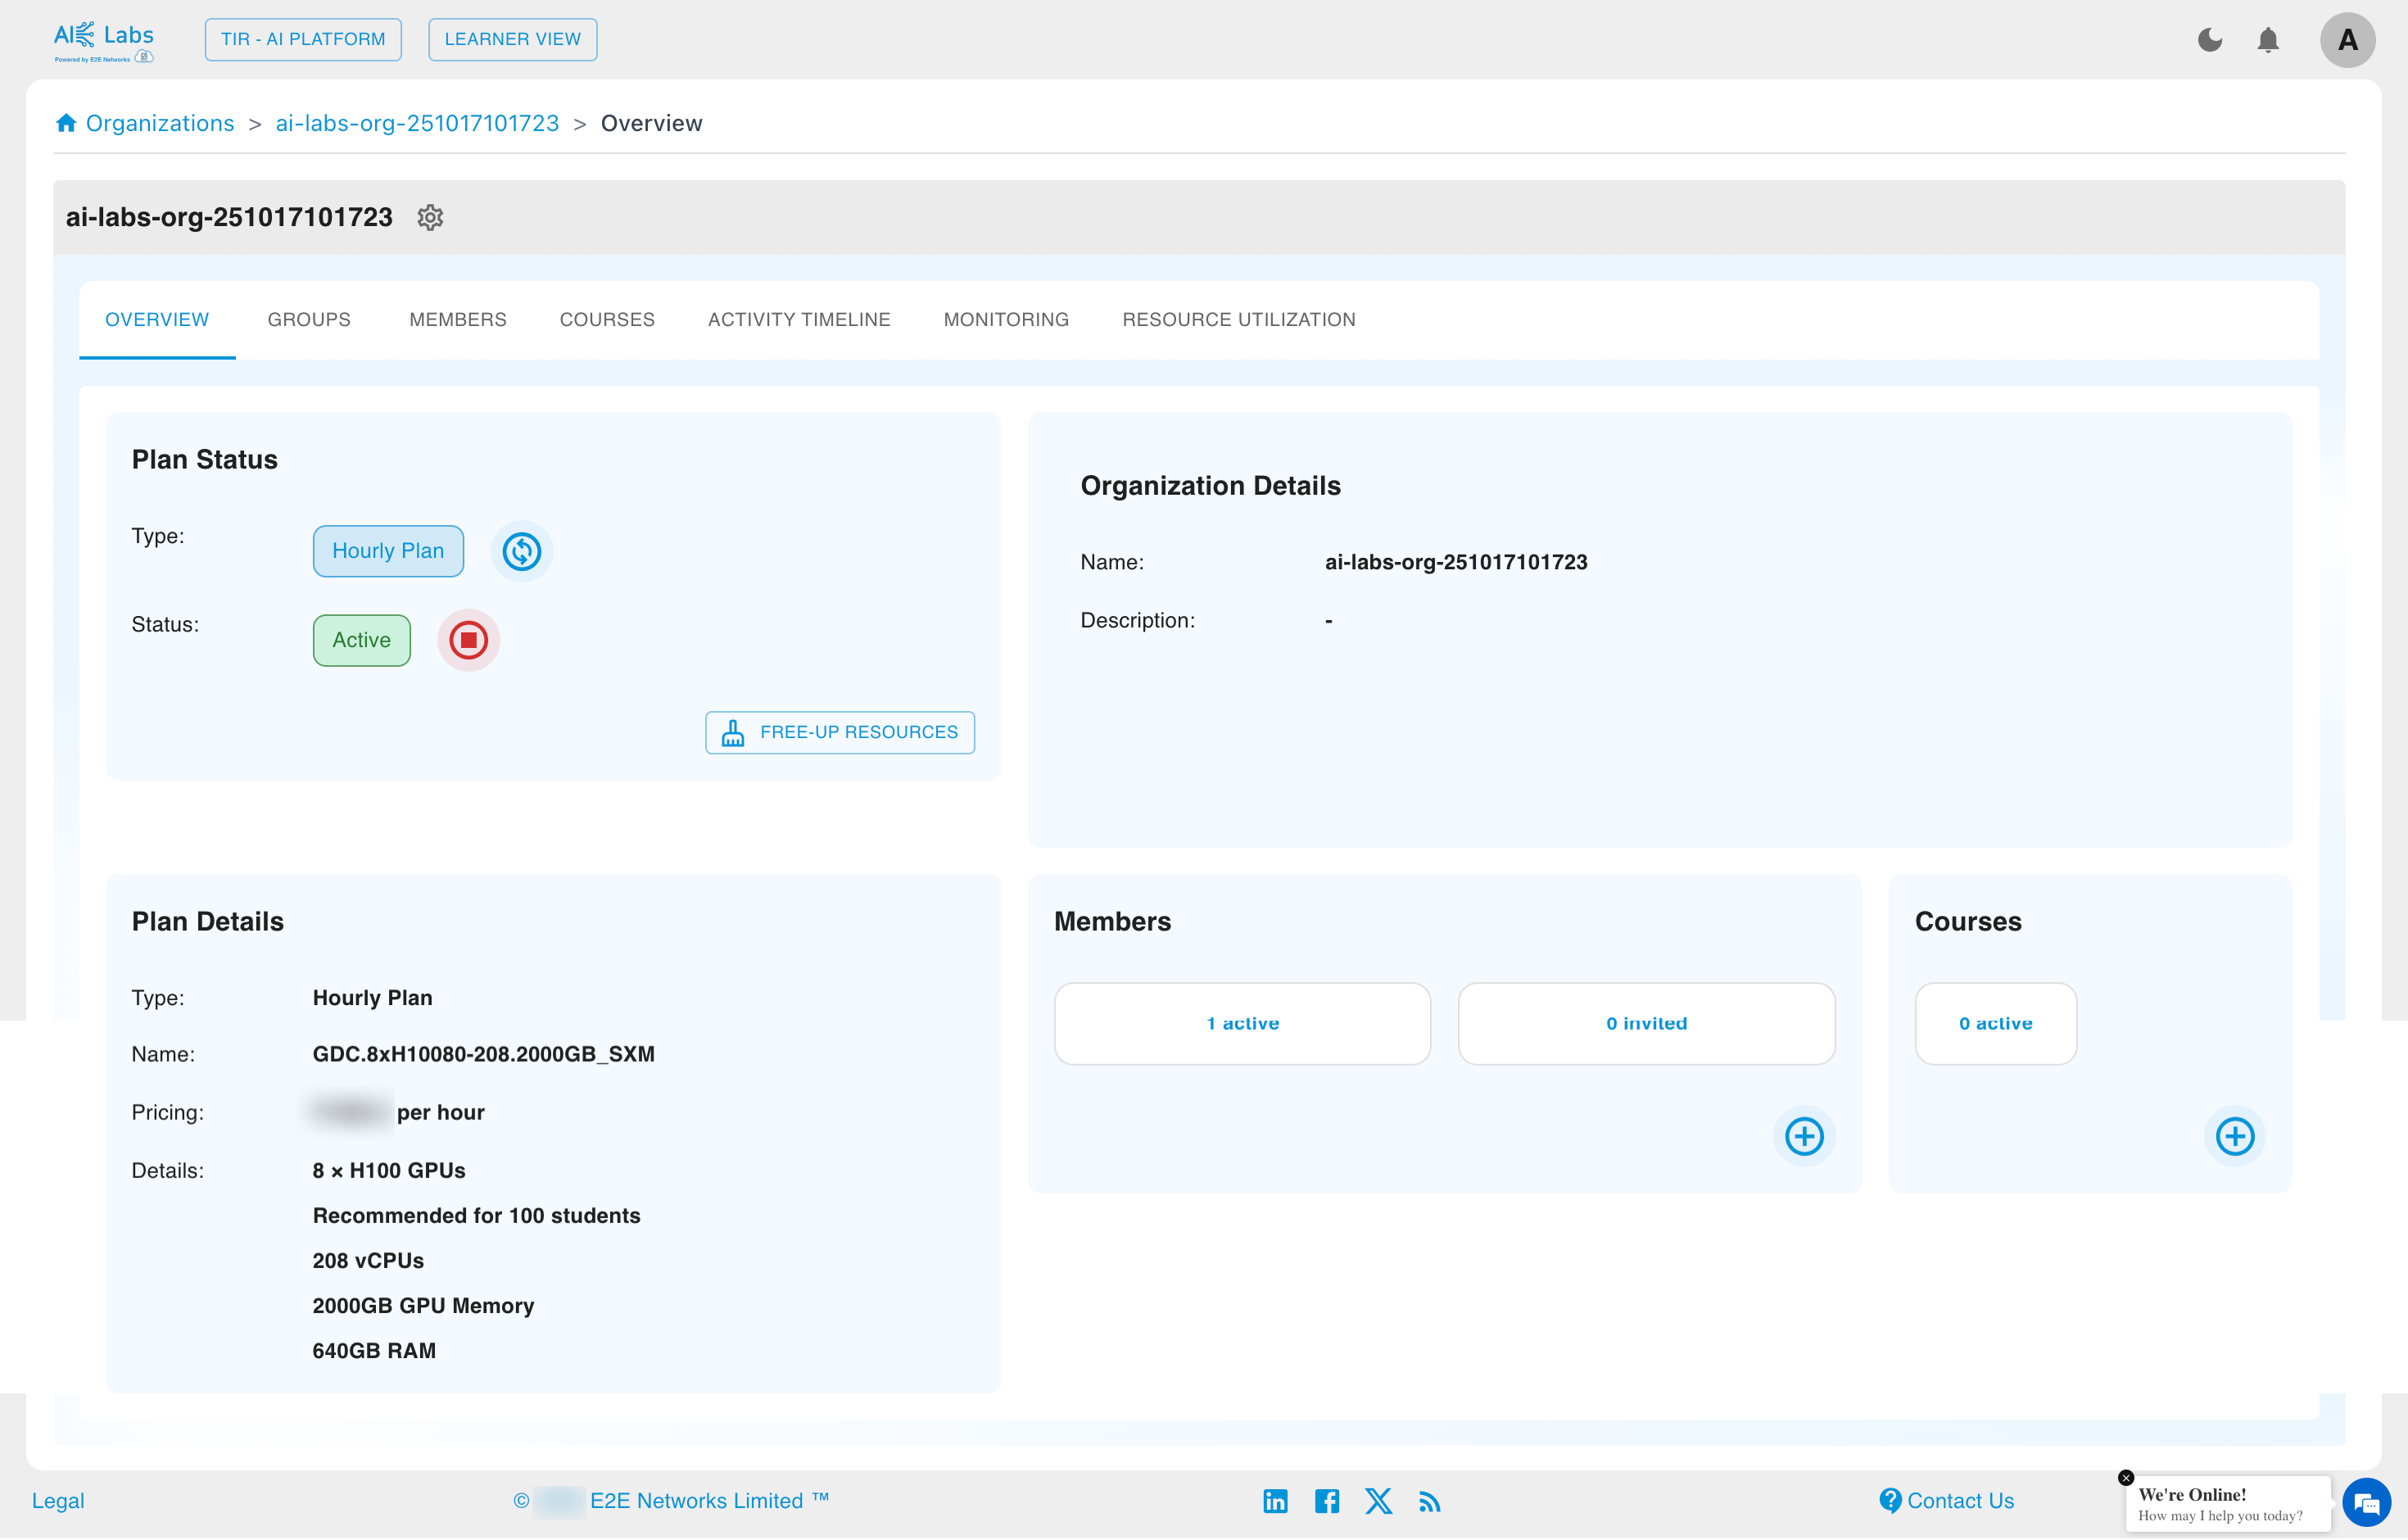
Organization Overview
Admins can view and manage all Organization details from the Overview section of the Organization dashboard.
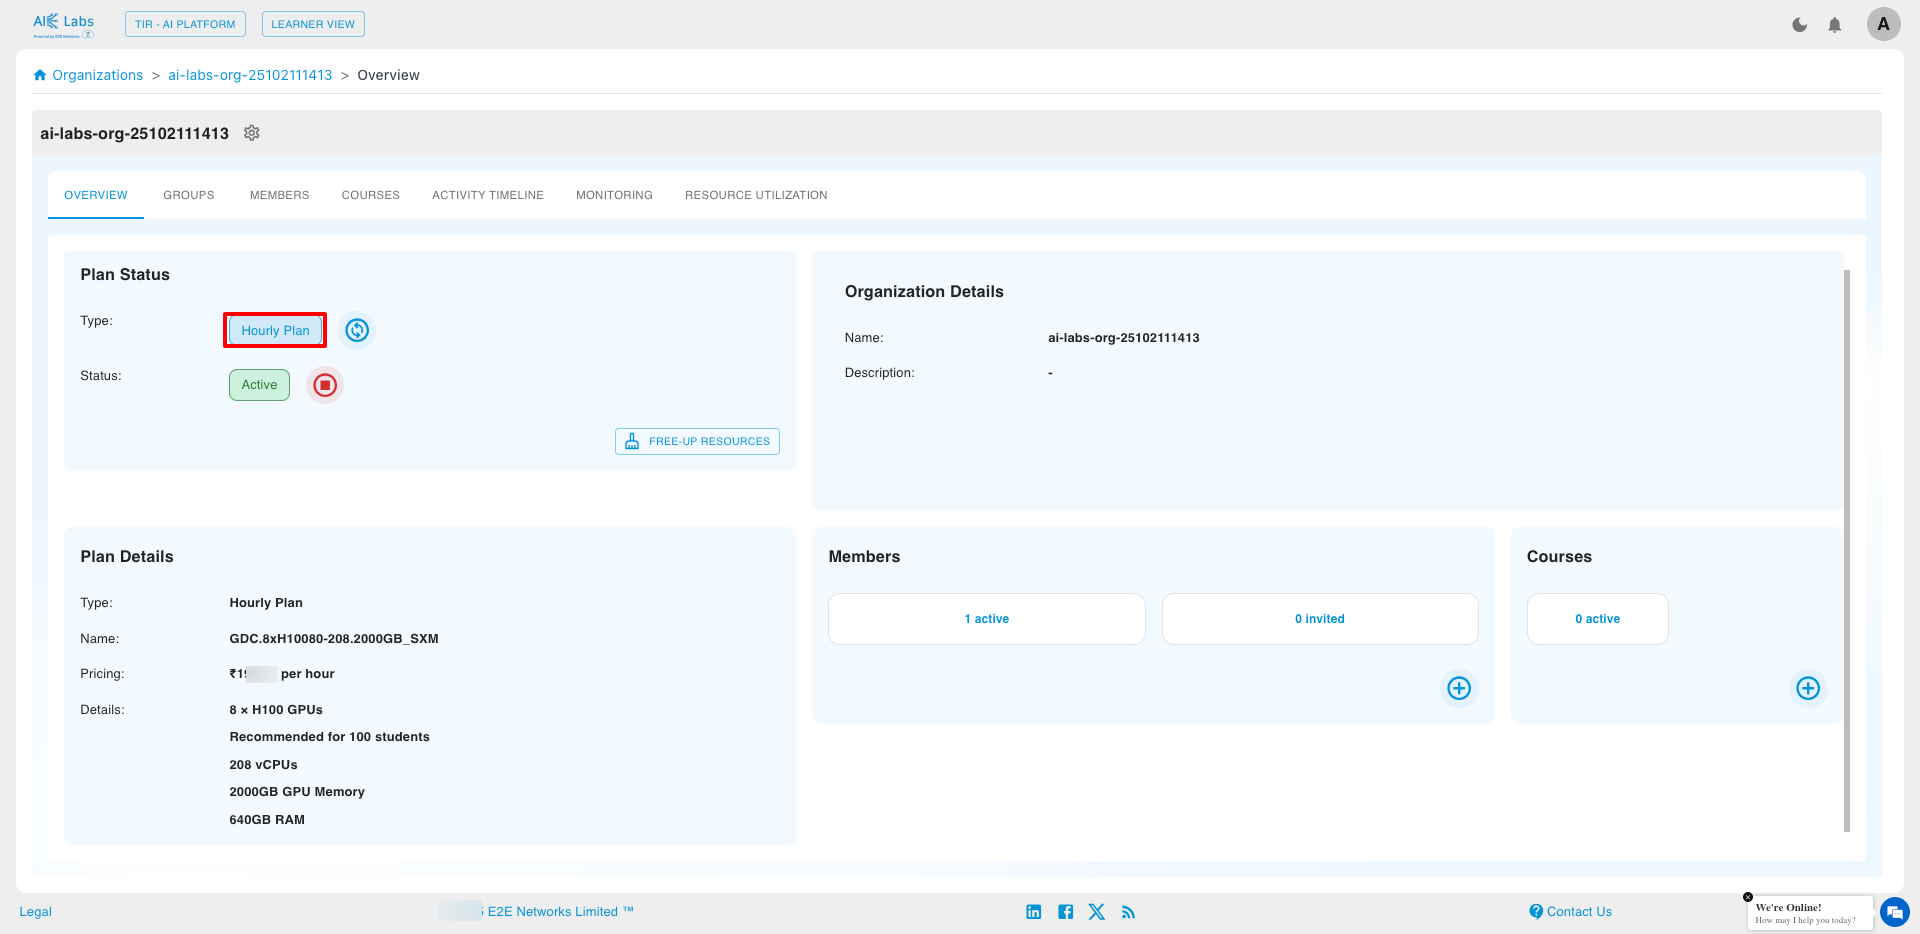
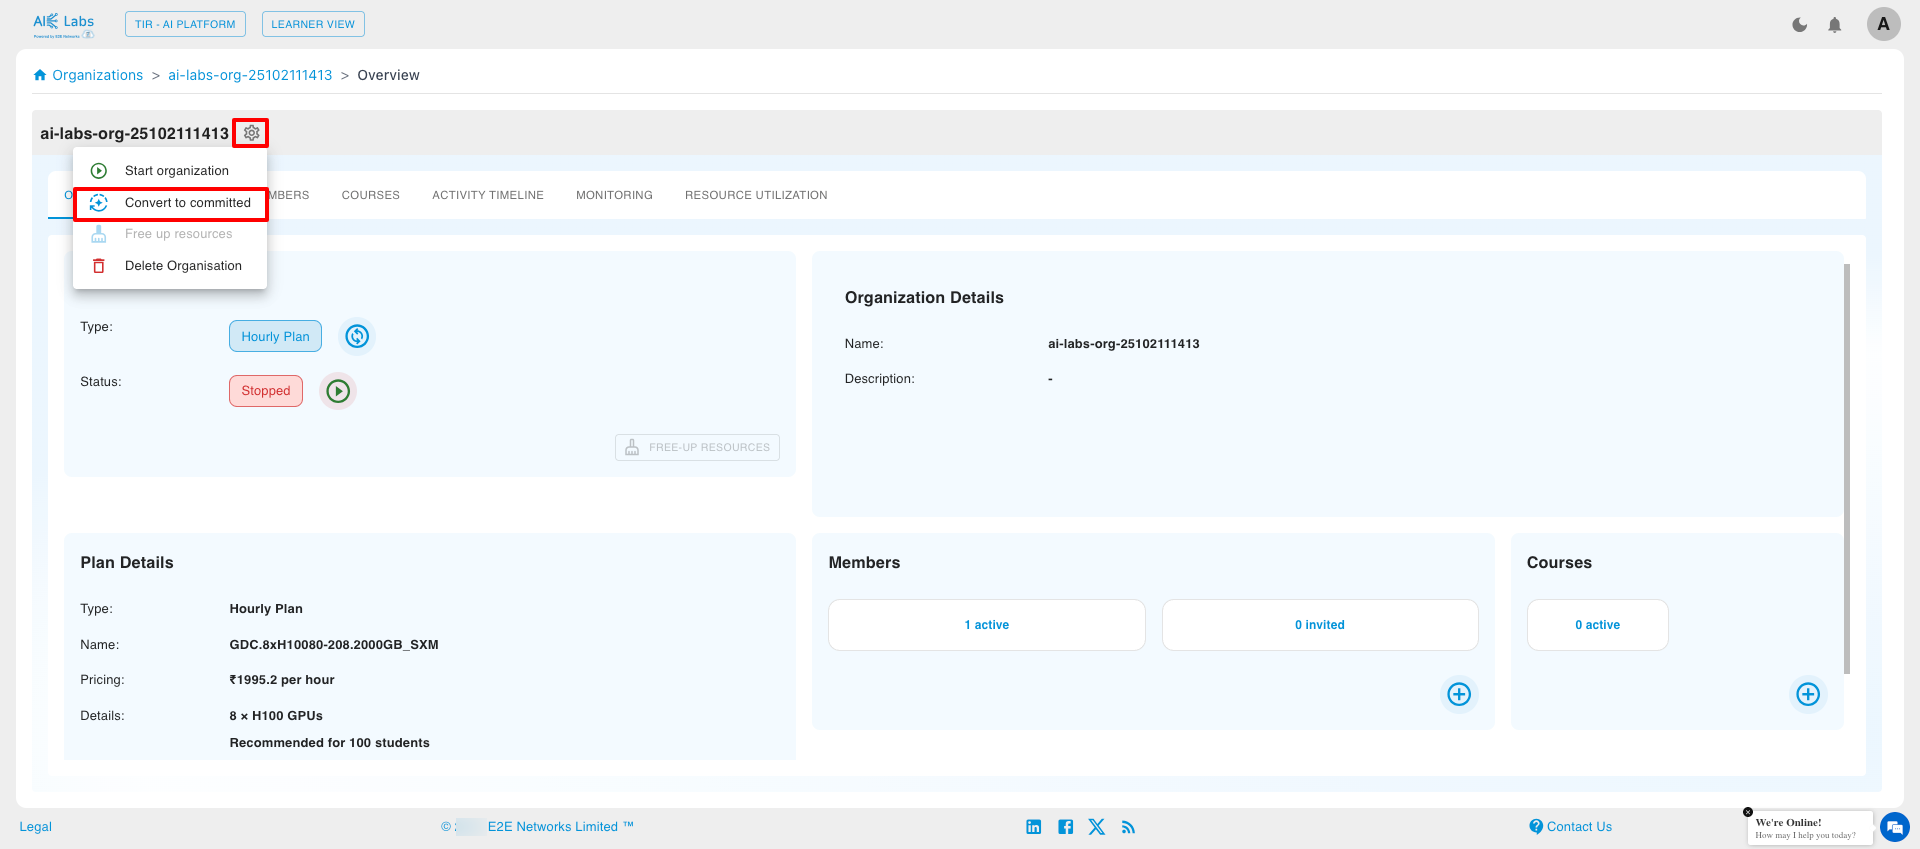
Stop the Organization
Admins have full access to stop the Organization by clicking on the settings icon and selecting Stop Organization.
![]()
A confirmation pop-up will appear before proceeding.

Once stopped:
- All resources (Instances and Inference) launched within the Organization will also be stopped.
- Students and users will not be able to access or create resources (Instances and Inference) until the Organization is started again by the Admin.
- Students can still create Datasets even if the Organization is stopped.
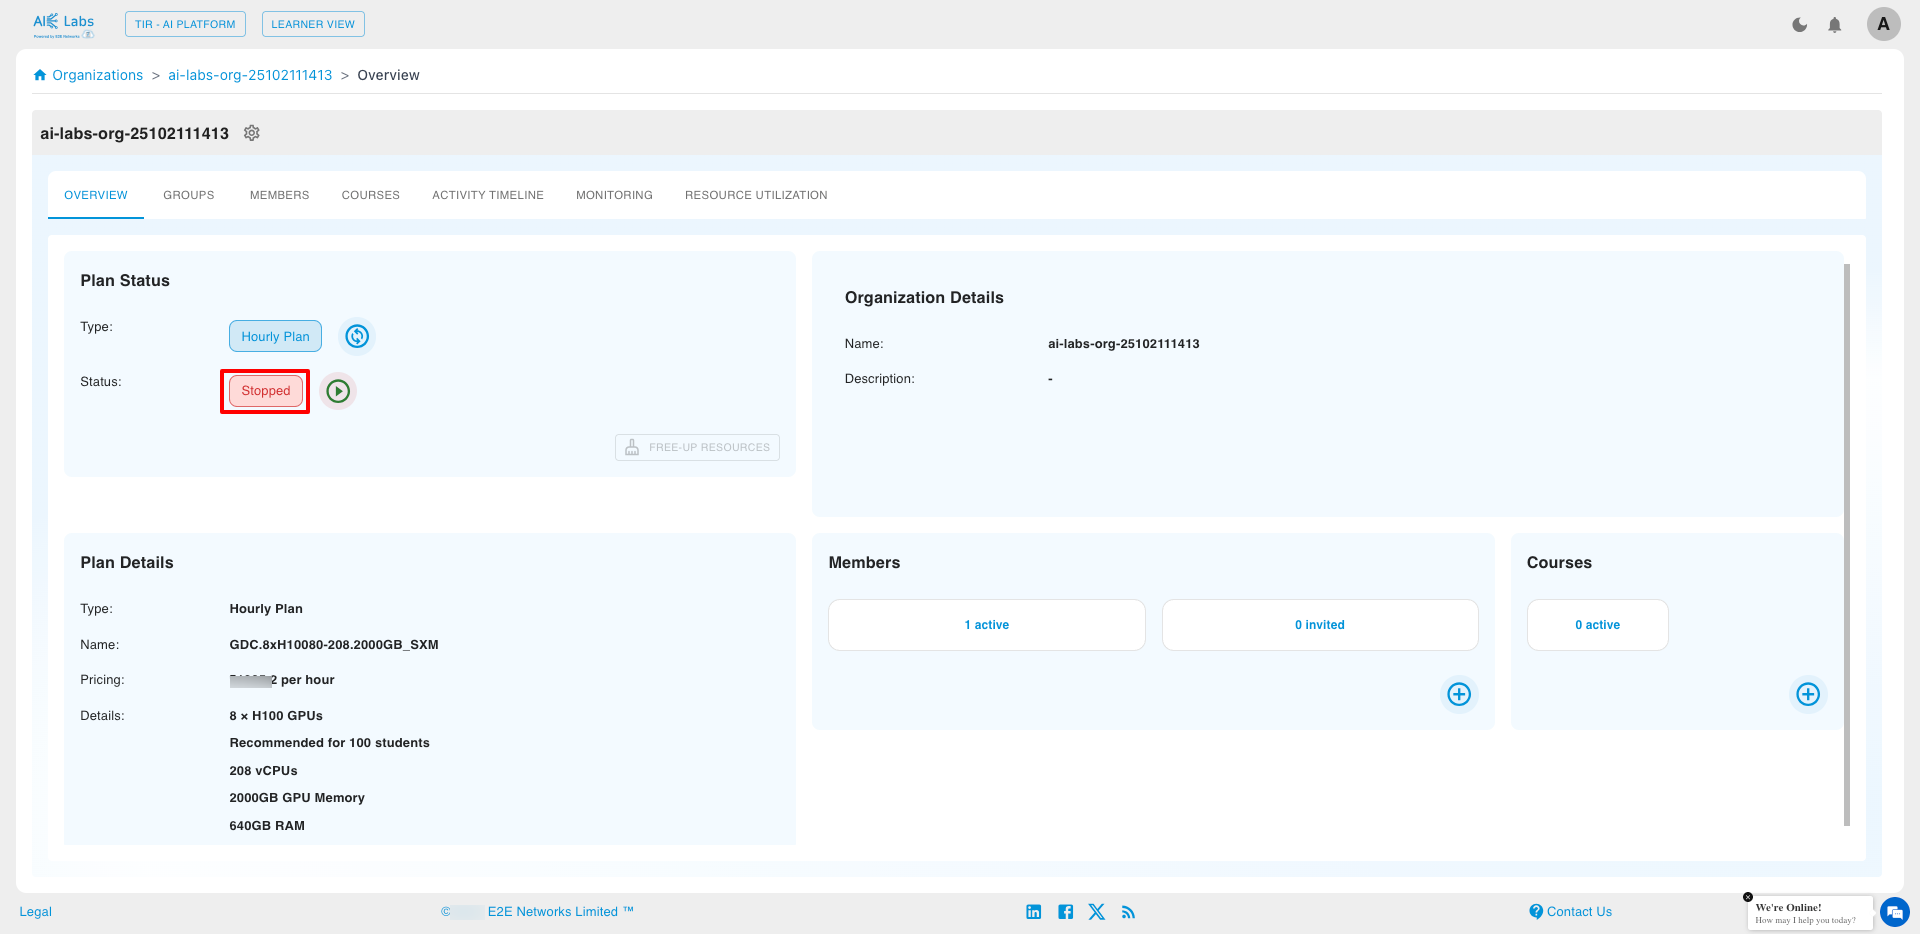
- Only Hourly Organizations can be stopped.
- Billing for the Organization automatically pauses when stopped and resumes once restarted.
- This operation can only be performed by an Admin.
Free up resources
Admins can manually free up compute resources in an AI Labs Organization by using the Free up resources option.
To free up resources, click on settings button and then select Free up resources option.

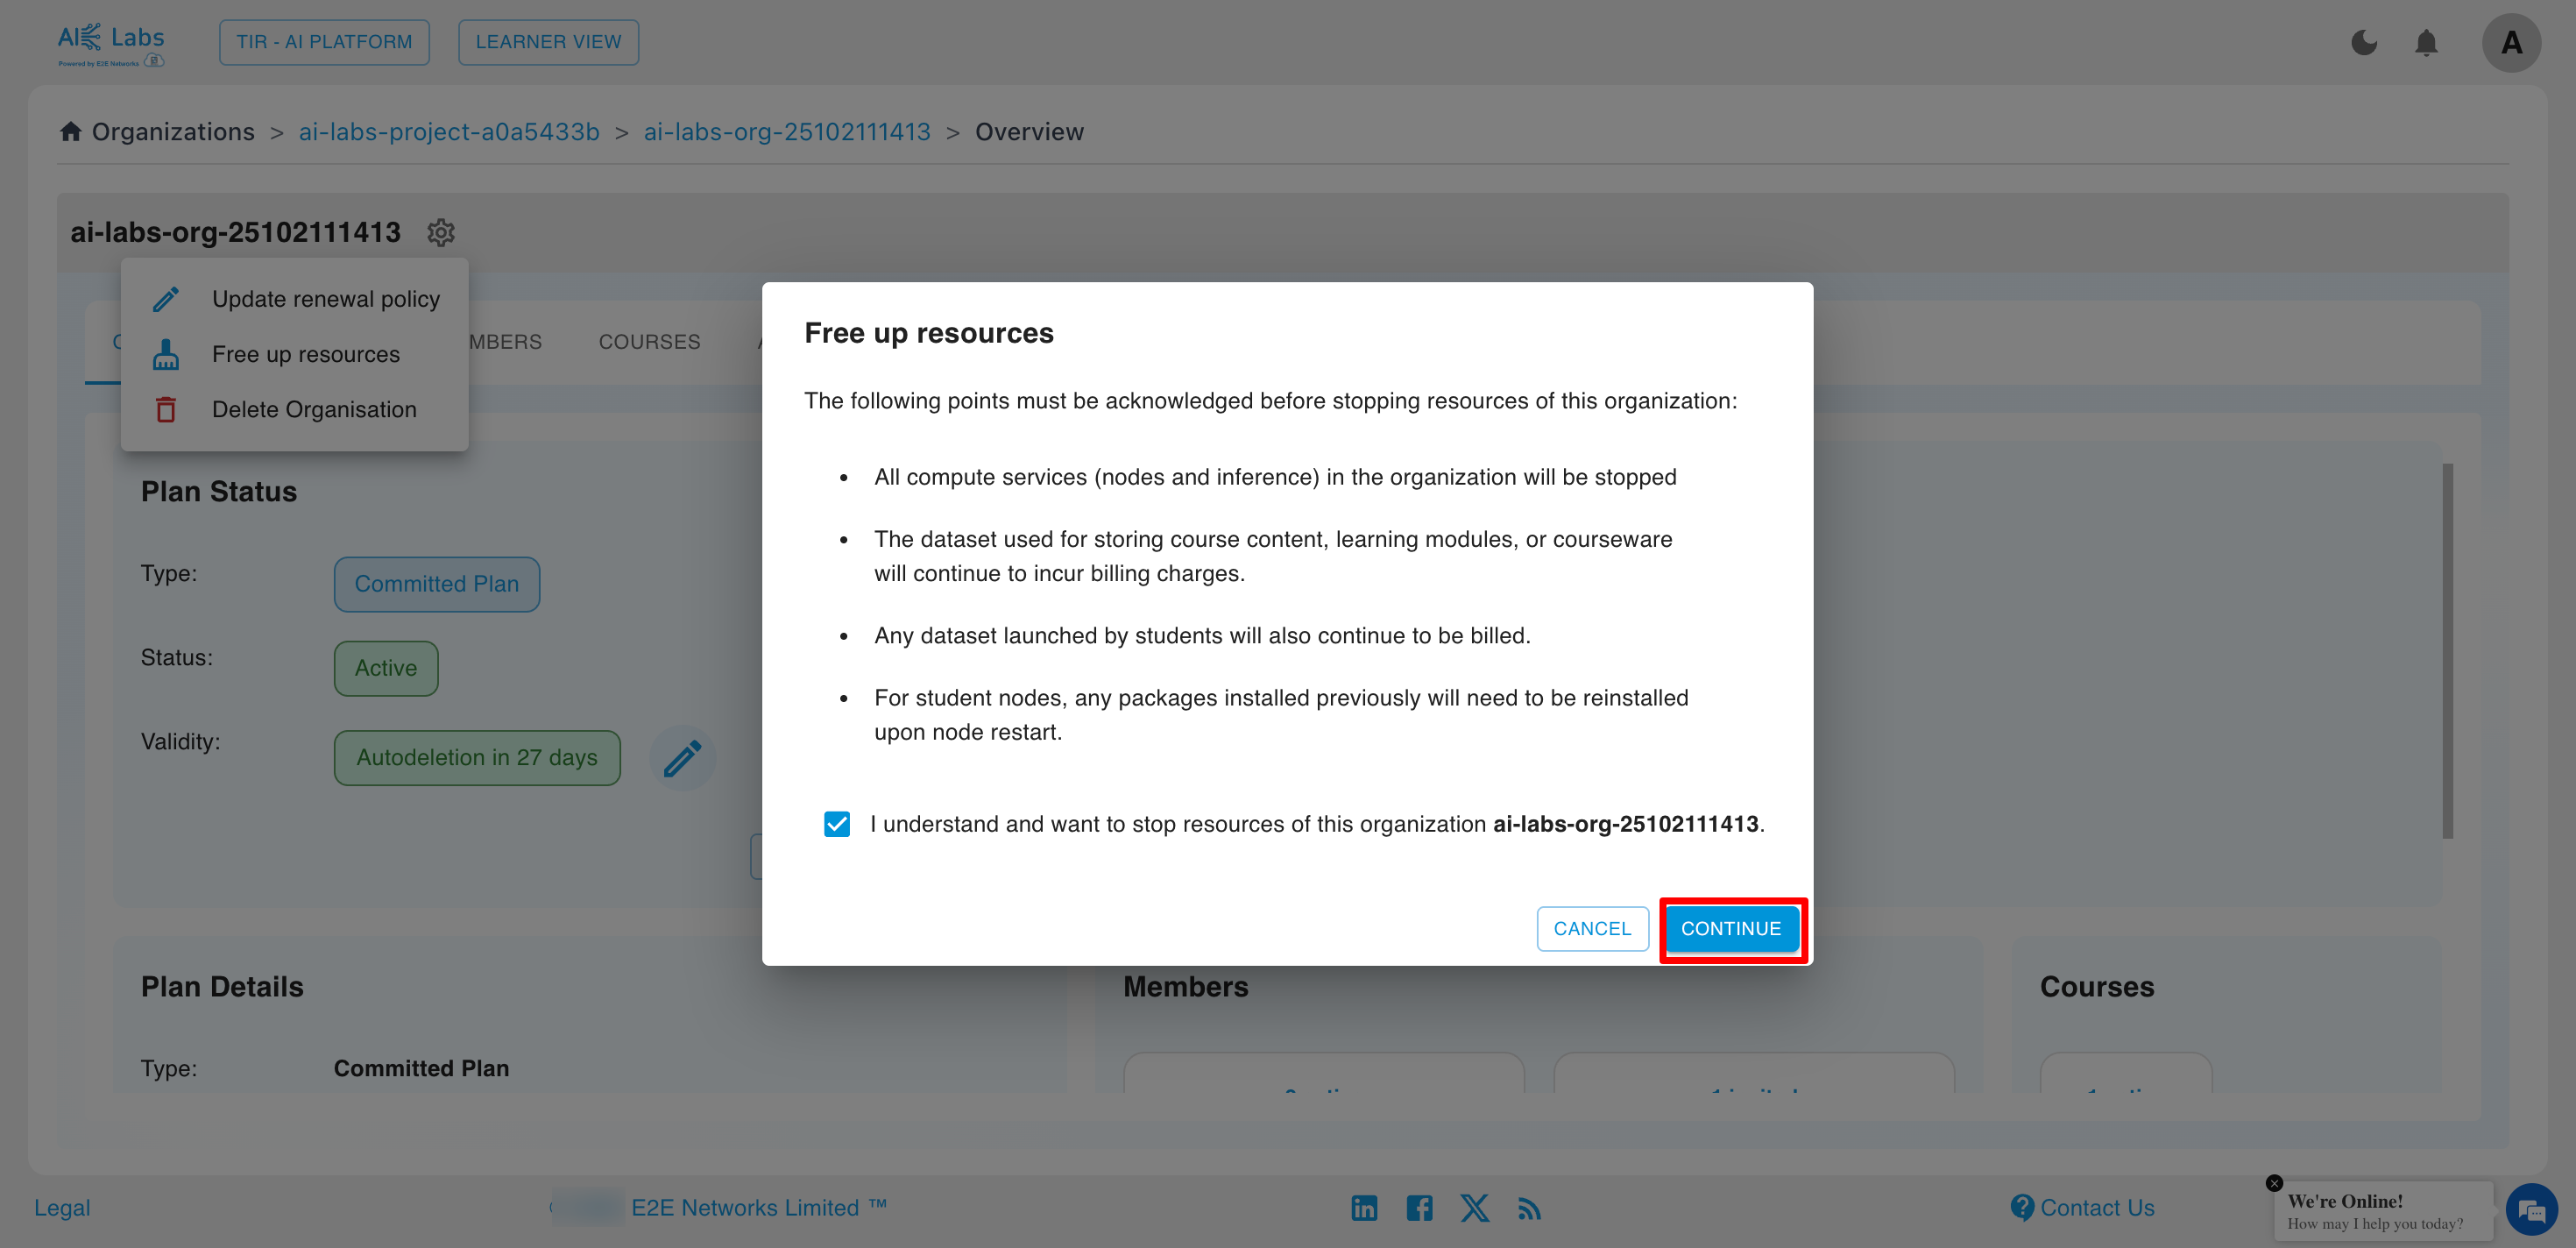
- All compute services (Instances and Inference) in the organization will be stopped.
- Datasets for courses, modules, or courseware will continue to incur charges.
- Student-launched datasets will also keep billing active.
- After restarting instances, installed packages must be reinstalled.
Start the Organization
Admins can restart the Organization anytime by clicking on the Start button.
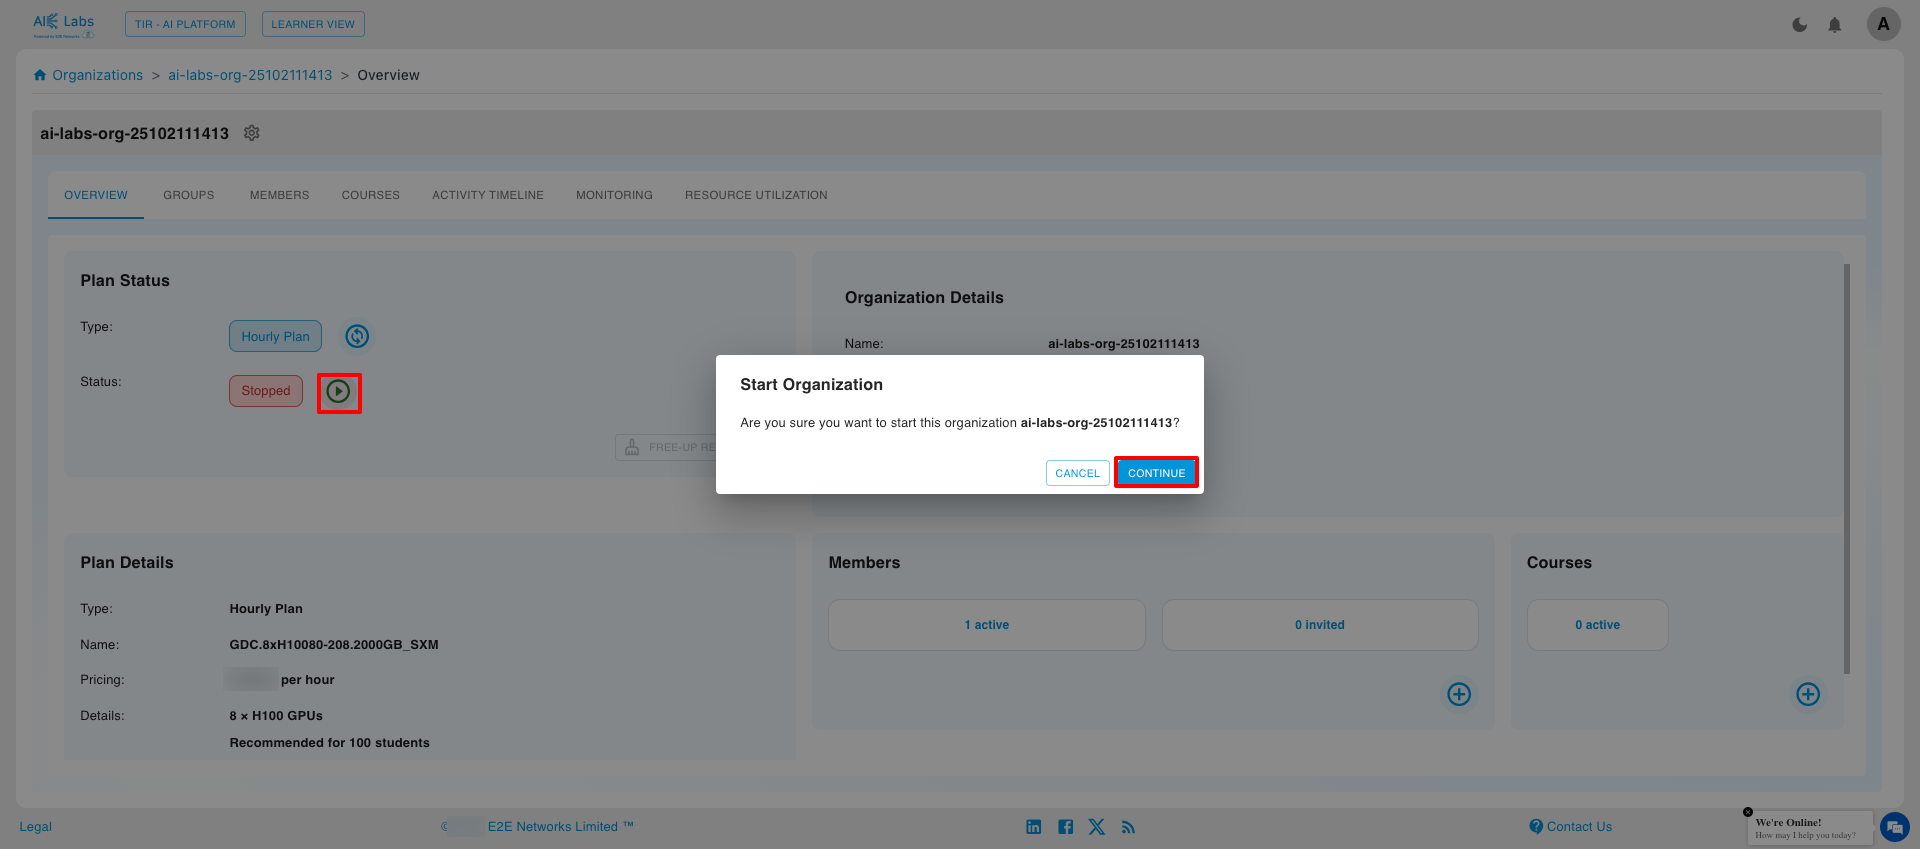
Once started, all members regain access to their assigned resources.
Convert to Committed
Admins can convert the Organization plan from Hourly to Committed by selecting the Convert to Committed option under the settings icon.
A pop-up will appear for plan and renewal selection.
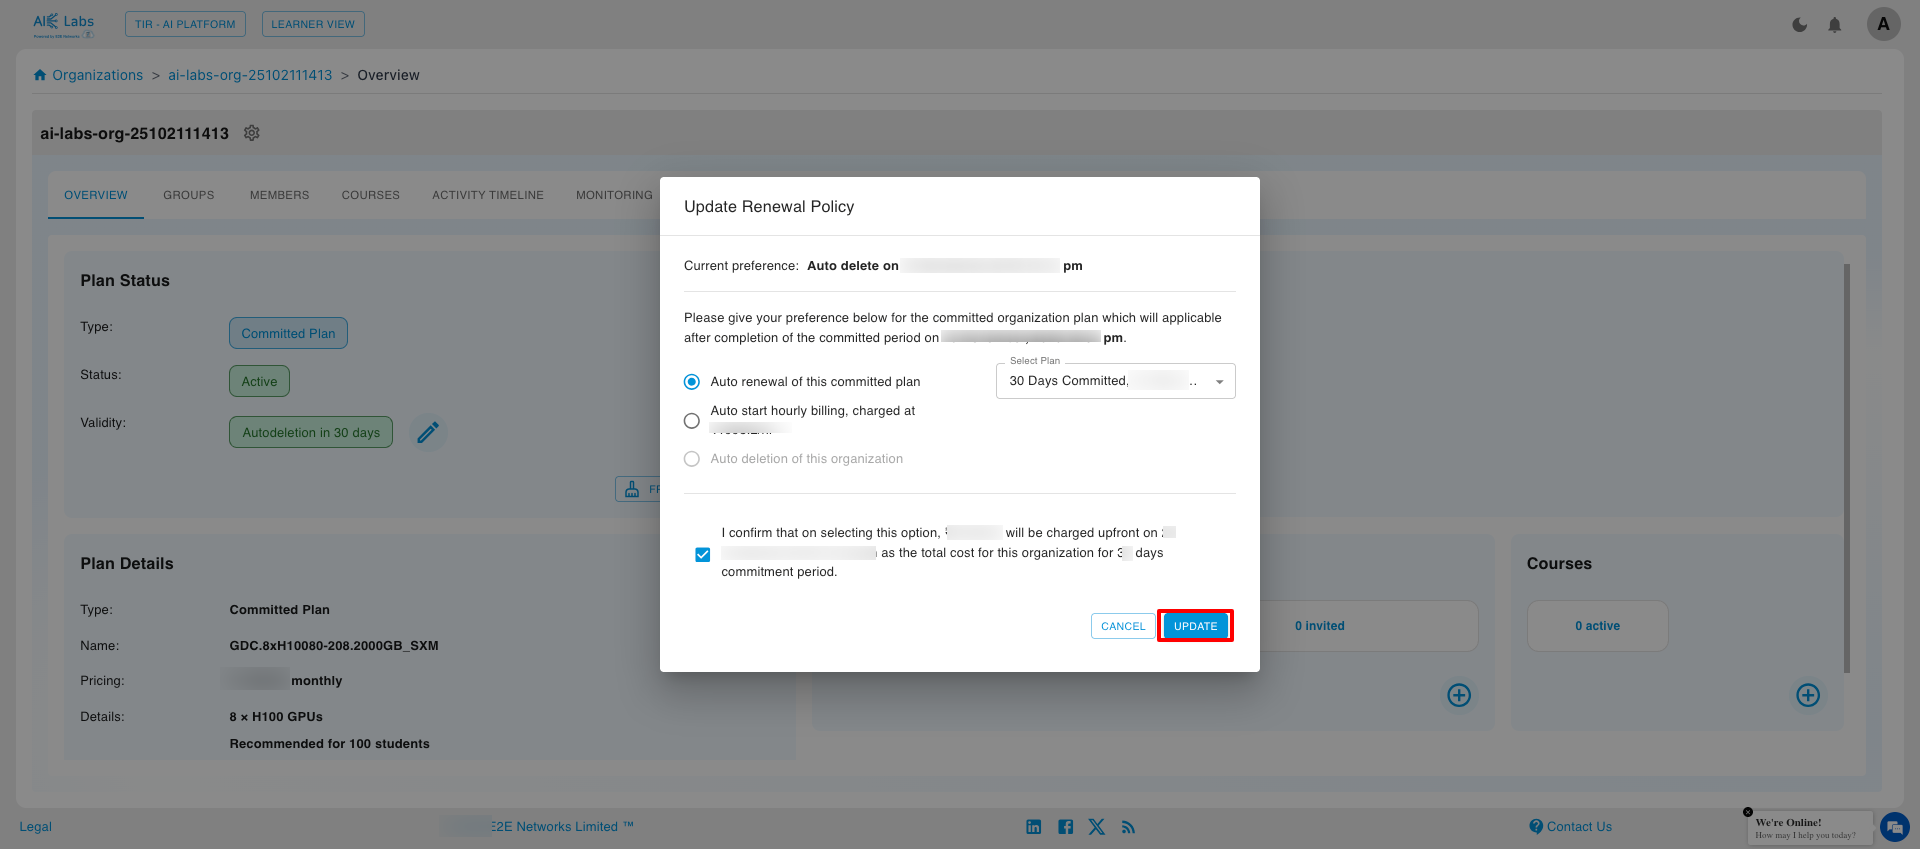
Admins can choose from the following Renewal Policies:
- Auto-Renew – The Organization automatically renews on the selected committed plan.
- Auto-Hourly – The Organization converts back to an Hourly plan after the committed period ends.
- Auto-Delete – The Organization will be deleted once the committed period ends.
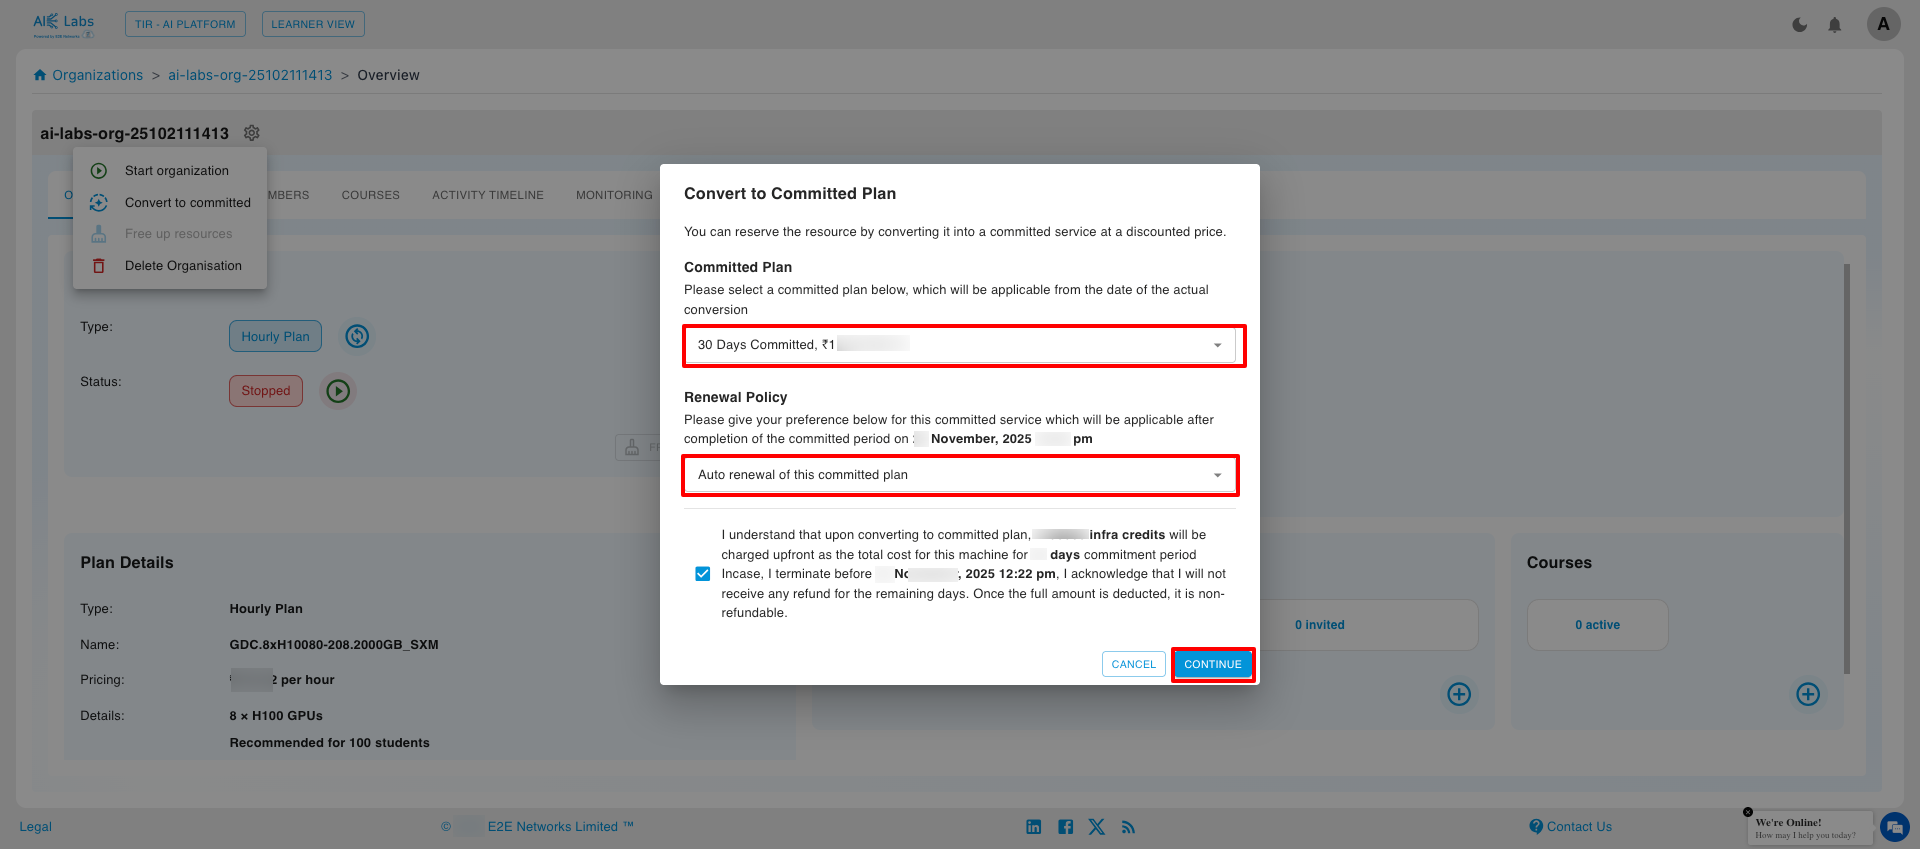
Once converted to a Committed plan, the Organization cannot be stopped until the commitment period ends.
Committed Settings
Admins can update the Committed Plan and Renewal Policy from the Committed Settings section by clicking on the Edit icon.
![]()
A configuration pop-up will appear to adjust plan and renewal options.
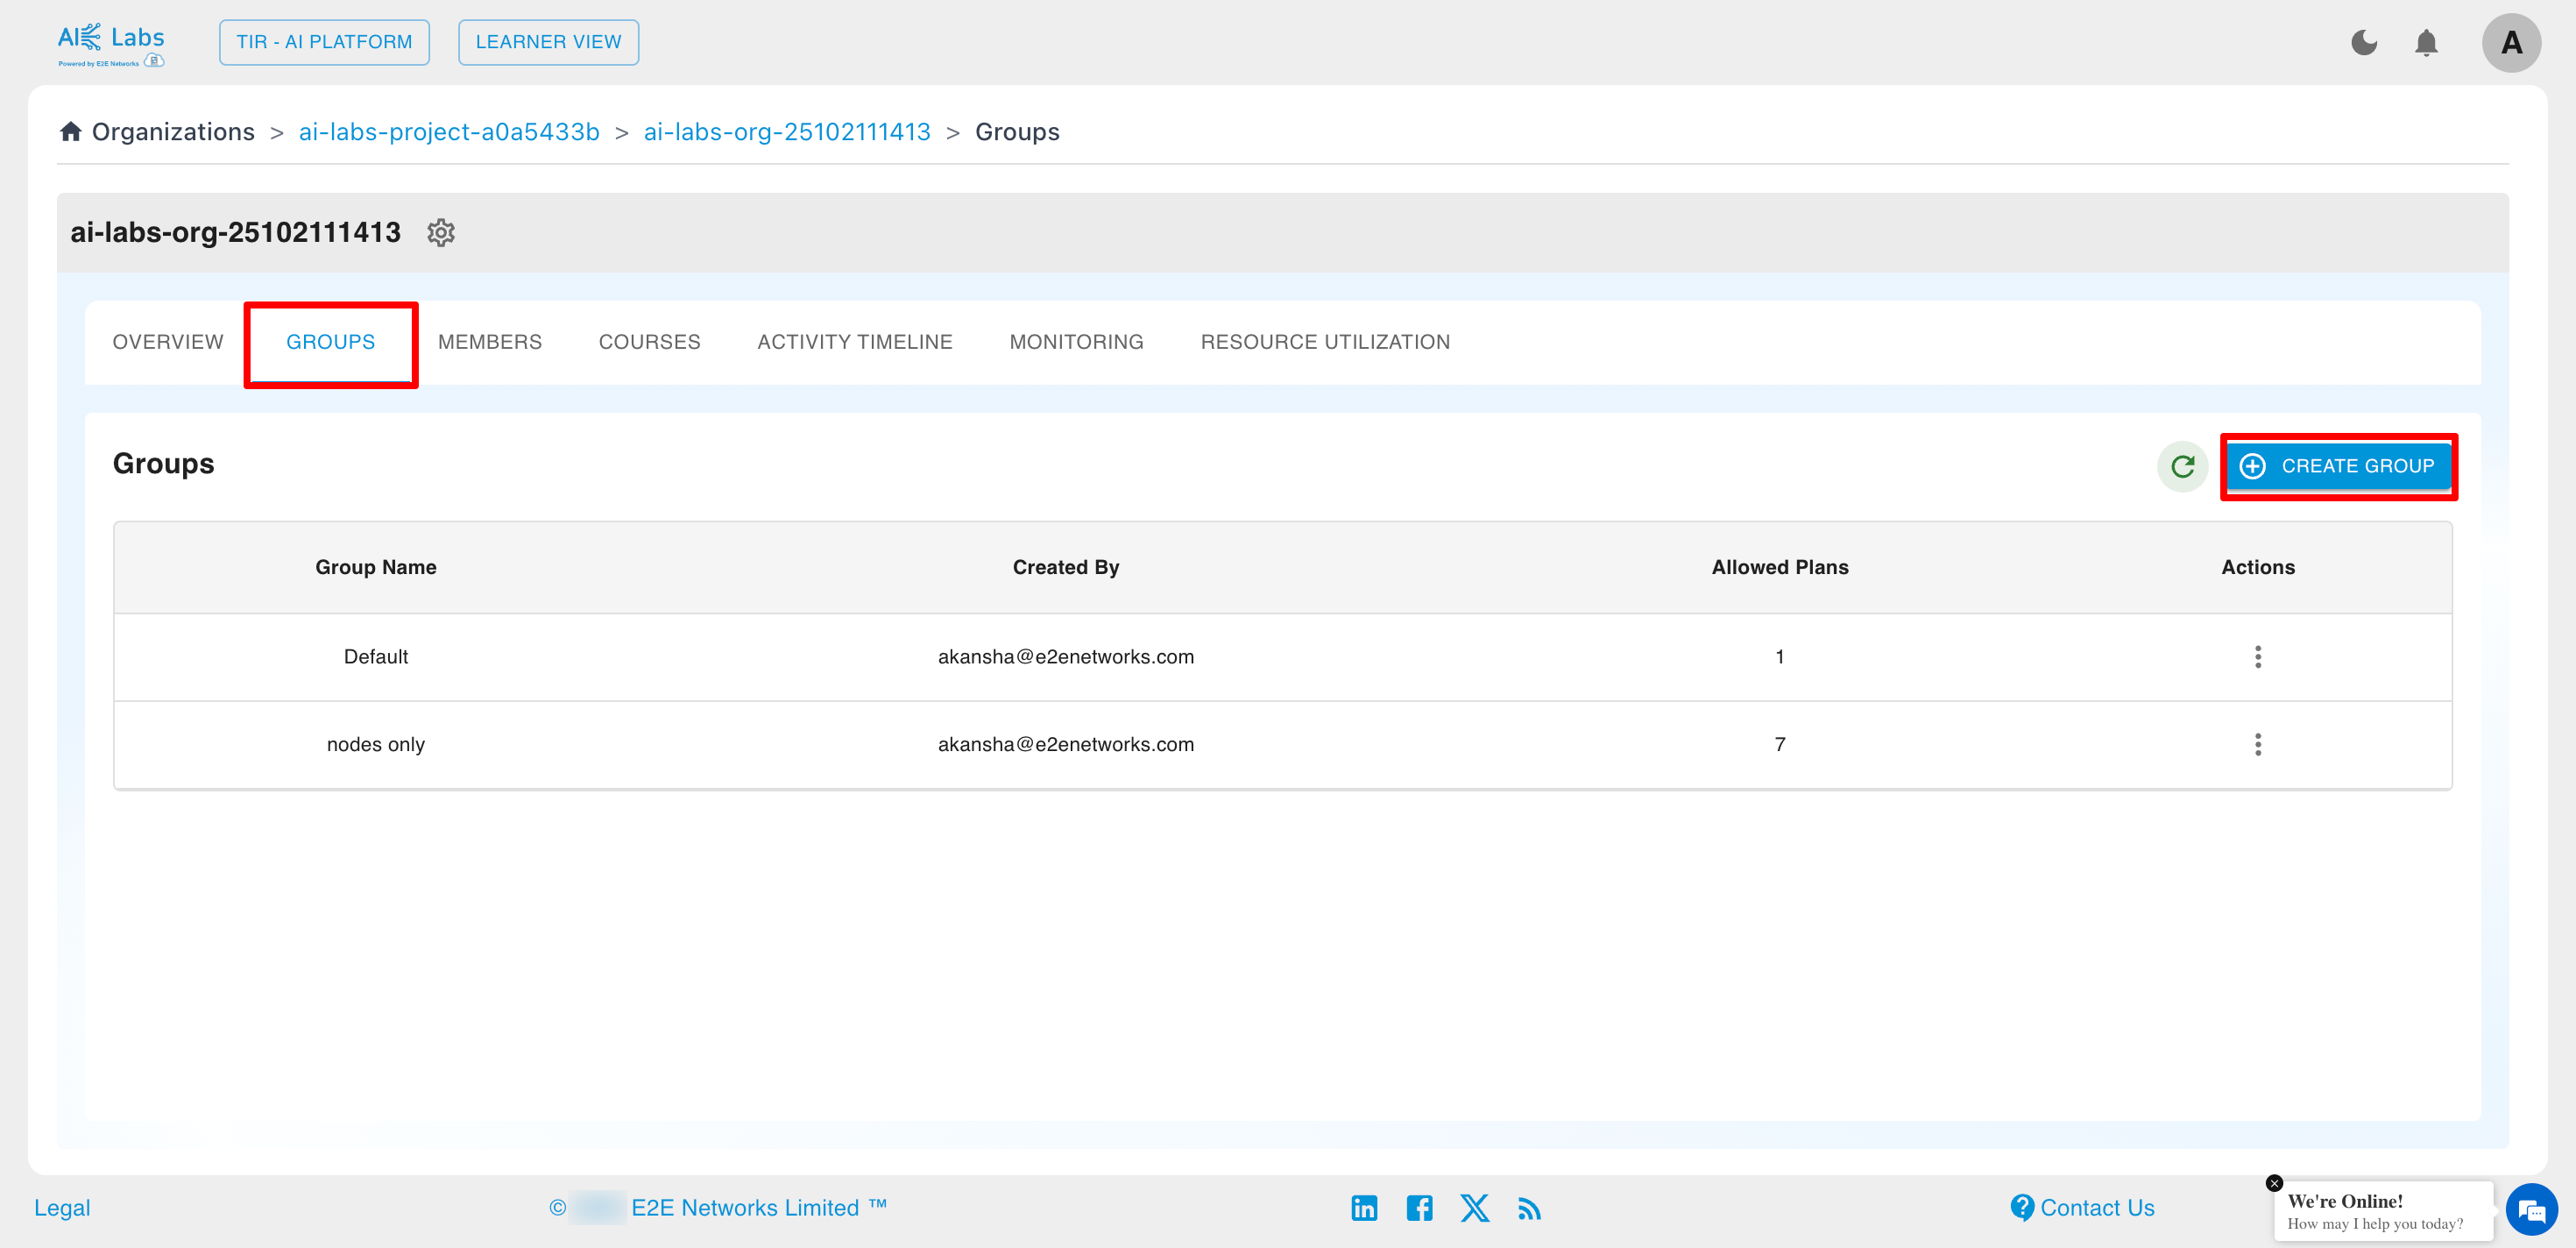
Groups
Admins and users with appropriate permissions can create Groups to manage resource access and plan configurations for specific sets of members within an existing AI Labs Organization.
Steps to Create a Group
1. Navigate to the Groups Section
From the Organization Dashboard, click on the GROUPS tab to view all existing groups.Then click on the Create Group button.
2. Enter Group Name
Provide a unique and descriptive name in the Name field.
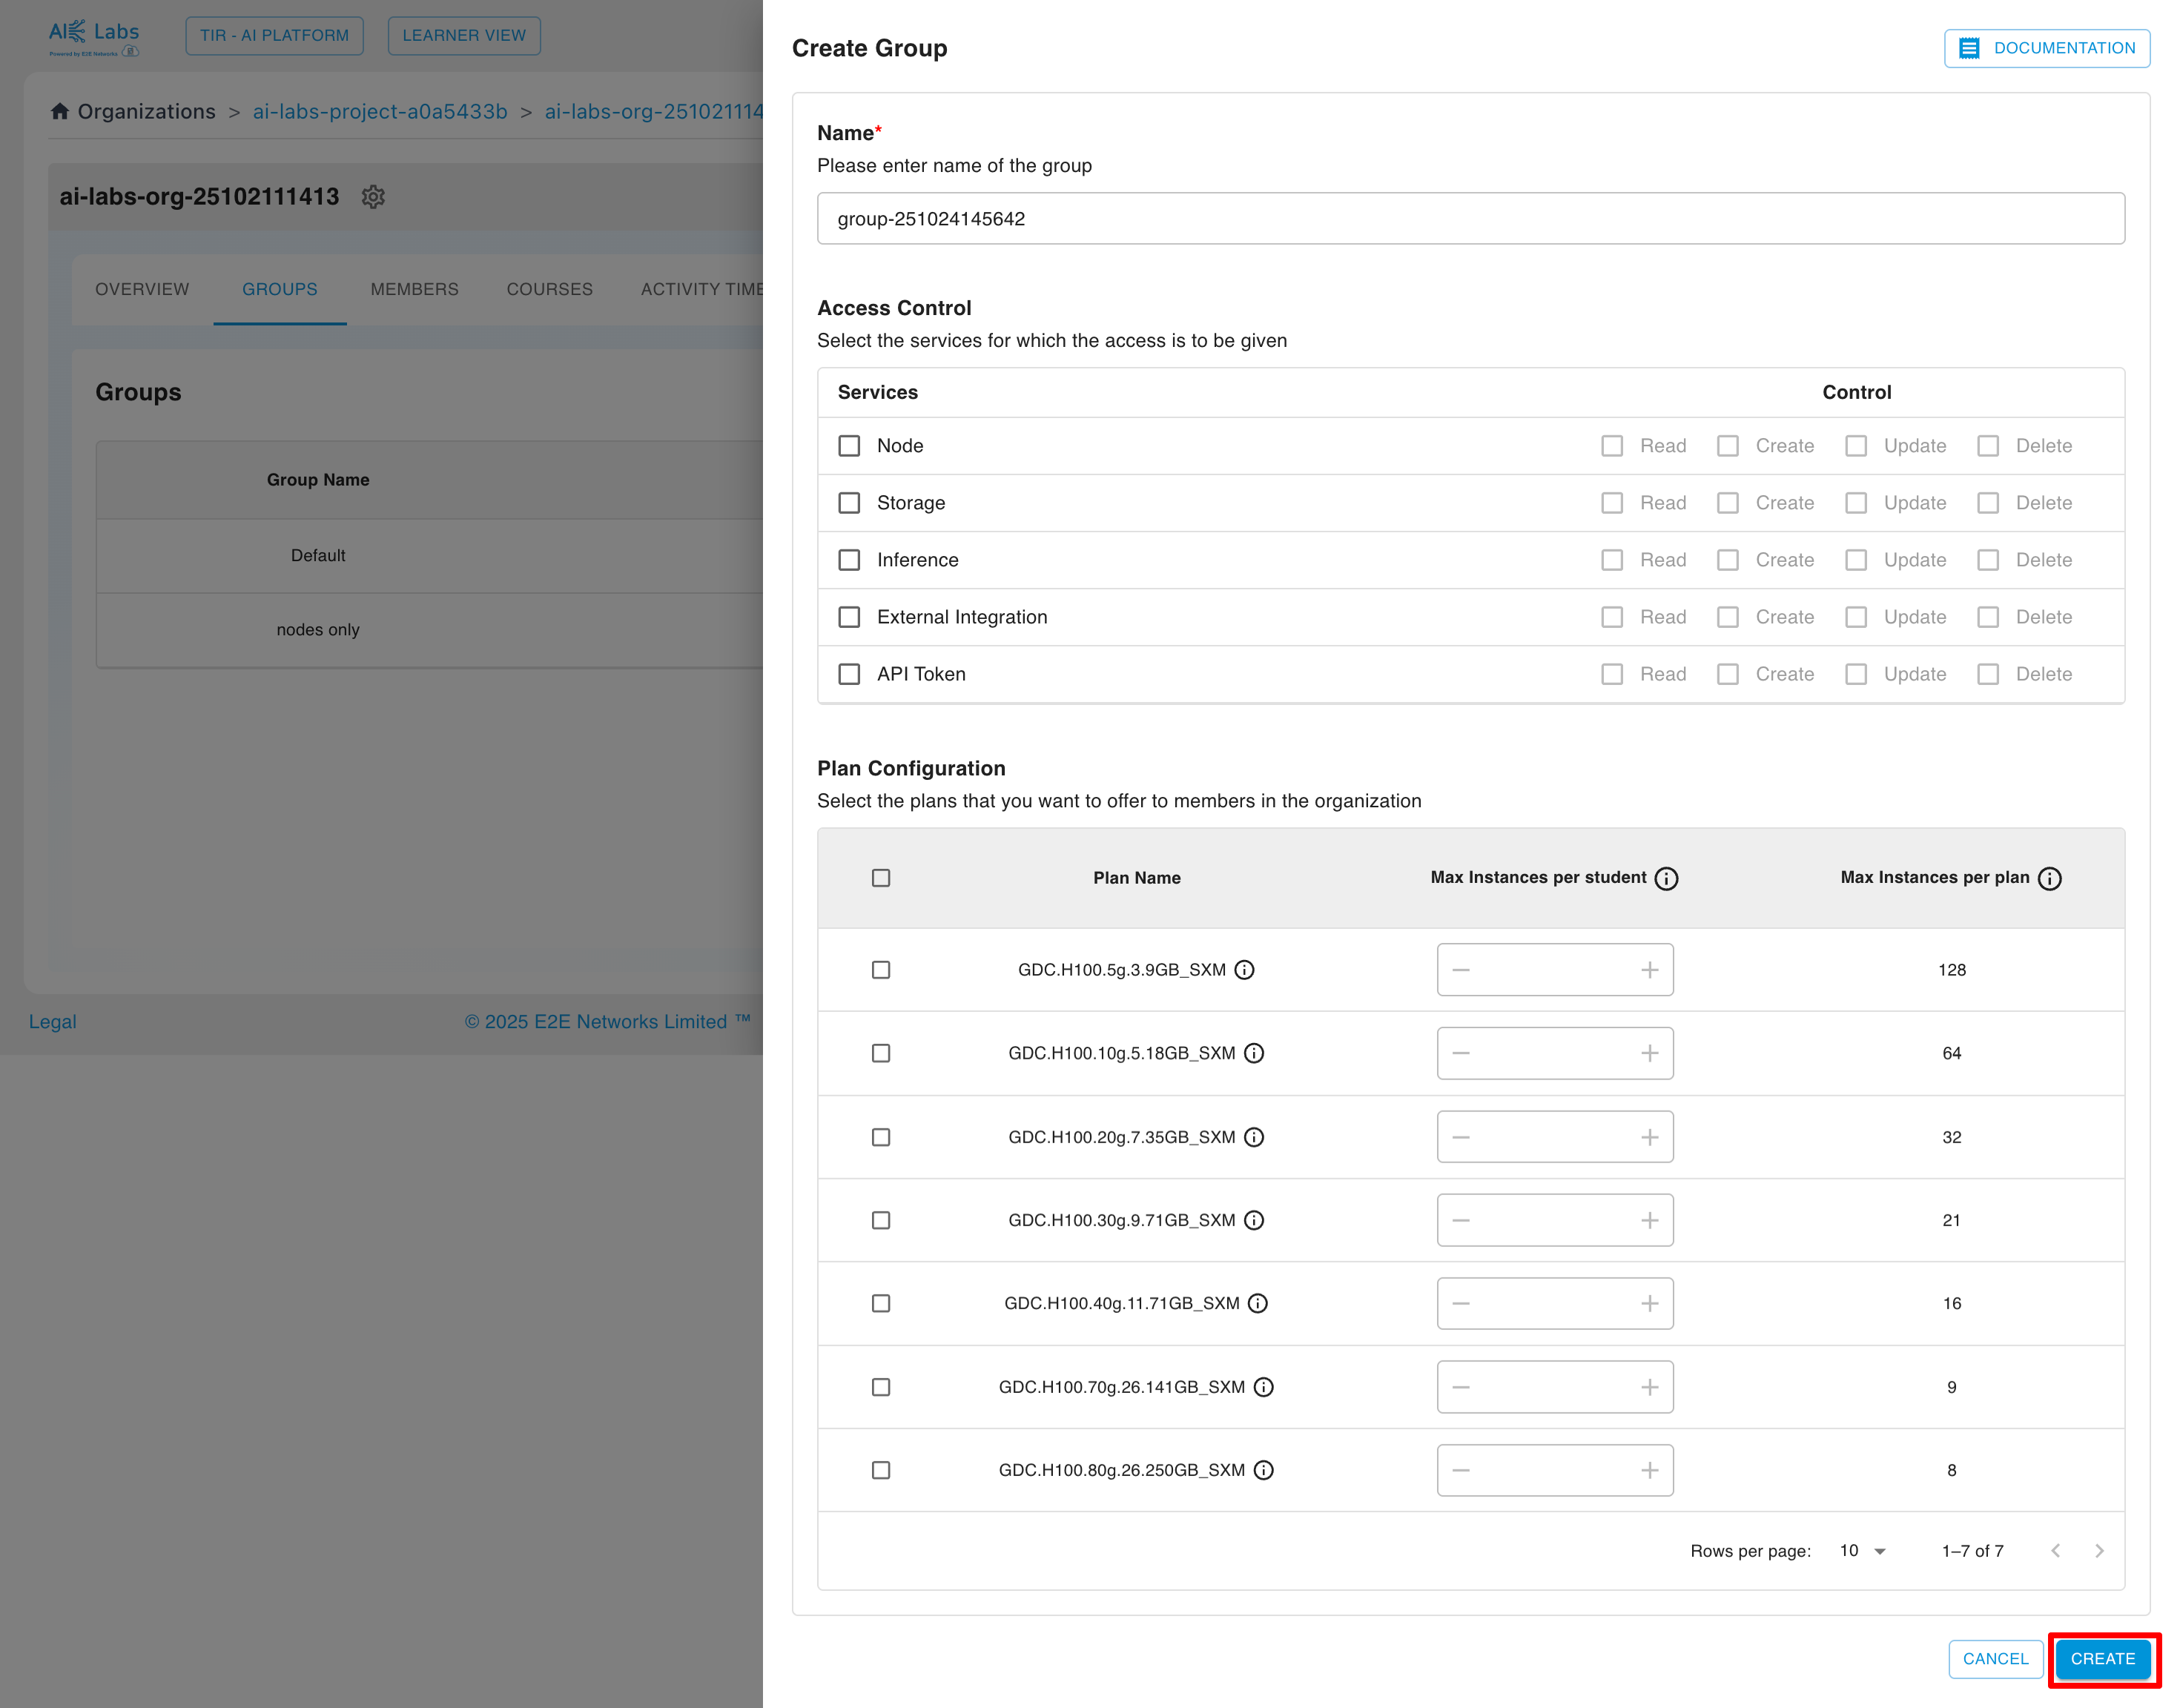
3. Configure Access Control (Services)
Under the Access Control section, select the services for which access should be granted.
Define the permission level for each service by checking the relevant boxes.
| Service | Read | Create | Update | Delete |
|---|---|---|---|---|
| Node | ☐ | ☐ | ☐ | ☐ |
| Storage | ☐ | ☐ | ☐ | ☐ |
| Inference | ☐ | ☐ | ☐ | ☐ |
| External Integration | ☐ | ☐ | ☐ | ☐ |
| API Token | ☐ | ☐ | ☐ | ☐ |
4. Configure Plan (Resource Allocation)
In the Plan Configuration section, select the plans that will be available to group members.
For each selected plan (e.g., GDC.H100.5g.5.9GB_SXM), configure:
- Max Instances per Student – Maximum number of instances a single member of this group can launch for the plan.
- Max Instances per Plan – Total number of instances of the plan that all members combined can launch within this group.
5. Finalize Creation
After reviewing all settings, click CREATE to save and activate the new group.
Only users with Admin permissions can create, edit, or delete groups within an AI Labs Organization.
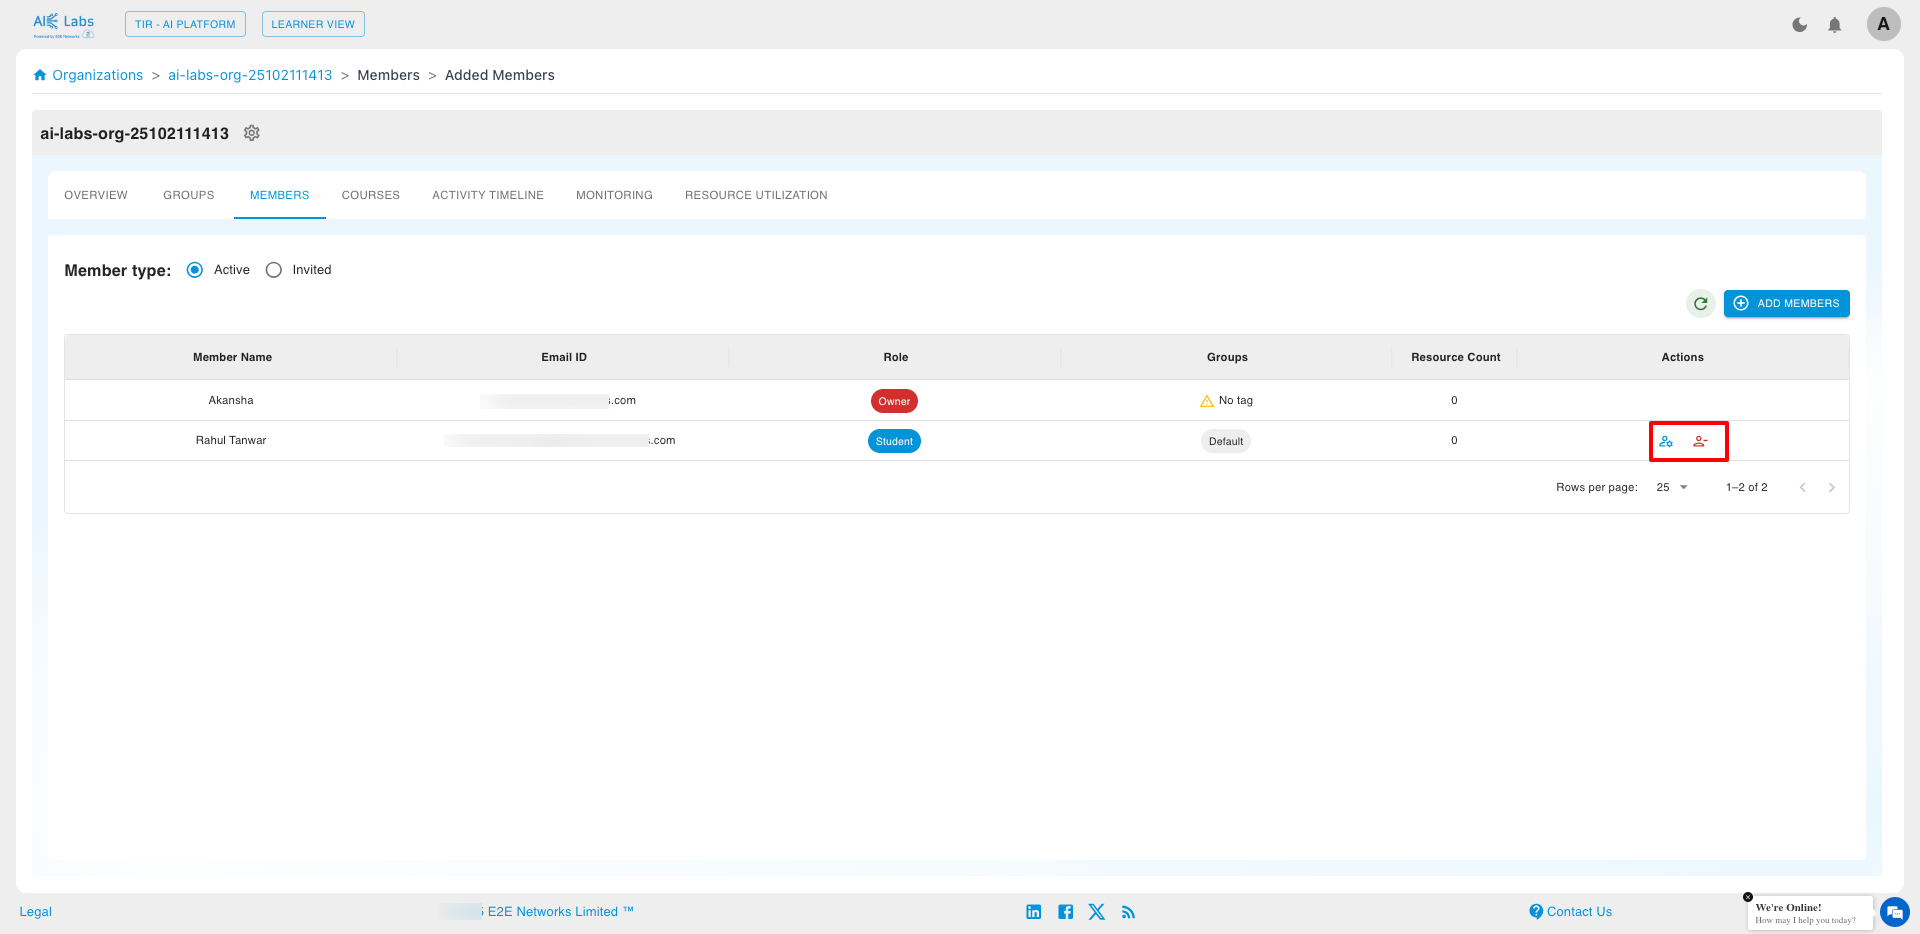
Members Administration
Admins can add, manage, or remove members (students) from the Organization.
To add new members, click Add Member and invite users by their email address.
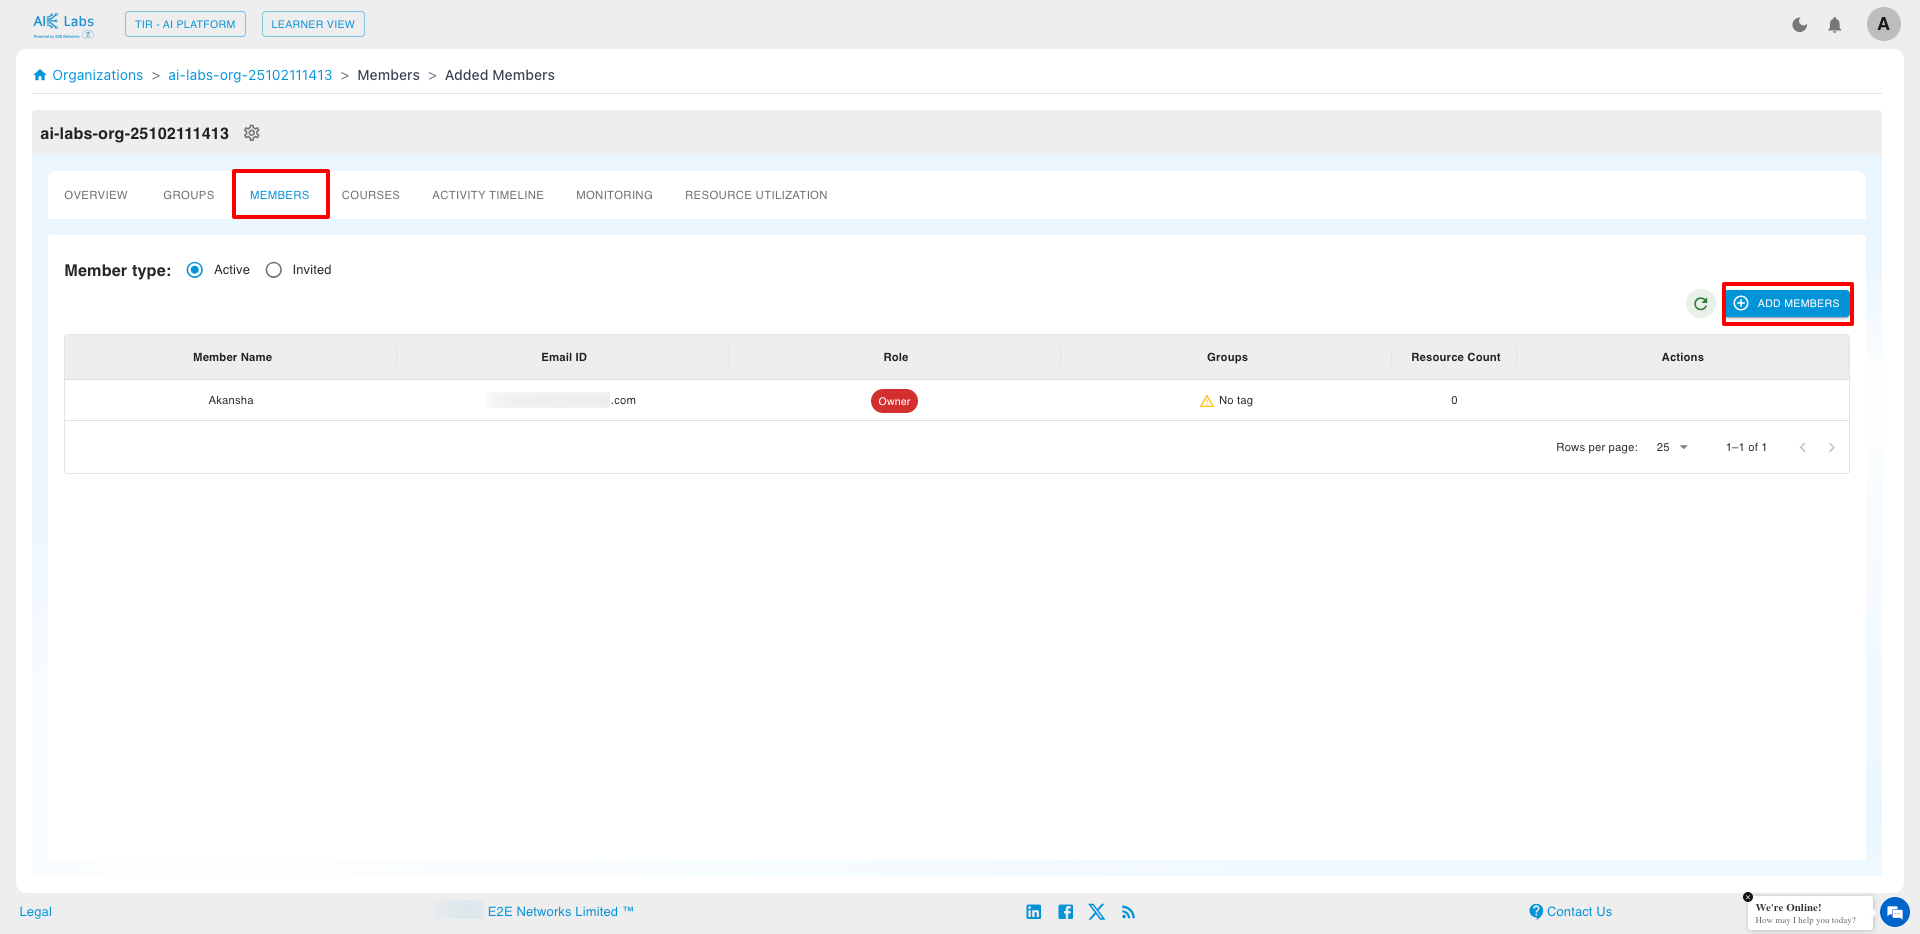
While adding members necessary permissions are granted to members. Advanced options can be used to assign specific policies.
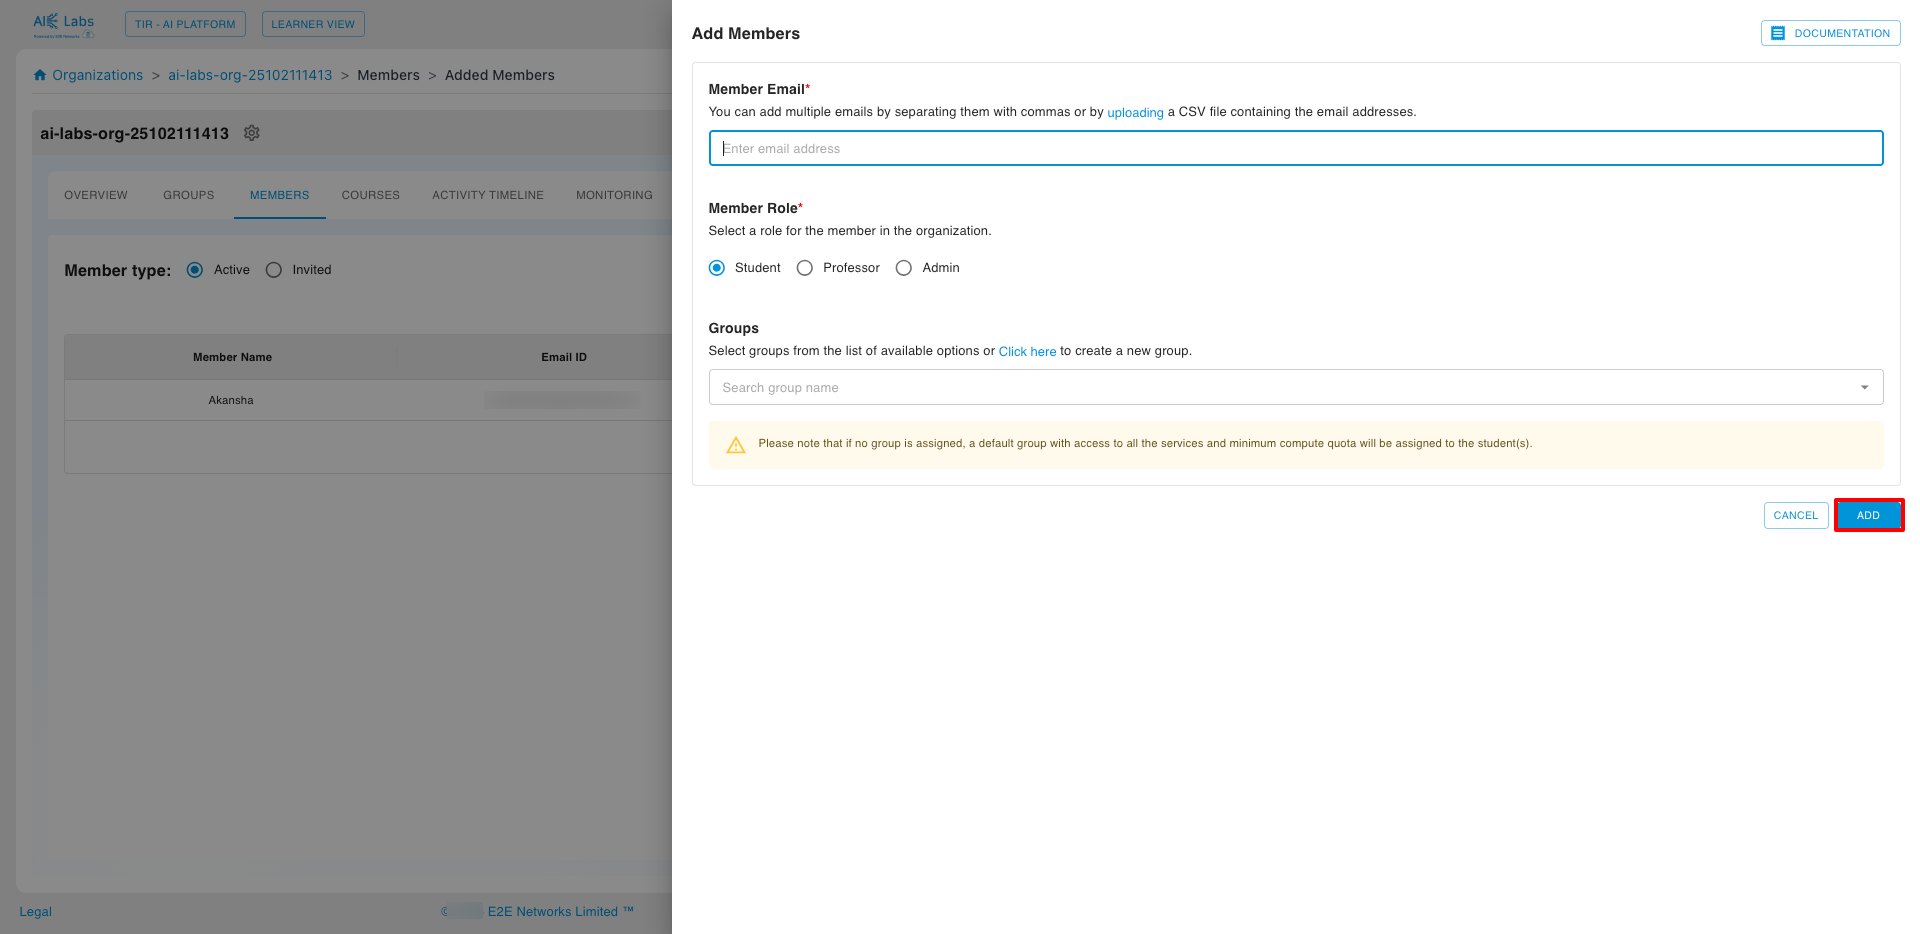
Admins can add one or multiple members at once by uploading a CSV file and optionally selecting Advanced Options for policy assignment.
All student accounts can be managed through the Actions menu in the Students Listing.
Courses Management
Admins/Professors can access the Courses section to view, add, or manage all course documents associated with the Organization.
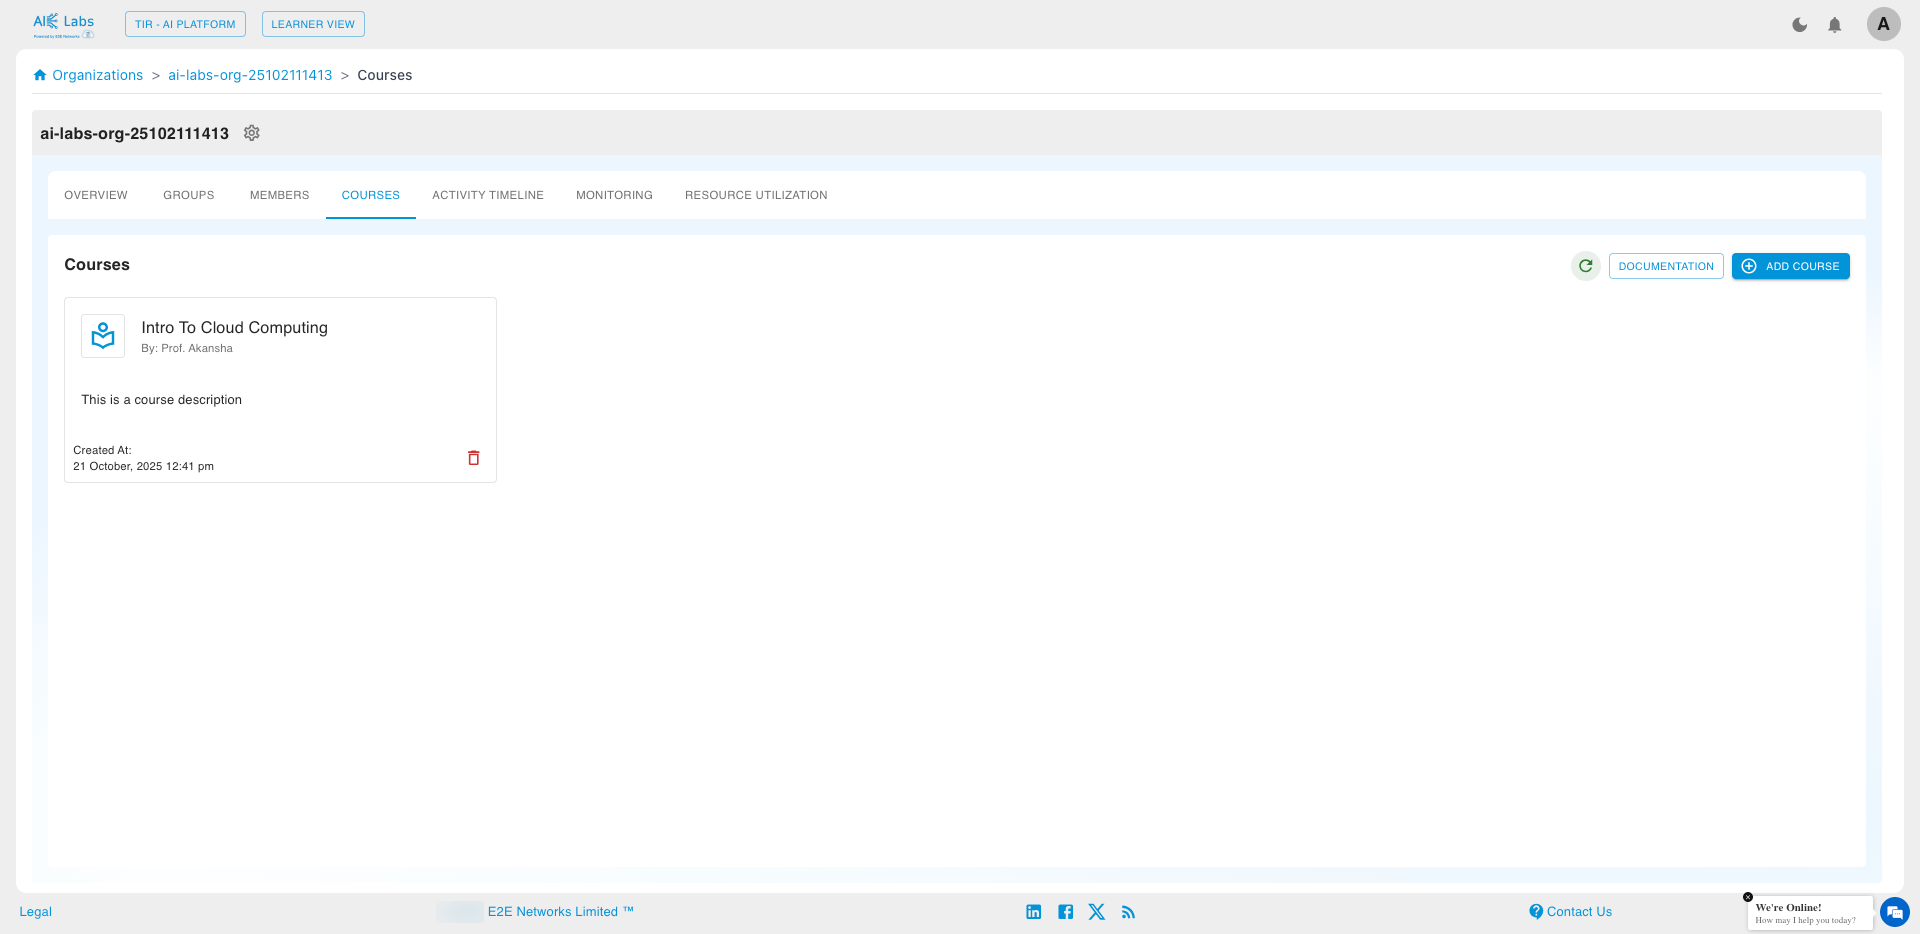
Enter the Course name, description, and Professor details to create Course.

Admins/Professors can update the Course details by clicking on the Edit button.
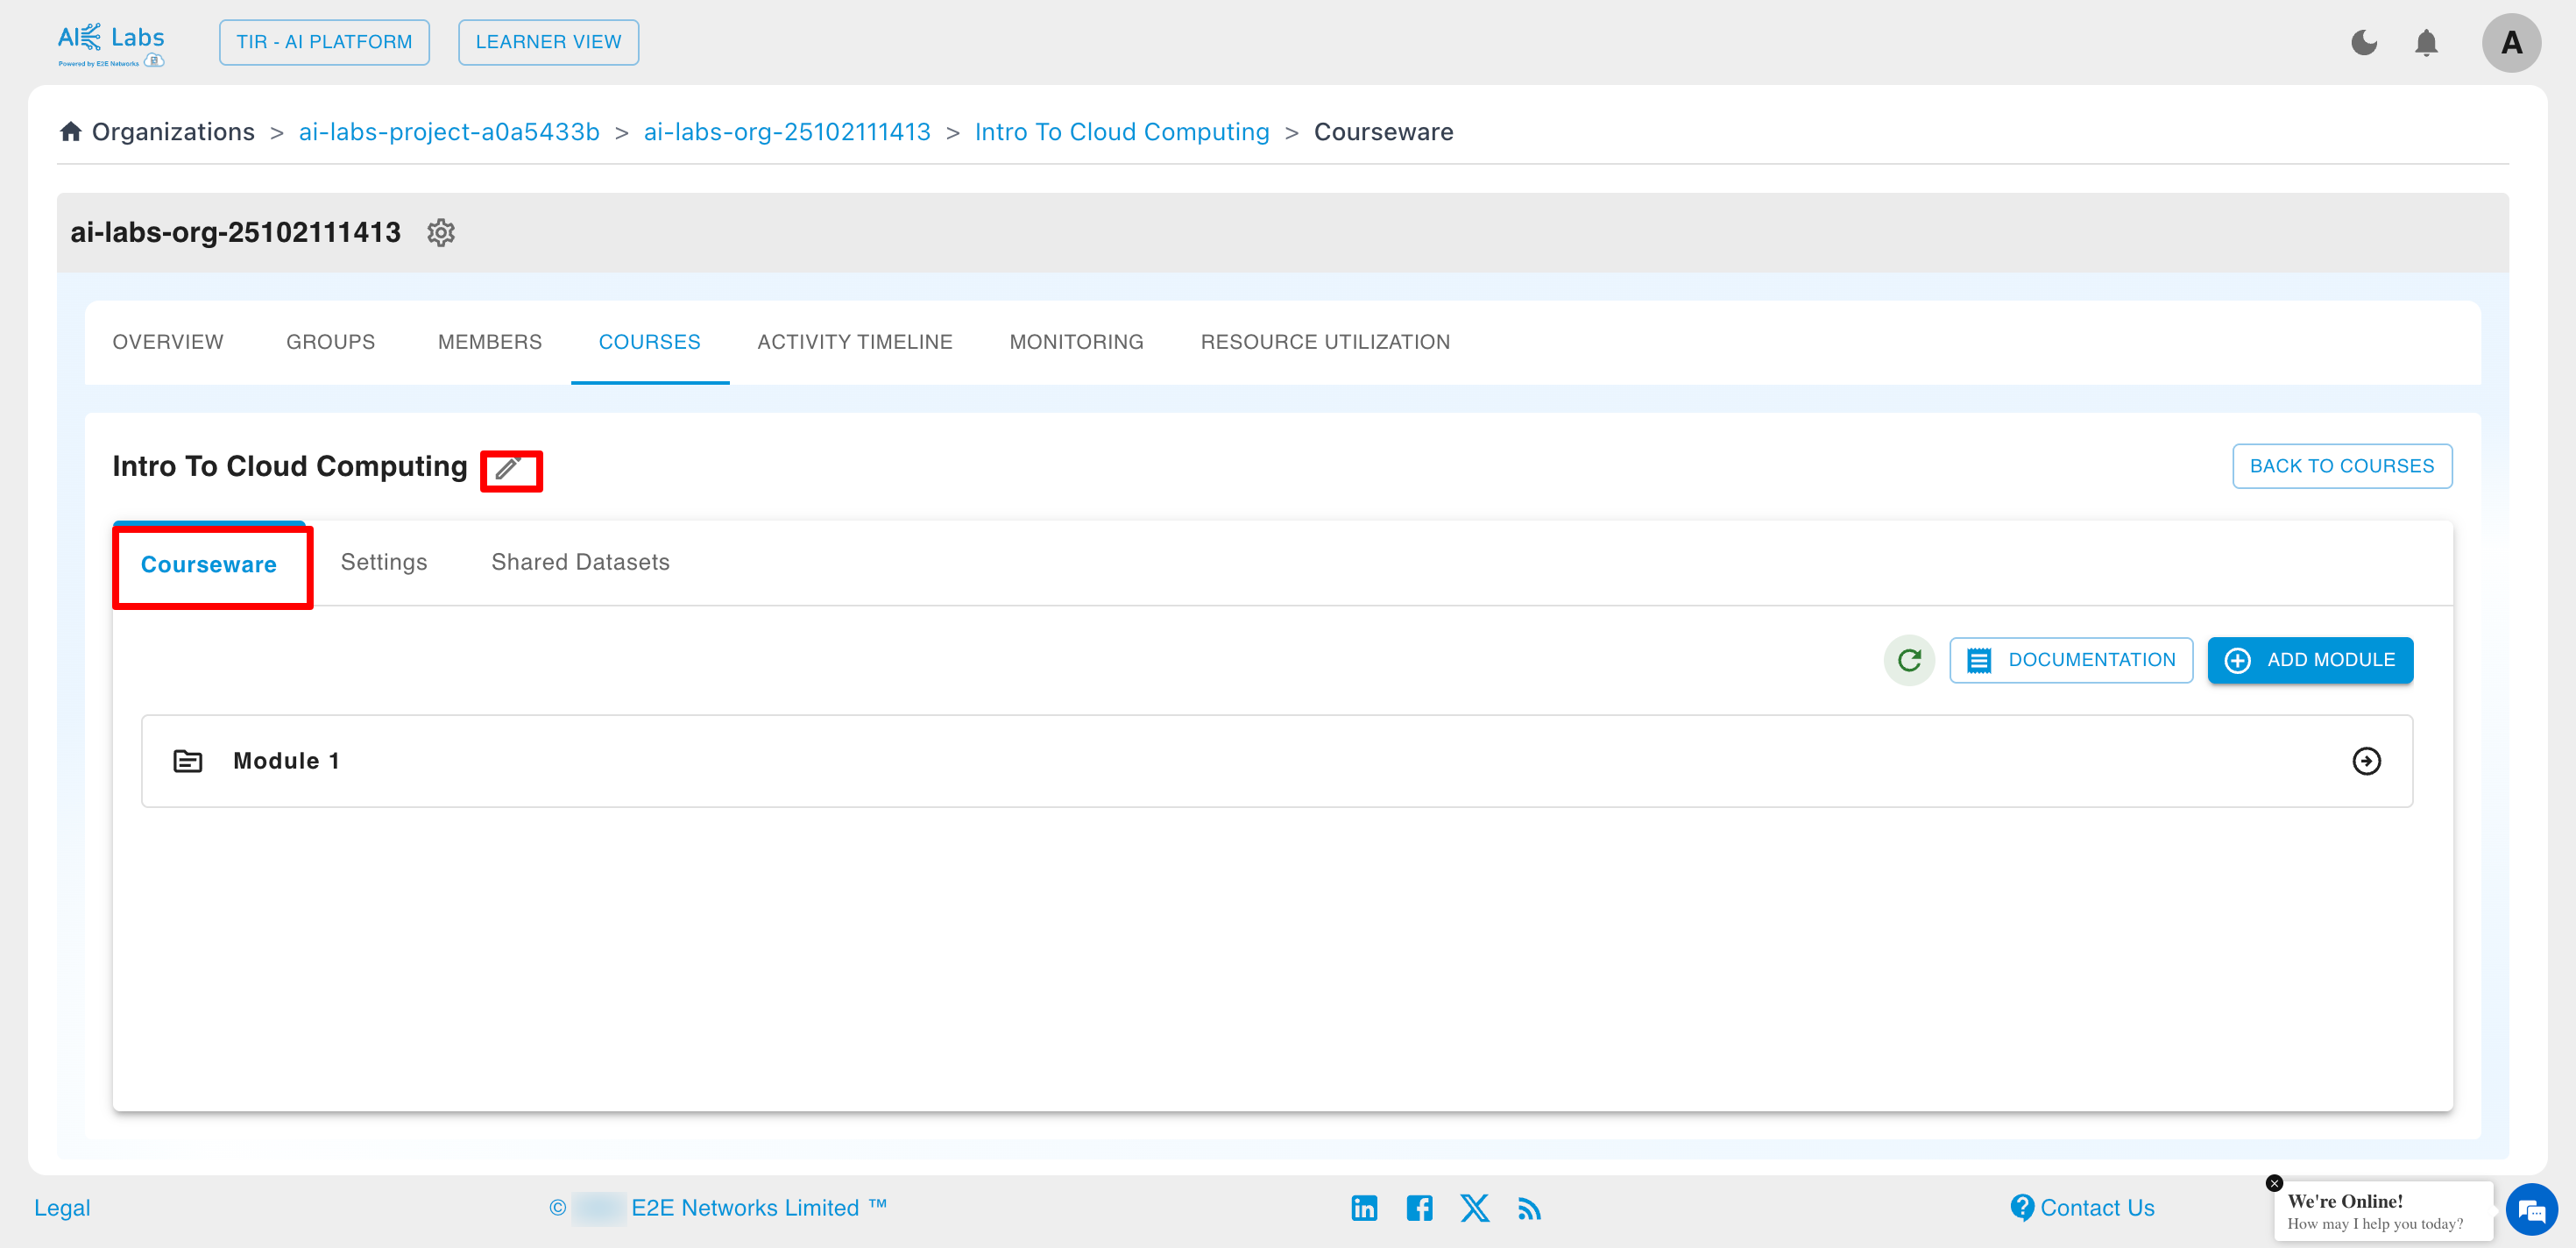
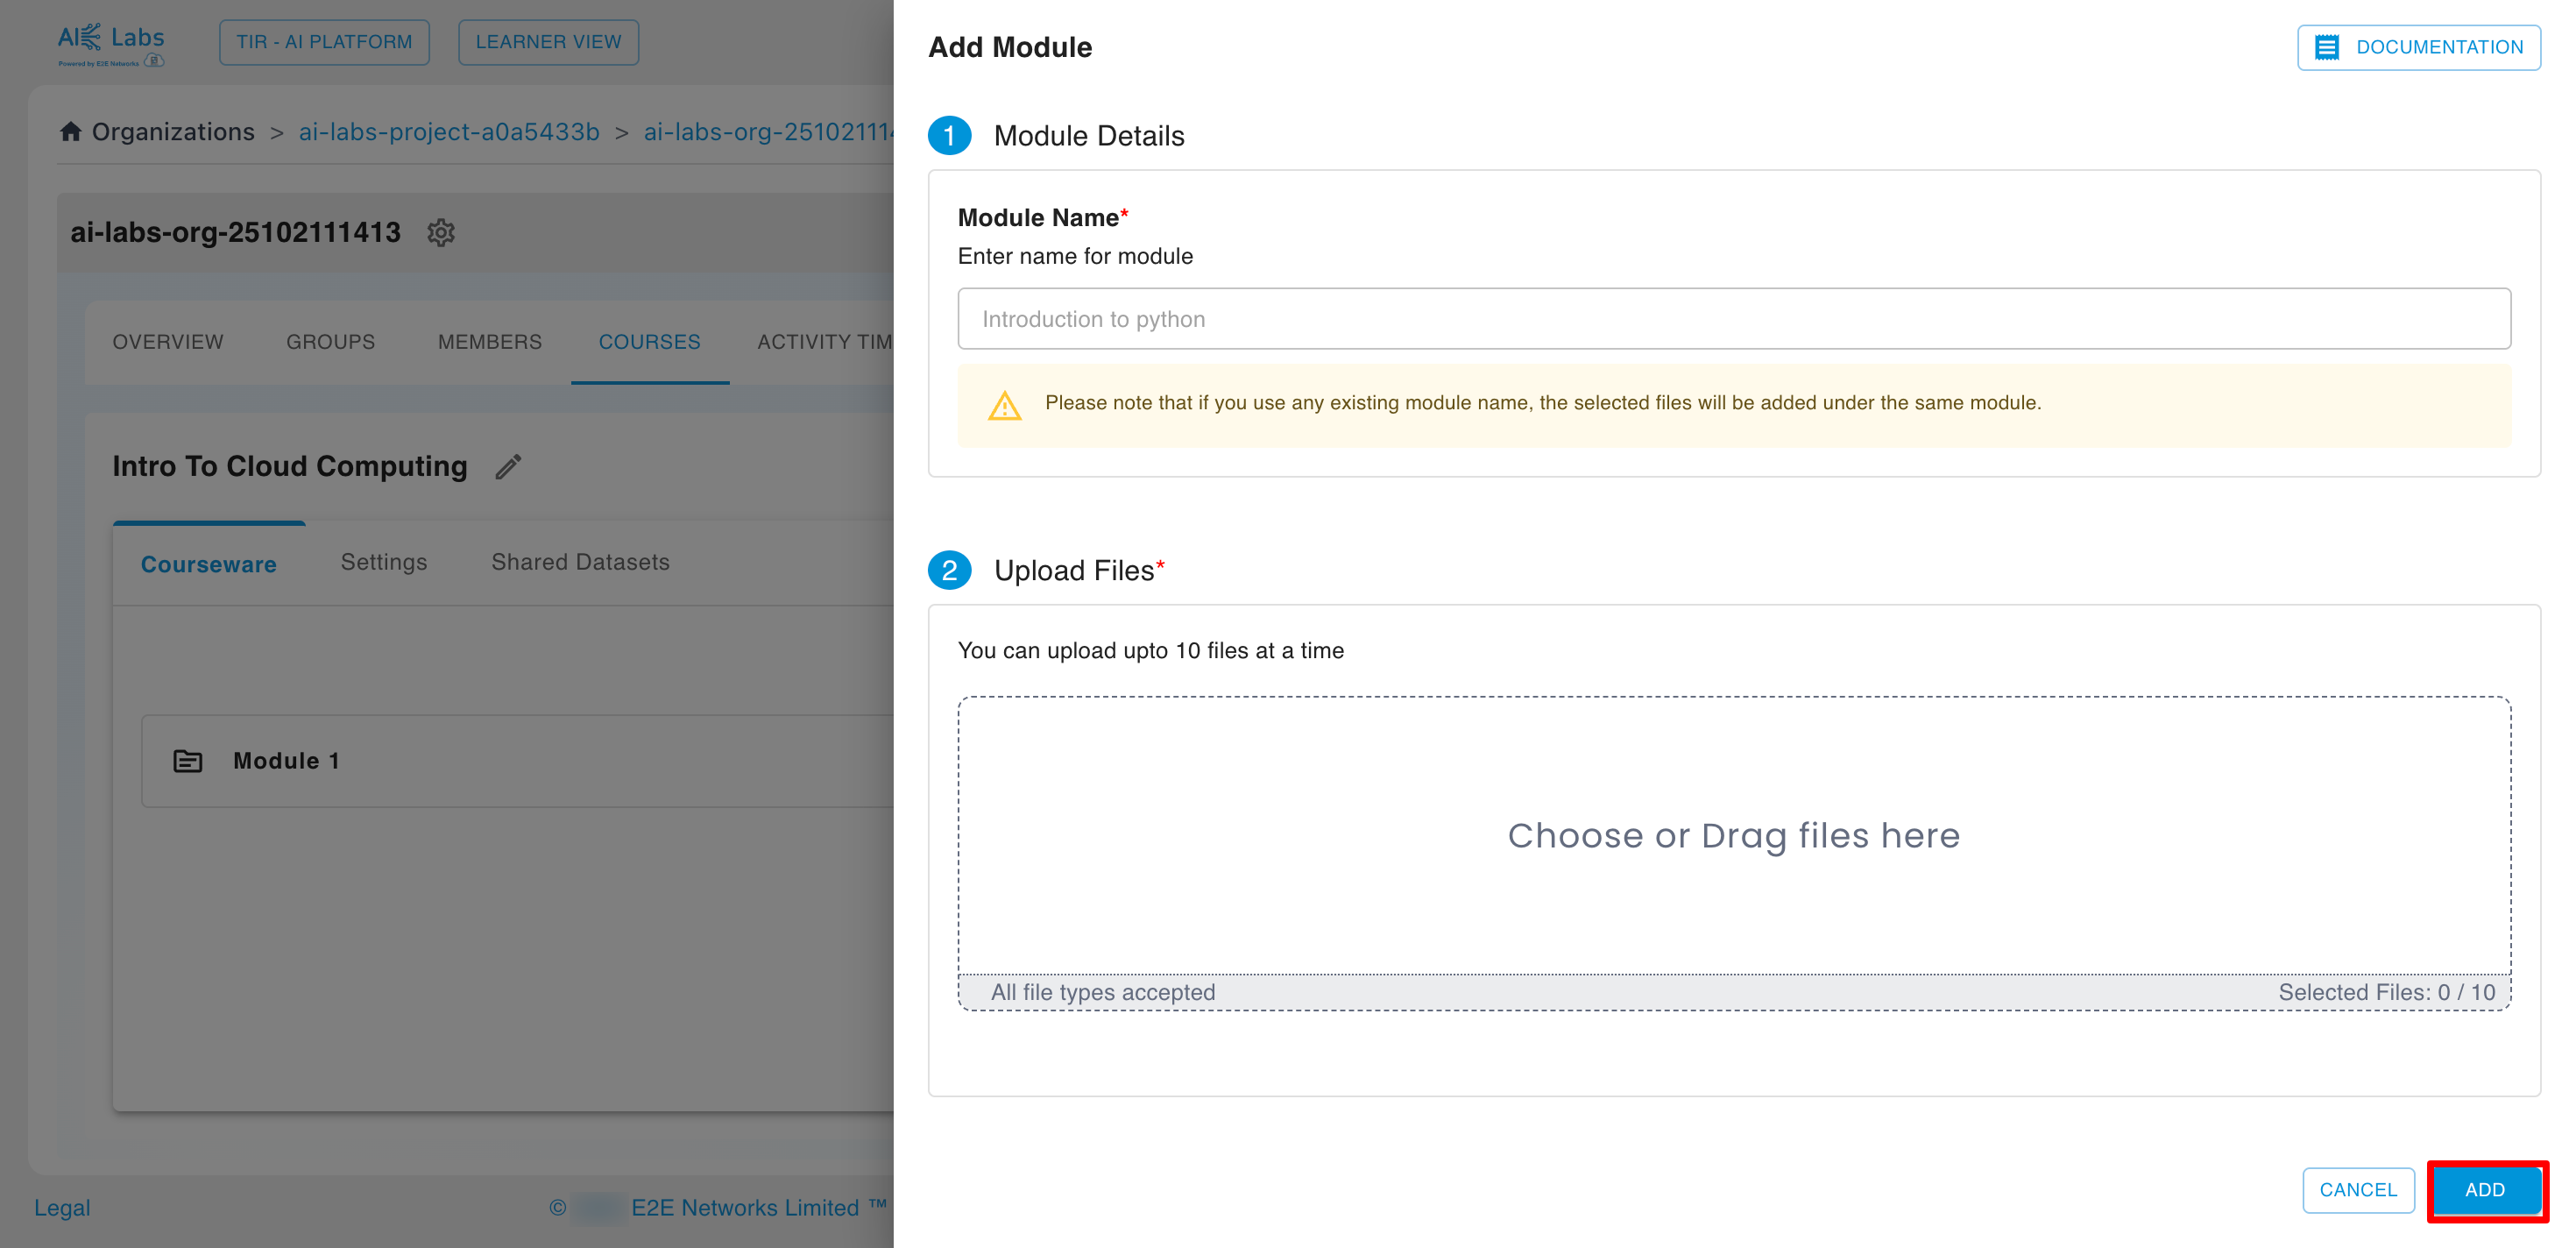
Admins/Professors can module by clicking on the Add Module button.
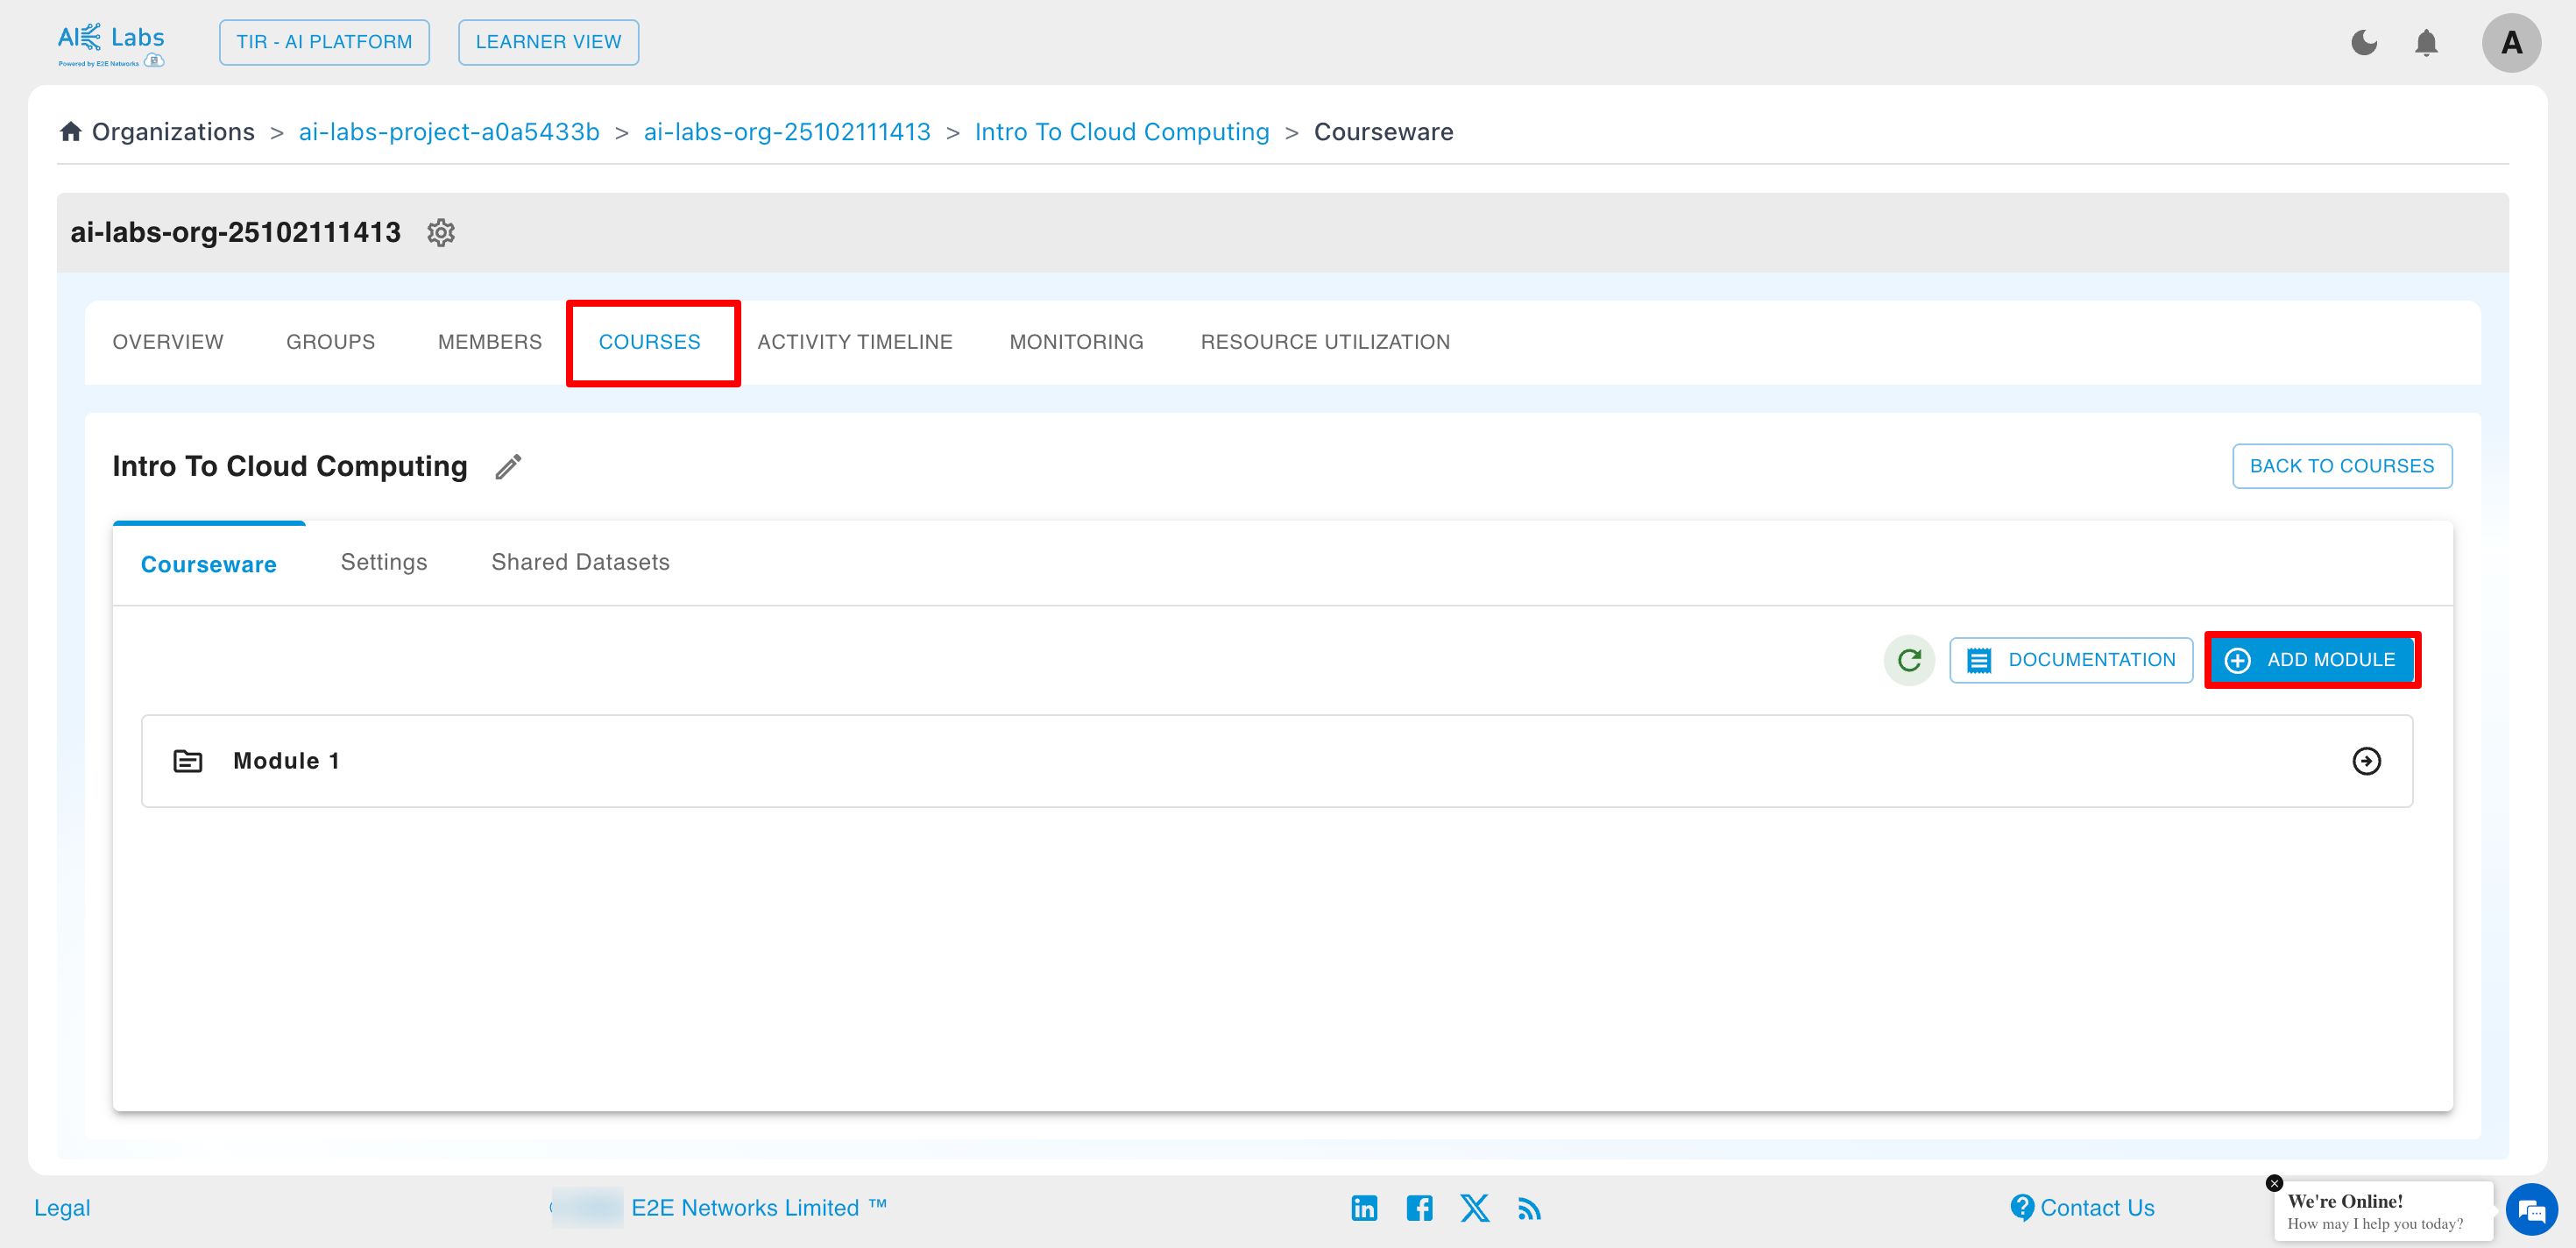
After clicking, a modal appears that asks for module name and files to be uploaded. Then click on Add button.
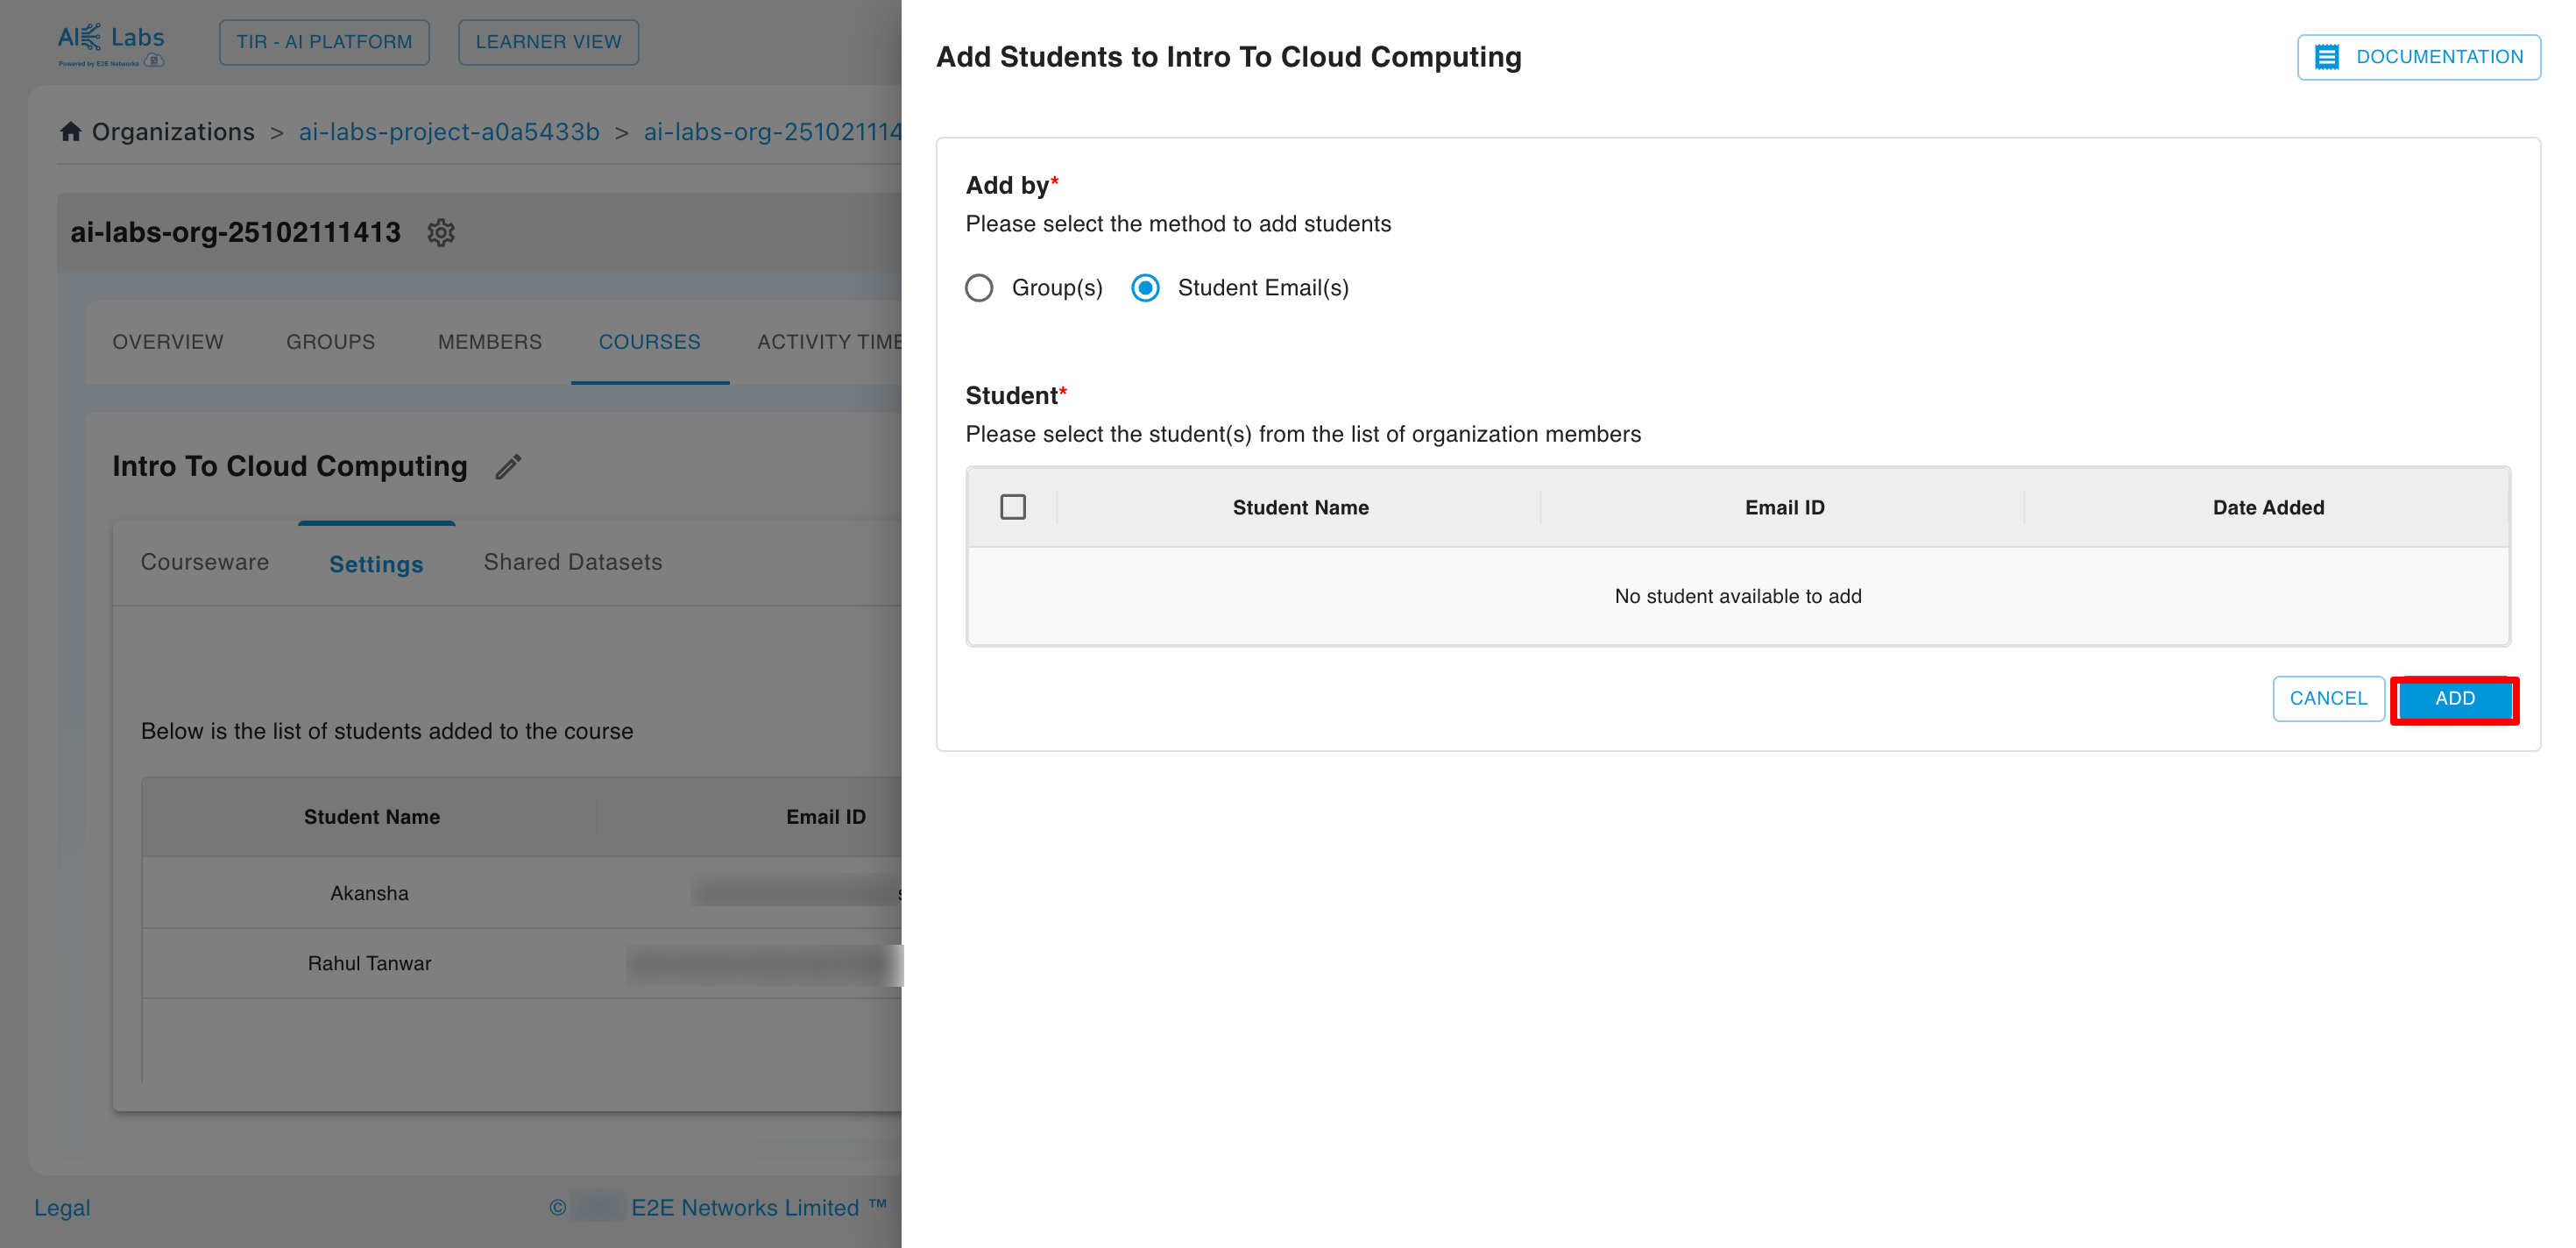
From the Settings tab, Admins can add or remove student from the Organization.
Only the members added in the settings tab can access the respective course
There are two options to add Students:
- By Group
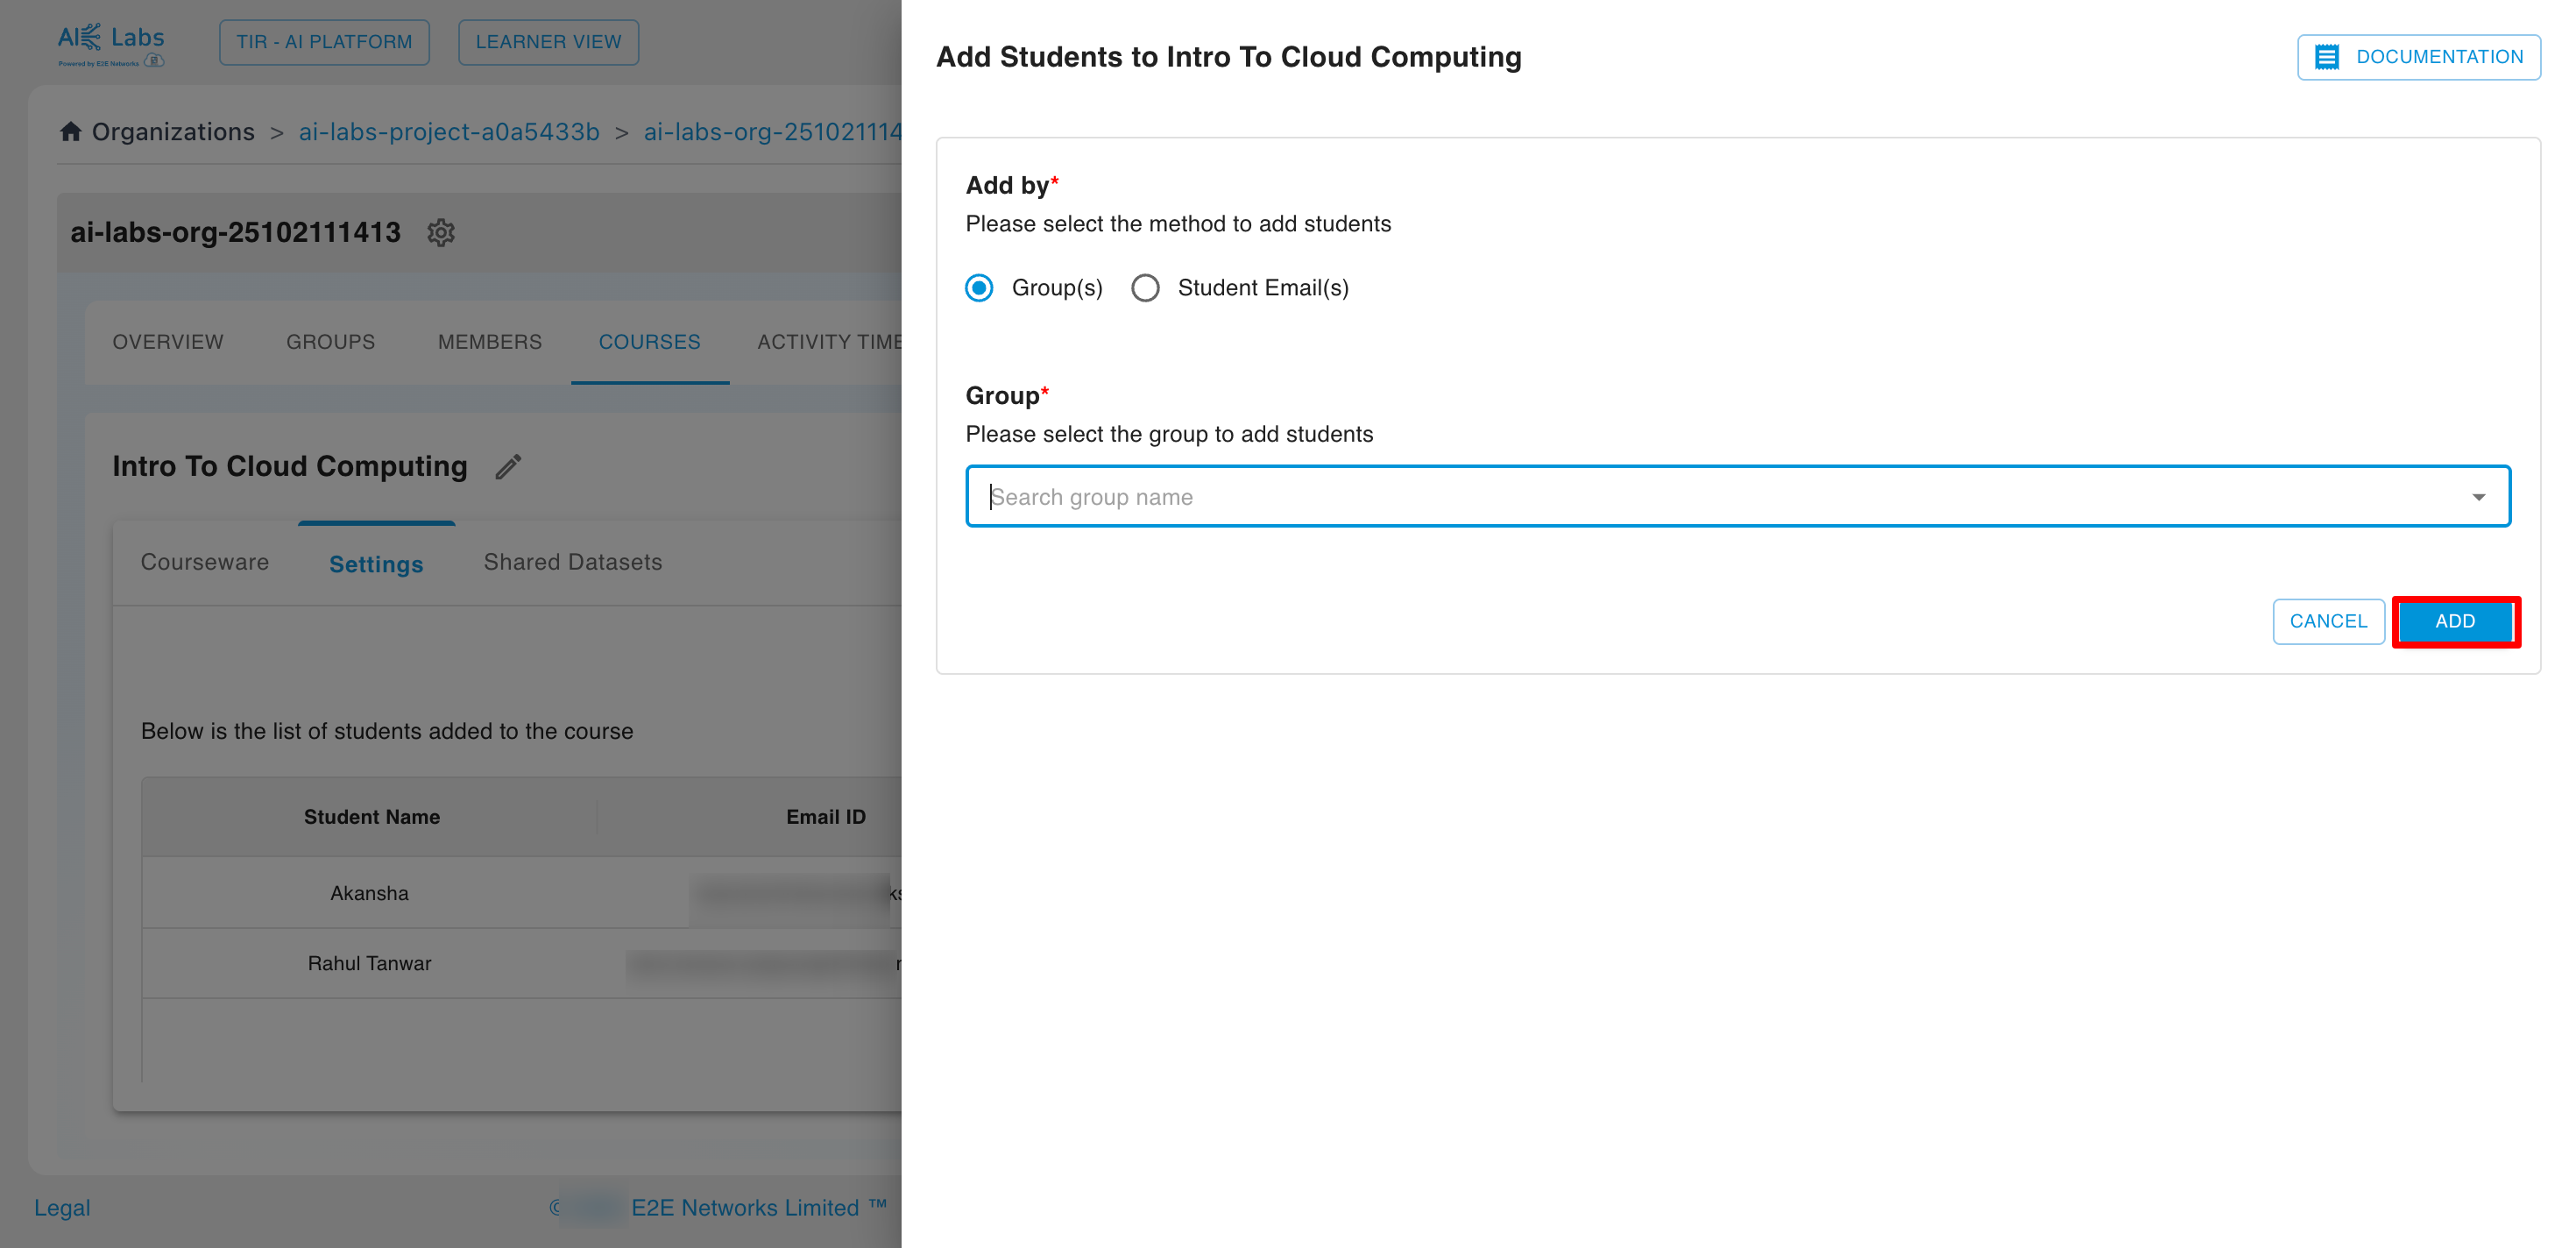
- By Student mail
From the Shared Datasets tab, Admin can see the list of datasets created and can create a new one by clicking on Create Dataset button.
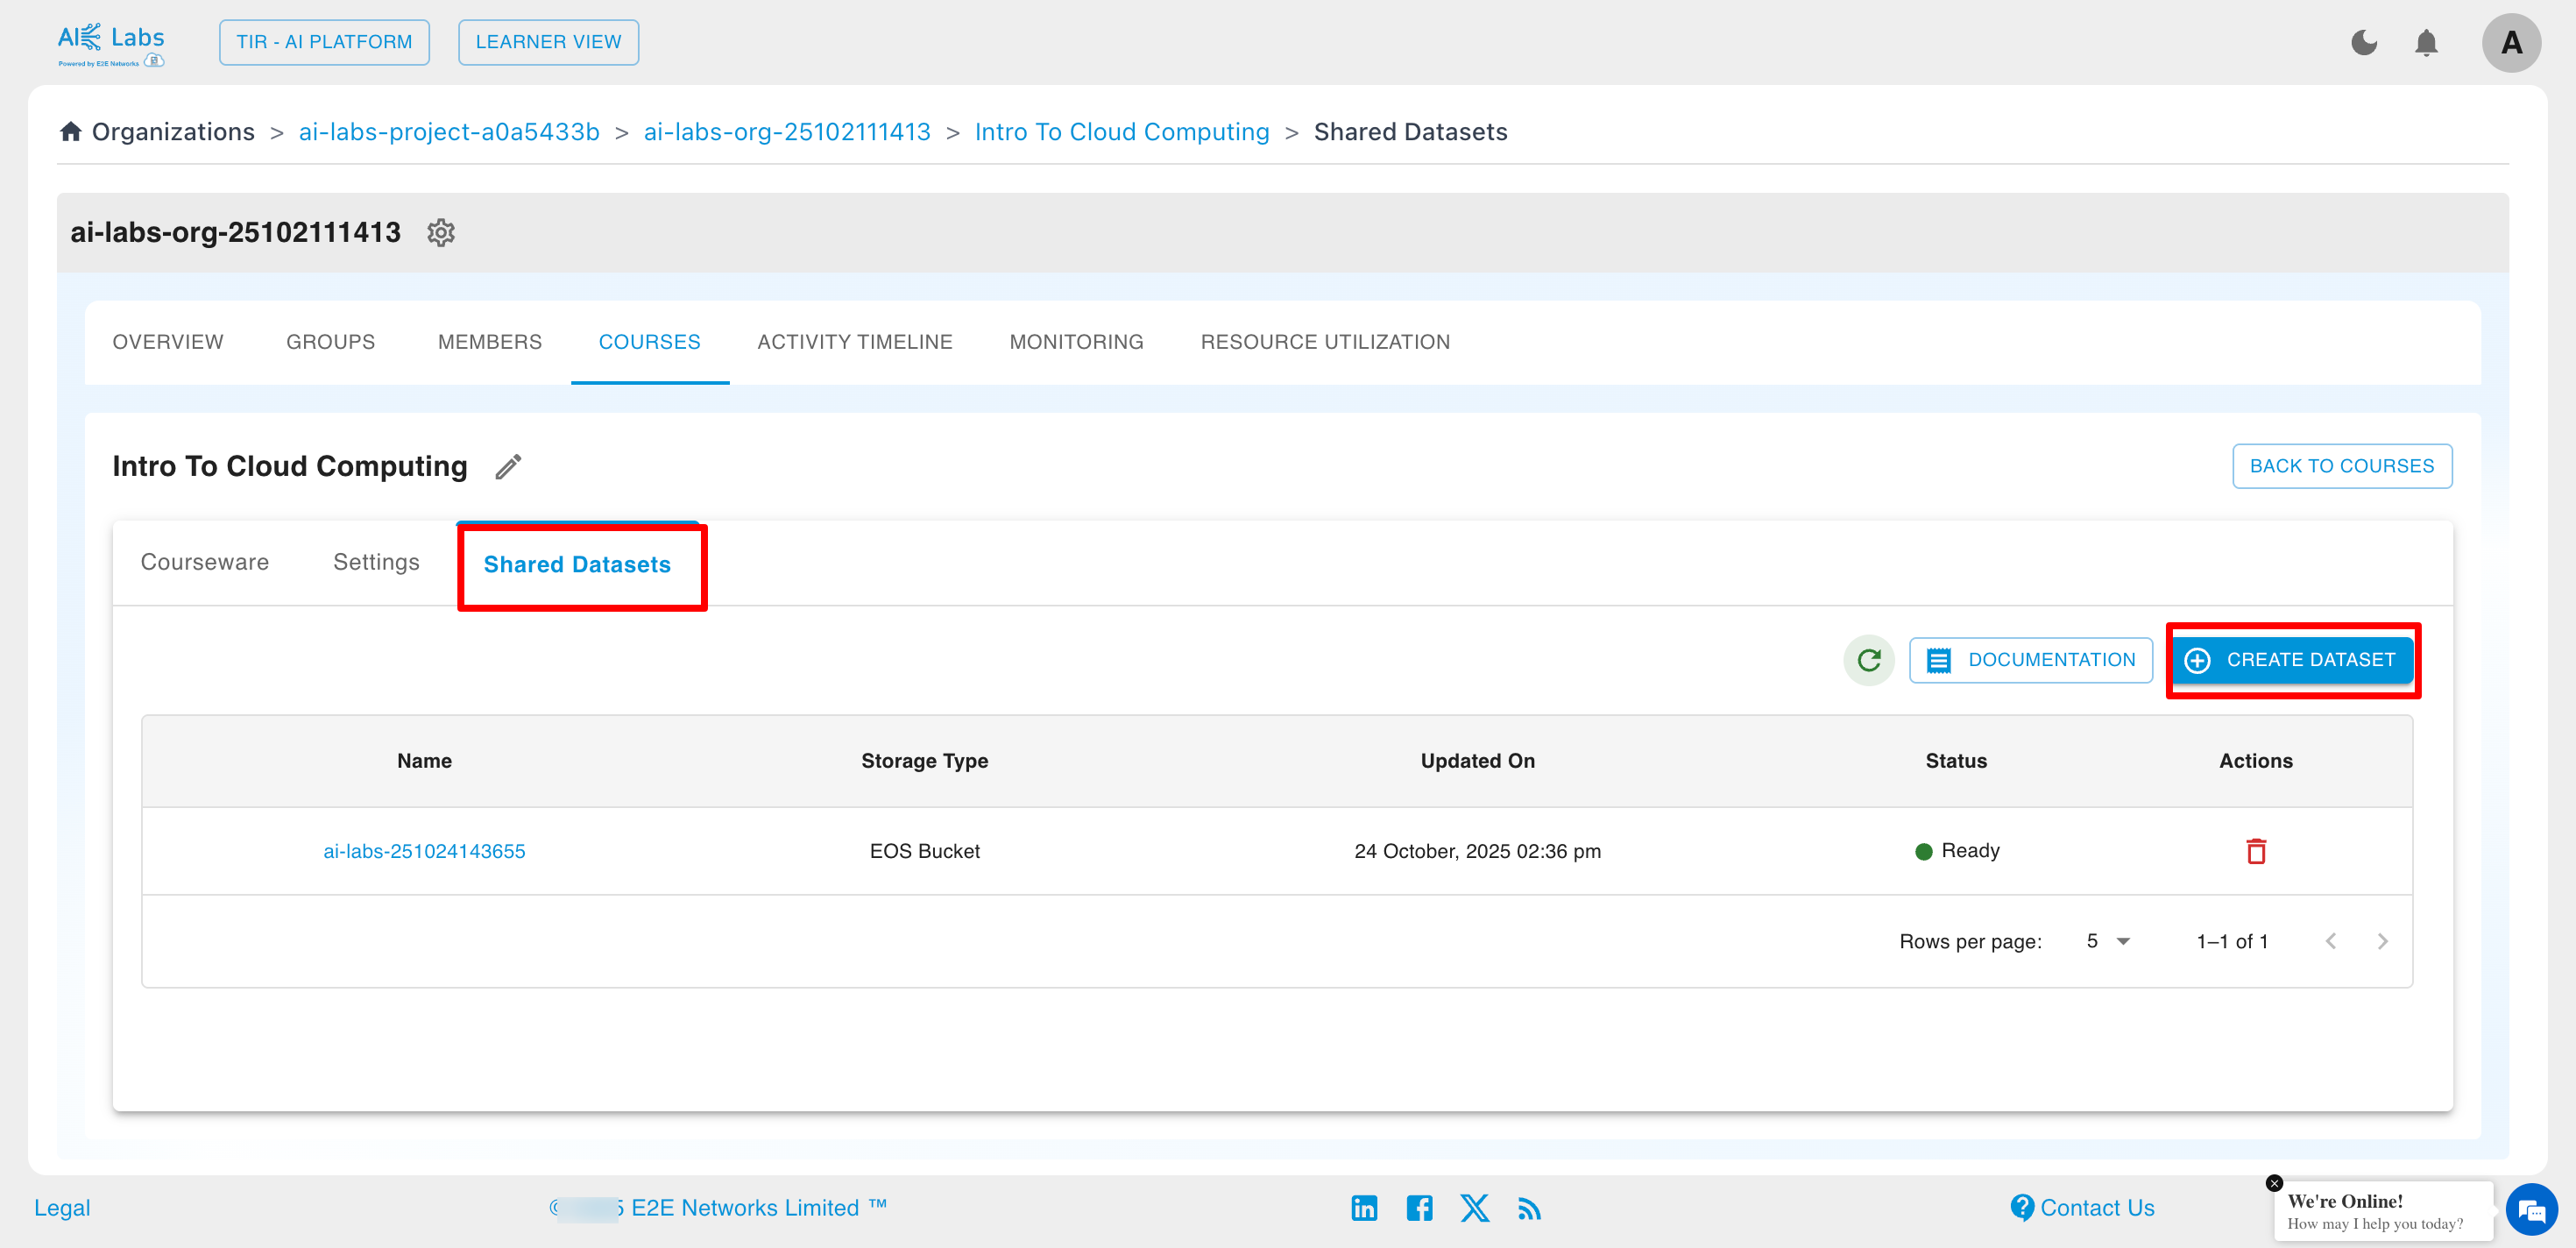
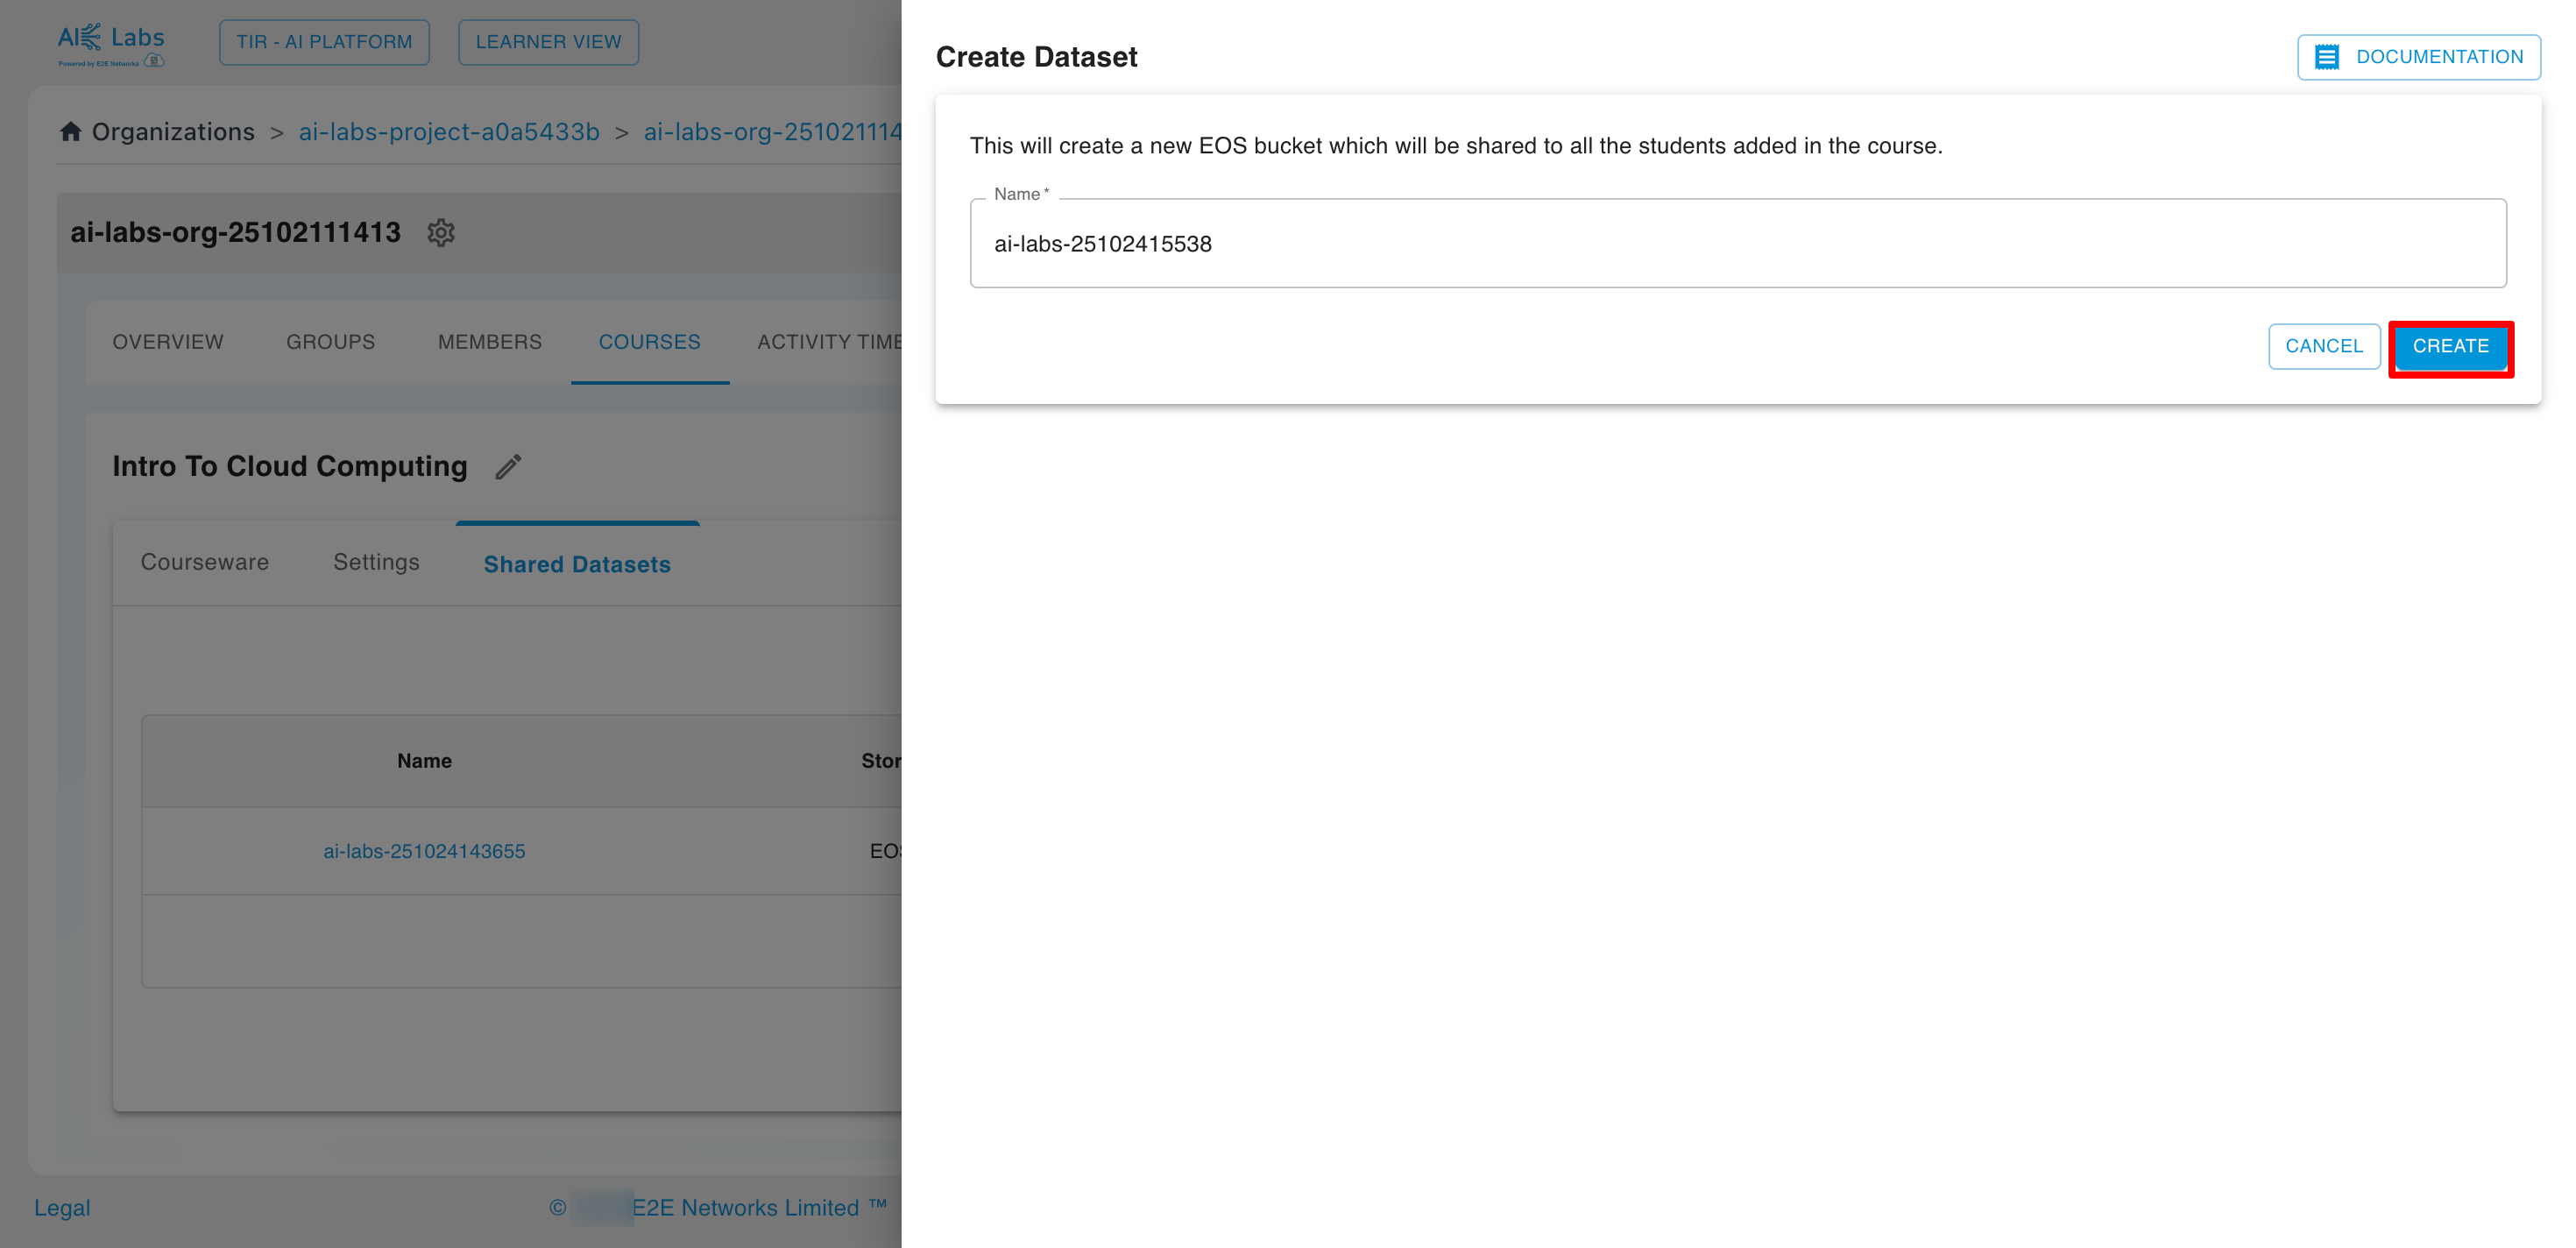
Shared Datasets will be shared to all the students who have access to the course.
Activity Timeline
Admins/Professors can track all activity logs for the Organization from the Activity Timeline tab.

This helps monitor actions such as resource launches, member additions, and configuration changes.
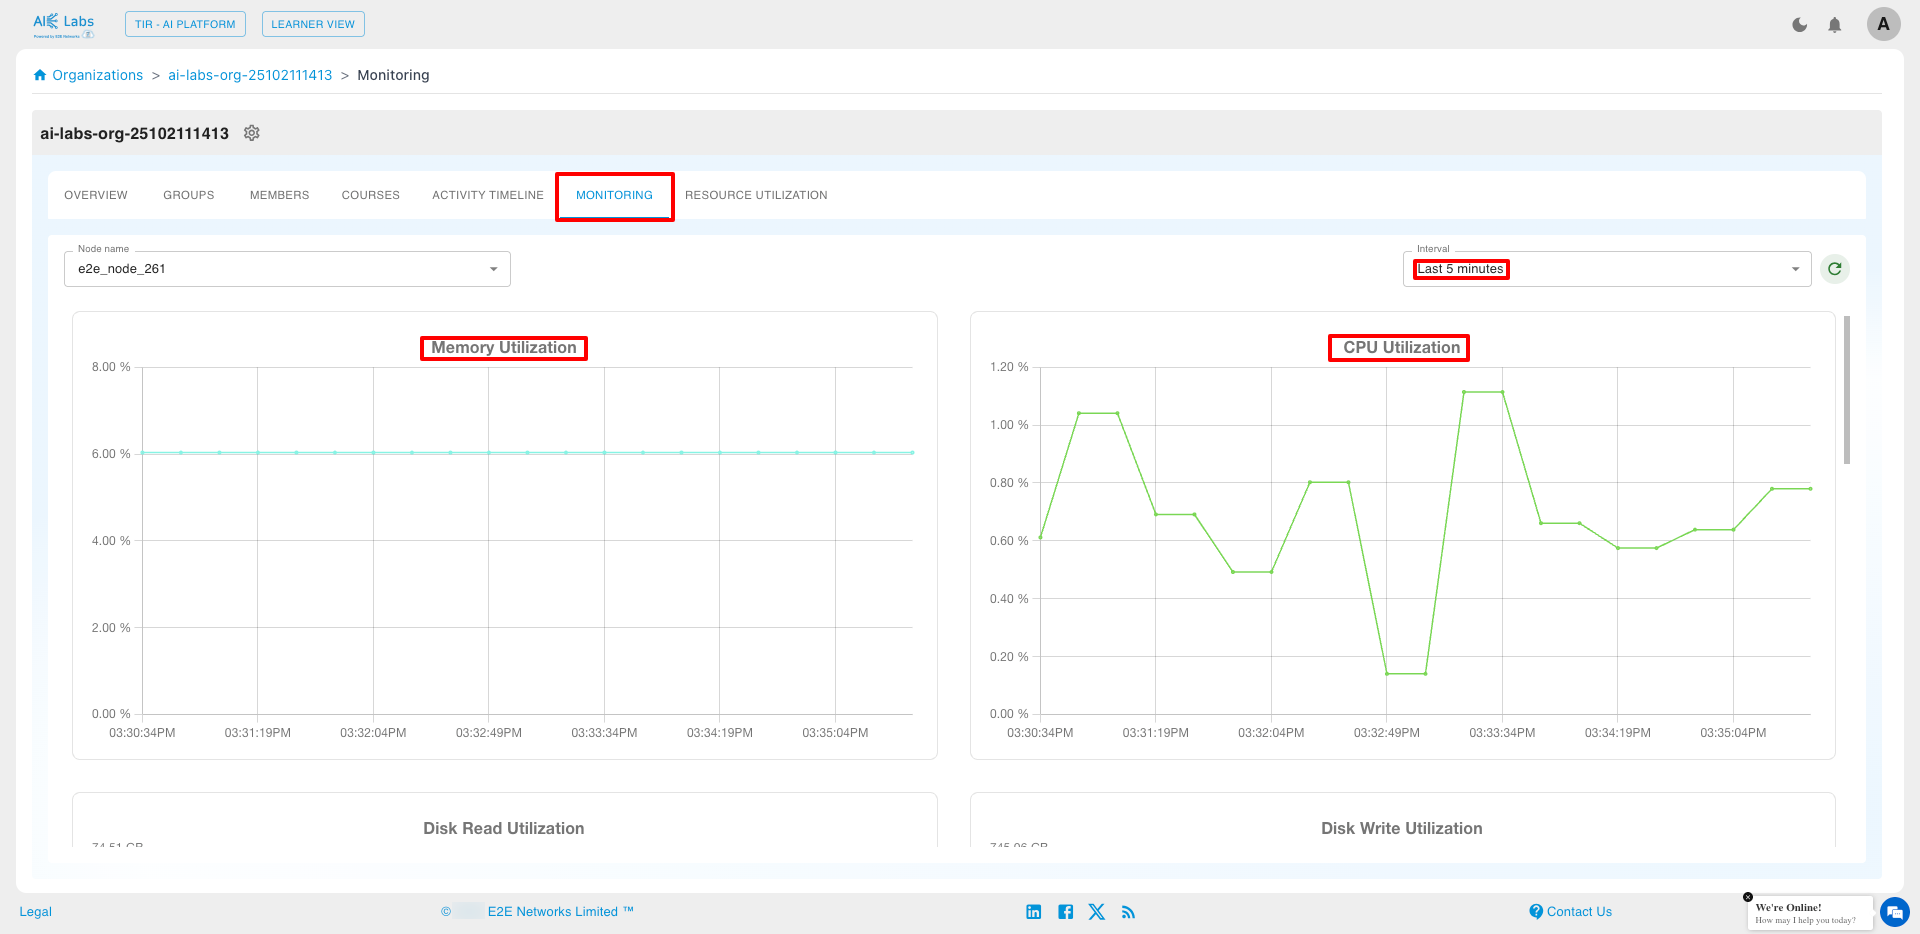
Monitoring
Admins/Professors can access the Monitoring tab for real-time insights into:
- Resource usage
- Performance metrics
- System health
across the entire Organization.
Resource Utilization
Admins/Professors can view complete resource utilization for all members under the Resource Utilization tab.
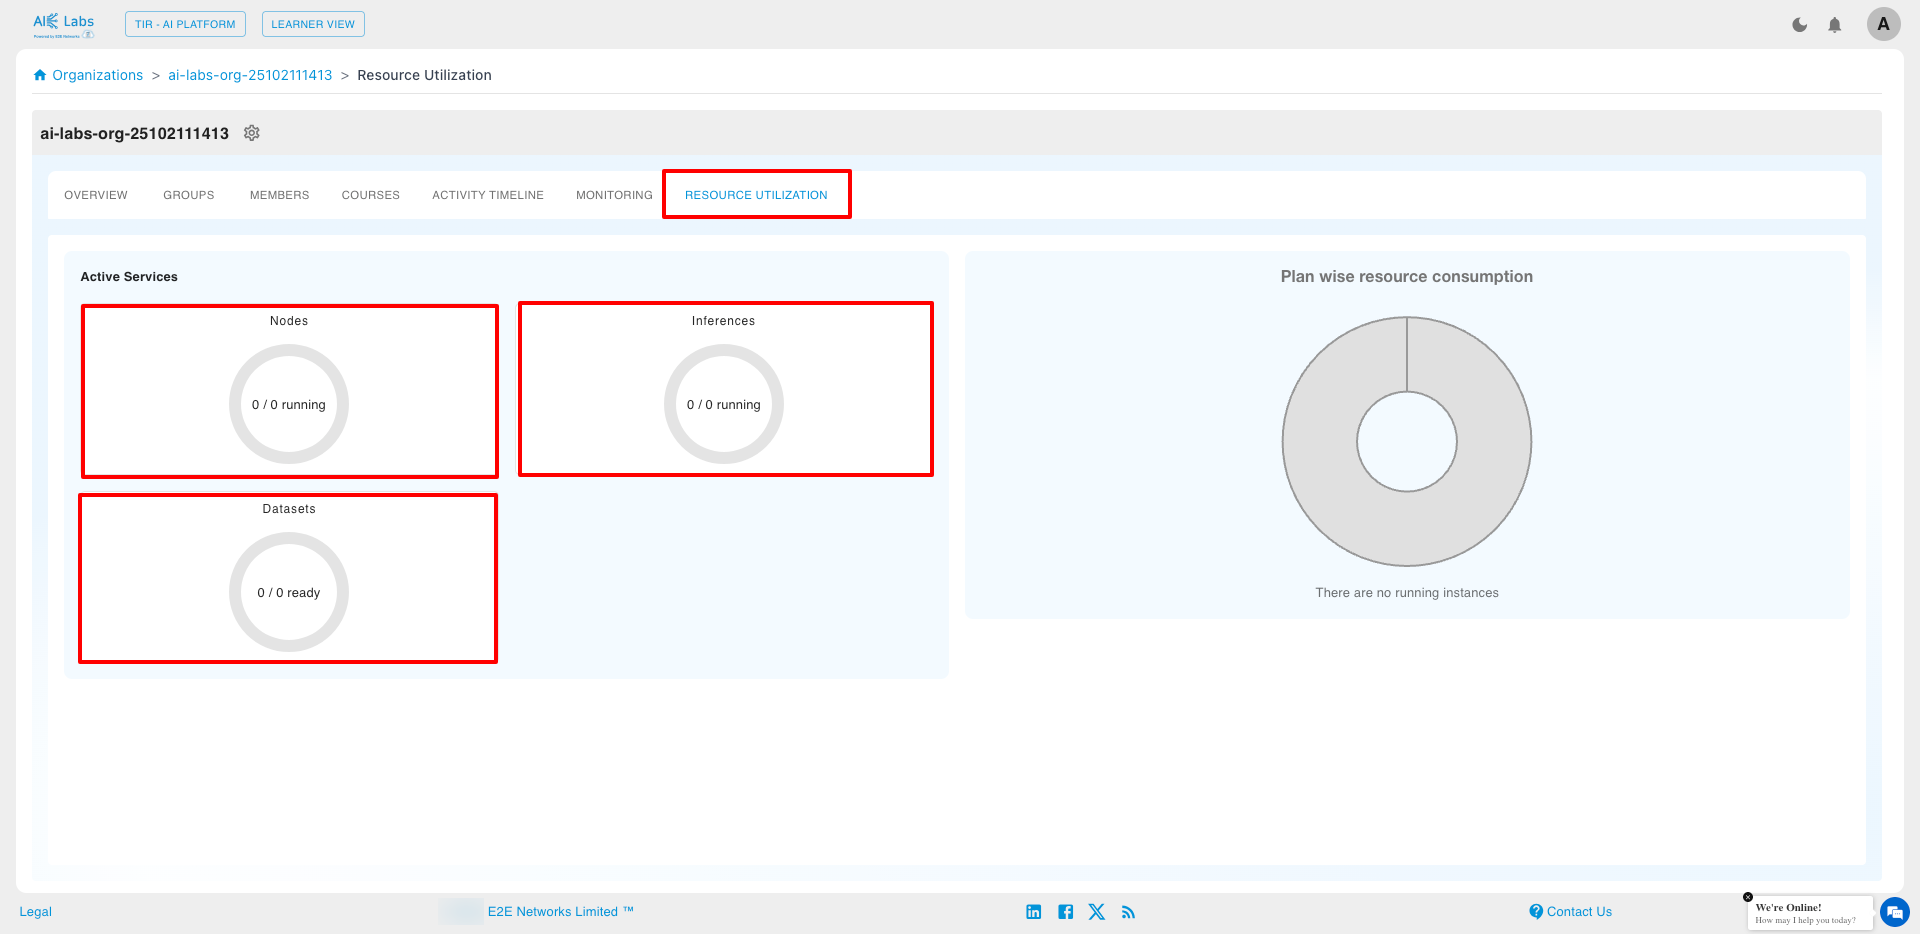
This section displays every resource (Instances, Inference, Datasets) launched by Organization members.
Deletion of an Organization
Only Admins can delete an Organization.
To delete:
- Click the settings icon.
- Select Delete Organization.
- Confirm the deletion in the pop-up dialog.
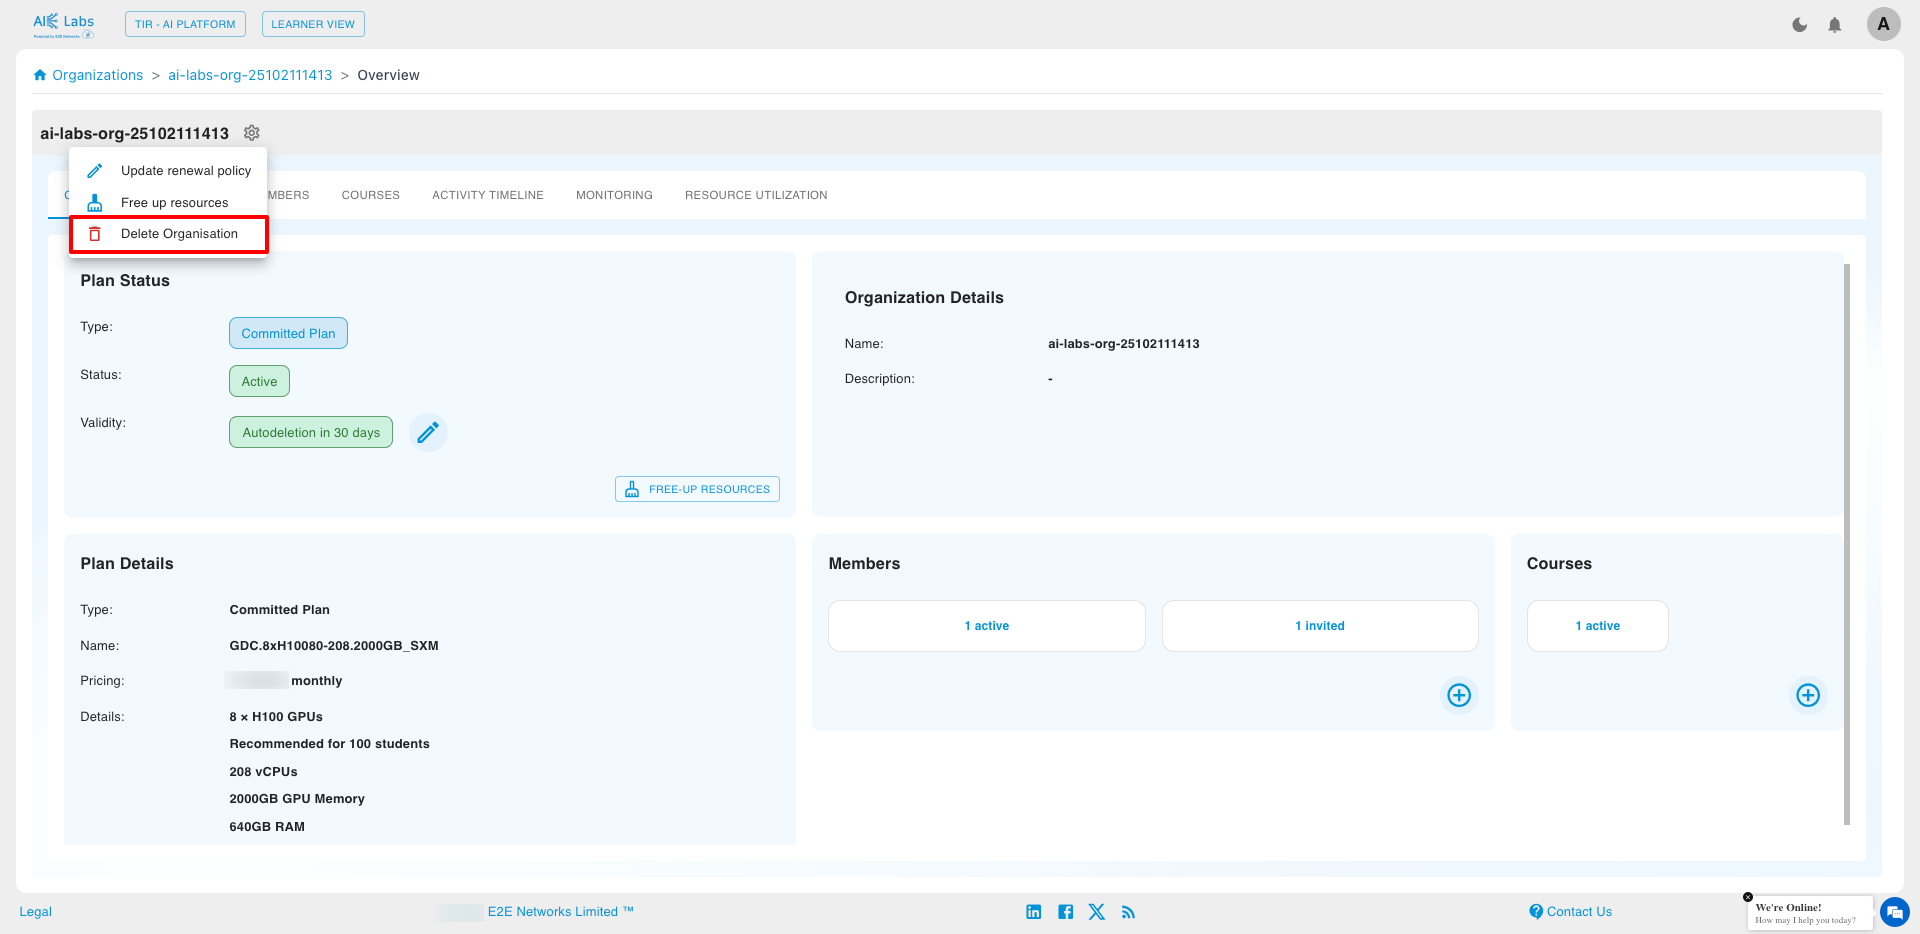
Click Delete to finalize the process.
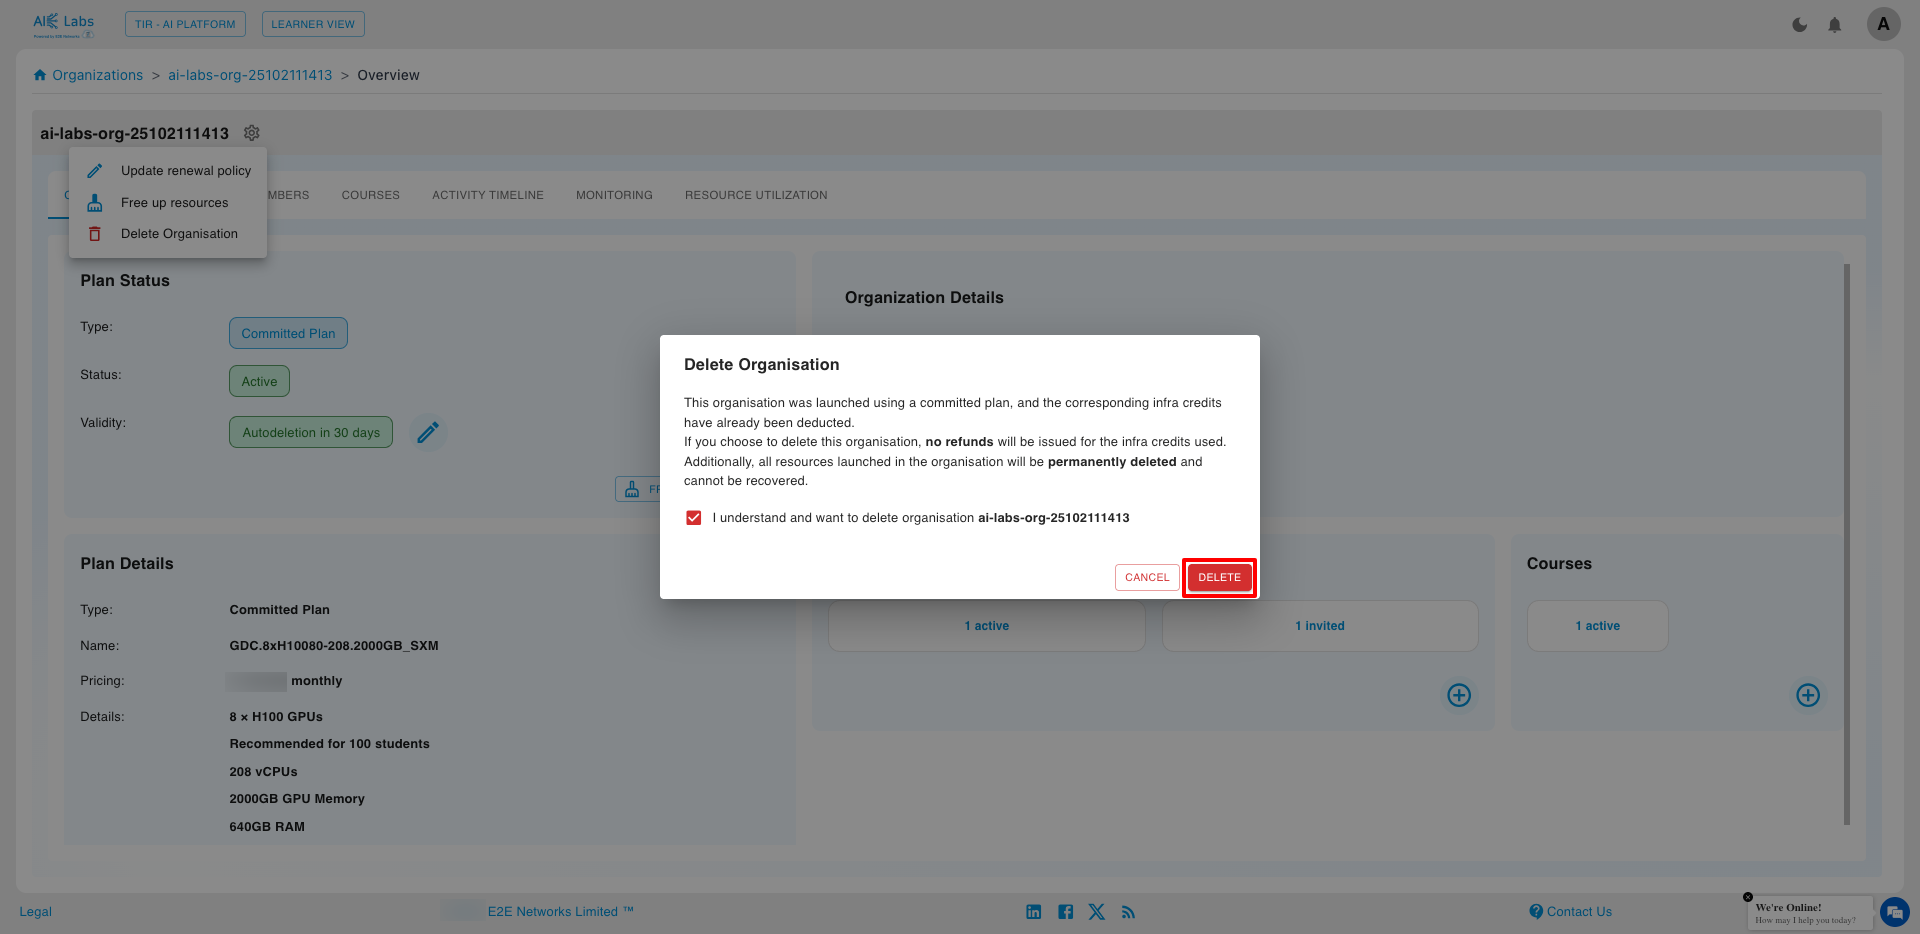
Once deleted, all Organization data and resources will be permanently removed.