Features
Unified Storage Access
Mount datasets directly to Instances and Training Jobs as local folders.
→S3 Compatibility
Seamlessly integrate with any S3-compatible tool like s3cmd and minio-client.
→Encryption Options
Secure data at rest with E2E managed or user-managed encryption keys.
→Data Importing
Migrate data from other cloud providers or local machines using Data Syncer or CLI.
→Lifecycle Rules
Automatically delete objects after a specified period to manage storage costs.
→Flexible Upload Options
Upload data via Web UI, MinIO CLI, or s3cmd with ready-to-use commands.
→Feature Overview
1. Unified Storage Access
Datasets can be mounted directly to your Instances (Nodes) and Training Jobs.
- Path:
/datasets/<dataset-name> - Benefit: Access cloud storage as if it were a local folder.
2. S3 Compatibility (EOS)
Seamlessly integrate with any tool that supports the S3 API.
- Tools:
s3cmd,minio-client
3. Encryption Options
Secure your data at rest with flexible encryption choices.
- E2E Managed: Hassle-free, platform-managed keys.
- User Managed: Full control over your keys (Caveat: Key loss = Data loss).
- For detailed instructions on reading data encrypted with user-managed keys, see User-Managed Encryption Guide.
4. Data Importing
Easily migrate data from other cloud providers or local machines using the Data Syncer or CLI tools.
How to Use Each Feature
Mounting Datasets in Notebooks
When launching a Notebook or Training Job, simply select the datasets you wish to mount. They will appear under the /datasets directory.
# Example: Accessing a file in a mounted dataset
import pandas as pd

df = pd.read_csv('/datasets/my-dataset/train.csv')
print(df.head())
Uploading Data (Web UI)
- Go to the Data Objects tab of your dataset.
- Click UPLOAD DATA.
- Drag and drop files or select from your system.
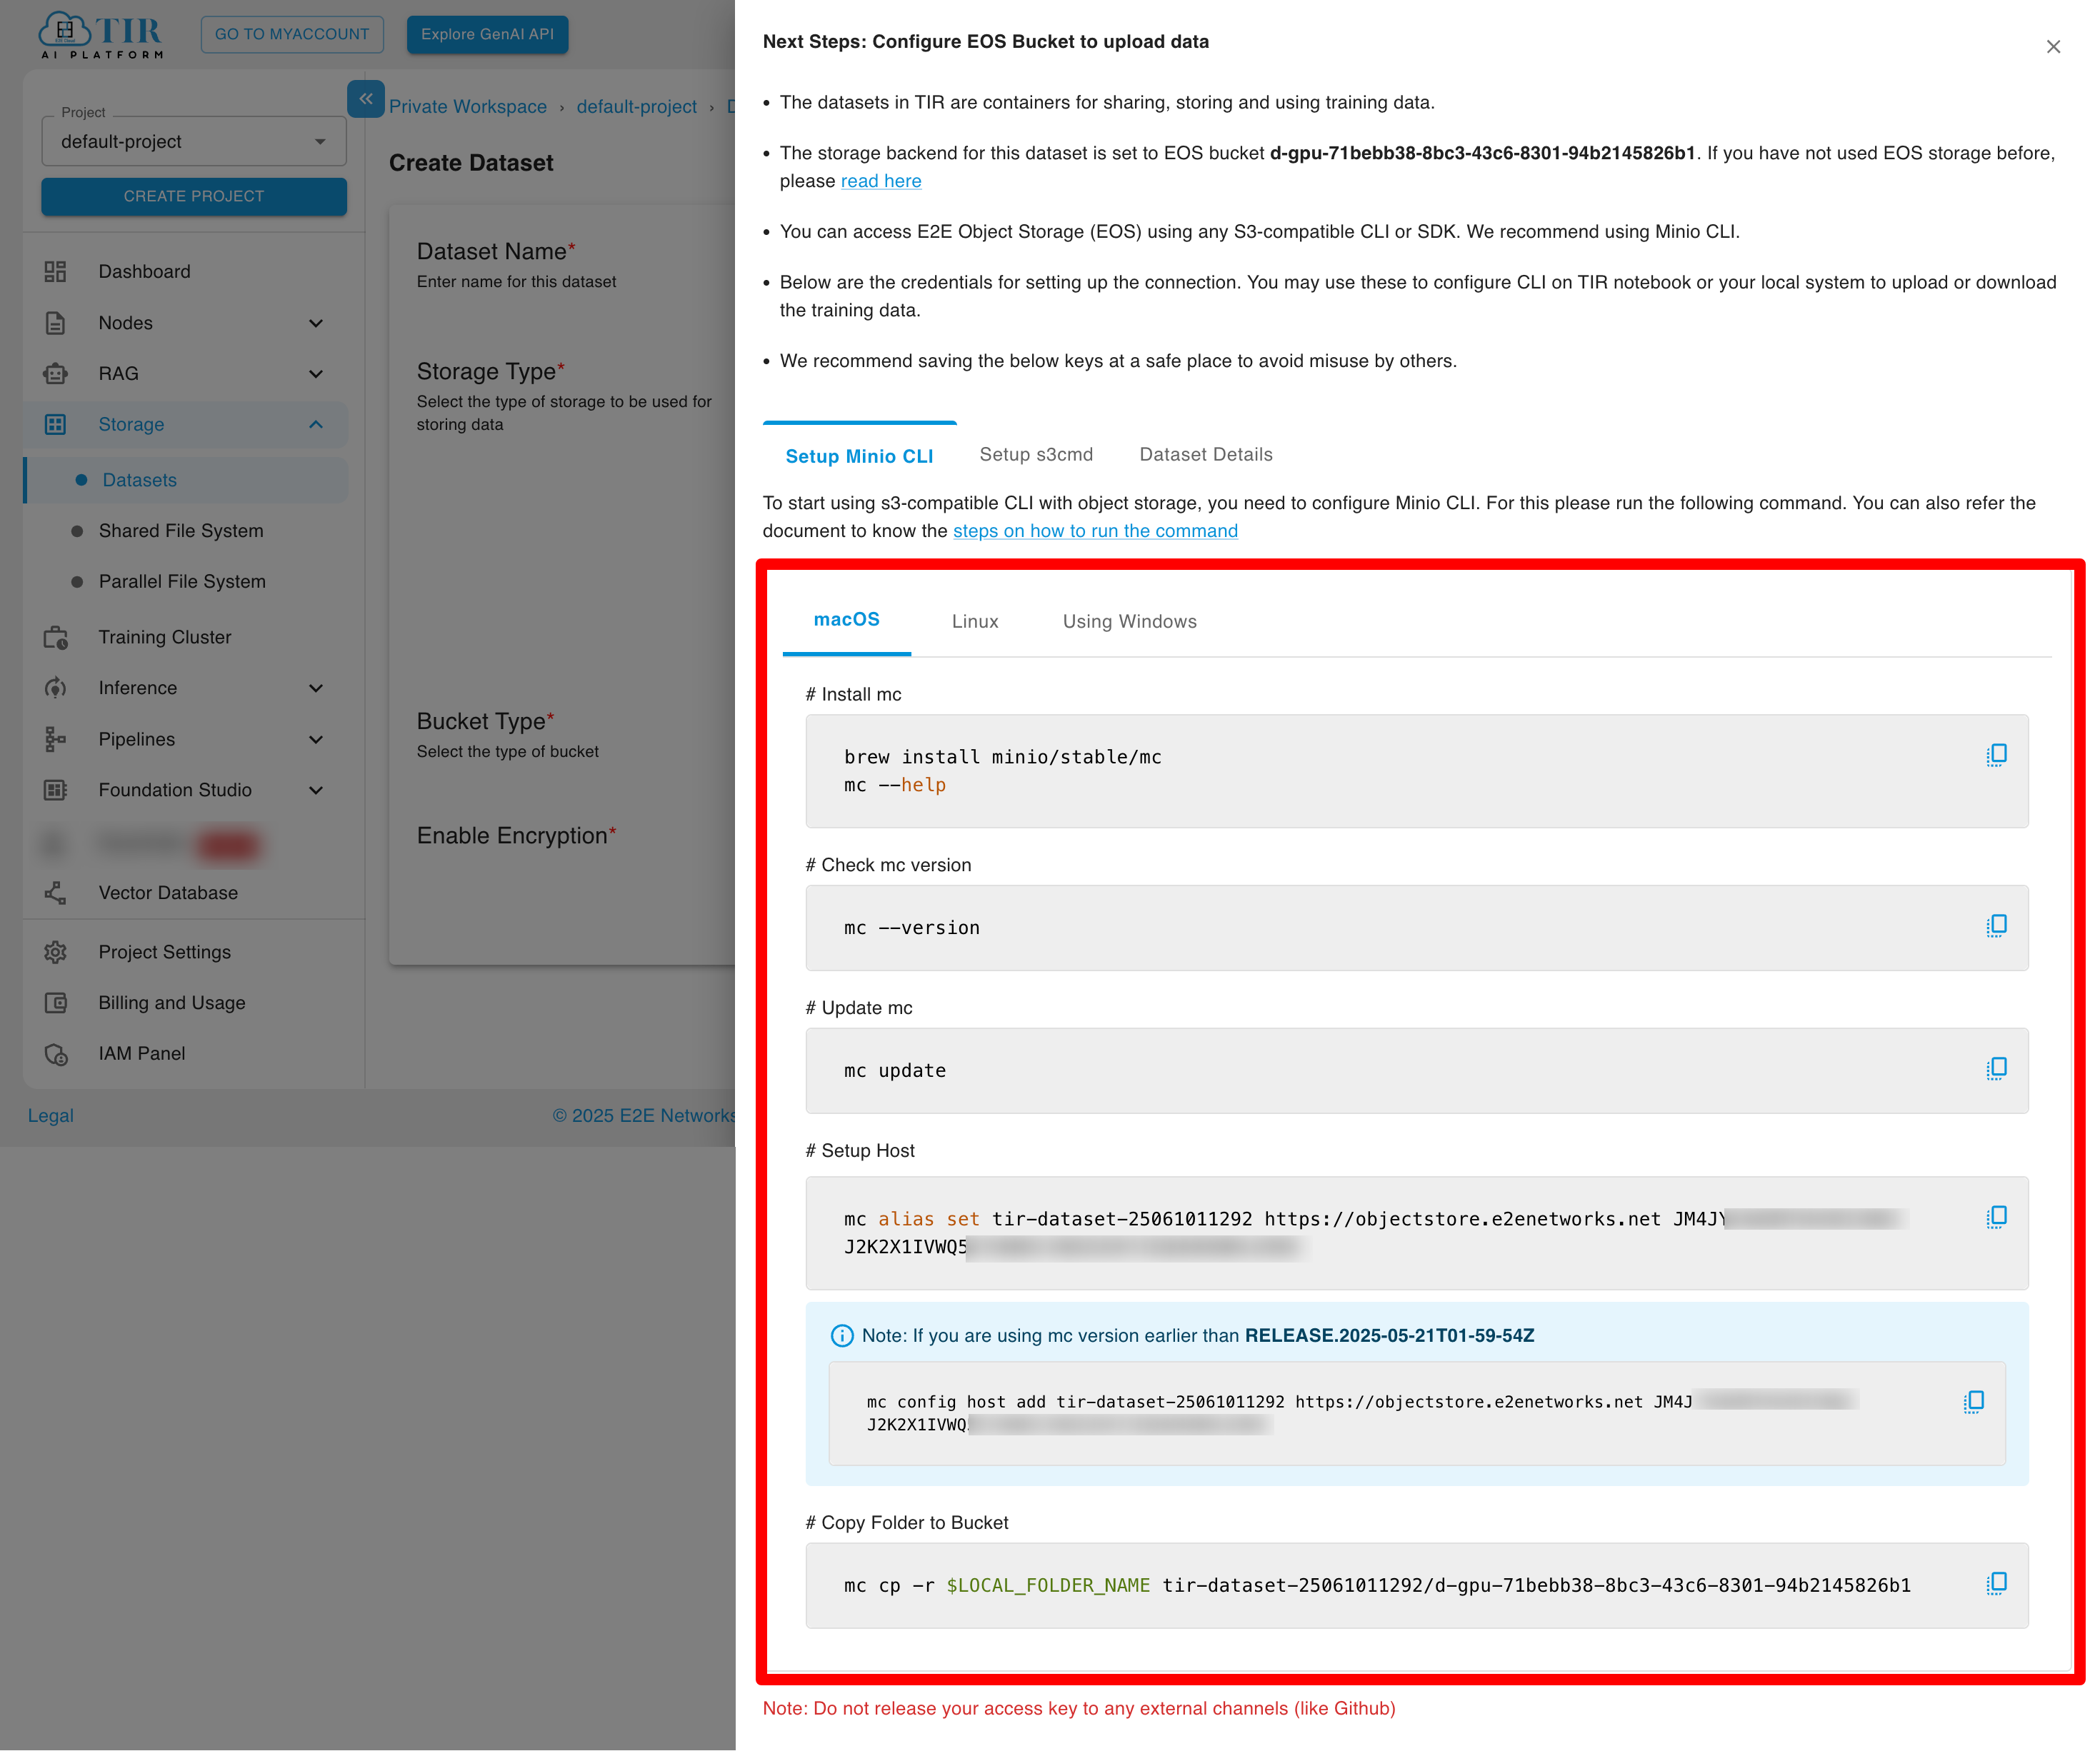
Uploading Data (MinIO CLI)
The UI provides ready-to-use commands for configuration.
- Configure Alias:
mc alias set <alias-name> <endpoint> <access-key> <secret-key> - Copy Files:
mc cp -r ./local-data/ <alias-name>/my-dataset/
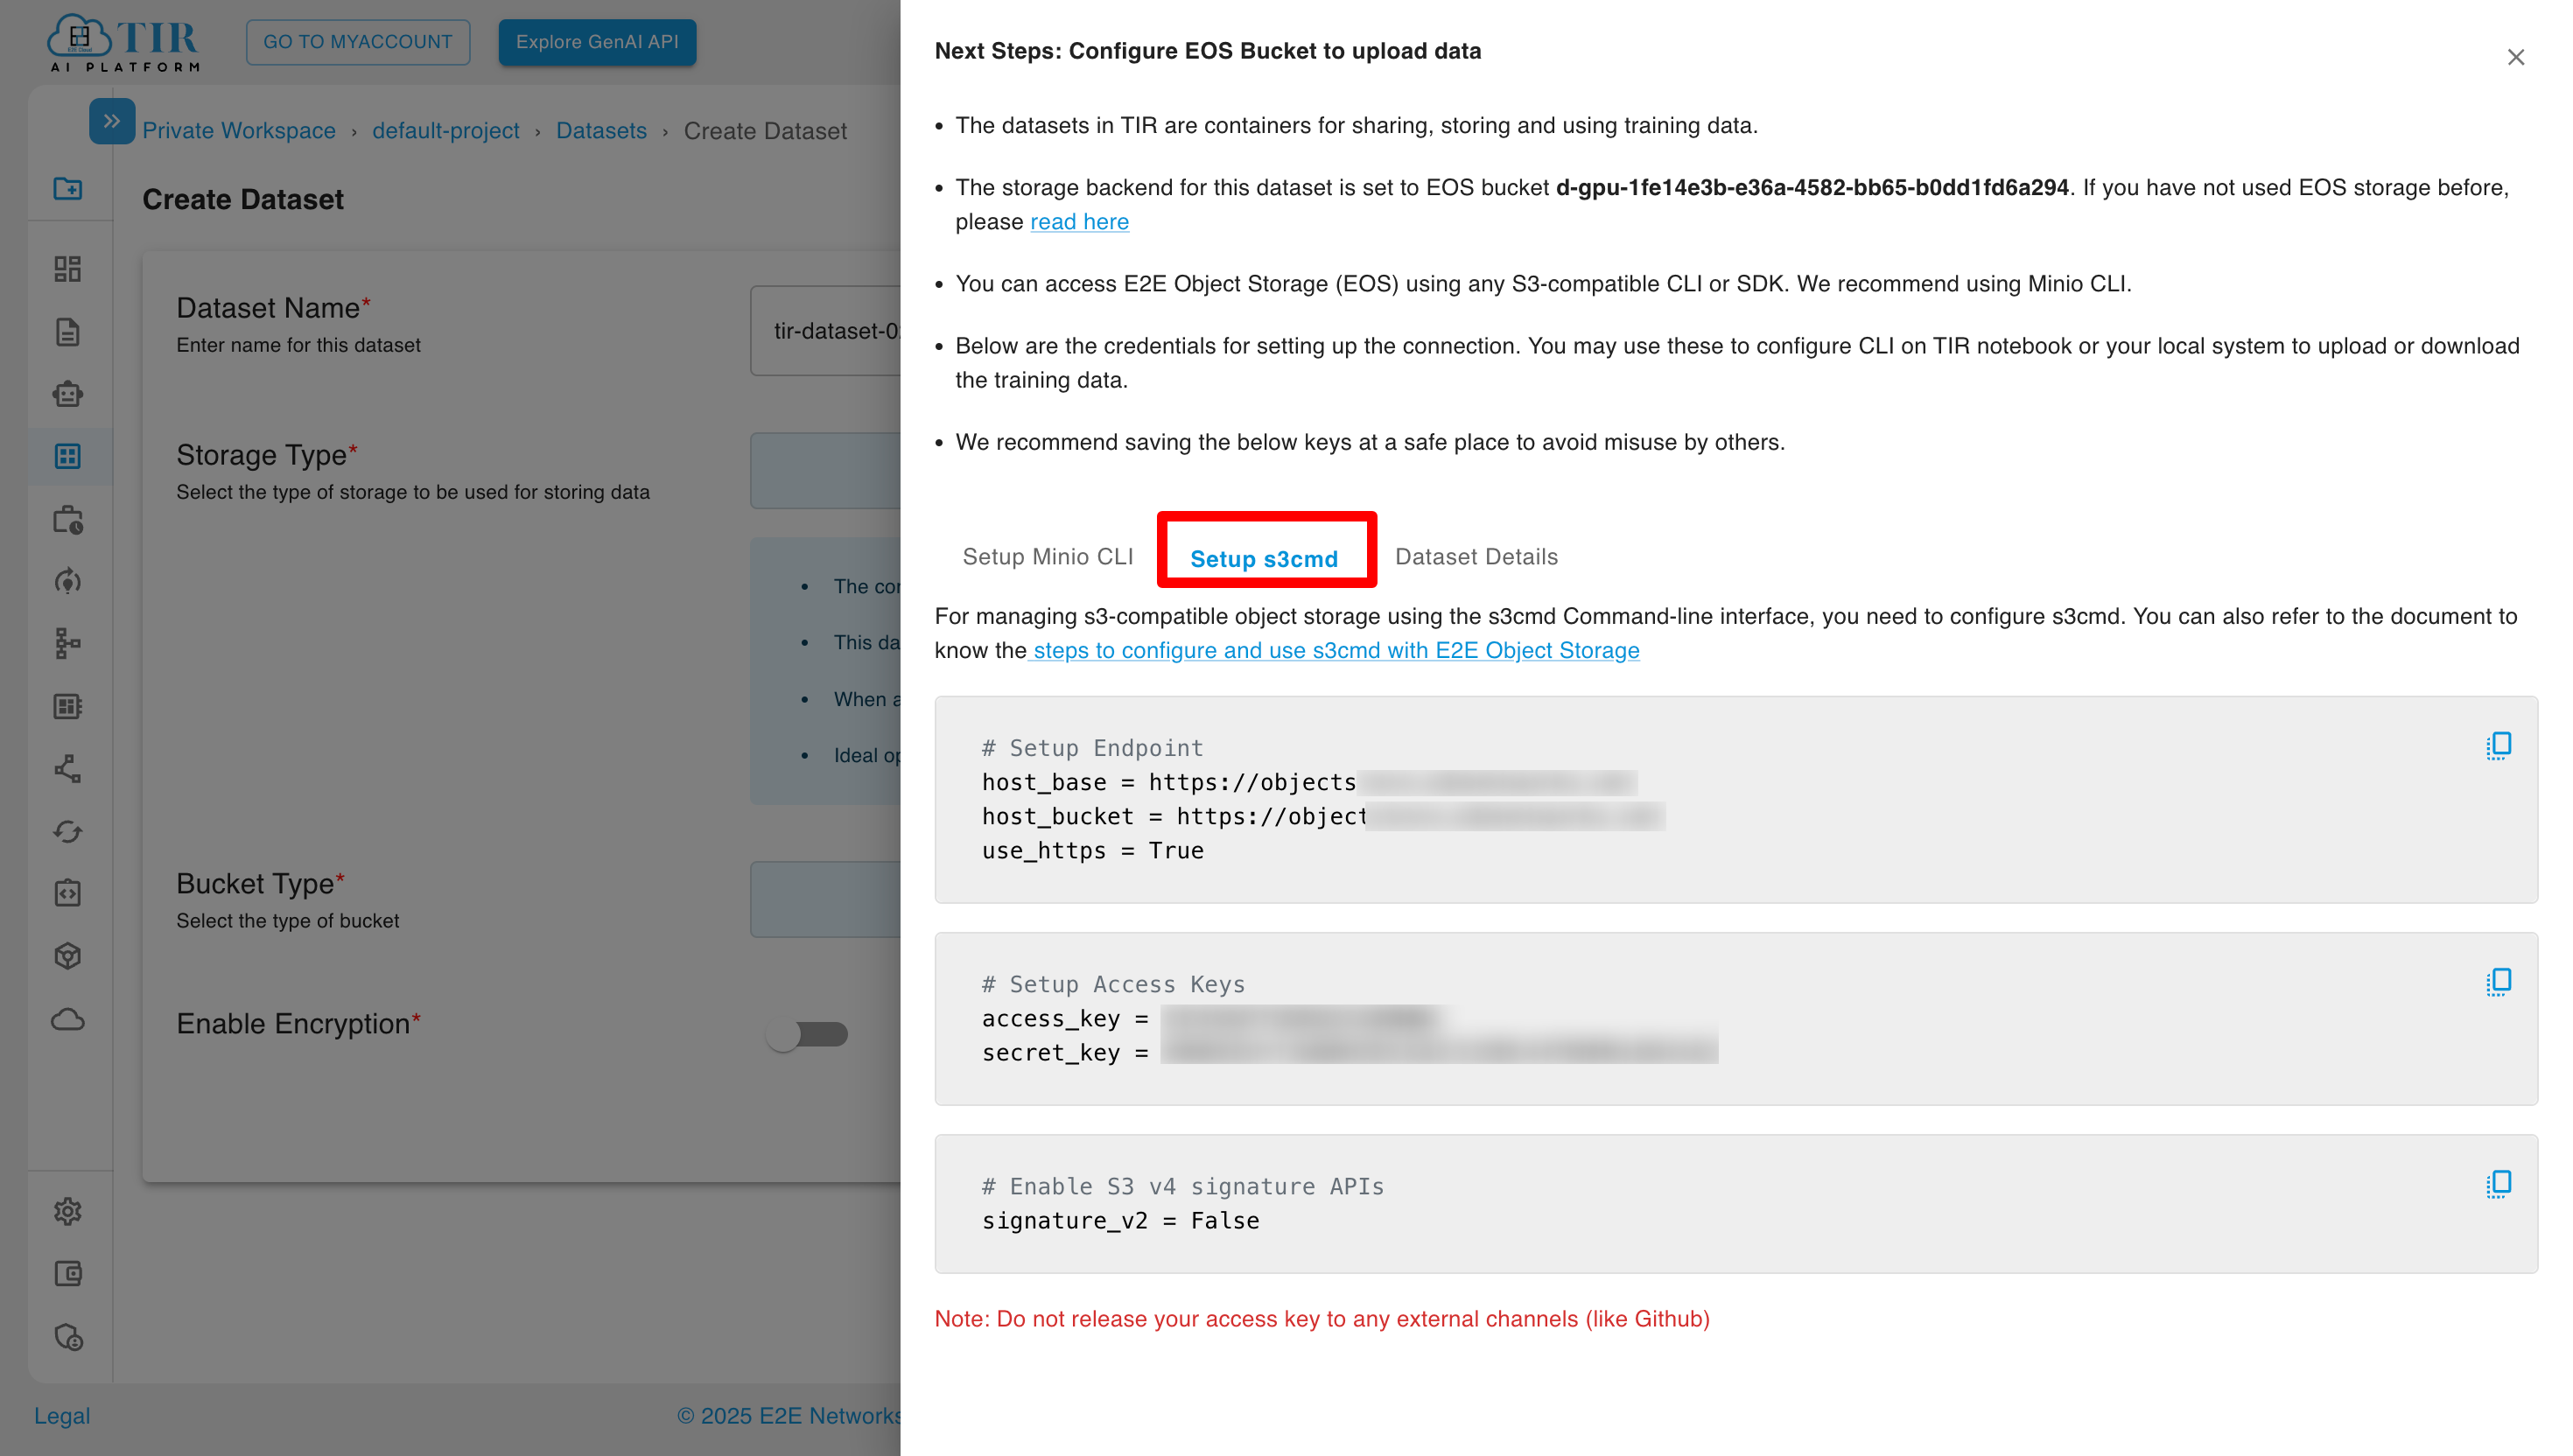
Uploading Data (s3cmd)
You can also use s3cmd to manage your datasets. For setup instructions, see the s3cmd configuration guide.
Upload Files:
# Upload a single file
s3cmd put local-file.txt s3://my-dataset/

# Upload a directory
s3cmd put -r ./local-data/ s3://my-dataset/

# List bucket contents
s3cmd ls s3://my-dataset/
Managing Lifecycle Rules
Lifecycle rules allow you to automatically delete objects in your EOS bucket after a specified period, helping you manage storage costs and maintain data hygiene.
What are Lifecycle Rules?
Lifecycle rules enable automatic deletion of objects based on:
- Time-based expiration: Objects are deleted after a specified number of days
- Prefix-based filtering: Apply rules to all objects or only those matching a specific prefix pattern
Creating a Lifecycle Rule
-
Navigate to Bucket Lifecycle:
- Go to your dataset's Bucket Lifecycle tab
- Click Configure Lifecycle Rule
-
Configure the Rule:
- Selected Dataset: The EOS bucket for which the rule is being created (auto-populated)
- Apply To: Choose the scope of the rule:
- All Objects: Apply to every object in the dataset without filtering
- Objects with Prefix: Apply only to objects matching a specific prefix pattern (e.g.,
temp/,logs/)
- Expiration Days: Set the number of days before objects are automatically deleted (minimum: 1 day)
-
Review and Create:
- Review the Irreversible Action warning: Objects will be permanently deleted after the specified period
- Click CREATE RULE to activate the lifecycle policy
Important Notes
- Lifecycle deletion is irreversible. Deleted objects cannot be recovered.
- Rules apply to objects based on their creation/modification date.
- Multiple rules can be created with different prefixes to manage different data types.
Use Cases
- Temporary Data: Automatically clean up scratch files or intermediate processing results
- Log Rotation: Delete old log files after a retention period
- Experiment Cleanup: Remove outdated experiment data while preserving important results
- Cost Optimization: Reduce storage costs by removing data that's no longer needed
Best Practices
Performance
TIR provides datasets through two storage options:
- EOS Bucket-based: Cloud object storage ideal for large-scale training with high throughput and parallel data access.
- Disk-based: Local storage for workloads requiring low-latency random access.
Cost Optimization
- Lifecycle Management: Delete temporary datasets or intermediate checkpoints that are no longer needed.
- Choose Right Storage: Use Disk only when low-latency random access is strictly required, as it is generally more expensive per GB than object storage.
Security
- Least Privilege: Share access keys only with those who need them.
- Encryption: Always use encryption for sensitive data. prefer E2E Managed for ease of use unless you have strict compliance requirements for key ownership.
Best Practices for Datasets
Use EOS (object storage) for large-scale training with high throughput. Use Disk only when low-latency random access is strictly required.
Always use encryption for sensitive data. Prefer E2E Managed keys for ease of use unless you have strict compliance requirements.
Delete temporary datasets or intermediate checkpoints that are no longer needed to optimize costs.
Share access keys only with those who need them, following the principle of least privilege.