Node creation and management
Node refers to a virtual machine (VM) instance that serves as a fundamental compute unit, providing dedicated CPU, memory, and storage resources. Nodes can be provisioned for a variety of workloads—ranging from general-purpose applications to high-performance computing (HPC), AI/ML, and GPU-intensive tasks. E2E offers different categories of nodes such as Compute Nodes and GPU Nodes, allowing users to choose the configuration best suited for their specific use case.
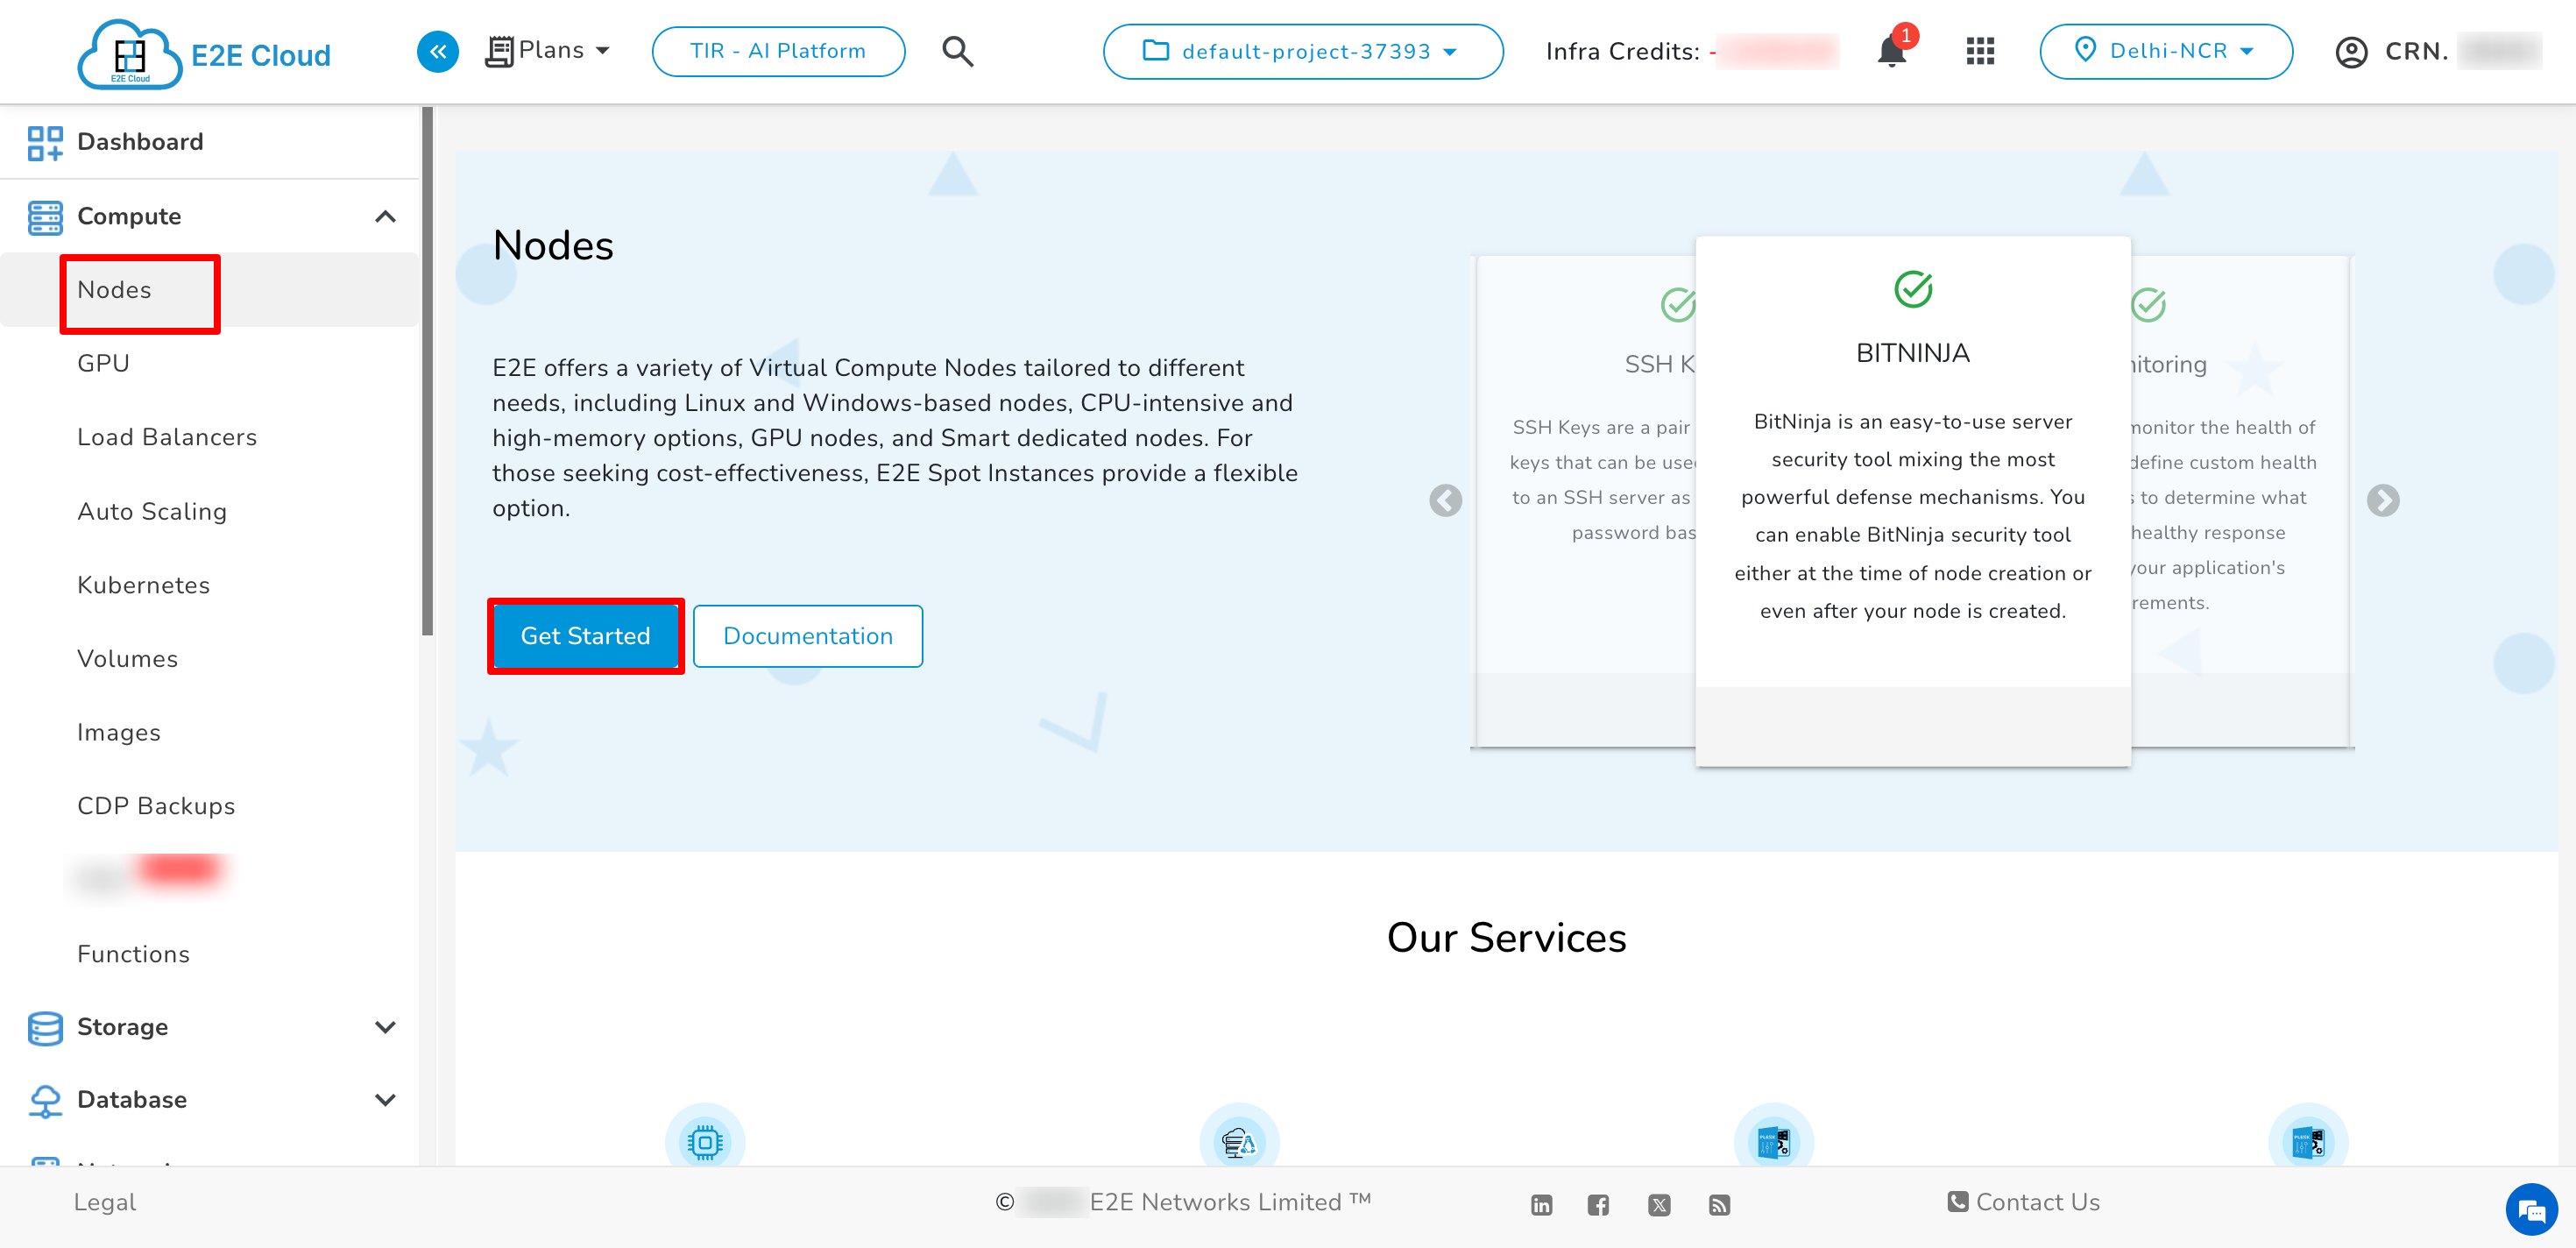
Navigate to Node create page
- Click on Get Started button
- Click on Marketplace Tab
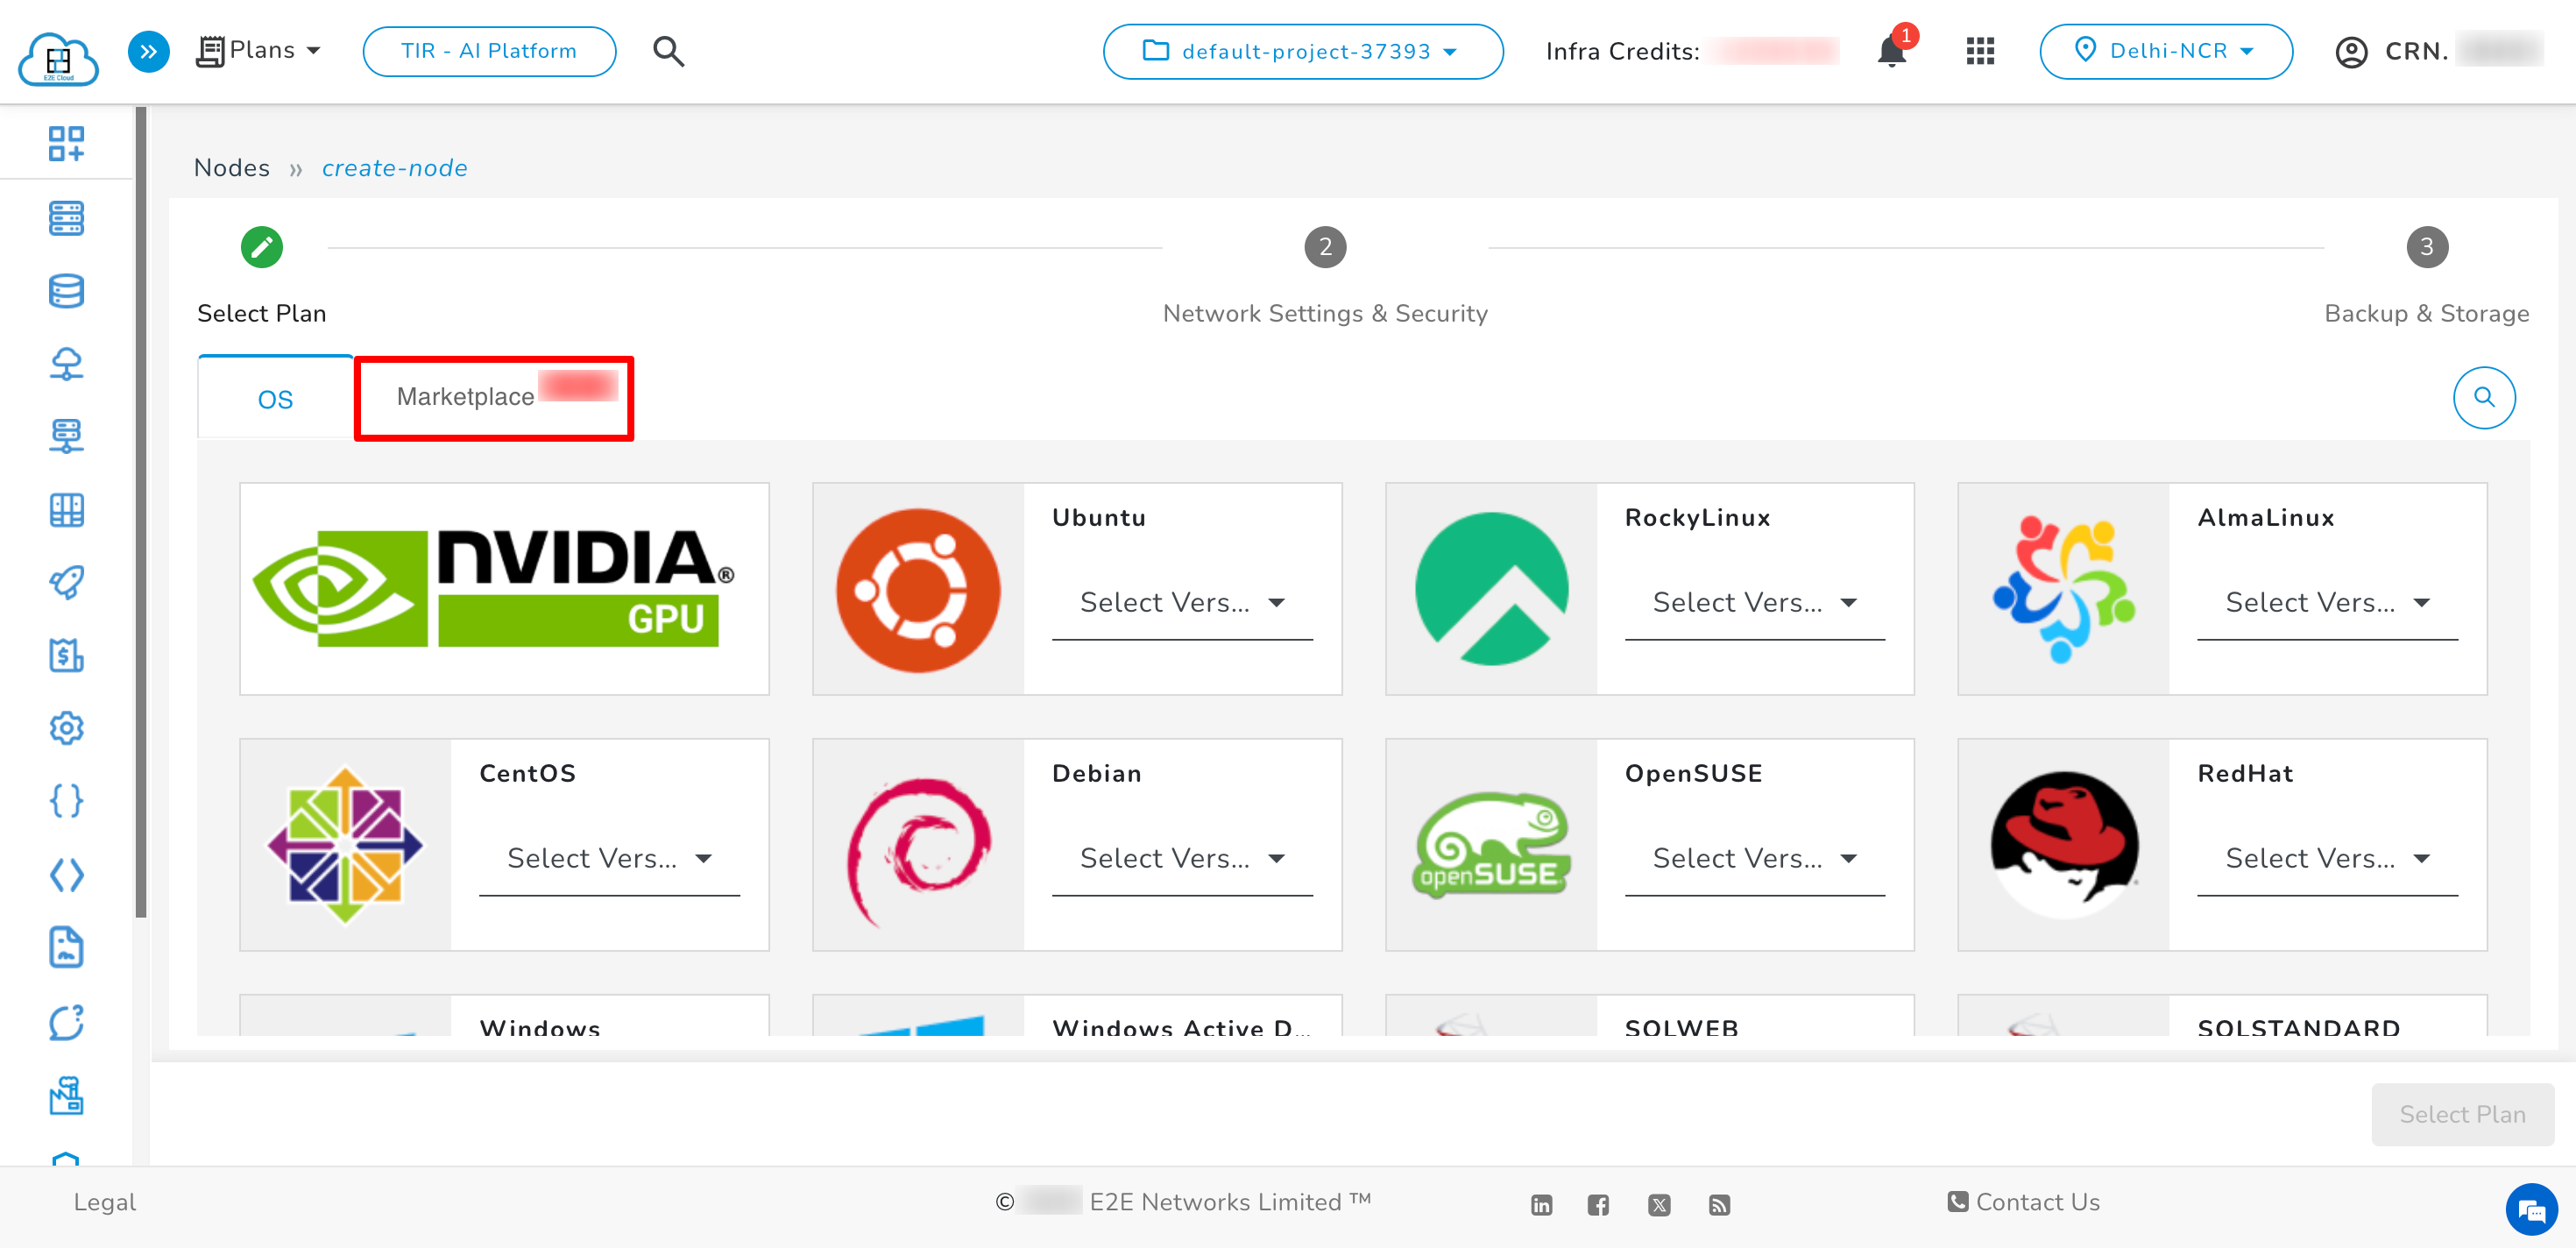
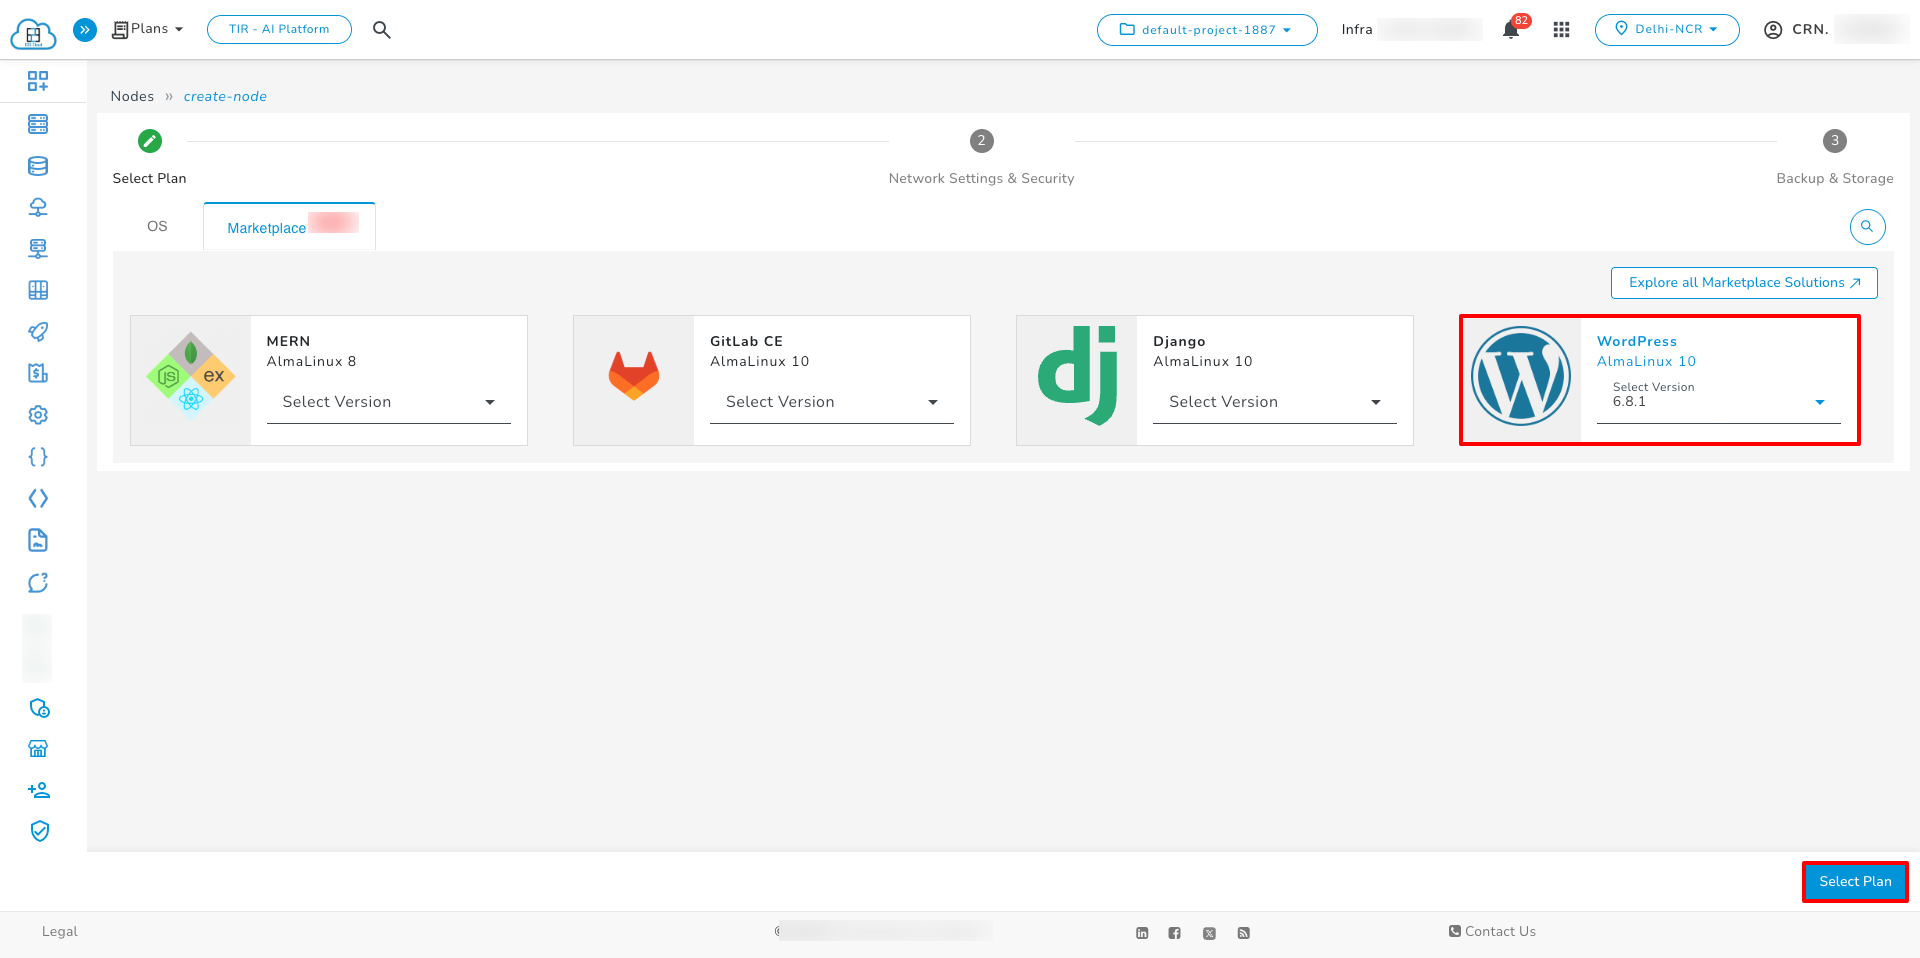
- You will see a list of OS available under Marketplace Tab
Choosing an OS
- After choosing the operating system, you must select the version of that OS.
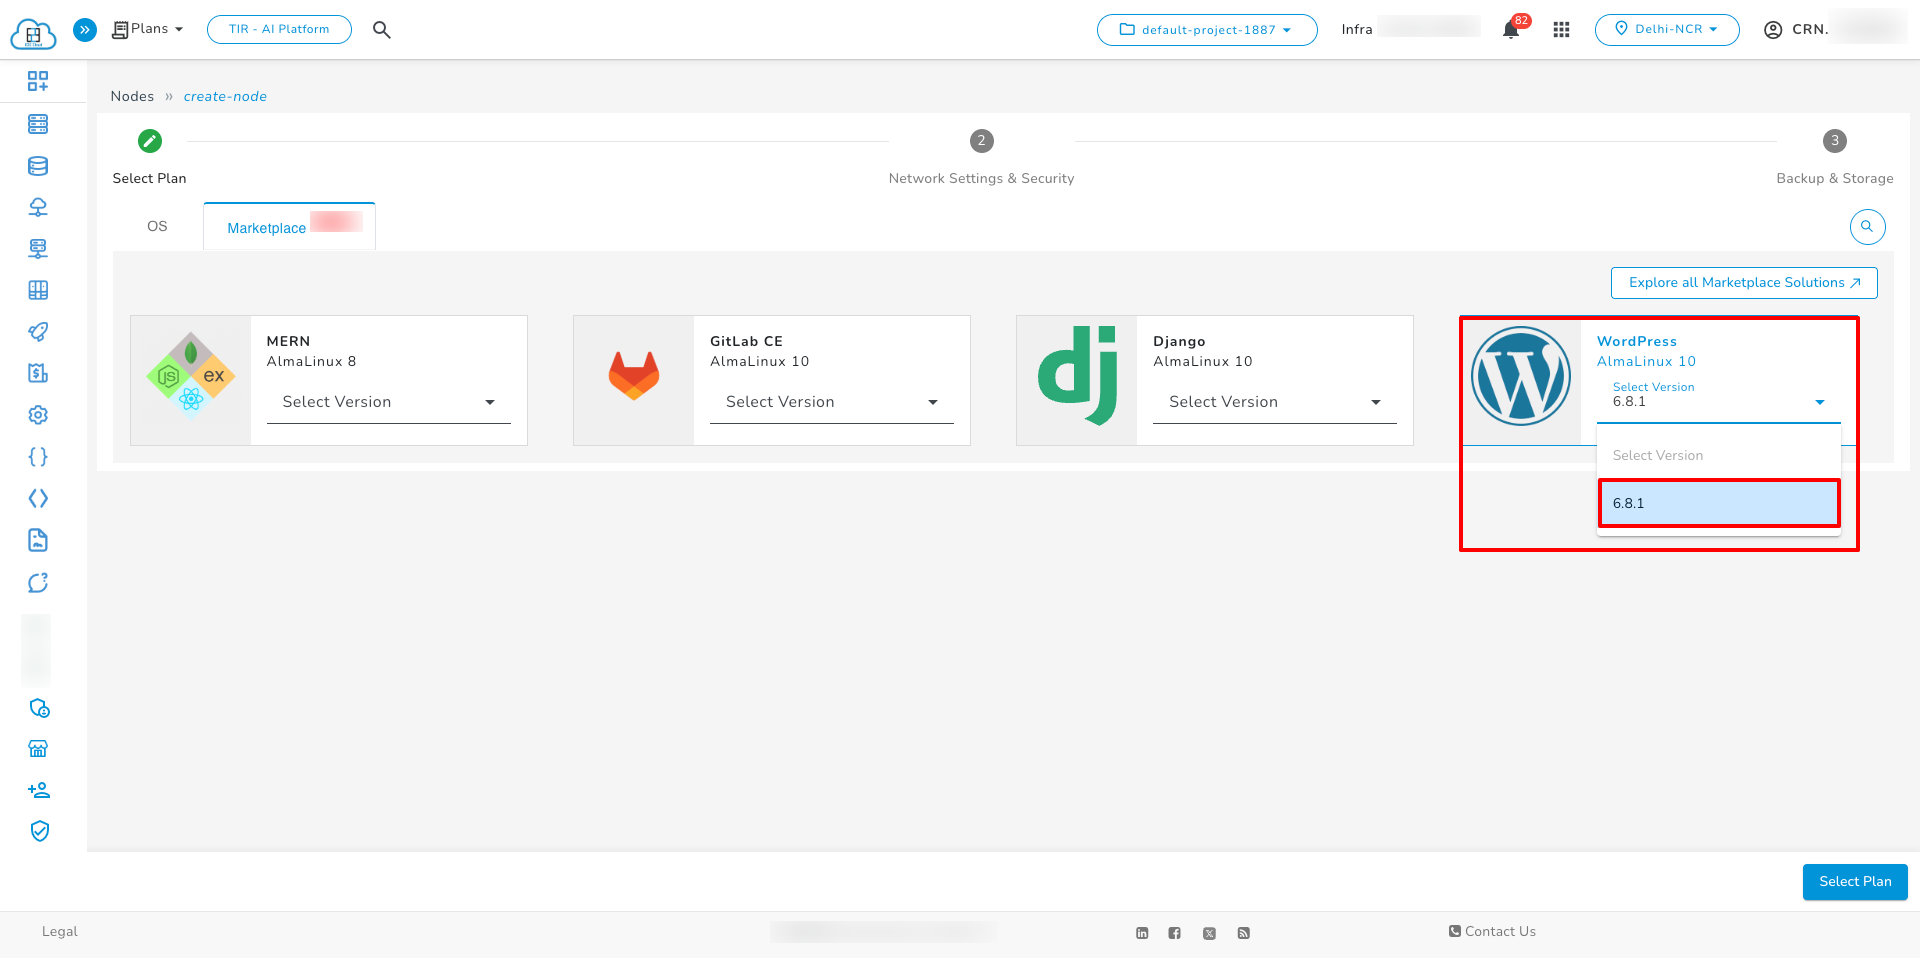
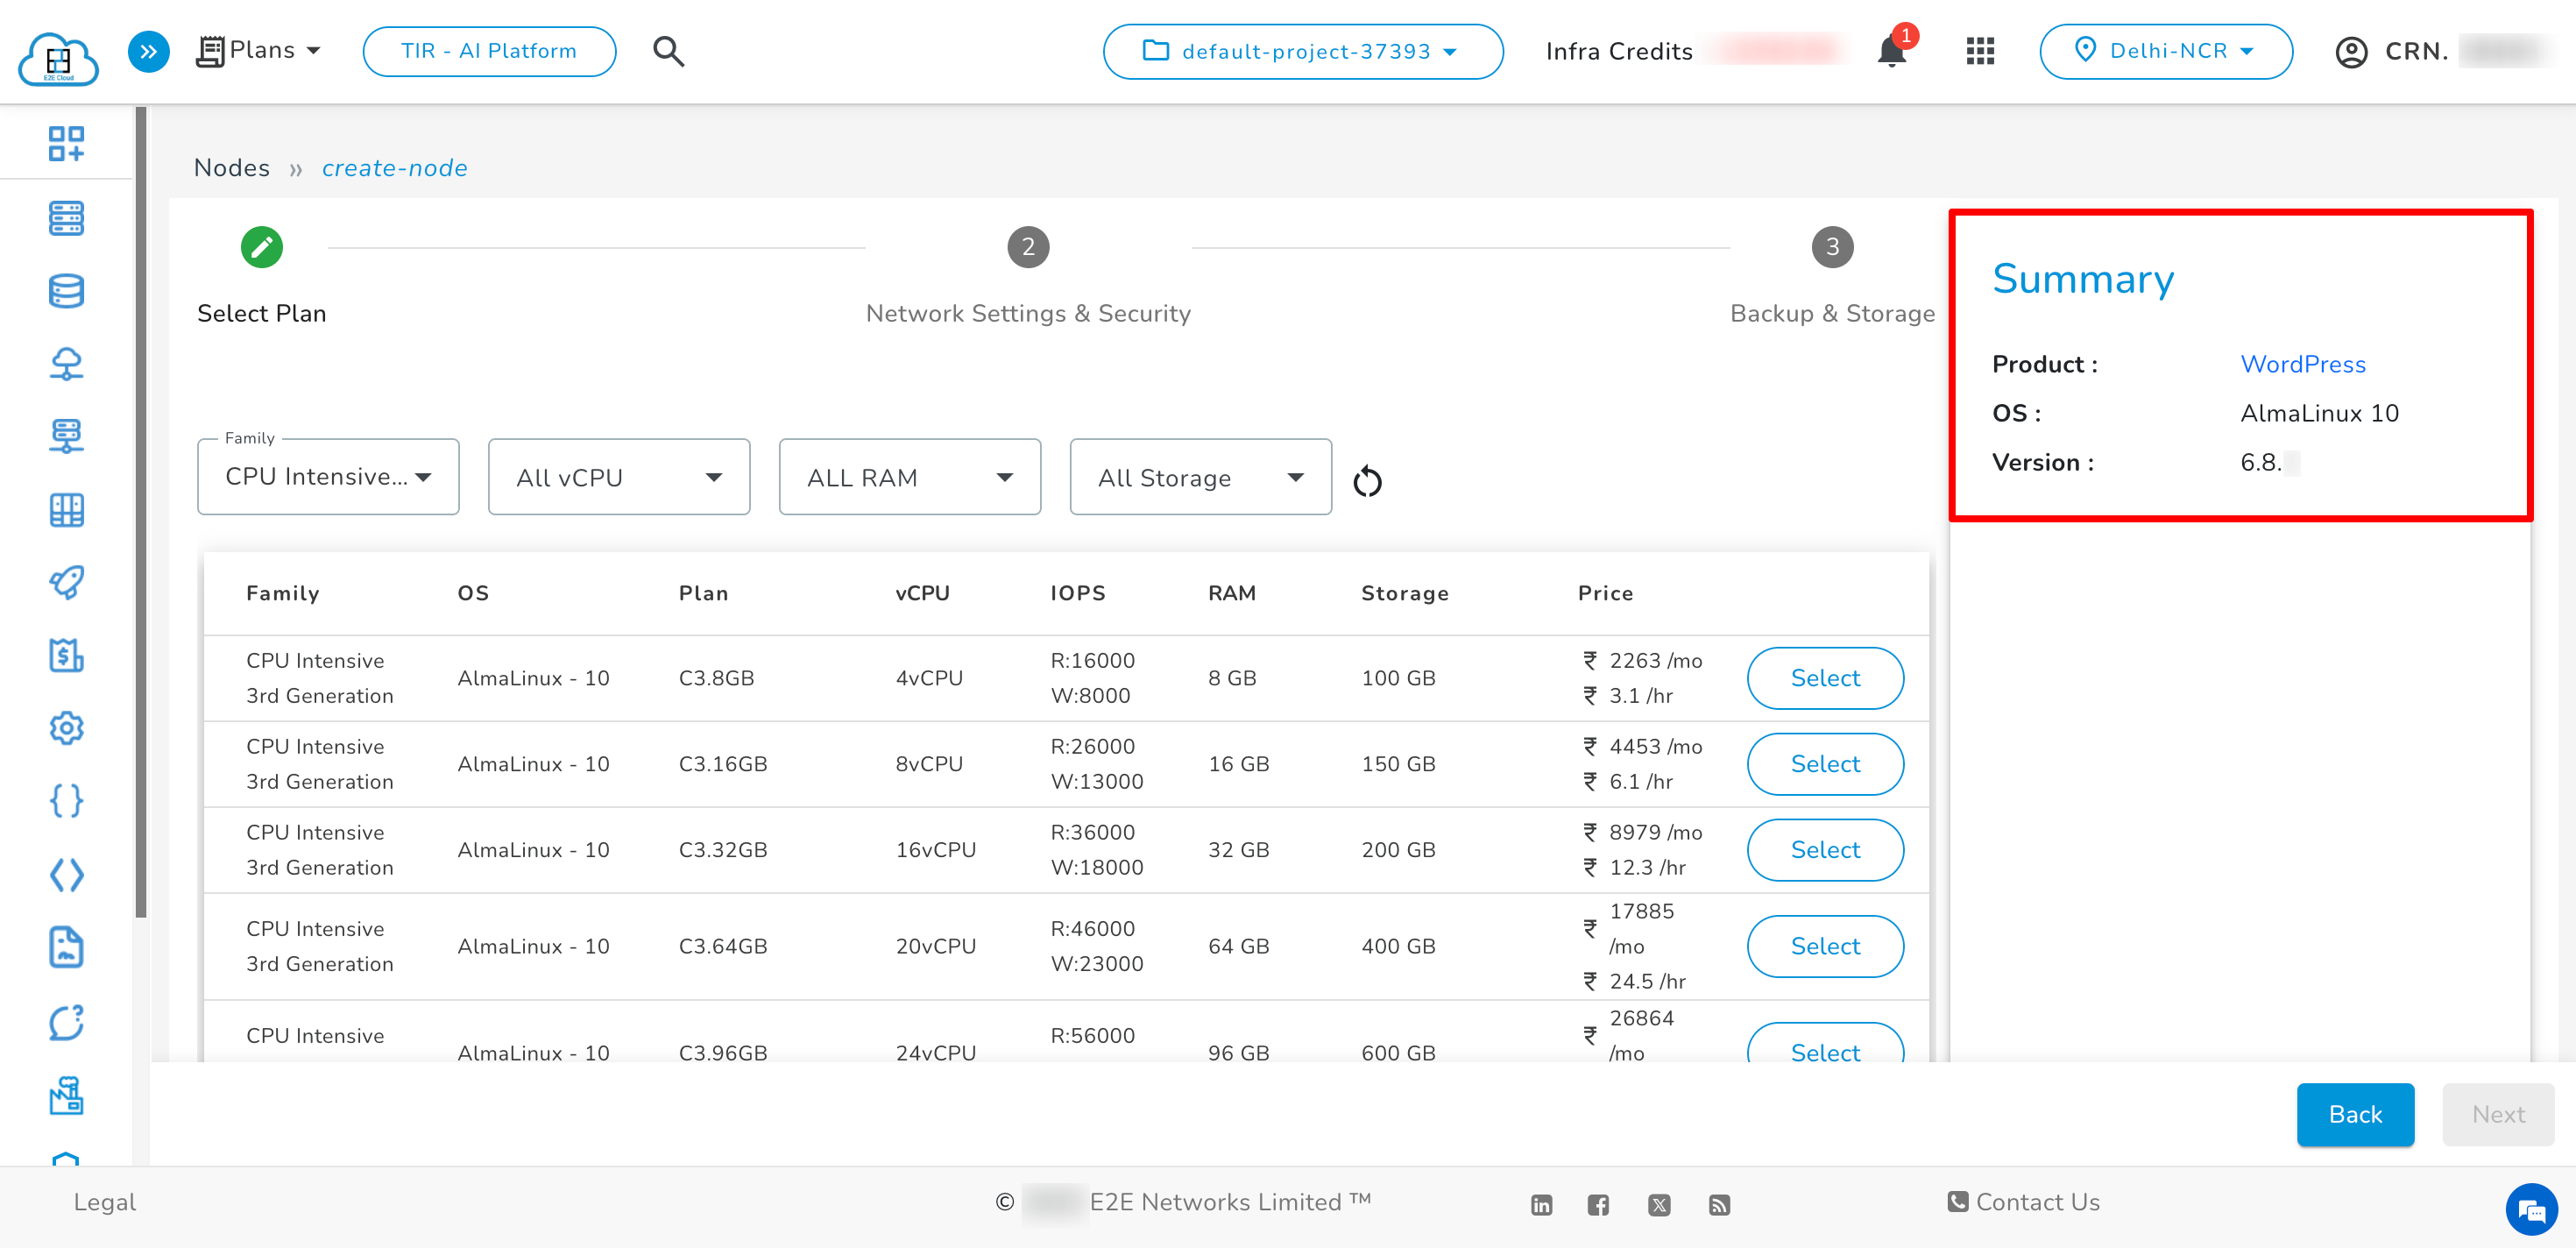
- After selecting the version, you will see the list of plans.
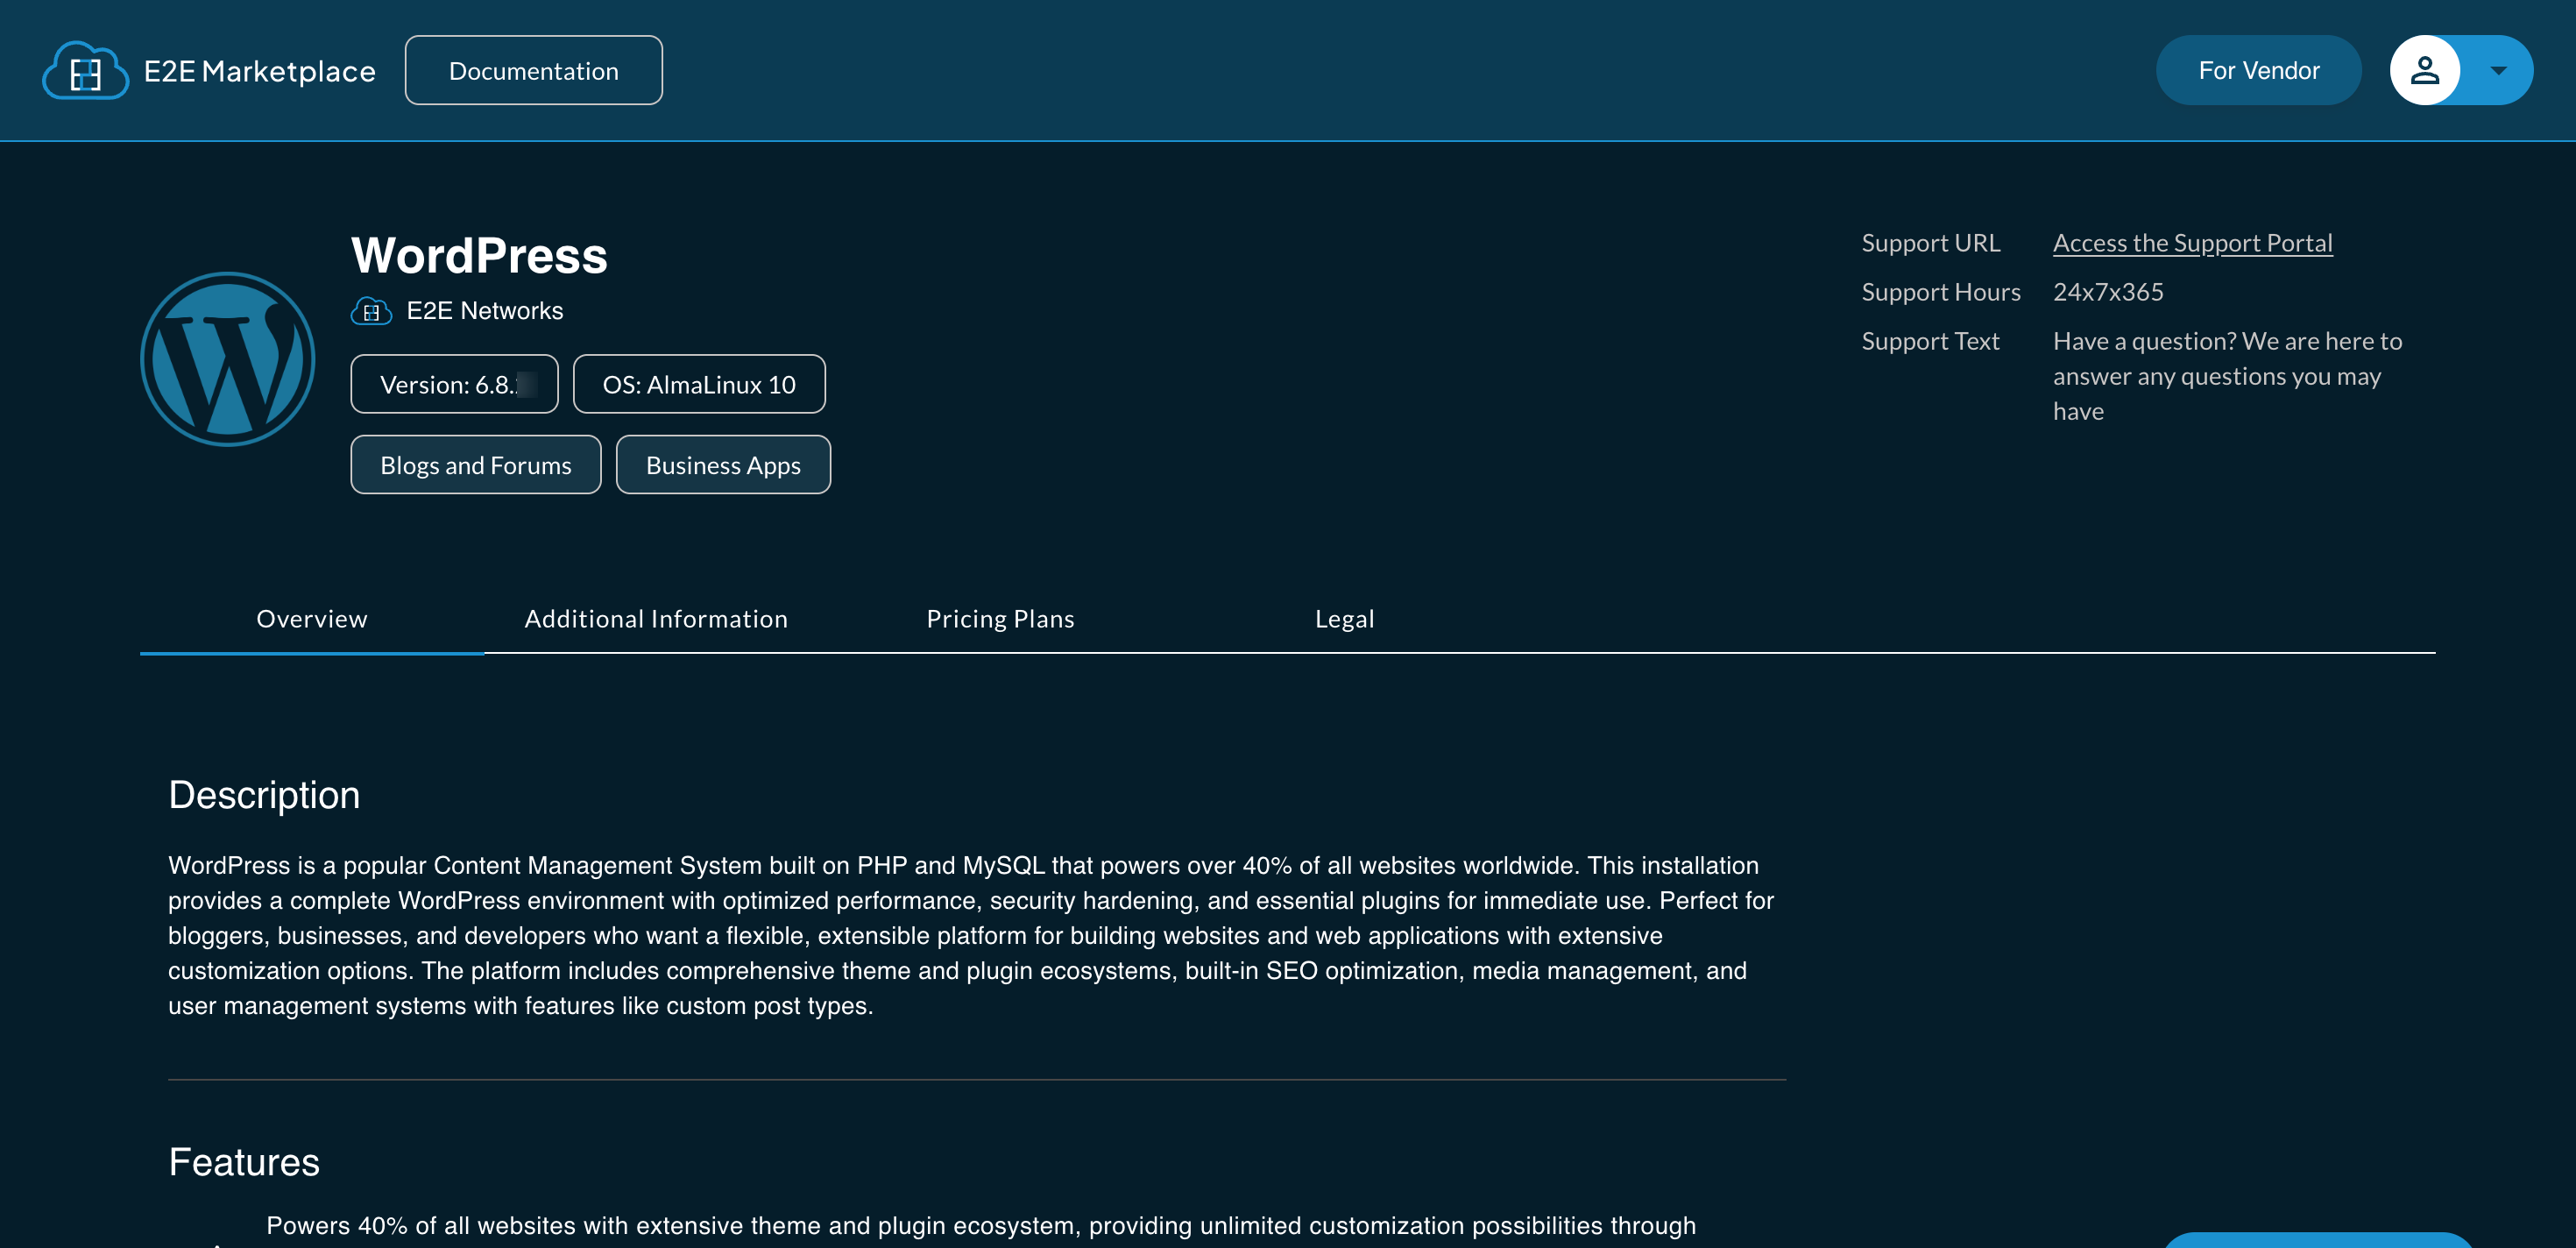
If you want to know more about your OS, click on the OS name, you will be redirected to E2E Marketplace website
- After clicking on the OS name, you will see a page like this
- Select the desired plan. Then click on Next button.

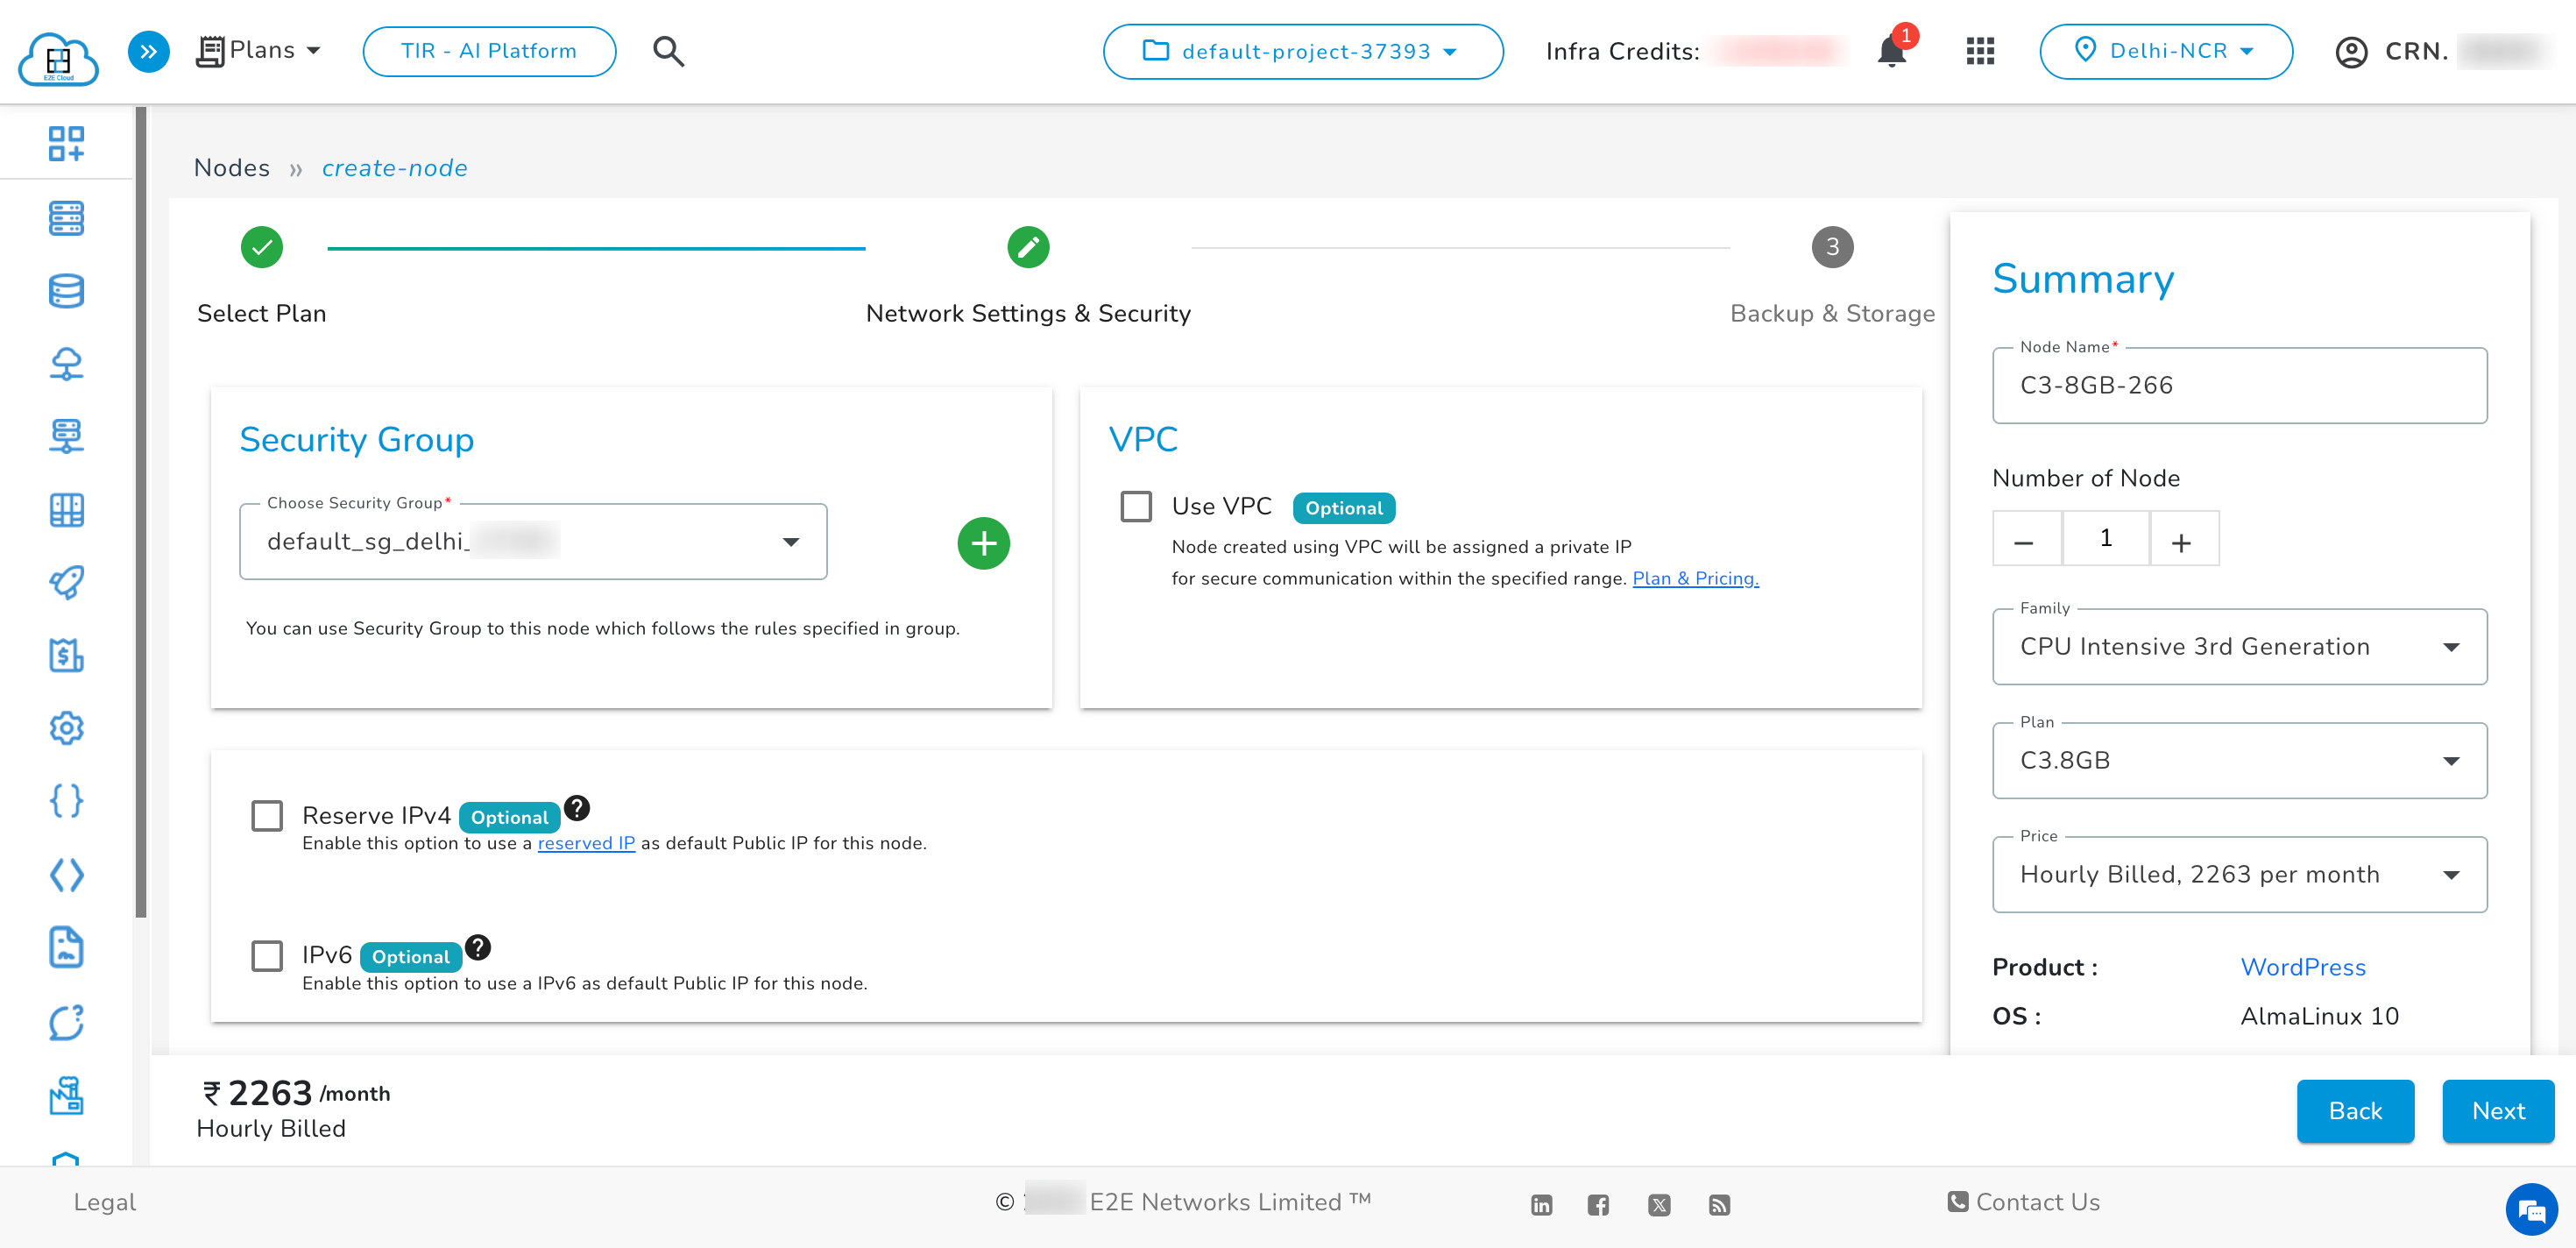
Network Settings & security
In this step, Attach VPCs, reserve IPs, set security groups, add SSH keys, BitNinja, IPv6, and enable encryption as per requirements.
Backup & Storage
Choose the required Backup Services and Storage Options, then click Launch Node to complete deployment.
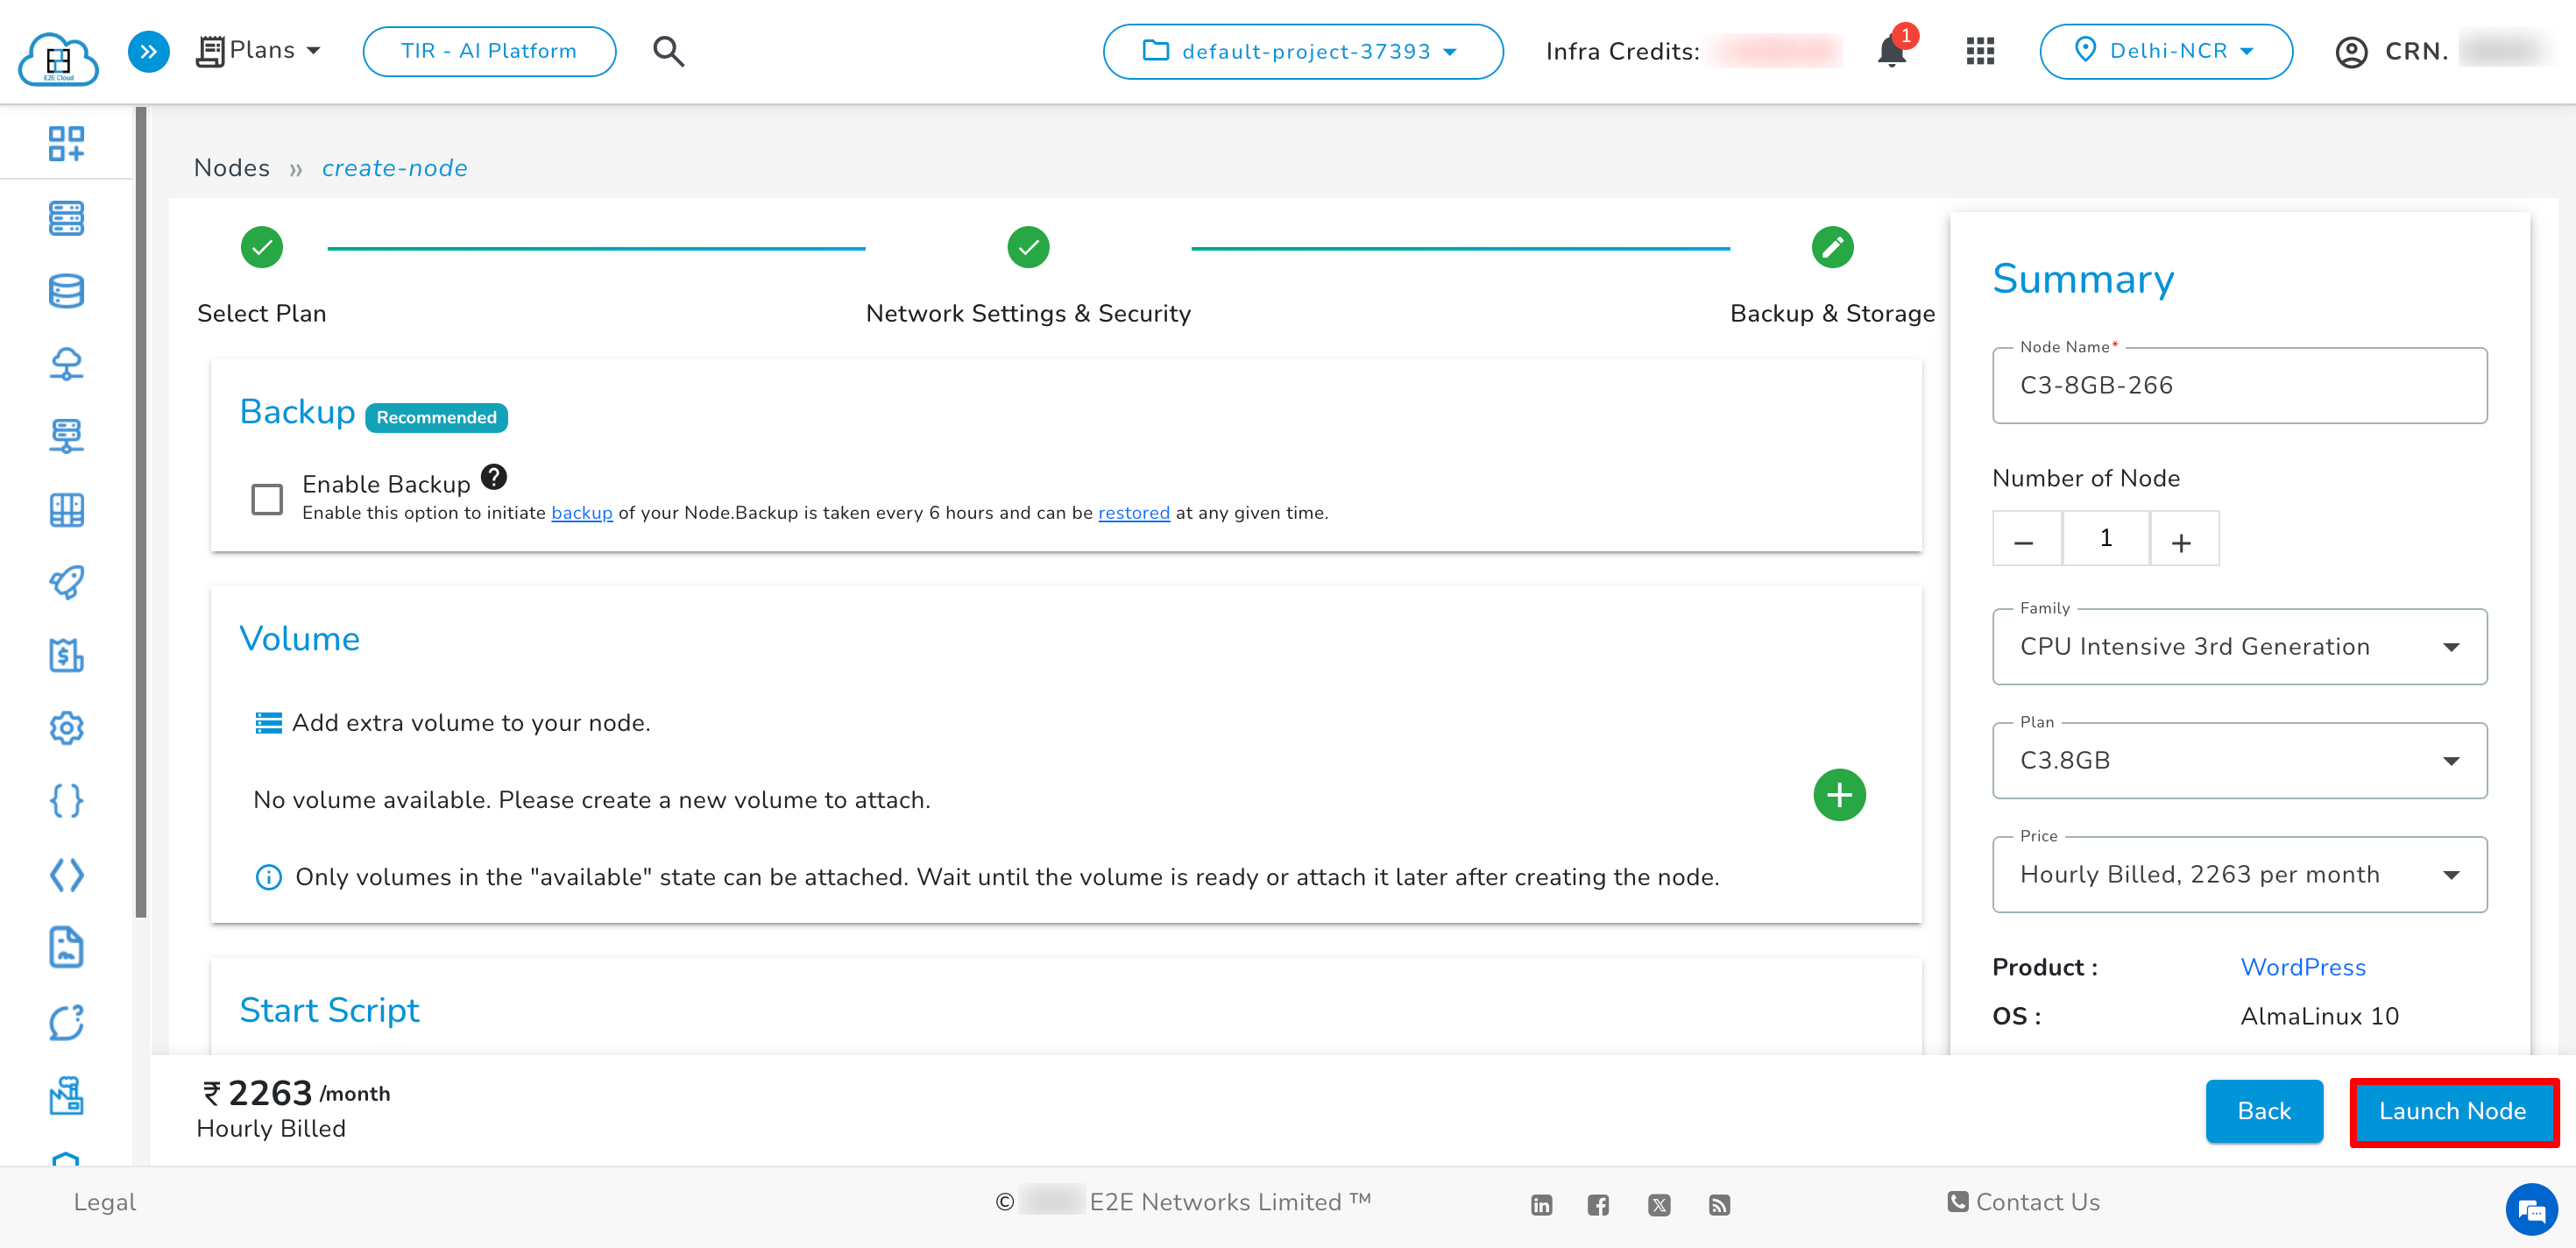
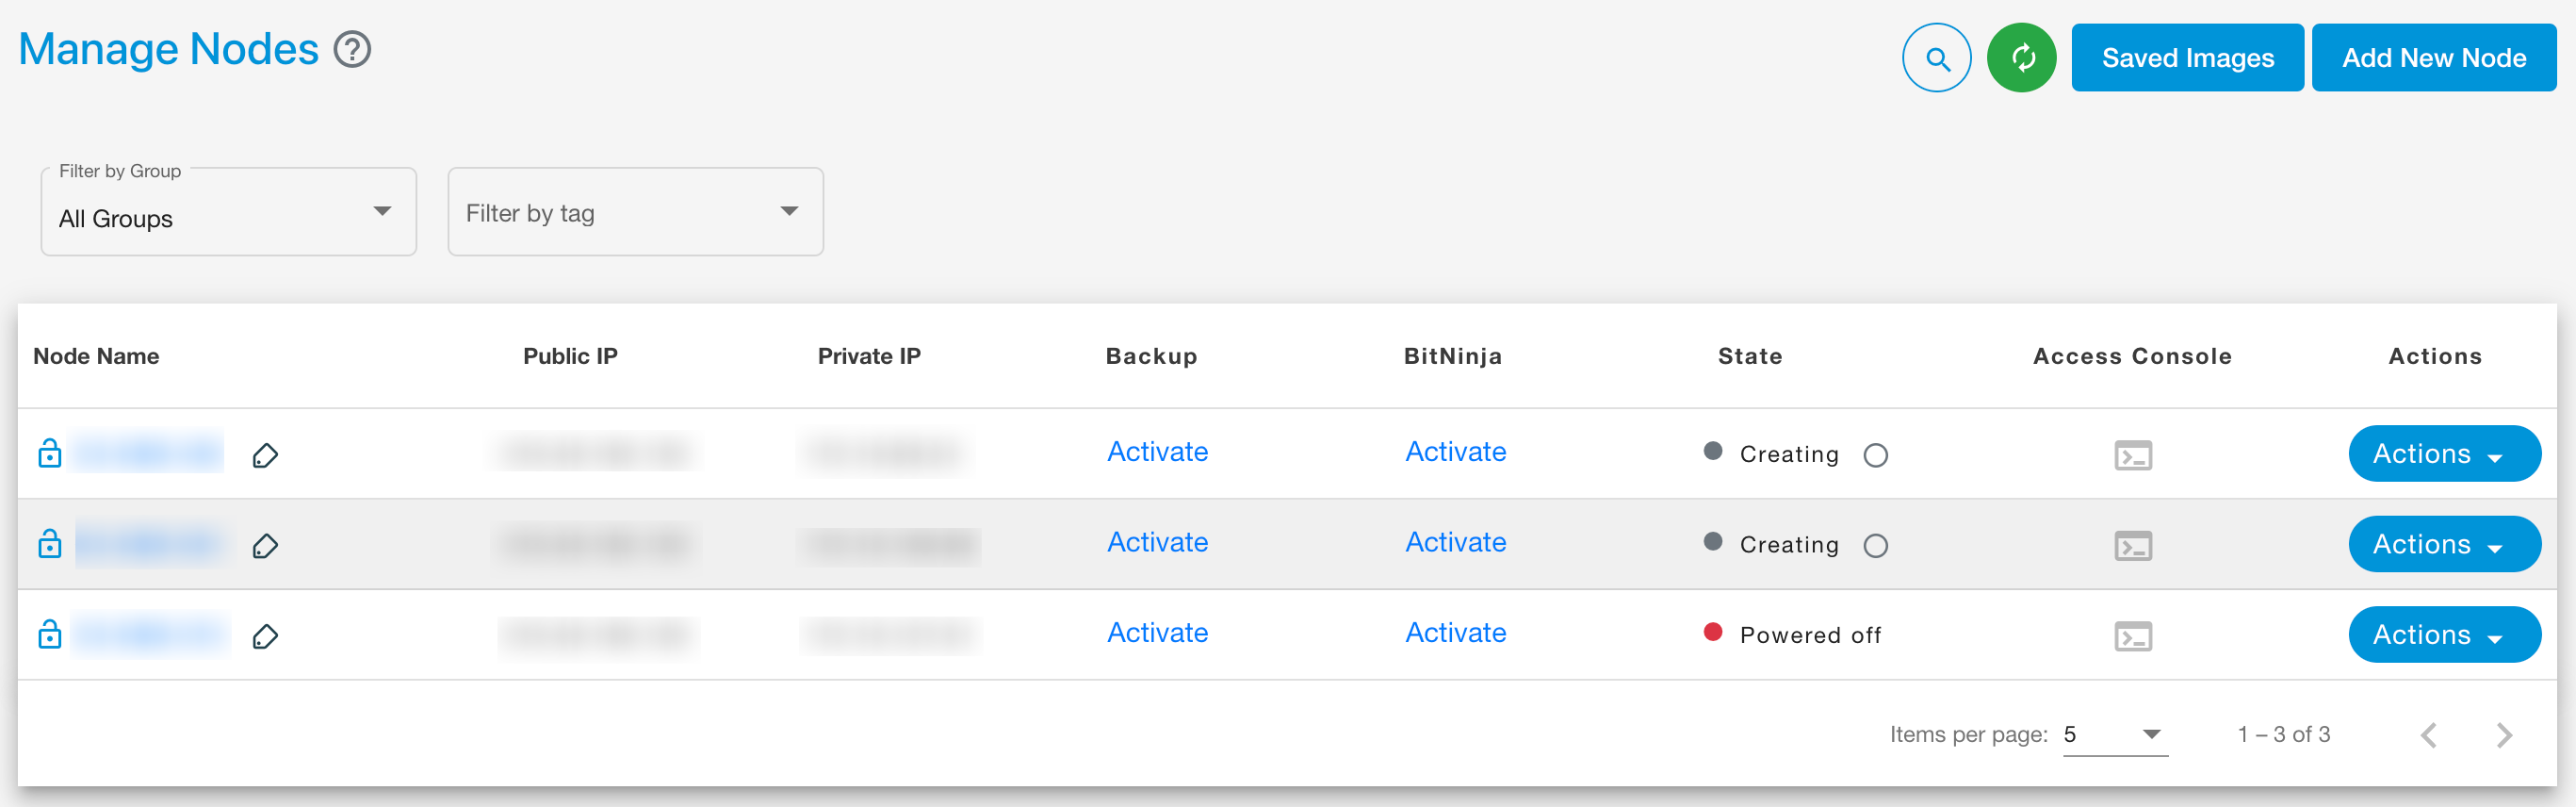
Once you’ve selected your options, click Launch Node. It will take a few minutes to set up the Node, and you will be taken to the Manage Node page.