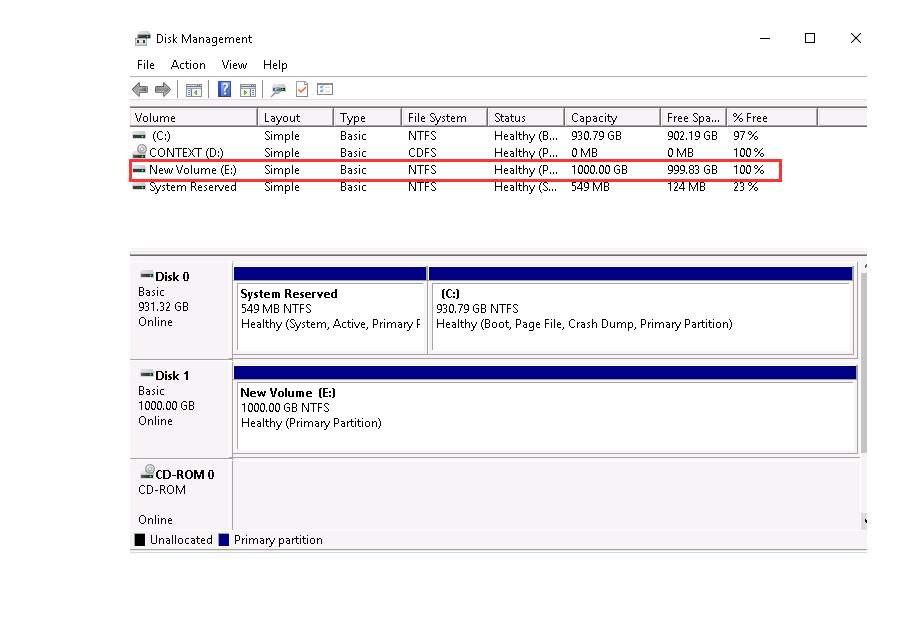
Make your Volume available for use on Windows
After you attach a Block Storage volume to your Windows Node, it is exposed as a block device and appears as a removable disk in Windows. You can format the volume with any file system and then mount it. You will be able to access it in the same way that you access any other volume.
To create a volume for your block storage attached to a Windows node, you can use the Disk Management utility.
-
Login to your Windows instance using Remote Desktop.
-
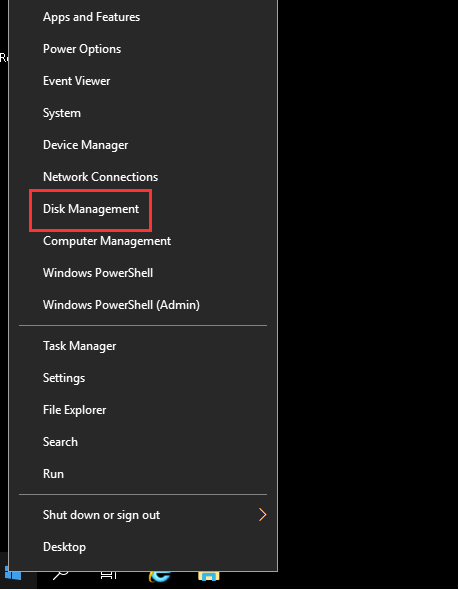
Start the Disk Management utility. On the taskbar menu, right-click on the Windows logo and select Disk Management Utility.
-
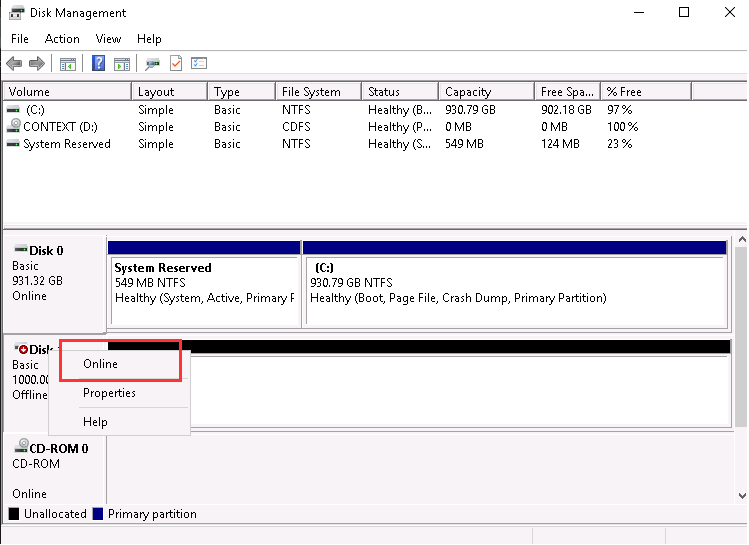
At the bottom left section, the attached disk will be available offline. To bring the volume online, right-click and select Online.
-
Next, we must initialize the disk to use it.
Note: Initializing must be done only for new volumes. If you have already existing data or an image, initializing will require you to reformat the disk, which will delete your existing data.
-
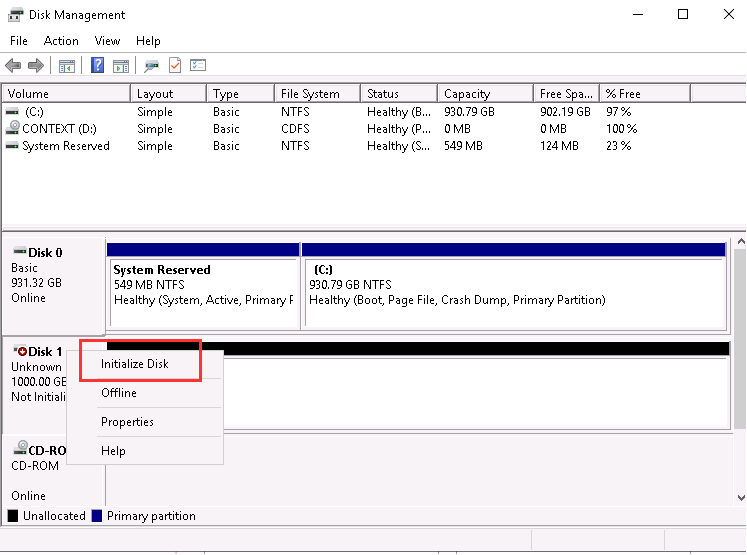
To initialize the disk, right-click on the disk and select Initialize.
-
You will be asked for the partition style. Select the partition and click OK.
Note: You need to select GPT partition tables for block storage disks larger than two terabytes (TB).
-
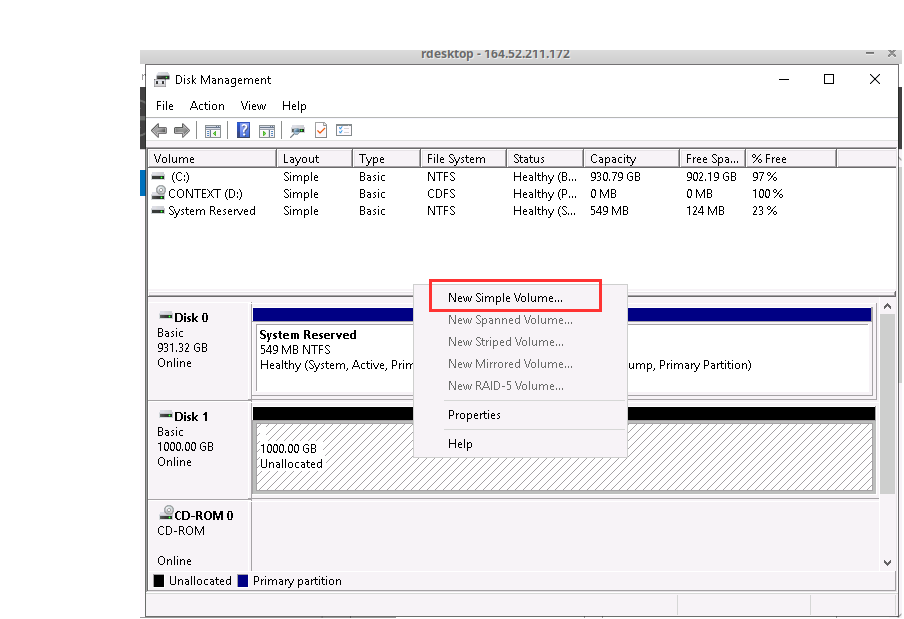
Now, we will create a new volume with the partitioned disk. Right-click on the disk and select New Simple Volume. Complete the simple volume wizard with a drive path and name.
-
The new volume is now available for use.
