Introduction to EPFS
Overview
EPFS (E2E Parallel File System) is a highly scalable and reliable parallel file system designed for large-scale High-Performance Computing (HPC) environments. It delivers exceptional performance by supporting parallel data access, making it ideal for handling massive datasets and numerous clients.
- High throughput: Supports multiple simultaneous clients.
- Scalability: Can handle petabytes of data and thousands of clients.
- Reliability: Uses robust mechanisms to ensure data integrity.
How EPFS Works
-
Data Distribution:
- Data is striped across multiple OSSs, enabling parallel read/write operations.
- The striping pattern can be customized for specific use cases.
-
Metadata Management:
- The MDS manages metadata, keeping operations like file creation and deletion fast.
-
Parallelism:
- Clients access data in parallel from OSSs, minimizing bottlenecks.
Advantages
- High Speed: Parallel operations increase performance.
- Fault Tolerance: Data is replicated across nodes.
- Scalability: Designed for massive datasets and numerous clients.
This feature is currently available on AlmaLinux and RockyLinux.
Managing EPFS
Creating an EPFS
-
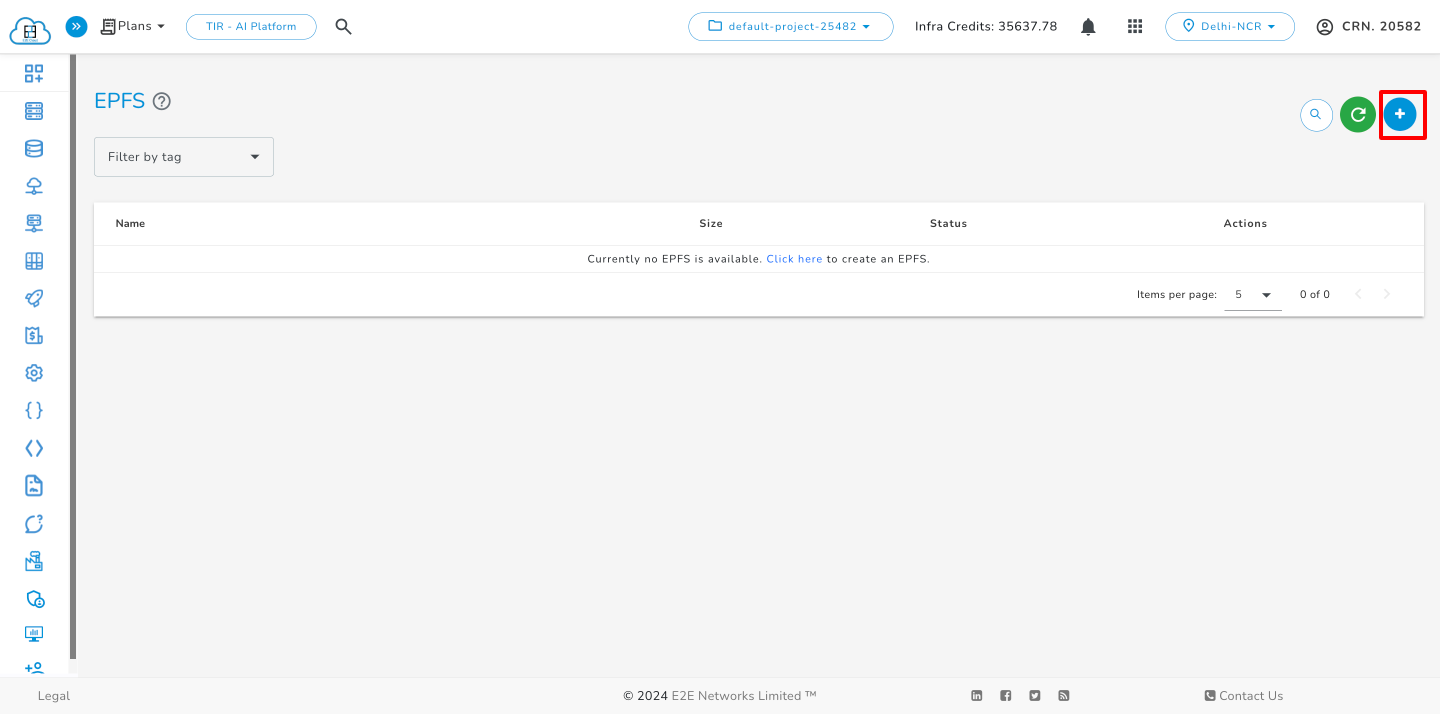
Navigate to the Storage > EPFS section in the left sidebar of the dashboard.

-
Click Create.
-
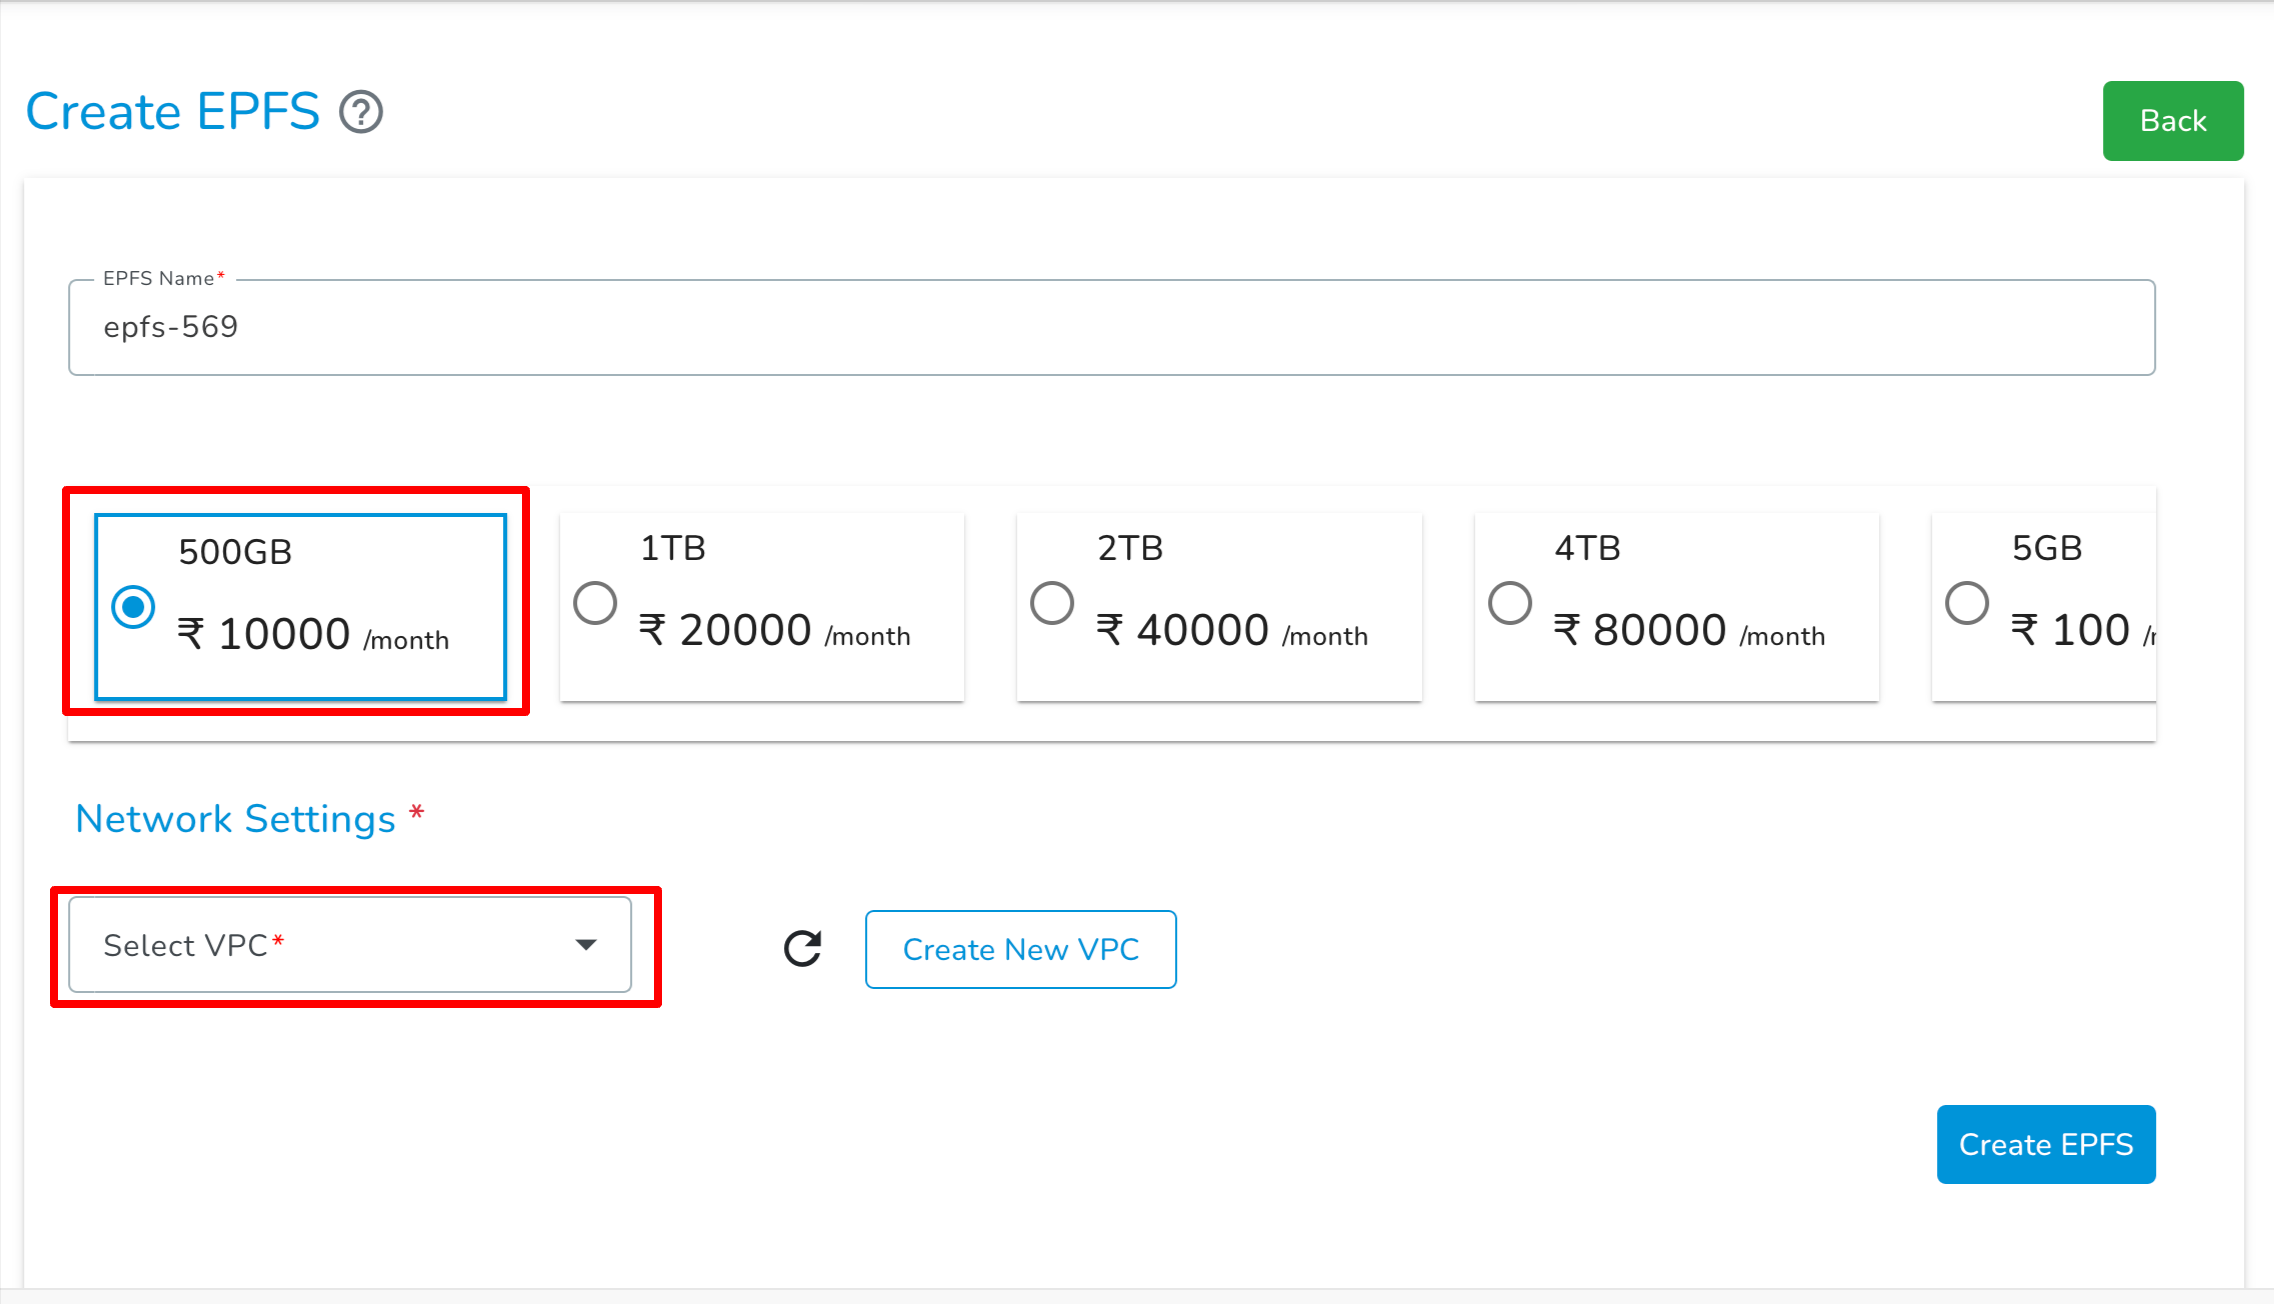
Provide the following details:
- Name: Enter a name for your EPFS.
- Plan: Select an appropriate plan.
- VPC: Choose the desired Virtual Private Cloud.
-
Click Create EPFS.
Your newly created EPFS will appear in the list.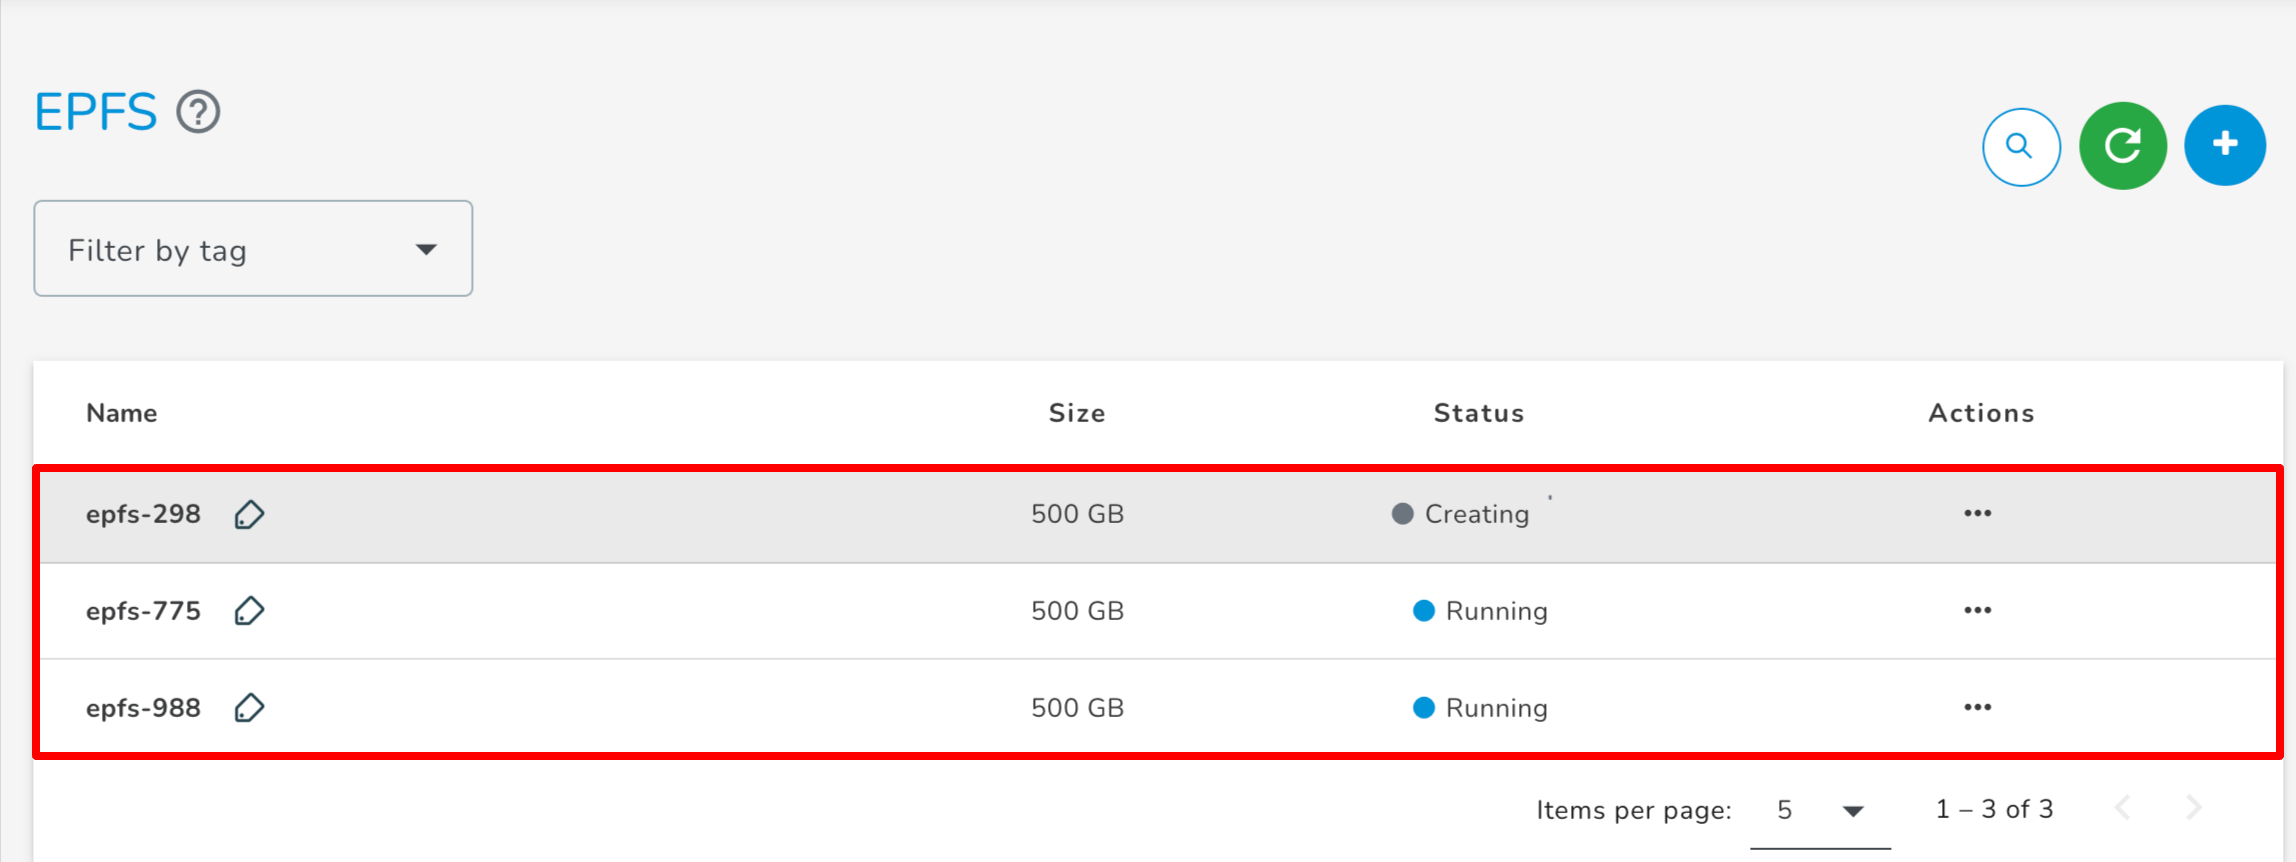
Accessing EPFS
Ensure that EPFS and the Virtual Machine (VM) are on the same network.
Follow these steps to set up the client and mount EPFS:
-
Download the Client Setup Script:
Download thescripts.tarfile.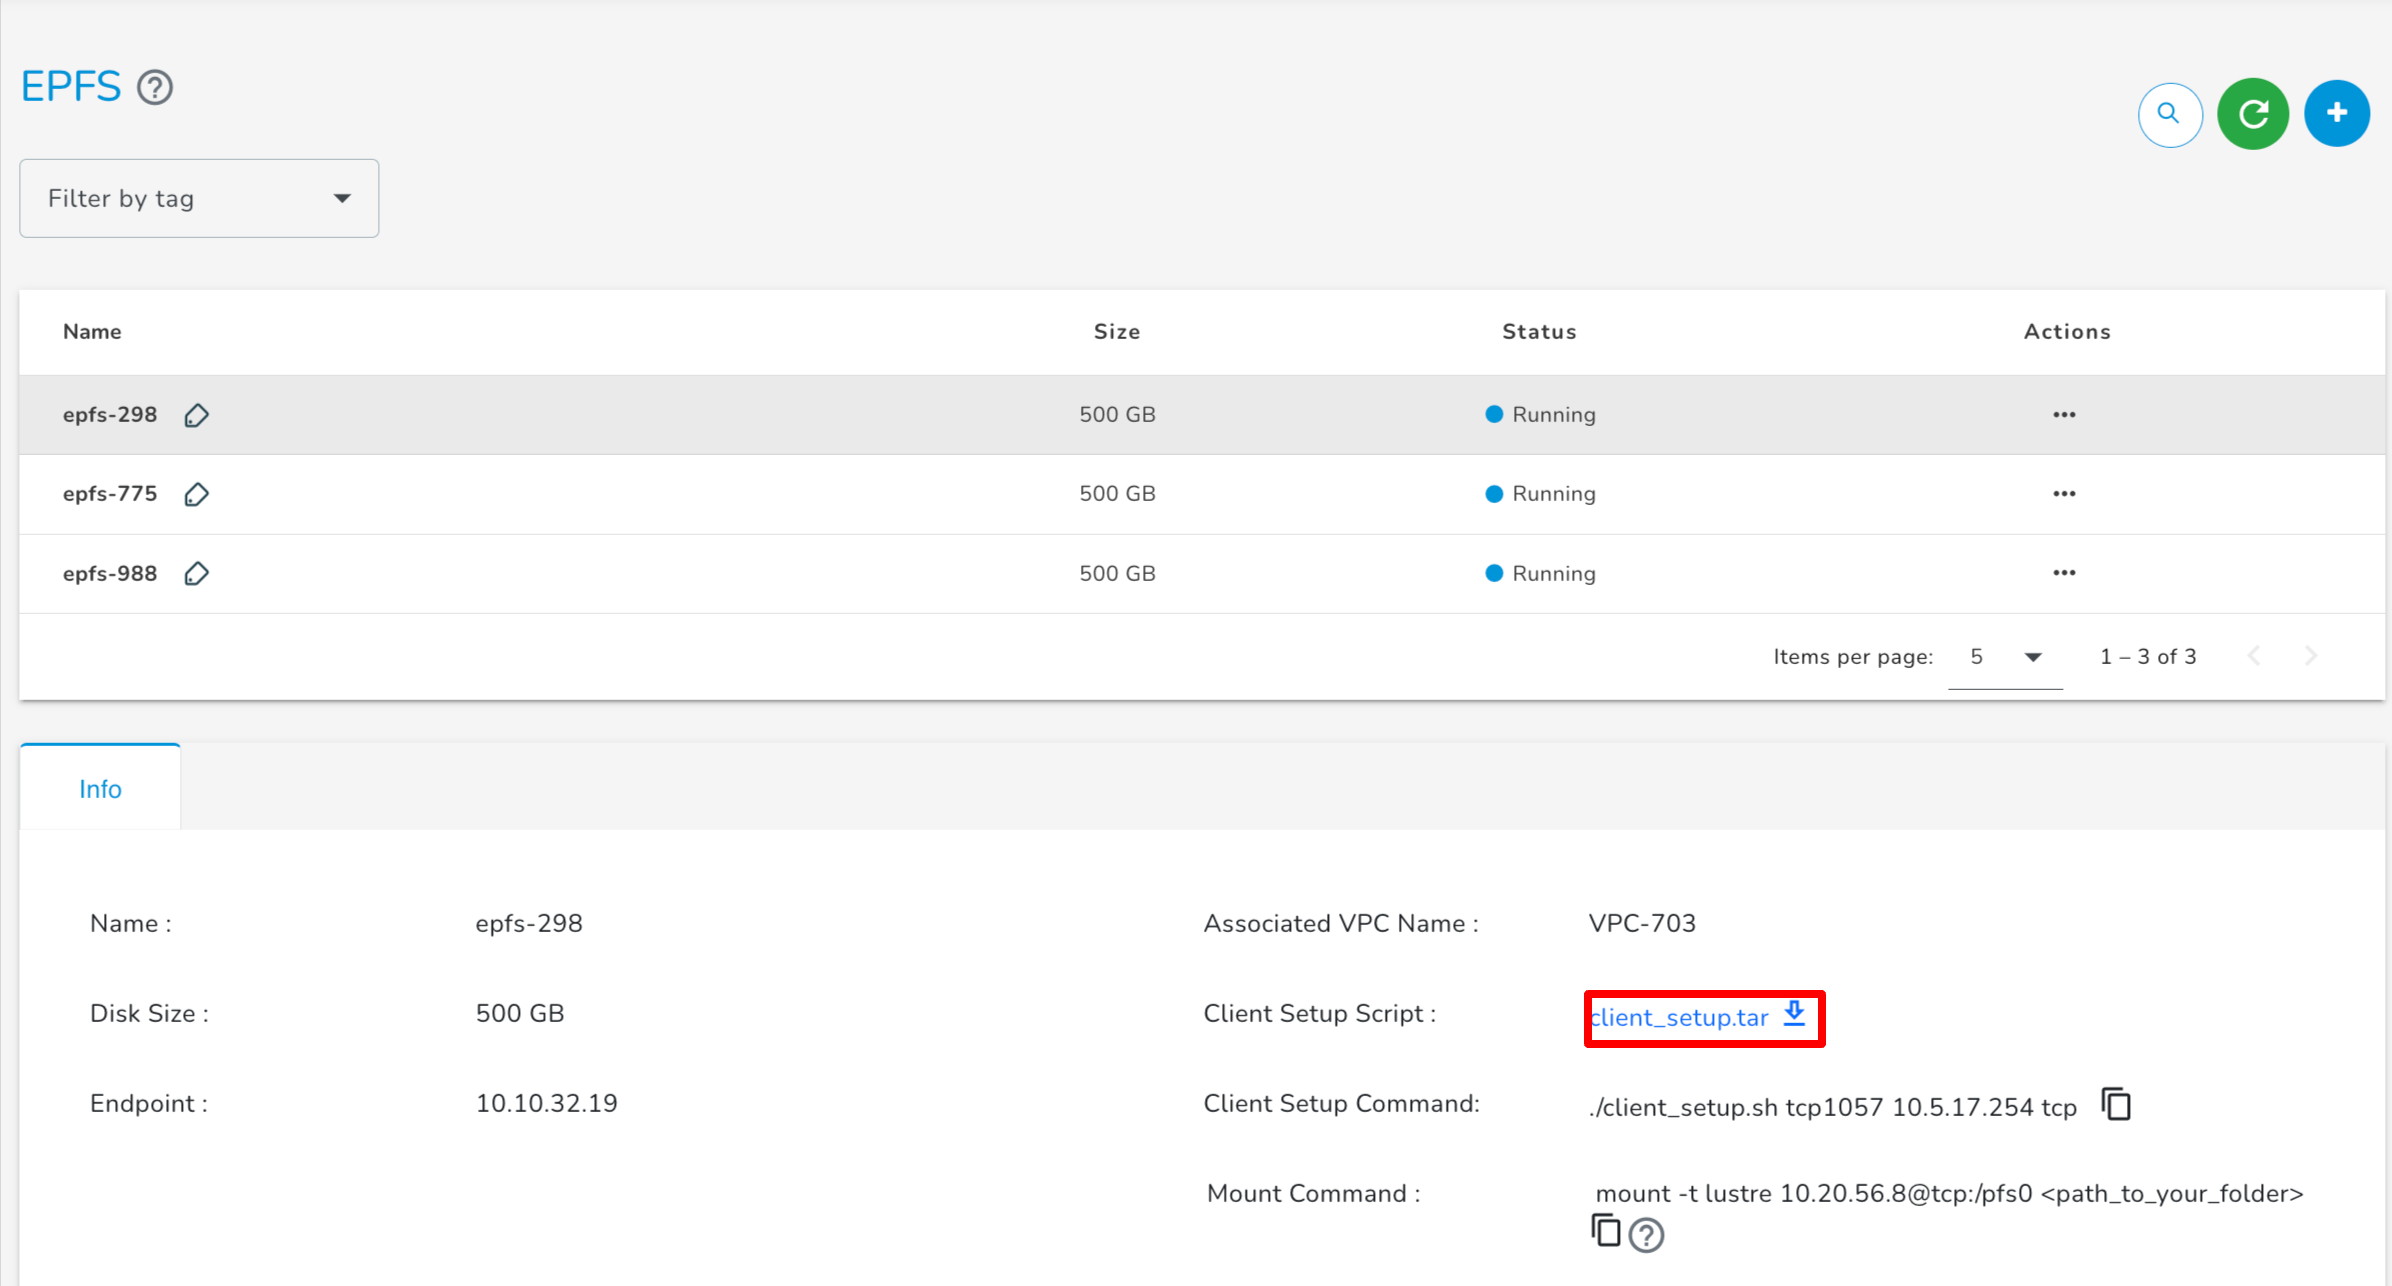
-
Transfer the script to the server:
Use thescpcommand to copy the file into your server.scp <File-Location>/scripts.tar <username>@<server_ip>:/root/ -
Extract the tar file:
Run the following command to extract the script:
tar -xvf <file_name>
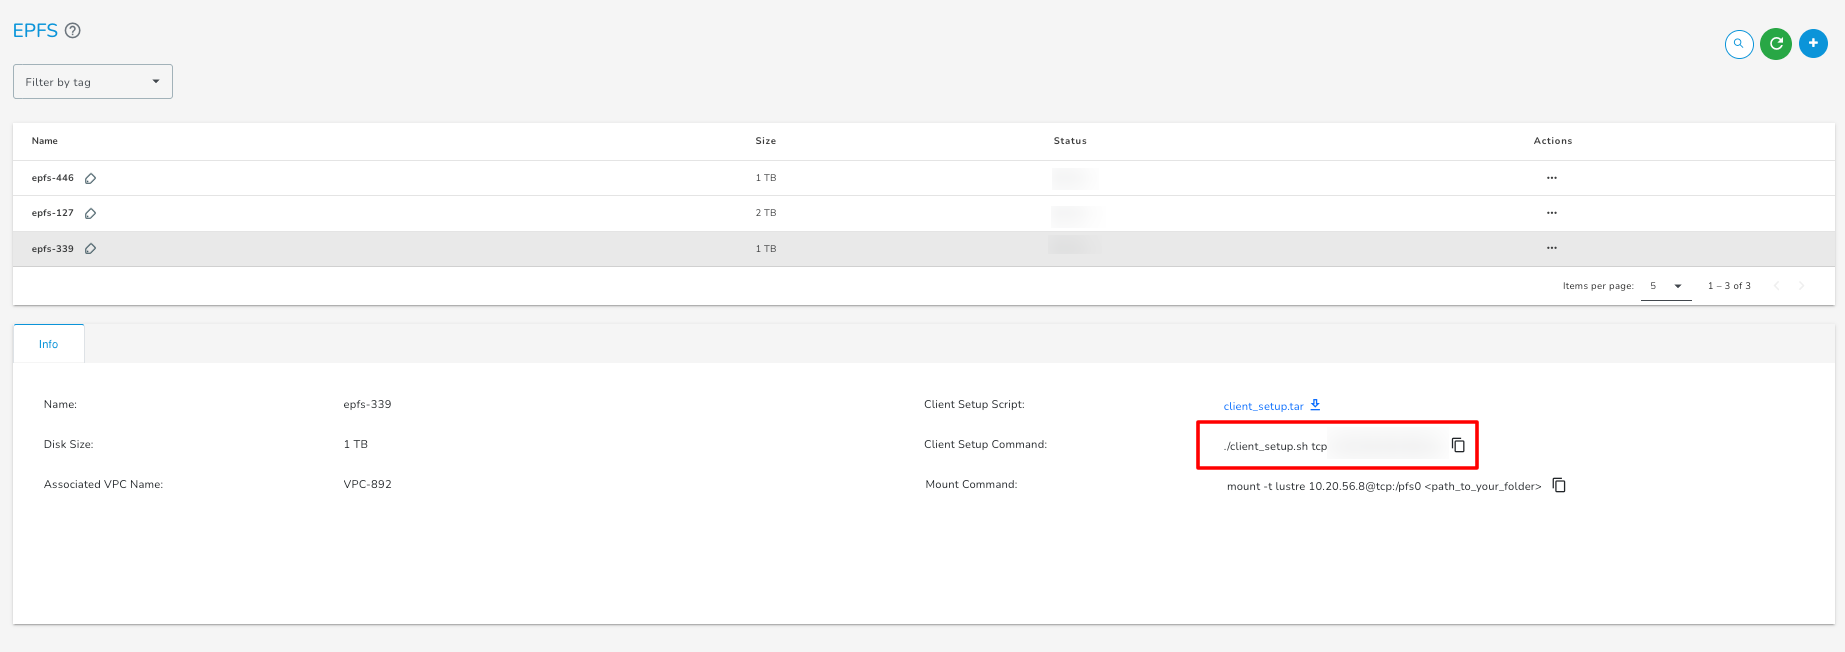
- Run the Client Setup Command:
To set up the client, you need to run the setup script using the command below. Each new EPFS (Encrypted Parallel File System) deployment will have its own unique parameters — these values change every time you create a new EPFS instance.
Execute the following script to set up the client:
./client_setup.sh <tcp_port> <server_ip> <protocol>
-
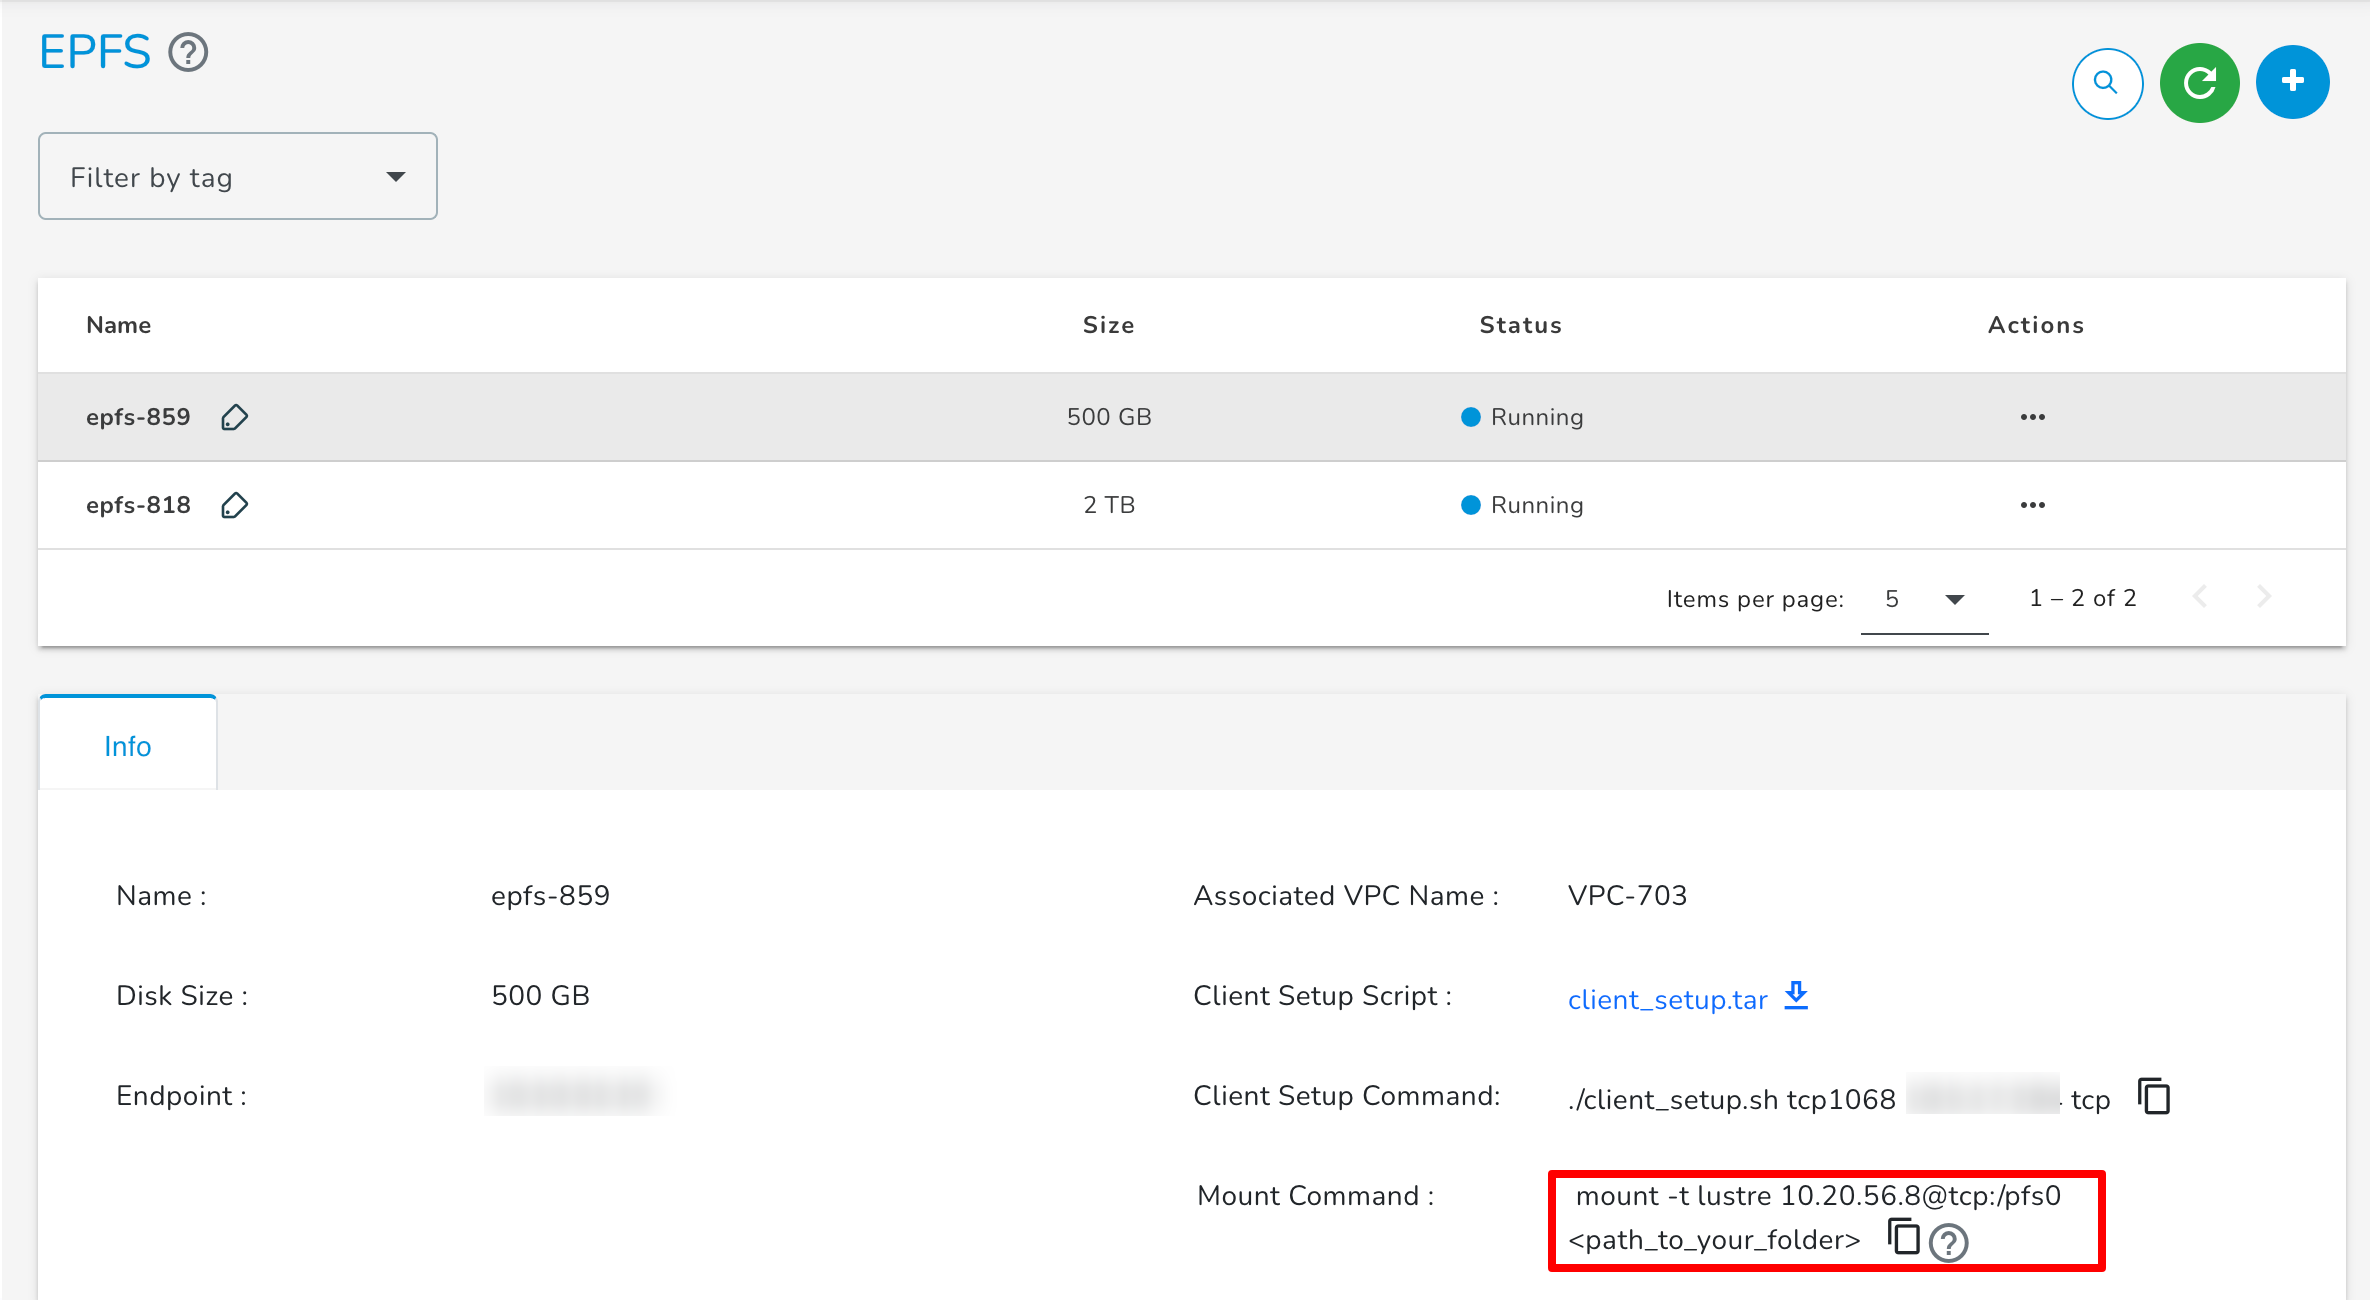
Mount the EPFS:
Use the following command to mount EPFS:
mount -t lustre 10.20.56.8@tcp:/pfs0 <path_to_your_folder>
Upgrading EPFS
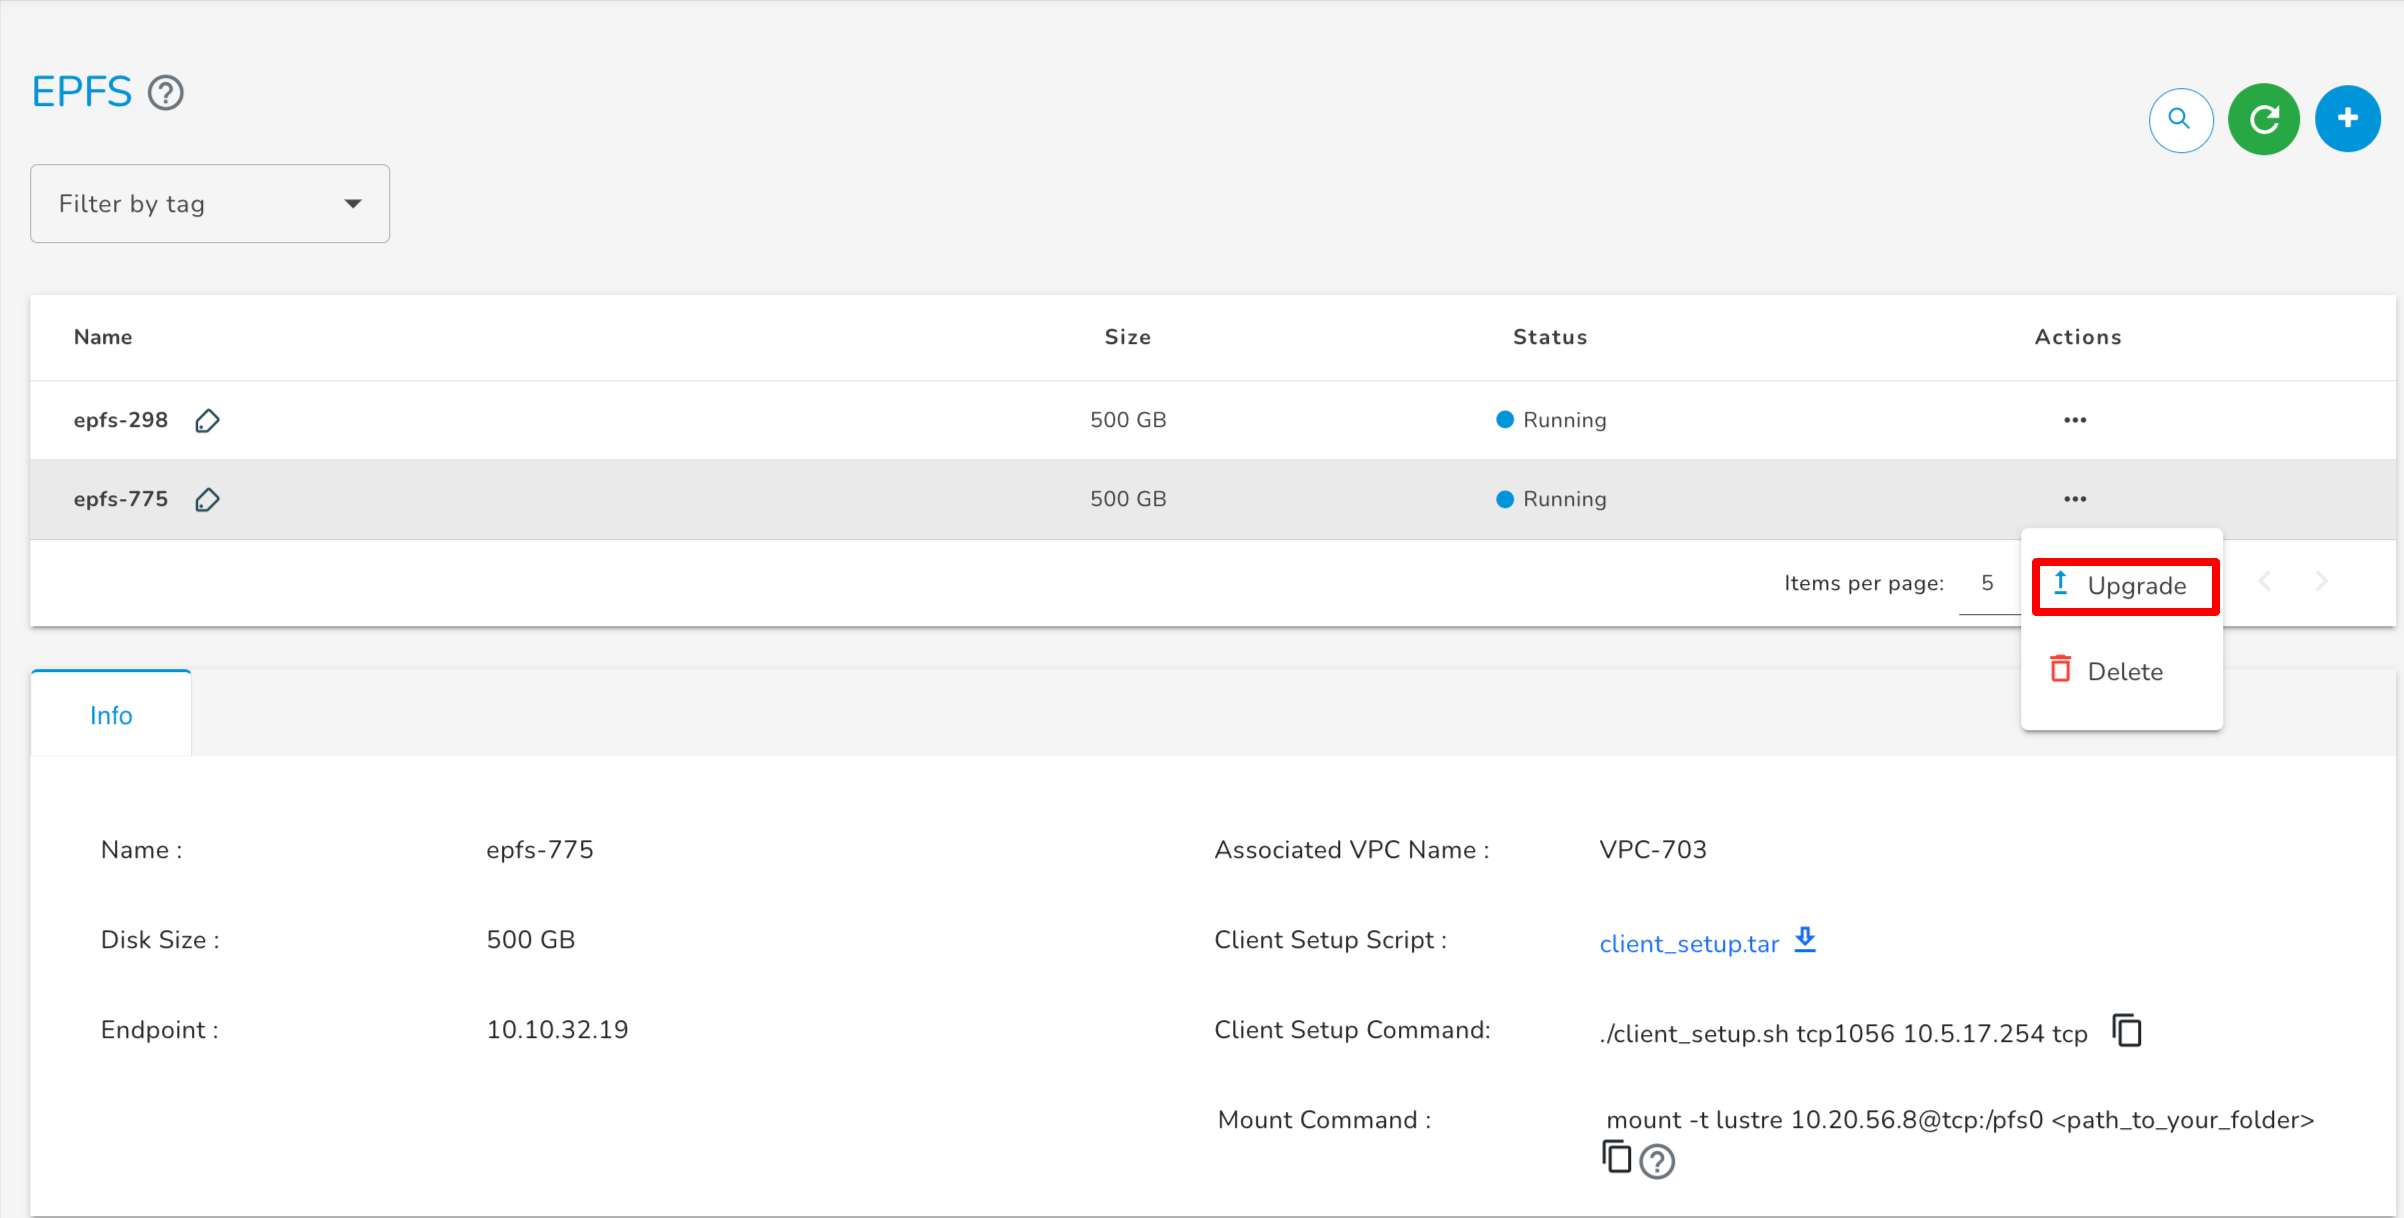
Enhance your EPFS by increasing its memory capacity through the Upgrade EPFS feature.
- Click Upgrade under the Action menu.
- Select the desired upgraded plan and Confirm by clicking the Upgrade button.
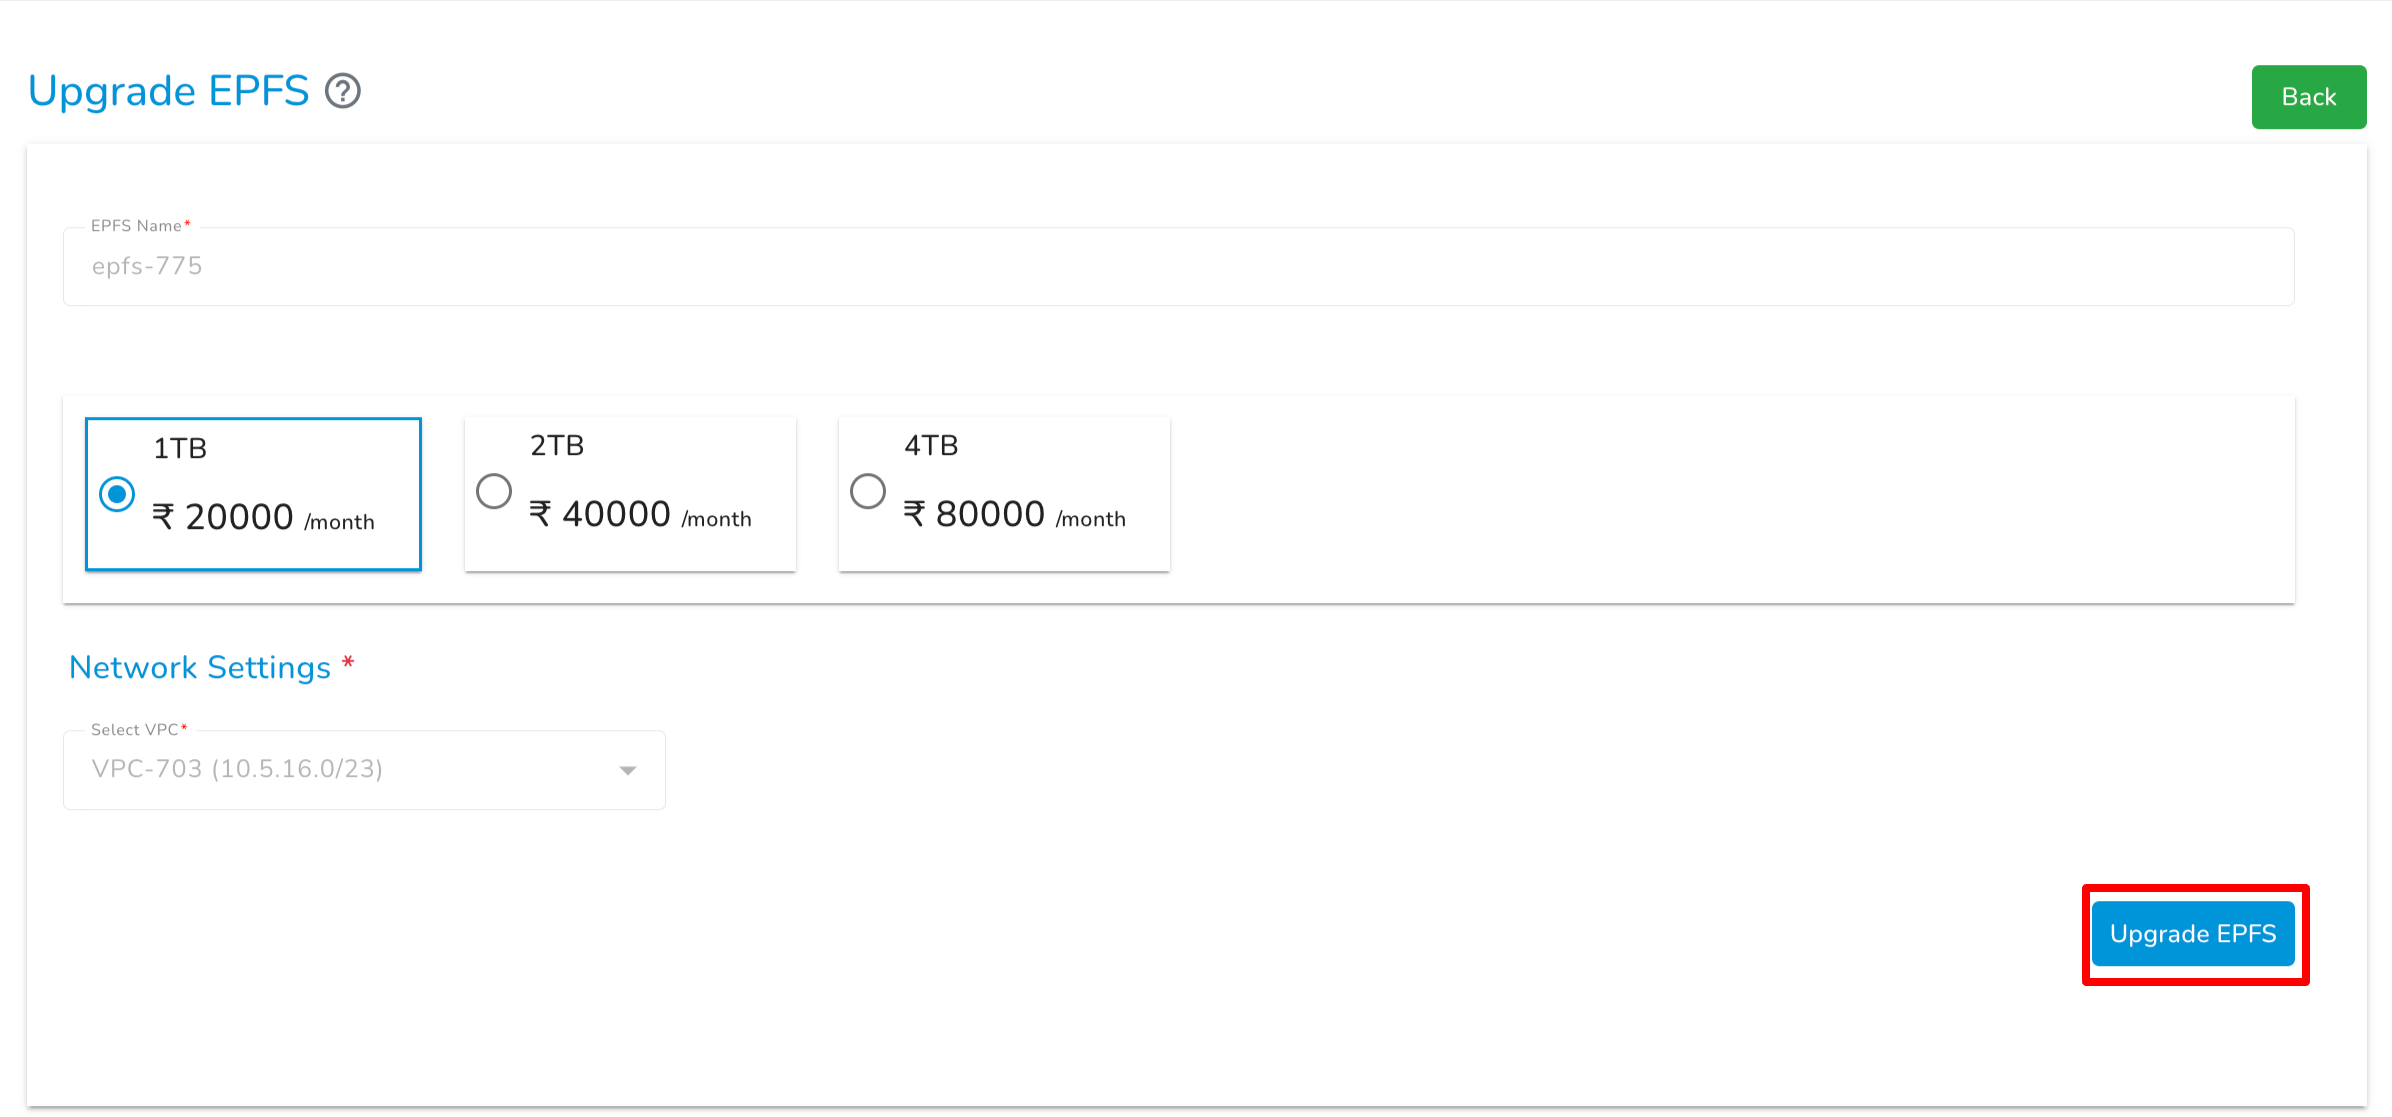
- Your EPFS will be upgraded to the selected configuration.


Deleting an EPFS
- Select Delete from the Action menu.
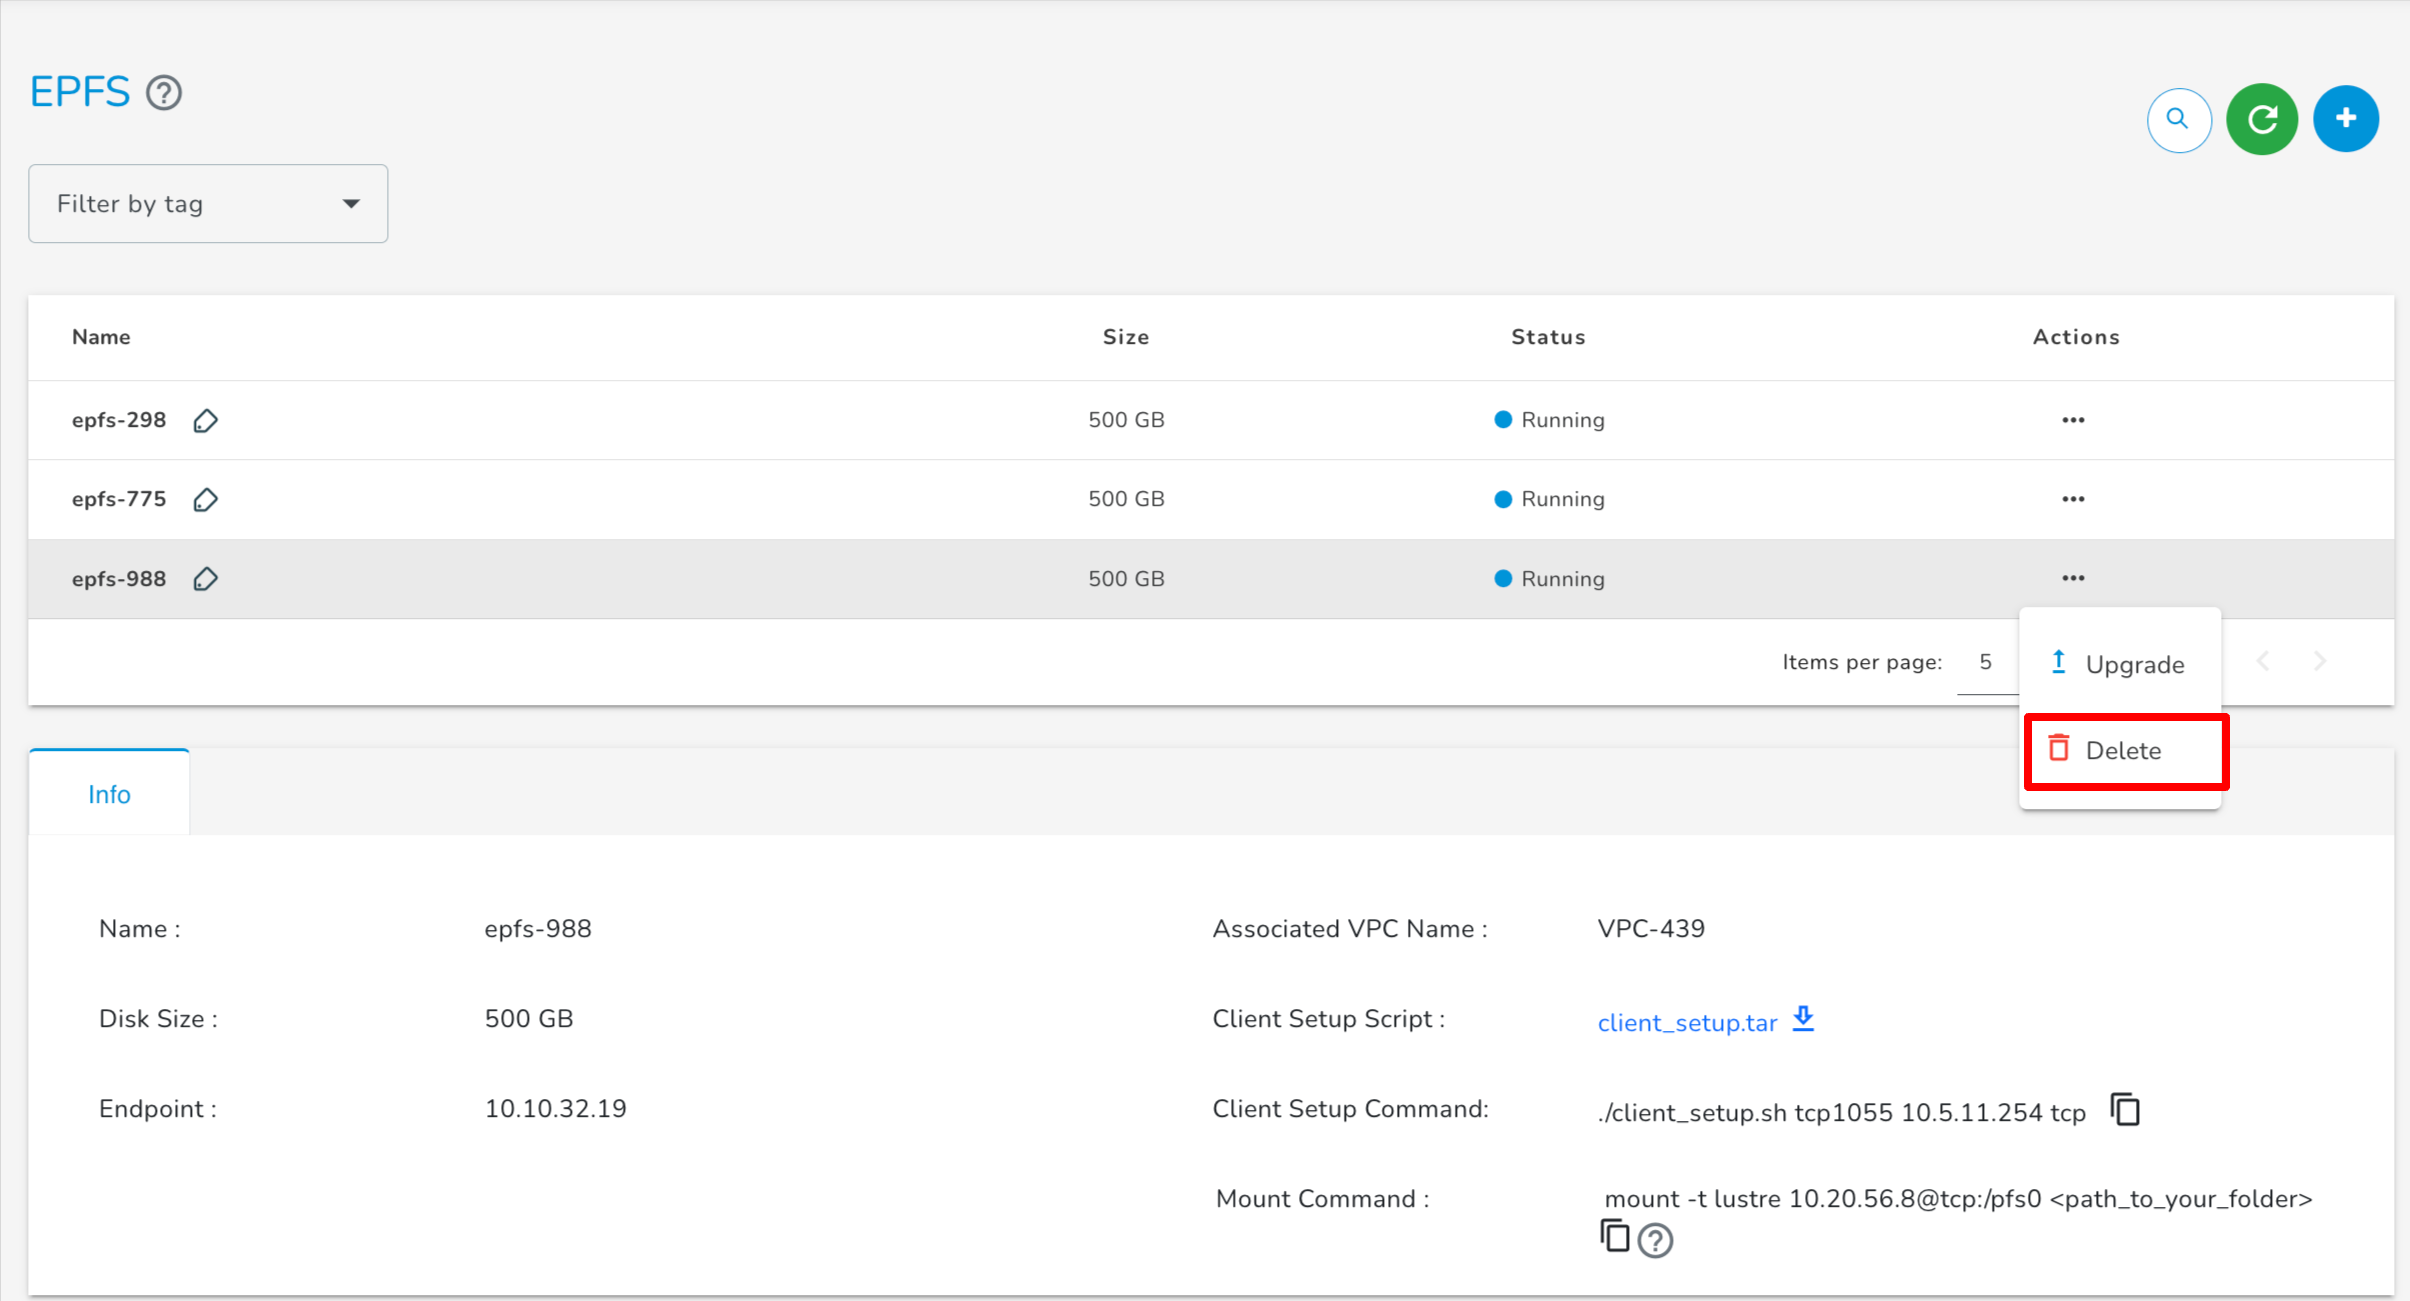
- A warning message will notify you of permanent data loss.
- Confirm and proceed by clicking Delete. The selected EPFS storage will be removed.
