How to run a Jupyter Notebook inside Tensorflow Container for Accelerated Machine Learning E2E GPU Wizard?
Launching an Instance based on Tensorflow container with Jupyter-notebook Running
Using myaccount portal
-
First sign into the myaccount portal.
-
Navigate to GPU Wizard:
- Under the compute menu, click on GPU.
- Then click on GPU Wizard.
- For NGC Container Tensorflow, click on Next under actions column.
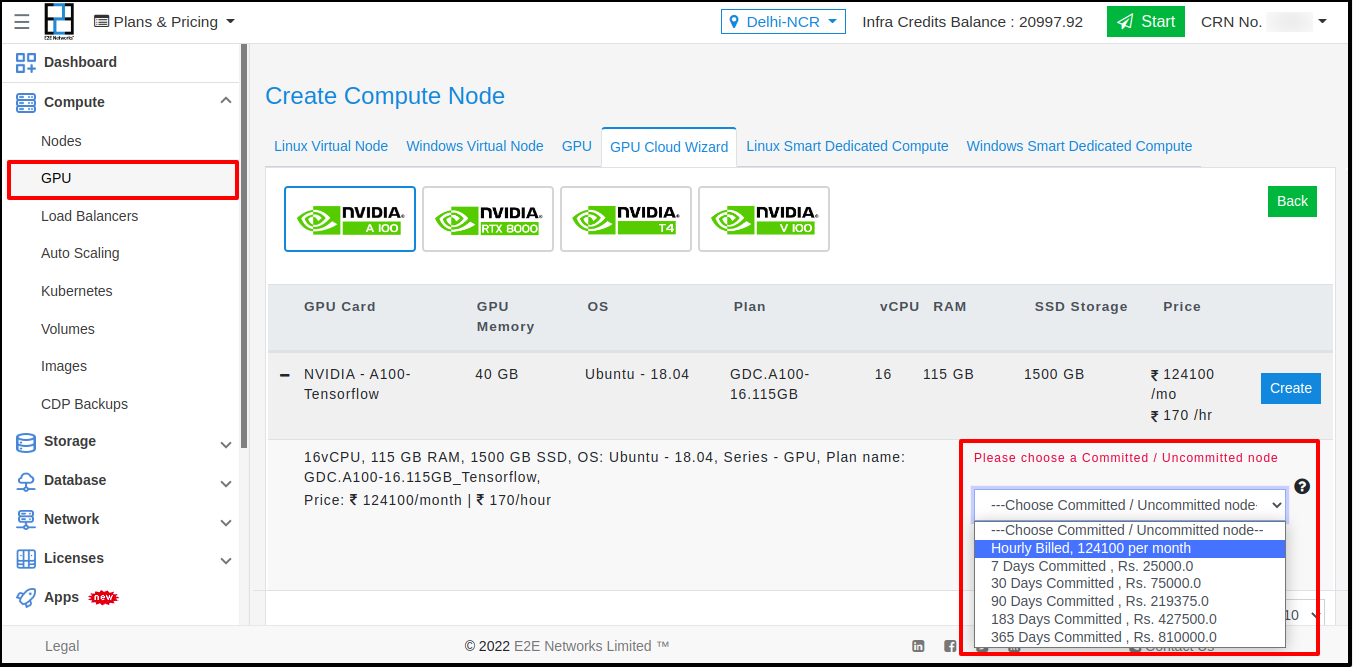
- Choose the card according to requirement. A100 is recommended.
-
Choose the plan as per the requirement:
- Optionally you can
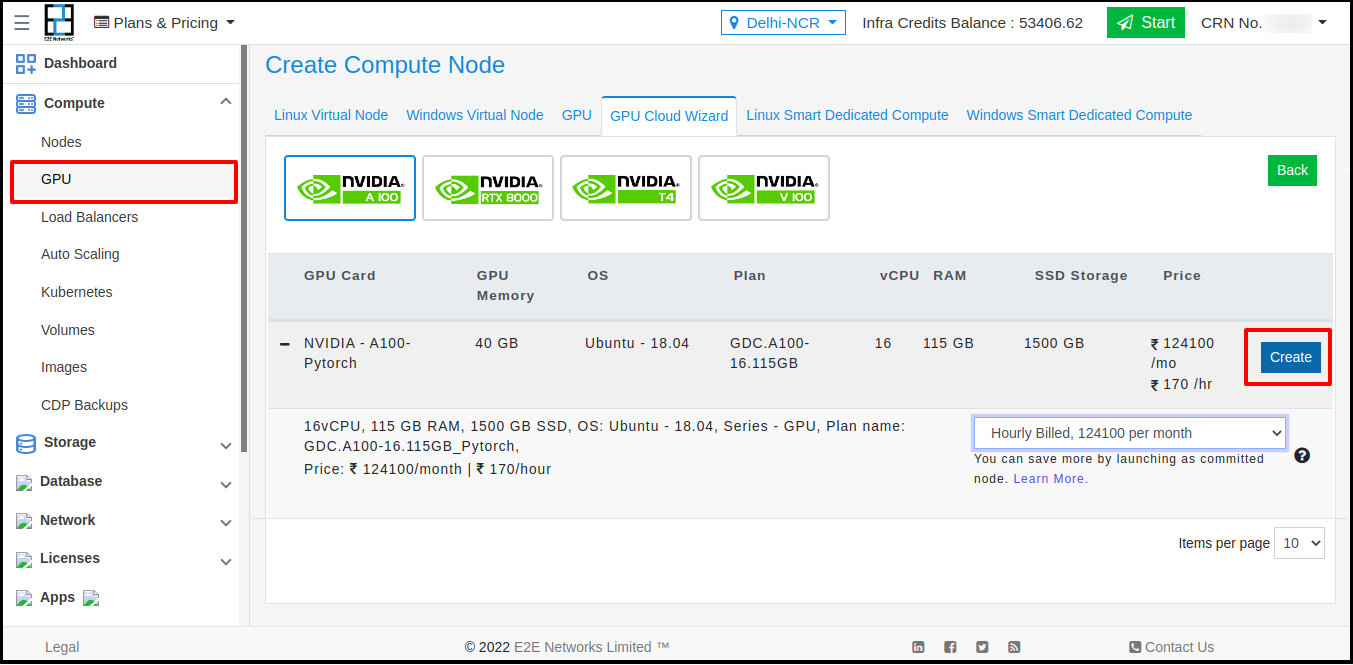
add SSH key(recommended) or subscribe to CDP backup. - Click on “Create my node”.
- Wait for a few minutes and confirm that node is in running state.
- Optionally you can
-
Open terminal on your local PC and type the following command:
ssh -NL localhost:1234:localhost:8888 root@<your_node_ip>
- The command usually will not show any output, which indicates that the command has run without any error.
- Go to a web browser on your local PC and hit the URL:
http://localhost:1234.

- Congratulations! Now you can run your Python code inside this Jupyter notebook, which has TensorFlow and all the libraries frequently used in machine learning pre configured.
- To get the most out of GPU acceleration, use
RAPIDSandDALI, which are already installed inside this container. - RAPIDS and DALI accelerate tasks in machine learning, including data loading and preprocessing, beyond just the learning process.
How to Run
- MNIST dataset is a kind of “Hello world” implementation in machine learning.
- Here we are about to use Fashion MNIST (clothing classification) as given in the NGC link
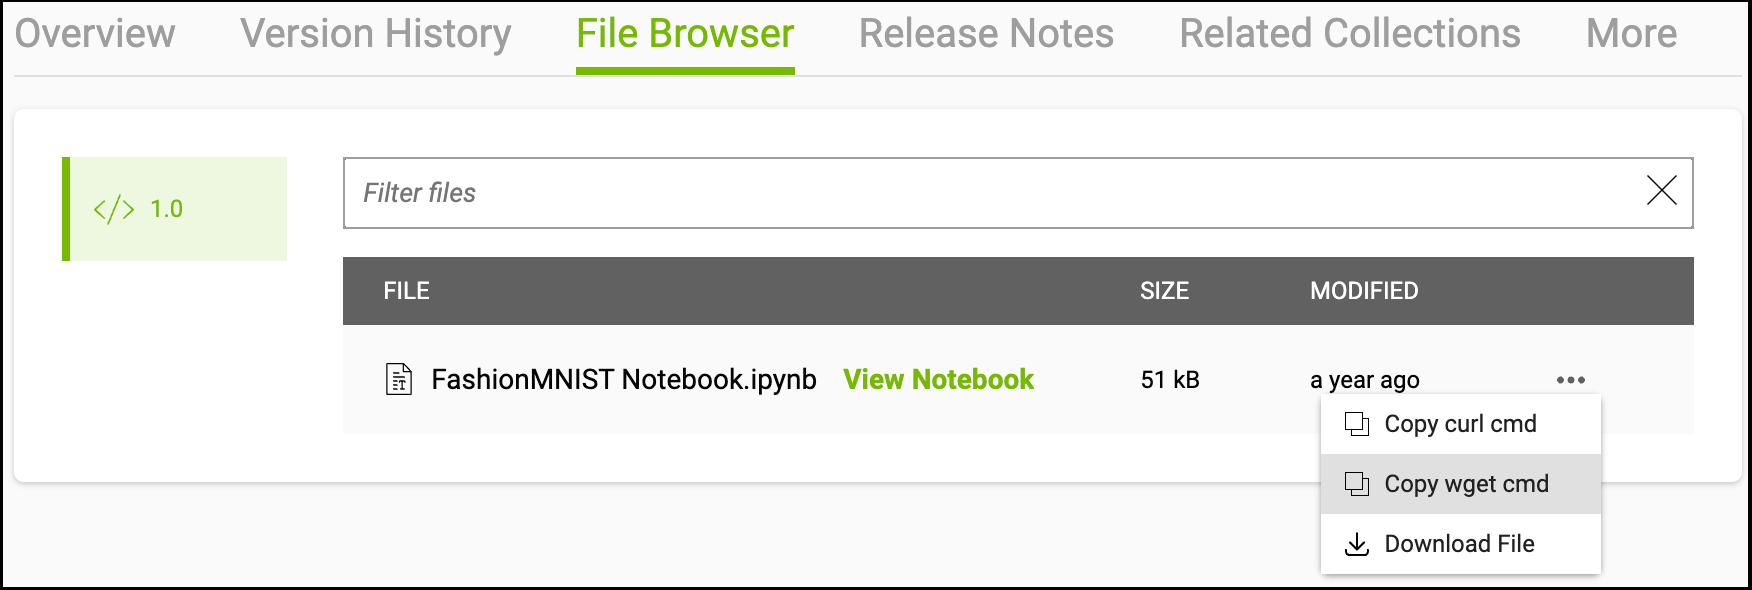
here. - Copy the
wgetcommand as given below.
- In your Jupyter Notebook UI, create a new notebook.

- Enter ‘!’ in the cell and paste the
wgetcommand.
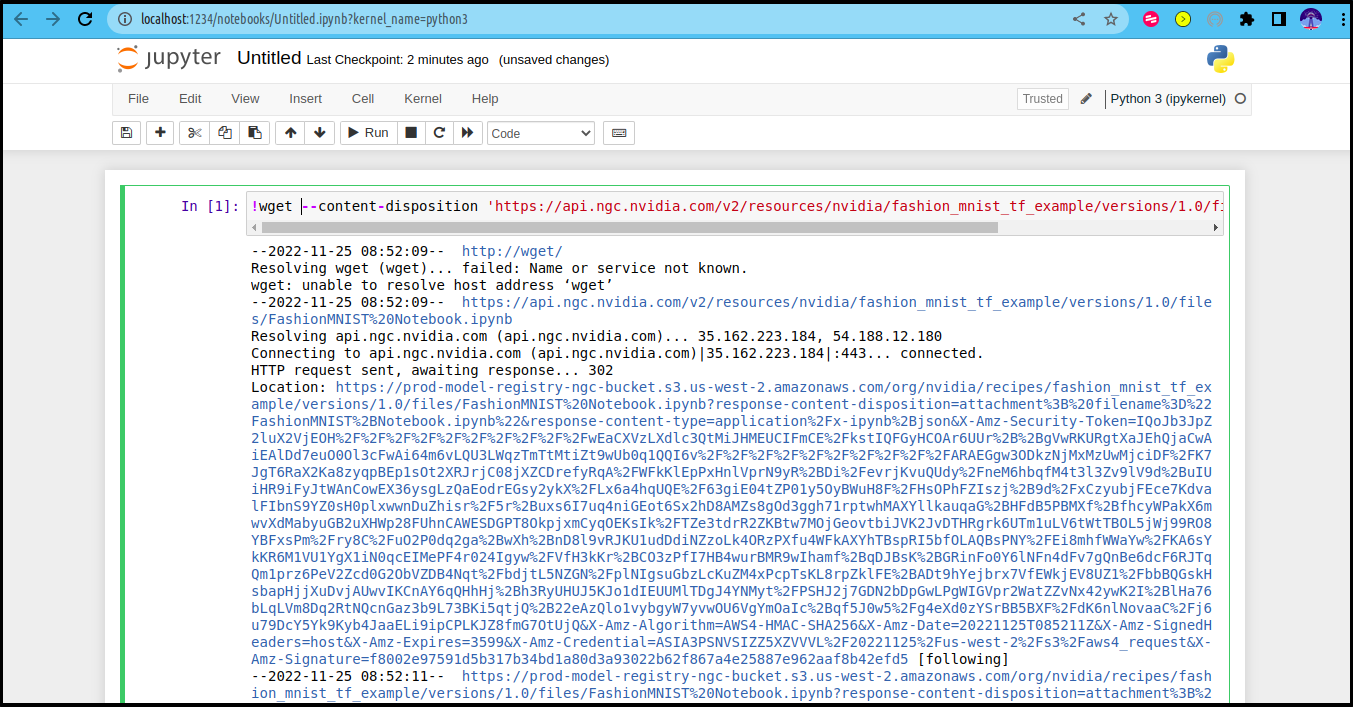
- Once you run the command, you can find the downloaded file on the Jupyter home page.
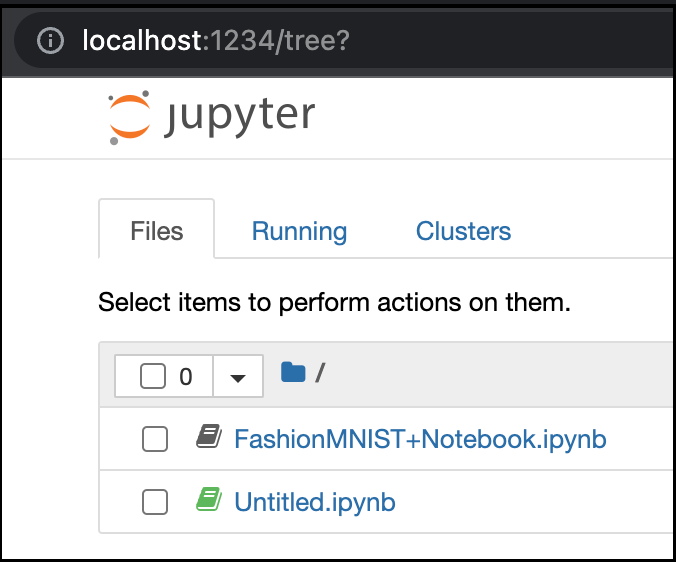
- Now open the notebook
FashionMNIST+Notebook.ipynb.- You can skip up to step 4 (which was already done) and directly go to Step 5.
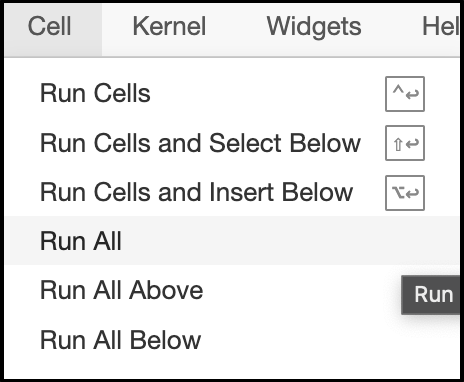
- You can run cell by cell from Step 5 and observe each output, or you can go to the menu bar and select “Cell -> Run All” to run all of them.
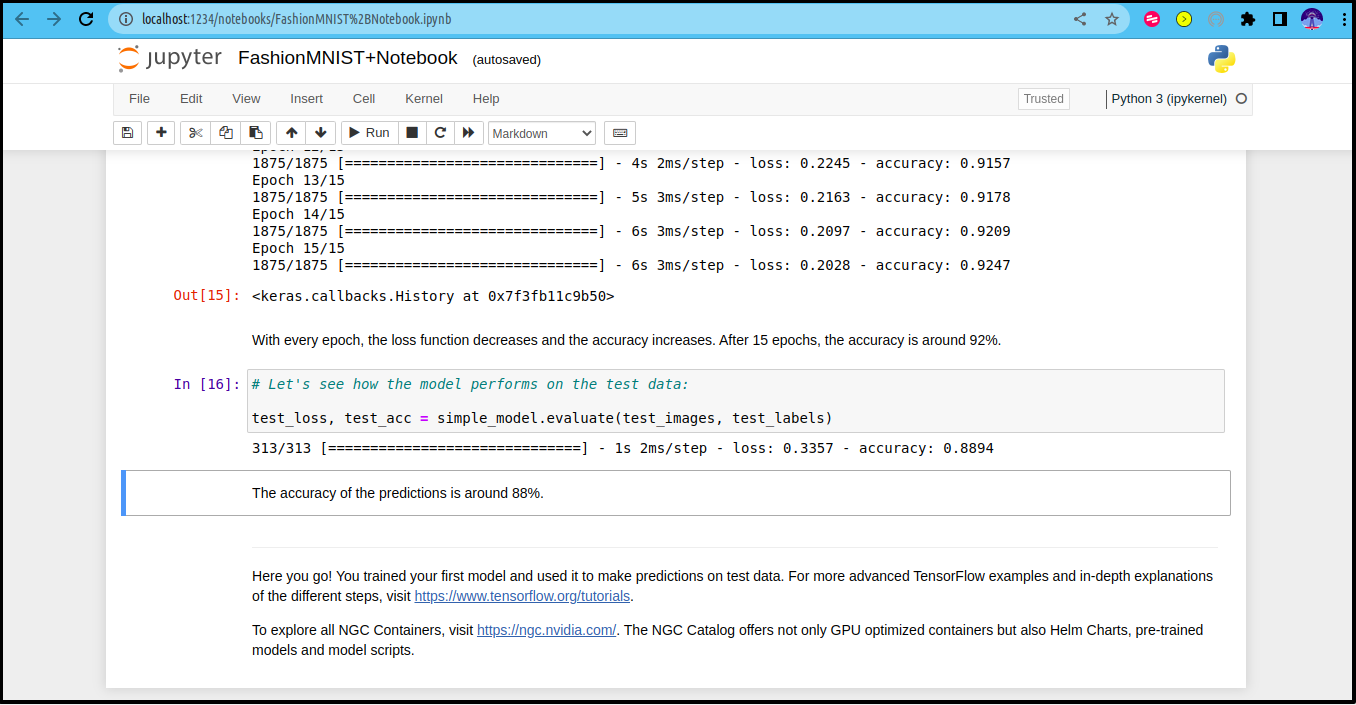
- You can see that after 15 epochs, the accuracy will be around 92% on training data and 88% on testing data.
How to troubleshoot if the notebook isn’t accessible
- SSH into your node with the public IP:
ssh username@<public-ip>. - Check the output of the
docker pscommand.

- If it shows a container is running using the TensorFlow image, you can use the following command in the terminal:
cnid=$(docker ps |grep tensorflow|head -1|awk '{print $1}');/usr/bin/nohup /usr/bin/docker exec $cnid /usr/local/bin/jupyter-notebook --no-browser --port=8888 --allow-root --NotebookApp.token='' --NotebookApp.password='' --NotebookApp.quit_button=False --NotebookApp.notebook_dir=/home/tensorflow &
- The command usually will not show any output, which indicates that the command has run without any error.
- Go to a web browser on your local PC and hit the URL:
http://localhost:1234.

- Congratulations! Now you can run your Python code inside this Jupyter notebook, which has TensorFlow and all the libraries frequently used in machine learning pre configured.
- To get the most out of GPU acceleration, use
RAPIDSandDALI, which are already installed inside this container. - RAPIDS and DALI accelerate tasks in machine learning, including data loading and preprocessing, beyond just the learning process.
How to Run
- MNIST dataset is a kind of “Hello world” implementation in machine learning.
- Here we are about to use Fashion MNIST (clothing classification) as given in the NGC link
here. - Copy the
wgetcommand as given below.

- In your Jupyter Notebook UI, create a new notebook.

- Enter ‘!’ in the cell and paste the
wgetcommand.

- Once you run the command, you can find the downloaded file on the Jupyter home page.

- Now open the notebook
FashionMNIST+Notebook.ipynb.- You can skip up to step 4 (which was already done) and directly go to Step 5.
- You can run cell by cell from Step 5 and observe each output, or you can go to the menu bar and select “Cell -> Run All” to run all of them.


- You can see that after 15 epochs, the accuracy will be around 92% on training data and 88% on testing data.
How to troubleshoot if the notebook isn’t accessible
- SSH into your node with the public IP:
ssh username@<public-ip>. - Check the output of the
docker pscommand.

- If it shows a container is running using the TensorFlow image, you can use the following command in the terminal:
cnid=$(docker ps |grep tensorflow|head -1|awk '{print $1}');/usr/bin/nohup /usr/bin/docker exec $cnid /usr/local/bin/jupyter-notebook --no-browser --port=8888 --allow-root --NotebookApp.token='' --NotebookApp.password='' --NotebookApp.quit_button=False --NotebookApp.notebook_dir=/home/tensorflow &

- Now create an SSH tunnel again on your local PC with the following command:
ssh -NL localhost:1234:localhost:8888 root@<your_node_ip>
and attempt to access the Jupyter notebook.
Why doesn't my notebook have a password?
The notebook is accessed via an SSH tunnel, which creates a secure encrypted connection between the node and the PC, making it accessible only for those who have SSH access. However, if you want to set a password, you can do so by following these steps:
- Stop any existing Jupyter notebook processes inside the container.
- Edit the field –NotebookApp.password=’Your password’ in the above commands.
- To set it on the next boot, open the file /etc/rc.local in your server and set the password as shown below.
