Event Monitoring Dashboard
Event Monitoring Dashboard lets you set alerts of your choice of threshold values and severity to any number of resources for one of the services in your application. This is a highly scalable and reliable service, which can be used to alert the user groups attached to the alert about the status of its resources.
How to Create Alerts?
-
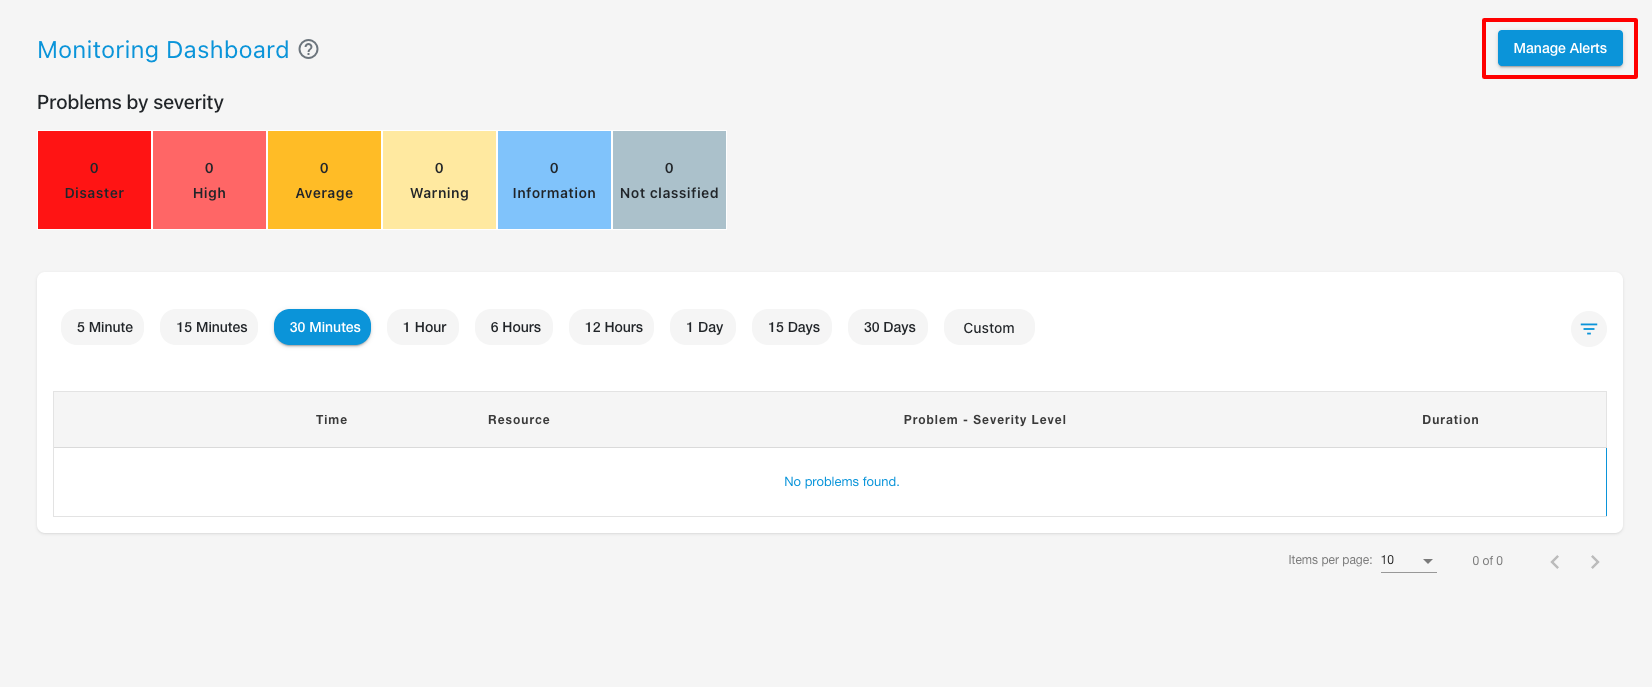
Click on Event Monitoring from the side navigation bar.

-
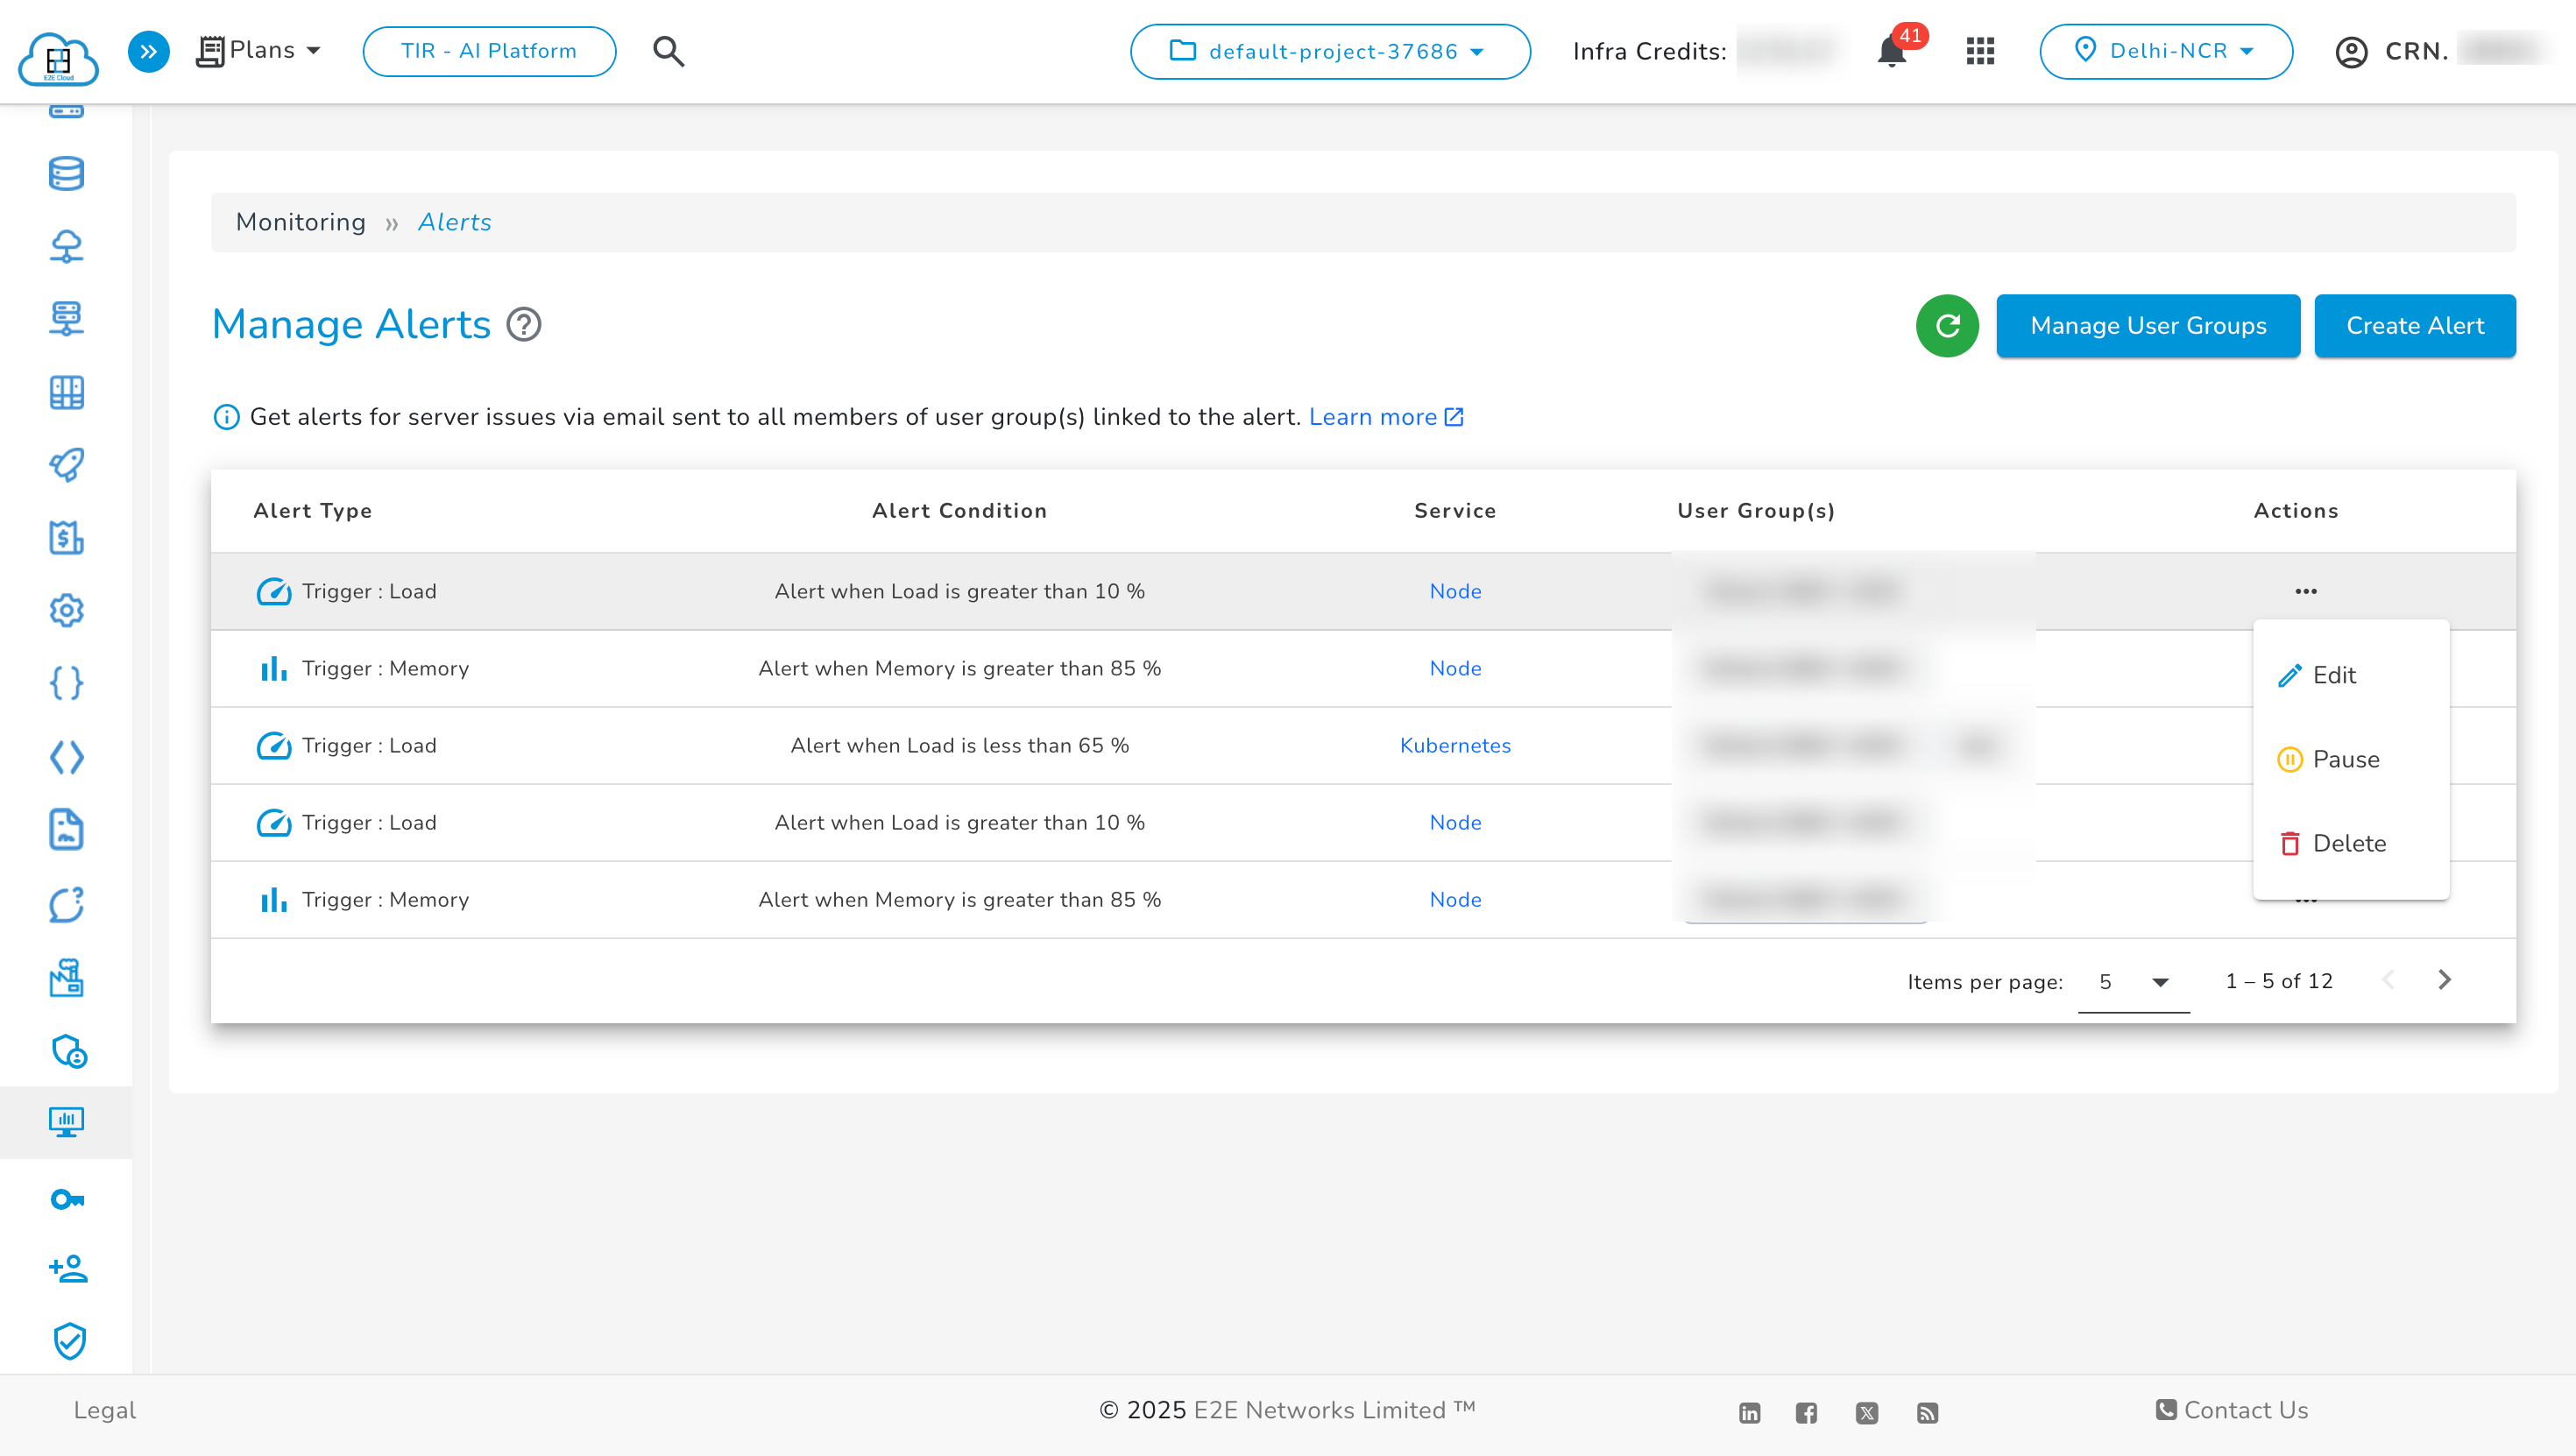
Click on Manage Alerts at the top right corner of the page.
-
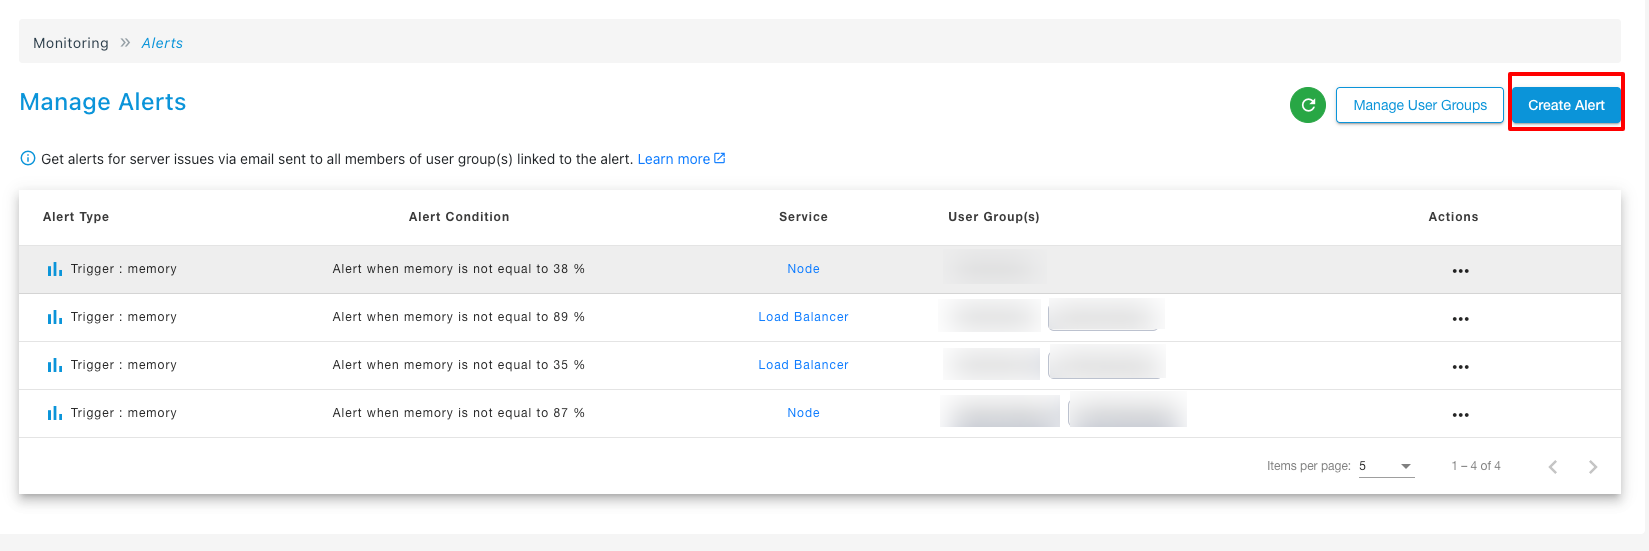
Click on Create Alert on the top right corner of the page.
-
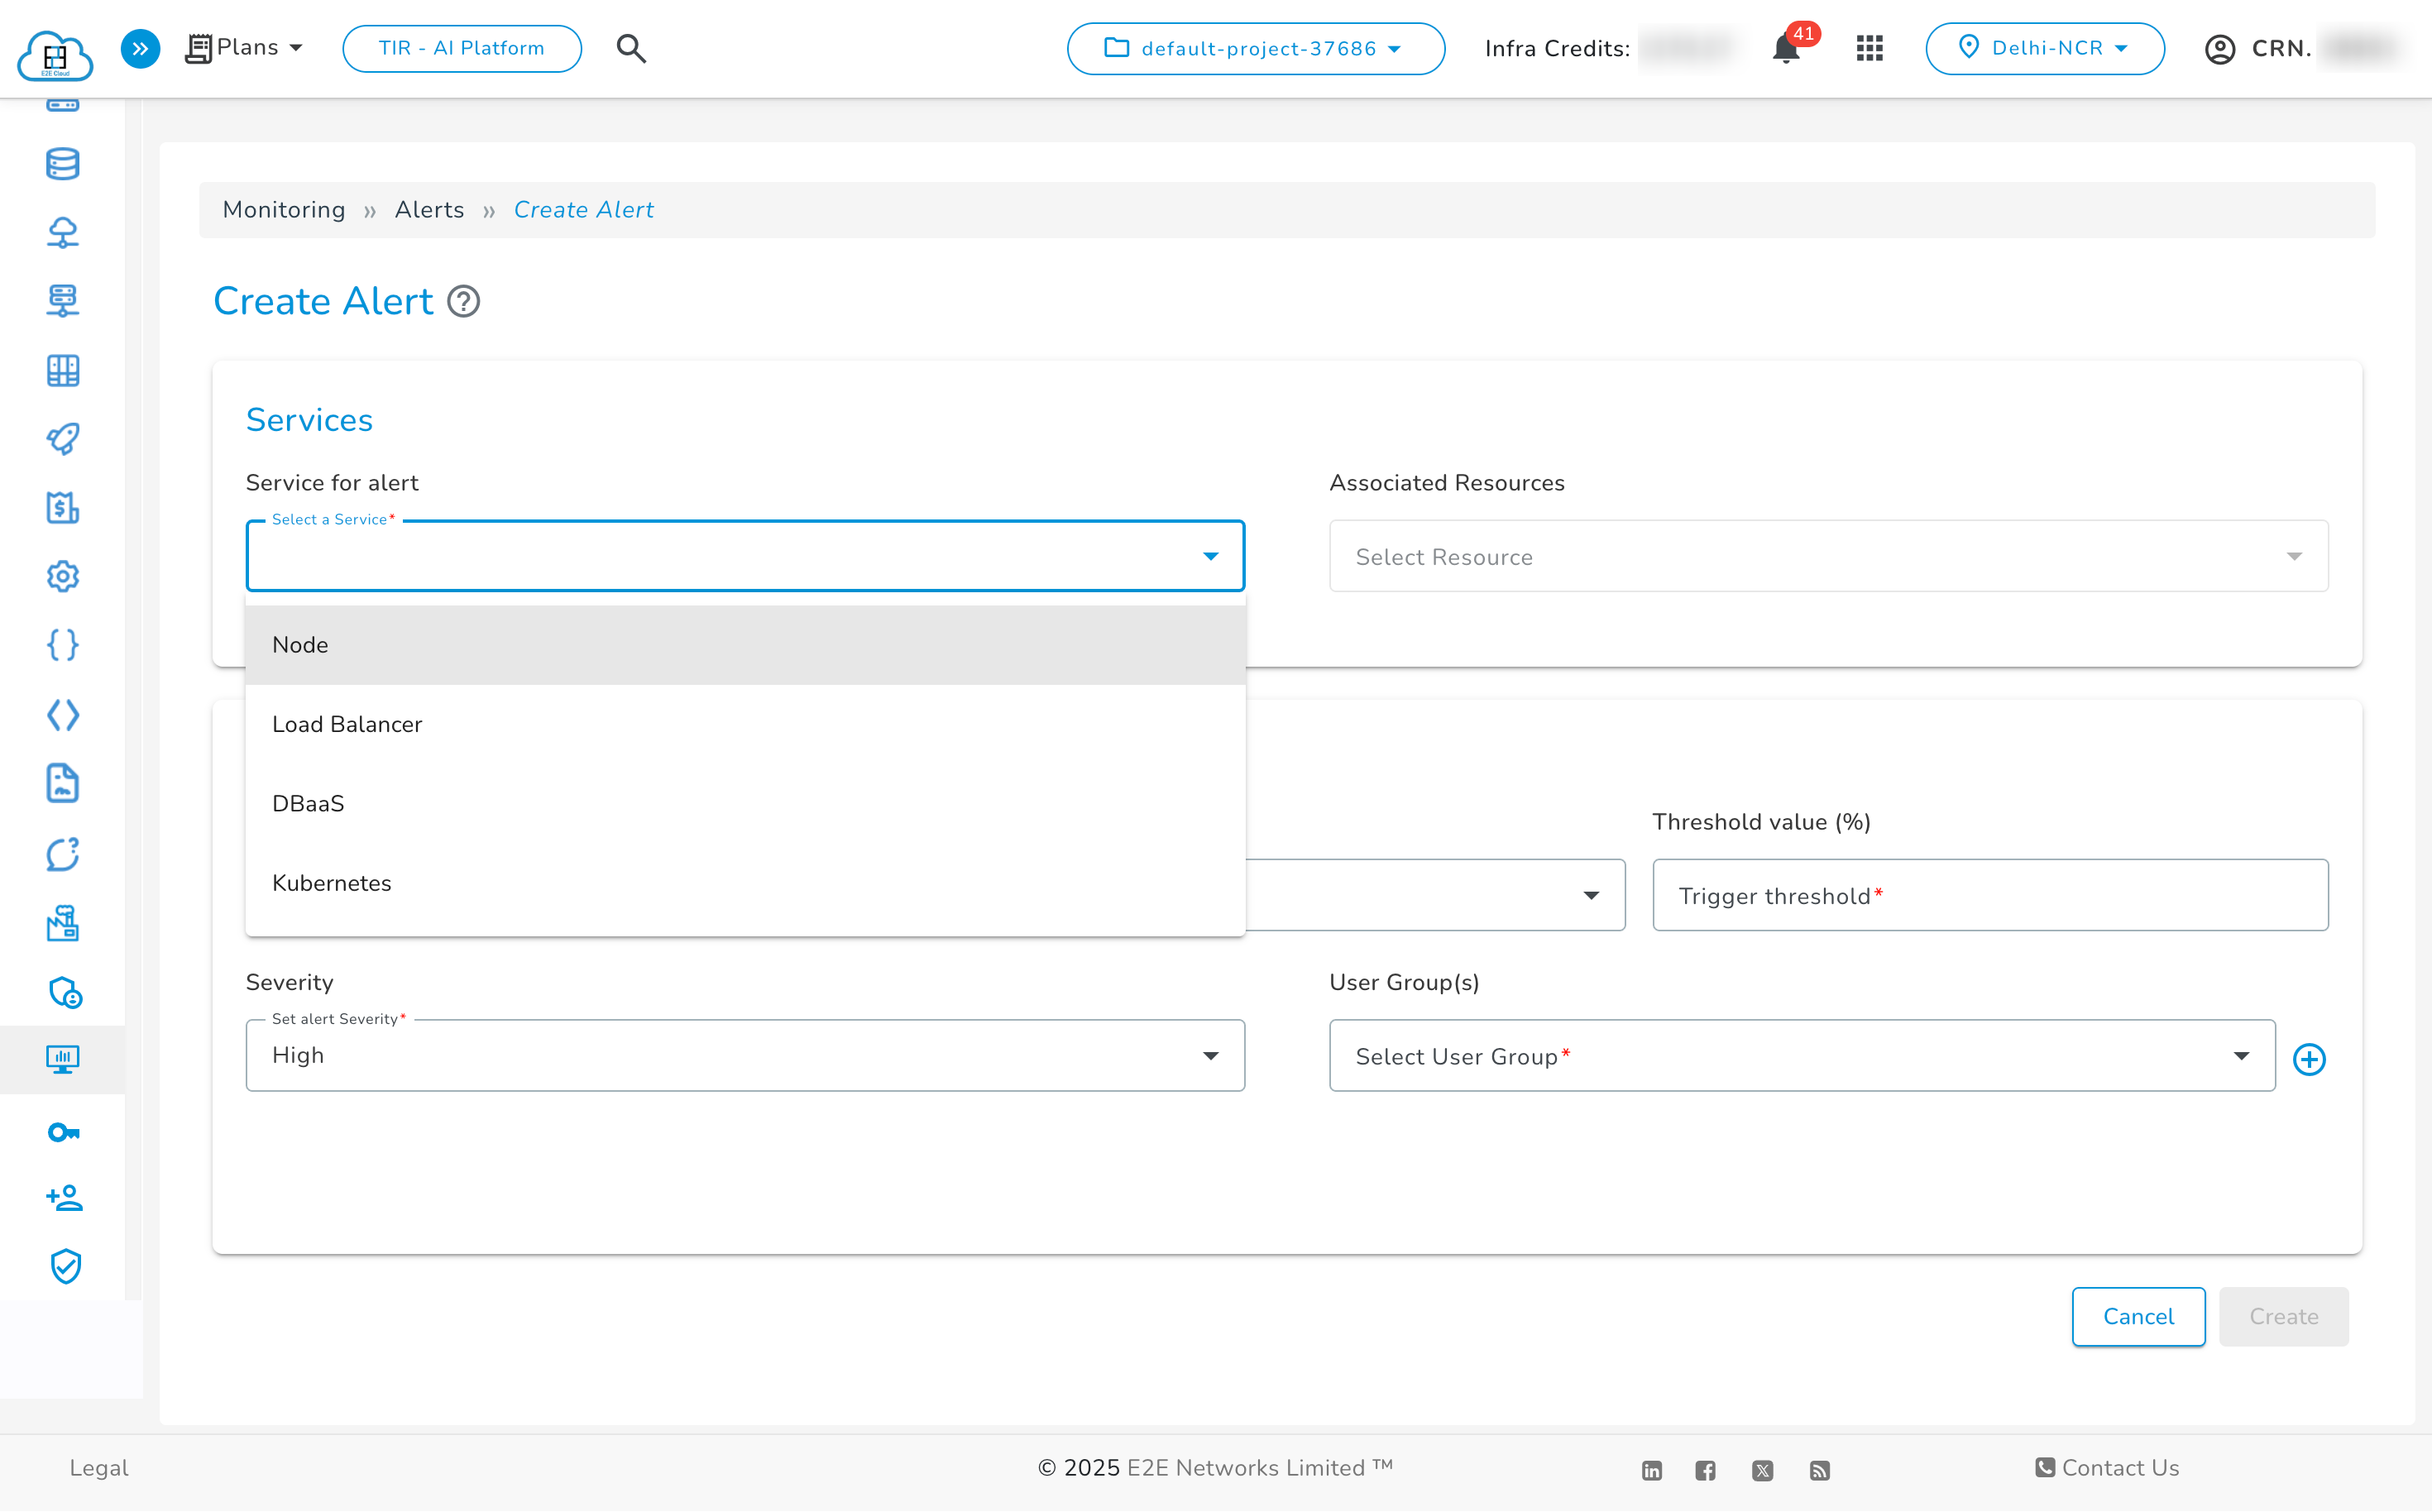
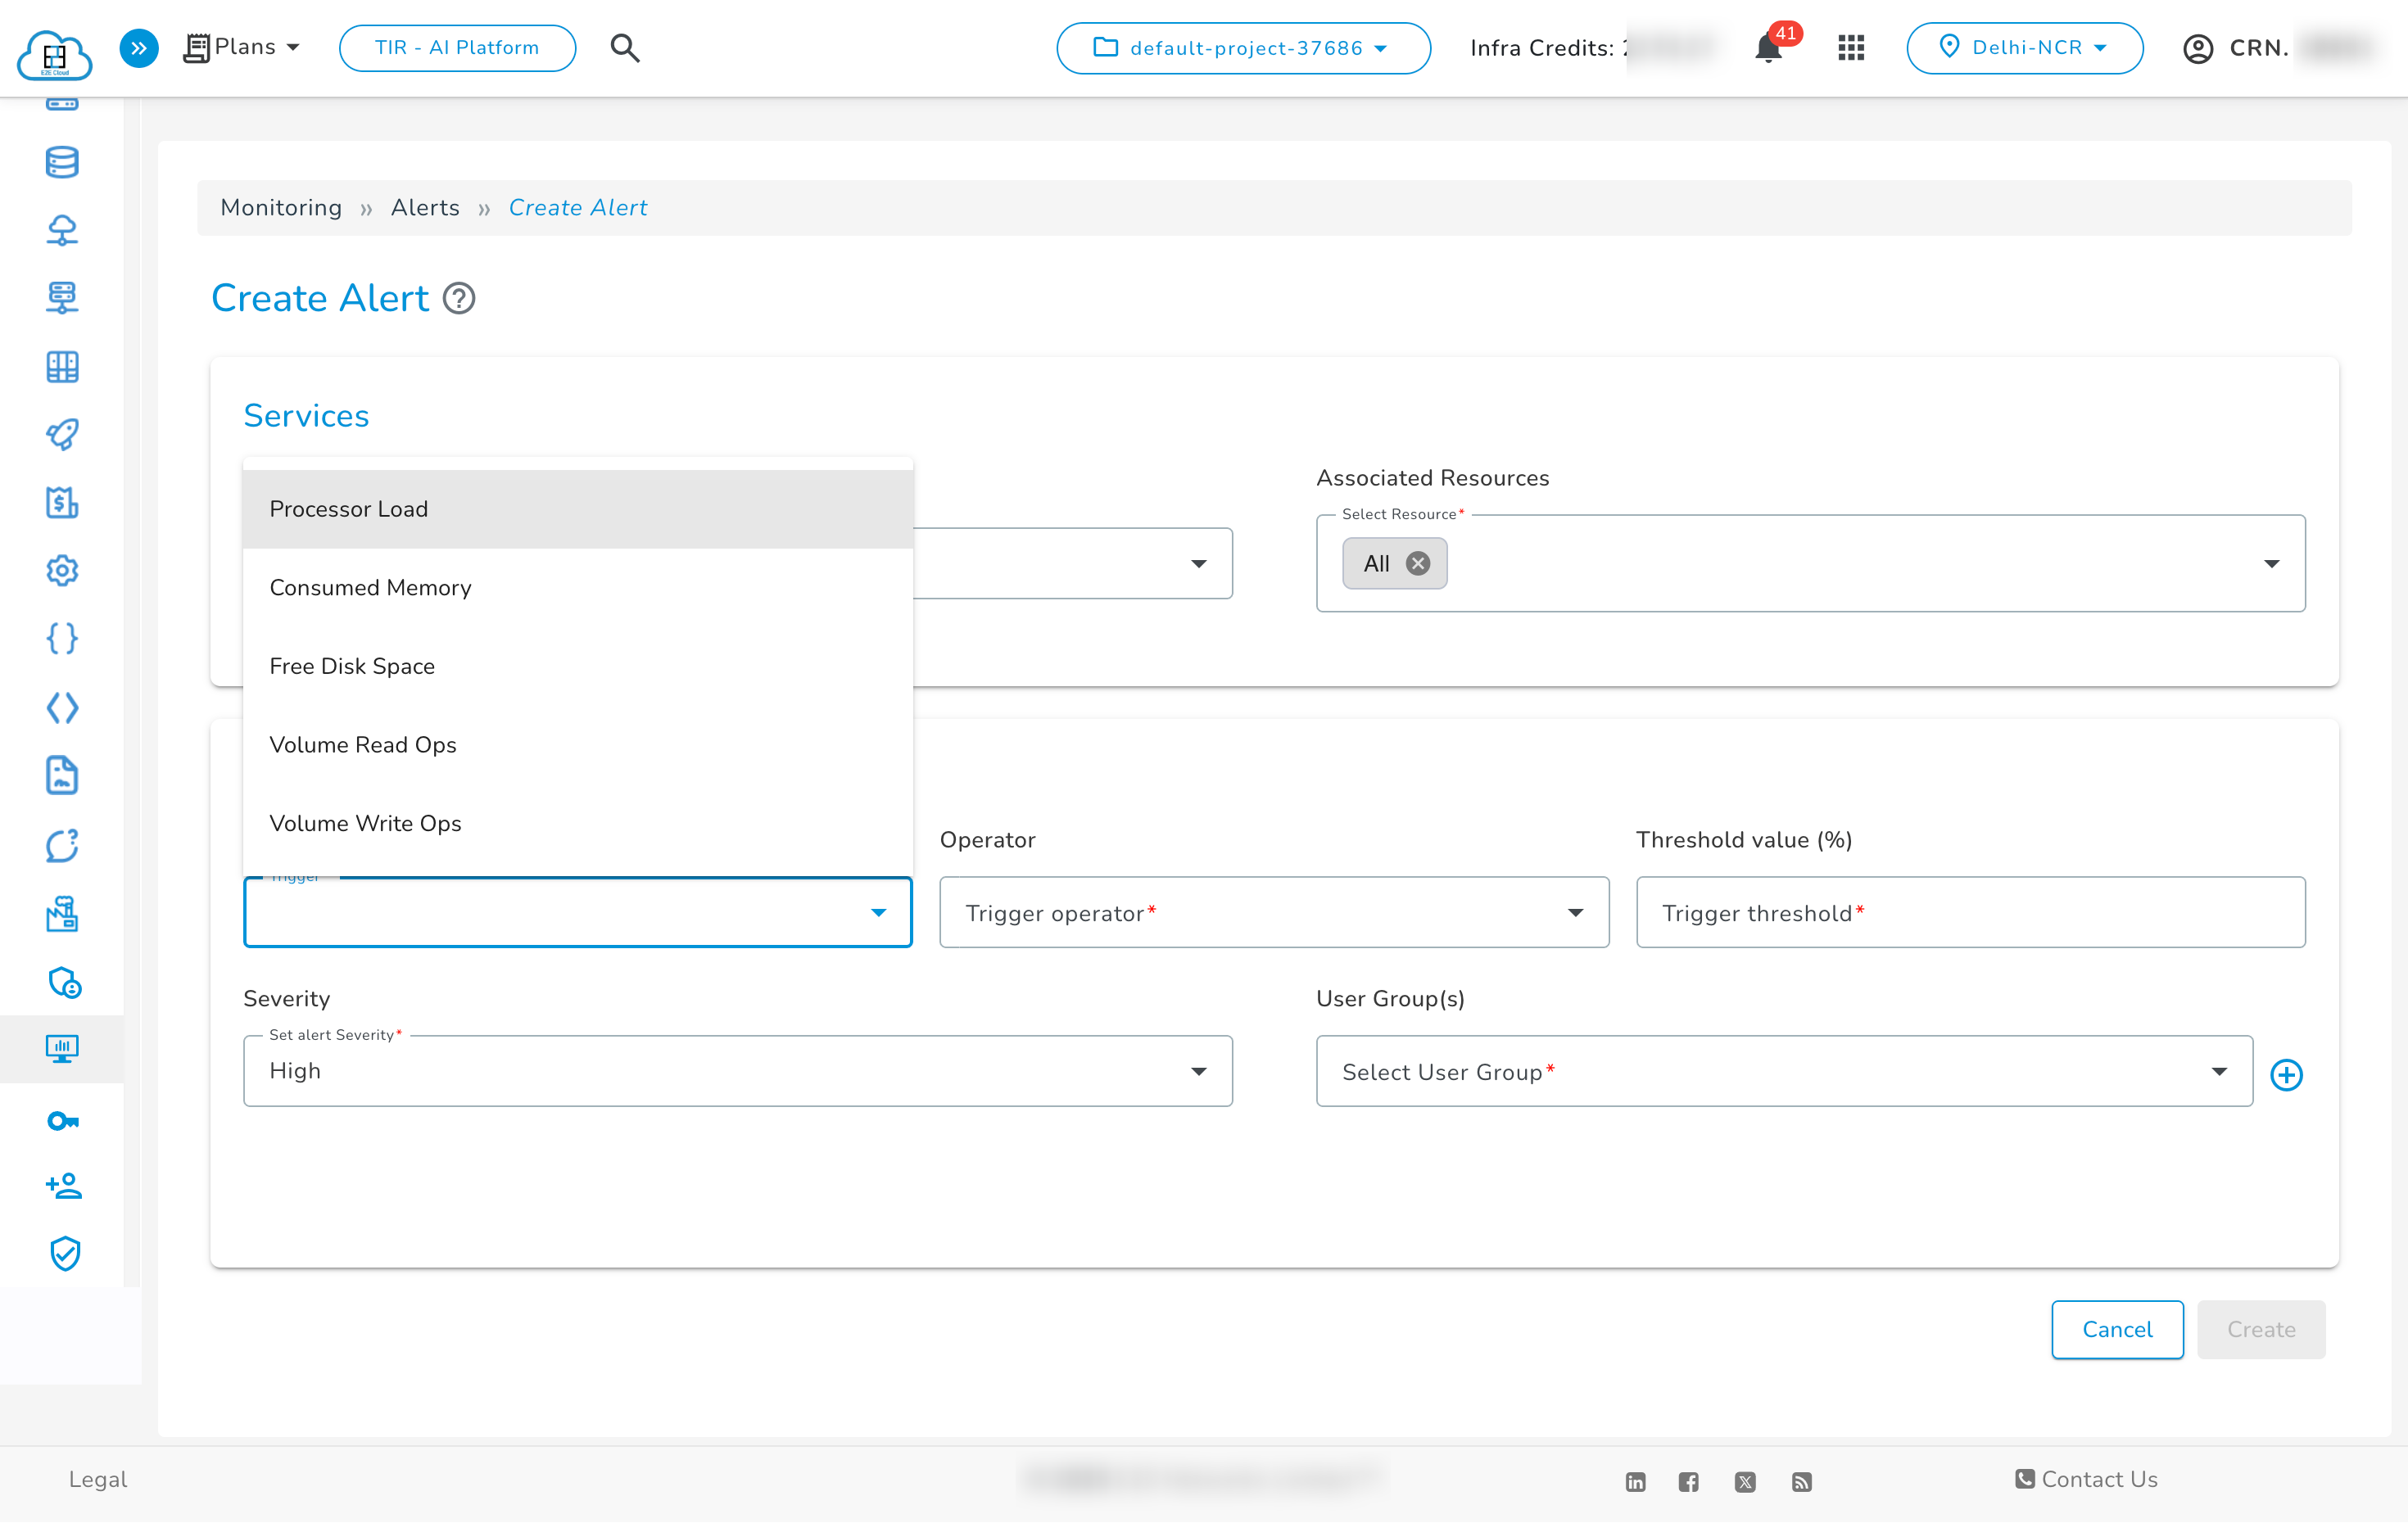
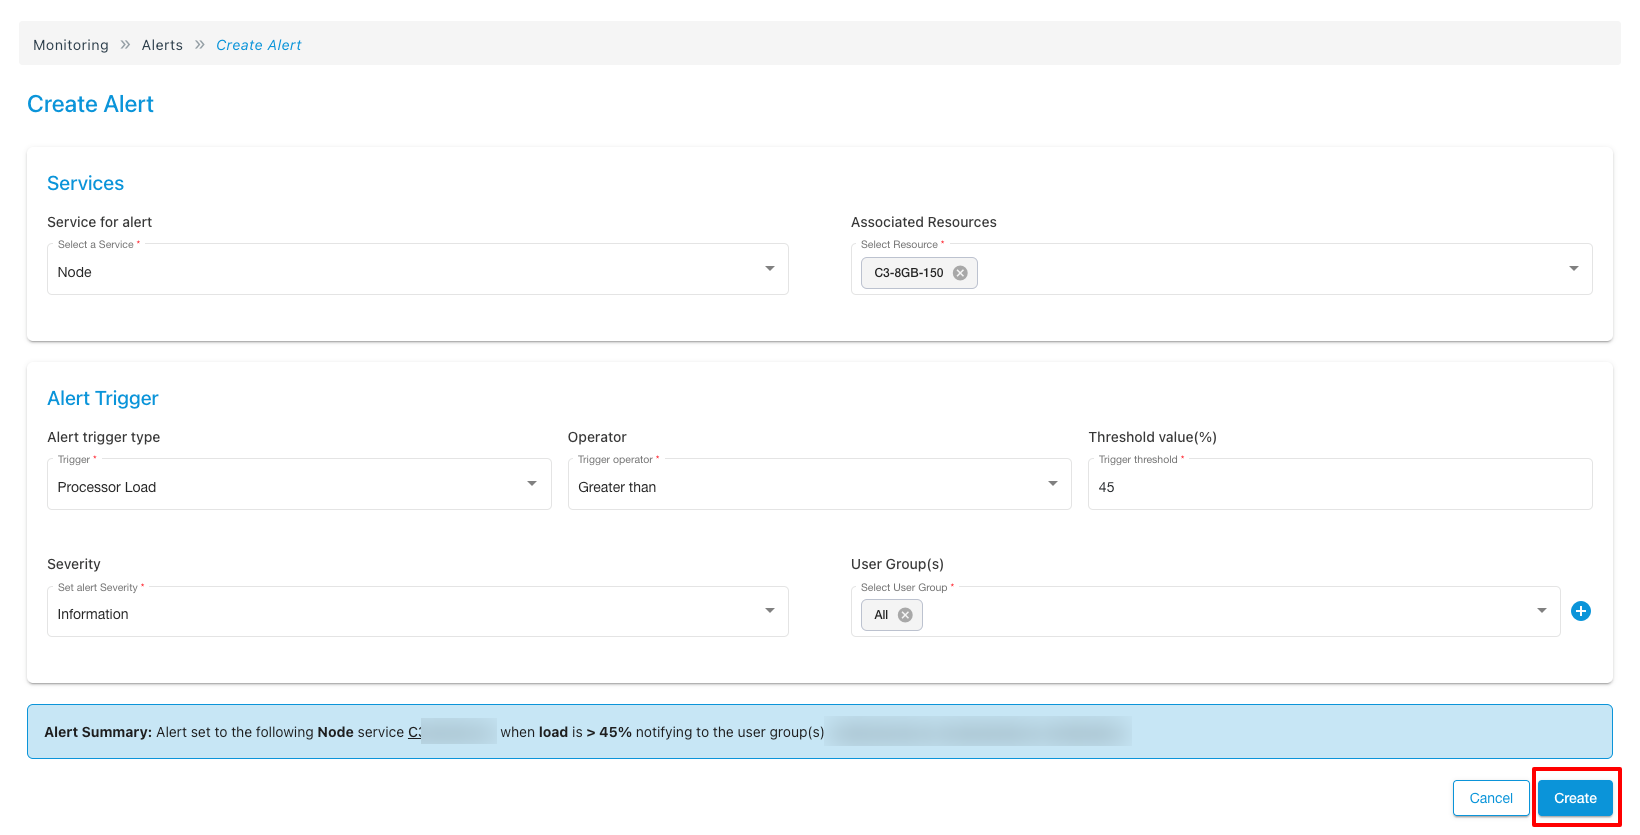
Choose any one of the given services.
-
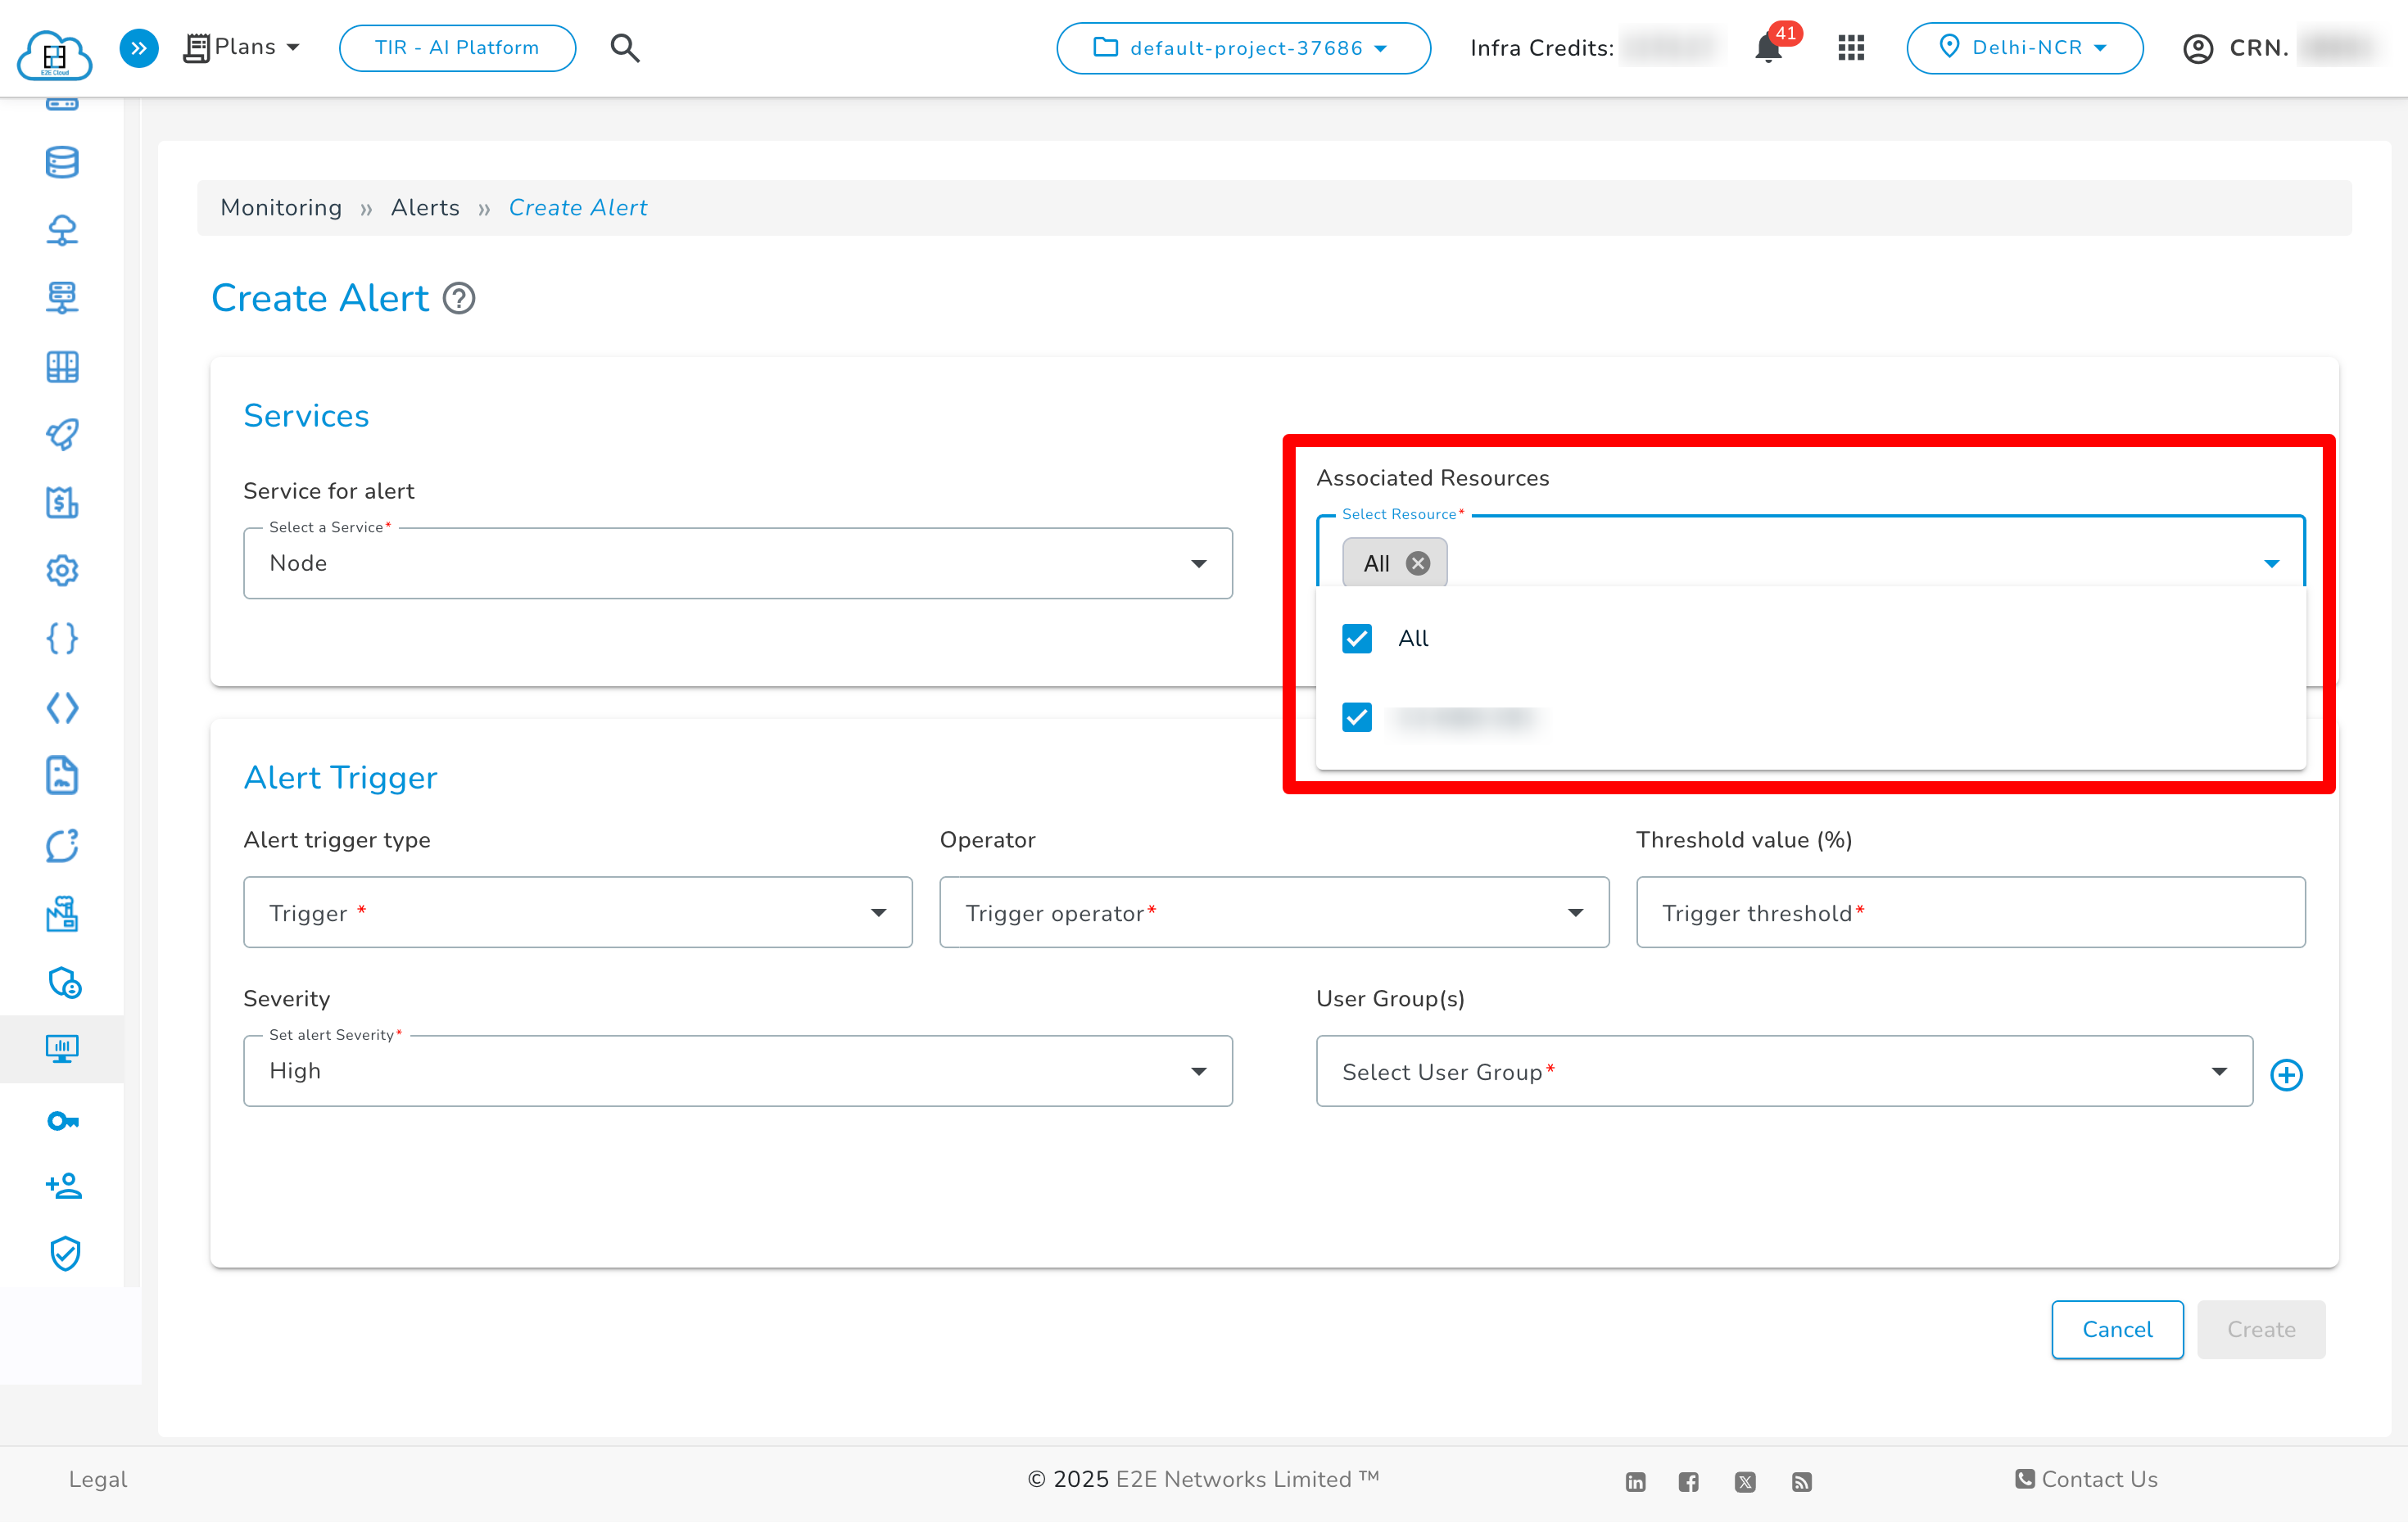
Choose any number of available resources for that particular service from the drop-down list in the Associated Resources tab.
-
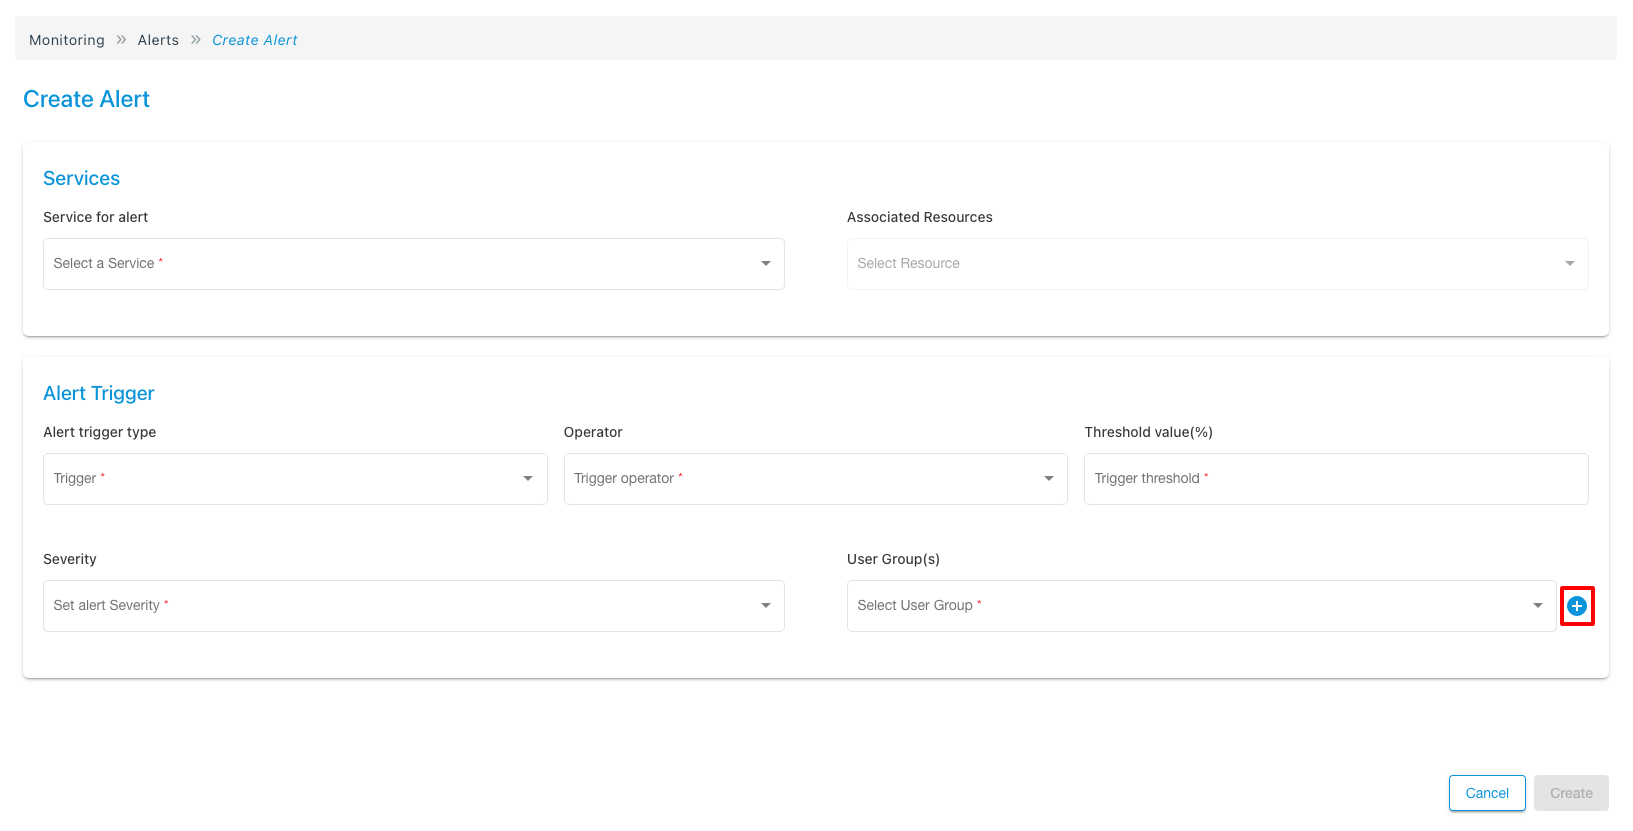
Set the rest of the parameters for the alert such as threshold value, trigger type, operator, severity, and user groups from the drop-down list.
-
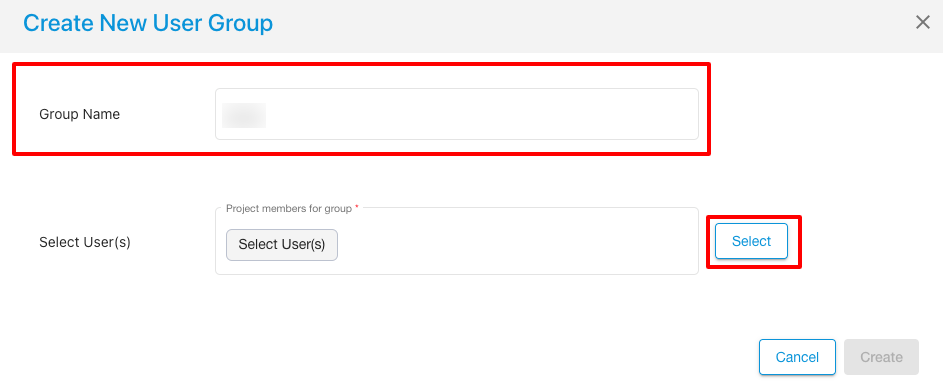
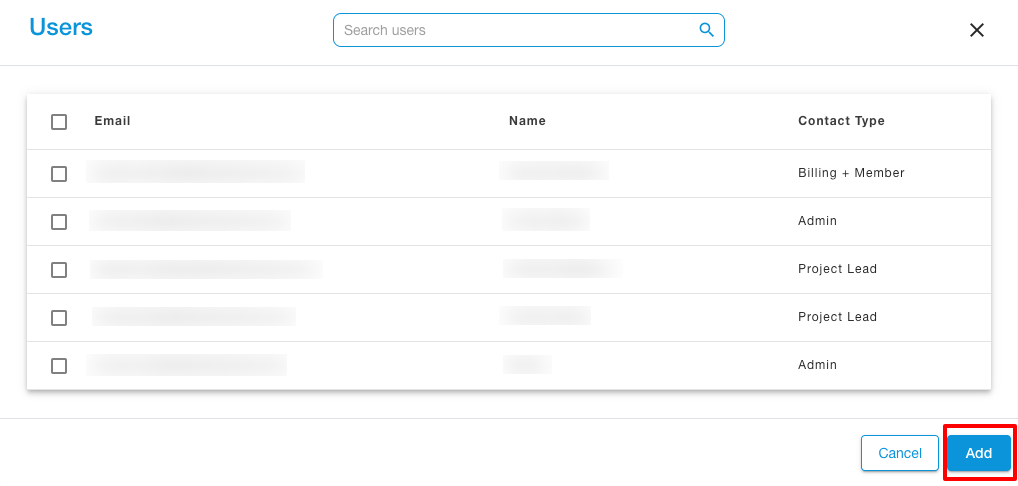
If you want to create a user group, click on the plus icon at the end of the user group tab.
-
Name your user group and add the users to form a user group to attach to the alert.
-
You can add the users who have been given access to Event Monitoring.
-
After this, click on the alert and the alert would be created.
Actions
You can perform the following actions available for alerts under Event Monitoring:
View
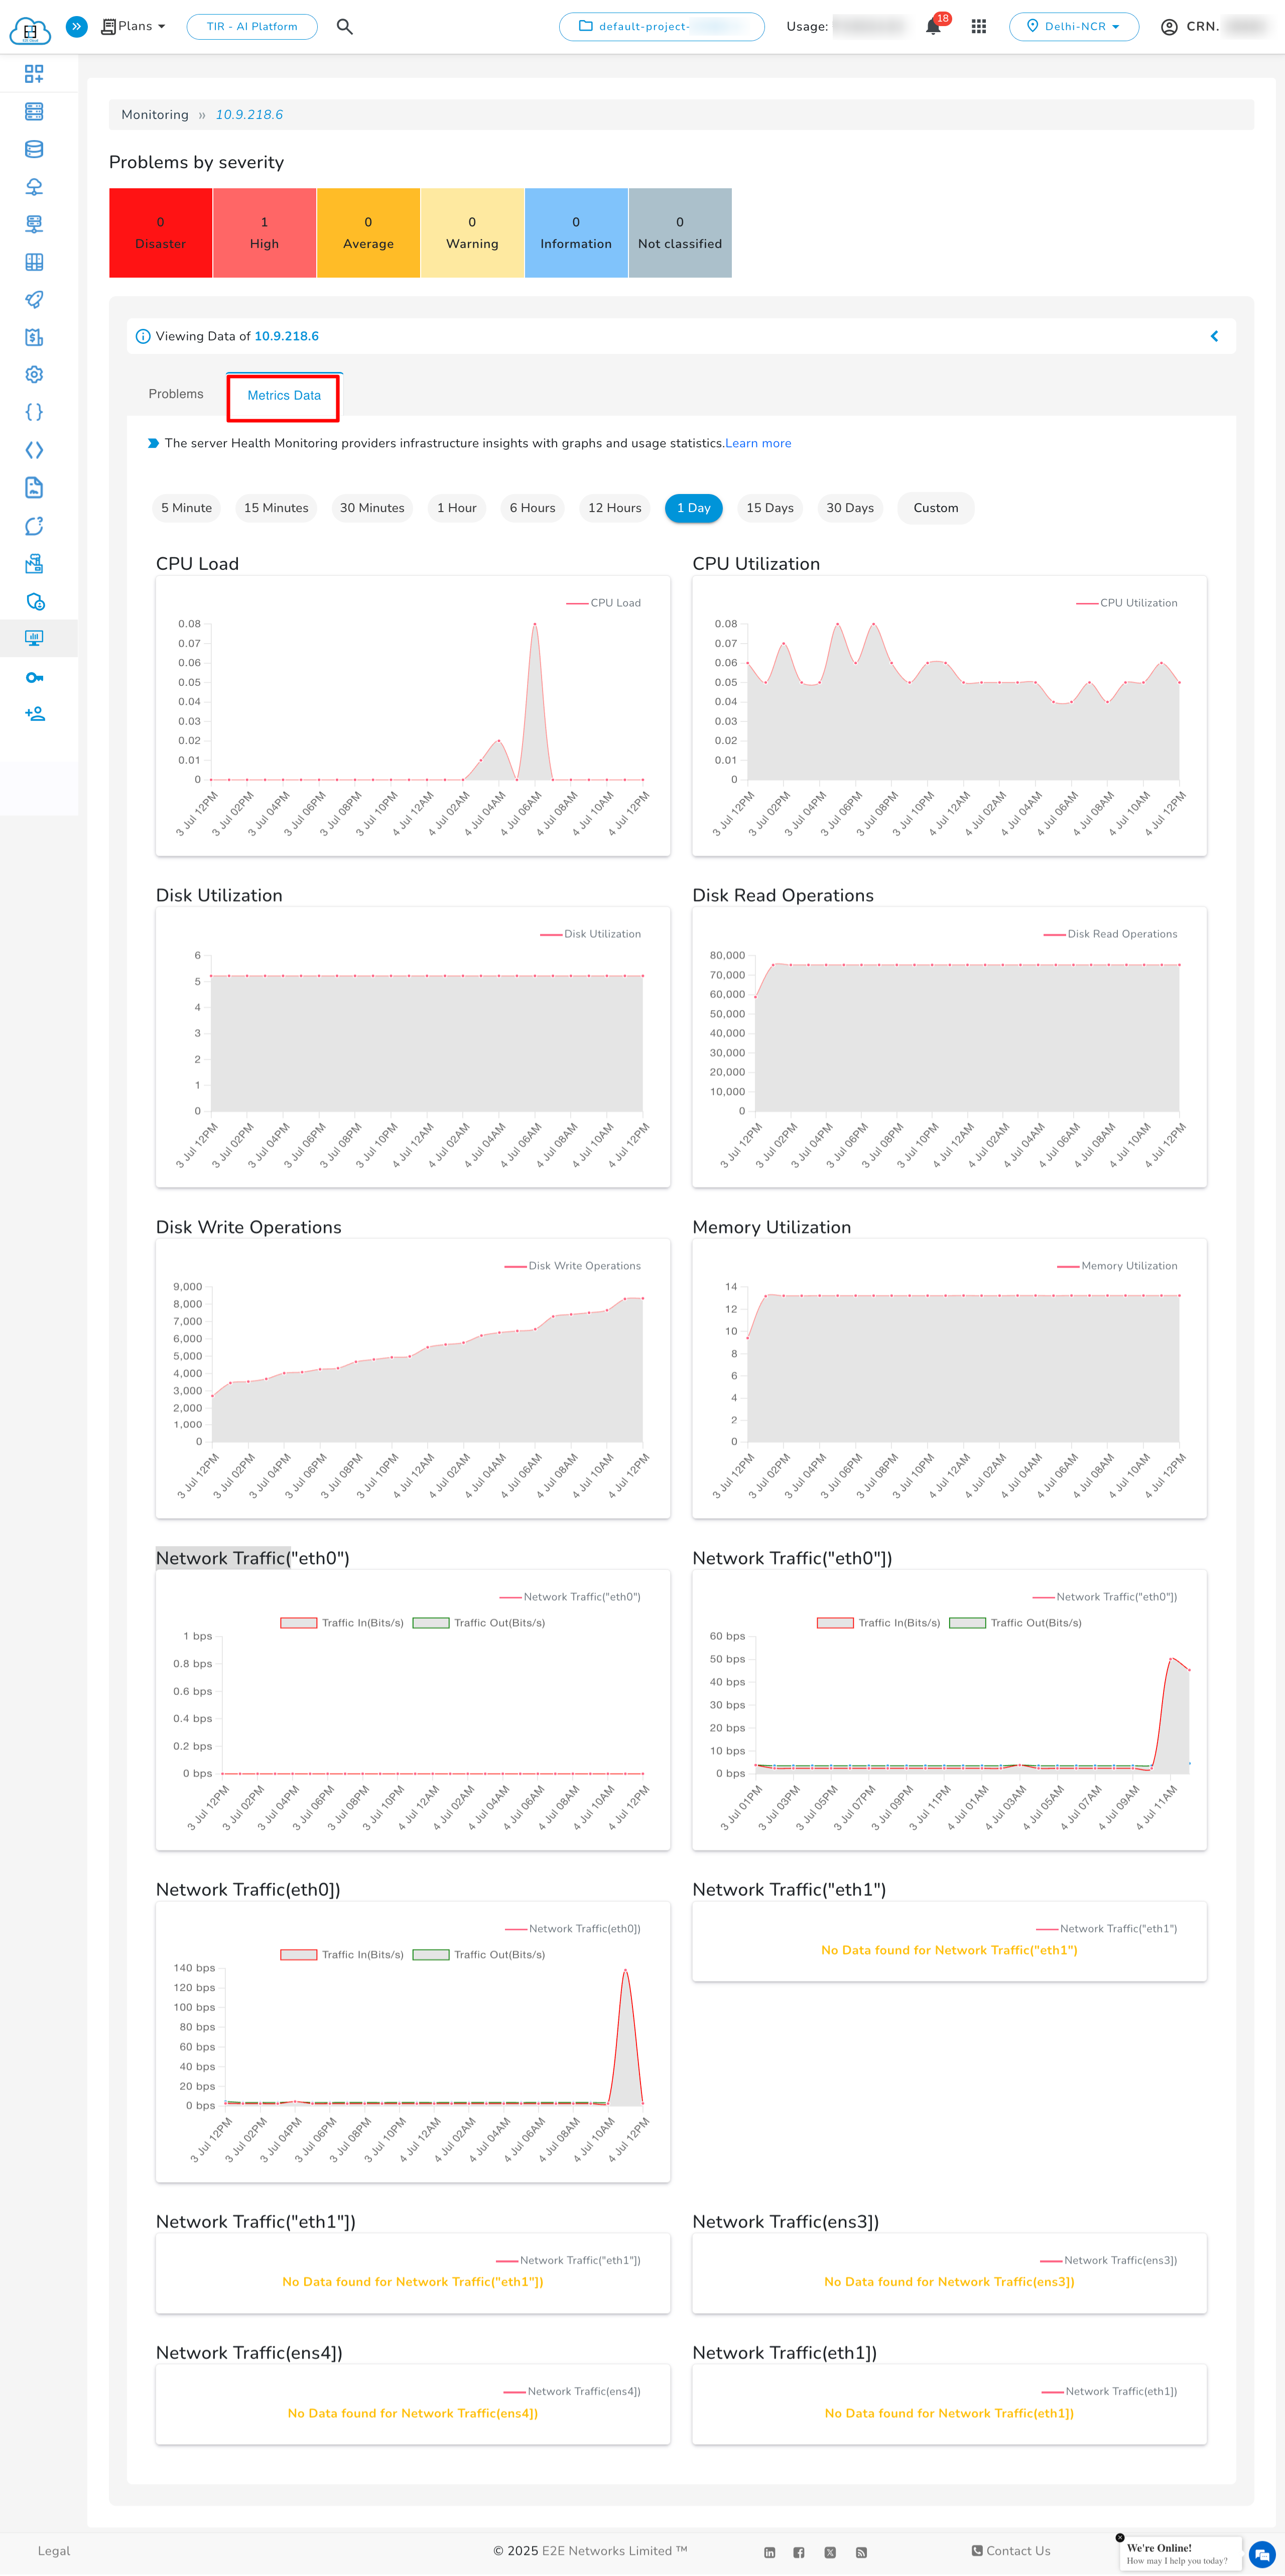
To view all the alerts that have been created, you can do it on the monitoring dashboard and click on Resource.
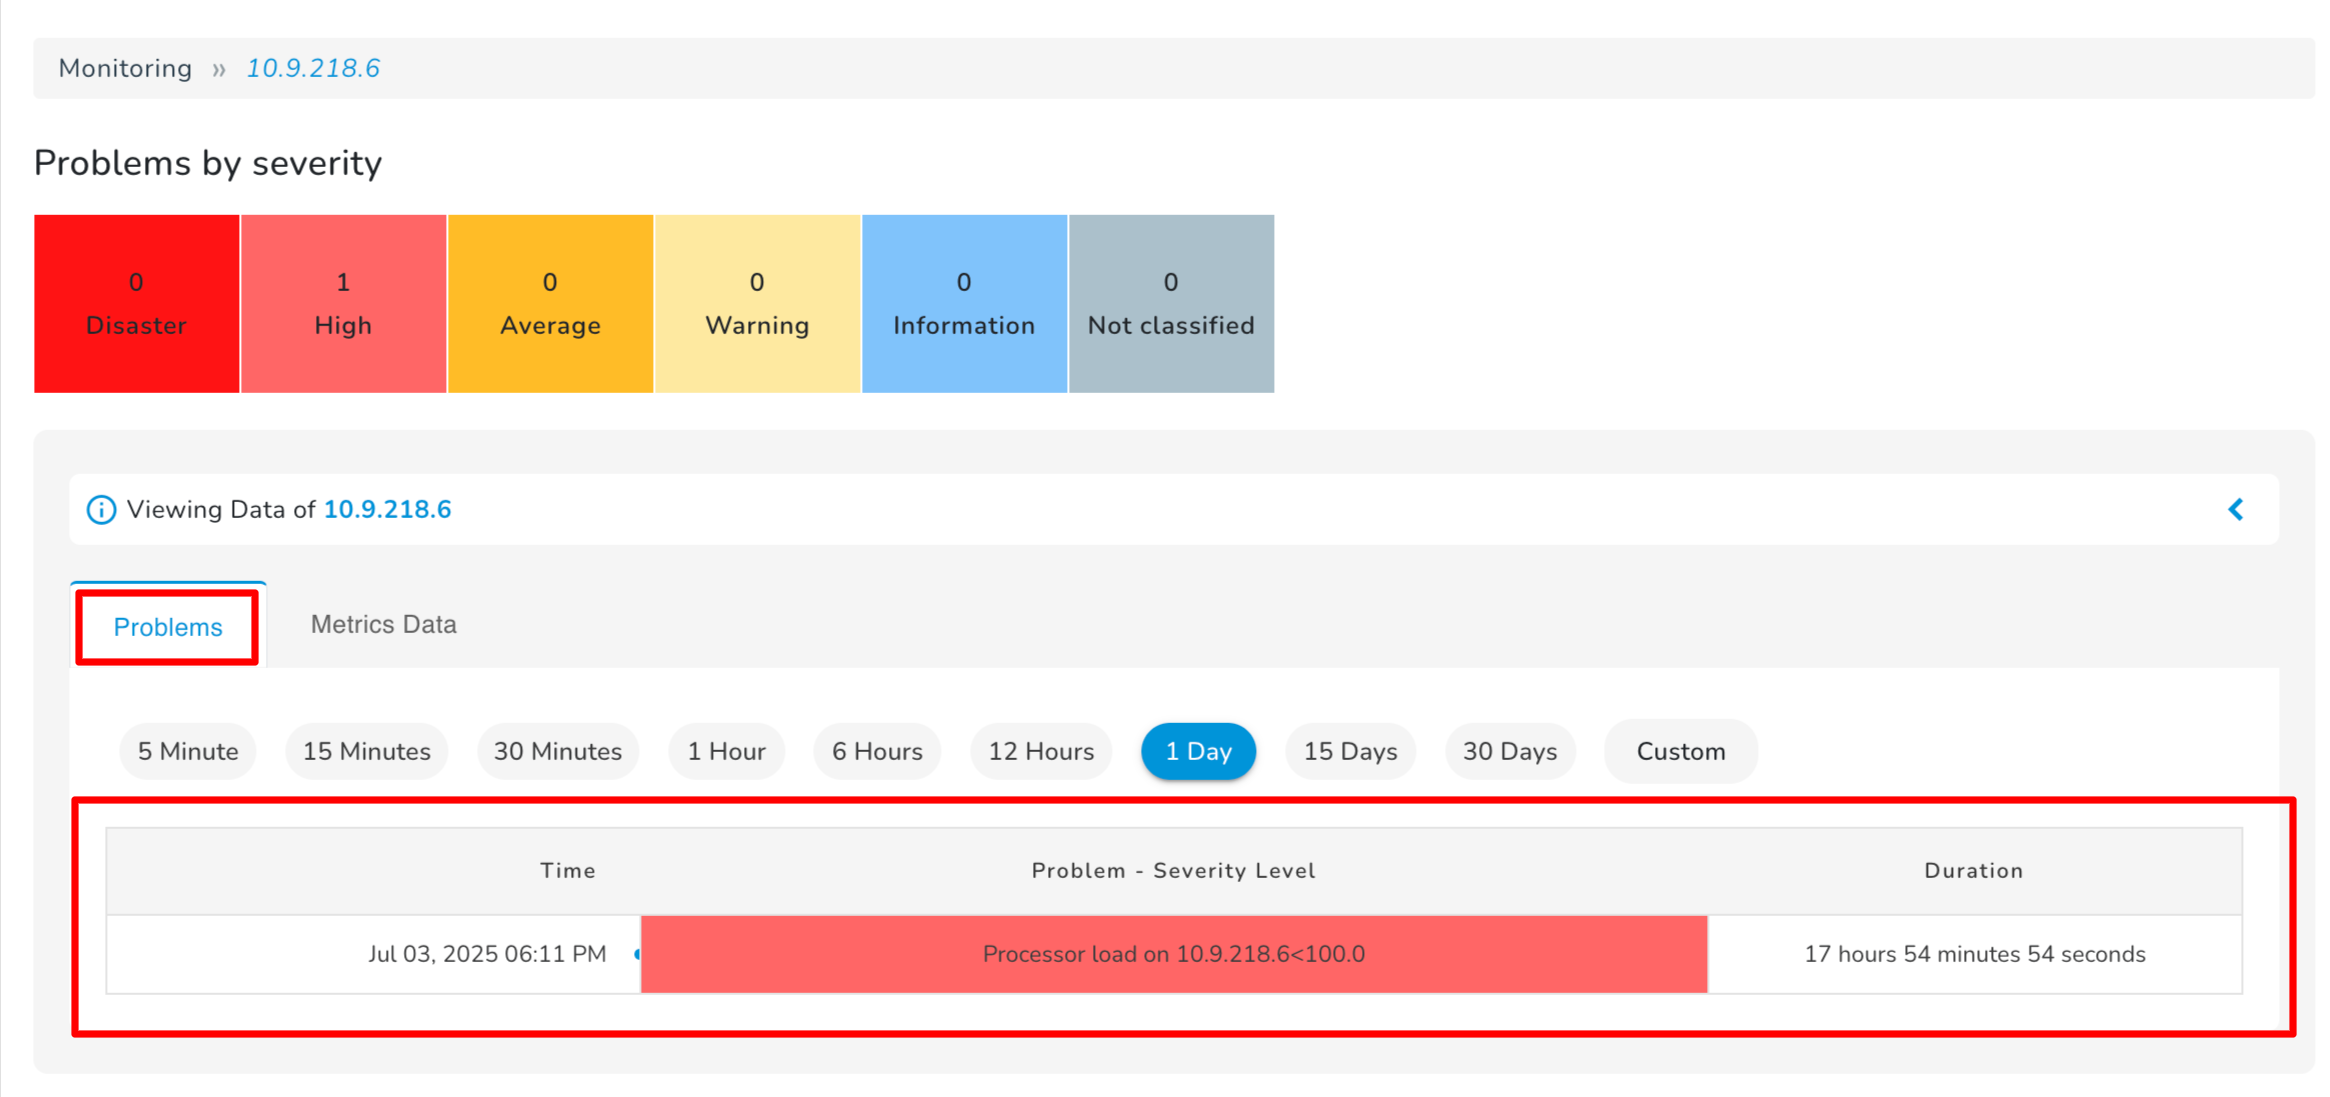
You can also view detailed metrics data such as CPU Load, CPU Utilization, Disk Utilization, Disk Read Operations, Disk Write Operations, Memory Utilization, and Network Traffic. This data helps in analyzing resource performance over time and identifying patterns or anomalies for more effective troubleshooting and optimization.
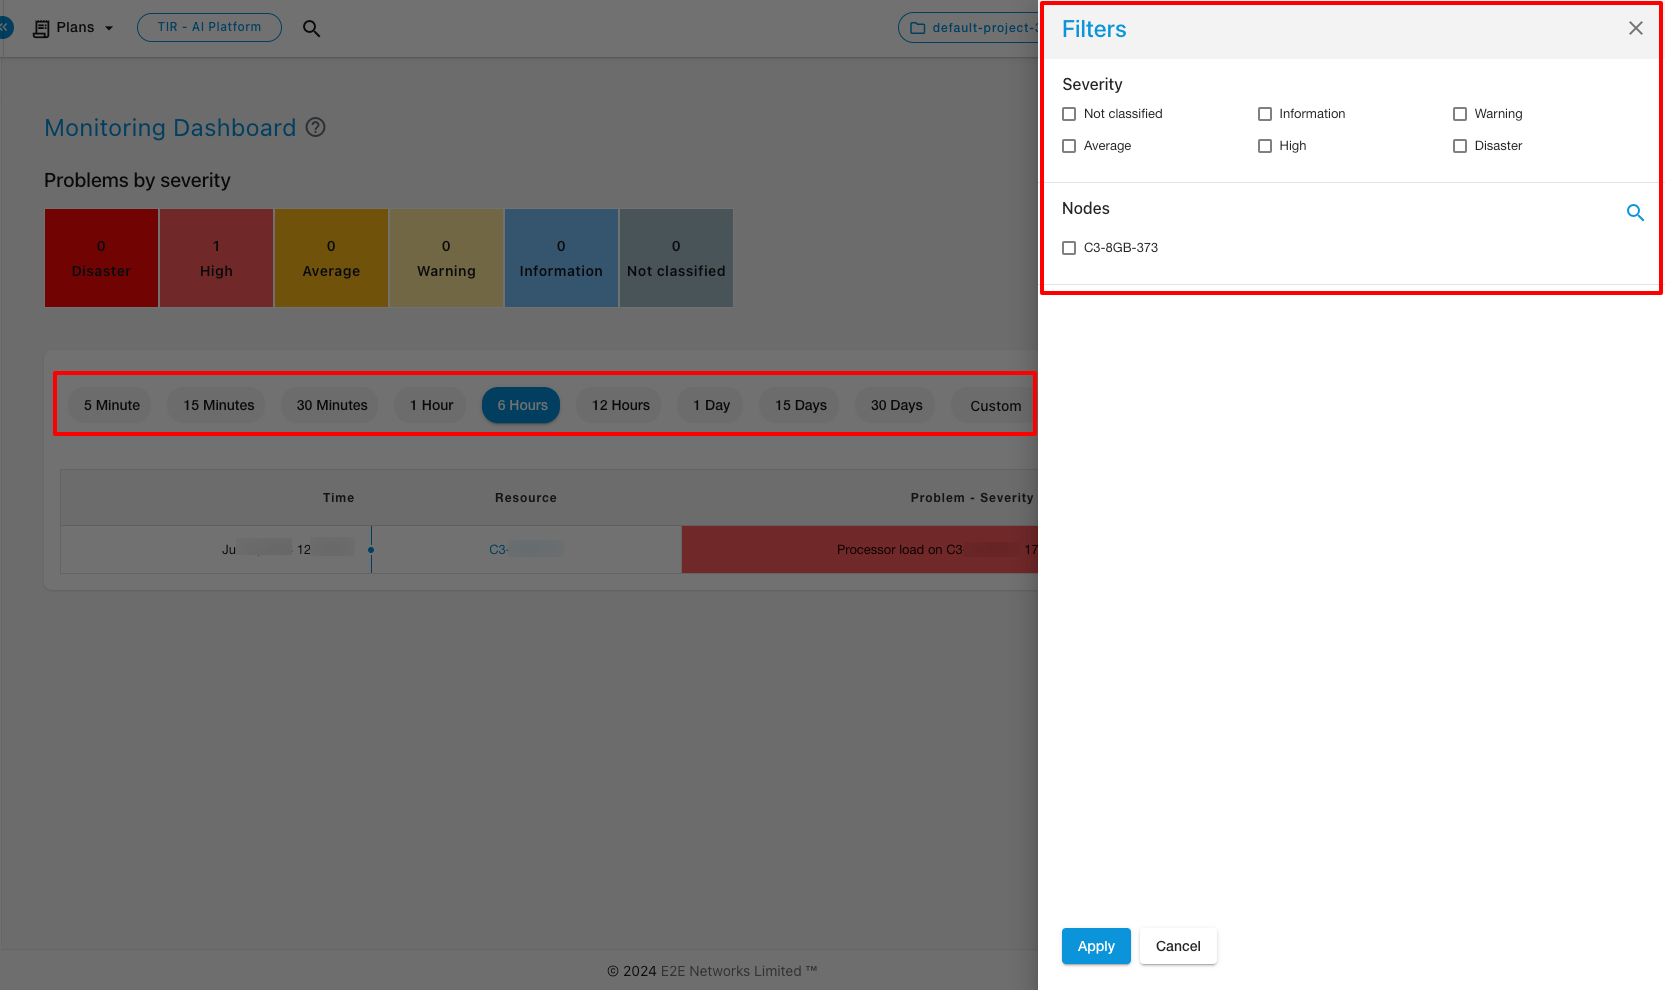
Filter
For filtering the alerts, you can filter based on severity, time, services, and resources.
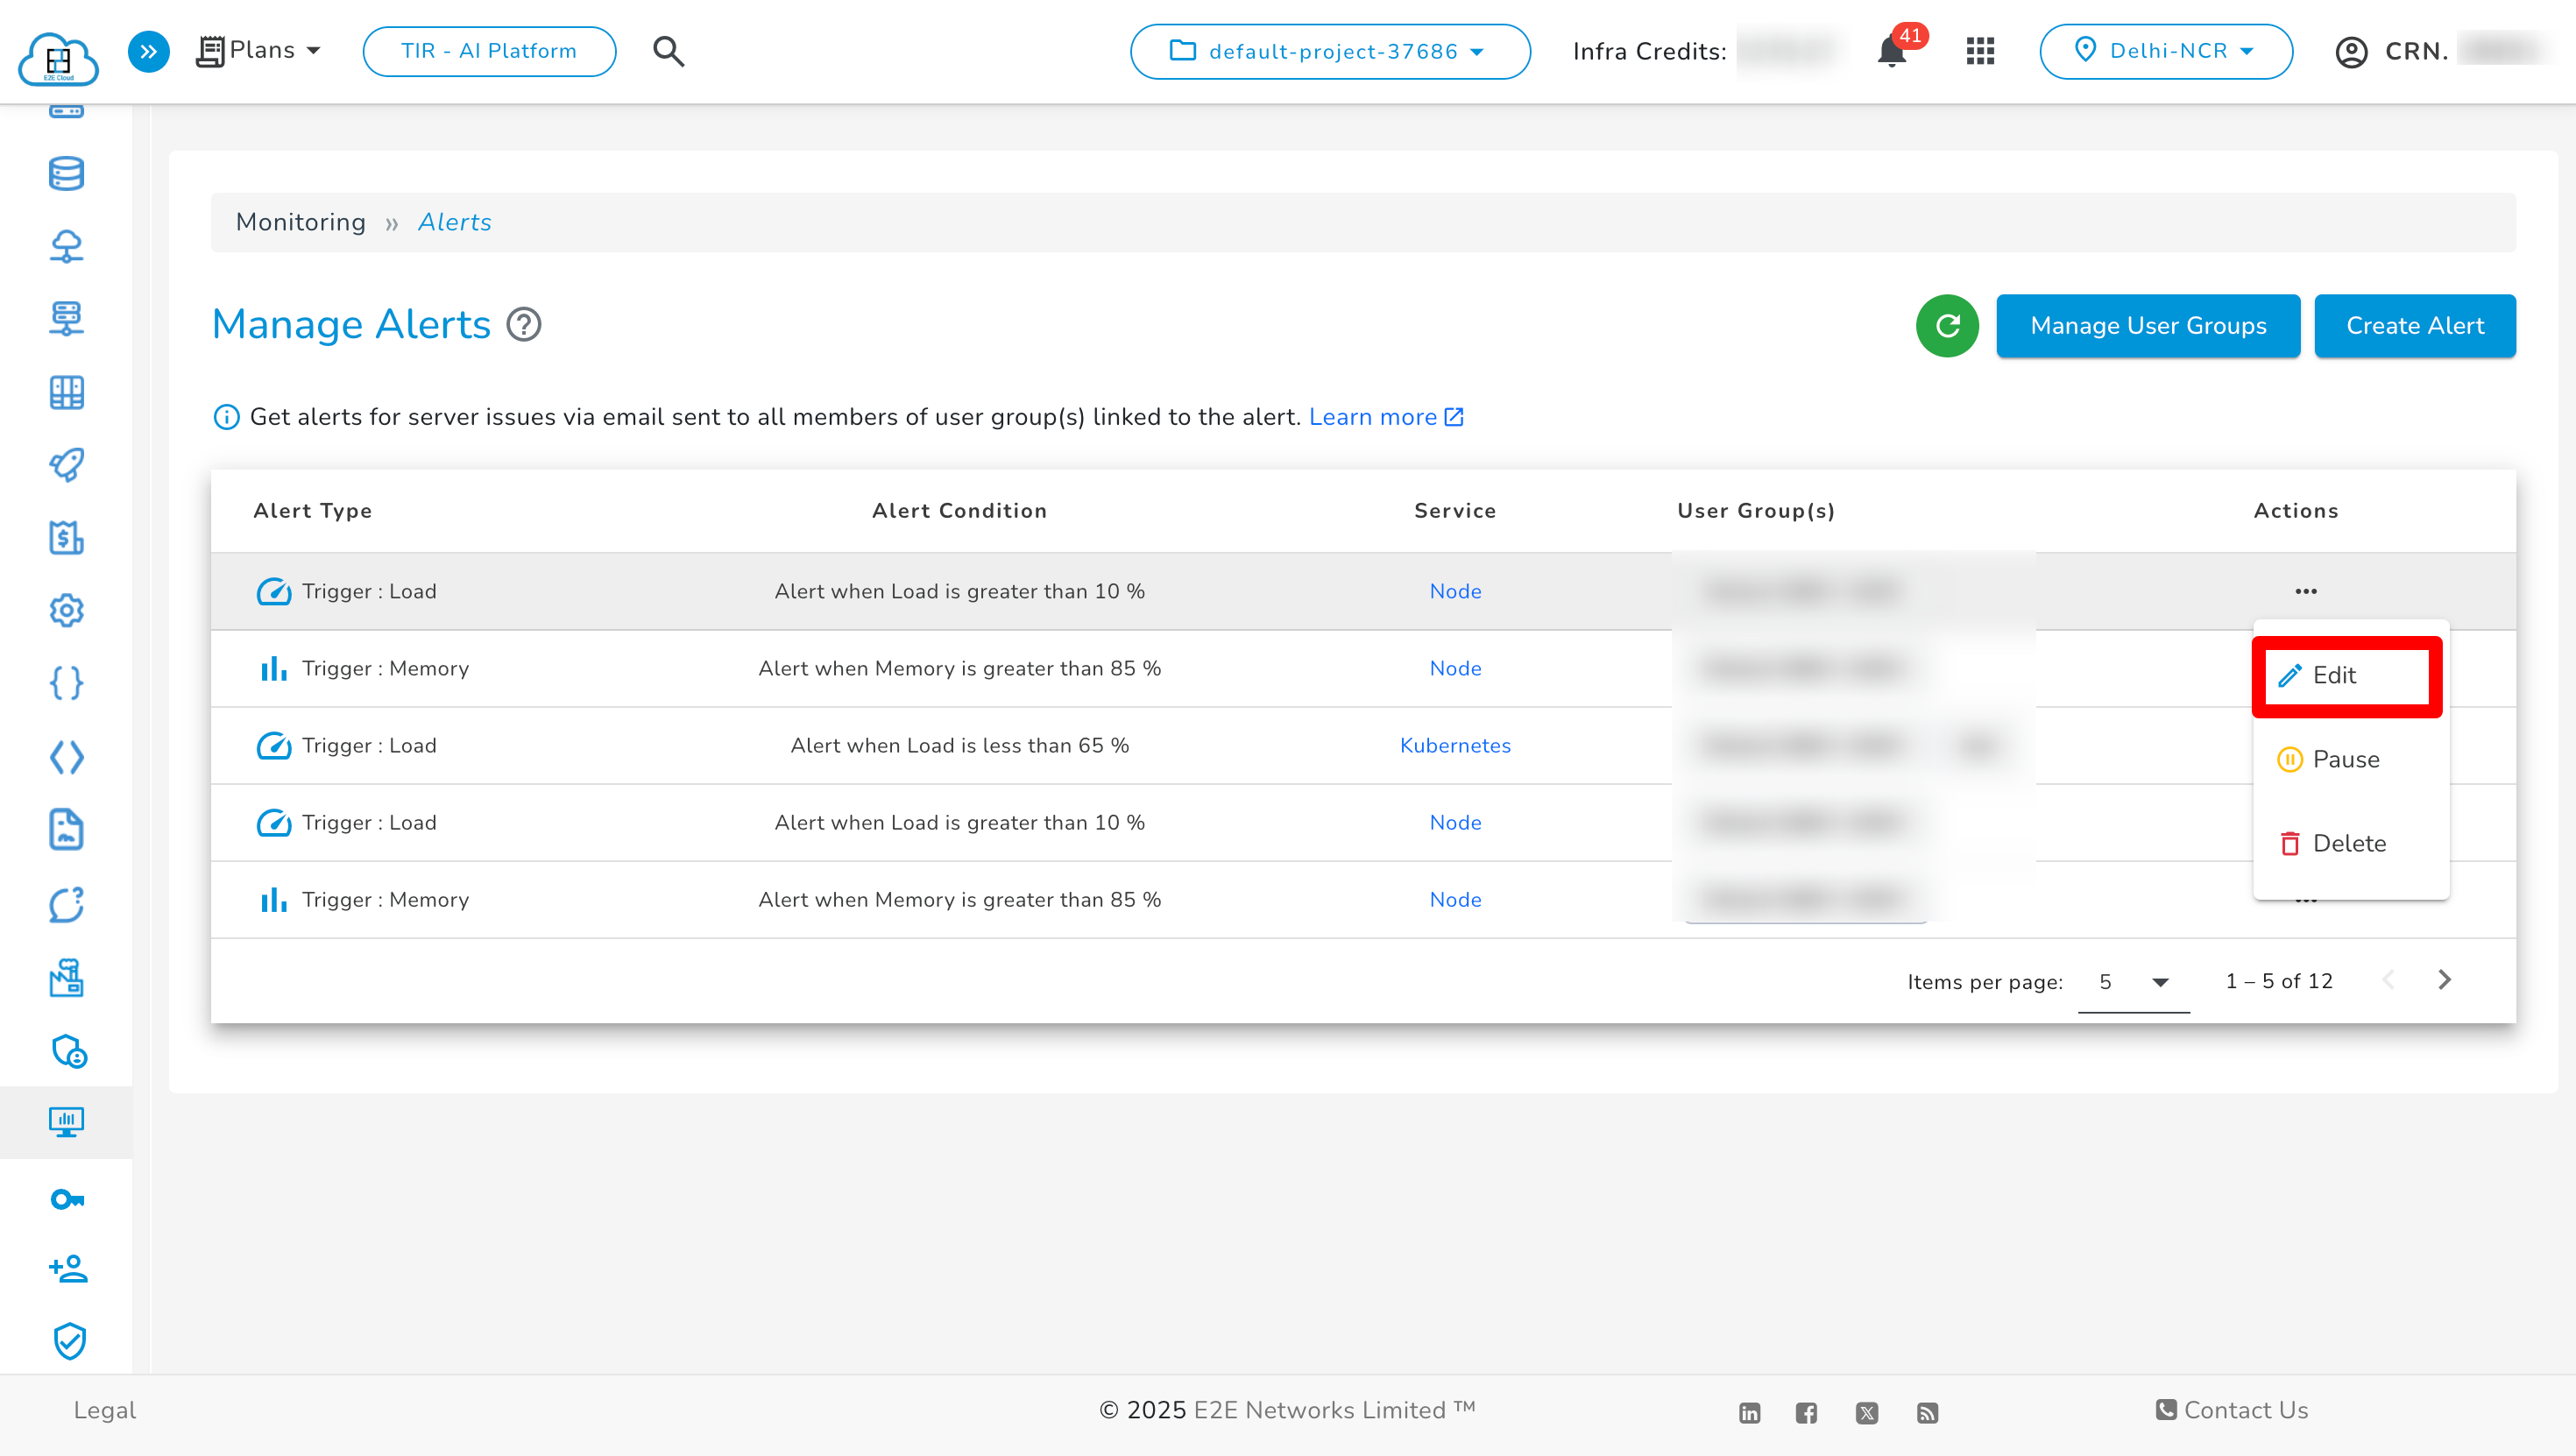
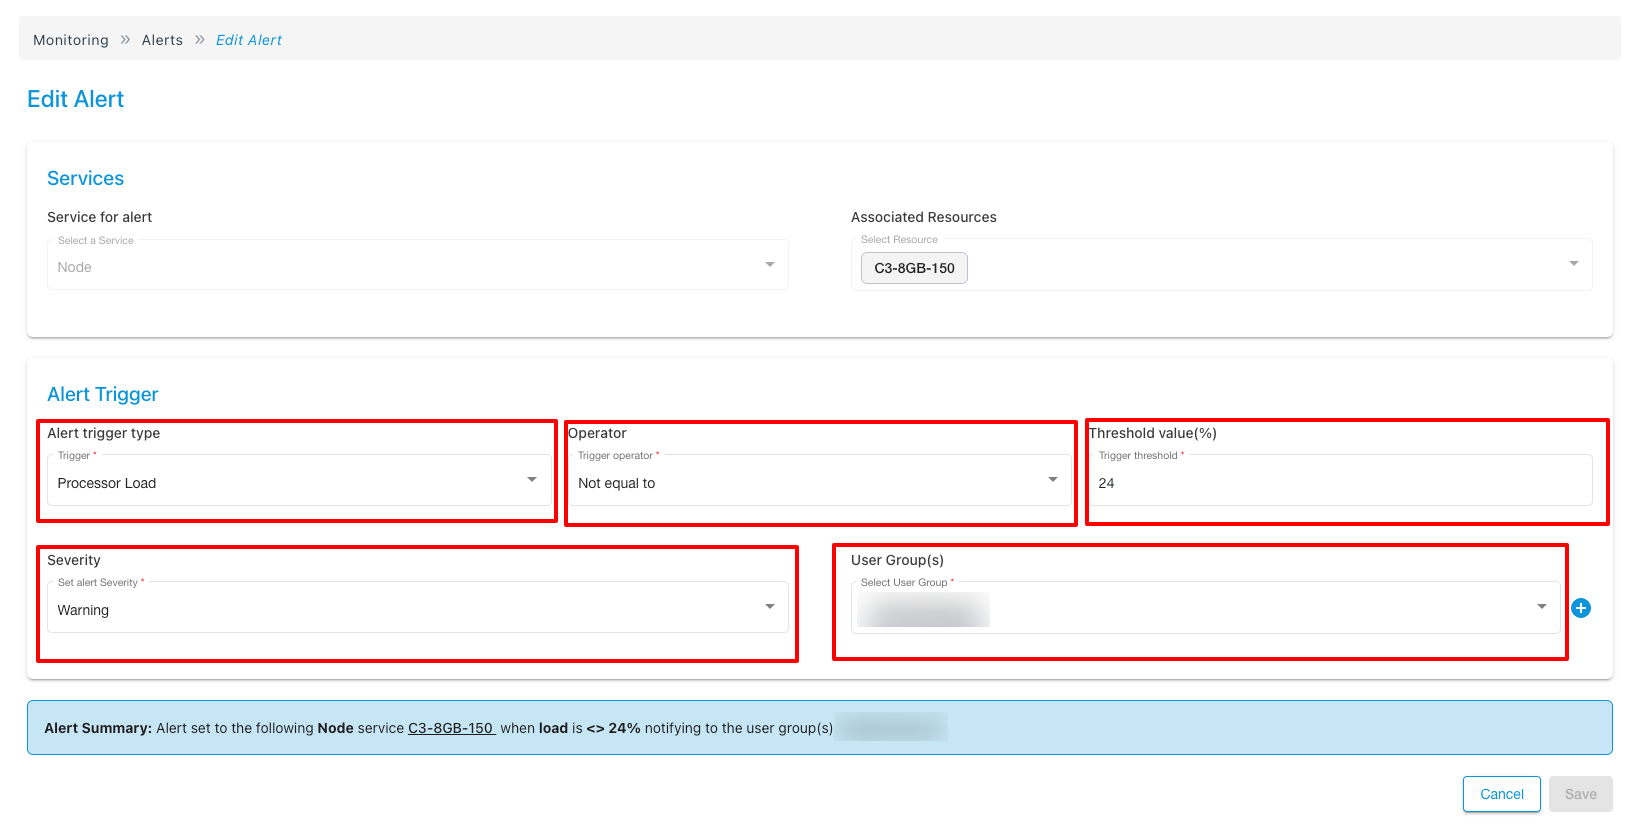
Edit
To edit a particular alert:
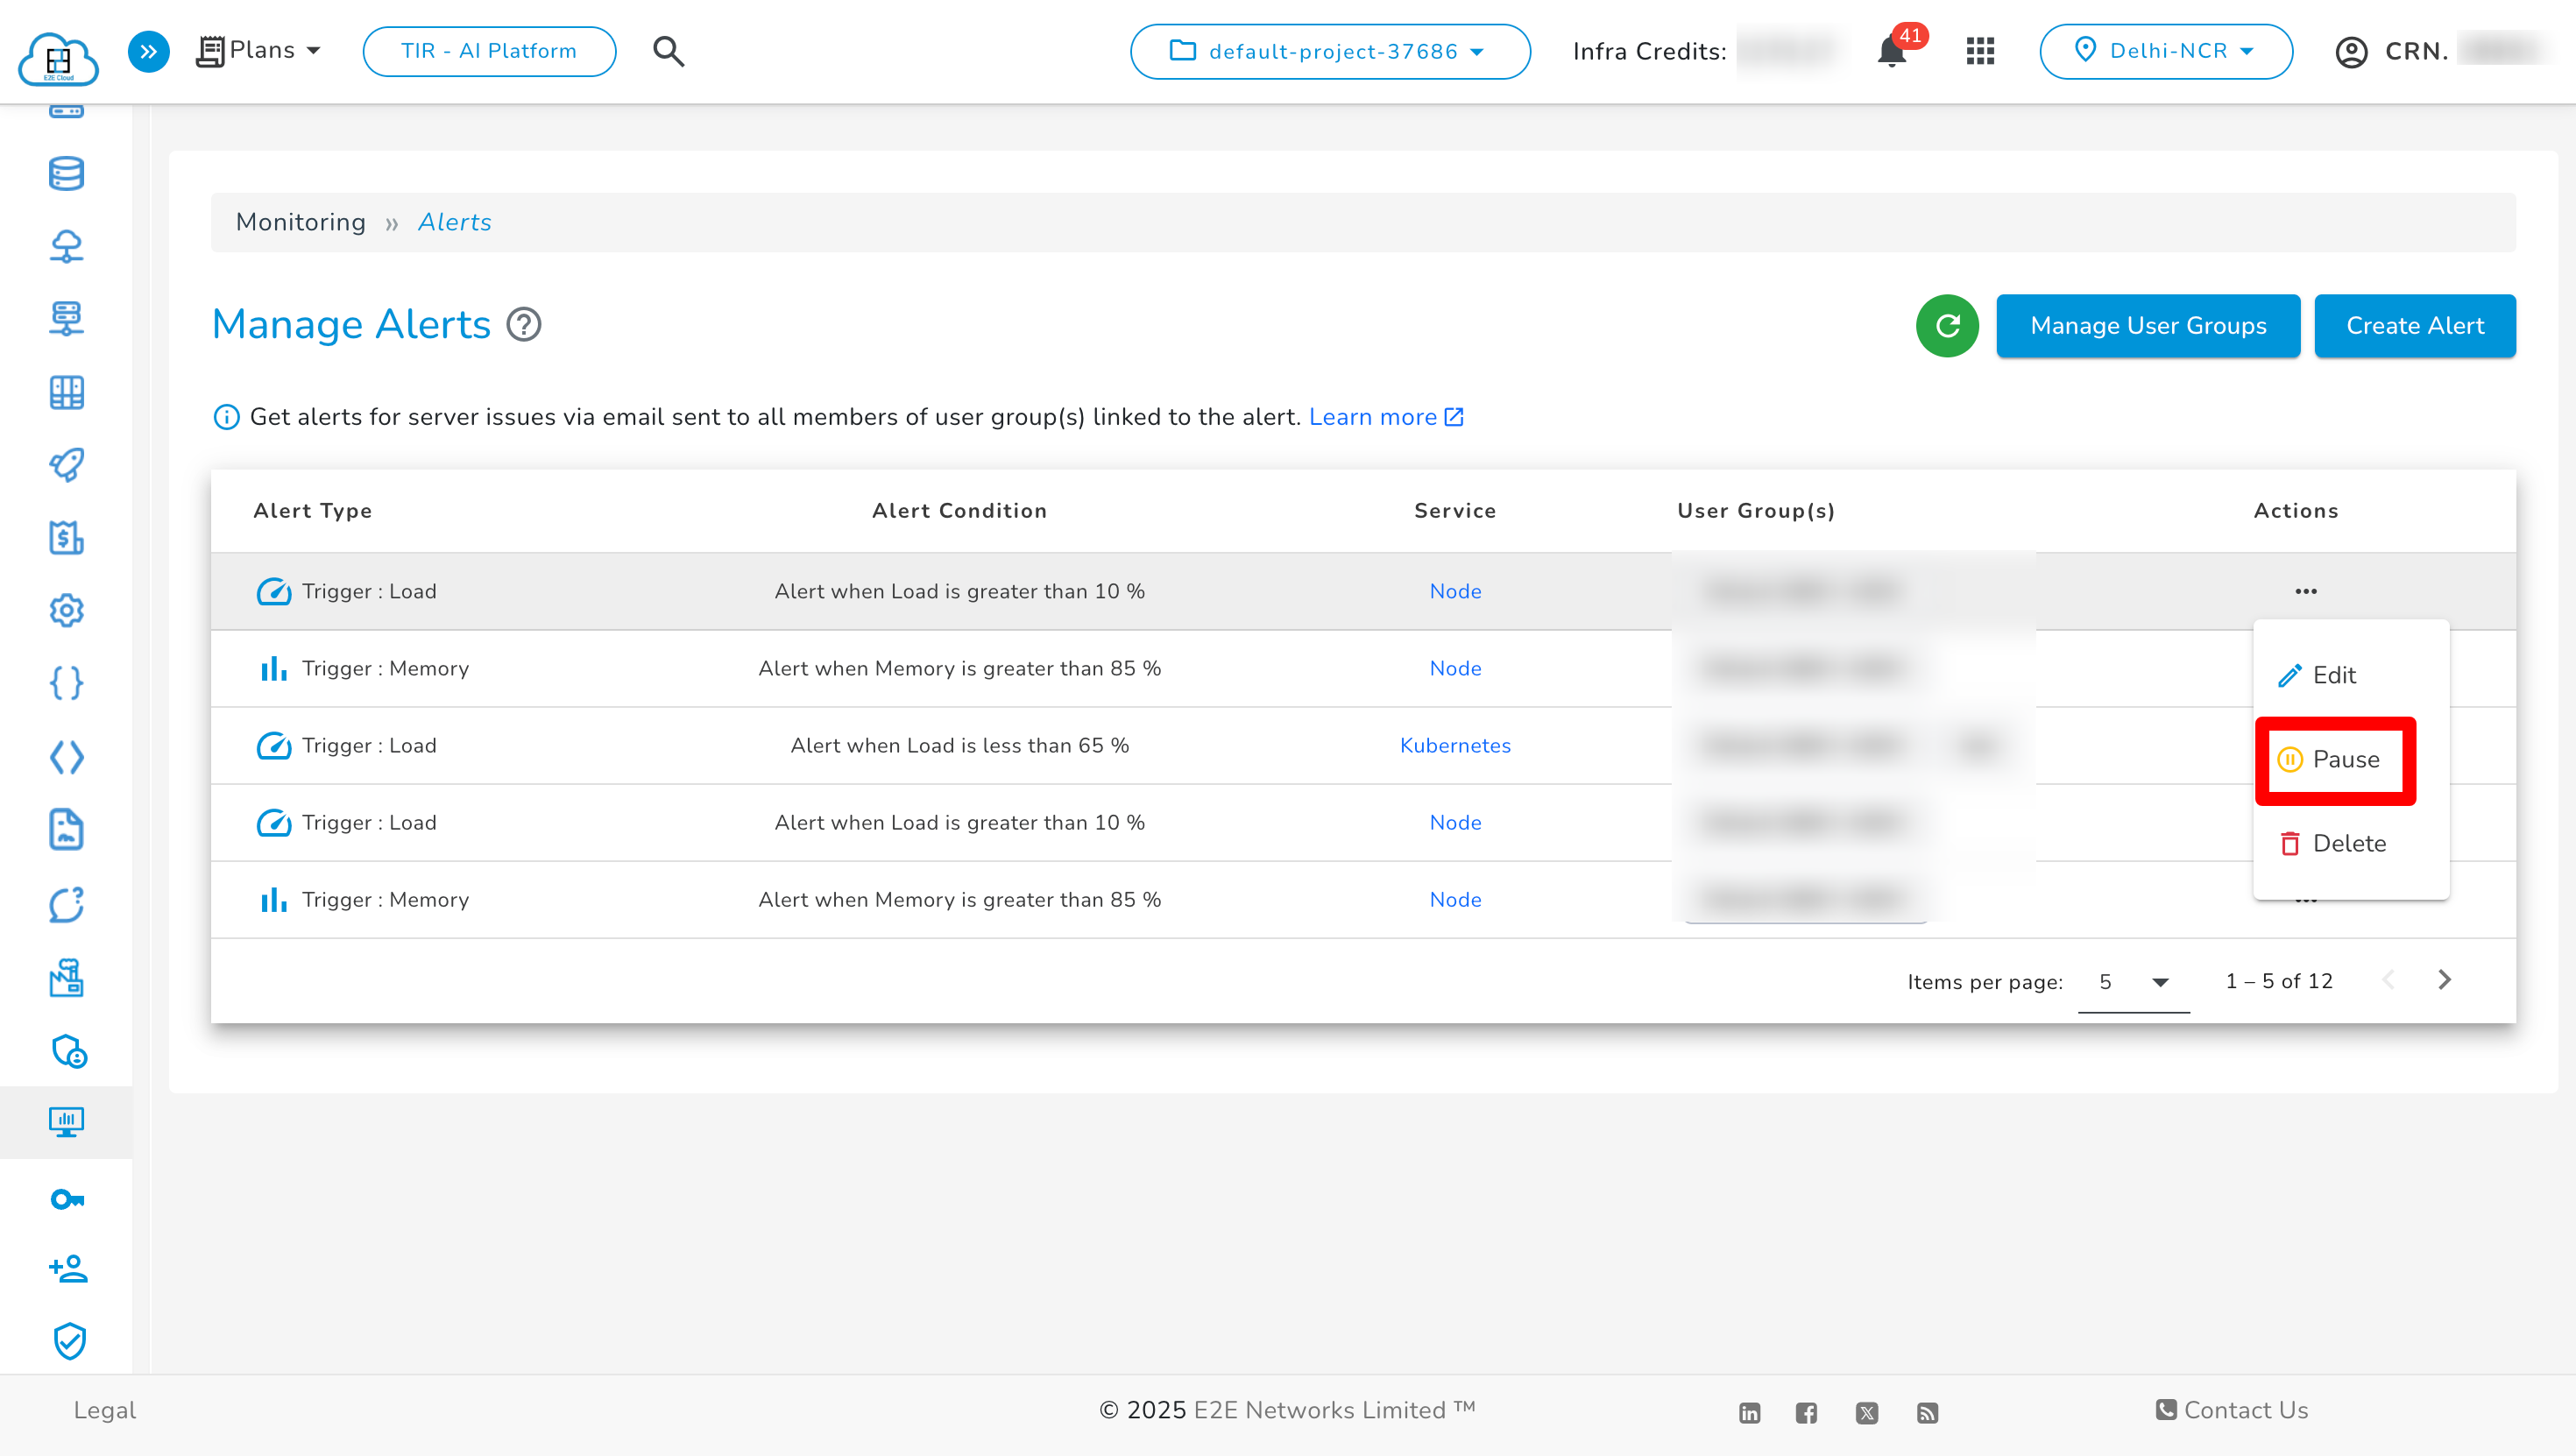
Pause and Resume Alerts
You can also pause or resume alerts directly from the global Event Monitoring dashboard.
-
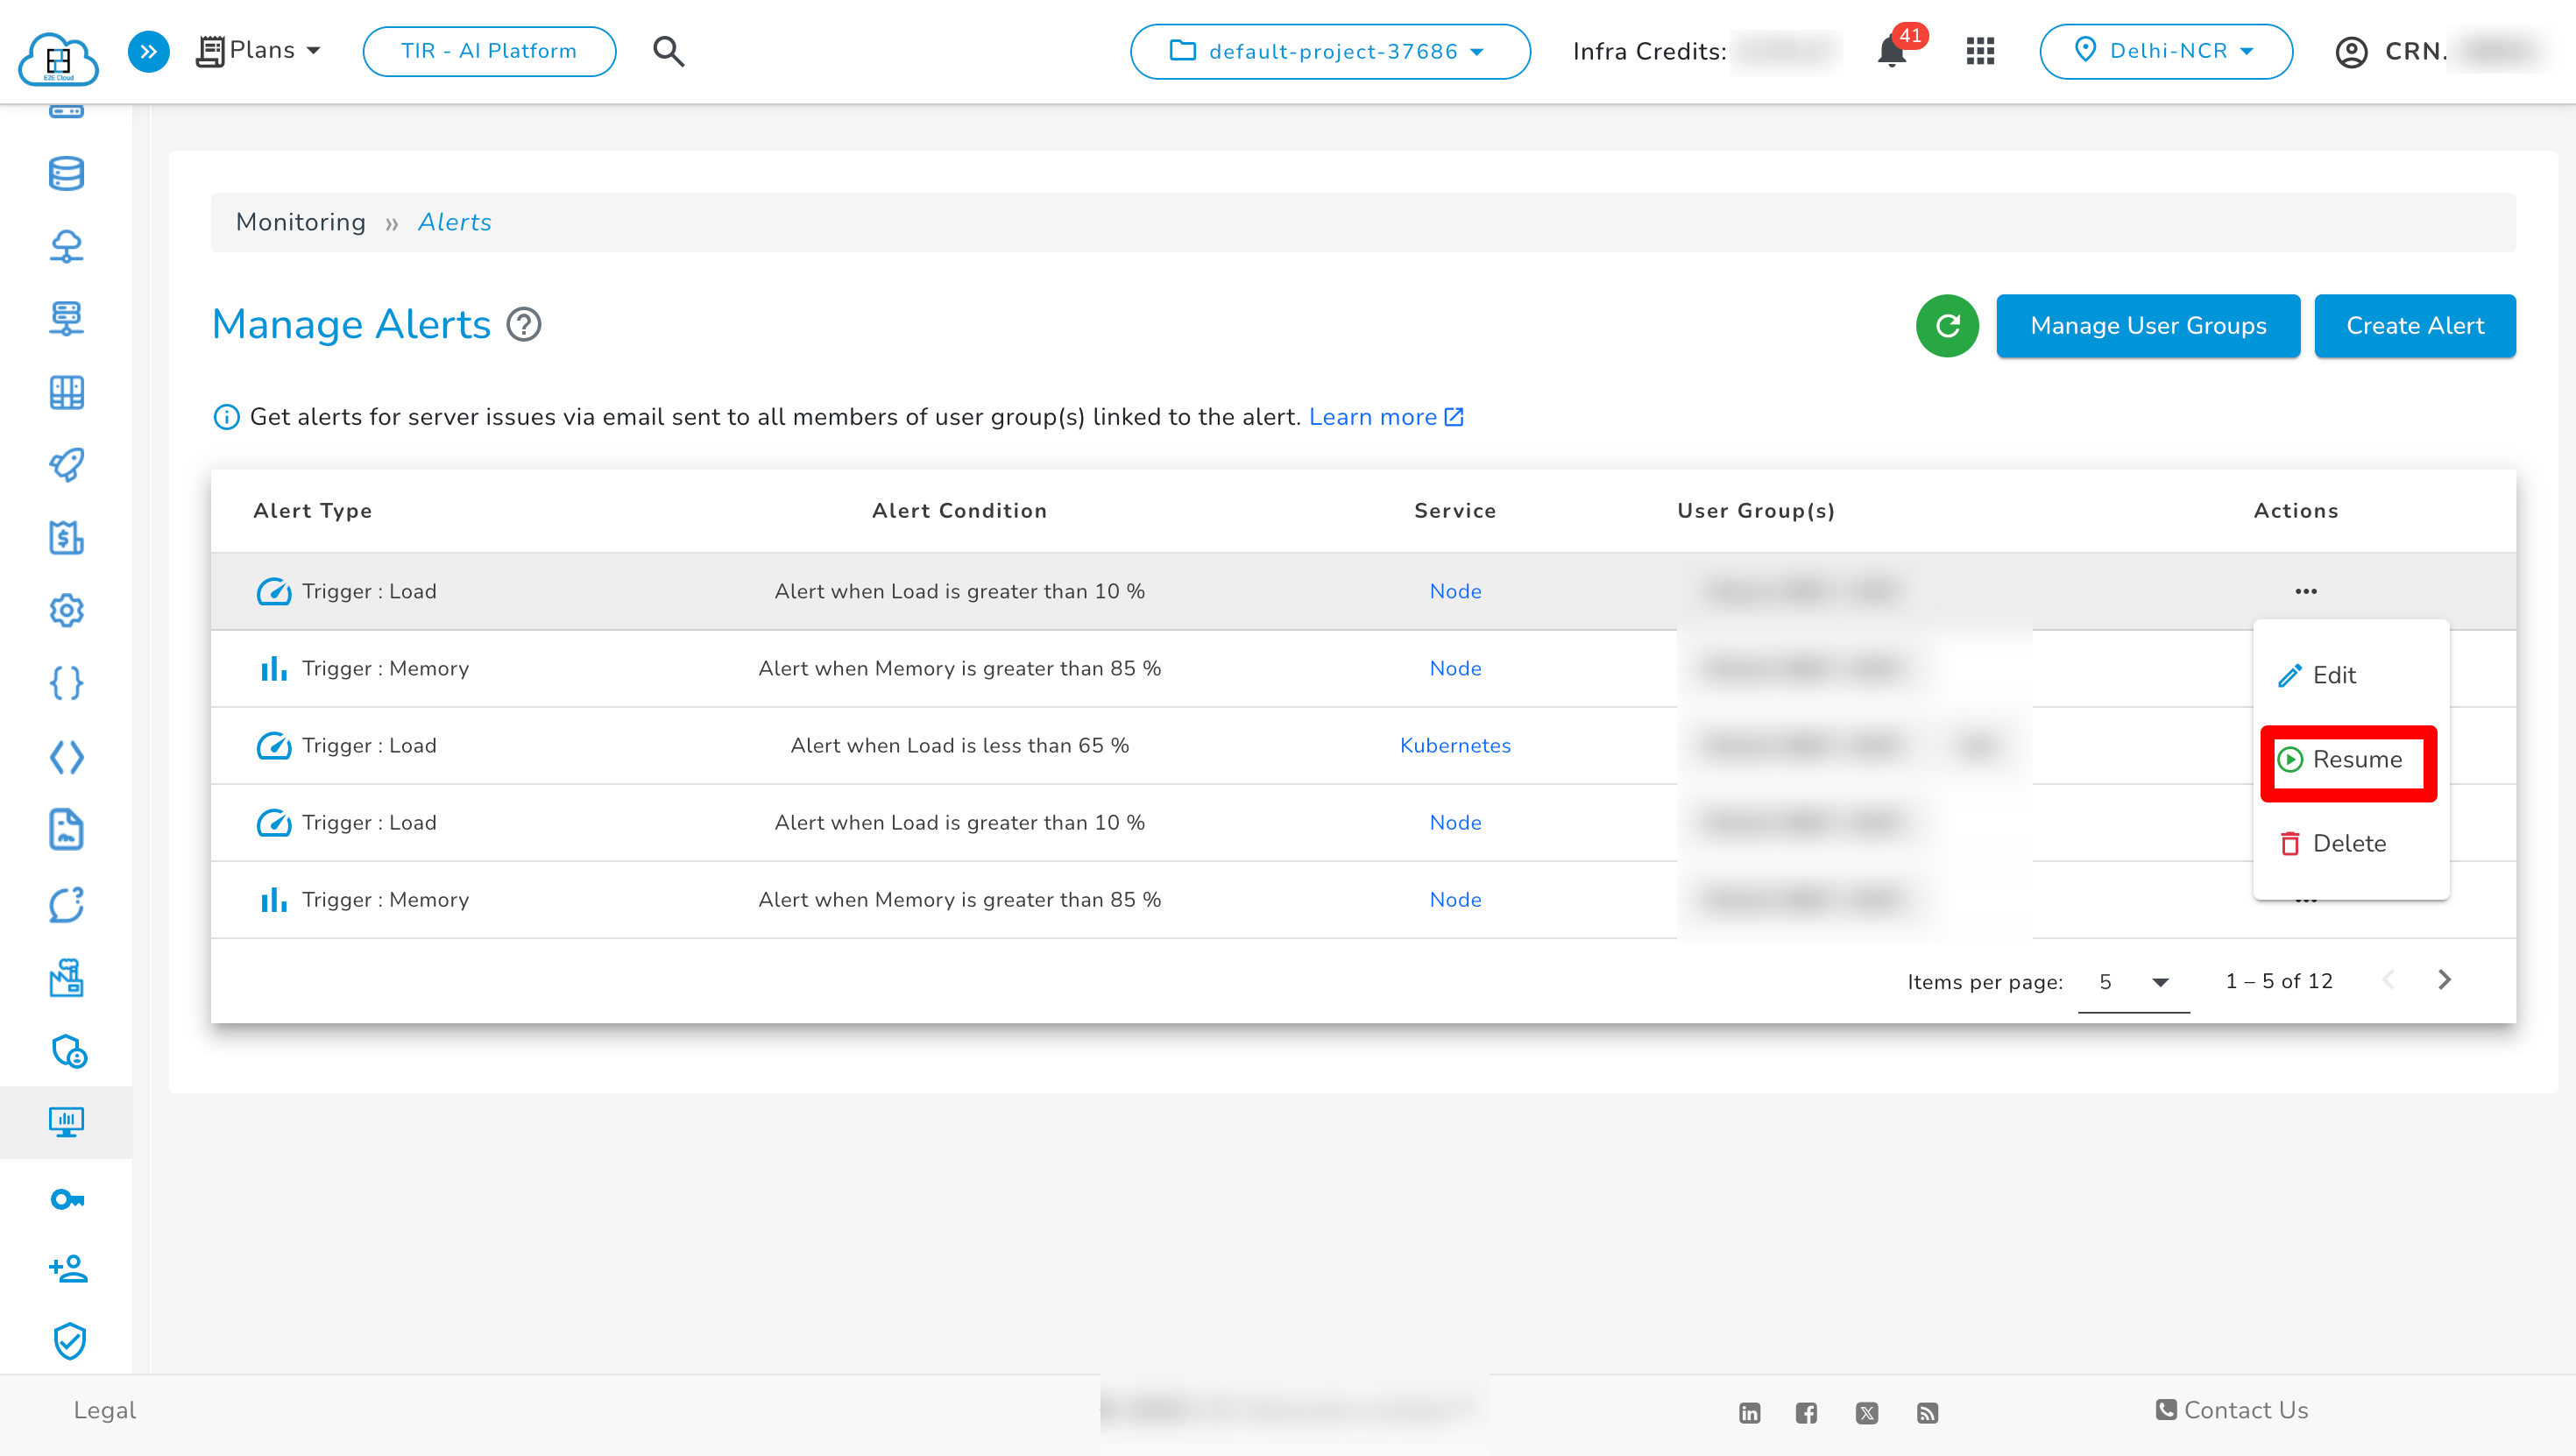
On the Monitoring Dashboard go to Manage Alerts page, locate the alert you want to pause or resume.
-
Click the Actions menu on the right side of the alert.
-
When clicking Pause, a confirmation popup will appear:
Are you sure you want to pause this alert?
This will stop the trigger across all configured user groups until you choose to resume them.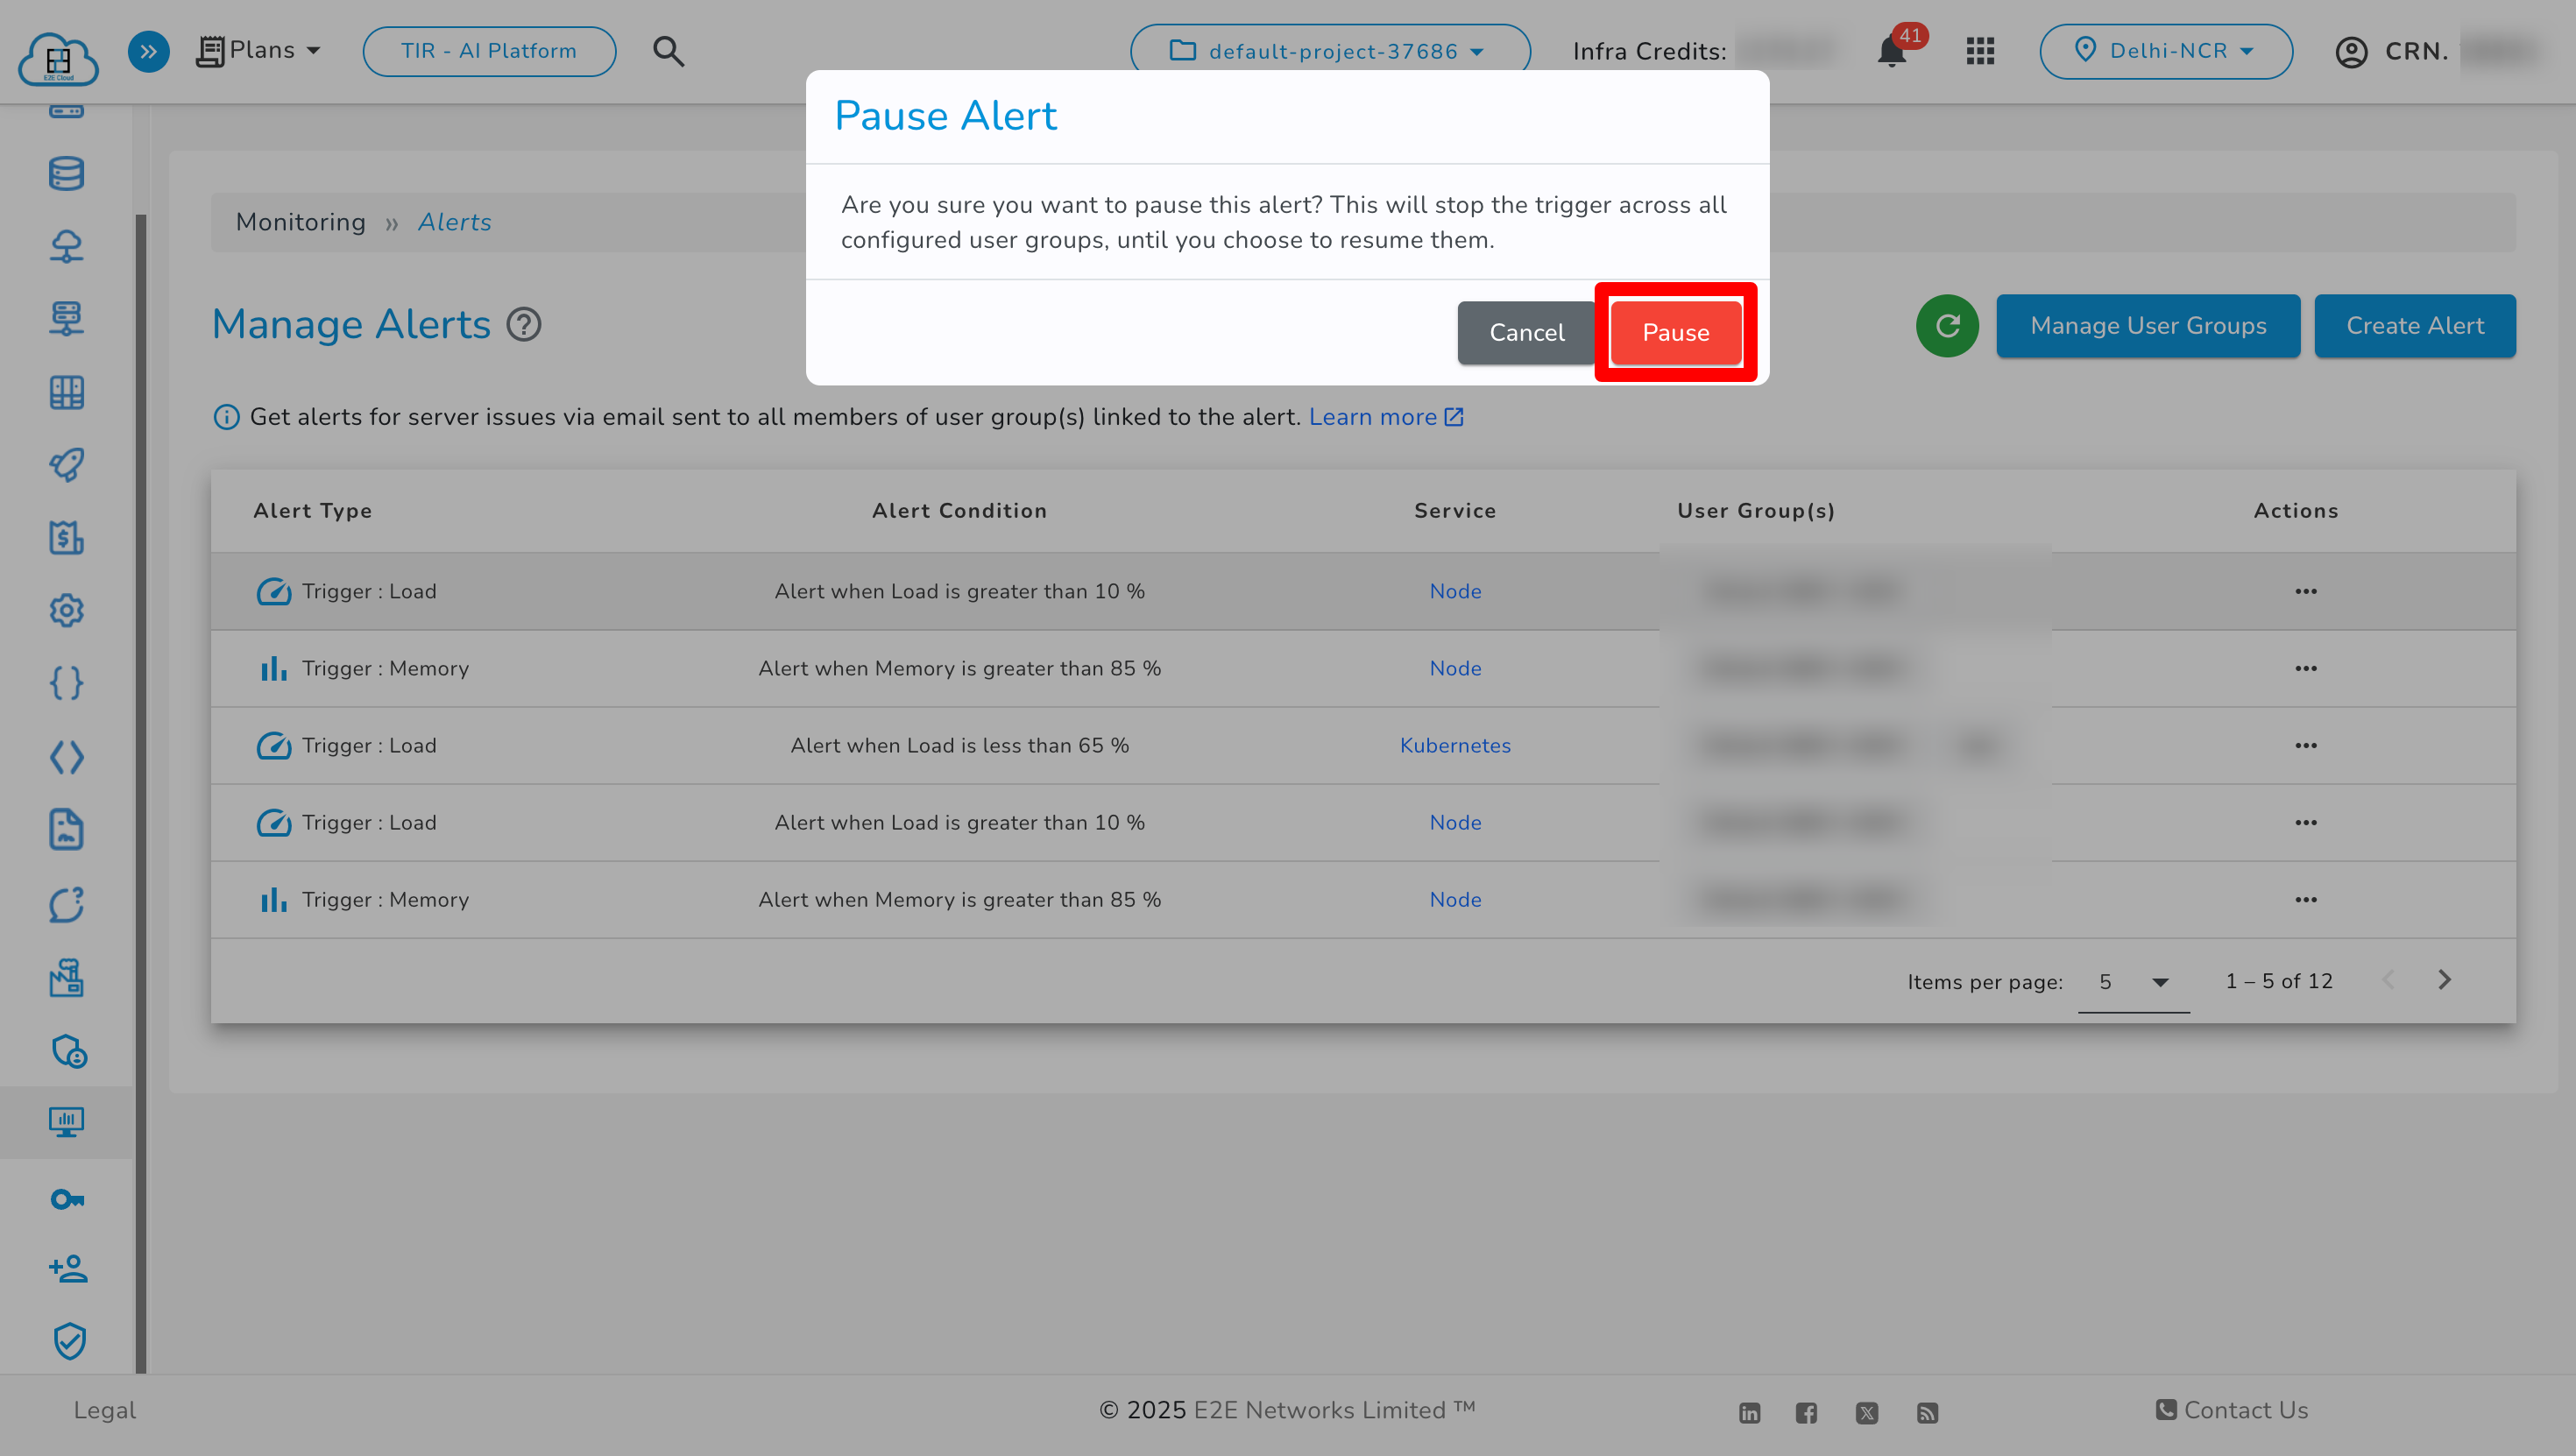
-
The alert status will be updated to reflect that the alert is paused. No alert notifications will be triggered until it is resumed.
-
When clicking Resume, a confirmation popup will appear:
Are you sure you want to resume this alert?
This will start the trigger across all configured user groups.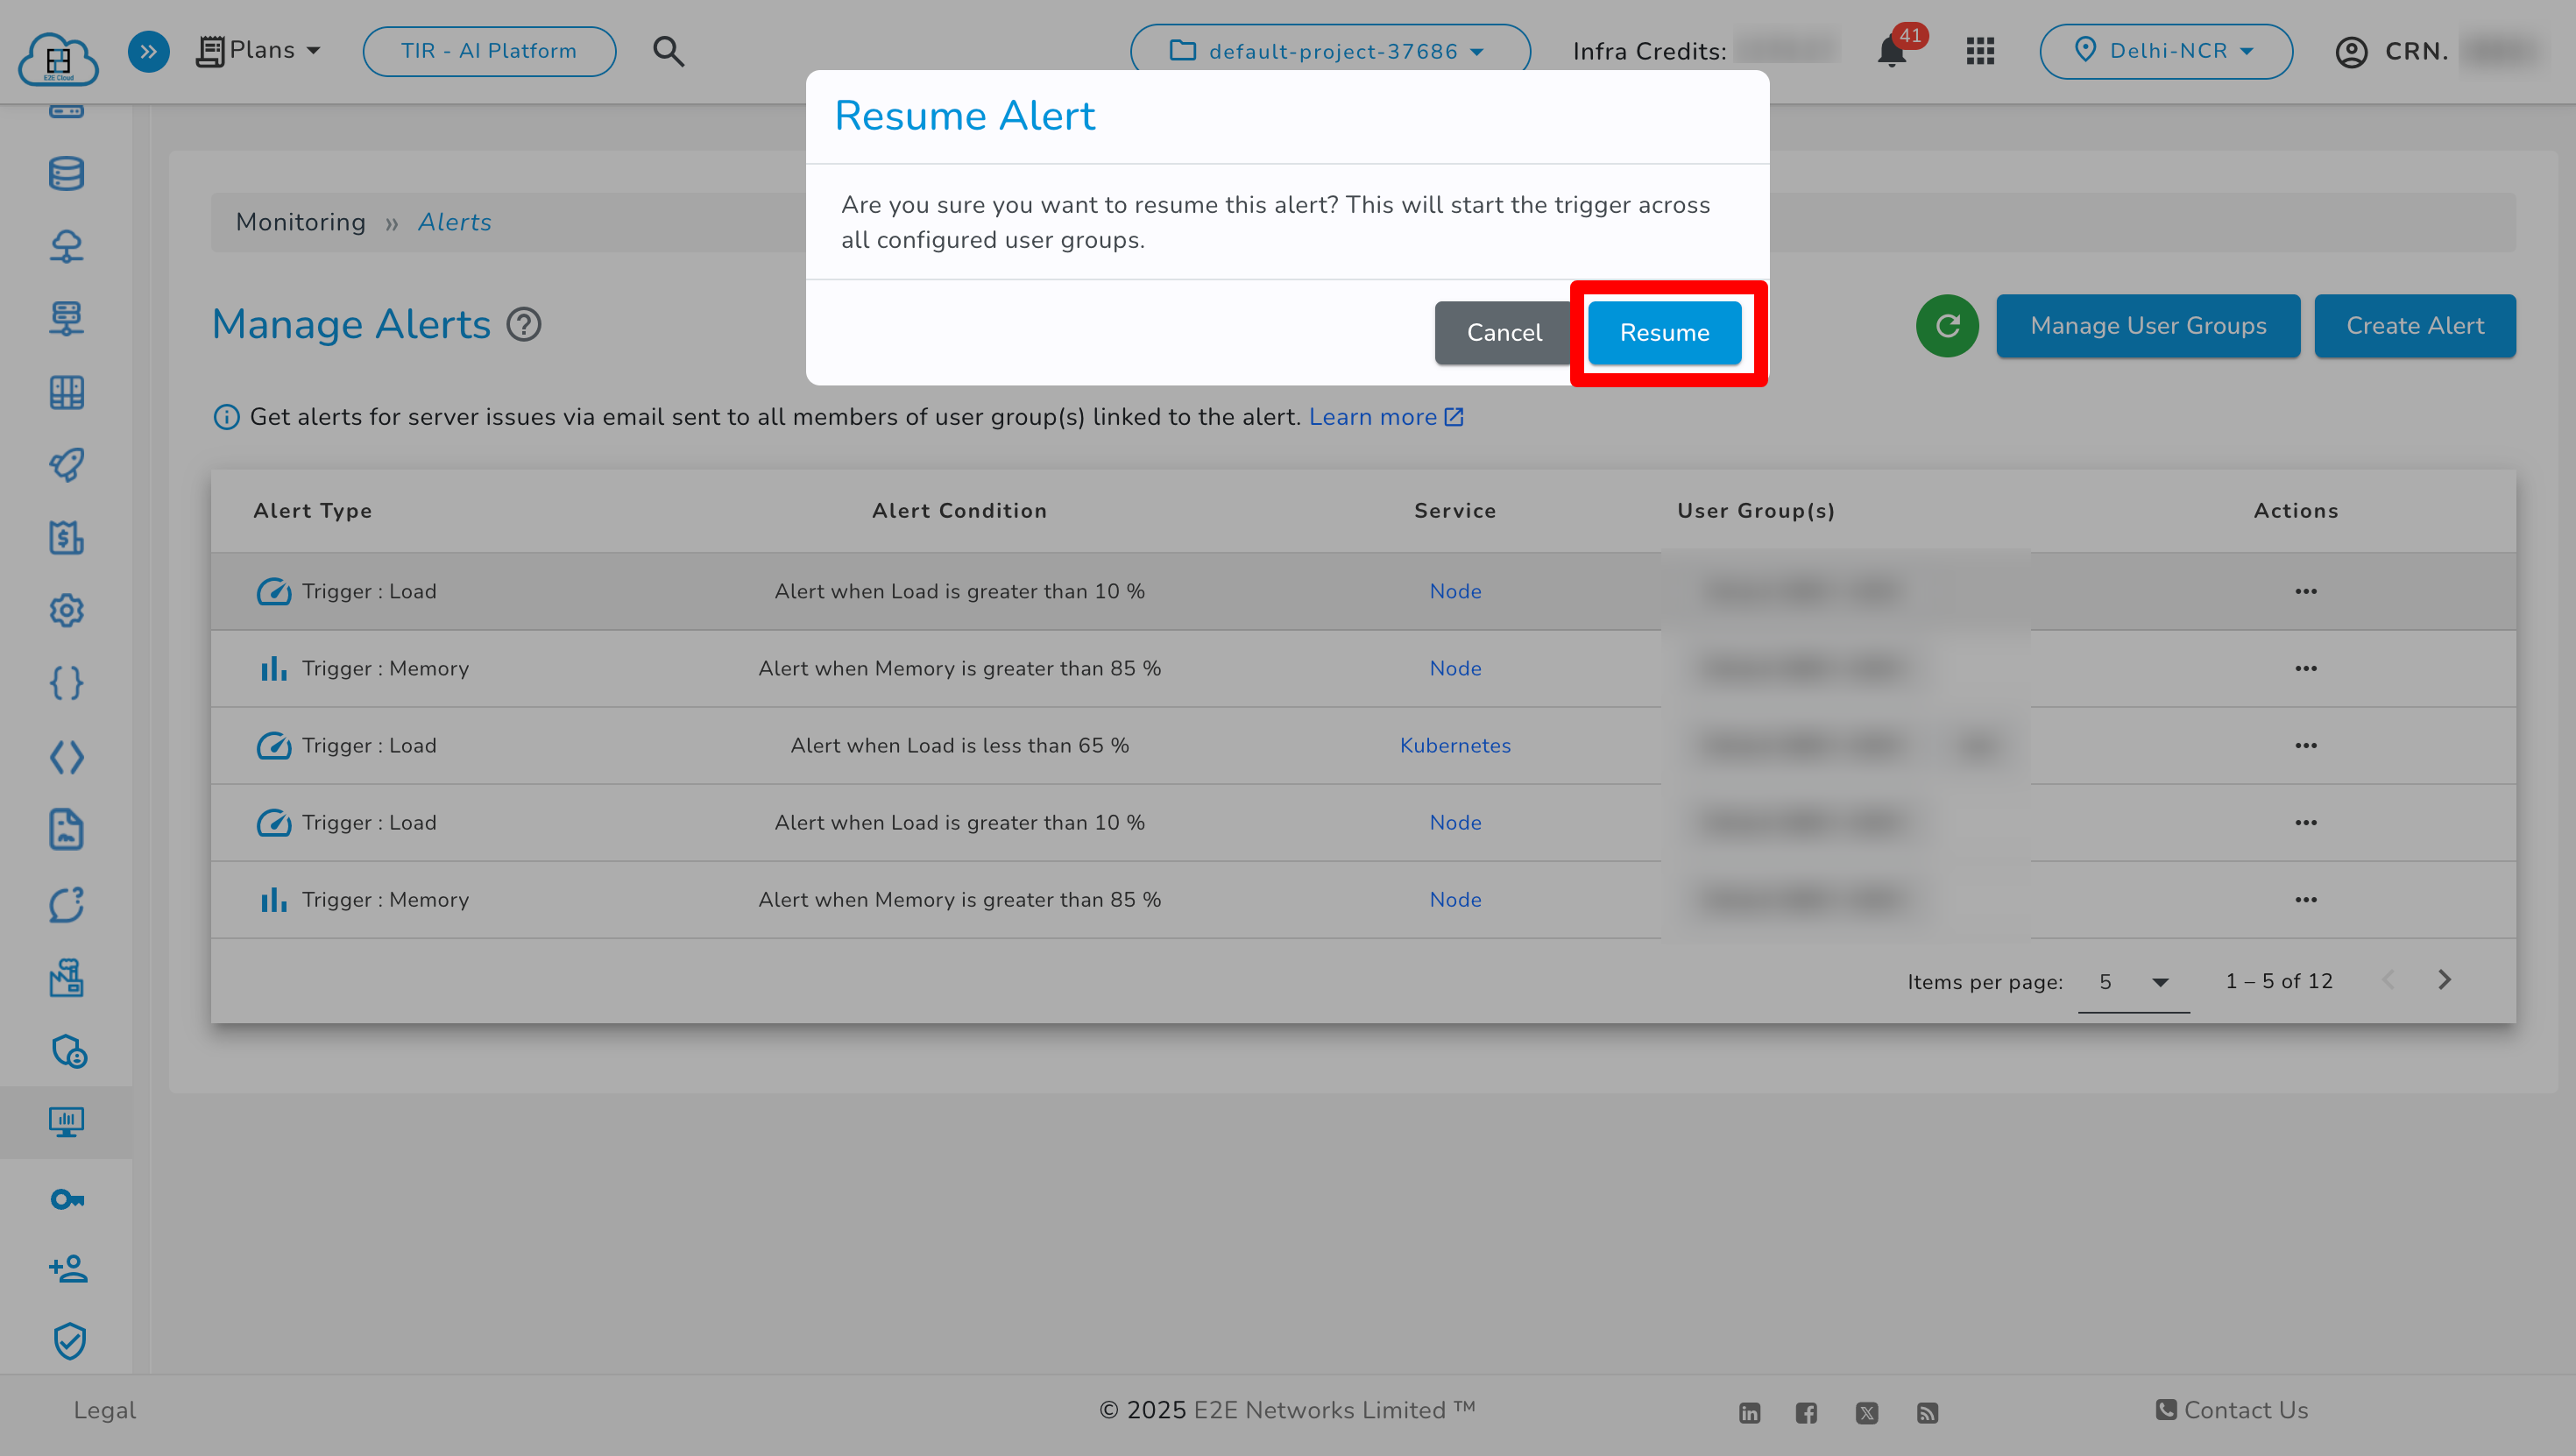
-
Click Cancel to exit or Pause/Resume to confirm the action.
✅ Note: Pausing does not delete or change the configuration of your alert—it simply disables trigger actions until resumed.
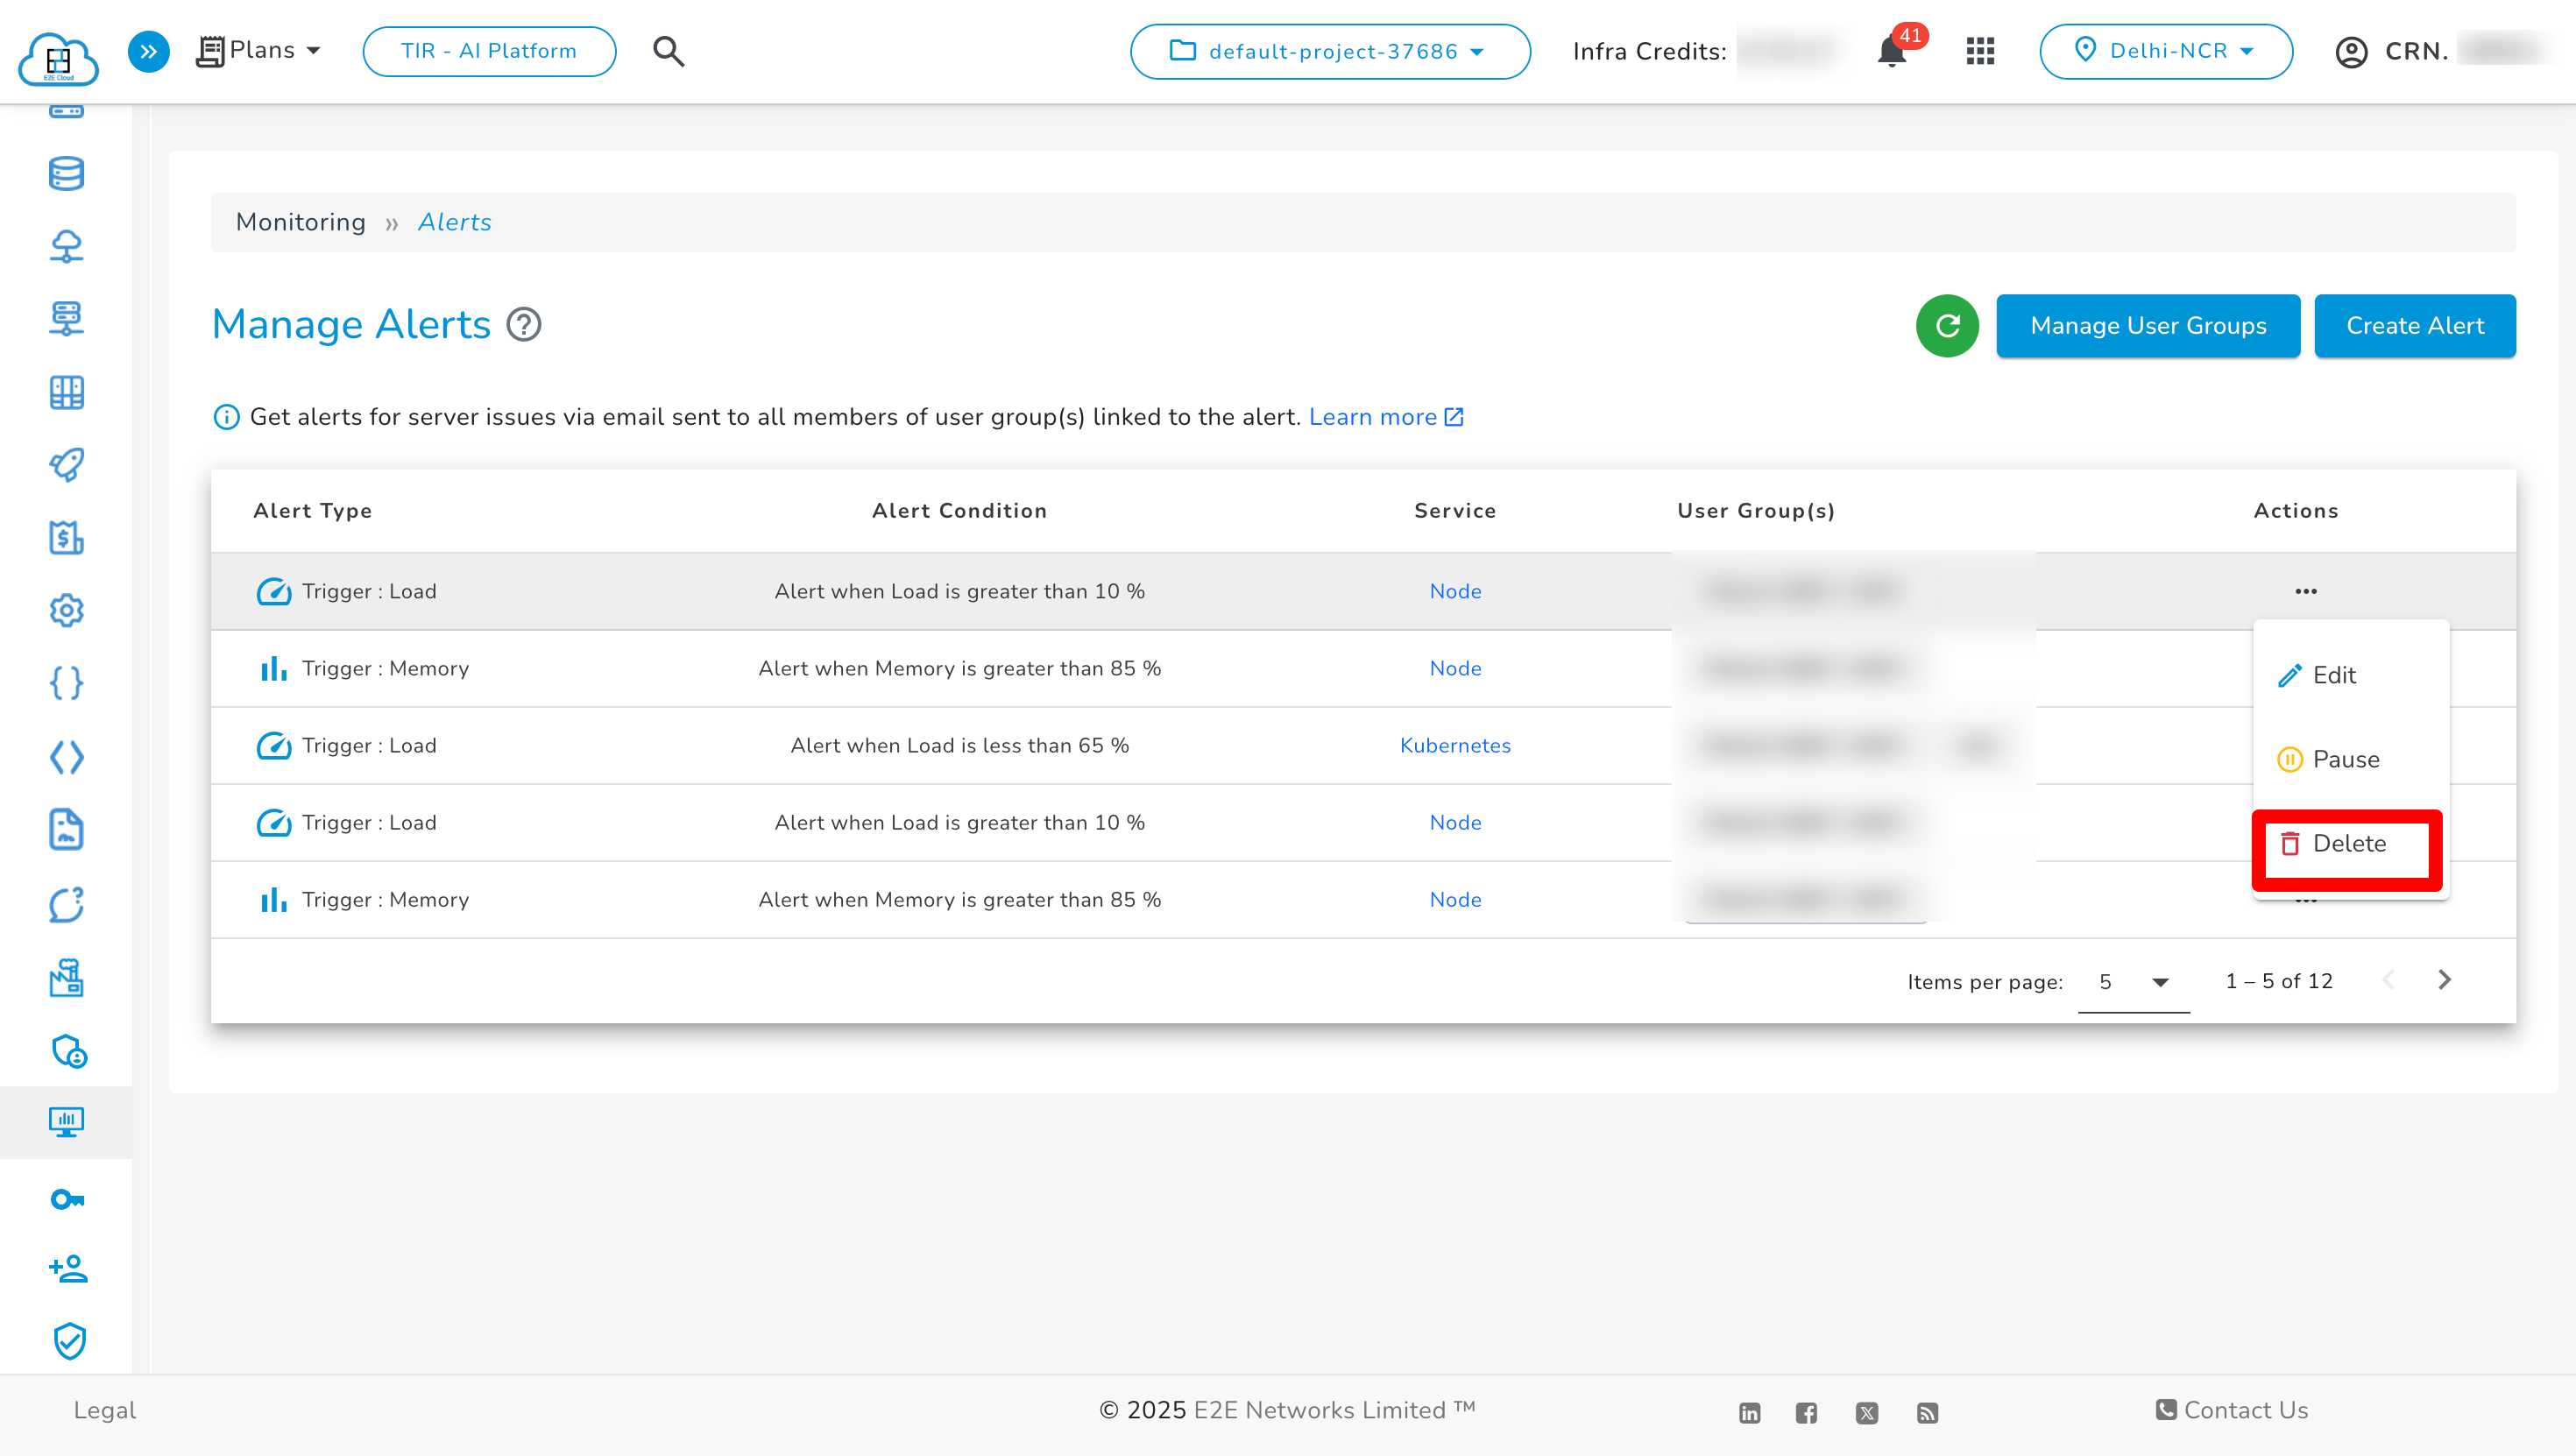
Delete
To delete a particular alert:
Actions for Editing Alerts
-
For editing a particular alert, click on the edit option of that particular alert.
-
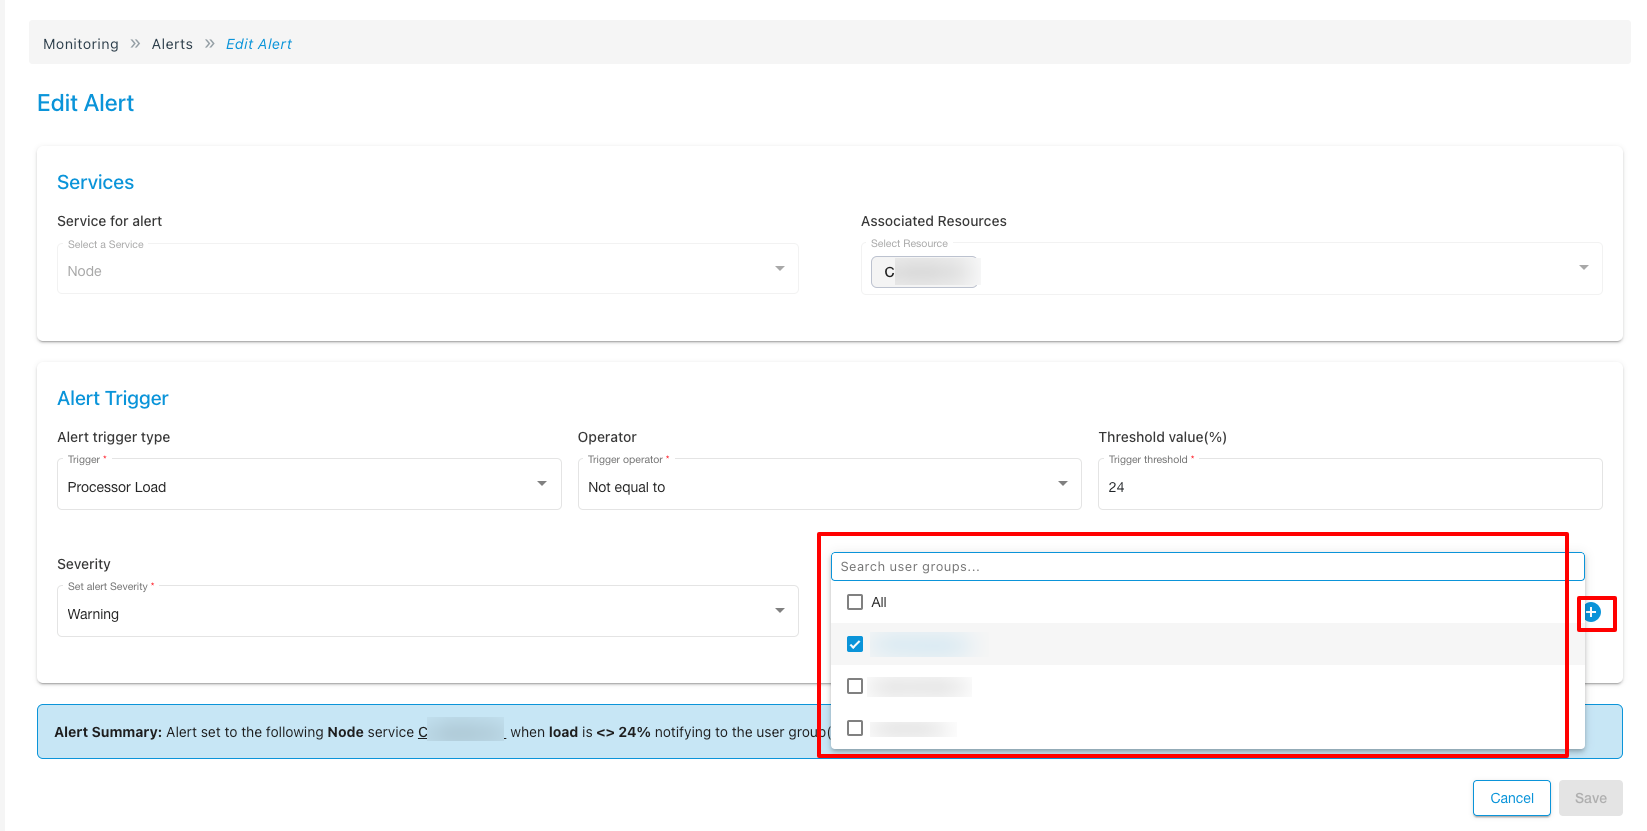
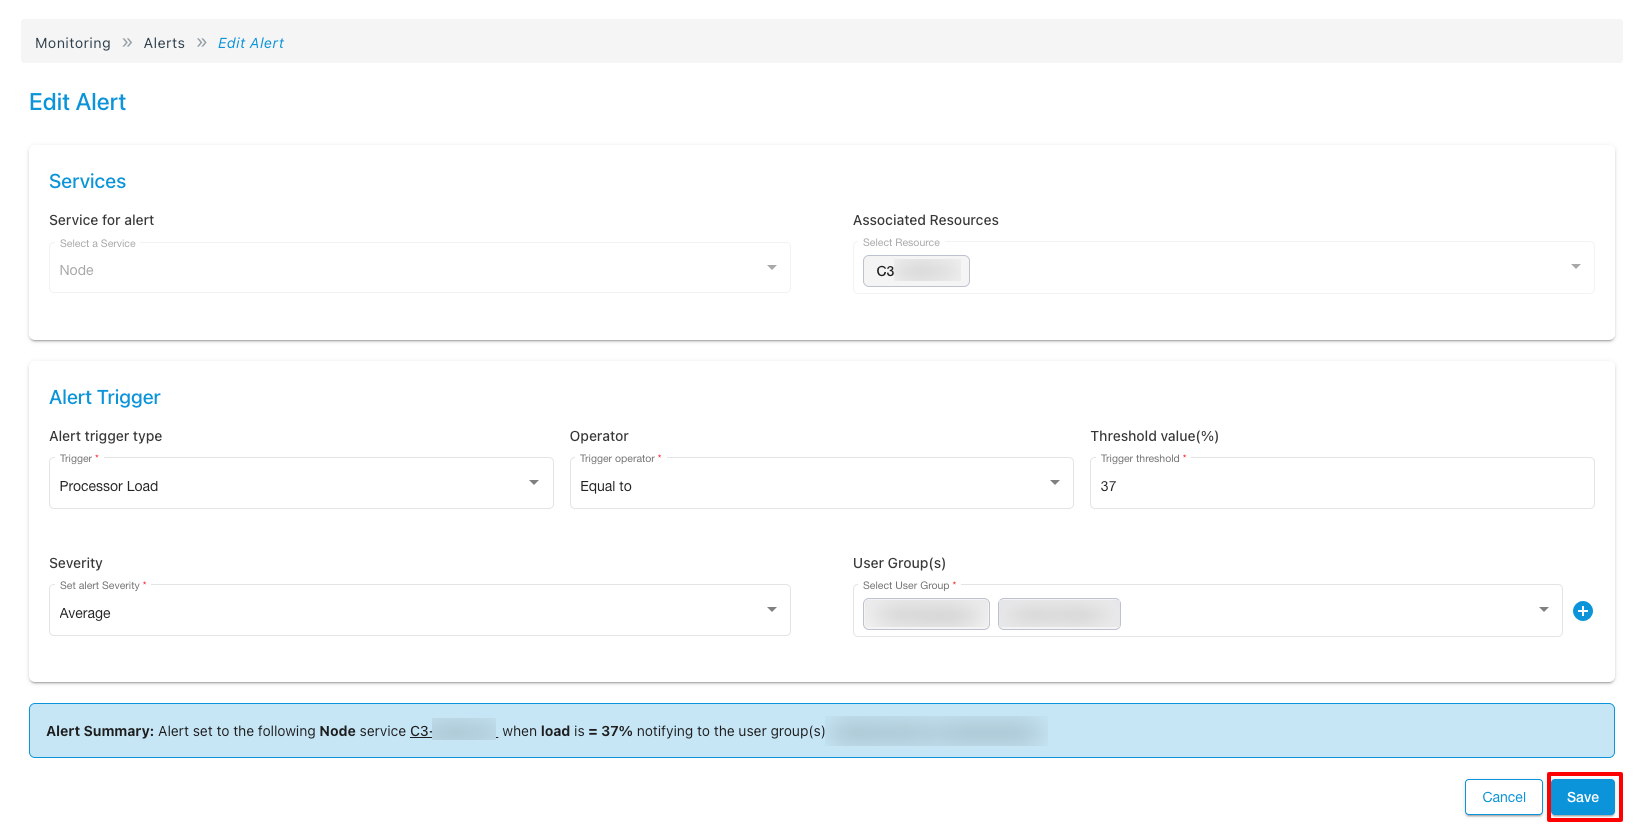
Make the necessary changes to the triggers of the alert, such as trigger type, operator, threshold value, severity, and user groups.
-
During the editing of the alert, you can also create a new user group if required, or just add the existing user groups from the User Group(s) tab.
-
If you click on the plus icon at the side of User Group(s) for creating a new group, you need to name your user group and add the users to form a user group.
-
You can add users of any role except for Billing role members.
-
After editing the alert, click on save to save the changes made to the alert.
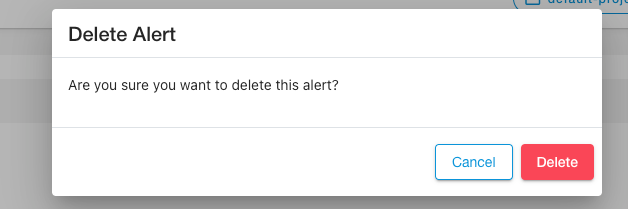
Actions for Deleting Alerts
-
To delete a particular alert:
-
If you click on delete, a pop-up will appear asking for the confirmation to delete the alert.