Open/Close ports on Windows Firewall
Introduction
Windows Firewall is an application of Microsoft Windows that filters incoming/outgoing information of your system from the Internet and blocks potentially harmful programs. Users need to add a program to the list of allowed programs to allow it to communicate through the firewall. When using a public network, Windows Firewall can also secure the system by blocking all unsolicited attempts to connect to your computer.
In this article, we will explain how to open a port in the Windows firewall for TCP access.
Steps to open a port
Step 1: On the Start menu, click Run, type WF.msc, and then press Enter.
Step 2: In the Windows Firewall with Advanced Security Panel, in the left pane, right-click Inbound Rules, and then click New Rule in the action panel.
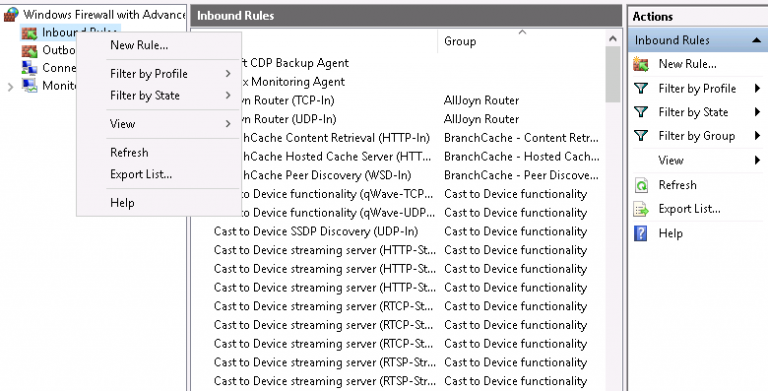
Step 3: You will get a Rule Type dialog box, select Port, and then click Next.
Step 4: On the Protocol and Ports dialog box, select TCP. Select Specific local ports, and then type the port number. Click Next.
(Note: The port 3306 is shown just as an example. You need to specify the port you are opening.)
Step 5: In the Action dialog box, select Allow the connection, and then click Next.
Step 6: In the Name dialog box, type a name and description for this rule, and then click Finish.
Create an Outbound Port Rule
To begin with, you should start the firewall extended interface. To do this, go to Control Panel, switch to large icons mode, and click on Windows Defender Firewall.
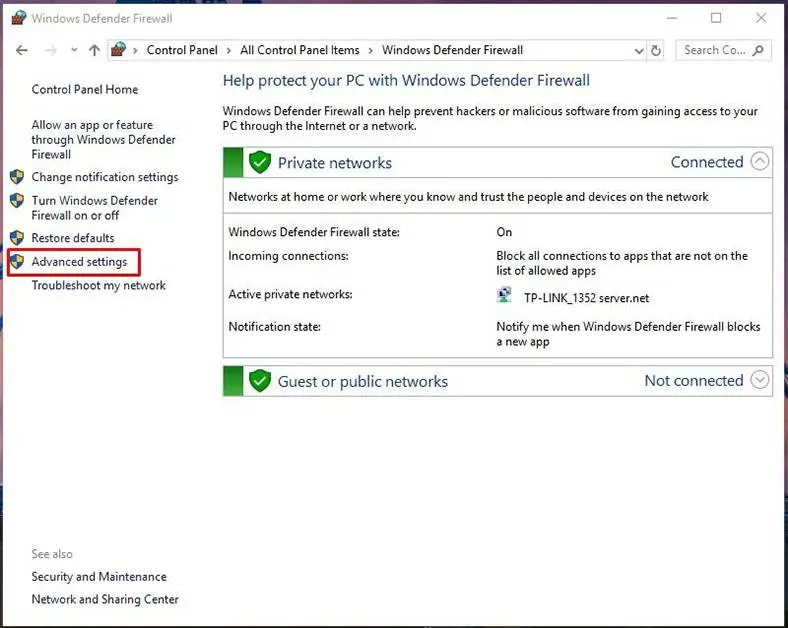
The firewall extended interface (which you can access by clicking on the Advanced settings link on the left) has many settings. Make all changes very attentively, and follow exactly what this tutorial instructs. If you set certain configurations incorrectly, it could result in issues with your computer.
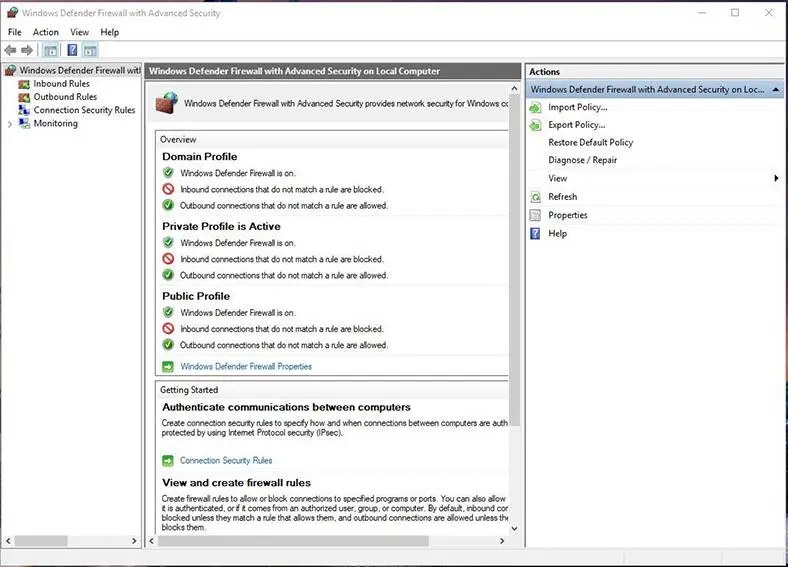
In the left navigation pane, select Outbound Rules. The system will show all previously created rules – and don’t be surprised to see dozens of entries created by Windows.
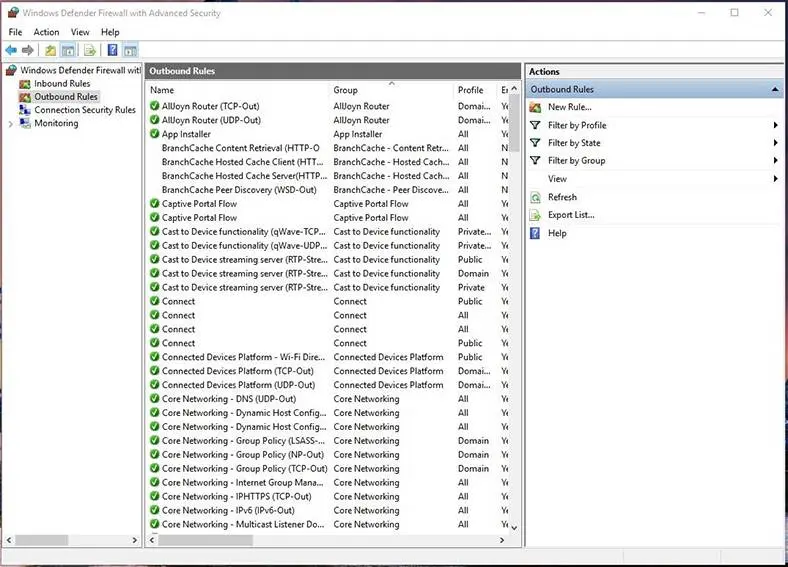
In the right pane, click New Rule….
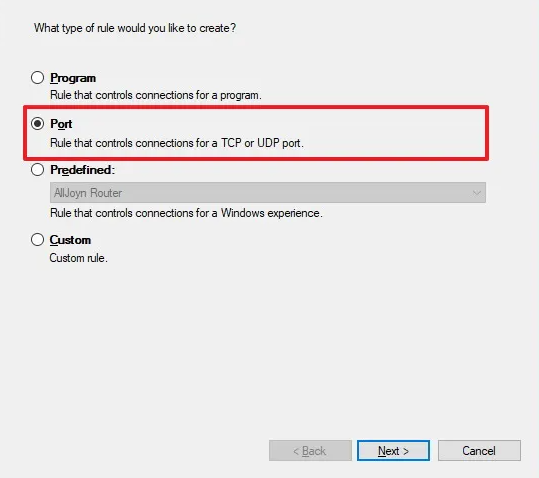
By default, you are prompted to create a rule for a port, so confirm your choice by clicking Next.
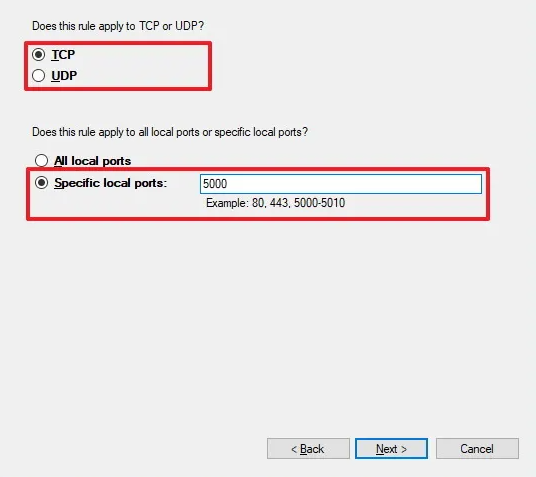
The next step is to add the custom port and specify TCP/UDP which has to be blocked, then click Next.
Confirm your file choice by clicking Next.
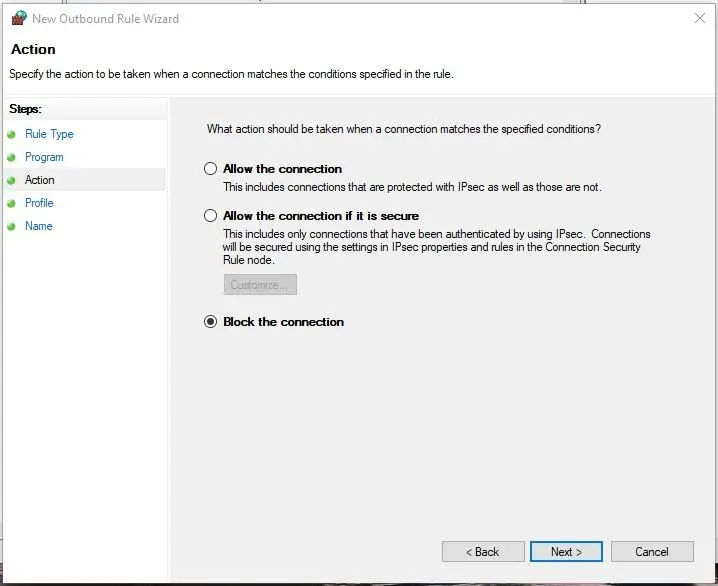
At the next stage, confirm the choice Block the connection by clicking Next.
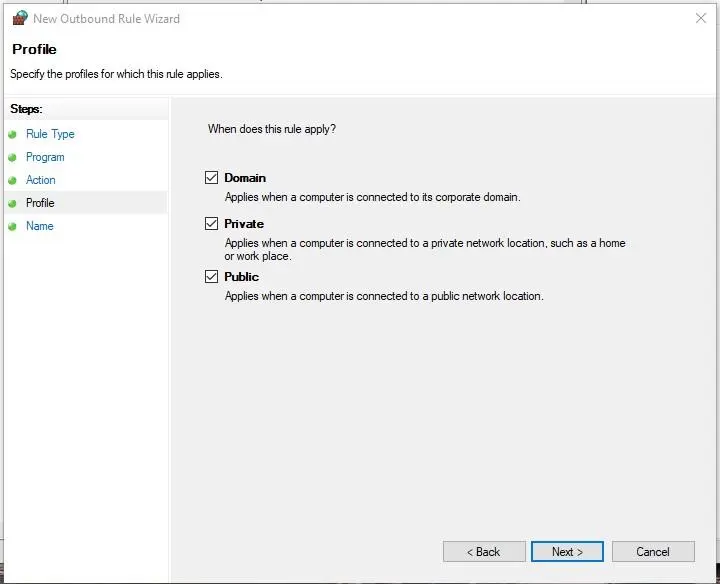
Your next step is to choose when the rule should apply (by default, all options are checked). They determine if the rule applies depending on whether the computer is connected to a network defined as public or private.
Let’s suppose you use a laptop at home (in a network you define as private), at work (in a domain network), and at a cafe (in a network you define as public). If you want the rule to apply at the cafe, at work, and at home, select all three options. If you want it to apply only in one of these cases, select the corresponding option.
If you have doubts, just leave all blocking options enabled by default. Confirm the choice by clicking Next.
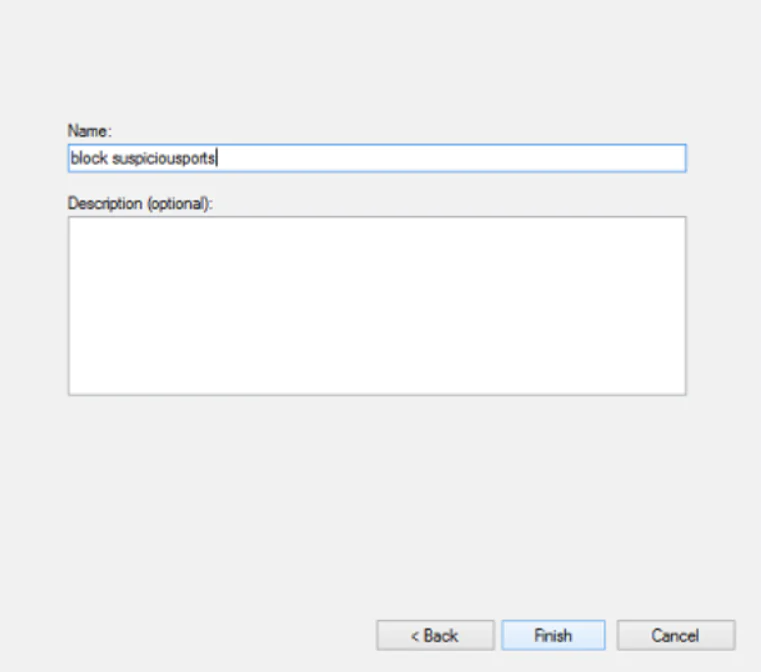
The last step is to give this rule a name. Think of a name that makes sense so you can easily find it later. At this point, you can also add a description so you can remember why you created it. Windows creates many firewall rules automatically, and all of them have quite fancy names.
To make your rule stand out, name it Block suspicious ports. Close the wizard by clicking Finish.
Now there is a new item on the outbound rules list. You can double-click on it to edit it. For example, you can specify the users for whom this rule will apply, or decide that only a certain protocol should be blocked - TCP, or others.