Introduction
E2E Object Store (EOS) is a simple, cost-effective, and S3-compatible storage service that enables you to store, backup, and archive large amounts of content for your web apps or data for AI/ML pipelines. Our S3-Compatible REST API enables data access from anywhere on the internet or within your private network.
EOS is designed to handle large data volumes, allowing you to scale as per your needs. Under the hood, it is a distributed object storage, a federation of large clusters that ensures high availability. Erasure coding, the standard practice for data storage, is employed for redundancy and fault tolerance.
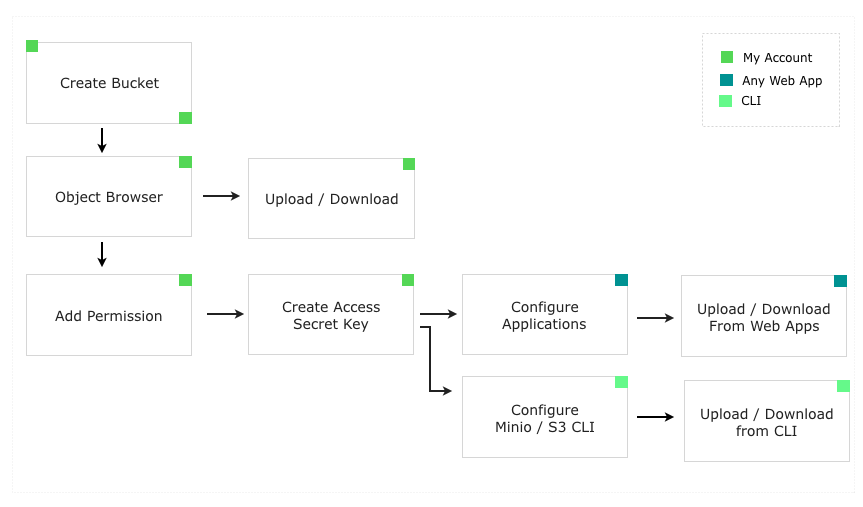
The user interface is simplified so that you can get started in a few clicks. The following diagram shows a typical user workflow when using the Object Store.

Create a Bucket
In EOS, data files are organized in the form of objects in a bucket. A bucket is a container, just like folders or directories in your OS, and allows separation of concerns. For example, you could create a bucket for a personnel app and another one for an accounts app. This enables you to manage permissions and data separately.
To start using EOS for data storage, you must create a bucket.


-
Sign into My Account
-
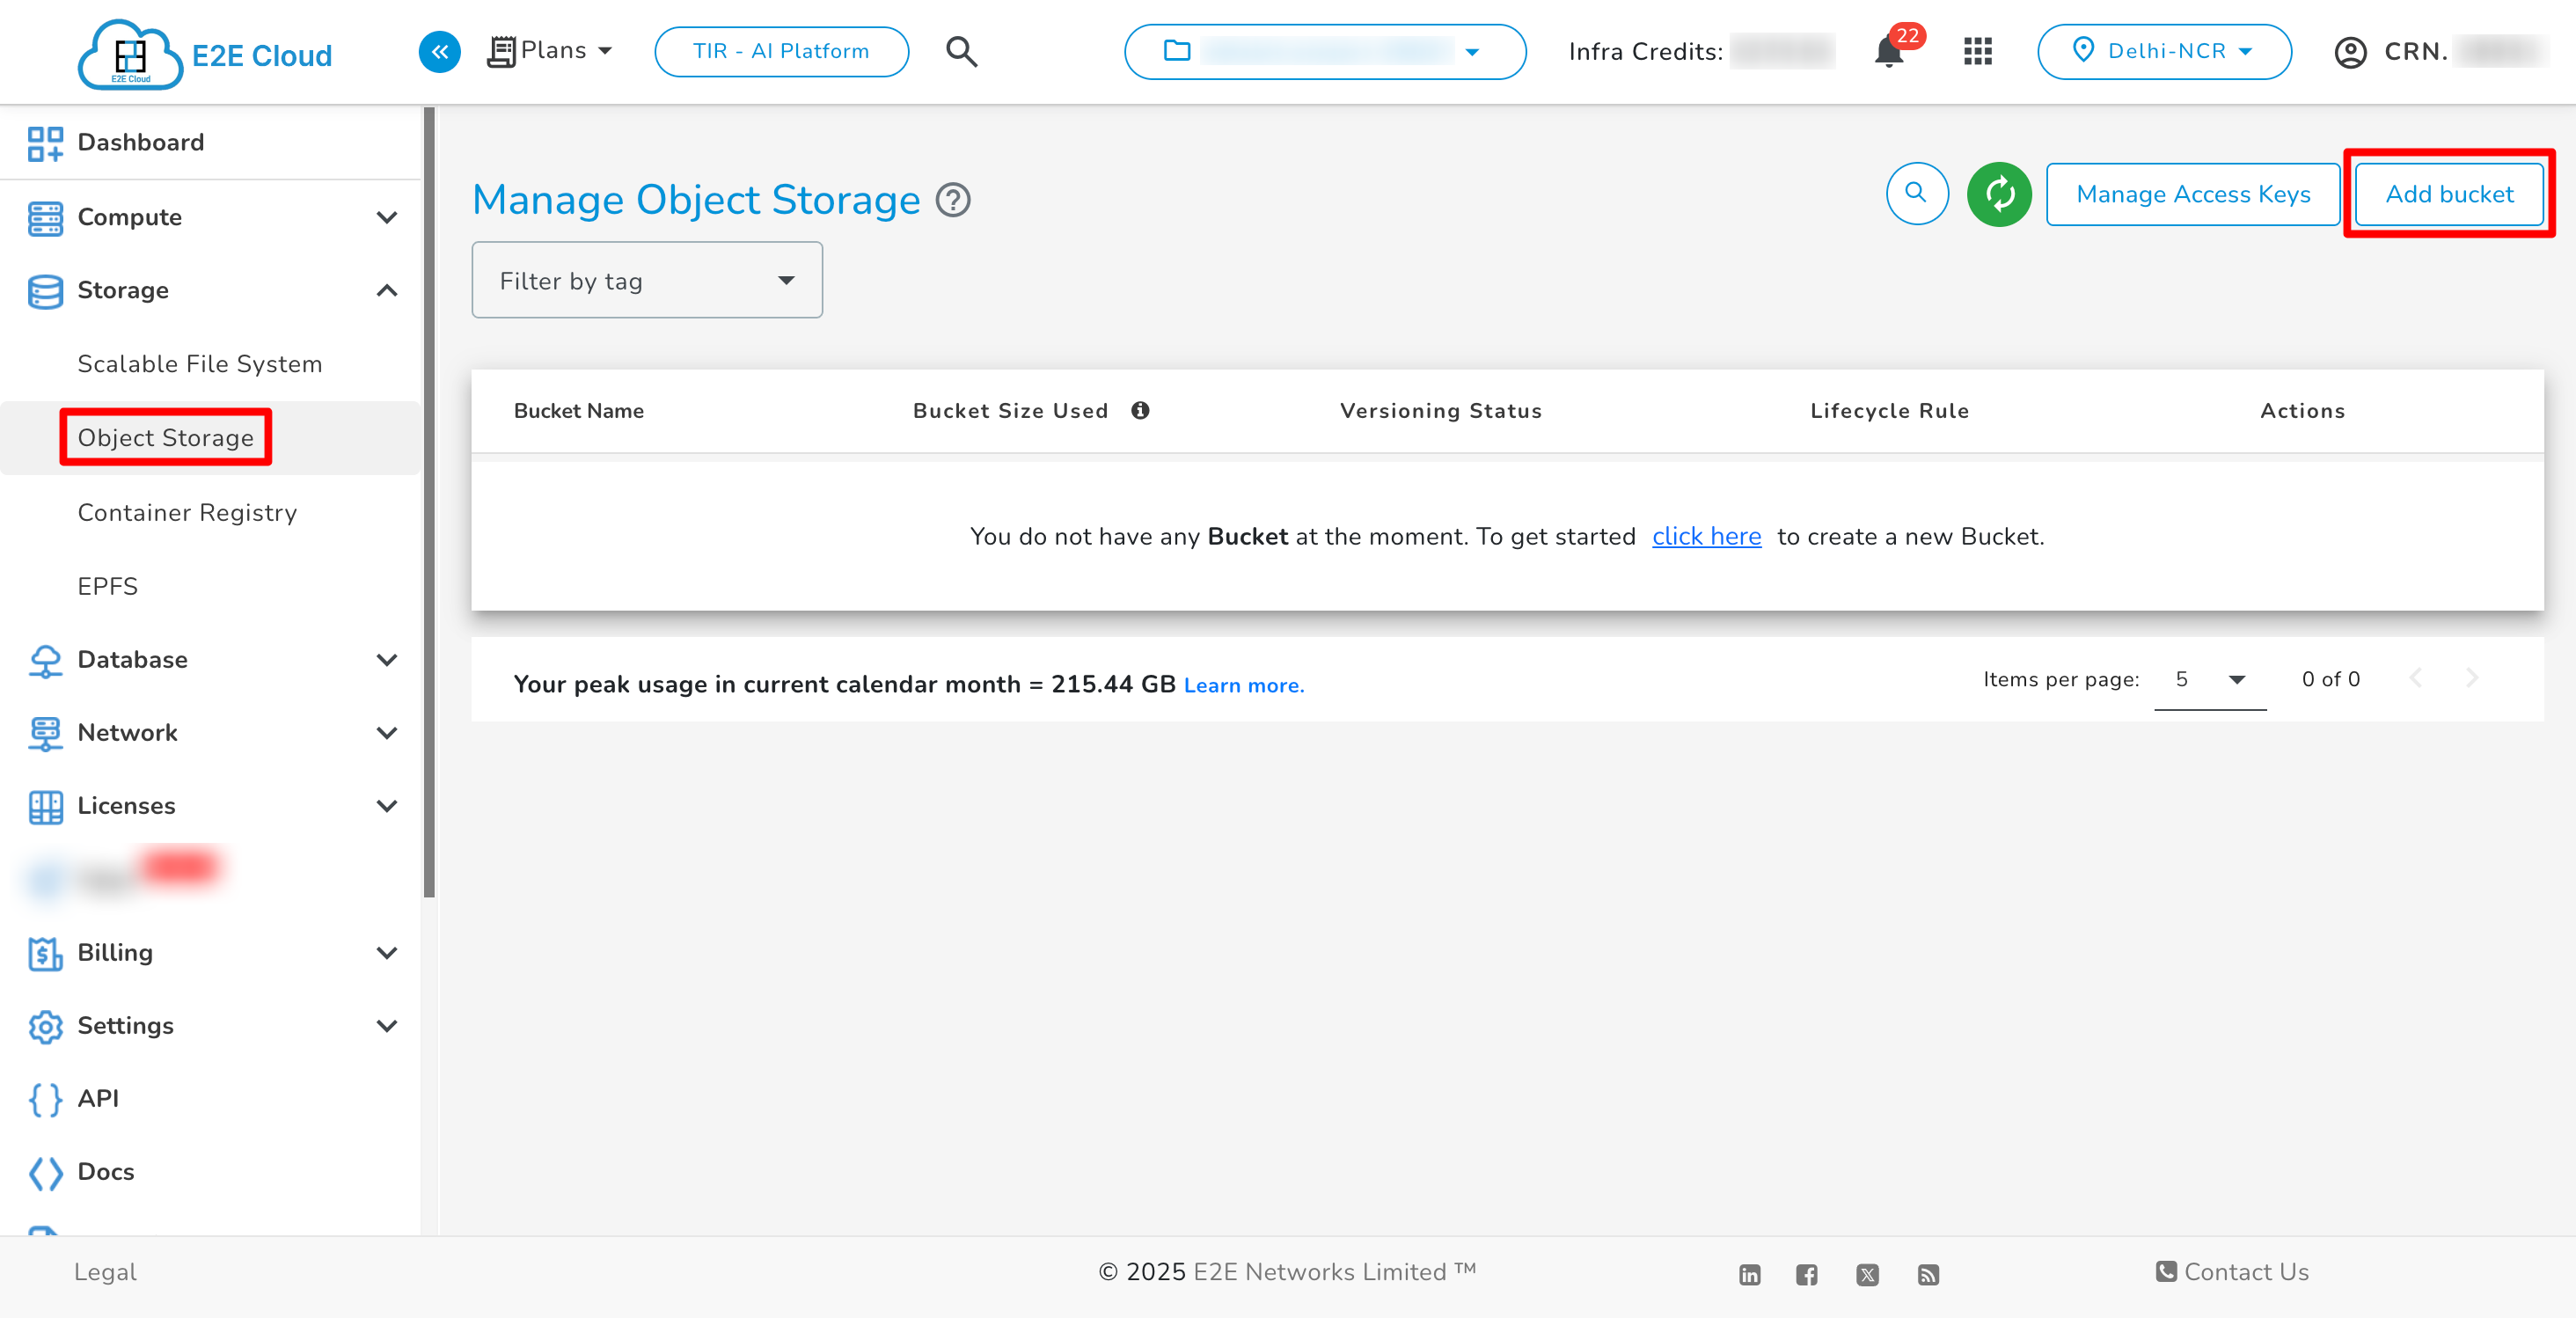
Go to Products > Storage option in the sidebar menu
-
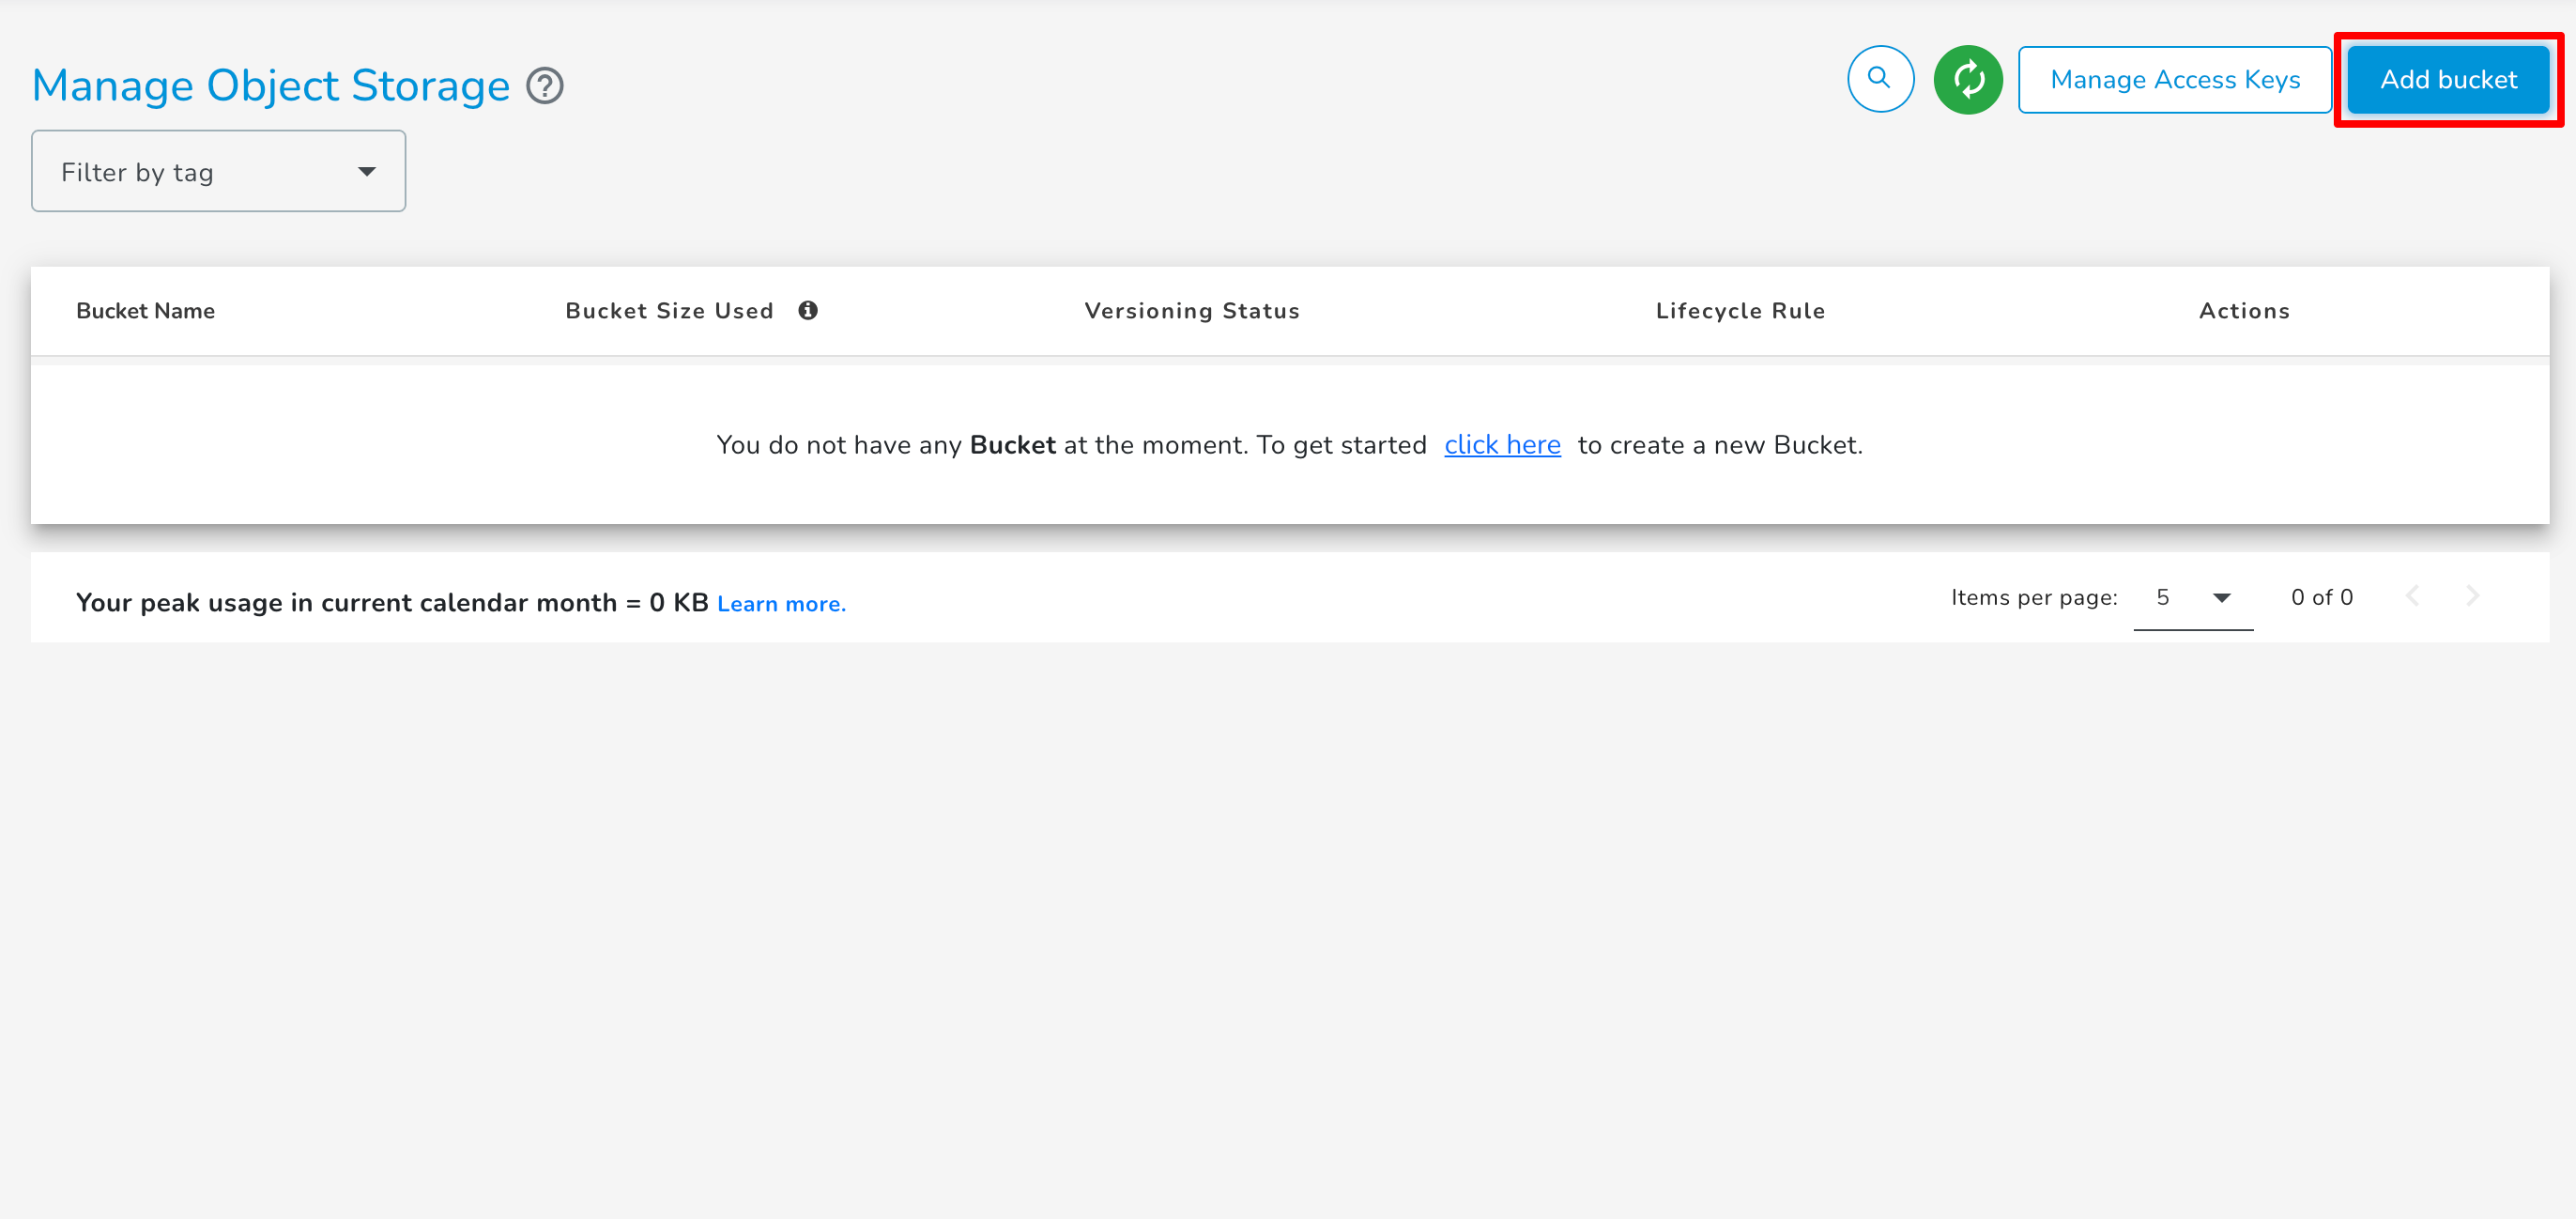
Click on the + Add bucket button
-
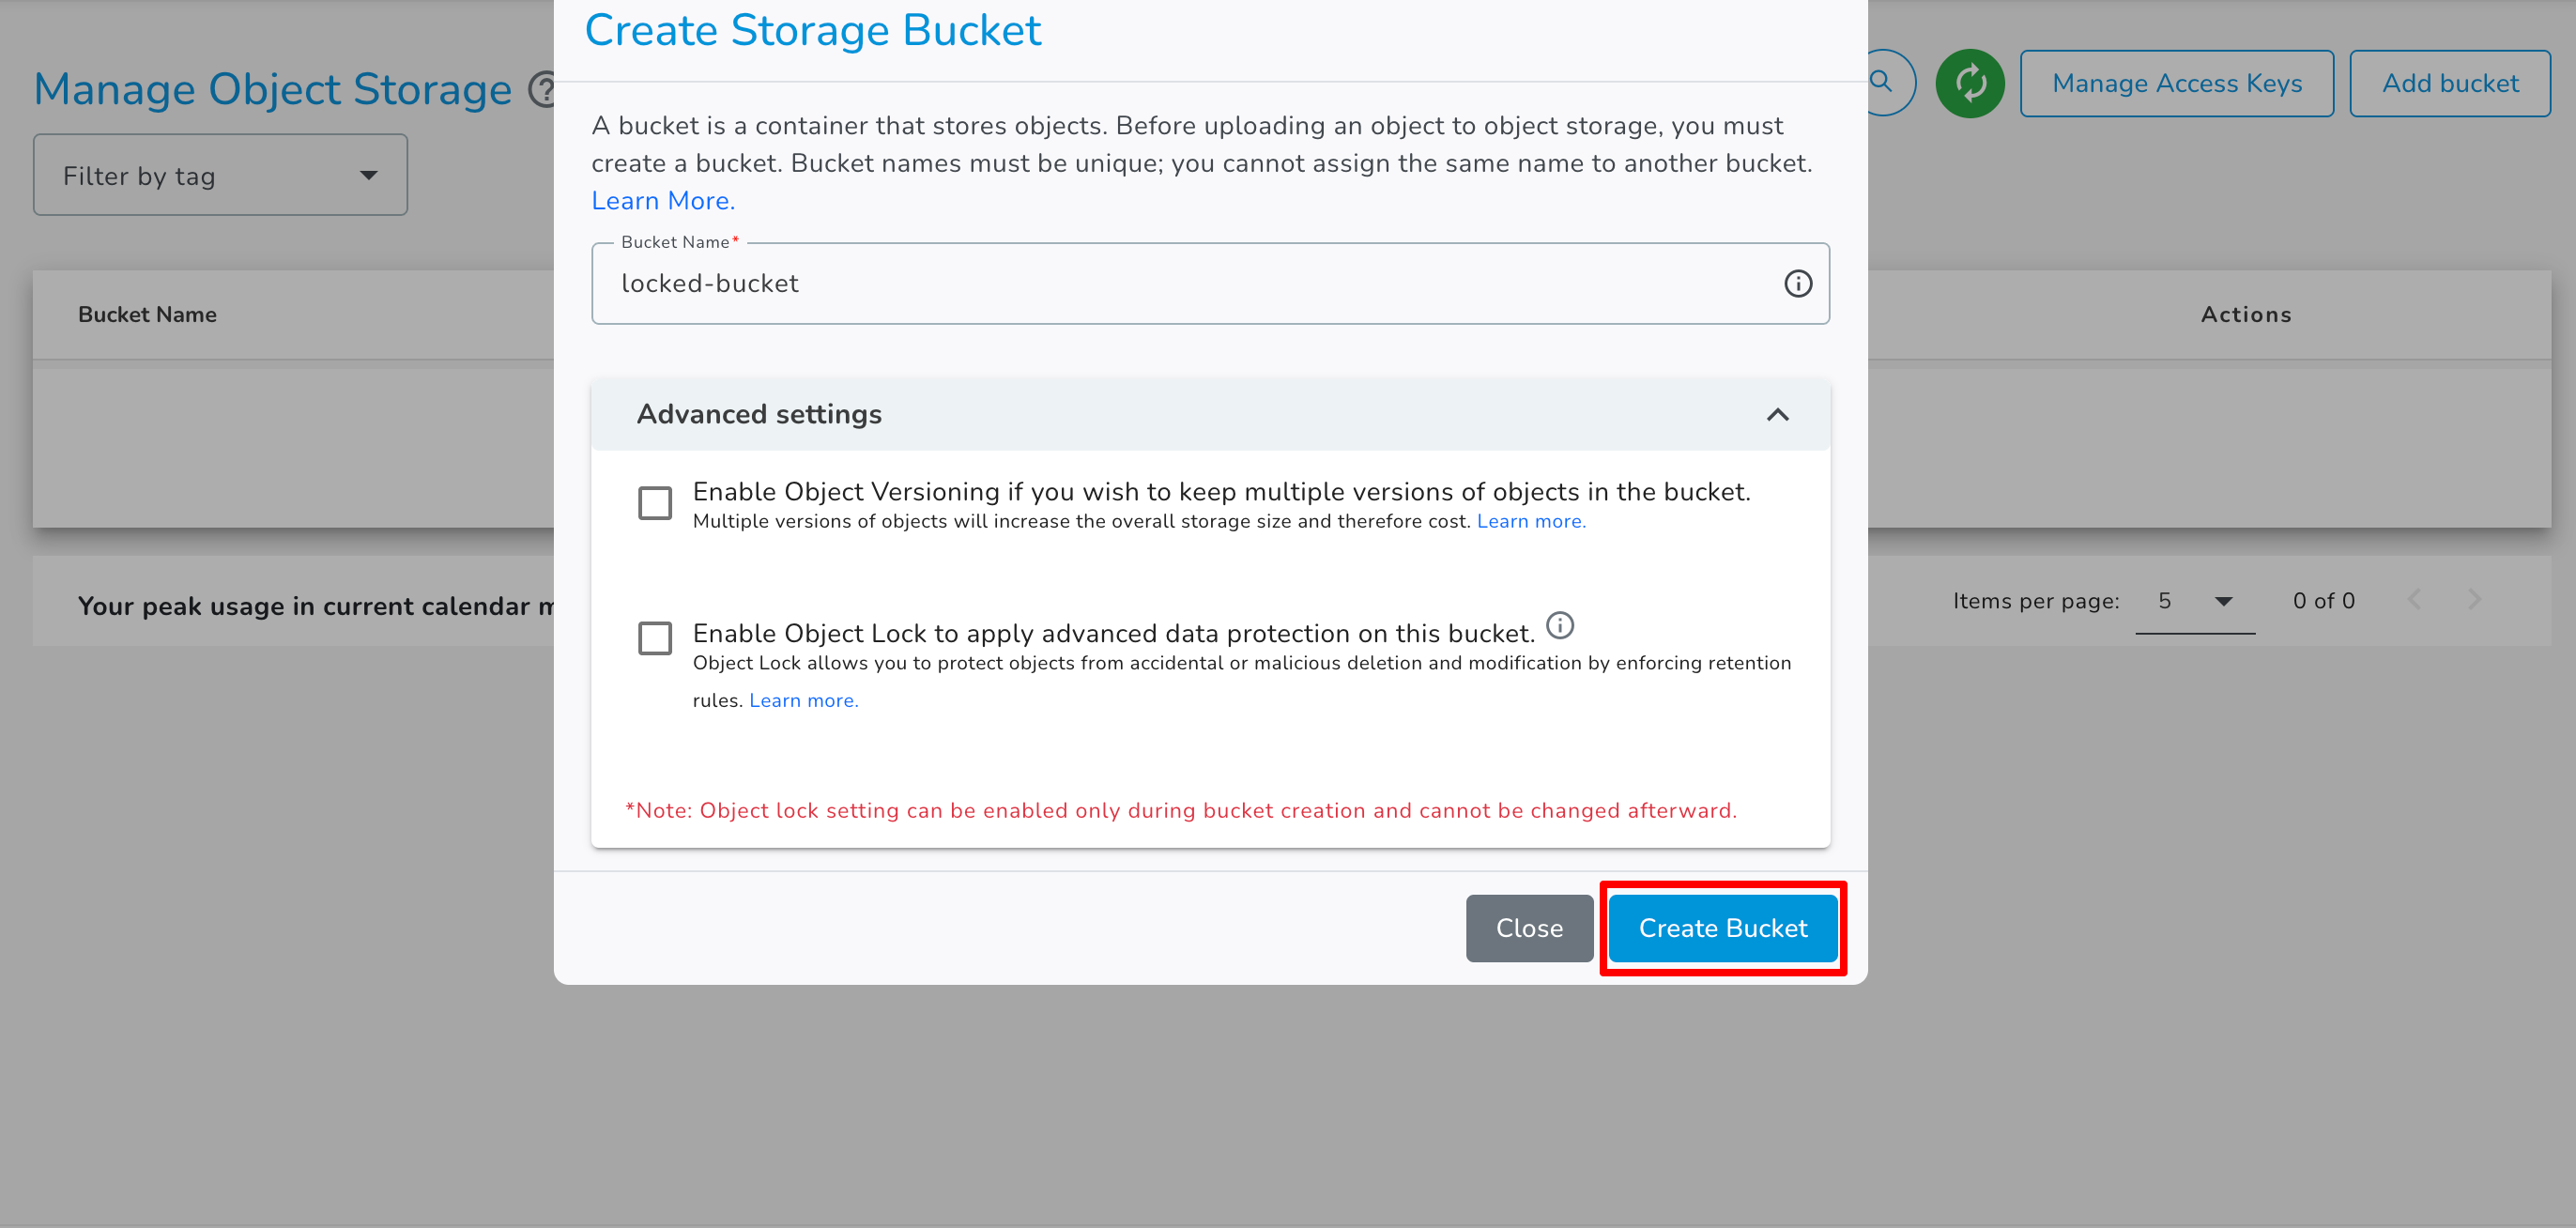
Enter a unique bucket name. You must follow these guidelines when choosing the bucket name-
- You must enter a bucket name that is unique across all existing buckets in E2E Object Storage. You cannot choose a name that is already in use by another user.
- Names cannot be changed after creation. So choose wisely.
- Bucket name must be at least 3 and no more than 63 characters long.
- Uppercase letters or underscores are not allowed.
- Do not format bucket names like an IP address (for example, 10.10.10.2).
-
Click Create
-
You will be redirected to the object browser.
If you want to enable Object Lock for your bucket, you can do so by clicking on the Enable Object Lock option while creating the bucket.
You will not be charged for empty buckets.
Now that your bucket is ready, you may choose to ̈Upload files through the object browser or set bucket permissions to enable CLI access.