Deploy Inference for Meta LLAMA 3 8B-IT
In this tutorial, we will create a model endpoint for LLAMA-3-8B-IT model.
The tutorial will mainly focus on the following:
Model Endpoint creation for LLAMA-3-8B-IT using prebuilt container
Model Endpoint creation for LLAMA-3-8B-IT, with custom model weights
Model Endpoint creation for LLAMA-3-8B-IT using prebuilt container
When a model endpoint is created in TIR dashboard, in the background a model server is launched to serve the inference requests.
TIR platform supports a variety of model formats through pre-buit containers (e.g. pytorch, triton, LLAMA-2-7b-chat, GEMMA-7B-IT etc.).
For the scope of this tutorial, we will use pre-built container (LLAMA-3-8B-IT) for the model endpoint but you may choose to create your own custom container by following this tutorial .
In most cases, the pre-built container would work for your use case. The advantage is - you won’t have to worry about building an API handler. API handler will be automatically created for you.
Steps to create model endpoint for LLAMA-3-8B-IT model:
Step 1: Create a Model Endpoint
Go to TIR AI Platform
Choose a project
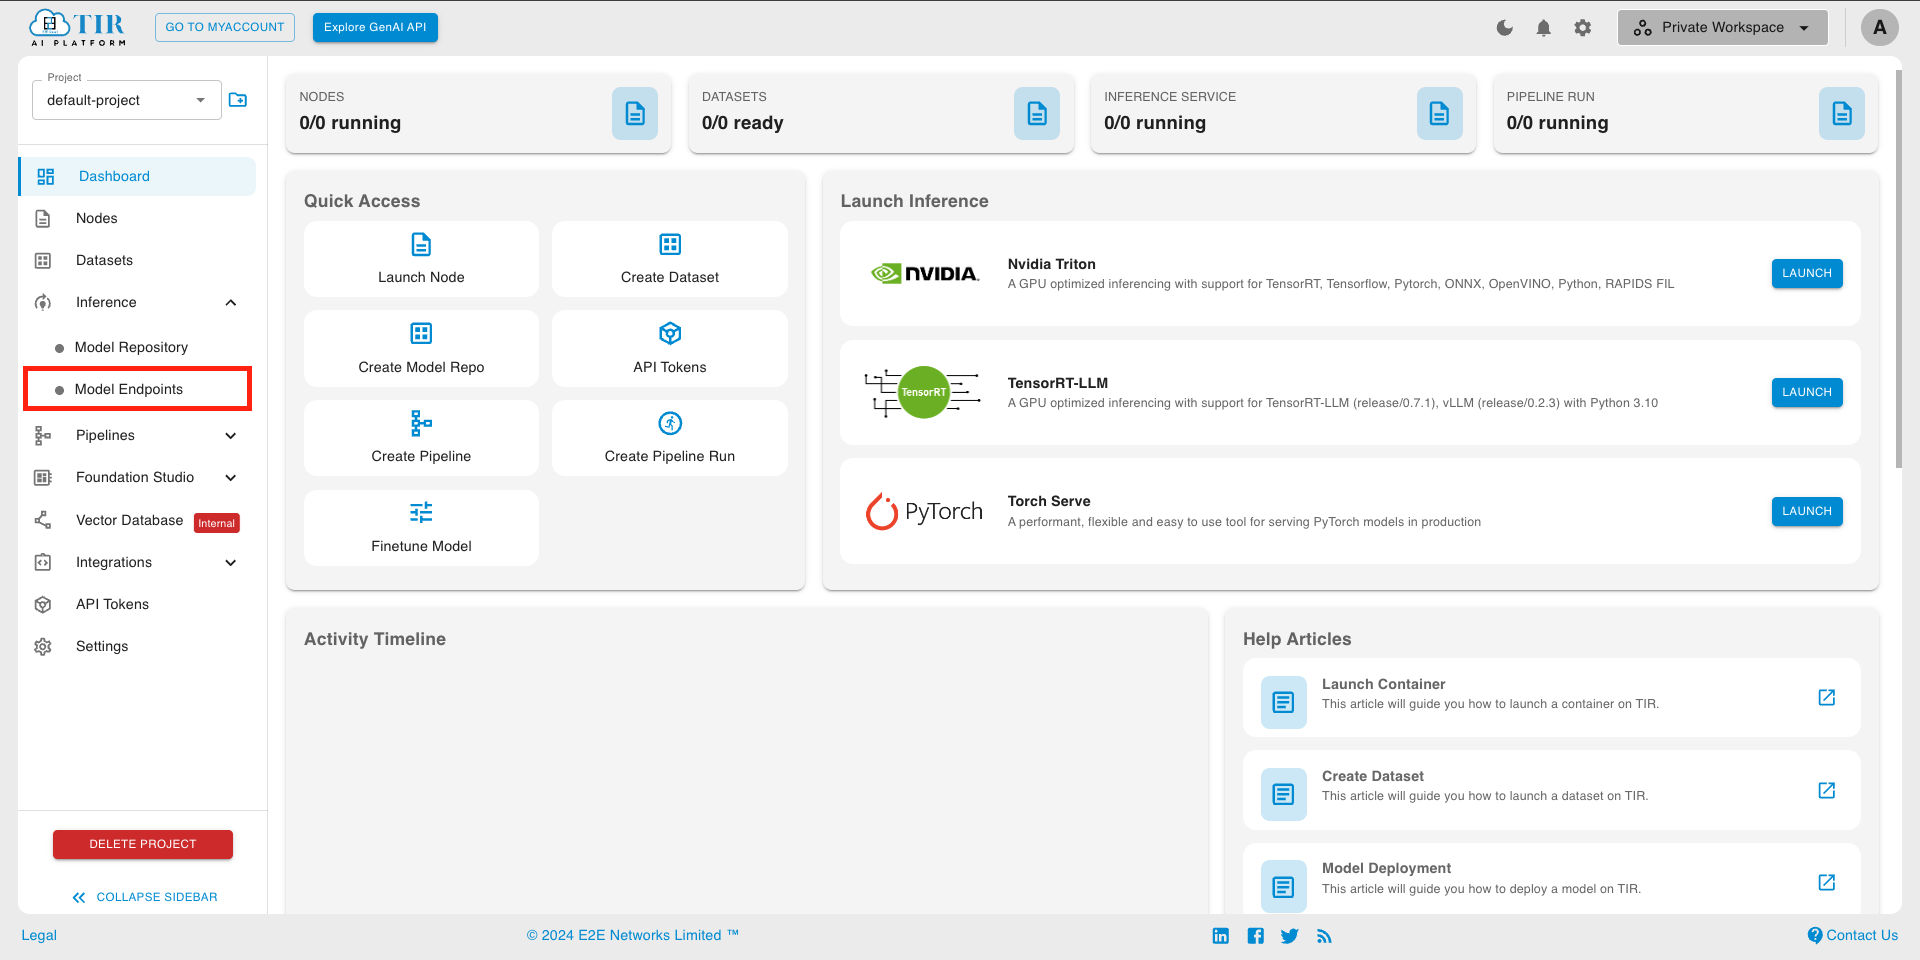
- Go to Model Endpoints section
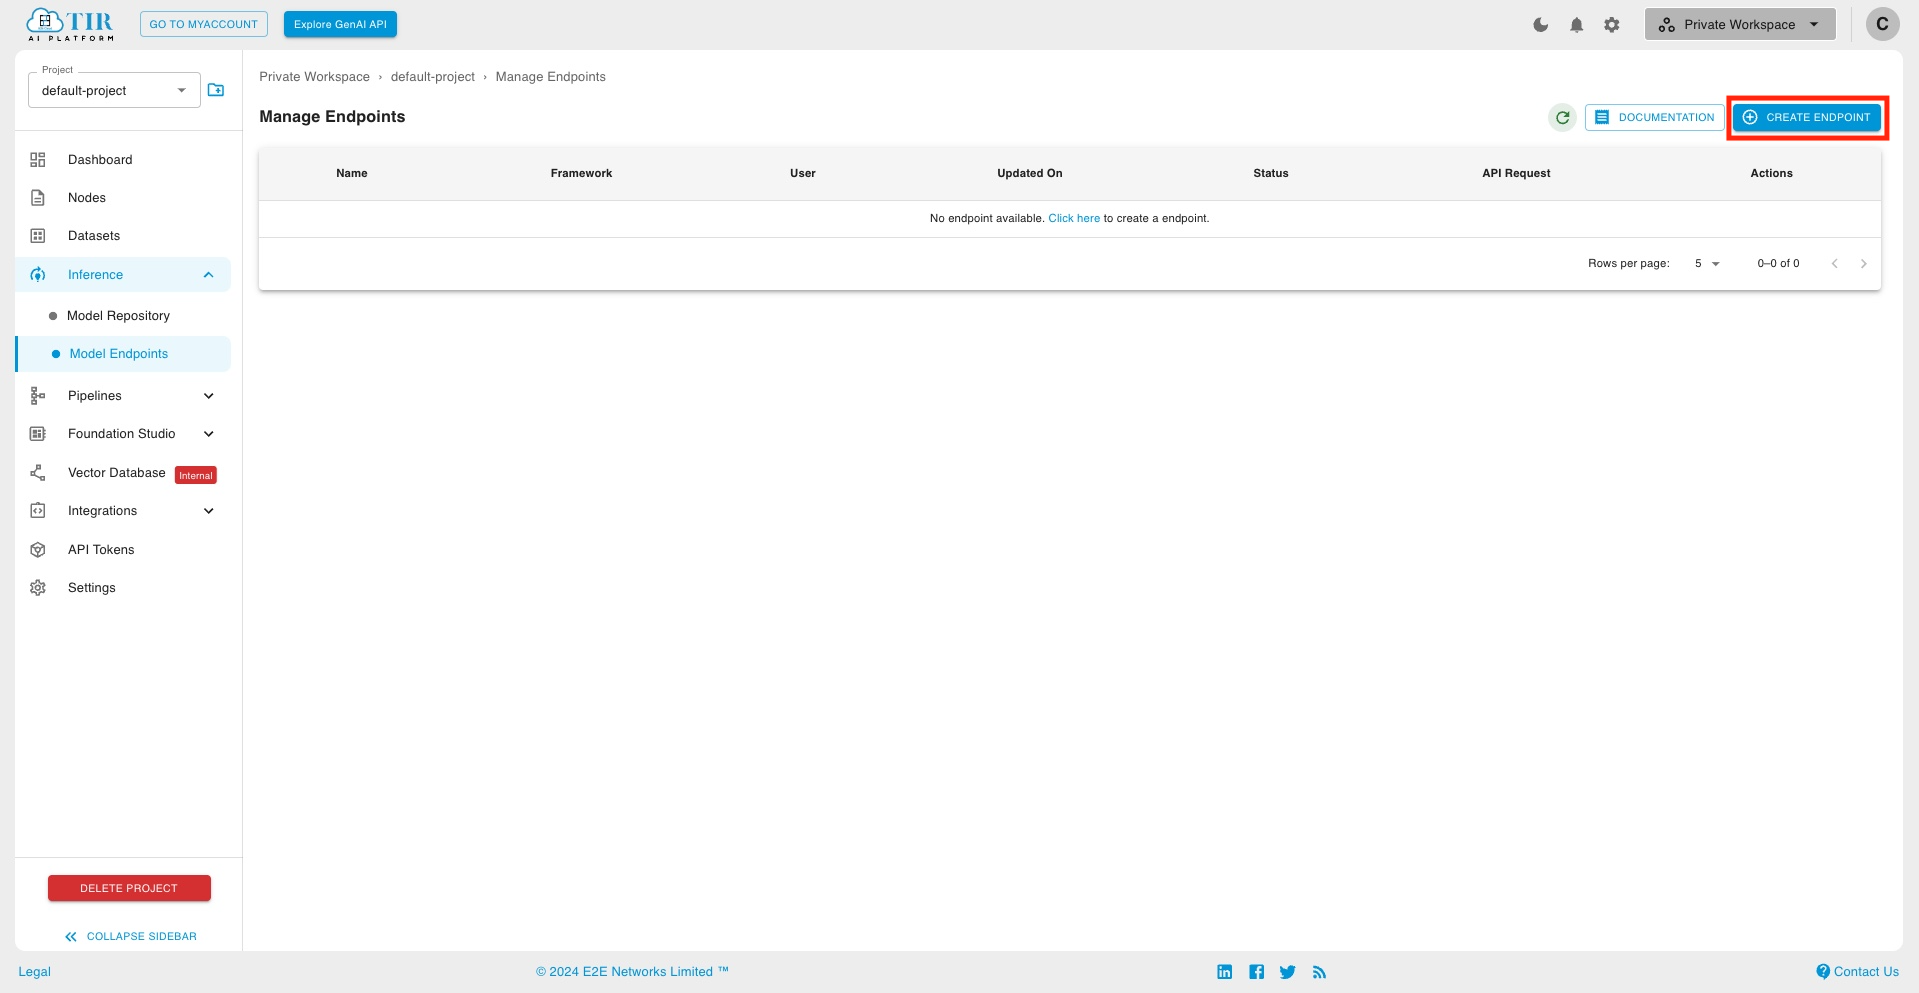
- Create a new Endpoint
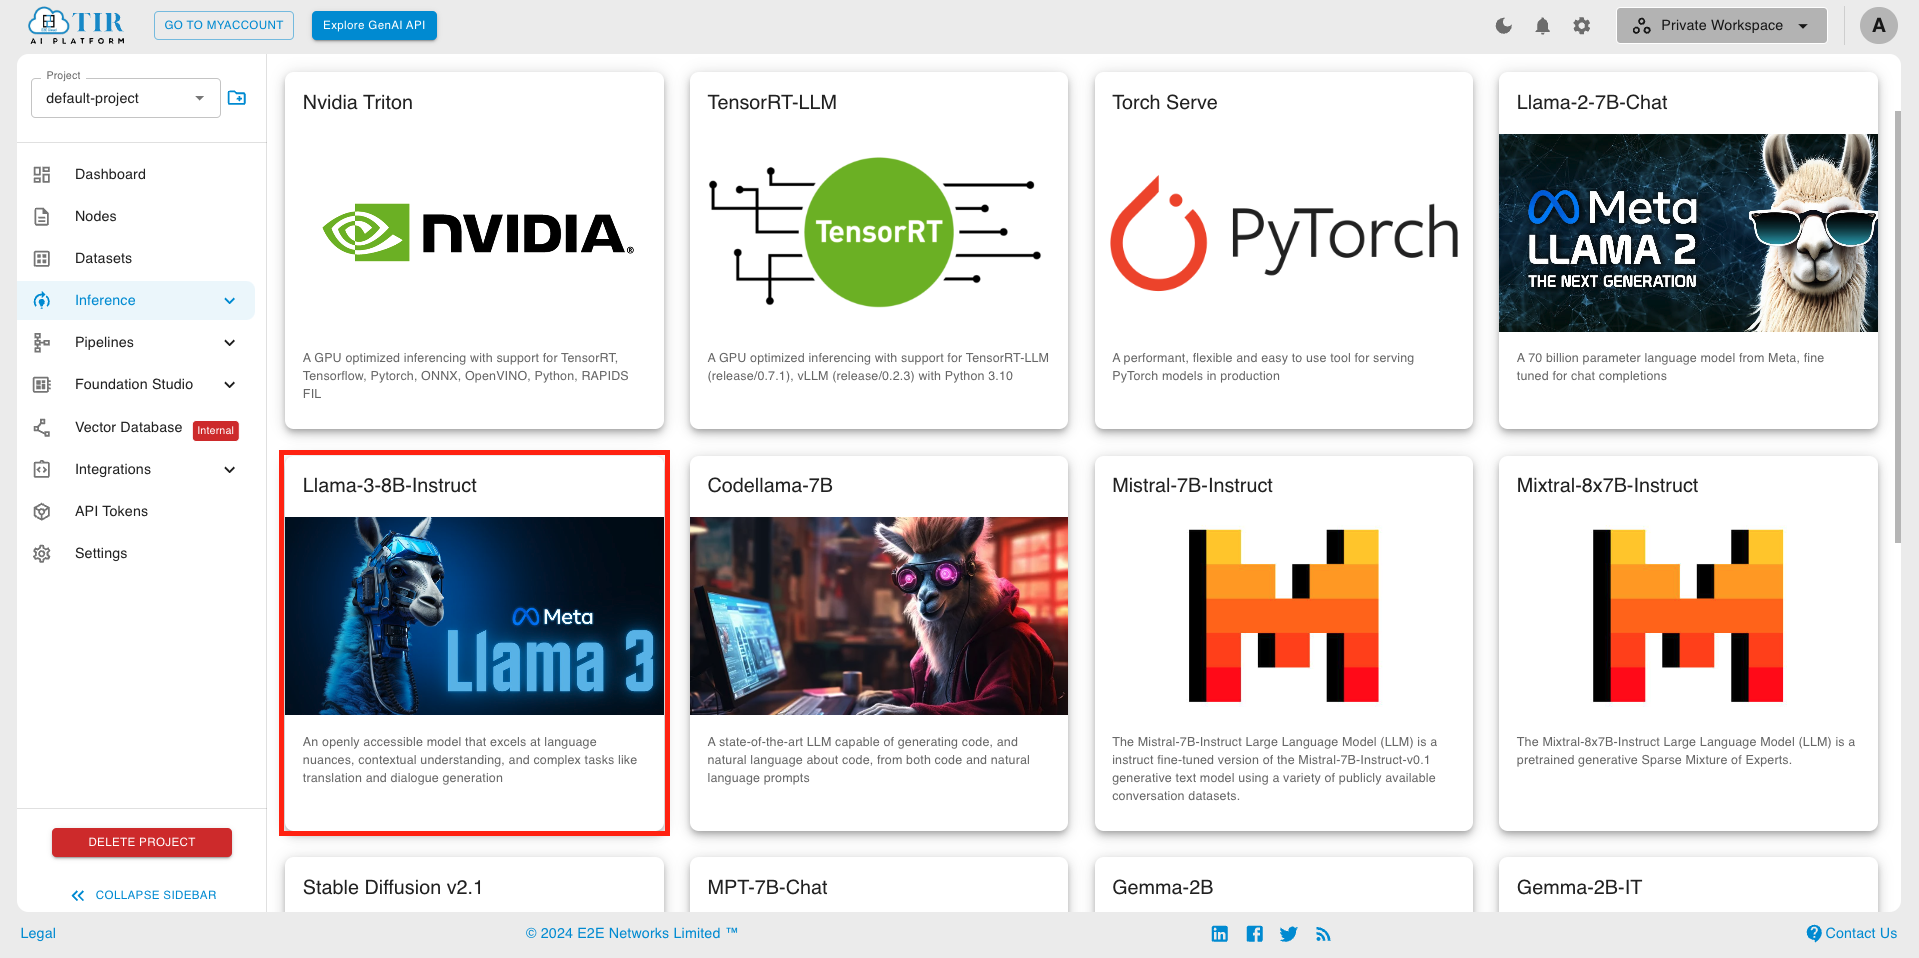
- Choose LLAMA-3-8B-IT model card
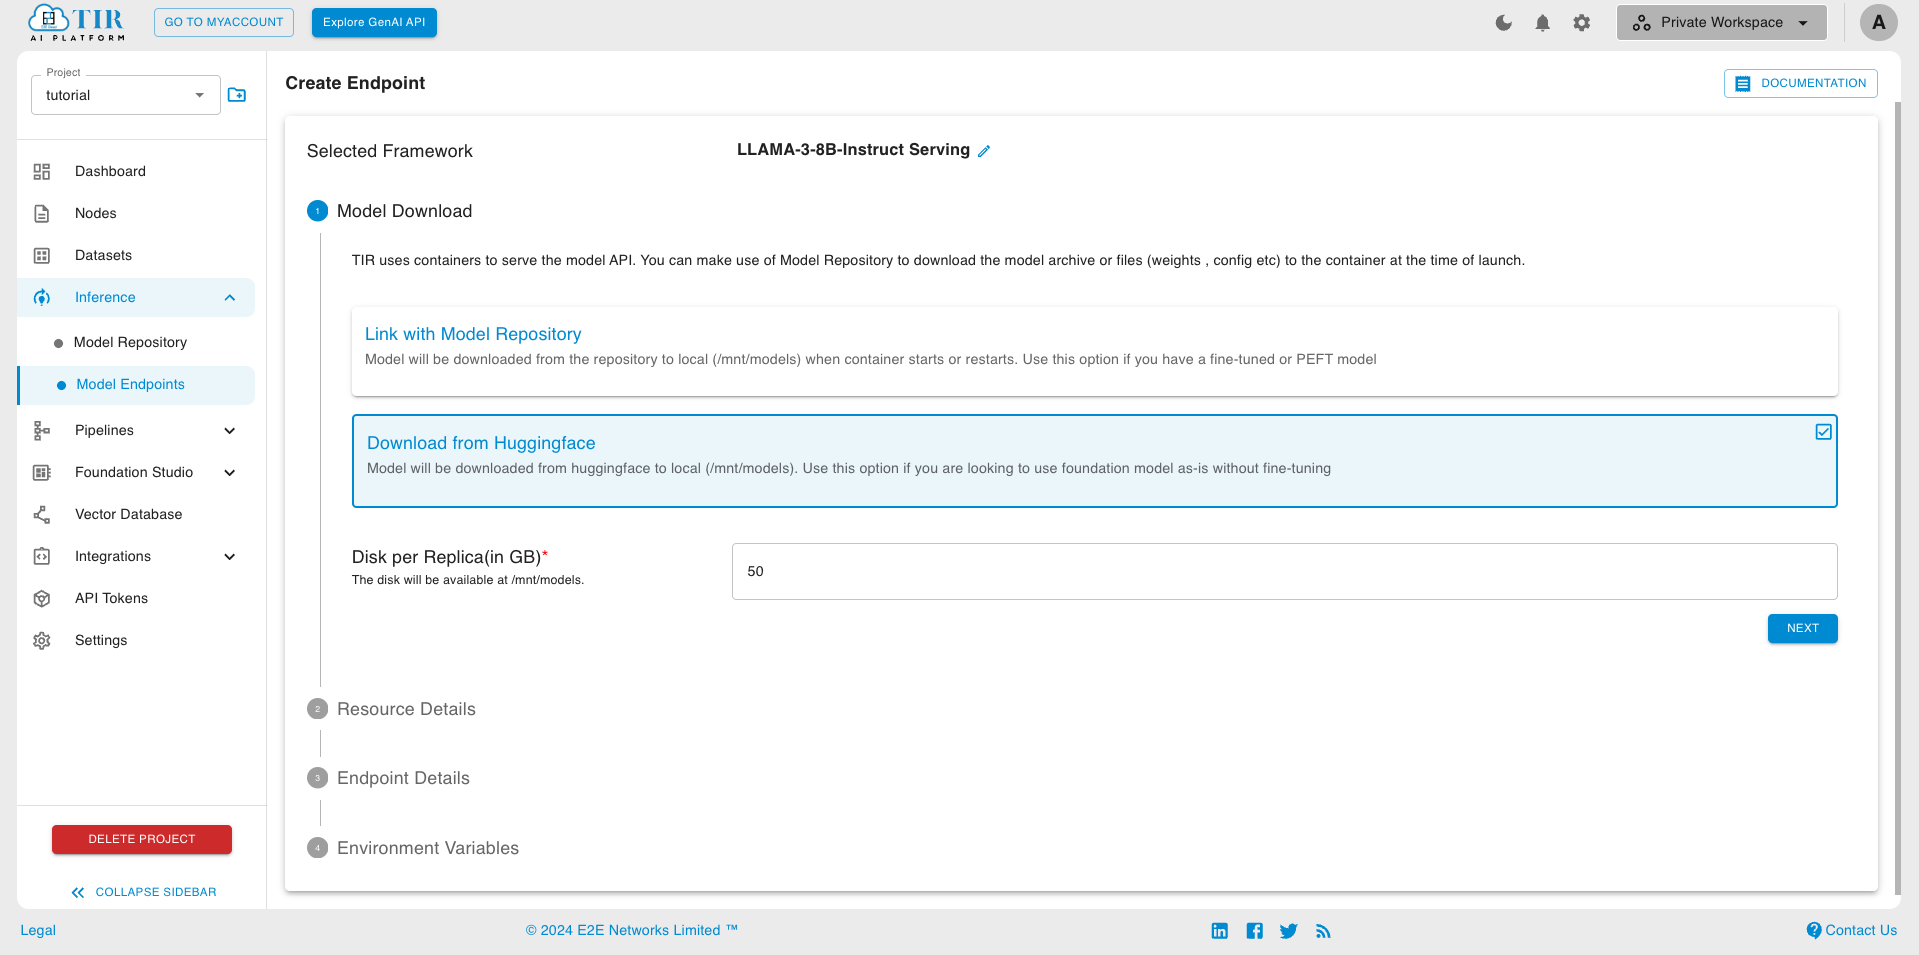
Choose Download from huggingface
Note
Use Link with Model Repository, if you want to use custom model weights or fine-tune the model. Refer Model Endpoint creation for LLAMA-3-8B-IT, with custom model weights section for more details
Pick a suitable GPU plan of your choice and set the replicas
Add Endpoint Name (eg llama-v3-endpoint)
- Setting Environment Variables
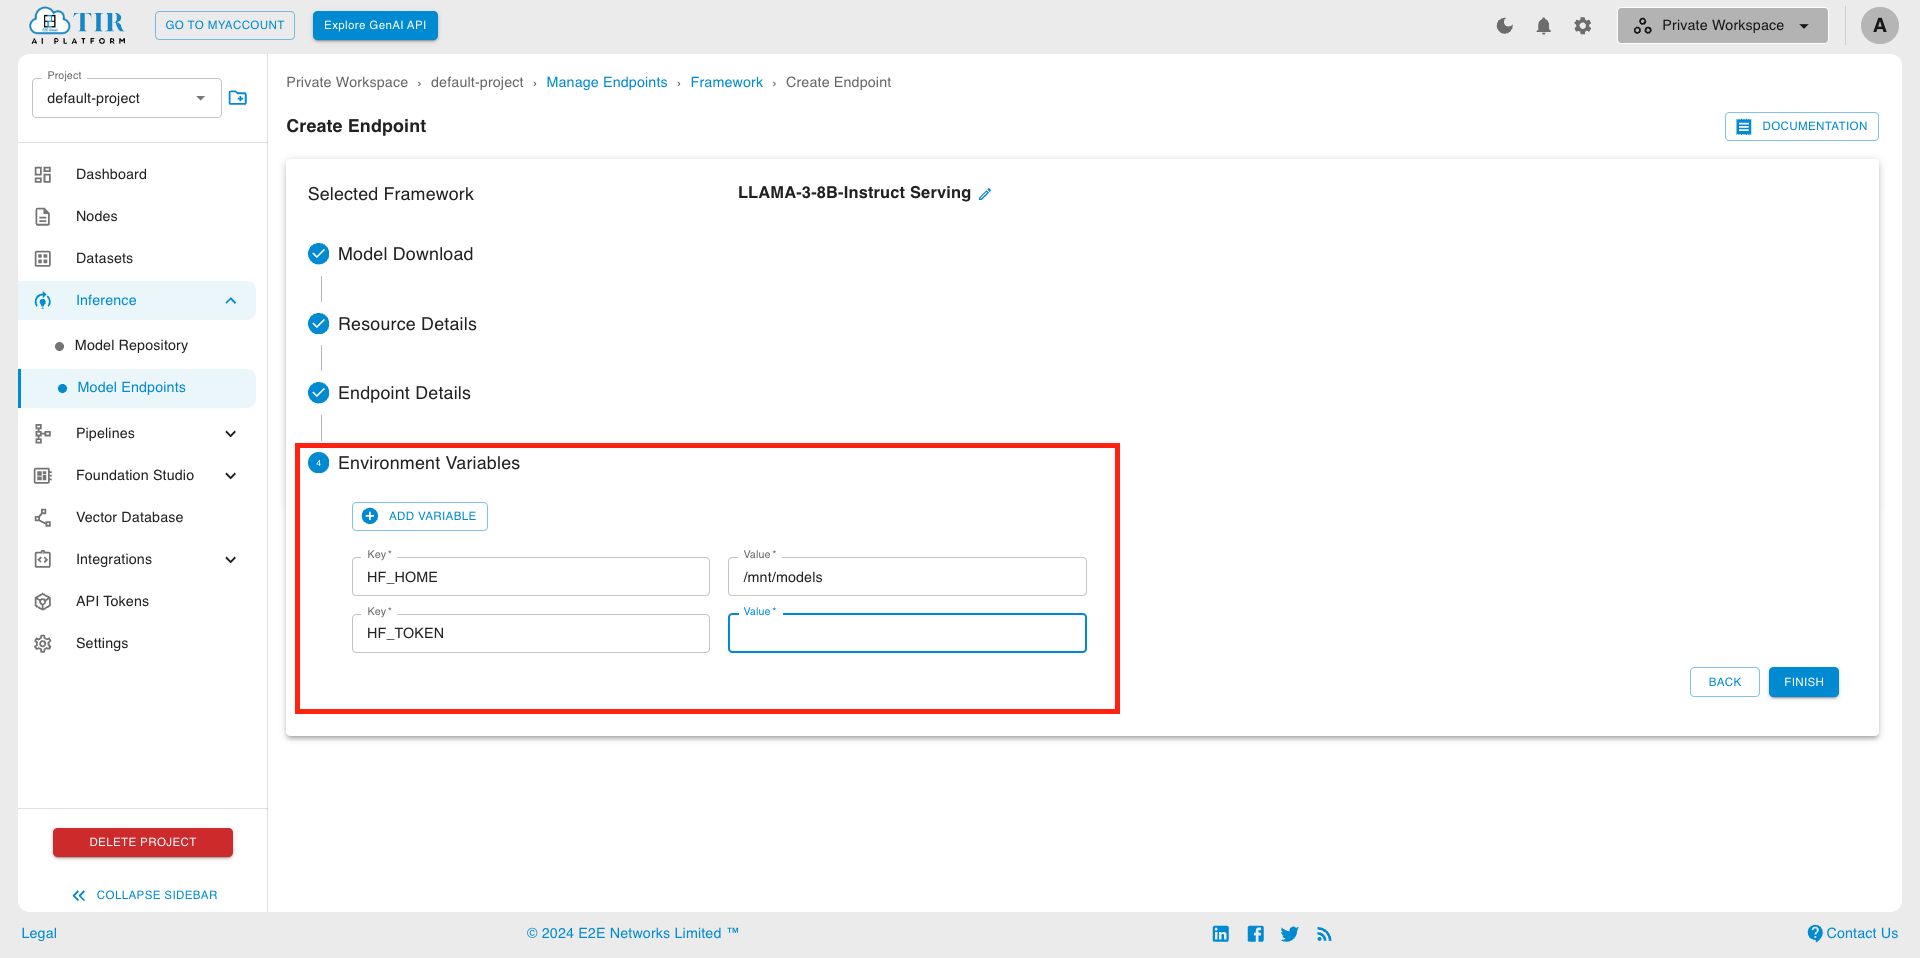
- Compulsory Environment Variables
Note: LLAMA-3-8B-IT is a Gated Model; you will need permission to access it.
Follow these steps to get access to the model :
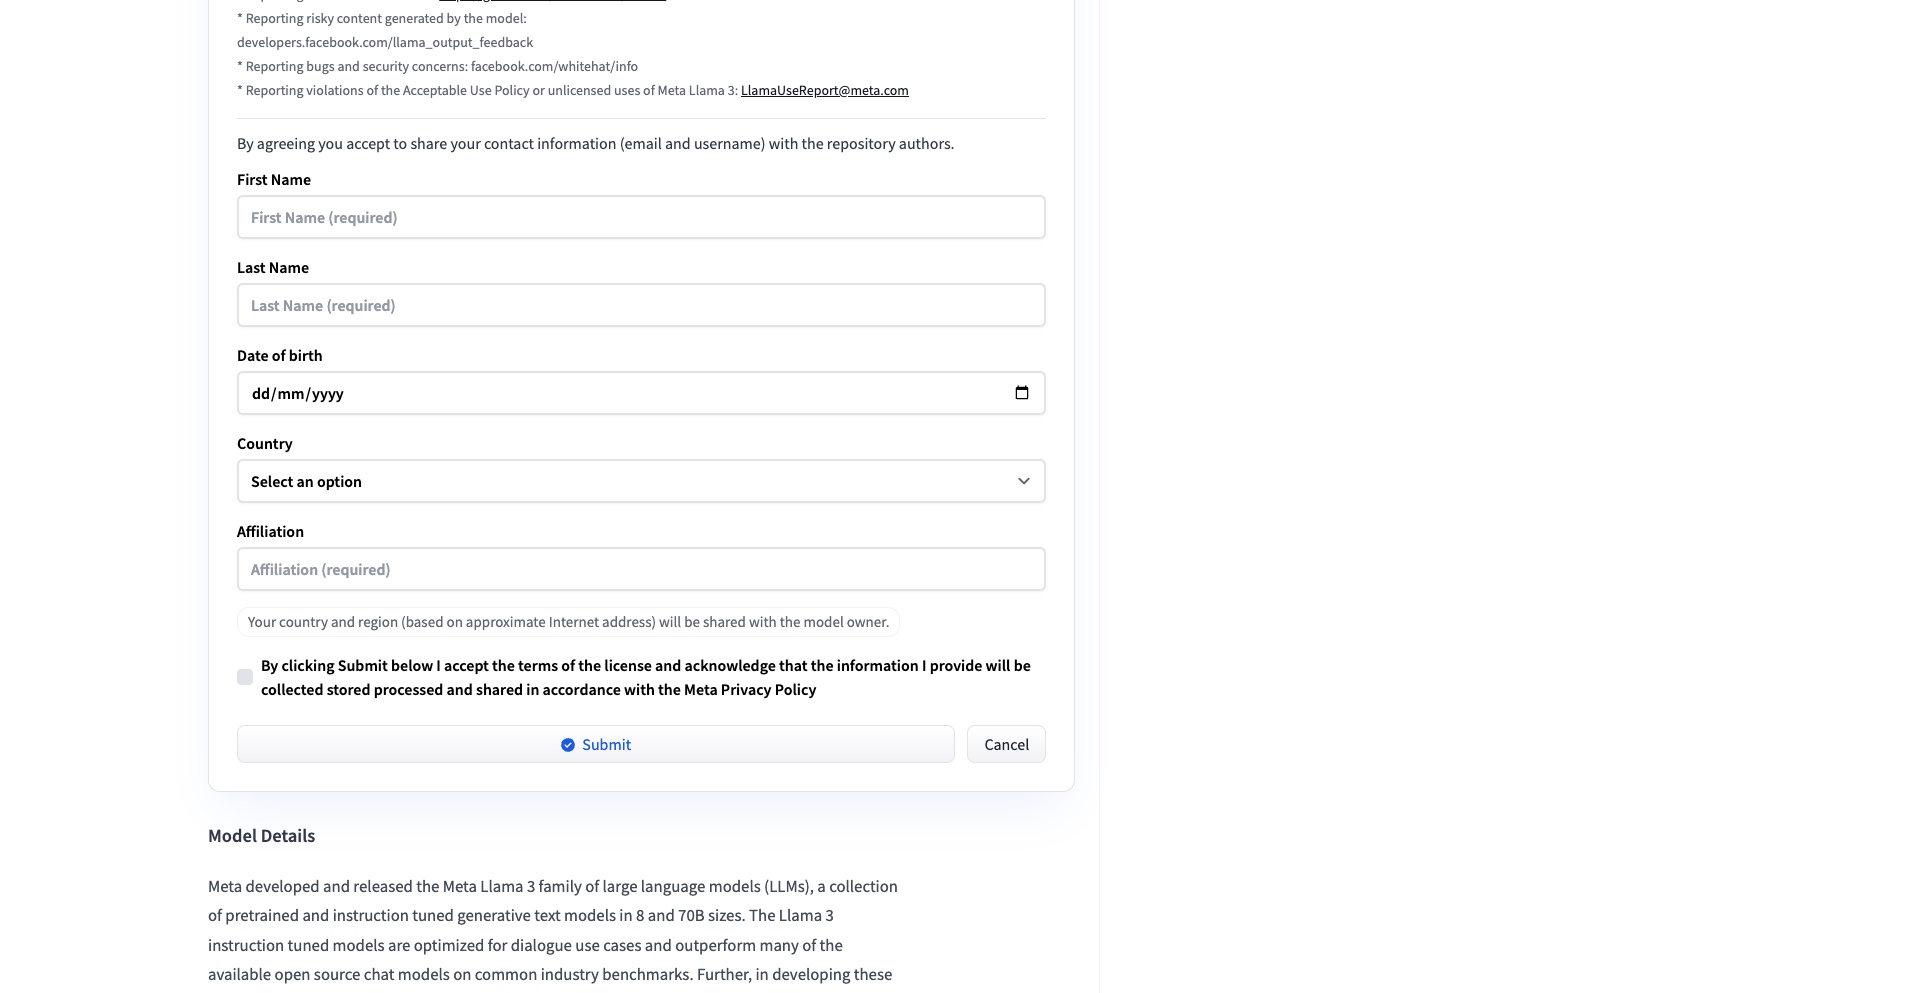
Login, complete the form, and click submit to “Request Access.”
Go to Account Settings > Access Tokens > Create New API Token once approved.
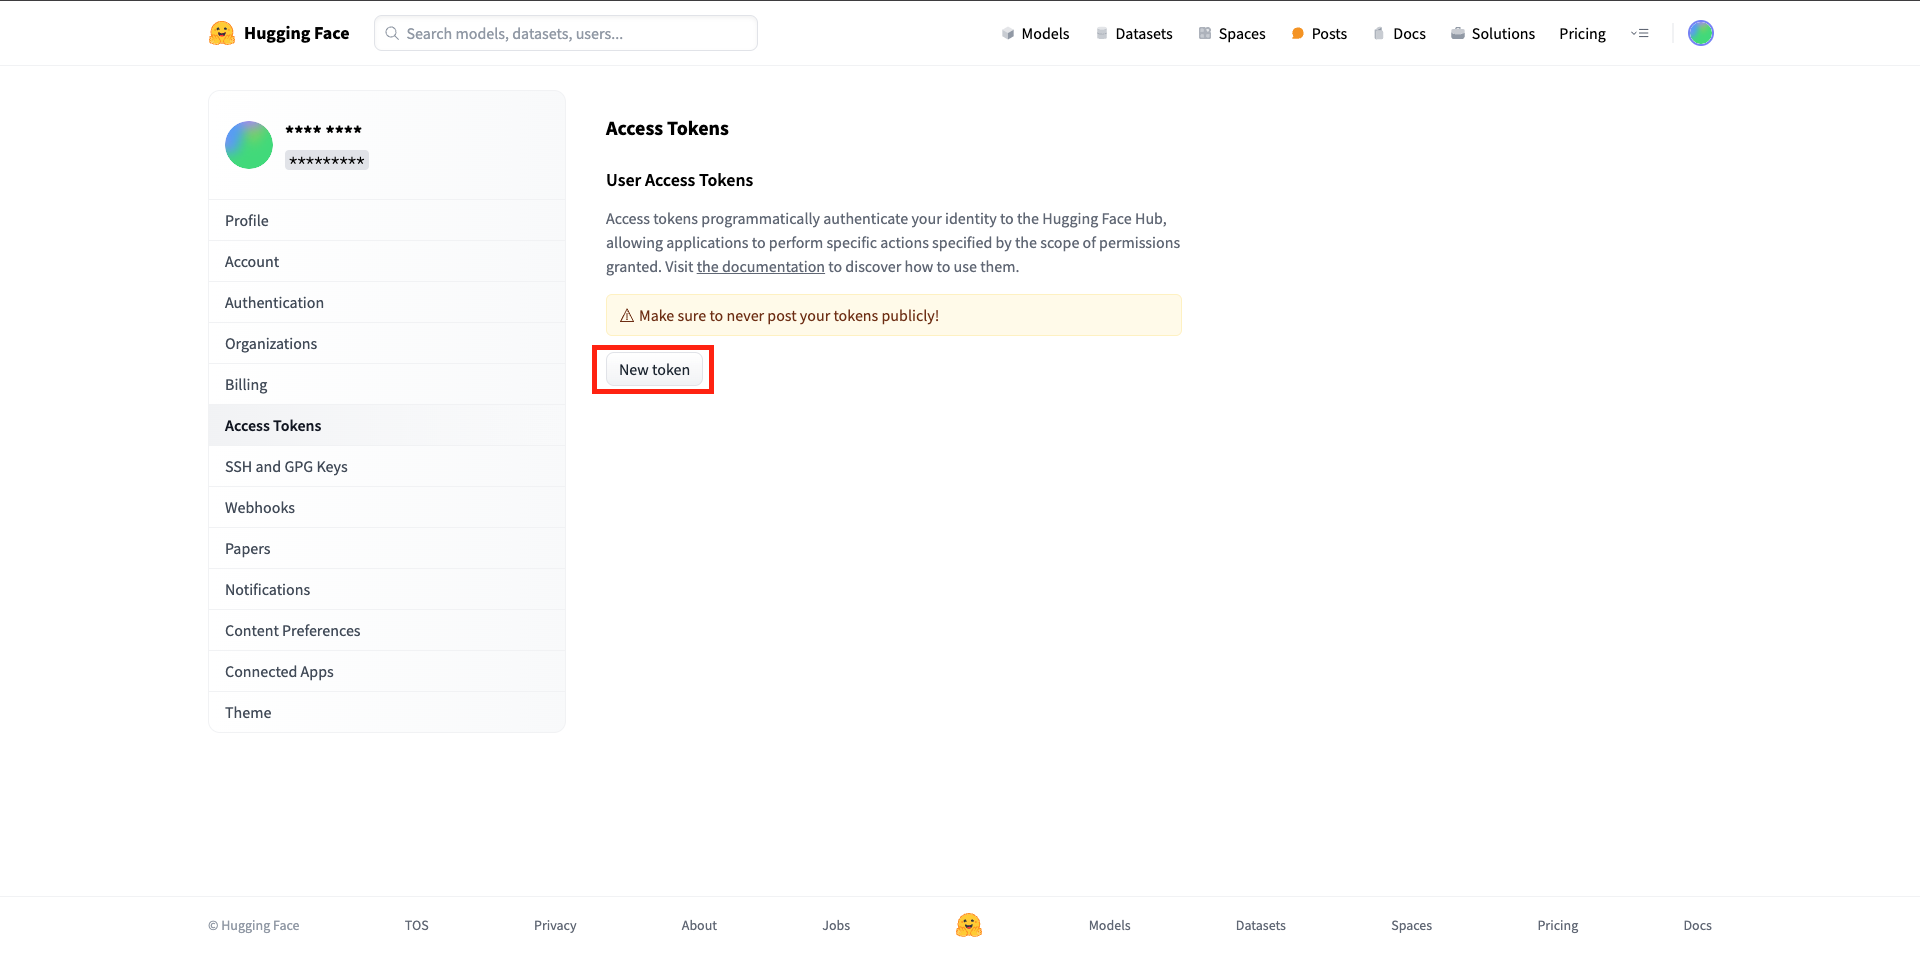
Copy API token
HF_TOKEN: Paste the API token key
Complete the endpoint creation
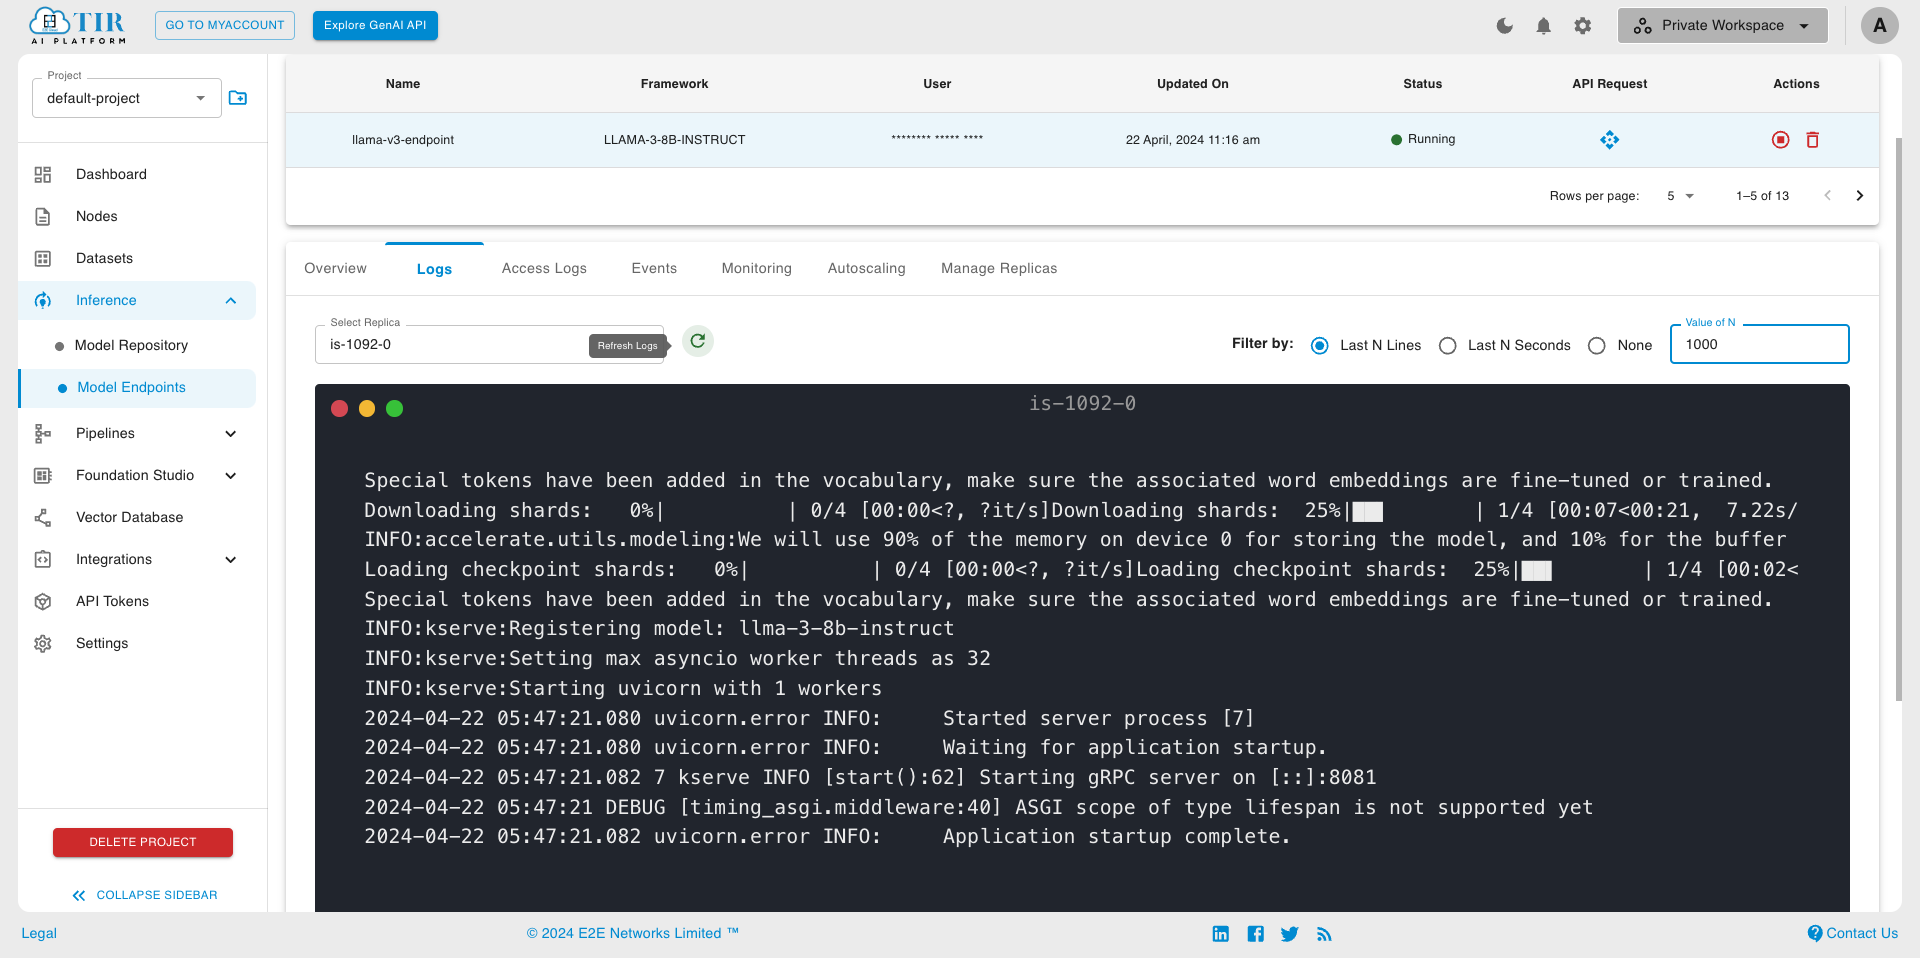
- Model endpoint creation might take a few minutes. You can monitor endpoint creations through logs in the log section.
Step 2: Generate your API_TOKEN
The model endpoint API requires a valid auth token, for which you’ll need to perform further steps. So, let’s generate one.
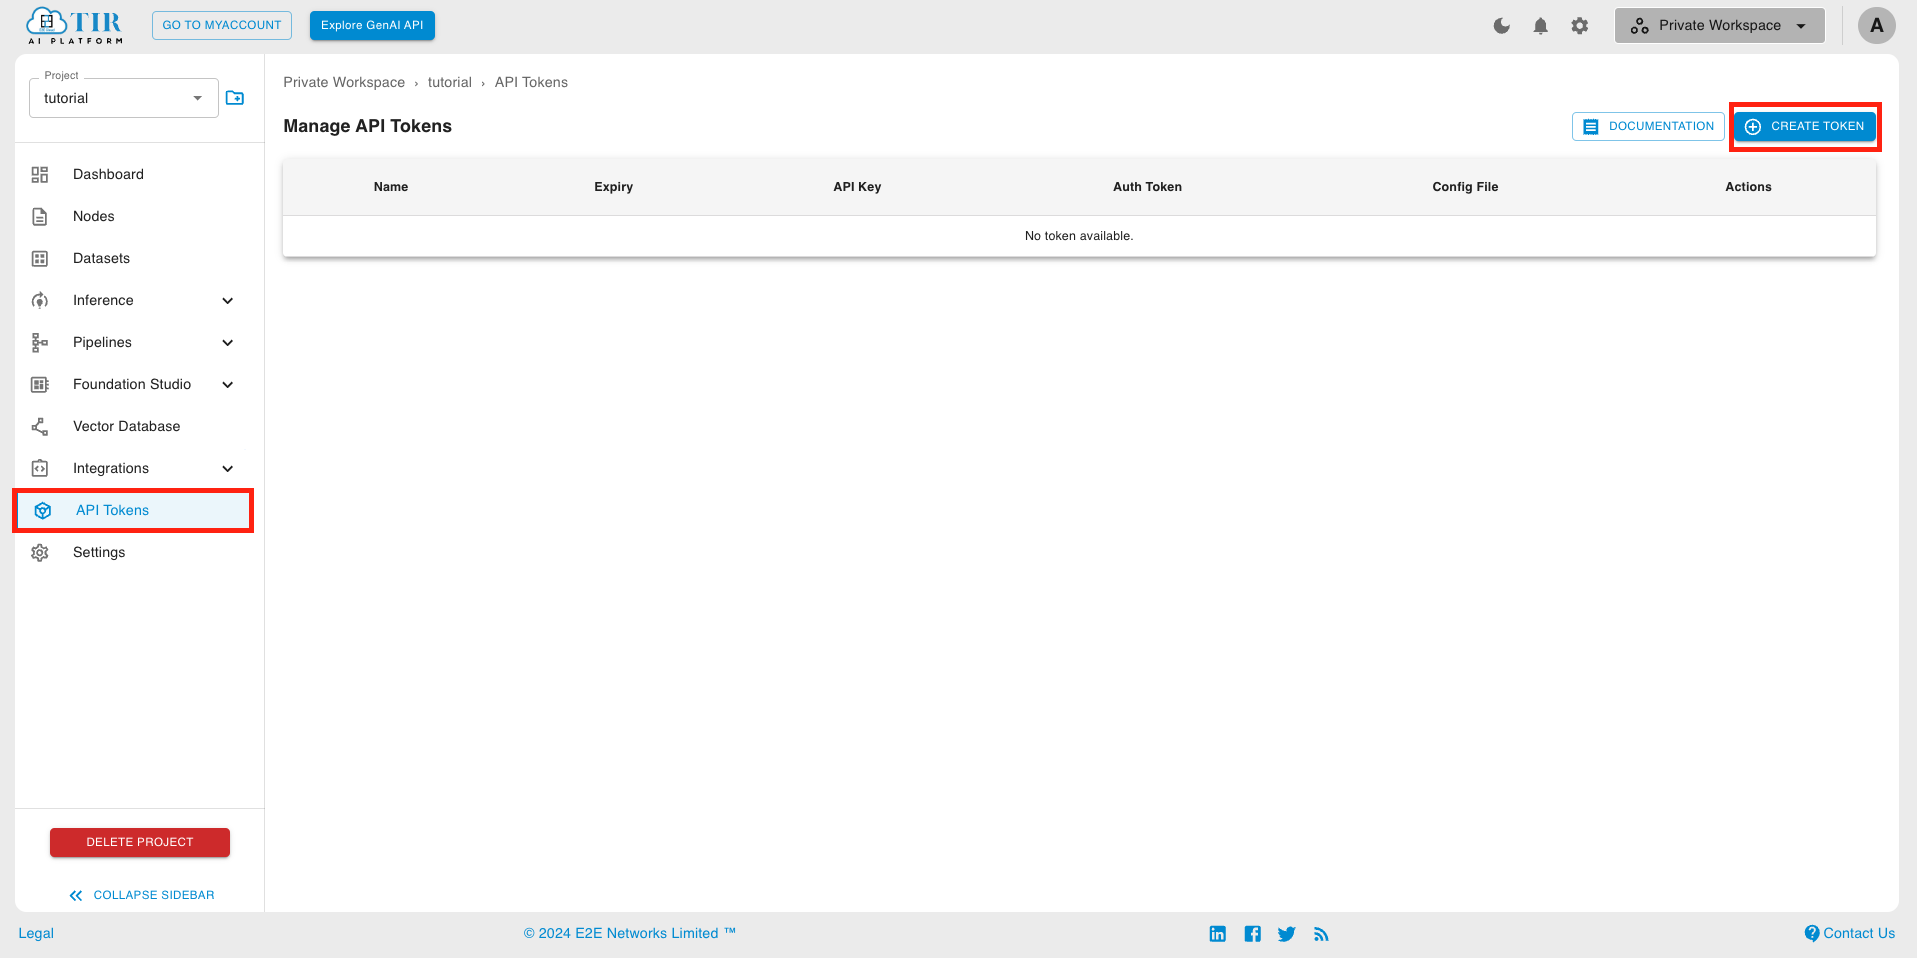
Go to API Tokens section under the project and click on the Create Token. You can also use an existing token, if already created.
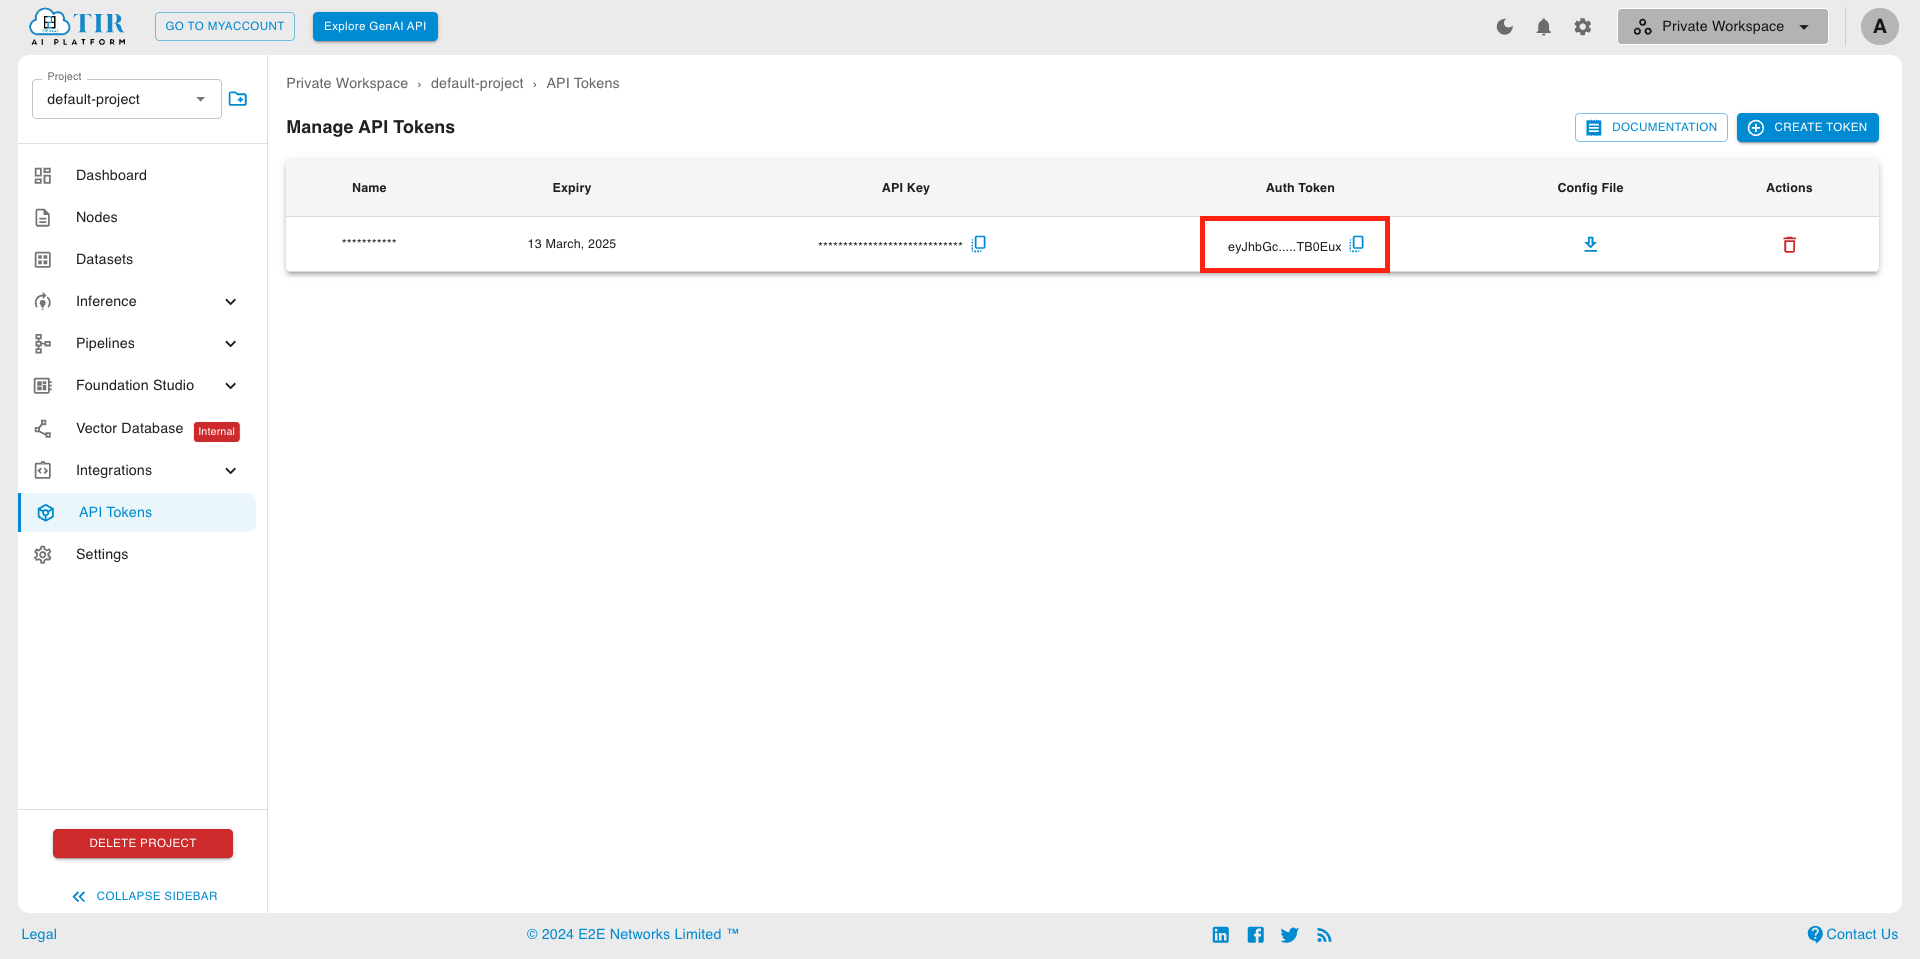
Once created, you’ll be able to see the list of API Tokens containing the API Key and Auth Token. You will need this Auth Token in the next step.
Step 3: Inferring Request
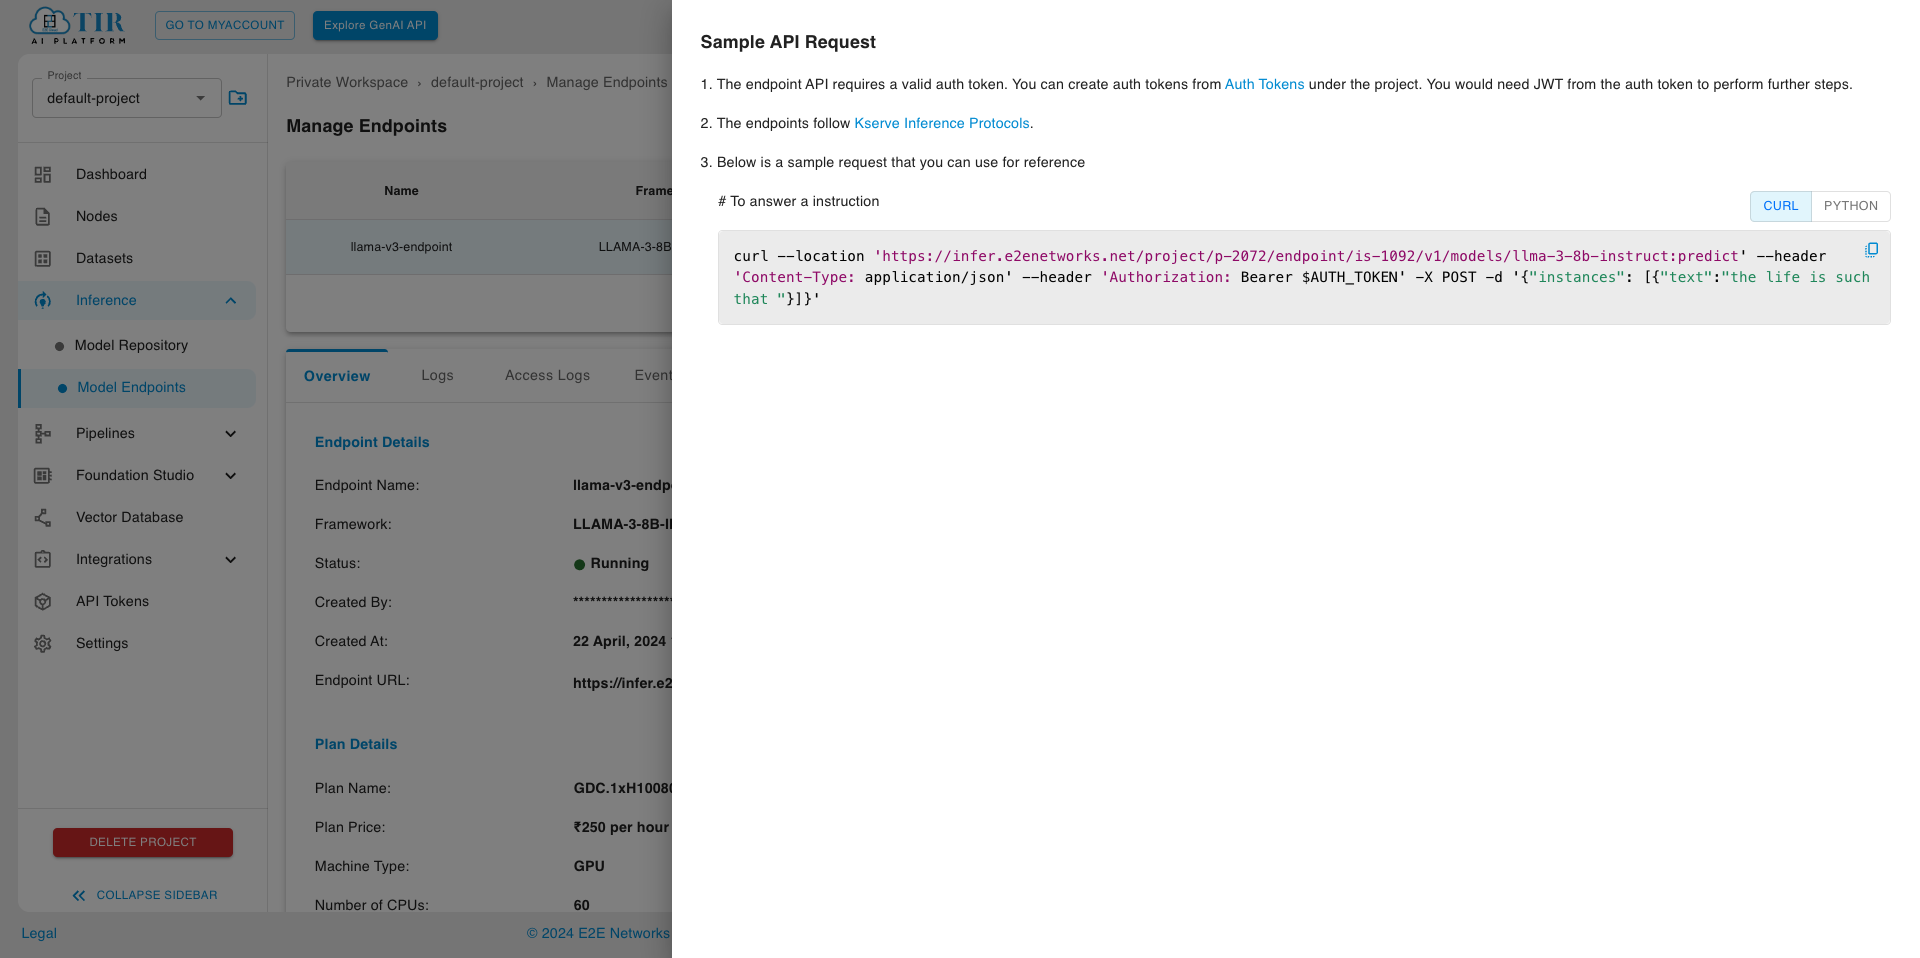
When your endpoint is ready, visit the Sample API request section to test your endpoint using curl (replace “$AUTH_TOKEN” with the token generated in the previous step )
You can go through Supported Parameters for inference requests that can be adjusted.
Creating Model endpoint with custom model weights
To create an Inference against LLAMA-3-8B-IT model with custom model weights, we will:
Download meta-llama/Meta-Llama-3-8B-Instruct model from huggingface
Upload the model to Model Repository (eos bucket)
Create an inference endpoint (model endpoint) in TIR to serve API requests
Step 1: Create a Model Repository
Before we proceed with downloading or fine-tuning (optional) the model weights, let us first define a model in TIR dashboard.
Go to TIR AI Platform
Choose a project
- Go to Model Repository section
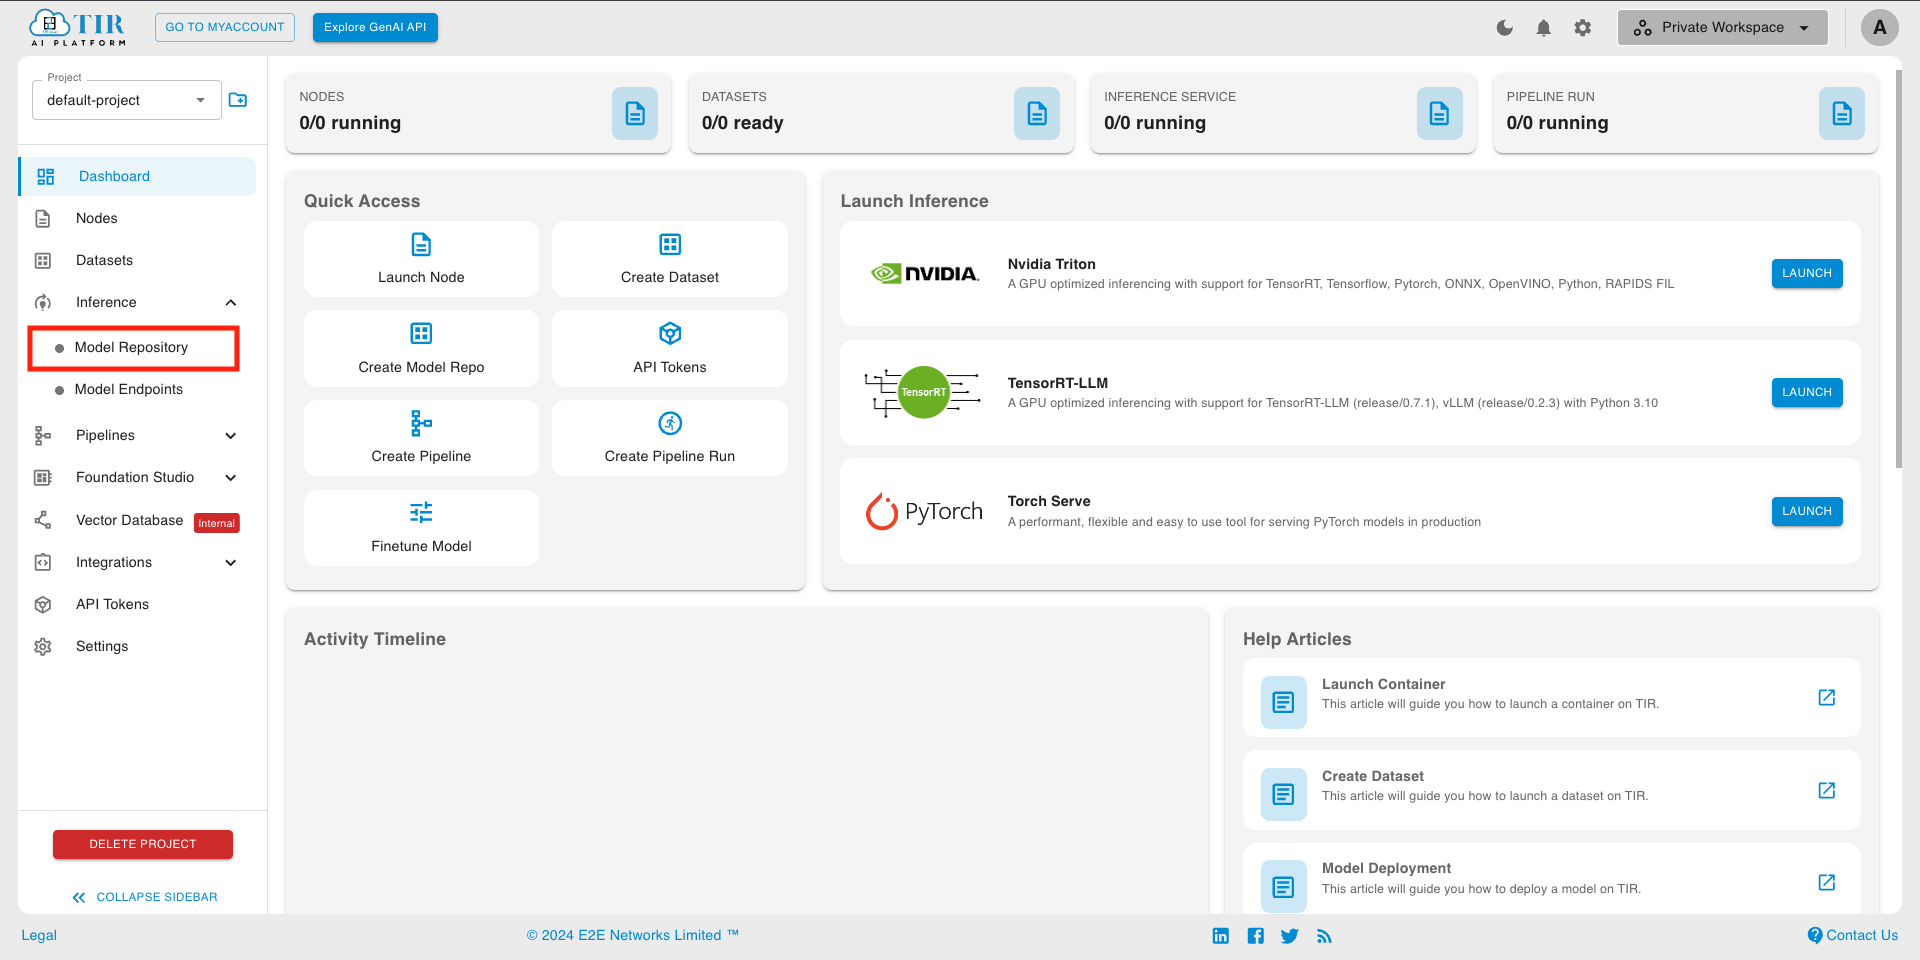
- Click on Create Model
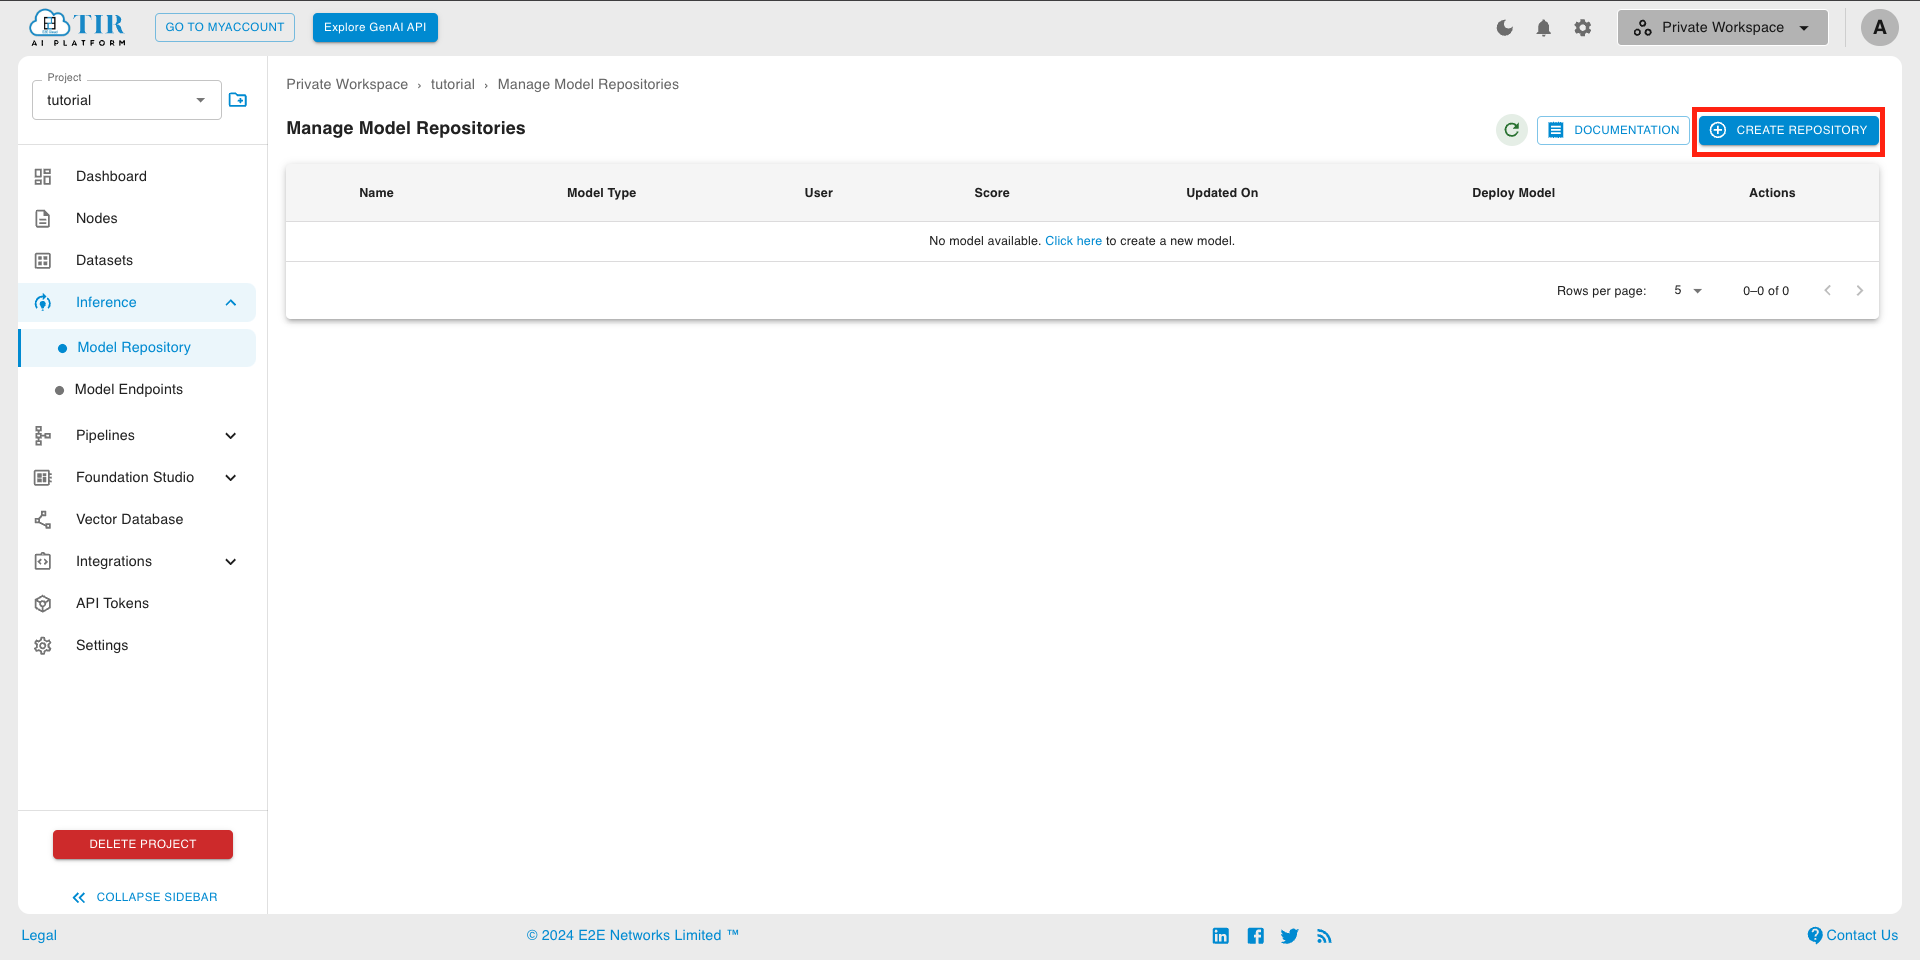
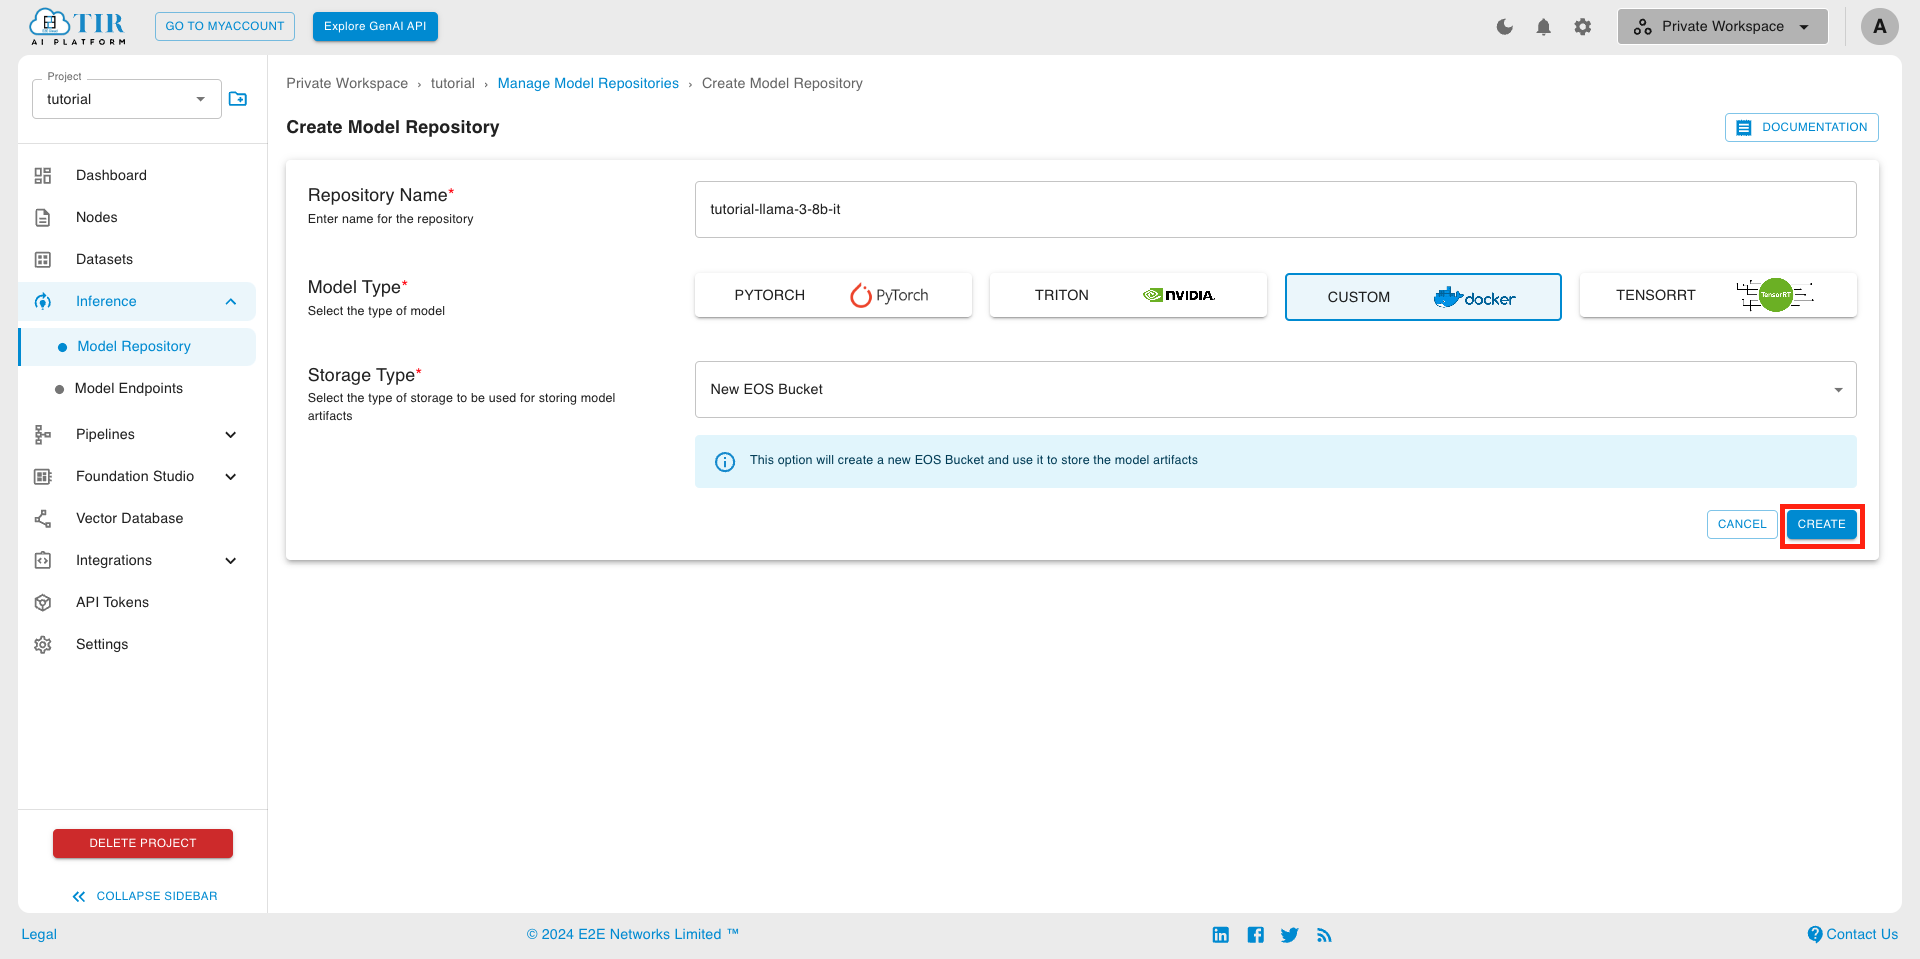
Enter a model name of your choosing (e.g. tutorial-llama-3-8b-it)
Select Model Type as Custom
- Click on CREATE
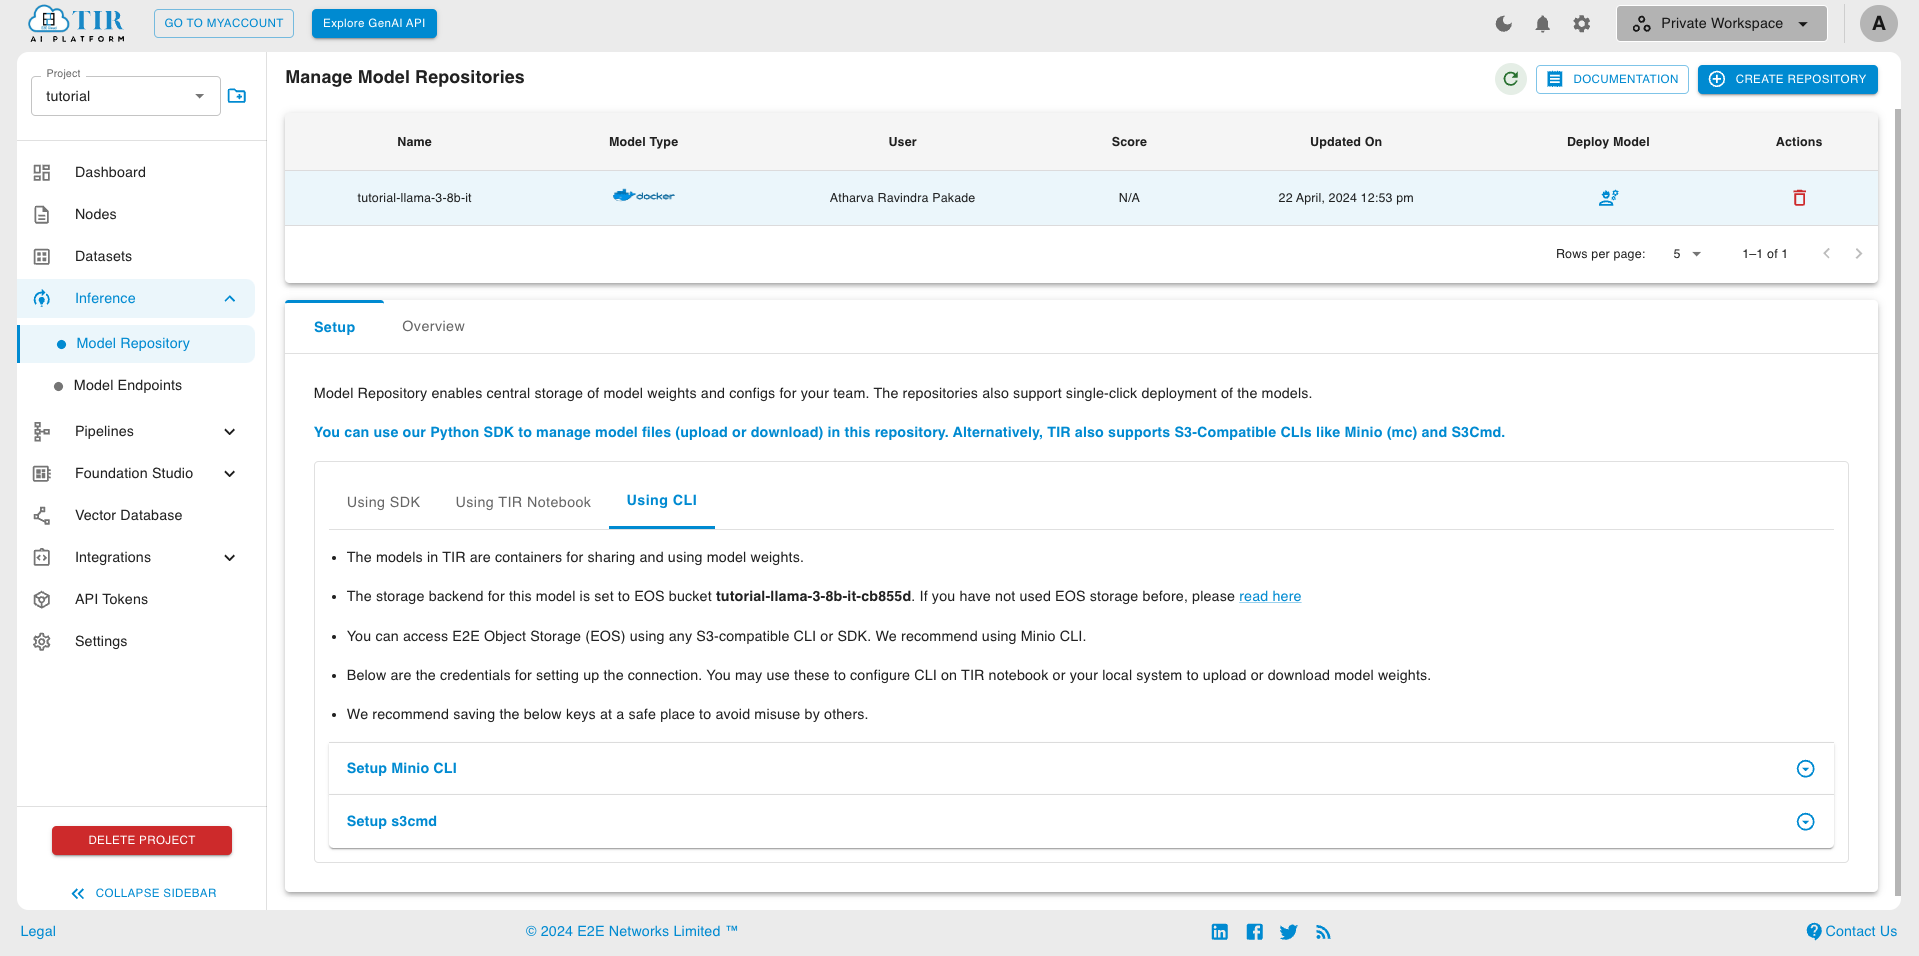
You will now see details of EOS (E2E Object Storage) bucket created for this model.
EOS Provides a S3 compatible API to upload or download content. We will be using MinIO CLI in this tutorial.
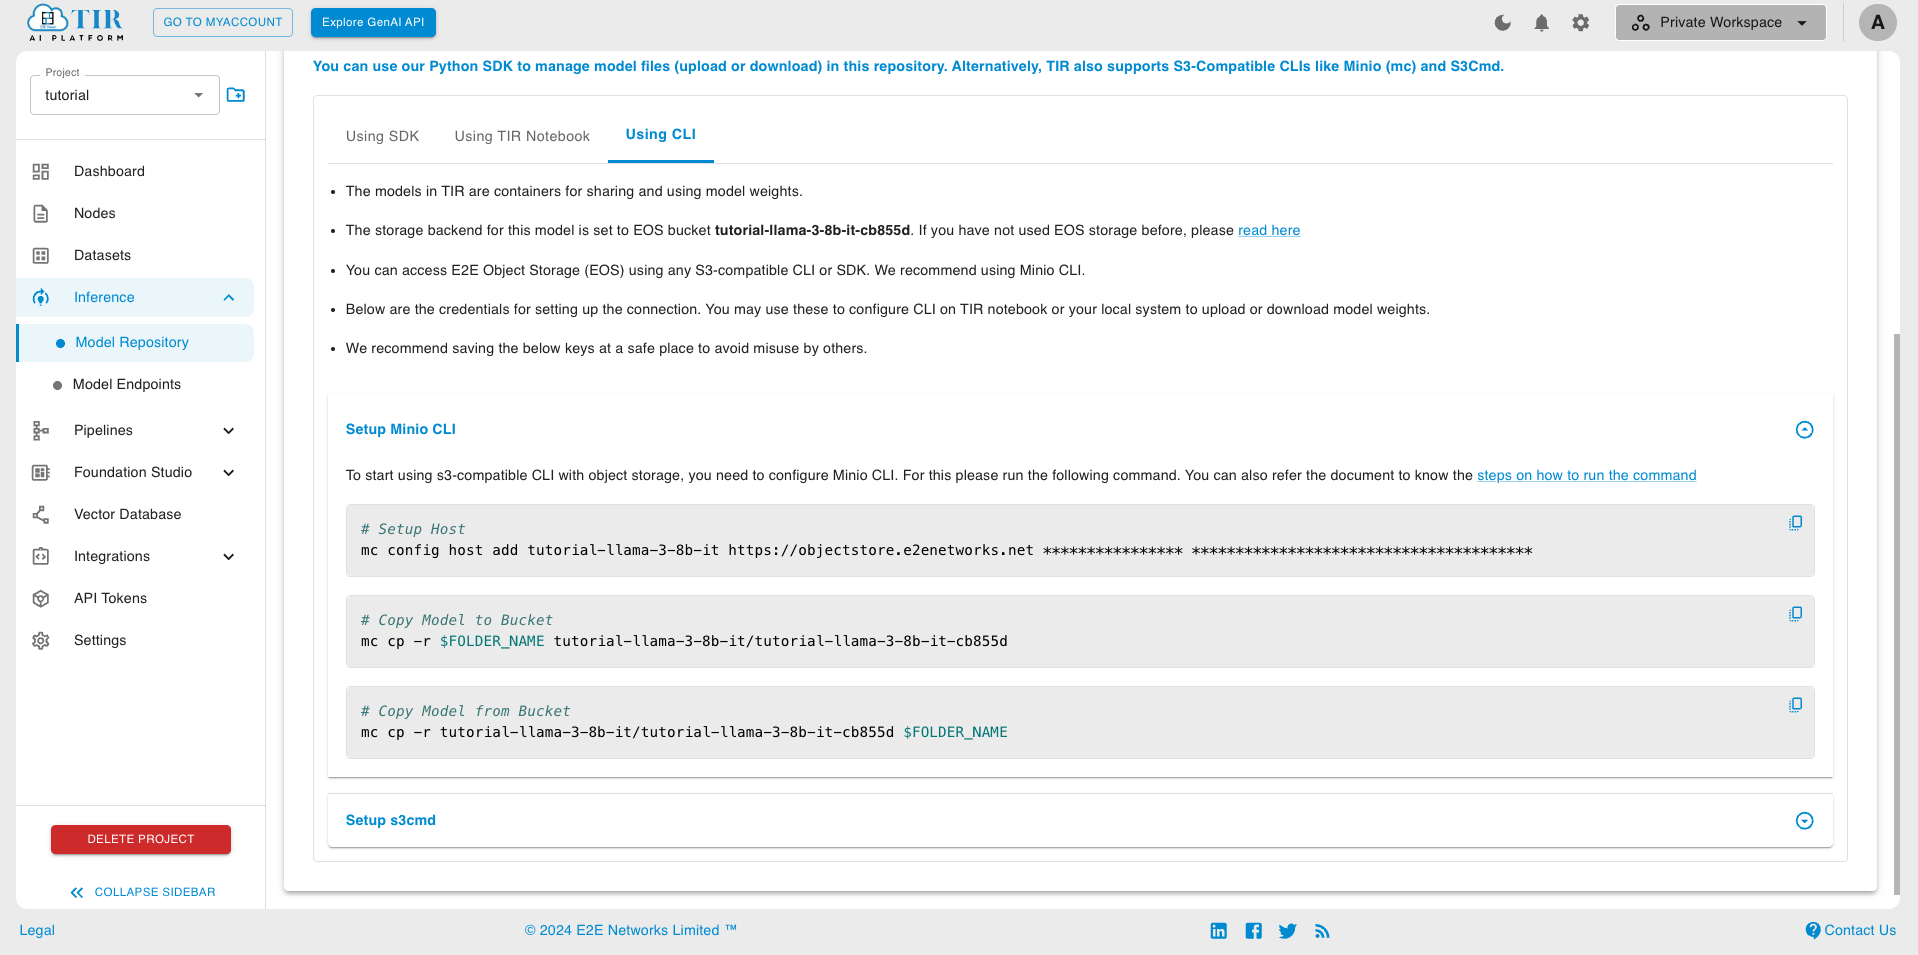
Copy the Setup Host command from Setup Minio CLI tab to a notepad or leave it in the clipboard. We will soon use it to setup MinIO CLI
Note
- In case you forget to copy the setup host command for MinIO CLI, don’t worry. You can always go back to model details and get it again.
Step 2: Start a new Notebook
To work with the model weights, we will need to first download them to a local machine or a notebook instance.
- In the TIR Dashboard, Go to Nodes
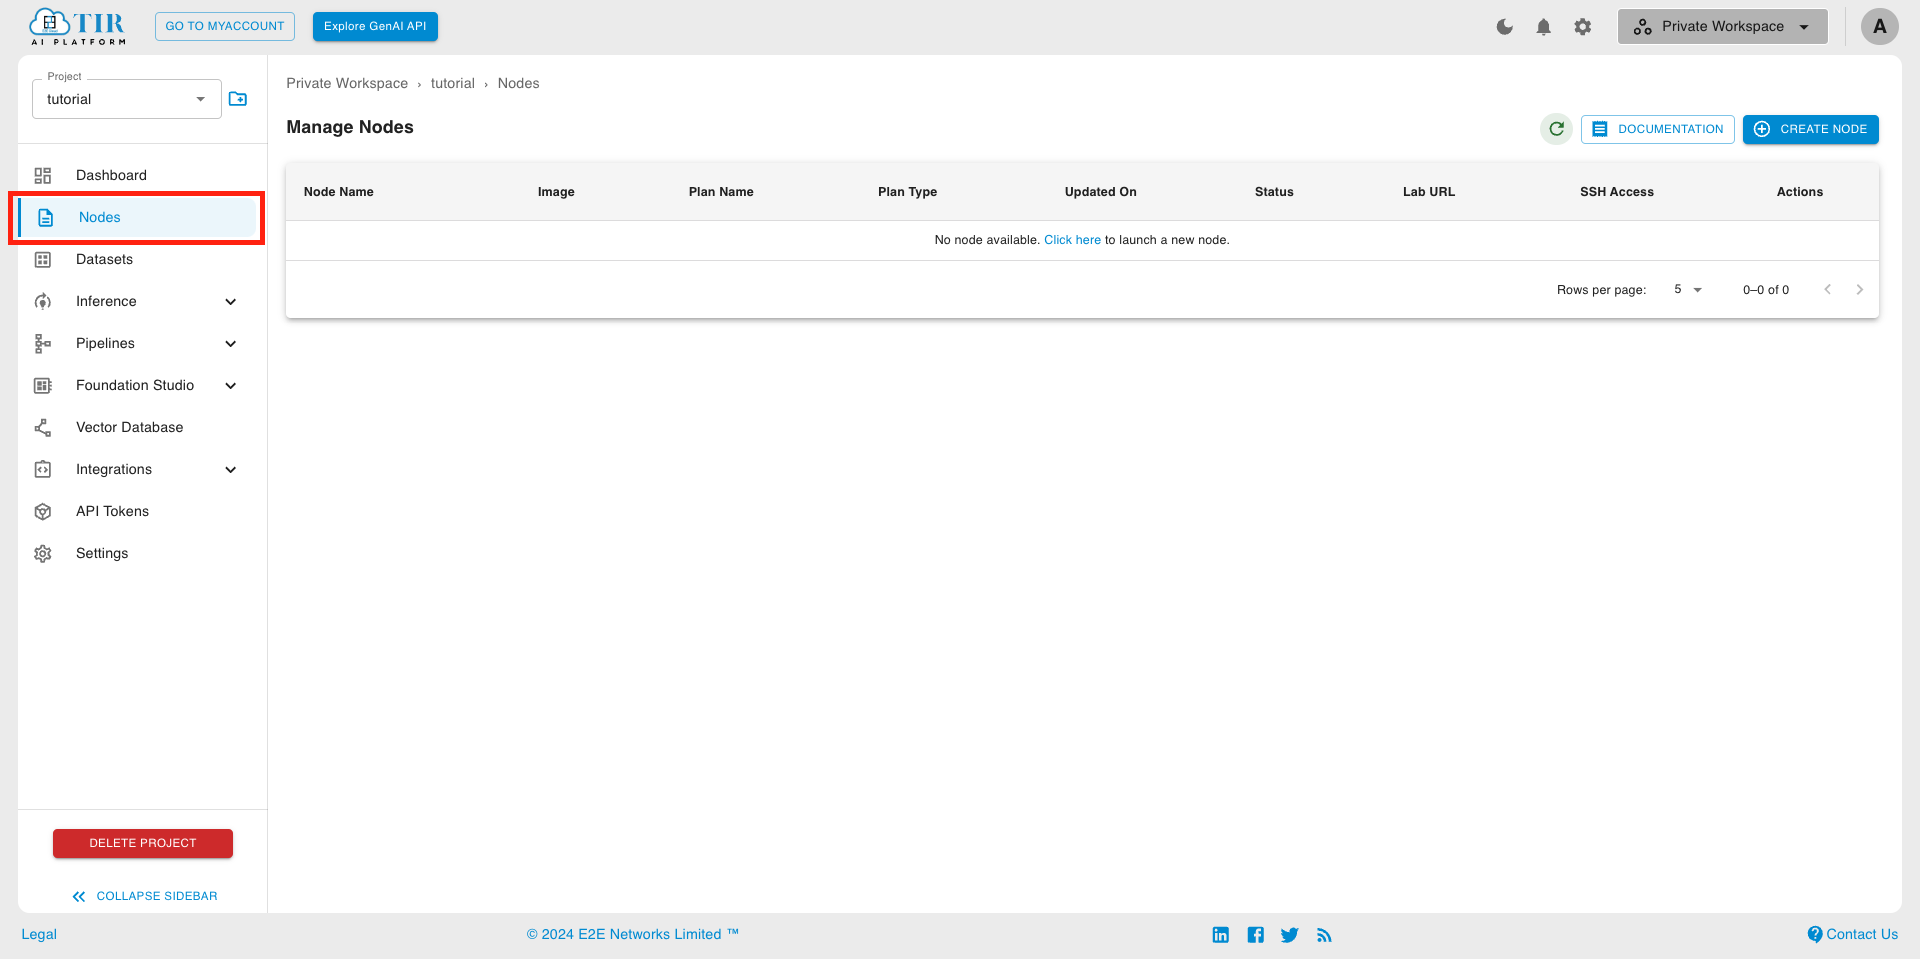
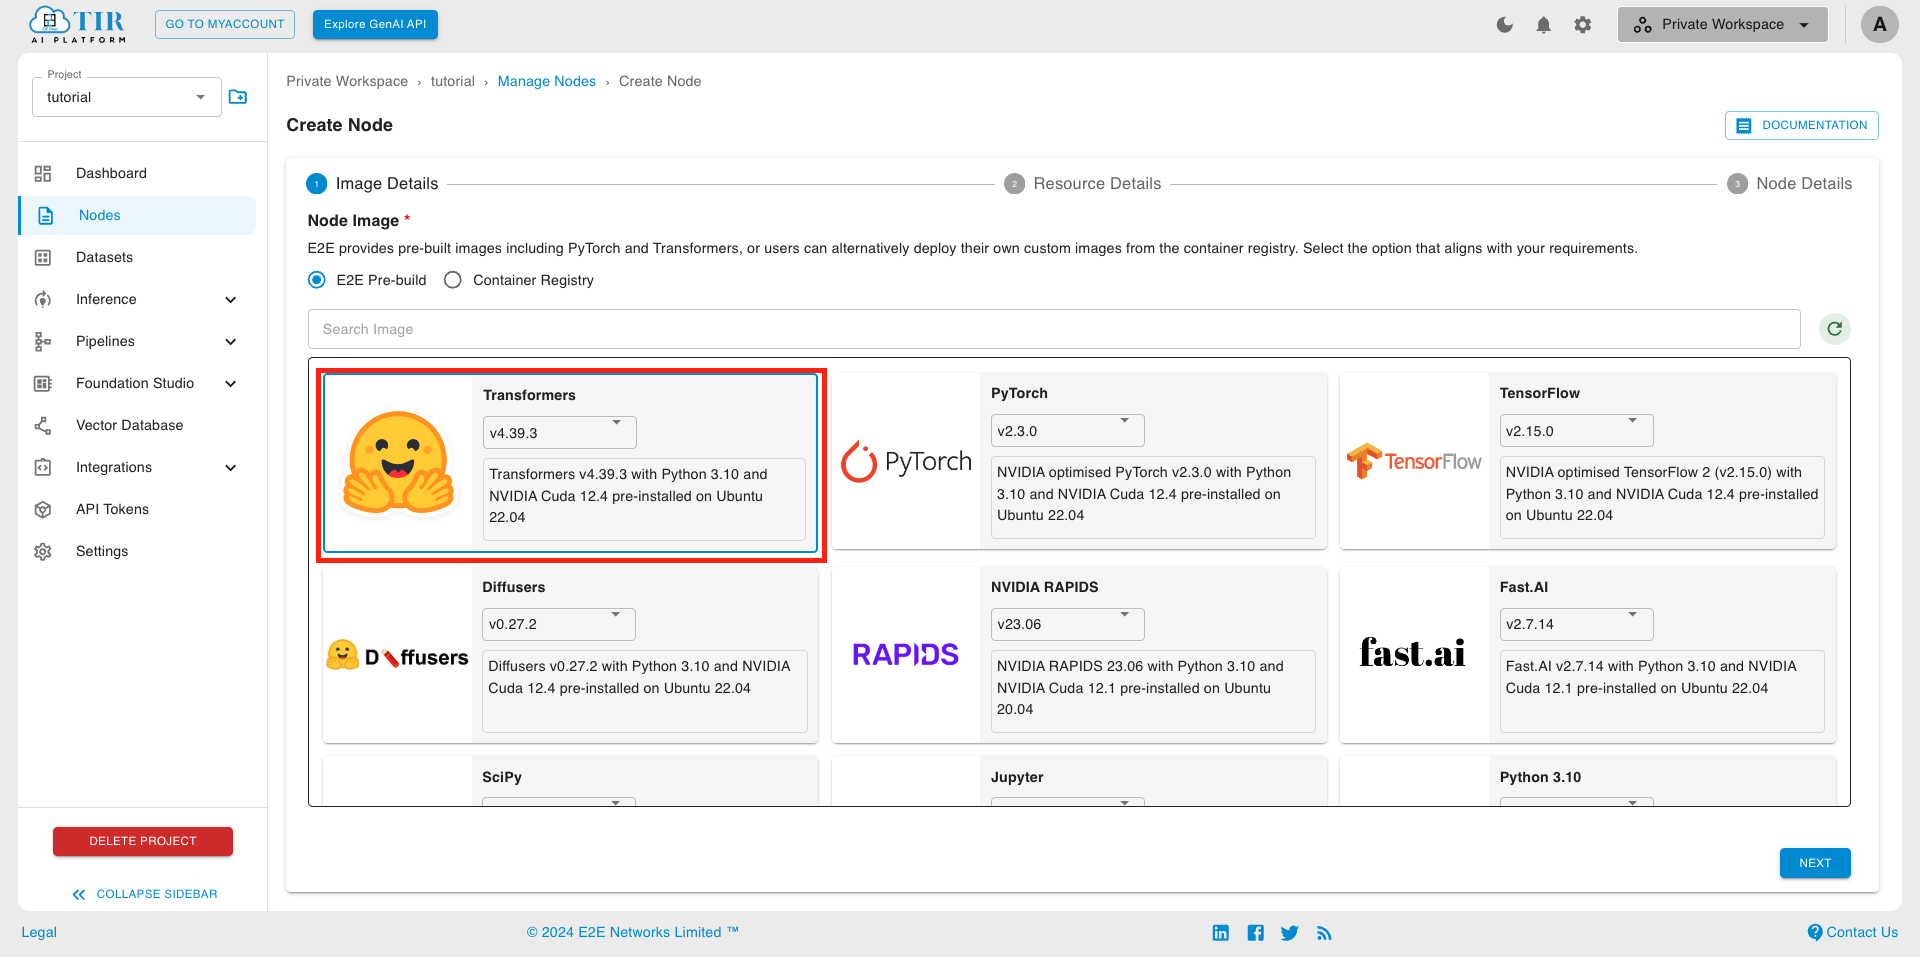
- Launch a new Node with a Transformers (or Pytorch) Image and a hardware plan (e.g. A10080). (Use GPU plan to test or fine-tune the model)
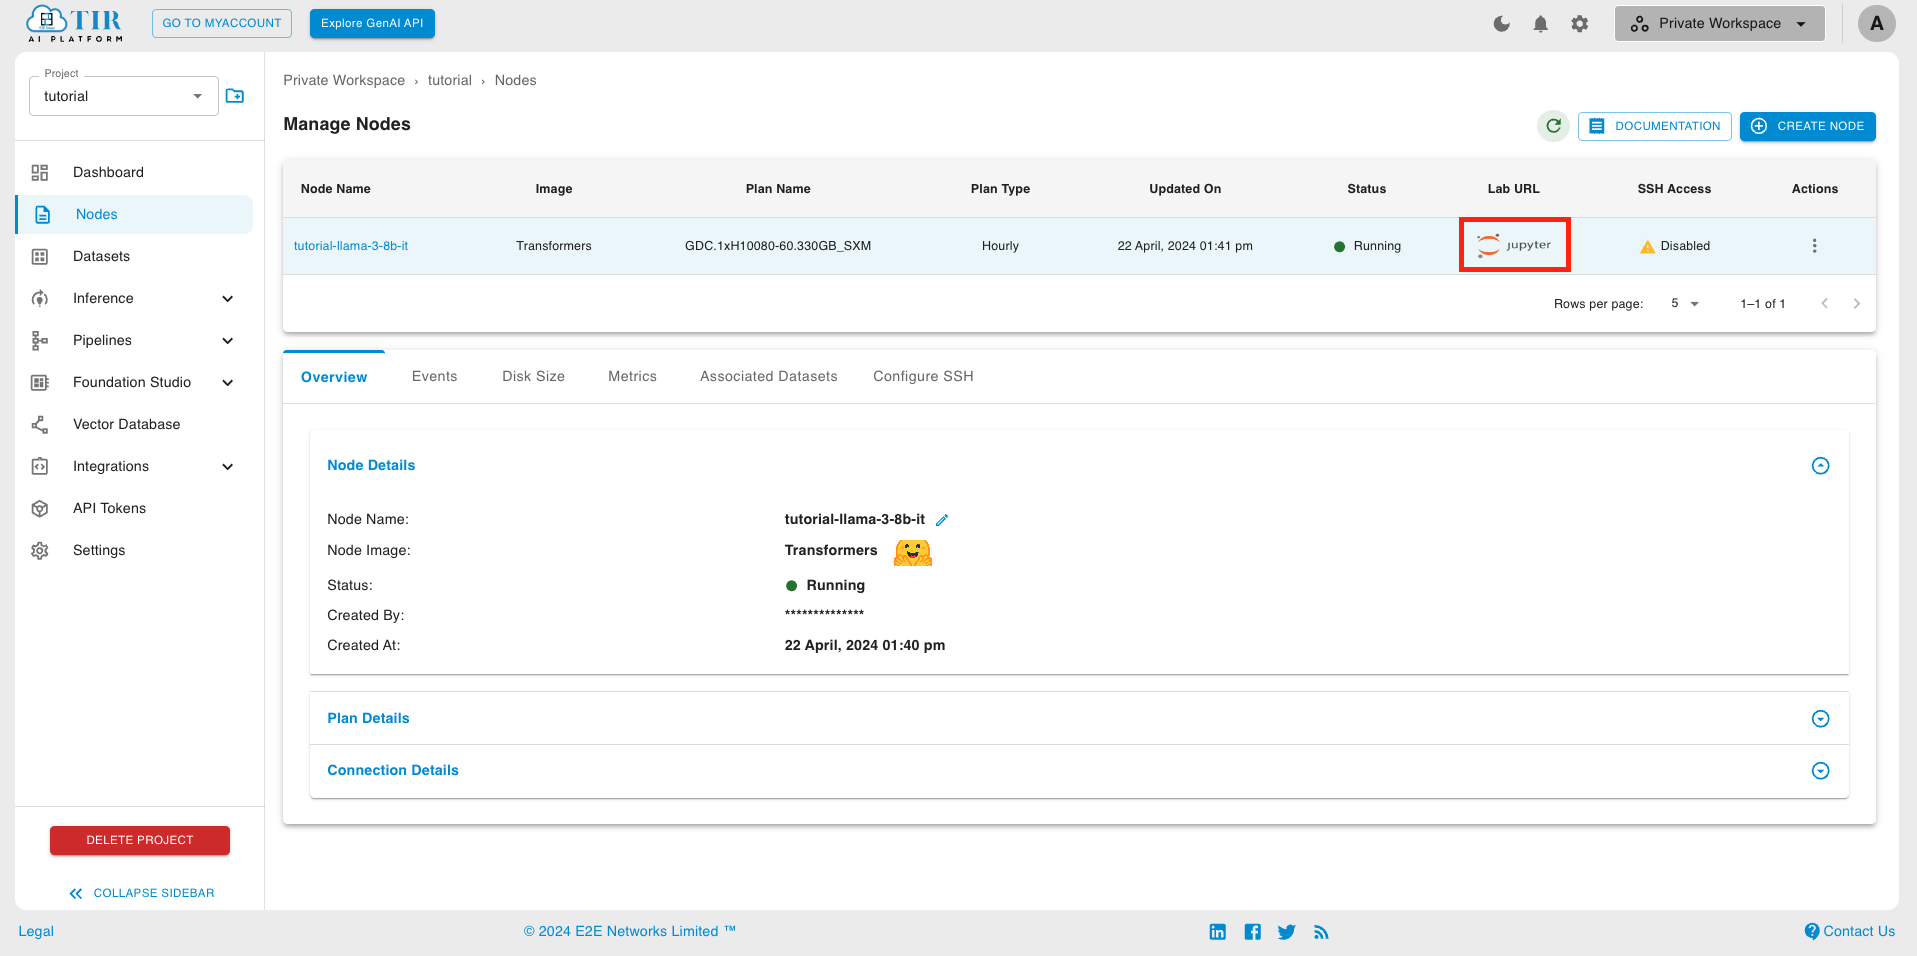
- Click on the Lab URL to start Jupyter labs environment
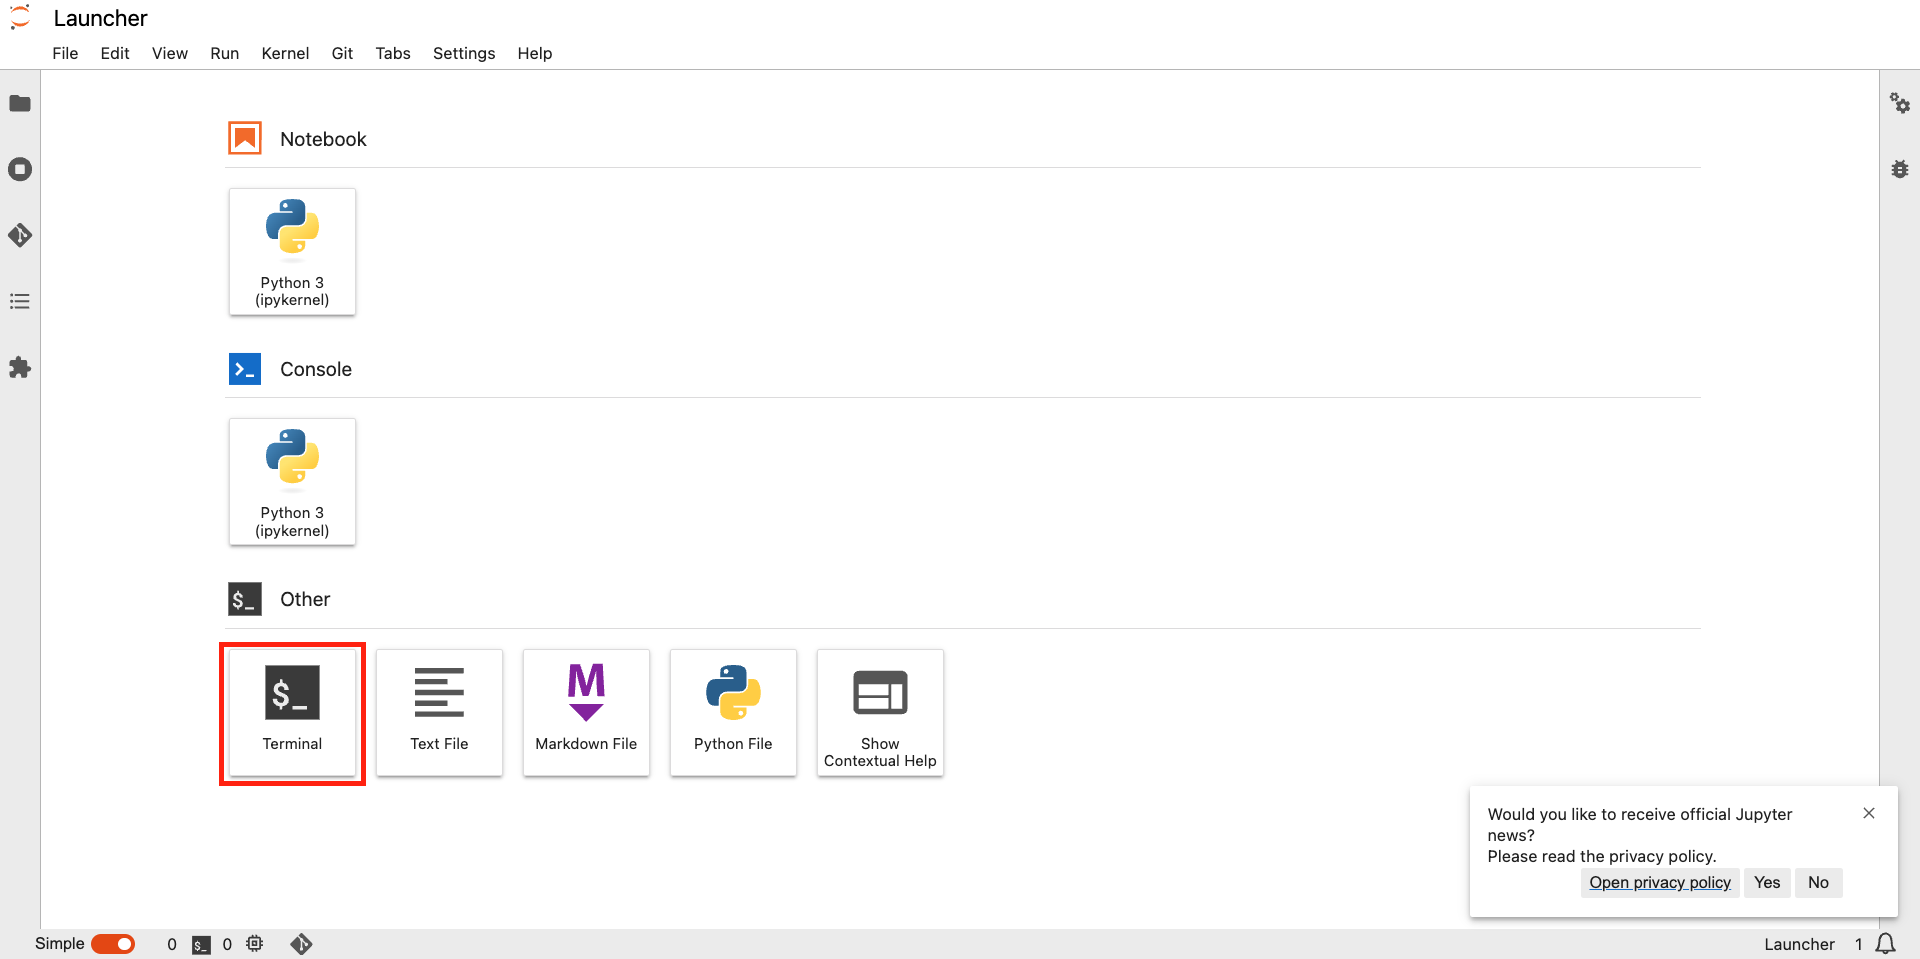
- In the jupyter labs, Click Terminal
- Now, paste and run the command for setting up MinIO CLI Host from Step 1
- Now, mc CLI ready for uploading our model
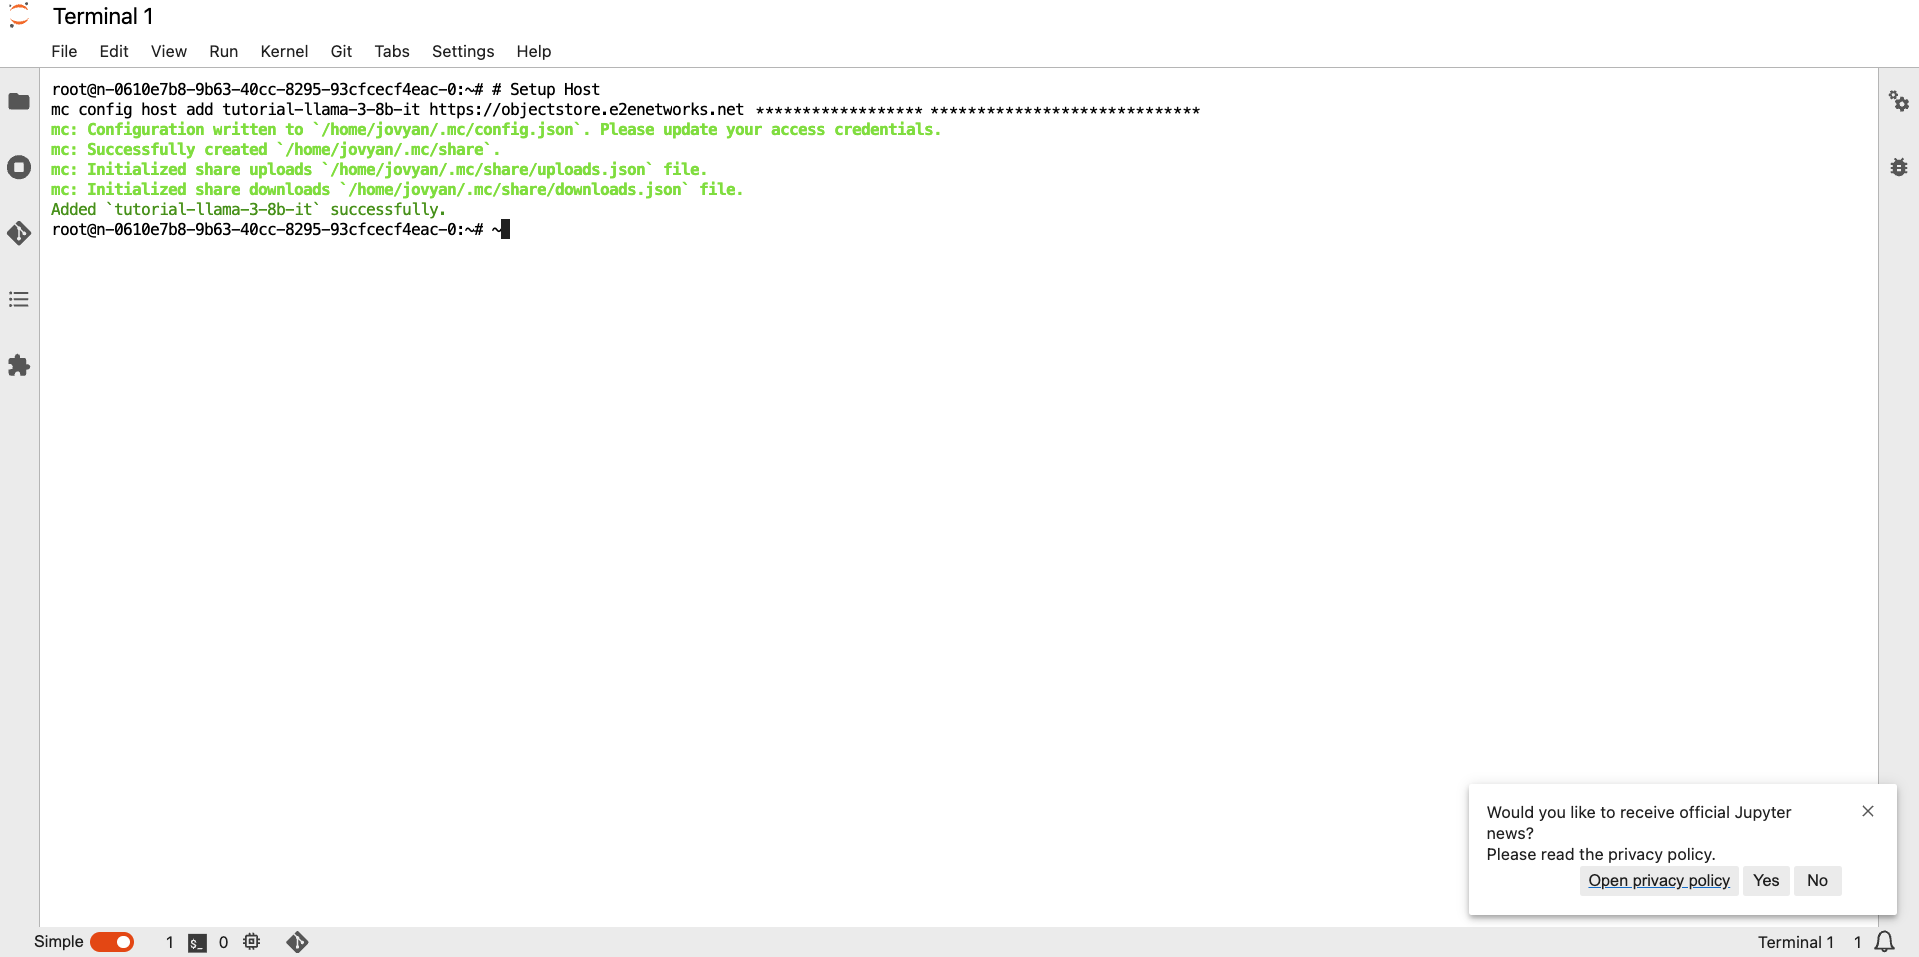
Step 3: Login to Huggingface CLI to get access to LLAMA-3-8B-IT (gated) Models
Again, Copy the Access token you used when creating a model endpoint
Inside terminal run following command
huggingface-cli login- Paste the token and complete the login procedure
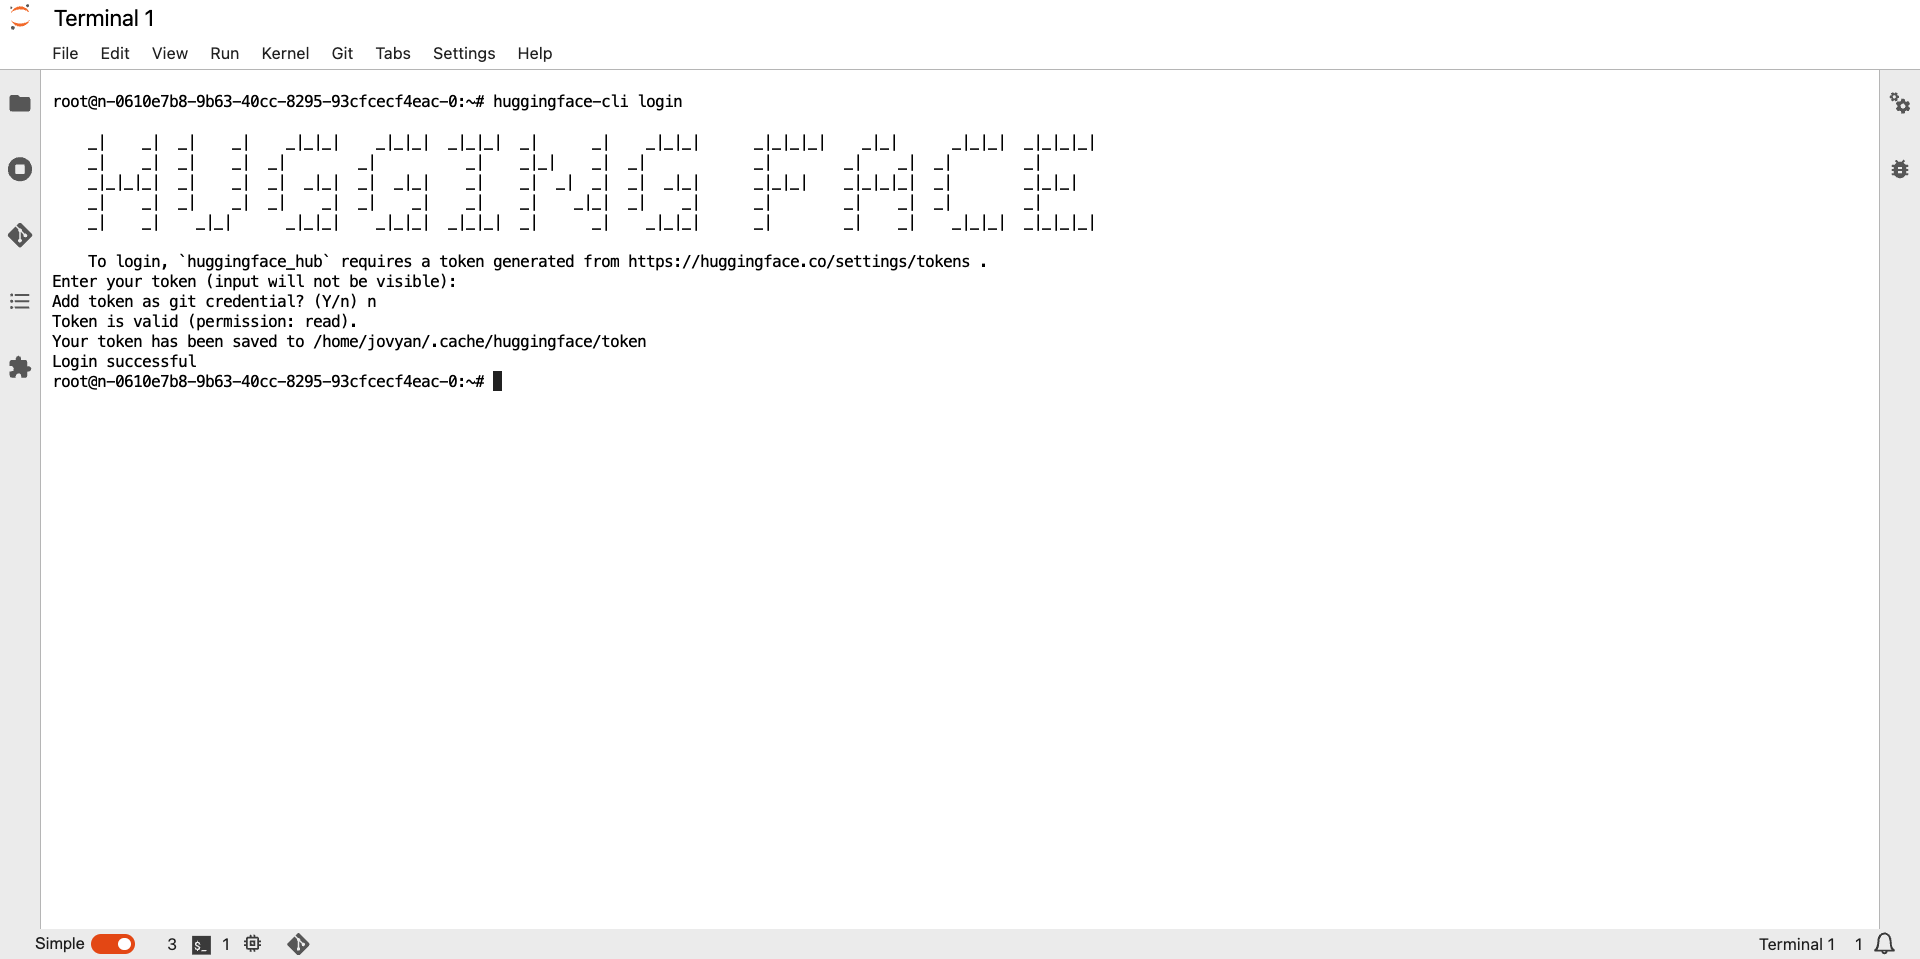
Step 4: Download the LLAMA-3-8B-IT model from Huggingface
Now, our EOS bucket will store the model weights. Let us download the weights from Huggingface.
- Start a new notebook tutorial-llama-3-8b-it.ipynb in jupyter labs
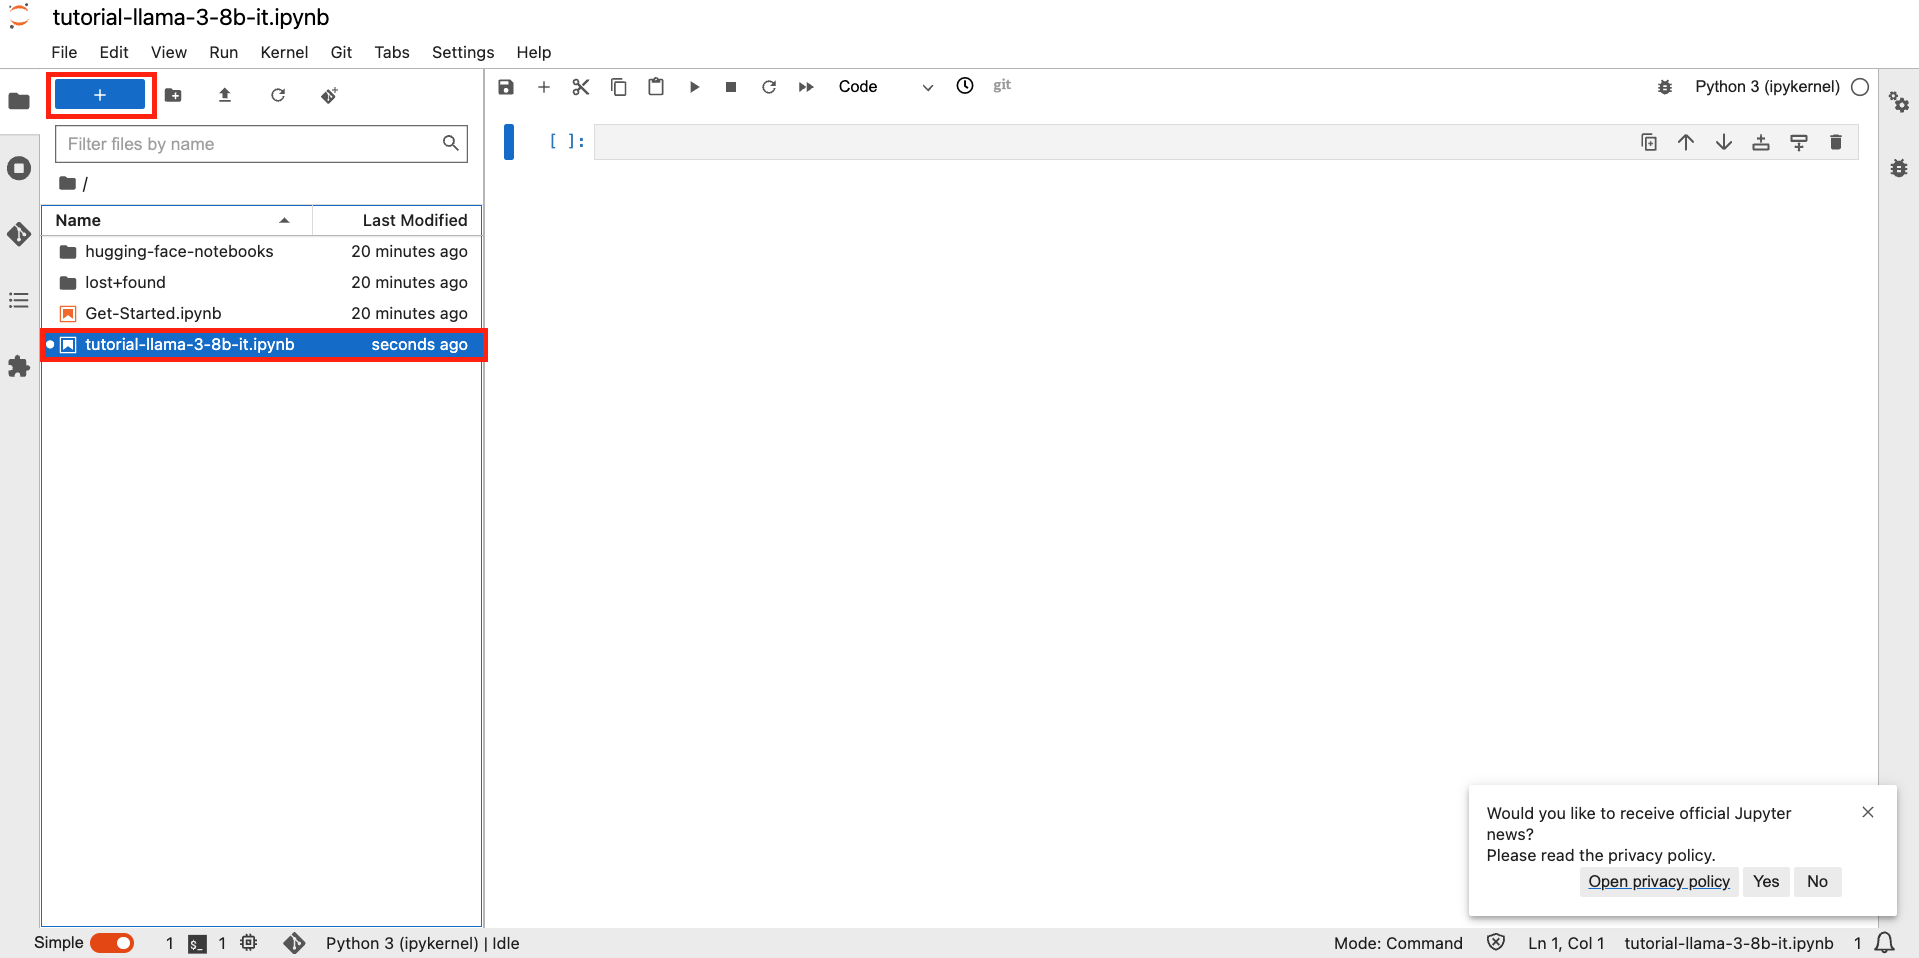
Run the following commands to download the model. The model will be downloaded by huggignface sdk in the $HOME/.cache folder
from transformers import AutoTokenizer
import transformers
import torch

model = "meta-llama/Meta-Llama-3-8B-Instruct"

tokenizer = AutoTokenizer.from_pretrained(model)

pipeline = transformers.pipeline(
    "text-generation",
    model=model,
    torch_dtype=torch.float16,
    device_map="auto",
    tokenizer=tokenizer)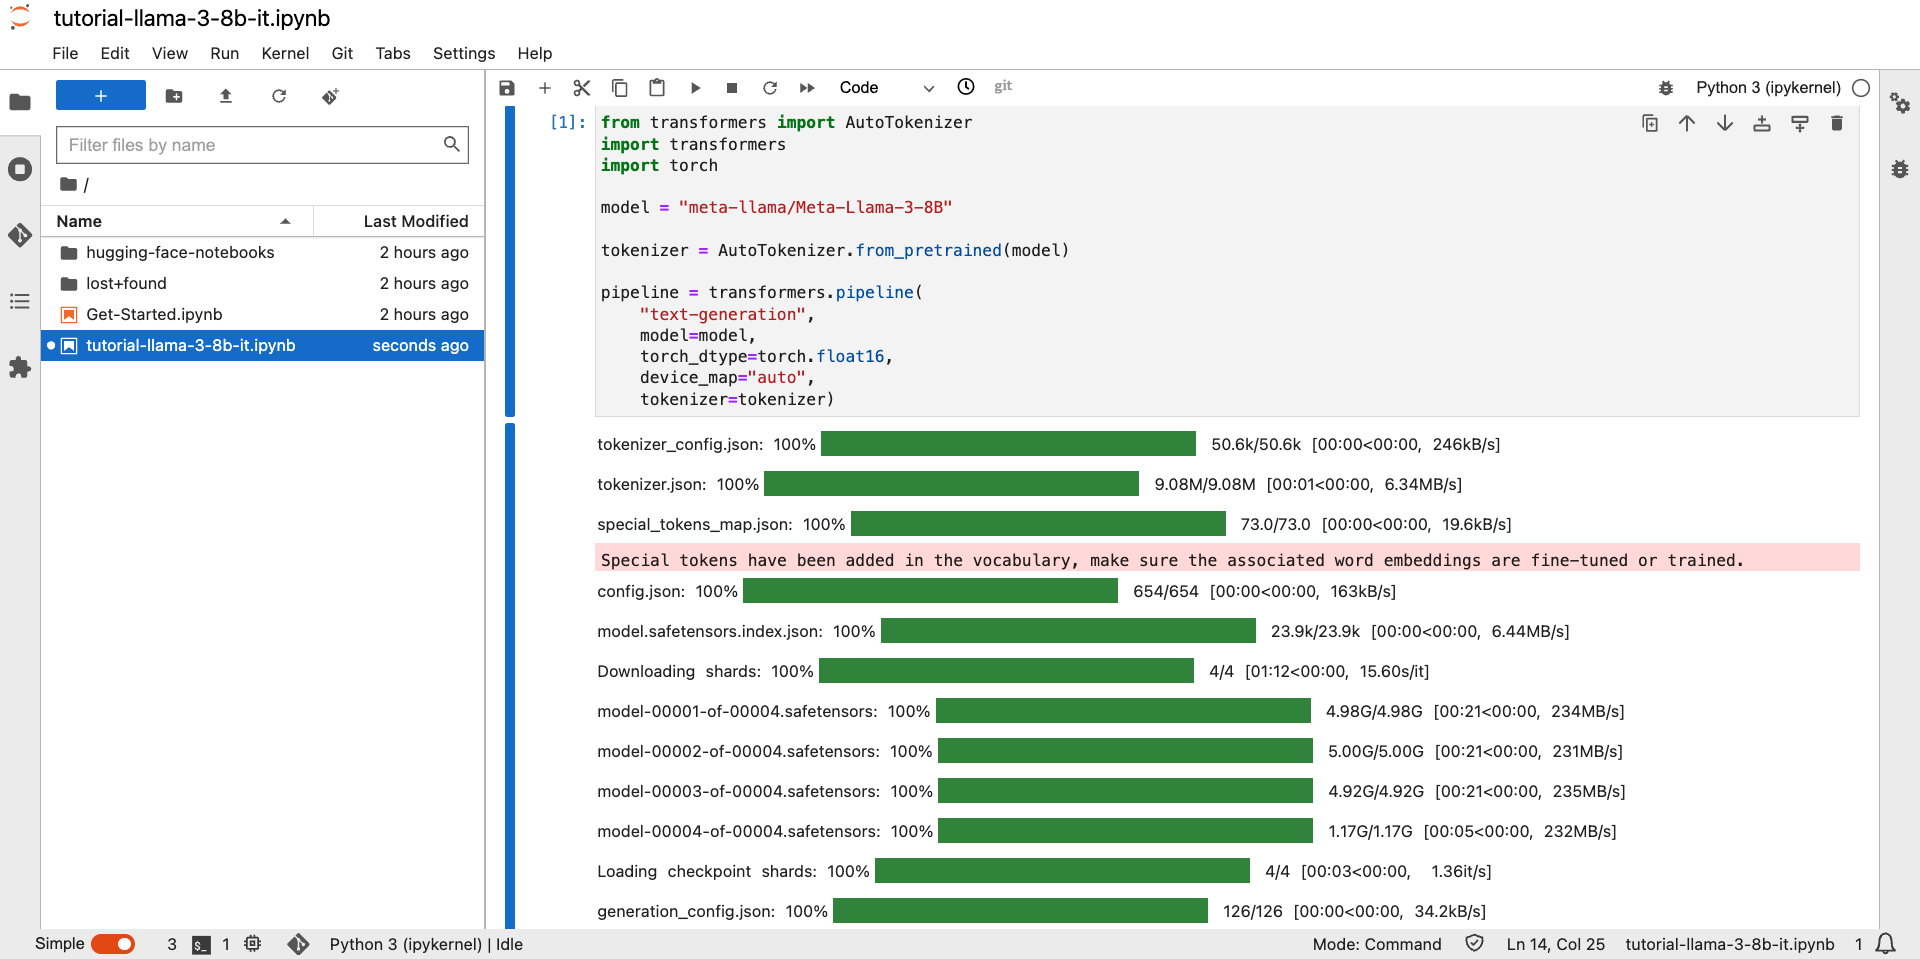
Note
If you face any issues running the above code in the notebook cell, you may be missing the required libraries. This may happen if you did not launch the notebook with the Transformers image.
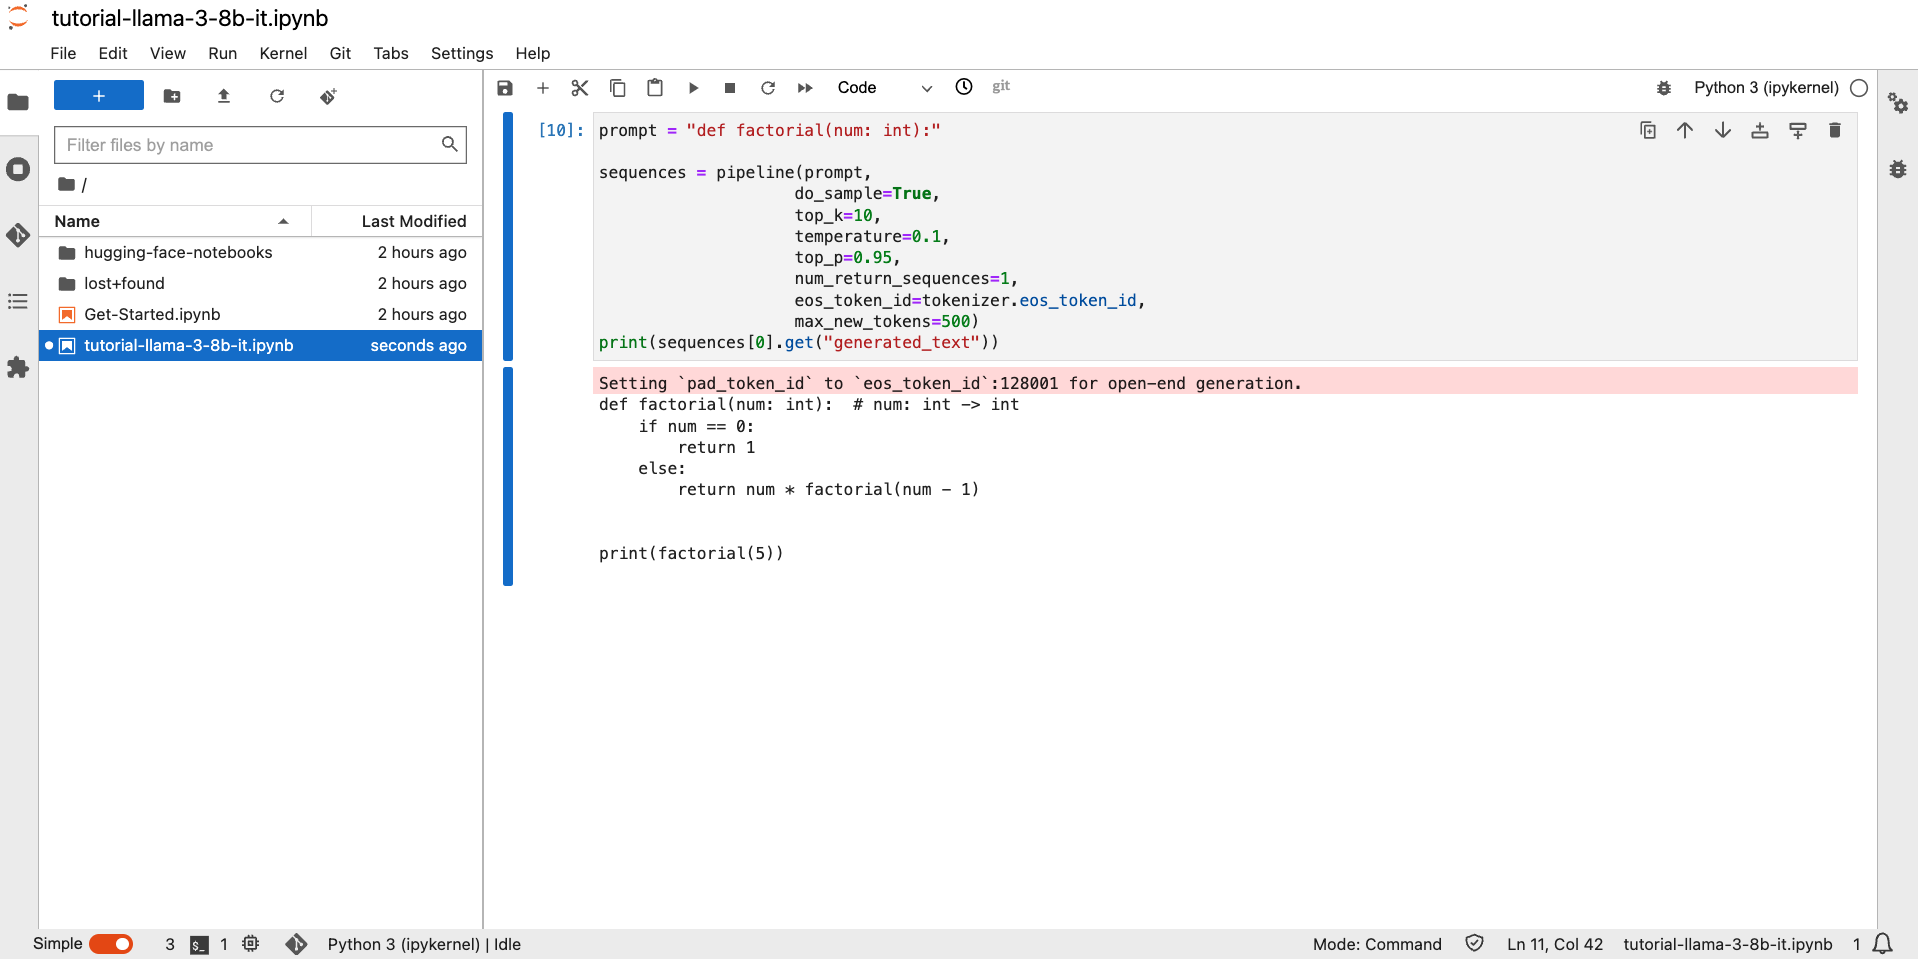
Let us run a simple inference to test the model.
prompt = "def factorial(num: int):"

sequences = pipeline(prompt,
                    do_sample=True,
                    top_k=10,
                    temperature=0.1,
                    top_p=0.95,
                    num_return_sequences=1,
                    eos_token_id=tokenizer.eos_token_id,
                    max_length=200
                    )
Note
All the supported parameters are listed in Supported Parameters
Step 5: Upload the model to Model Bucket (EOS)
Now that the model works as expected, you can fine-tune it with your data or choose to serve the model as-is. This tutorial assumes you are uploading the model as-is to create an inference endpoint. If you fine-tune the model, you can follow similar steps to upload the model to the model repositories EOS bucket.
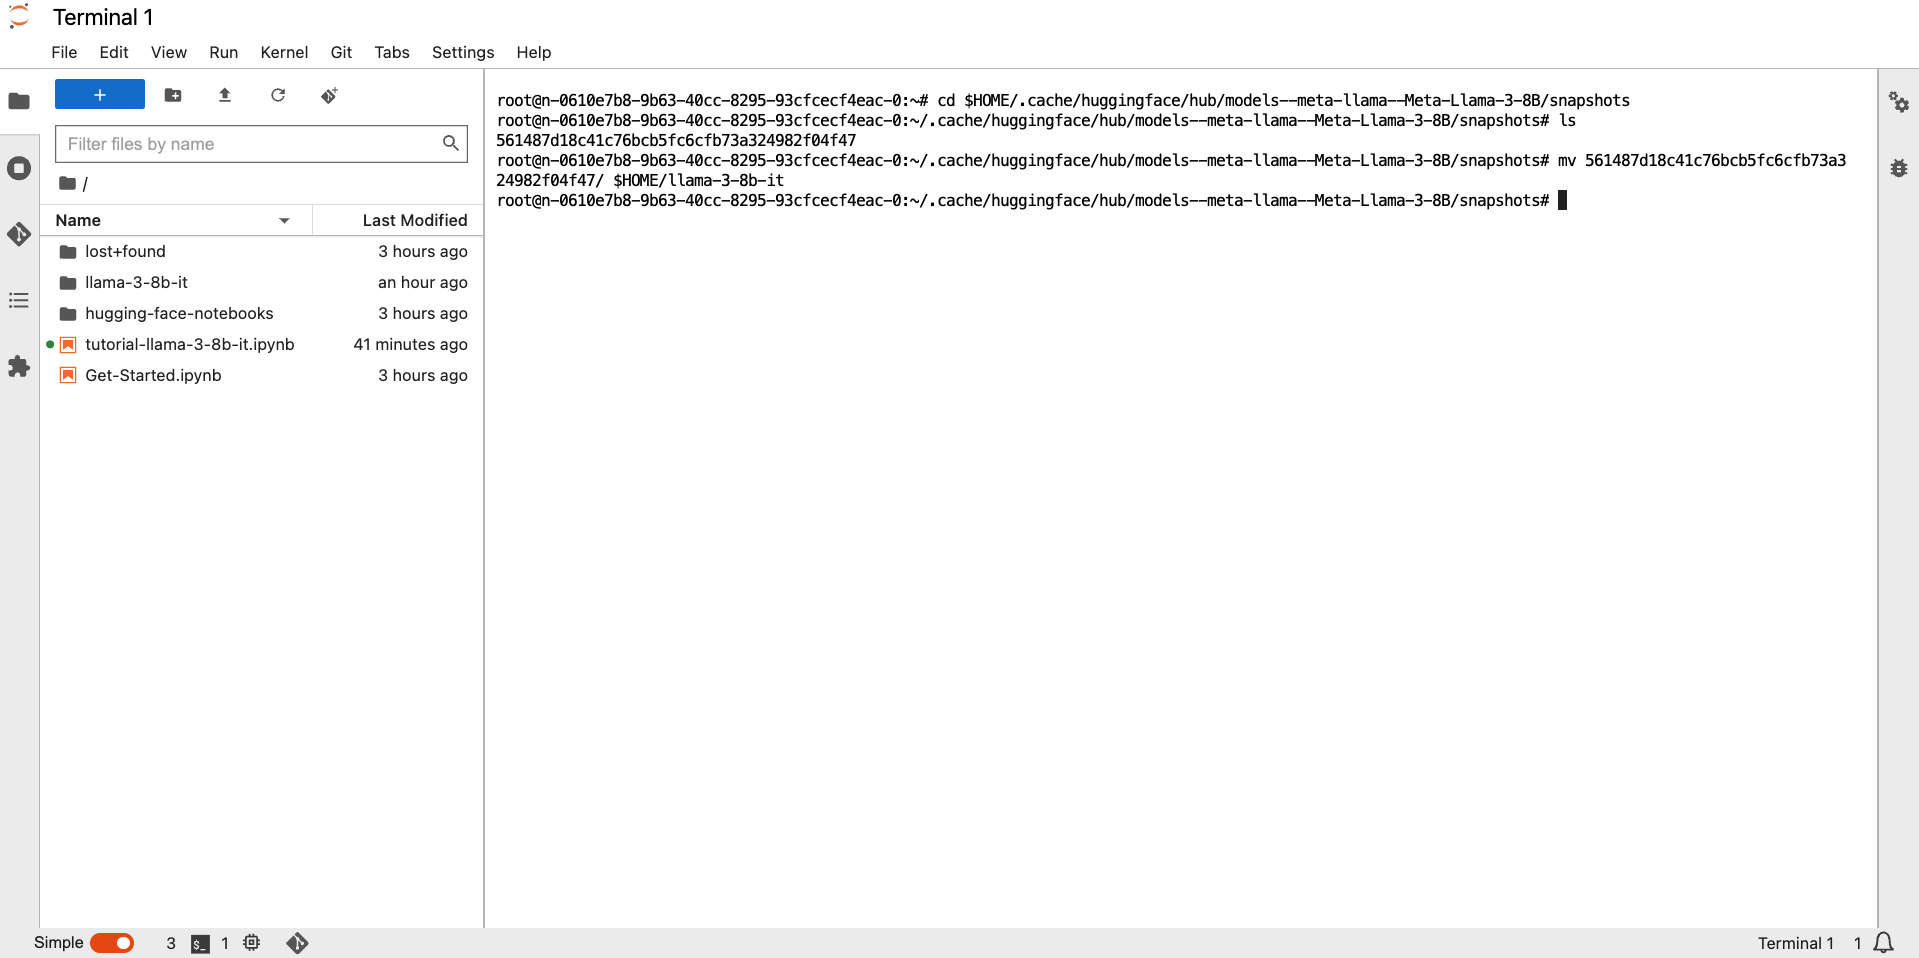
# Go to the directory
cd $HOME/.cache/huggingface/hub/models--meta-llama--Meta-Llama-3-8B/snapshots

# List all snapshots
ls

# change directory to snapshot
cd <snapshot-dir-name>
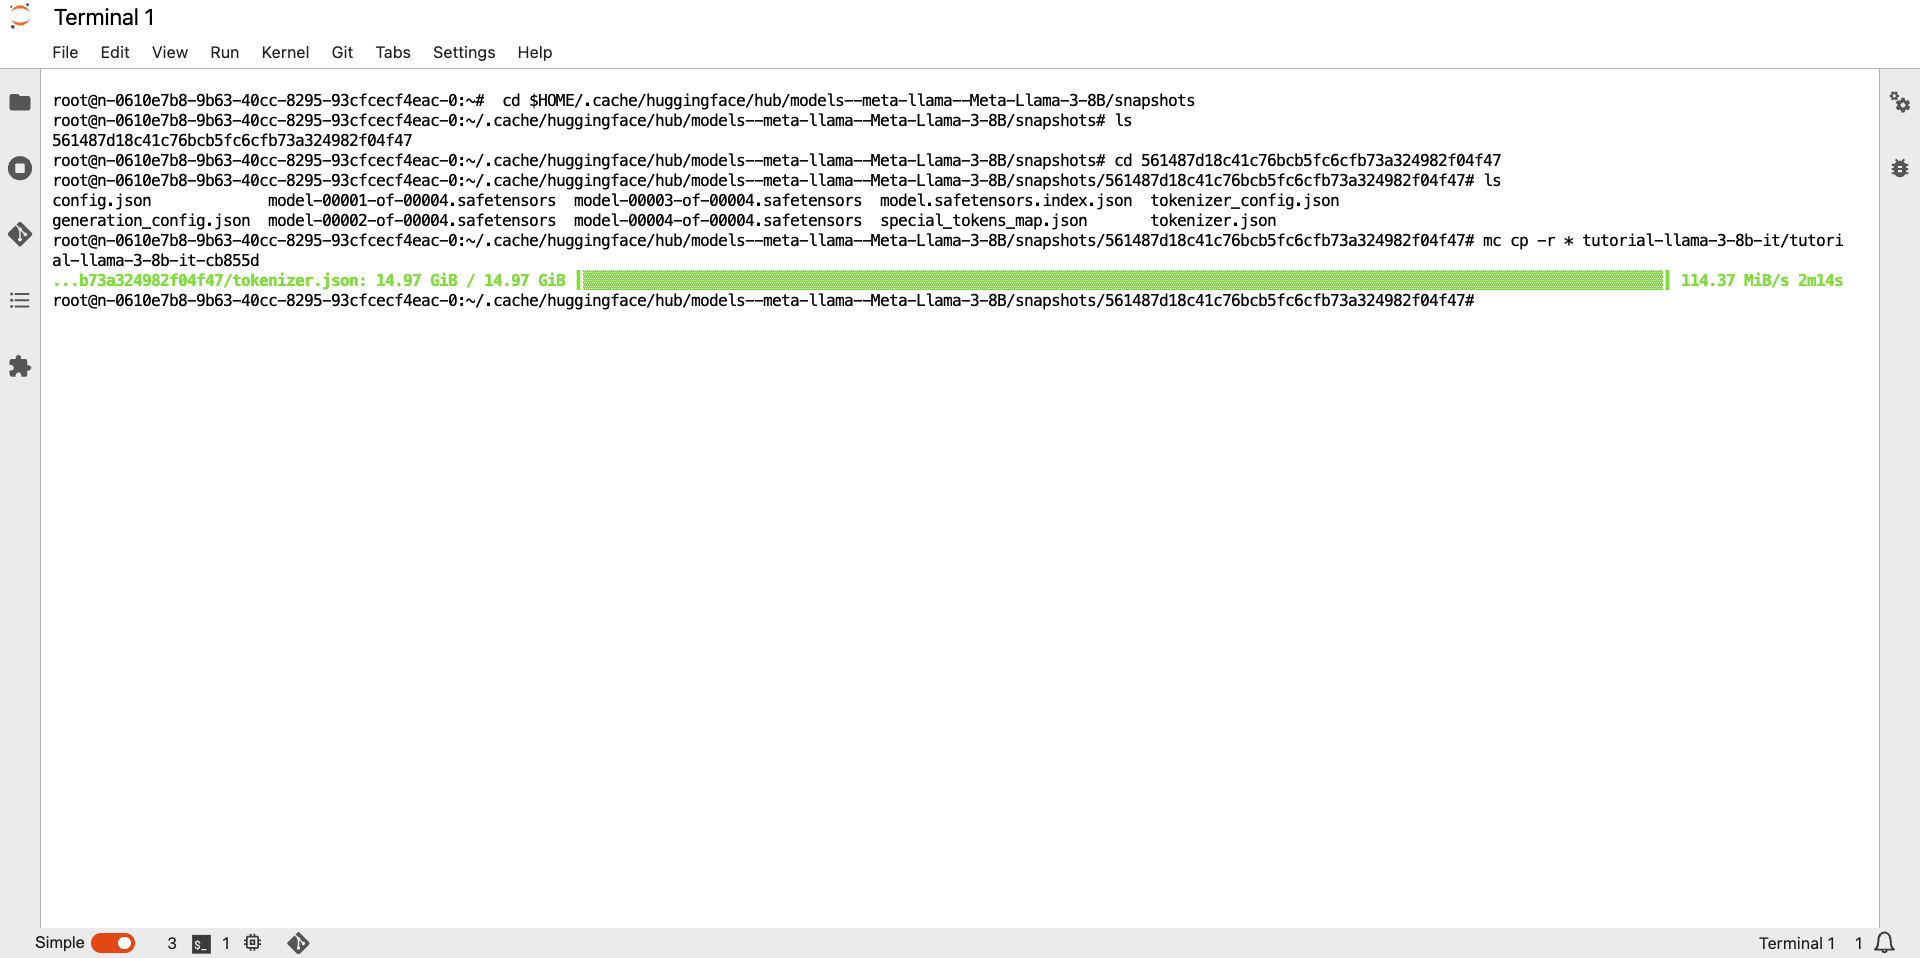
# push the contents of the folder to EOS bucket.
# Go to TIR Dashboard >> Models >> Select your model >> Copy the cp command from Setup MinIO CLI tab.

# The copy command would look like this:
# mc cp -r $FOLDER_NAME tutorial-llama-3-8b-it/tutorial-llama-3-8b-it-cb855d

# here we replace $FOLDER_NAME with '*' to upload all contents of snapshots folder
mc cp -r * tutorial-llama-3-8b-it/tutorial-llama-3-8b-it-cb855d
Note
The model directory name may be a little different (we assume it is models–meta-llama–Meta-Llama-3-8B). In case, this command does not work, list the directories in the below path to identify the model directory $HOME/.cache/huggingface/hub
Step 6: Create an endpoint for our model
With model weights uploaded to TIR Model Repository, what remains is to just launch the endpoint and serve API requests.
- Go to Model Endpoints section

- Create a new Endpoint

- Choose LLAMA-3-8B-IT model card

- Choose Link with Model Repository and select the model Repository created in step 1
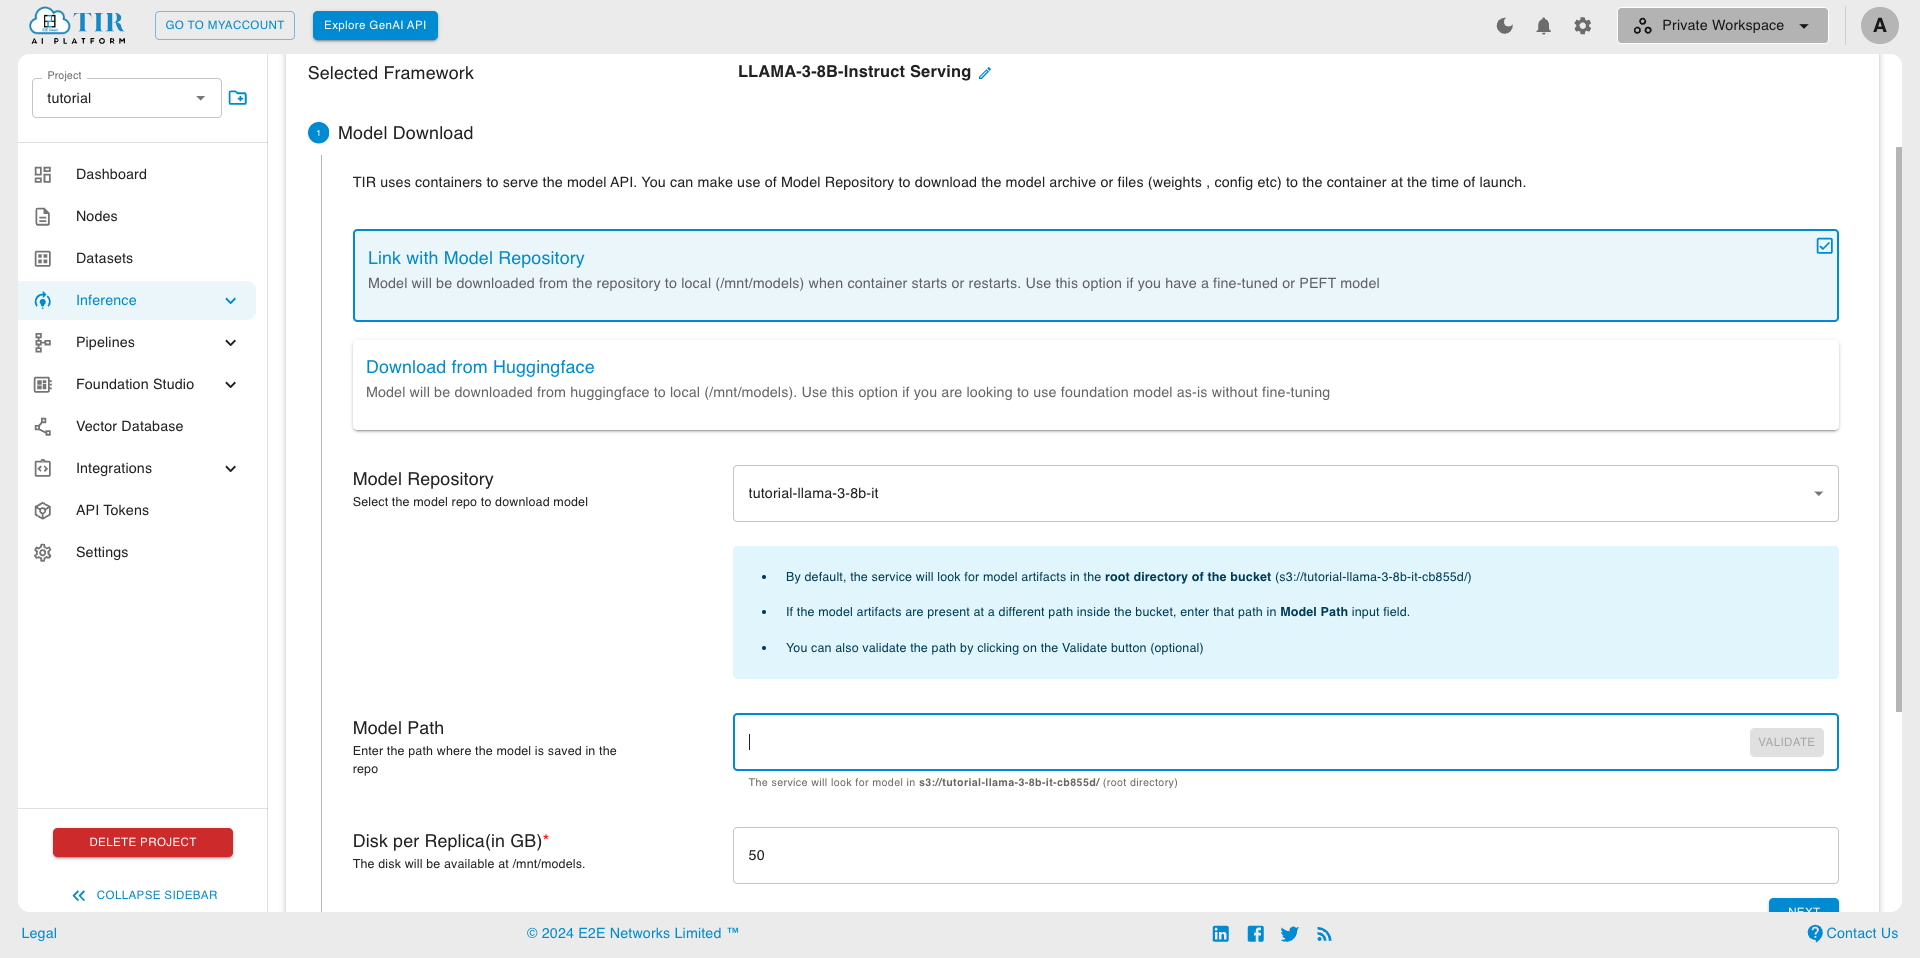
Leave the Model Path empty and set Disk size
Pick a suitable GPU plan of your choice and set the replicas
Add Endpoint Name (eg llama-3-custom)
- Setting Environment Variables

- Compulsory Environment Variables
Note: LLAMA-3-8B-IT is a Gated Model; you will need permission to access it.
Follow these steps to get access to the model :
Visit https://huggingface.co/meta-llama/Meta-Llama-3-8B-Instruct
Login, complete the form, and click submit to “Request Access.”

Go to Account Settings > Access Tokens > Create New API Token once approved.

Copy API token
HF_TOKEN: Paste the API token key
Complete the endpoint creation
- Model endpoint creation might take a few minutes. You can monitor endpoint creations through logs in the log section.
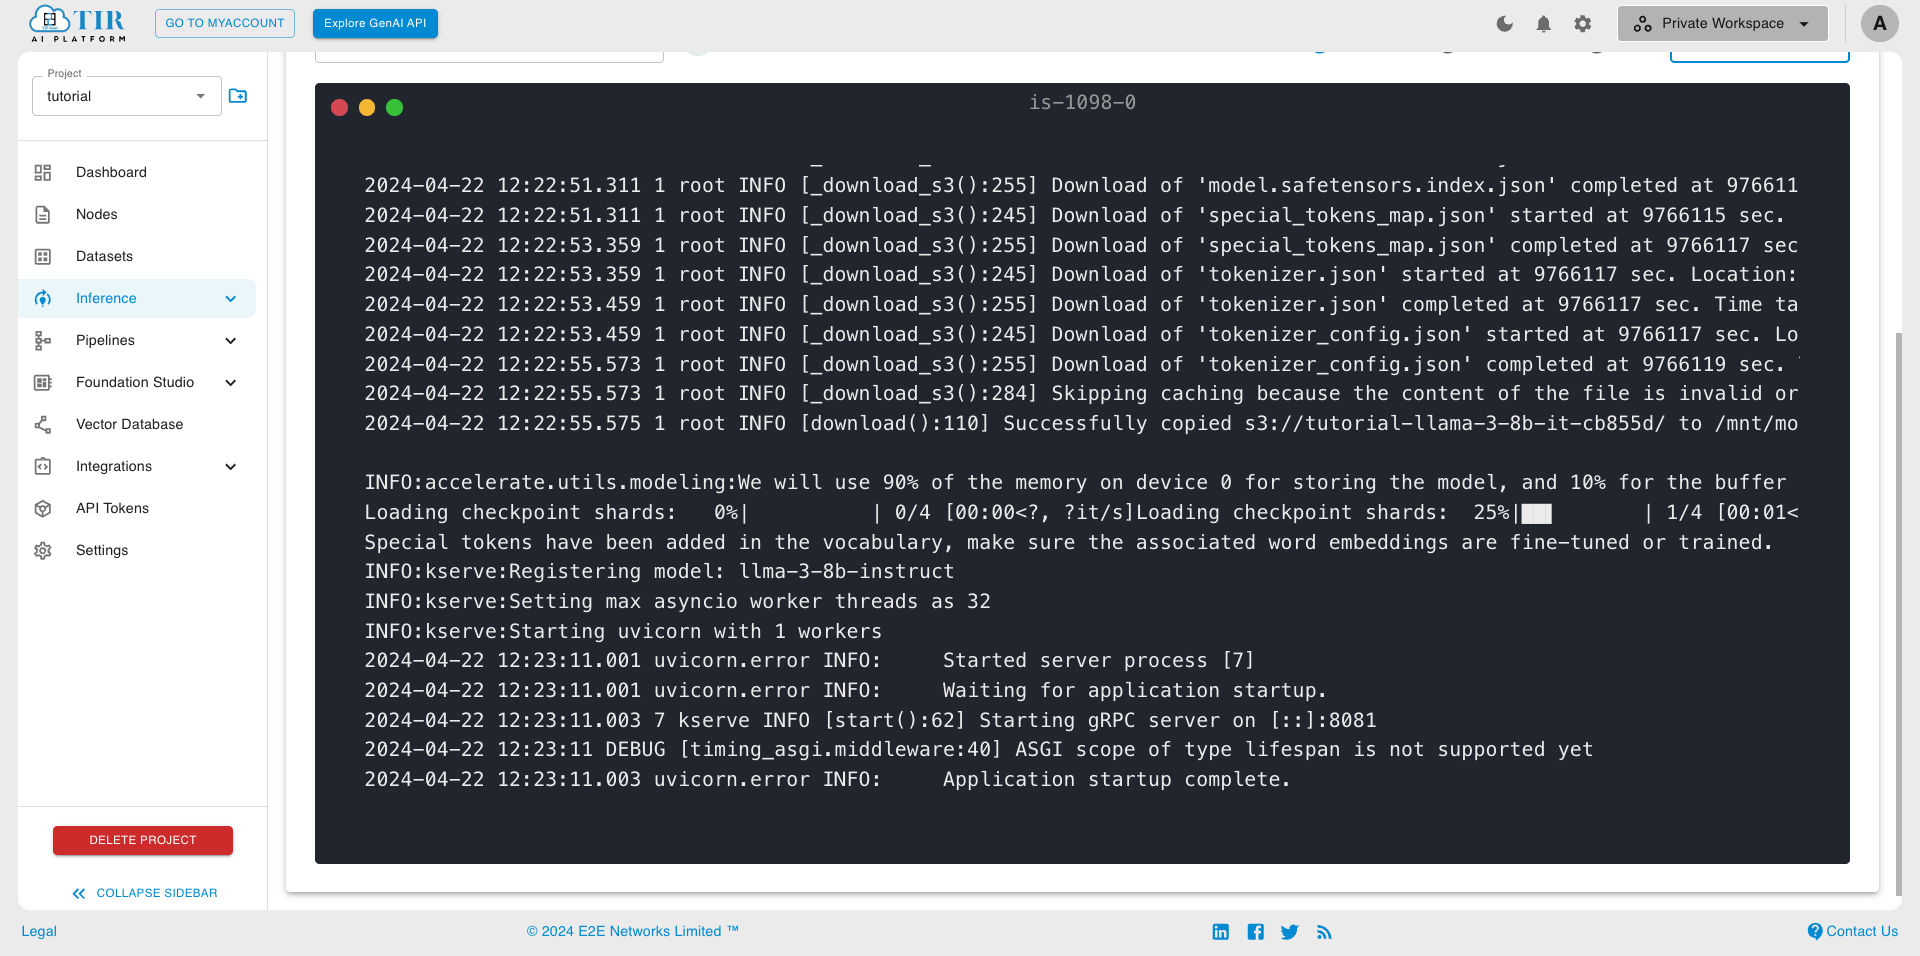
Step 2: Generate your API_TOKEN
The model endpoint API requires a valid auth token, for which you’ll need to perform further steps. So, let’s generate one.
Go to API Tokens section under the project and click on the Create Token. You can also use an existing token, if already created.

Once created, you’ll be able to see the list of API Tokens containing the API Key and Auth Token. You will need this Auth Token in the next step.

Step 3: Inferring Request
When your endpoint is ready, visit the Sample API request section to test your endpoint using curl (replace “$AUTH_TOKEN” with the token generated in the previous step ).
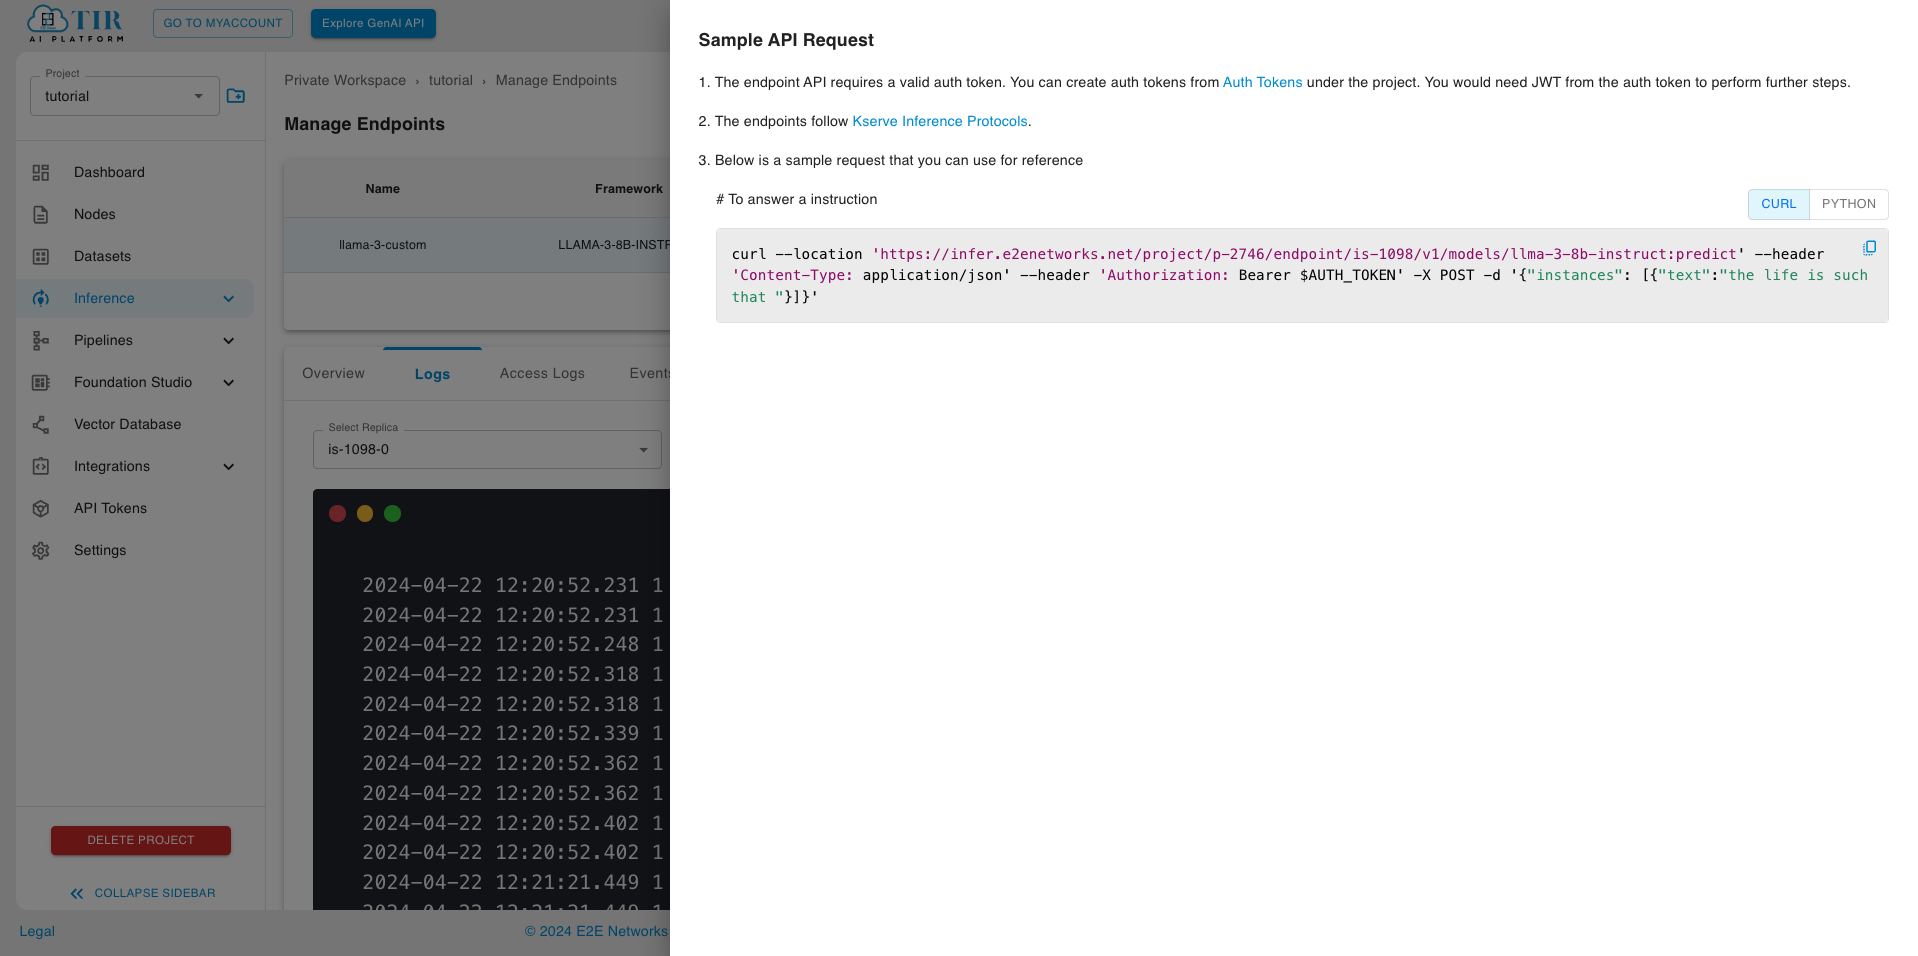
You can go through Supported Parameters for inference requests that can be adjusted.
Supported Parameters
Field |
Description |
Shape |
Data Type |
|---|---|---|---|
text_input |
Input text to be used as a prompt for text generation. |
[-1] |
TYPE_STRING |
max_tokens |
The maximum number of tokens to generate in the output text. |
[-1] |
TYPE_INT32 |
bad_words |
A list of words or phrases that should not appear in the generated text. |
[-1] |
TYPE_STRING |
stop_words |
A list of words that are considered stop words and are excluded from the generation. |
[-1] |
TYPE_STRING |
end_id |
The token ID marking the end of a sequence. |
[1] |
TYPE_INT32 |
pad_id |
The token ID used for padding sequences. |
[1] |
TYPE_INT32 |
top_k |
The number of highest probability vocabulary tokens to consider for generation. |
[1] |
TYPE_INT32 |
top_p |
Nucleus sampling parameter, limiting the cumulative probability of tokens. |
[1] |
TYPE_FP32 |
temperature |
Controls the randomness of token selection during generation. |
[1] |
TYPE_FP32 |
length_penalty |
Penalty applied to the length of the generated text. |
[1] |
TYPE_FP32 |
repetition_penalty |
Penalty applied to repeated sequences in the generated text. |
[1] |
TYPE_FP32 |
min_length |
The minimum number of tokens in the generated text. |
[1] |
TYPE_INT32 |
presence_penalty |
Penalty applied based on the presence of specific tokens in the generated text. |
[1] |
TYPE_FP32 |
frequency_penalty |
Penalty applied based on the frequency of tokens in the generated text. |
[1] |
TYPE_FP32 |
random_seed |
Seed for controlling the randomness of generation. |
[1] |
TYPE_UINT64 |
return_log_probs |
Whether to return log probabilities for each token. |
[1] |
TYPE_BOOL |
return_context_logits |
Whether to return logits for each token in the context. |
[1] |
TYPE_BOOL |
return_generation_logits |
Whether to return logits for each token in the generated text. |
[1] |
TYPE_BOOL |
prompt_embedding_table |
Table of embeddings for words in the prompt. |
[-1, -1] |
TYPE_FP16 |
prompt_vocab_size |
Size of the vocabulary for prompt embeddings. |
[1] |
TYPE_INT32 |
embedding_bias_words |
Words to bias the word embeddings. |
[-1] |
TYPE_STRING |
embedding_bias_weights |
Weights for the biasing of word embeddings. |
[-1] |
TYPE_FP32 |
cum_log_probs |
Cumulative log probabilities of generated tokens. |
[-1] |
TYPE_FP32 |
output_log_probs |
Log probabilities of each token in the generated text. |
[-1, -1] |
TYPE_FP32 |
context_logits |
Logits for each token in the context. |
[-1, -1] |
TYPE_FP32 |
generation_logits |
Logits for each token in the generated text. |
[-1, -1, -1] |
TYPE_FP32 |

