Nodes
TIR Nodes are fully collaborative environments that make AI development possible. They combine power of containers, jupyter labs and AI/ML frameworks to create a readily usable workspace for you and your entire team.
Some of the most common use cases are:
Run a script or notebook to fine-tune a Large Language Model (LLM) on single GPU using pytorch or huggingface train
Run a script or notebook to tokenize and fine-tune LLMs or Diffusion models with with multiple GPUs (single machine) using deepspeed and accelerate
Open and run a jupyter notebook (.ipynb) from the platforms like github, kaggle or collab
Download and review datasets stored on TIR or other platforms like huggingface
Download and test models like stable diffusion, or any LLM
Note
A TIR node is fully functional coding environment.
If you prefer to work with command line (shell) over jupyter labs, you can configure ssh on a notebook(node). This way you can upload your data using sftp or sync your code with git tools and run the scripts as you would on your local system.
Getting started with Nodes on TIR
User needs to login using myaccount credentials and select TIR AI platform to use resources on TIR.
User will be landed to TIR landing page and user will create a project using “Create project” button.
Note: The project will be created on the private workspace of the user.
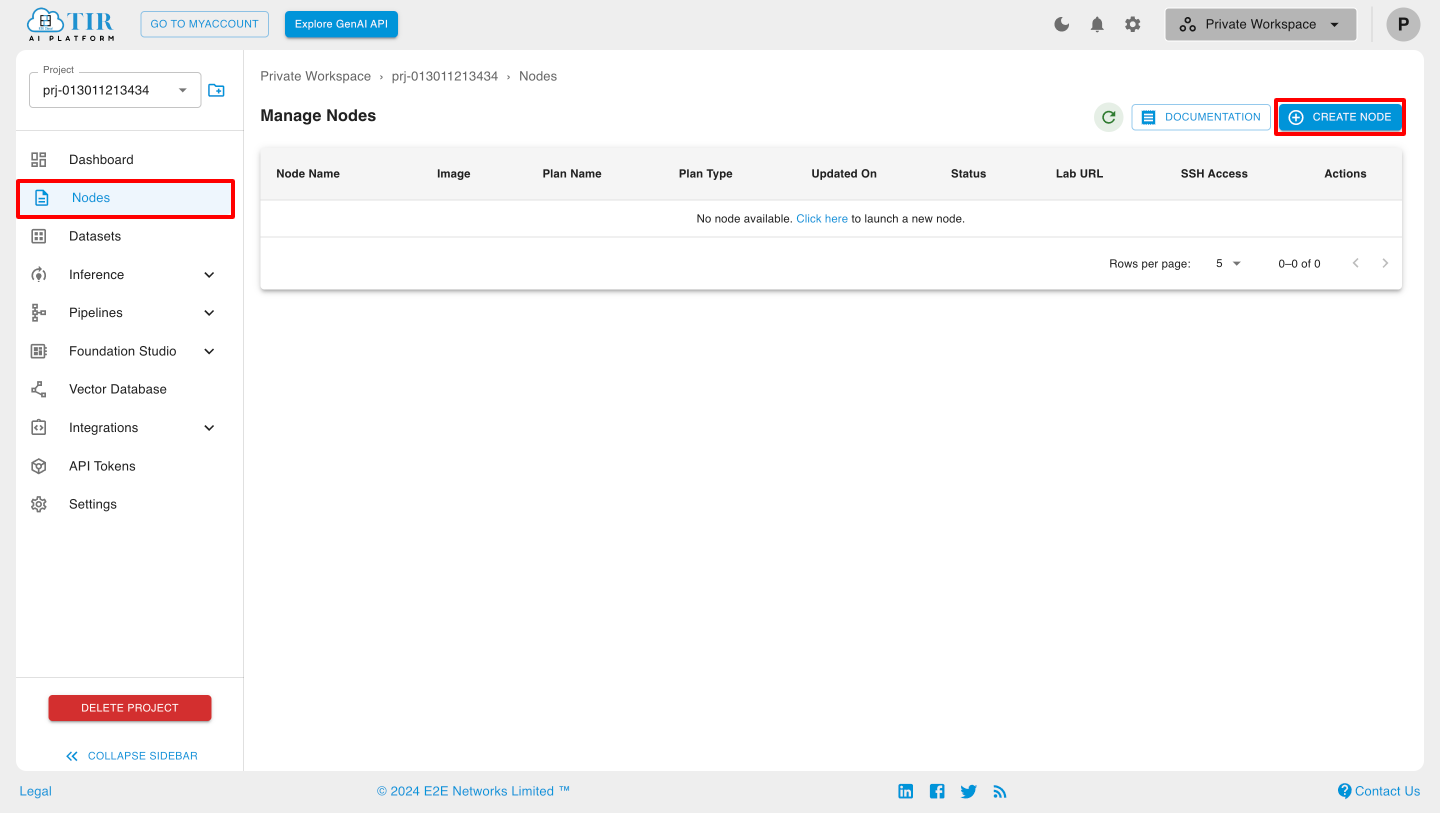
Once you are into the newly created project, click on “Nodes” in side panel to launch the resource.
User can select from the available images to create a node.
Note
User can also filter the nodes based on the need using TIR pre-built, container Registry, Base OS.
Next, you can choose a CPU or GPU plan. Feel free to choose Free Tier plan for this exercise
User need to select the GPU or CPU required plan. In case of CPU, user can always select the free Tier Plan in the exploration stage. In case of GPU, if the required plan is not available user can always request for the plan and we will notify the user once it is available via email.
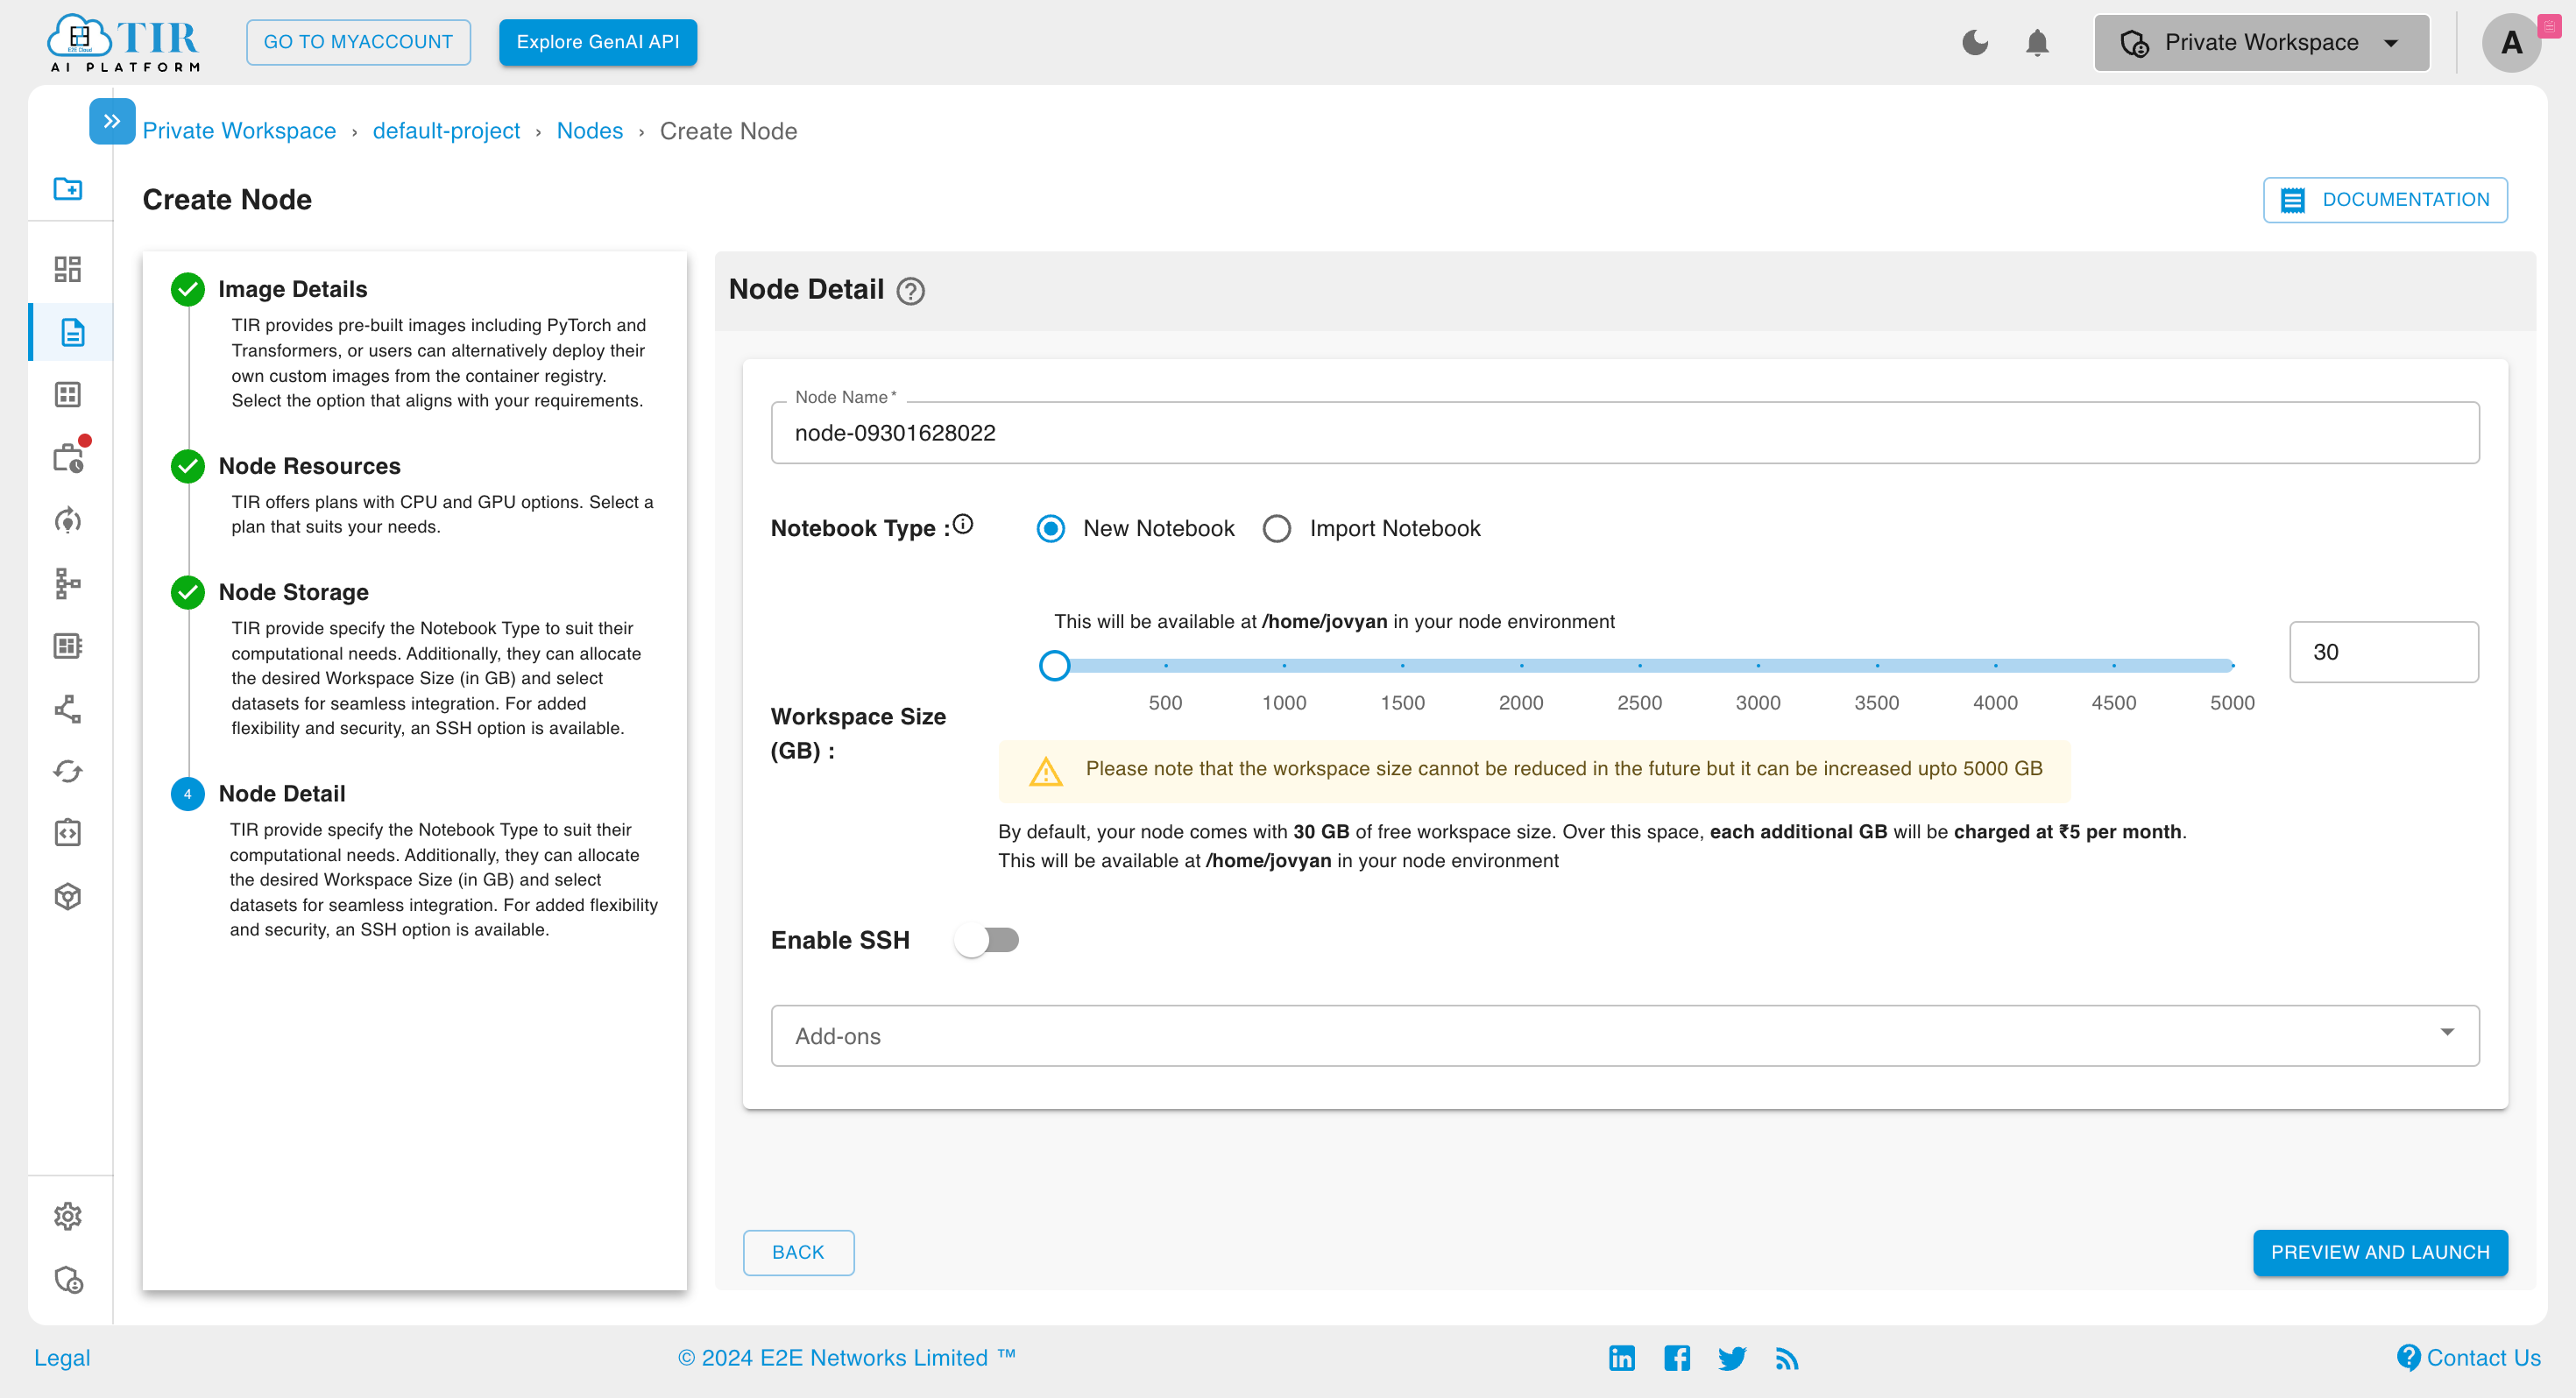
Choose and appropriate name for you node and select the type of nodes as New Notebook or Import Notebook. If import nootebook is selected then user need to provide the url for the node.
Note
Choosing new Notebook will create will open an empty JuypterLab, while Import node will give flexibility to the user to seamlessly pull publicly available nodes from GitHub or Colab.
Select the workspace size you want to create. Please note, by default 30 GB of free workspace is provided with each node.
(Optional) Set Enable SSH Access switch to enabled to add or select your SSH key.
When the node is ready, you will see both Jupyter labs and SSH options (if configured). Choose any of these to access the node environment .
Node options
TIR nodes are extremely powerful and flexible. While most configurations have a default to make User’s life easier, sometimes you may need to tweak the knobs. The following are the configurations that you can tweak in a node environments:
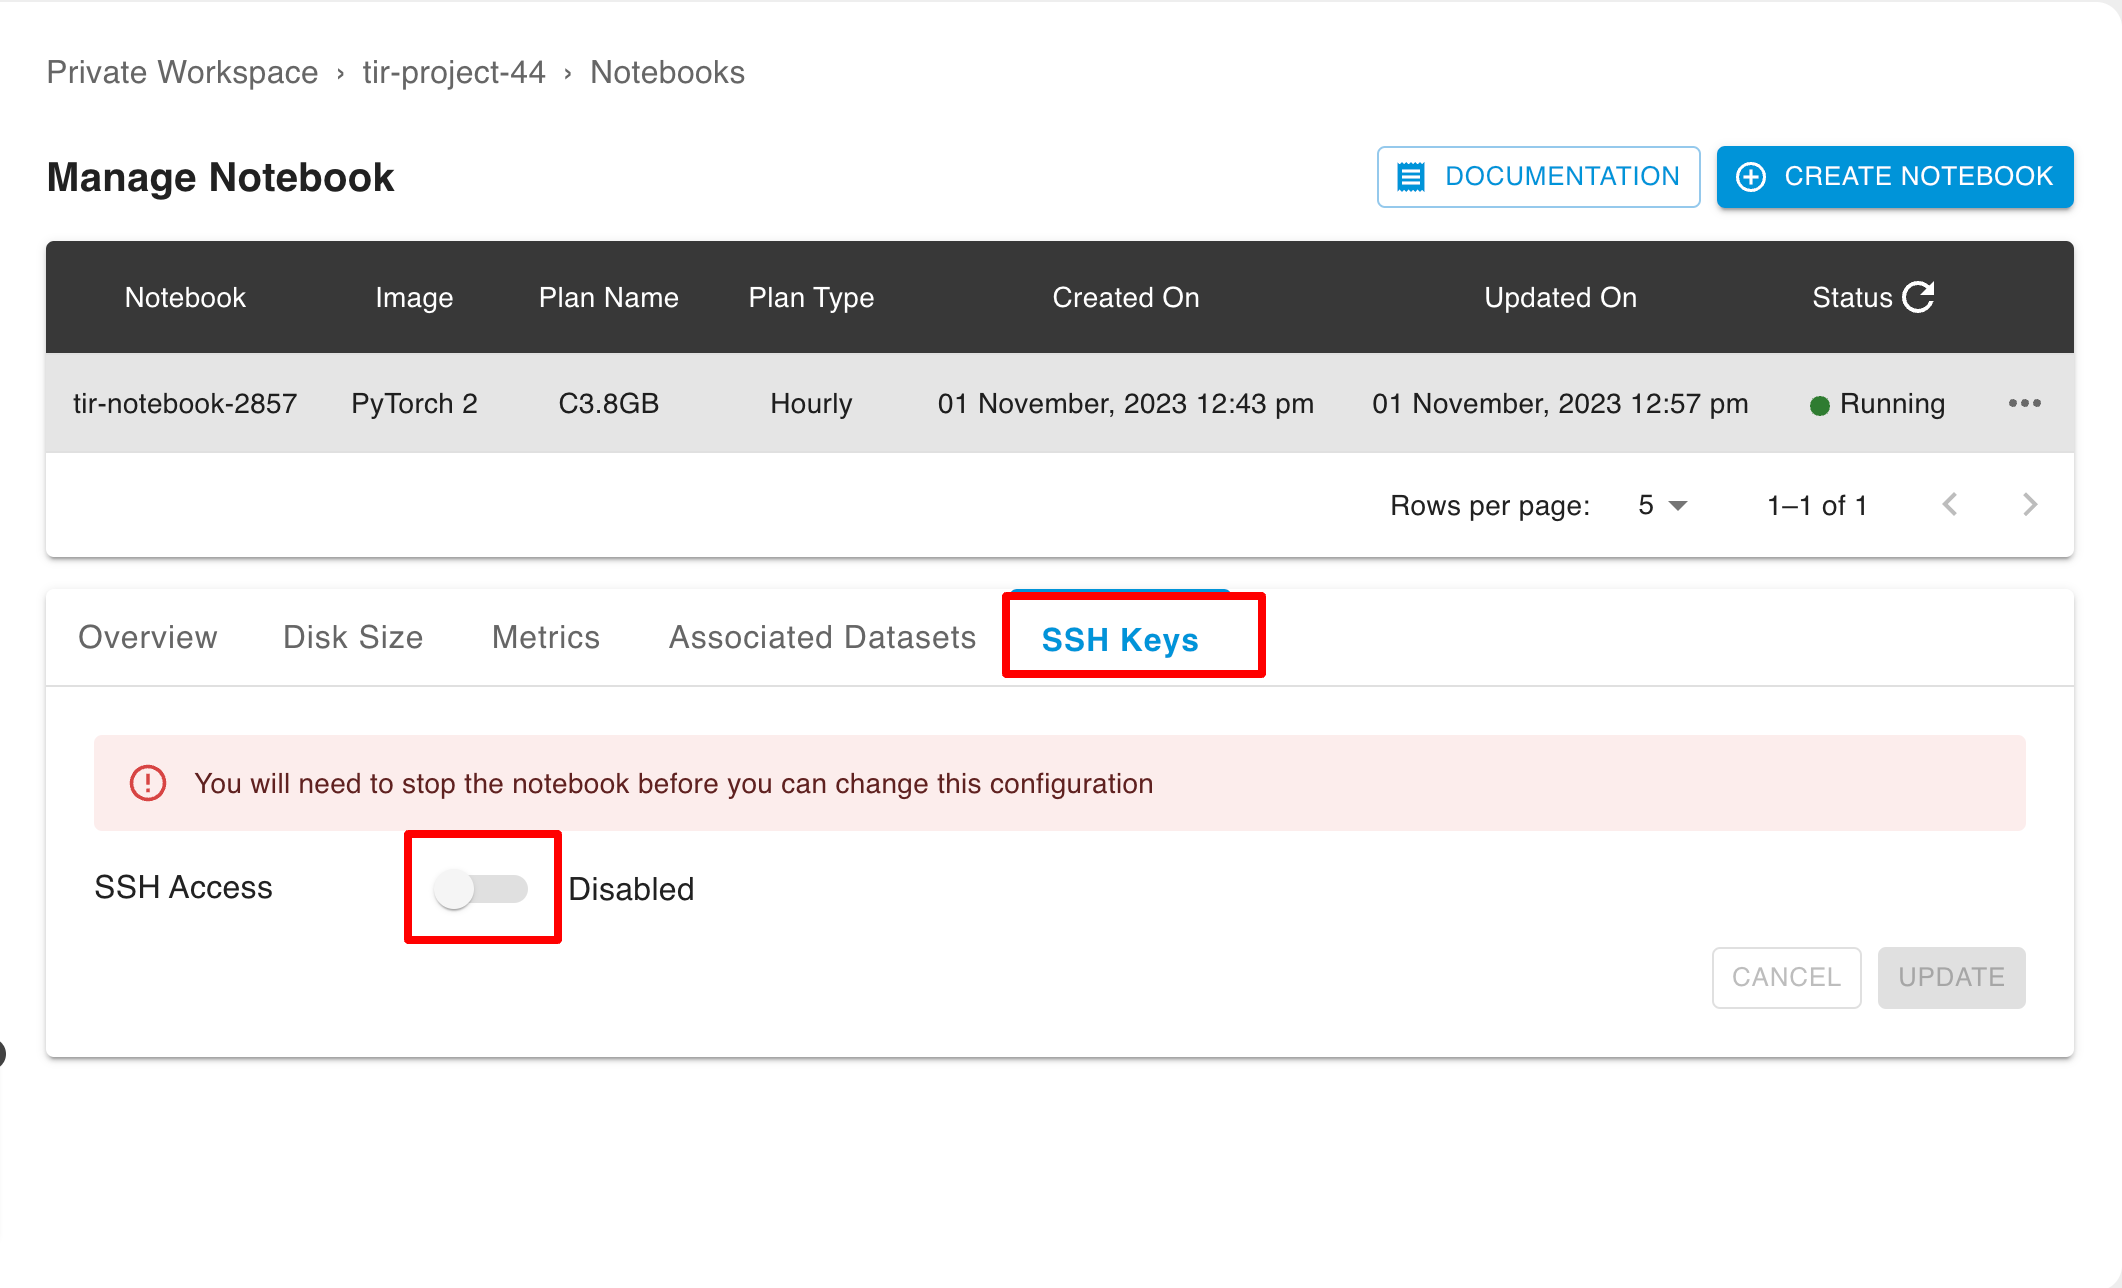
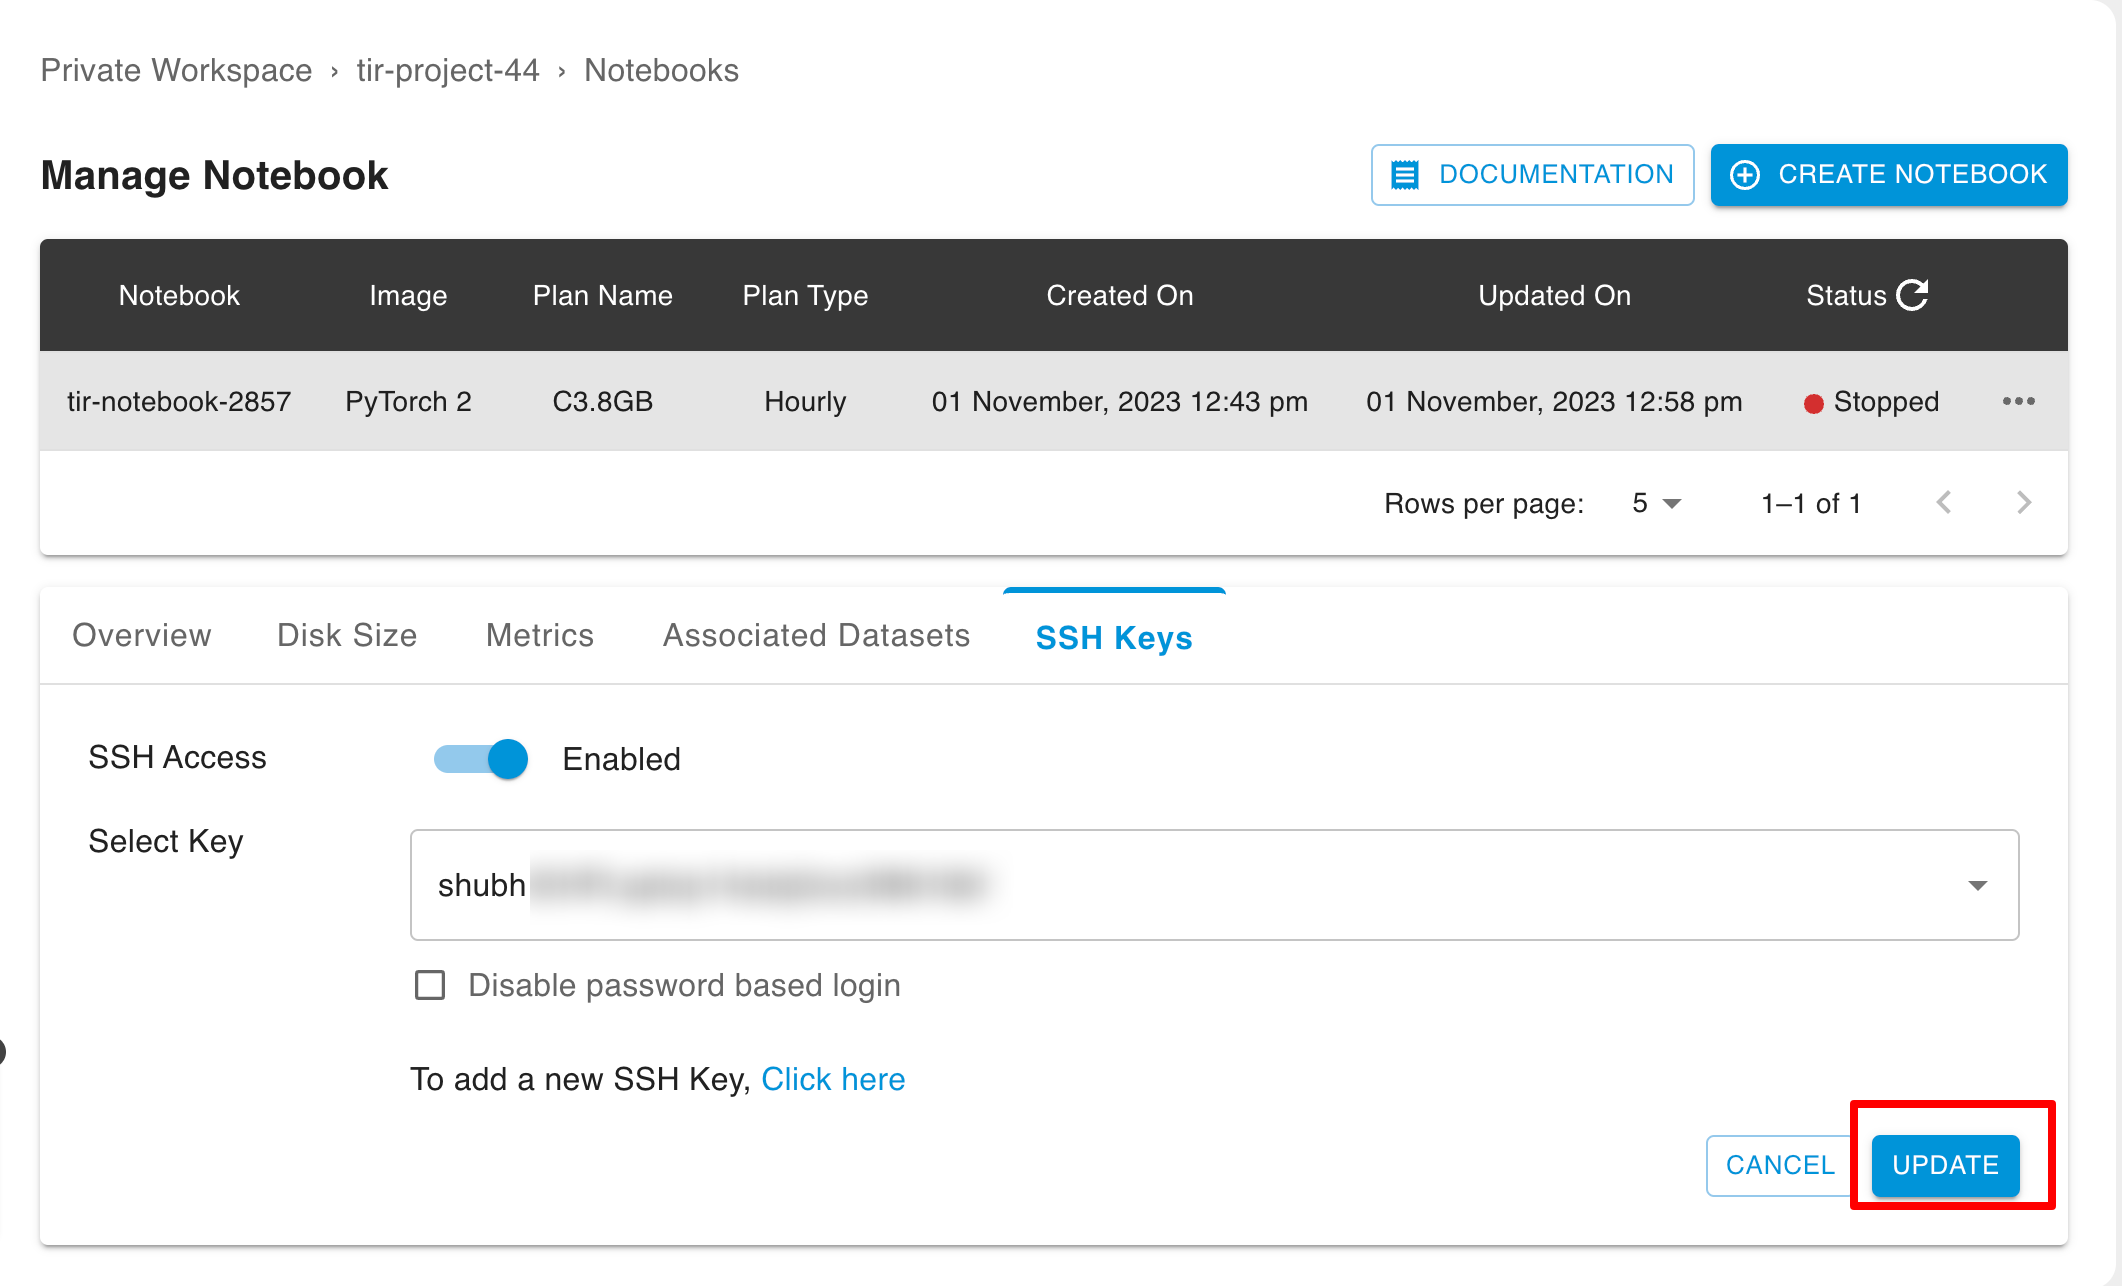
Enable SSH: You can enable SSH access on the node using public key or password (not recommended). If you decide to enable ssh after starting a node, you will have to first stop the node before you make changes.
Disk Size: Each TIR node can have a disk size upto 5000GB. The default is 30GB. The selected disk will be mounted at /home/jovyan in your node environment. We recommend using this path as your workspace so in case of restarts, your content will be persistent. Since, TIR is container-native, the changes that you make to any other paths on the node will not be persisted on restarts. You can extend the disk size after the start of container as well. This workspace will be deleted when the associated node is deleted.
Note
Please raise a support ticket if you need more than 5TB of disk workspace.
Local NVME Storage: Only available for H100 plans. This fast local storage will be available at /mnt/local andonly for the duration of run. We recommend using this path when you need faster writes (e.g. save model checkpoints) or reads. Be sure to move this data to EOS bucket or under /home/jovyan before shutting down the node. This type of storage is fixed and can not be expanded at anytime during the node cycle.
Plan (Pricing): You can choose between an hourly or committed plan. We recommend using committed plans as they offer discounts and also may offer access to local NVME storage (for H100 plans only).
Node Image: TIR environments are container-native. You can use pre-built images with well known frameworks like pytorch, transformers or customise the pre-built images. You can make your own images TIR-compatible using image builder utility. We recommend starting with pre-built images. In case you need to install packages from pip or apt-get, we recommend doing so from a jupyter notebook (.ipynb) or maintaining requirements.txt.
Configuration: TIR offers a variety of cpu and gpu options. We recommend using A100 or H100 for best performance.
Update Node: You can upgrade or downgrade both the configuration (e.g. upgrade from cpu to gpu) and Plan (e.g. hourly to committed) of a node if desired. This is useful option when restarting nodes and the original hardware plan (gpu) on the node is no longer available.
Stop Node: If the plan and configuration allows, you can stop a node and restart. In case of hourly plan, you will not be billed for the GPU or GPU when node is in a stopped state. However, if your disk usage is beyond free tier, you will be charged for it.
Delete Node: When a node is deleted, all the resources associated with it will be deleted including the workspace (disk).
Node Statuses
Waiting: The node instance is being deployed on the hardware of your choise.
Running: The node is active and you can use either jupyter labs or ssh (if enabled) to access it.
Stopped: The node is not assigned to any machine. However, the workspace (disk mounted at /home/jovyan) will continue to exist until you delete the node. Depending on the size of the disk, you will charged for the usage.
How to create Node ??
To create a Node you have to click on Create Node which is at the right corner of the page.
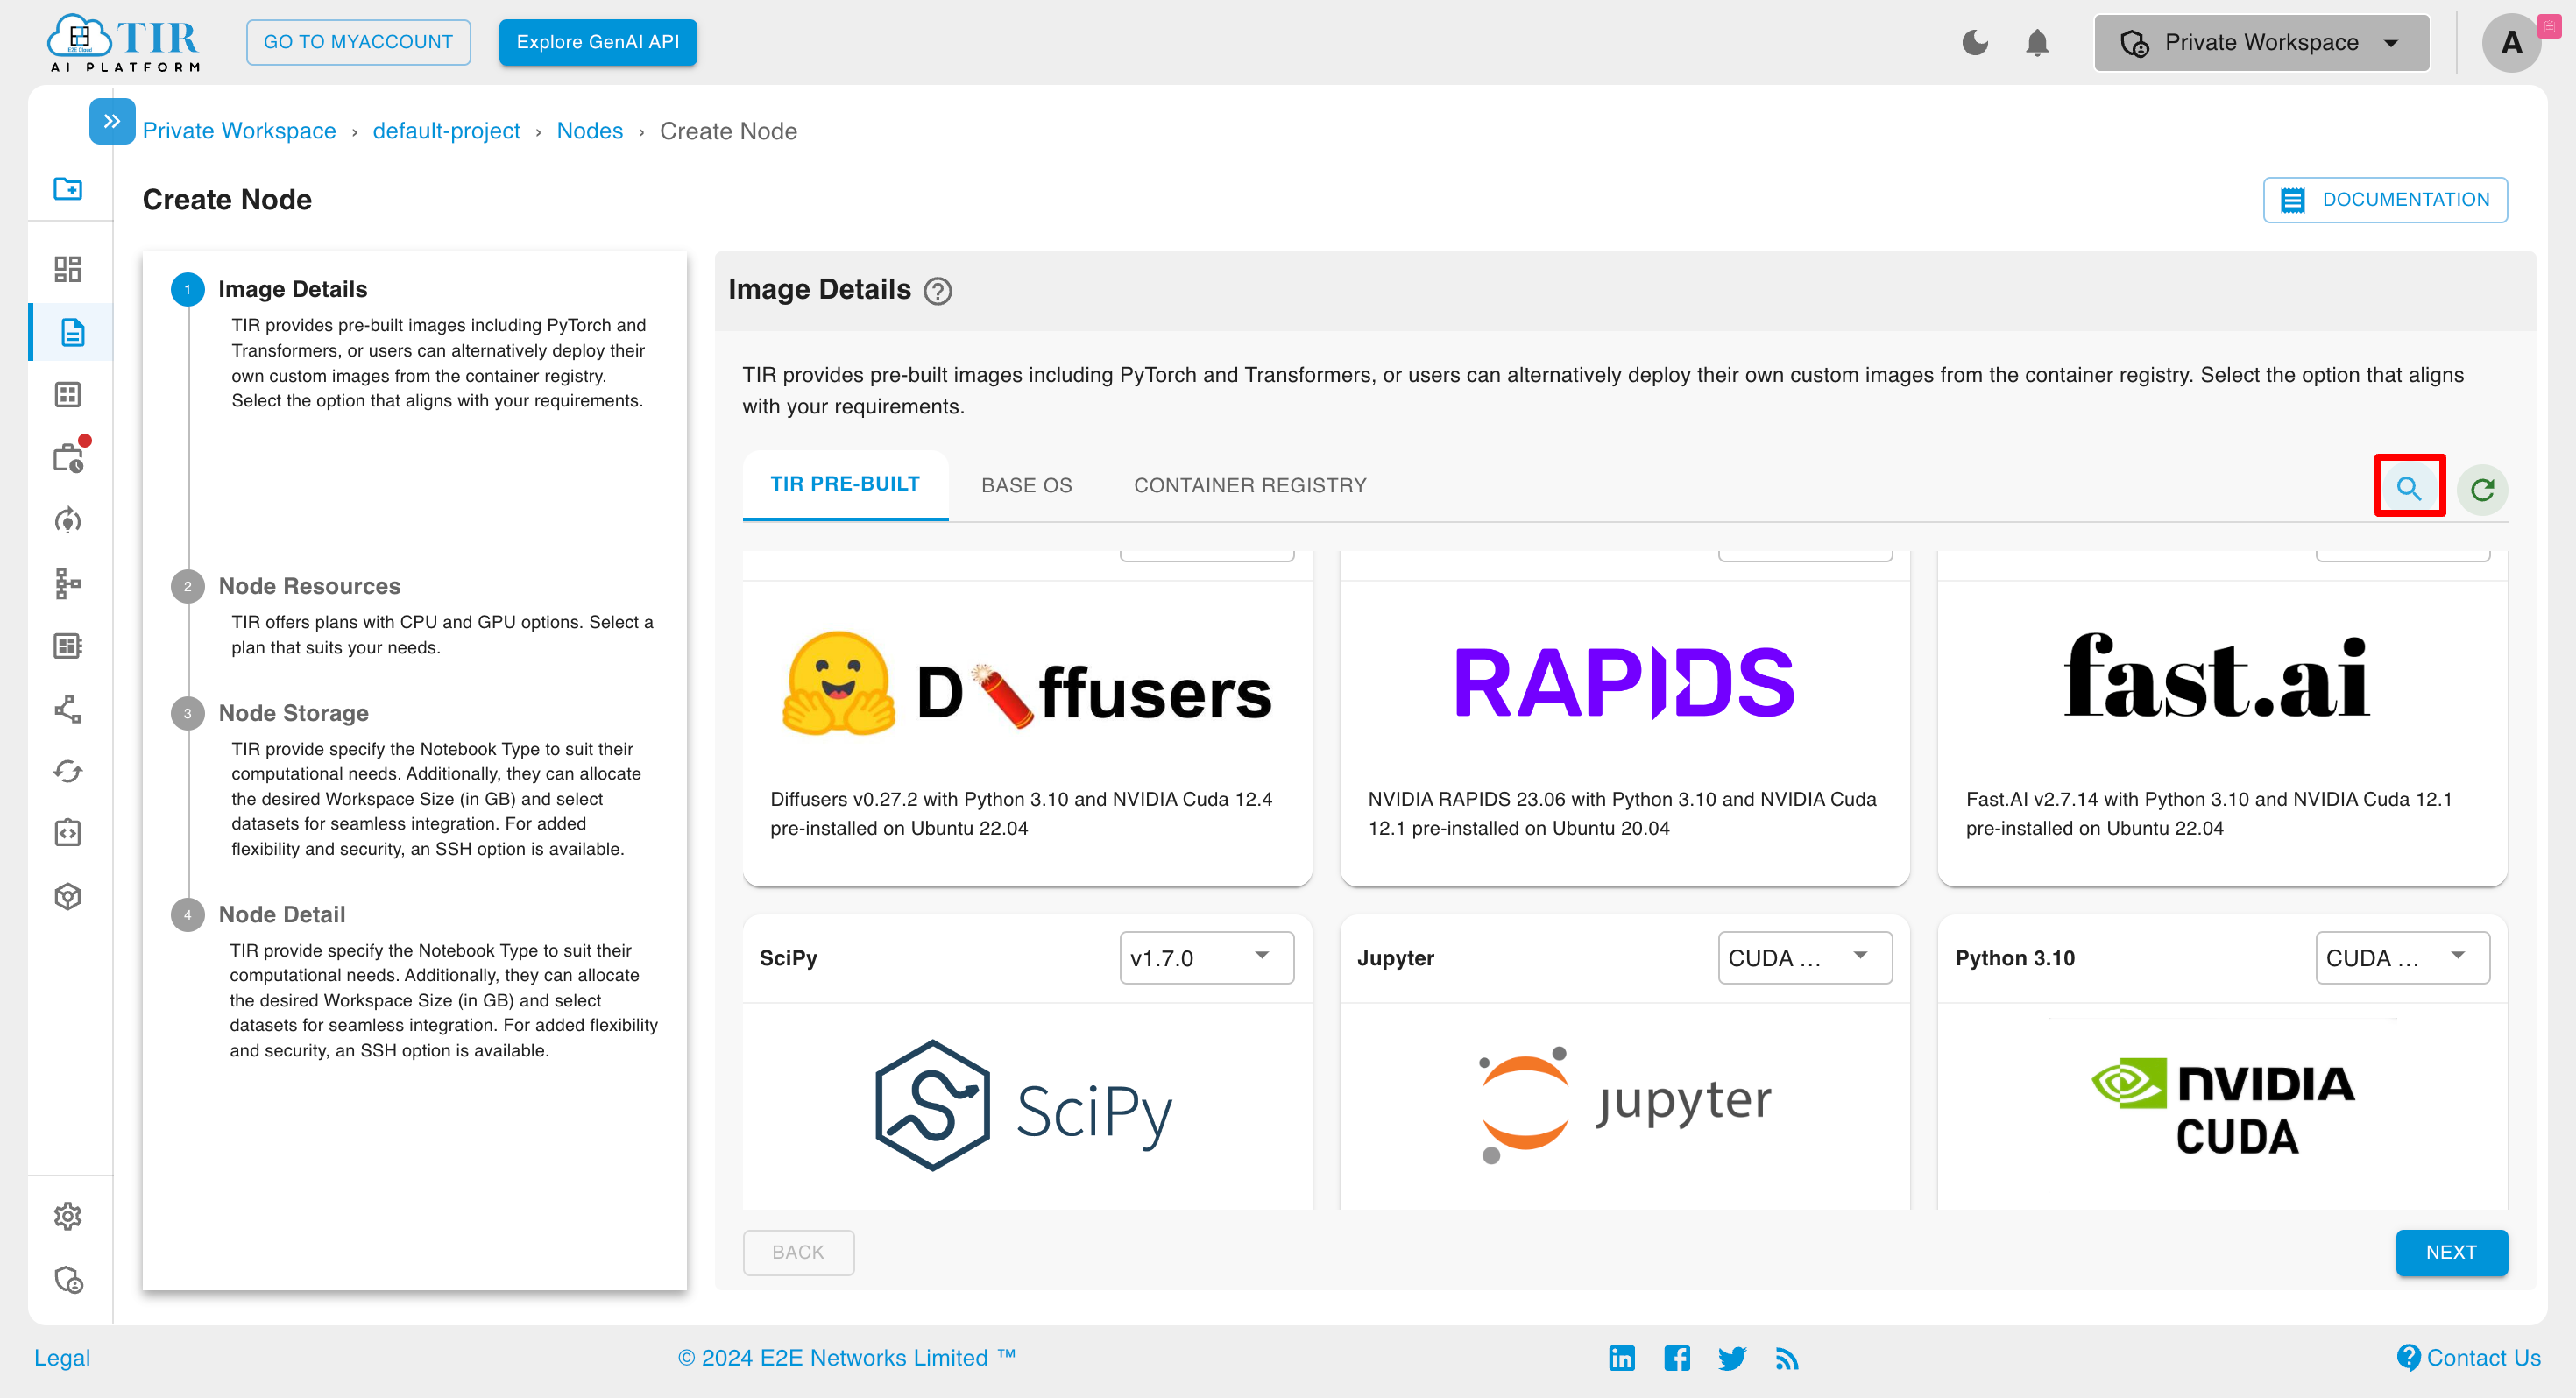
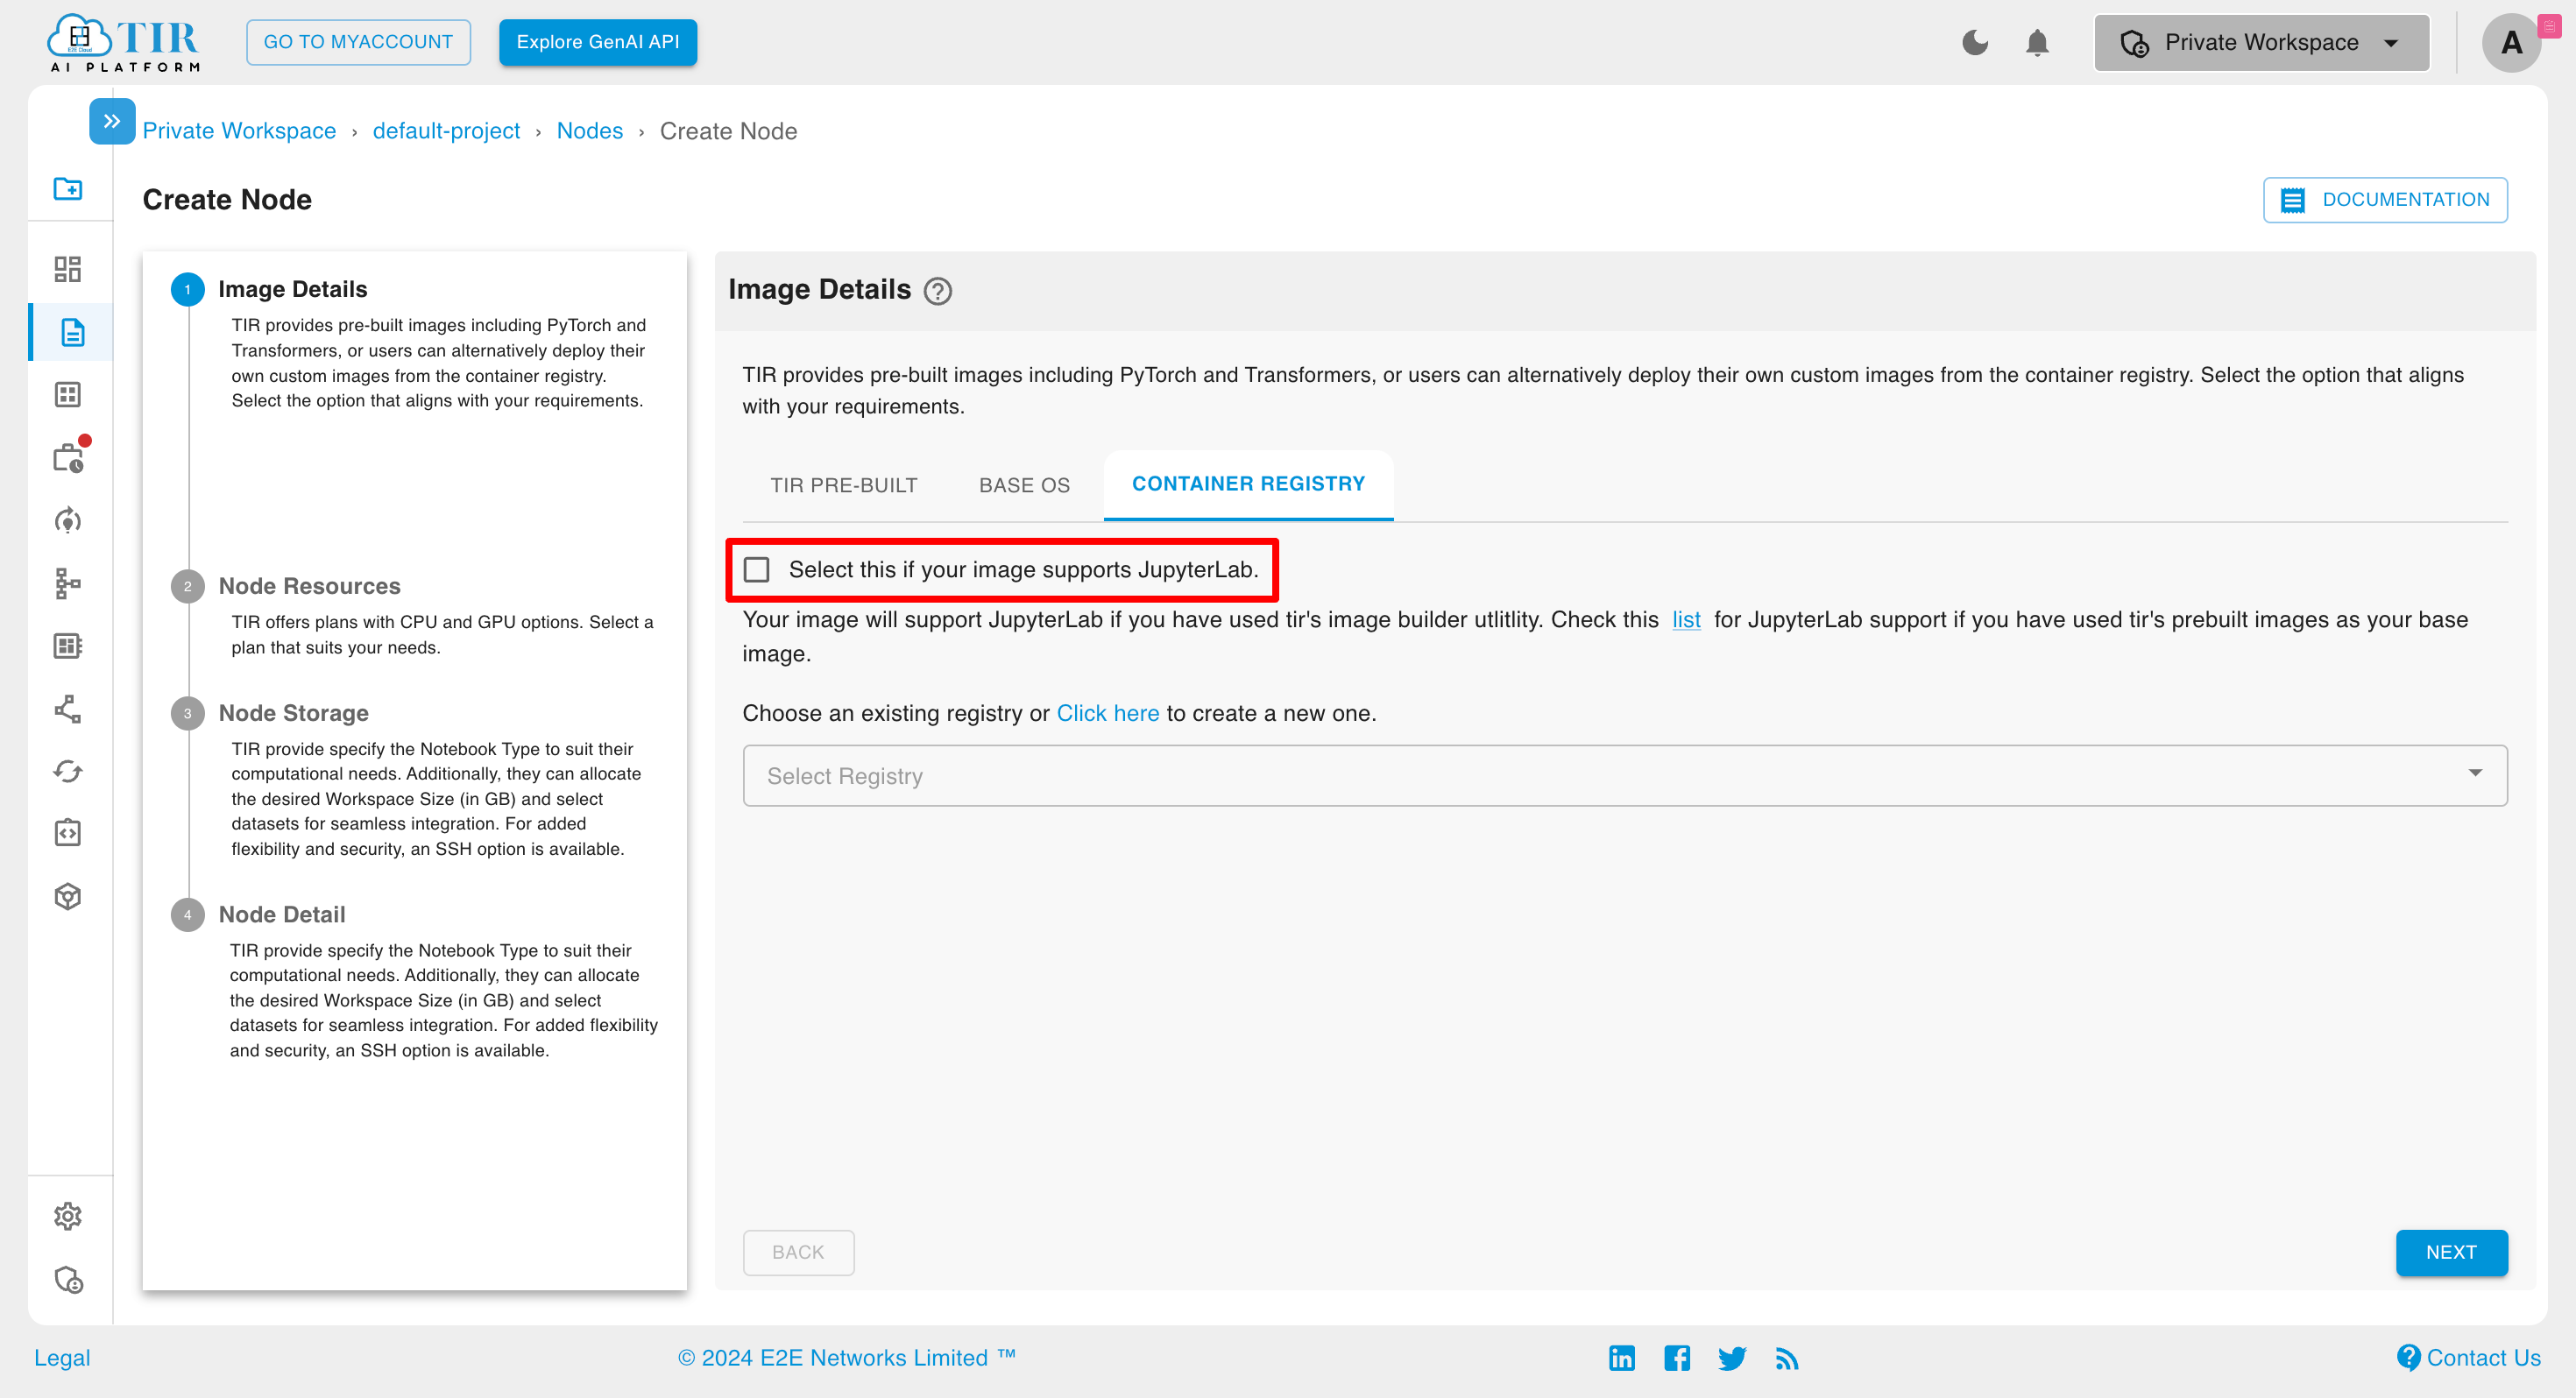
After clicking on the Create Node button a page will appear, now select Node image option from TIR PRE-BUILT , BASE OS and CONTAINER REGISTRY. Additionally you can also perform the search on the Node Images.
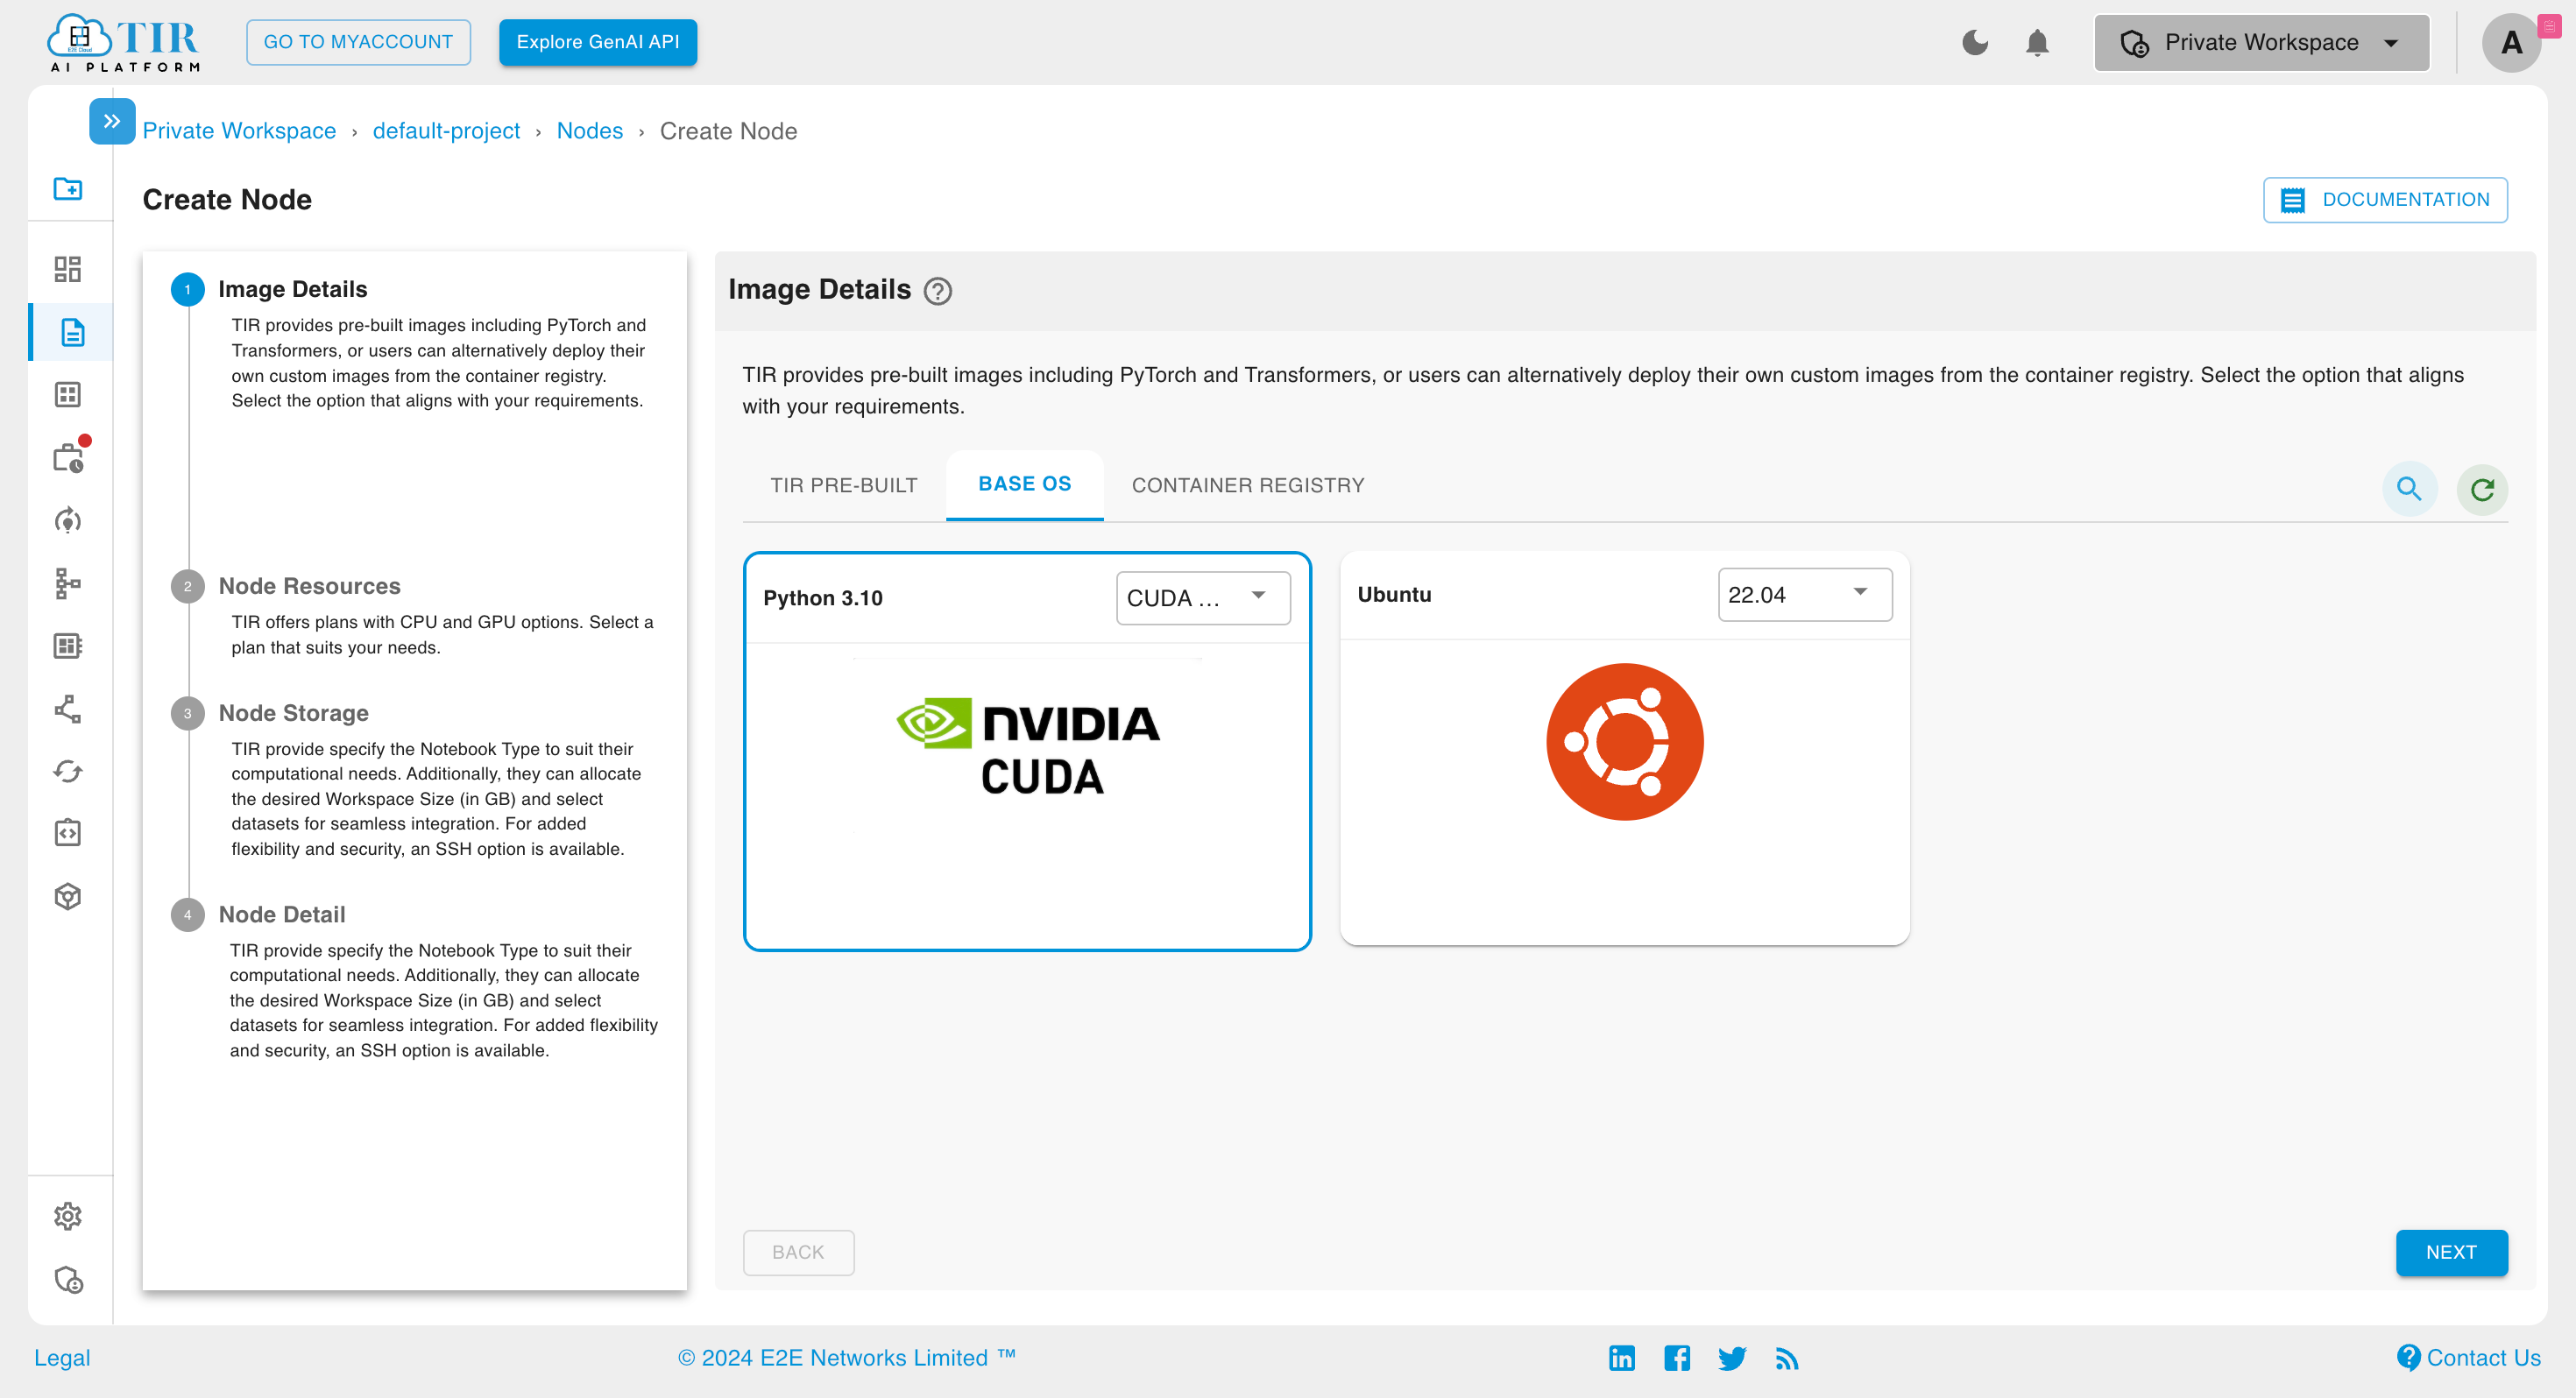
The Base OS node image does not come with JupyterLab pre-installed.
When installing an image from the Container Registry, the user must specify whether the selected image includes JupyterLab pre-installed or not.
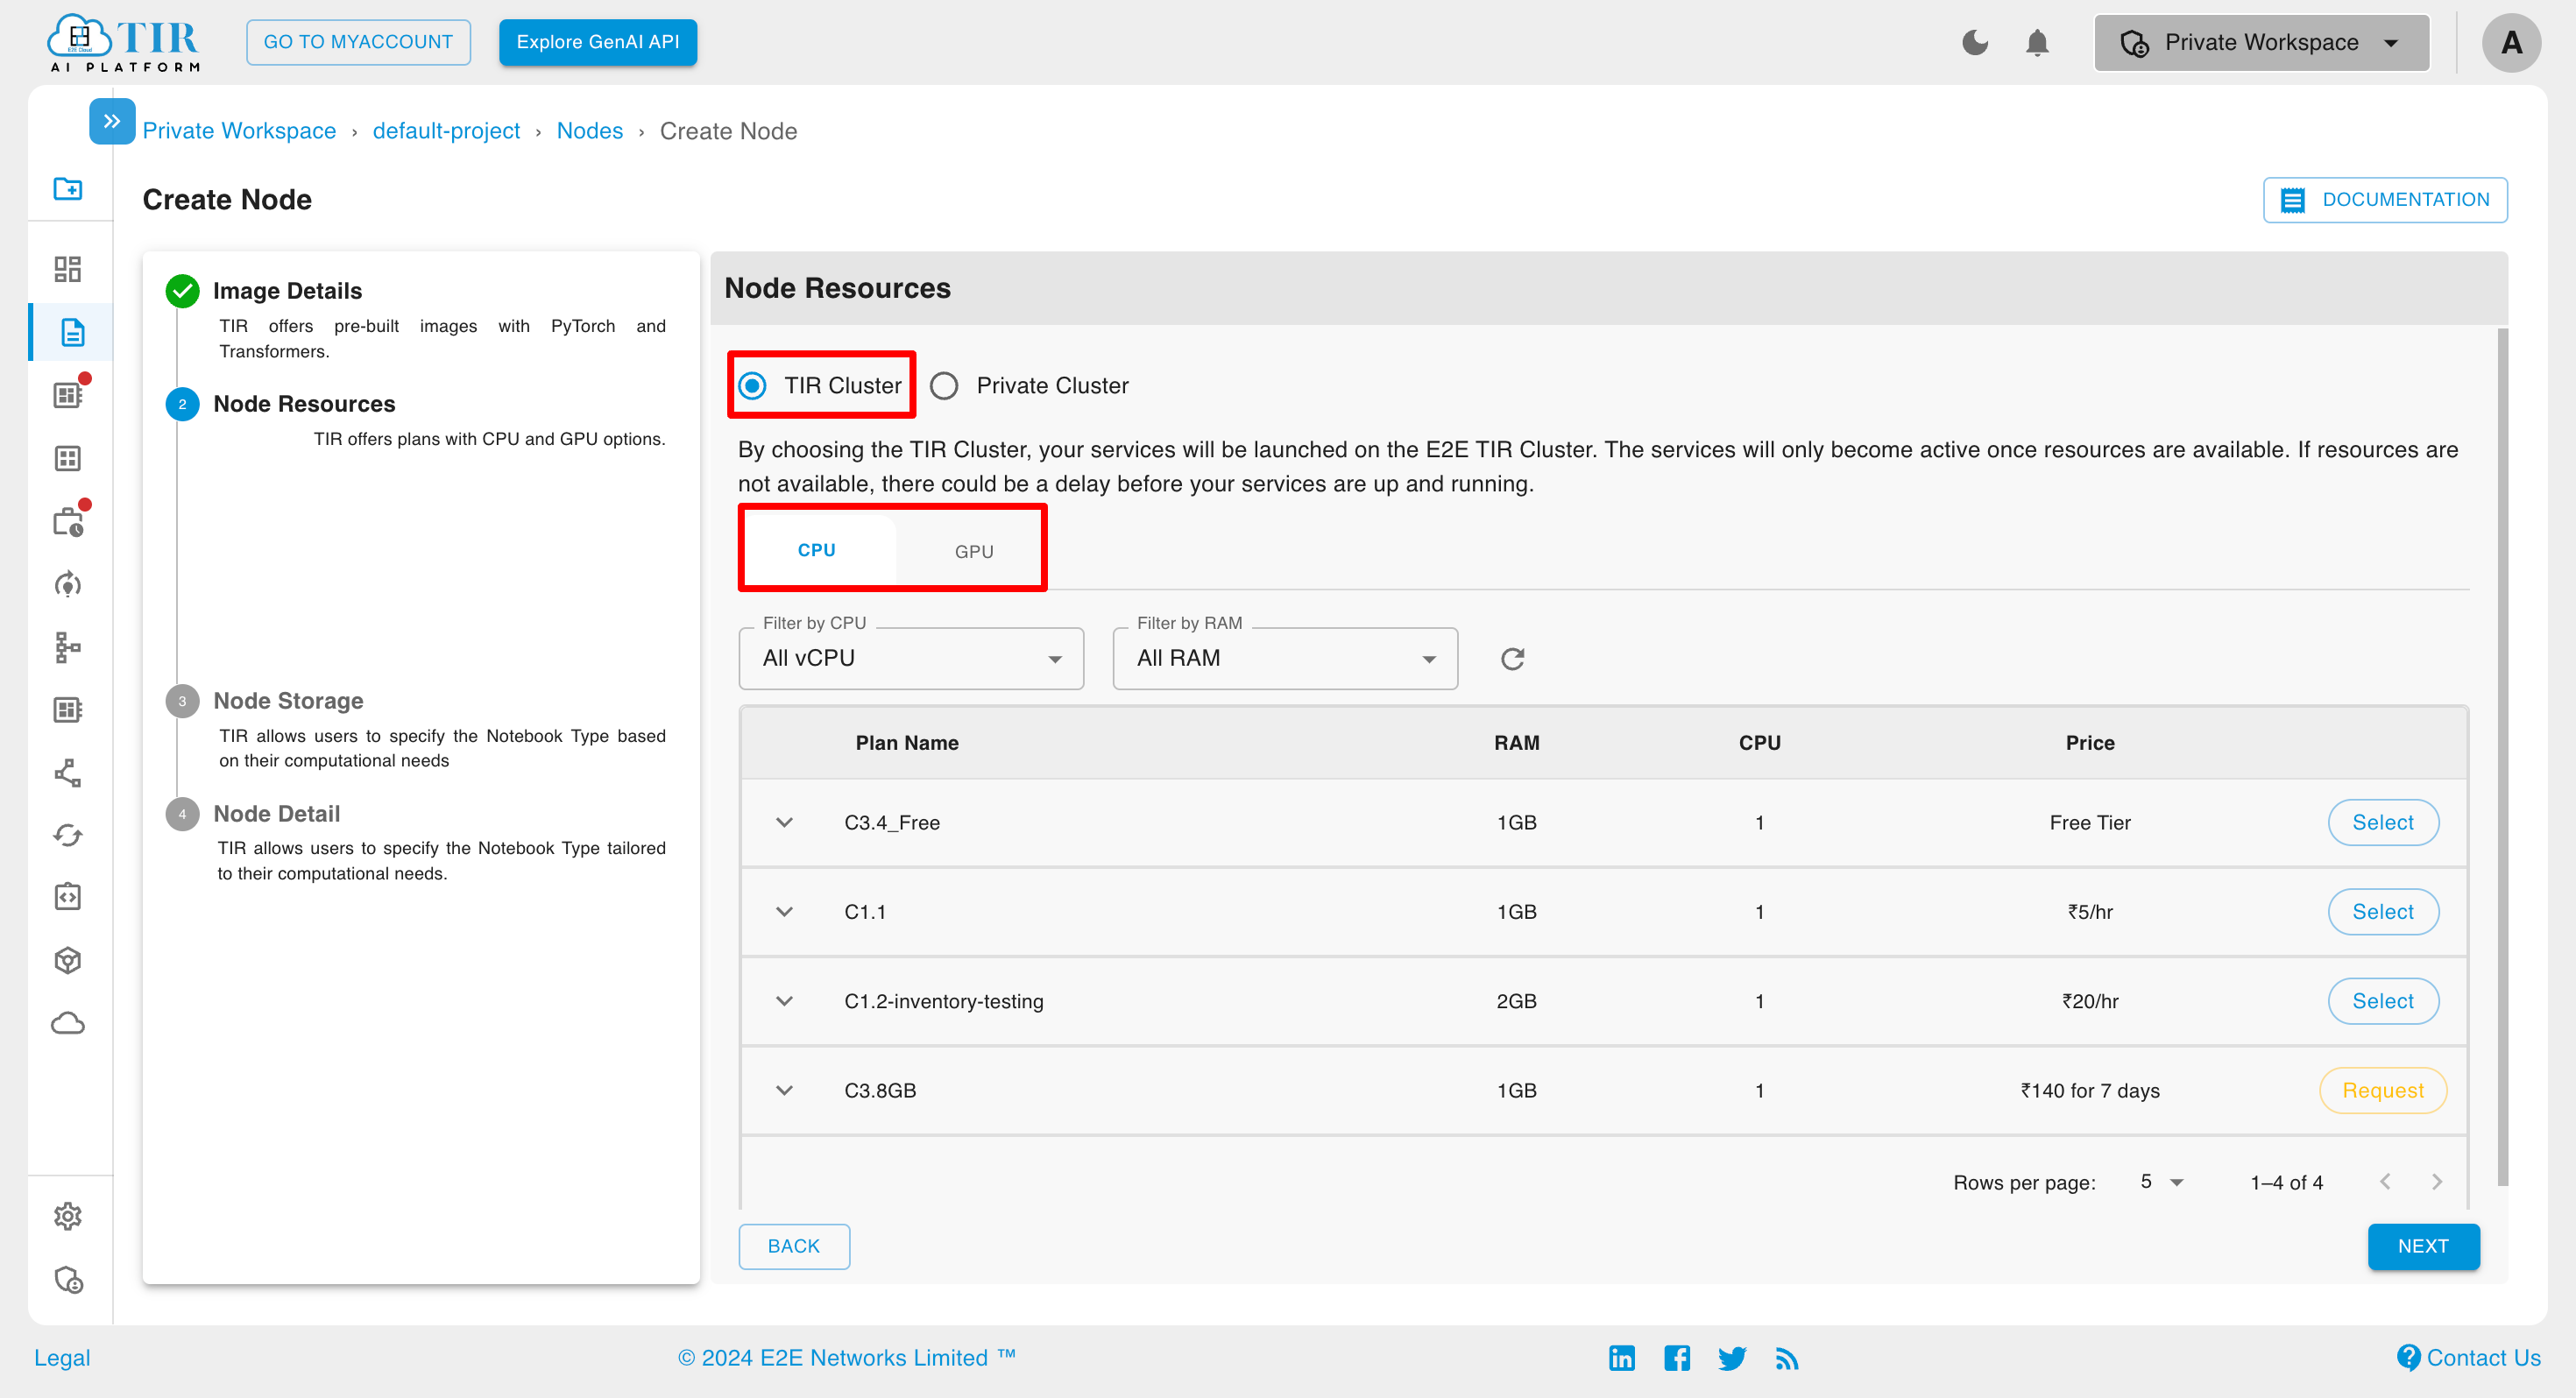
After selecting the image, the you have the option to select from TIR Cluster & Private Cluster. When TIR Cluster is chosen the Resource page will appear. At this stage, choose a plan based on either CPU or GPU requirements.
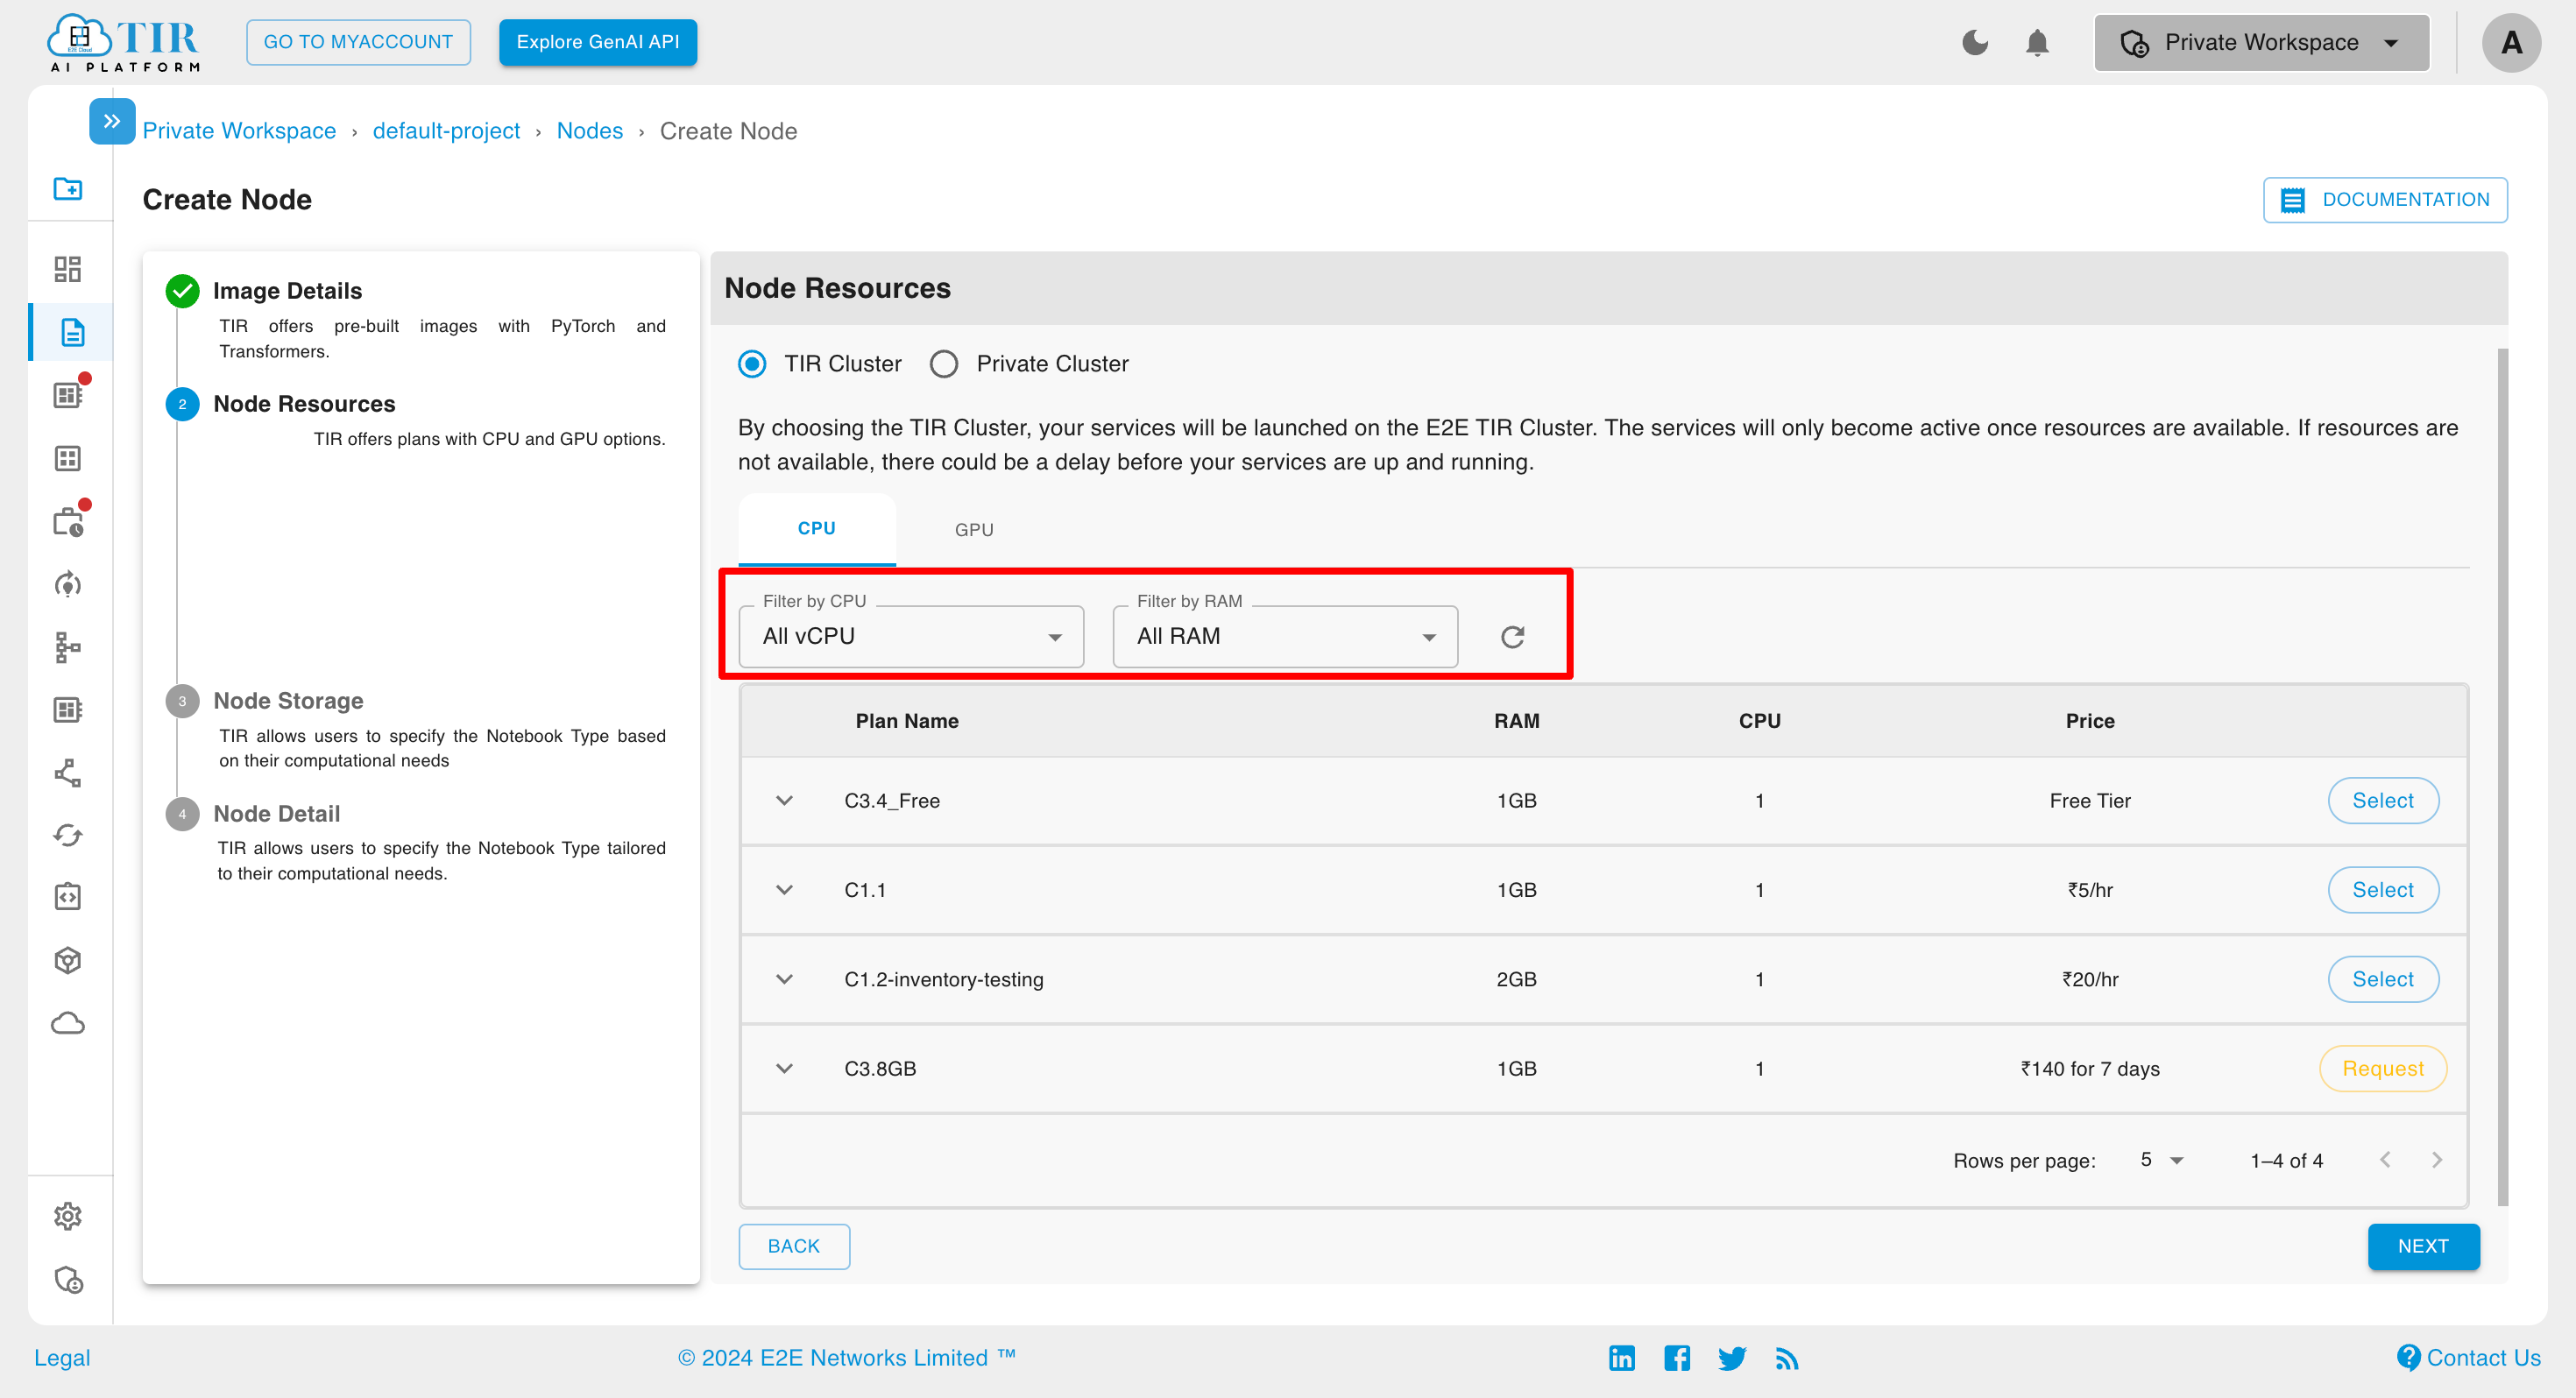
Additionally, you can filter CPU and GPU resources based on your specific requirements for more tailored selection.
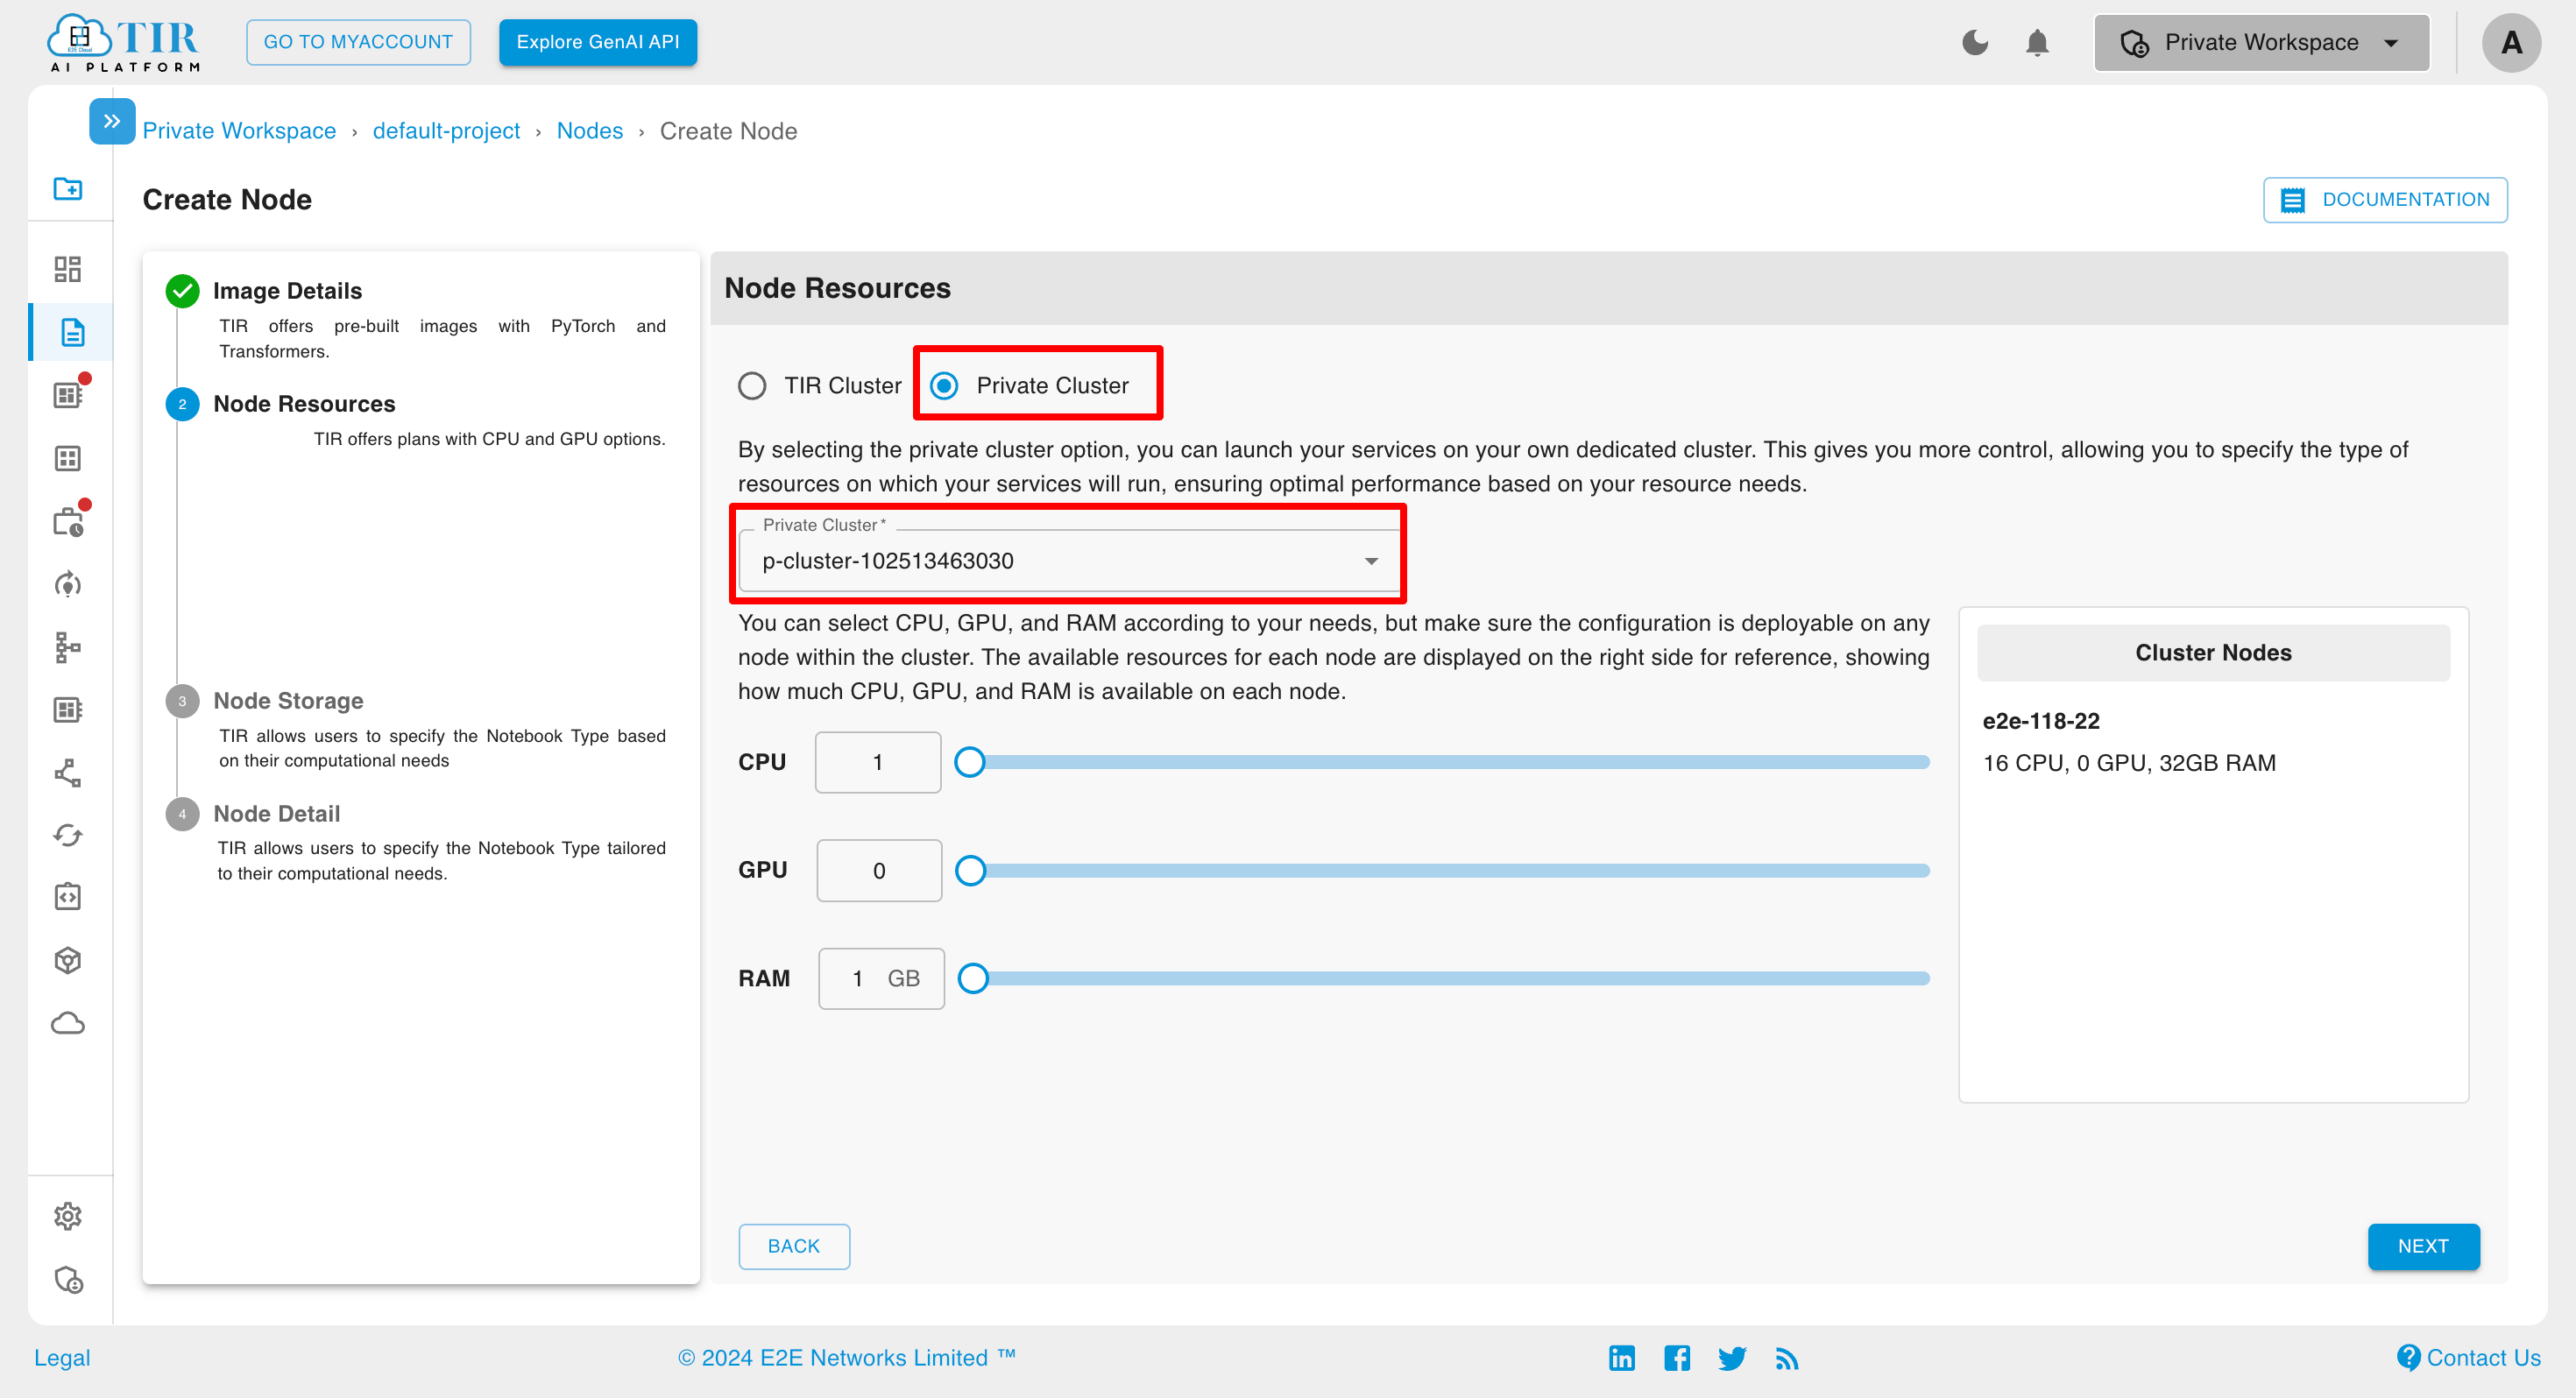
When selecting a Private Cluster, you can either choose from the available options or create a new one. For the chosen Private Cluster, you can specify the quantity of vCPUs, RAM, and GPU.
At this step, the user can also add the required dataset to the node being created.
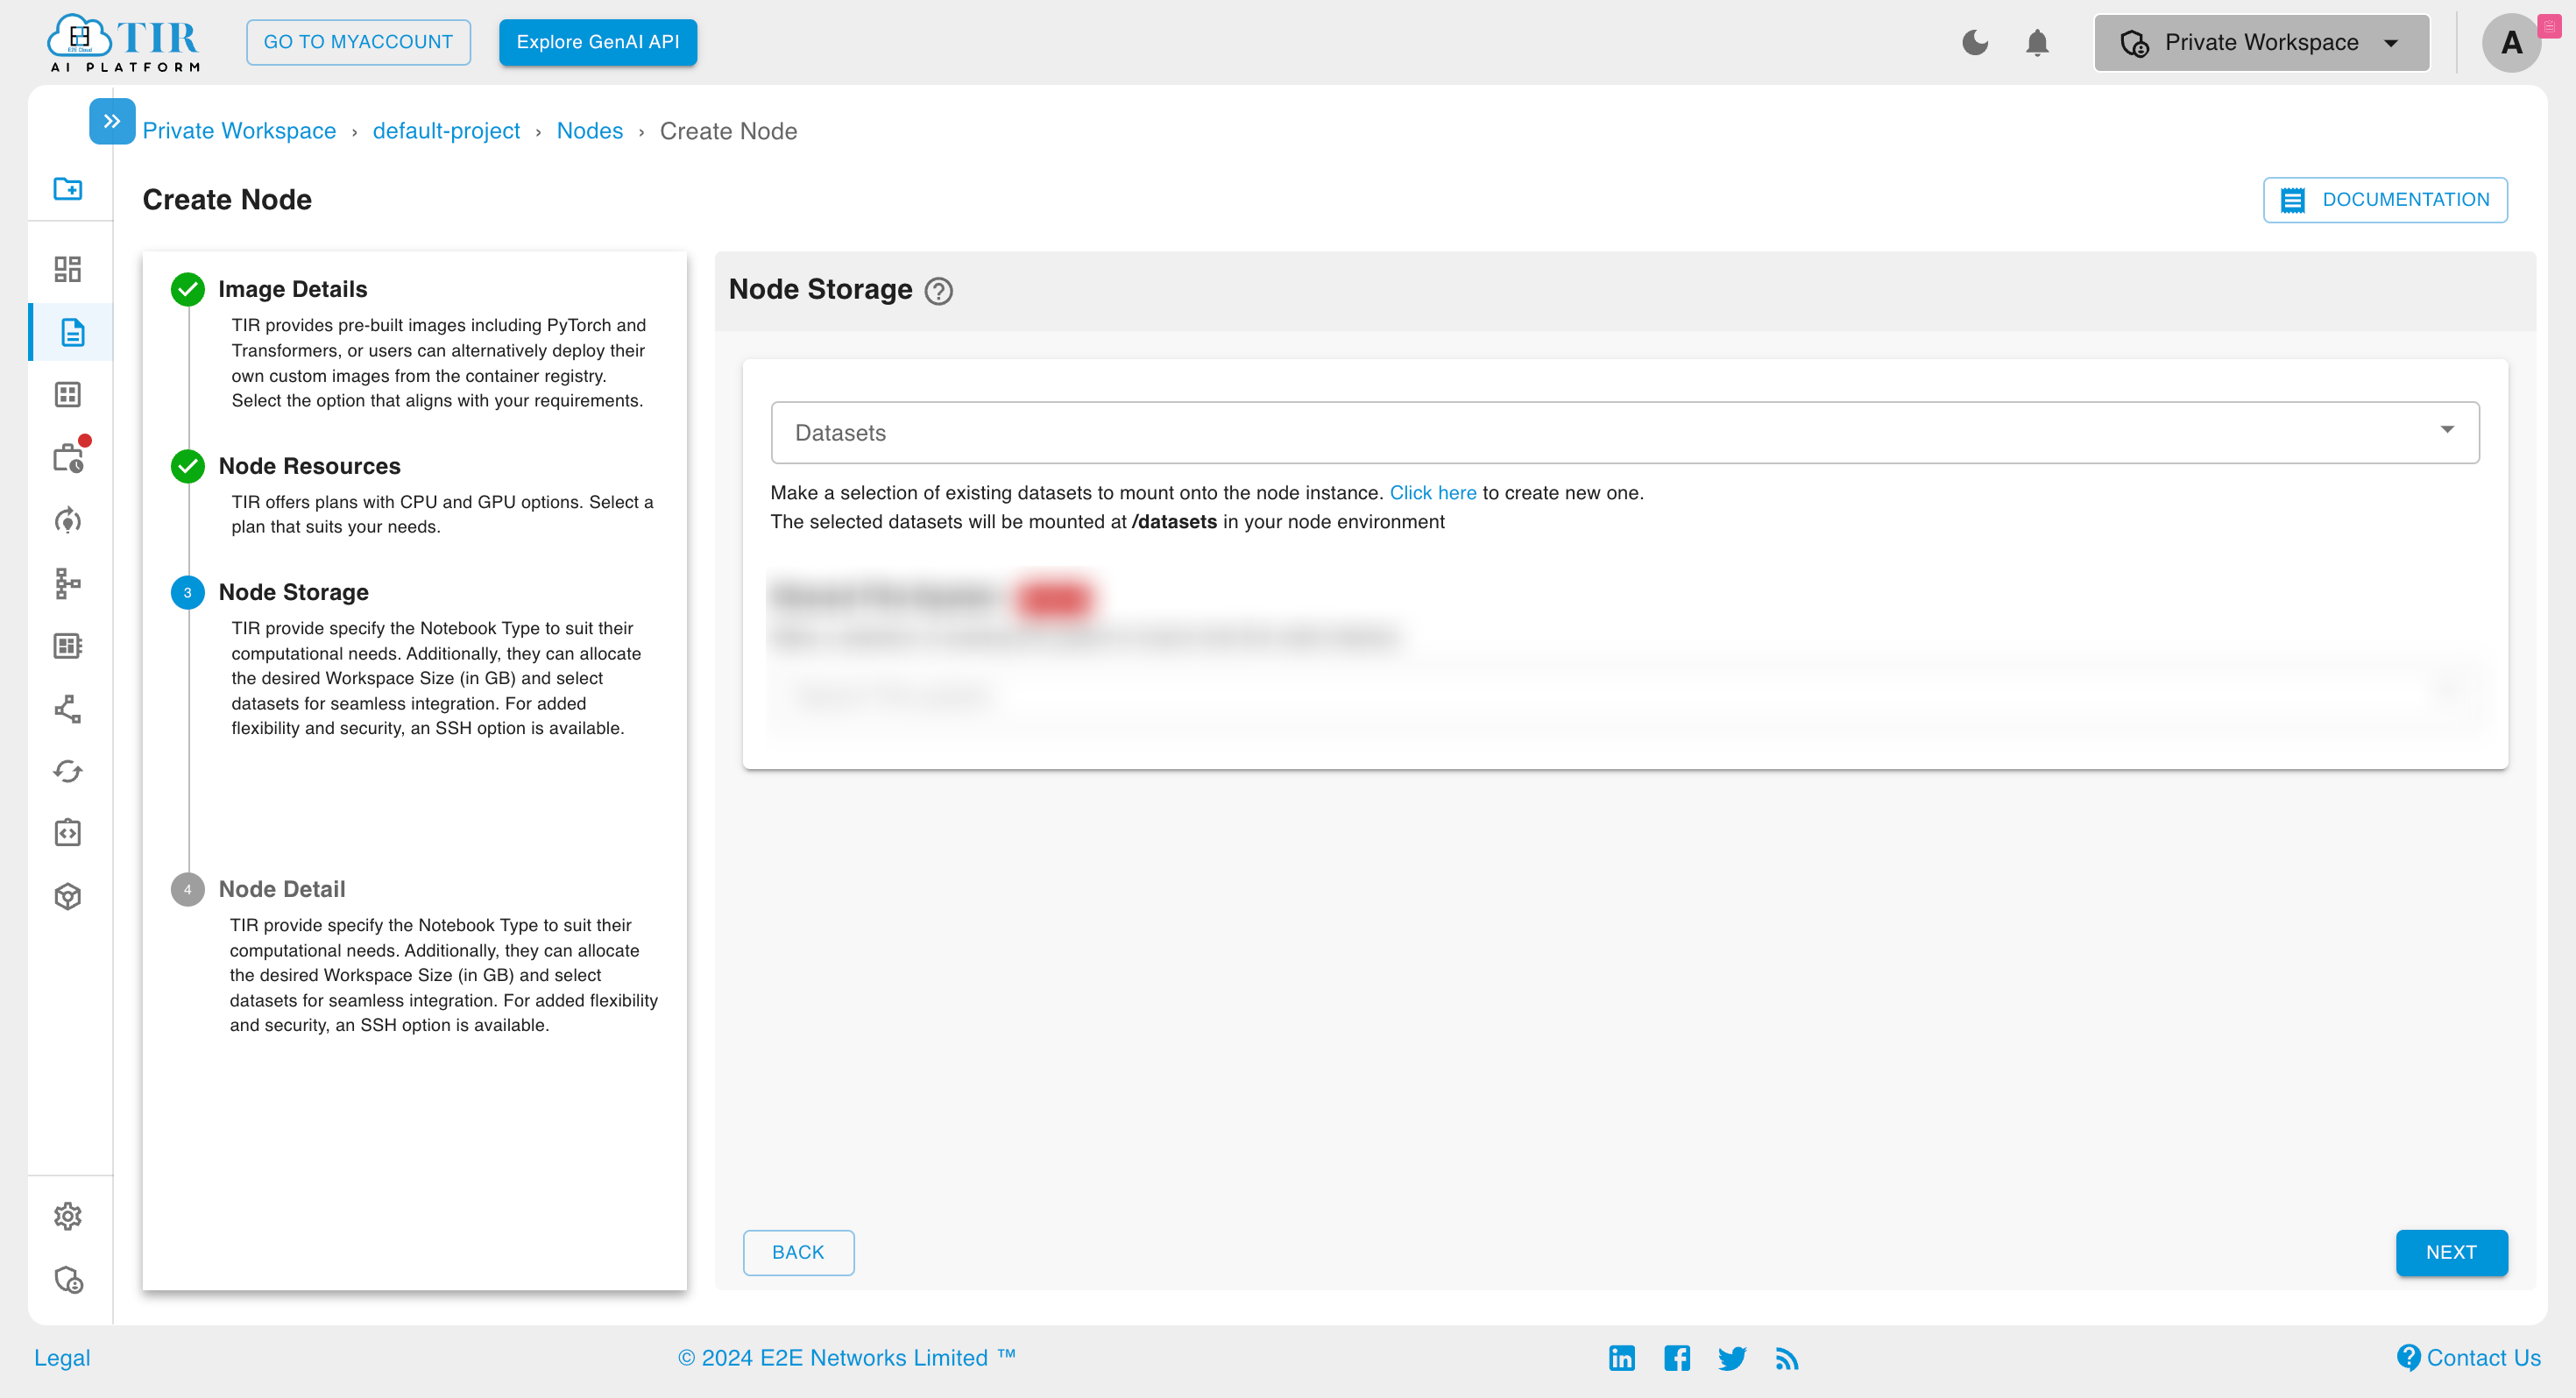
The user is prompted to provide the essential details before the node is created.
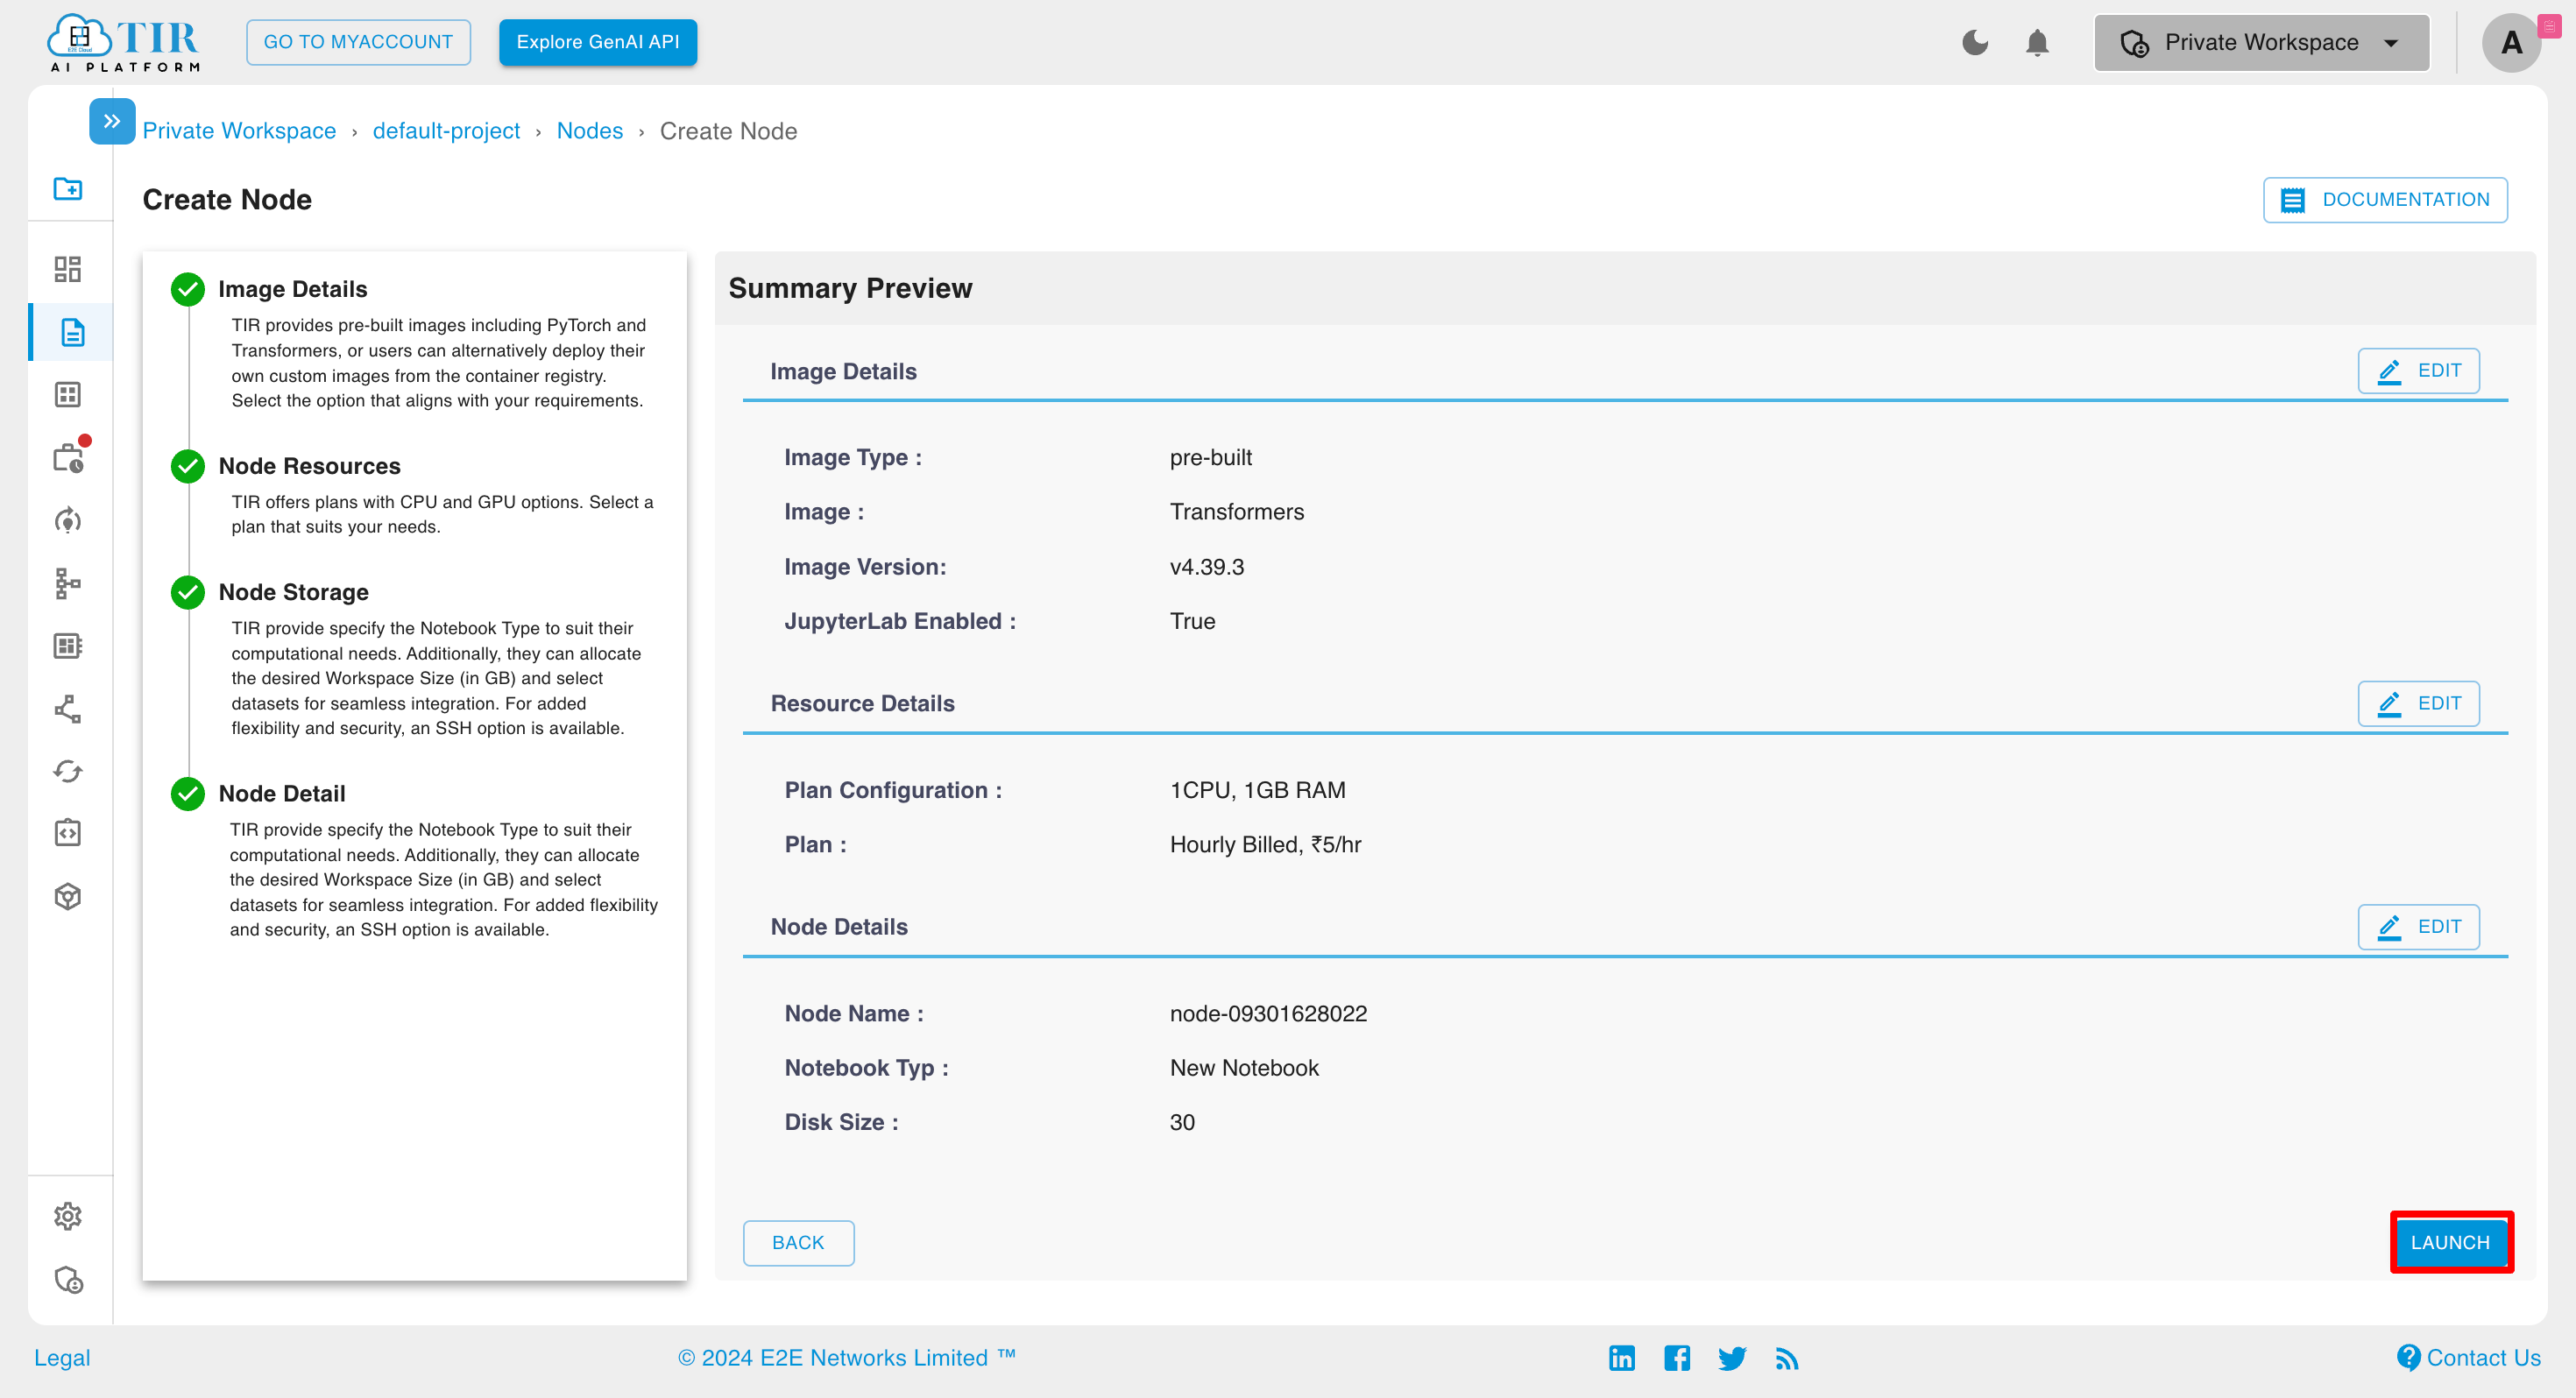
After all steps are completed, the Node Summary details will be displayed.
After clicking on the ‘Create’ button, the page will redirect to the ‘Manage Nodes’ page and display all details there.
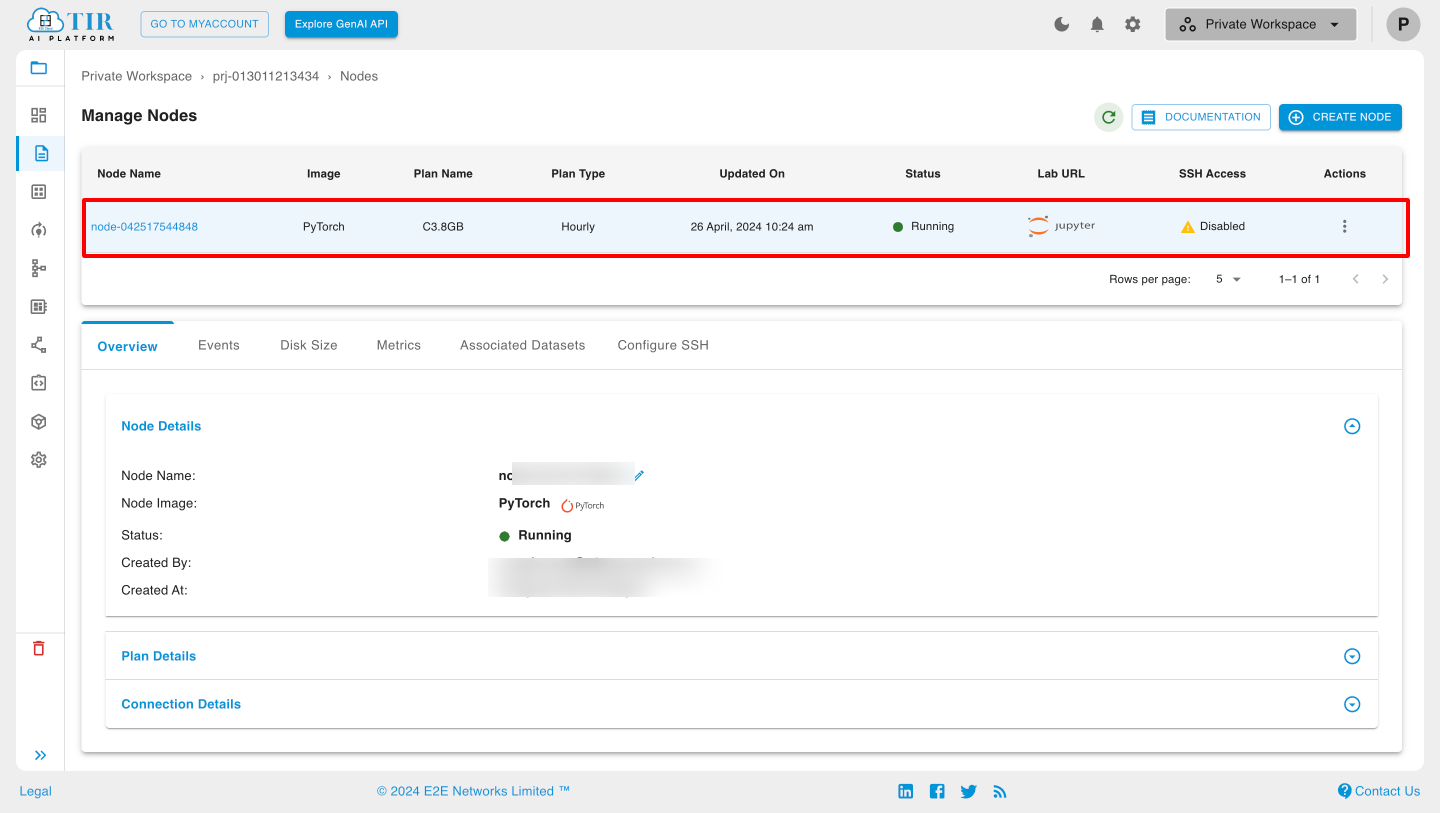
Node Details
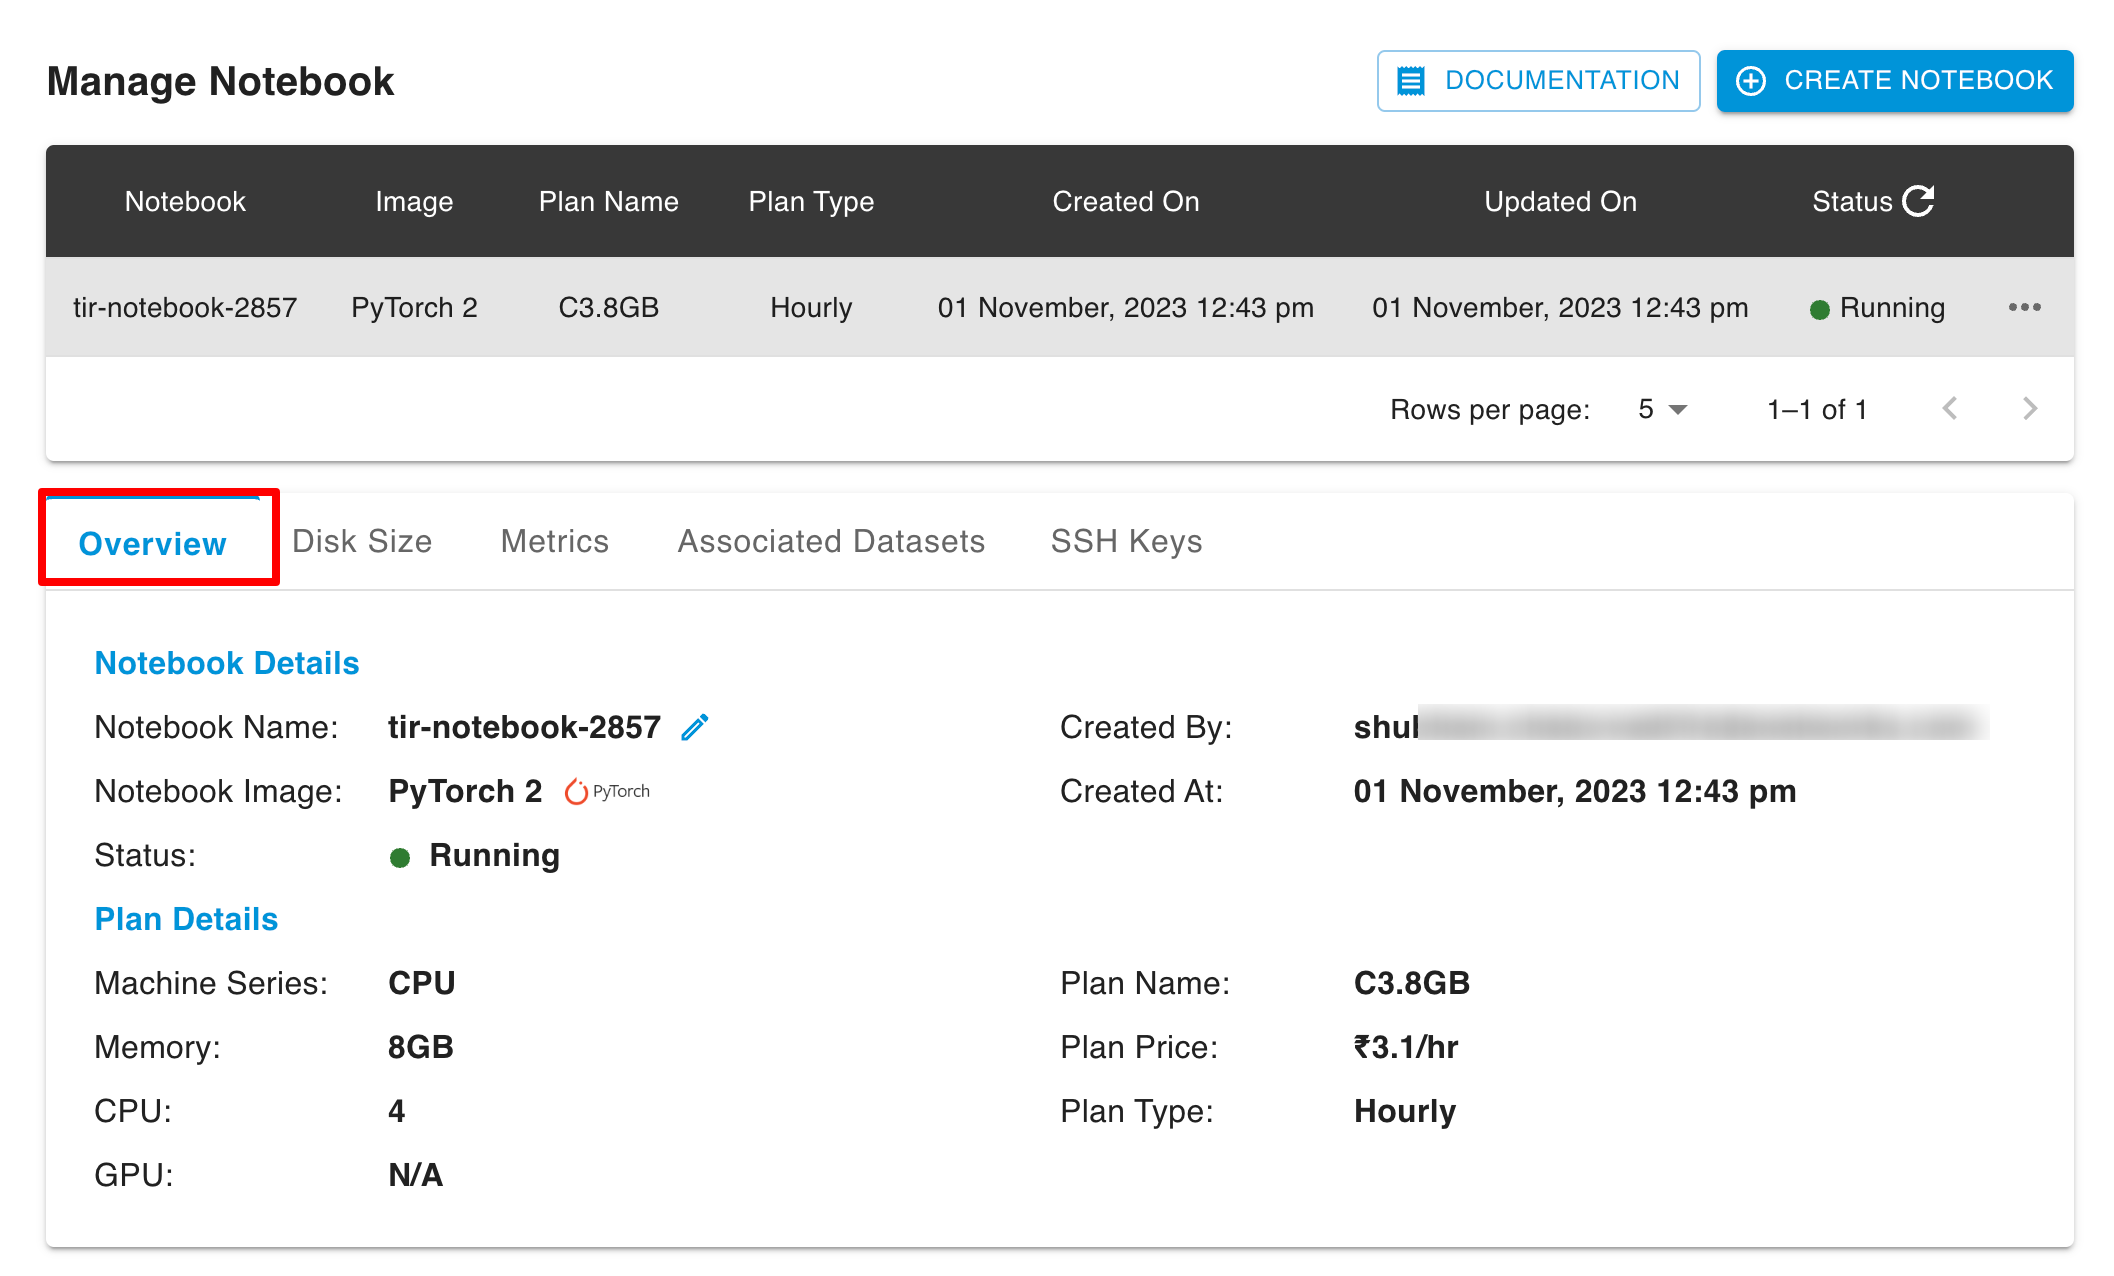
Overview
You can see the Node Details, Plan Details under Overview tab.
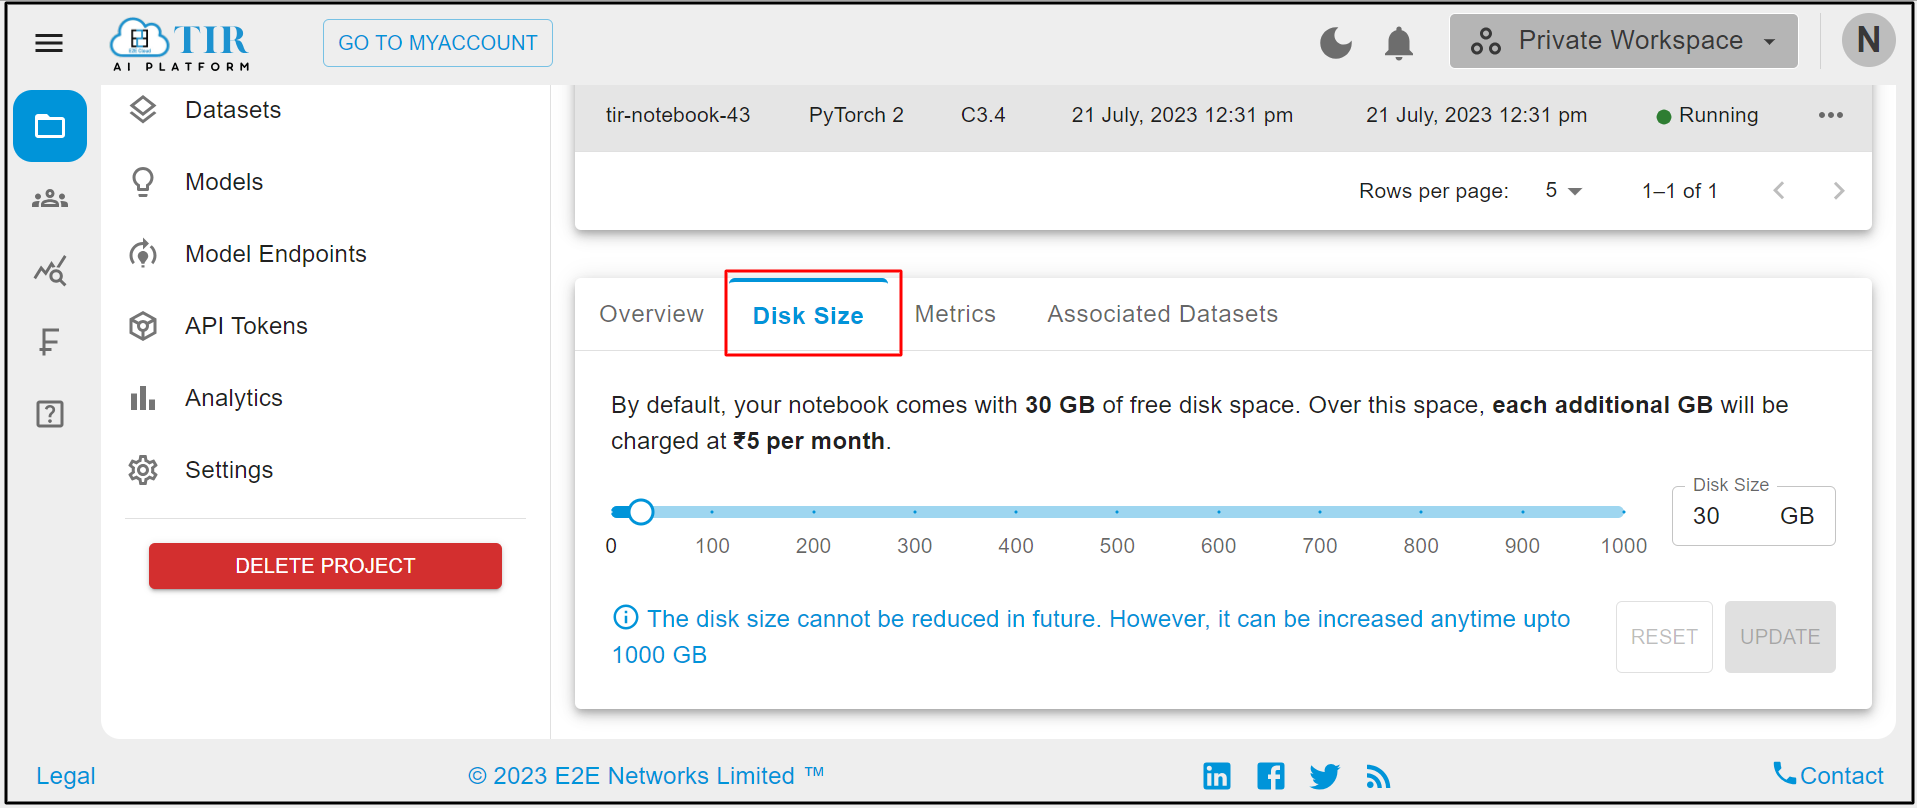
Disk Size
You can see the details disk size and also You can change the Disk size as per your requirements.
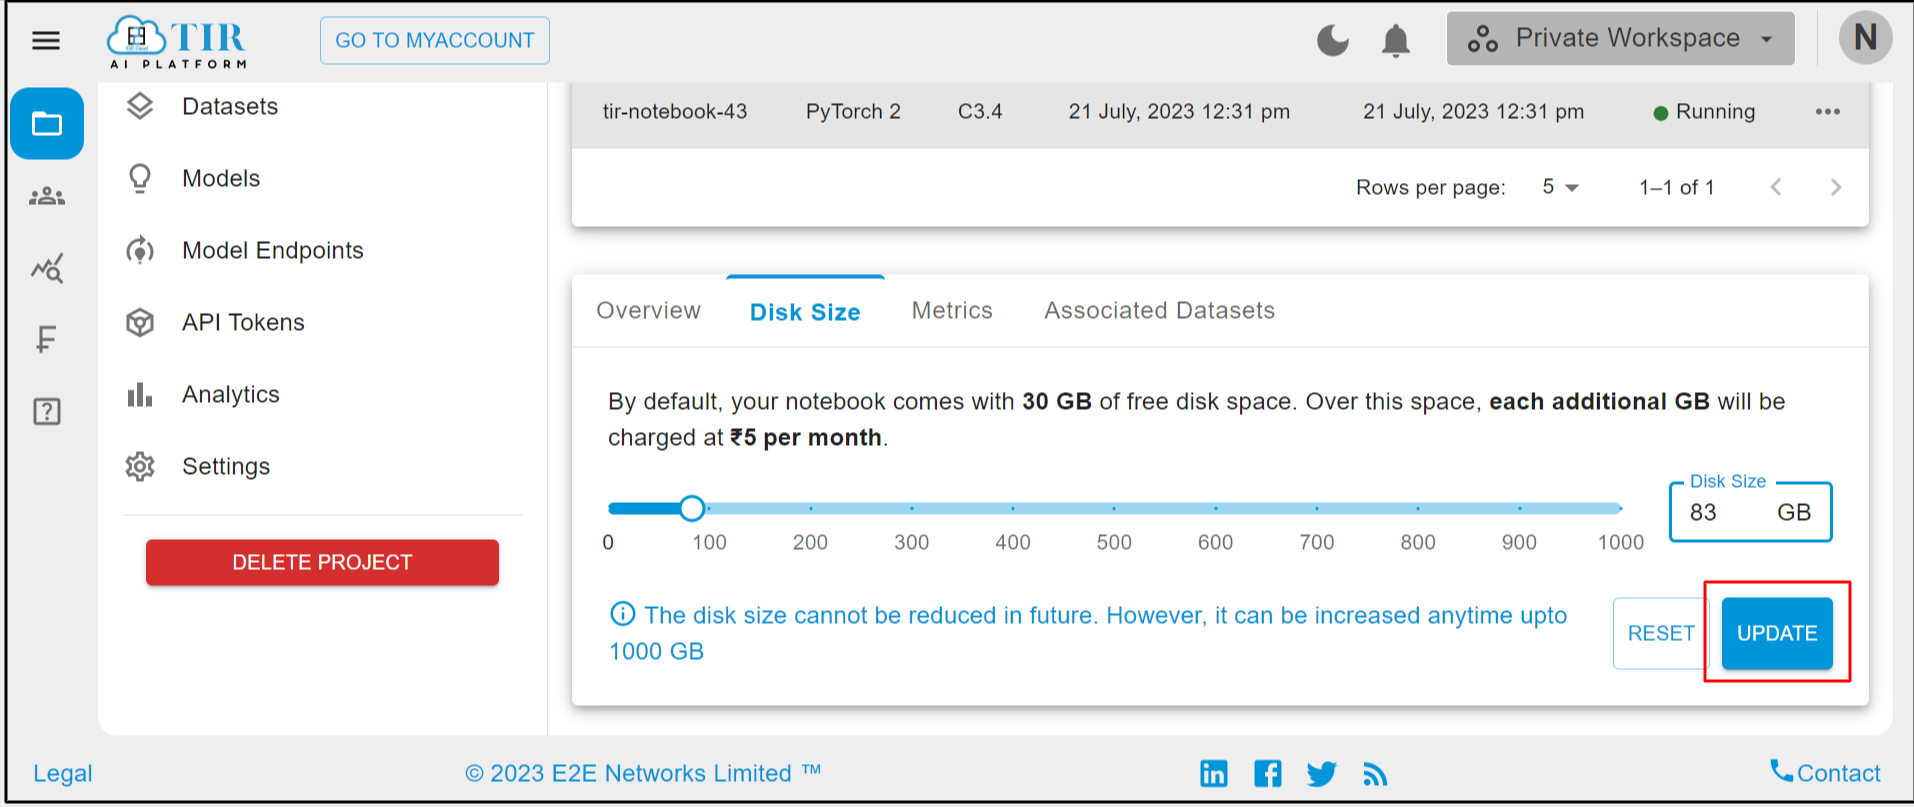
For updating the disk size you have to change the disk size and then click on update button.
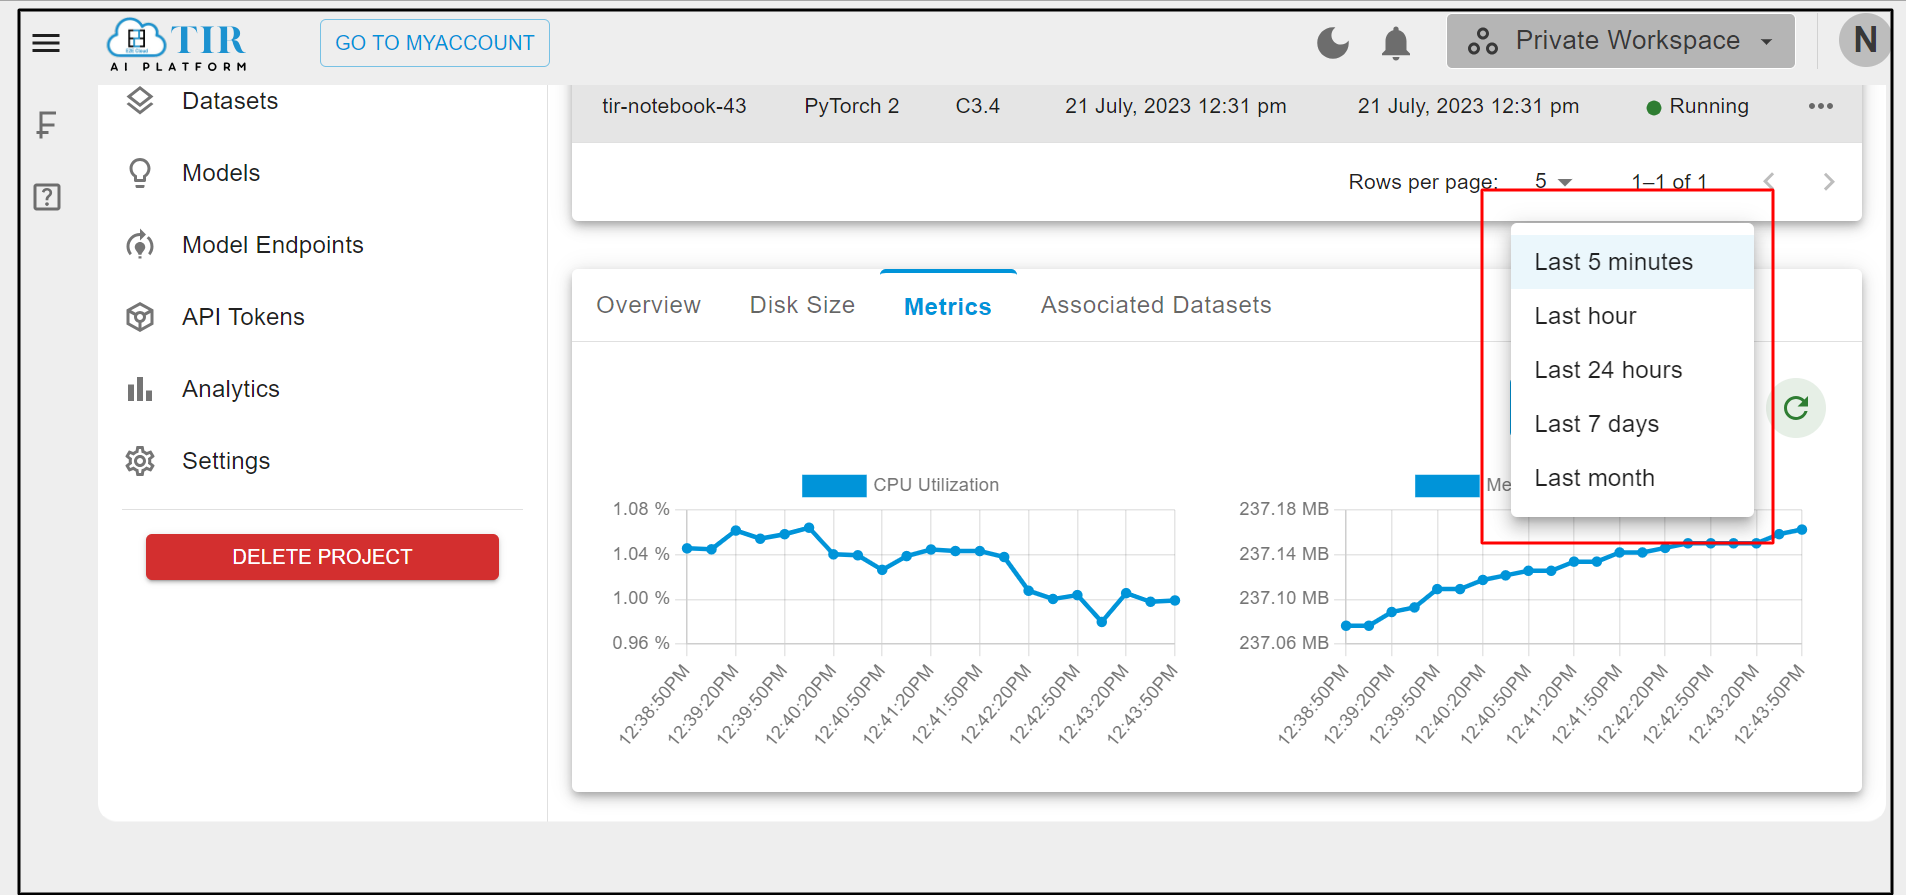
Metrics
You can see the Metrics graph in CPU Utilization , Memory Utilization & Interval.
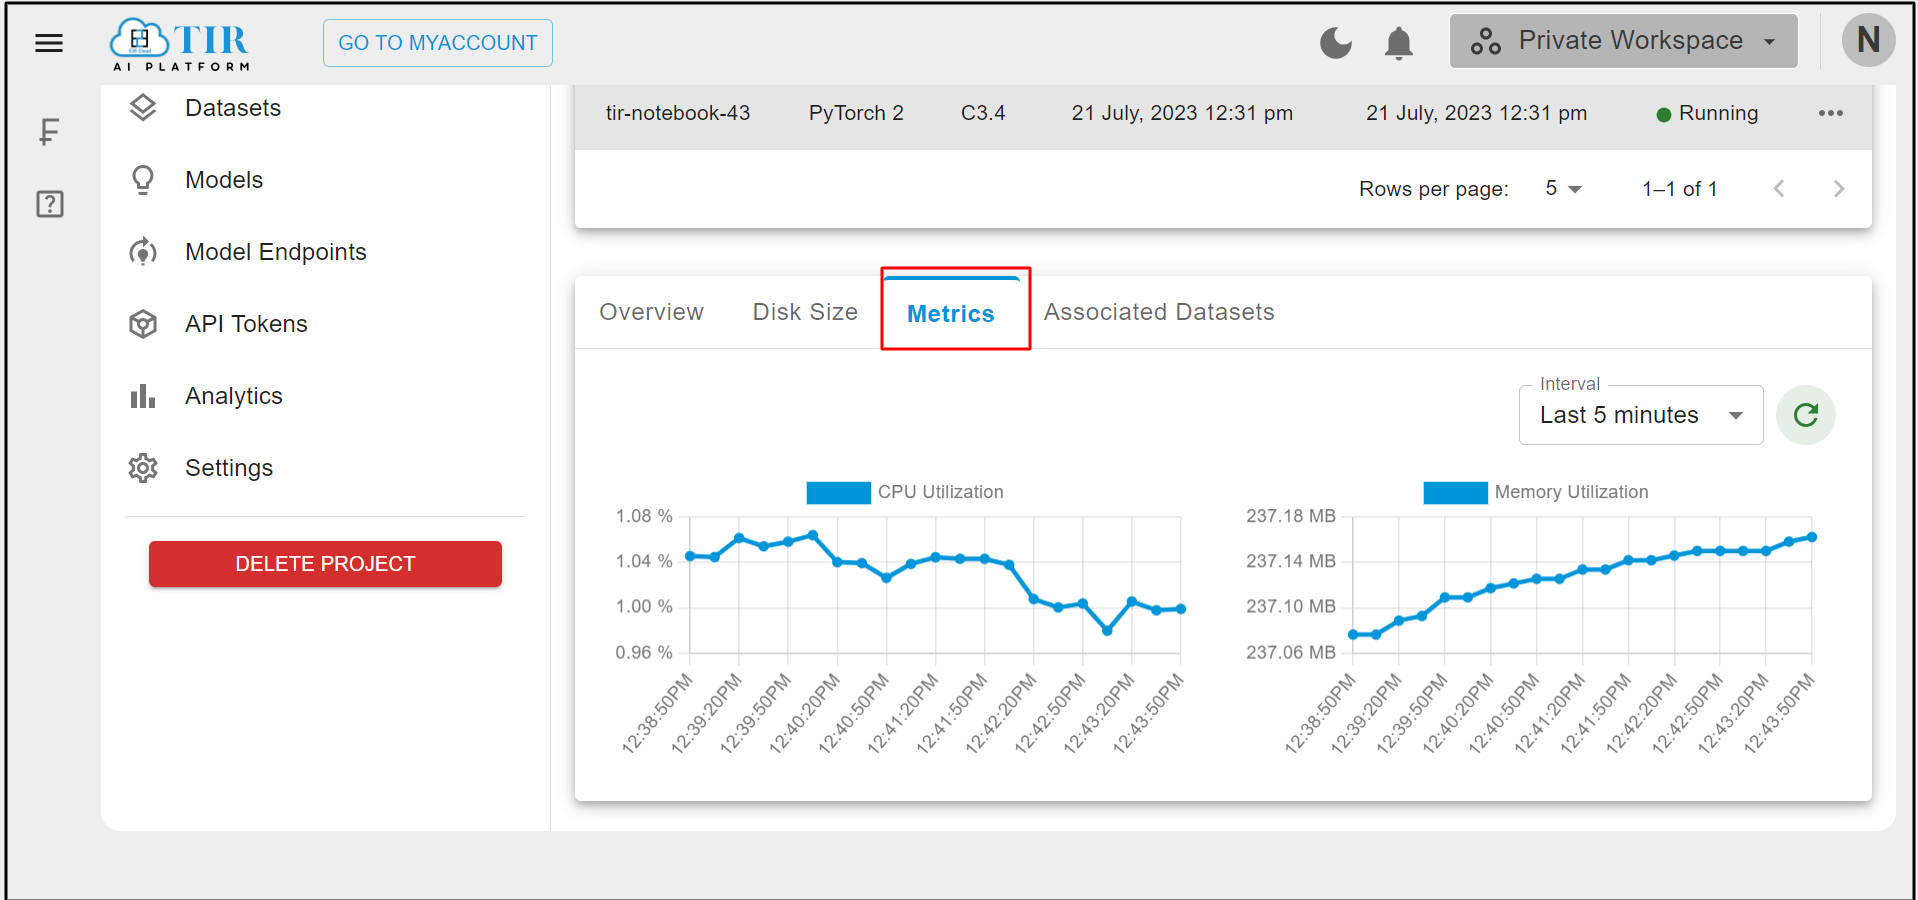
You can see the one month activity as per your requirement in days & hours.
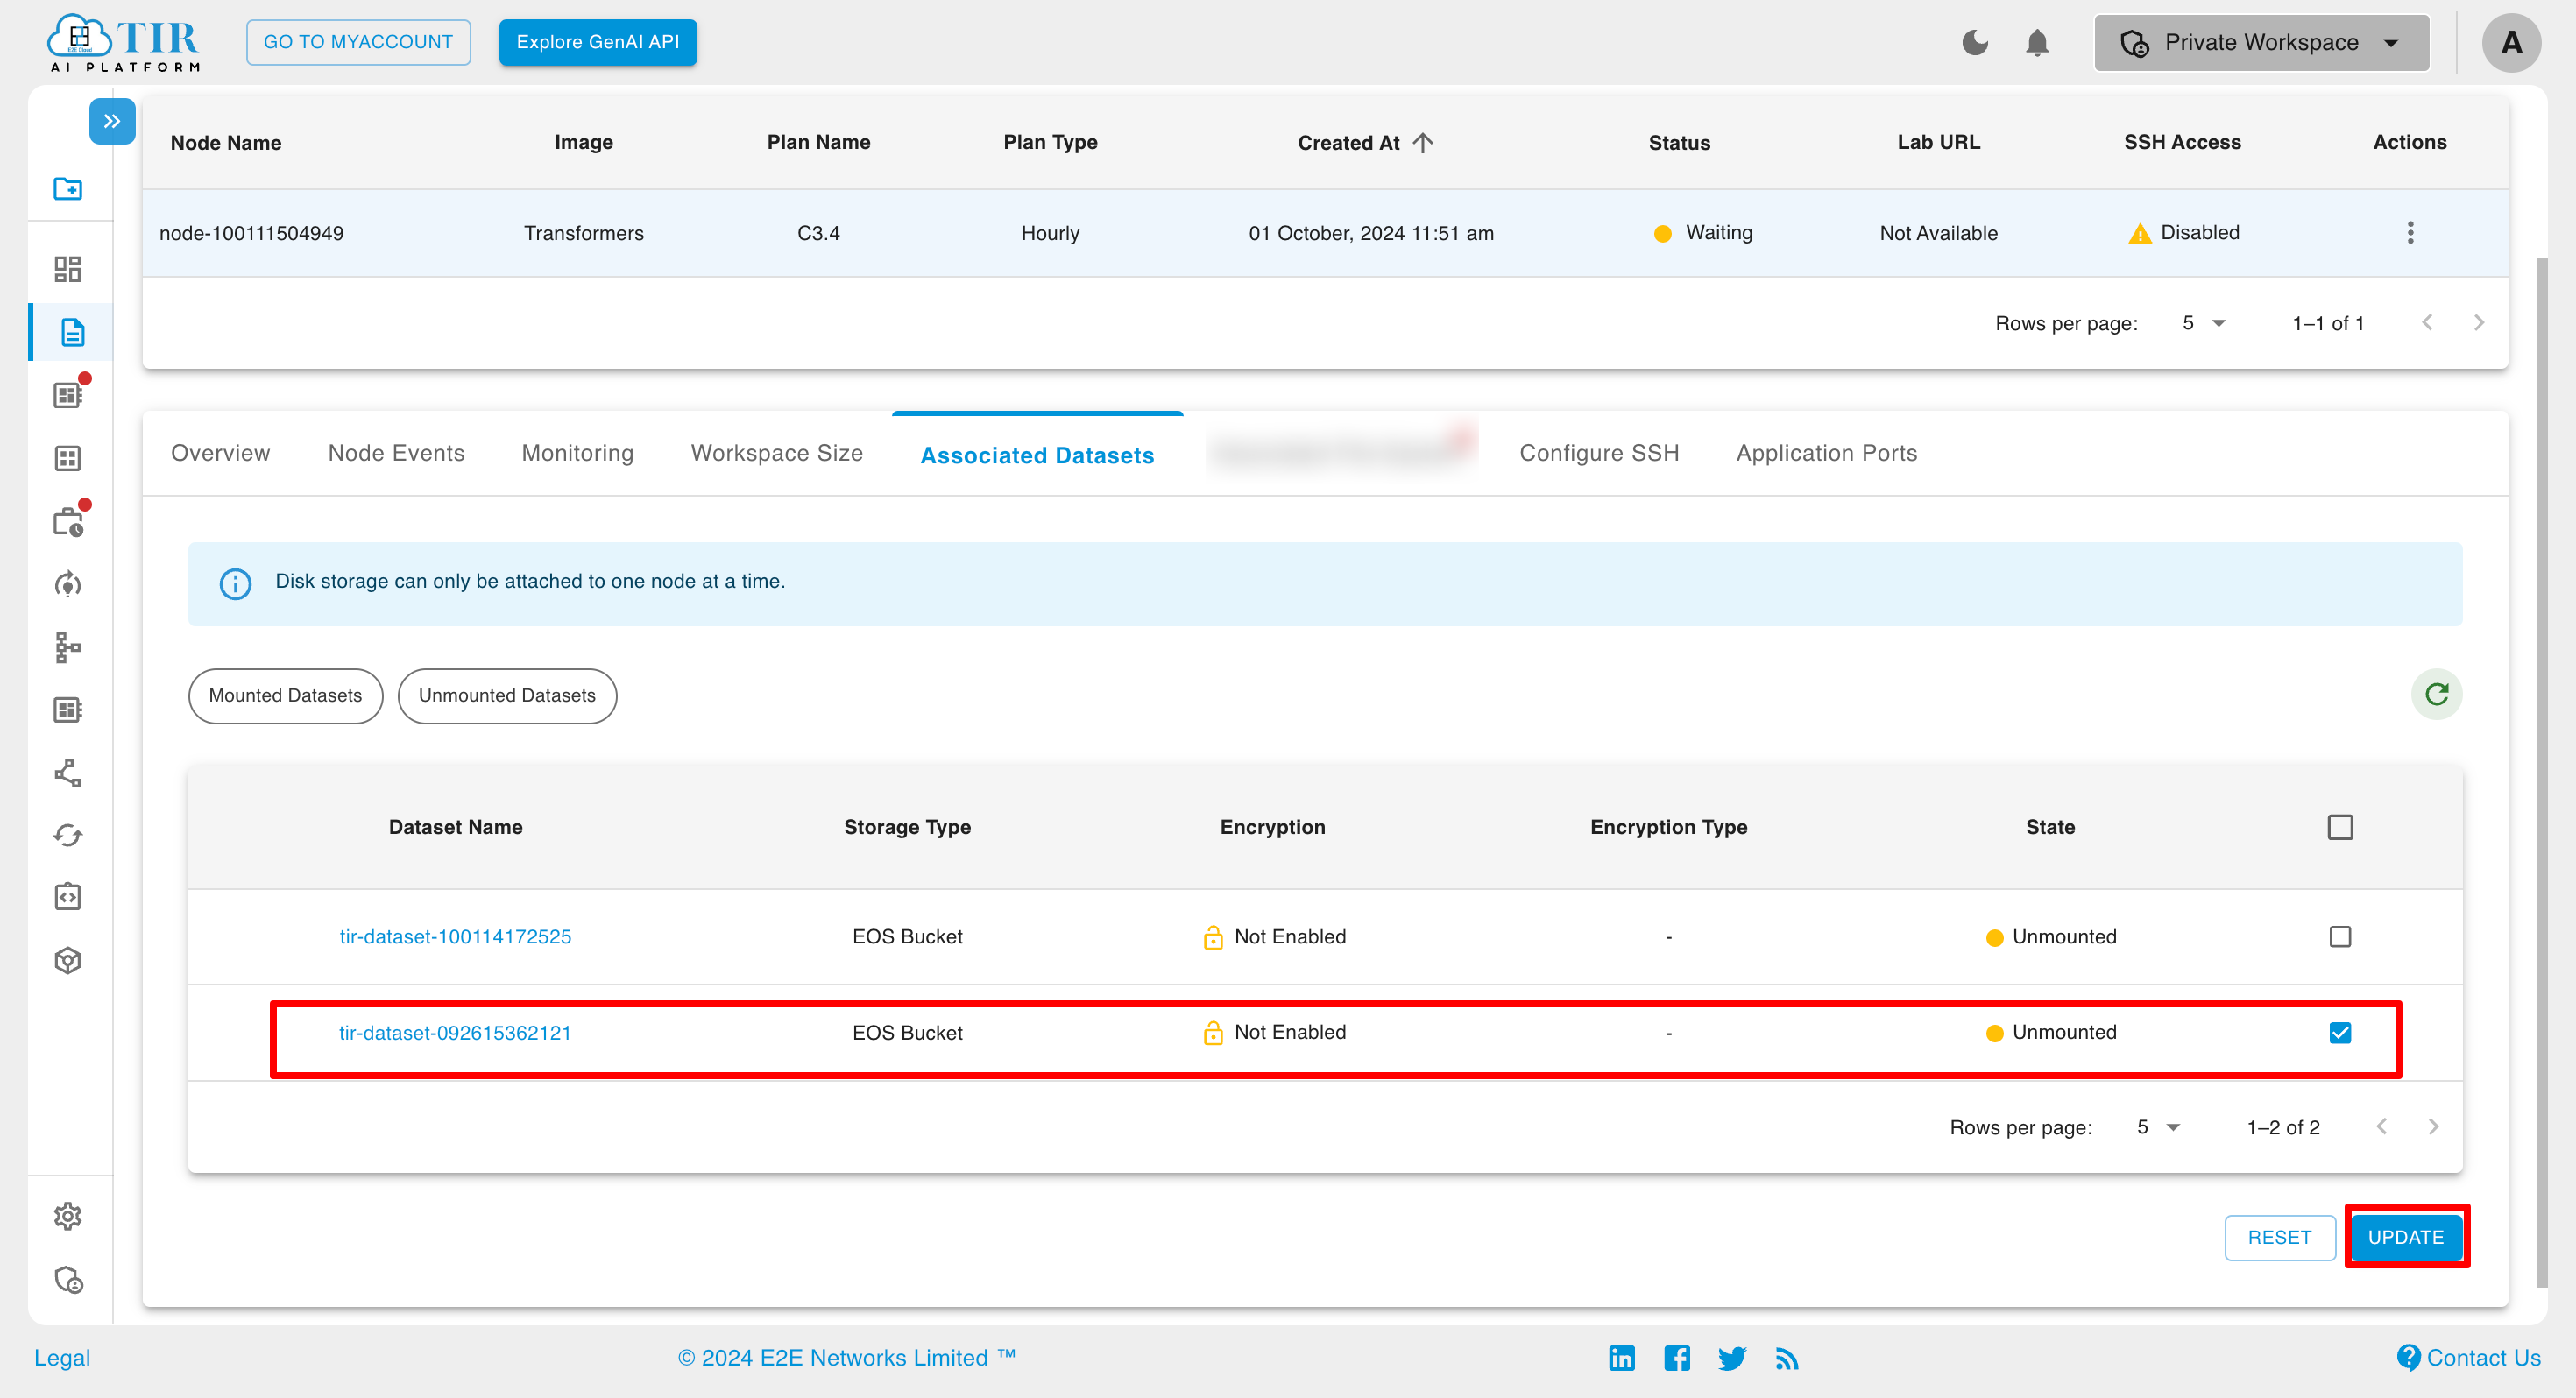
Associated Datasets
You can view the Associated Datasets, categorized into Mounted and Unmounted datasets. To mount an unmounted dataset, simply select the dataset and click Update.
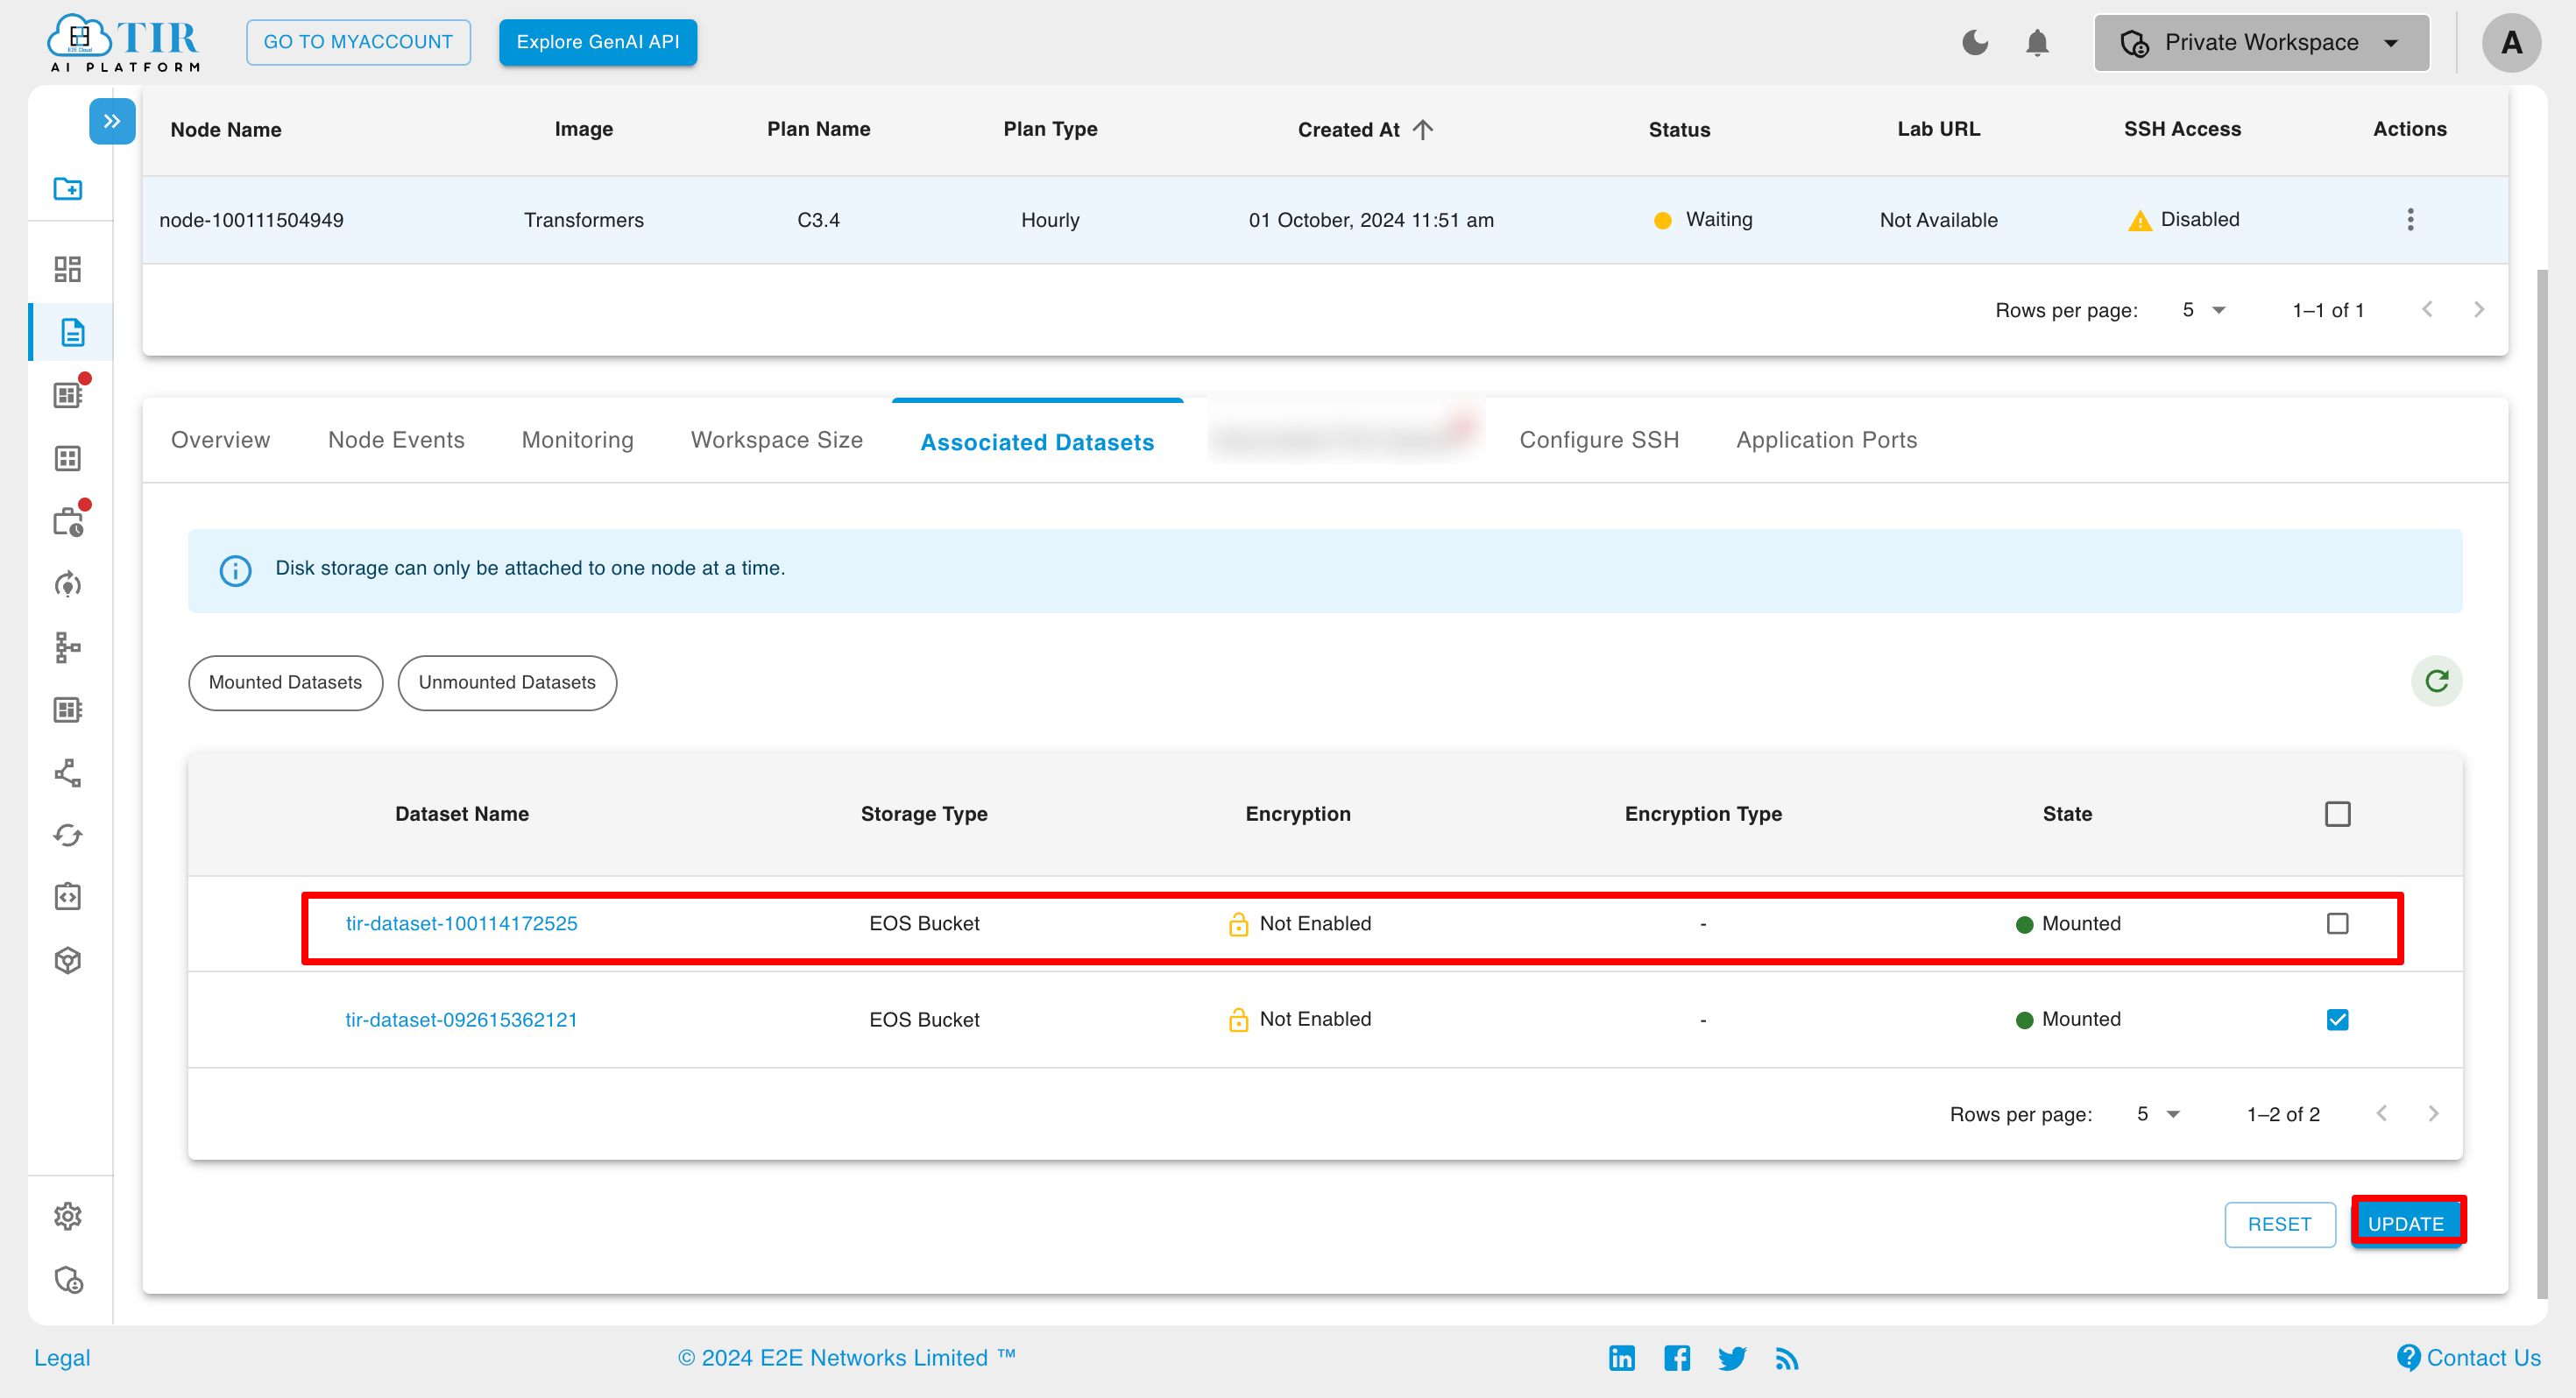
Similarly, to unmount a dataset, unselect the desired dataset and click Update.
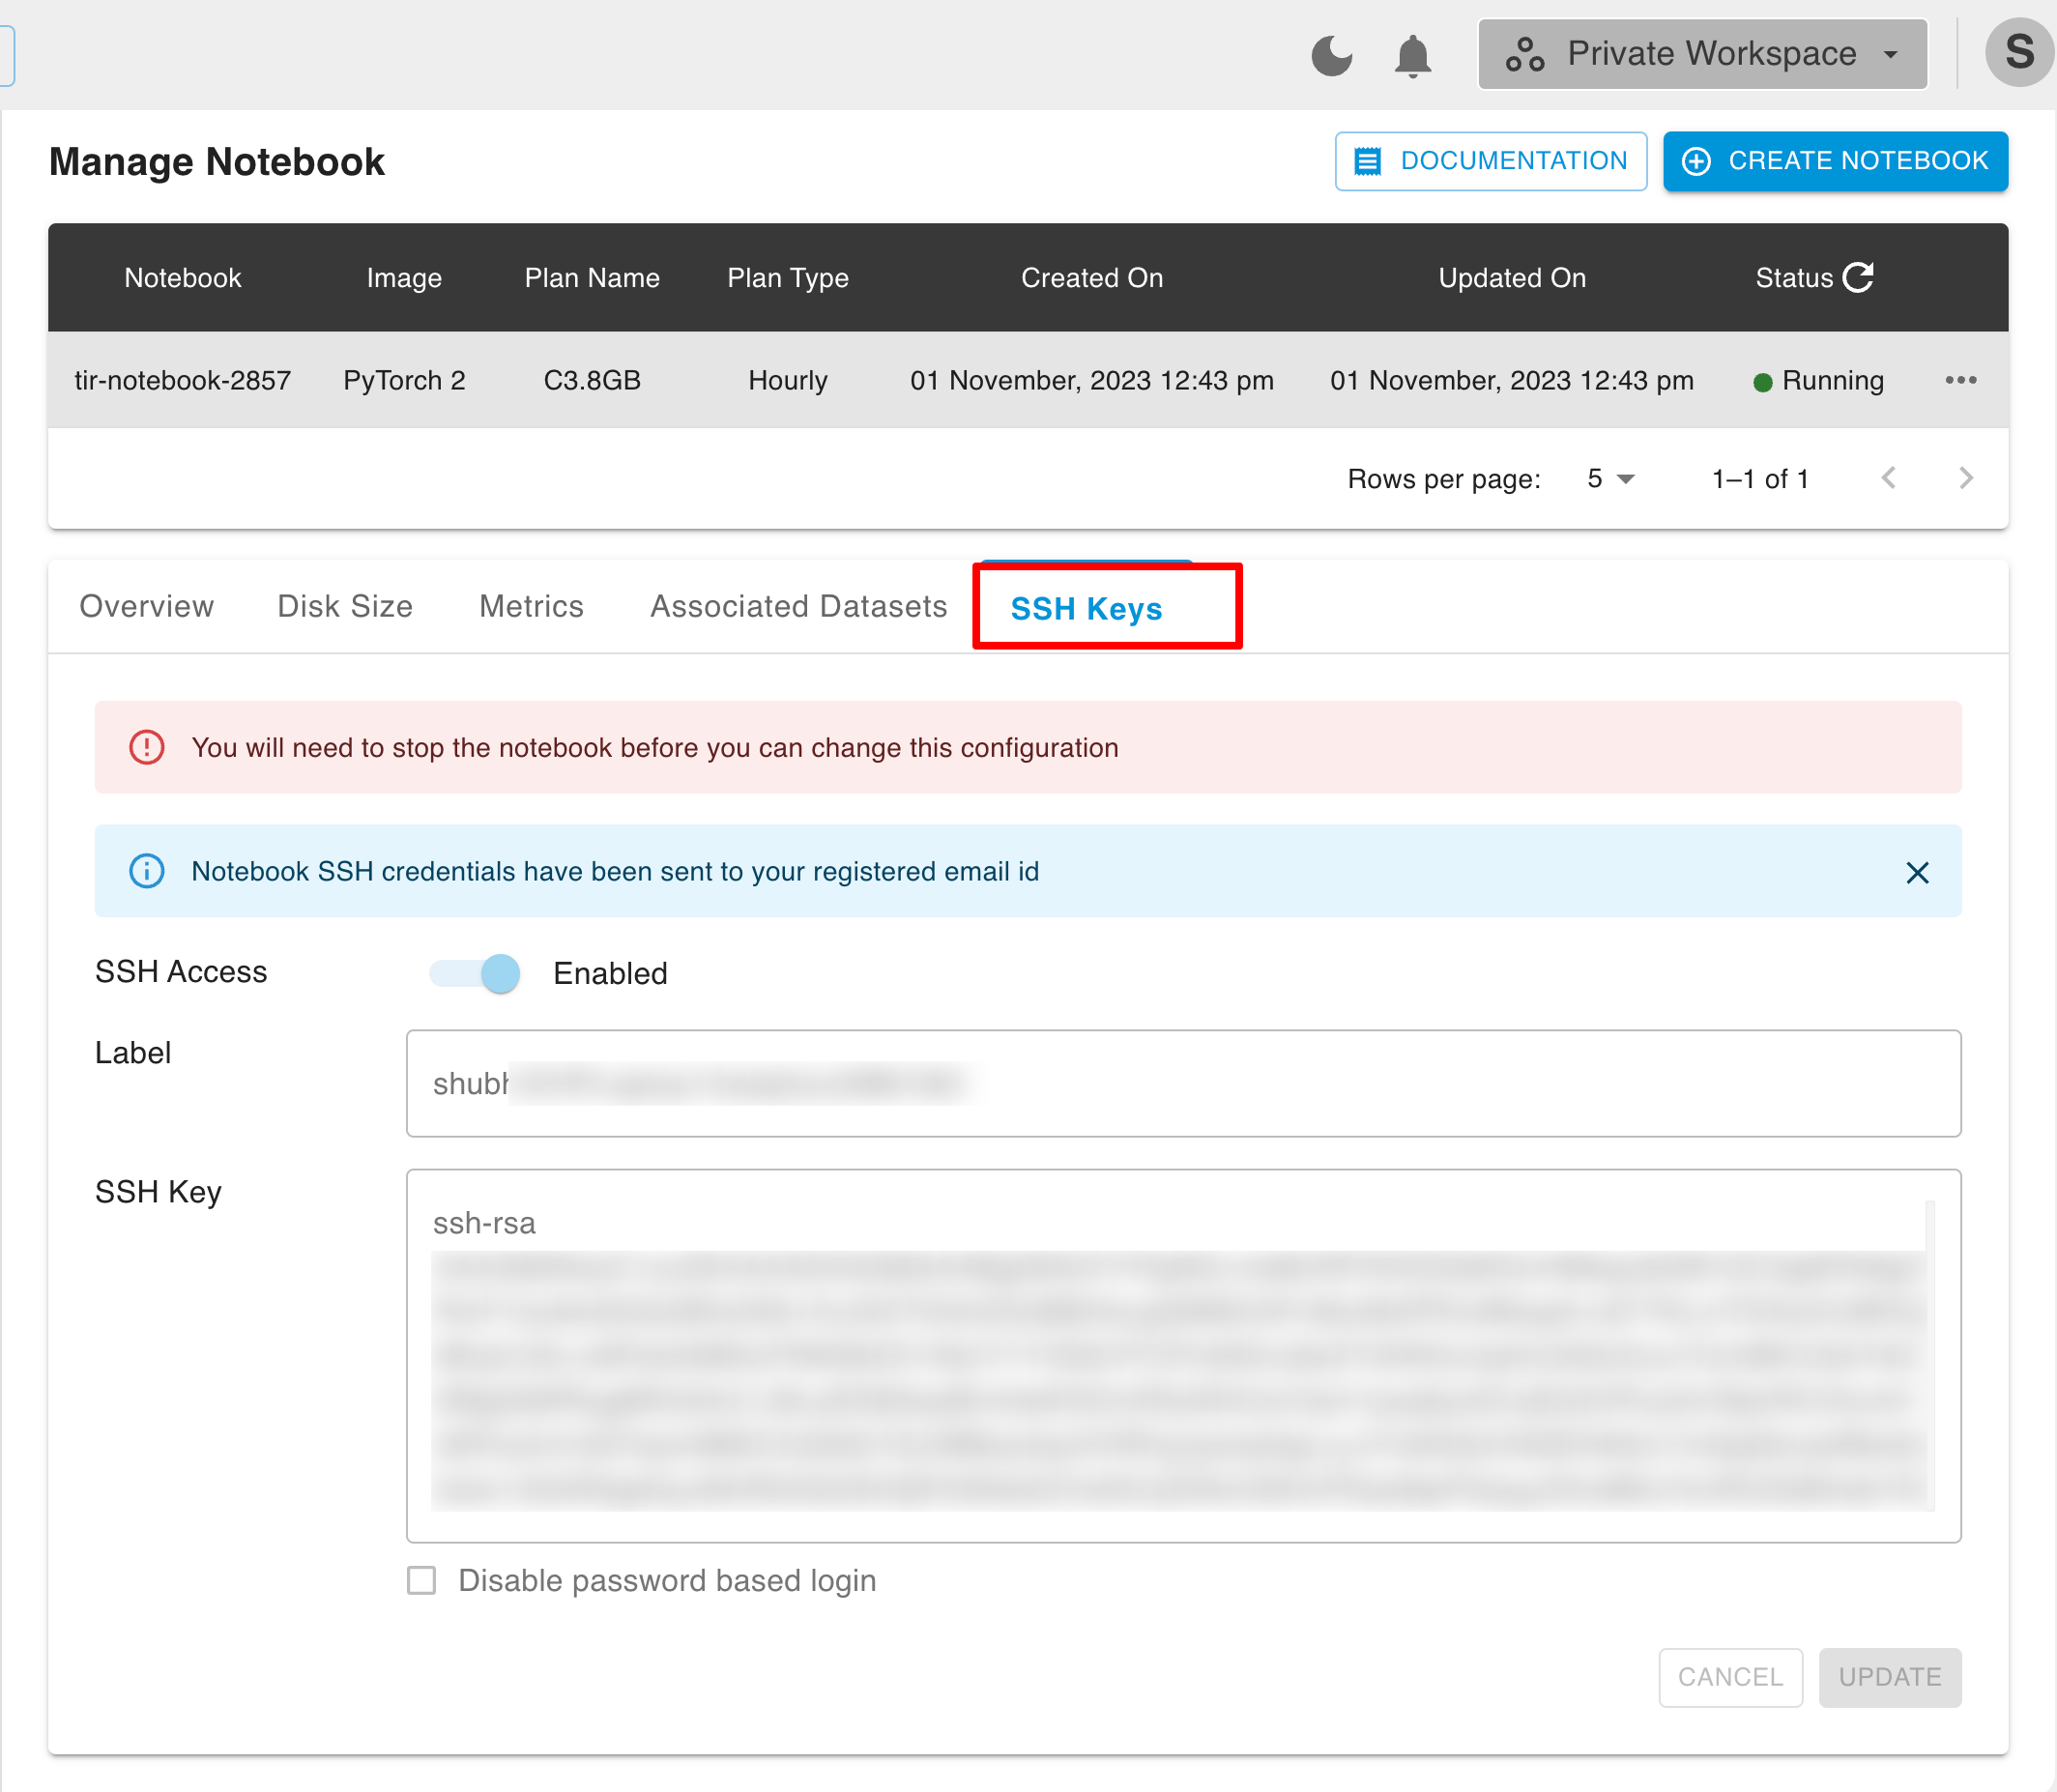
SSH Key
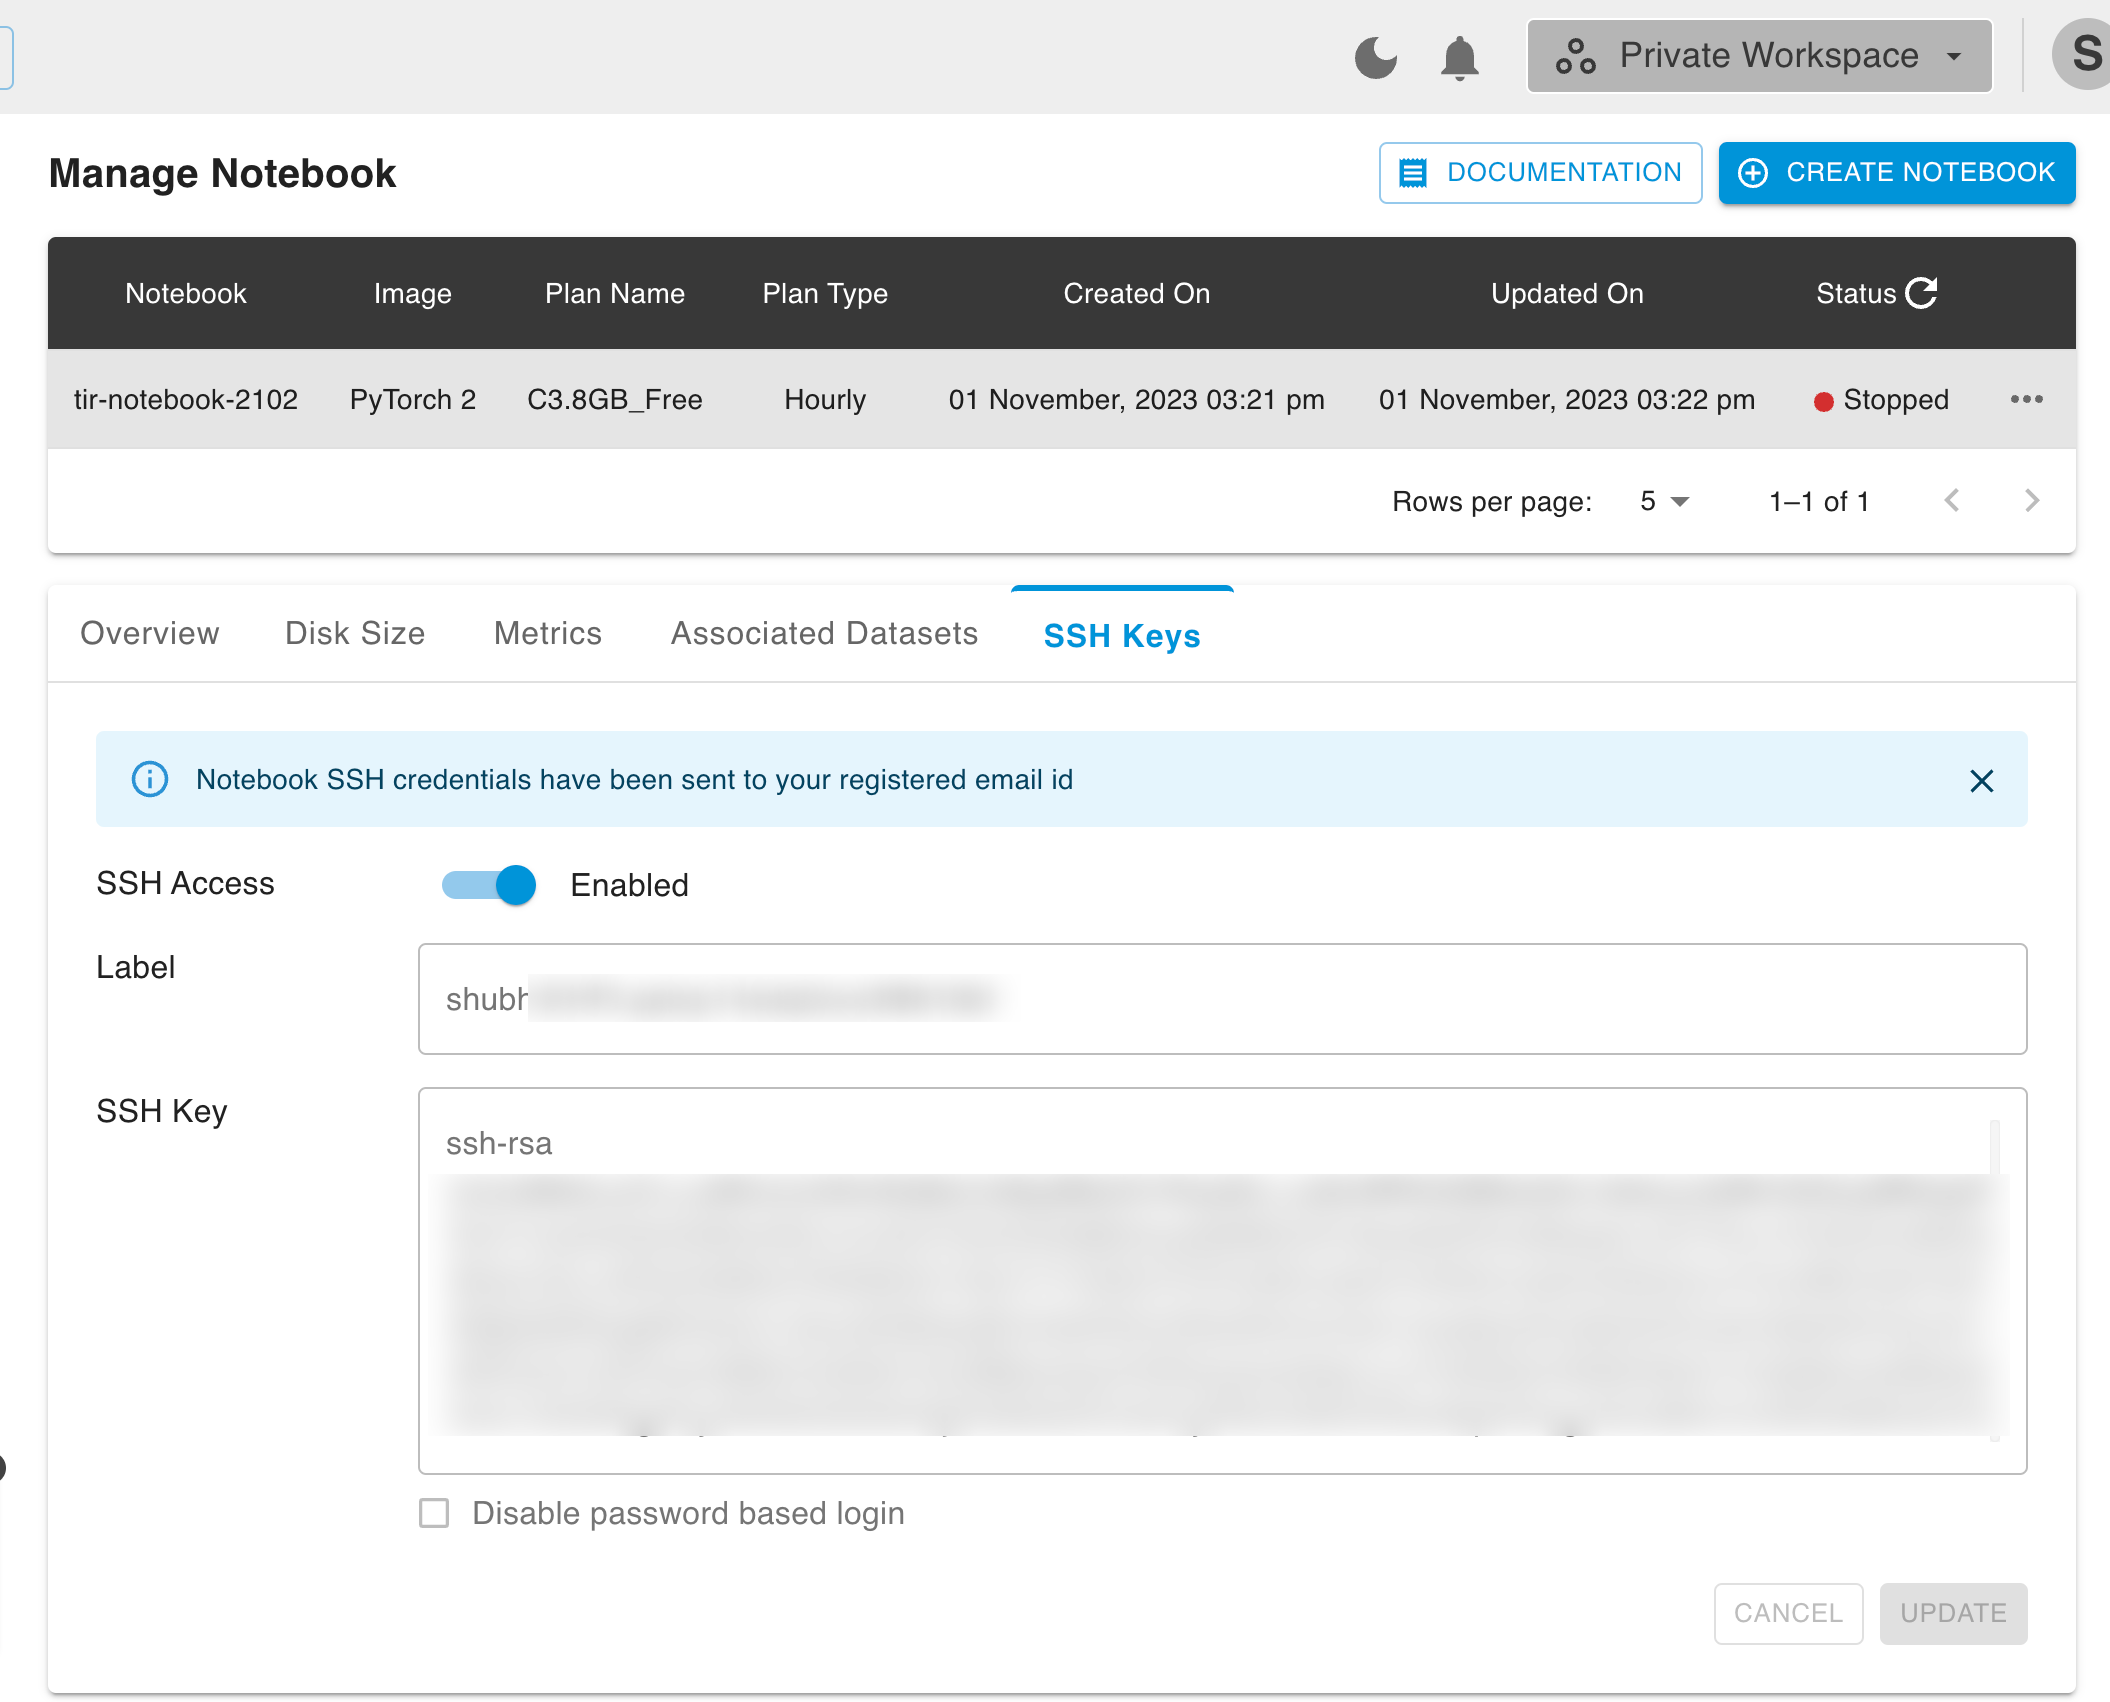
You can see the SSH Key Details under ssh key tab.
Update SSH Key
Note
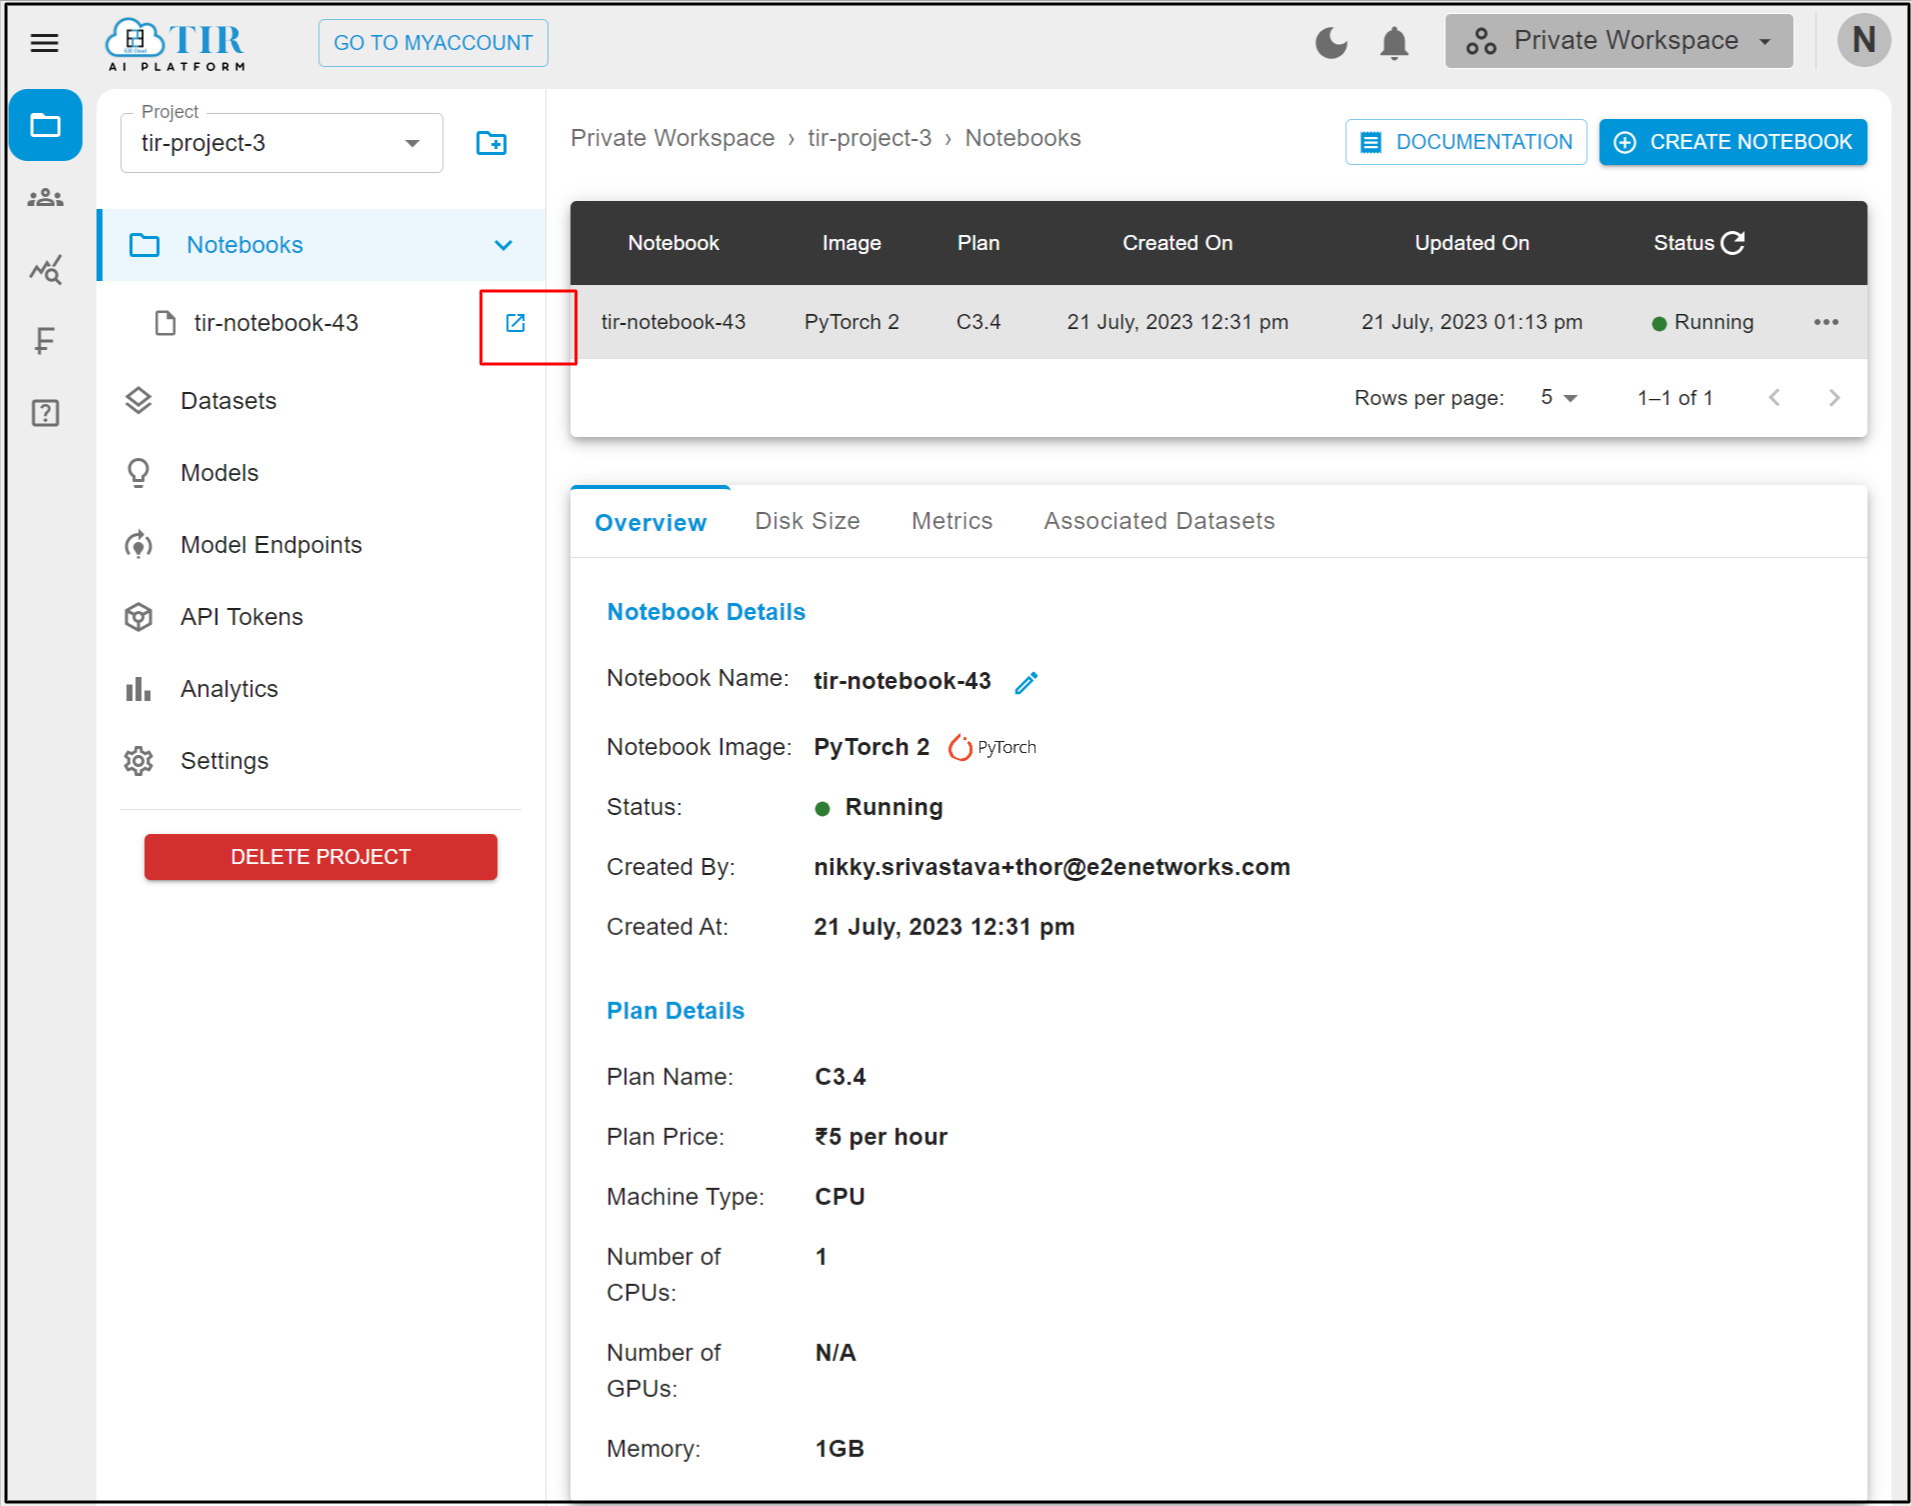
Only one SSH key can be added to a Launch Node from Sidebar
You can launch the node from the left side of the Node name .
Node
Note
When user want to change ssh key kindly first stop the node then change the ssh key
Add SSH Key After Node Creation
Note
When user want to add ssh key after Notebook creation, kindly first stop node then add ssh key
Node Actions
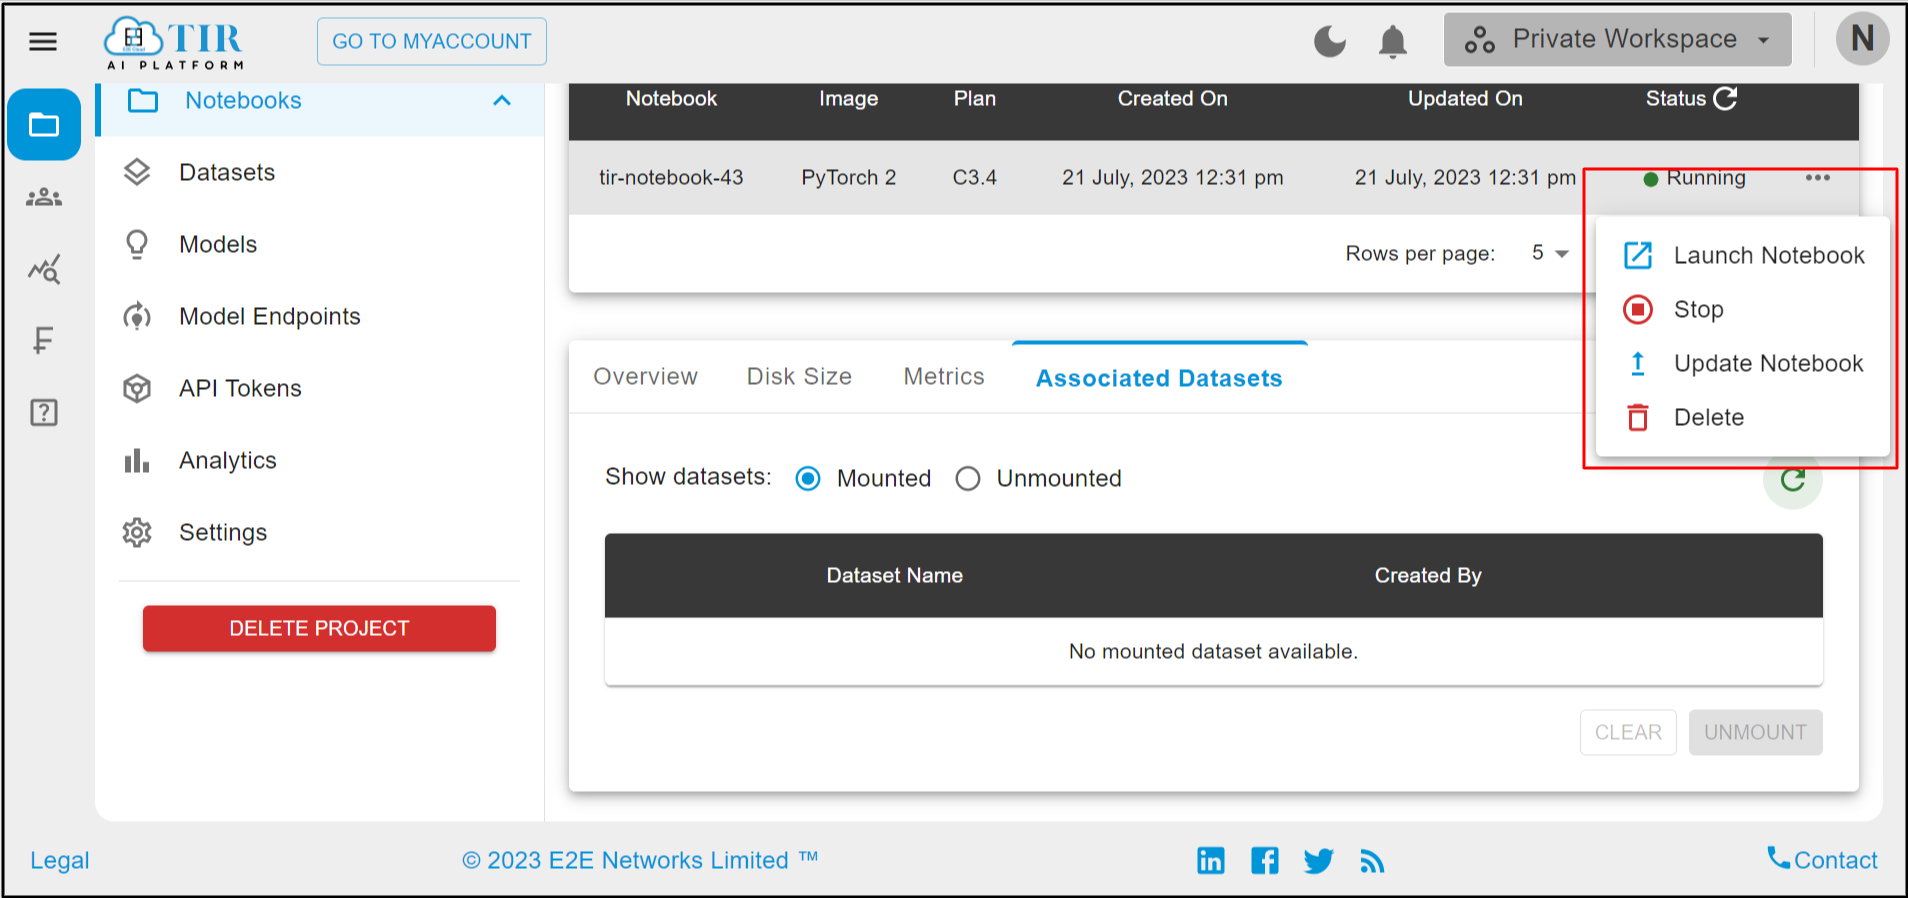
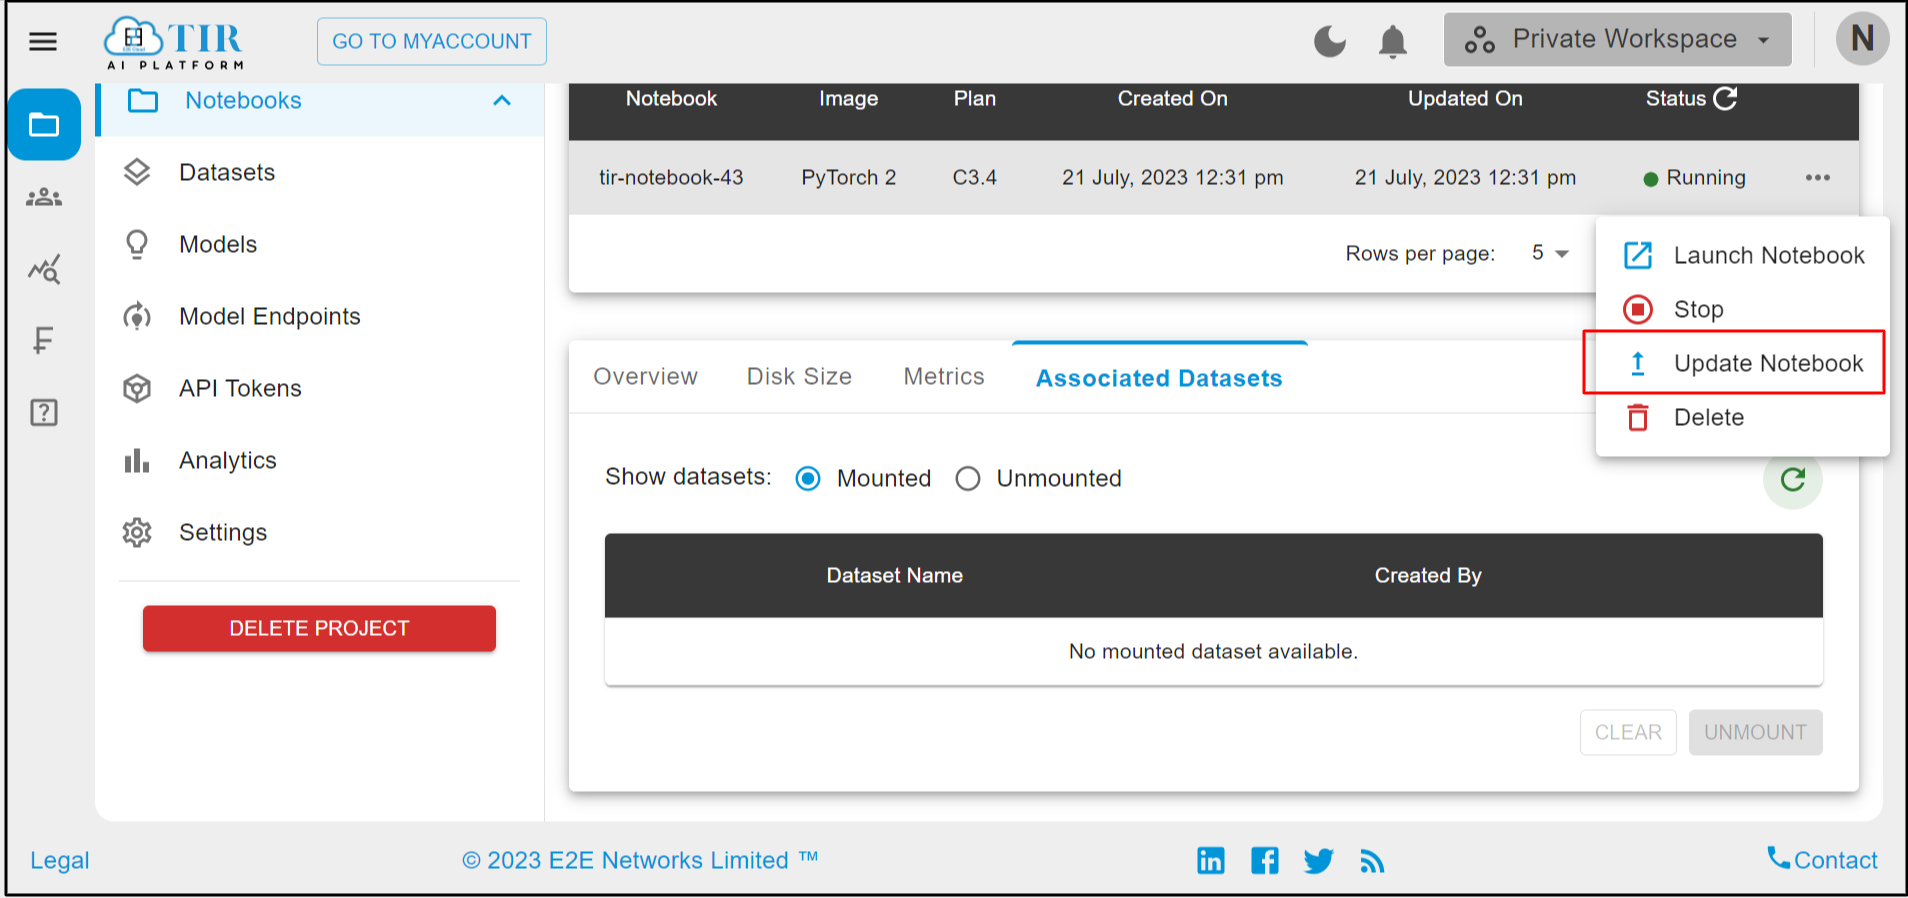
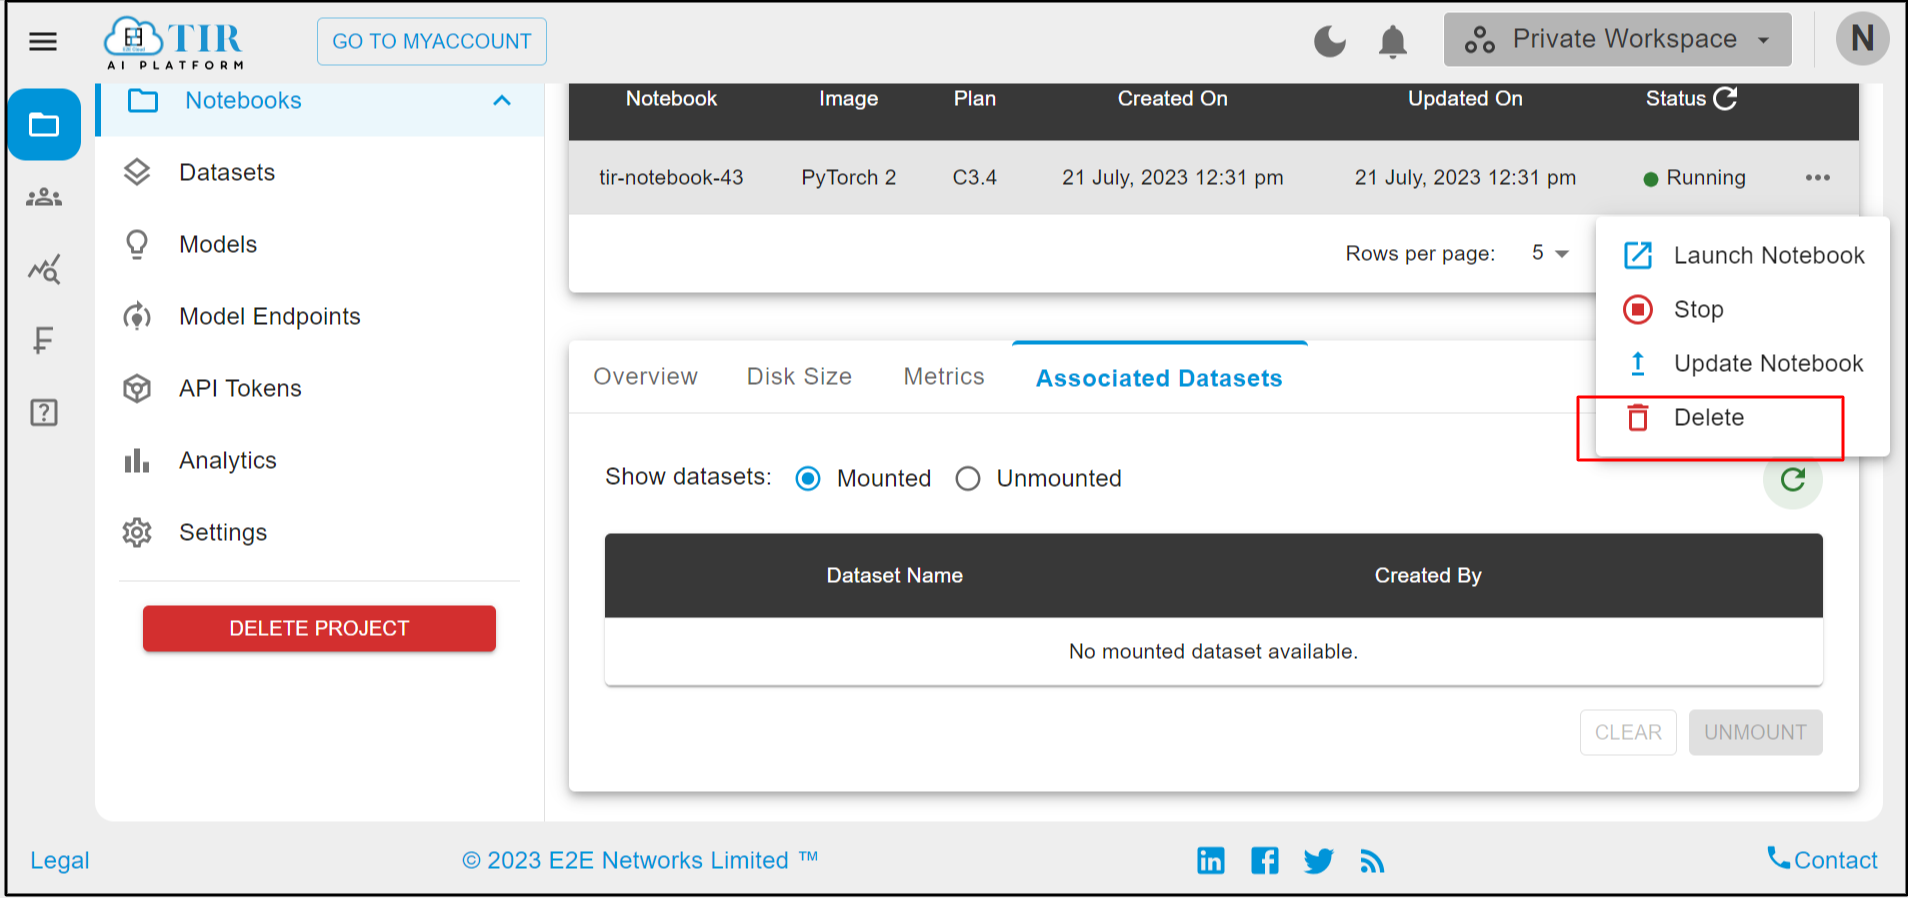
You can see the actions like Launch Node, Stop, Update Node, Delete.
Launch Node
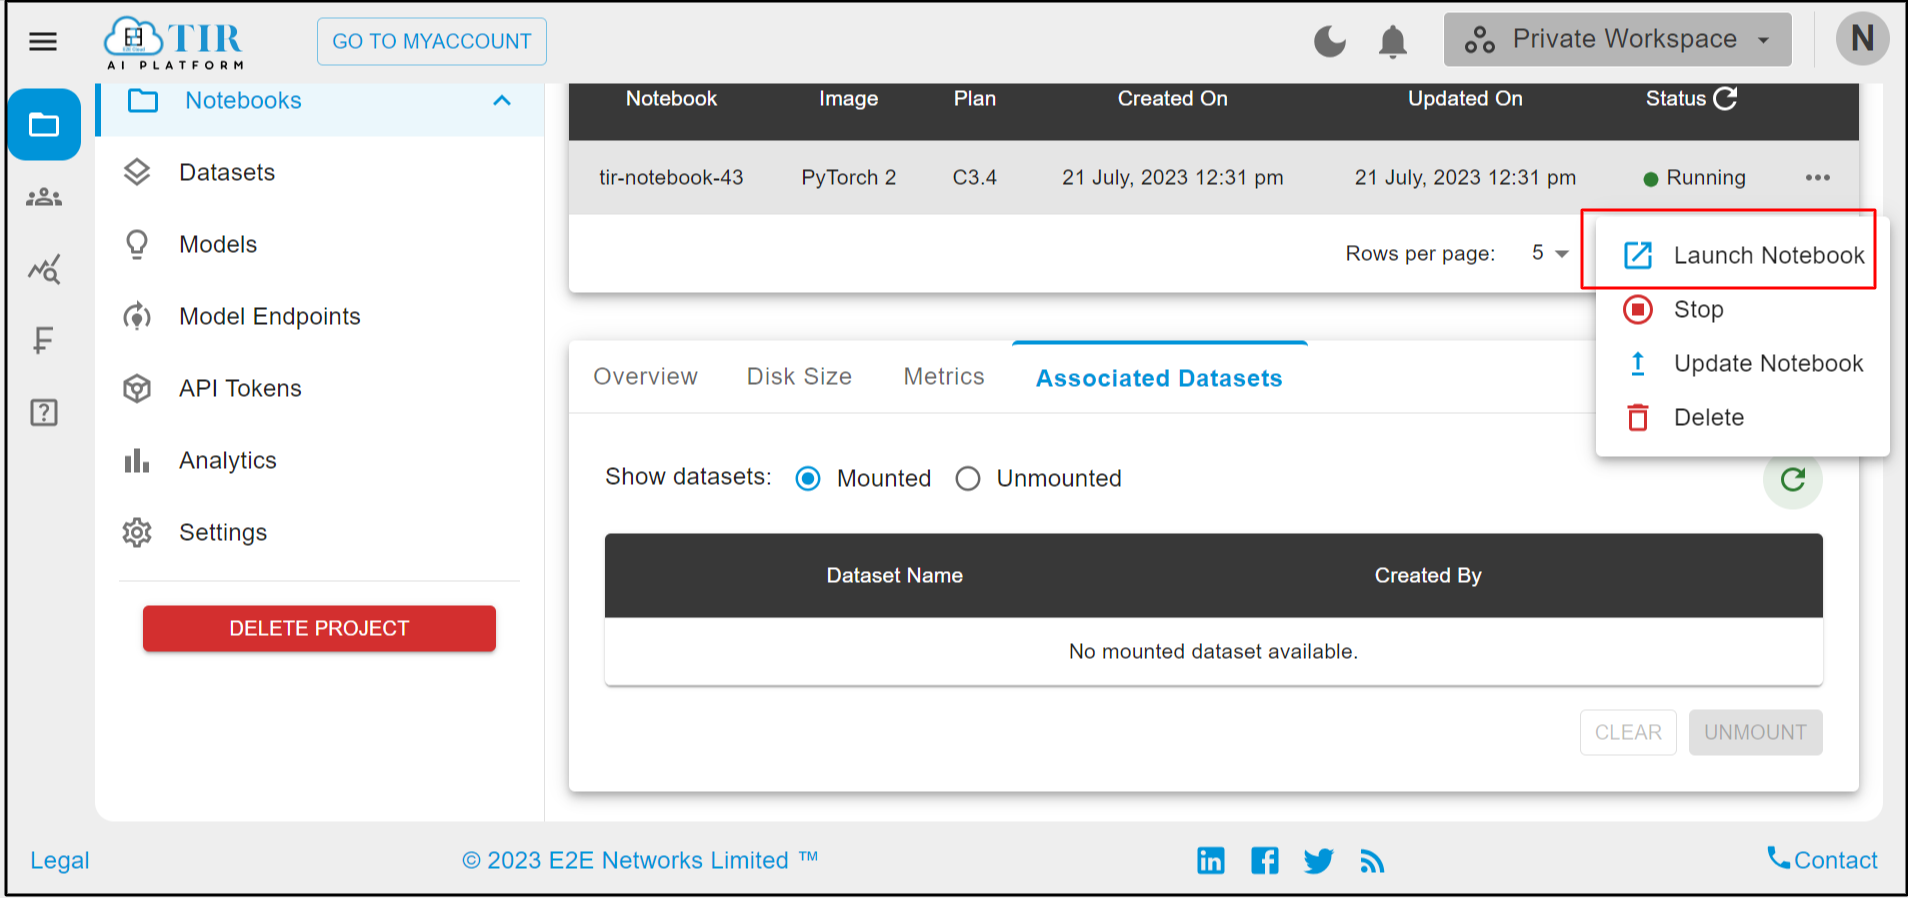
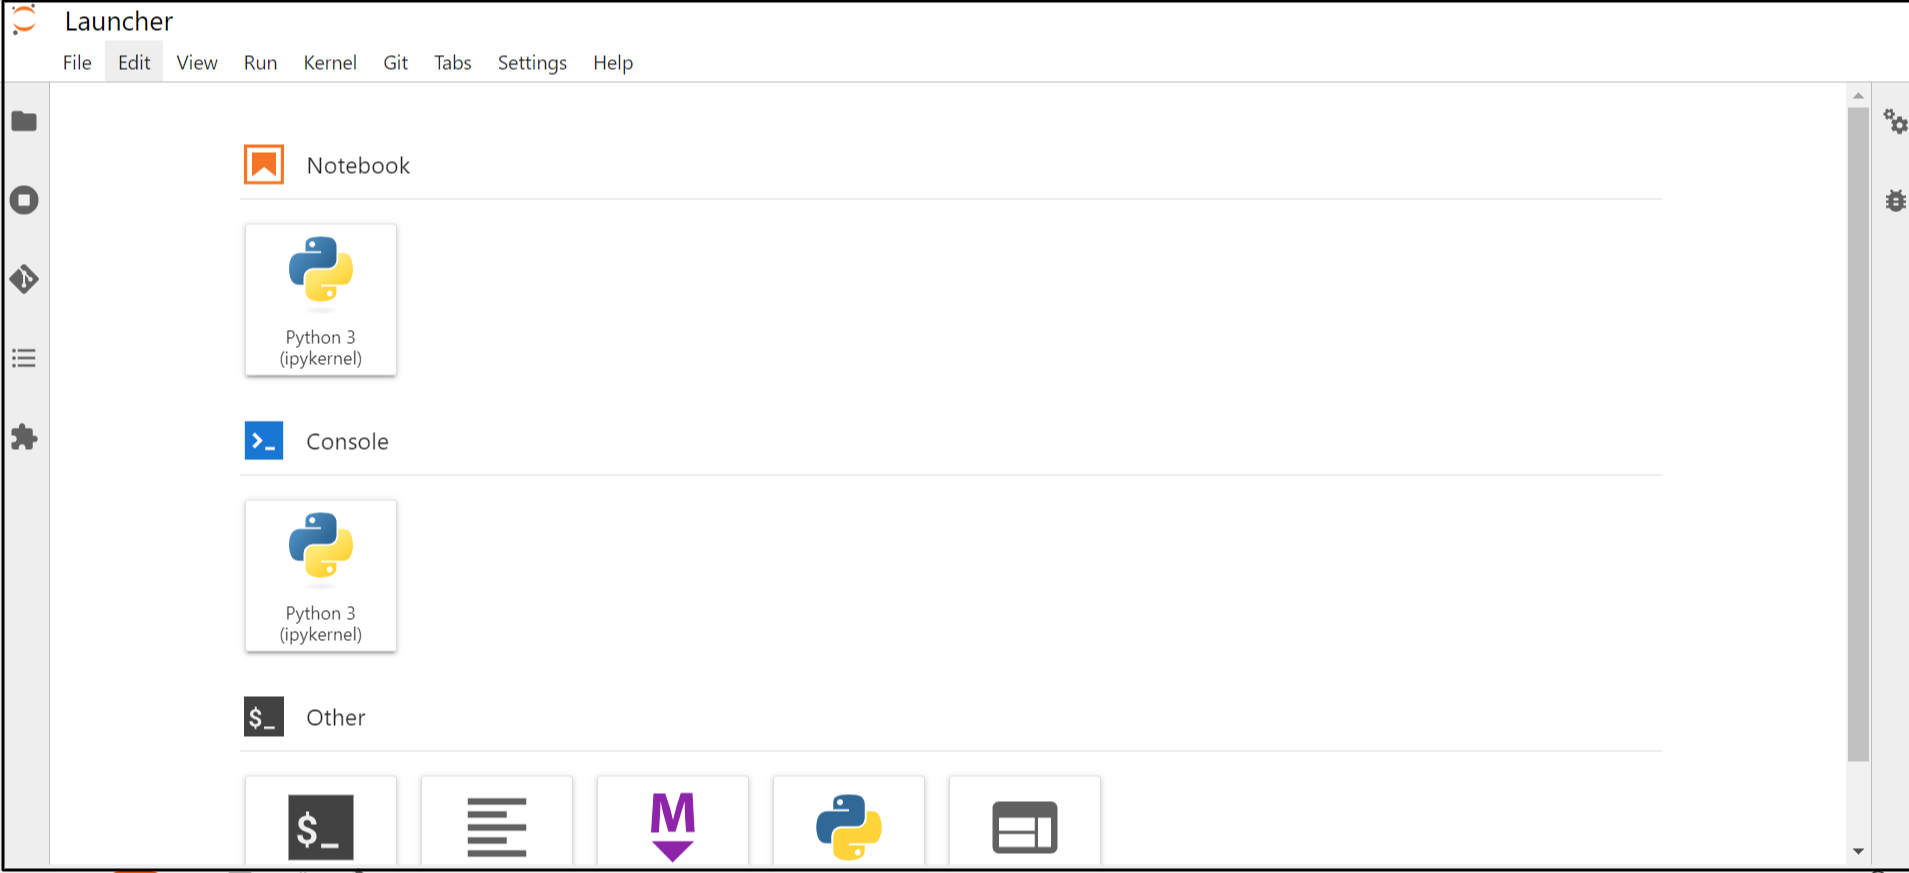
After clicking on Launch Node, Node will be launched and it should be visible like this.
Stop
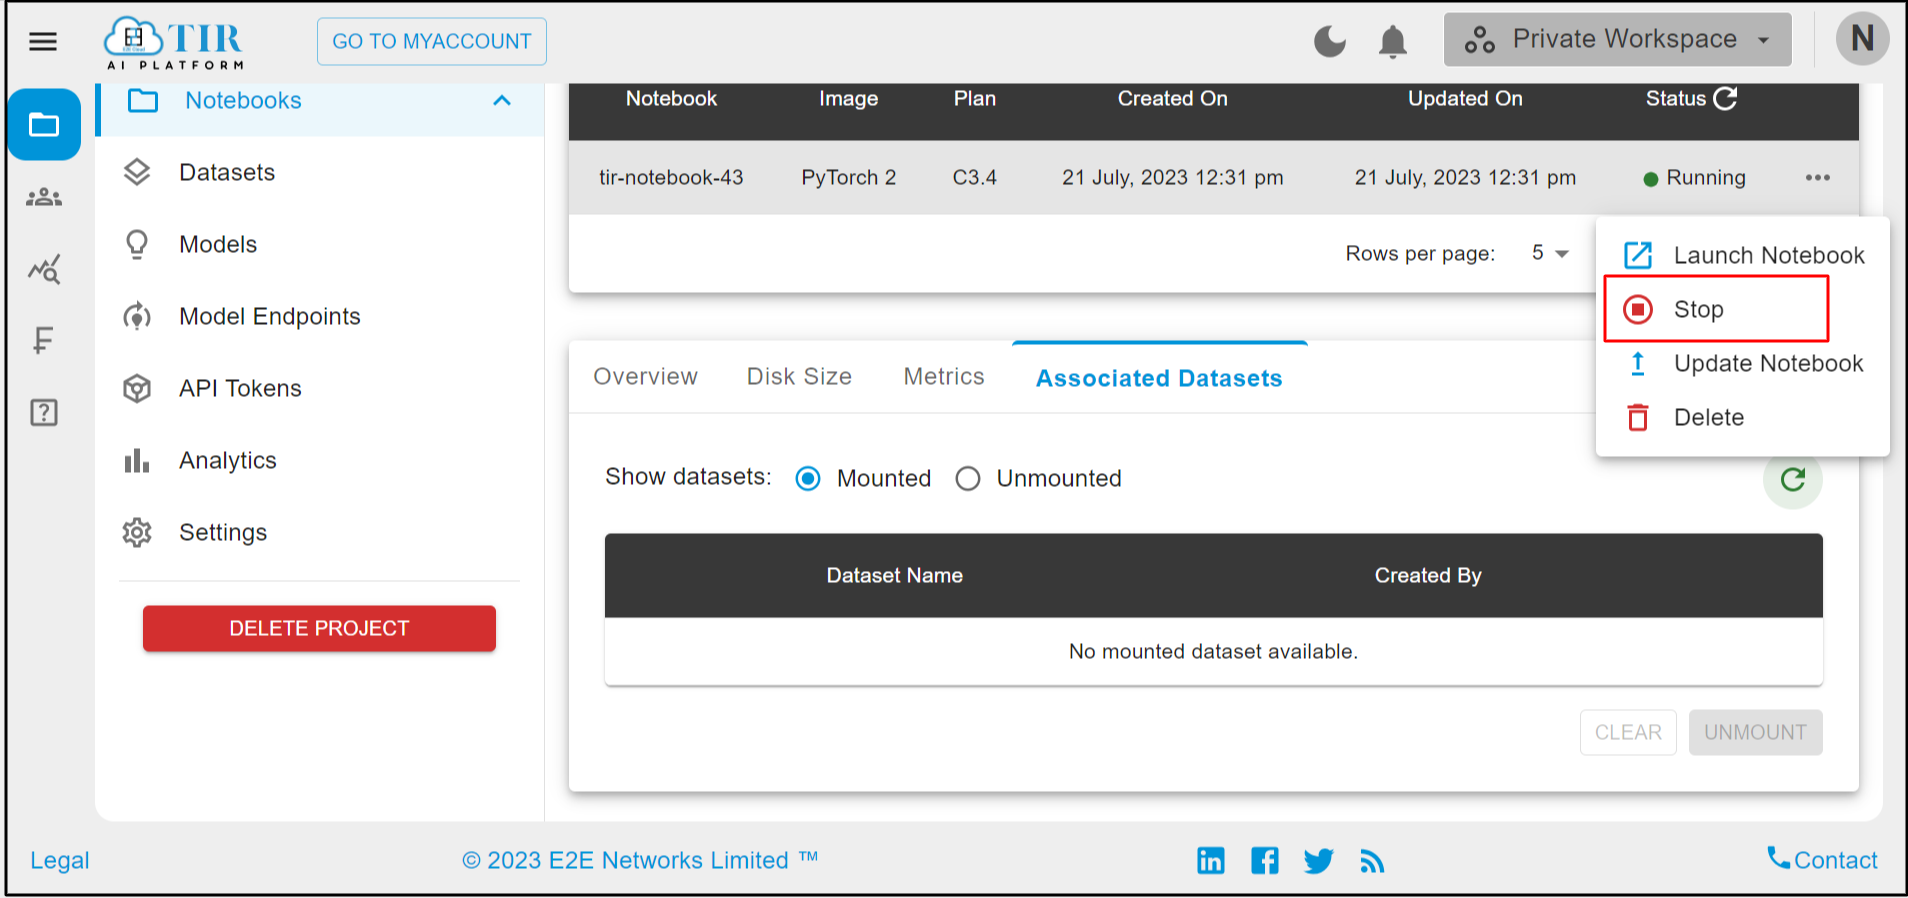
For Stopping the Notebbok you have to click on Stop button and the Node will be stopped.
Update Node
You can update Node, For updating the Node You have to click on Update button.
Note
Node must be in Stop state before updating the Node.
Delete Node
For Deleting the Node you have to click on Delete button.
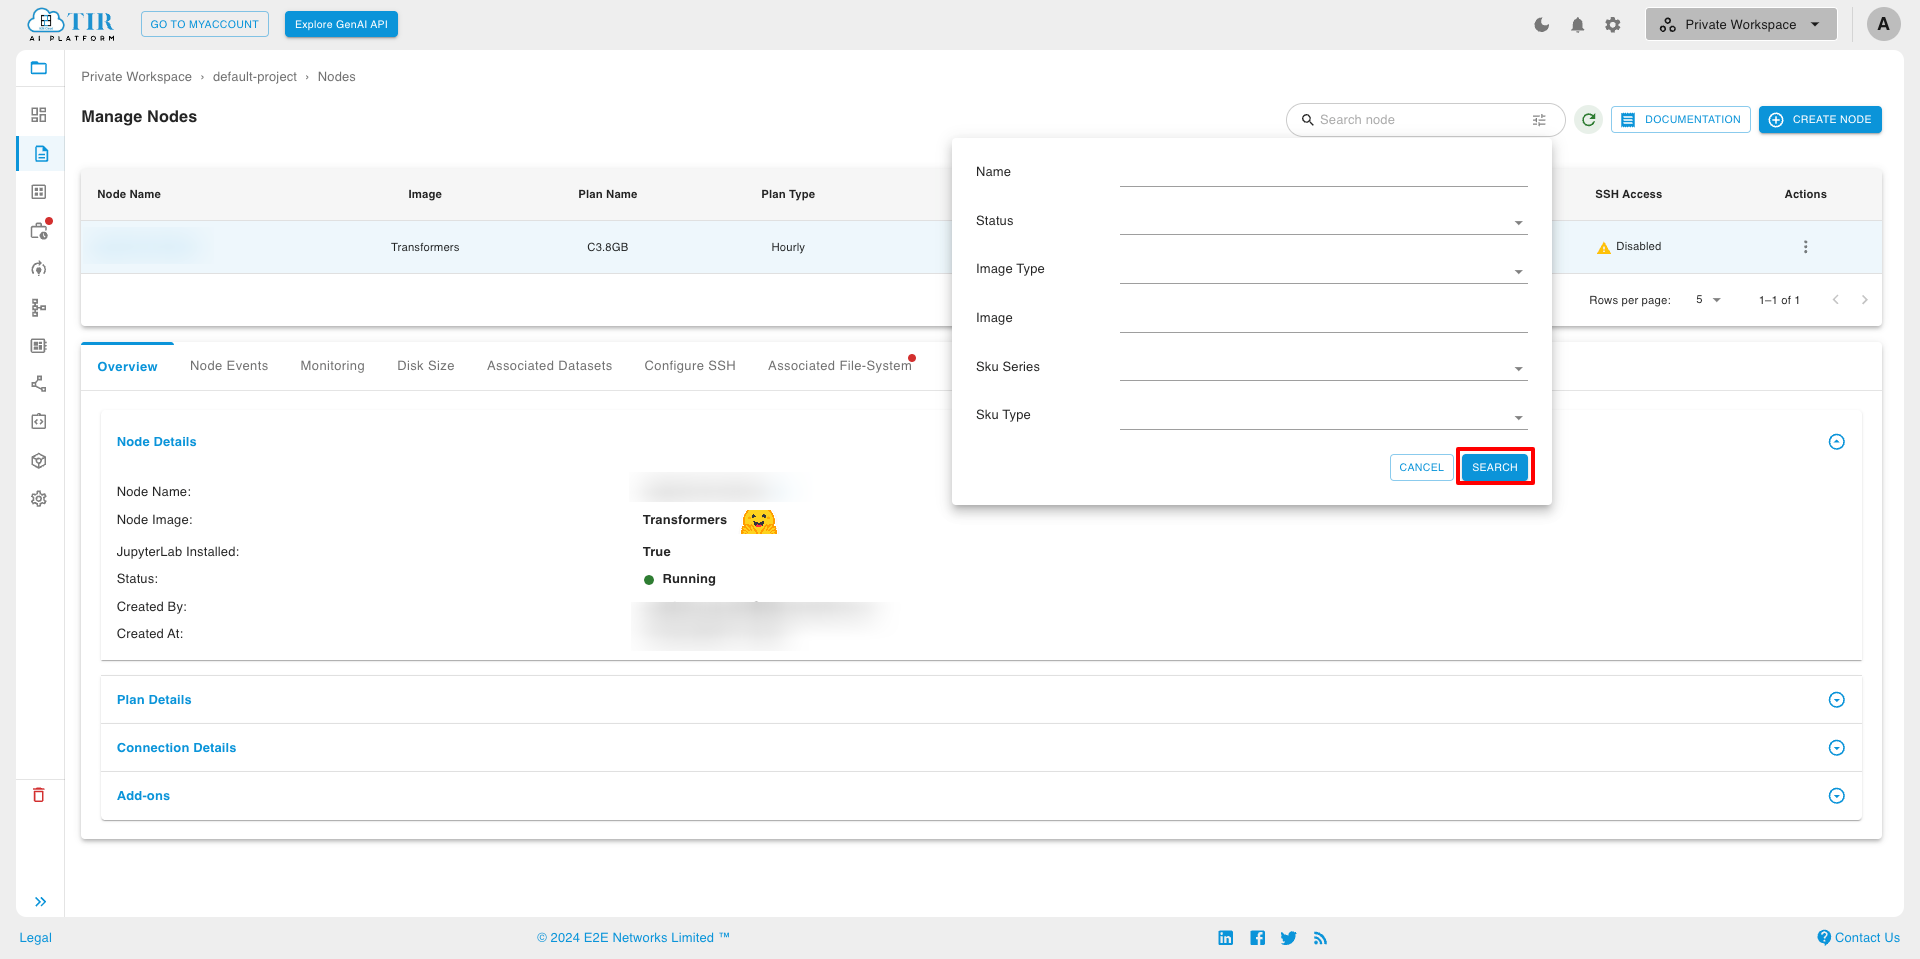
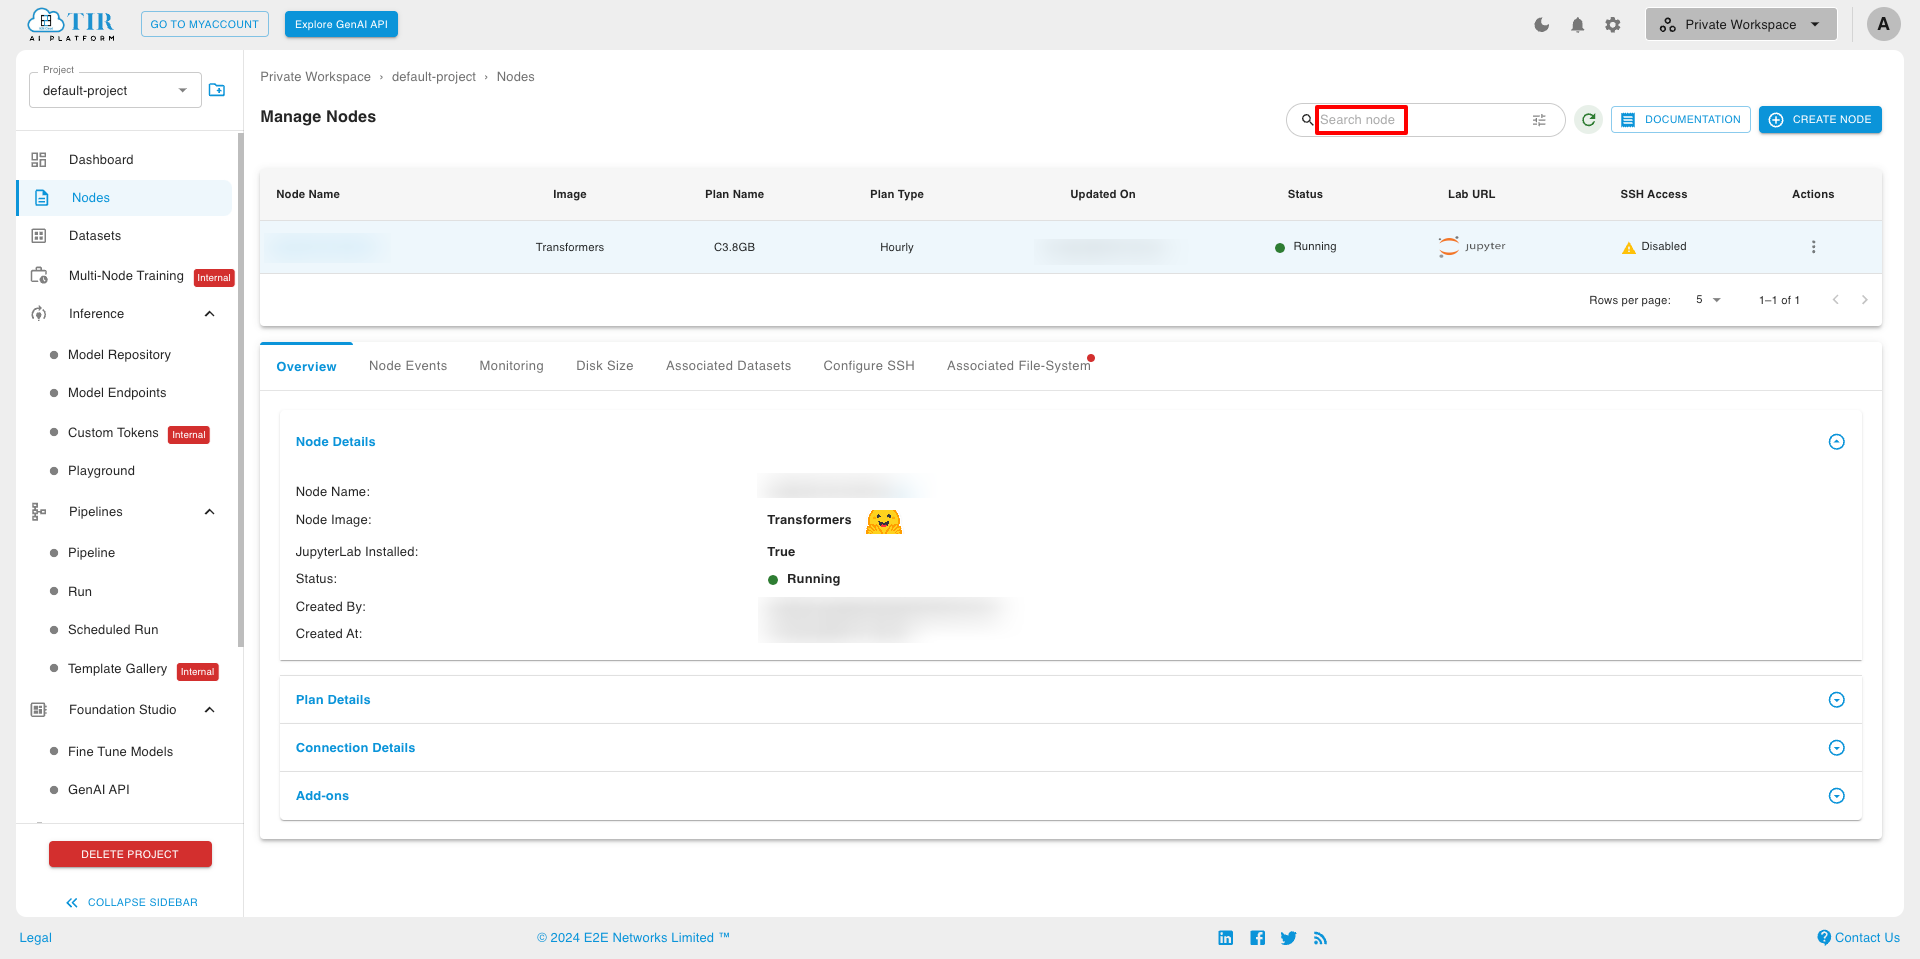
Advance Filter on Node
You can locate the node by entering its name in the search bar.
You can access advanced filter options by clicking on this button.
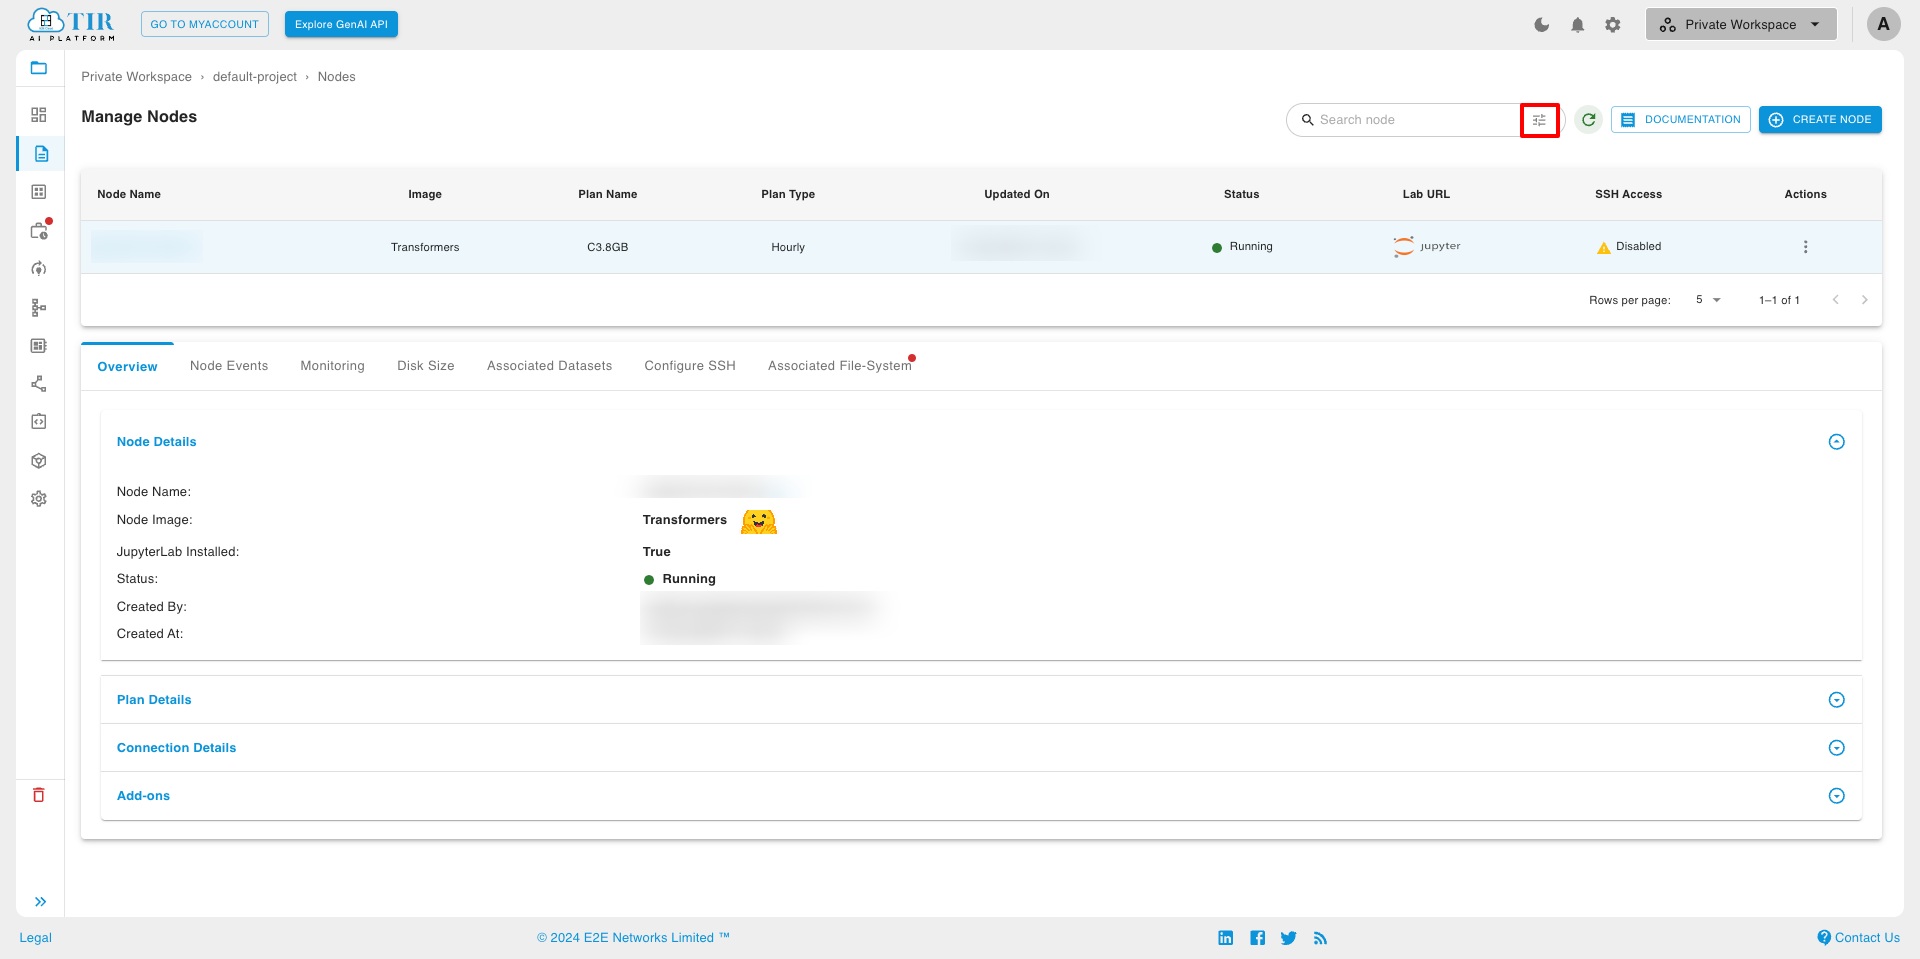
You can apply the advanced filter configurations and then click the search button.
