Application Load Balancer
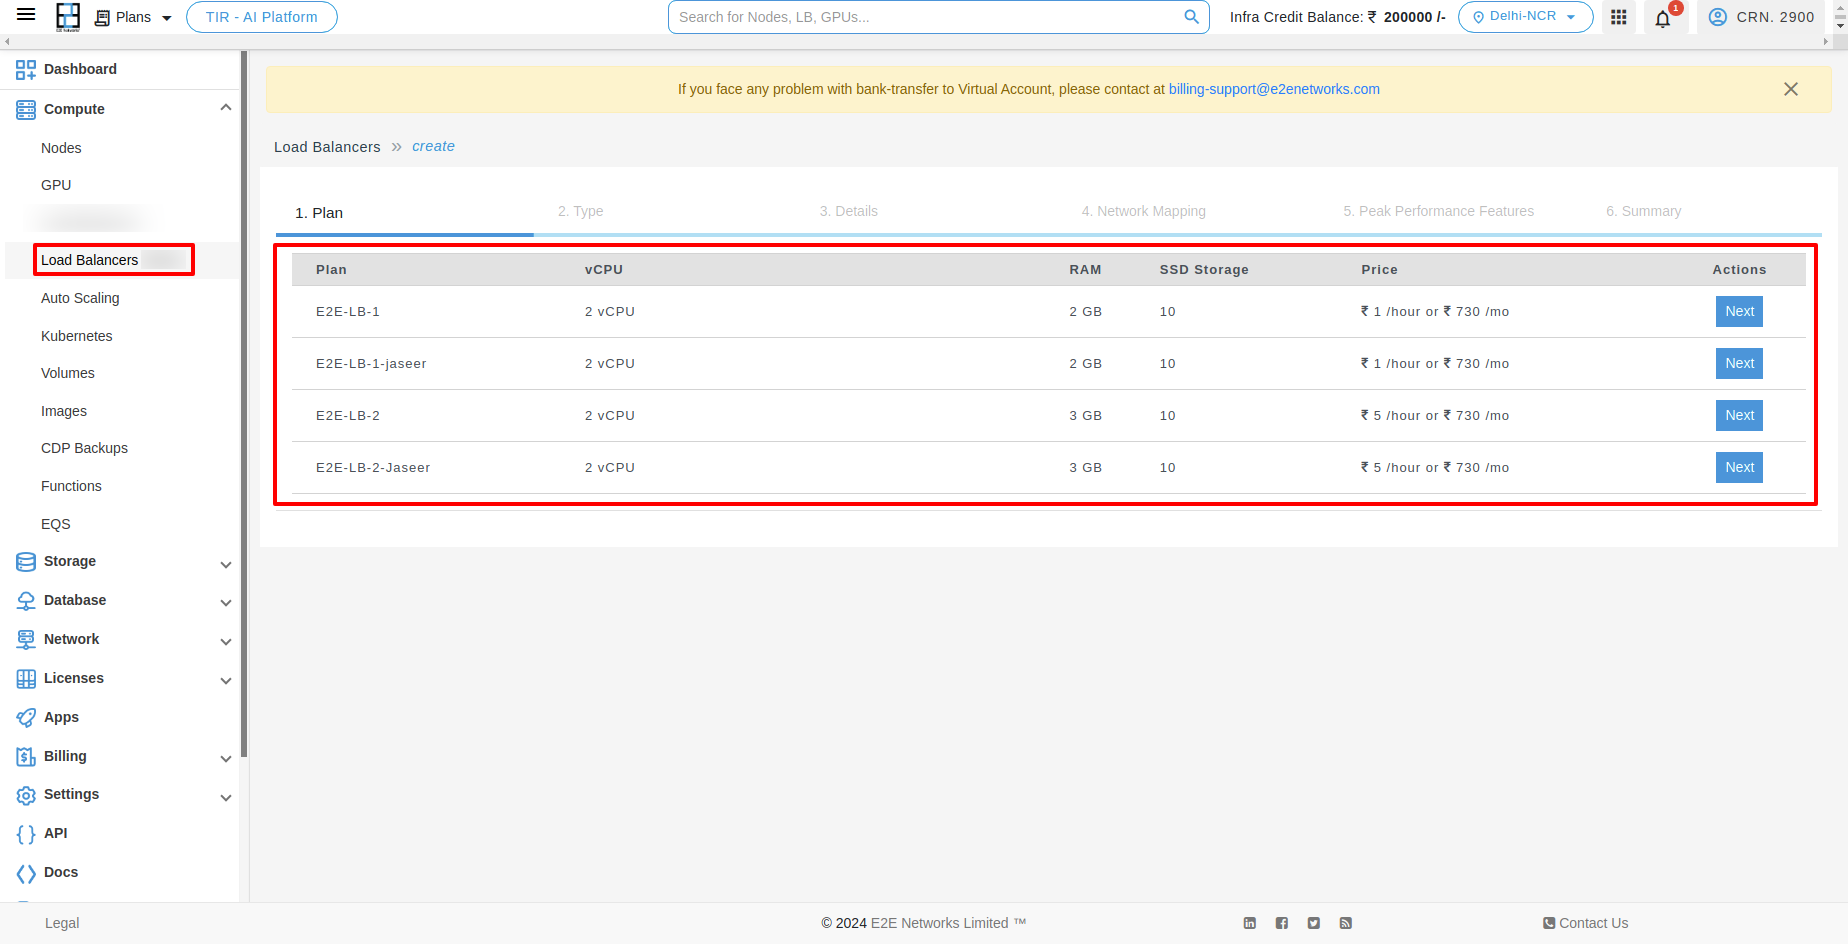
Select your Load Balancer Plan
- All the load balancer plans are listed based on different memory, vCPU, storage configuration, and price.
- Select a plan to create the new load balancer.
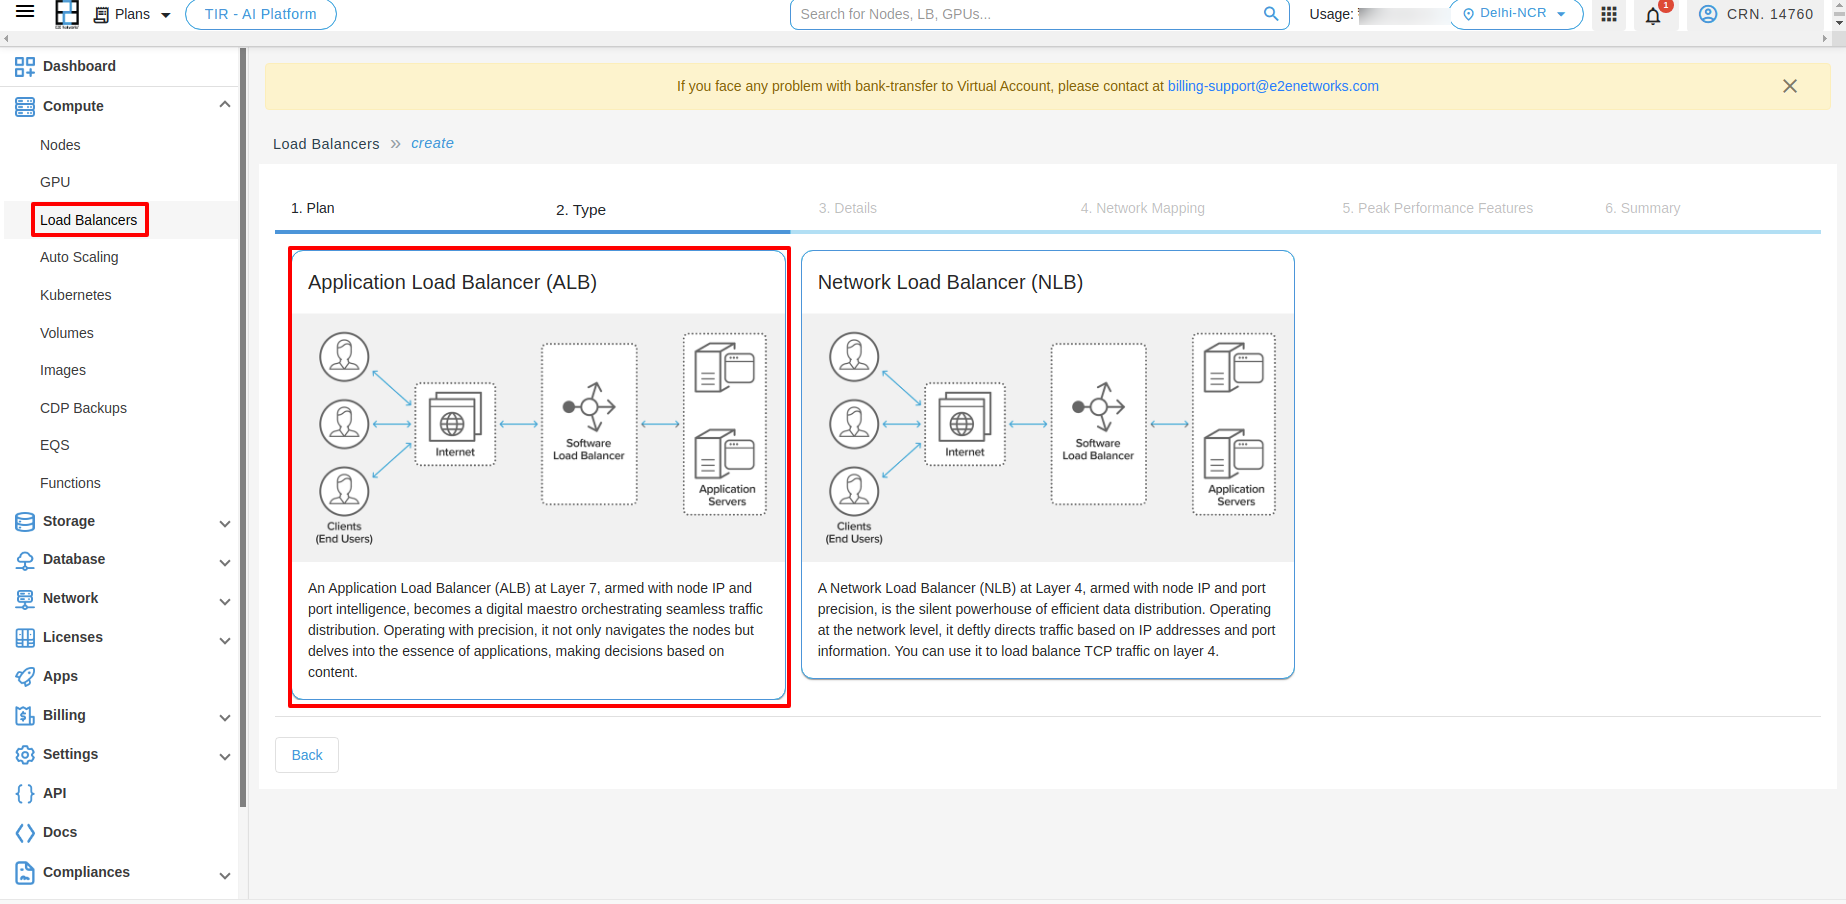
Type
- After selecting the plan, choose the Application Load Balancer type.
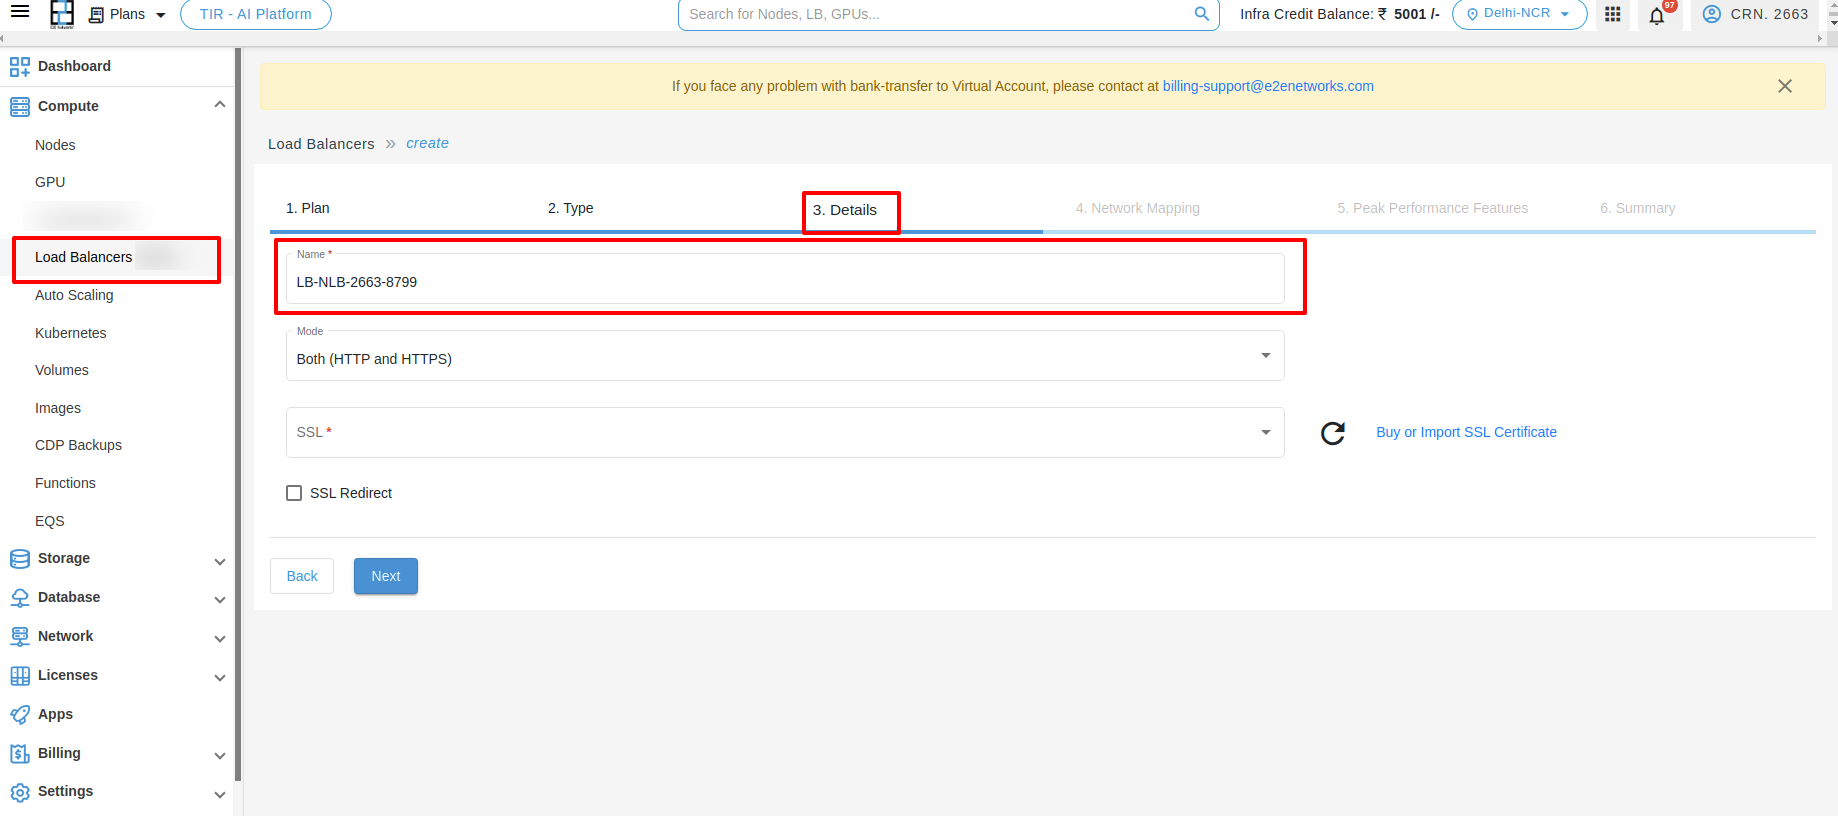
Details
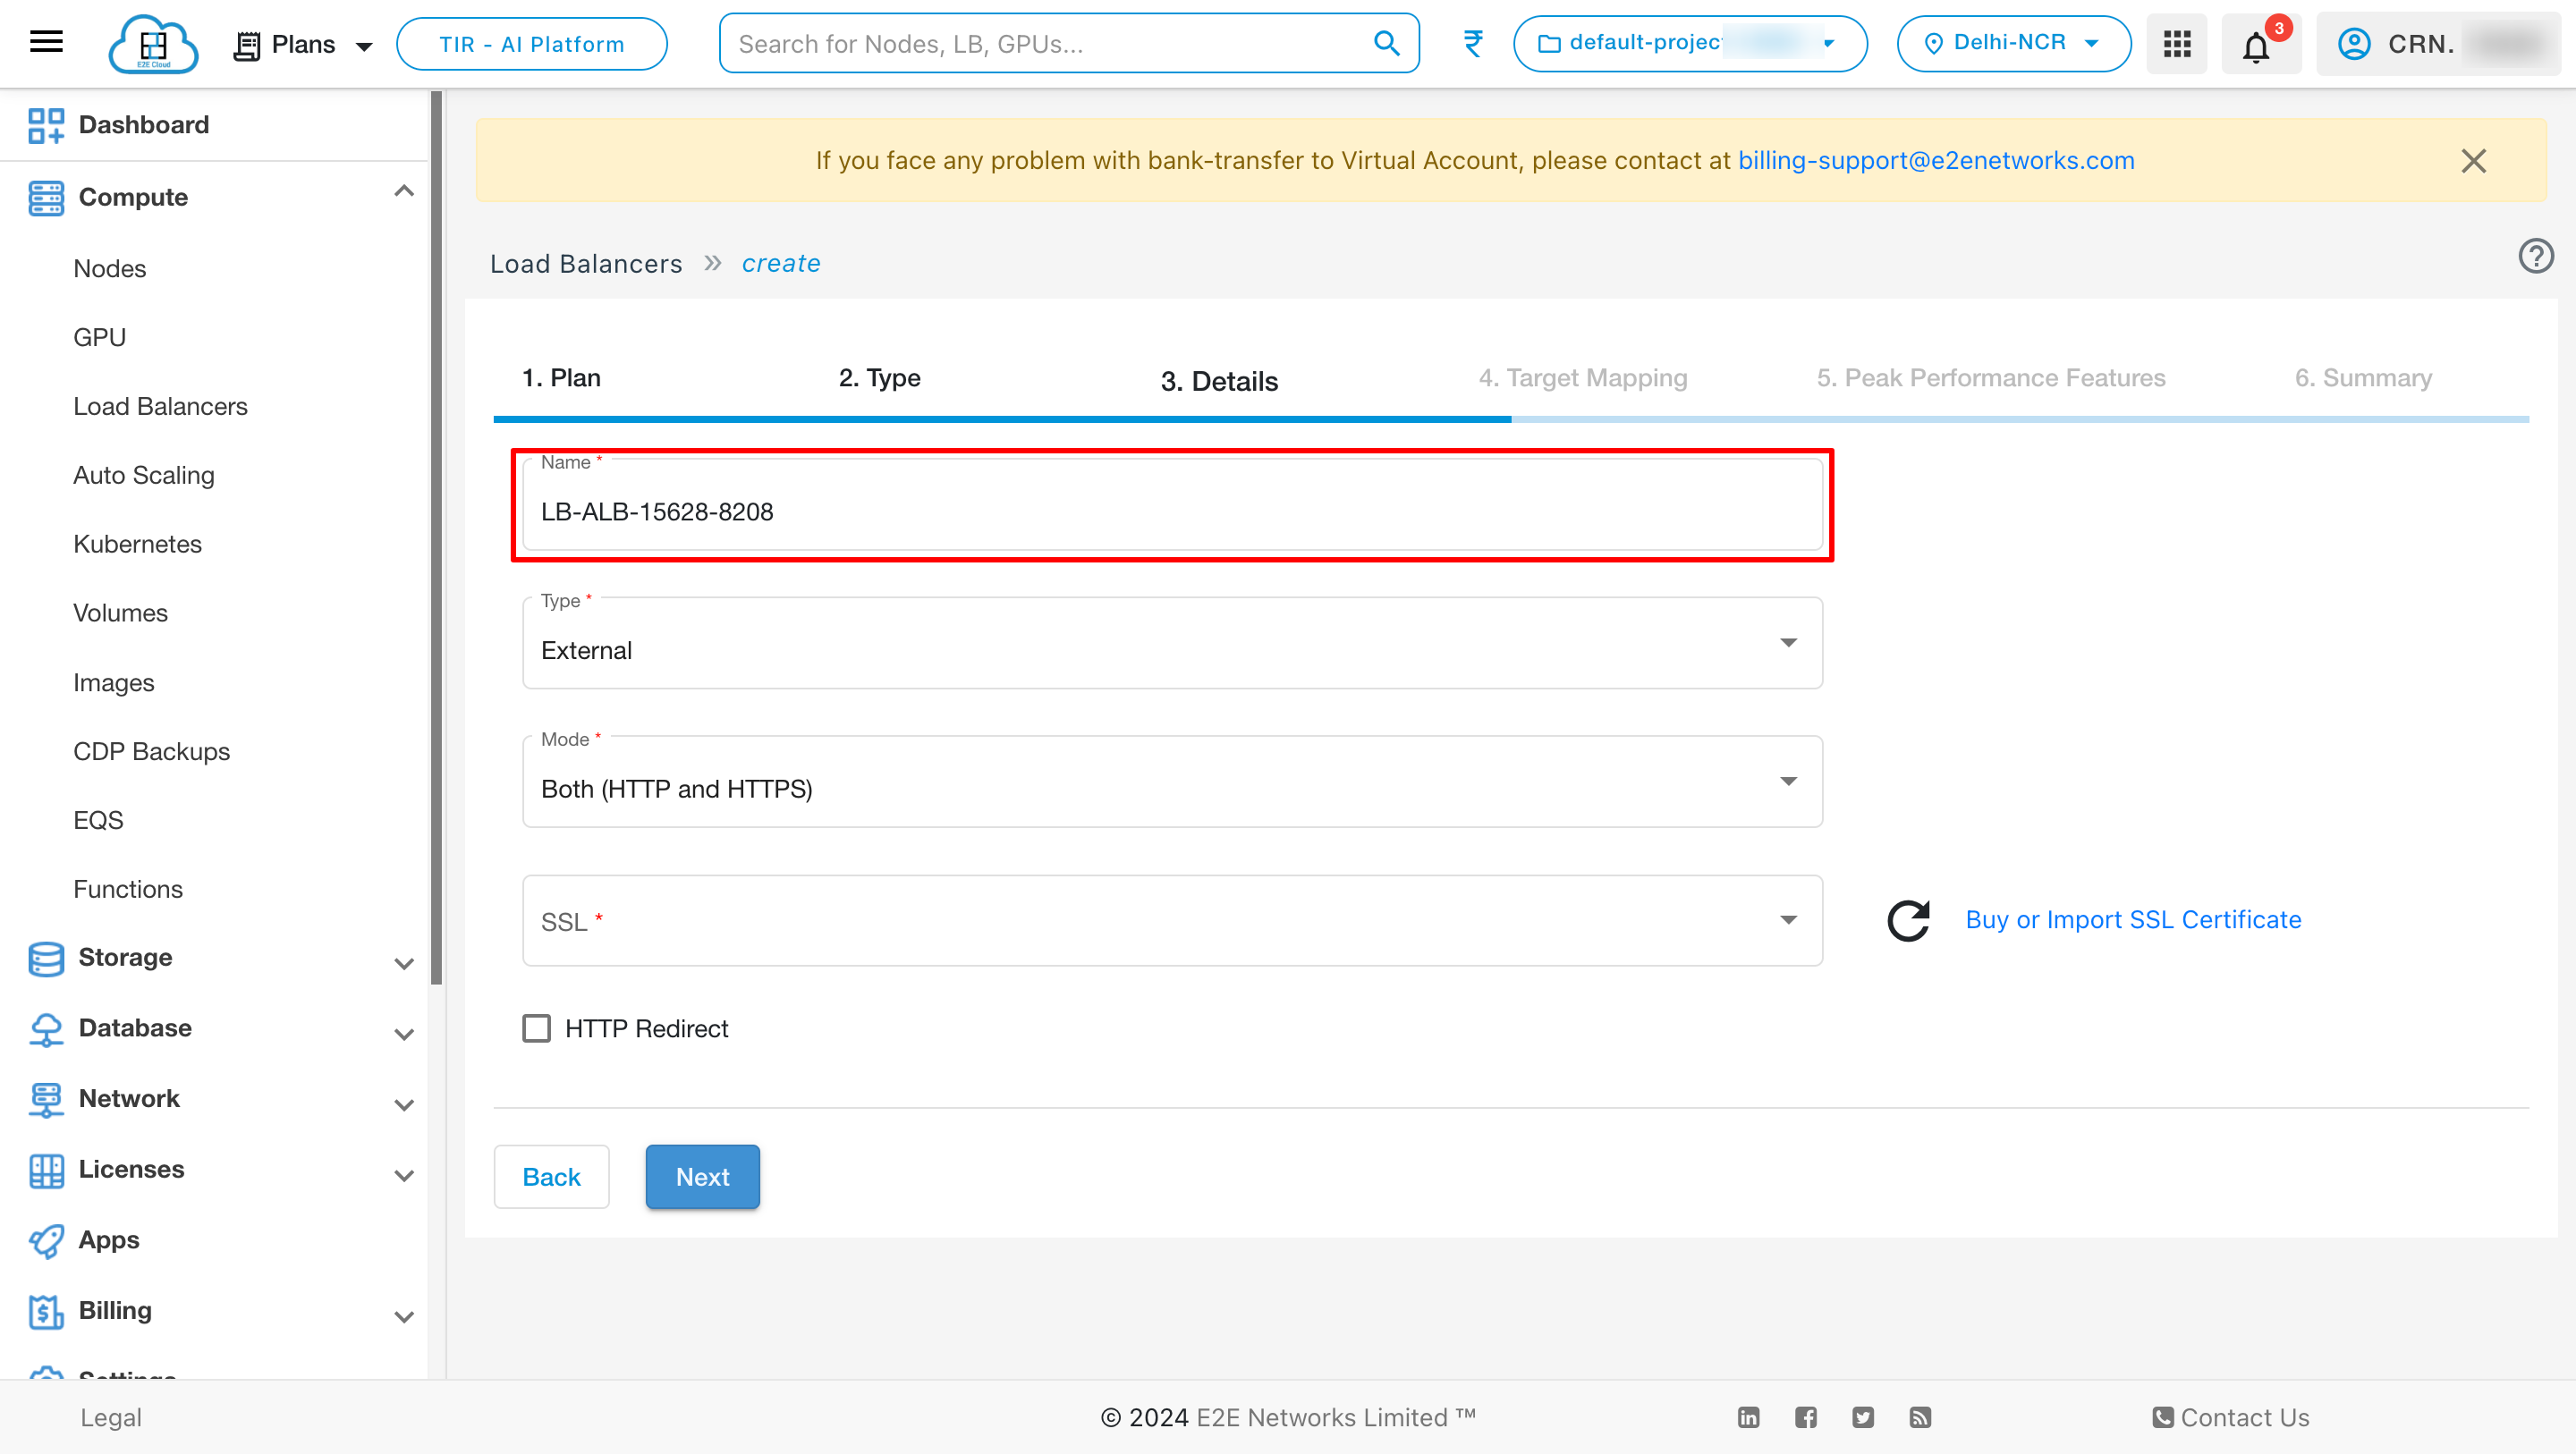
- Name: A default name is provided based on the selected plan, but you can modify it.
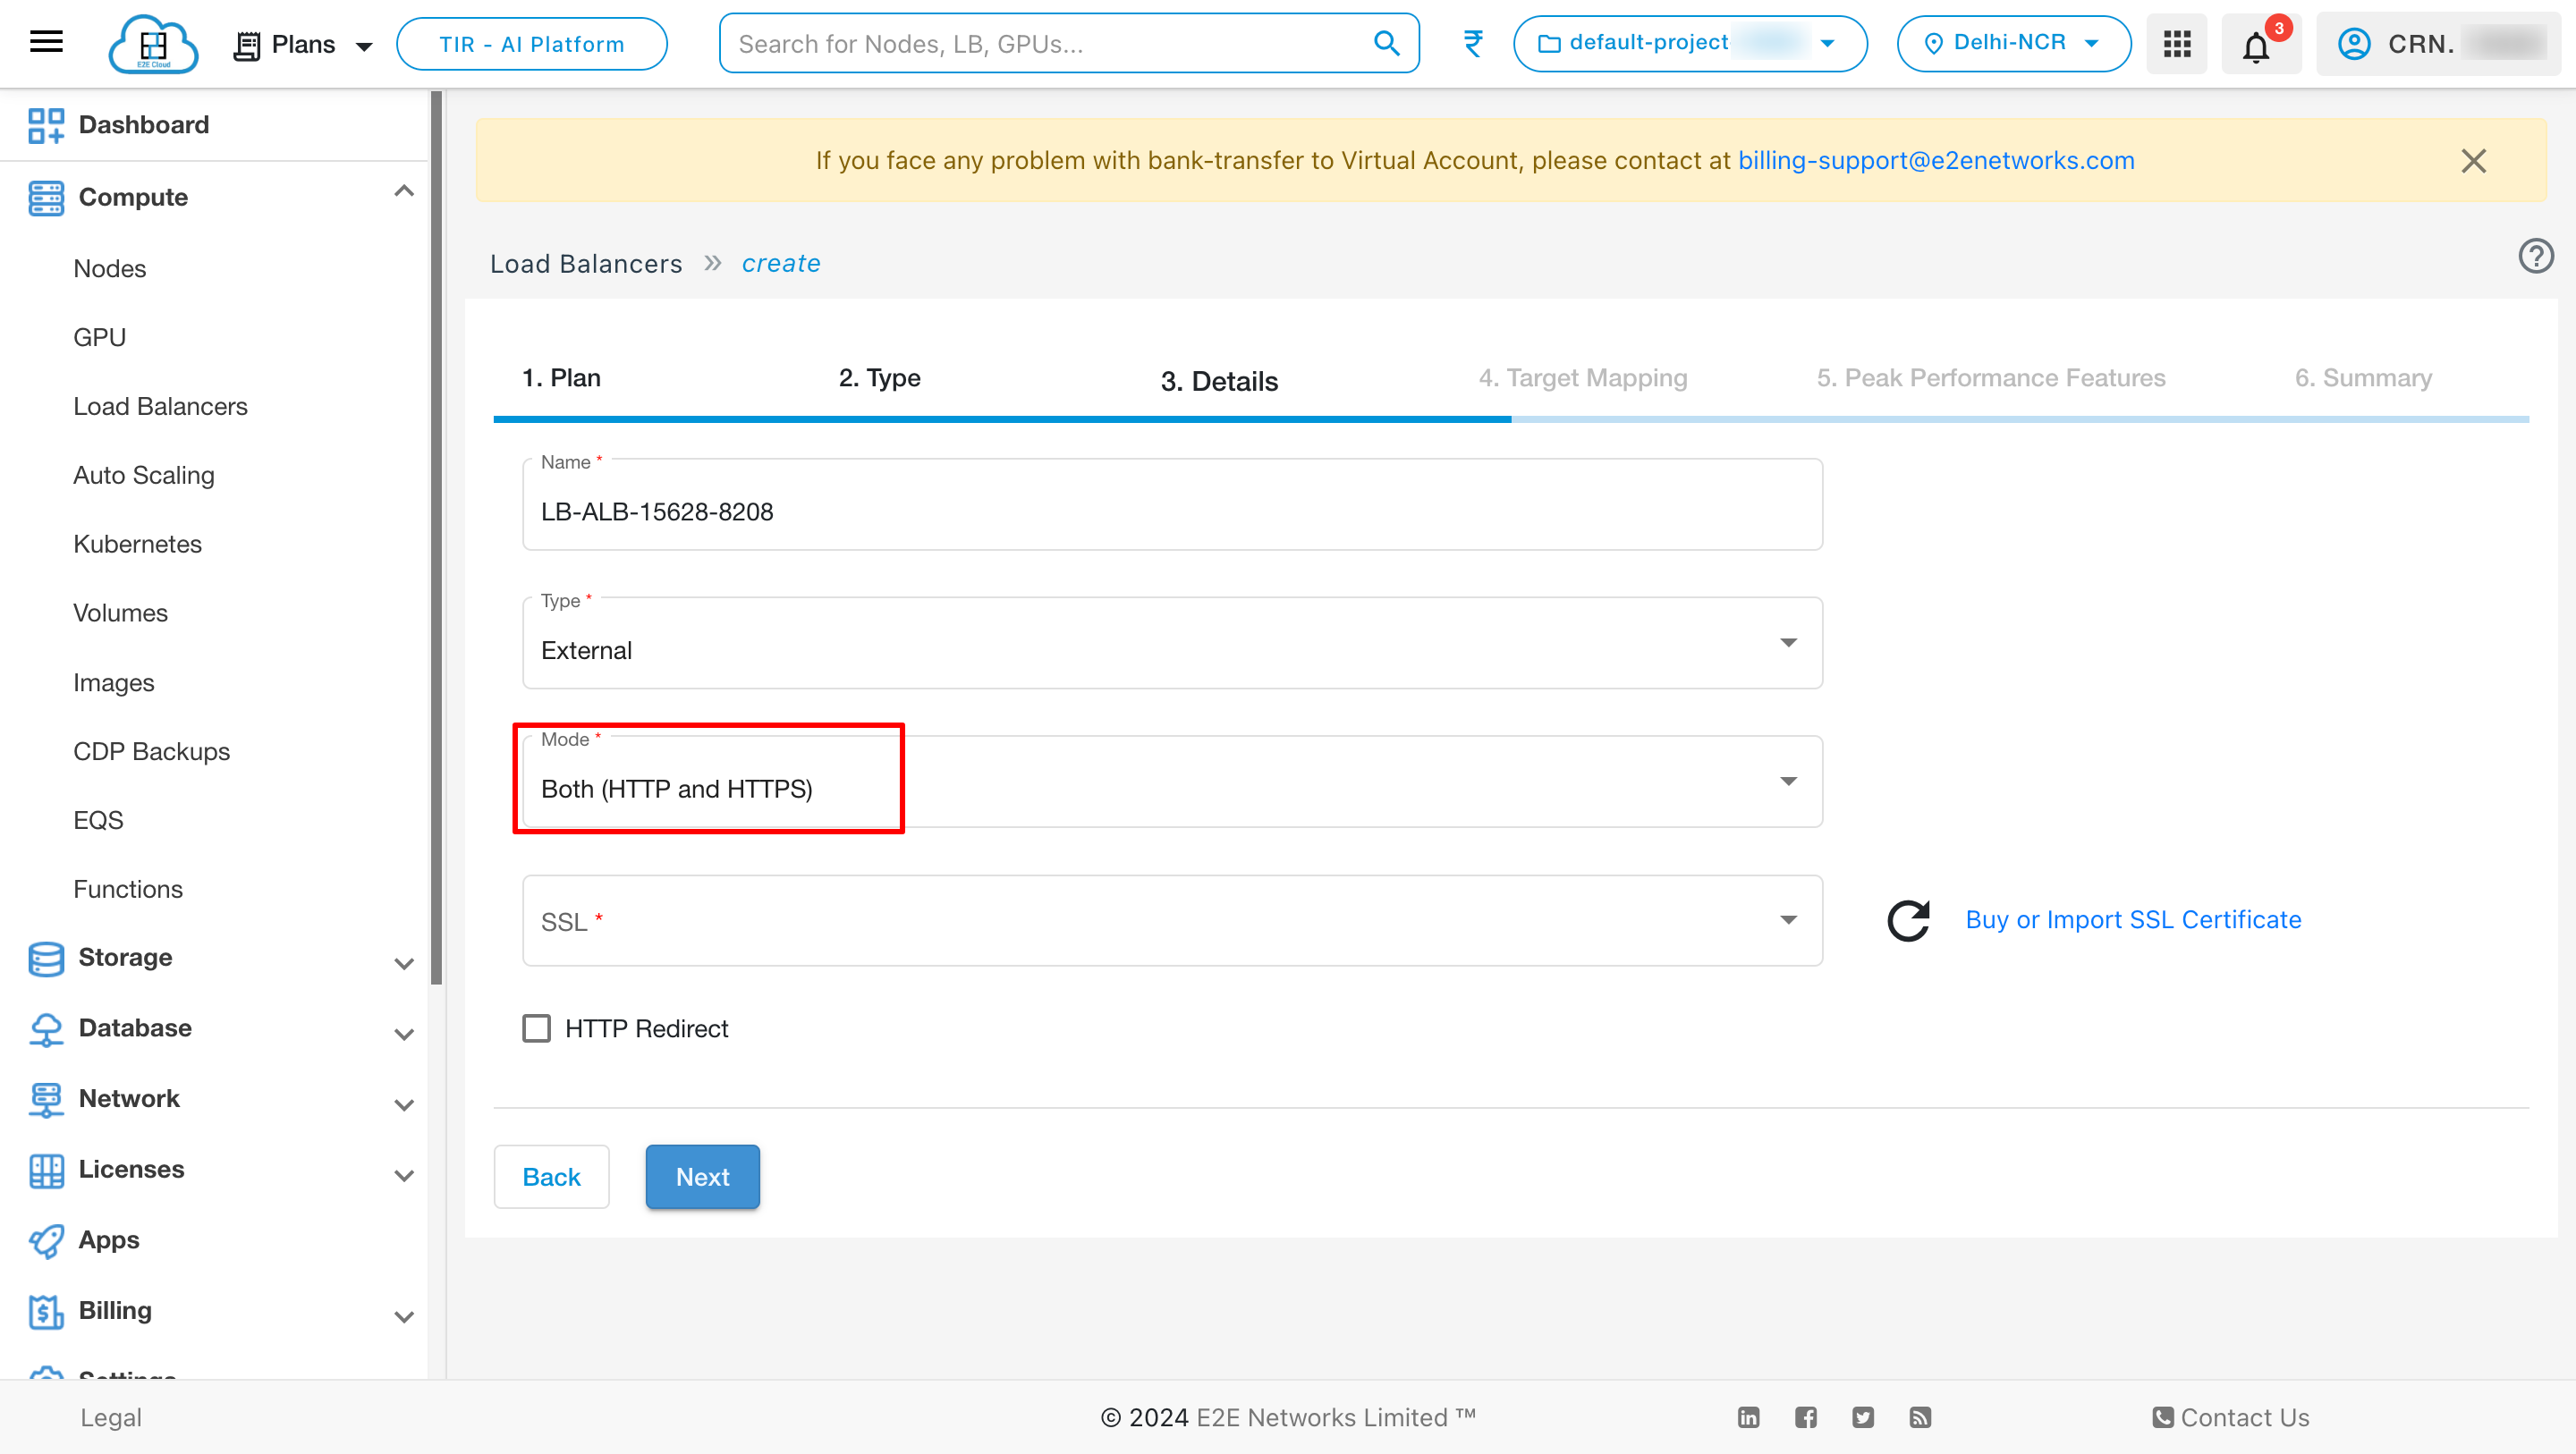
- Type: Select either Internal or External, depending on your requirement.
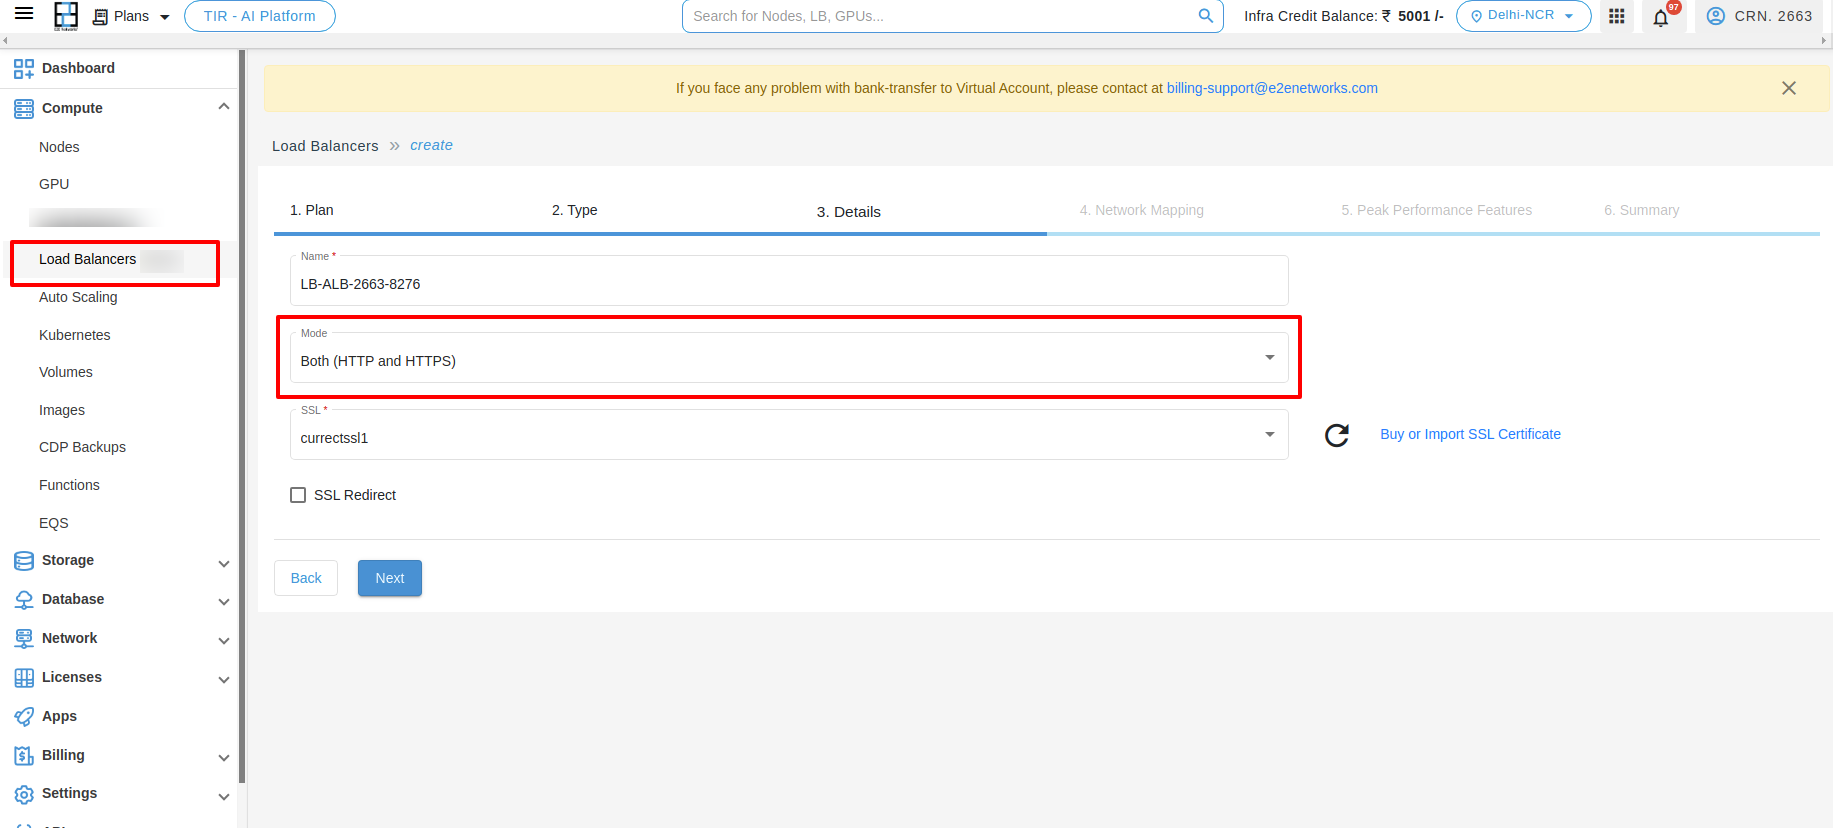
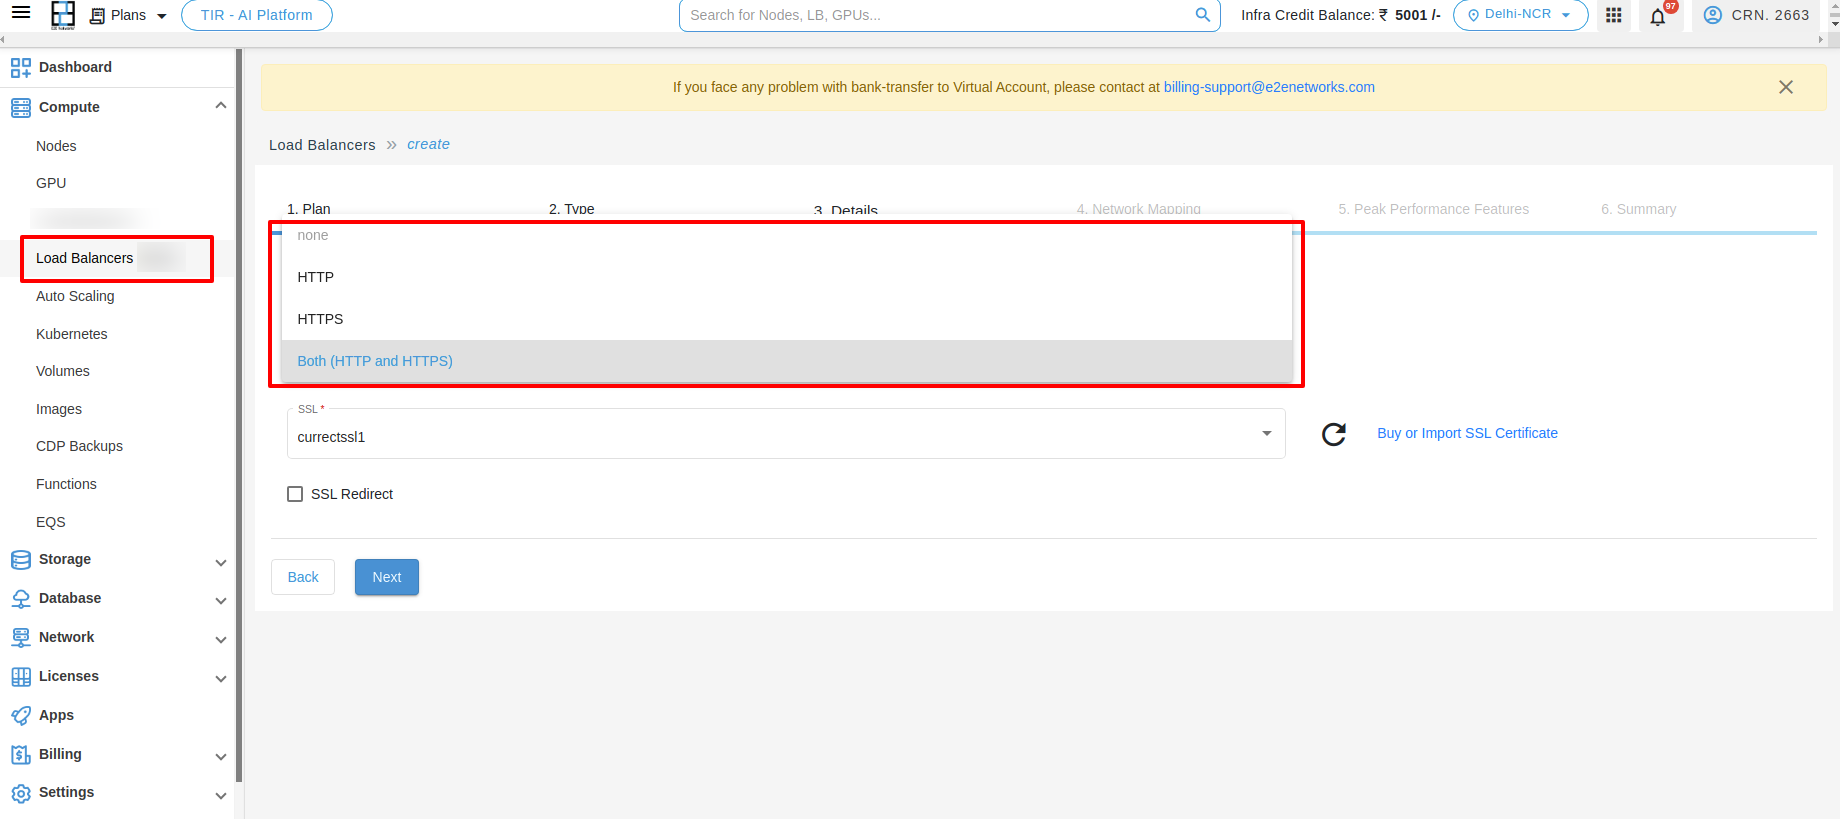
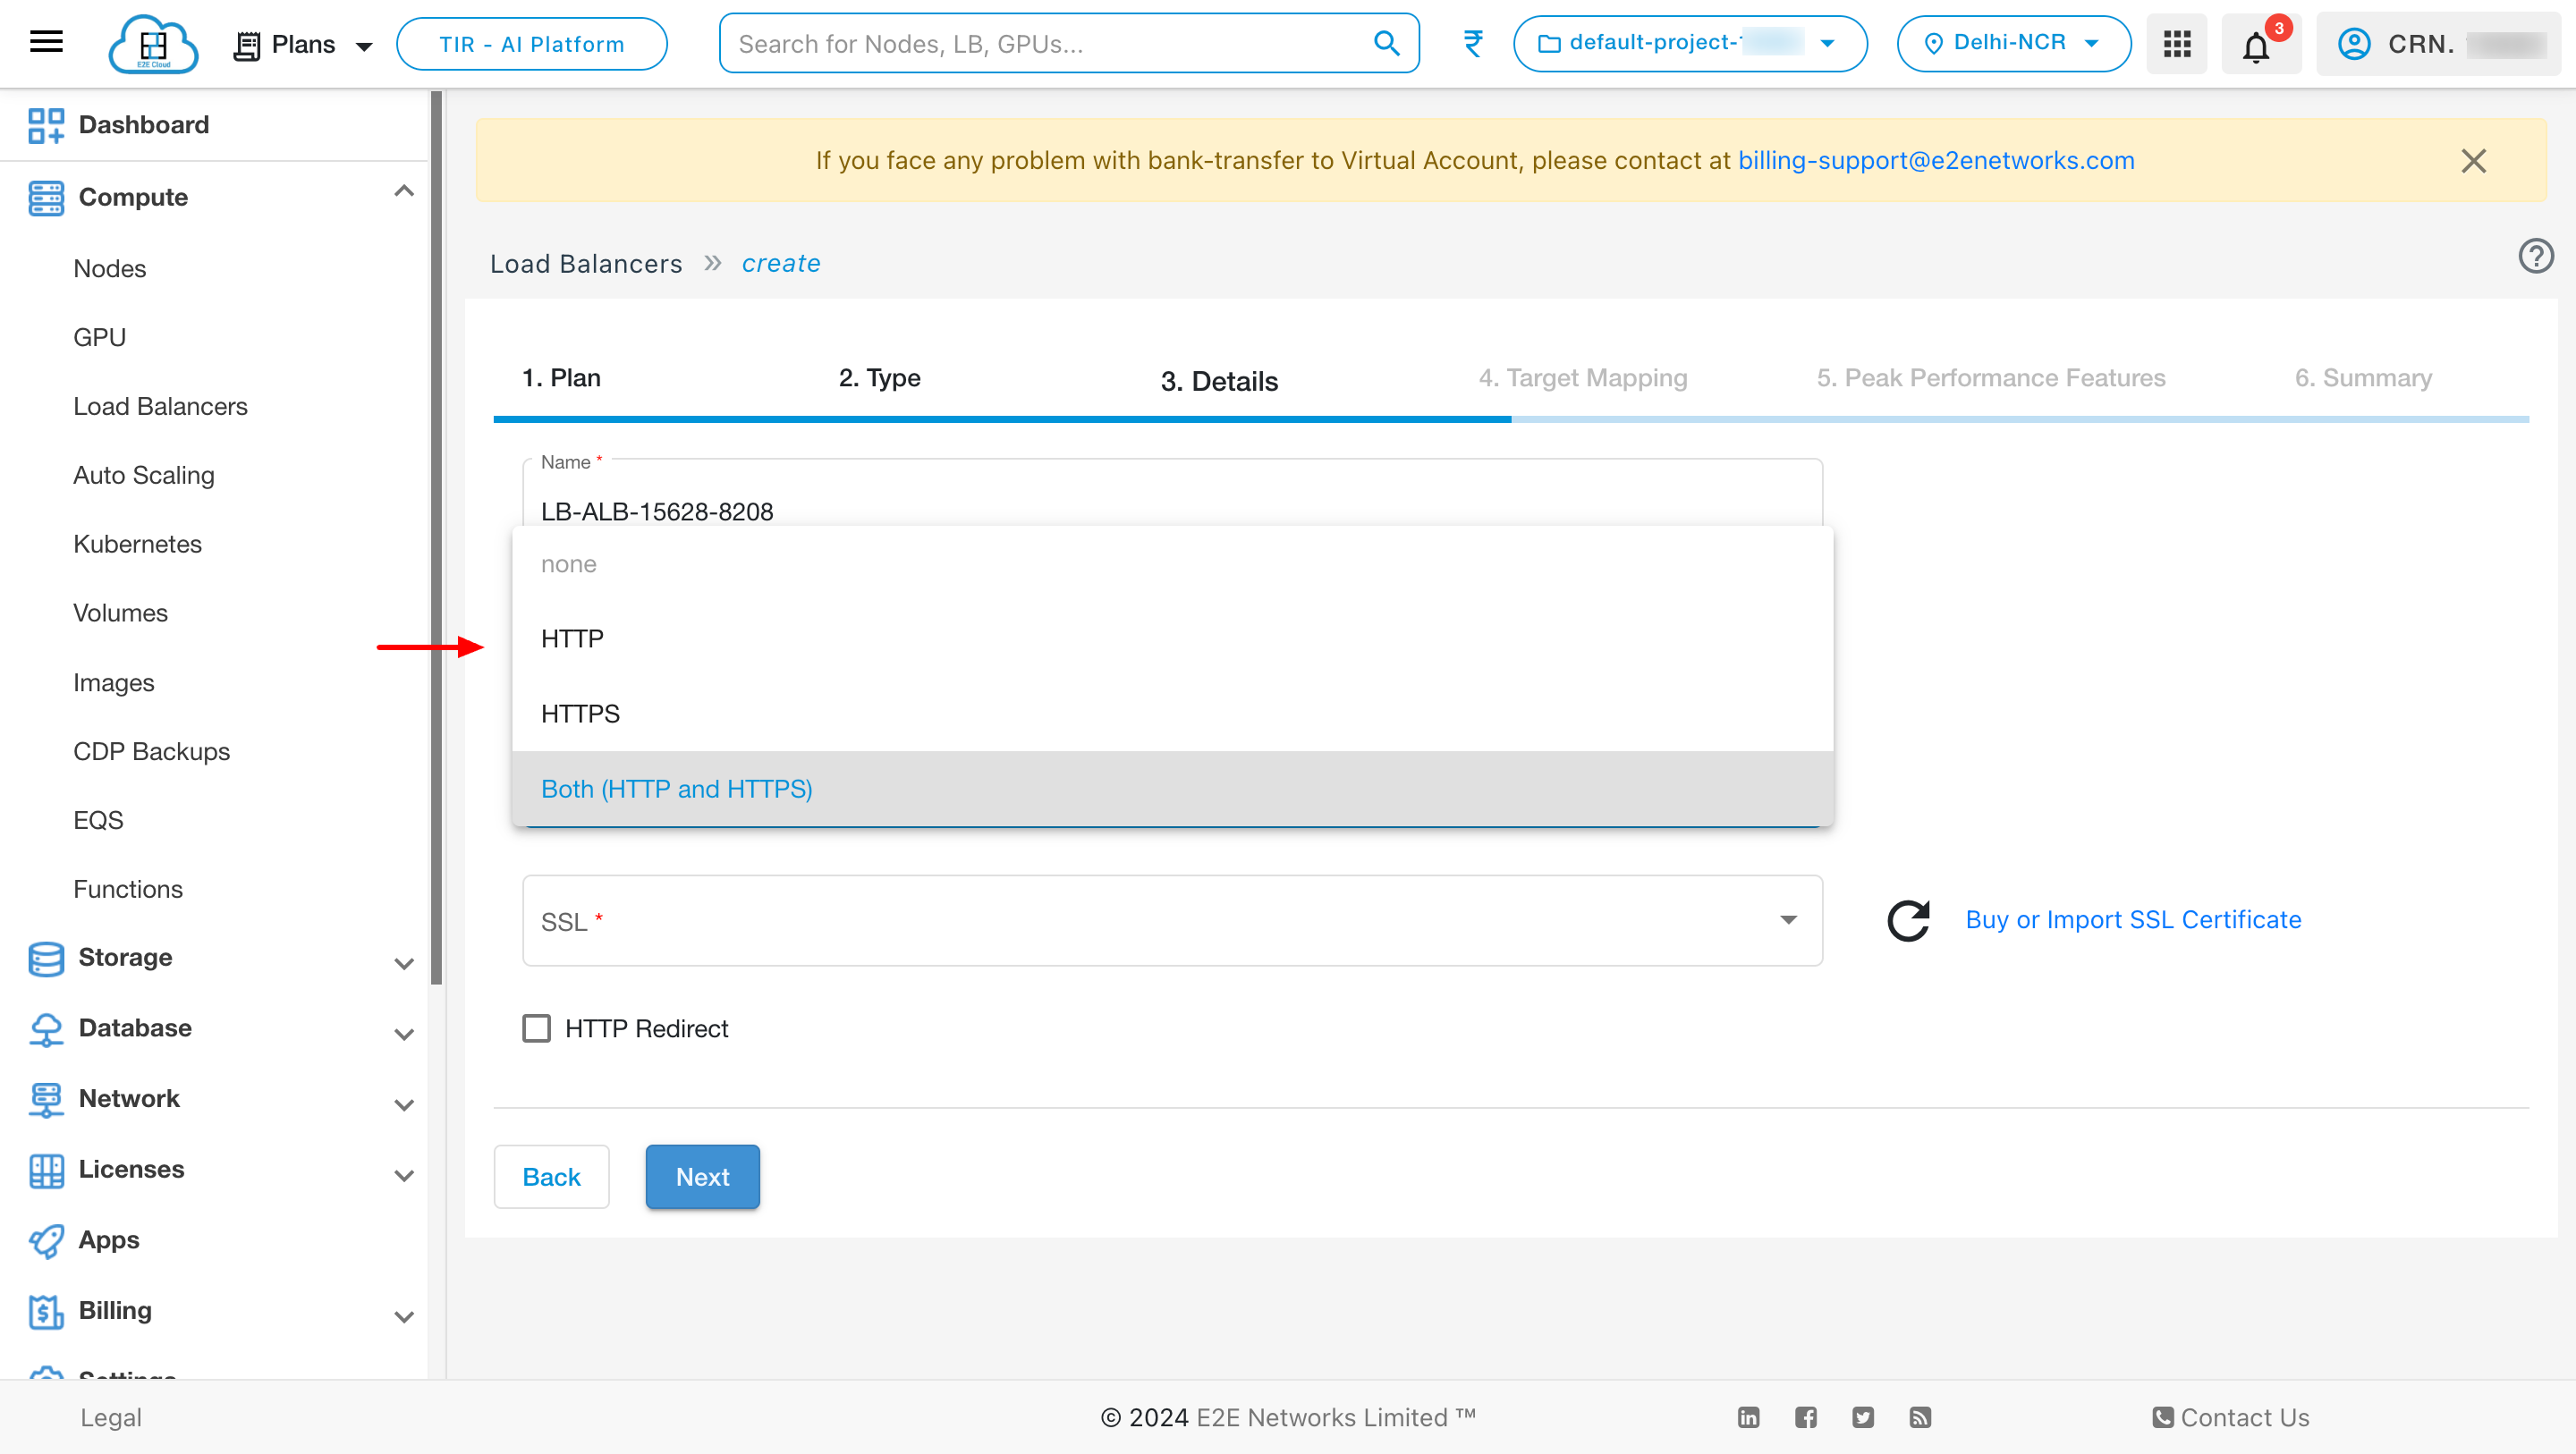
Mode
- Choose Mode: Mode checks for connection requests using a specified protocol and port for front-end (client to load balancer) connections. E2E Networks Load Balancer supports the following protocols:
- HTTP and HTTPS protocols independently.
- HTTPS (secure HTTP) using SSL/TCL: Supports the X-Forwarded headers and requires an SSL certificate on the load balancer.
- HTTP: Supports the X-Forwarded headers.
Note: For back-end (load balancer to nodes) connections, the HTTP protocol is used by default.
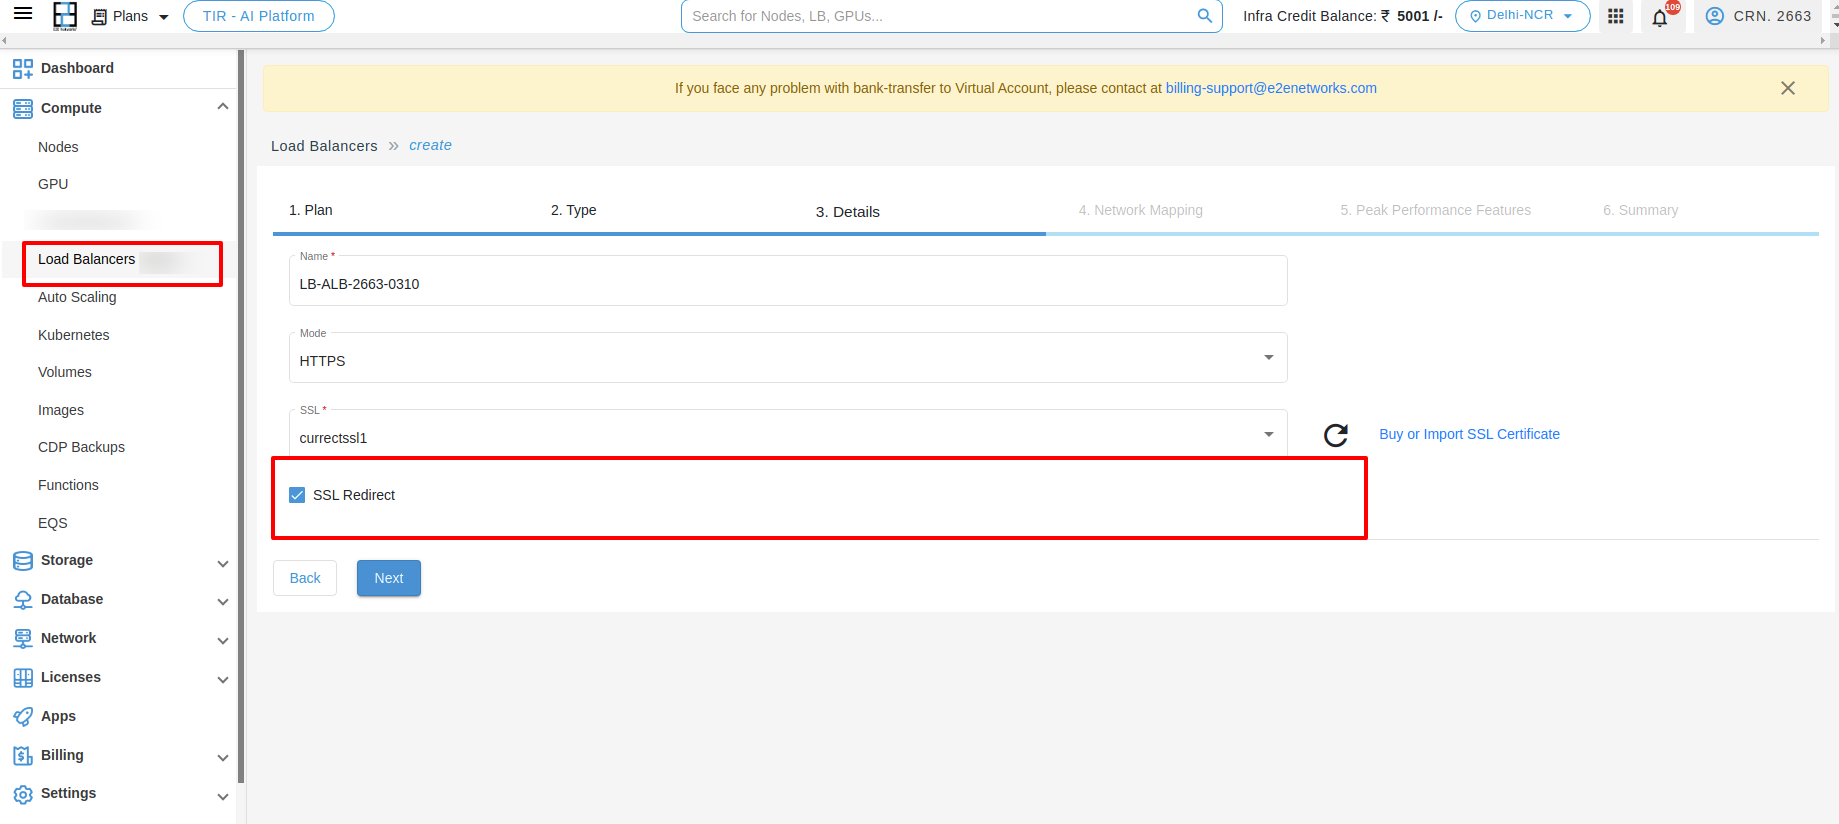
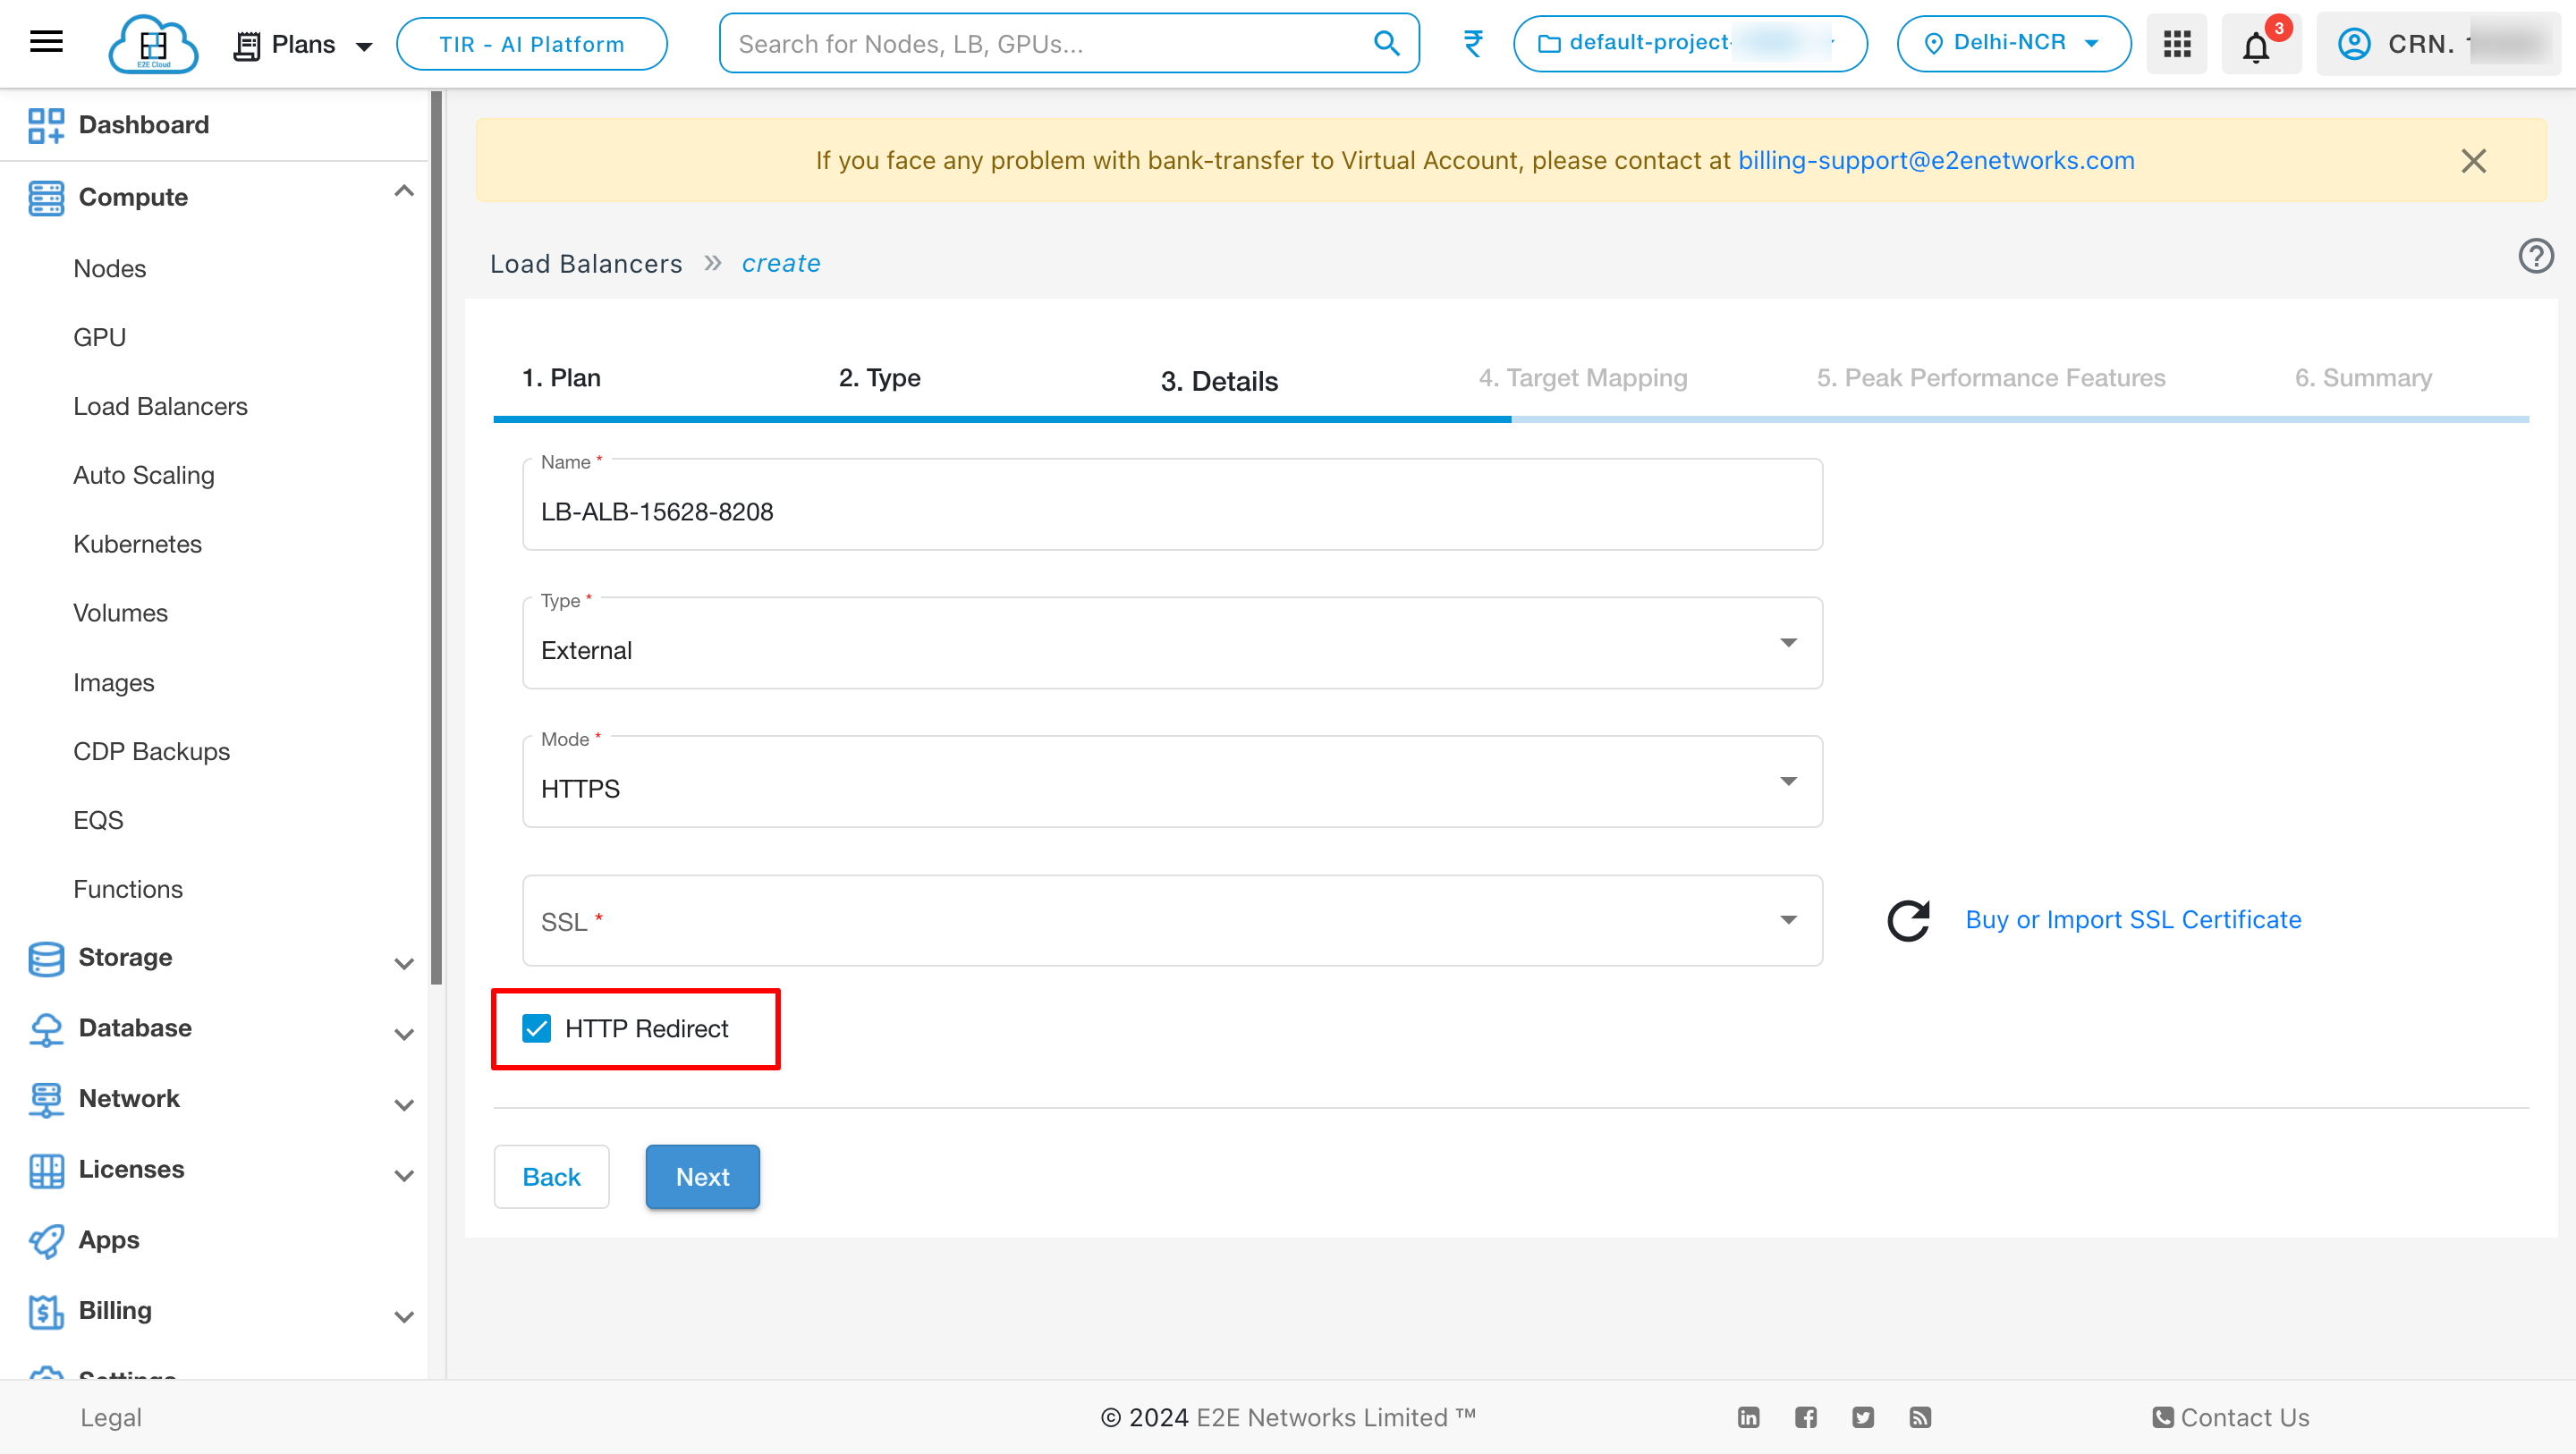
HTTP Redirect
Select "Redirect HTTP to HTTPS" if you use HTTPS for the front-end protocol of the load balancer. For web user safety, accessibility, or PCI compliance, it may be essential to enable this redirect.
Target Mapping
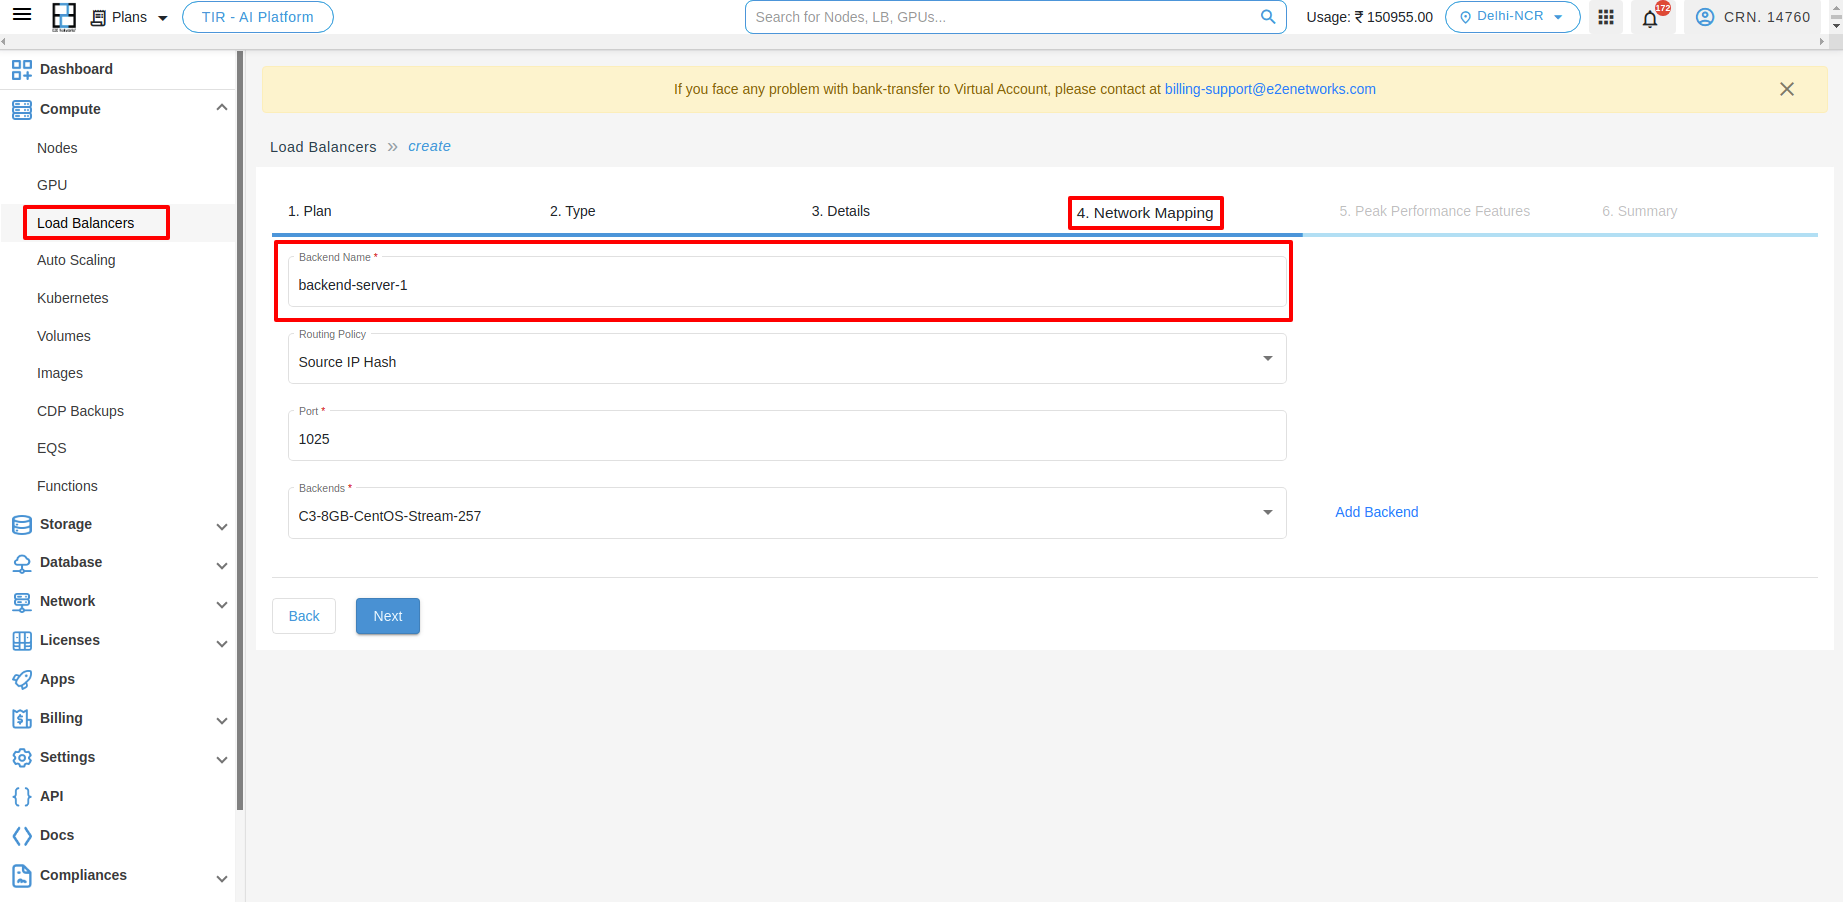
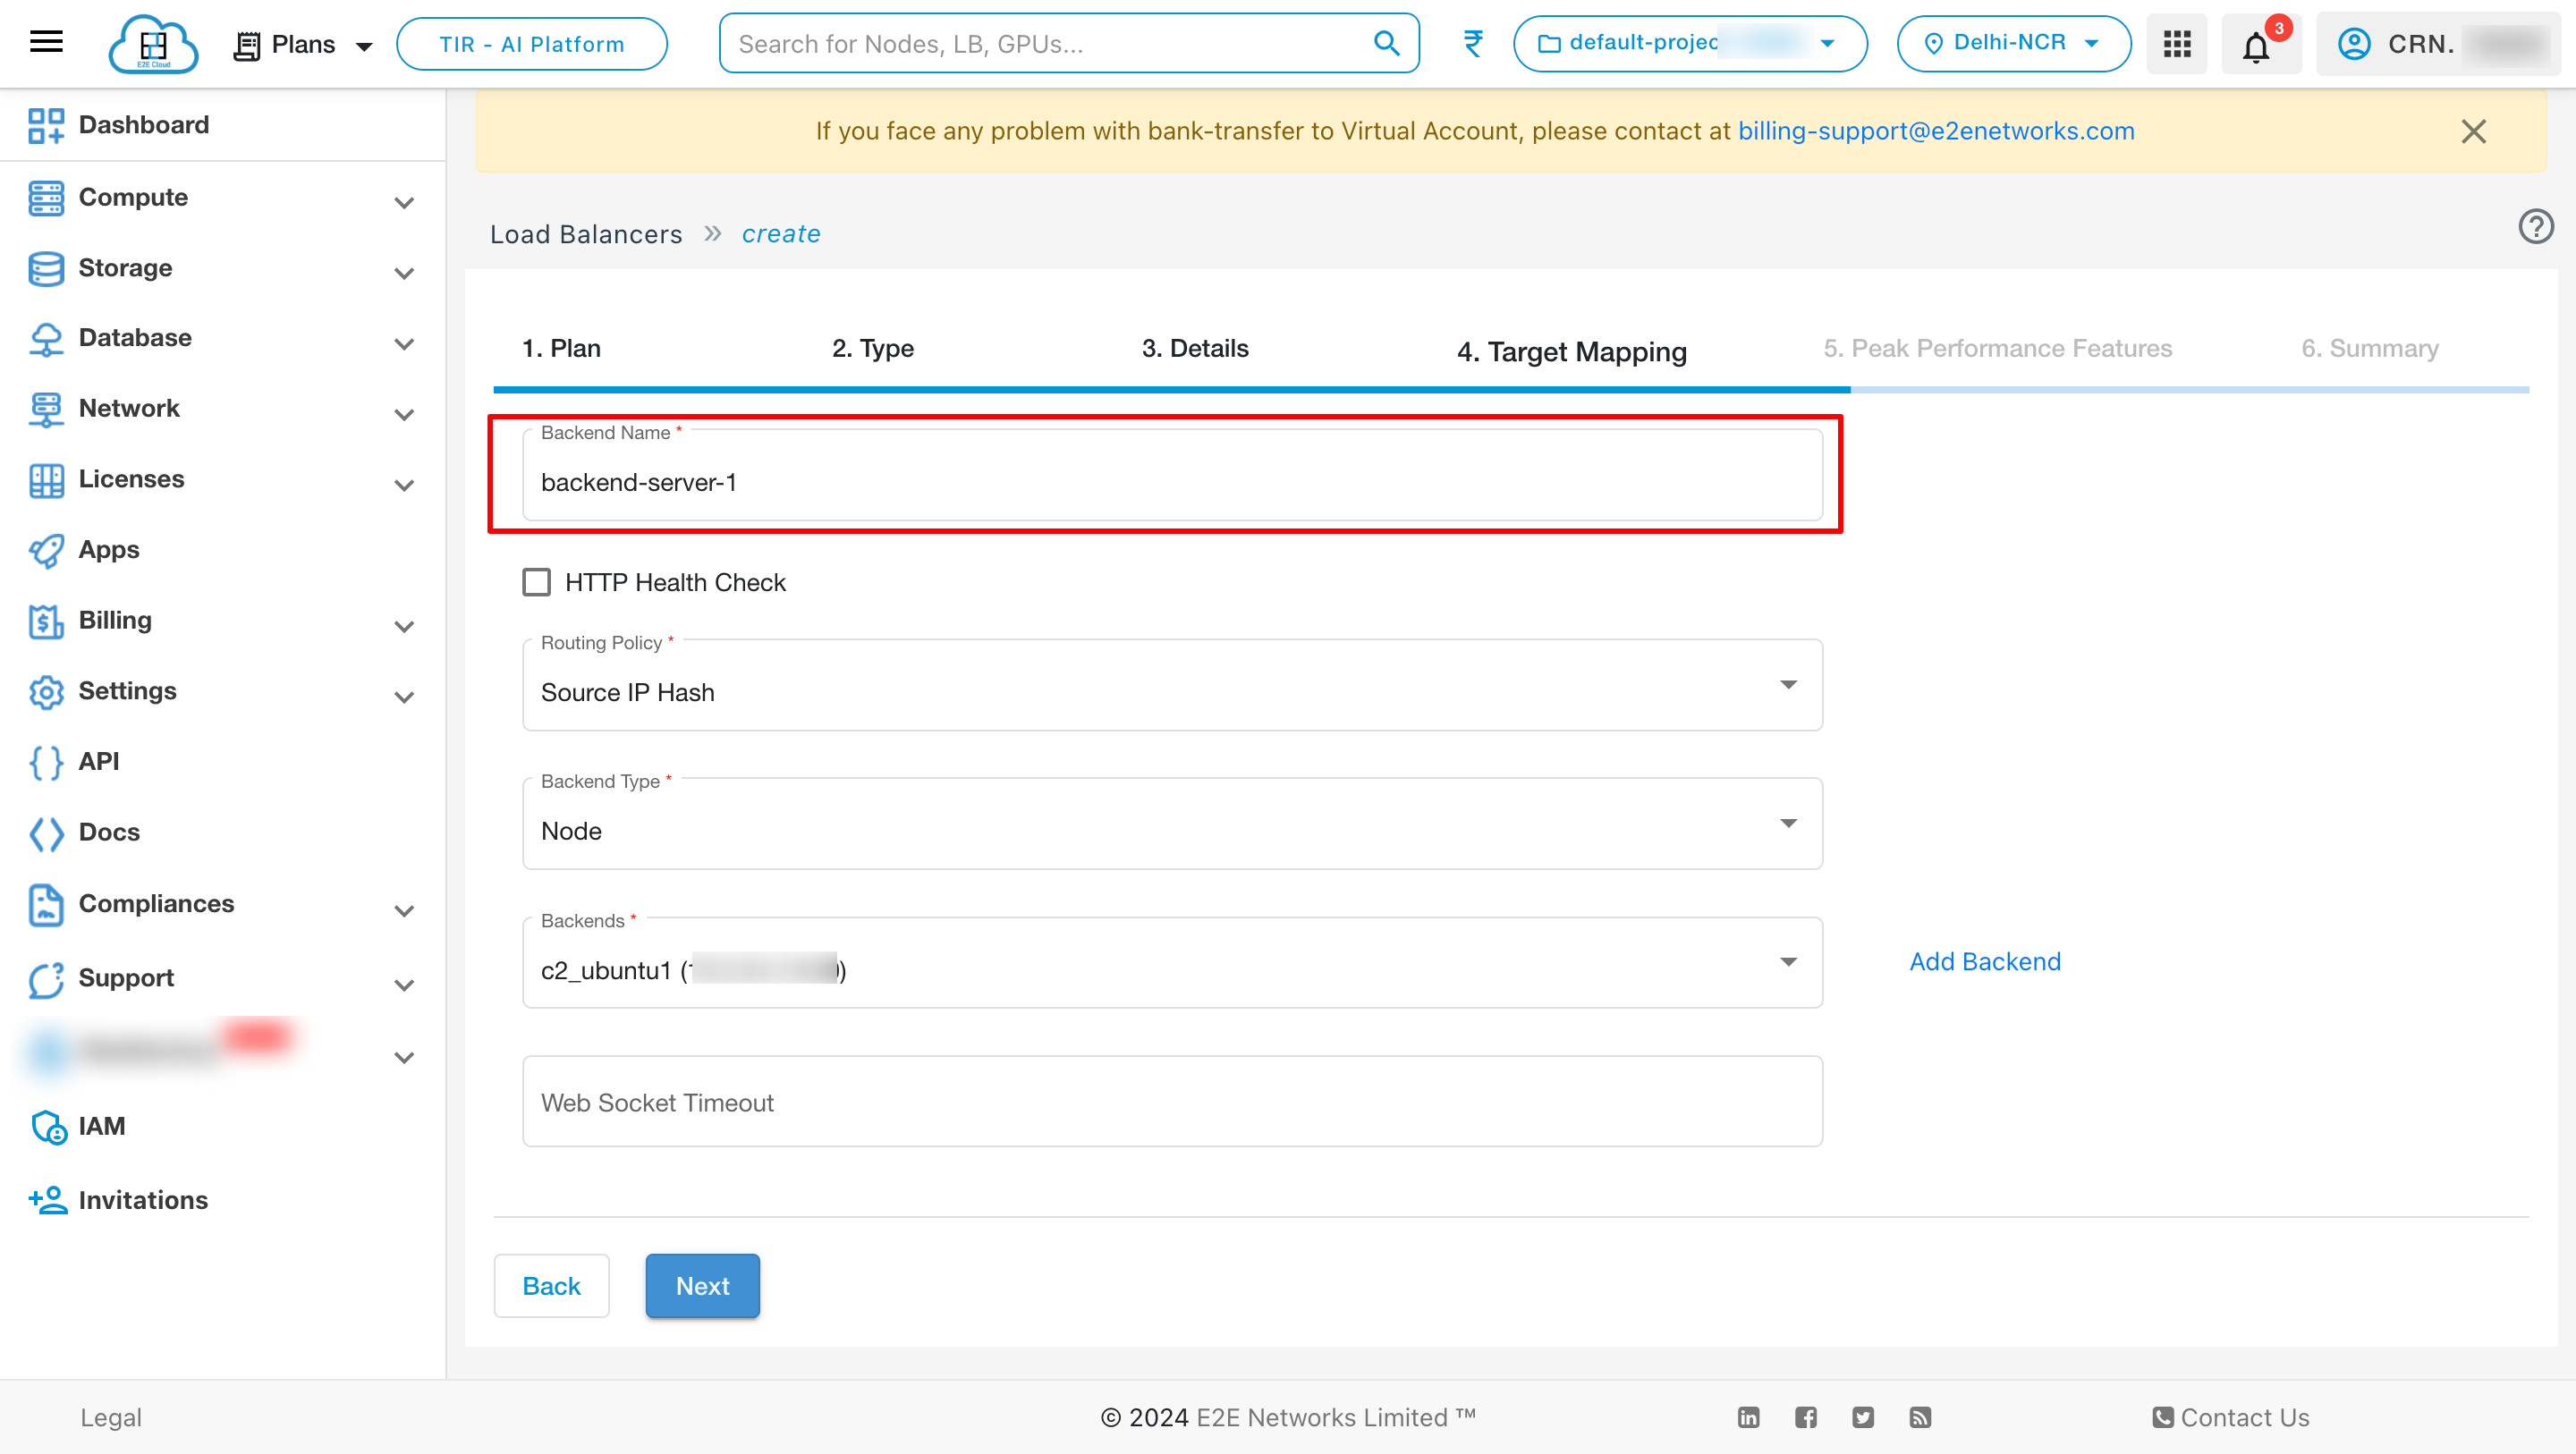
Backend Name
Health Check
Your load balancer checks the health of the web application configuration you specify. If the backend node responds with a 2xx or 3xx HTTP status code for the defined URL path, it is marked as UP; otherwise, it is marked as DOWN.
- Select "Add HTTP Health Checks" to define HTTP-based monitoring for the health of your backend nodes.
- Define a URL path to which HTTP HEAD requests will be sent to fetch the response code.
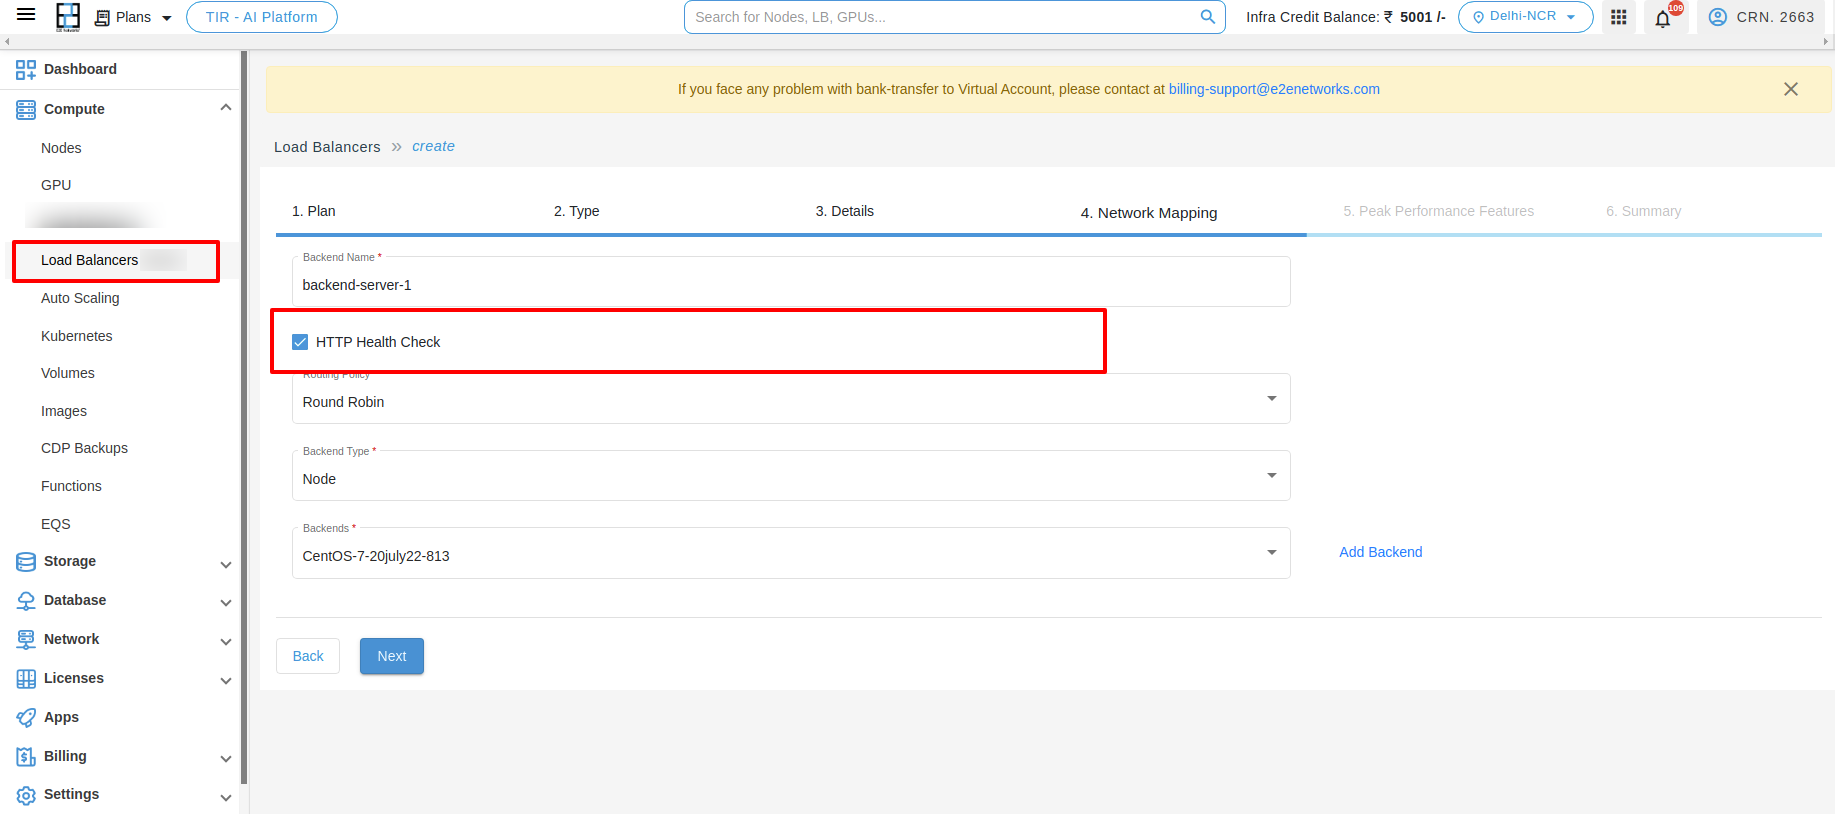
Note: The default URL path is
/, which can be changed to any other URI path as required.
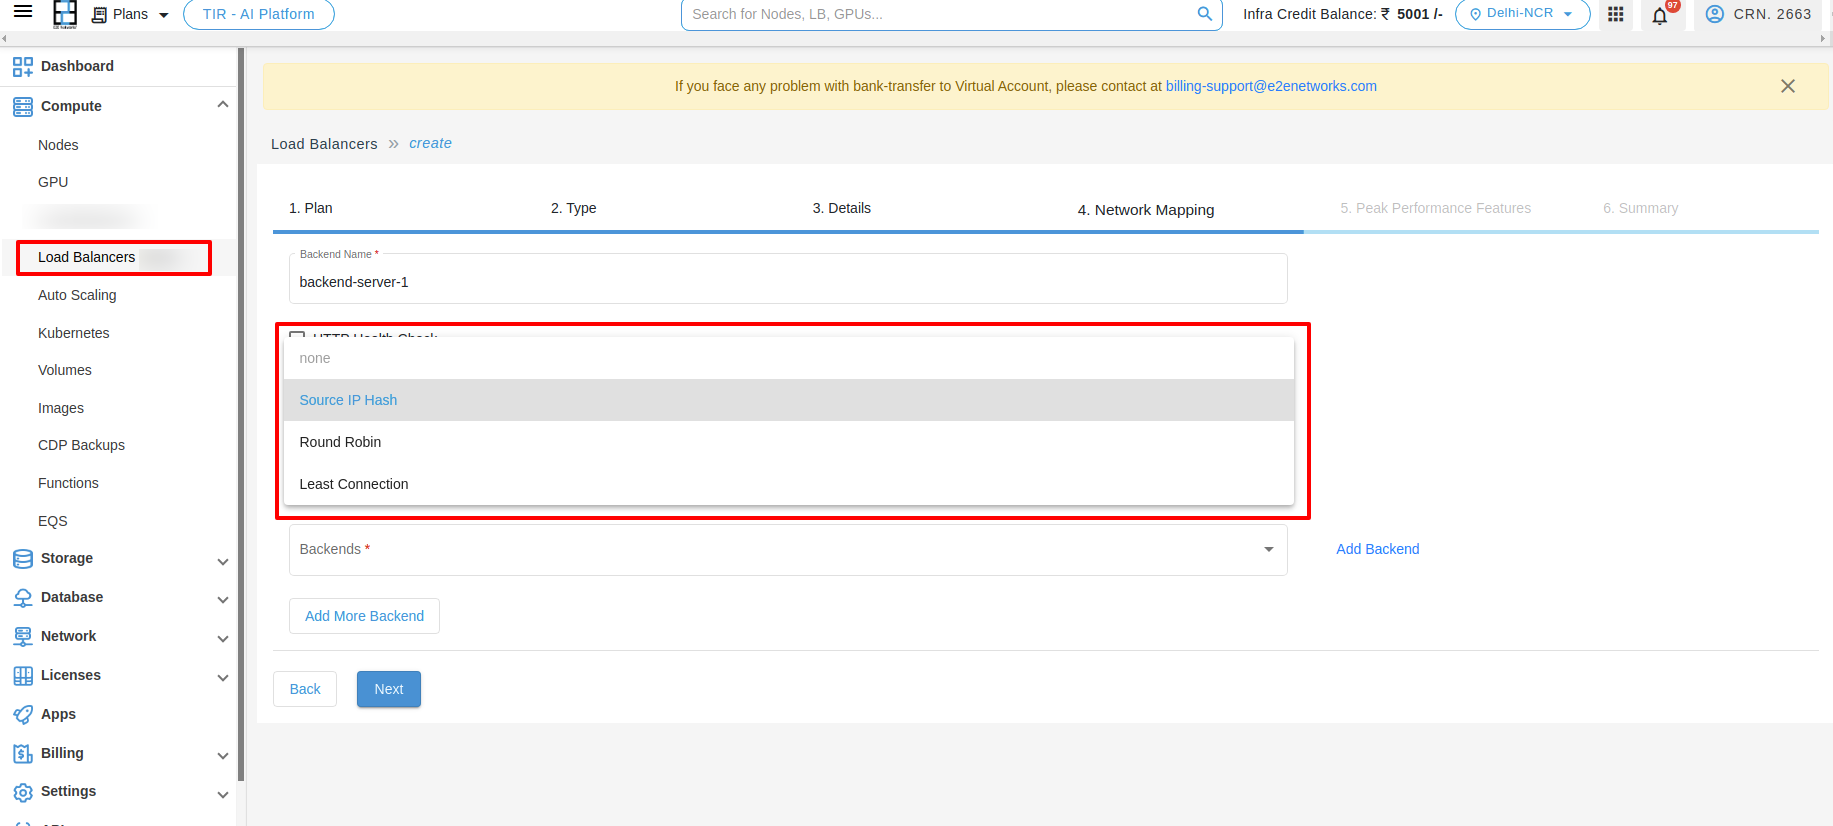
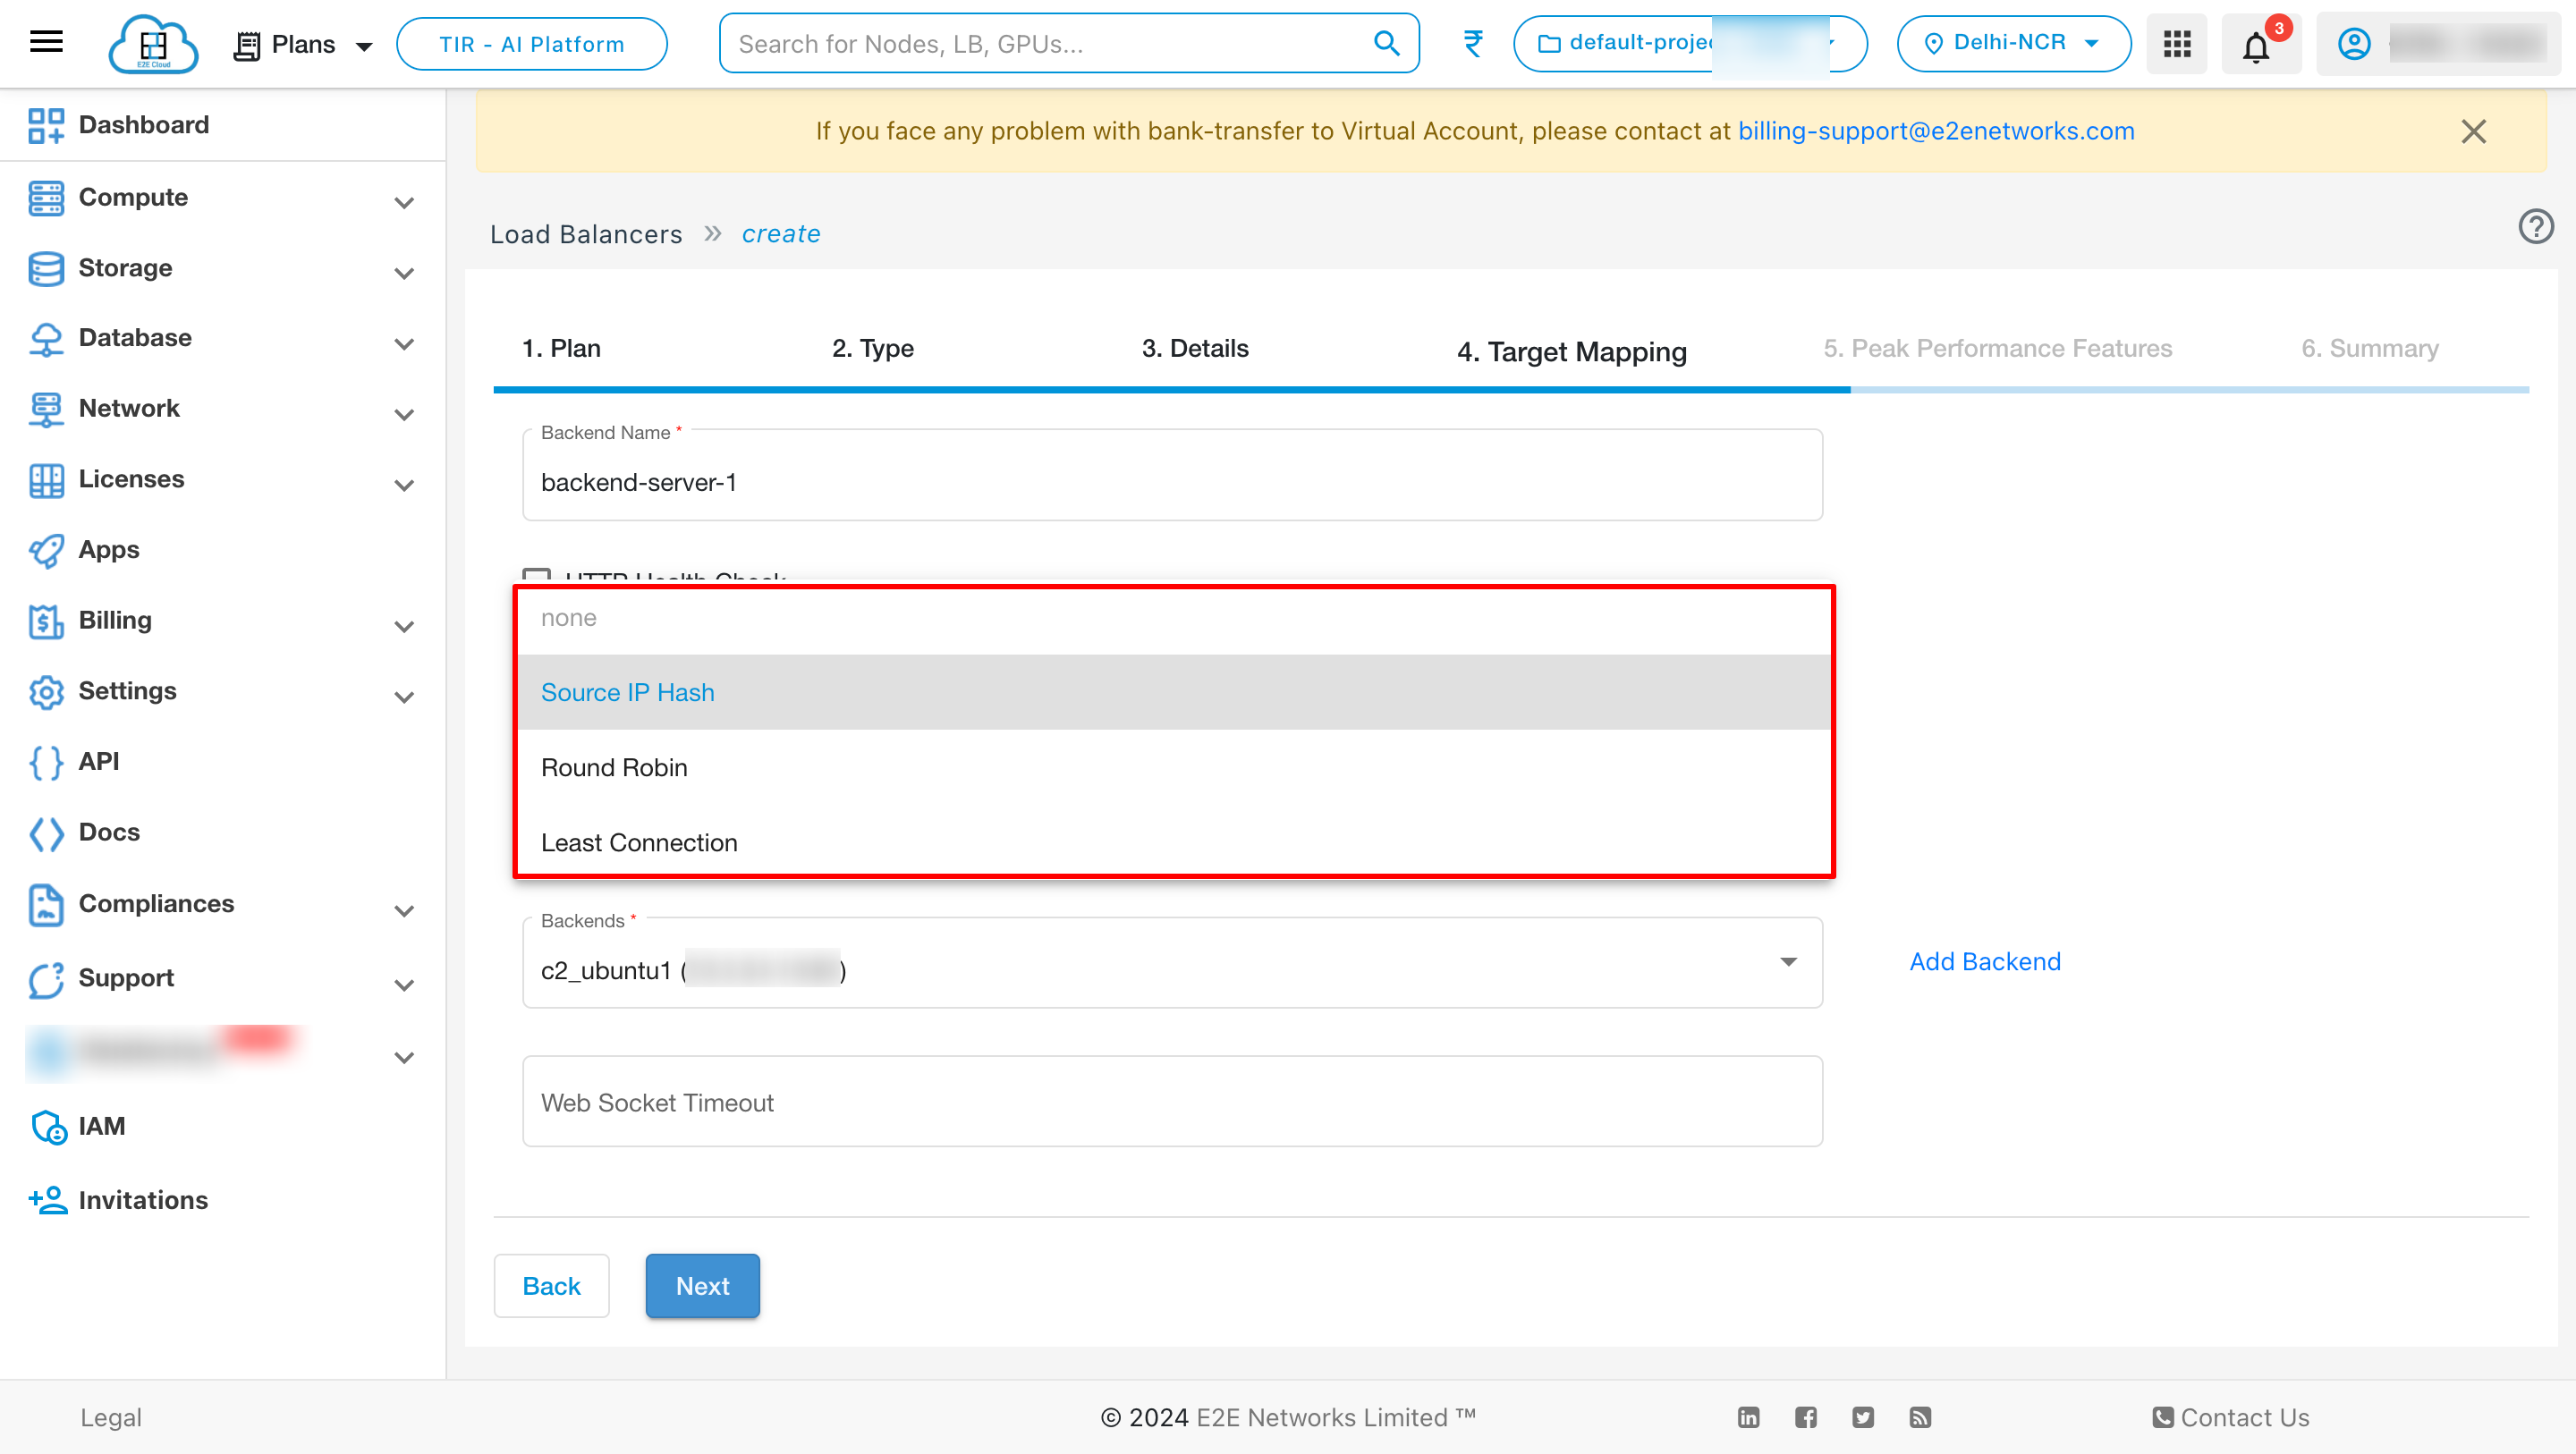
Routing Policy
- Choose Balancing Policy: Different load balancing policies offer different benefits:
- Round Robin: Distributes connection requests evenly among backend servers.
- Source IP Hash: Routes based on a hash of the source IP to keep a user on the same backend server.
- Least Connection: Distributes traffic by sending requests to the server with the least active connections.
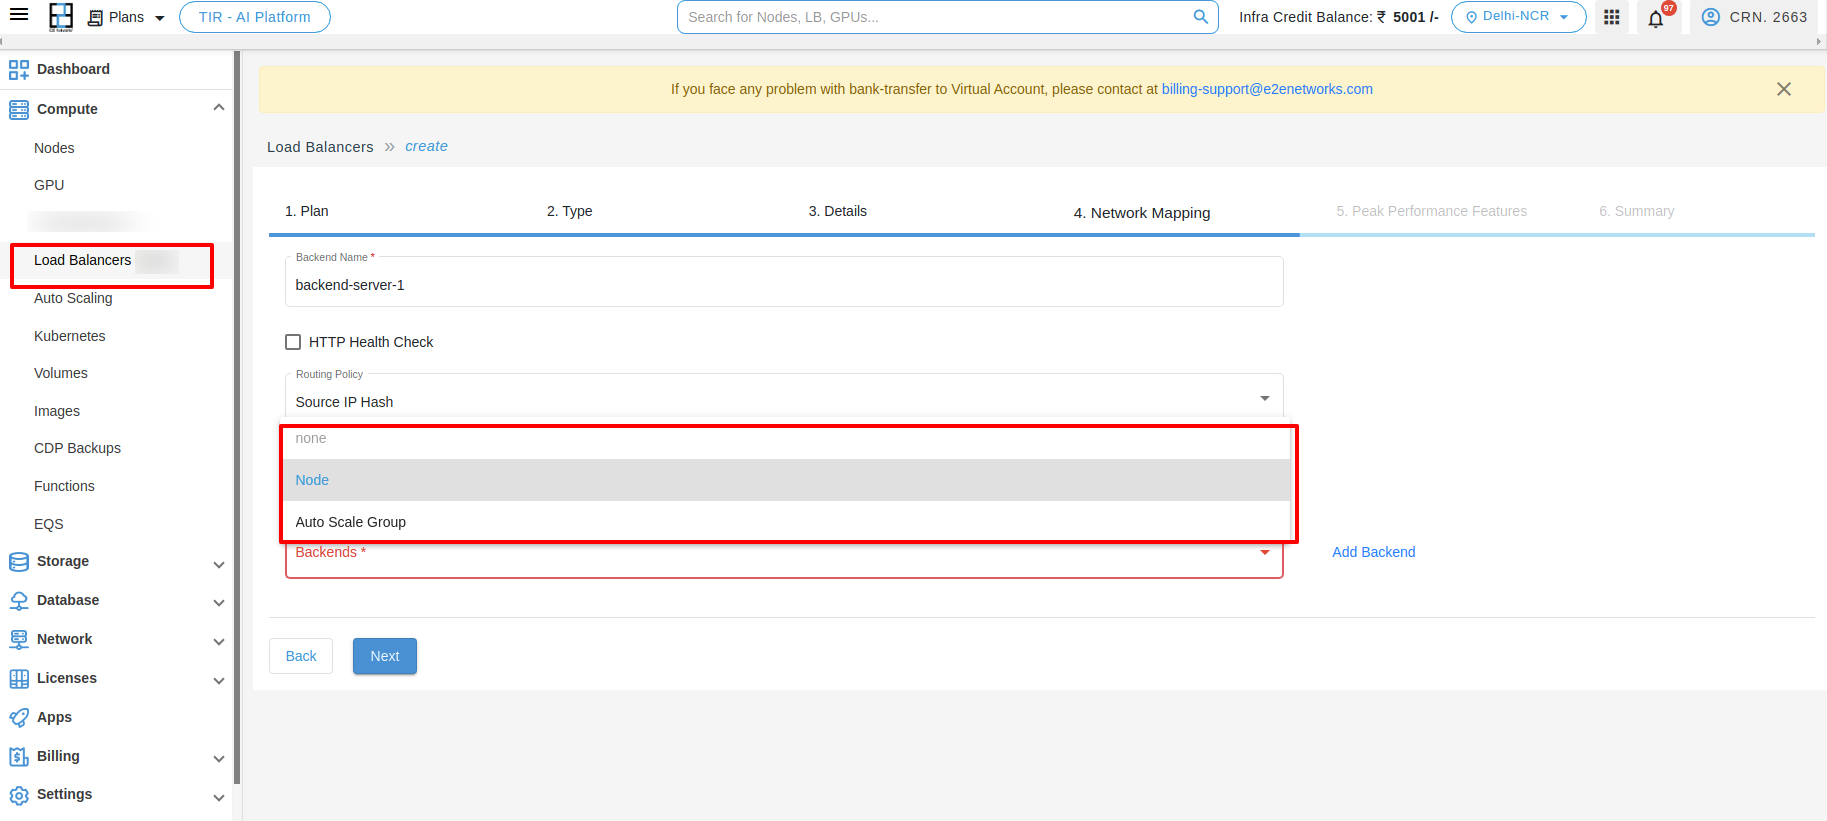
Backend Type
In the List Type, select either Node or Auto Scale Group (for auto-scaling group nodes) to configure the backend connection.
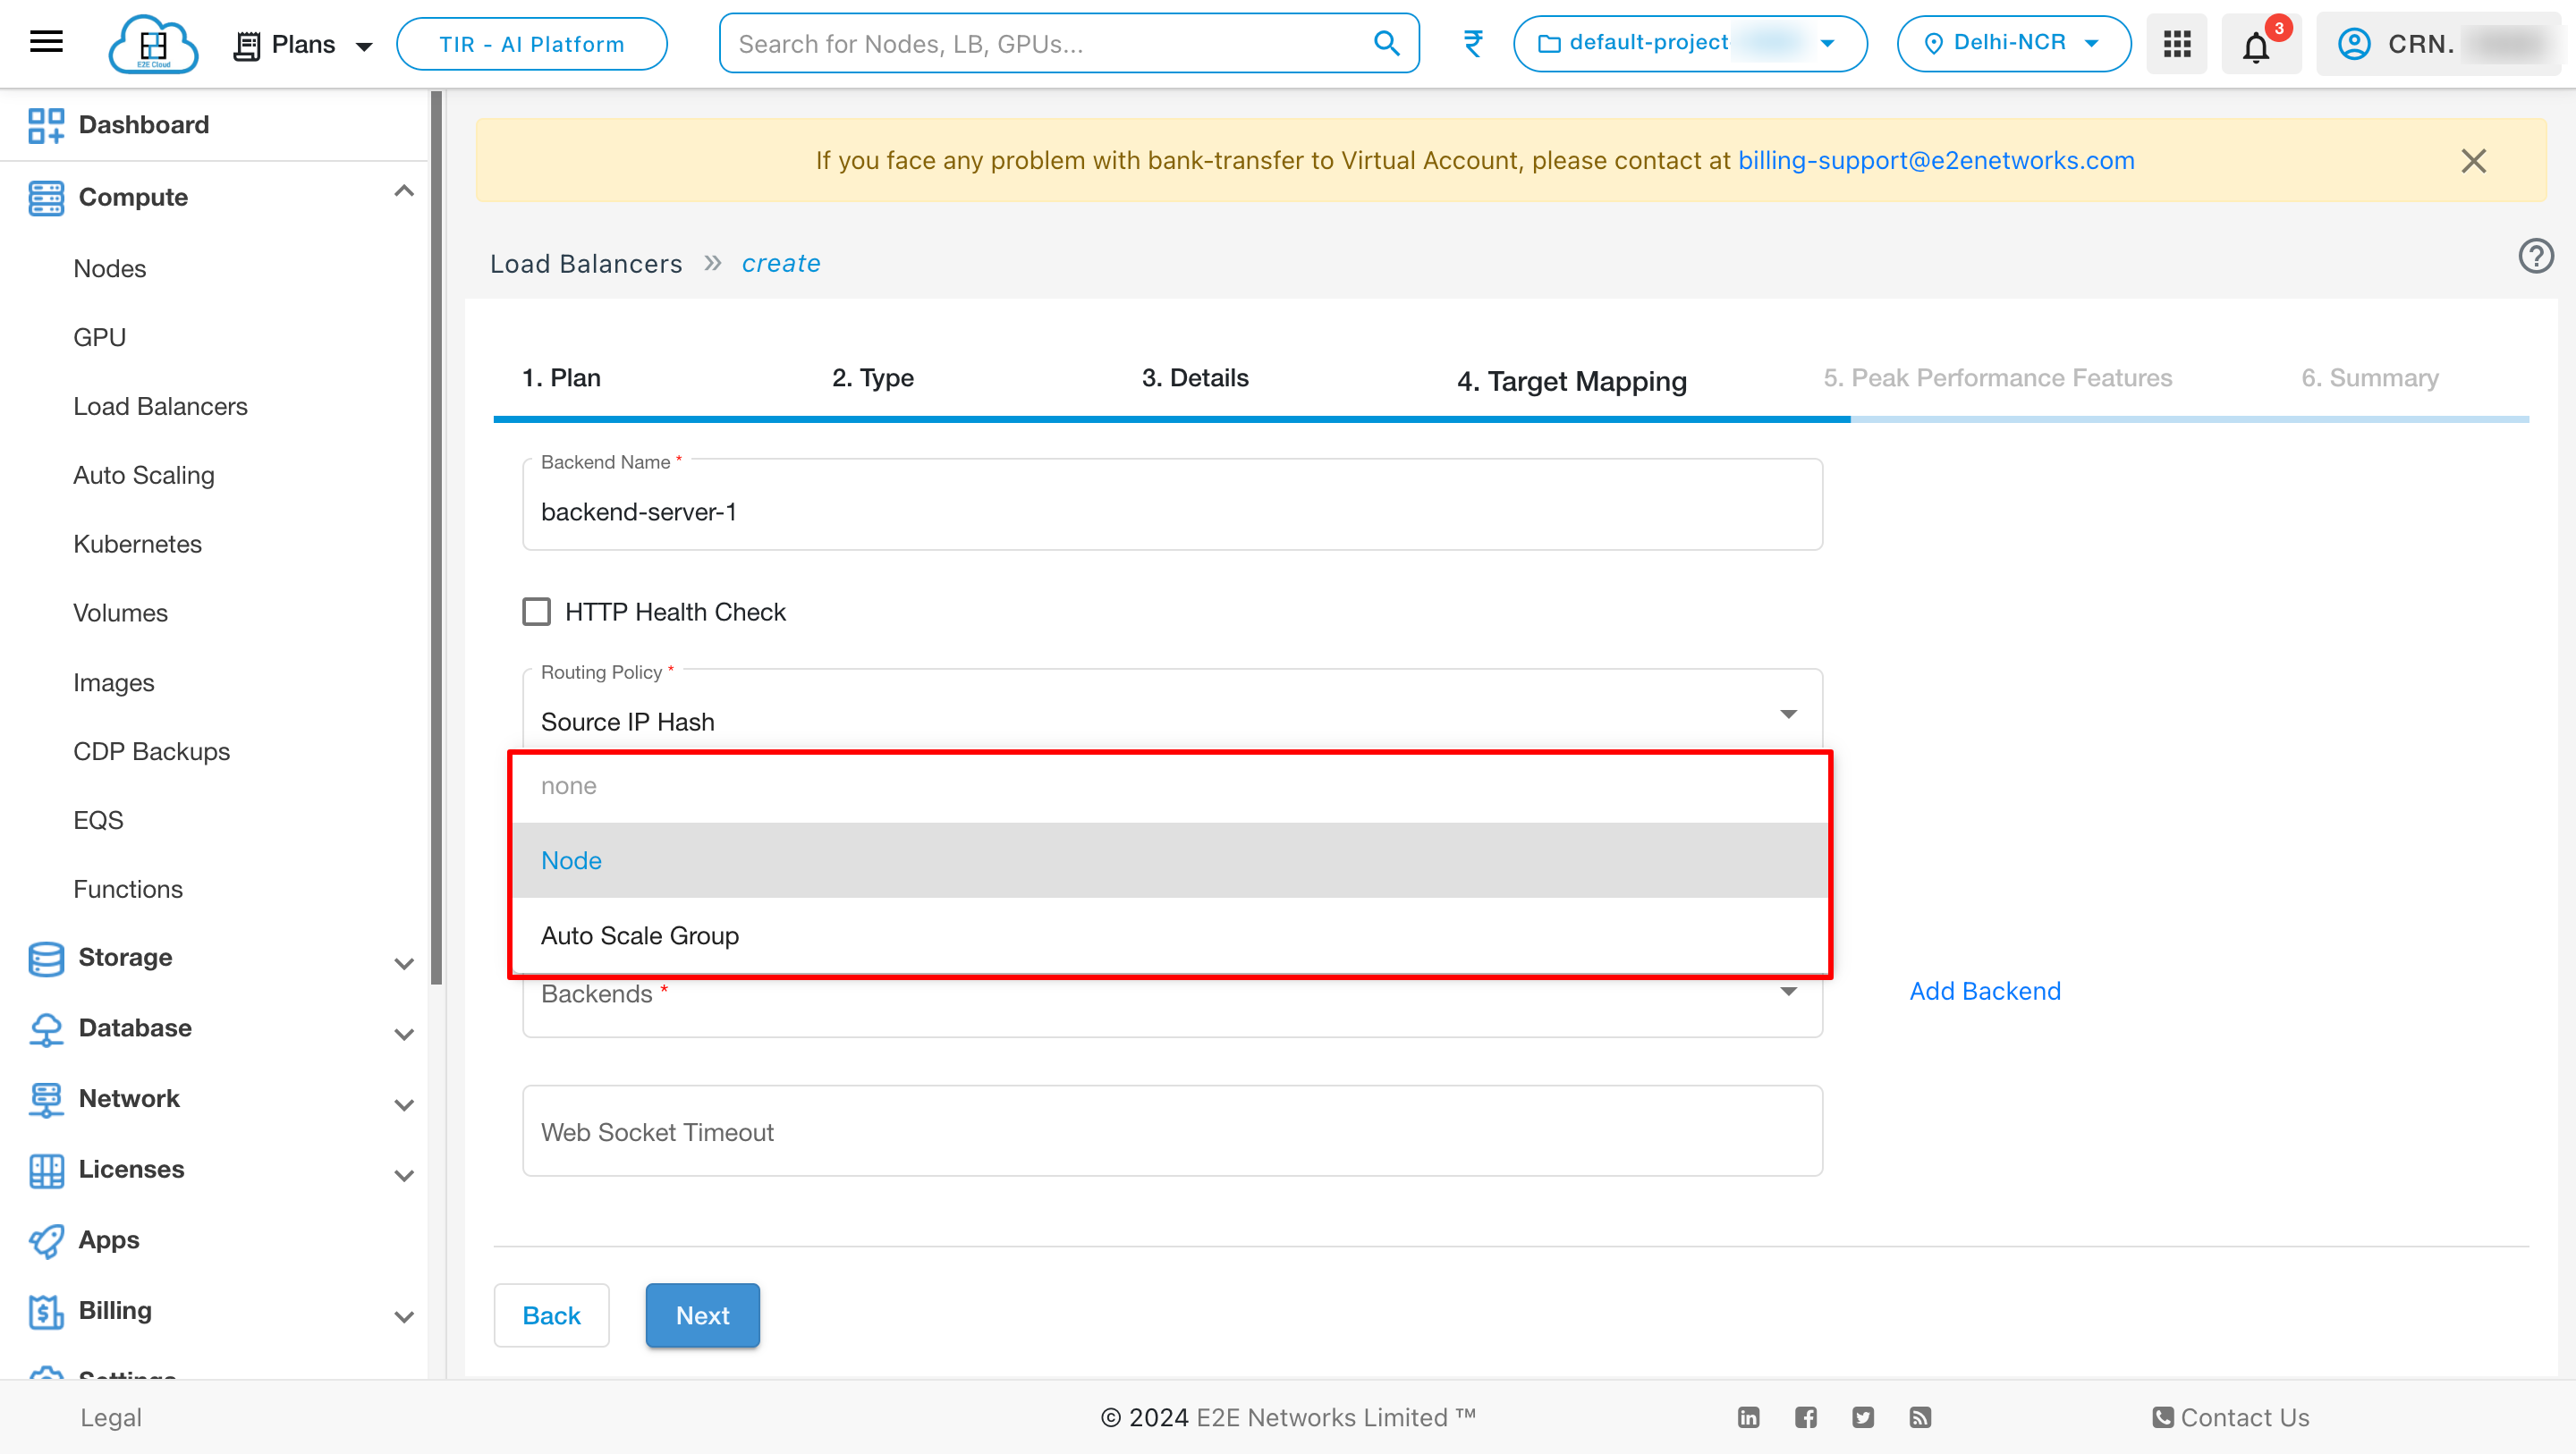
Node
Registering an E2E node adds it to your load balancer. The load balancer monitors the health of registered nodes and routes requests only to healthy nodes.
- Select Node in the list type field to display the Node Details section.
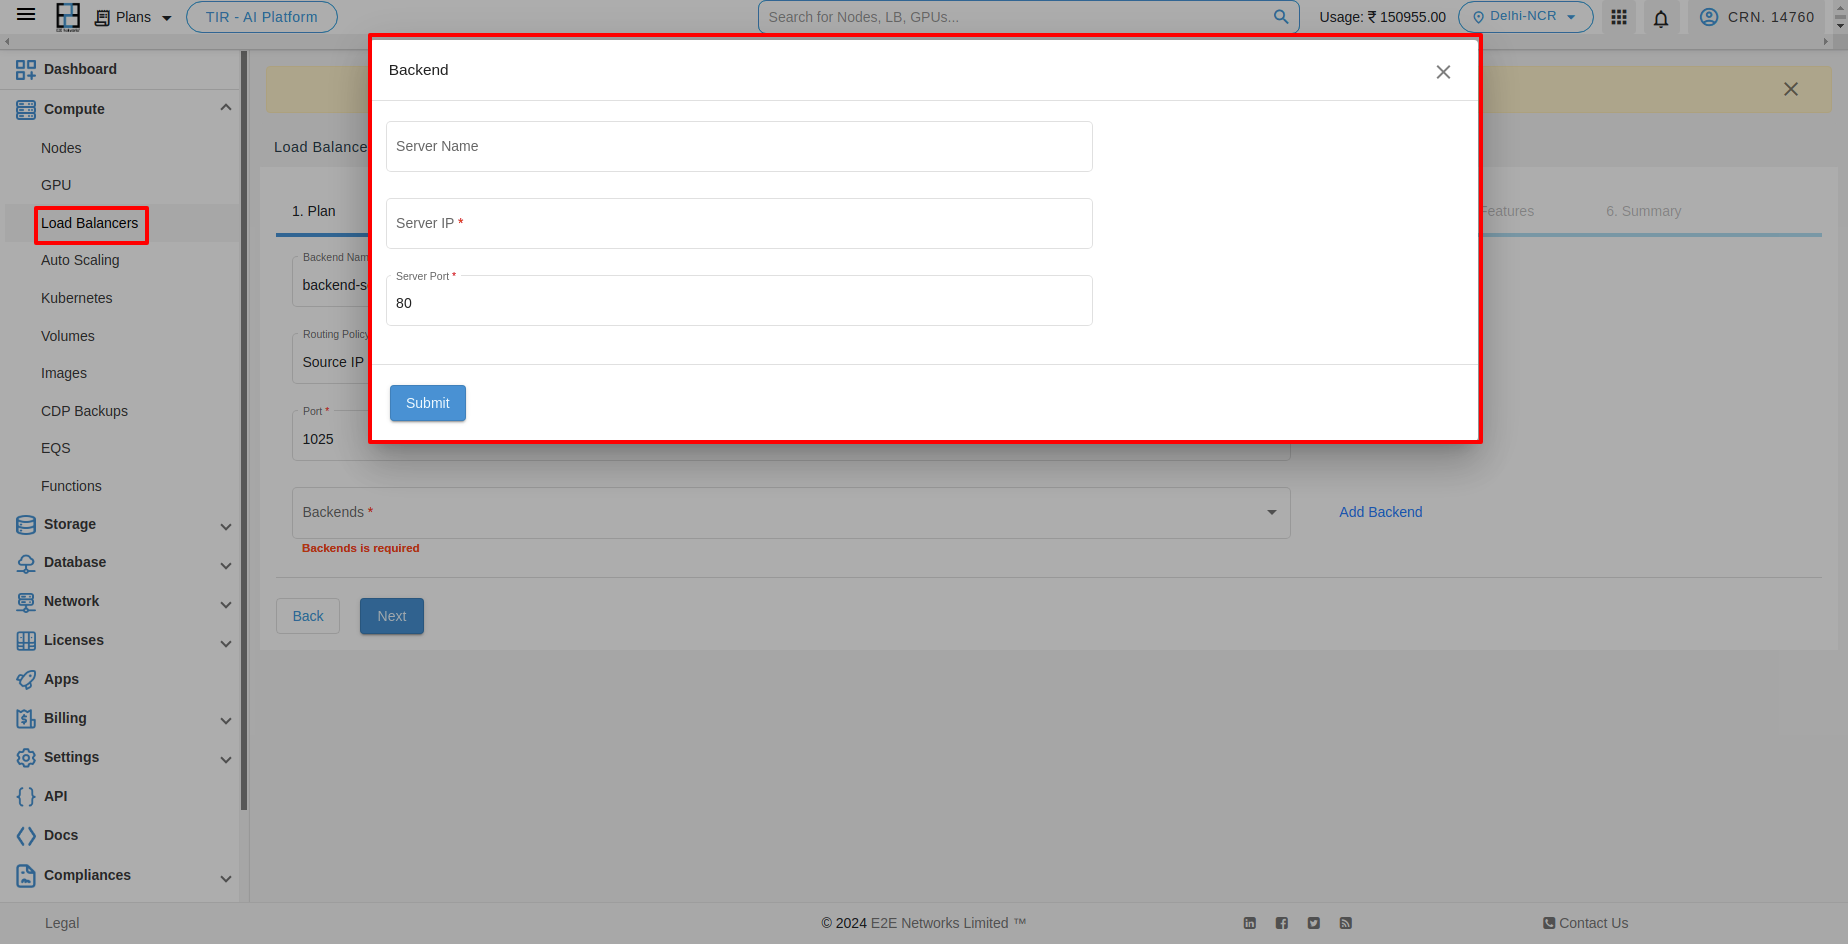
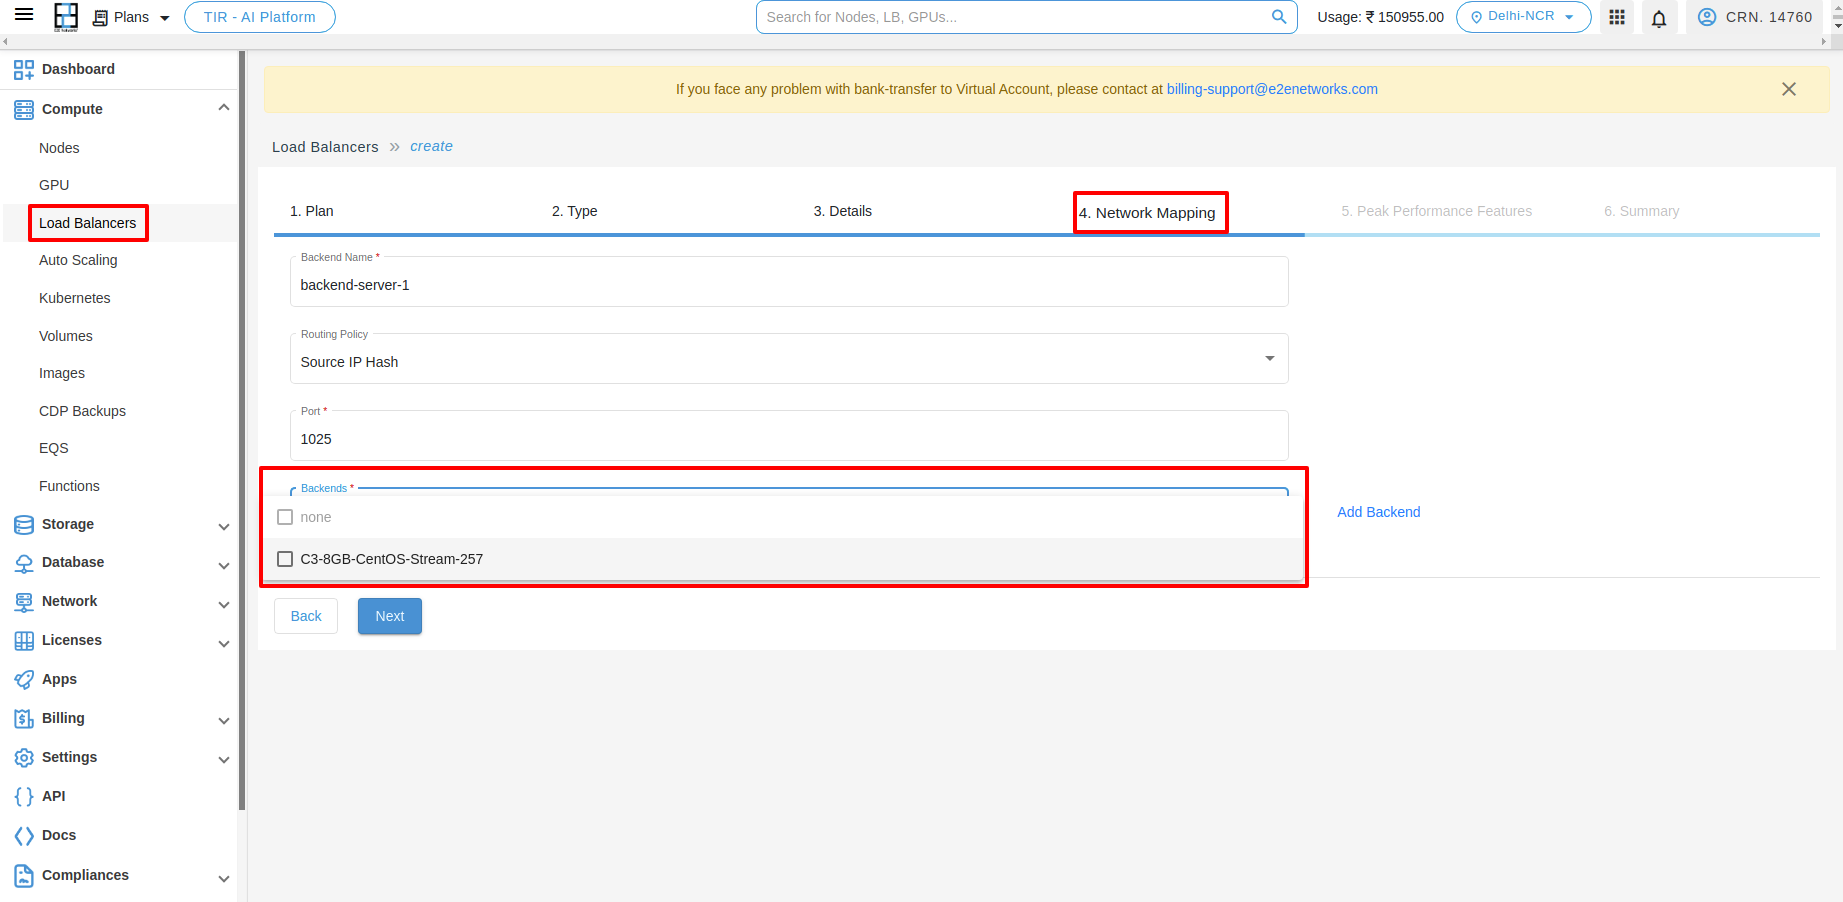
- Specify the details of virtual nodes you wish to register behind the load balancer, including name, IP (preferably private IP if on E2E cloud), and port.
Add Backend
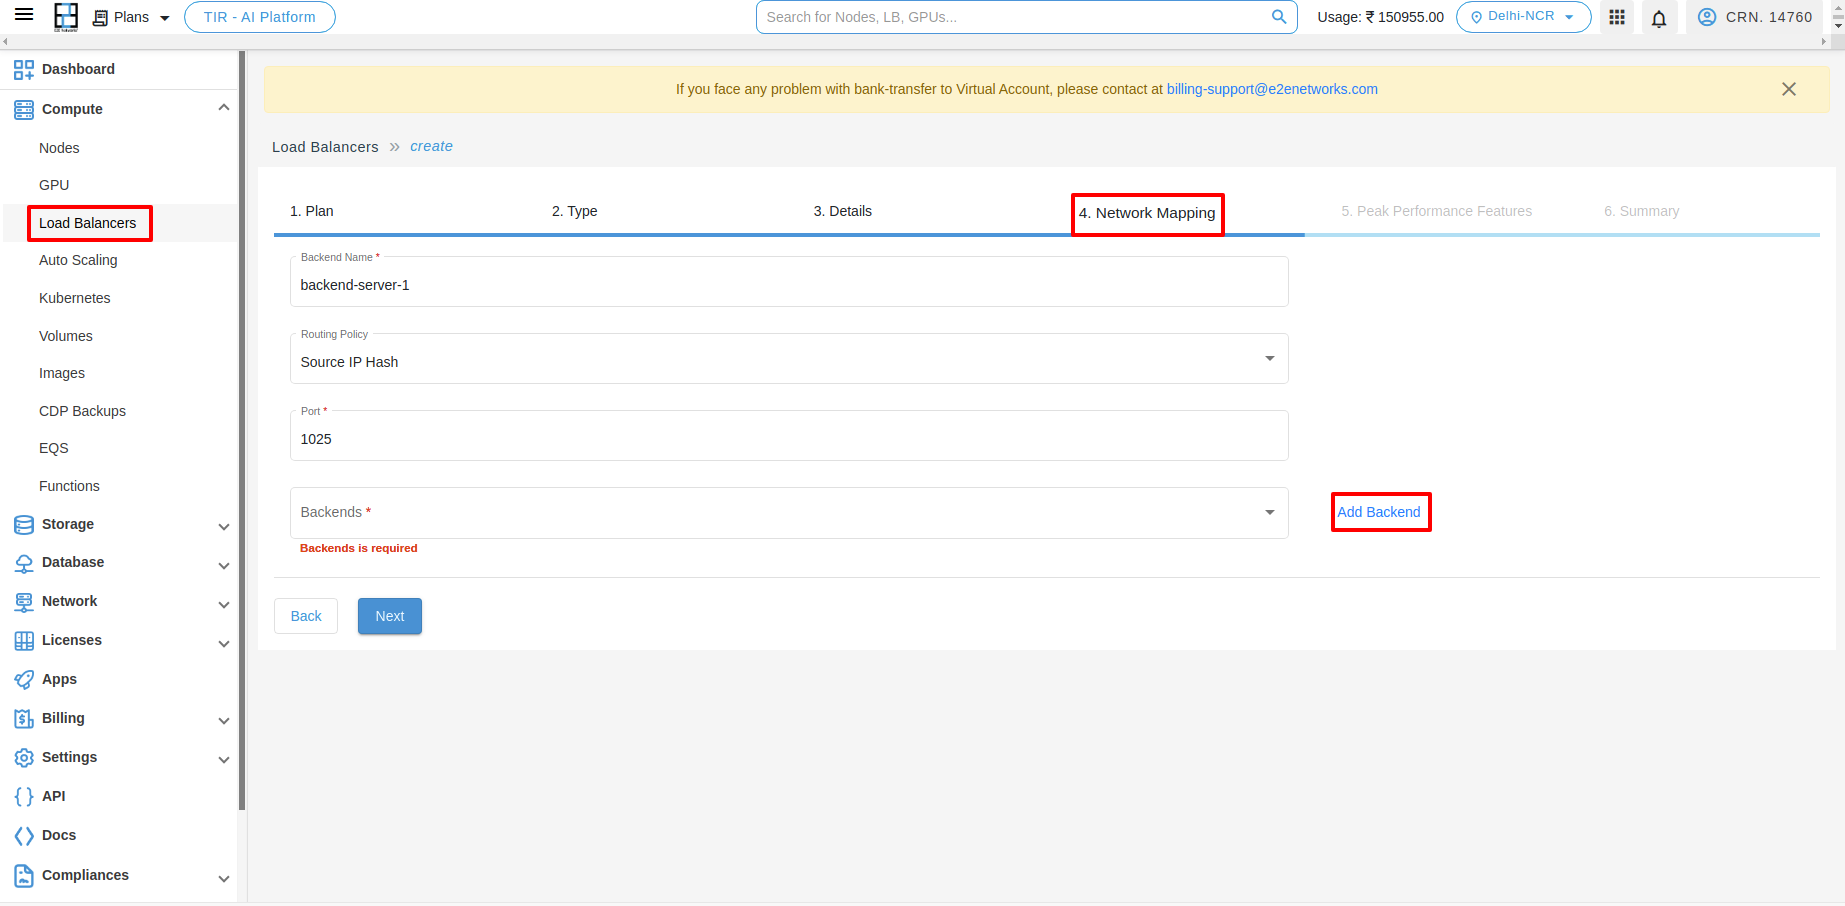
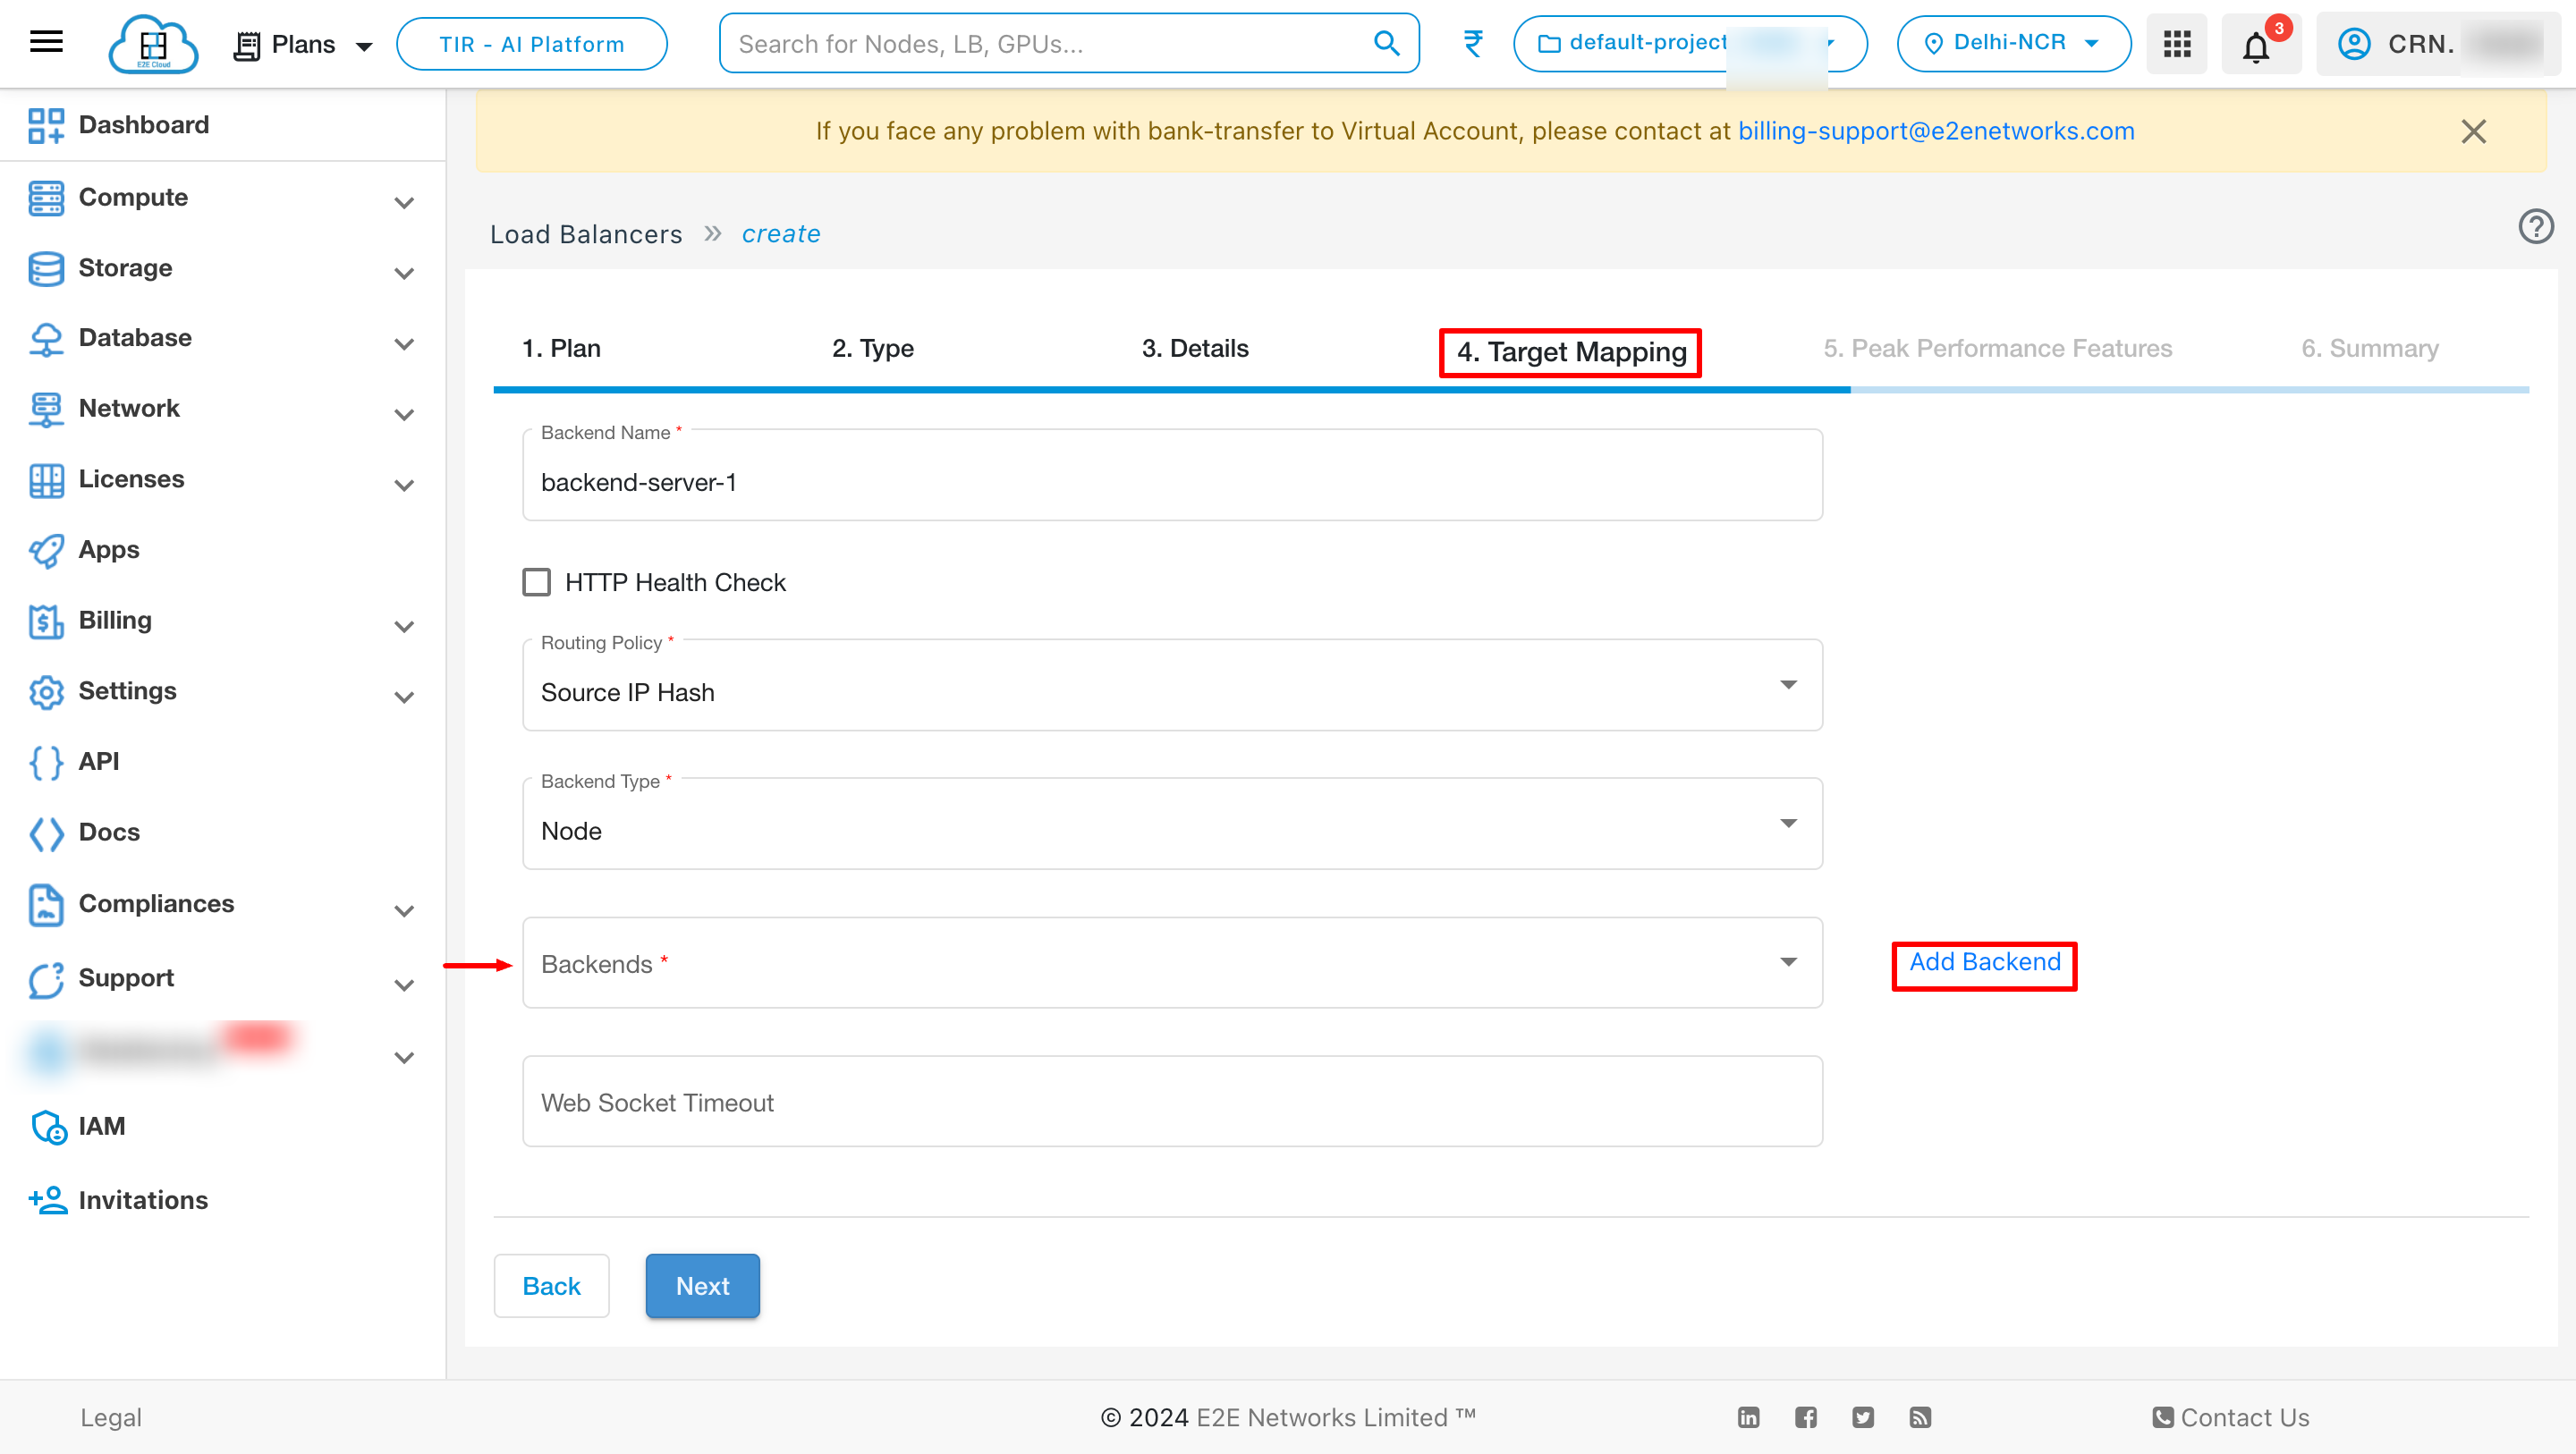
Click Add Backend to add a backend.
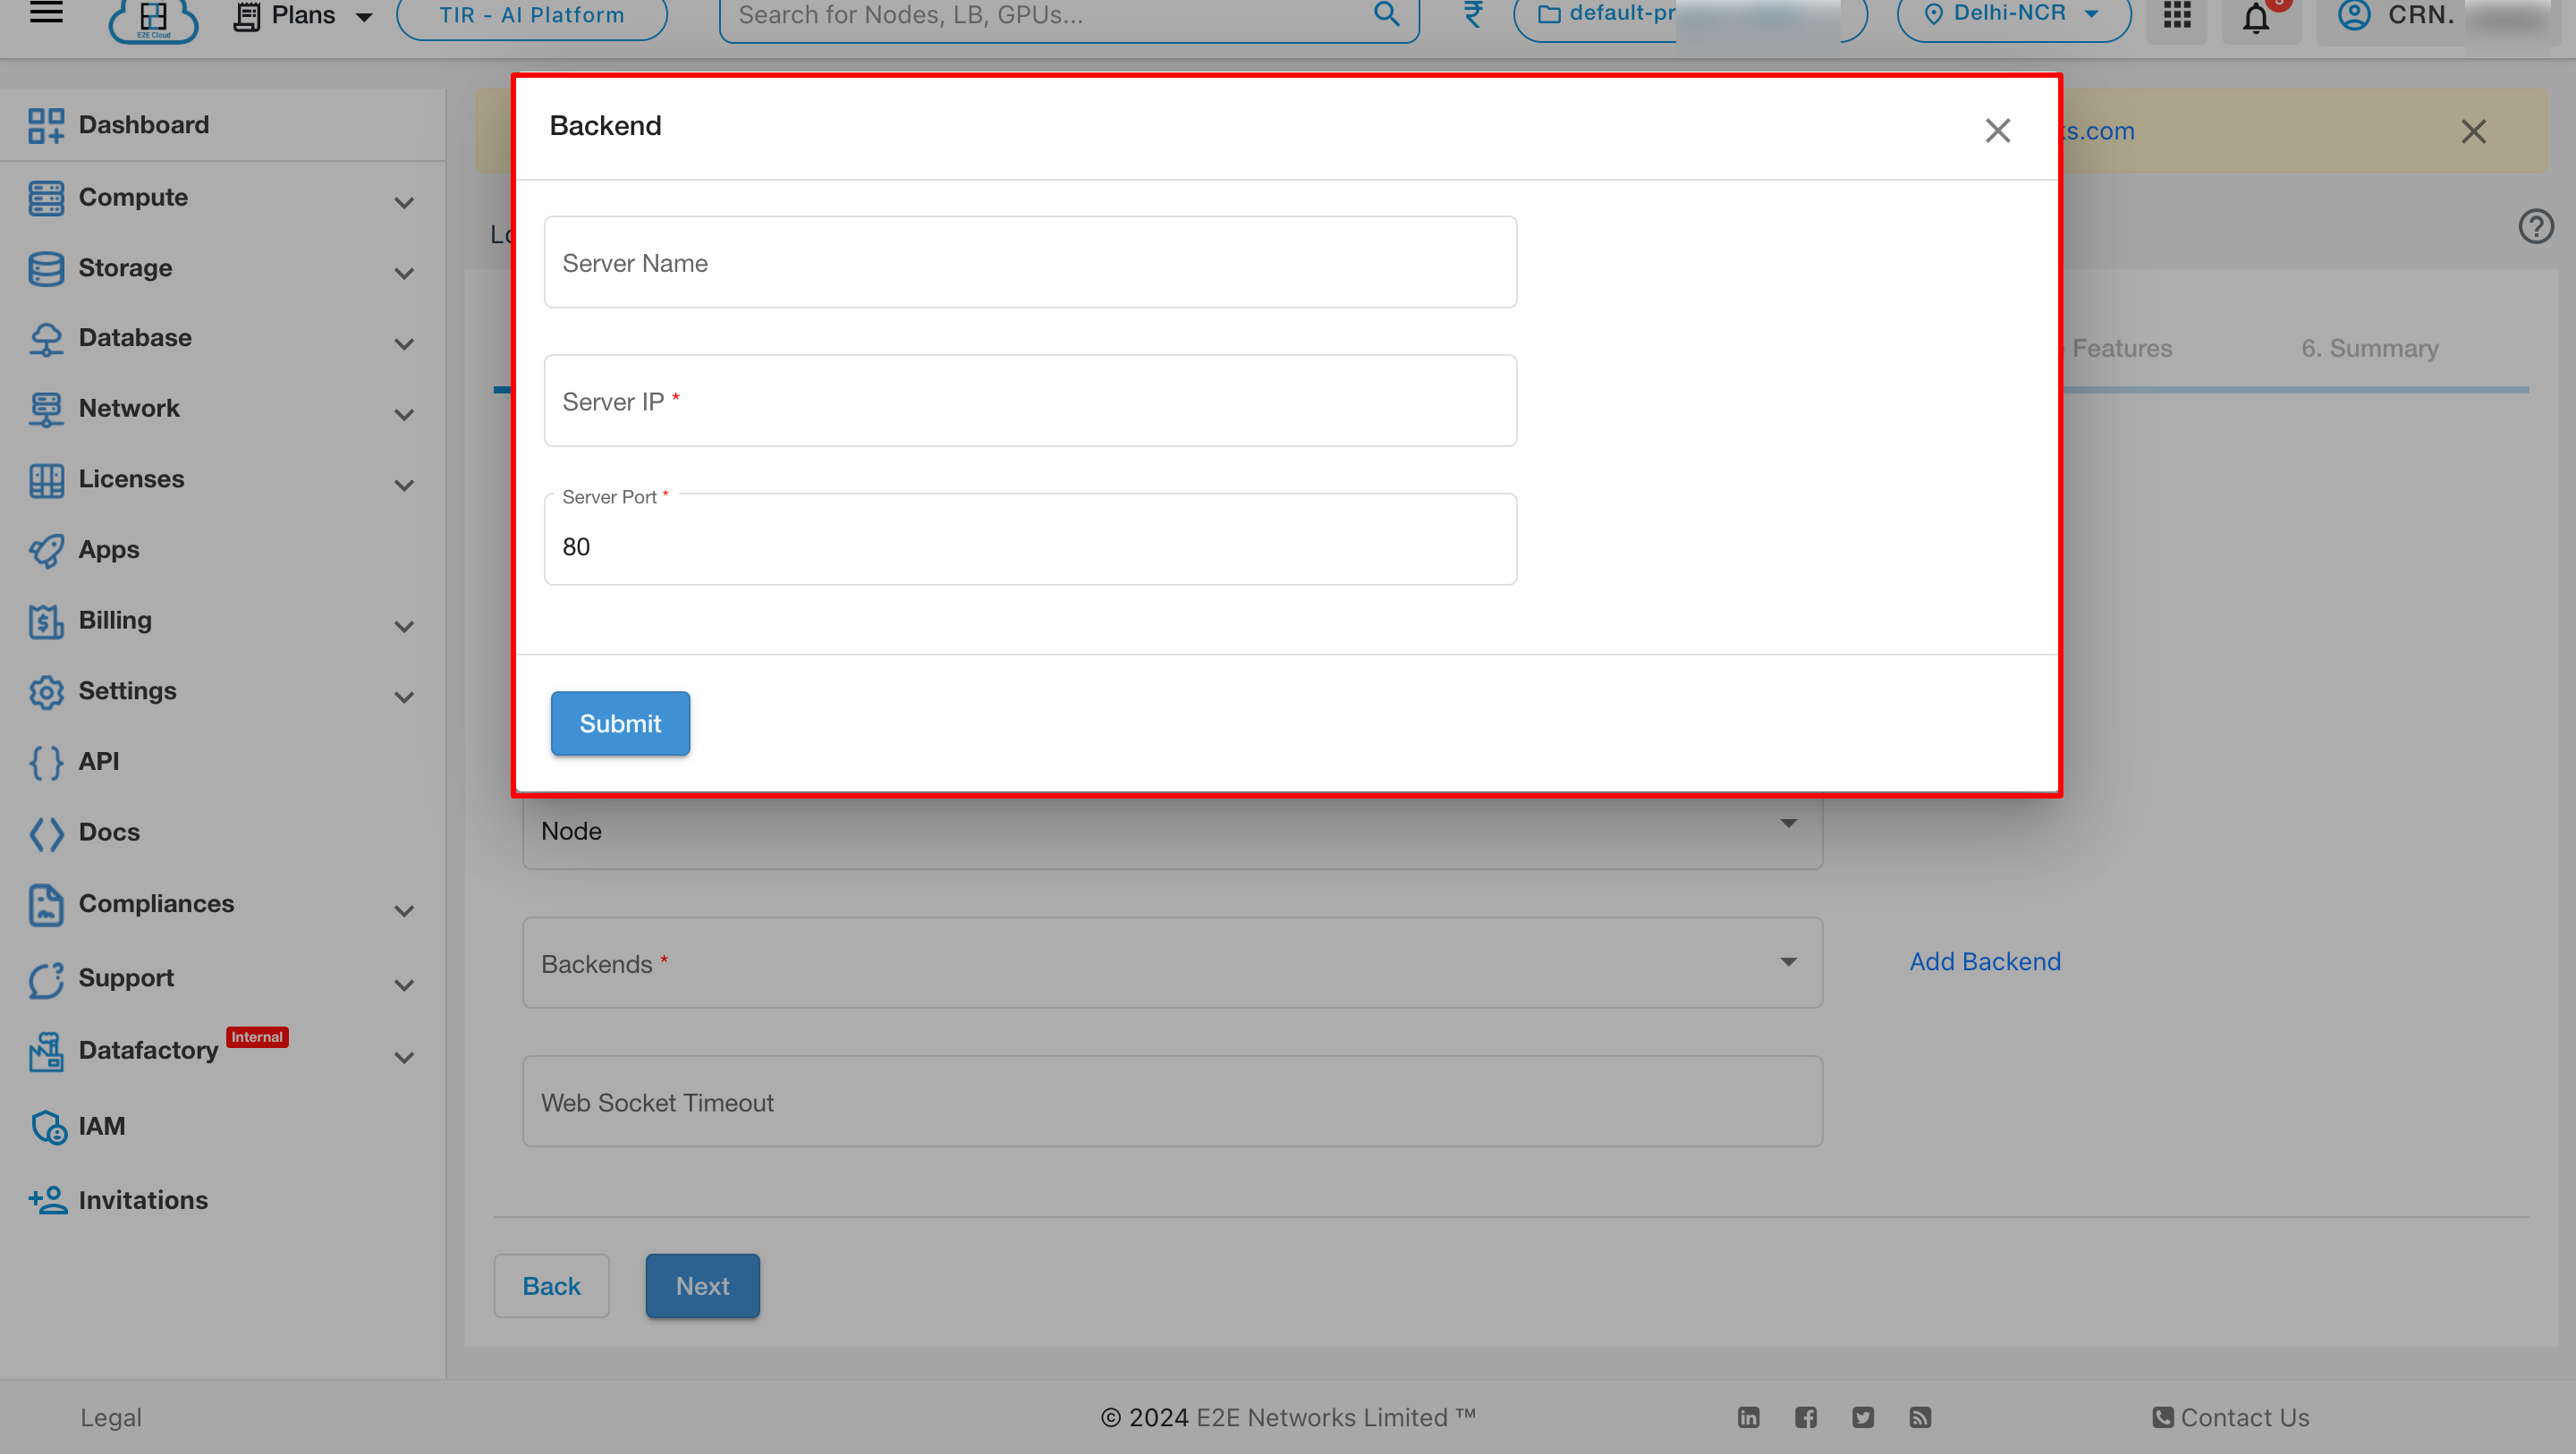
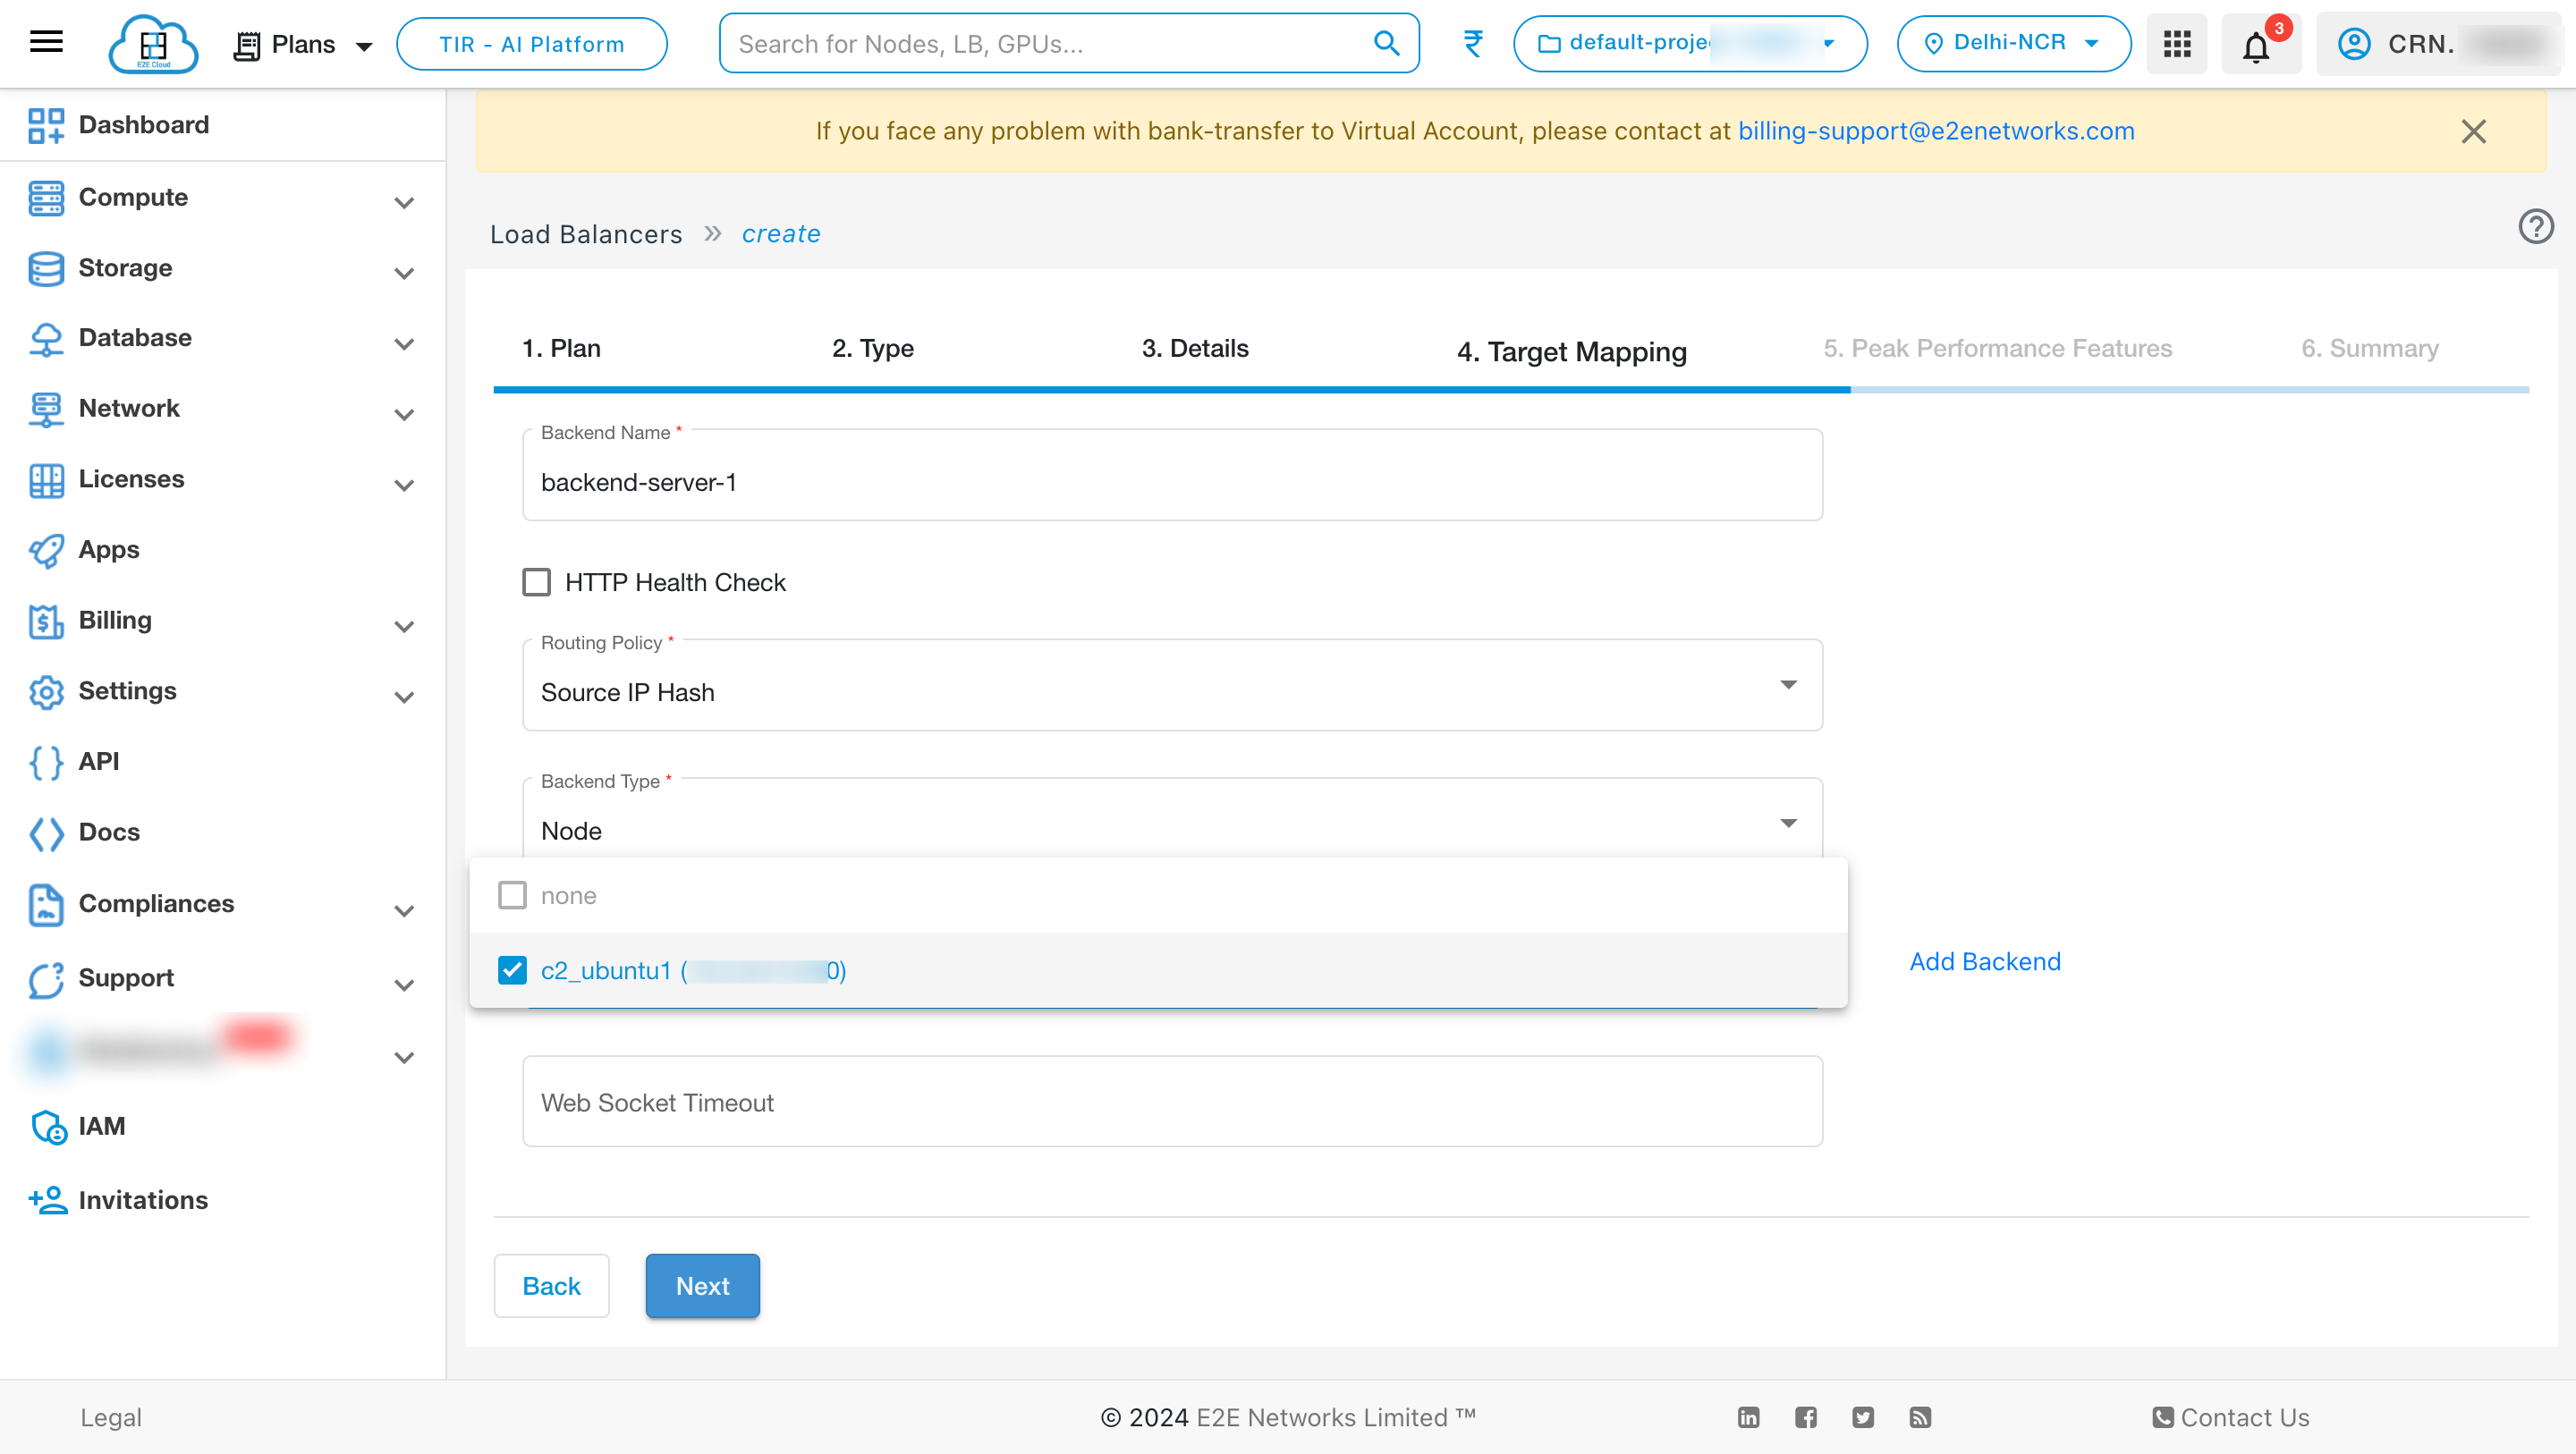
After adding backends, view the backend list by clicking the dropdown.
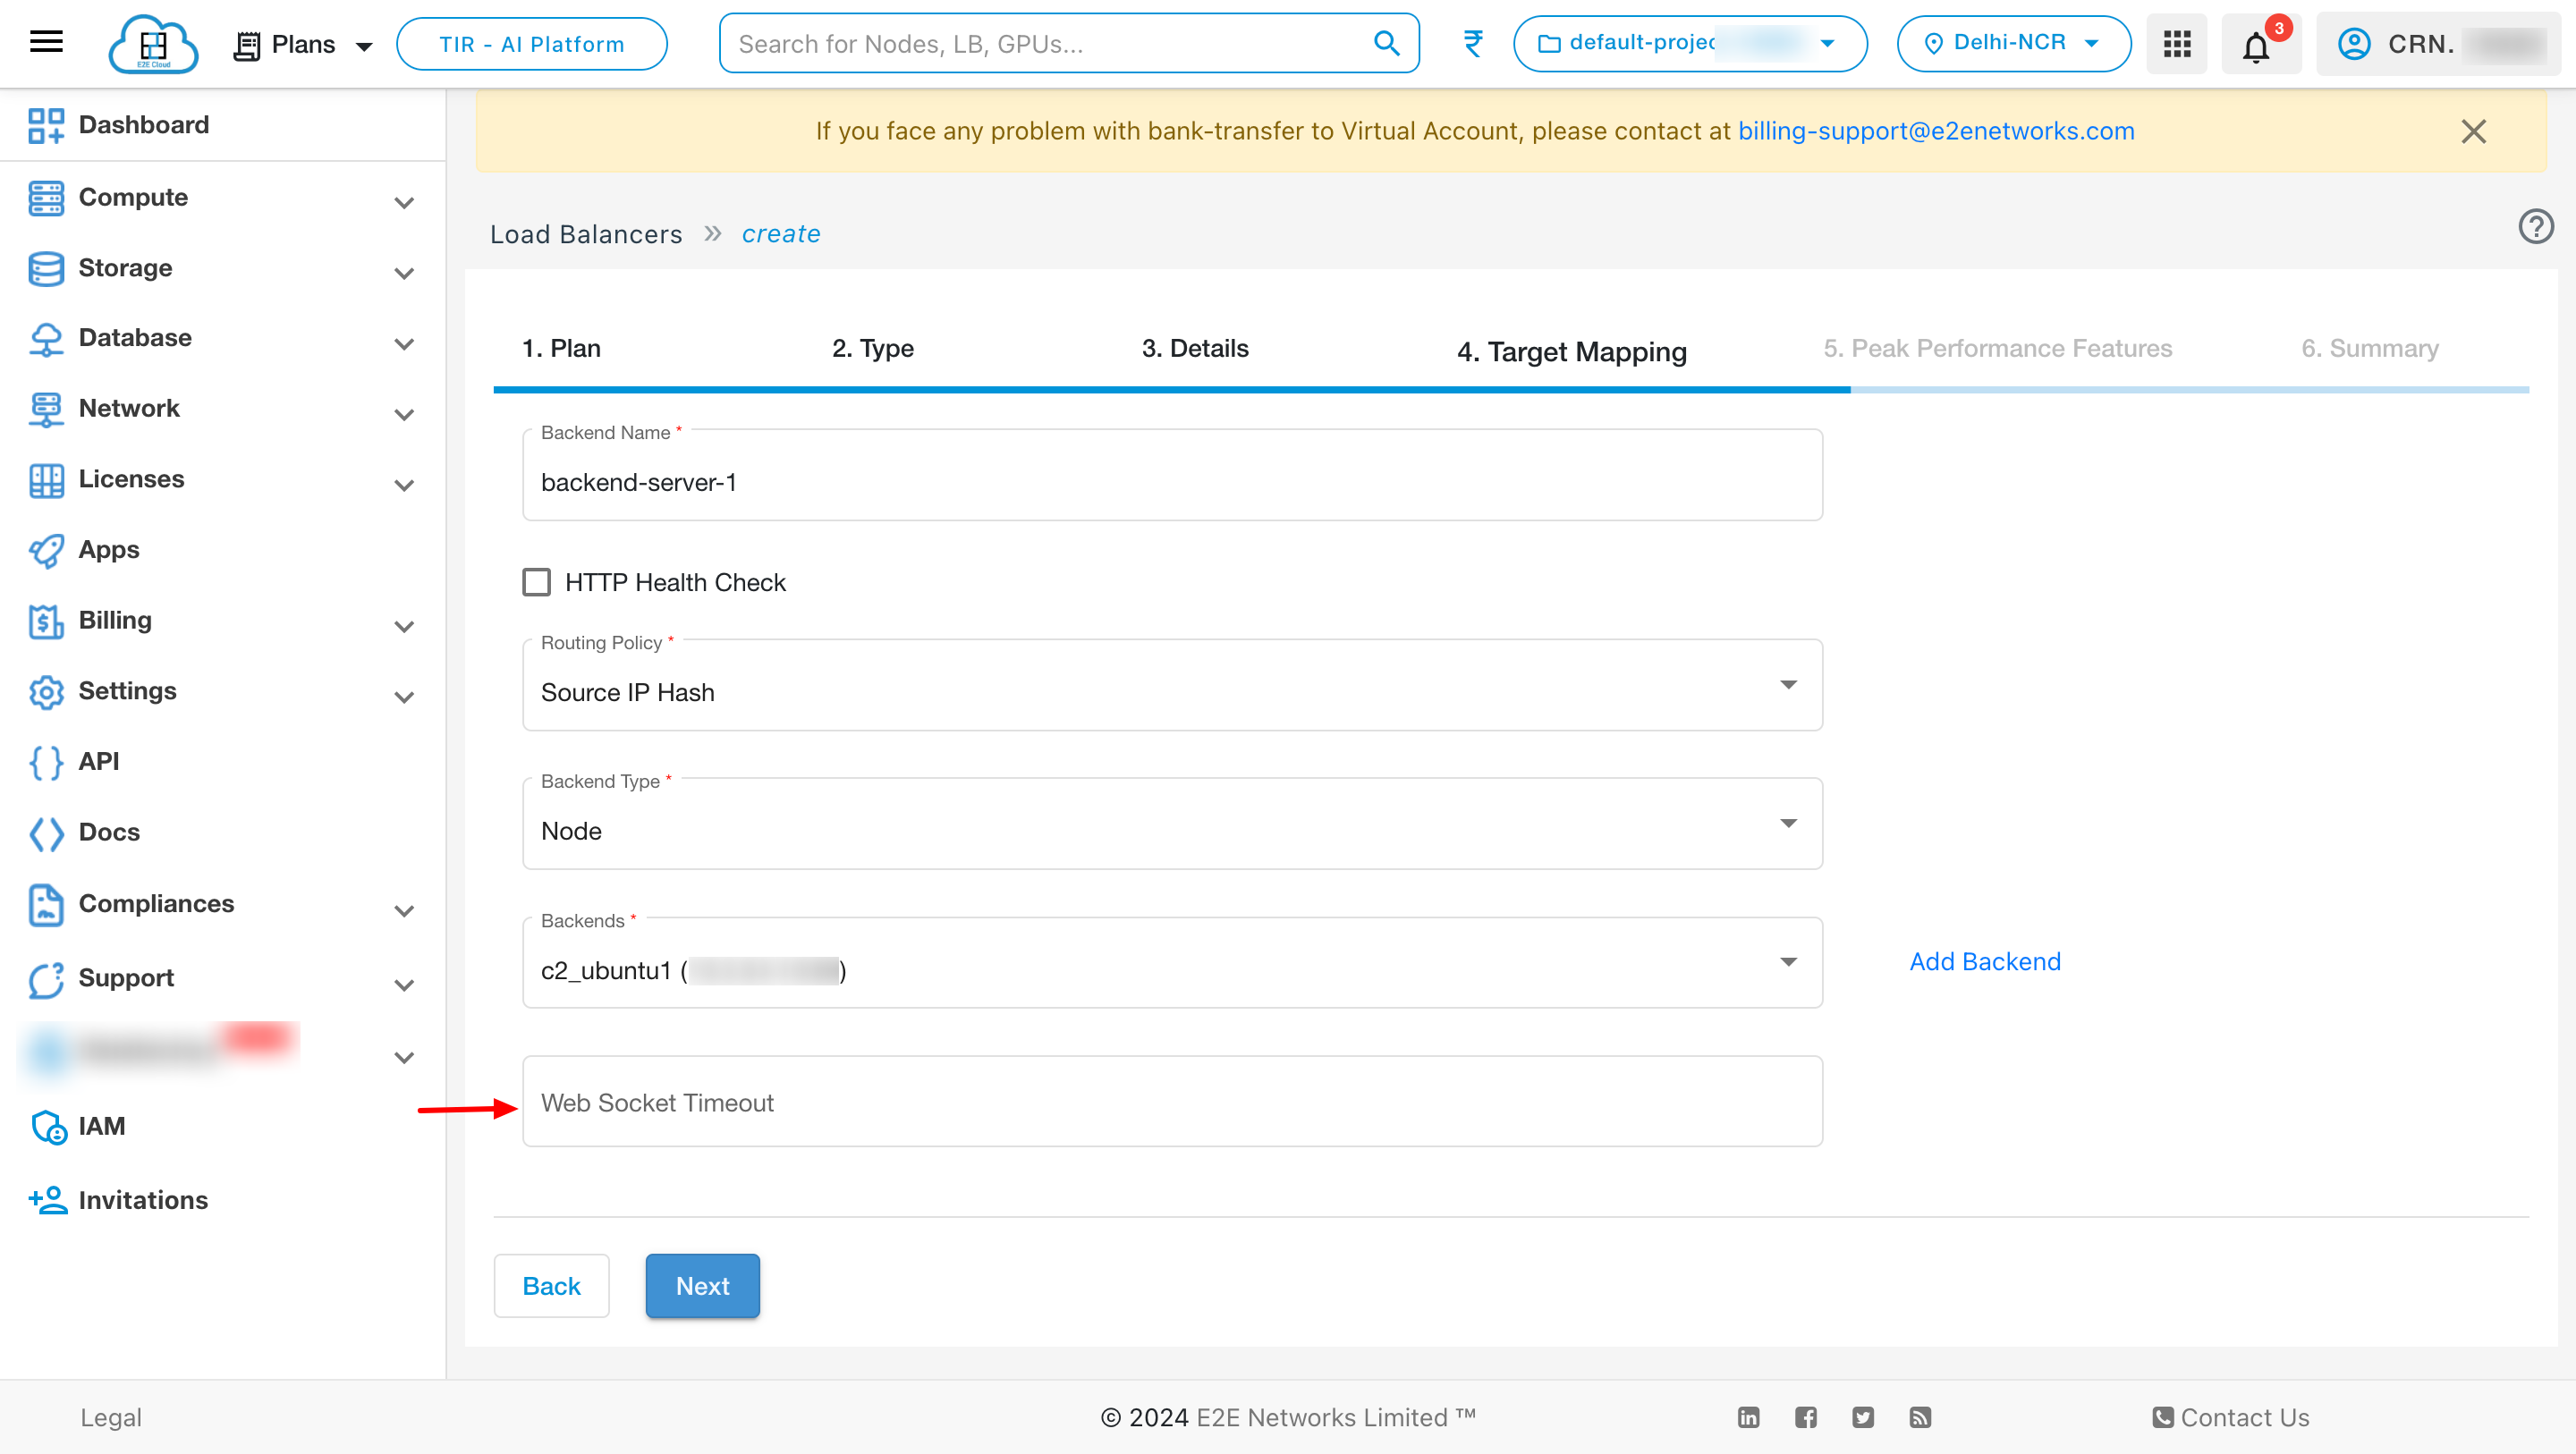
You can also set a websocket timeout for an ALB.
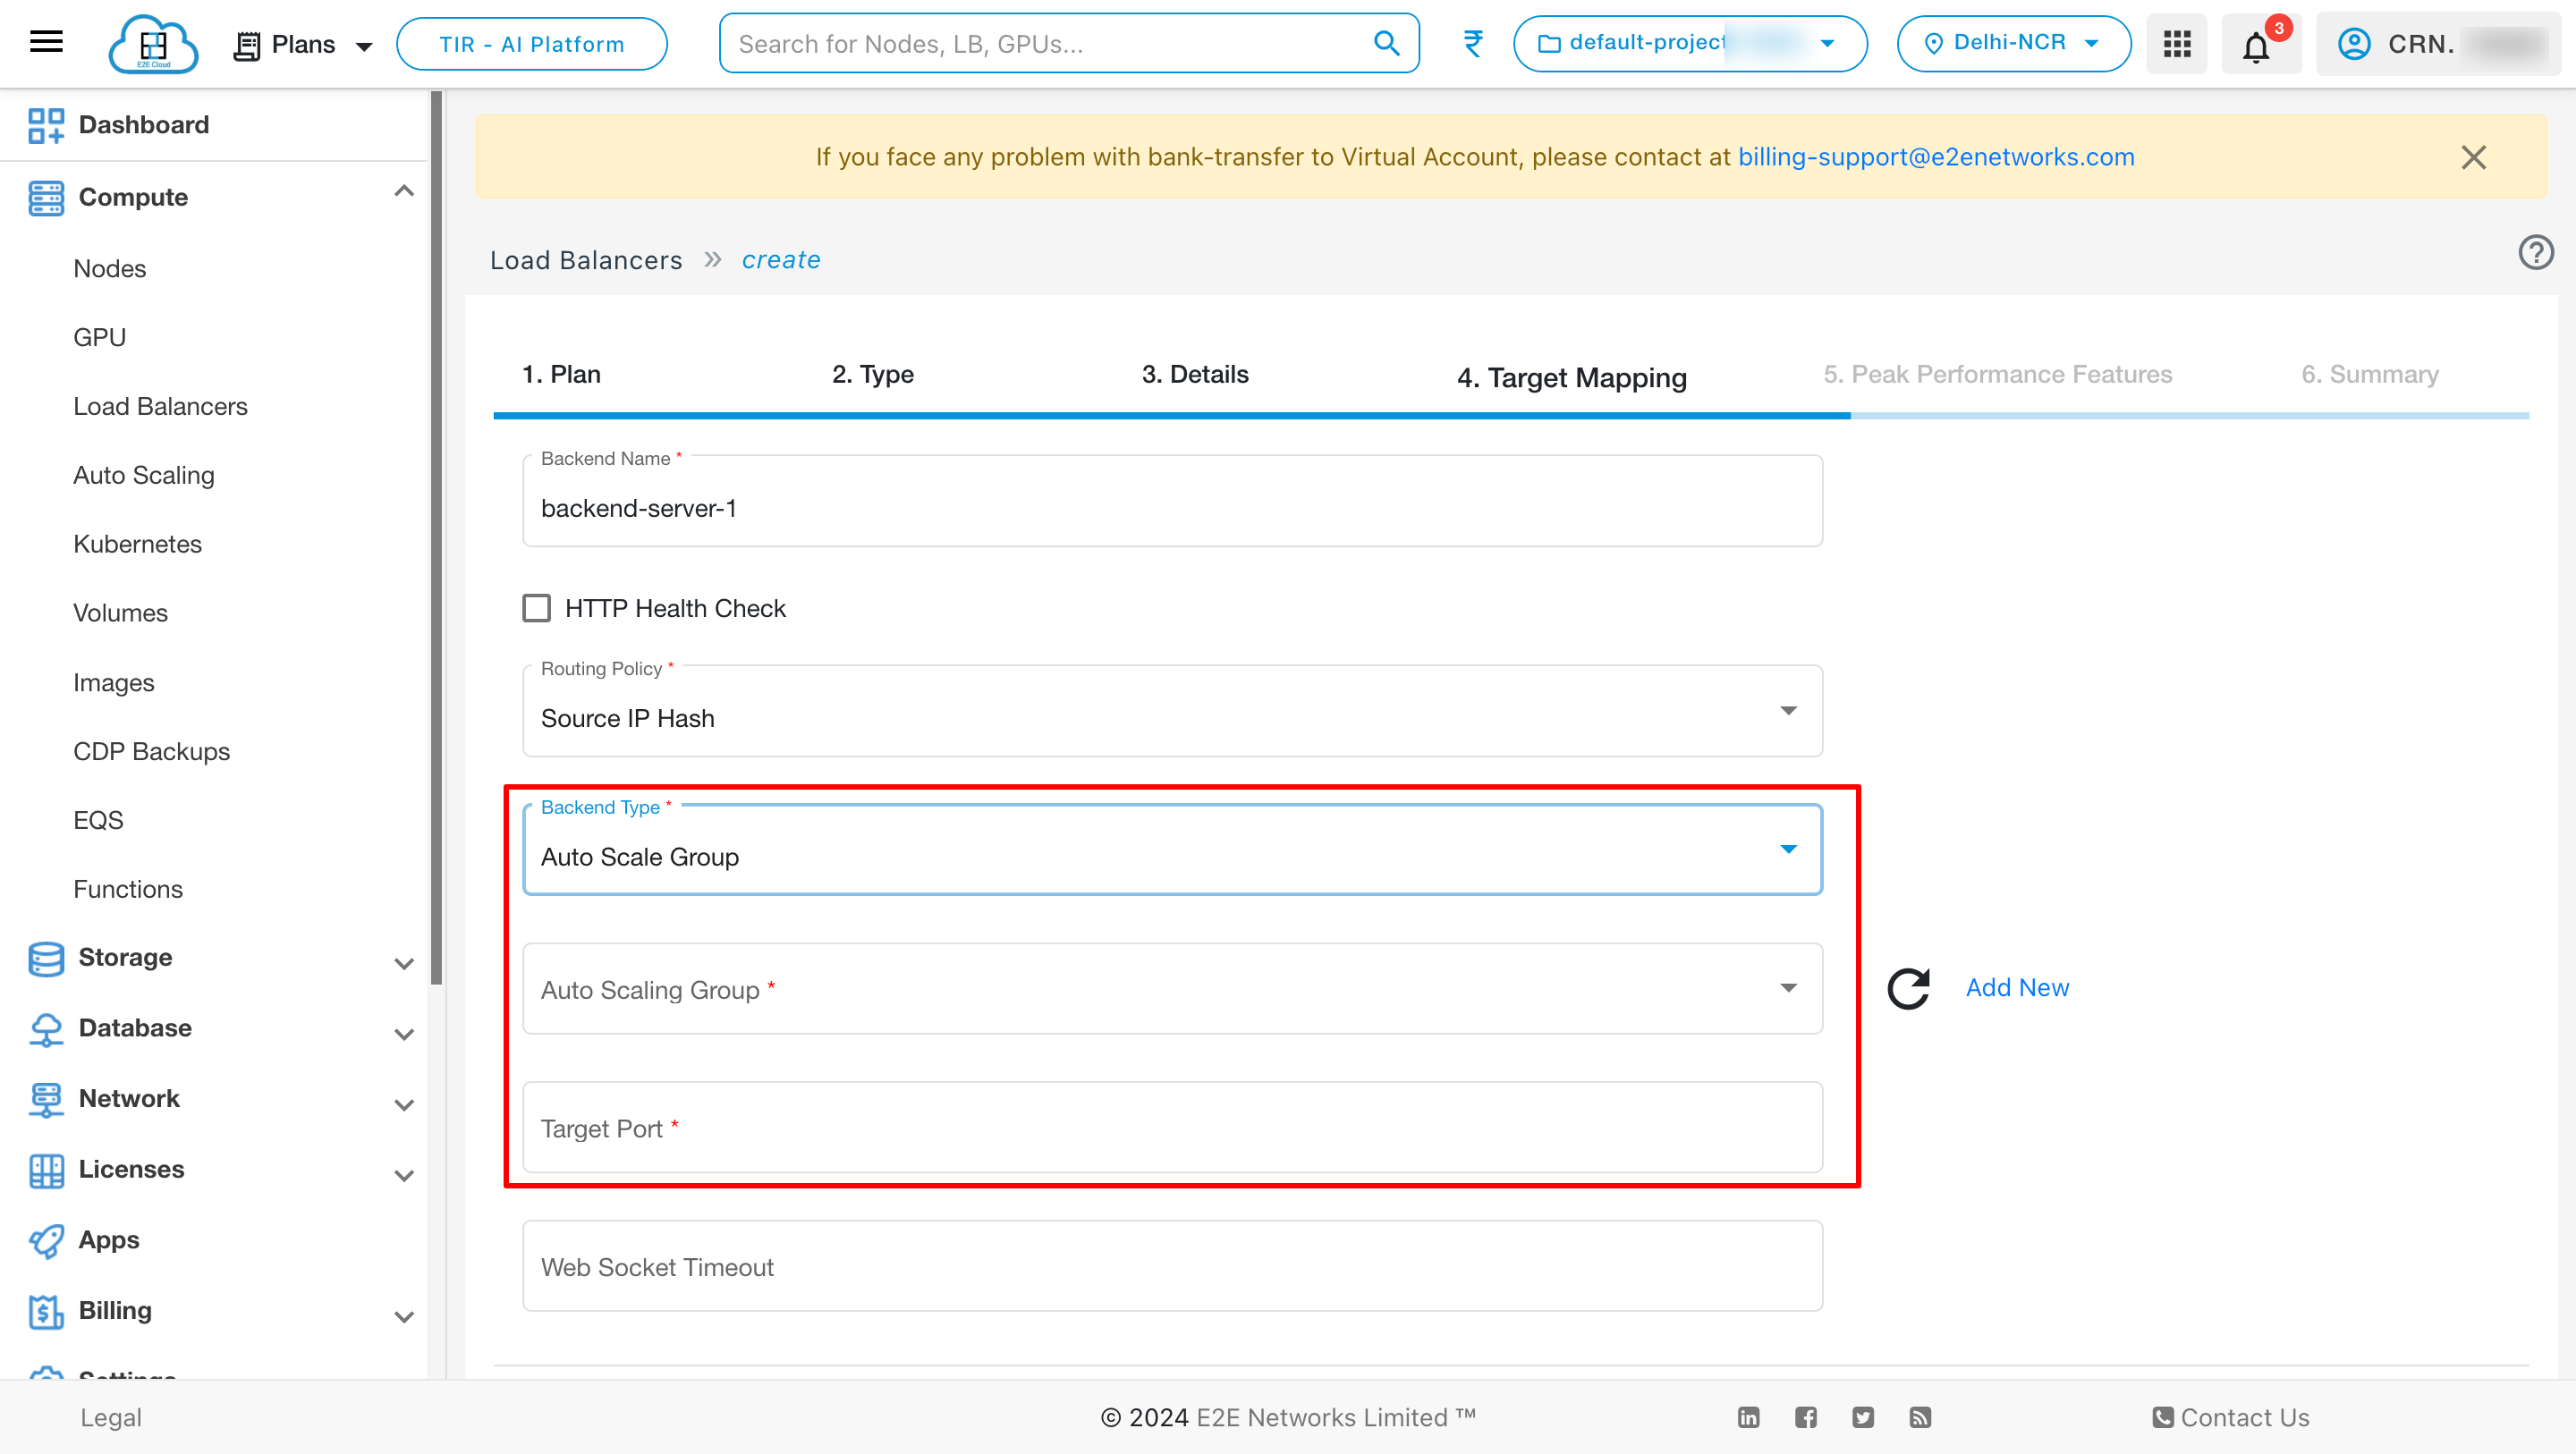
Auto Scale Group
Registering your Auto Scaling group with a load balancer helps you set up a load-balanced application because EAS enables you to dynamically scale compute nodes based on varying workloads and defined policy. This feature allows you to meet seasonal or fluctuating infrastructure demands, optimize cost, and distribute incoming traffic across your healthy E2E nodes—enhancing scalability and availability.
- Select the Dynamic Scale group in the list type field. The node details section will display.
- In the Scale Group Details section, select an application scaling group from the dropdown list to register behind the Load Balancer.
- After selecting the scale group, define the port to send/receive traffic via the Load Balancer in the Target Port field.
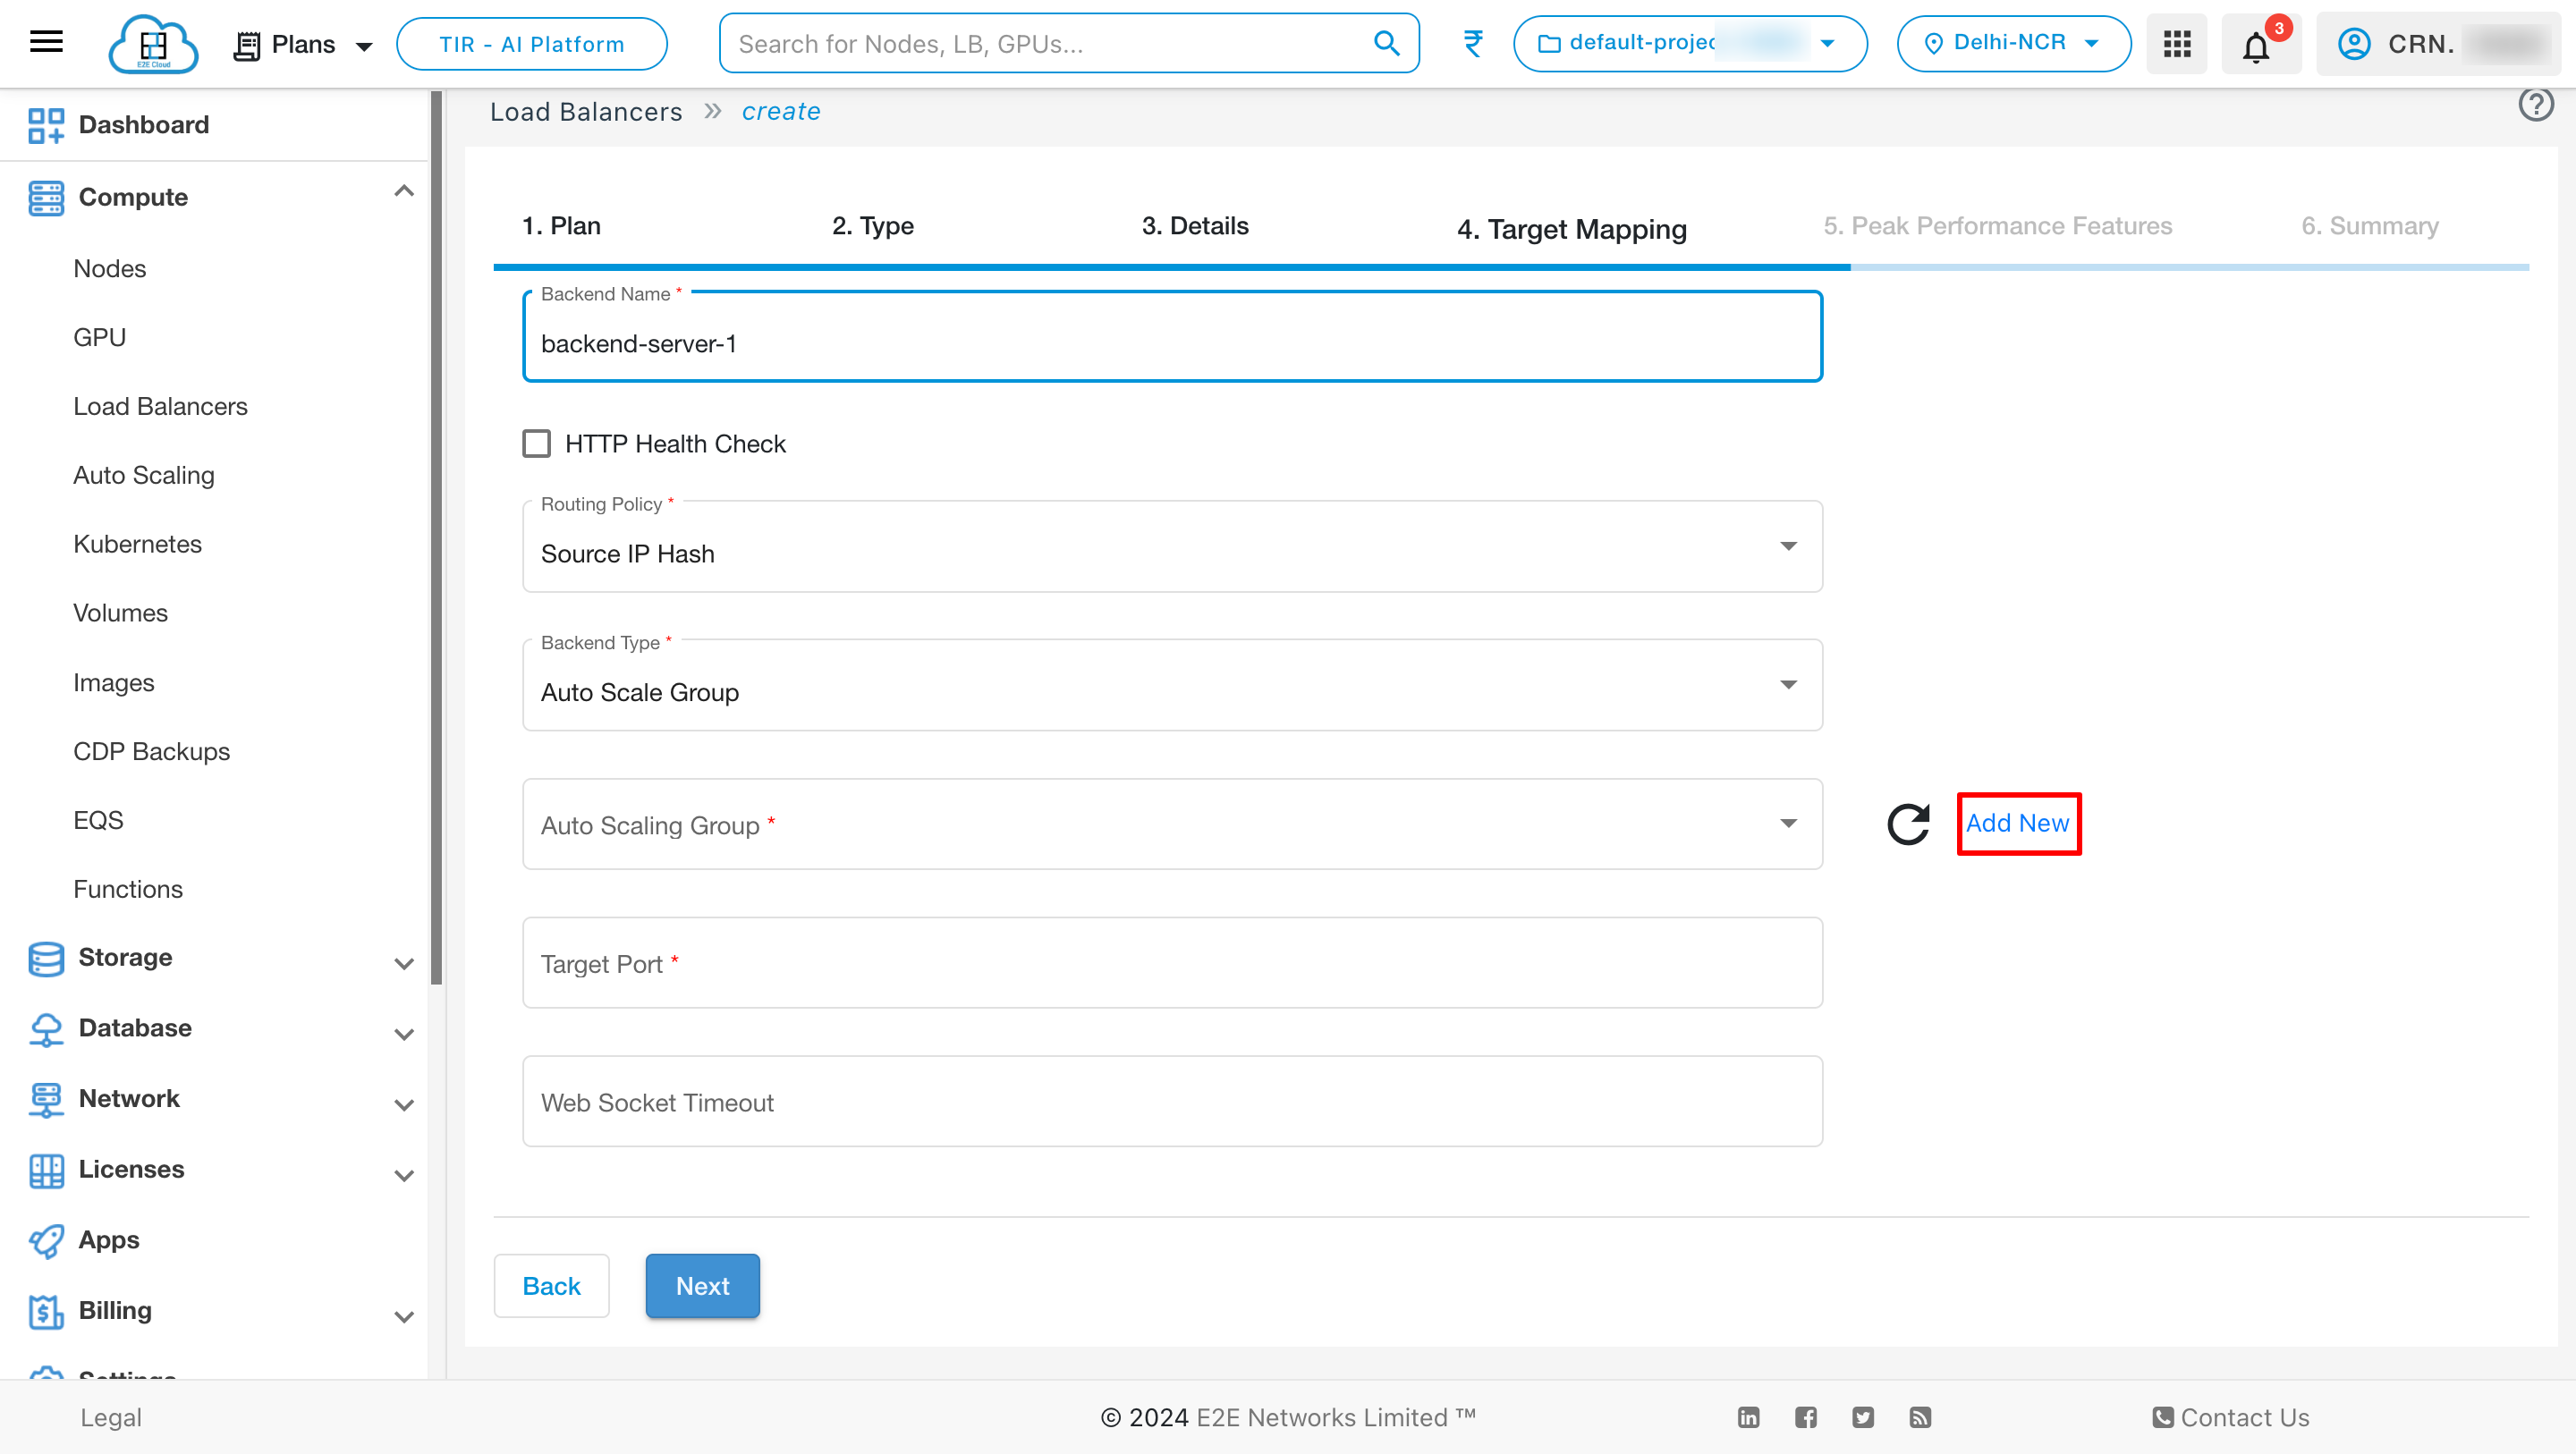
To add an auto-scaling group, click on Add New.
Peak Performance Features
Create New VPC - Enable this option to use a VPC IP as the default VPC IP for your load balancer, allowing internal connections.
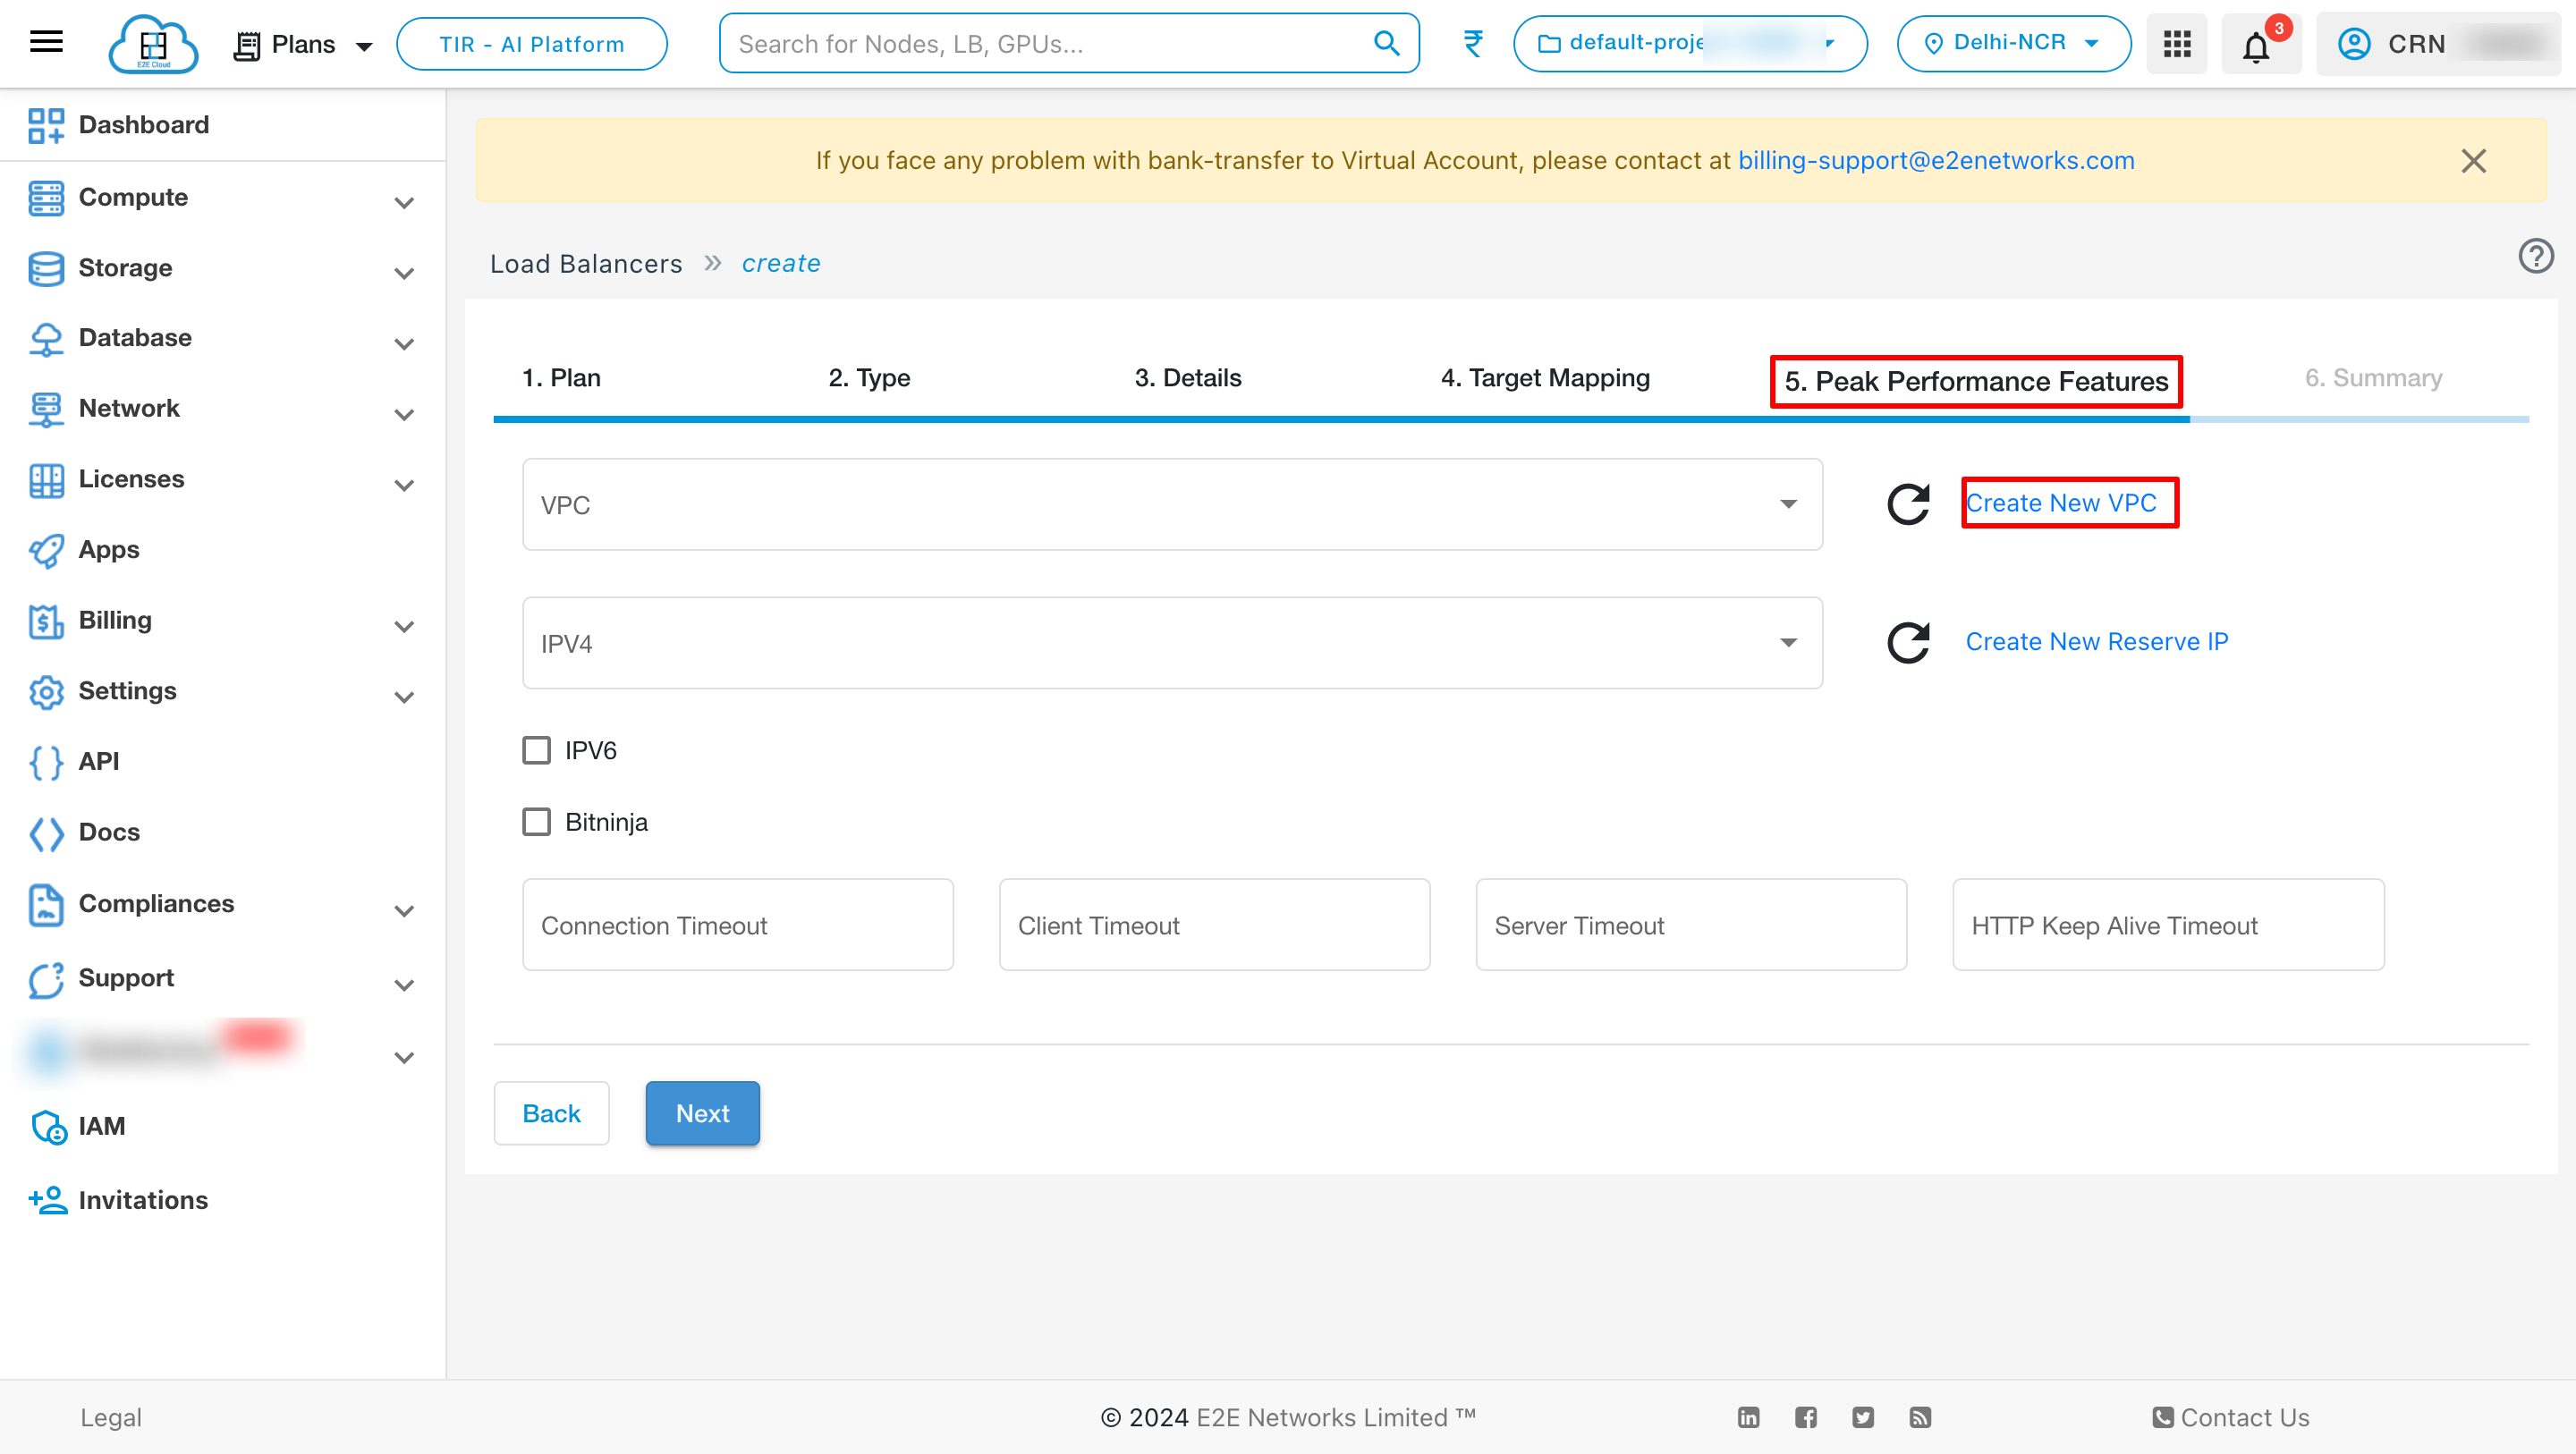
After creating a VPC, it will appear in the dropdown list.
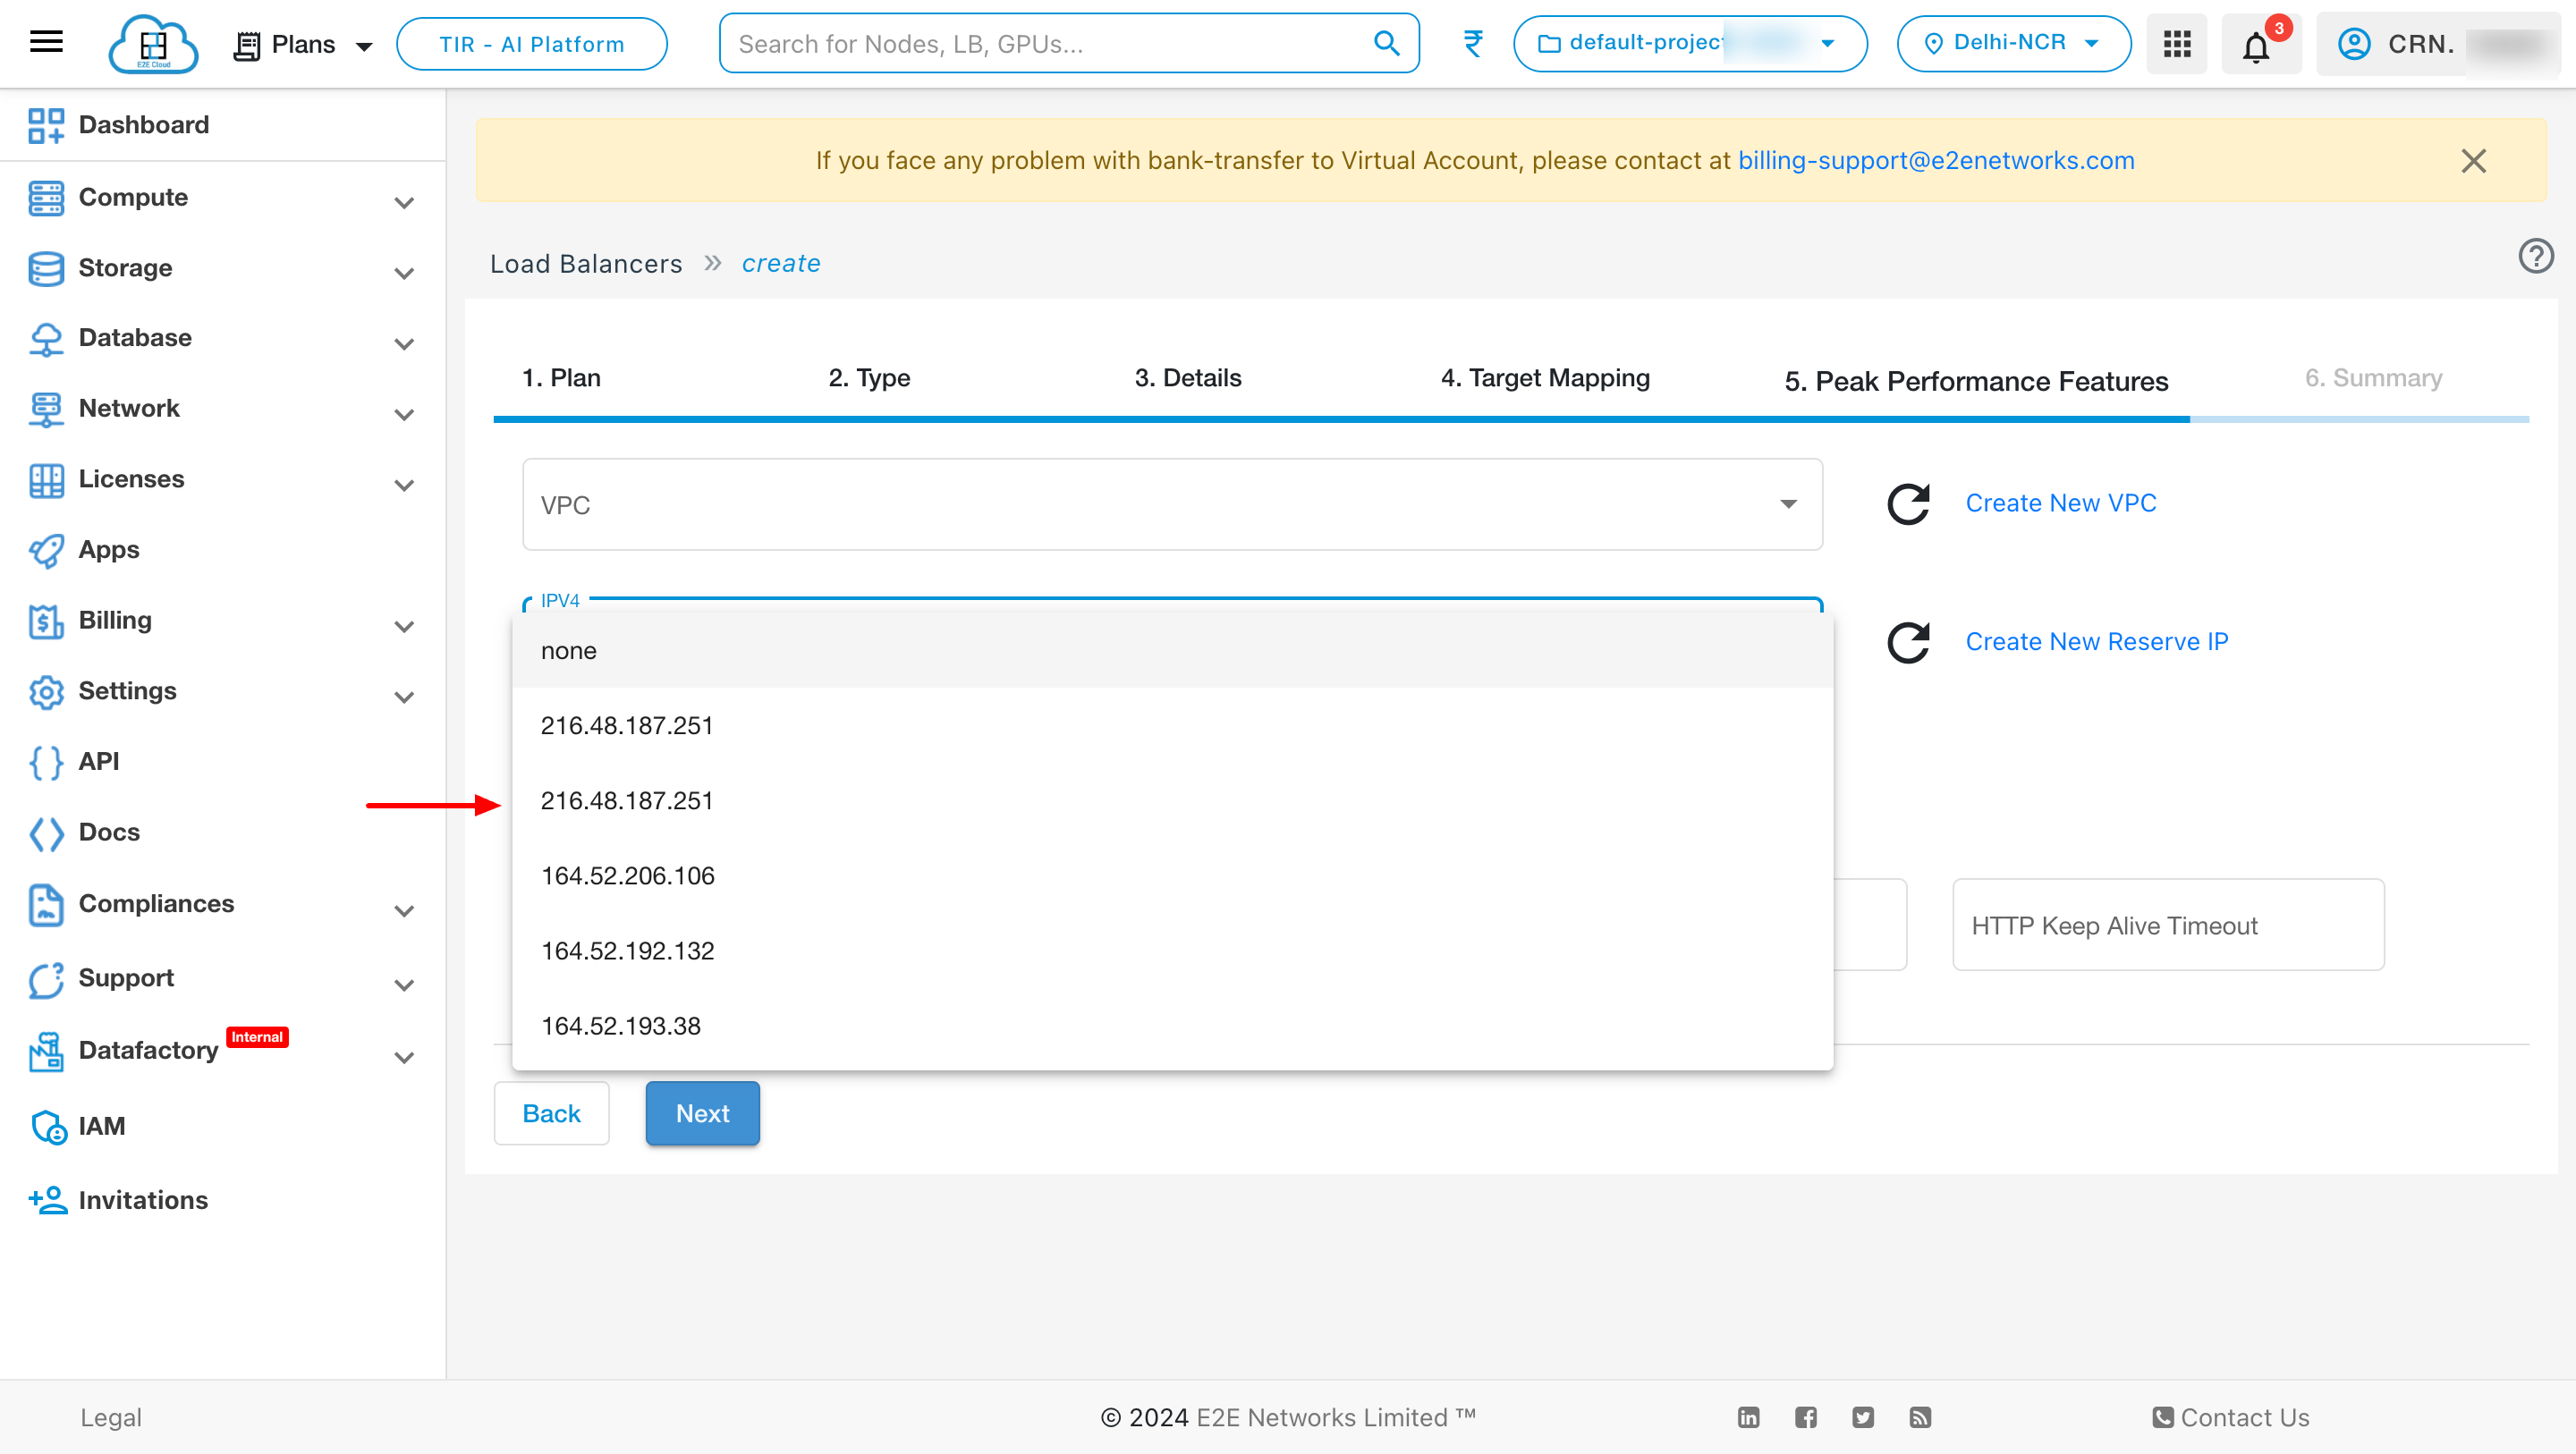
Add New Reserve IP - Enable this option to use a reserved IP as the default Public IP for your load balancer. You can dynamically update backend resources without downtime by re-assigning the reserved IP address.
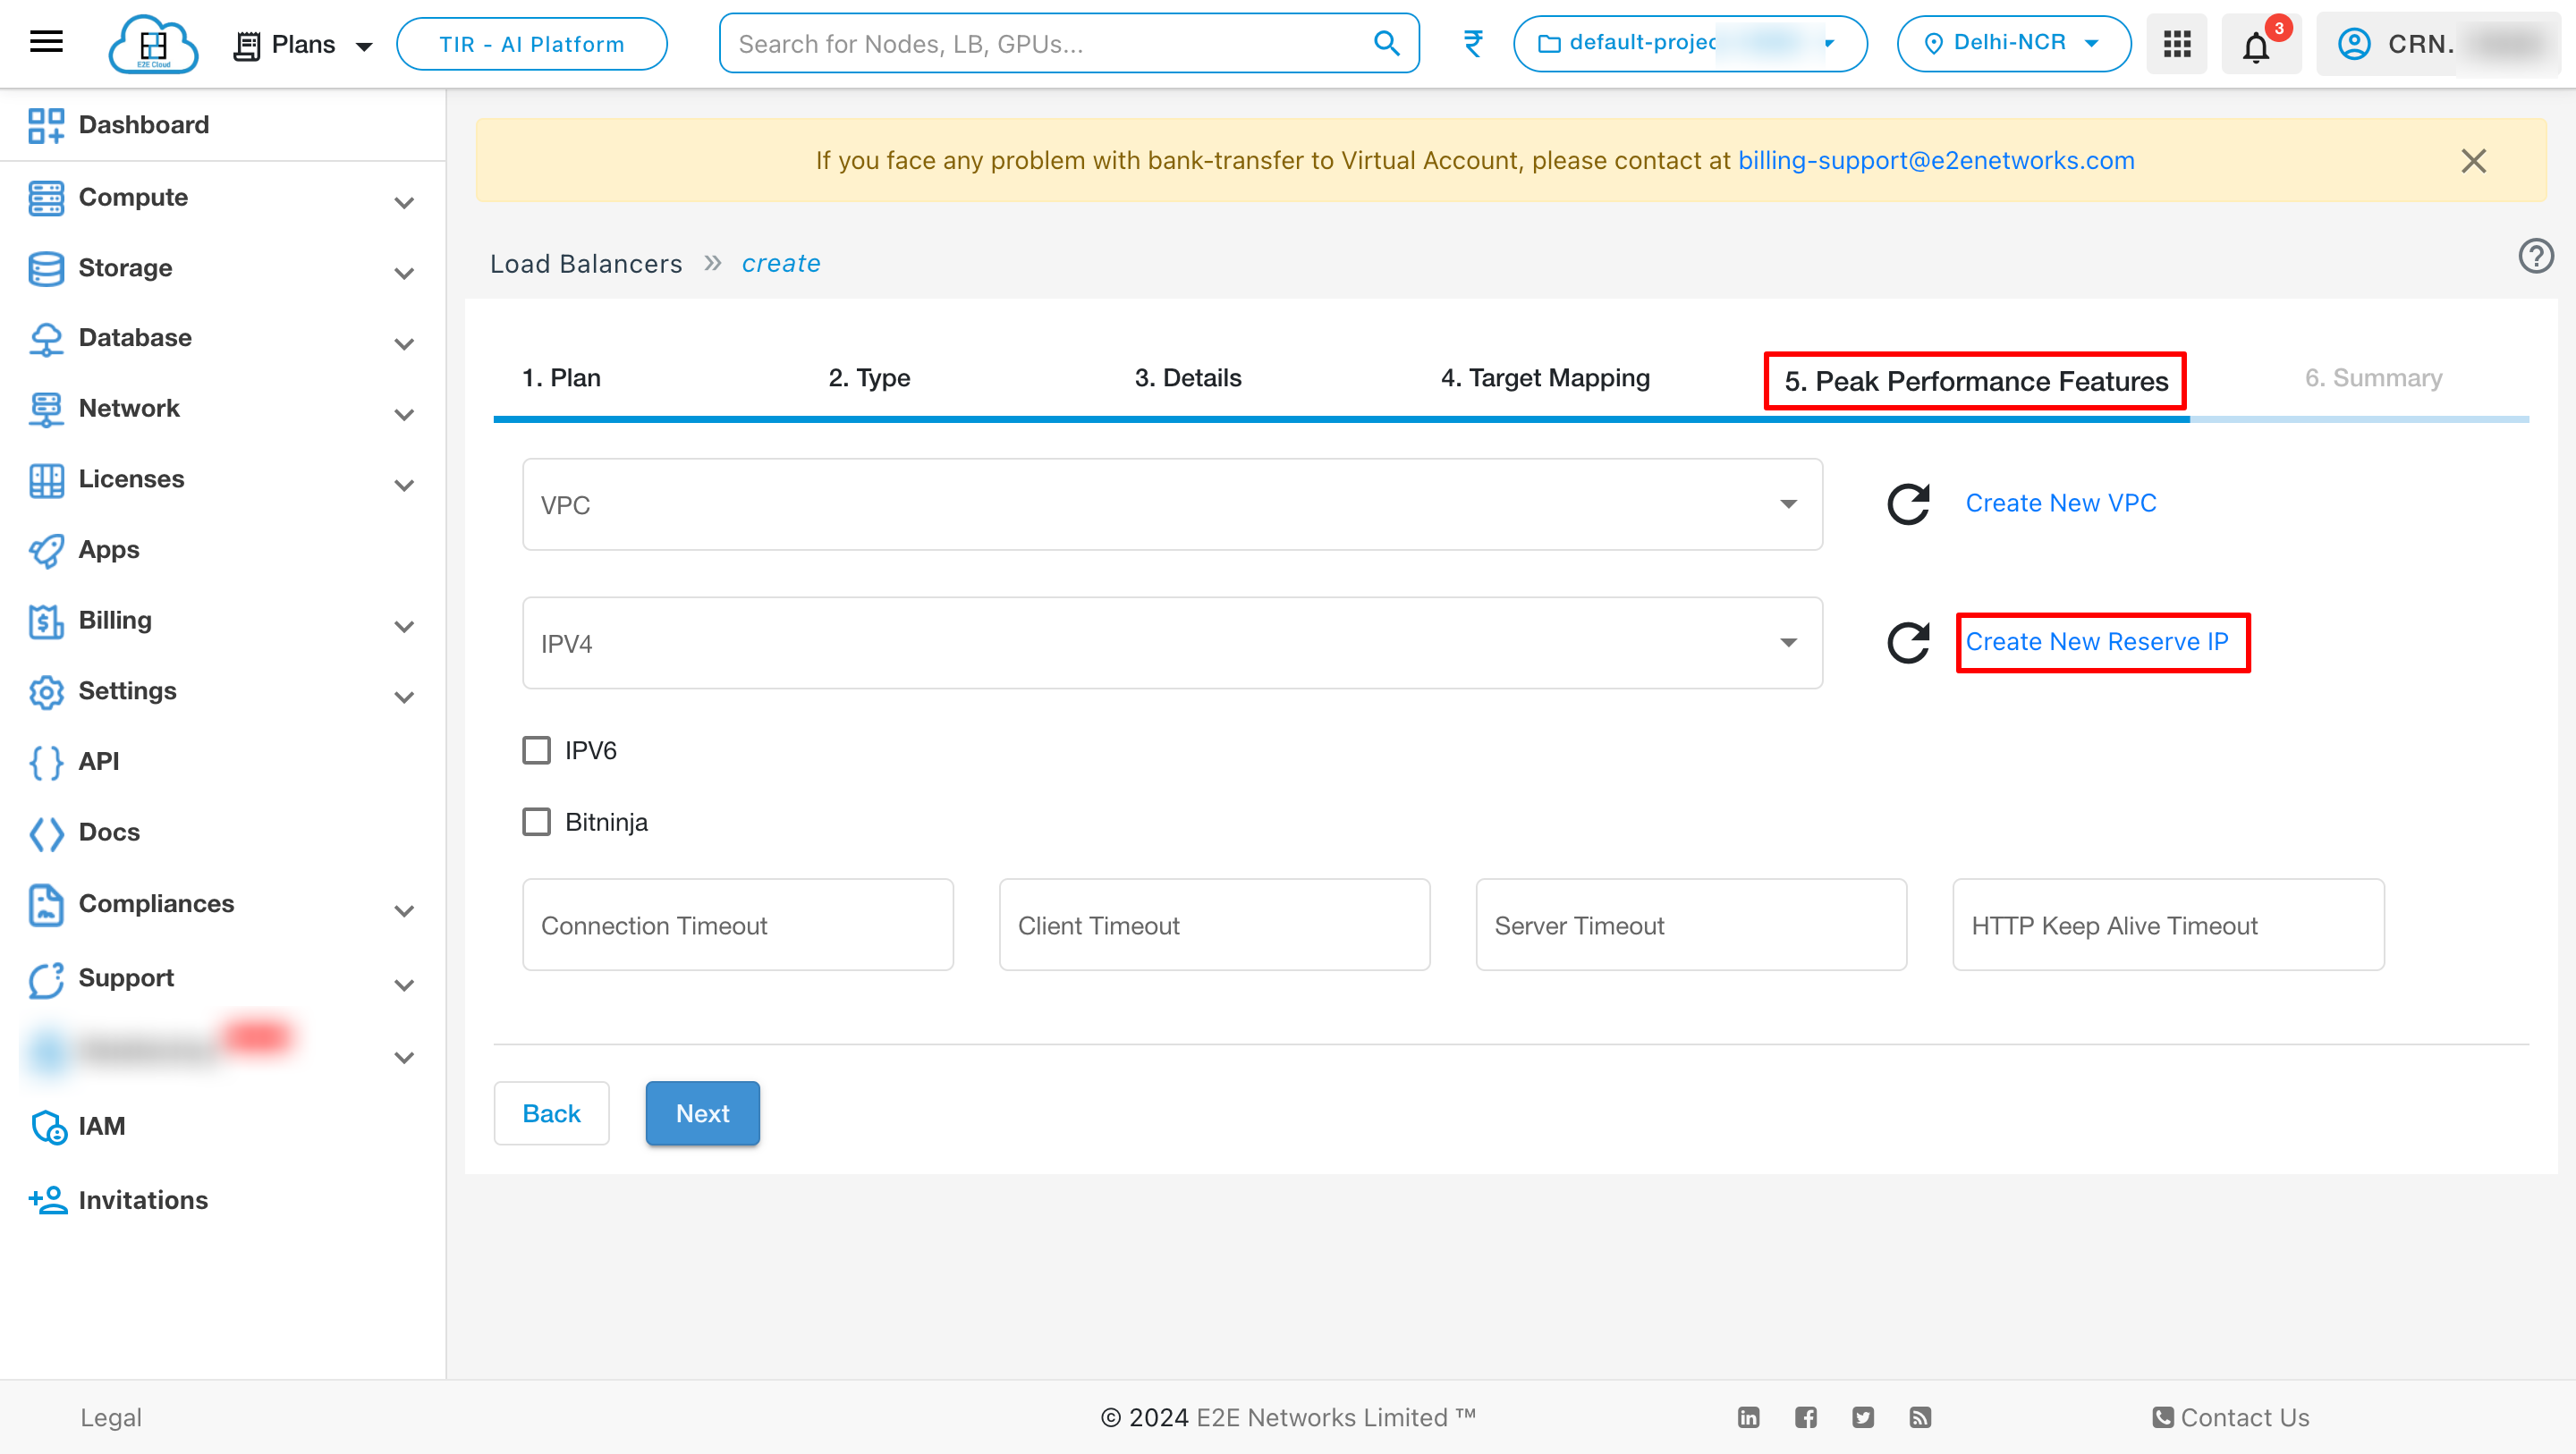
After creating the IP, it will appear in the dropdown list.

BitNinja
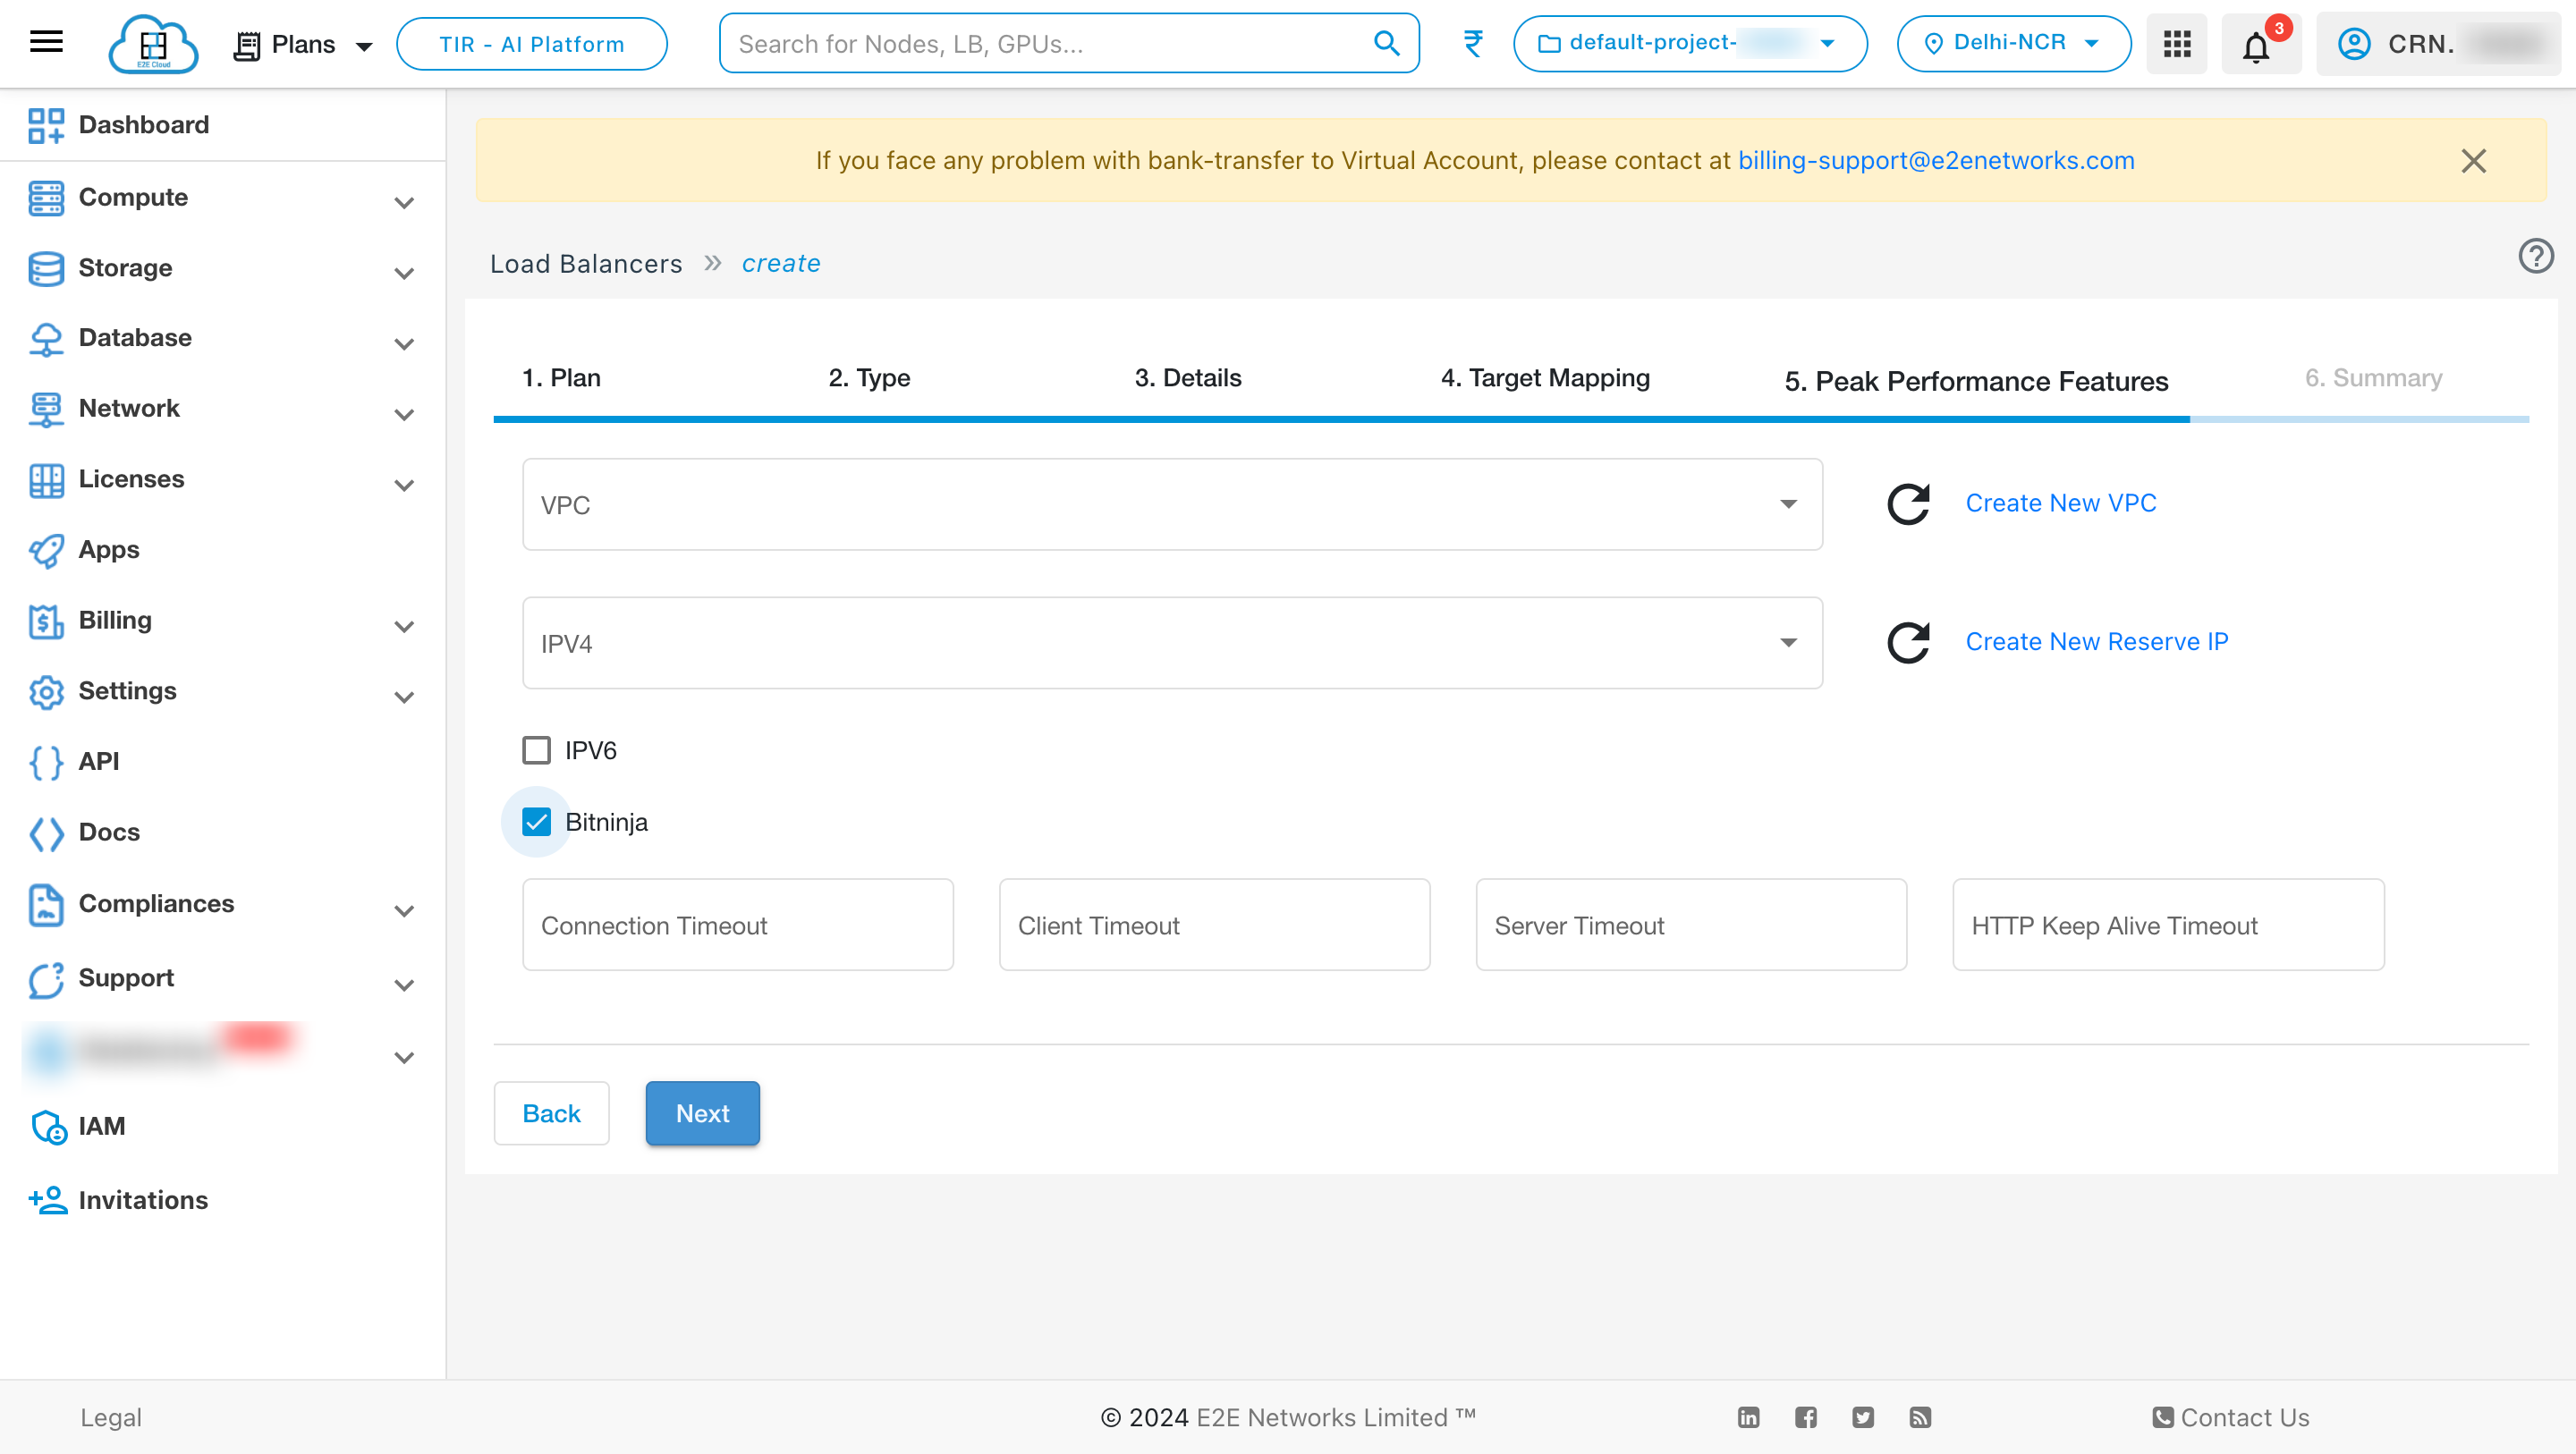
BitNinja is a server security tool that combines powerful defense mechanisms. Each protected load balancer learns from every attack, applying this information across all BitNinja-enabled servers and load balancers. Learn more.
Enable BitNinja - Enable this option to use BitNinja for your load balancer. BitNinja offers various modules to defend against cyberattacks, is easy to install, requires minimal maintenance, and provides immediate protection.
Timeouts
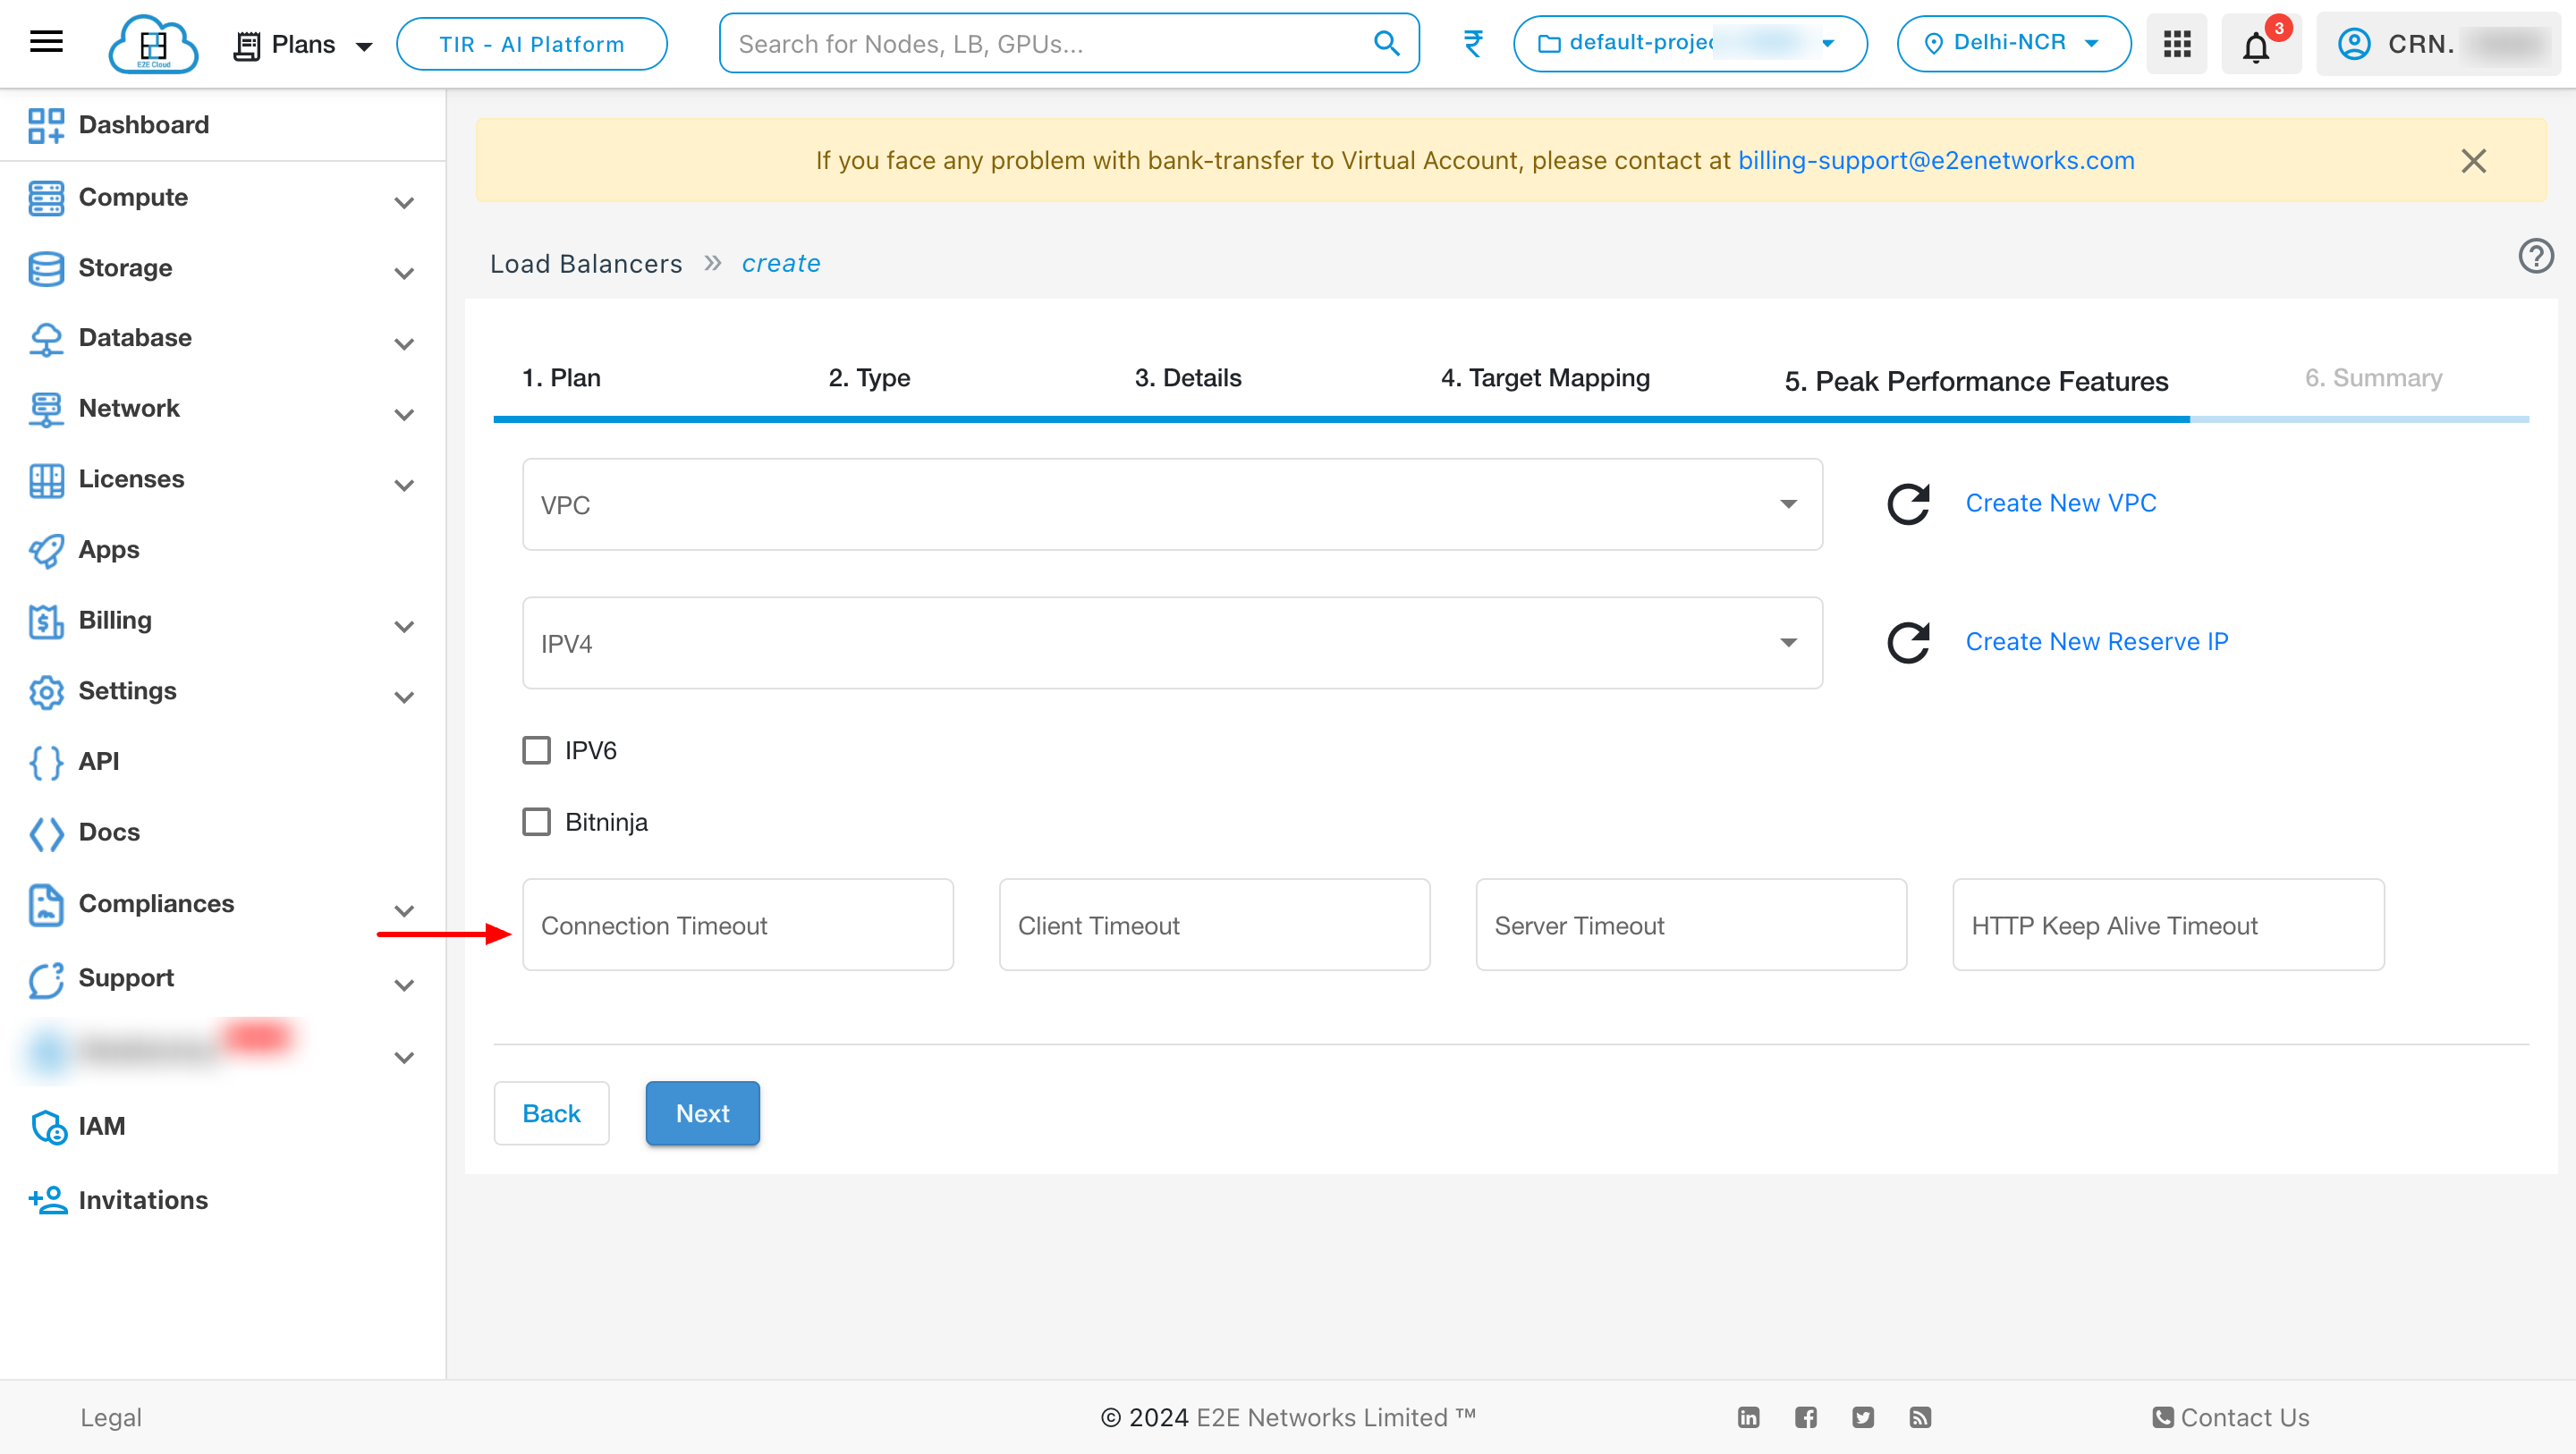
Configure different timeout values like connection timeout, client timeout, server timeout, and HTTP keep-alive timeout as needed.
Summary
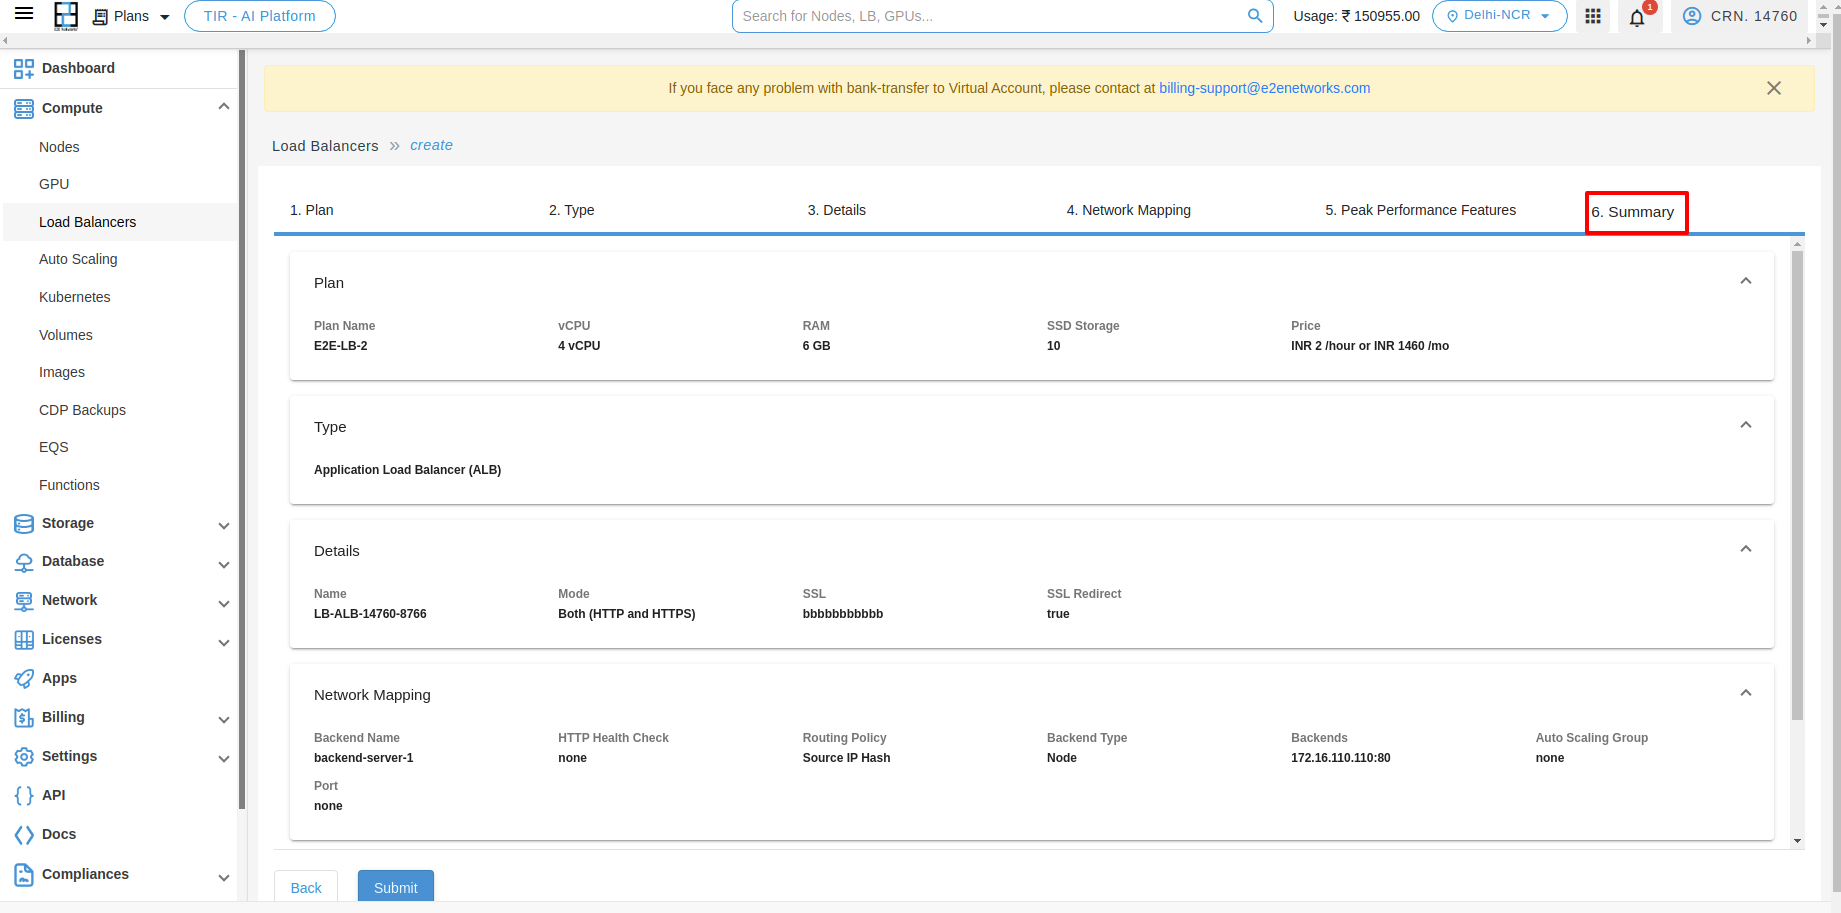
In the Summary section, verify your Plan, Type, Details, Network Mapping, and Peak Performance Features.
Deploy Load Balancer
After completing all fields, click Submit. The setup may take a few minutes, after which you will be redirected to the ‘Load Balancers’ page.
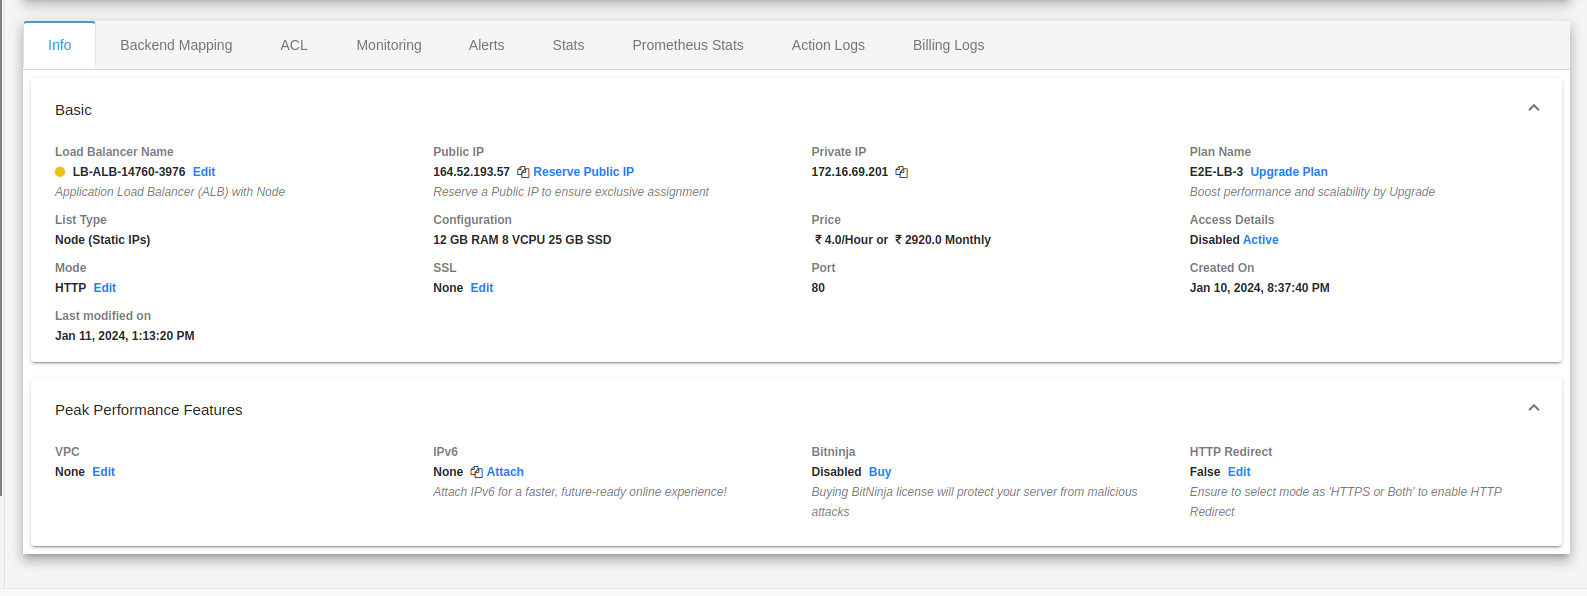
Application Load Balancer Info
You can review basic, security, backend configurations, and network details of your load balancer on the Load Balancer Info tab.
Backend Mapping
Once your load balancer is created, you can access and manage it from the My Account Portal. Click on the installed LoadBalancer instance to see various management options.

To add a backend, click on Add Backend.
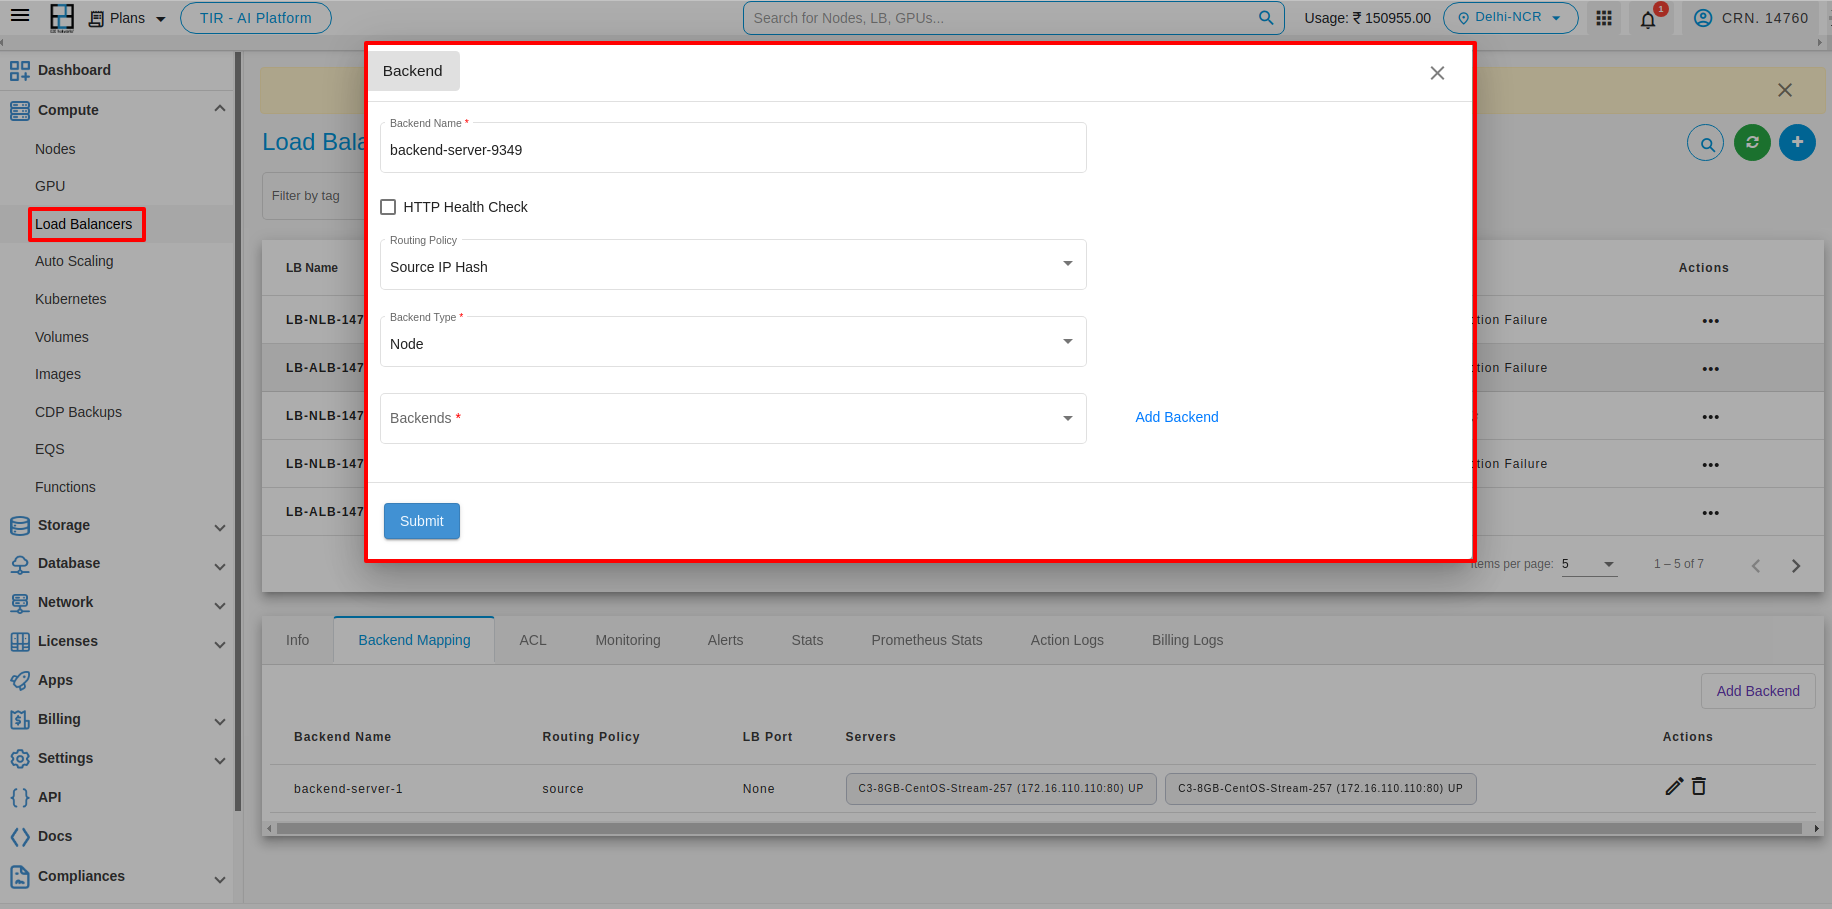
After adding a backend, it will appear in the list below.

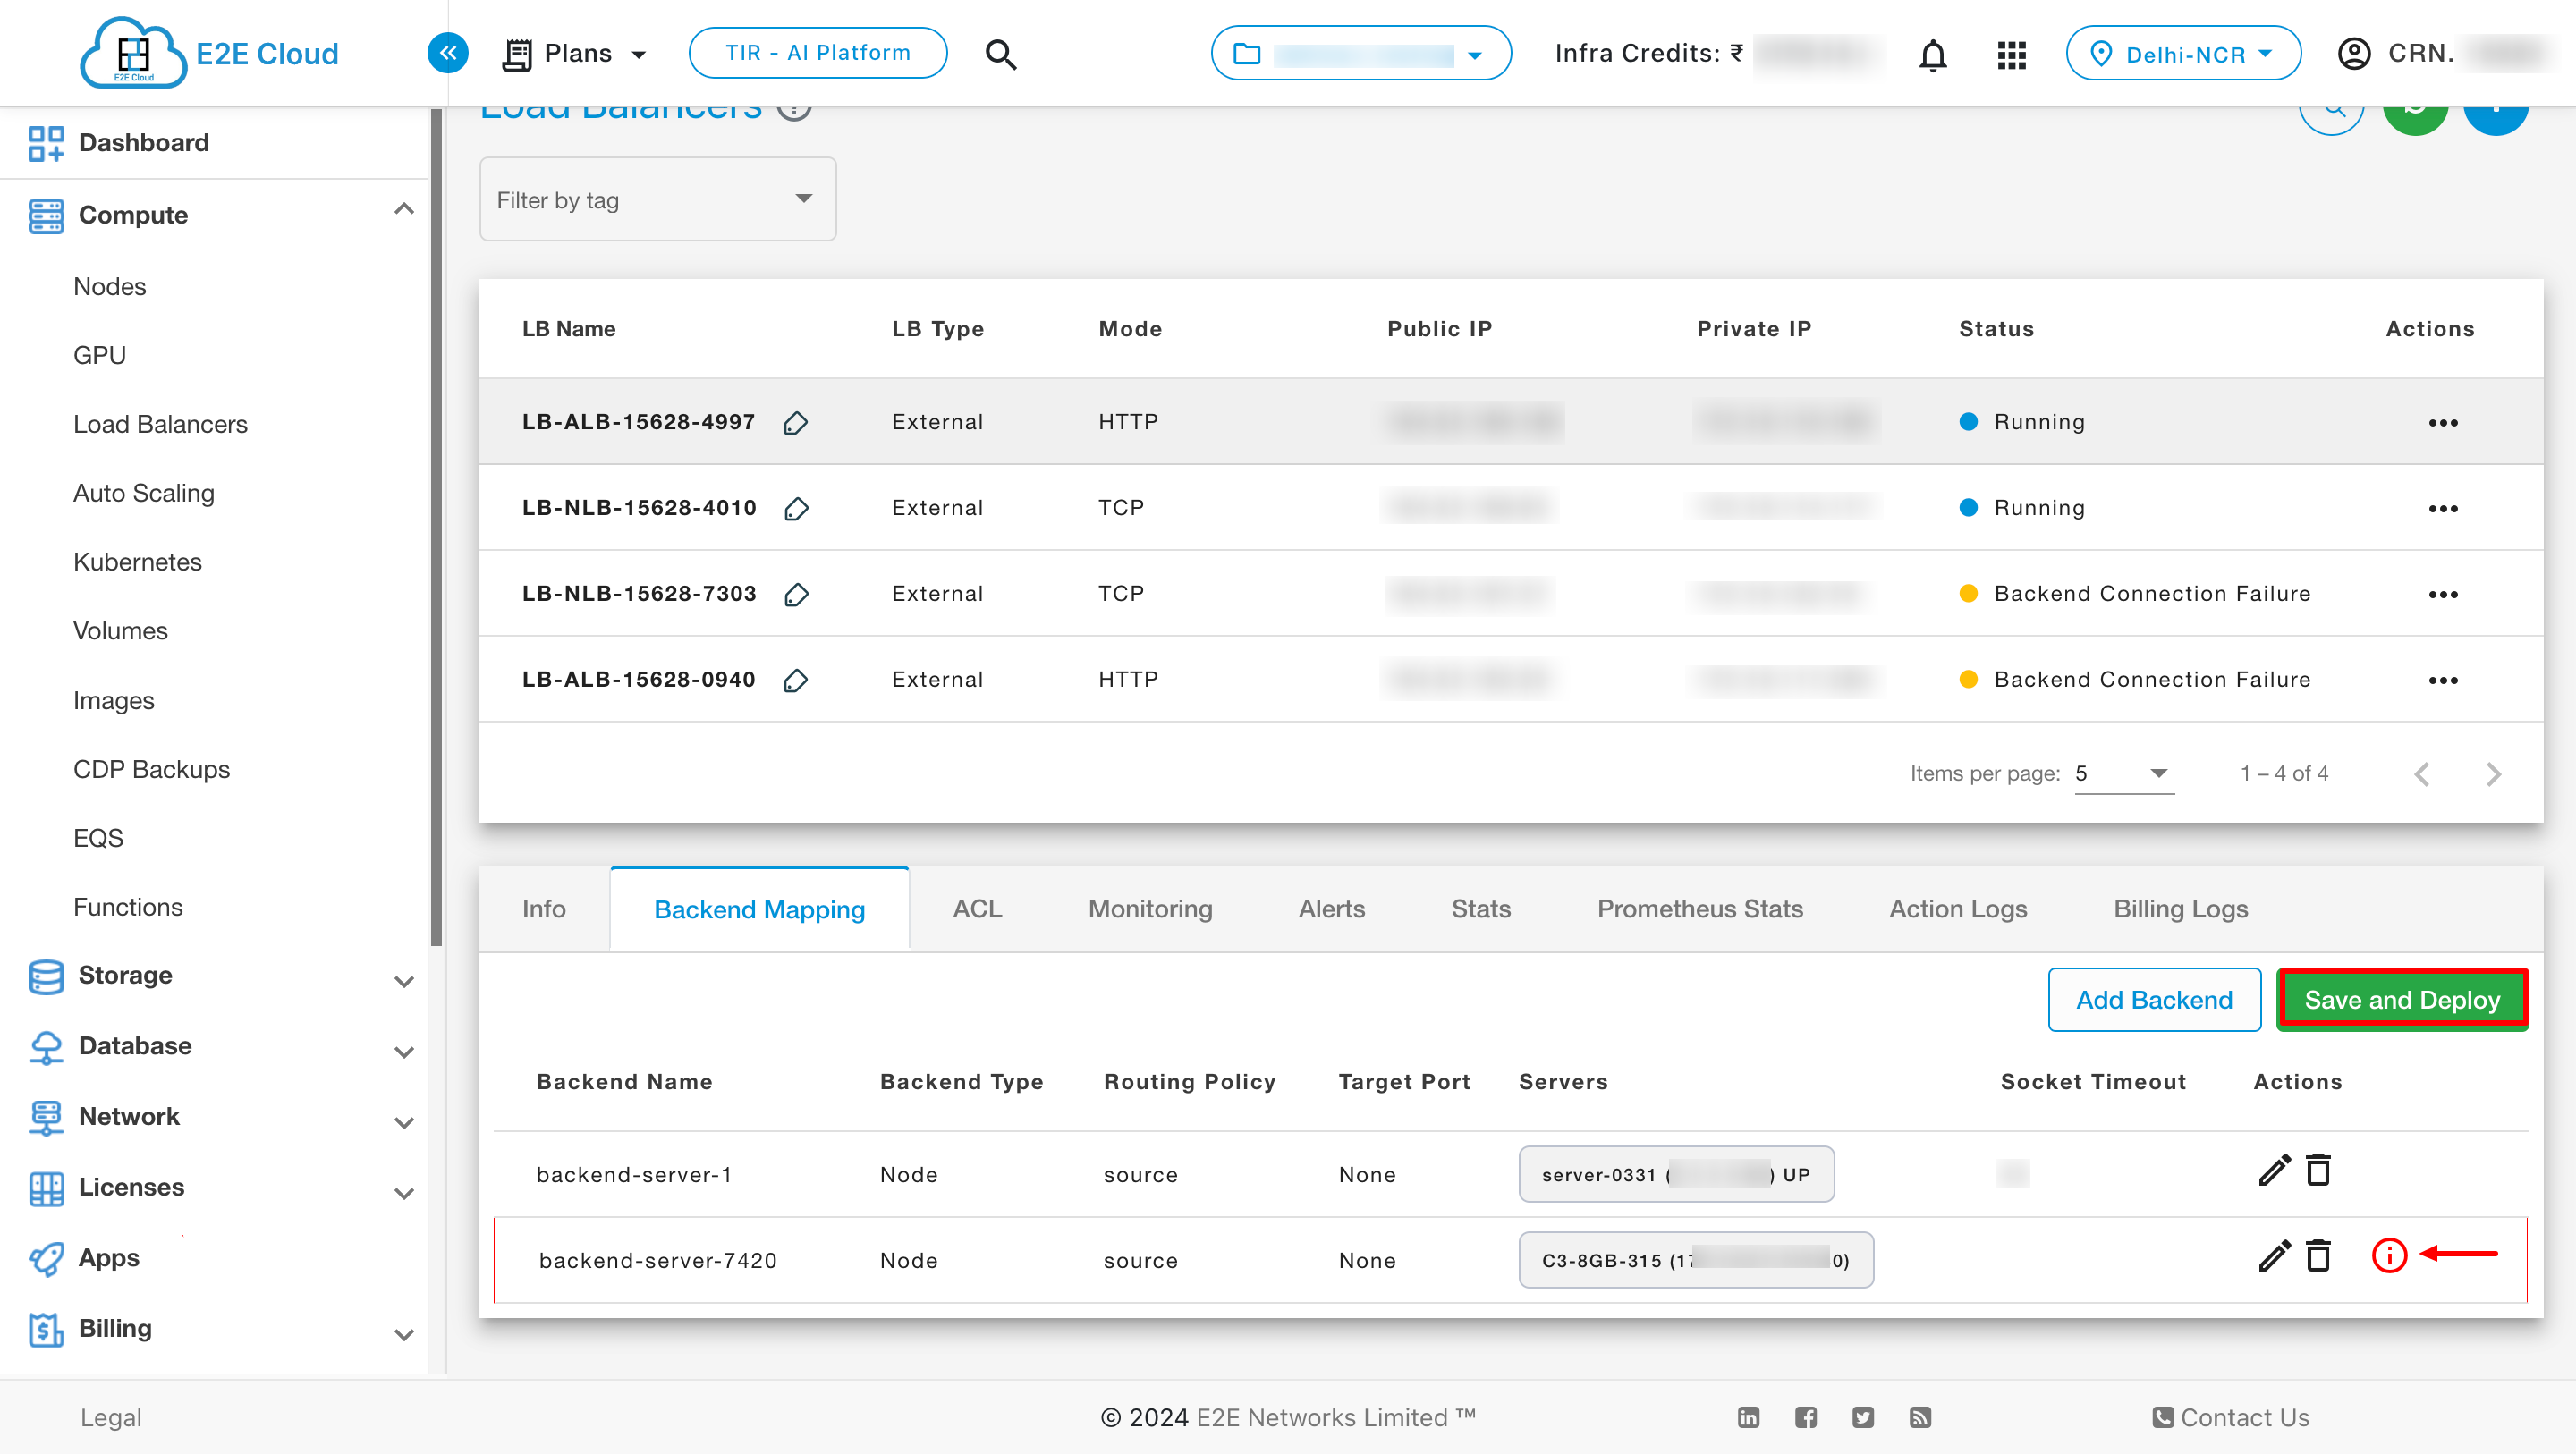
Users can add or edit multiple backends simultaneously. After making edits, a “Save and Deploy” button appears along with an info icon. Click on Save and Deploy to save changes.
The Edit Load Balancer page allows you to modify backend and frontend configurations.

You can delete backend and frontend configurations from the Delete Load Balancer page.

ACL
You can add ACL by clicking ADD ACL button under the ACL tab.

Users have the option to add multiple ACL rules simultaneously. After making desired edits, a “Save and Deploy” button will appear. Additionally, an info icon will be displayed next to the newly added rules. Click on the �“Save and Deploy” button to save your changes.
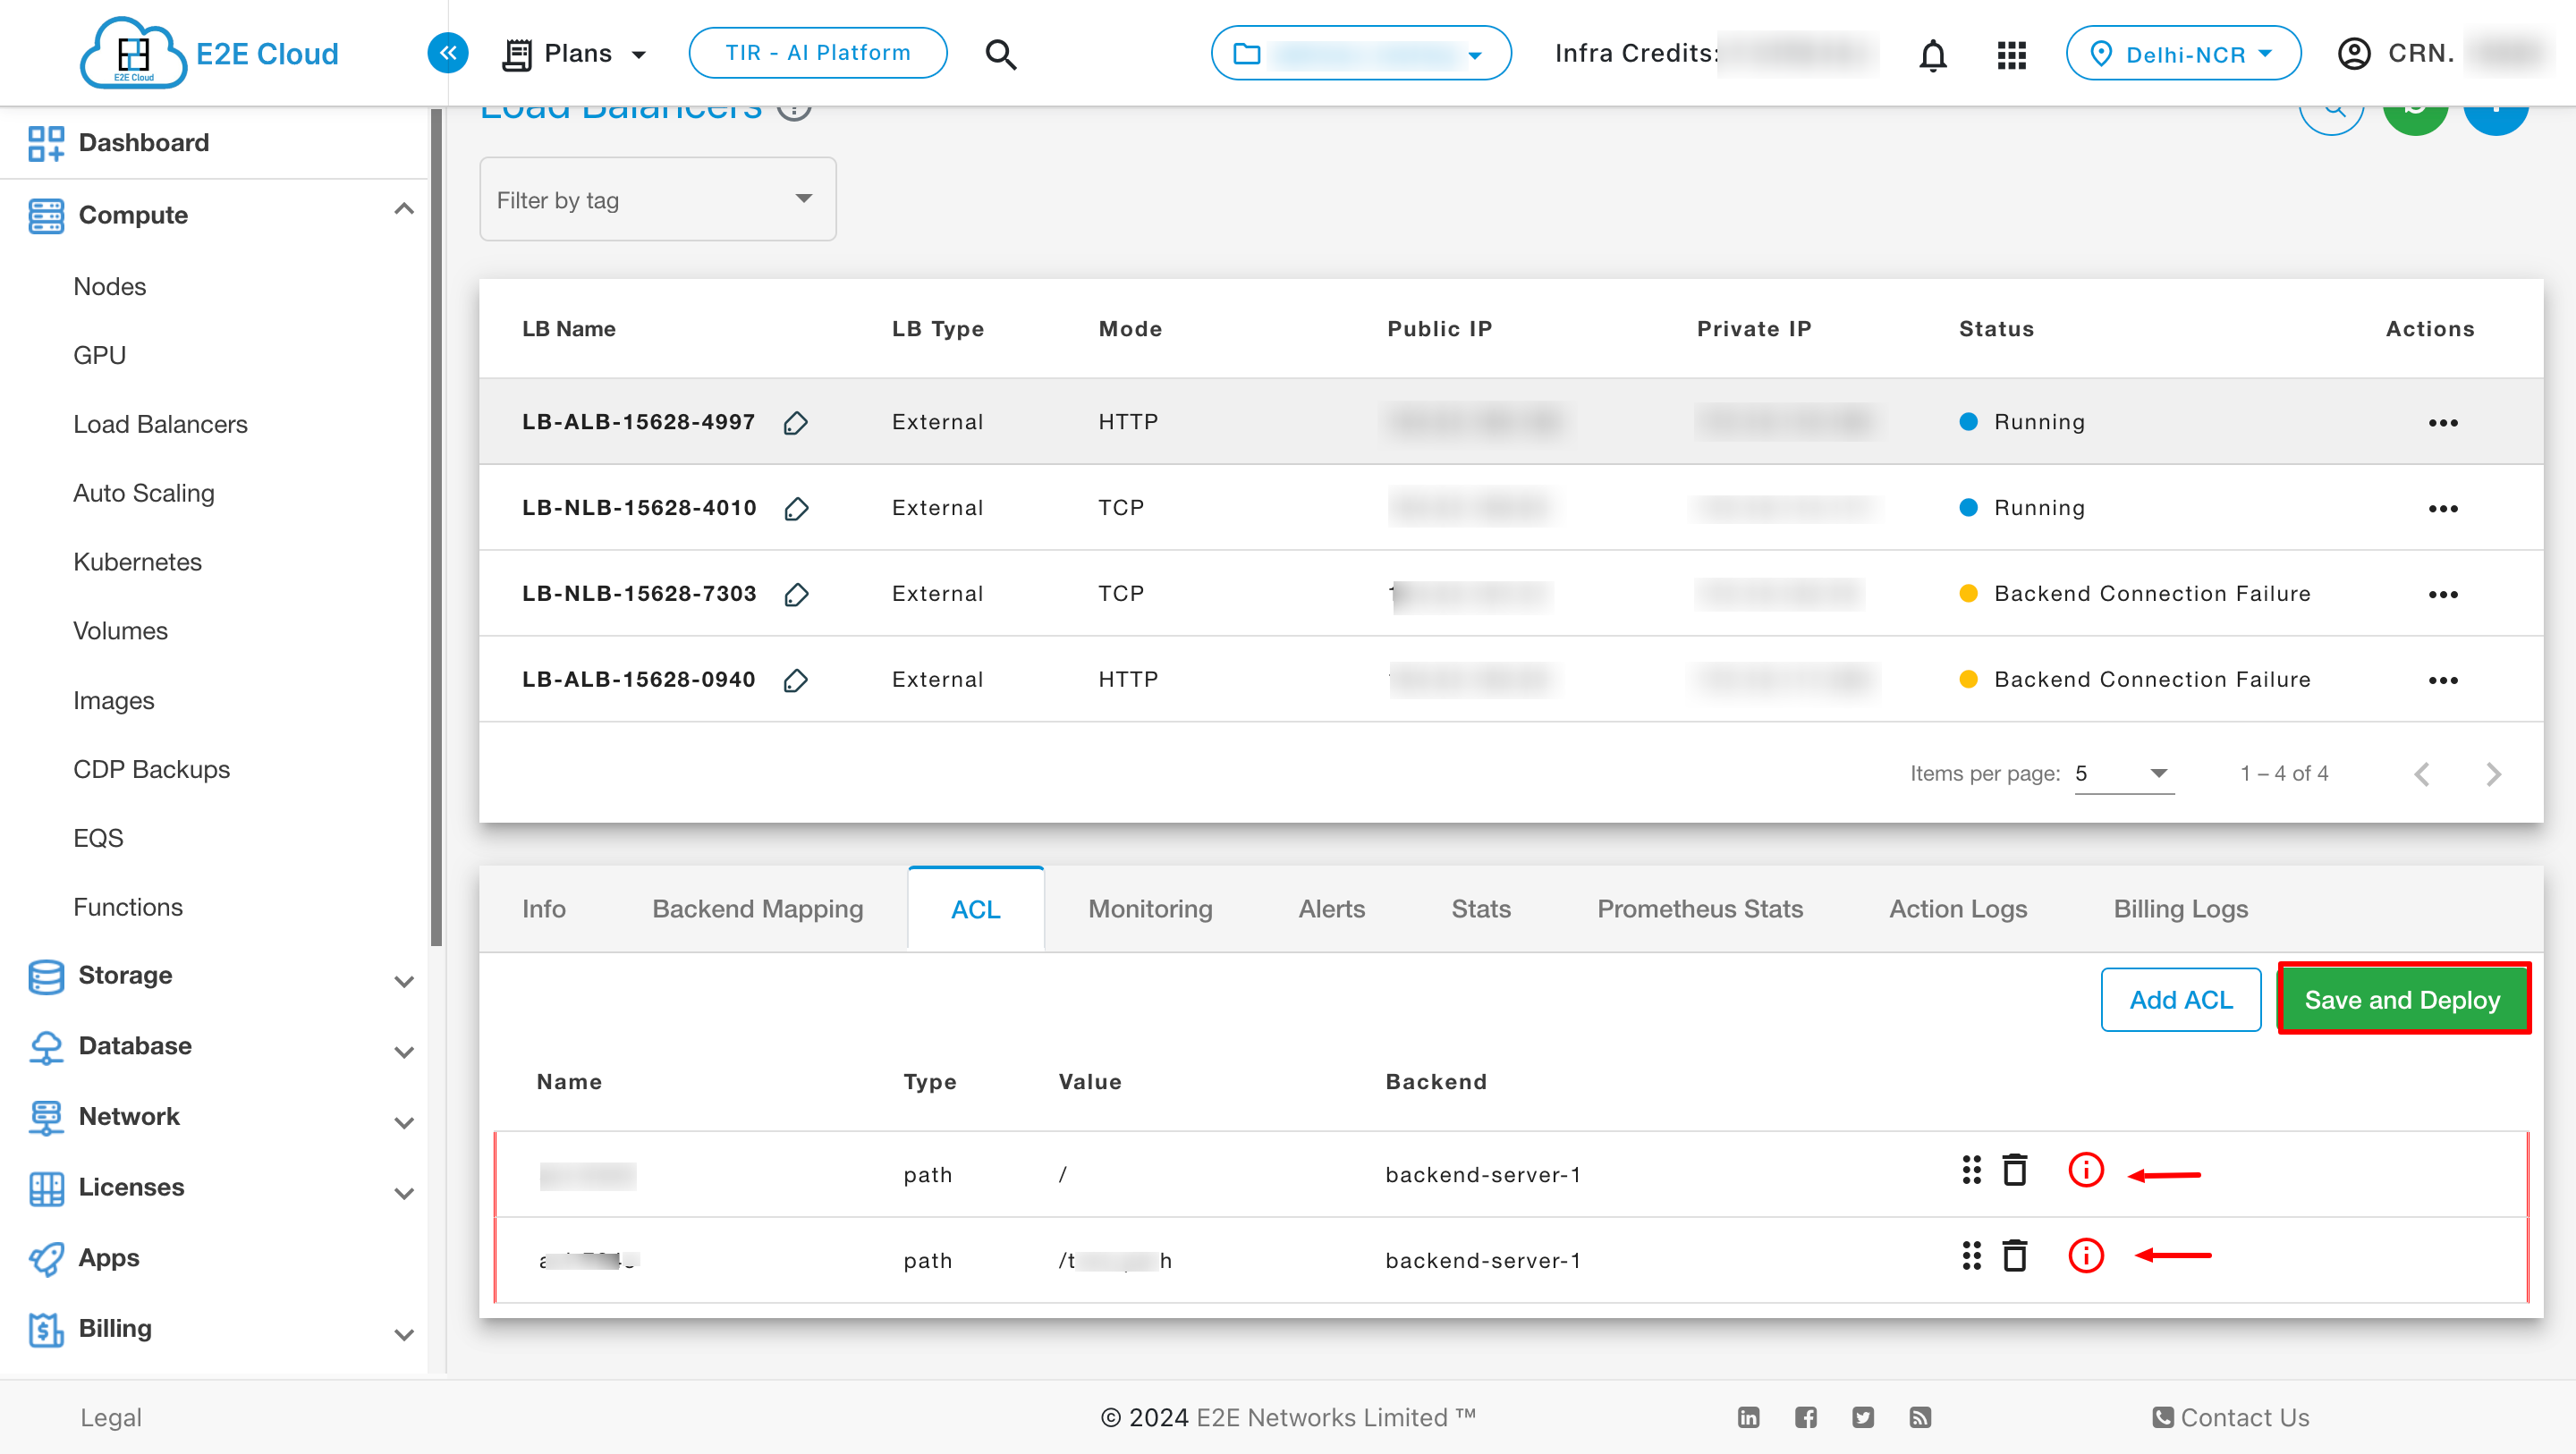
Access rules can be added based on five conditions.
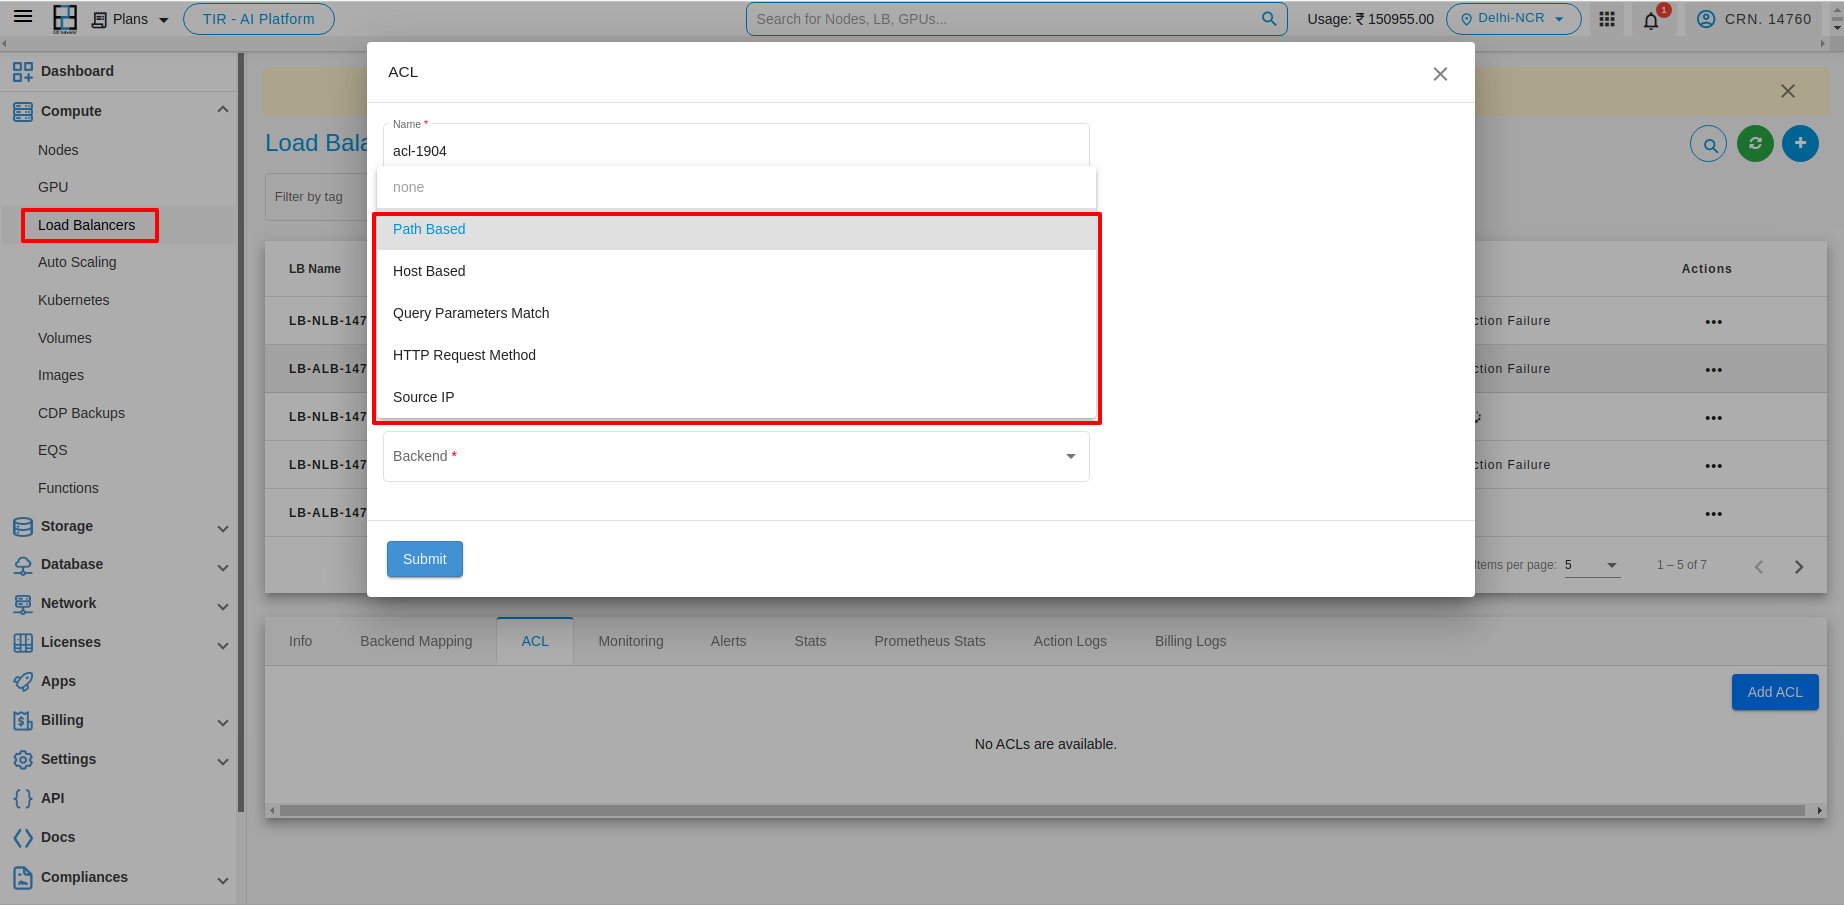
- Path Based Condition
- Host Based Condition
- Query Parameters Match
- HTTP Request Method
- Source IP
1. Path Based Condition
You can use path conditions to define rules that route requests based on the URL in the request. The path pattern is applied only to the path of the URL, not to its query parameters. For example, in the below image the path is added as e2enetworks.com/test.


Path Matching Types
-
Exact Match: Matches exactly "pathbase".
Example: "pathbase" -
Prefix Match: Matches any word beginning with "pathbase".
Example: "pathbasefolder", "pathbaseconfig", "pathbasedirectory" -
Suffix Match: Matches any word ending with "pathbase".
Example: "datapathbase", "sourcepathbase", "projectpathbase" -
Regex Match: Matches any word containing "pathbase".
Example:\b\w*pathbase\w*\b(matches words like "pathbasefile", "mypathbaseproject", etc.) -
Exact Match (Case Sensitive): Matches "pathbase" exactly with the same capitalization.
Example: "pathbase" (matches), "PathBase" (does not match) -
Prefix Match (Case Sensitive): Matches any word beginning with "pathbase" with exact capitalization.
Example: "pathbaseFolder" (matches), "PathBaseConfig" (does not match) -
Suffix Match (Case Sensitive): Matches the suffix "pathbase" with exact capitalization.
Example: "pathbase" (matches), "PathBase" (does not match) -
Regex Match (Case Sensitive): Matches words containing "pathbase" with exact capitalization.
Example:\b\w*pathbase\w*\b(matches "pathbasefile" but not "mypathbaseProject")
After adding the ACL type Path Based and conditions, you can see the list below.

2. Host Based Condition
Use host conditions to define rules that route requests based on the hostname in the host header, known as host-based routing. For example, the host is added as test.e2enetworks.com.

Host Matching Types
-
Exact Match: Matches exactly "hostbase".
Example: "hostbase" -
Prefix Match: Matches words beginning with "hostbase".
Example: "hostname", "hosting" -
Suffix Match: Matches words ending with "hostbase".
Example: "database", "homebase" -
Regex Match: Matches any word containing "hostbase".
Example:\b\w*pathbase\w*\b
After adding the ACL type Host Based and conditions, you can see the list below.

3. Query Parameters Match
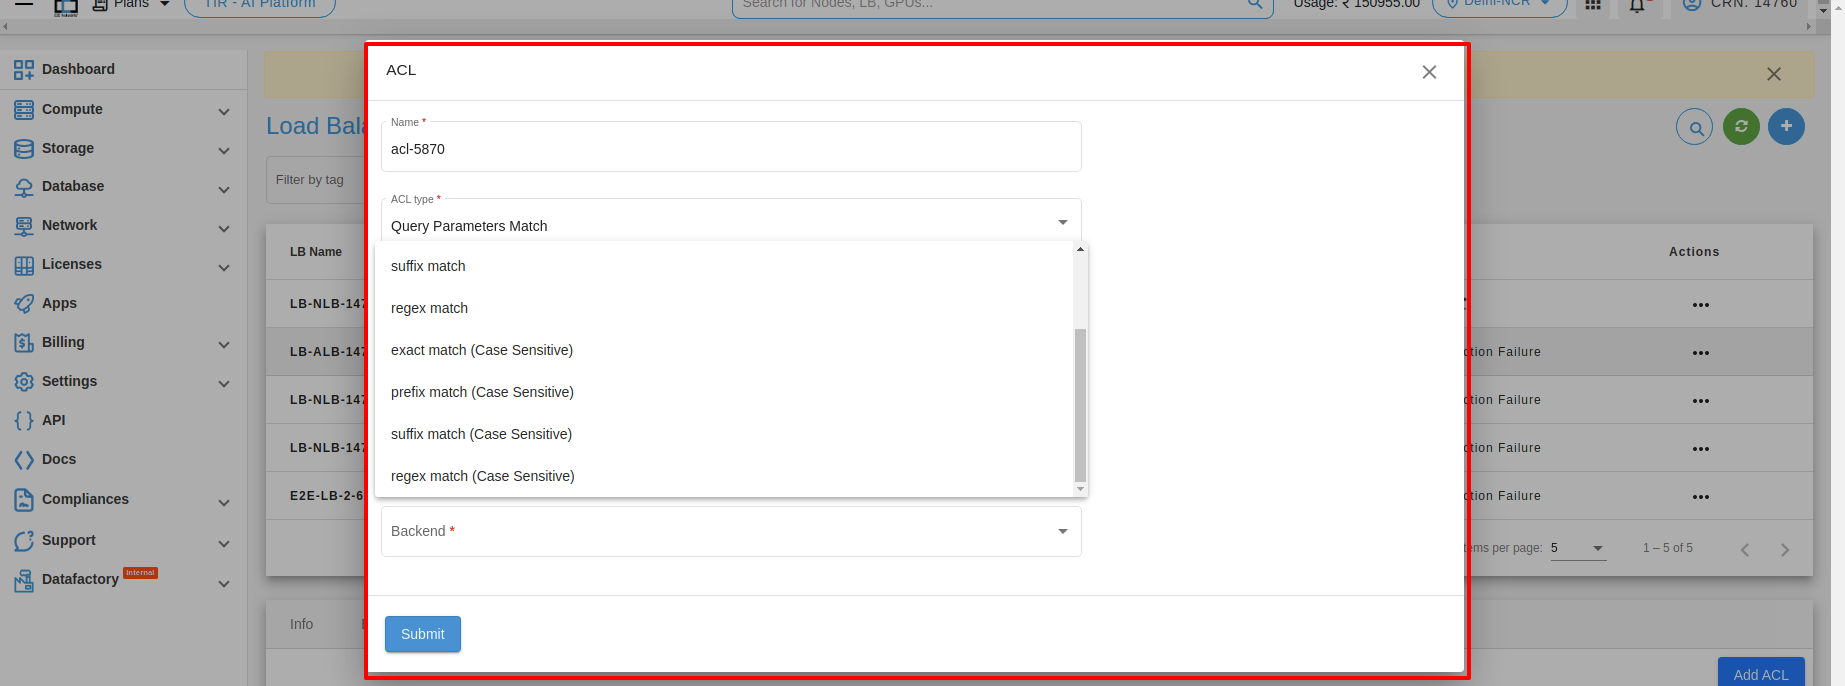
Query parameters are used to pass data from a client to a server through the URL. Matching options include exact match, prefix match, suffix match, and regex match.
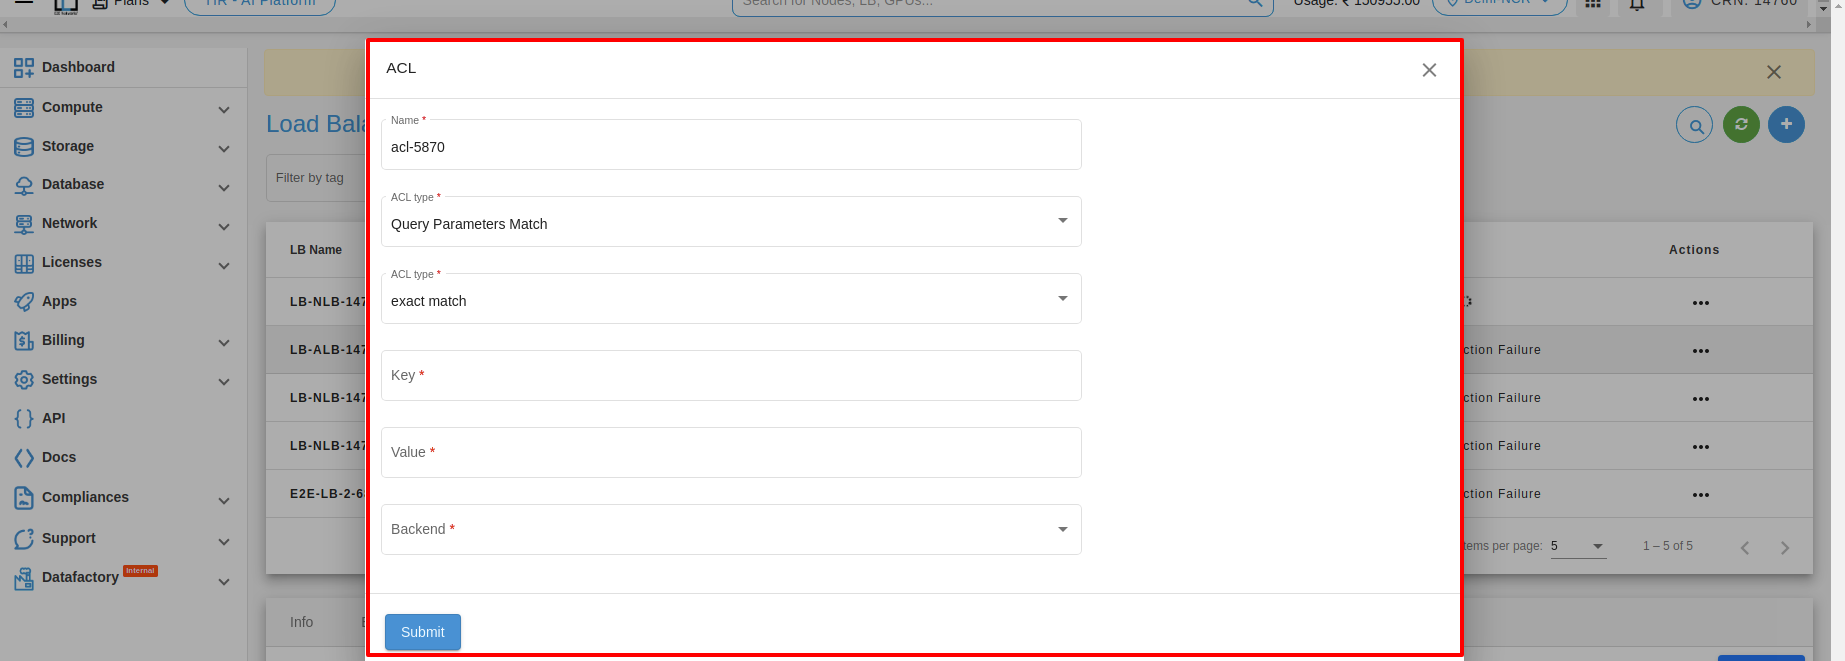
Query Parameter Matching Types
-
Exact Match: Matches specific values exactly.
Example:https://example.com/users?id=123 -
Prefix Match: Matches values that start with a specific string.
Example:https://example.com/search?query=phone -
Suffix Match: Matches values that end with a specific string.
Example:https://example.com/files?type=pdf -
Regex Match: Matches values based on complex patterns.
Example:https://example.com/articles?search=python\+\+programming -
Exact Match (Case-Sensitive): Matches specific values exactly with case sensitivity.
Example:https://example.com/users?id=USER123 -
Prefix Match (Case-Sensitive): Matches case-sensitive values starting with a specific string.
Example:https://example.com/search?query=phone -
Suffix Match (Case-Sensitive): Matches case-sensitive values ending with a specific string.
Example:https://example.com/files?type=PDF -
Regex Match (Case-Sensitive): Matches case-sensitive patterns using regular expressions.
Example:https://example.com/articles?search=Python\+\+Programming
4. HTTP Request Method
HTTP request method matching is used to direct incoming requests to specific servers or services based on the HTTP method used in the request.

-
Match GET Requests: Routes all GET requests to a specific server for static content.
-
Match POST Requests: Routes all POST requests to a server for handling form submissions.
-
Match PUT Requests: Routes all PUT requests to a server for file uploads.
5. Source IP
Source IP matching is a feature commonly used in load balancers to direct incoming requests to specific servers or services based on the source IP address of the request. Here's an example of how source IP matching can be used in a load balancer.
-
Match requests from a specific IP address: This type of source IP matching is used to direct all incoming requests from a specific IP address to a specific server or service. For example, if you have a client that is accessing your application from a dedicated IP address, you could use a load balancer to match all incoming requests from that IP address and direct them to a specific server.
-
Match requests from a range of IP addresses: This type of source IP matching is used to direct all incoming requests from a range of IP addresses to a specific server or service. For example, if you have a set of servers that are optimized for handling requests from a specific geographic region, you could use a load balancer to match all incoming requests from that region and direct them to those servers. Here's an example configuration in the load balancer:

Monitoring
Monitoring is an important part of maintaining the reliability, availability, and performance of your load balancer. You can check the monitoring information for your load balancer on the Monitoring tab. This information is collected from your load balancer and processes raw data into readable graphs. Each graph is based on one of the different metrics. Learn more.

Alerts
Server health alerts are automatically created for your newly created load balancer using recommended parameters for alert policy. You can also set up new alerts by defining trigger parameters as per your use case. The alerting system works by sending automatic response notifications to your defined email list. Learn more.
Stats
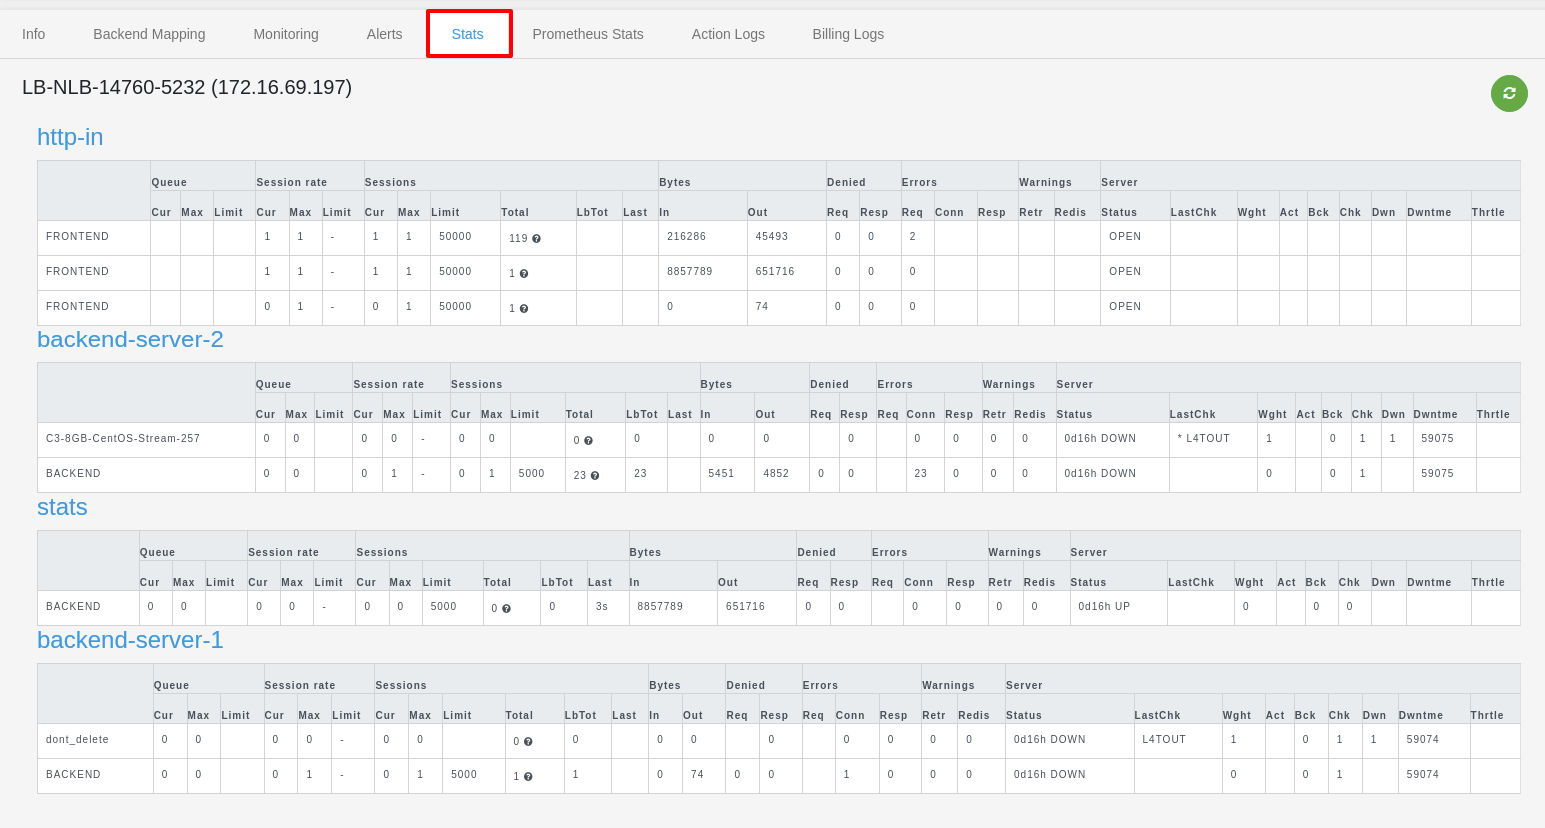
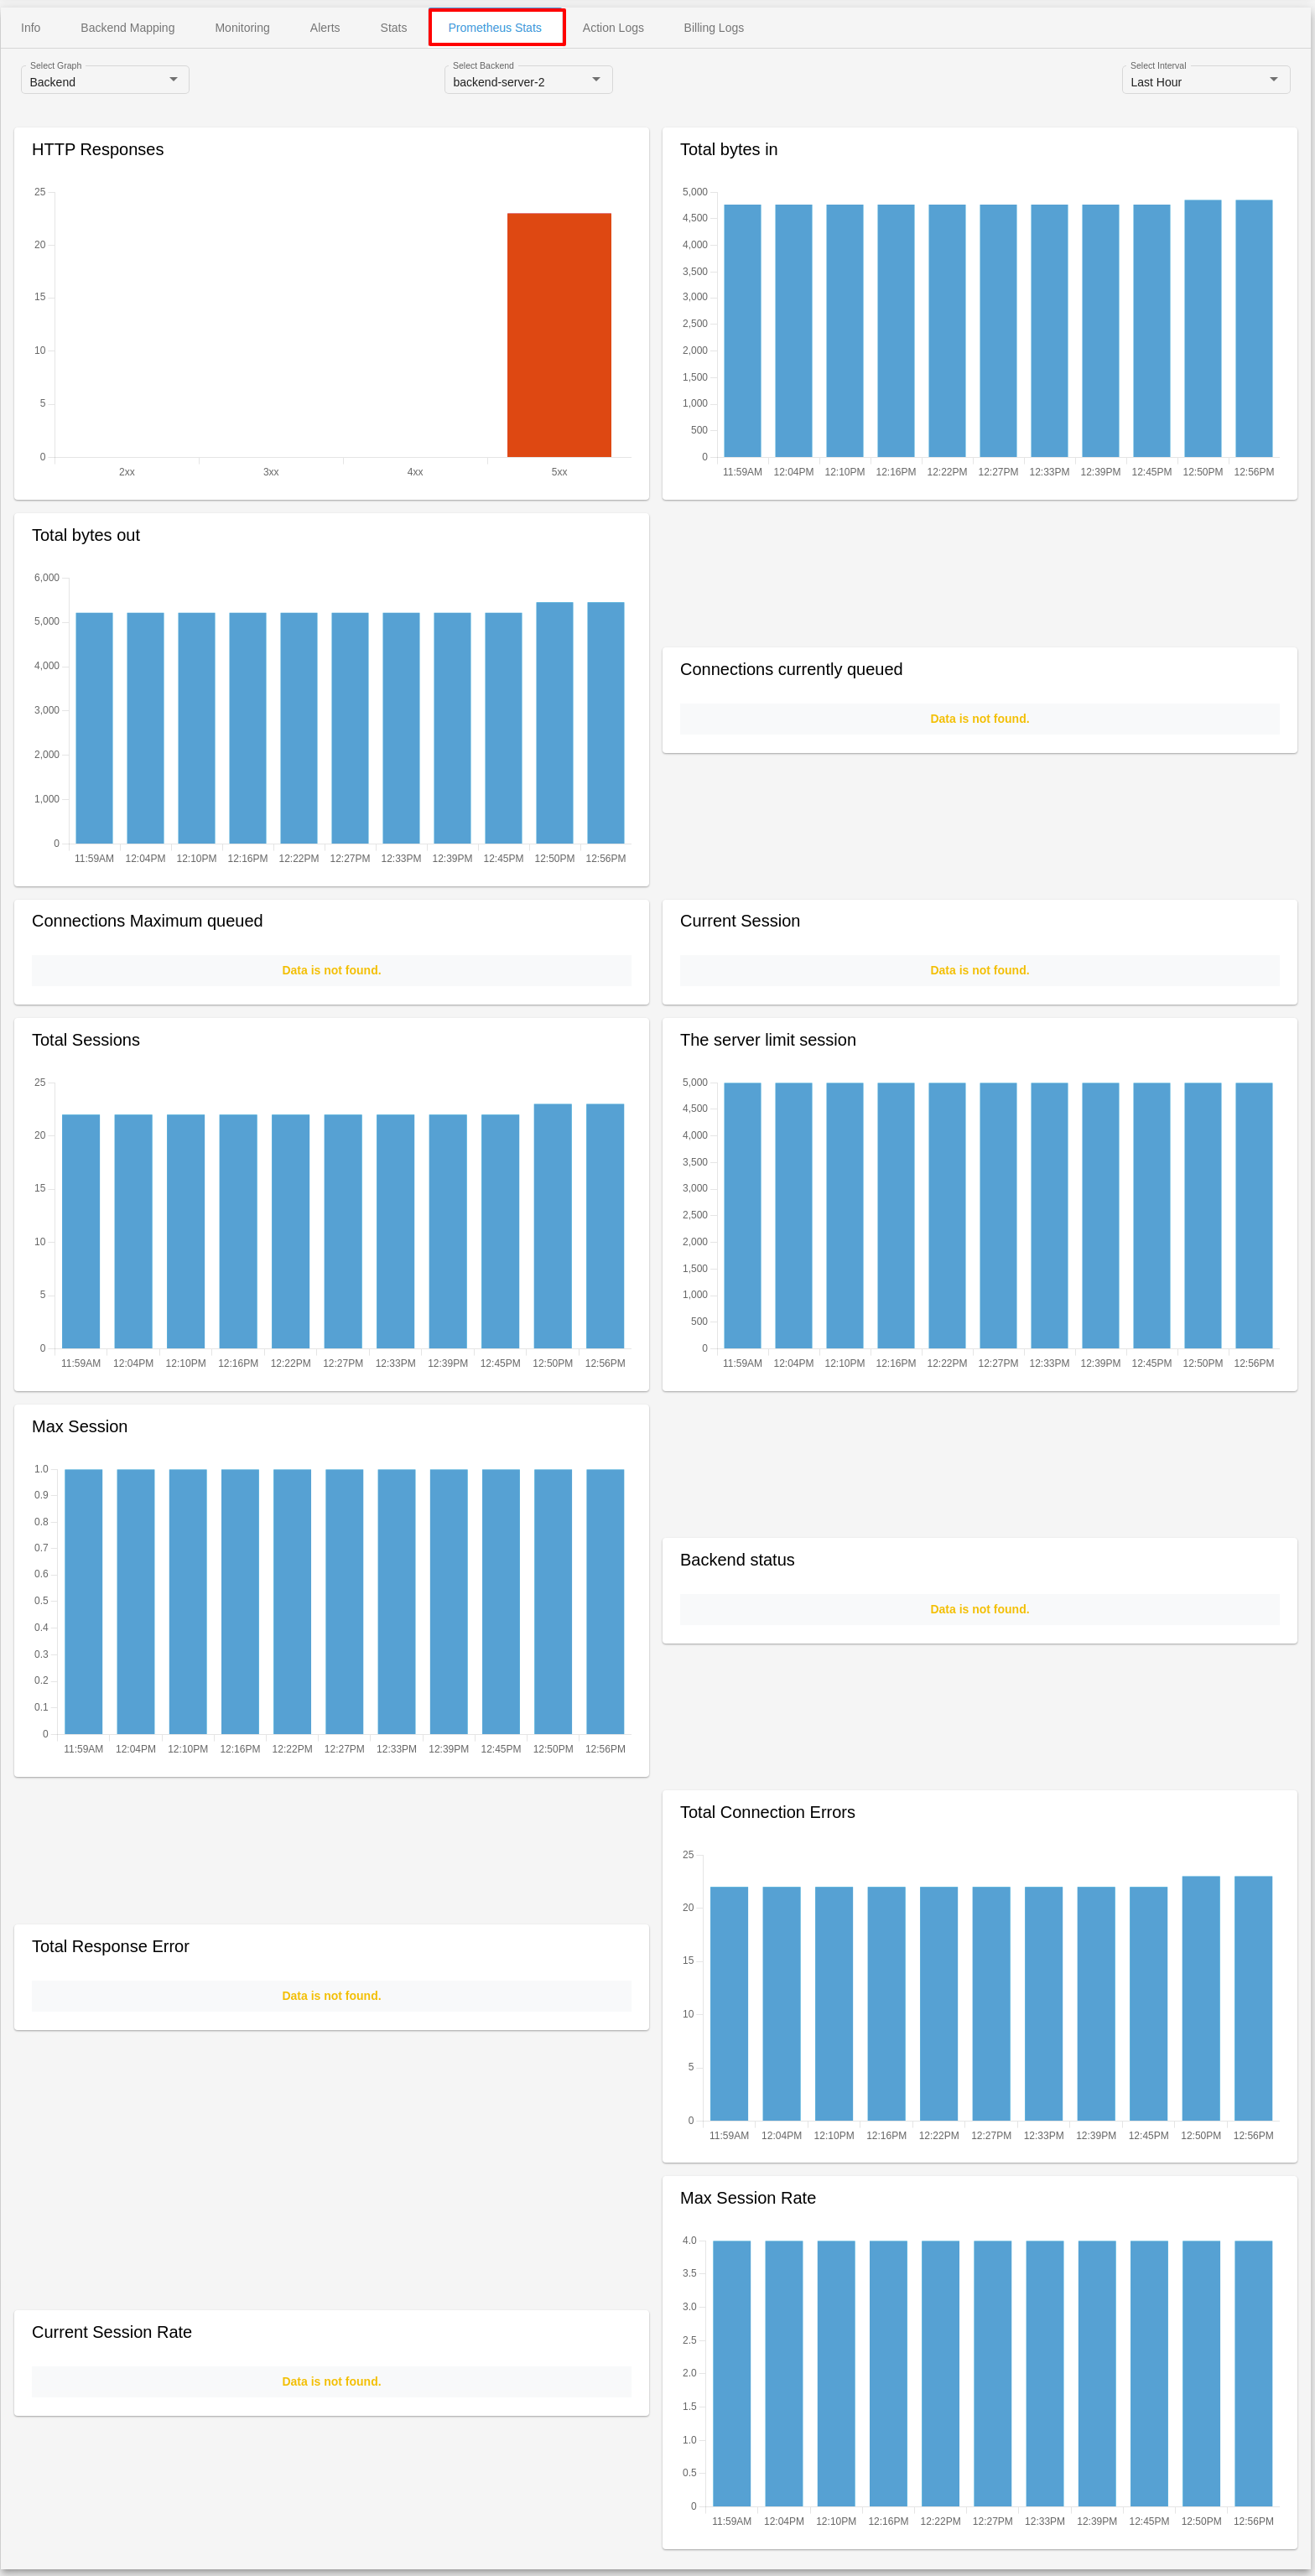
Prometheus Stats
Action Logs
Action logs contain detailed information about requests sent to your load balancer such as the date/time the request was received, client’s IP address, request protocol, request paths, and server responses. These access logs are useful to understand incoming network traffic patterns and troubleshoot issues if any arise.

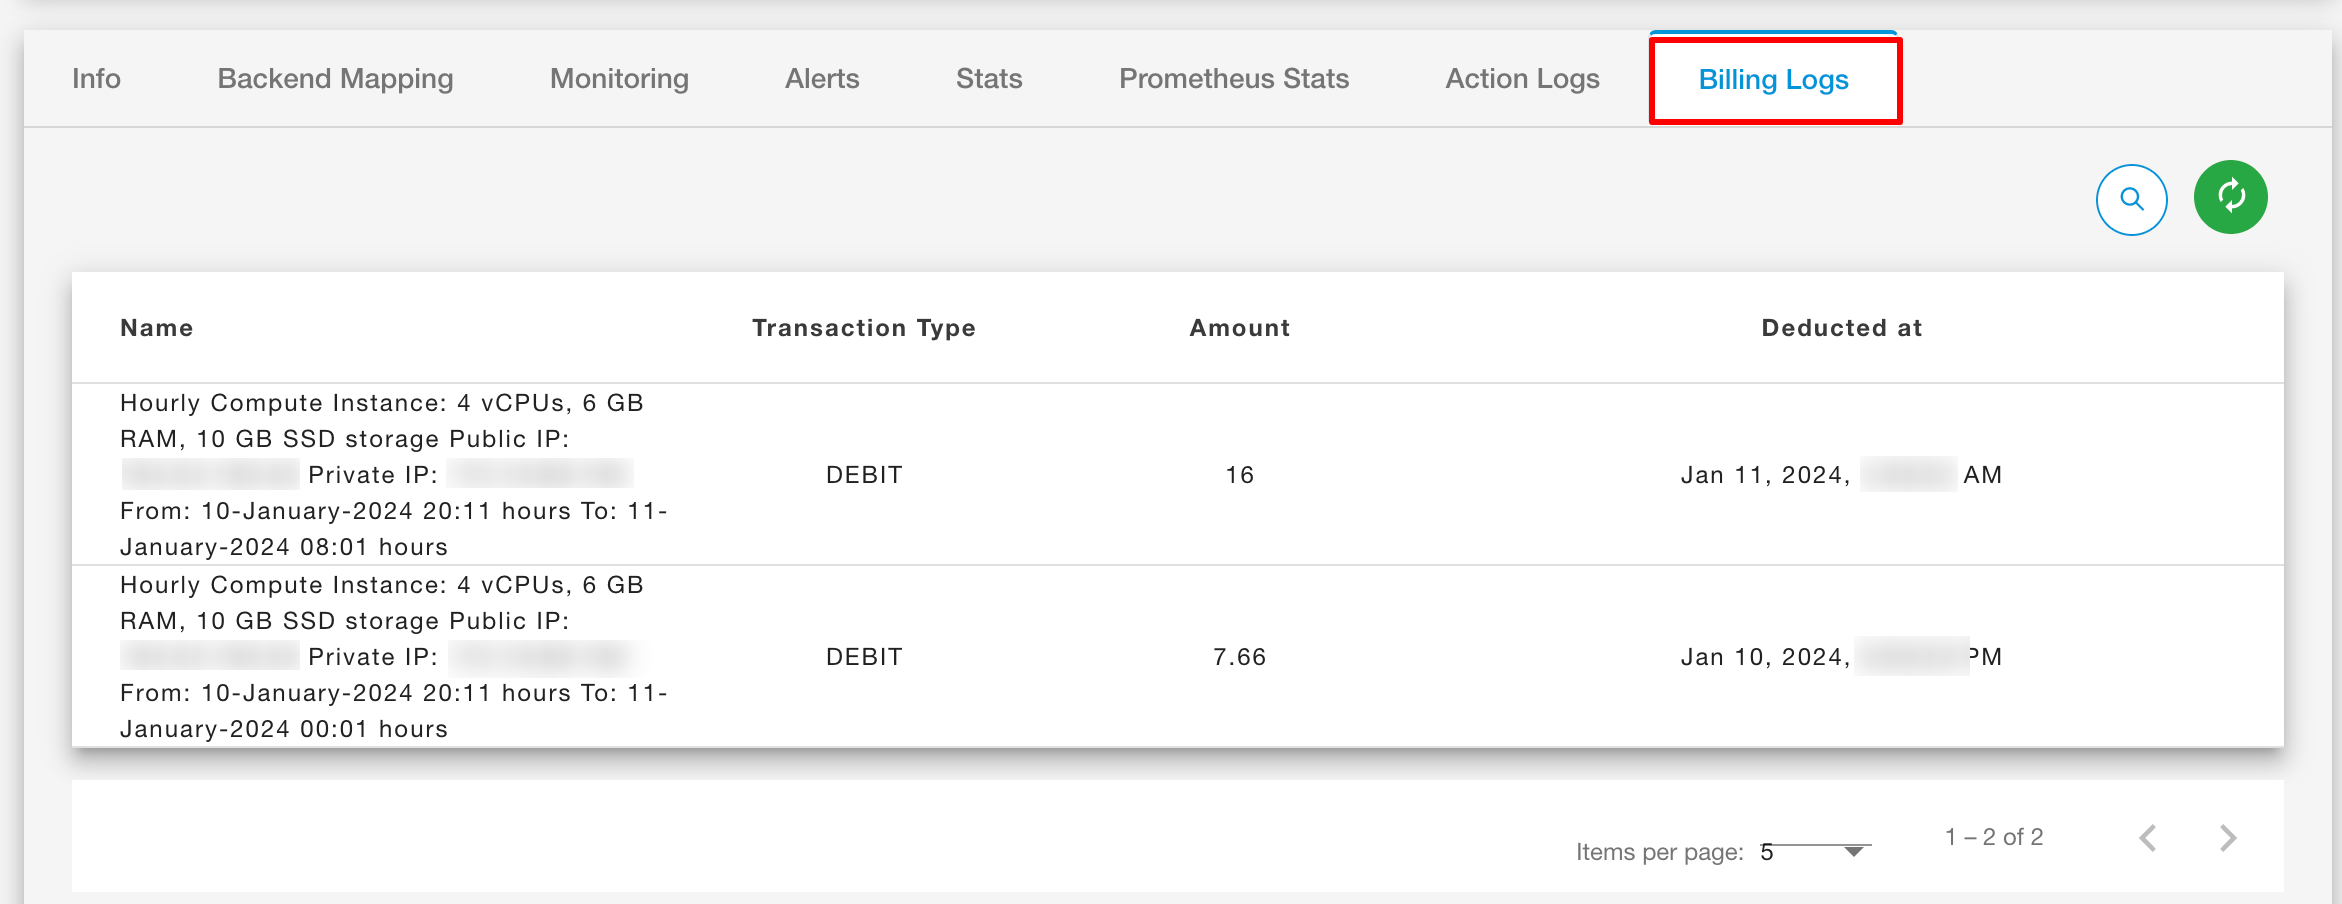
Billing Logs
Actions
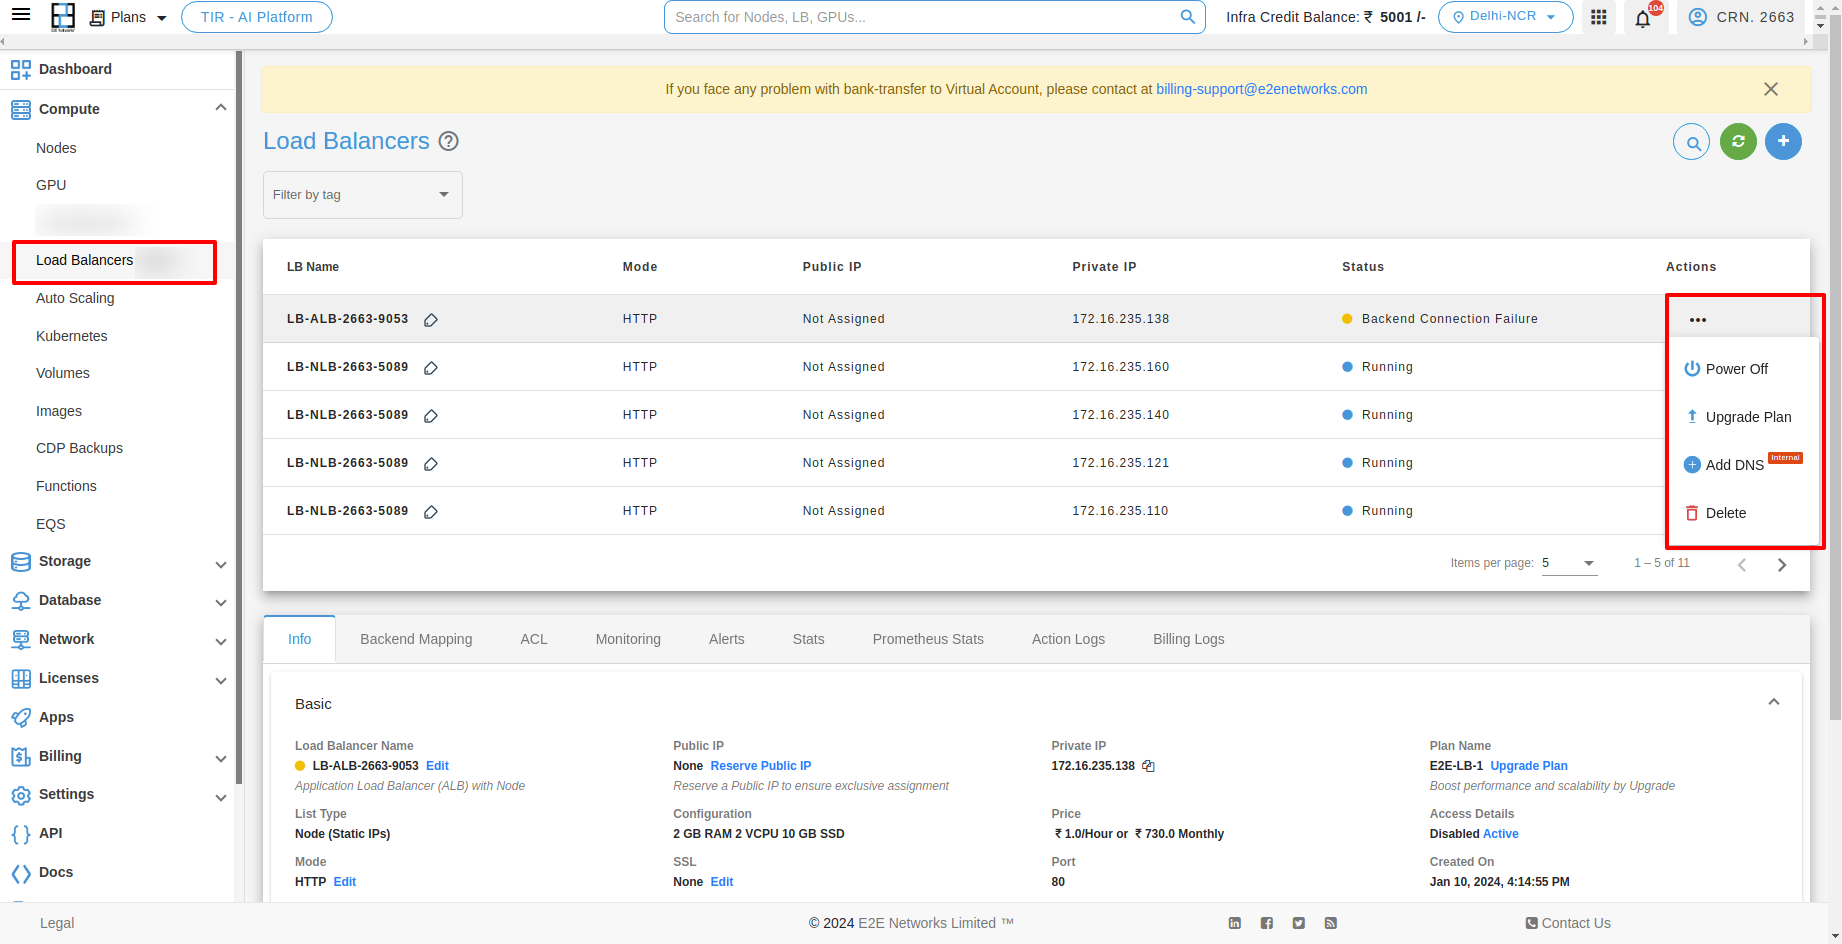
Types of actions you can perform with Load Balancer.
Stopping your Load Balancer
To stop your Load Balancer, click on the Stop button. A confirmation popup will open; click on the Power Off button to confirm.
Upgrade your Load Balancer
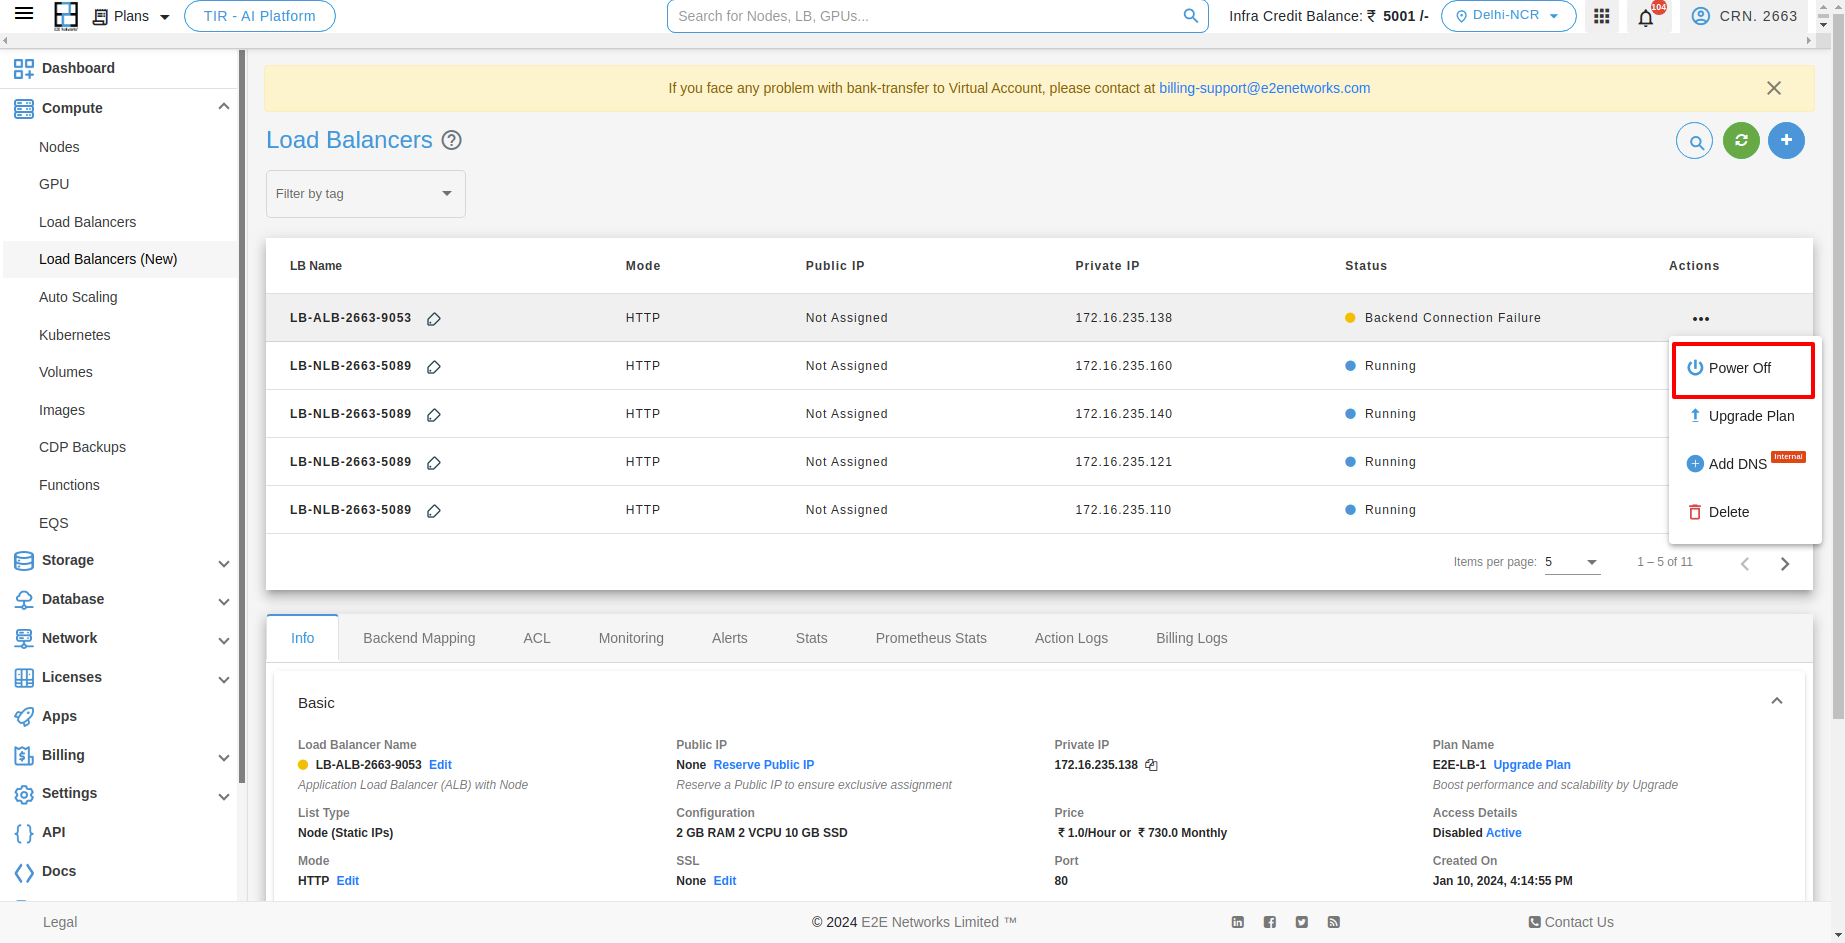
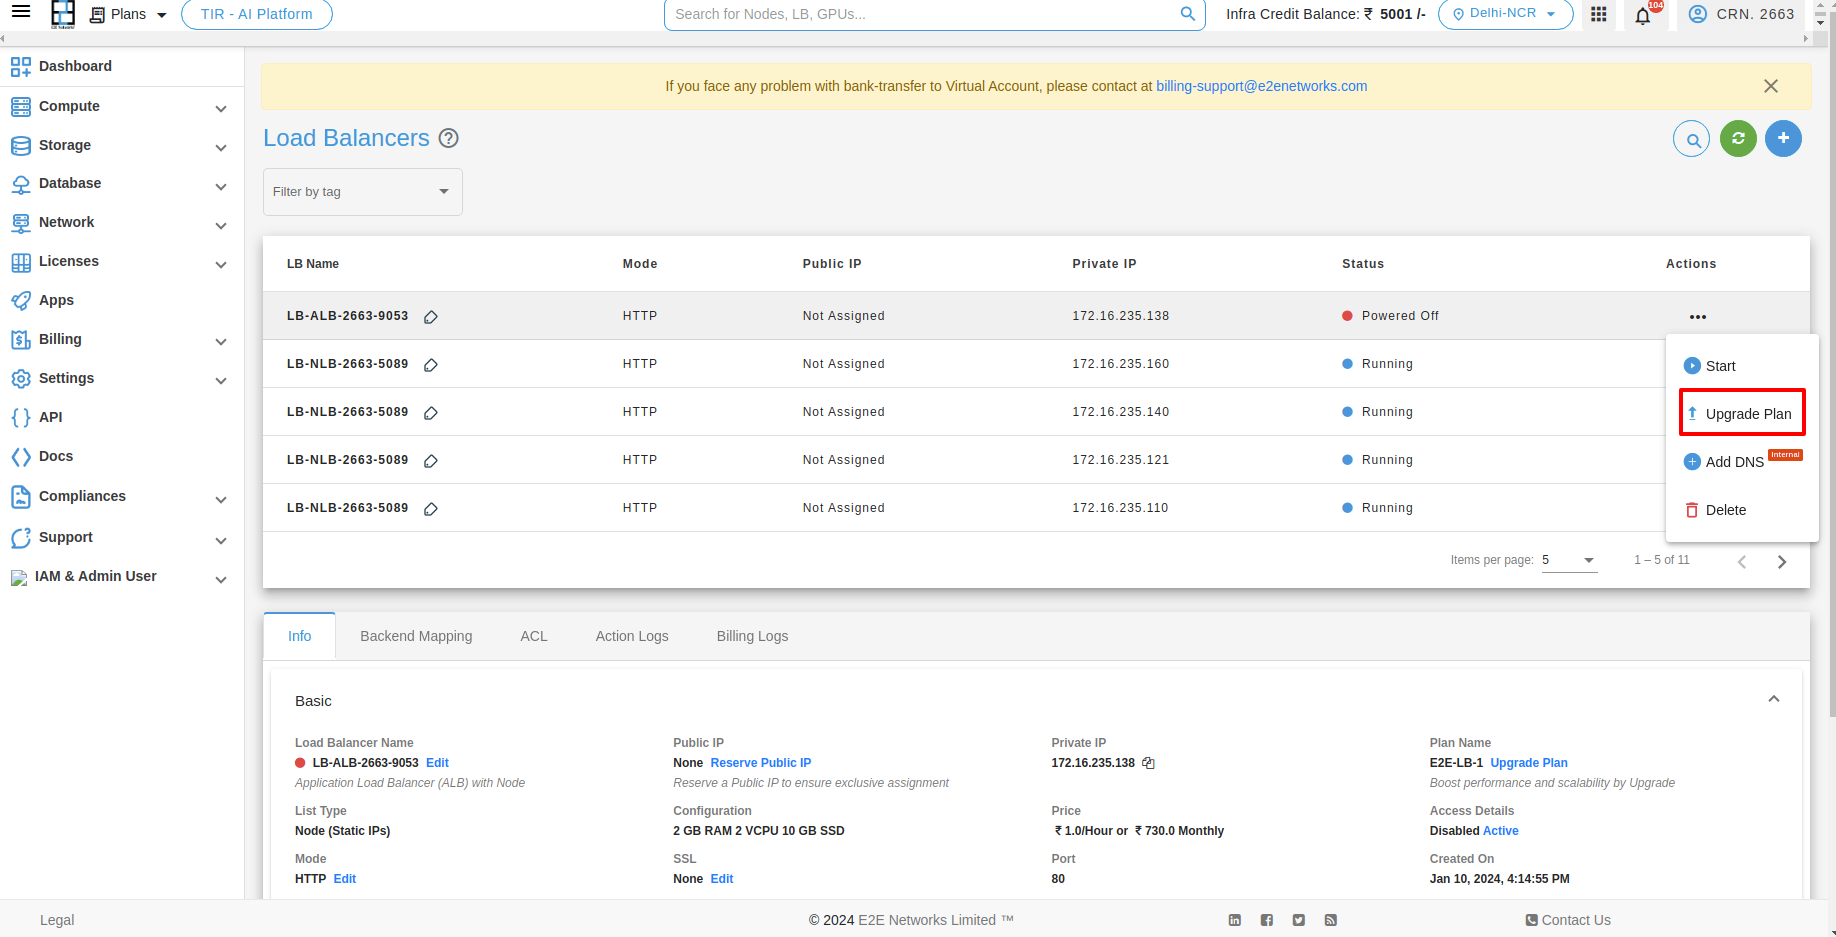
The LB upgrade feature enables customers to easily upgrade their LB plan based on their specific usage requirements. To upgrade your Load Balancer, click on the Upgrade button under the Action button.
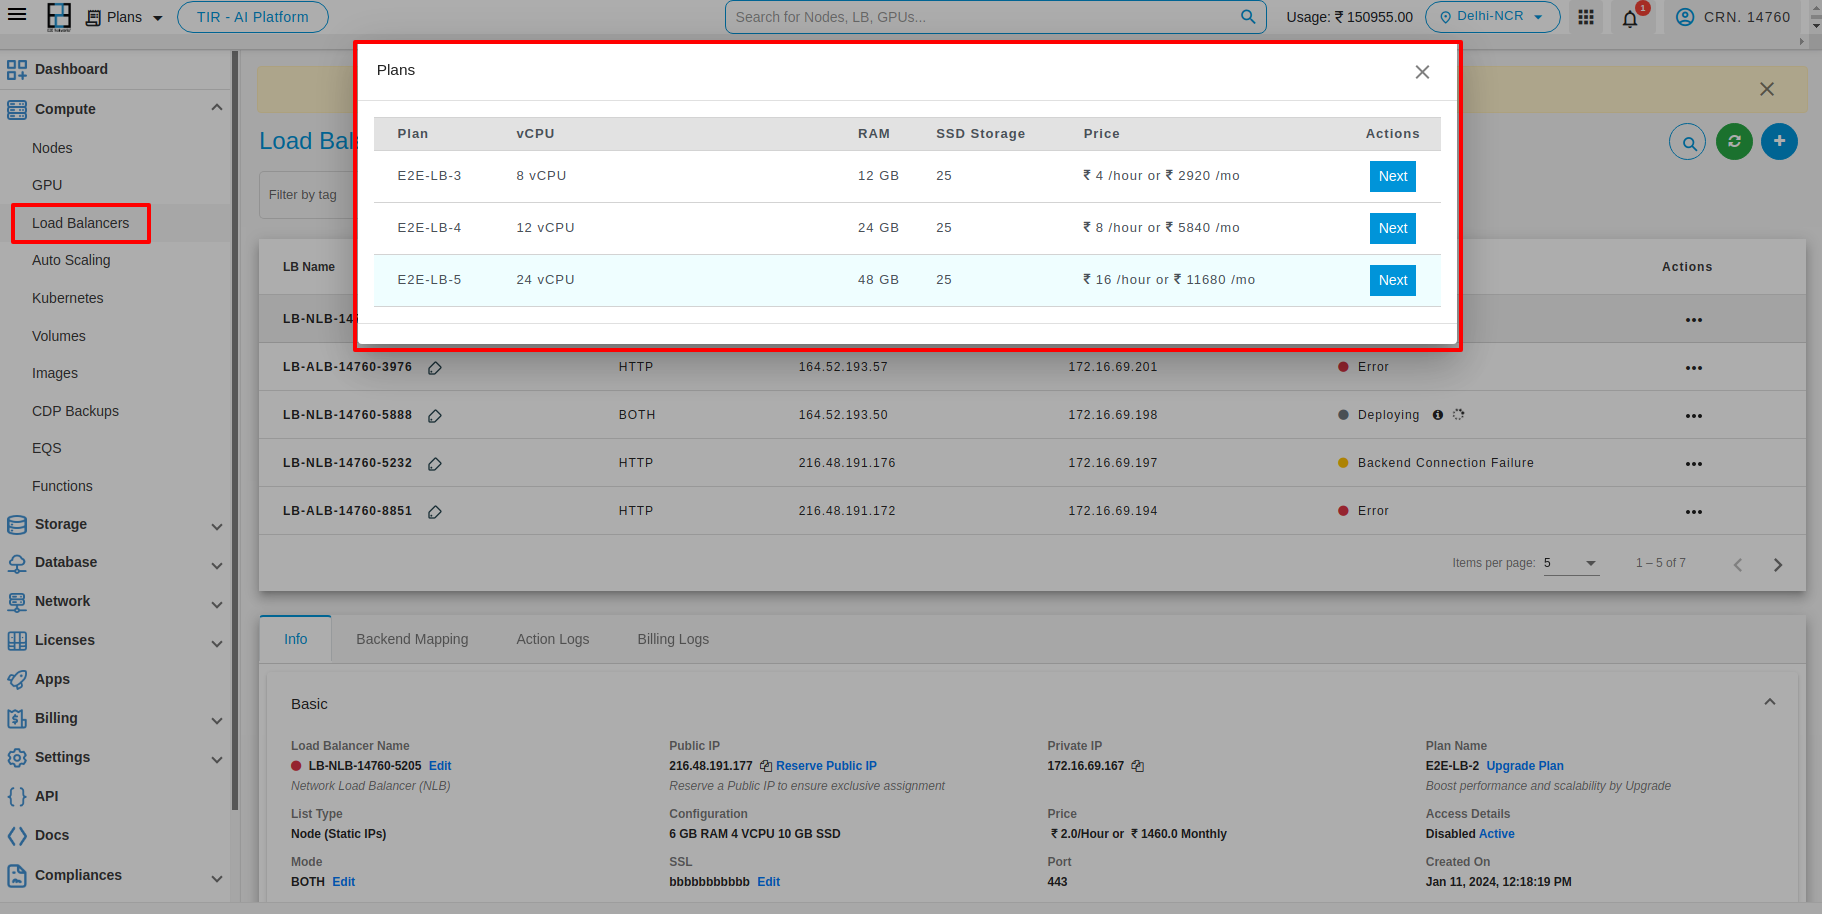
After that, click on the Apply button with the selected plan. The upgrading process will then start.
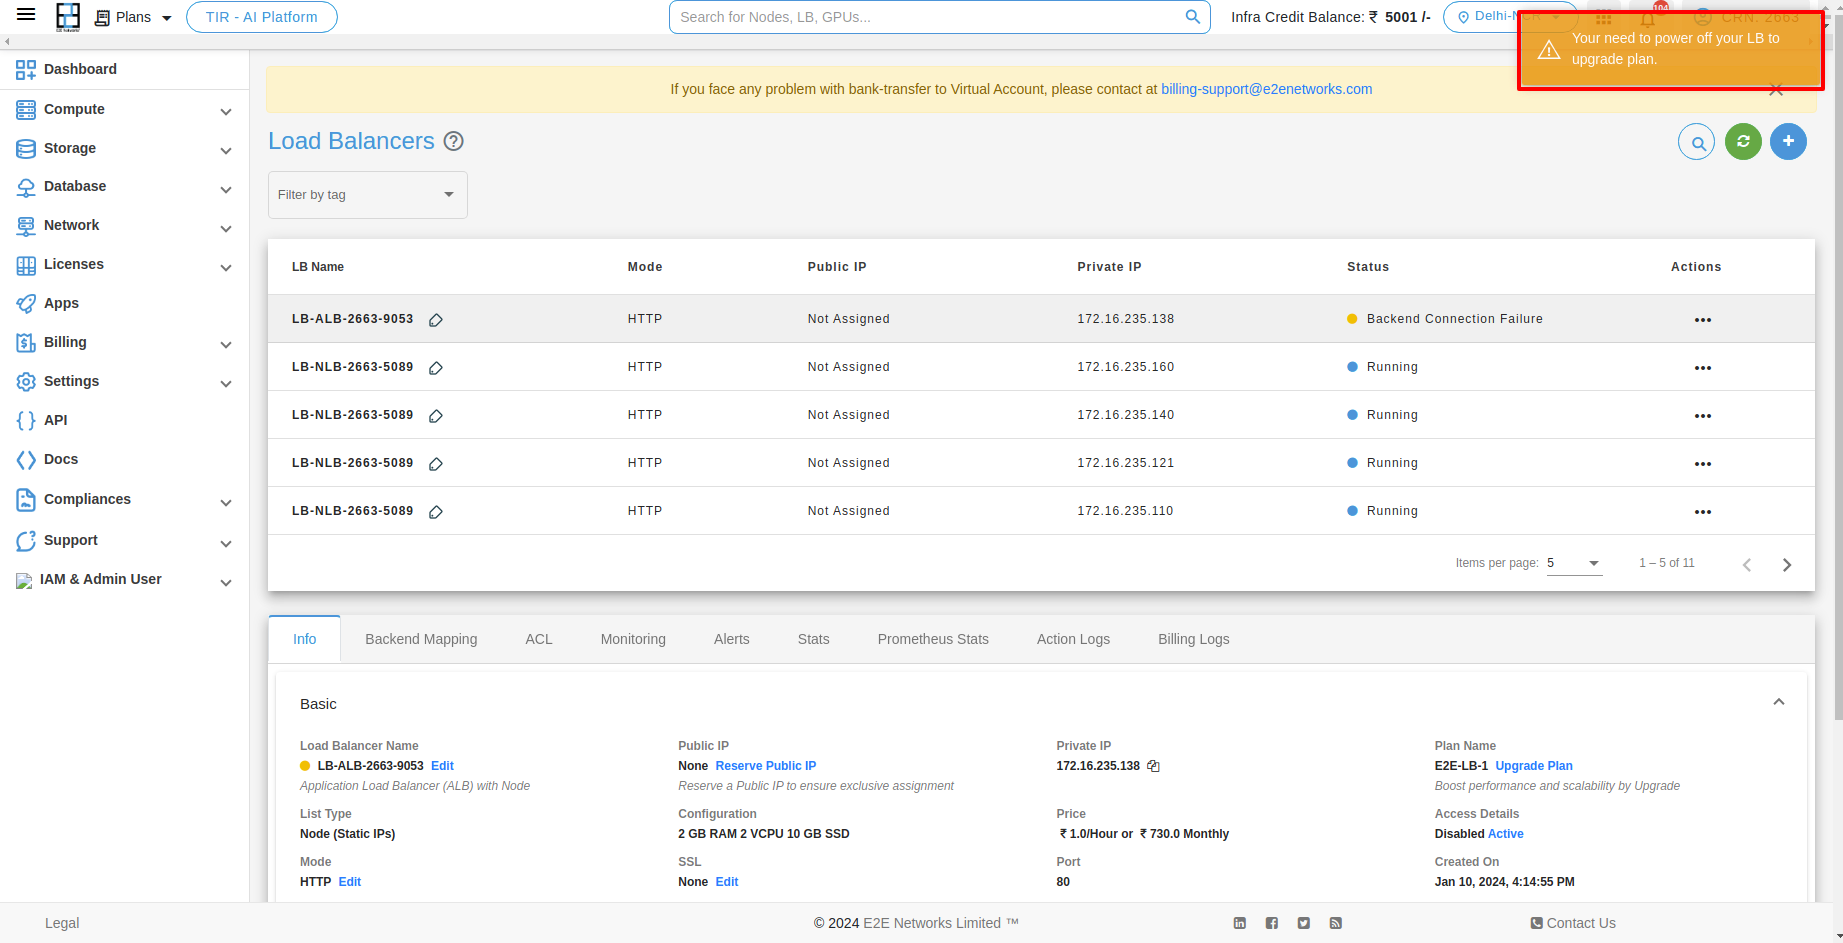
Note: Please ensure that your load balancer is stopped when performing the upgrade action.
Delete
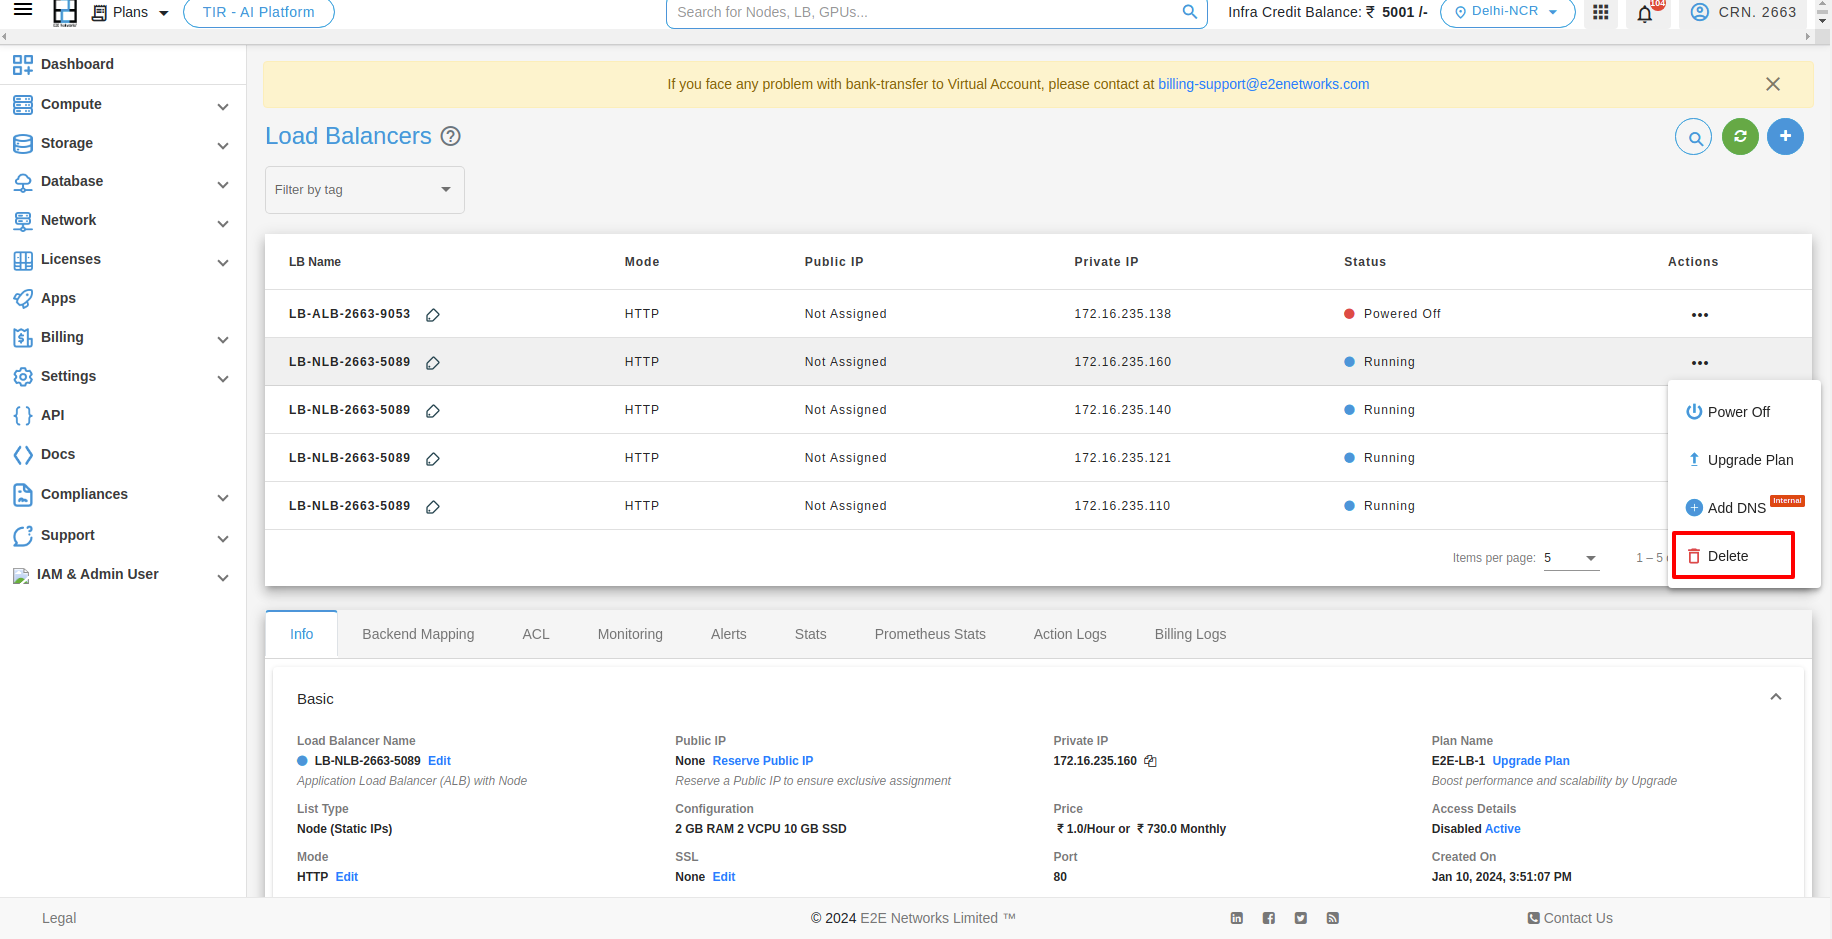
To delete your Load Balancer, click on the Delete button.
Network Load Balancer
Initiate Load Balancer Creation
-
Log in to the MyAccount portal using your credentials.
-
On the MyAccount dashboard, click on Load Balancers.
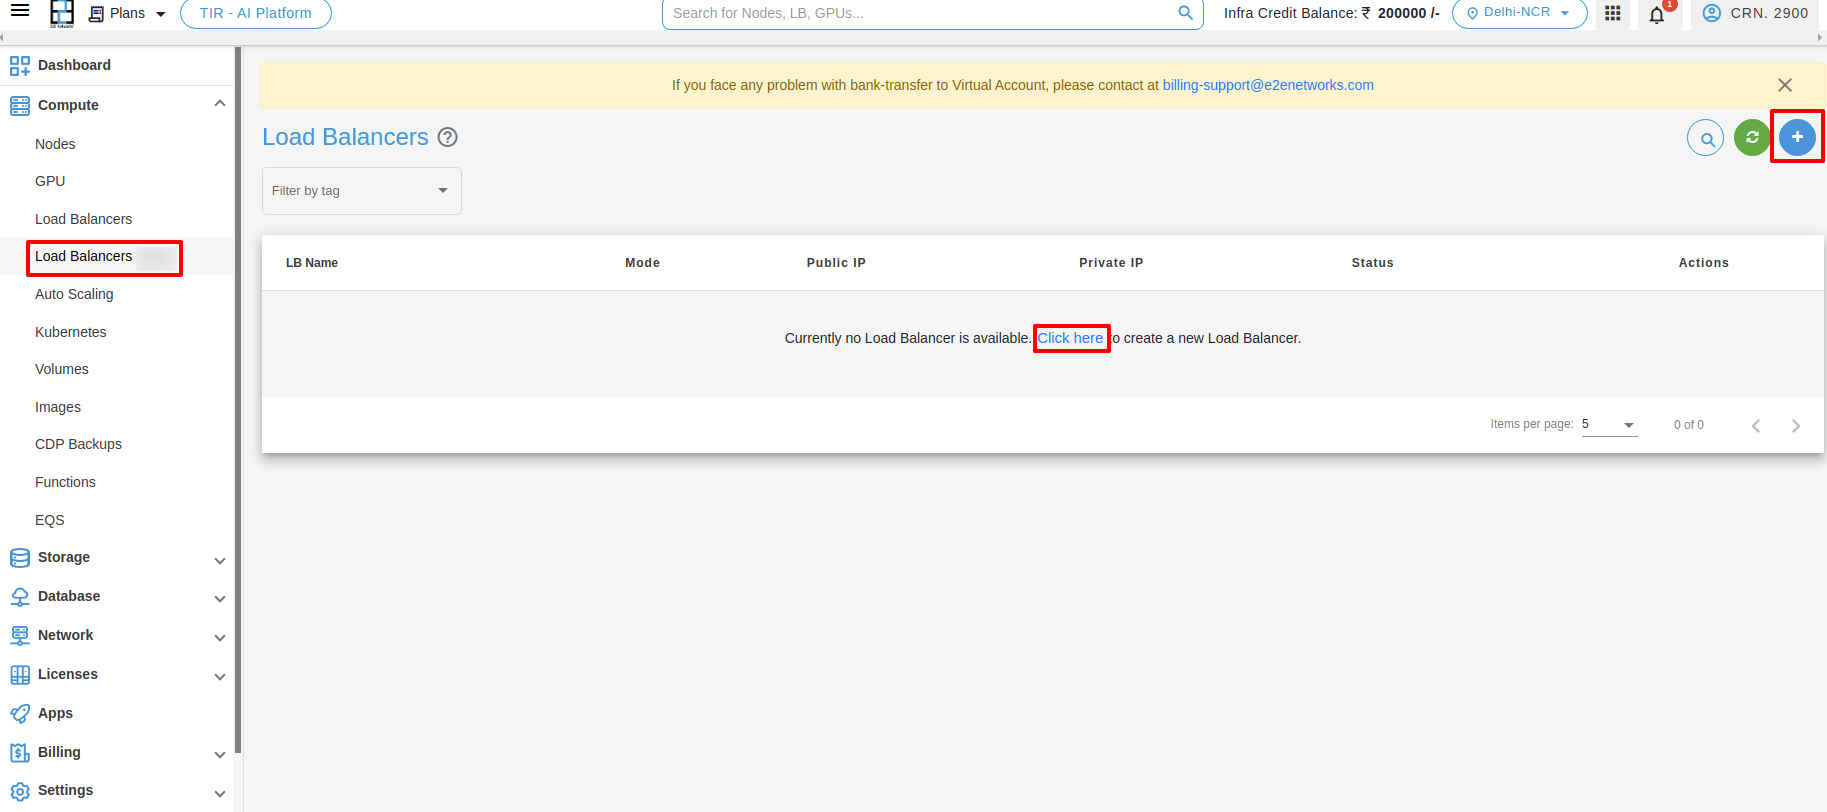
Select your Load Balancer Plan
- Load balancer plans are listed by memory, vCPU, storage, and price. Choose a plan to create your load balancer.

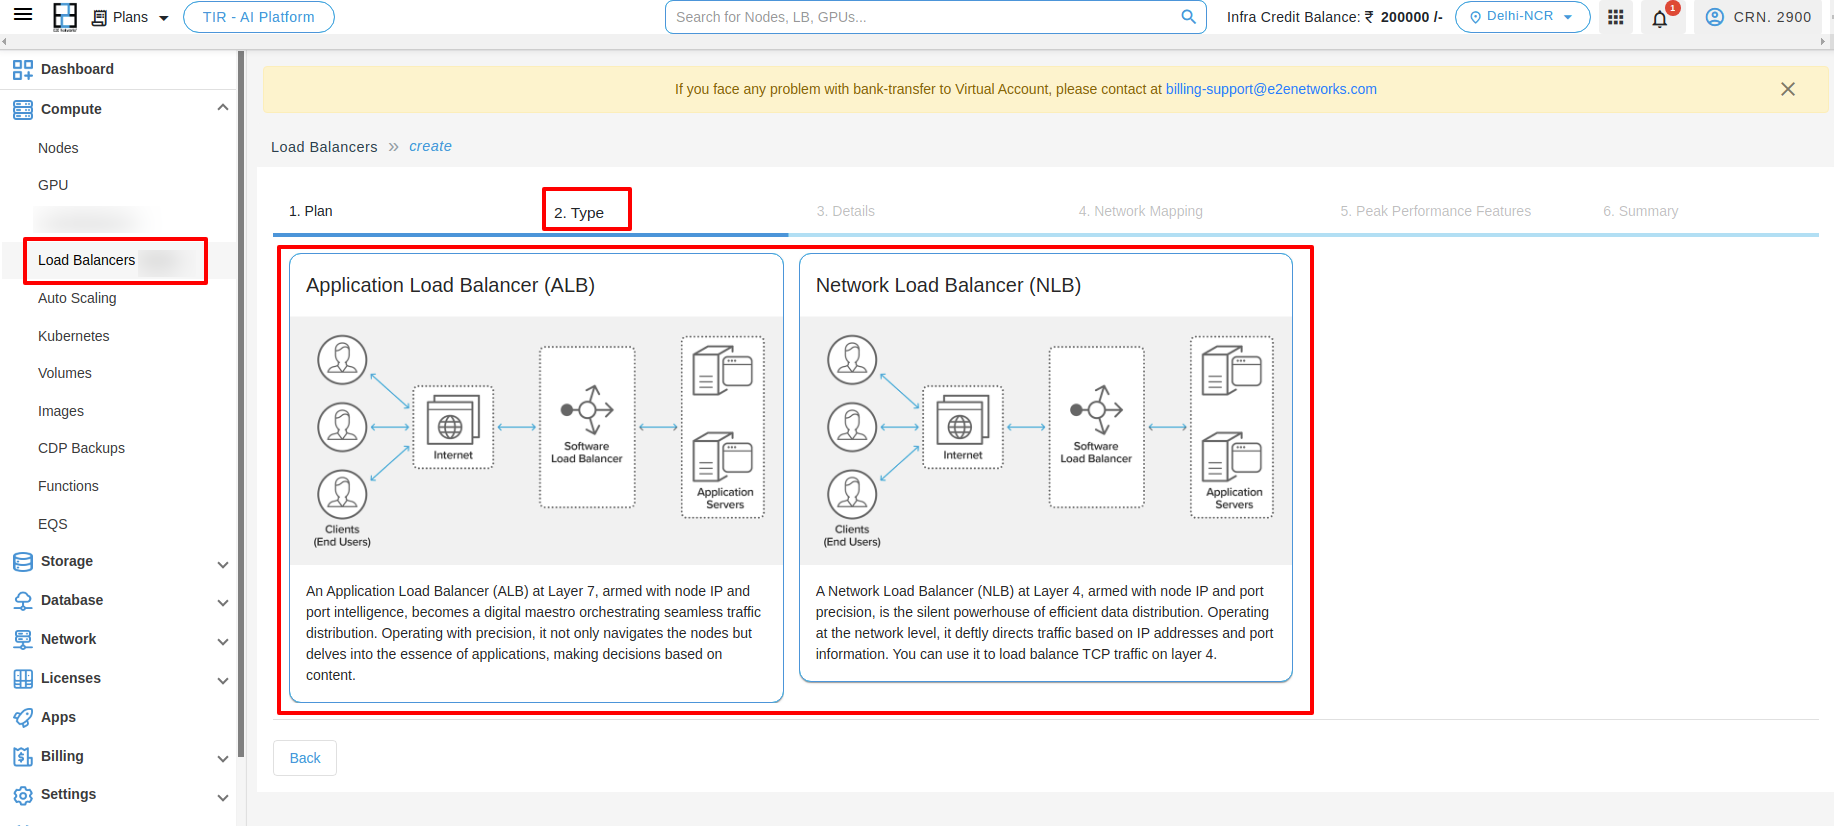
- After selecting a plan, choose the load balancer type:
- Application Load Balancer (ALB):
Works at Layer 7, making decisions based on content and application logic. - Network Load Balancer (NLB):
Works at Layer 4, routing TCP traffic based on IP and port.
- Application Load Balancer (ALB):
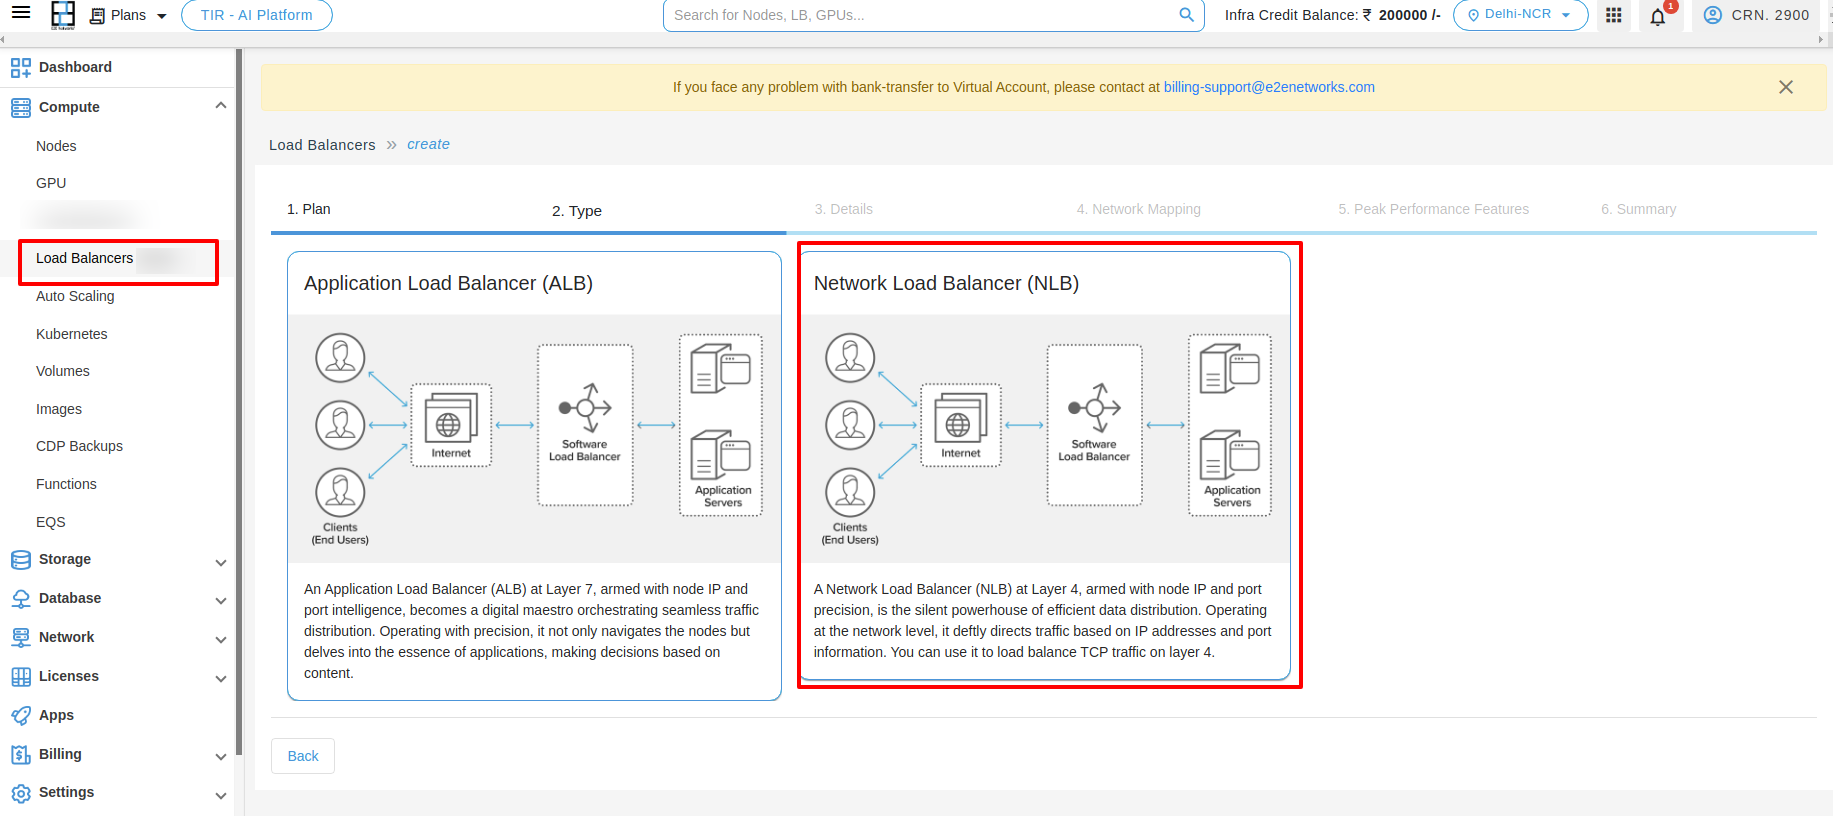
- To create a Network Load Balancer (NLB), click on the Network Load Balancer (NLB) option.
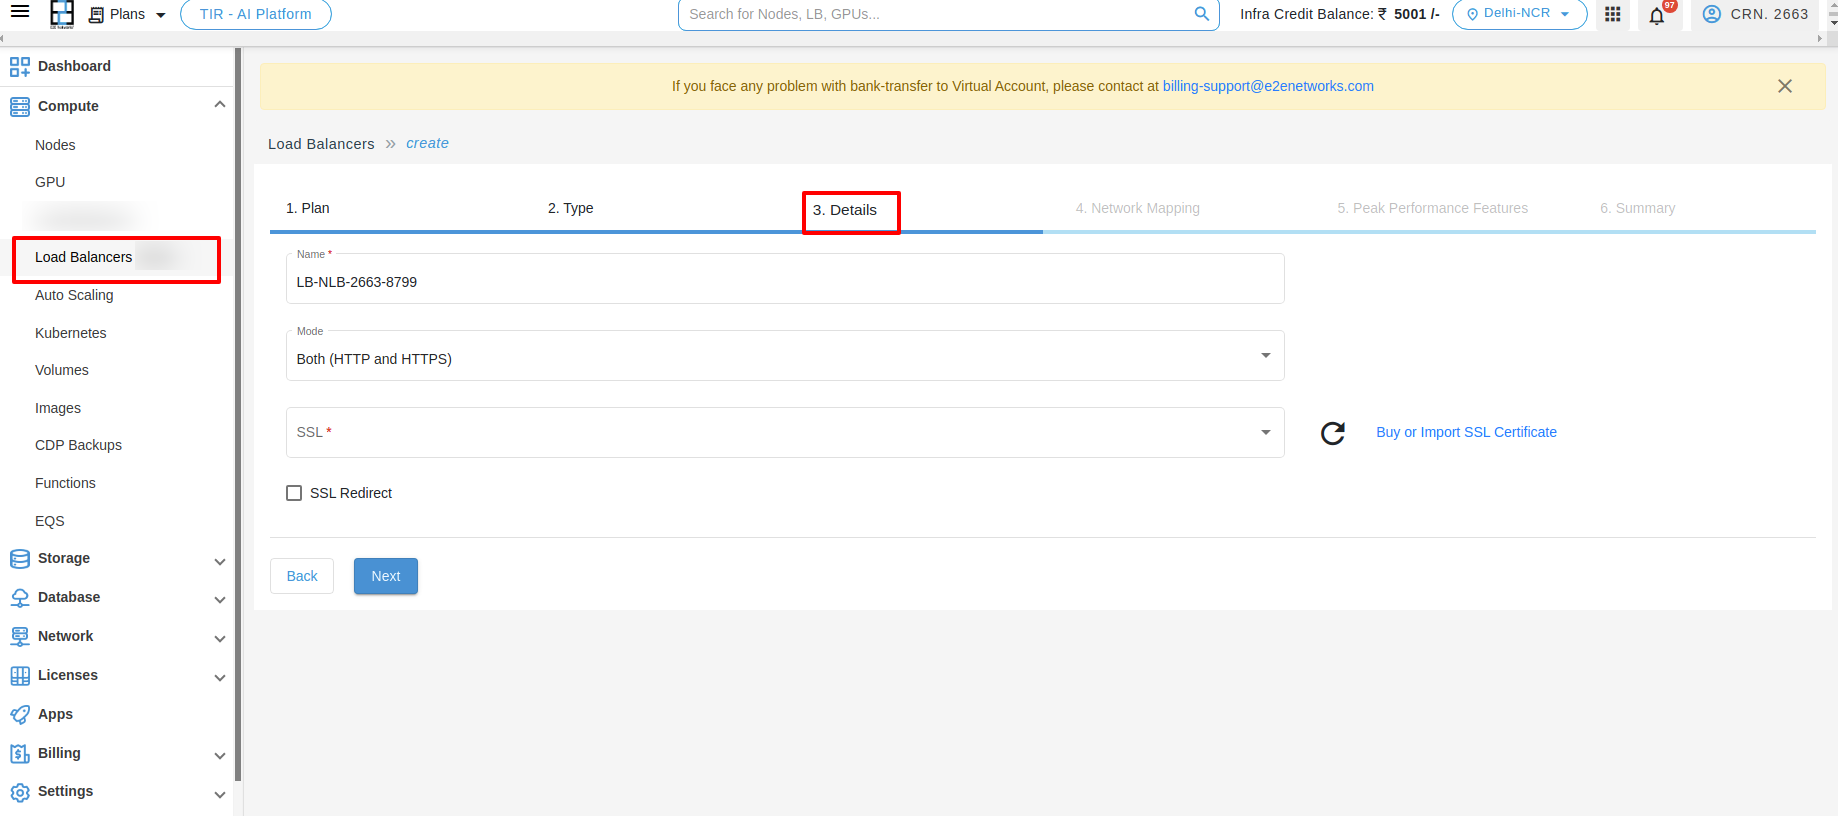
- Enter configuration details (name, mode, port, SSL certificates, etc.) for front-end and back-end connections. ALB Deployment Help
Details
-
Name: A default name is provided based on the selected plan, but you can modify it.
-
Type: Choose between Internal or External load balancer.

Target Mapping
Backend Name

Routing Policy
- Choose a Balancing Policy:
- Round Robin: Distributes requests evenly among backend servers.
- Source IP Hash: Routes based on the user’s IP address to ensure consistency.
- Least Connection: Routes traffic to the server with the fewest active connections.
How Least Connection Works:
- The load balancer tracks active connections for each server.
- Incoming requests are routed to the server with the least active connections.

Port
- For NLB, use a port between 1024-65535, except 8080, 10050, and 9101.
- ALB does not require a target port.
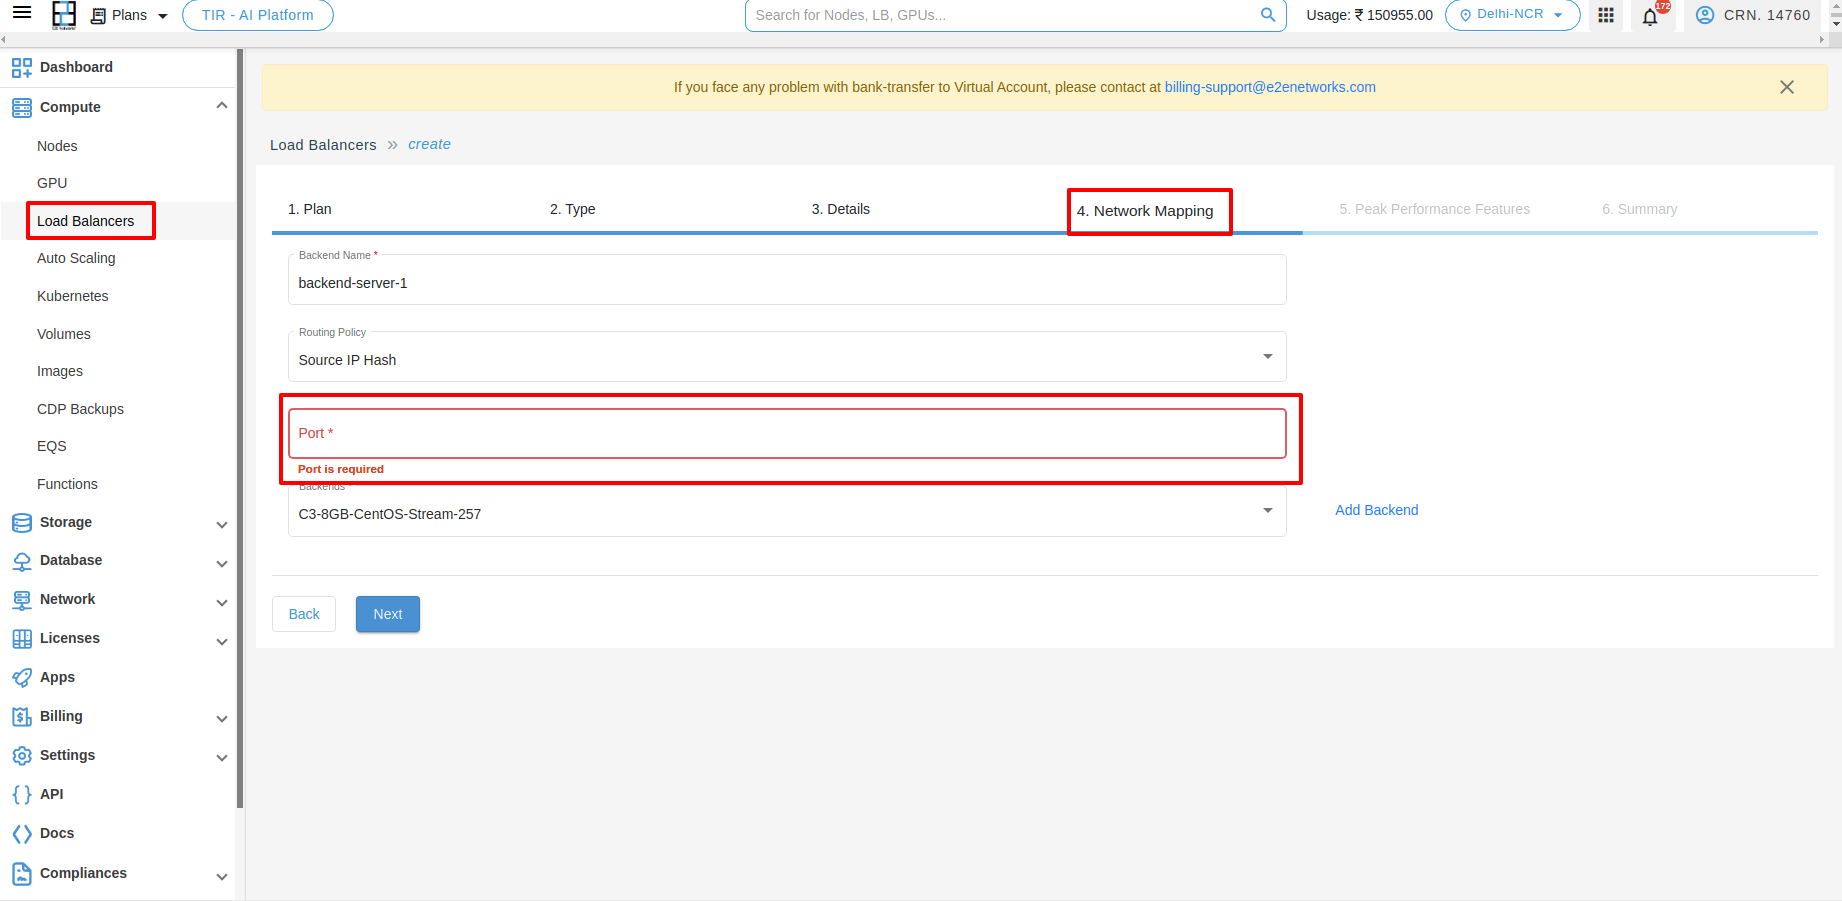
Backends
- Adding a backend is mandatory. Click Add Backend to add a backend.

- View the backend list via the dropdown.

Peak Performance Features
Create New VPC
Enable this option to use a VPC IP as the default VPC IP for your load balancer to connect internally.
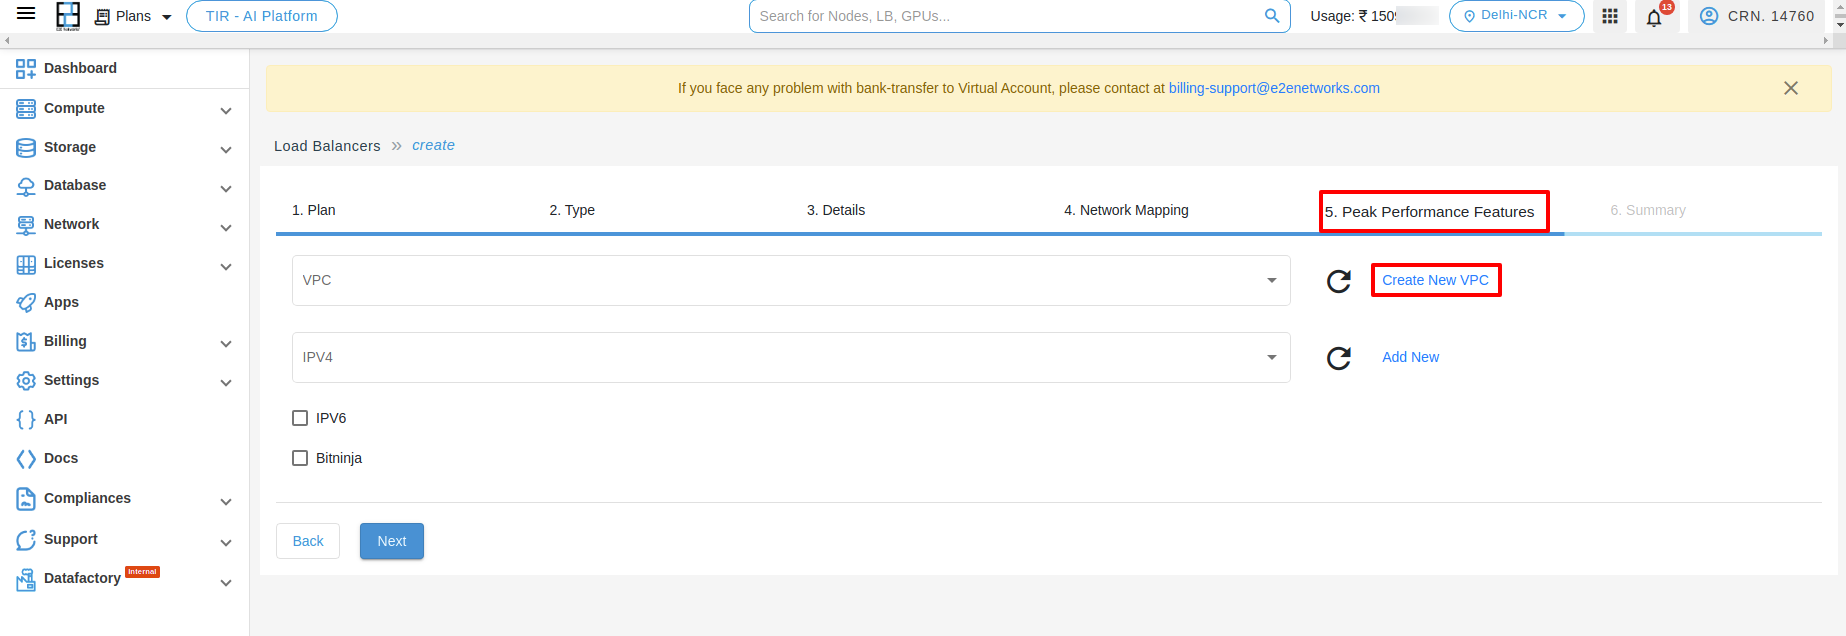

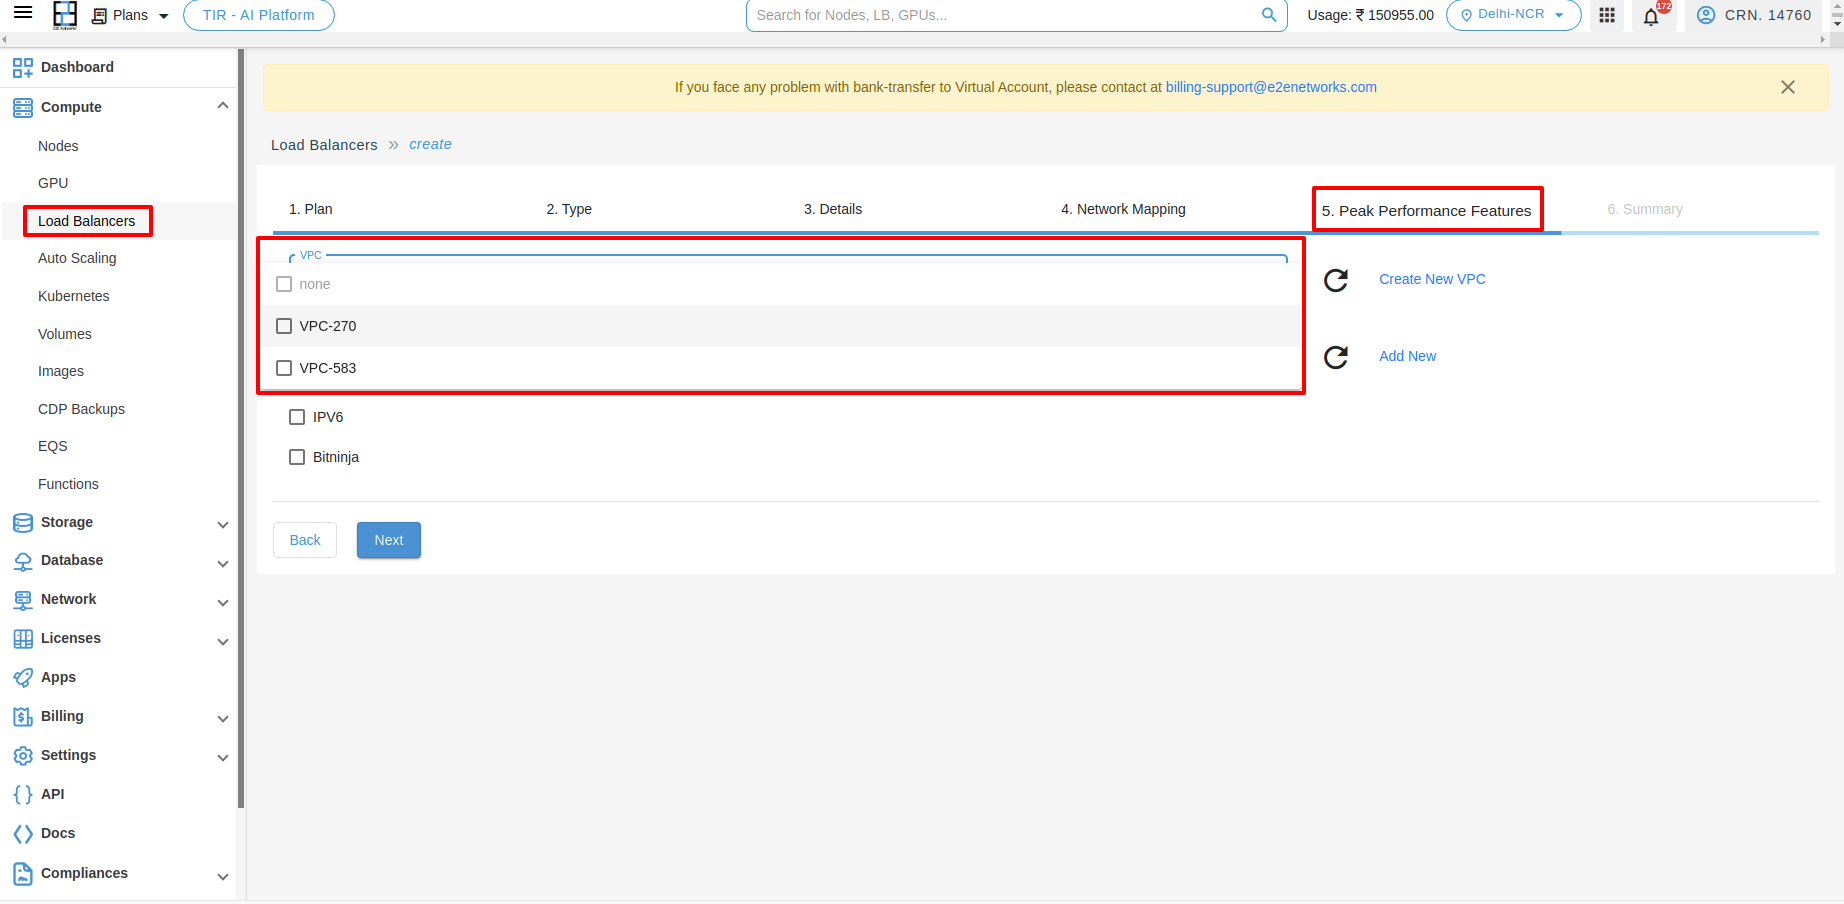
After creating a VPC, you can see it in the dropdown list.
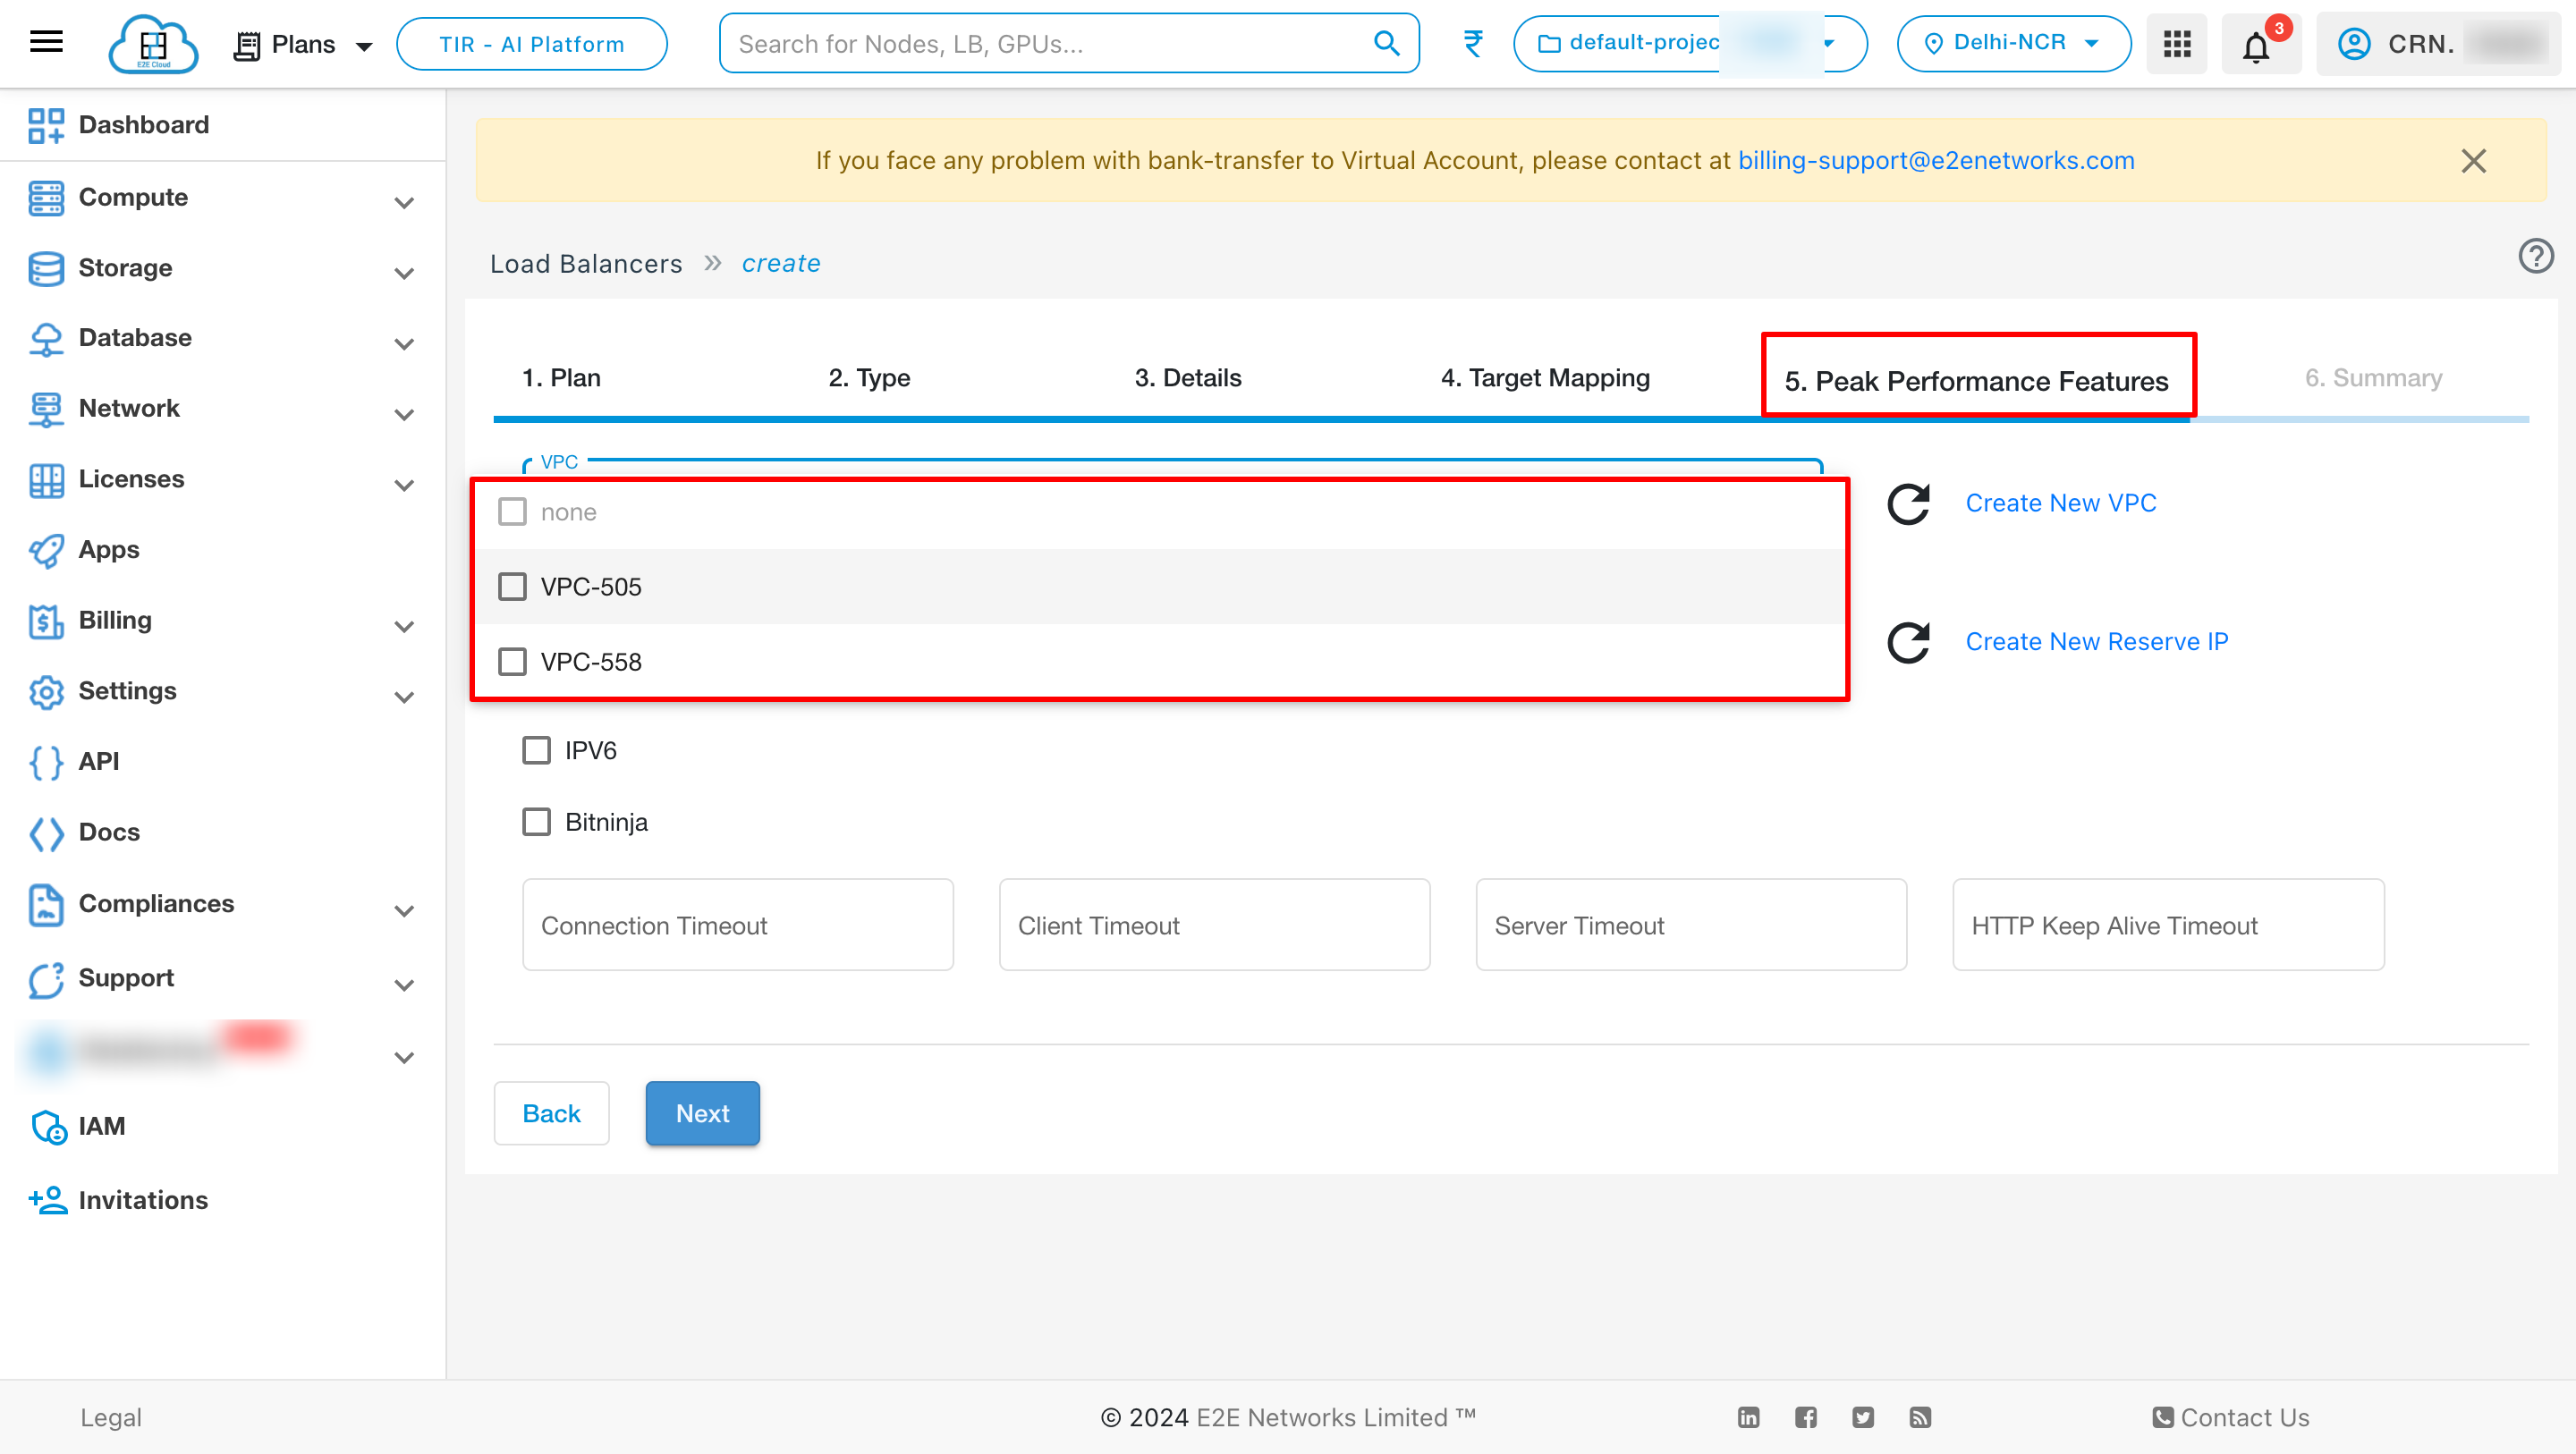
Add New Reserve IP
Enable this option to use a reserved IP as the default Public IP for your load balancer. You can dynamically update the backend resources of your applications and websites by re-assigning the reserved IP address without downtime.

After creating an IP, you can see it in the dropdown list.

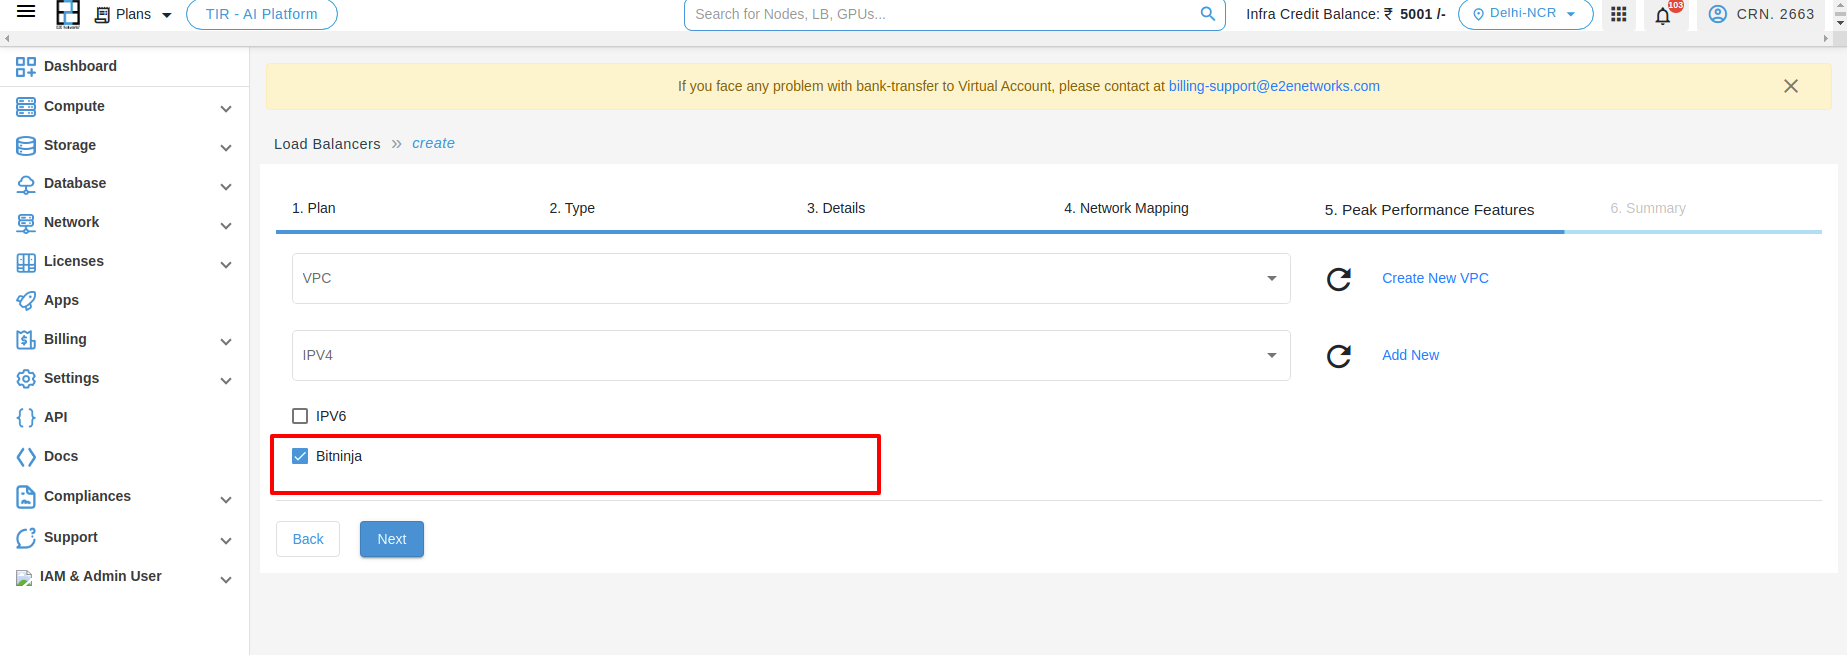
BitNinja
BitNinja is a user-friendly server security tool that combines various powerful defense mechanisms. Every BitNinja-protected load balancer learns from every attack, automatically applying this information across all BitNinja-enabled servers/load balancers, strengthening protection with each attack. Learn more
Enable BitNinja
Enable this option to use the BitNinja security tool for your load balancer. BitNinja has modules for different types of cyberattacks. It’s easy to install, requires minimal maintenance, and provides immediate protection against a wide range of cyberattacks.

Timeouts
You can set different timeout values, such as connection timeout, client timeout, server timeout, and HTTP keep-alive timeout, according to your requirements.

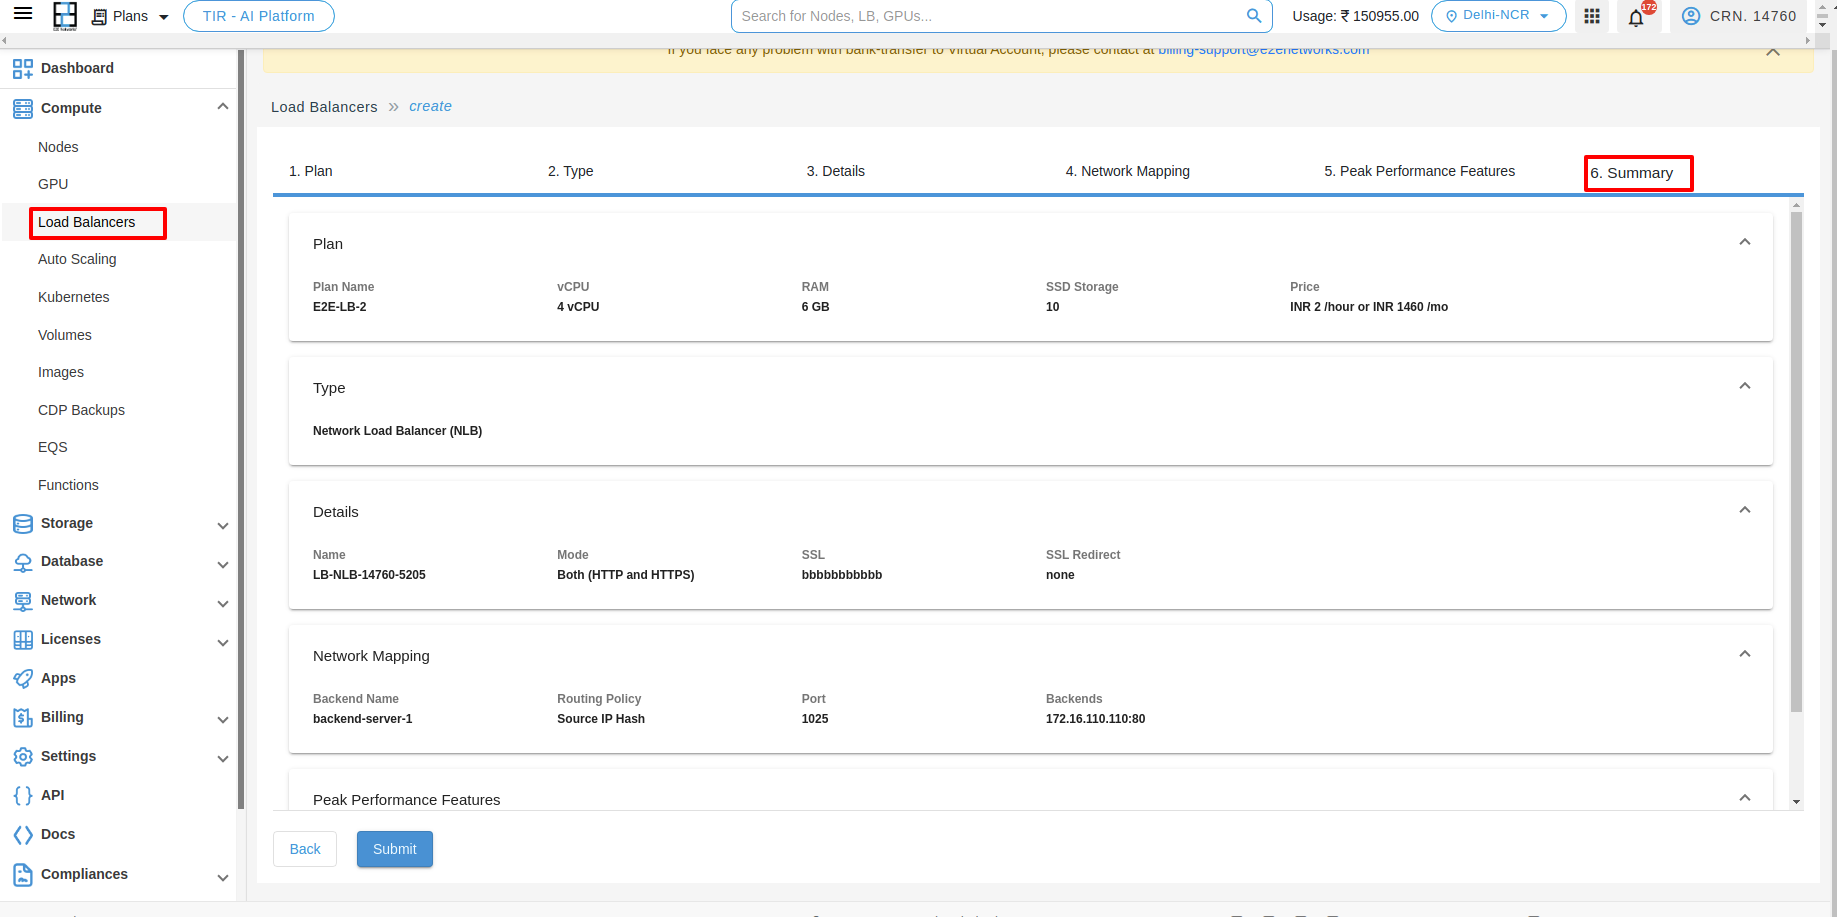
Summary
In the summary section, you can verify your Plan, Type, Details, Network Mapping, and Peak Performance Features.
Deploy Load Balancer
After filling in all the details successfully, click on the Submit button. It will take a few minutes to set up the scale group, and you will be taken to the ‘Load Balancers’ page.
Load Balancer Info
You can check all the basic, security, backend configurations, and network details of your load balancer on the Load Balancer info tab.

Backend Mapping
Once you've created your load balancer, you can manage it from the My Account Portal. Click on the installed LoadBalancer instance to see various management options.

To add a backend, click on the Add Backend button.
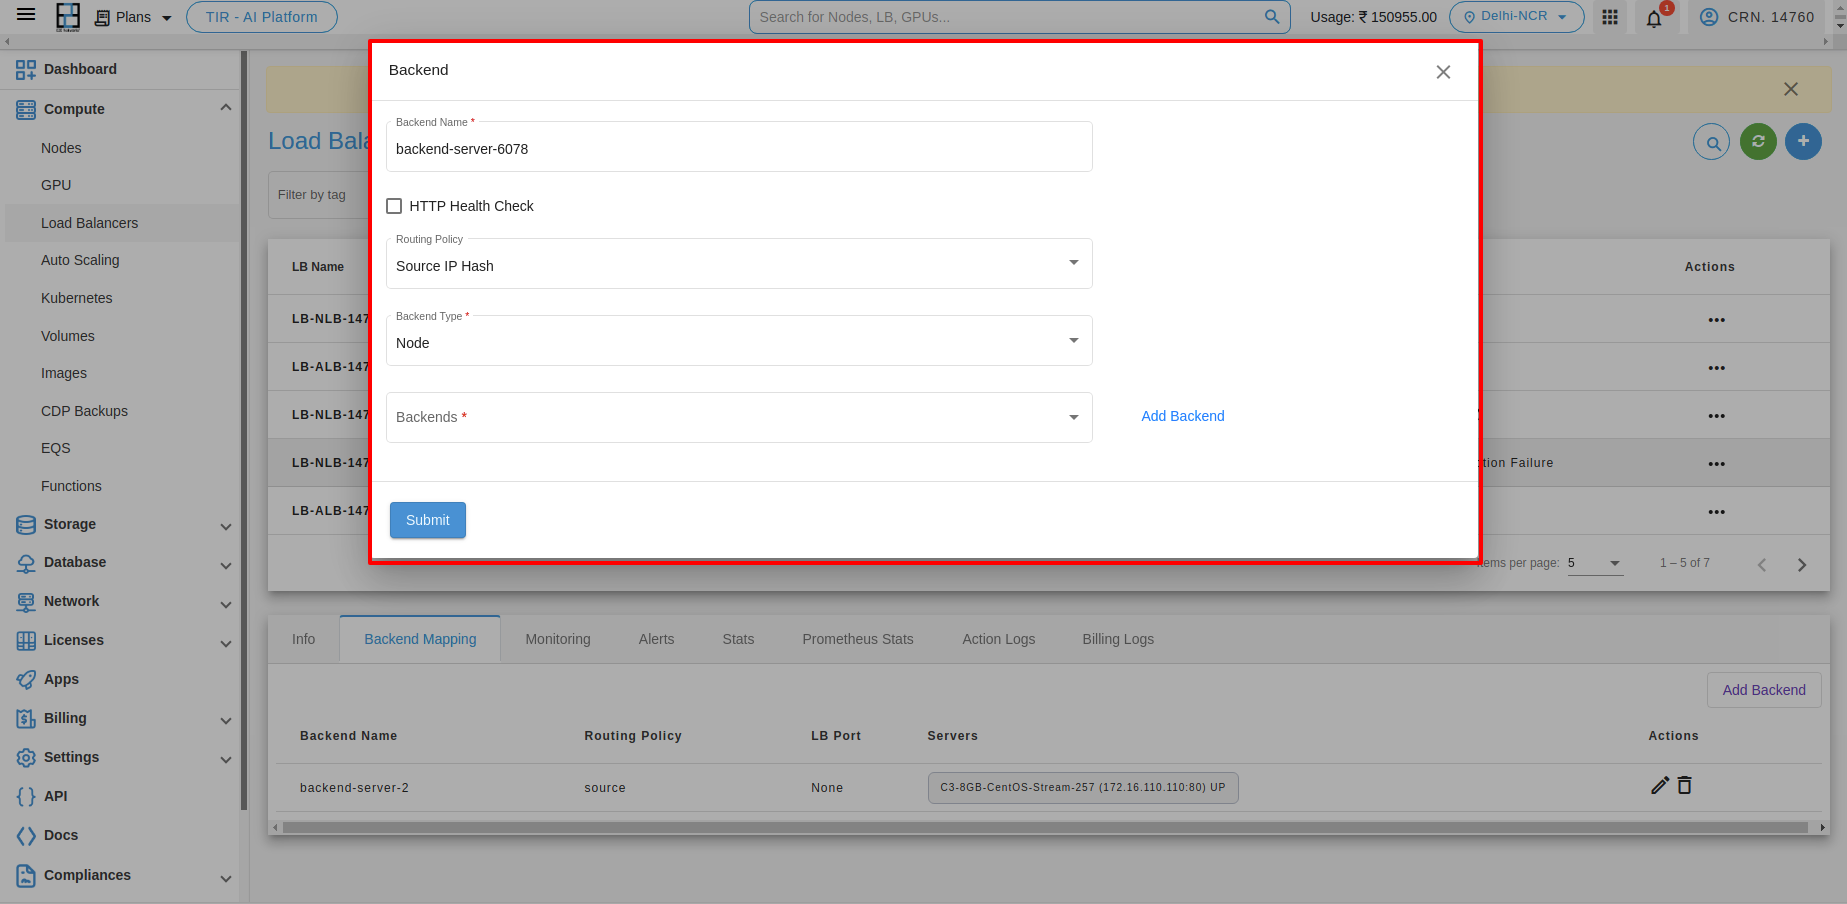
After adding the backend, you can see the list below.

You will be redirected to the Edit Load Balancer page, where you can add or change backend and frontend configurations for your load balancer.

You will be redirected to the Delete Load Balancer page, where you can delete backend and frontend configurations for your load balancer.

Monitoring
Monitoring is an essential part of maintaining the reliability, availability, and performance of your load balancer. You can view monitoring information for your load balancer on the Monitoring tab. This data is collected from your load balancer and processed into readable graphs, each based on a different metric. Learn more.

Alerts
Server health alerts are automatically created for your newly created load balancer using recommended alert policy parameters. You can also set up custom alerts by defining trigger parameters to suit your use case. The alerting system sends automatic response notifications to your defined email list. Learn more.
Stats

Prometheus Stats

Action Logs
Action logs contain detailed information about requests sent to your load balancer, such as the date/time the request was received, client’s IP address, request protocol, request paths, and server responses. These access logs are useful for understanding incoming network traffic patterns and troubleshooting any issues.

Billing Logs

Actions
Types of actions you can perform with your Load Balancer.

Stopping Your Load Balancer
To stop your Load Balancer, click the Stop button. A confirmation popup will appear; click on Power Off to confirm.

Upgrade Your Load Balancer
The Load Balancer (LB) upgrade feature allows customers to easily upgrade their LB plan based on specific usage needs. To upgrade, click the Upgrade button under Actions.

Then, click on the Apply button with the selected plan. The upgrade process will start.

Note: Please ensure that your load balancer is stopped when performing the upgrade action.

Delete
To delete your Load Balancer, click on the Delete button.
