VPC
Introduction
E2E Networks Virtual Private Cloud lets you create a virtual network and launch E2E nodes into it. This virtual network closely resembles a traditional network that you would operate in your own data center. VPC networks provide a more secure connection between resources because the network is inaccessible from the public internet and other VPC networks. Traffic within a VPC does not count toward your bandwidth usage.
There are two types of VPC options available:
-
Custom VPC: User defines the IP range and manages subnets.
-
E2E-Provided VPC: A predefined VPC managed by E2E Networks. Subnets cannot be created under this VPC type, and IPs are allocated automatically from class A pool.
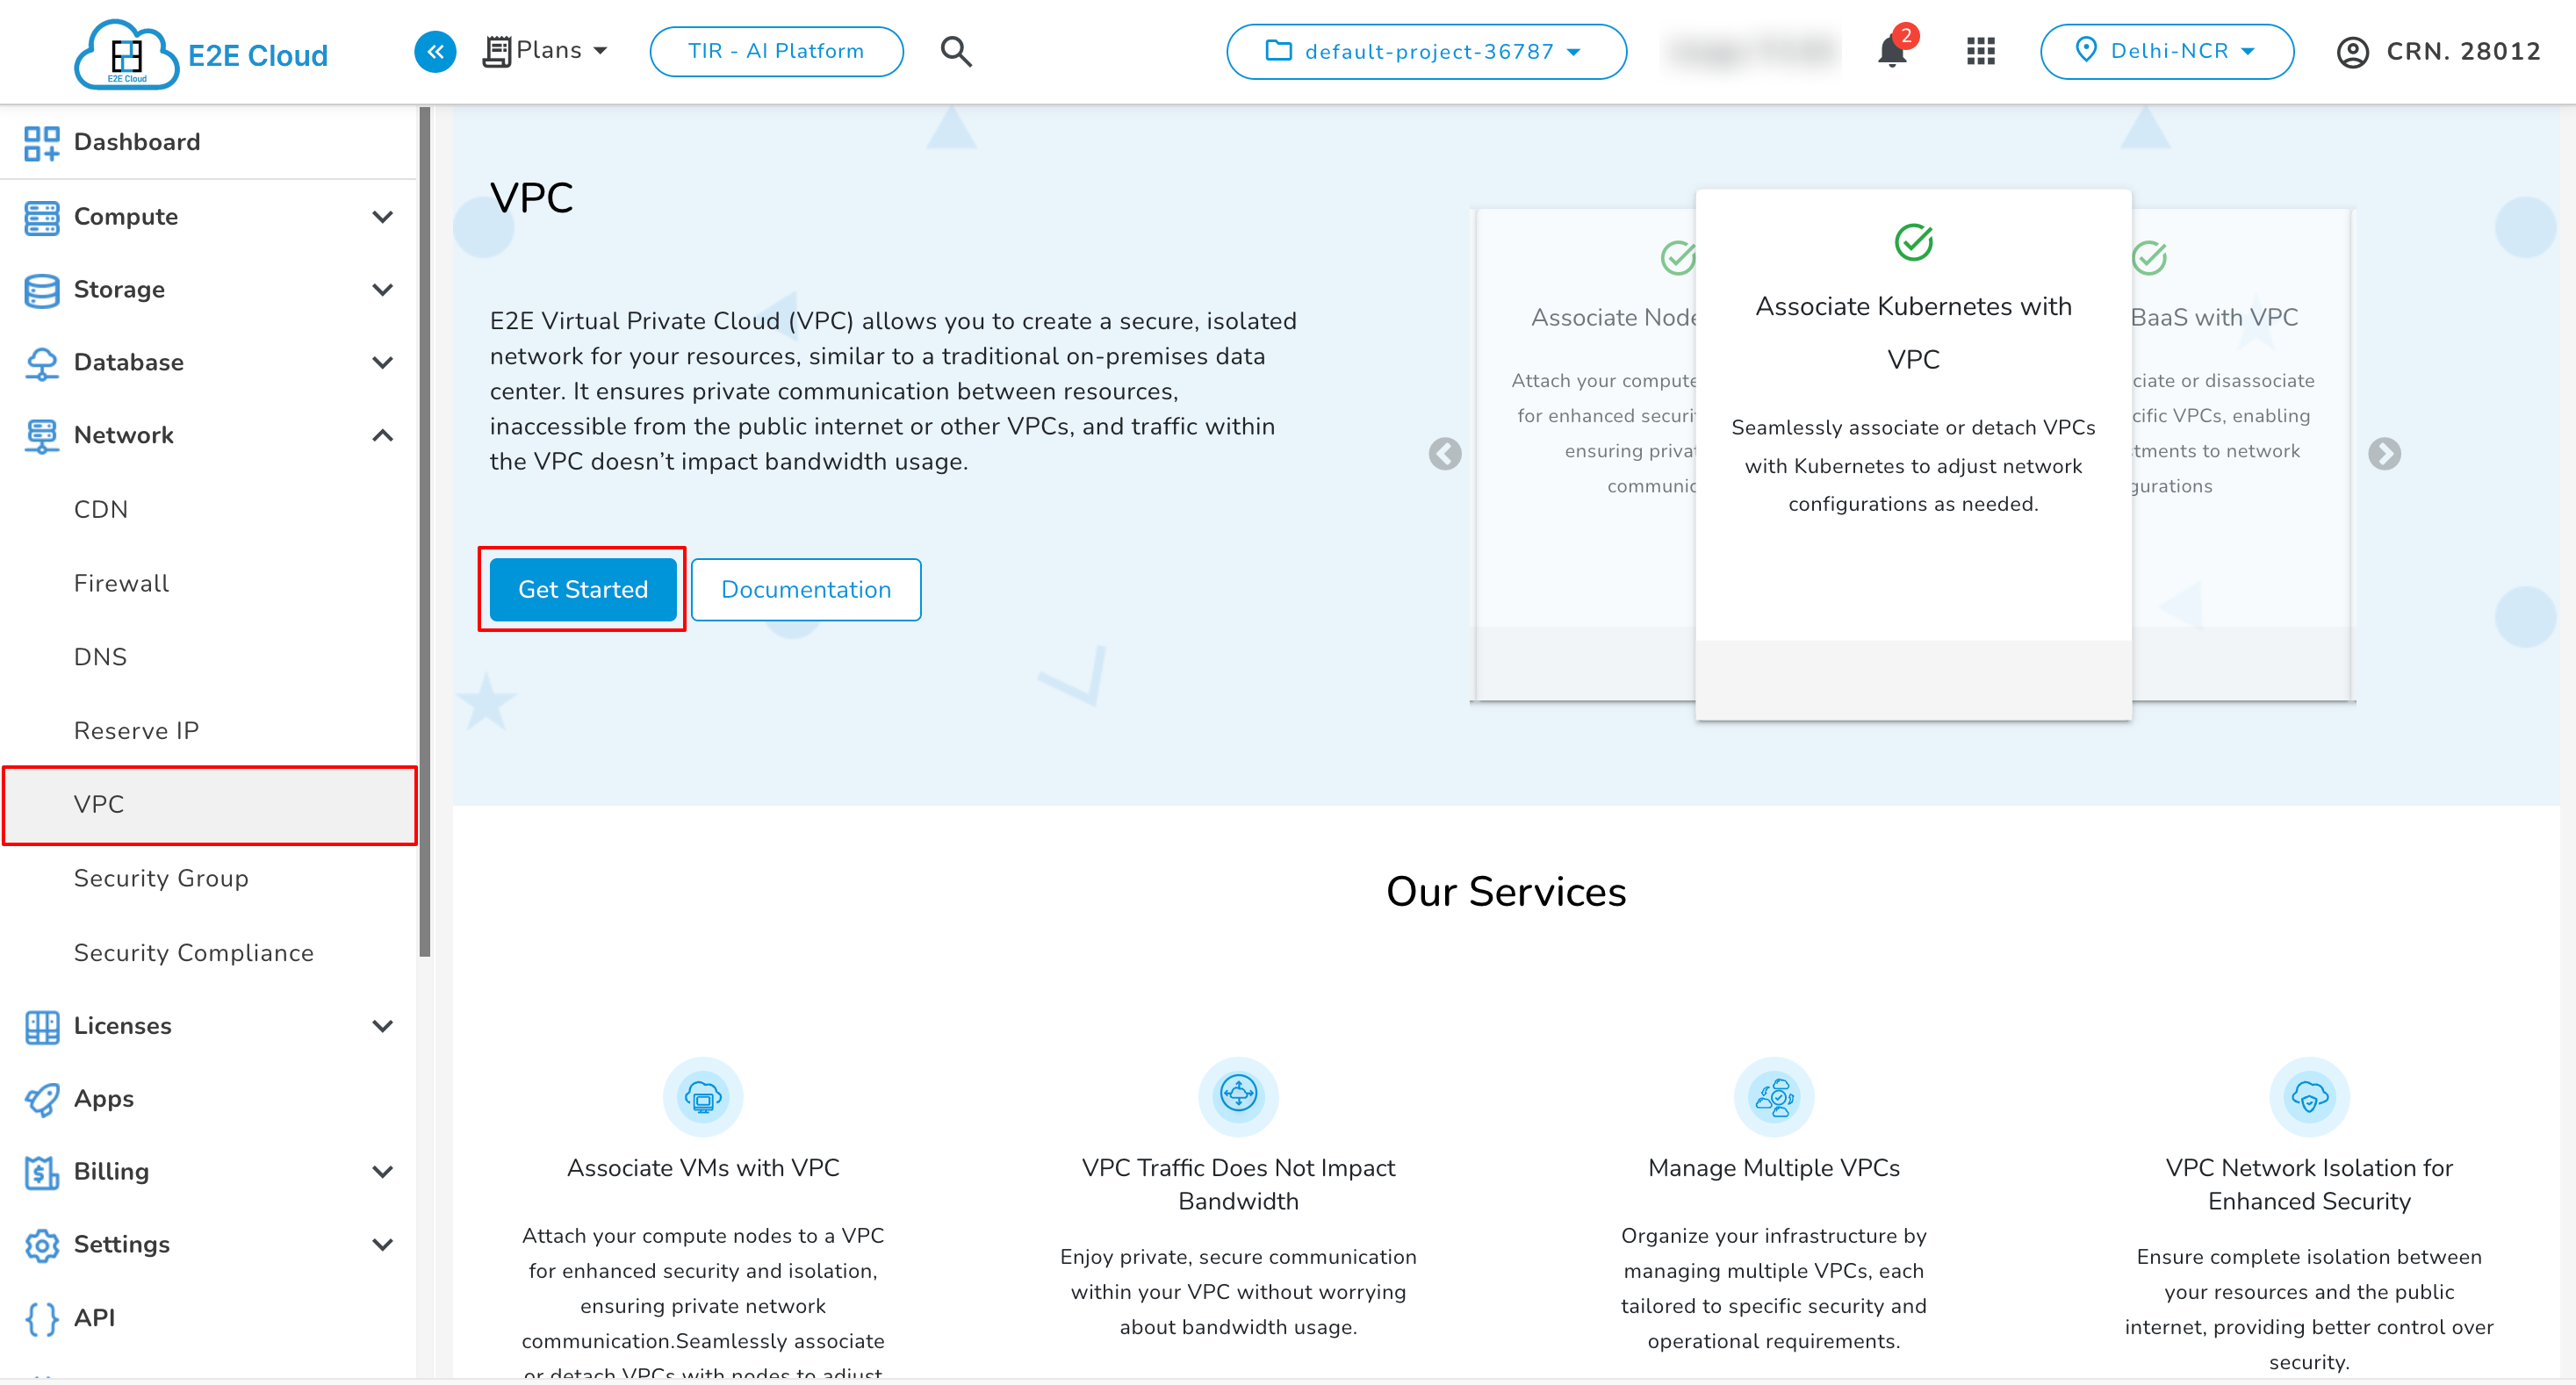
Navigate to VPC page
- Please go to ‘MyAccount’ and log in using your credentials set up at the time of creating and activating the E2E Networks ‘My Account’.
- After you log in to your E2E Networks MyAccount, on the left side of the MyAccount dashboard, click on the “VPC” sub-menu available under the Networking section.
Working with VPC
The following sections describe how you can use VPC.
Create New VPC
- Click on the ‘VPC’ sub-menu available under the Network section.
- You will be directed to the Get Started page.
- Click on the Get Started button.
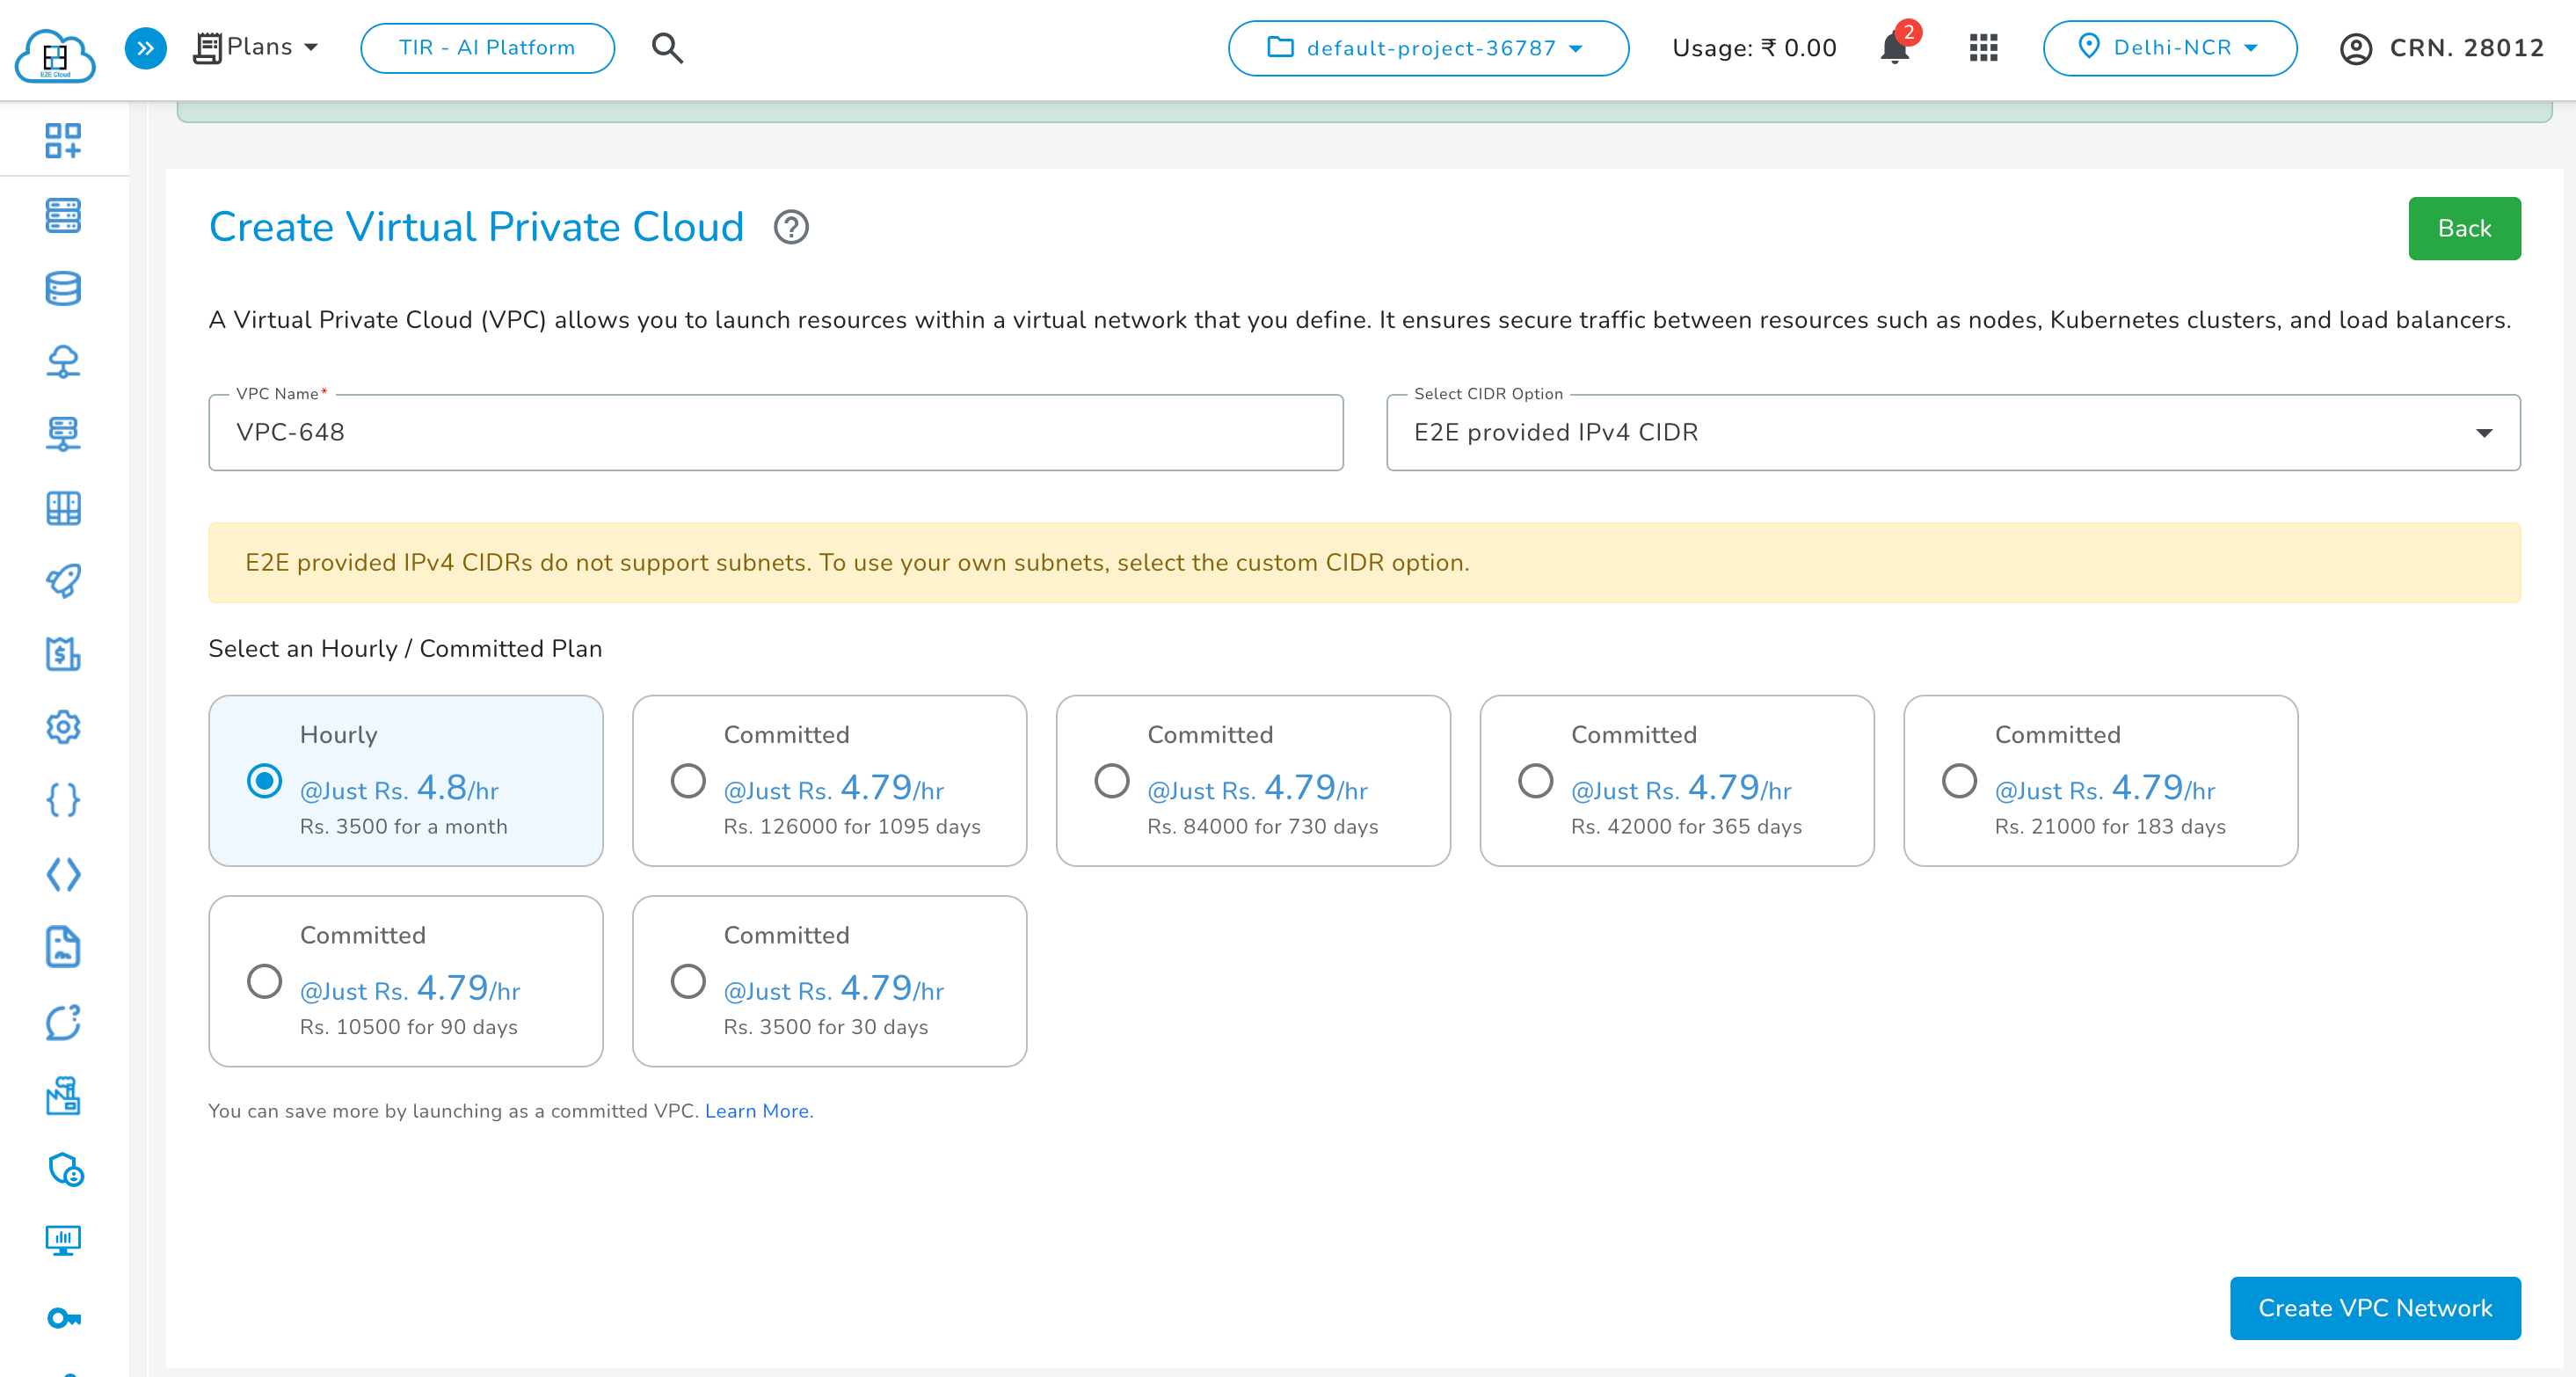
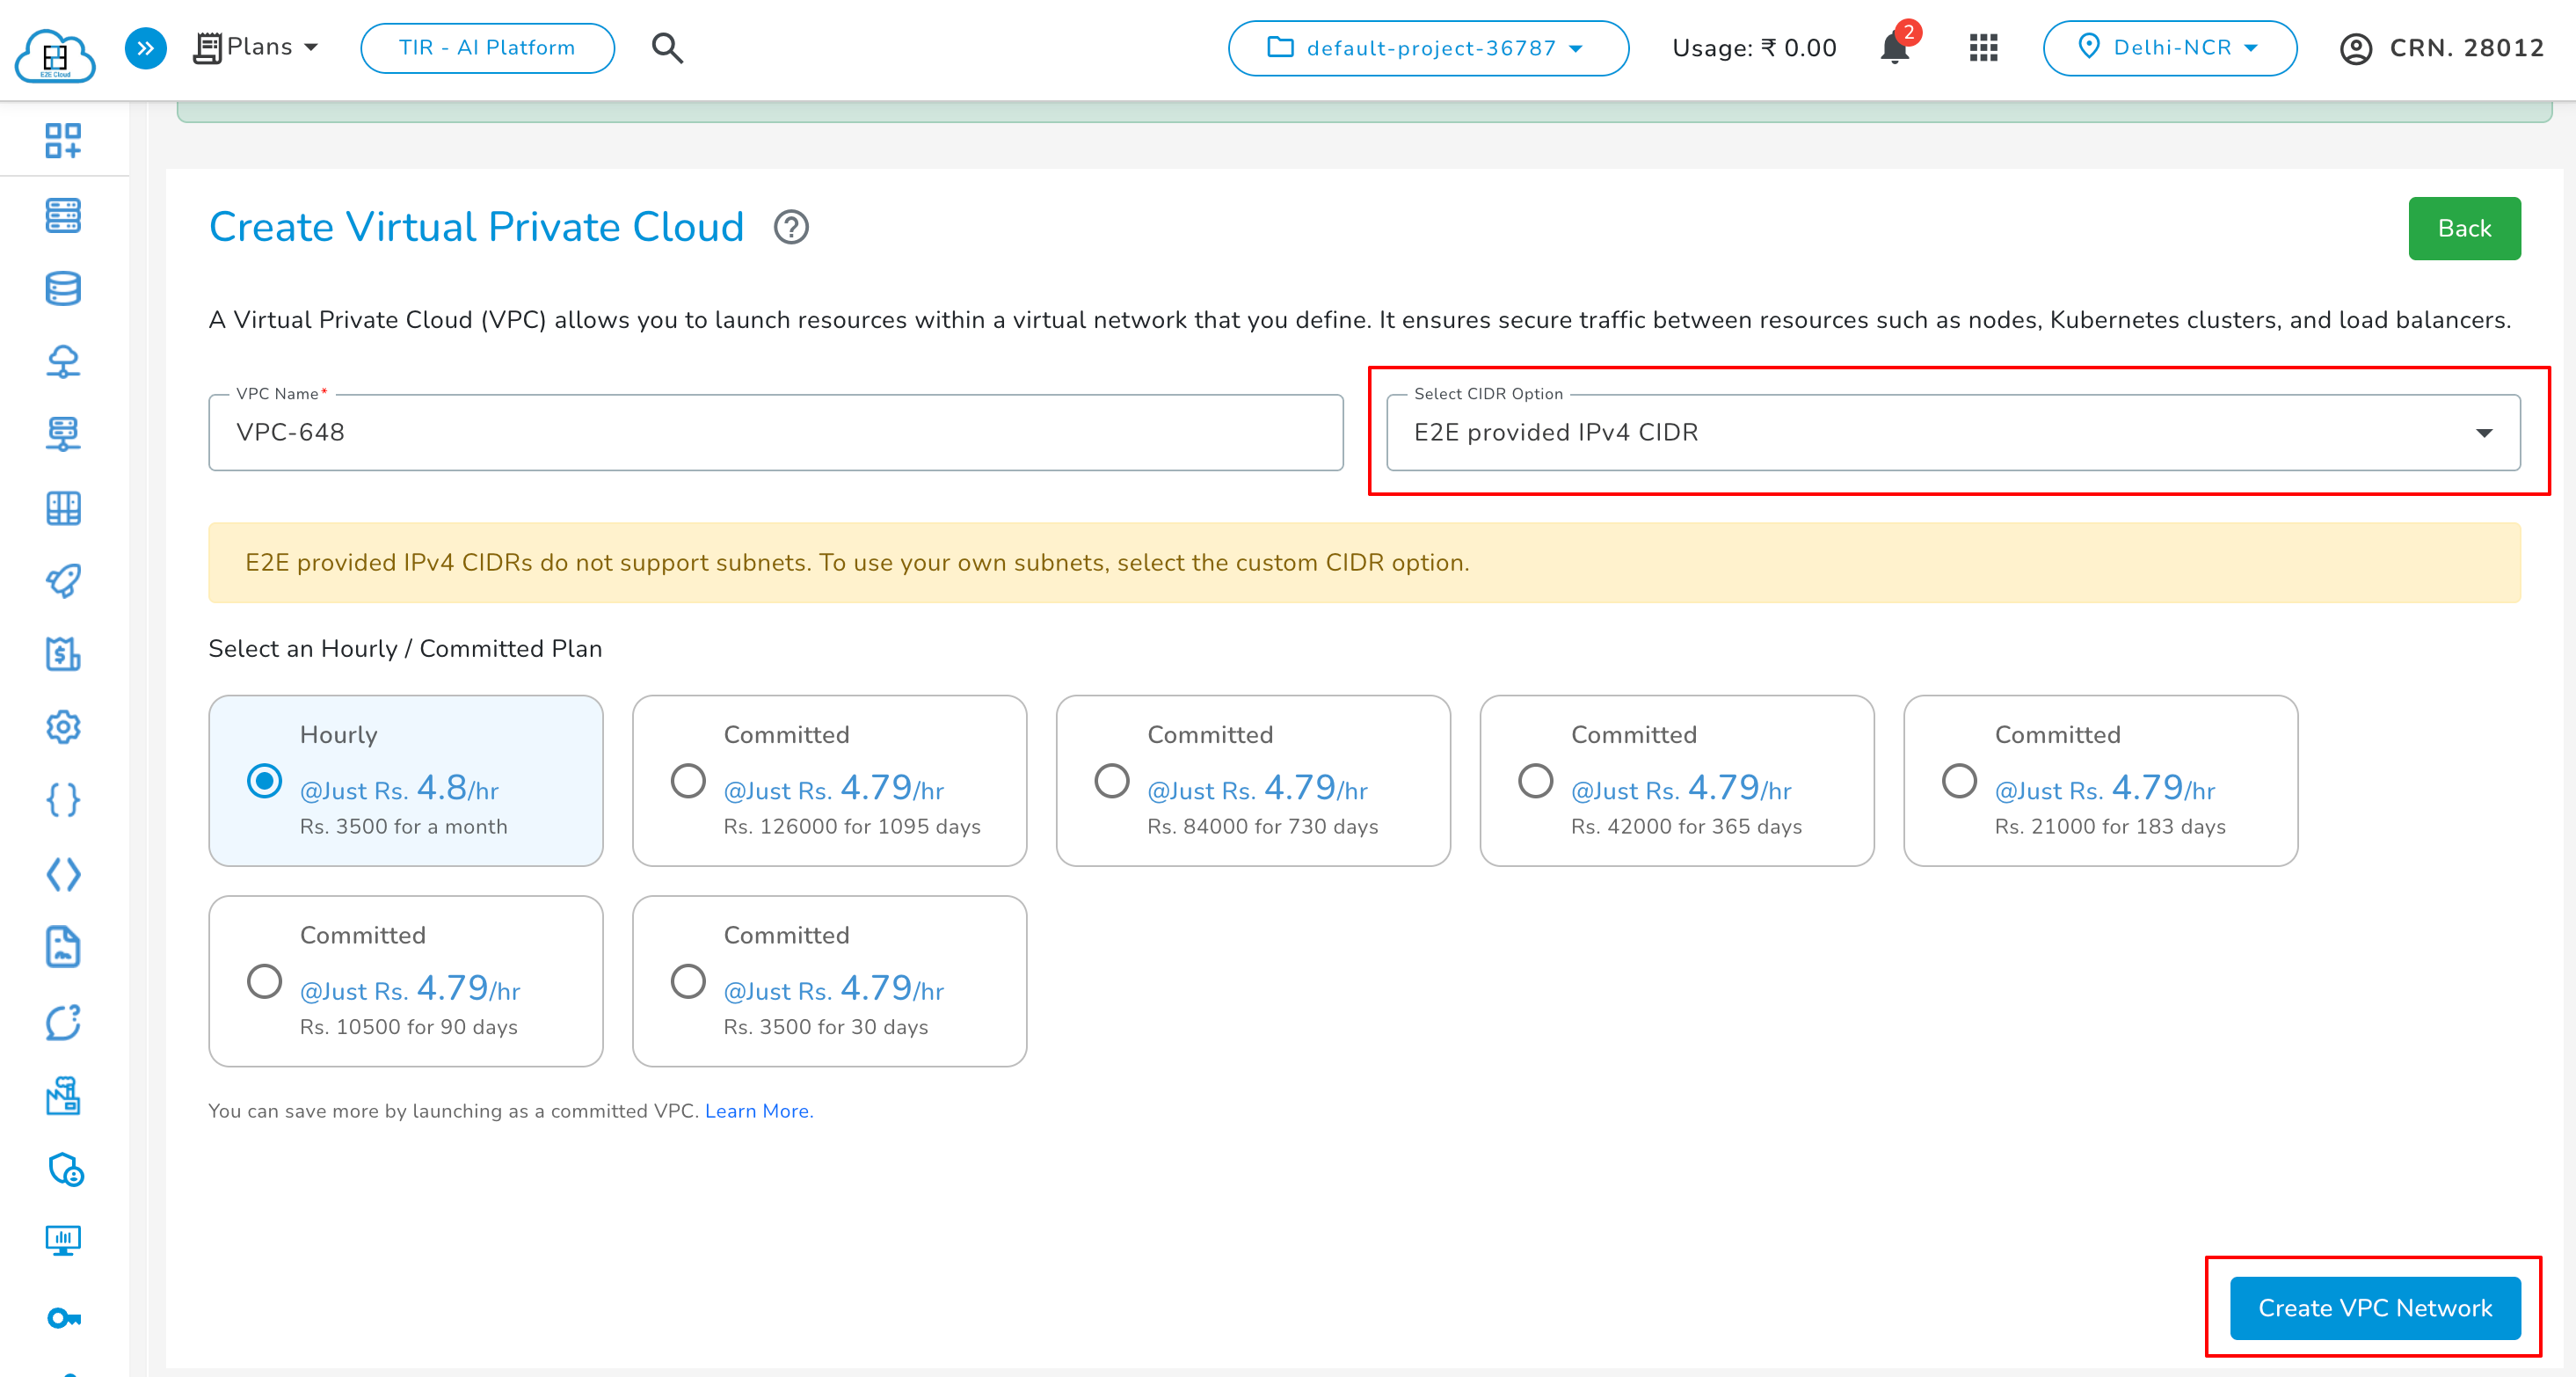
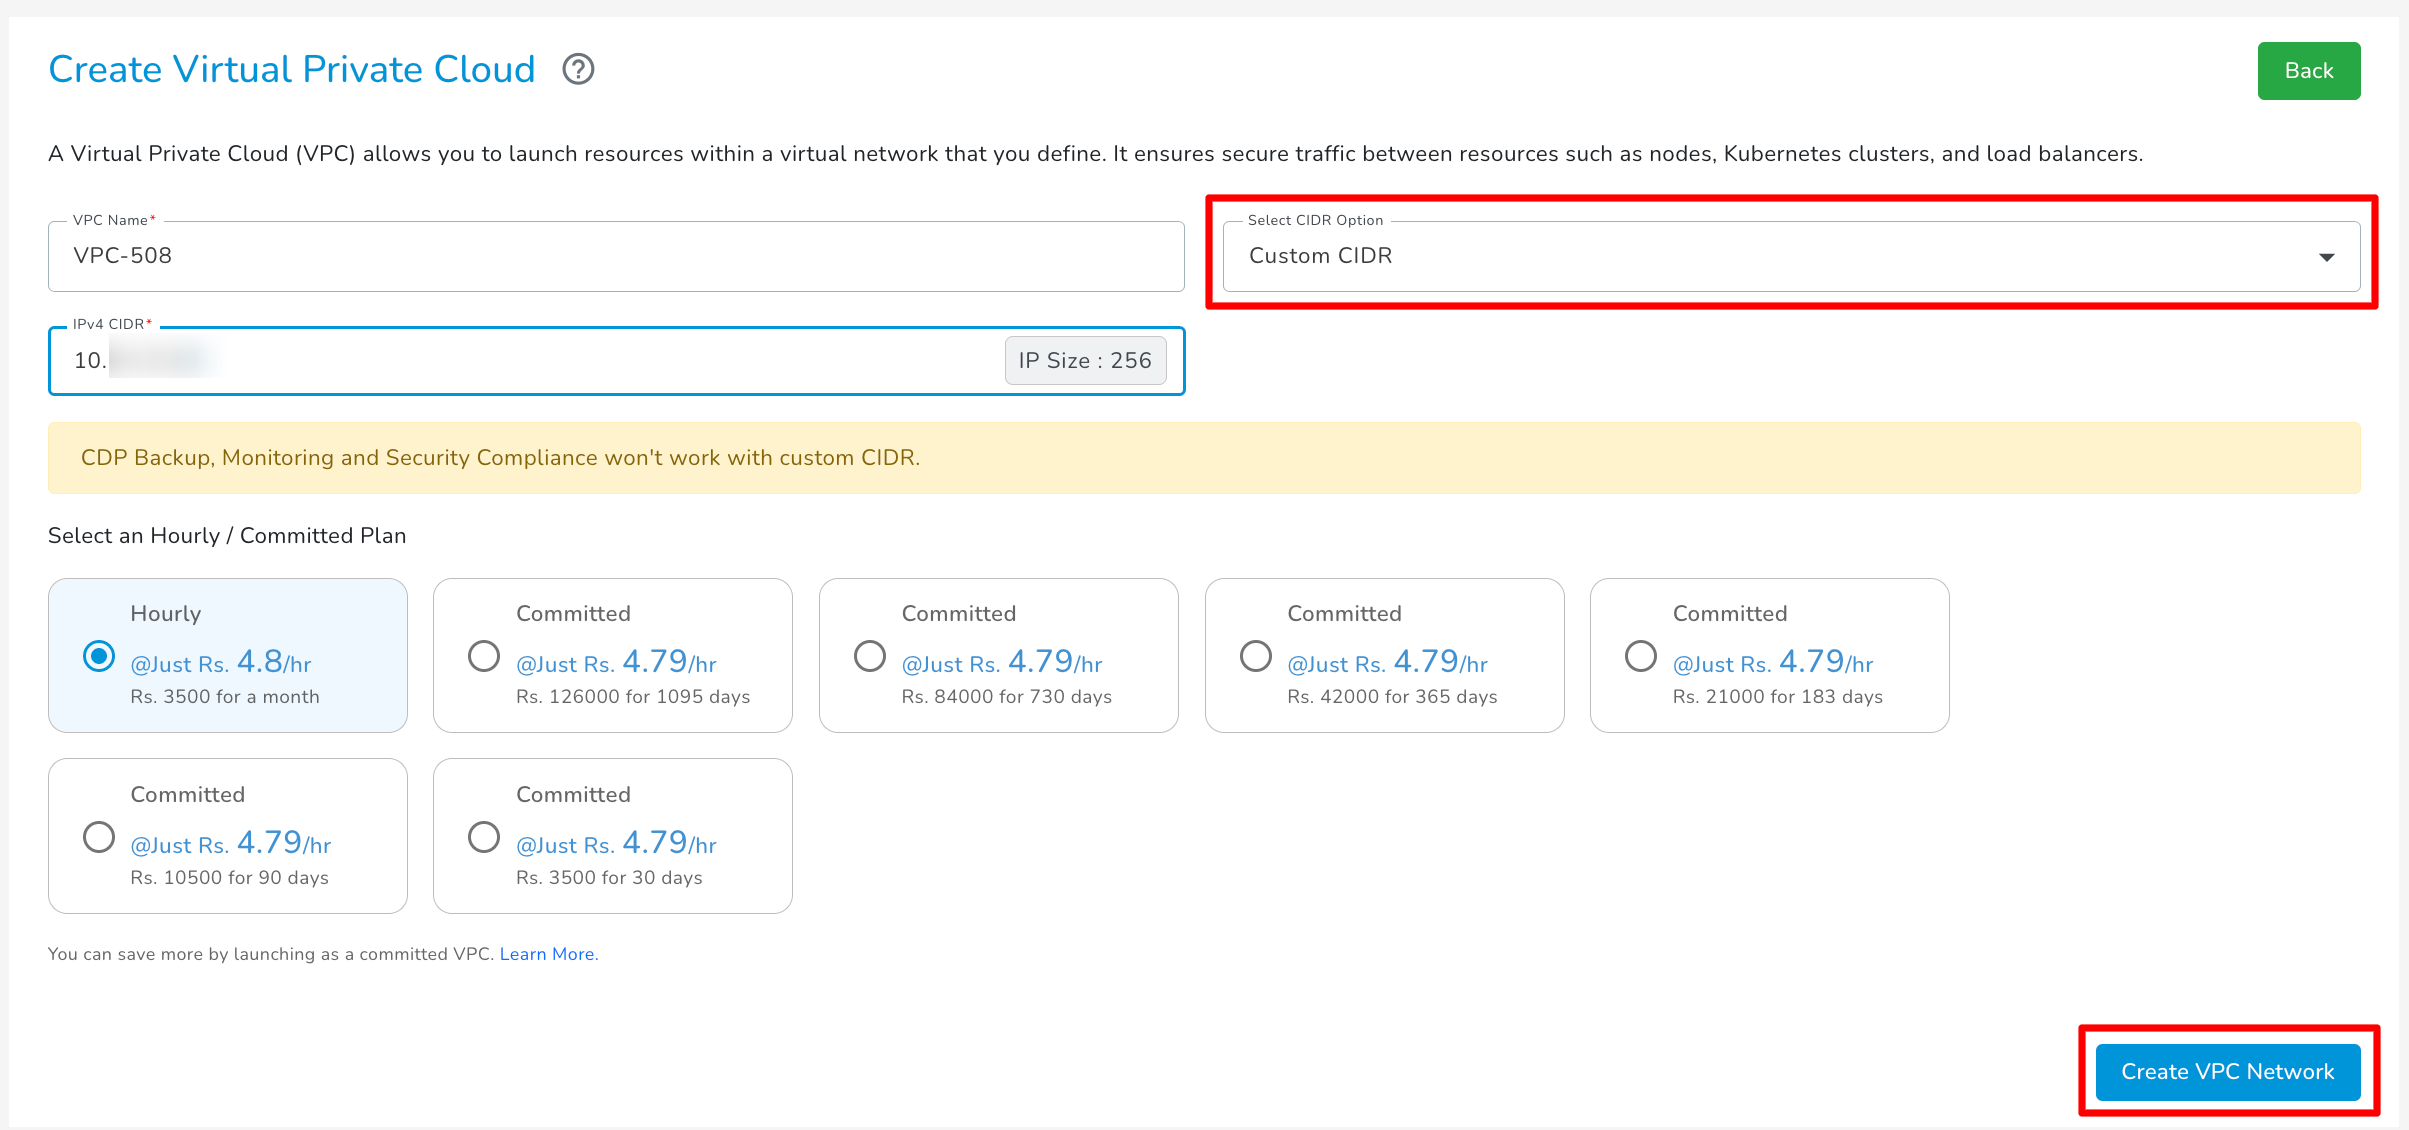
- You will be redirected to the Create Virtual Private Cloud page.
-
Select an Hourly / Committed Plan
-
Select CIDR Option - E2E provided IPv4 CIDR or Custom CIDR
E2E provided IPv4 CIDR
- If you select E2E provided IPv4 CIDR, an IPv4 address range for your virtual private cloud will be generated automatically by E2E Networks which will have 512 available IPv4.
- Click on Create VPC Network.
E2E-provided IPv4 CIDRs do not support subnet creation. To define and manage your own subnets, choose the Custom CIDR option instead.
Custom CIDR
- Enter IPv4 CIDR and CIDR block must be between /16 and /28.
When creating VPC with Custom CIDR block, note the following:
-
You can choose a private IP range from:
-
Class A: e.g.,
10.0.0.0/16 -
Class B: e.g.,
172.16.0.0/20
-
-
The last octet must be 0 when specifying the base IP of the VPC CIDR block.
-
Valid: 10.1.0.0/16
-
Invalid: 10.1.0.5/16
-
-
The base IP must be the starting address of the CIDR block. This means all host bits must be 0.
- Click on the ‘Create VPC Network’ button to create a new VPC pool for your MyAccount. The ‘Information’ popup will appear.
- Your Custom VPC will be created and it will show in the list.
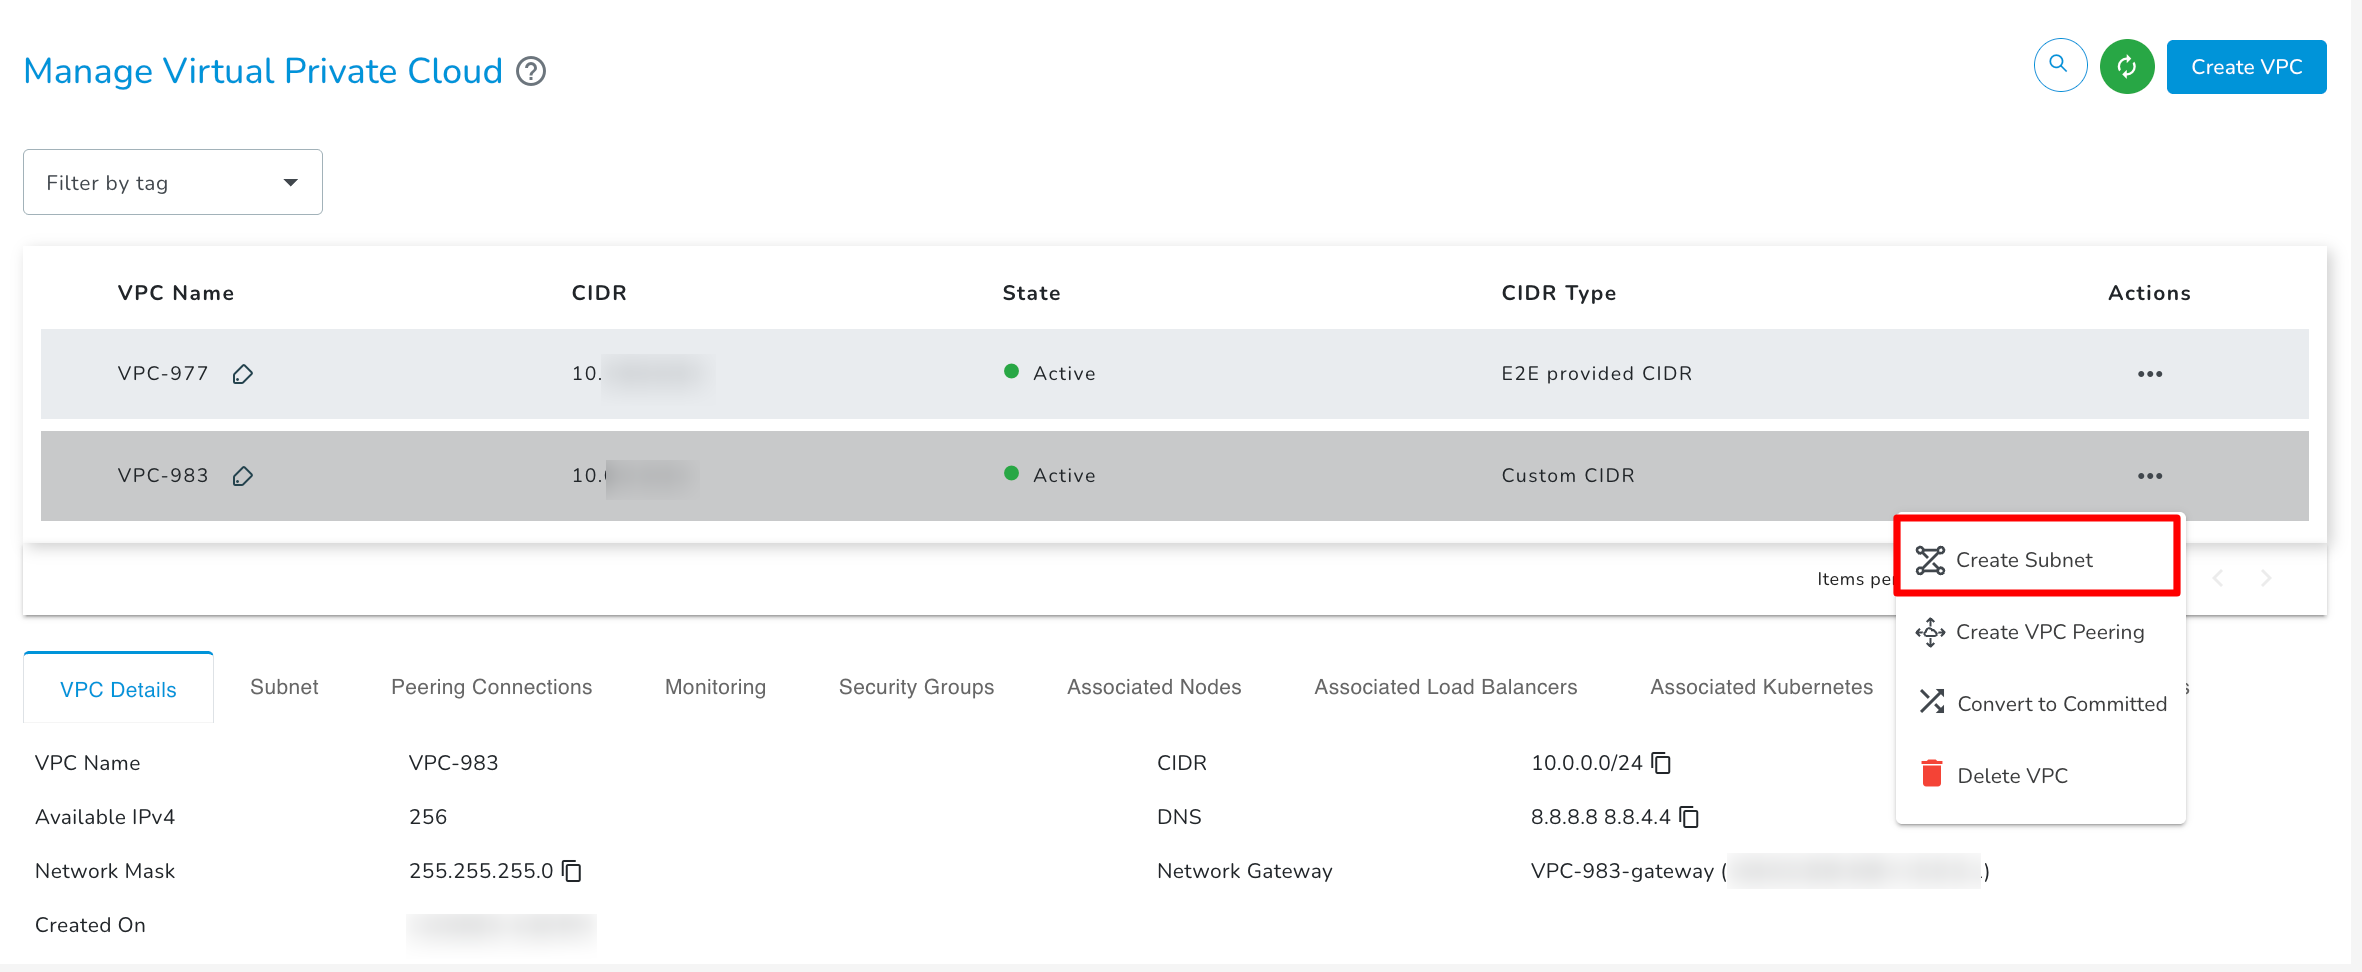
VPC - Actions
1. Create Subnet
Create Subnet action will be disabled for E2E provided CIDR, it's only available if you select the custom CIDR option.
You can create subnets within a VPC which allows you to divide a VPC’s IP address range into smaller, manageable blocks. When you create a VPC with a CIDR block (e.g., 10.10.0.0/16), it provides a large range of IP addresses. Now you can split them into smaller blocks called subnets. You can divide it into subnets like: 10.10.0.64/26
When creating subnets within a CIDR block, note the following:
-
The first 4 and last 4 IP addresses in the entire VPC range are reserved for networking purposes.
-
Due to this, the first and last subnet within the VPC will not have the full range of usable IPs.
-
These subnets are considered unsuitable for use as they won't meet the expected IP capacity.
Example:
-
VPC CIDR:
10.10.0.0/23 -
If you divide it into /25 subnets, you'll get:
-
10.10.0.0/25 -
10.10.0.128/25 -
10.10.1.0/25 -
10.10.1.128/25
-
-
Which subnets should you use?
You should use only the middle subnets:
-
10.10.0.128/25 -
10.10.1.0/25
-
(The first subnet 10.10.0.0/25 and last subnet 10.10.1.128/25 are not usable due to reserved IPs)
If you're creating a subnet which is valid but still encounter an error like "IP not available", it could be because some IPs from that subnet are already assigned to other resources. Always ensure that the IPs in the subnet are free and not in use elsewhere before proceeding.
- To create subnets for any VPC, click on Create Subnet
- Enter valid IPv4 Subnet CIDR Block. CIDR block of subnet must be greater than CIDR block of VPC
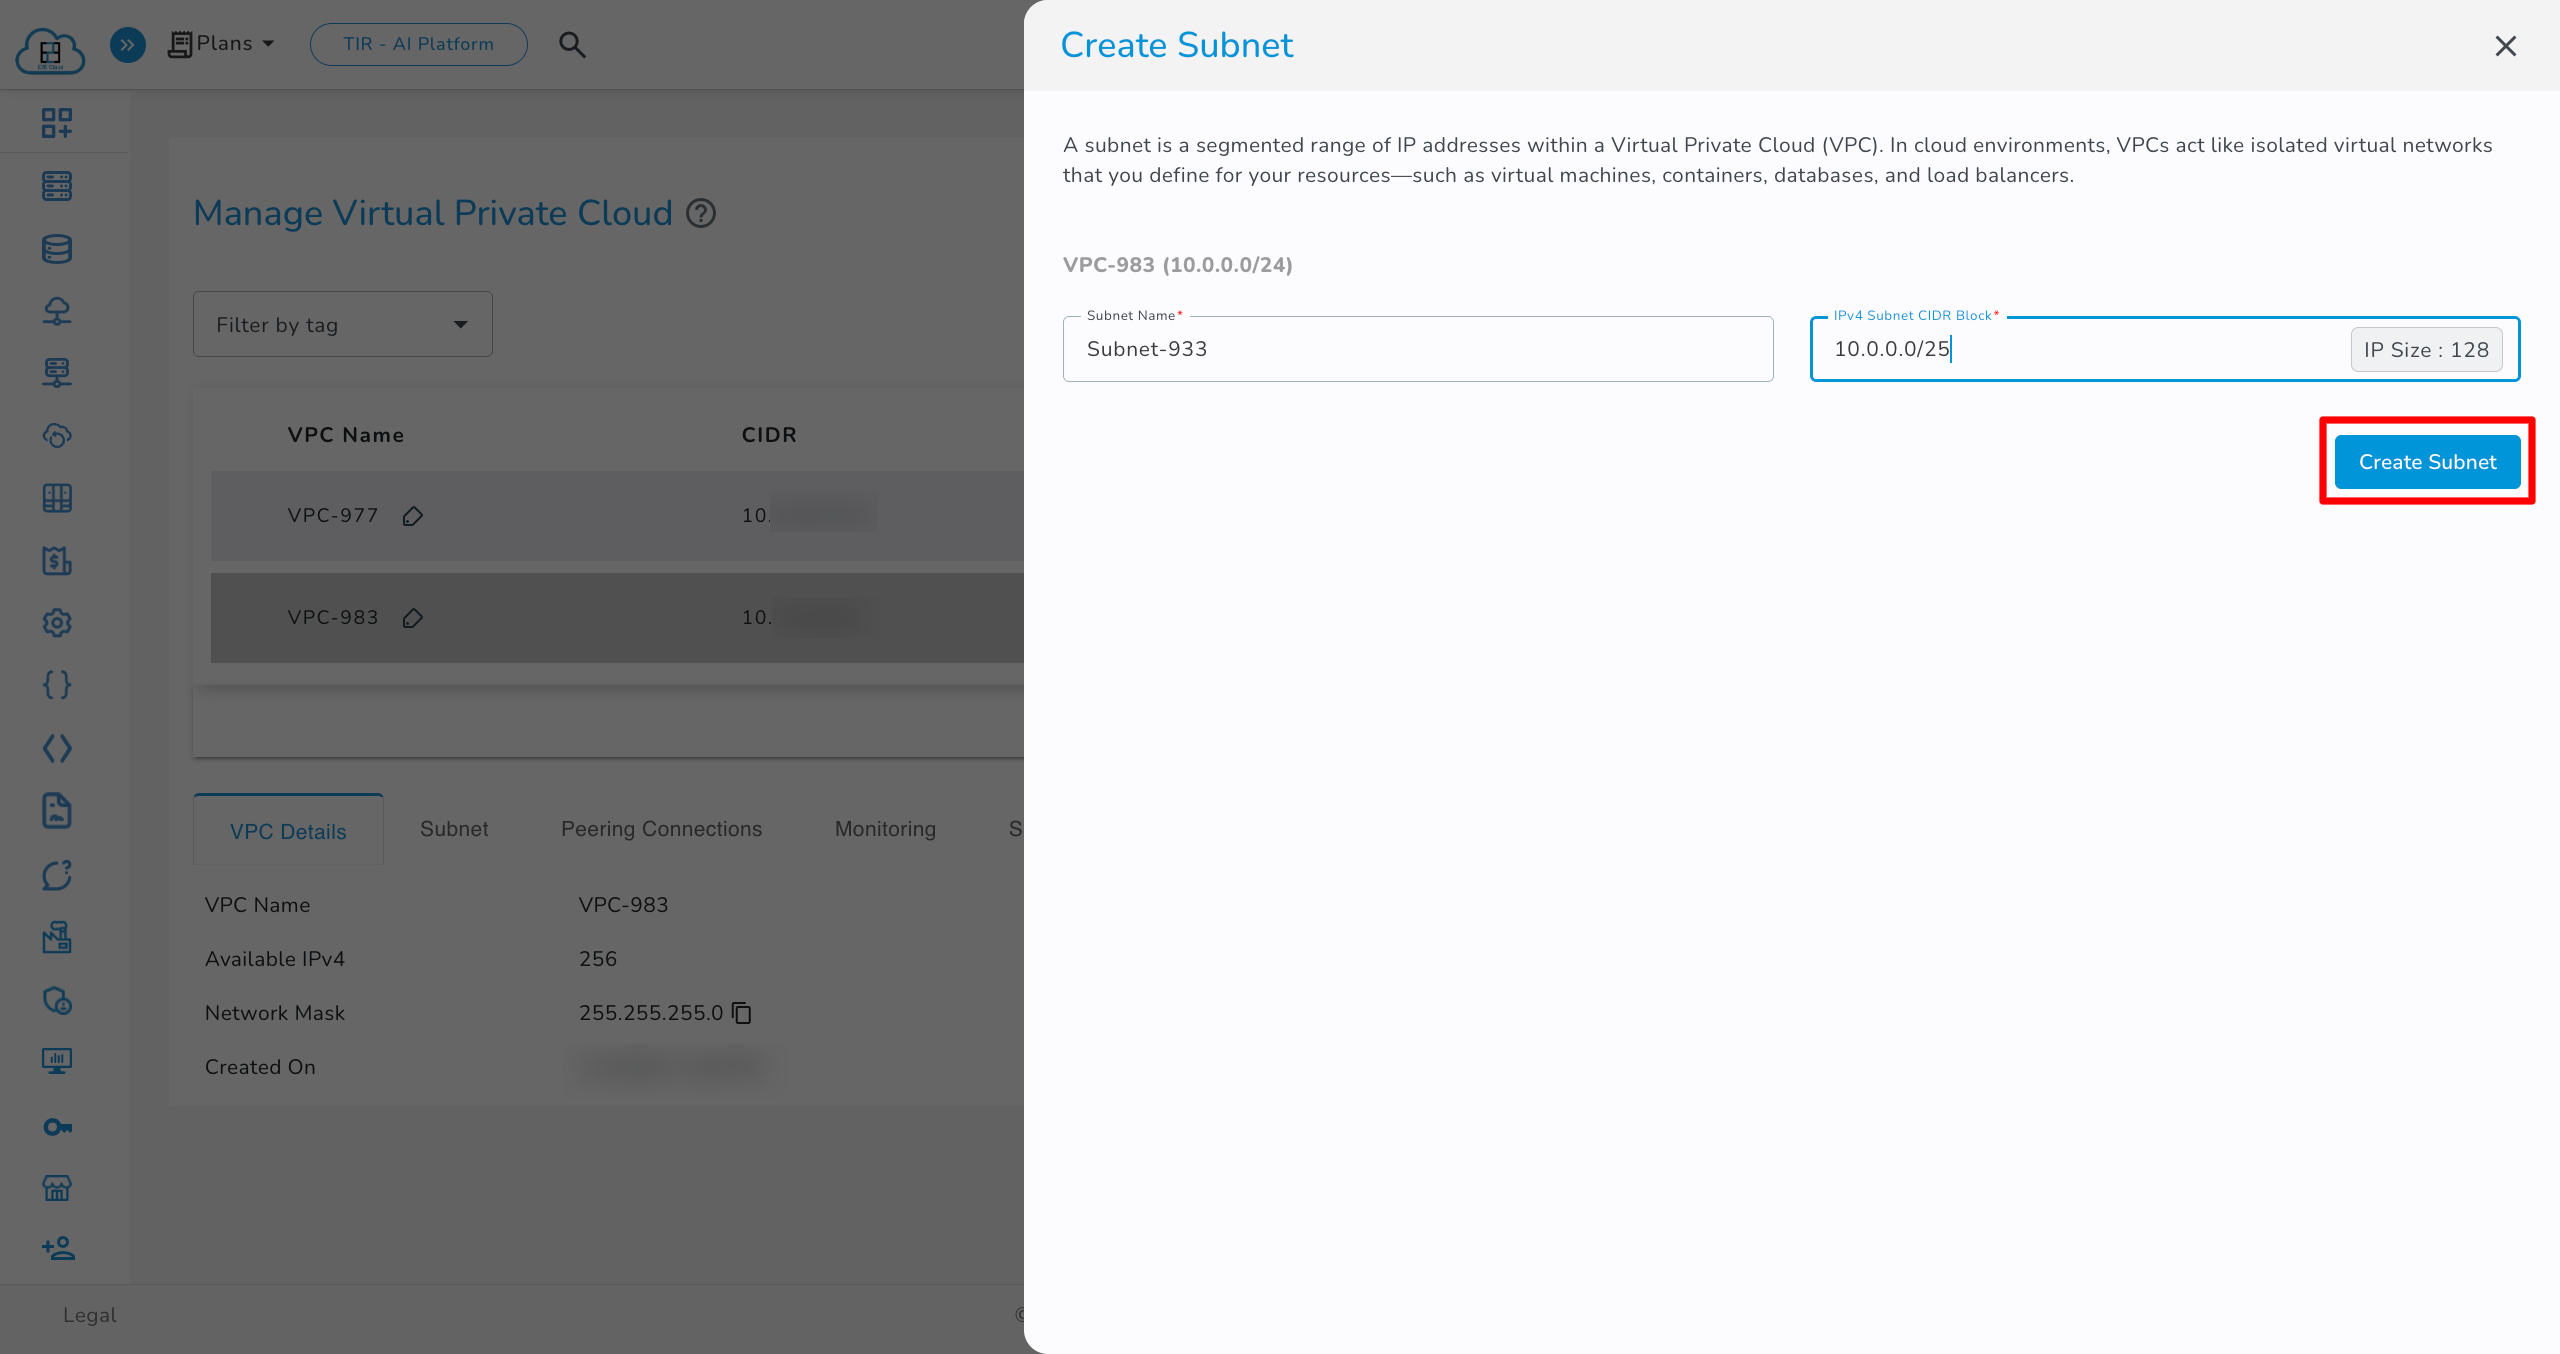
- Once created, the subnet will appear in the Subnet tab for easy access and management.
- To delete a particular subnet, go to action of subnet and click on Delete action.
2. Delete VPC
- Click on the ‘Actions’ button to list out the ‘Delete VPC’ button.
You need to delete all subnets inside a VPC before you can delete the VPC itself.

- Click on the ‘Delete VPC’ button, which opens a popup ‘Delete VPC’. Click on the ‘Delete’ button to remove the VPC.
3. Converting Hourly VPC to Committed Plans
If you've launched VPC on an hourly plan, you can convert them into committed plans to save more. Follow these steps:
- Navigate to the VPC page in your My Account Portal.
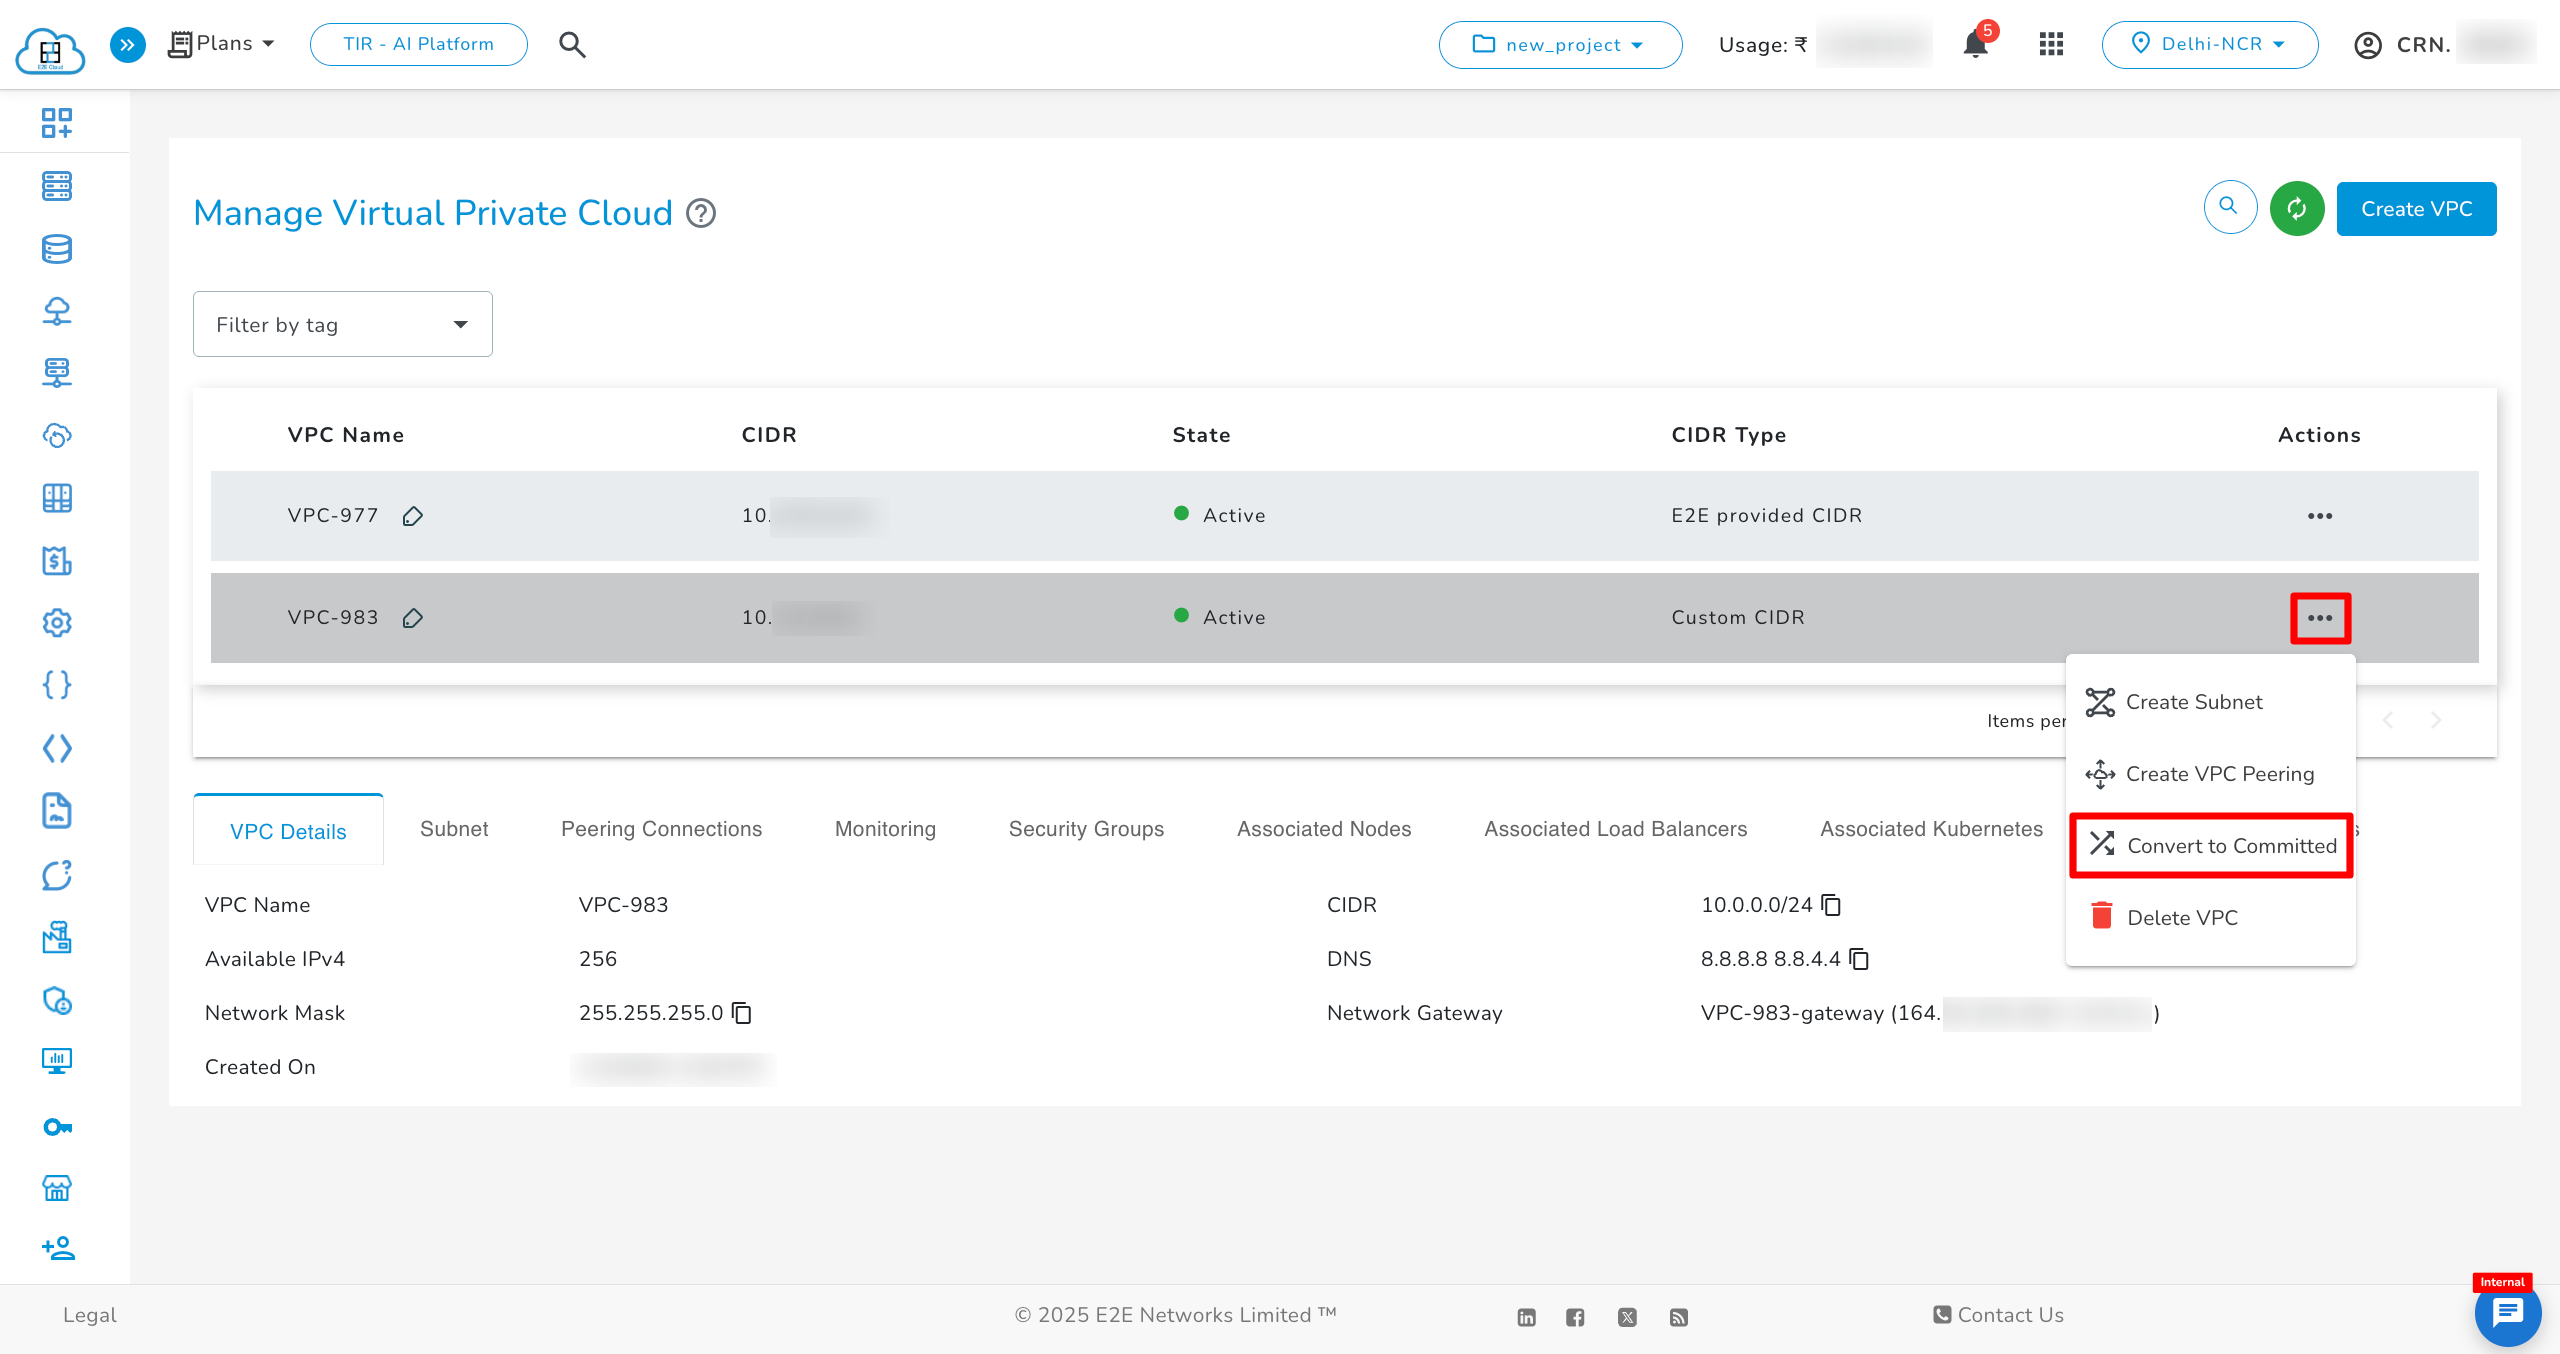
- Select the VPC you wish to convert to a committed plan.
- Click on the Convert to Committed action.
- In the Convert to Committed window, select the desired committed plan from the dropdown list.
- Confirm your acknowledgment by ticking the checkbox.
- Click the Convert button.
Once converted, you’ll receive an email notification confirming the successful update.
Managing Committed VPC Settings
After launching a VPC with a committed plan, you can manage its settings as needed. Follow these steps to access and update committed VPC settings:
- Go to the VPC page in your My Account Portal.
- Select the VPC with the committed plan.
- Click on the Committed VPC Settings action.
- In the settings window, update the renewal or billing preferences.
Renewal Options
Committed VPC plans provide the following renewal options:
Auto-Renewal
The default option for committed VPC plans. Once the committed period ends, the plan will auto-renew with the same settings. You can choose a different plan, but the changes will take effect only after the current committed period ends.
Hourly Billing
If selected, the VPC will switch to hourly billing after the committed period ends, providing flexibility to terminate or modify the VPC without restrictions.
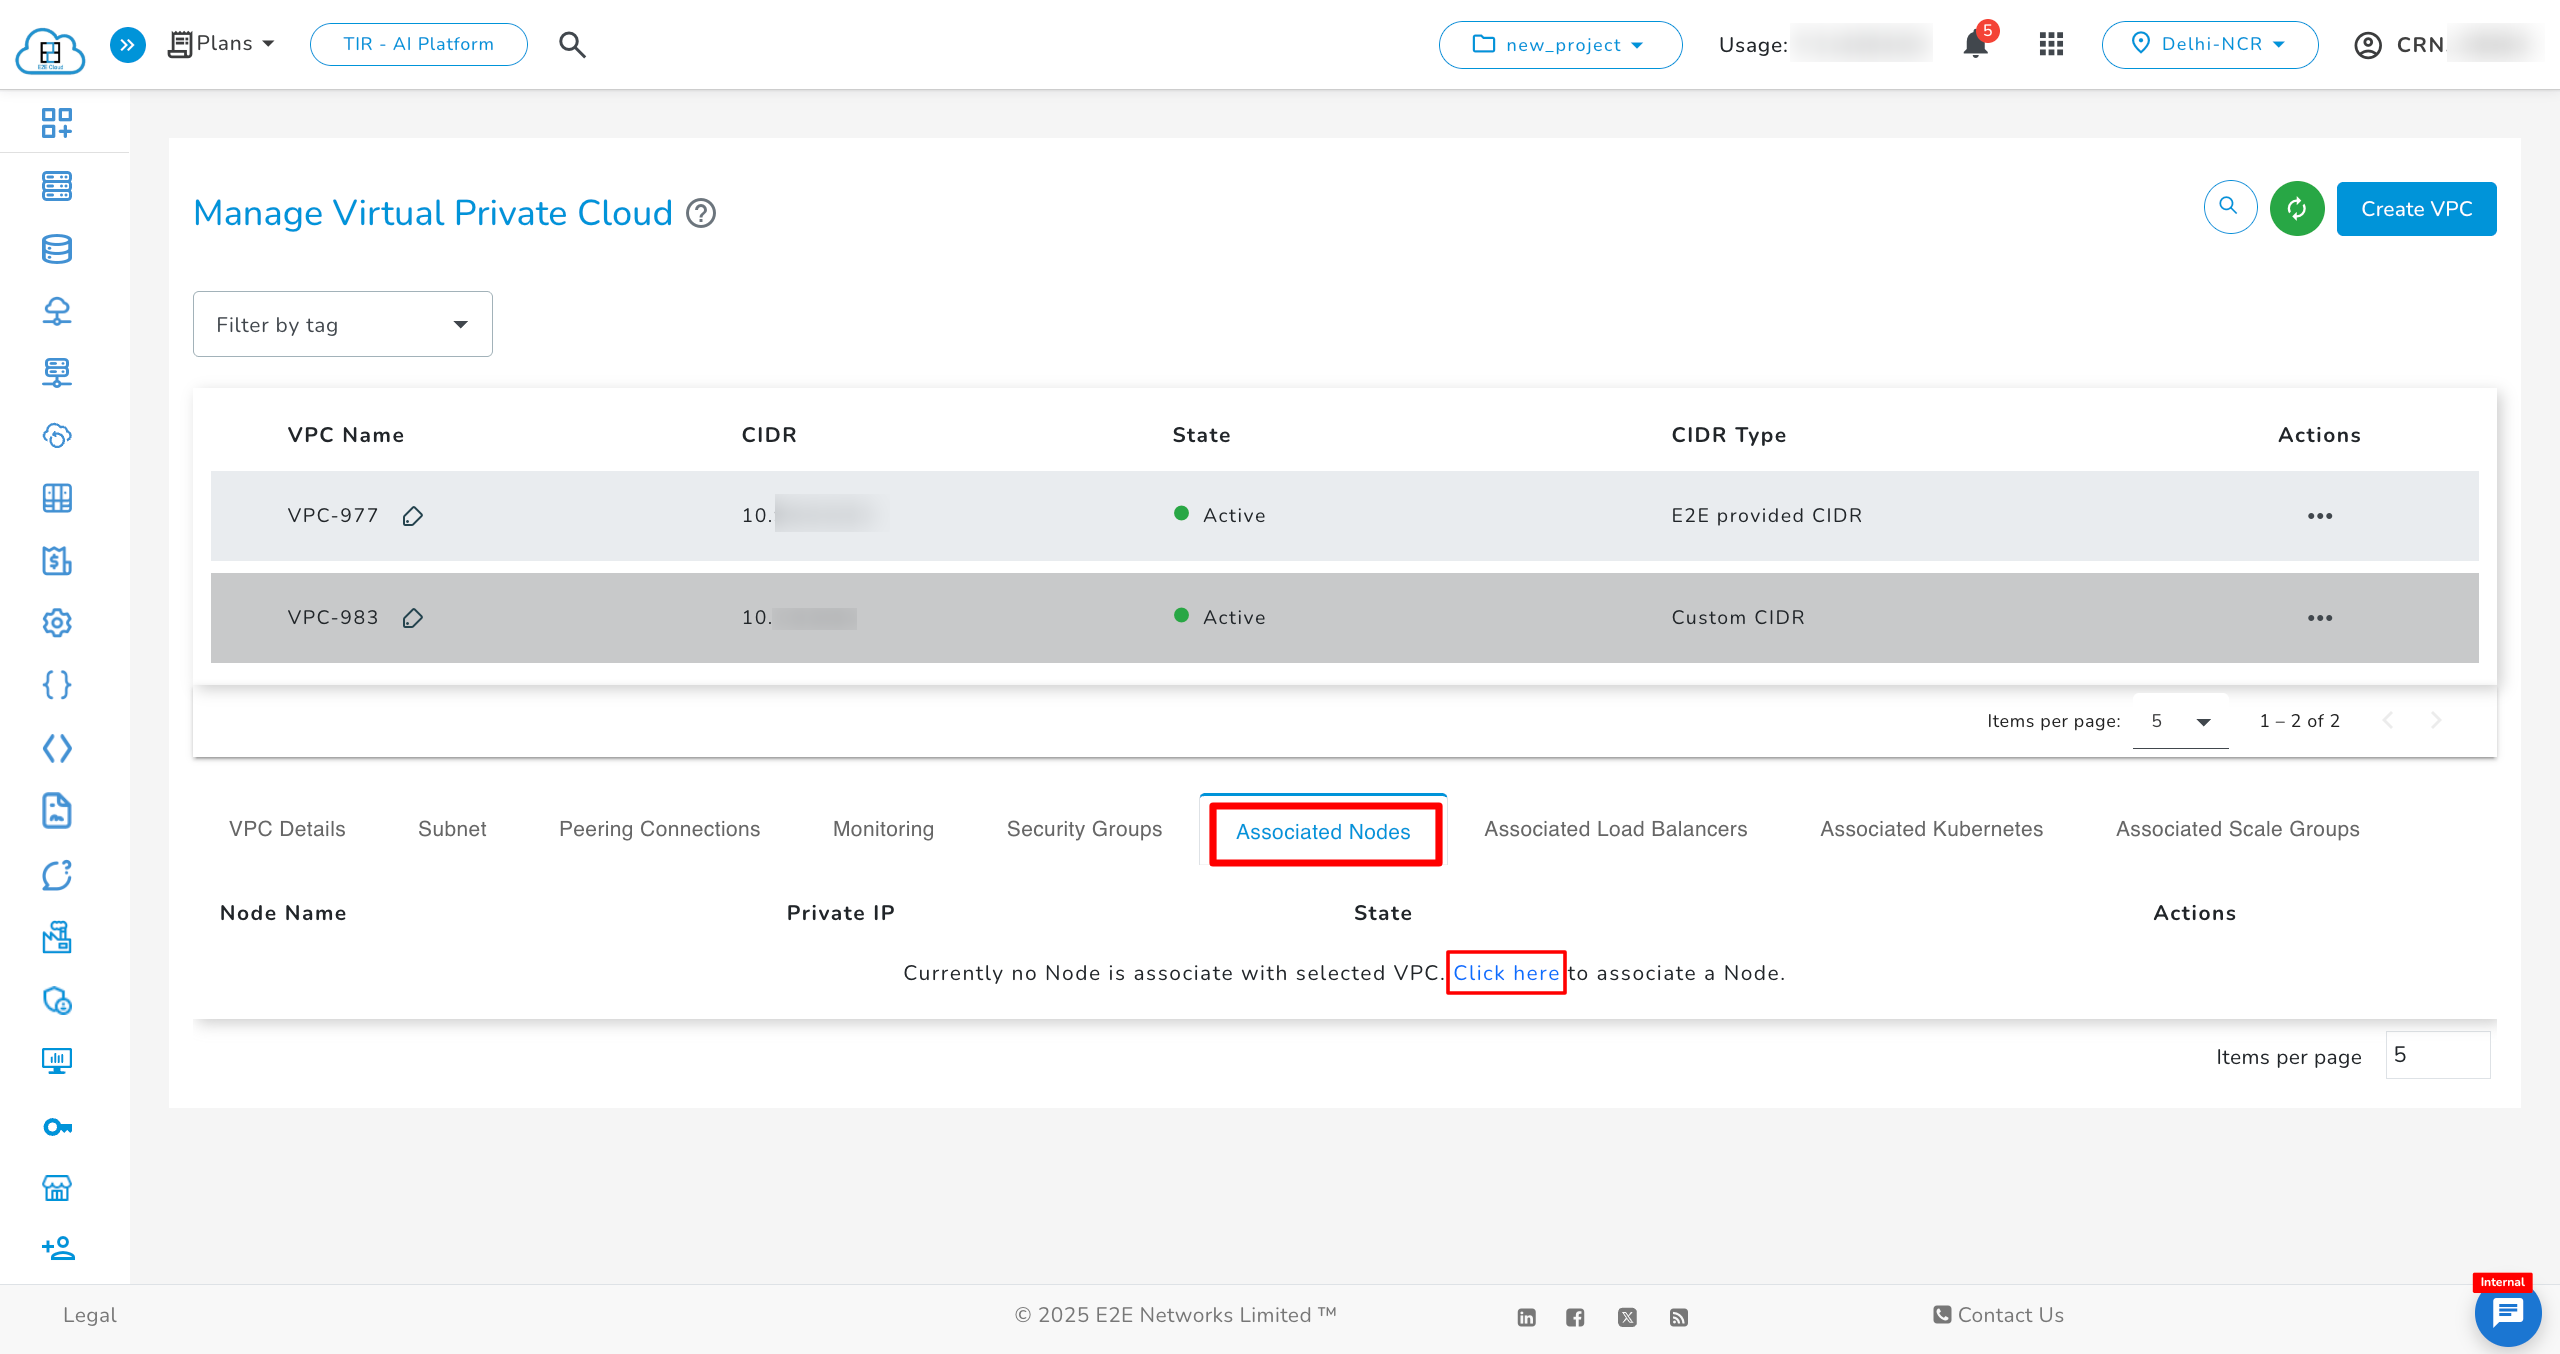
Associated Node With VPC
The subnet feature is currently supported only for nodes.
-
Click on the ‘Associated node Details’ tab to associate a Node.
-
Click on the ‘Click here’ link to associate a Node. It will redirect to the ‘Manage Node’ page.
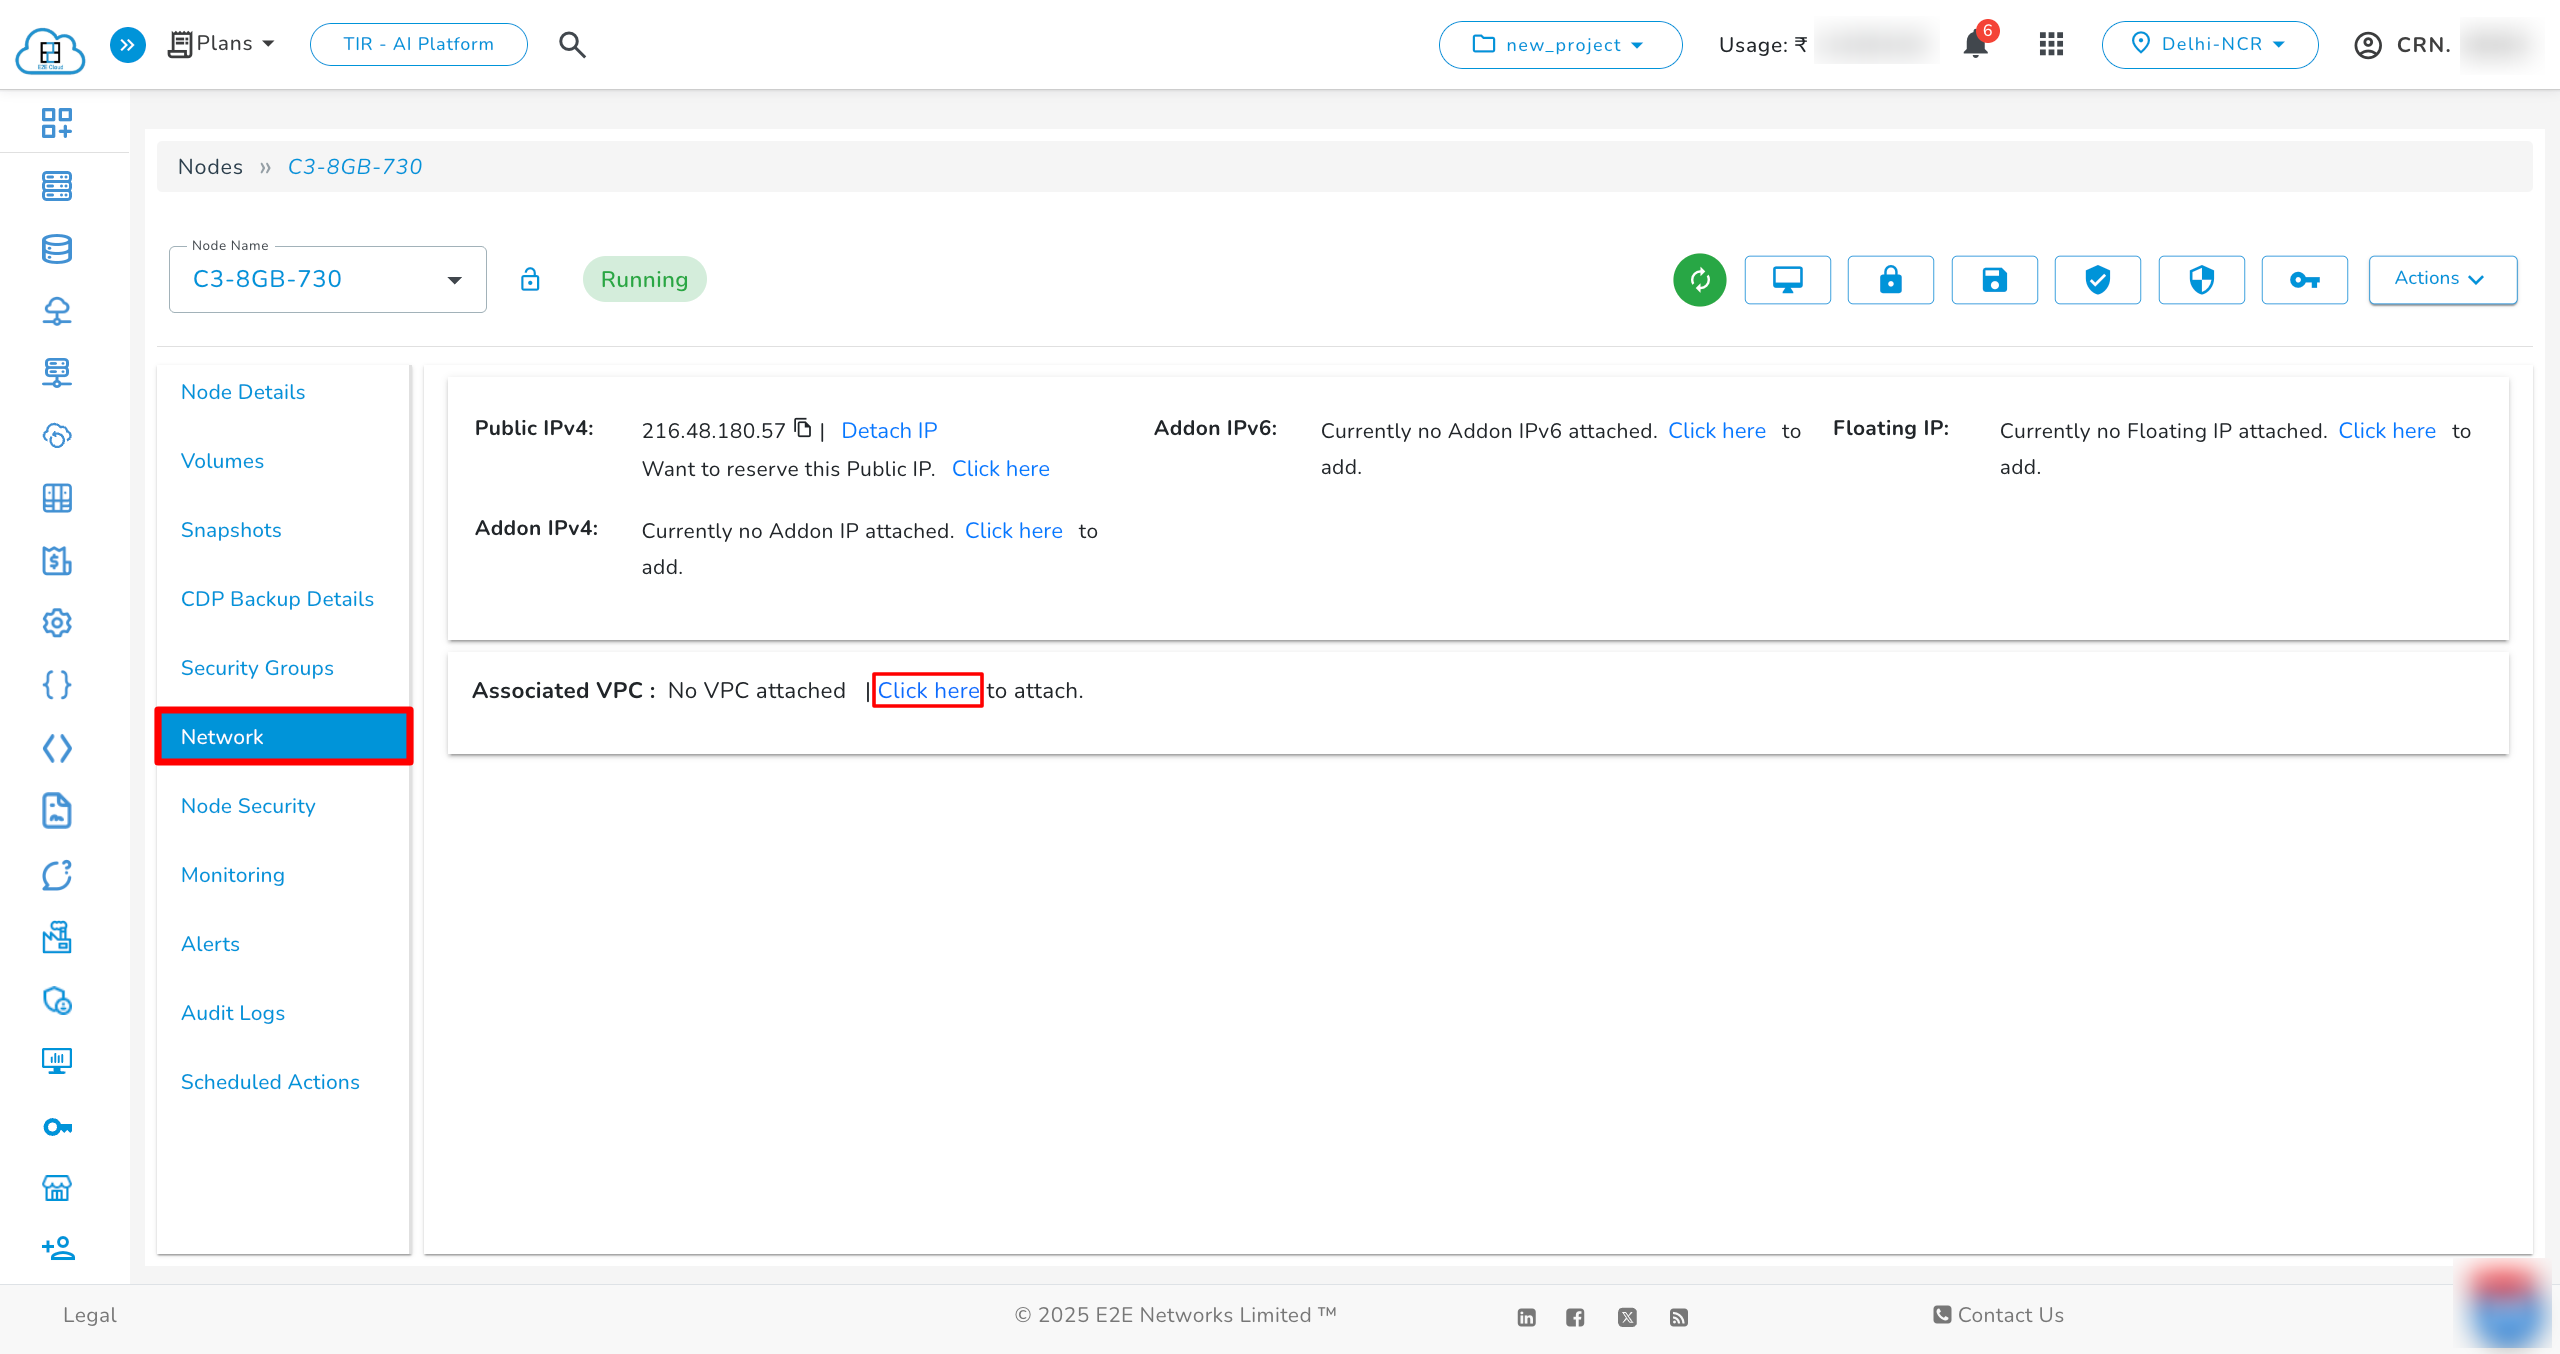
- Click on the ‘Network’ tab to associate VPC with Node and click on the ‘Click here’ link to associate VPC with Node.
- If a Custom VPC is being attached, the user can select a specific subnet within that VPC. Additionally, a custom IP from the chosen subnet can also be specified.
- If an E2E-Provided VPC is being attached, subnet selection is not available. Only the VPC itself can be selected and attached to the node.
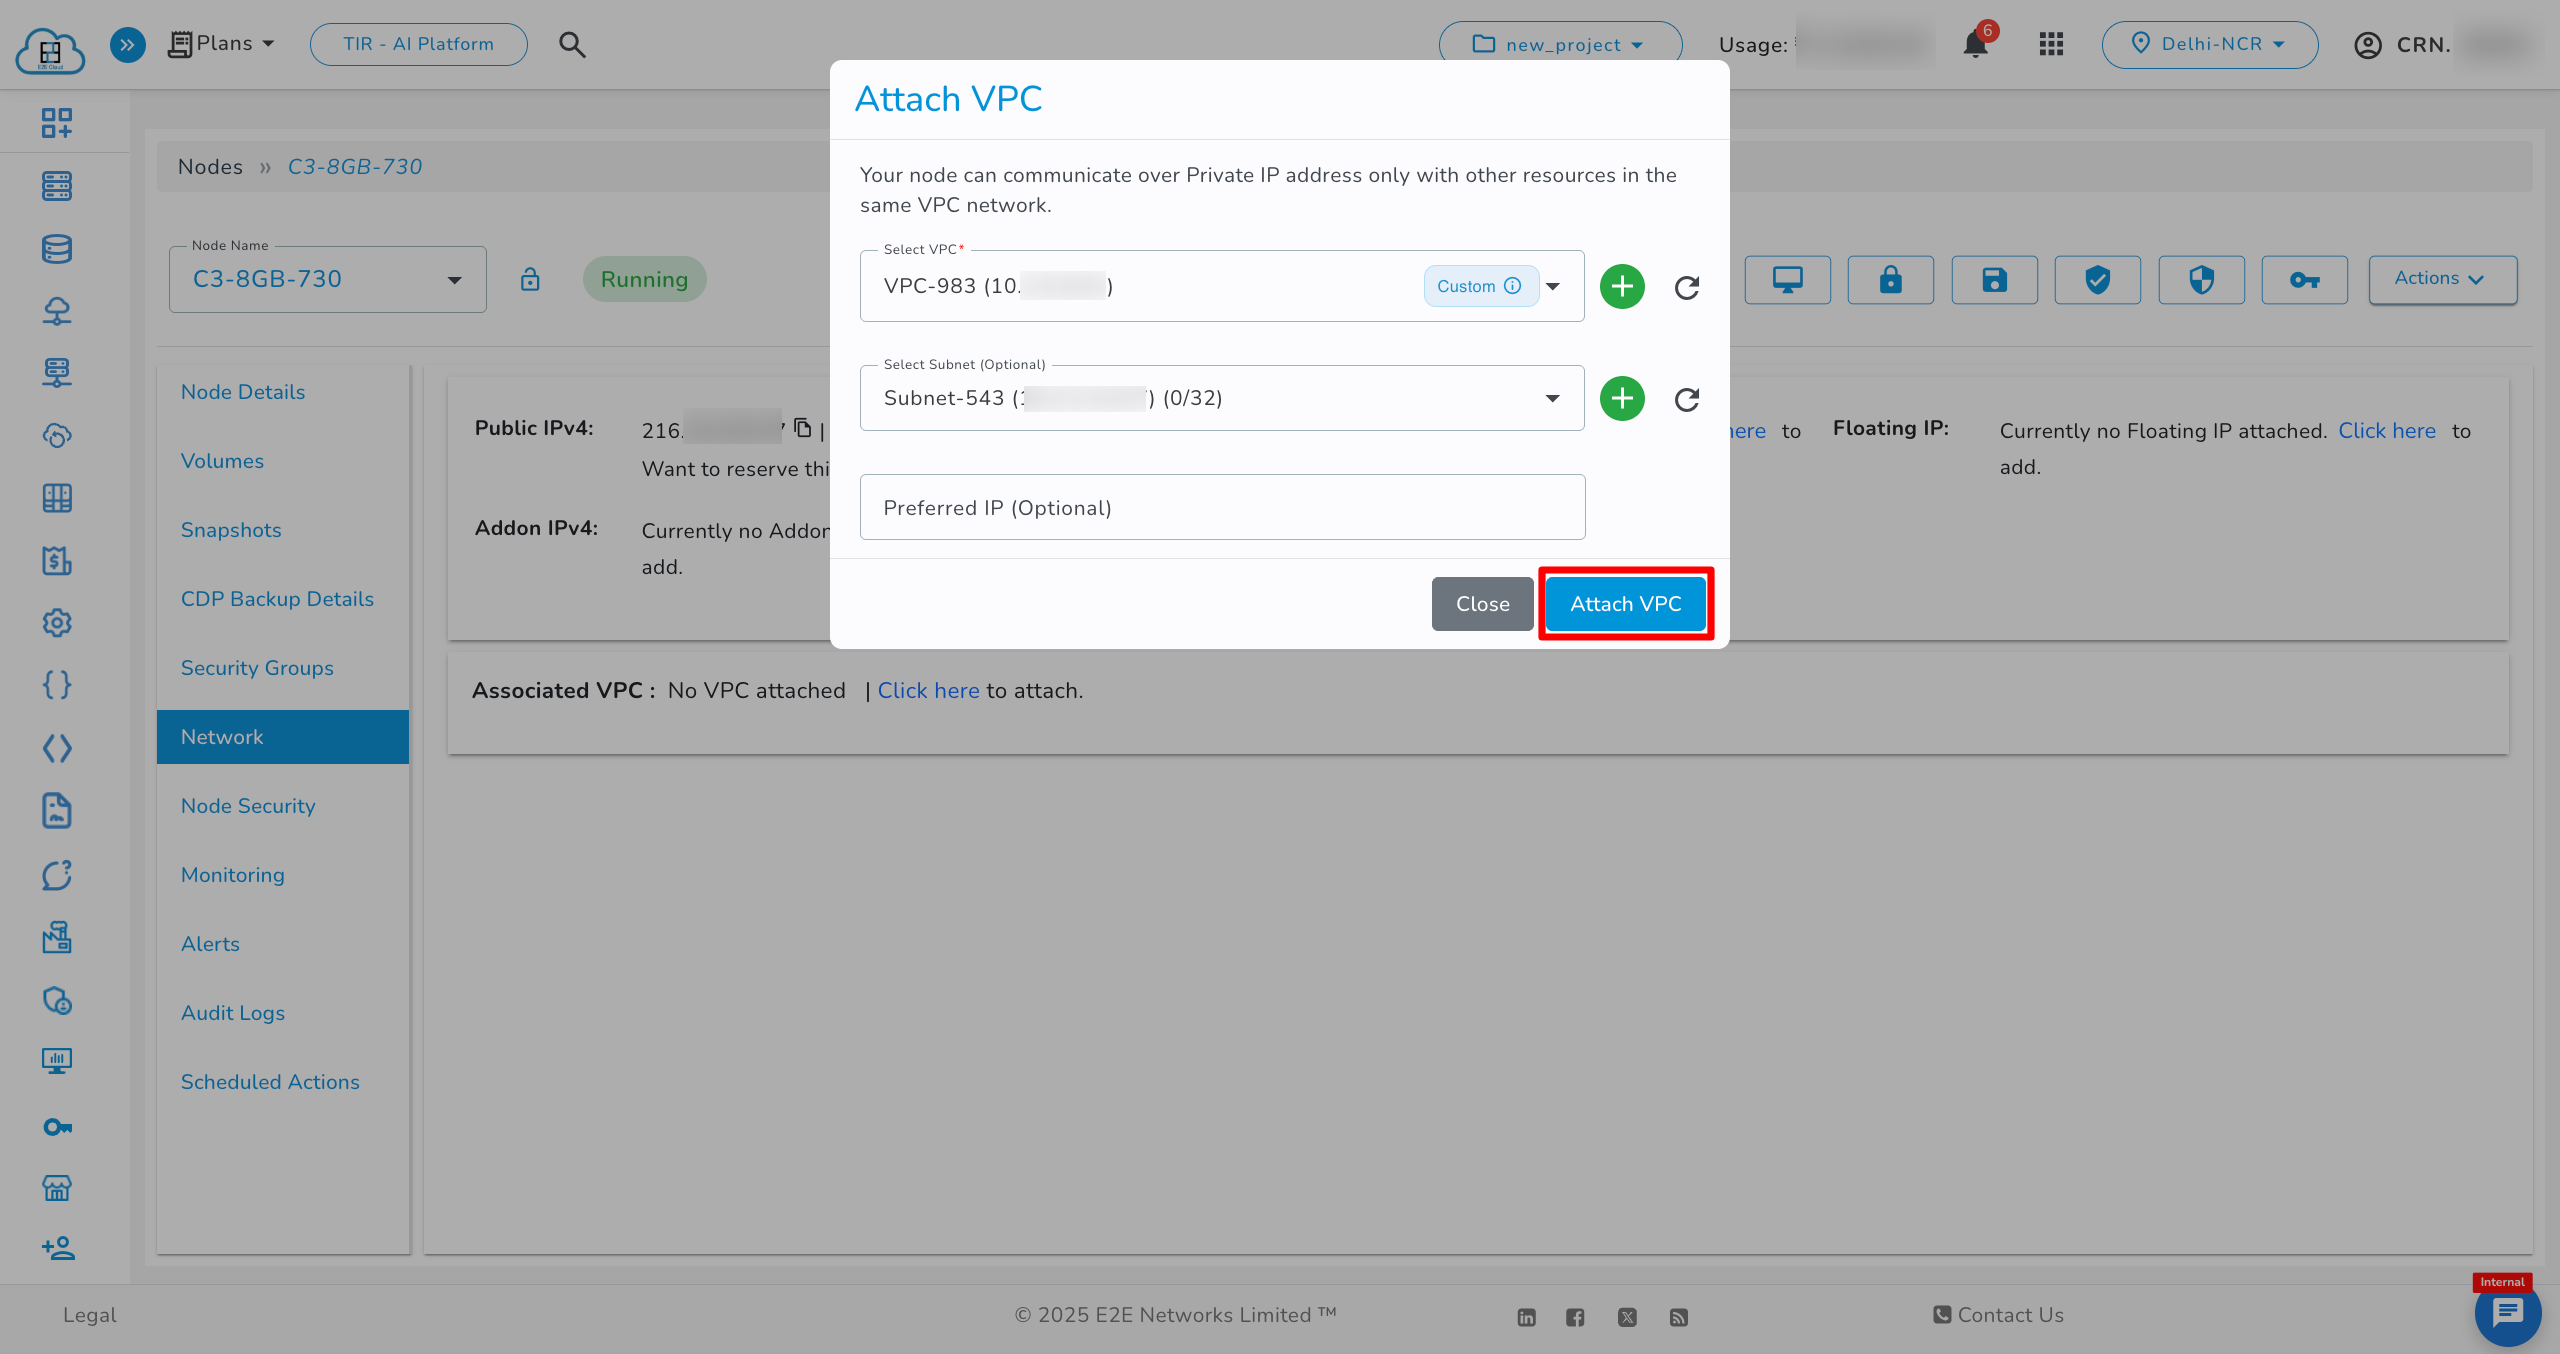
- The selected VPC or subnet will then be displayed in the Network section.
Associated Node - Actions
- Click on the ‘Actions’ button to list out the ‘Access Console’ button.
-
Click on ‘Access Console’; the user can access the node on the console.
-
Click on the ‘Actions’ button to list out the ‘View Details’ button.
-
Click on ‘View Details’; the user can redirect to the ‘Manage Node’ list and can see node details.
Adding Node
- Click on the ‘Compute’ sub-menu under ‘Products’.
- Click on the ‘Add New Node’ to redirect to the ‘Create Compute Node’ page.
Select any plan and click on the ‘Create’ button to redirect to the ‘Create Compute Node’ page.
- Select ‘Use VPC’ under the ‘Network’ section while creating nodes.
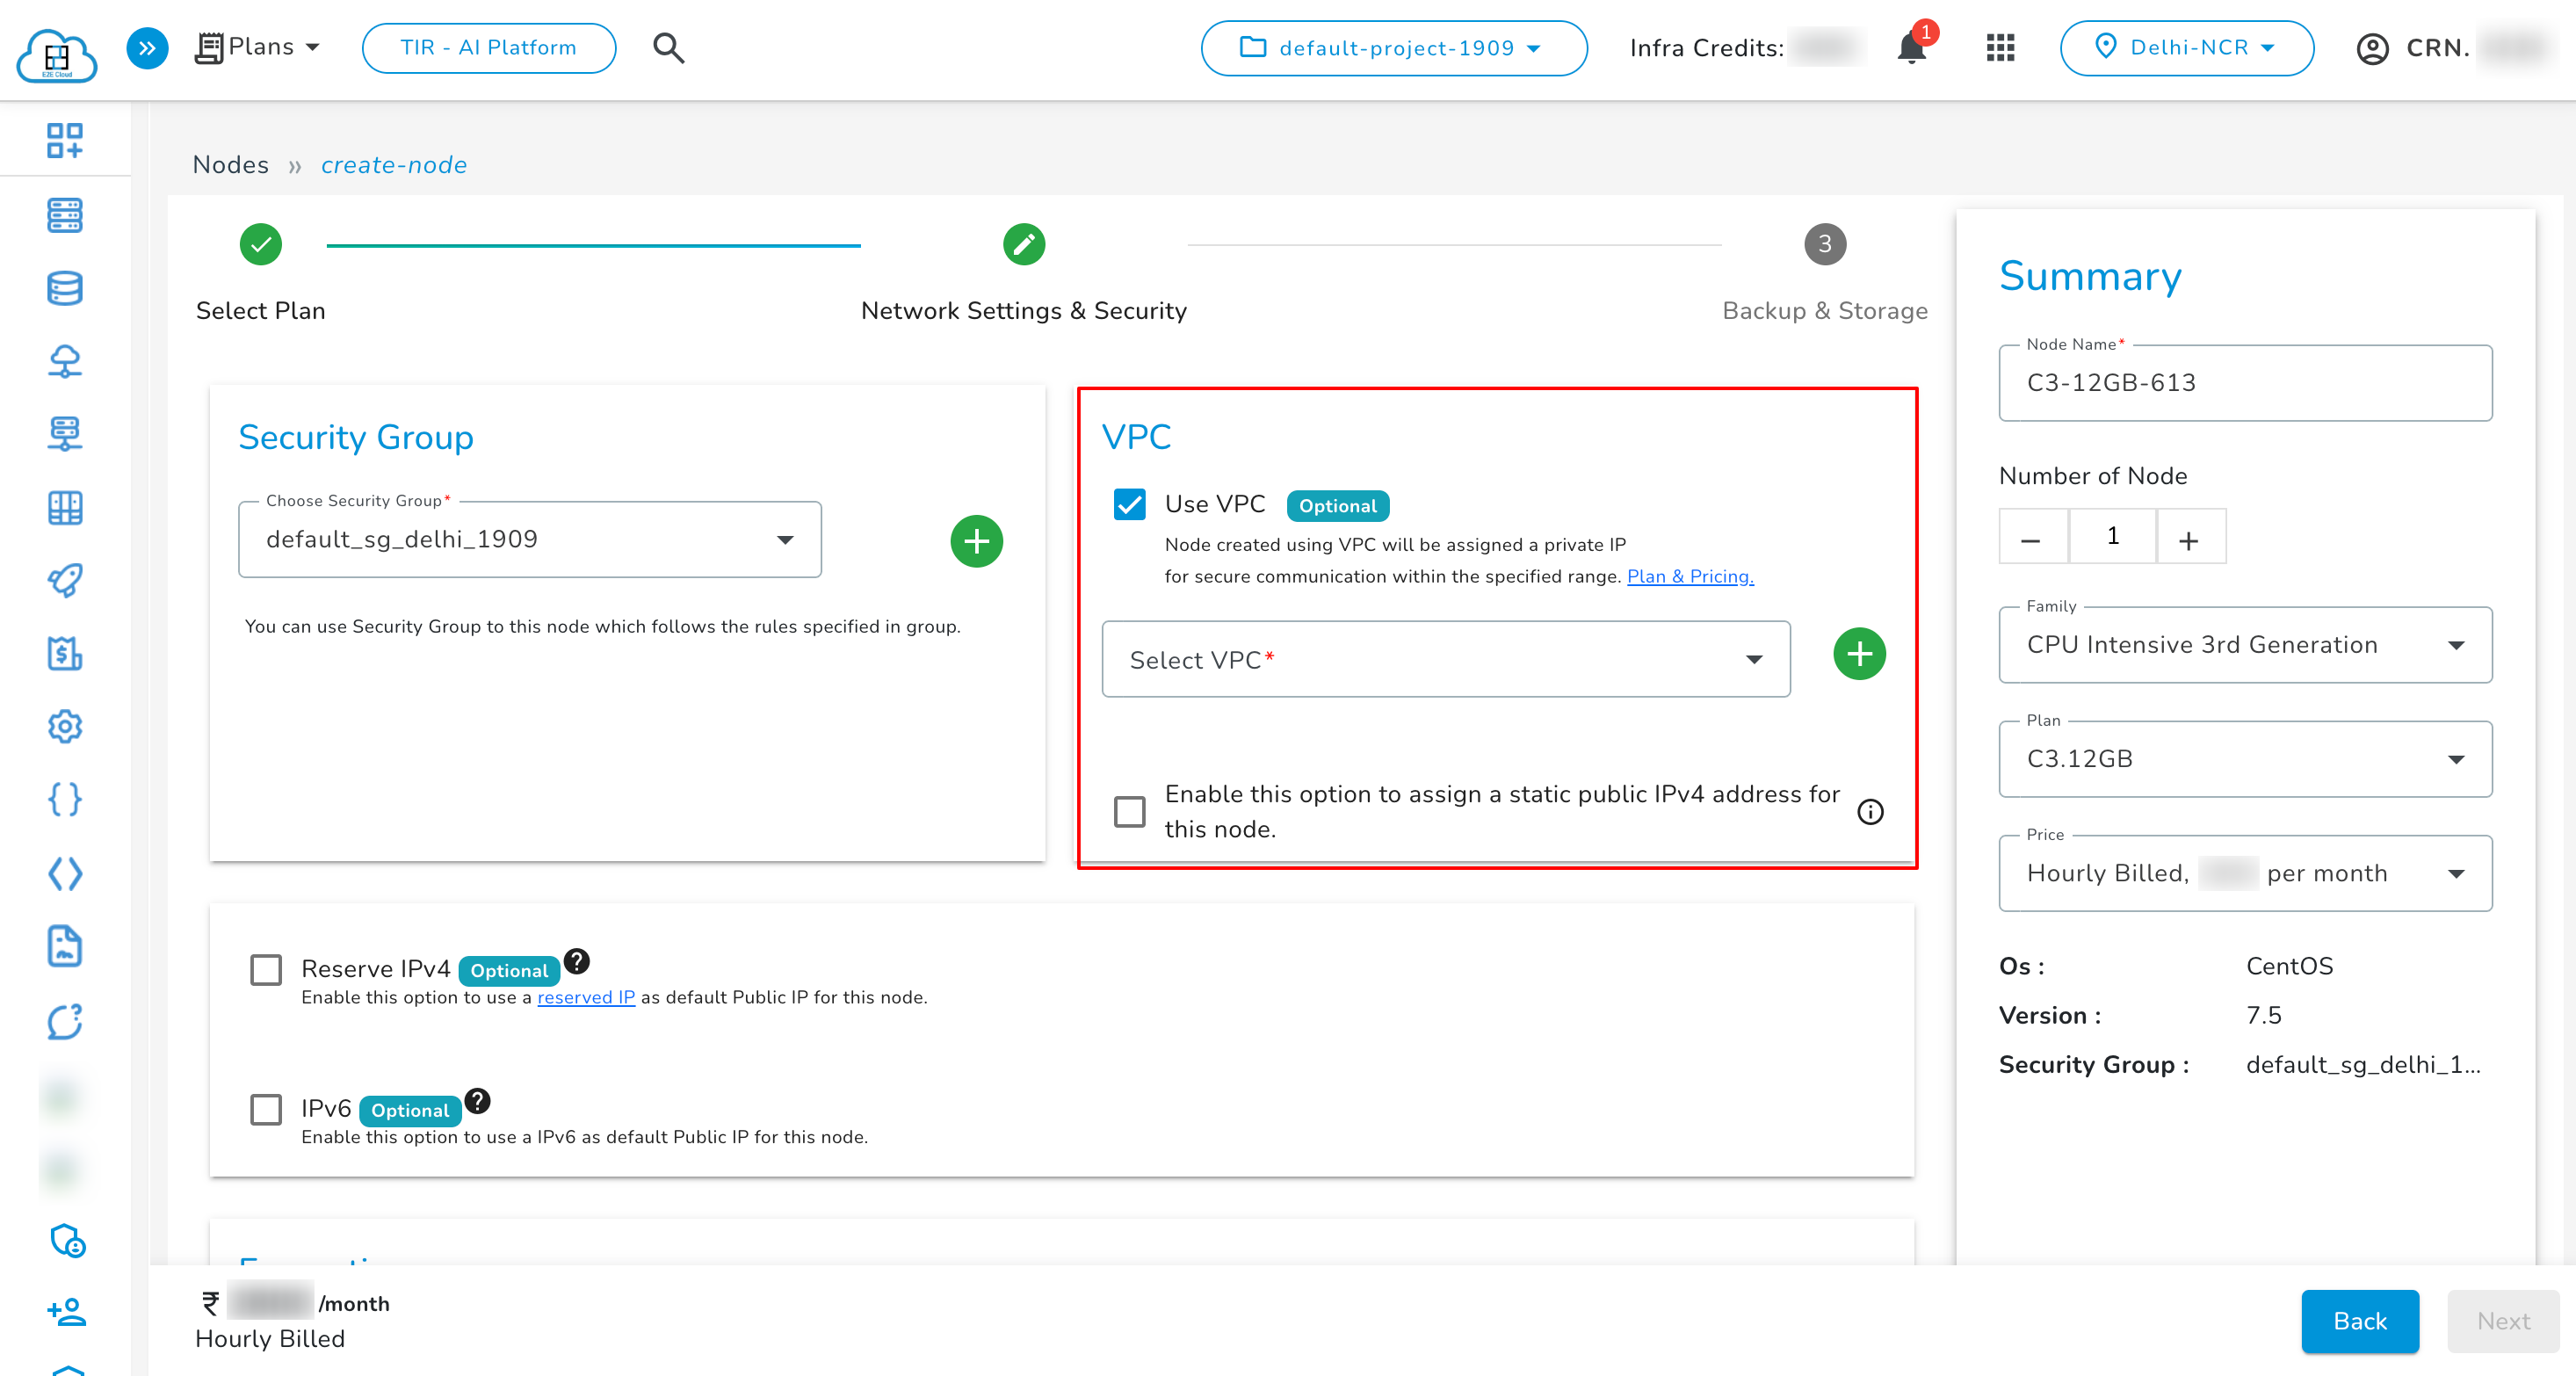
- The user can also select a subnet (this field is optional). It will be visible only if the selected VPC uses a Custom CIDR.

- The user can create a new VPC using the "Create New VPC" button and can also add a new subnet under the selected VPC.
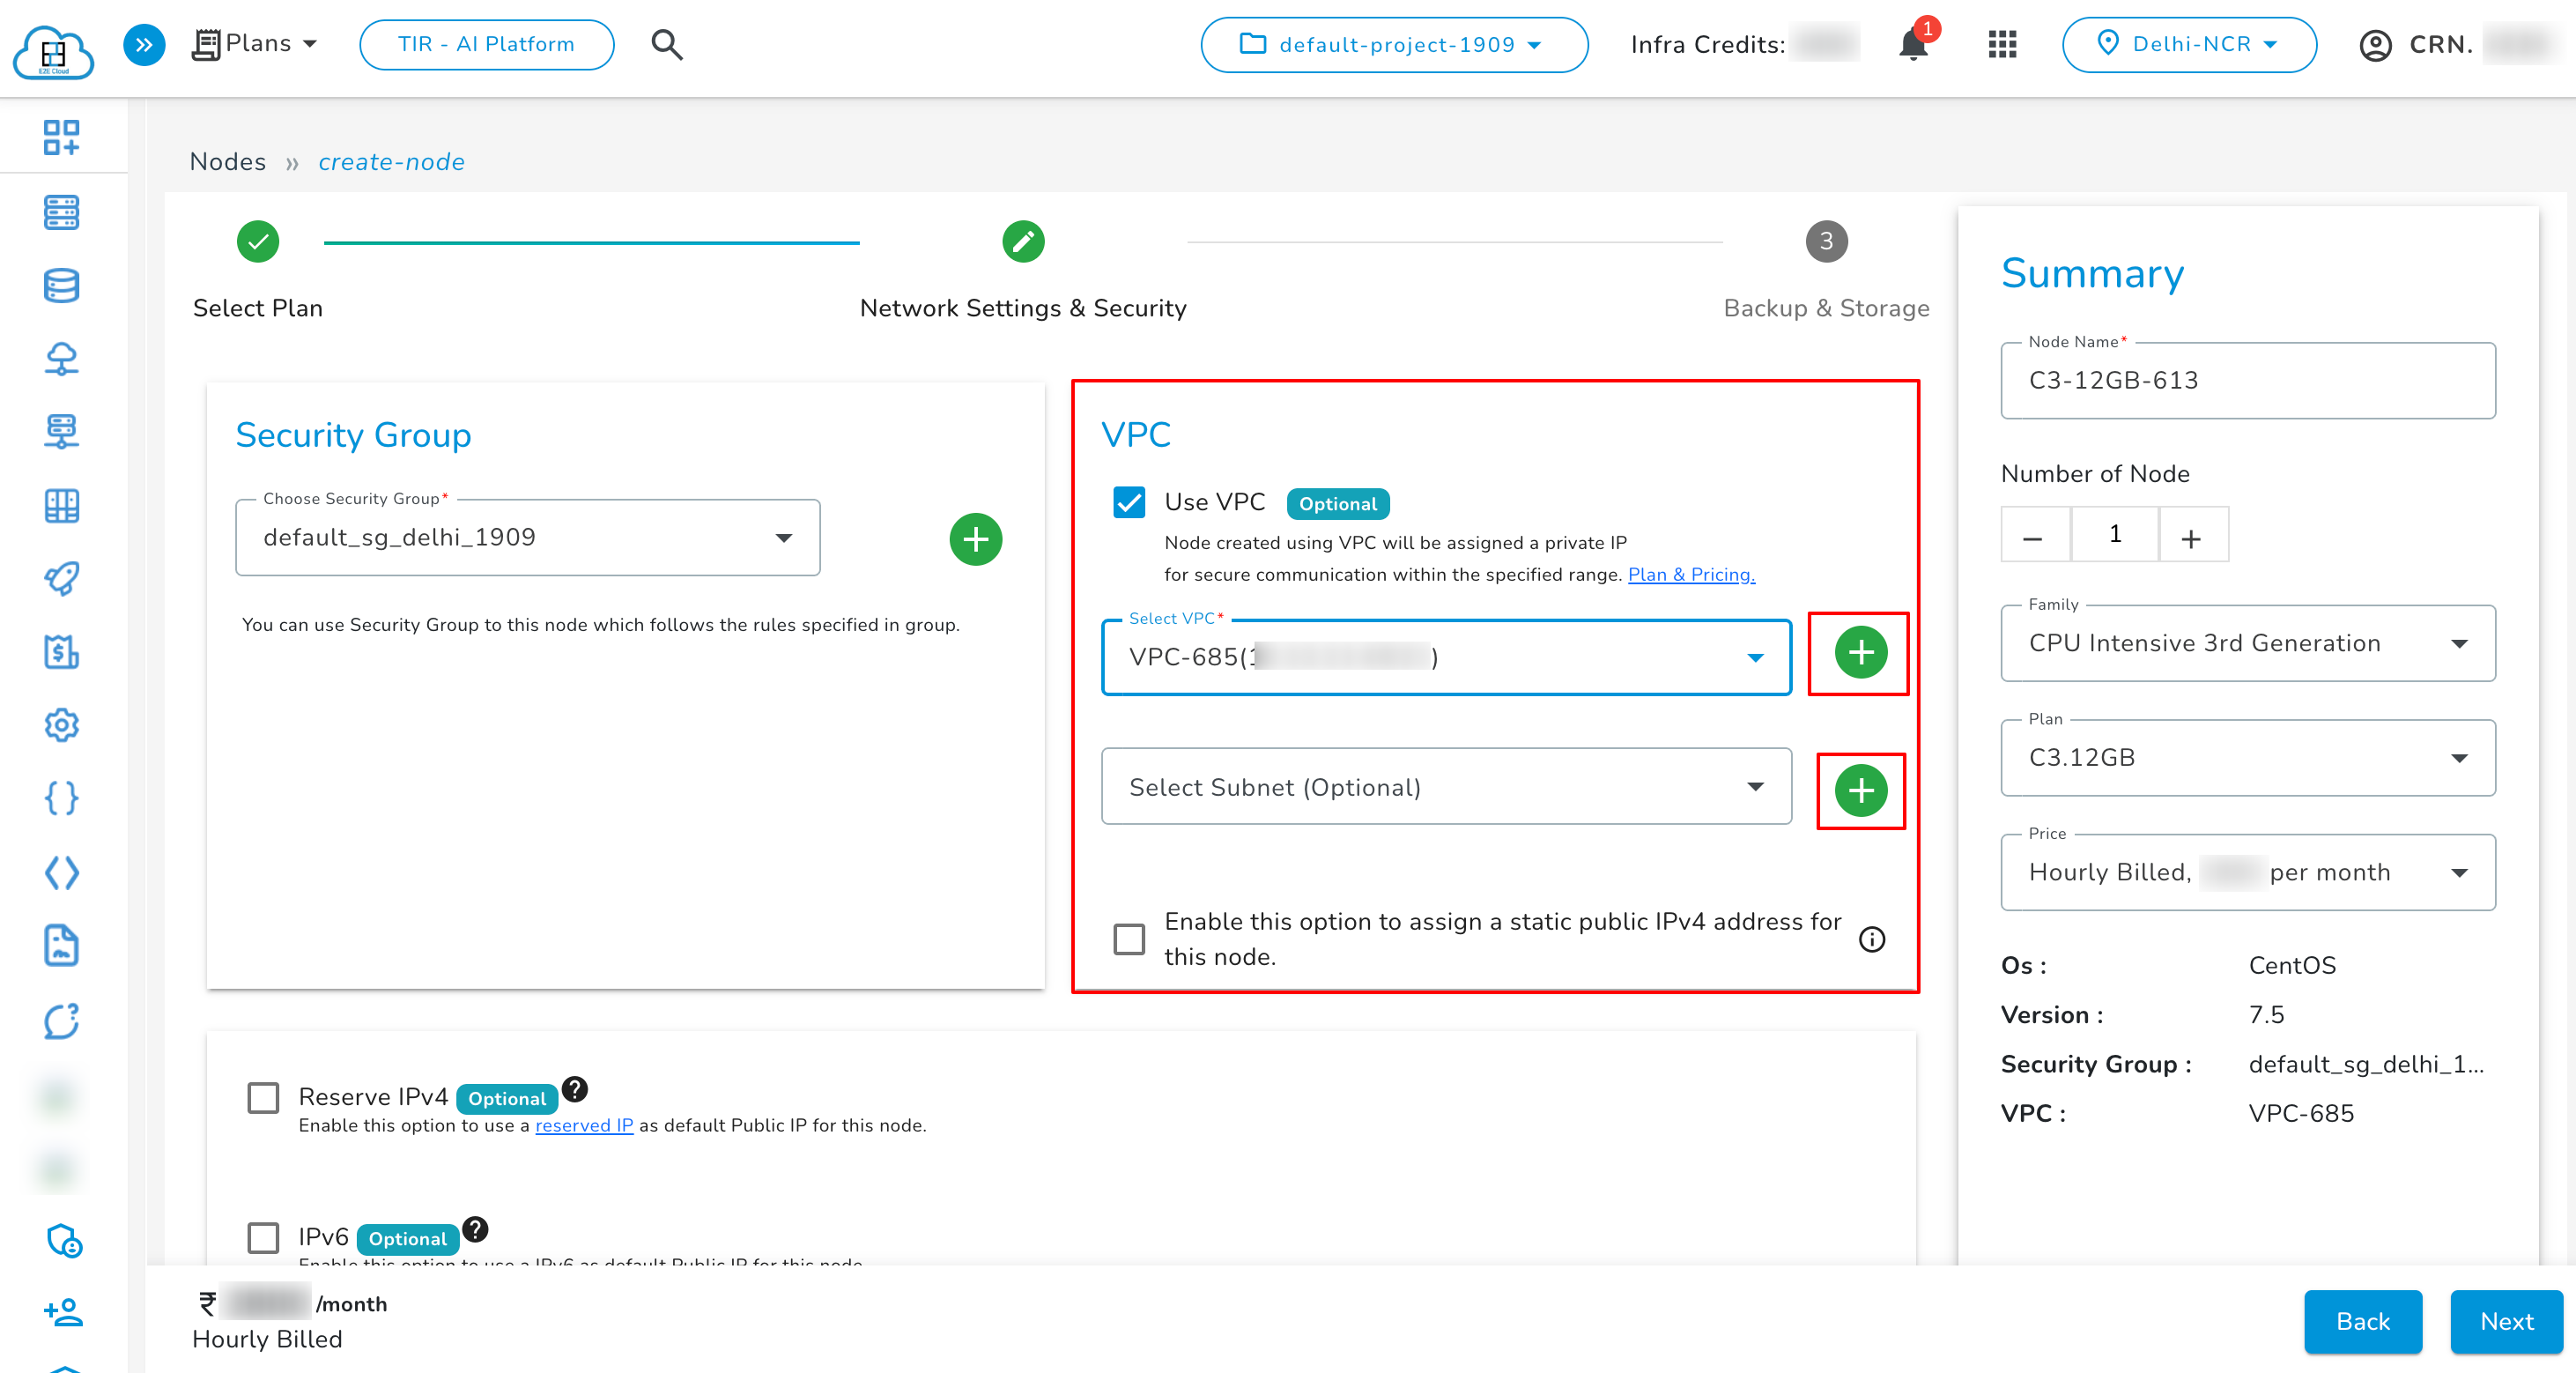
- Click on ‘Create My Node’ and the VPC is attached with the new node and visible in the ‘Network’ tab.
- Click on ‘Detach VPC’ for detaching VPC from the Node.
VPC & Subnet – Frequently Asked Questions
What is a VPC?
A Virtual Private Cloud (VPC) is a private network in the cloud that allows you to launch and manage resources like servers, databases, and other services in an isolated environment.
Why can’t I use the first and last subnet in a VPC?
The first 4 and last 4 IP addresses of the entire VPC CIDR range are reserved for networking purposes (e.g., network ID, broadcast address).
As a result, the first and last subnet do not have the full range of usable IPs and are generally considered unsuitable for resource allocation.
What will happen if I try to use a reserved (first or last) subnet?
You might encounter errors. These subnets may not provide enough usable IPs for your resources.
I’m creating a subnet in my VPC, and even though the Subnet CIDR is valid, I’m still getting an “IP not available” error. Why?
Even if the subnet is valid, this error may appear when one or more IP addresses within the subnet are already in use by existing resources.
Make sure that no other services are using IPs from that subnet.
Can I delete a VPC while subnets still exist in it?
No — you can’t delete a VPC until you manually delete each subnet inside it. VPC deletion is blocked until all its associated subnets are removed.
How do I divide a VPC into smaller subnets?
You can split a VPC's CIDR block into smaller subnets by subnetting. For example:
- VPC CIDR:
10.10.0.0/23 - Dividing into
/25subnets results in:10.10.0.0/2510.10.0.128/2510.10.1.0/2510.10.1.128/25
Subnets that can be created are:
10.10.0.128/25and10.10.1.0/25
Avoid using10.10.0.0/25(first) and10.10.1.128/25(last) due to reserved IPs.