Security Groups
Overview
A Security Group is like a virtual firewall that controls the flow of traffic going to and coming from your virtual machines. It allows or blocks traffic based on rules that you define. When you create resources such as nodes, load balancers, autoscaling groups, or Kubernetes clusters, you can attach a Security Group to them. The Security Group then decides which types of traffic are allowed, based on protocol, port numbers, and source IP addresses and blocks everything else. This ensures that only trusted traffic can access your resources.
How to Create a Security Group
Follow the steps below to create and configure a new Security Group:
-
Access the Dashboard Log in to your MyAccount portal using your credentials. Upon successful authentication, you will be directed to the main dashboard.
-
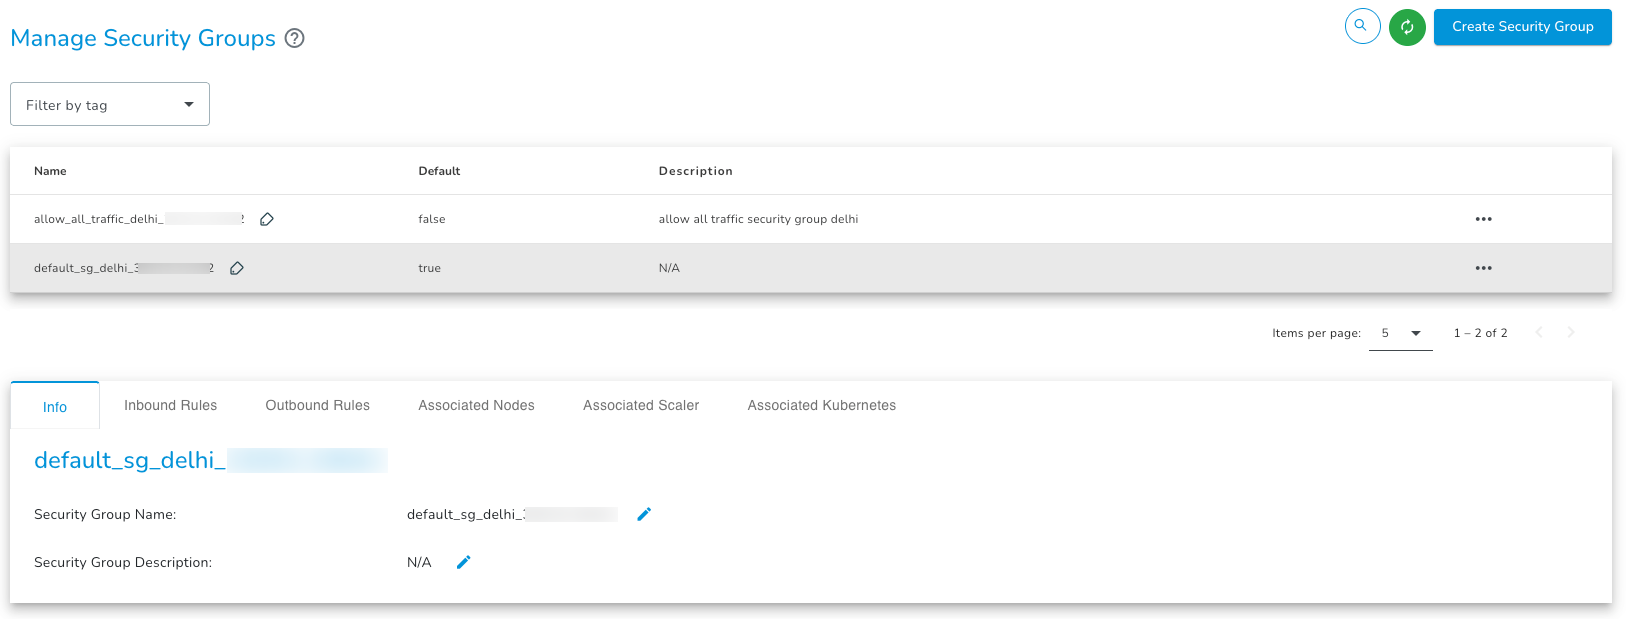
Navigate to Security Groups From the left navigation sidebar, expand the Network section and click Security Groups. You will be redirected to the Manage Security Groups page. All the created security groups will be displayed here.
-
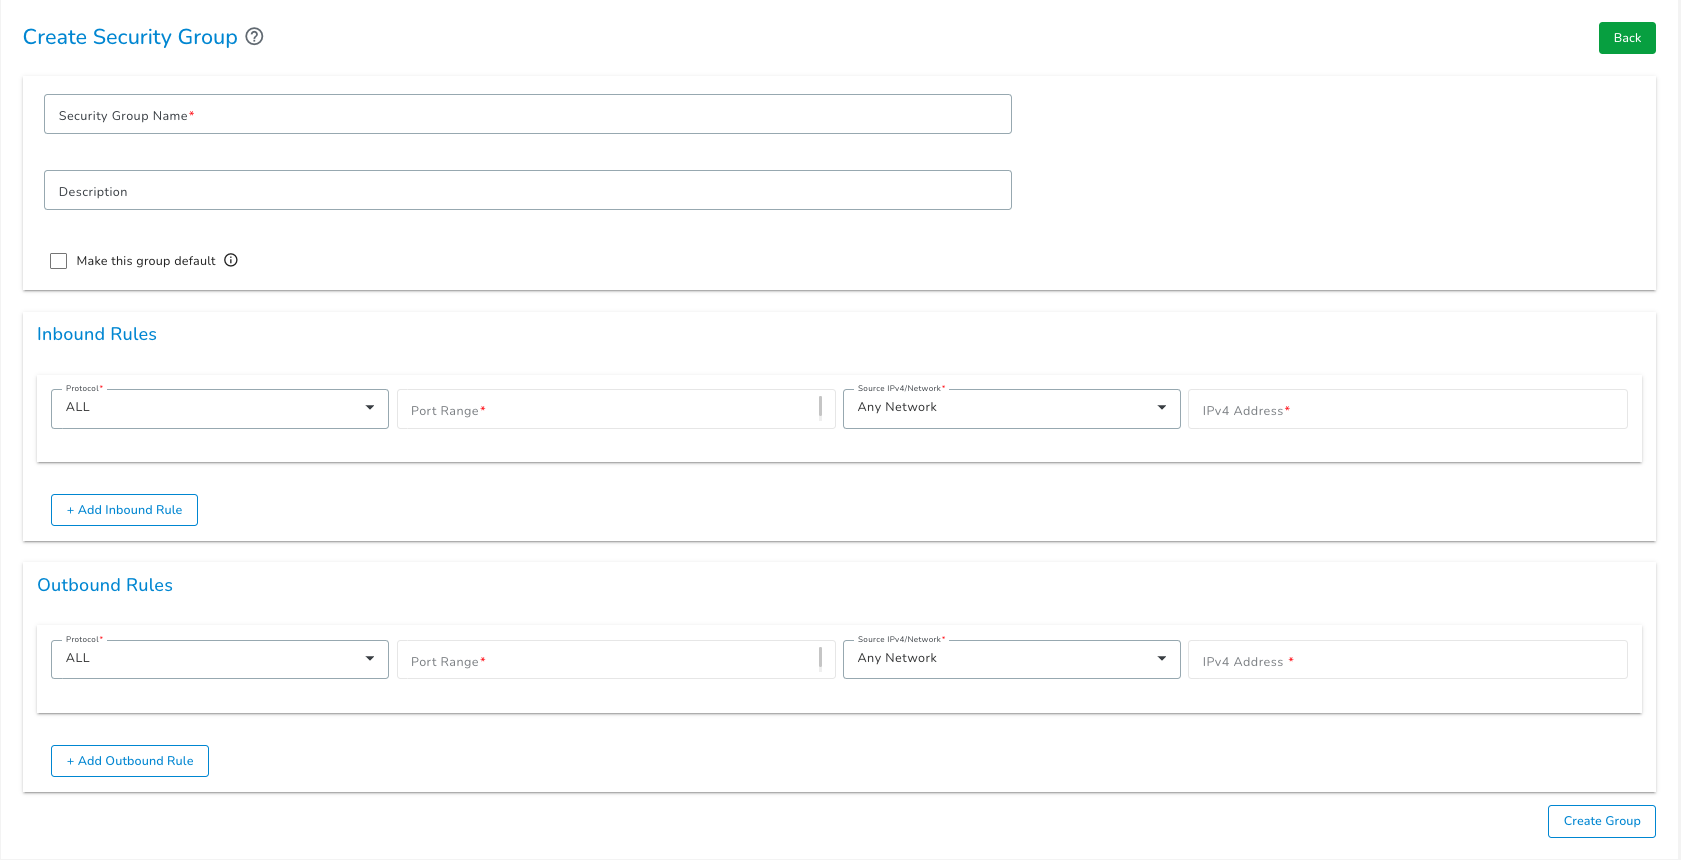
Initiate Creation Click the Create Security Group button to open the Create Security Group page.
-
Configure Security Group Details Enter the following details:
- Security Group Name: Provide a unique name (Max 50 characters; allows numbers, letters, underscores
_, and hyphens-). - Description: (Optional) Add a brief description.
- Rule Configuration: Configure inbound and outbound rules by selecting the Protocol, Port Range, and Source IPv4.
noteAt least one inbound rule and one outbound rule must be configured.
- Security Group Name: Provide a unique name (Max 50 characters; allows numbers, letters, underscores
-
Click Create Group and then a new Security Group will appear in the list and is ready to be attached to resources.
Configuration of Security Group Rules
When you create a security group, you must configure two types of rules:
- Inbound Rule – Defines which traffic is allowed to enter your resource (who can access your resource).
- Outbound Rule – Defines which traffic is allowed to leave your resource.
Multiple inbound and outbound rules can be added to a security group.
For each rule, fill in the following fields:
| Field | Description |
|---|---|
| Protocol | Select the protocol used to send and receive data (for example, TCP or UDP). |
| Port Range | Choose a single port or a comma-separated list of ports you want to allow. |
| Source IPv4 / Network | Select a valid option from the dropdown, such as Any, VPC, Custom (Manual) or My IP / Whitelist IP. |
1. Protocol
Select the protocol type to control how data is transmitted.
- ALL: Permits all traffic across all protocols and ports.
- All TCP: Permits all traffic using the TCP protocol.
- All UDP: Permits all traffic using the UDP protocol.
- ICMP: Permits network diagnostic traffic, such as ping requests.
- Custom TCP: Permits TCP traffic only on the specific ports you define.
- Custom UDP: Permits UDP traffic only on the specific ports you define.
2. Port Range
Define the specific ports the rule applies to.
- Format: Enter a single port or a comma-separated list of ports (e.g.,
80, 443, 8080).
3. Source IPv4 / Network
Define who is allowed to access the resource.
| Option | Description |
|---|---|
| Any | Allows inbound and outbound traffic from all IP addresses. |
| VPC | Restricts traffic to resources within a specific Virtual Private Cloud. You must select the particular VPC from the dropdown in the next field name IPv4 Address. |
| Custom (Manual) | This option allows you to use either of the following : • Enter a CIDR notation (e.g., 192.168.1.0/24) to allow a range of IP addresses.• Enter a single IPv4 address (e.g., 172.16.1.34) to allow only that specific address. |
| My IP / Whitelist IP | Automatically detects and fills the field with your current public IP address. Currently My IP / Whitelist IP can be set for inbound rules only Note: This field is editable so any valid IP can be used as Whitelist IP. |
Managing Security Groups
Once a security group is created, users can update rules, manage associations, or delete the security group.
Actions
When a specific security group is selected, the following actions are available:
1. Make Group Default
Sets the selected security group as the default security group for new resources. Only one security group can be set as default at a time.
Default security groups cannot be deleted so it is preferd to make another security group as default before deleting the current default security group.
2. Delete
Permanently removes the security group.
You cannot delete a security group if it currently has resources (Nodes, Autoscale, etc.) attached to it. Please detach all resources before attempting deletion.
Information Tabs
The details page is organized into the following tabs:
| Tab Name | Description |
|---|---|
| Info | This tab displays the name and description of selected security group. Names and descriptions are editable. |
| Inbound Rules | Displays all incoming traffic rules. Users can view and update rules that control traffic attempting to reach the instance. |
| Outbound Rules | Displays all outgoing traffic rules. Users can view and update rules that control traffic originating from the instance. |
| Associated Nodes | Lists all individual compute nodes (VMs) currently attached to this security group. |
| Associated Scaler | Lists all Autoscales currently attached to this security group. |
| Associated Kubernetes | Lists all Kubernetes clusters currently attached to this security group. |
Multiple security groups can be created and can be associated with a single compute node, autoscale, or Kubernetes cluster.