Snapshots in Qdrant
Snapshots are tar archive files that contain data and configuration of a specific collection on a specific node at a specific time. This feature can be used to archive data or easily replicate an existing deployment.
We have provided a step-by-step guide on how to use snapshots.
Snapshots using TIR
TIR provides its own managed qdrant snapshot service where you can take the snapshot of the whole cluster in one-click.
But first you need to create your vector database. To create you vector database refer to Creating A New Qdrant Database
Creating a Snapshot
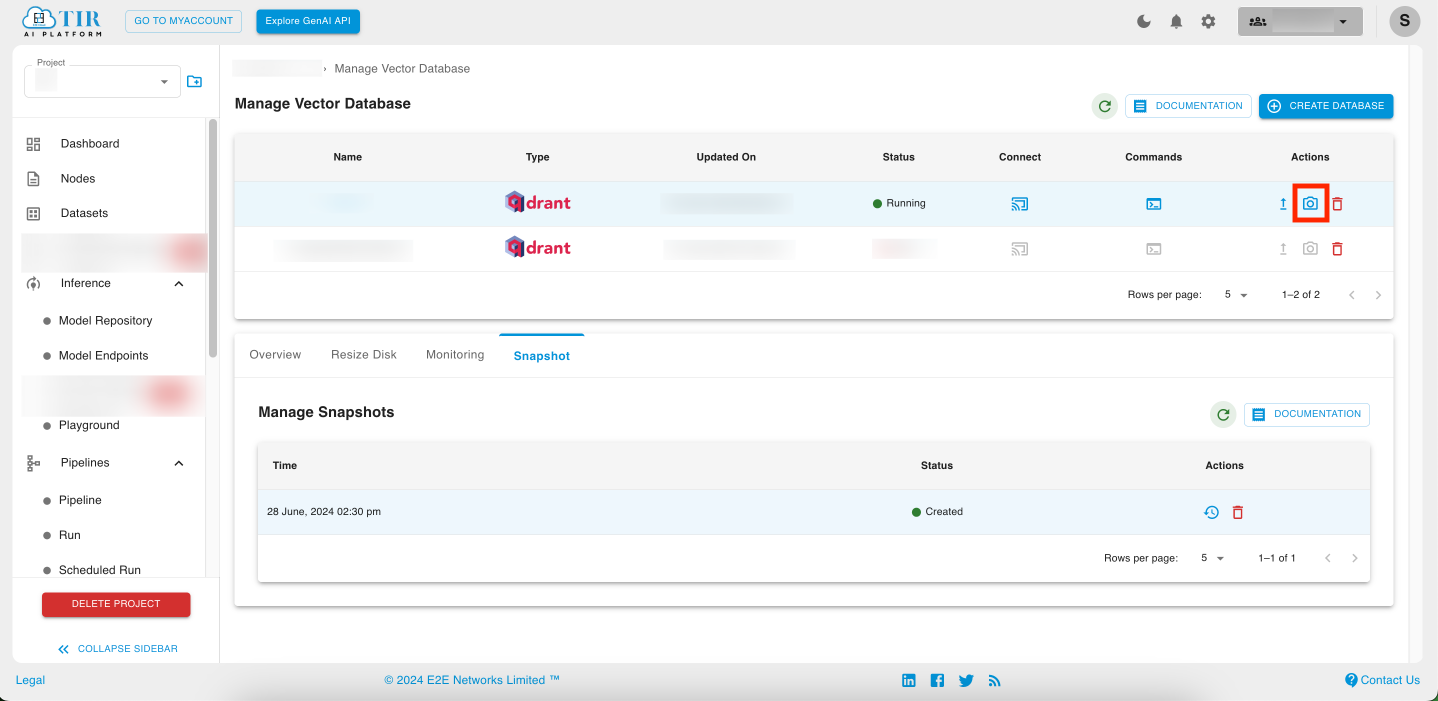
To create a snapshot you need to click on the take snapshot icon on the Vector Database dashboard.

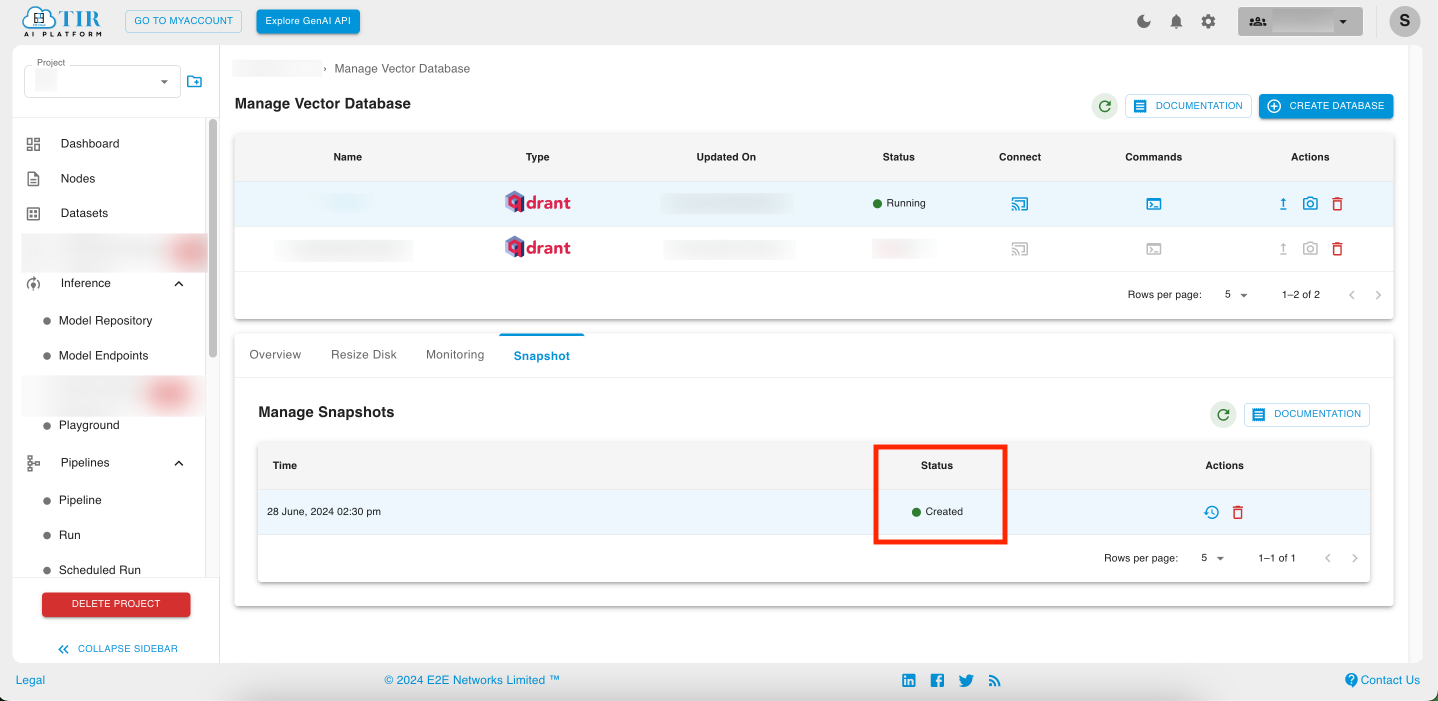
You can see the current status of your snapshot in the Snapshots tab.

Note
While creation of a particular snapshot is in progress you will not be able to create another snapshot or upscale your particular cluster.
Restoring a Snapshot
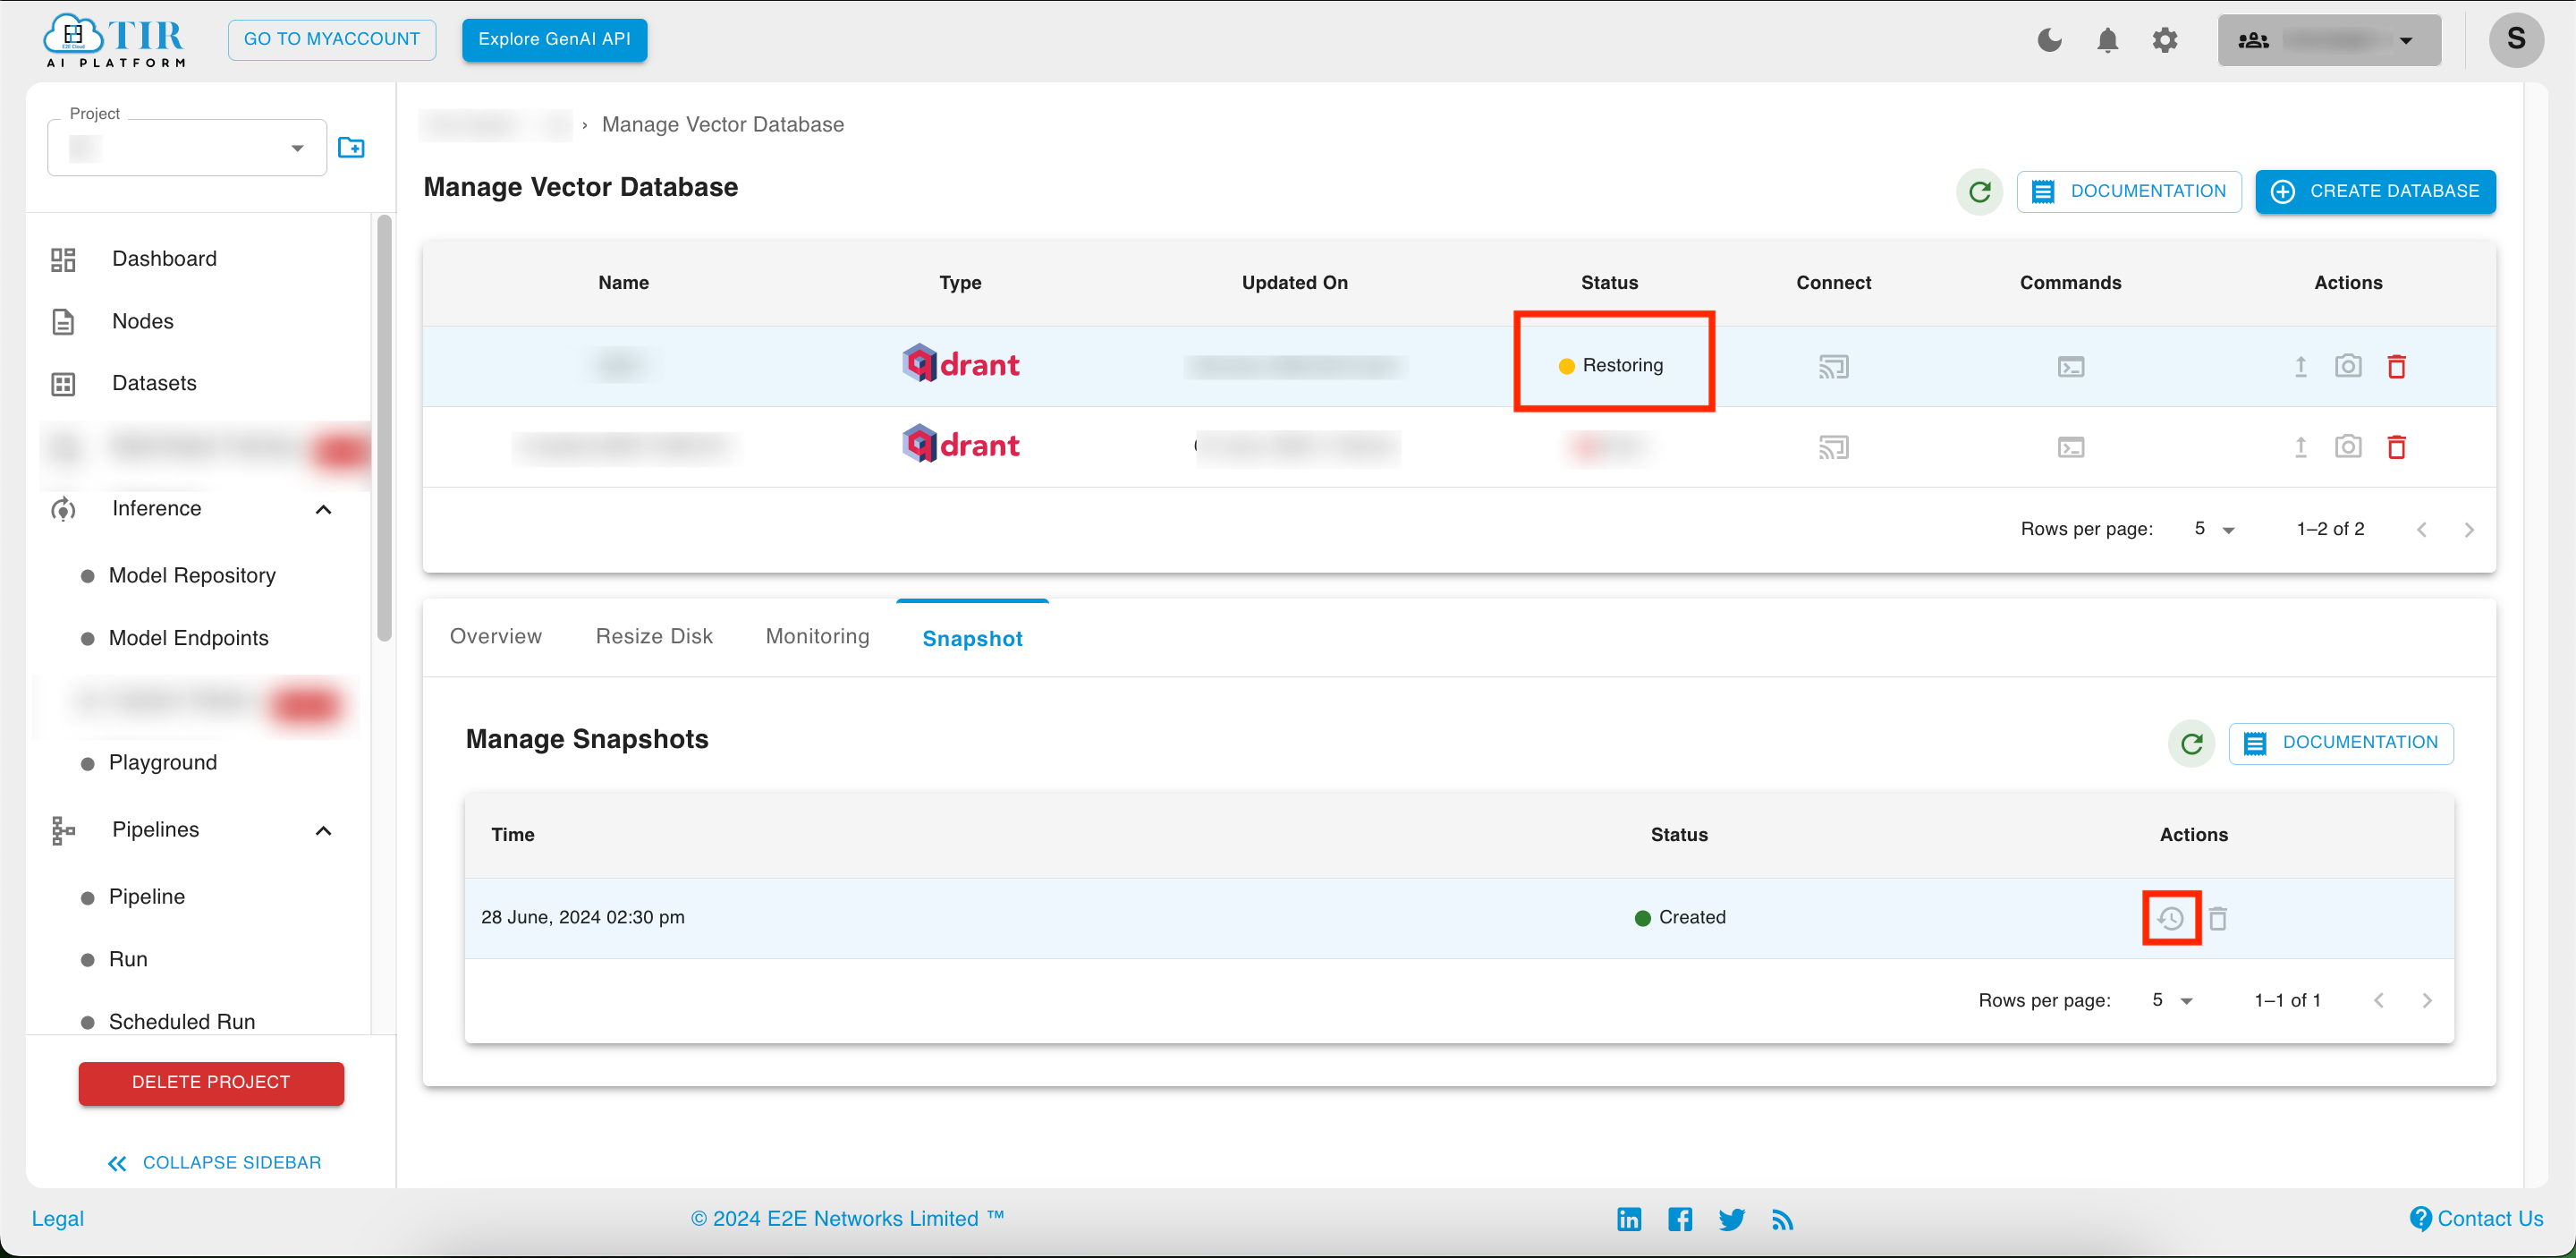
To restore a snapshot you need to click on the restore snapshot icon of the snapshot you want to restore.

You can check the restoration status in the status column of vector database.
Note
While restoration is in progress we disable the connect and upscaling operations. We advise the users not to perform any creation, updation or deletion operation while the cluster is restoring.
Deleting a Snapshot
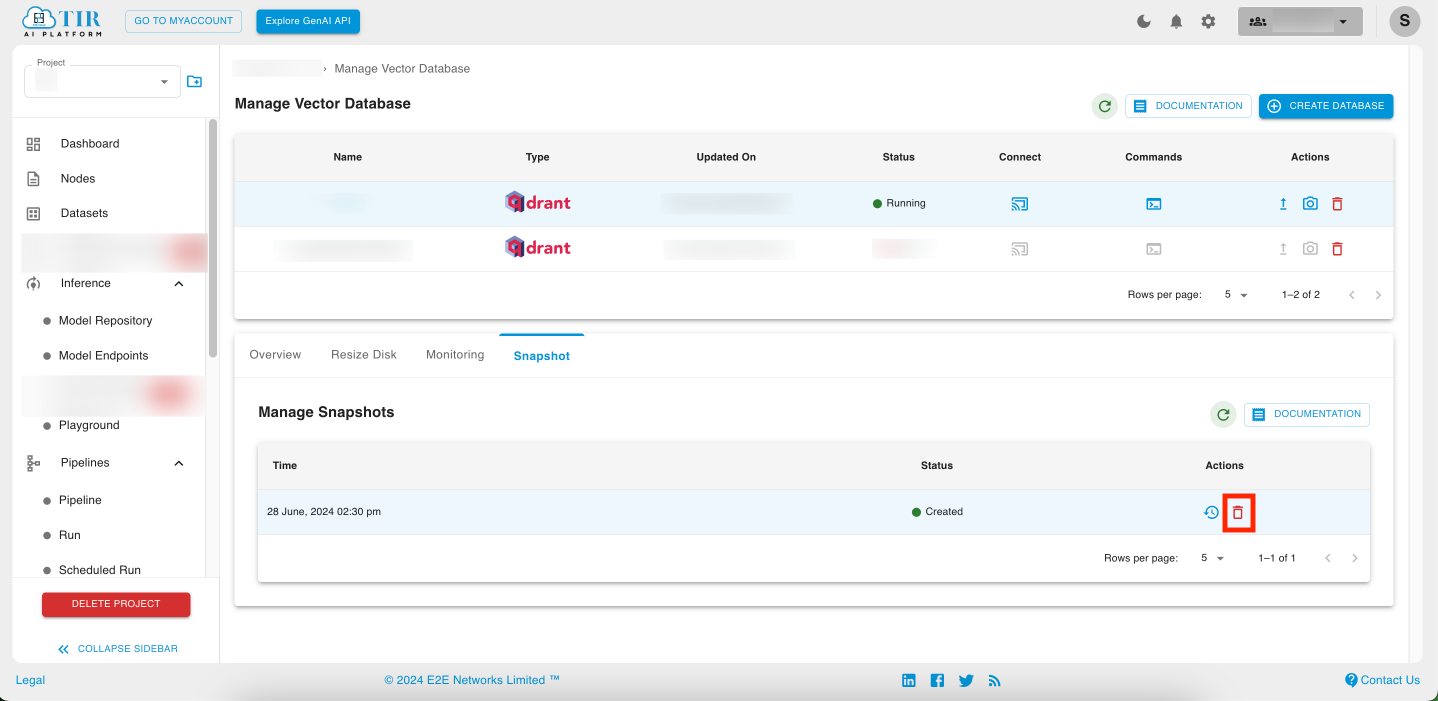
To delete a snapshot you need to click on the delete icon of the snapshot you want to delete.

Note
While restoration is in progress you cannot delete the snapshot whose restoration is going on.
Snapshots using Qdrant API
Qdrant also provides its own API for creating, listing, deleting and restoring snapshots. The snapshots that are created using the Qdrant API will be created on the Disk associated with that Qdrant Node. So, make sure you have enough space on your disk before creating a snapshot.
Note
You have to create snapshots and restore snapshots for each node per collection separately. A single snapshot will contain only the data of the collection you specify which is stored on the node on which the snapshot was created. For that you will need to use the node specific URI i.e.
https://<qdrant_endpoint_url>:6333/node-{node}where node ranges from 0 to number_of_replicas-1.Note that snapshots using Qdrant API are only available via REST API.
Creating a Snapshot
To create a snapshot for an existing collection
from qdrant_client import QdrantClient
client = QdrantClient(host="<qdrant_endpoint_url>", port=6333, prefix="node-<node>", api_key="<qdrant_api_key>")
client.create_snapshot(collection_name="<collection_name>")
curl -X POST \
-H "api-key: <your-api-key>" \
https://<your-endpoint-url>:6333/node-<node_number>/collections/<collection_name>/snapshots
List Snapshots
To list snapshots and related information
from qdrant_client import QdrantClient
client = QdrantClient(host="<qdrant_endpoint_url>", port=6333, prefix="node-<node>", api_key="<qdrant_api_key>")
client.list_snapshots(collection_name="<collection_name>")
curl -X GET \
-H "api-key: <your-api-key>" \
https://<your-endpoint-url>:6333/node-<node_number>/collections/<collection_name>/snapshots
Downloading Snapshot File
To download a specific snapshot from a collection as a file
Note
Only available through REST API for the time being.
curl -X GET \
-H "api-key: <your-api-key>" \
https://<your-endpoint-url>:6333/node-<node_number>/collections/<collection_name>/snapshots/<snapshot_name>
Restoring Snapshots
In restoring the snapshots, Qdrant will extract the shard data from the snapshot and properly register shards in the cluster. If there are other active replicas of the recovered shards in the cluster, Qdrant will replicate them to the newly recovered node by default to maintain data consistency.
There are 2 ways to restore snapshots:
Recover from URL or Local file: This method of recovery requires the snapshot file to be downloadable from a URL or exist as a local file on the node (like if you created the snapshot on this node previously).
Note
If the target collection in the snapshot file doesn’t exist then it will be created automatically.
To recover from URL or local file you can use the snapshot recovery endpoint provided by qdrant.
from qdrant_client import QdrantClient
client = QdrantClient(host="<qdrant_endpoint_url>", port=6333, prefix="node-<node>", api_key="<qdrant_api_key>")
client.recover_snapshot(
    "<collection_name>",
    "<file_location>",
)
curl -X GET \
-H "api-key: <your-api-key>" \
-d '{
    "location": "<file_location>"
}' \
https://<your-endpoint-url>:6333/node-<node_number>/collections/<collection_name>/snapshots/recover
Recover from an uploaded file: The snapshot file can also be uploaded as a file and restored using the recover from uploaded snapshot. This endpoint accepts the raw snapshot data in the request body.
curl -X POST 'https://<qdrant-url>:6333/node-<node_number>/collections/<collection_name>/snapshots/upload?priority=snapshot' \
    -H 'api-key: <your-api-key>' \
    -H 'Content-Type:multipart/form-data' \
            -F 'snapshot=@/path/to/<file_name>.shapshot'
Snapshots Priority
When recovering a snapshot to a non-empty node, there may be conflicts between the snapshot data and the existing data. The “priority” setting controls how Qdrant handles these conflicts.
The available snapshot recovery priorities are :
replica: (default) prefer existing data over snapshot.
snapshot: prefer snapshot data over existing data.
no_sync: restore snapshot without any additional synchronization.
Deleting Snapshot
To delete an existing snapshot:
from qdrant_client import QdrantClient
client = QdrantClient(host="<qdrant_endpoint_url>", port=6333, prefix="node-<node>", api_key="<qdrant_api_key>")
client.delete_snapshot(
    collection_name="<collection_name>", snapshot_name="<snapshot_name>"
)
curl -X DELETE \
-H "api-key: <your-api-key>" \
https://<your-endpoint-url>:6333/node-<node_number>/collections/<collection_name>/snapshots/<snapshot_name>
What’s Next?
This was a quick start guide to get you started with the Qdrant Snapshots.
You can explore more features of snapshot in the Qdrant Snapshot Documentation
For more information on Qdrant, head over to Qdrant Documentation

