Manage your Database
Managing Your Database Node
In this section, you can find instructions and details to manage and maintain your database.
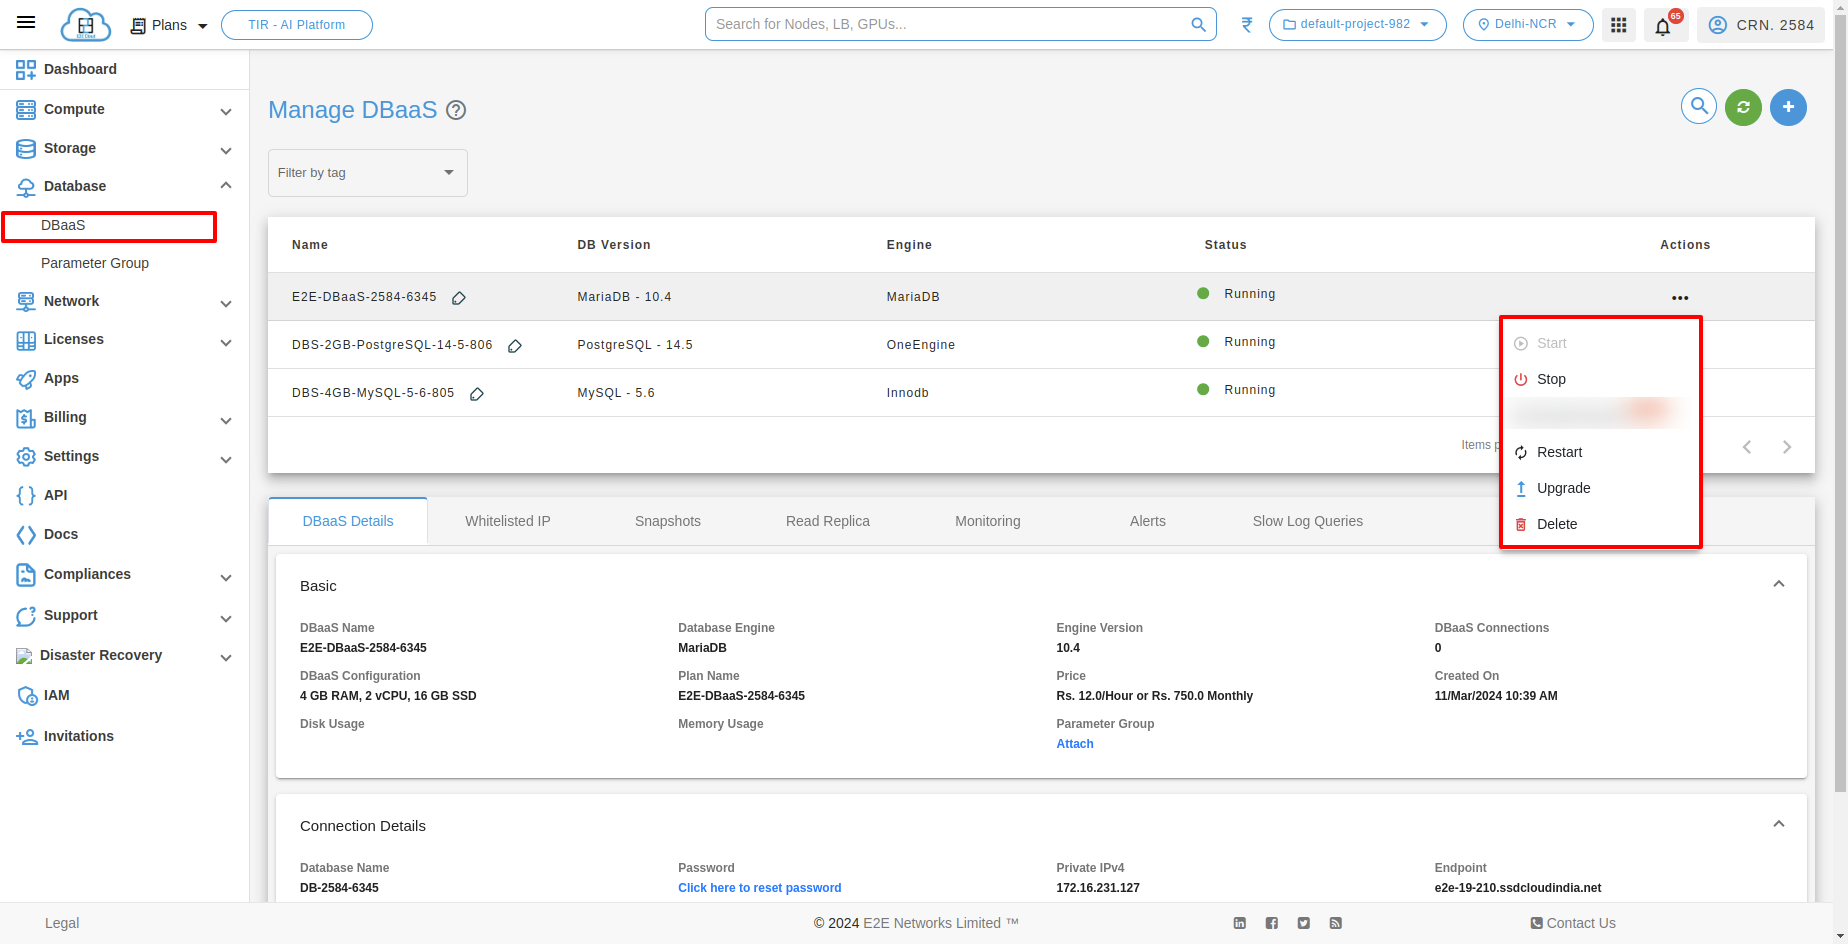
To manage your Database Instance, click on ... (Action Button) and select the Manage option for your database node.
Stopping your Database
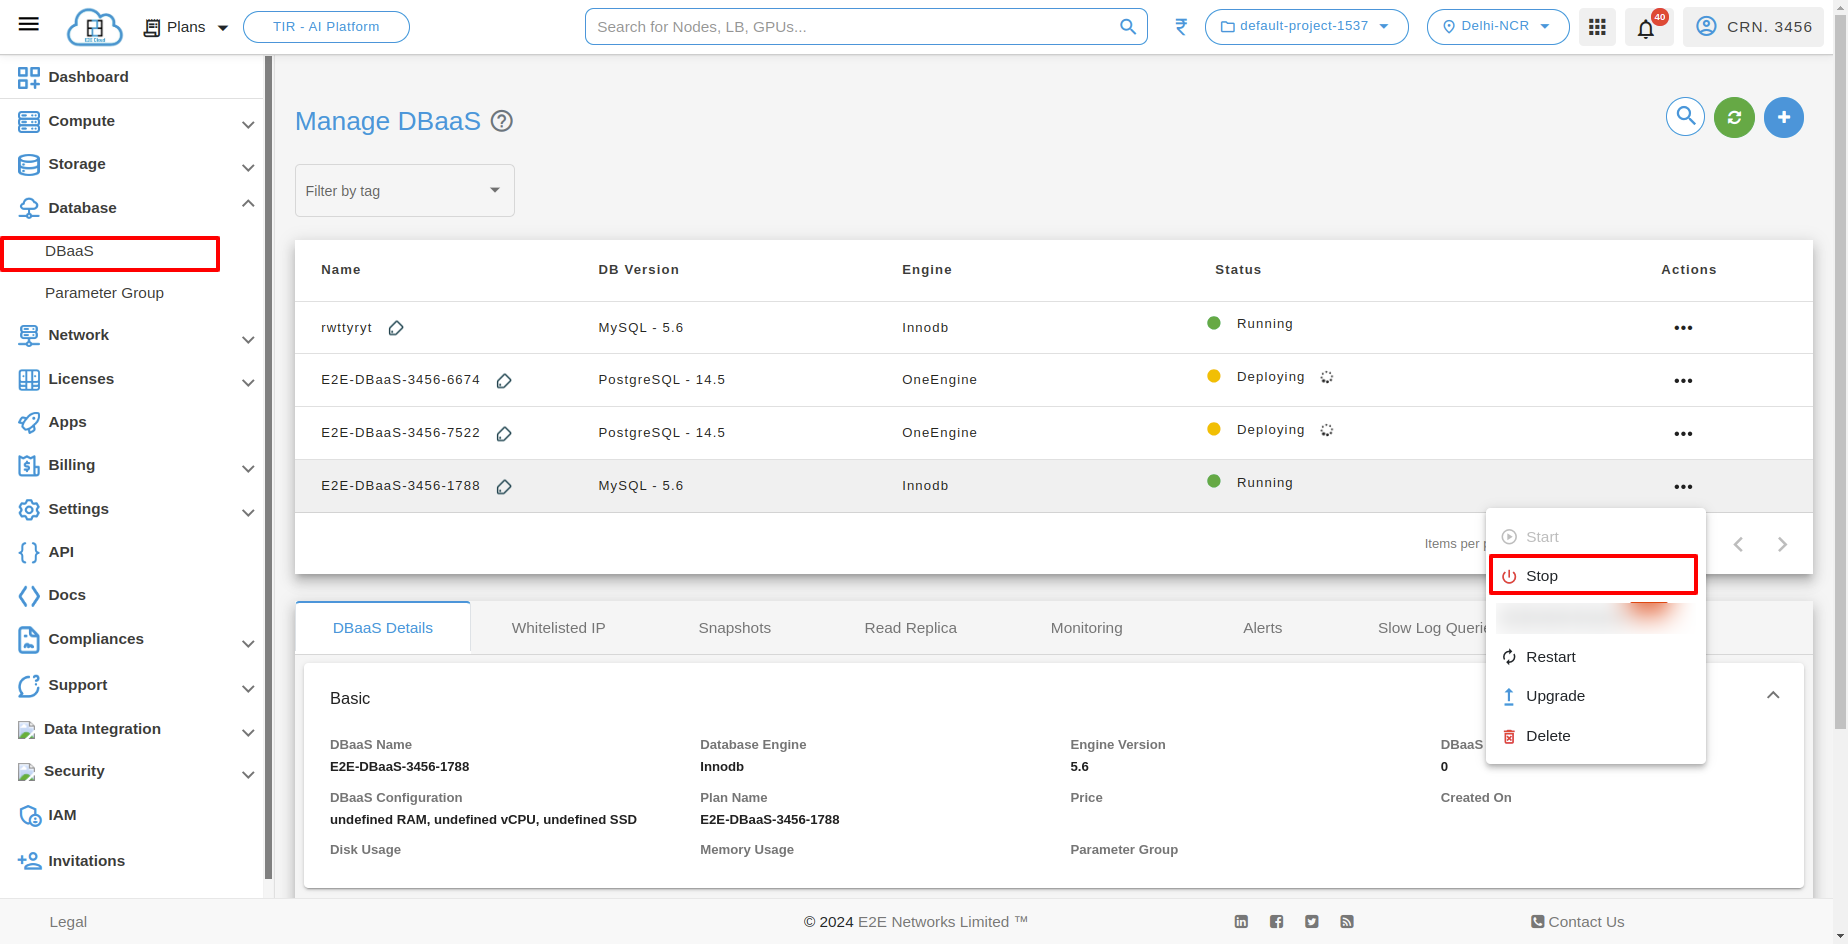
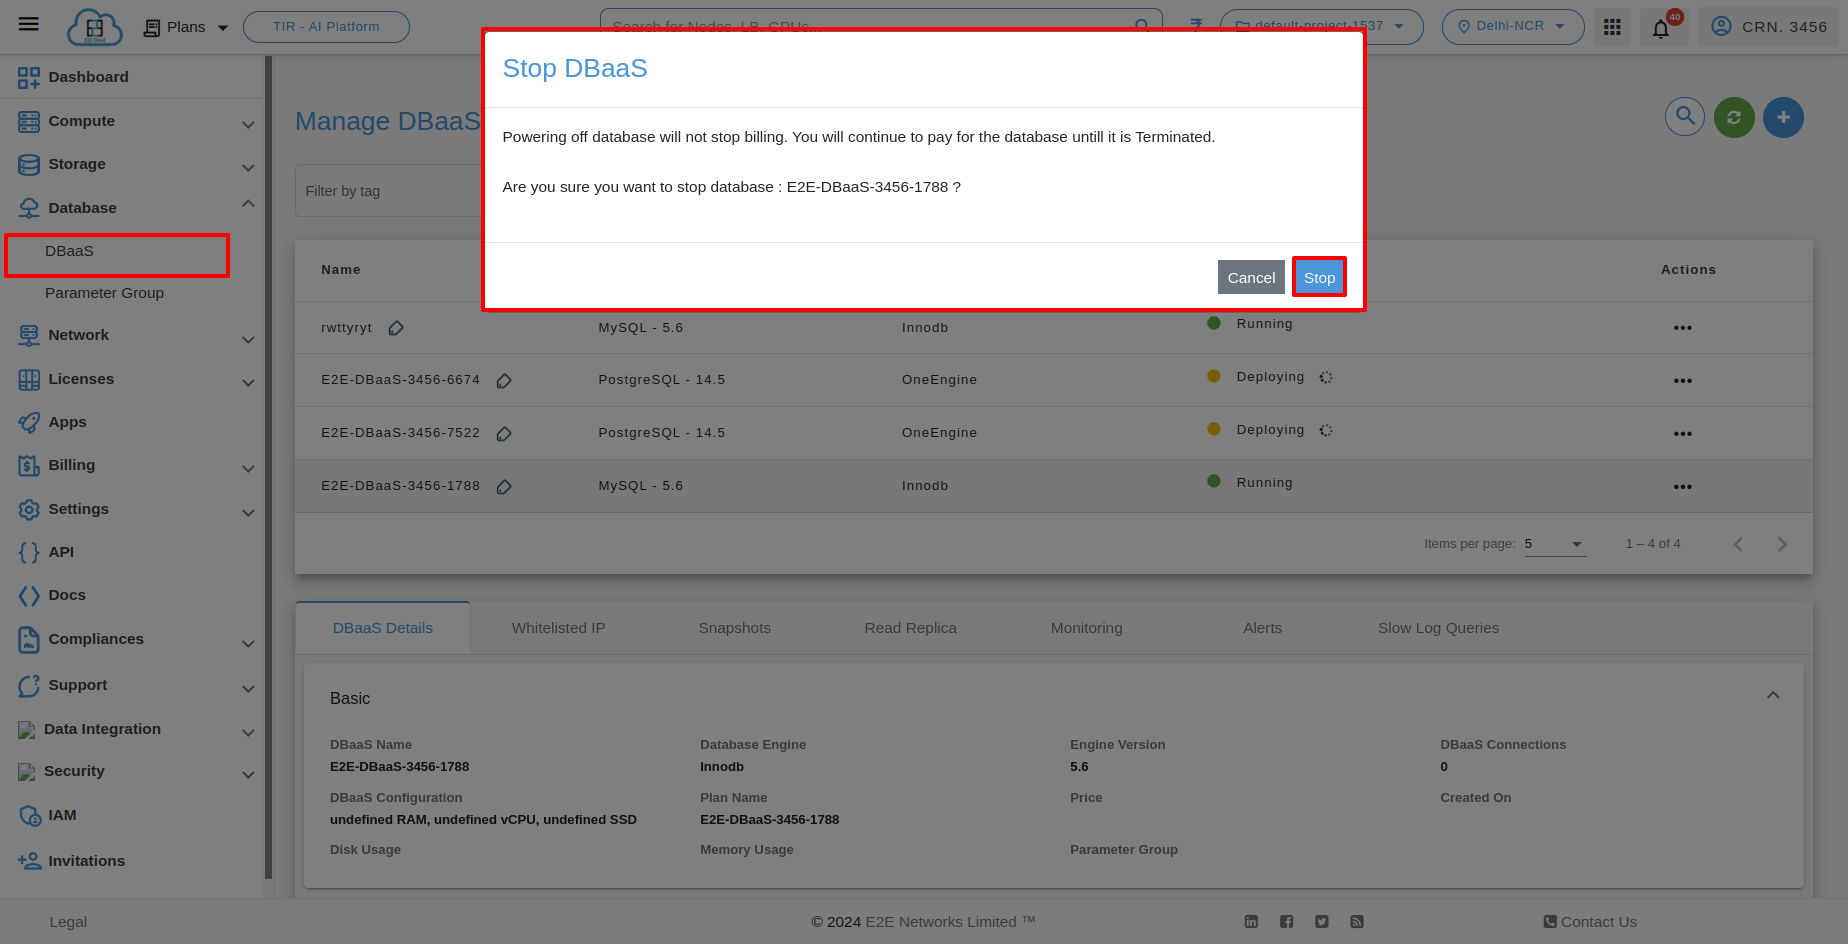
If you are using your DB node for temporary testing or any other daily development activity and want to test out your database by stopping it (which will close all the connections in your database), you can perform this action by clicking on Action and selecting the Stop button.
Starting your Database
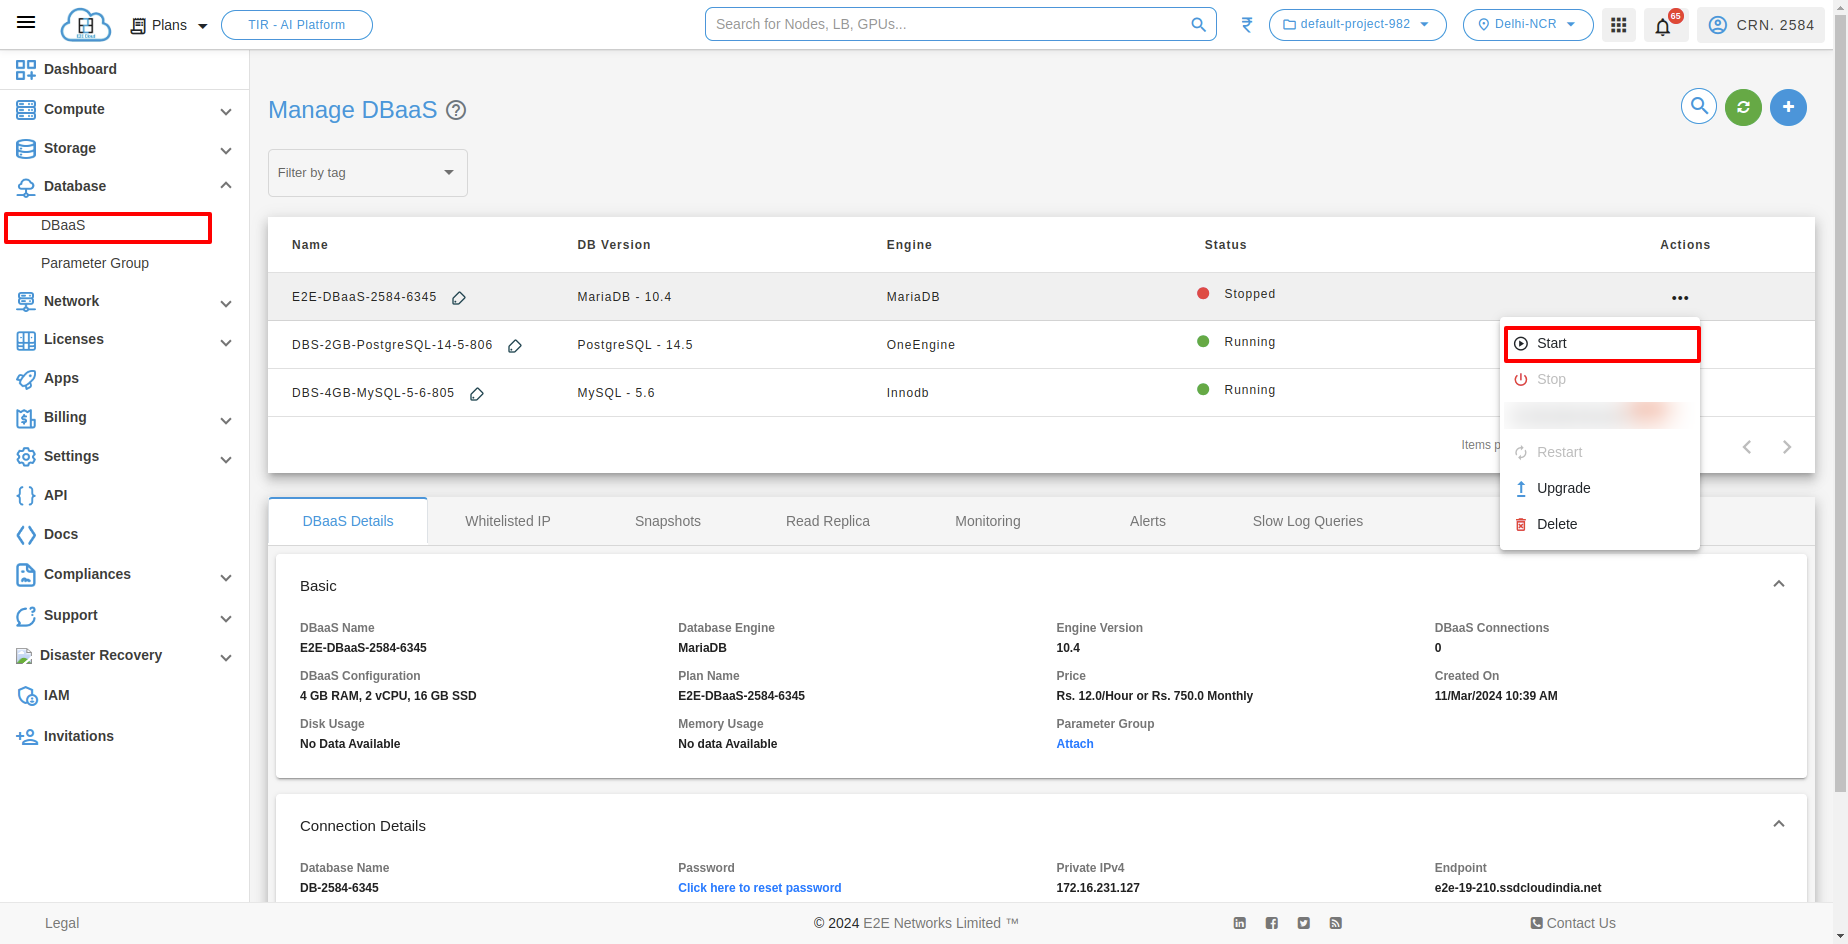
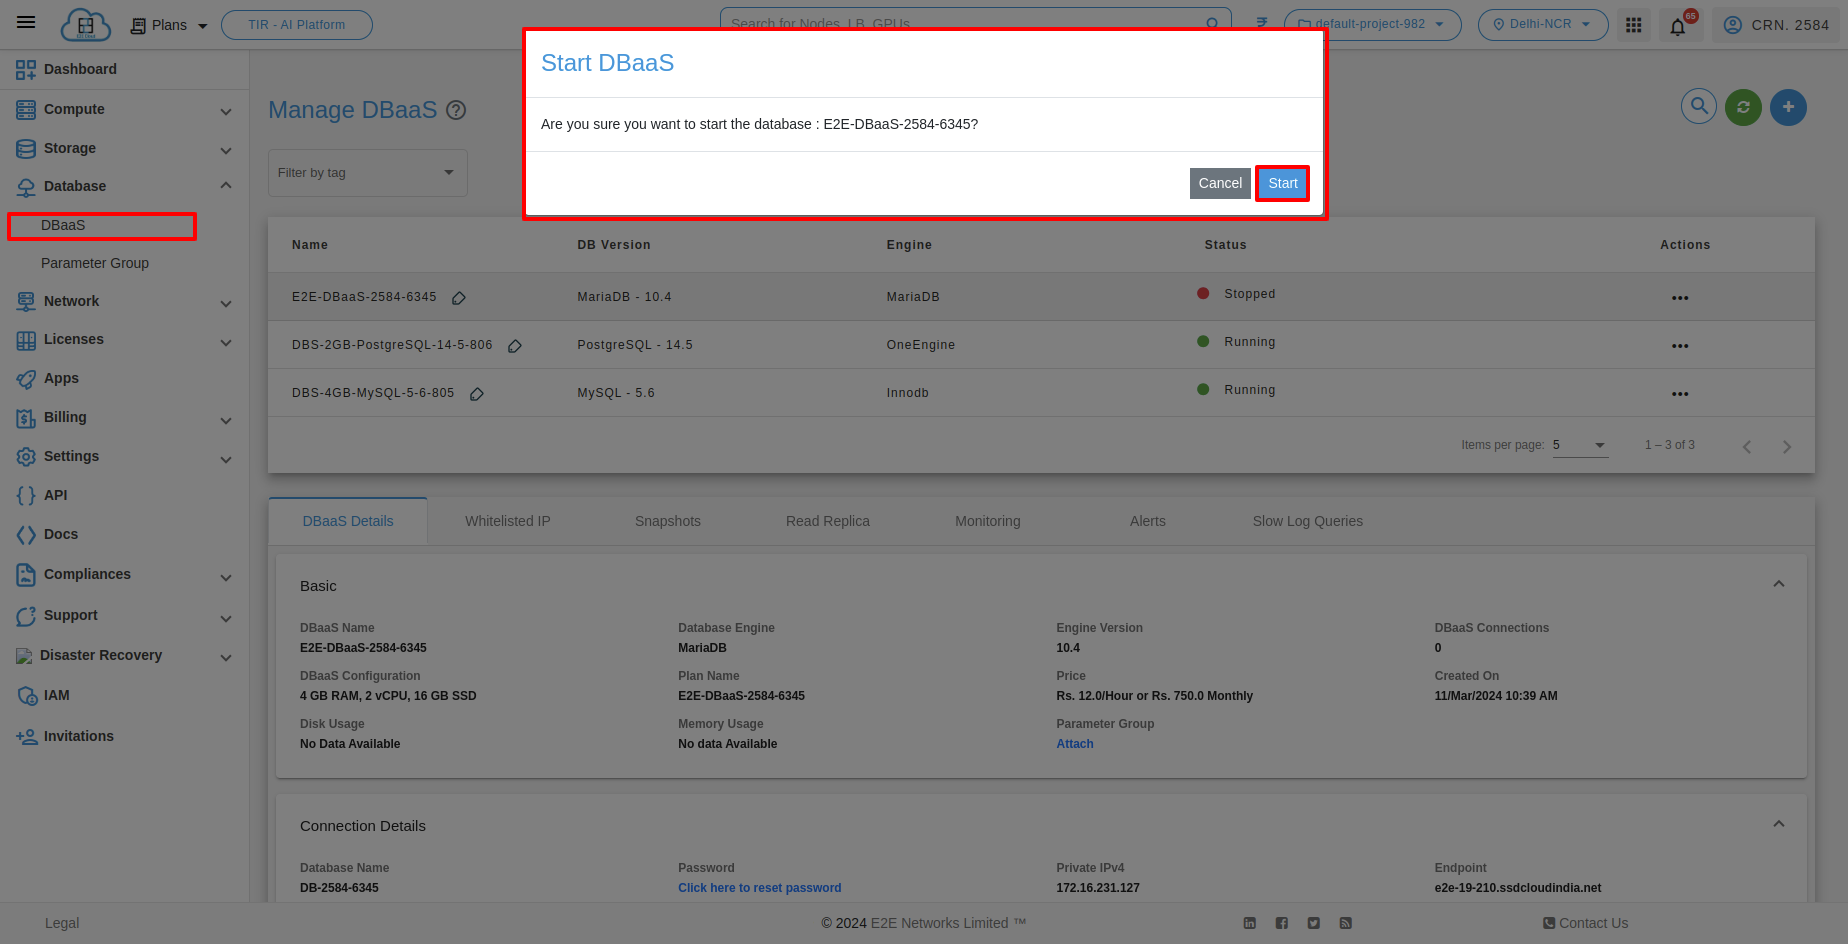
You can resume your database that was stopped earlier by clicking on the Start button in the Action menu. Resuming your database will retain the same IP and credentials for your database, and there will not be any changes at the configuration level.
Restart
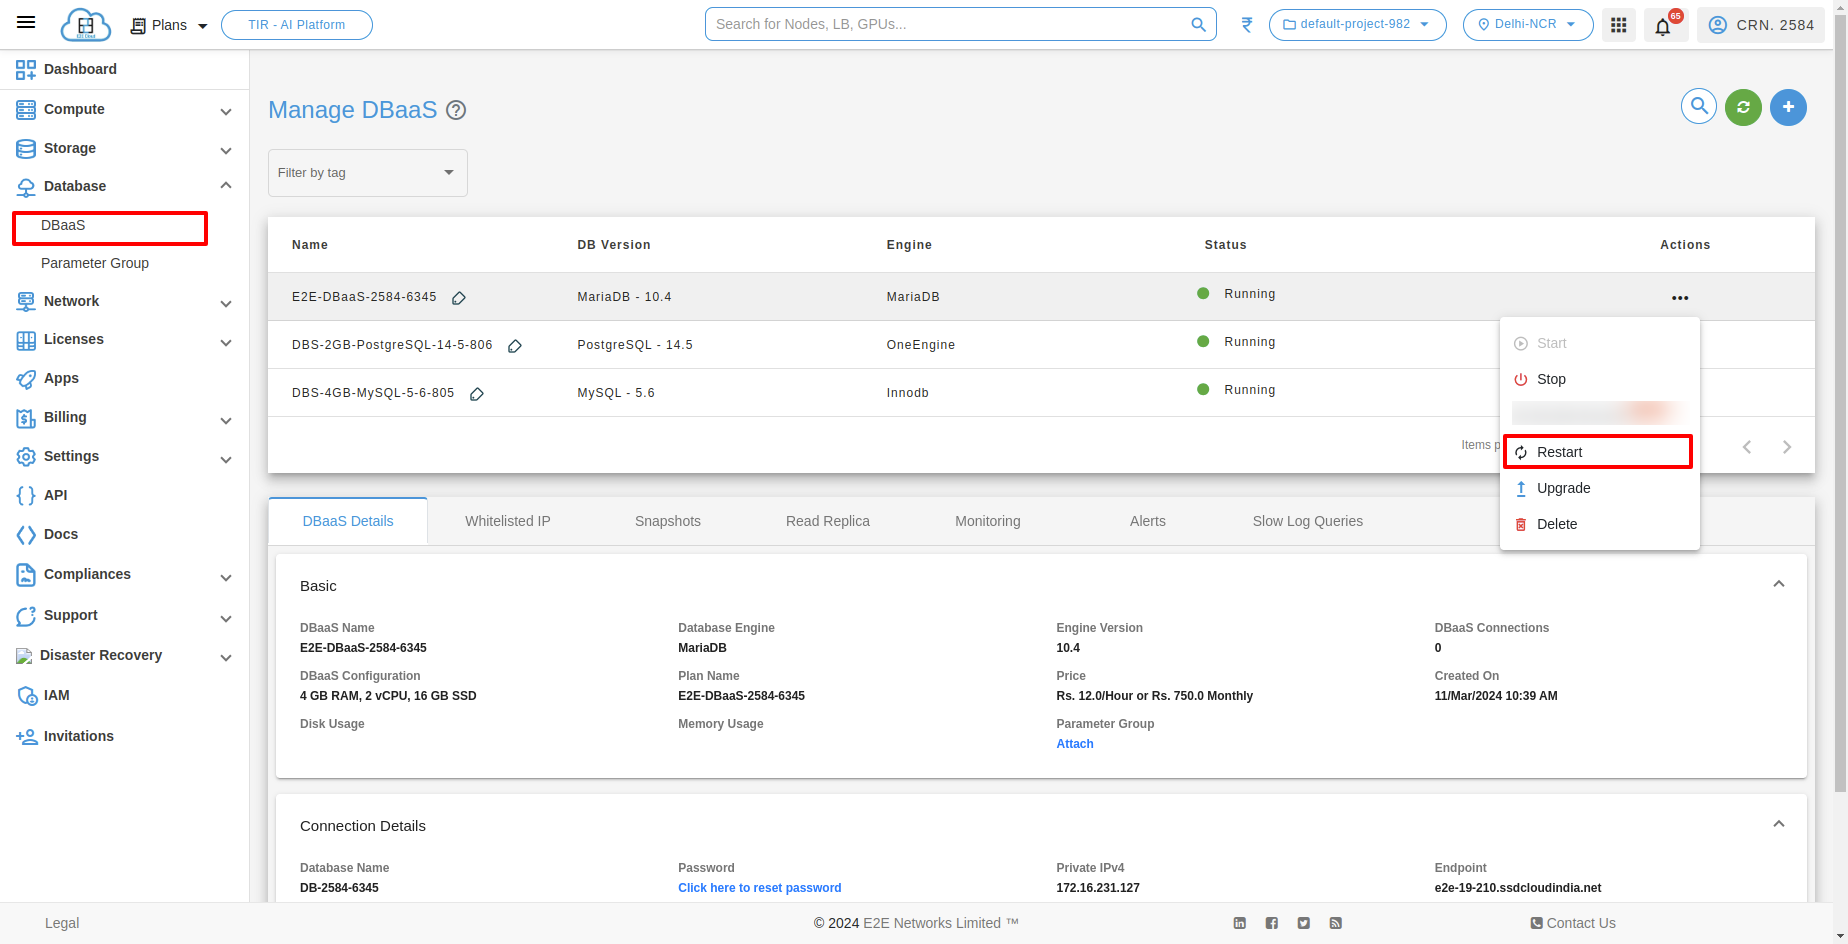
If you are testing out your DB nodes, restarting your database to reset connections or for any troubleshooting purpose can be done by clicking on the Restart button on the action menu.
Upgrade your database
The DBaaS upgrade feature enables customers to easily upgrade their DBaaS plan based on their specific usage requirements. To upgrade your database, click on the Upgrade button under the Action button.
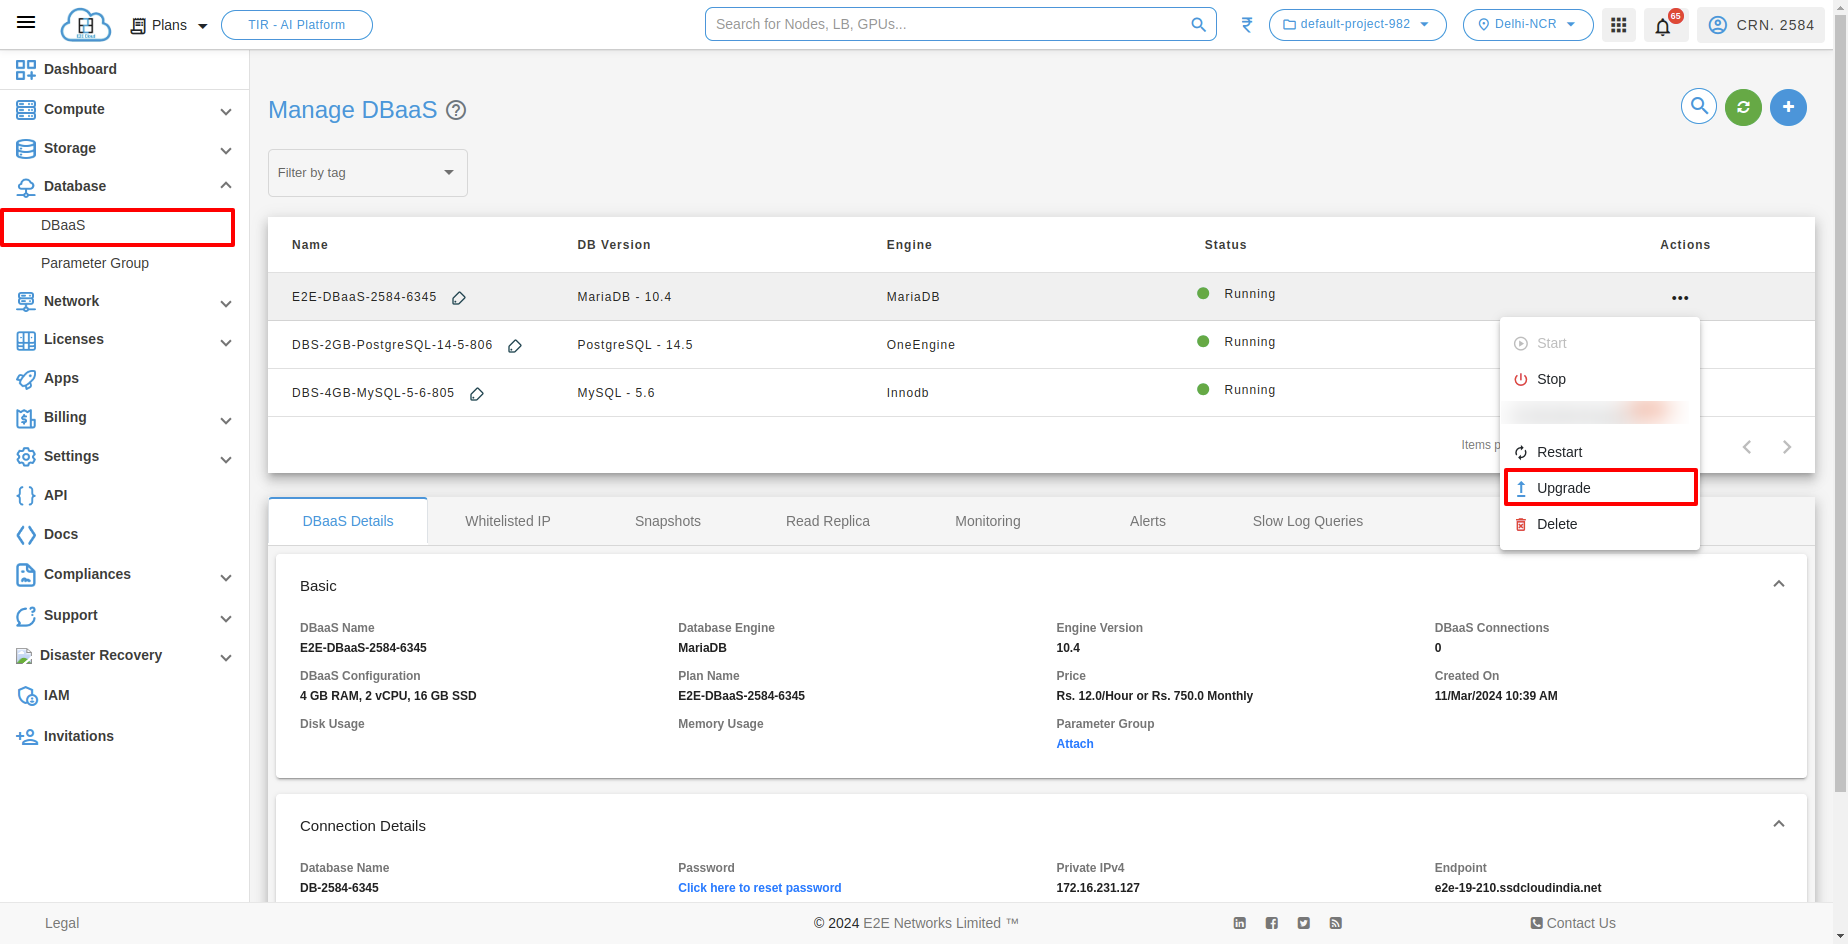
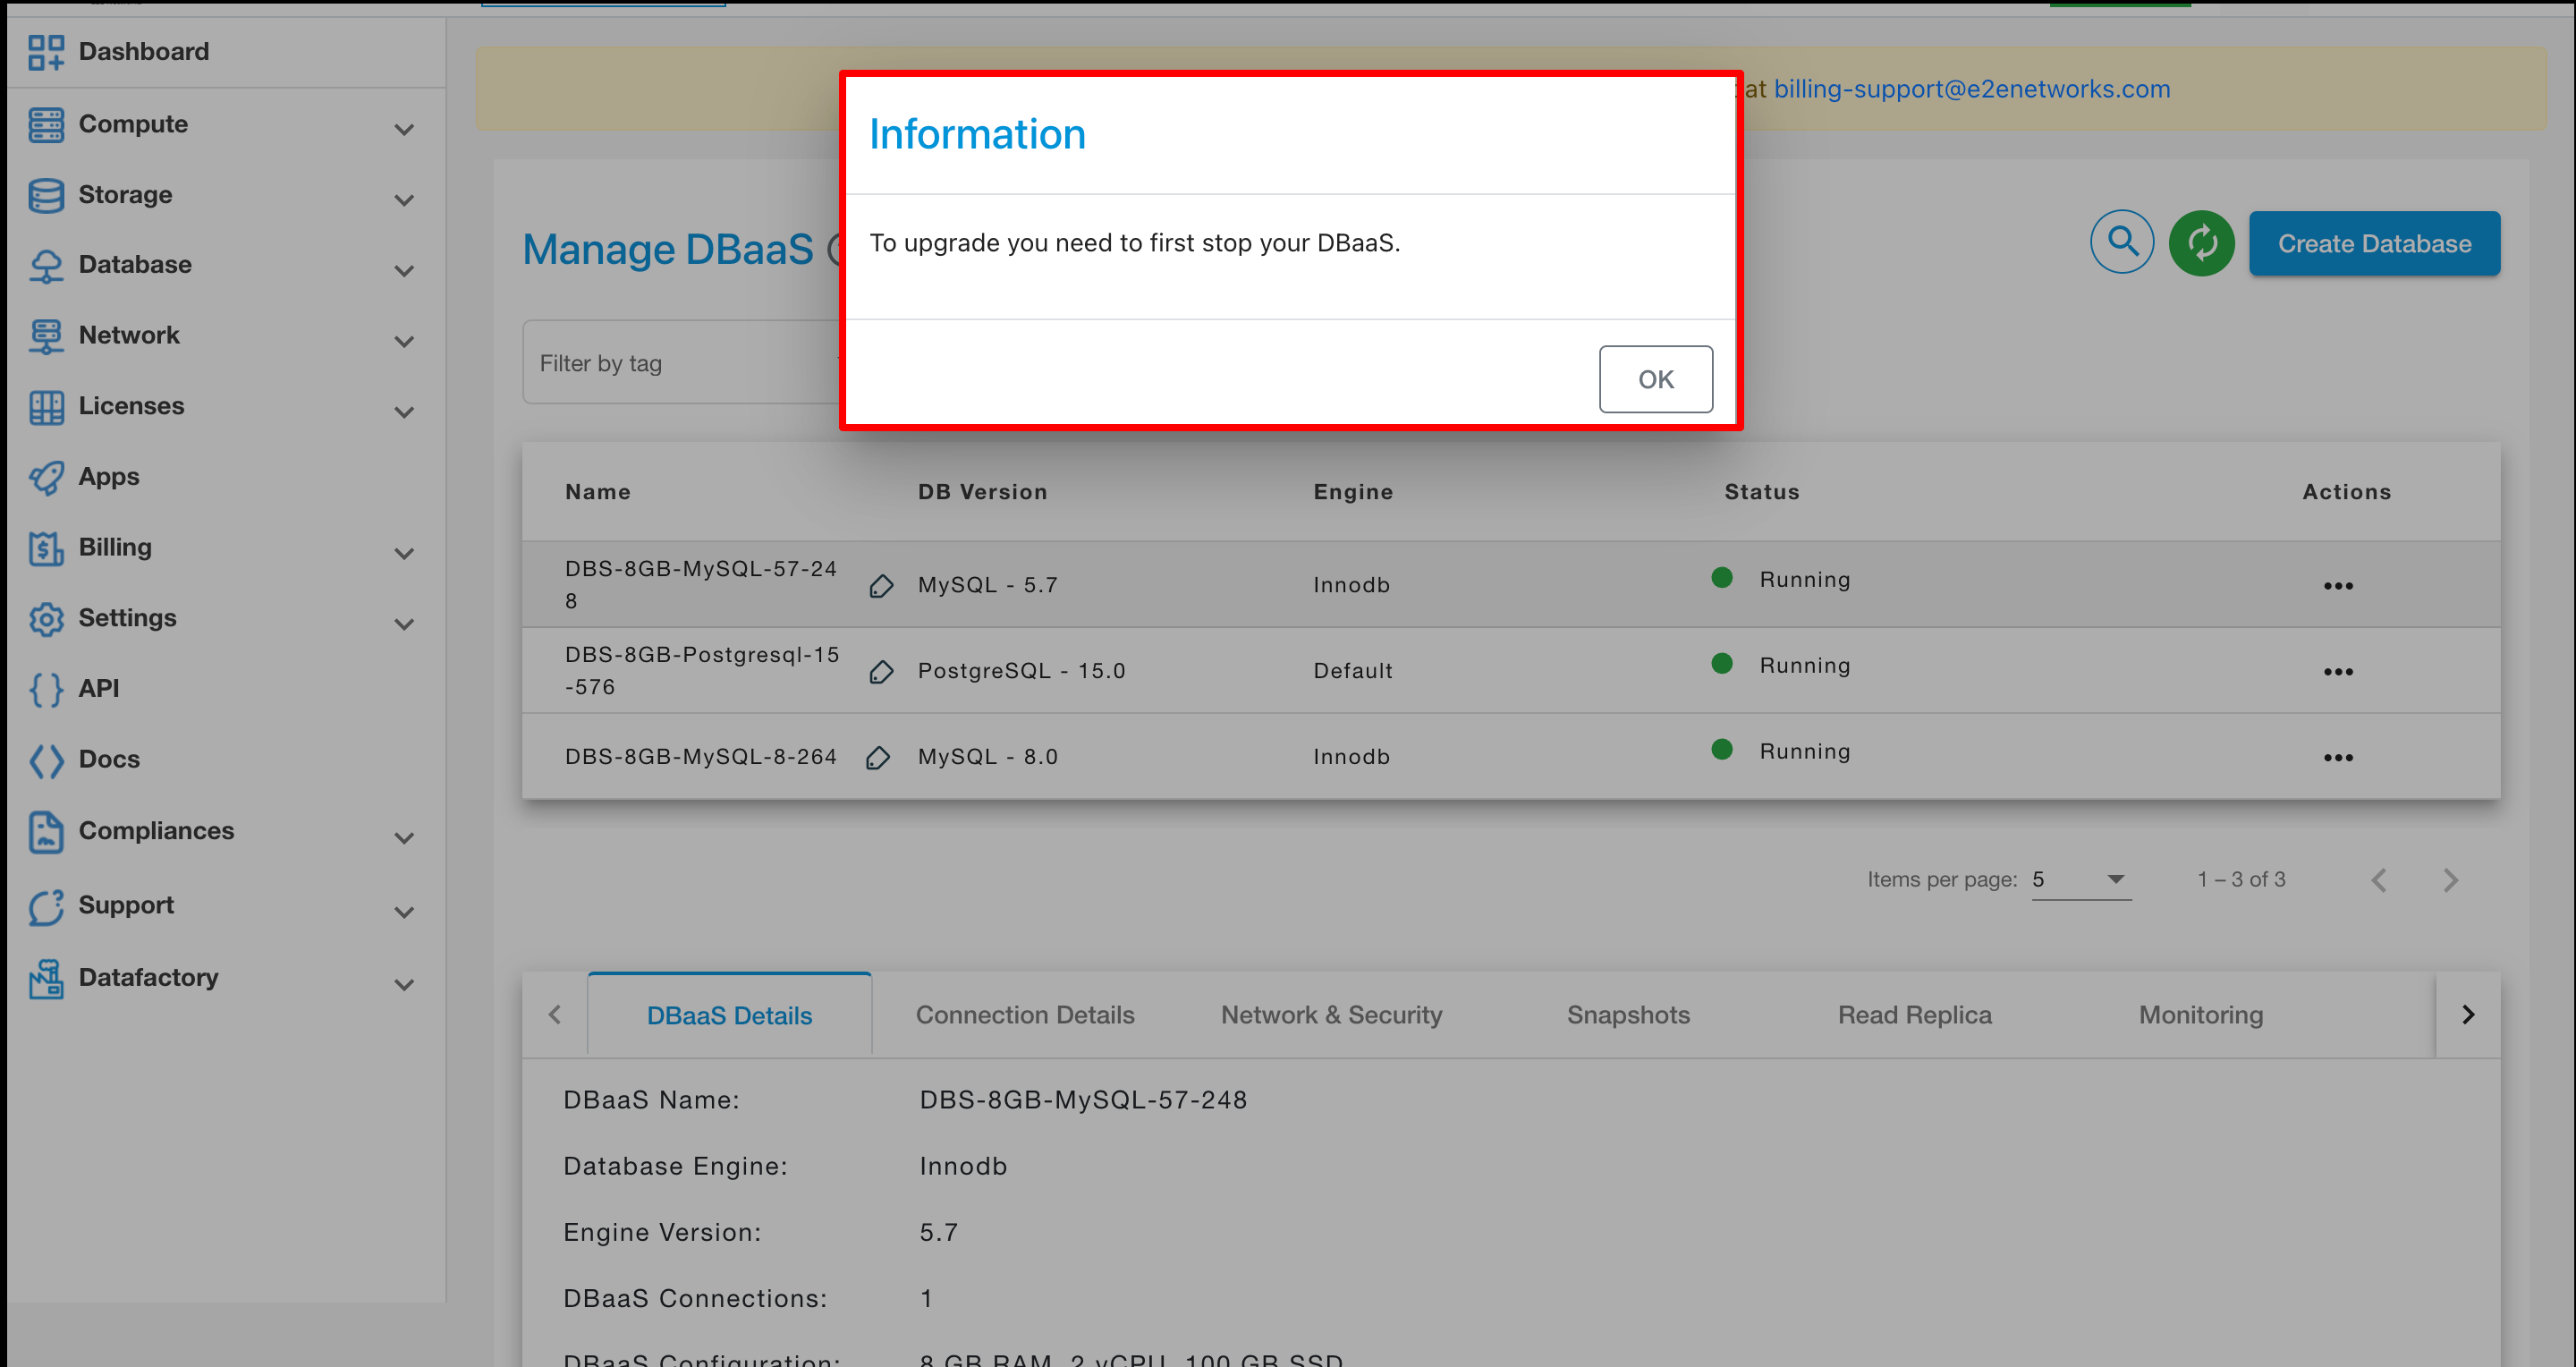
Before upgrading, you need to stop your DBaaS first.
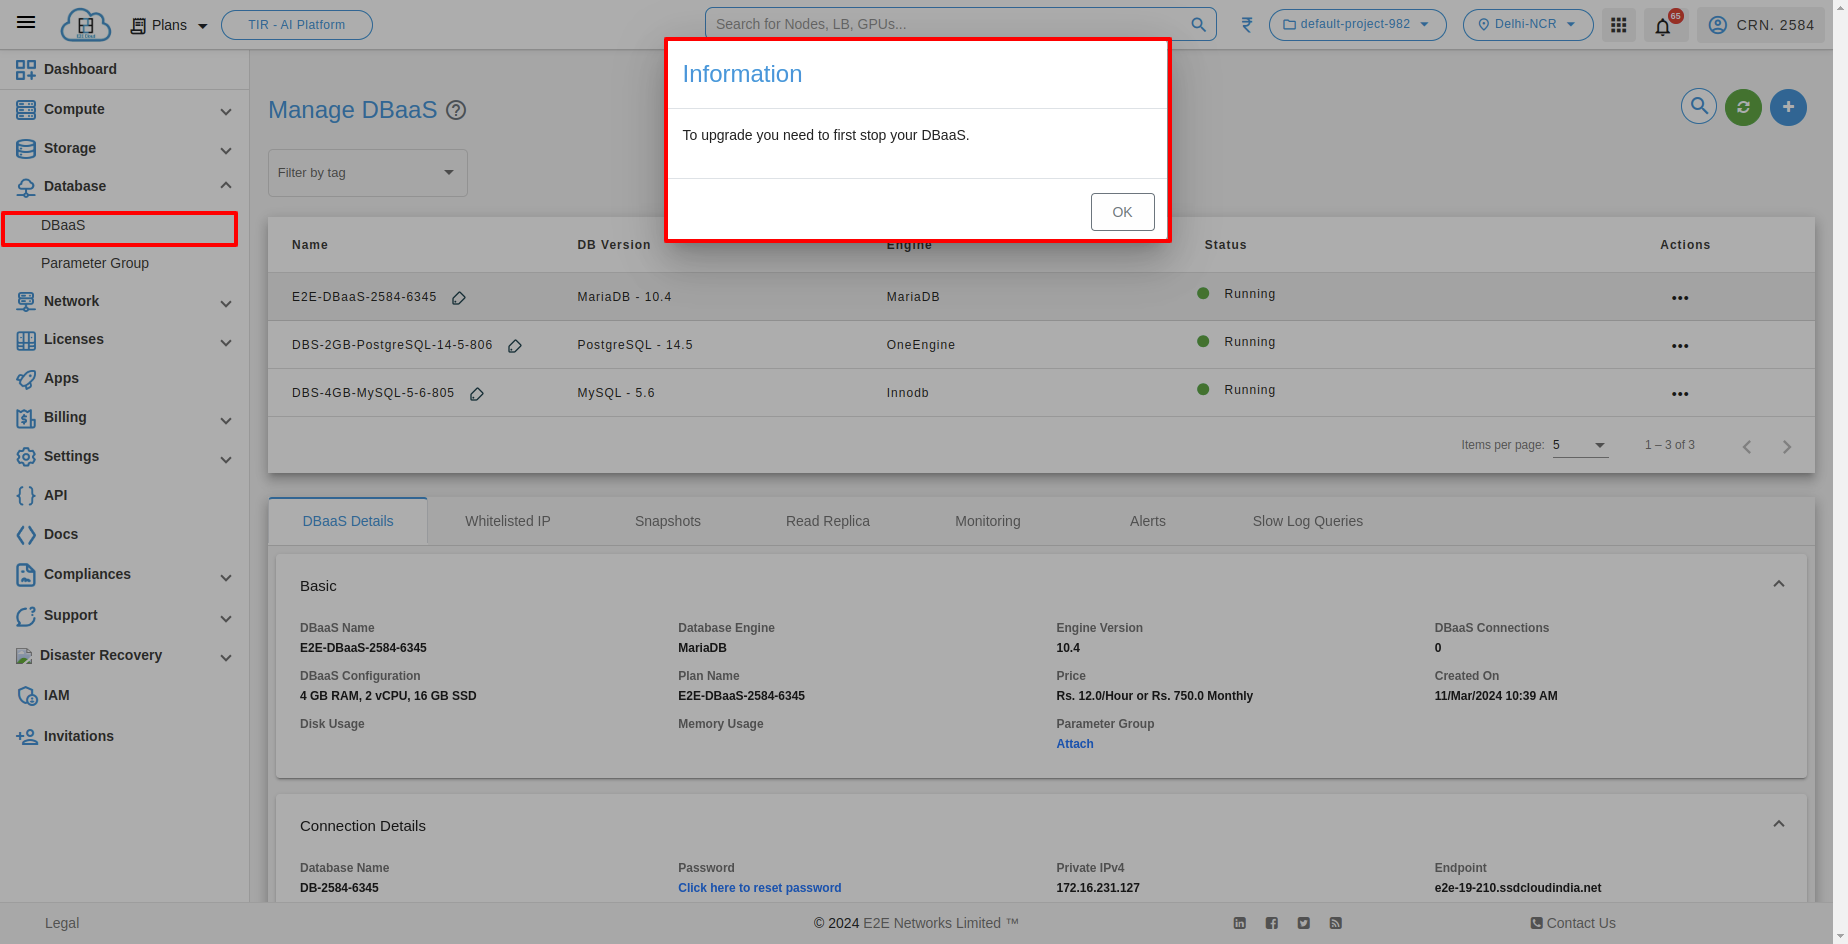
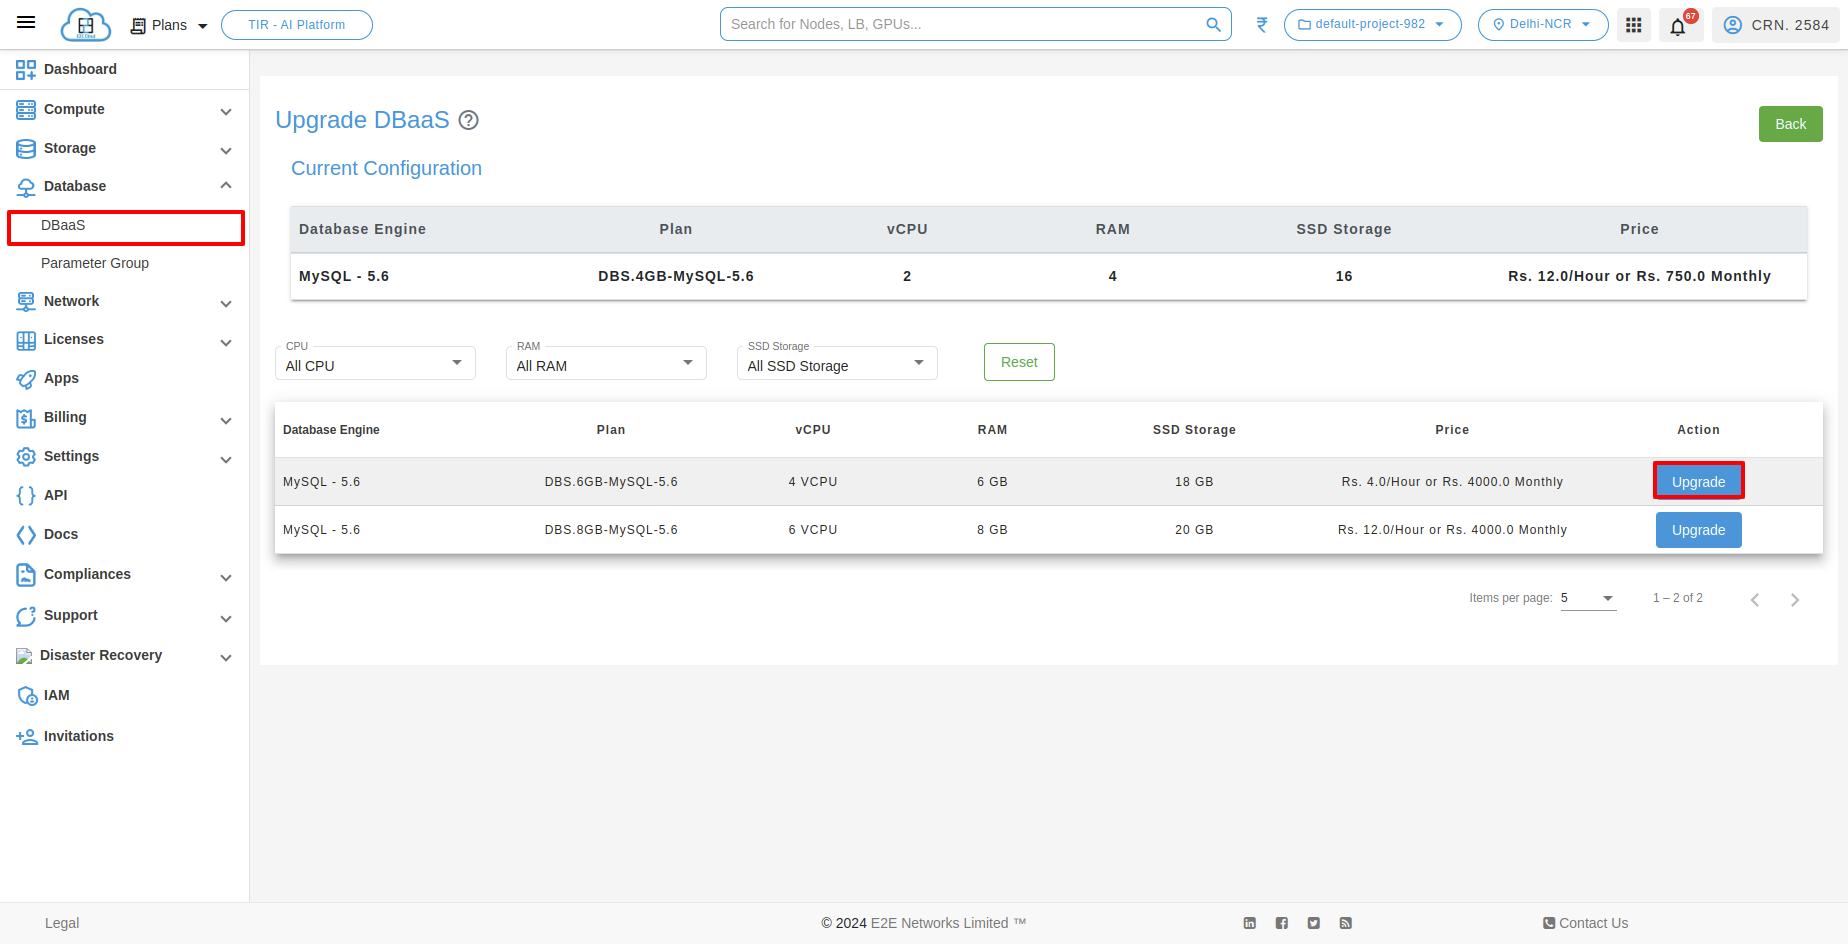
After clicking on Upgrade, the upgrade plan will be shown, and you have to click on the Upgrade button with the selected plan. After that, the confirmation popup will open, and you have to click on the Upgrade button.
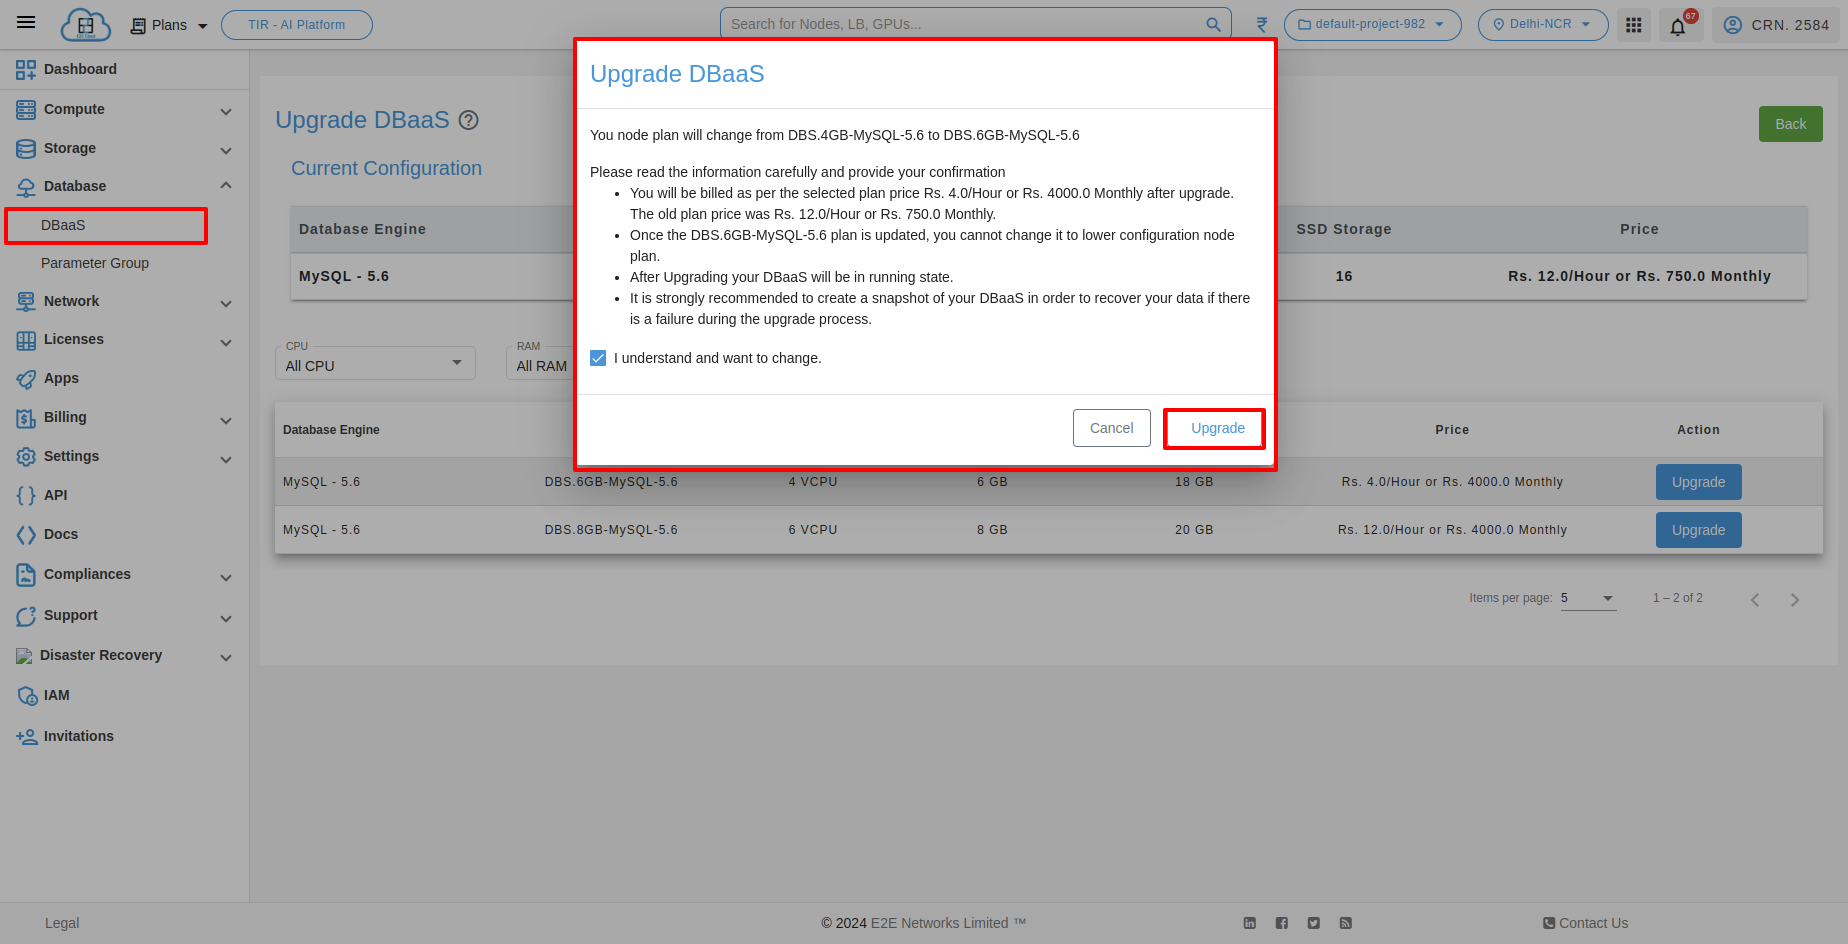
After this, the upgrading process will start, and the database status will be in the upgrading state.
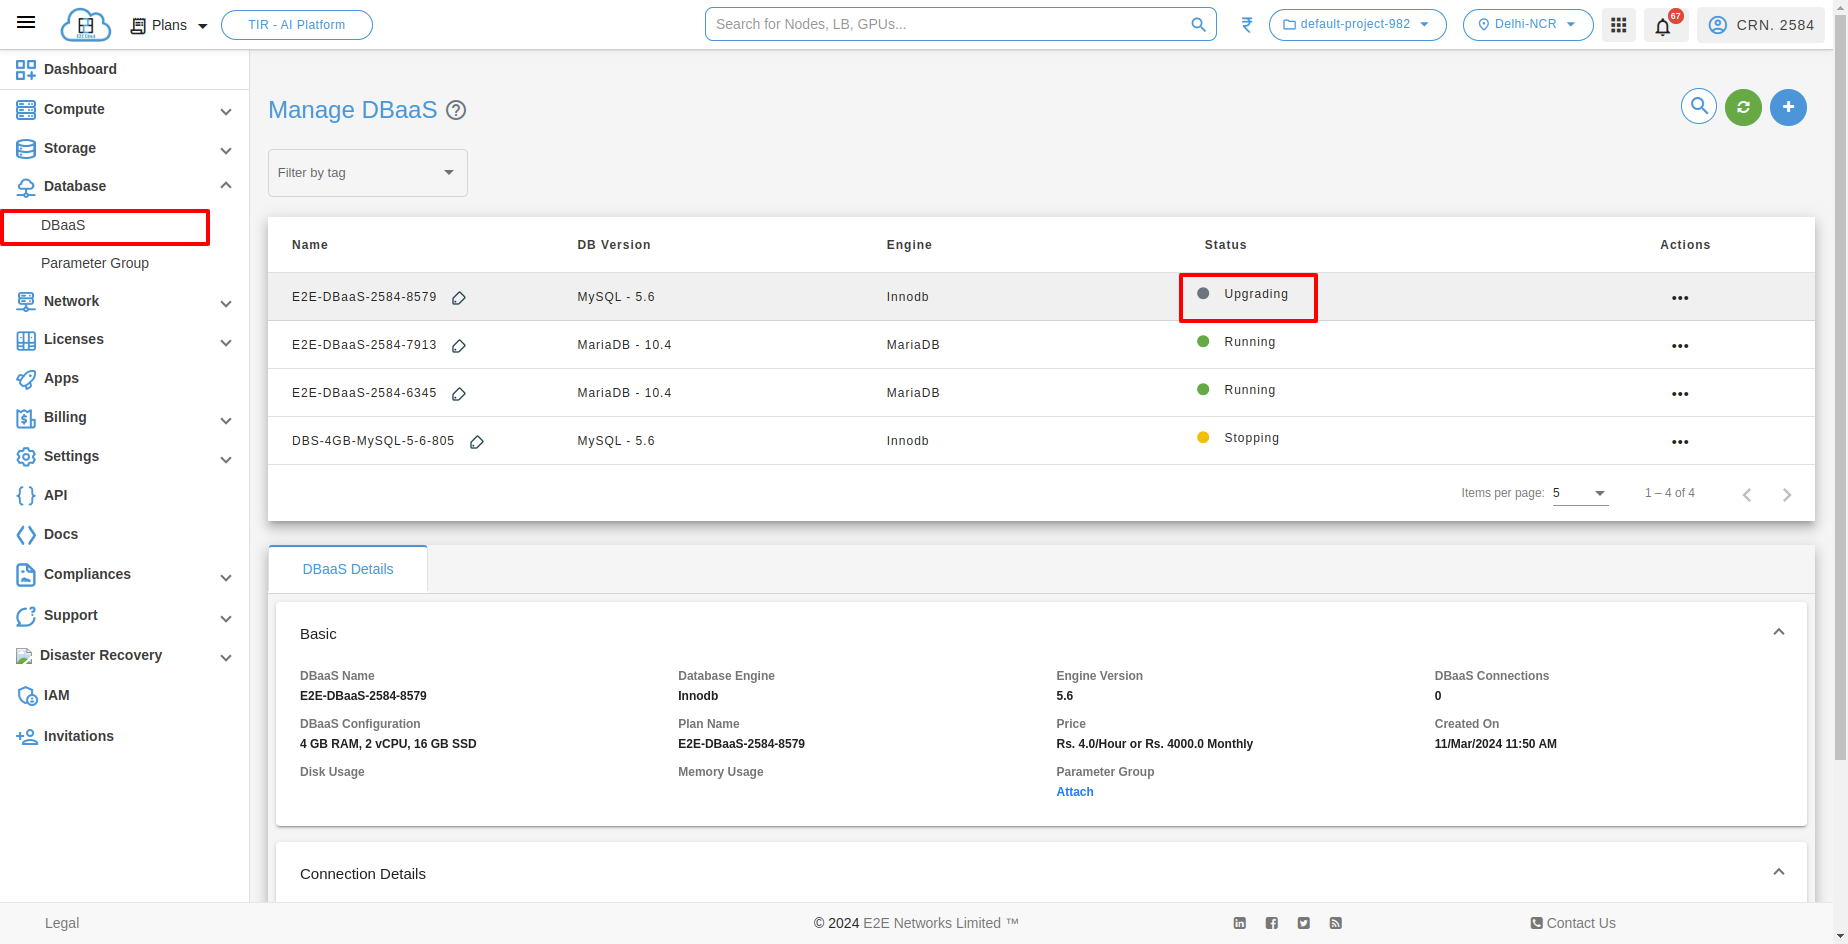
Please ensure that your database is stopped when performing the upgrade action.
Expand Disk Size
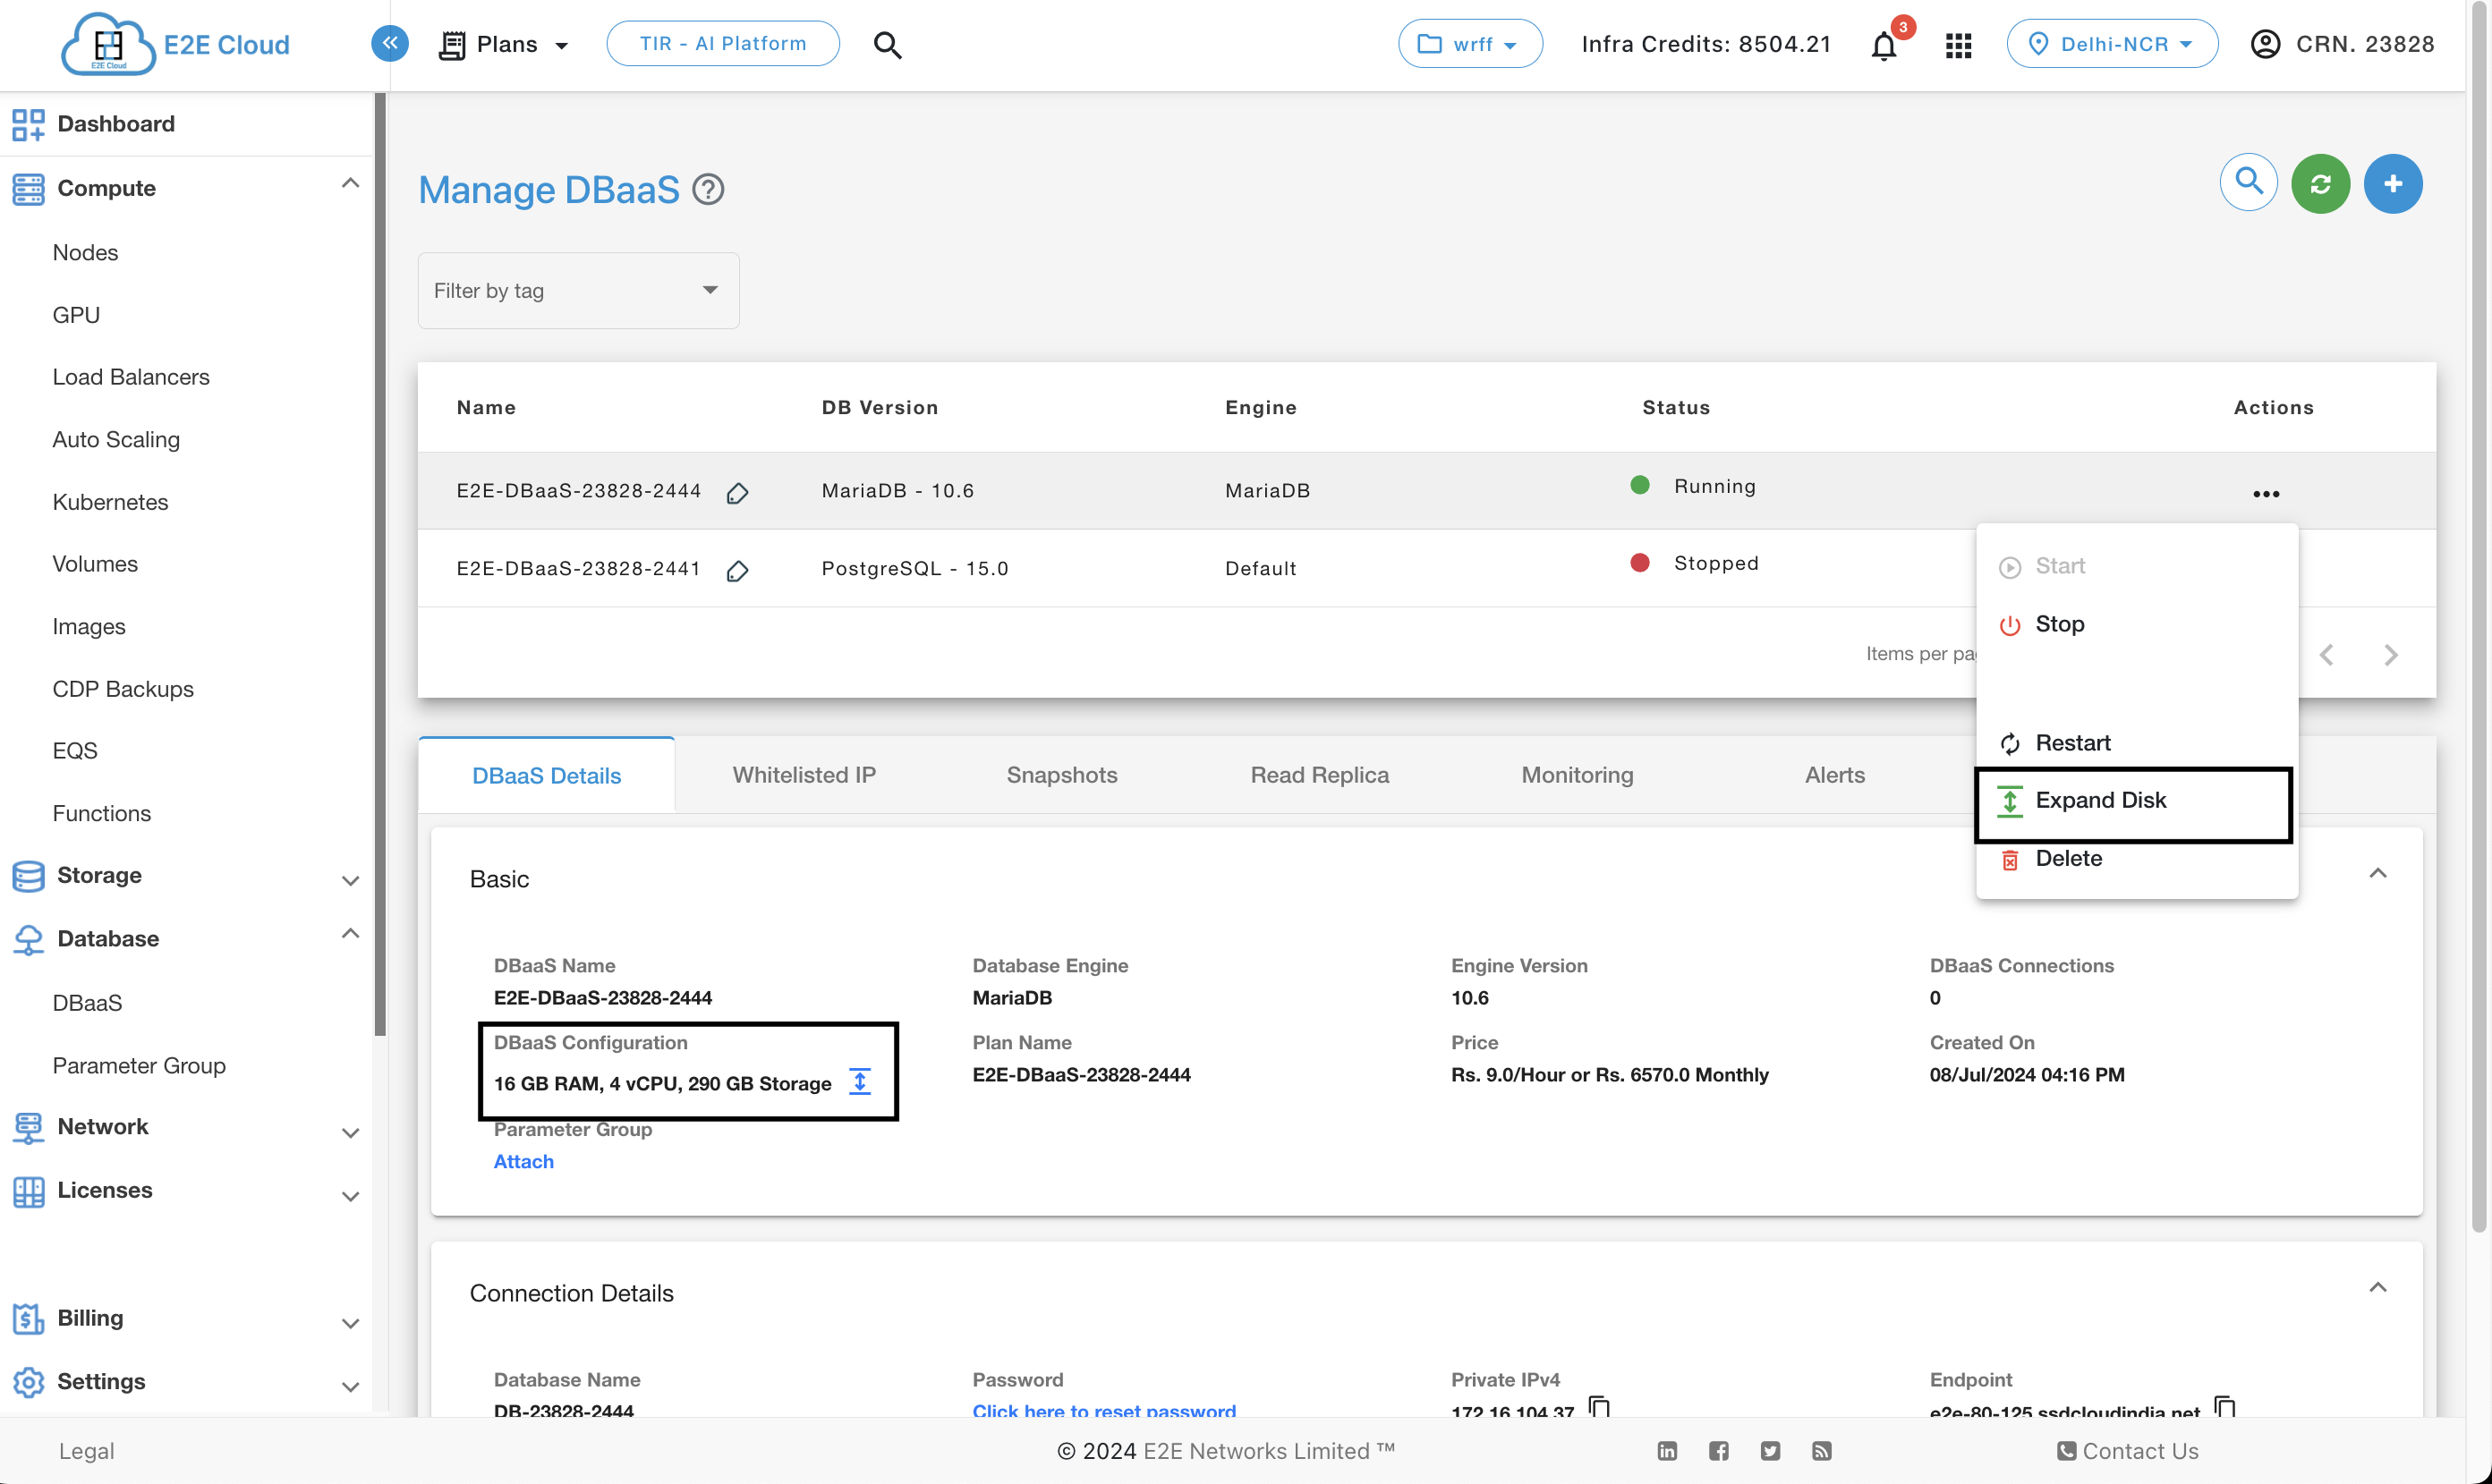
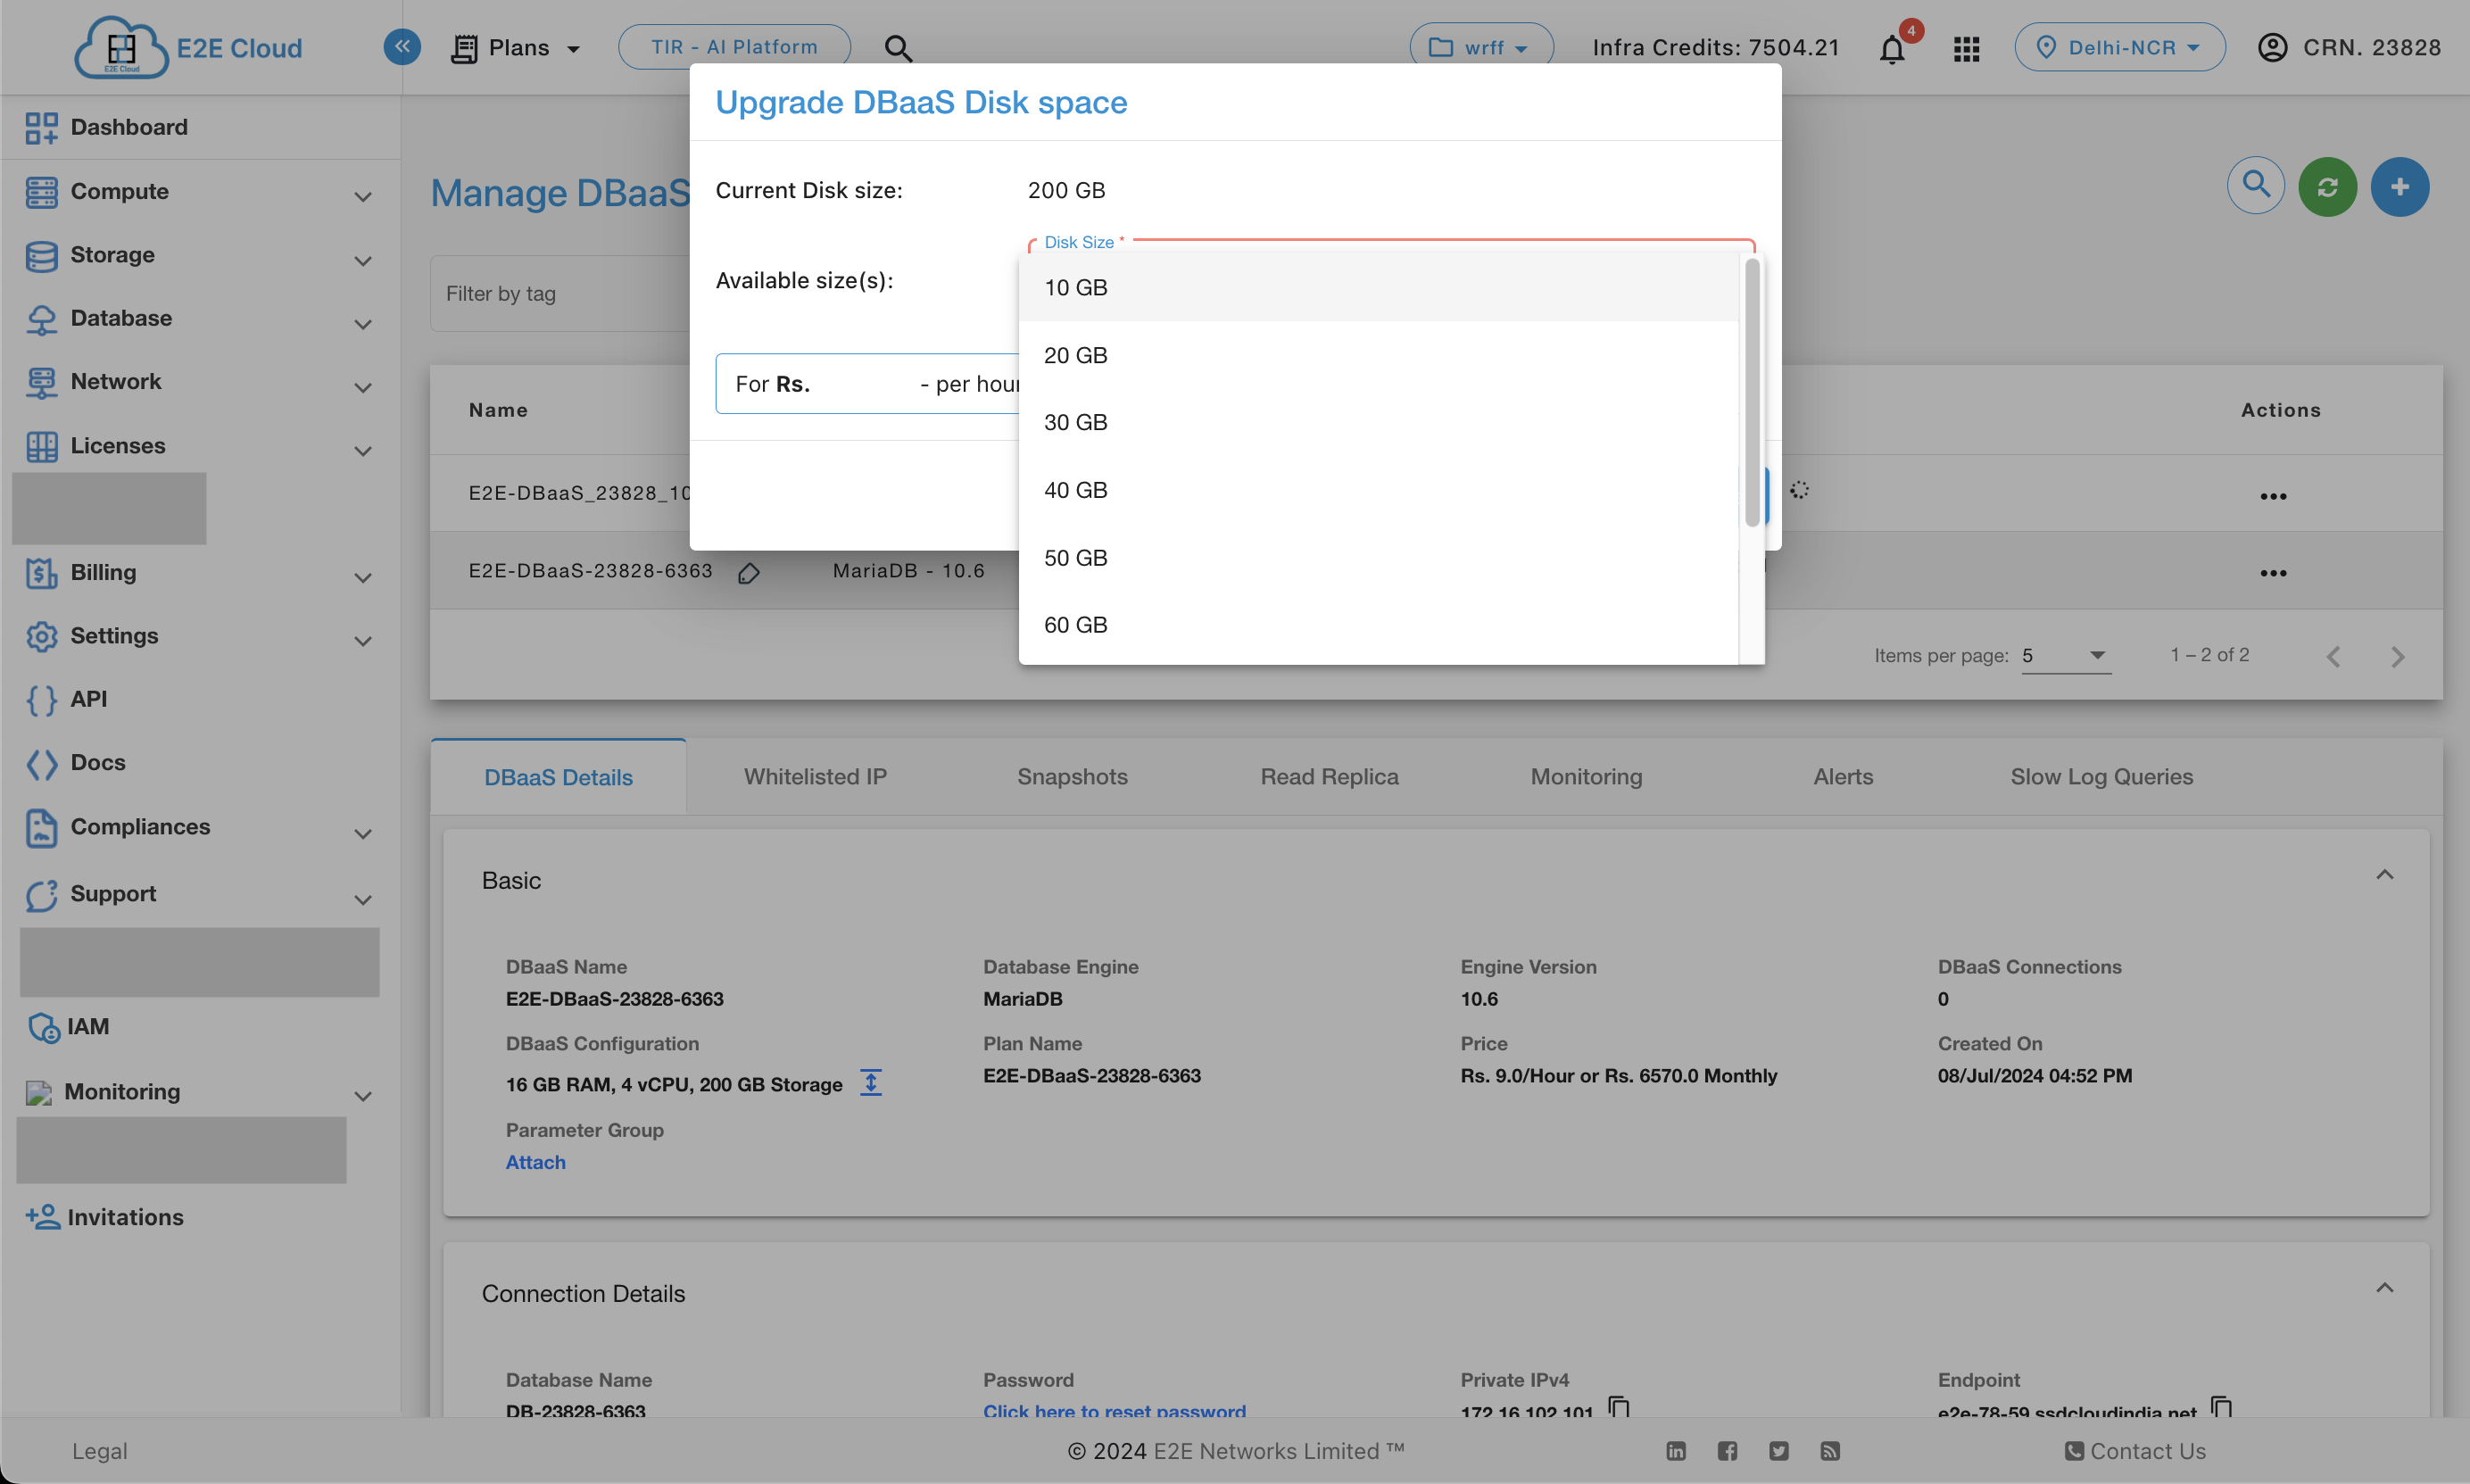
The DBaaS disk expand feature gives customers the option to expand the disk size of their DBaaS without the need to upgrade all the specifications.
This feature can be used only once for any DBaaS. This means that if, after expanding the disk size of any DBaaS one time, the customer wants to expand the disk size even more, then they will have to upgrade their DBaaS to a higher plan.
Delete your Database
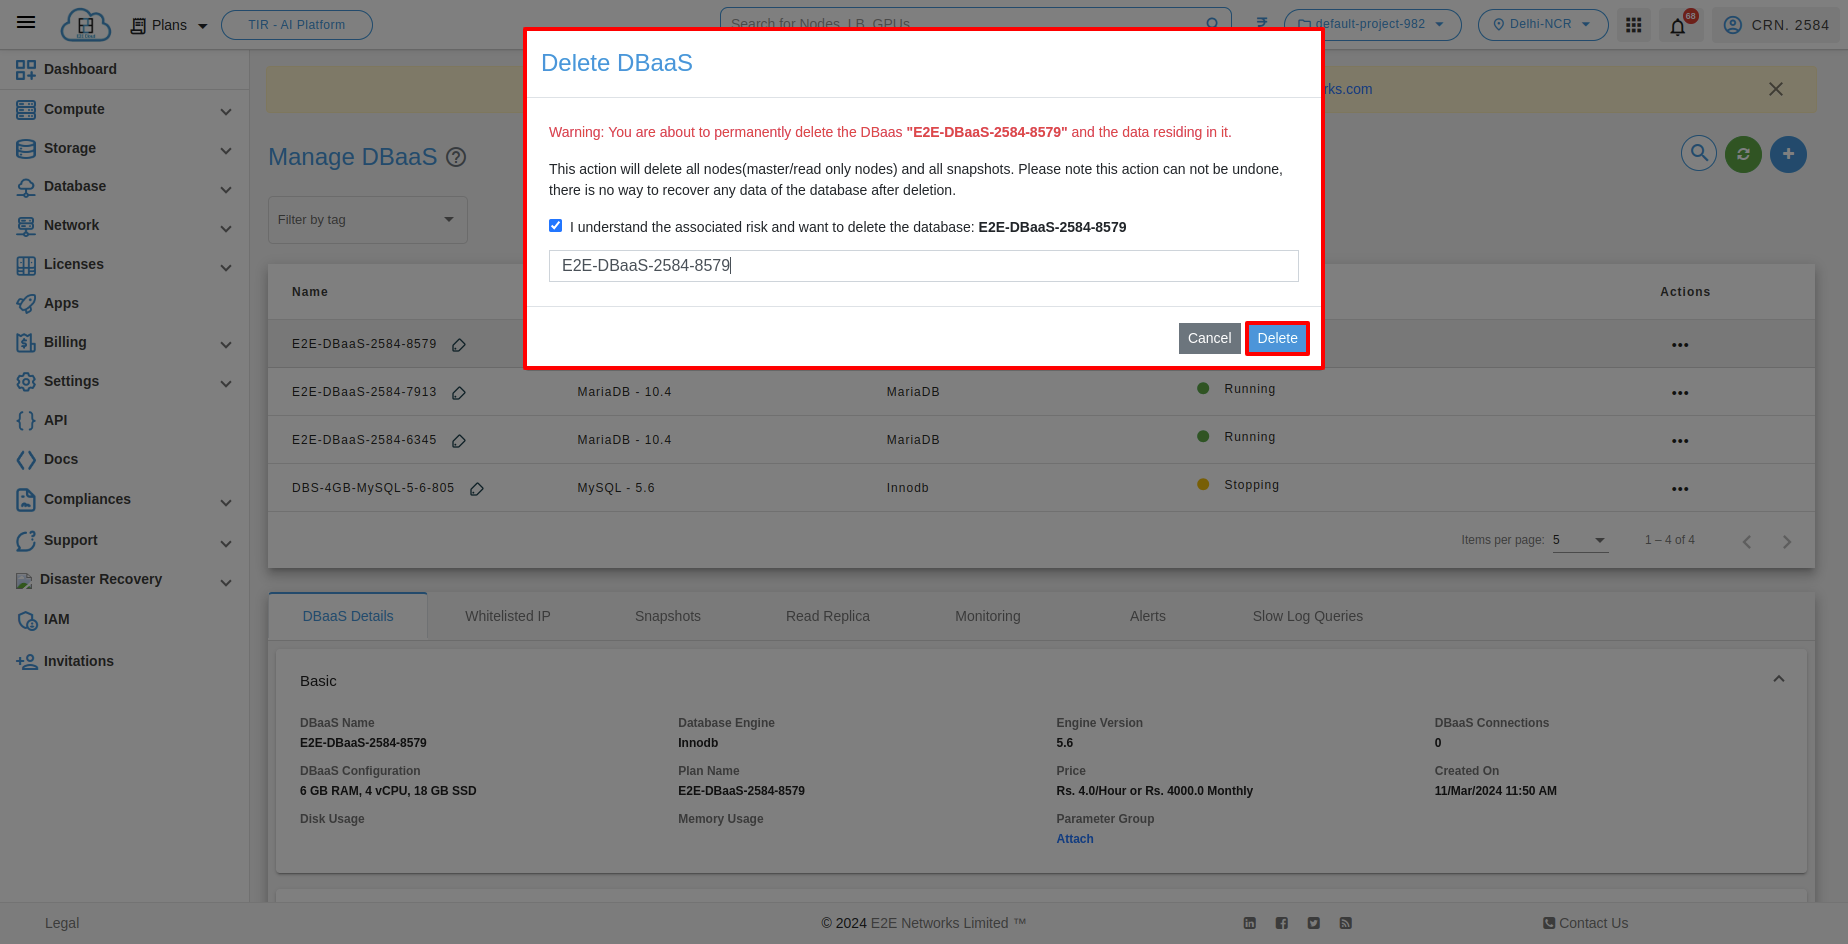
To delete your database, click on the Delete option. Please note that once you have deleted your database, you will not be able to recover it.
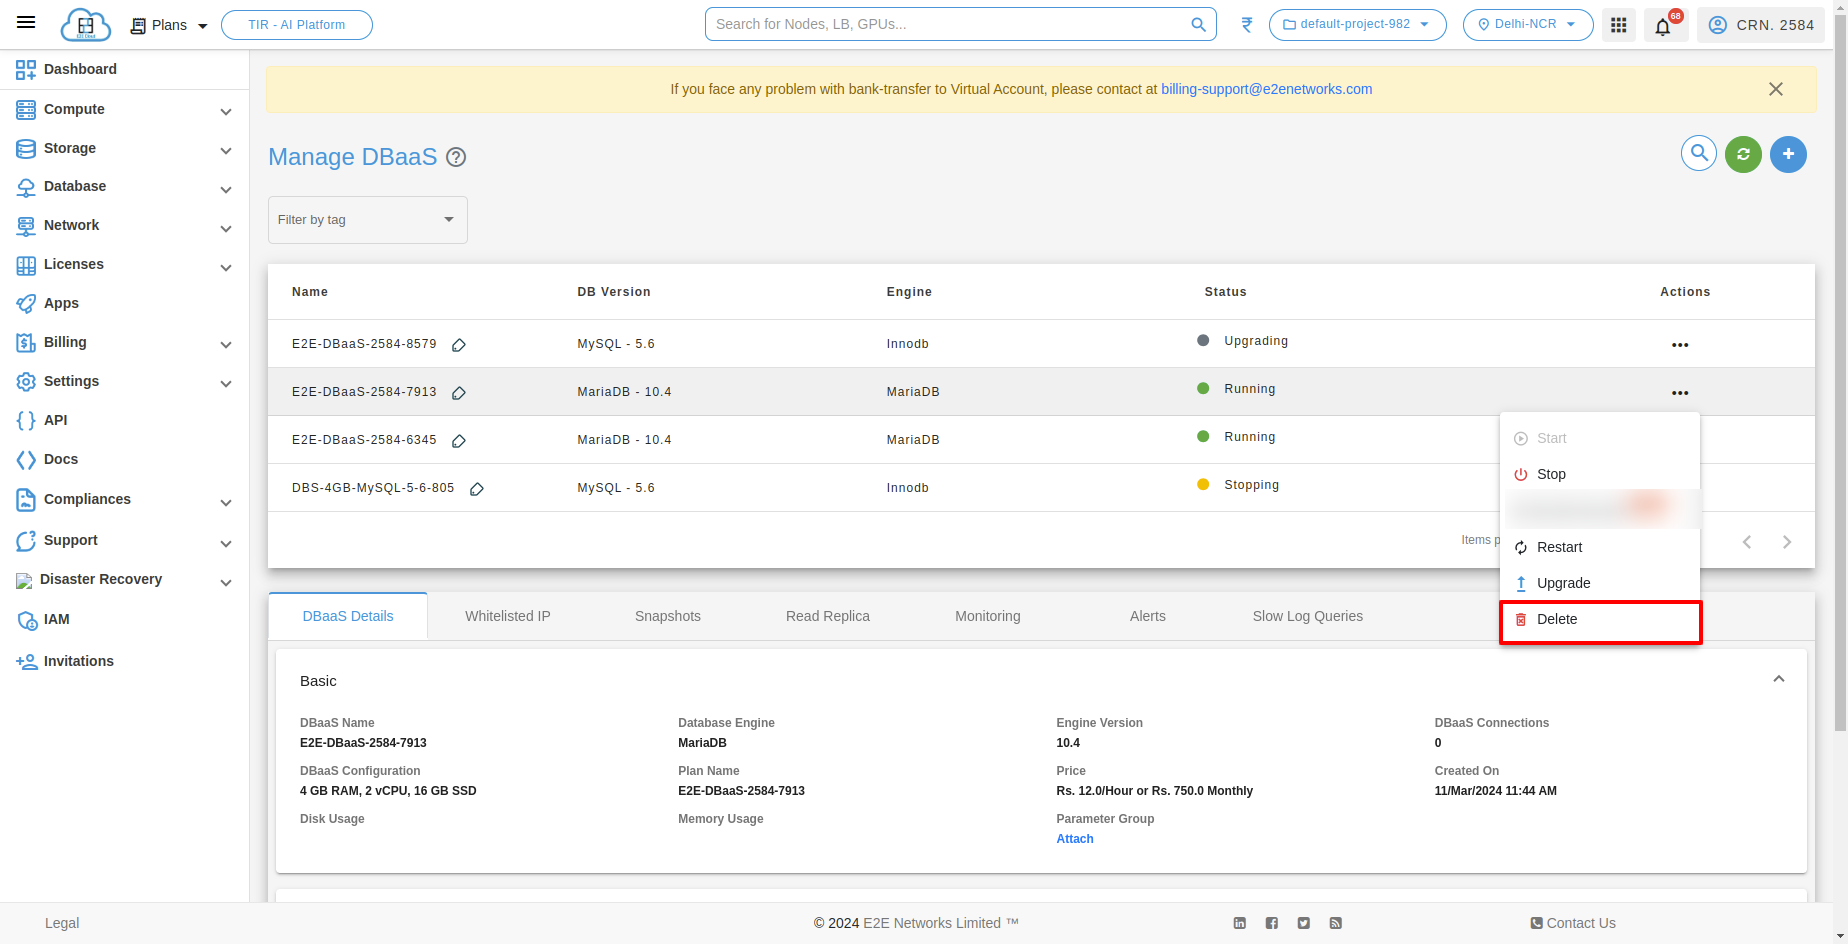
After clicking on delete, you will see a popup; click on delete.
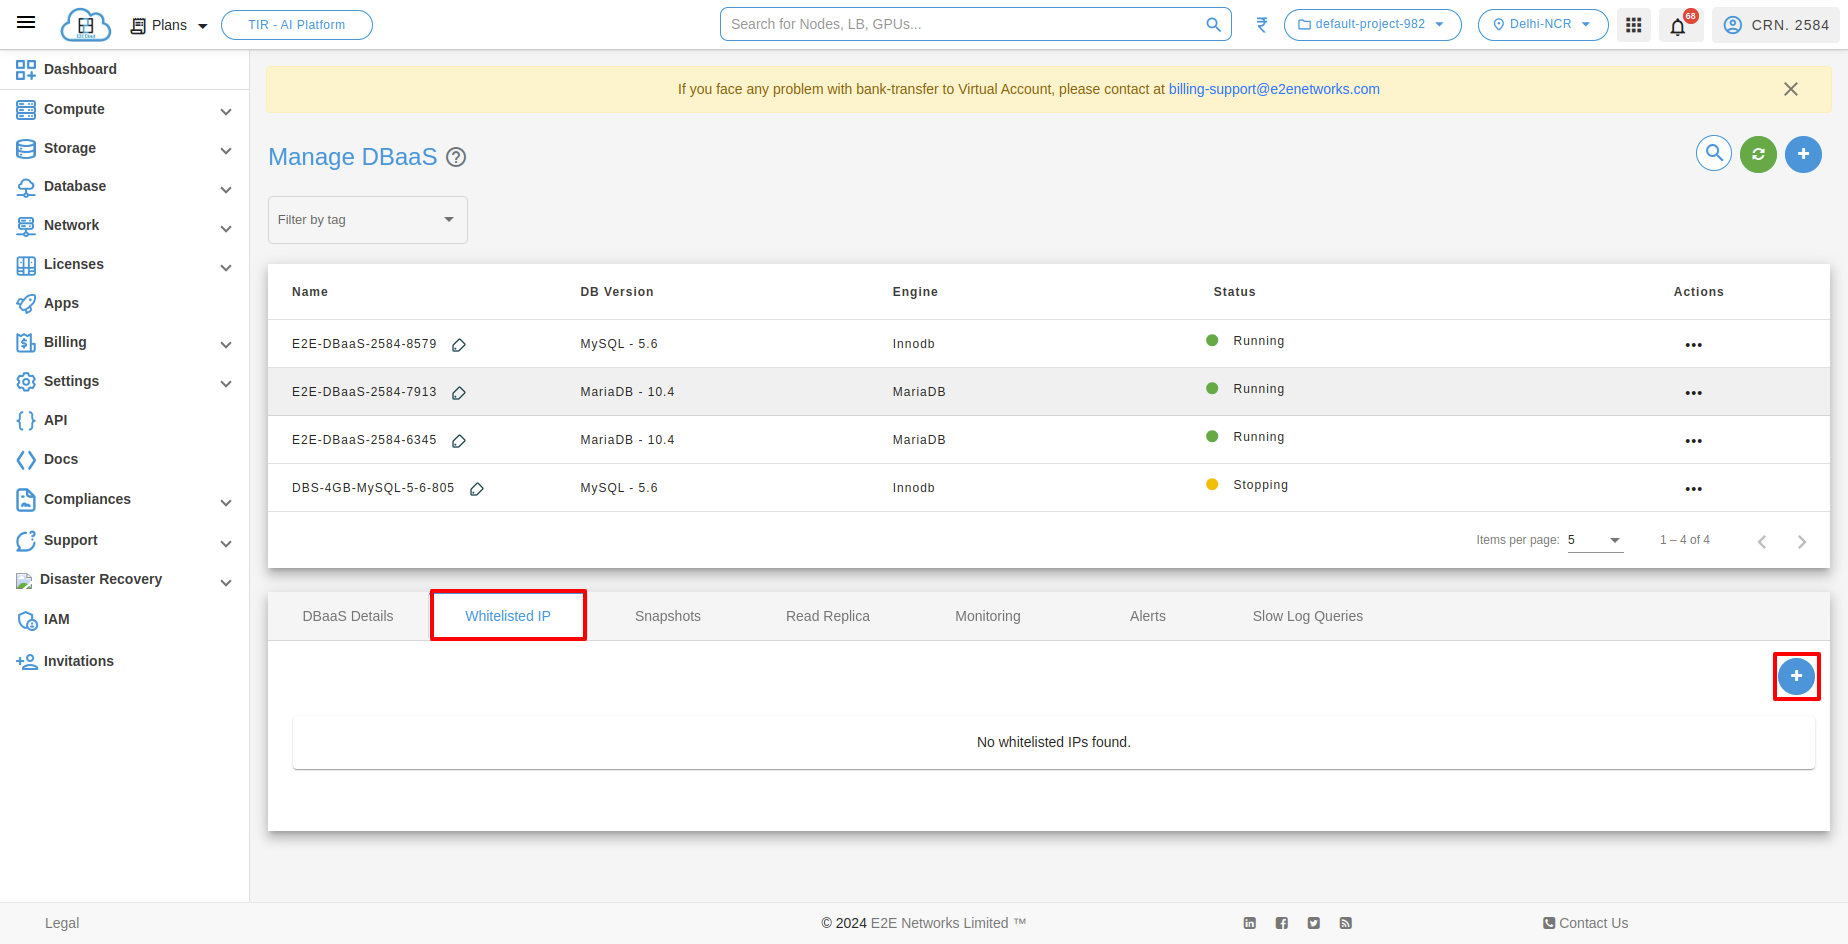
Whitelisted IP
Allow Trusted Host IPs: This setting controls the access of allowed host IPs that can connect to your database node from your trusted ISP IP. If no trusted host is selected, anyone can connect using credentials.
Click on the "Add icon" to add a new trusted IP address to the list.
Instead of using the default local loopback IP address (127.0.0.1), provide the private IP address of the node you want to whitelist. Confirm and save the changes.
The green mark likely indicates a successful addition of the trusted IP.
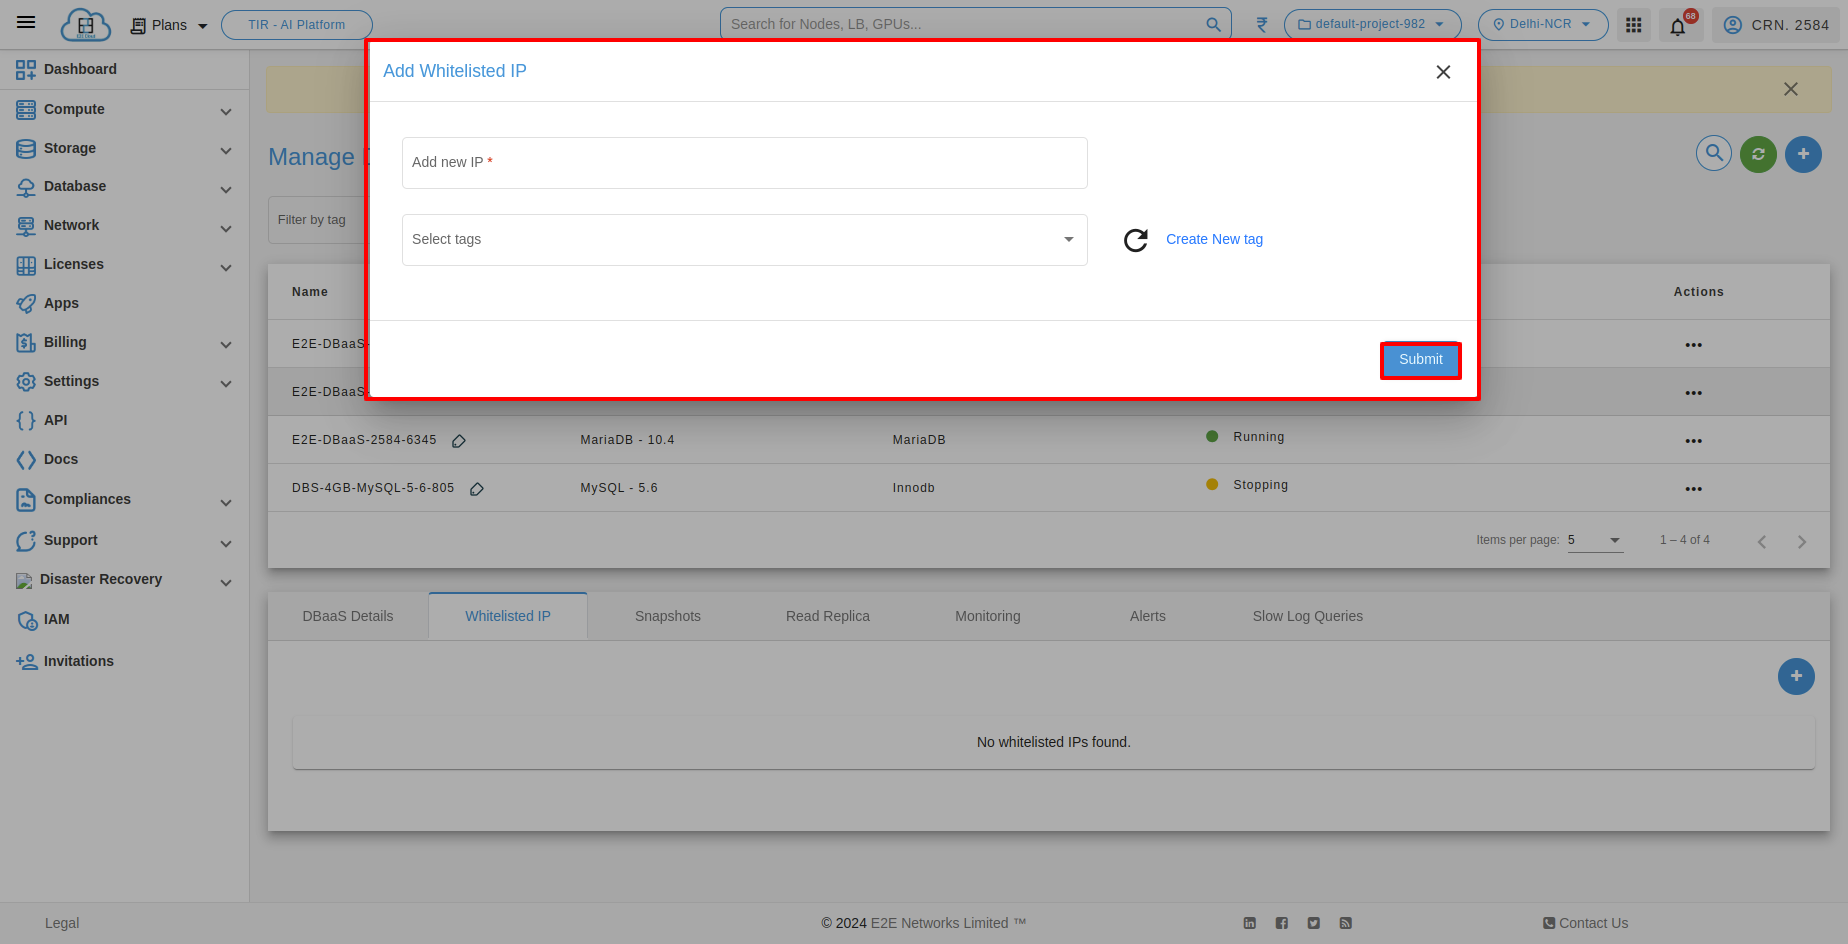
If you want to categorize or label the trusted IP for organizational purposes, you can add a tag with a custom name.
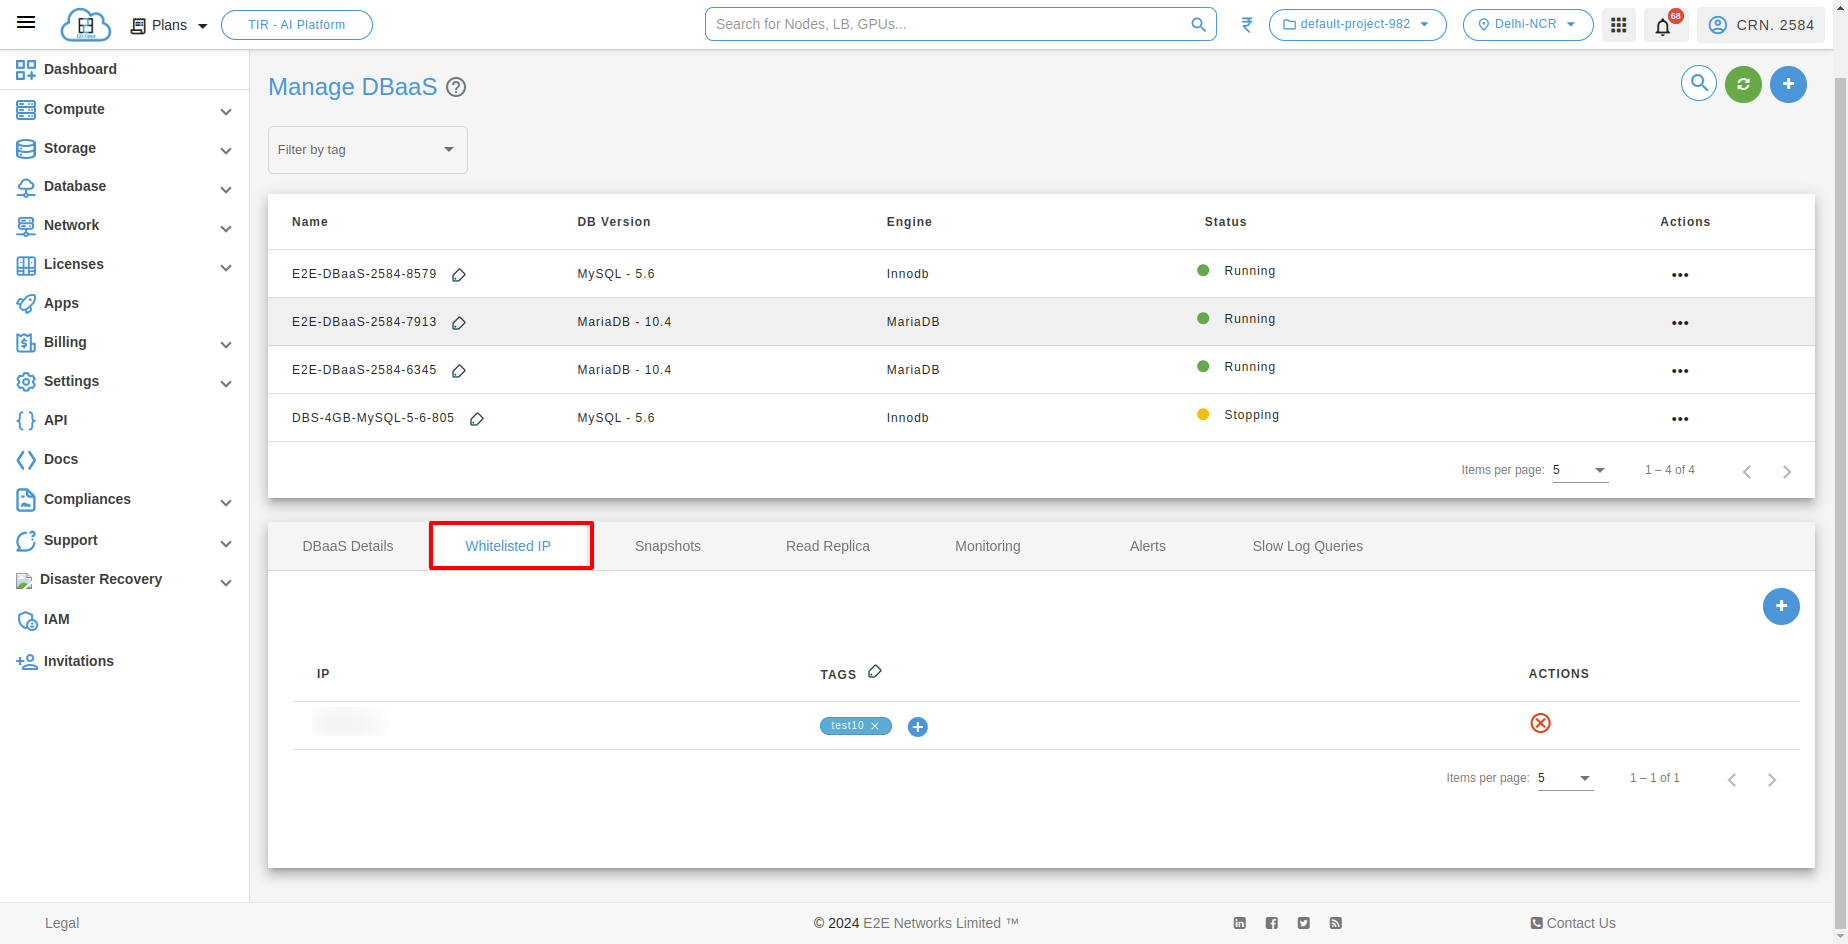
Now, you have successfully whitelisted the node IP in the DBaaS environment.
Additionally, always follow best practices for securing databases and regularly monitor them. This helps to prevent brute-force password and denial-of-service attacks from any server not explicitly permitted to connect.
Snapshots
The snapshot feature is valuable for data protection, disaster recovery, and testing scenarios, providing users with the ability to easily revert to a previous database state or create duplicates for various purposes. We use "restore snapshot" to quickly recover lost or corrupted data, recover from system failures, and revert to a stable state in case of issues during testing or updates. It's like a fast-forward button to a previously known good state of a system.
Take Manual Snapshot of Database
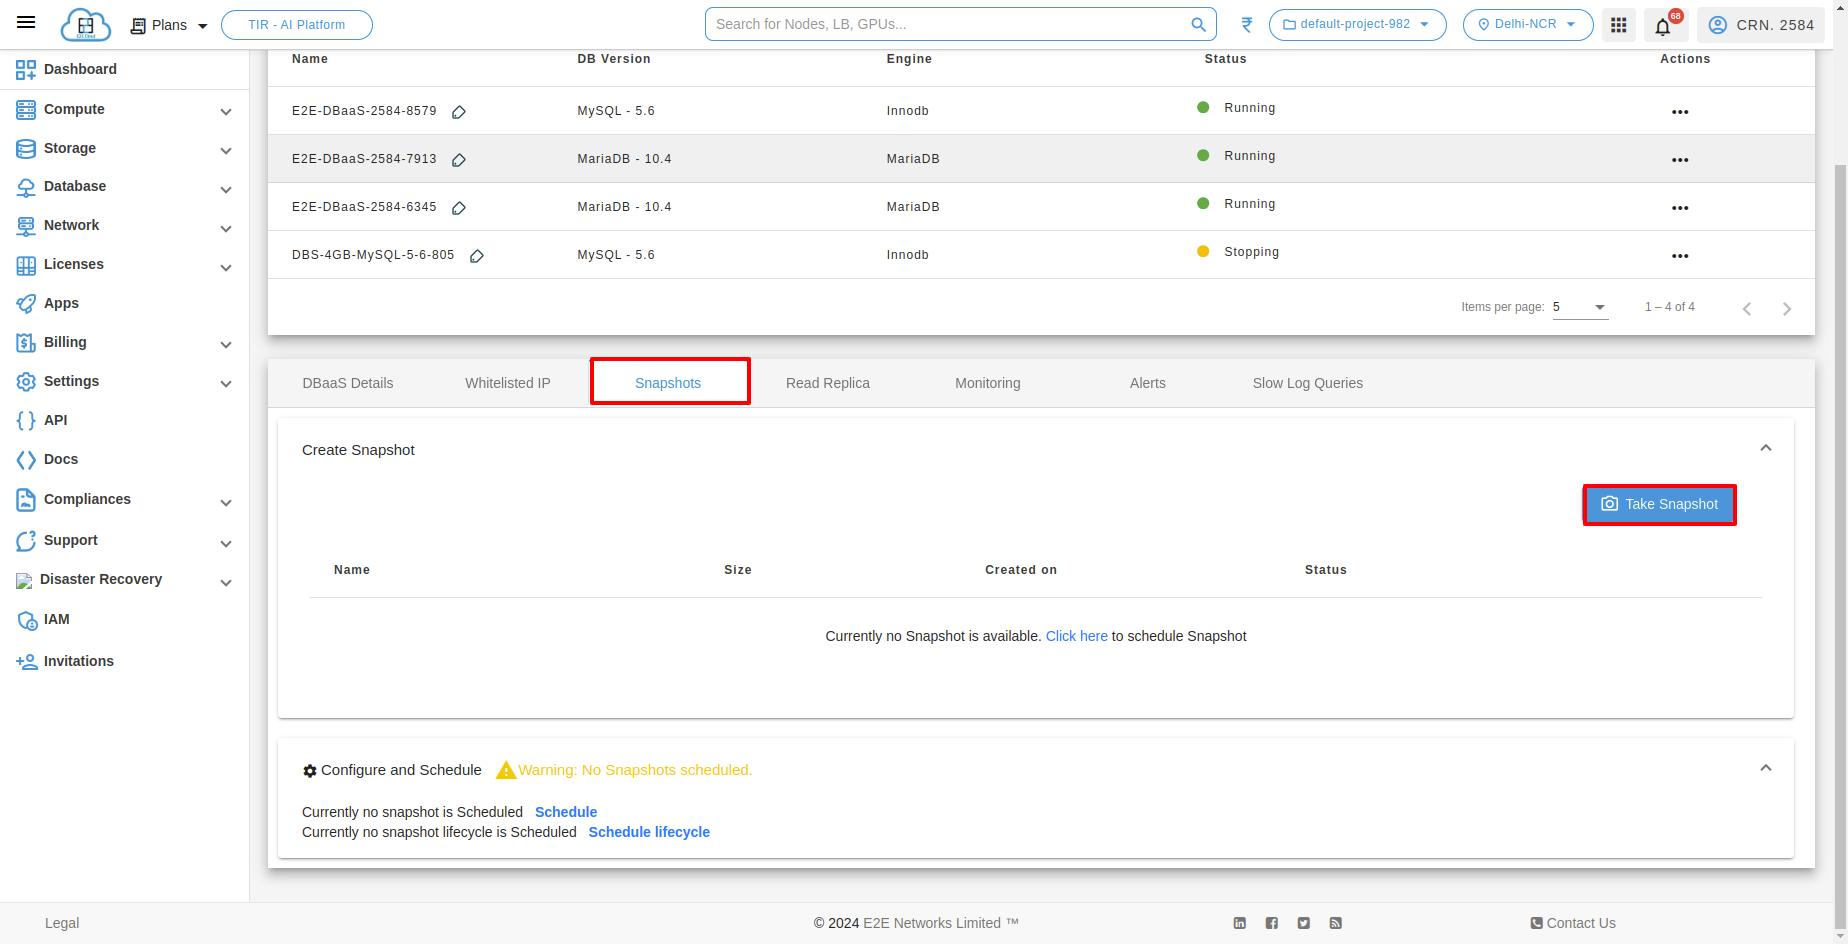
When the user wants to take a snapshot immediately and manually, they can click on the take snapshot button.
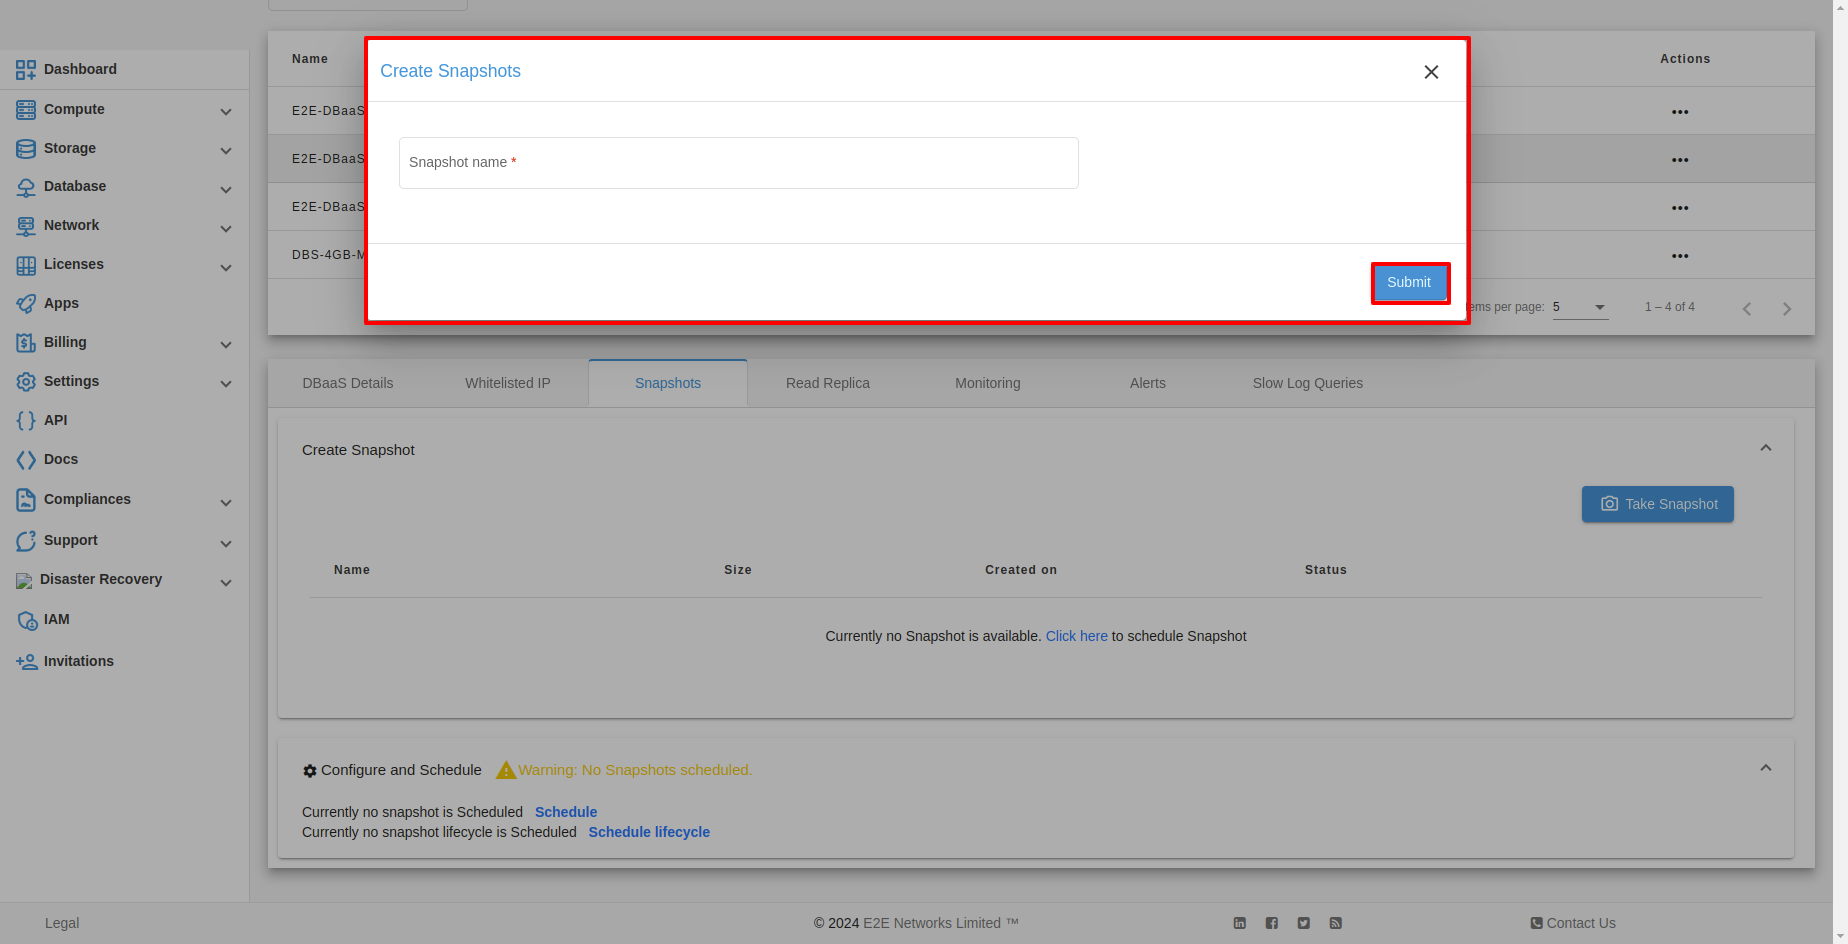
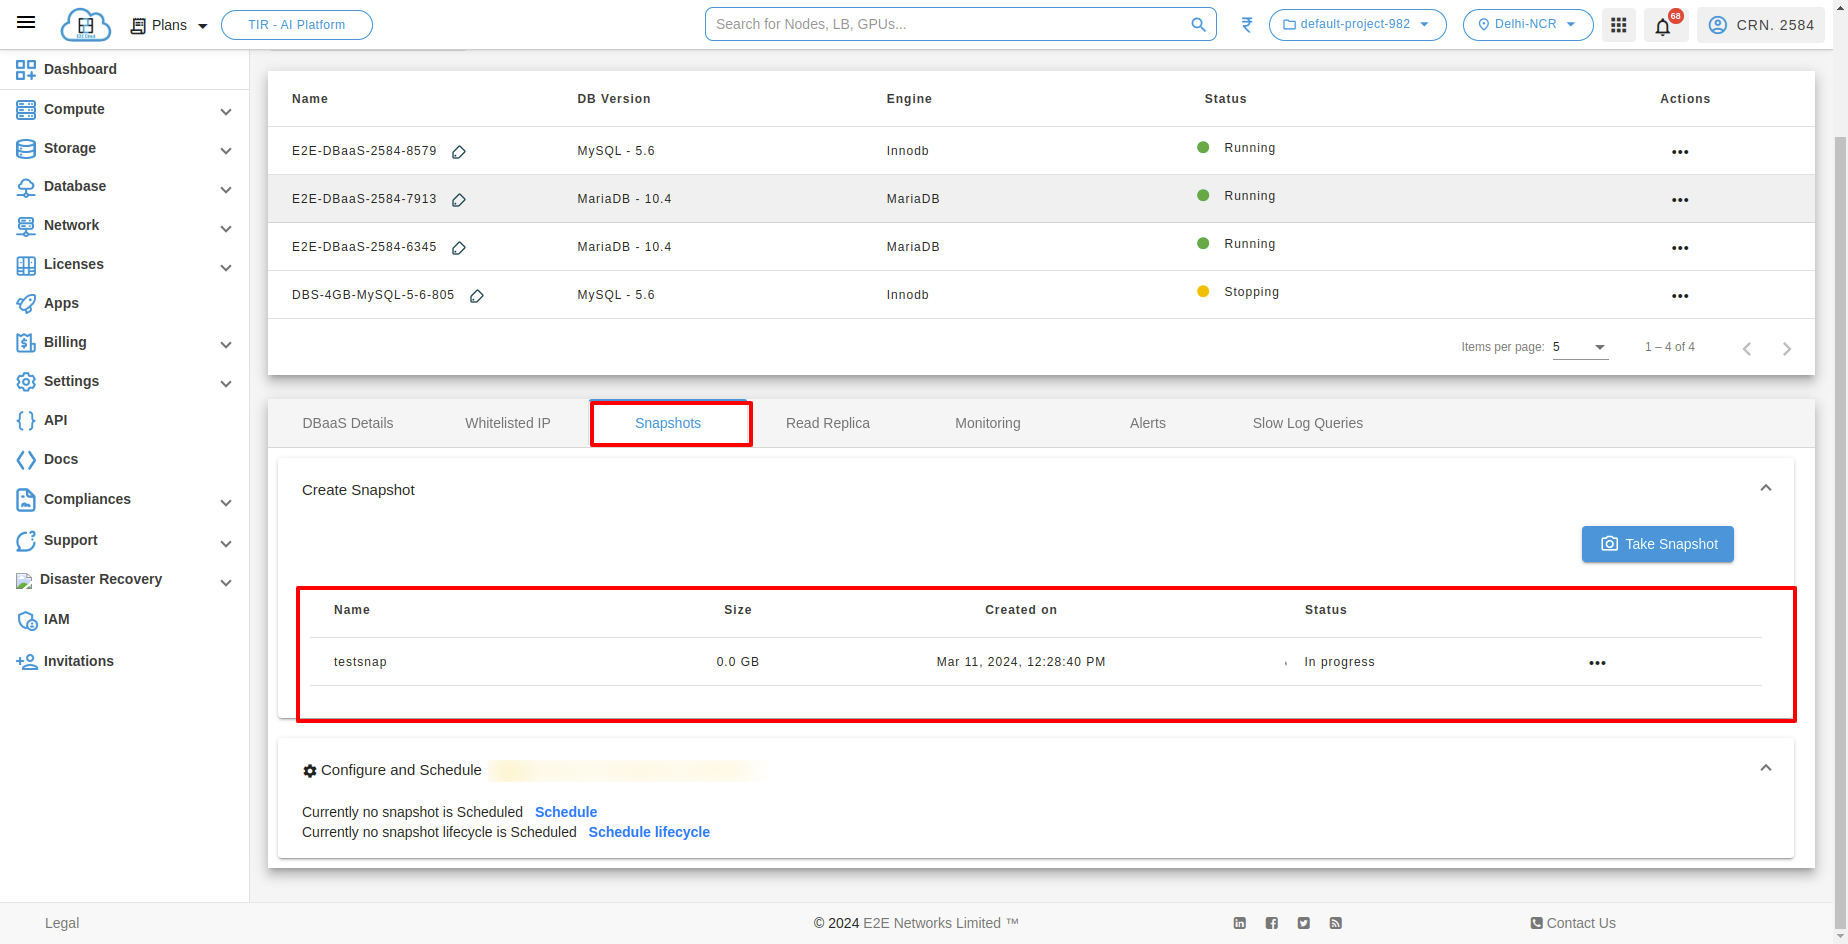
After clicking on the take snapshot button, a popup menu will appear, prompting you to enter the snapshot name. Provide the snapshot name and click on 'create snapshot' to initiate the snapshot creation.
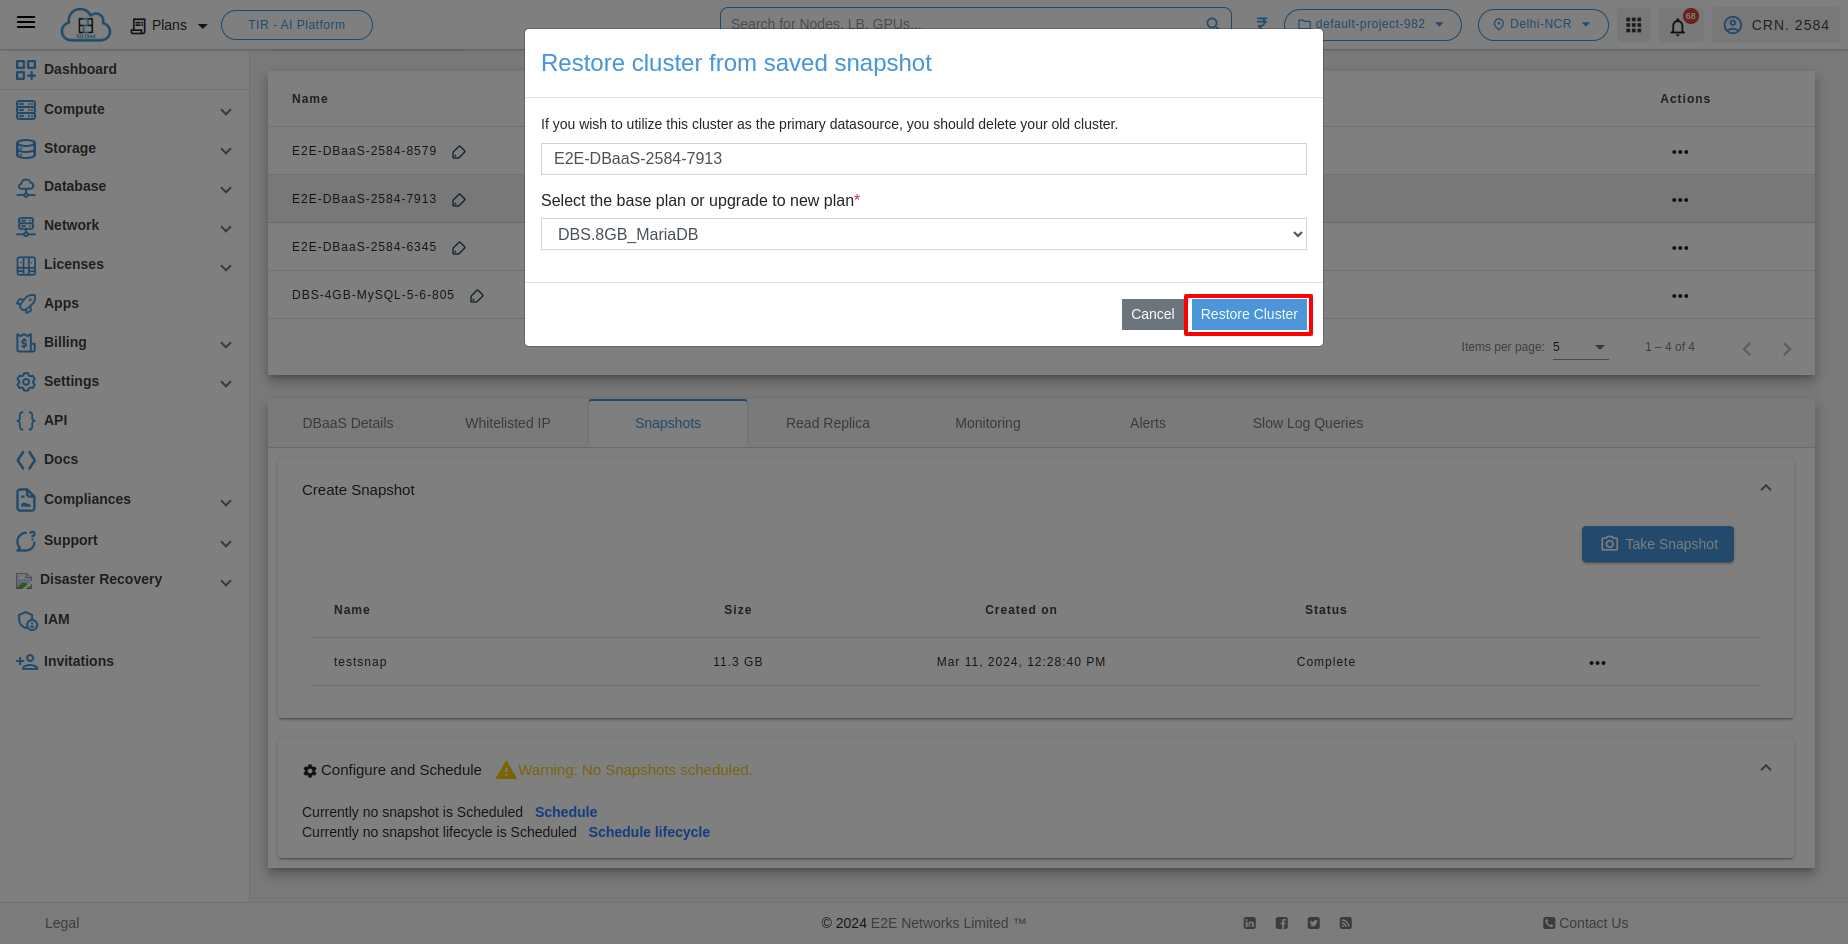
Restore Snapshot
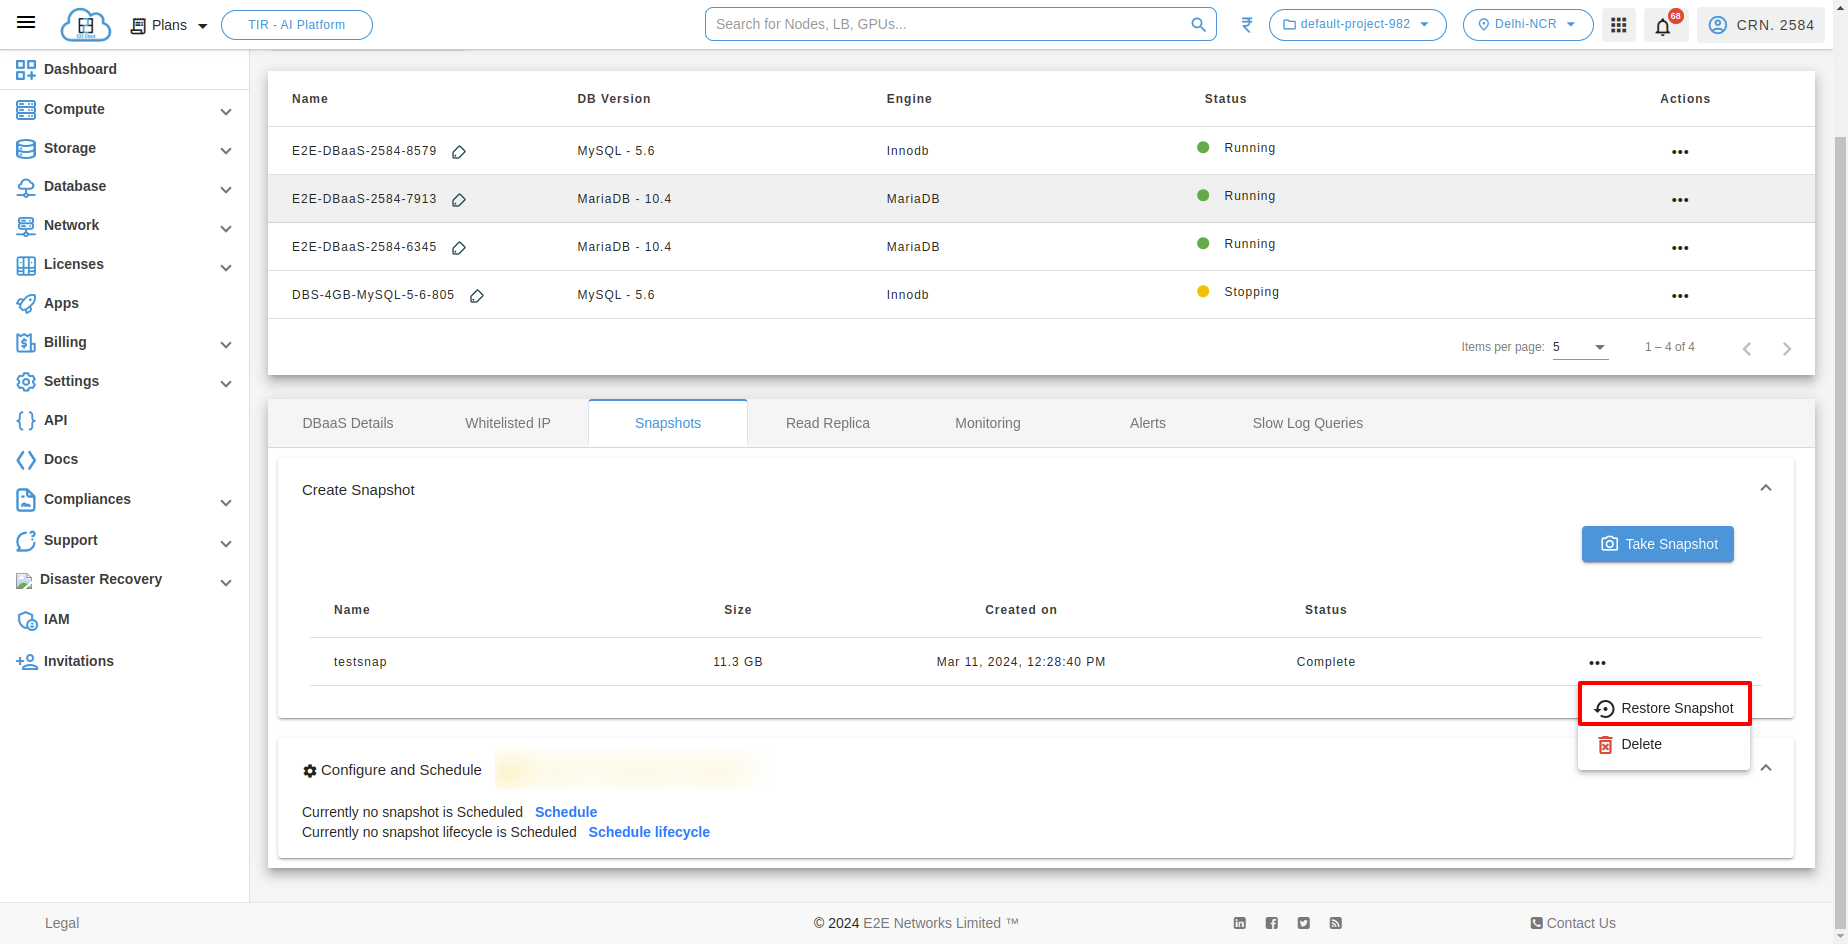
To restore the snapshot from the saved file, click the action button, select the 'restore' option, and proceed with the snapshot restoration.
Delete Snapshot
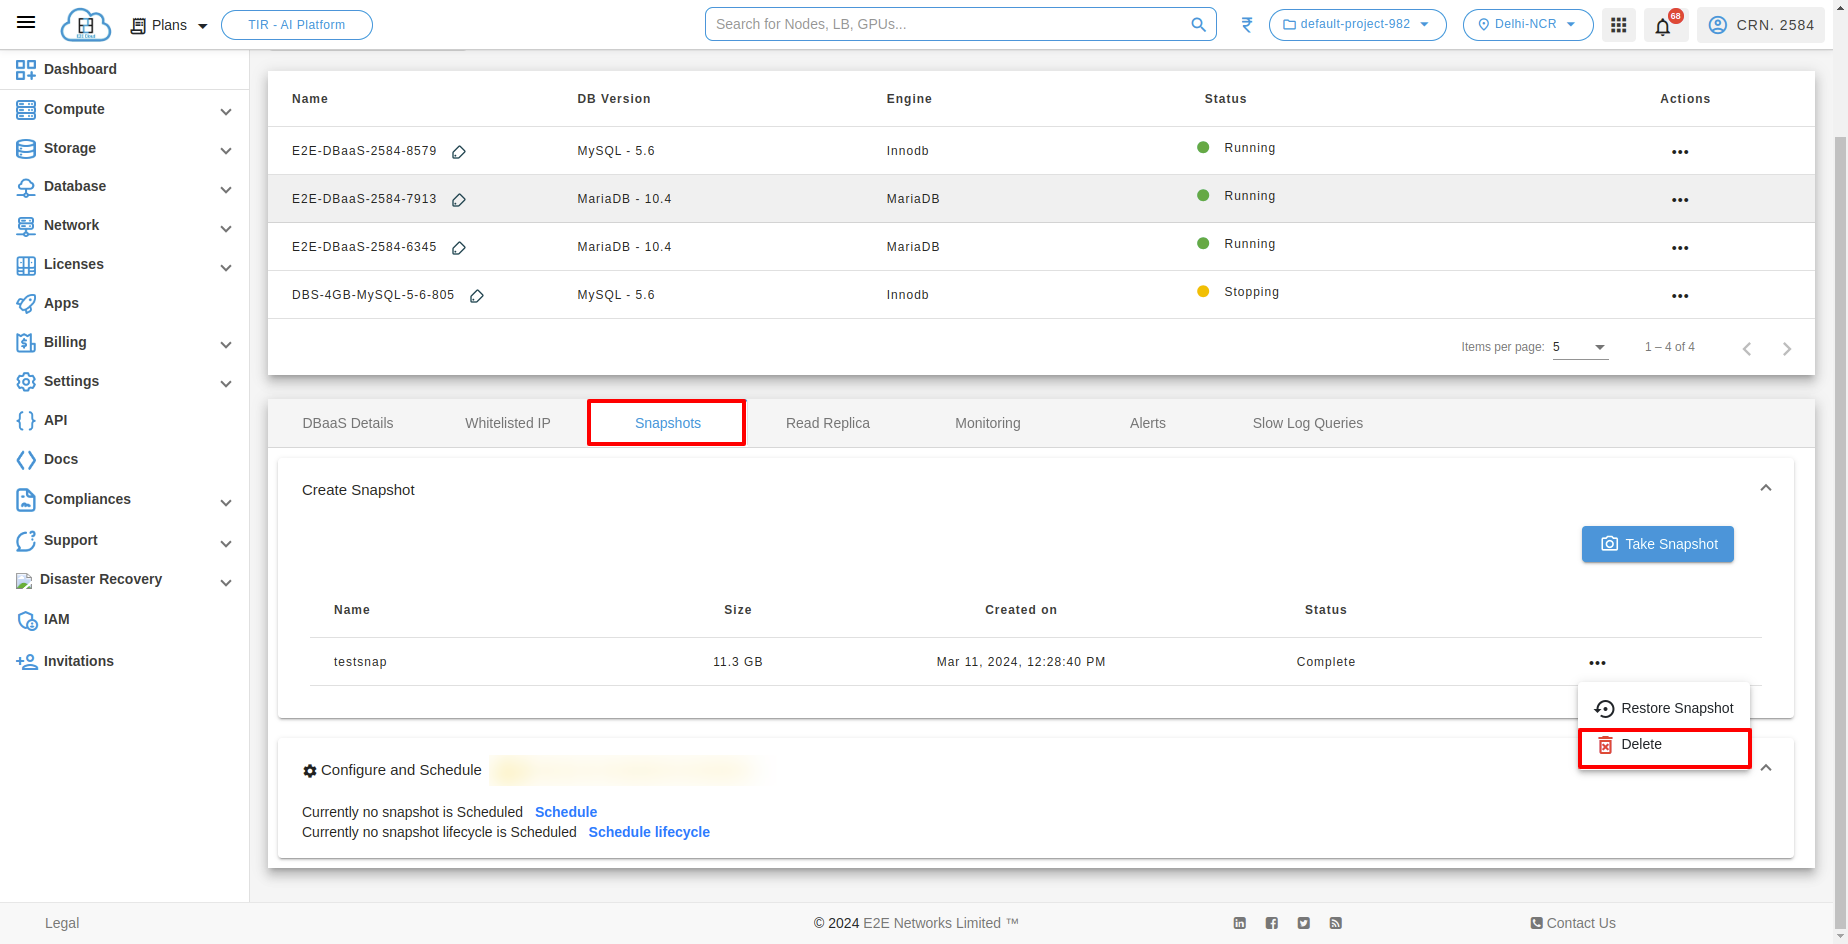
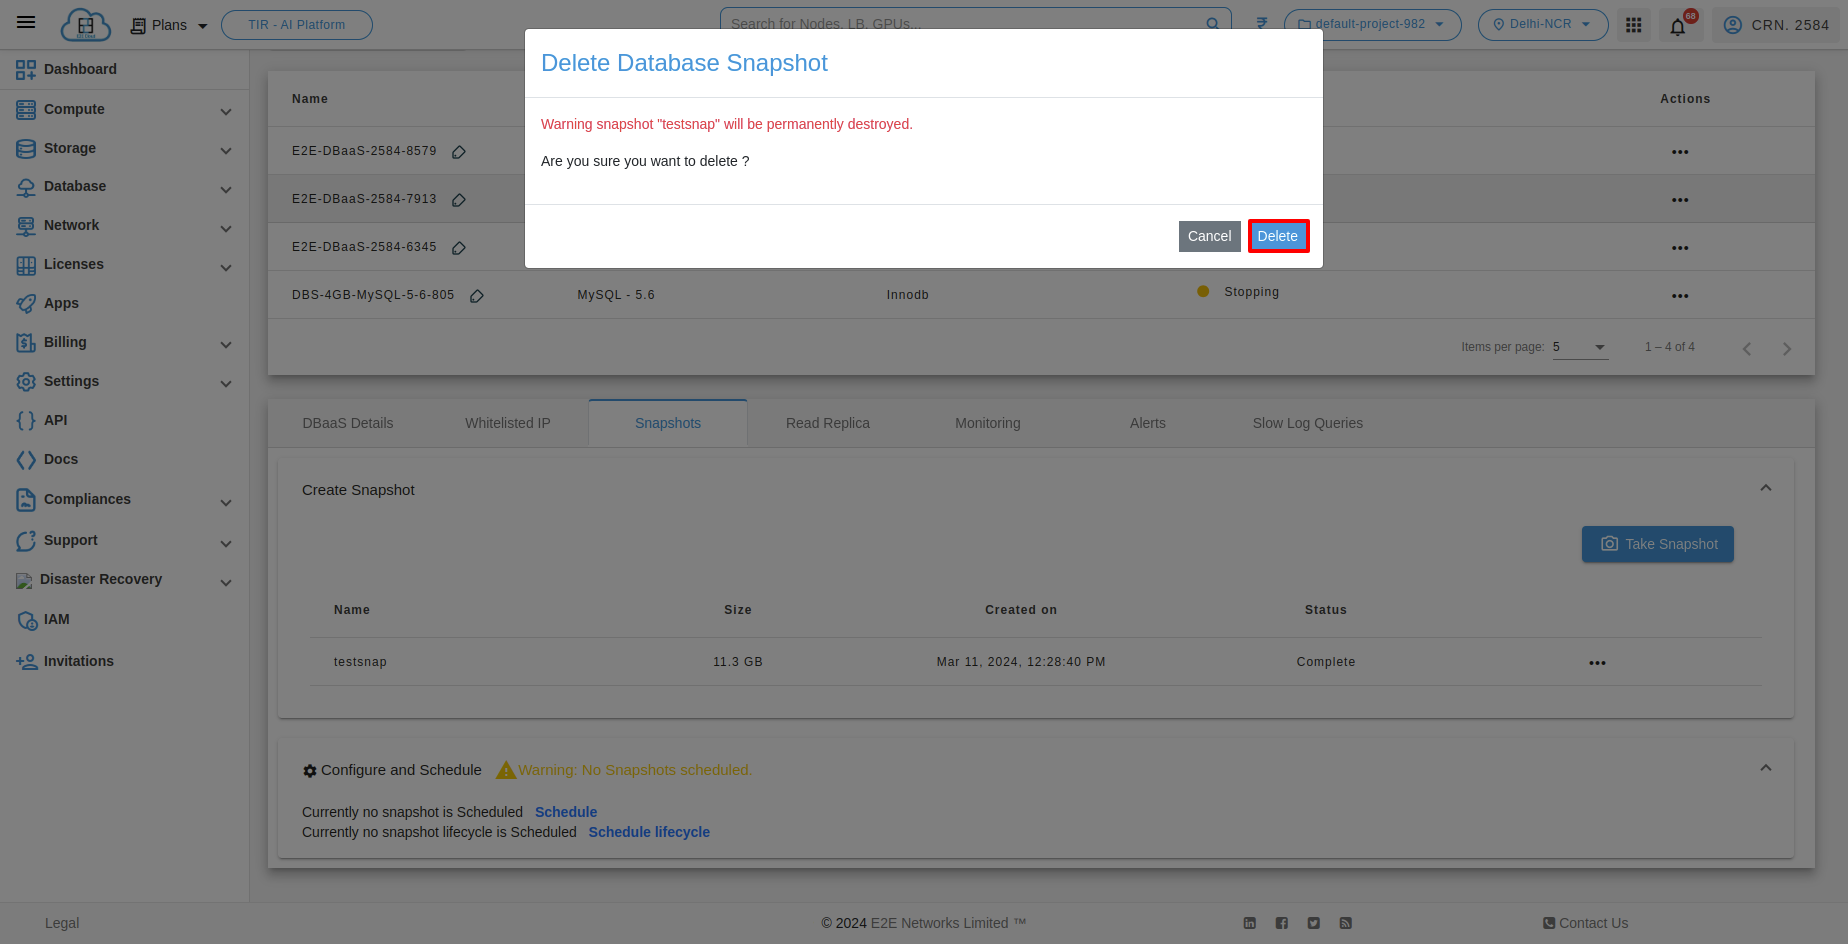
When a user wants to delete the snapshot, they can remove it from the snapshot list.
To delete a snapshot, click the action button, select the delete option, and confirm the deletion of the snapshot.
Scheduled Snapshot
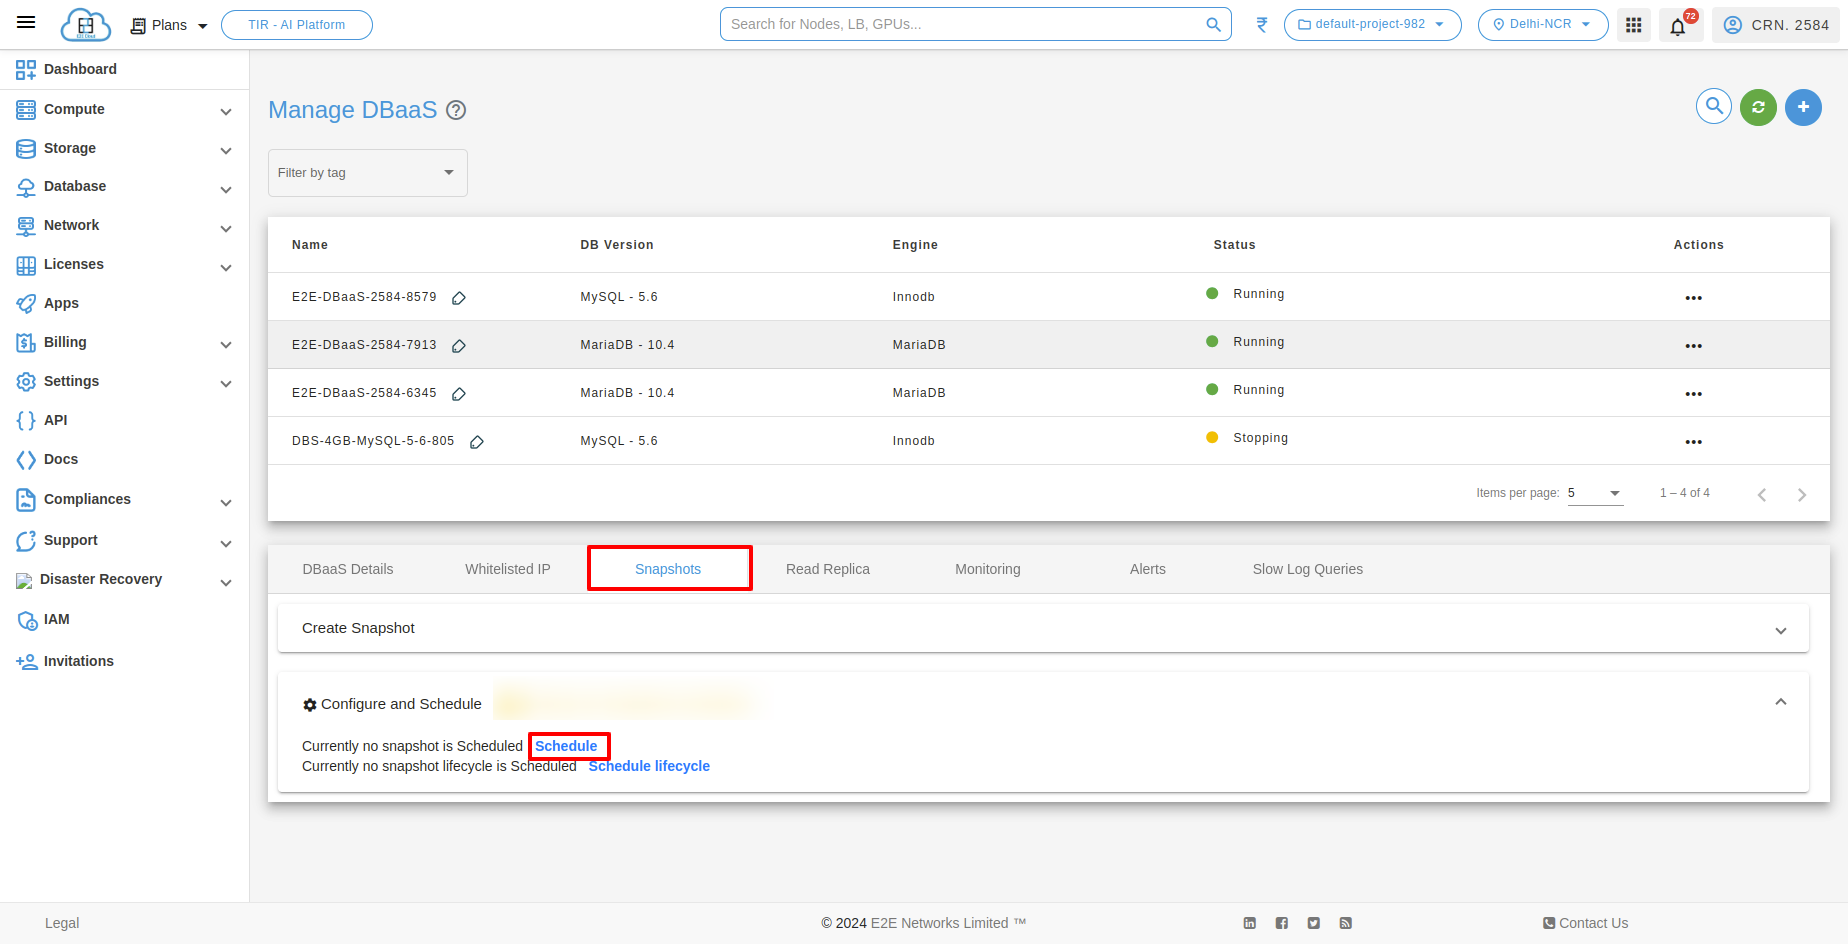
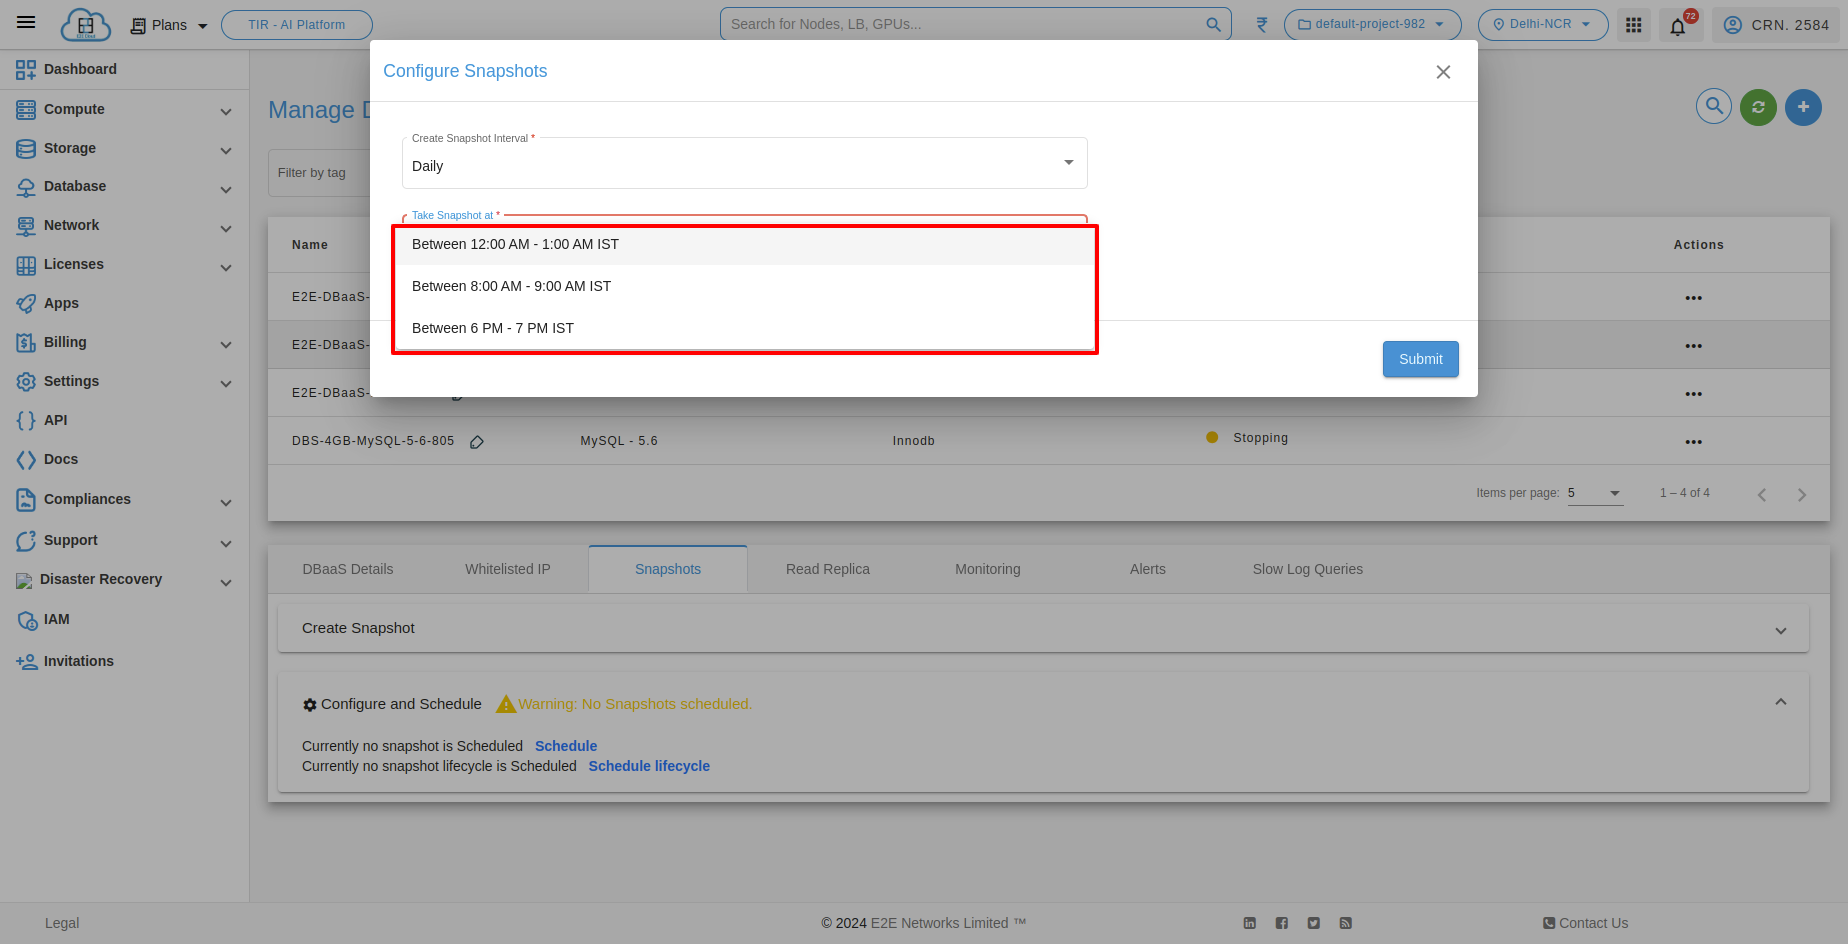
Scheduled snapshots are a proactive approach to data management and system backup, providing regular and automated snapshots to enhance data protection, disaster recovery, and overall system reliability. When a user schedules a time duration, a snapshot will be created every day within the specified timeframe.
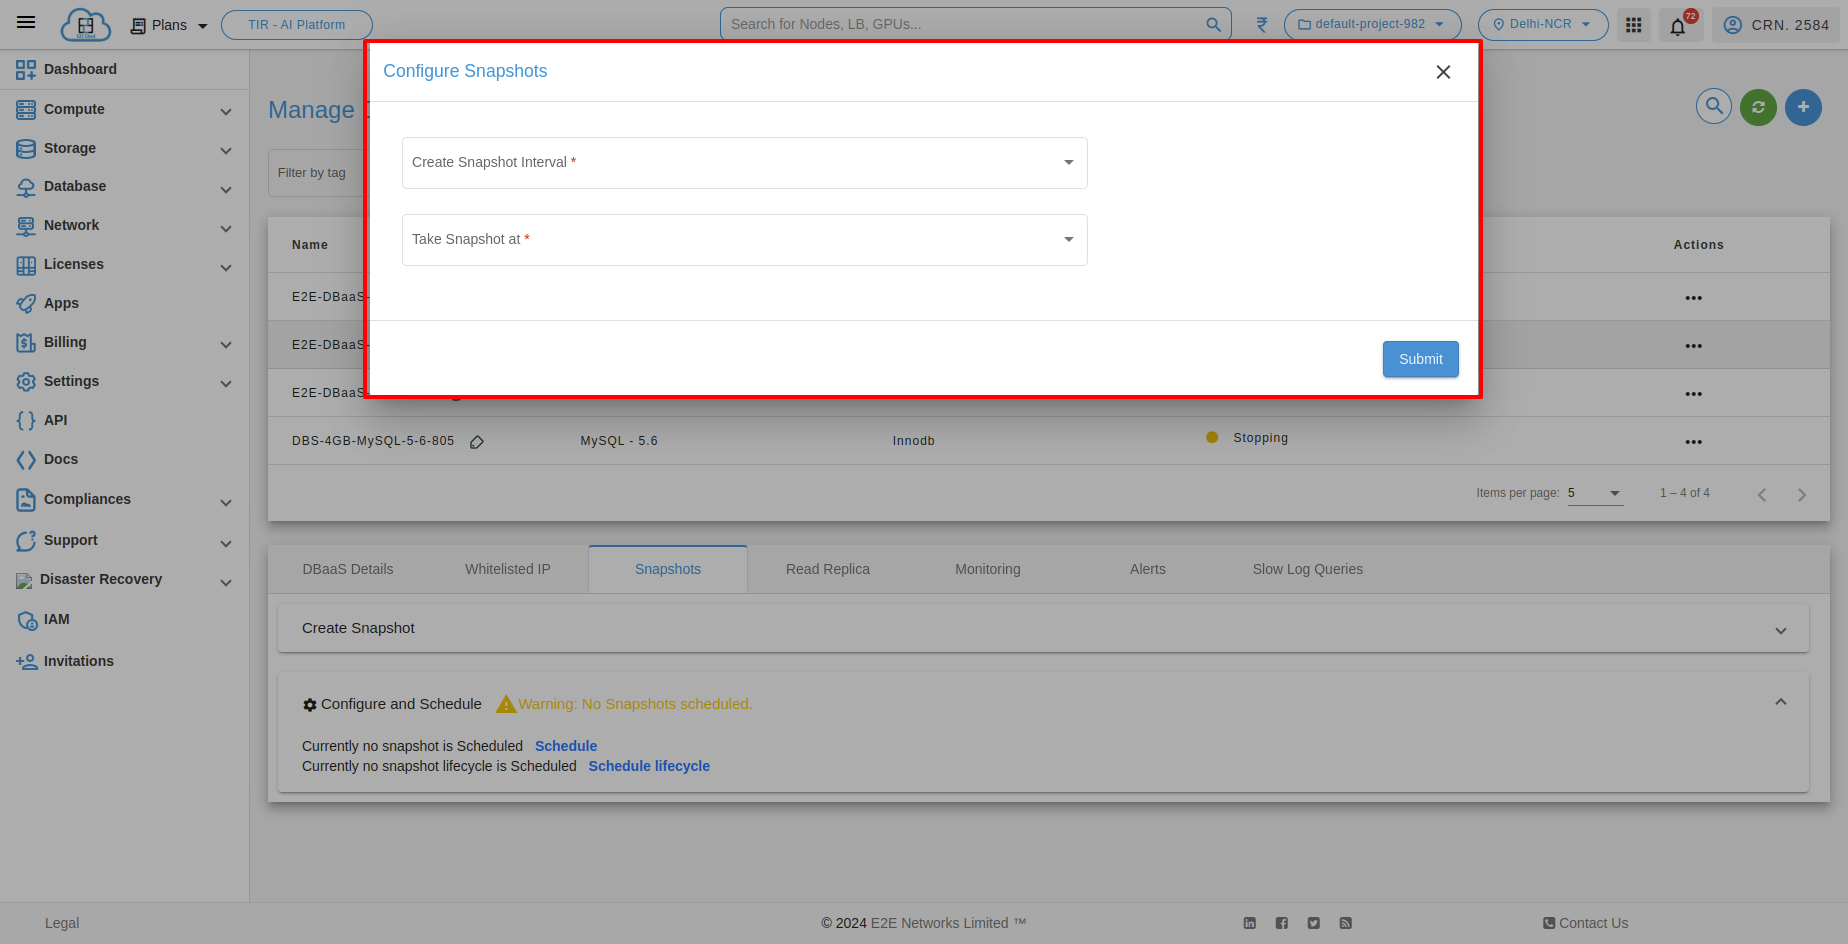
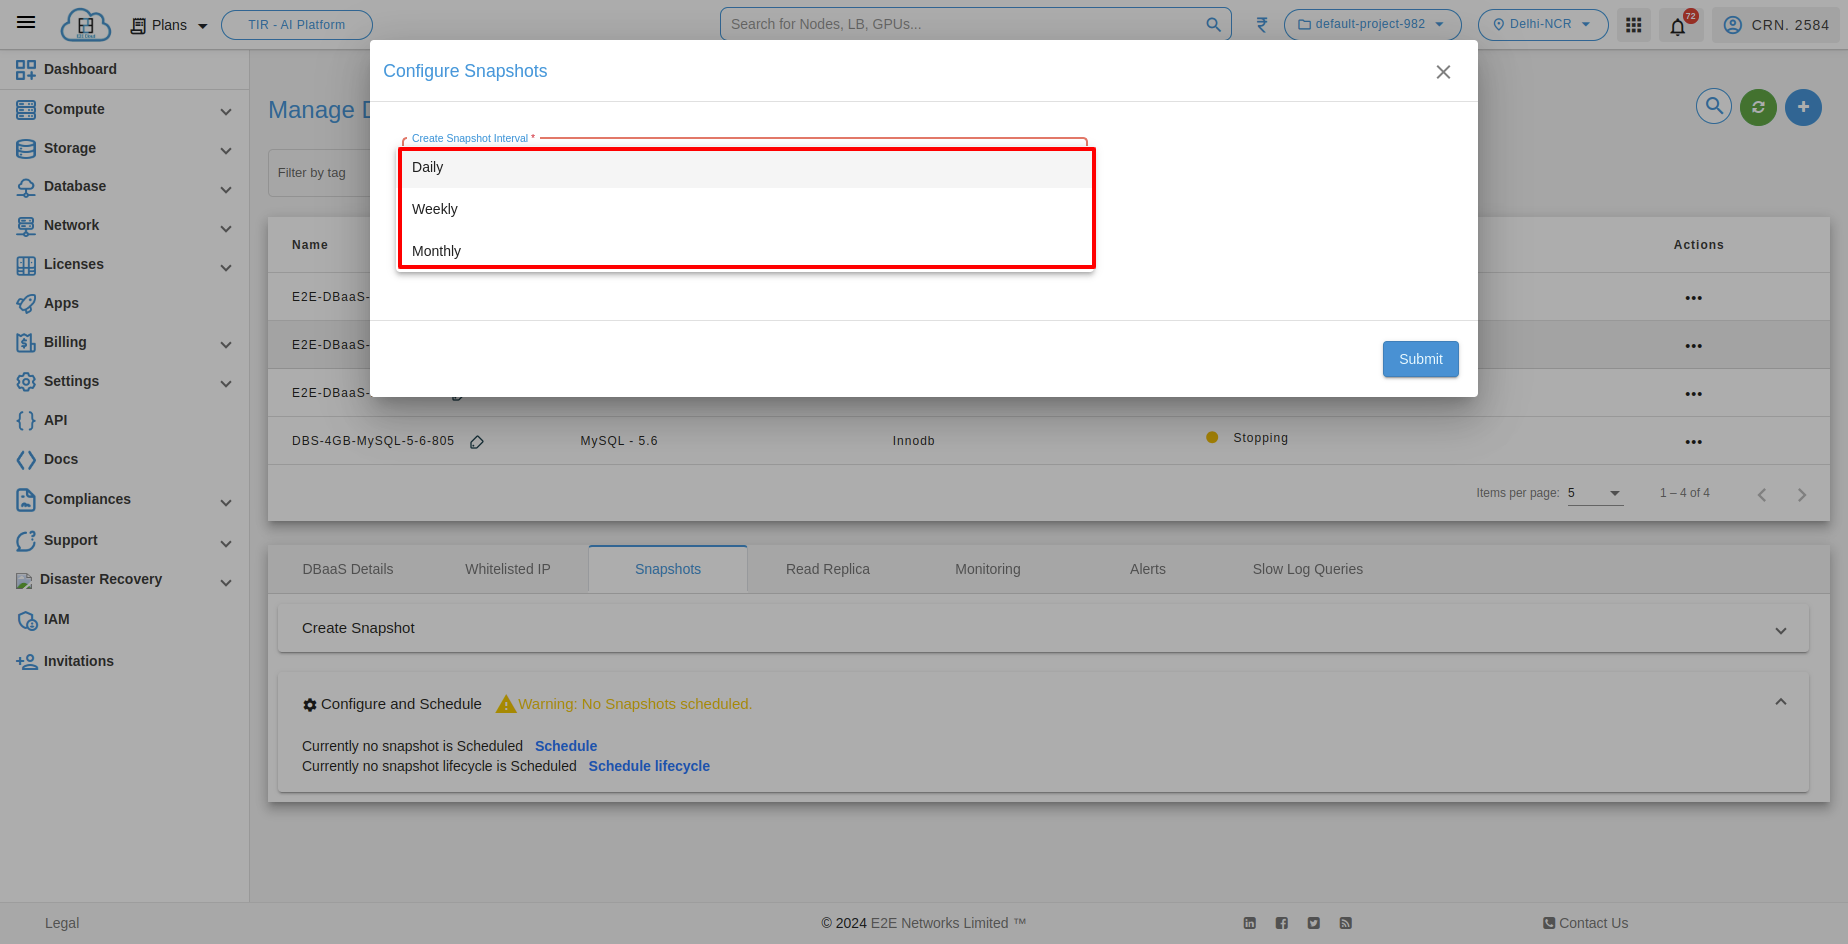
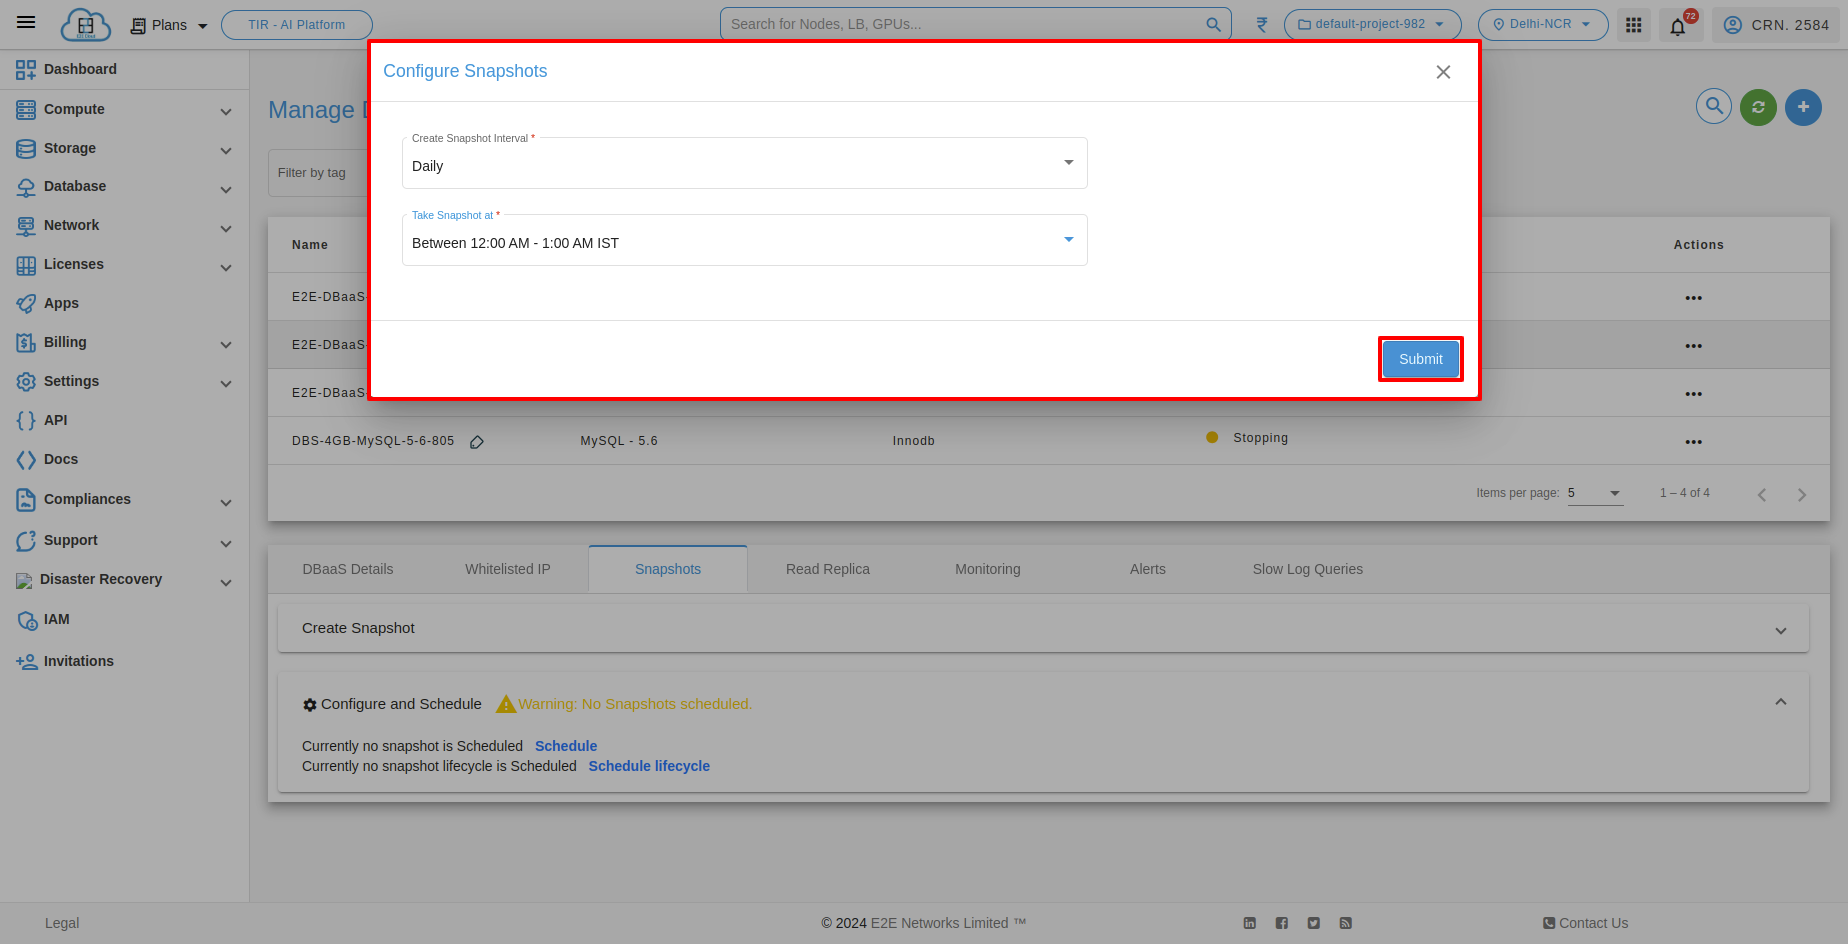
To schedule a snapshot of your database, click on the 'Schedule' link. Choose the snapshot creation interval and select the desired time duration for taking snapshots.
Edit Scheduled Snapshot
When a user wants to edit the scheduled snapshot interval, they can modify the time duration for the scheduled snapshot changes.
To edit the scheduled snapshot of your database, click on the 'Edit' link. Select the desired options and save the changes to the scheduled snapshot.
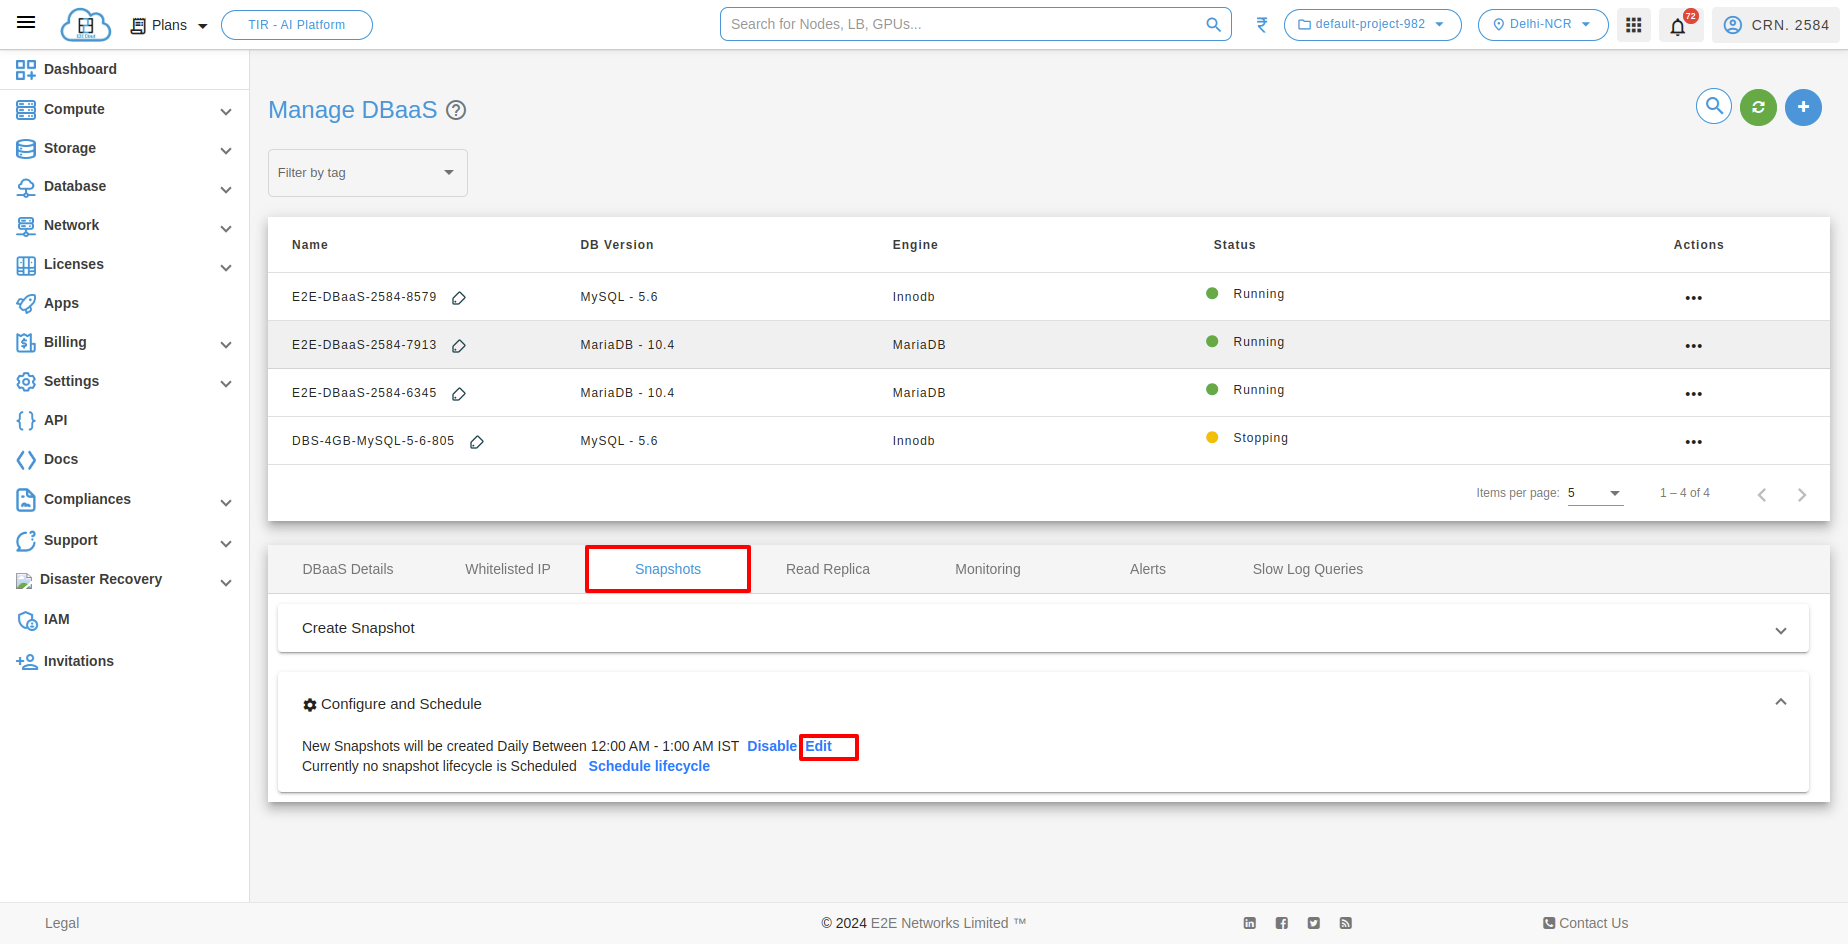
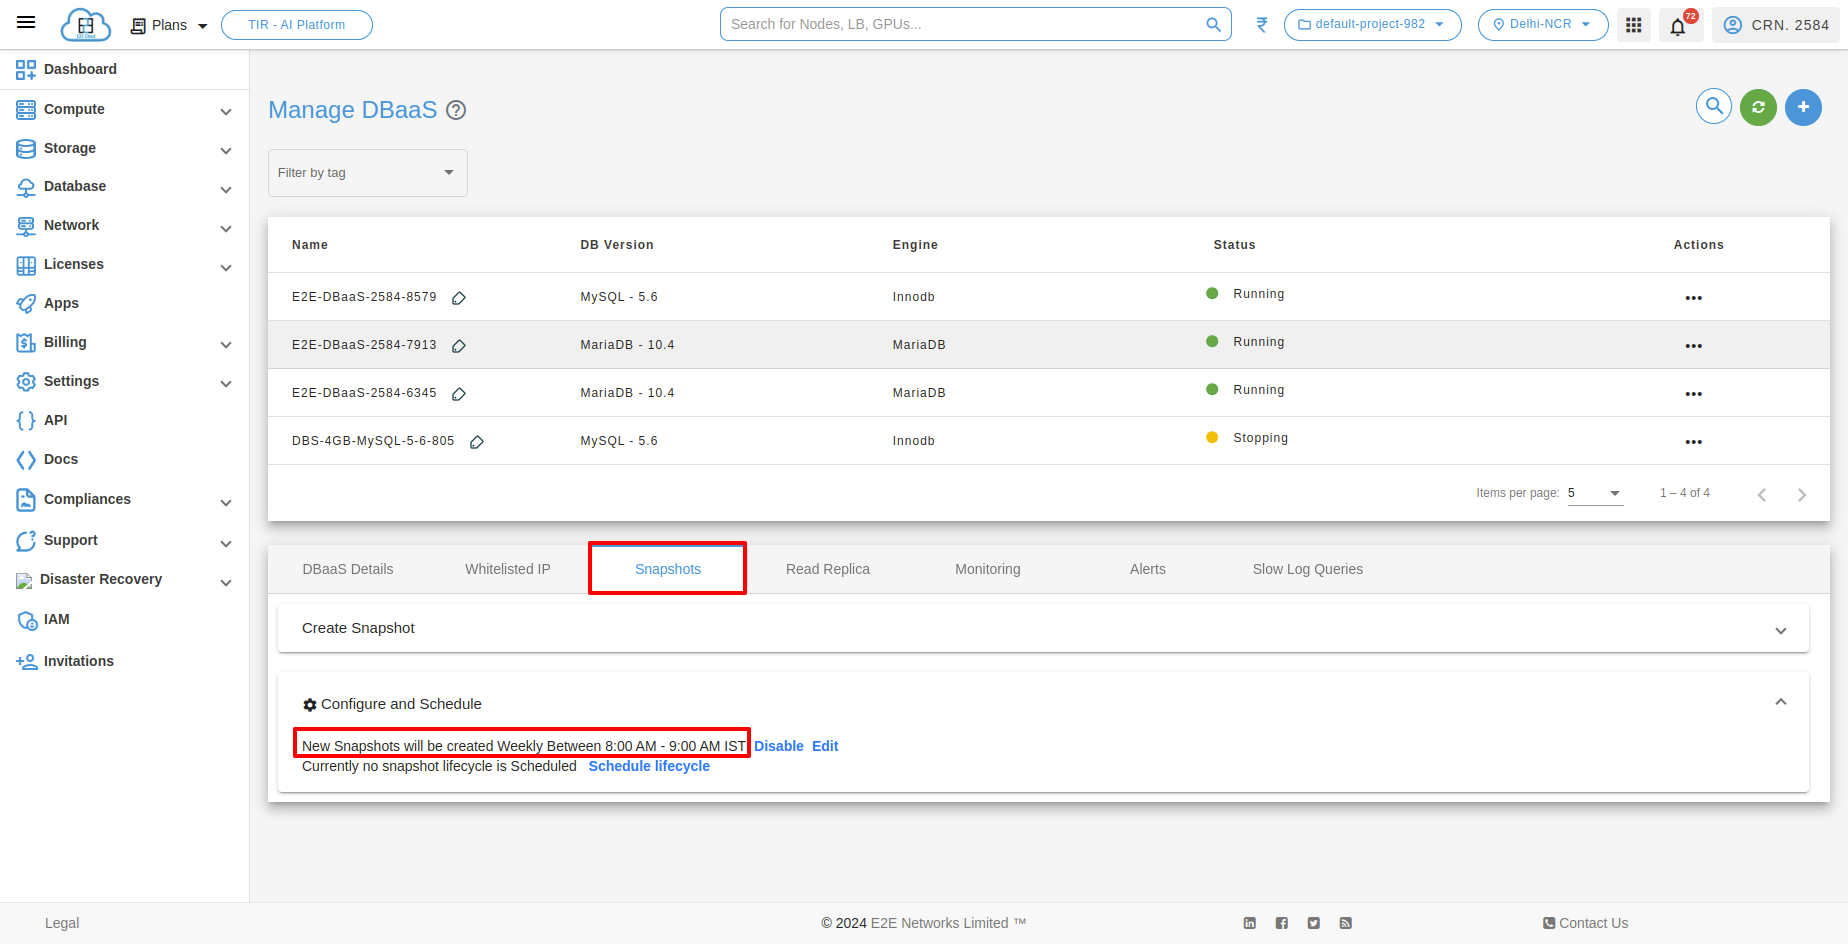
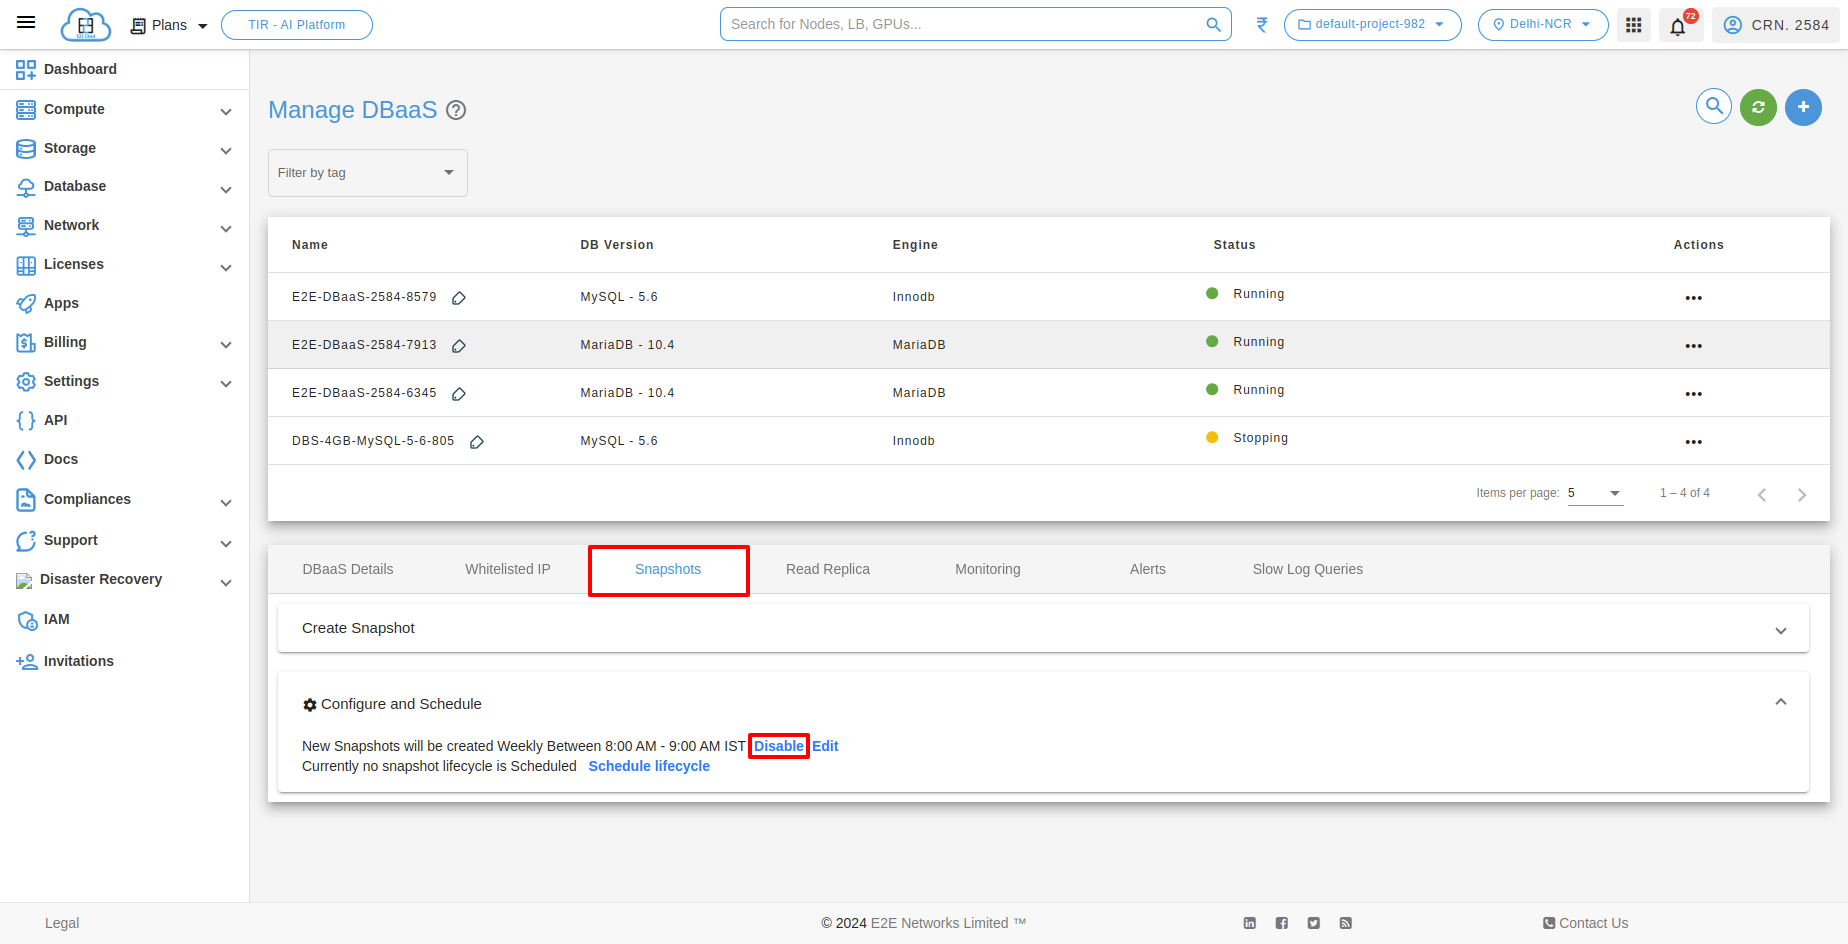
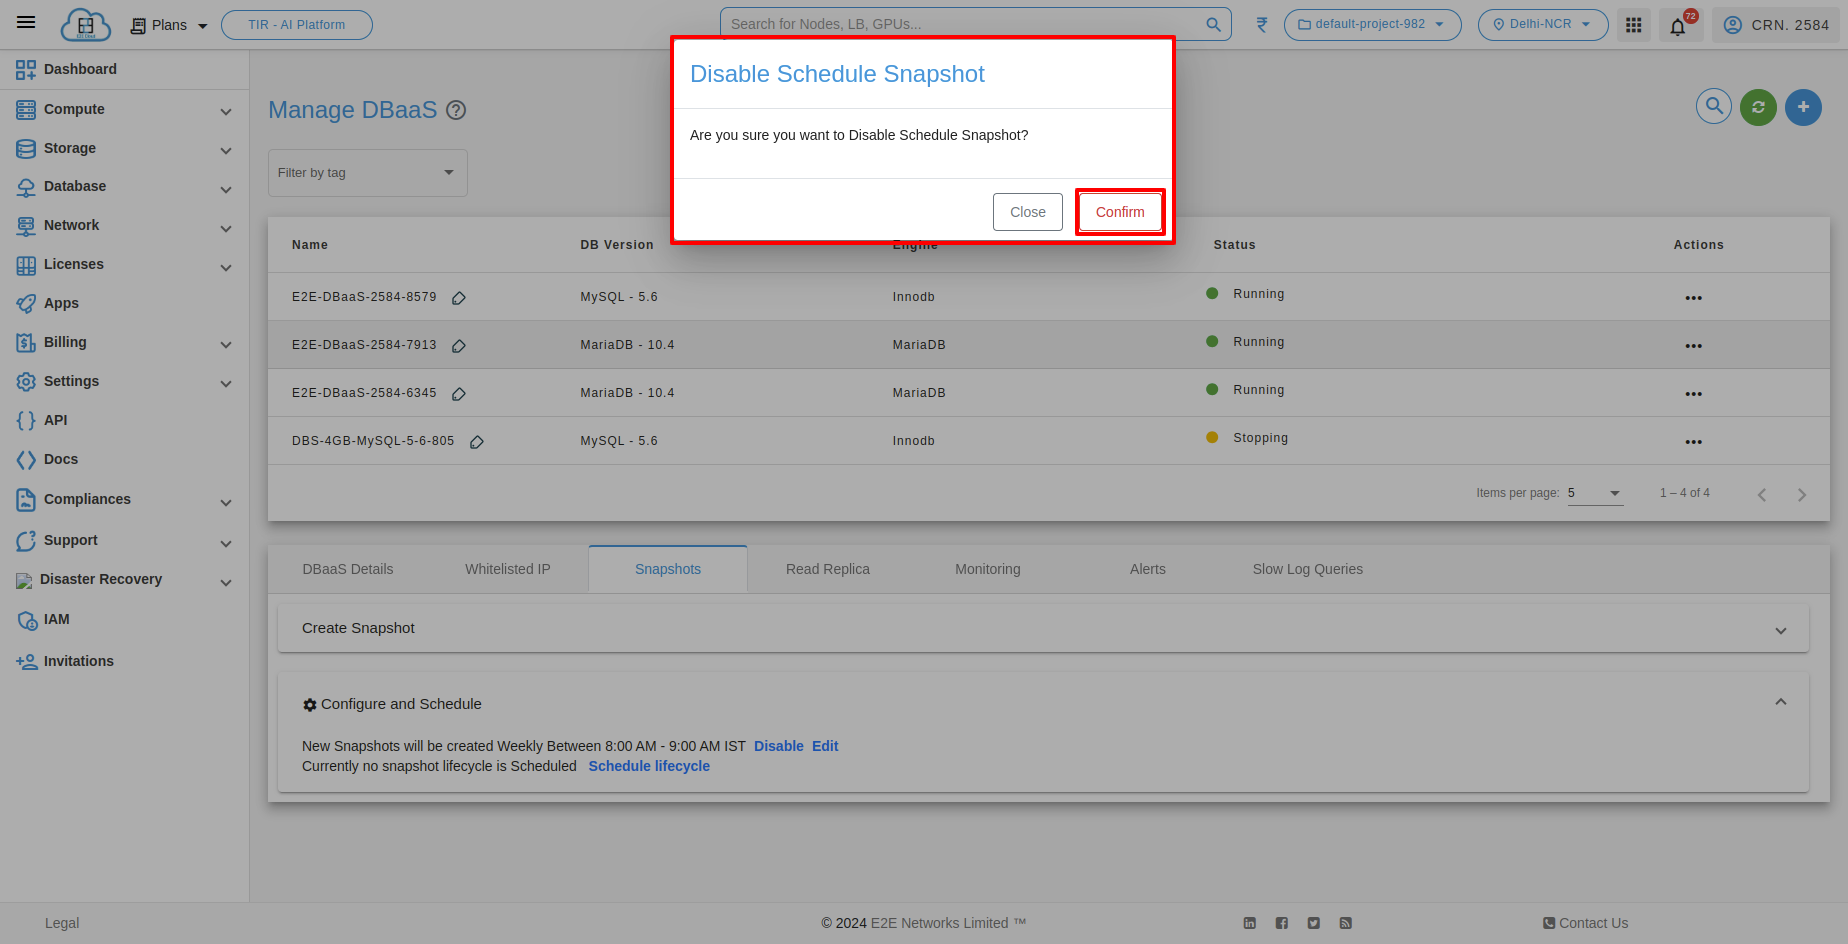
After editing the scheduled snapshot for your database, you can disable the scheduled snapshot.
Schedule Lifecycle
To configure the Schedule lifecycle of your database, click on 'Schedule lifecycle' and select the option to configure the snapshot lifecycle. When a user selects the snapshot lifecycle, the snapshot is automatically deleted after the specified time duration.
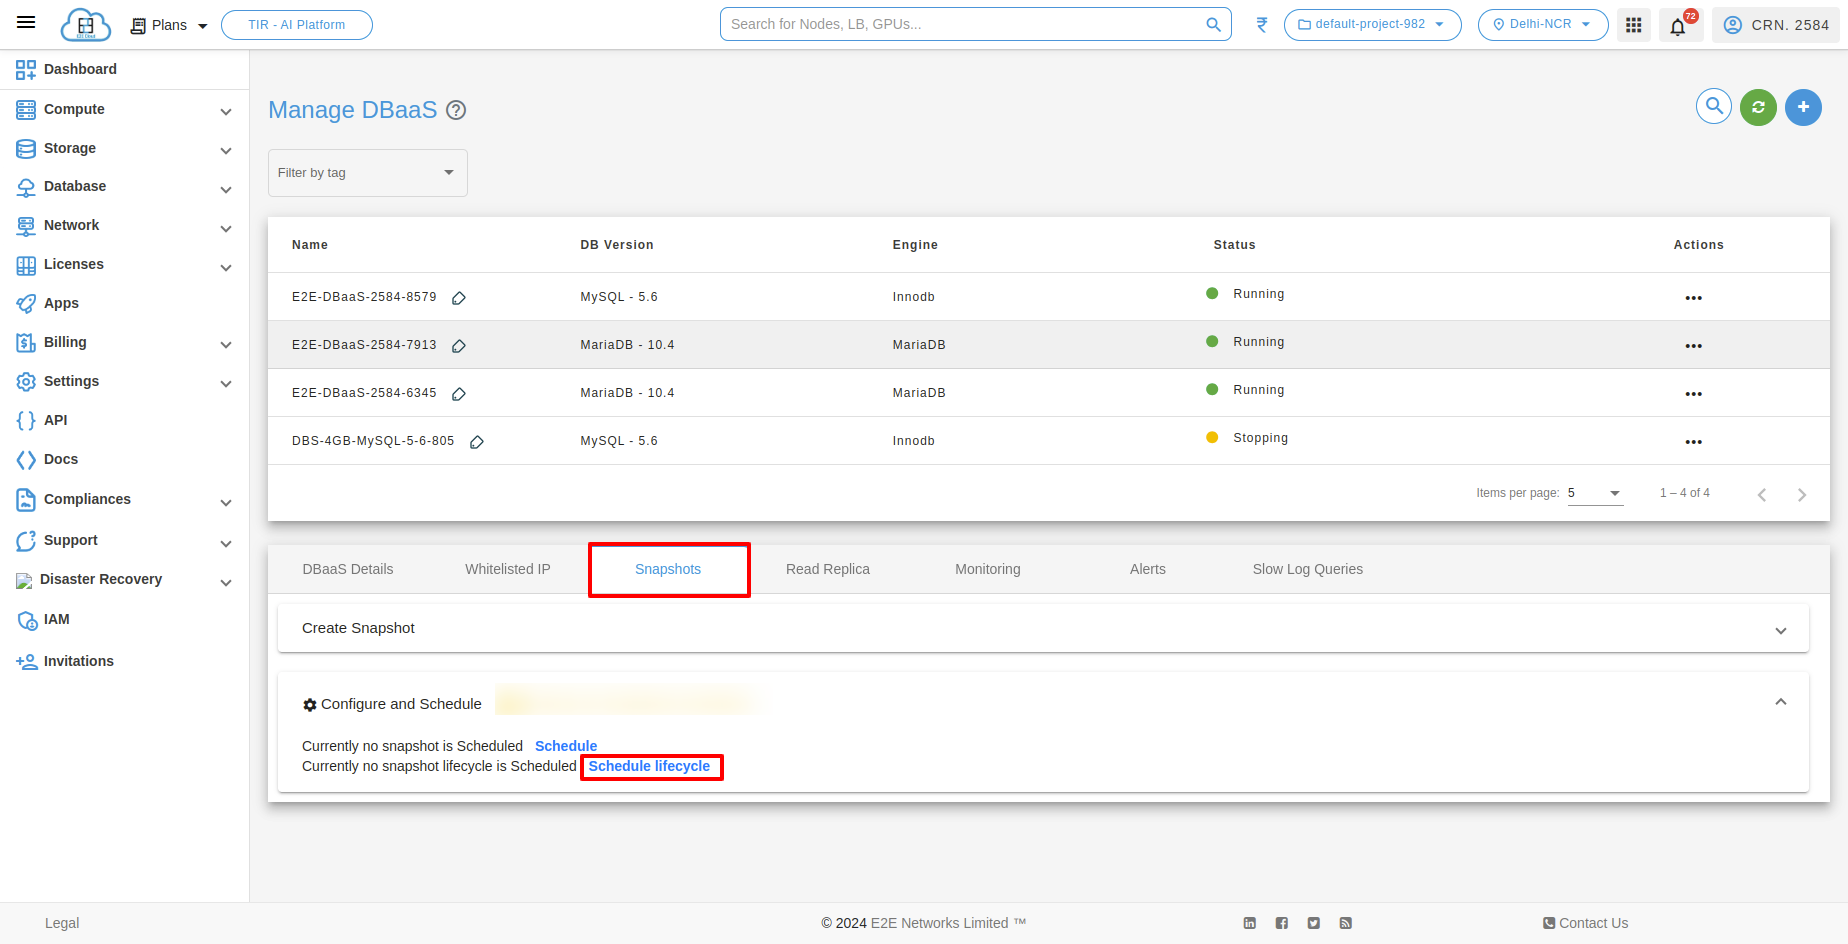
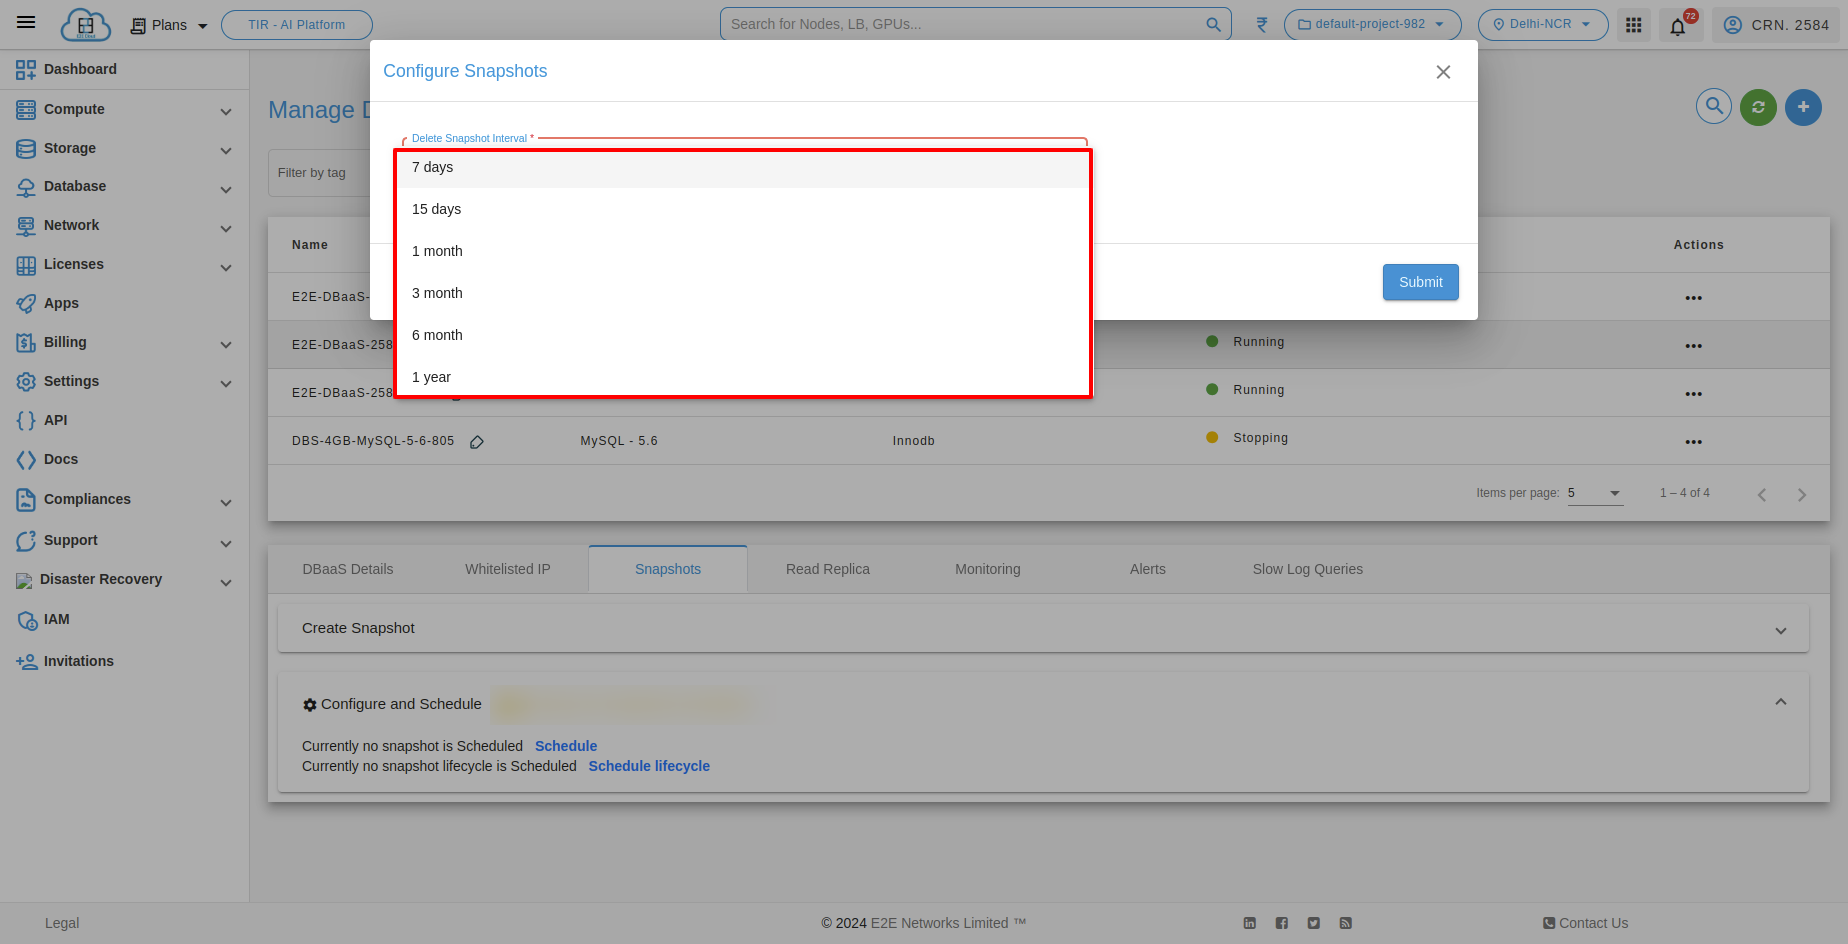
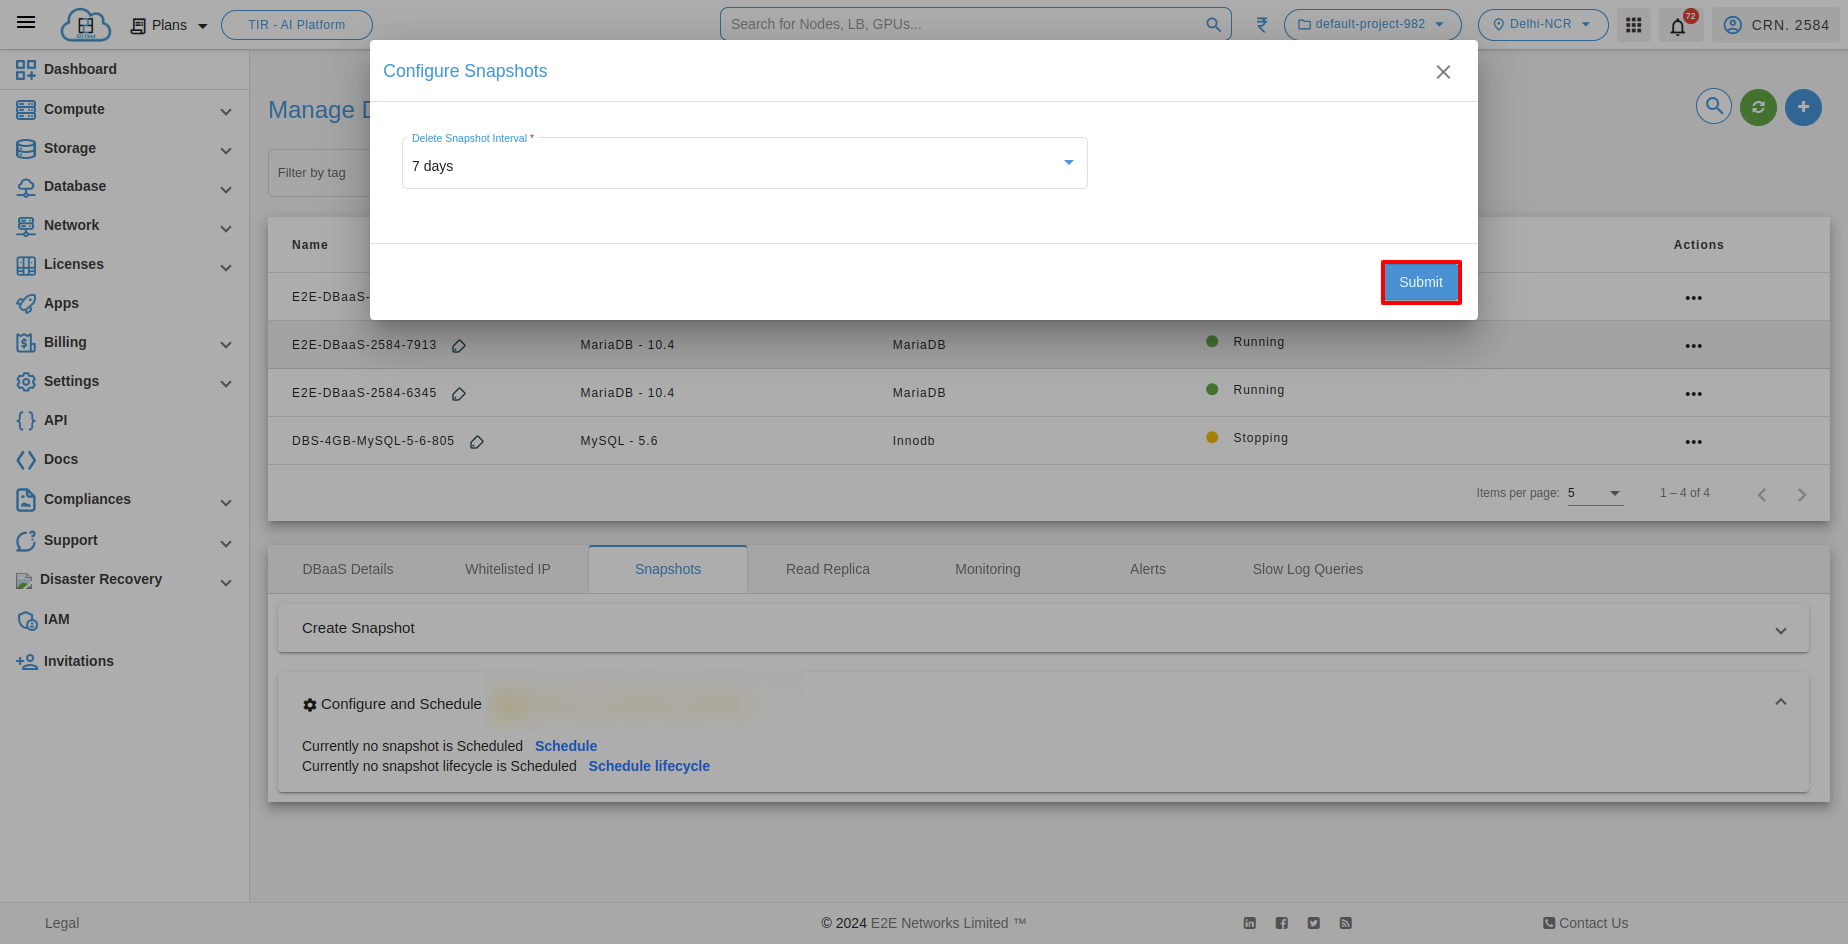
The snapshot will be deleted automatically after the selected interval.
Edit Configure Snapshot Lifecycle
To edit the Configure scheduled snapshot of your database, click on the 'Edit Configure Scheduled Snapshot' button. Select the desired options and save the changes to the scheduled snapshot. When a user edits the snapshot lifecycle, the time duration for the snapshot lifecycle changes.
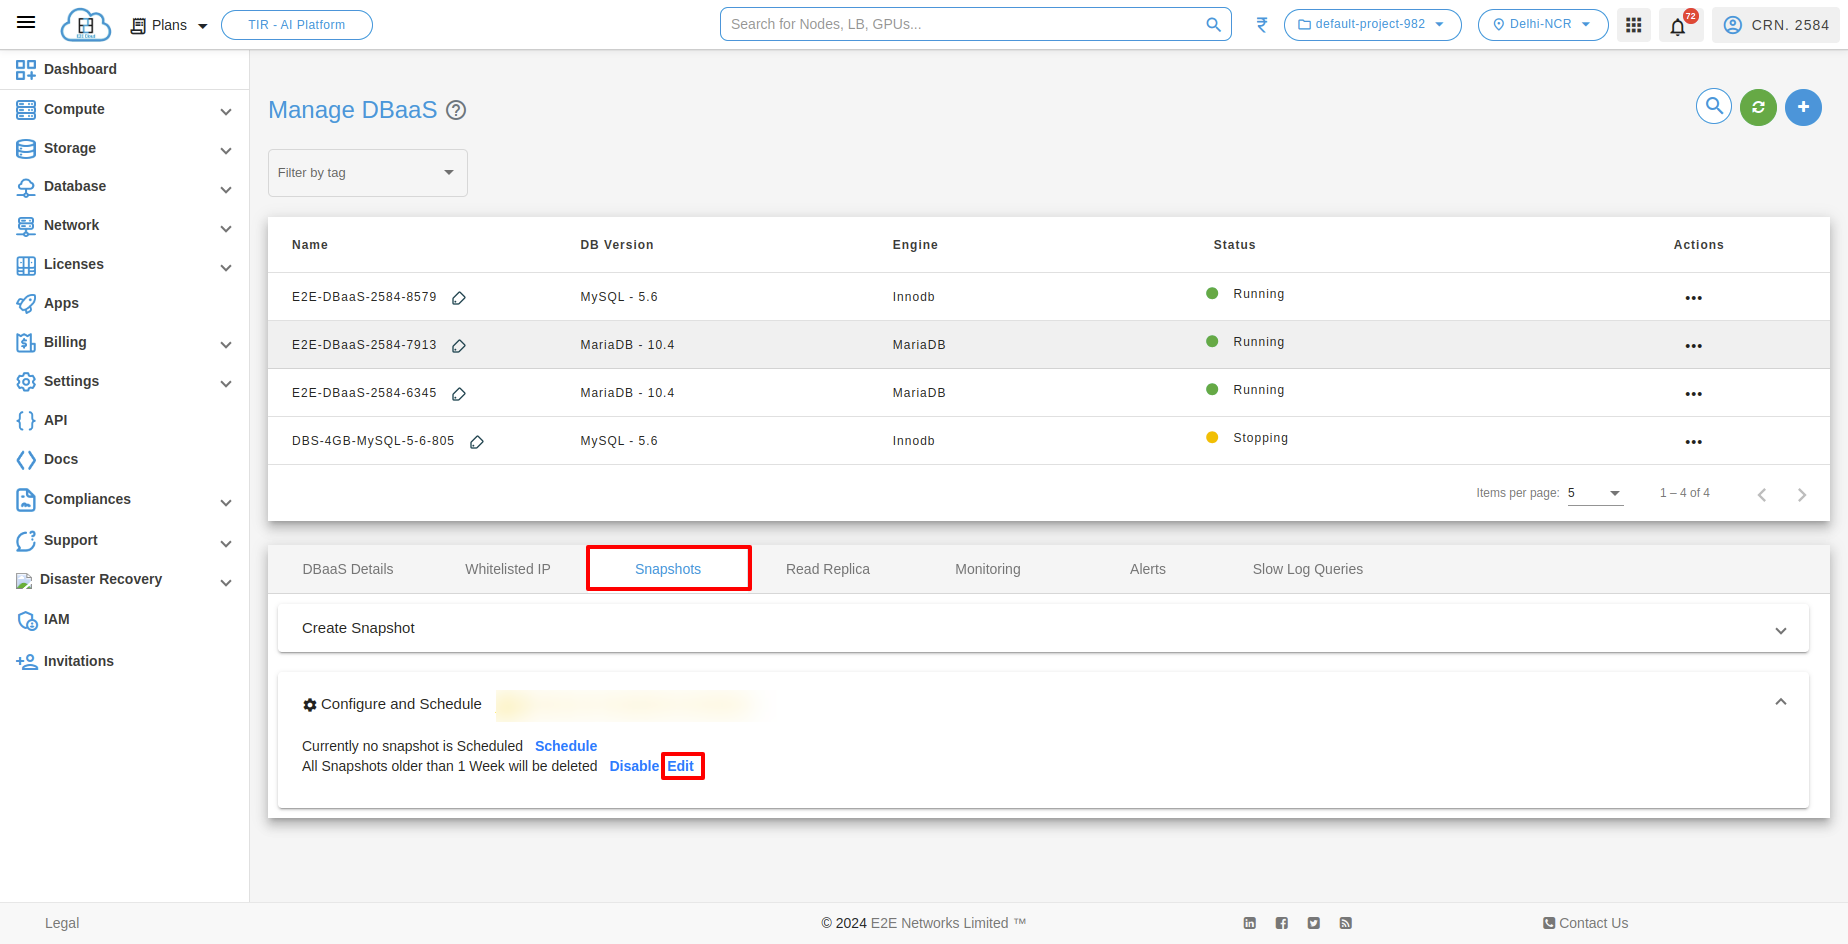
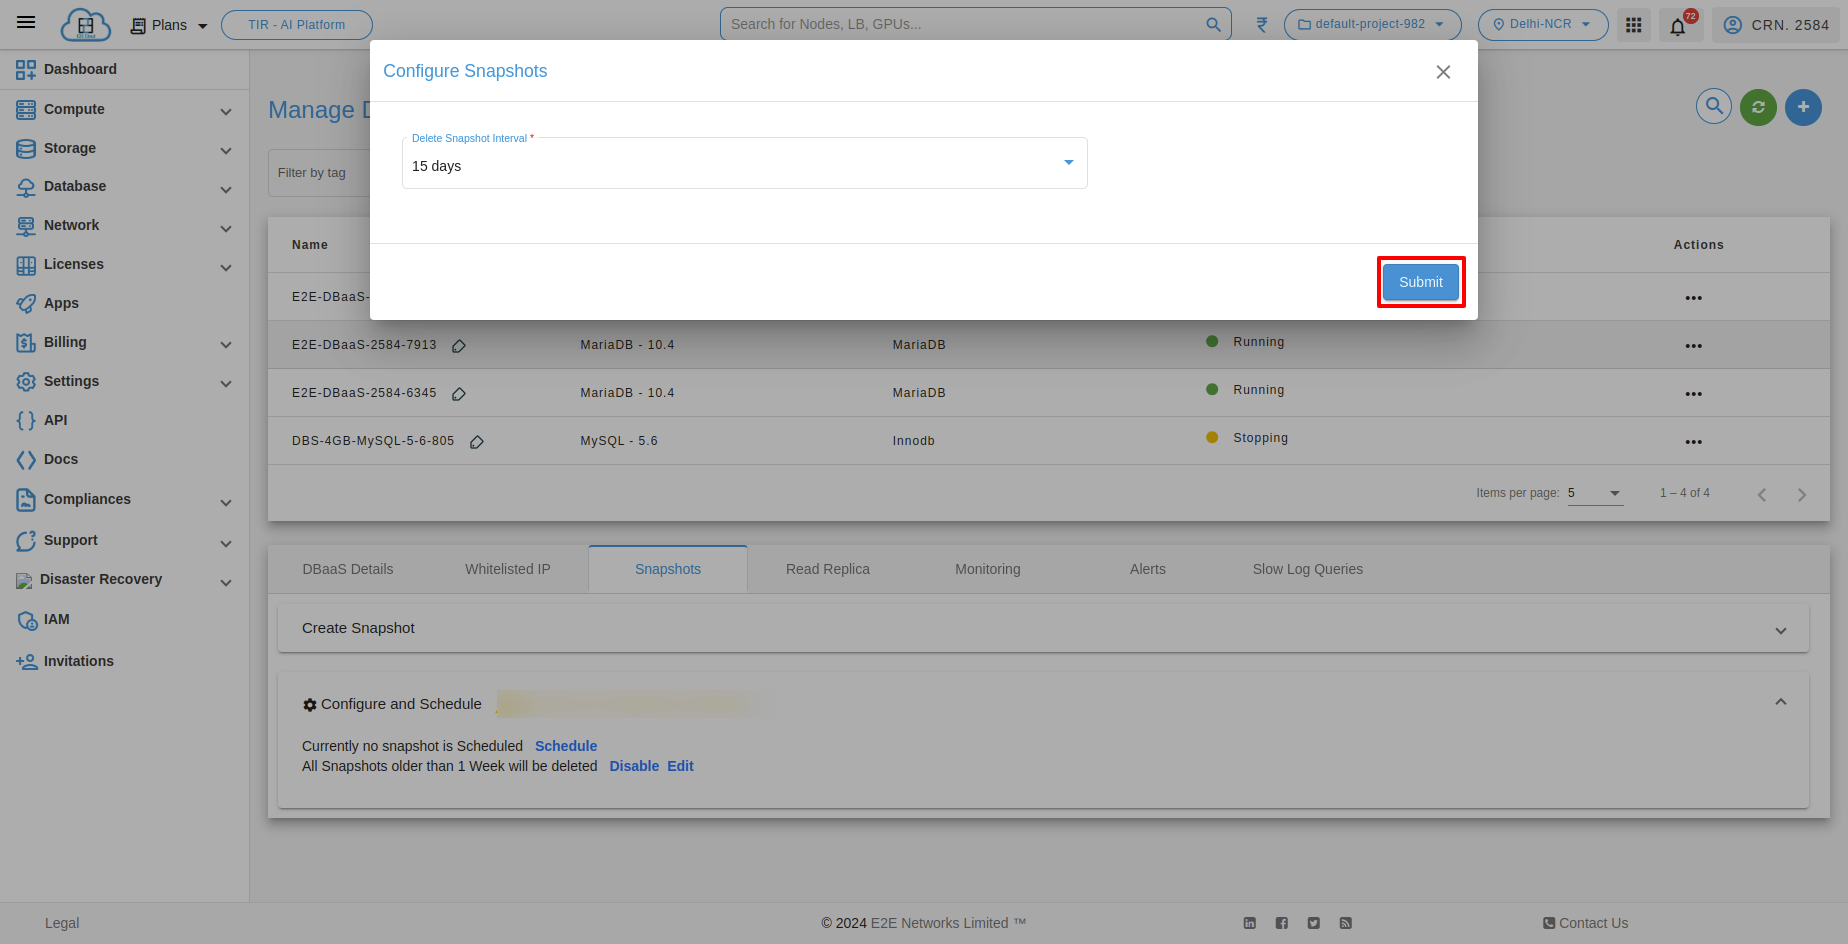
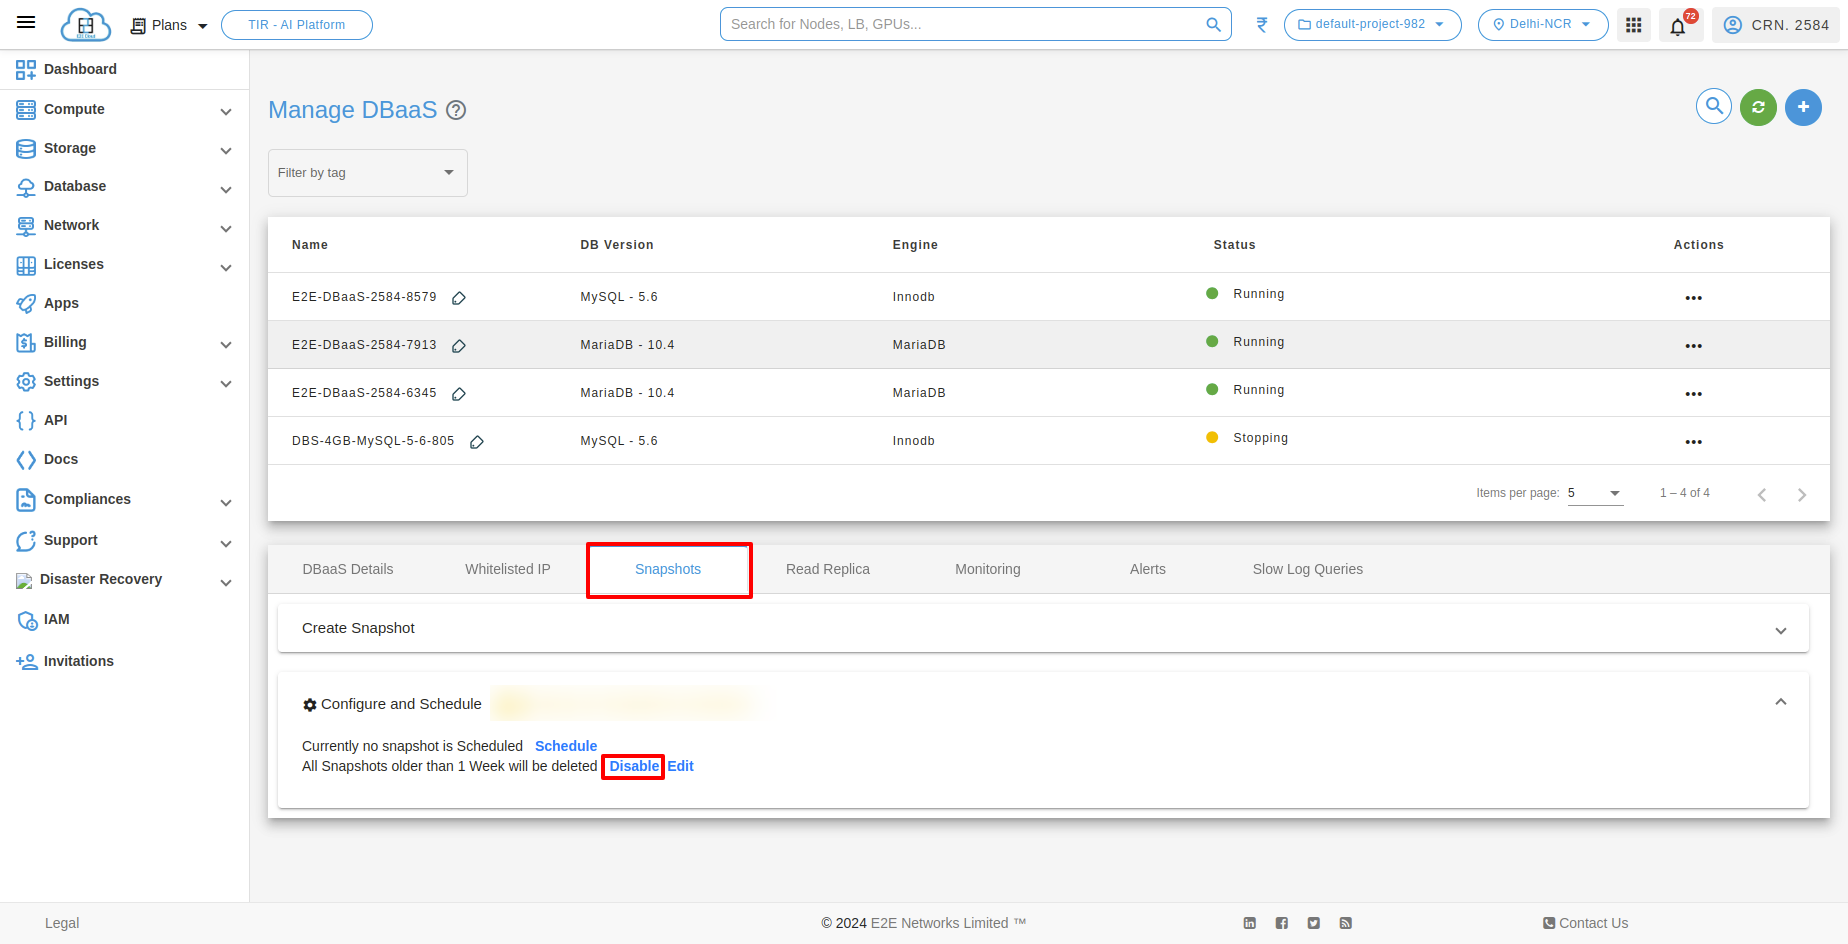
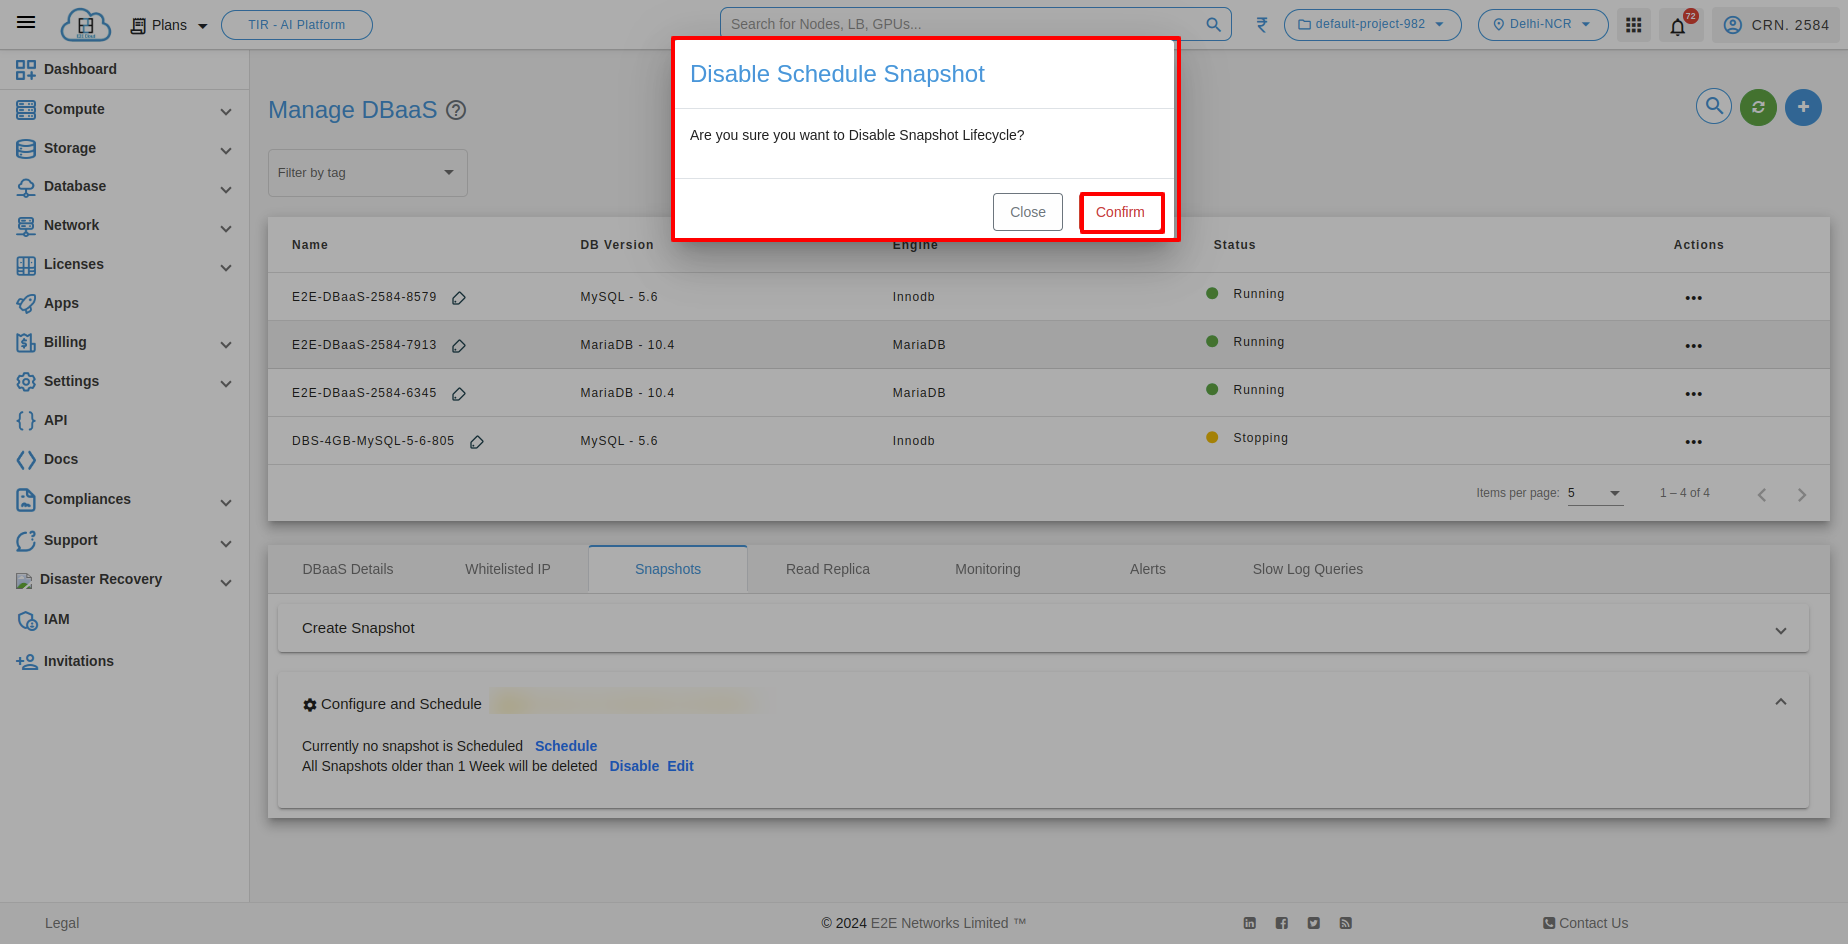
After editing the configure snapshot lifecycle for your database, you can disable the configure snapshot lifecycle.
Horizontal Scaling In DbaaS
In context of databases, horizontal scaling involves distributing the data and the load across multiple database servers. This approach can improve performance, availability, and fault tolerance. Horizontal scaling involves adding more instances of a system to distribute the load. When it comes to databases, horizontal scaling can be achieved through Read Replicas and specific writing strategies.
Read Replicas
Replication involves copying data from one DbaaS server (the master) to one or more other replicas servers. This allows read operations to be distributed across multiple servers, improving performance and availability.
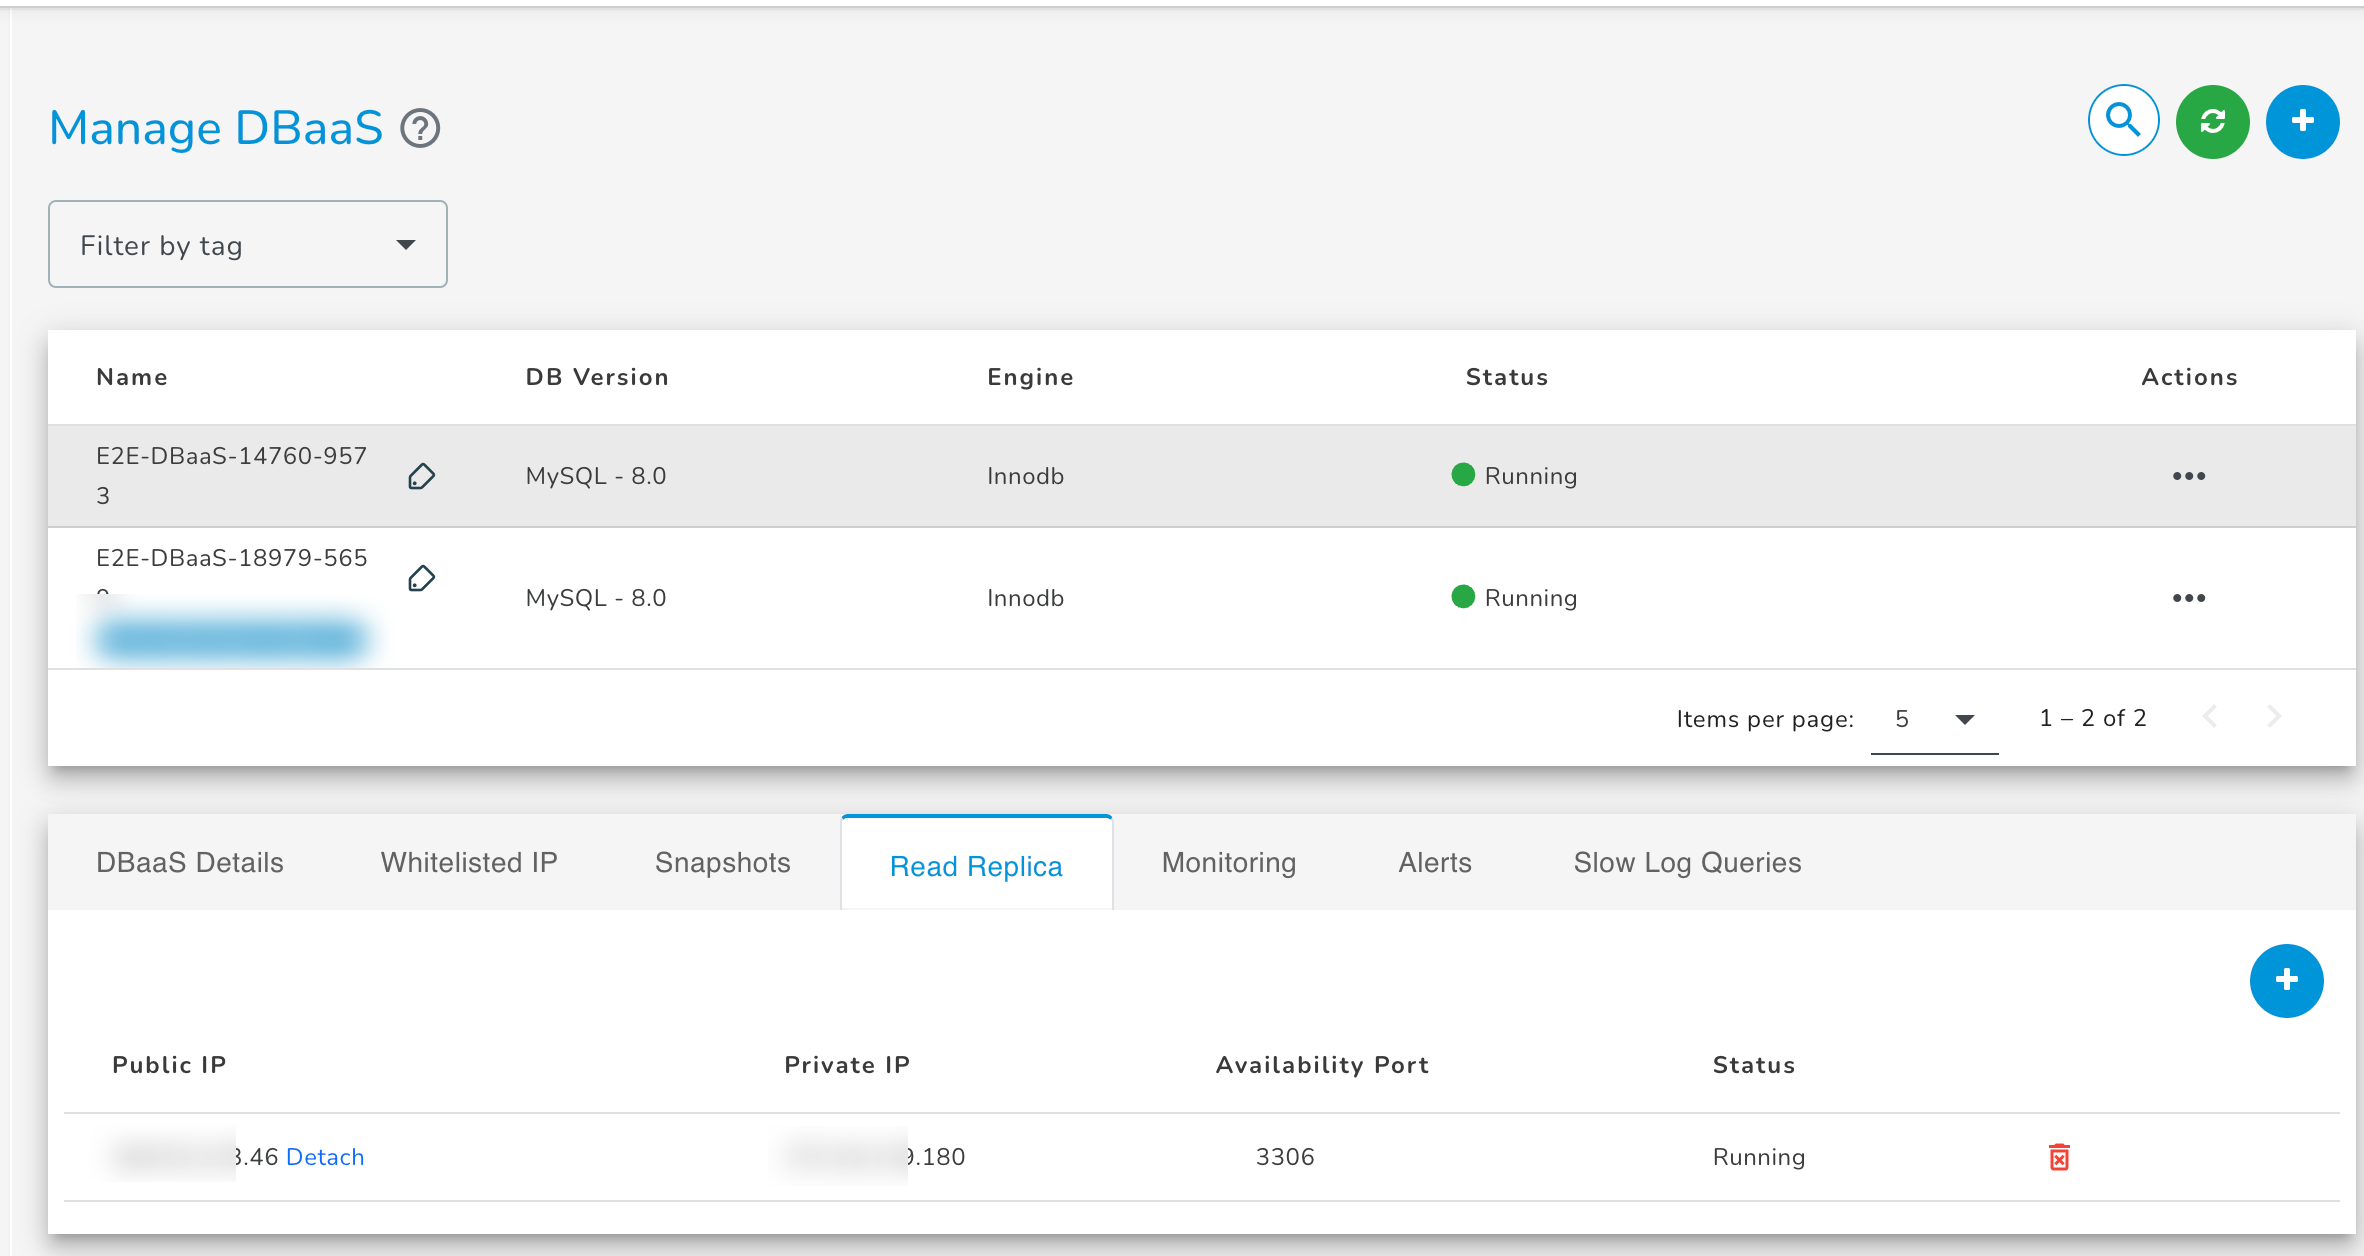
The read replica operates as a DB instance that allows only read-only connections. Applications can connect to a read replica just as they would to any DB instance.
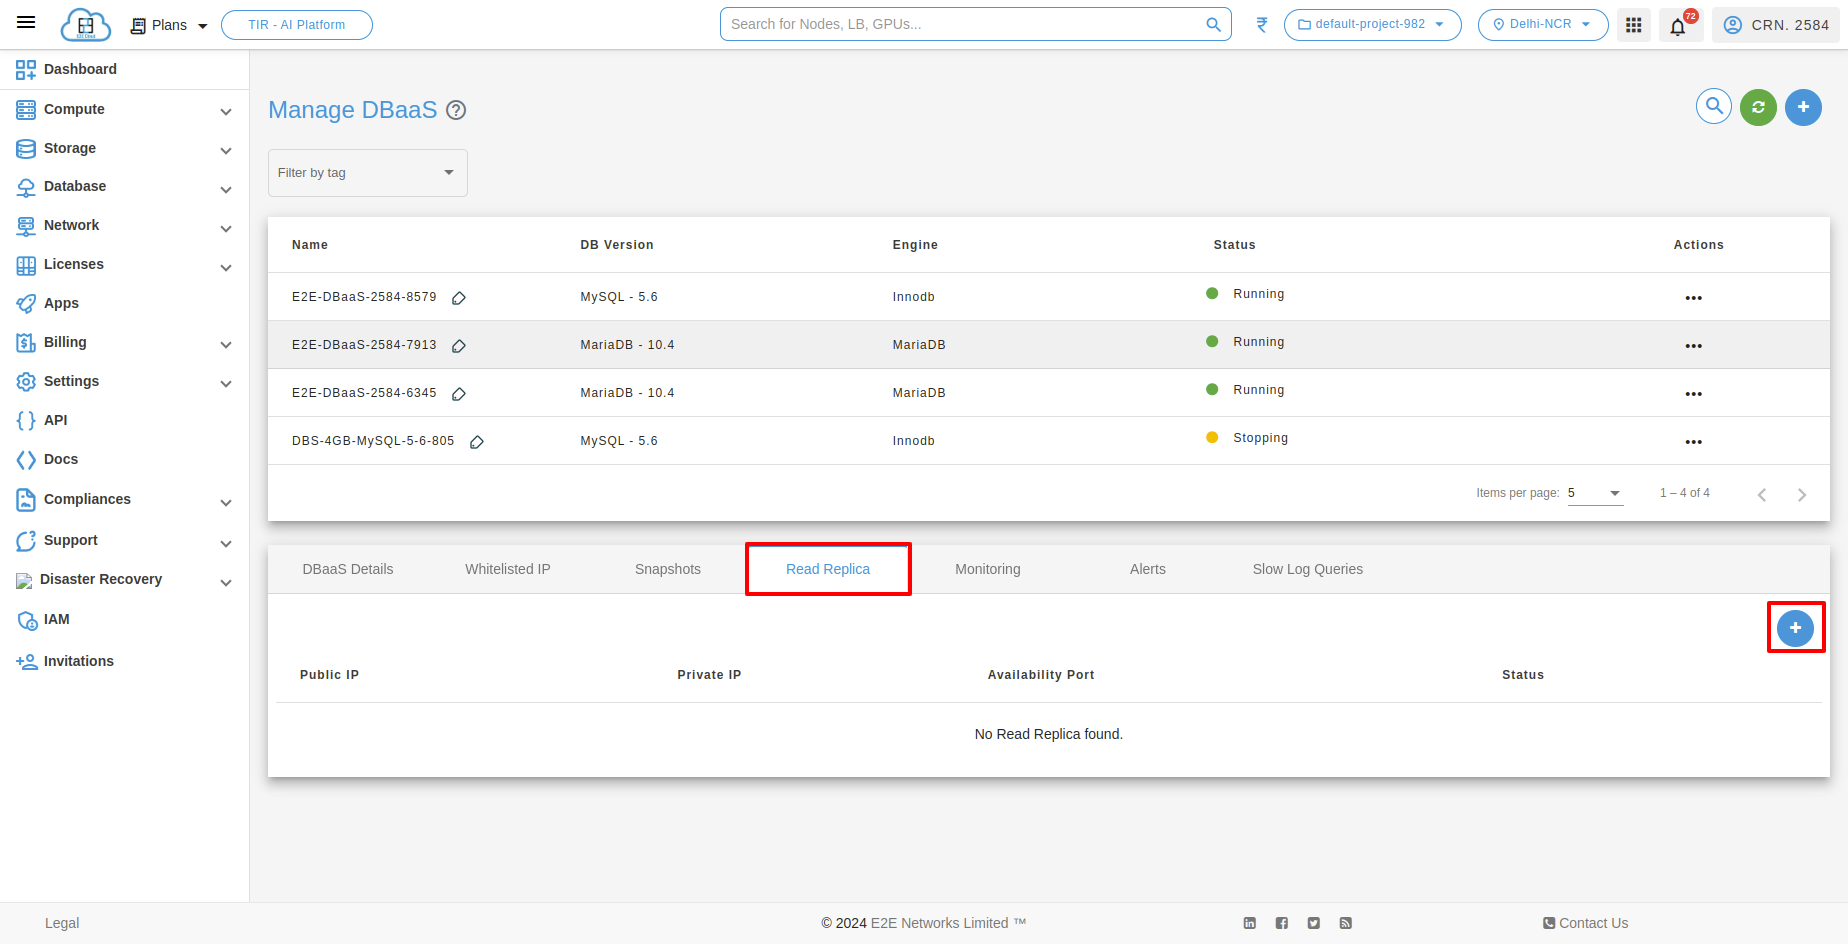
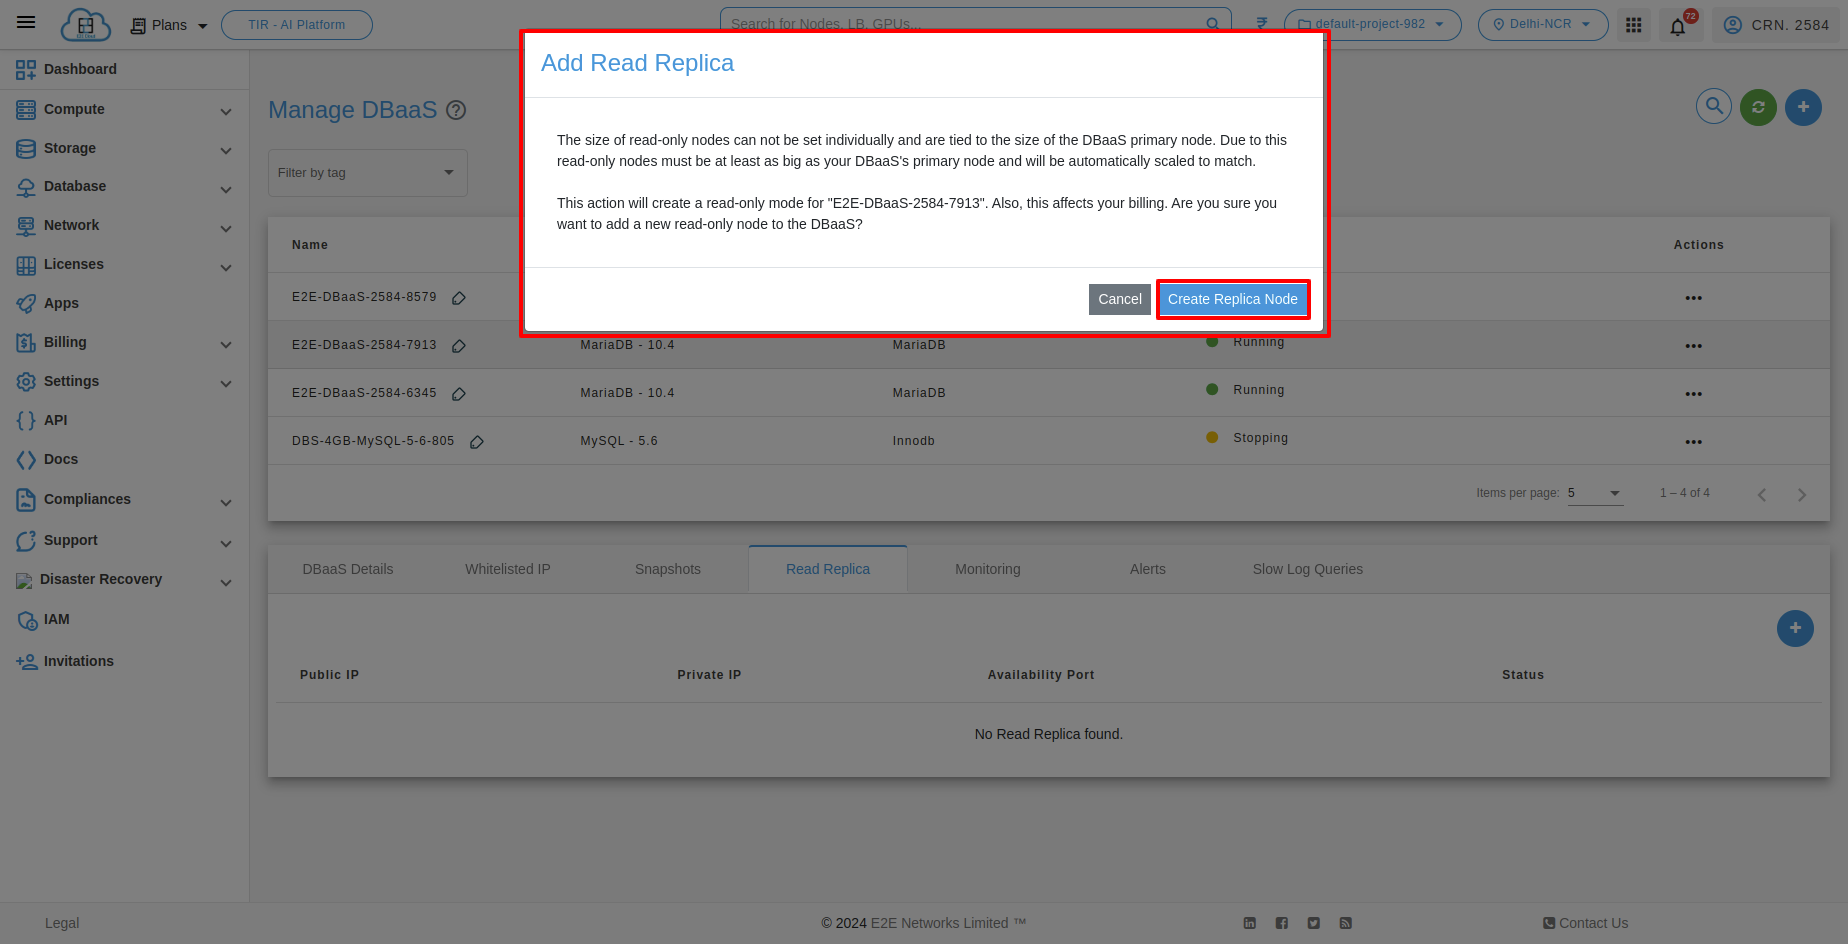
We are providing users with public IP addresses to access read replicas separately. This approach allows users to distribute read operations across multiple replicas, enhancing performance and ensuring high availability.
Note: The size of read-only nodes cannot be set individually and are tied to the size of the DBaaS primary node. Due to this, read-only nodes must be at least as big as your DBaaS's primary node and will be automatically scaled to match.
Monitoring
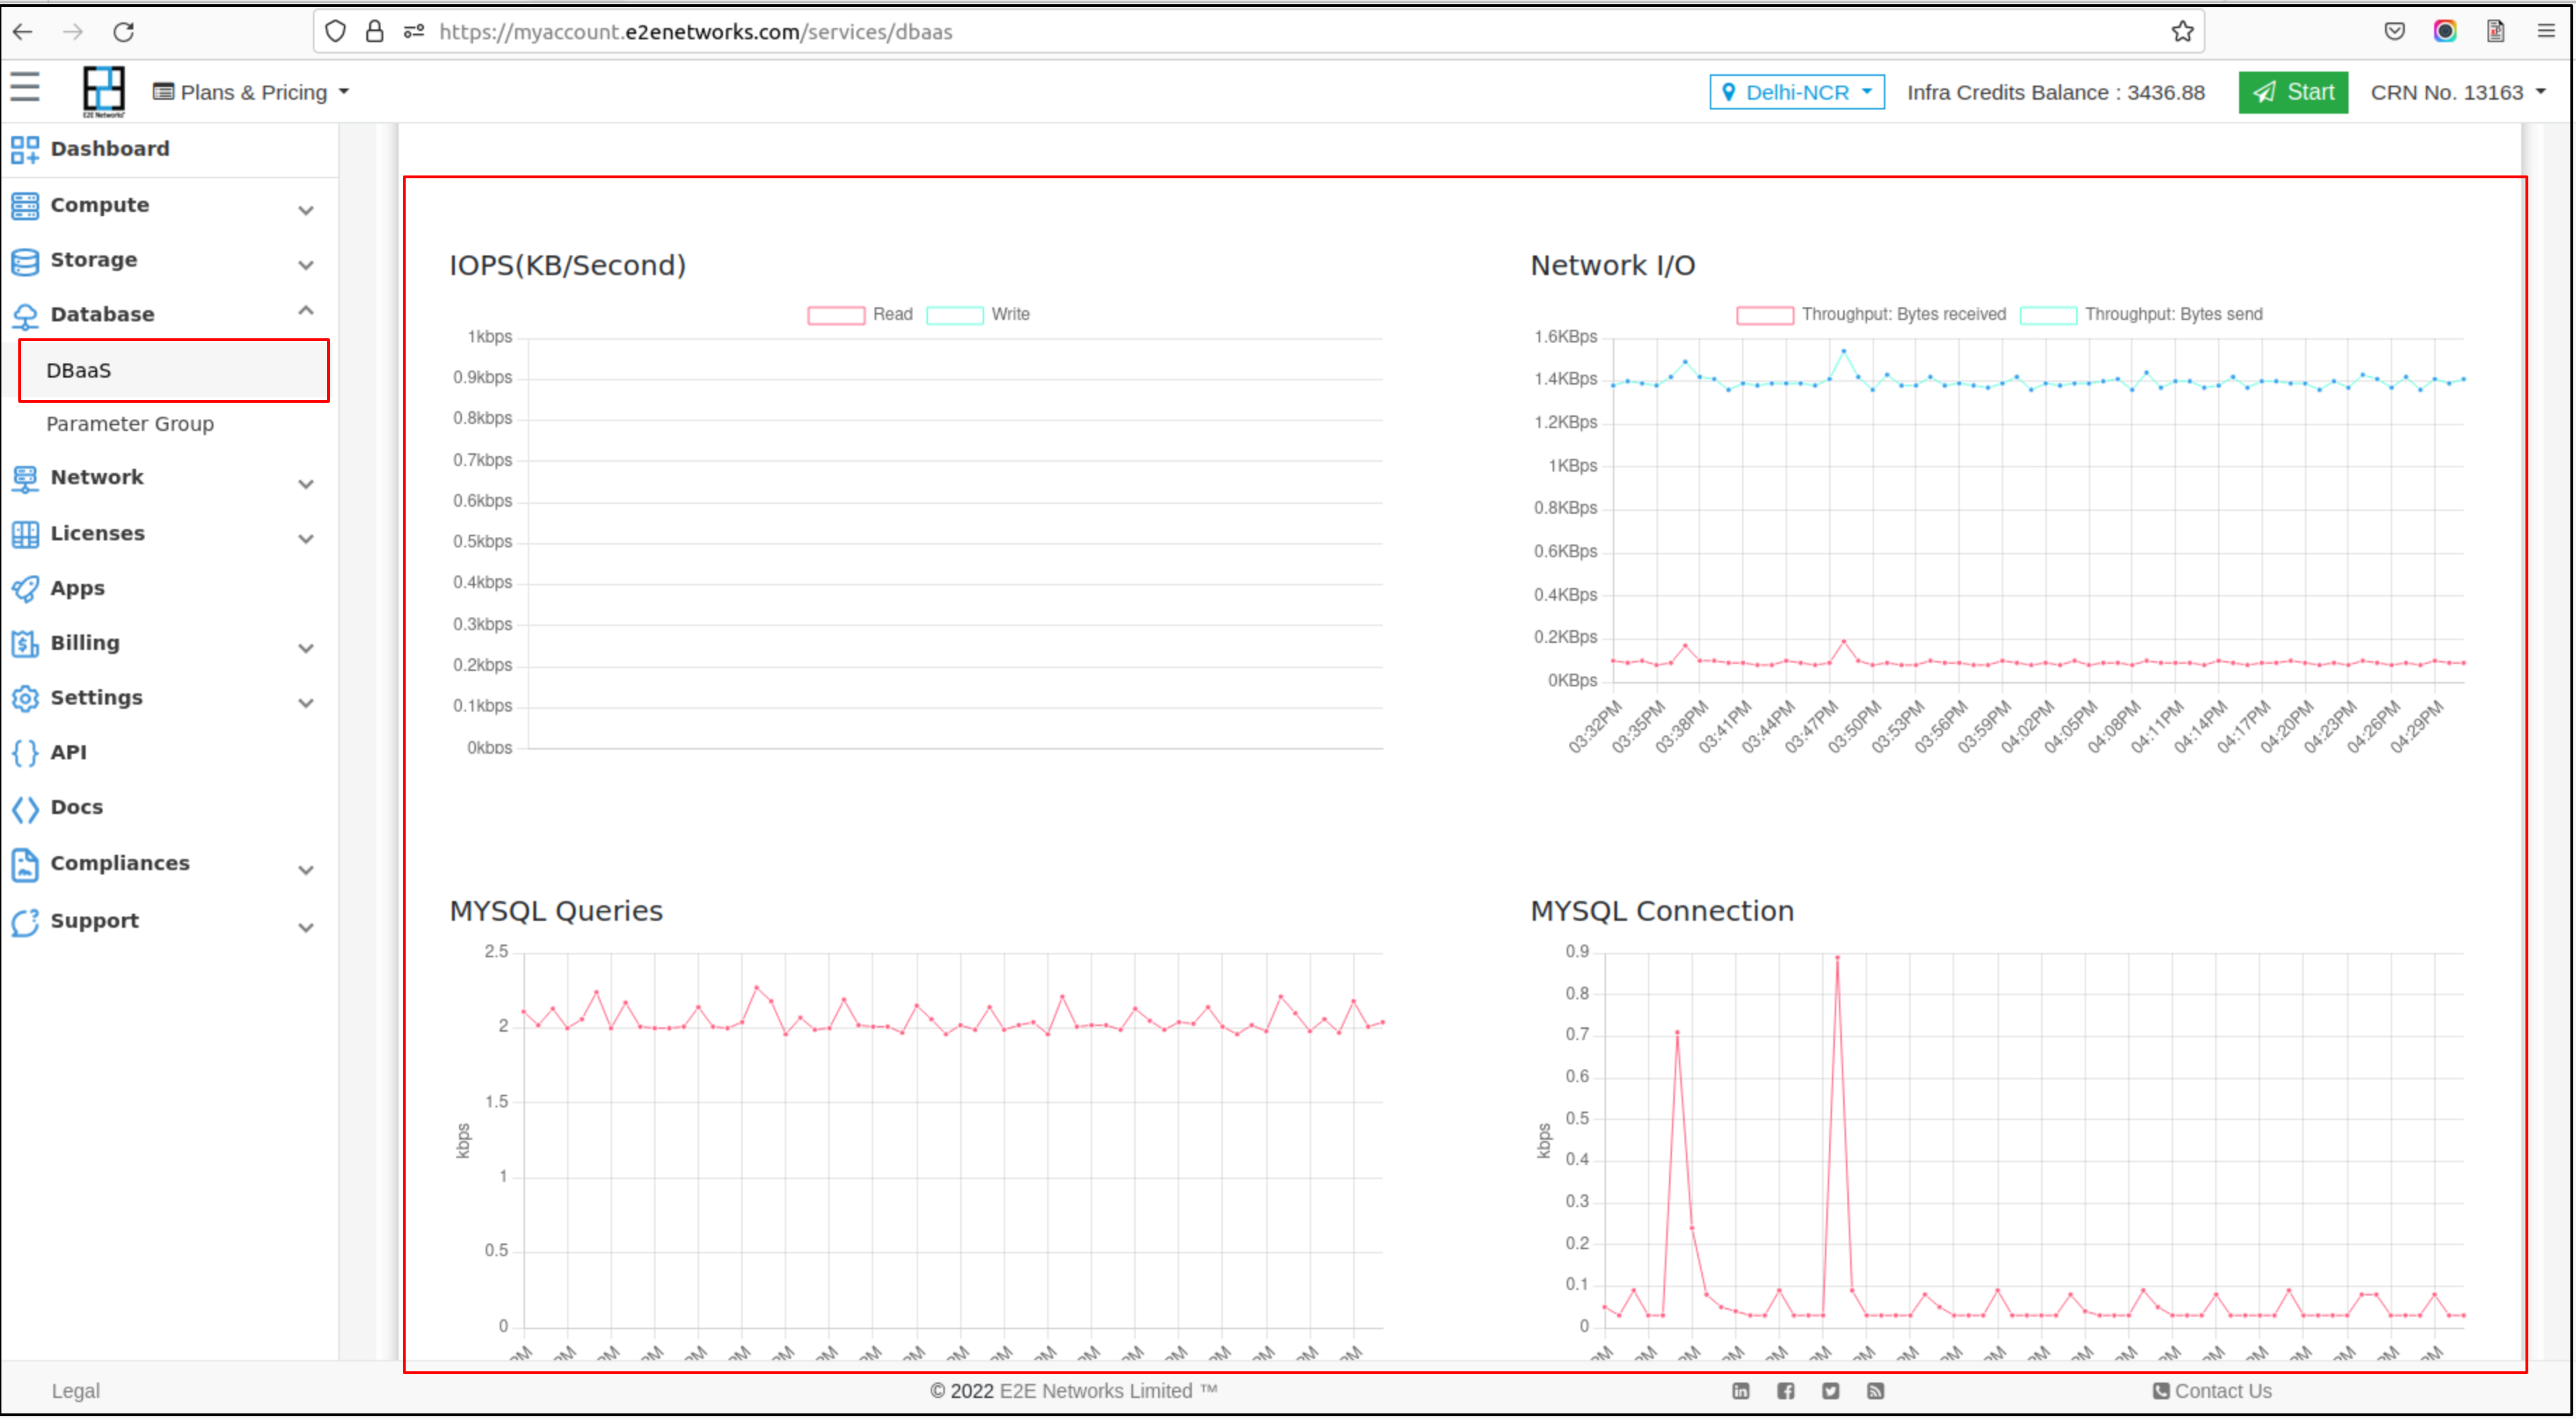
After you launch your database node, you can view the monitoring graphs for your node on the Monitoring tab. Each graph is based on one of the different metrics. This information is collected from your node and processes raw data into readable graphs. Monitoring is an important part of maintaining the reliability, availability, and performance of your database.
Alerts
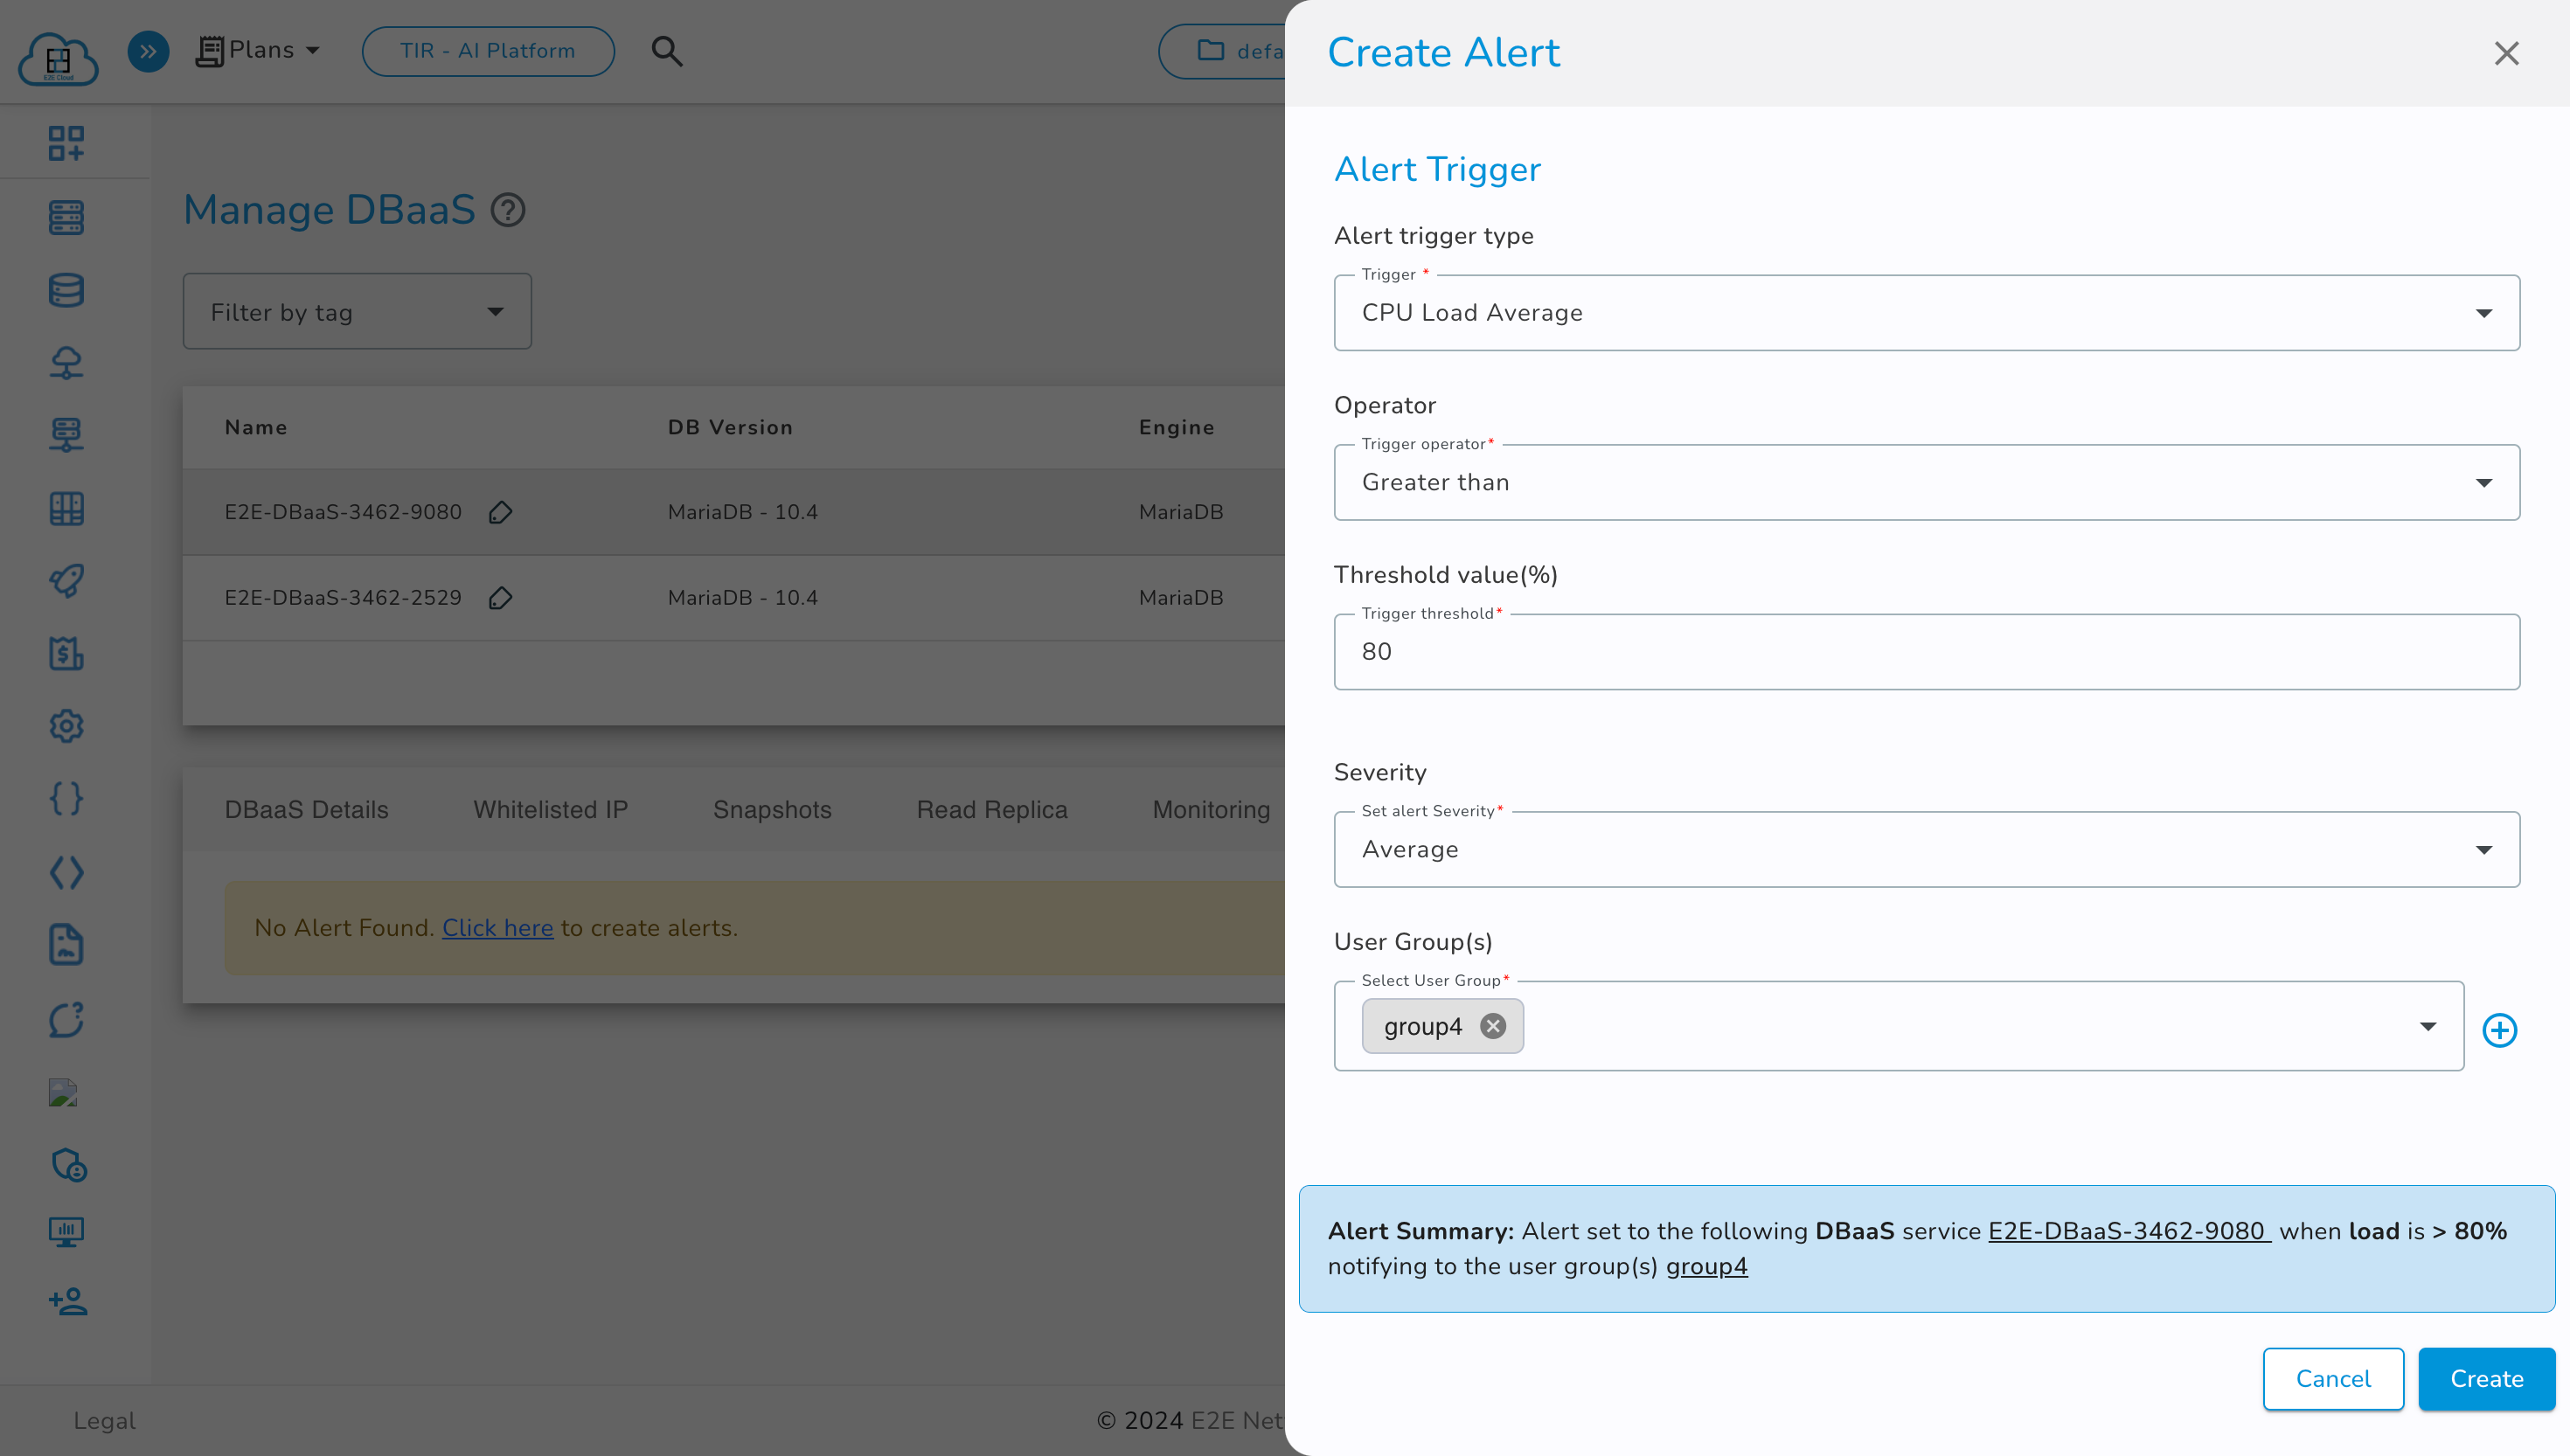
You can set up new alerts by defining trigger parameters as per your use case for your database. The alerting system works by sending automatic response notifications to your defined email list.
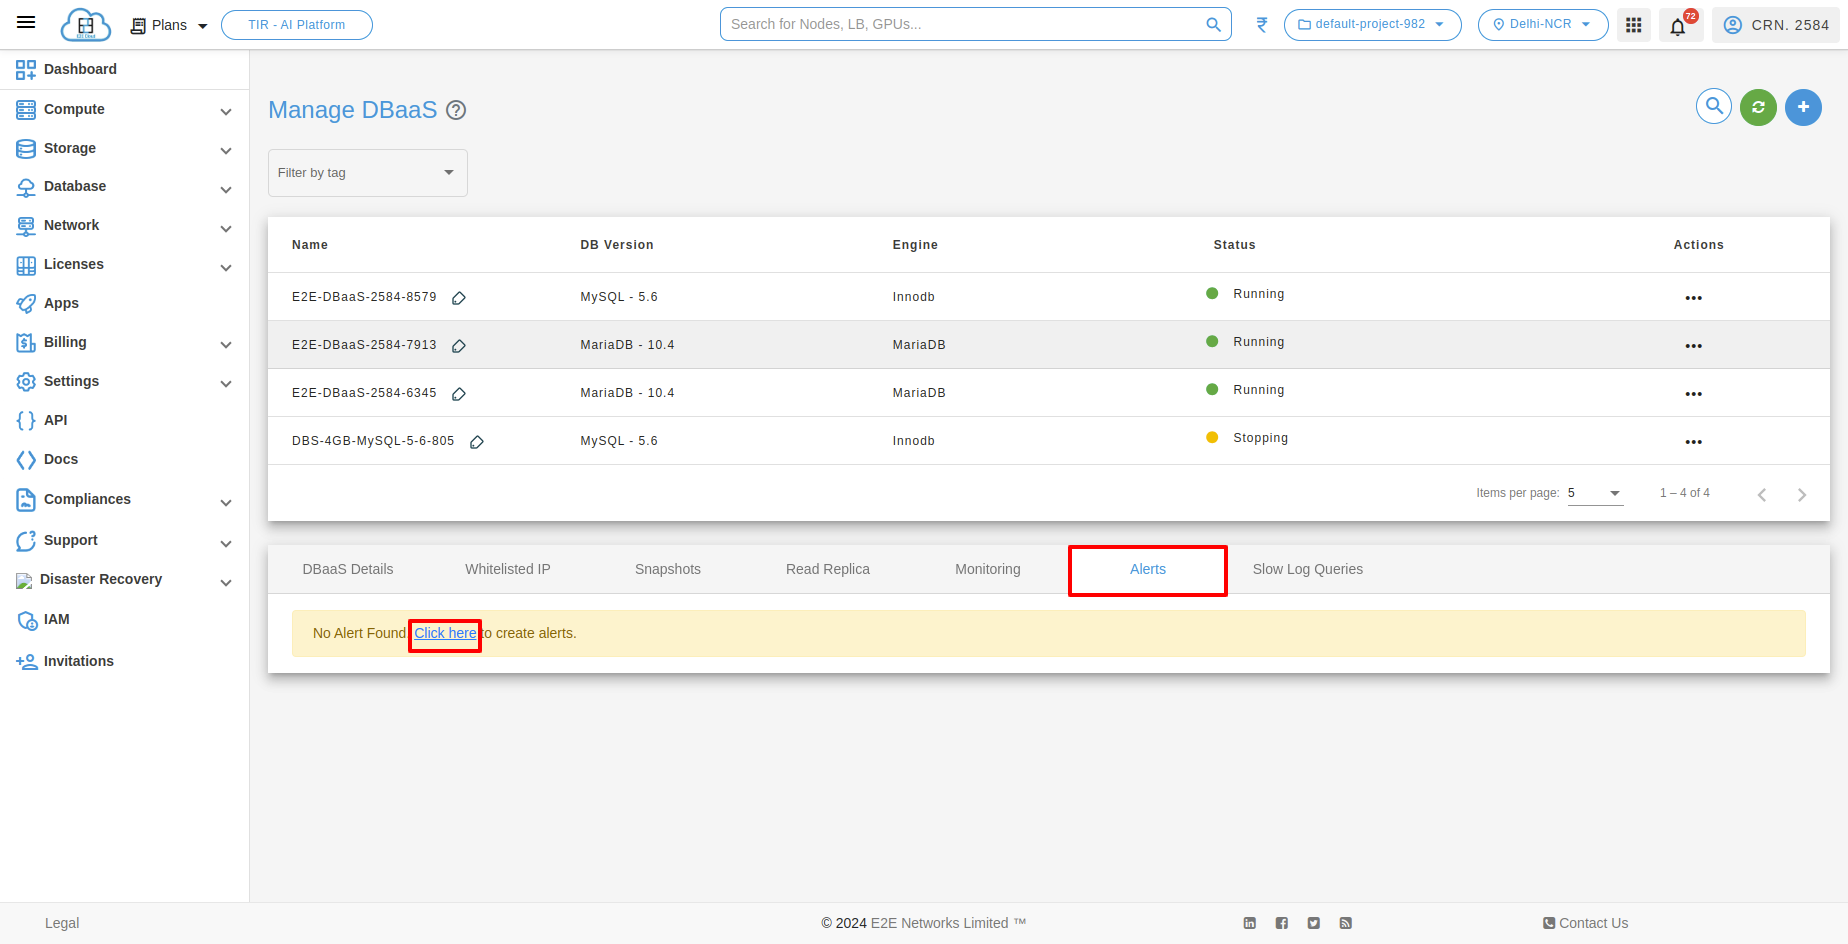
After clicking the Click Here link, you will be redirected to the "Create Alert" popup page.
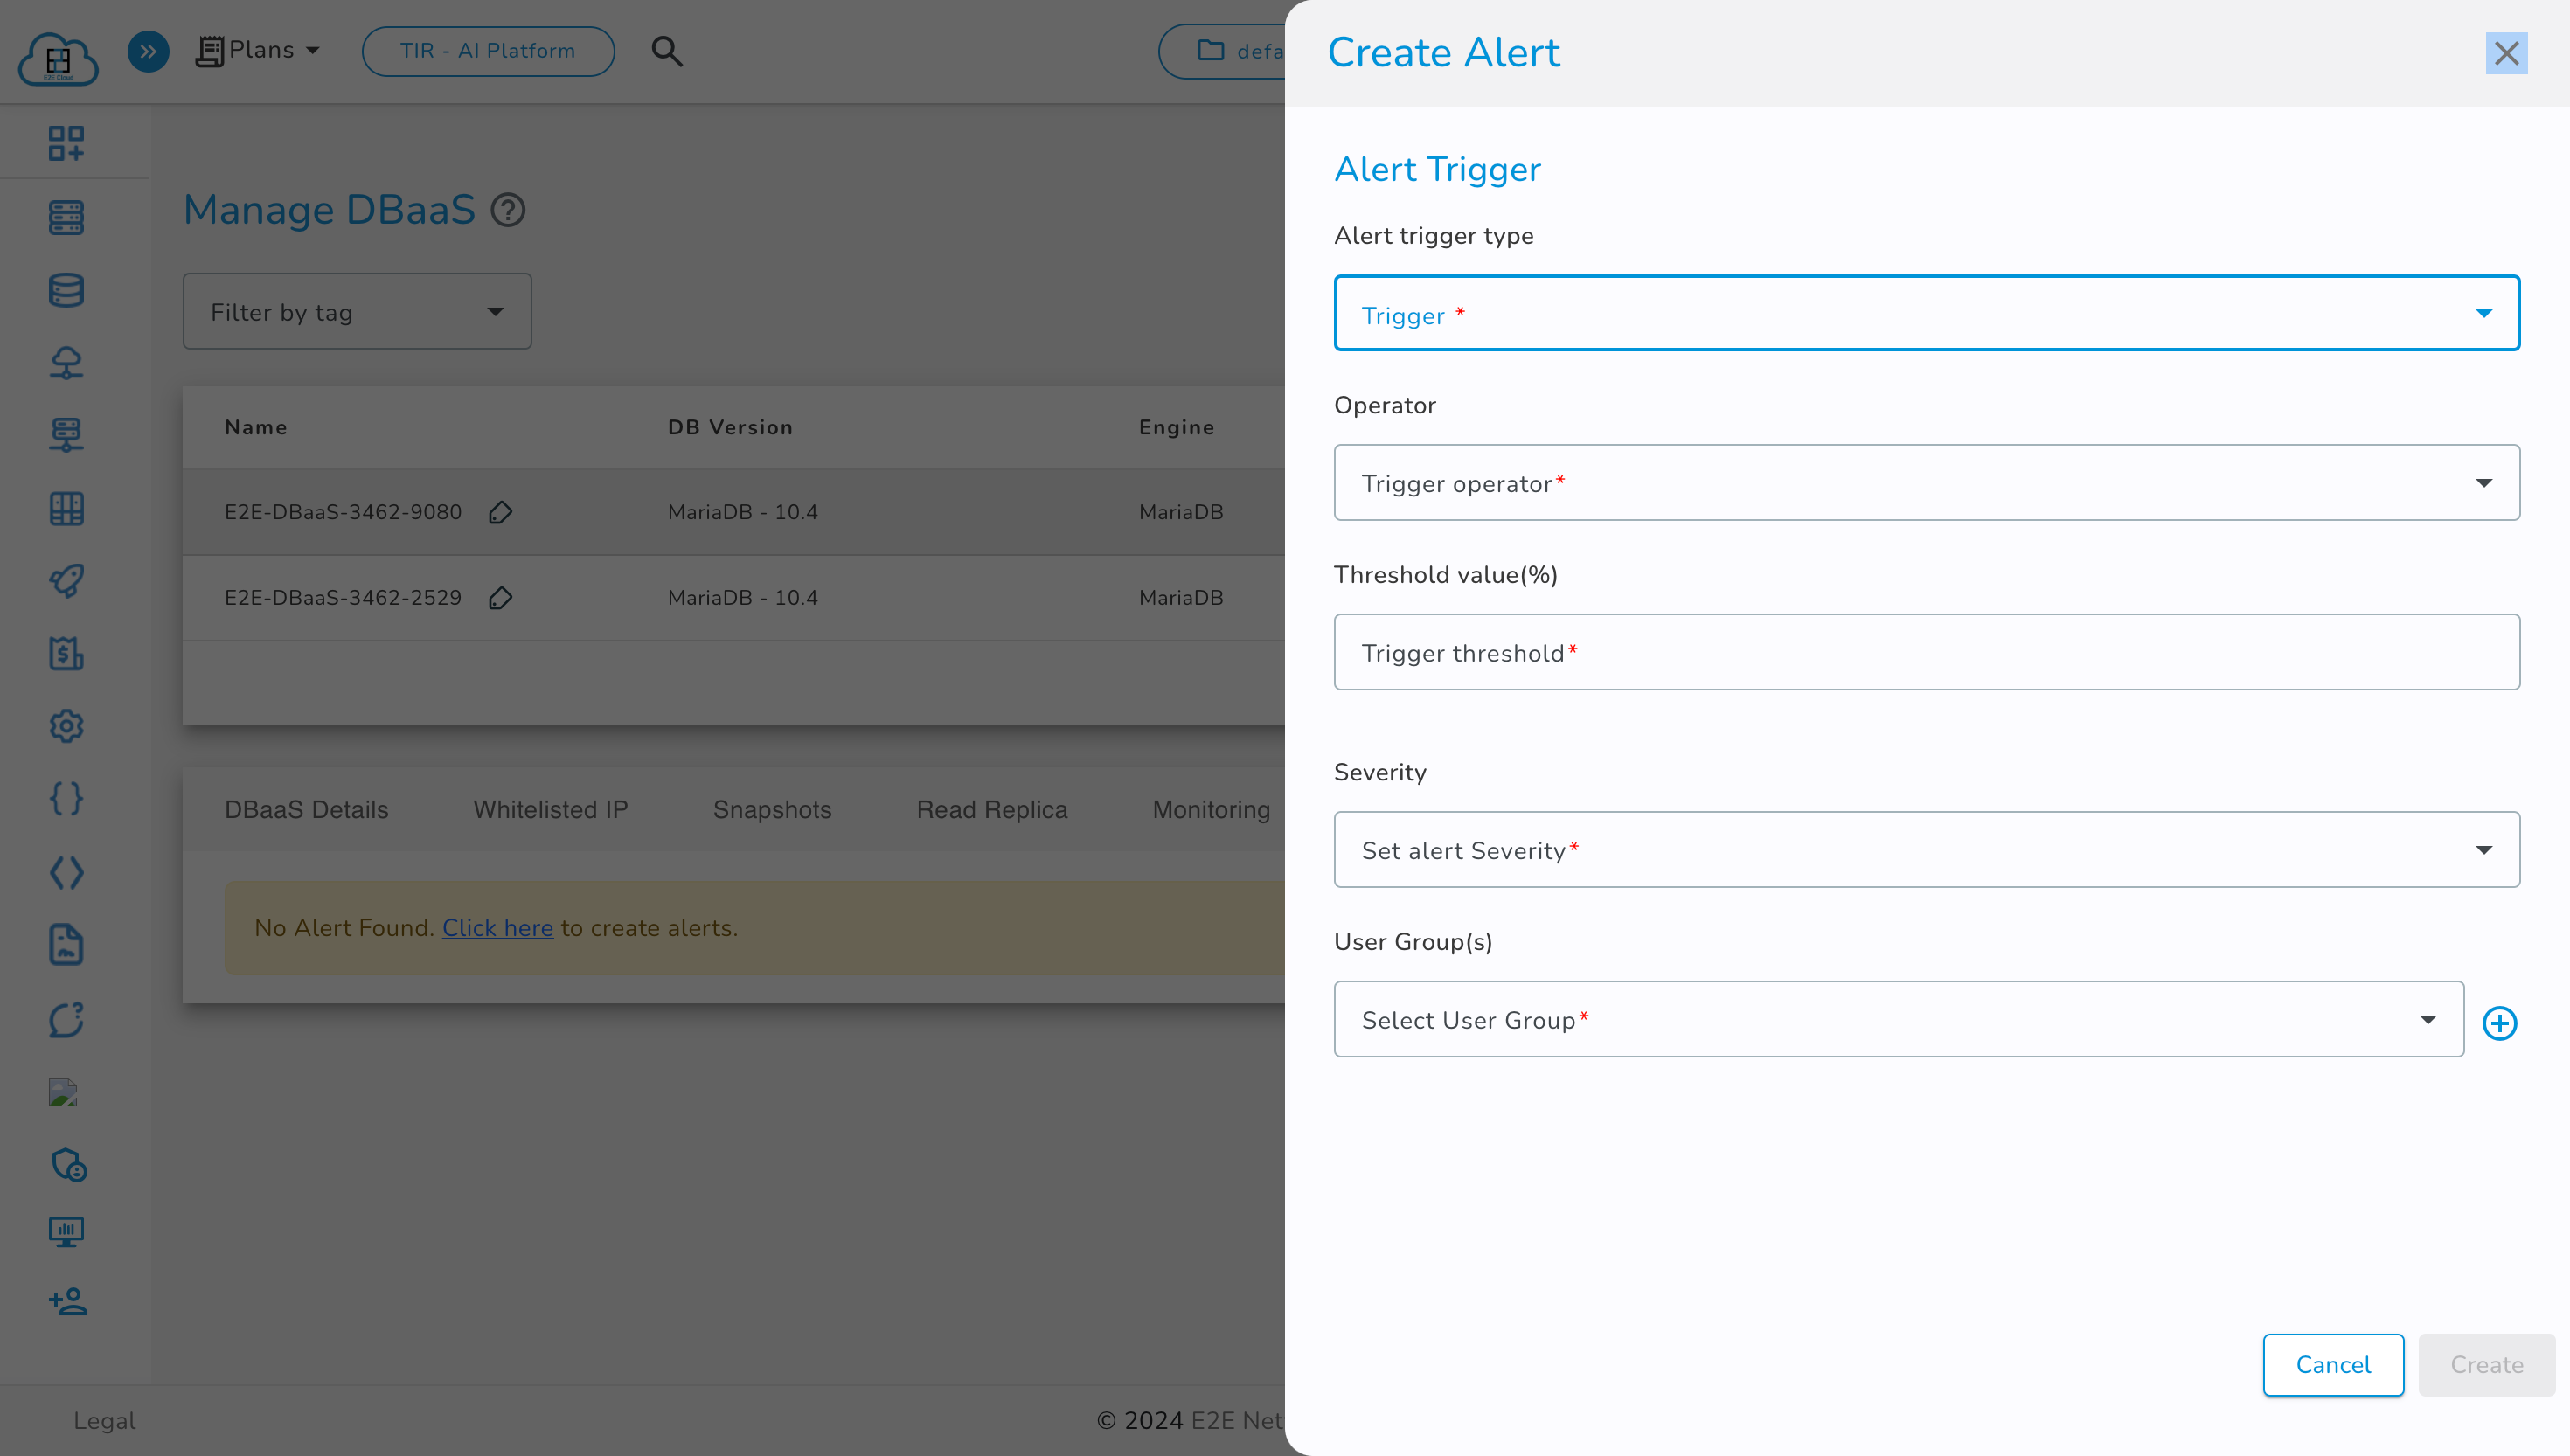
In the popup, you need to select Trigger Type.
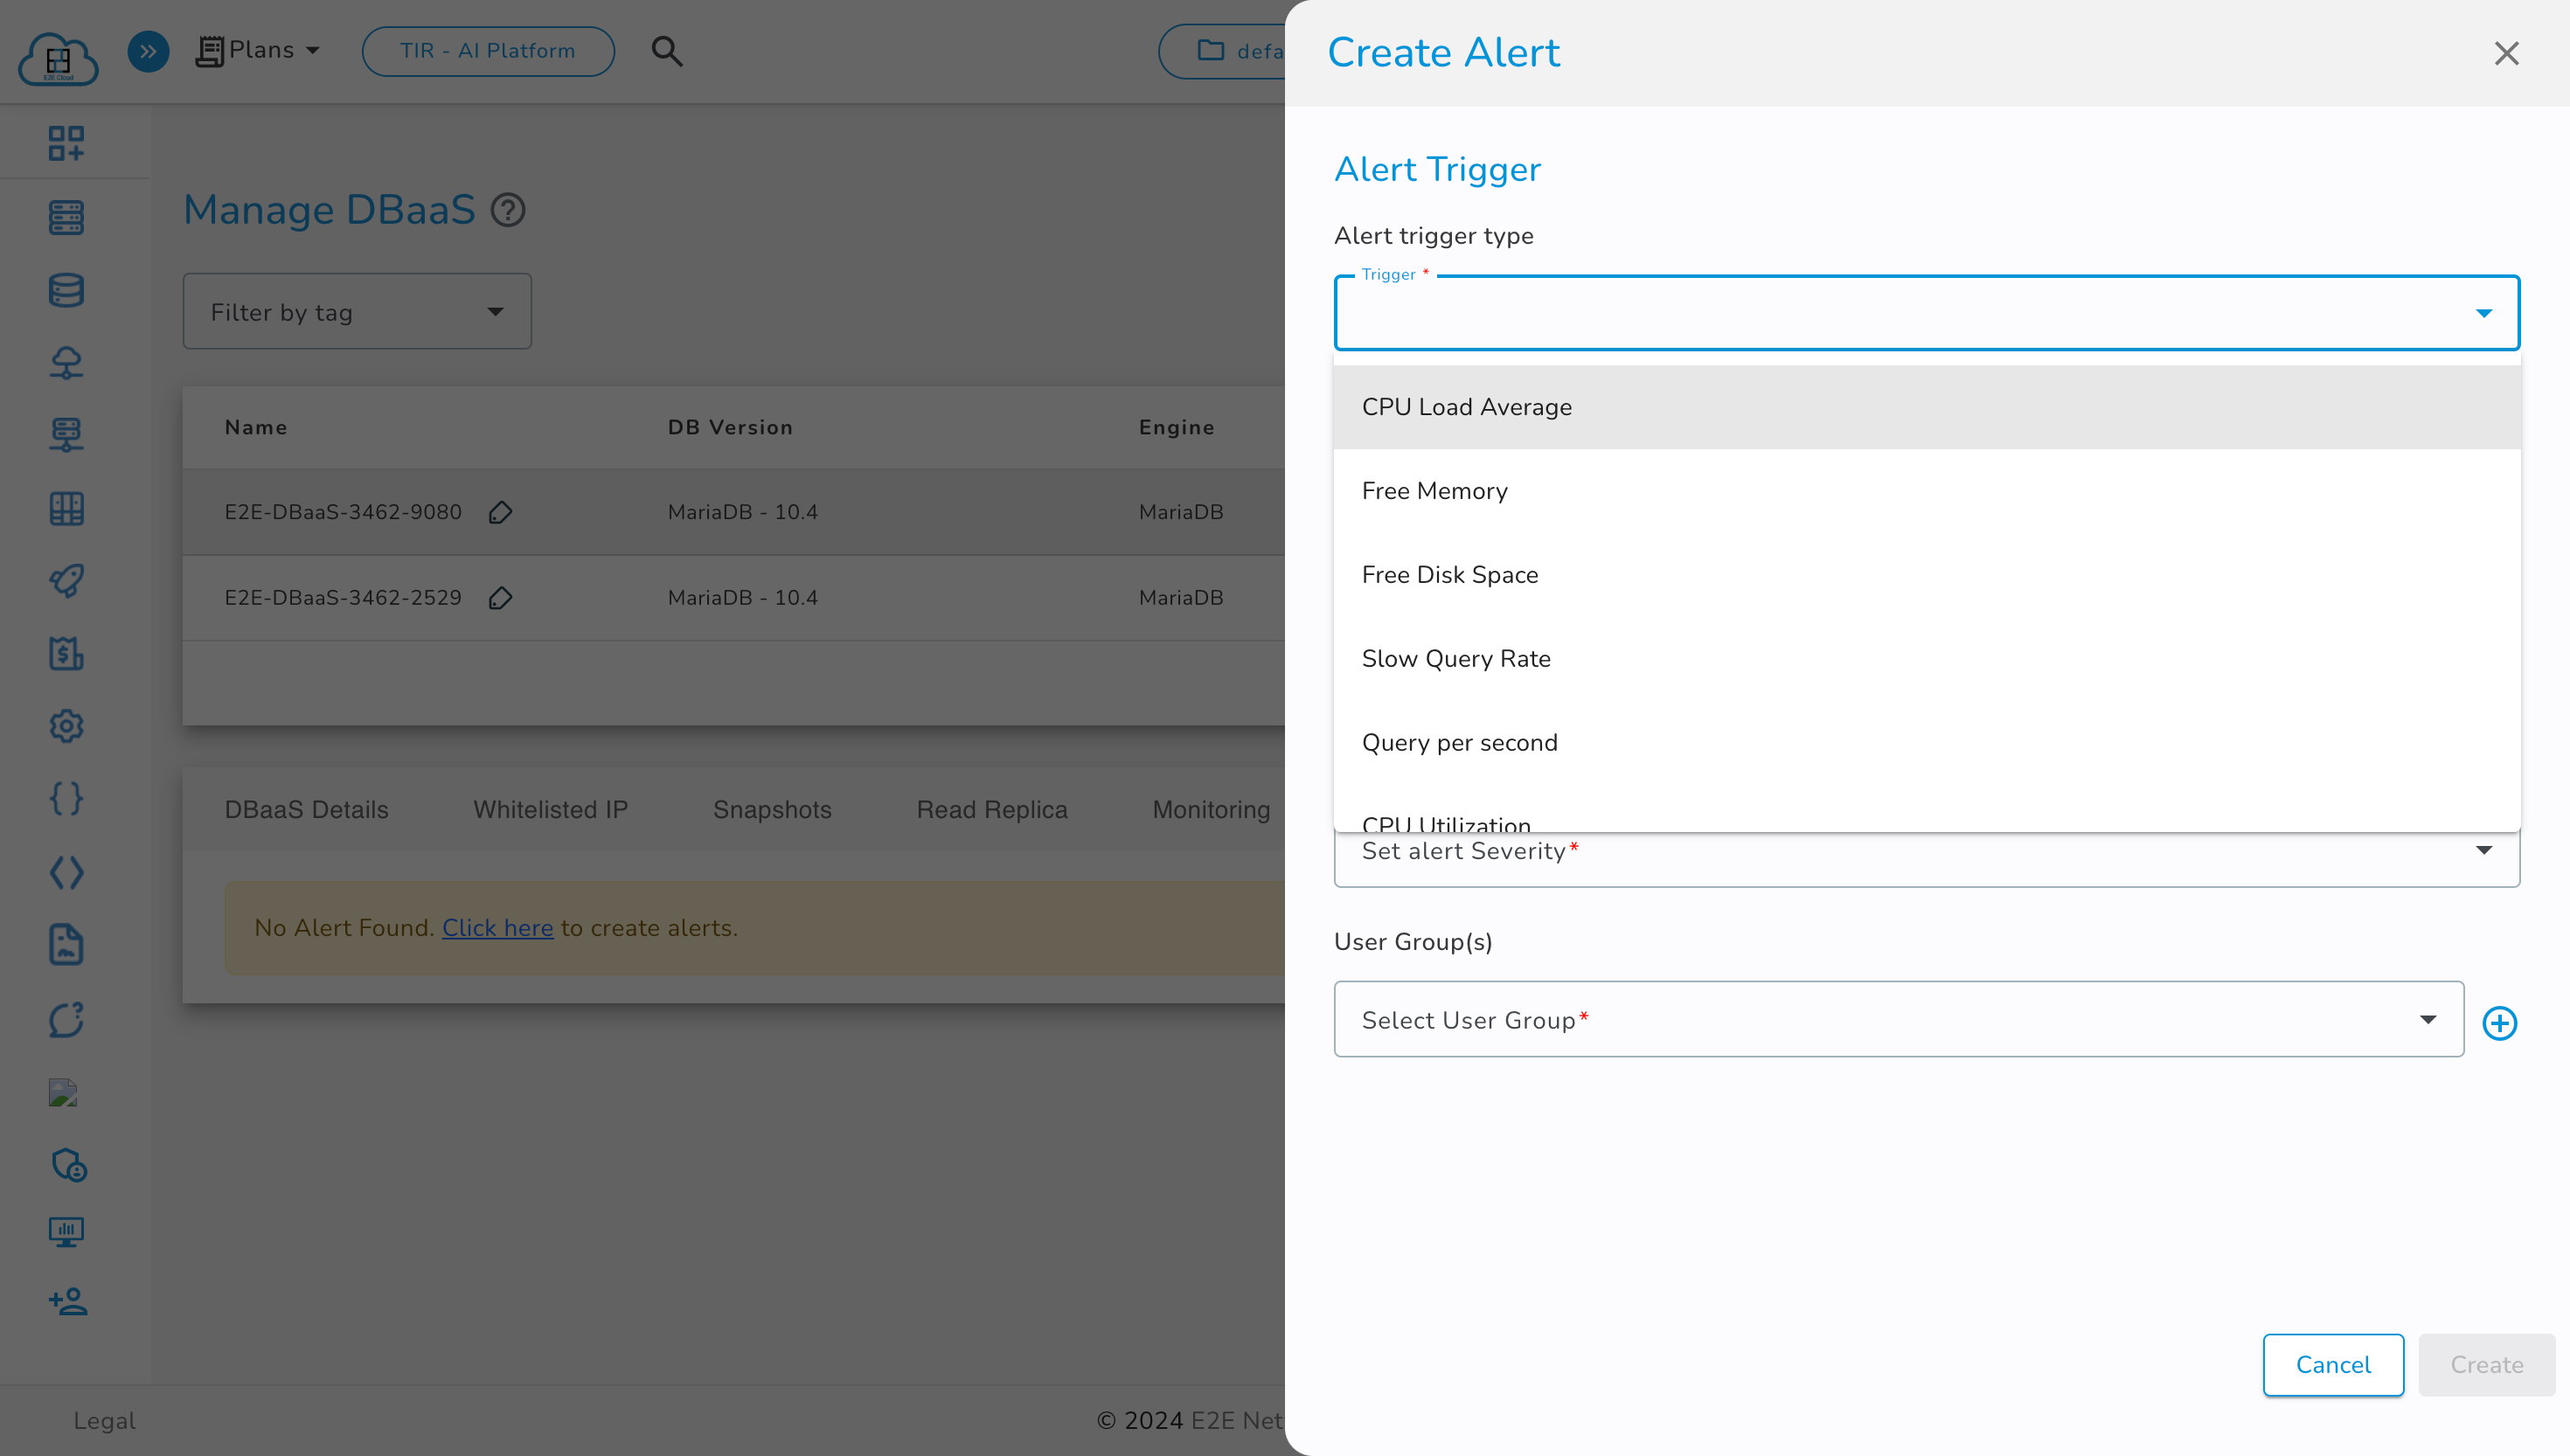
Next, select Trigger Operator.
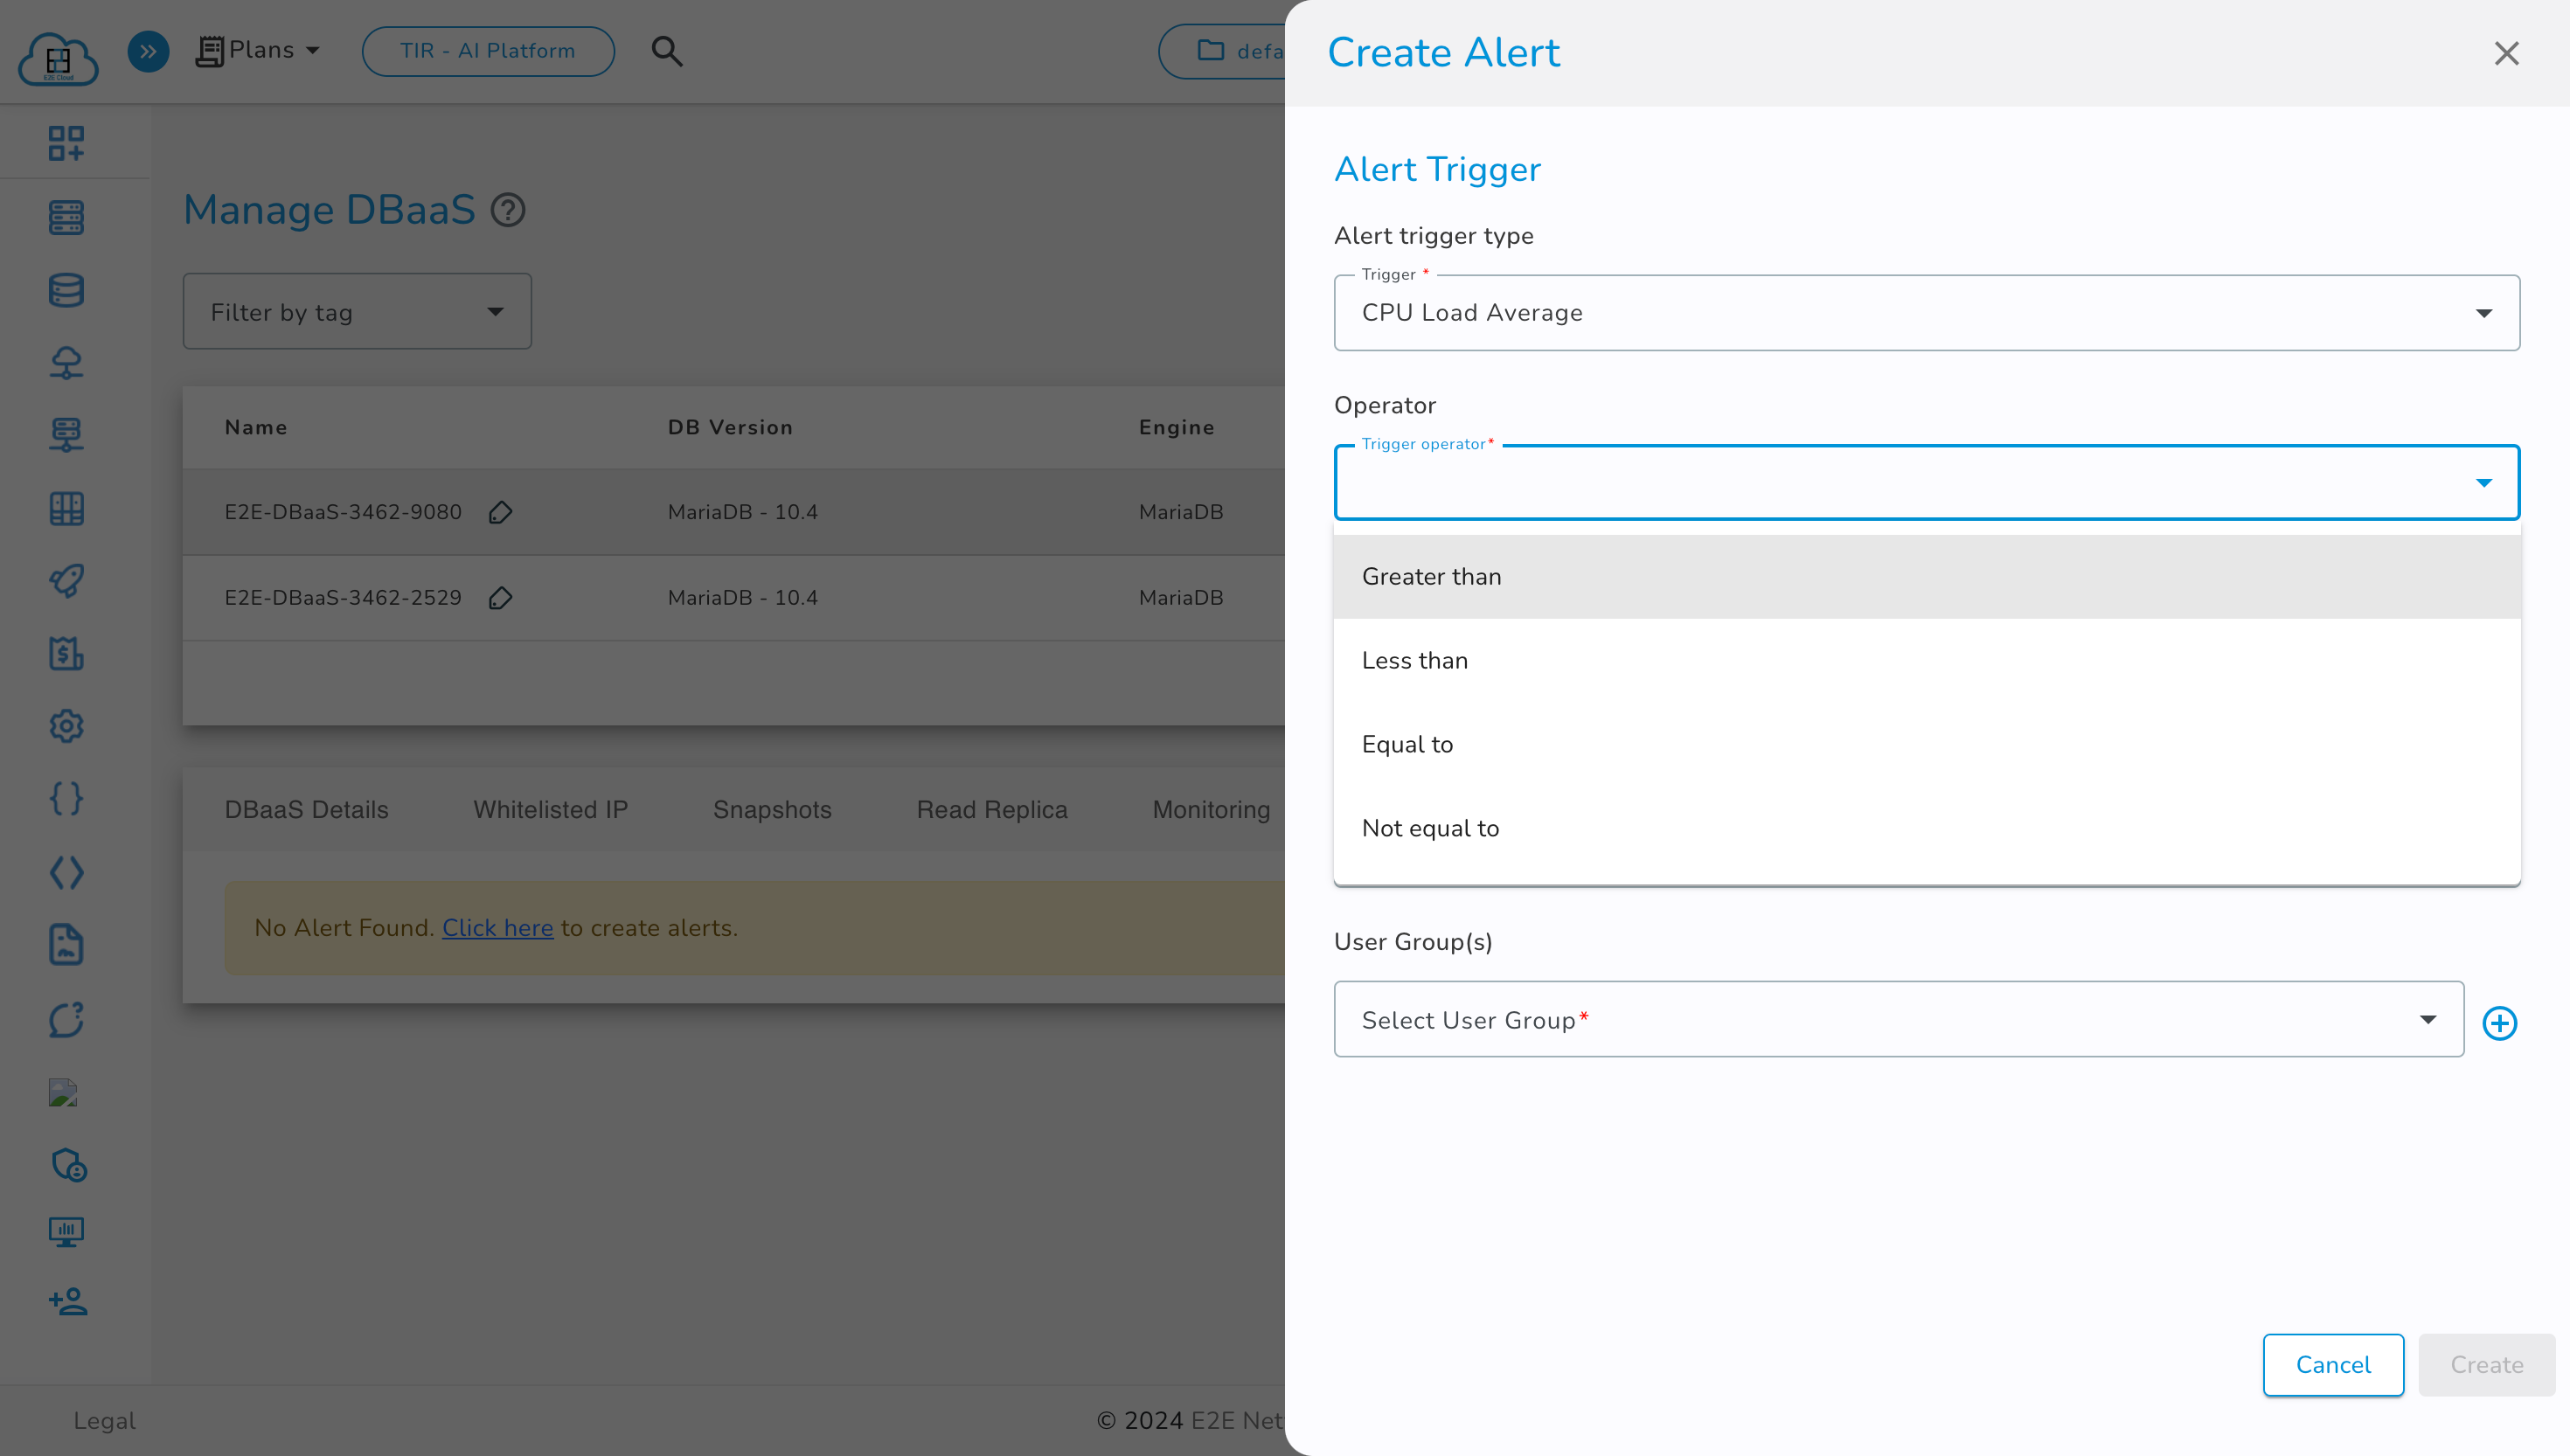
Enter the Trigger Value.
Now, select Severity.
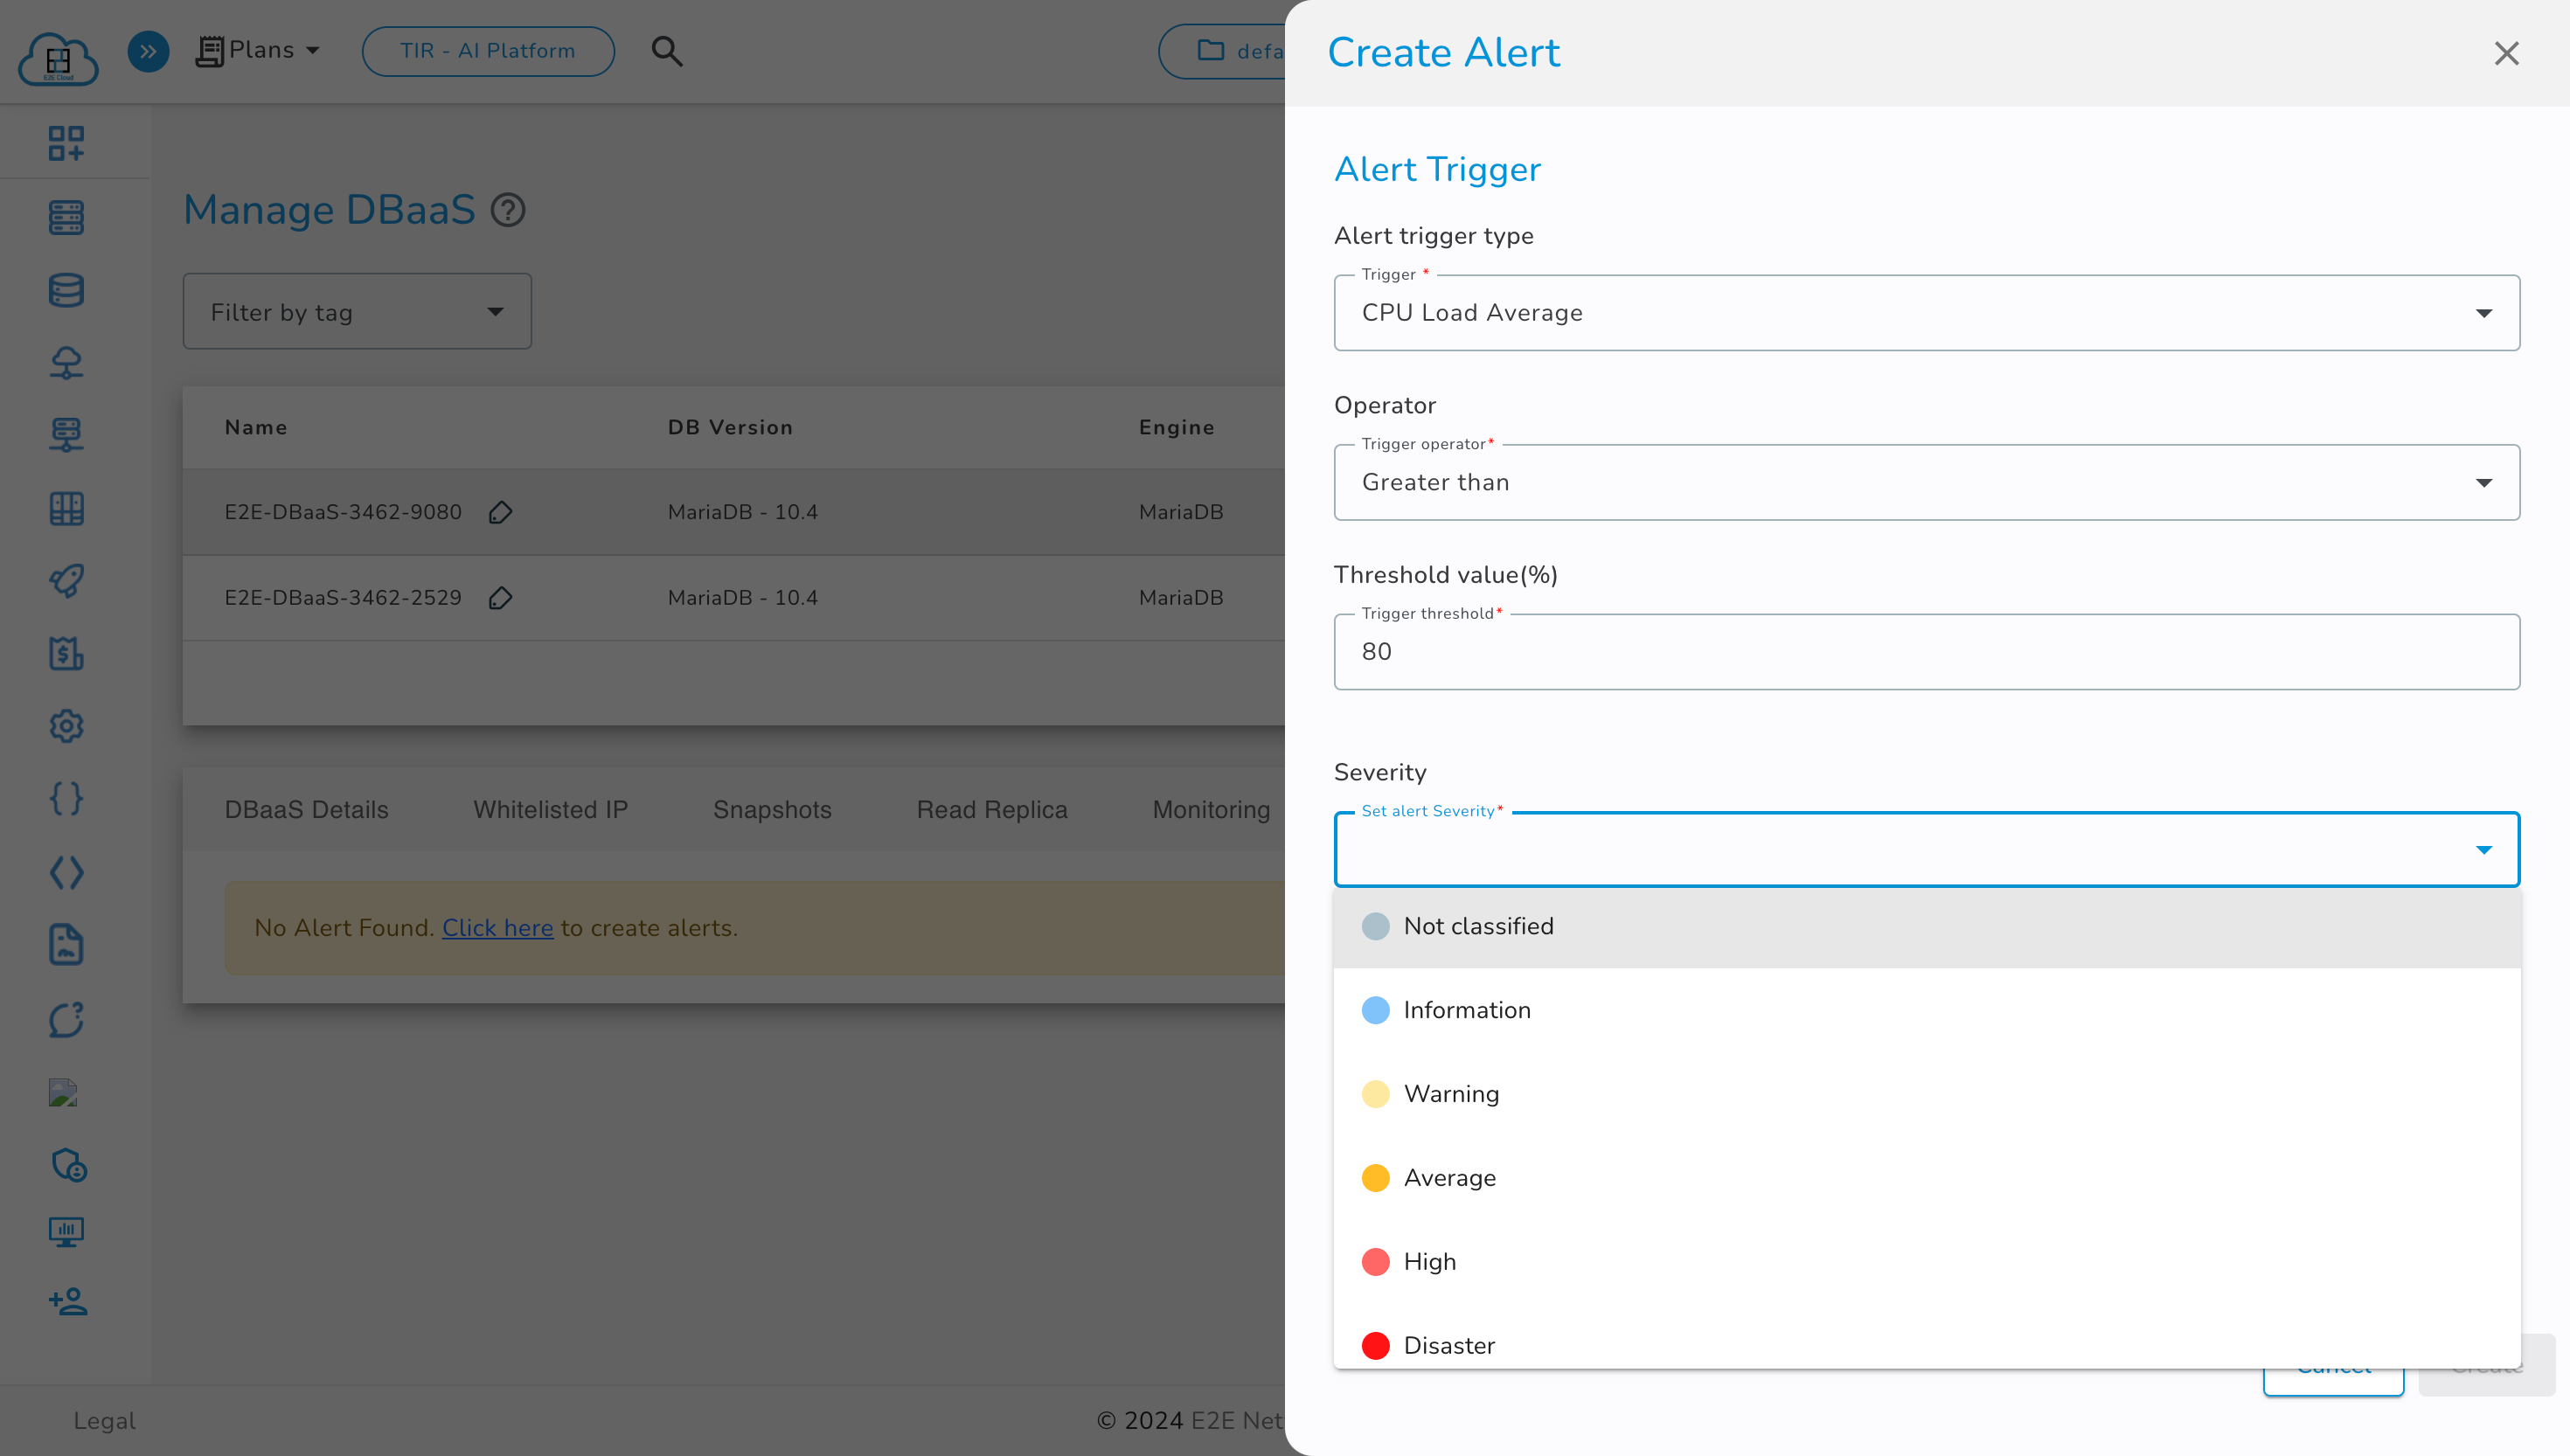
Next, select the User Group you want to send the alert to. To learn more about User Groups, Click Here.
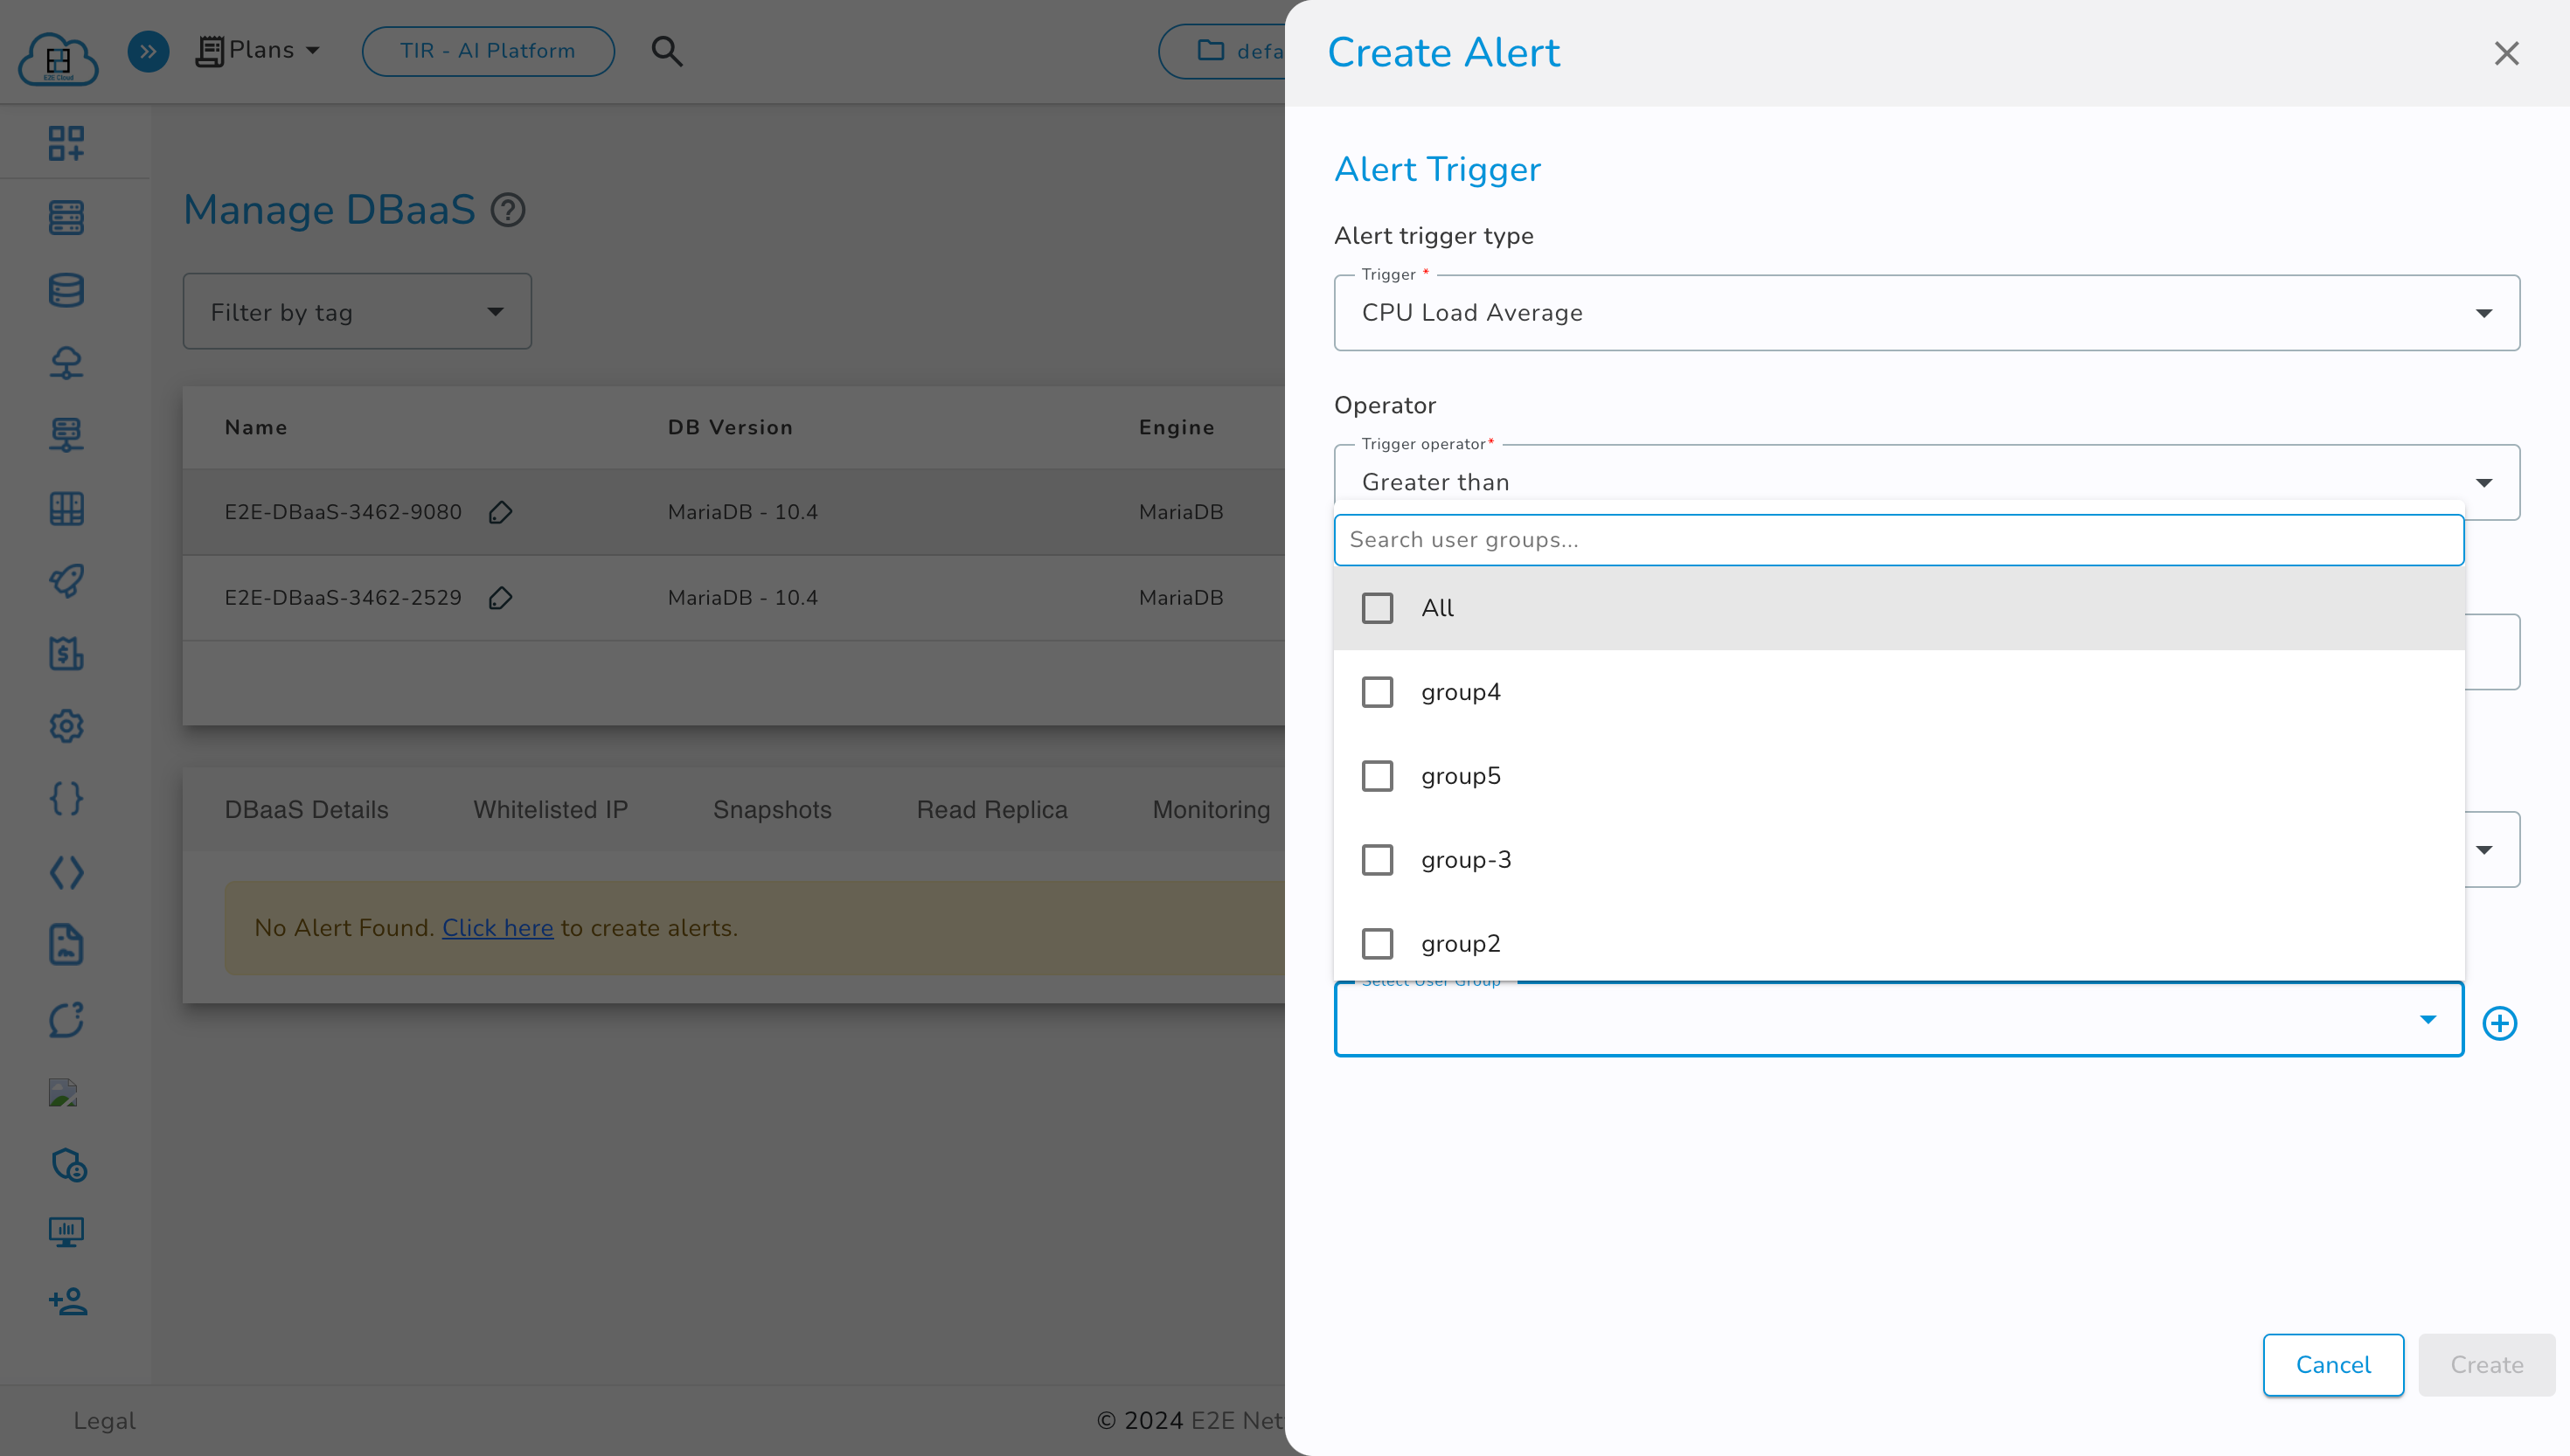
To create a new user group, click the '+' button. The rest of the process is the same as described in the Node Monitoring section. To learn more, Click Here.
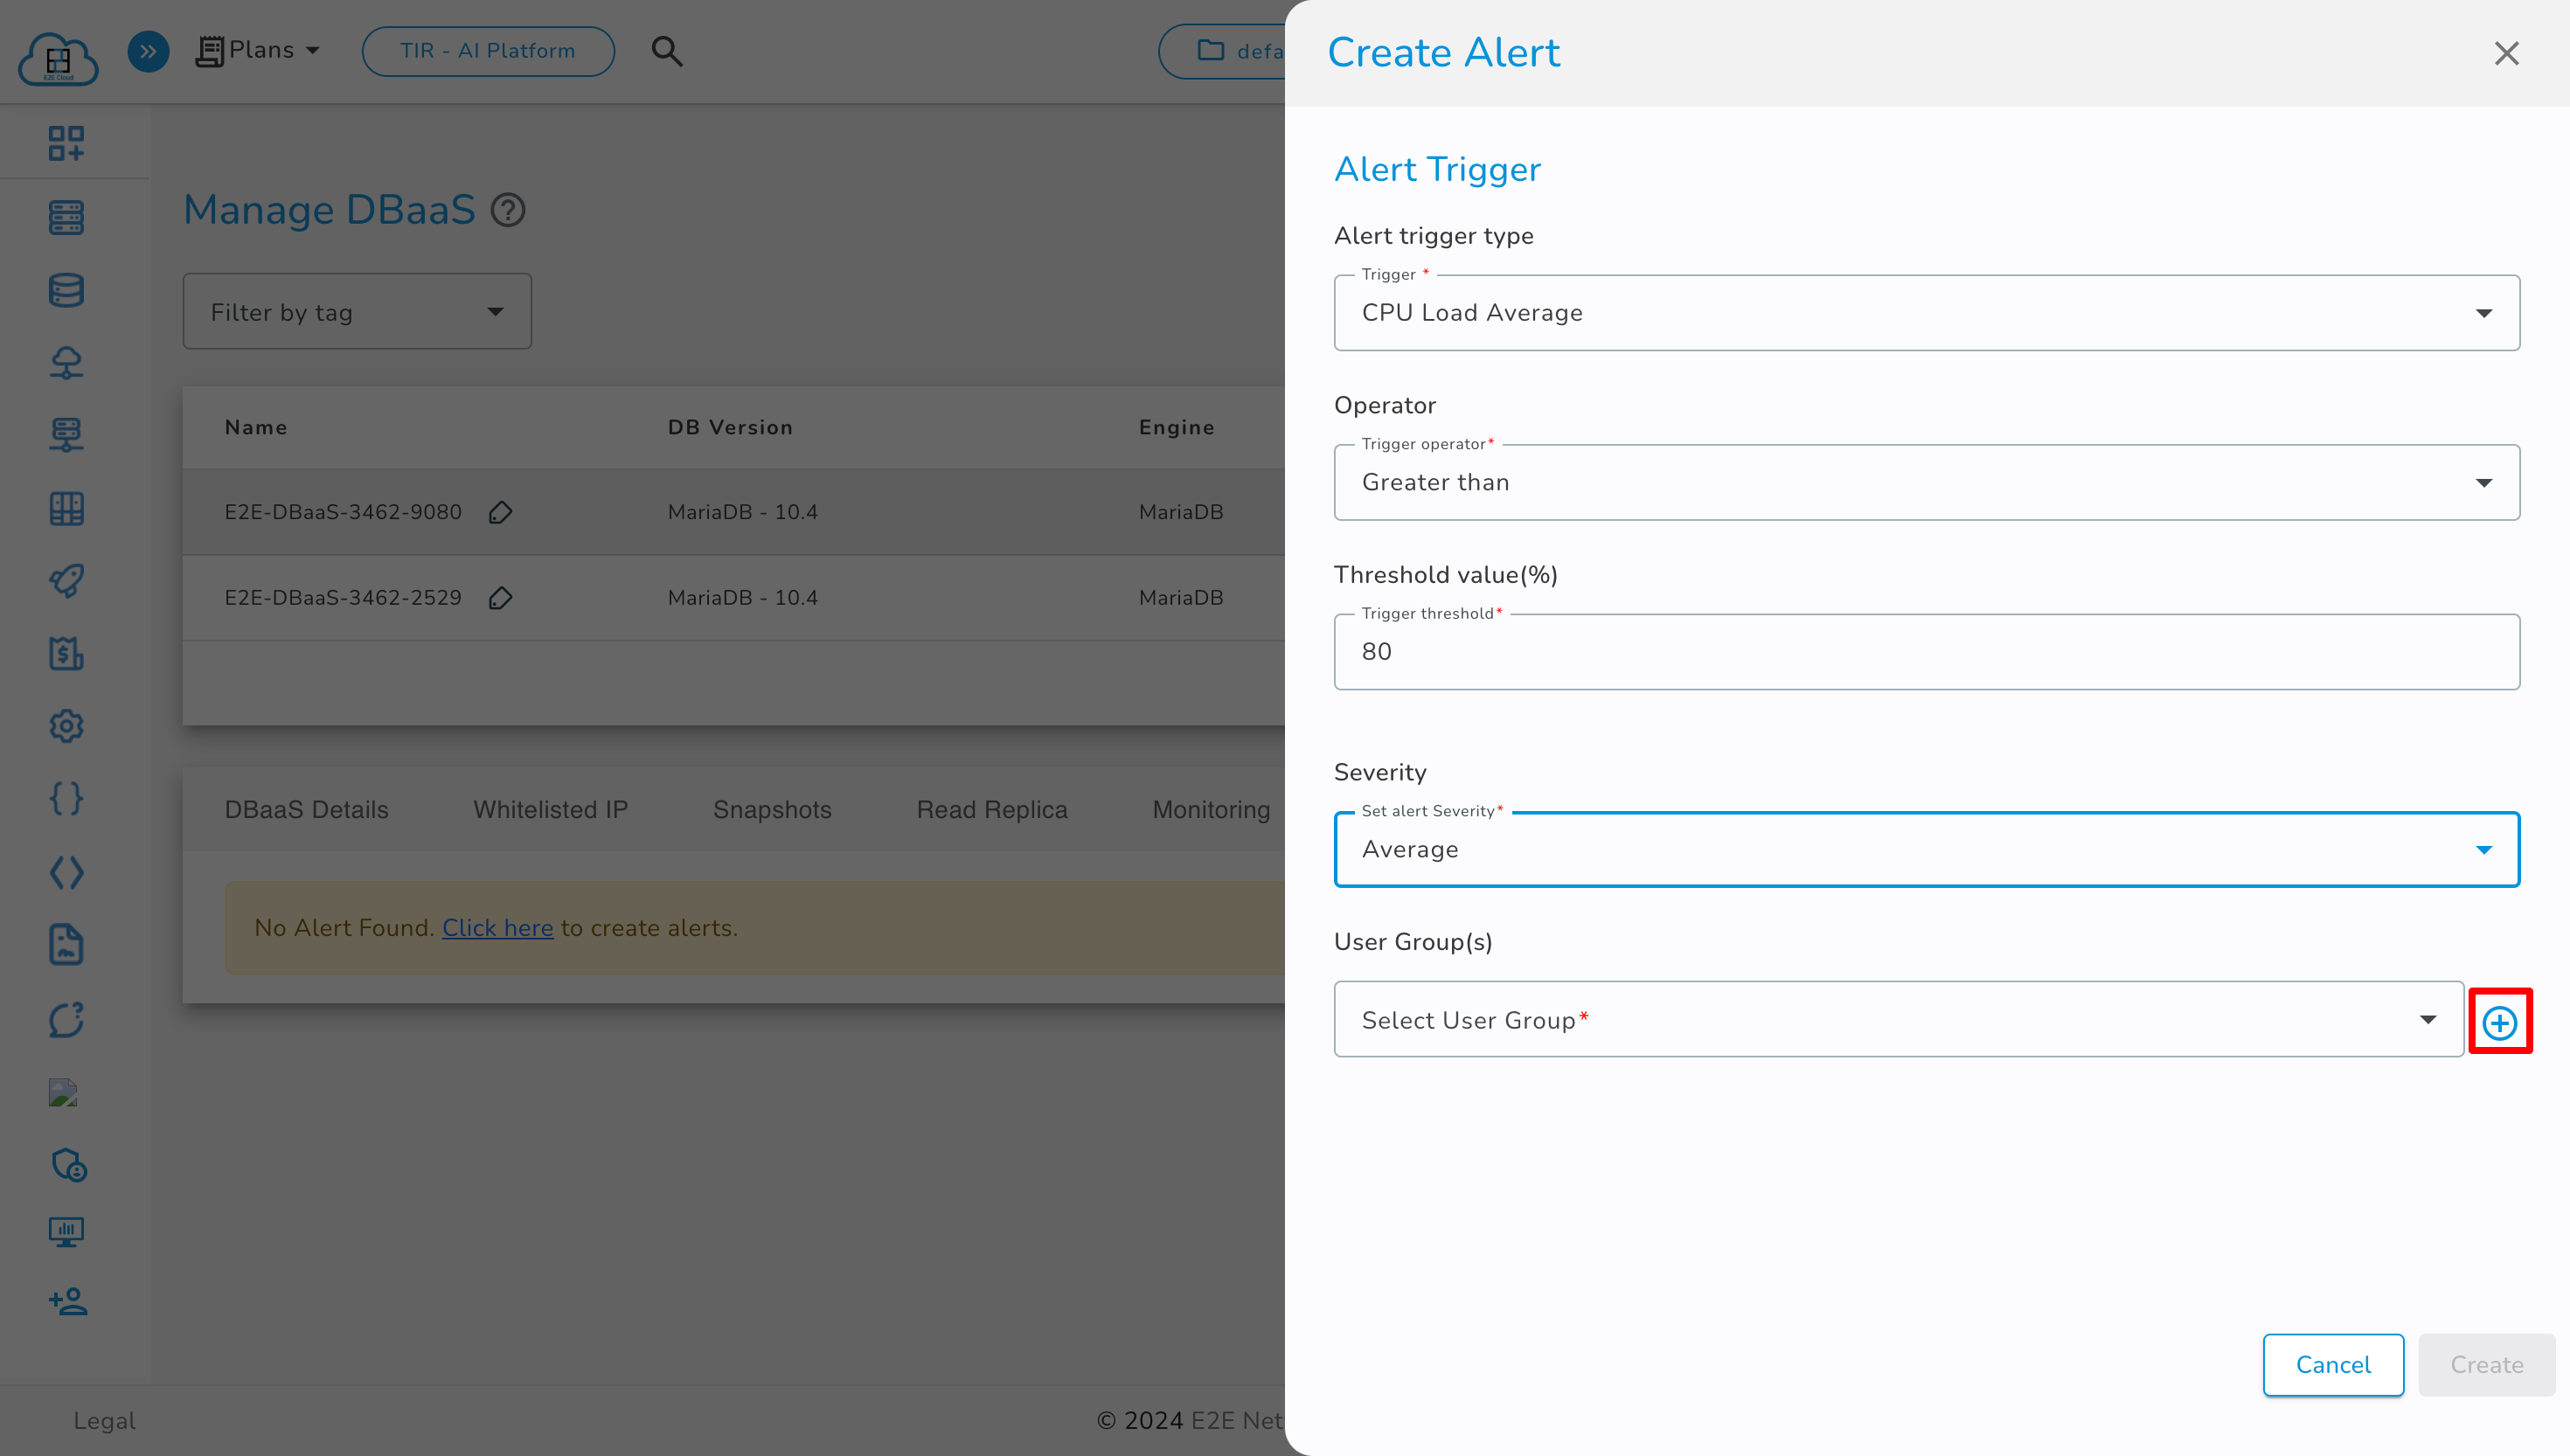
After selecting the user group, click on the "Create" button to create the alert.
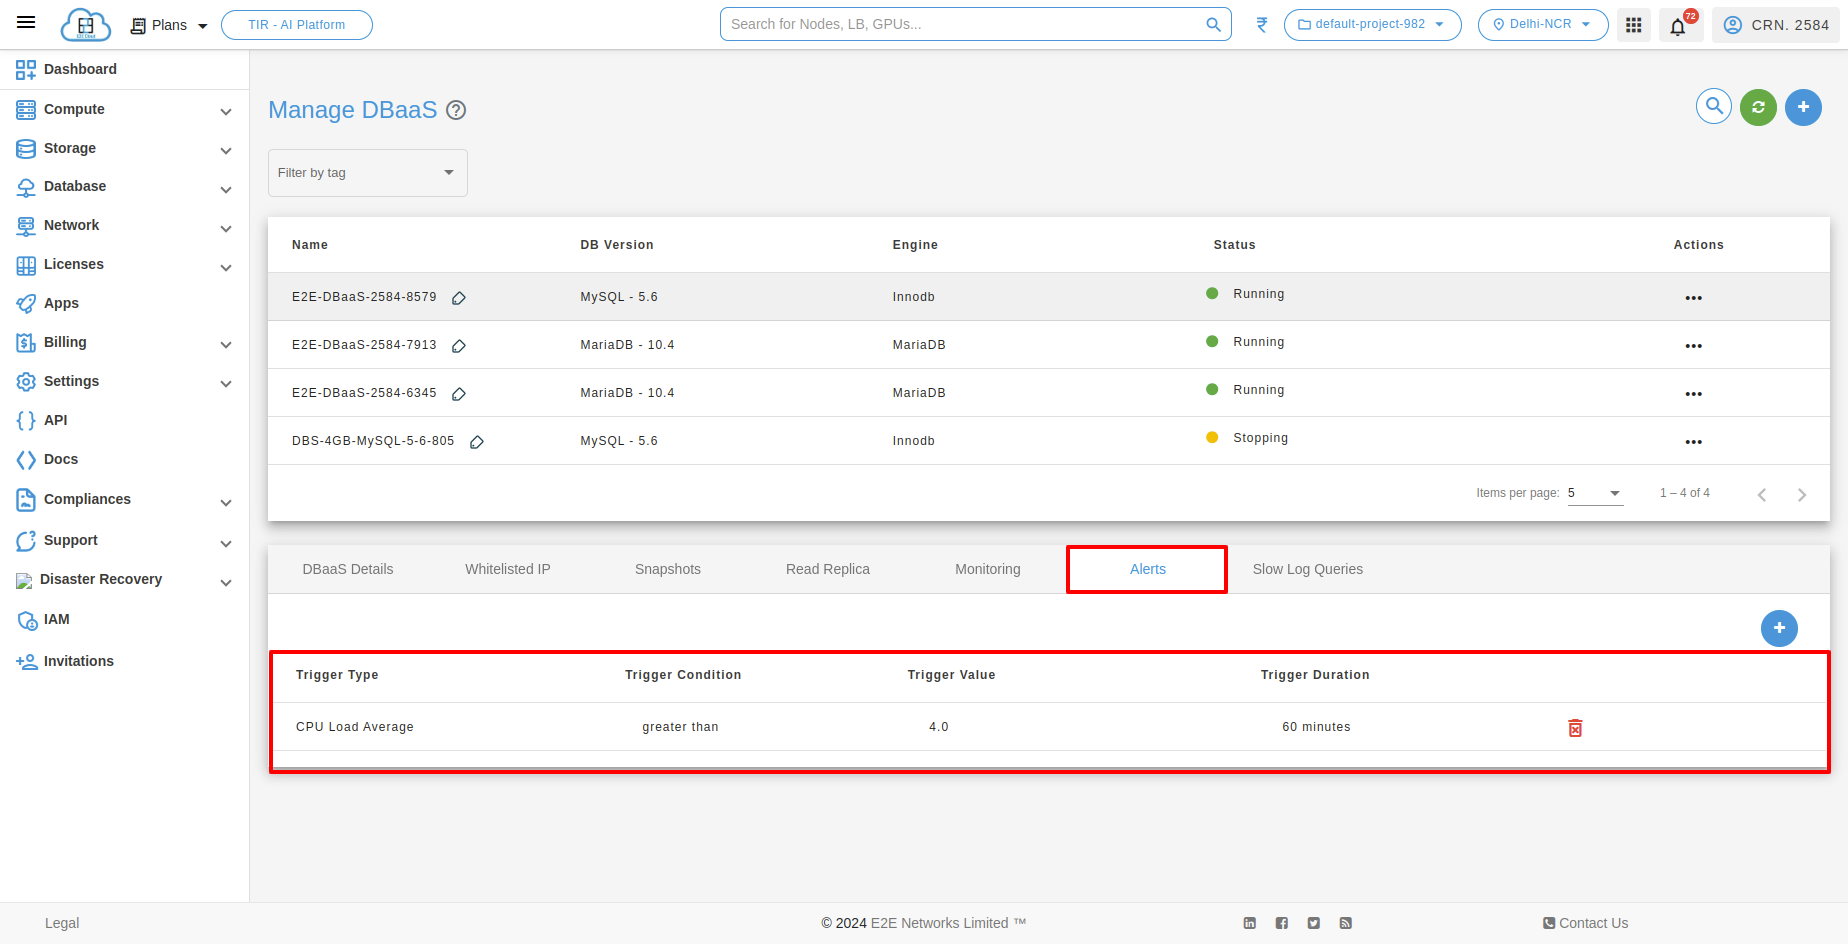
Once the alert is successfully created, you can view the list of alerts below.
Slow Log Queries
The slow query log feature in MySQL allows you to log all queries that take longer than a given threshold of execution time. The queries in the slow query log are good candidates to start optimizing and eliminating the bottlenecks.
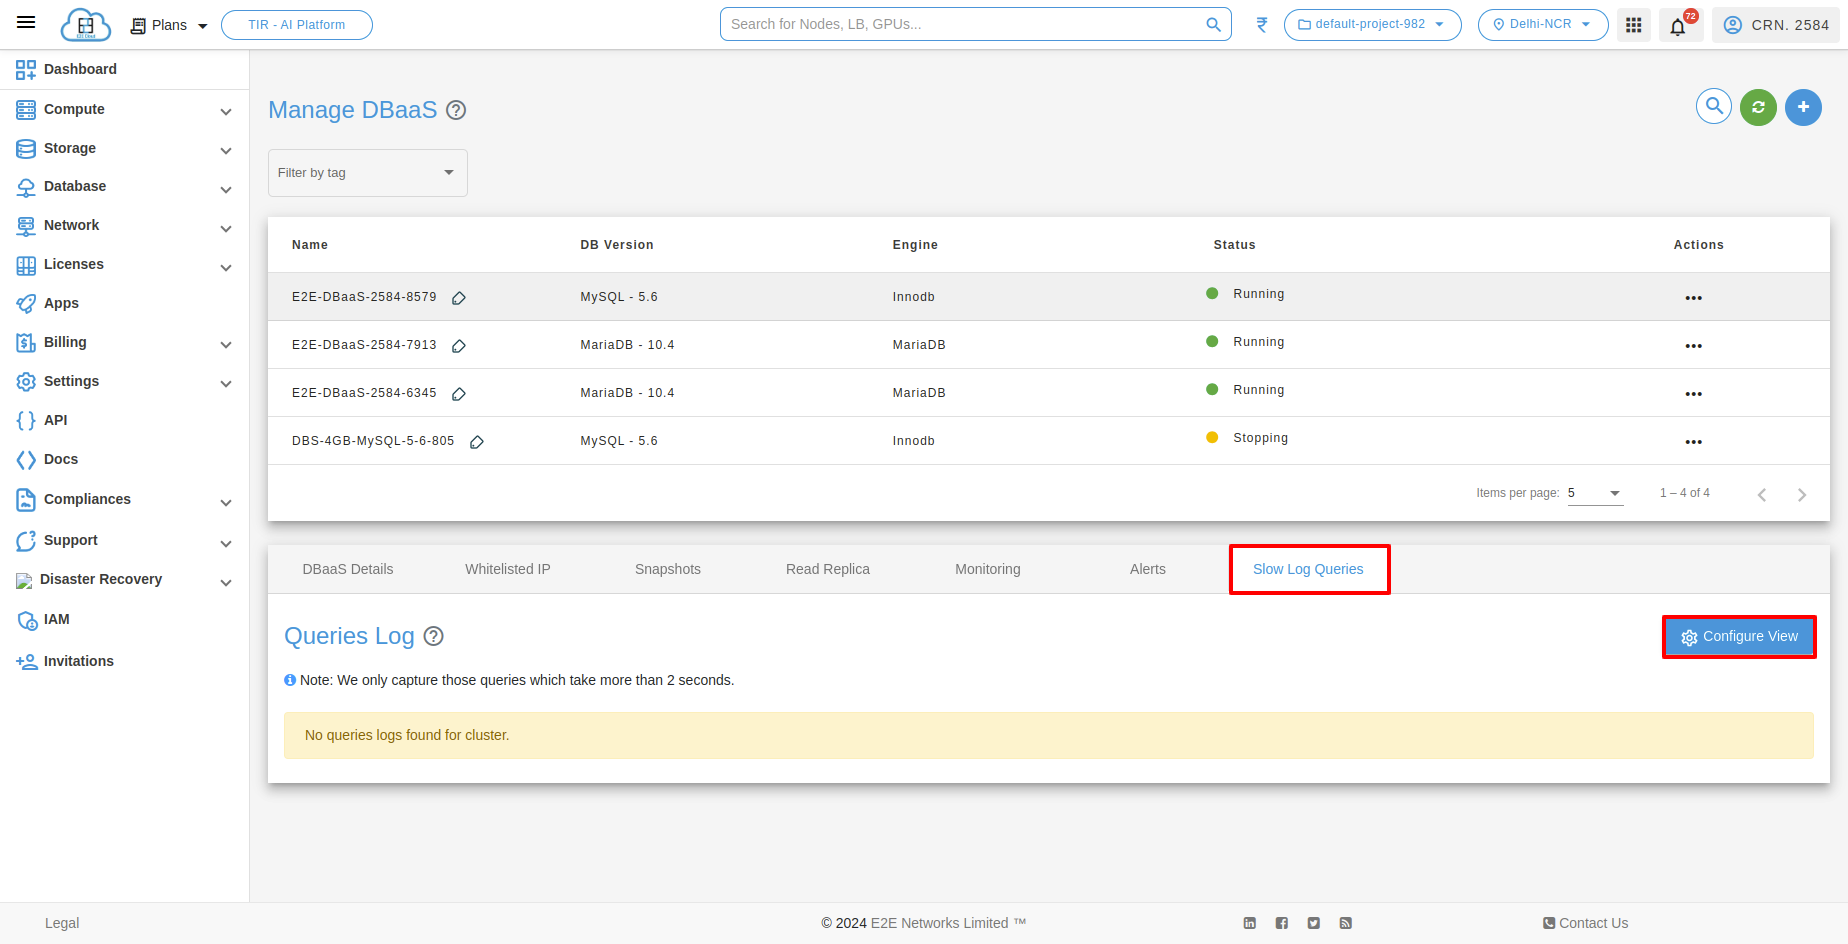
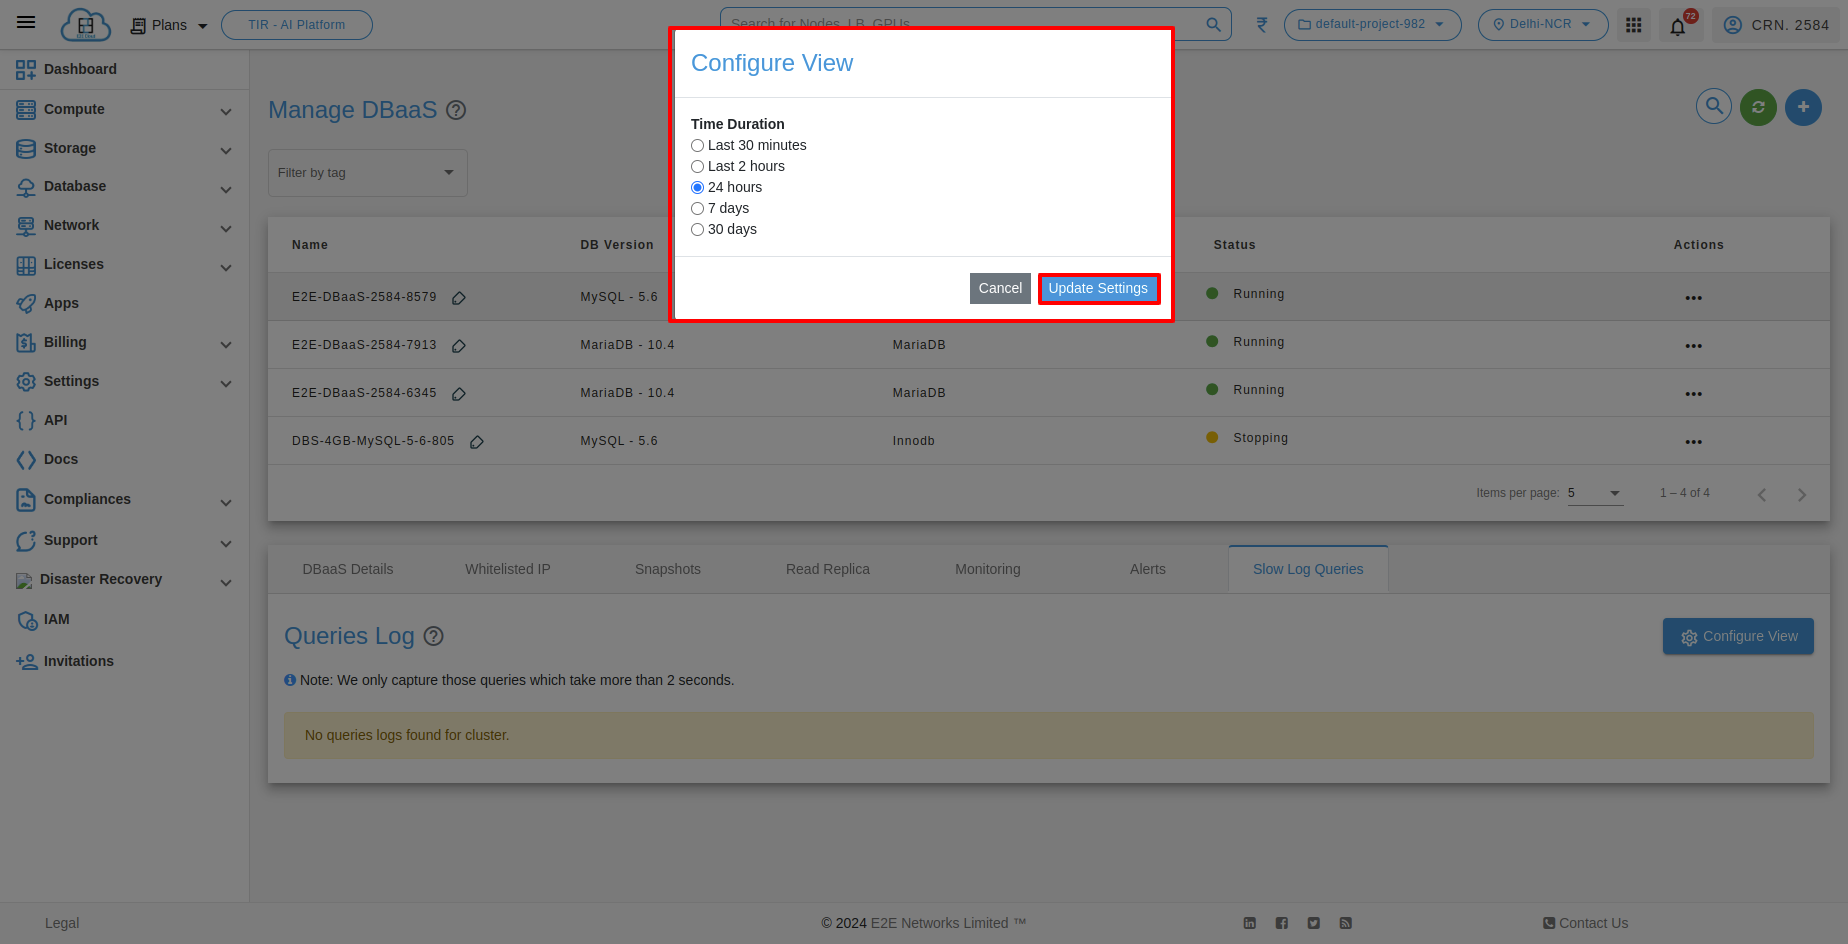
To configure slow log queries, click on configure view and select the appropriate time duration to log the queries that will be displayed on the dashboard.
