Load Balancer in Private Cluster
A Load Balancer in a Private Cluster helps distribute incoming traffic across multiple backend nodes to ensure:
- High Availability
- Scalability
- Fault Tolerance
E2E Cloud offers two types of load balancers in Private Clusters:
Application Load Balancer (ALB)
Steps to Create an ALB in a Private Cluster
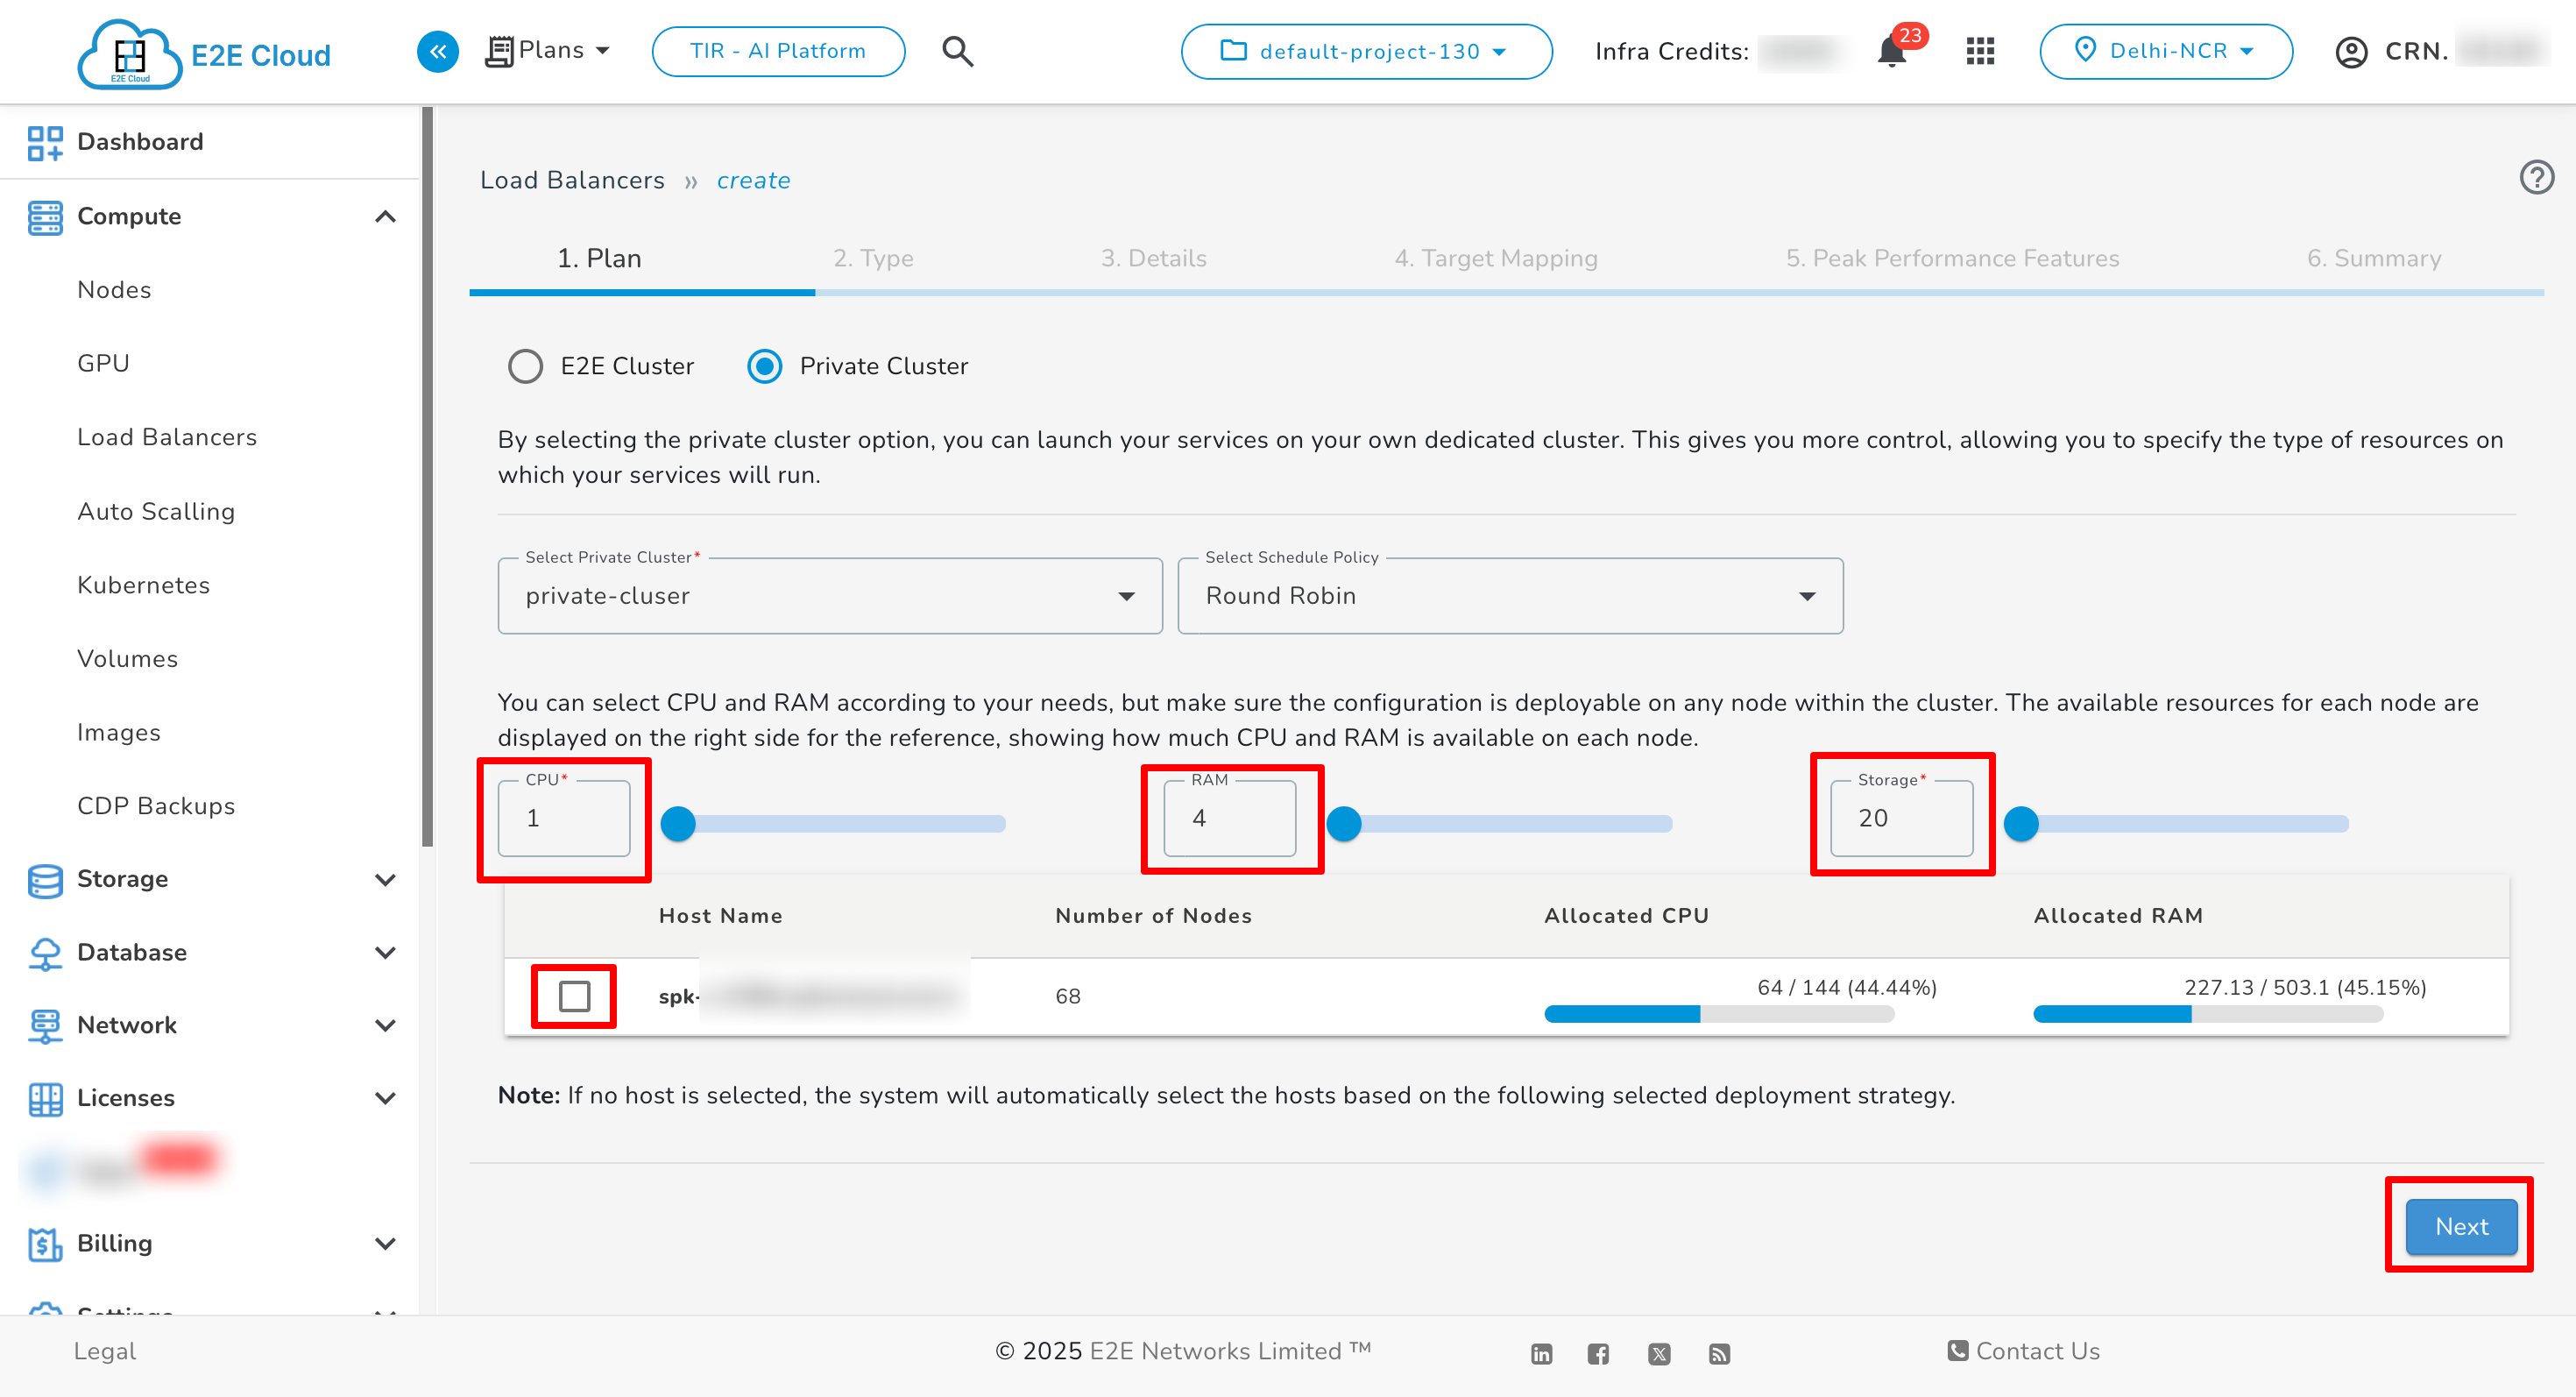
1. Select Plan
-
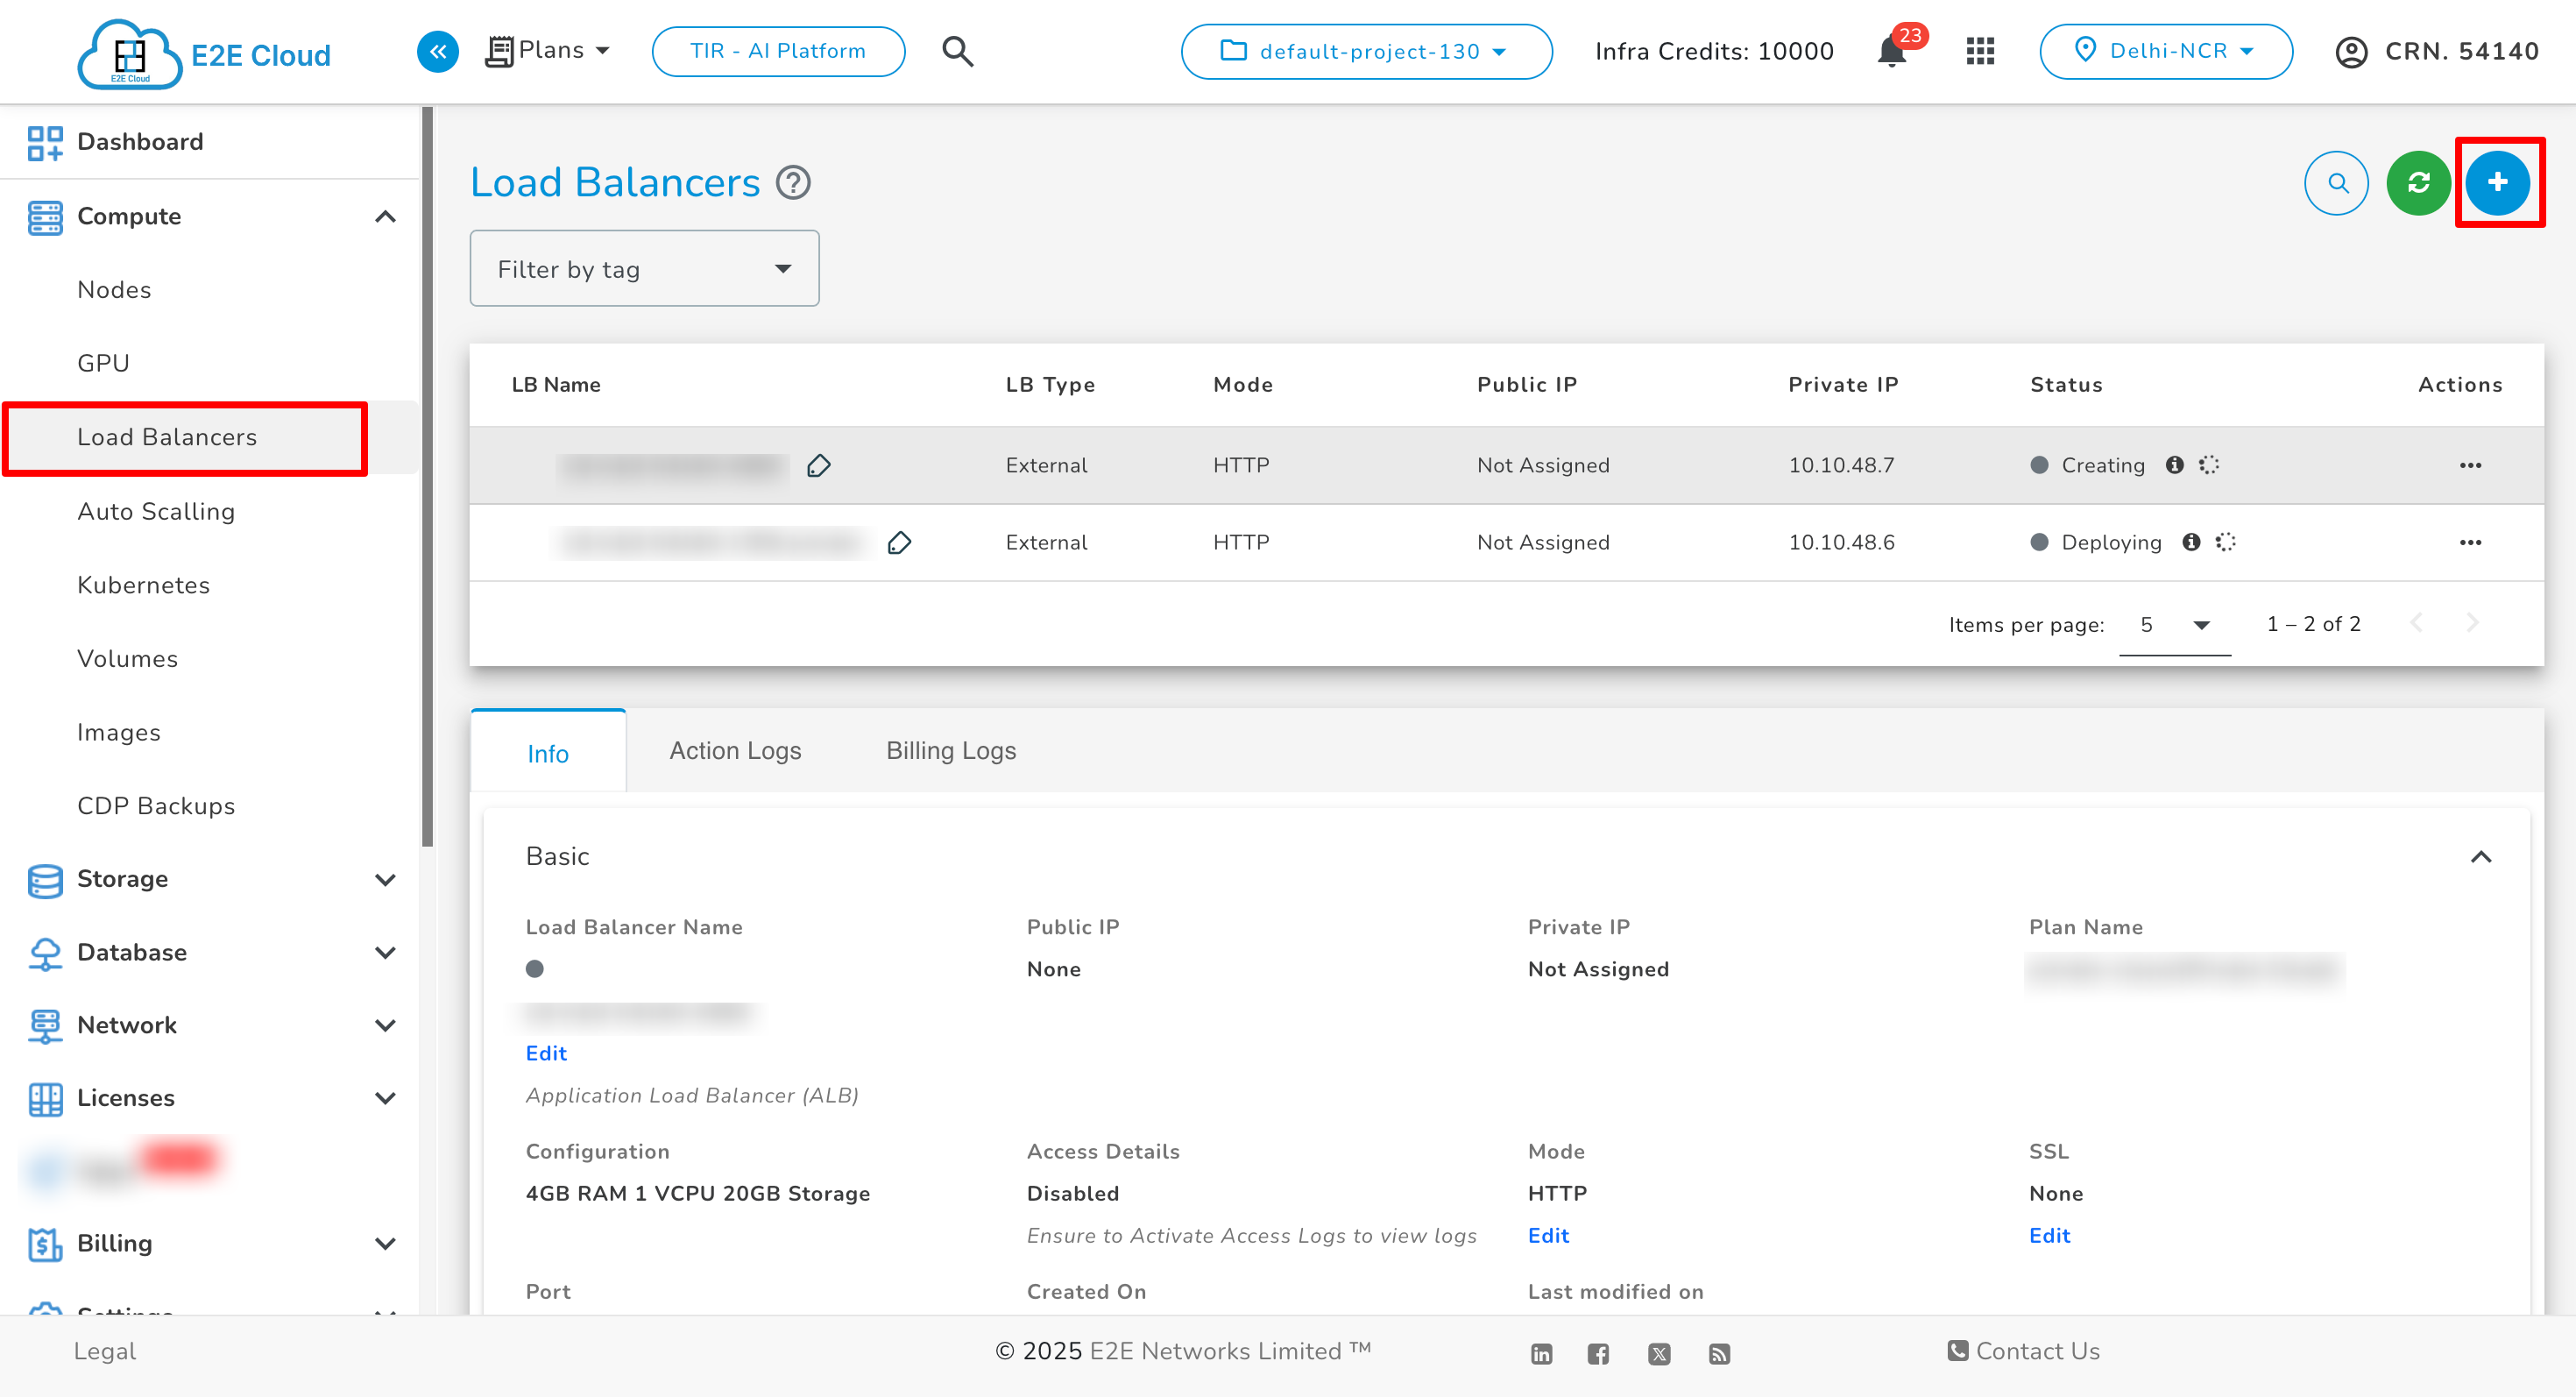
Navigate to the Load Balancers section and click Create.
2. Choose Load Balancer Configuration
-
Select Private Cluster as the plan.
-
Choose the desired CPU, RAM, and Storage.
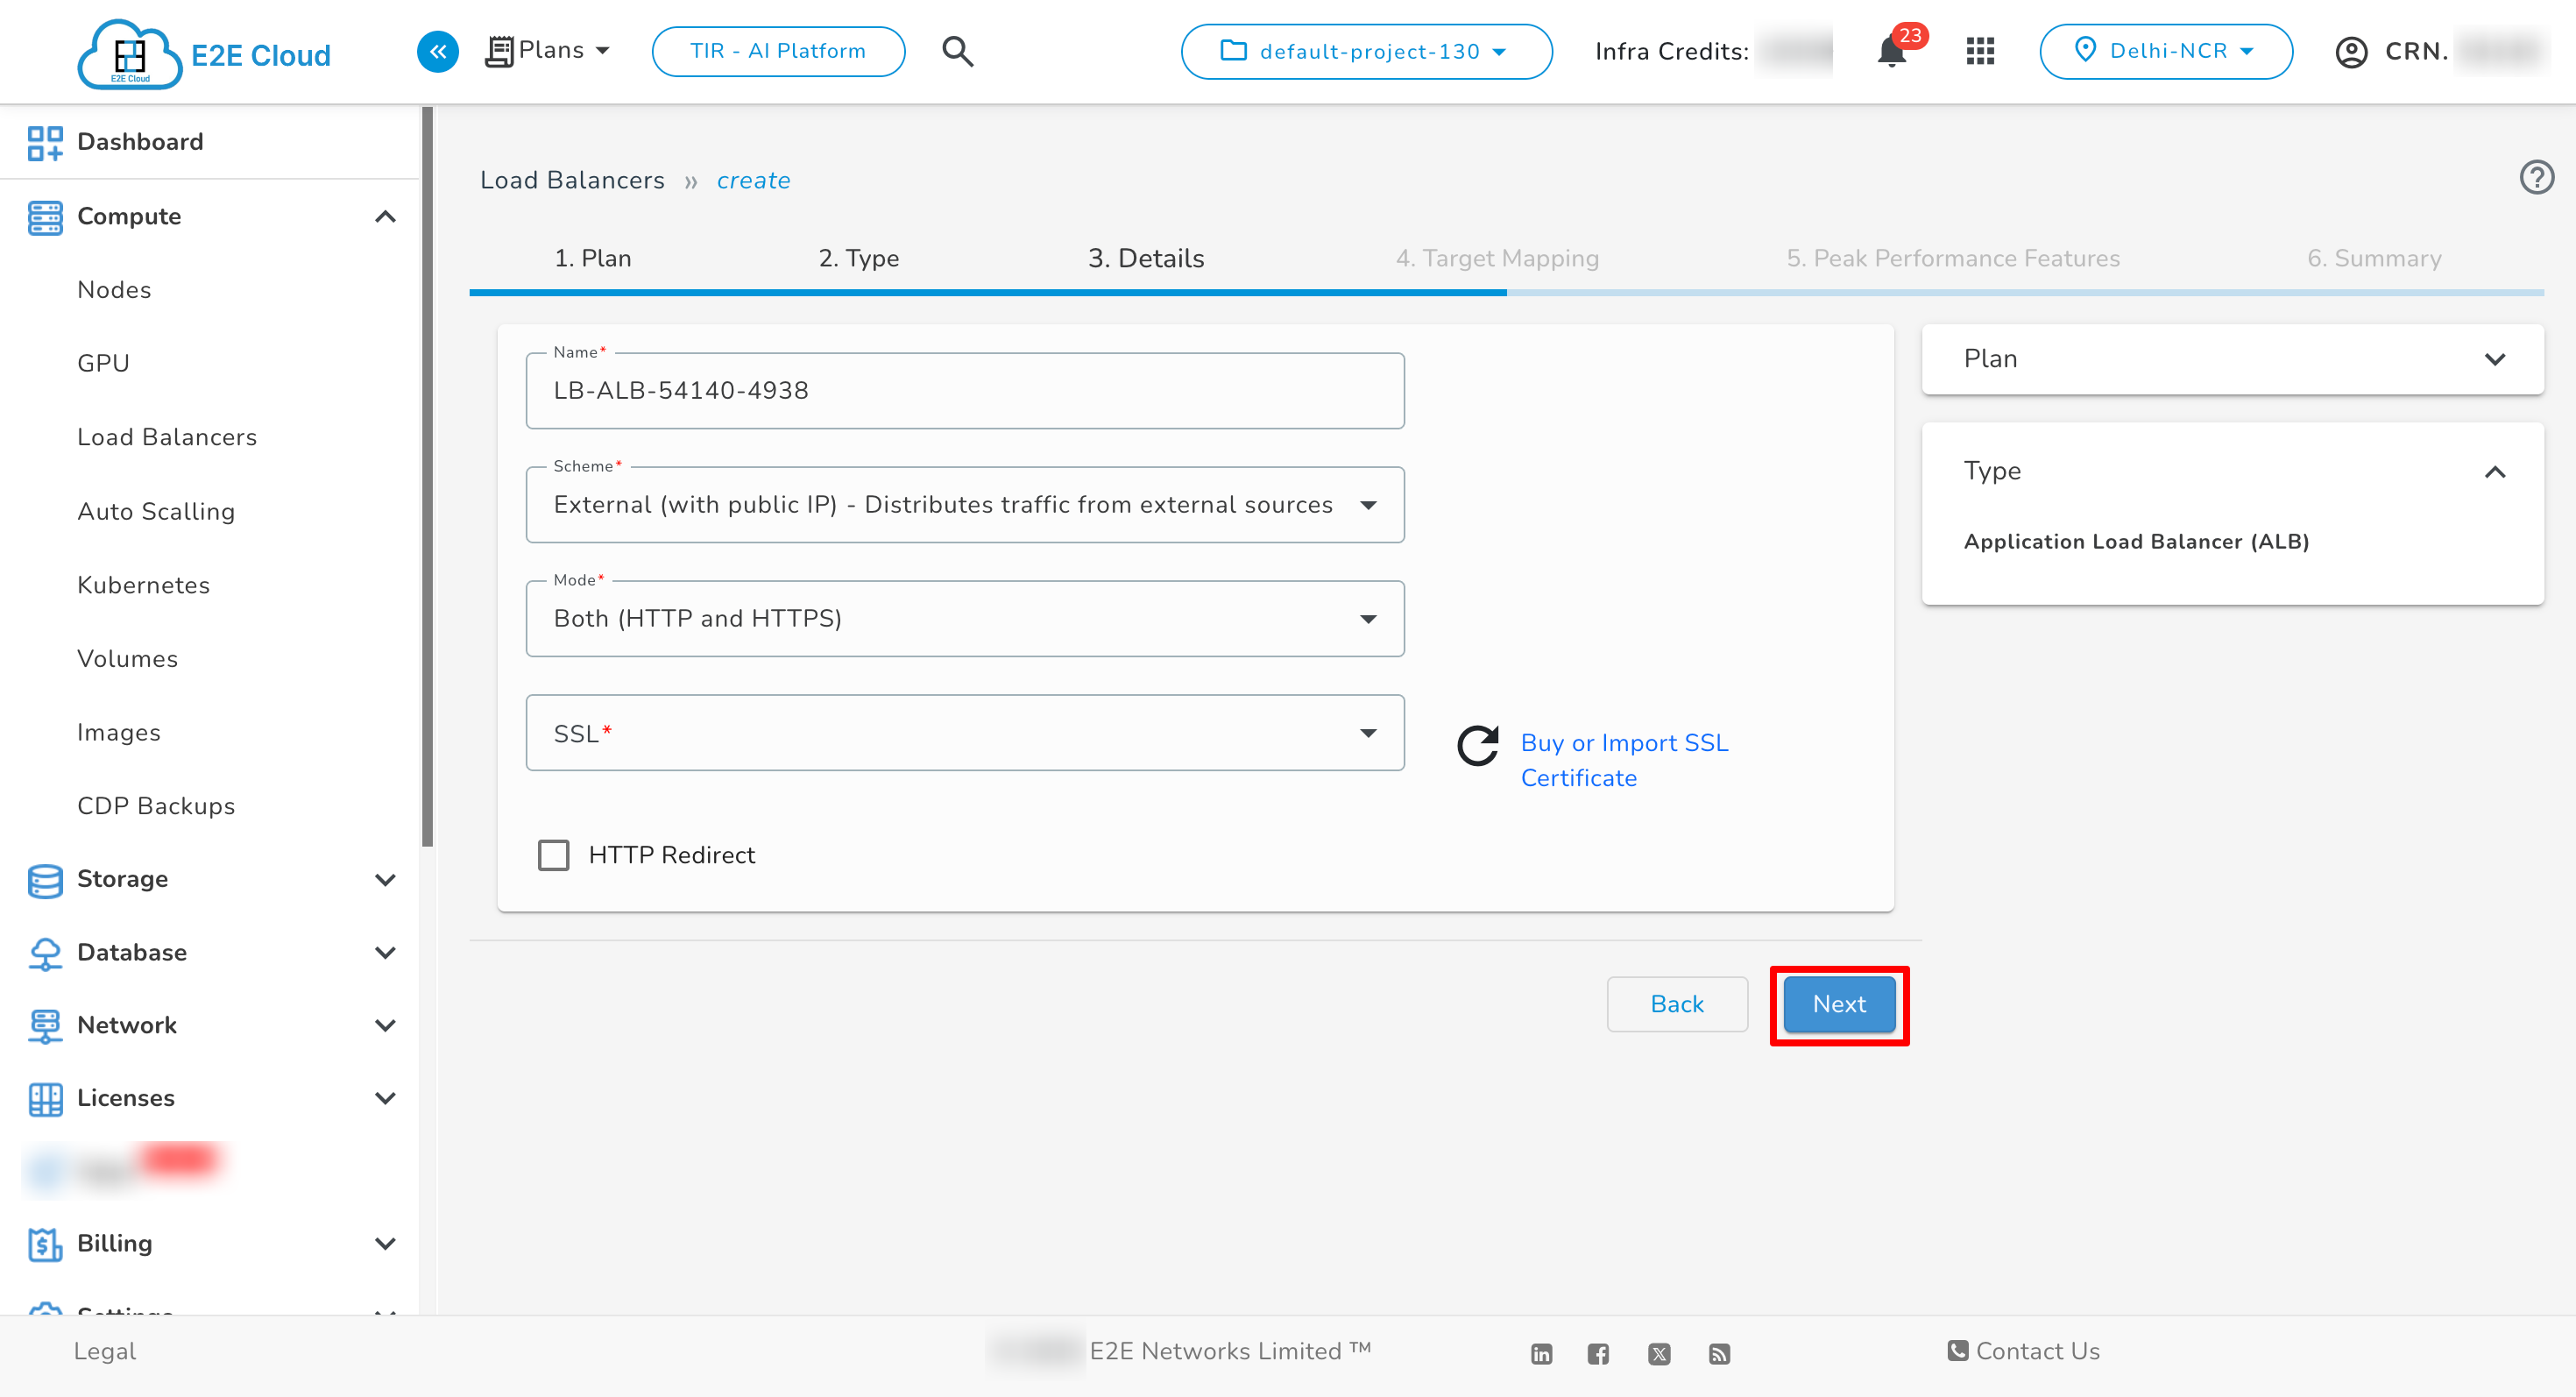
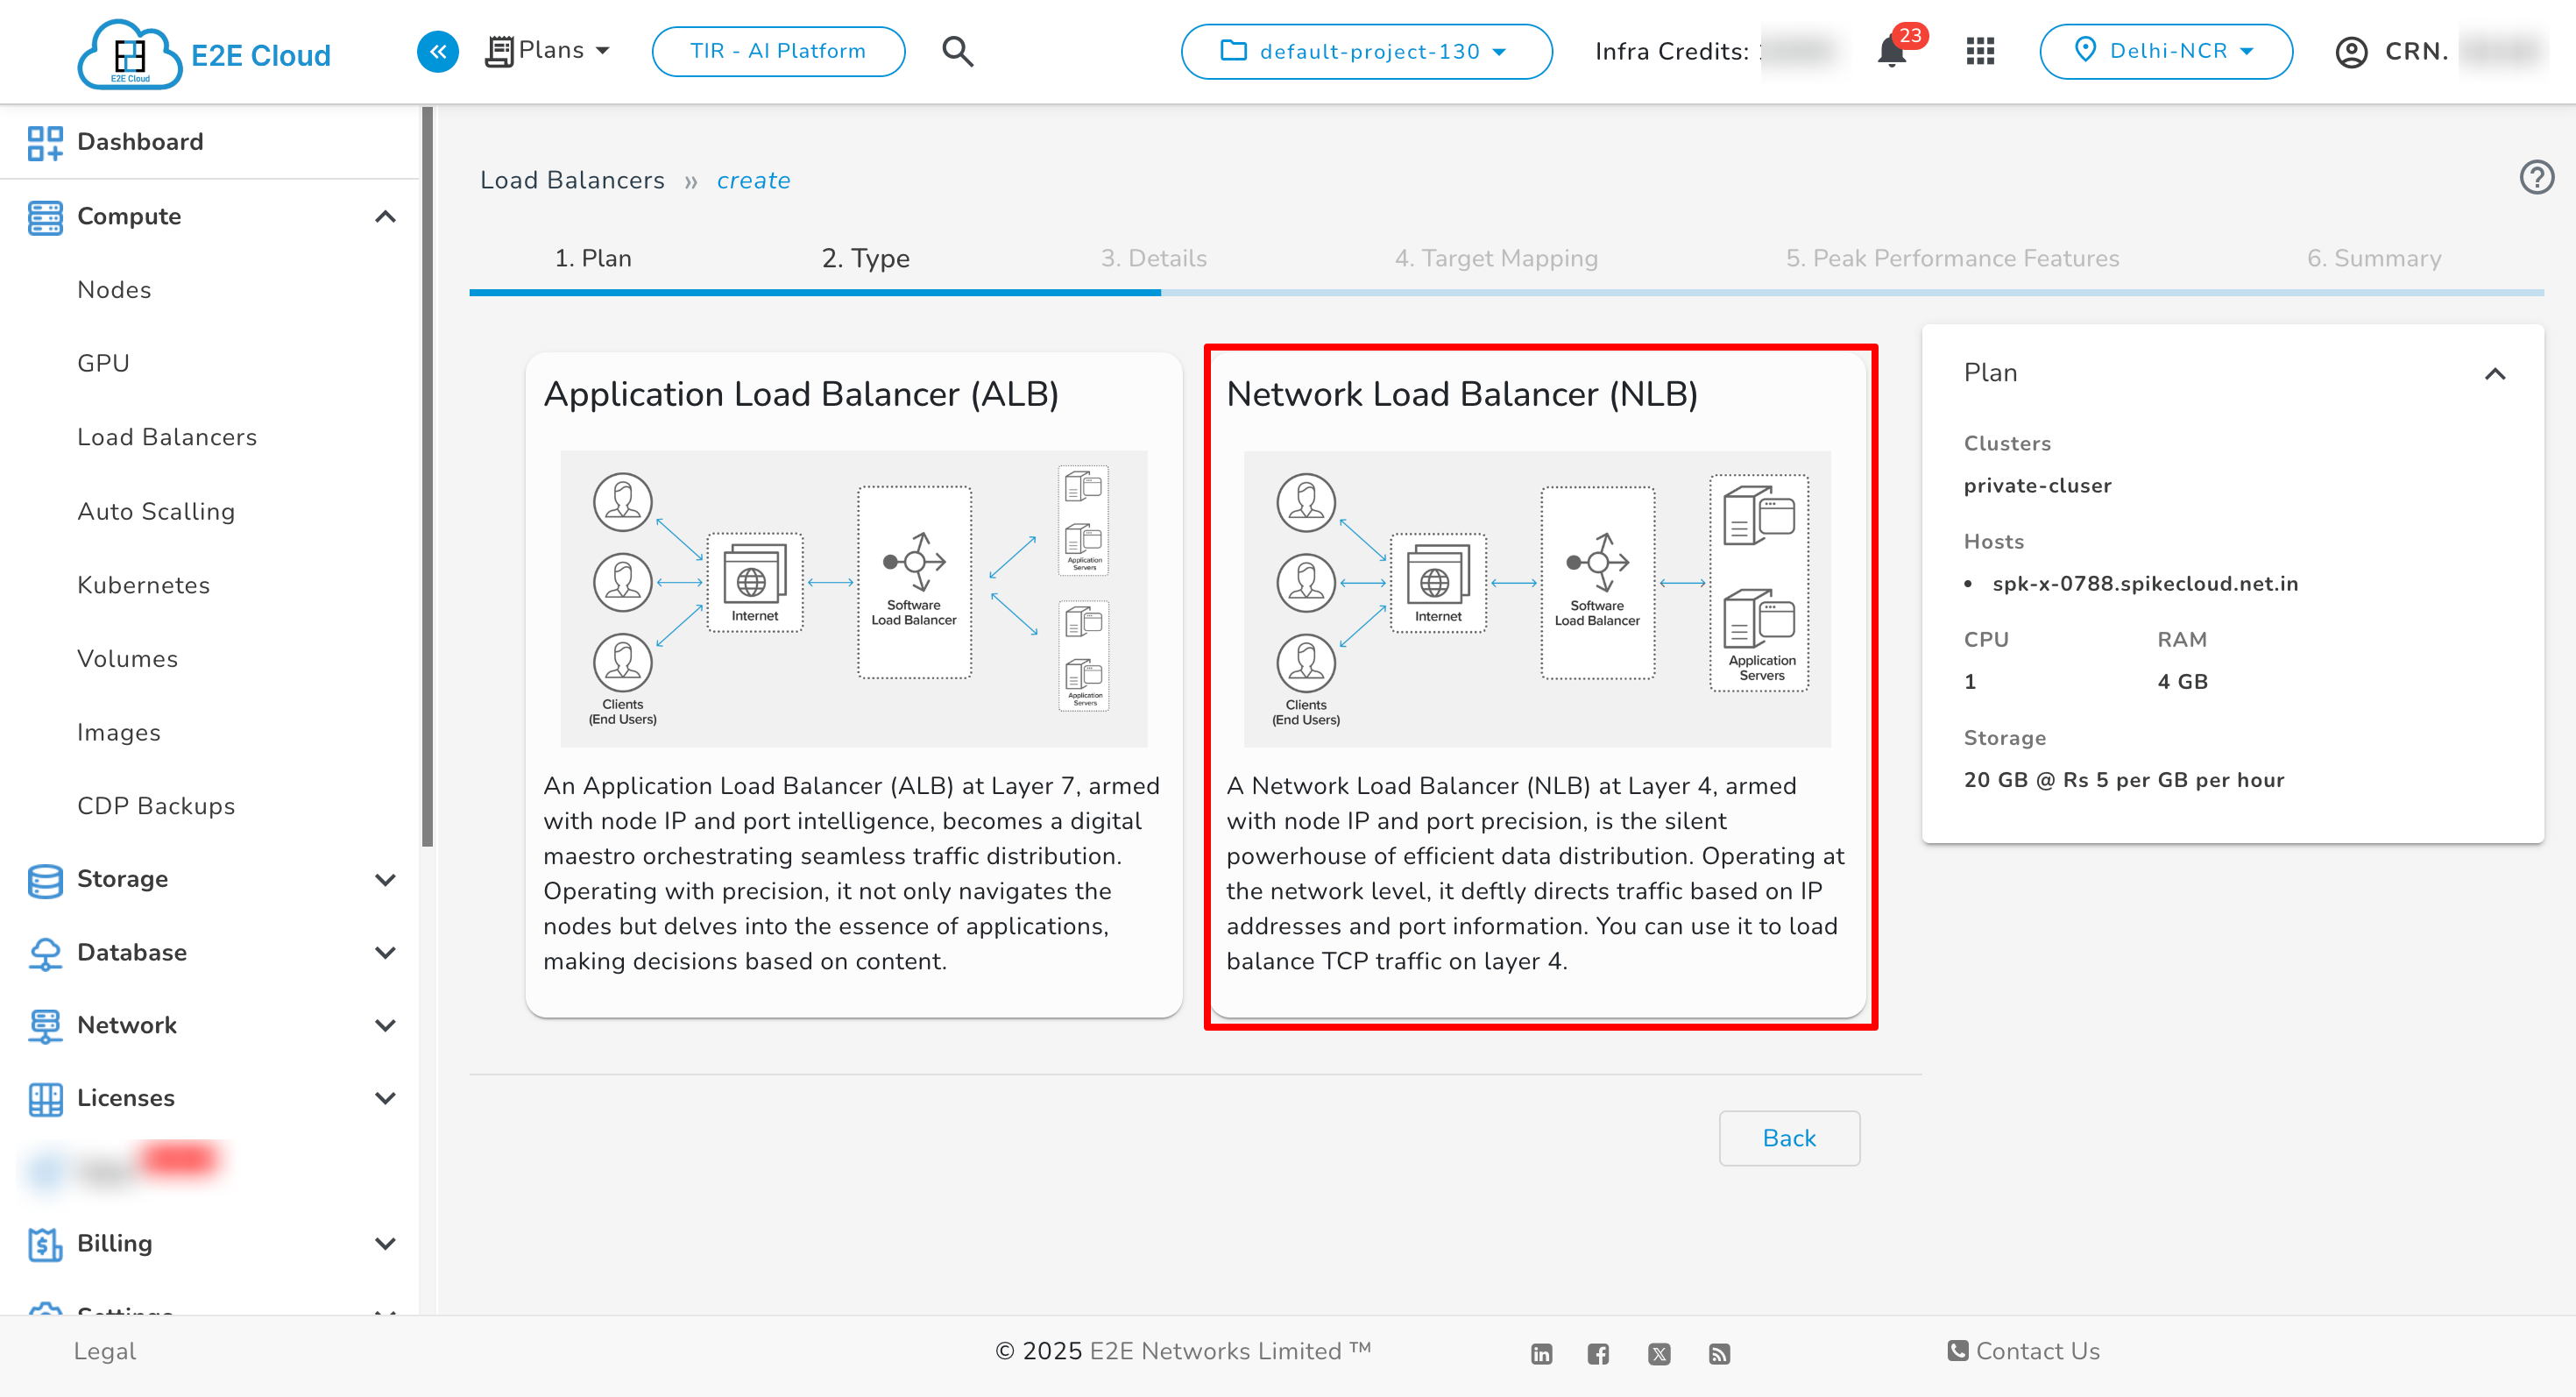
3. Choose Load Balancer Type
-
Select Application Load Balancer (ALB).

4. Configure Details
-
Provide a Name, select the Scheme (internal or external), and choose the Mode.
-
Click Next.
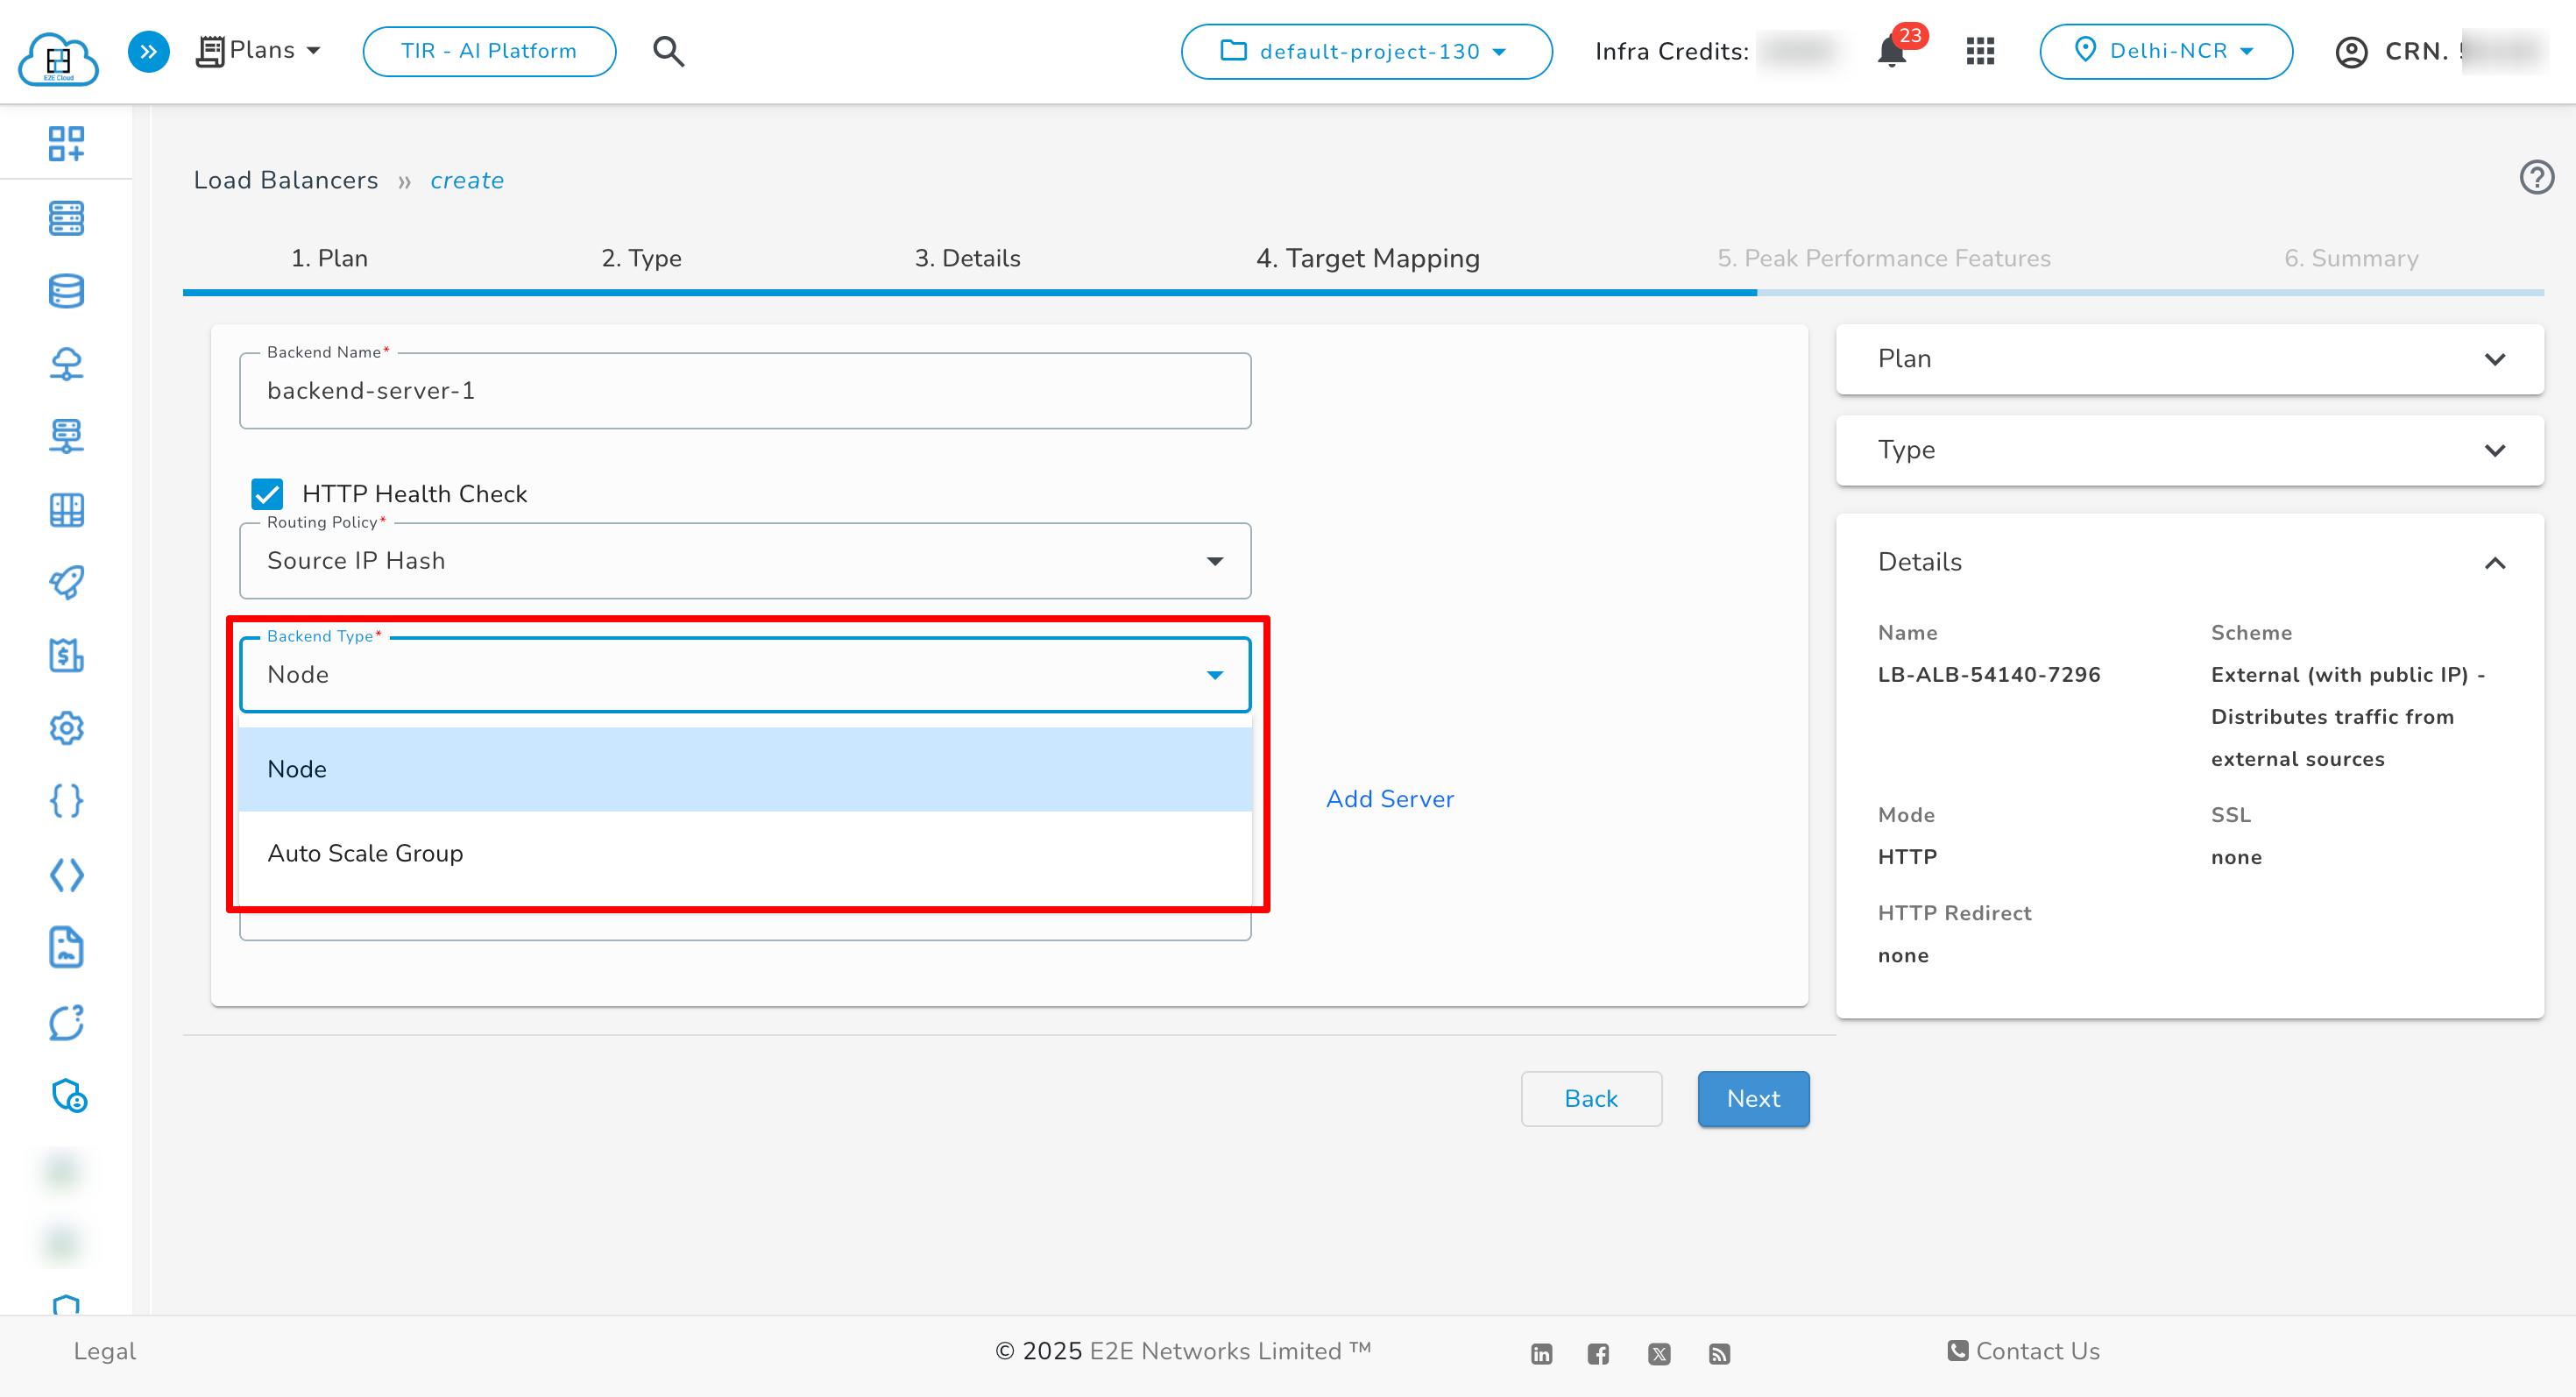
5. Choose Backend Type
-
Select Node or AutoScale as the backend type.
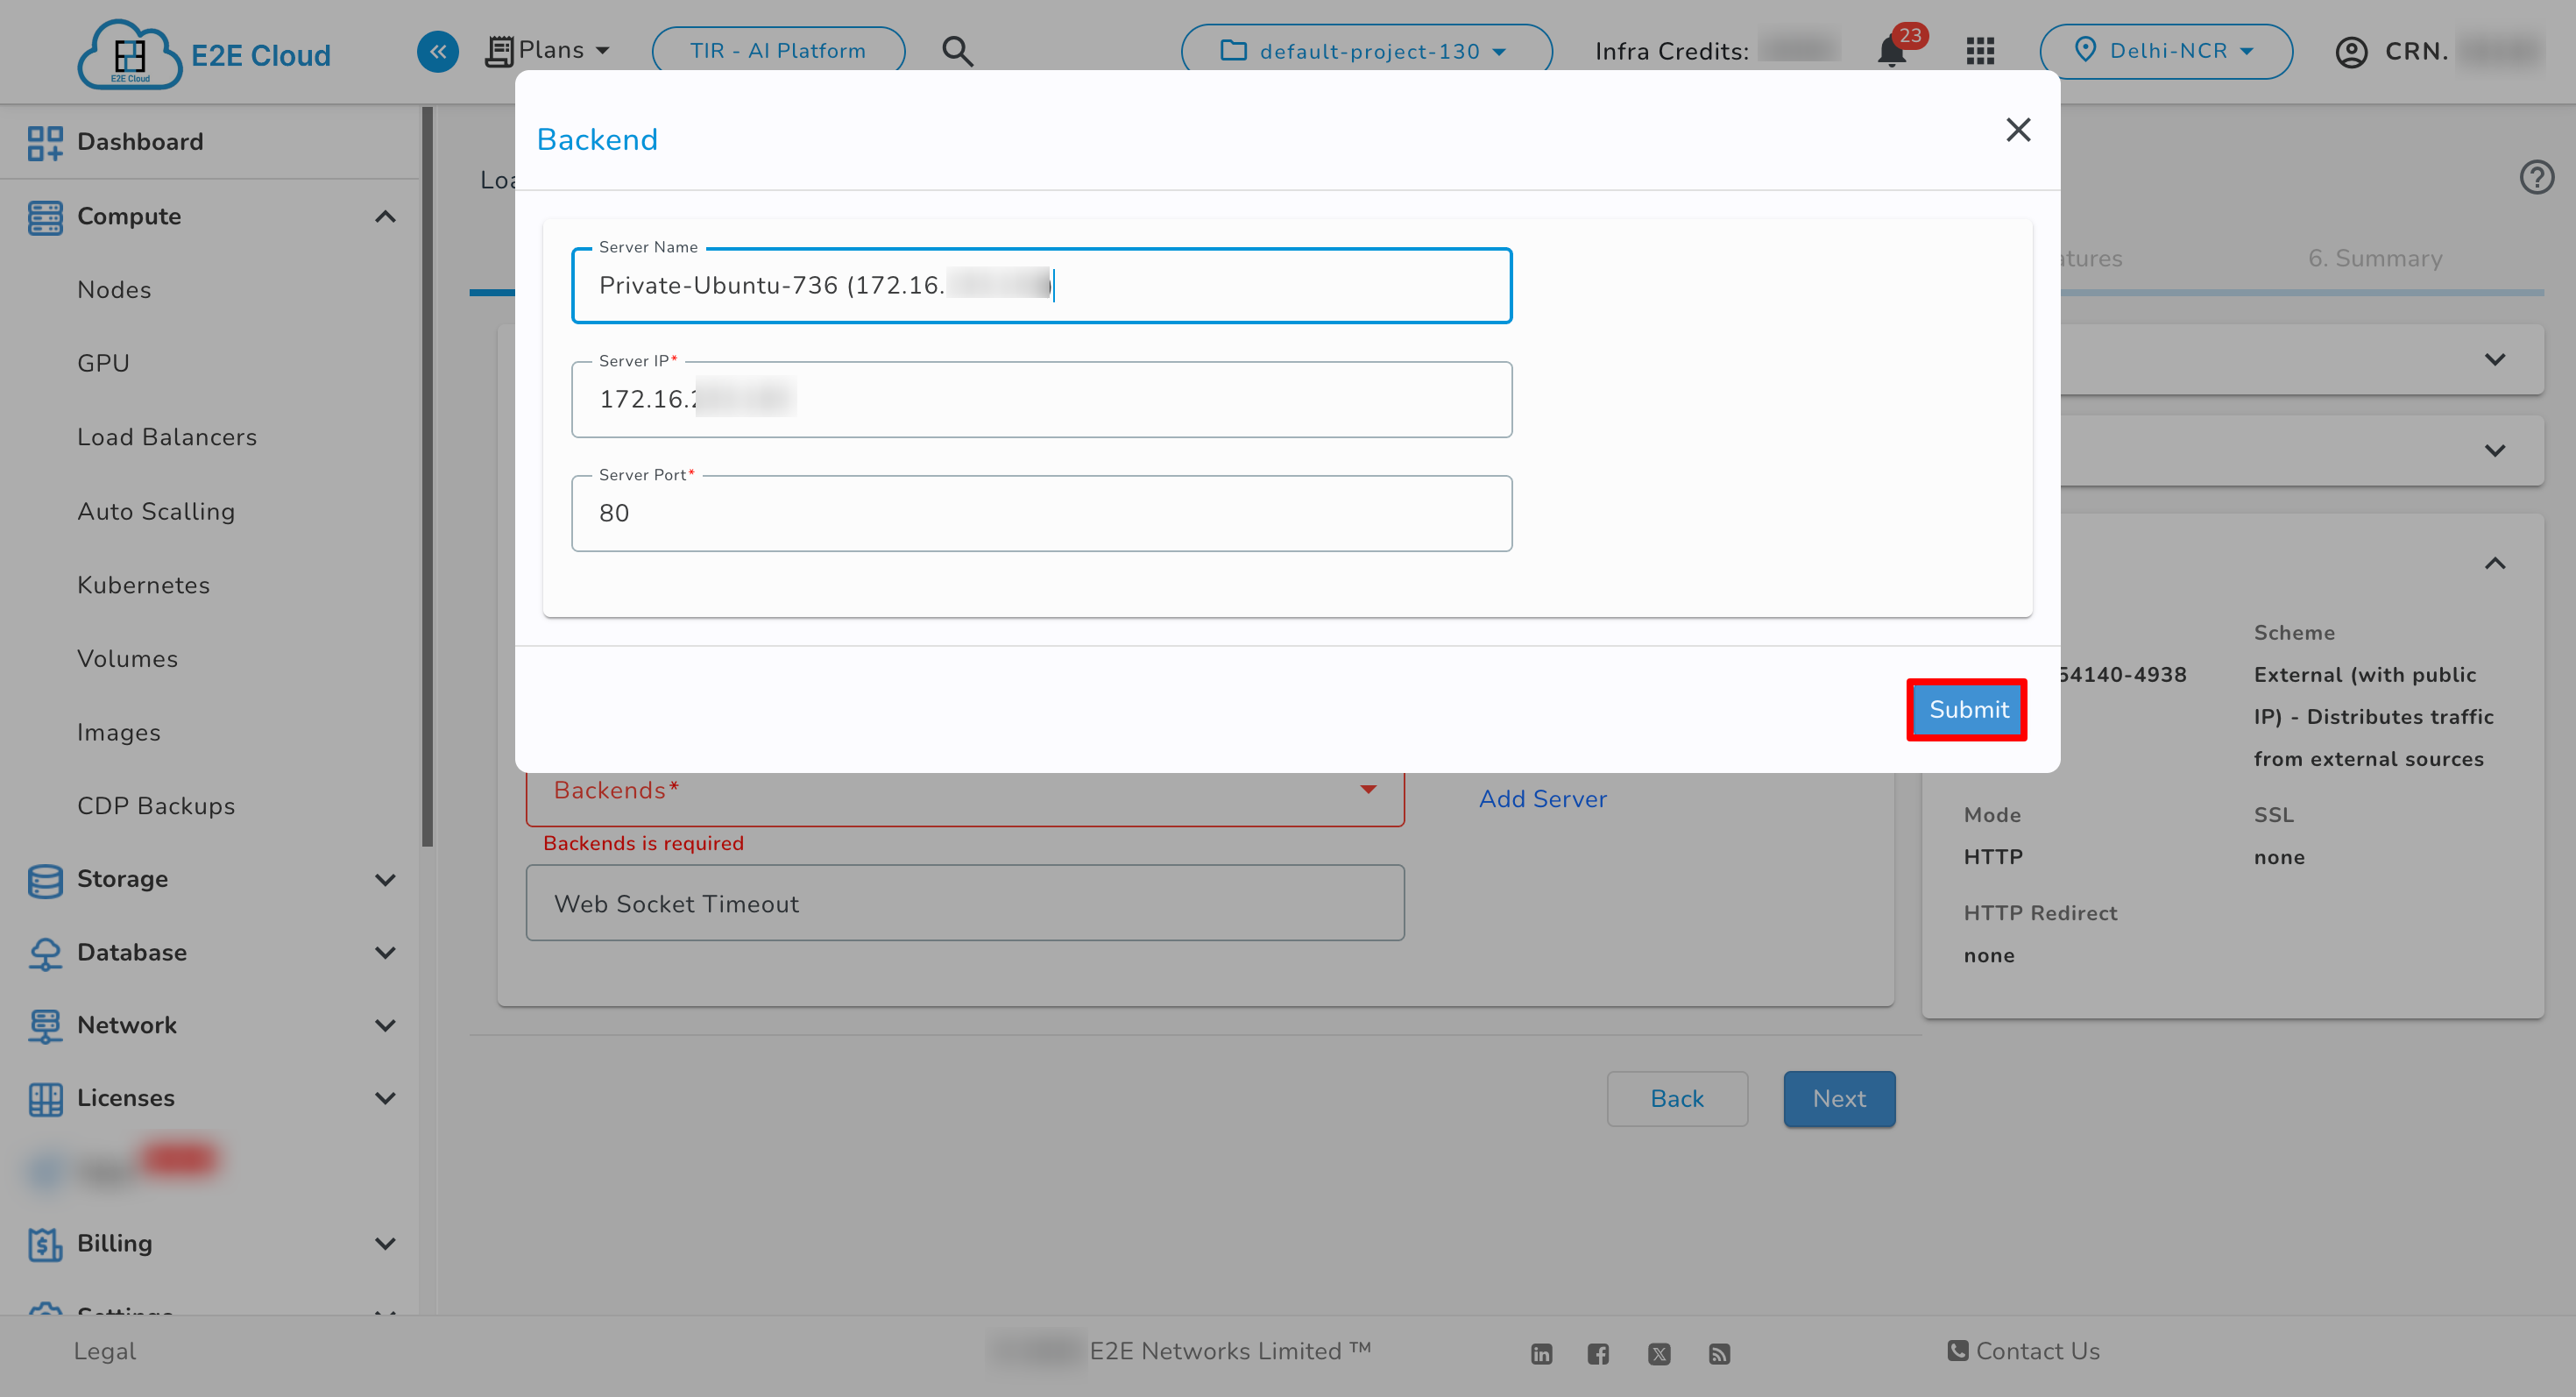
6. Target Mapping & Backend Configuration
-
Click Add Server.
-
In the pop-up:
- Enter the Server Name
- Enter the Server IP from within your Private Cluster.
-
Click Submit to add the backend.
-
Repeat the process to add multiple servers.
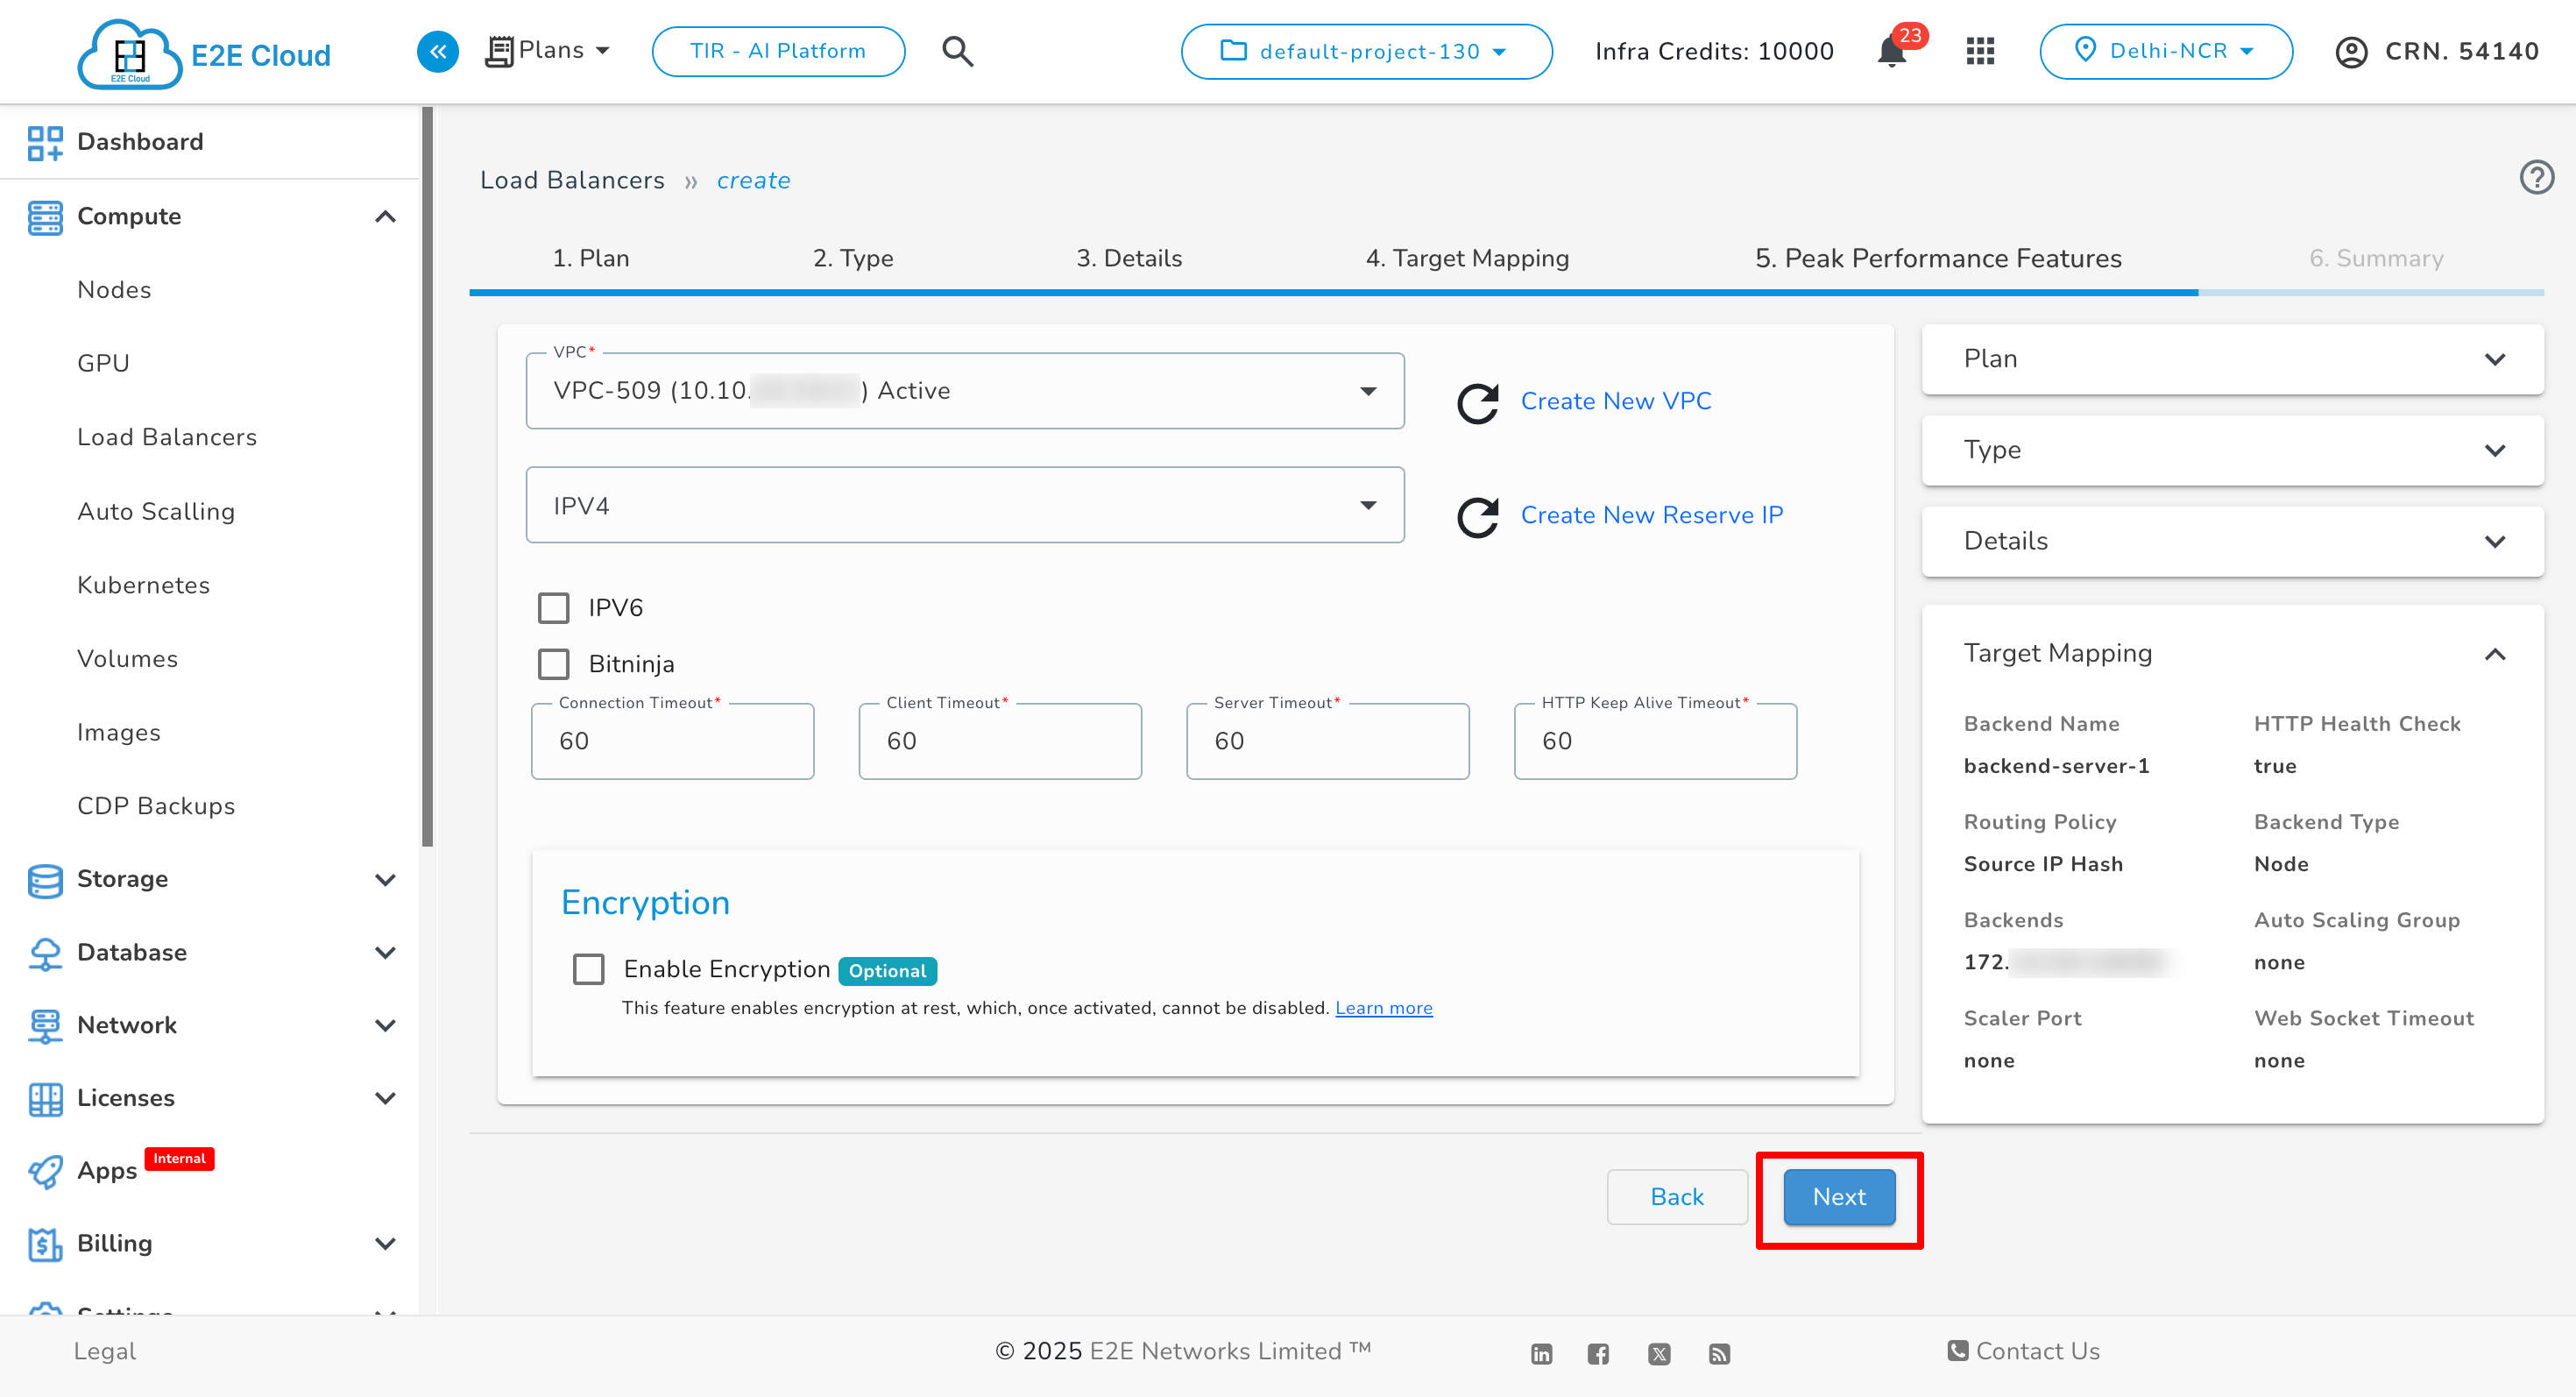
7. Peak Performance Features
- Select VPC, IPv4, IPv6, and BitNinja.
- Set the Connection Timeout, Client Timeout, Server Timeout, and HTTP Keep-Alive Timeout.
The VPC field is a required parameter when creating a Load Balancer within a Private Cluster.
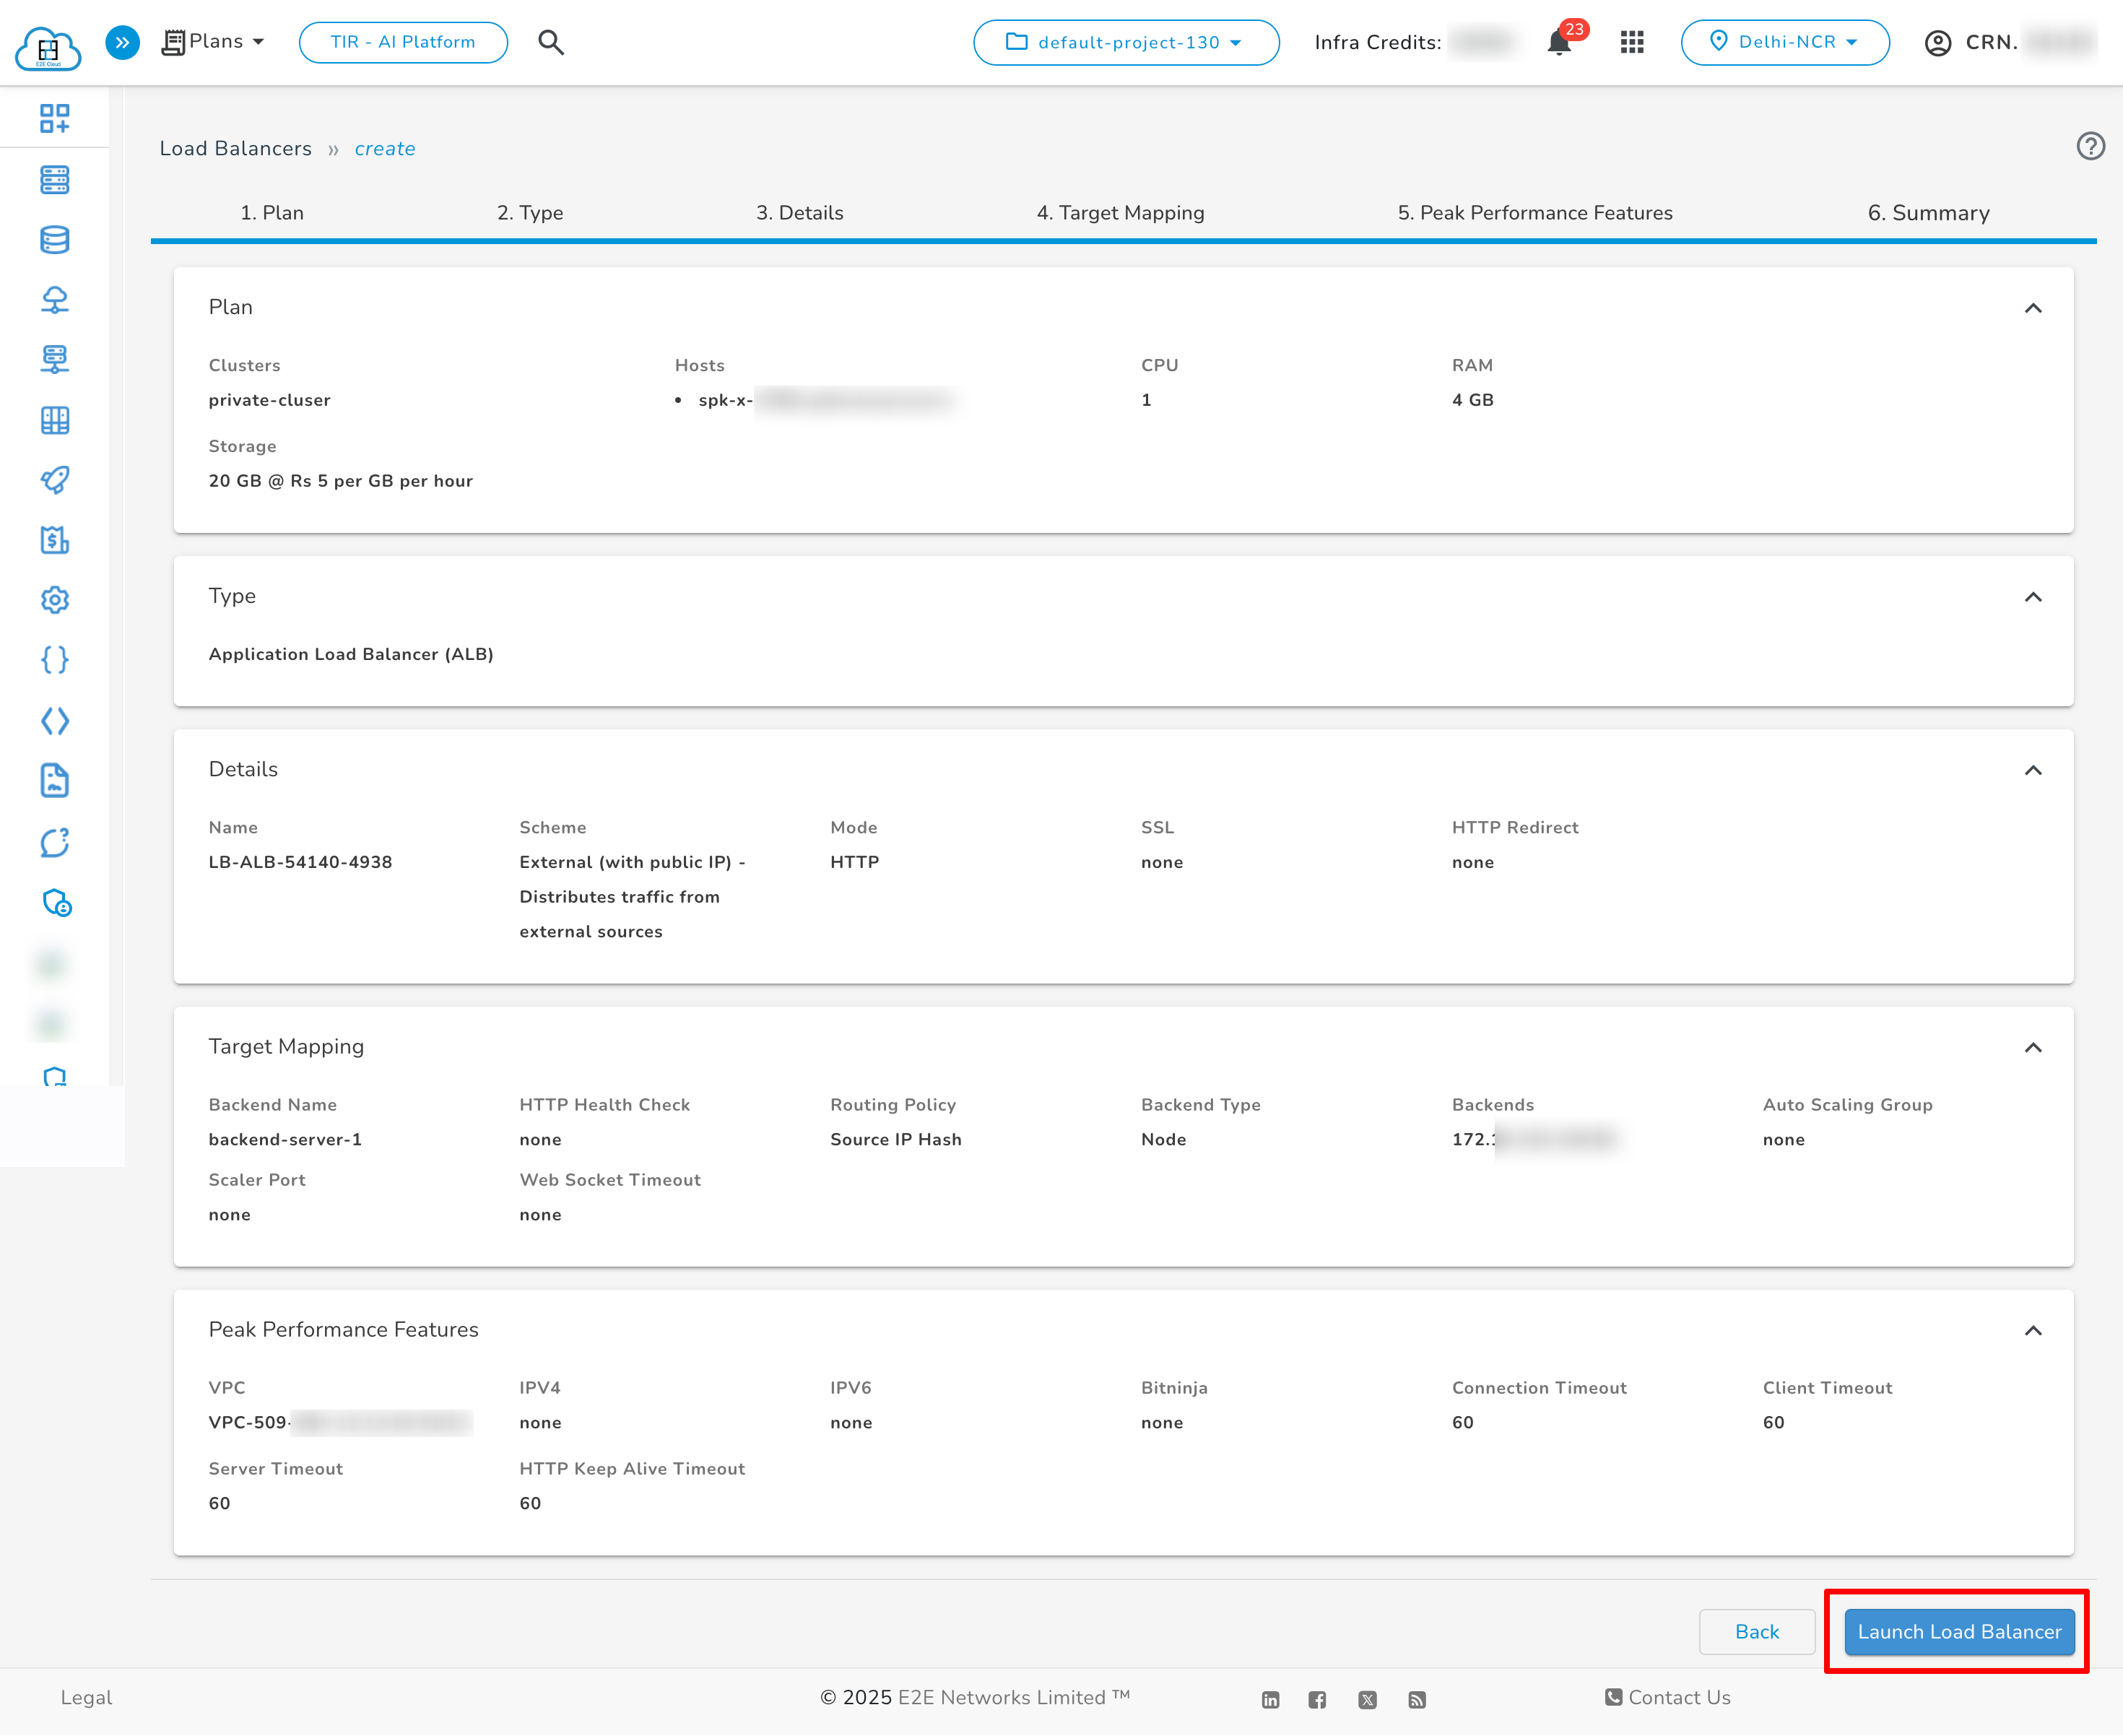
8. Review and Launch
-
Review all configuration details.
-
Click Launch Load Balancer to deploy your ALB.
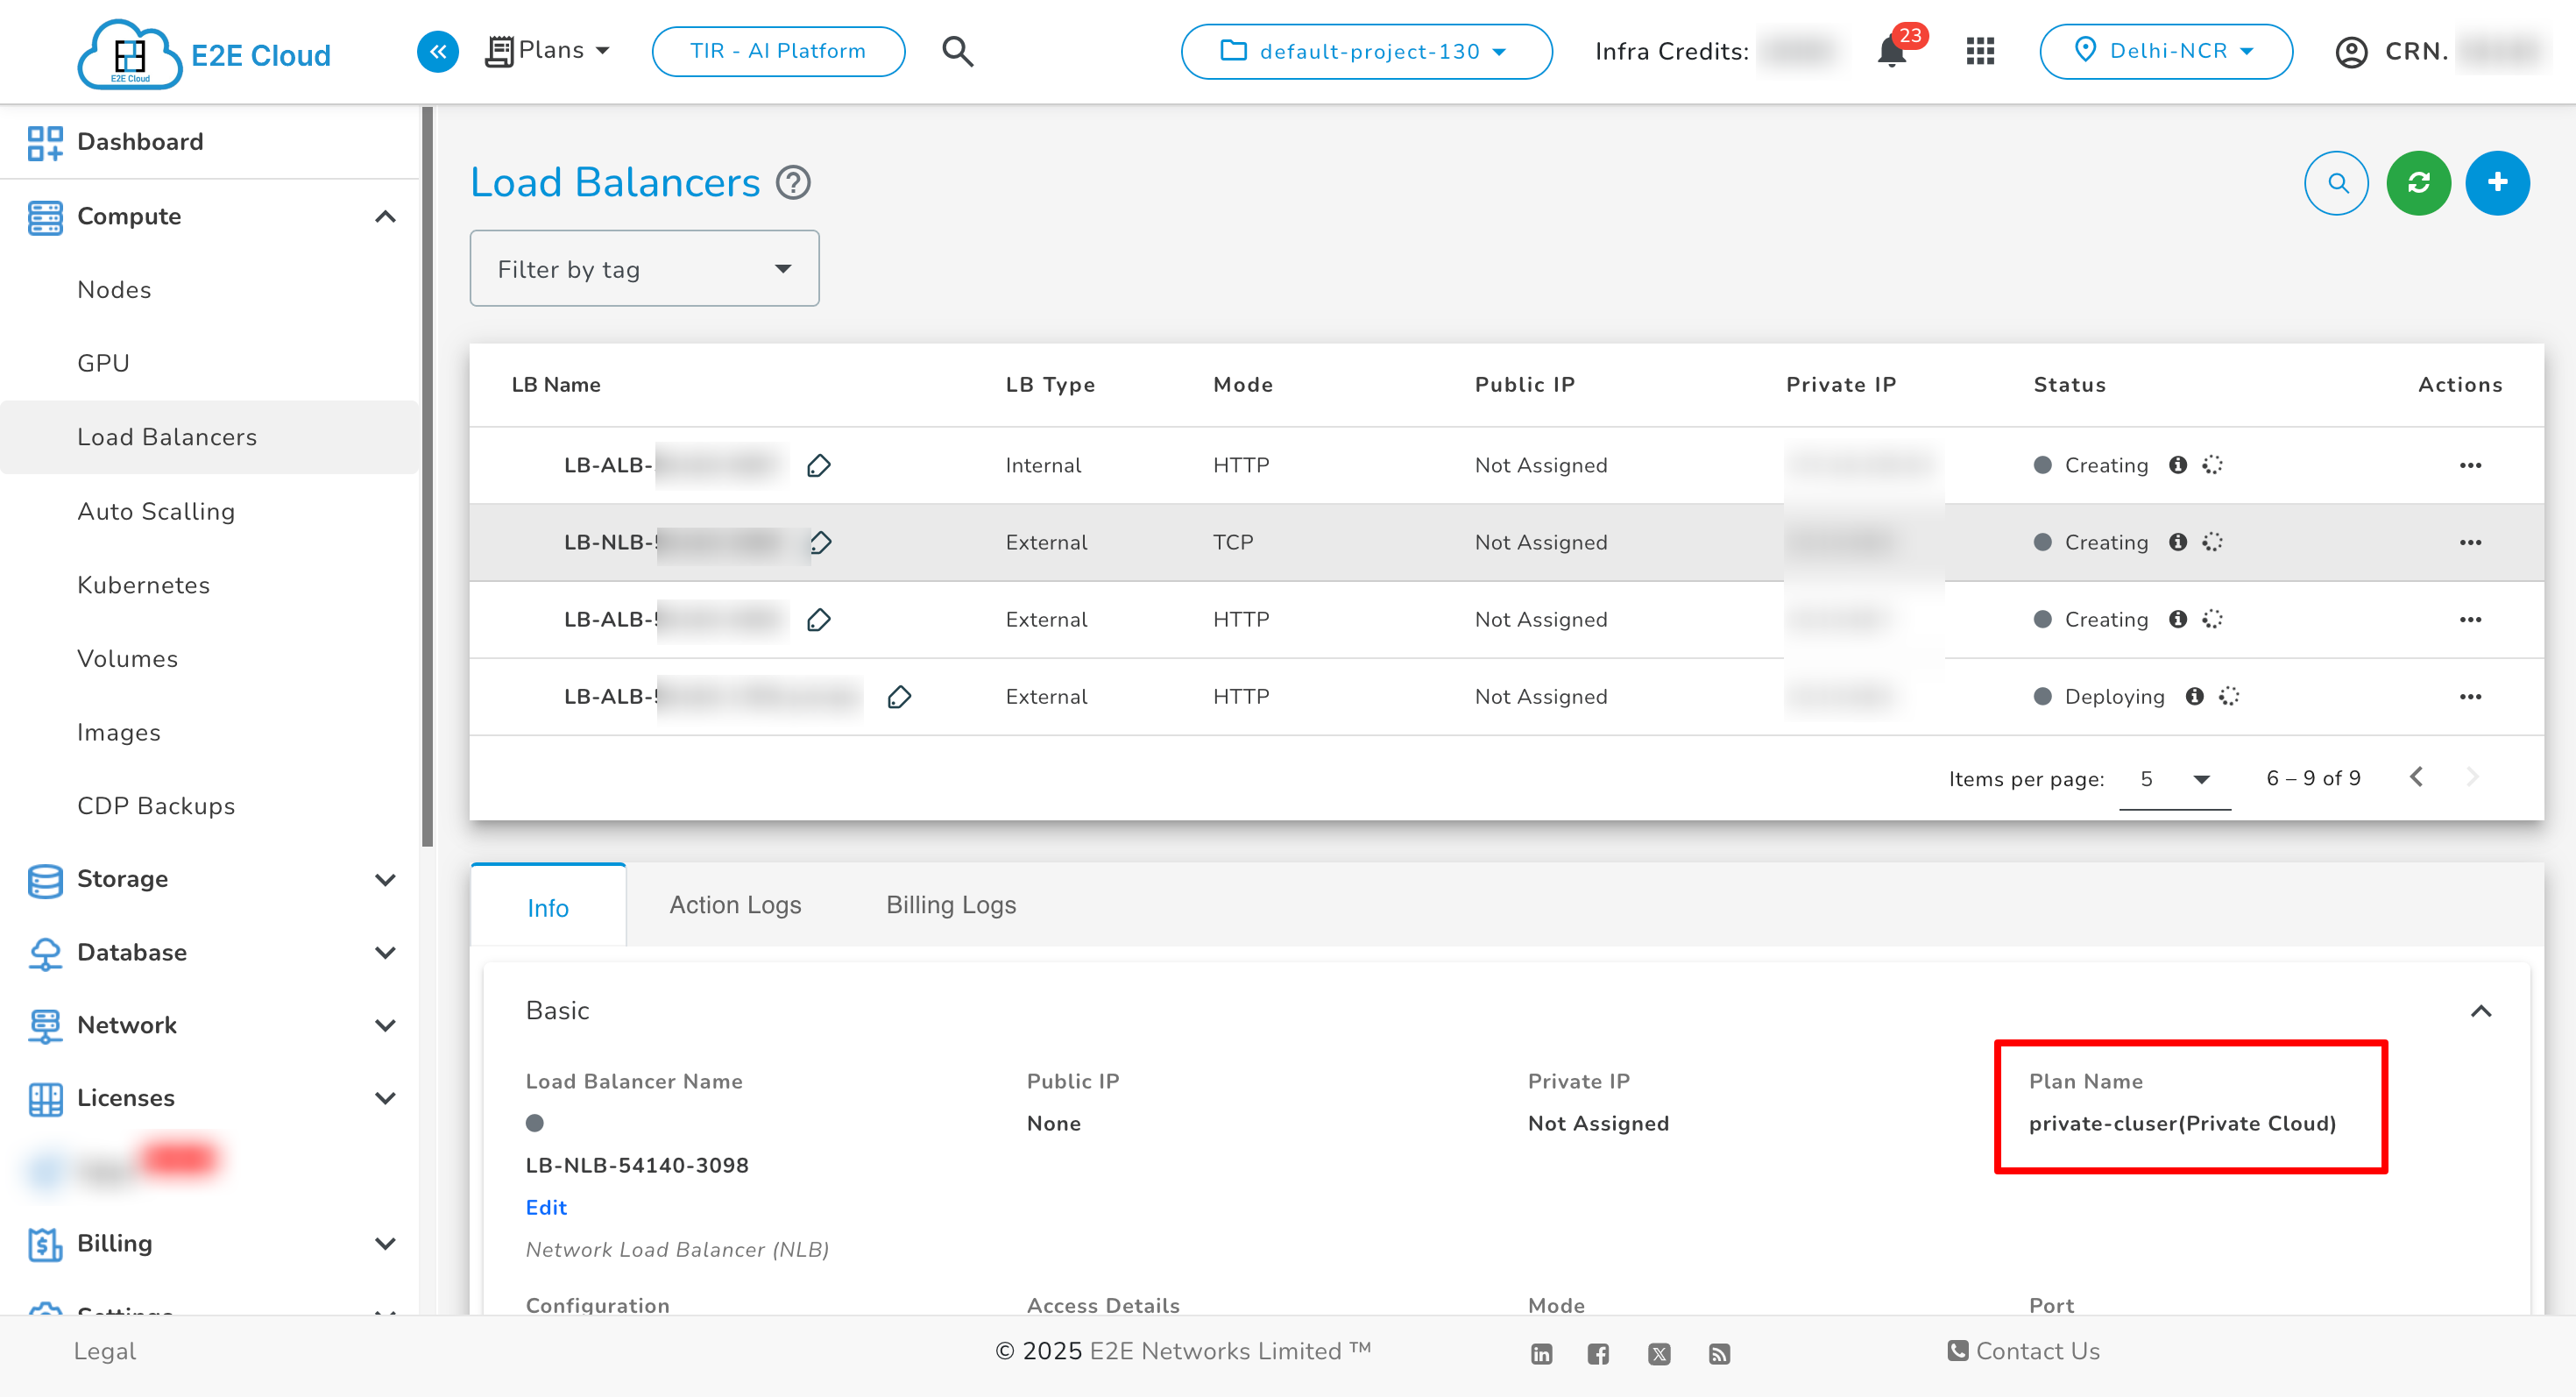
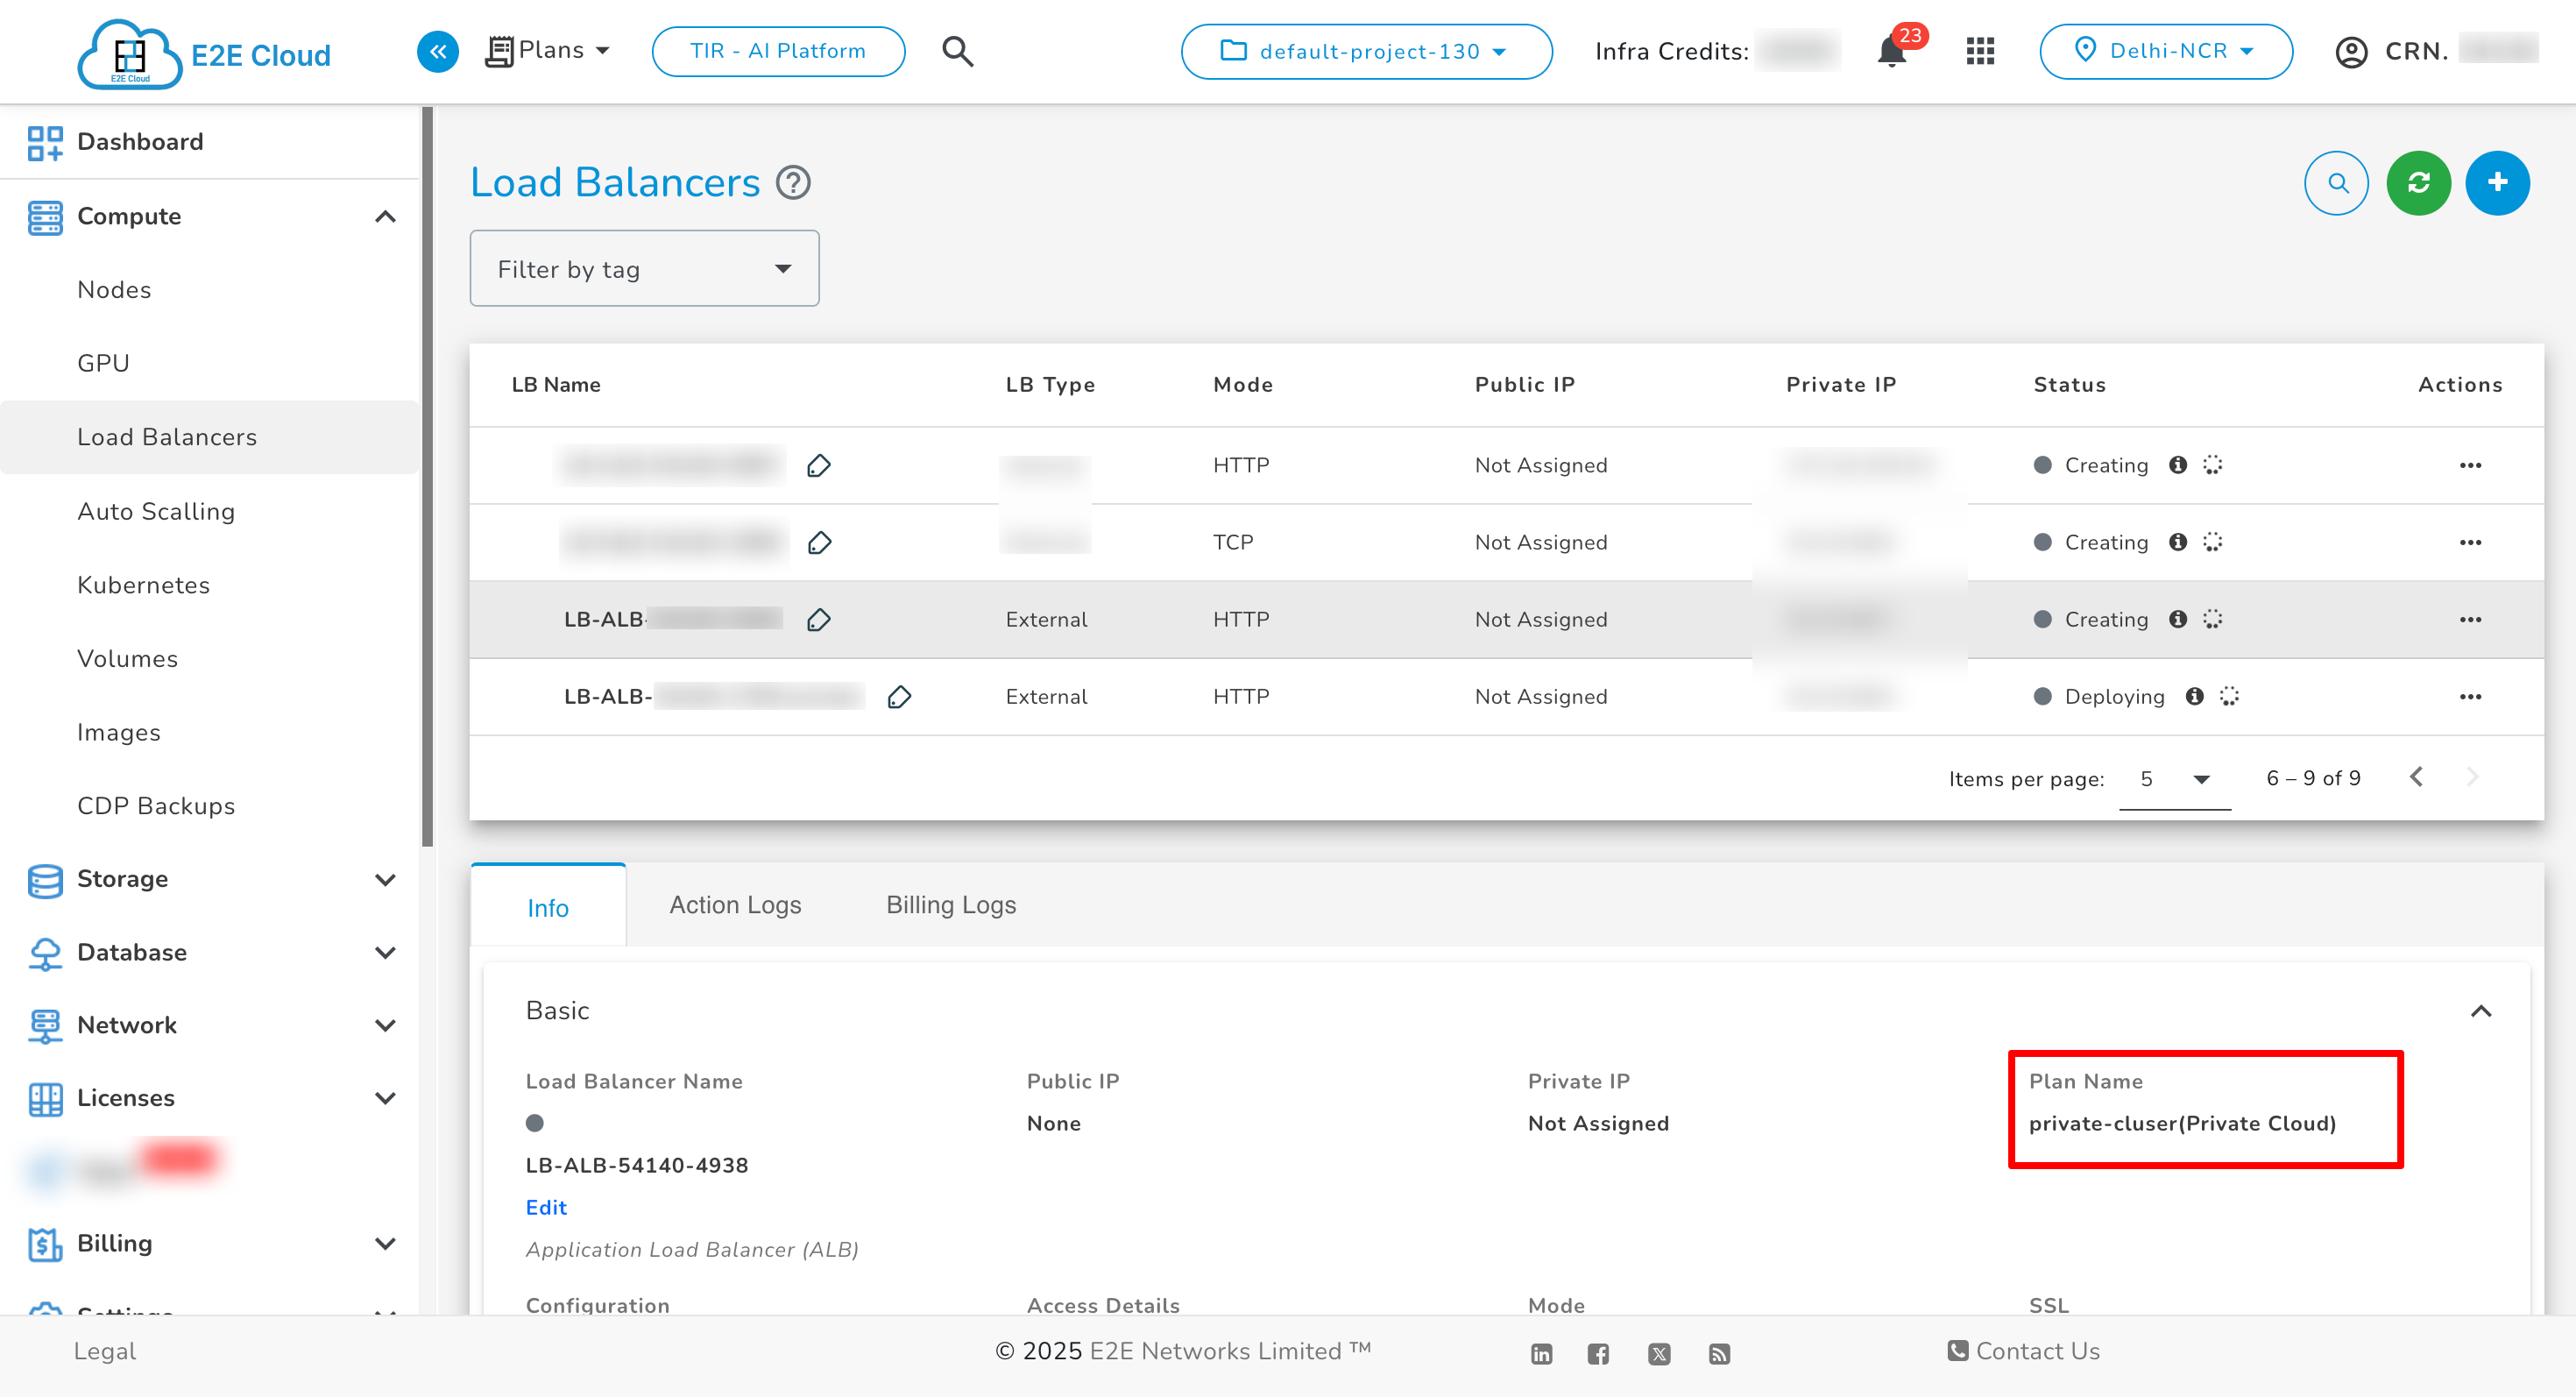
Managing ALB
After successful deployment:
-
Go to the Load Balancers section.
-
Click on the ALB name to view its details.
Network Load Balancer (NLB)
Steps to Create an NLB in a Private Cluster
1. Select Plan
-
Navigate to the Load Balancers section in the sidebar and click Create.
2. Choose Load Balancer Configuration
-
Select Private Cluster as the deployment plan.
-
Choose the required CPU and RAM resources.
3. Configure Details
-
Provide a Name, select the Scheme (internal or external).

4. Choose Backend Type
-
Select the Backend Name, Routing Policy, Target Port, and Backend Server.
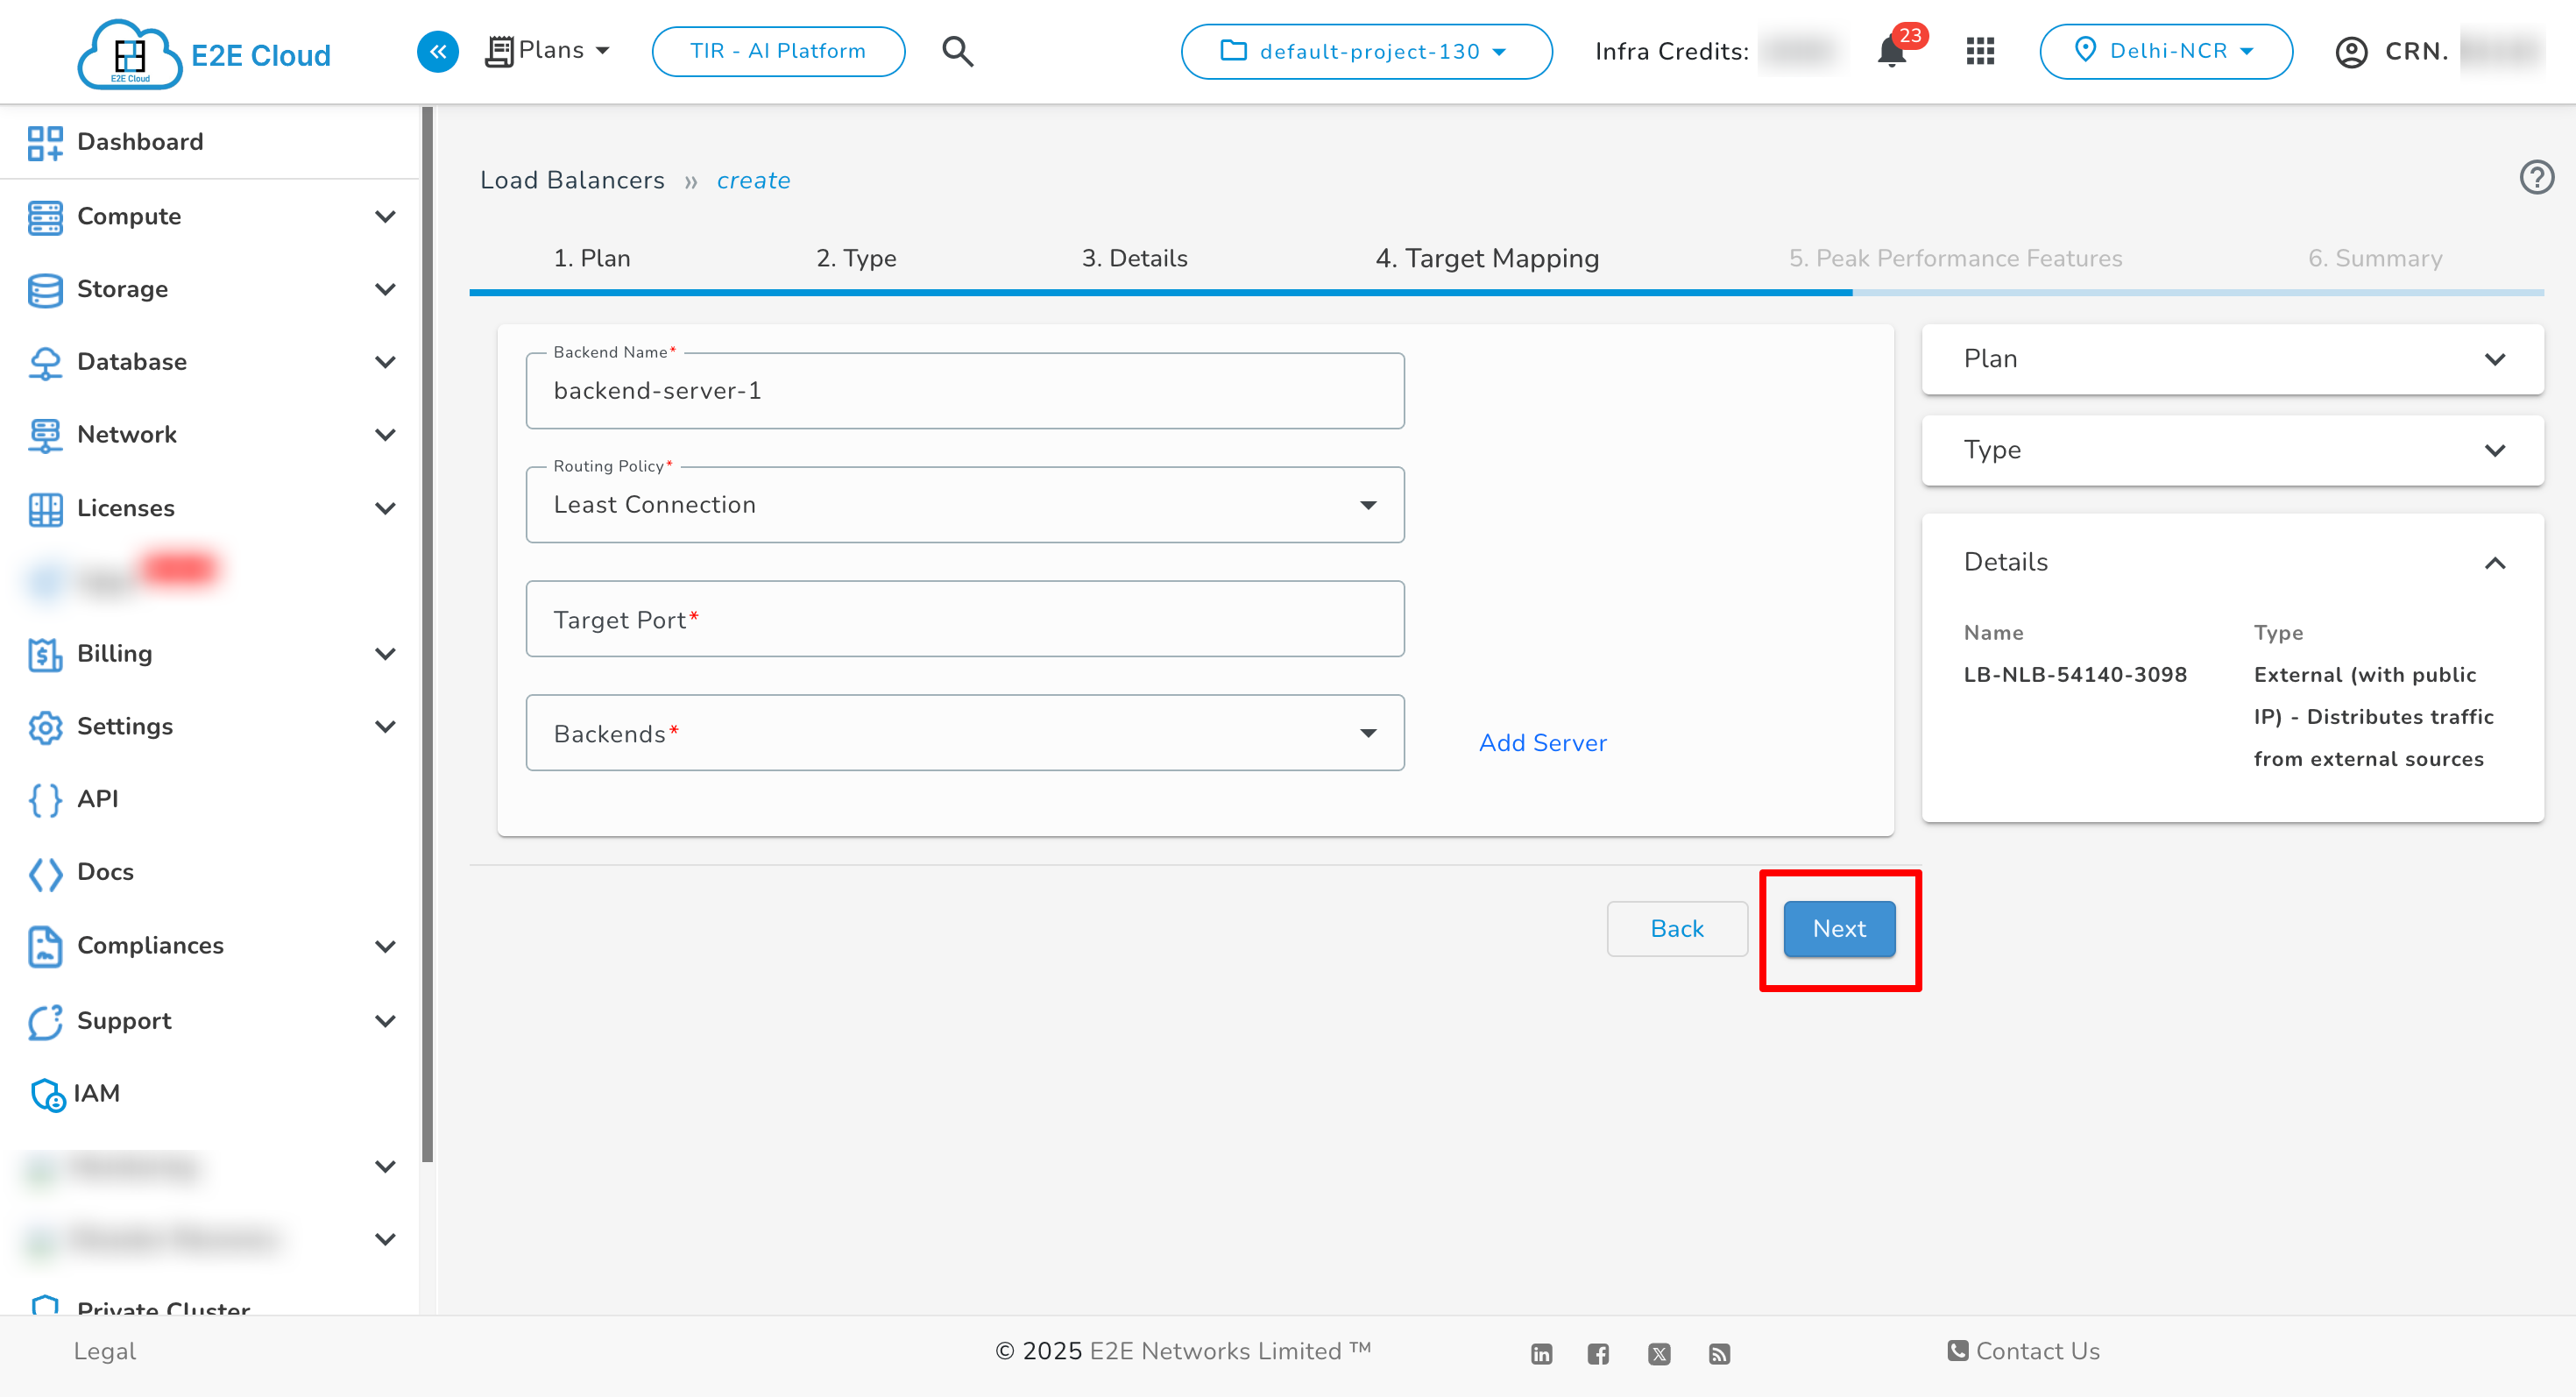
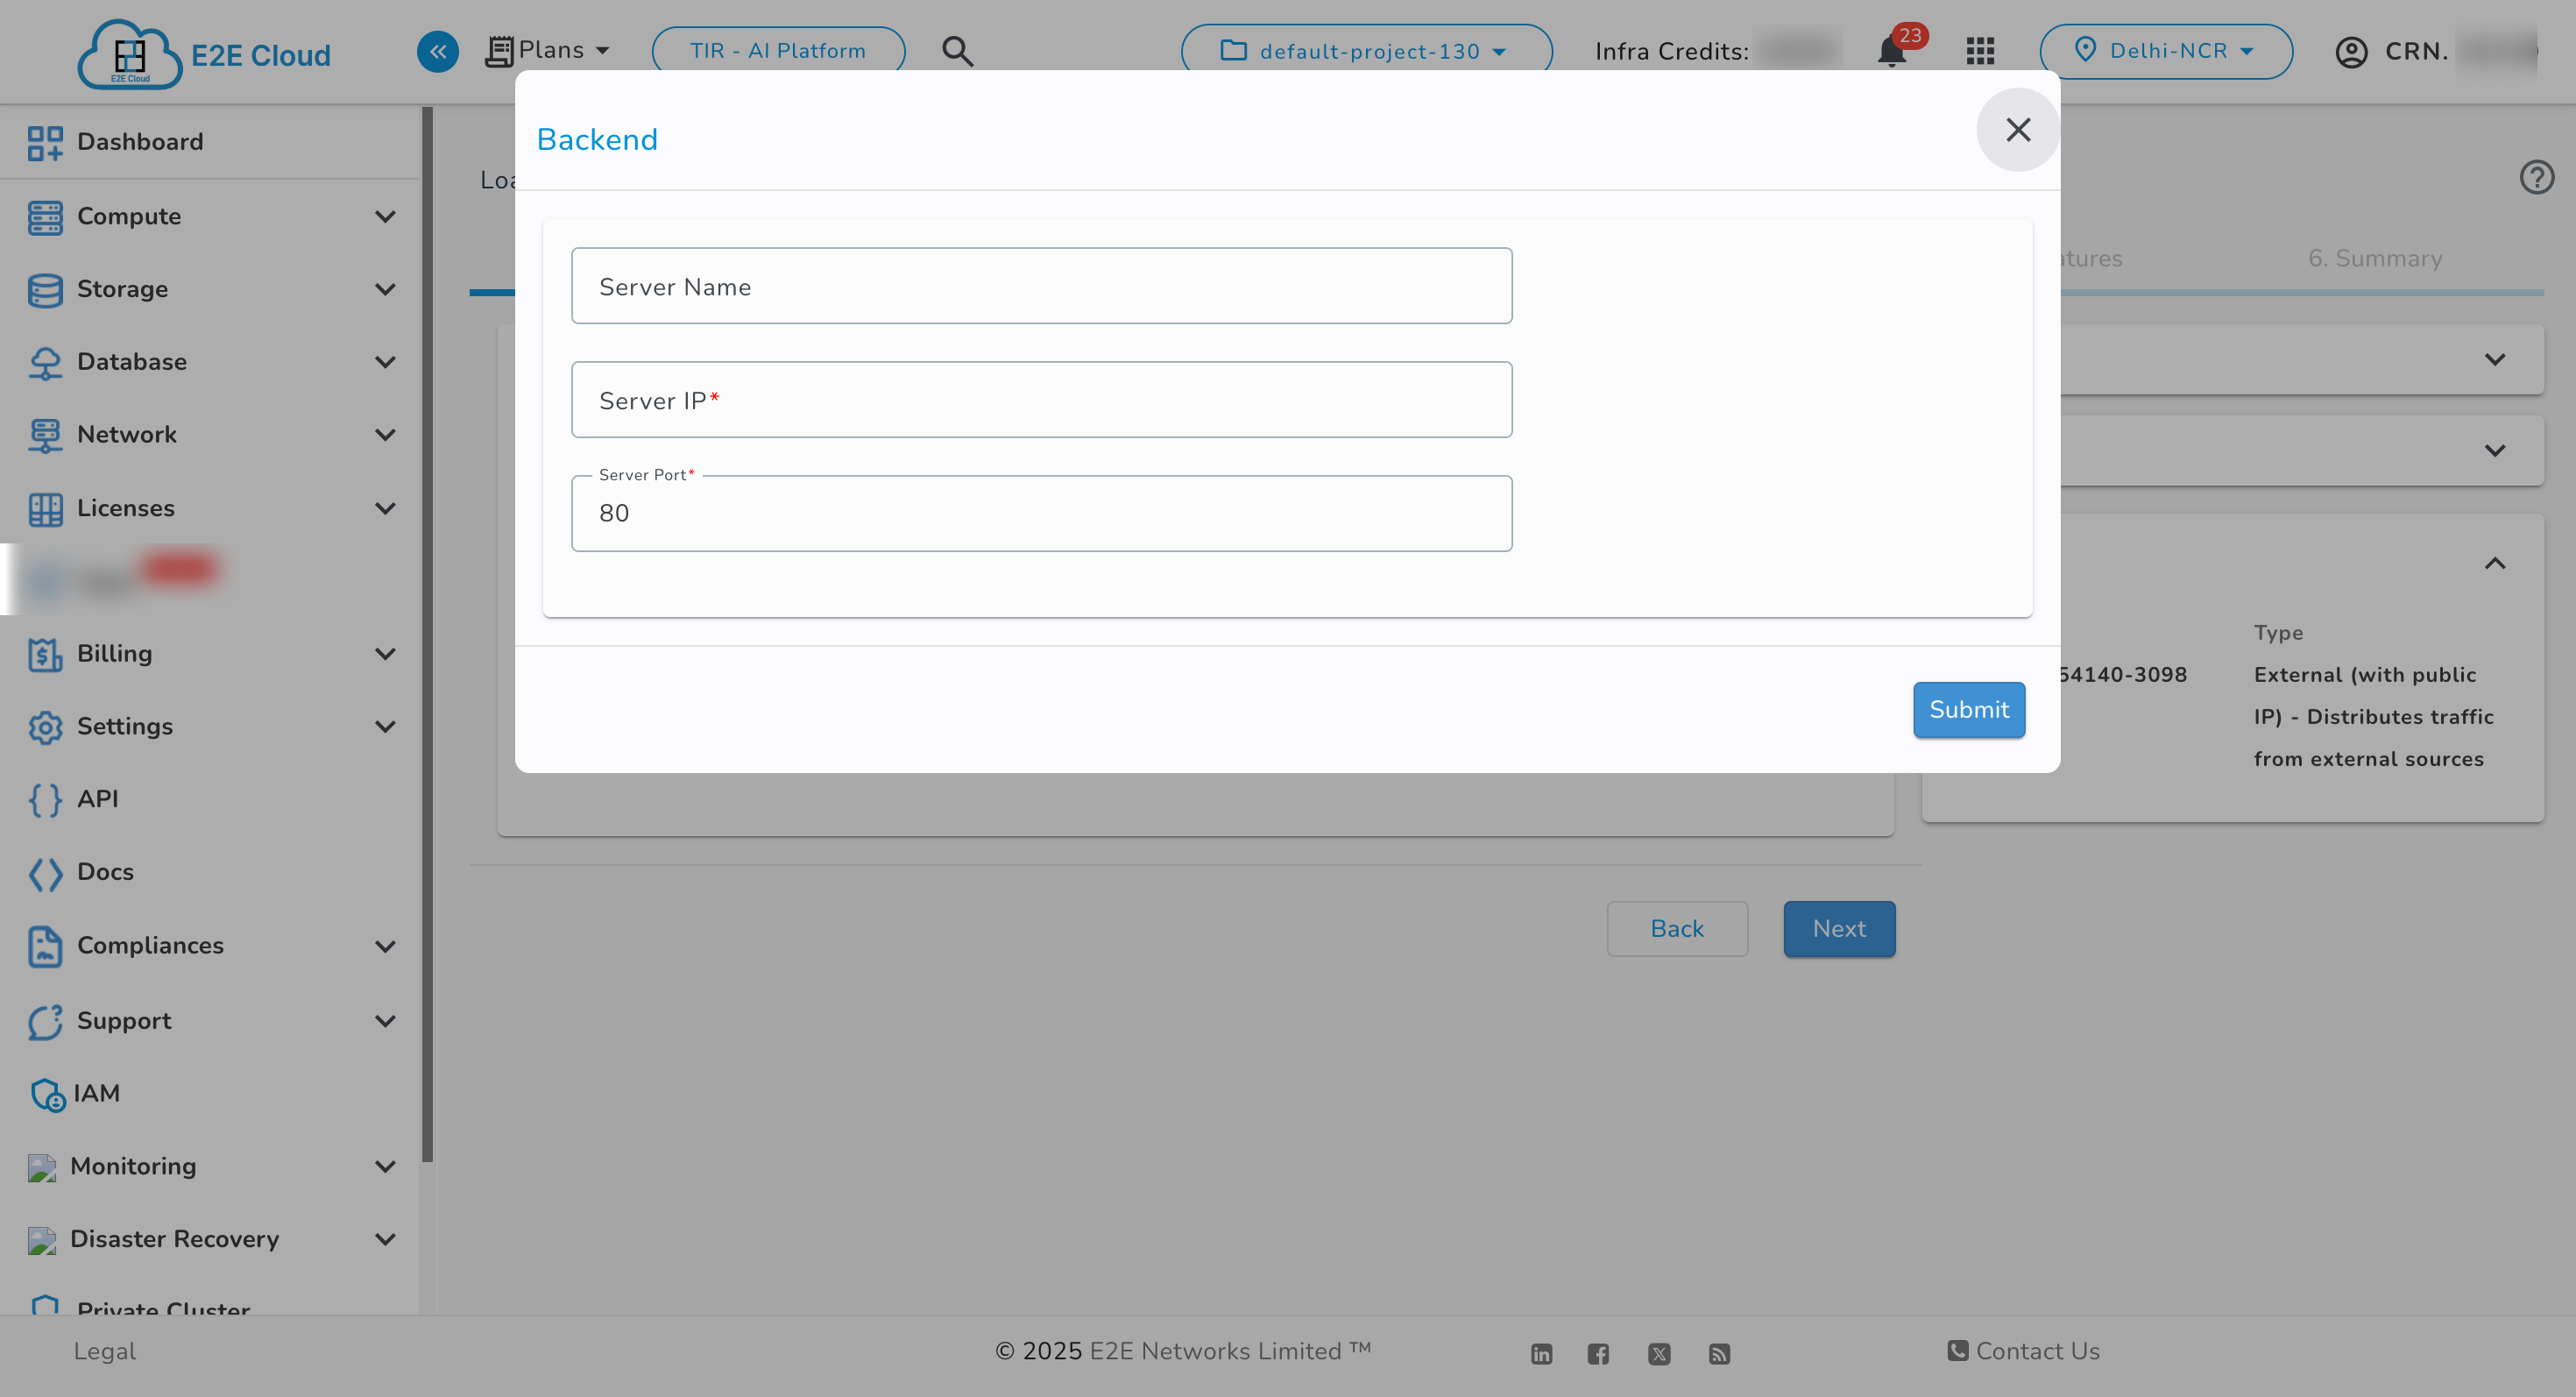
5. Target Mapping & Backend Configuration
-
Click Add Server.
-
In the pop-up:
- Enter the Server Name
- Enter the Server IP from within your Private Cluster.
-
Click Submit to add the backend.
6. Peak Performance Features
- Select VPC, IPv4, IPv6, and BitNinja.
- Set the Connection Timeout, Client Timeout, Server Timeout, and HTTP Keep-Alive Timeout.
The VPC field is a required parameter when creating a Load Balancer within a Private Cluster.
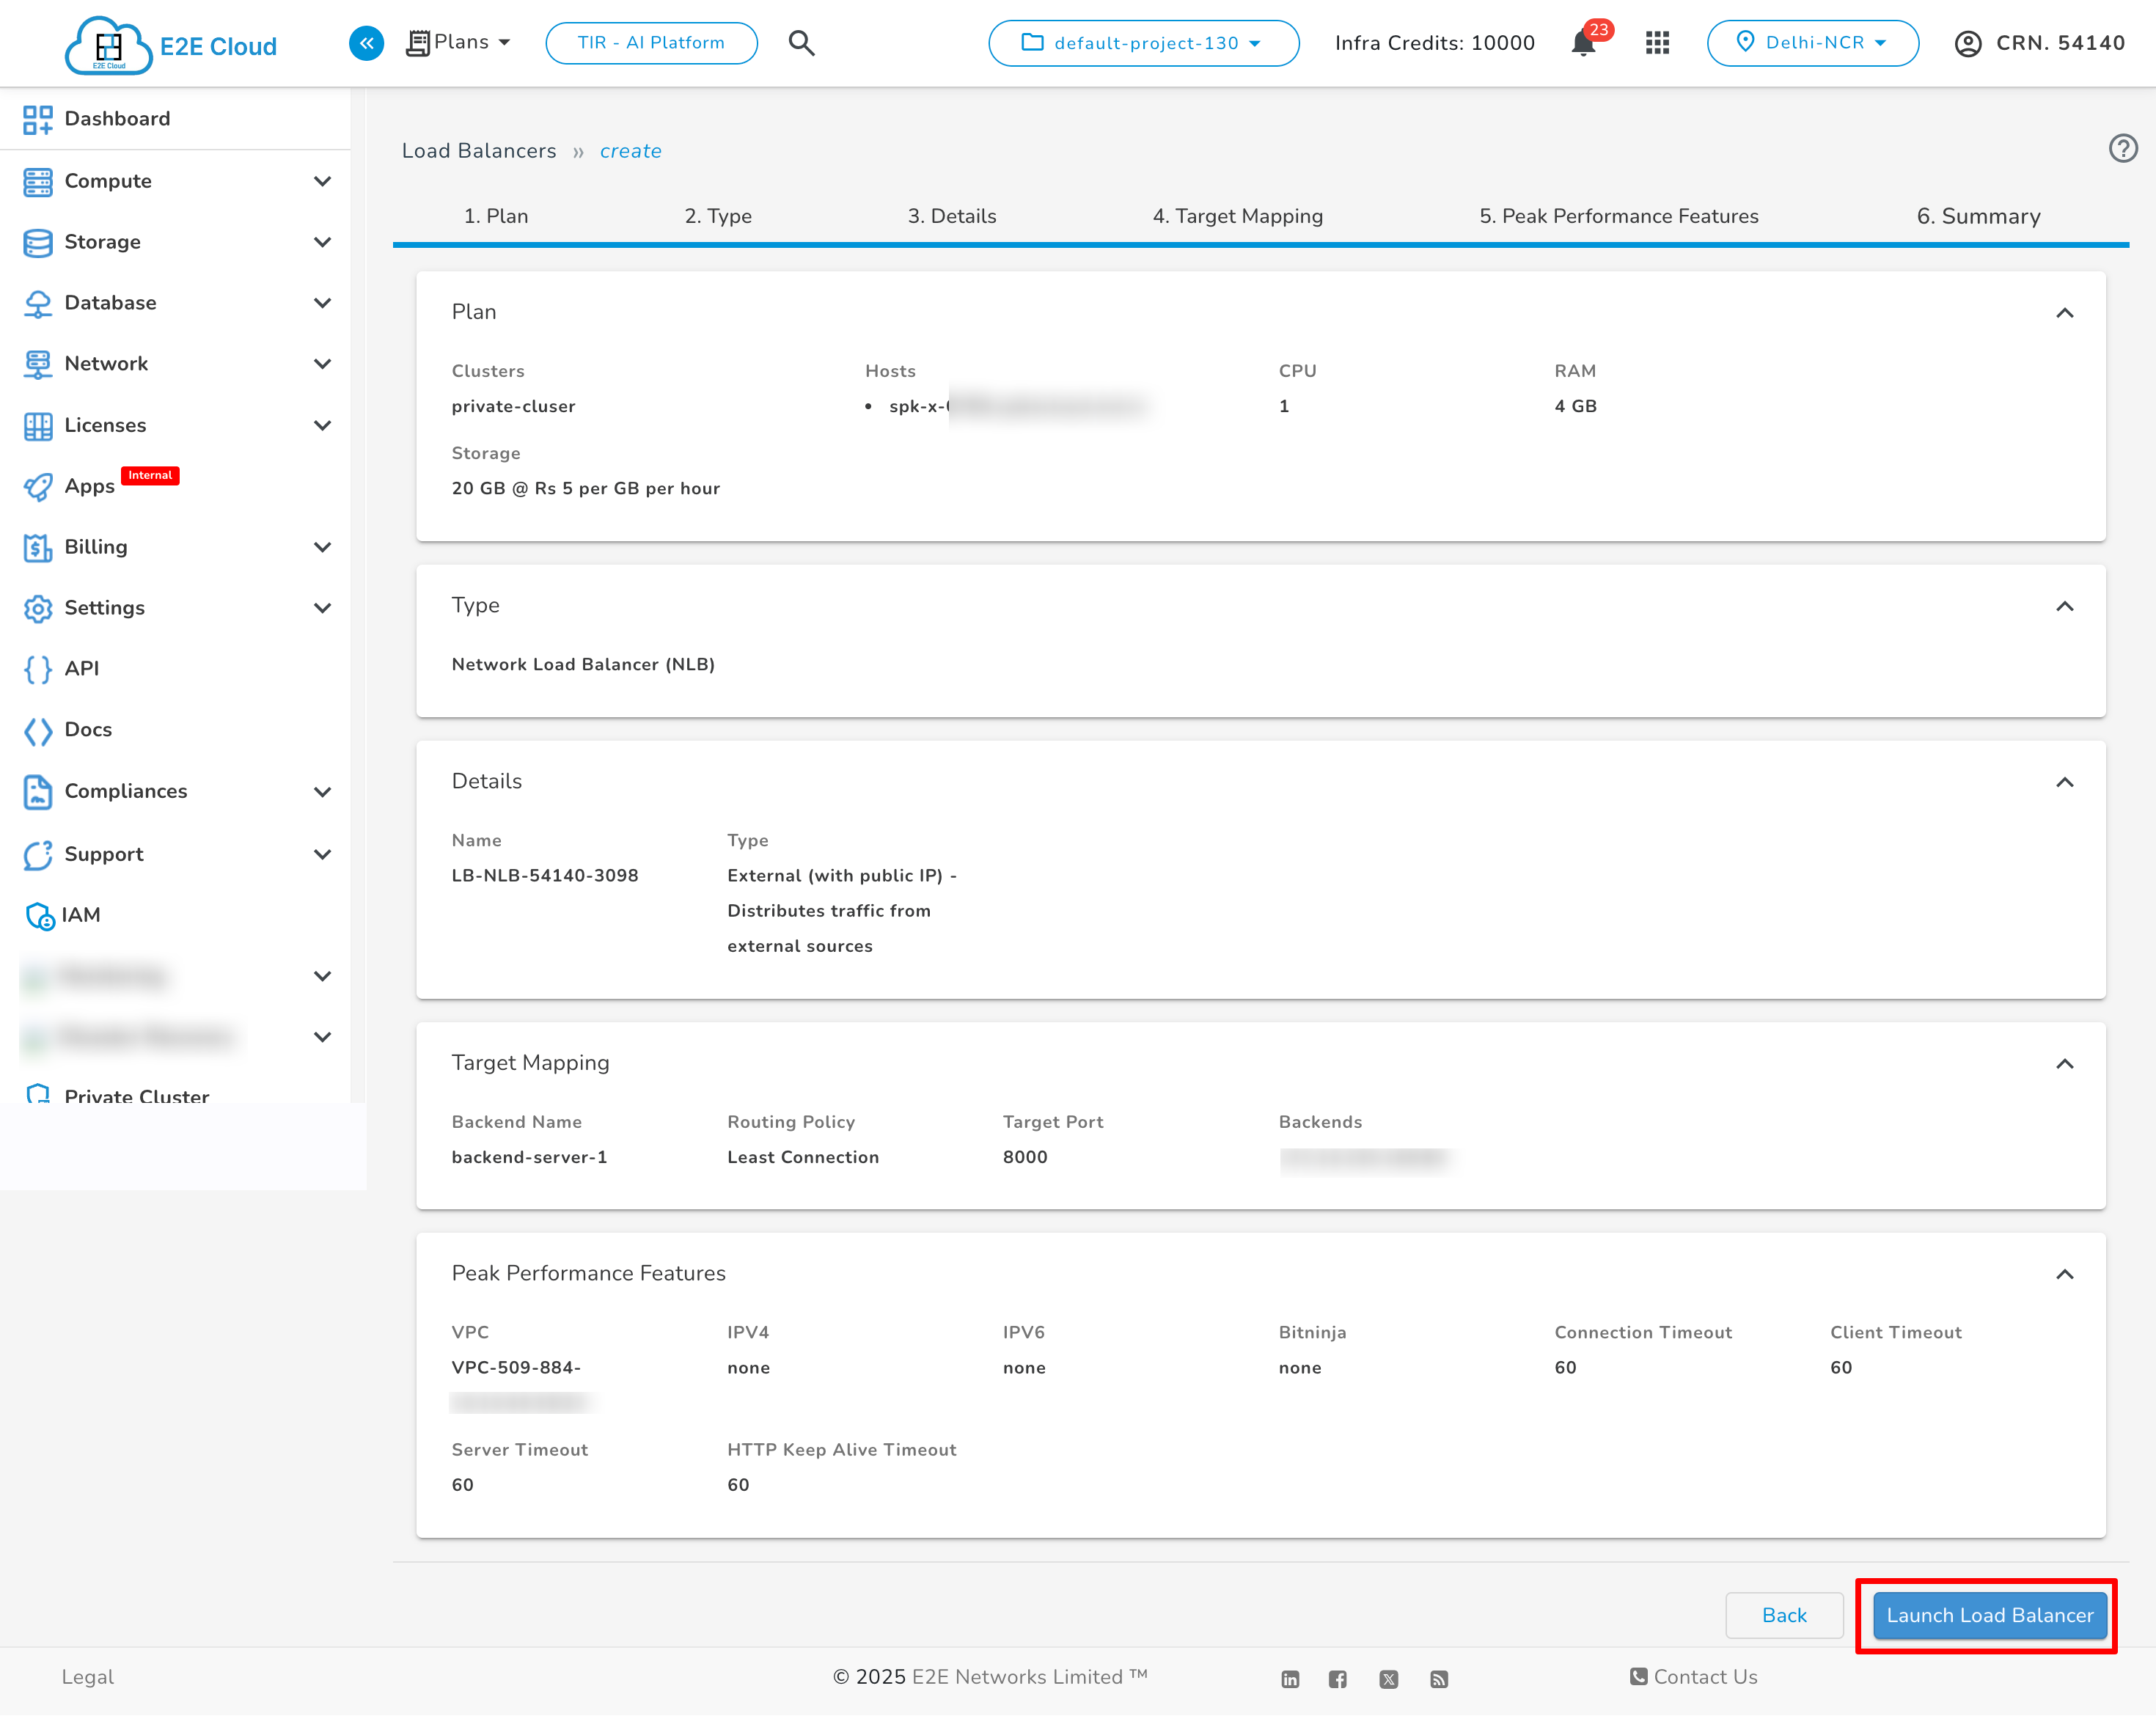
7. Review and Launch
-
Review all configuration details:
- Plan
- Load Balancer Type
- Backend Settings
-
Click Launch Load Balancer to finalize the deployment.
Managing NLB
After deployment:
-
Go to the Load Balancers section.
-
Click on the NLB name to view its status and configuration.