VPC Peering
Introduction
VPC Peering enables encrypted communication between isolated networks using secure tunnels. It facilitates seamless communication between VPCs without exposing traffic to the public internet. This ensures low-latency, high-bandwidth communication while maintaining strong security boundaries. Ideal for scaling applications, managing multi-environment deployments, and ensuring network segmentation within accounts.
What is Tunnel?
The term "tunnel" refers to a secure communication channel established between two endpoints — in our case, the gateways of two VPCs. This tunnel uses shared secrets (pre-shared keys) for authentication and encryption. All data transferred through this channel is encrypted, ensuring it cannot be intercepted or read during transit.
Users can create tunnels between:
- Two VPCs within the same project
- VPCs across different projects
- VPCs in different regions
Currently, we support VPC peering within a single CRN
Working with VPC Peering
The following sections explain how to use VPC Peering.
Create VPCs
- Click on the VPC sub-menu available under the Network section.
- Click on the Get Started button.
- You will be redirected to the Create Virtual Private Cloud page and create 2 VPCs.
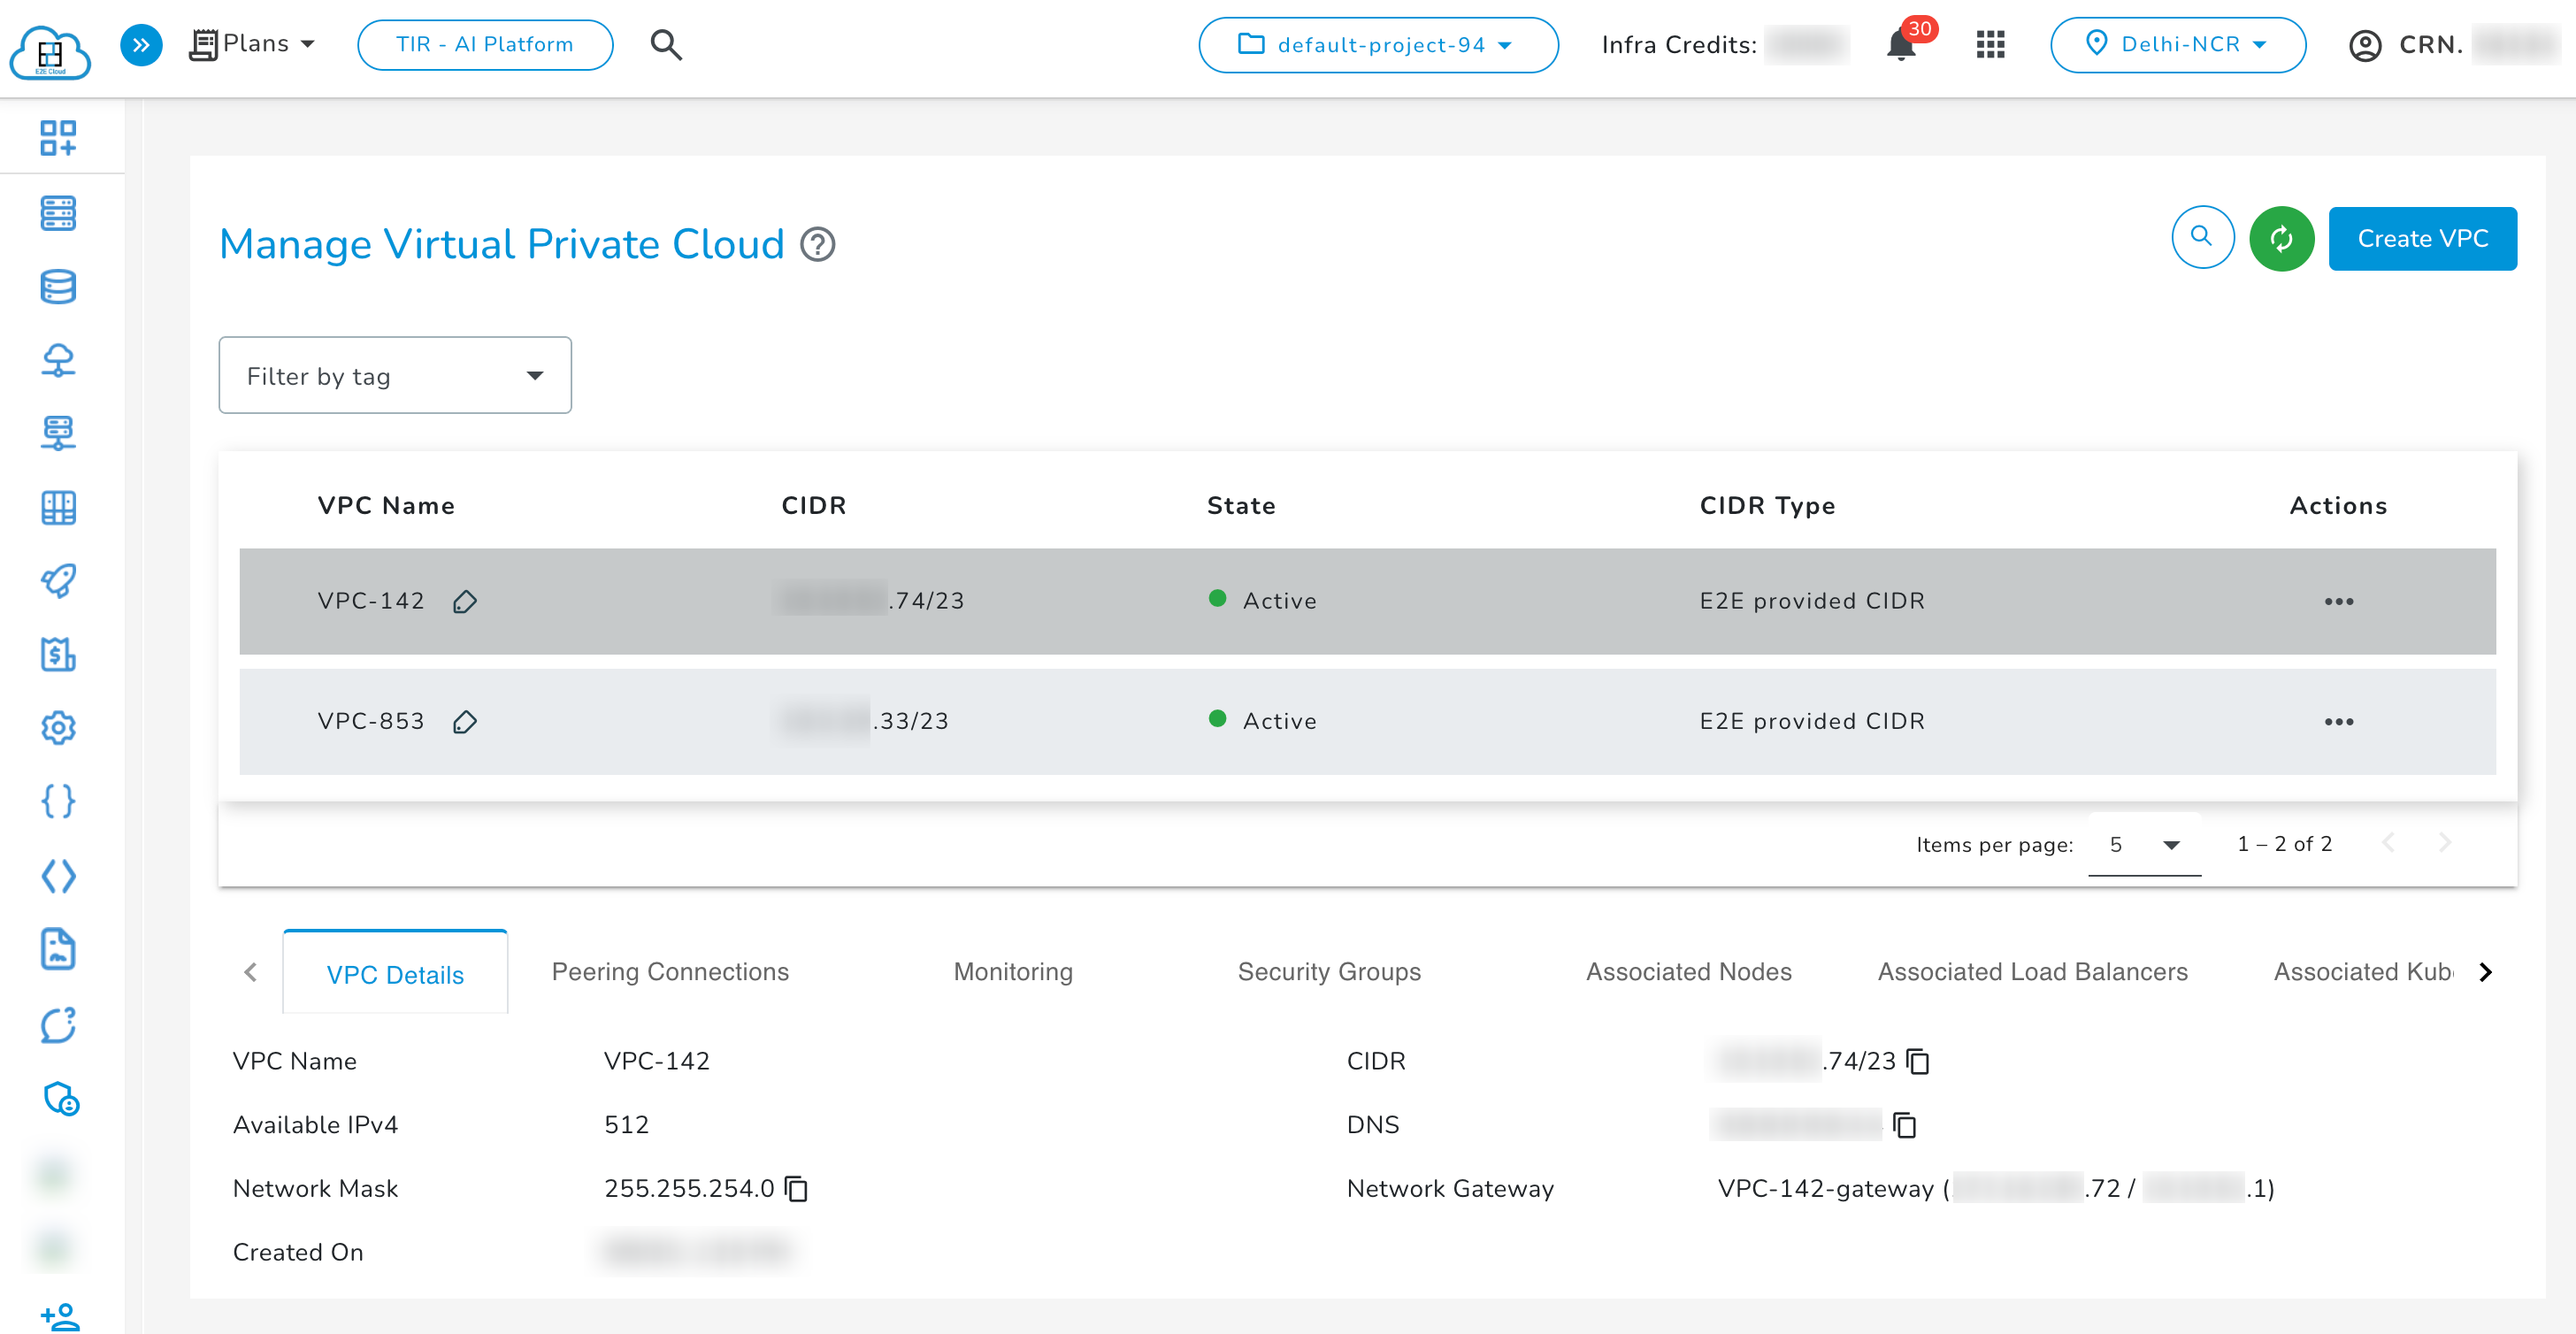
For more information on creating a VPC -> Click here
Create Peering Connection
The following table demonstrates how two nodes (VMs) in different VPCs can communicate after VPC peering.
| Node Name | VPC Name | IP Address | Can Ping Other Node |
|---|---|---|---|
| Node A | VPC A | 10.0.0.2 | Yes (Node B: 10.1.0.2) |
| Node B | VPC B | 10.1.0.2 | Yes (Node A: 10.0.0.2) |
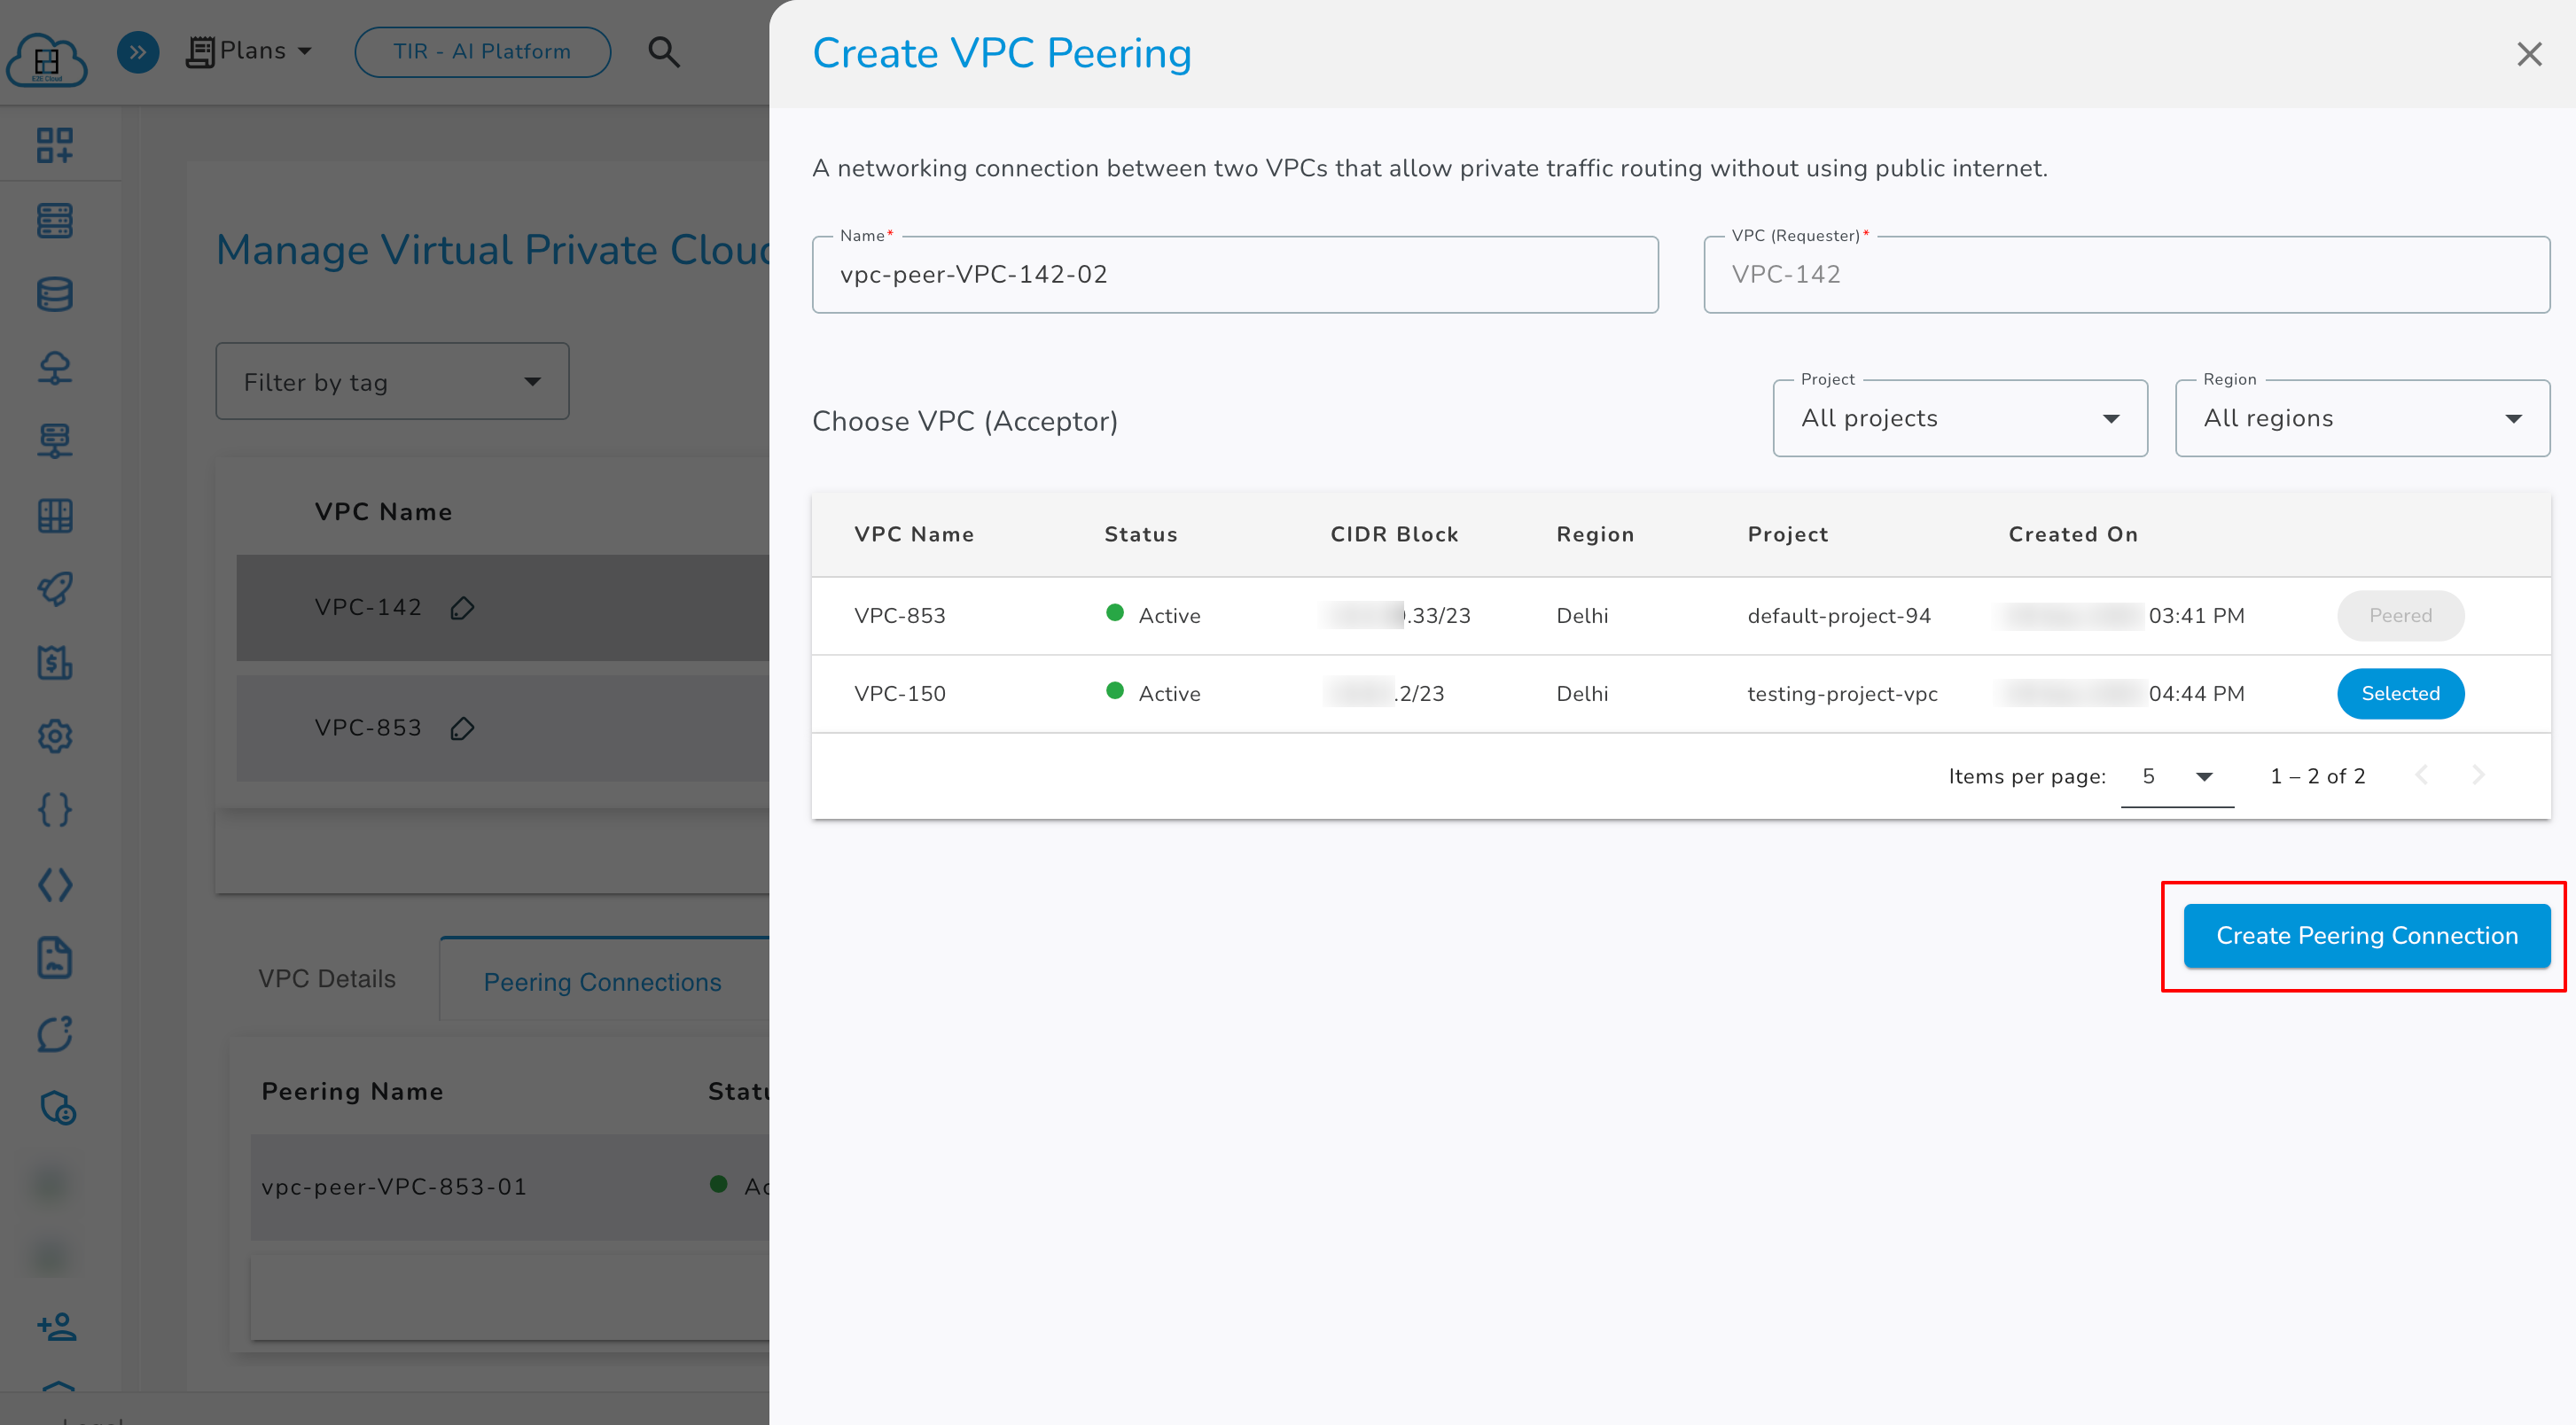
- Select the desired VPC, then go to its actions and click on Create VPC Peering.
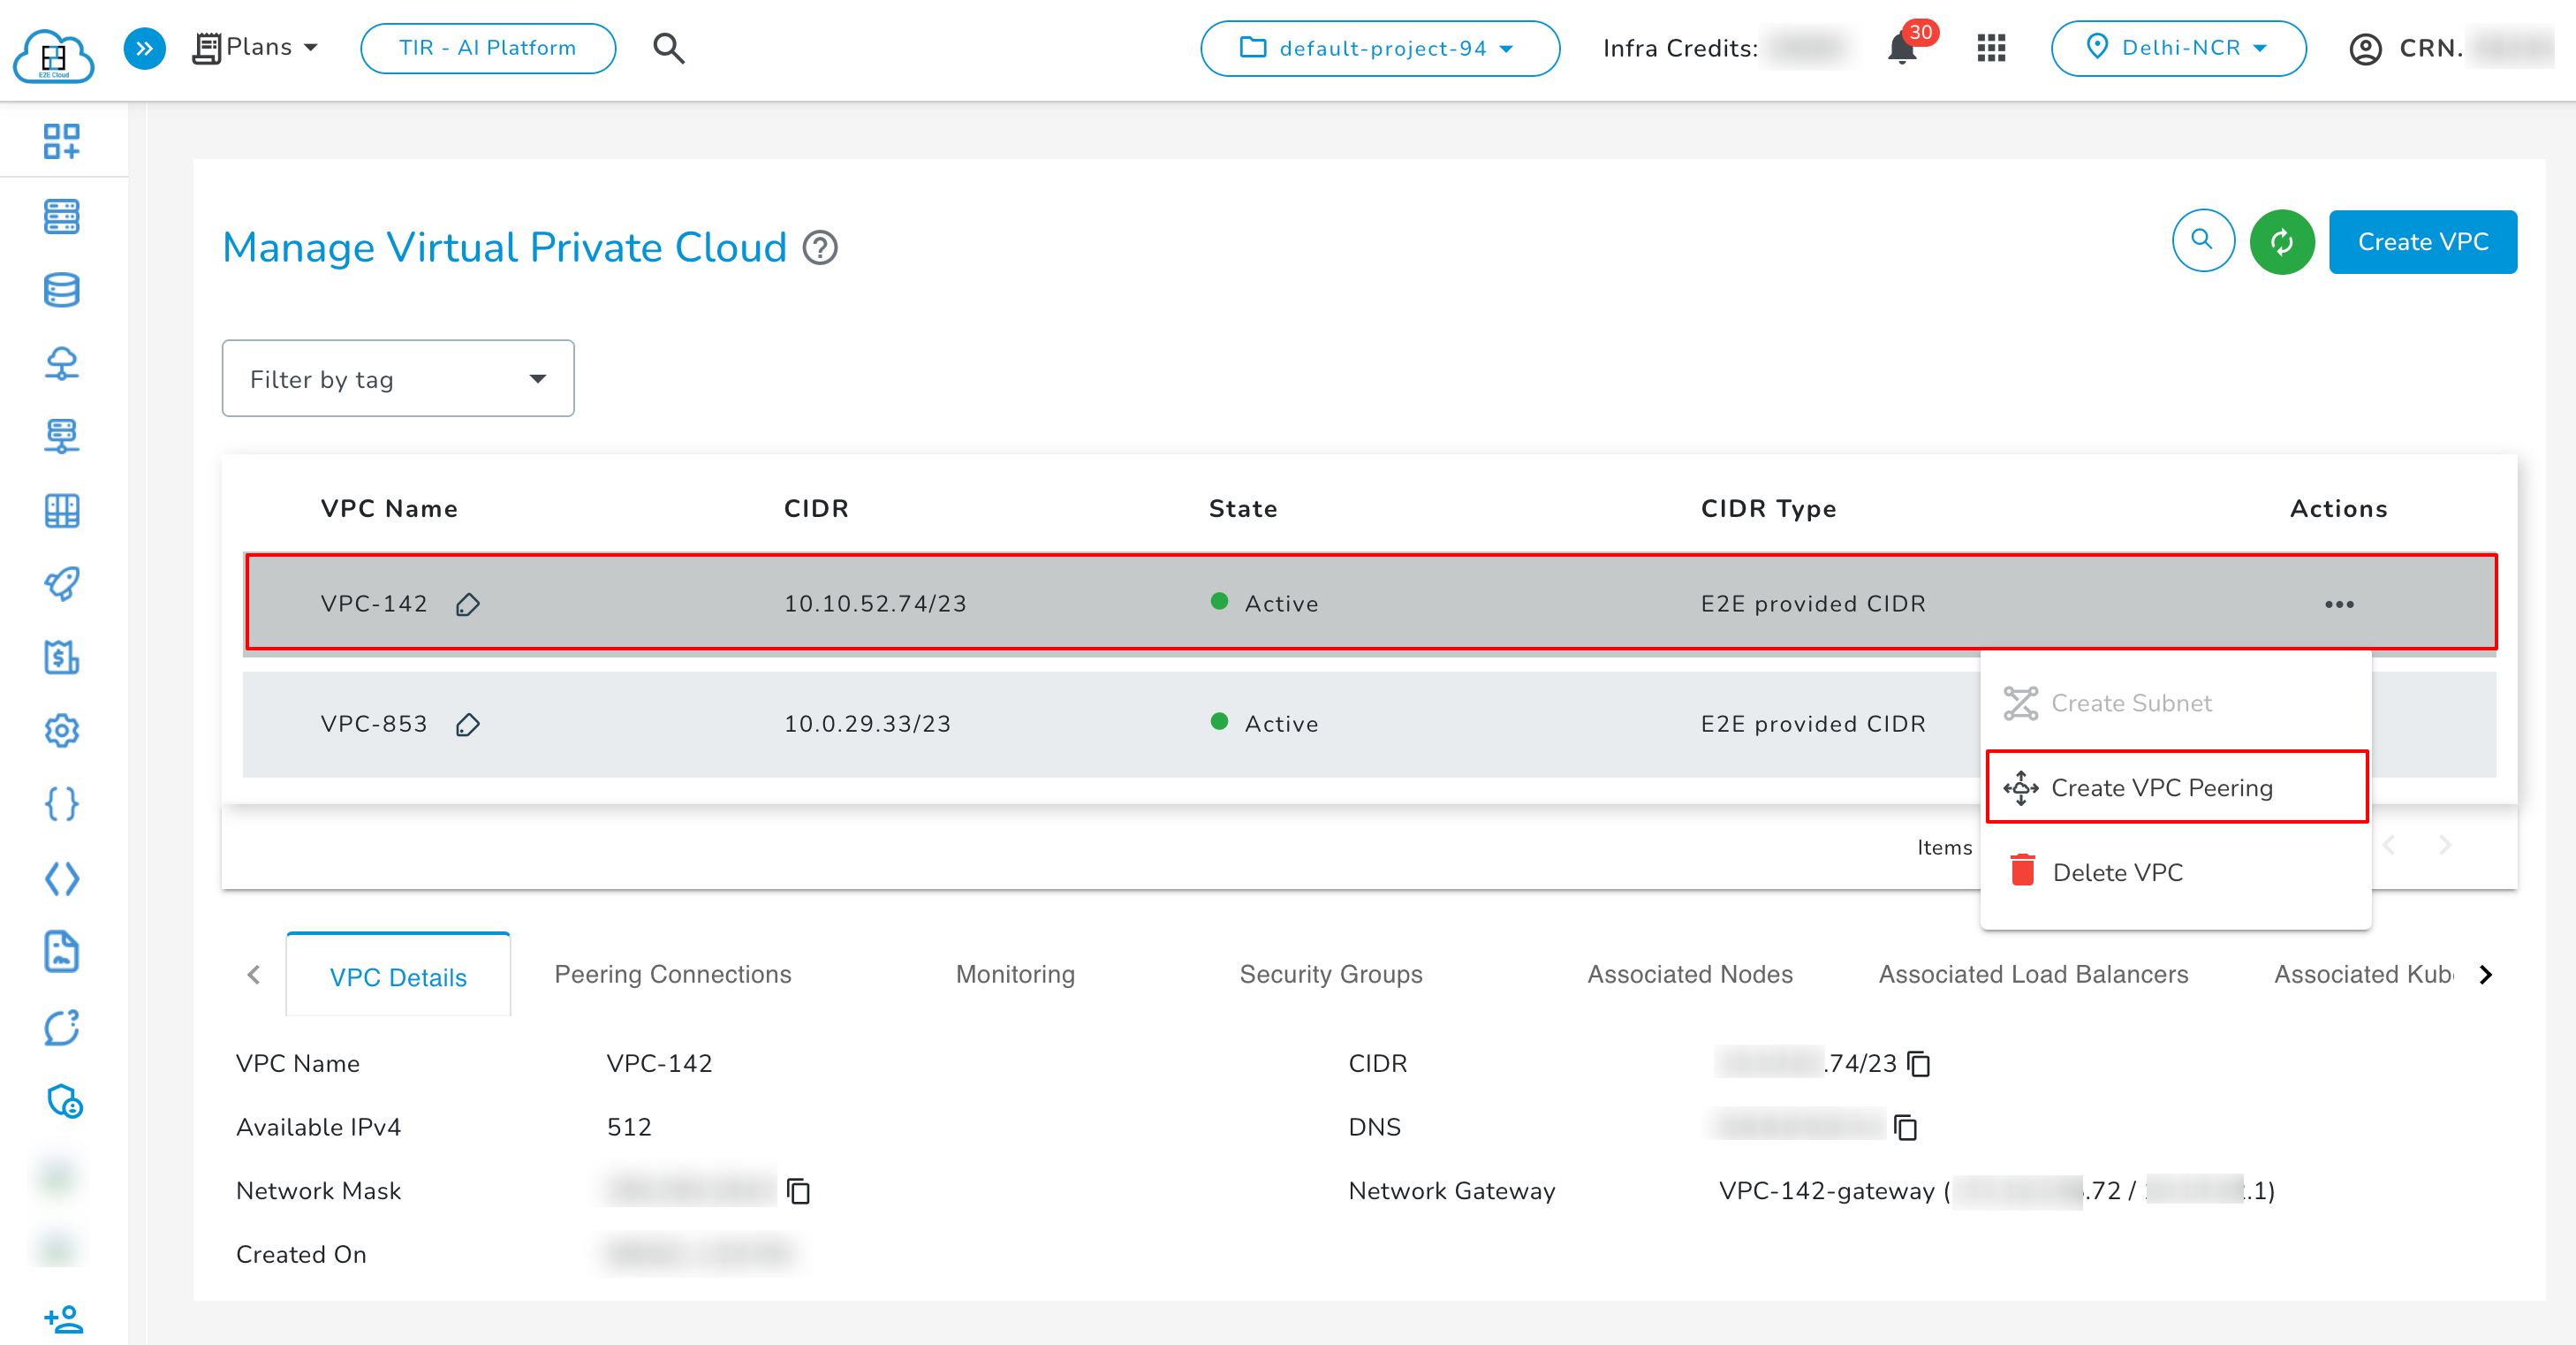
- Select the VPC you want to connect to (the Acceptor VPC). You can apply filters by region and project, and the VPCs matching the selected criteria will be displayed.
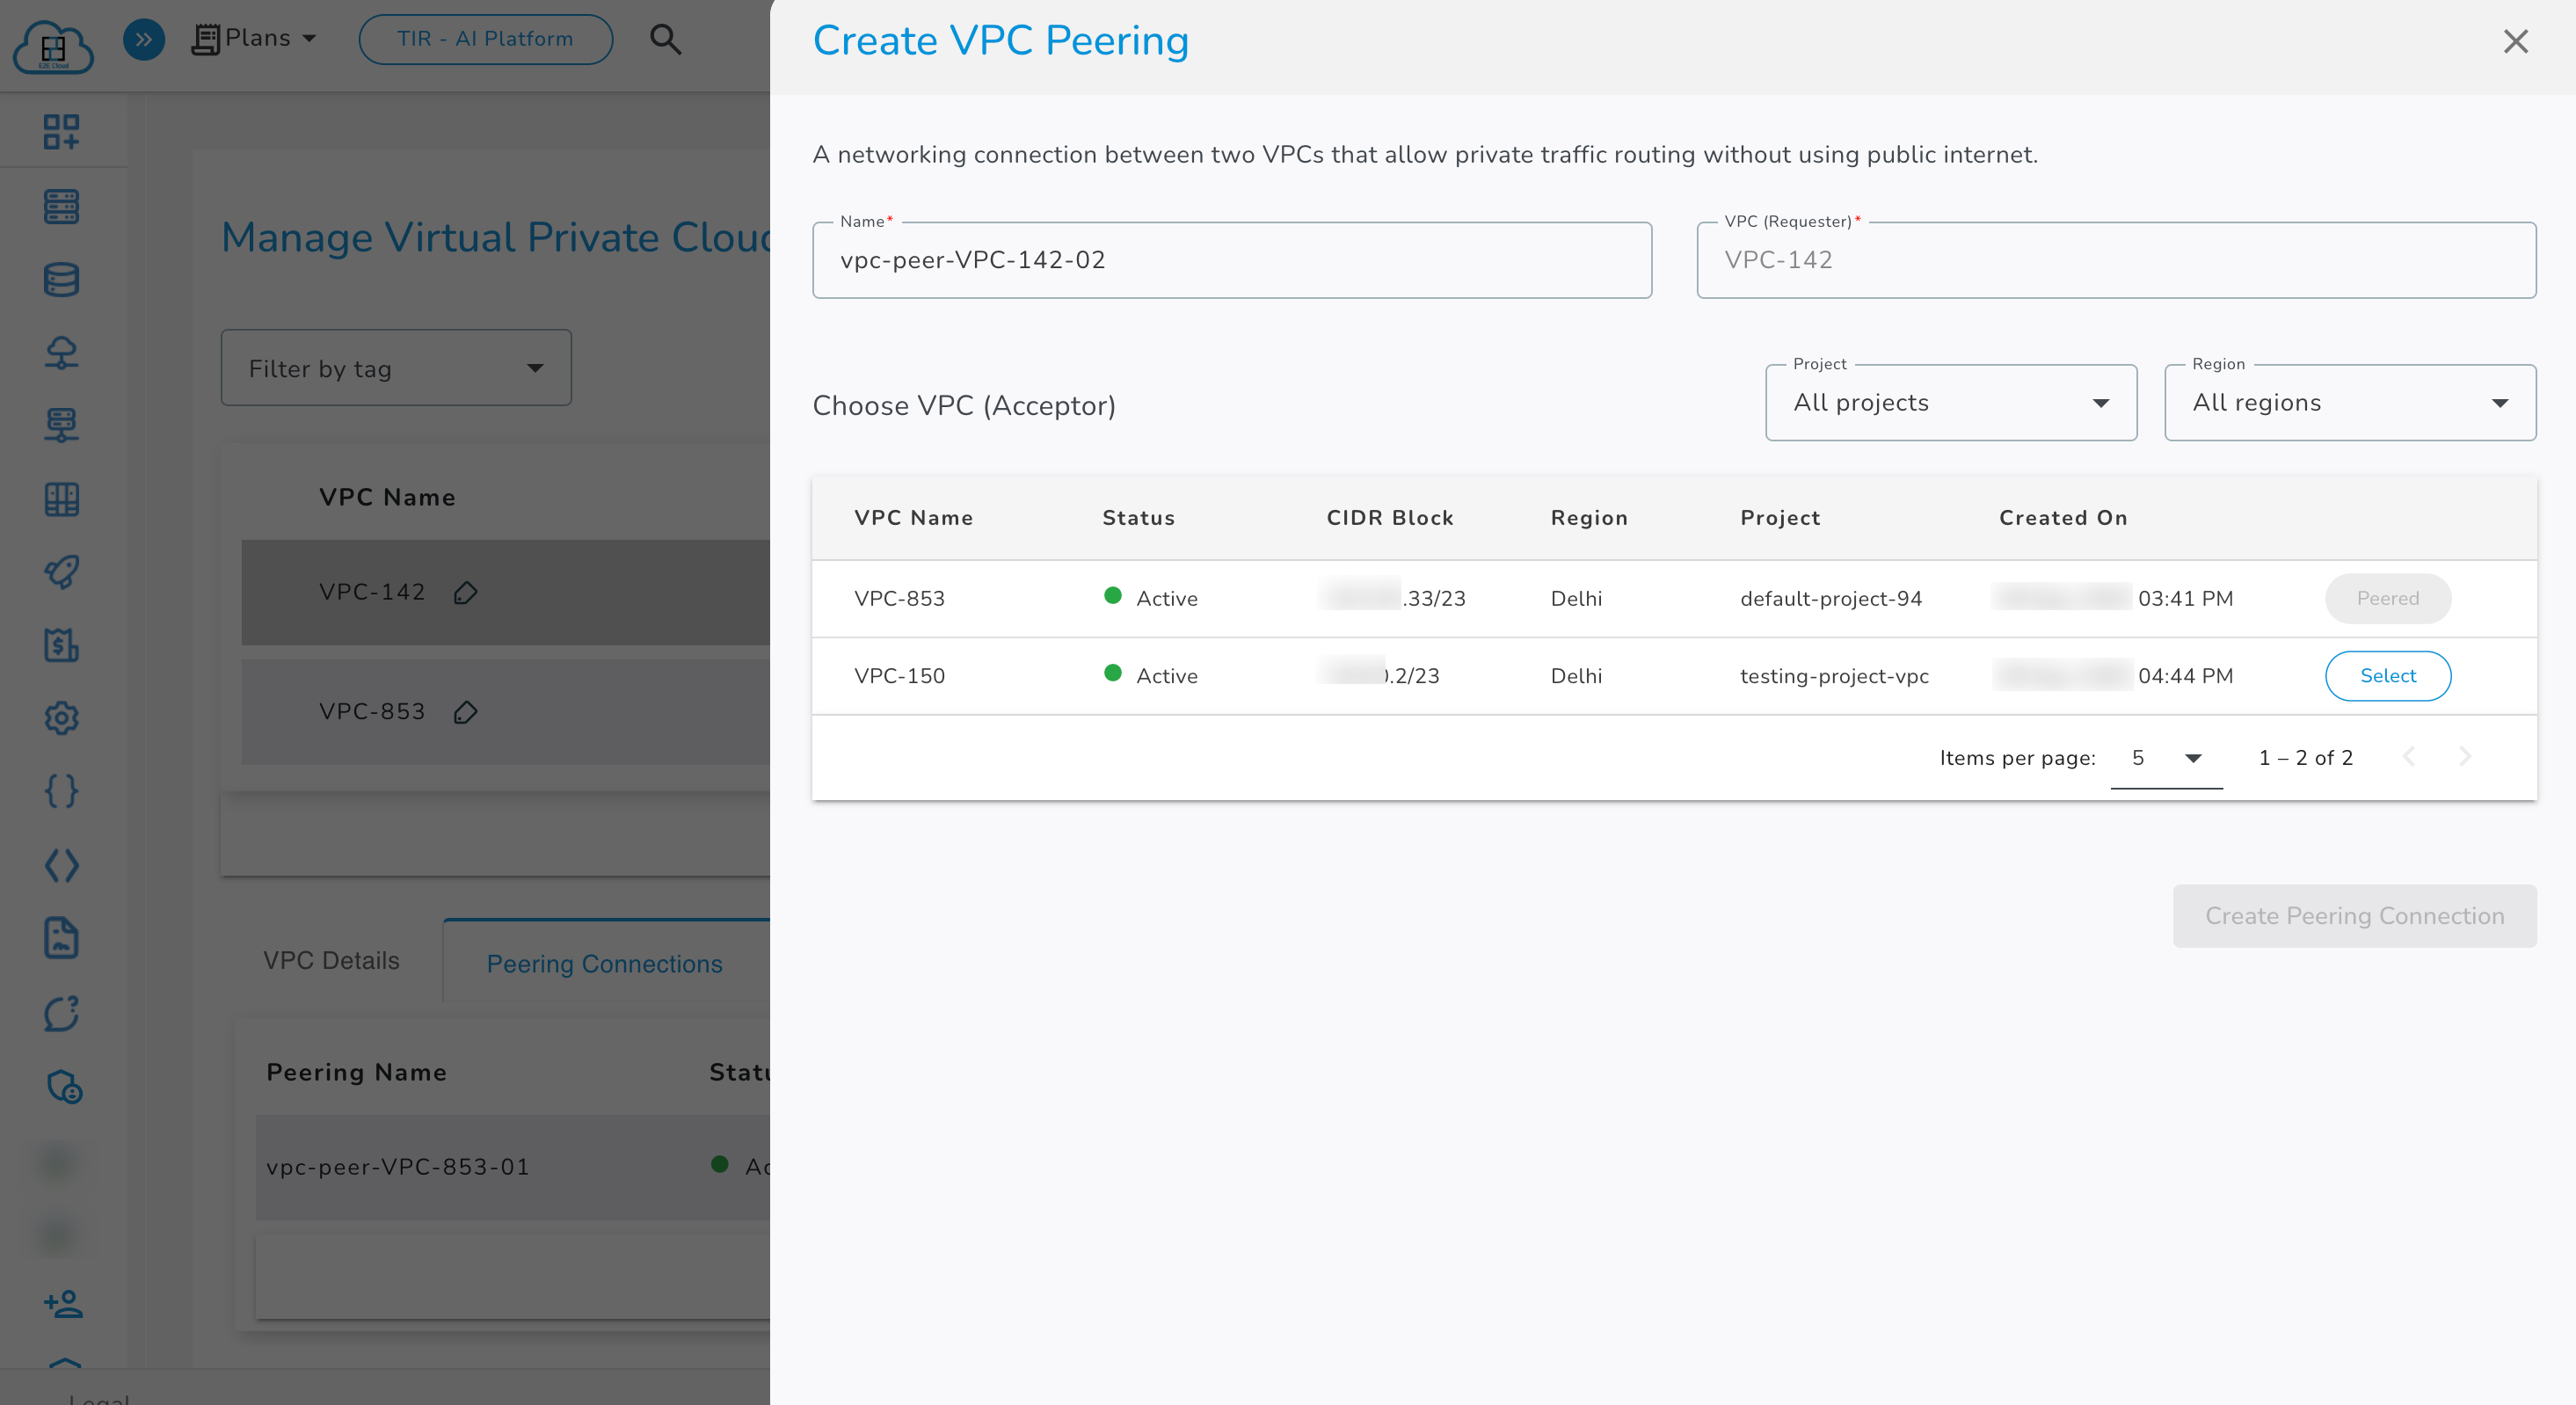
- Select the vpc with status Select and click on Create Peering Connection.
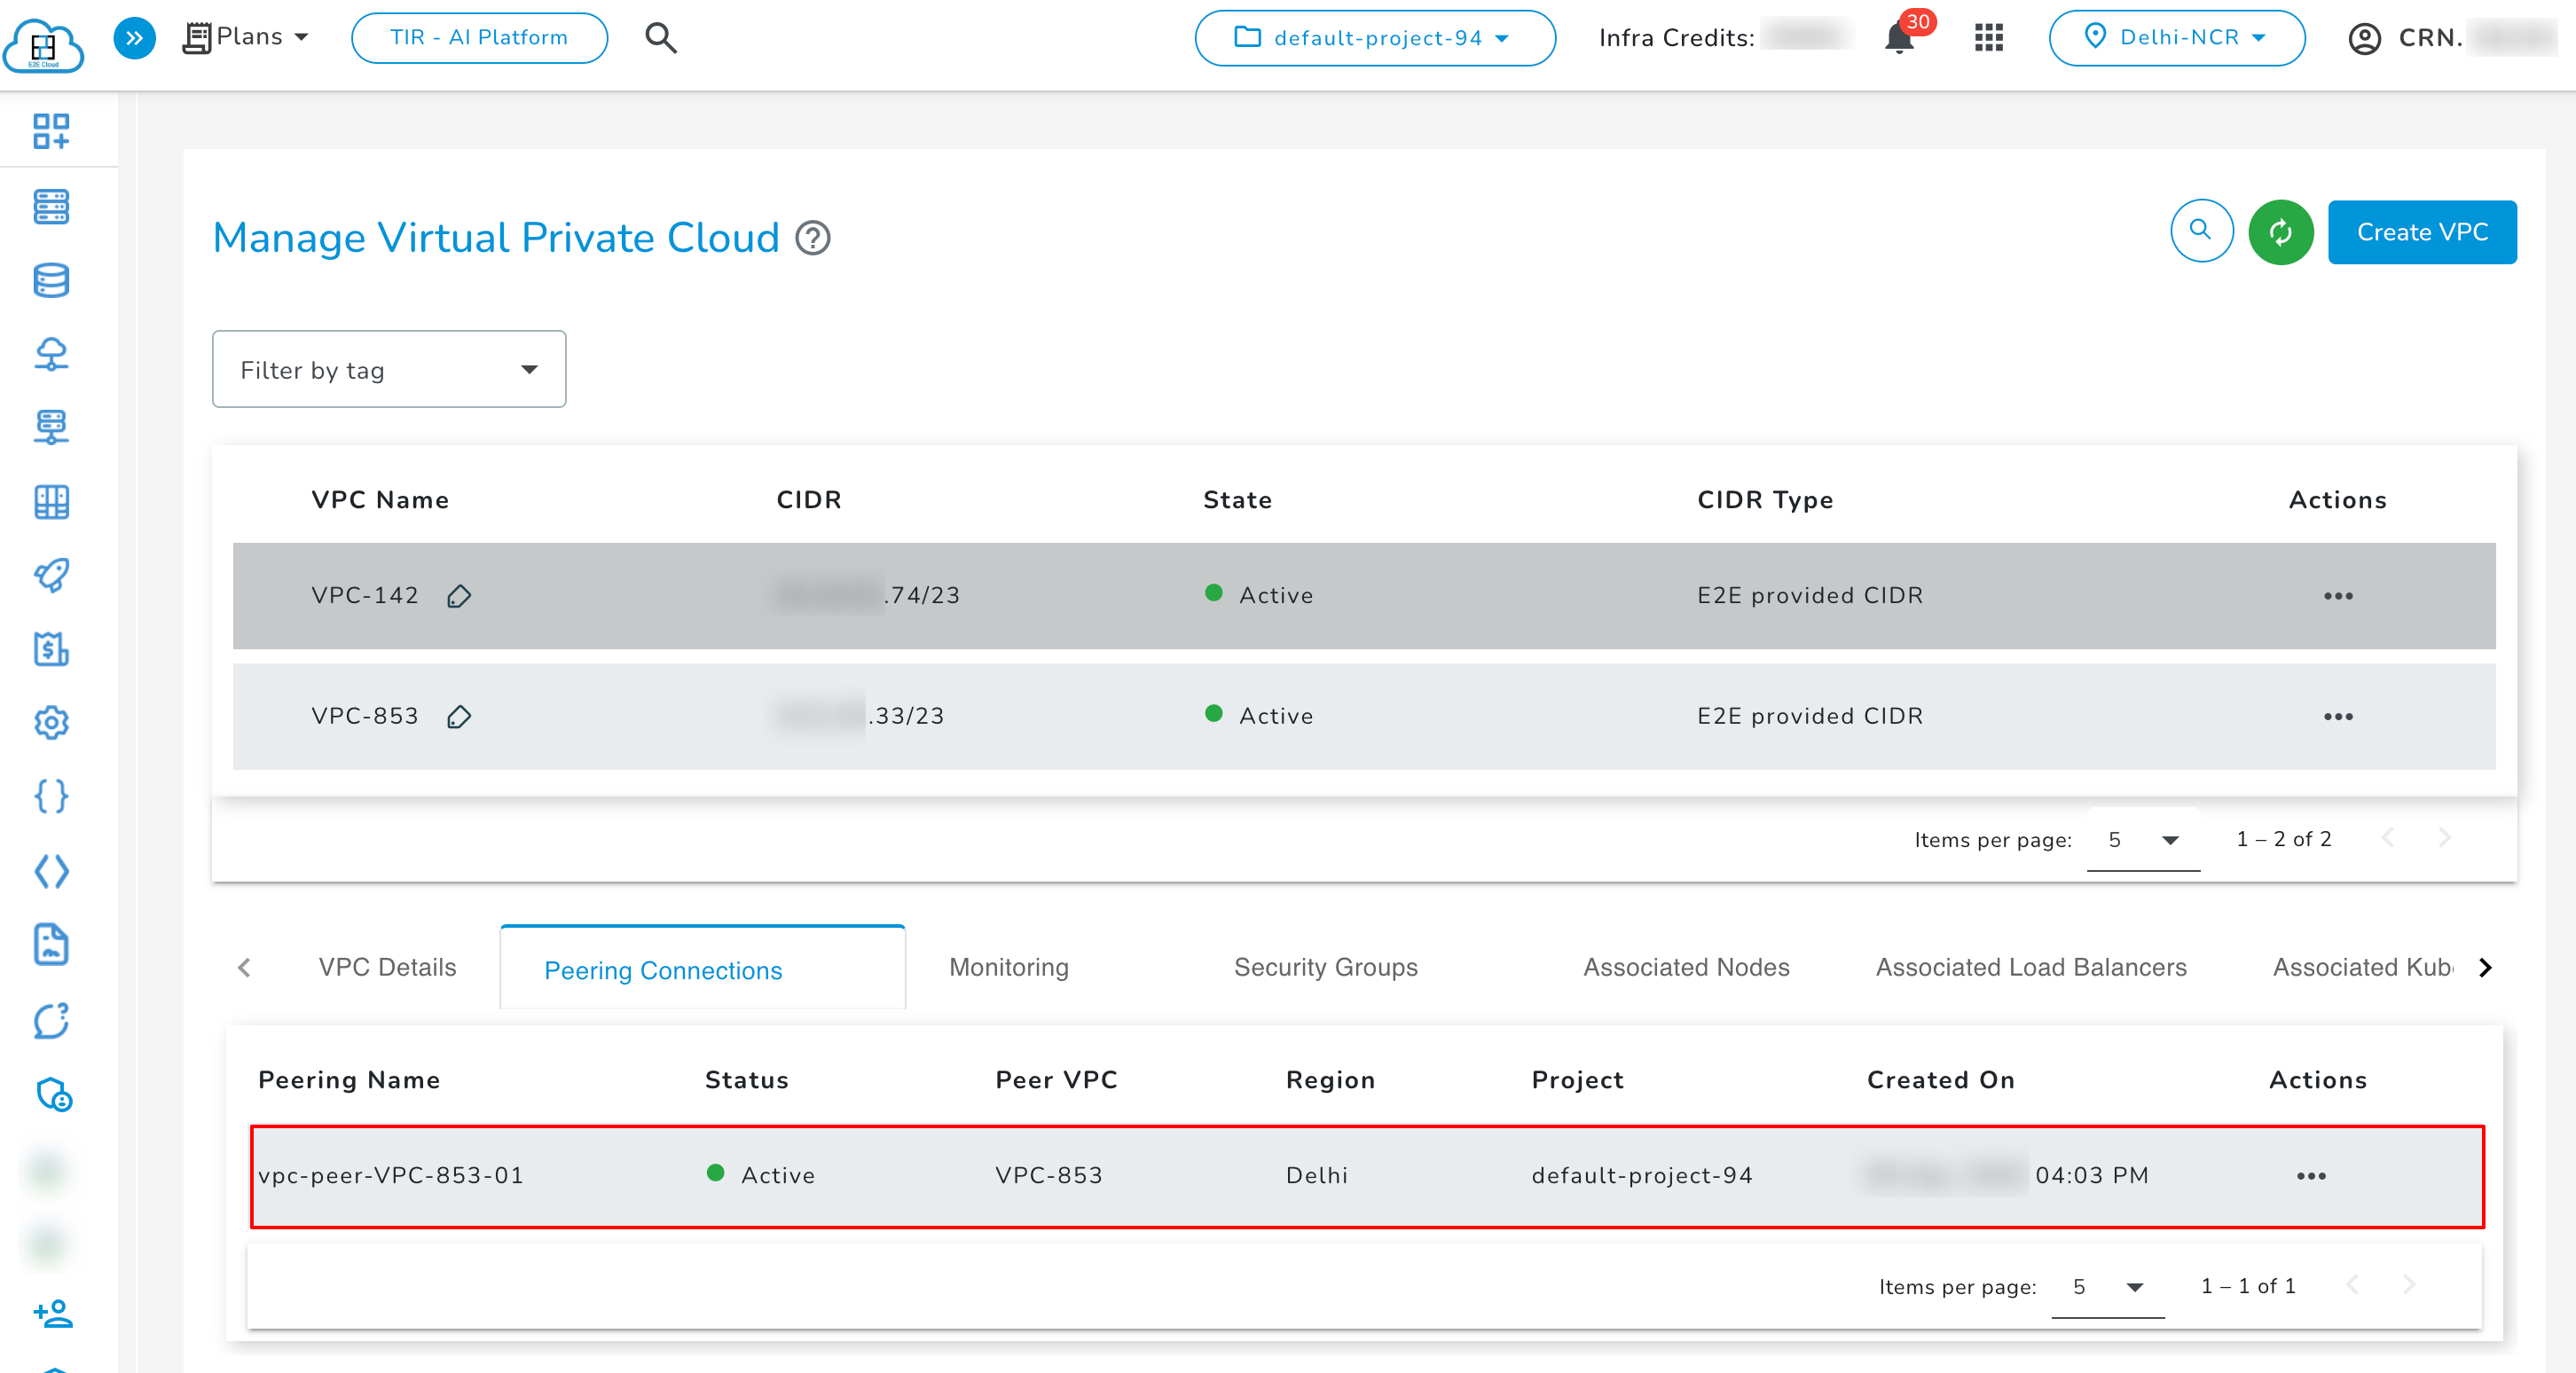
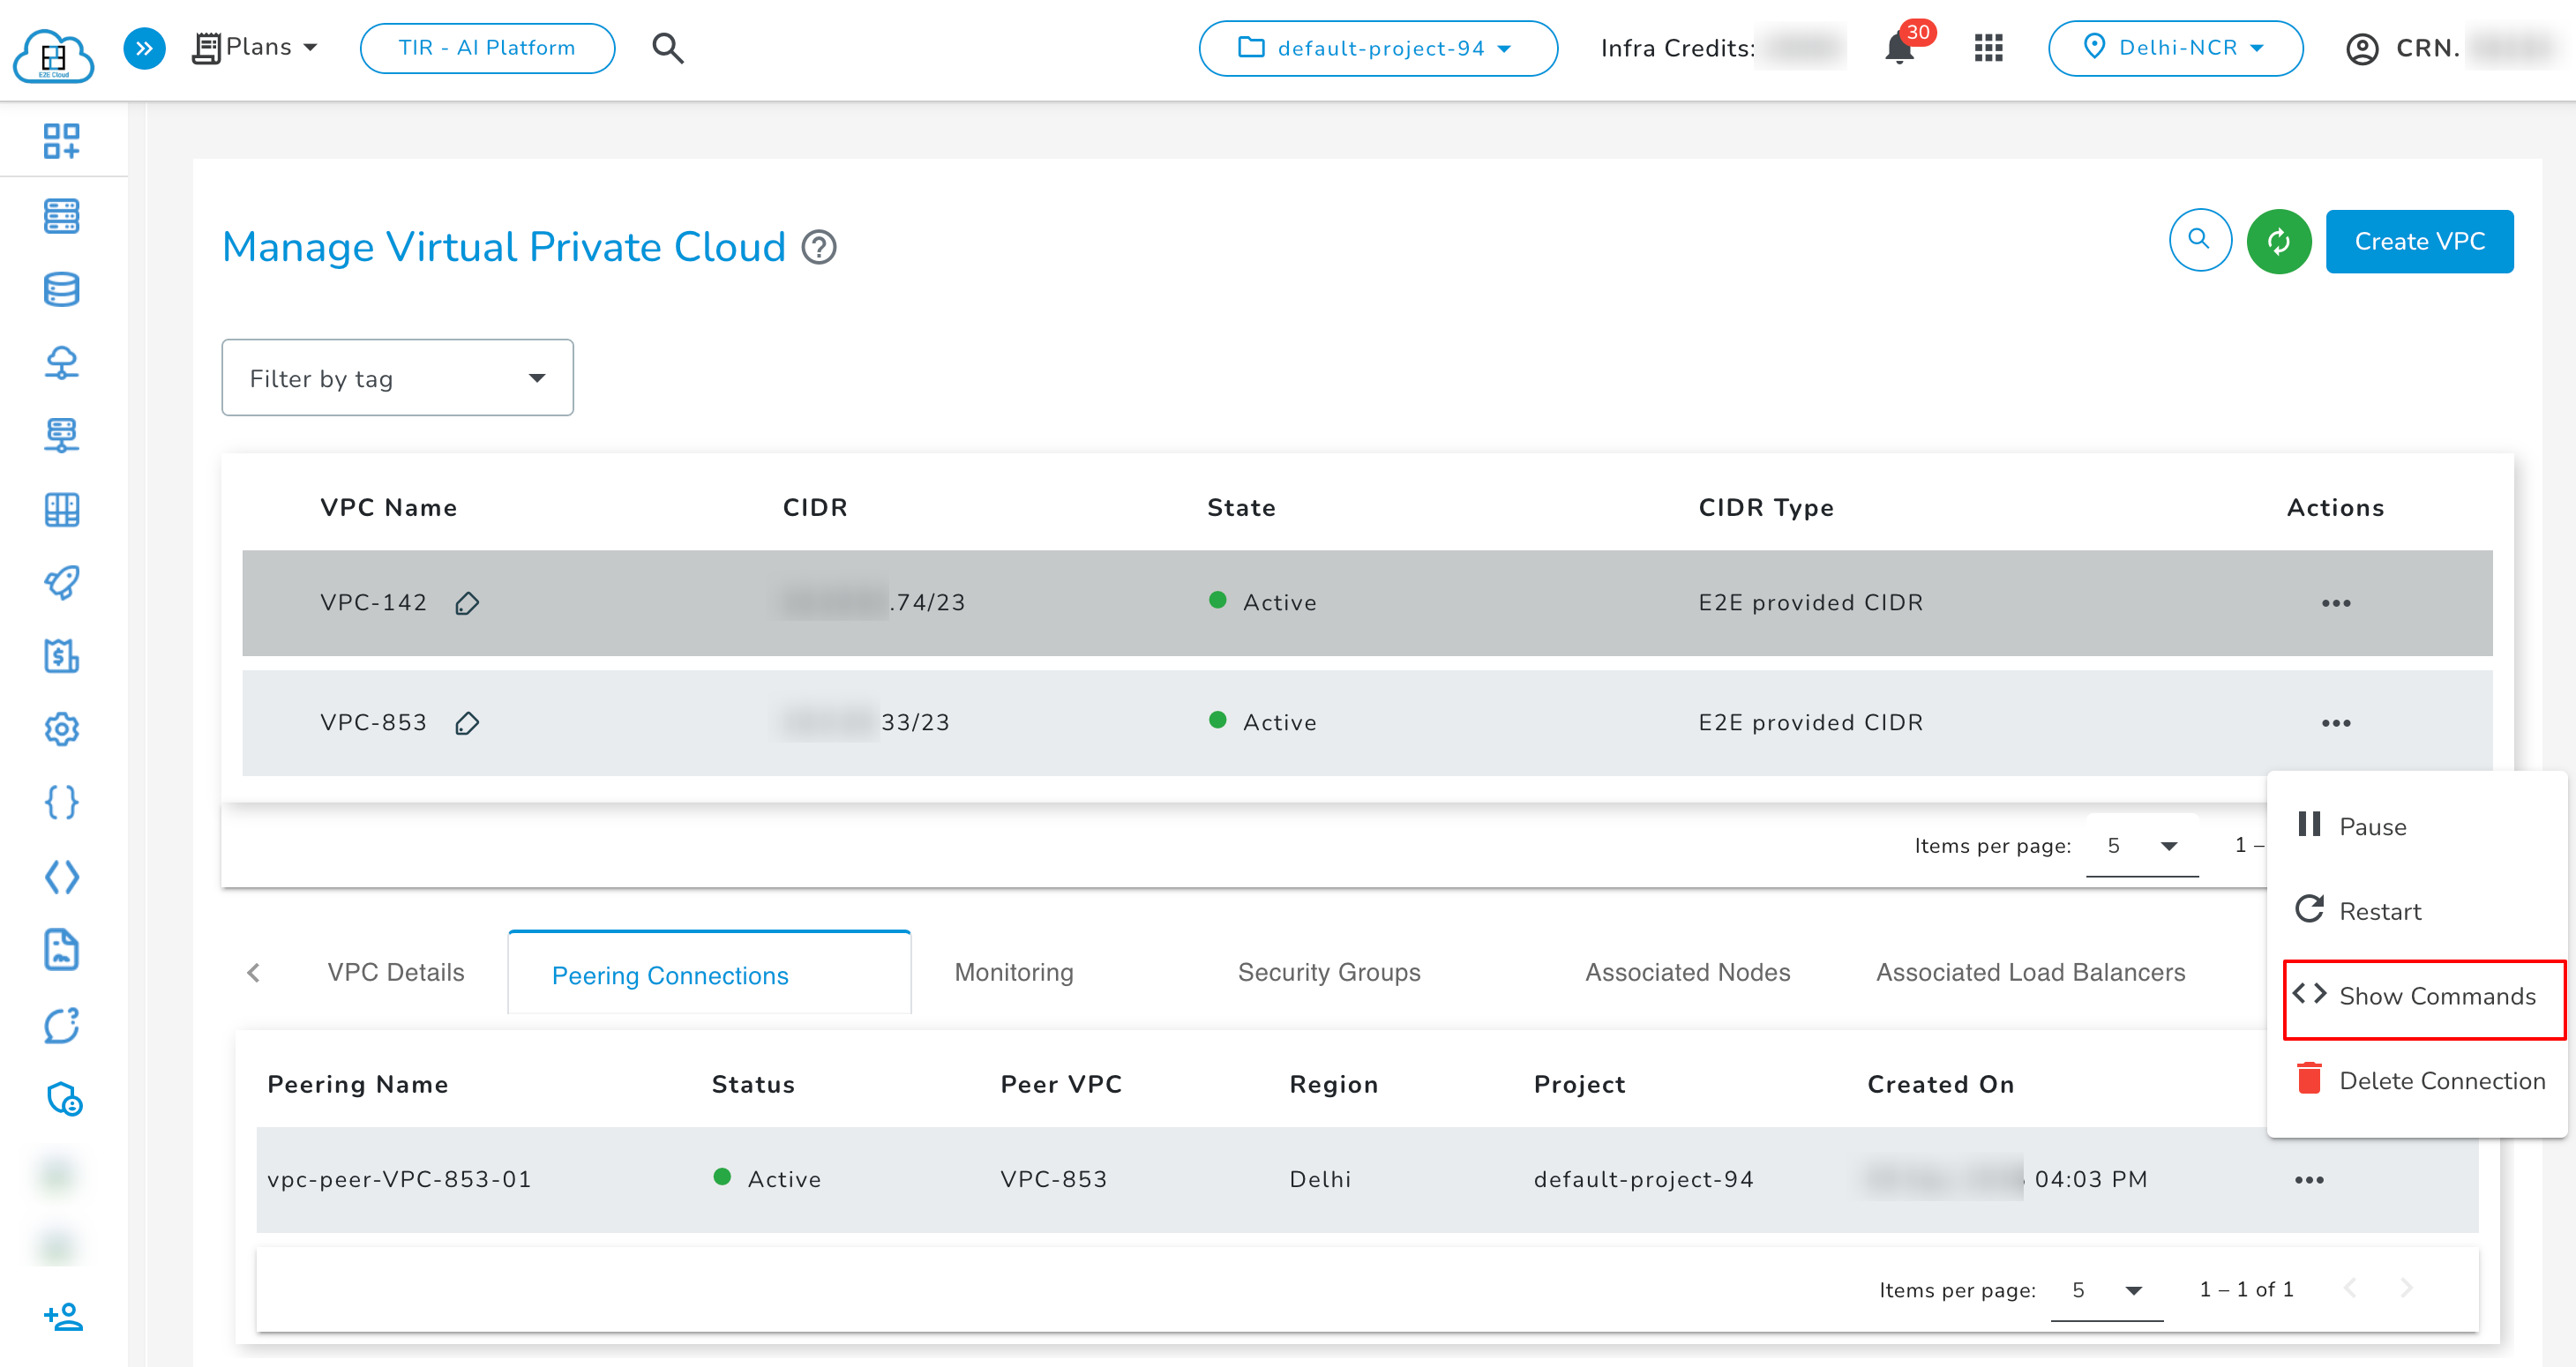
- The established VPC connection will be listed under the Peering Connections tab. Initially, the tunnel status is shown as Creating. Once the tunnel is successfully created, the status changes to Active and if the creation fails, the status will be Failed.
Actions of Peering Connection
- Pause: You can pause the tunnel at any time using the pause action, which will temporarily stop its operation and status of tunnel changes to Inactive. Pause button will be enabled only when tunnel is in active status.
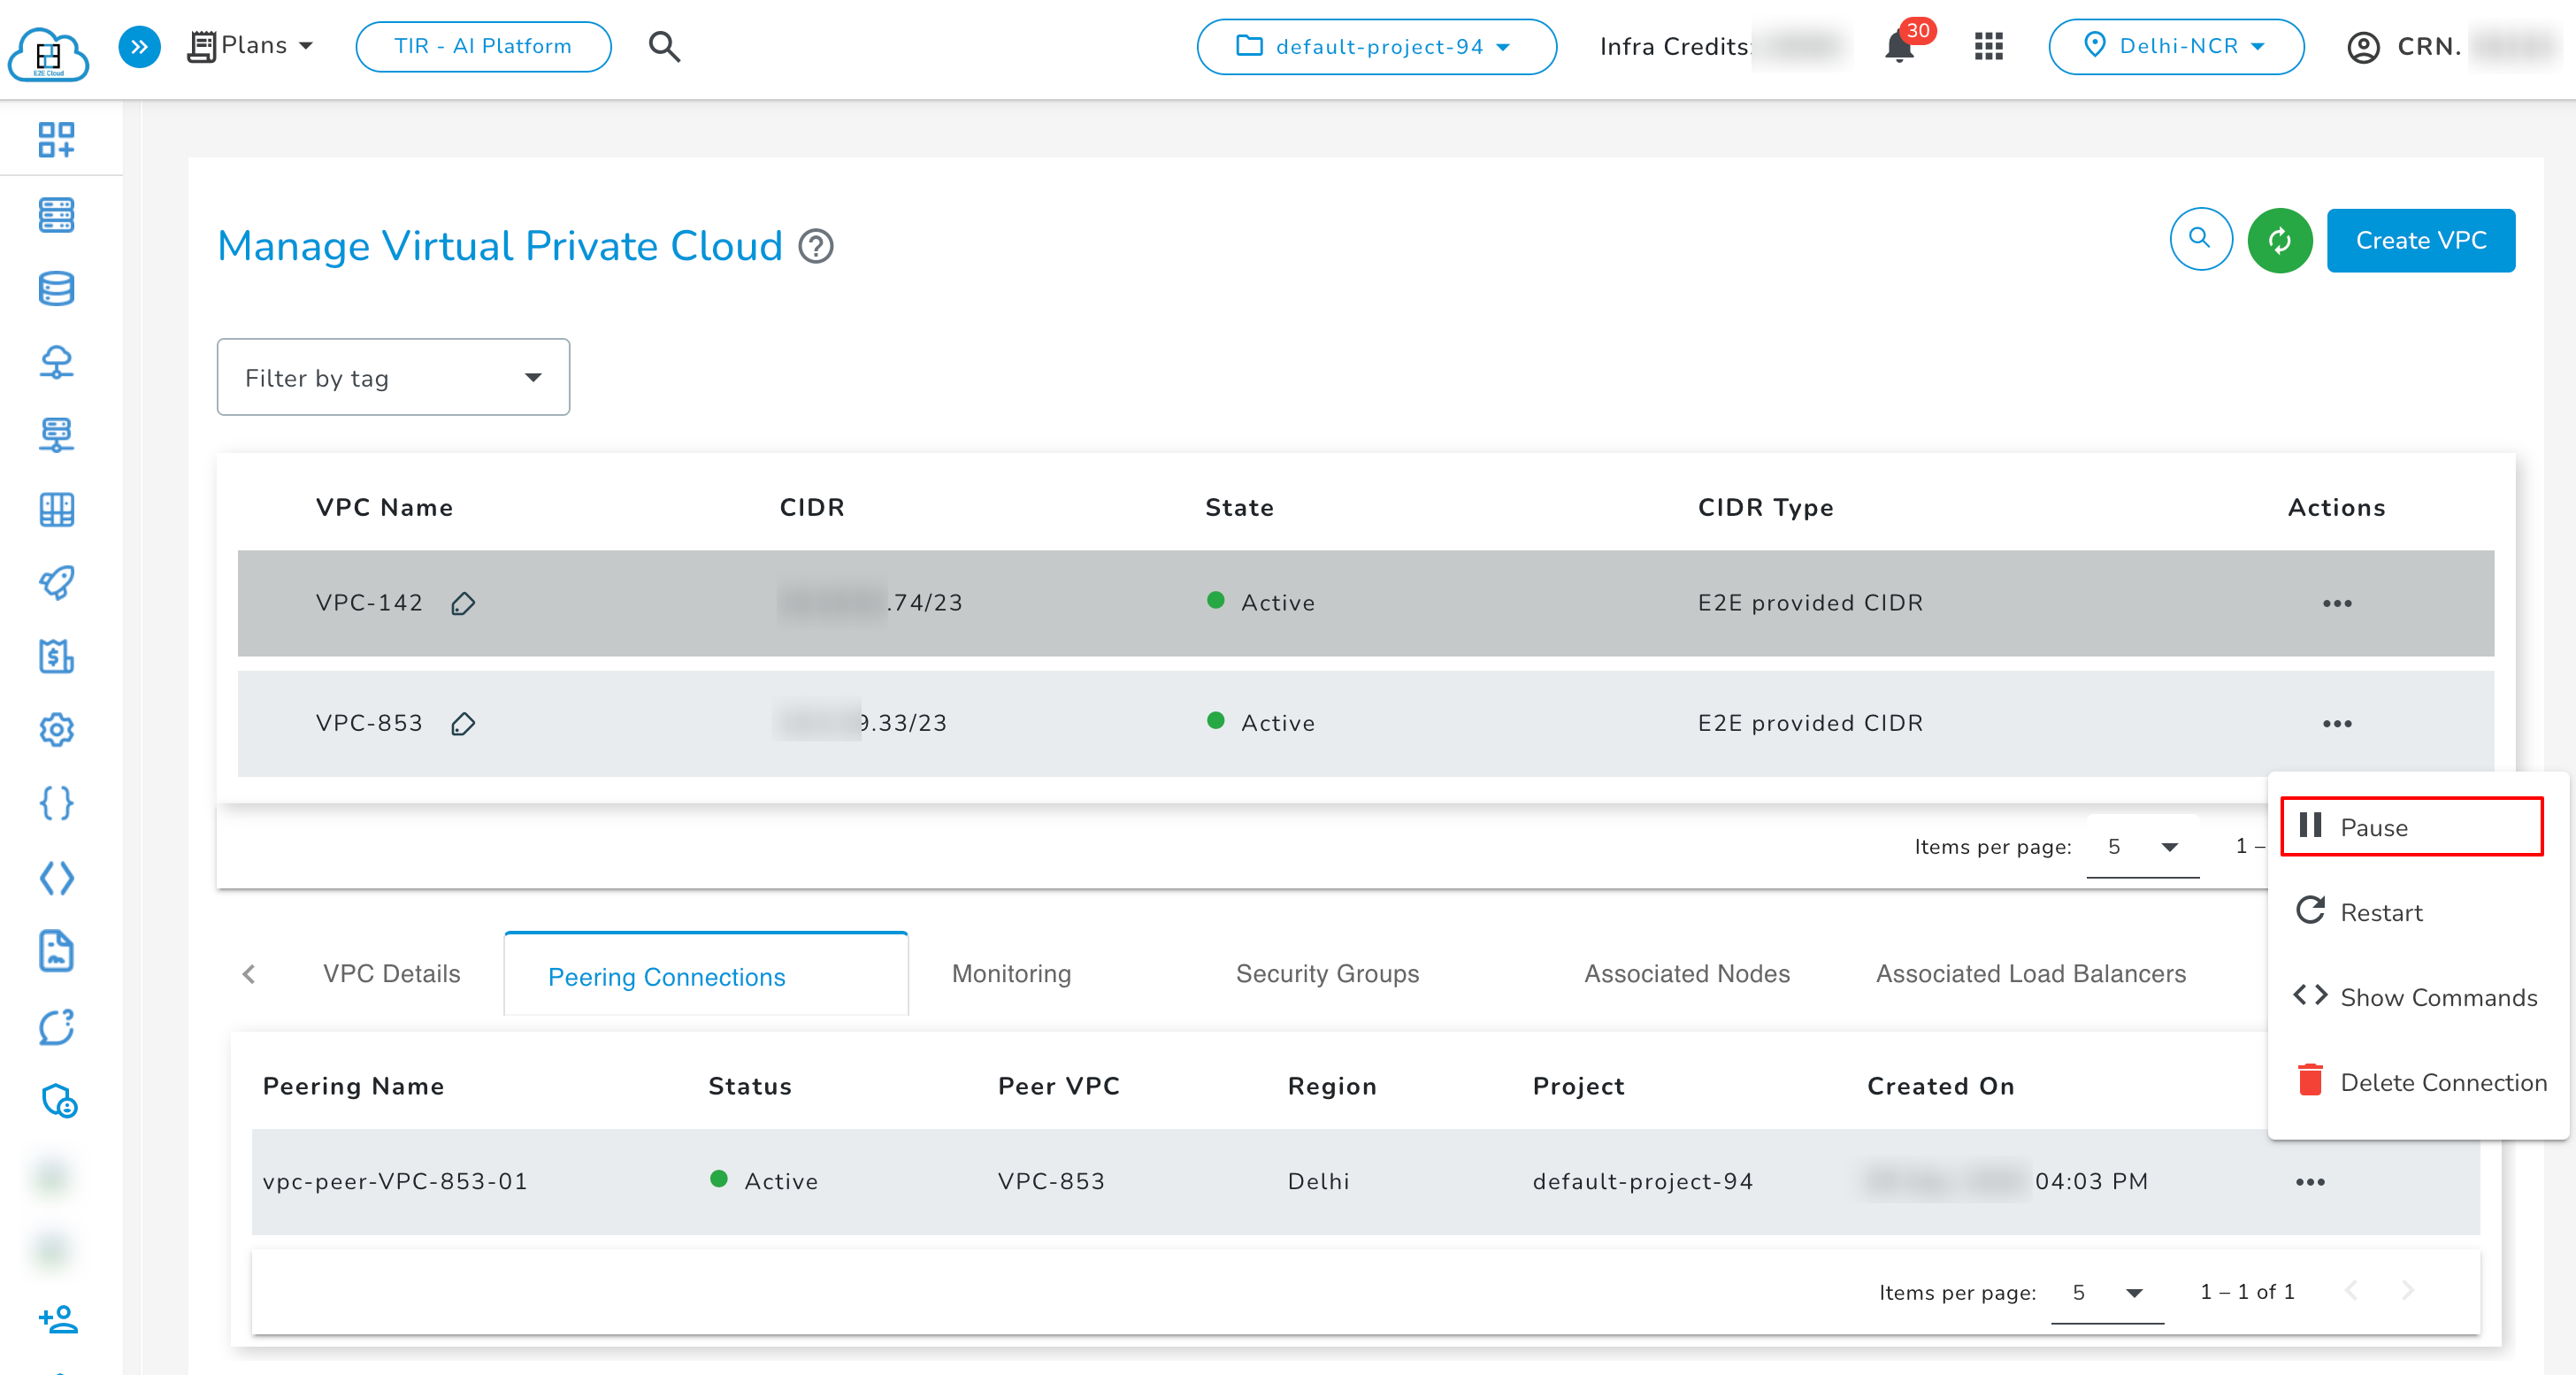
- Restart: If the tunnel is Inactive or Paused, you can use the restart action to bring it back up and make it active again.
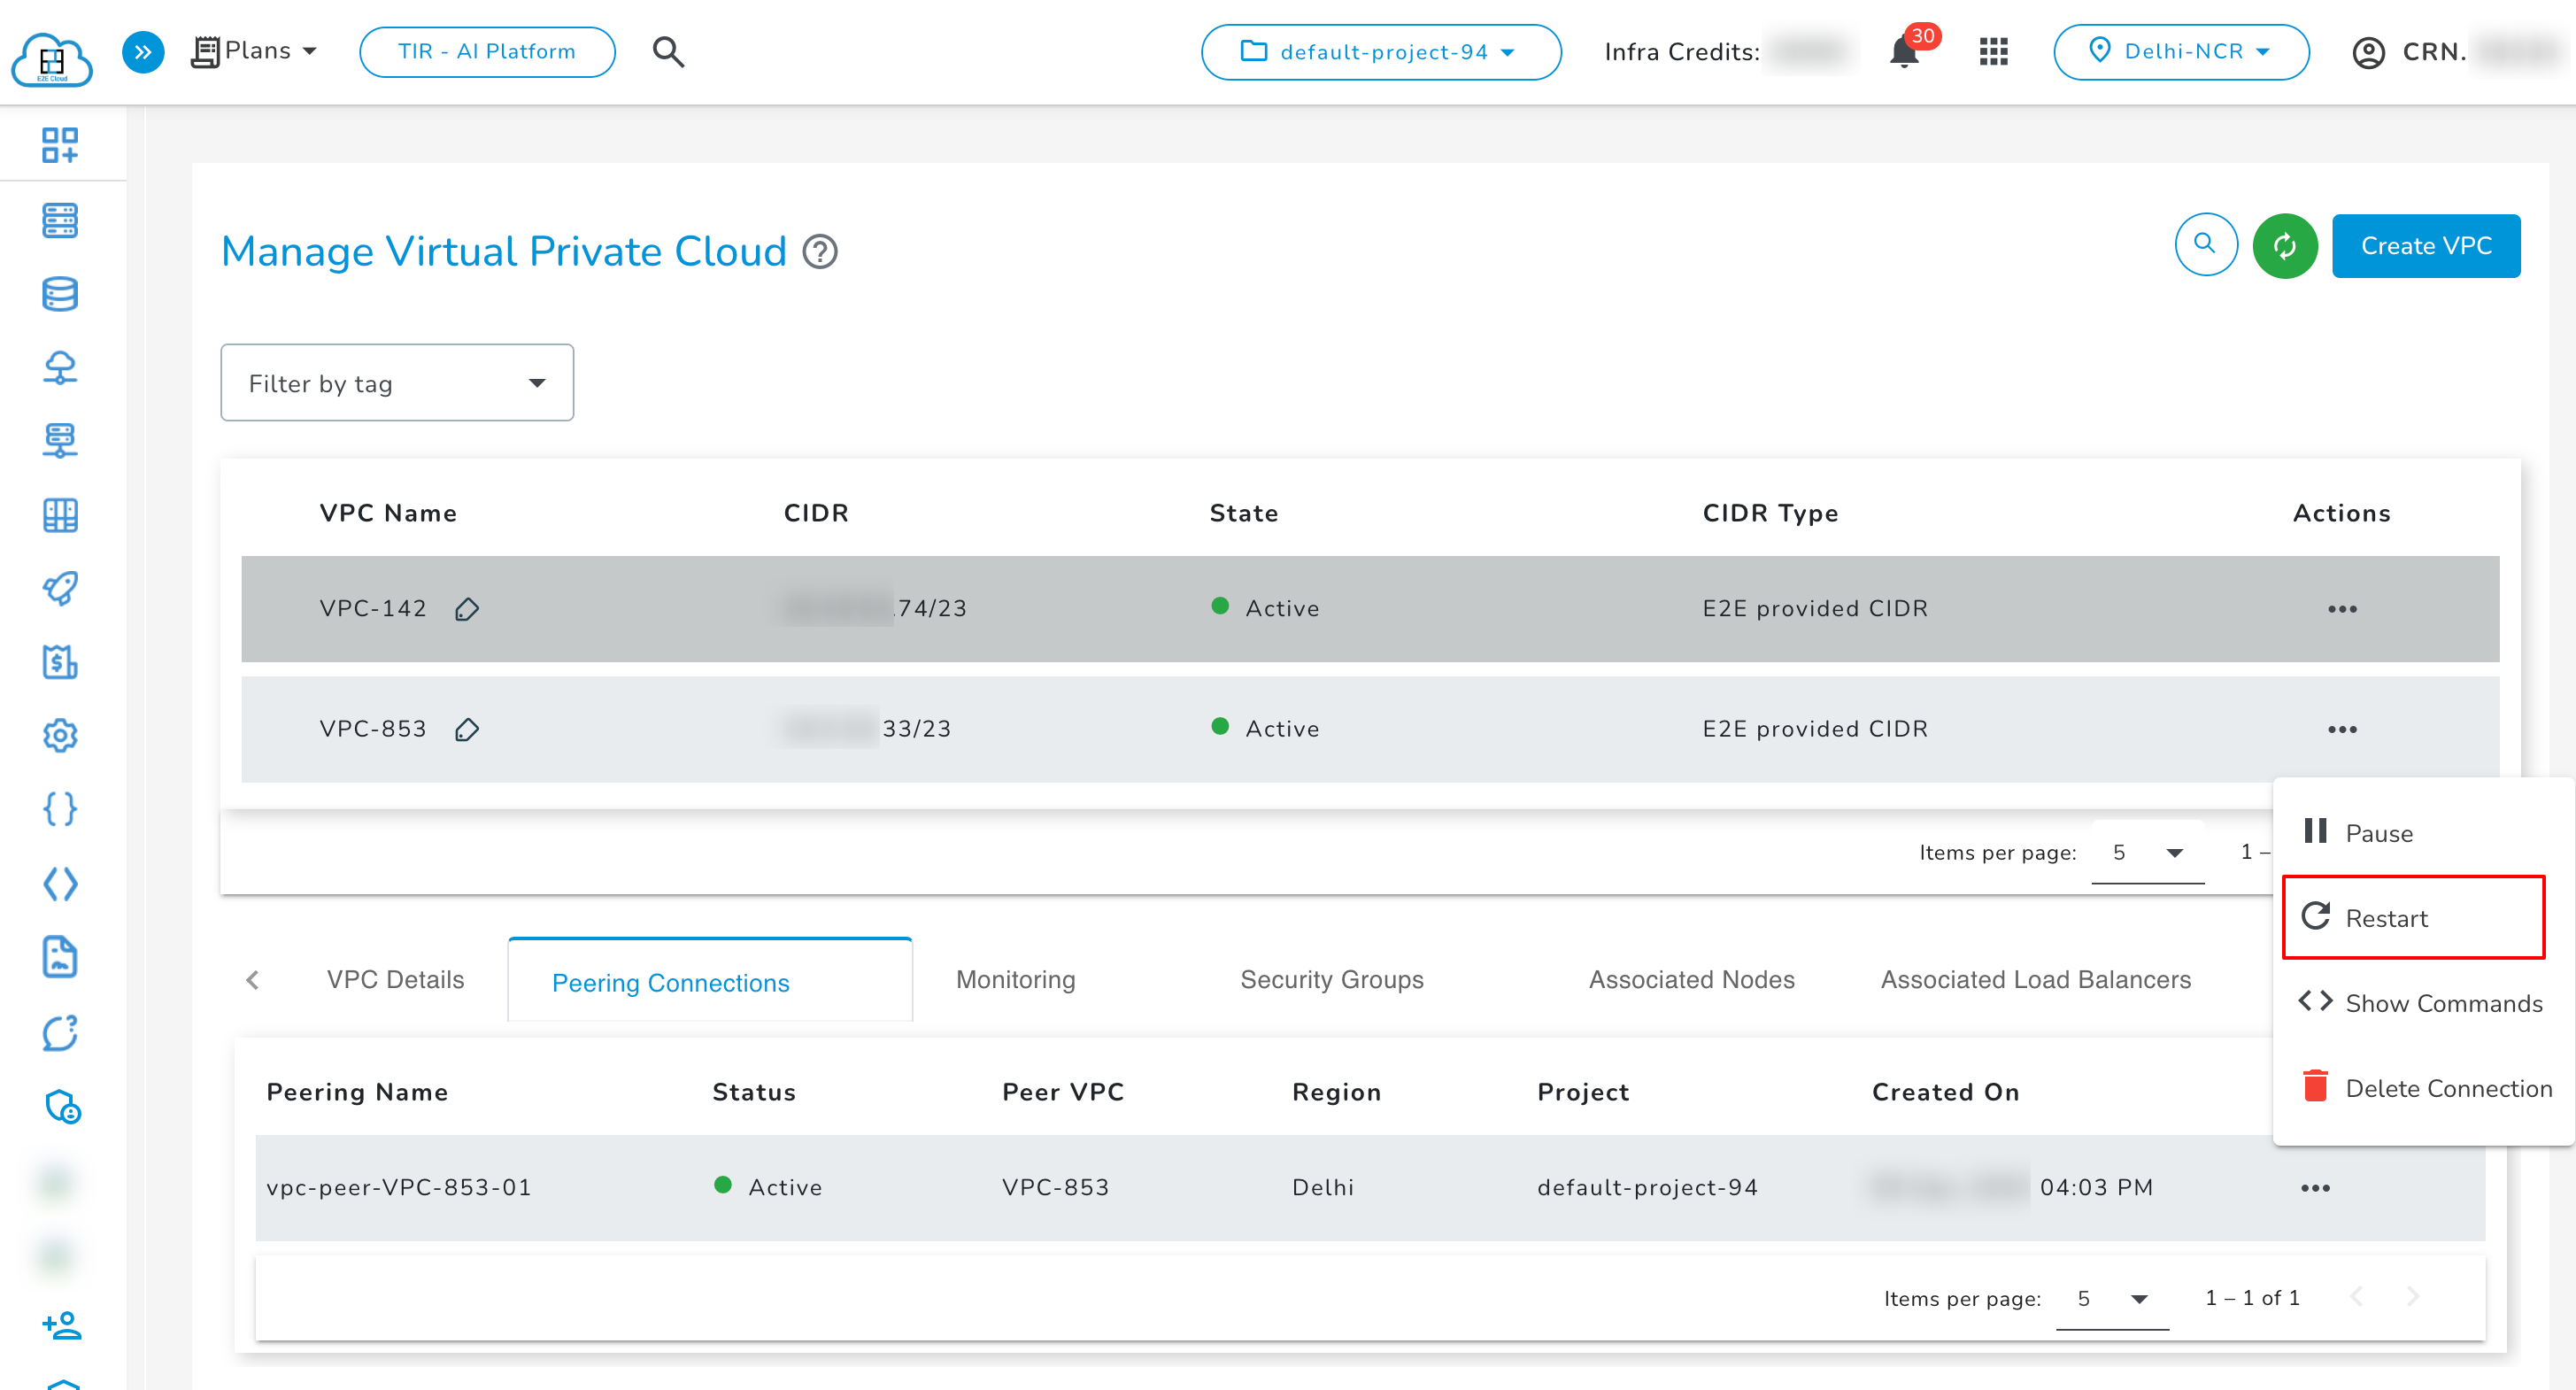
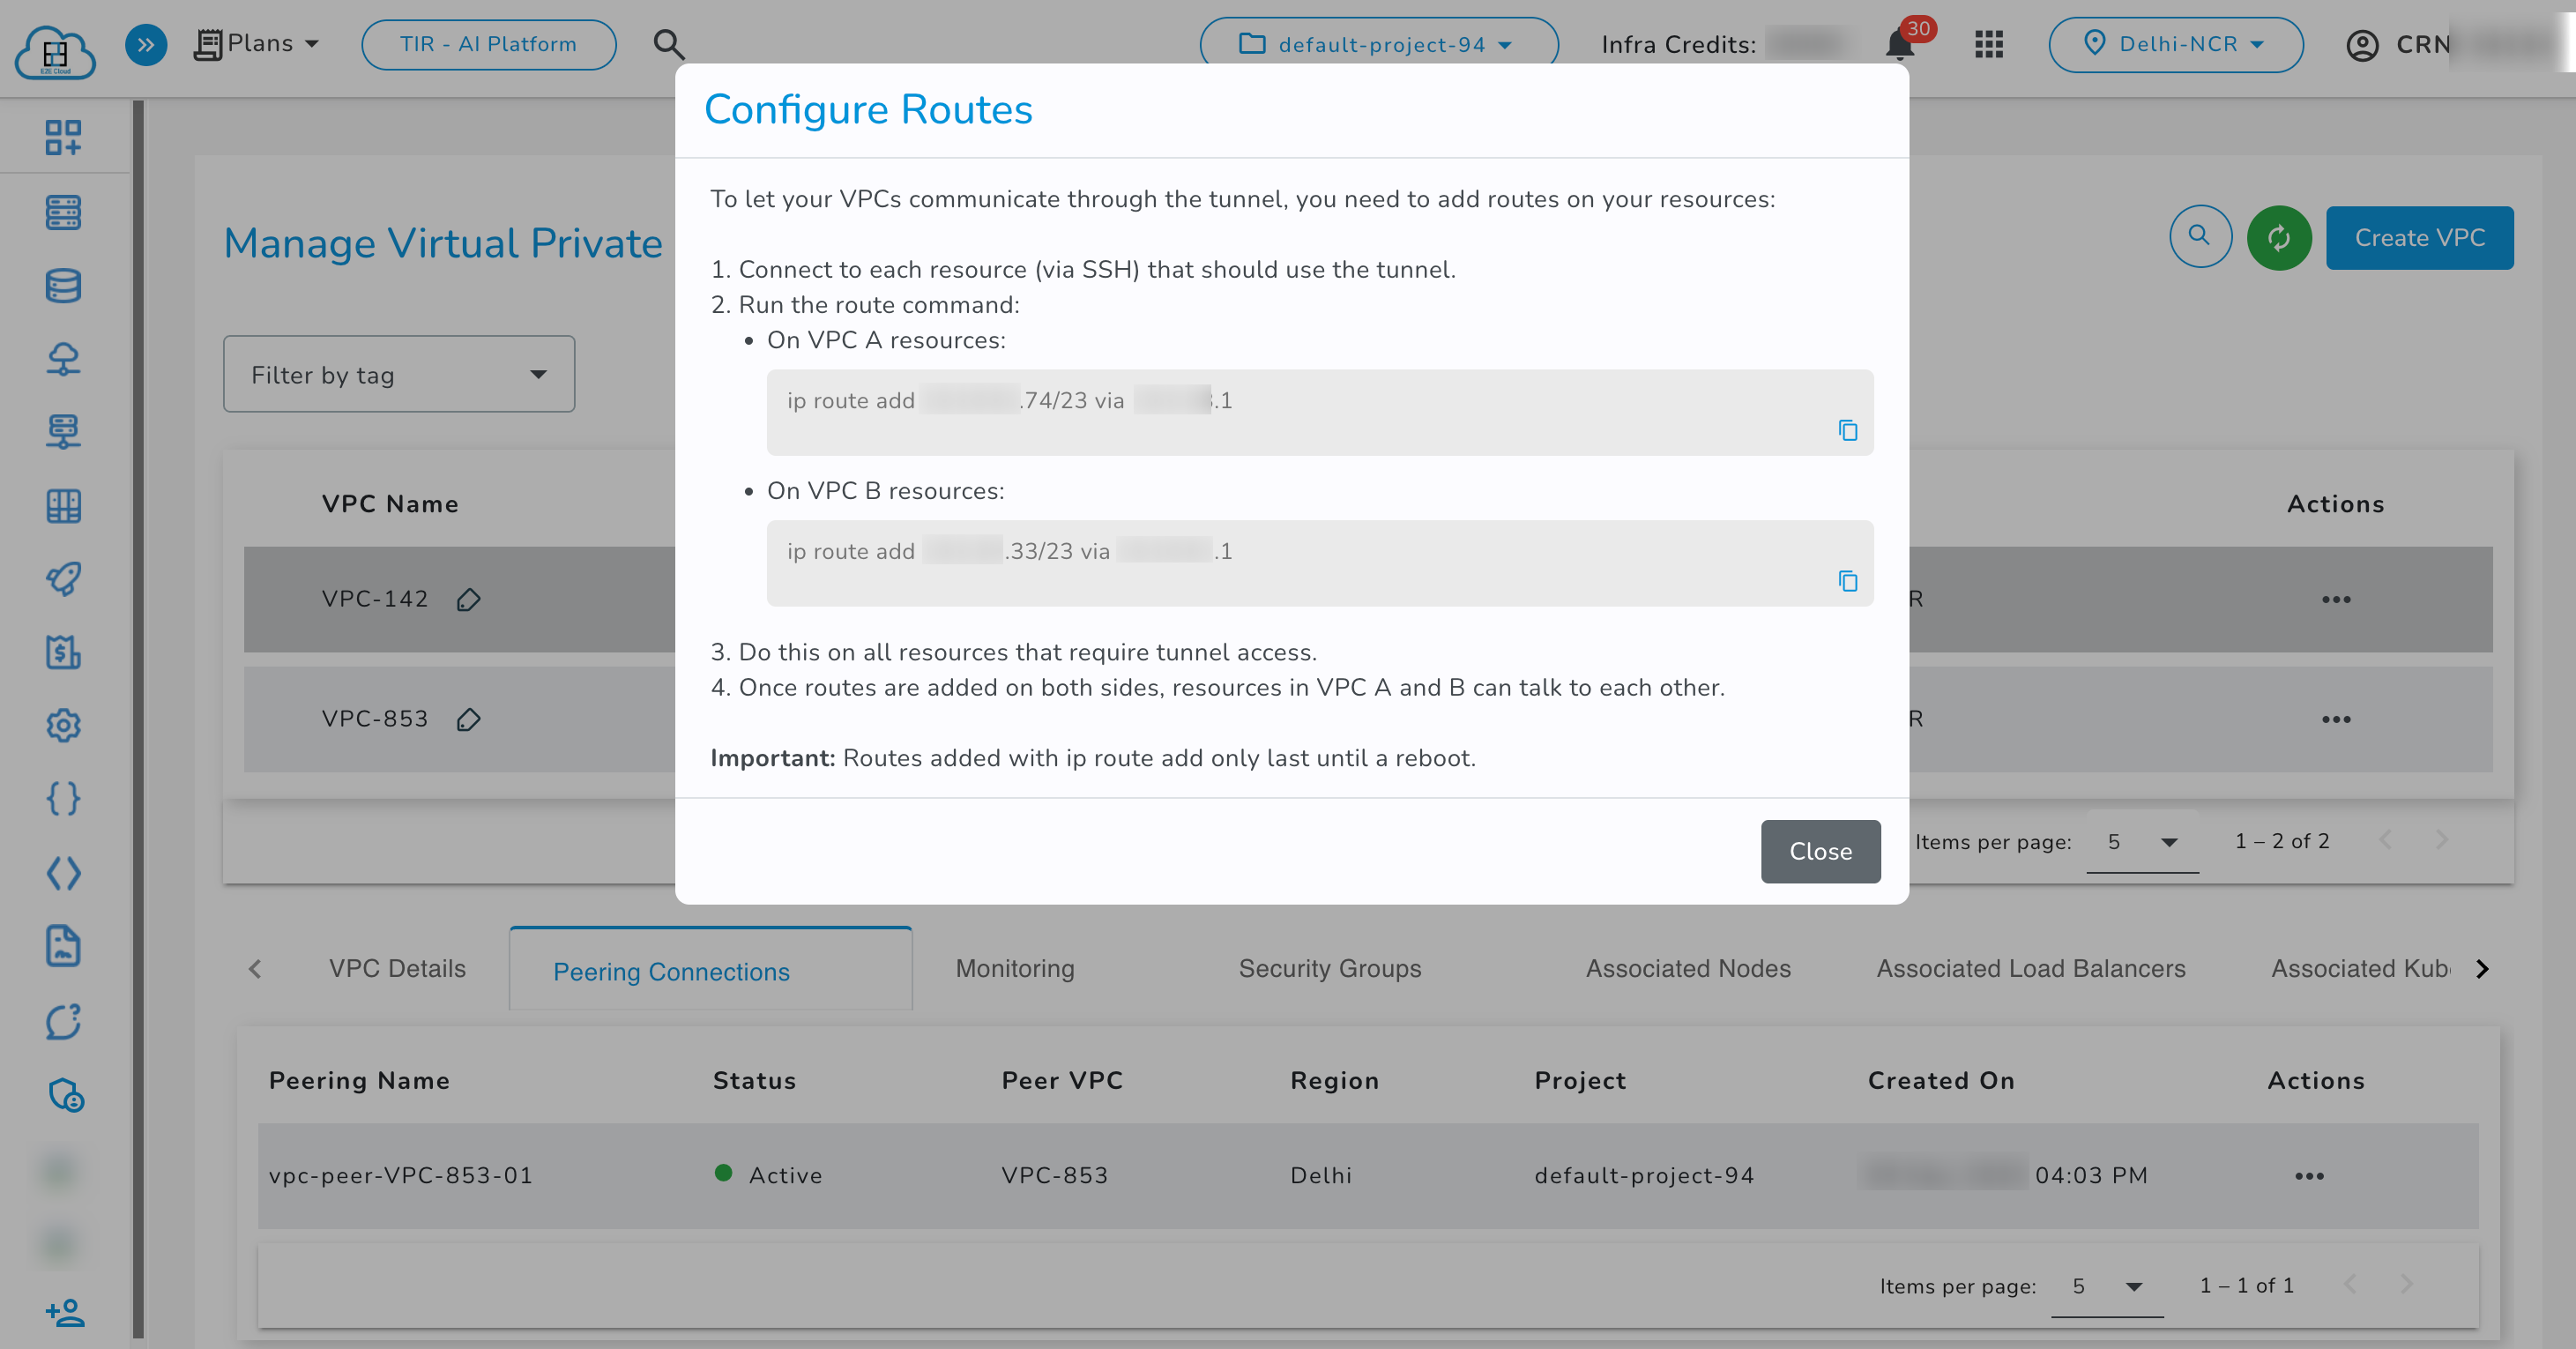
- Show Commands: This action provides the required commands to configure routes on your resources so that VPCs can communicate through the tunnel.
Consider two VPCs connected through a tunnel:
- VPC A with Node A
- VPC B with Node B
Add routes to both nodes to enable communication via the tunnel.
ip route add < 2nd vpc cidr > via < 1st vpc gateway ip>
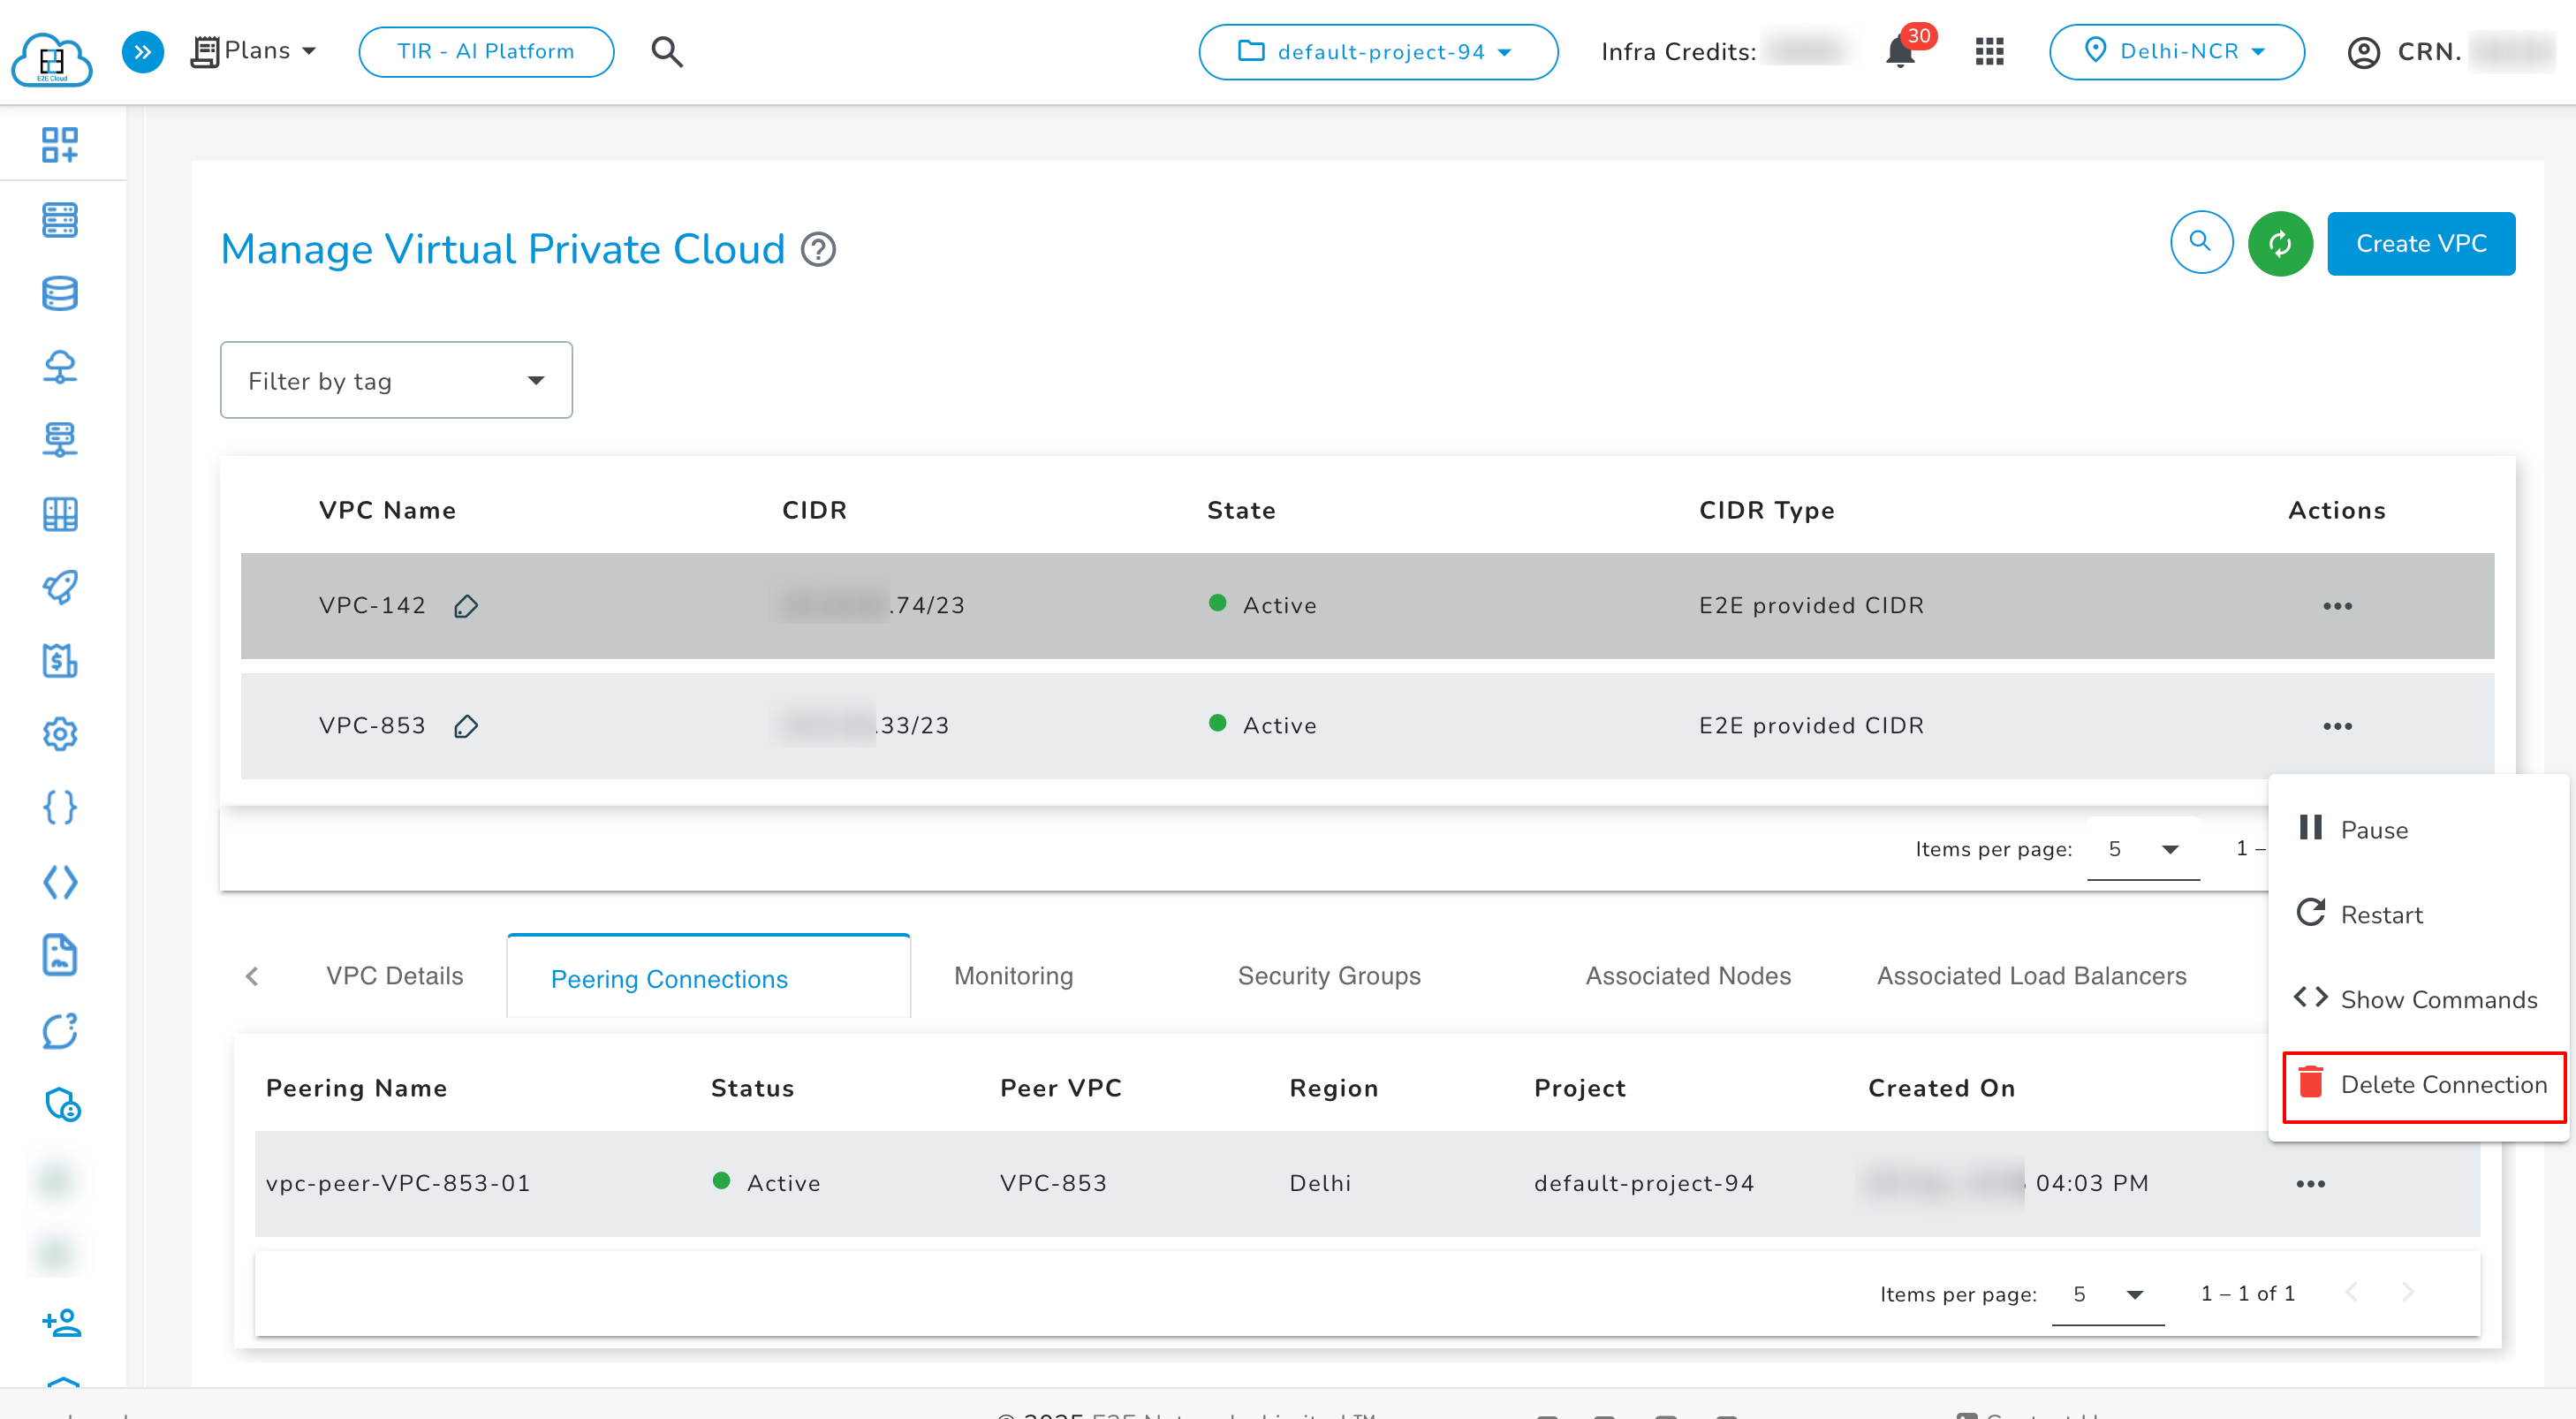
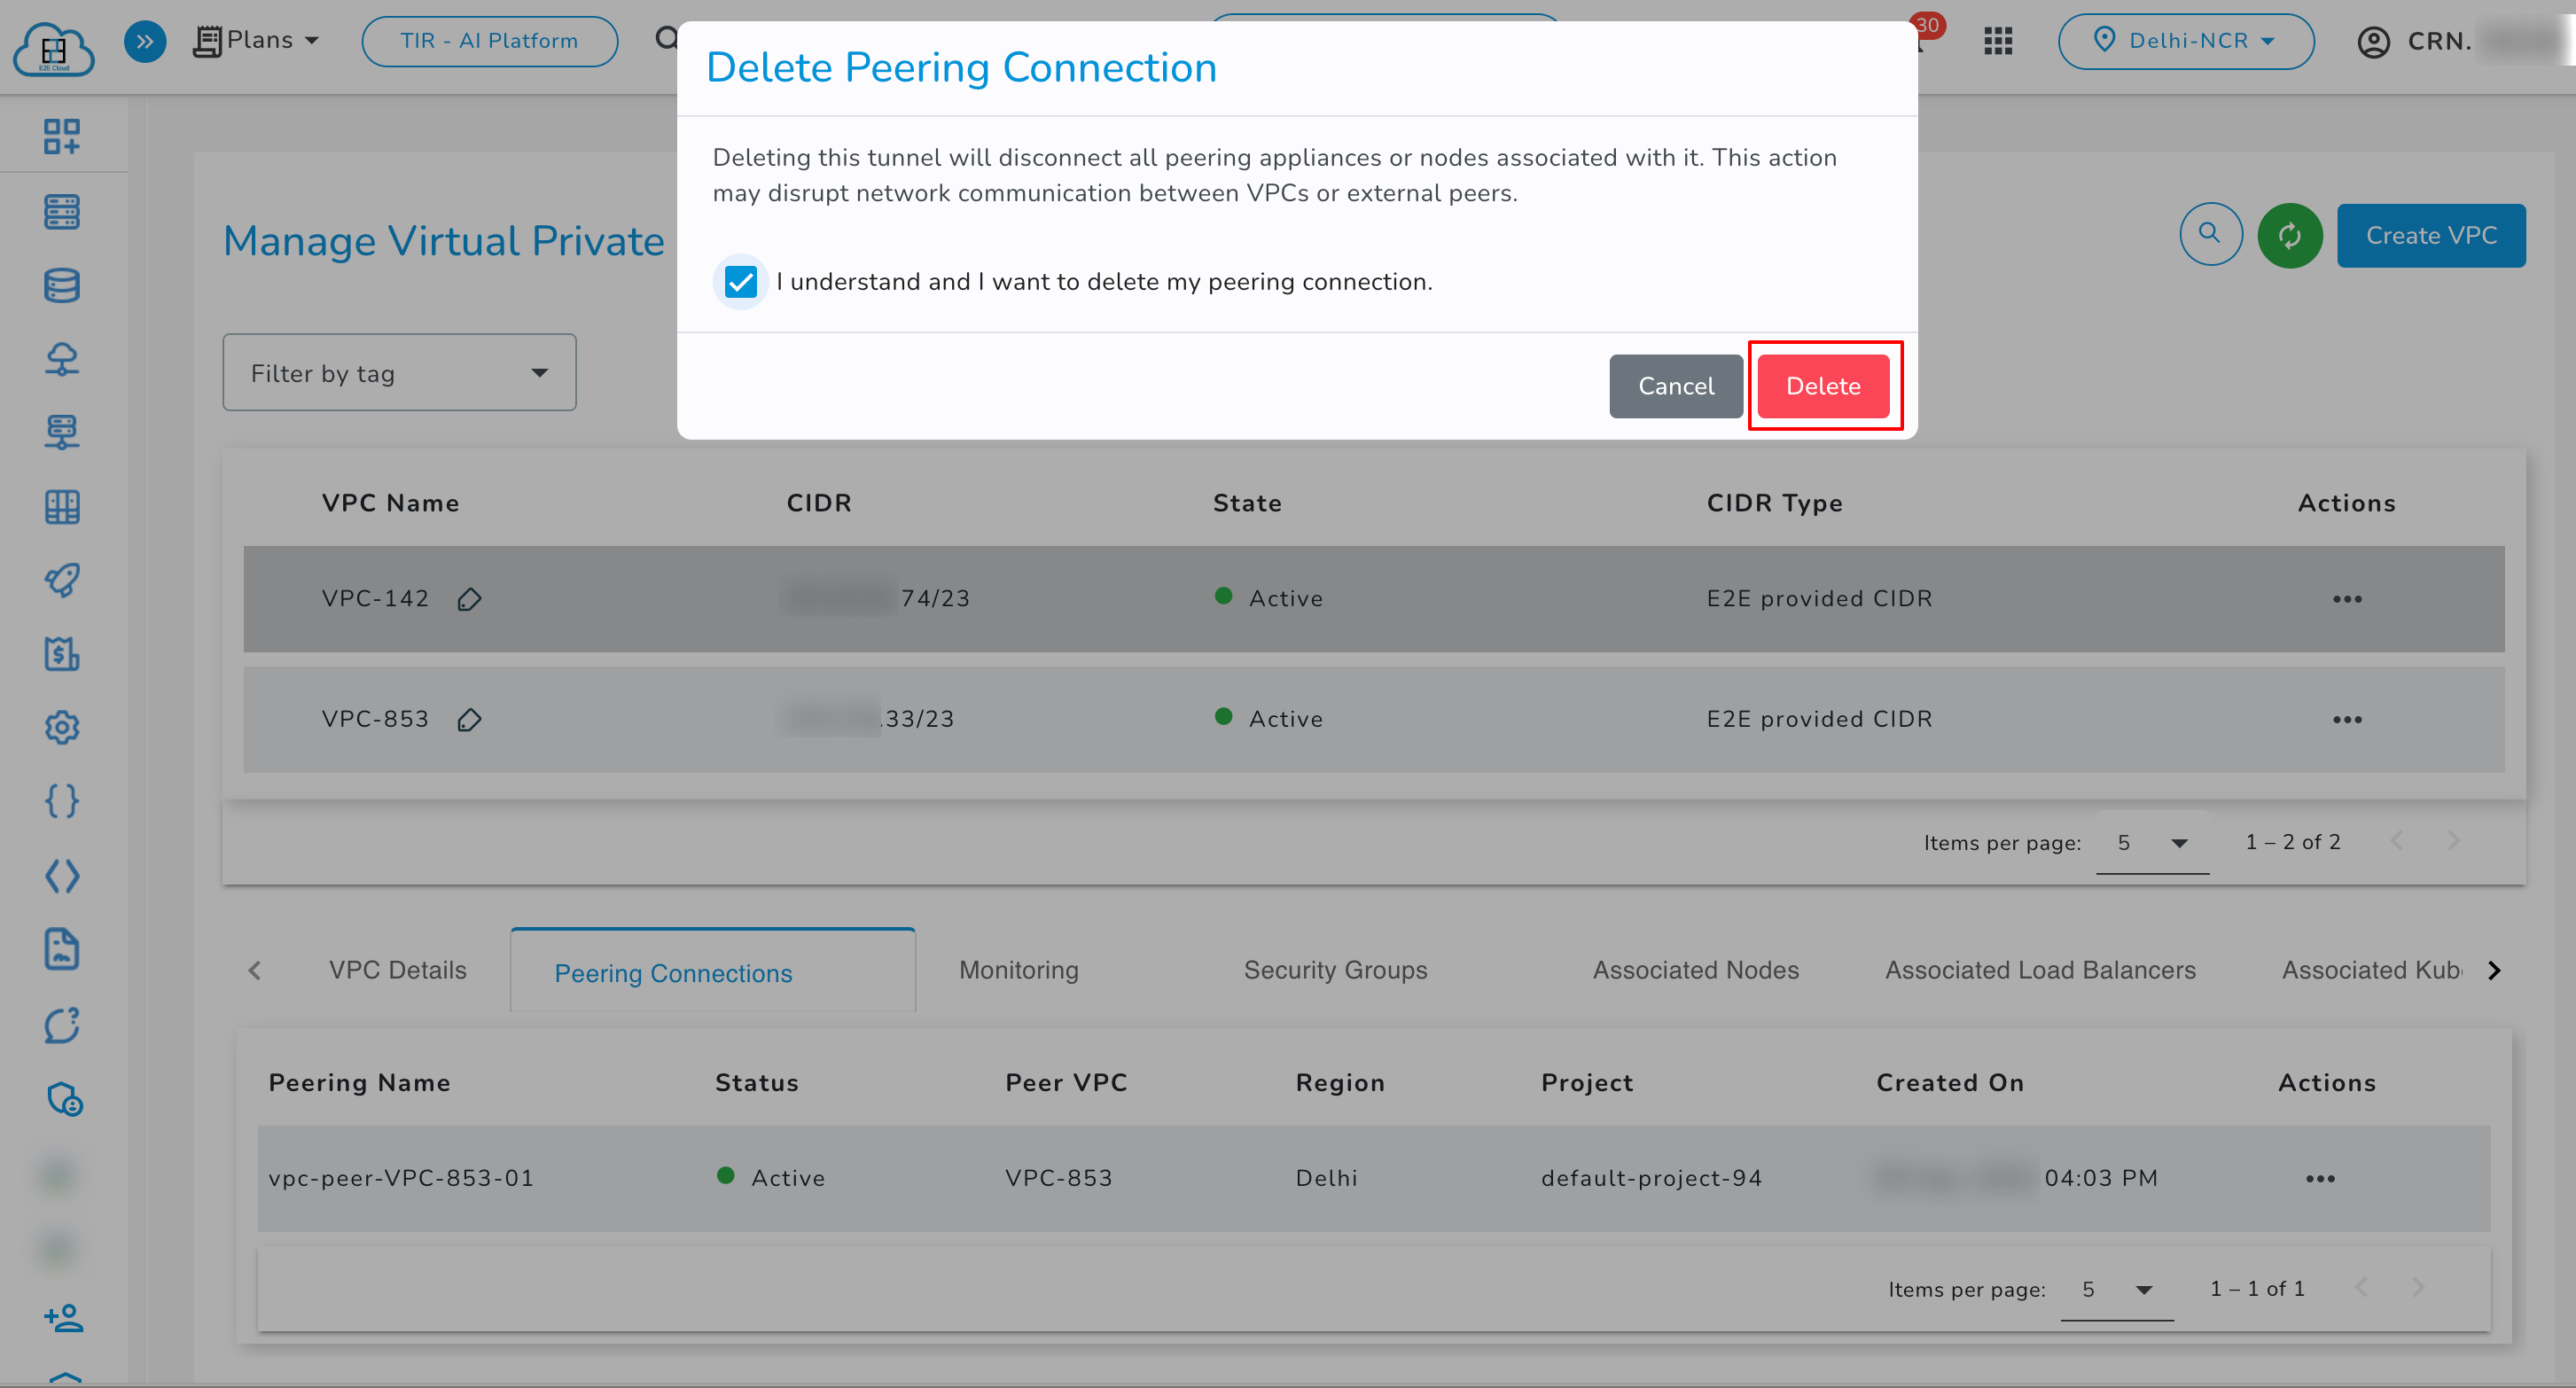
- Delete Connection: Use the delete action to permanently remove the tunnel.
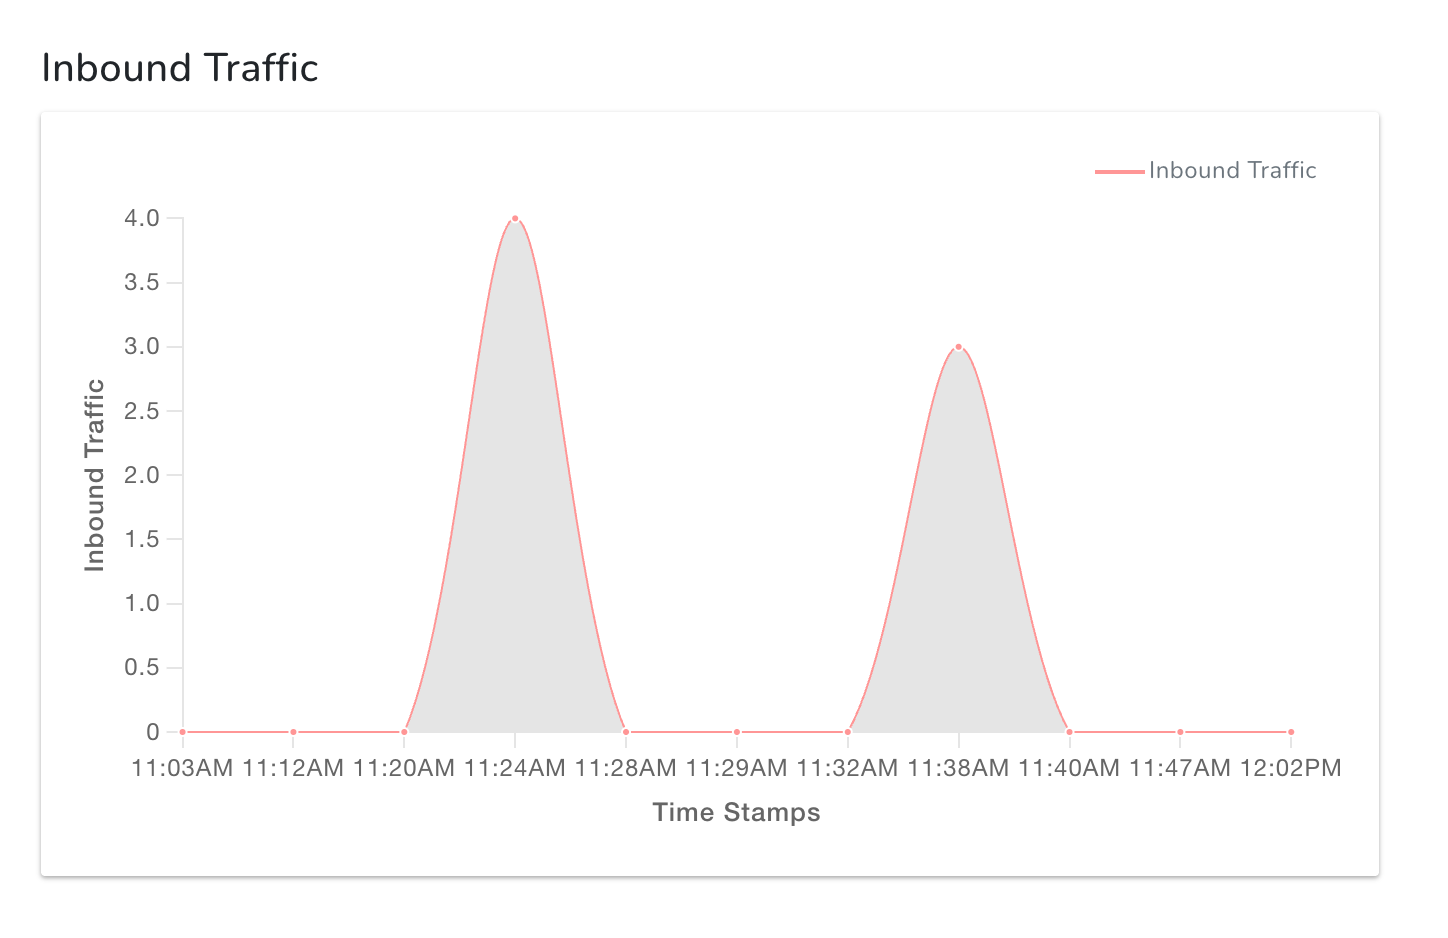
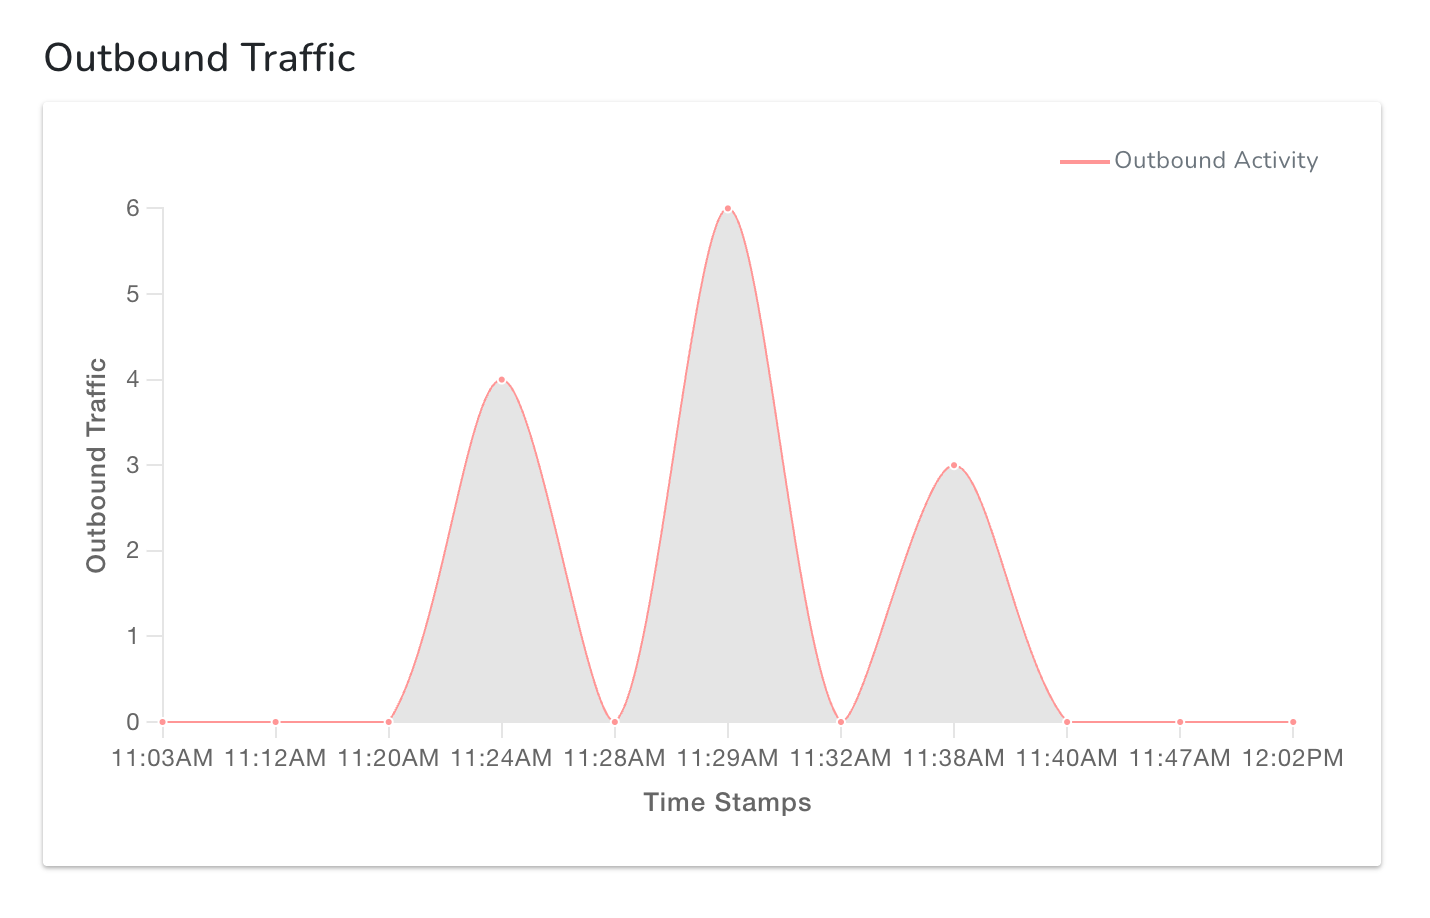
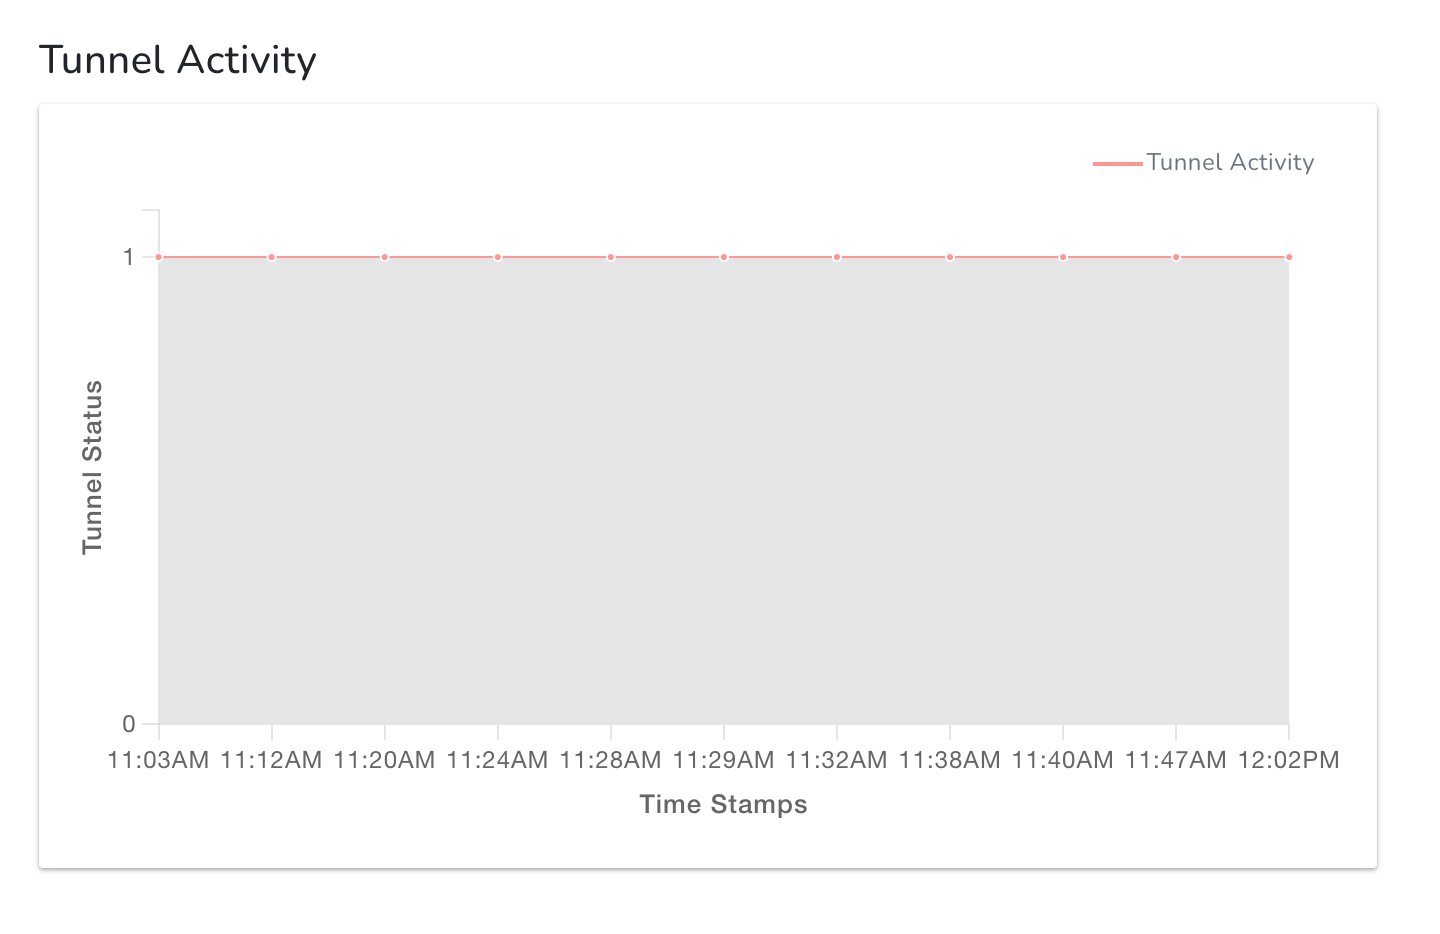
Monitoring of Peering Connections
The Monitoring section displays three types of graphs related to the peering connection:
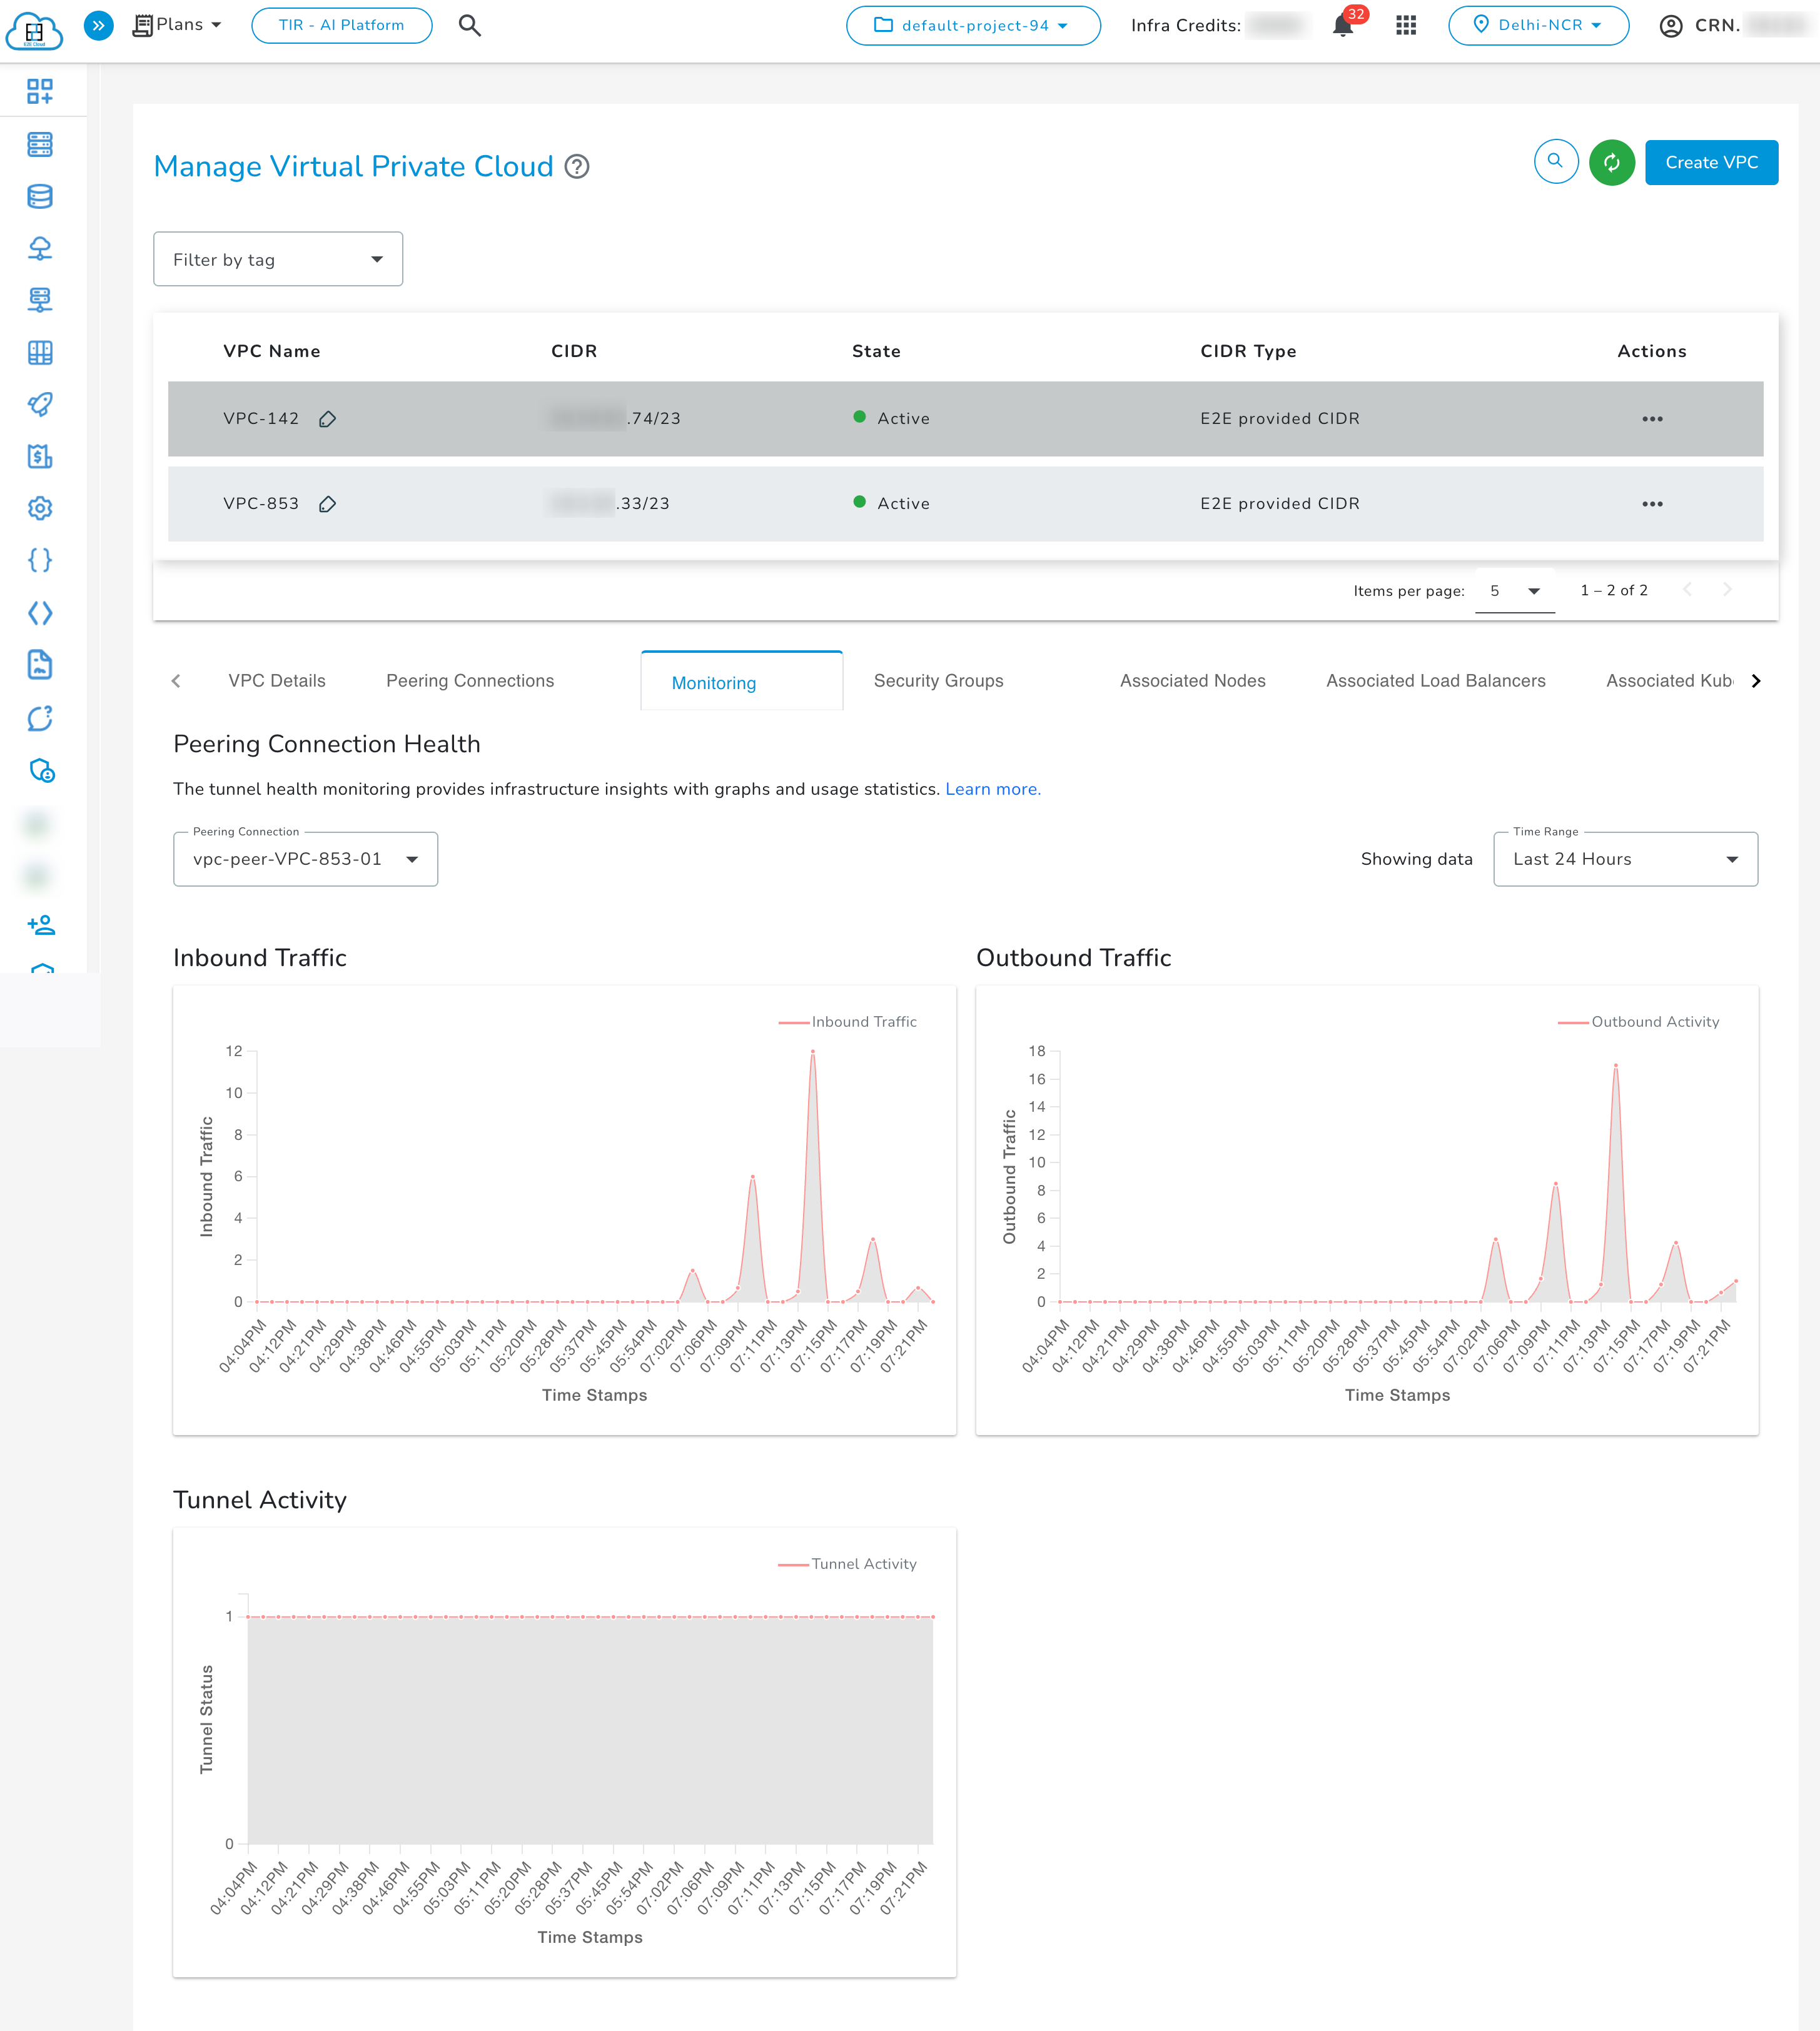
- Inbound Traffic graph
- Outbound Traffic graph
- Tunnel Activity graph : where 1 on the y-axis indicates the tunnel is Active, and 0 indicates it is In-active.
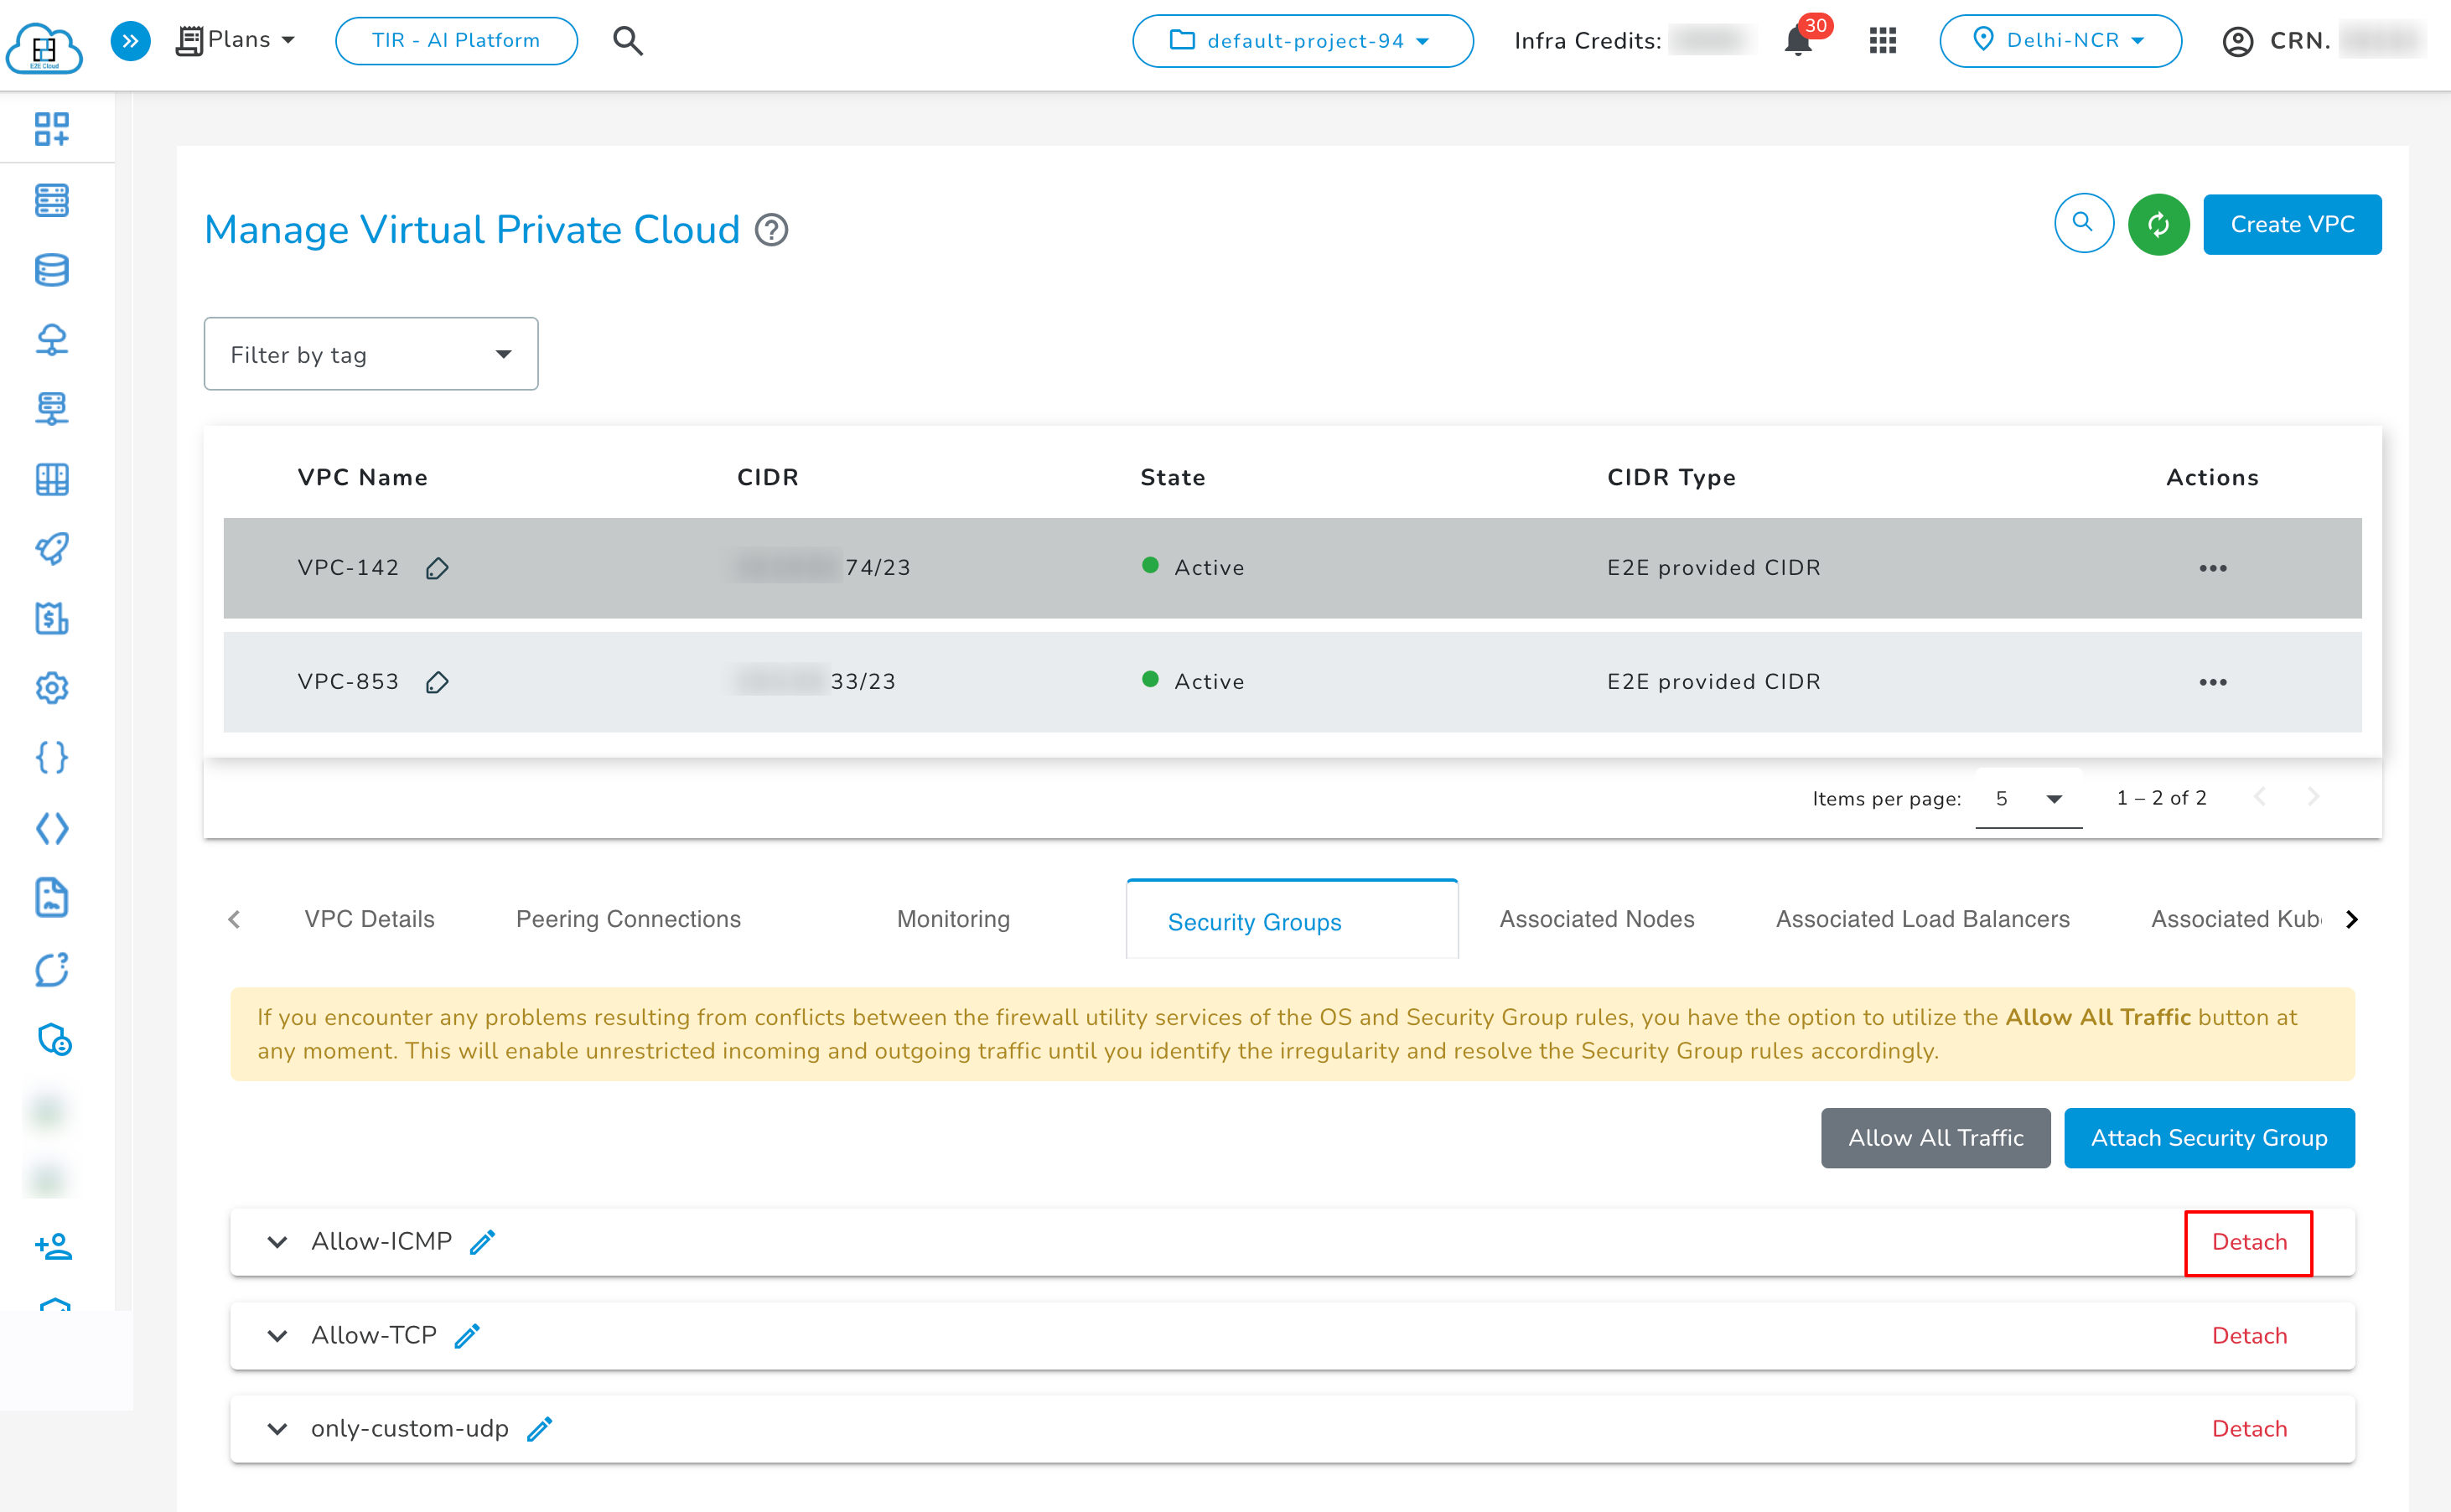
Security Groups for Peering Connection
The tunnel cannot be created if any restrictive security group is applied on the VPC gateways. Tunnel can be created in either of these two ways:
- By manually attaching the Allow All Traffic security group on both VPC gateways.
- By keeping default settings for security groups.
- Users can attach security groups to their VPC gateways to control which traffic is allowed through the tunnel.
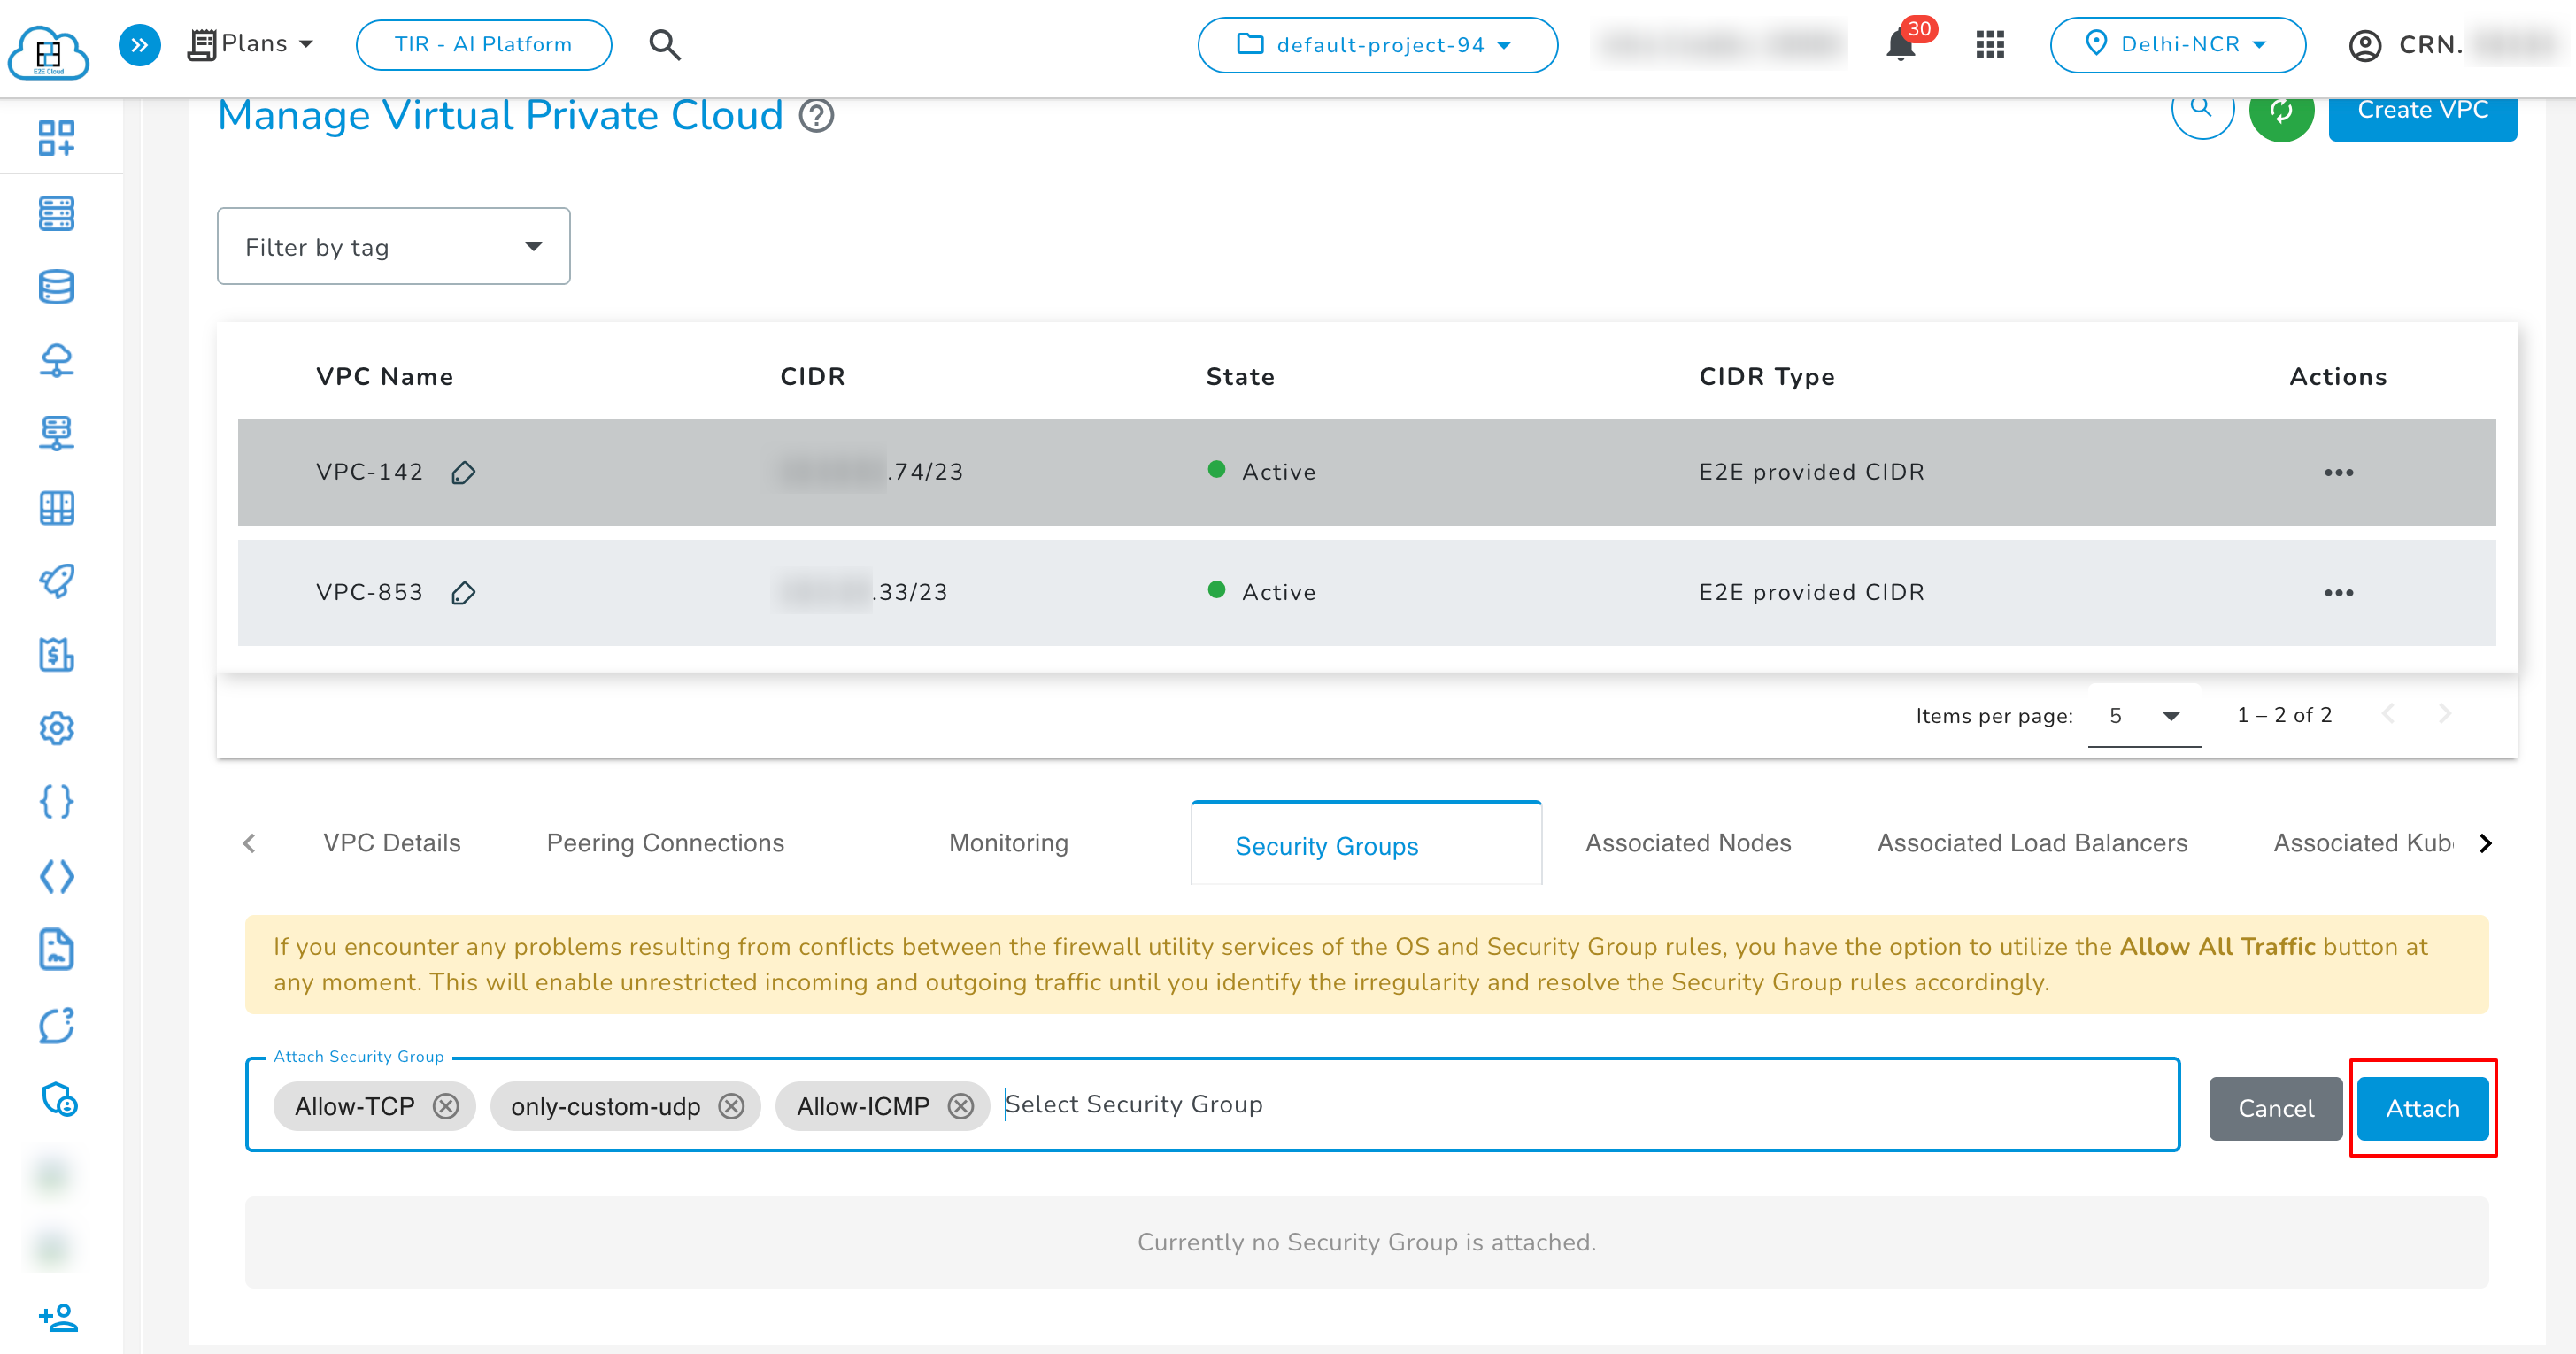
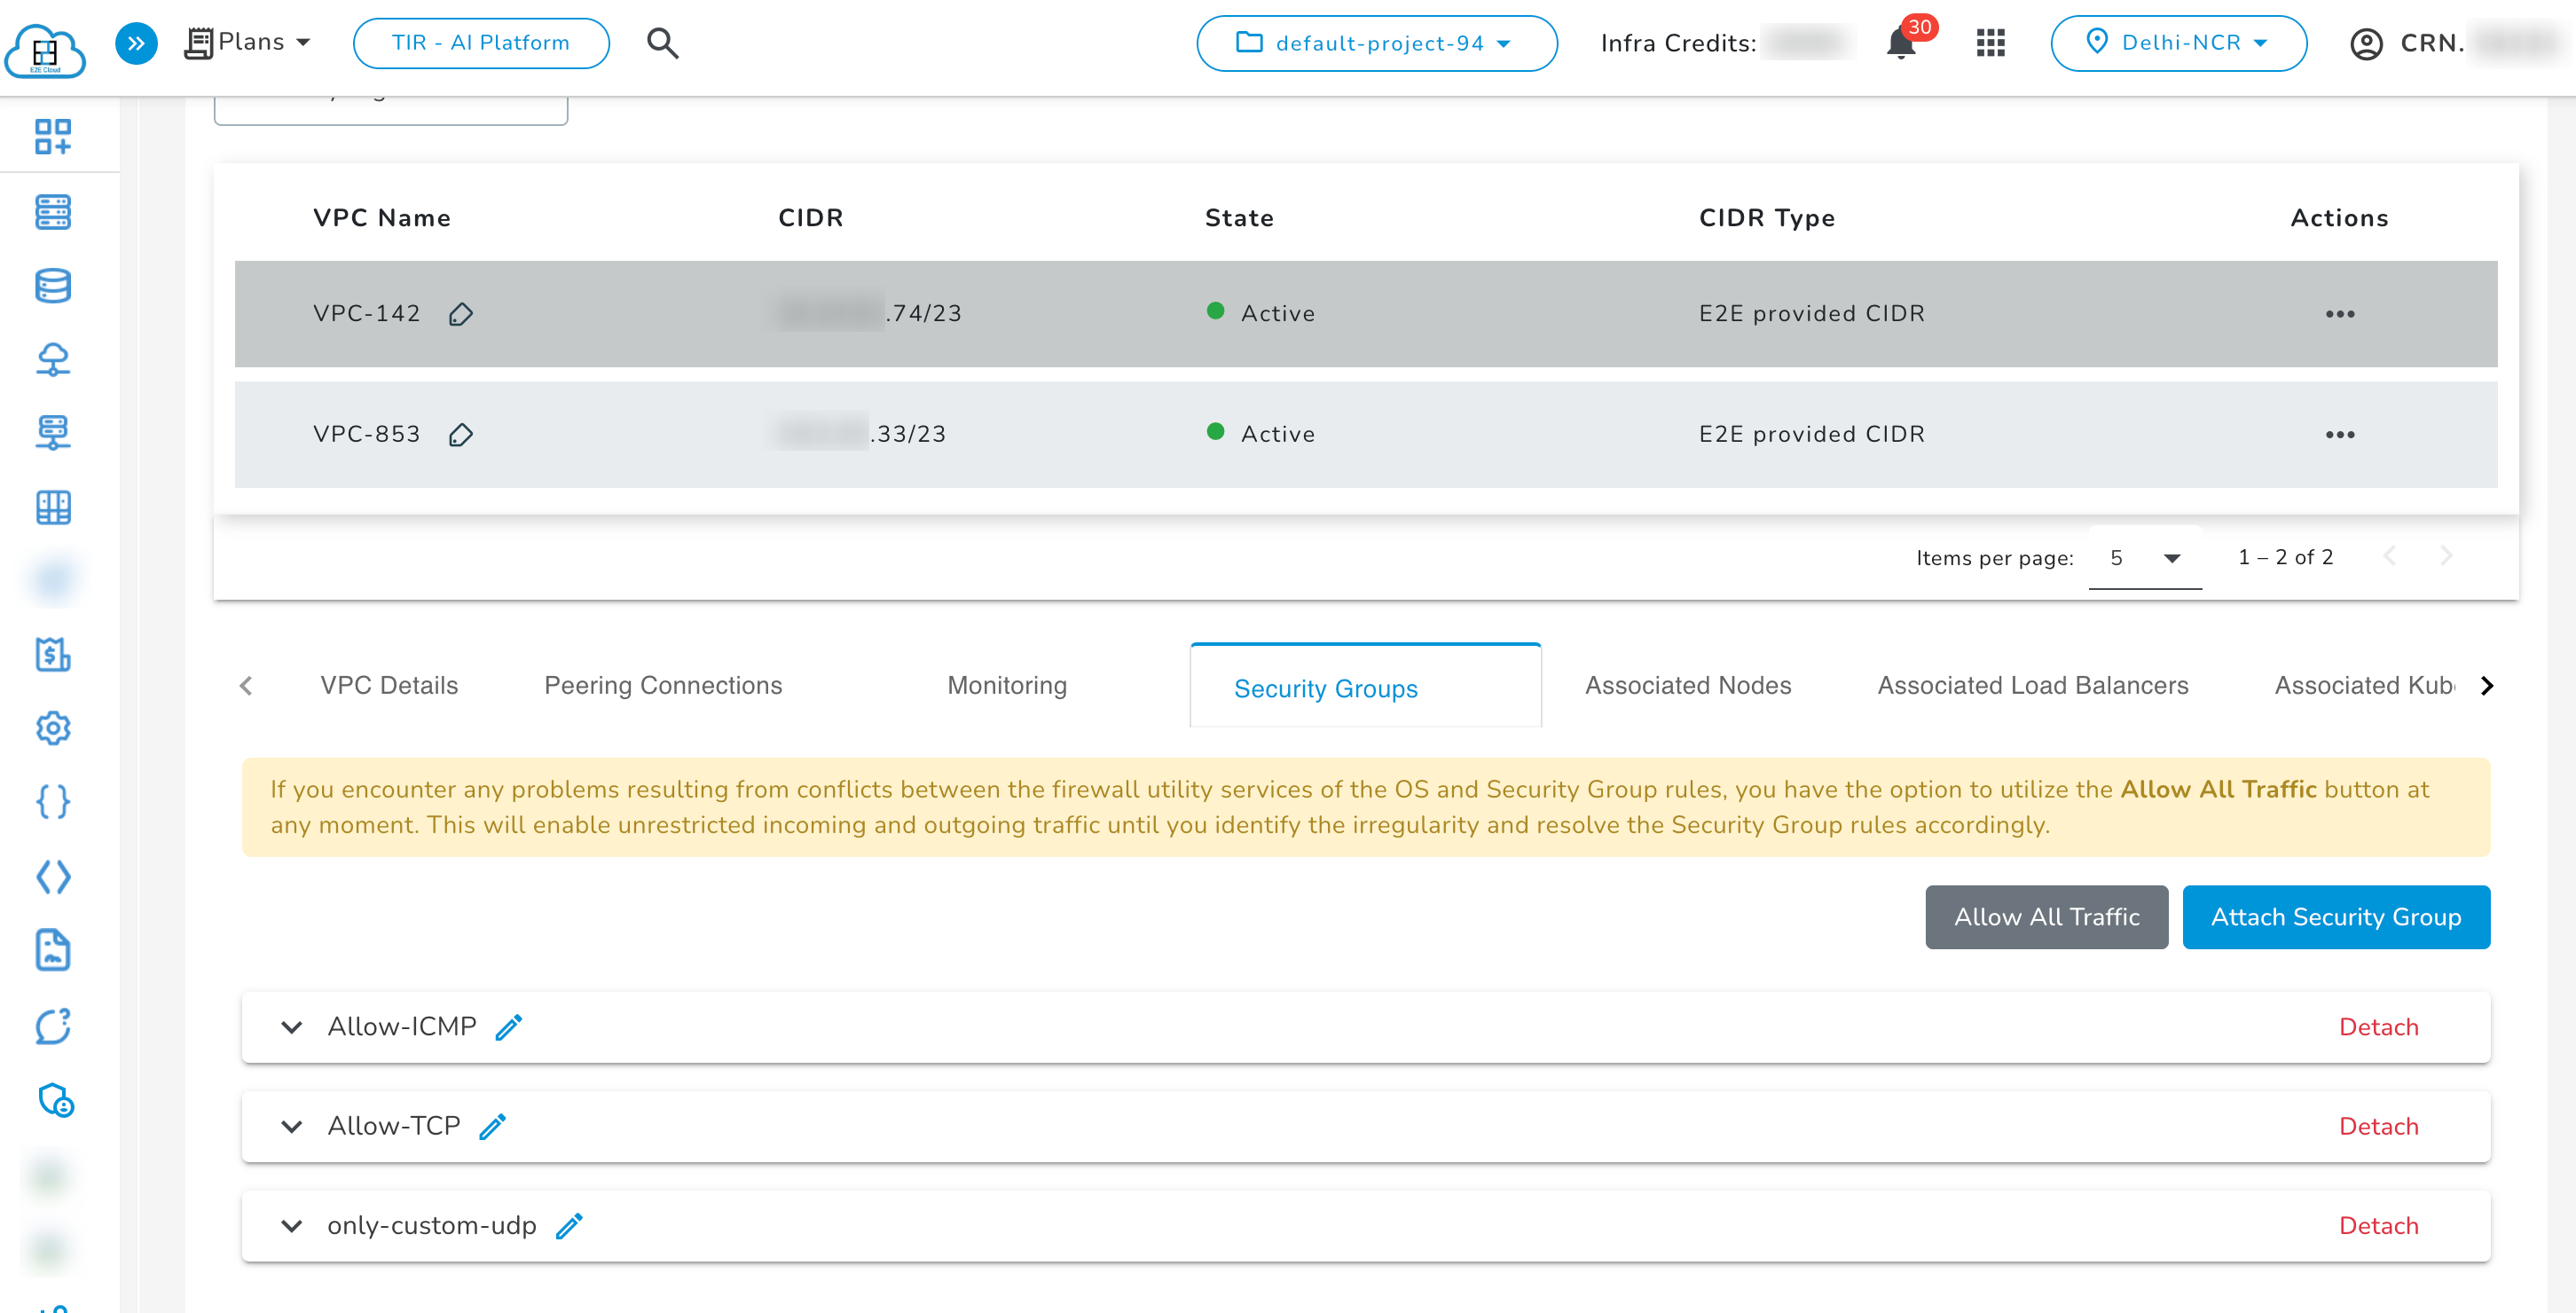
- If the tunnel goes down at any point, apply a security group > Allows All Traffic.

- Users can detach a security group from a VPC gateway at any time.