TDS Refund- How to claim TDS Refunds?
TDS Refund
With regards to Invoice payment, customers need to pay (using any payment option) the full invoice amount to E2E networks limited (“E2E”), but you may be required to pay TDS (as per applicable rate) to the government as per the Income-tax act. Once you have provided a signed TDS certificate from the government as evidence of payment, E2E will refund the TDS amount based on the TDS certificate directly to your bank account.
As an example, let’s say the basic value of services charged is INR 100 and then 18% GST will be levied on the basic value and your total invoice value will be INR118, so you’ll pay INR 118 in total against invoice to E2E. Please note that you are responsible for paying the TDS by applicable TDS rate as per Income TAX act directly to the government. Let’s say TDS rate is 1.5% hence TDS amount will be 1.5% of INR 100 i.e. INR 1.5.. E2E will refund INR 1.5 of TDS directly to your bank account, once the valid signed TDS certificate is submitted with us.
For claiming the TDS refund, customers need to upload the signed TDS certificates via E2E MyAccount and enter their respective bank details along with a cancelled cheque copy on which TDS refund is sought.
Kindly note that TDS certificates are required to be uploaded for every quarter. Certificates for quarters ending in June, September, December, and March need to be uploaded by 20th August, 20th November, 20th February, and 20th June respectively. Once the TDS certificate is uploaded, the E2E team will review and refund the TDS amount subject to TDS certificate/bank account details being approved by the E2E team.
No TDS certificates for the previous financial year will be accepted if uploaded after 30th June of the current financial year. For example, all certificates for the fiscal year 2019-20 should be uploaded no later than 30th June 2020. The TDS refund is possible only for Indian customers.
that the information is provided as general information, and does not constitute tax, legal, or other professional advice, and must not be used as such. Please consult your tax advisor if you have any questions regarding the above.
Claim a TDS Amount
Logging into E2E Networks ‘MyAccount’
Please go to ‘MyAccount’ <https://myaccount.e2enetworks.com/>_ and log in using your credentials set up at the time of creating and activating the E2E Networks ‘MyAccount’.
Navigate to TDS page
After you log in to the E2E Networks ‘MyAccount’ <https://myaccount.e2enetworks.com/>_
. On the left side of the MyAccount dashboard, click on the “TDS” sub-menu available under the Billing section.
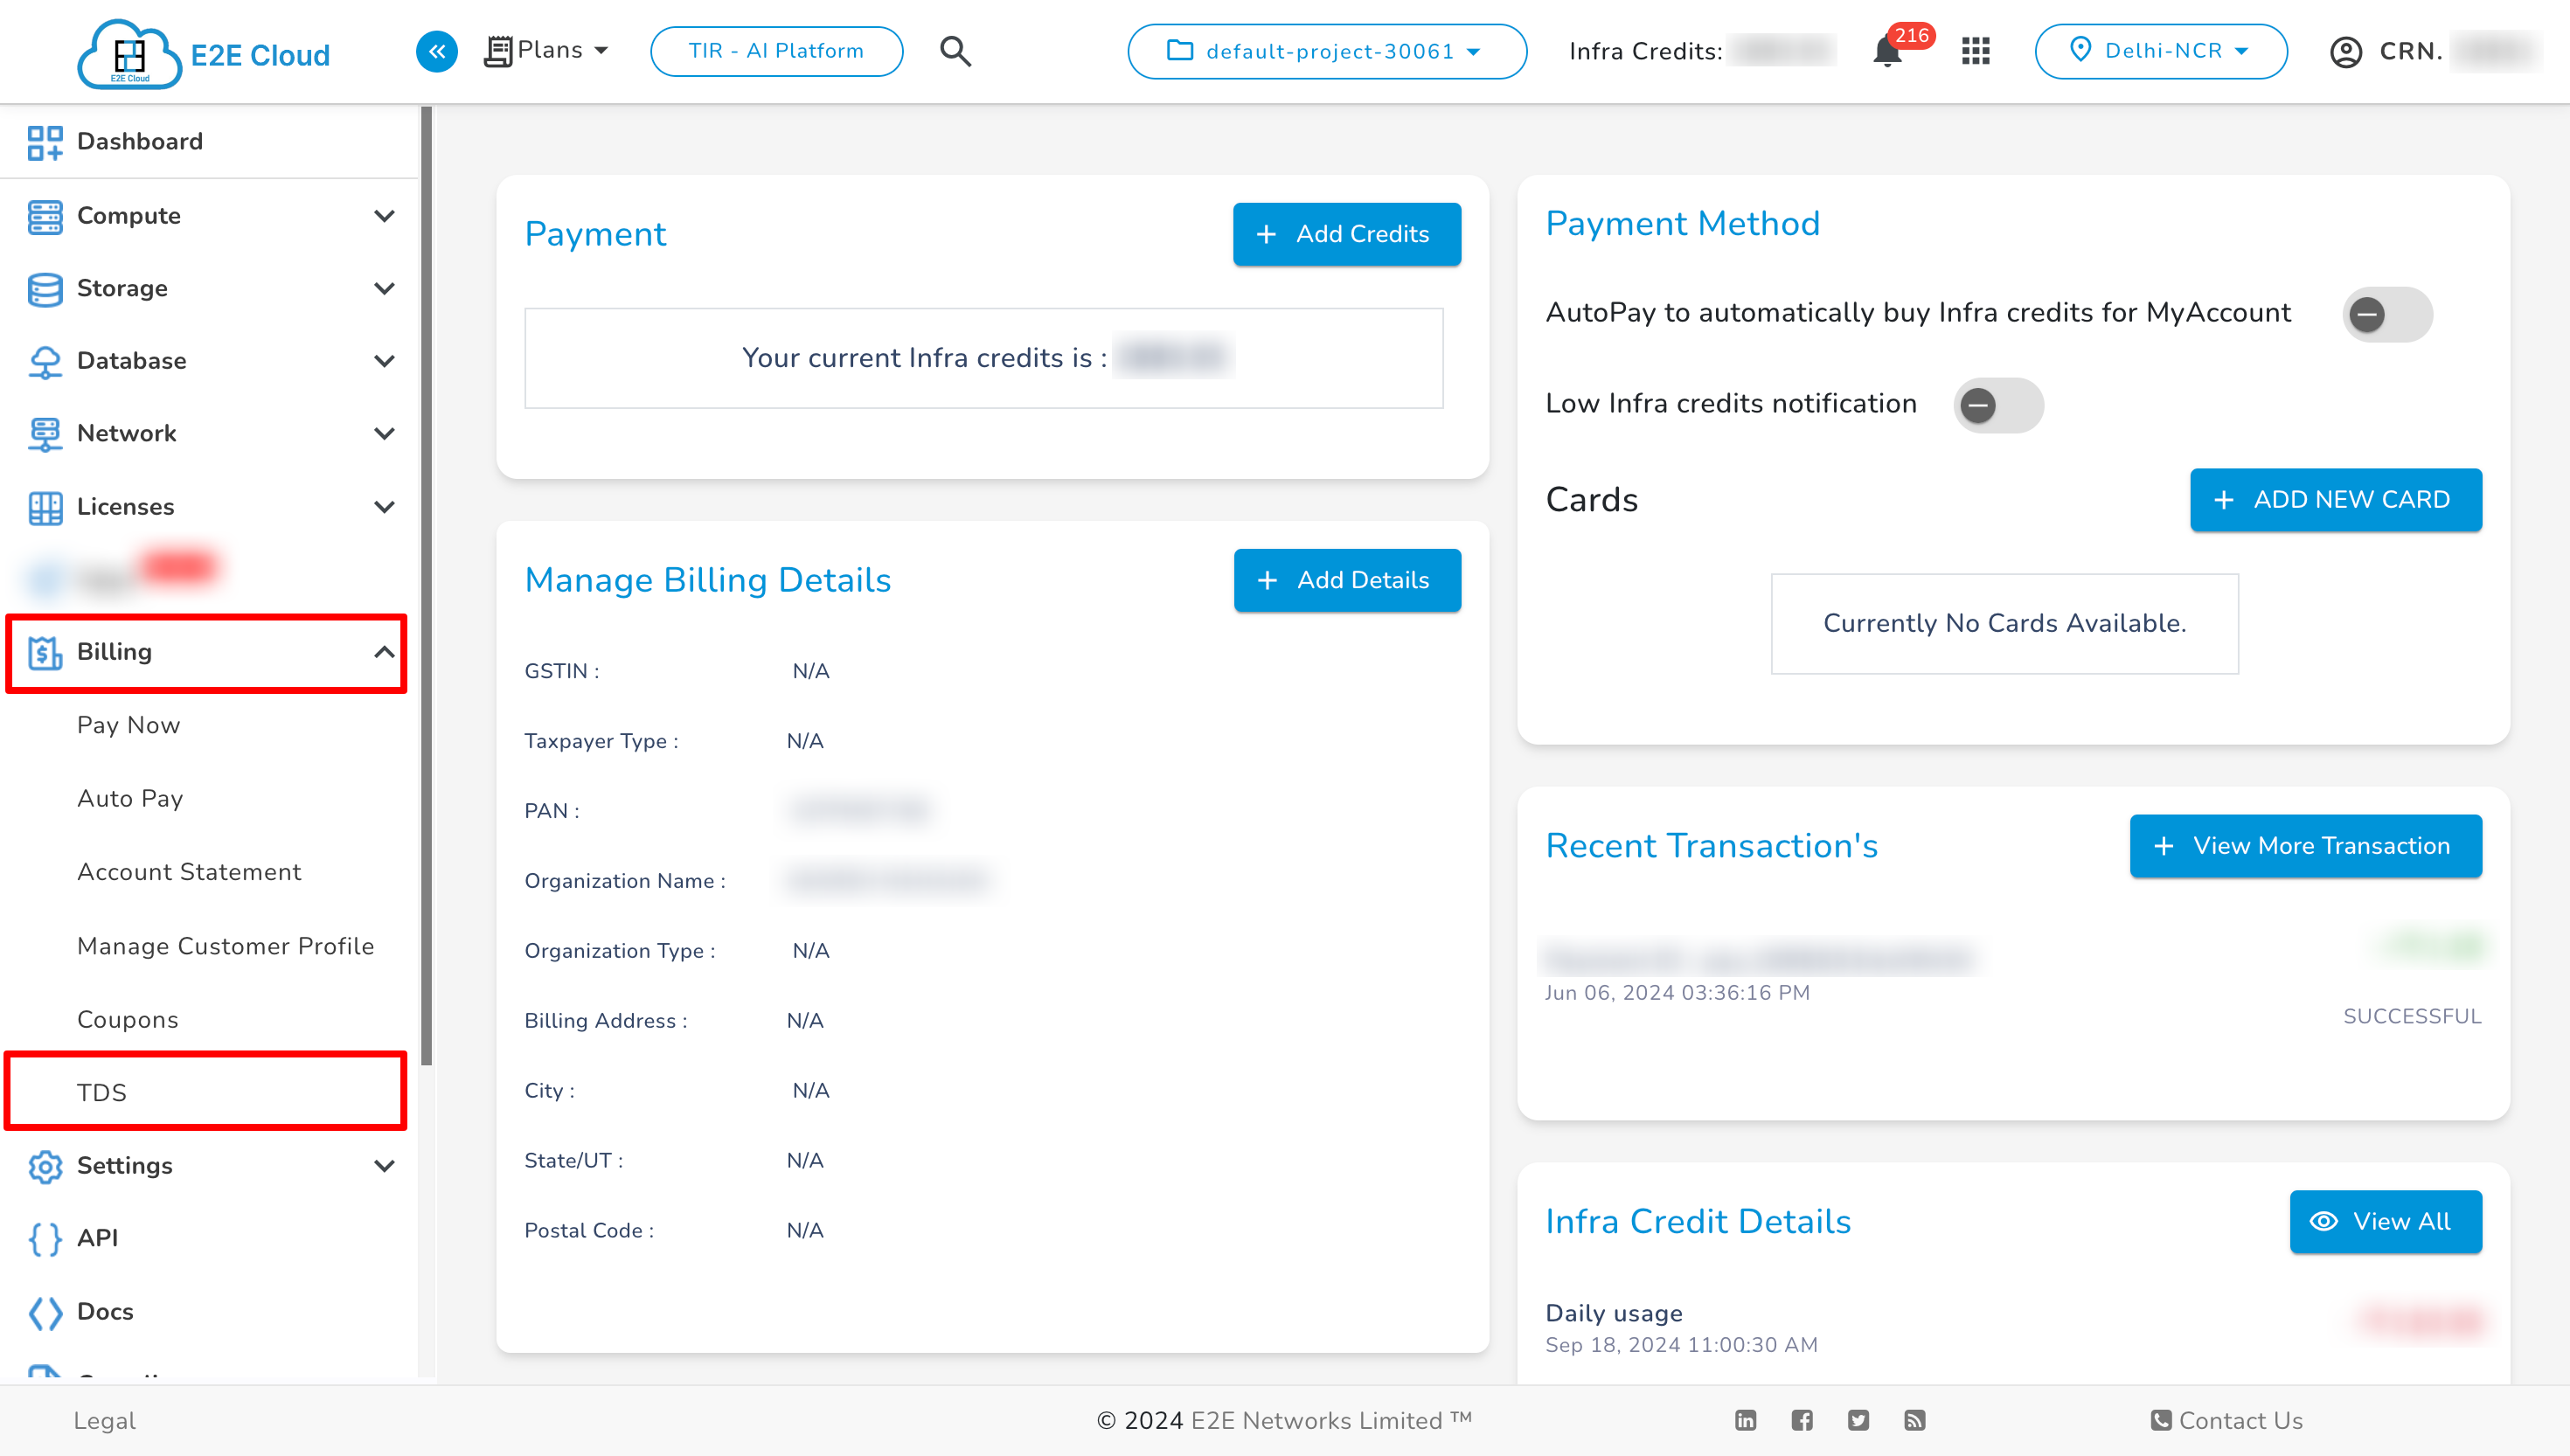
Submitting the TDS Certificates (Form-16A)
Go to the “Submit TDS certificate” tab. Here, you can submit the TDS certificate (Form-16A) to claim the TDS refund. Our finance team will review your submitted TDS certificate (Form-16A) and will release the refund into your specified bank account.
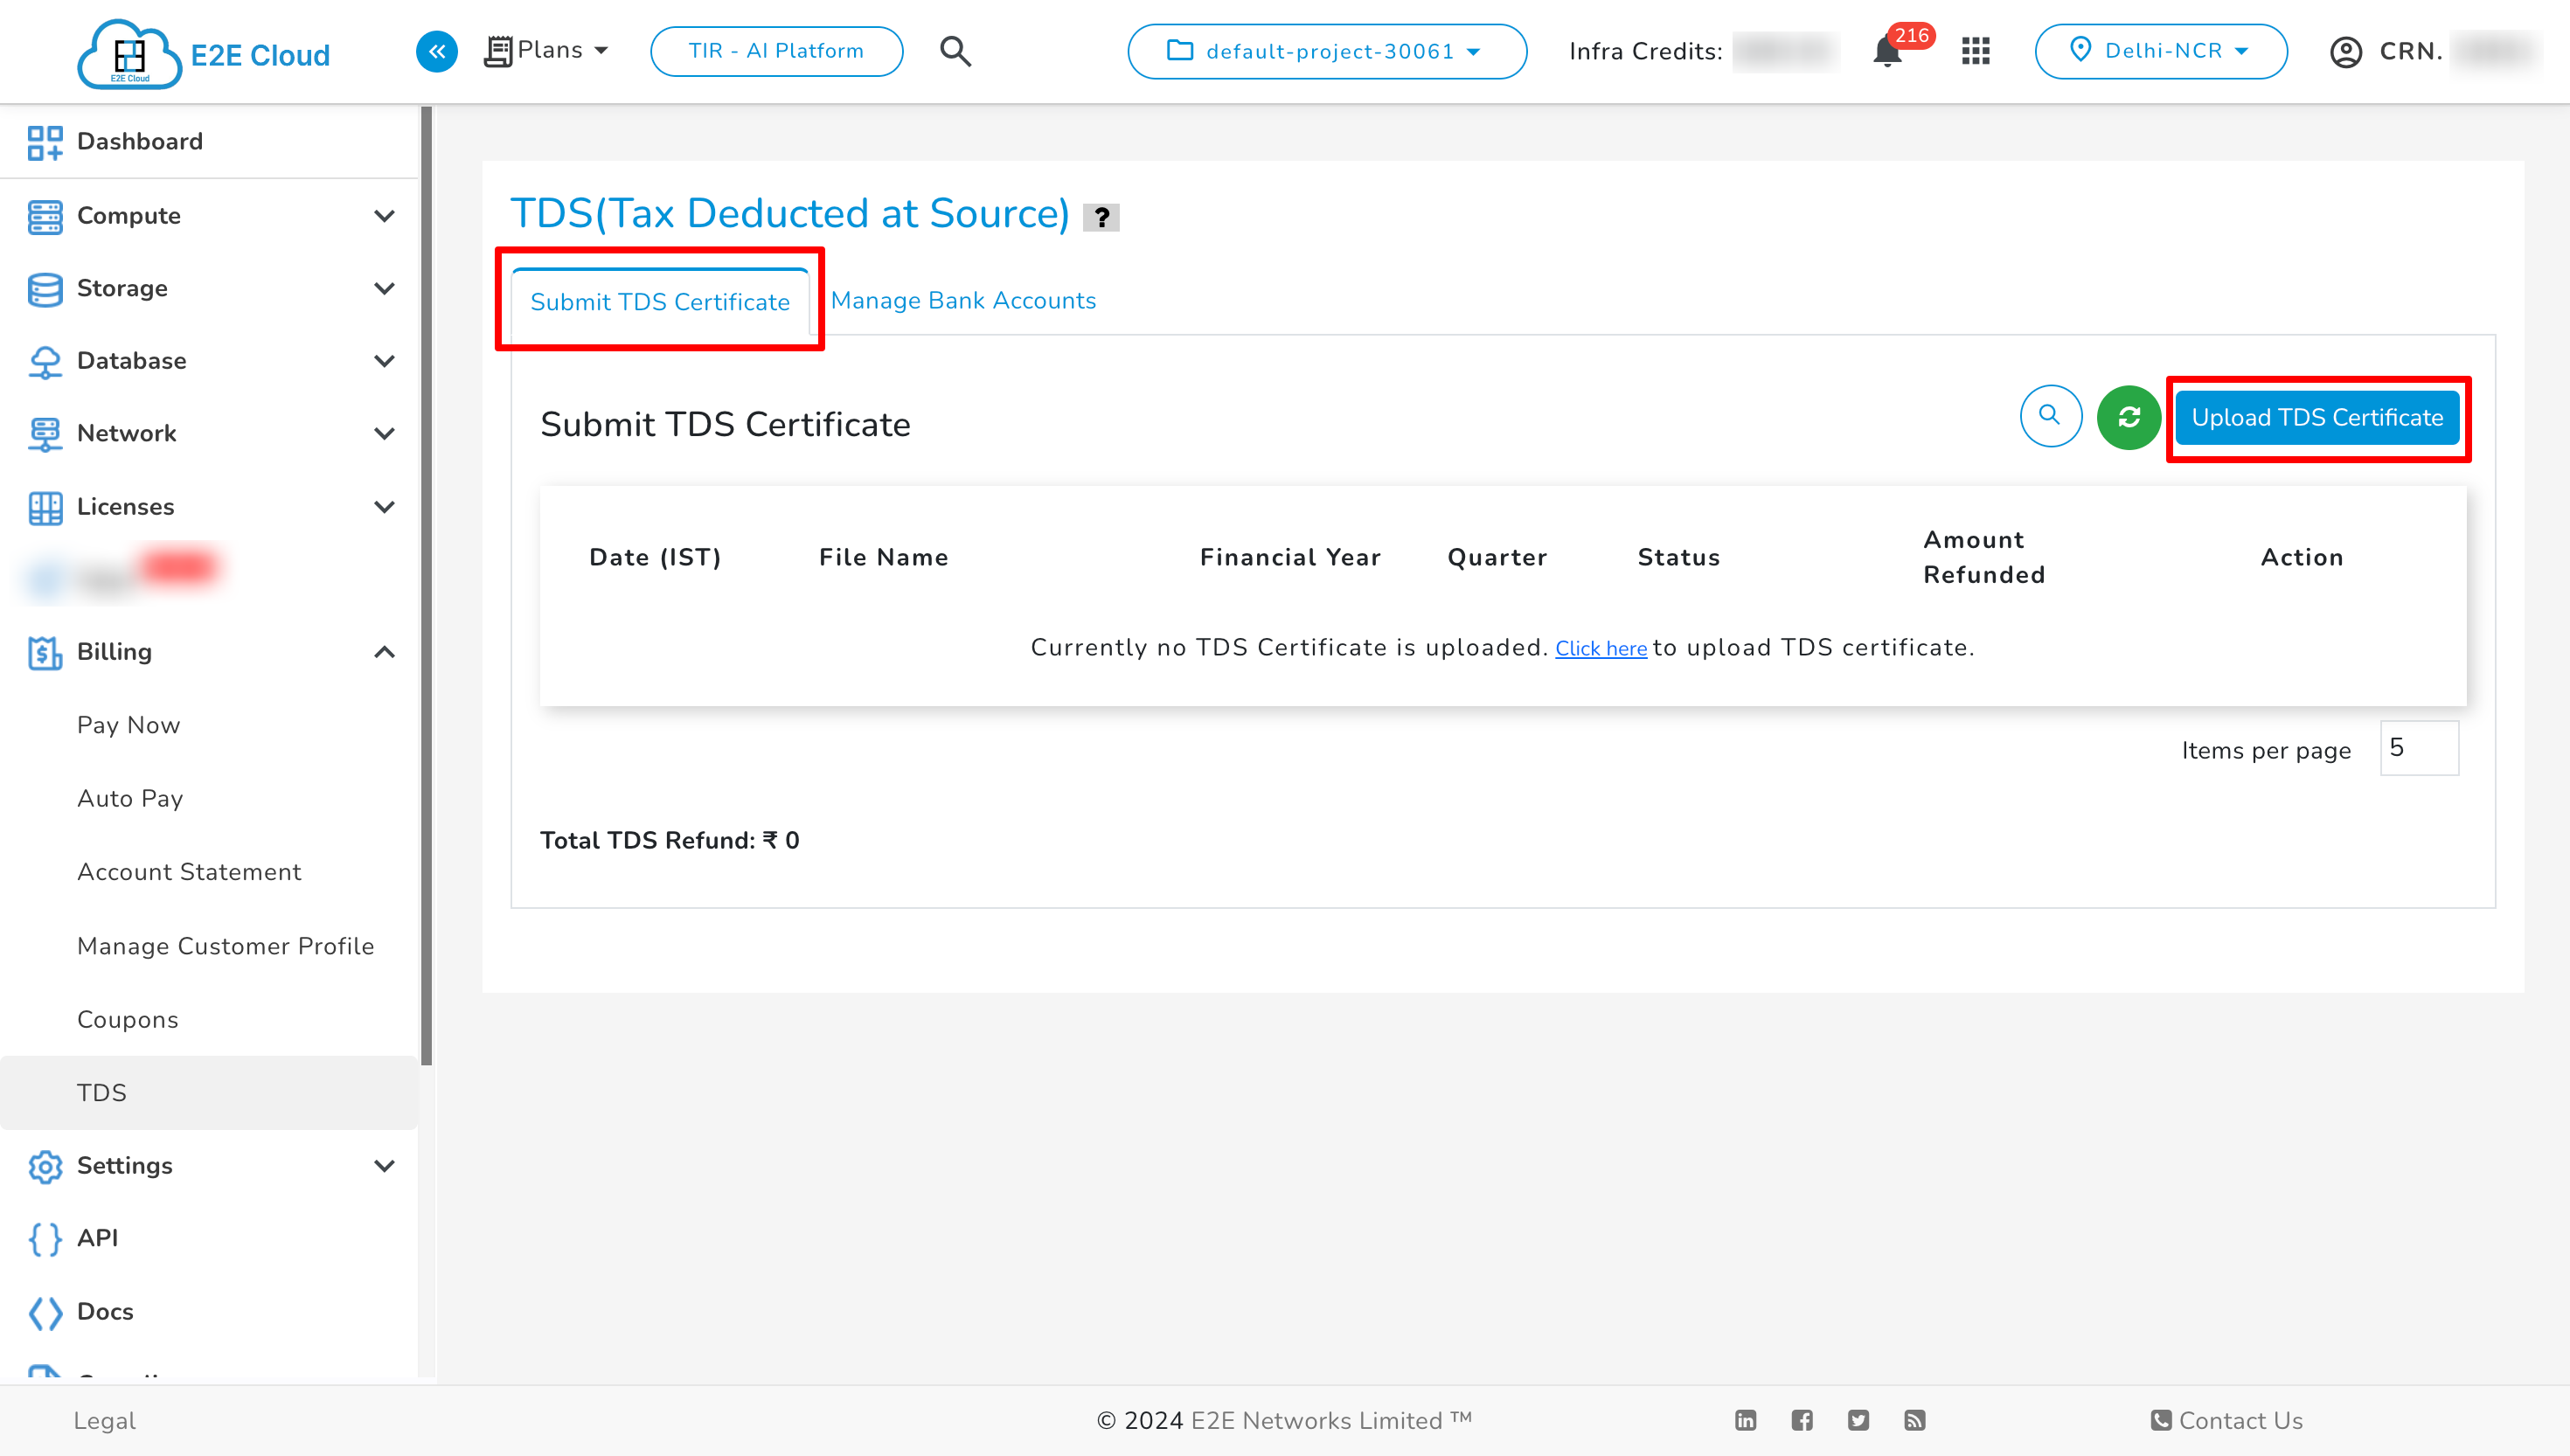
Click on the ‘Upload TDS certificate’ to upload a TDS certificate.
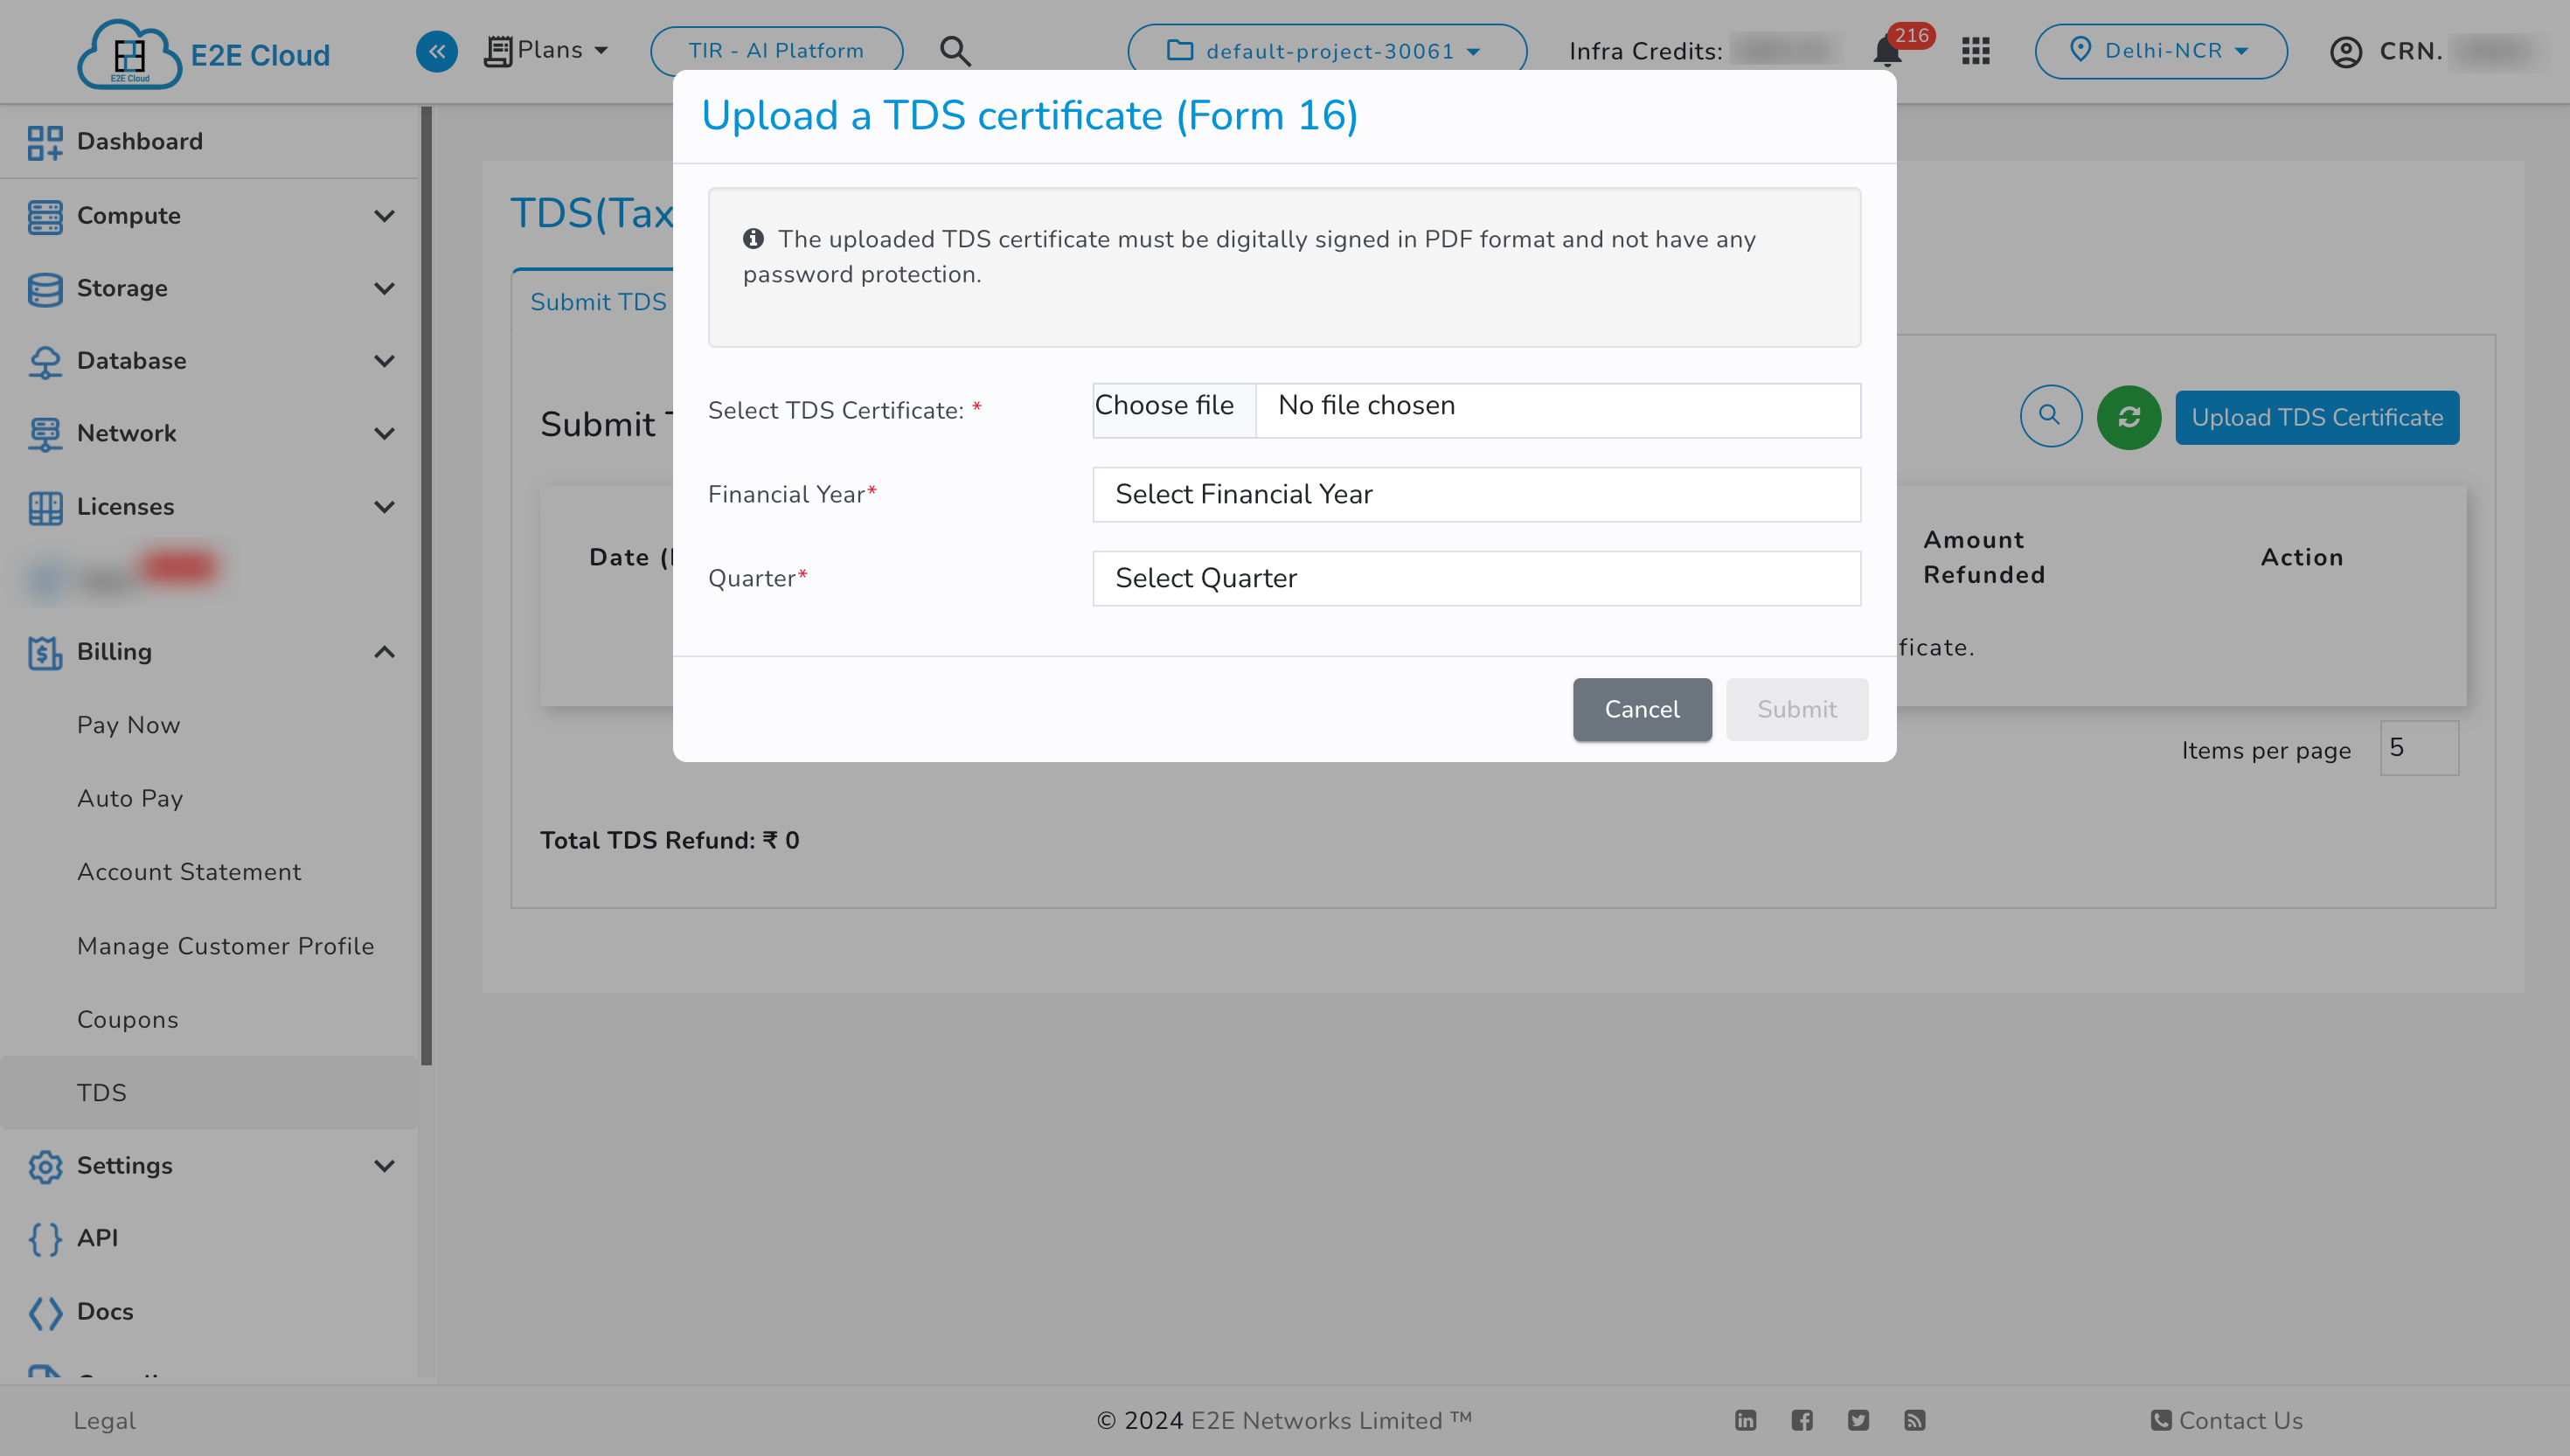
The upload TDS certificate (Form-16A) window will open. You need to select the TDS certificate (Form-16A) file. Please ensure that the file you are trying to upload satisfies the following conditions for successful upload and verification:
- Must be in PDF format
- Must be signed (doesn’t necessarily need to be digitally signed)
- Should not have any password protection
- Select the appropriate “Financial Year and Quarter” for your TDS certificate (Form-16A).
- Then, click on “Upload & Save” and you will receive a confirmation message on the screen.
- If you receive an error message, kindly try to re-submit your TDS certificate (Form-16A), or you can reach out to us at “cloud-platform@e2enetworks.com”.
- Successfully uploaded TDS certificates will be listed in the table. The following information will be available under this section:
| Field/Option | Description |
|---|---|
| Date | Displays the calendar date on which you have submitted the TDS certificate (Form-16A). |
| File Name | The name of the uploaded TDS certificate (Form-16A) file. |
| Financial Year | Displays the Financial year specified by you while submitting the TDS certificate (Form-16A). |
| Quarter | Displays the quarter specified by you while submitting the TDS certificate (Form-16A). |
| Status | The verification status of the submitted TDS certificate (Form-16A) will be available here.Verification pending – when the submitted TDS certificate (Form-16A) is under review with our finance team.Verification Complete – when the submitted TDS certificate (Form-16A) review is complete and approved by our finance team.Verification Fail– when the submitted TDS certificate (Form-16A) review is complete and failed. You will be notified via an auto-generated email whenever a review is completed by our finance team. |
| Amount Refunded | The TDS refund amount information will be available respective to TDS certificate (Form-16A) when verification status is complete and “Approved” by our finance team, subject to the clearance of the TDS certificate. |
| Action | On clicking the delete icon, you can delete a submitted TDS certificate (Form-16A) only if the verification status is “Verification Pending”. This allows the user to upload a new TDS certificate if a wrong file is chosen. The Delete icon will not be available when verification status is either “Verification Complete”** or “Verification Fail”. On clicking the Download icon, you can download the submitted TDS certificate (Form-16A). |
| Total TDS refund | The sum of the total TDS refund which you have received at present. |
Any discrepancies and non-submission of TDS certificates will lead to no TDS refund.
Manage Bank Account Details
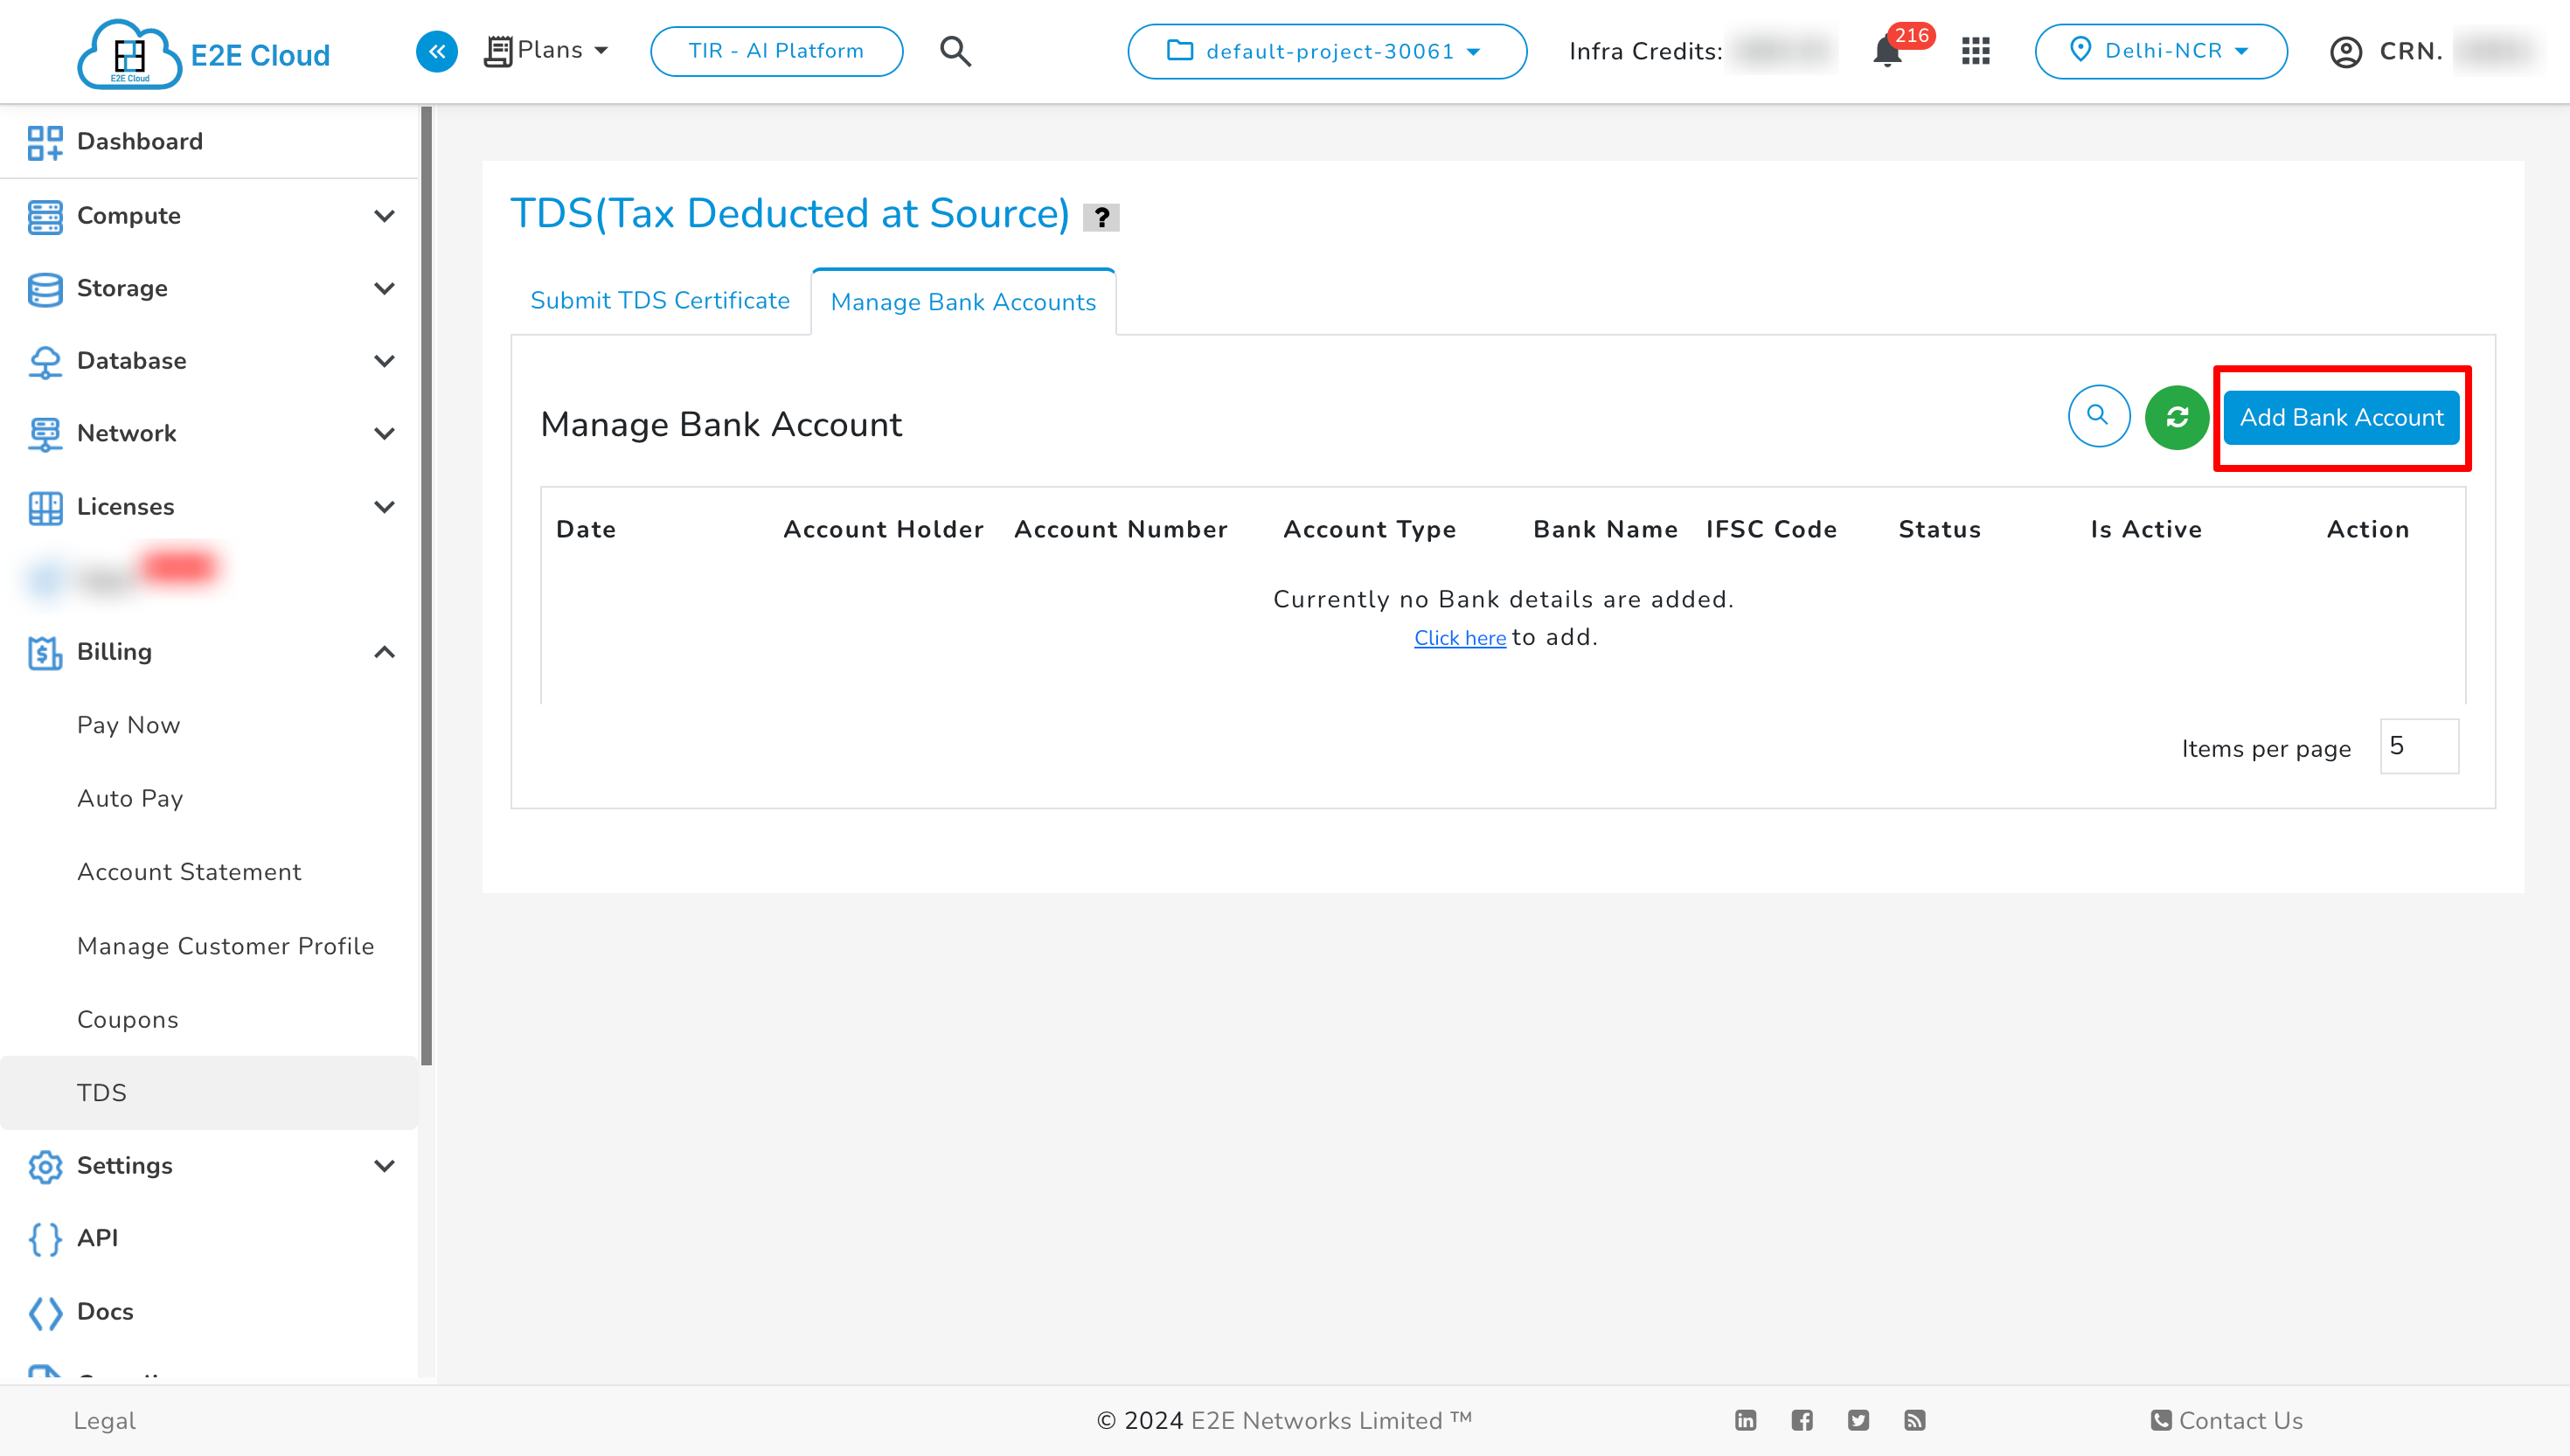
Go to the “Manage Bank Accounts” tab. Here, you can add your bank account details to get a TDS refund for your submitted TDS certificate (Form-16A) into your bank account. You need to upload a scanned copy of your canceled cheque without your signature.
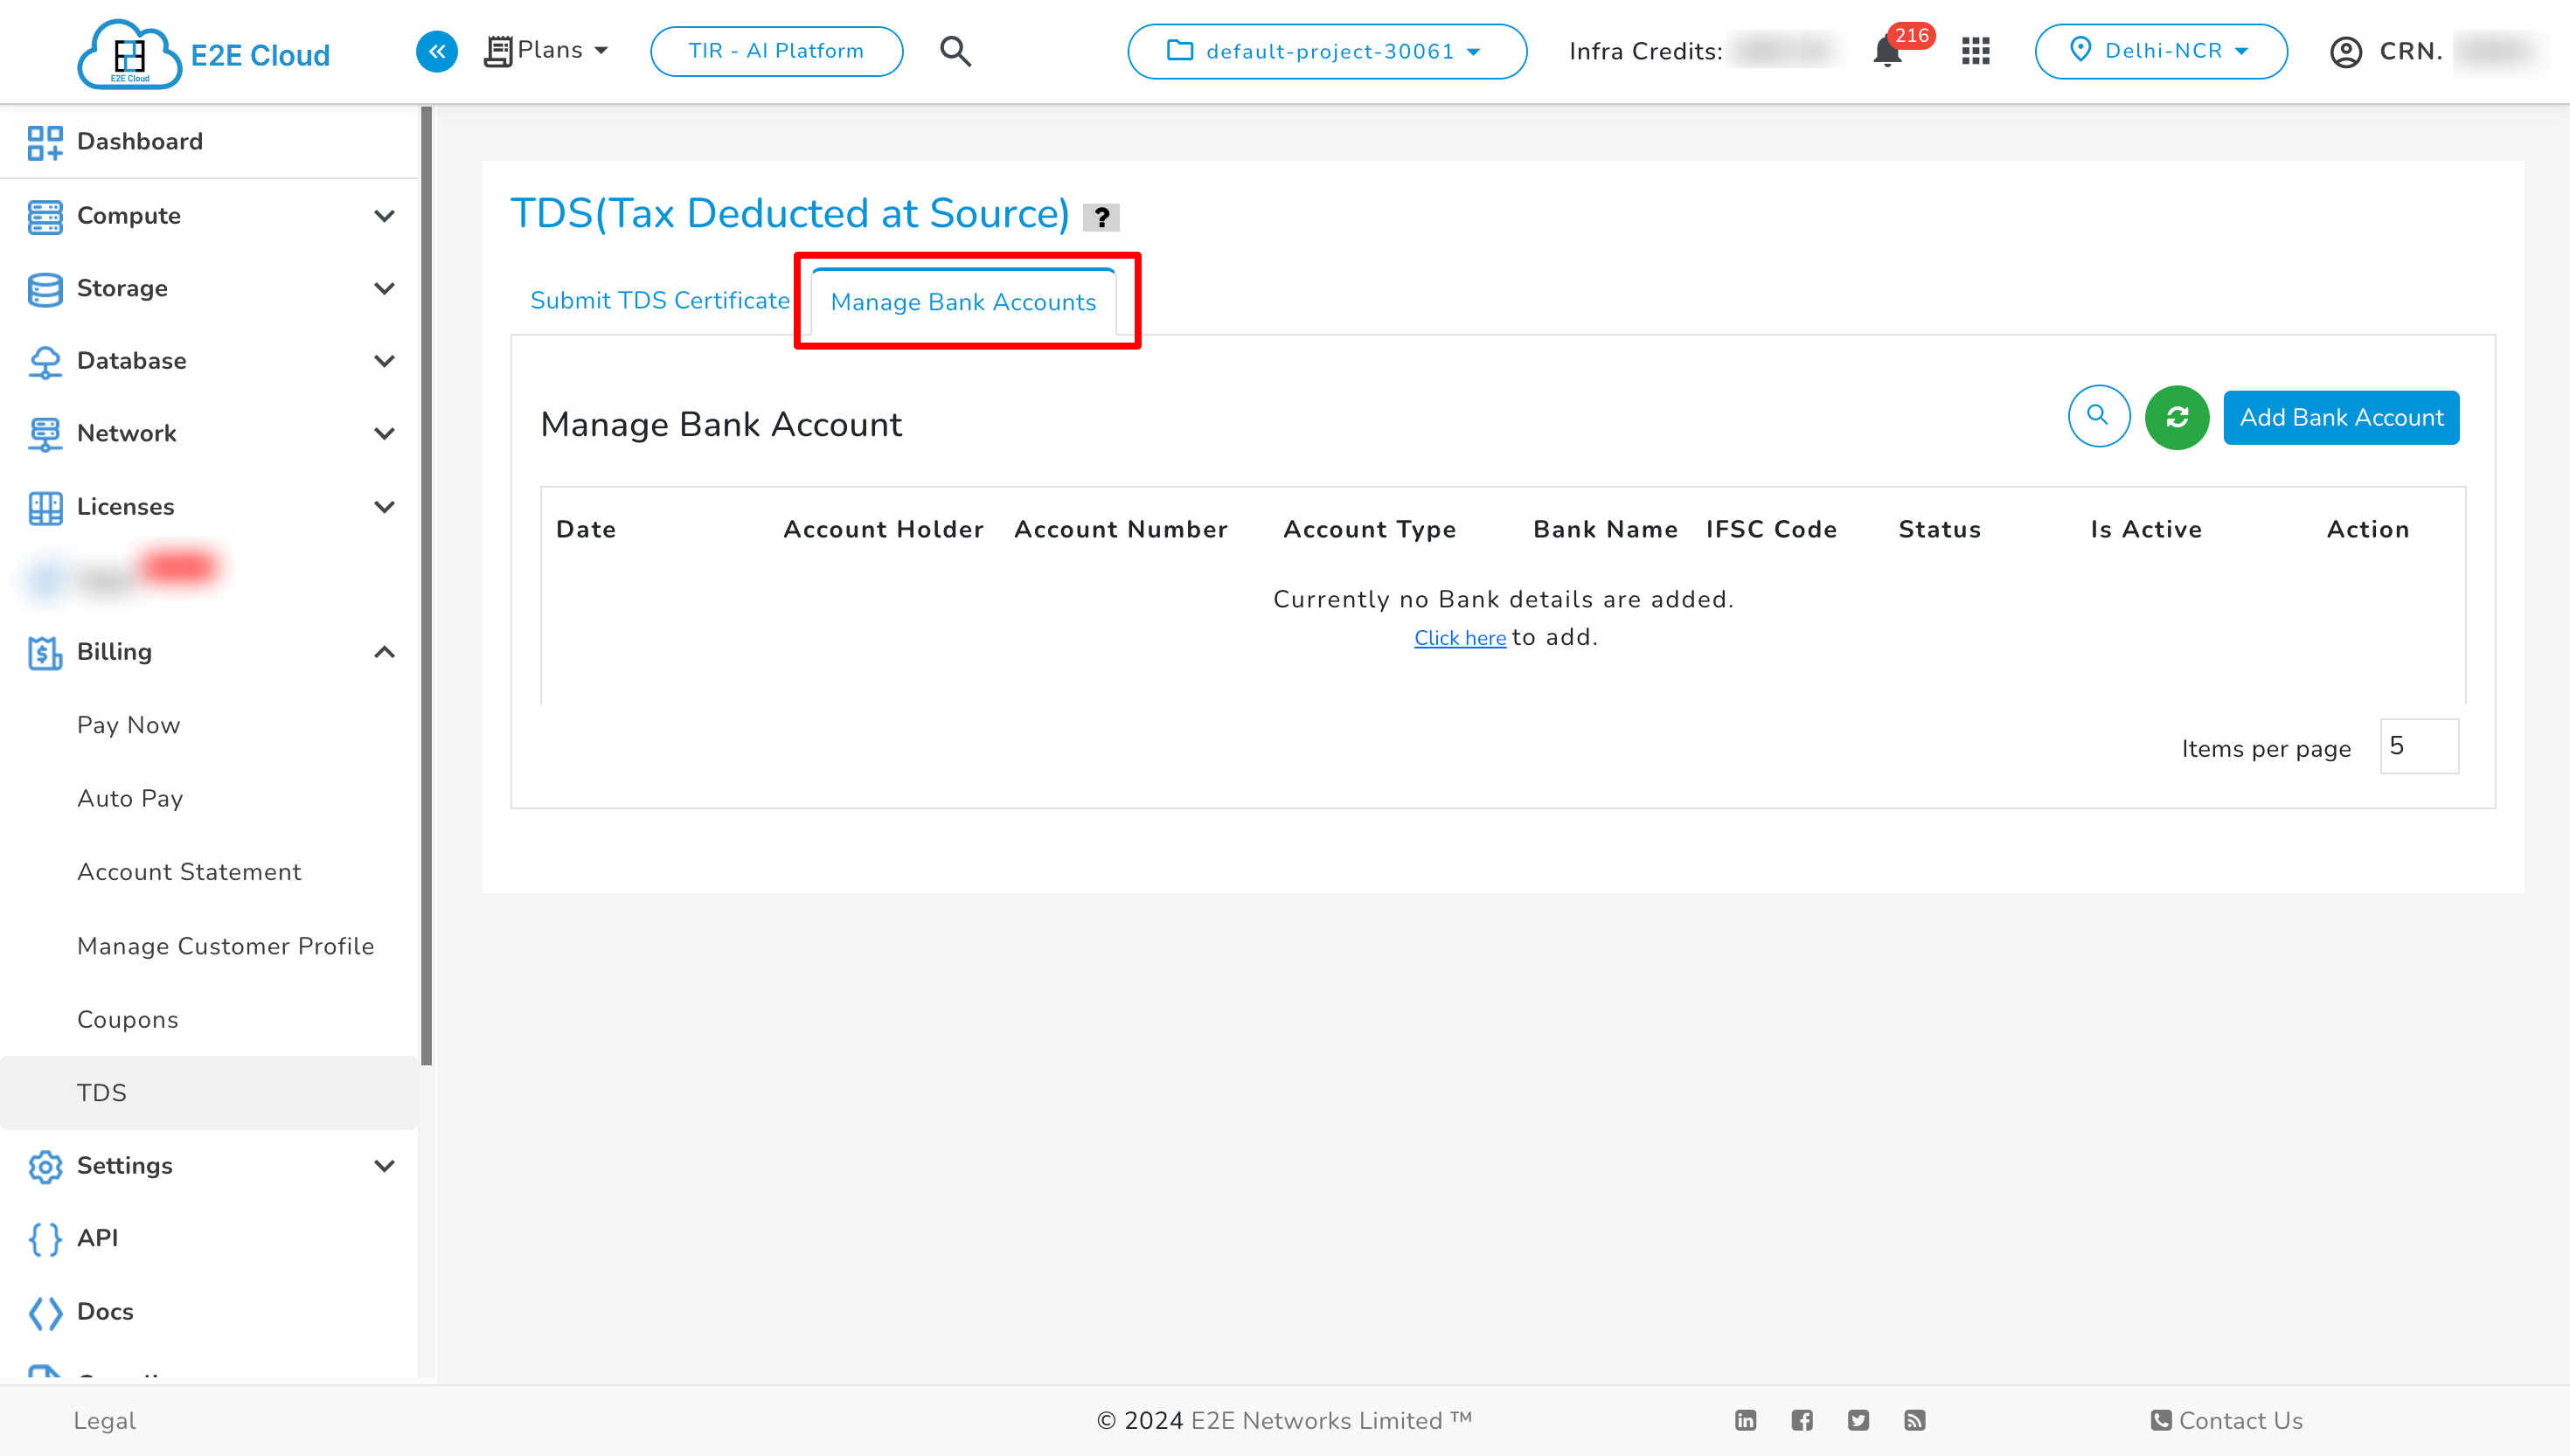
- Click on “+ Add Bank Account” to add bank account details.
-
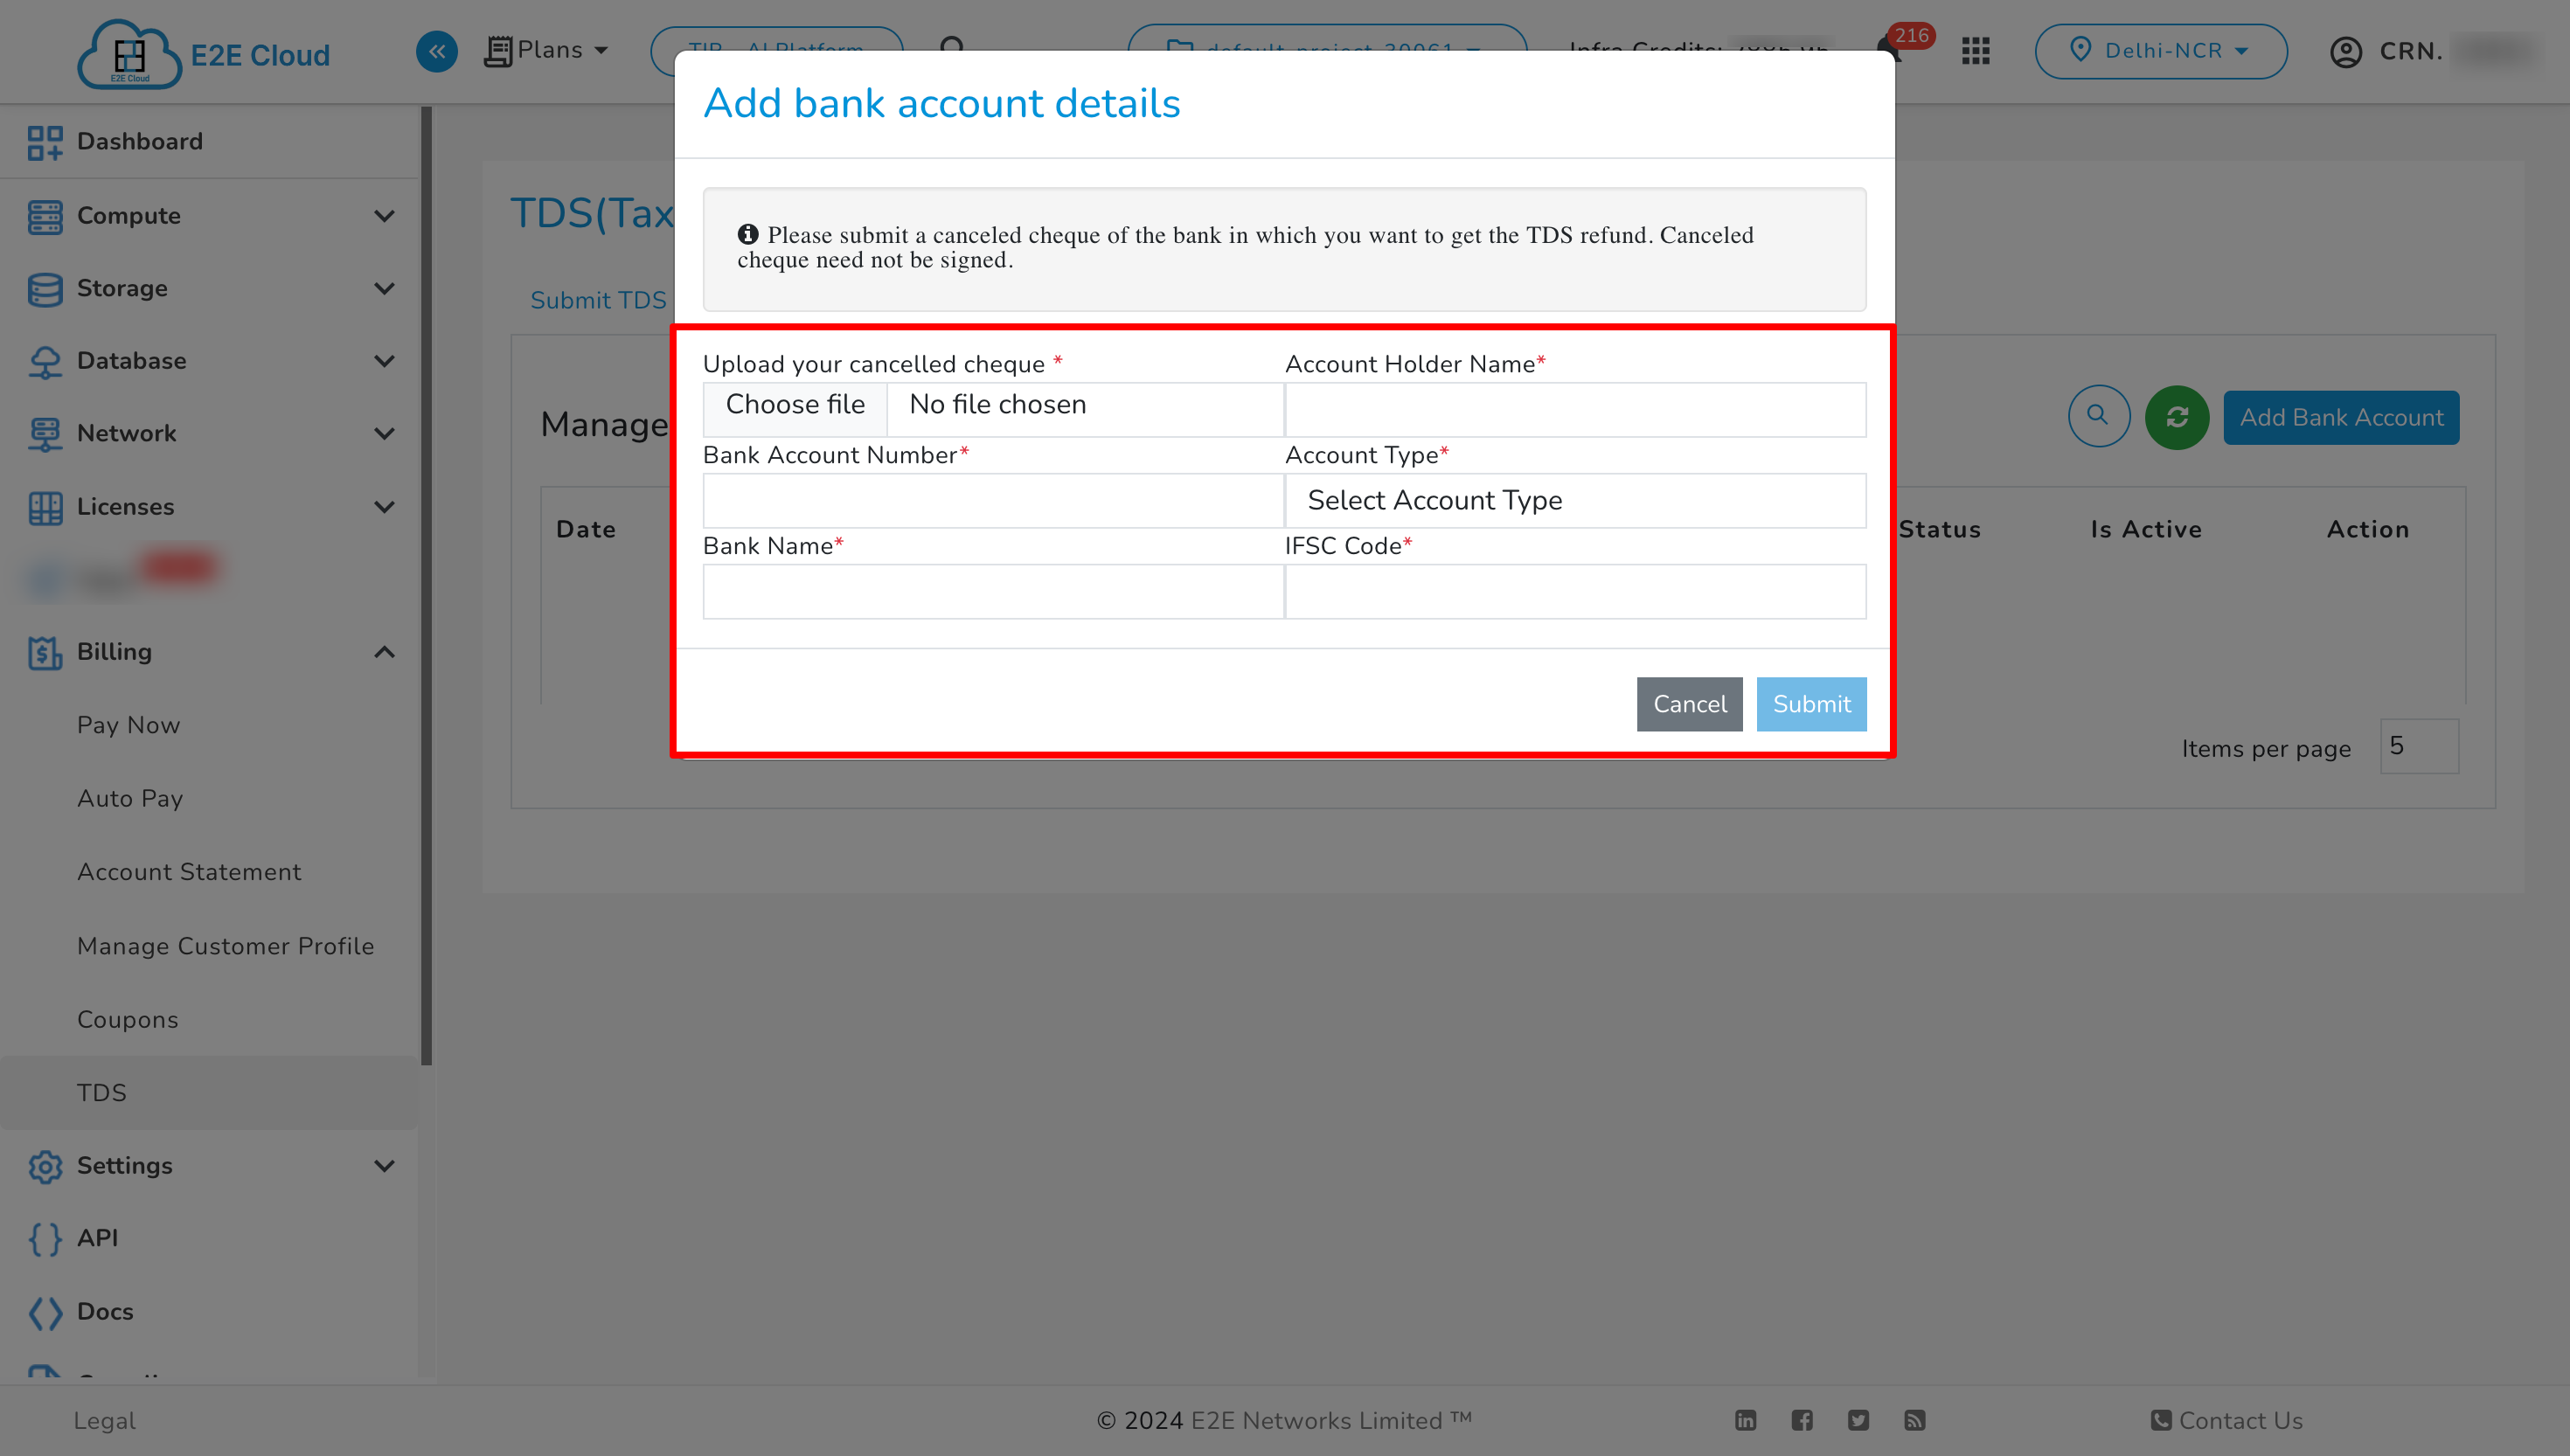
The “Add bank account details” window will open. You need to select the file. Please ensure that the file you are trying to upload satisfies the following conditions for successful submission and verification:
- Must be a scanned canceled cheque.
- The file should not have any password protection.
- The file size should be less than 1 MB.
- Must be an Indian bank.
-
After selecting the file, you need to enter bank details in the following fields which need to be consistent with the canceled cheque. In case you face any issues in updating the required details, you can reach out to us at “cloud-platform@e2enetworks.com”.
| Field | Description |
|---|---|
| Account Holder’s Name | Please ensure that you enter the correct name associated with this bank account. |
| Bank Account Number | Enter the bank account number, which is the unique ID given to your account by the bank. |
| Bank Name | Please specify the Bank Name in which you hold a bank account. |
| Account Type | Please select the type of bank account. |
| IFSC Code | Please specify the IFSC Code, which is the Indian Financial System Code. This is an eleven character code assigned by the Reserve Bank of India to uniquely identify every bank branch participating in the National Electronic Funds Transfer (NEFT) system in India. |
- Then, click on “submit” and you will get a confirmation message on the screen.
- Now, the successfully added bank account details will be listed in the table. The following information will be available under this section:
| Field/Option | Description |
|---|---|
| Date | The calendar date on which you have added a bank account. |
| Account Holder | The name of the account holder associated with this bank account. |
| Account Number | The bank account number specified by you for the saved bank account. |
| Account Type | The type of bank account you have added. |
| Bank Name | The bank name specified by you for the saved bank account. |
| IFSC Code | The IFSC code specified by you for the saved bank account. |
| Status | The verification status of the added bank account will be available here.Pending– when the added bank account details are under review with our finance team.Approved – when the added bank account details under review are completed and approved by our finance team.Rejected– when the added bank account details under review are completed and failed. You will be notified via an auto-generated email whenever a review is completed by our finance team. |
| Is Active | The added bank account will be used to credit the TDS refund only when the “Is Active” flag is set to true and status is “Approved”. Kindly note that at a time only one saved bank account will remain active. |
| Action | On clicking the Download icon, you can download the uploaded canceled cheque. |
Any discrepancies in added bank account details will lead to no TDS refund for the submitted TDS certificates.