Container Registry
Introduction
Container Registry is a service for storing private container images. It provides a subset of features provided by Artifact Registry, a universal repository manager and the recommended service for managing container images and other artifacts .
Artifact
A service for storing and managing artifacts in private repositories, including container images, and Helm charts.
Artifact Registry extends the capabilities of Container Registry. In addition to supporting multiple artifact formats, the service provides additional benefits such as:
Ability to create multiple discrete repositories in the same region.
Working with your images
Many people use Docker Hub as a central registry for storing public Docker images, but to control access to your images you need to use a private registry such as Container Registry.
You can access the registry through secure HTTPS endpoints, which allow you to push, pull, and manage images from any system.
Getting Started
How to Launch Container Registry from Myaccount portal
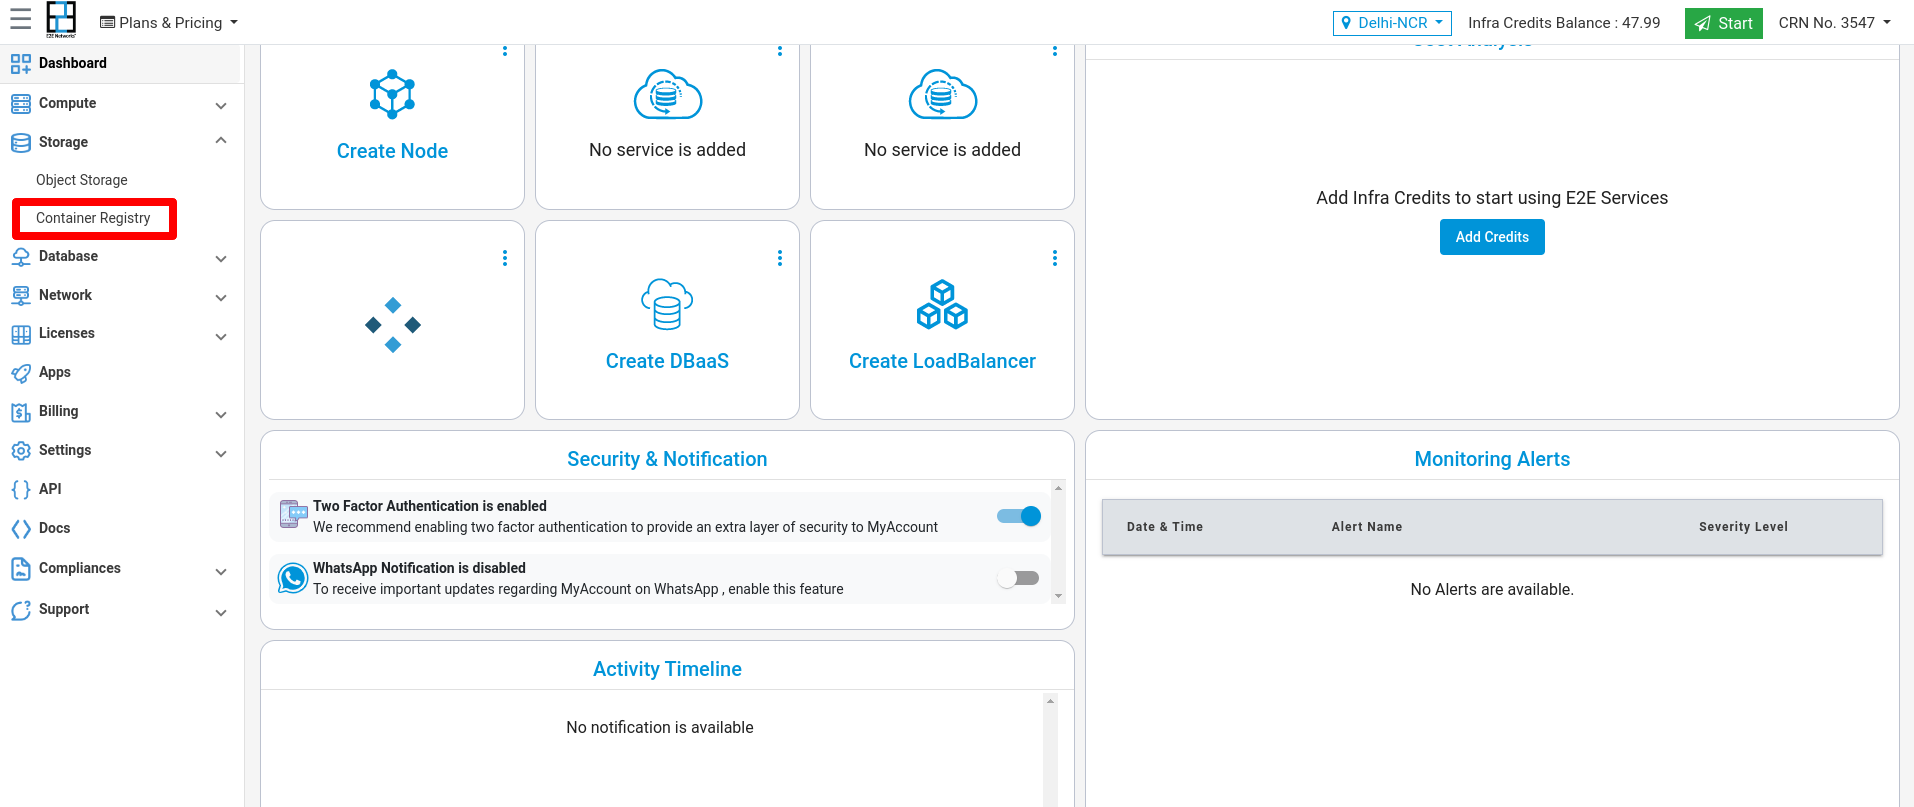
Login into MyAccount
Please go to ‘My Account’ and log in using your credentials set up at the time of creating and activating the E2E Networks ‘My Account’.
Working with Container Registry
The following sections describe how you can use Container Registry .
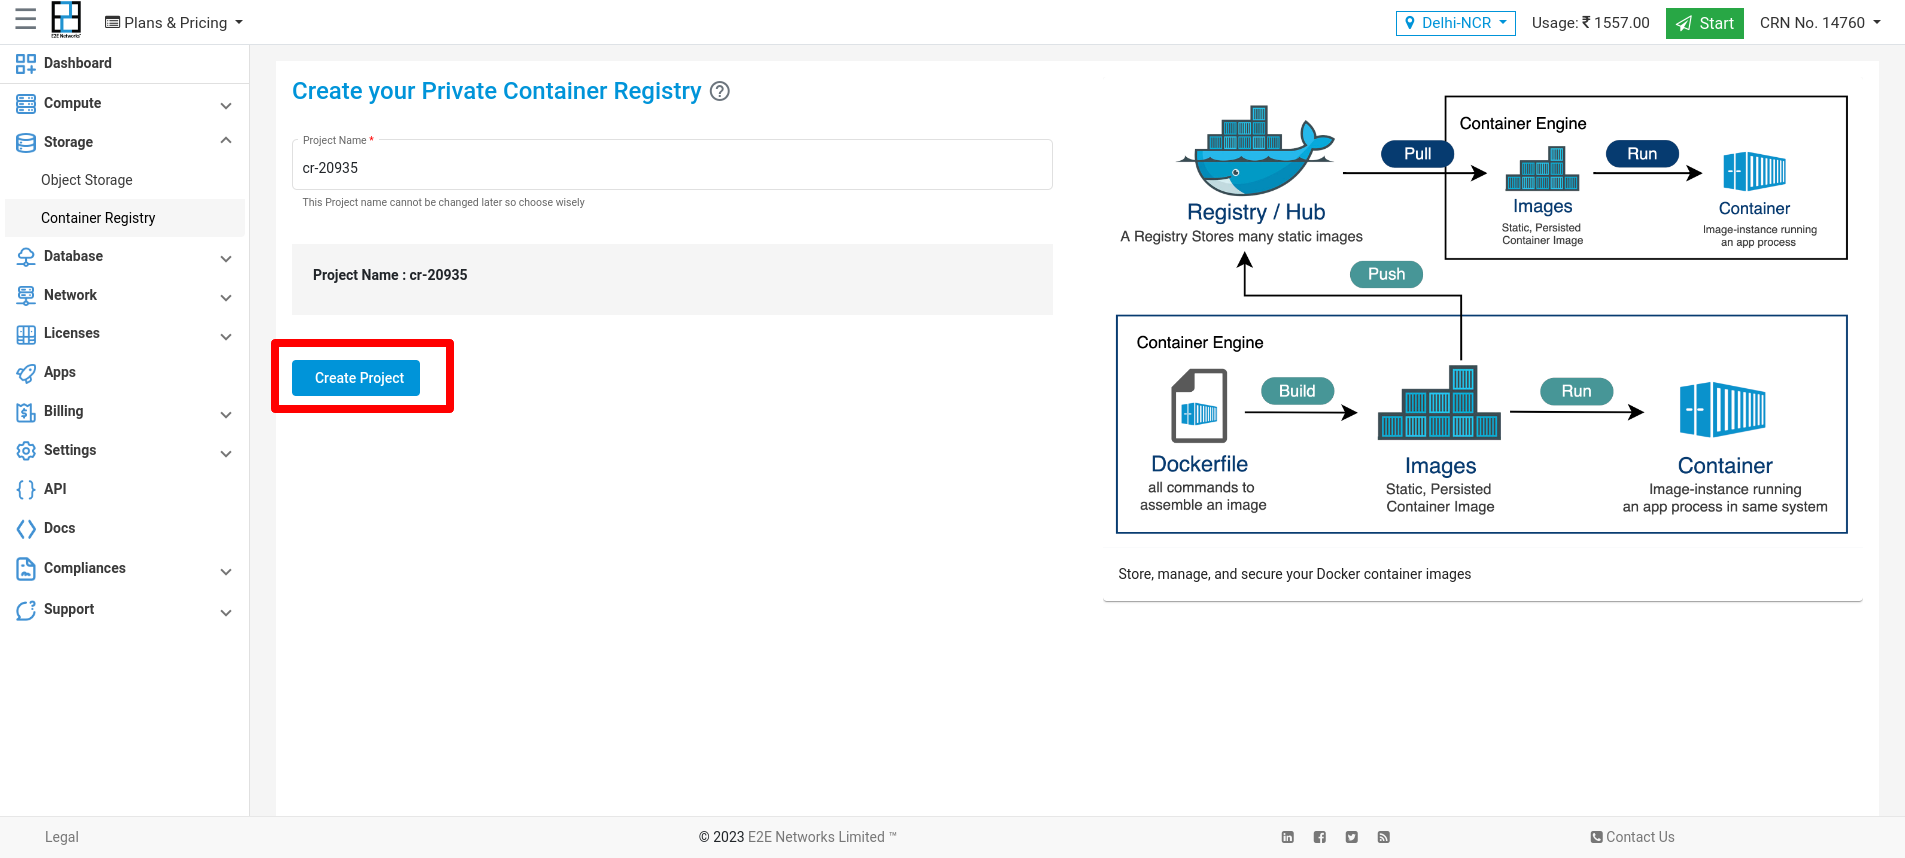
Create New Container Registry
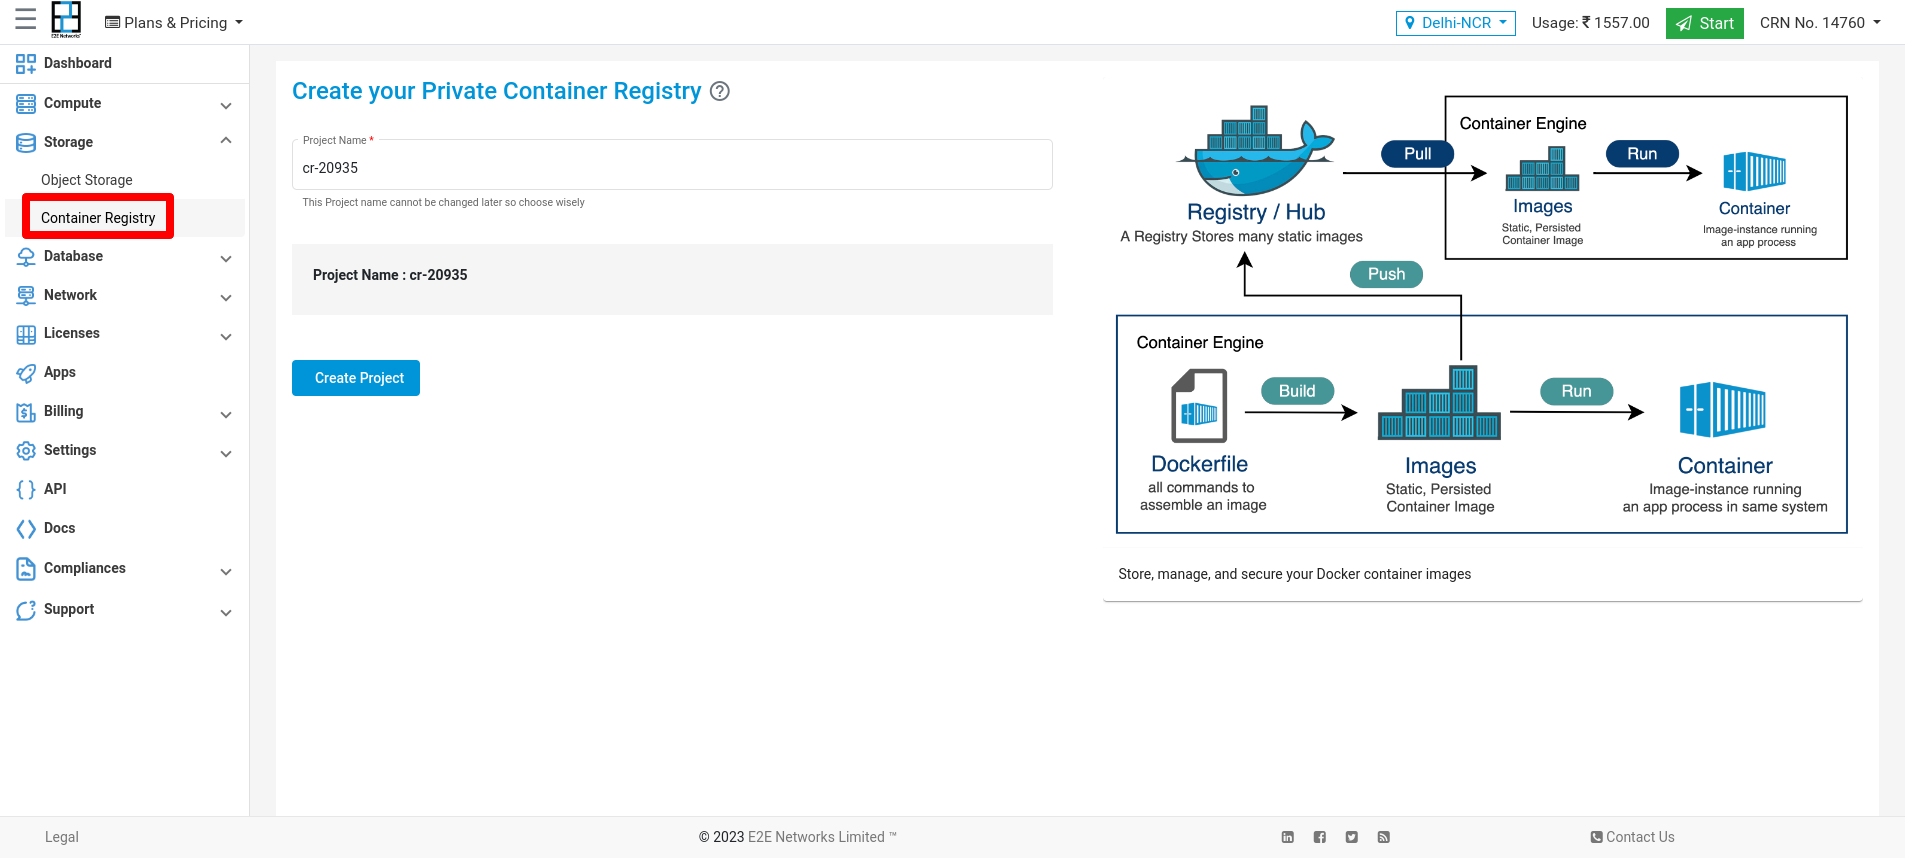
Click on the “Container Registry” sub-menu available under the Storage section.
You will be directed to the ‘Container Registry manager’ page.
You can provide the project name(optional).
Click on the “Create Container Registry ” button.
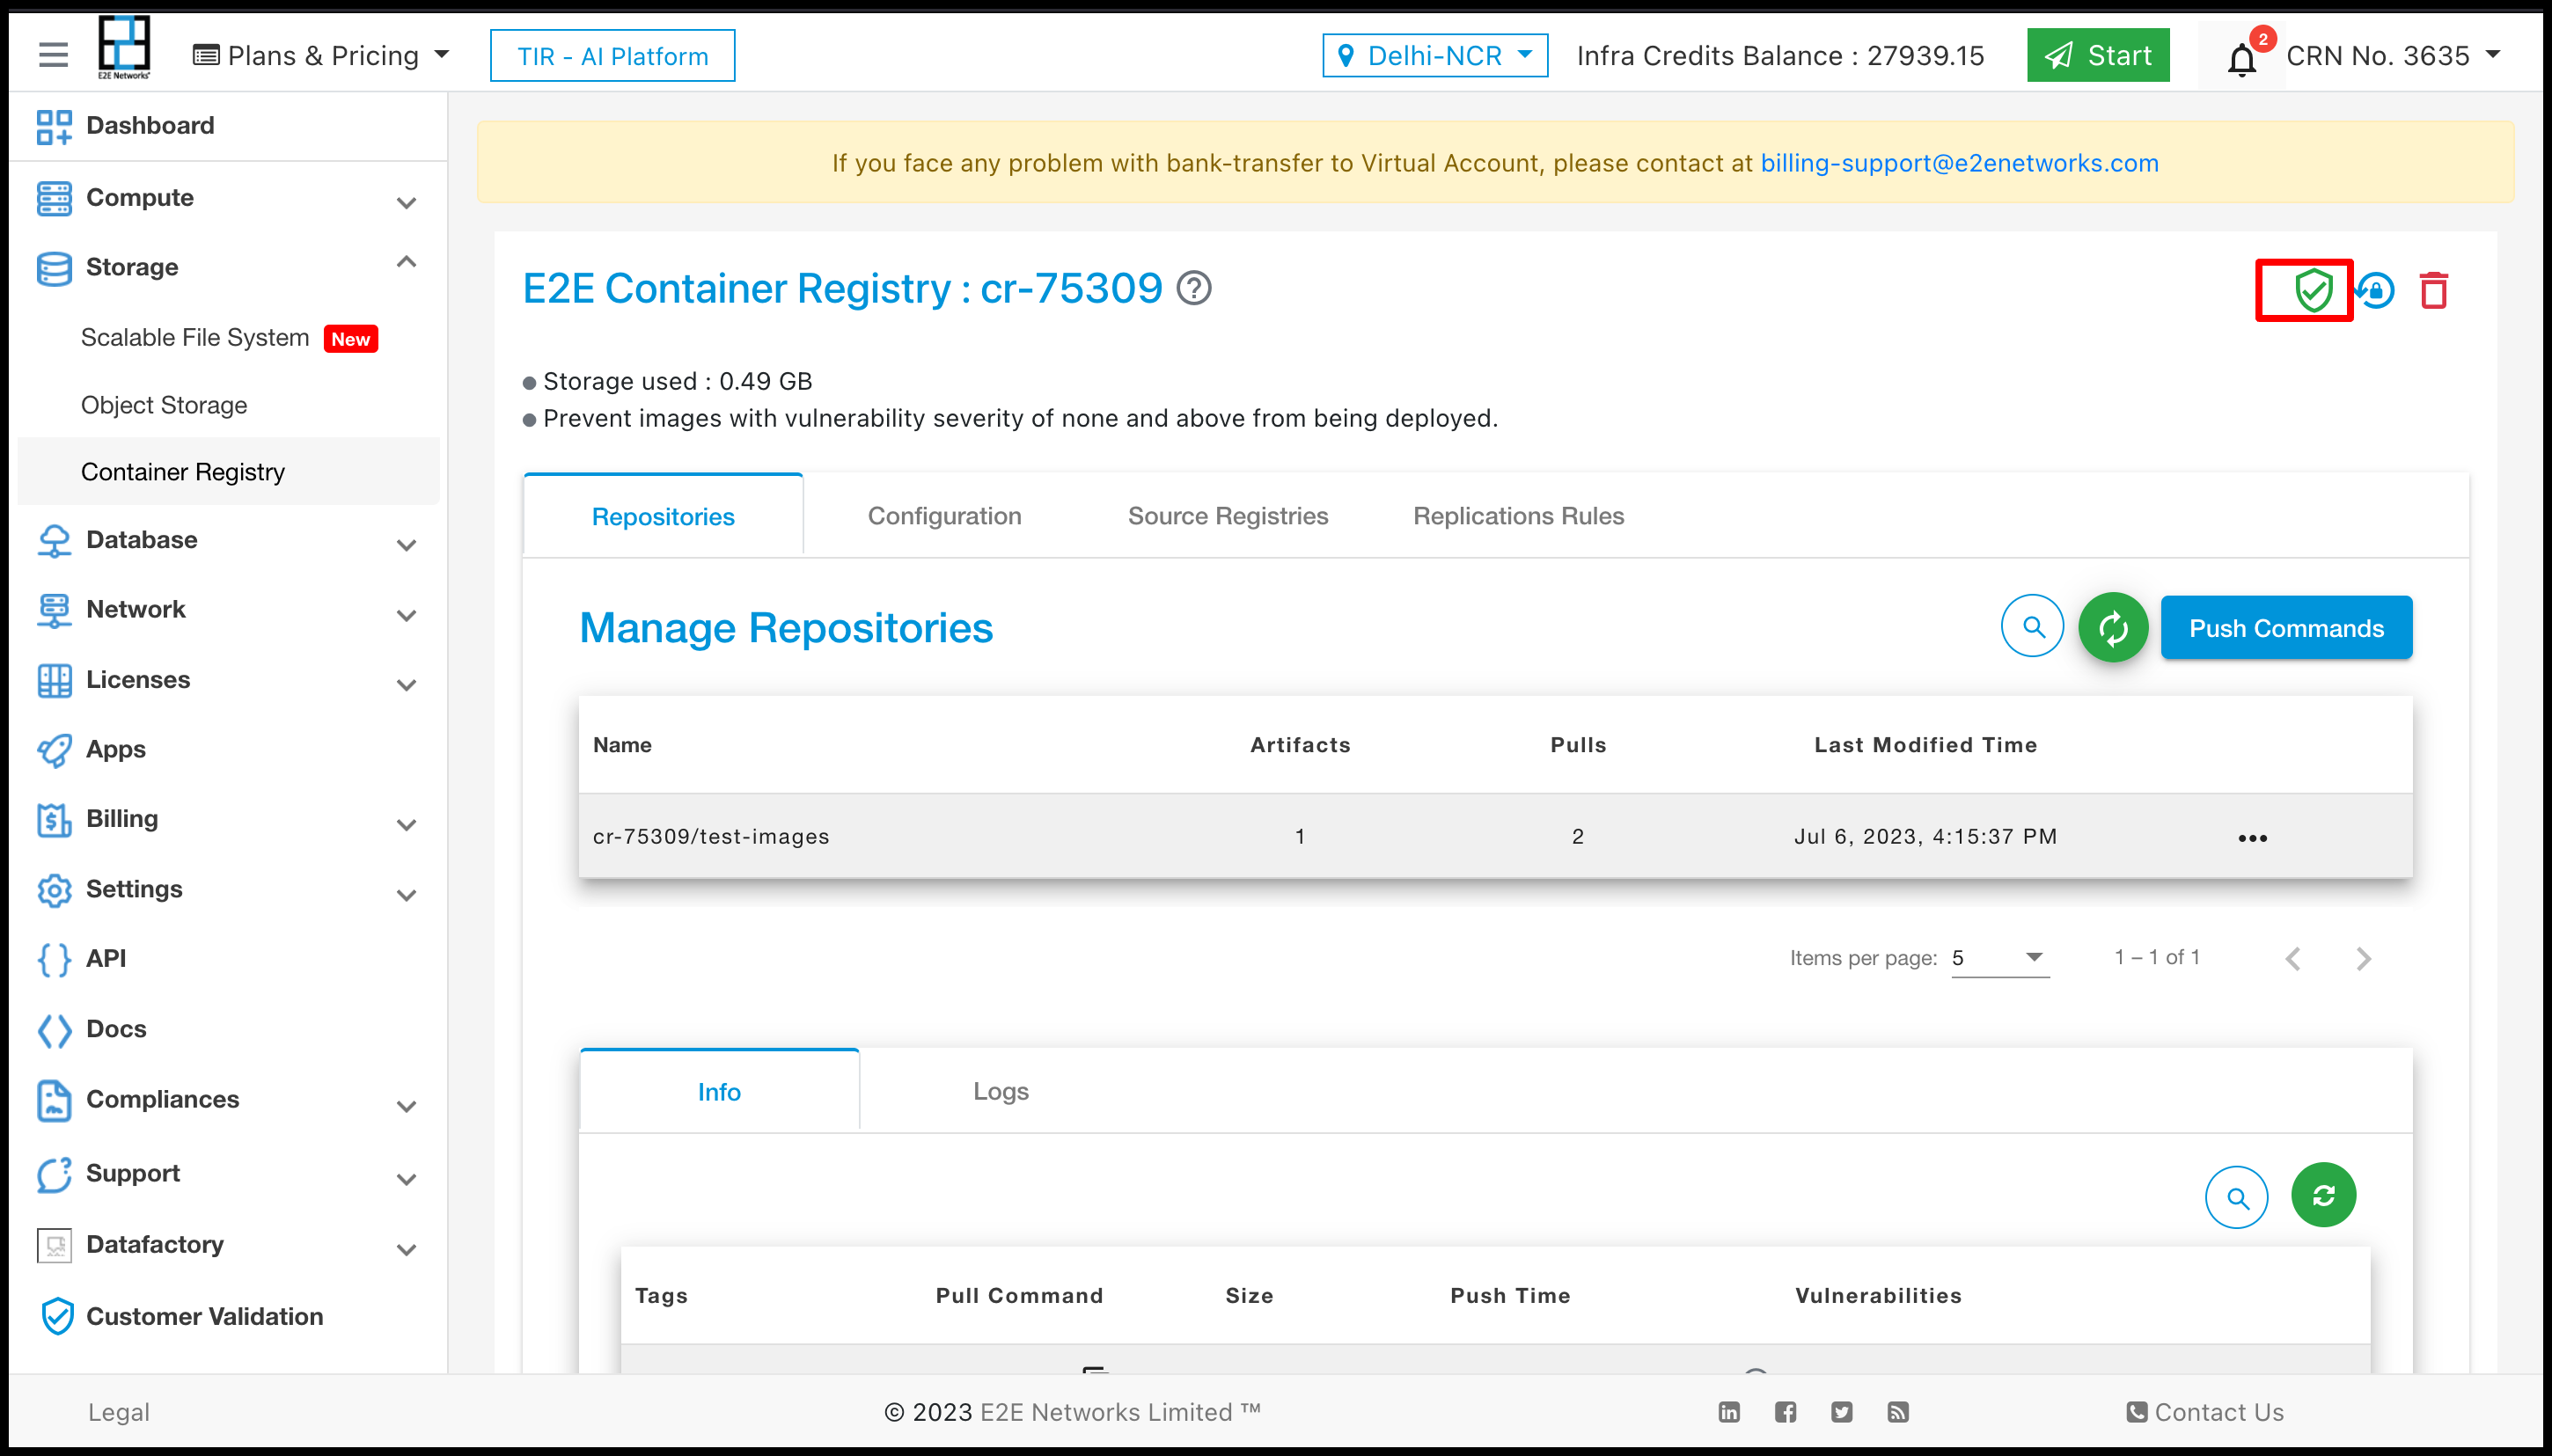
Scan Project
Click on the scan Project button to scan your Project.
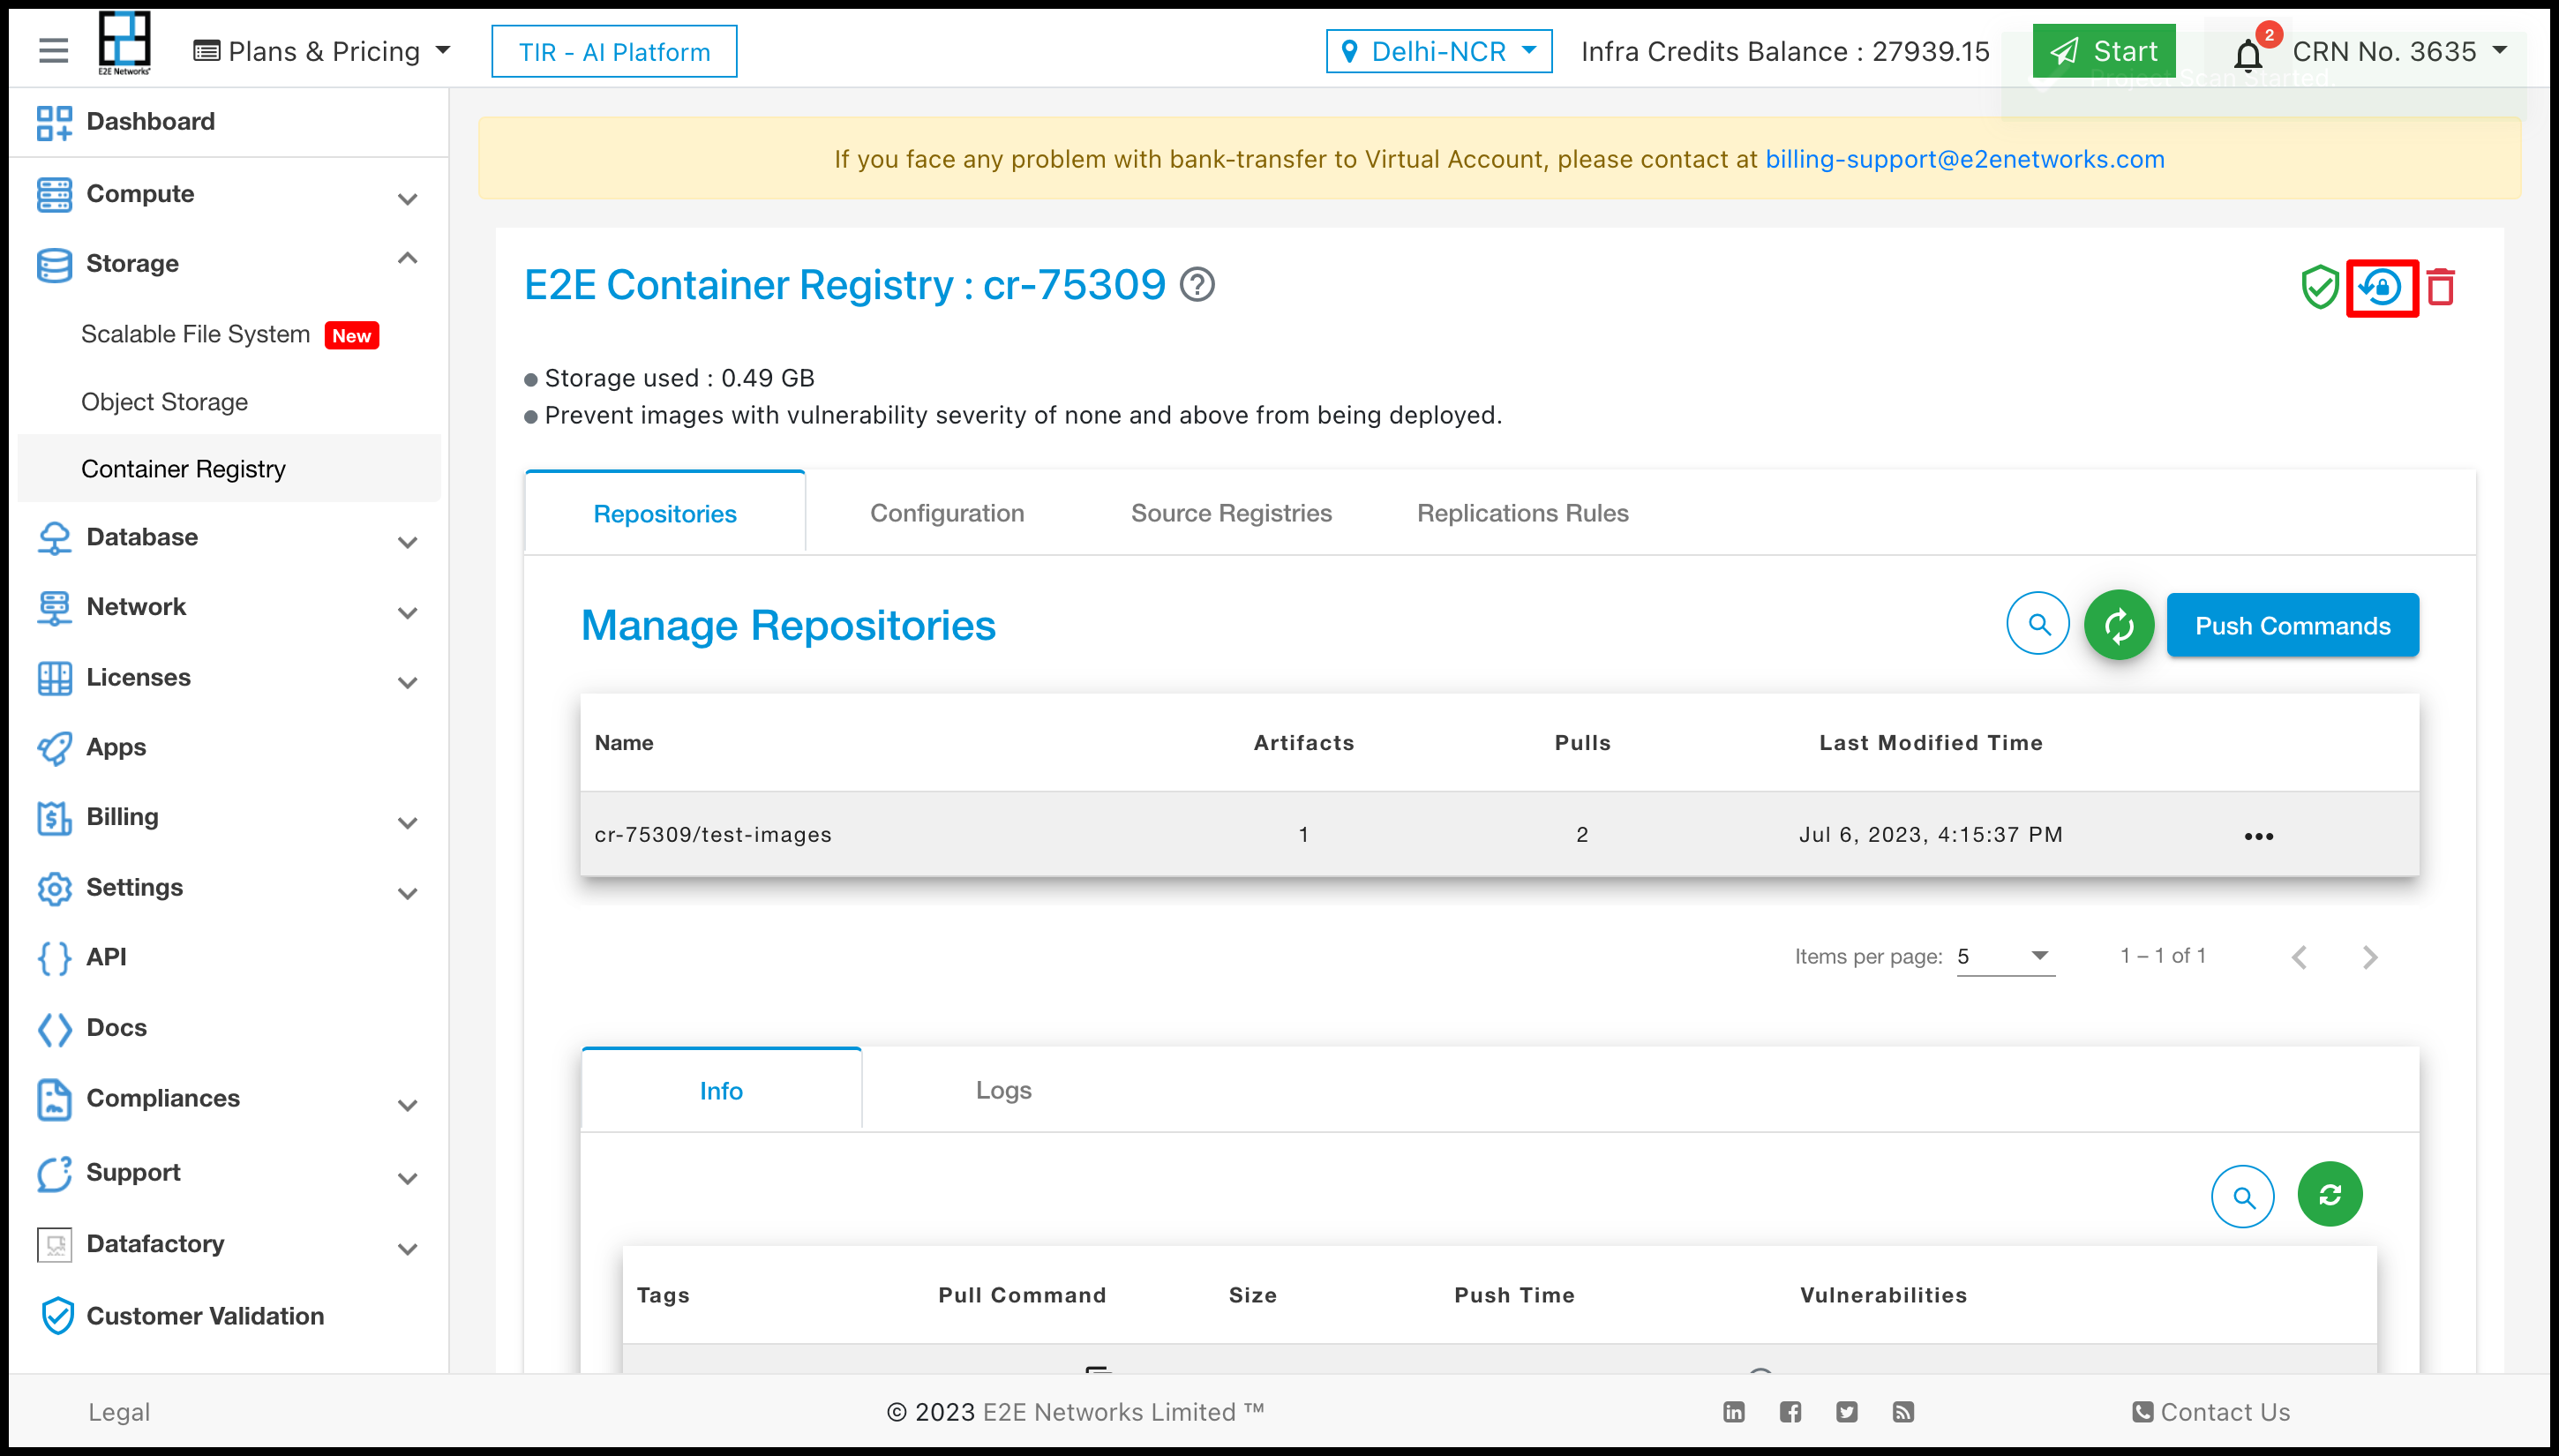
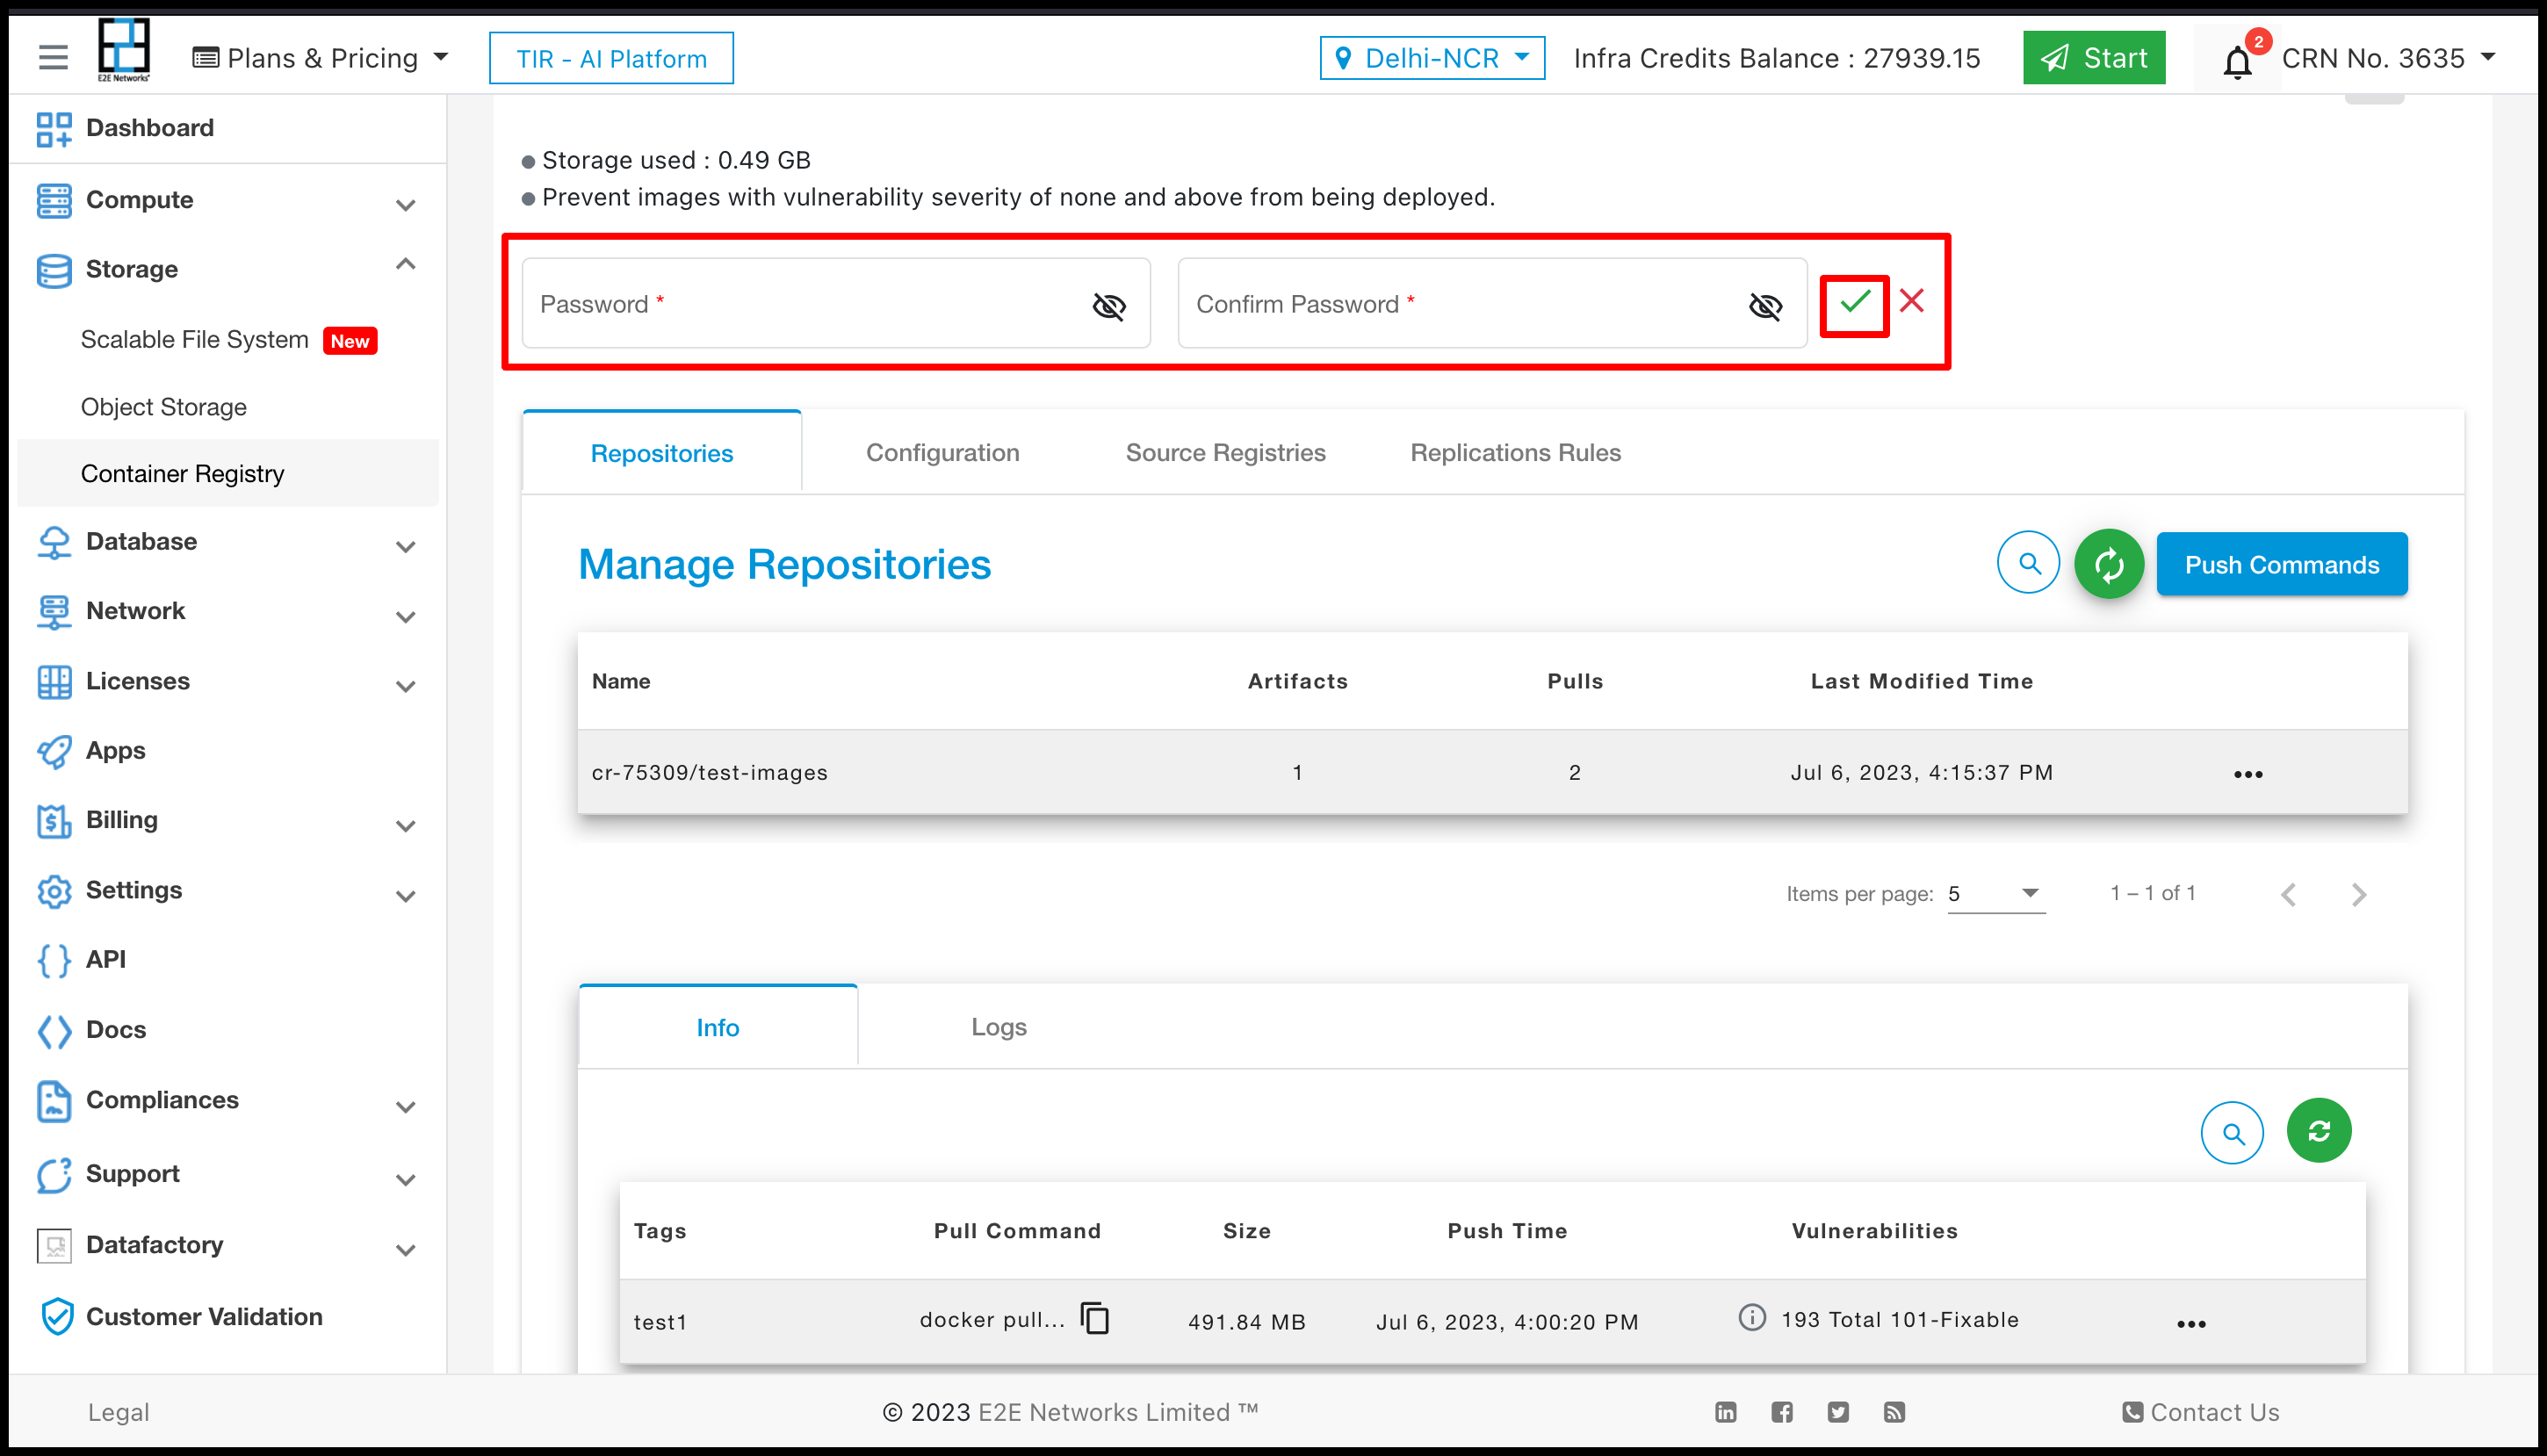
Reset Password
Click on the Reset Password button to Change the password of your Project.
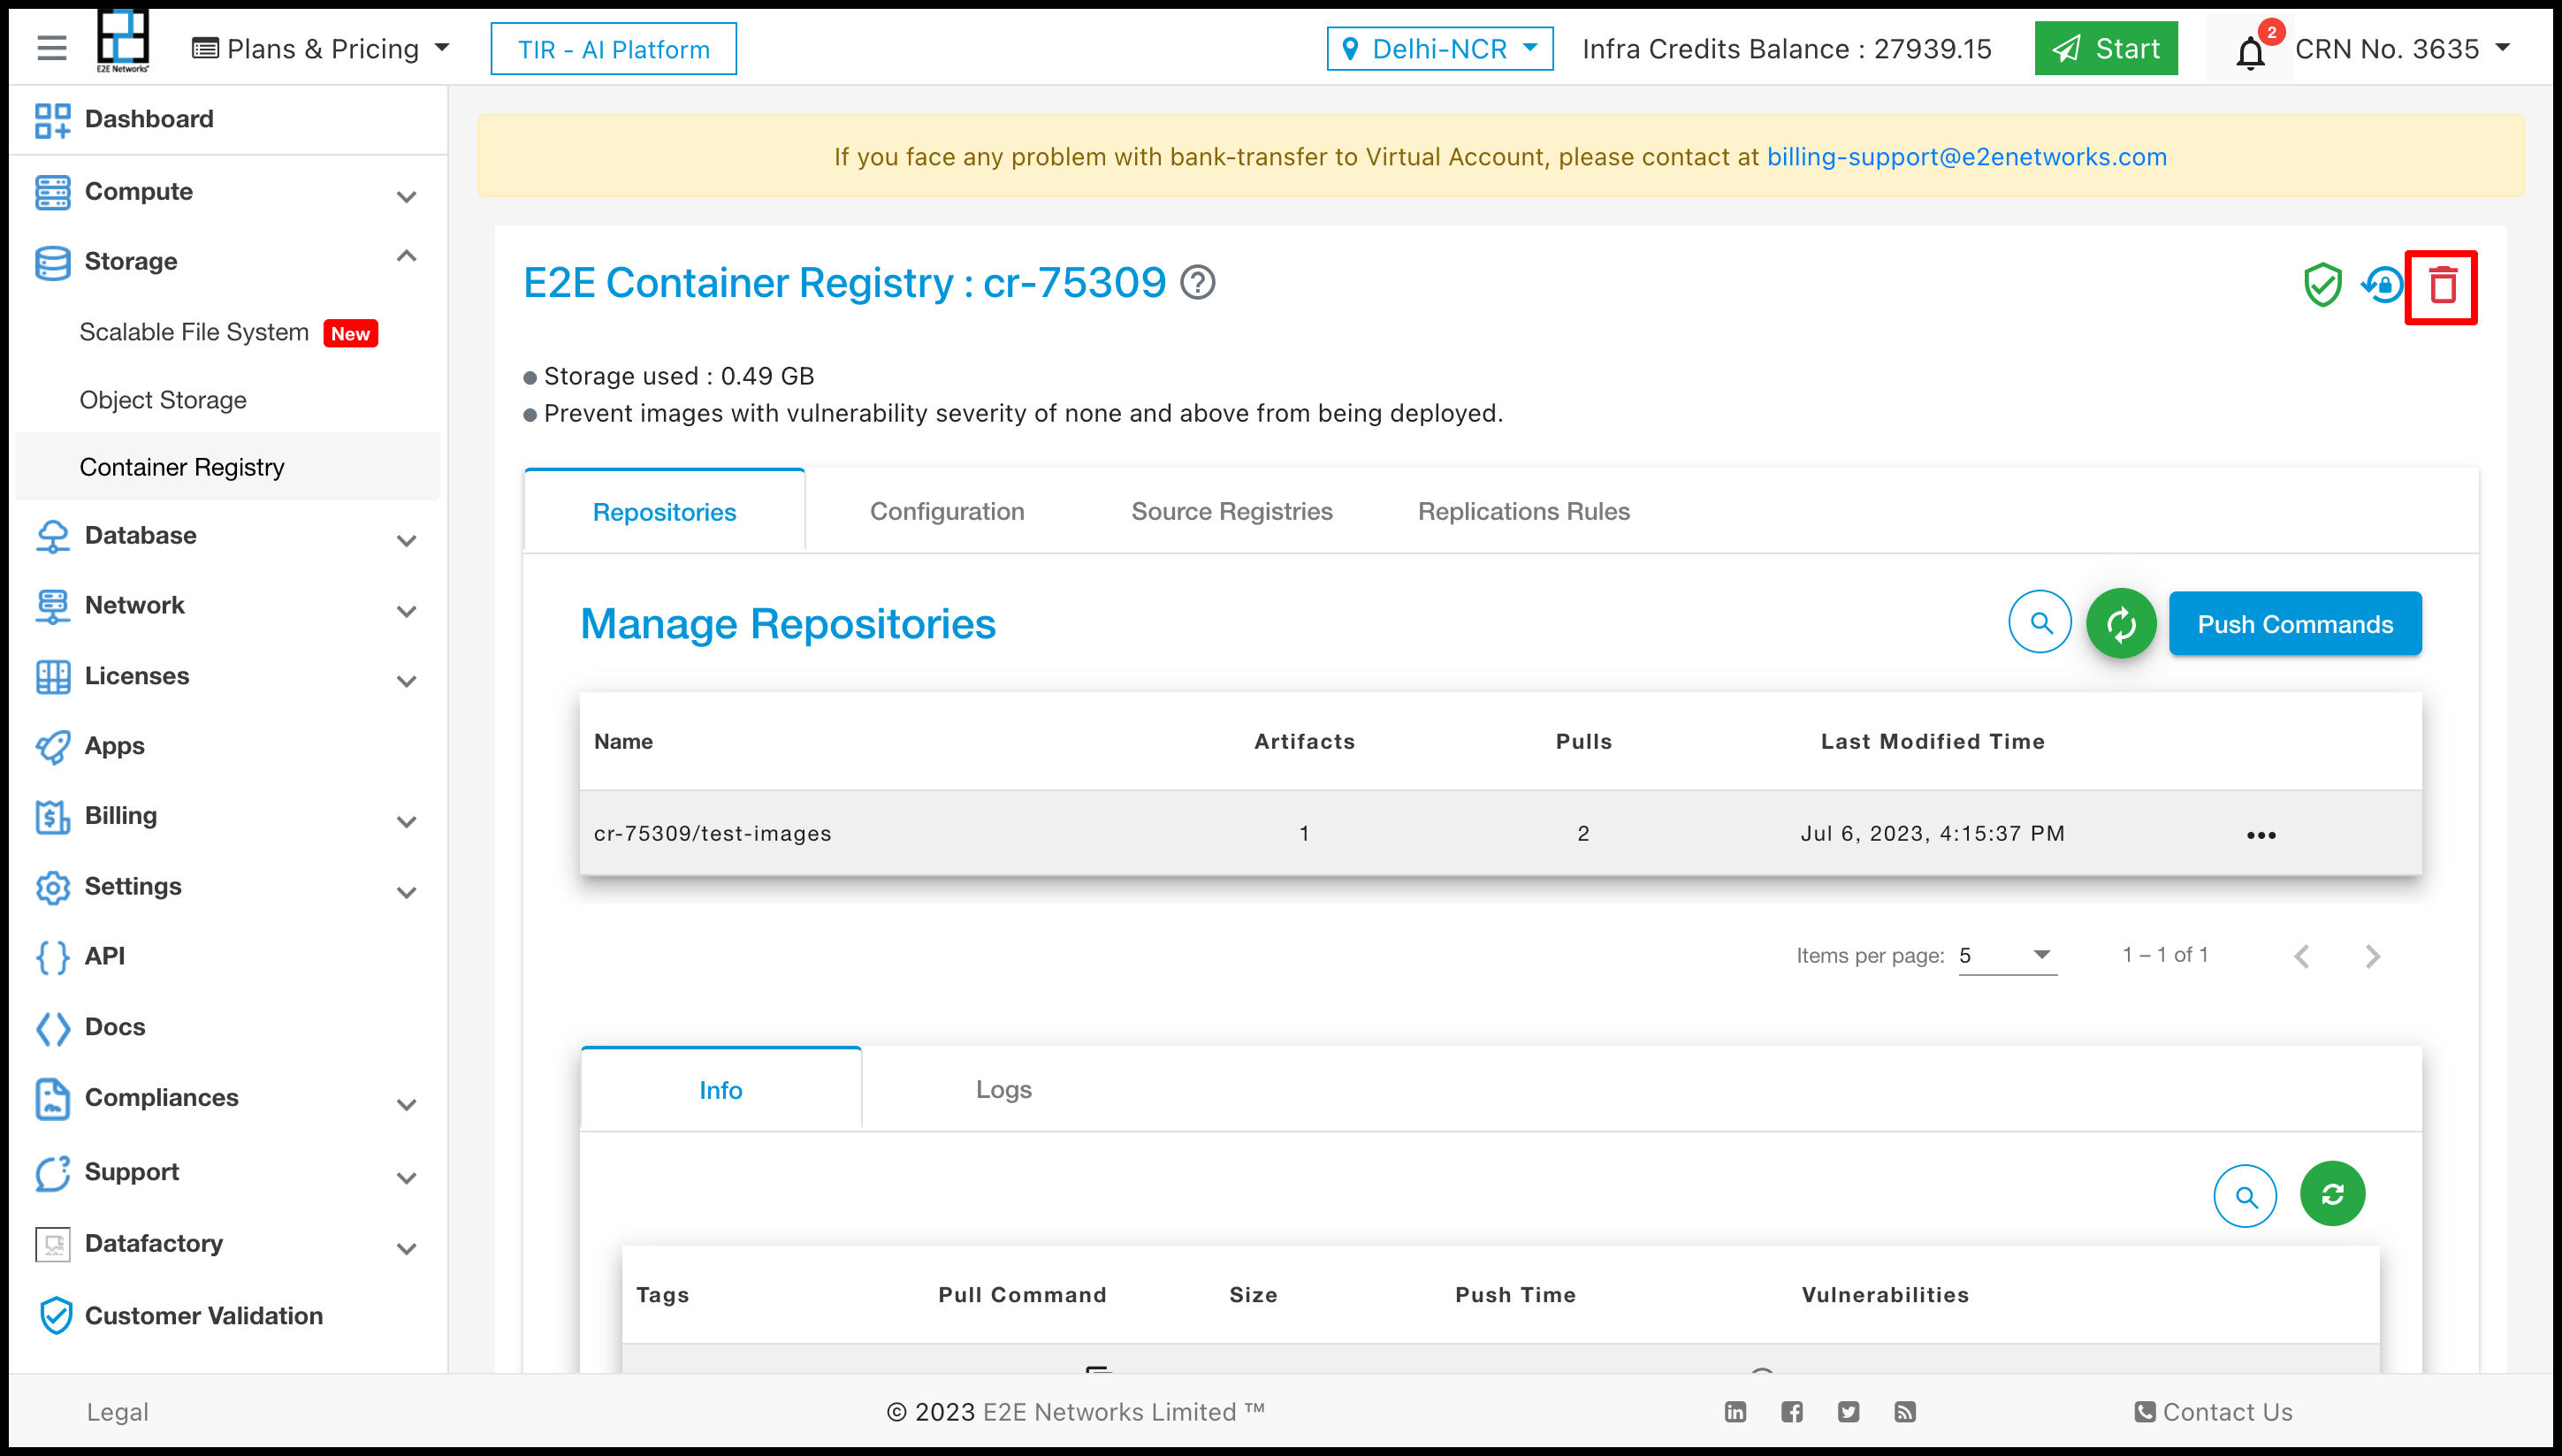
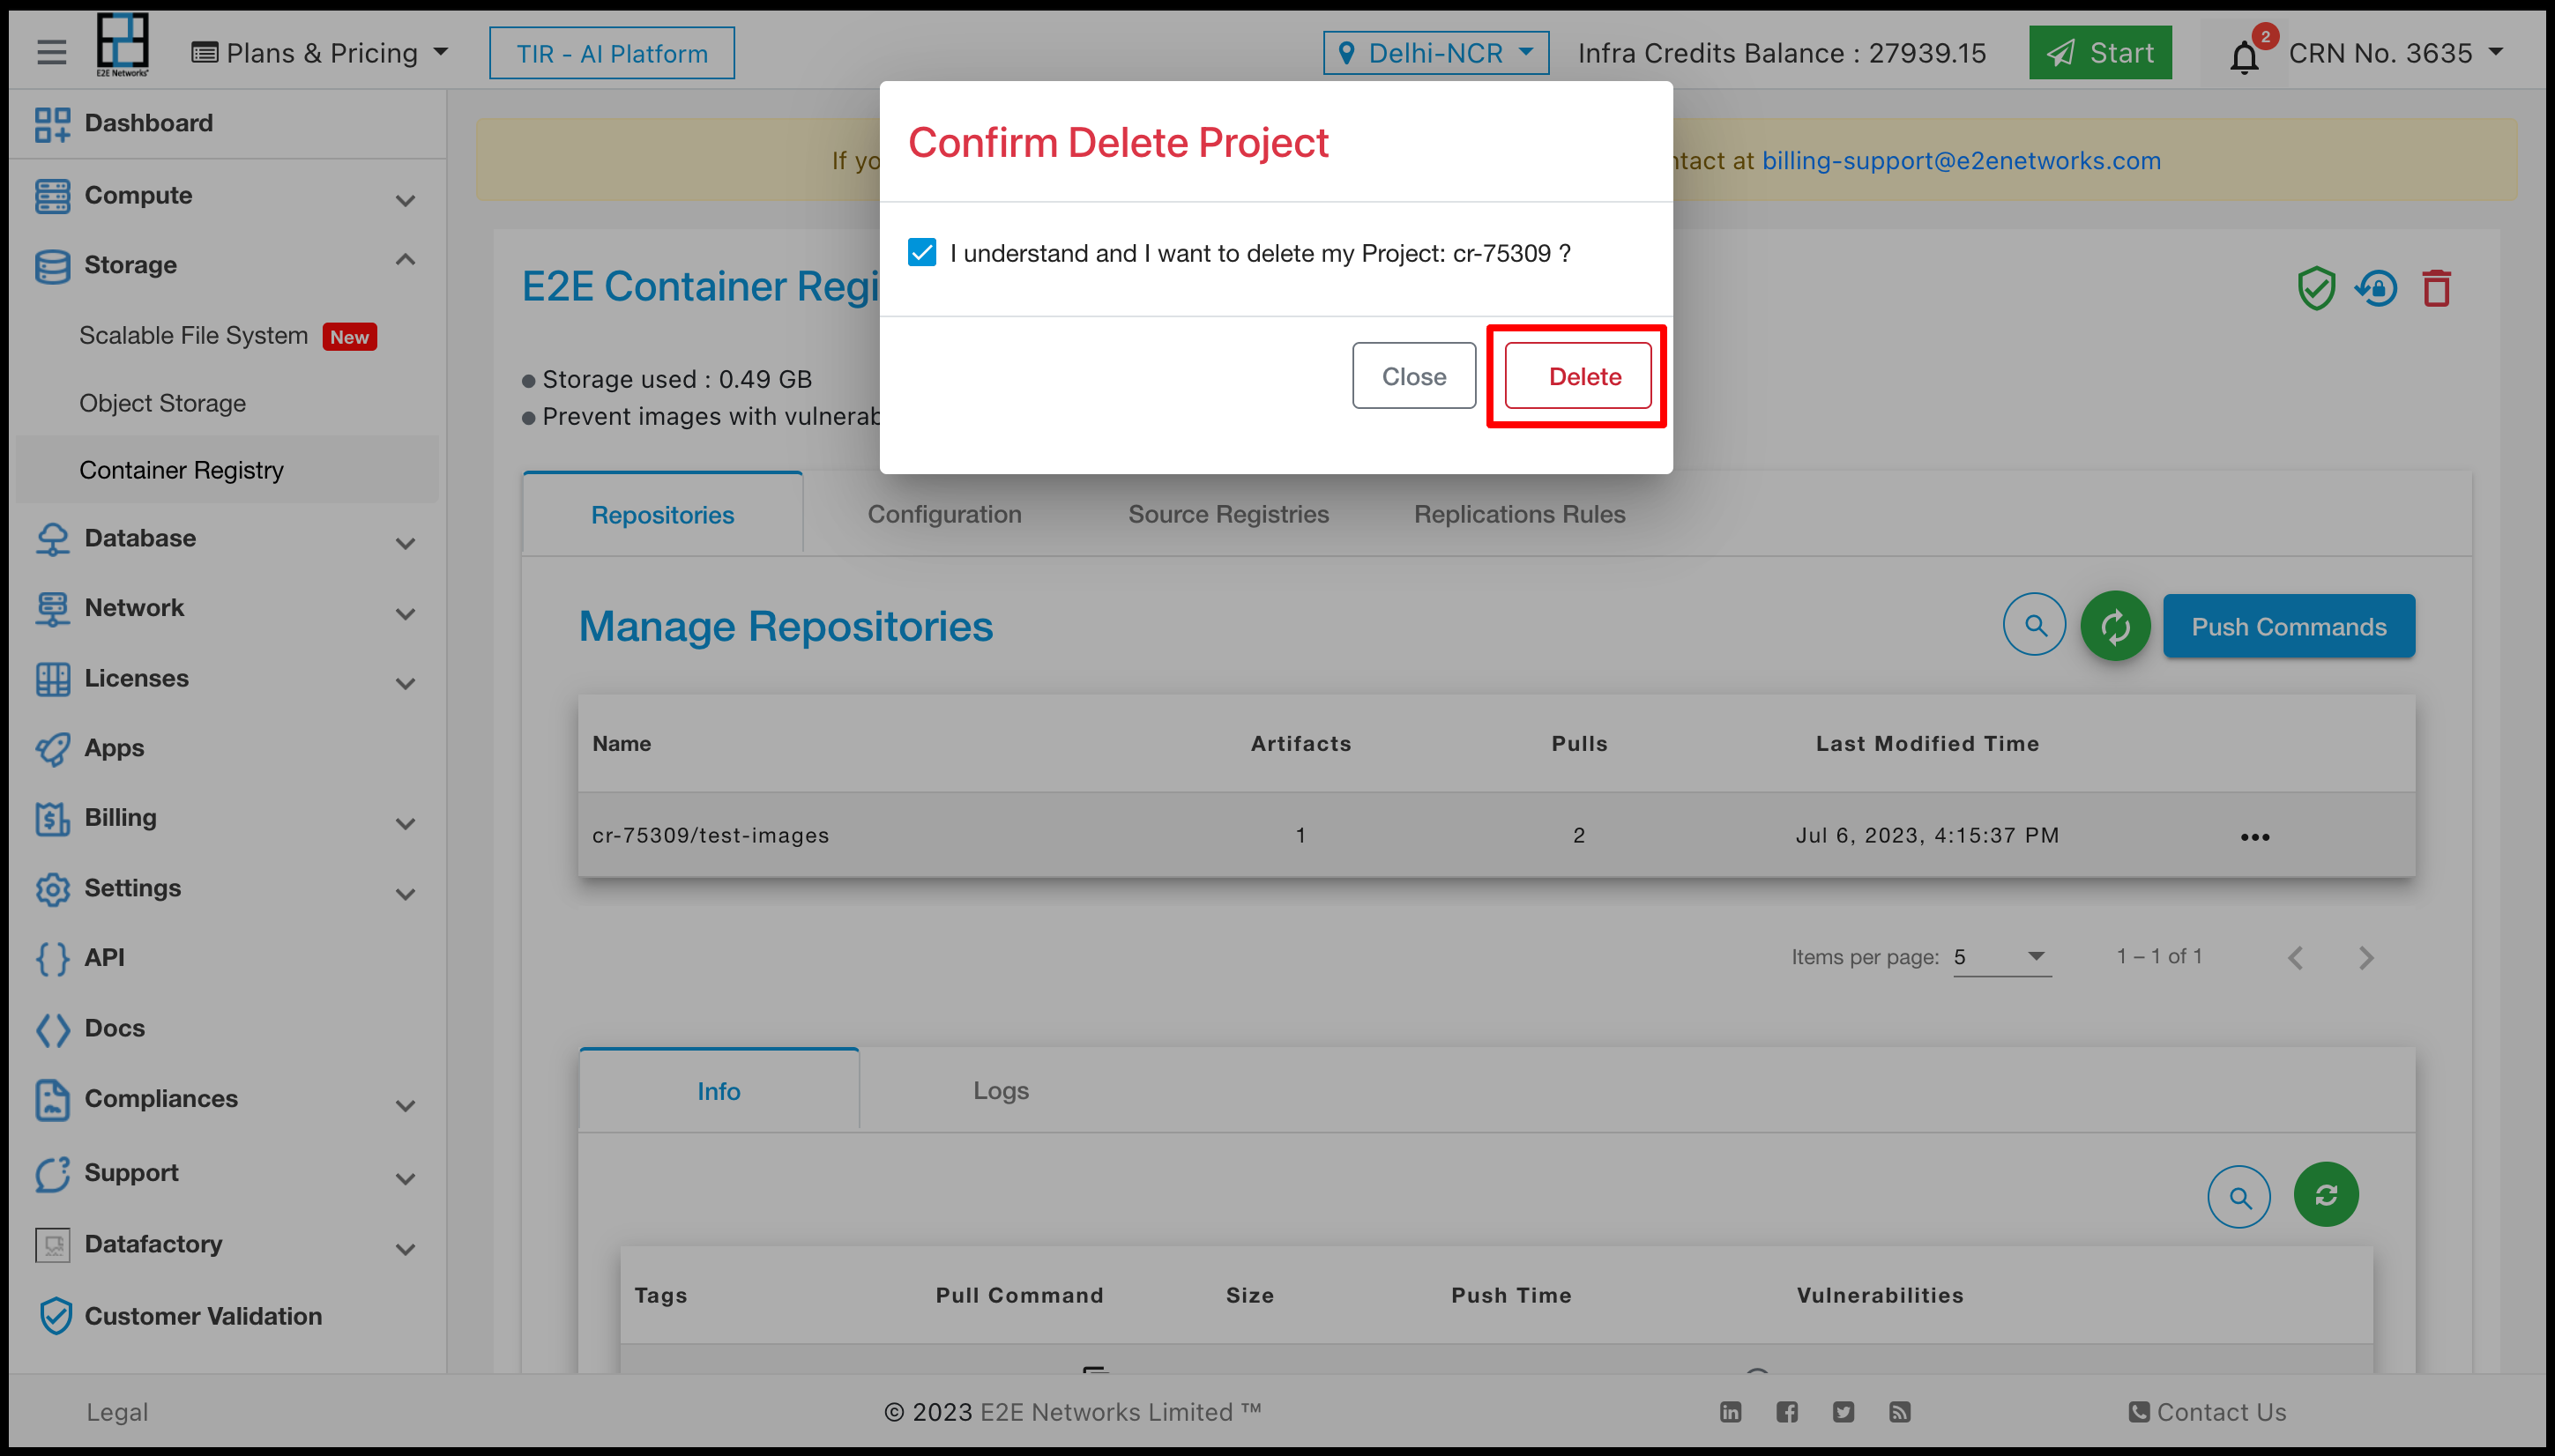
Delete Project
Click on the Delete Password button to Delete your Project
Connecting to your Container Registry
Enter the following command at a command prompt on your local or client desktop to connect to a container Registry.
docker login registry.e2enetworks.net -u <user_name> -p <password>

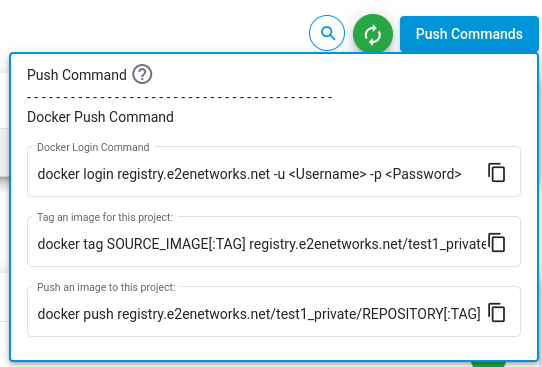
Push Command
Using Docker
Enter the following command to push your image on the project.
Push Command -
docker push registry.e2enetworks.net/<project_name>/<image_name>
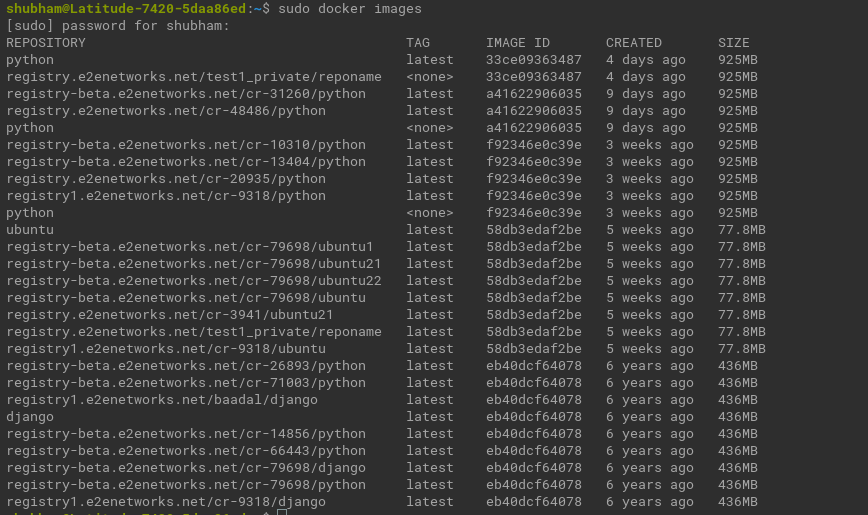
Docker Images –
sudo docker images
Create tag -
docker tag <image> registry.e2enetworks.net/<project_name>/<image>


Push Imagess
docker push registry.e2enetworks.net/<project_name>/<image_name>

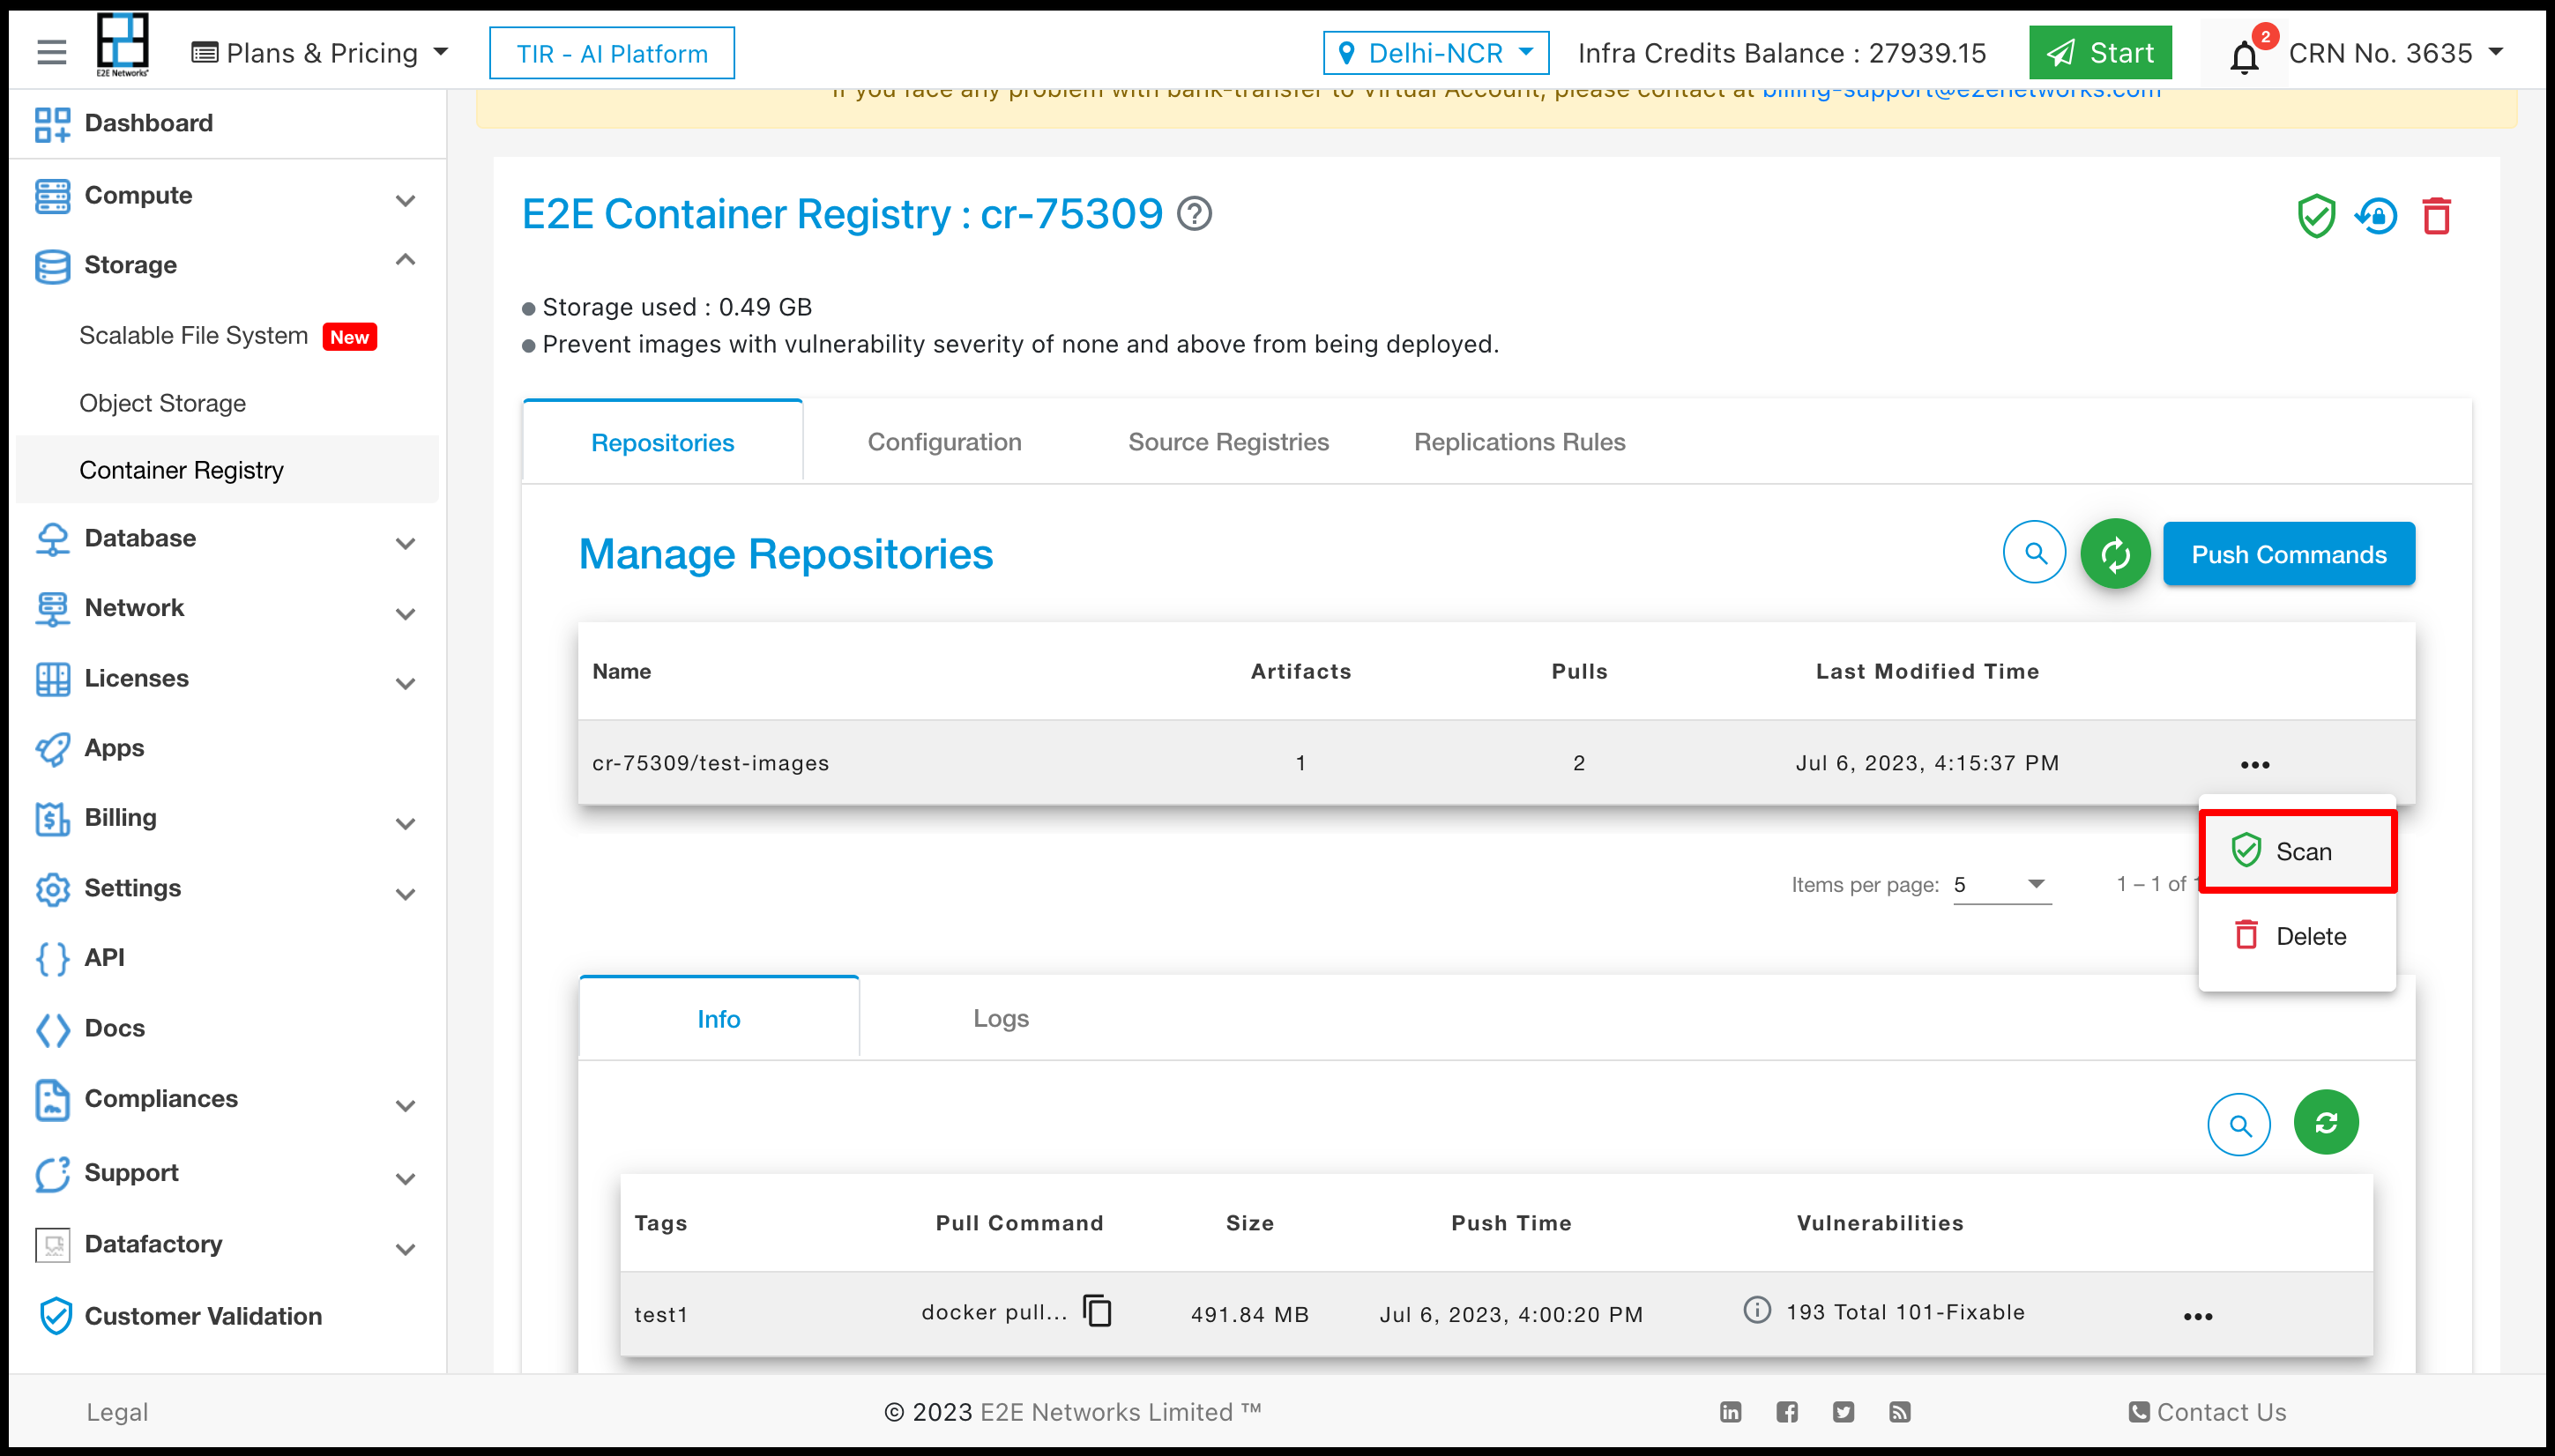
Scan Repositories
For scan repositories you have to click on the scan button to scan your Repositories.
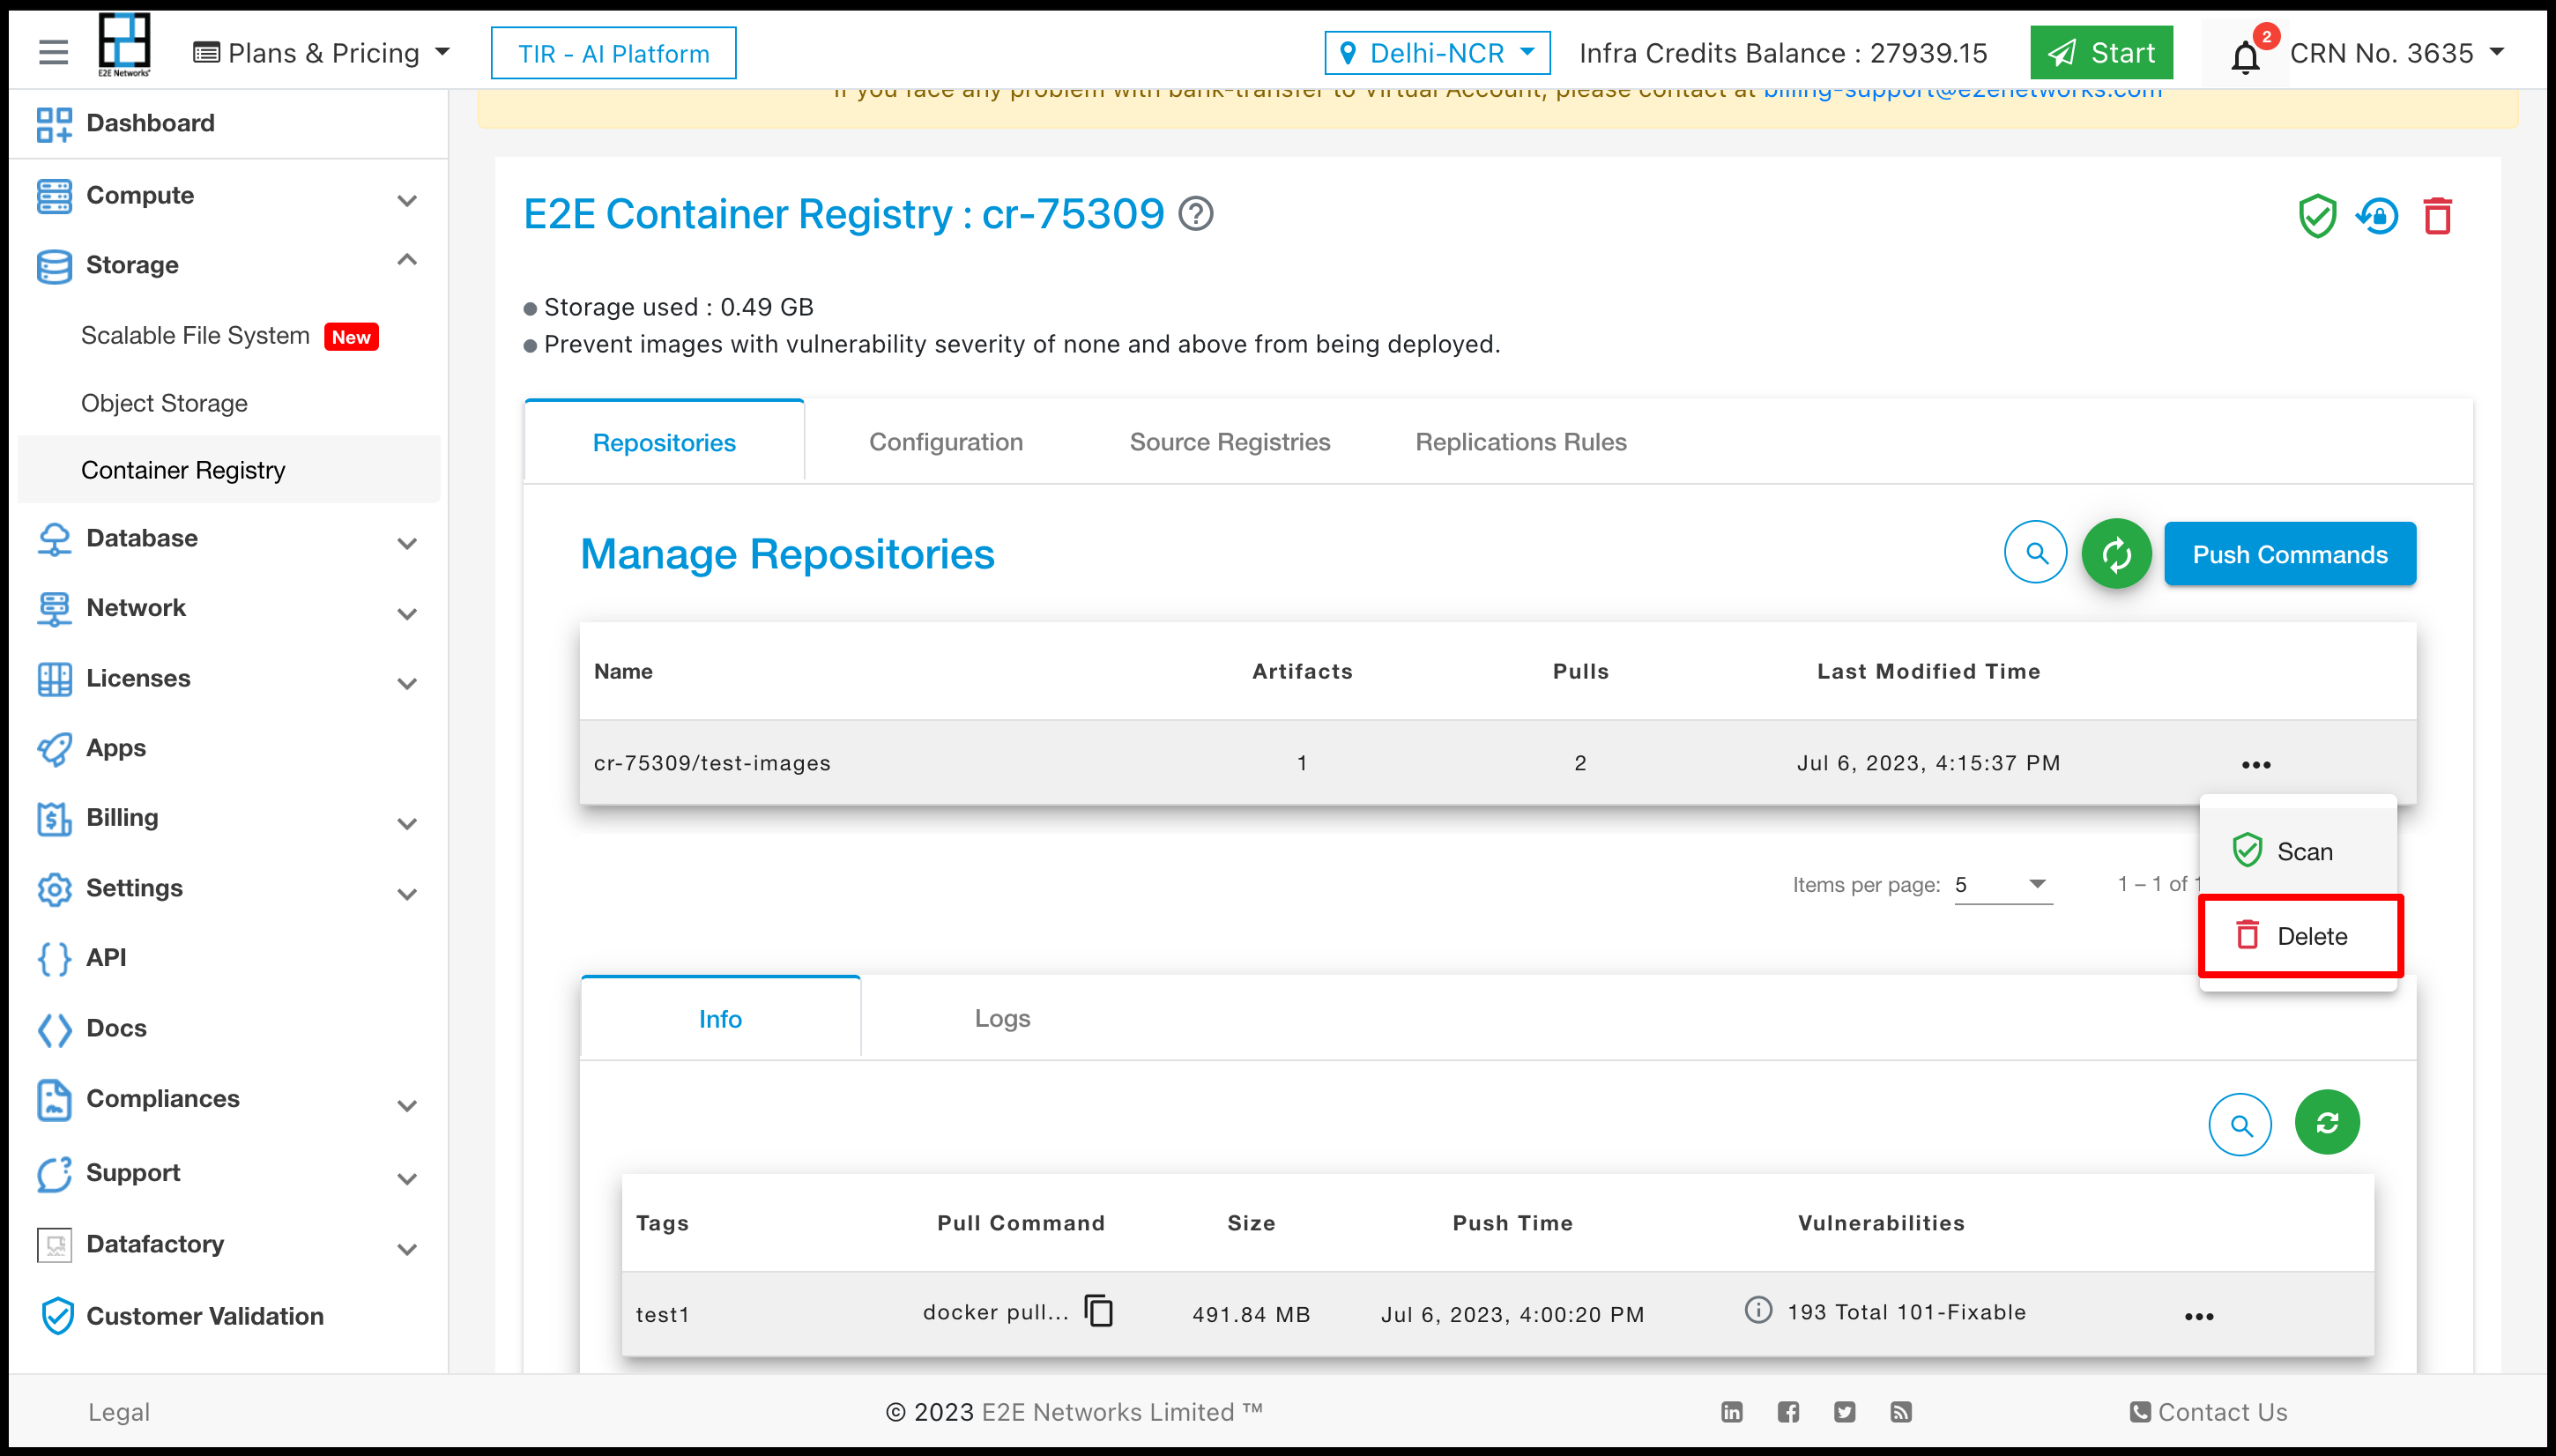
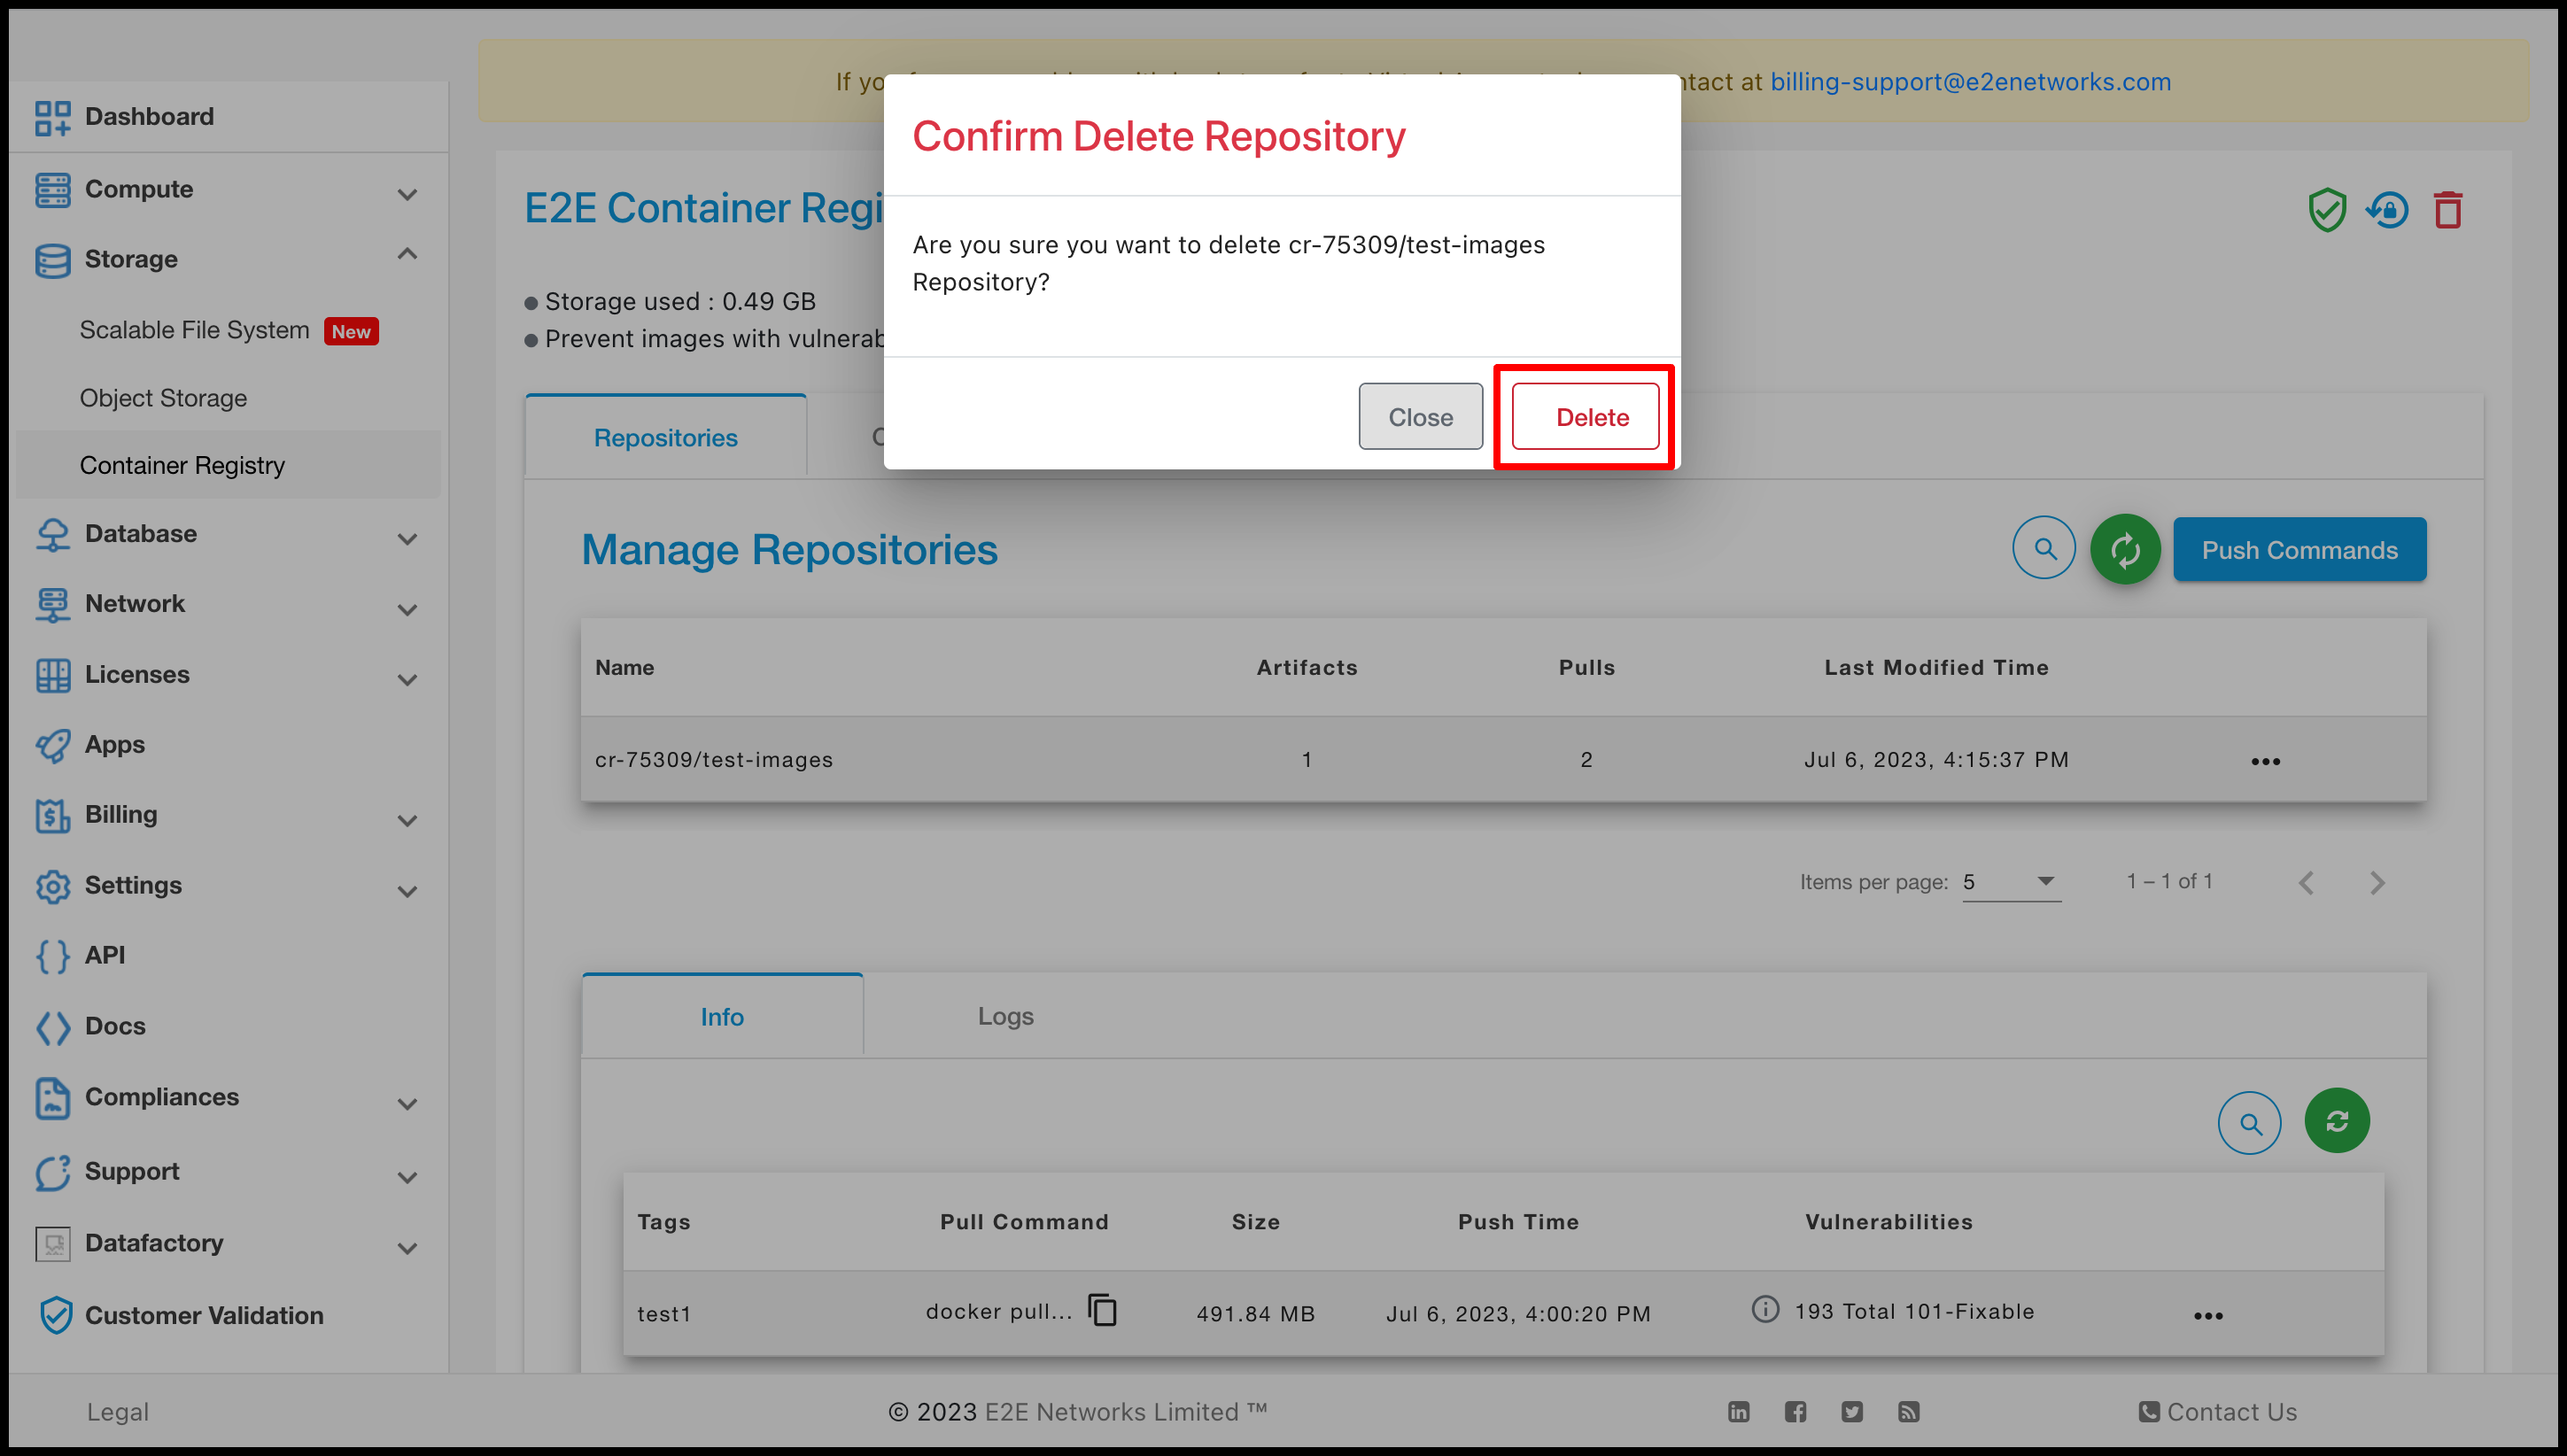
Delete Repositories
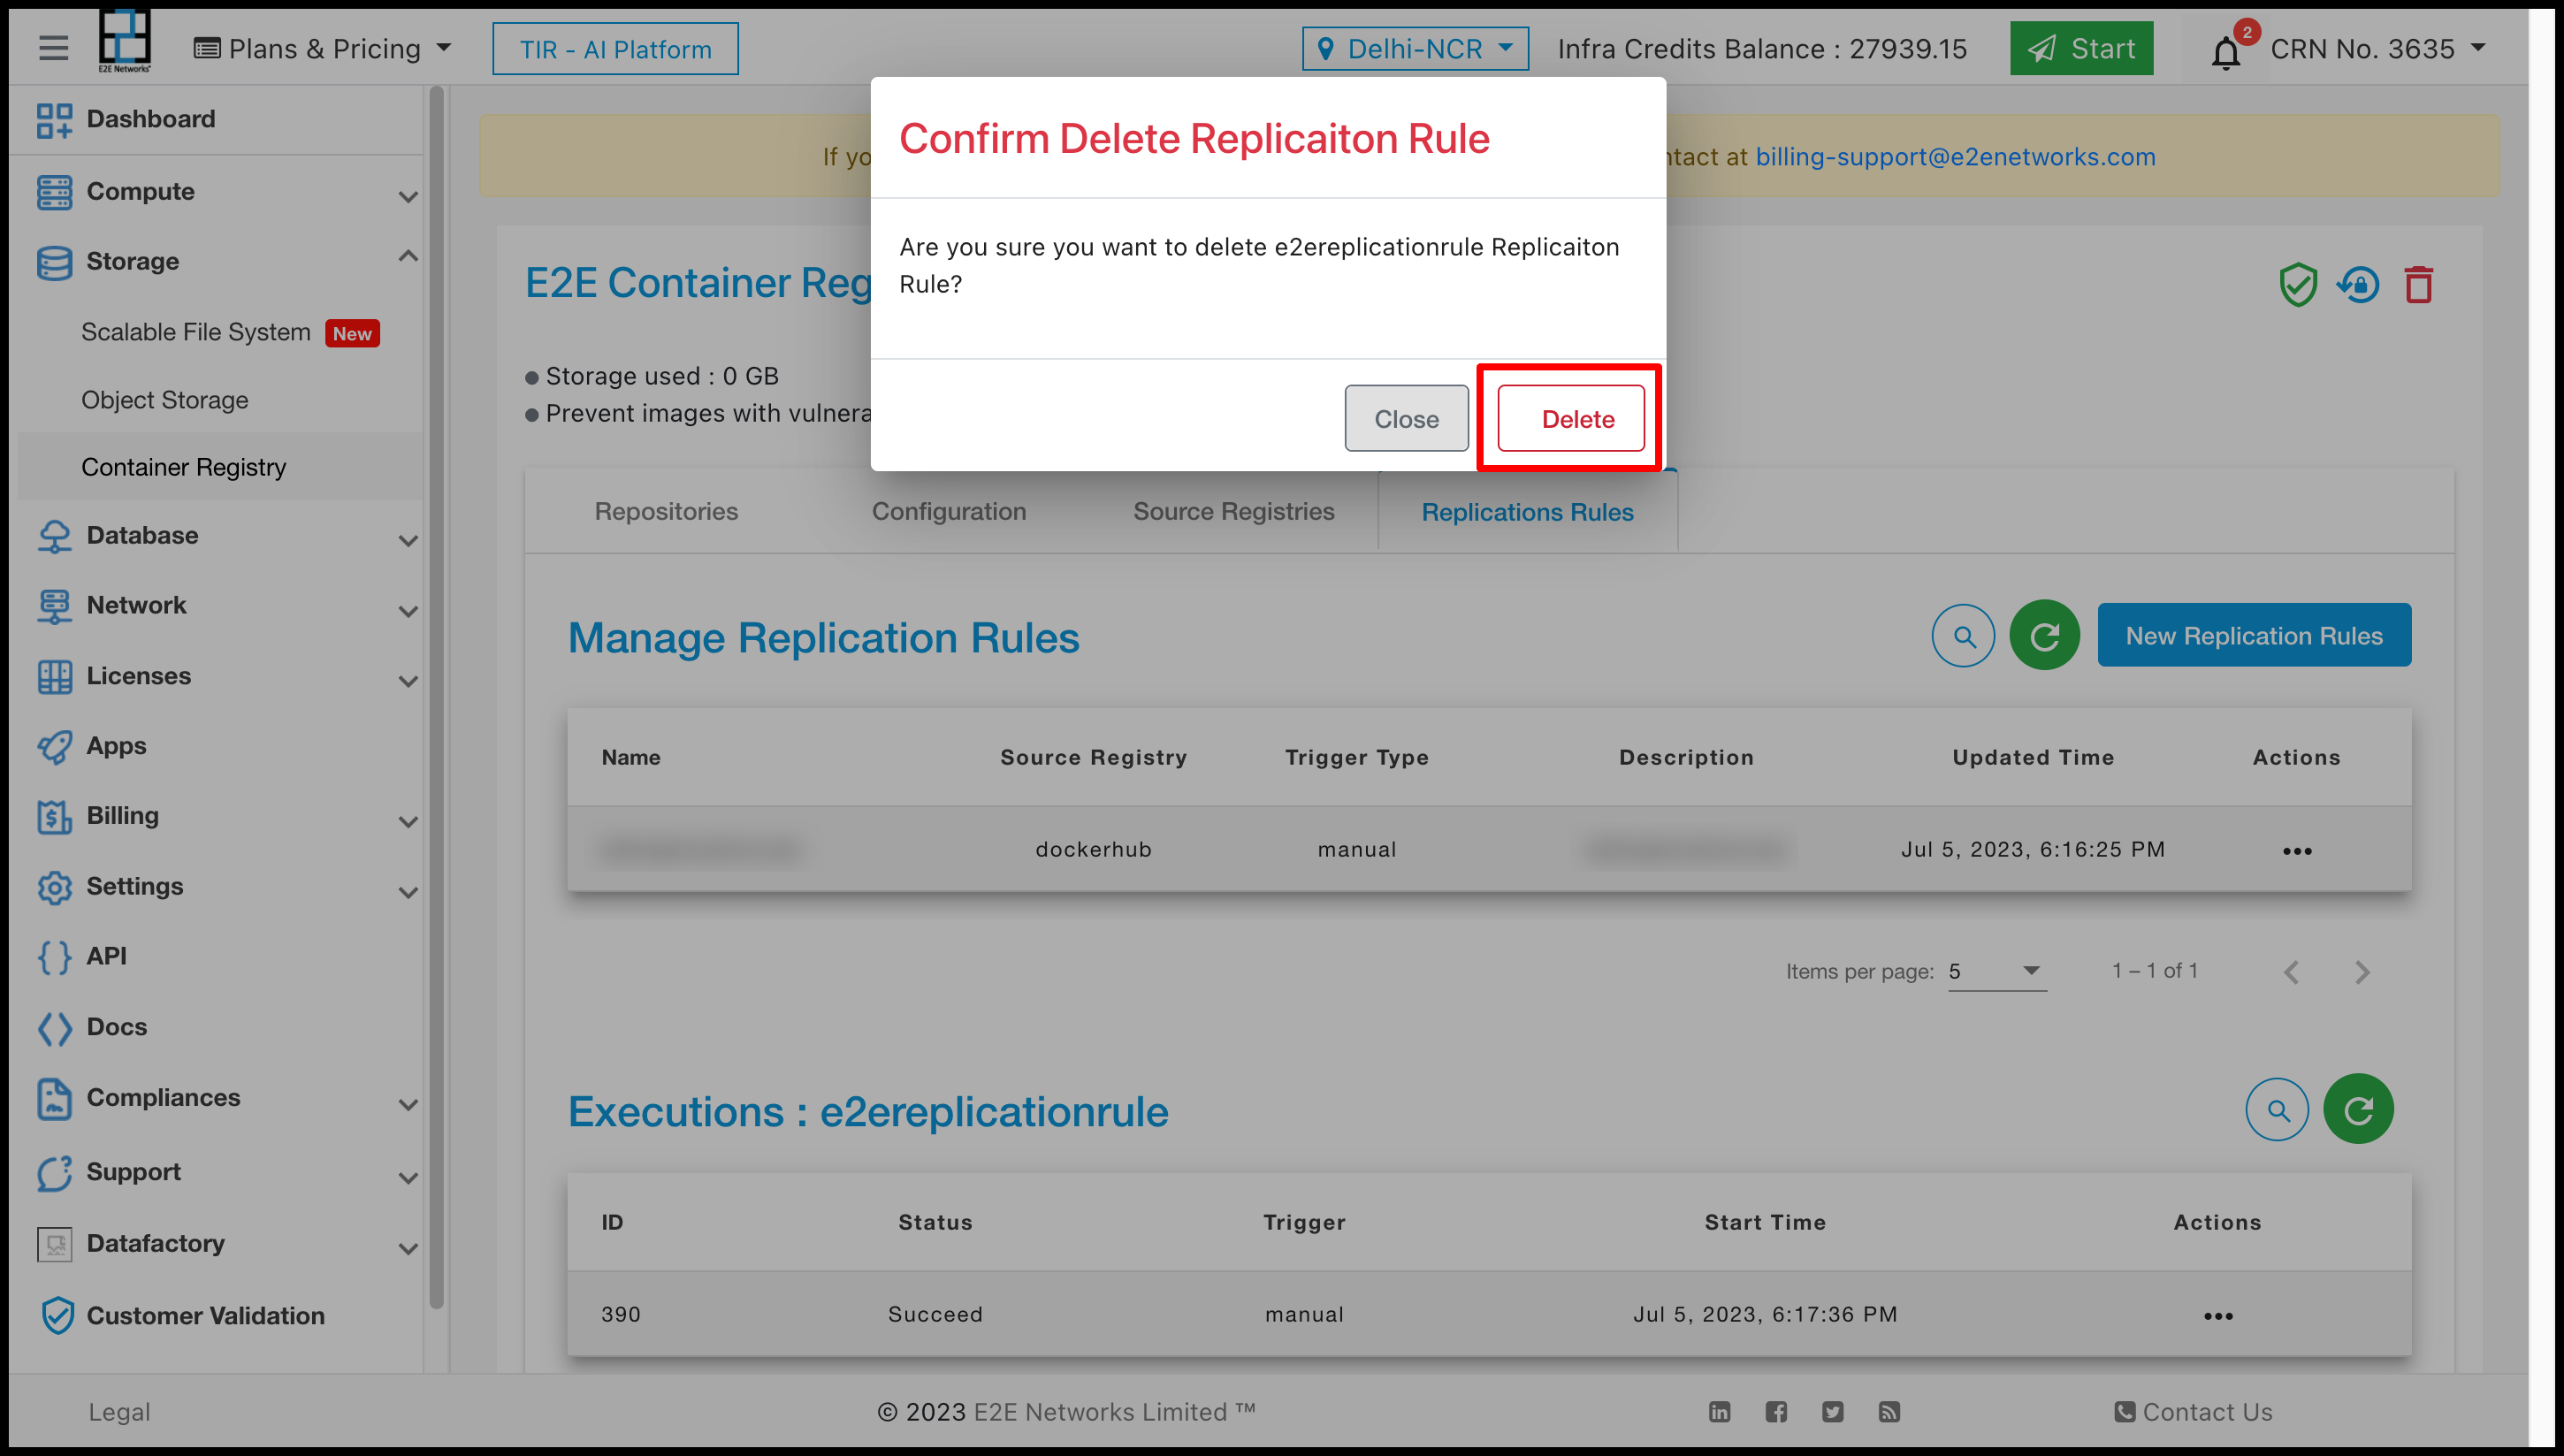
For deleting the repositories you have to click on the Delete button. And confirmation popup will be open and you need to confirm that click on Delete button.
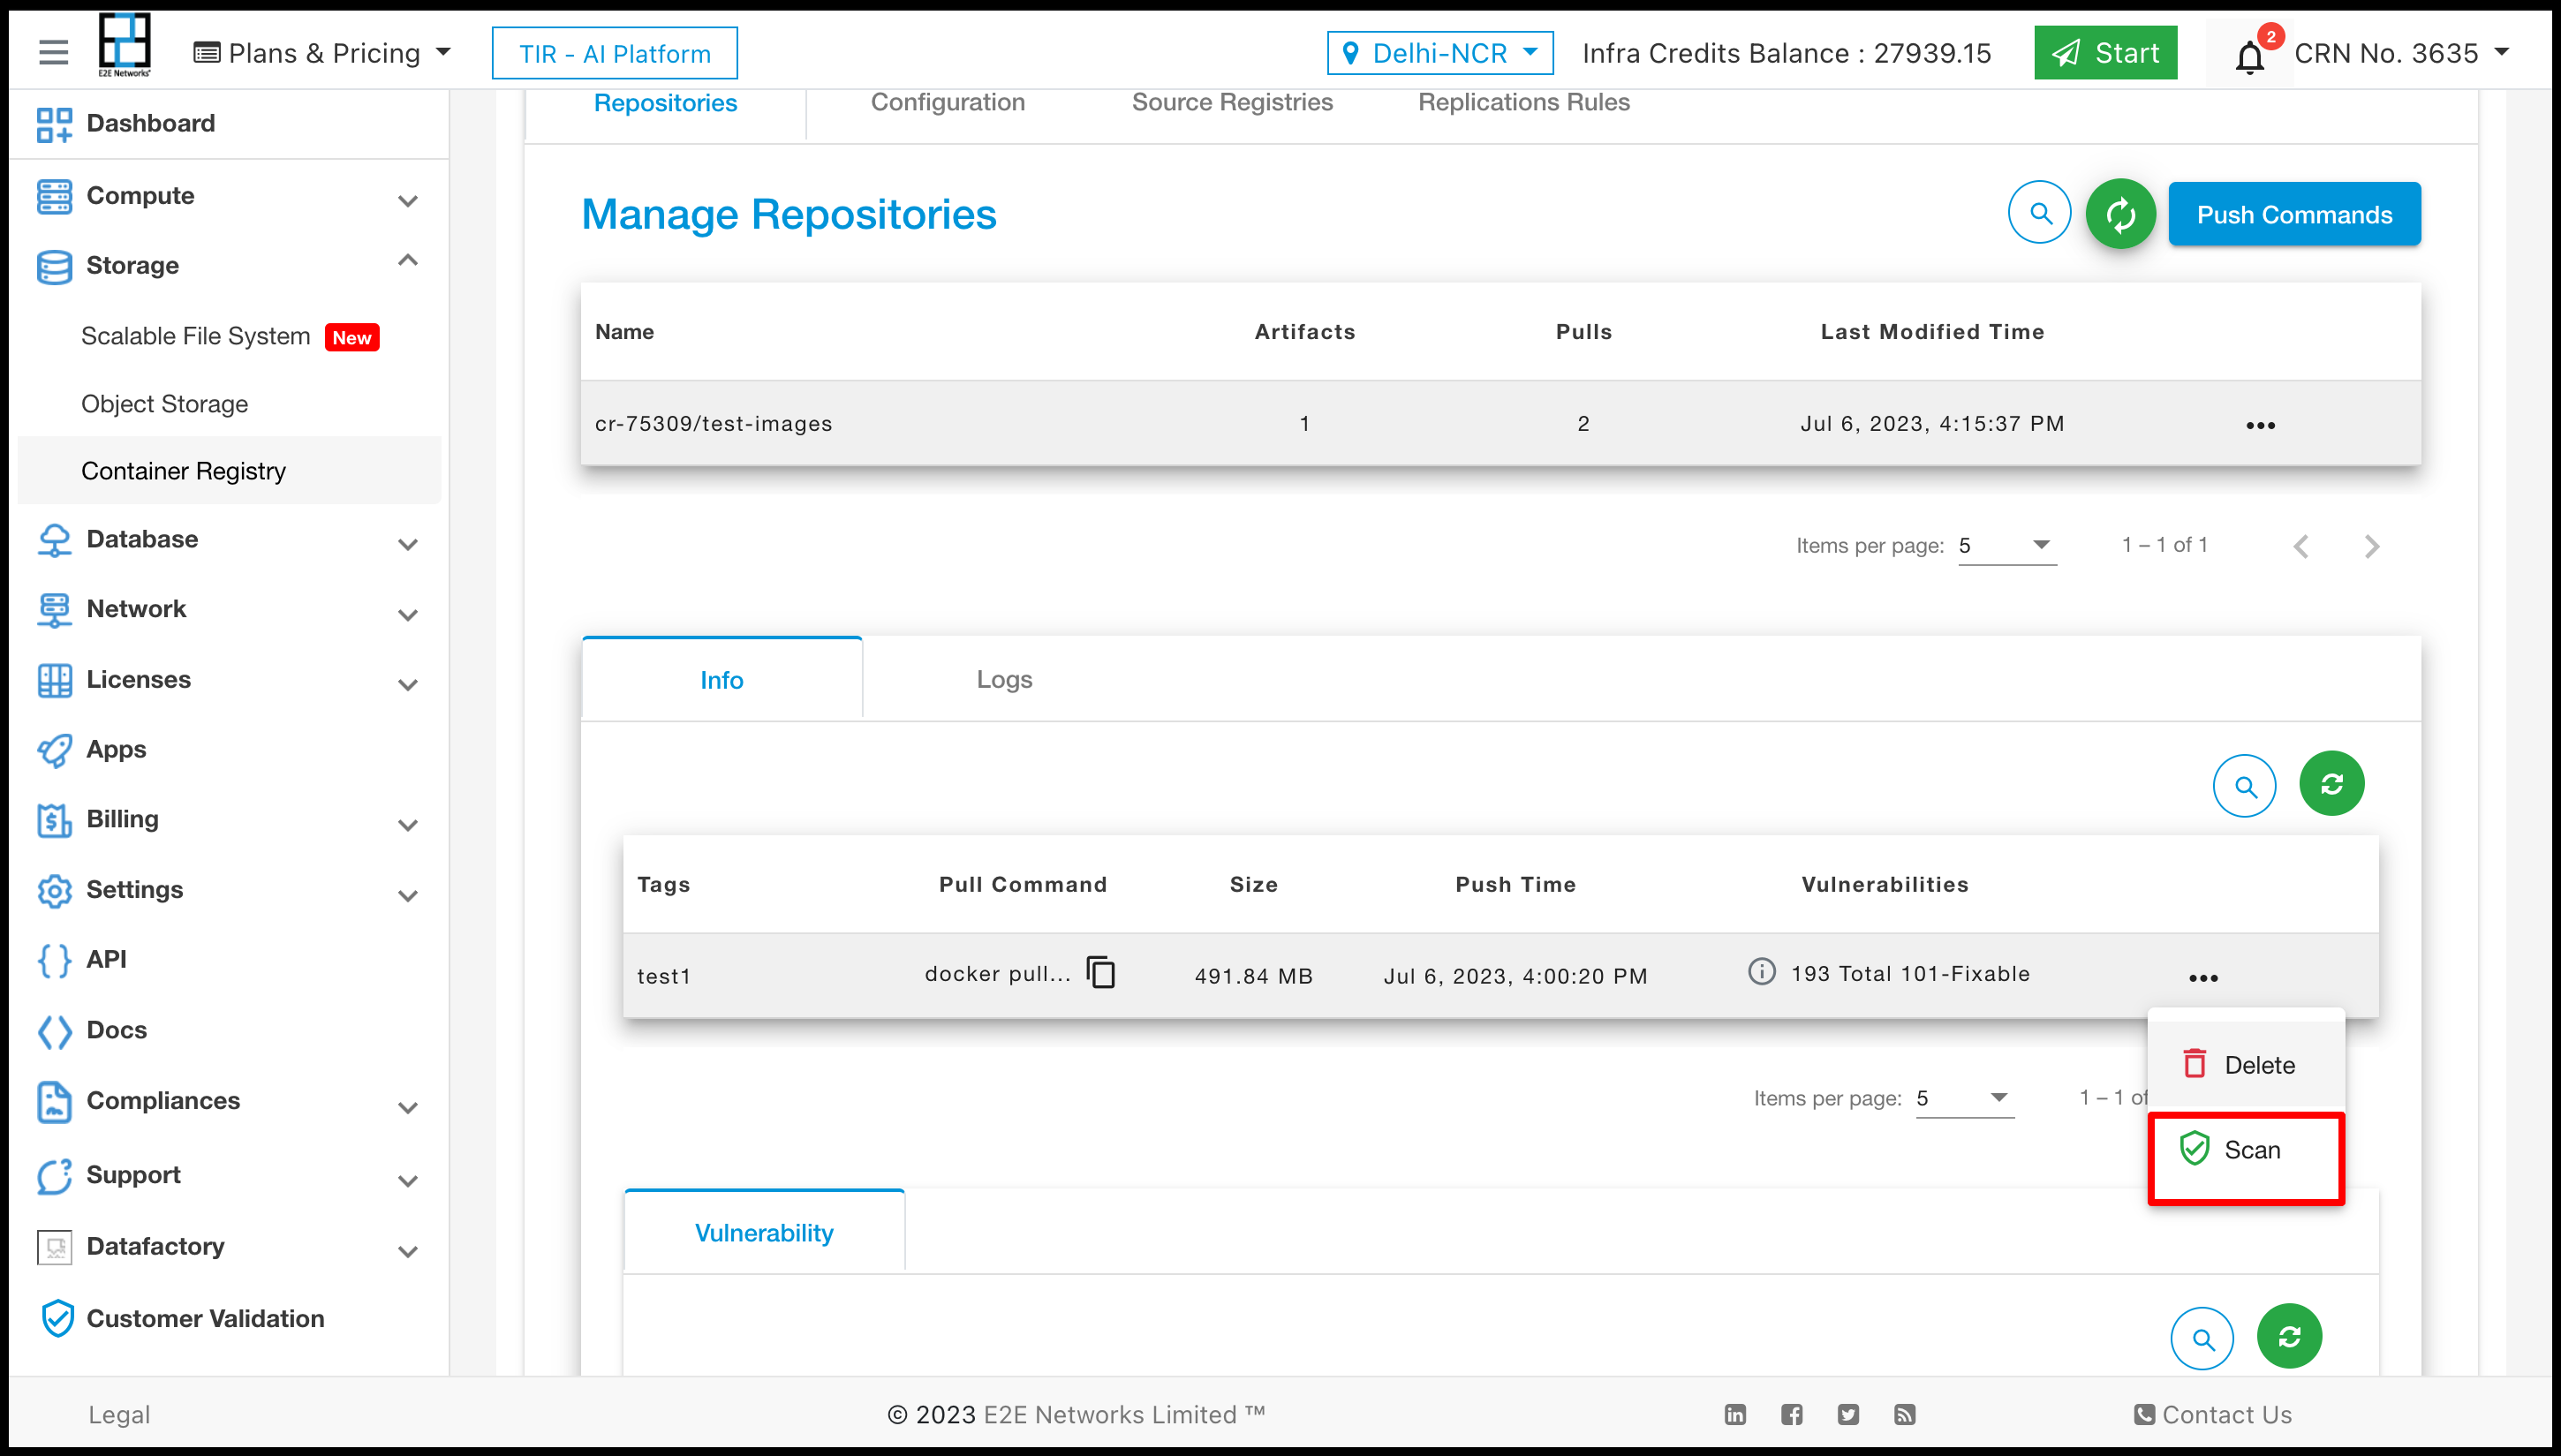
Scan Artifact
For scanning the Artifact click on scan button of artifact.
Delete Artifact
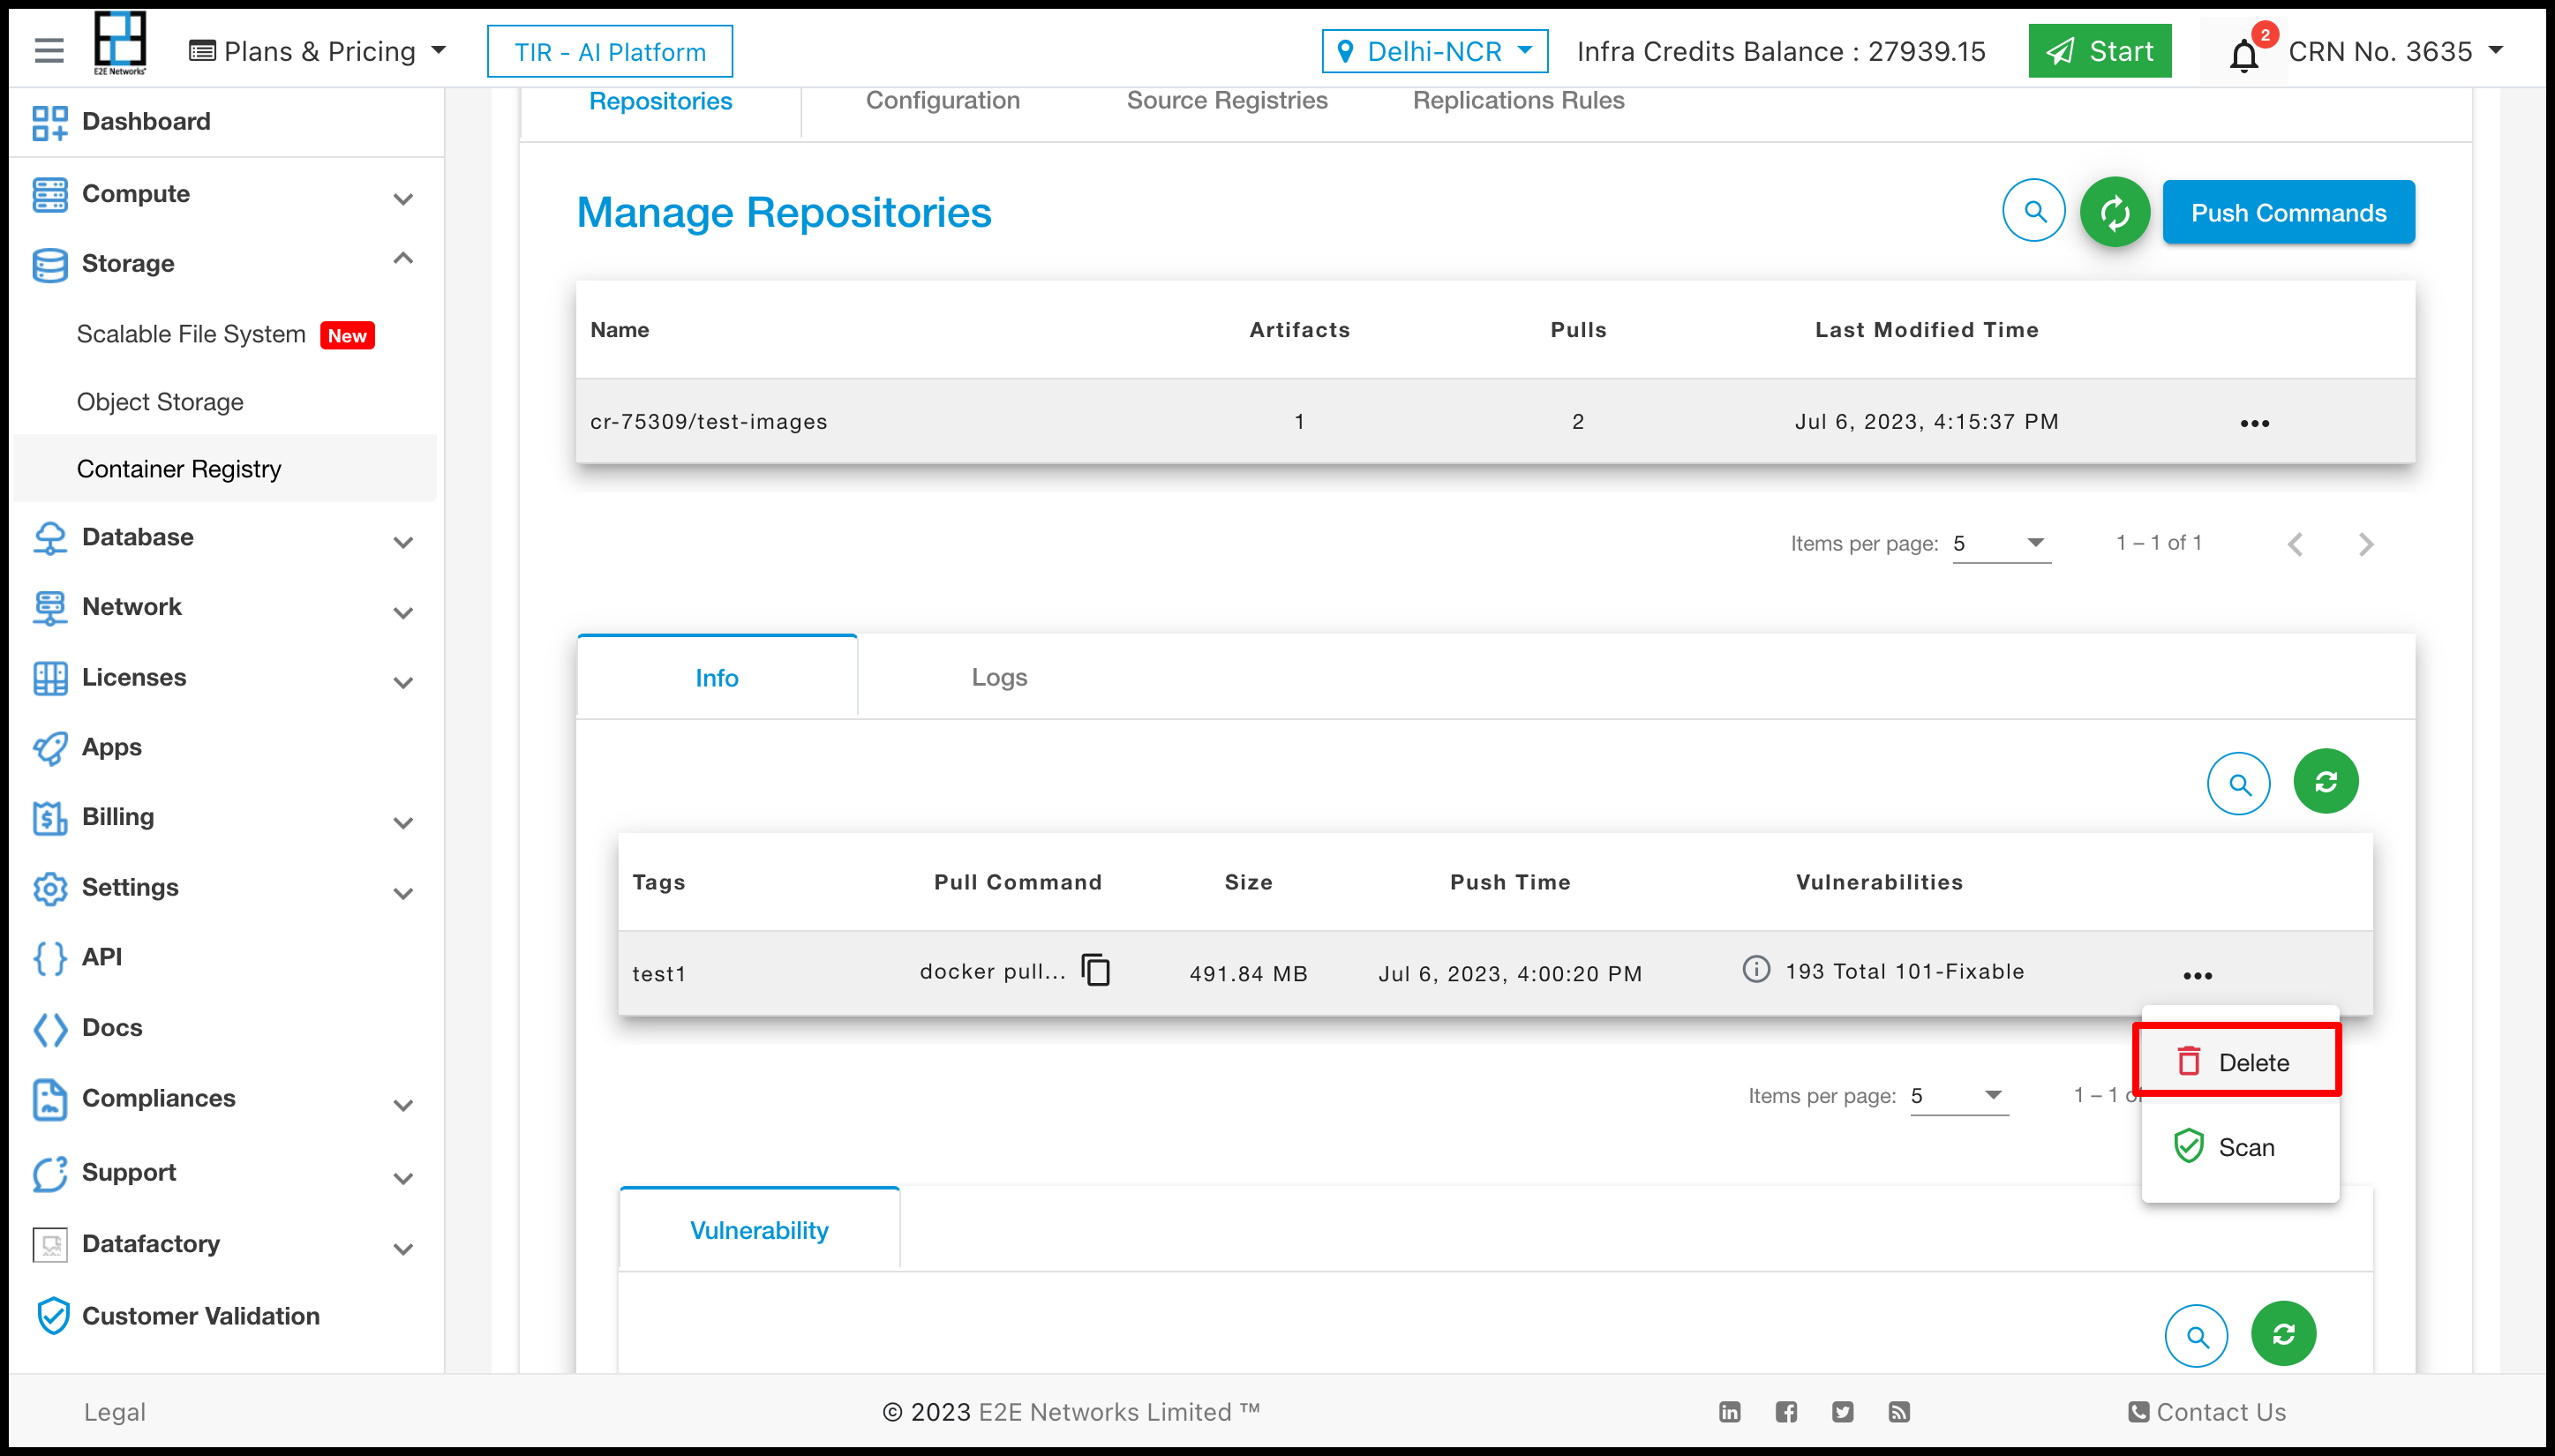
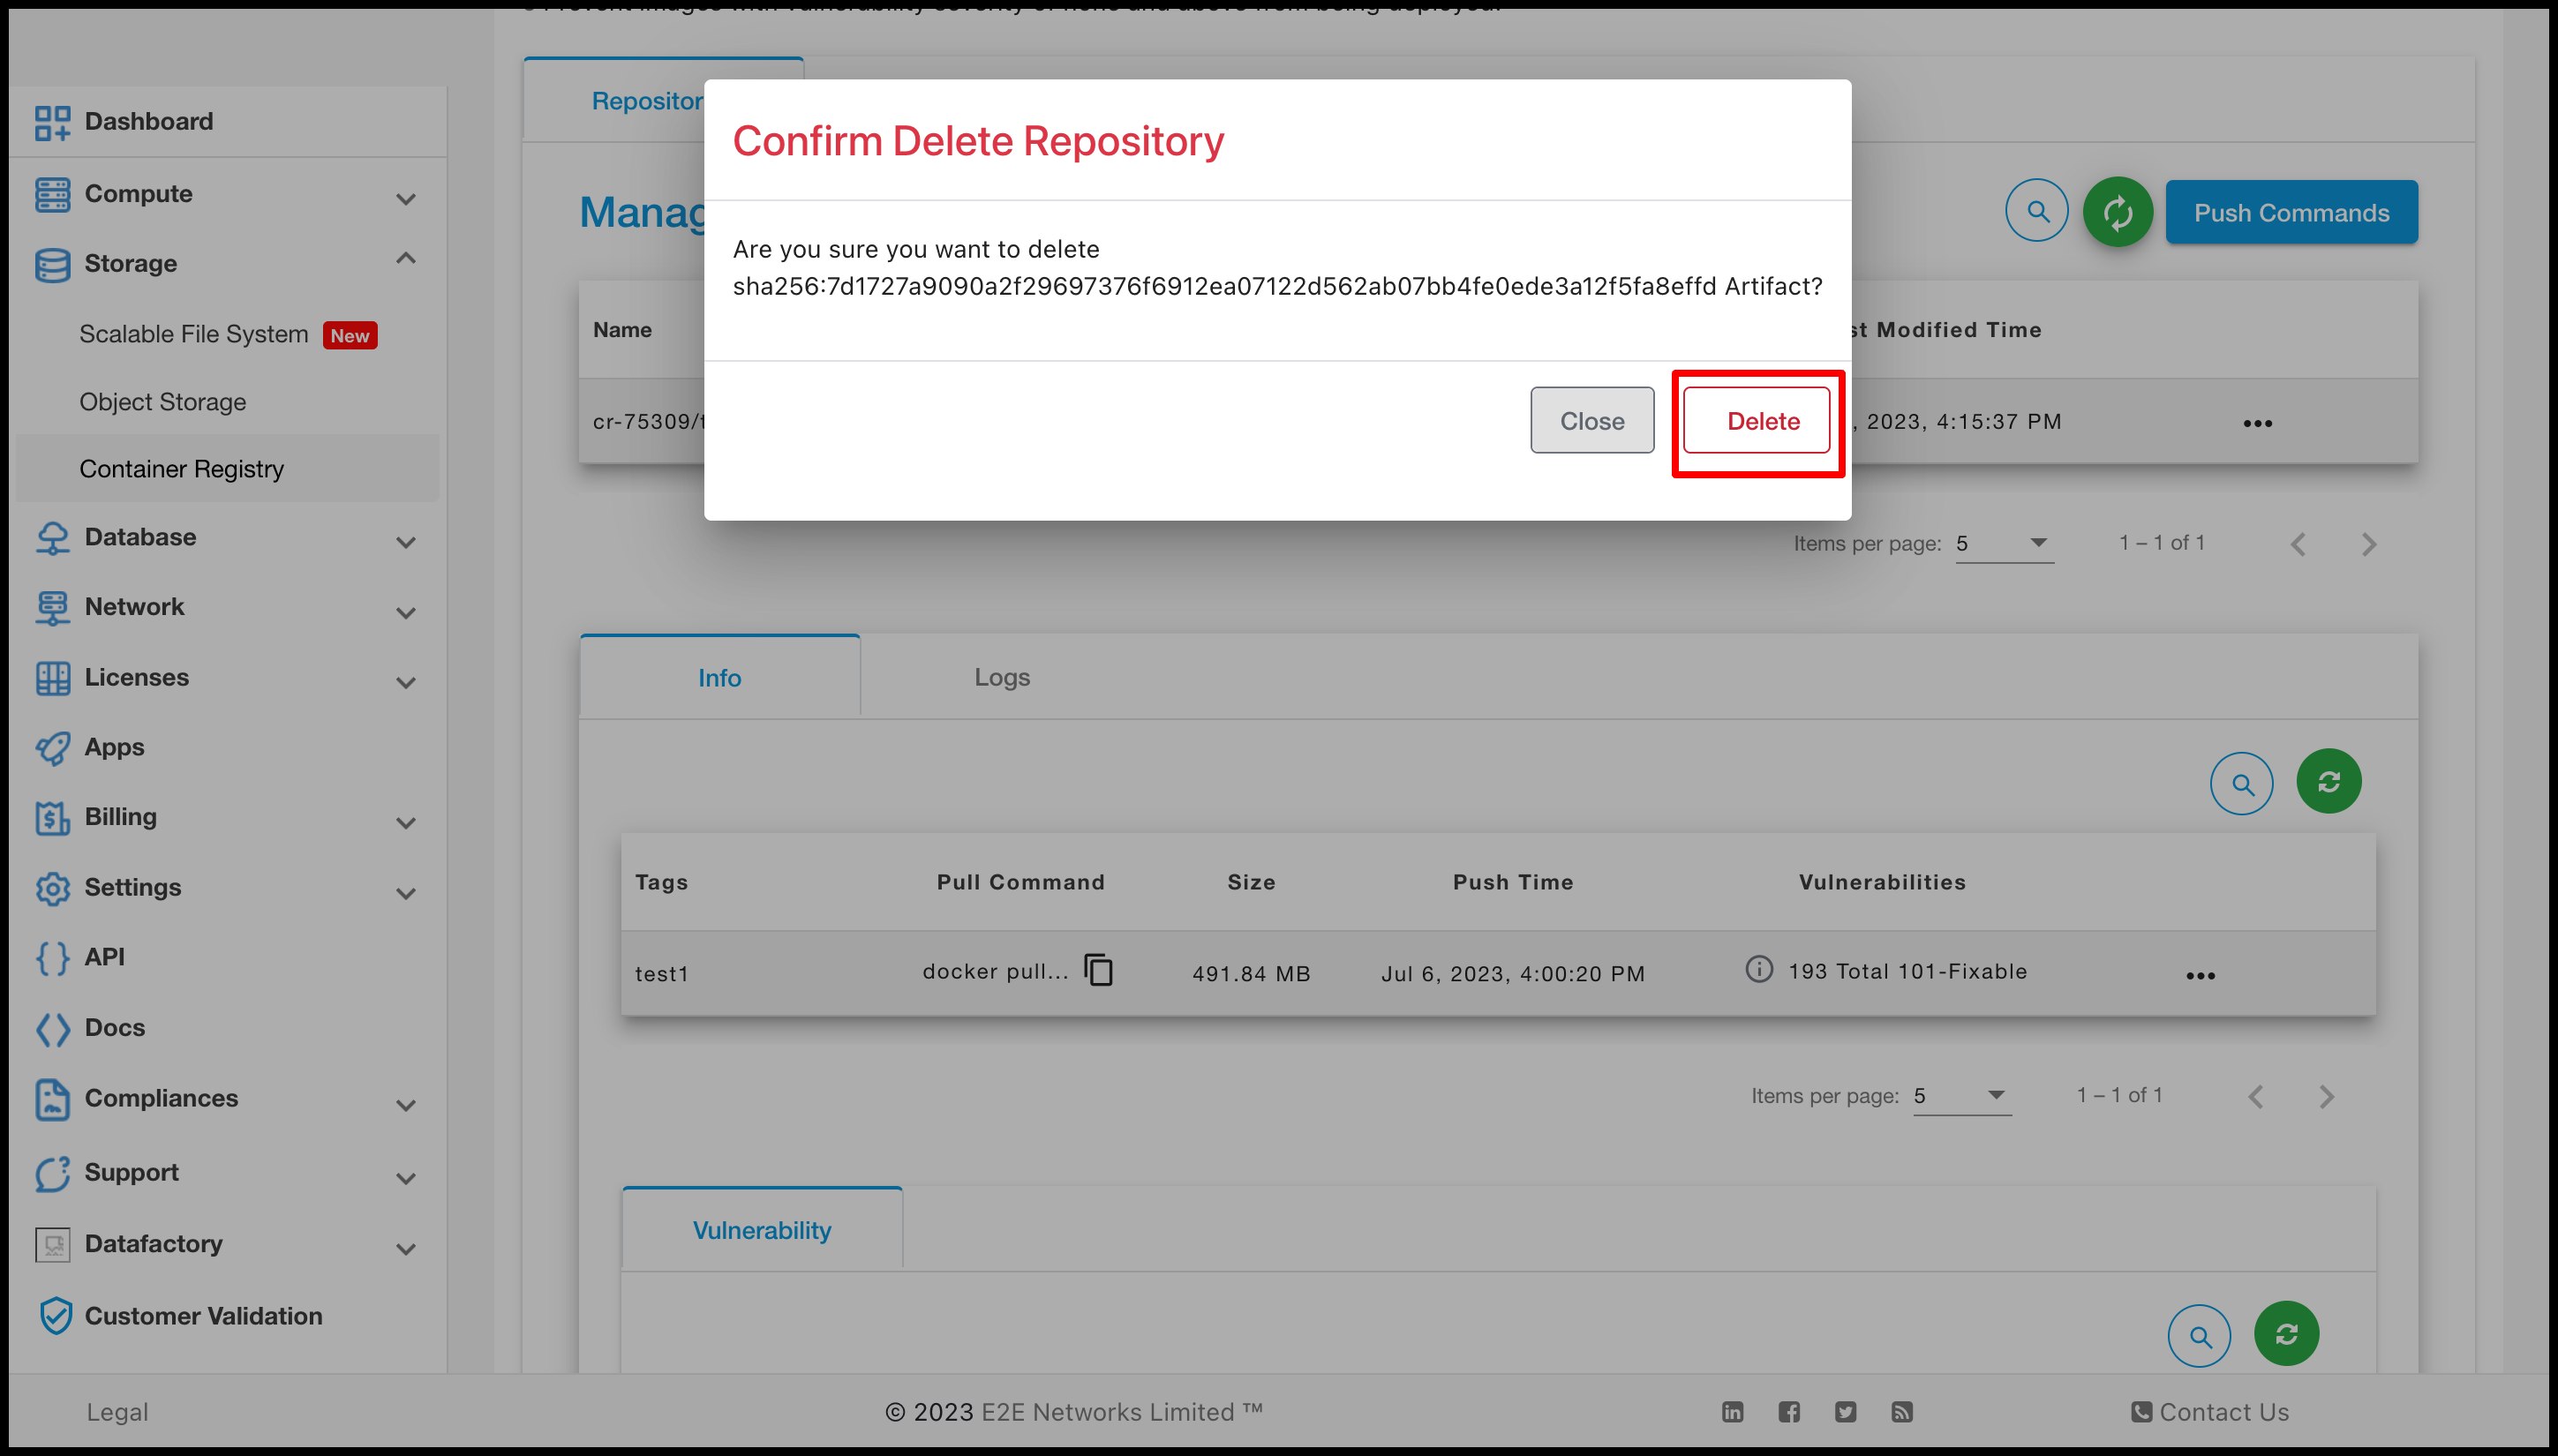
Click on the Delete button to Delete your Artifact. And confirmation popup will be open and you need to confirm that click on Delete button.
Create a Secret For Container Registry
Secrets
A Secret is an object that contains a small amount of sensitive data such as a password, a token, or a key. Such information might otherwise be put in a Pod specification or in a container image. Using a Secret means that you don’t need to include confidential data in your application code.
Create Secrets
kubectl create secret docker-registry name-secrets \
--docker-username=username \
--docker-password=pass1234 \
--docker-server=registry.e2enetworks.net
Create a Pod that Uses your Secret
cat > private-reg-pod-example.yaml << EOF
apiVersion: v1
kind: Pod
metadata:
  name: node-hello
spec:
  containers:
  - name: node-hello-container
    image: registry.e2enetworks.net/vipin-repo/node-hello@sha256:bd333665069e66b11dbb76444ac114a1e0a65ace459684a5616c0429aa4bf519
  imagePullSecrets:
  - name:  name-secrets
EOF
Simplifying Pull Operations with User-Friendly Interface
Source Registries
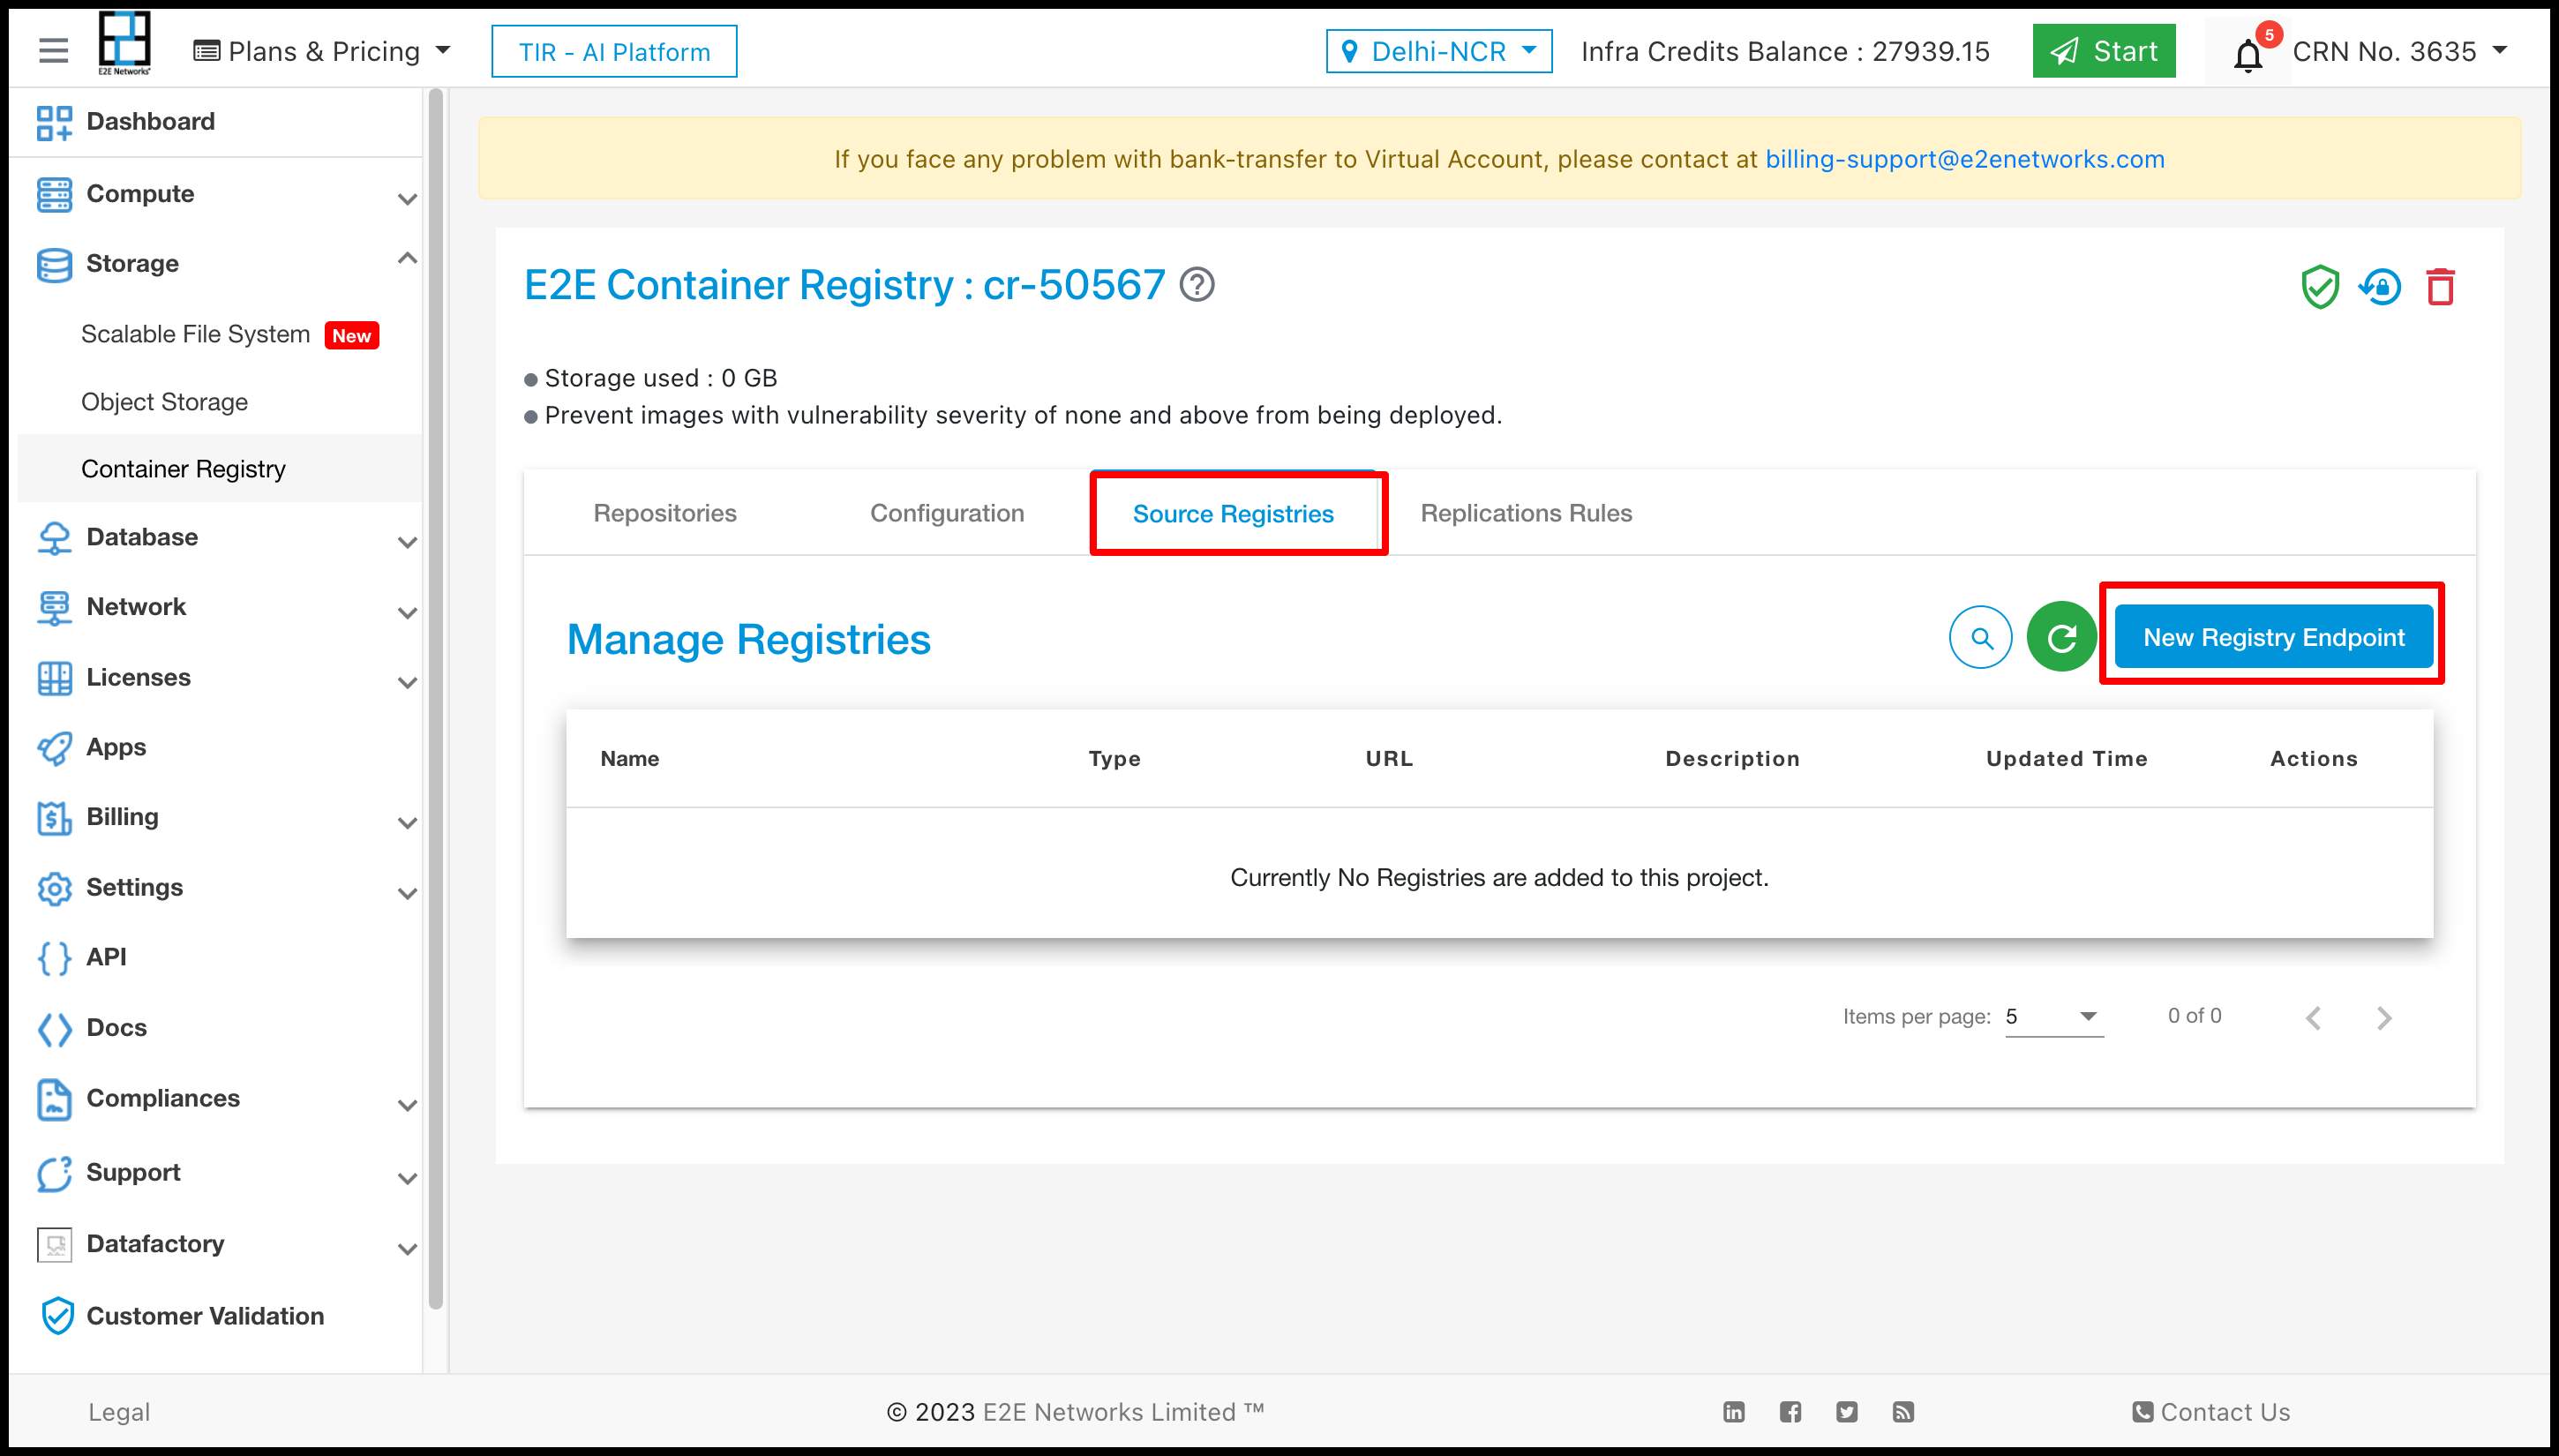
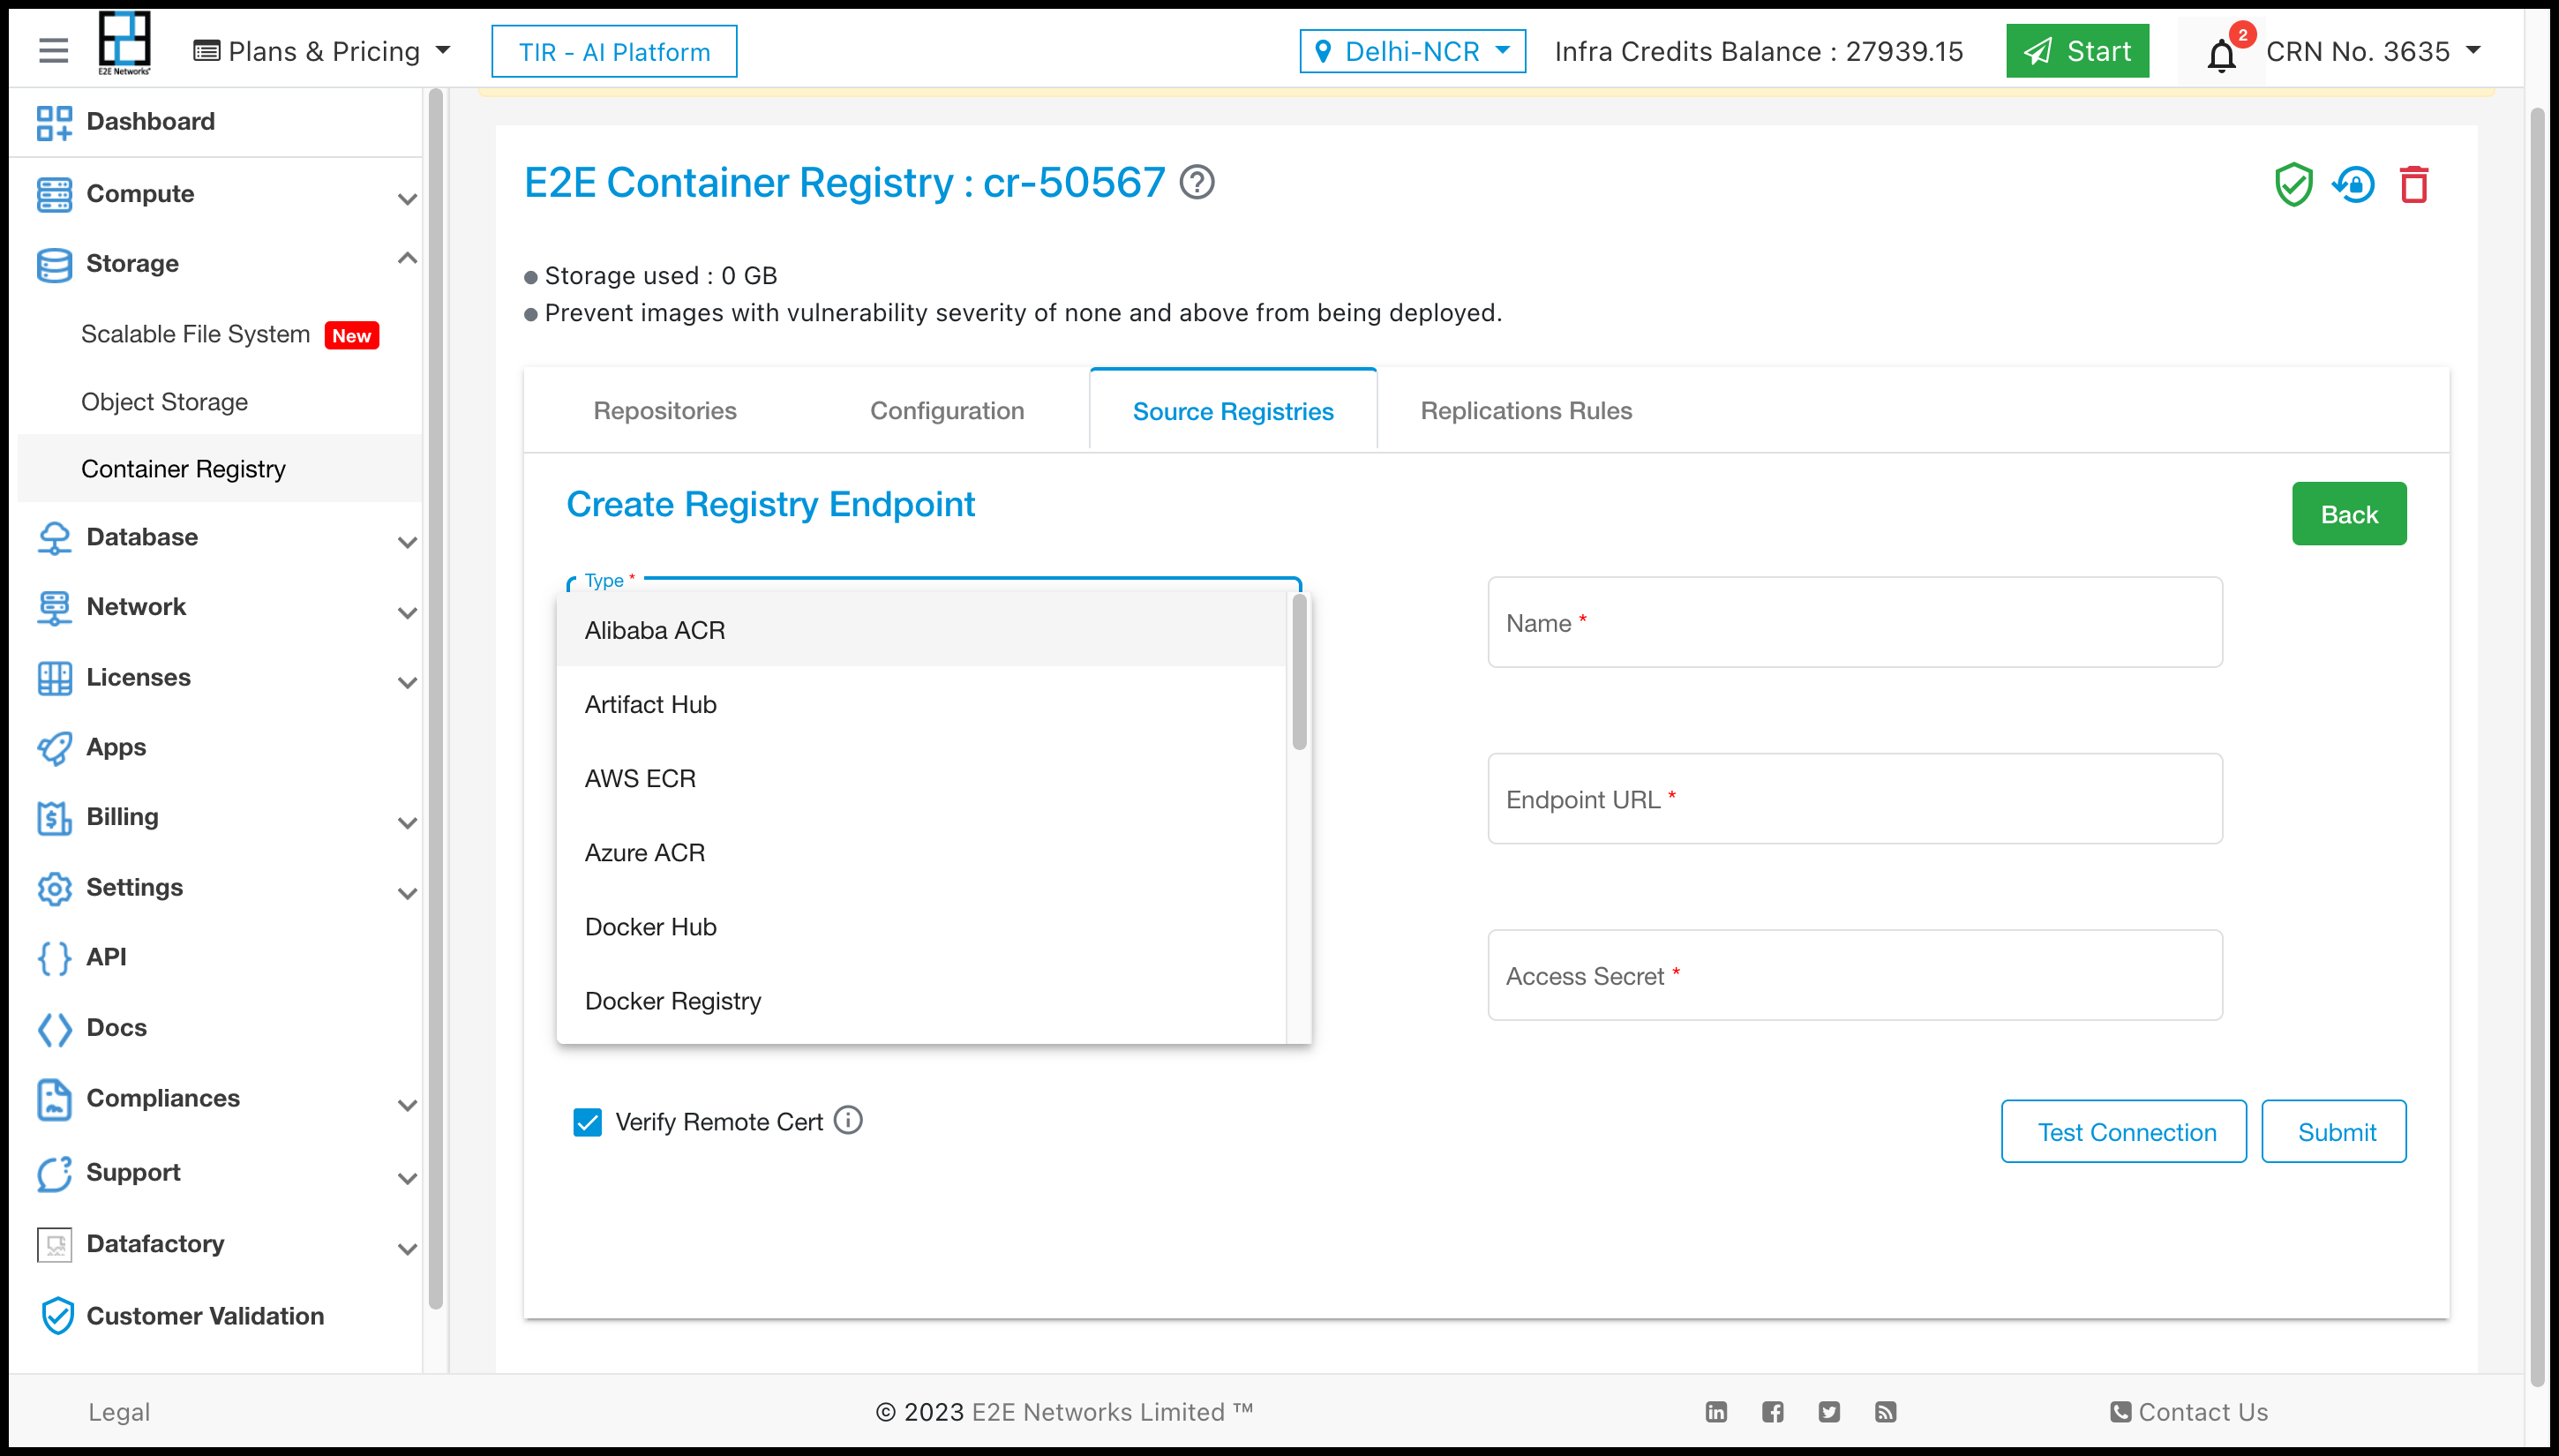
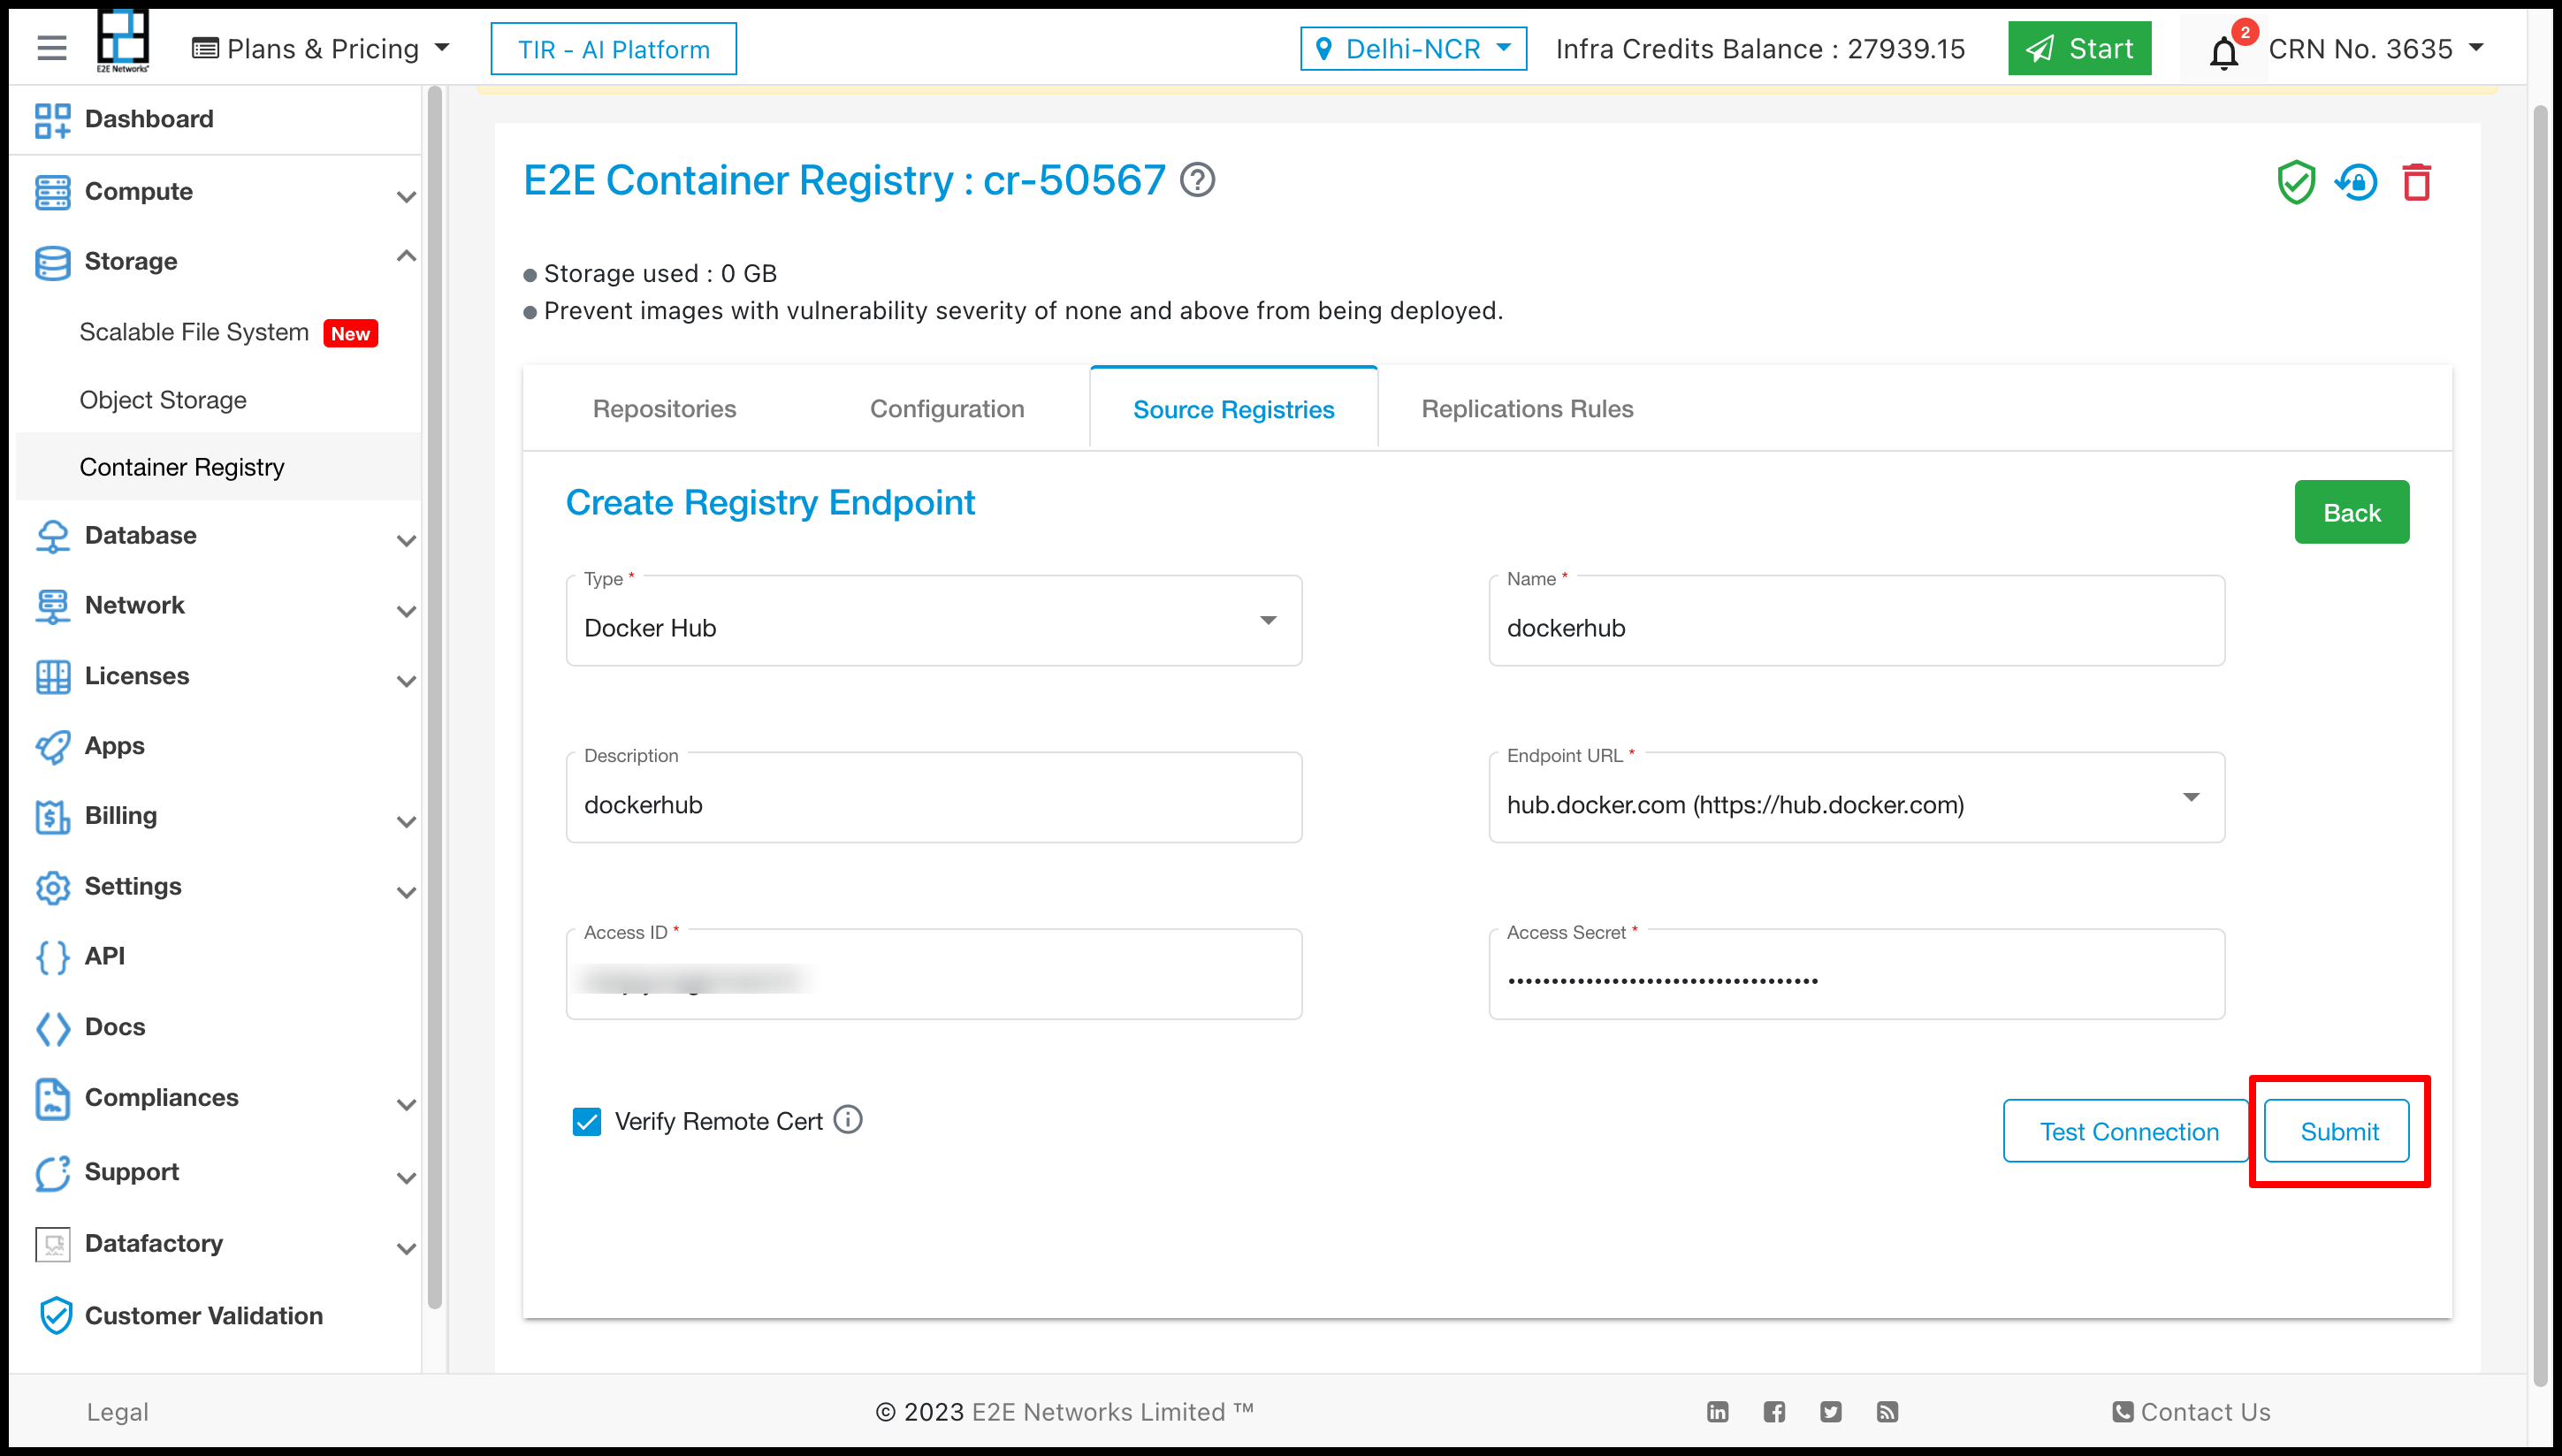
Source registries assist users in defining the Source from which they wish to draw their specific resources. Customers must click New Registry Endpoint for Source Registries. You must then enter the necessary information. After that, you must press the “Submit” button.
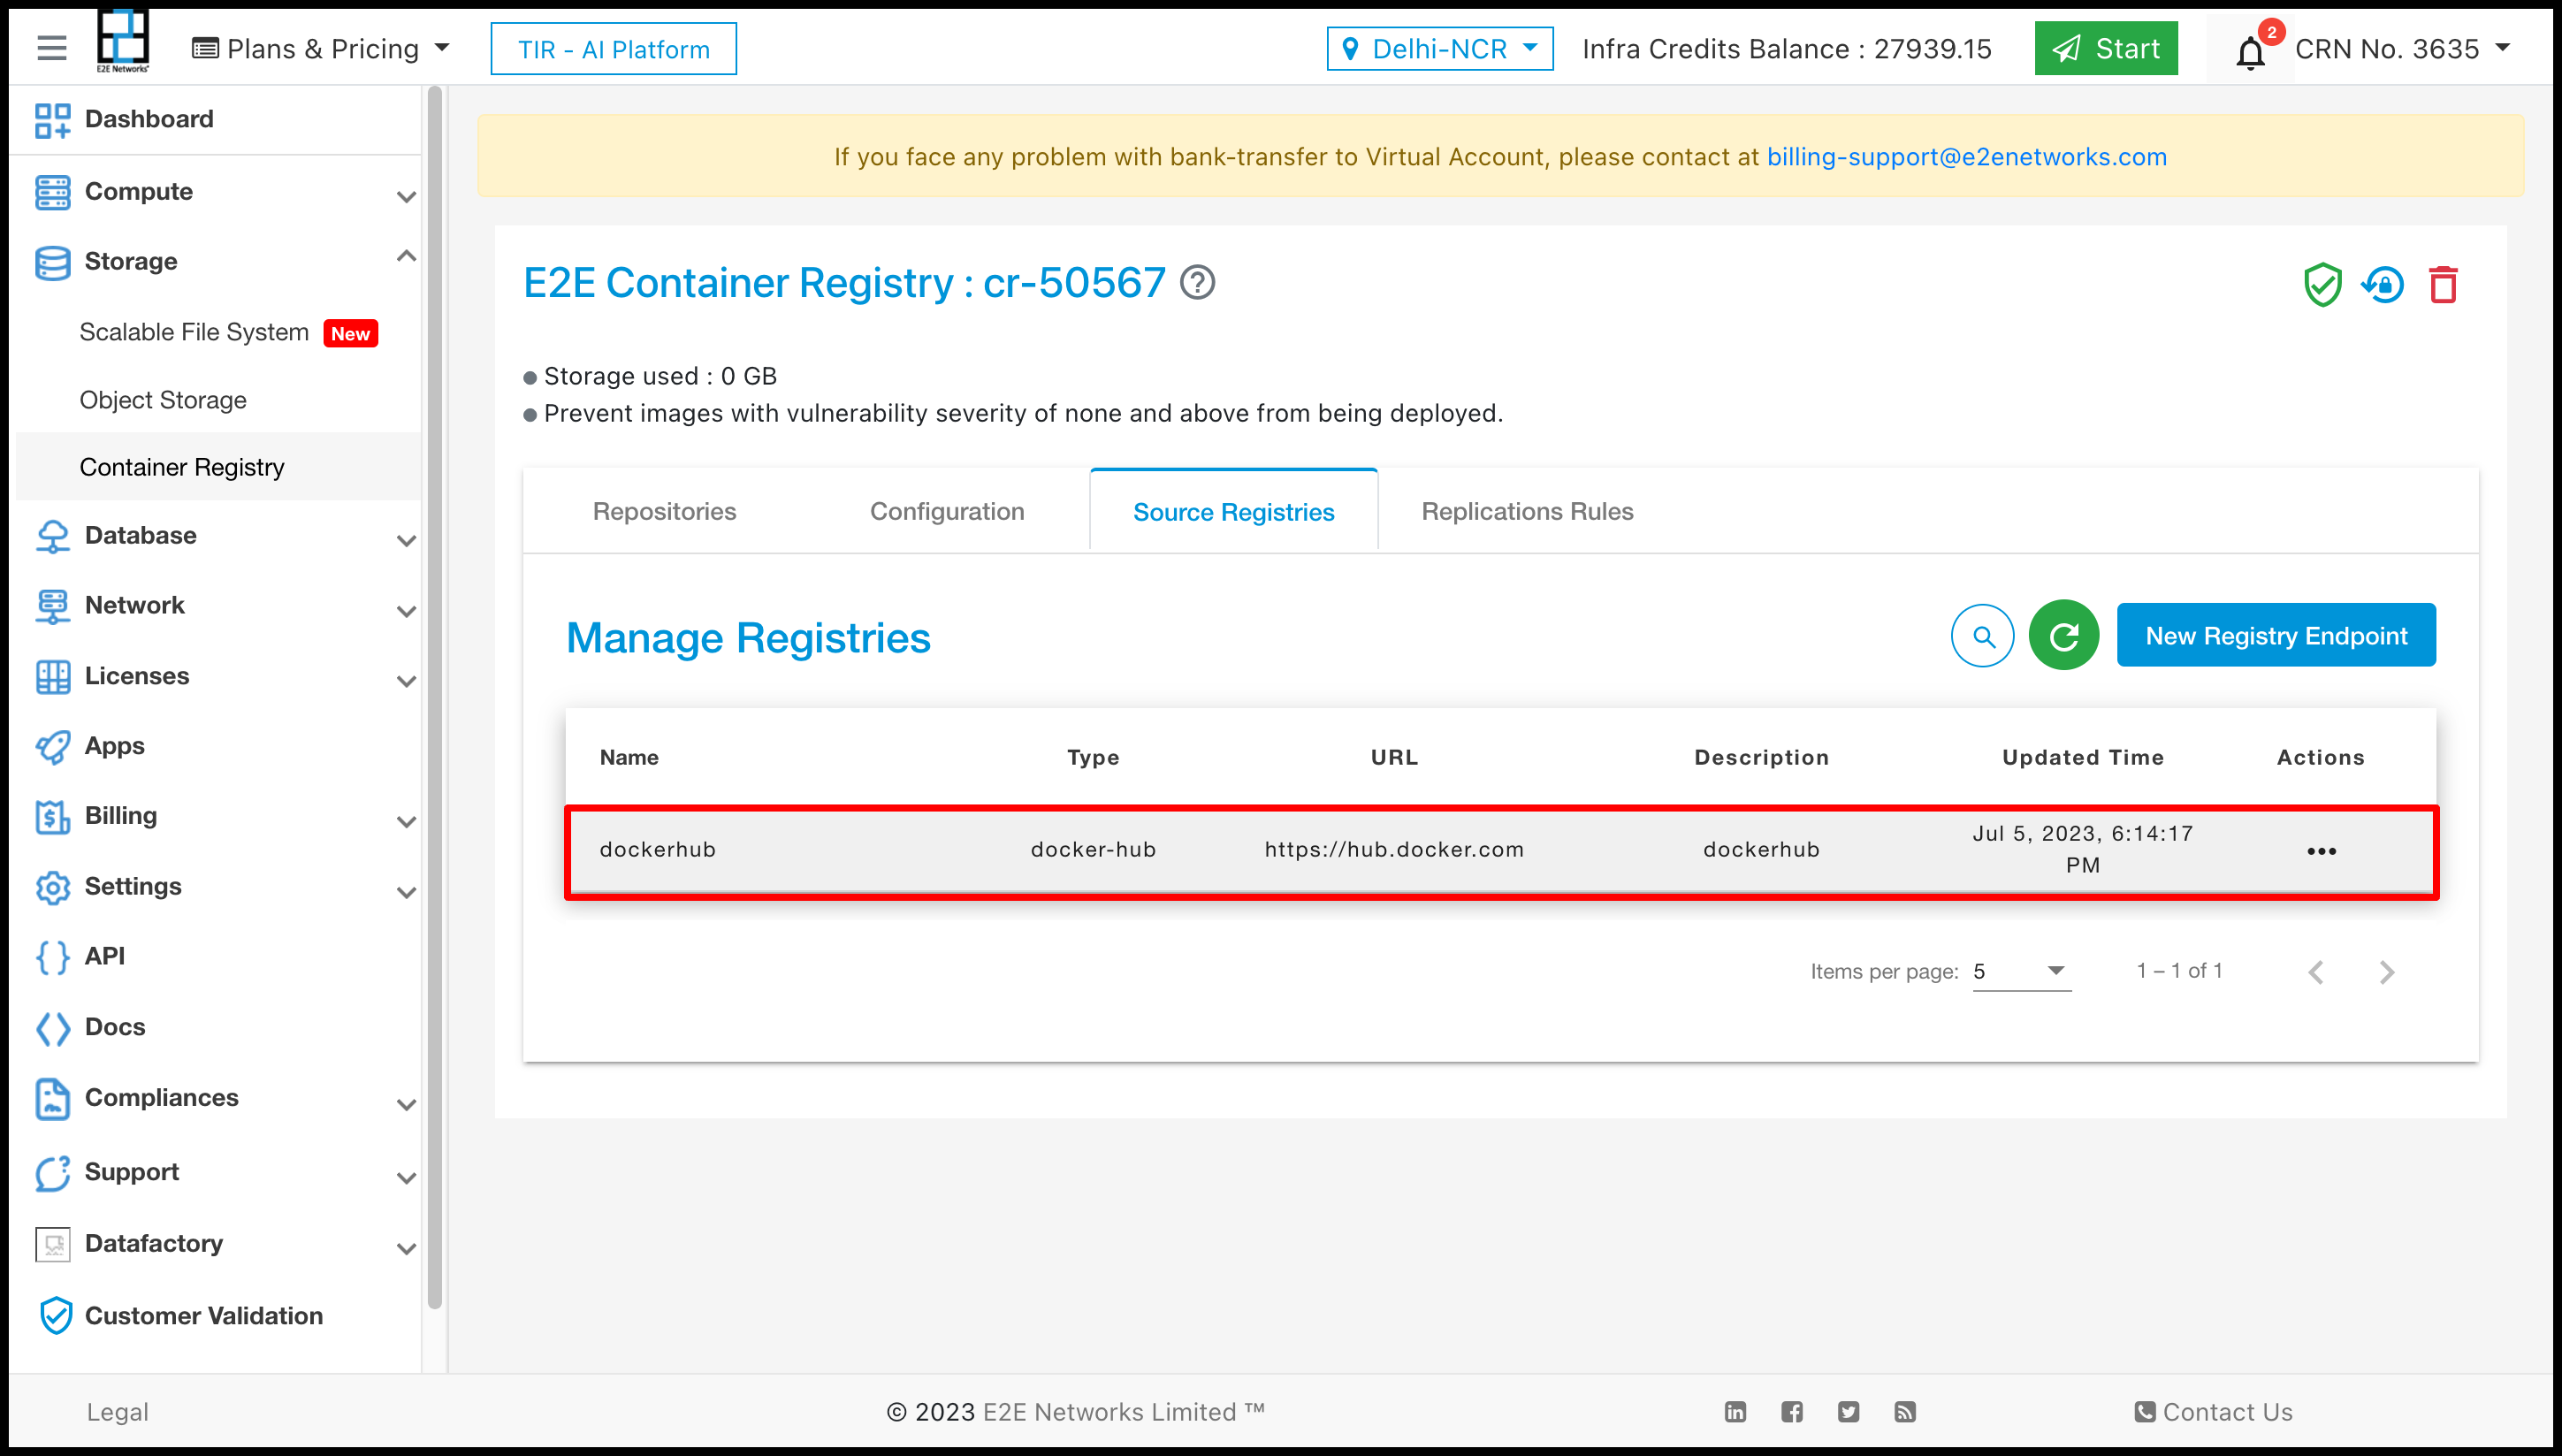
After Adding Source Registries it will be shown in the list.
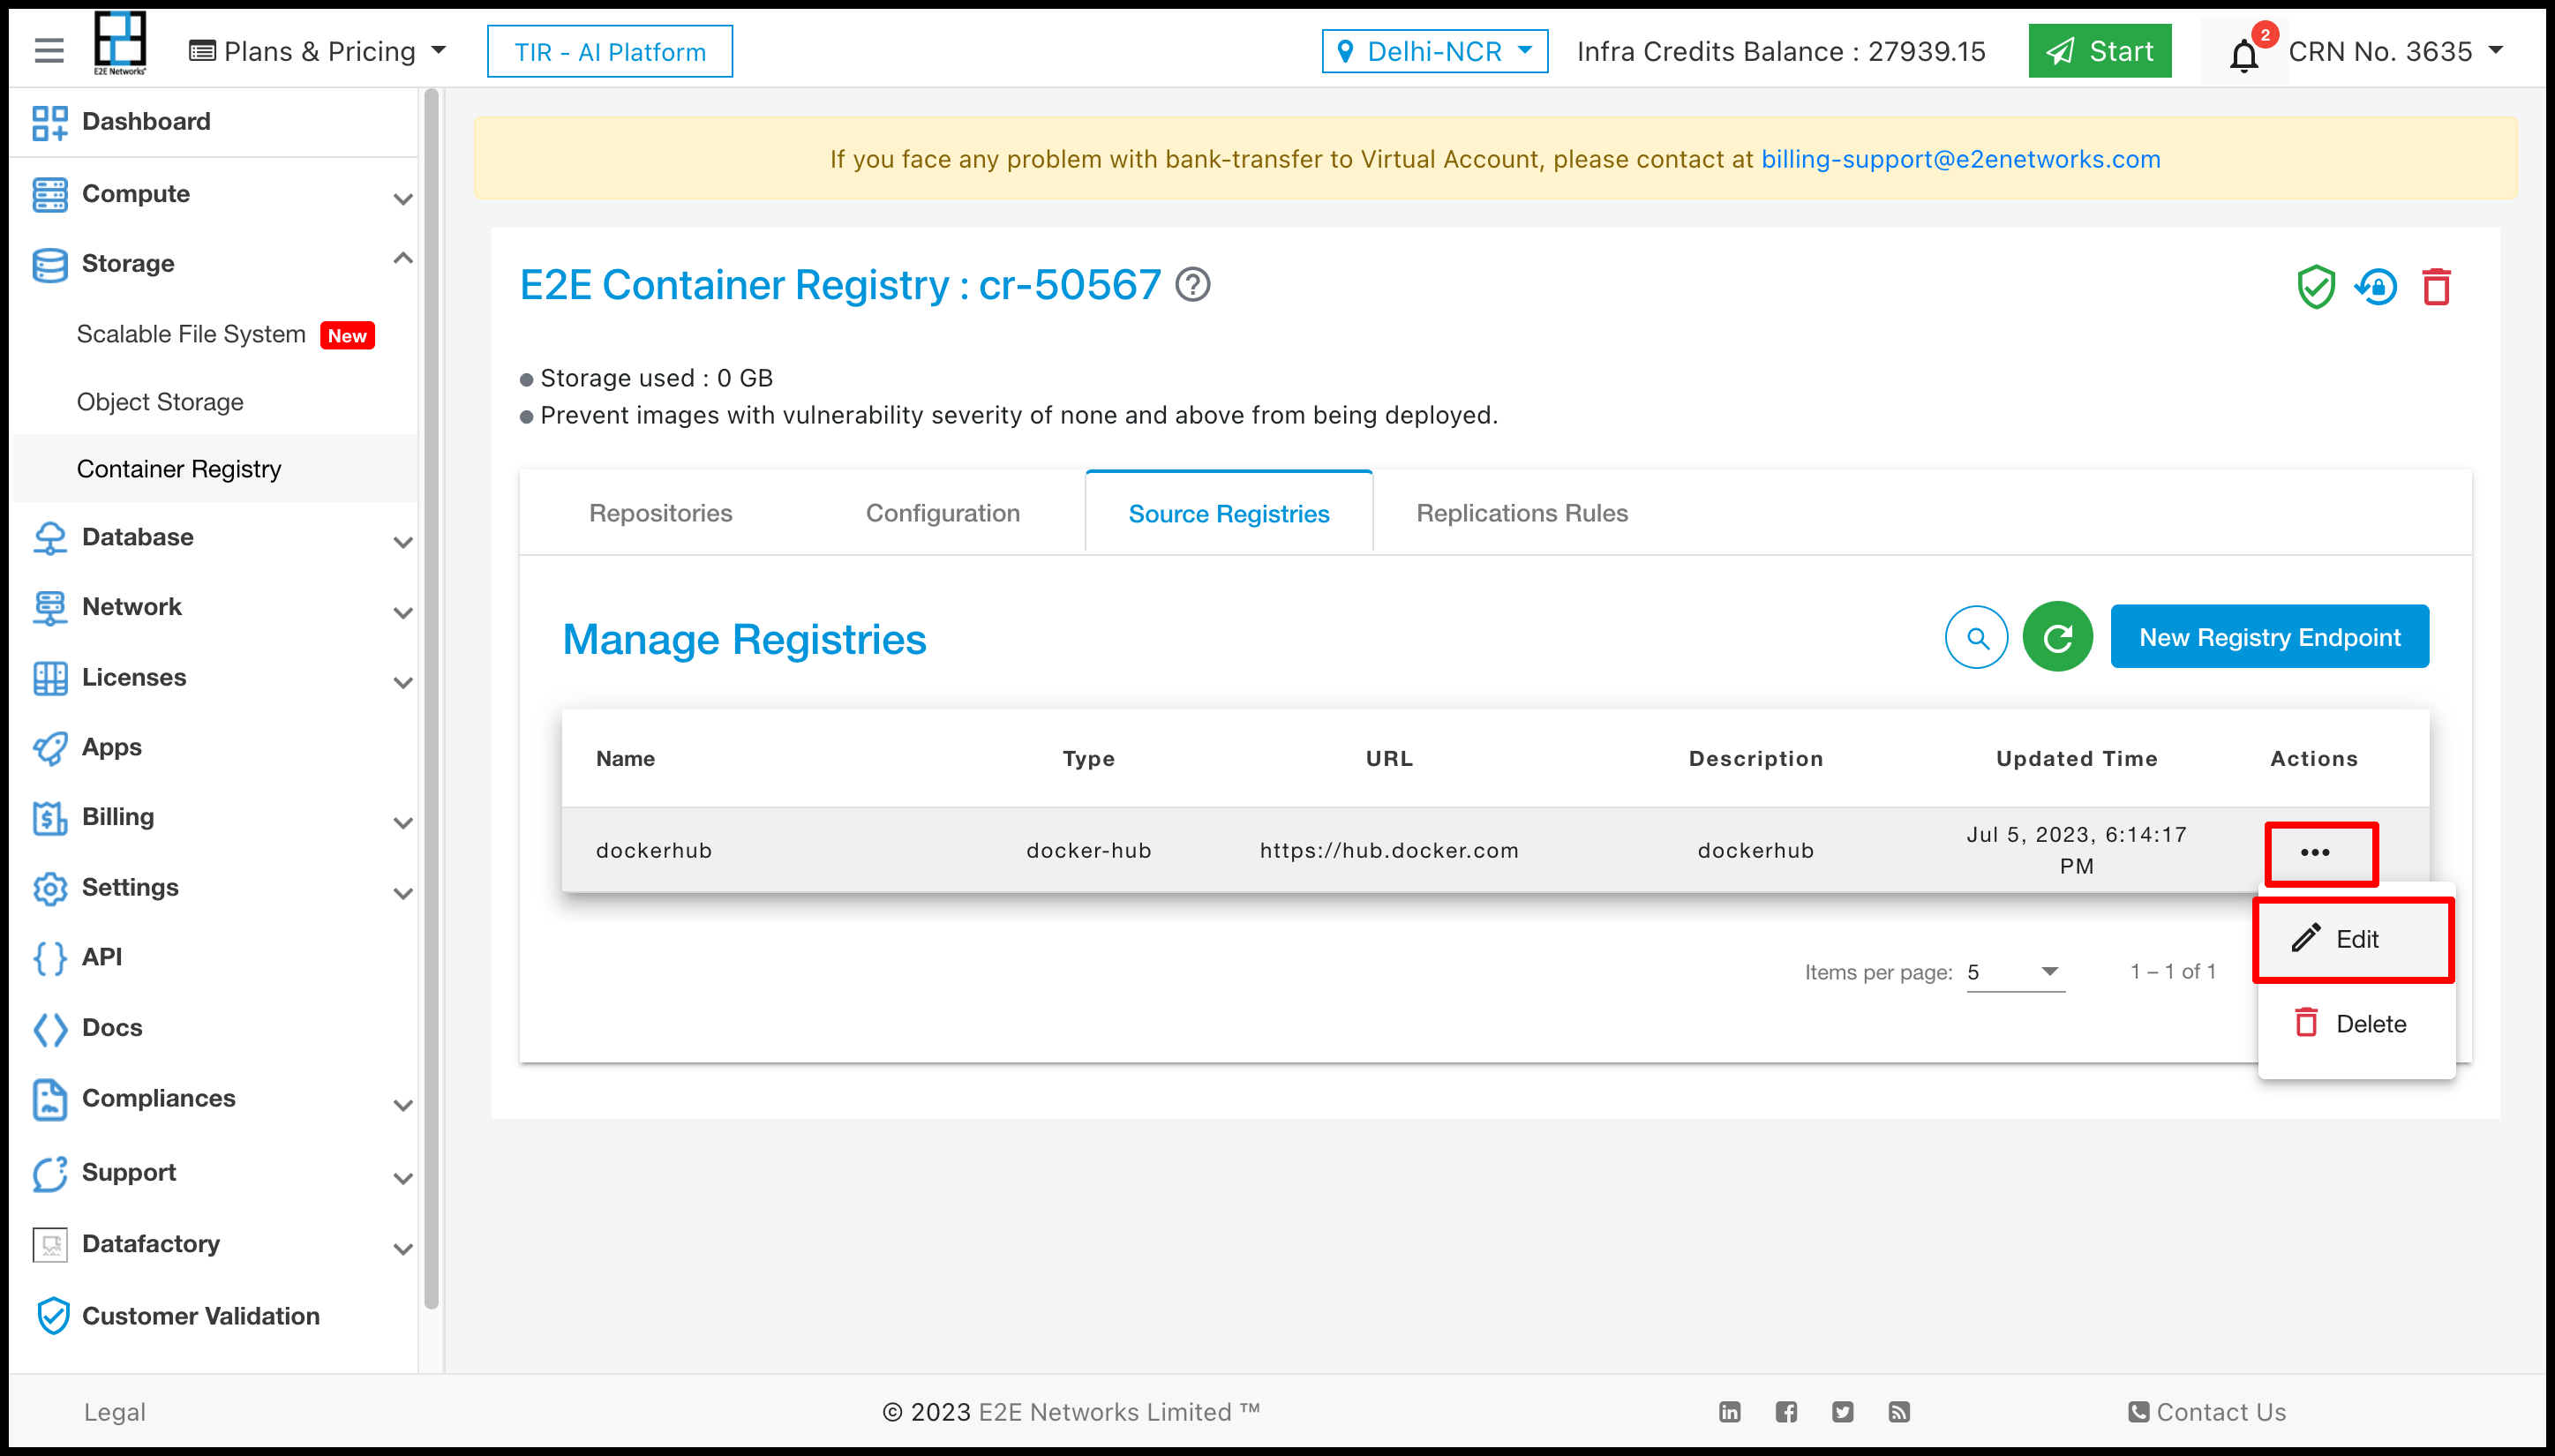
Source Registries Action
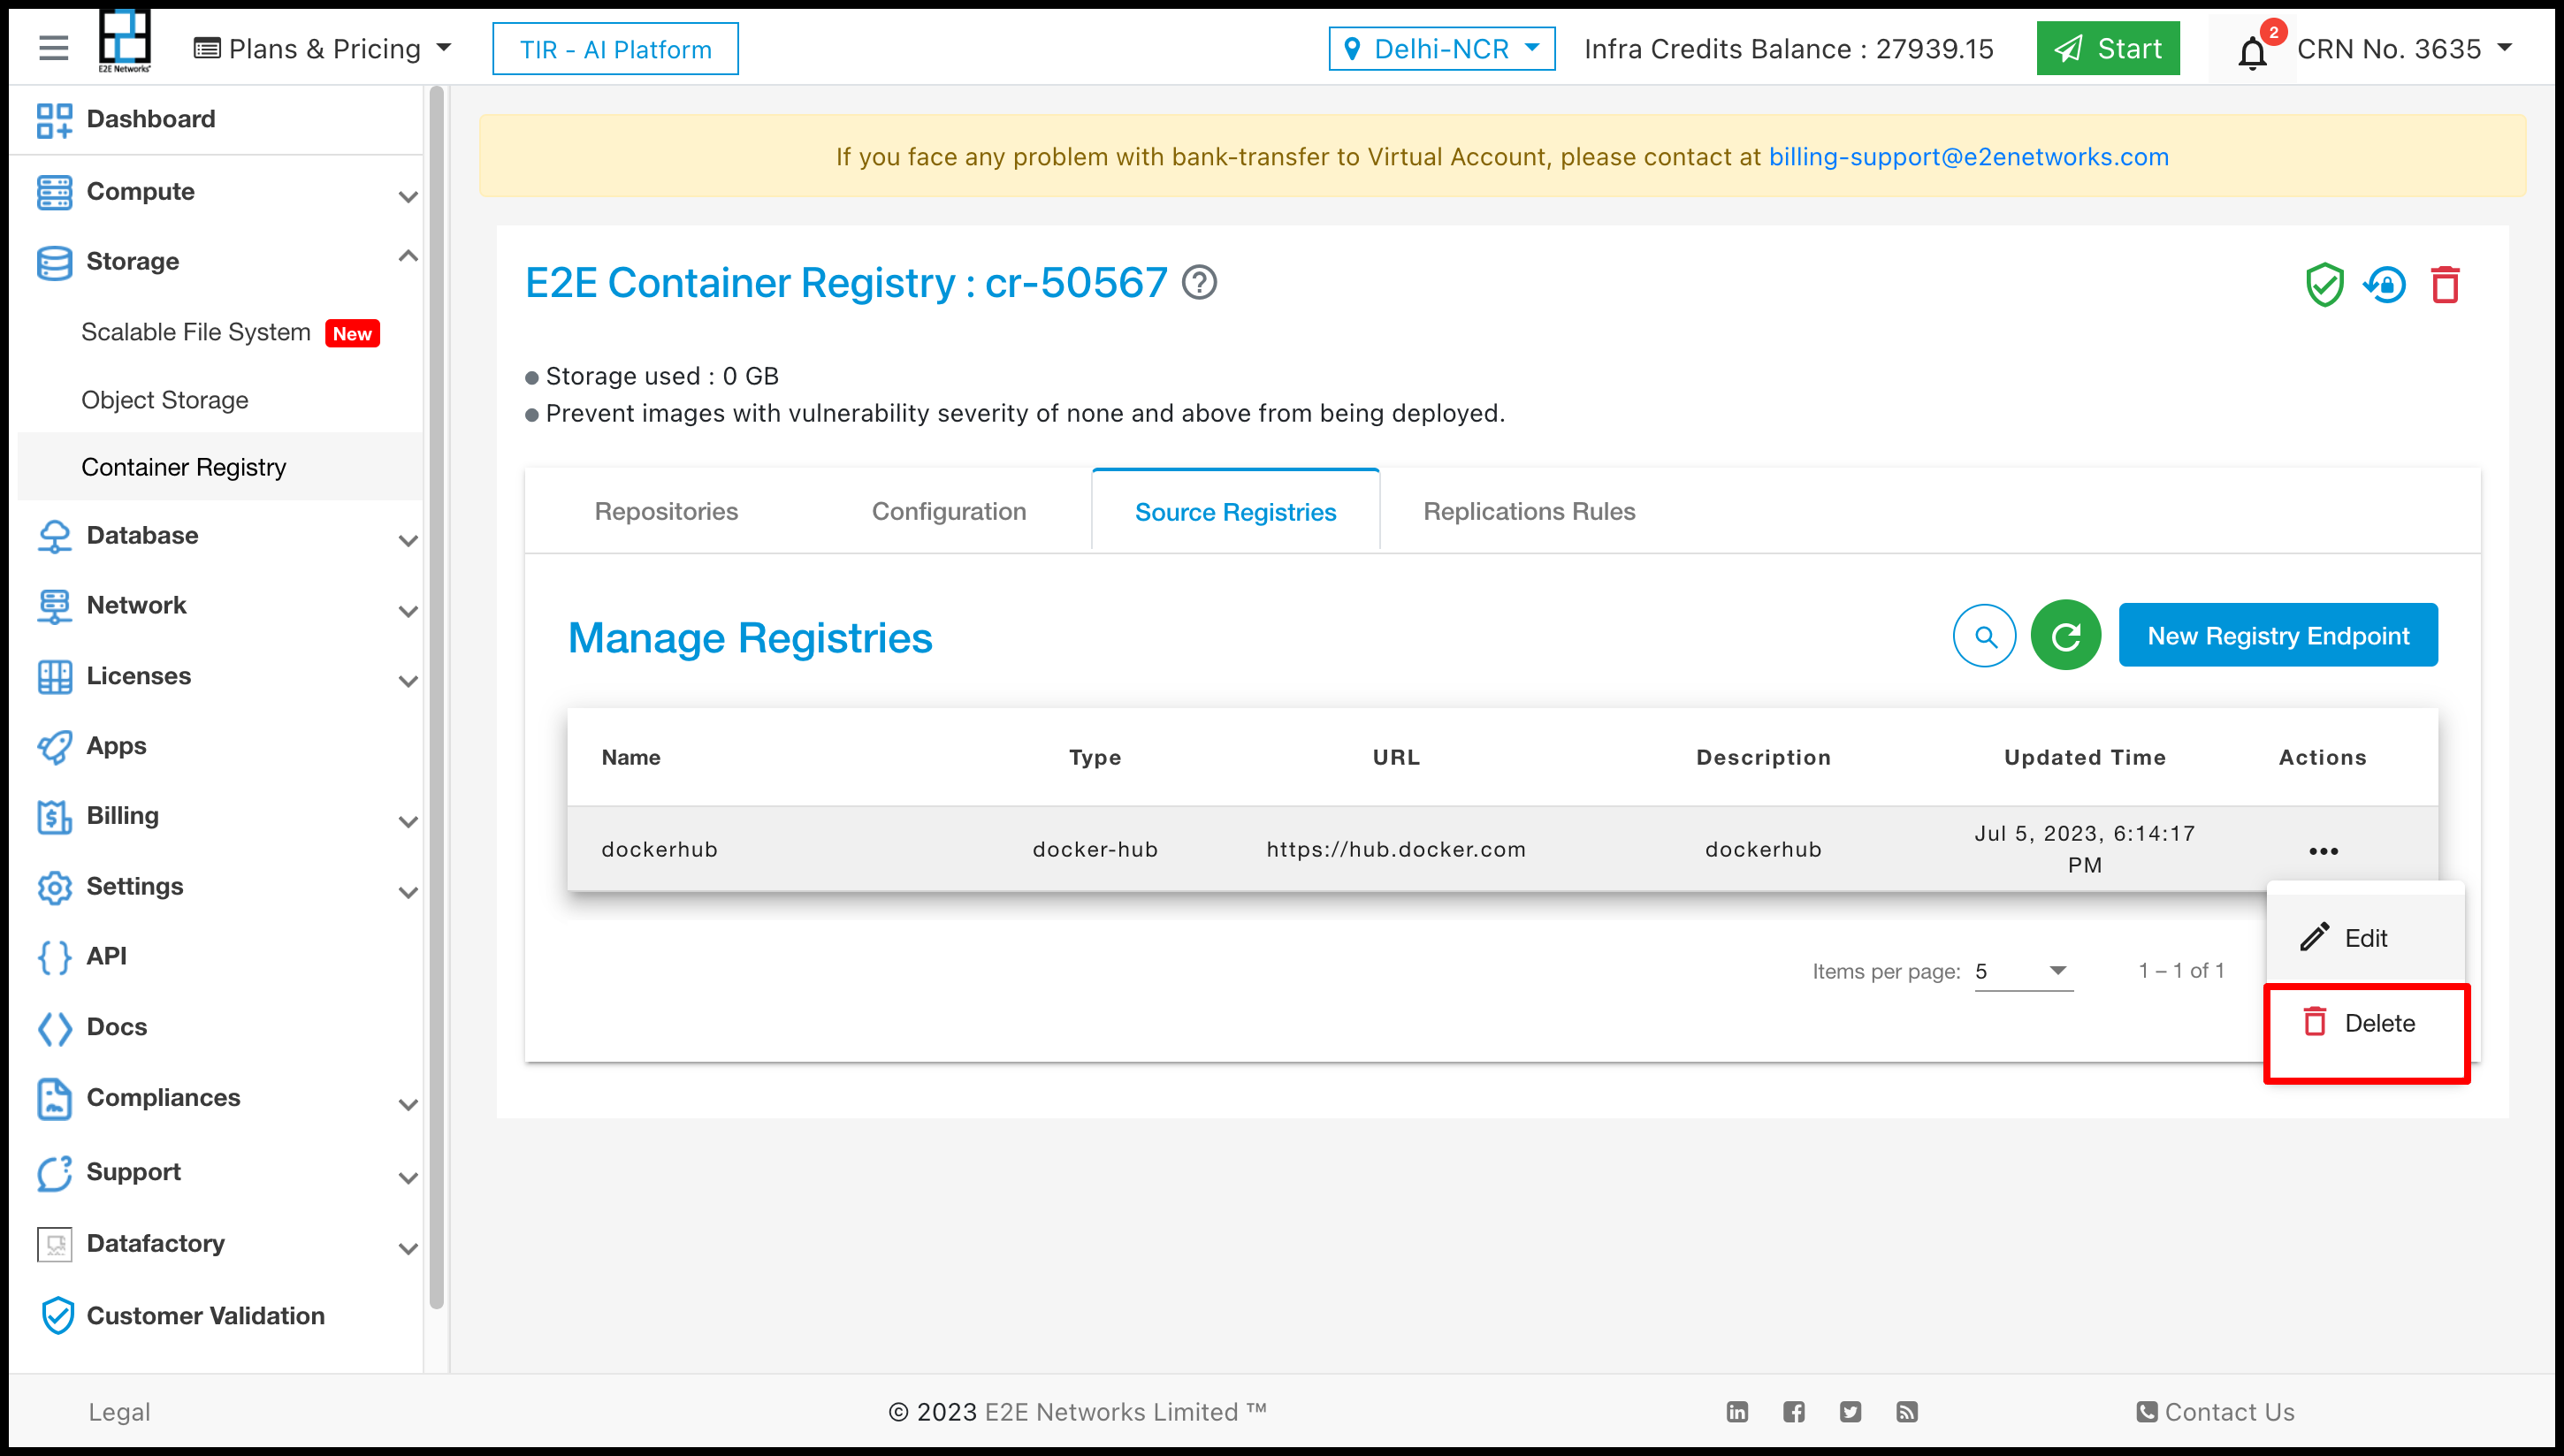
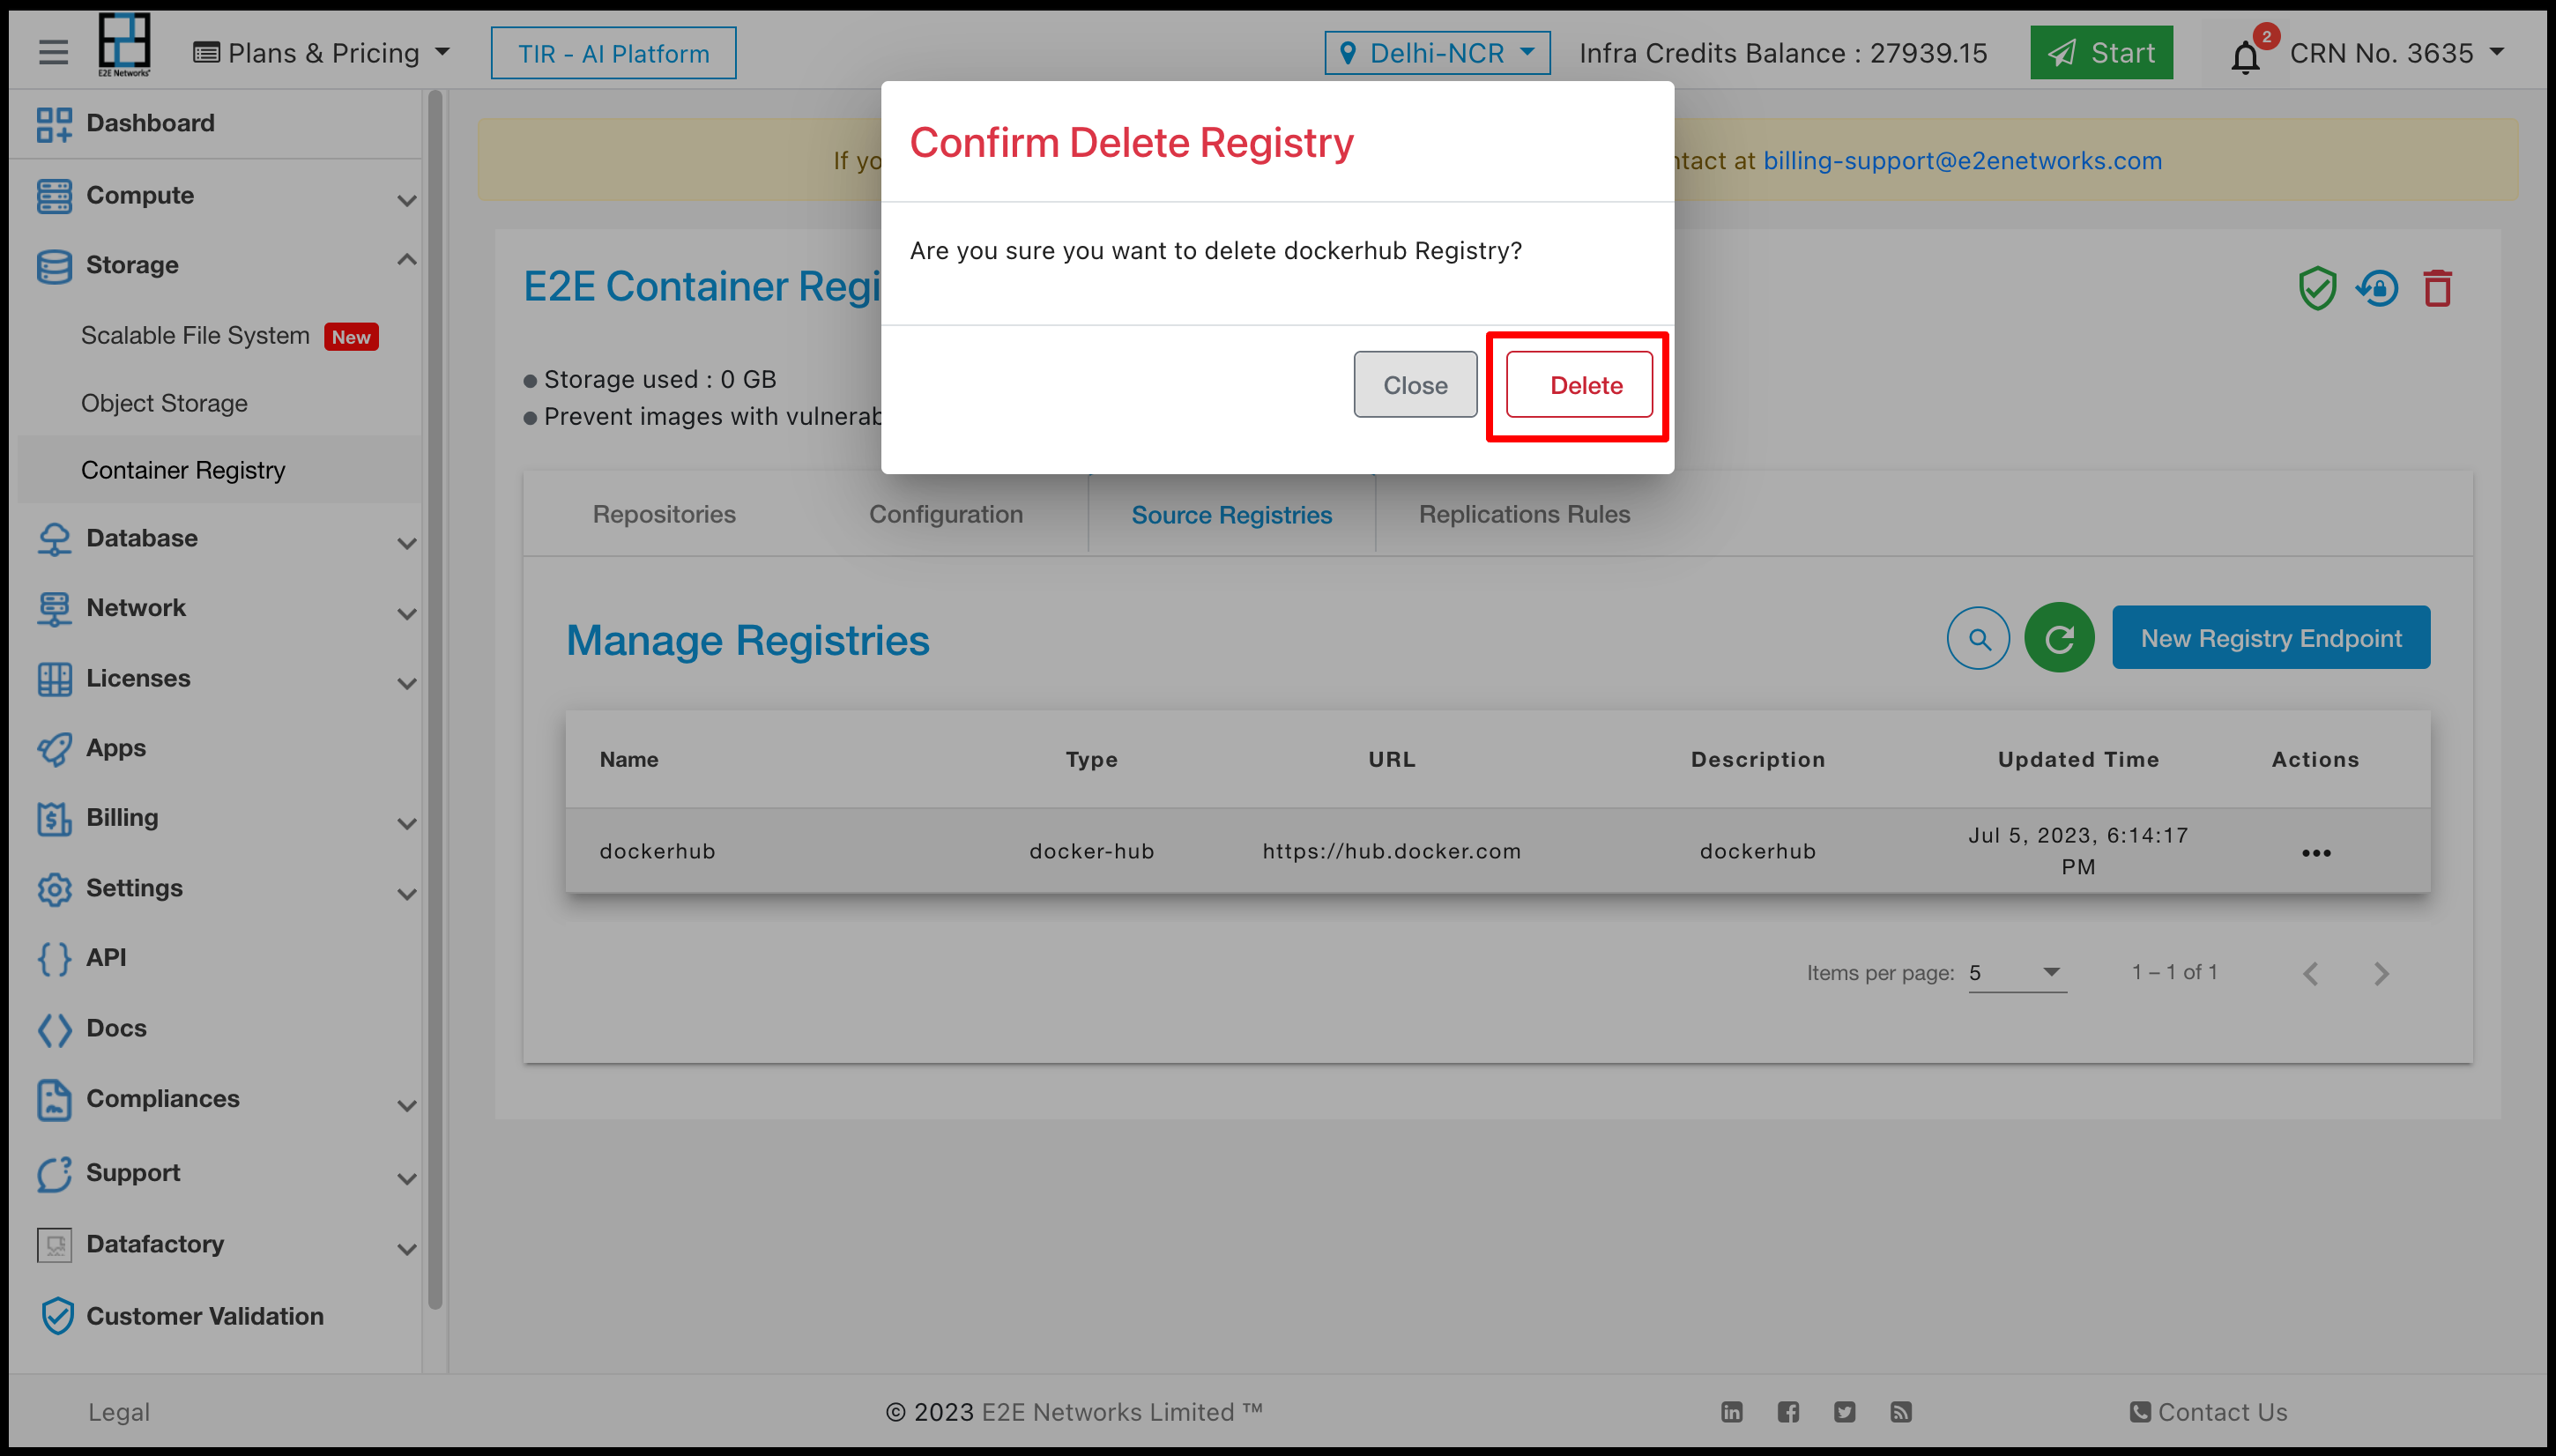
You can perform two actions on Source Registries Edit, and Delete.
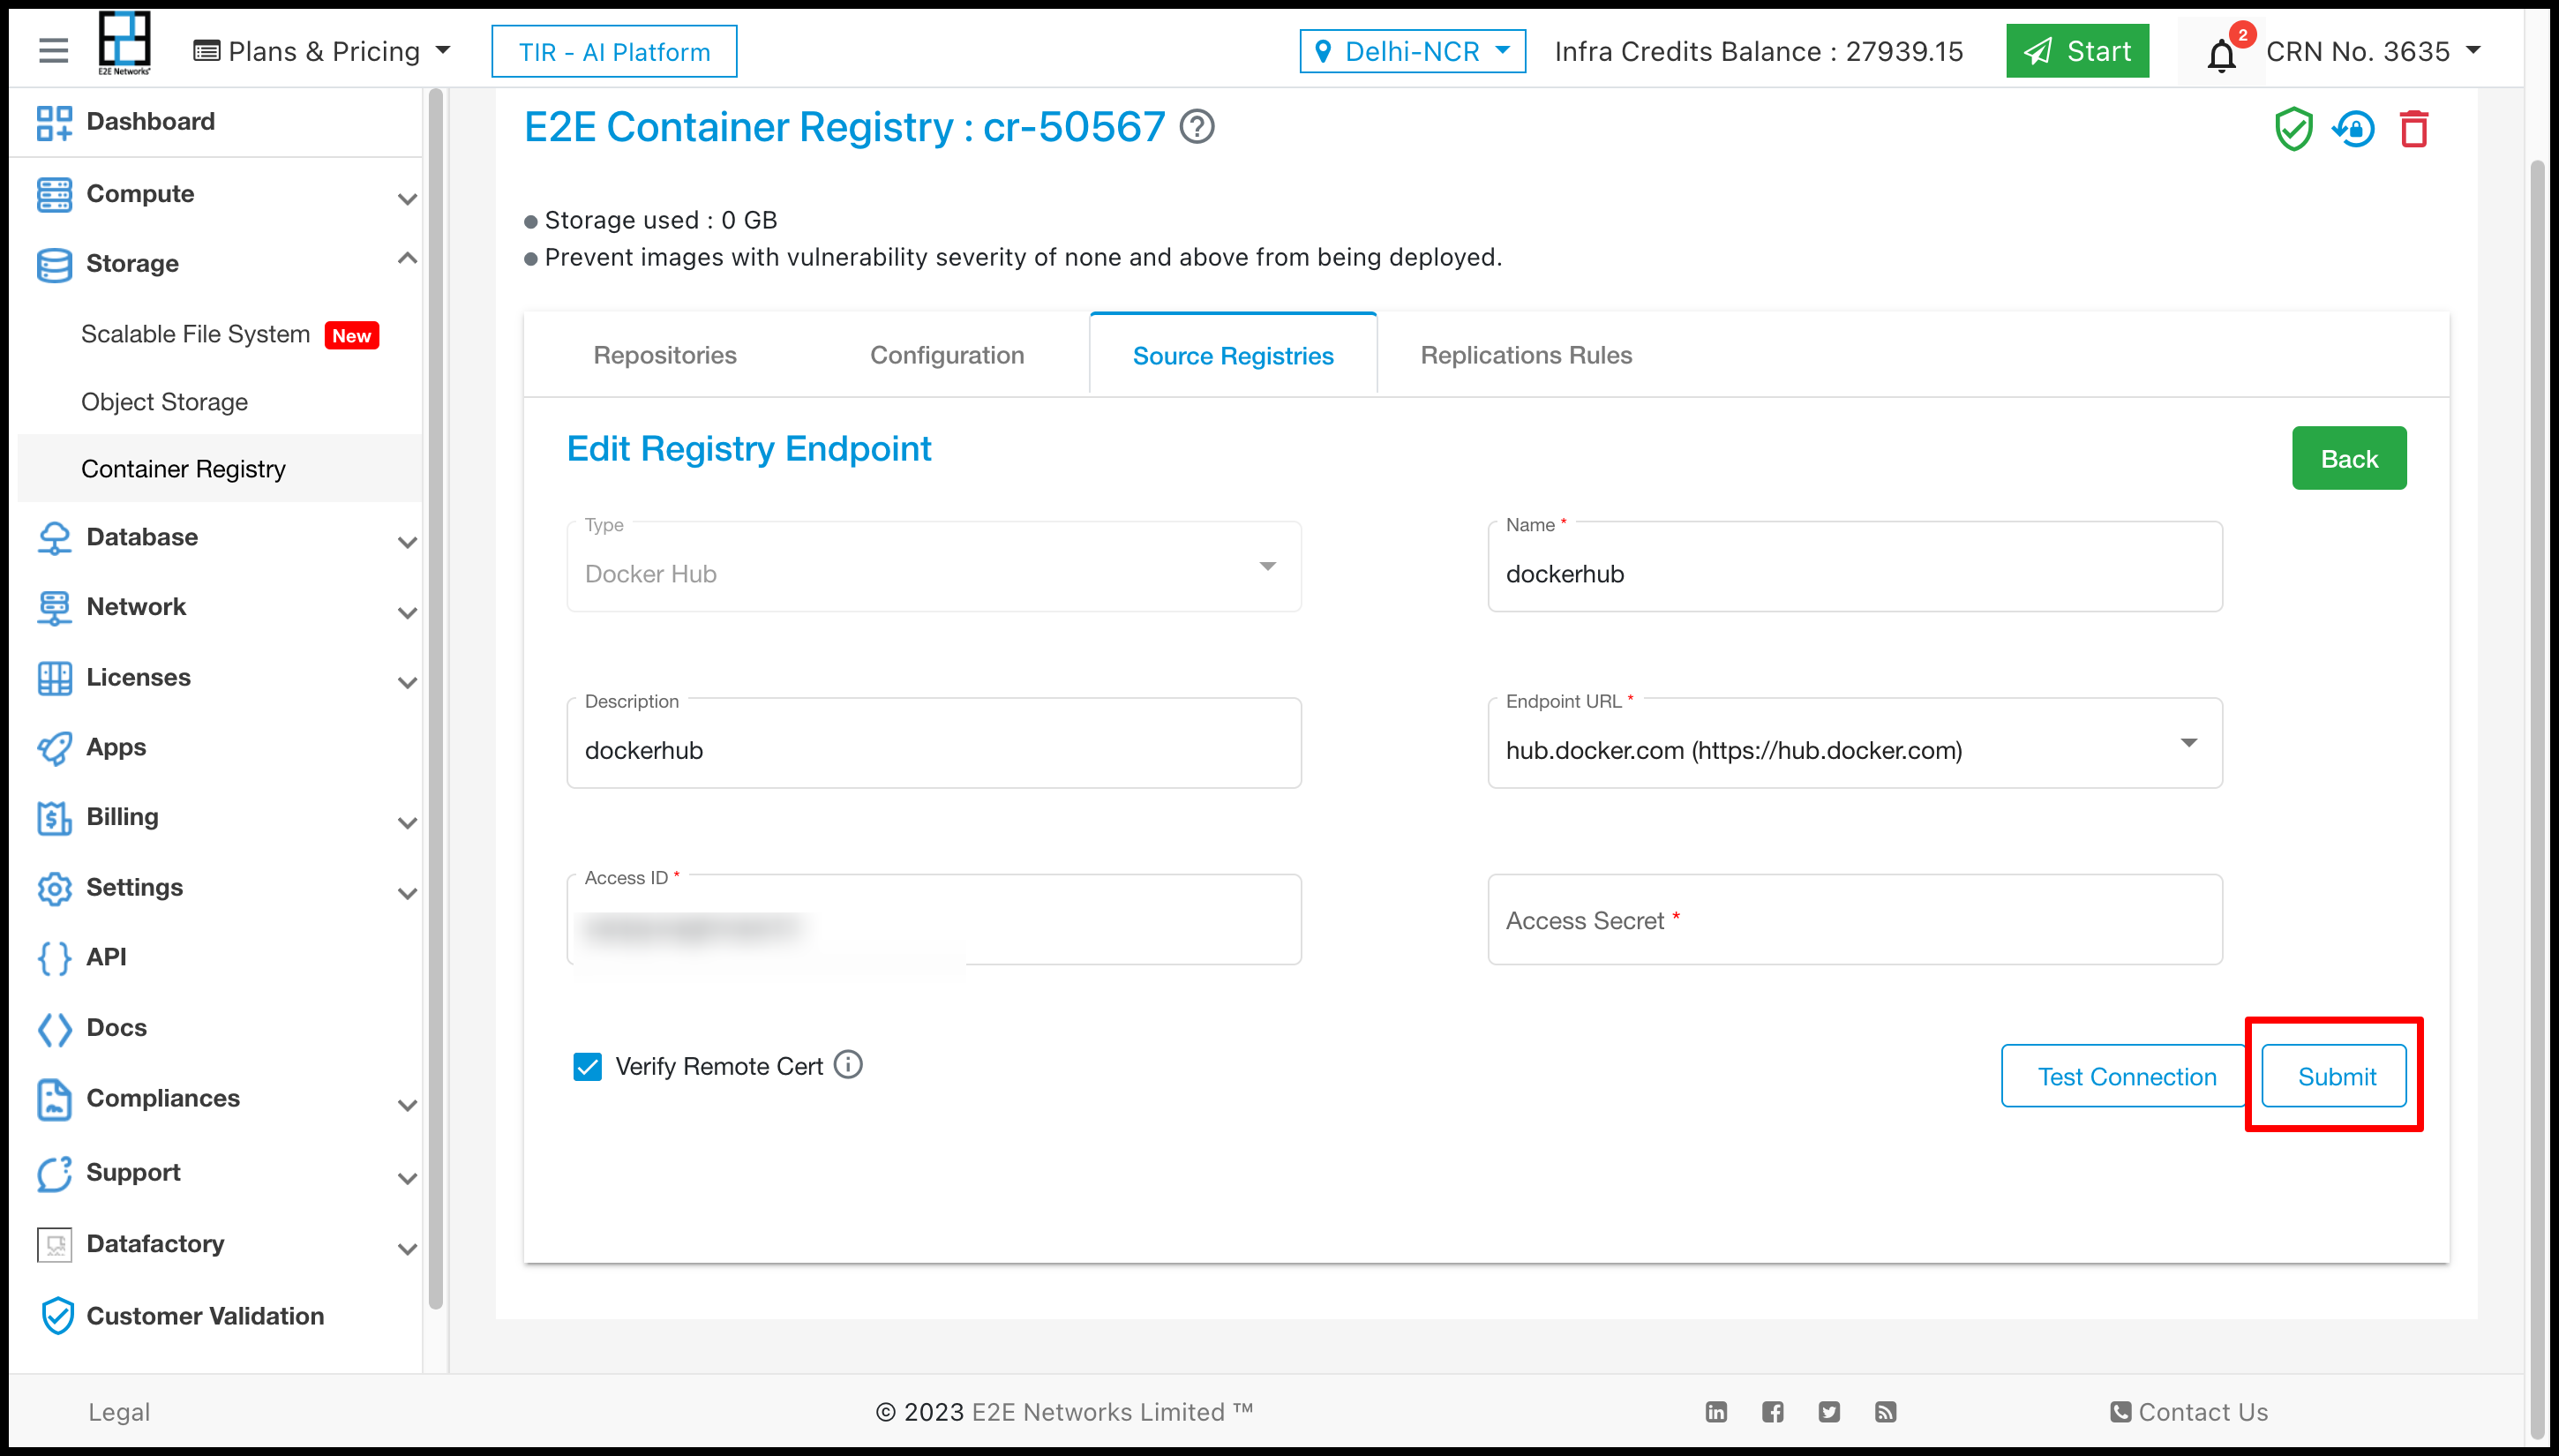
Edit :- For Editing Source Registries you have to click on Edit button and set the value as per you choice.
Delete :- For Deleting replication Rule you have to click on Delete button.
Replication Rule
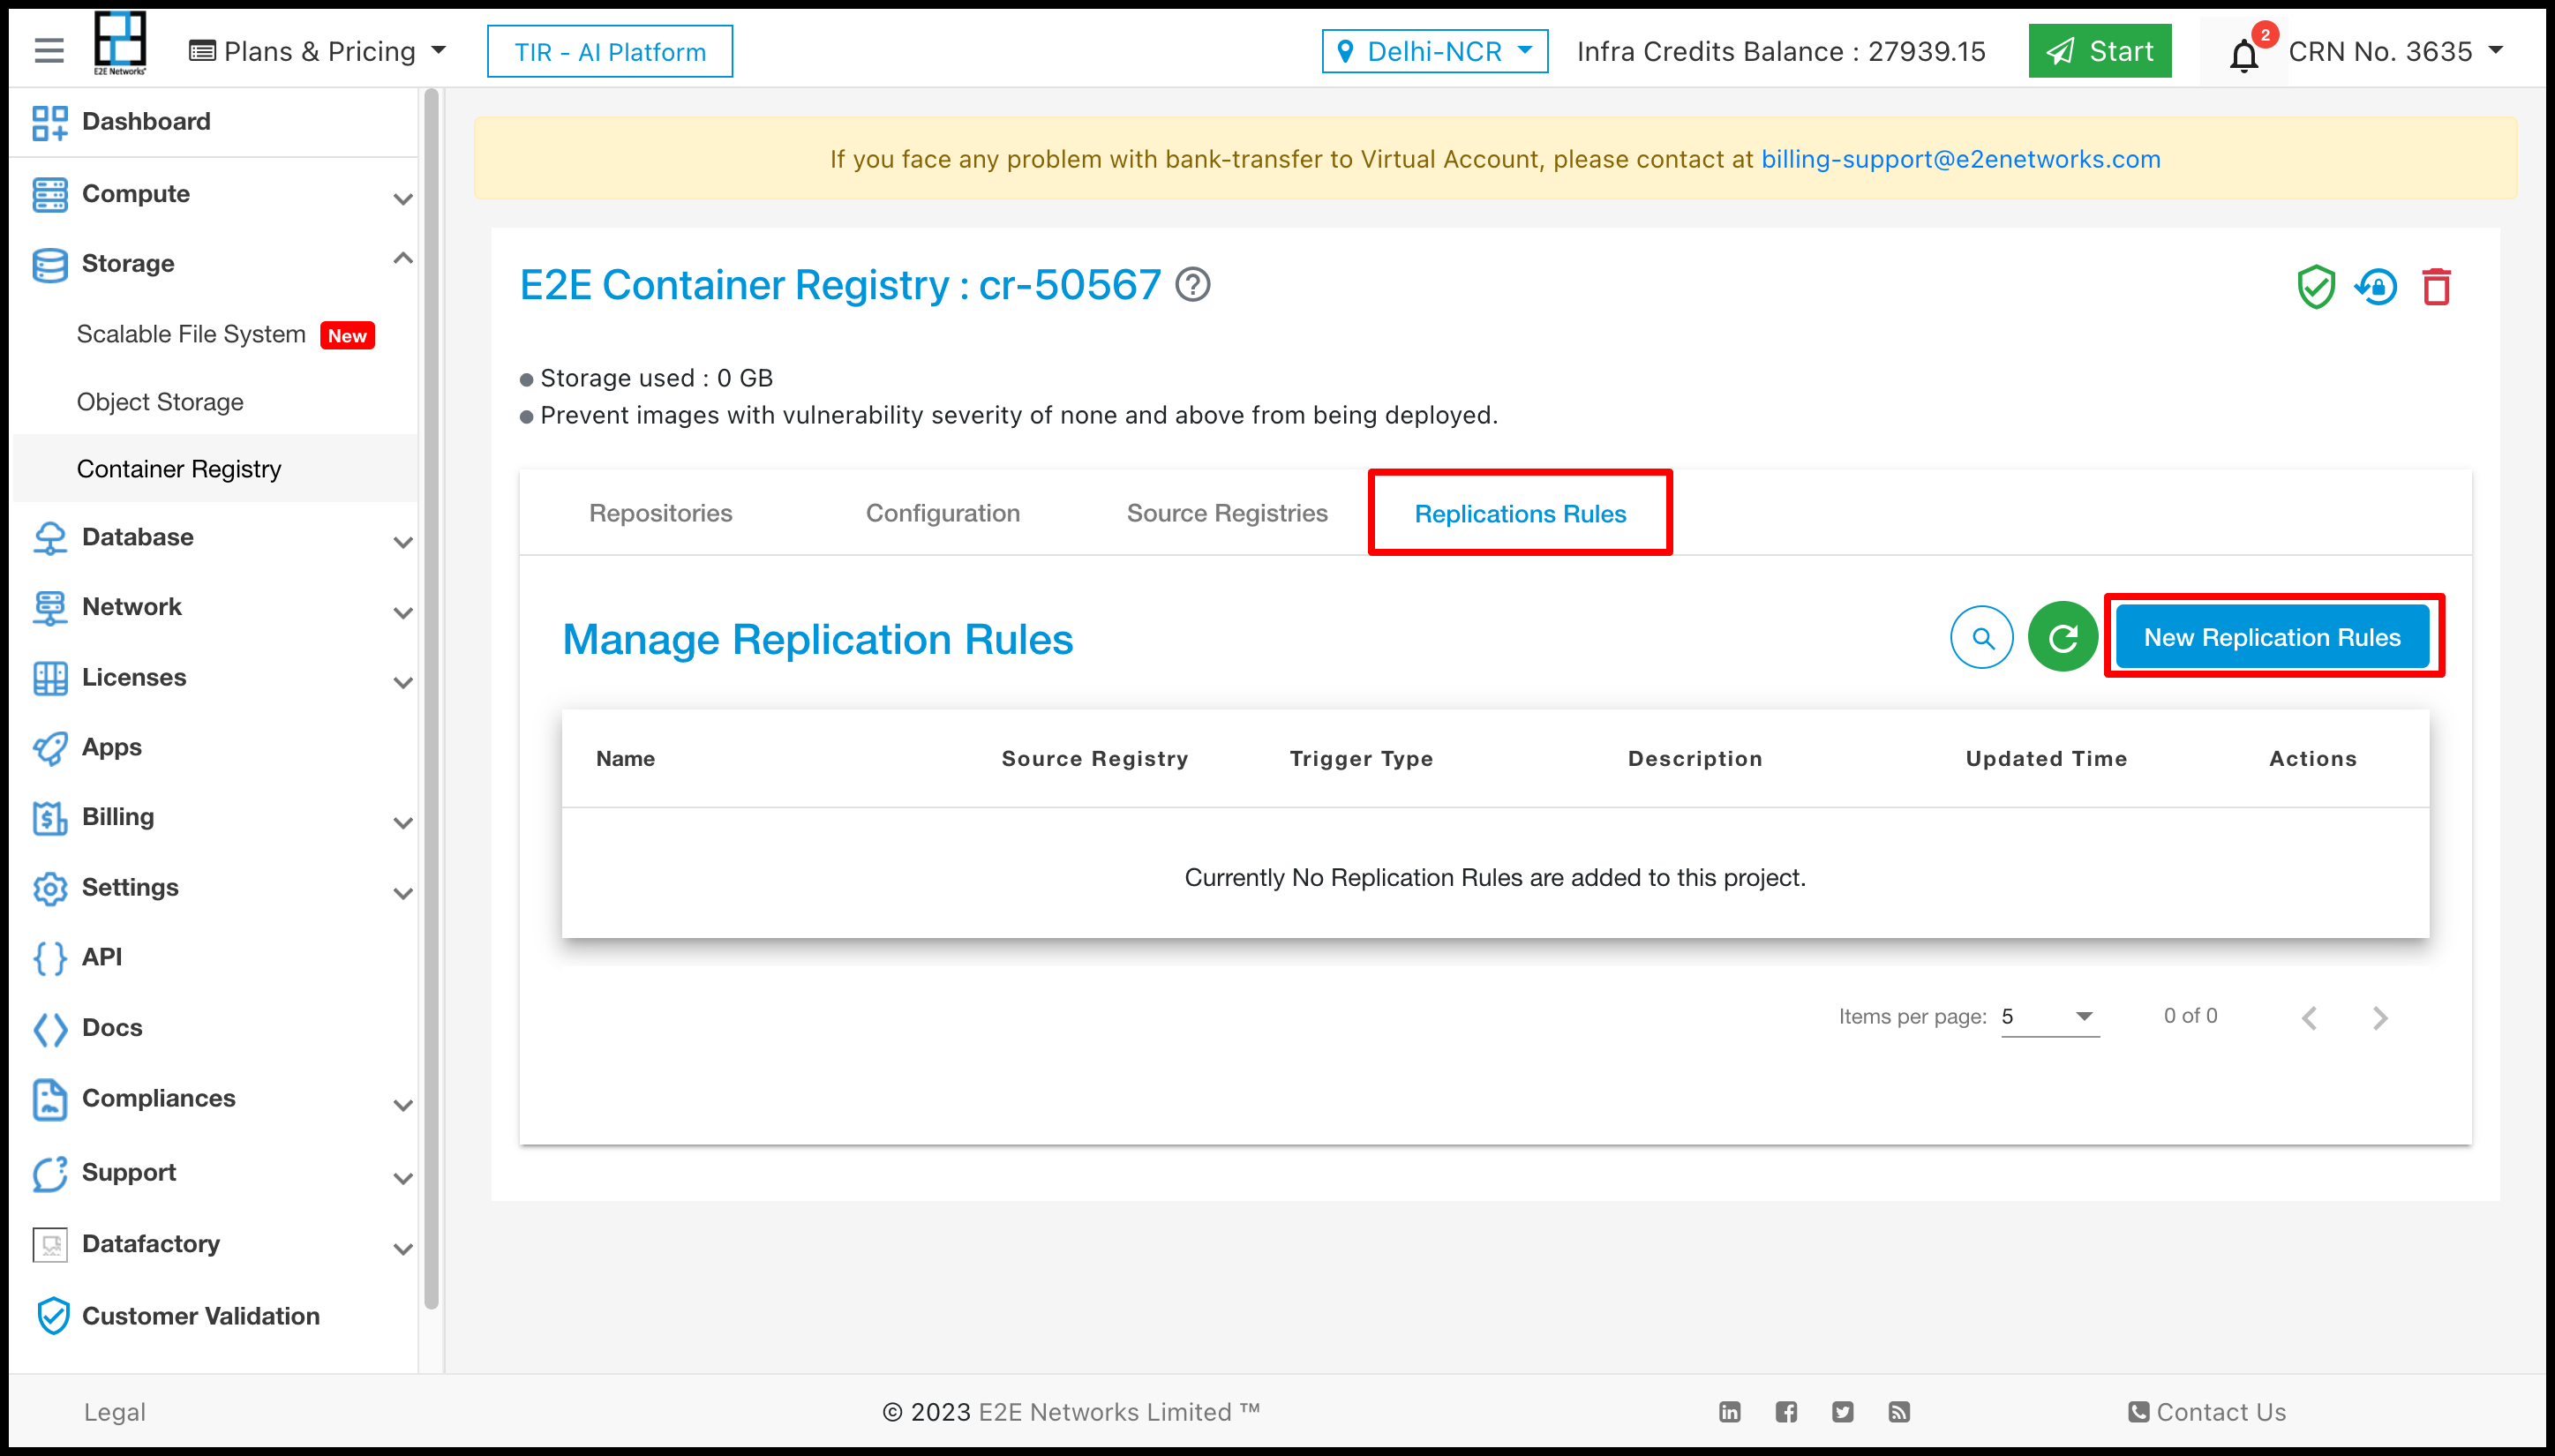
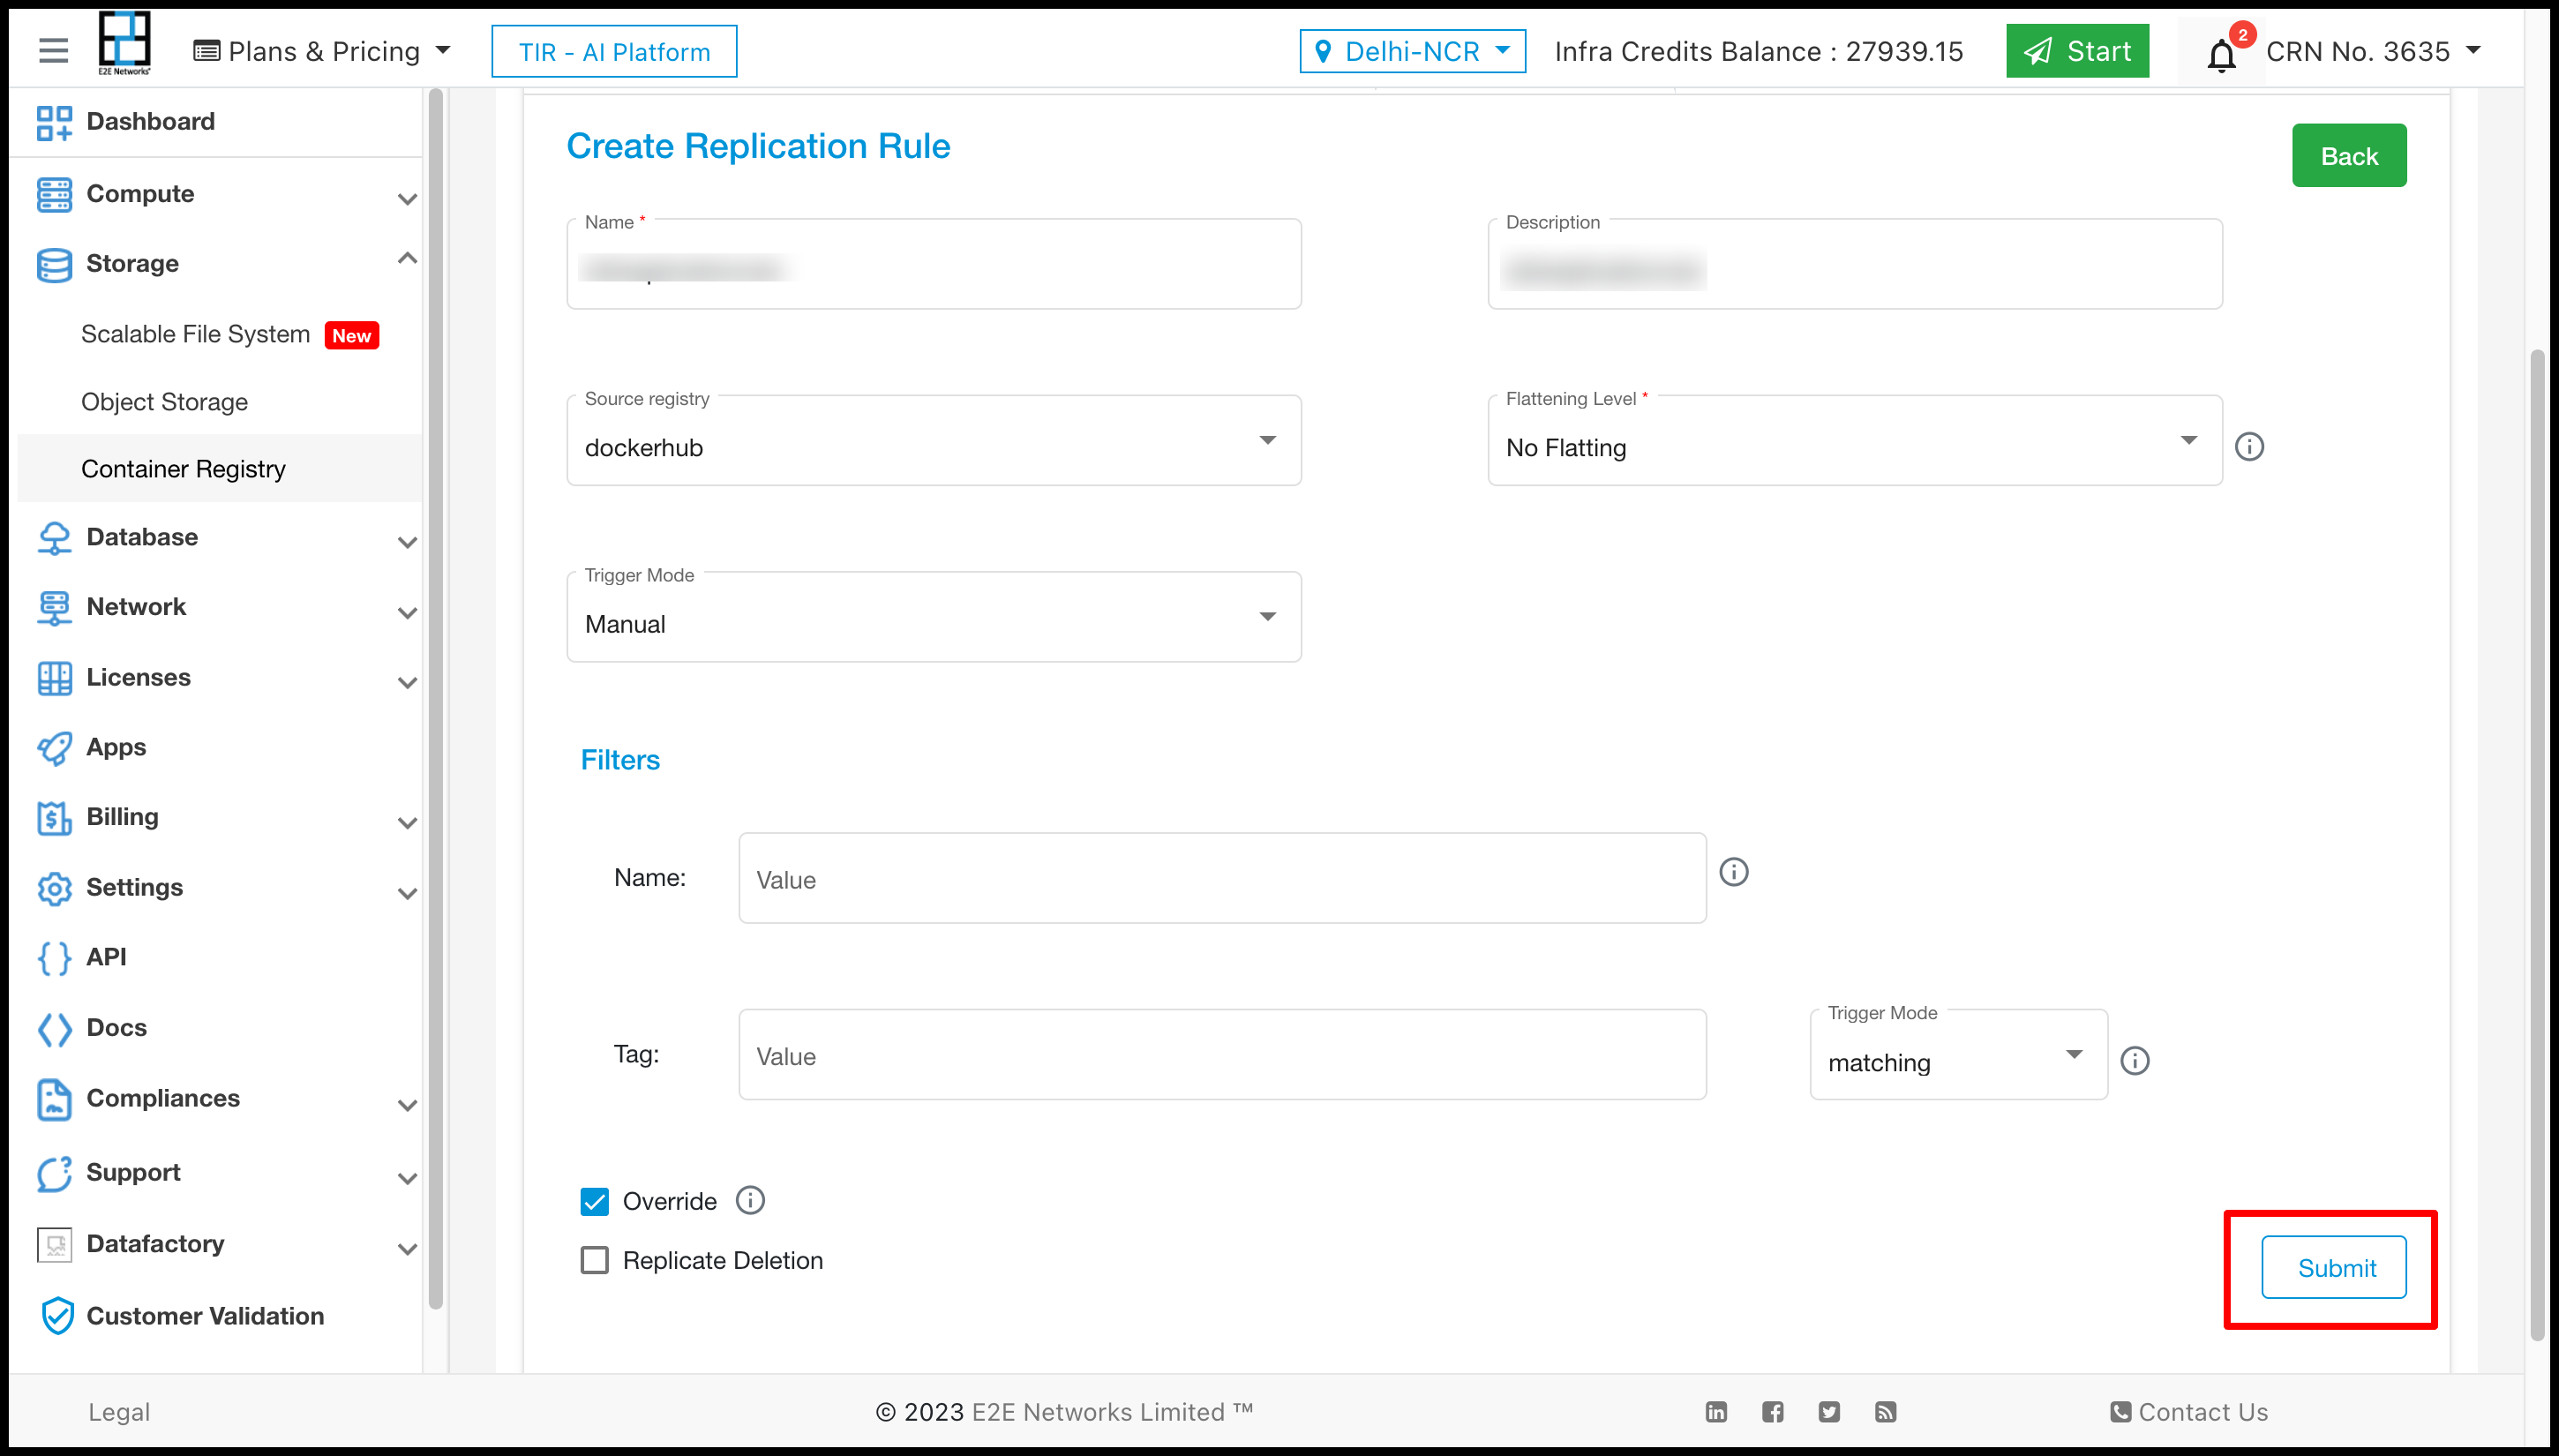
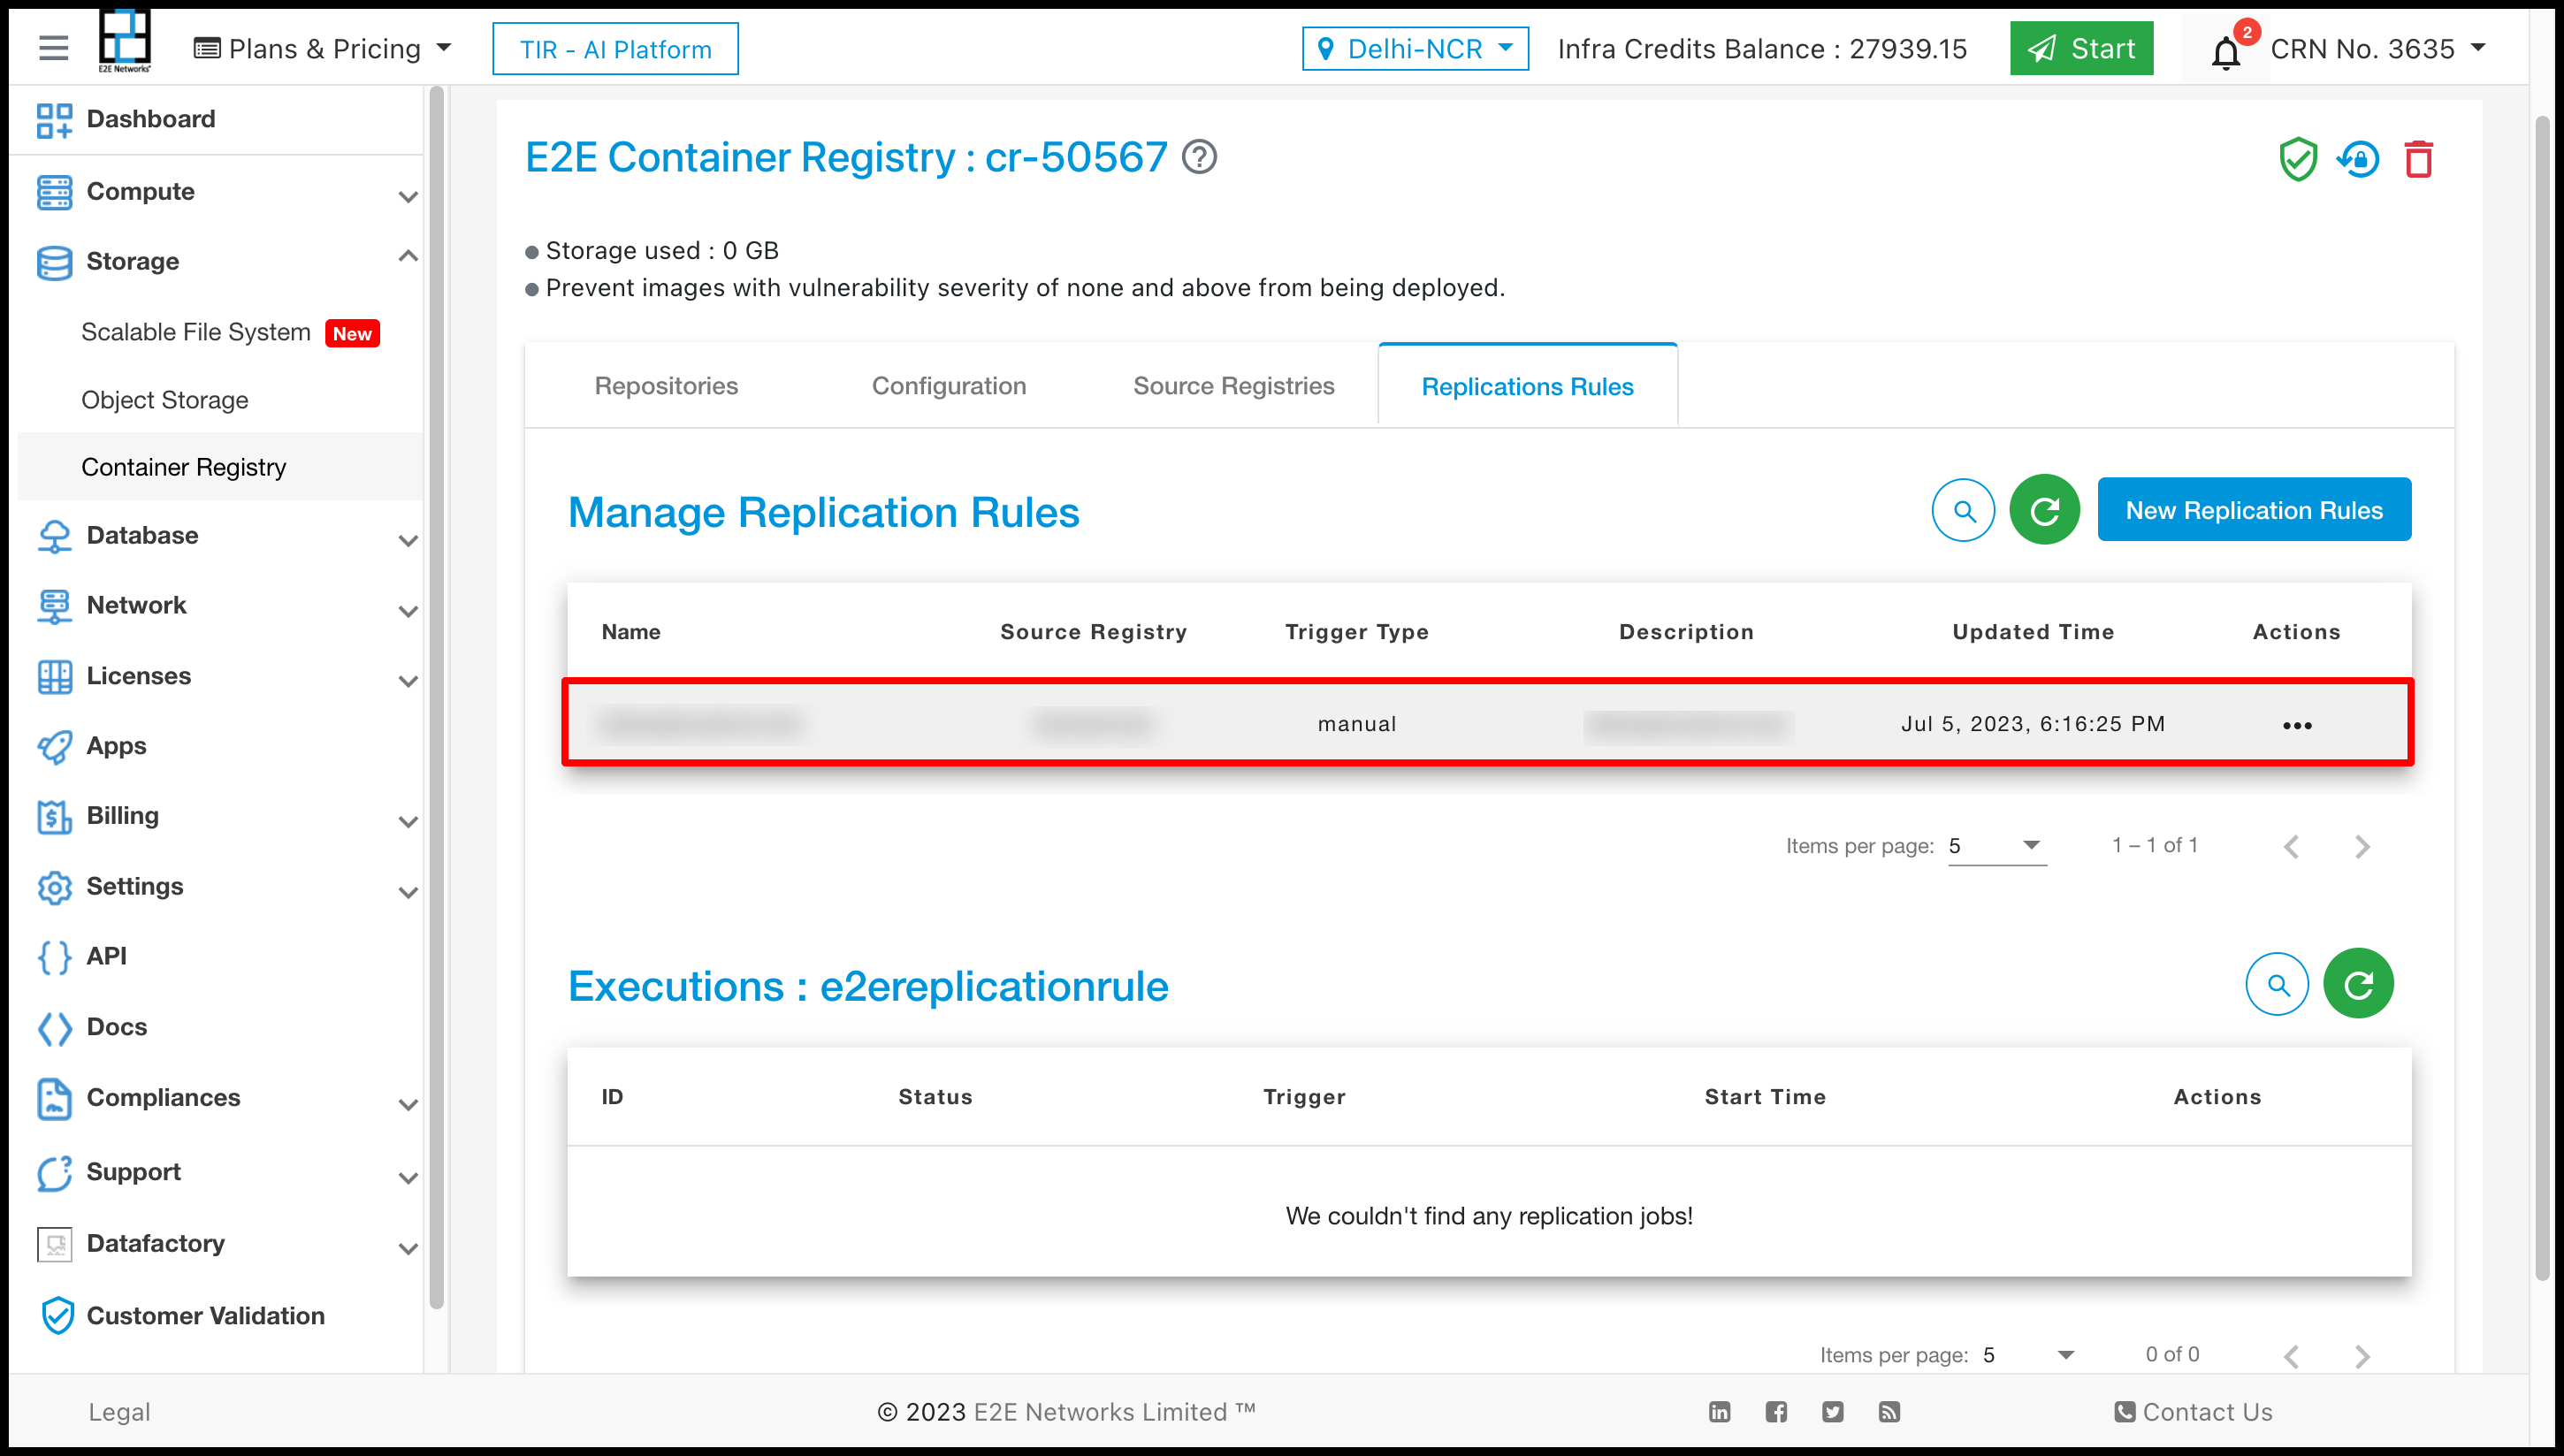
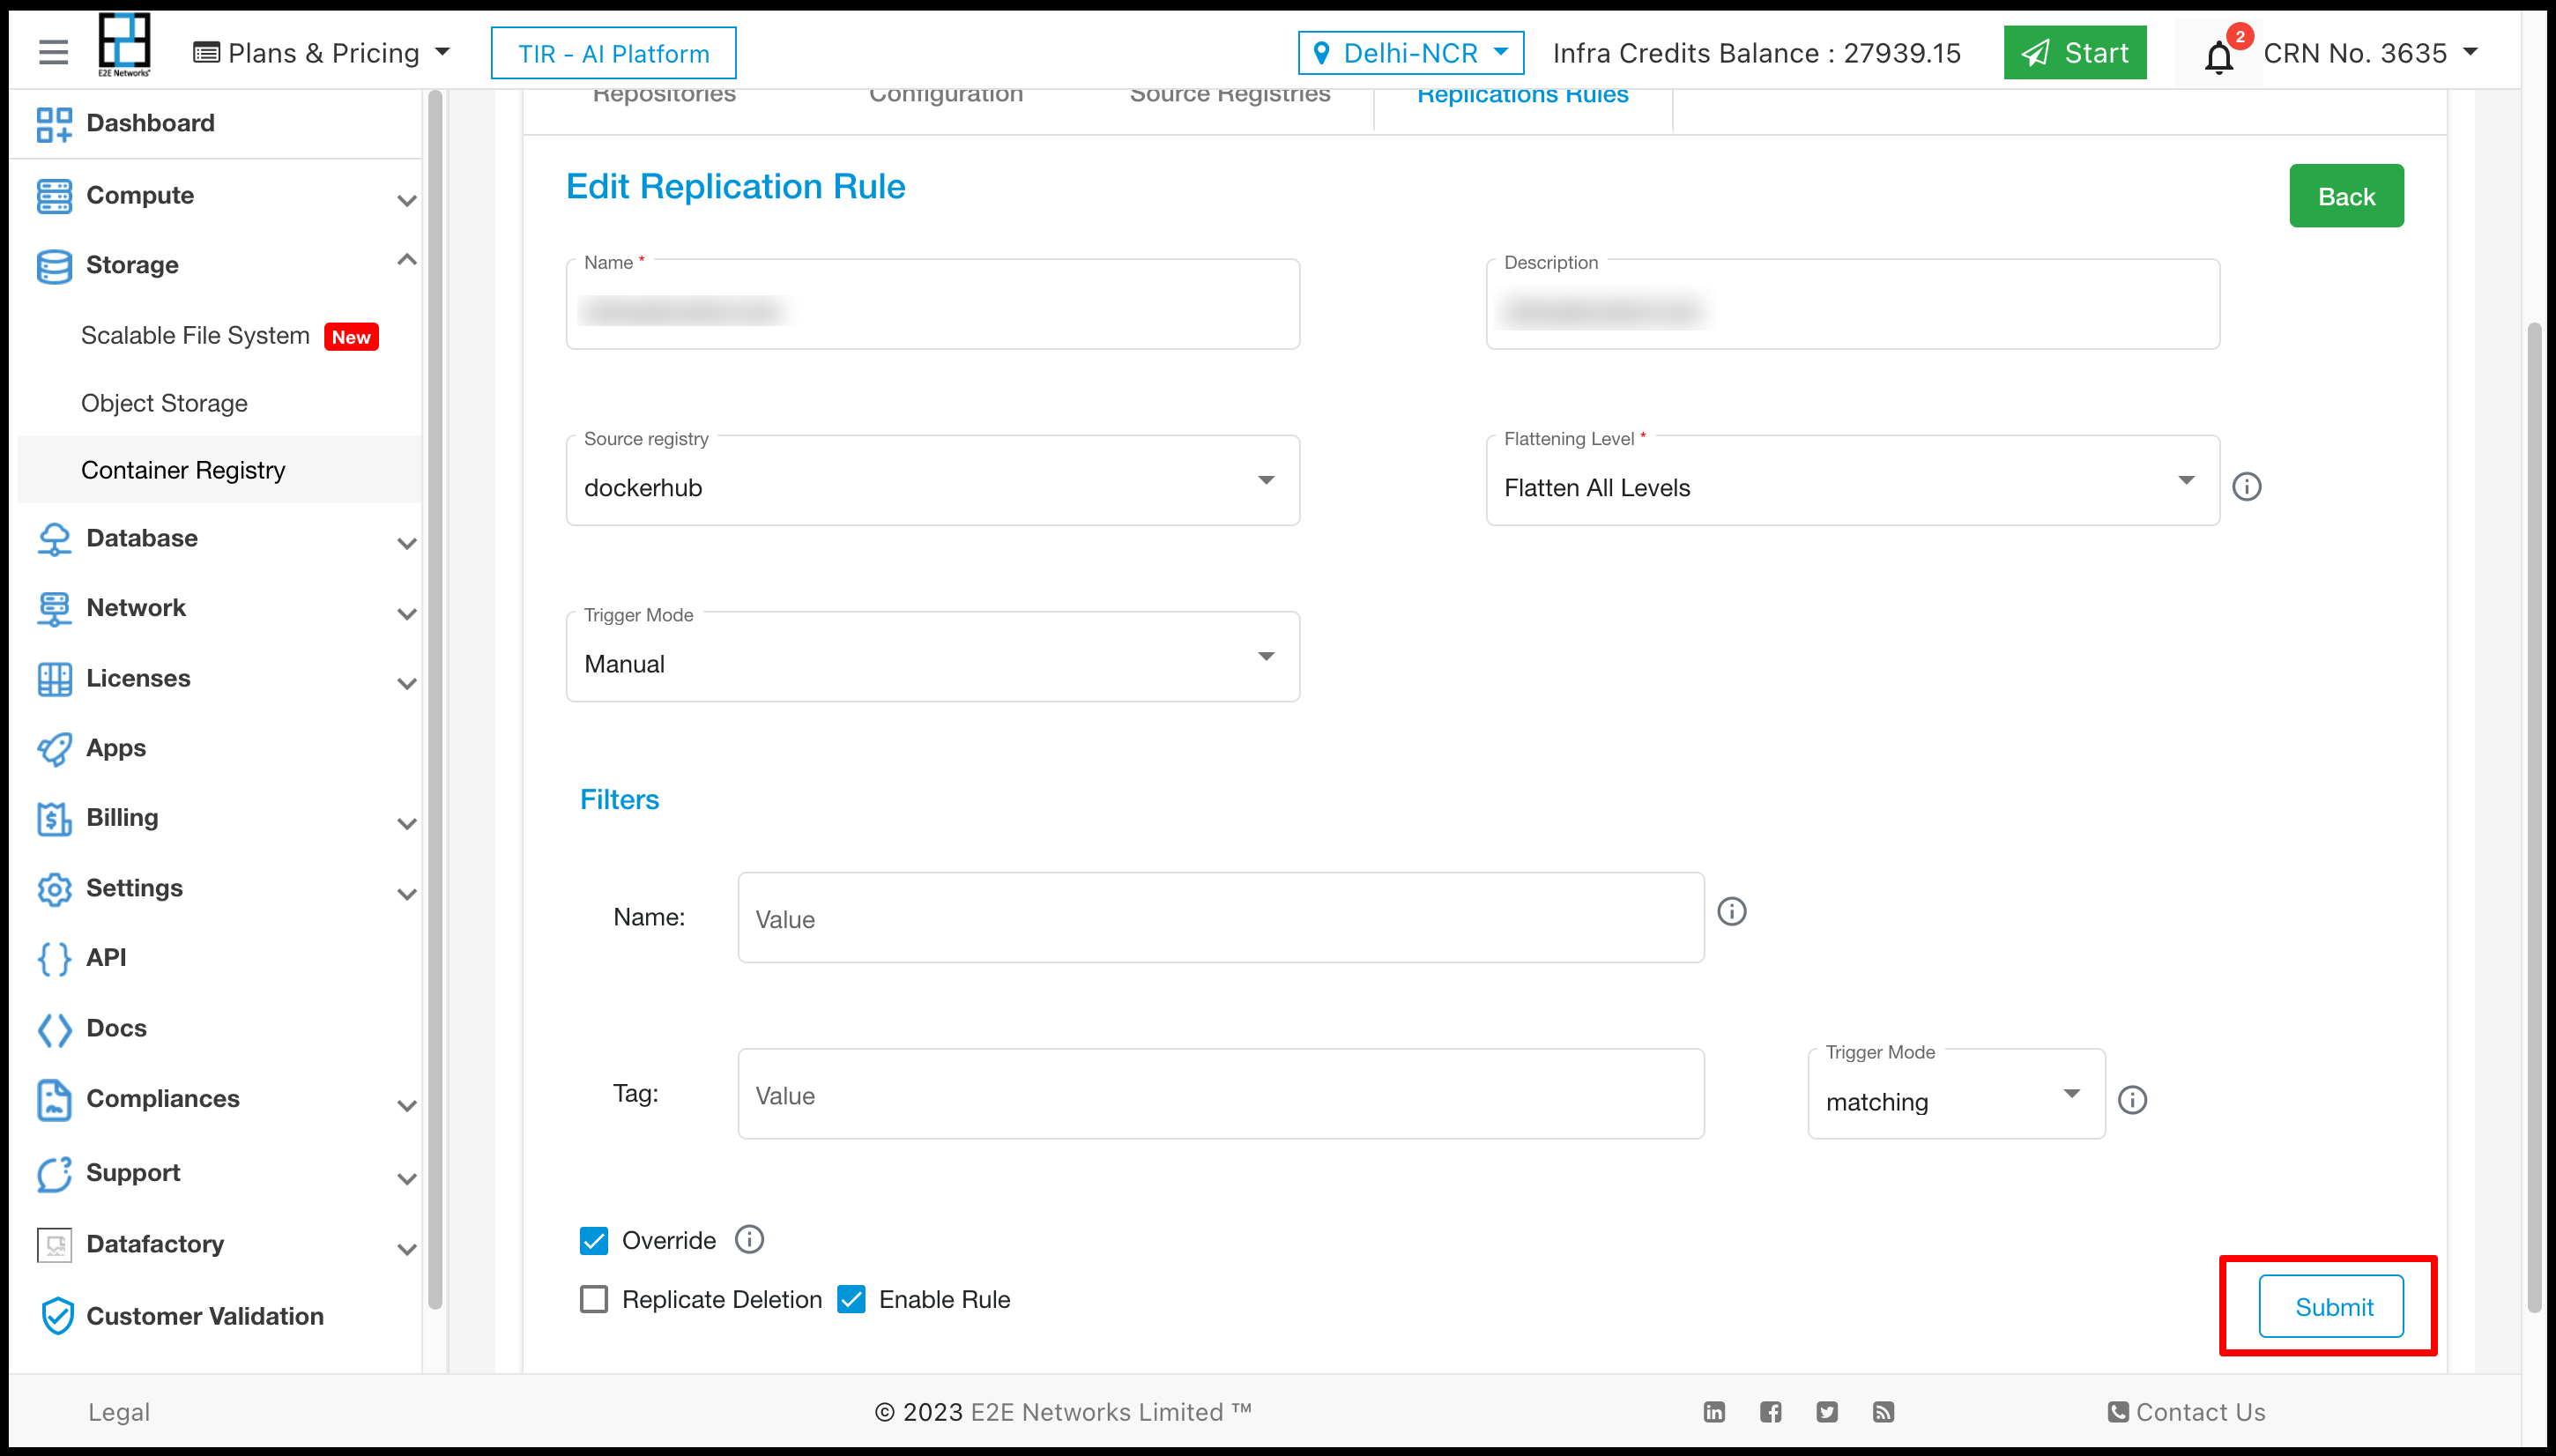
Replication Rules allow you to specify how you wish to replicate your resources from a certain source registry. The New Replication Rules button must be clicked by the customer to create a replication rule. Next, you must enter the required data. Afterward, you must click the “submit” button.
Replication Rule Action
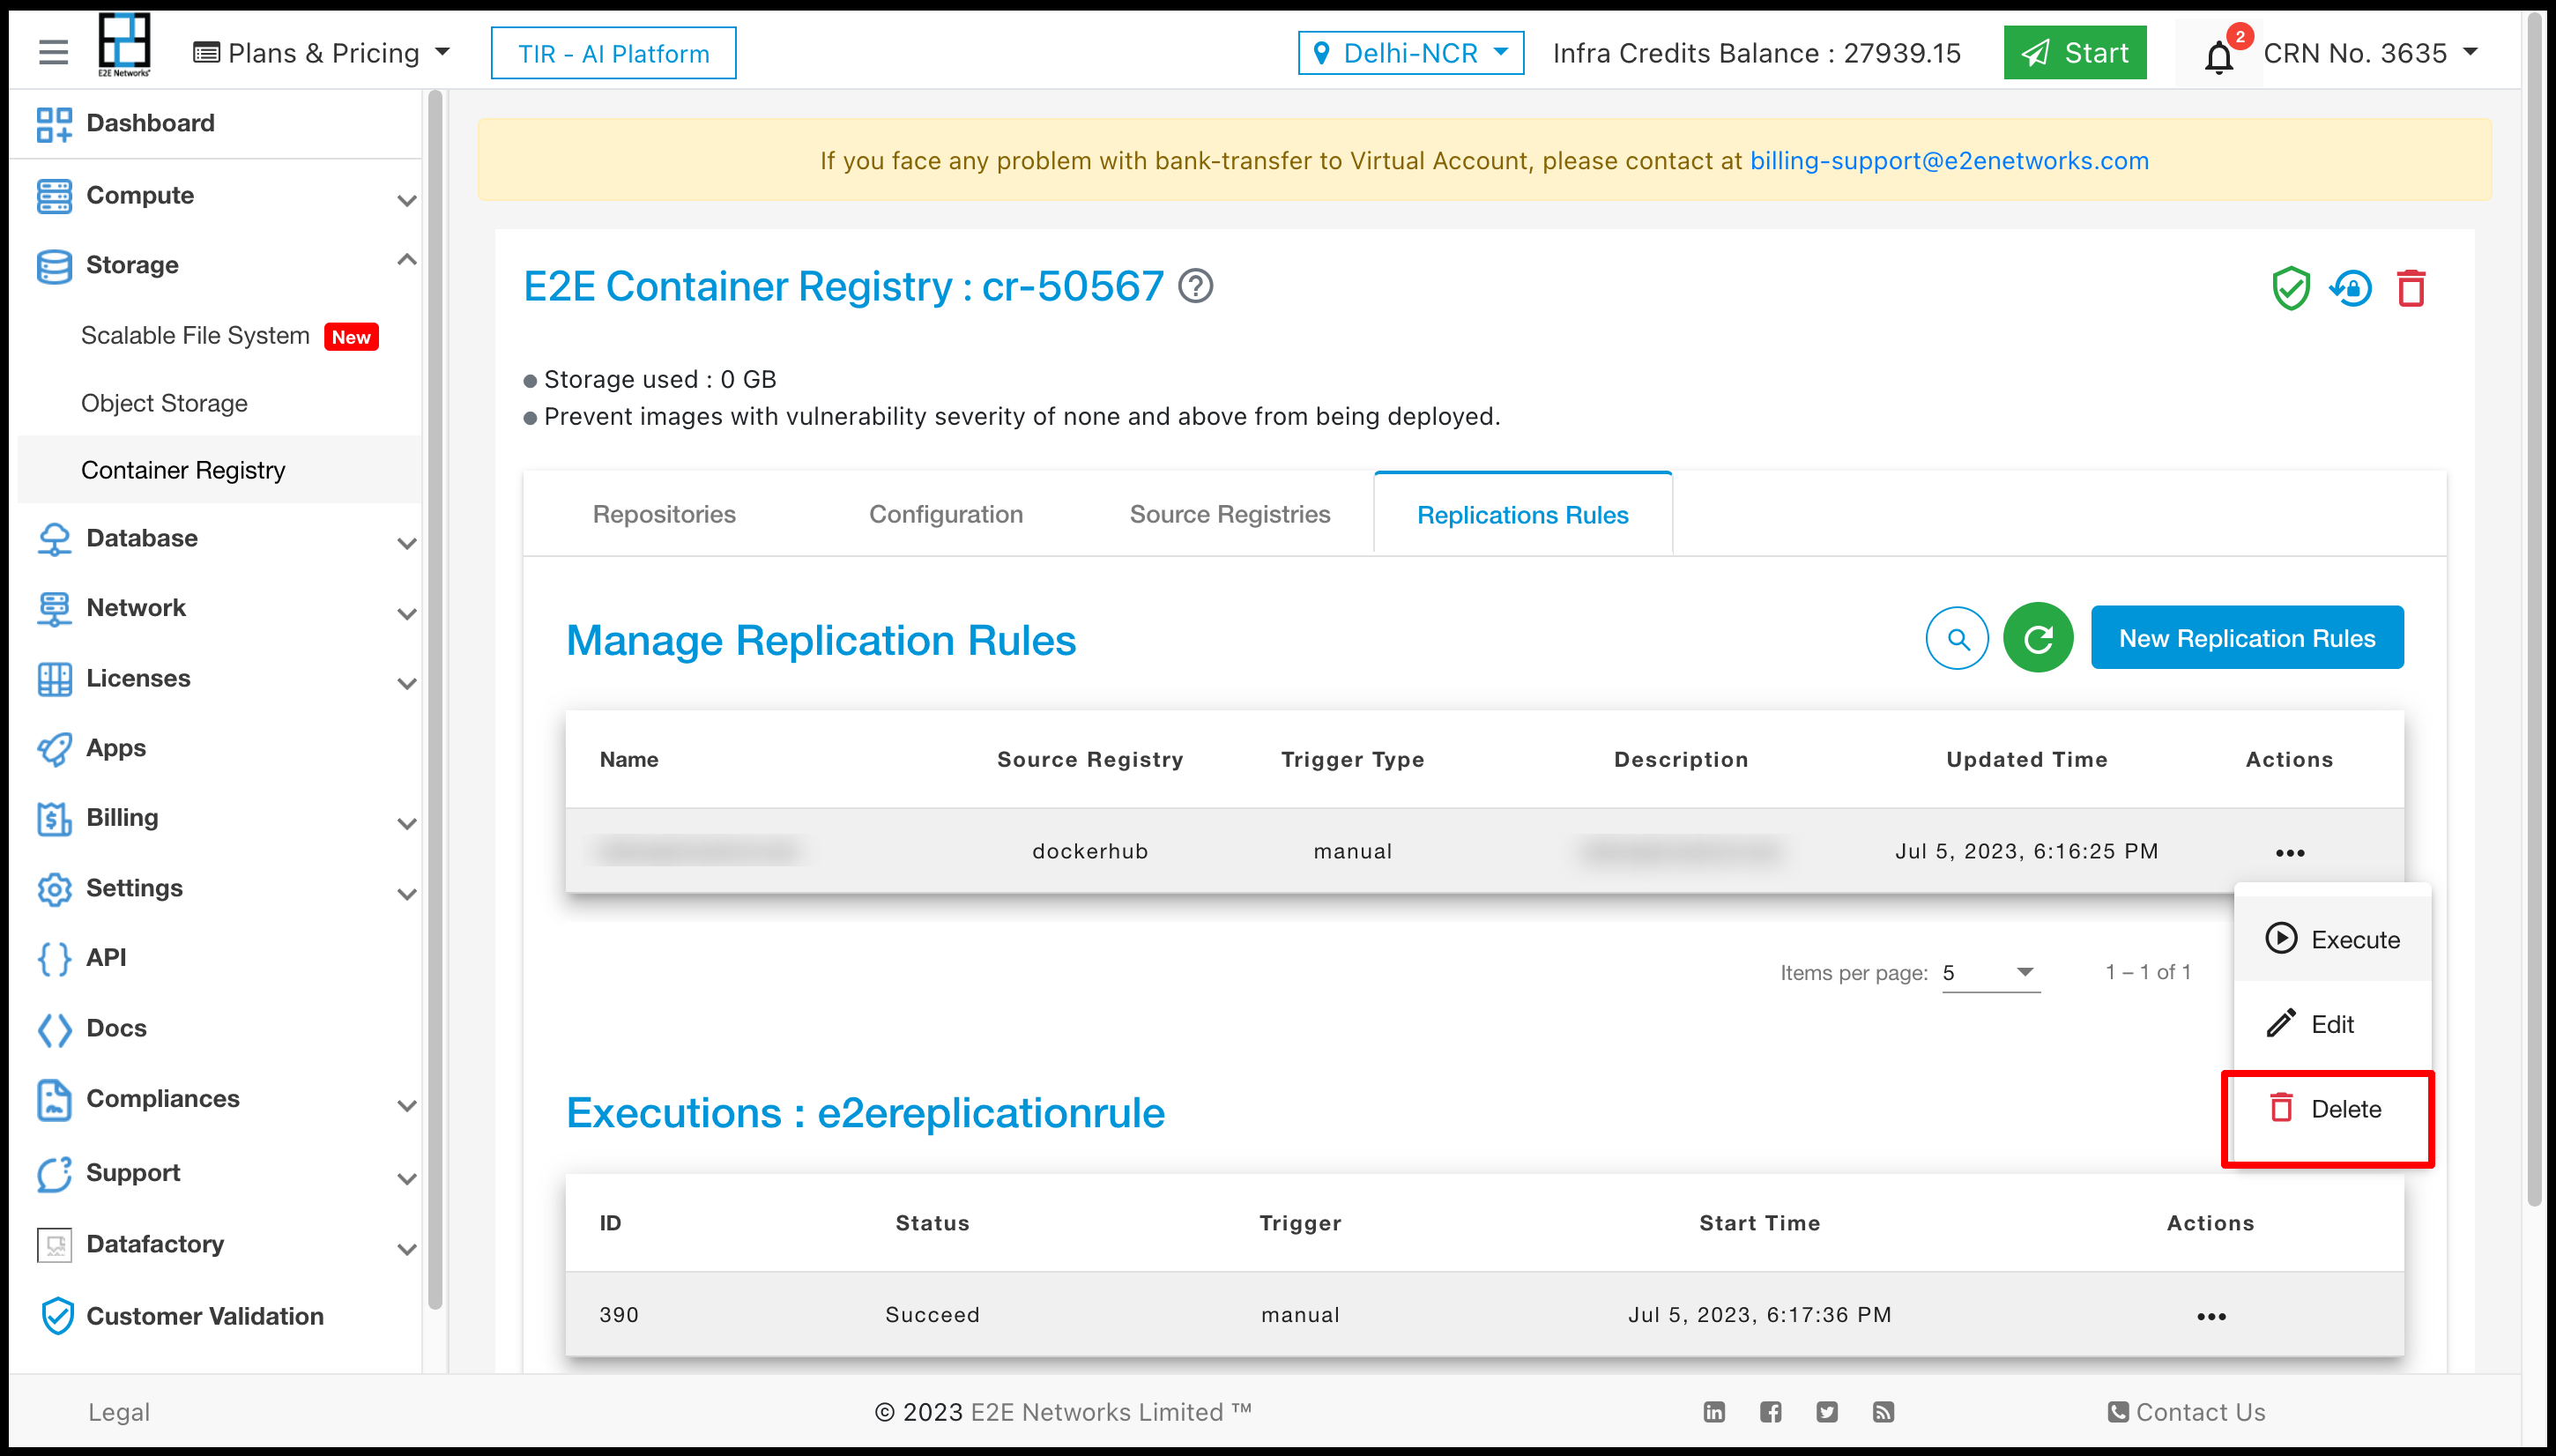
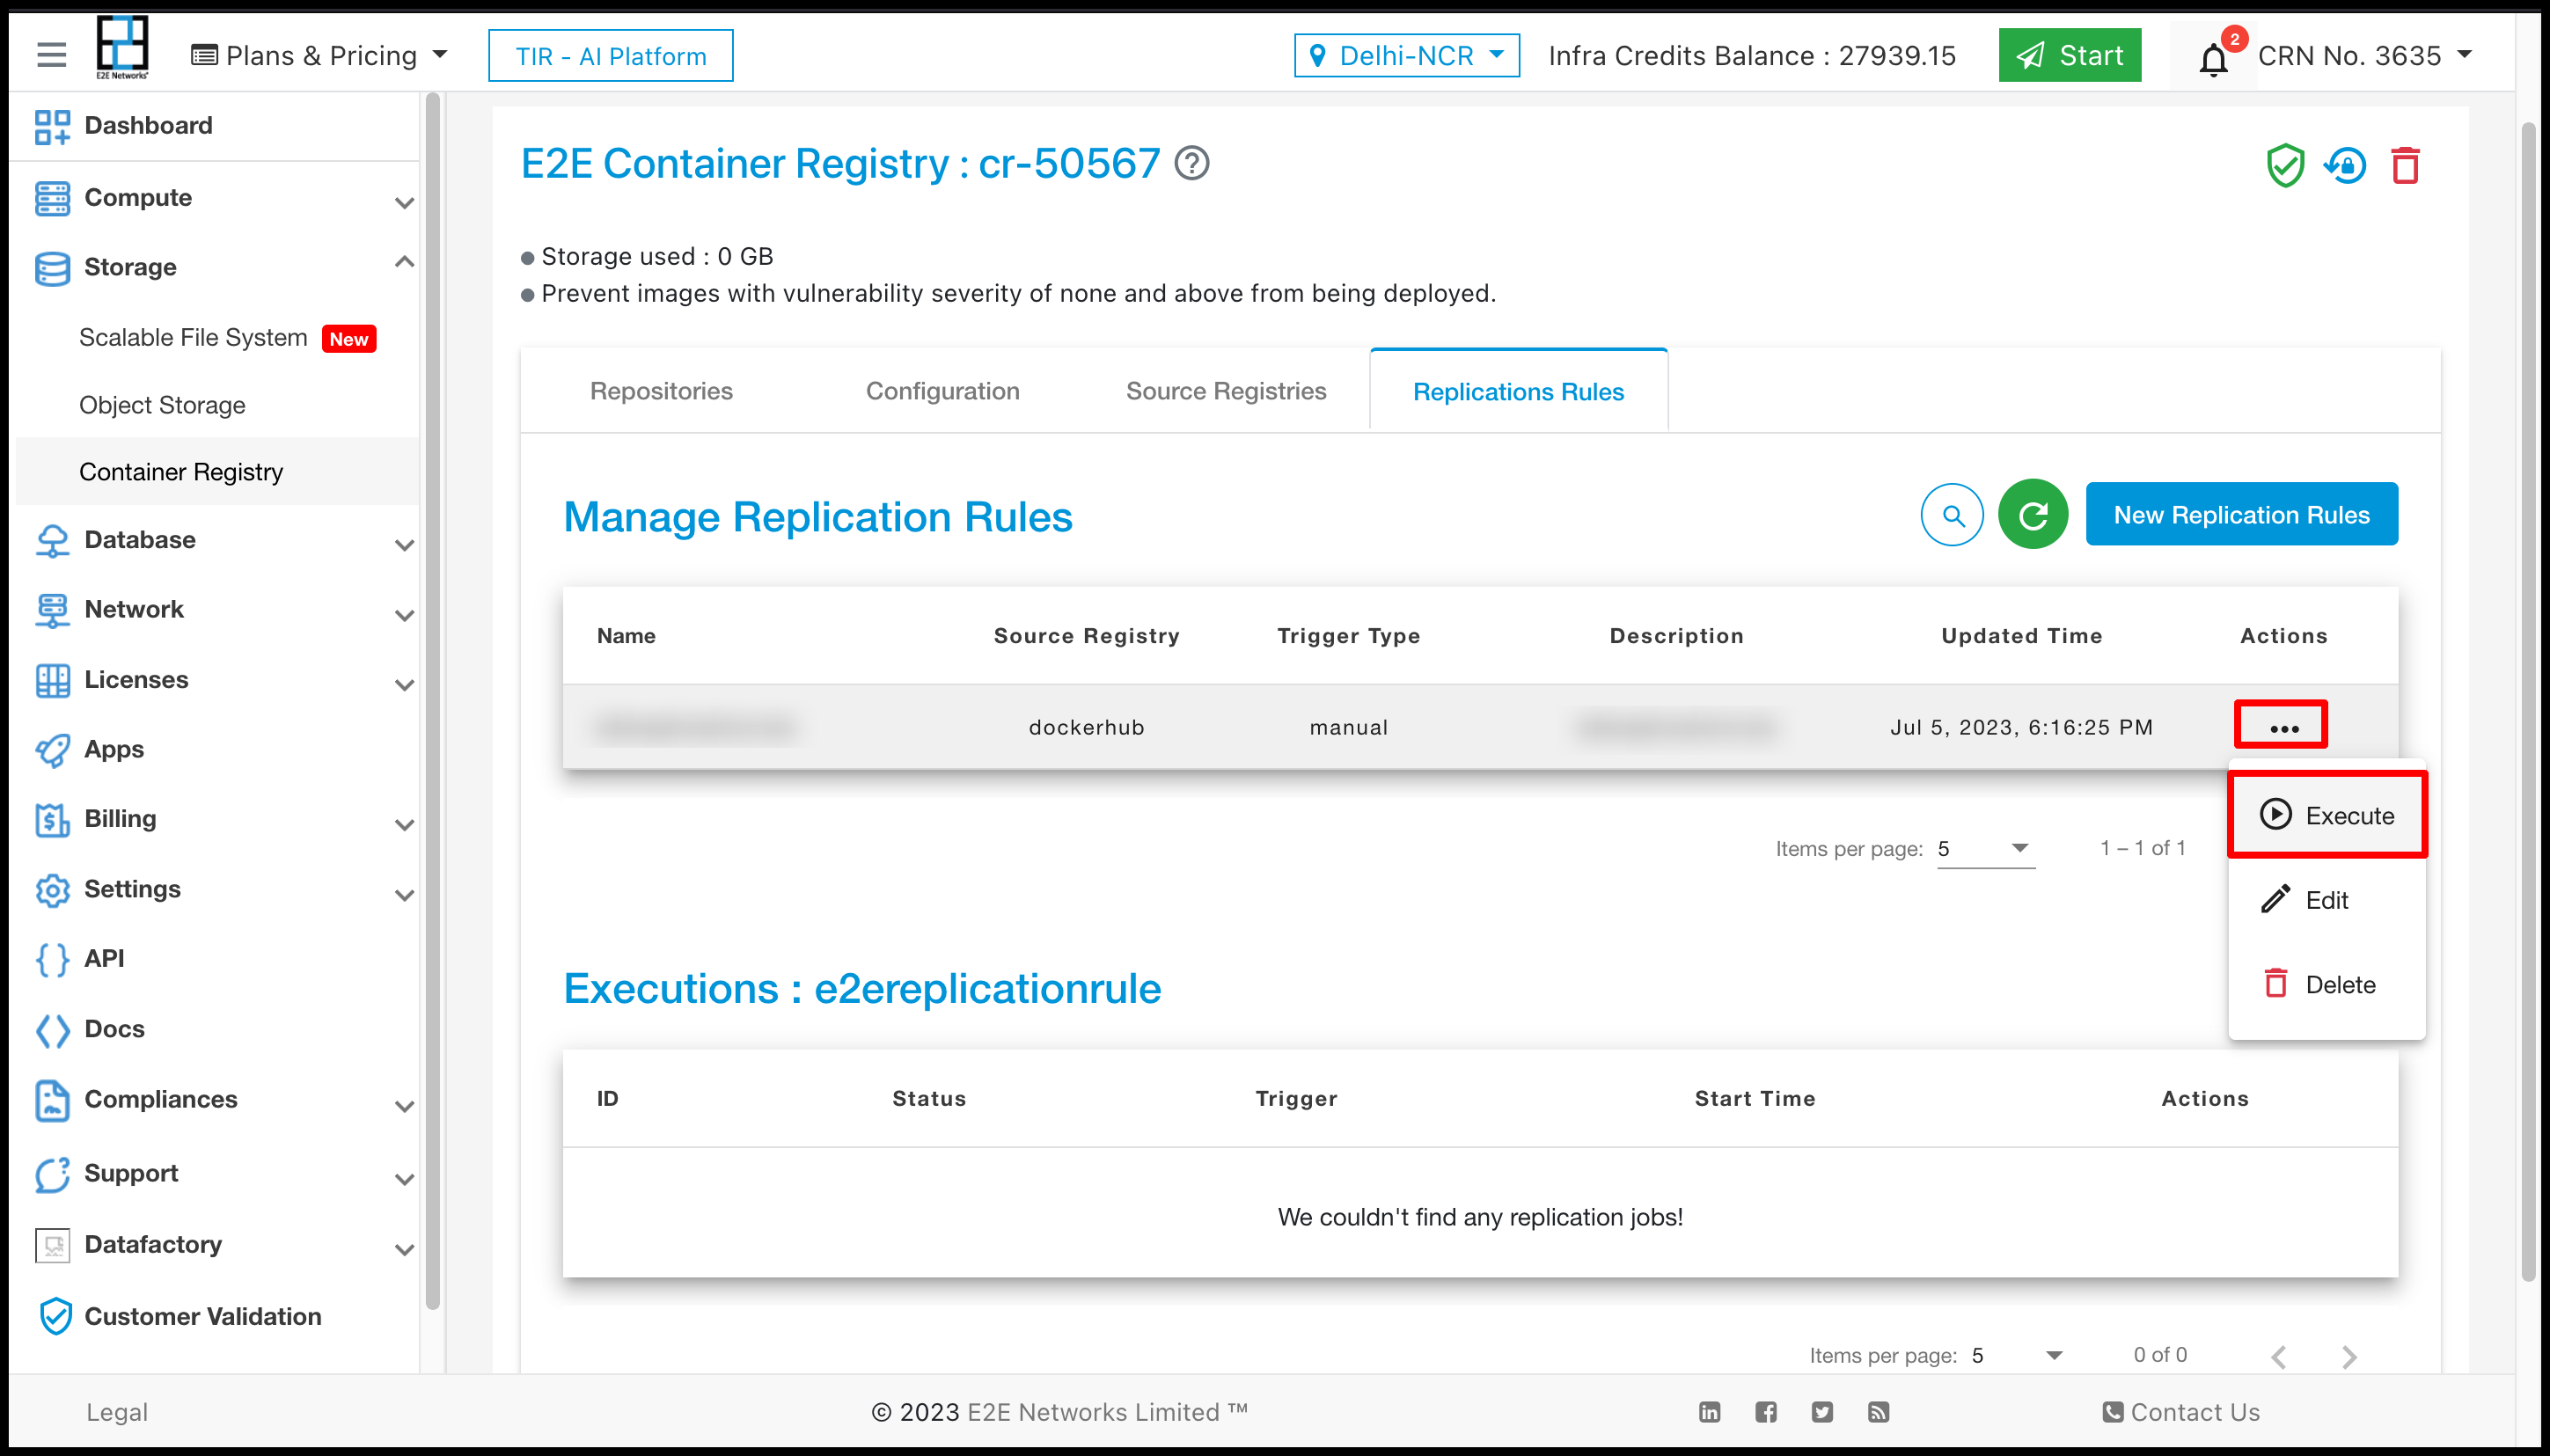
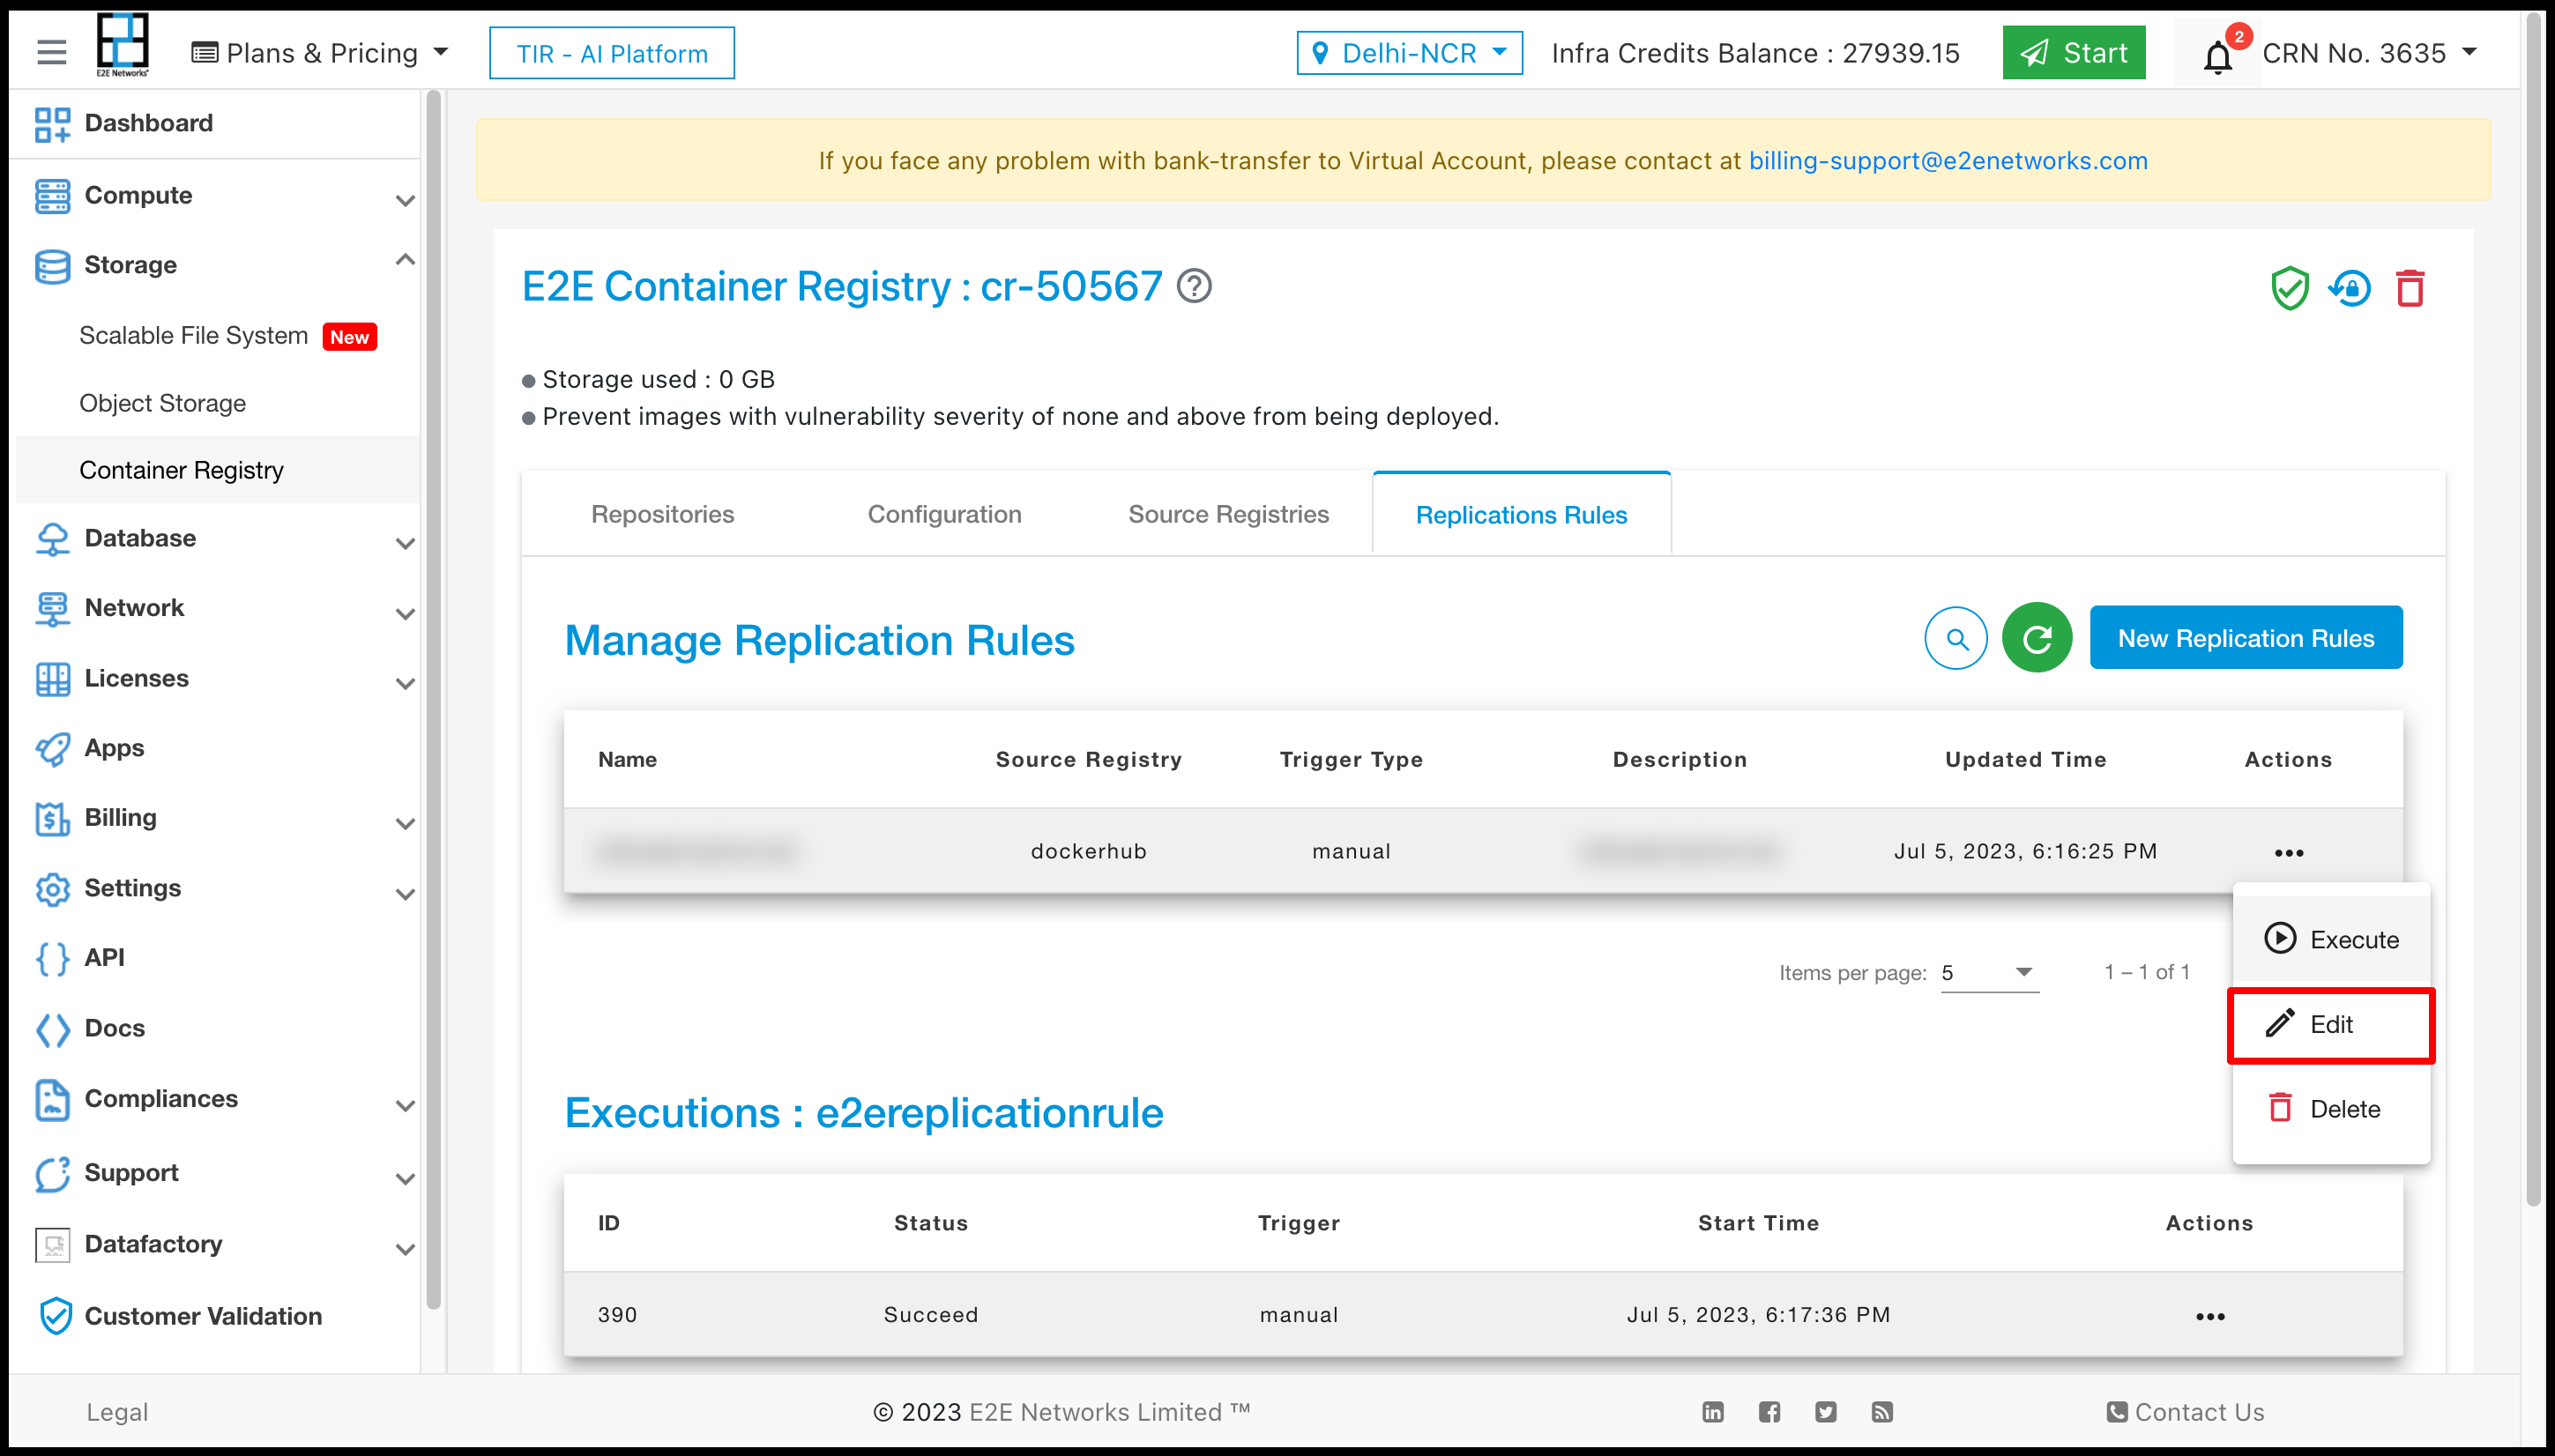
You can perform three actions on Replication Rule Execute, Edit, and Delete.
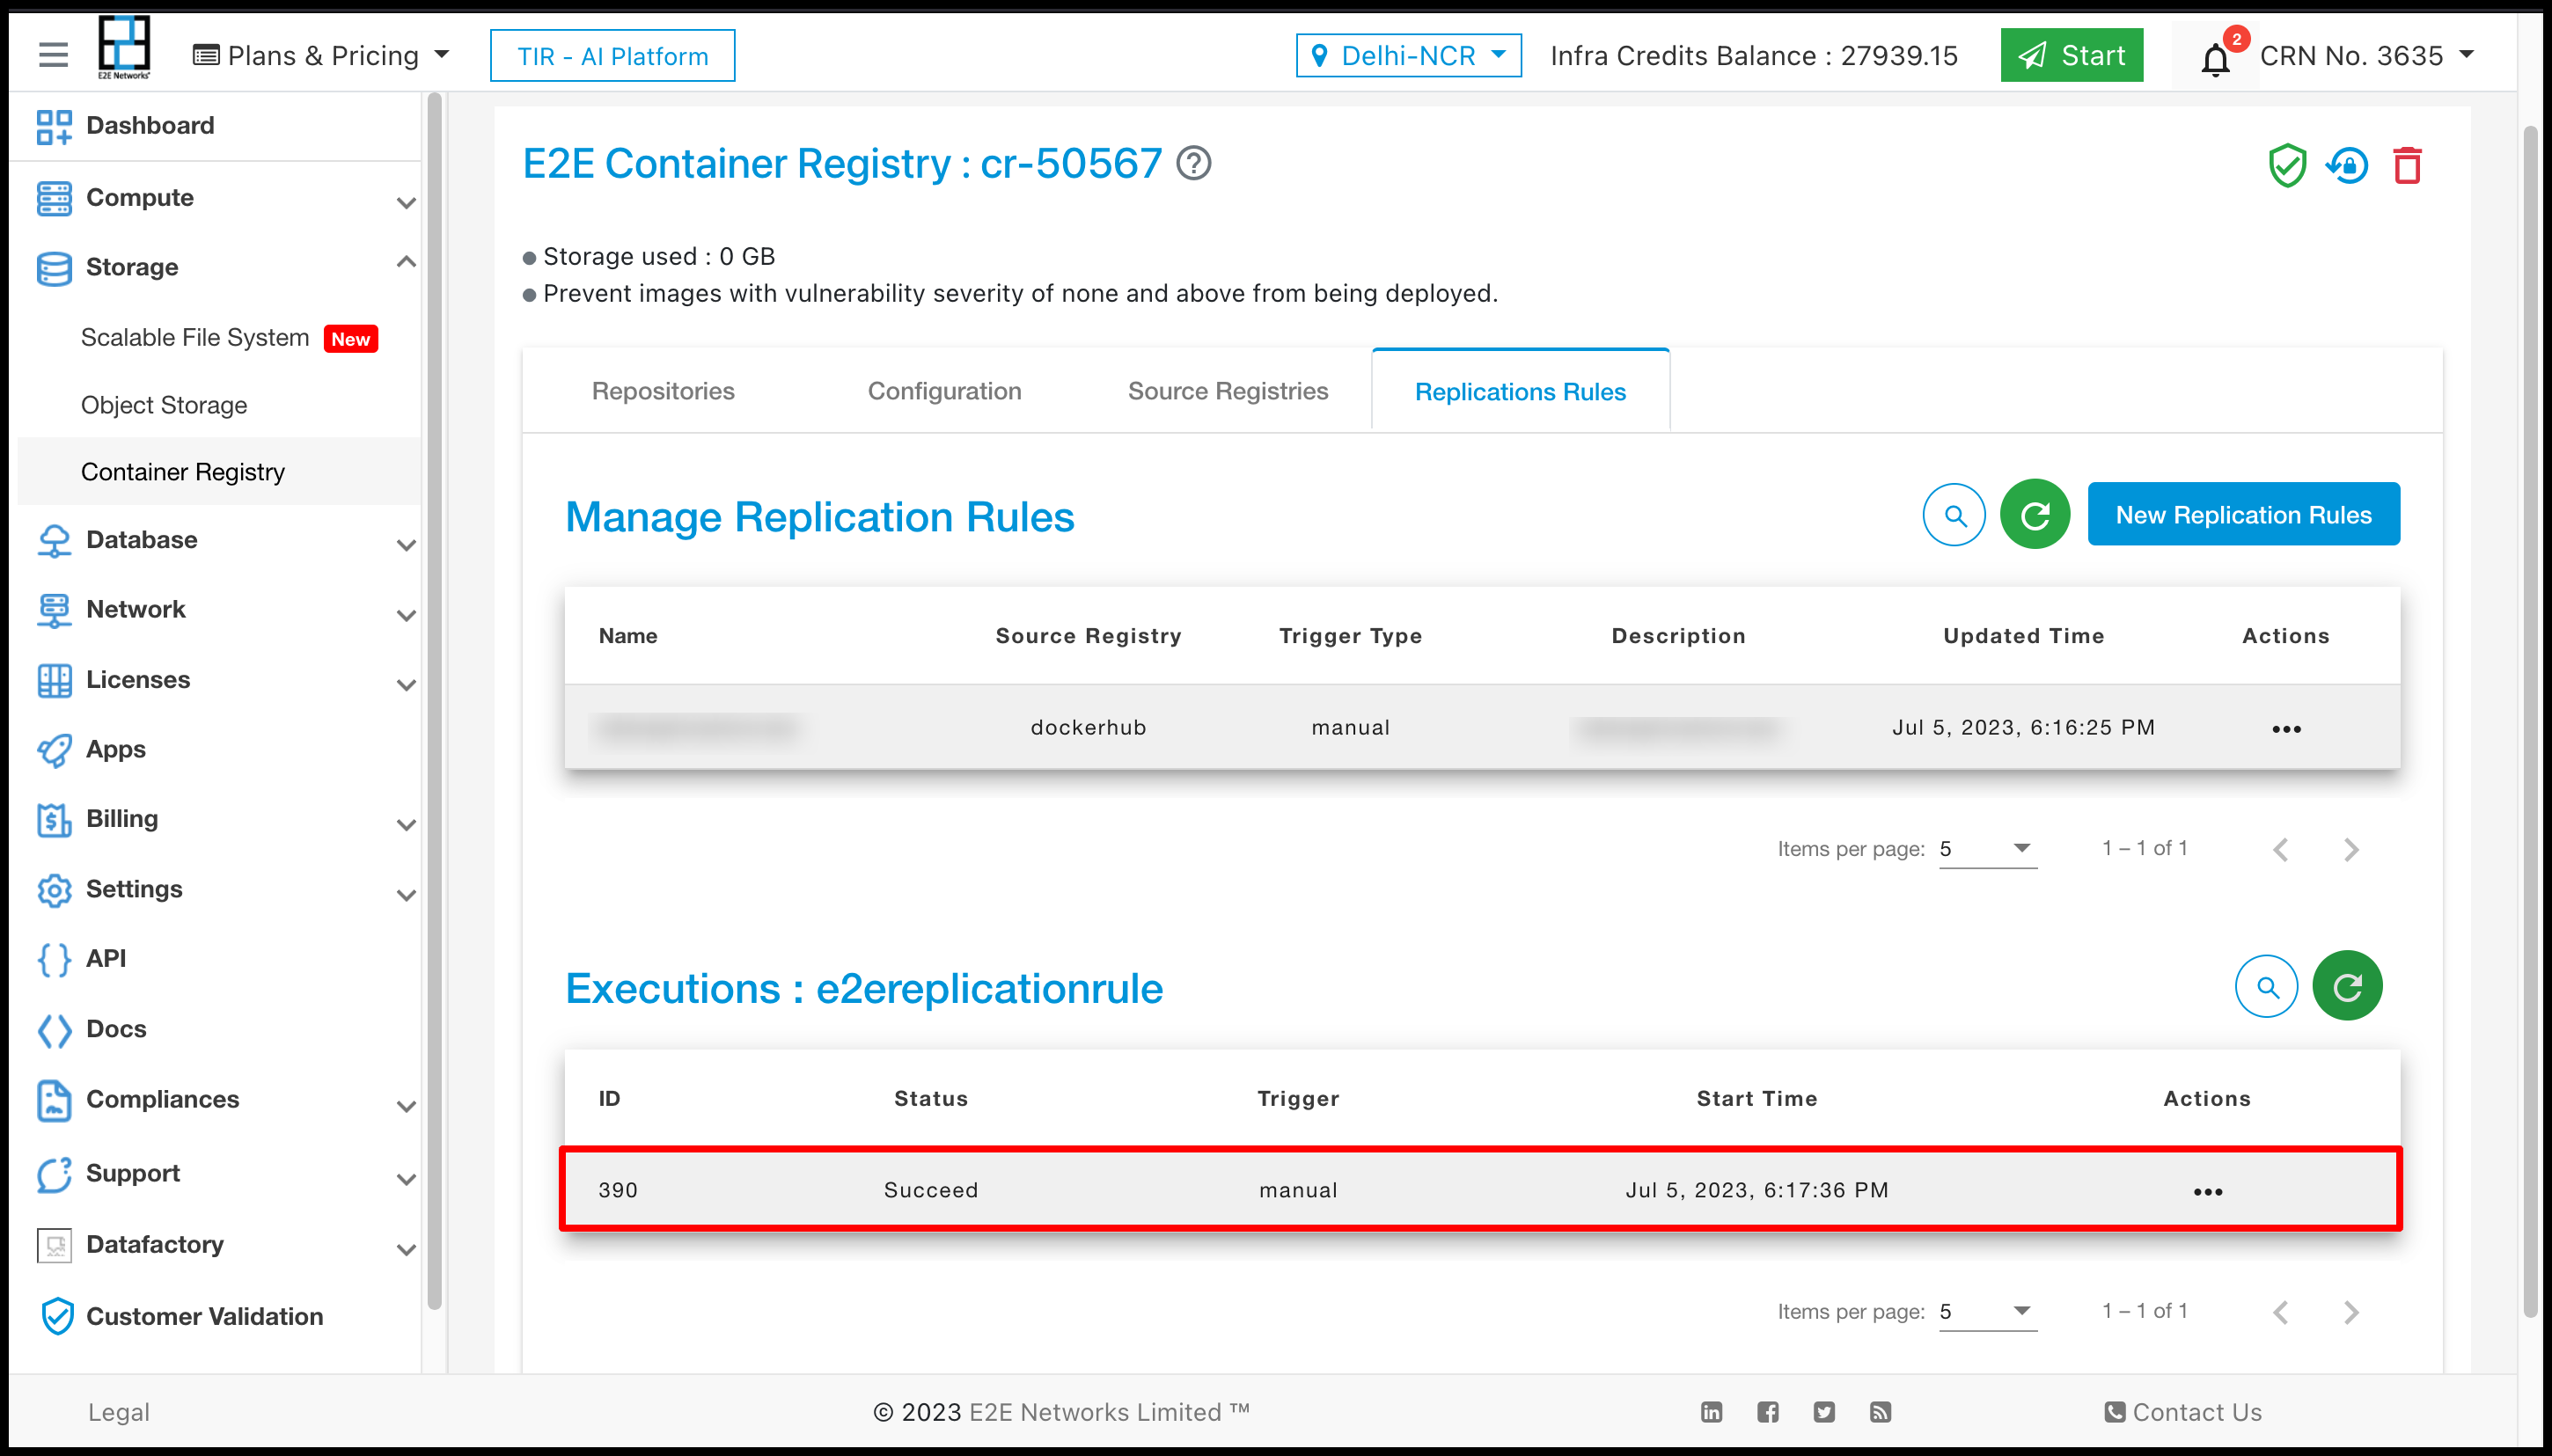
Execute :- For executing Replication Rule you have to simply click on Execute button the execution will be start as per Replication rule which you have set.
Edit :- For Editing the Replication Rule you have to click on Edit button and set the value as per you choice.
Delete :- For Deleting replication Rule you have to click on Delete button.
