How to setup SSH keys – Windows OS
Introduction
Setting up SSH based security to access your server is a much more effective way than the use of a manual root password. Cracking the security system of a node depending on SSH keys is nearly impossible since it secures your node in a more sophisticated way by the use of encoded keys.
About SSH keys:
Use of SSH keys favors a very boosted form of security against the brute forces attacking a virtual private server. Use of passwords, independent of their complex nature is always vulnerable towards security threats. SSH keys provide a whole new level of security which is safe and impregnable. SSH keys are basically generated in pairs (i.e public key and a private key). One can associate the public key with any server, and only the client in possession of the private key can have access to the decrypted data.
The data gets decrypted only when the two keys exactly match. This primitive approach of SSH makes it almost impossible to be deciphered by the brute forces. SSH keys also provide an auxiliary security measure, using which a passphrase can be affiliated with the private key which will require the user to enter the passphrase for accessing the private key.
Note
The private key is to be safeguarded and should never be revealed, unlike the public key.
Setup SSH Keys – Windows
For setting up the SSH key-based security from your windows machine, you will require the PuTTy tool for generating the keys.
You can download the putty tool from here.
Follow the steps to generate SSH keys using the PuTTY tool:
Step 1 – Generate the SSH keys
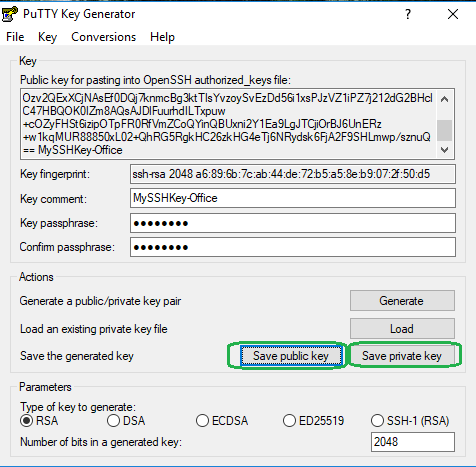
Launch the PuTTY Key Generator by opening the .exe file that you have downloaded.
Select the Parameters –
Type of key to generate: Select SSH-2 RSA the key type.
Number of bits in a generated key: This field requires the bit value of the keys to be generated. Higher the bit value, stronger is the security.Specify either 2048 or 4096 as the bit value.
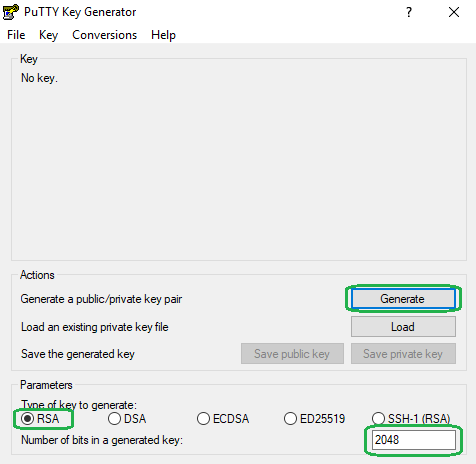
Click the Generate Button.
Move the mouse pointer randomly within the blank area of the SSH-Key section, below the progress bar (to generate some randomness) until the progress bar is full.
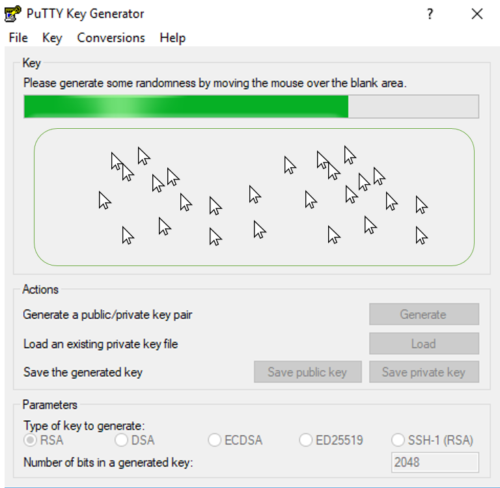
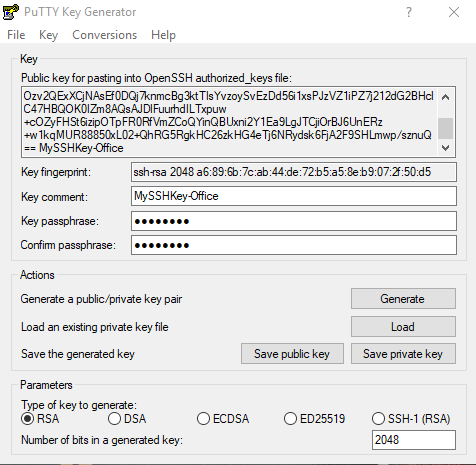
The PuTTY Key Generator should now generate a public key and a private key.
Key comment: In this field enter any comment you’d like. This will help you in identifying this key pair, later (e.g. your e-mail address; home; office; etc.)
the key comment is particularly useful when you generate multiple keys on the same machine.
Optional – Enter a passphrase in the Key passphrase field and enter the same passphrase in the Confirm passphrase field.
(A Passphrase is a recommended security measure provided for securing the private key. Use of a passphrase elevates the level of security. Since the whole concept of SSH is to facilitate security and to safeguard the data from unauthorized accessing. We recommend the use of a passphrase every time you generate the SSH keys.)
Step 2 – Save the Keys
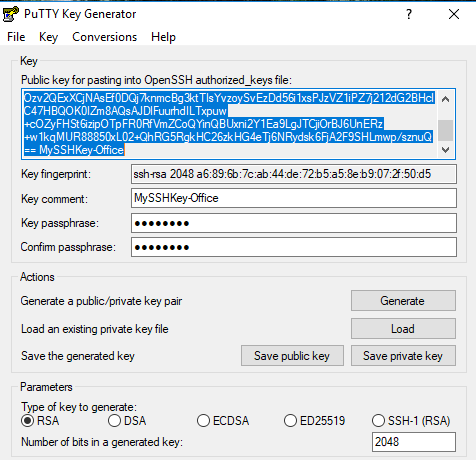
Click Save Public key, and enter a name for your public key.
Click Save Private key, and enter a name for your private key.
Note
The Private key is not to be shared and hence save it in a very secure location.
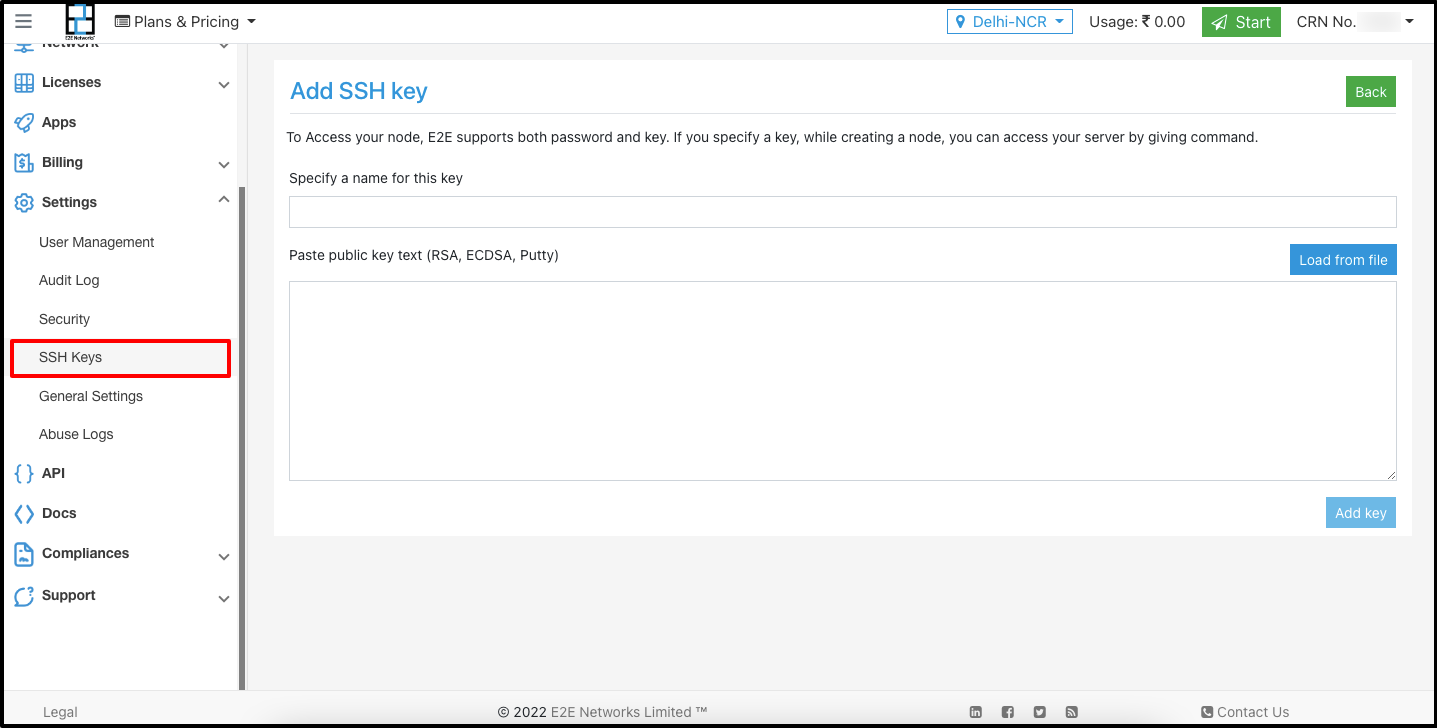
Copy the content present in the Public key for pasting into OpenSSH authorized_keys file on the top. Right-click and then click select all and copy the whole content.
Step 3 – Copy the Public Key to your node
Now you can copy and add your public key to set up SSH on your node under MyAccount.
You may add multiple SSH keys & can provide a label to each SSH key for easy identification & management purpose.