Install Jitsi Private Meet on Ubuntu
Jitsi Meet stands as a complimentary and open-source video conferencing solution, distinguished by a suite of premium features encompassing superior sound quality, advanced encryption and privacy measures, and ubiquitous compatibility across multiple platforms. Leveraging the capabilities of Jitsi Meet facilitates the seamless establishment of an impressive video conferencing service tailored to your unique needs.
Manual Installation
If you prefer to install your server manually, follow the steps below.
Prerequisites
A fresh E2E Ubuntu server node. For best results, we recommend a High Frequency Compute instance with at least 2 GB of memory.
A non-root sudo user. Use Vultr’s best practice guide to create a sudo user on Ubuntu.
A Fully Qualified Domain Name (FQDN) assigned to your server’s IP address.
1. Create a Swap Partition
To enhance system performance on a machine equipped with 2 GB of memory, it is advisable to allocate a swap partition of at least 2 GB (2048 MB). Selecting a swap partition size commensurate with your instance’s memory specifications contributes to optimizing overall system responsiveness and stability.
sudo dd if=/dev/zero of=/swapfile count=2048 bs=1M

sudo chmod 600 /swapfile

sudo mkswap /swapfile

sudo swapon /swapfile

echo '/swapfile   none    swap    sw    0   0' | sudo tee -a /etc/fstab

free -m
2. Set the Hostname and FQDN
You must set the hostname and fully qualified domain name (FQDN) before you deploy the Let’s Encrypt HTTPS certificate for security. Use the E2E Best Practice Guide to configure your server hostname and FQDN. This guide uses the example names jitsi, and jitsi.example.com.
Jitsi requires OpenSSH, HTTP, and HTTPS traffic, along with inbound UDP traffic on port 10000 through port 20000.
iptables -A INPUT -p tcp -m tcp --dport 22 -j ACCEPT

iptables -A INPUT -p tcp -m tcp --dport 80 -j ACCEPT

iptables -A INPUT -p tcp -m tcp --dport 443 -j ACCEPT

iptables -A INPUT -p tcp -m tcp --dport 10000 -j ACCEPT

iptables -A INPUT -p tcp -m tcp --dport 20000 -j ACCEPT

iptables-save

systemctl restart iptables

Command may disrupt existing ssh connections. Proceed with operation (y|n)? y
When prompted to proceed, type Y and then ENTER.
3. Update the system and Install OpenJDK Java Runtime Environment (JRE)11
sudo apt update

sudo apt install openjdk-11-jre-headless
Verify OpenJDK is installed properly.
java -version
Set the JAVA_HOME environment variable.
echo "JAVA_HOME=$(readlink -f /usr/bin/java | sed "s:bin/java::")" | sudo tee -a /etc/profile

source /etc/profile
Install the Nginx Web Server
Jitsi works best with Nginx and will automatically configure Nginx settings if we install it first.
sudo apt install -y nginx

sudo systemctl start nginx.service

sudo systemctl enable nginx.service
5. Install Jitsi
Install Jitsi from the official Jitsi repository.
wget -qO - https://download.jitsi.org/jitsi-key.gpg.key | sudo apt-key add -

echo "deb https://download.jitsi.org stable/"  | sudo tee -a /etc/apt/sources.list.d/jitsi-stable.list

sudo apt update

sudo apt install -y jitsi-meet
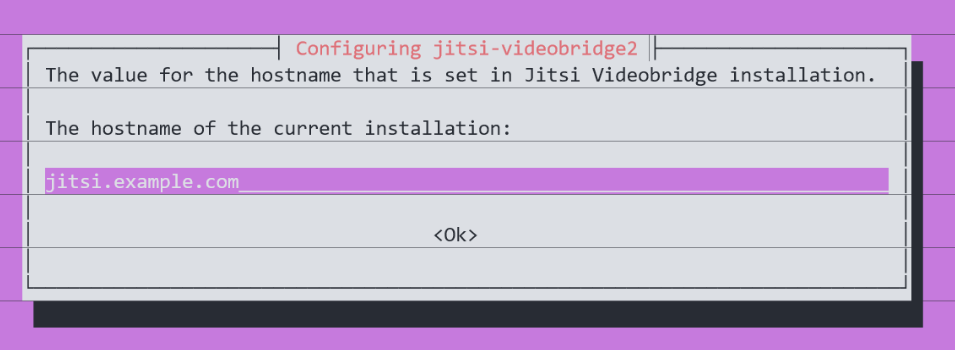
The installer will request your FQDN. Enter the fully-qualified domain name of your server.
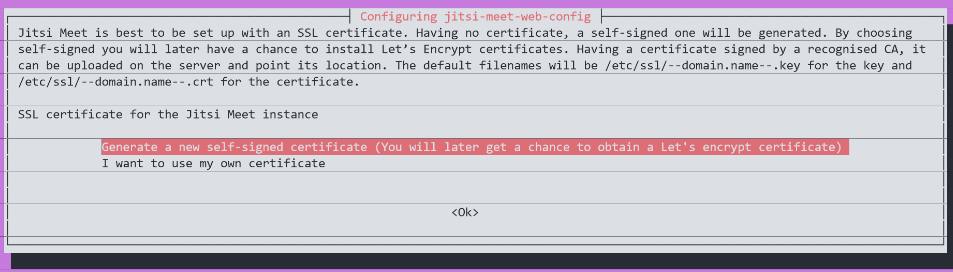
When asked to configure SSL, select Generate a new self-signed certificate.
6. Install Let’s Encrypt SSL Certificate
Use the following script to request a Let’s Encrypt SSL certificate.
sudo /usr/share/jitsi-meet/scripts/install-letsencrypt-cert.sh
The script prompts for your email address. Enter your address and press ENTER.
Enter your email and press [ENTER]: admin@example.com
Correct the certbot-auto error
You will probably see the following error, because Ubuntu has removed the python-virtualenv package.
Package python-virtualenv is not available, but is referred to by another package.

This may mean that the package is missing, has been obsoleted, or is only available from another source.


E: Package 'python-virtualenv' has no installation candidate
This work-around will correct the error.
Install the certbot package from the Ubuntu repository.
sudo apt install certbot
Update install-letsencrypt-cert.sh to use certbot instead of certbot-auto.
sudo sed -i 's/\.\/certbot-auto/certbot/g' /usr/share/jitsi-meet/scripts/install-letsencrypt-cert.sh
The Jitsi script expects certbot in /usr/sbin, and Ubuntu installs it in /usr/bin. Make a symbolic link for the script.
sudo ln -s /usr/bin/certbot /usr/sbin/certbot
Run the script again.
sudo /usr/share/jitsi-meet/scripts/install-letsencrypt-cert.sh
7. Start a Meeting
Navigate to https://jitsi.example.com in your favorite web browser to access your Jitsi Meet Video conferencing service.