How to change the hostname of your Virtual Compute Nodes
Change Linux Virtual Compute Nodes Hostname
Please follow the below steps to change the hostname of your Virtual Compute Node.
Step 1: Log in
Login to your Virtual Compute Node as a root user.
Step 2: Check Hostname
To check the current hostname of your server, run the command
# hostname
To change the hostname of your server, type new name followed by hostname
# hostnamectl set-hostname new-hostname
Step 3: Edit the network configuration file
For CentOS
Edit the /etc/hostname file and update hostname:
# vi /etc/hostname
Step 4: Edit the hosts file
Edit the /etc/hosts file and update your old-host-name:
# vi /etc/hosts
Now save and exit the file.
Step 5: Save Hostname permanently
Immediately after executing the previous command, the hostname is changed, but the change will last only until the next reboot. To permanently change the hostname, the next step is to run the following command in your terminal
# cd /etc/one-context.d/
This will take you inside the directory one-context.d
List the contents of the directory by running the following command,
# ls -la
You will see the following result
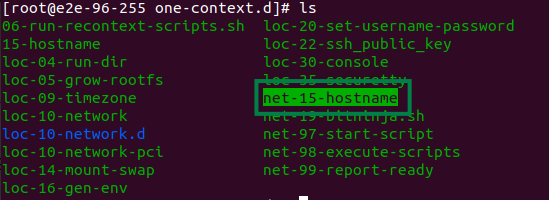
We need to move the directory 05-hostname to the root folder. For KVM-based servers, you will have a directory as net-15-hostname. To execute this run the following command in the terminal.
# mv 05-hostname /root/
or
# mv net-15-hostname /root/
Now your hostname is changed permanently.
For cPanel Server Node
Step 1. First follow the above-mentioned steps to change server hostname
Step 2. To change the server’s hostname, use WHM’s Change Hostname interface (WHM >> Home >> Networking Setup >> Change Hostname).
Step 3. Add the following lines into your Server node /etc/sysctl.conf configuration file.
kernel.hostname = hostname.domainname.com
kernel.domainname = domainname.com
Step 4. And execute the command # sysctl -p /etc/sysctl.conf to read and apply the changes of your /etc/sysctl.conf configuration file.