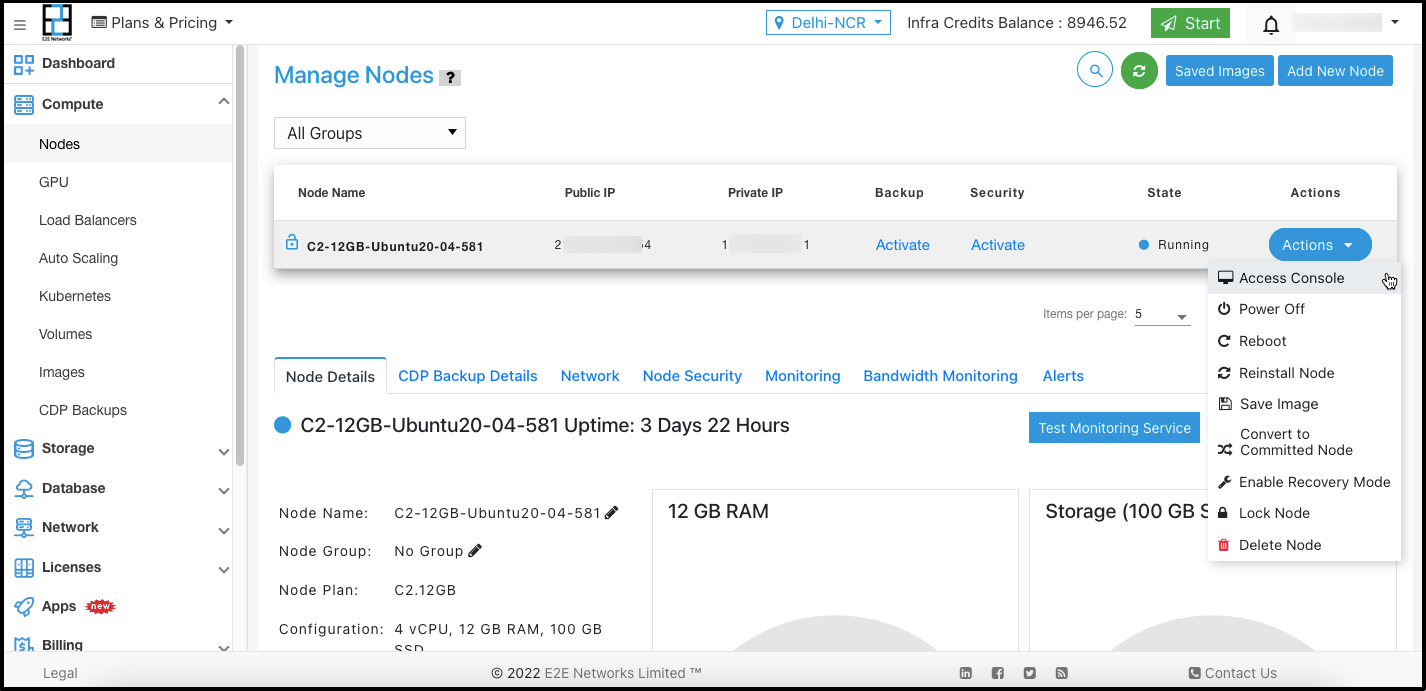
How To Log Into Your Virtual Compute Node?
Log in to your Virtual Compute Node
You can access your Virtual Compute Node through SSH keys (If previously added) or the root password sent to you on your account’s email address.
Linux Users
Log in to a Linux machine from a Linux machine.
This article will be about using ssh (secure shell) to login to a remote machine:
(i) Password-Based Login – Linux
First, you will need to open up the terminal. (Application –> Accessories –> Terminal).
Then type the following command
$ ssh username@hostname (where username is the name of the user of the target computer & hostname is the IP address i.e. the Public IP that you will be connecting to)
The first time you log in you may see this message:
Note
The authenticity of host ‘#.#.#.#(#.#.#.#)’ can’t be established. RSA key fingerprint is ————–. Are you sure you want to continue connecting (yes/no)?
The terminal will display a warning but that’s fine, write yes & continue.
Next Terminal will prompt you for a password
username@hostname password: Type password & press Enter key 4
Login with your credentials (You can access your login credentials from an e-mail sent to you).
(ii) SSH Login – Linux
You can log in to a remote Linux server without entering a password by your public/private key pair.
If you have not generated an SSH Keypair please visit – How To Set-Up SSH Keys – Linux
To SSH into your Linux virtual compute node, use the following command on your Linux terminal.
$ ssh username@hostname
That’s it. You should be now able to log in to the remote machine without a password.
Windows Users
Password-based authentication is very insecure and vulnerable to bot-nets trying to guess user names and passwords over the internet. Hence we recommend key-based authentication to access the server. Please follow these steps to add your keys to the server:
Prerequisites
PuTTY, PuTTYgen. Download here: http://www.chiark.greenend.org.uk/~sgtatham/putty/download.html
If you have not generated an SSH Keypair please visit – How To Set-Up SSH Keys – Windows
(i) Password-Based Login – Windows
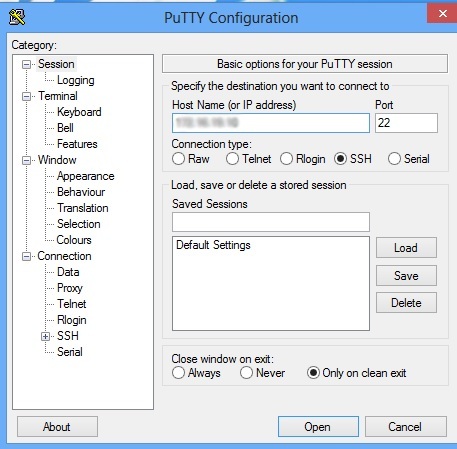
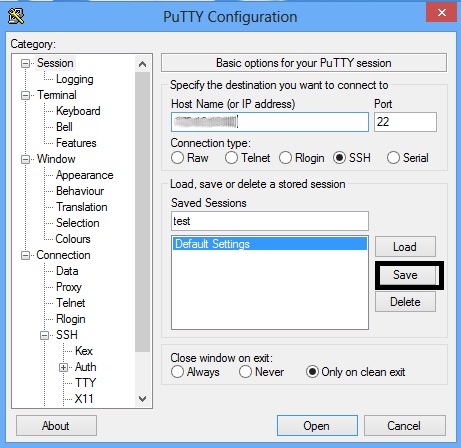
Launch PuTTY which will open the PuTTY configuration window and set the following:
Select “Session” from the “Category” pane on left. Set Host Name(or IP Address) root@hostname (where hostname is the IP address i.e. the External IP that you will be connecting to).

Go back to Session, create a session name under “Saved Session” and click on Save.

To Login selects the session you saved and click on Load. Then click on “Open” to launch the terminal window.
Next Terminal will prompt you for a user ID & password
Login with your credentials (You can access your login credentials from an e-mail sent to you)
(ii) SSH Login – Windows
Launch PuTTY which will open the PuTTY configuration window and set the following:
Select “Session” from the “Category” pane on left. Set Host Name(or IP Address) root@hostname (where hostname is the IP address i.e. the External IP that you will be connecting to) and Connection Type as SSH.
On the left pane, go to “Connection -> Data” and set “Auto-login username” as “root” or enter your username.

On the left pane, go to “Connection -> SSH -> Auth” .Click on “Browse” to select your private key file.
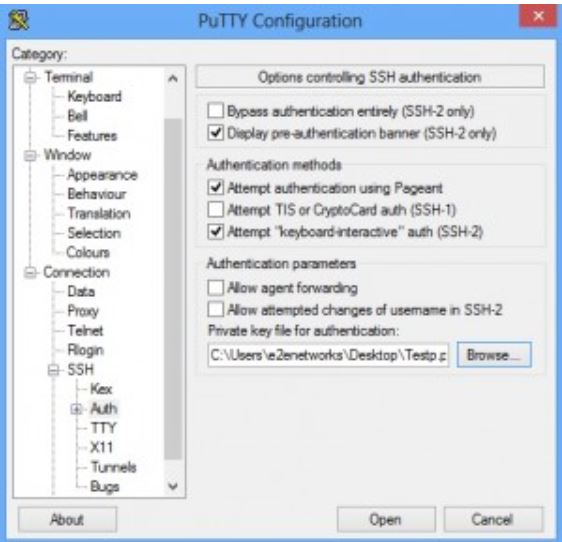
Go back to Session, create a session name under “Saved Session” and click on Save.
To SSH Select the session you saved and click on Load. Then click on “Open” to launch the terminal window.