DBaaS
Introduction
E2E’s DBaaS provides a selection of node types optimized to fit different relational database use cases consisting of different database engines. Node Cluster configuration comprises varying combinations of CPU, memory, storage and gives you the flexibility to choose the appropriate mix of resources for your database.
E2E’s Relational DBaaS Service makes it easier for us to set up and operate Relational Databases in the cloud, providing us with Cost-efficient service and automating time-consuming administrator tasks such as Provisioning, Patching, and Setups.
Benefits
Easy Administration
Database makes it easier to deploy the nodes, Using the Myaccount portal with just a click away from providing necessary details you will be able to provision the node. There will not be any administrative task of installing or maintaining the database software.
Scalability and Failover
Database with only a few clicks helps you setup a slave which allows you to launch one or more Read Replicas to offload read traffic from your primary database nodes.
Speed
Database Supports the most demanding application. You can choose between different cluster configurations based on your usage which are optimized for high performance.
Secure
Database is highly secure restricting access to the external environment with Firewall. It Provides the necessary option for you to optimize the setting so that only a known and existing host will be able to connect with your database.
Getting Started with Database
E2E’s DBaaS is a service that makes it easier to set up, operate, and scale a relational database in the cloud. MyAccount Portal provides you a web-based interface for accessing and managing all your Database resources.
How to Create a Database Cluster in Myaccount Portal
This section will show you how to create a database cluster from the Myaccount portal. The tutorial that is mentioned below are the basic steps of getting started with the Relational Database cluster in Myaccount Portal
Login into MyAccount Portal
Please Login to Myaccount Portal using your credentials set up at the time of creating and activating the E2E Networks ‘My Account’.
Navigate to Database Page
Once you have logged in to Myaccount Portal, You can navigate to the database page from the sidebar menu
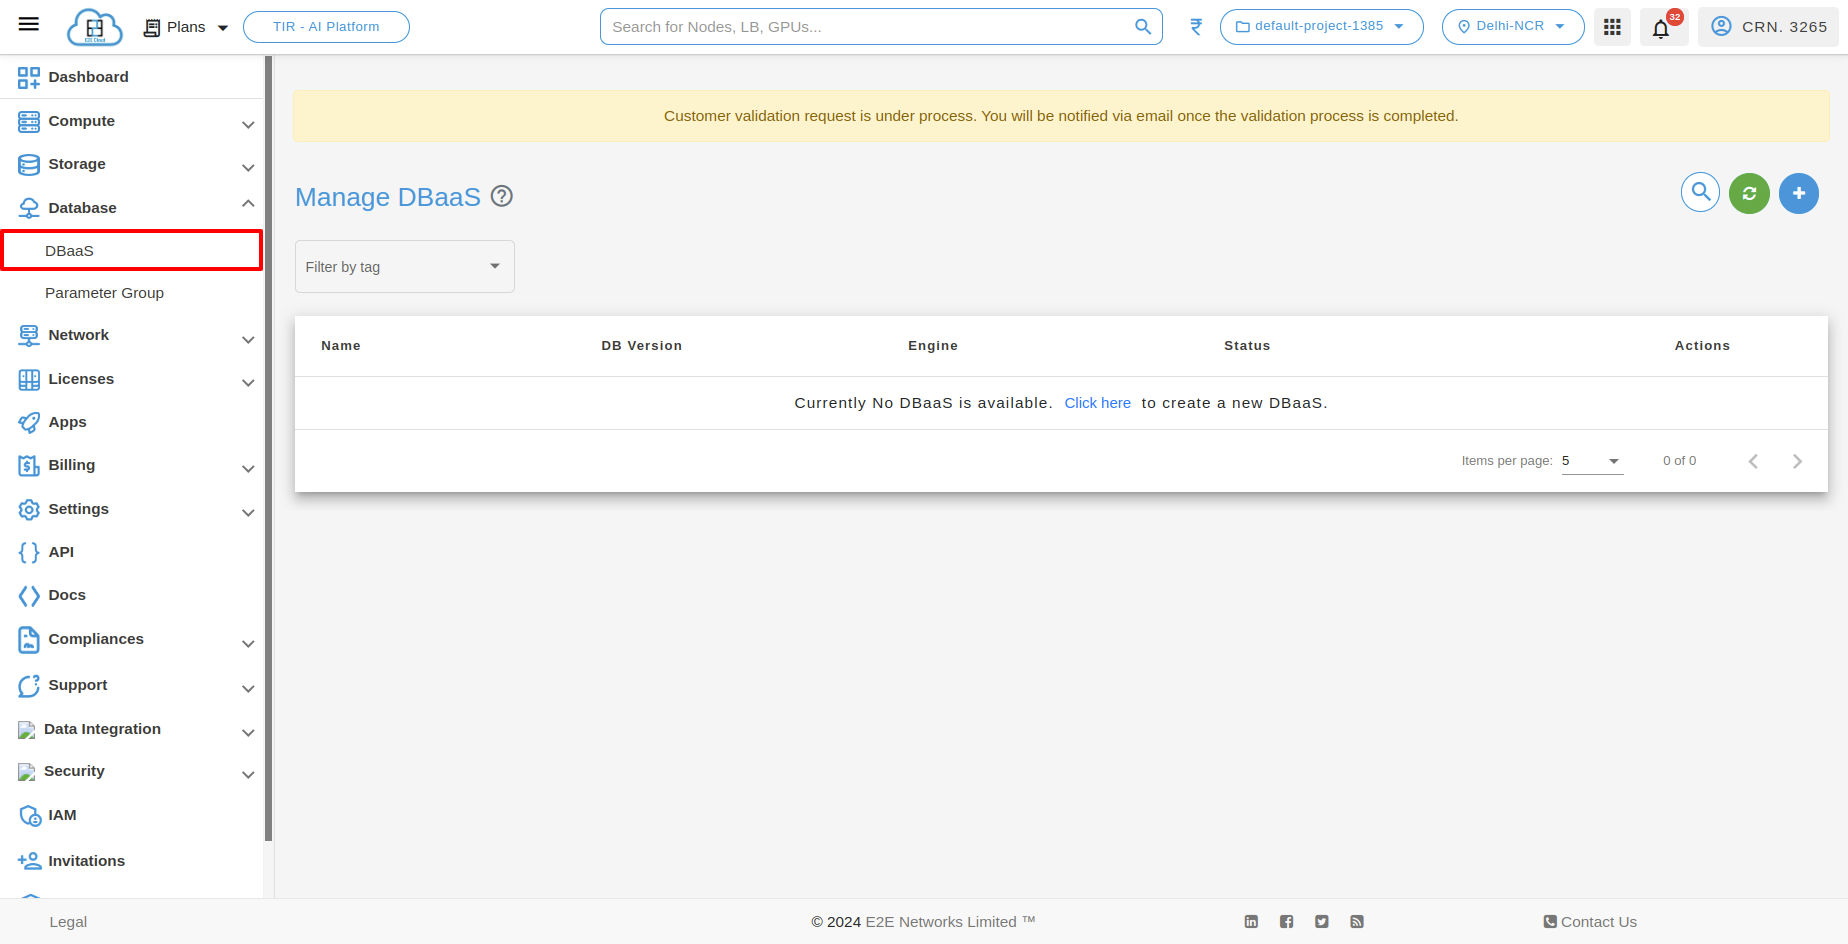
Create Database
On the top right section of the manage database dashboard, You need to click on the “Create Database” Button which will prompt you to the cluster page where you will be selecting the configuration and entering the details of your database

Database Configuration and Setting
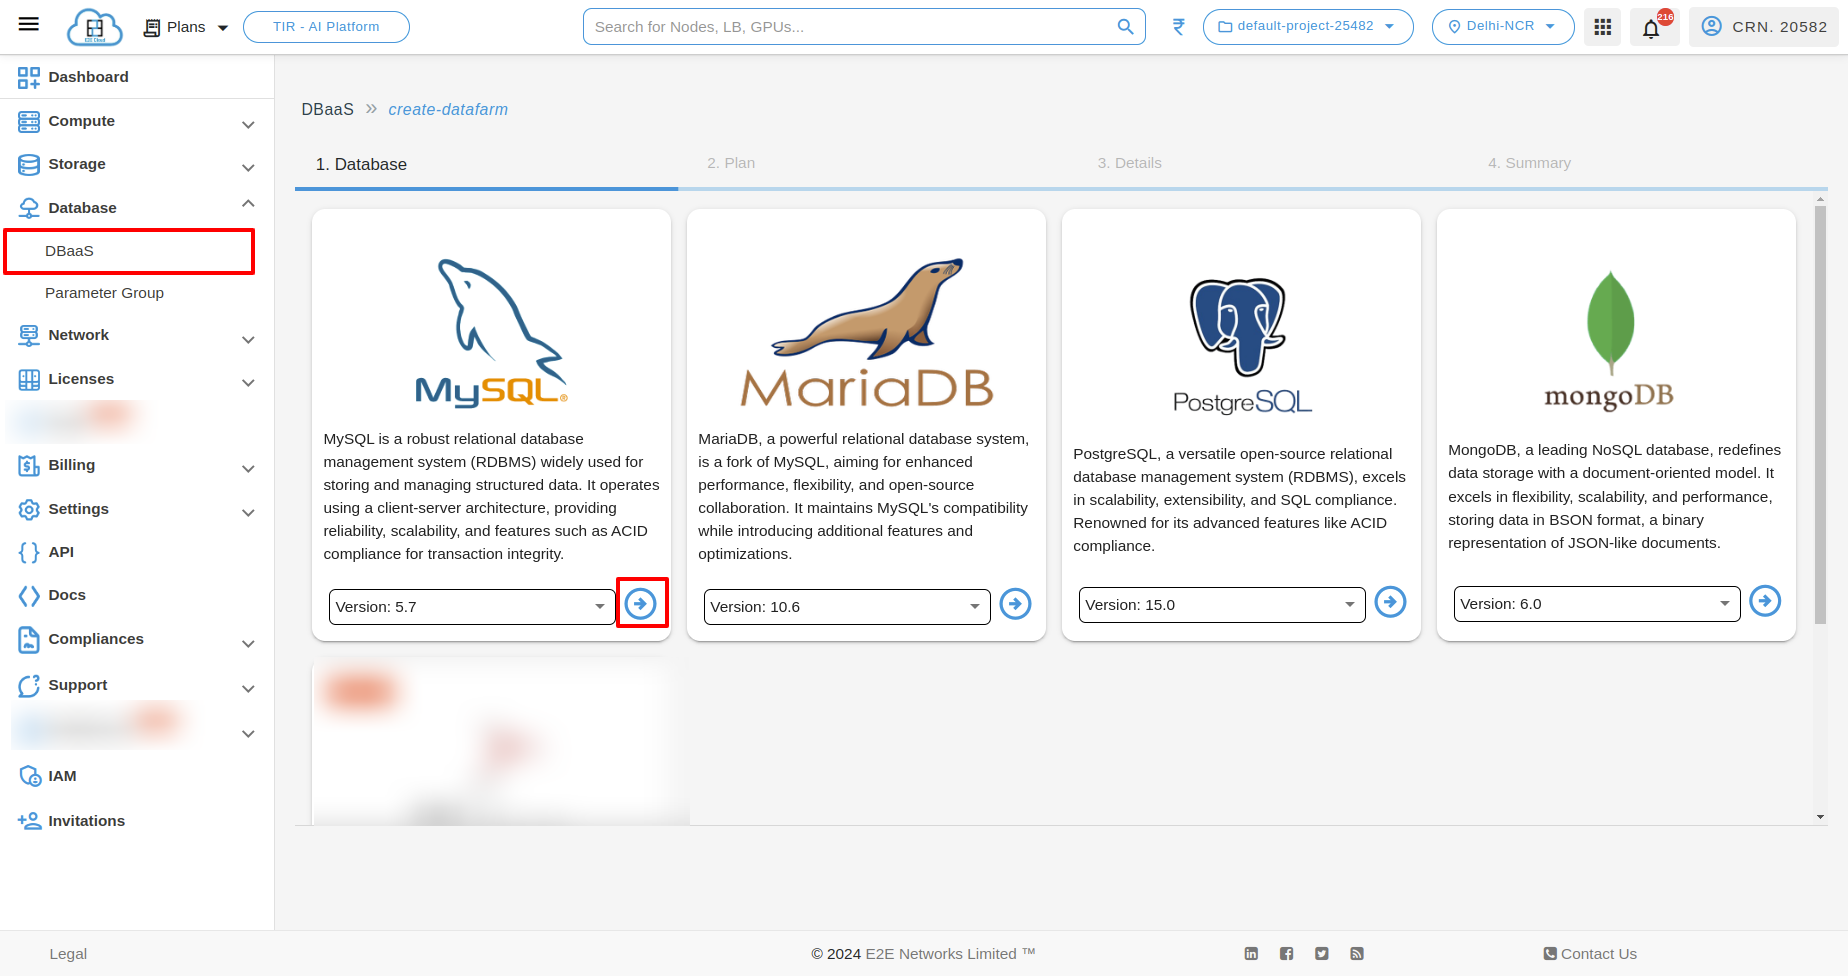
Database
Please choose a database of your preference from options such as MySQL, MariaDB, PostgreSQL, Cassandra along with the specific version. Each database provides a range of database engines and versions for selection.
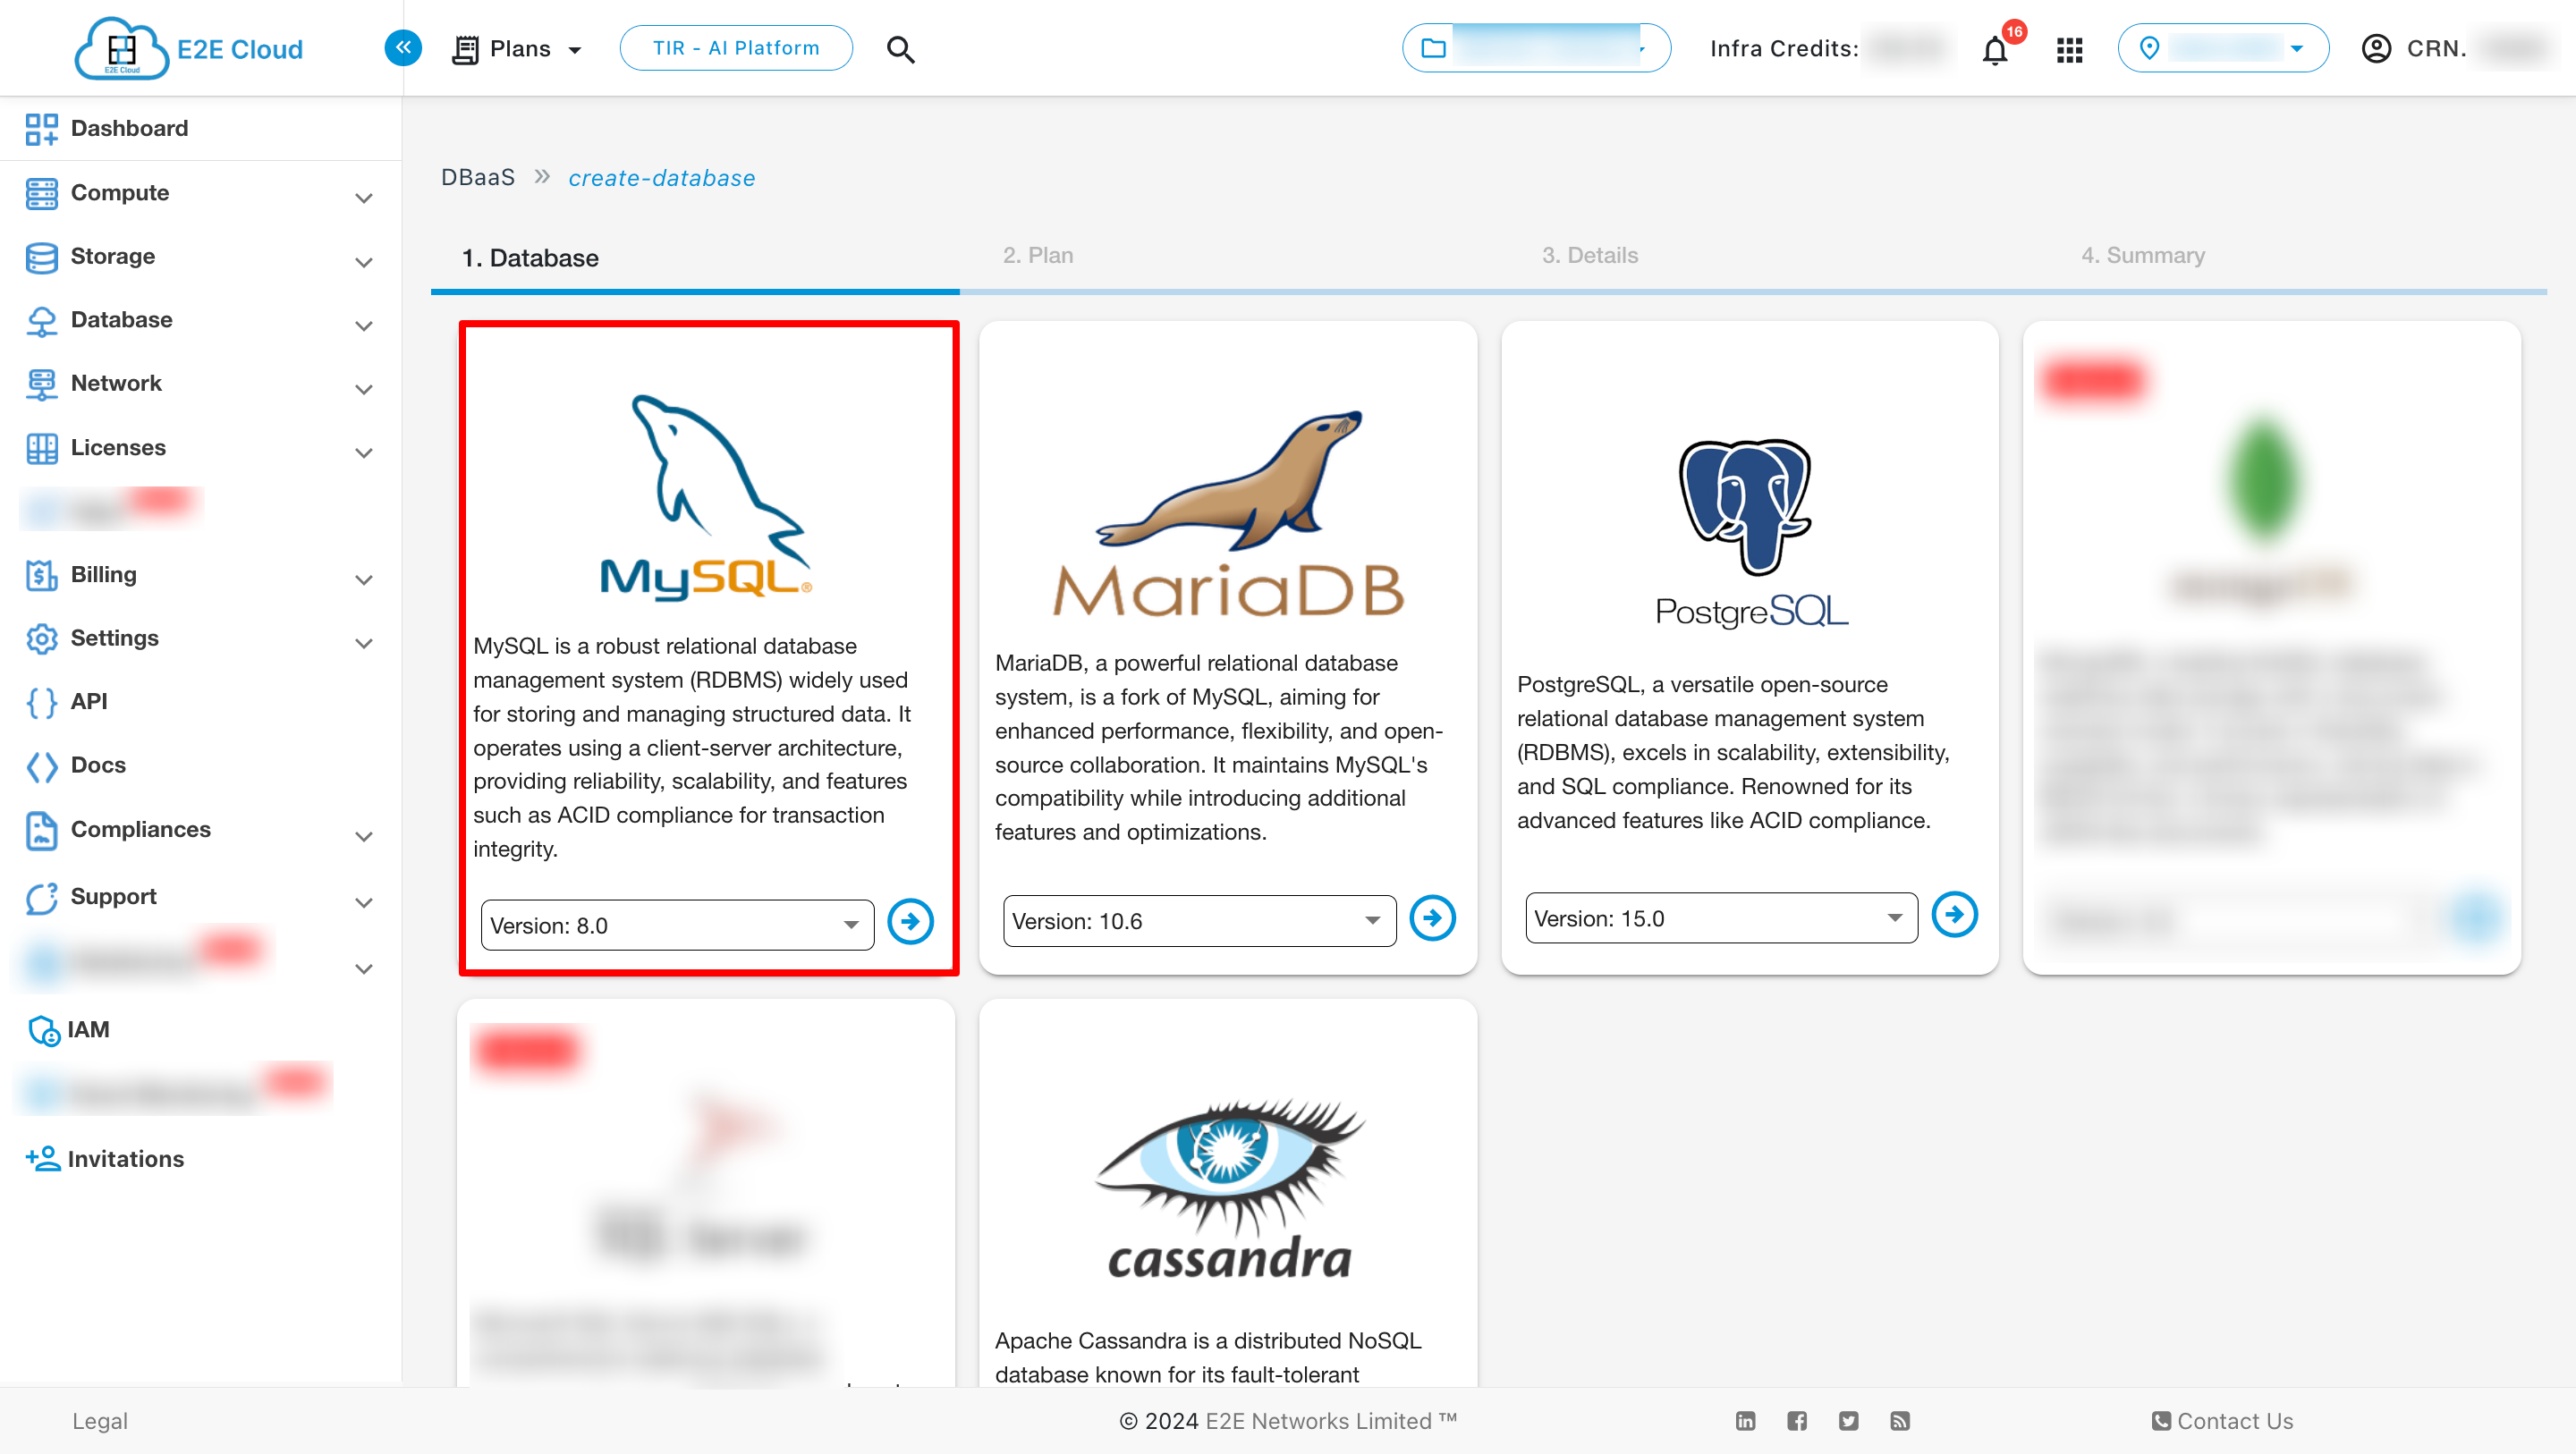
Please select the appropriate version corresponding to the database engine. Currently, we are displaying the MySQL version in the image.
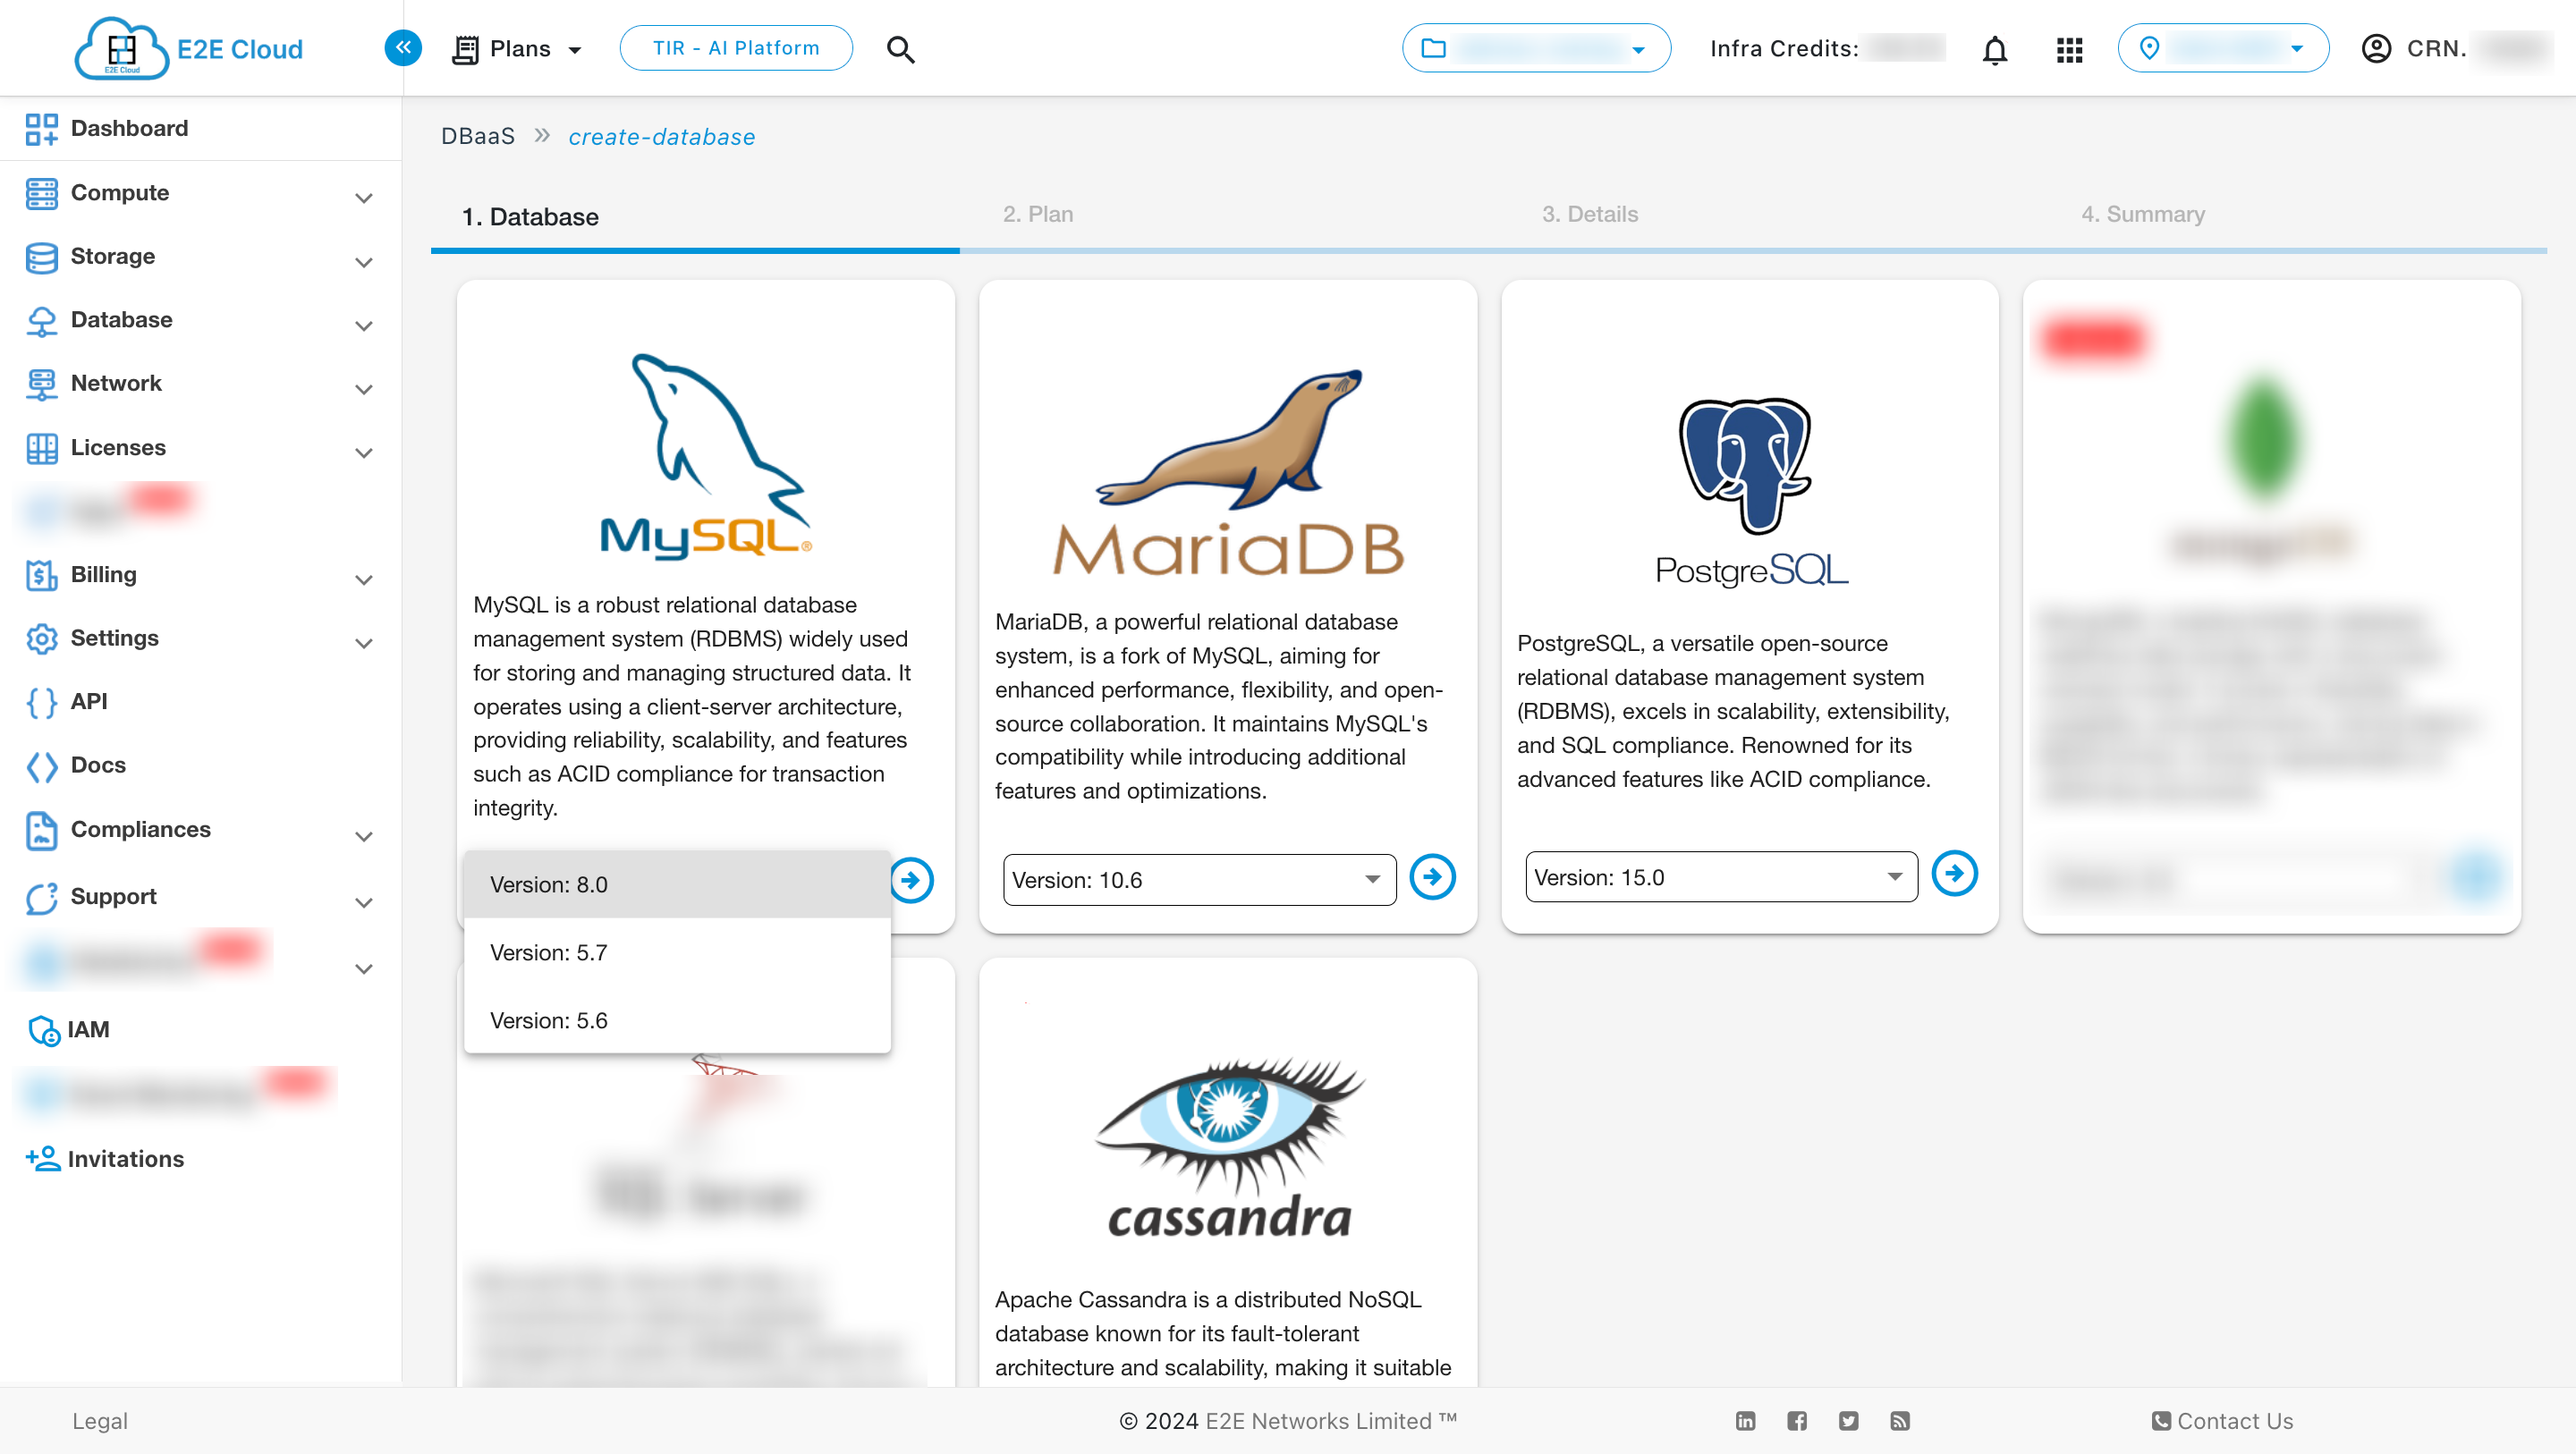
Below are the list of database engine which we currently support.
Mysql 5.6
Mysql 5.7
Mysql 8.0
Mariadb - 10.4
Mariadb - 10.6
Mariadb - 10.11
PostgreSQL 10.0
PostgreSQL 11.0
PostgreSQL 12.0
PostgreSQL 13.0
PostgreSQL 14.0
PostgreSQL 15.0
Cassandra 4.0
Cluster Configuration - Node Cluster configuration comprises varying combinations of CPU, memory, storage and gives you the flexibility to choose the appropriate mix of resources for your database.
After that click on next icon.
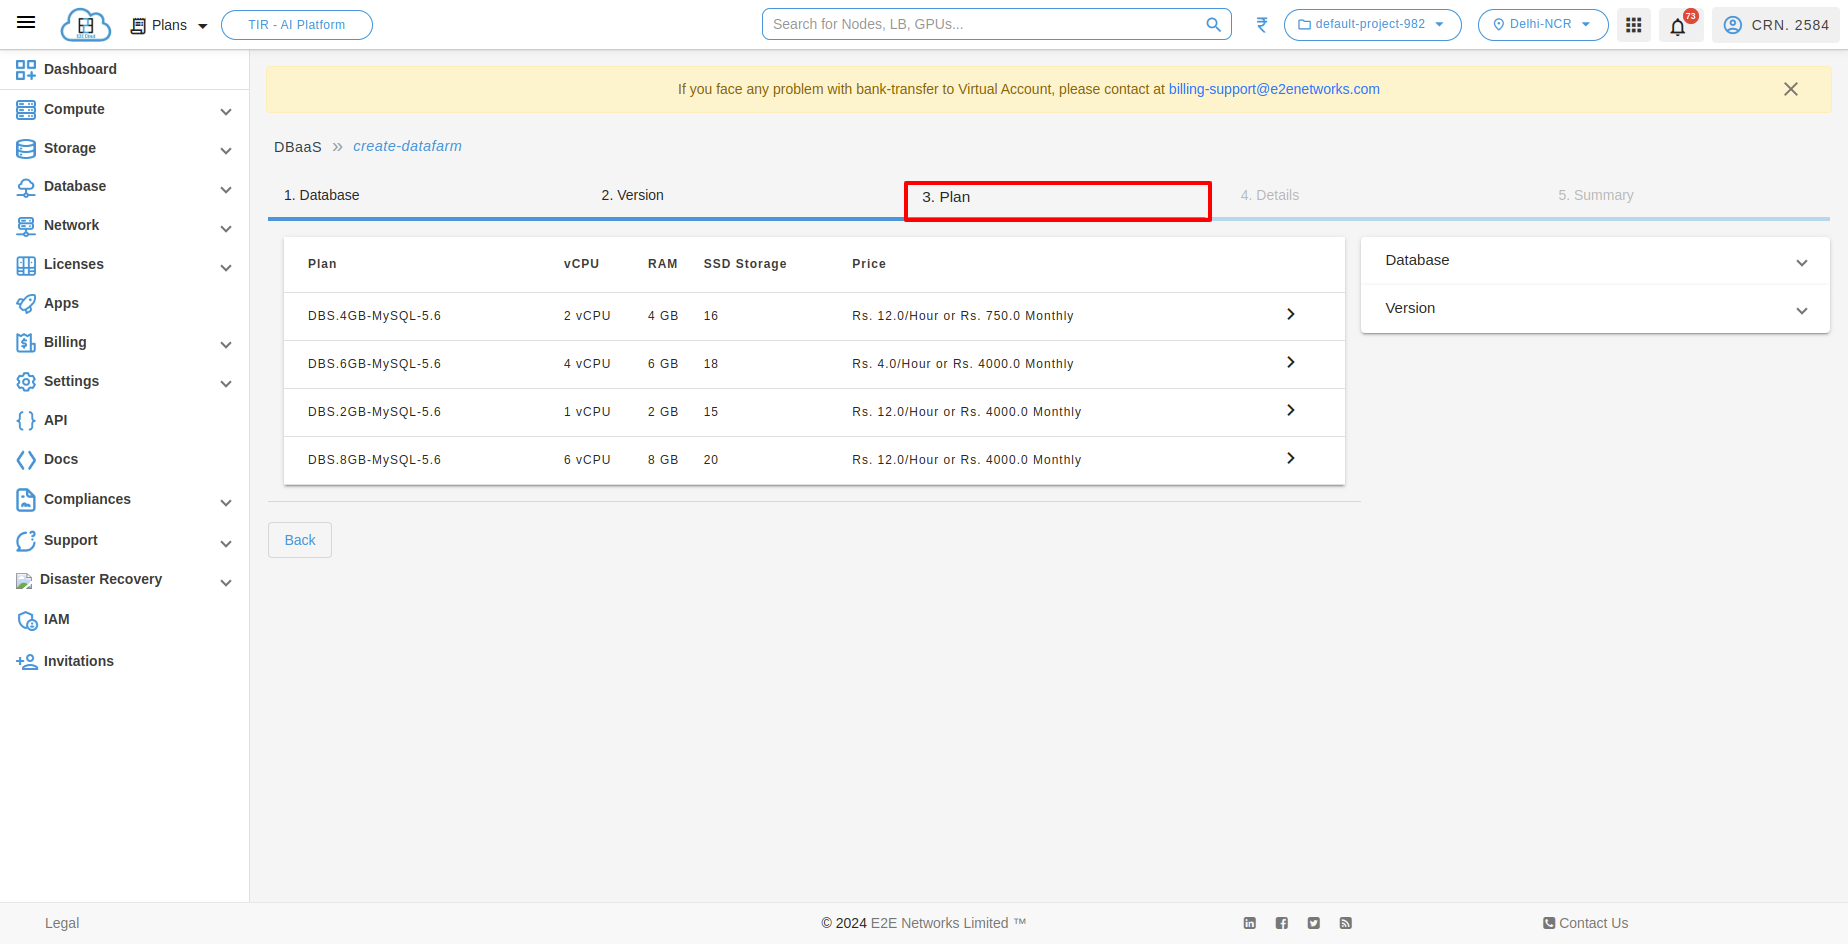
Plan
After selecting version,you will be redirected to plan section. Here you need to select plan according to your need.
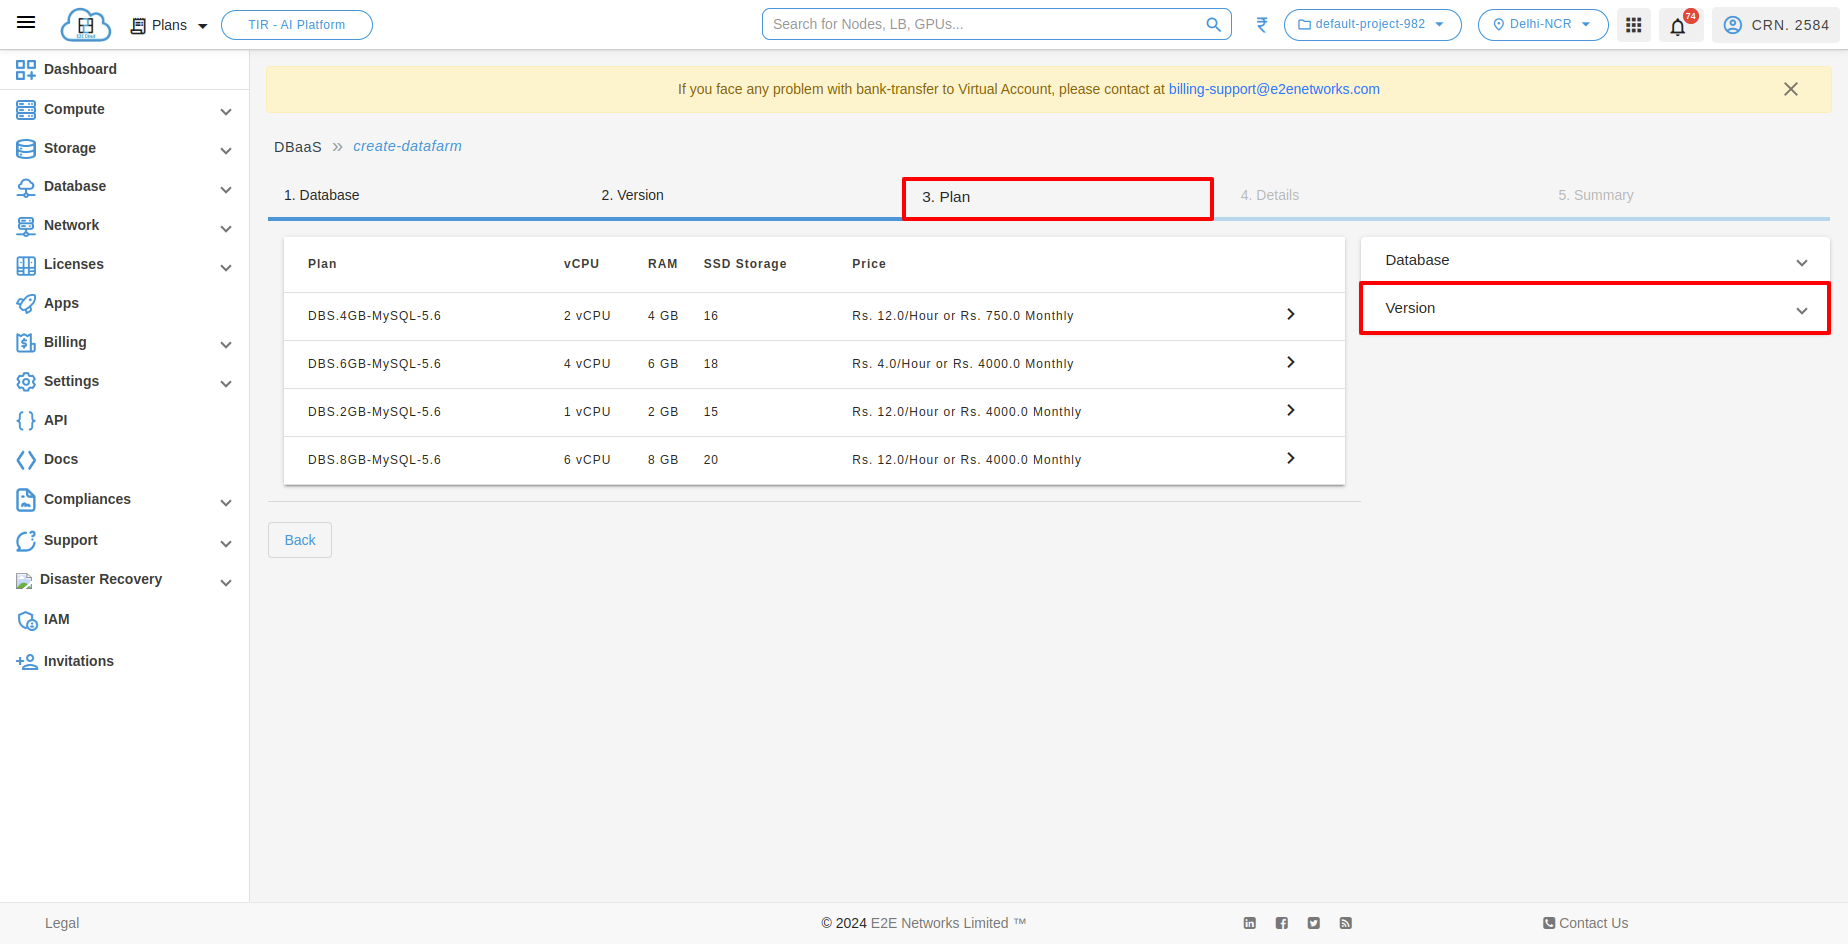
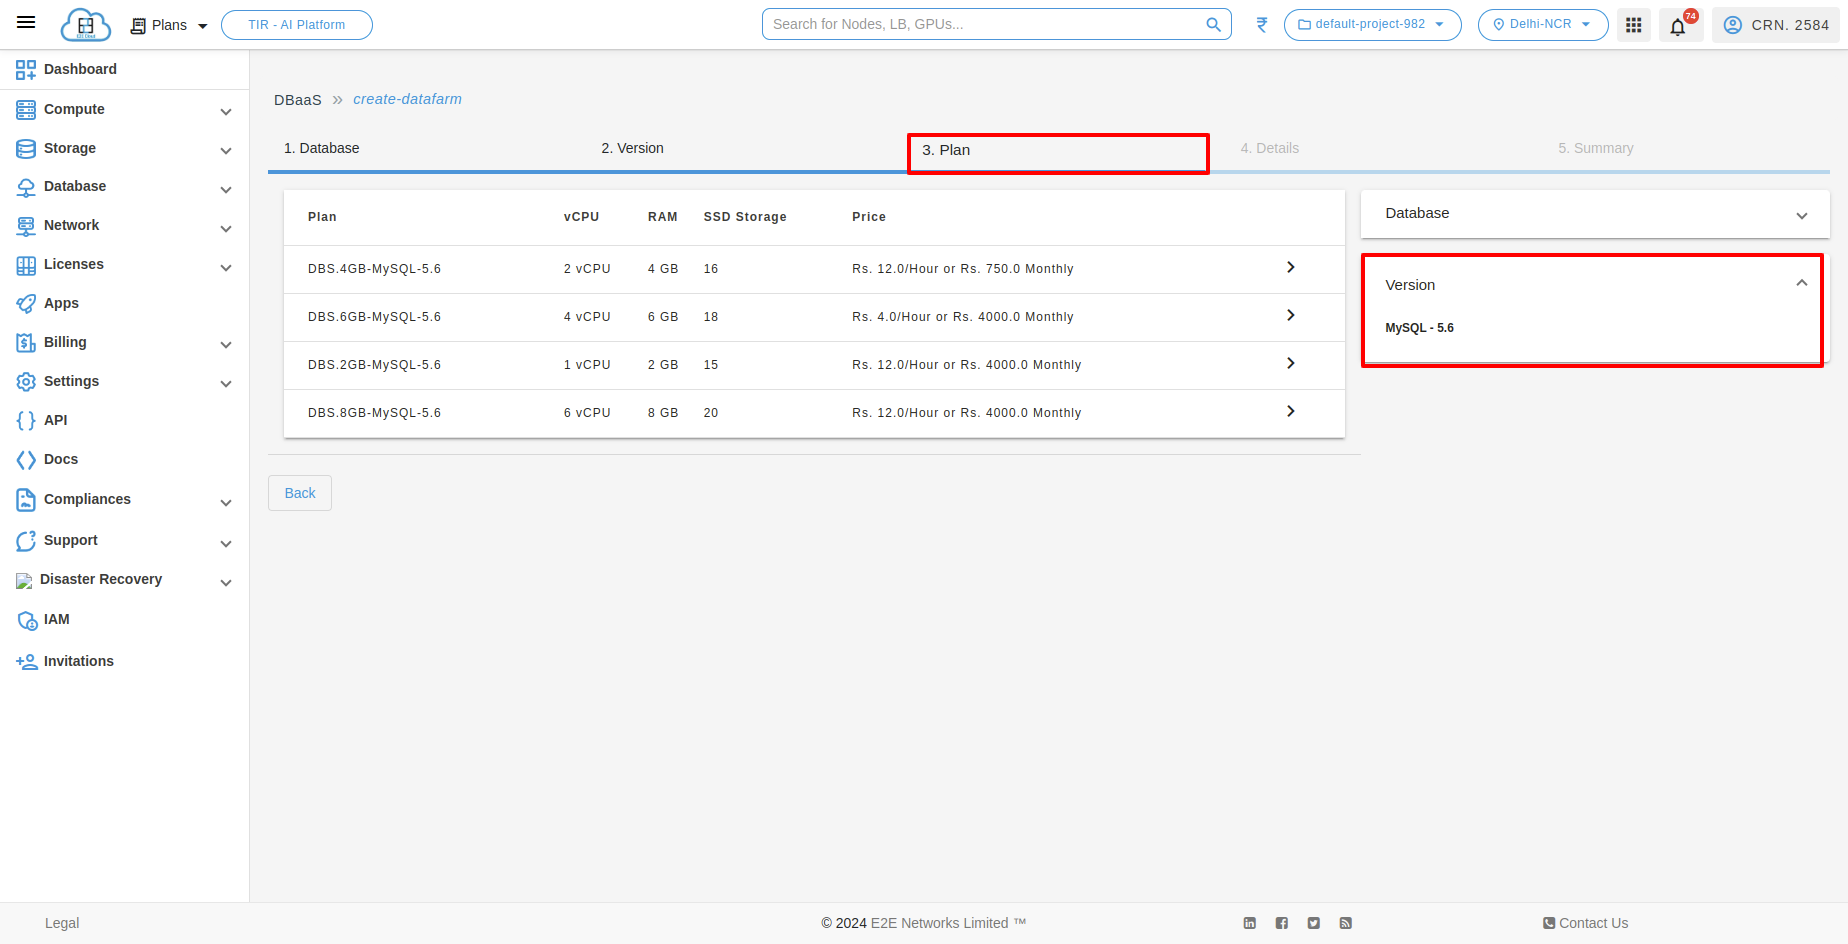
By clicking Version, you can see the selected version.
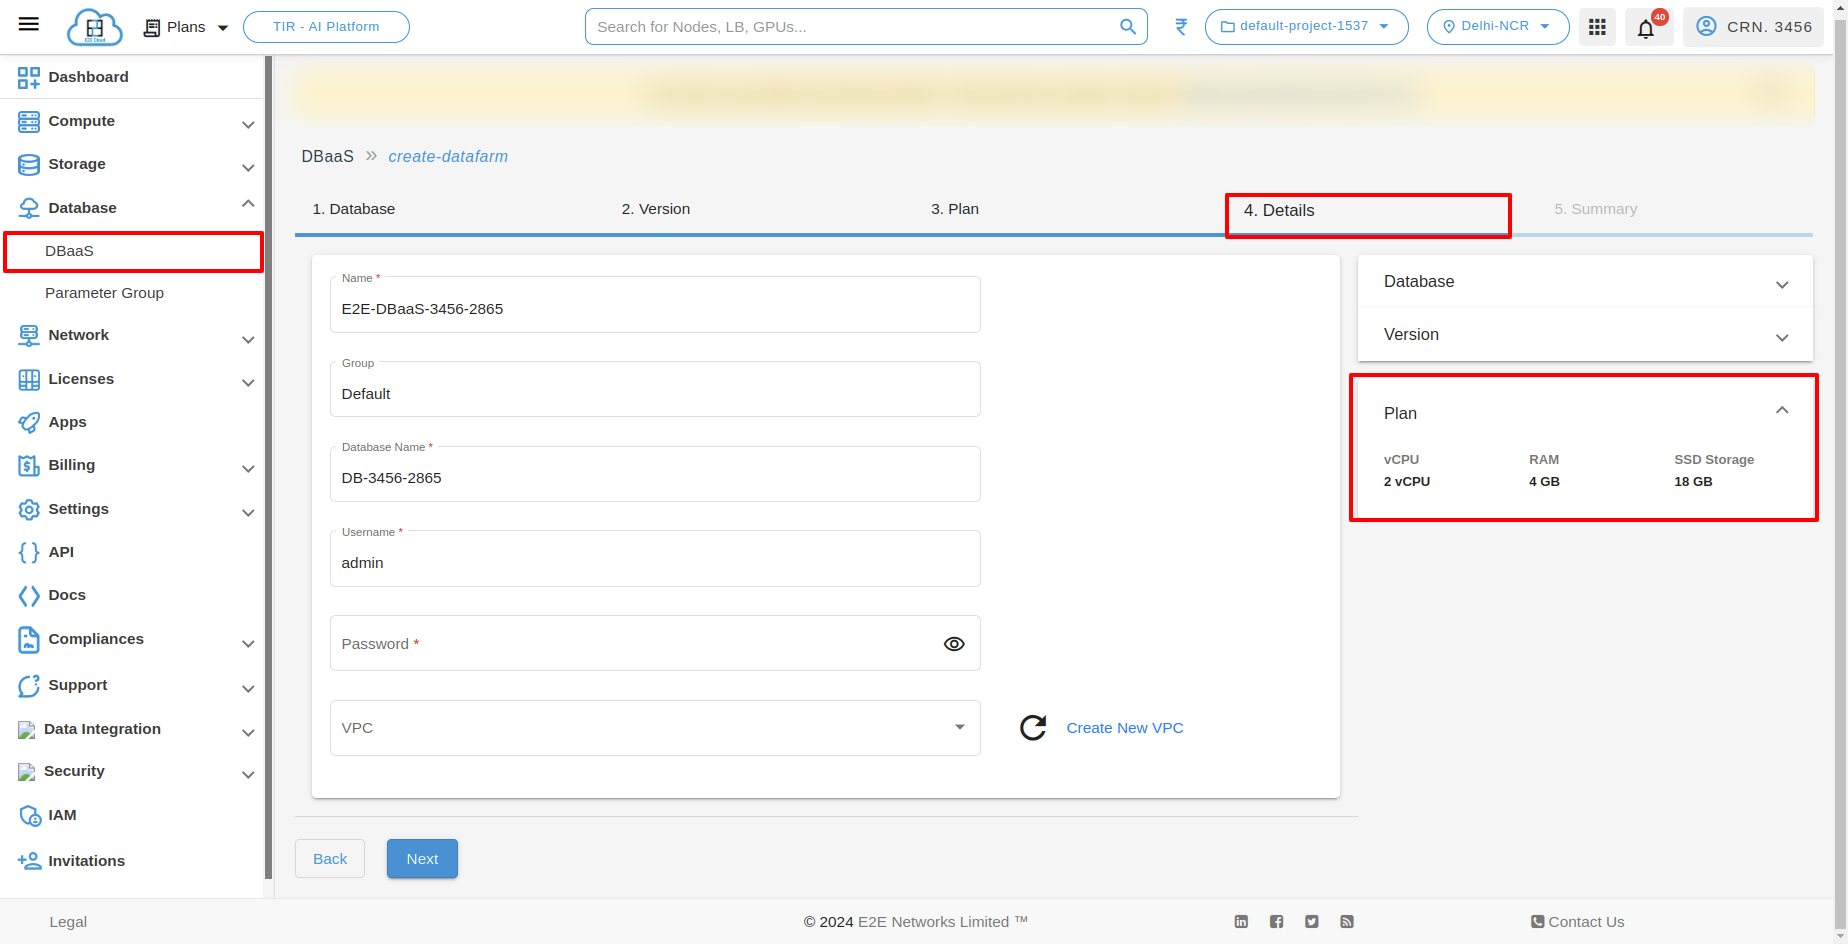
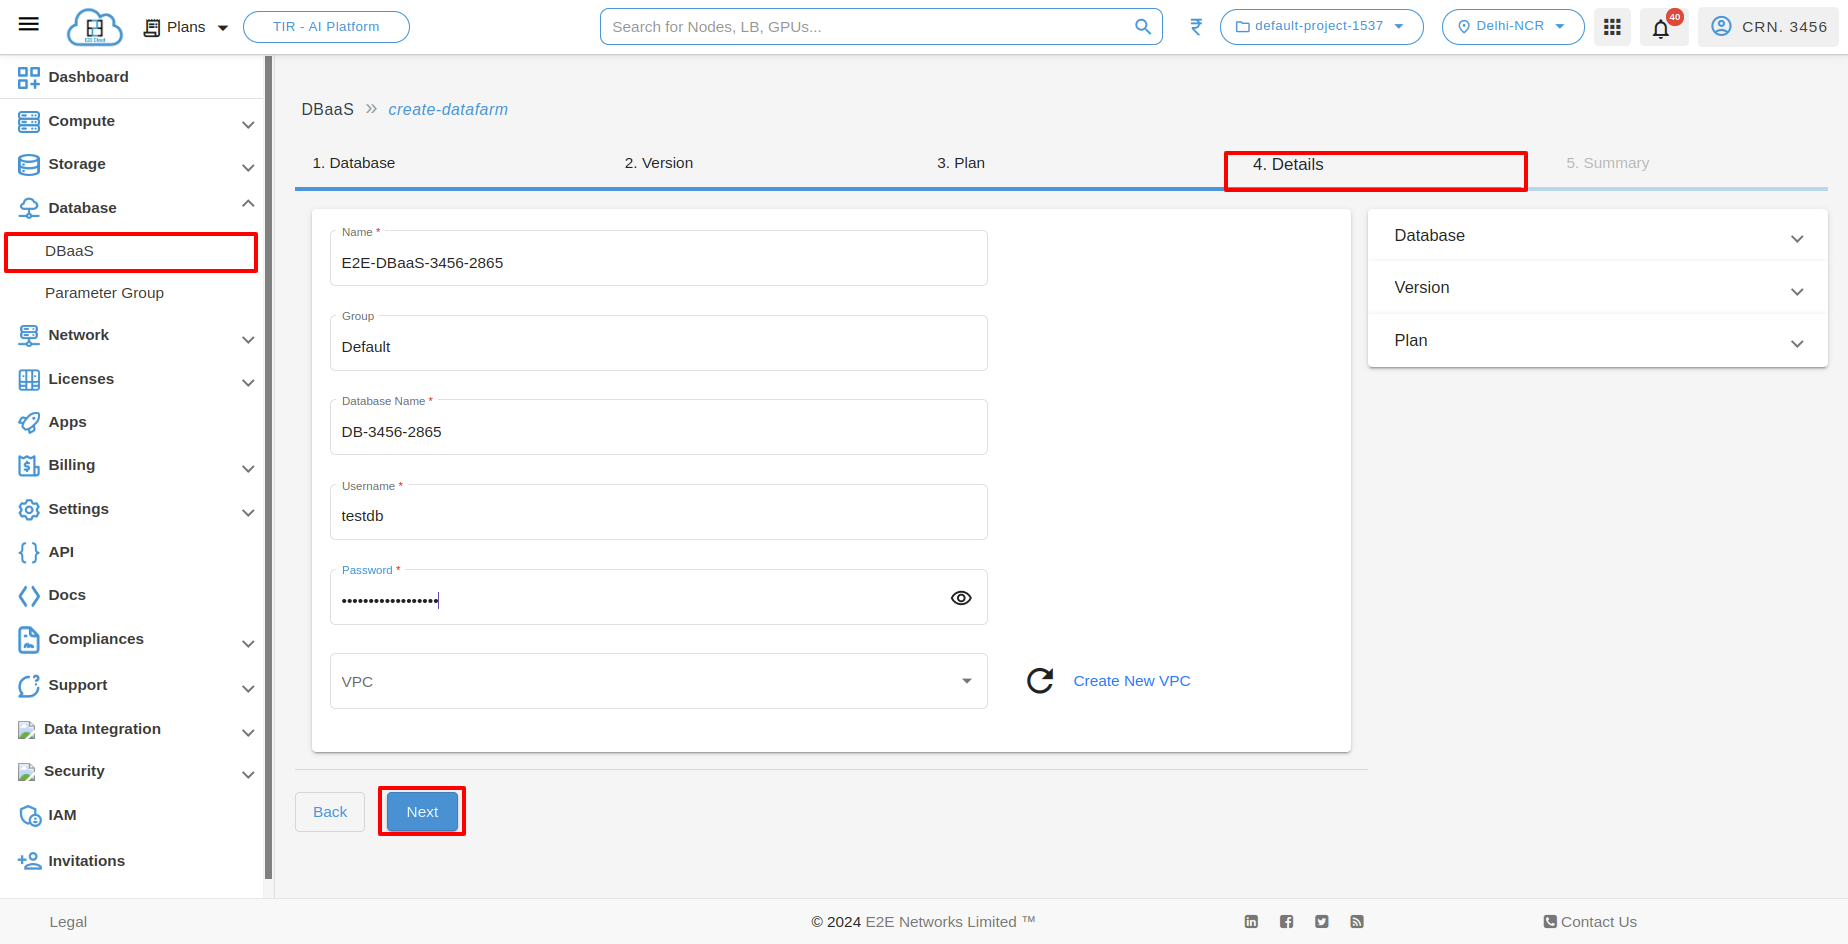
Details
After selecting the plan, You need to select the required configuration and setting for your database which are mentioned below.
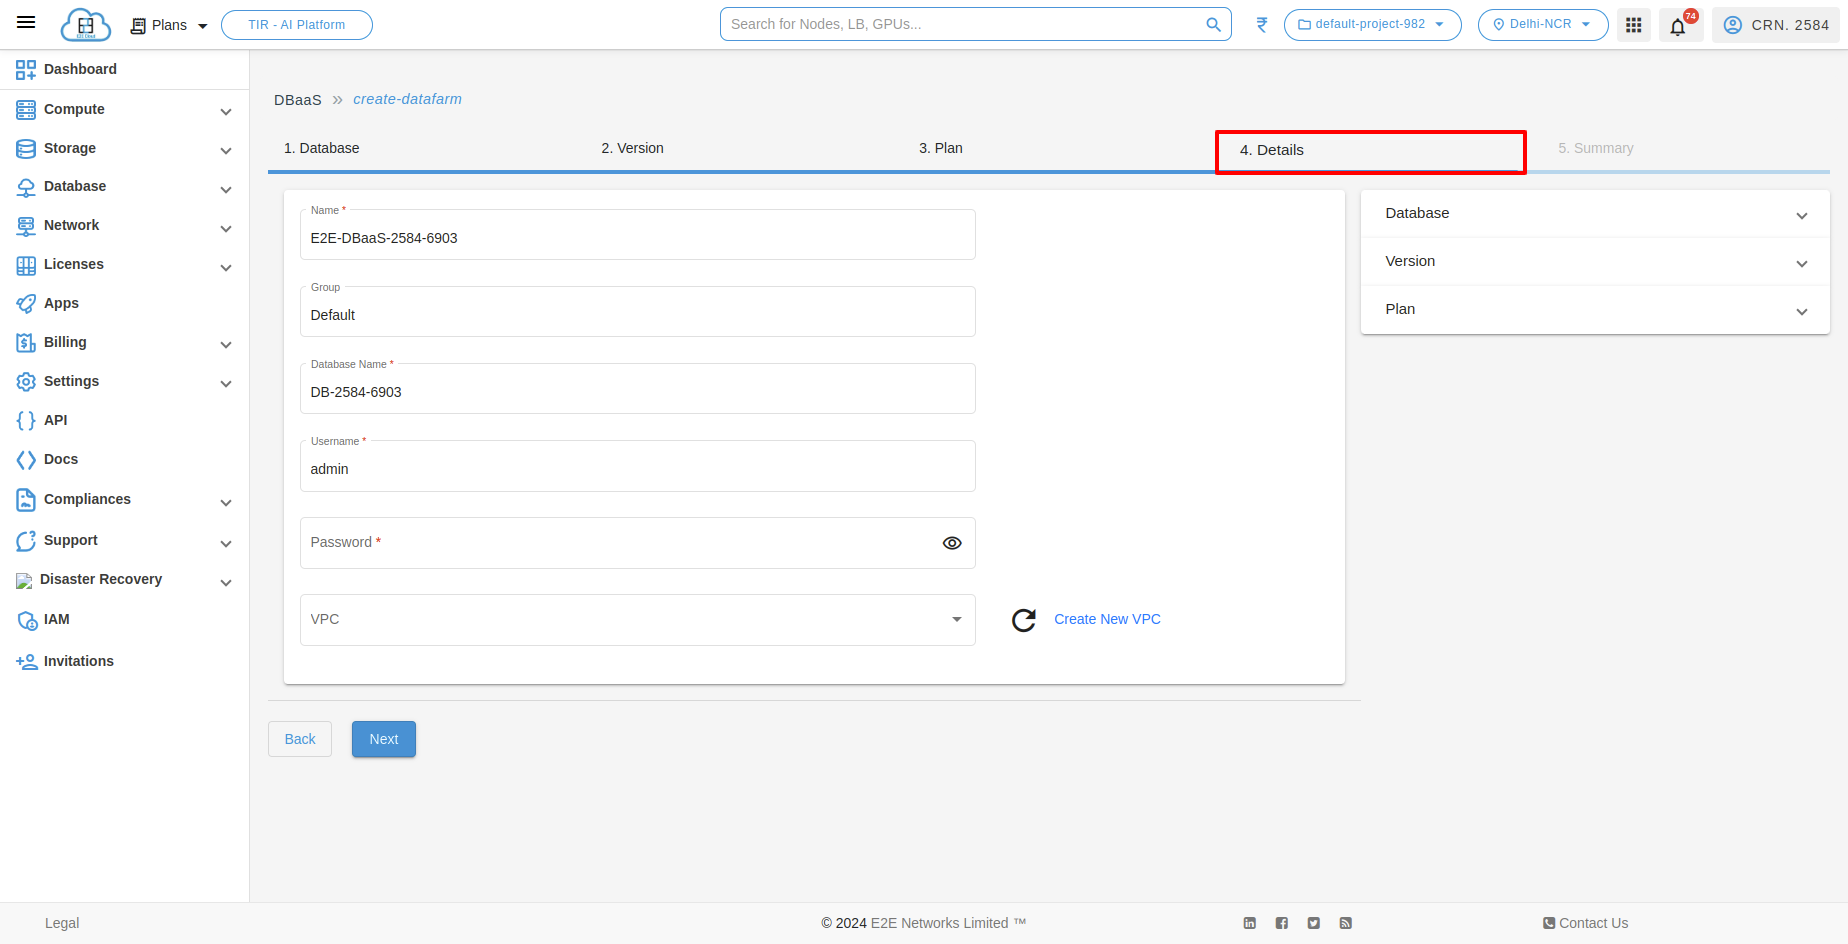
Name - You need to Provide the Cluster name which you want for your cluster. This name will be visible on the Database page.
Database Setting - We need to update the database name, user and provide a secure password for our database. You will be using these credentials to log in to the database server.
With strong password authentication, your database controls and authenticates user accounts. If a DB engine has strong password management features, they can enhance security.
Once you have entered the required details, click on create a database. Your database might take a few minutes to Launch. The database node will be in a setting up state until its ready to use and when the status will change to running.
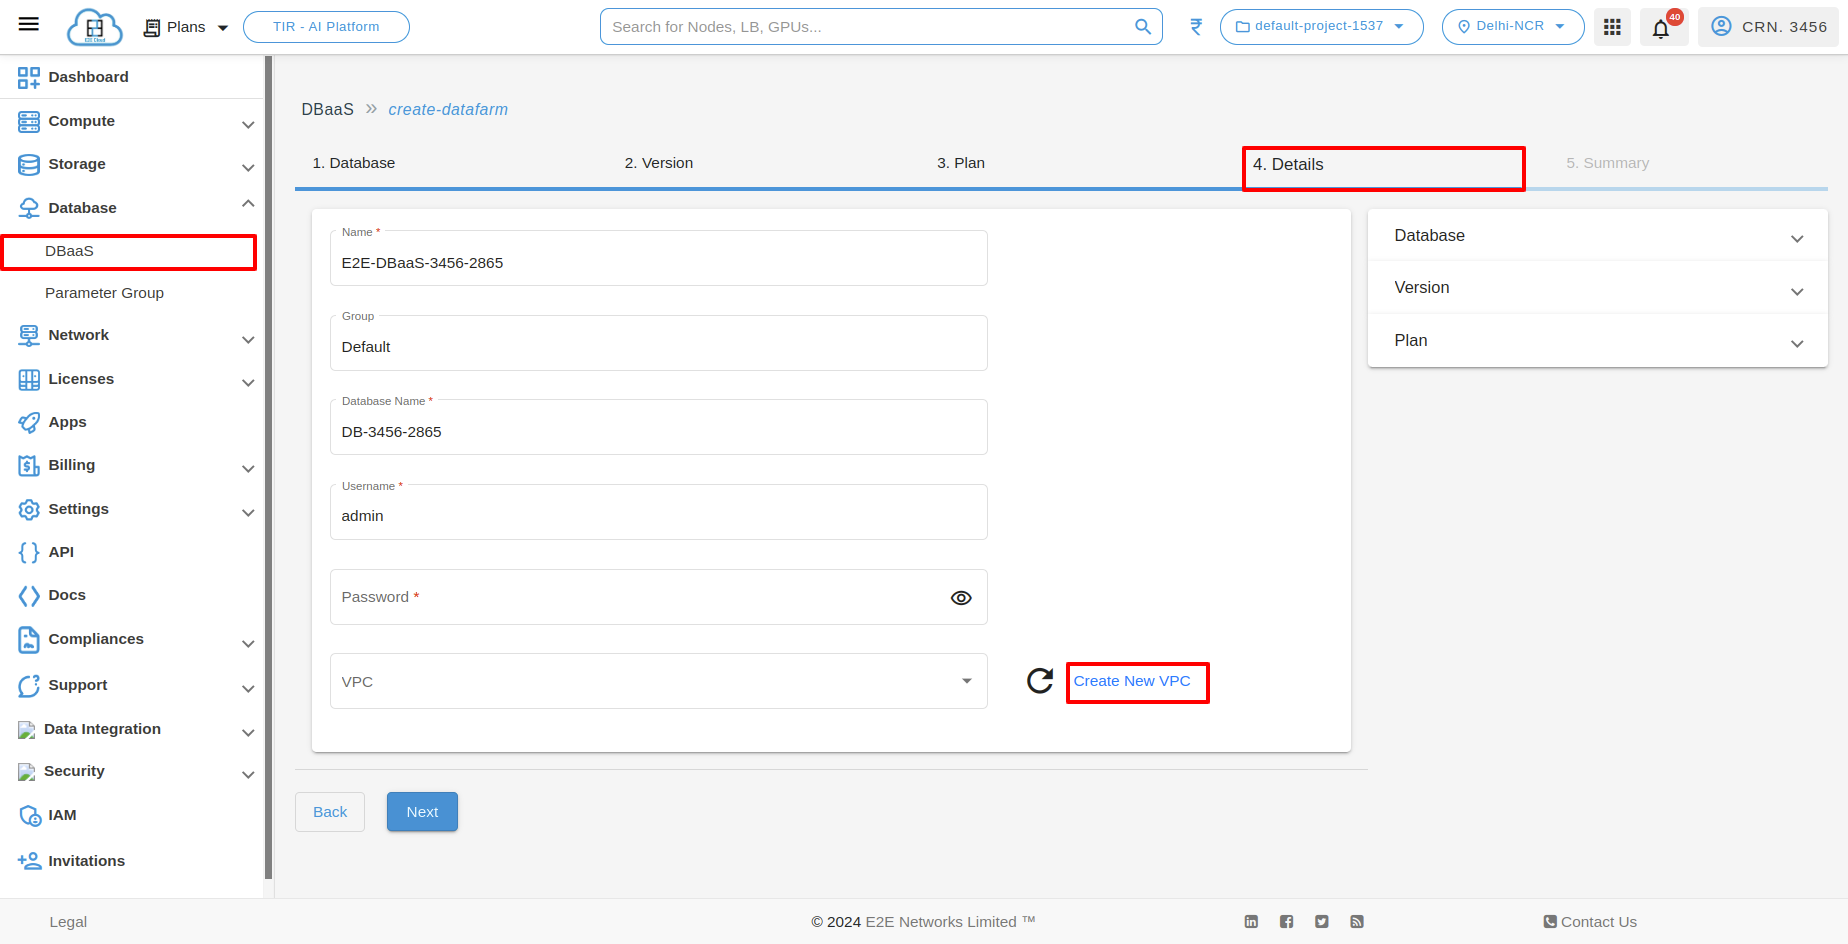
VPC - If you want to attach VPC with your DBaas, you can select if you have VPC , it will show in the list.
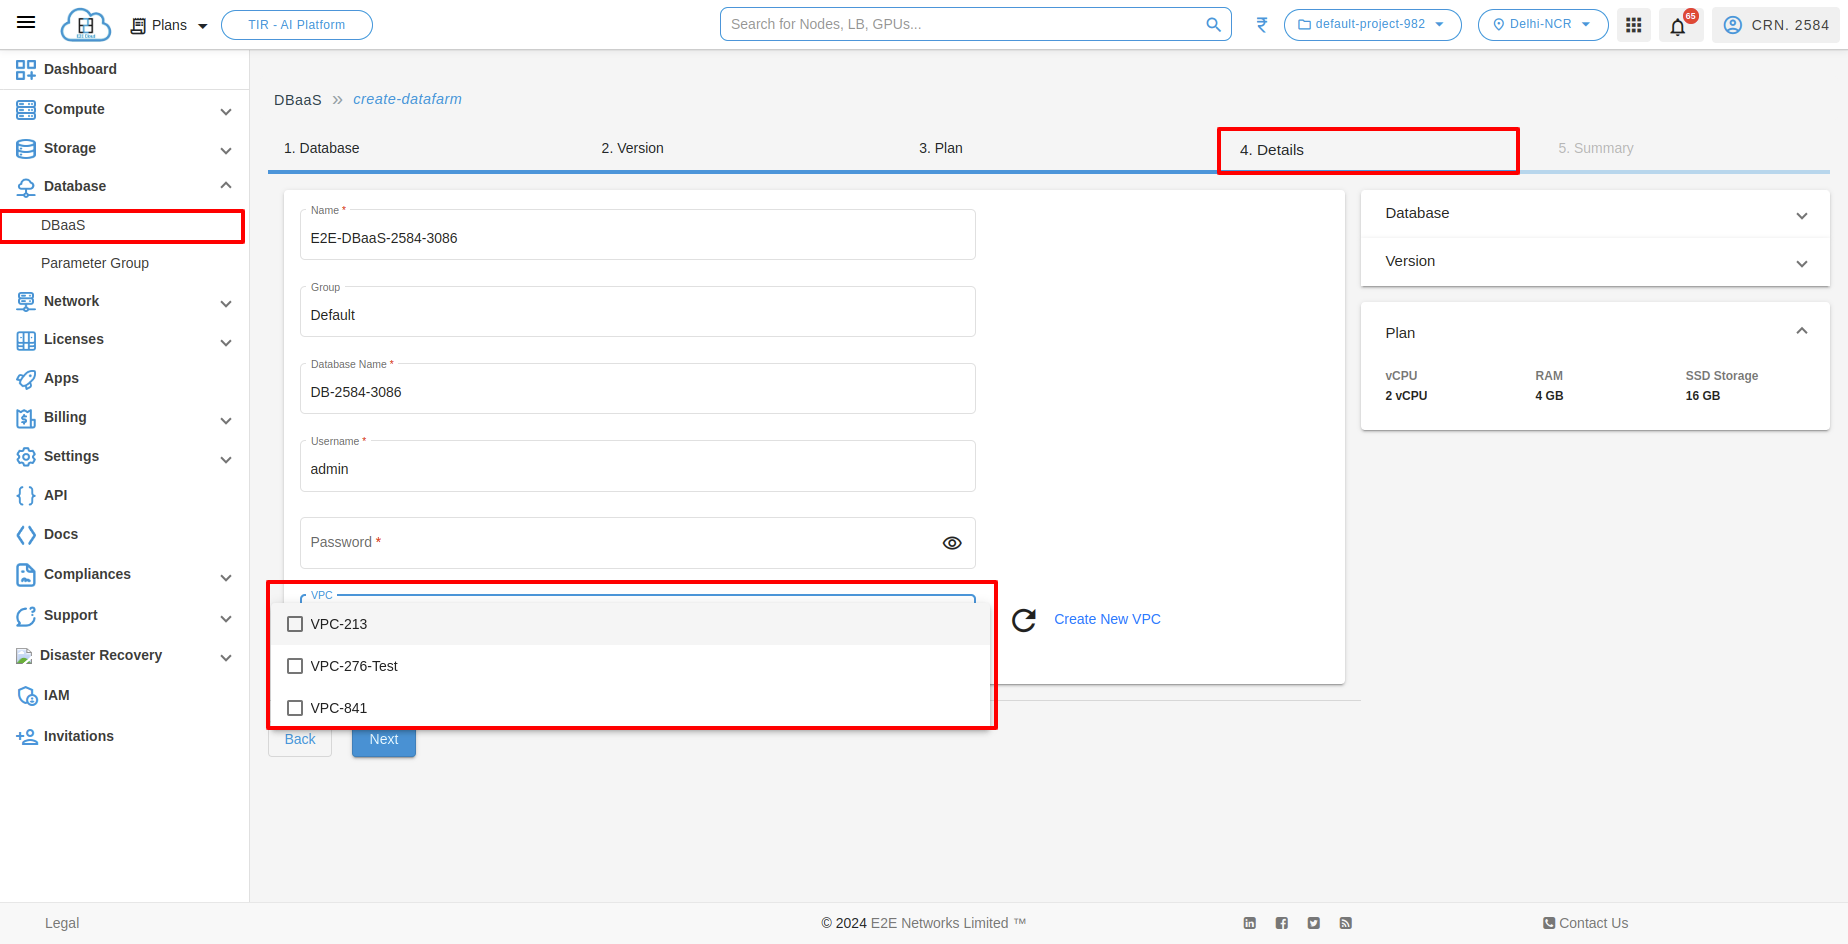
or you can create a new VPC by clicking on “Create New VPC”.
By clicking Plan, you can see the selected plan.
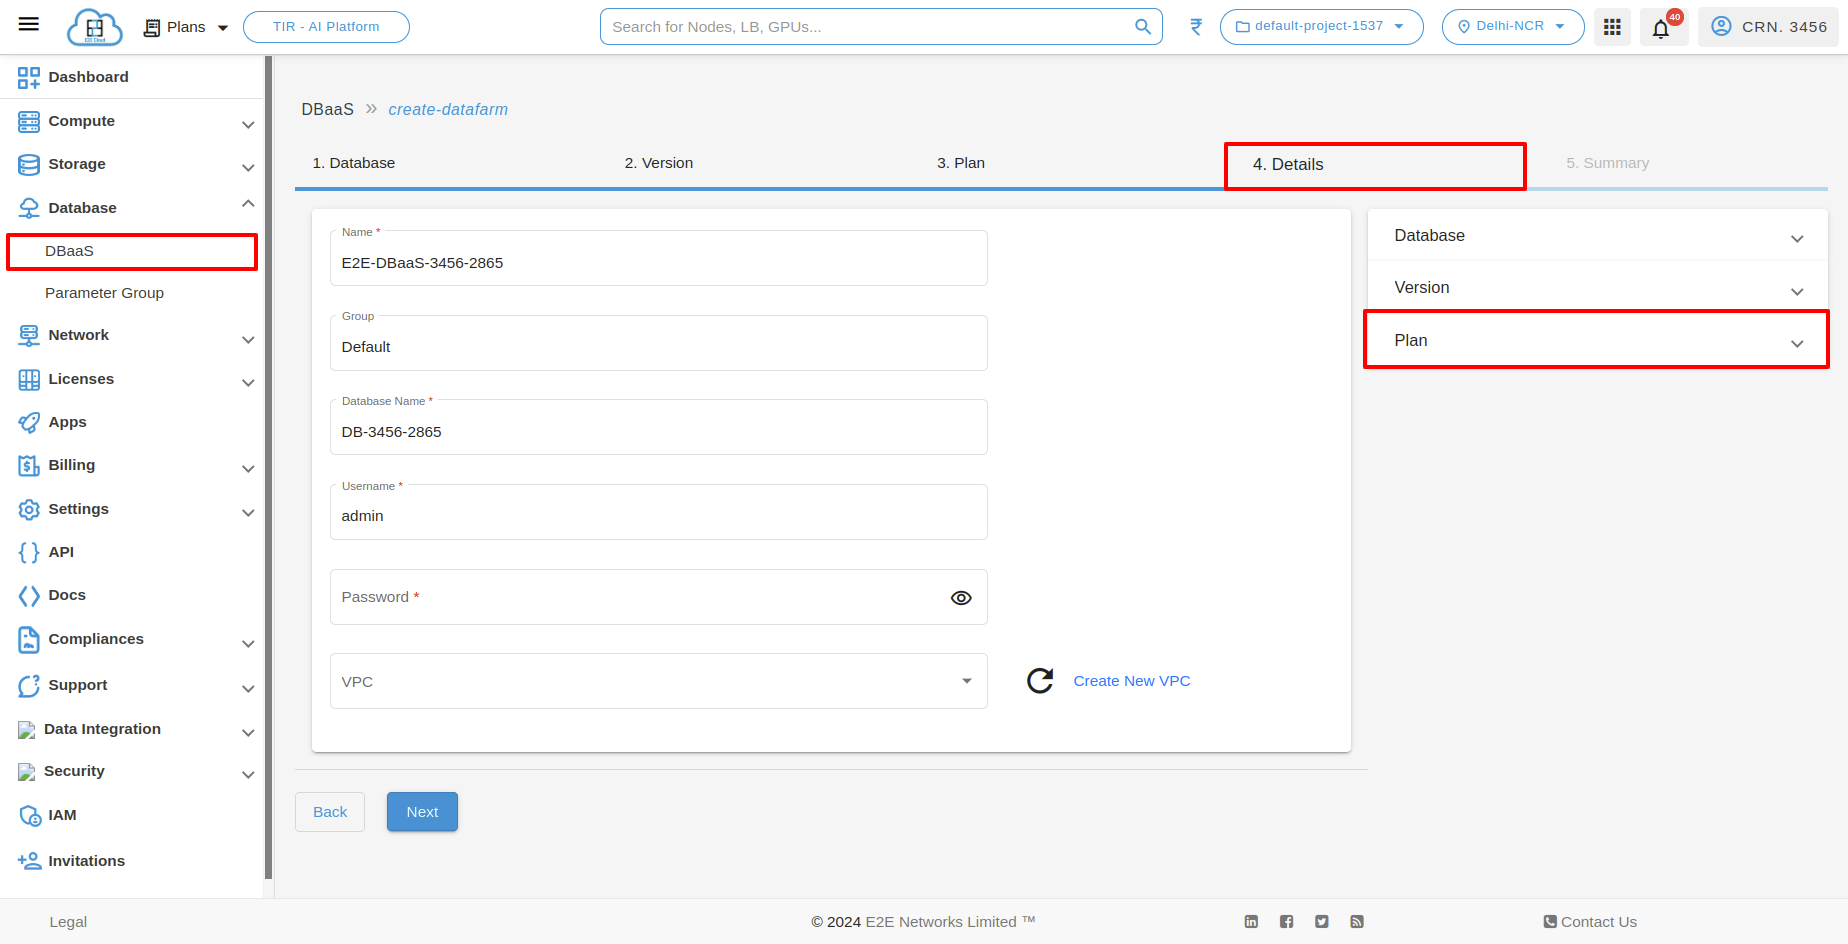
Click on “Next” button.
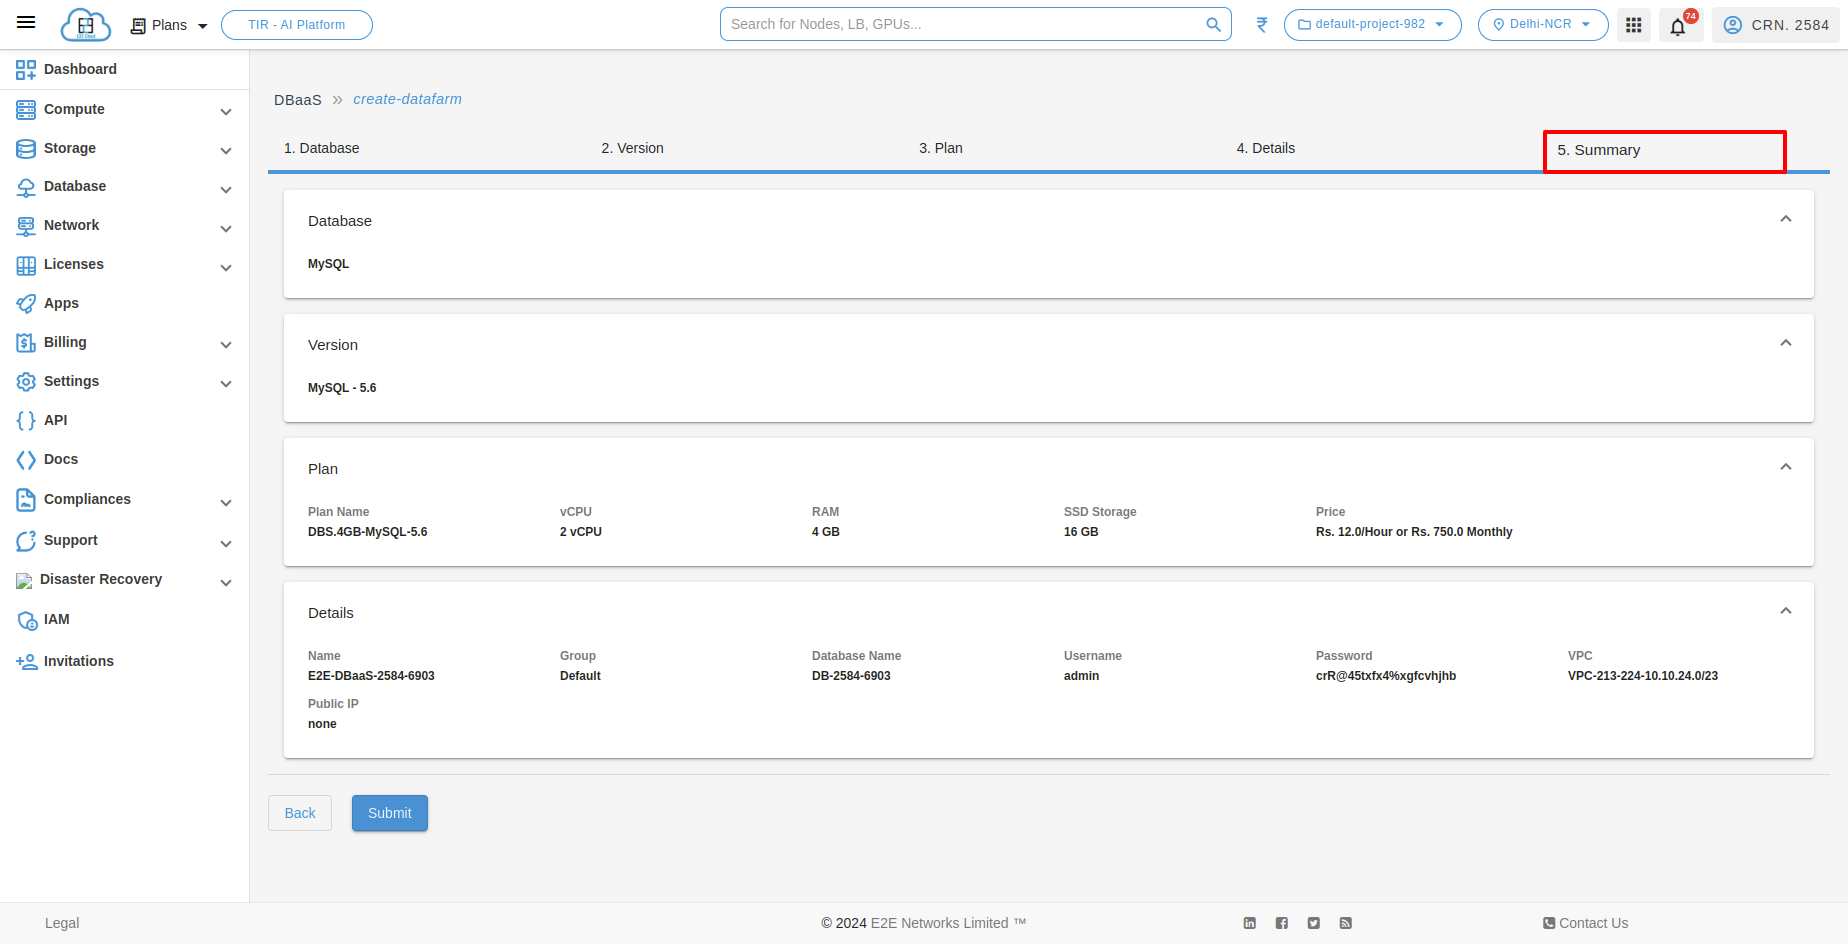
Summary
After clicking on Next button, you will move to the Summary section.In that you will see the selected details and click on Submit button.
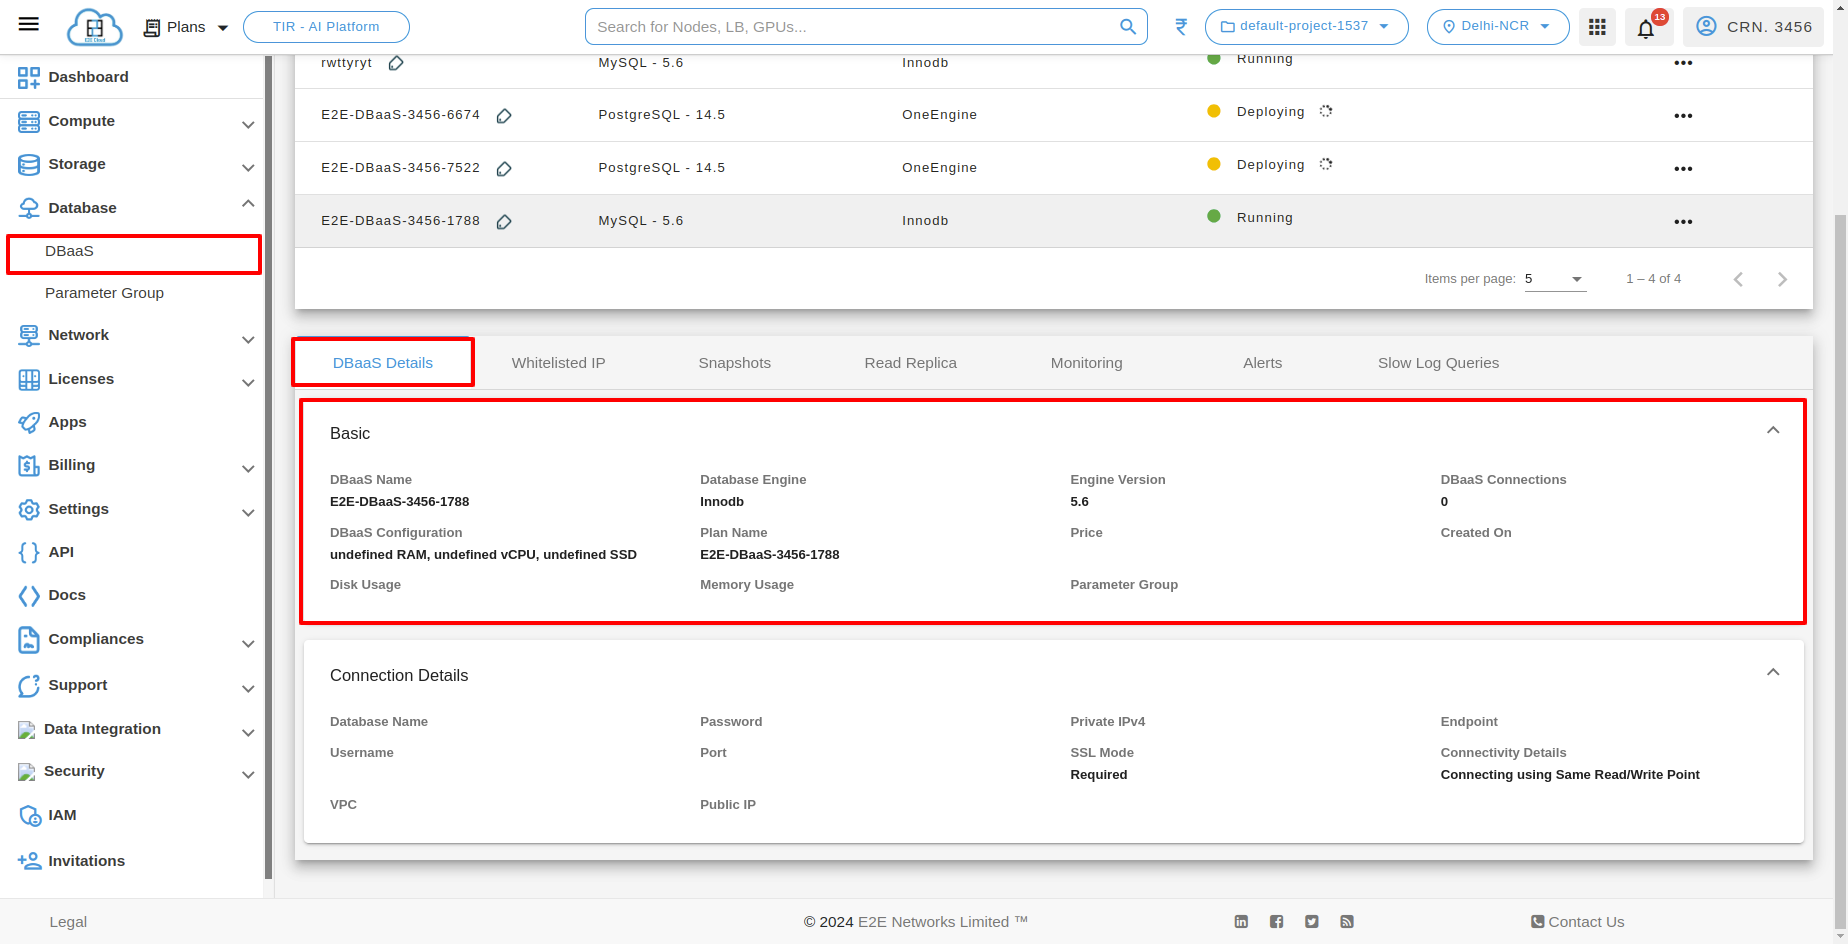
DBaaS Details
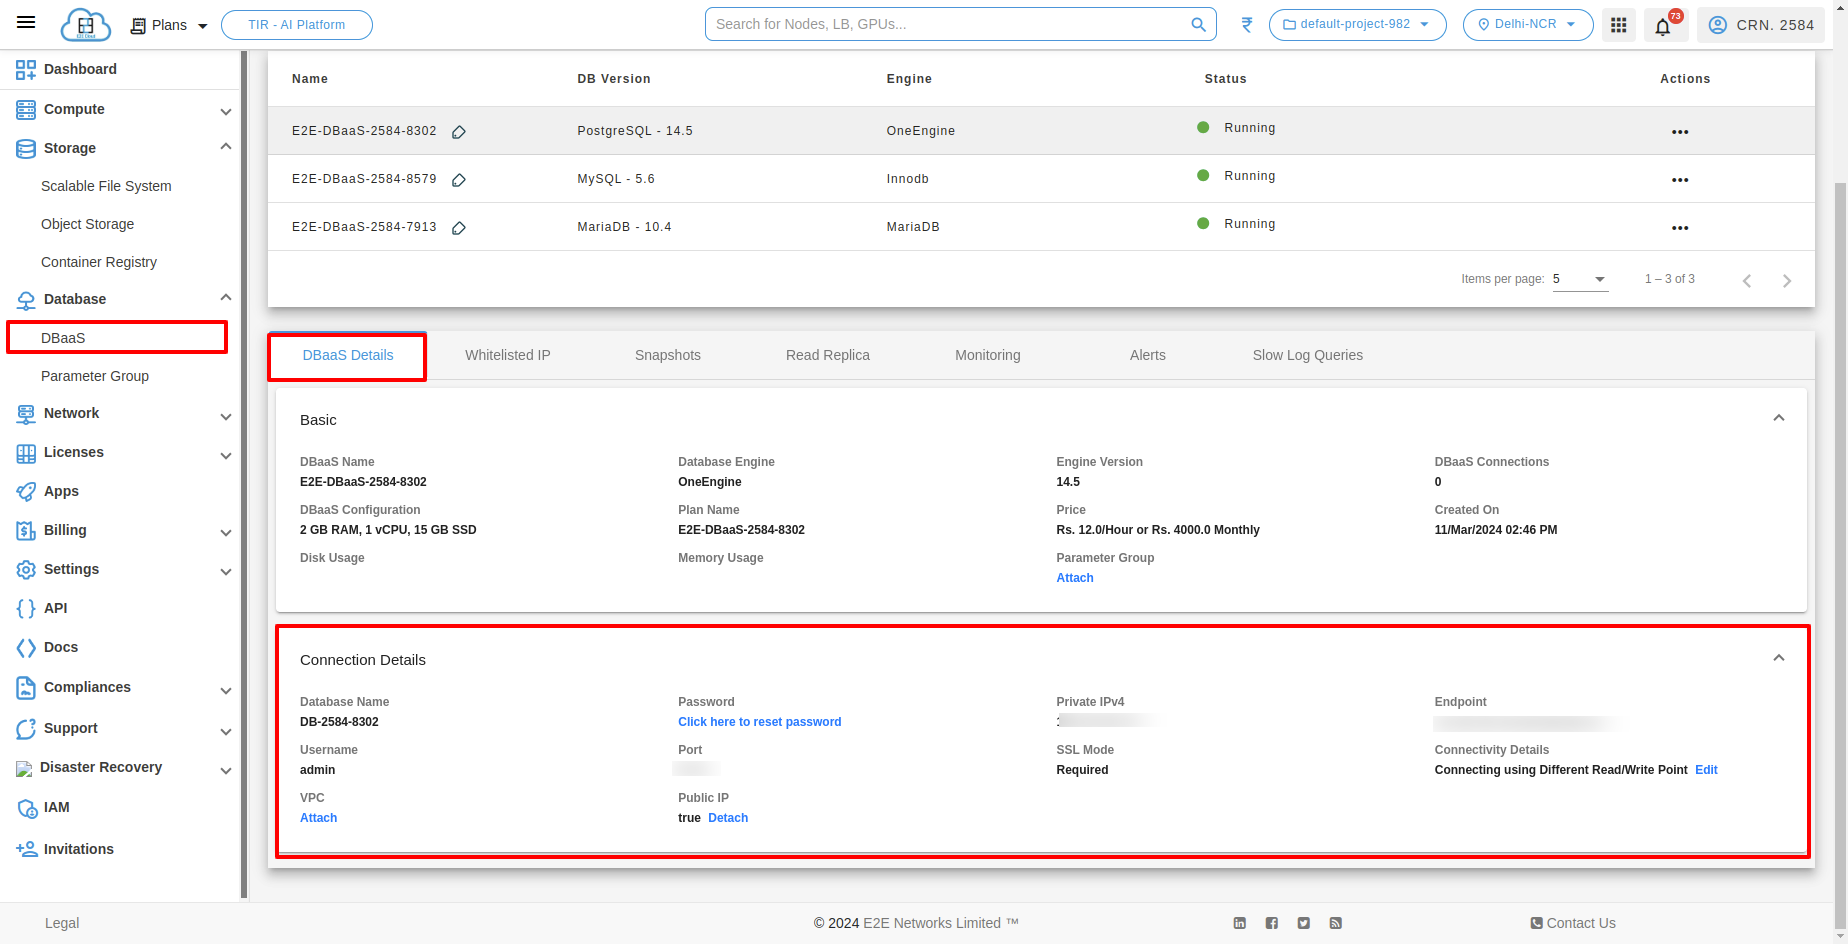
After successfully created DBaas, You can see the details of it on DBaaS Details tab.
Connecting to your database Cluster
After E2E’s database (DBS) provision your nodes, you can use any standard SQL client application to connect to a database on the DB instance. In this example, you connect to a database on a Maria DB instance using the MySQL command-line tool.
To connect to your database node using MySQL command line
Once your database has been provisioned and its running status, You can get the database connectivity information on the dashboard.
Usernames
Host Details
Port
SSL Mode
Enter the following command at a command prompt on your local or client desktop to connect to a MySQL database.
mysql -h <host> -P 3306 -u <’username’> -p <’password’>
After you enter the password for the user, you should see output similar to the following.
Welcome to the MySQL monitor.  Commands end with ; or \g.
Your MySQL connection id is 272
Server version: 5.5.5-10.0.17-MariaDB-log MariaDB Server

Copyright (c) 2000, 2015, Oracle and/or its affiliates. All rights reserved.

Oracle is a registered trademark of Oracle Corporation and/or its
affiliates. Other names may be trademarks of their respective
owners.

Type 'help;' or '\h' for help. Type '\c' to clear the current input statement.

mysql >
To connect to your database node using MariaDB command line
Once your database has been provisioned and its running status, You can get the database connectivity information on the dashboard.
Usernames
Host Details
Port
SSL Mode
Enter the following command at a command prompt on your local or client desktop to connect to a MariaDB database.
mysql -h <host> -P 3306 -u <’username’> -p <’password’>
To connect to your database node using PostgreSQL command line
Once your database has been provisioned and its running status, You can get the database connectivity information on the dashboard.
Usernames
Host Details
Port
SSL Mode
Enter the following command at a command prompt on your local or client desktop to connect to a PostgreSQL database.
- ::
psql -h <host> -p 5432 -U <’username’> -d <database>
To connect to your database node using mongoDB command line
Once your database has been provisioned and its running status, You can get the database connectivity information on the dashboard.
Usernames
Host Details
Port
SSL Mode
Enter the following command at a command prompt on your local or client desktop to connect to a mongoDB database.
mongosh -host <host> -u <’username’> -p --authenticationDatabase <’databasename’>
To connect to your database node using Valkey-cli command line
Once your database has been provisioned and its running status, You can get the database connectivity information on the dashboard under the connection details.
Public IPv4
Username
Password
Port
Enter the following command at a command prompt on your local or client desktop to connect to a Valkey database.
valkey-cli -u "redis://<'username'>:<'password'>@<Public_IP>:6379/<"dbaas name">"
Note
When including the password in the connection string, ensure it’s properly URL encoded. This means replacing special characters like ‘@’ with their corresponding URL-encoded equivalents. For example, ‘@’ becomes ‘%40’, etc.
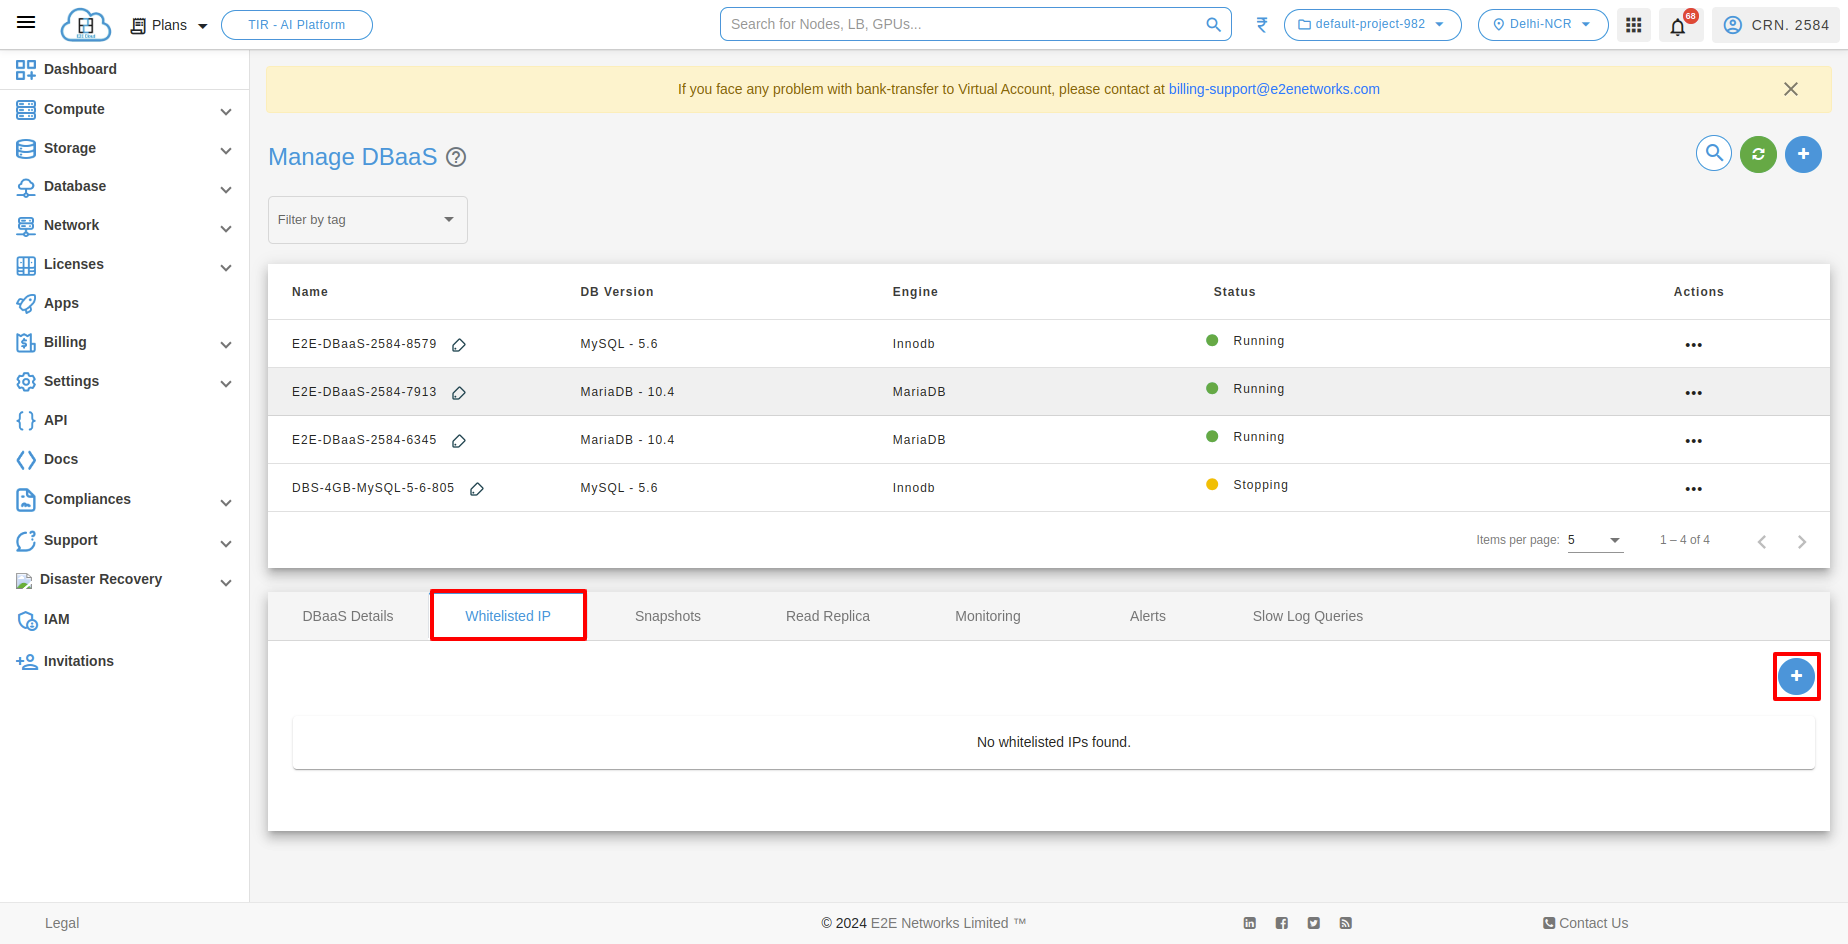
Whitelisted IP
Allow Trusted Host IP’s:- This setting control the access of Allowed Host IP that can be able to connect your Database node from your trusted ISP IP. If No trusted host selected. Anyone can connect using credentials.
Click on “Add icon” to add a new trusted IP address to the list.
Instead of using the default local loopback IP address (127.0.0.1), provide the private IP address of the node you want to whitelist, Confirm, and save the changes.
The green mark likely indicates a successful addition of the trusted IP.
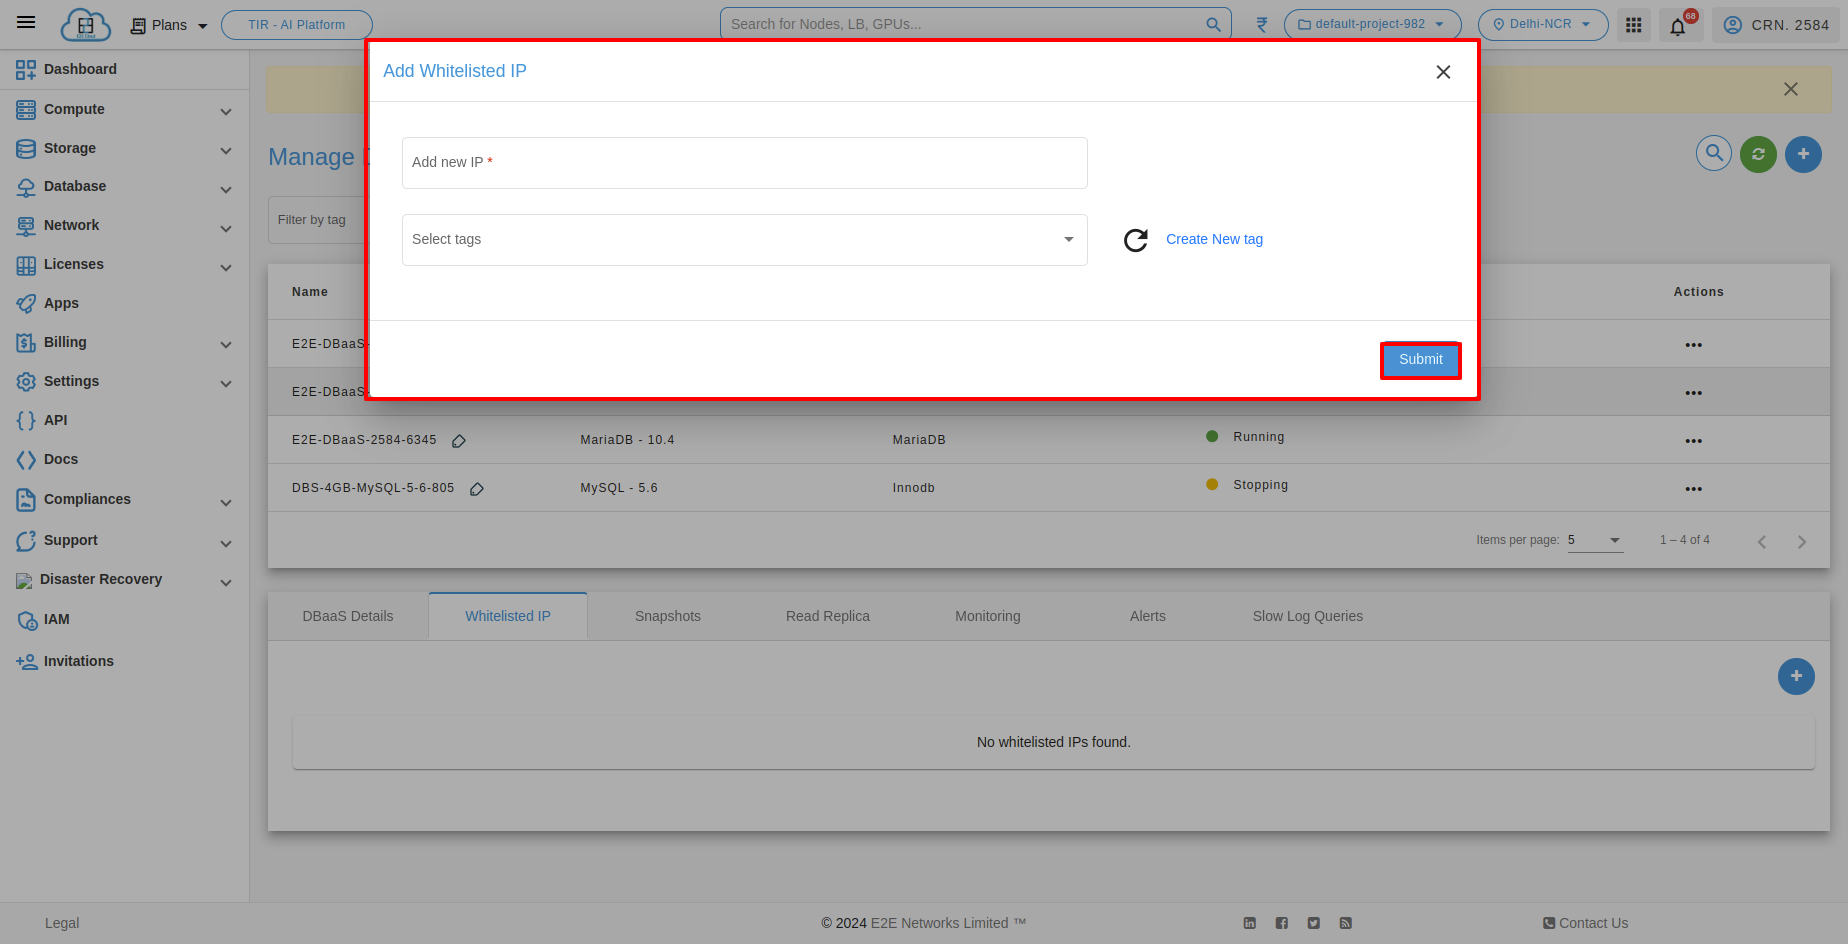
If you want to categorize or label the trusted IP for organizational purposes, you can add a tag with a custom name.
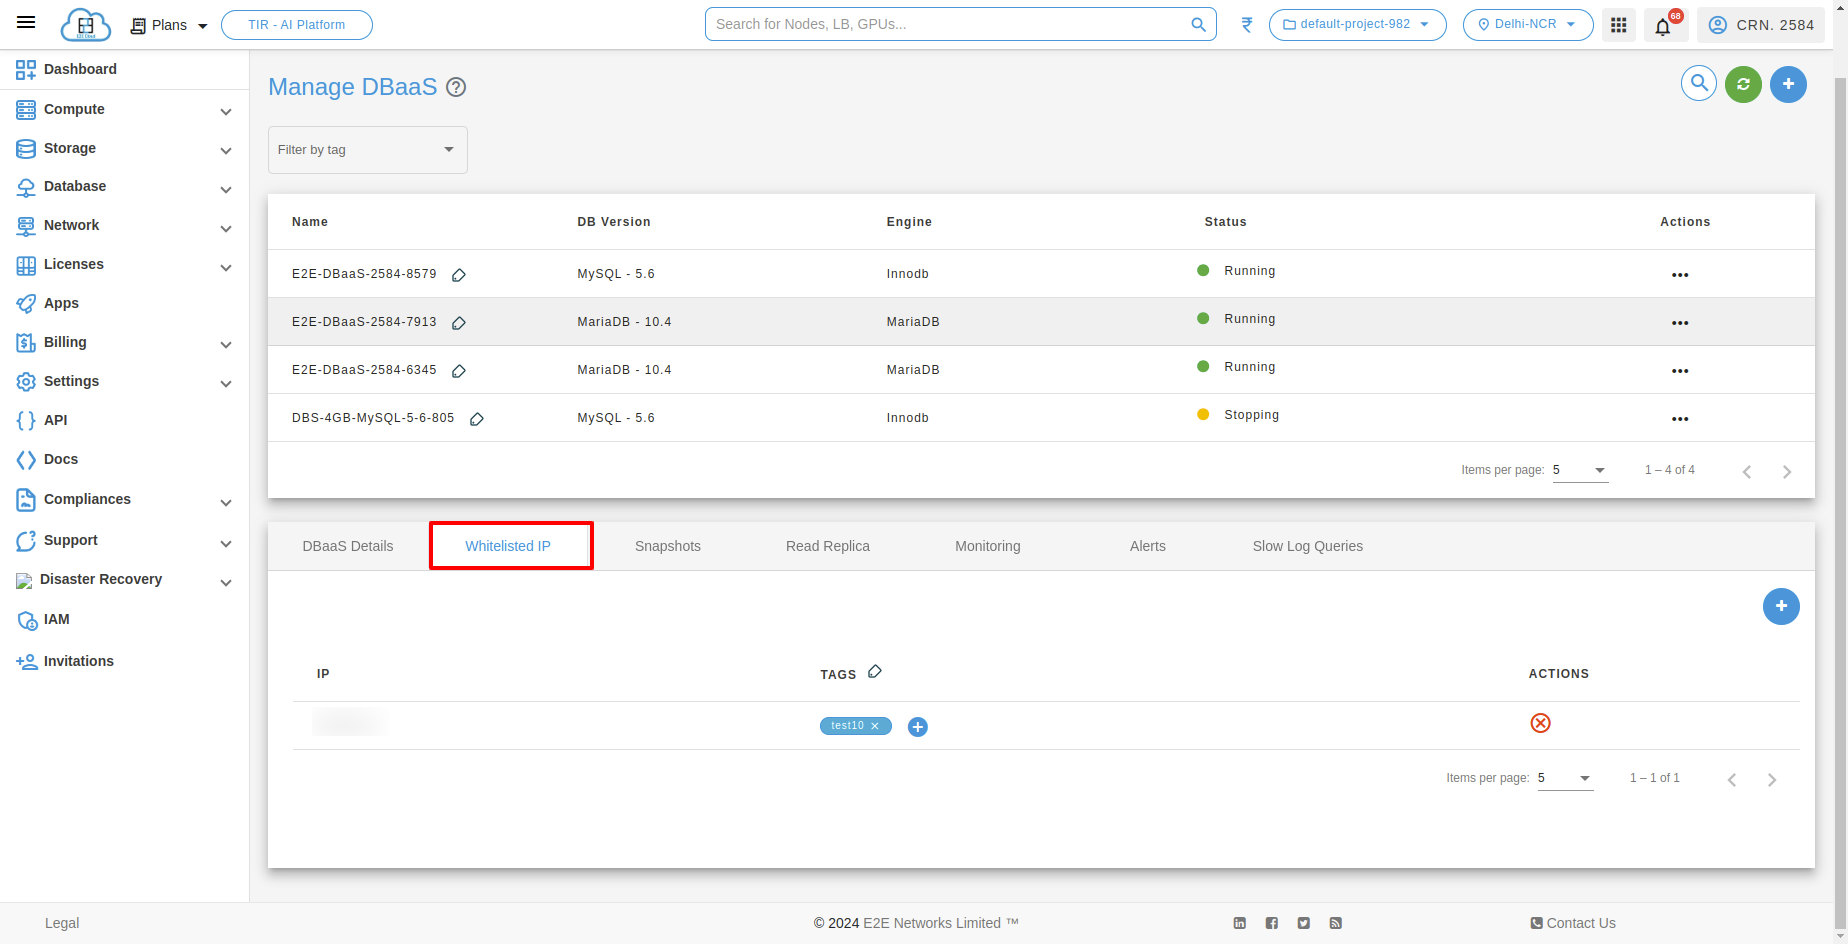
Now, you have successfully whitelisted the node IP in the DBaaS environment.
Additionally, always follow best practices for securing databases and regularly monitor, this helps to prevent brute force password and denial-of-service attacks from any server not explicitly permitted to connect
Snapshots
The snapshot feature is valuable for data protection, disaster recovery, and testing scenarios, providing users with the ability to easily revert to a previous database state or create duplicates for various purposes.and we use “restore snapshot” to quickly recover lost or corrupted data, recover from system failures, and revert to a stable state in case of issues during testing or updates. It’s like a fast-forward button to a previously known good state of a system.
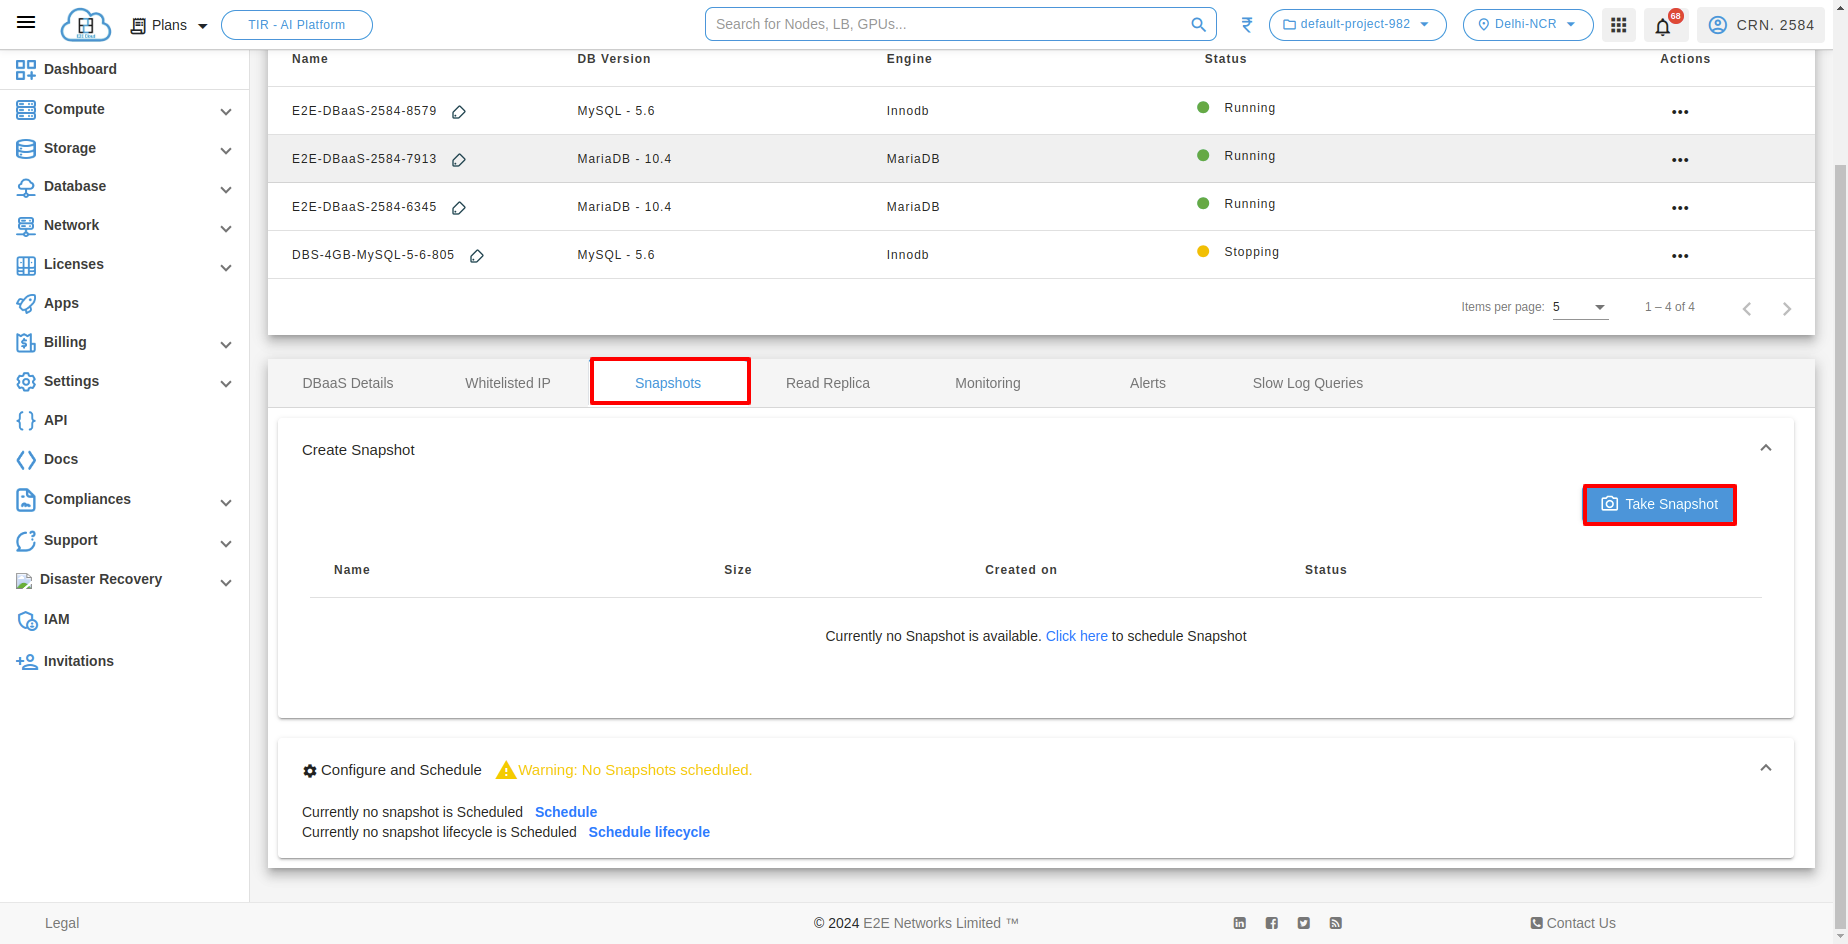
Take Manual Snapshot of Database
When the user wants to take a snapshot immediately and manually, they can click on the take snapshot button.
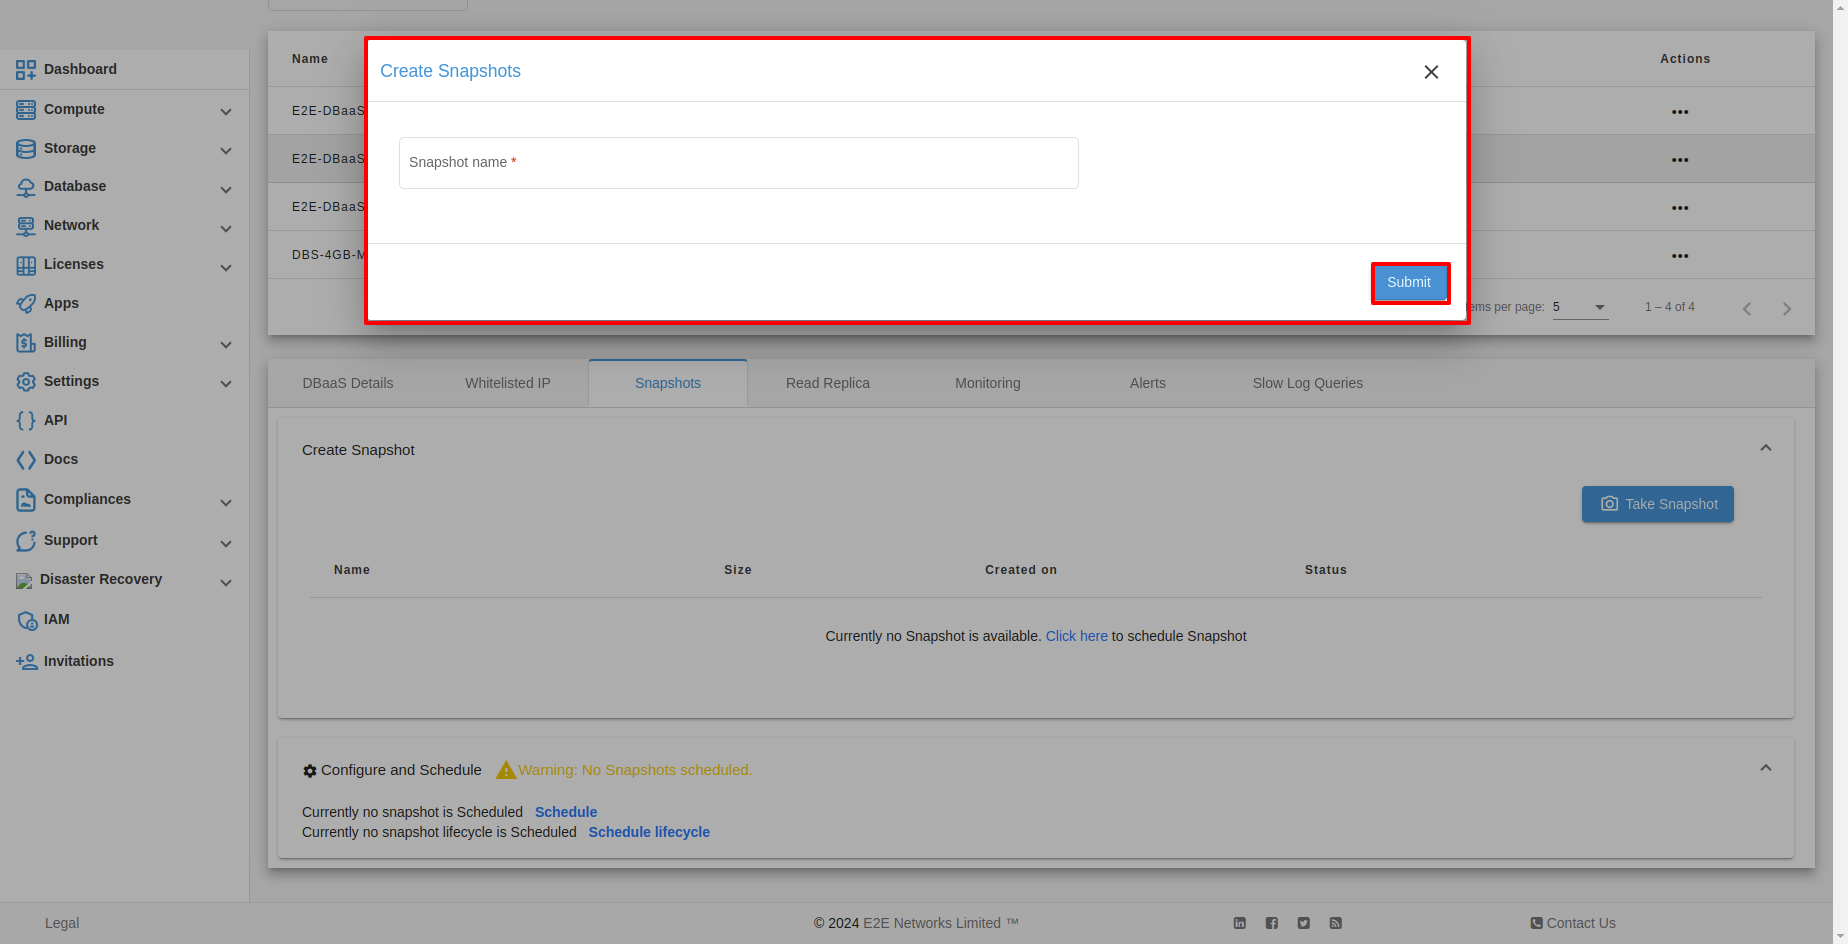
After clicking on the take snapshot button. A popup menu will appear, prompting you to enter the snapshot name. Provide the snapshot name and click on ‘create snapshot’ to initiate the snapshot creation.

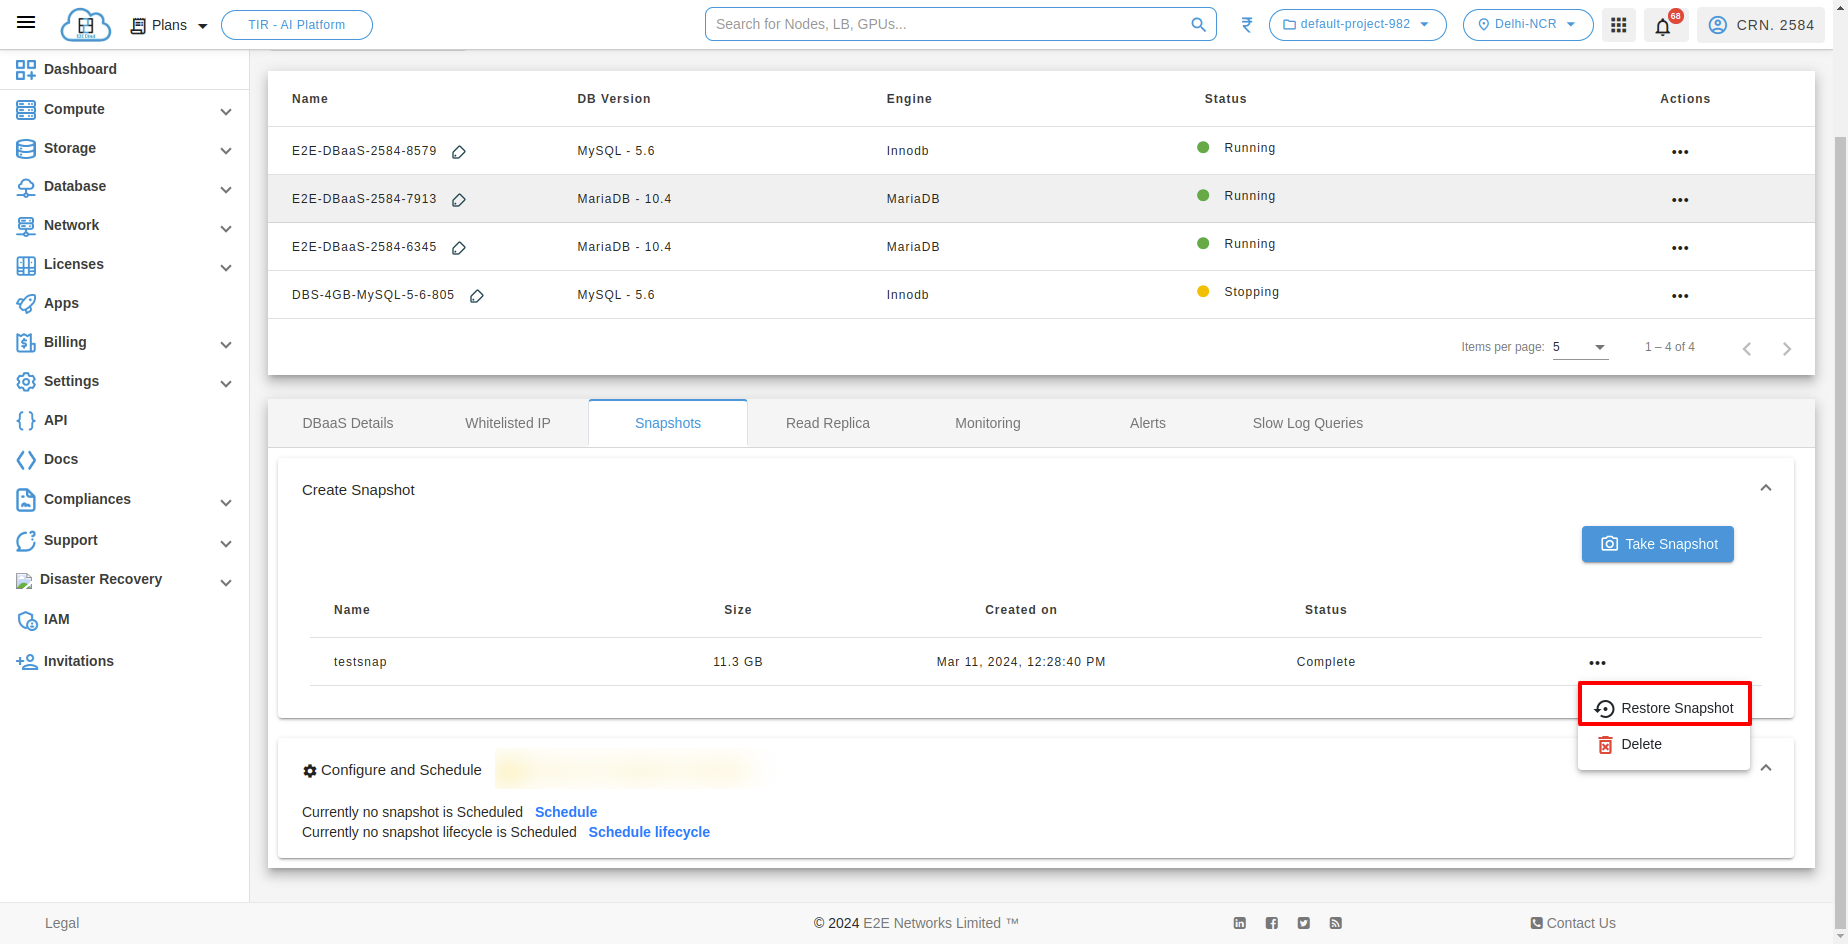
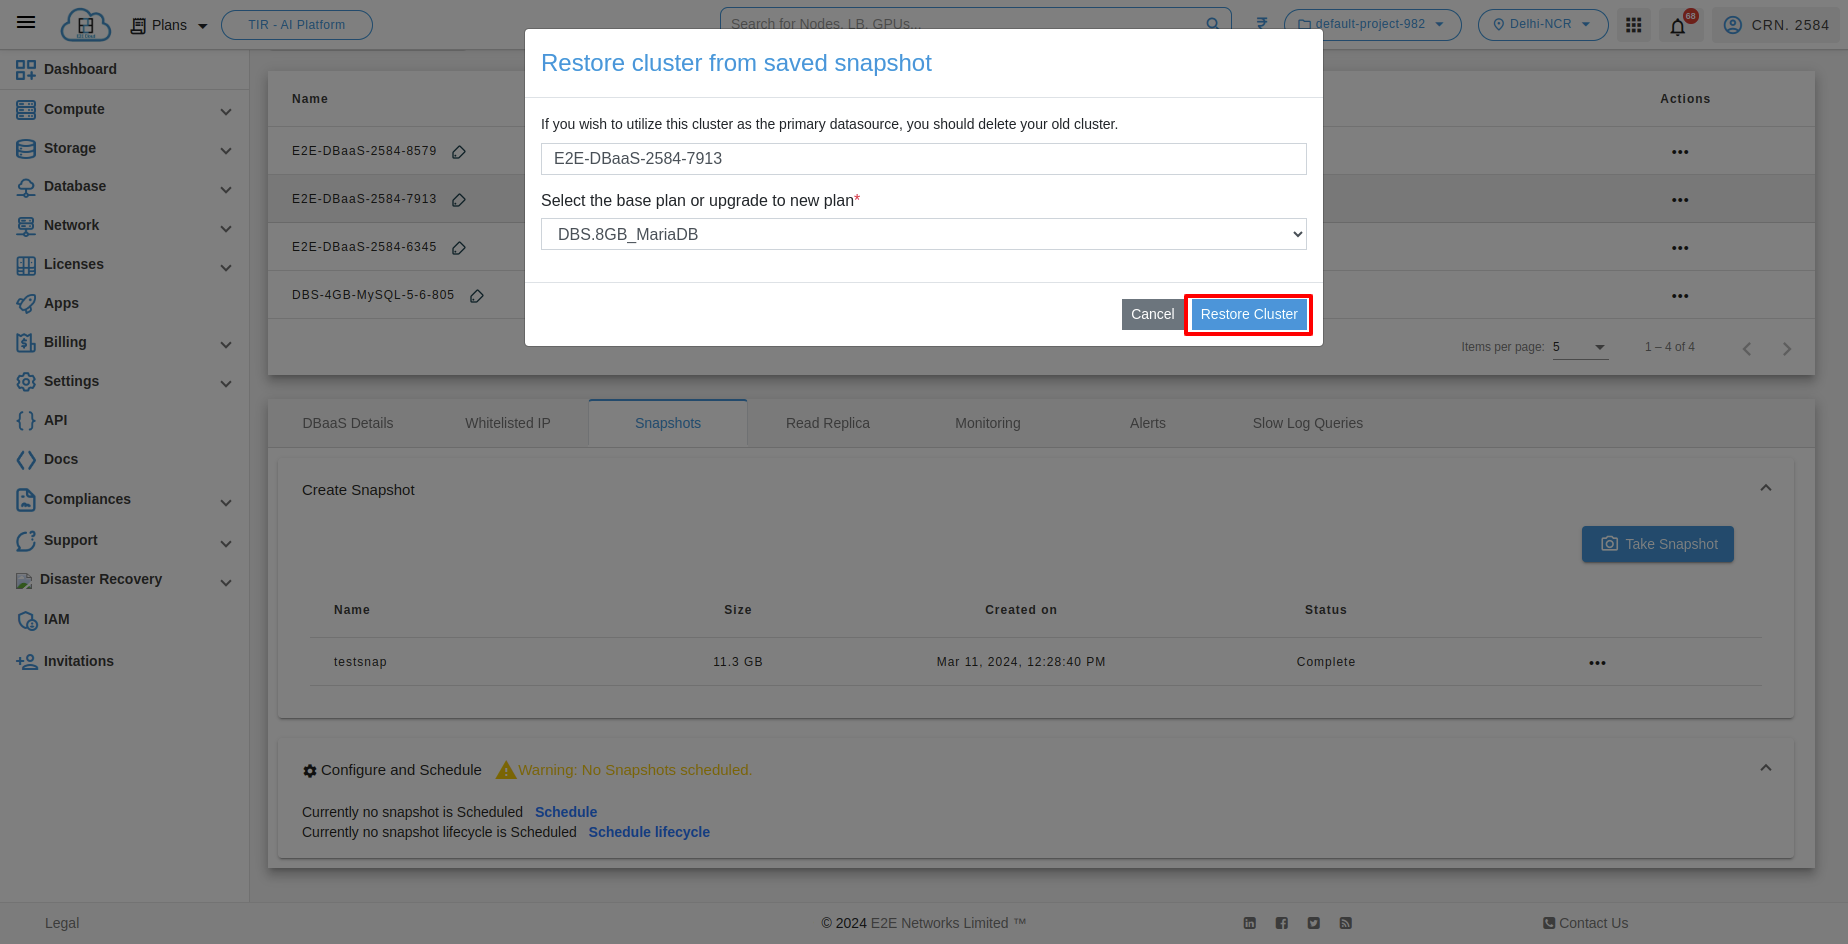
Restore Snapshot
To restore the snapshot from the saved file, click the action button, select the ‘restore’ option, and proceed with the snapshot restoration.
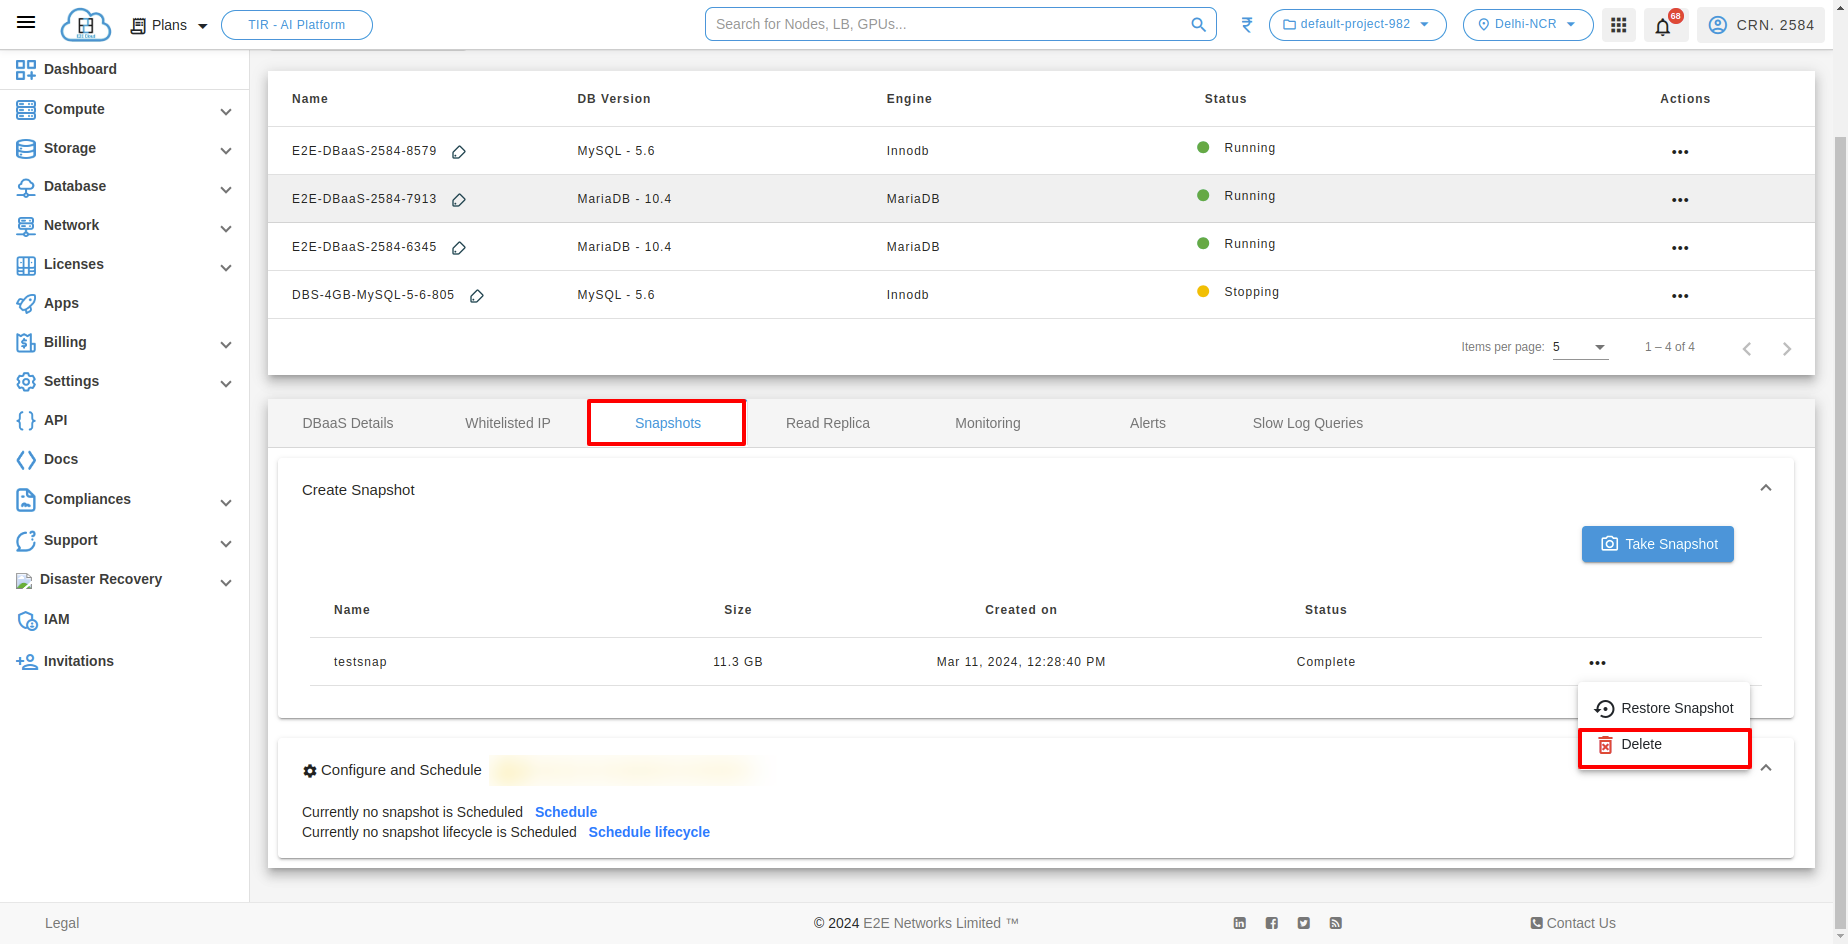
Delete Snapshot
When a user wants to deletes the snapshot, they can remove from the snapshot list.
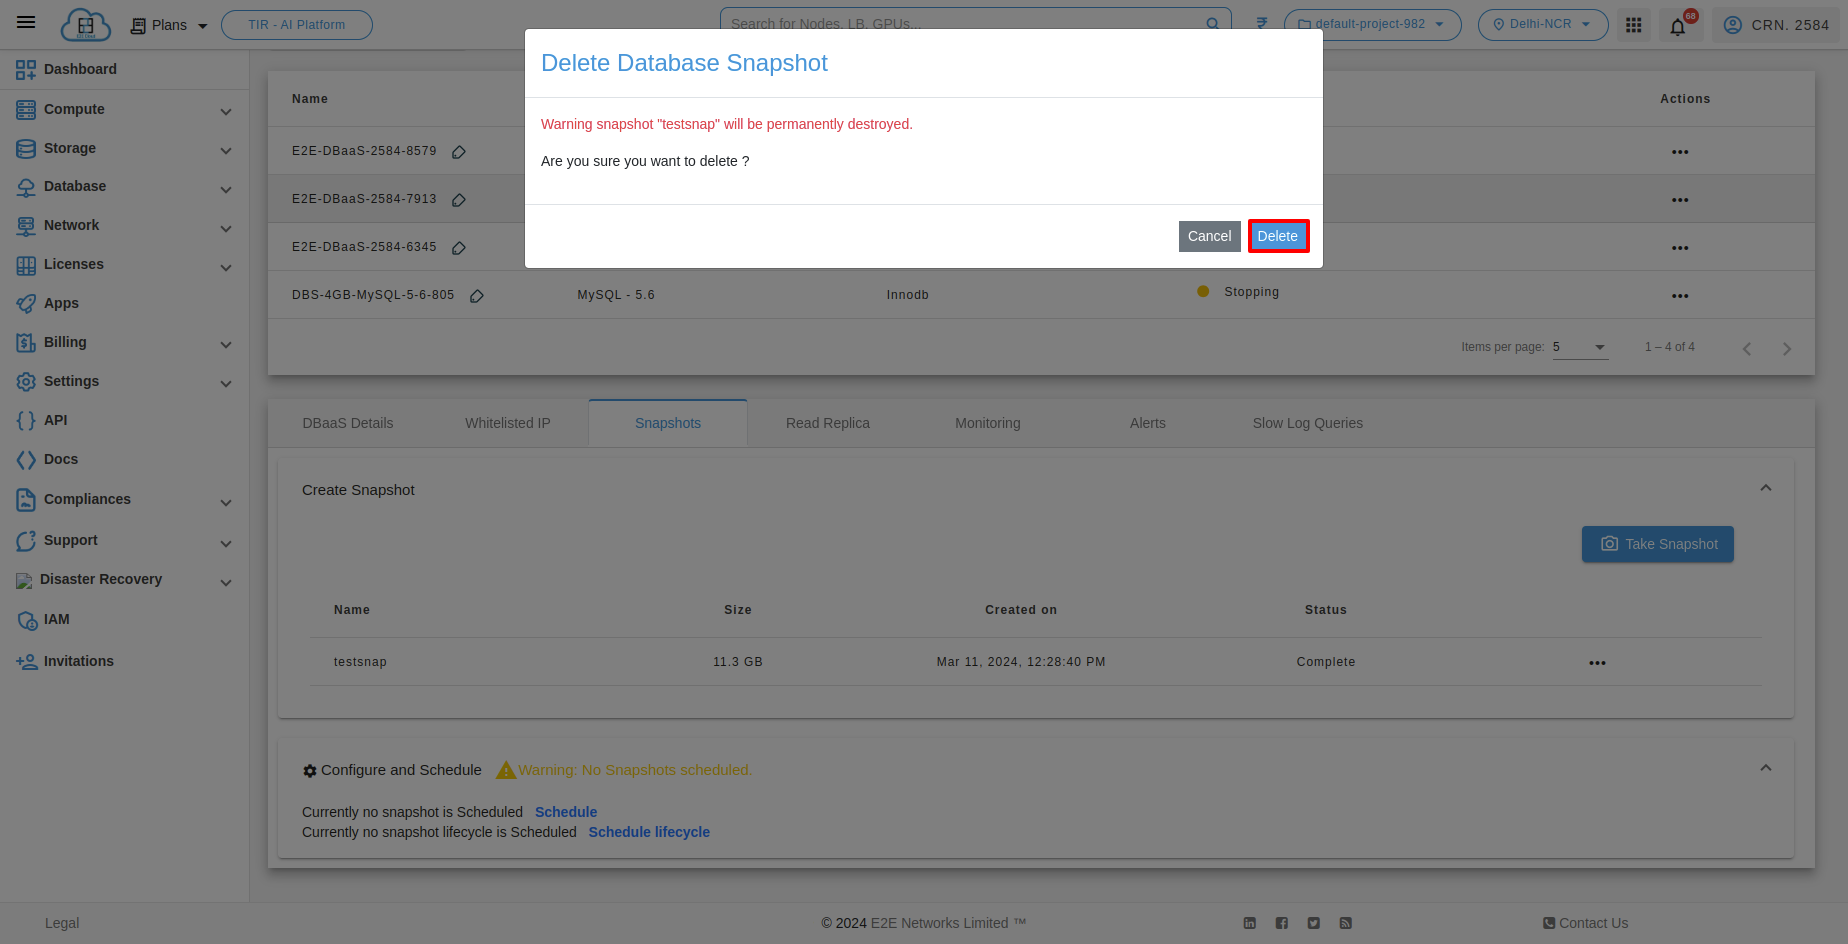
To delete a snapshot, click the action button, select the delete option, and confirm the deletion of the snapshot.
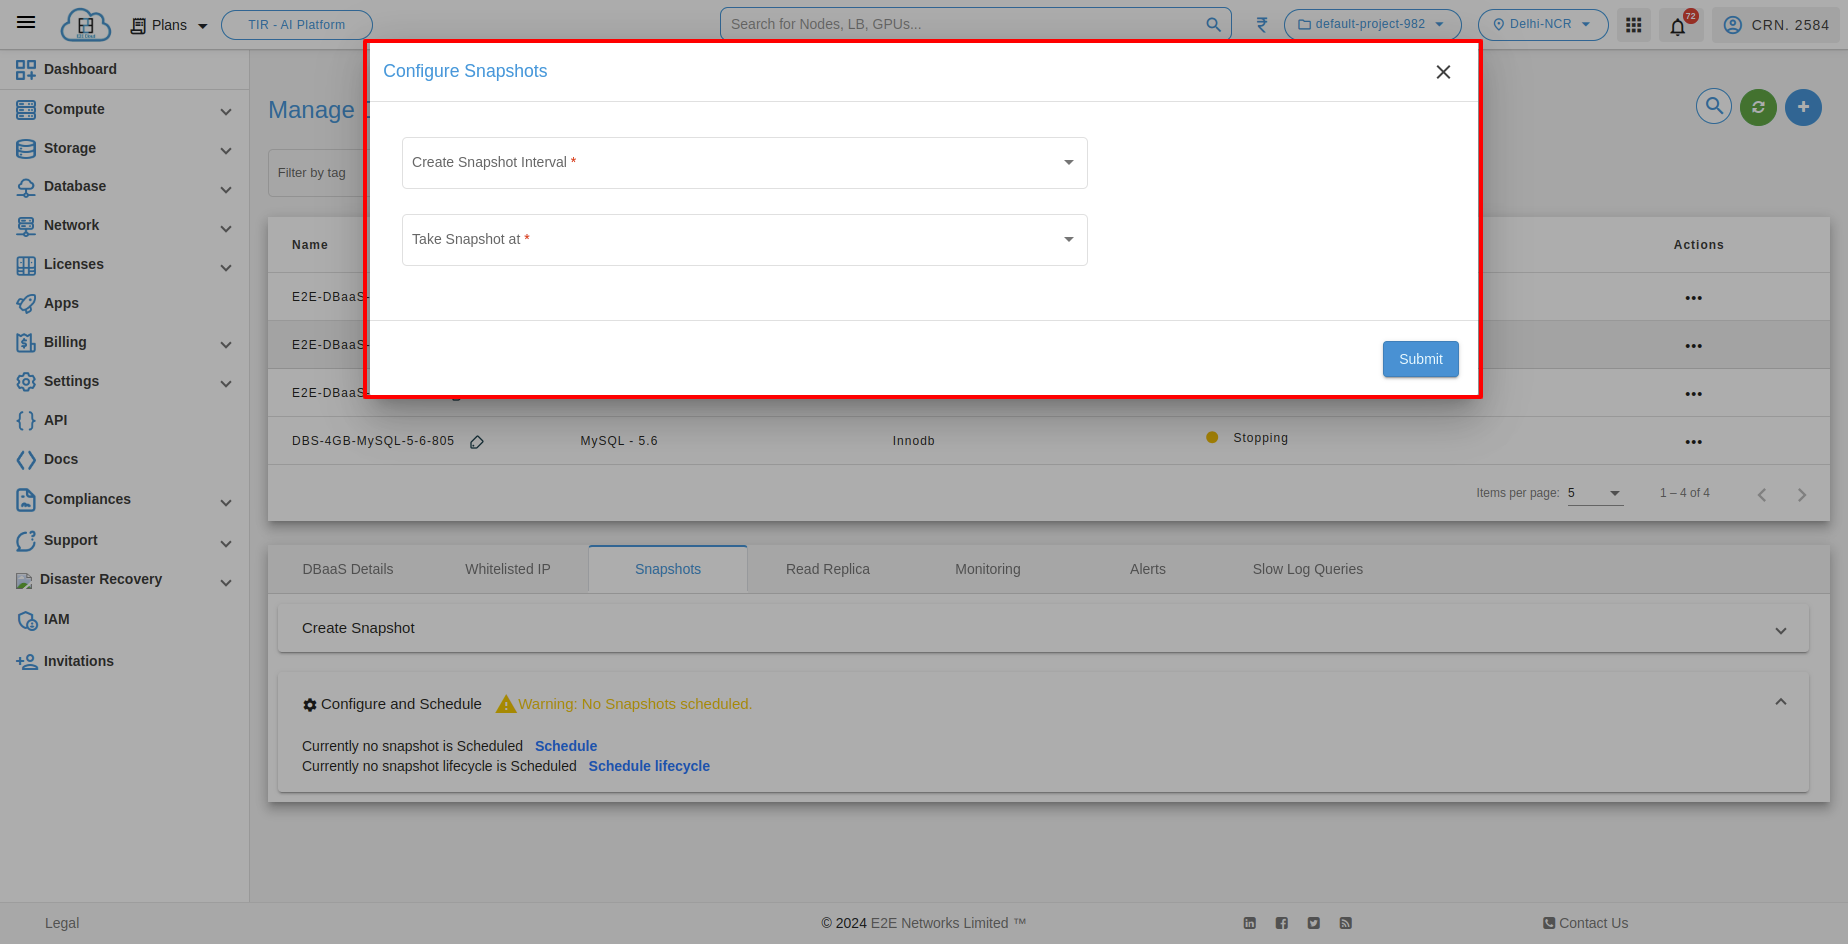
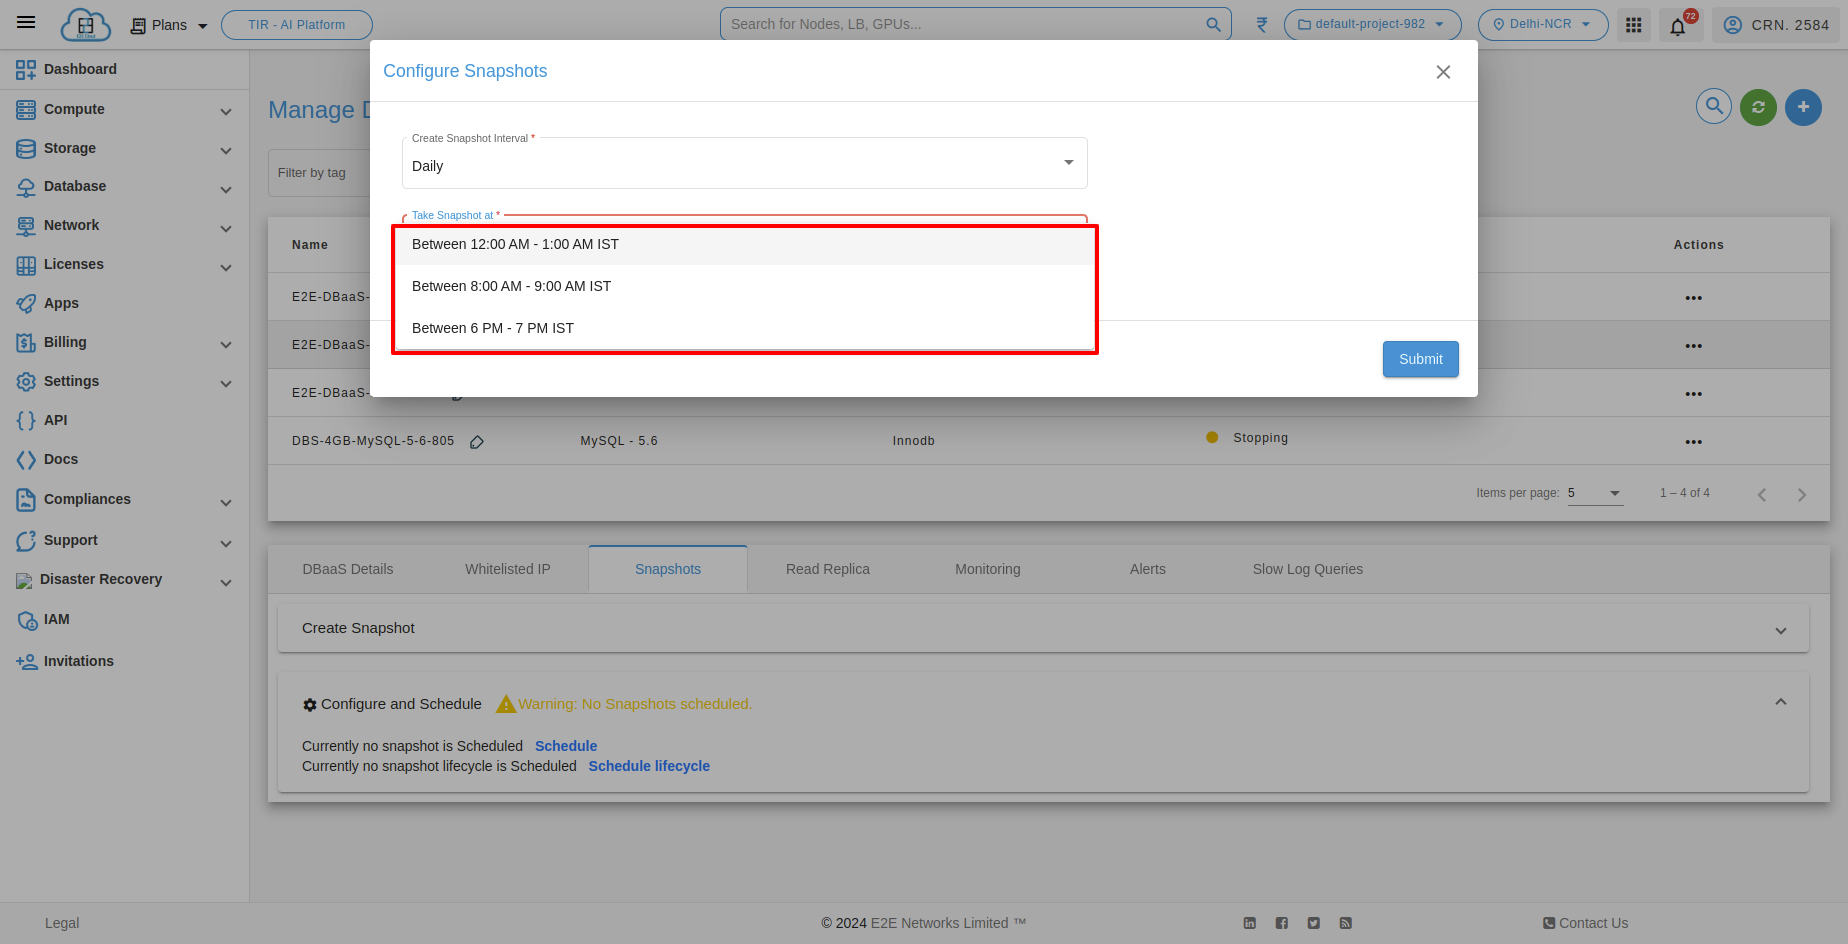
Scheduled snapshot
scheduled snapshot is a proactive approach to data management and system backup, providing regular and automated snapshots to enhance data protection, disaster recovery, and overall system reliability. When a user wants to schedules a time duration, a snapshot will be created every day within the specified timeframe.
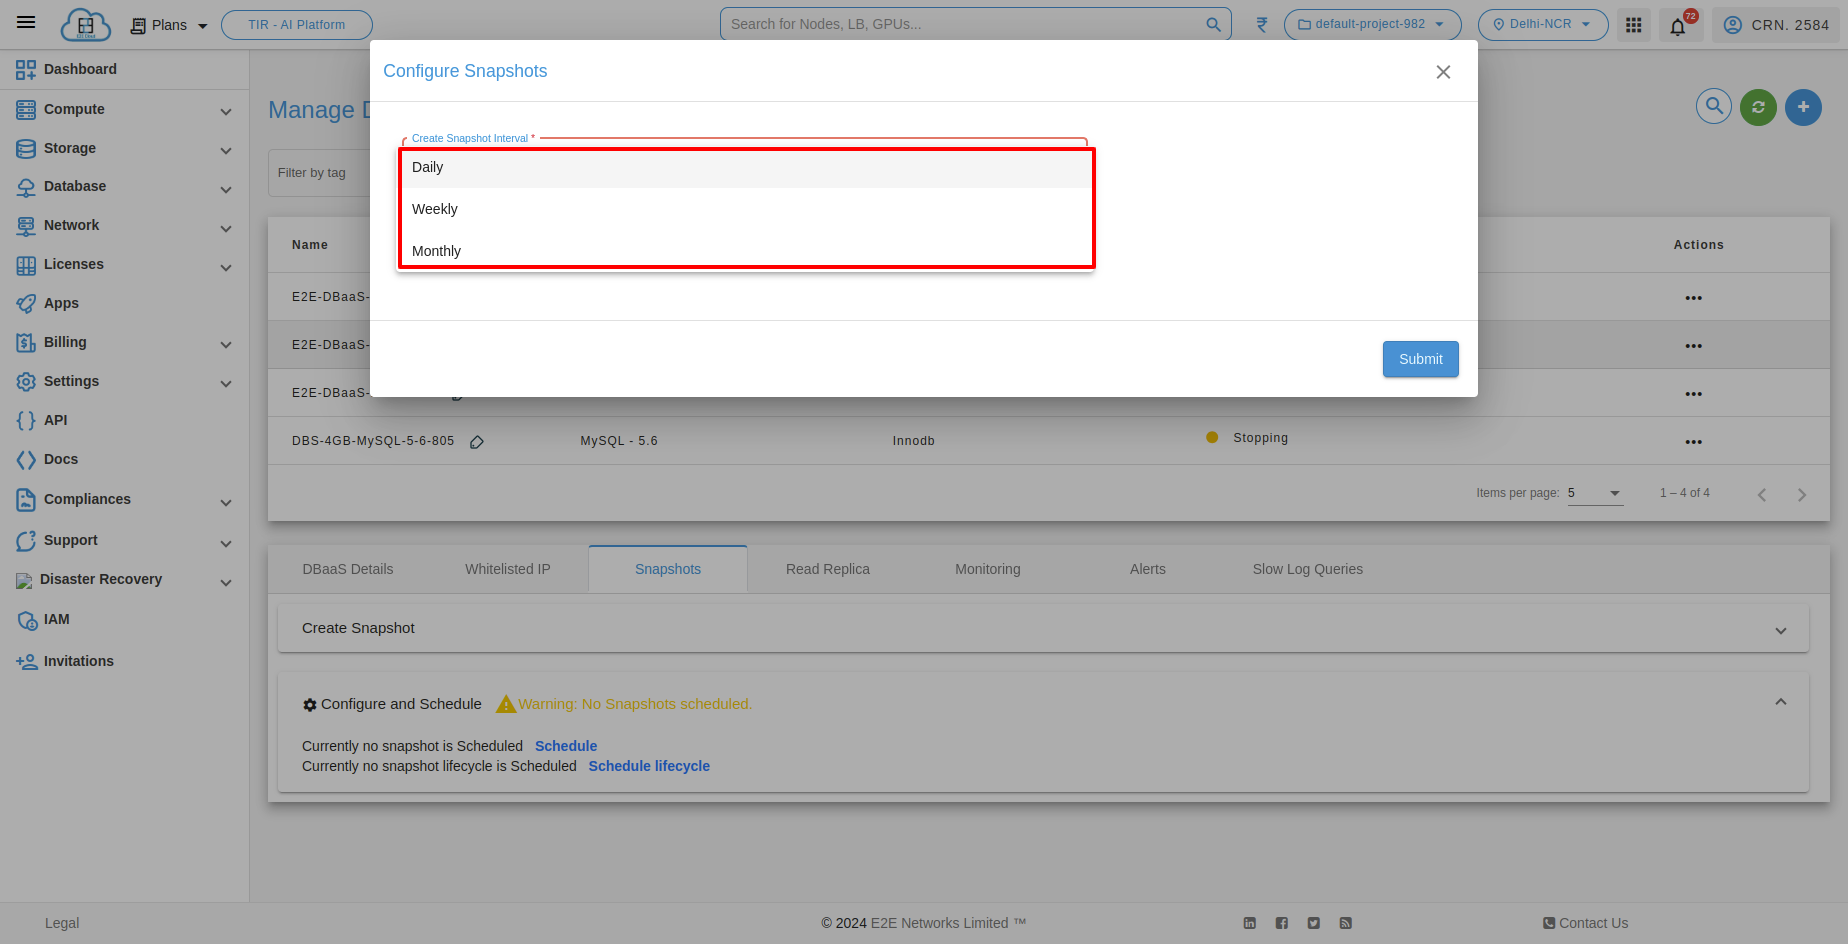
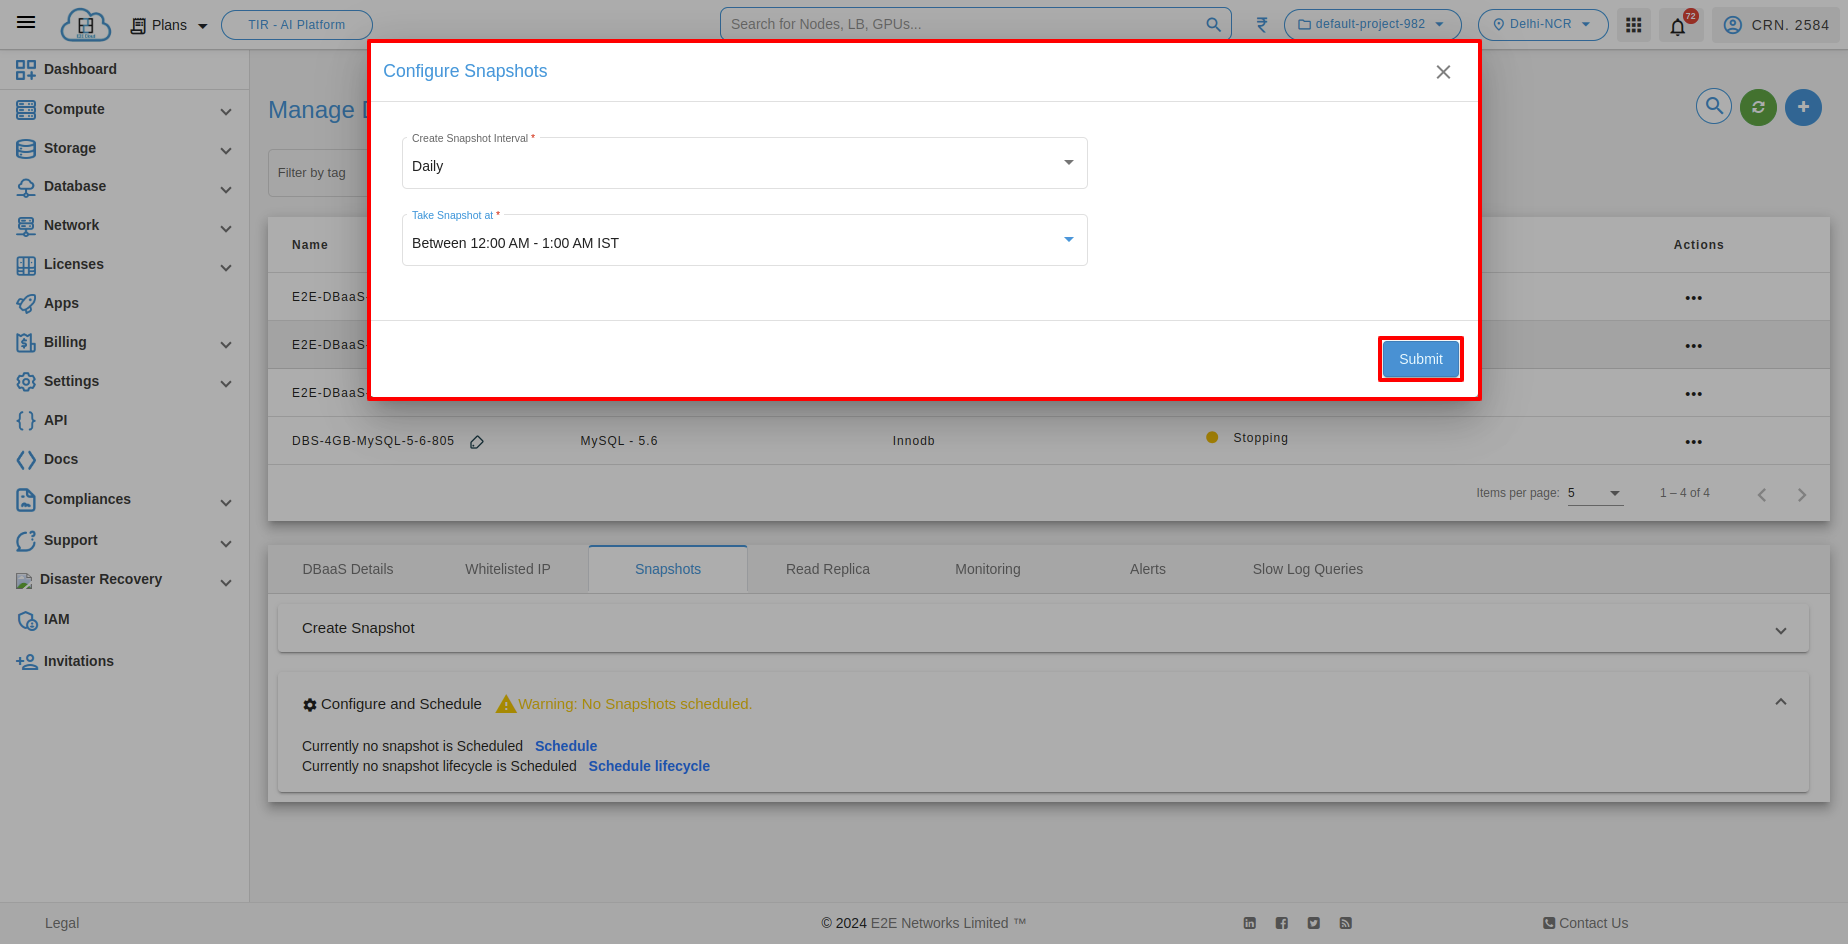
To schedule a snapshot of your database, click on the ‘Schedule’ link. Choose the snapshot creation interval and select the desired time duration for taking snapshots.

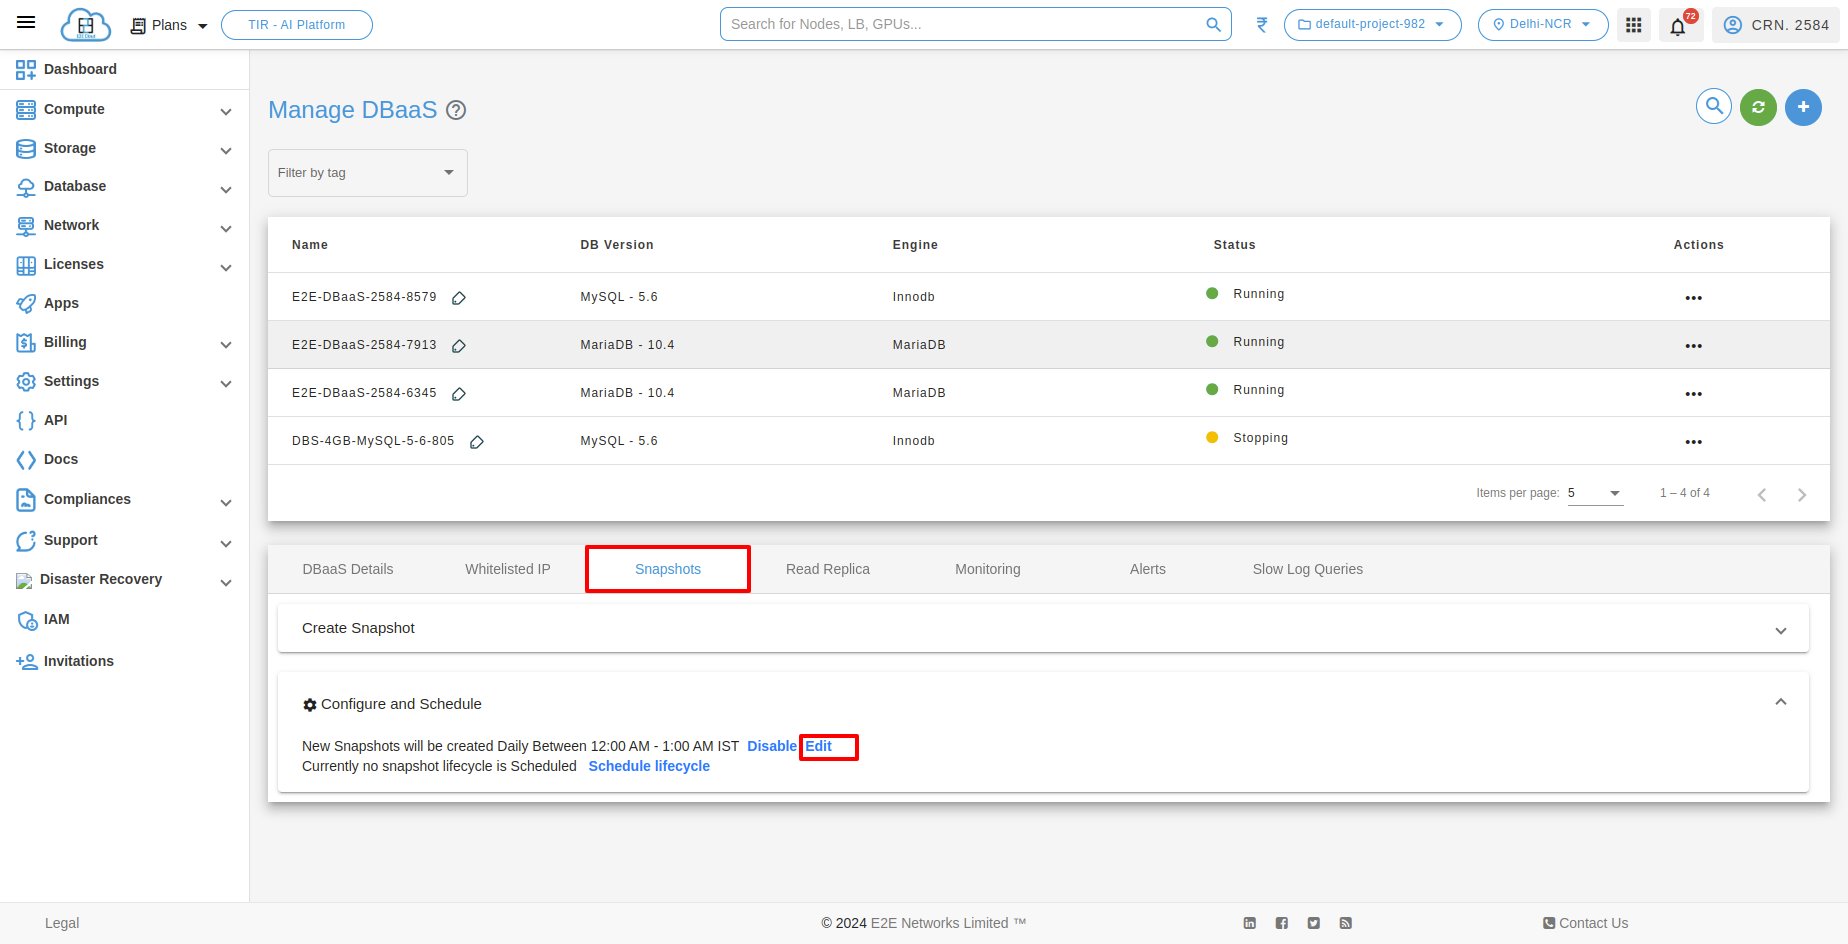
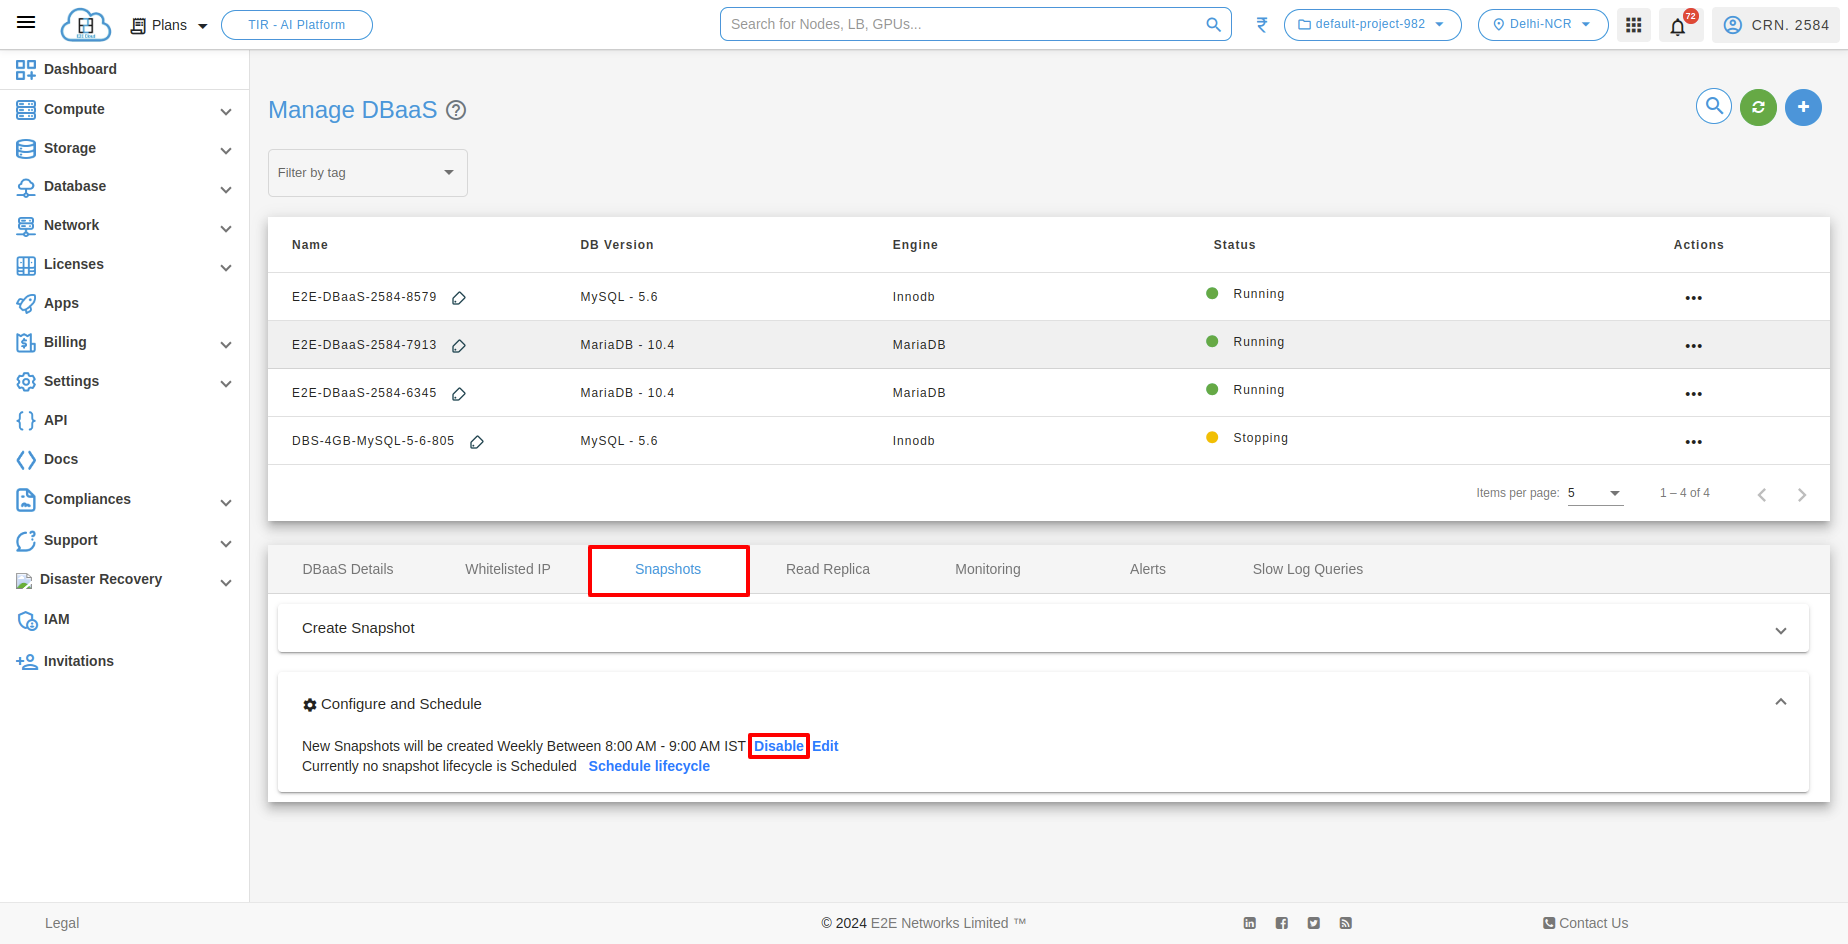
Edit Scheduled Snapshot
When a user wants to edit the scheduled snapshot interval, they can modify the time duration for the scheduled snapshot changes.
To edit the scheduled snapshot of your database, click on the ‘Edit’ link. Select the desired options, and save the changes to the scheduled snapshot.
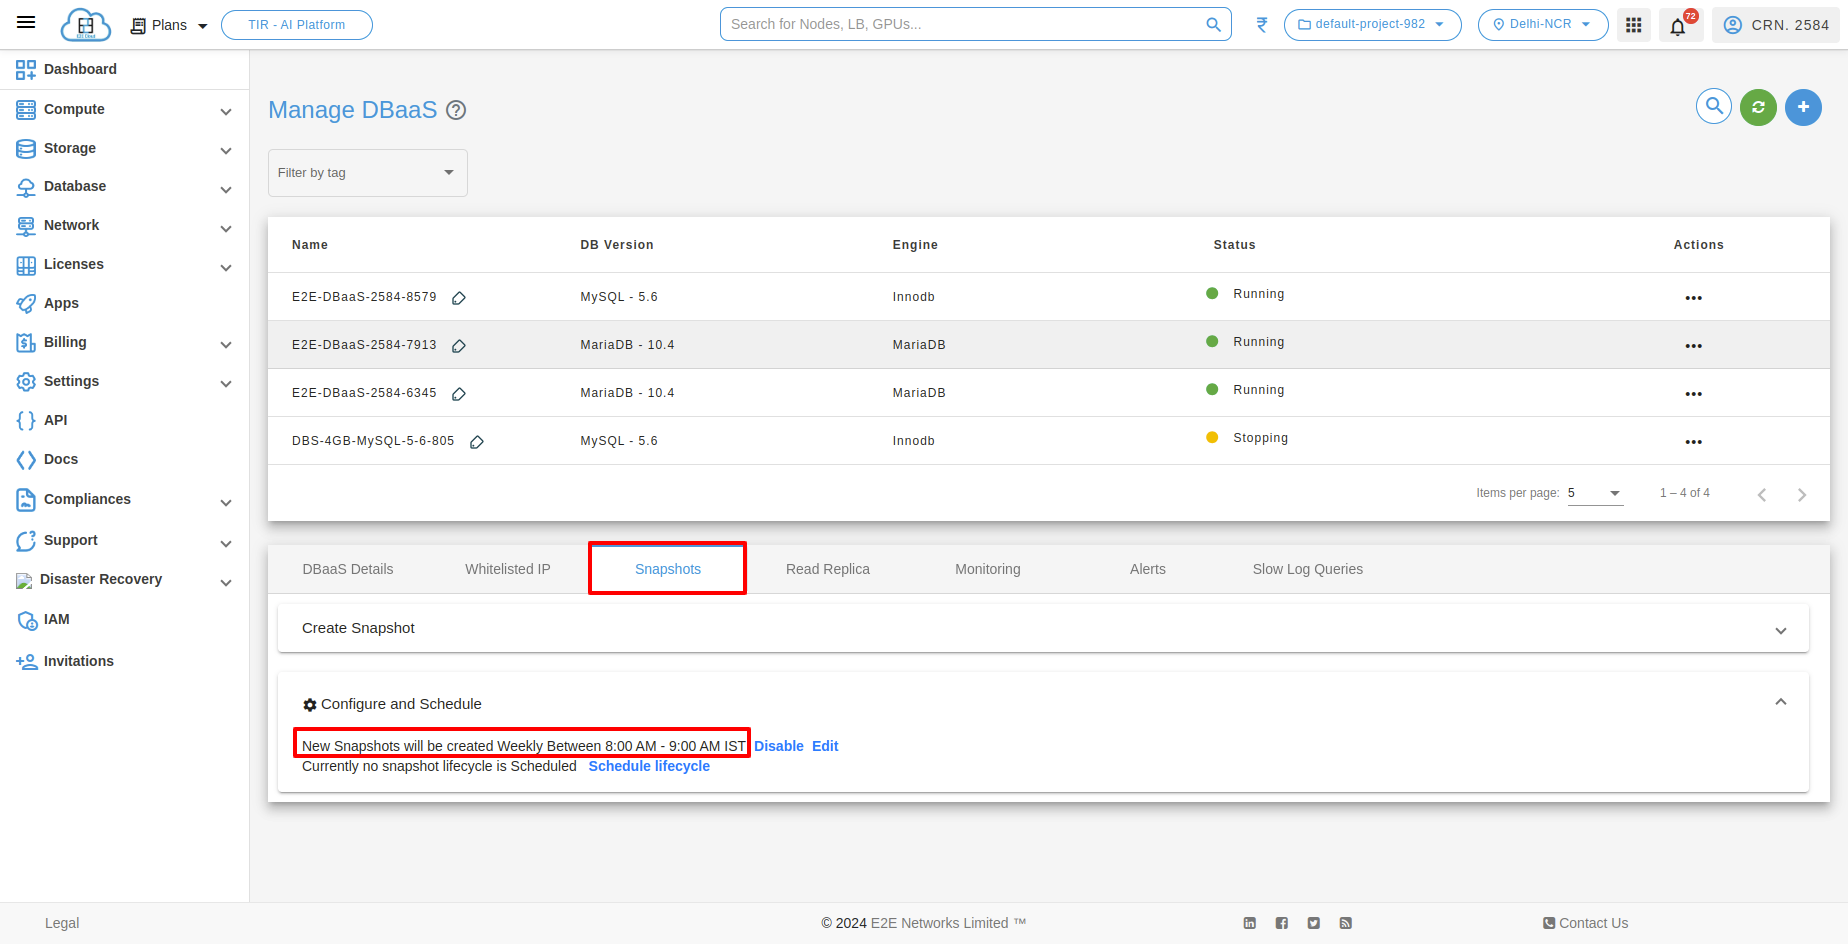
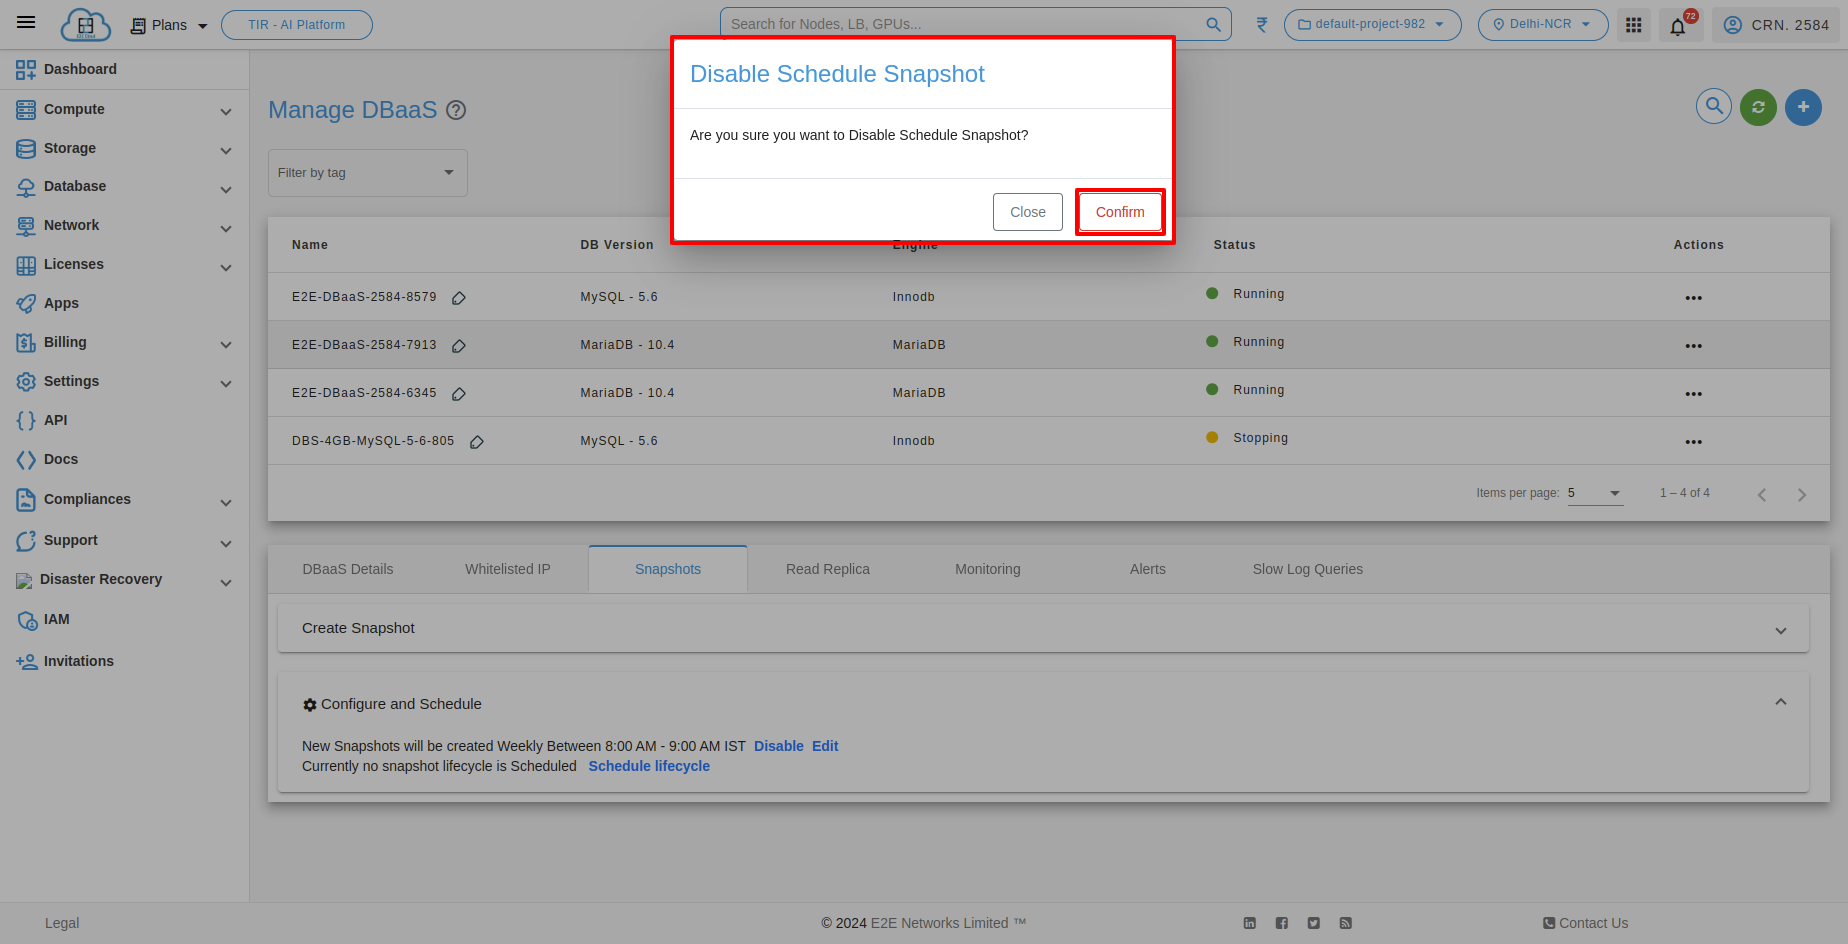
After editing the scheduled snapshot for your database, you can disable the scheduled snapshot.
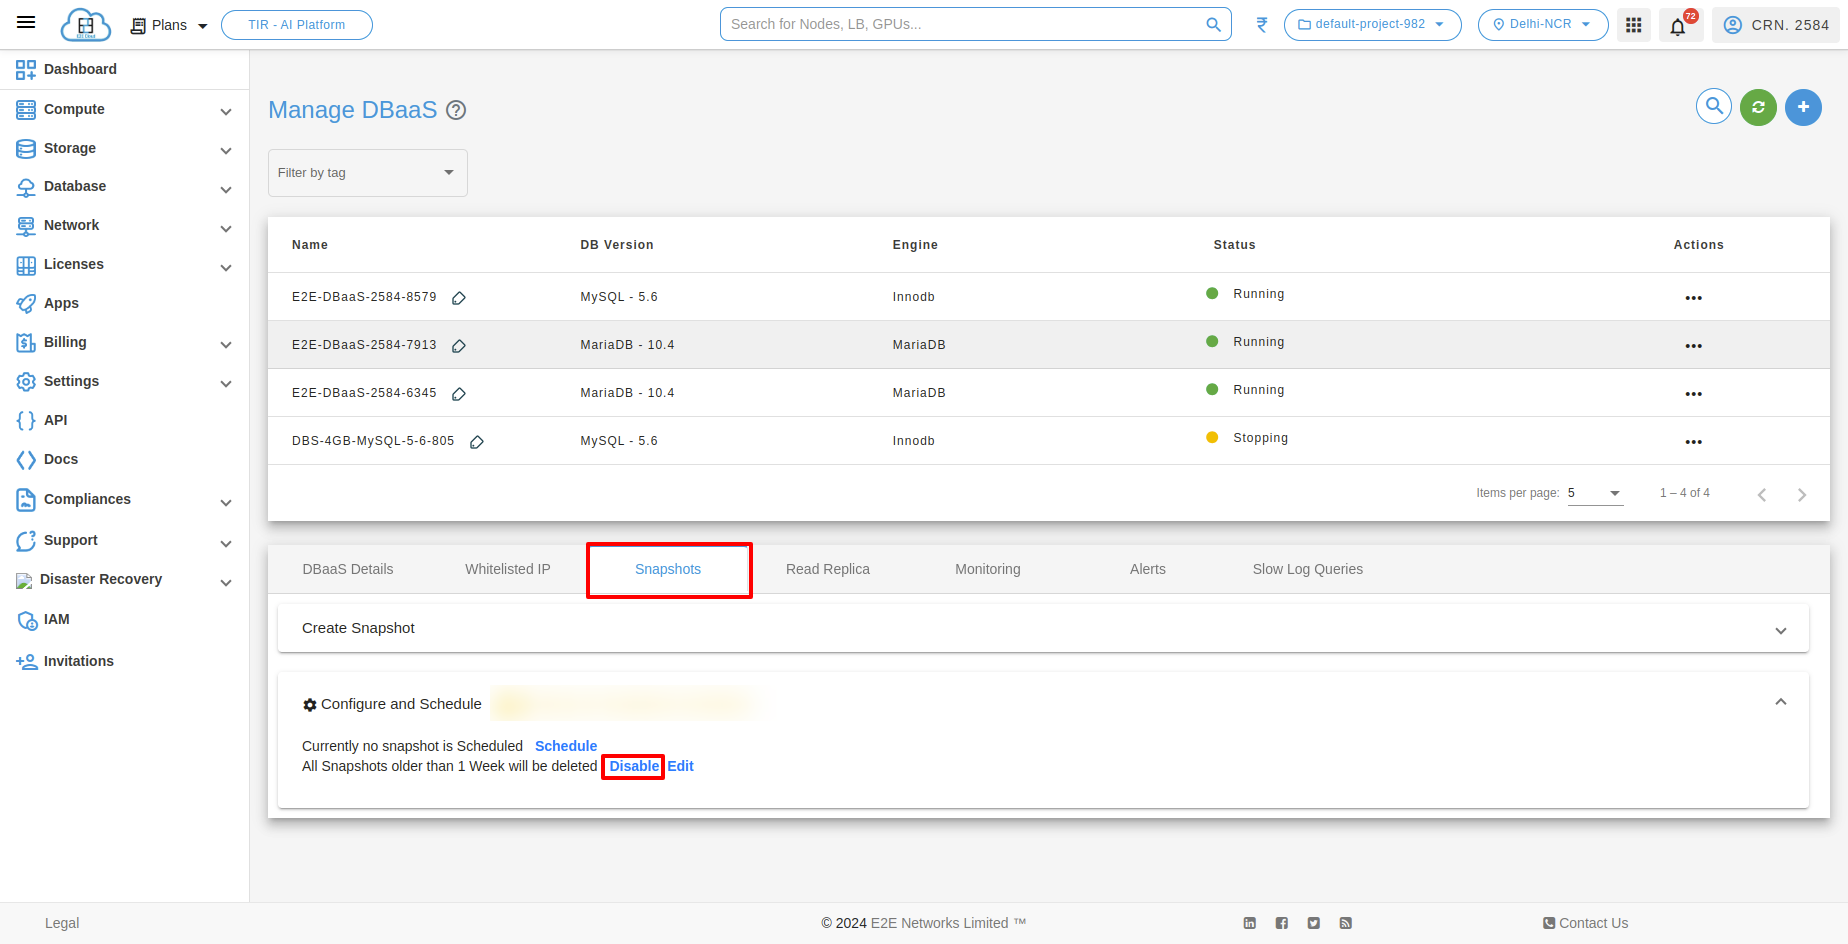
Schedule Lifecycle
To configure the Schedule lifecycle of your database, click on ‘Schedule lifecycle’ and select the option to configure the snapshot lifecycle. When a user selects the snapshot lifecycle, the snapshot is automatically deleted after the specified time duration.

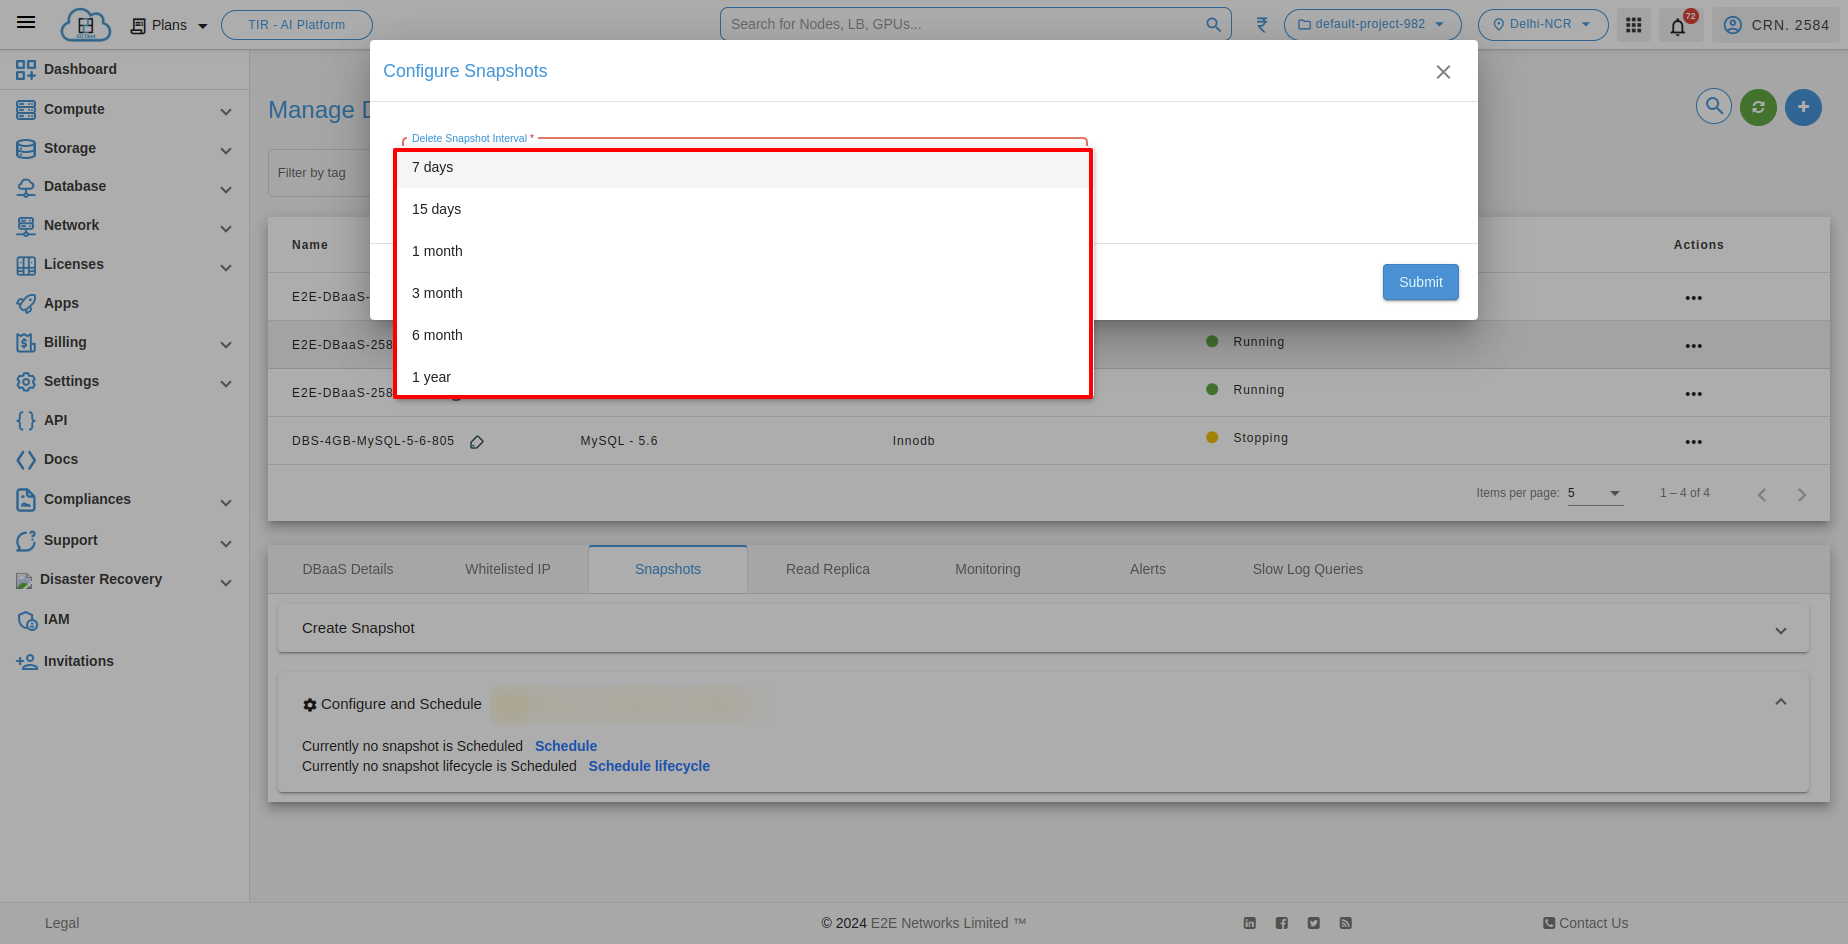

Note
Snapshot will be deleted automatically after the selected interval.
Edit configure Snapshot lifecycle
To edit the Configure scheduled snapshot of your database, click on the ‘Edit Configure Scheduled Snapshot’ button. Select the desired options, and save the changes to the scheduled snapshot. When a user edits the snapshot lifecycle, the time duration for the snapshot Lifecycle changes.

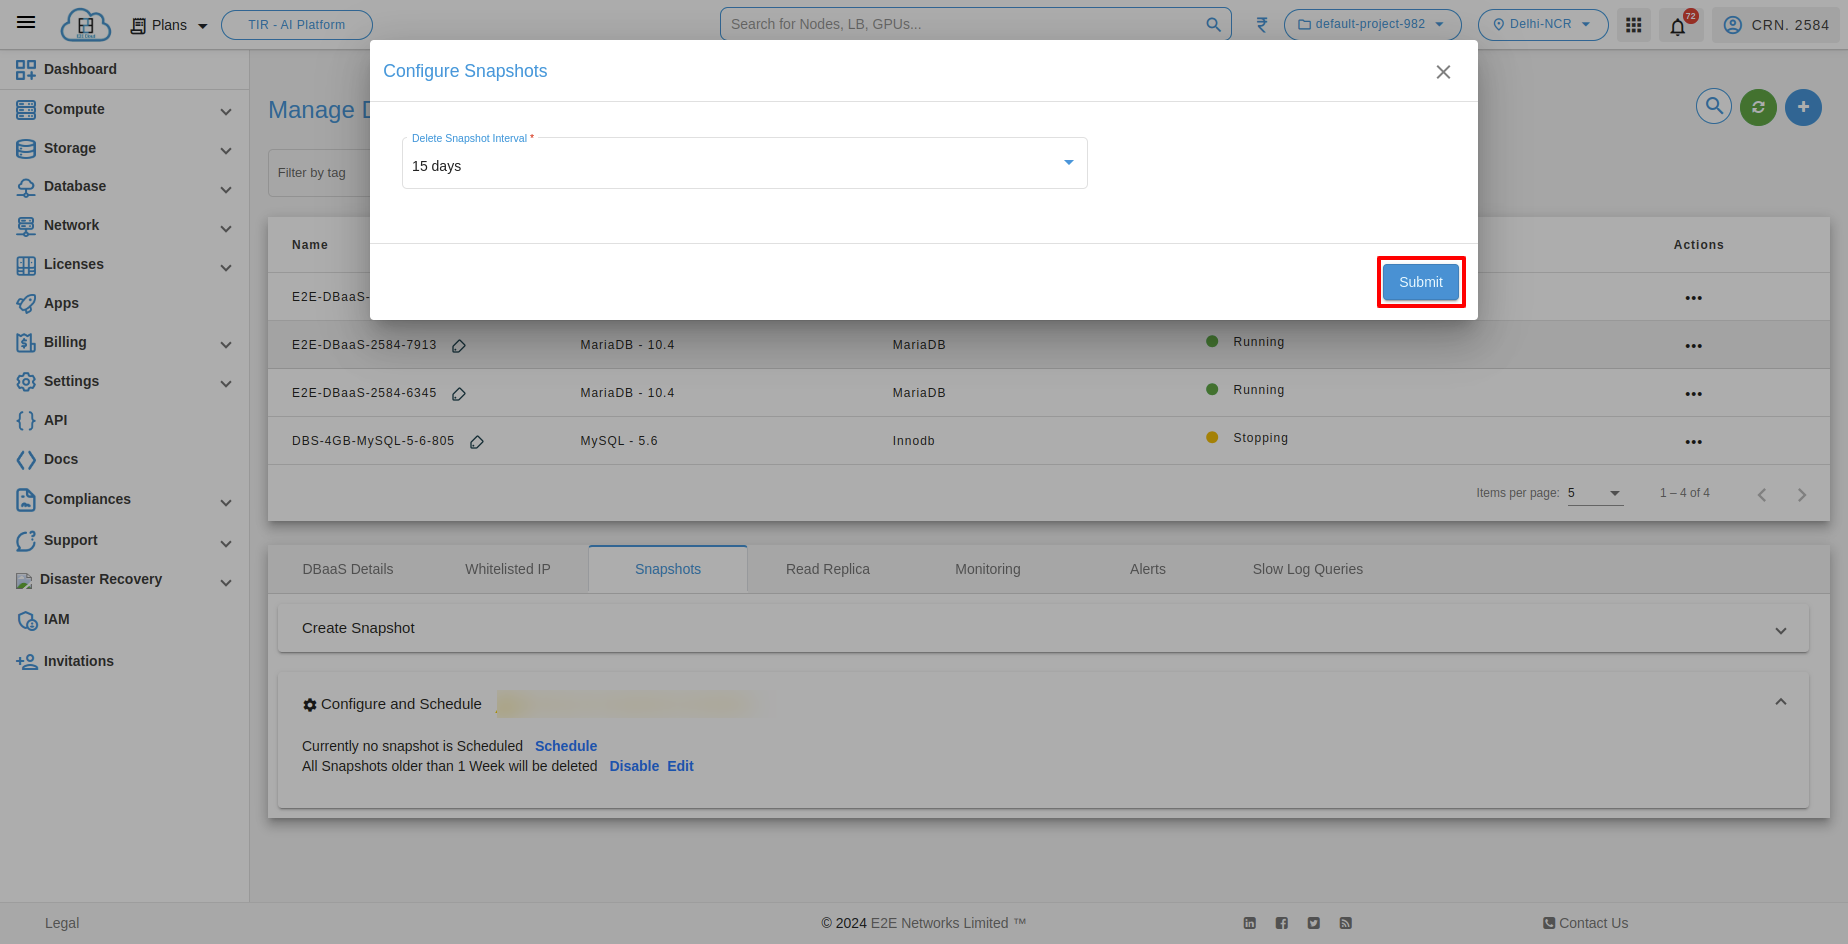
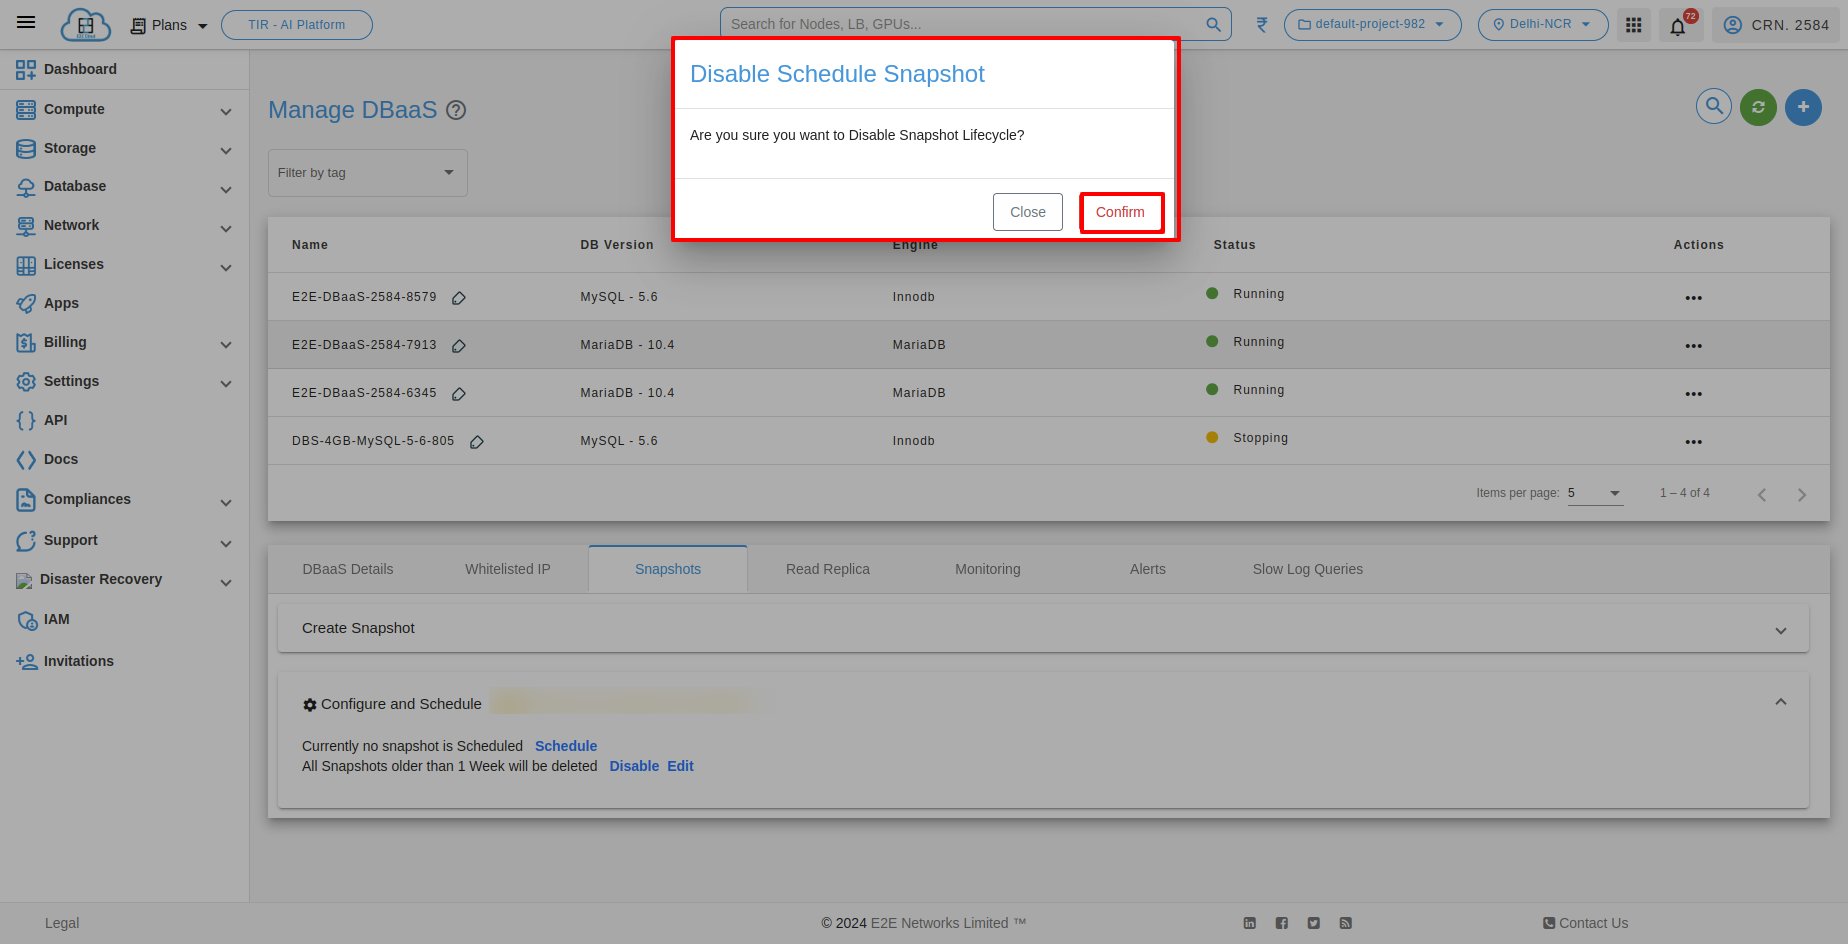
After editing the configure snapshot lifecycle for your database, you can disable the configure snapshot lifecycle.
Read Replica
The read replica operates as a DB instance that allows only read-only connections. Applications can connect to a read replica just as they would to any DB instance.
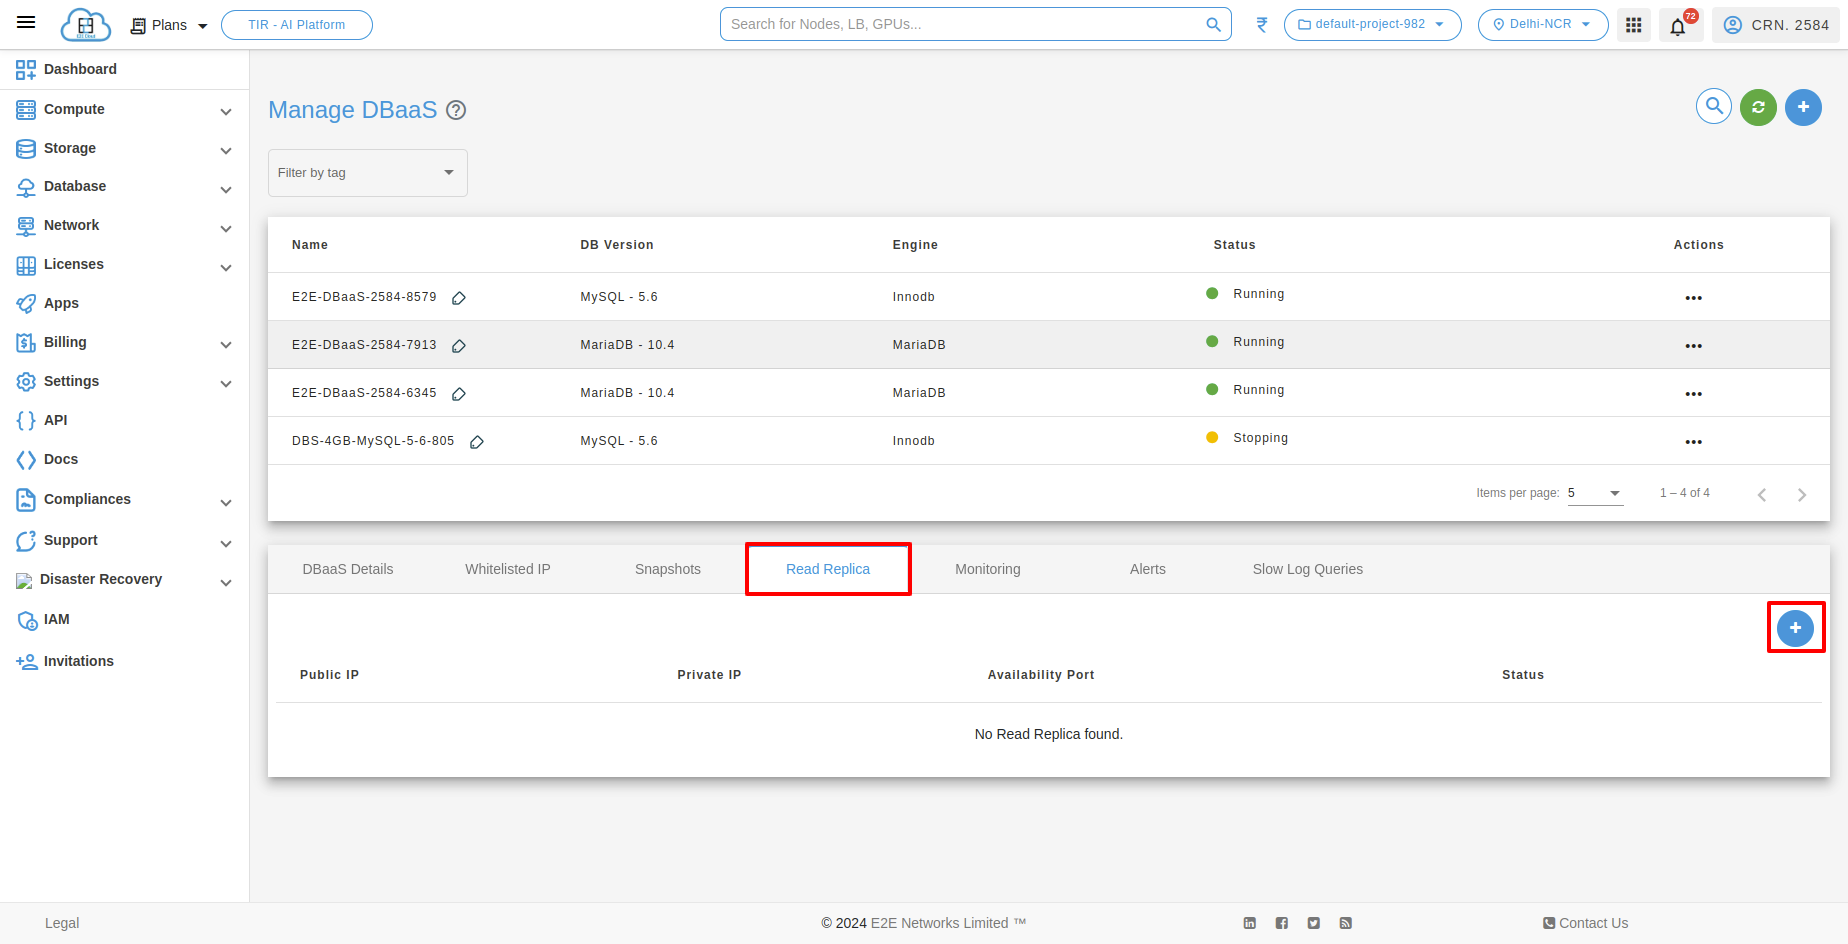

Note
The size of read-only nodes can not be set individually and are tied to the size of the DBaaS primary node. Due to this read-only nodes must be at least as big as your DBaaS’s primary node and will be automatically scaled to match.
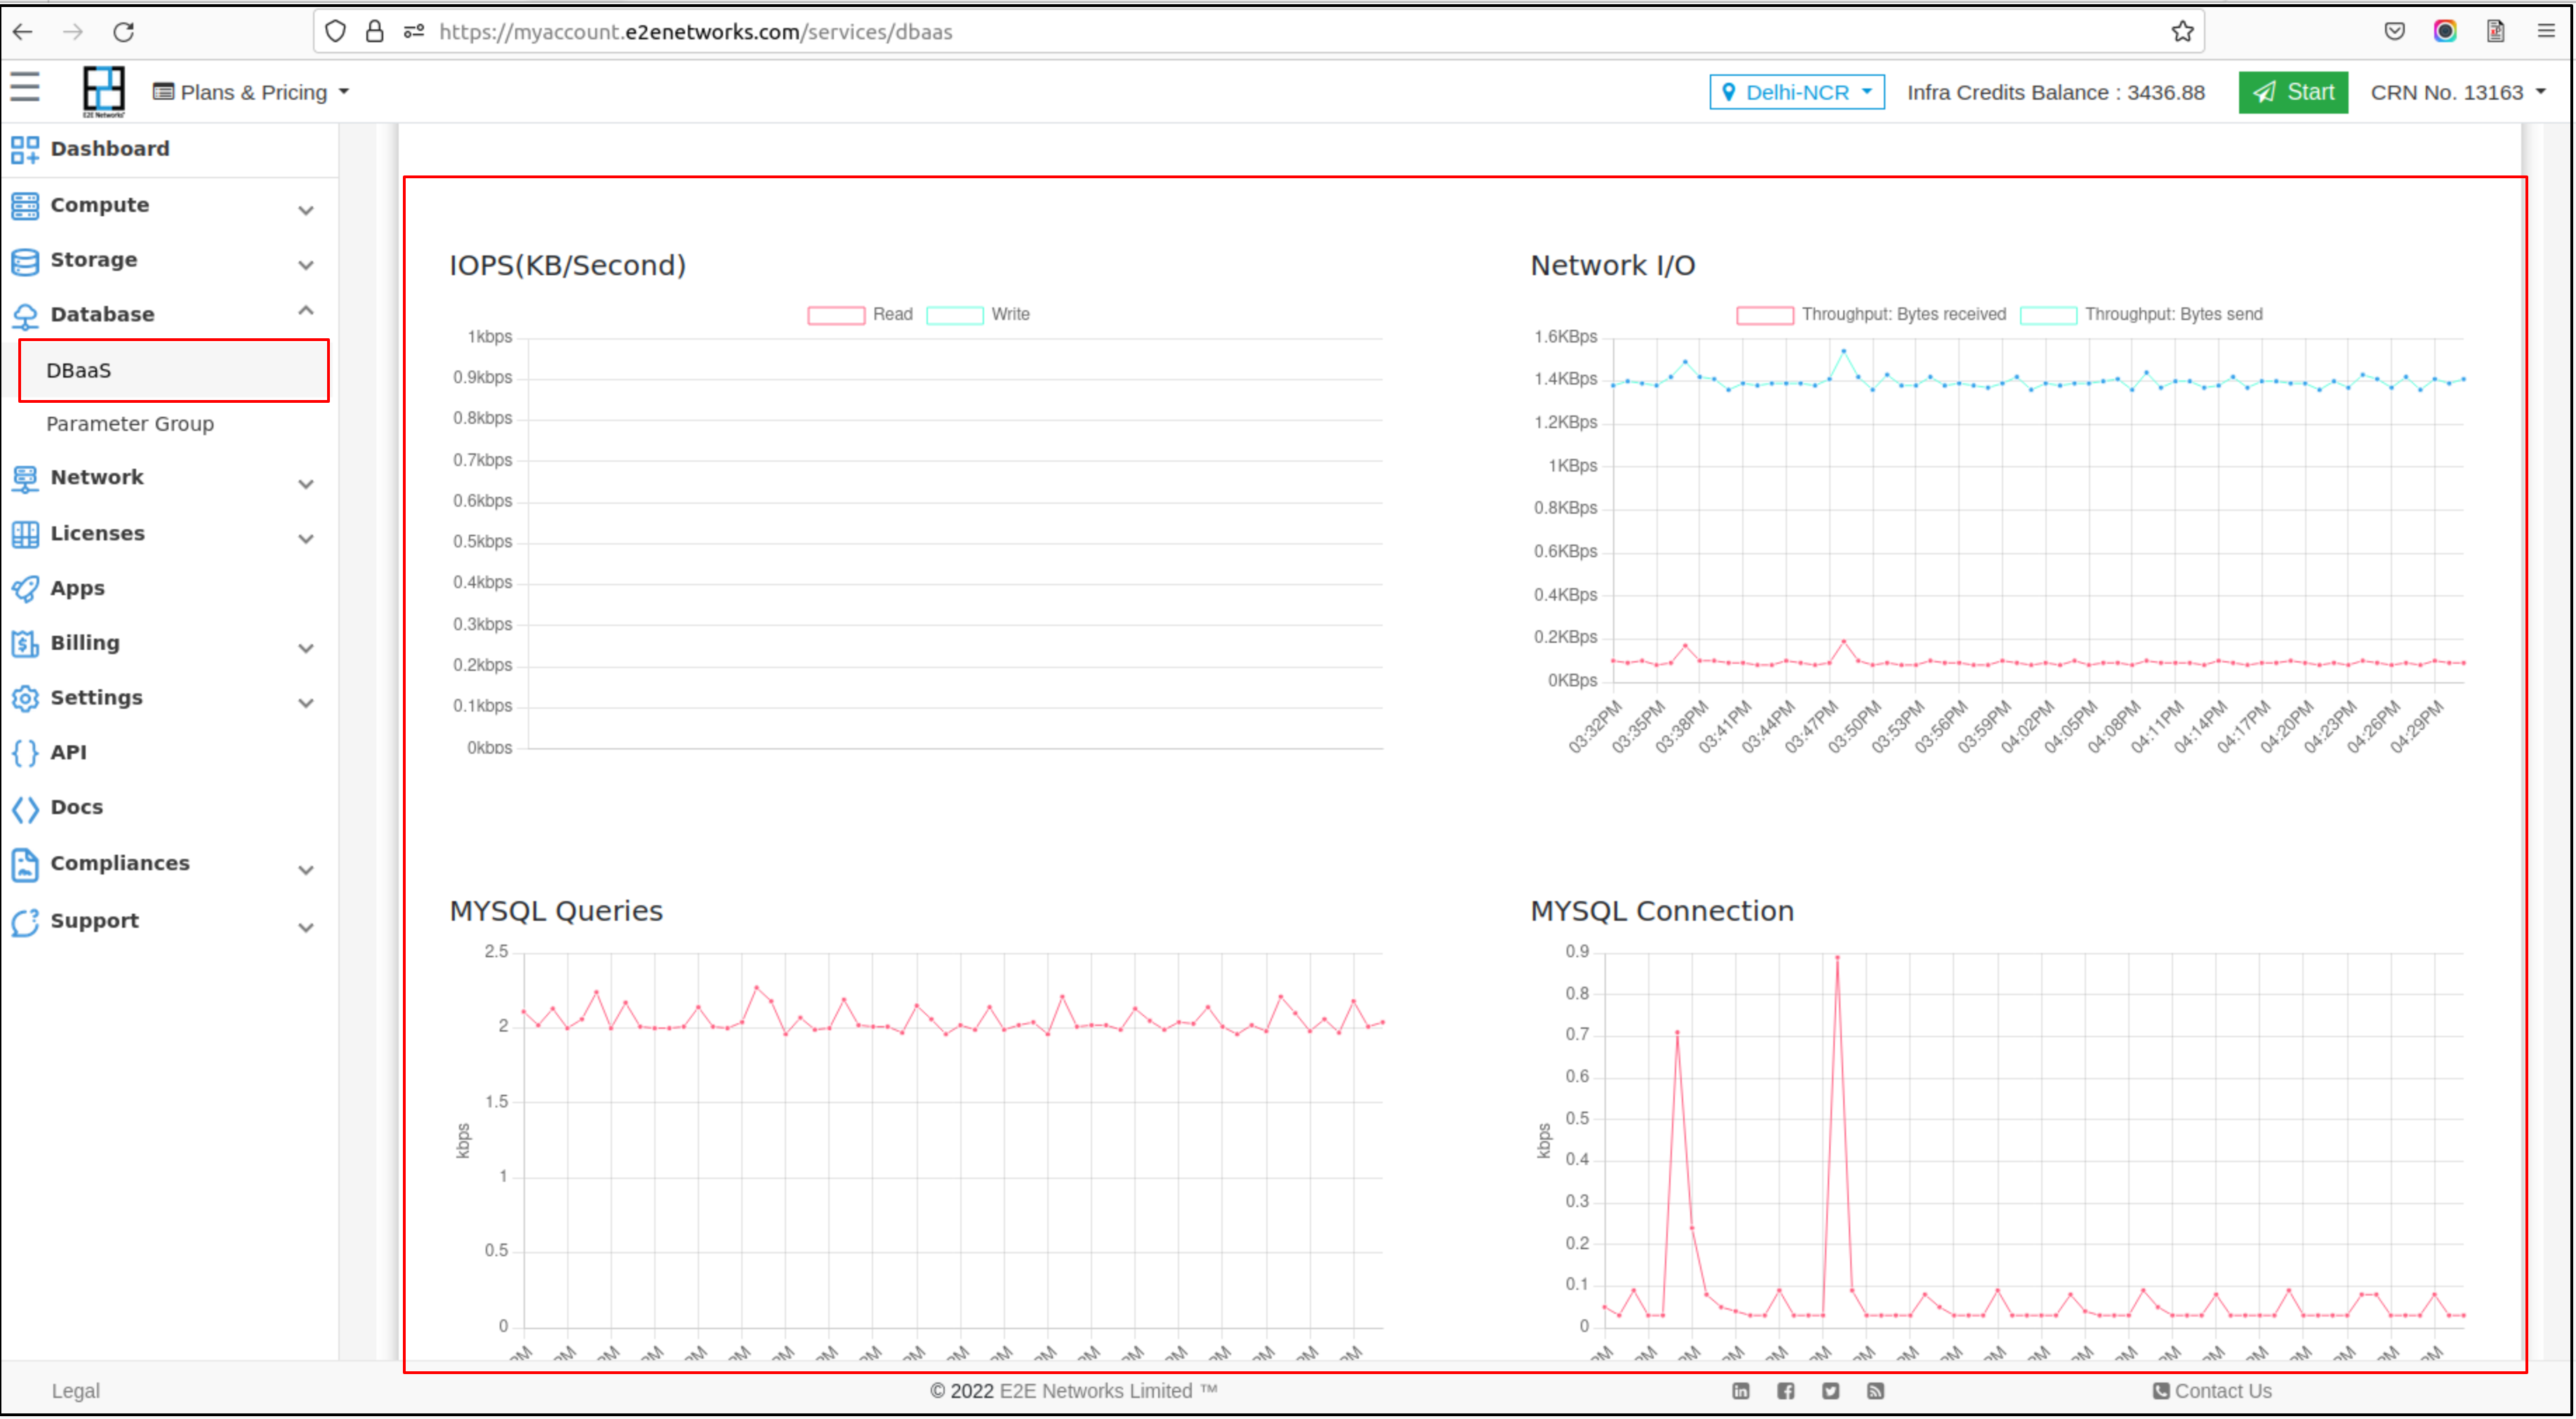
Monitoring
After you launch your database node, you can view the monitoring graphs for your node on the Monitoring tab. Each graph is based on one of the different metrics. This information is collected from your node and processes raw data into readable graphs. Monitoring is an important part of maintaining the reliability, availability, and performance of your database.
Alerts
You can set up new alerts by defining trigger parameters as per your use case for your database. The alerting system works by sending automatic response notifications to your defined email list.
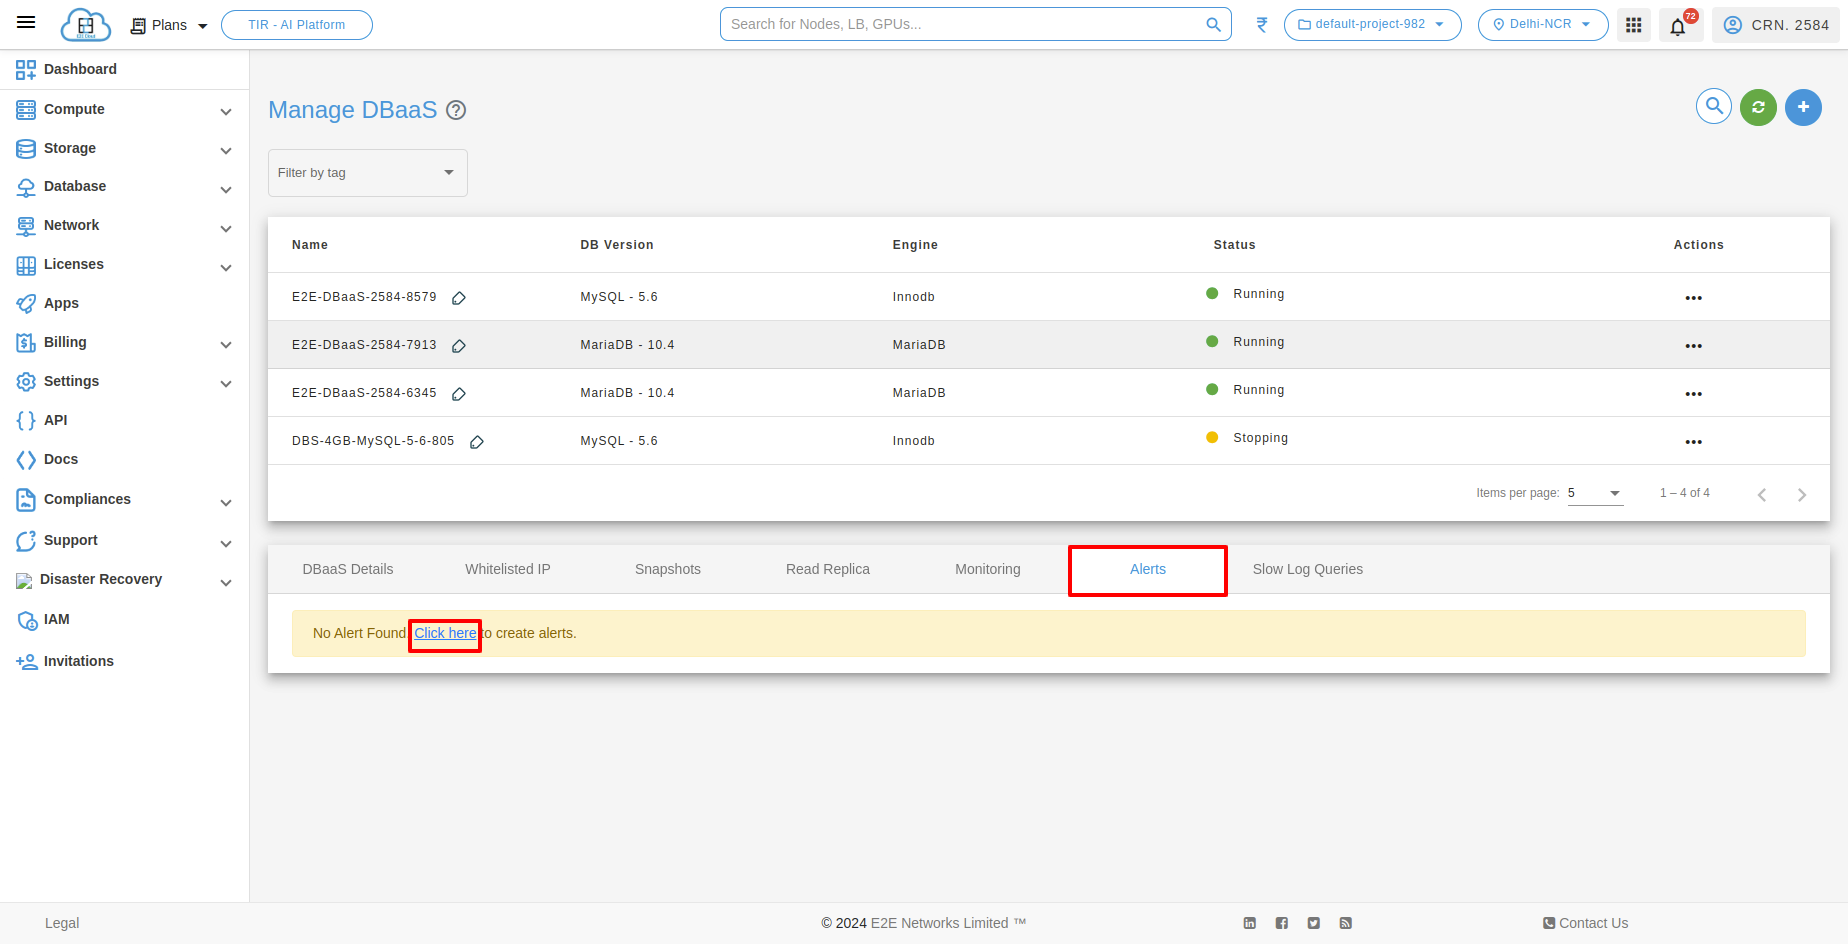
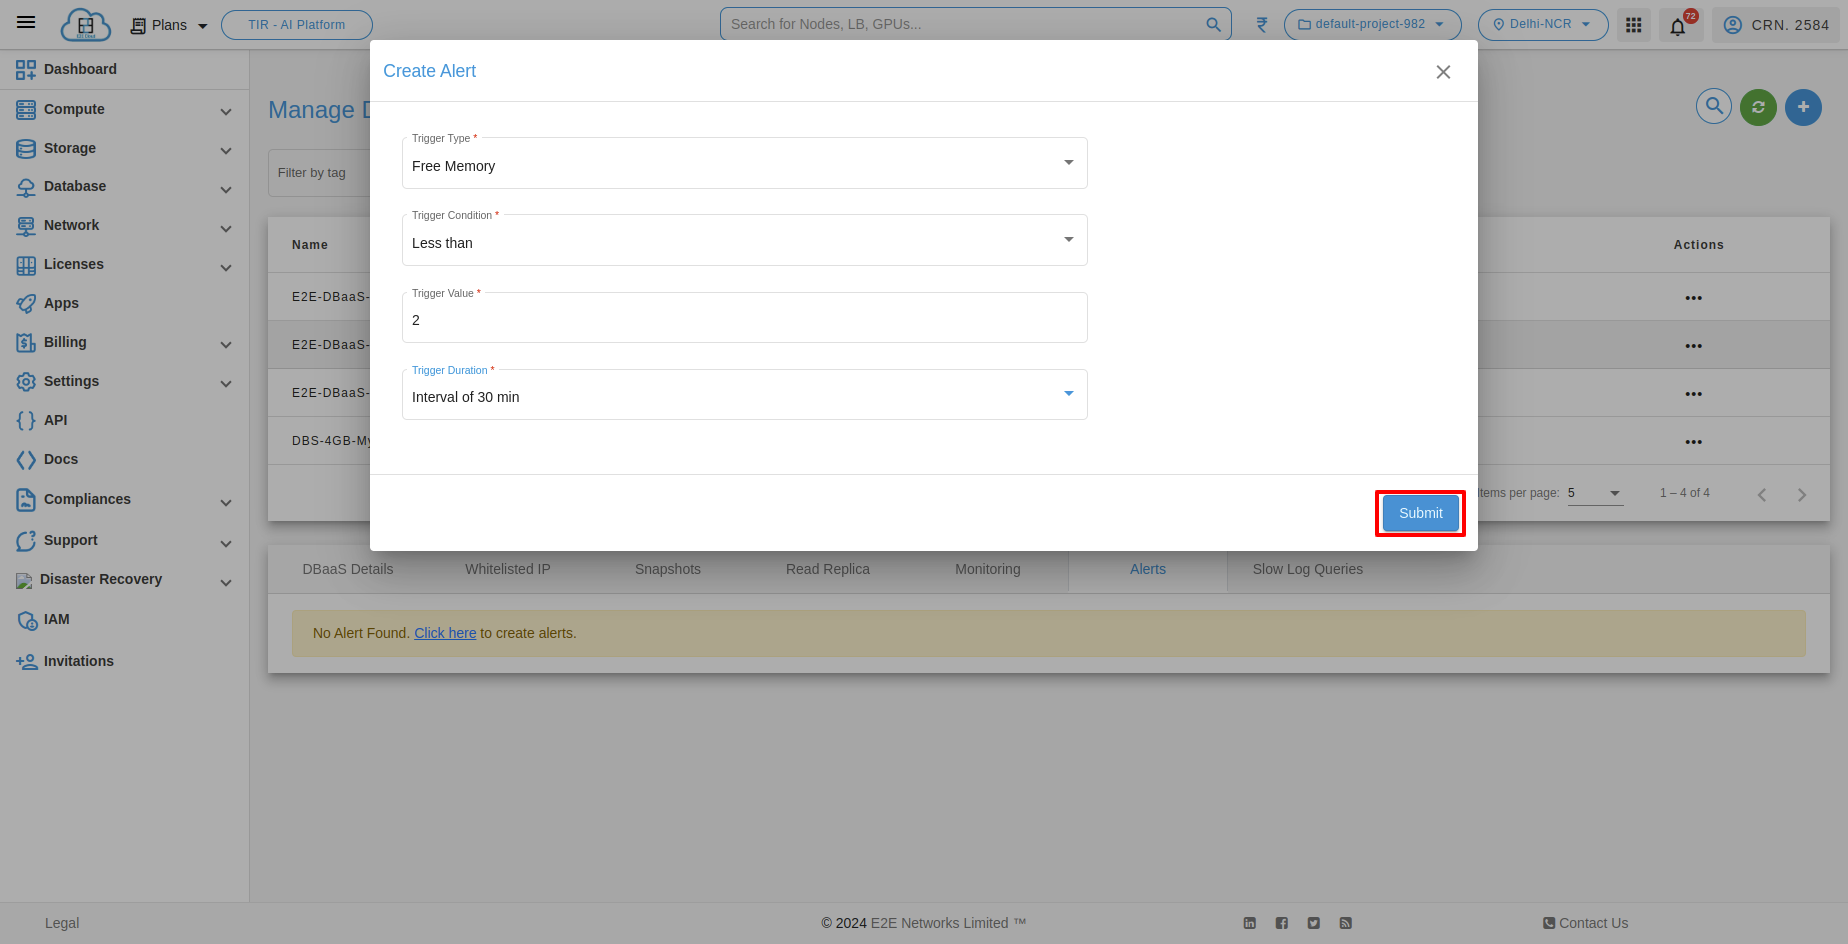
After clicking click here link, you will be redirected to “Create Alert” popup page.
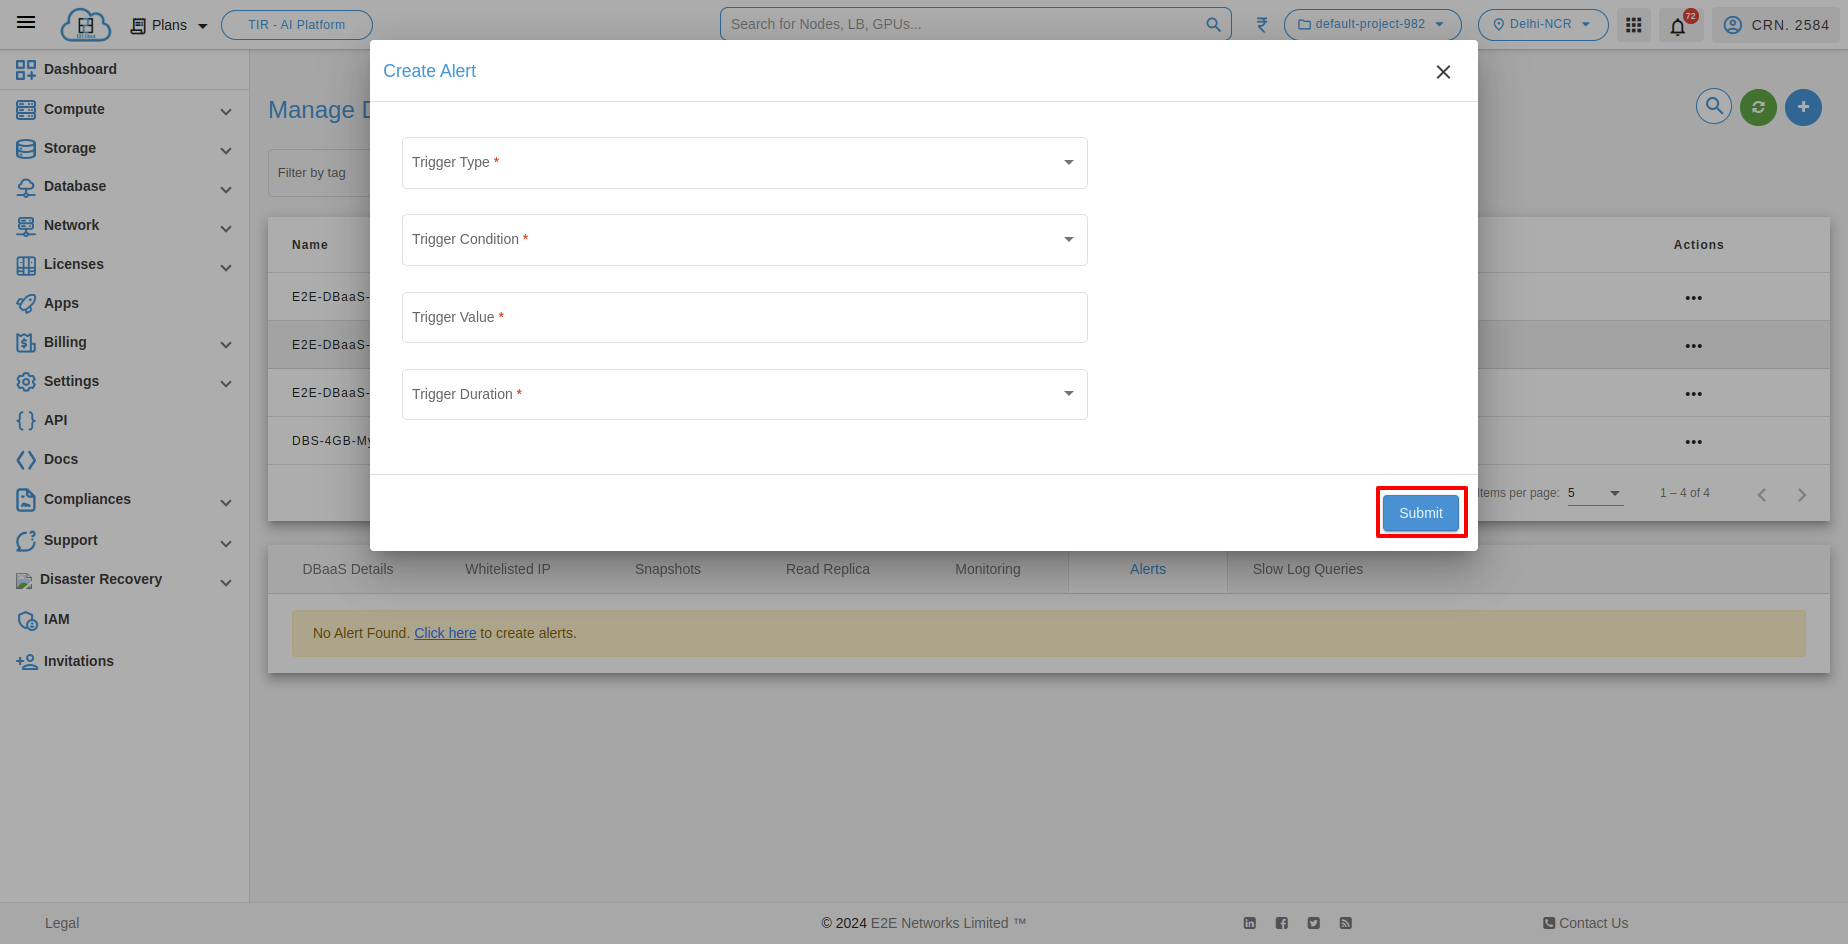
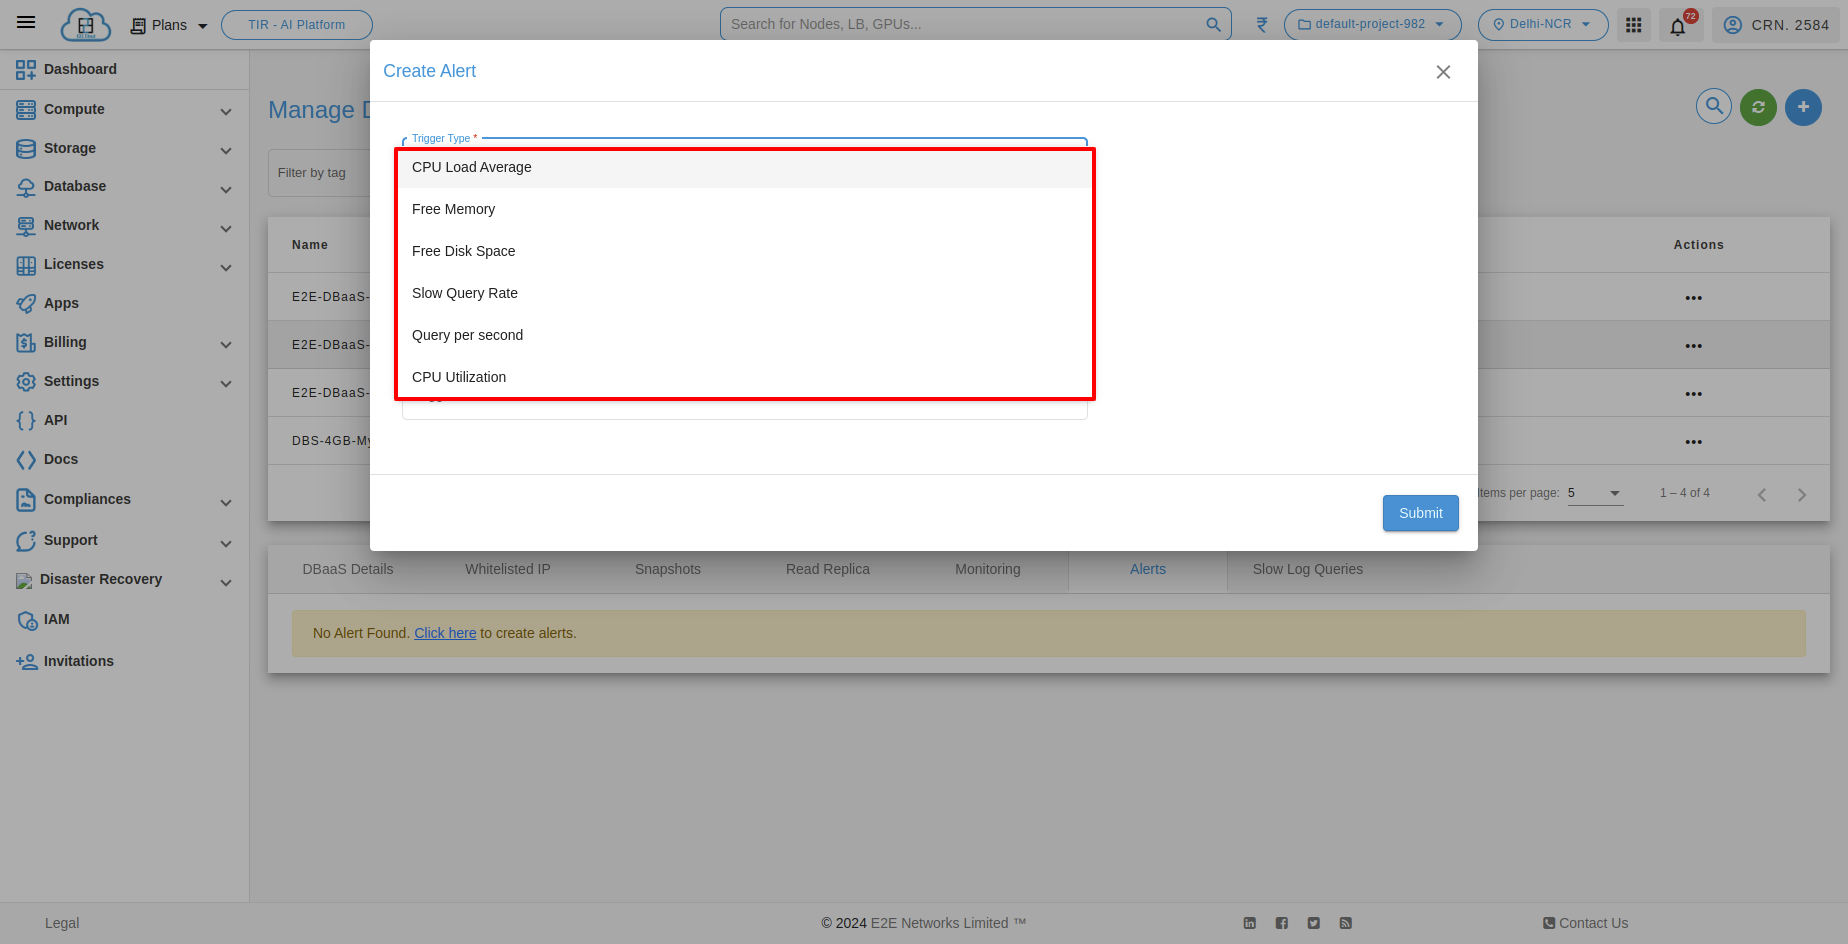
In that you have to select Trigger Type.
and select Trigger Condition.

Enter Trigger value.
In that you have to select Trigger Duration.
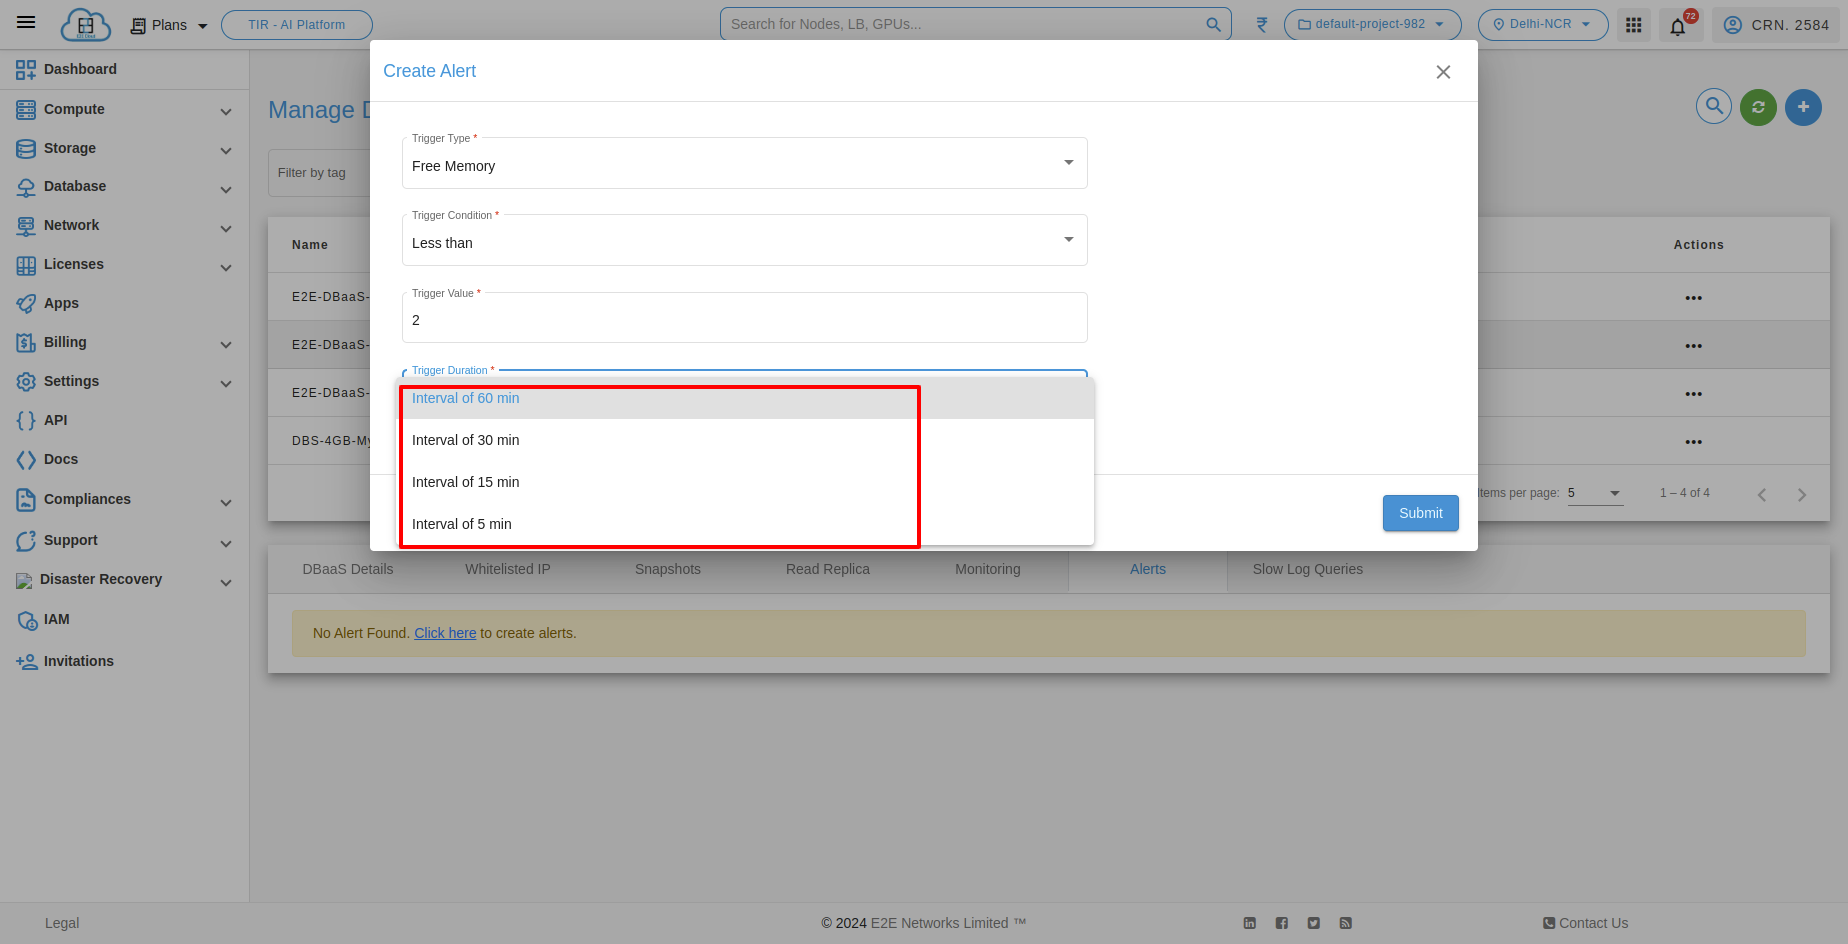
and then click on “Submit” button.
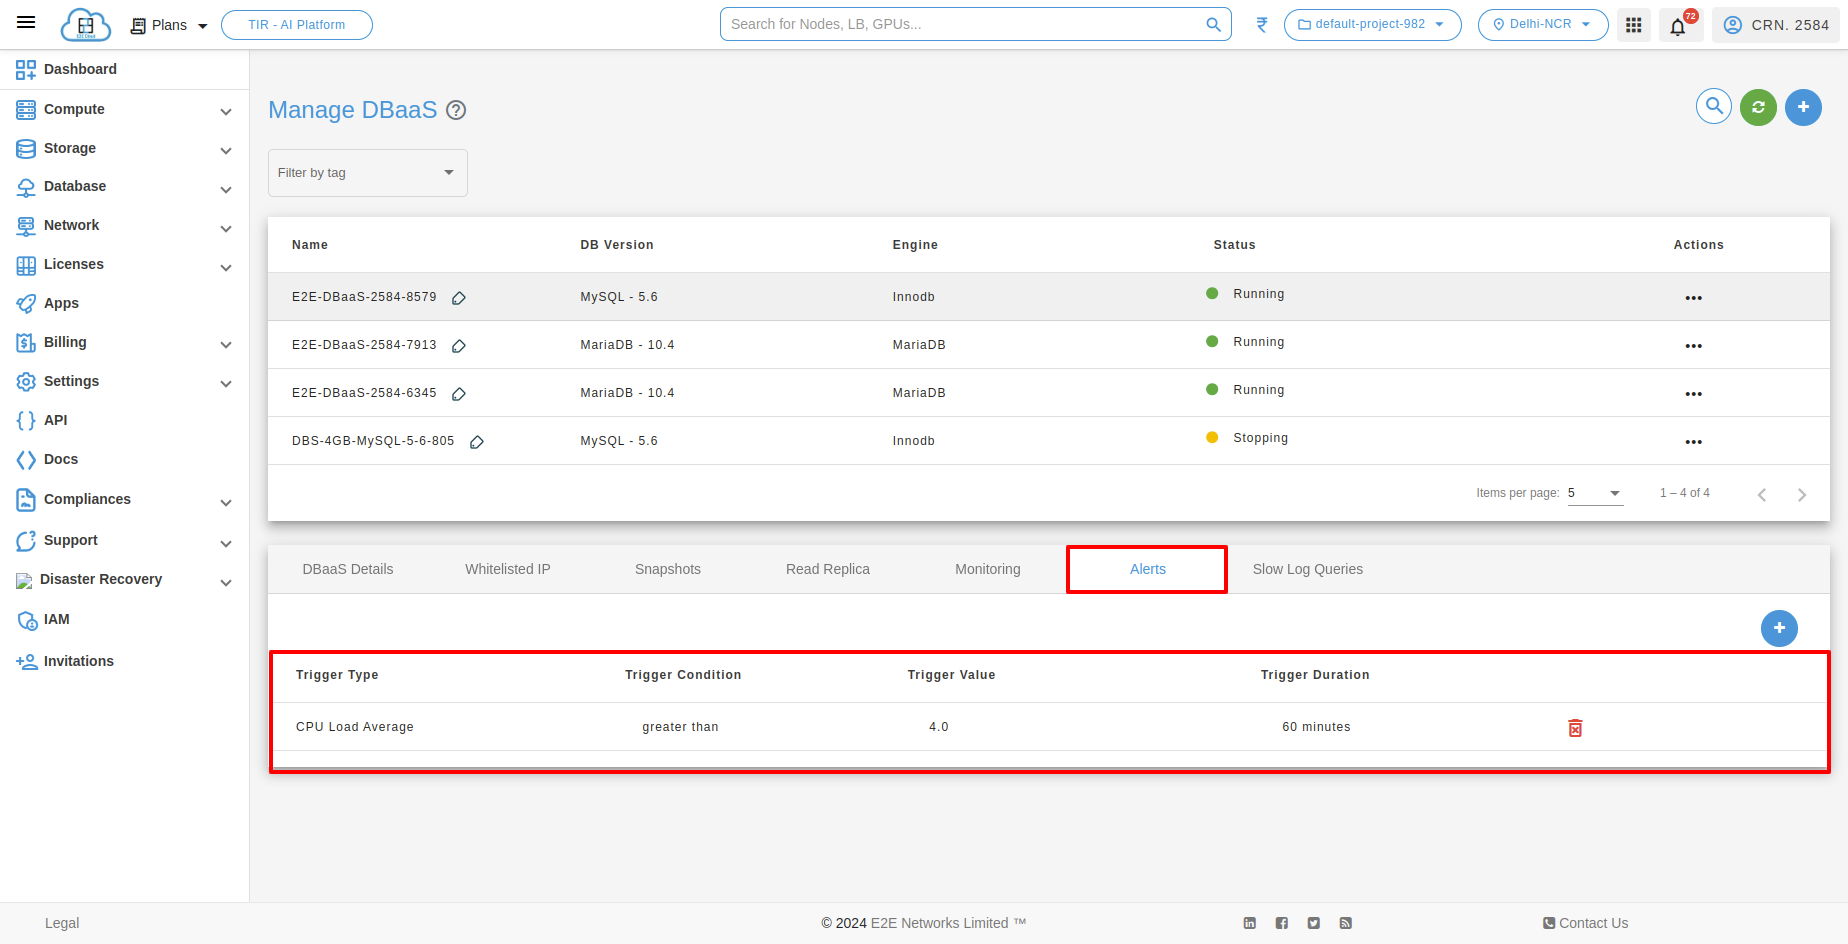
After successfully creation of alert, you can see the list below.
Slow Log Queries
The slow query log feature in MySQL allows you to log all queries that take longer than a given threshold of execution time. The queries in the slow query log are good candidates to start optimizing and eliminating the bottlenecks.
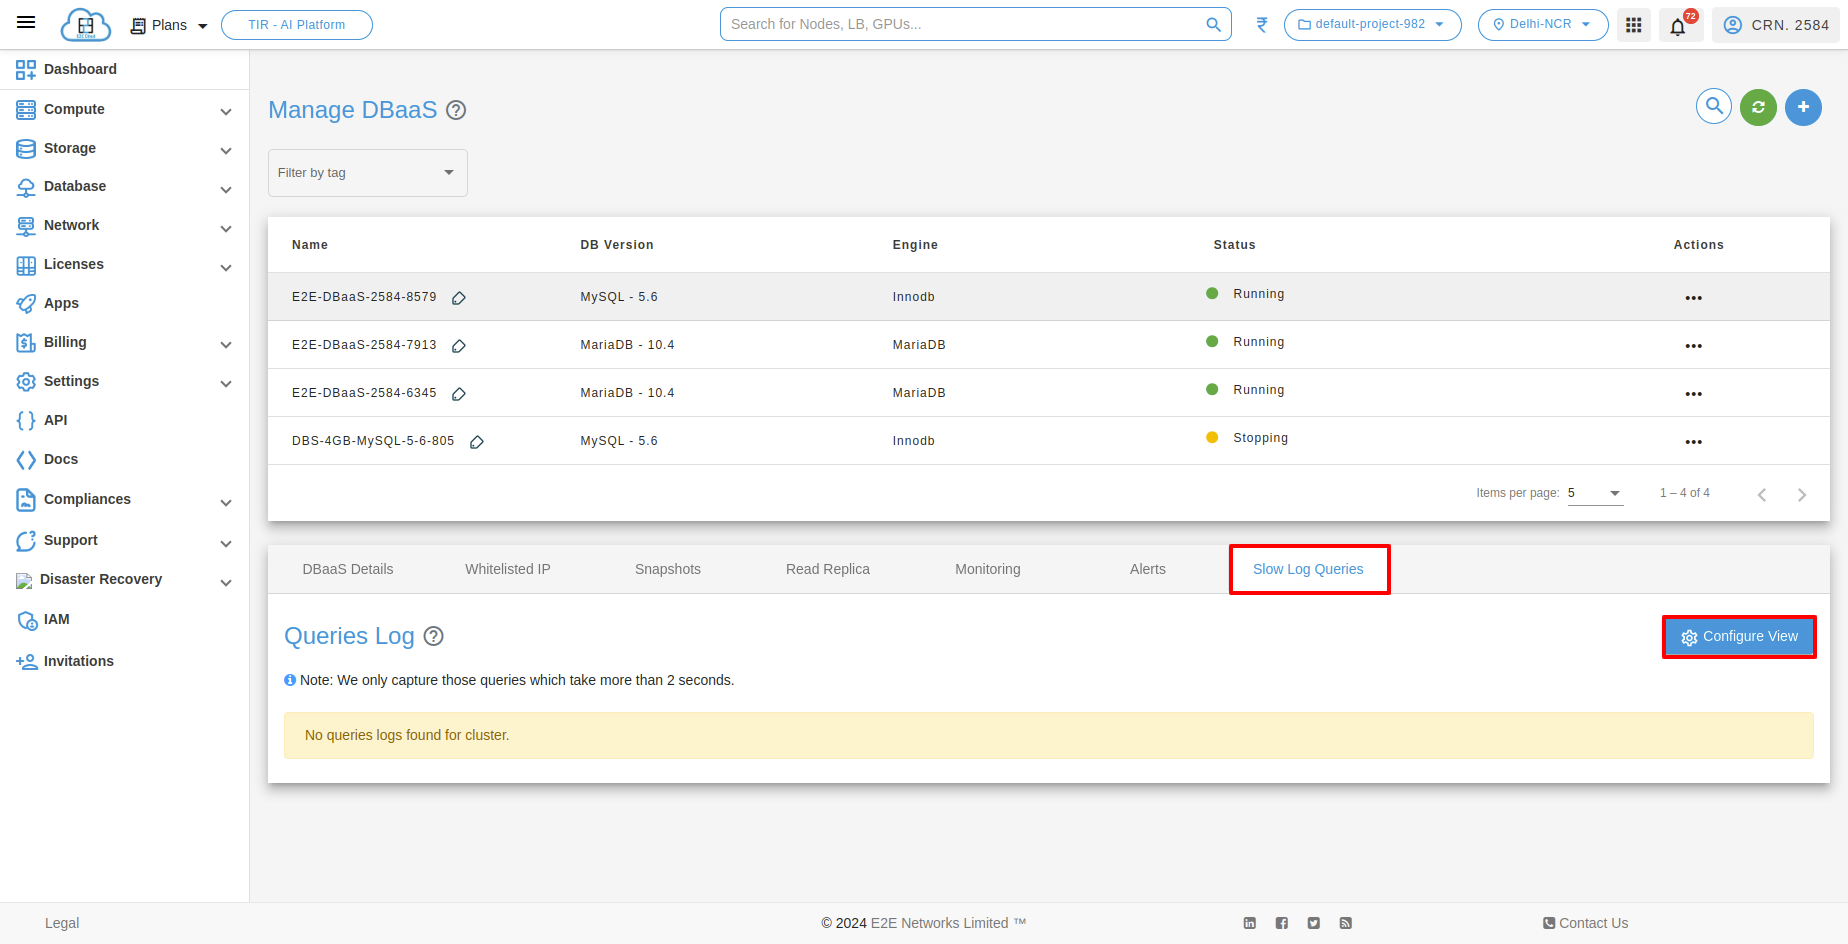
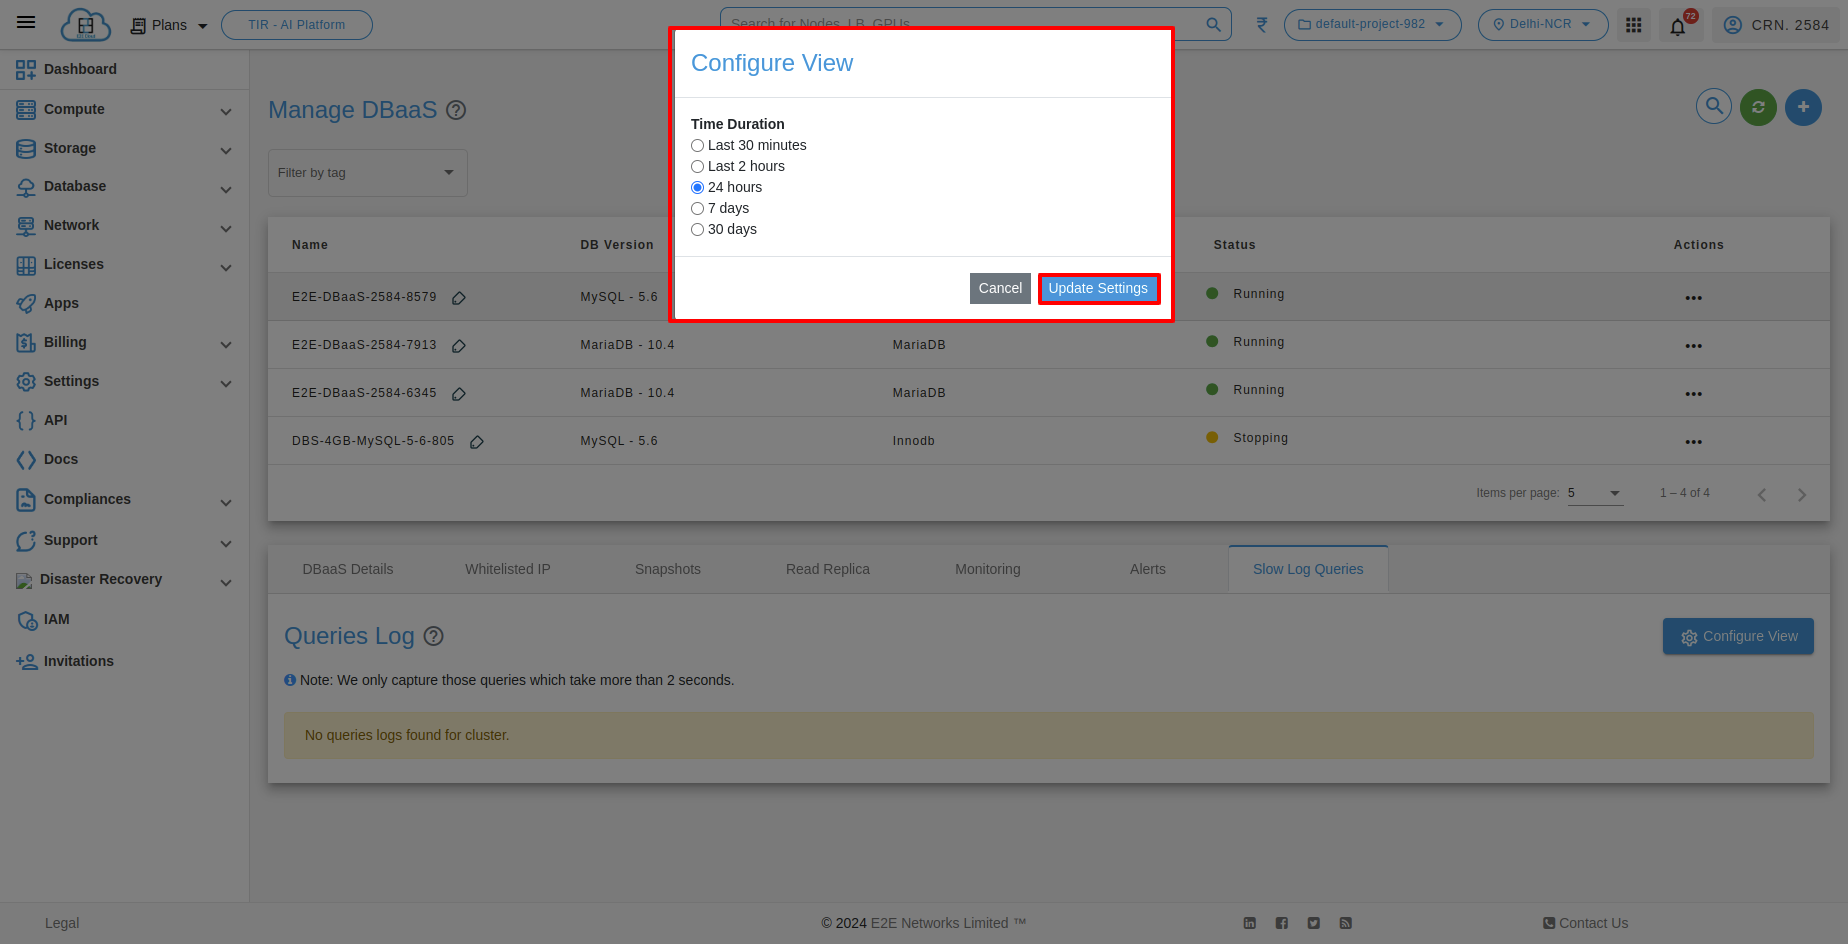
To configure slow log queries, Click on configure view and select the appropriate time duration to log the queries that will be displayed on the dashboard.
Managing Your Database Node
In this section, you can find instructions and details to Manage and Maintain your database.
To manage your Database Instance, Click on … (Action Button) and Select Manage option for your database Node
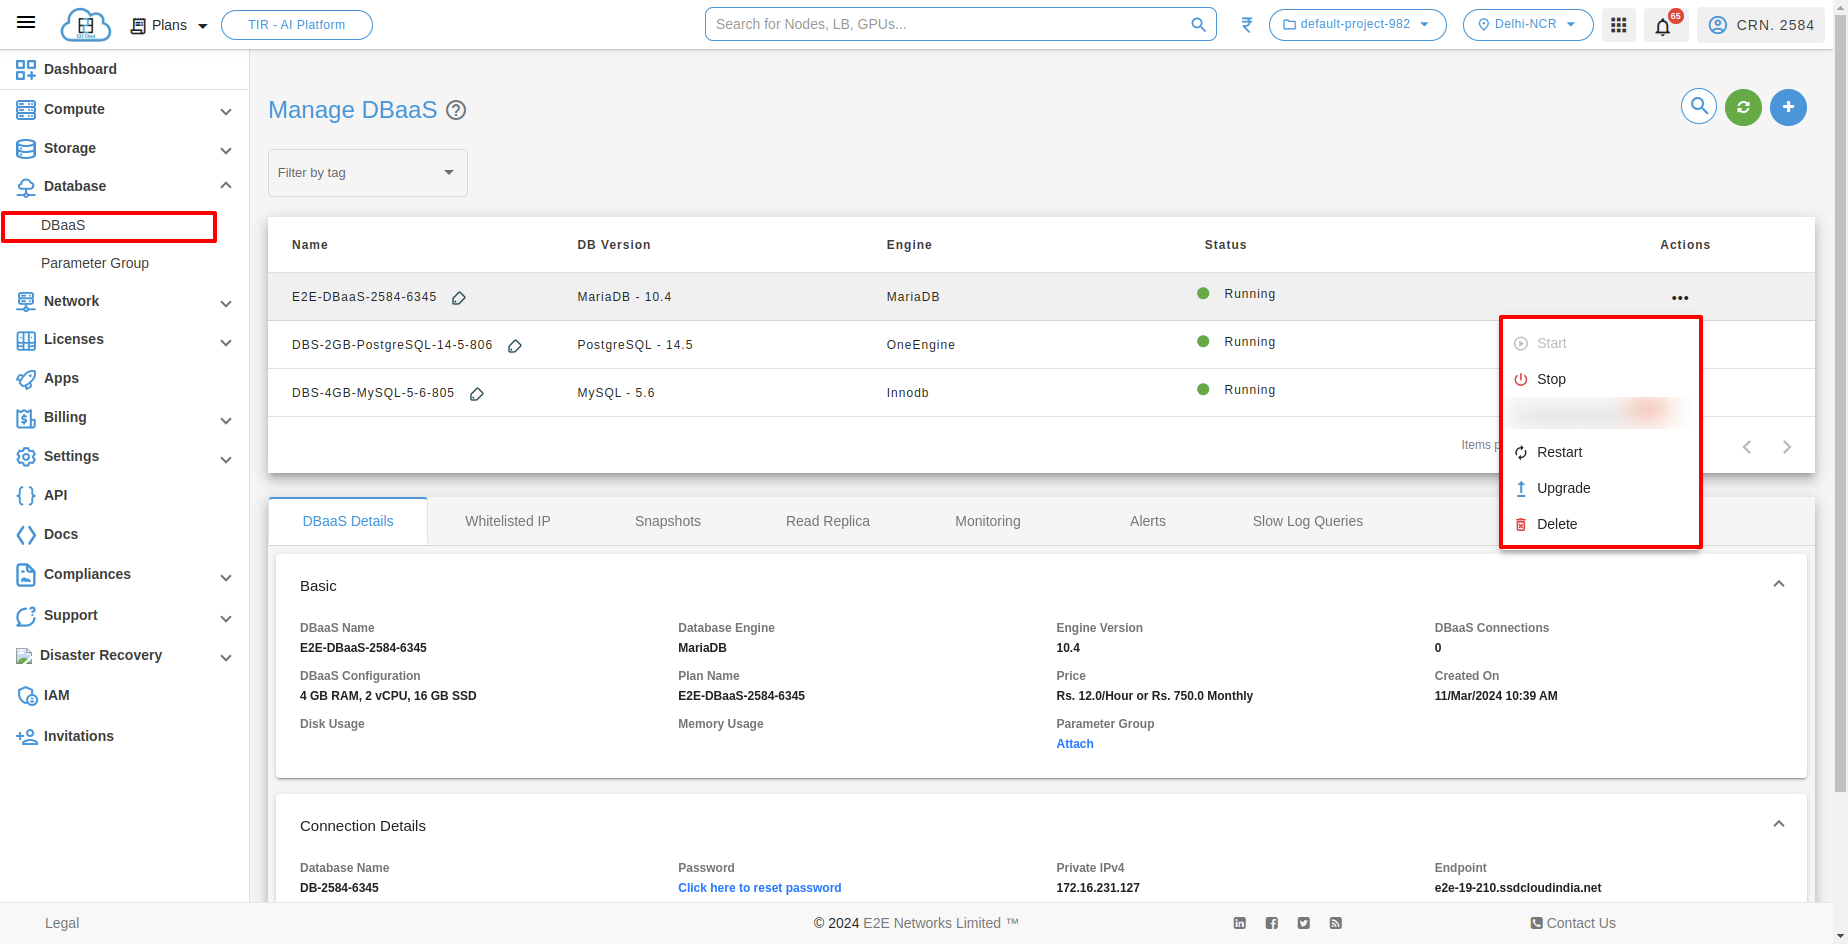
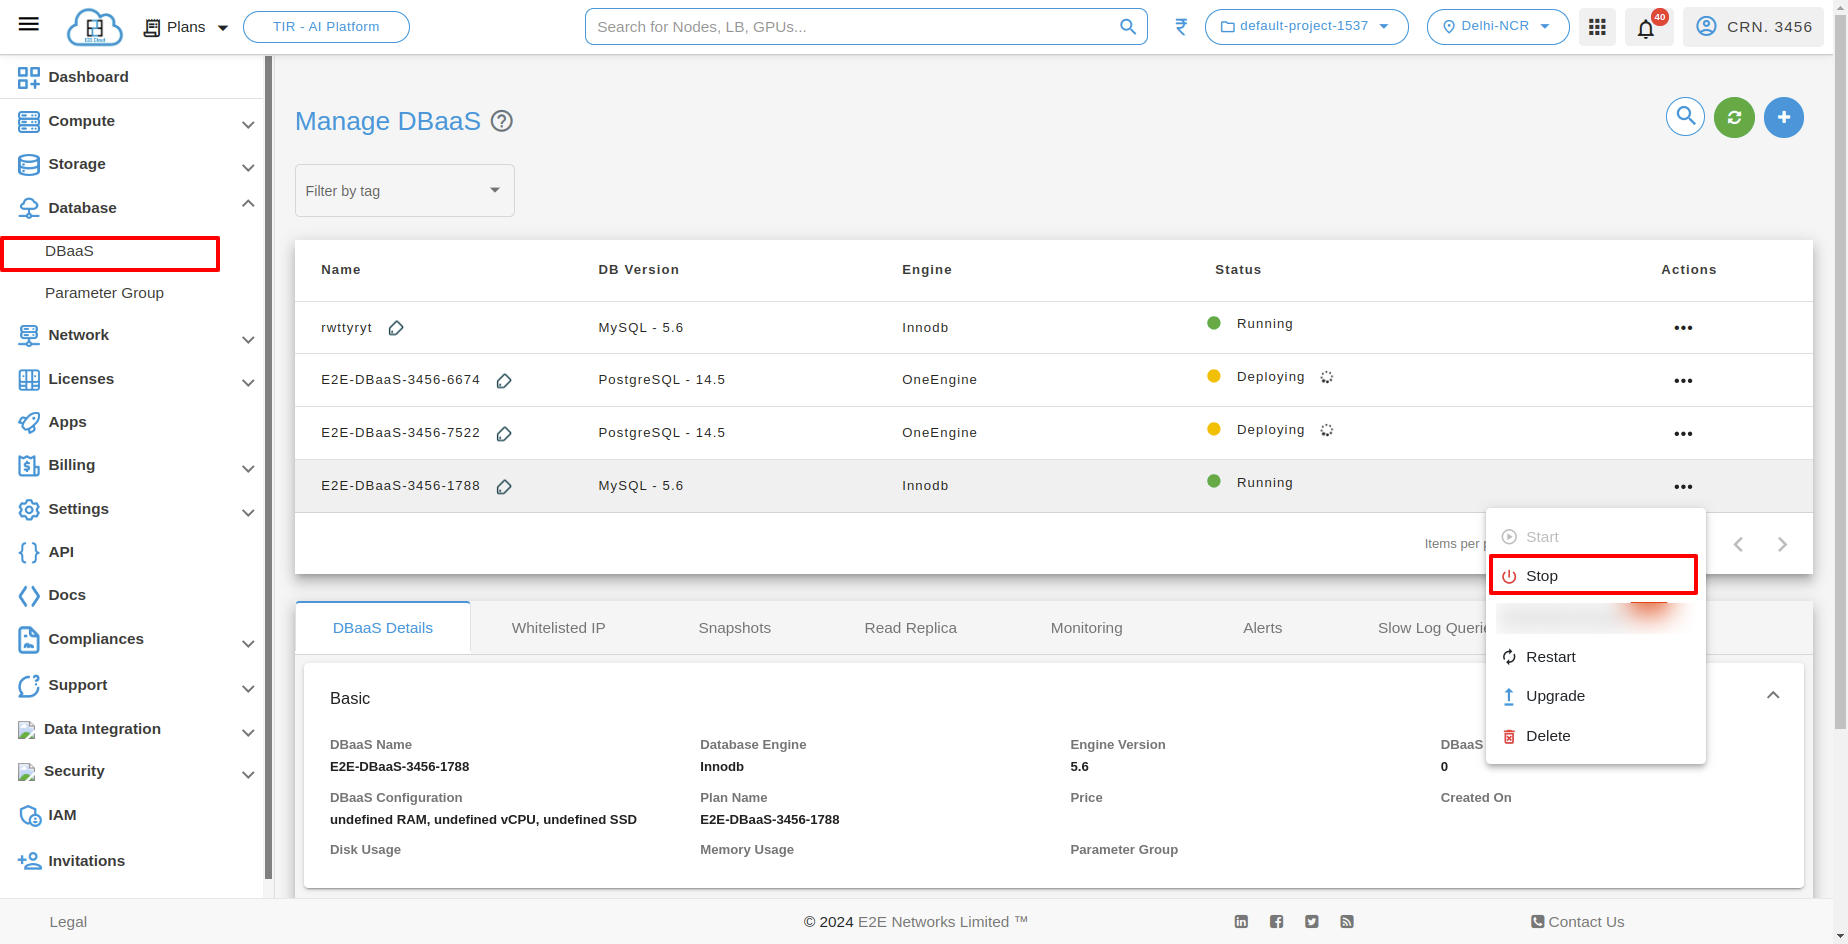
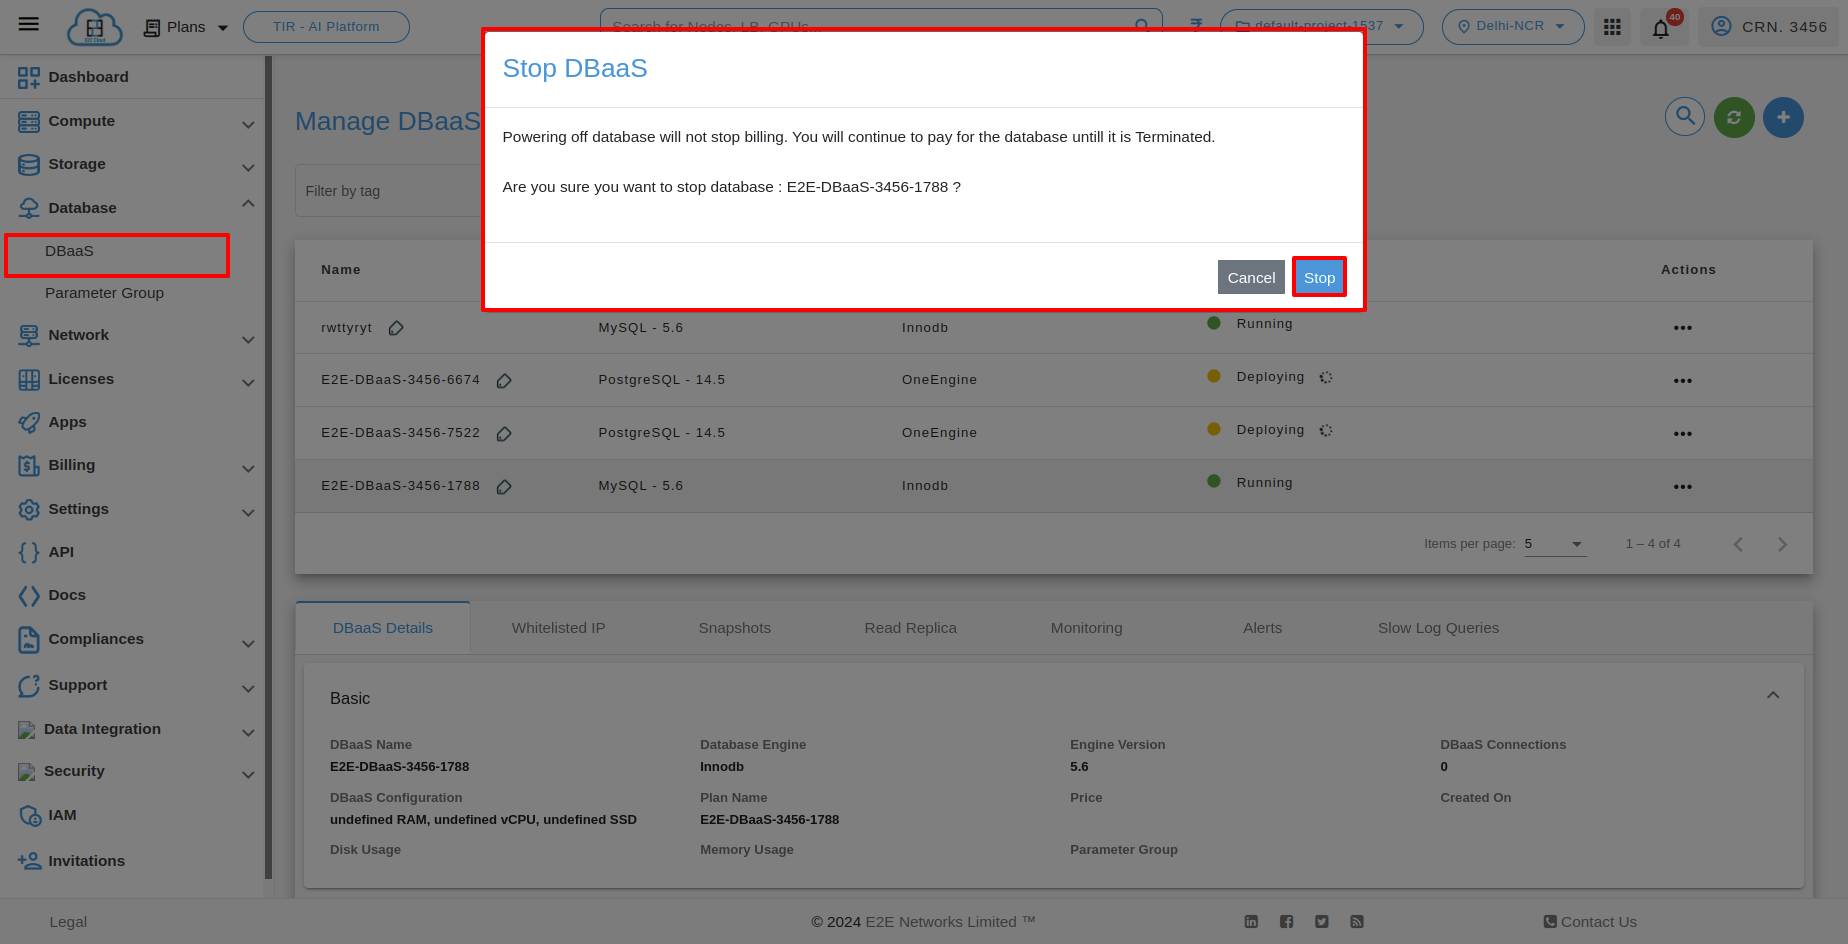
Stopping your Database
If you are using your DB Node for temporary testing or for any other daily development activity and want to test out your database by stopping it which will close all the connections in your database. You can perform this action by clicking on Action and selecting the Stop button.
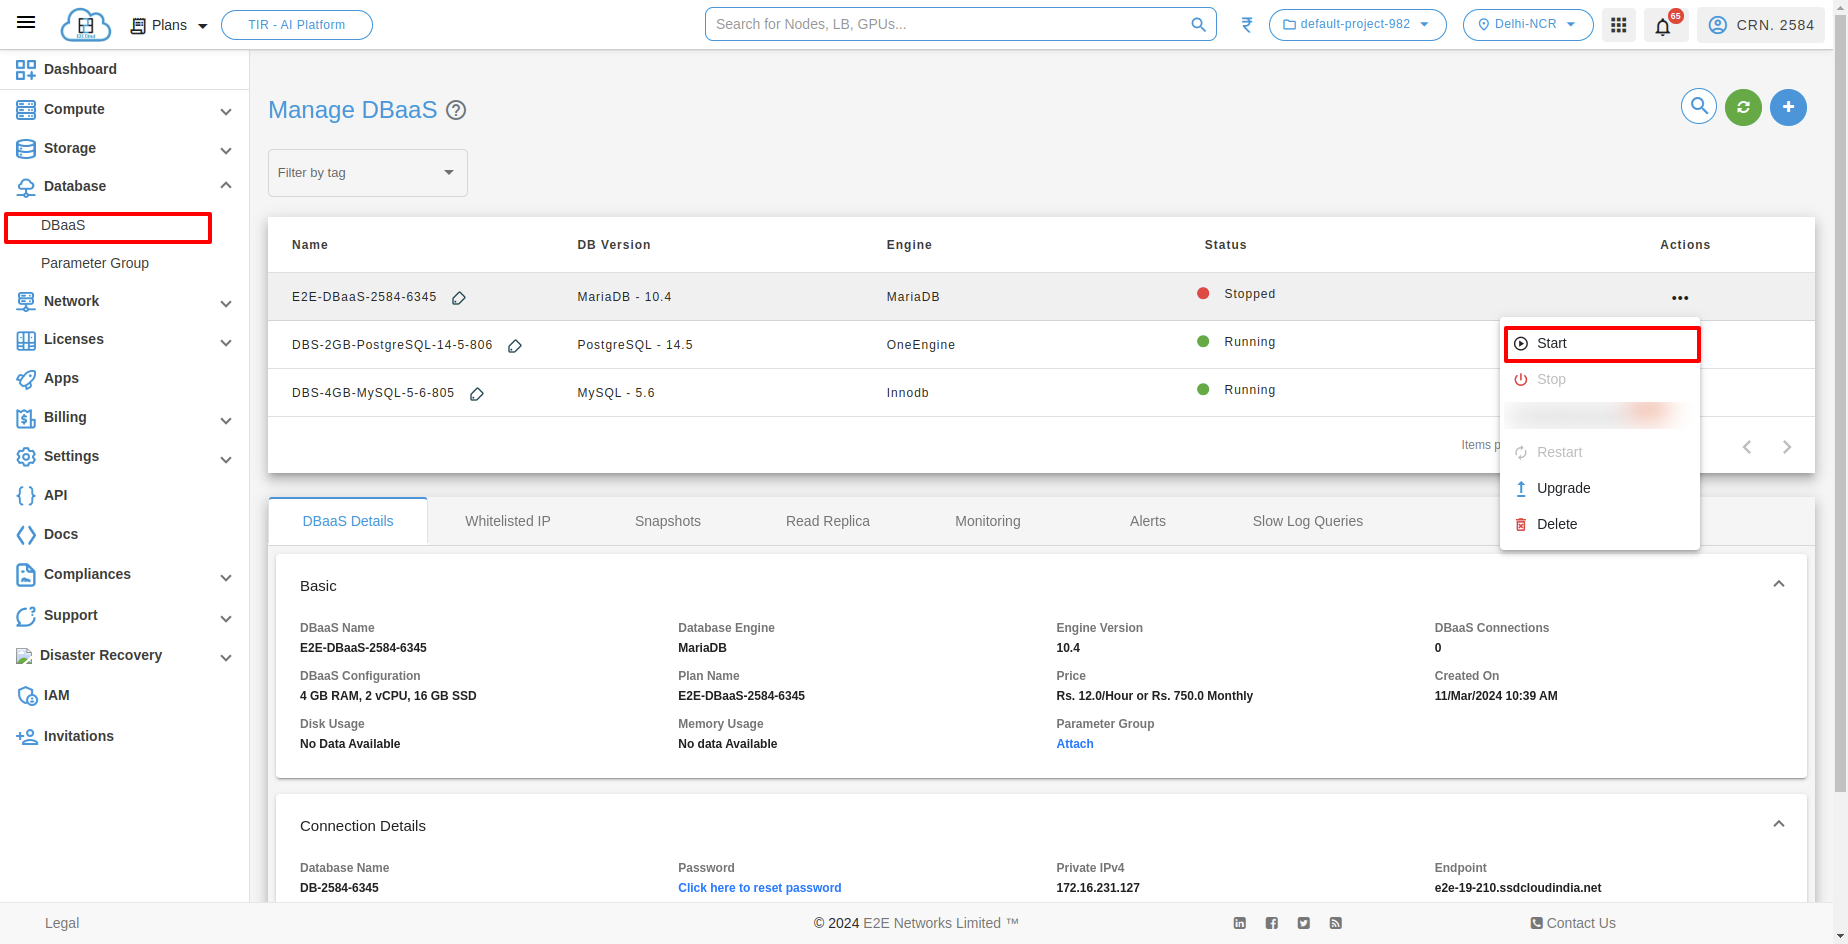
Starting your Database
You can resume your database which was stopped earlier by clicking on the Start button in the Action menu. Resuming your database will retain the same IP and credentials for your database and there will not be any changes at configuration level.

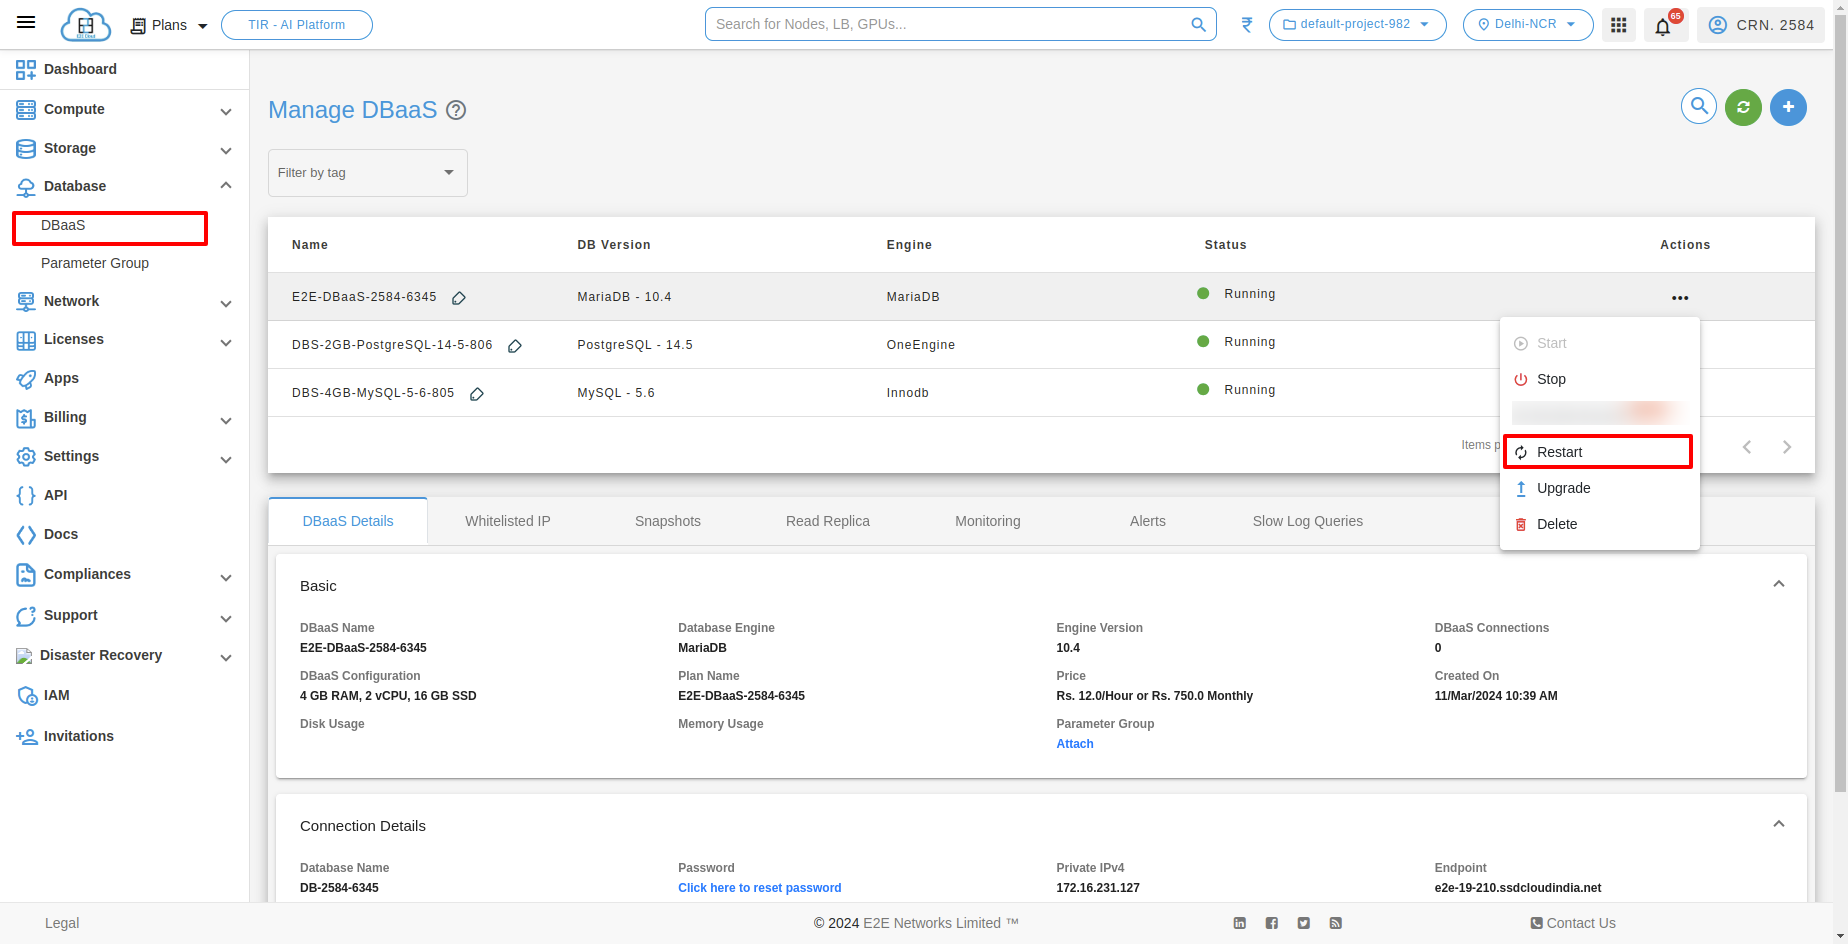
Restart
If you are testing out your DB nodes, restarting your database to reset connections or for any troubleshooting purpose, You can restart your database by clicking on the Restart button on the action menu.
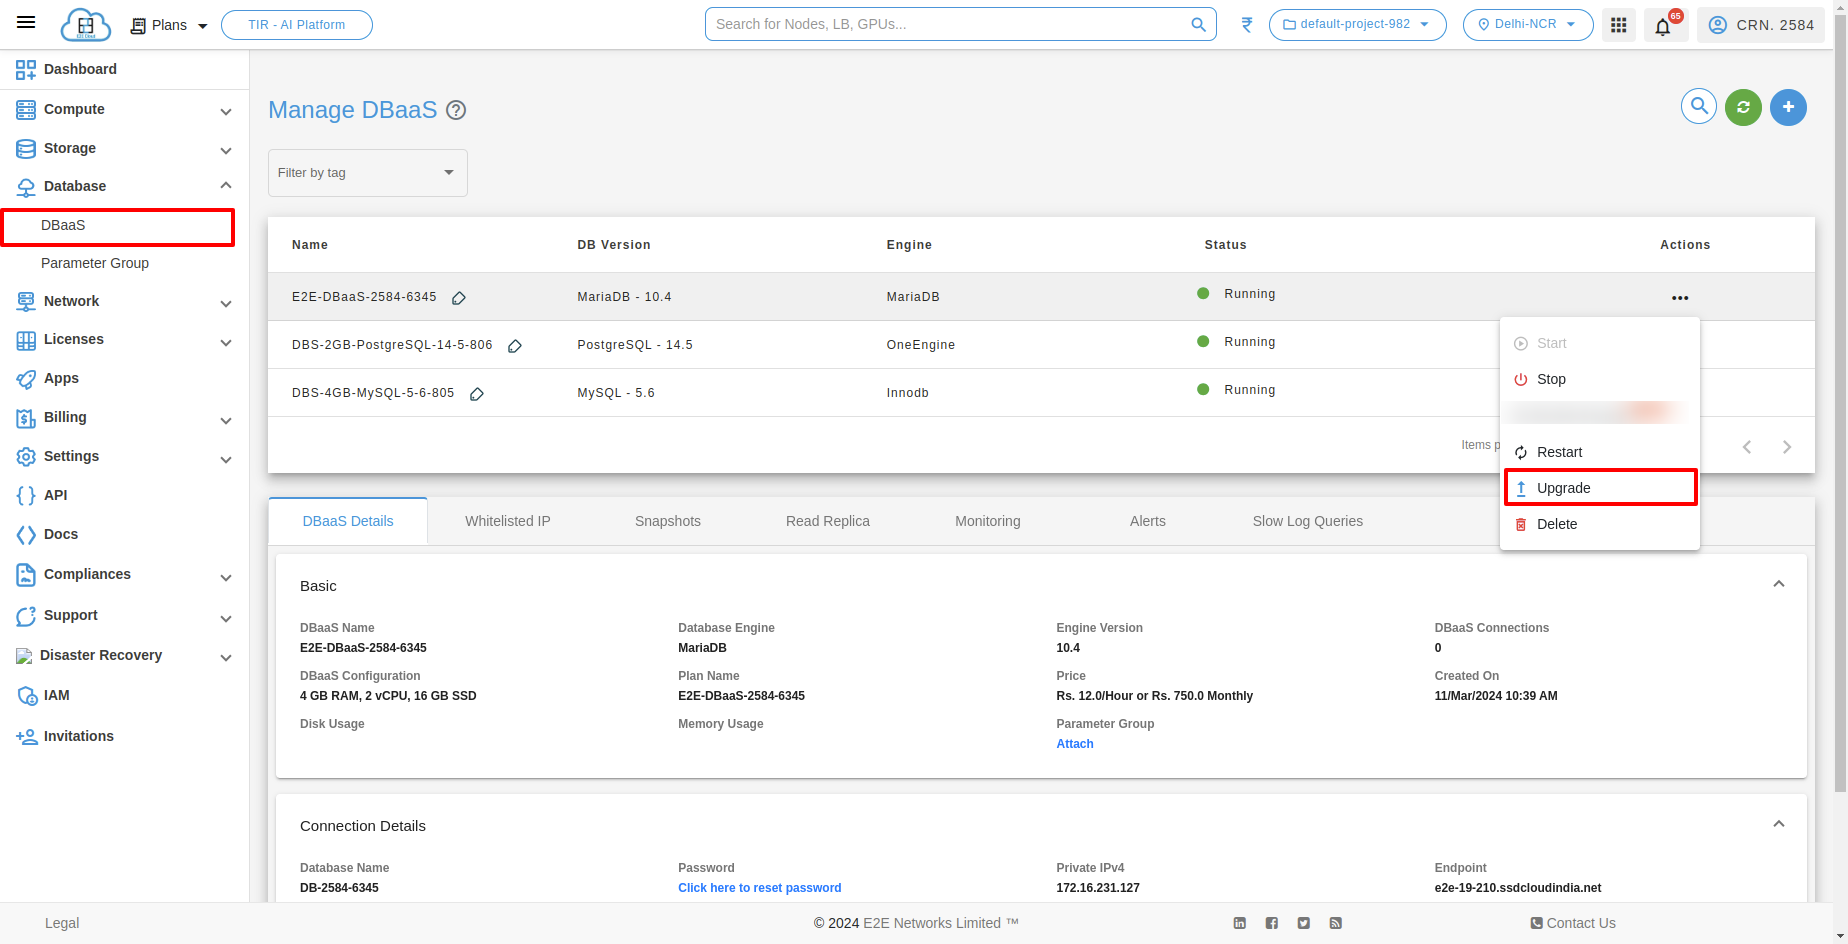
Upgrade your database
The DBaaS upgrade feature enables customers to easily upgrade their DBaaS plan based on their specific usage requirements. For upgrading you database you have to click on Upgrade button under Action button.
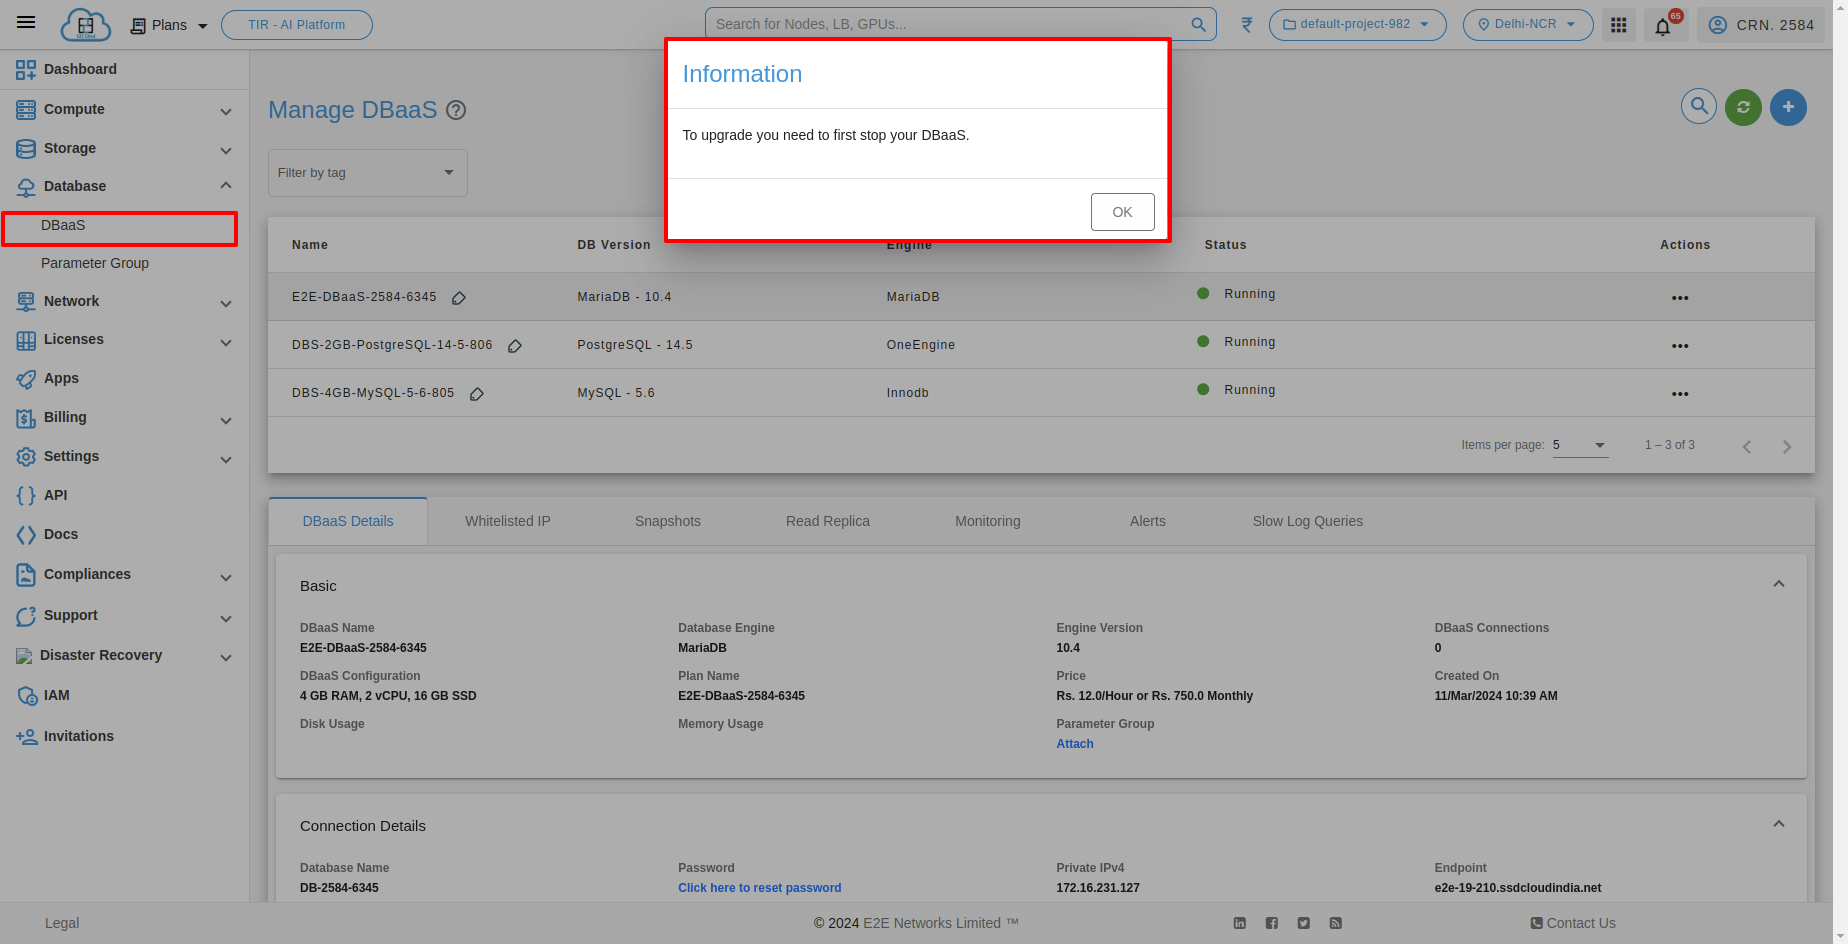
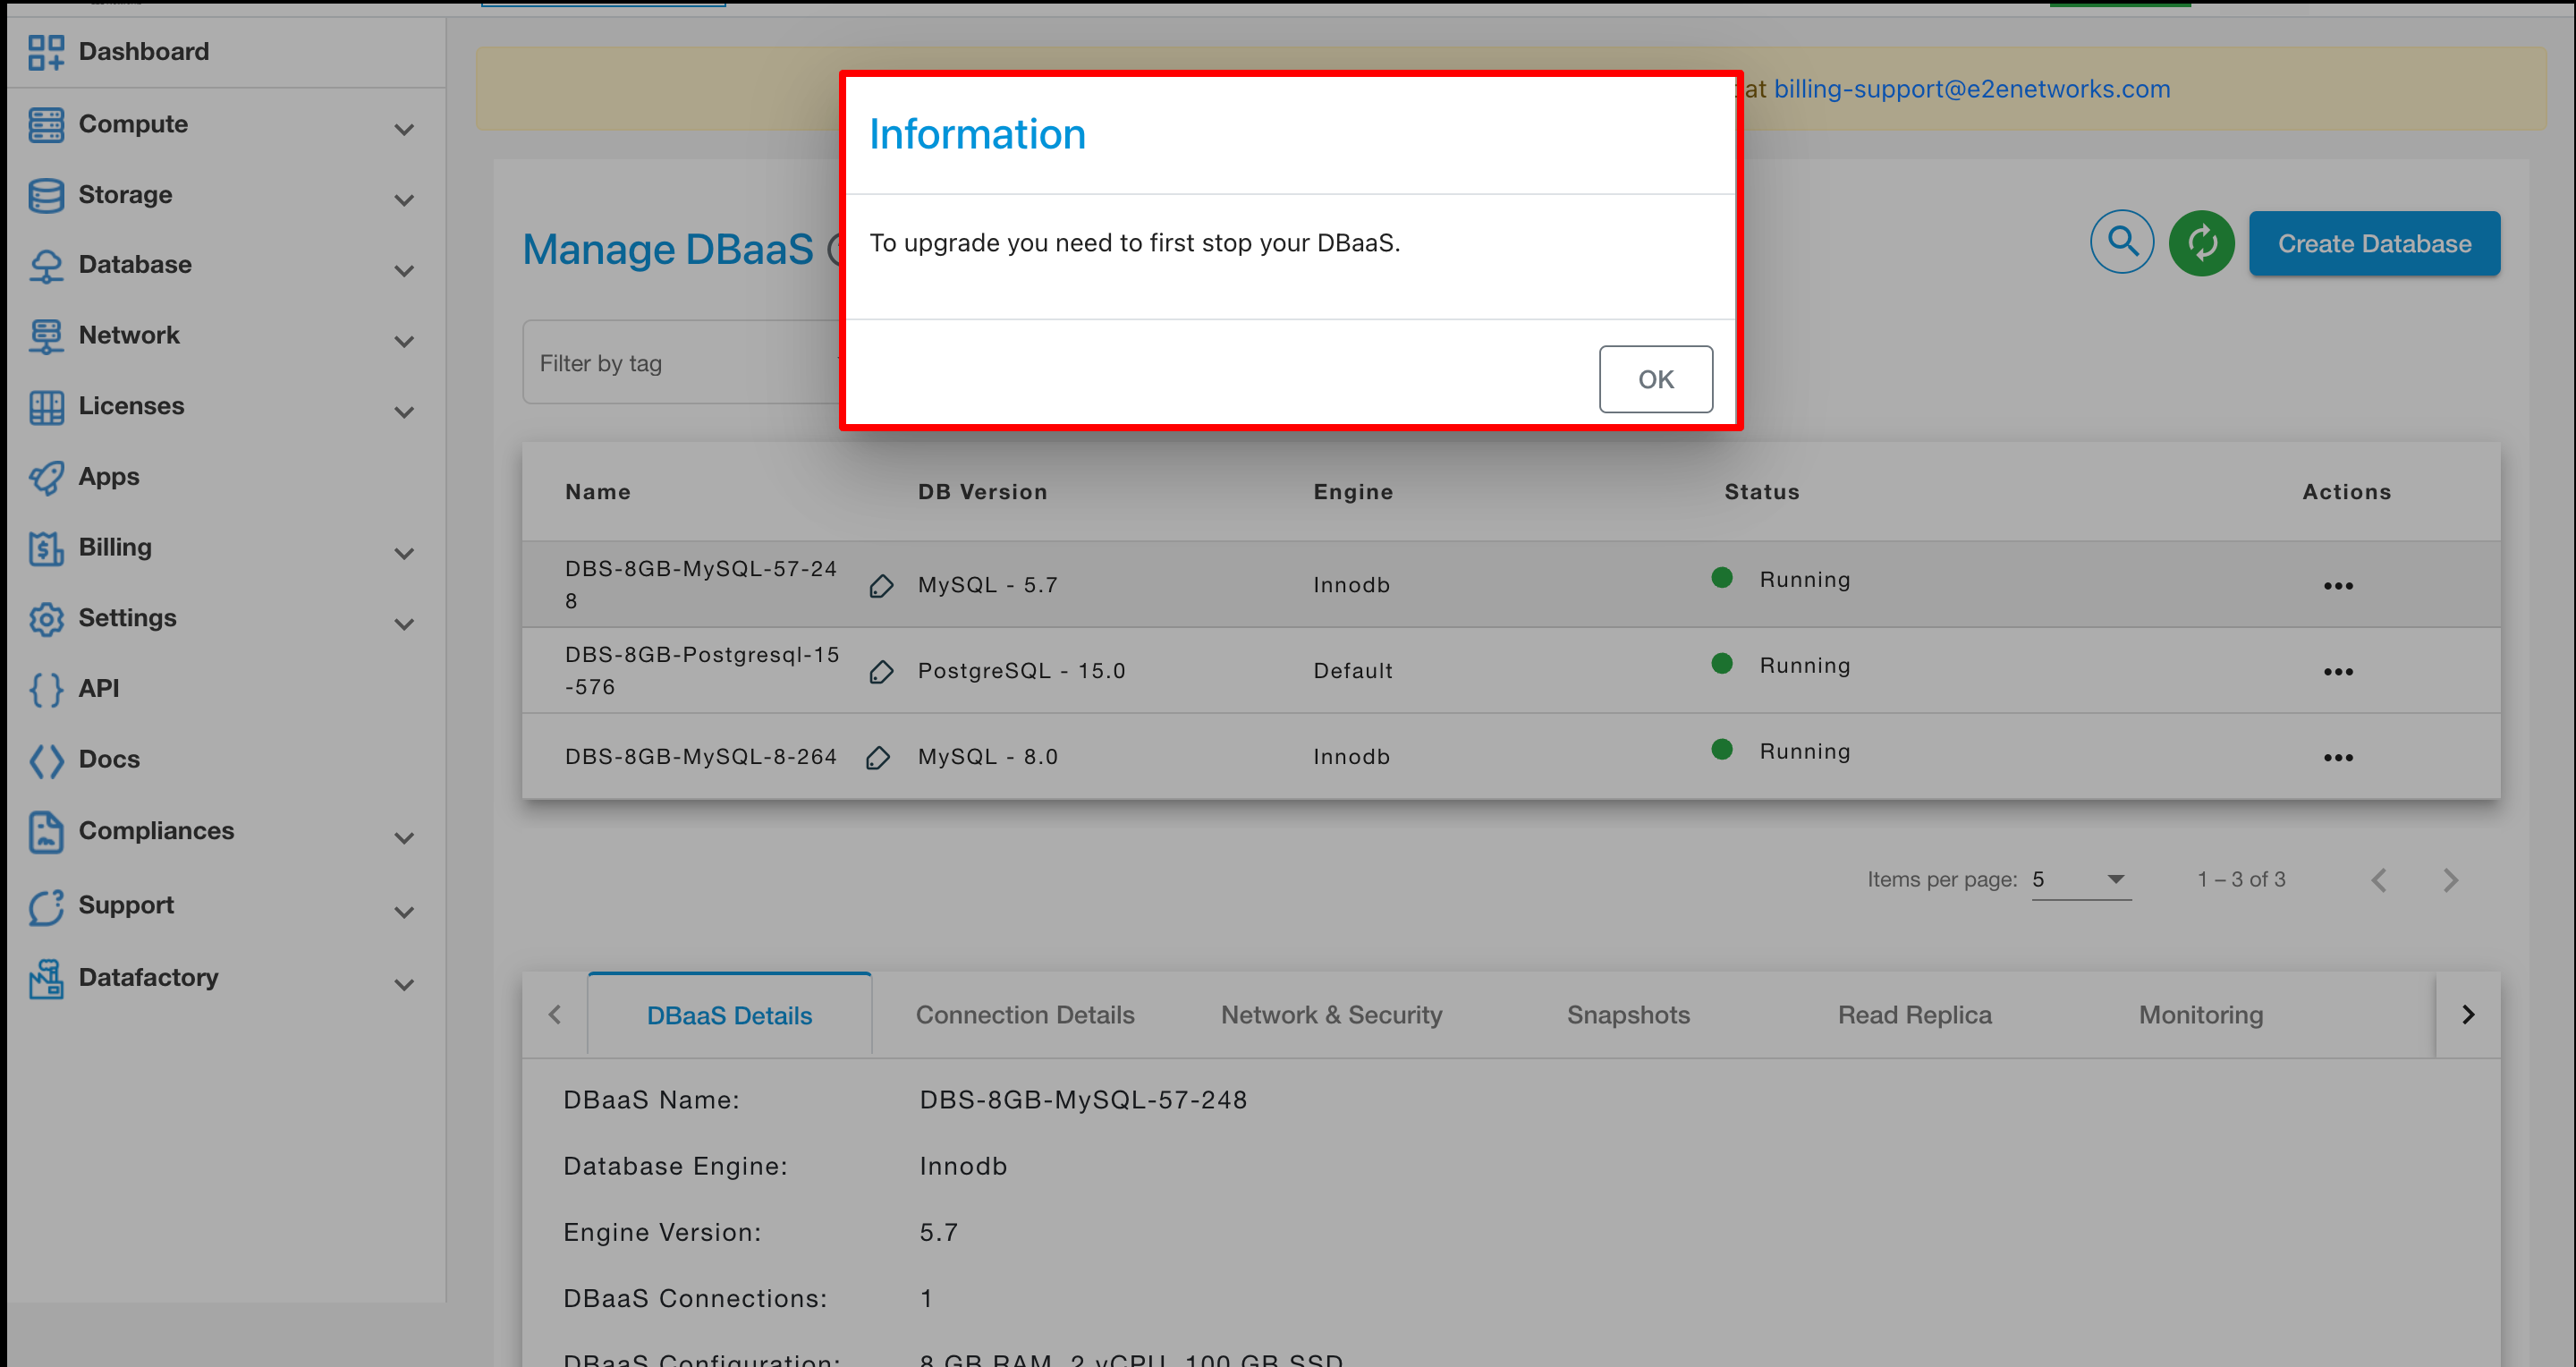
Before upgrading, you need to stop your DBaas first.
After clicking on Upgrade the Upgrade plan will be show and you have to click on Upgrade button with the selected plan after that the confirmation popup will be open and you have to click on Upgrade button.
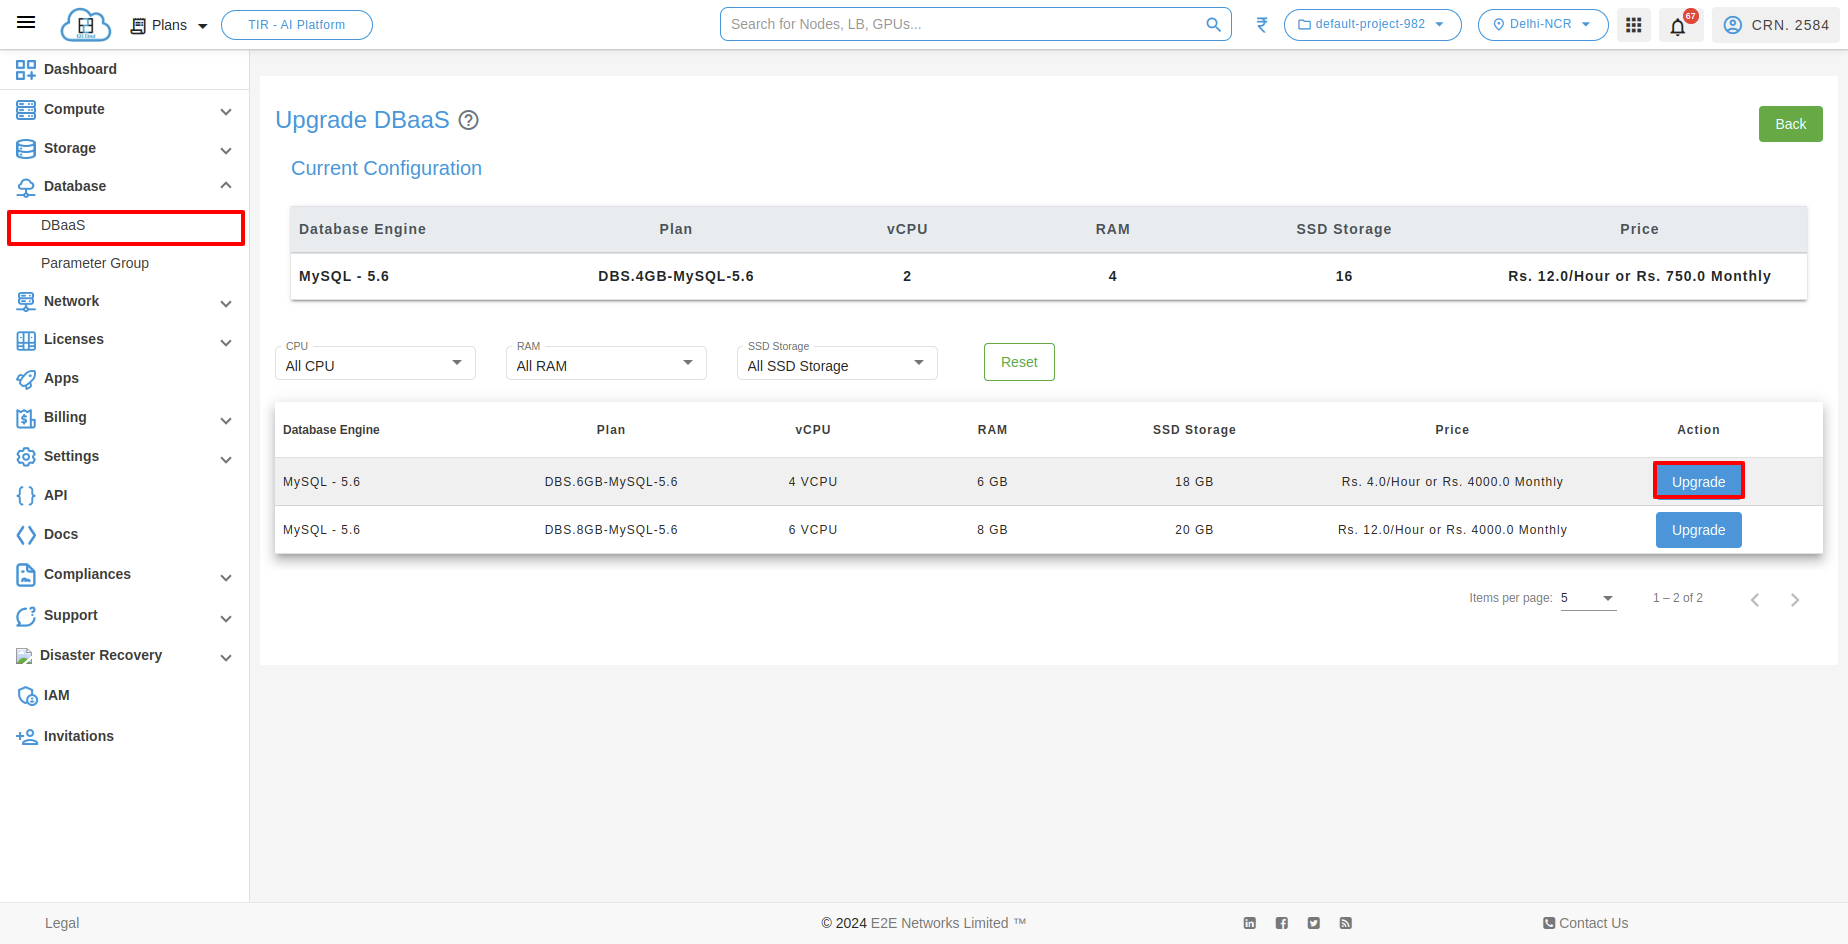
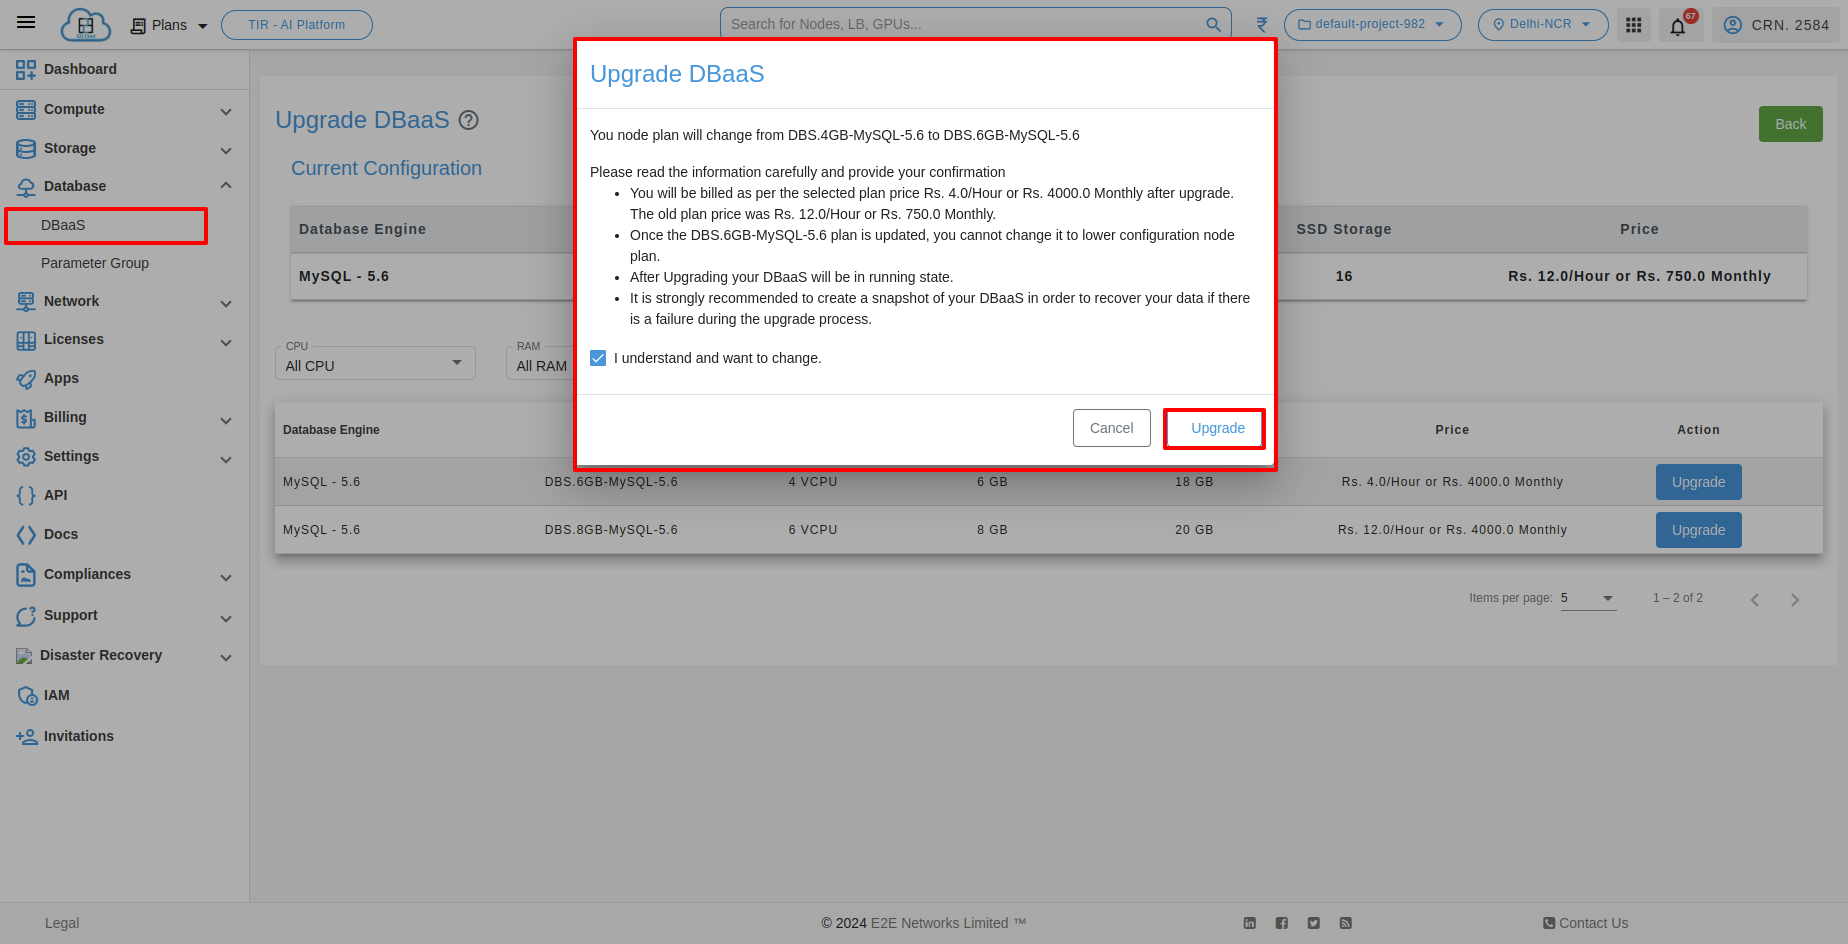
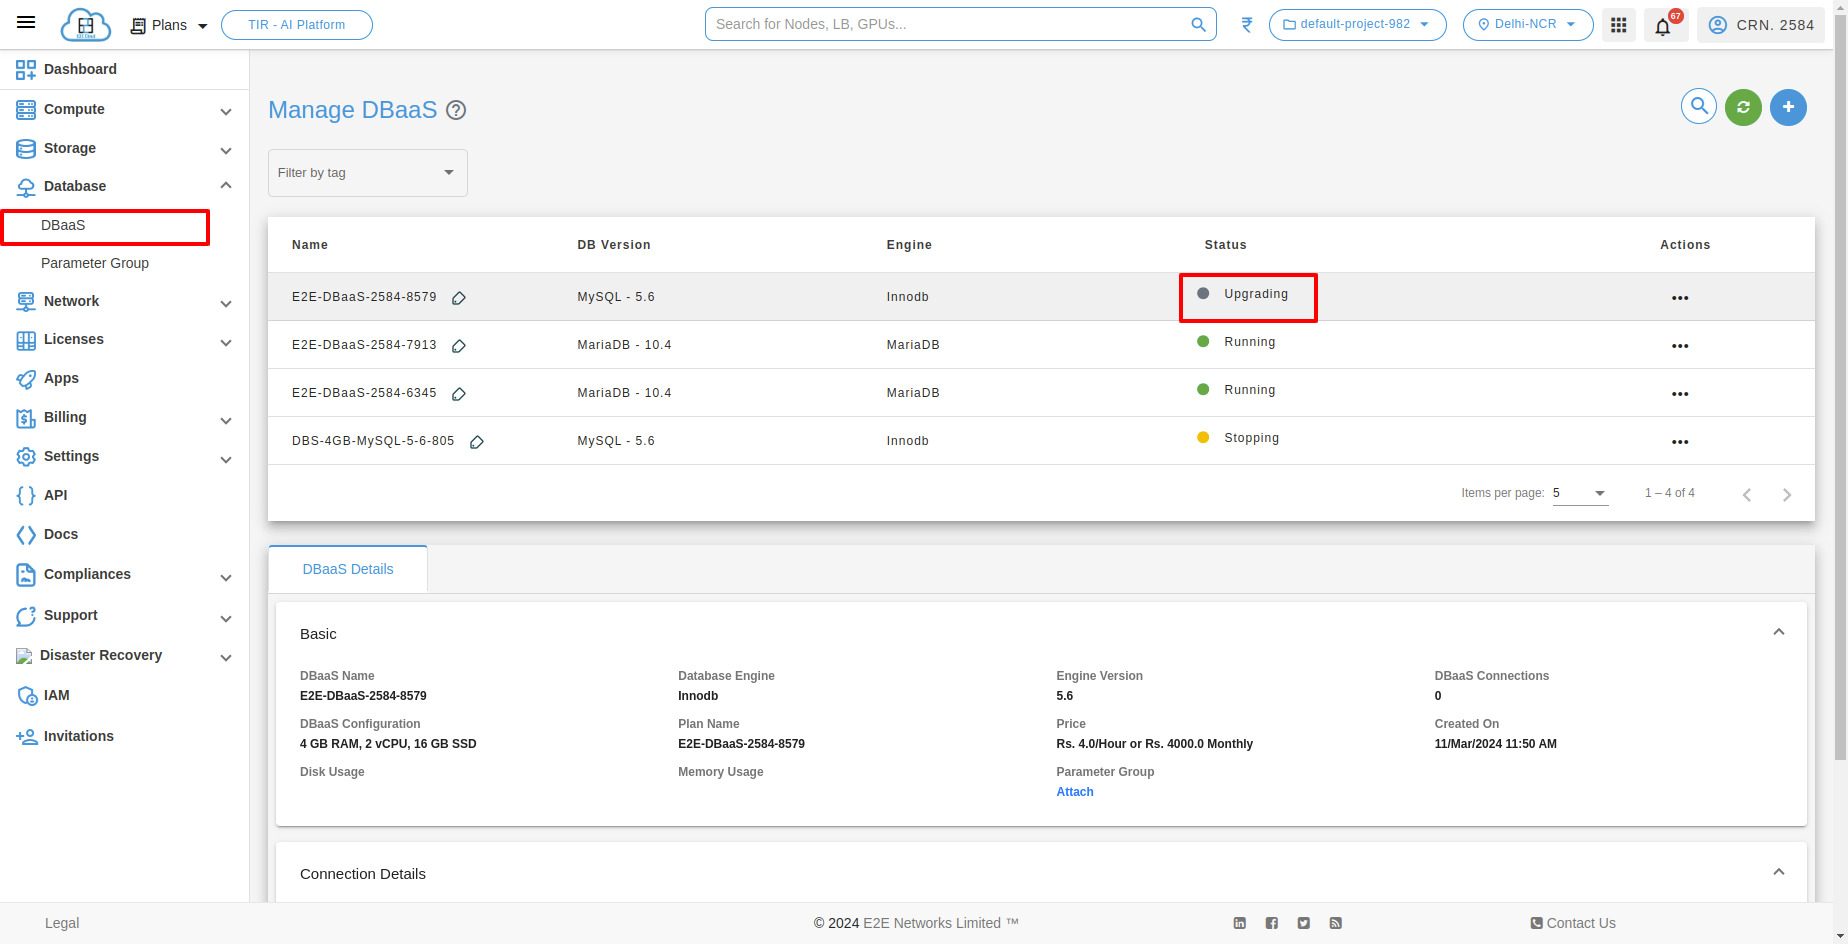
After this the Upgrading process will be start and the database status will be in upgrading status.
Note
Please ensure that your database is stopped when performing the upgrade action.
Move to Another Project
Using this action you can transfer your dbaas from its current project to another project within the same CRN.
Note
To transfer the dbaas -
Ensure the Dbaas is in Running or Stopped only.
The Dbaas must not have any Tags, VPC or Parameter Group attached.
Transfer is not permitted for Kafka databases.
To transfer the Dbaas click on Move To Another Project button in actions.
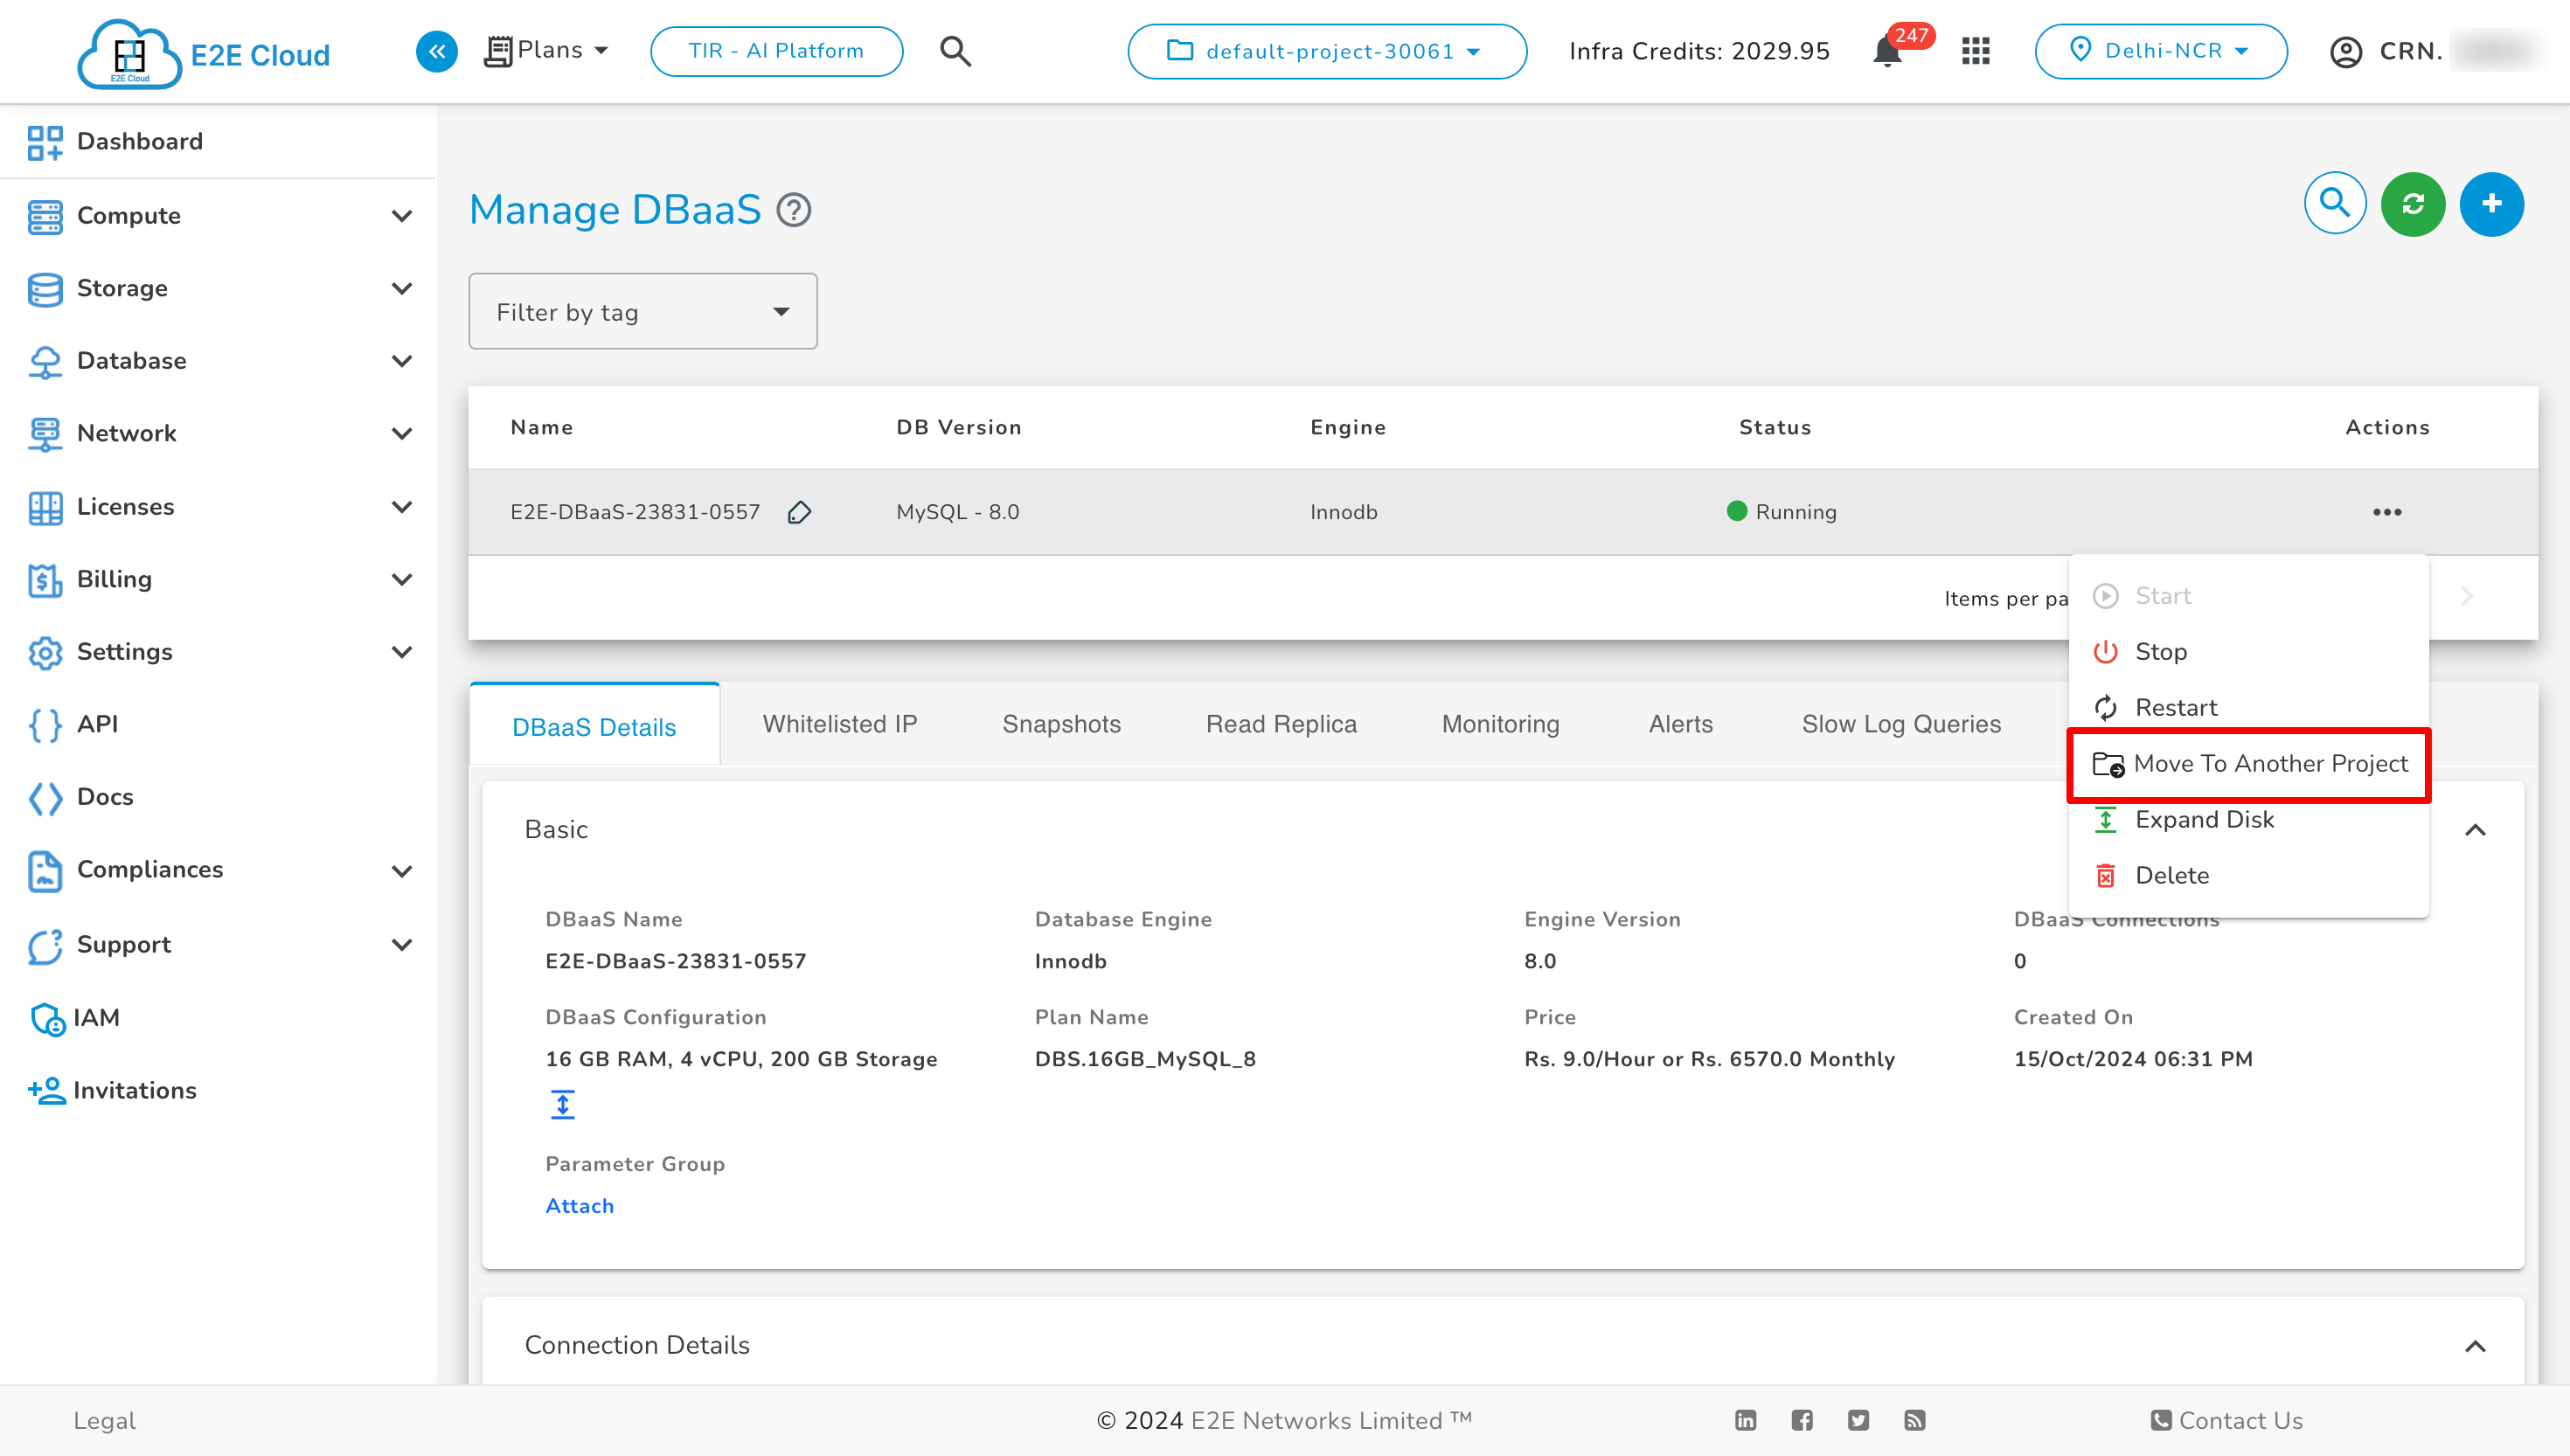
Then click on Move To Another Project from Actions, select the target project, check the checkbox, and click Transfer.
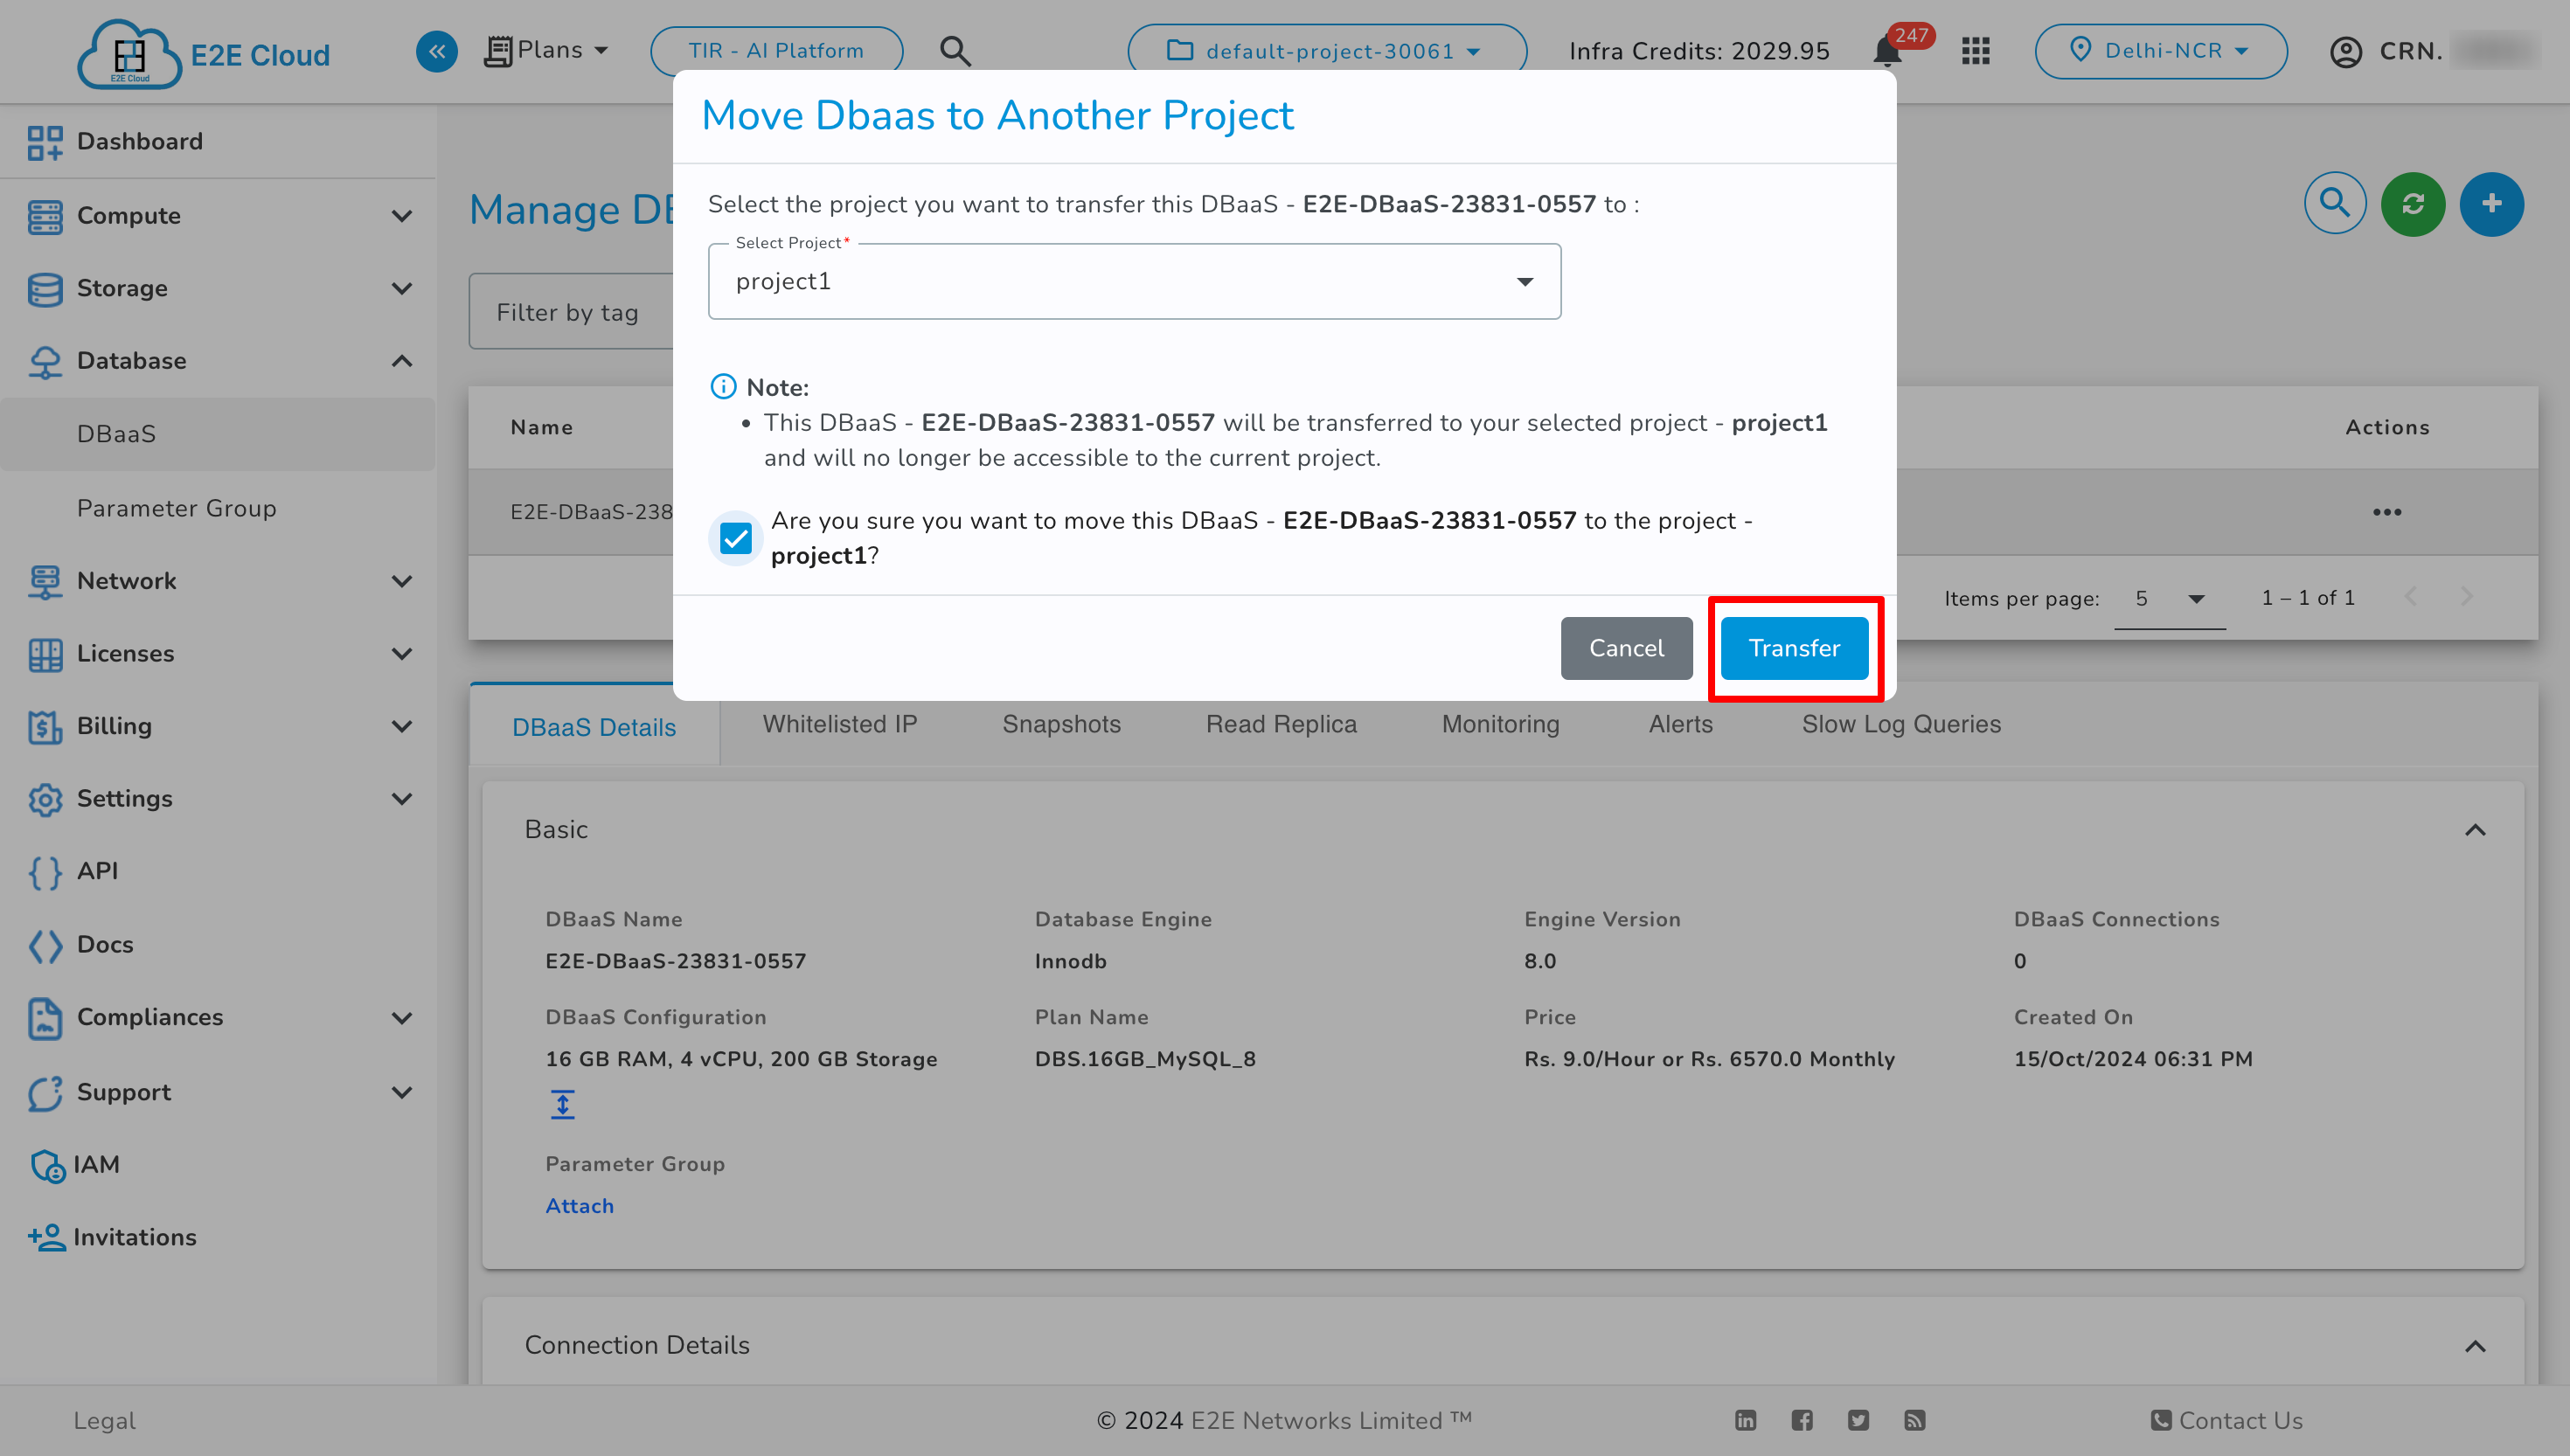
Note
An audit log will be created for the transfer in both the current and target projects during the transfer.
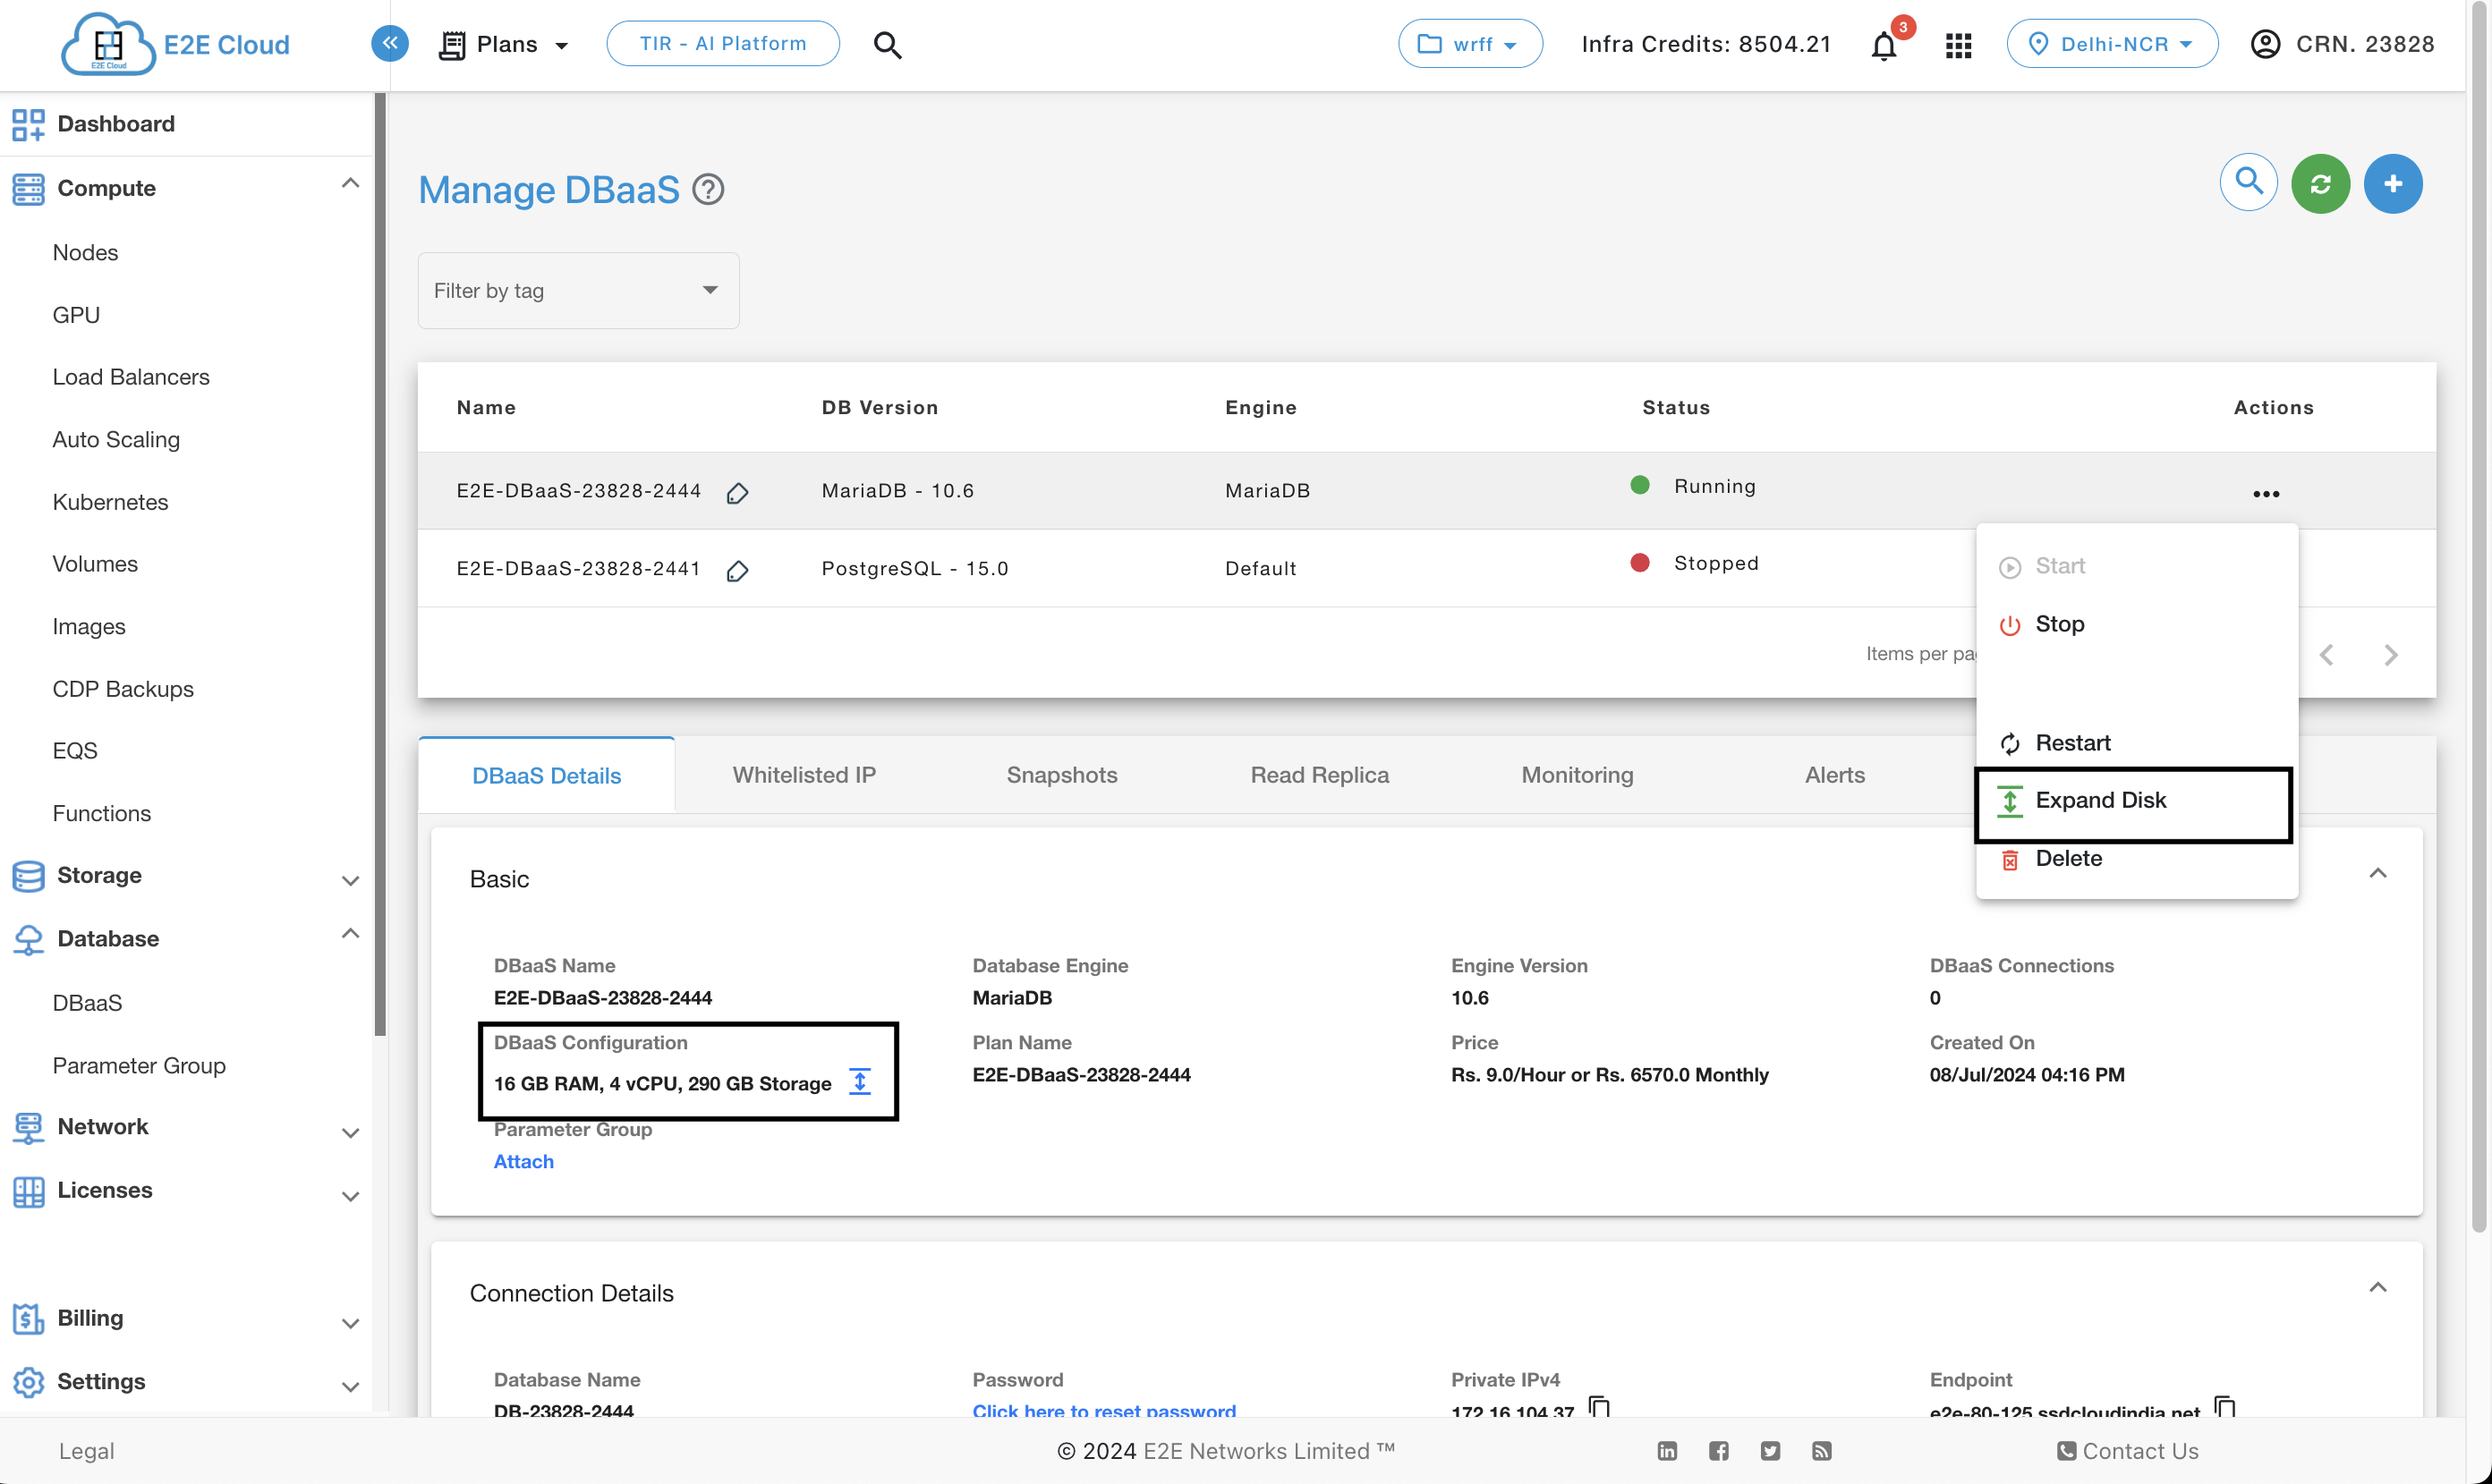
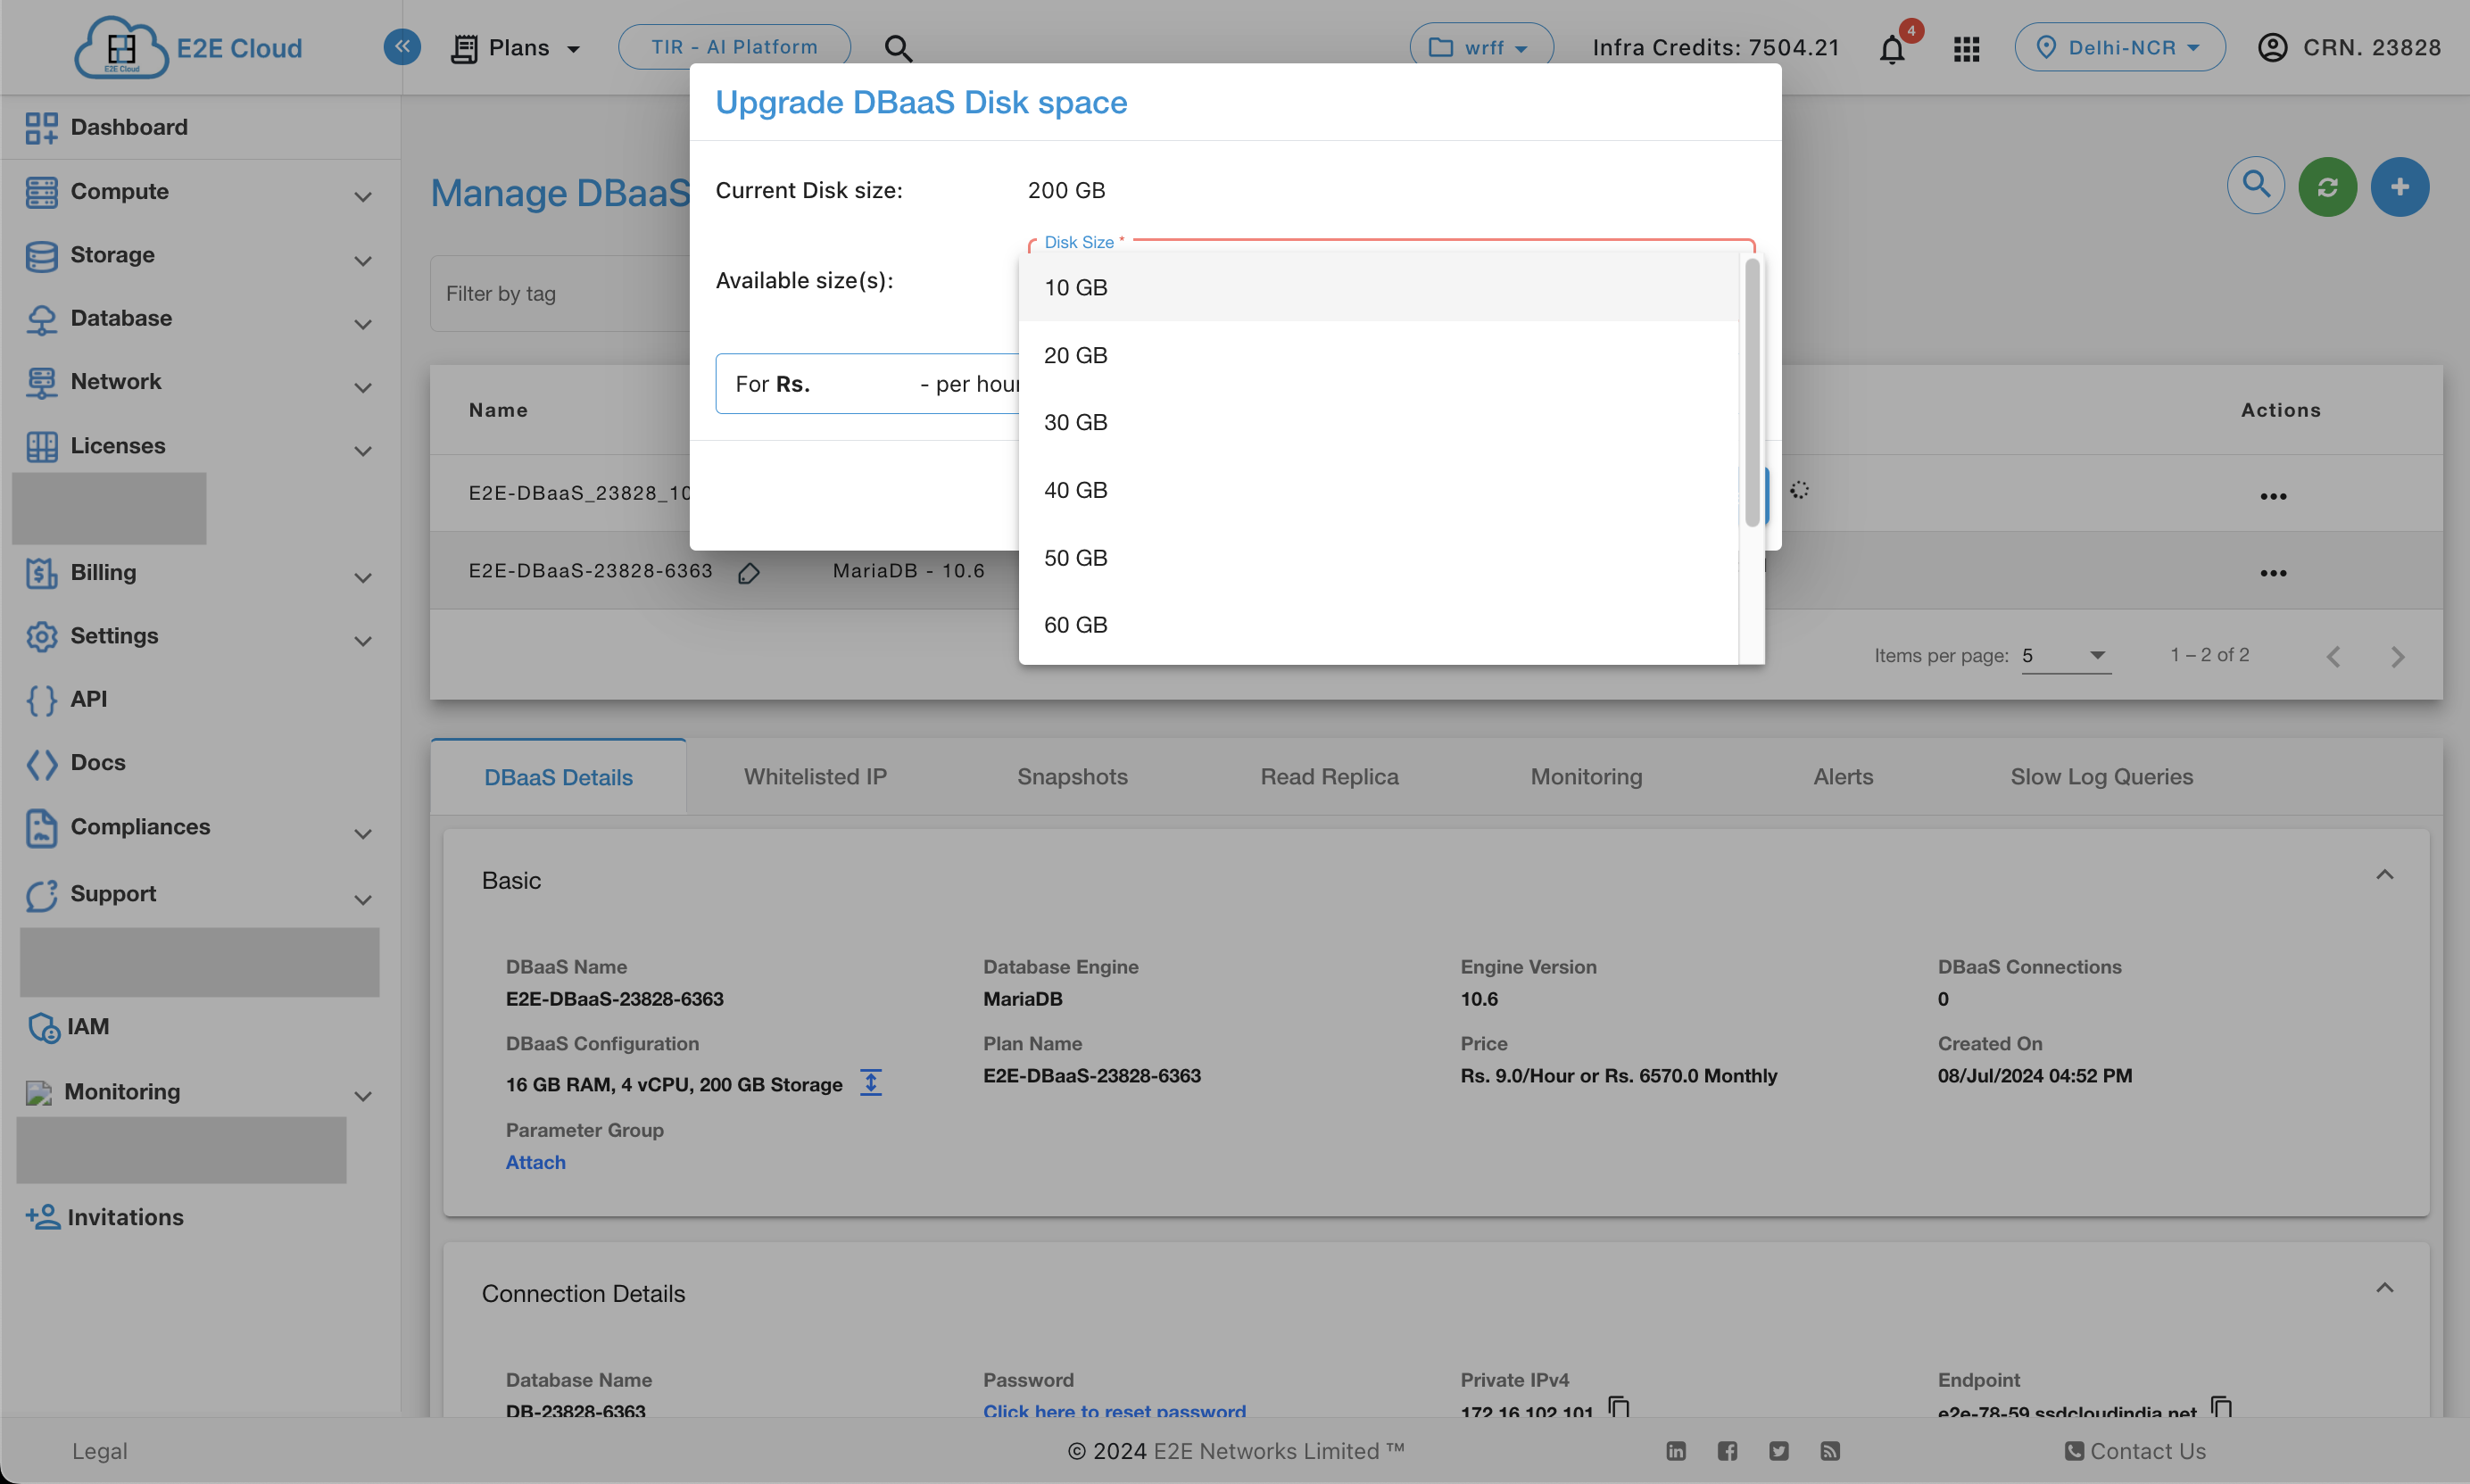
Expand Disk Size
The DBaaS disk expand feature gives the customers an option to just expand the disk size of their DBaaS without the need of upgrading all the specifications.
Delete your Database
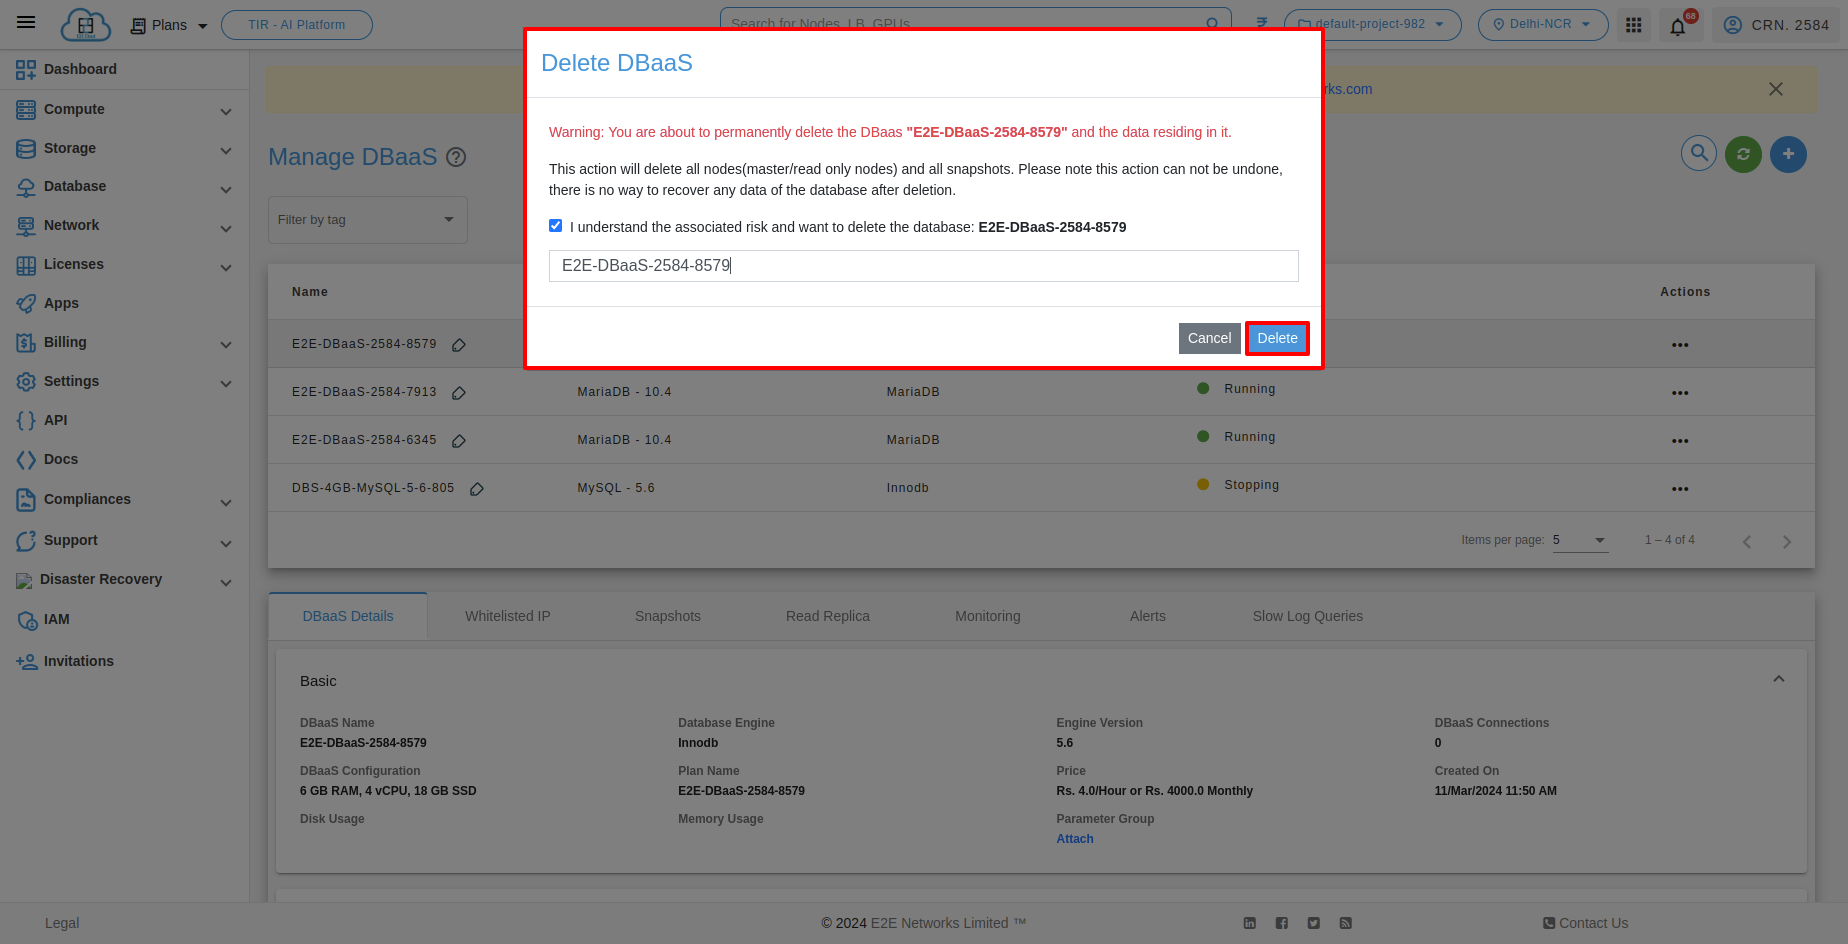
To delete your database, click on Delete option. Please note that once you have deleted your database you will not be able to recover your database.
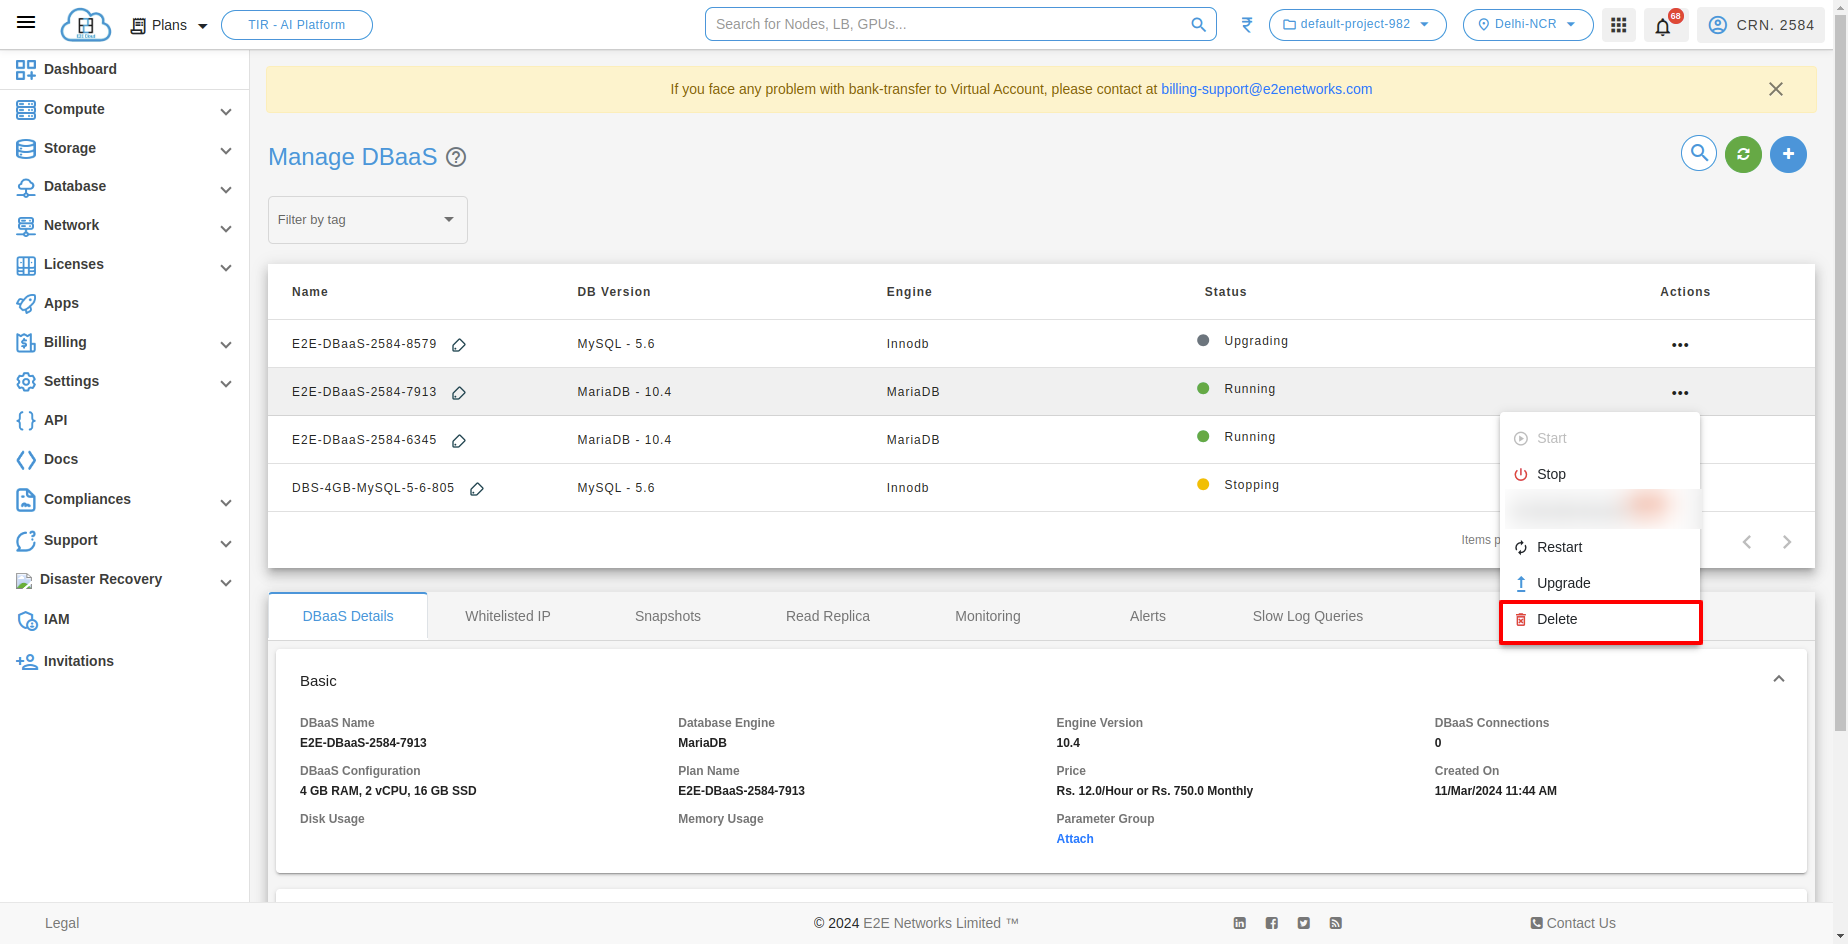
After clicking on delete, you will see the popup and click on delete.