Introduction
This feature is provided in order to get in touch with our 24x7 support team whenever required. You can create and track support tickets using this page.
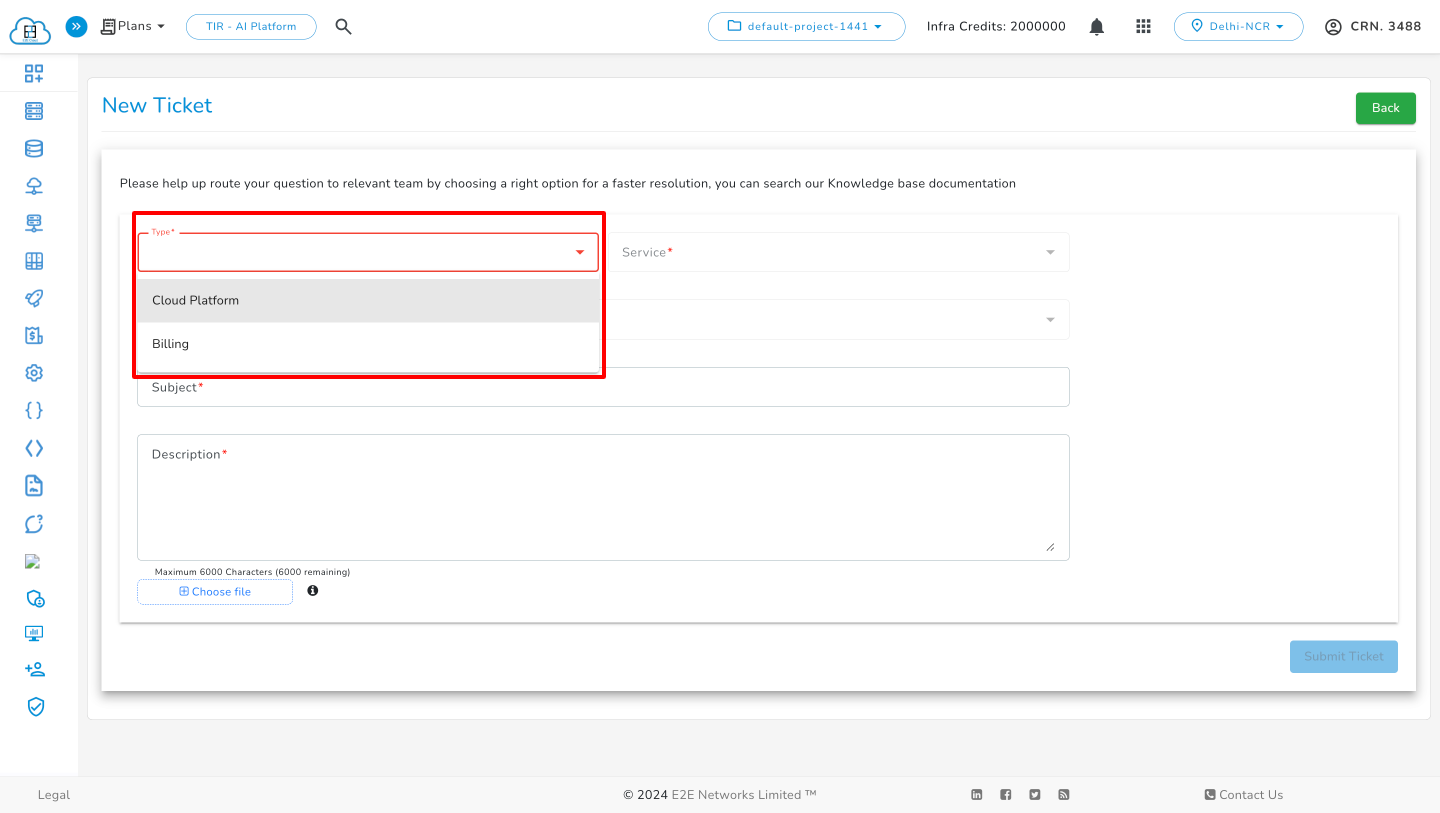
As of now we have two categories:
Cloud Platform - For all technical support related to the cloud services.
Billing - Billing and Payment related queries select Billing type tickets.
Create Support Ticket
To access the ticketing portal, click on the Cloud Platform.
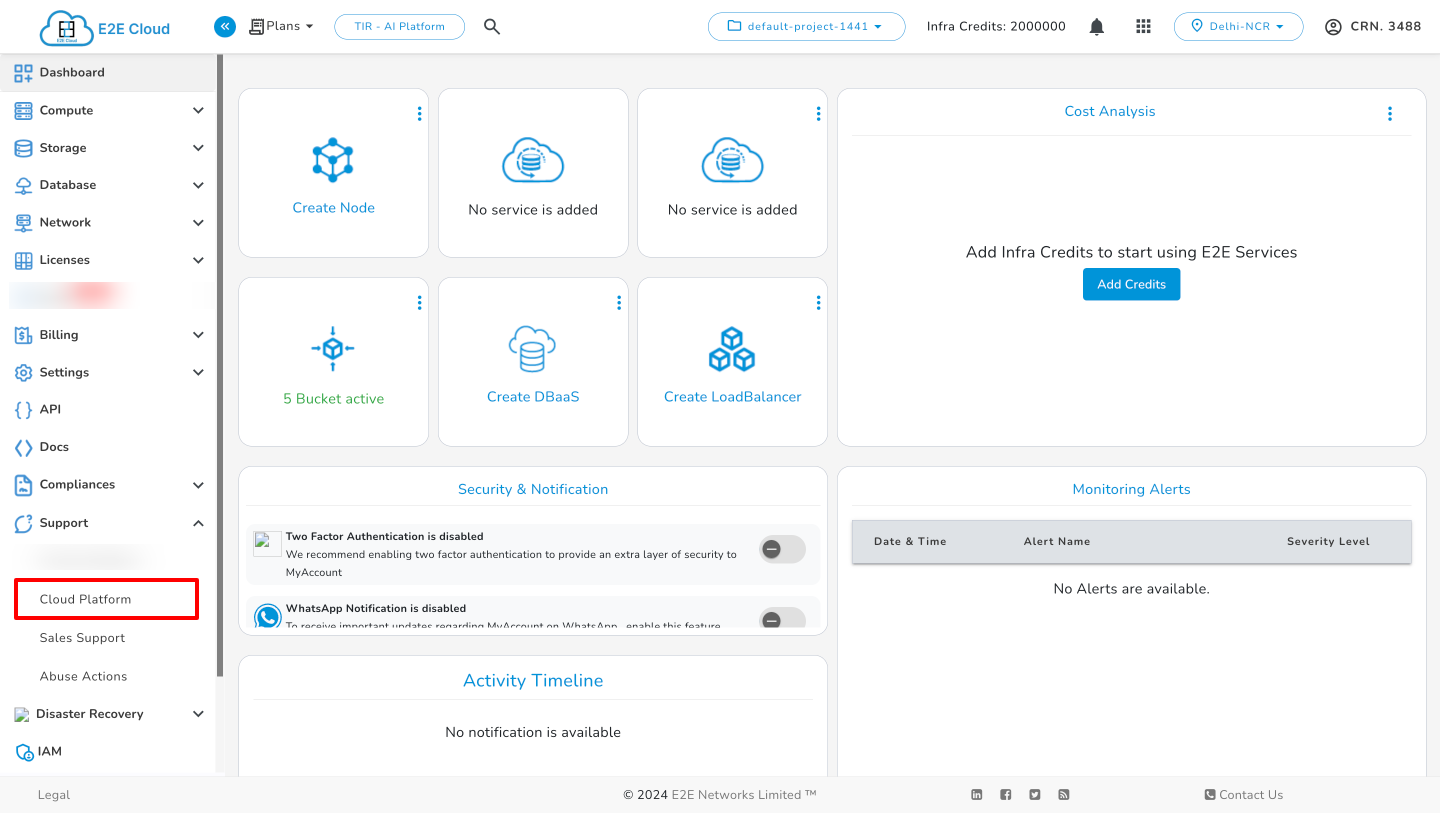
You will be redirected to the “Support” page.
To create a new ticket, click on the “Create Ticket” button.
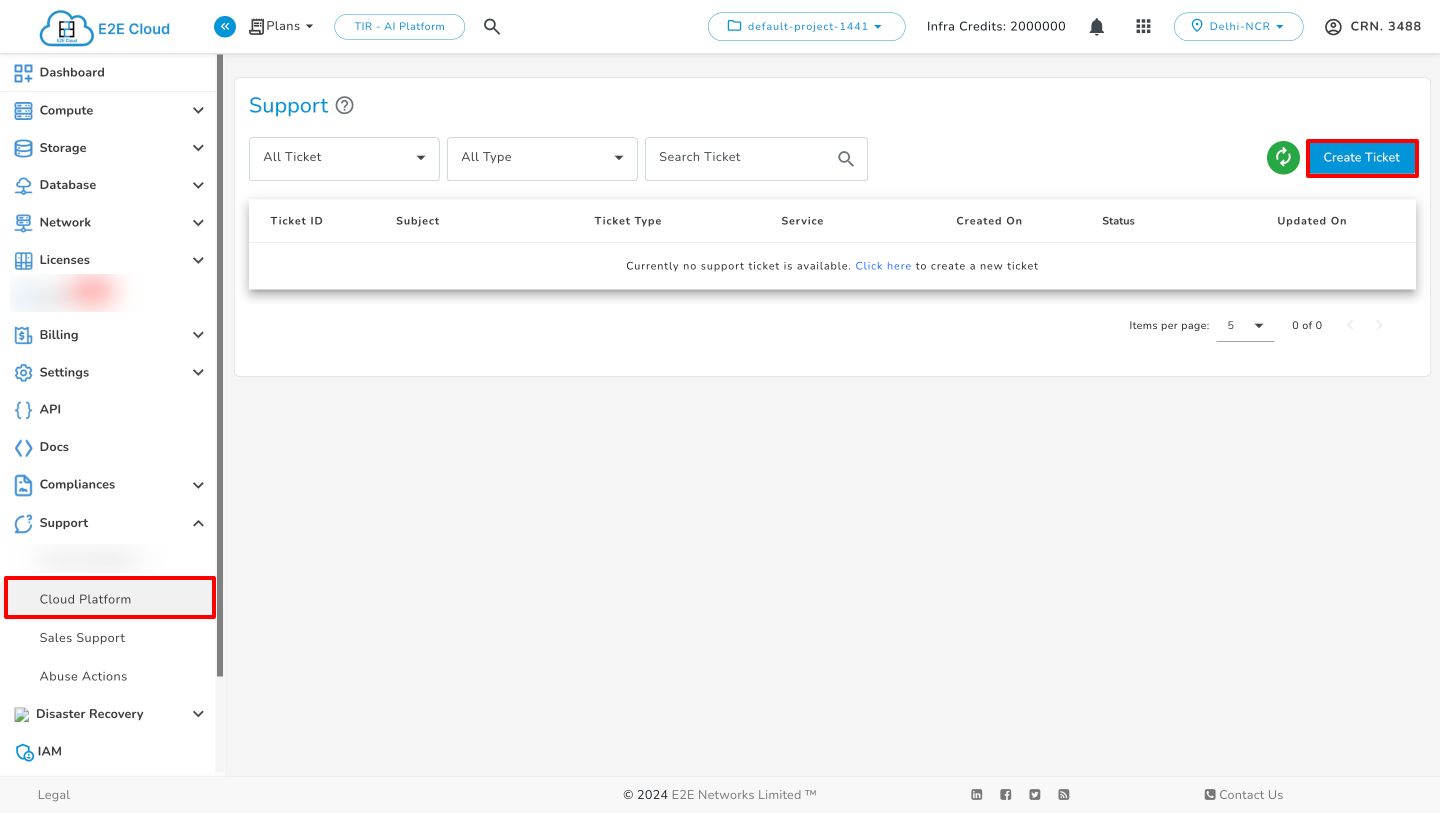
You will be redirected to the “New Ticket” page, where you can fill the required information.
Type: Choose the respective category of ticket created.
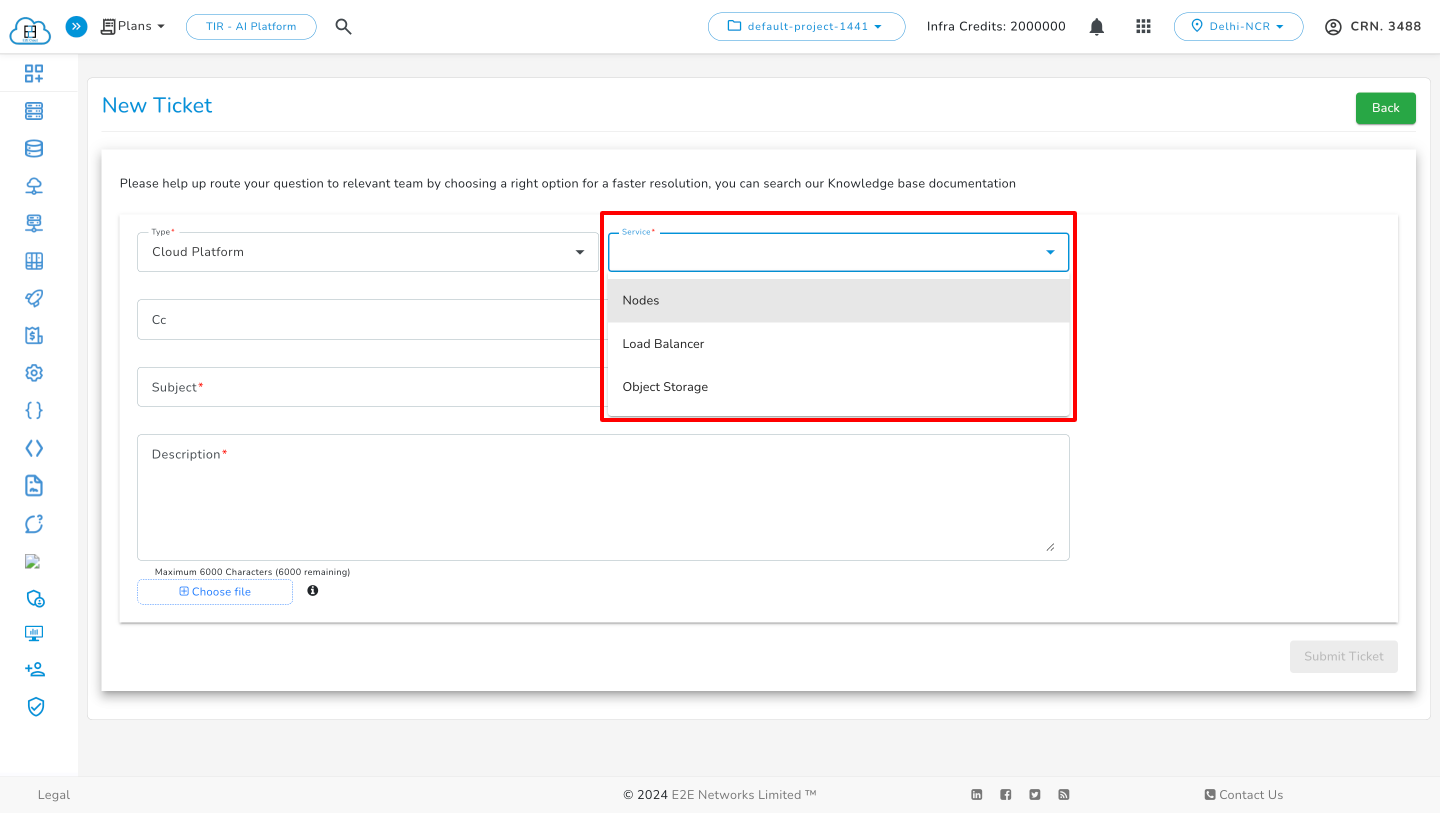
Service: Select the service for which you want to create the ticket.
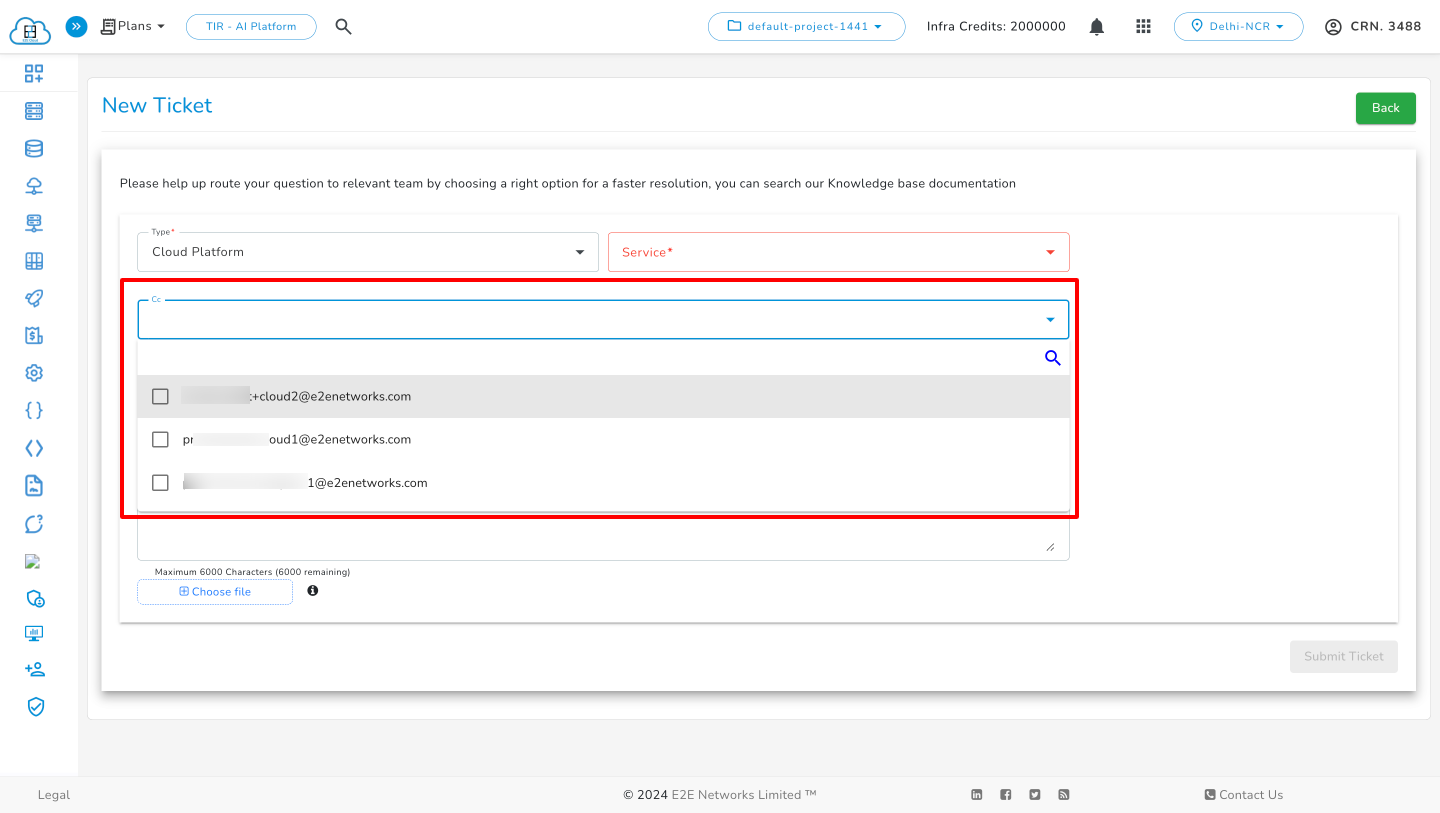
CC: The CC list will display customers associated with the owner’s account. If “Cloud” is selected, only Admin and Technical customers will appear in the CC list. Once a member of any type is selected, you can add CC emails for customers when creating Zoho Desk tickets, allowing them to include their IAMs in the thread.
Note
For Cloud-type tickets, you can select up to 10 CC members. This feature is only enabled for Cloud-type tickets.
Subject: It can be a tagline for the reported issue.
Description: Please share the issue observed in detail (with information like server IP, domain name, etc,.) and attach the relevant screenshot which can represent the issue.
Click the “Submit Ticket” button to create a support ticket.


The created ticket will be displayed like below and our team will check and reply on the same shortly.
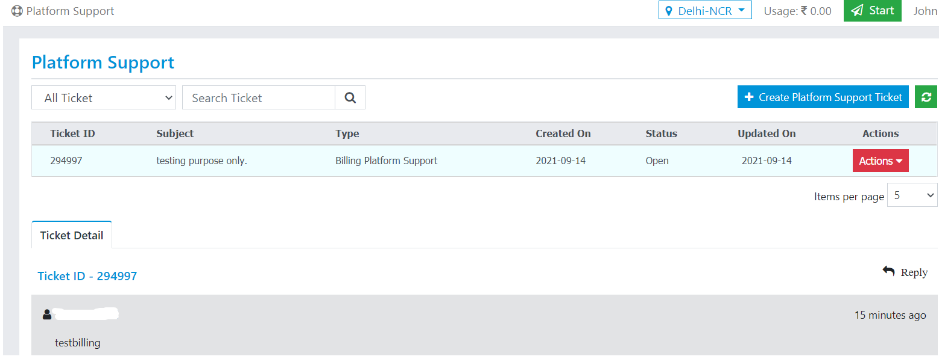
You can further continue the conversation with our team using the reply button.


You can fill in the message and also add up attachments as required then click on “Reply” button.

Once the reported issue has been resolved, you can close the ticket by clicking close button.


