Setting up CDN Video Streaming with EOS
E2E Object Storages
E2E Object Store (EOS) is a simple, cost-effective and S3-compatible storage service that enables you to store, backup and archive large amounts of content for your web apps or data for AI/ML pipelines. Our S3 Compatible REST API enables data access from anywhere on the internet or within your private network. EOS is designed to handle large data volumes so you can scale as per your needs. Under the hood, it is a distributed object storage, a federation of large clusters that ensure high availability. Erasure coding, the standard practice for data storage, is employed for redundancy and fault tolerance.
Getting Started
In EOS, data files are organized in form of objects in a bucket. A bucket is container just like folders or directories in your OS and allows separation of concerns. For example, you could create a bucket for a personnel app and another one for accounts app. This will enables you to manage permissions and data separately.To start using EOS for data storage, you must create a bucket.
How to Create a Bucket
Logging into E2E Networks MyAccount
Please go to My Account and log in using your credentials set up at the time of creating and activating the E2E Networks My Account.
Sign into My Account
Go to Products > Storage option in sidebar menu
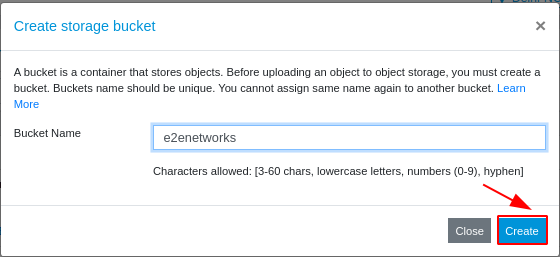
Click on + Add bucket button

Enter a unique bucket name. You must follow these guidelines when choosing the bucket name.
You must enter a bucket name that is unique across all existing buckets in E2E Object Storage. You can not choose a name that is already in use by another user.
Names can not be changed after creation. So choose wisely.
Bucket name must be atleast 3 and no more than 63 chars long.
Upper case or underscores are not allowed.
Do not format bucket names like ip address (for example, 10.10.10.2).
Click Create
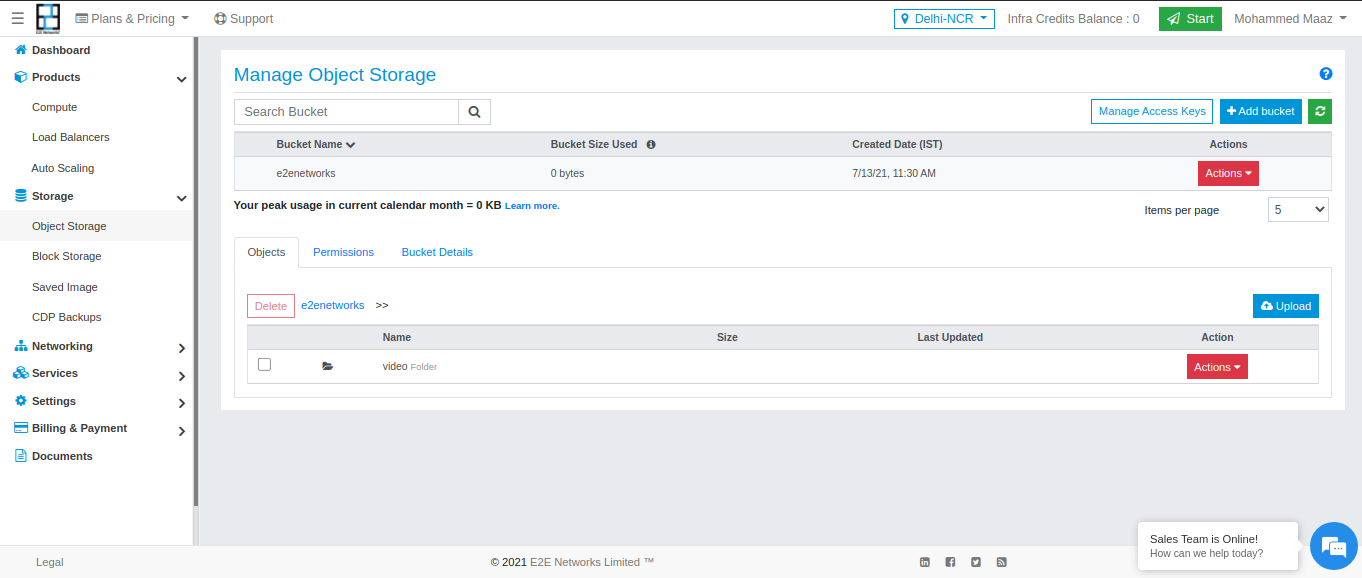
You will be redirected to object browser.
Storage Browser
Storage browser works as a primary control center for your content. The browser supports bucket creation, permission handling and also upload or download of objects.
To access storage browser, visit My Account
Bucket Details
You can browse through objects in your bucket or assign permissions using Bucket Details page.
Login to My Account
Go to Products > Storage option in the sidebar menu
Choose any bucket or create a new one.
Click the Object browser tab, it will be opened for the selected bucket.
You can now browse through files and directories or manage permissions for the bucket.
Click the bucket details tab for the selected bucket.
You can now check bucket related information.
Public Access Permissions
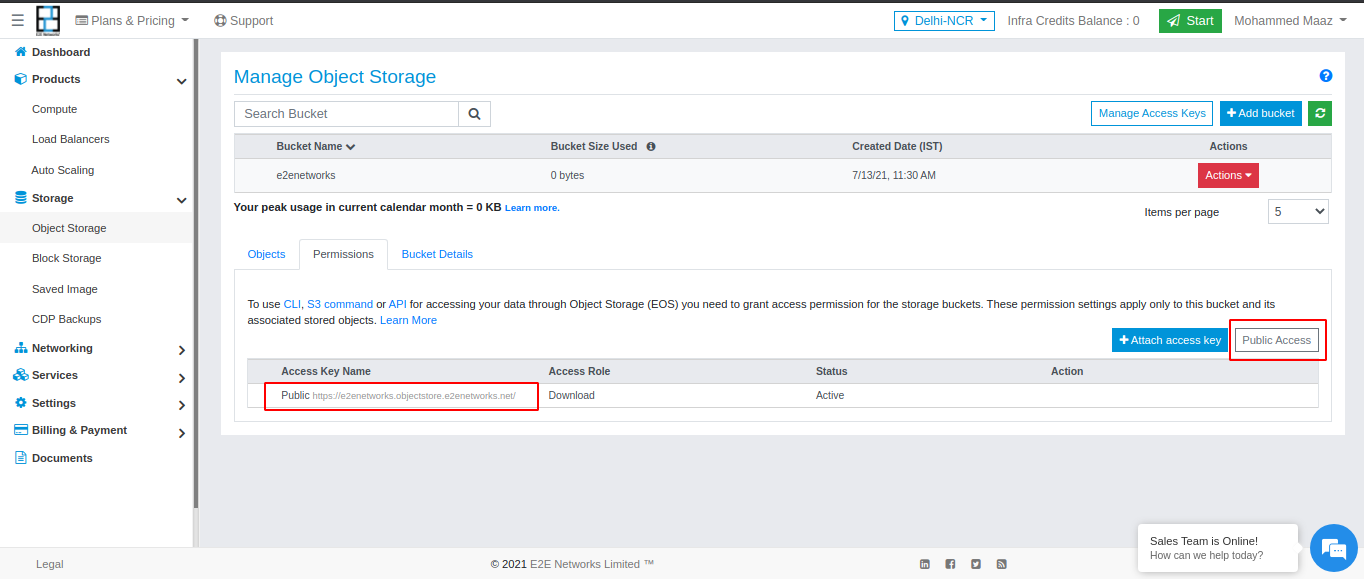
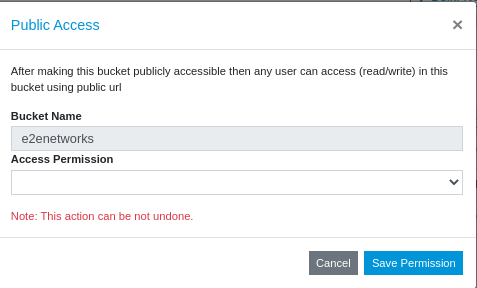
(EOS) you need to grant access permission for the storage buckets. These permission settings apply only to this bucket and its associated stored objects
Bucket Permissions
If you intend to use CLI or API for accessing your data on EOS then you will need to define bucket permissions.
Create access key
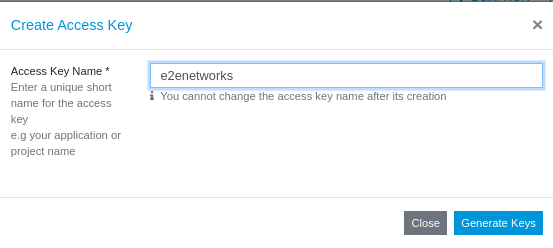
Enter a name for your access key. This can be an application name, project name or a team member name.
Click Generate Key.
If all goes well, you will see newly generated access and secret keys
Keep a note of both these keys as you will not see them again after you close the modal window.
If you have mc setup then use the given command to configure CLI for this access key.
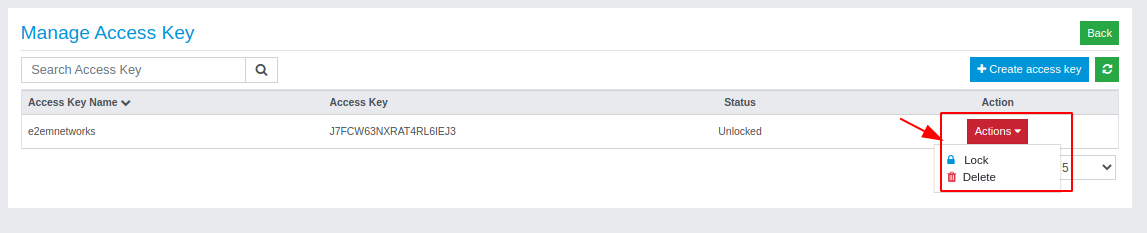
Manage Access
Sometimes you may need to disable access for certain users or target applications. The way to do that is to lock their access key from manage access page.
Go to Products > Storage Storage option in the sidebar menu
Click Manage Access Key
Identify the access you want to lock using key name
Click lock icon as desired
To unlock, follow the same steps above except this time you will see an unlock icon instead of lock.
Working with CLI
This tutorial contains steps for using s3-compatible CLI with the Object Store. We recommend using MinIO CLI (mc) for best experience.
Download MinIO Client
Linux (64-bit Intel)
https://dl.min.io/client/mc/release/linux-amd64/mc
Linux (64-bit PPC)
https://dl.min.io/client/mc/release/linux-ppc64le/mc
Windows (64-bit)
https://dl.min.io/client/mc/release/windows-amd64/mc.exe
MacOS
brew install minio/stable/mc
For other methods, visit MinIO documentation here.
Adding Picture in Bucket using CLI
Object store supports creation of multiple access credentials (keys) from storage section in my account. After generating or creating an access key, you will be provided with a mc config command:
mc config host add <Access key_name> https://objectstore.e2enetworks.net <access_key> <secret_key>
Minio CLI Configurations
mc config host add e2enetworks https://objectstore.e2enetworks.net <xxxxx><xxxx>

View Object Content
Use cat command to view contents of objects in your bucket. You can also use head command to display top few lines of an object.
<mybucket >is accesskey name. <mybucket-01> is bucket name
You can copy content from local system to object store using cp command. The copy operations to object store are verified with MD5SUM checksums. Interrupted or failed attempts can be resumed from the point of failure.
<mybucket >is accesskey name. <mybucket-01> is bucket name

Remove Content
Use rm command to delete file or object.
<mybucket >is accesskey name. <mybucket-01> is bucket name

Uploading Videos to Bucket Storage and attaching with CDN
Please go to My Account and log in using your credentials set up at the time of creating and activating the E2E Networks My Account.
Sign into My Account
Go to Products > Storage option in sidebar menu
Click on Upload button
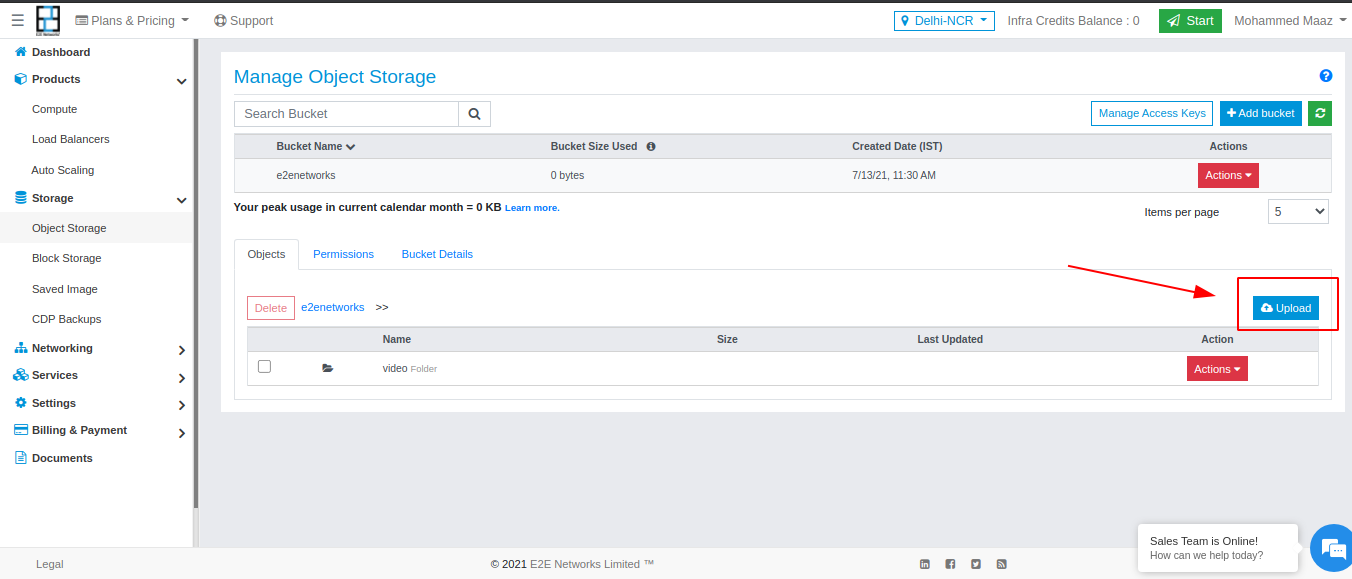
Uploading objects in EOS:
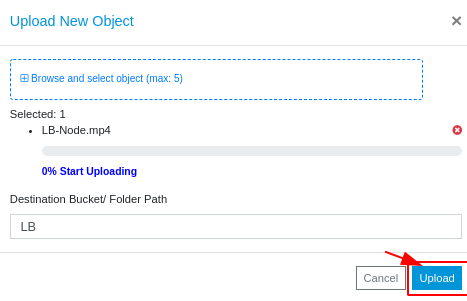
After Uploading video it can be accessed by url:
https://e2enetworks.objectstore.e2enetworks.net/LB/LB-Node.mp4 <https://bucket-link>/File -directory>
Creating CDN
E2E CDN is a fast content delivery network (CDN) service that securely delivers data, and static contents to customers globally with low latency, high transfer speeds. The idea of a CDN is essentially to have multiple edges in different locations of the world which caches all the static content so that it can be delivered from the customer’s closest location. We intend to integrate CDN such that people hosting applications through us can use CDNs to improve their static asset delivery. With E2E’s CDN, you can take the initial steps to speed up the delivery of your static content (for example images, JavaScripts, Style Sheets, and many others). With E2E CDN, you can guarantee your viewers a fast, reliable, and safe experience across the globe. To create CDN with E2E.
Navigate to the CDN page on MyAccount
On the left side of the My Account dashboard, click on the “CDN” sub-menu available under the “Services” section.
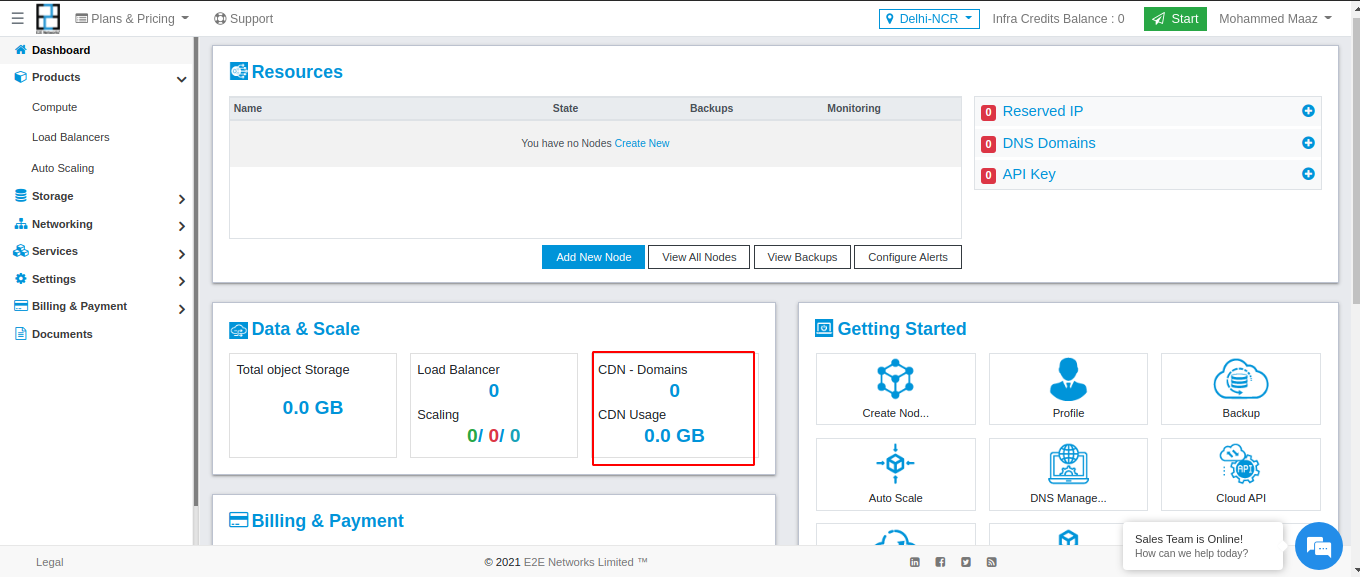
Click on the “Create CDN” button. You will be redirected to the “Create Content Delivery Network” page.
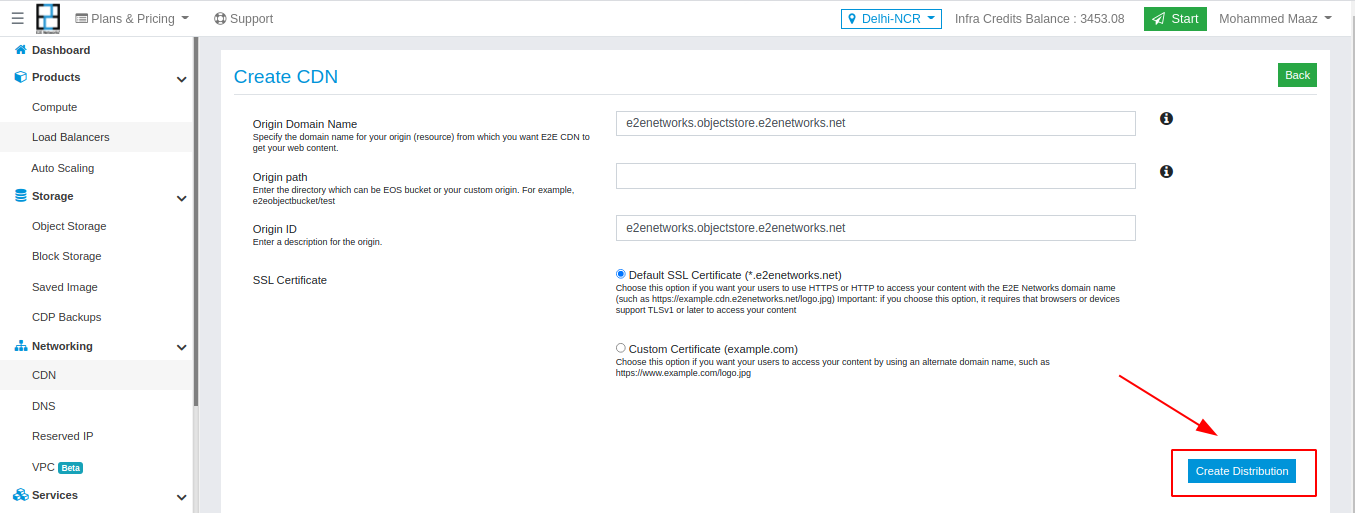
Here, you need to specify the ‘Origin Domain Name’, ‘Origin Path’, and ‘Origin ID’.
Origin Domain Name: Enter the “Origin Domain Nameâ€. For example, xyz.abc.com / abc.com.
It is the DNS domain name of the HTTP Server or E2E Object storage bucket from which your static content gets delivered. For example, xyz.abc.com / abc.com. The files in your origin must be publicly readable. E2E CDN will contact this origin for the content requested by the user if not found on the CDN edge server cache.
Origin Path: Enter the “Origin Path†beginning with /. For example, xyz.com/static. Do not include / at the end of the directory name.
It is the path of the folder or directory from where the content should be delivered. CDN appends the directory name to the value of Origin Domain Name when forwarding the request to the origin. If the content from this directory fails, CDN will give a “Not Found†response to the user.
Origin ID: Enter a description for the “Origin Pathâ€. This value lets you distinguish multiple origins in the same distribution from one another. The description for each origin must be unique within the distribution. Currently, you can add only a single origin for a distribution.
SSL Certificate:
Default SSL Certificate (*.e2enetworks.net) Choose this option if you want your users to use HTTPS or HTTP to access your content with the E2E Networks domain name (such as https://example.cdn.e2enetworks.net/logo.jpg) Important: if you choose this option, it requires that browsers or devices support TLSv1 or later to access your content.
Custom Certificate (example.com) Choose this option if you want your users to access your content by using an alternate domain name, such as https://www.example.com/logo.jpg.
If you want to use a custom certificate then you need to specify the CNAMEs separated with commas or put each on a new line.
Note
Origin Domain and Alternate Domain Names(CNAMEs)(if any provided) should have the same domain names. All the Alternate Domain Names(CNAMEs) on the CDN should be covered by the Subject Alternative Name (SAN) of the certificate.

After specifying the above value, click on the Create Distribution button. You will automatically redirect to the CDN Services page and a confirmation message will appear on the screen.
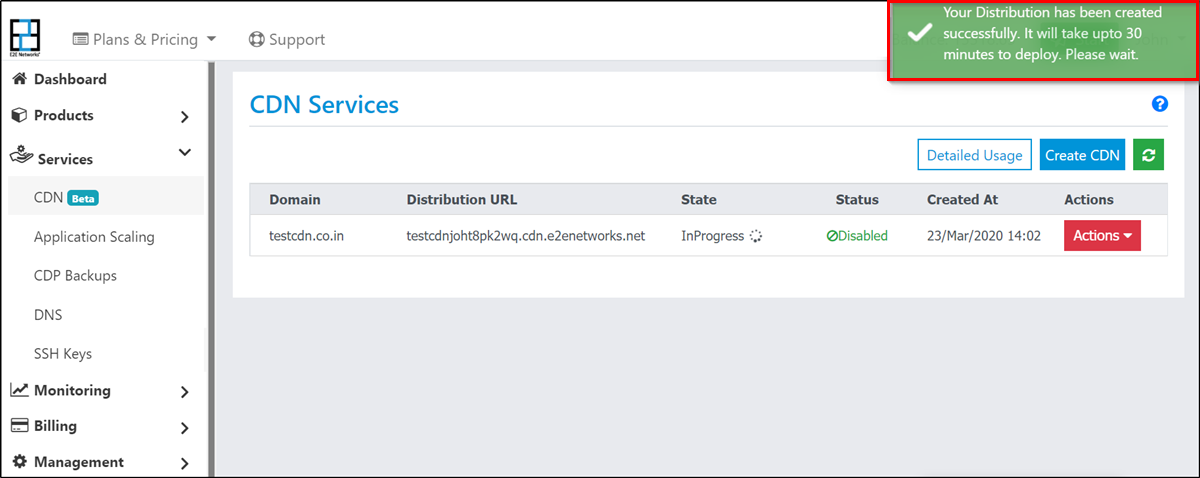
Note
After the creation of CDN distribution, it will take up to 30 minutes to deploy the configuration changes on the CDN Edge servers.
CDN URL e2enetworksn3dd0rlzwd.cdn.e2enetworks.net/LB/LB-Node.mp4
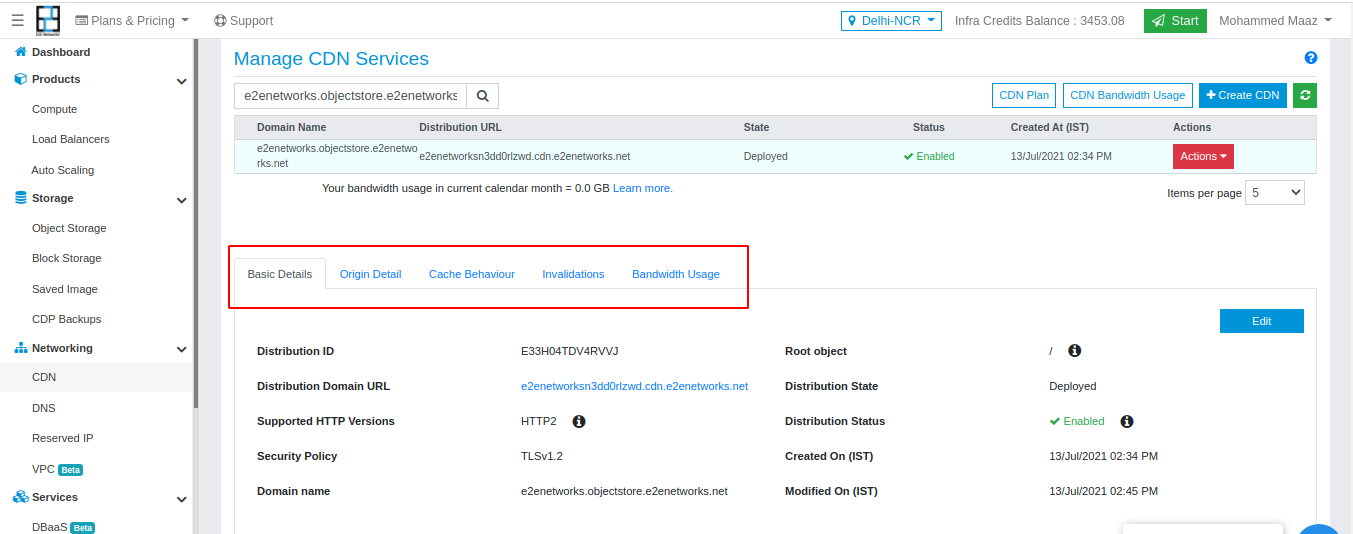
Manage/Update CDN settings
There are 5 types of settings that a user can check and update for any CDN:
Basic Details
In the Basic detail tab, you will get to the general information about your CDN which are the default settings and you specify during the creation/updation of the CDN. Click on the Edit button to update the basic setting of your distribution.