Resource Transfer
Resource Transfer action allows users to transfer their services from one project to another within the same CRN.
Note
This action is only available to Owners and Contact Persons with the roles of Admin or Project Lead.
Node
Using this action you can transfer your node from node’s current project to another project within the same CRN. On transferring this node, all attached Reserved IPs, Backups, Volumes, and Saved Images associated with this node will also be transferred to the selected project.
Note
After the transfer, the security group attached to the node in the current project will be removed, and the node will be assigned the default security group of the target project.
- To transfer the node
Ensure the node is not in Creating, Terminating, Failed state. Also, the node should not be Locked.
The node should not be attached to a Load Balancer or to a Scalable File System.
Auto-scaling configured using the node’s saved image also prohibits transfer.
The node must not have any Tags, VPC, or more than one security group assigned.
No services with attached tags should be linked to the node.
To transfer a node, click on Move To Another Project from Actions.
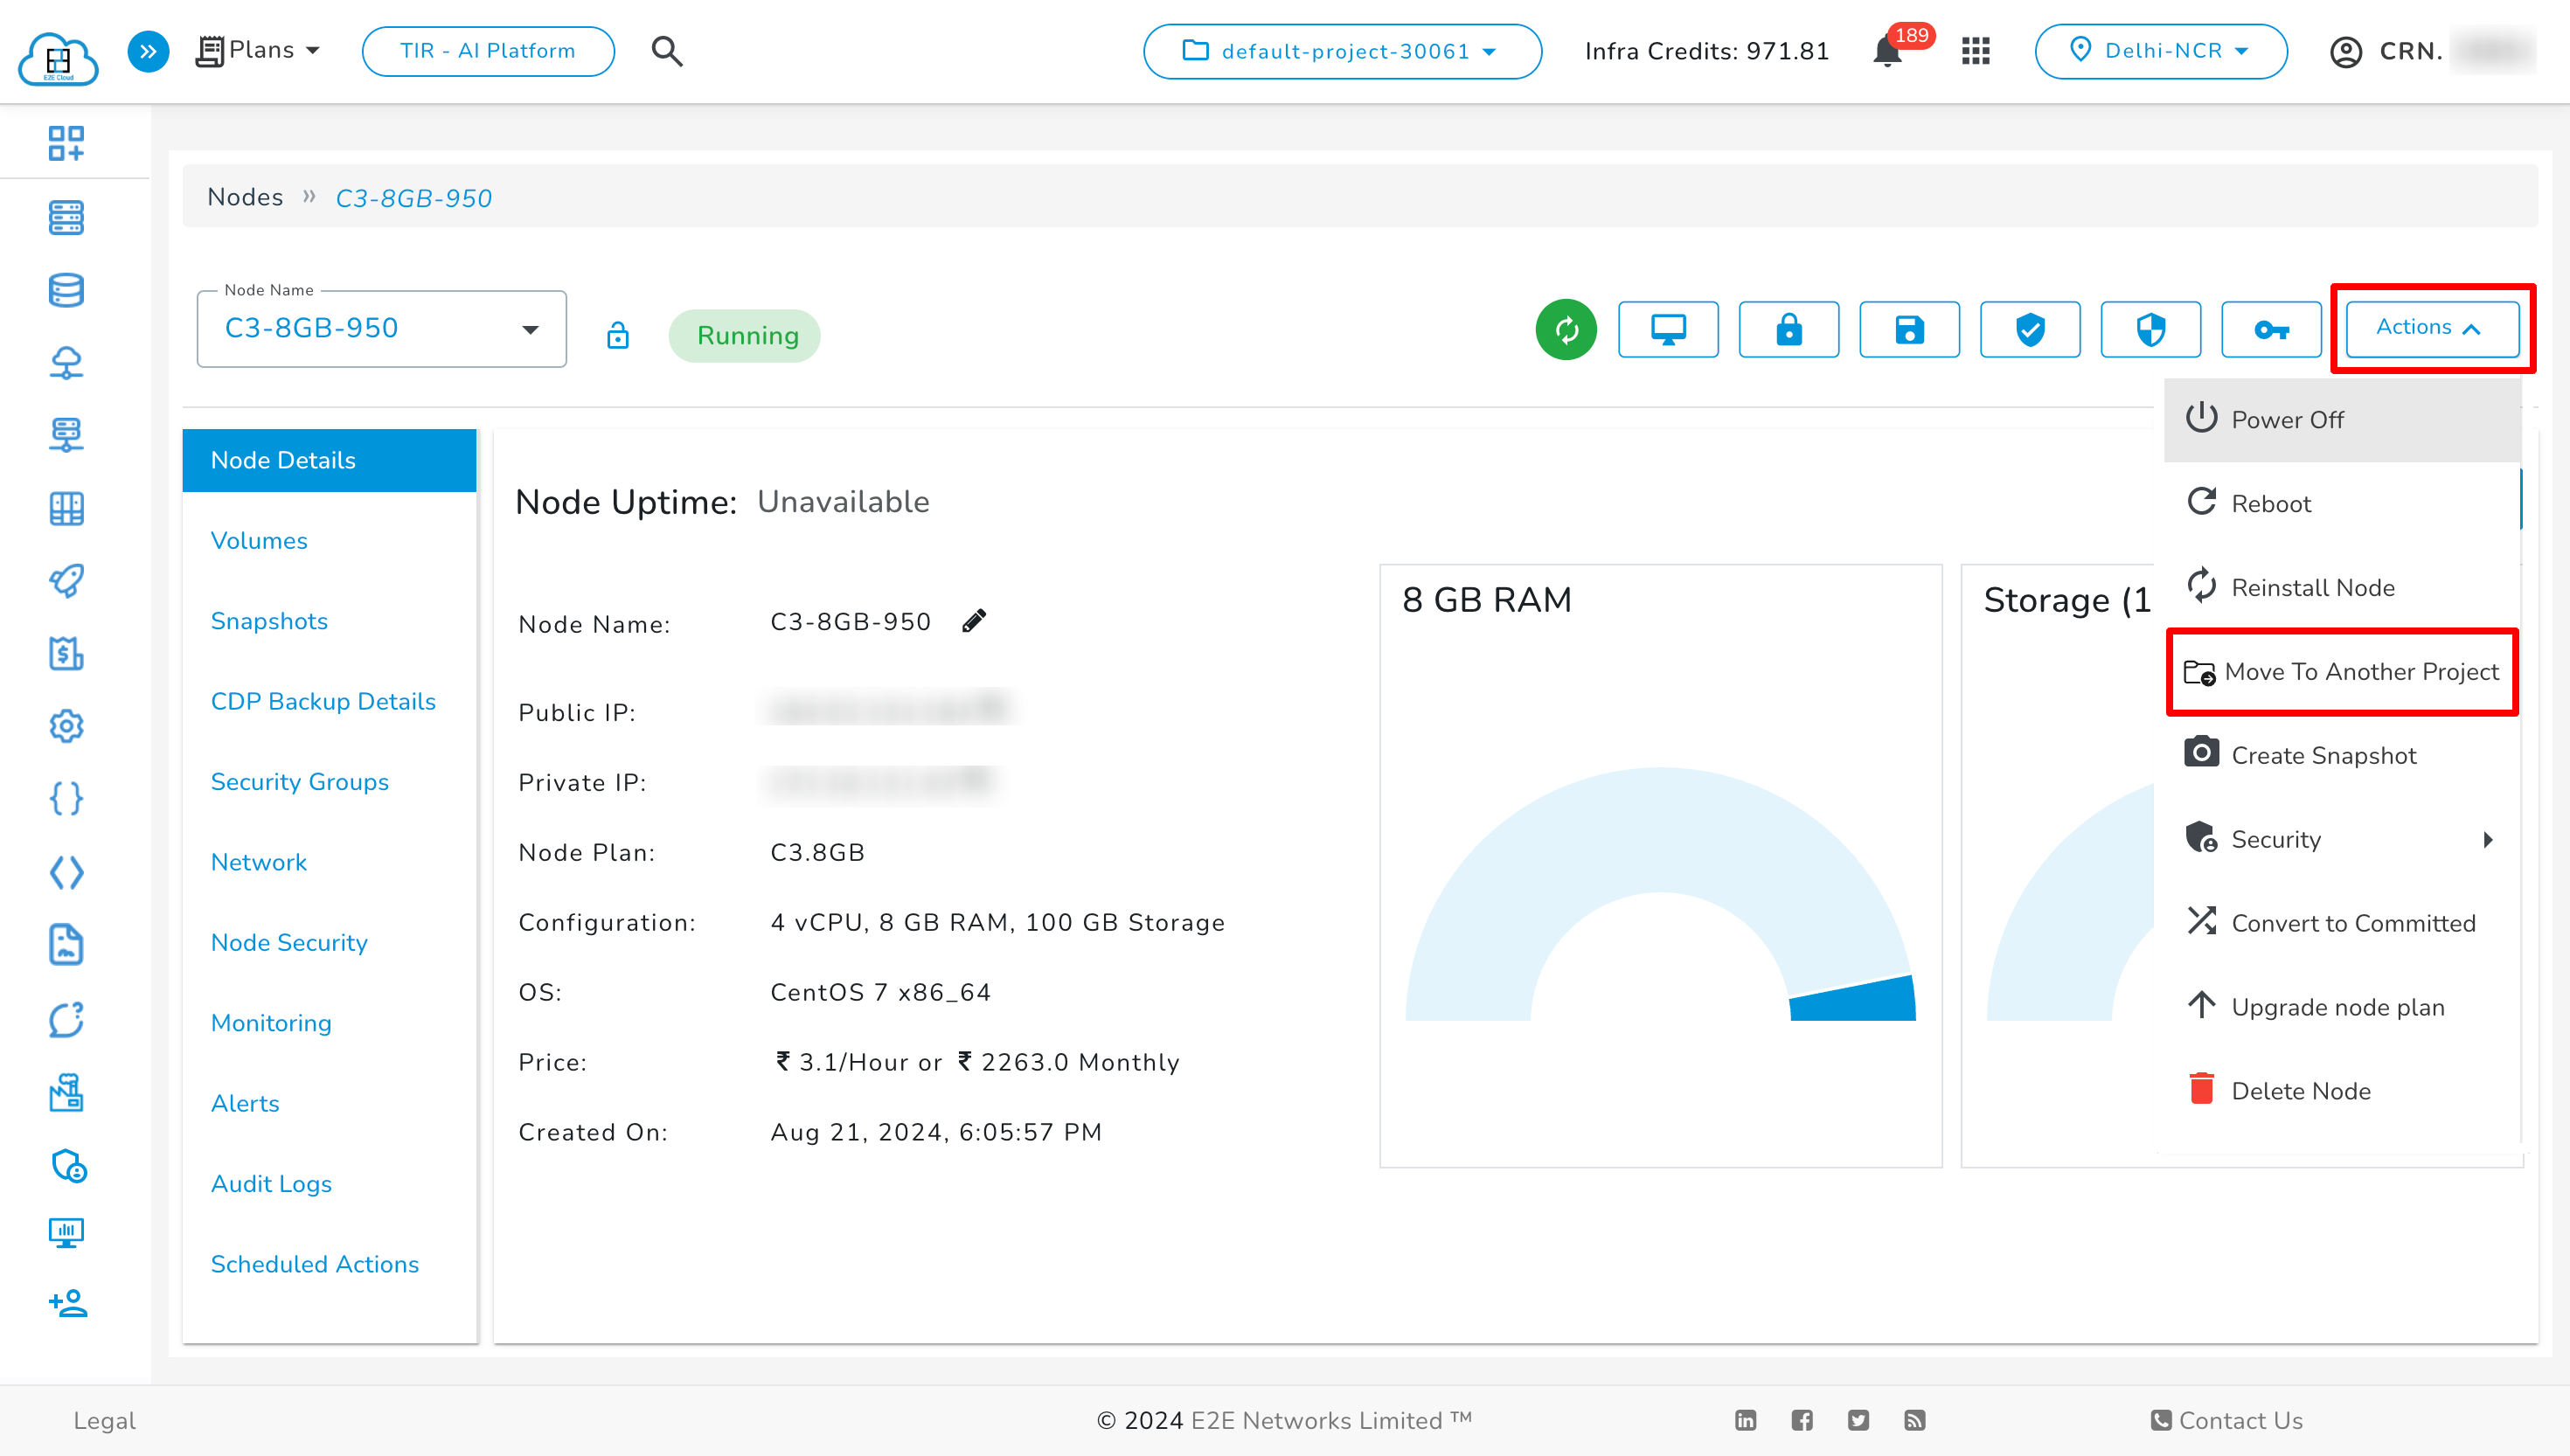
Now, select the target project, check the checkbox, and click Transfer.

Note
An audit log will be generated for the node and any associated resources in both the current and target projects during the transfer.
Images
Using this action you can transfer your image from image’s current project to another project within the same CRN.
Note
To transfer the image -
Ensure the image is not in Deleting or Error state.
Ensure no Auto-scaling is configured using the image.
The image must not have any Tags attached.
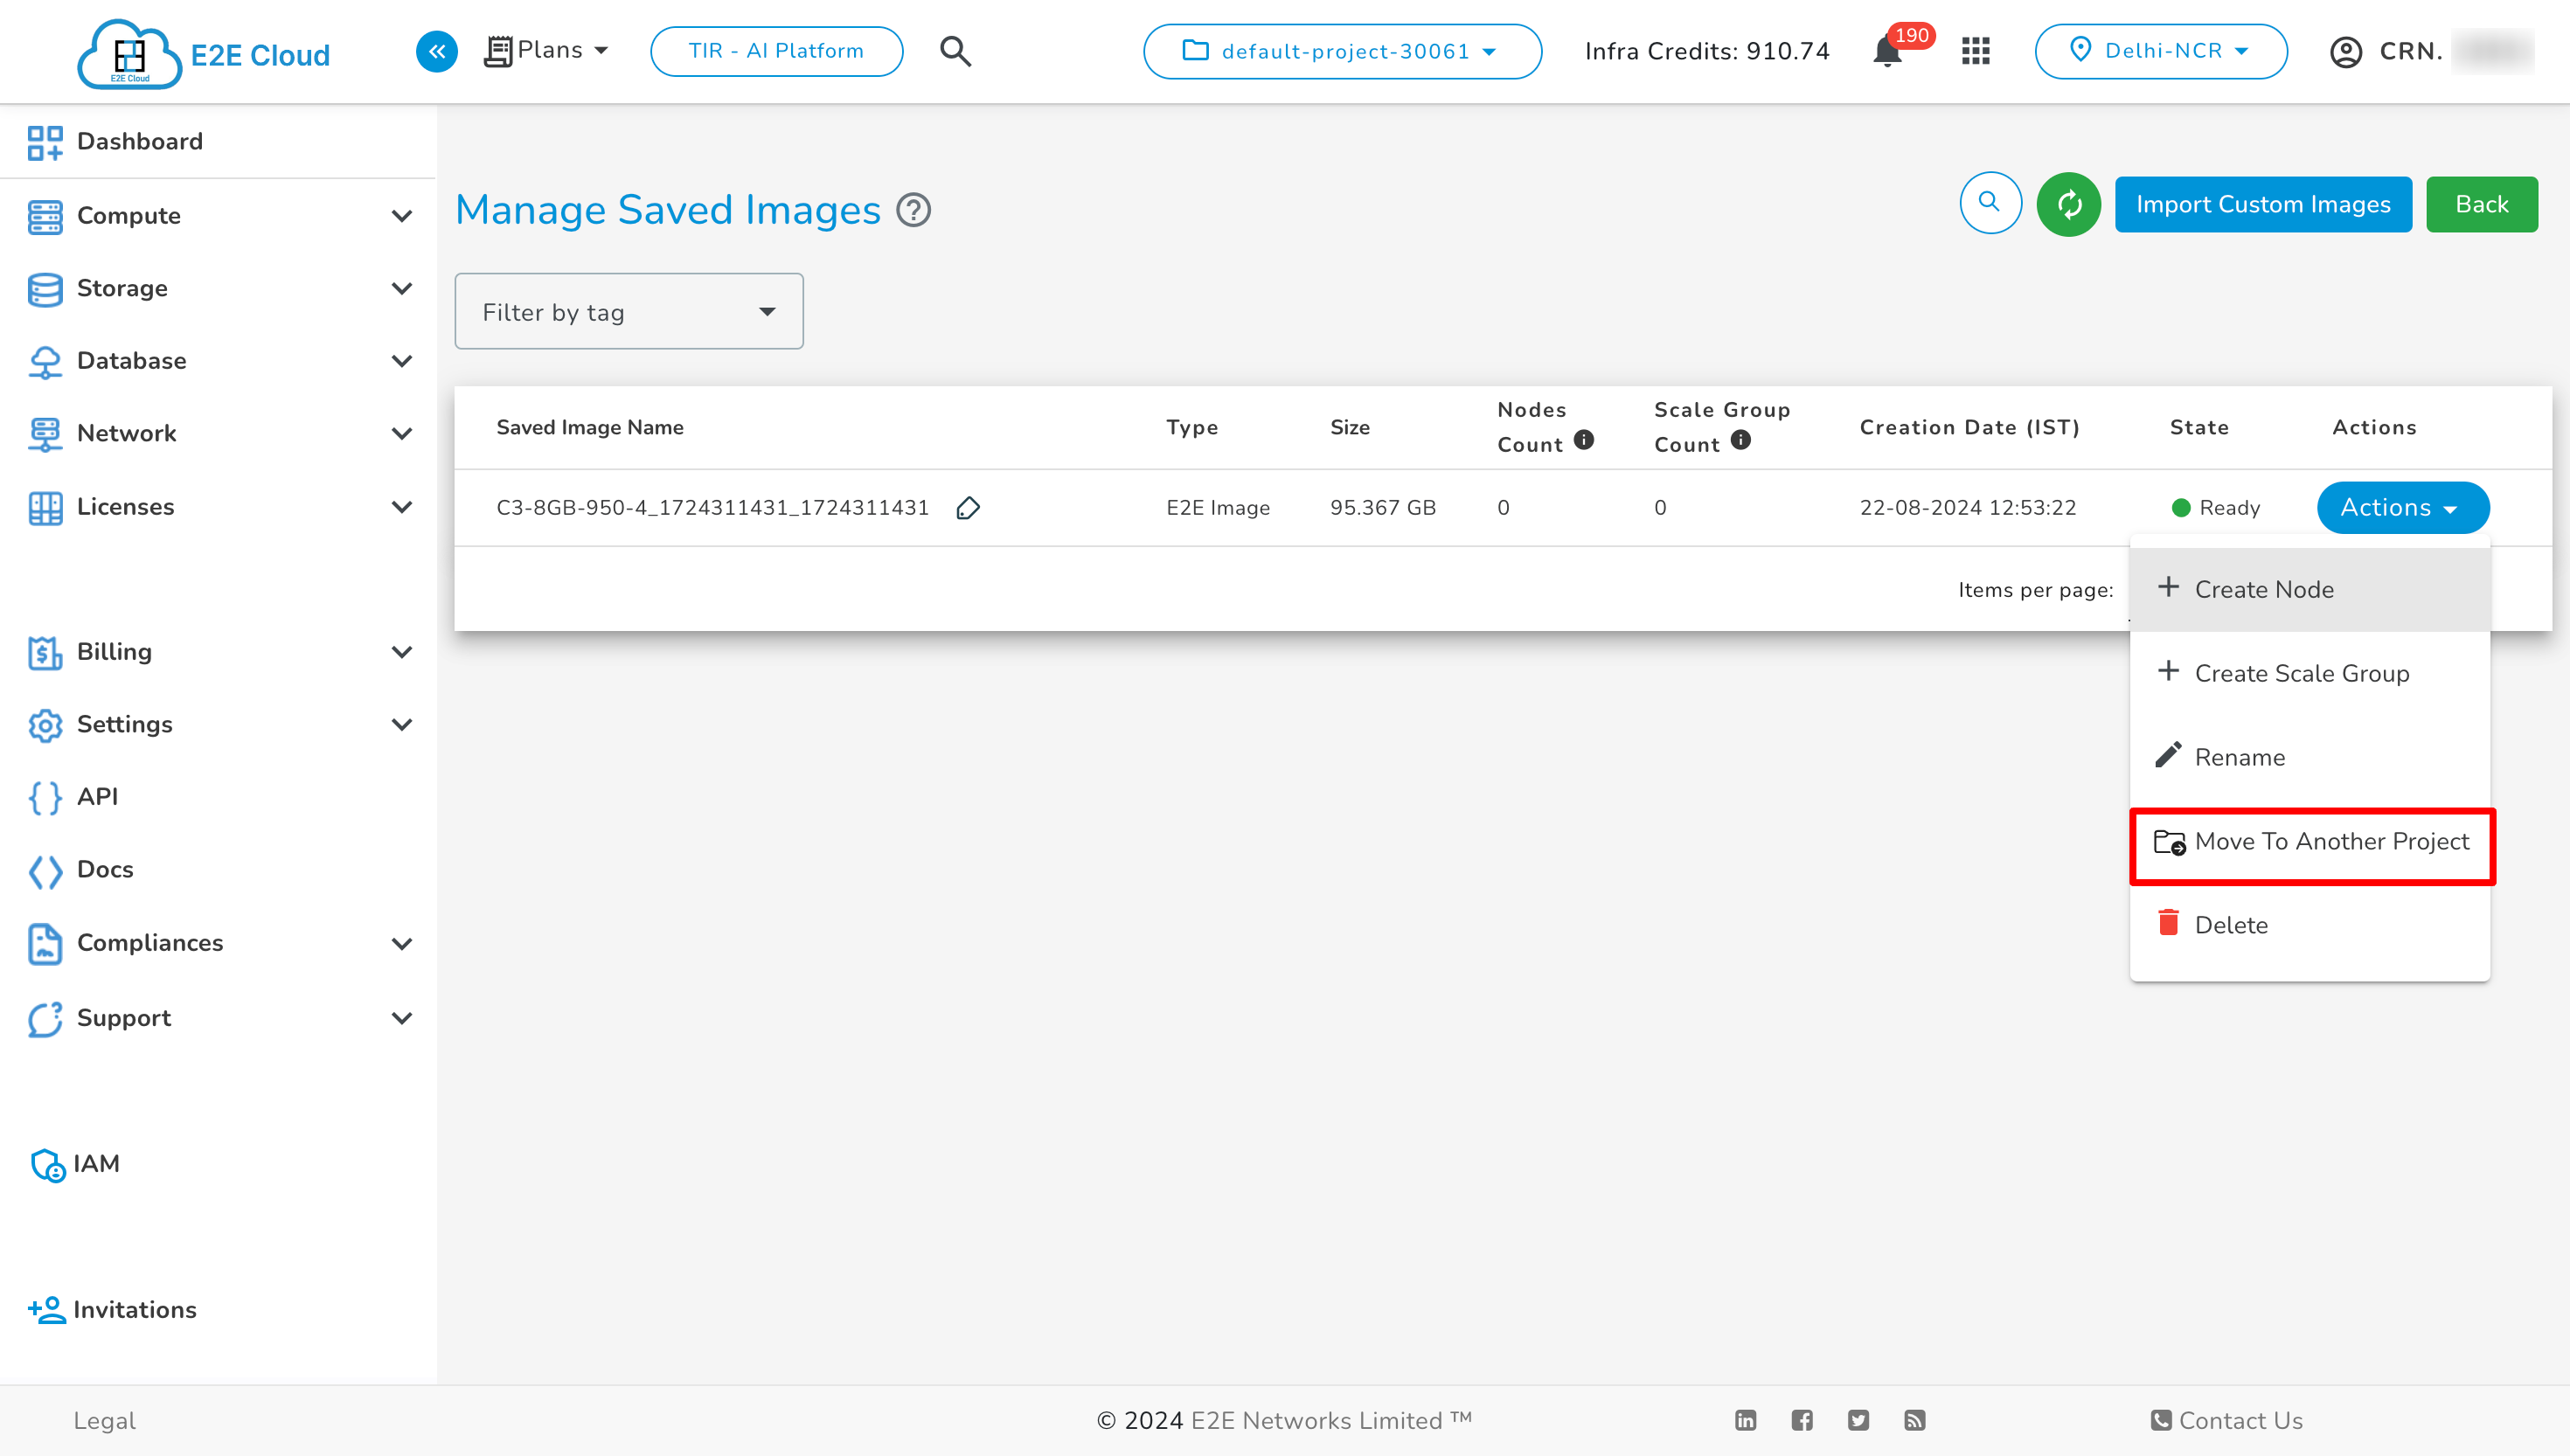
To transfer a image, click Move To Another Project from Actions.
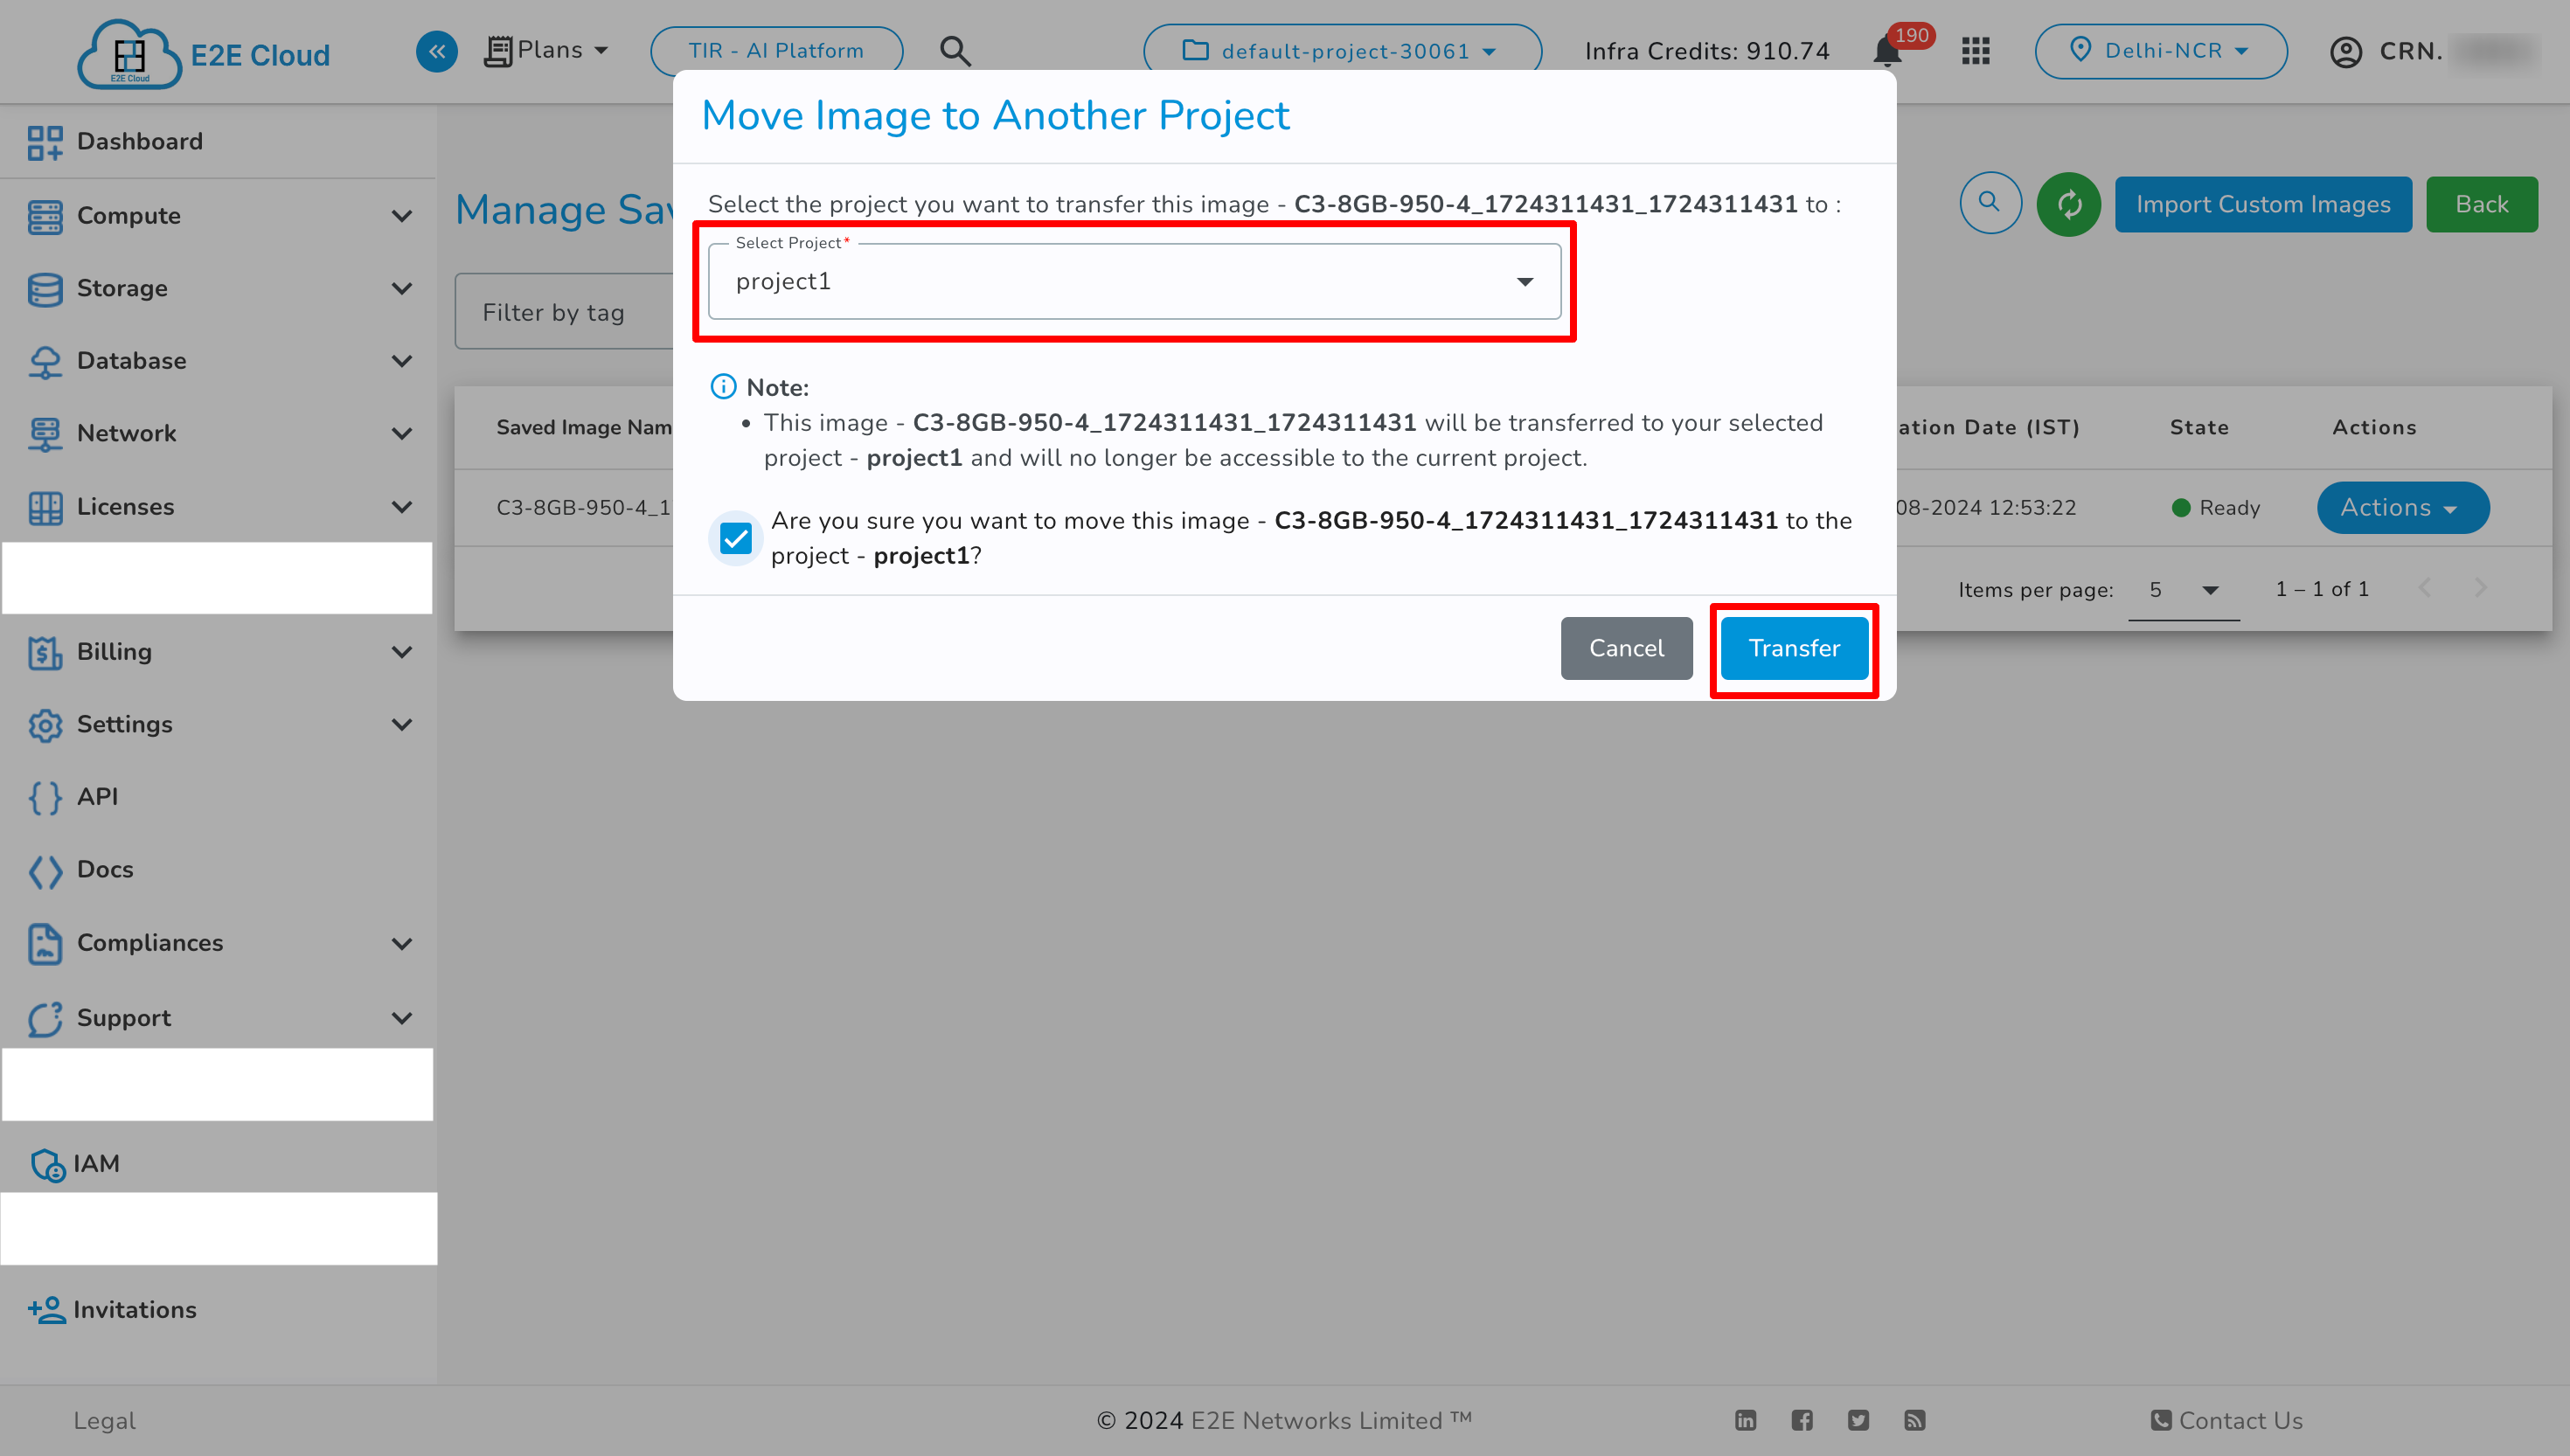
Now, select the target project, check the checkbox, and click Transfer.
Volume
Using this action you can transfer your volume from volume’s current project to another project within the same CRN. On transferring this volume, Snapshots of volume will also be transferred.
Note
To transfer the volume -
Ensure the volume is not in Attached, Creating, Deleting or Error state.
The volume must not have any Tags attached.
To transfer the volume click on Move To Another Project button in actions.
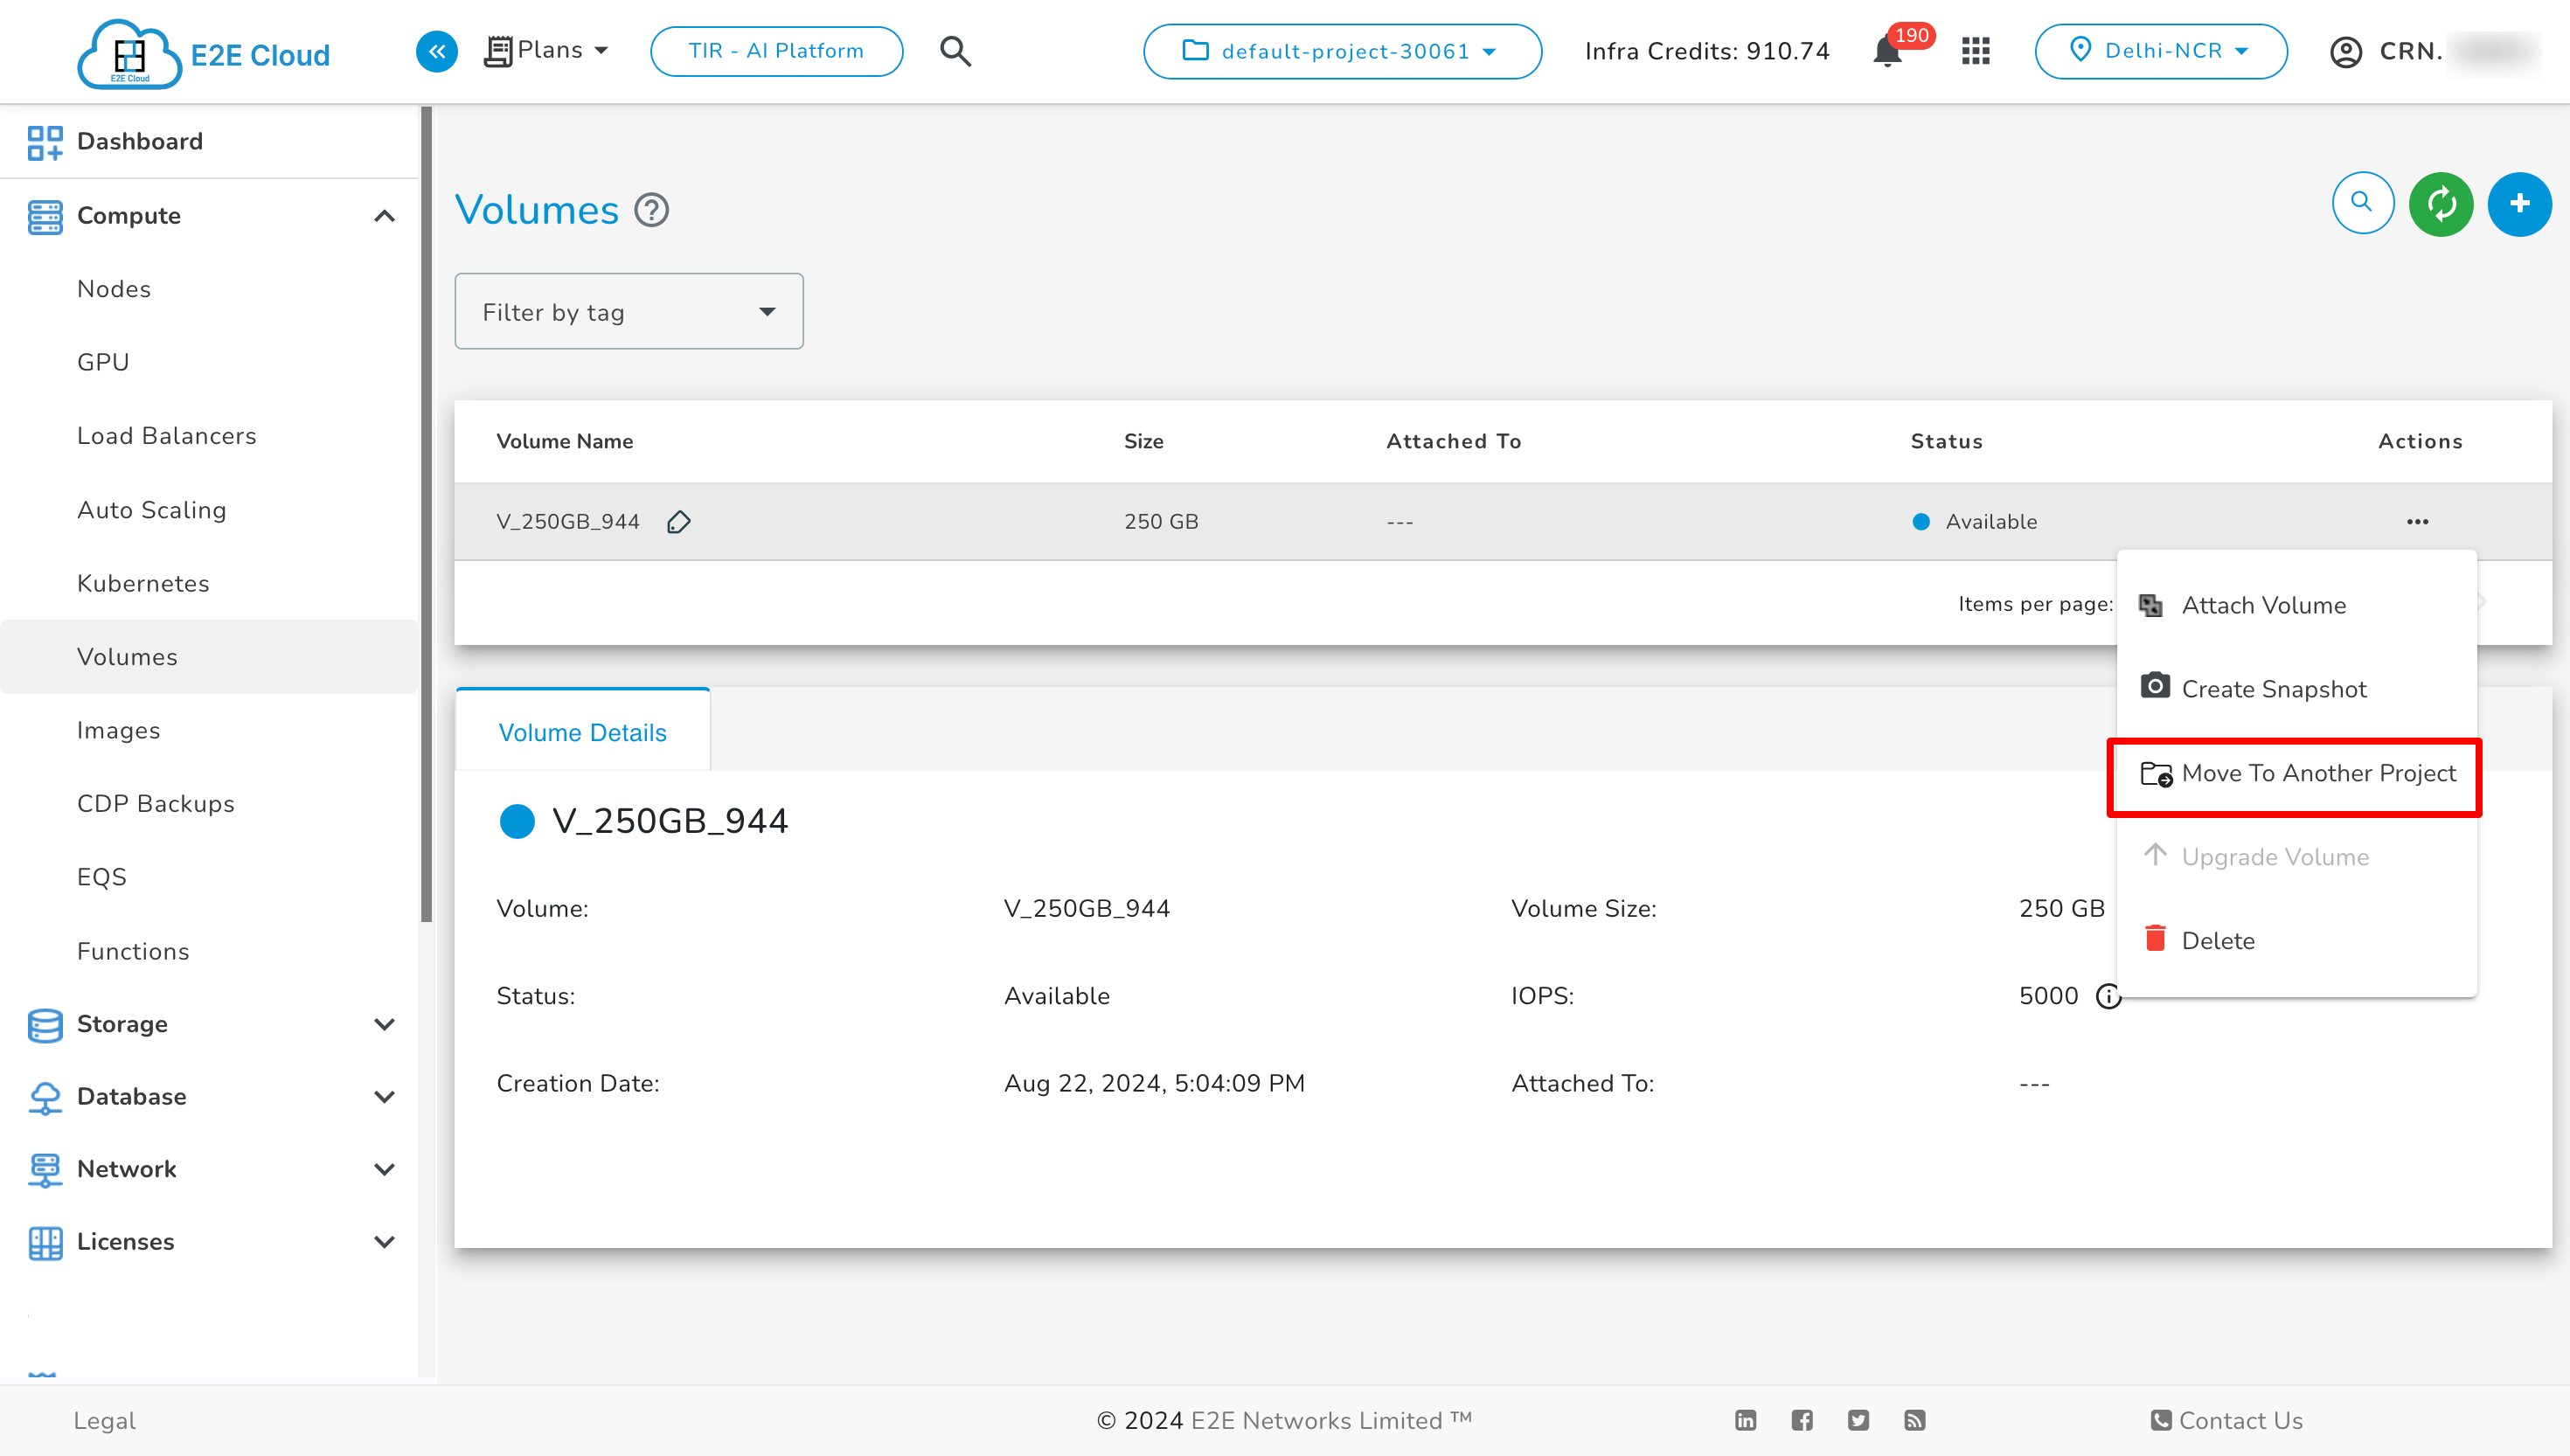
Then click on Move To Another Project from Actions, select the target project, check the checkbox, and click Transfer.

Note
An audit log will be created for the transfer in both the current and target projects during the transfer.
Reserve IP
Using this action you can transfer your reserve ip from its current project to another project within the same CRN.
Note
To transfer the reserve ip -
Ensure the reserve ip is not in Attached or Unavailable state.
The reserve ip must not have any Tags attached.
To transfer the reserve ip click on Move To Another Project button in actions.
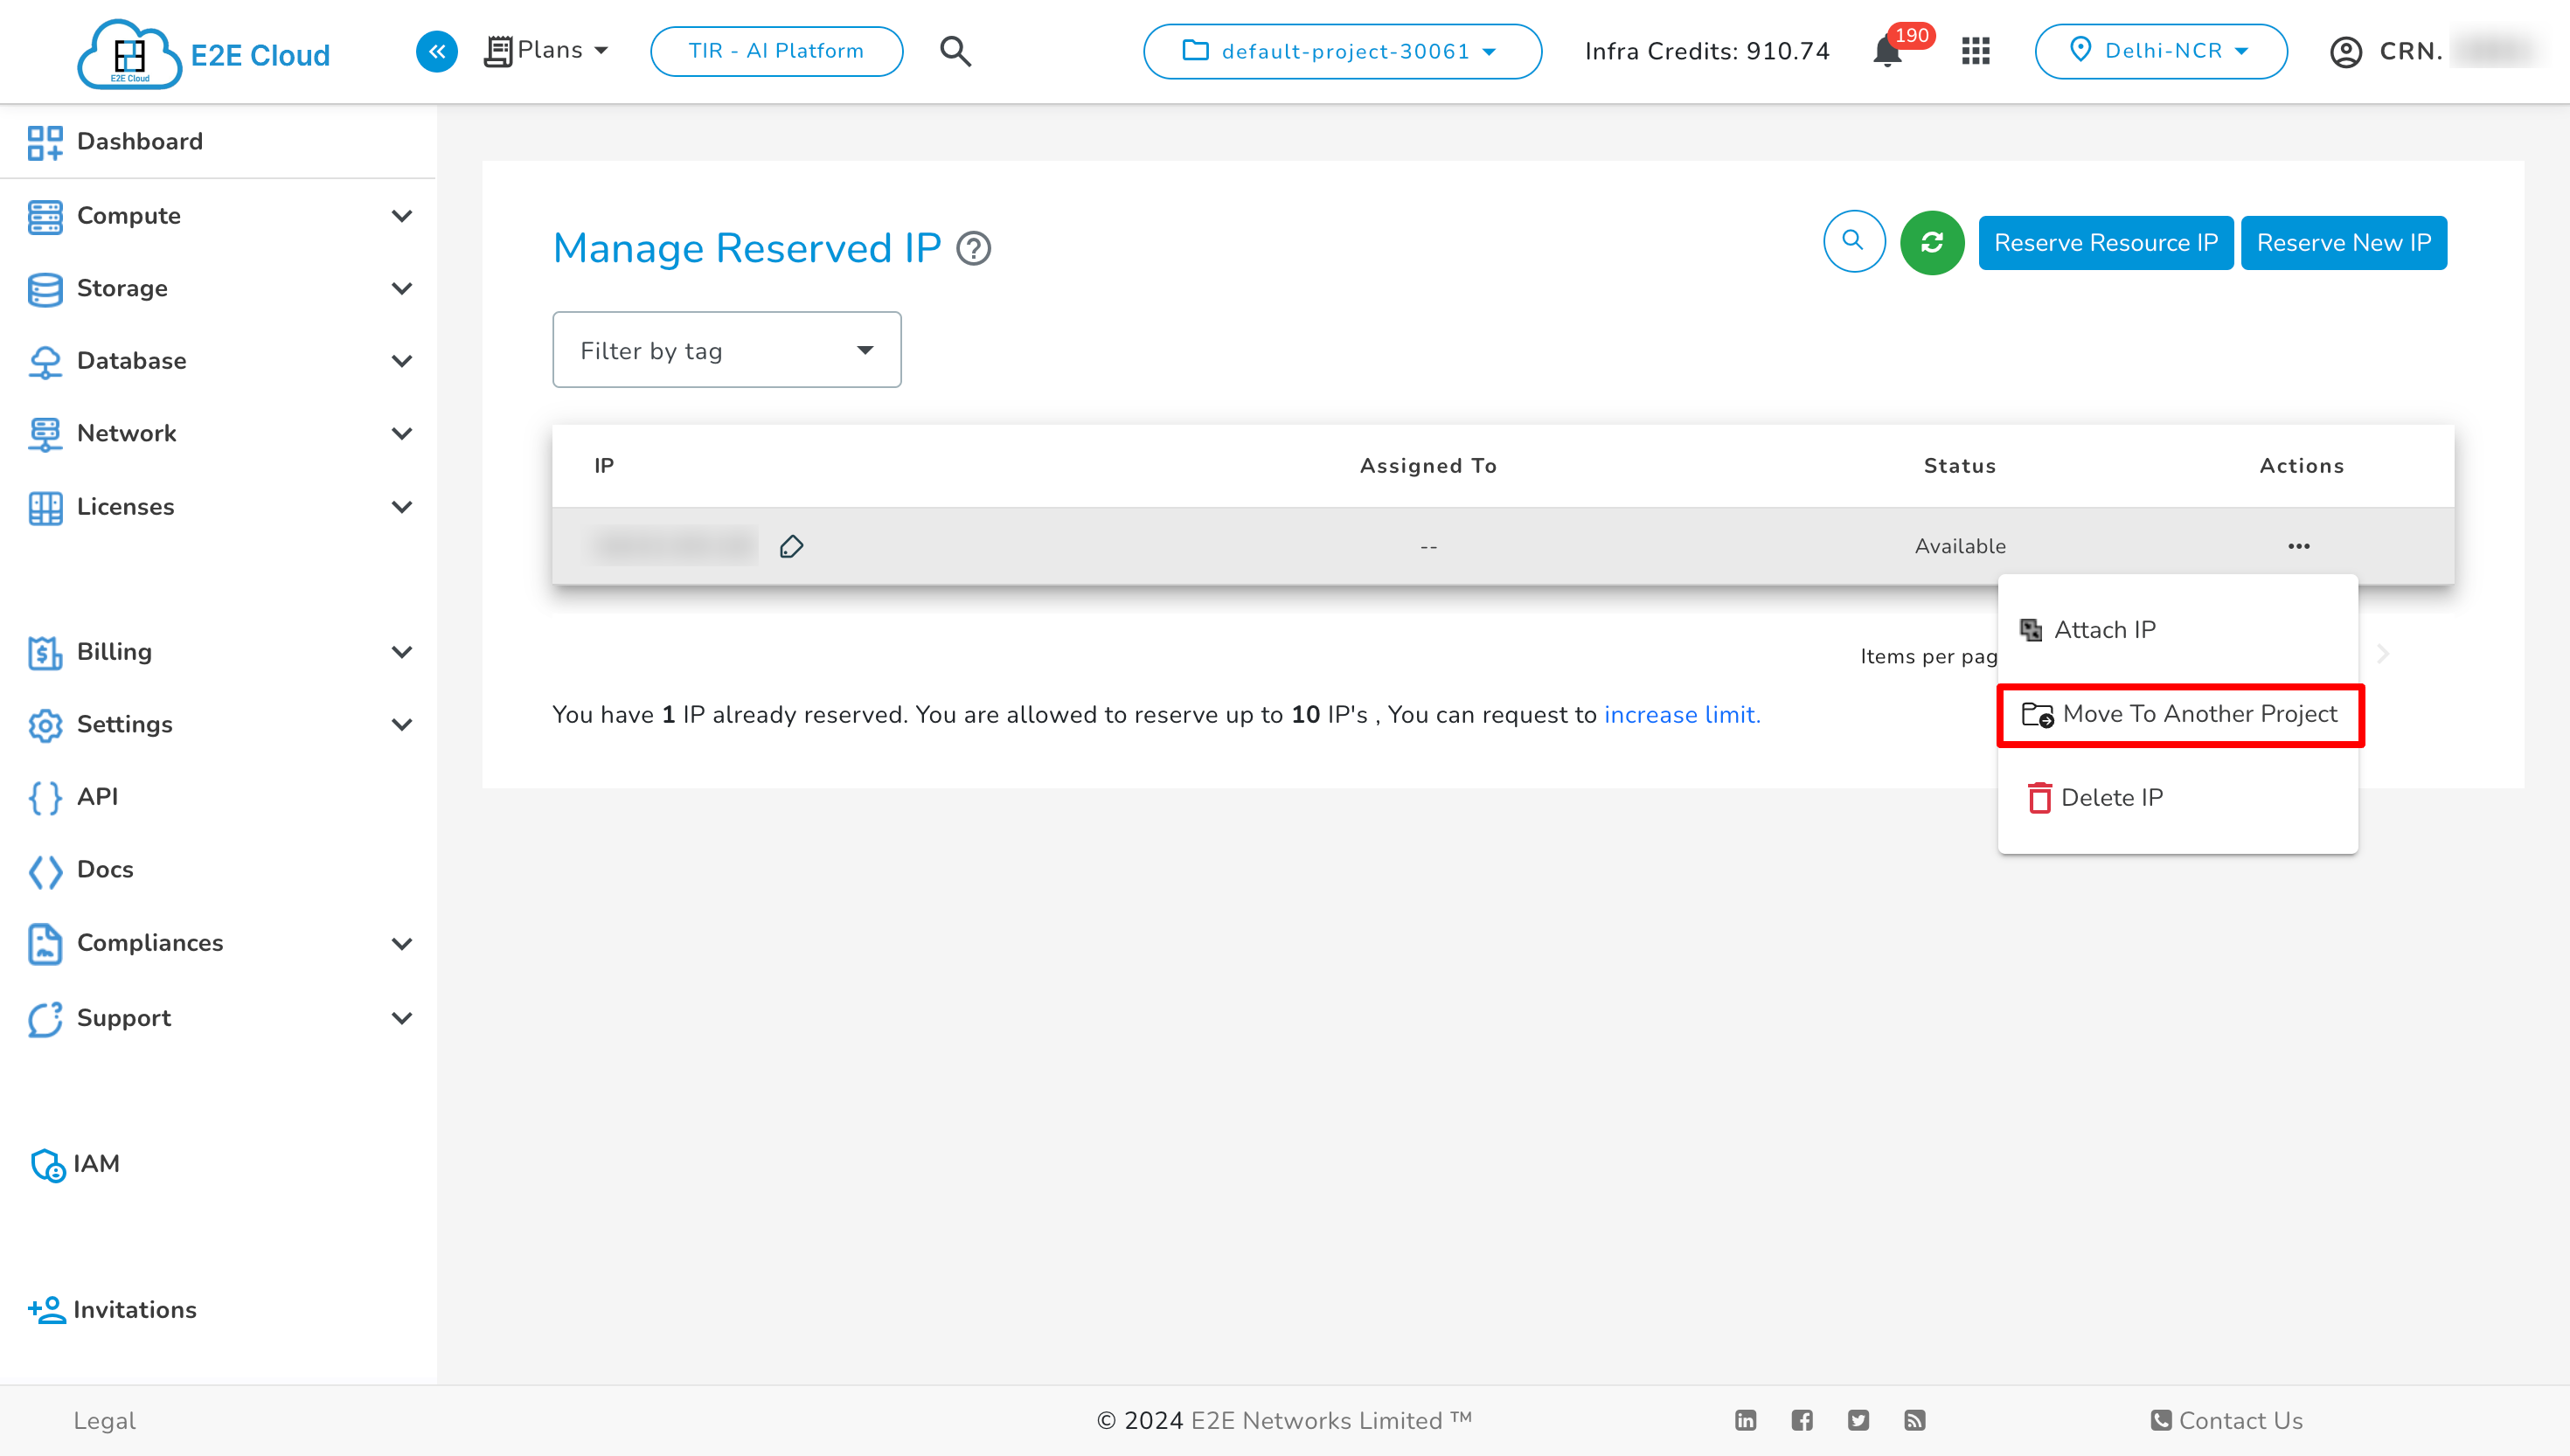
Then click on Move To Another Project from Actions, select the target project, check the checkbox, and click Transfer.
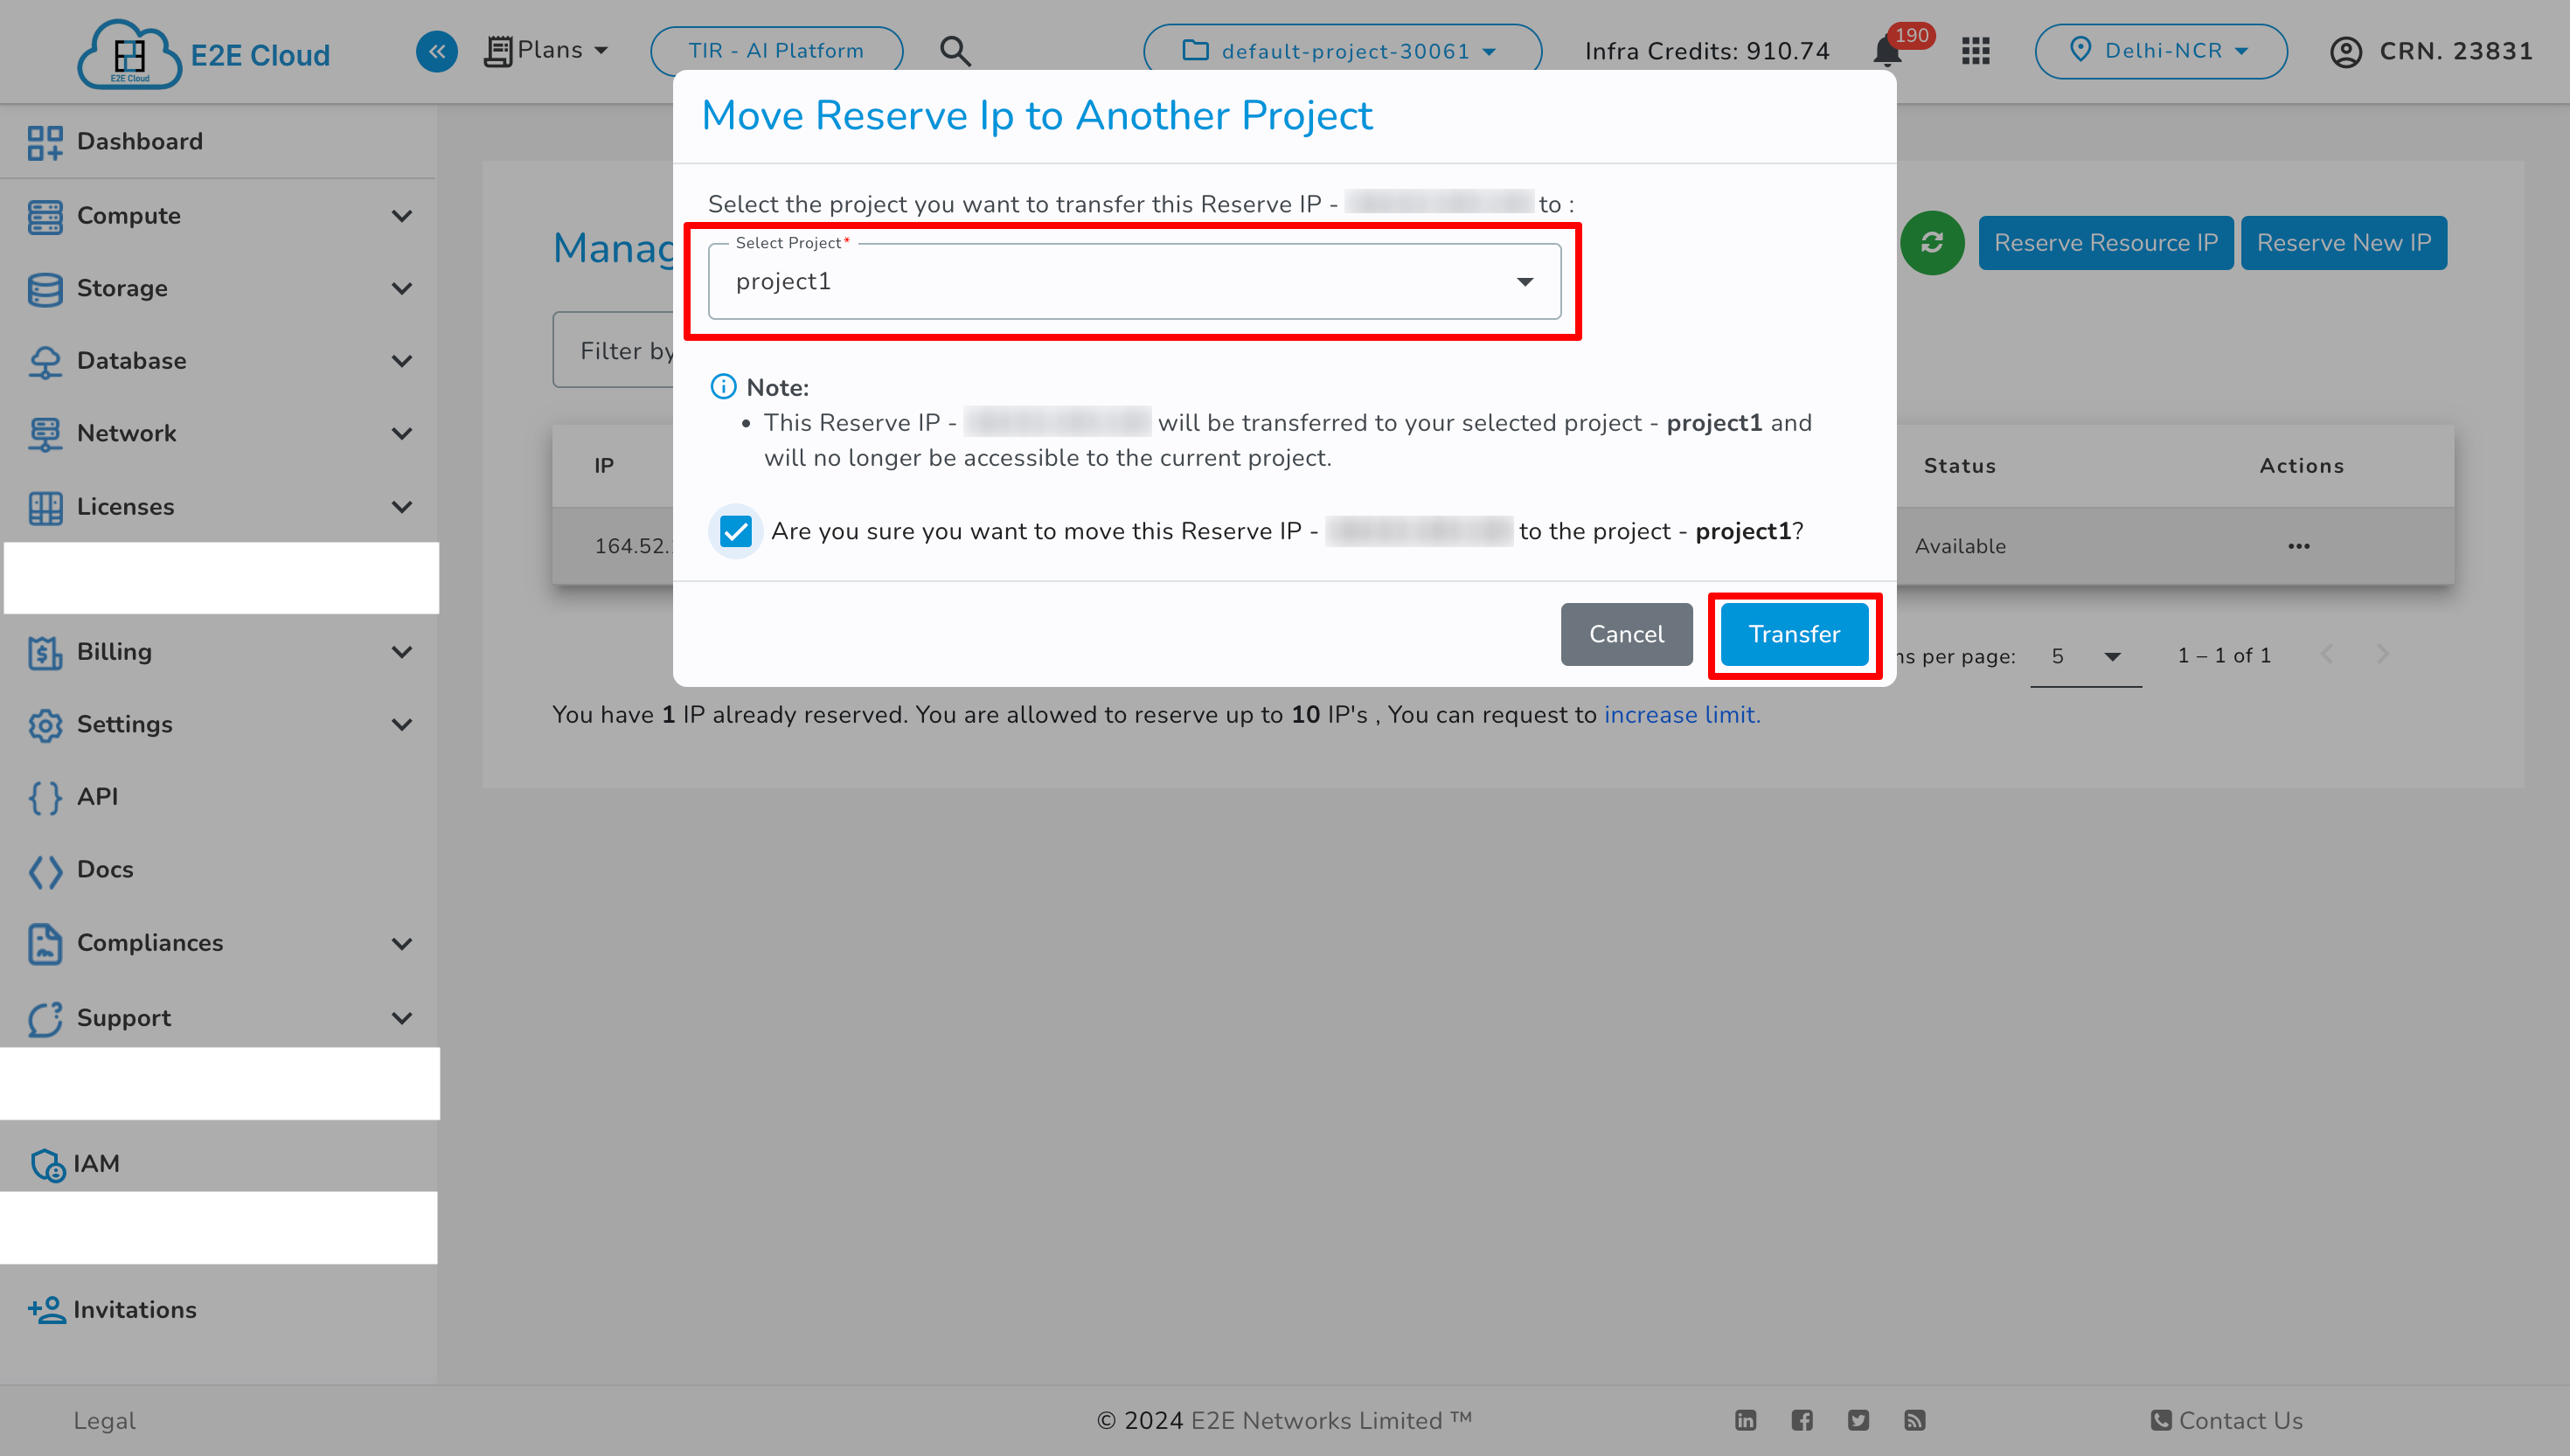
Note
An audit log will be created for the transfer in both the current and target projects during the transfer.
Dbaas
Using this action you can transfer your dbaas from its current project to another project within the same CRN.
Note
To transfer the dbaas -
Ensure the Dbaas is in Running or Stopped only.
The Dbaas must not have any Tags, VPC or Parameter Group attached.
Transfer is not permitted for Kafka databases.
To transfer the Dbaas click on Move To Another Project button in actions.

Then click on Move To Another Project from Actions, select the target project, check the checkbox, and click Transfer.
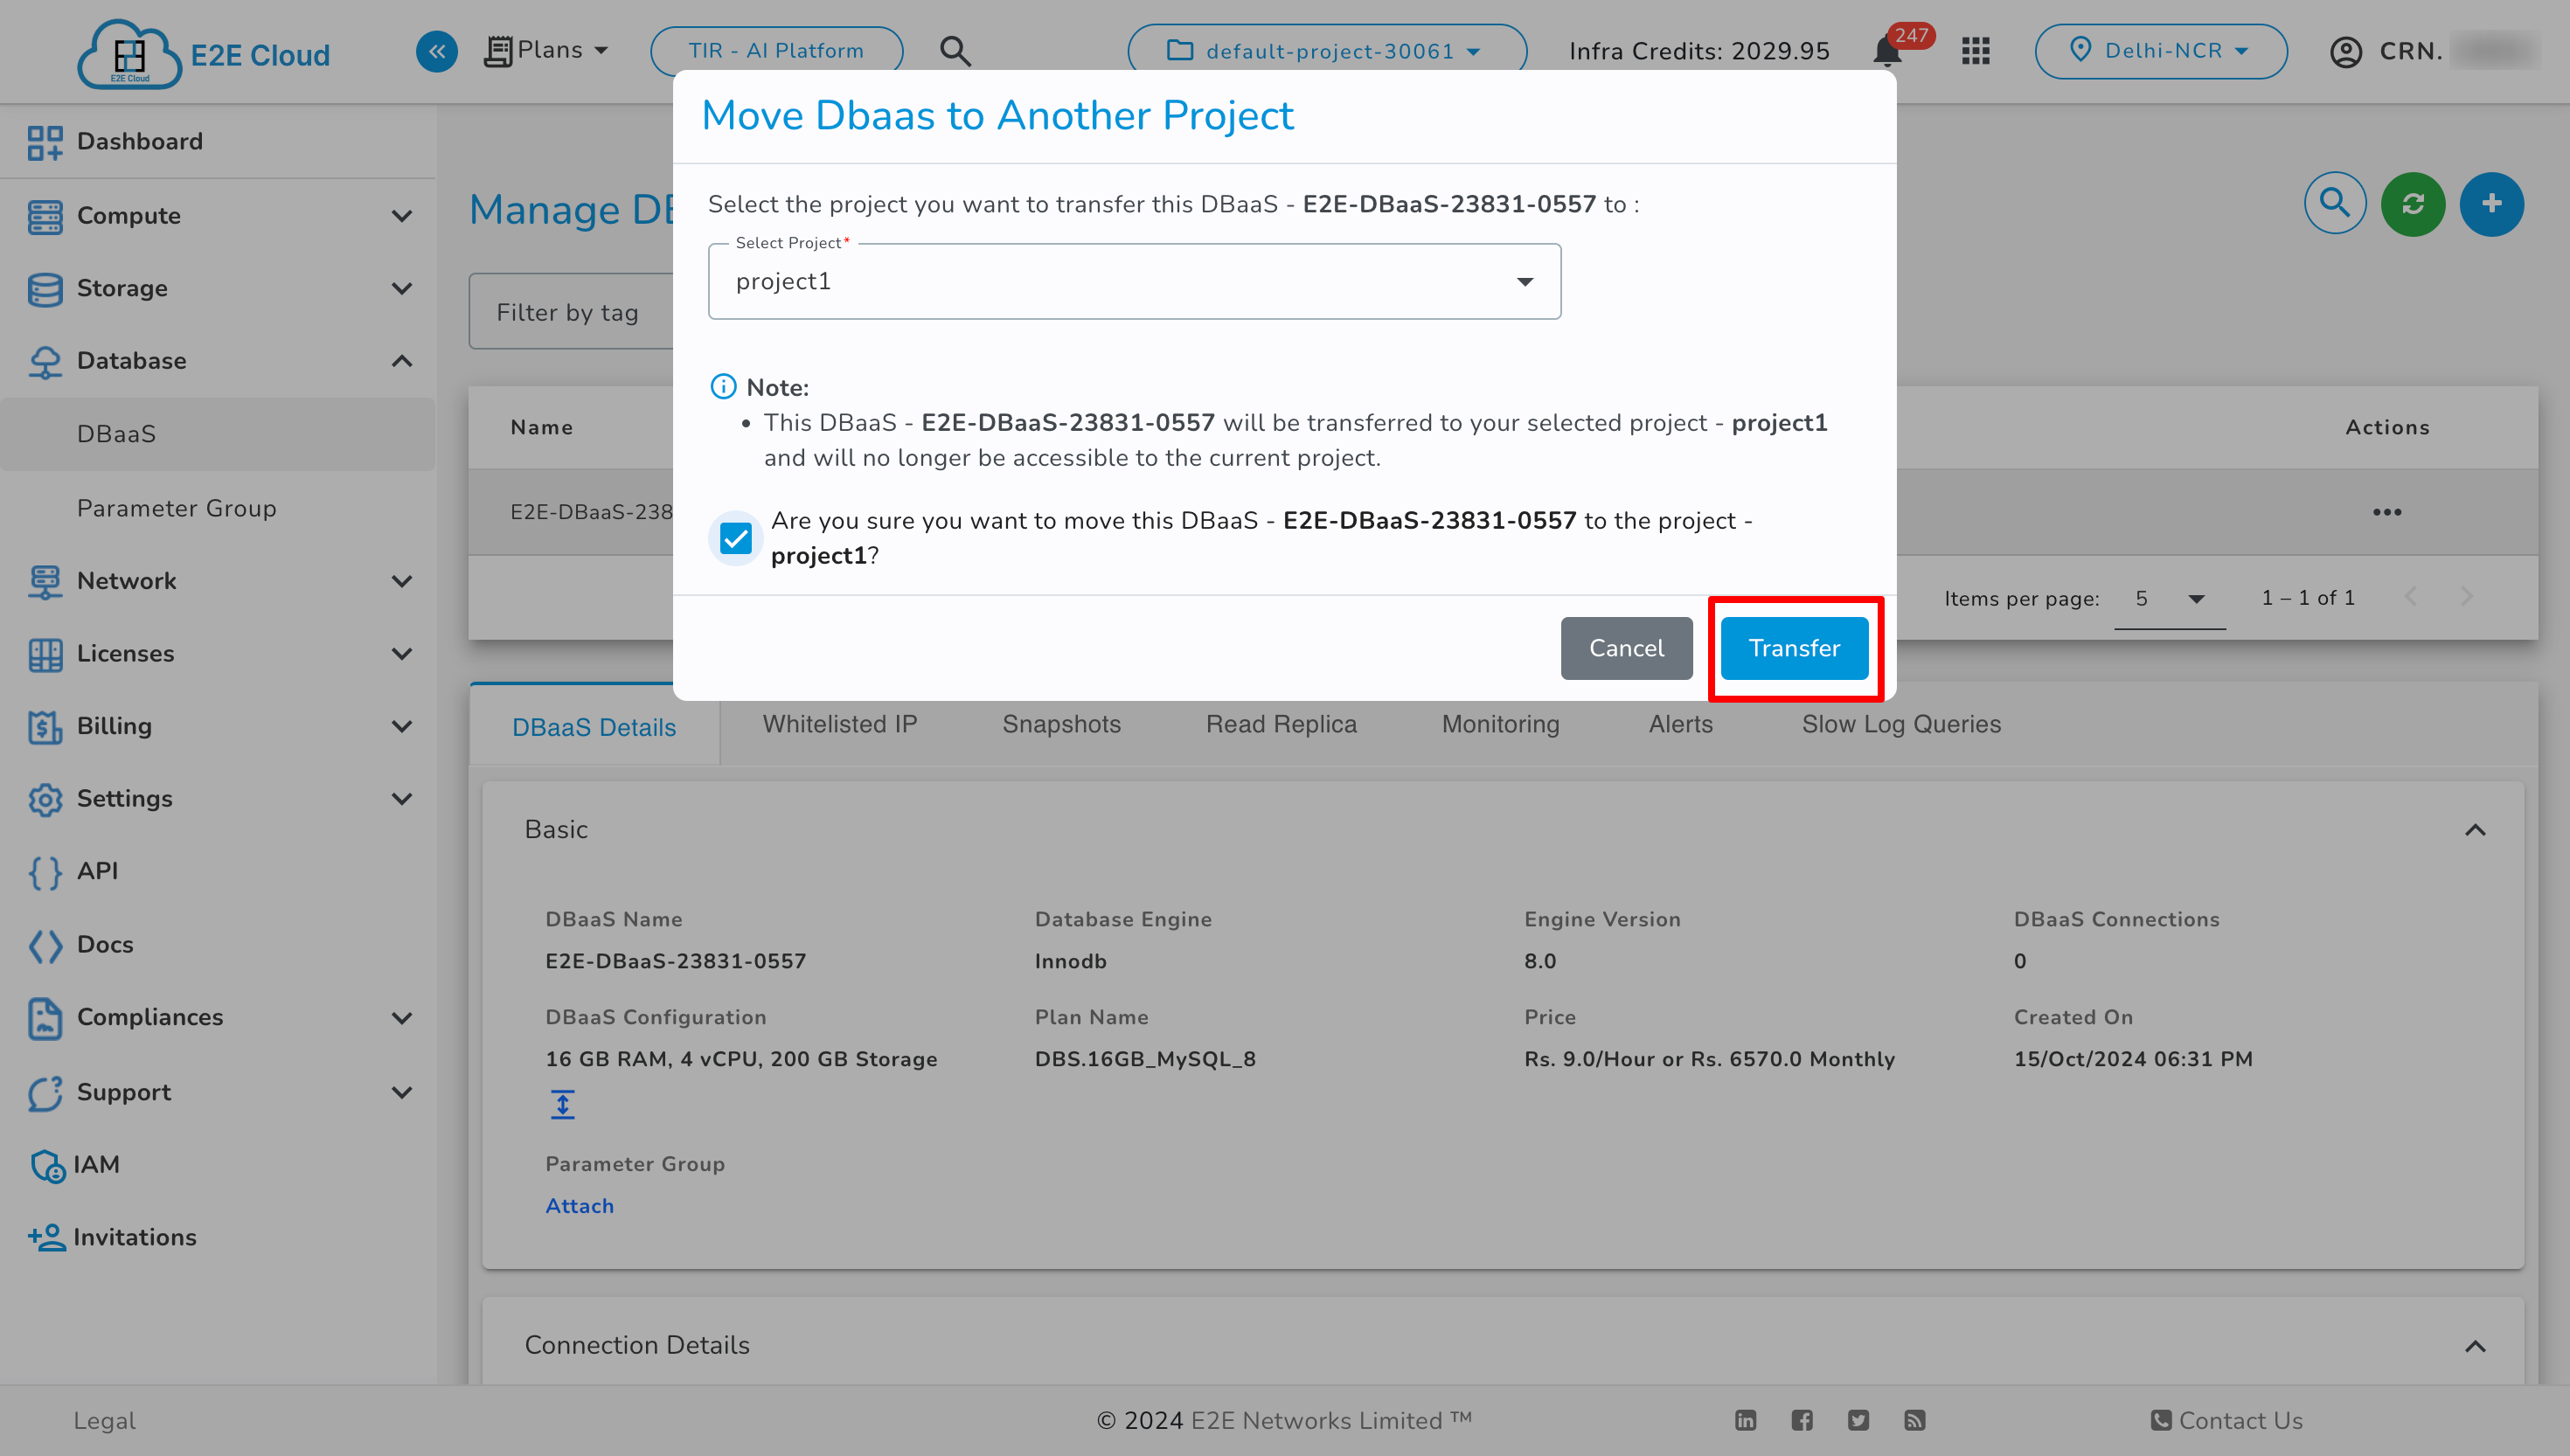
Note
An audit log will be created for the transfer in both the current and target projects during the transfer.
Parameter Group
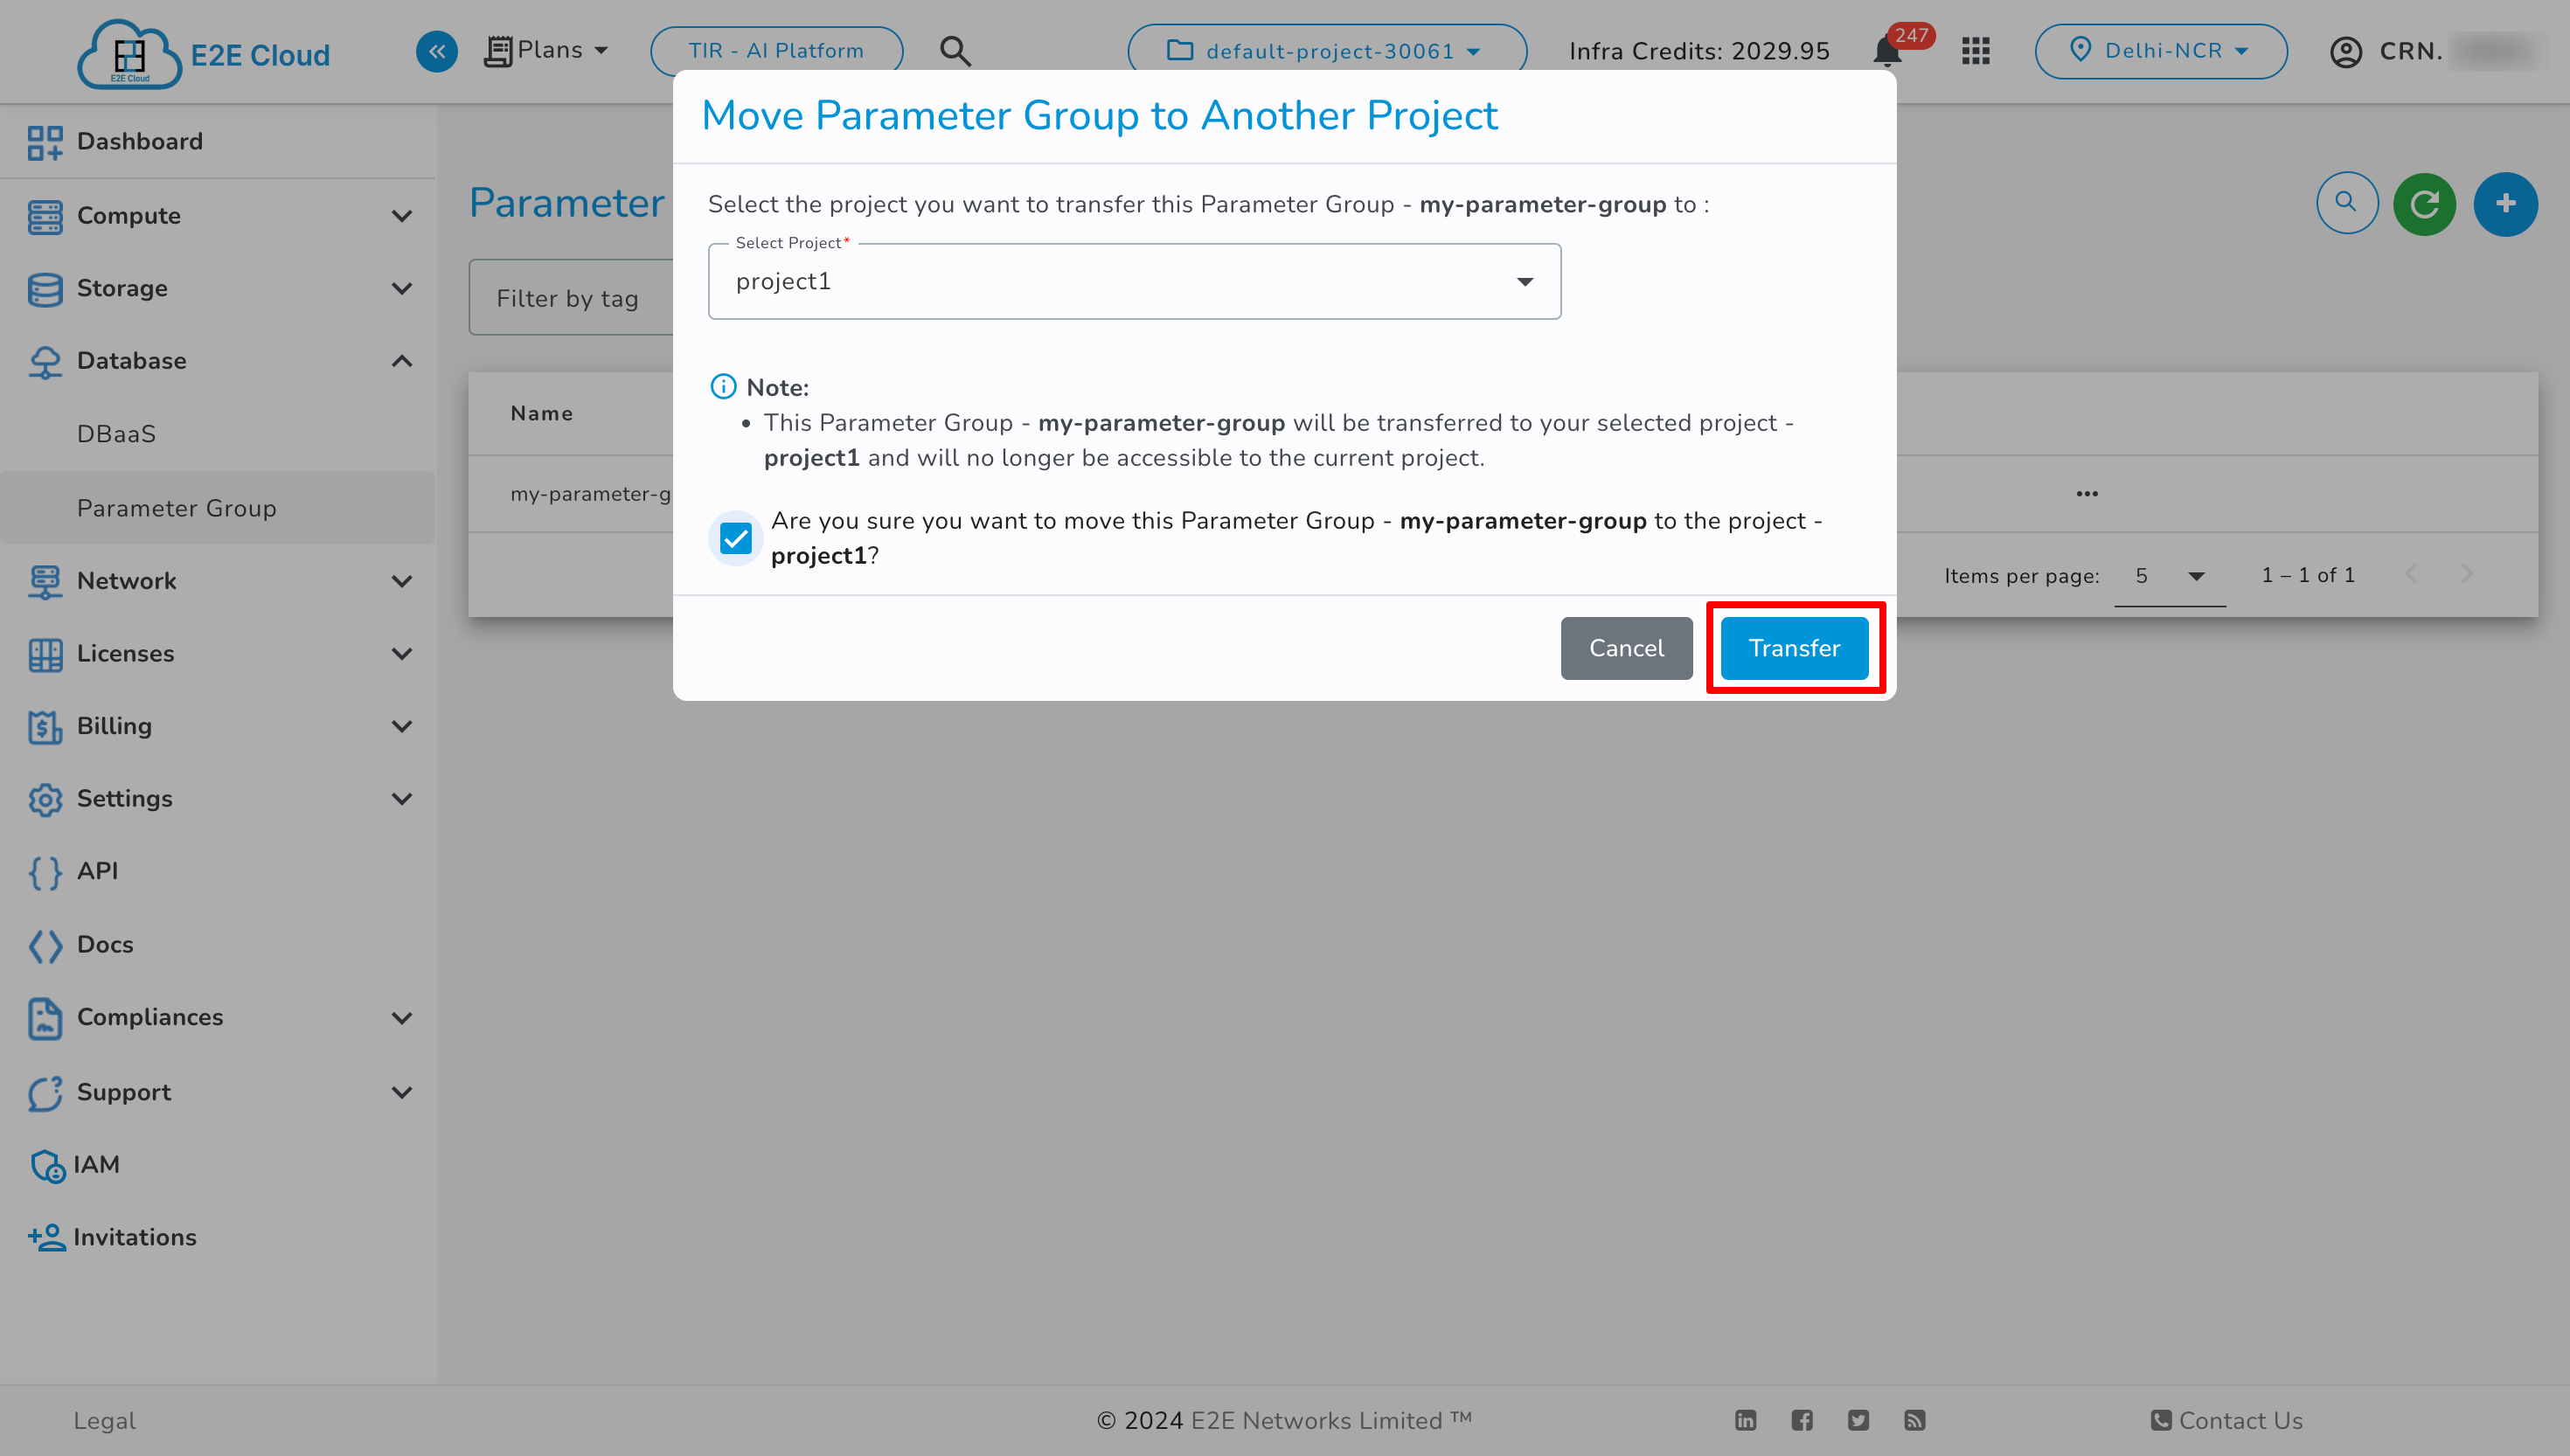
Using this action you can transfer your Parameter Group from its current project to another project within the same CRN.
Note
To transfer the Parameter Group -
The Parameter Group must not have any Tags attached.
The Parameter Group must not be attached to a Dbaas.
To transfer the Parameter Group click on Move To Another Project button in actions.
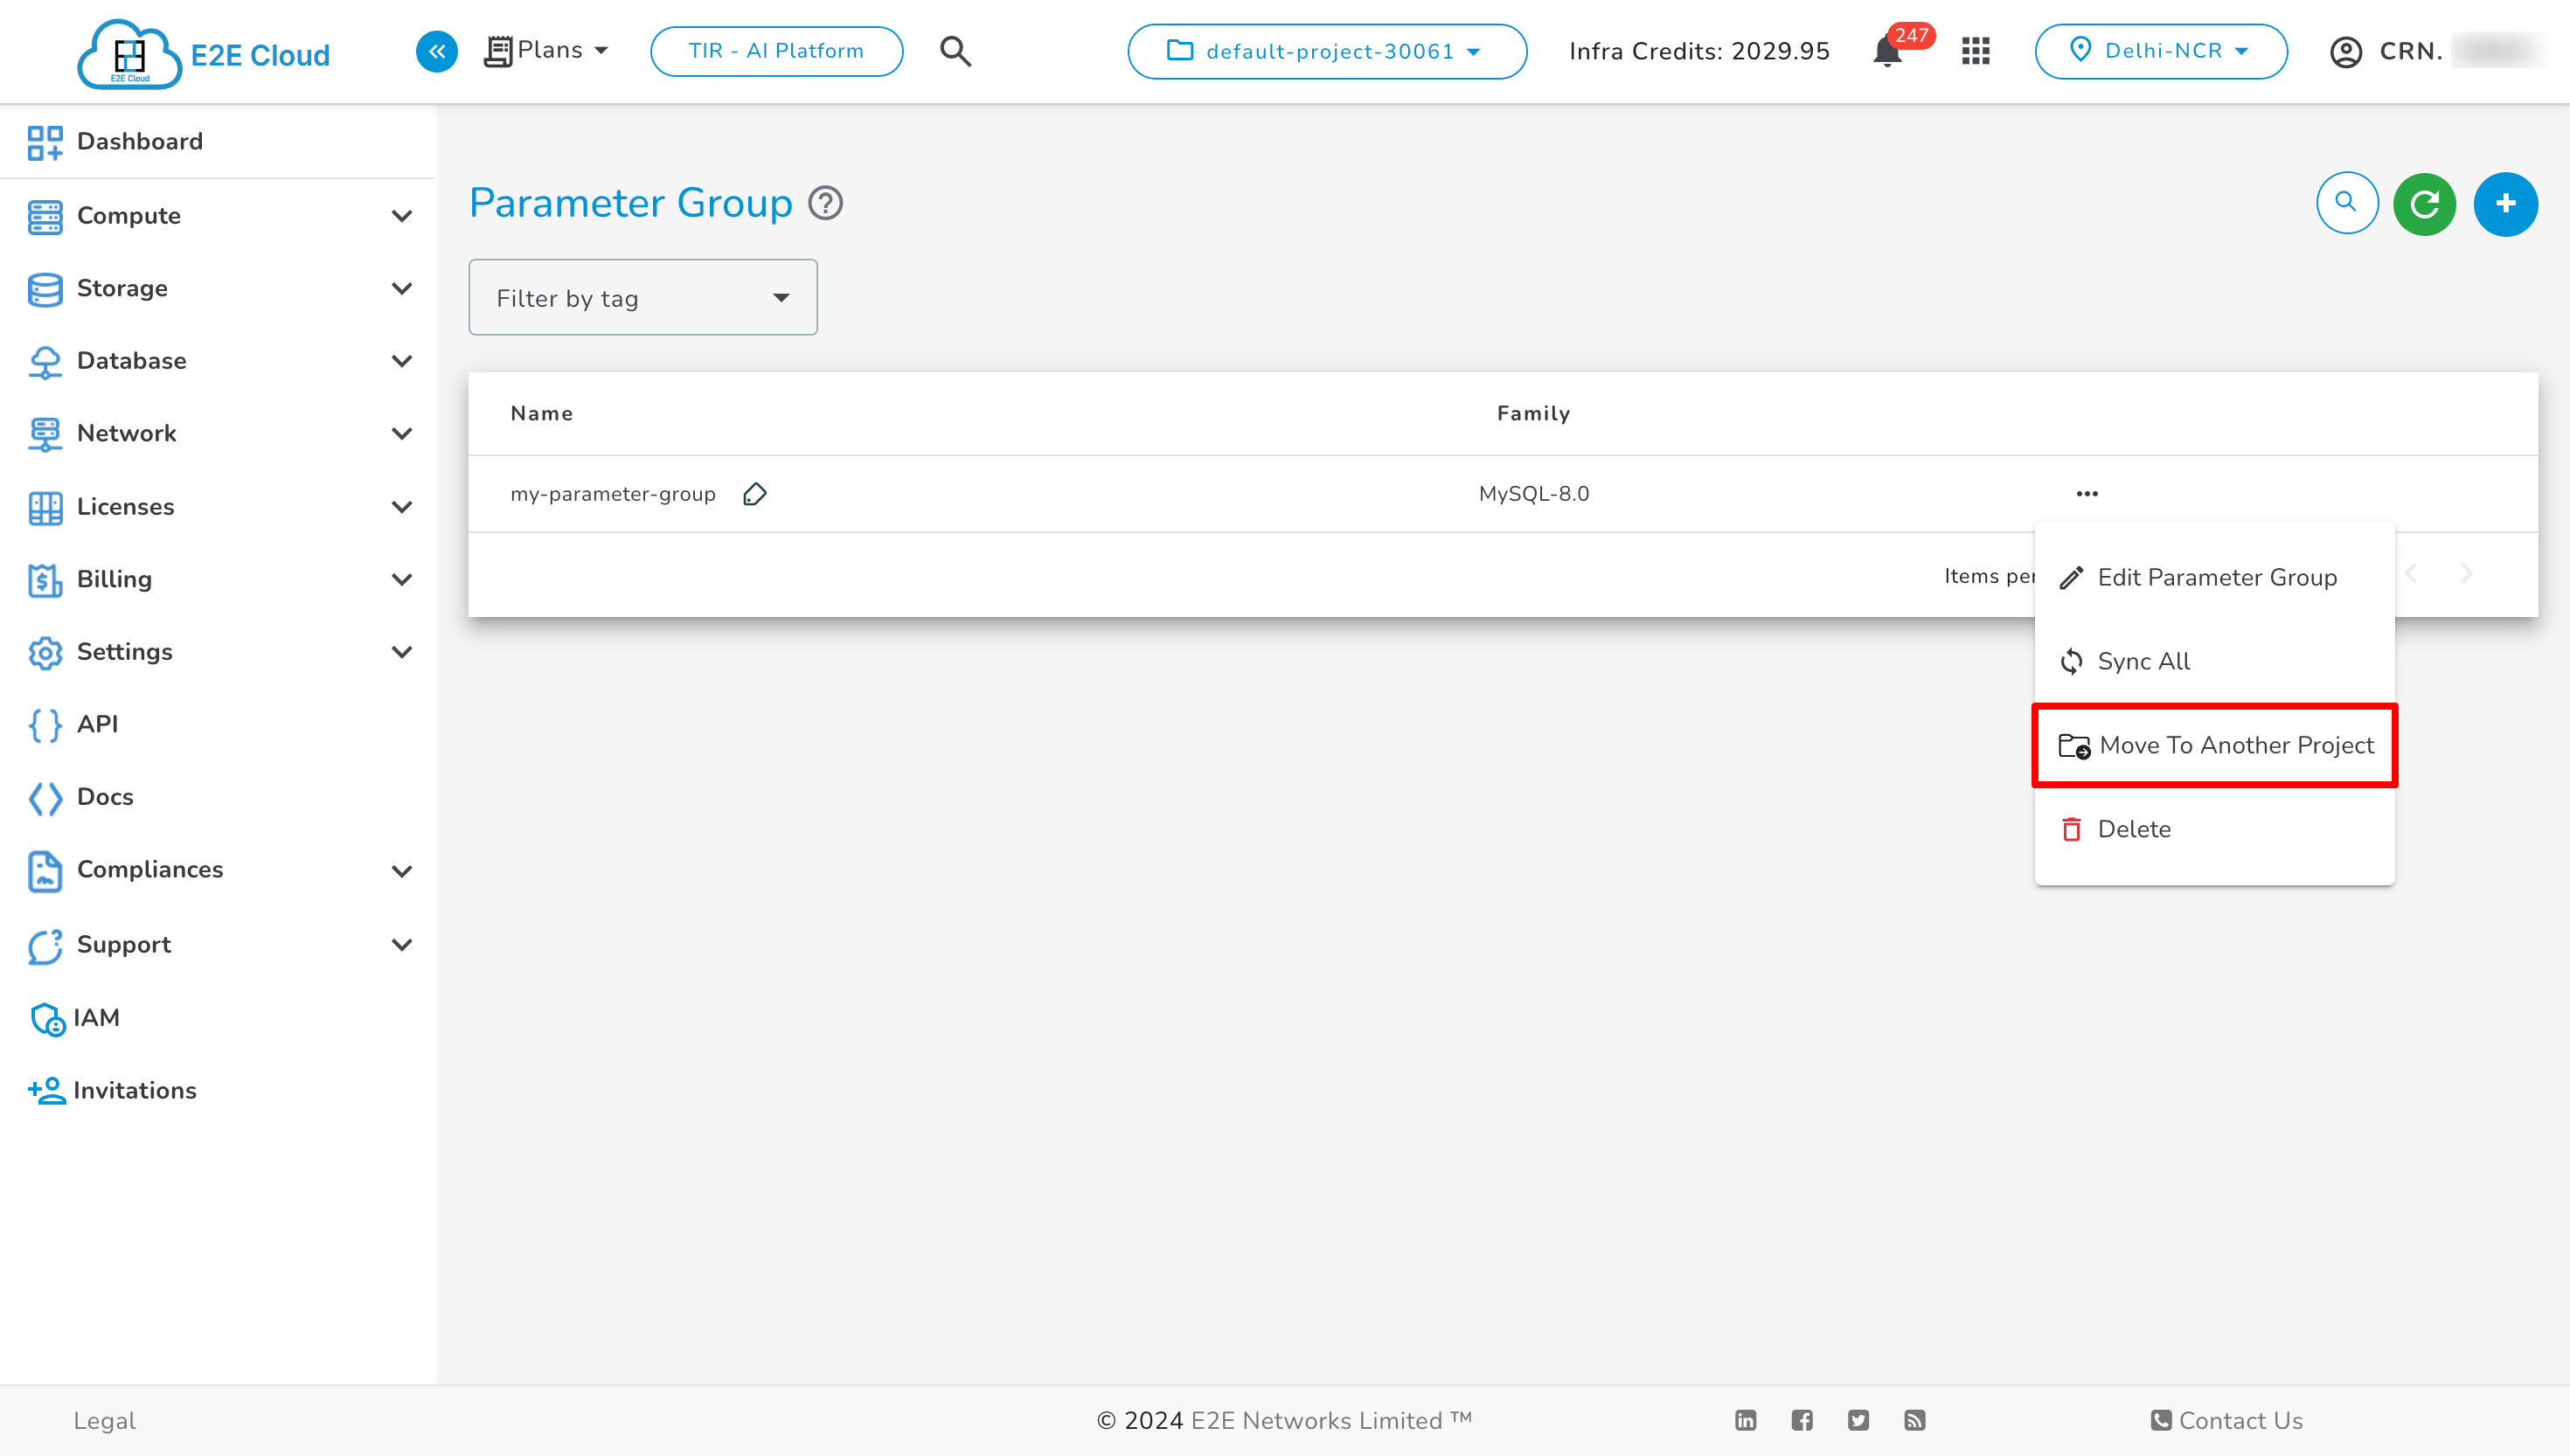
Then click on Move To Another Project from Actions, select the target project, check the checkbox, and click Transfer.
