Deploy a resilient and fault-tolerant persistent volume utilizing SFS within a Kubernetes environment.
Step 1: Create SFS(Scalable File System)
You have to click on Scalable File System(SFS) from the left sidebar menu.

After that, click on the ‘click here’ link or the Create SFS icon to create Scalable file System(SFS).

After clicking on create Scalable File System, give a name to your SFS and select the plan and VPC and then click on create SFS button.

After clicking on Create SFS button your created Scalable File System will be shown like this.

Step 2: Grant all Access
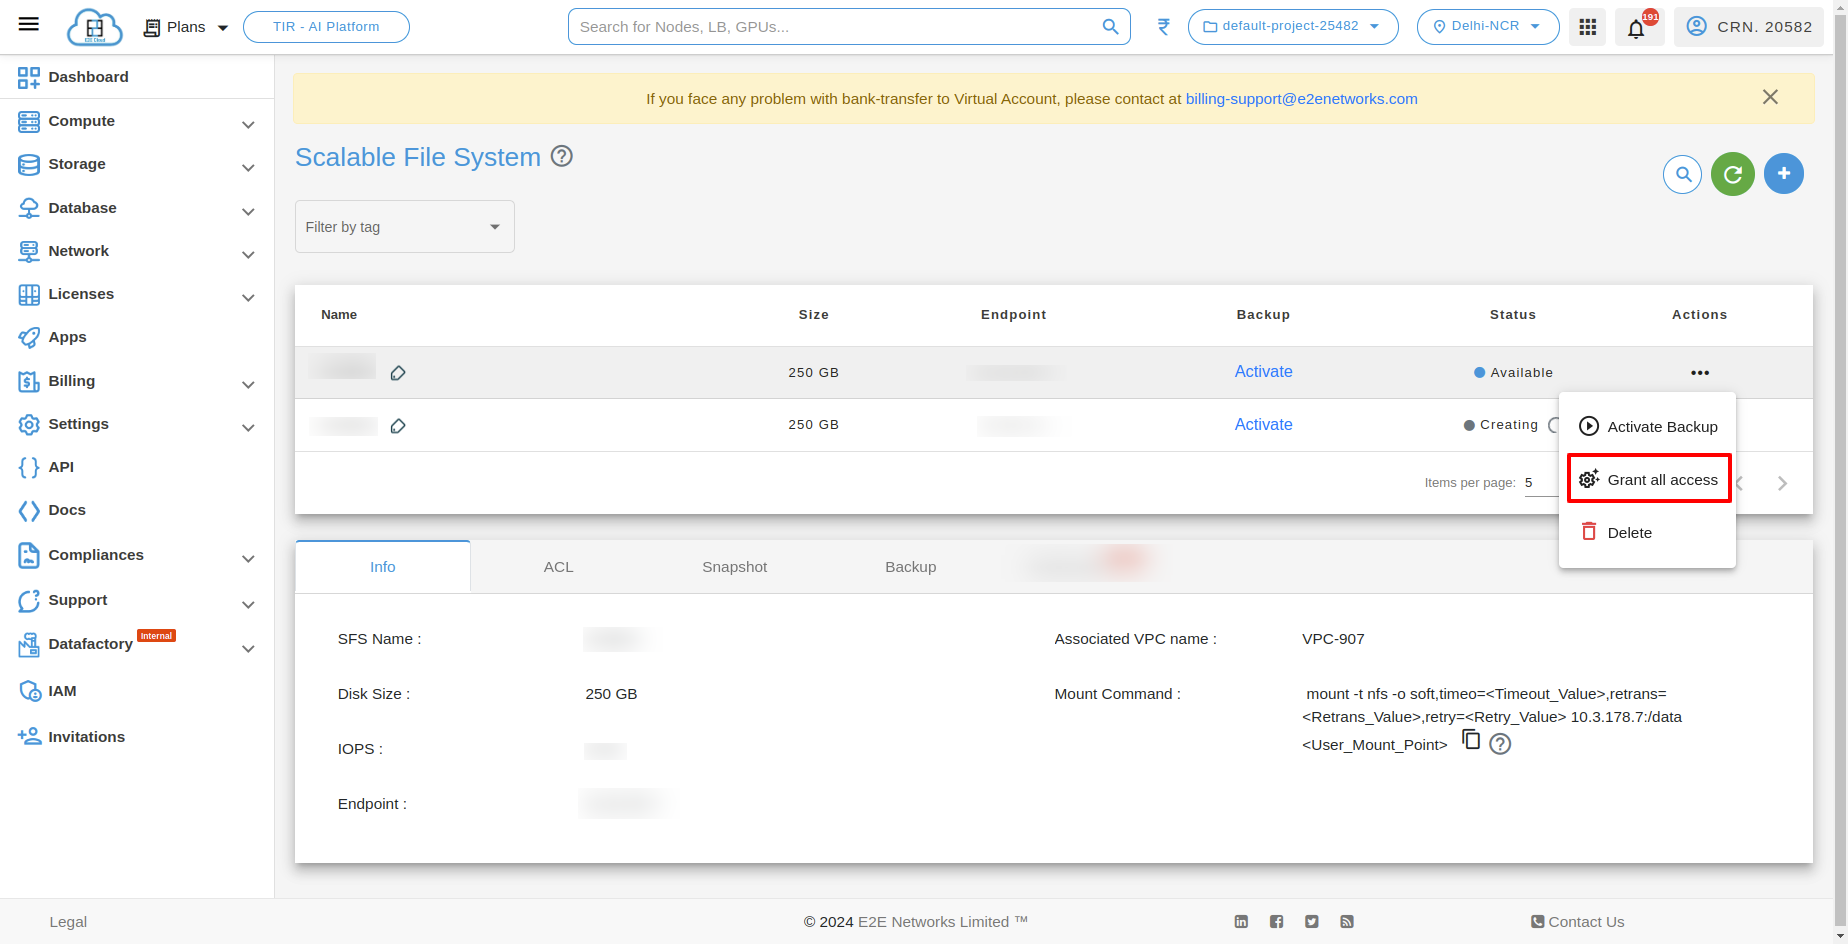
To Grant all access, select a particular SFS(Scalable File System) click on “Grant all access” under actions.
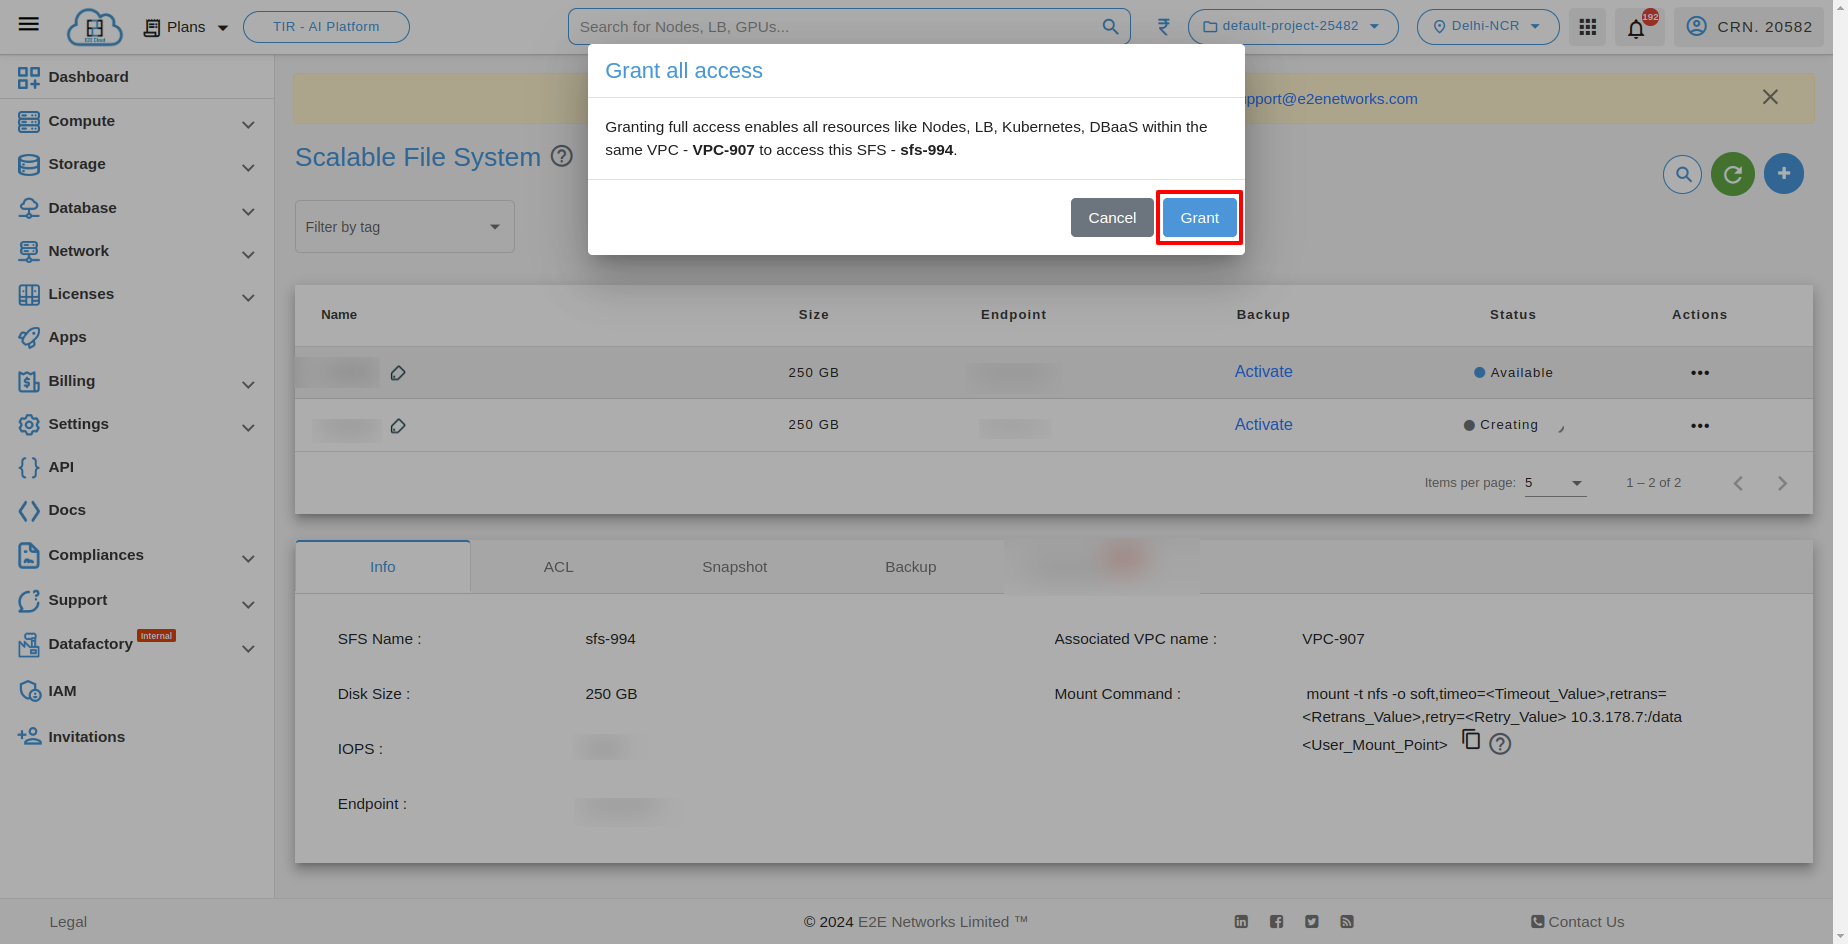
After clicking “Grant all access” action, you can see the below popup.If you click on Grant button it will Granting full access enables all resources like Nodes, LB, Kubernetes, DBaaS within the same VPC to access this SFS.
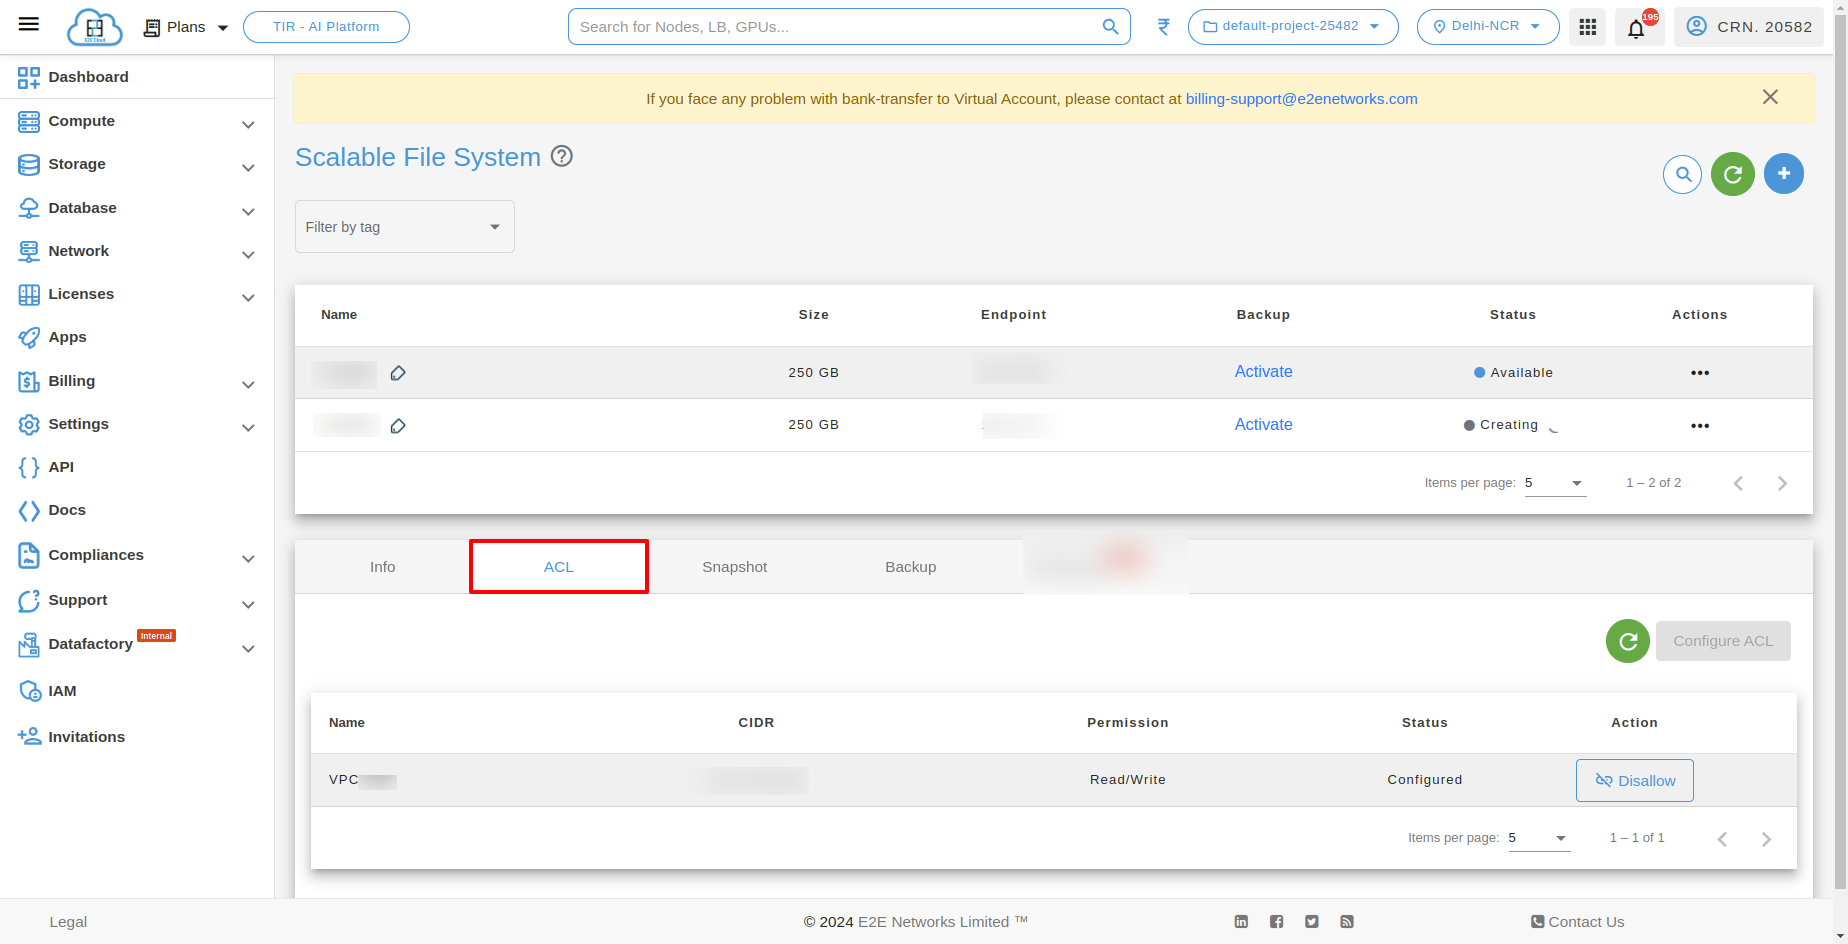
Permission has been granted and the process has started. It should be completed within few minutes. You can view the configured Virtual Private Cloud (VPC) under the ‘ACL’ tab.
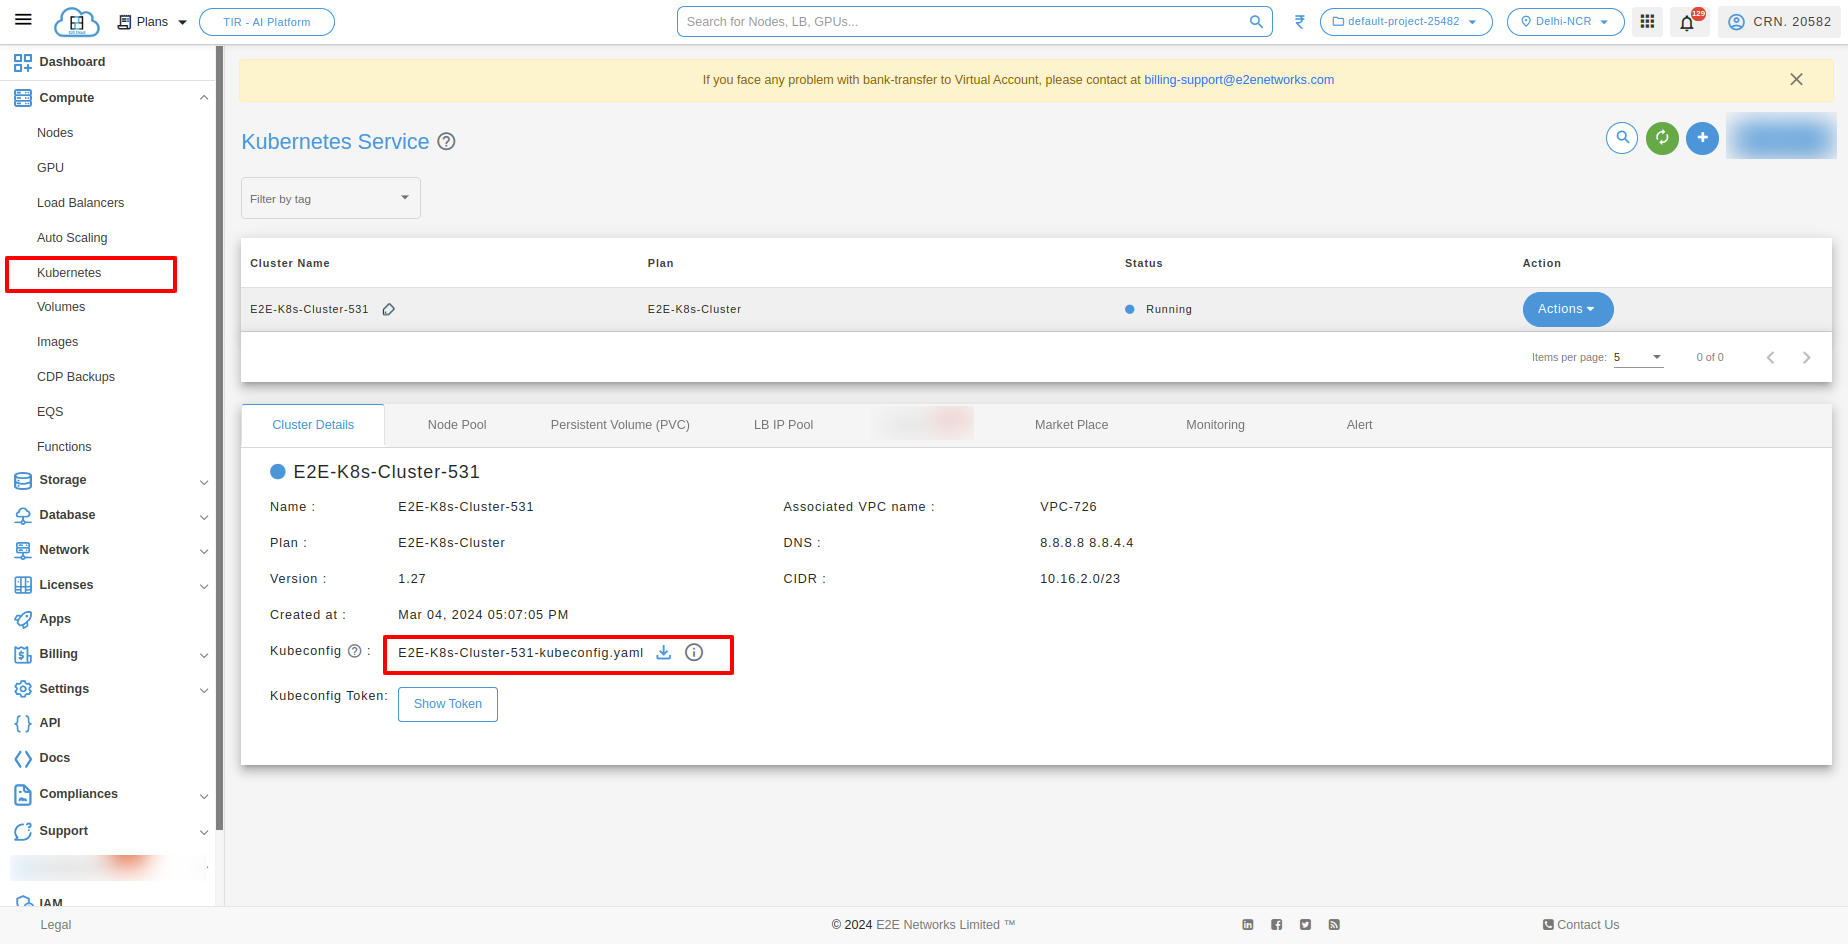
Step 3: Download Kubeconfig.yaml File
After Launching kubernetes Download the Kube config file
Please make sure kubectl is installed on your system
To install kubectl follow this doc: https://kubernetes.io/docs/tasks/tools/
Run the below command used in kubernetes to retrieve information about the nodes in the cluster
kubectl get nodes

Step 4: Connect using the Persistent Volume resource
You can also use the SFS volume through a PersistentVolumeClaim. You have to create a PersistentVolume that will hold the information about SFS server. Then, you have to create a PersistentVolumeClaim that will be bounded with the PersistentVolume. Finally, you can mount the PVC into a pod.
Create PersistentVolume :
Below is the YAML for PersistentVolume that provision volume from /data directory of the SFS server. You have to create pv.yaml file and put the below code into this pv.yaml file.
cat << EOF > pv.yaml
apiVersion: v1
kind: PersistentVolume
metadata:
  name: nfs-pv
  labels:
    name: mynfs # name can be anything
spec:
  storageClassName: manual # same storage class as pvc
  capacity:
    storage: 200Mi
  accessModes:
    - ReadWriteMany
  nfs:
    server: 10.10.12.10 # SFS server IP address
    path: "/data"
EOF
To run PersistentVolume YAML file, you have to run below command.
kubectl apply -f pv.yaml
Step 5: Create a PersistentVolumeClaim
Now, we have to create a PersistentVolumeClaim. This PVC will be bounded with the PersistentVolume we have created above.
Below is the YAML for the PersistentVolumeClaim that we are going to create.You have to create pvc.yaml file and put the below code into this pvc.yaml file.
cat << EOF > pvc.yaml
apiVersion: v1
kind: PersistentVolumeClaim
metadata:
  name: nfs-pvc
spec:
  storageClassName: manual
  accessModes:
    - ReadWriteMany #  must be the same as PersistentVolume
  resources:
    requests:
      storage: 50Mi
EOF
To run PersistentVolumeClaim YAML file, you have to run below command.
kubectl apply -f pvc.yaml
Step 6: Create a Deployment
You have to create deployment.yaml file and put the below code into this deployment.yaml file.
cat << EOF > deployment.yaml
apiVersion: apps/v1
kind: Deployment
metadata:
  labels:
    app: nginx
  name: nfs-nginx
spec:
  replicas: 1
  selector:
    matchLabels:
      app: nginx
  template:
    metadata:
      labels:
        app: nginx
    spec:
      volumes:
      - name: nfs-test
        persistentVolumeClaim:
          claimName: nfs-pvc # same name of pvc that was created
      containers:
      - image: nginx
        name: nginx
        volumeMounts:
        - name: nfs-test # name of volume should match claimName volume
          mountPath: /usr/share/nginx/html # mount inside of contianer
EOF
To run deployment YAML file, you have to run below command.
kubectl apply -f deployment.yaml
Step 7: Get Pod Details
Run the below command to retrieve information about the pods running within a Kubernetes cluster.
kubectl get pod

Step 8: Execution
Run the below command to execute a command inside a running container in a Kubernetes pod.
kubectl exec -it nfs-nginx-85d5ffd747-n88f9 -- /bin/bash
Step 9: Disk Space Usage
Run the below command to display disk space usage statistics for file systems in a human-readable format.
df -h
It will list information about all mounted file systems on your system, including the total size, used space, available space, and usage percentage. The sizes will be displayed in a format that is easy to read and understand. This command is useful for monitoring disk space usage and identifying potential storage issues.

Alternative way to use — Dynamic provisioning using StorageClass :
Steps 1,2 and 3 are same for this method.
Step 4: Install helm
To install Helm, follow this documentation. Click here : install Helm
To run helm, you have to run below commands
helm repo add csi-driver-nfs https://raw.githubusercontent.com/kubernetes-csi/csi-driver-nfs/master/charts
helm install csi-driver-nfs csi-driver-nfs/csi-driver-nfs --namespace kube-system --version v4.9.0
Step 5: Create sc.yaml file
You have to create sc.yaml file and put the below code into this sc.yaml file.
cat << EOF > sc.yaml
kind: StorageClass
apiVersion: storage.k8s.io/v1
metadata:
  name: nfs-csi
provisioner: nfs.csi.k8s.io
parameters:
  server: 10.10.12.10 # SFS server IP address
  share: /data
reclaimPolicy: Delete
volumeBindingMode: Immediate
mountOptions:
  - nfsvers=4.1
EOF
To run sc.yaml file, you have to run below command.
kubectl apply -f sc.yaml
Step 6: Create pvc-sc.yaml file
After that you have to run pvc-sc.yaml file and put the below code into this pvc-sc.yaml file.
cat << EOF > pvc-sc.yaml
apiVersion: v1
kind: PersistentVolumeClaim
metadata:
  name: nfs-pvc-1
spec:
  accessModes:
    - ReadWriteOnce
  storageClassName: nfs-csi   # Reference to the NFS storage class
  resources:
    requests:
      storage: 500Gi   # Requested storage size

EOF
To run pvc-sc.yaml file, you have to run below command.
kubectl apply -f pvc-sc.yaml
Step 7: Create a Deployment file
You have to create deployment.yaml file and put the below code into this deployment.yaml file.
cat << EOF > deployment.yaml
apiVersion: apps/v1
kind: Deployment
metadata:
  labels:
    app: nginx
  name: nfs-nginx
spec:
  replicas: 1
  selector:
    matchLabels:
      app: nginx
  template:
    metadata:
      labels:
        app: nginx
    spec:
      volumes:
      - name: nfs-test
        persistentVolumeClaim:
          claimName: nfs-pvc # same name of pvc that was created
      containers:
      - image: nginx
        name: nginx
        volumeMounts:
        - name: nfs-test # name of volume should match claimName volume
          mountPath: /usr/share/nginx/html # mount inside of contianer
EOF
To run deployment YAML file, you have to run below command.
kubectl apply -f deployment.yaml
Step 8: Get Pod Details
Run the below command to execute a command inside a running container in a Kubernetes pod.
kubectl get pods
Step 9: Execution
Run the below command to execute a command inside a running container in a Kubernetes pod.
kubectl exec -it nfs-nginx-85d5ffd747-n88f9 -- /bin/bash
Step 10: Disk Space Usage
Run the below command to display disk space usage statistics for file systems in a human-readable format.
df -h
It will list information about all mounted file systems on your system, including the total size, used space, available space, and usage percentage. The sizes will be displayed in a format that is easy to read and understand. This command is useful for monitoring disk space usage and identifying potential storage issues.

Disable all Access
Note
If you disable all access, it will deny full access to all resources such as Nodes, Load Balancers, Kubernetes, and DBaaS within the same VPC from accessing this SFS.
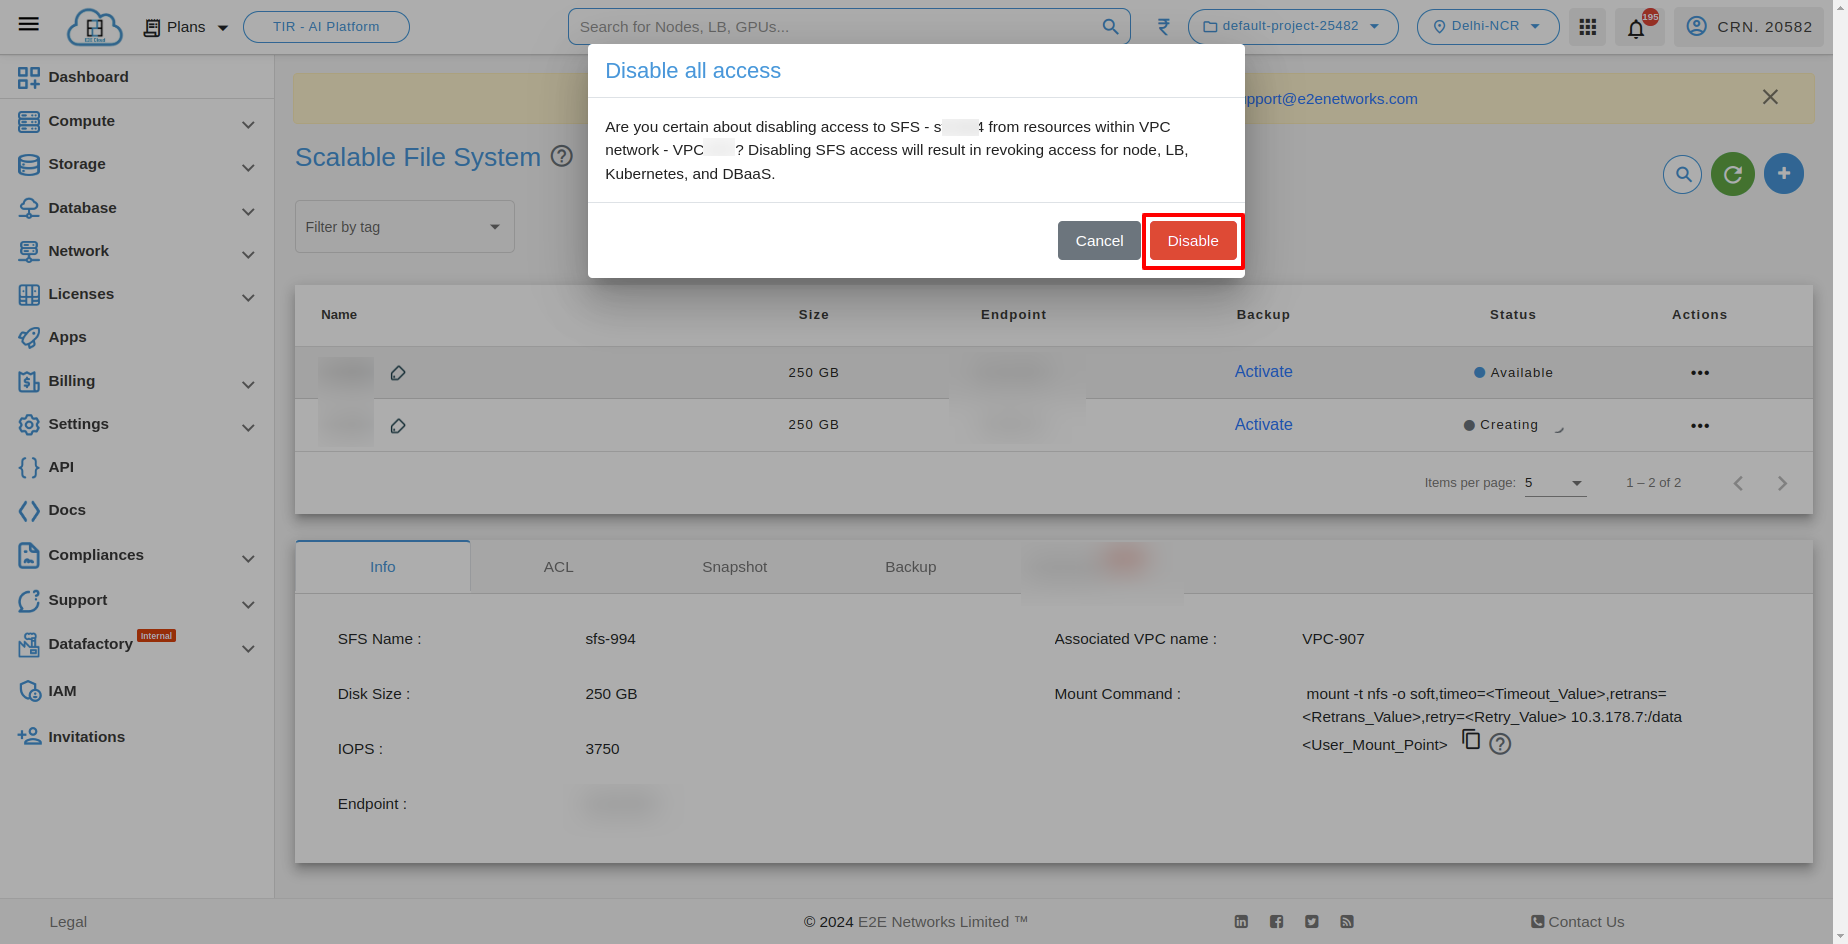
If you want to disable all access from SFS(Scalable File System) then click on Disable all access” under actions.

After clicking “Disable all access” action, you can see the below popup.If you click Disable button, access will be disable from all the services.
Disable access process has started. It should be completed within few minutes. You can view the configured Virtual Private Cloud (VPC) under the ‘ACL’ tab.