Node Snapshot
Snapshots protect Node data by capturing the contents of a Node at a specific point in time. Snapshots greatly simplify and increase the performance of backup and recovery operations. As of now E2E Networks provide Snapshot feature only for C3/M3 type of VM’s.
How to Create Snapshot
Login into MyAccount Please go to ‘My Account’ and log in using your credentials set up at the time of creating and activating the E2E Networks ‘My Account’. Navigate to Node create page.
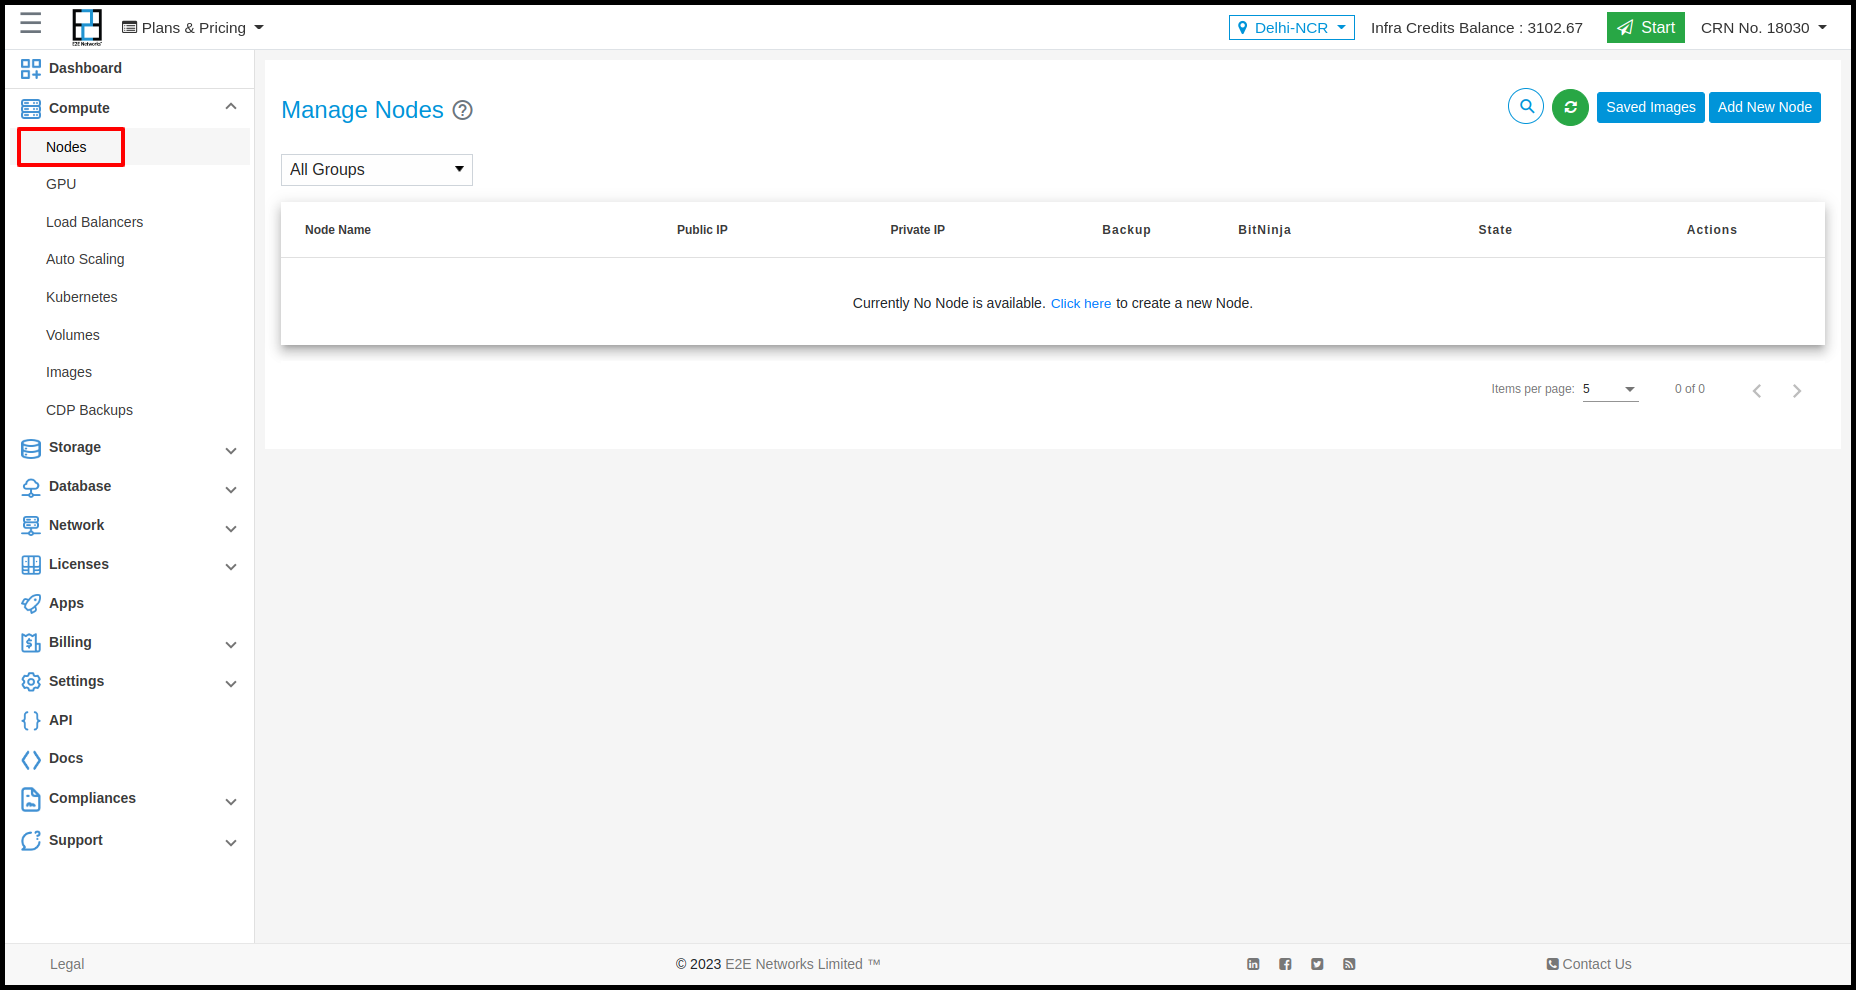
Click on Nodes from the side navigation bar.
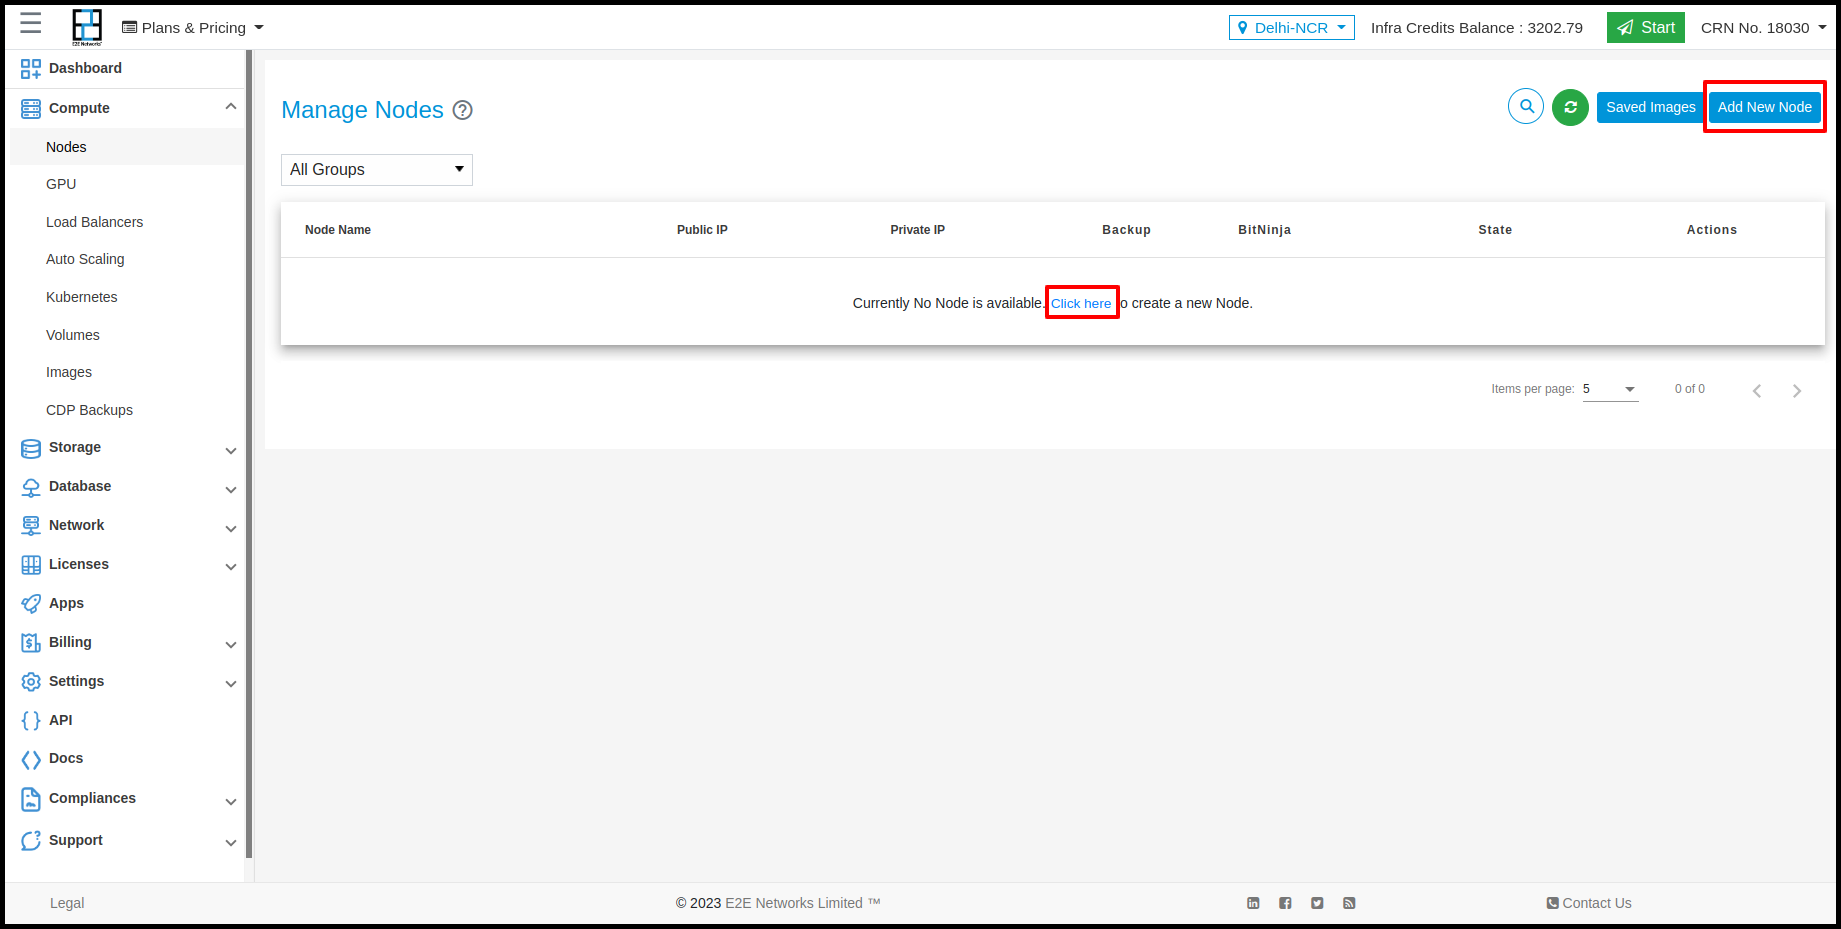
Click on Add New Node button.
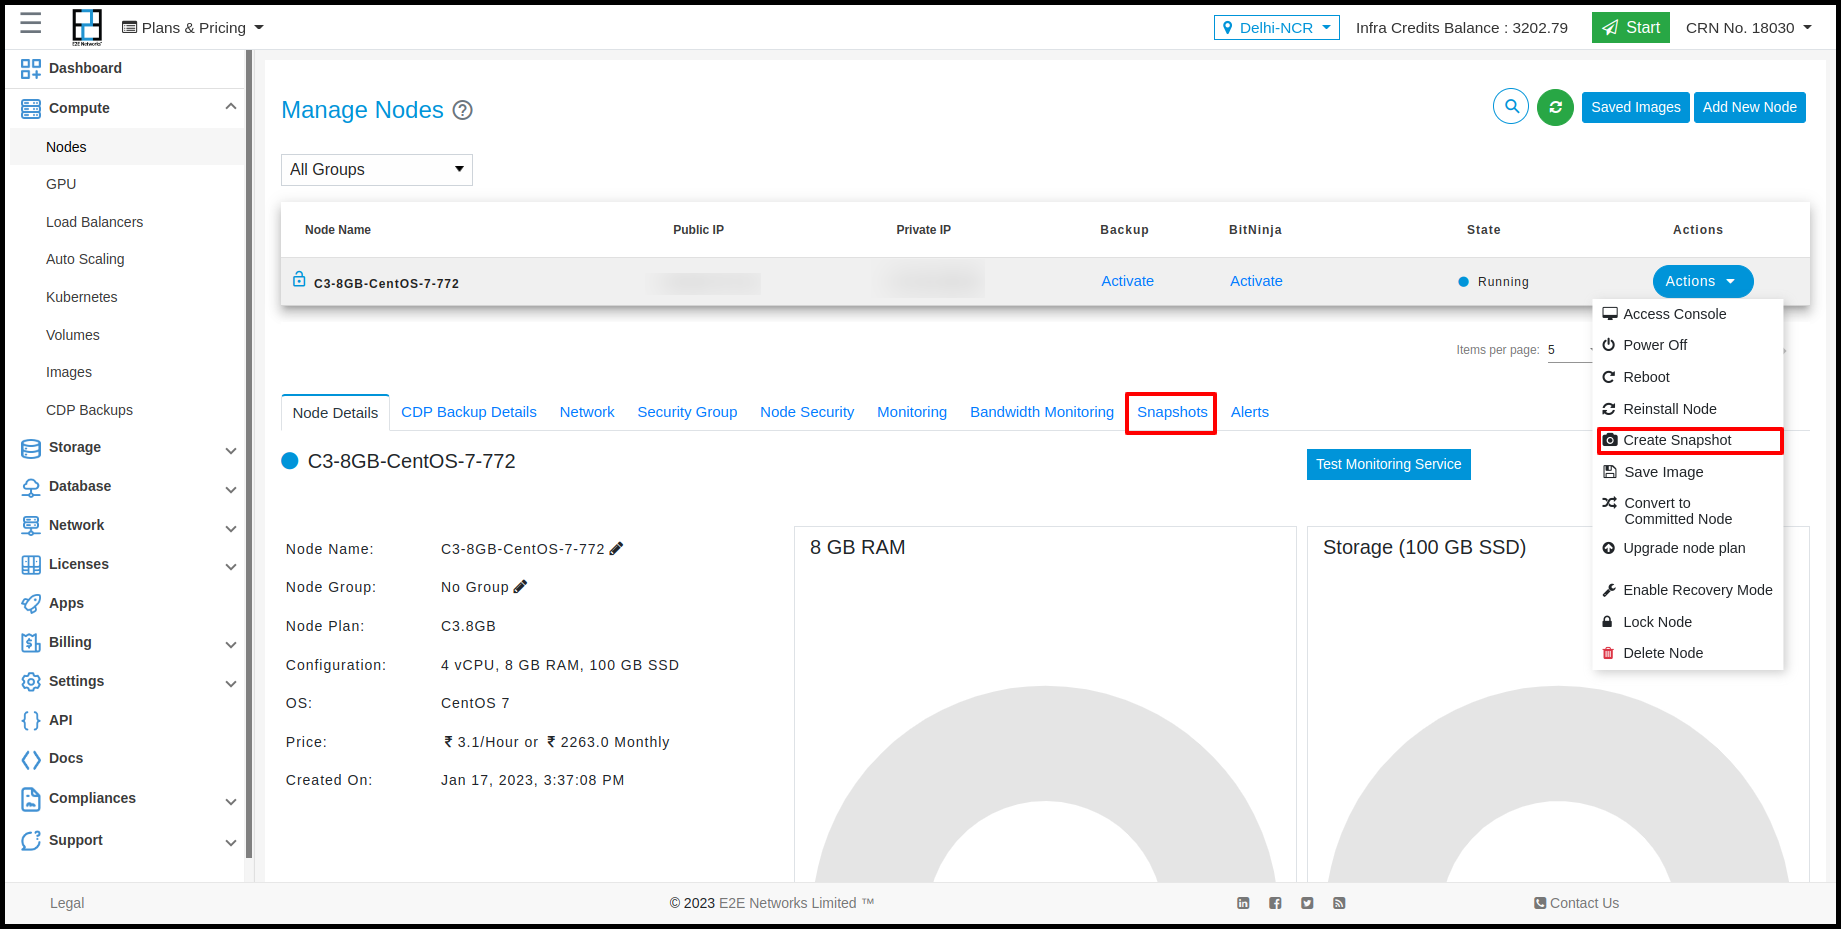
Once the Node is in running status then to make Node’s data backup you can create a snapshot, To create a snapshot you need to click on the Action button and click on create snapshot button.
Click on “Snapshot Now”.

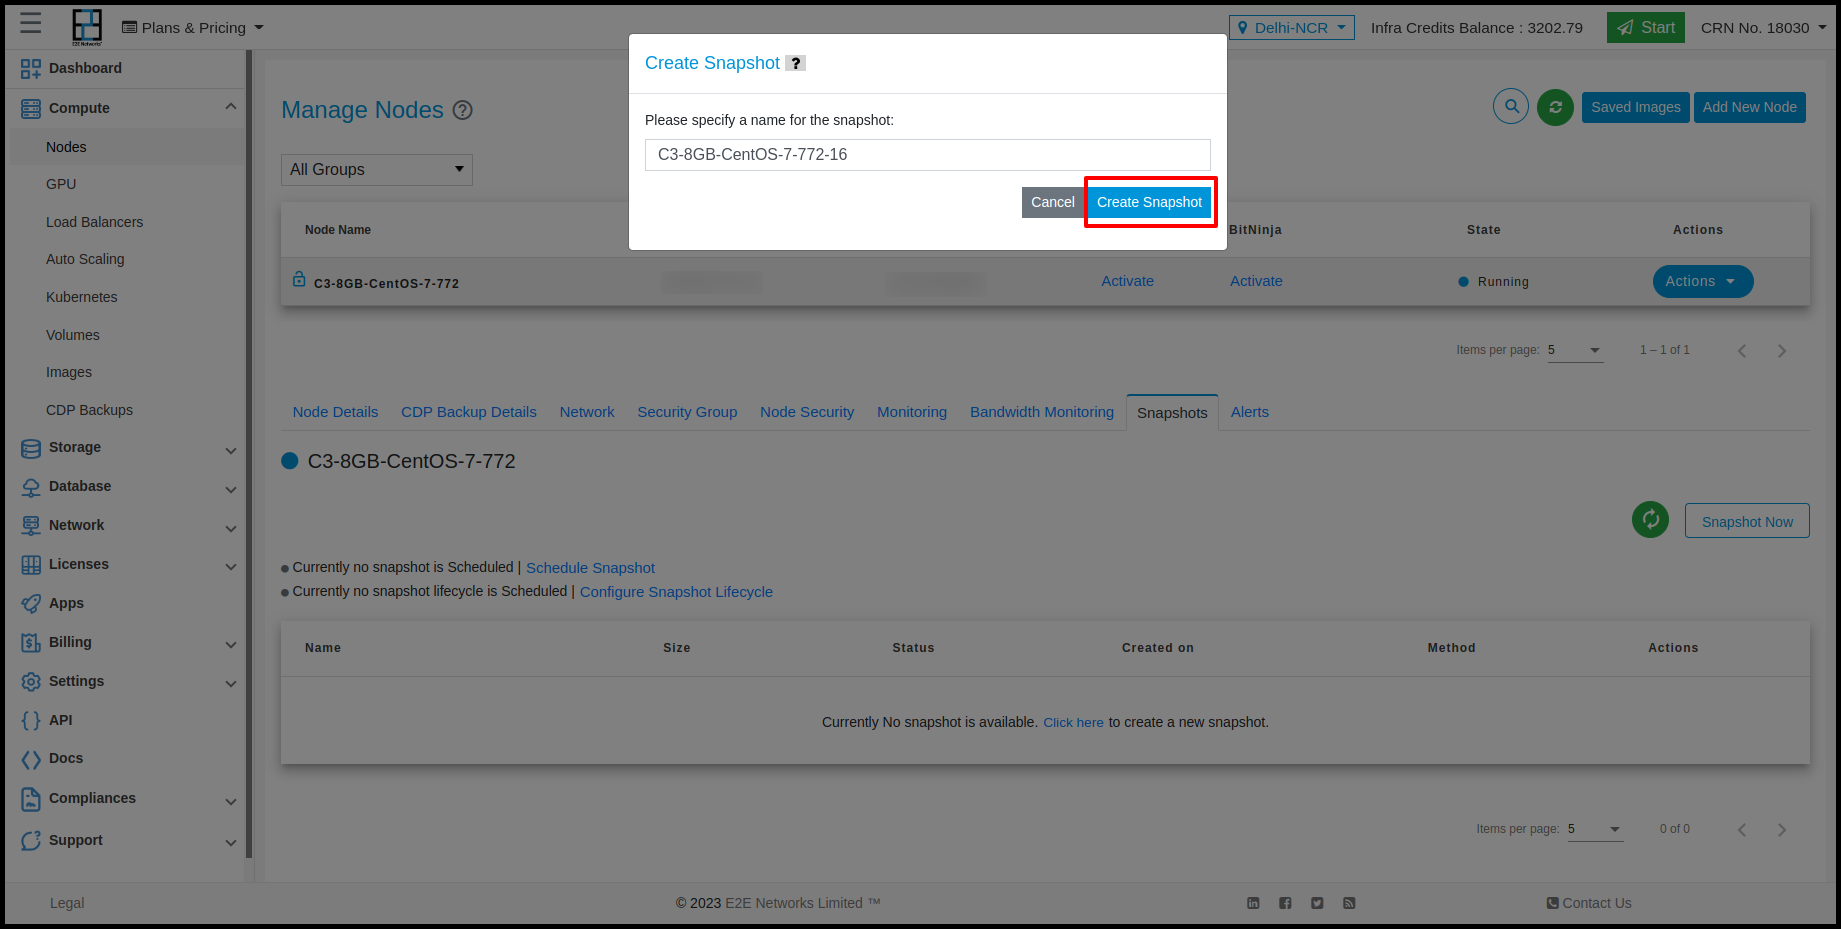
After clicking on Snapshot Now, a pop up will show on screen, then click on “Create Snapshot”.
We can see the created snapshot in the list as shown in the image below.
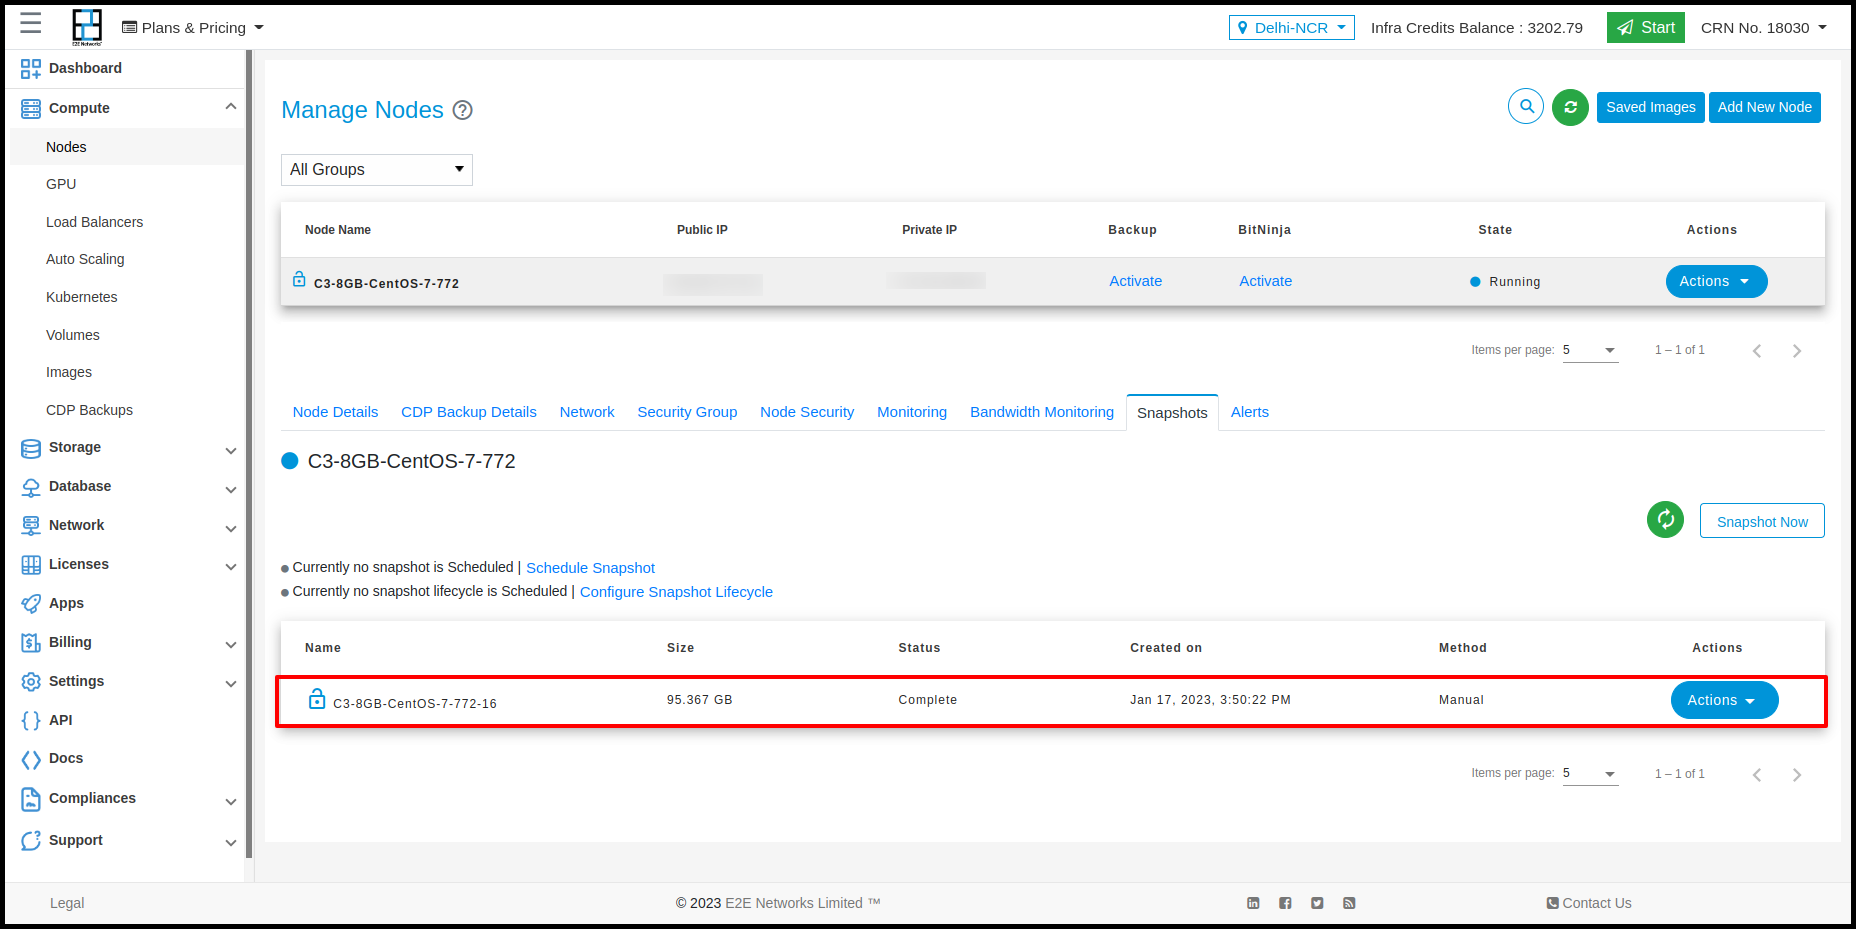
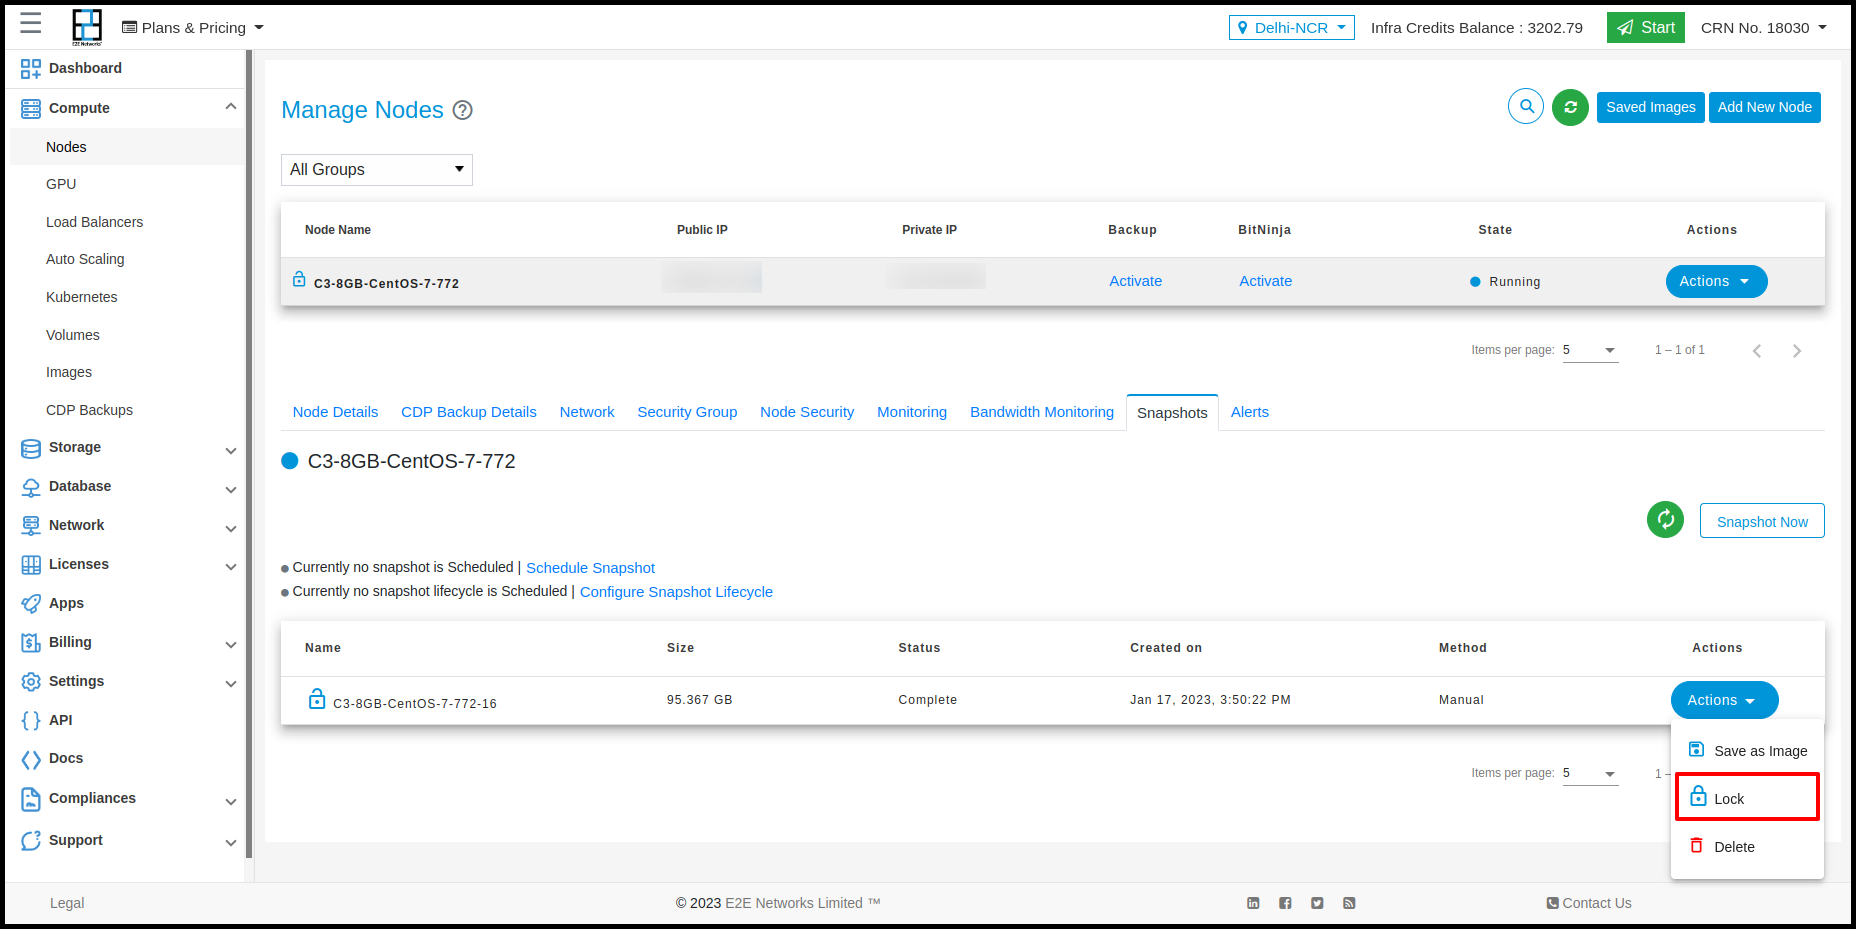
To perform some action on Snapshot click on the “Action” button of snapshot.
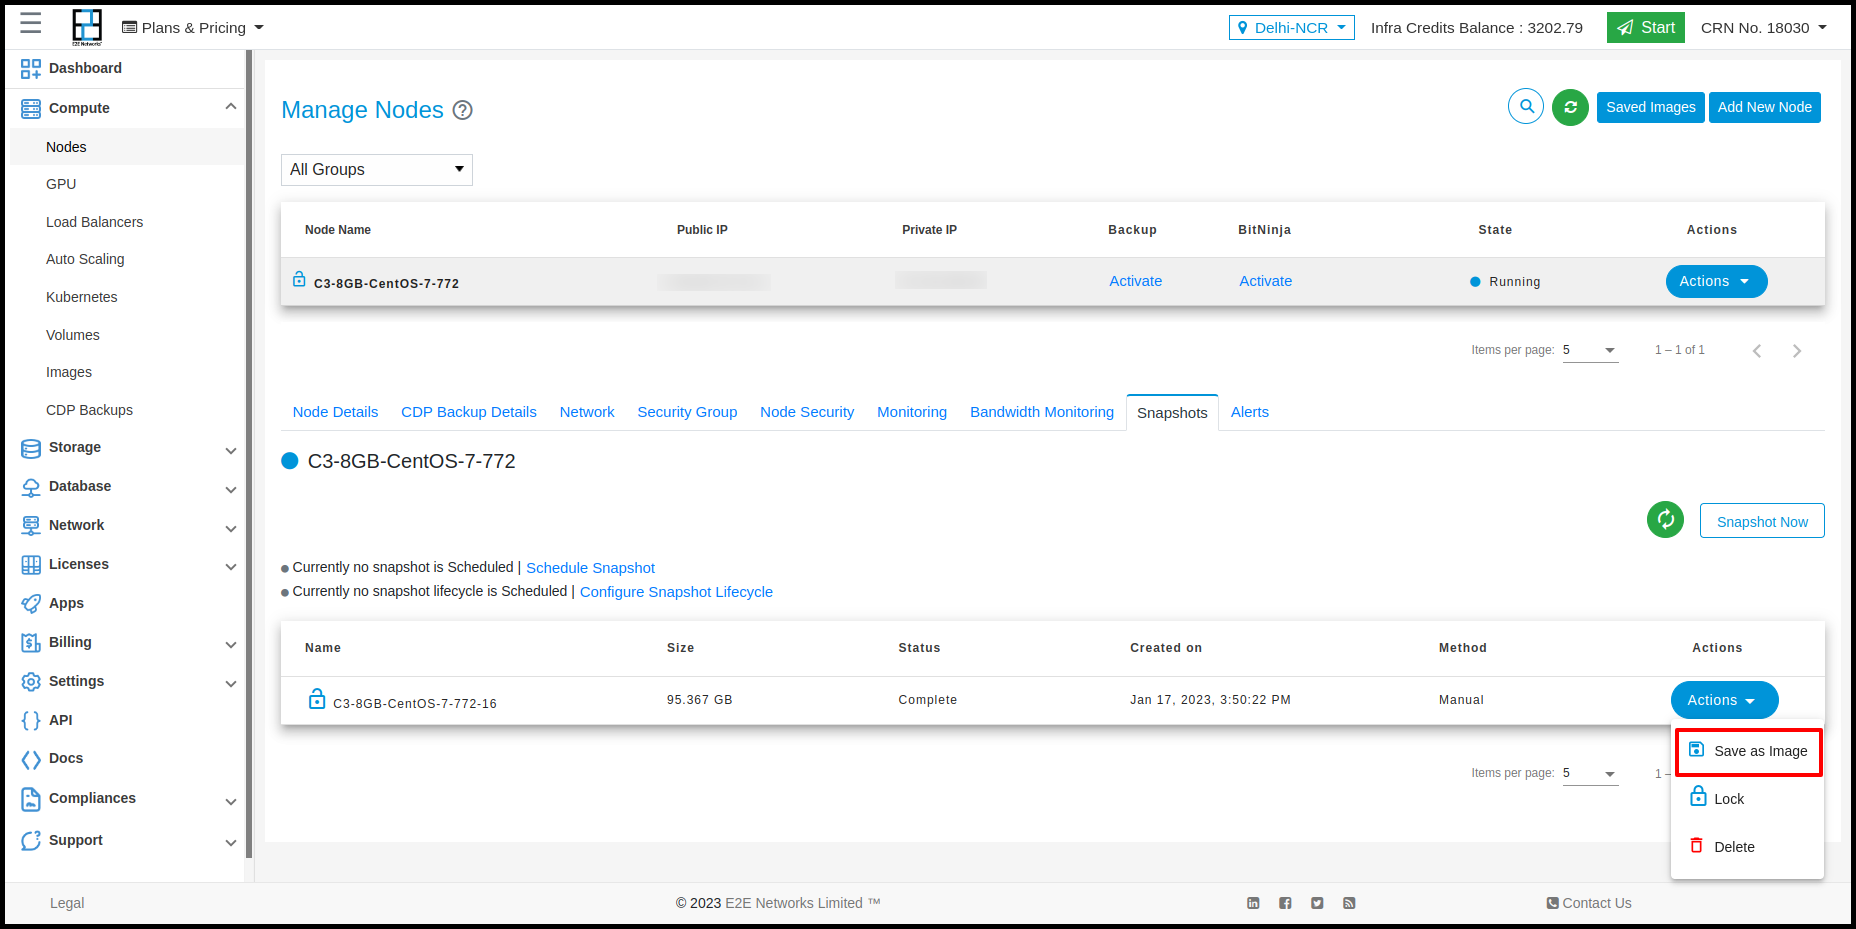
Save Image of Snapshot
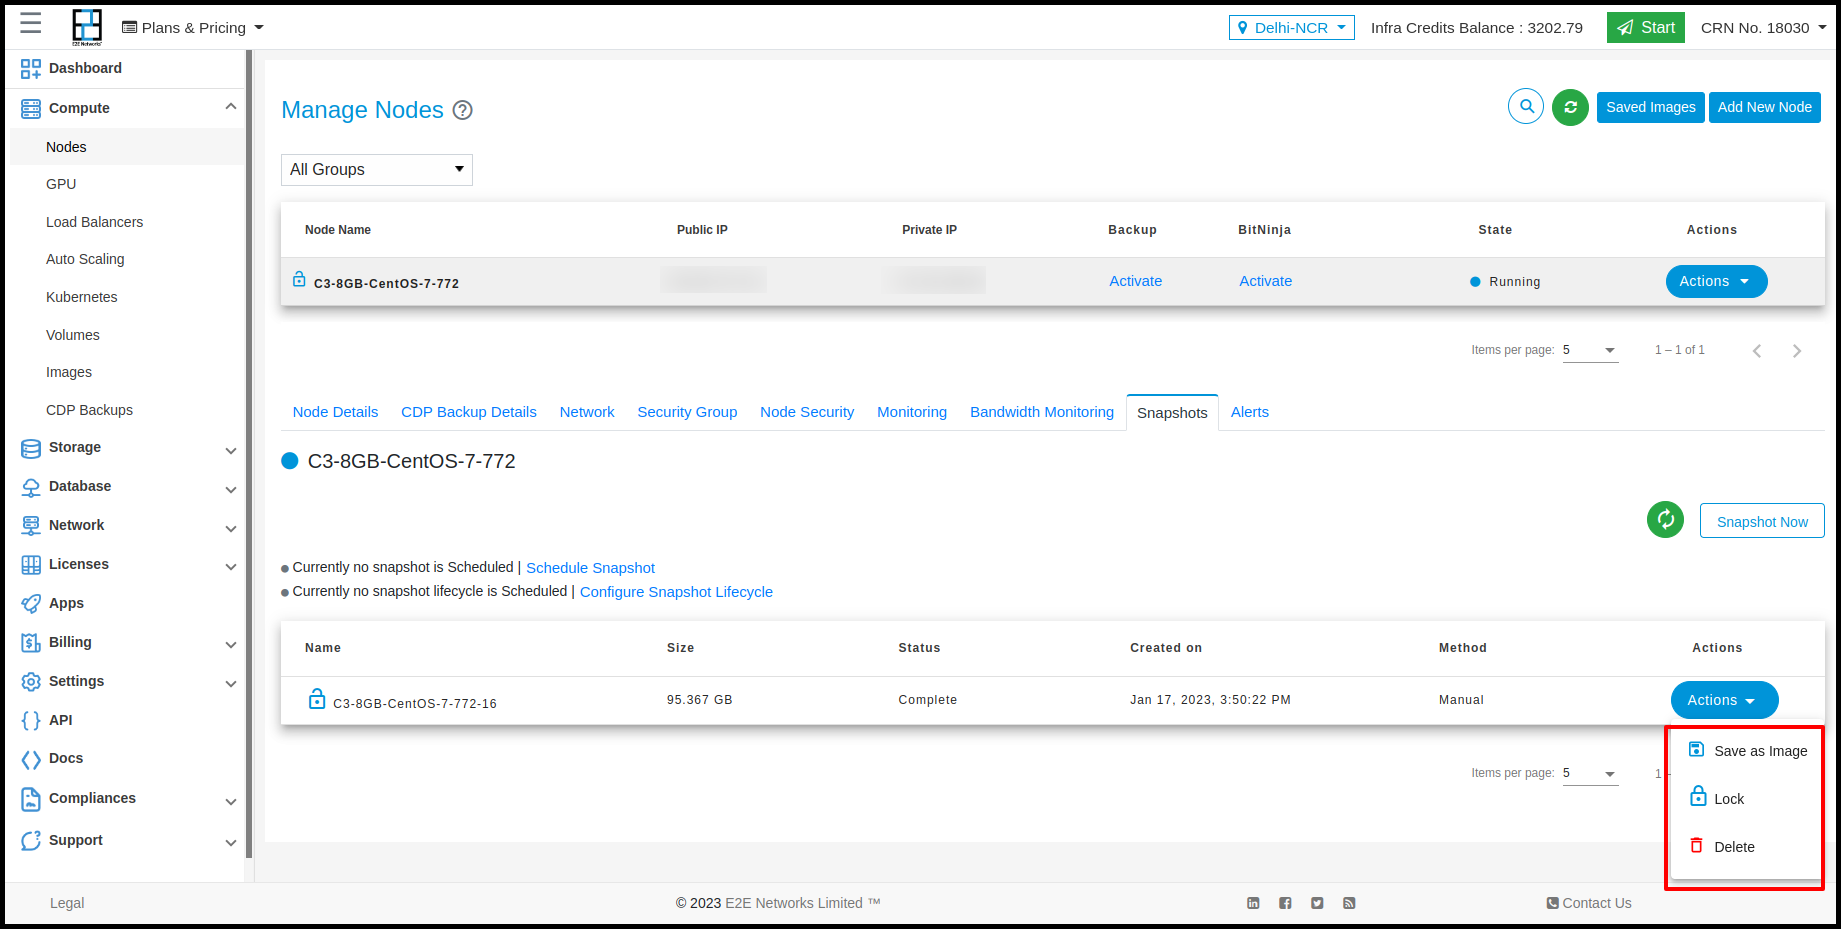
To save an image of a Virtual Node, click on the “Save as image” under the action button.
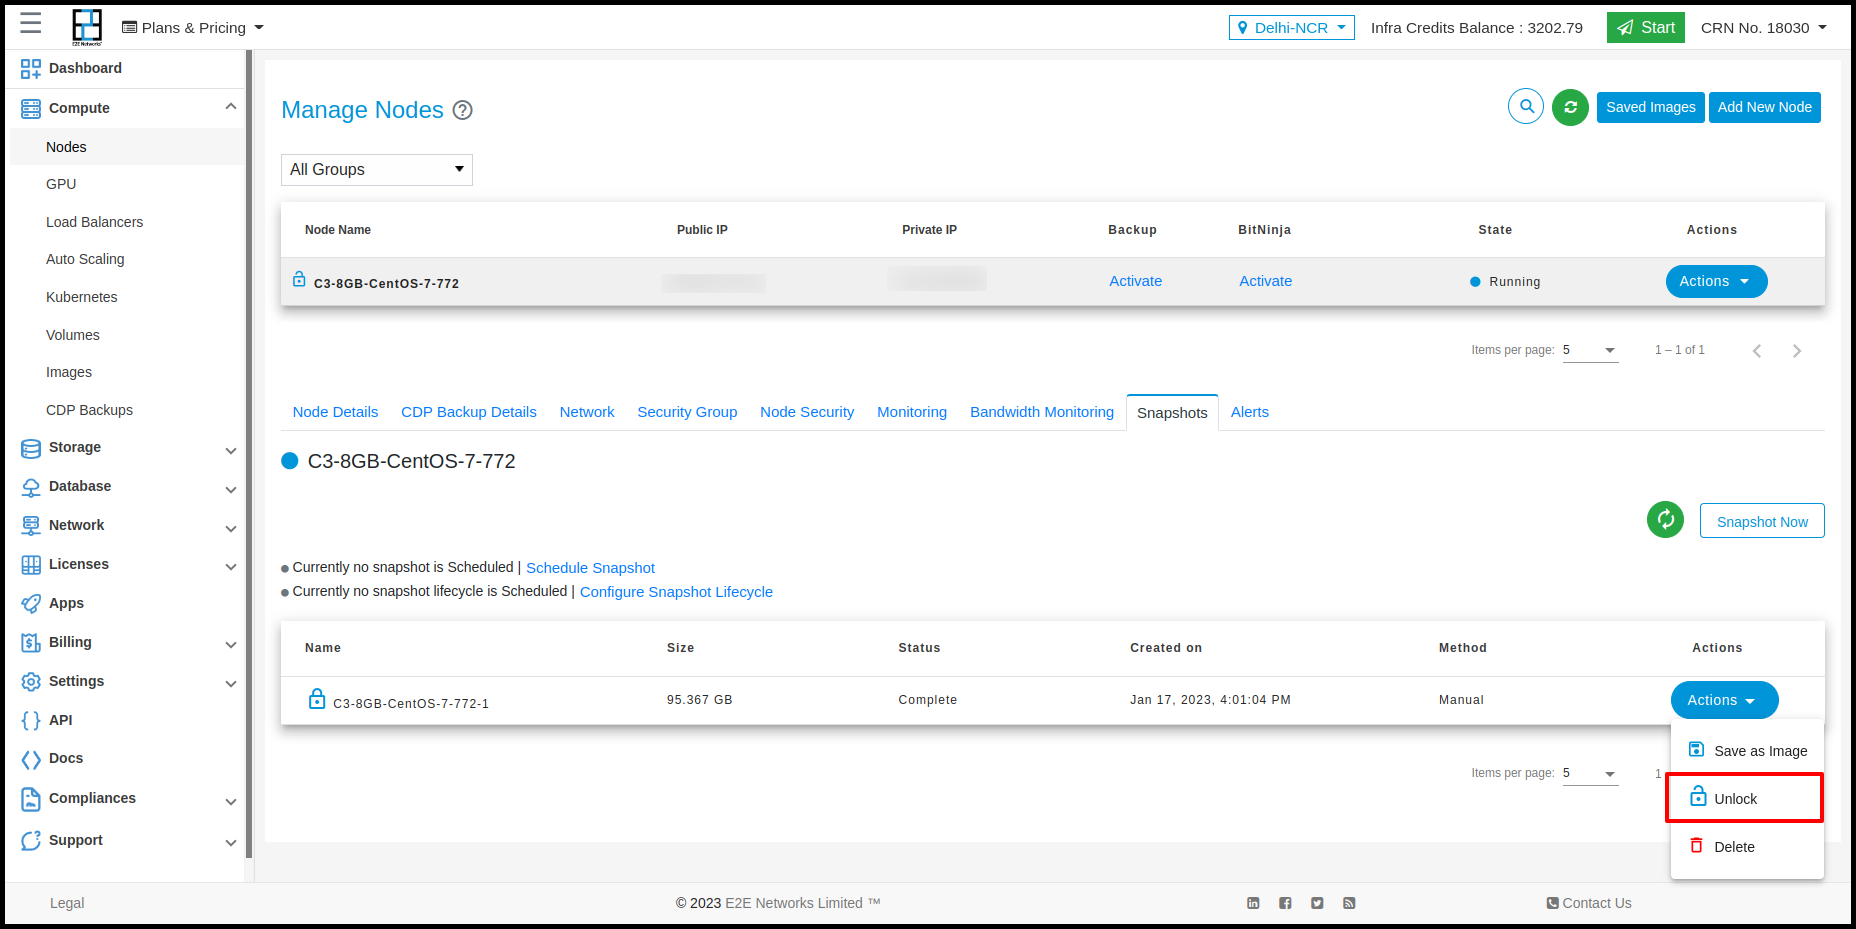
We can lock and unlock the Snapshot by clicking on “Lock” & “Unlock” under the action button.
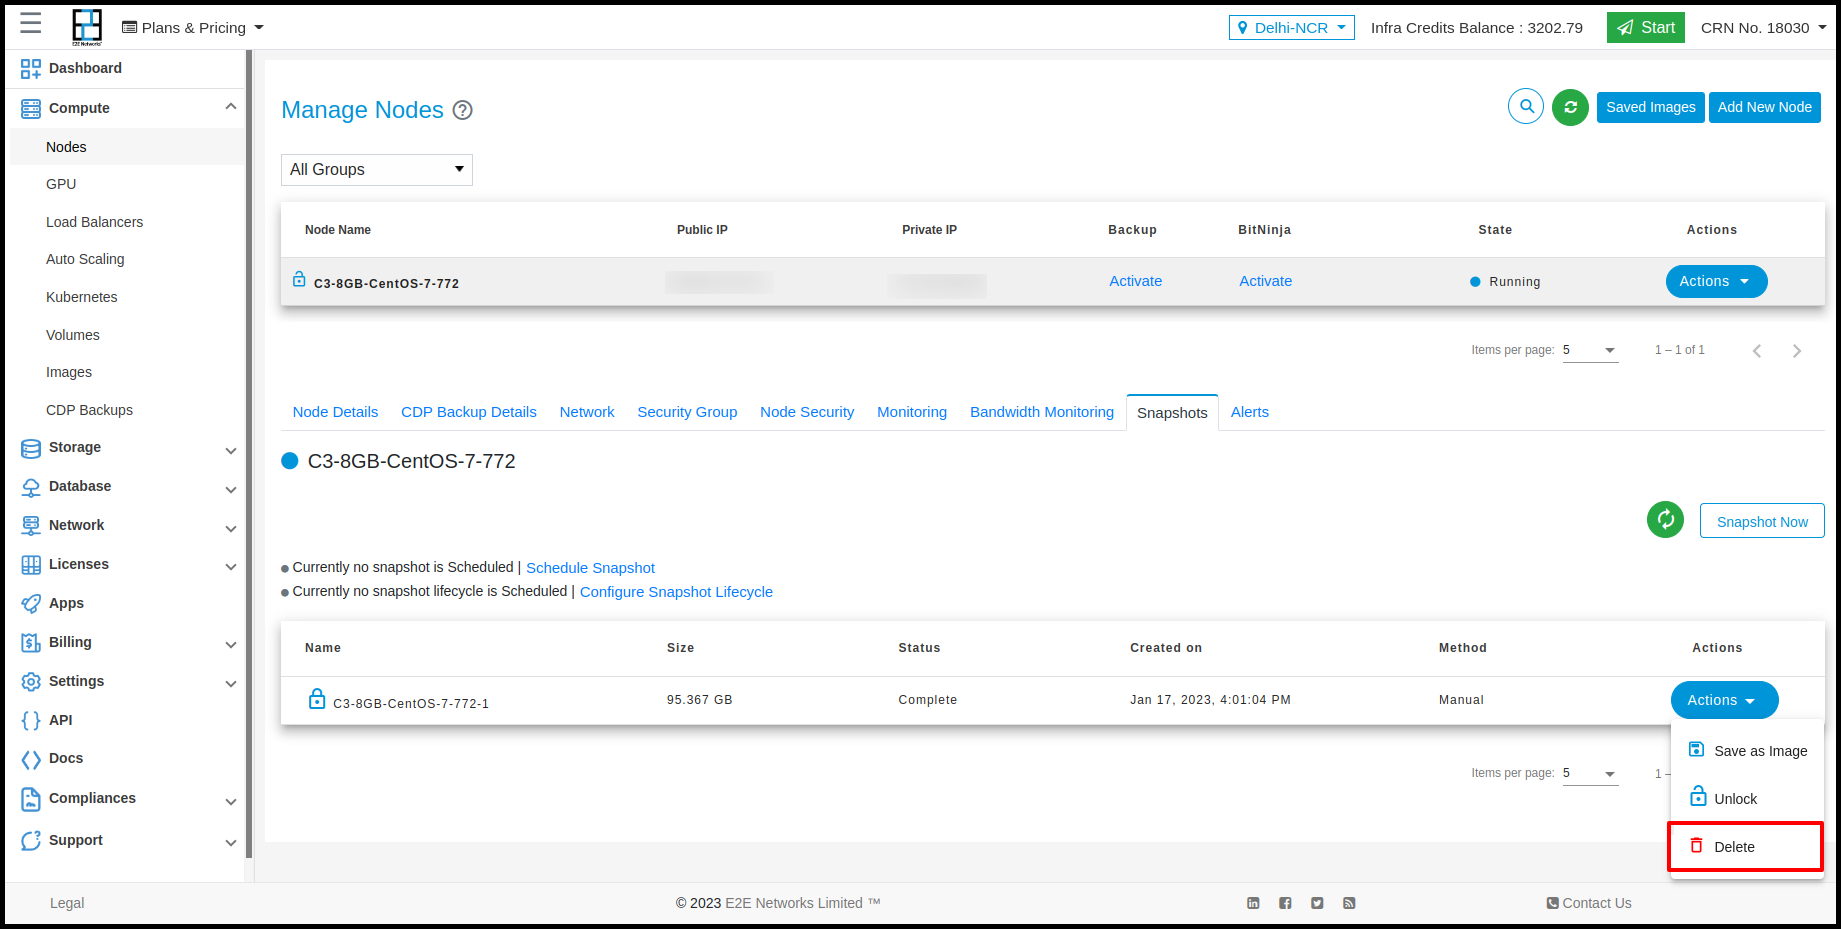
We can Delete the Snapshot by selecting “Delete”under the action section.
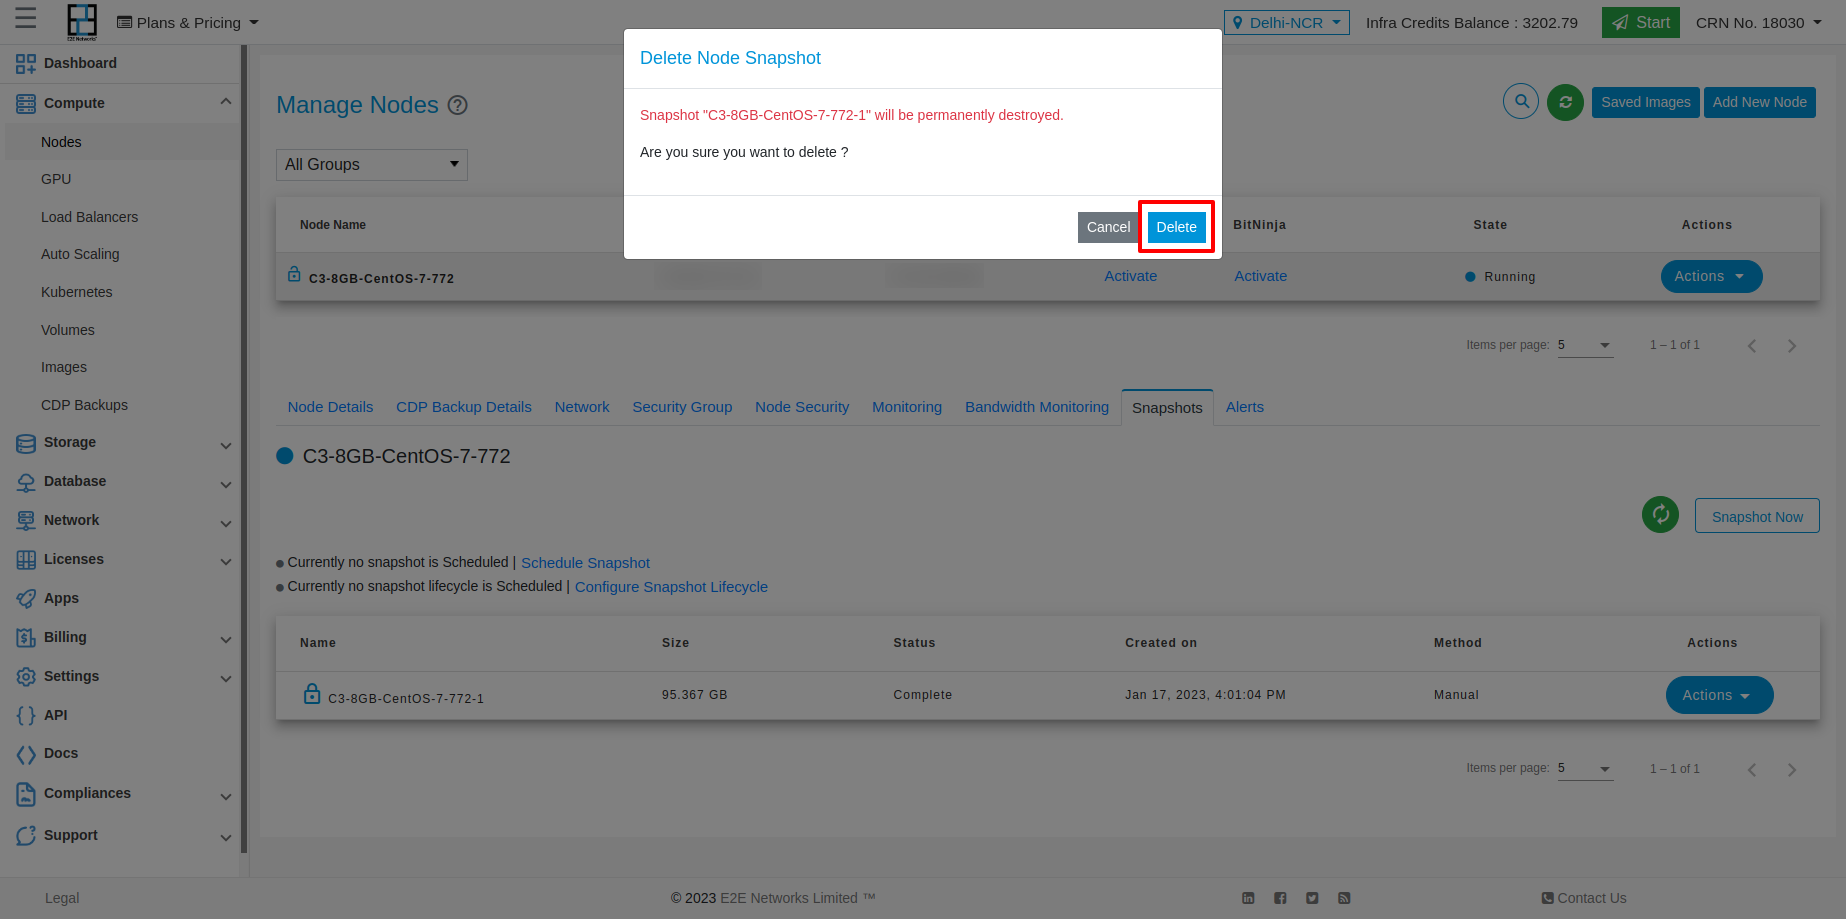
When we click on delete then a pop up will show on screen, click on “Delete” then snapshot will be permanently deleted.
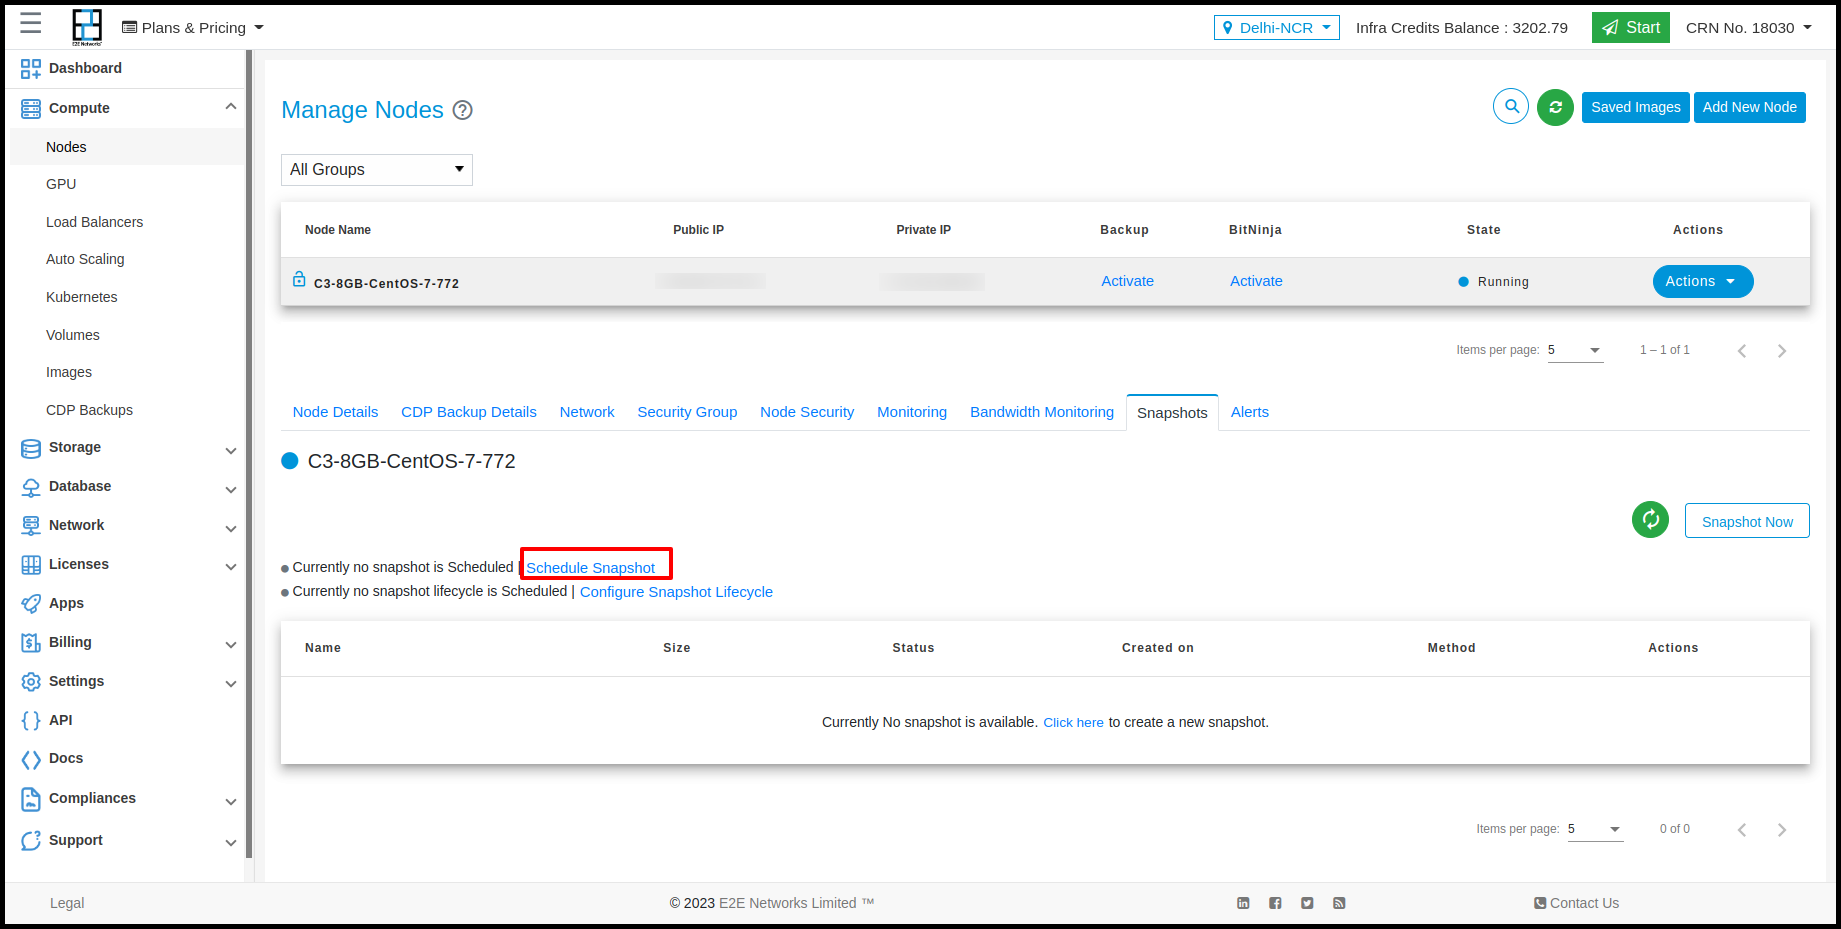
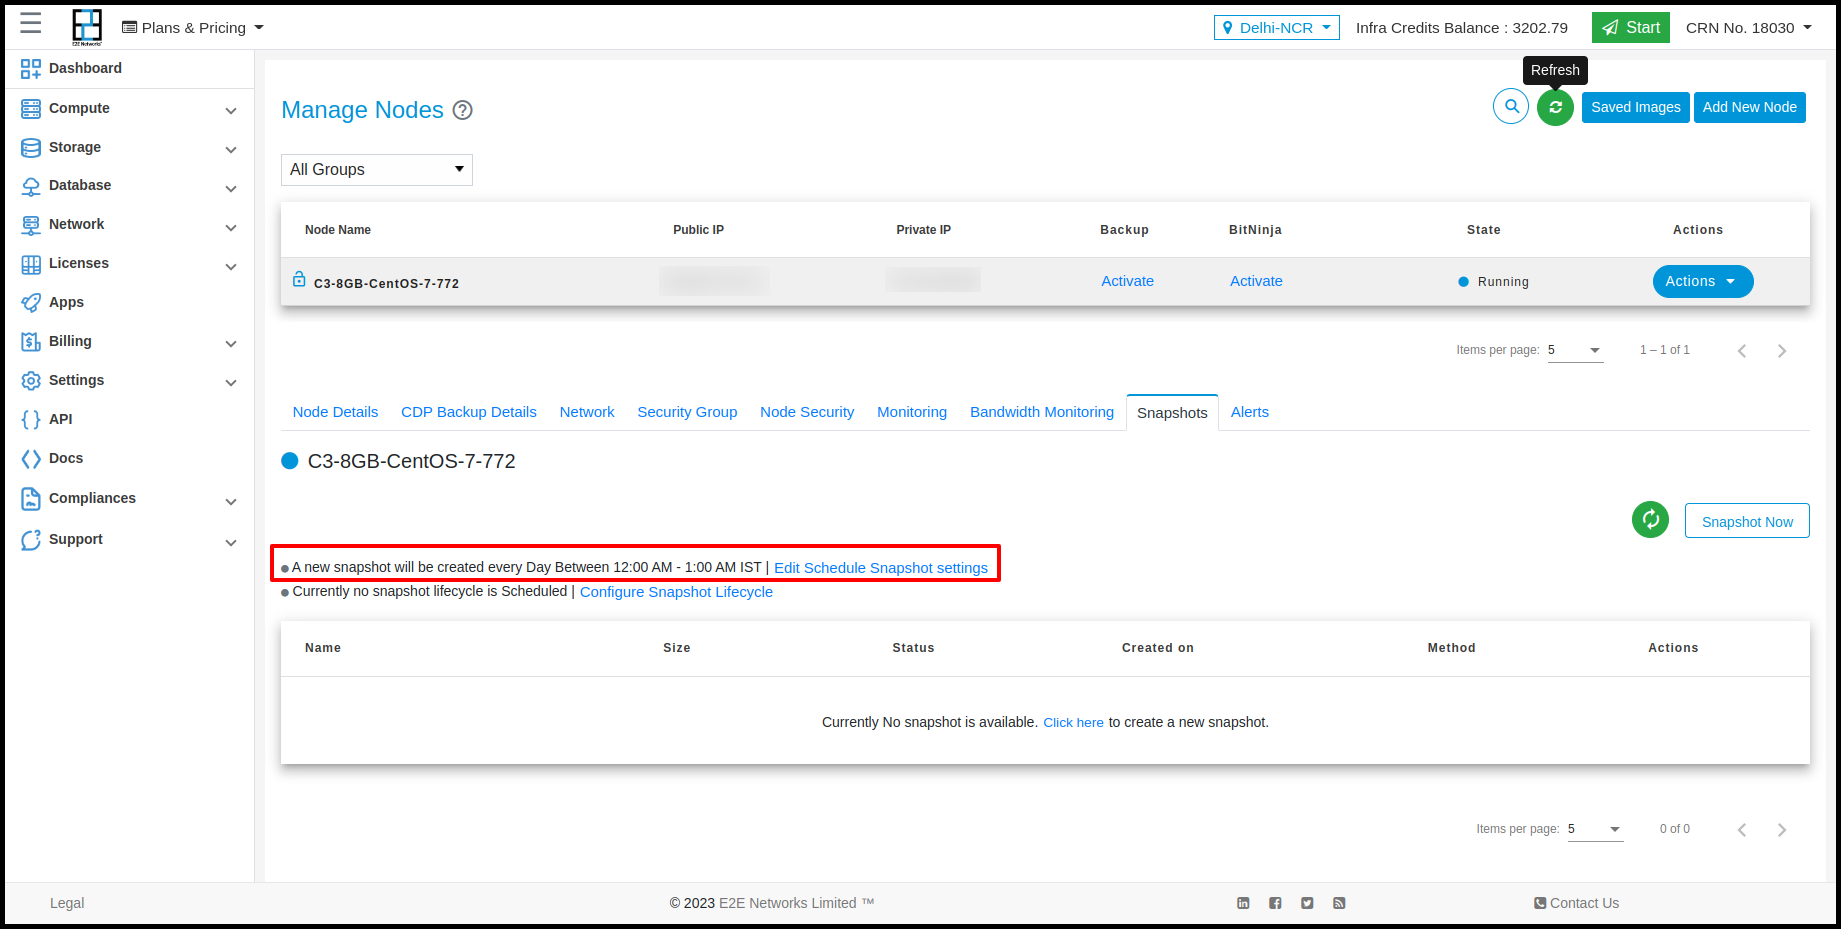
Schedule Snapshot
We can schedule the snapshot on clicking “Schedule Snapshot”
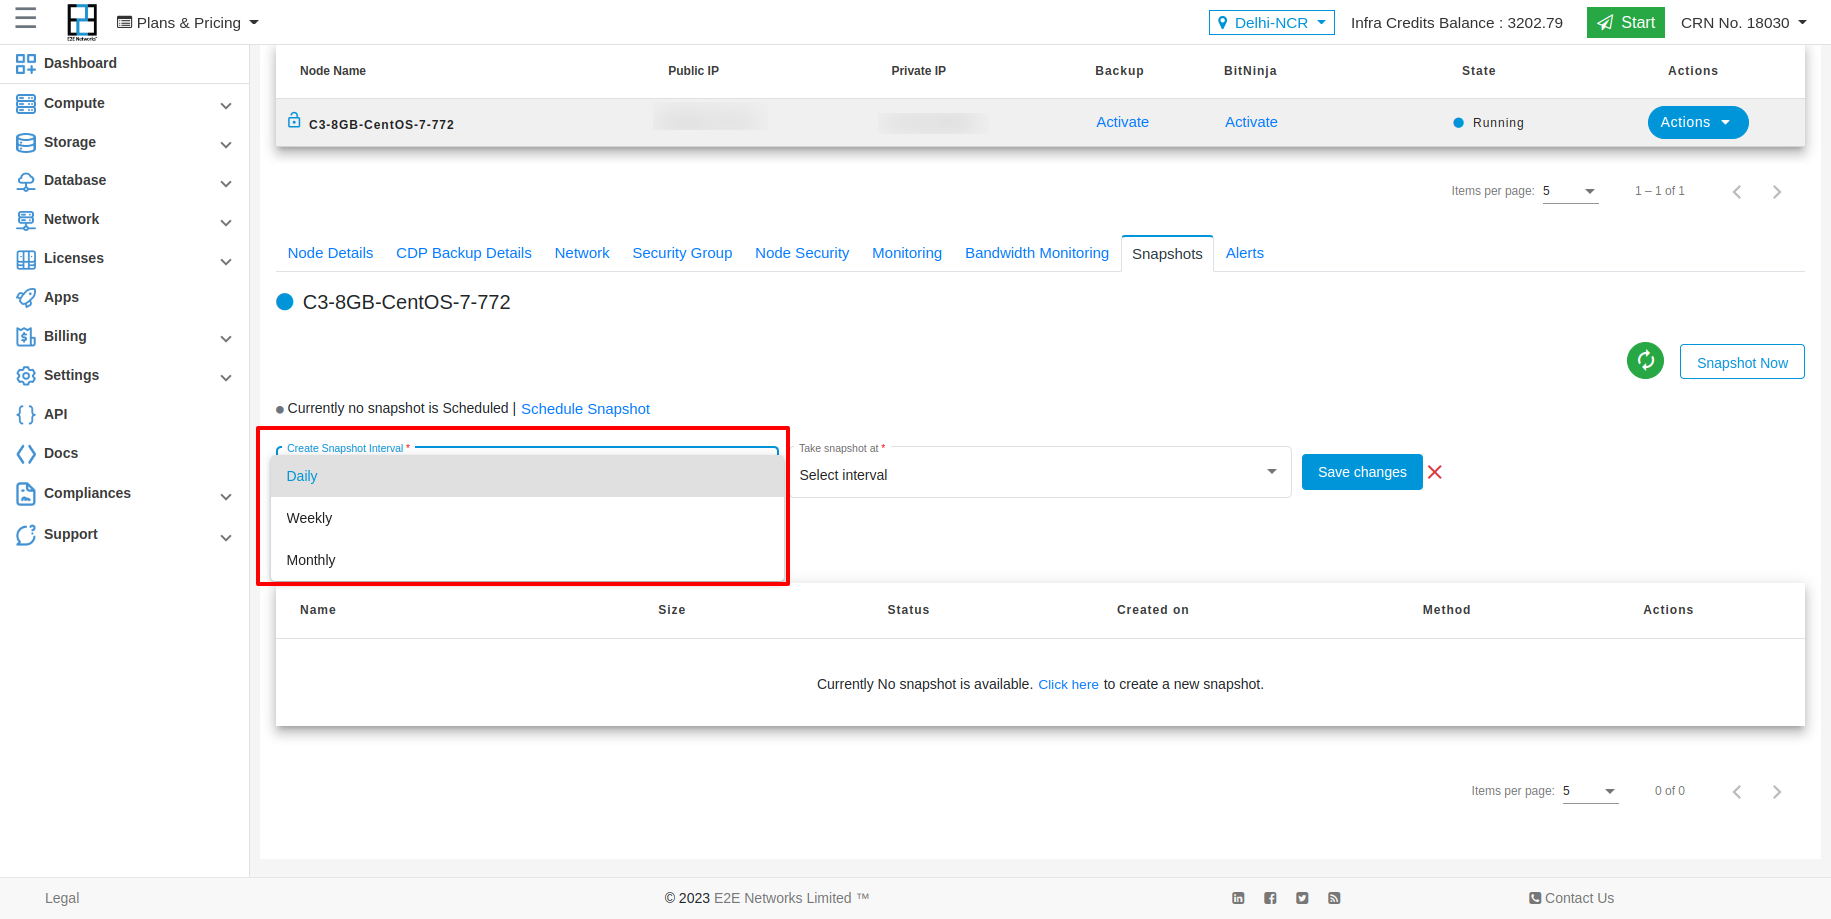
When we click on Schedule Snapshot then we needs to select interval

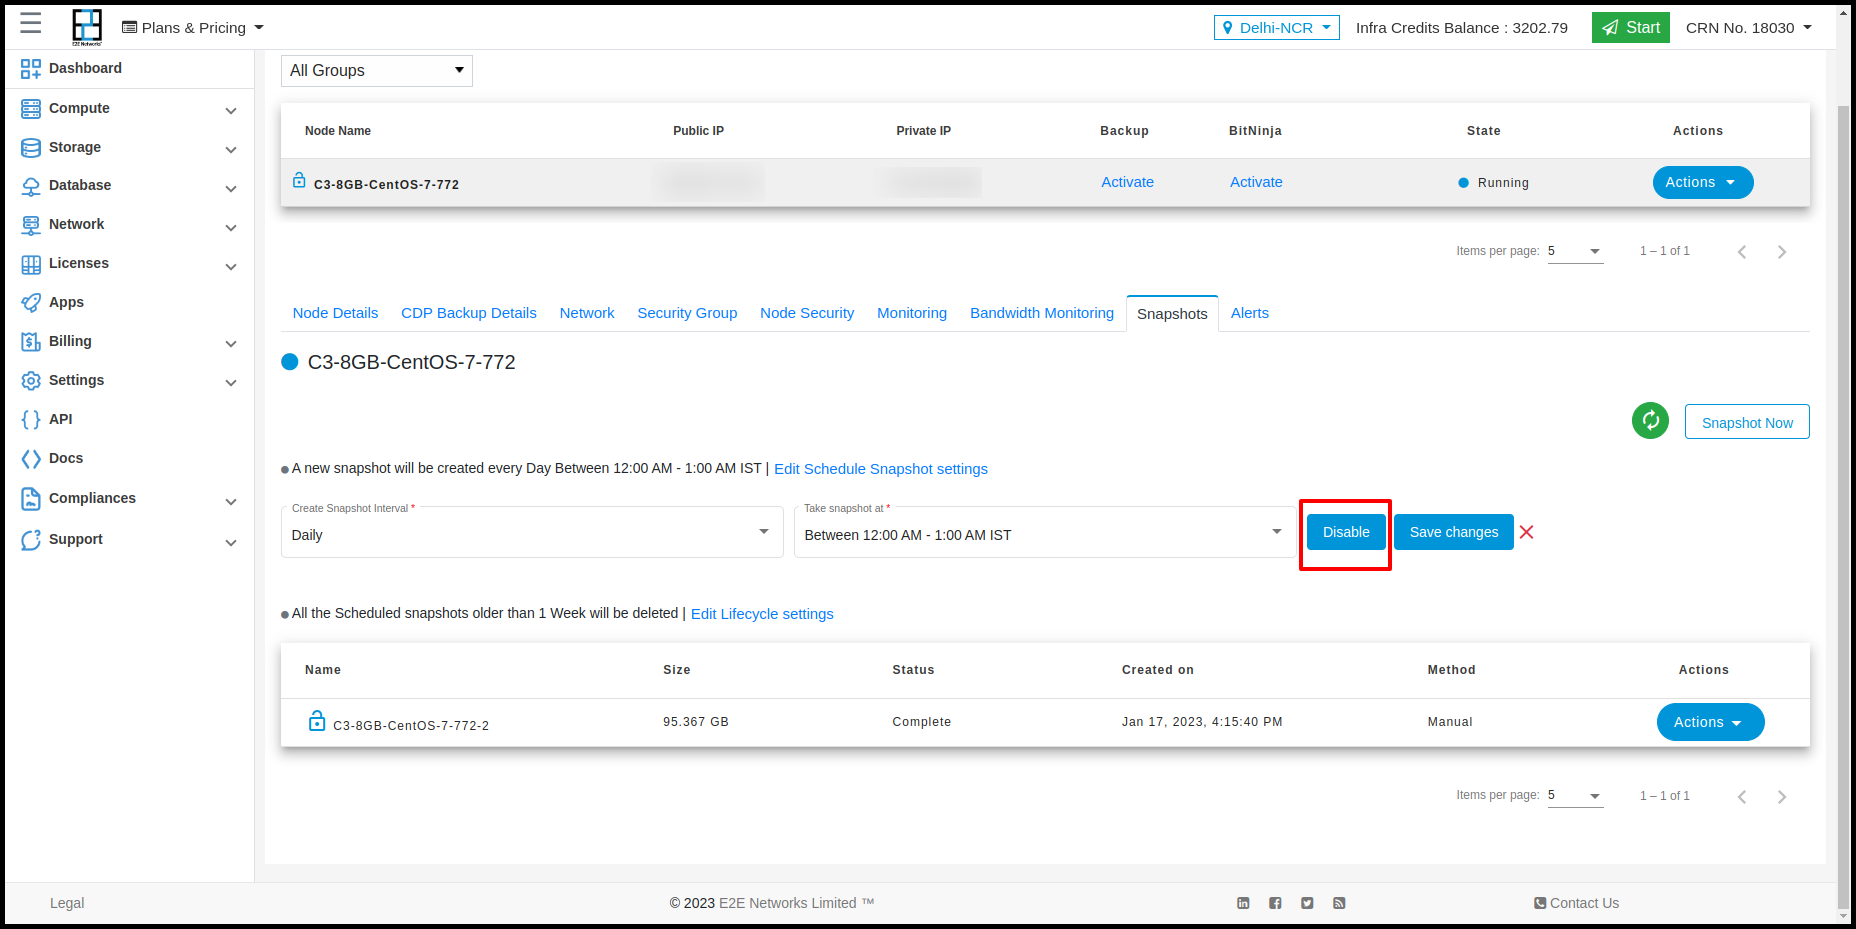
Create Snapshot interval
In this field we can schedule the snapshot on Daily,Weekly & Monthly as shown below image
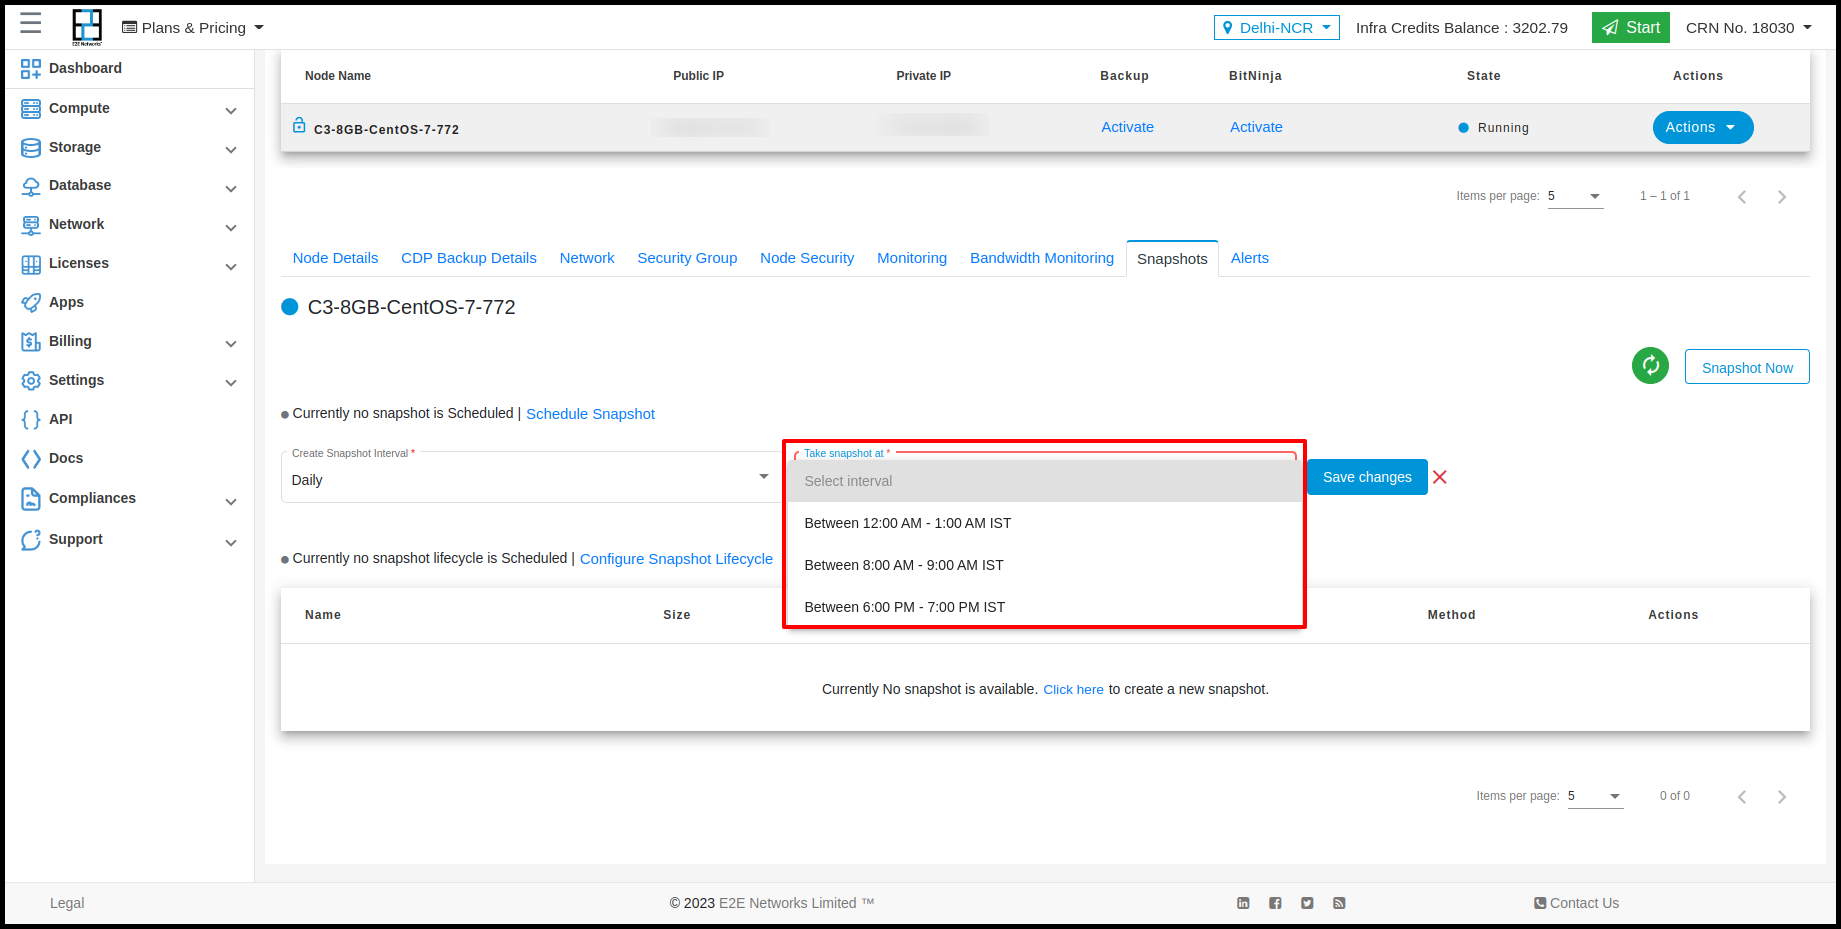
Take Snapshot at
In this field we can schedule the snapshot time as shown below image.
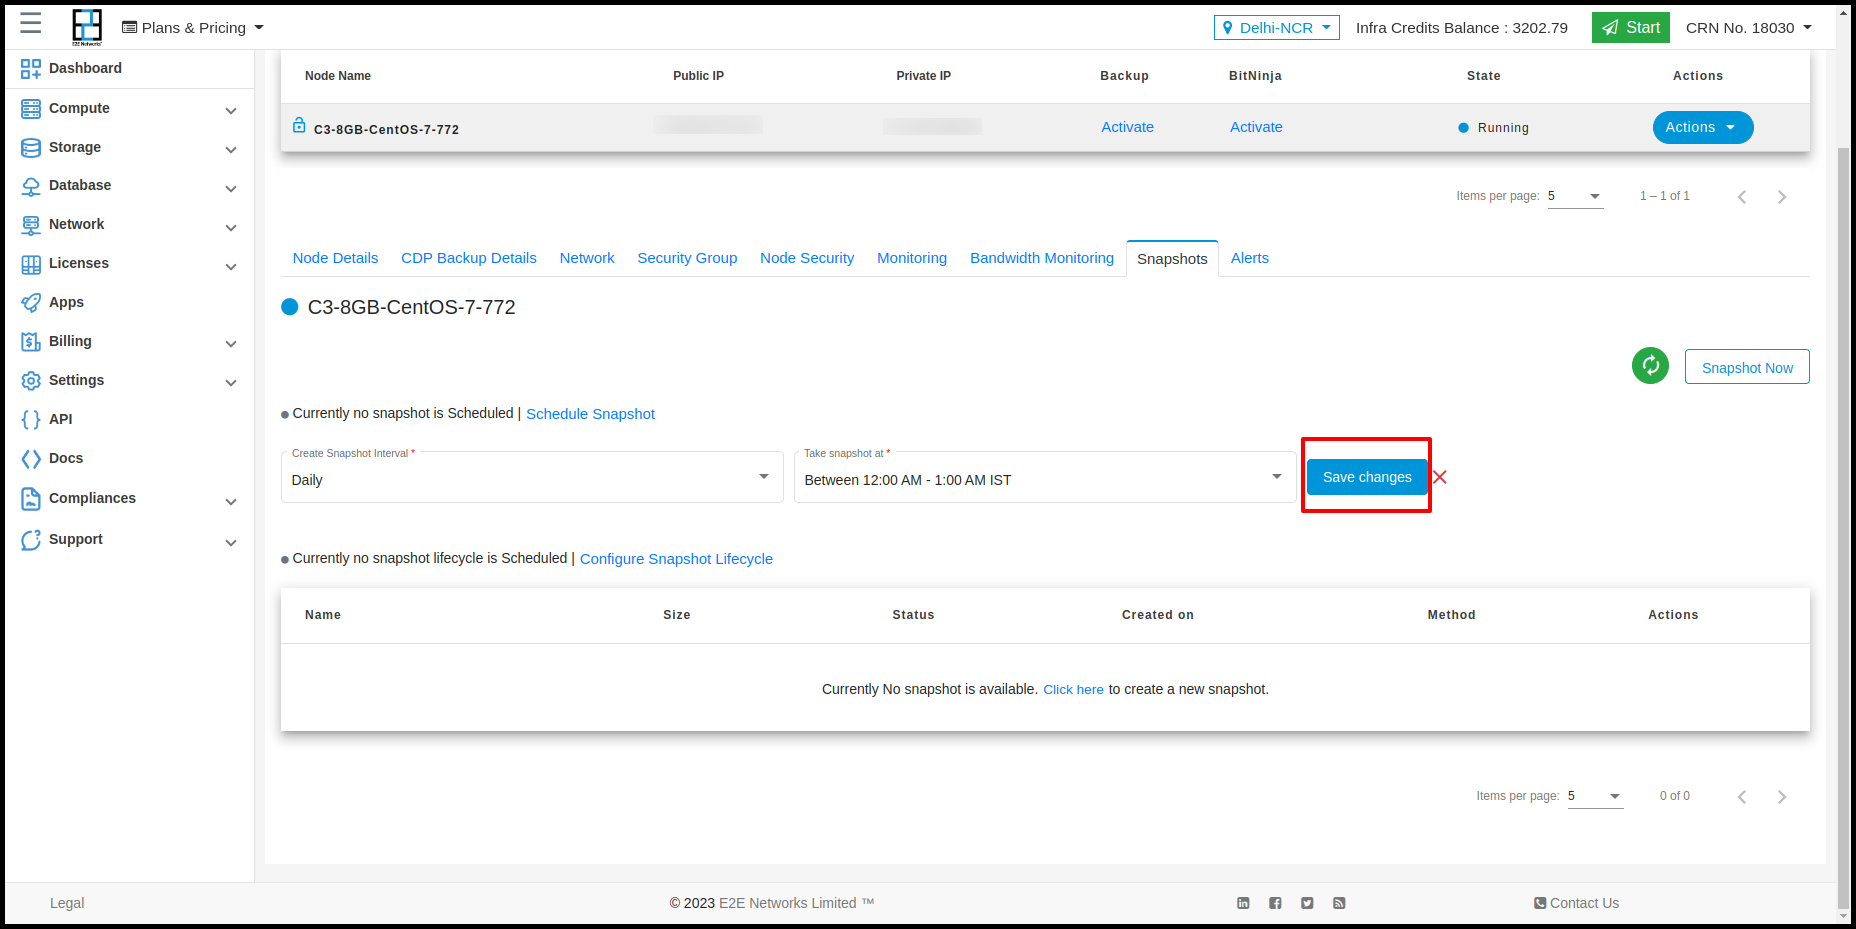
After selecting the Snapshot interval & Snapshot interval time then click on “Save changes”.
After saving the Snapshot interval and Snapshot interval time then it will be shown in the list as shown below.
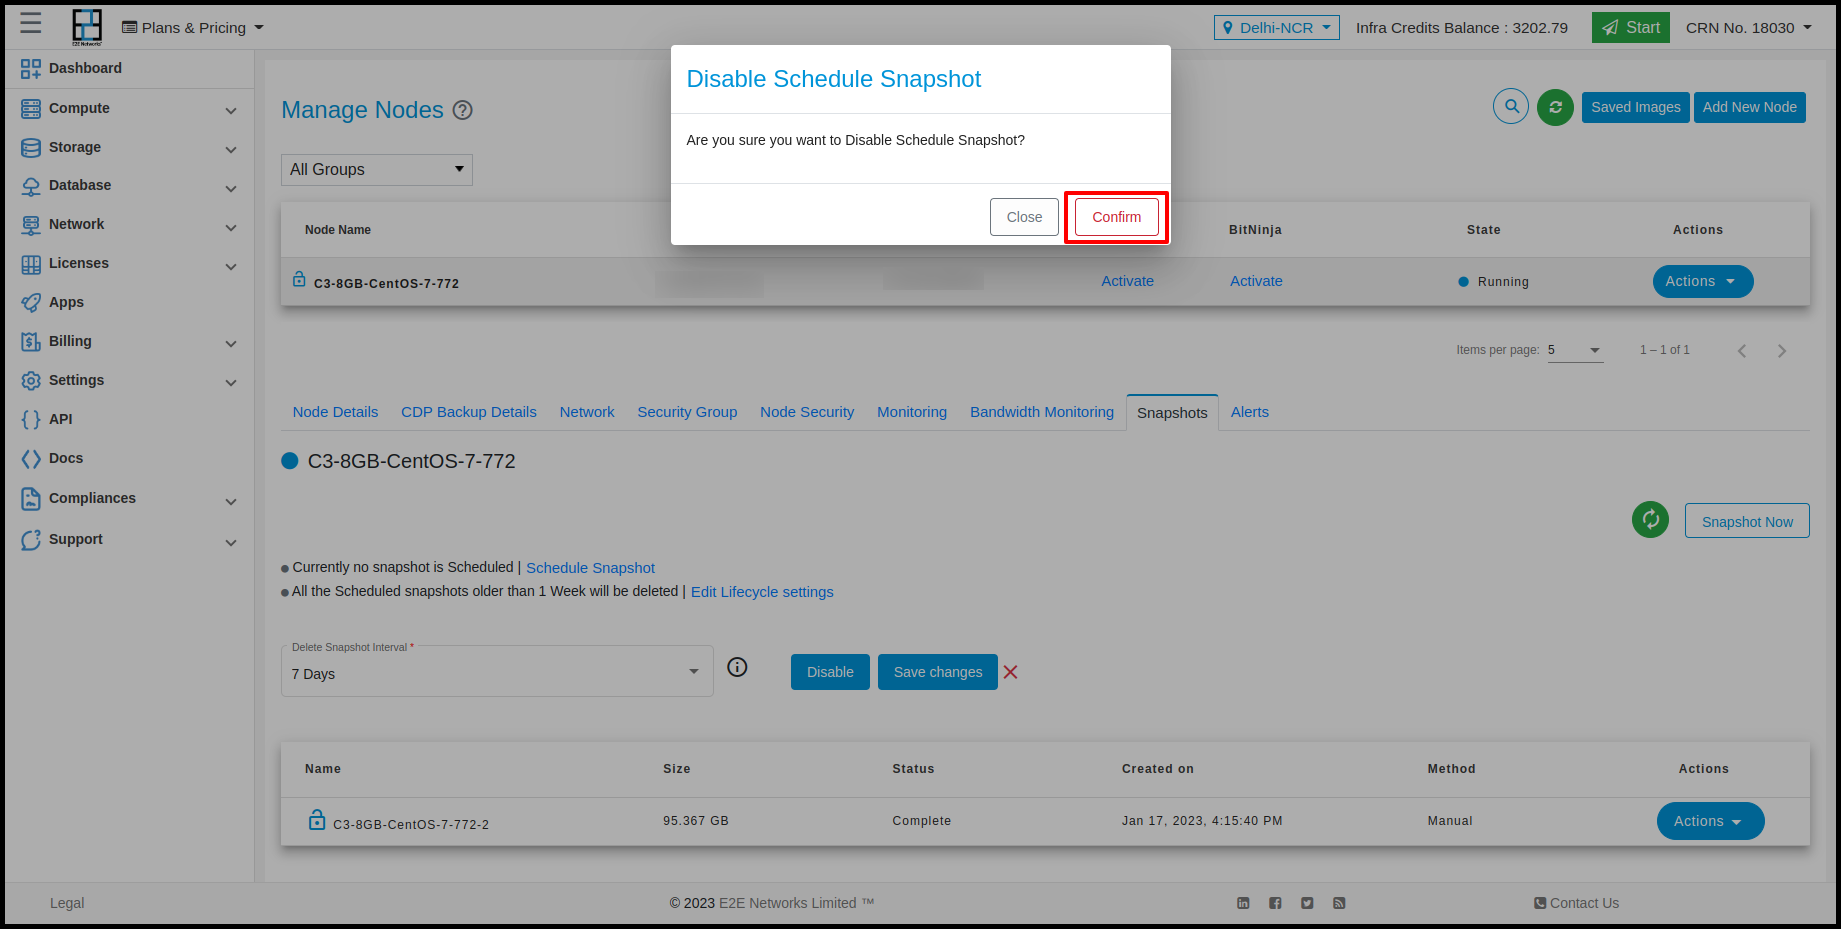
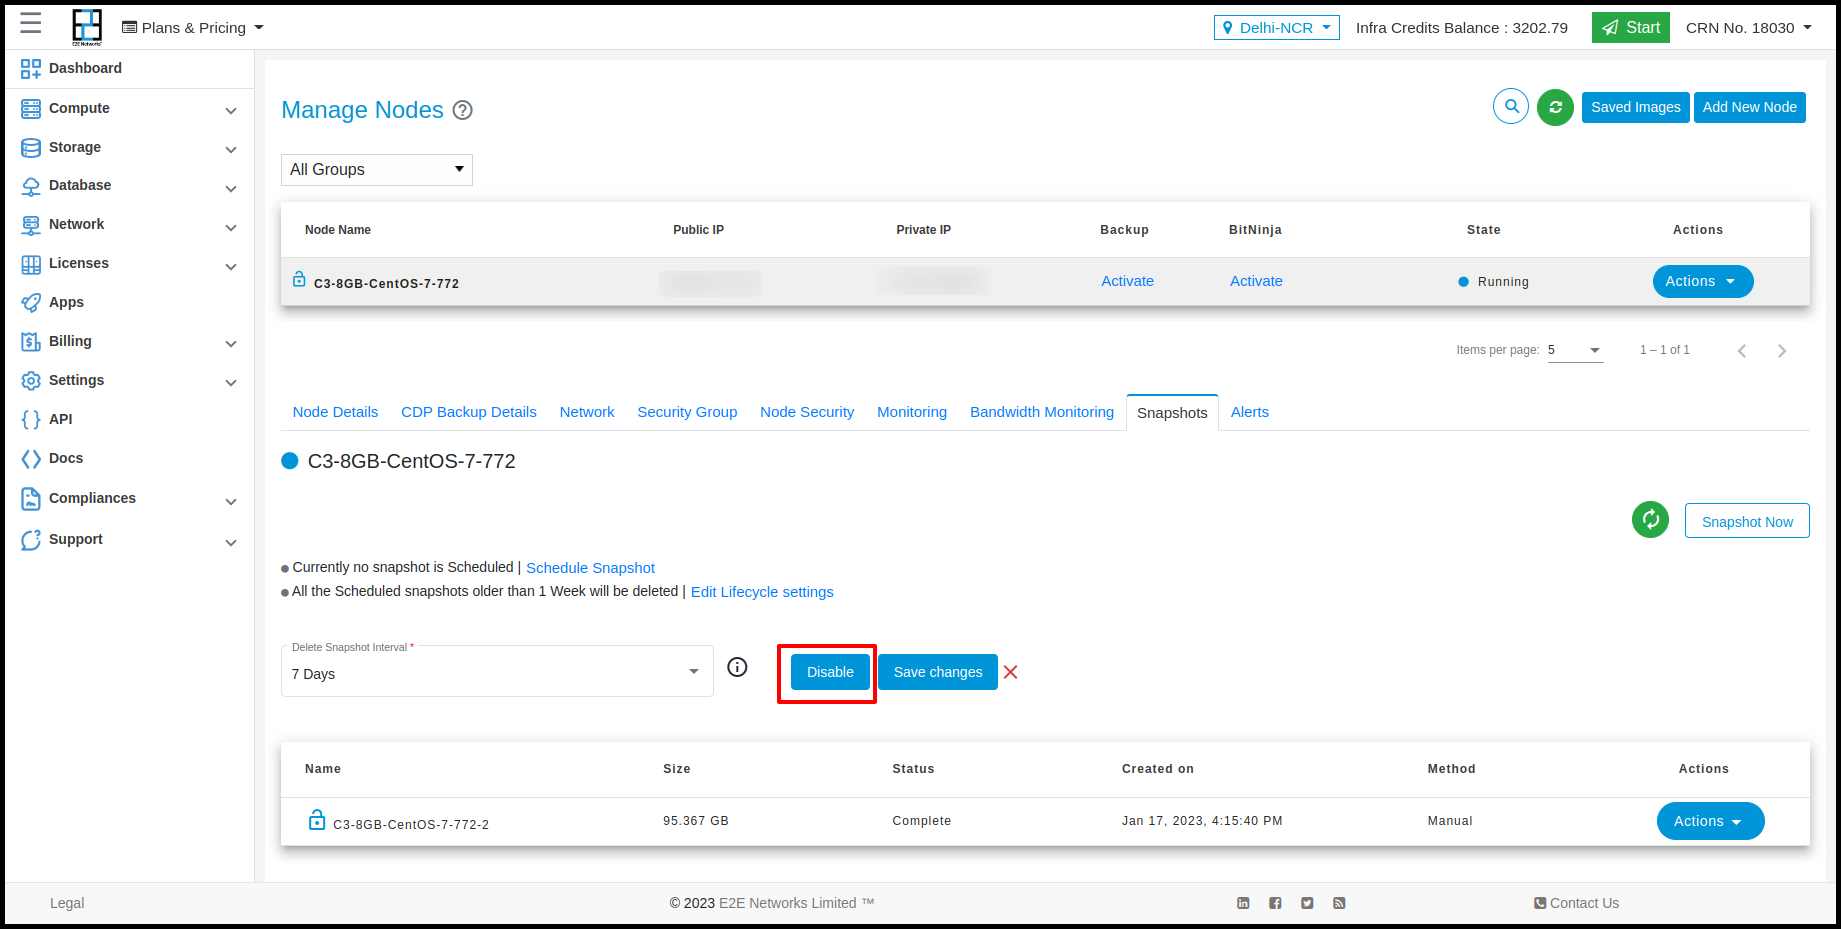
To Disable the schedule snapshot settings then click on the “Disable” button.
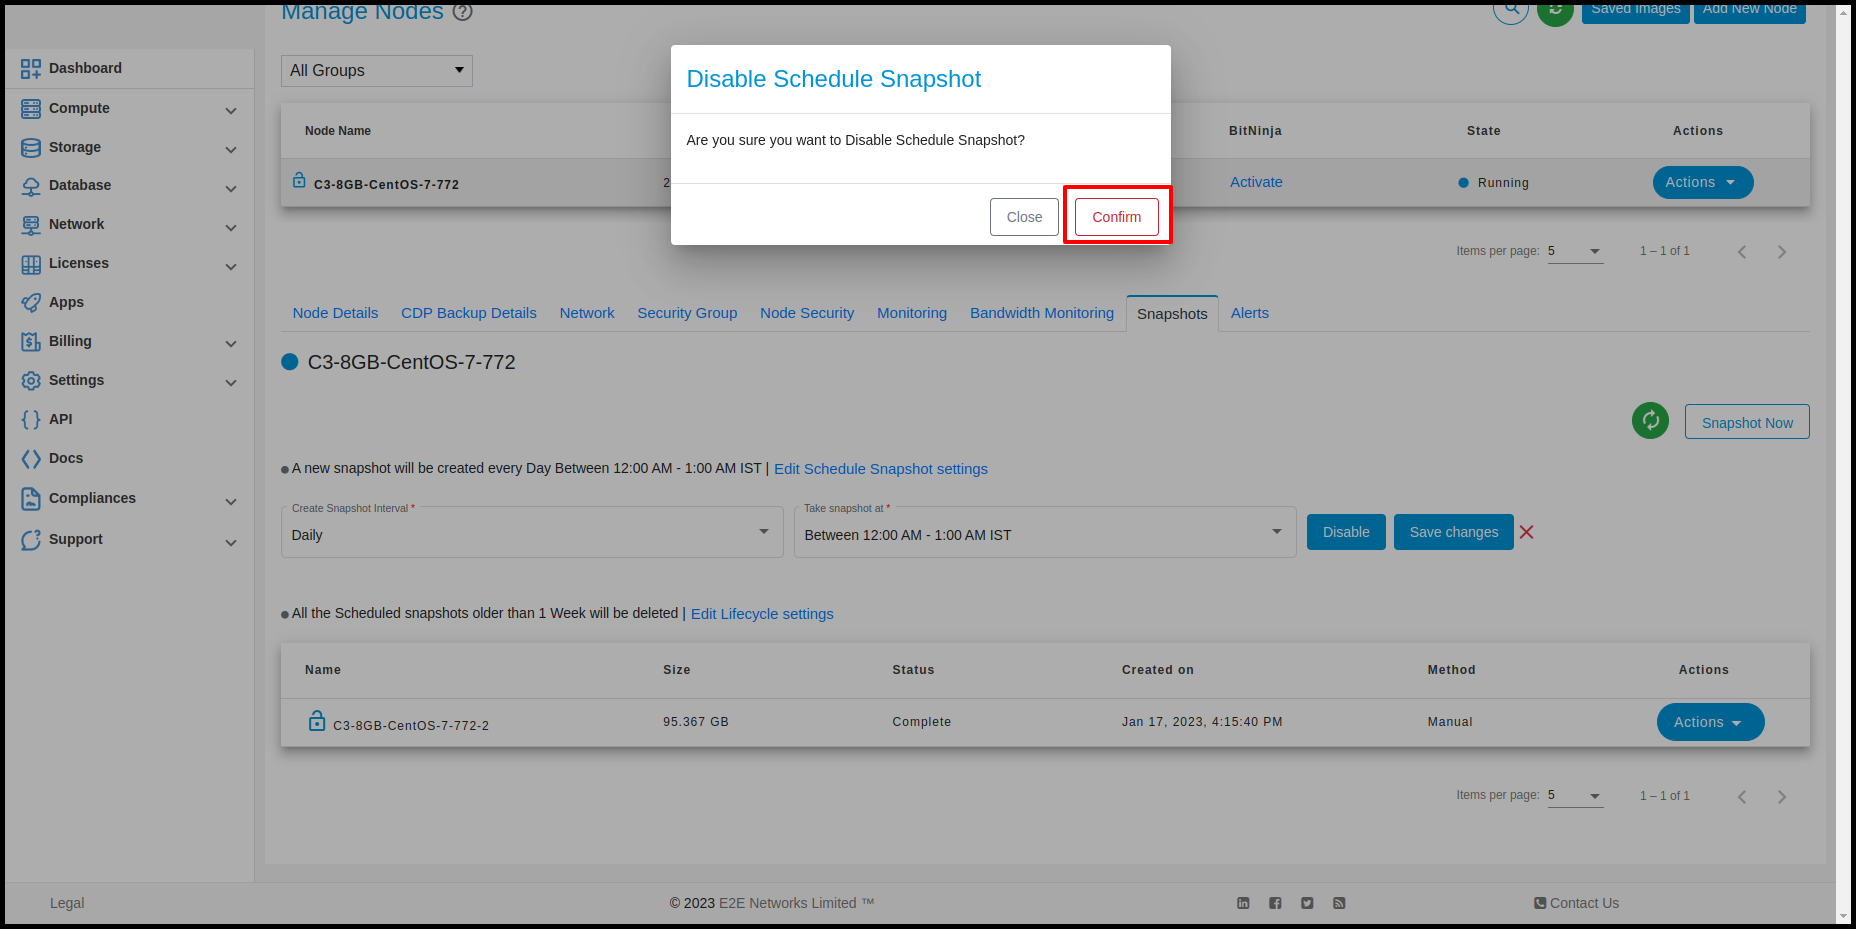
After clicking on the disable tab a confirmation message will appear on the screen then click on the confirm button then the Schedule snapshot will be Disabled.
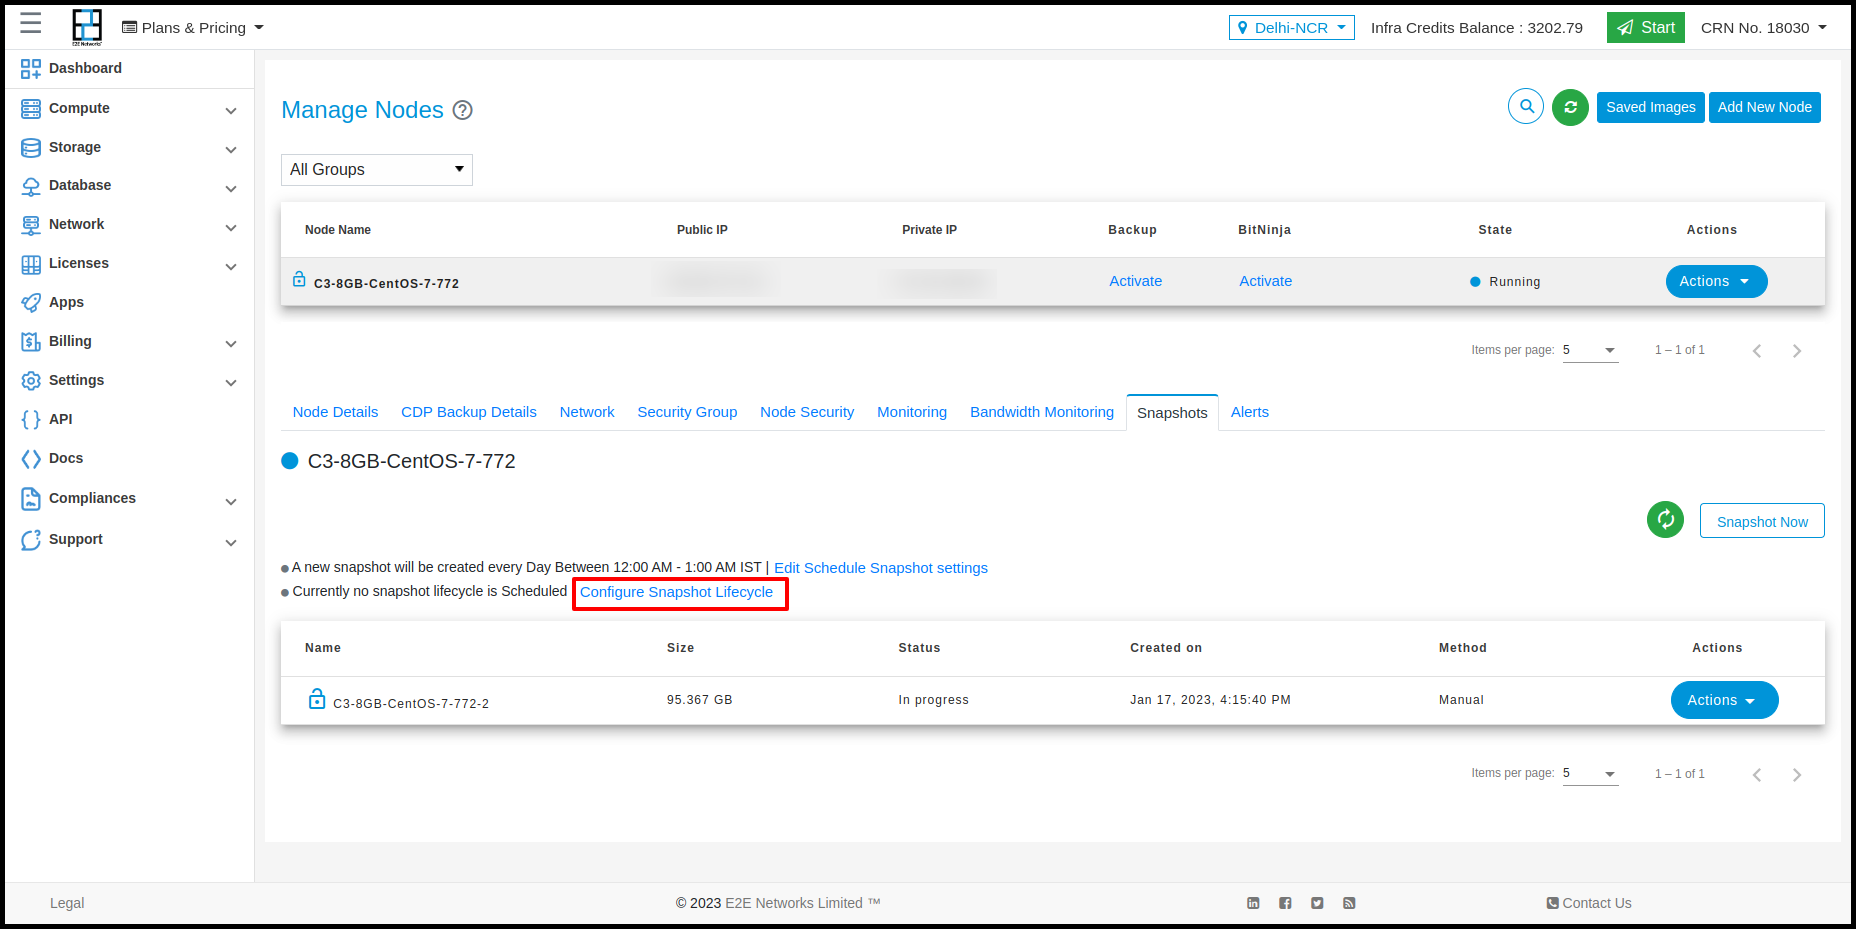
Snapshot Lifecycle
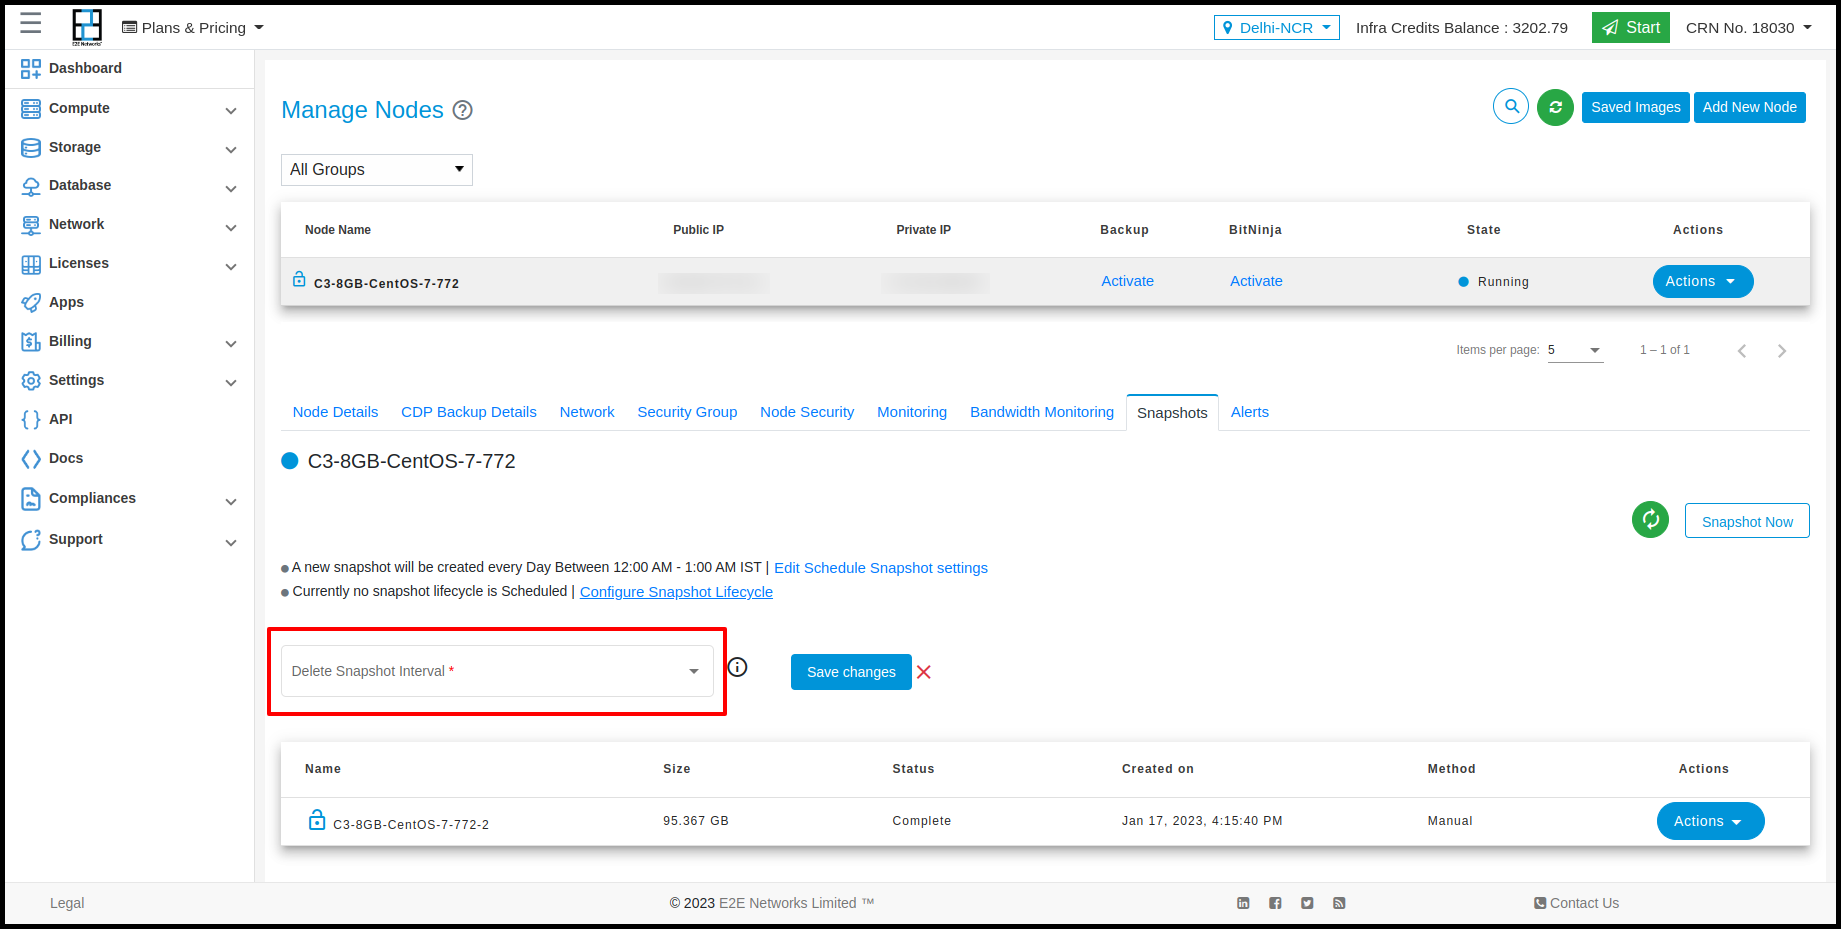
Snapshot Lifecycle is used for deleting created scheduled snapshot We can configure the Snapshot Lifecycle by clicking “Snapshot Lifecycle”.
When we click on Schedule Snapshot then the following tab will appear shown below.
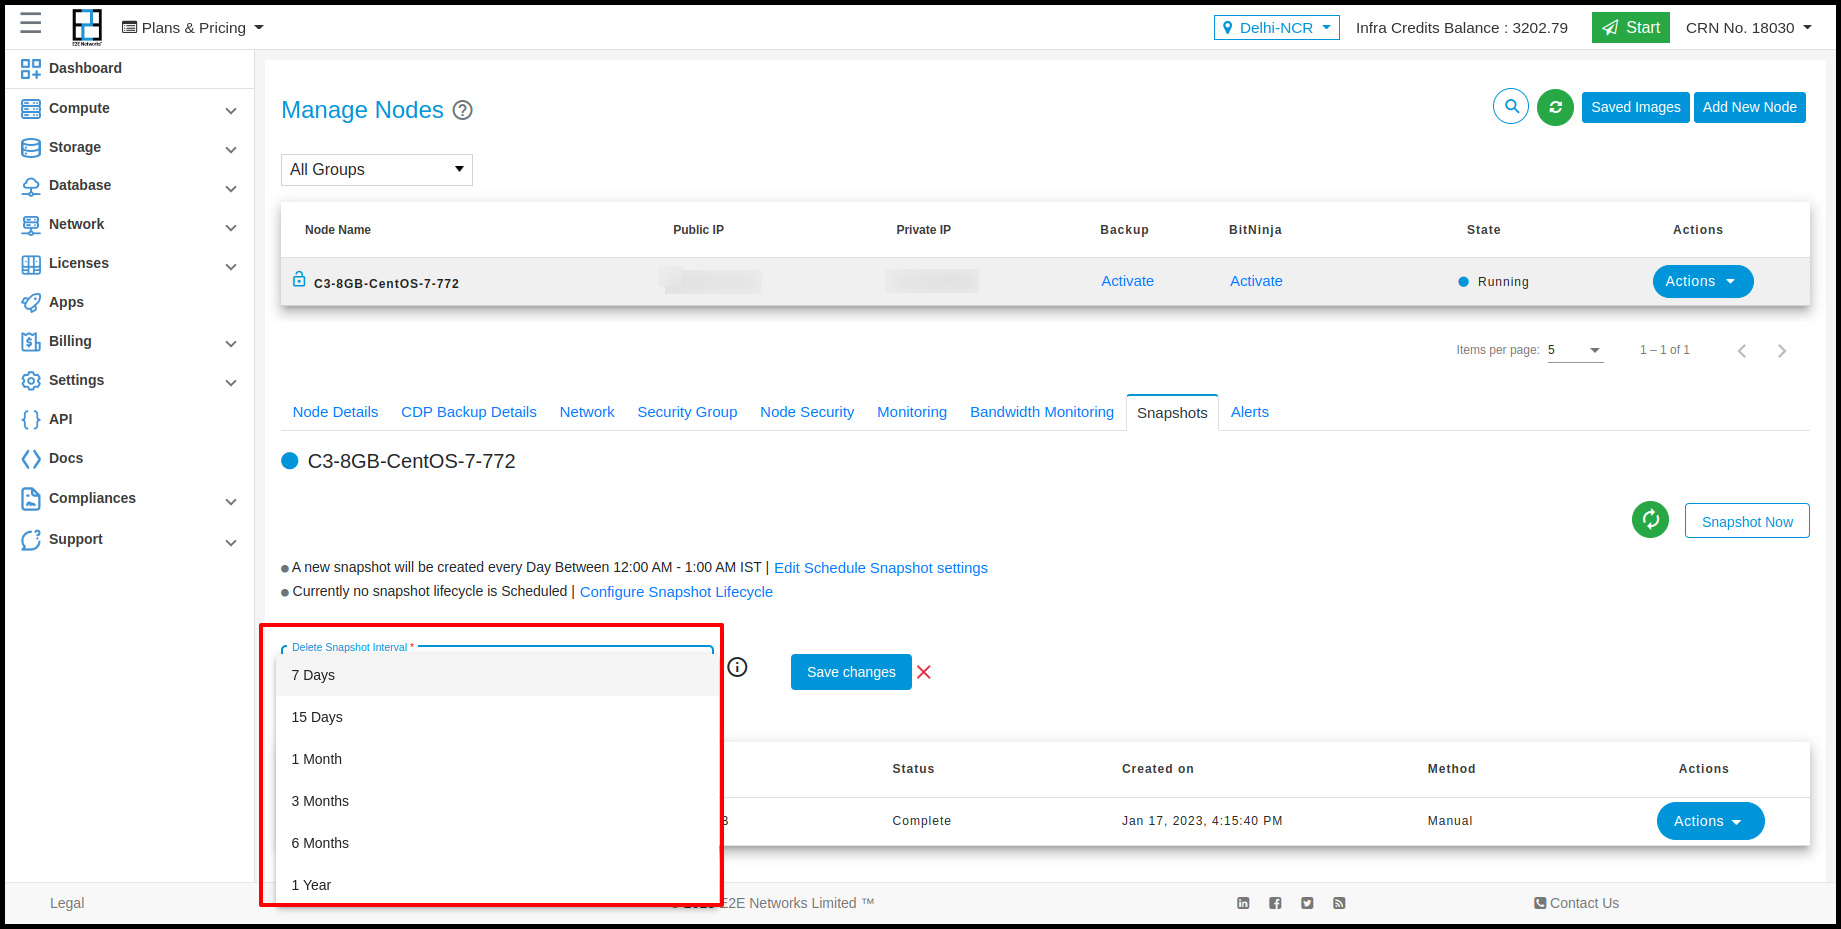
In this field we can select the Delete Snapshot Interval on 7 Days, 15 Days, 1 Month, 3 Month, 6 Month & 1 Year as per the requirement.
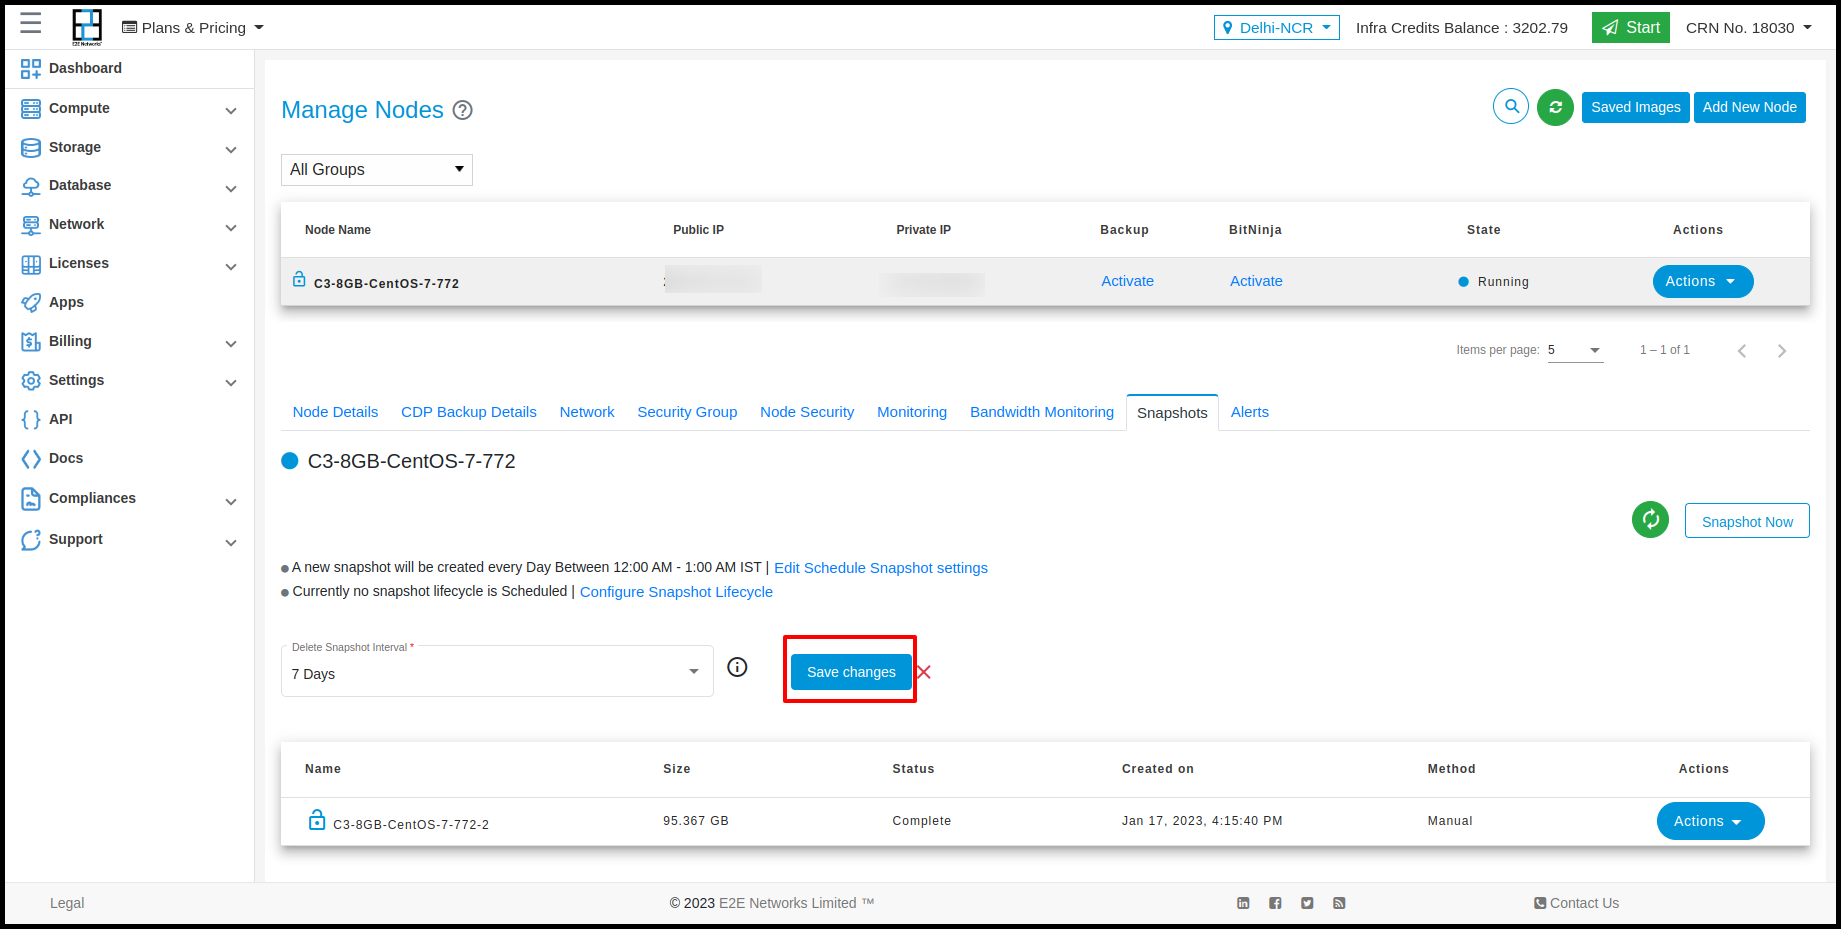
After selecting the Delete Snapshot interval then click on “Save changes”.
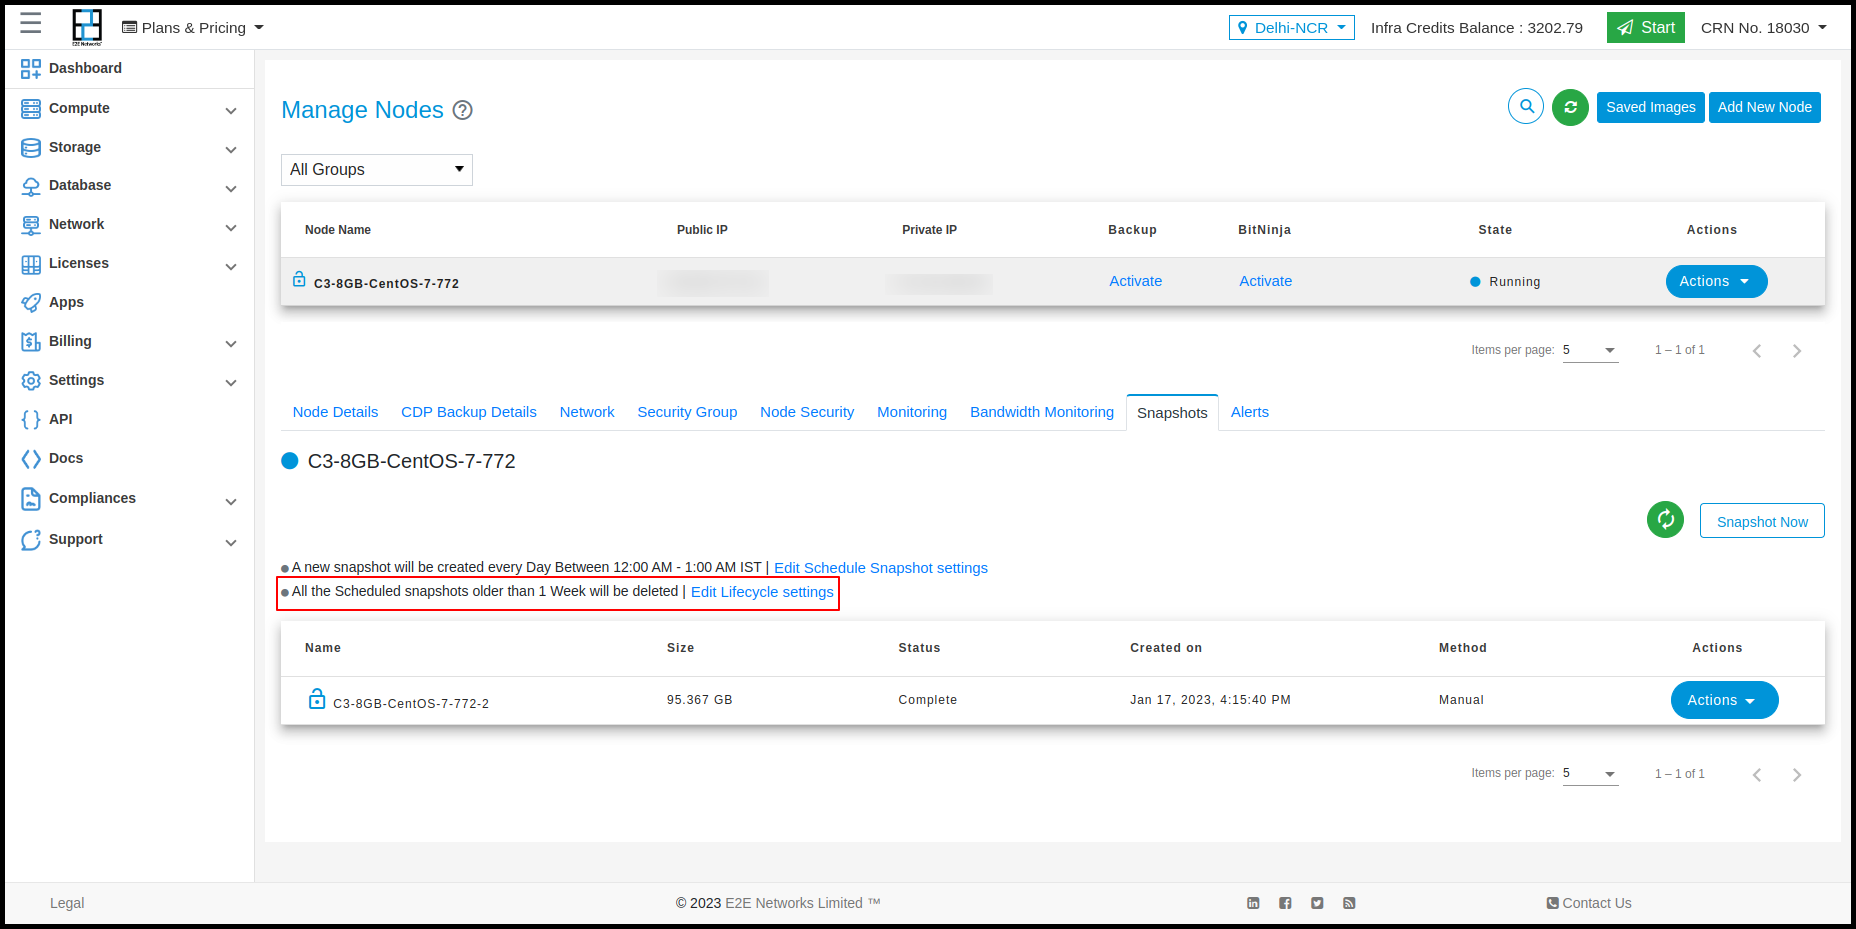
After saving the Delete Snapshot interval then it will be shown in the list as shown below image.
To Disable all the schedule snapshot settings then click on the “Disable” tab.
After clicking on the disable tab a confirmation message will appear on the screen then click on the confirm tab then all the Schedule snapshot will be Disabled.