Introduction
To create an E2E Compute Node, you’ll require an E2E MyAccount. If you don’t have one, you can create it from the E2E Networks account sign-up page. The E2E Networks MyAccount portal offers access to and management of your E2E Nodes through a simple and intuitive web-based user interface.
Additionally, you can also use E2E Networks API, this will enable you to programmatically perform various actions for your Nodes before start please ensure that you have created your API token using E2E MyAccount.
Getting Started
How to Launch Nodes from Myaccount portal
Login into MyAccount
Please go to ‘My Account’ and log in using your credentials set up at the time of creating and activating the E2E Networks ‘My Account’.
Navigate to Node create page

- After you log in to the E2E Networks ‘MyAccount’, you can click on any of the following options.
On the left side of the MyAccount dashboard, click on the “Nodes” sub-menu available under the Compute section.
You may also click on “Nodes” header on the dashboard.
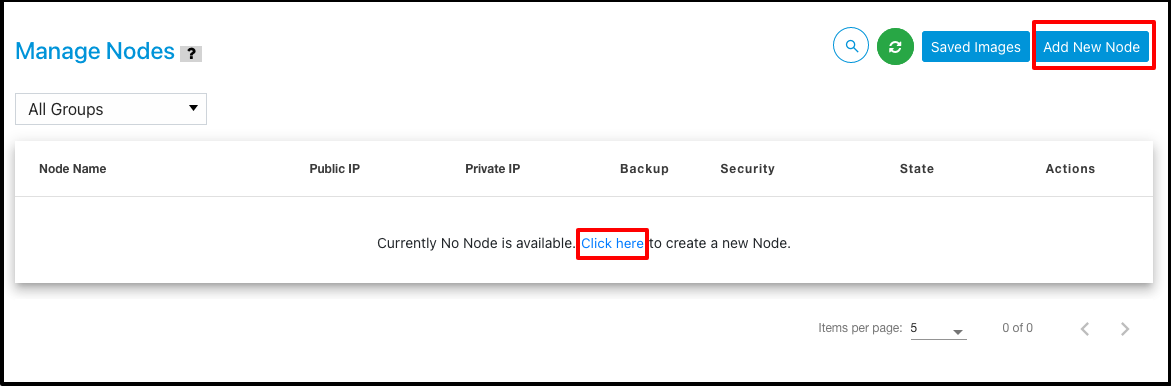
You will be routed to the ‘Manage Nodes’ page. Now, you have to Click on the ‘Add New Node‘ button to create a node that takes you to the ‘Create Node’ page.
1. Choosing an OS
To create a node, you need to select the operating system (OS) for the node you wish to create.
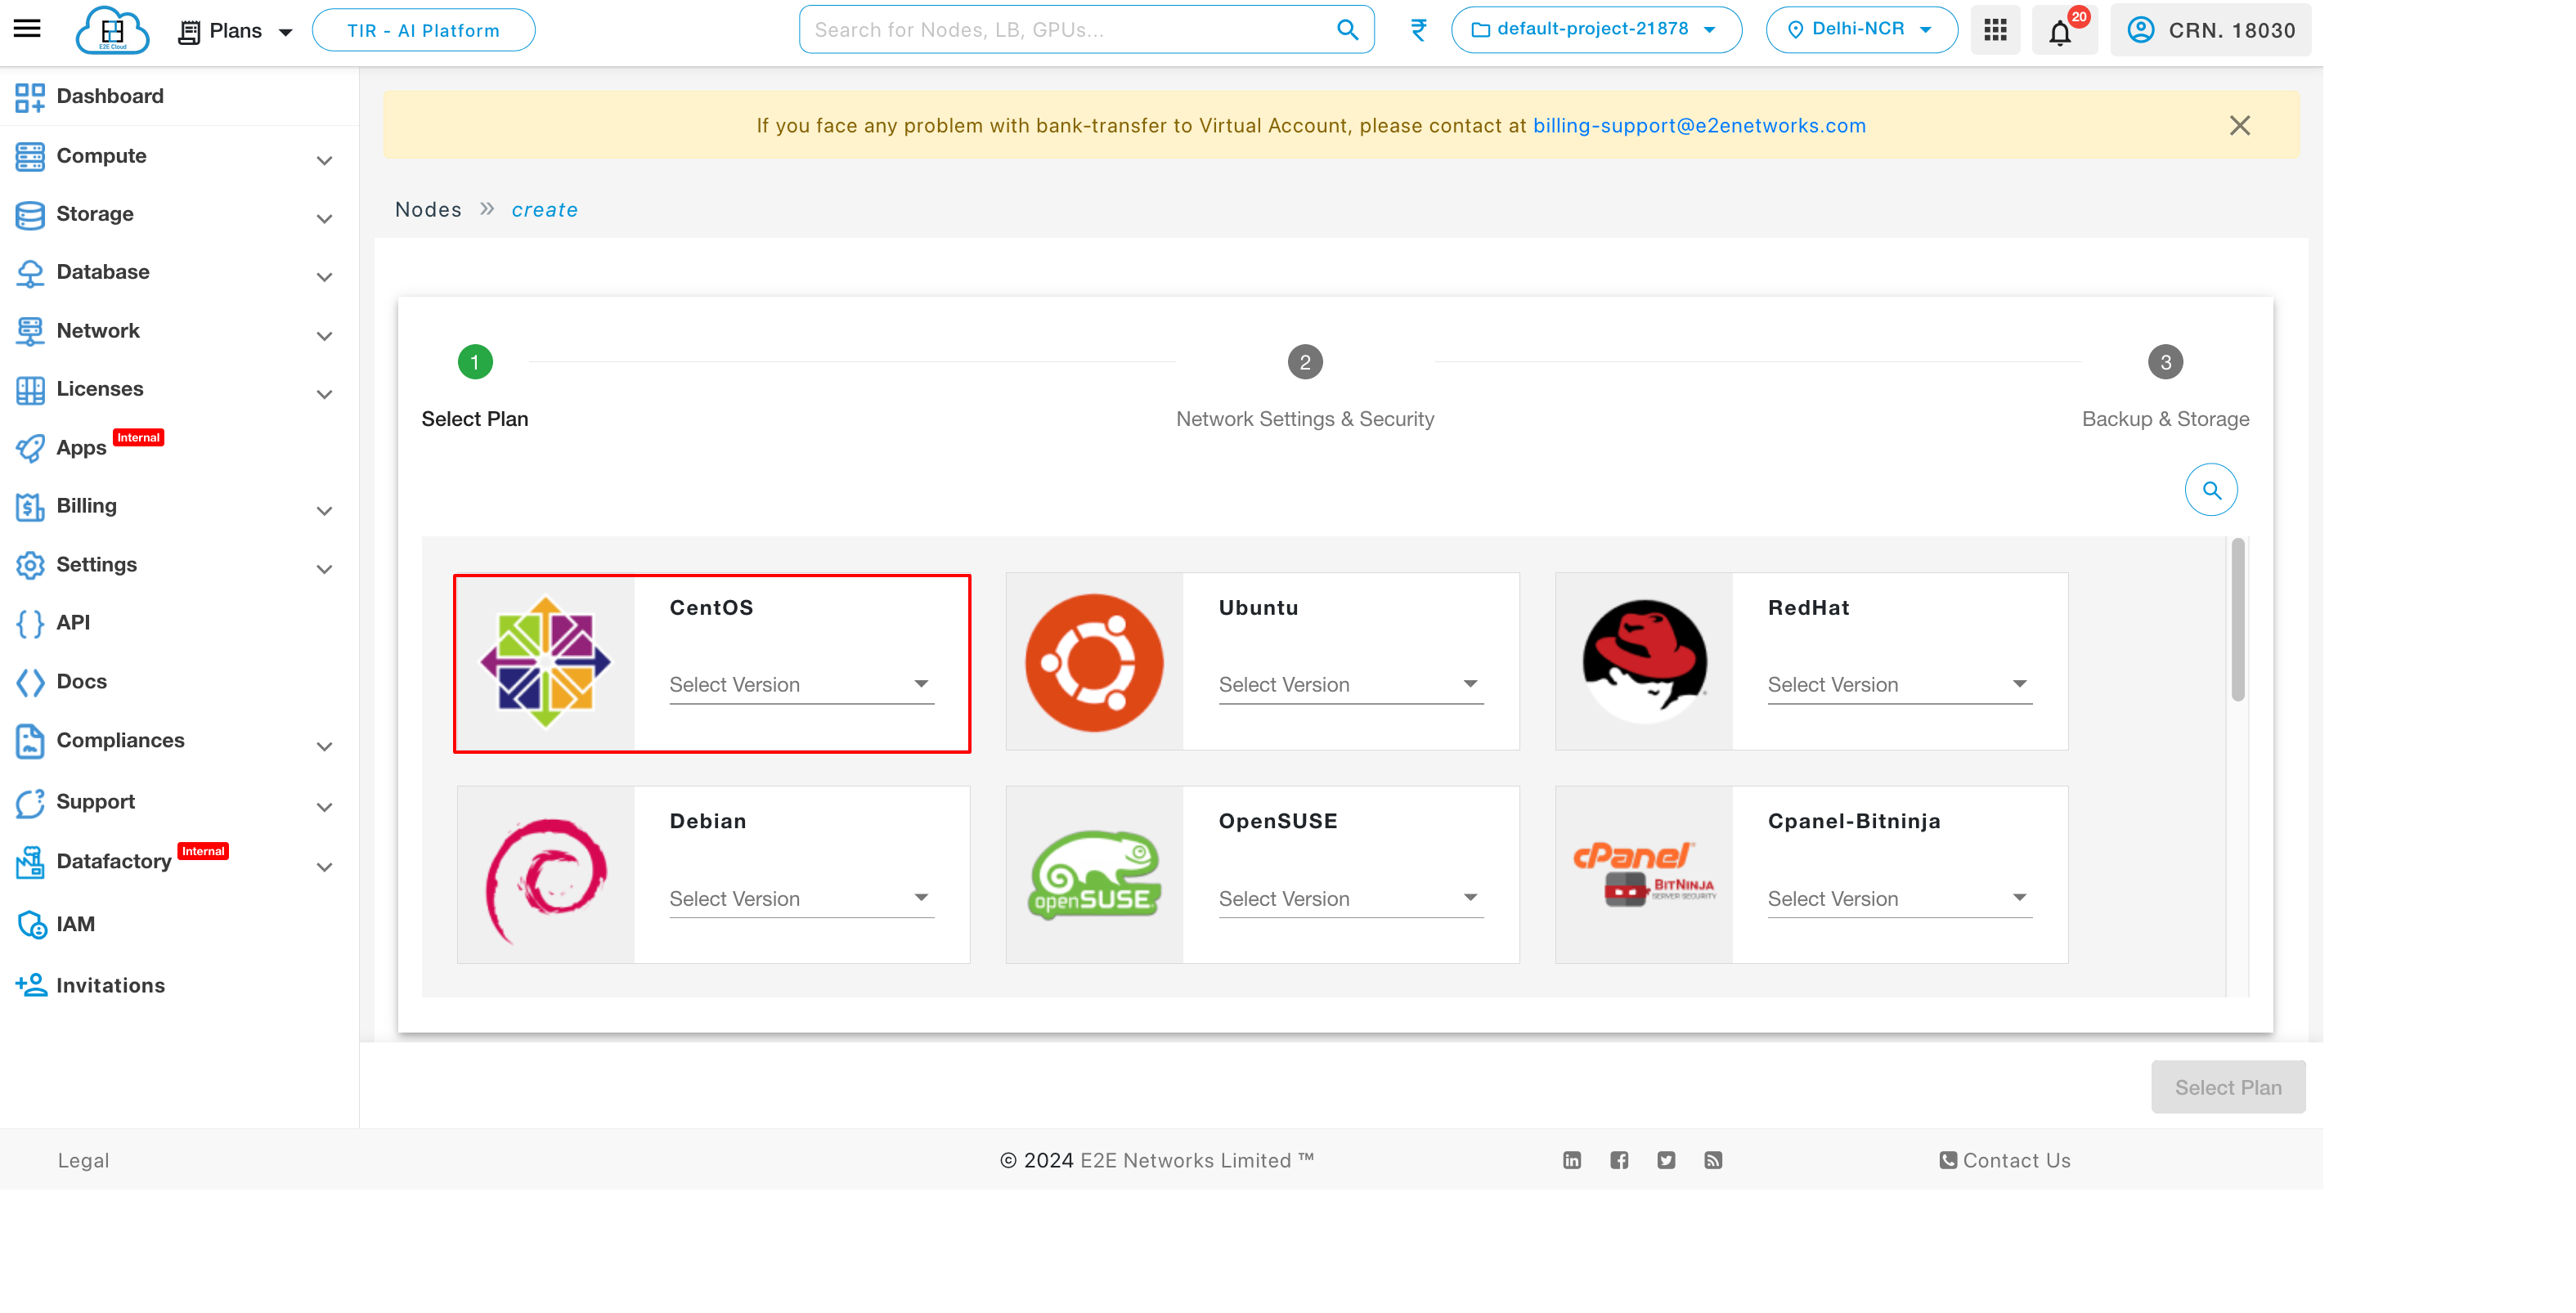
The Create Node page is where you have to choose your Node’s configuration from different categories of images based on its operating system, how much memory and storage it has, and a number of vCPU according to your requirement.
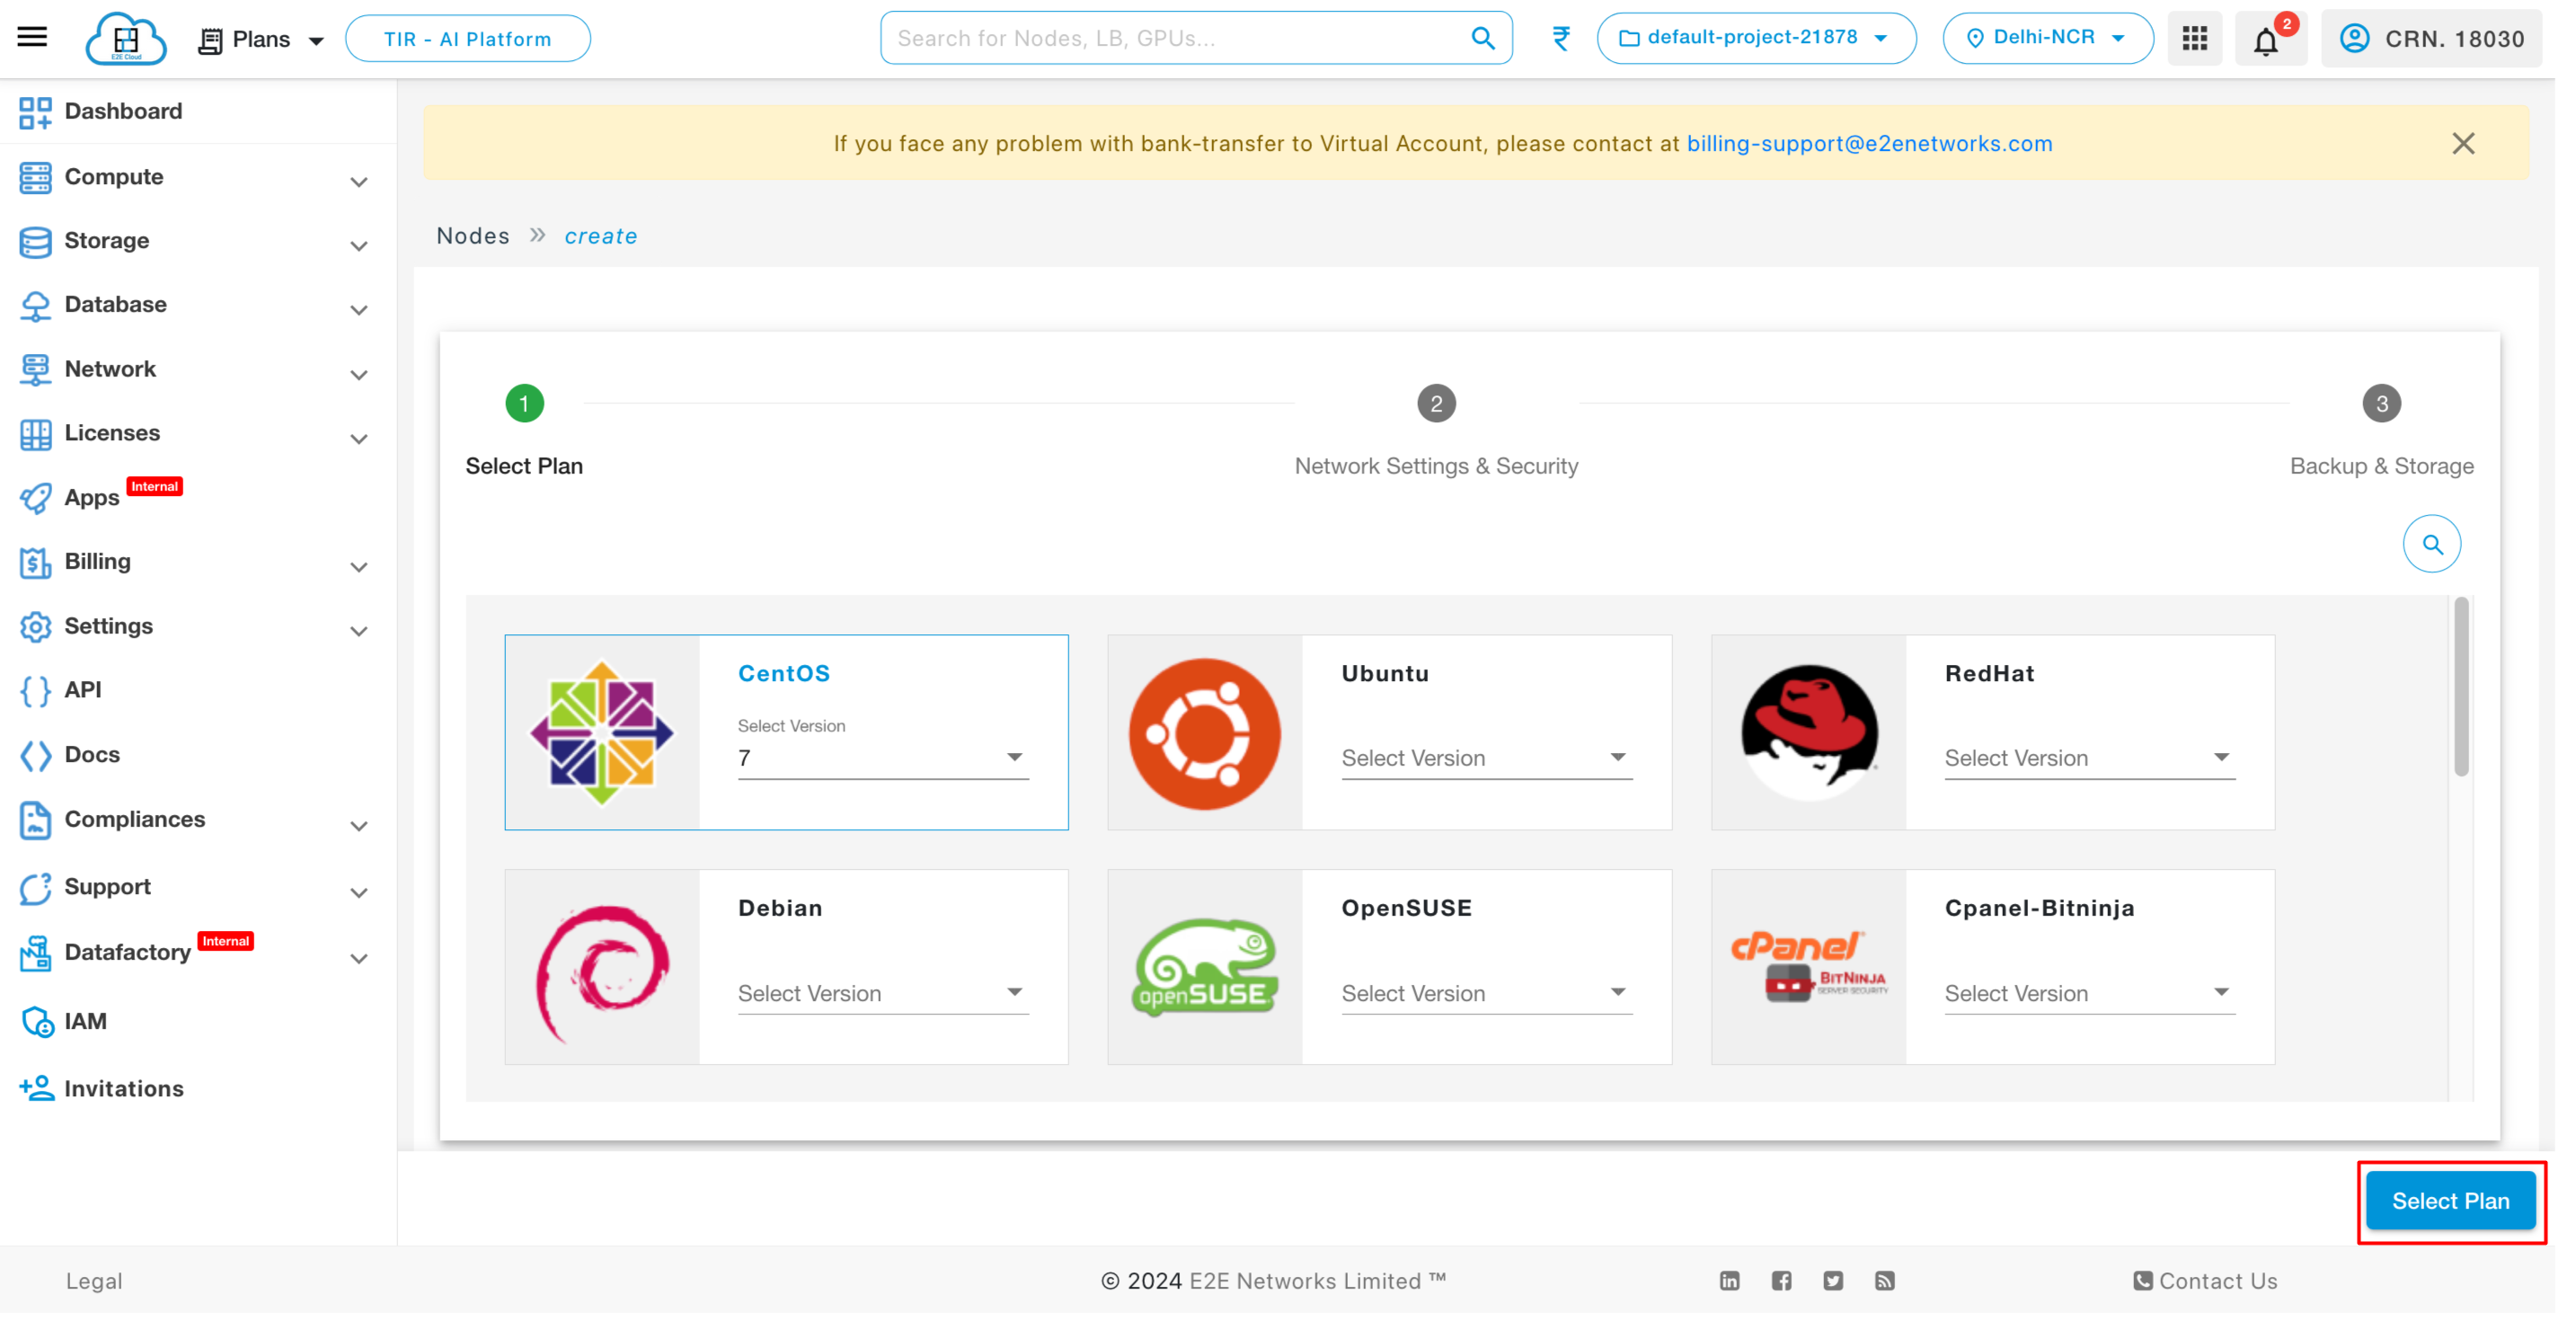
After choosing the operating system, you must select the version of that OS.
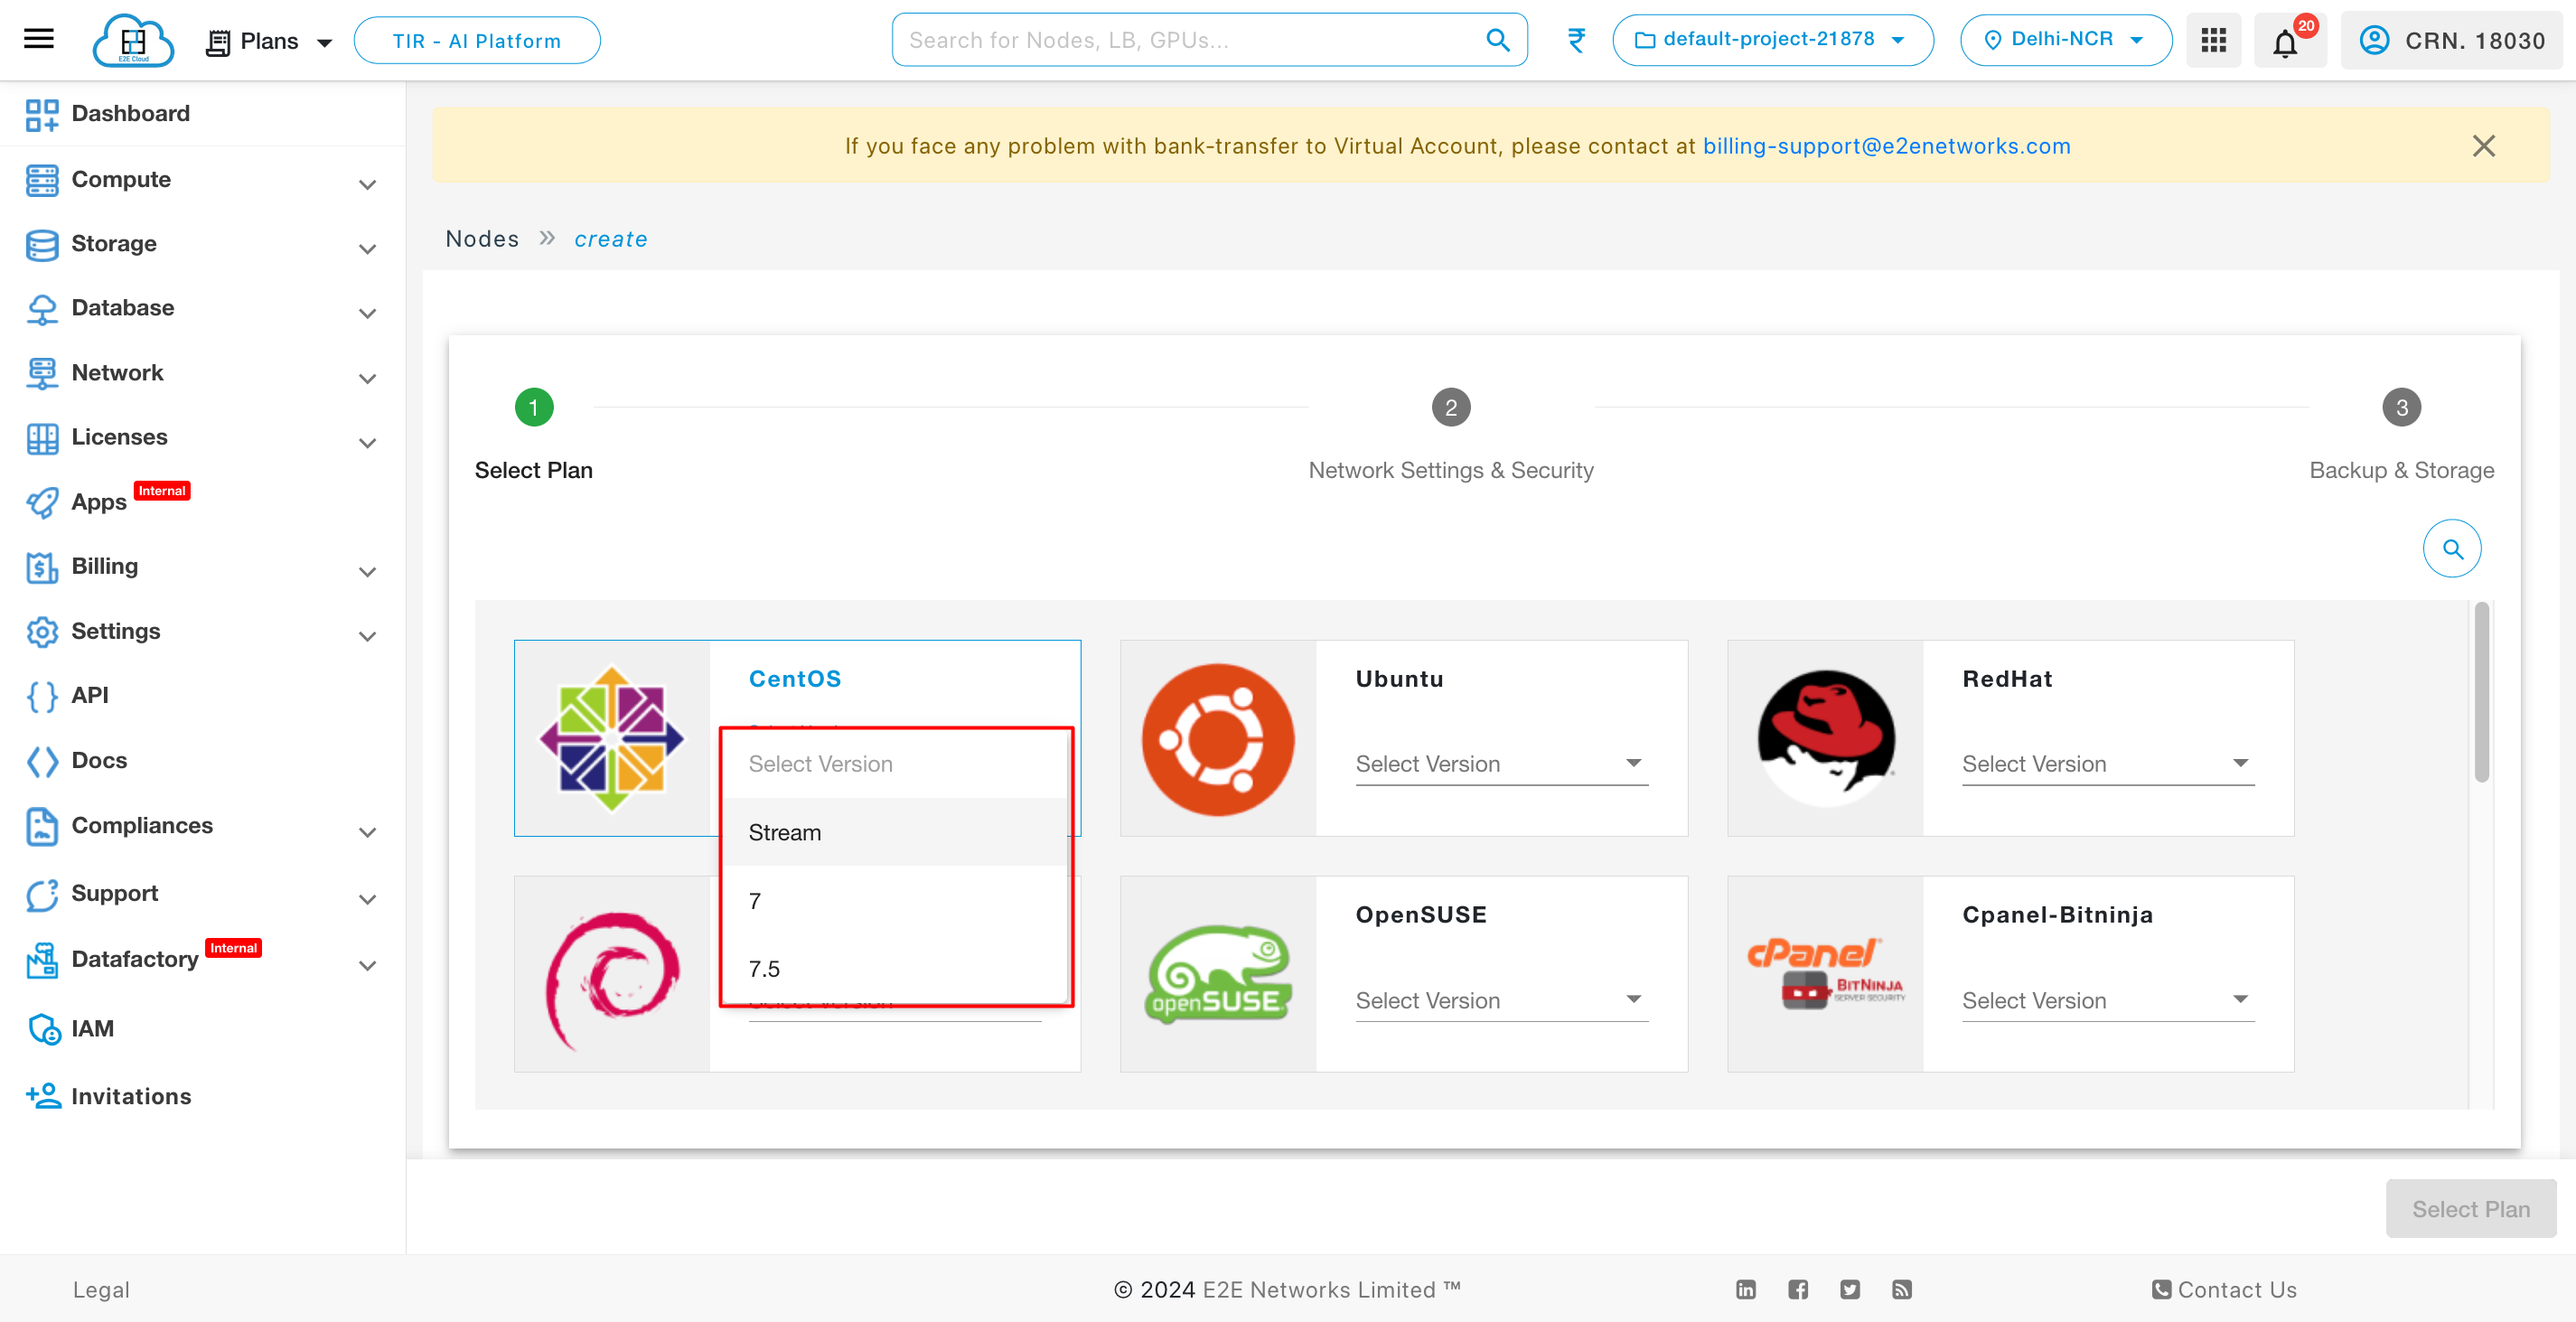
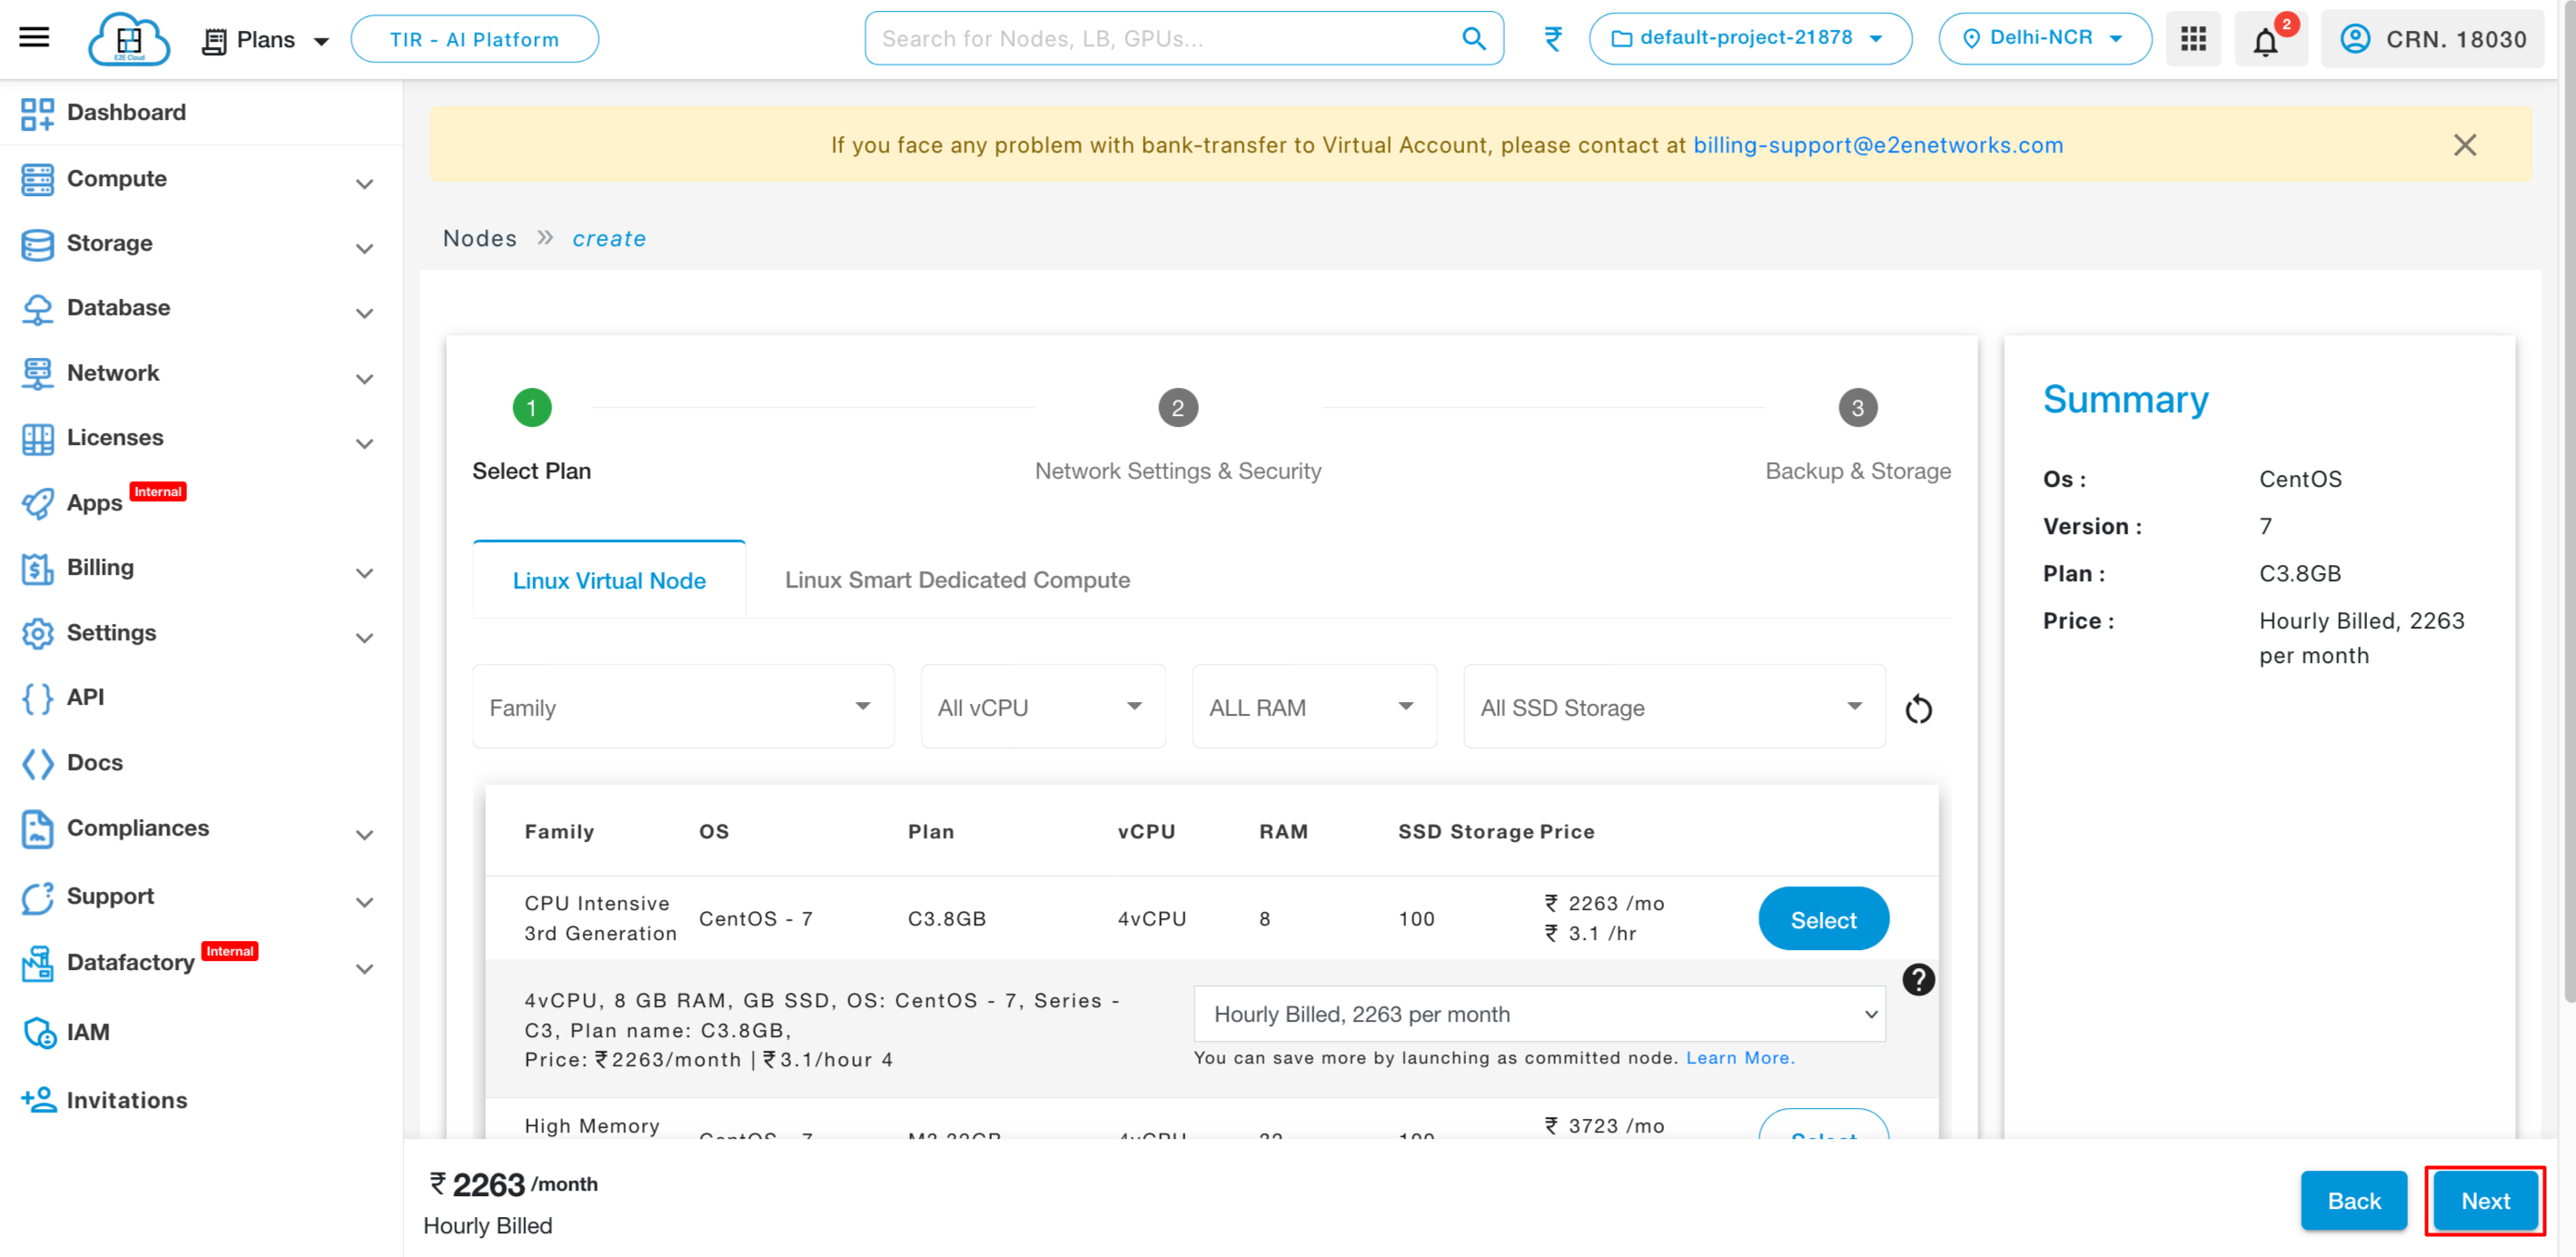
After selecting the desired version, click on the Select Plan button to choose a plan.
The categorization of Node images available at Select Plan page are:
Linux Virtual Nodes
The Linux Compute Node’s image is based on a different version of operating systems like CentOS, Ubuntu, Debian, cPanel, Plesk, and webuzo and has subcategories which are:
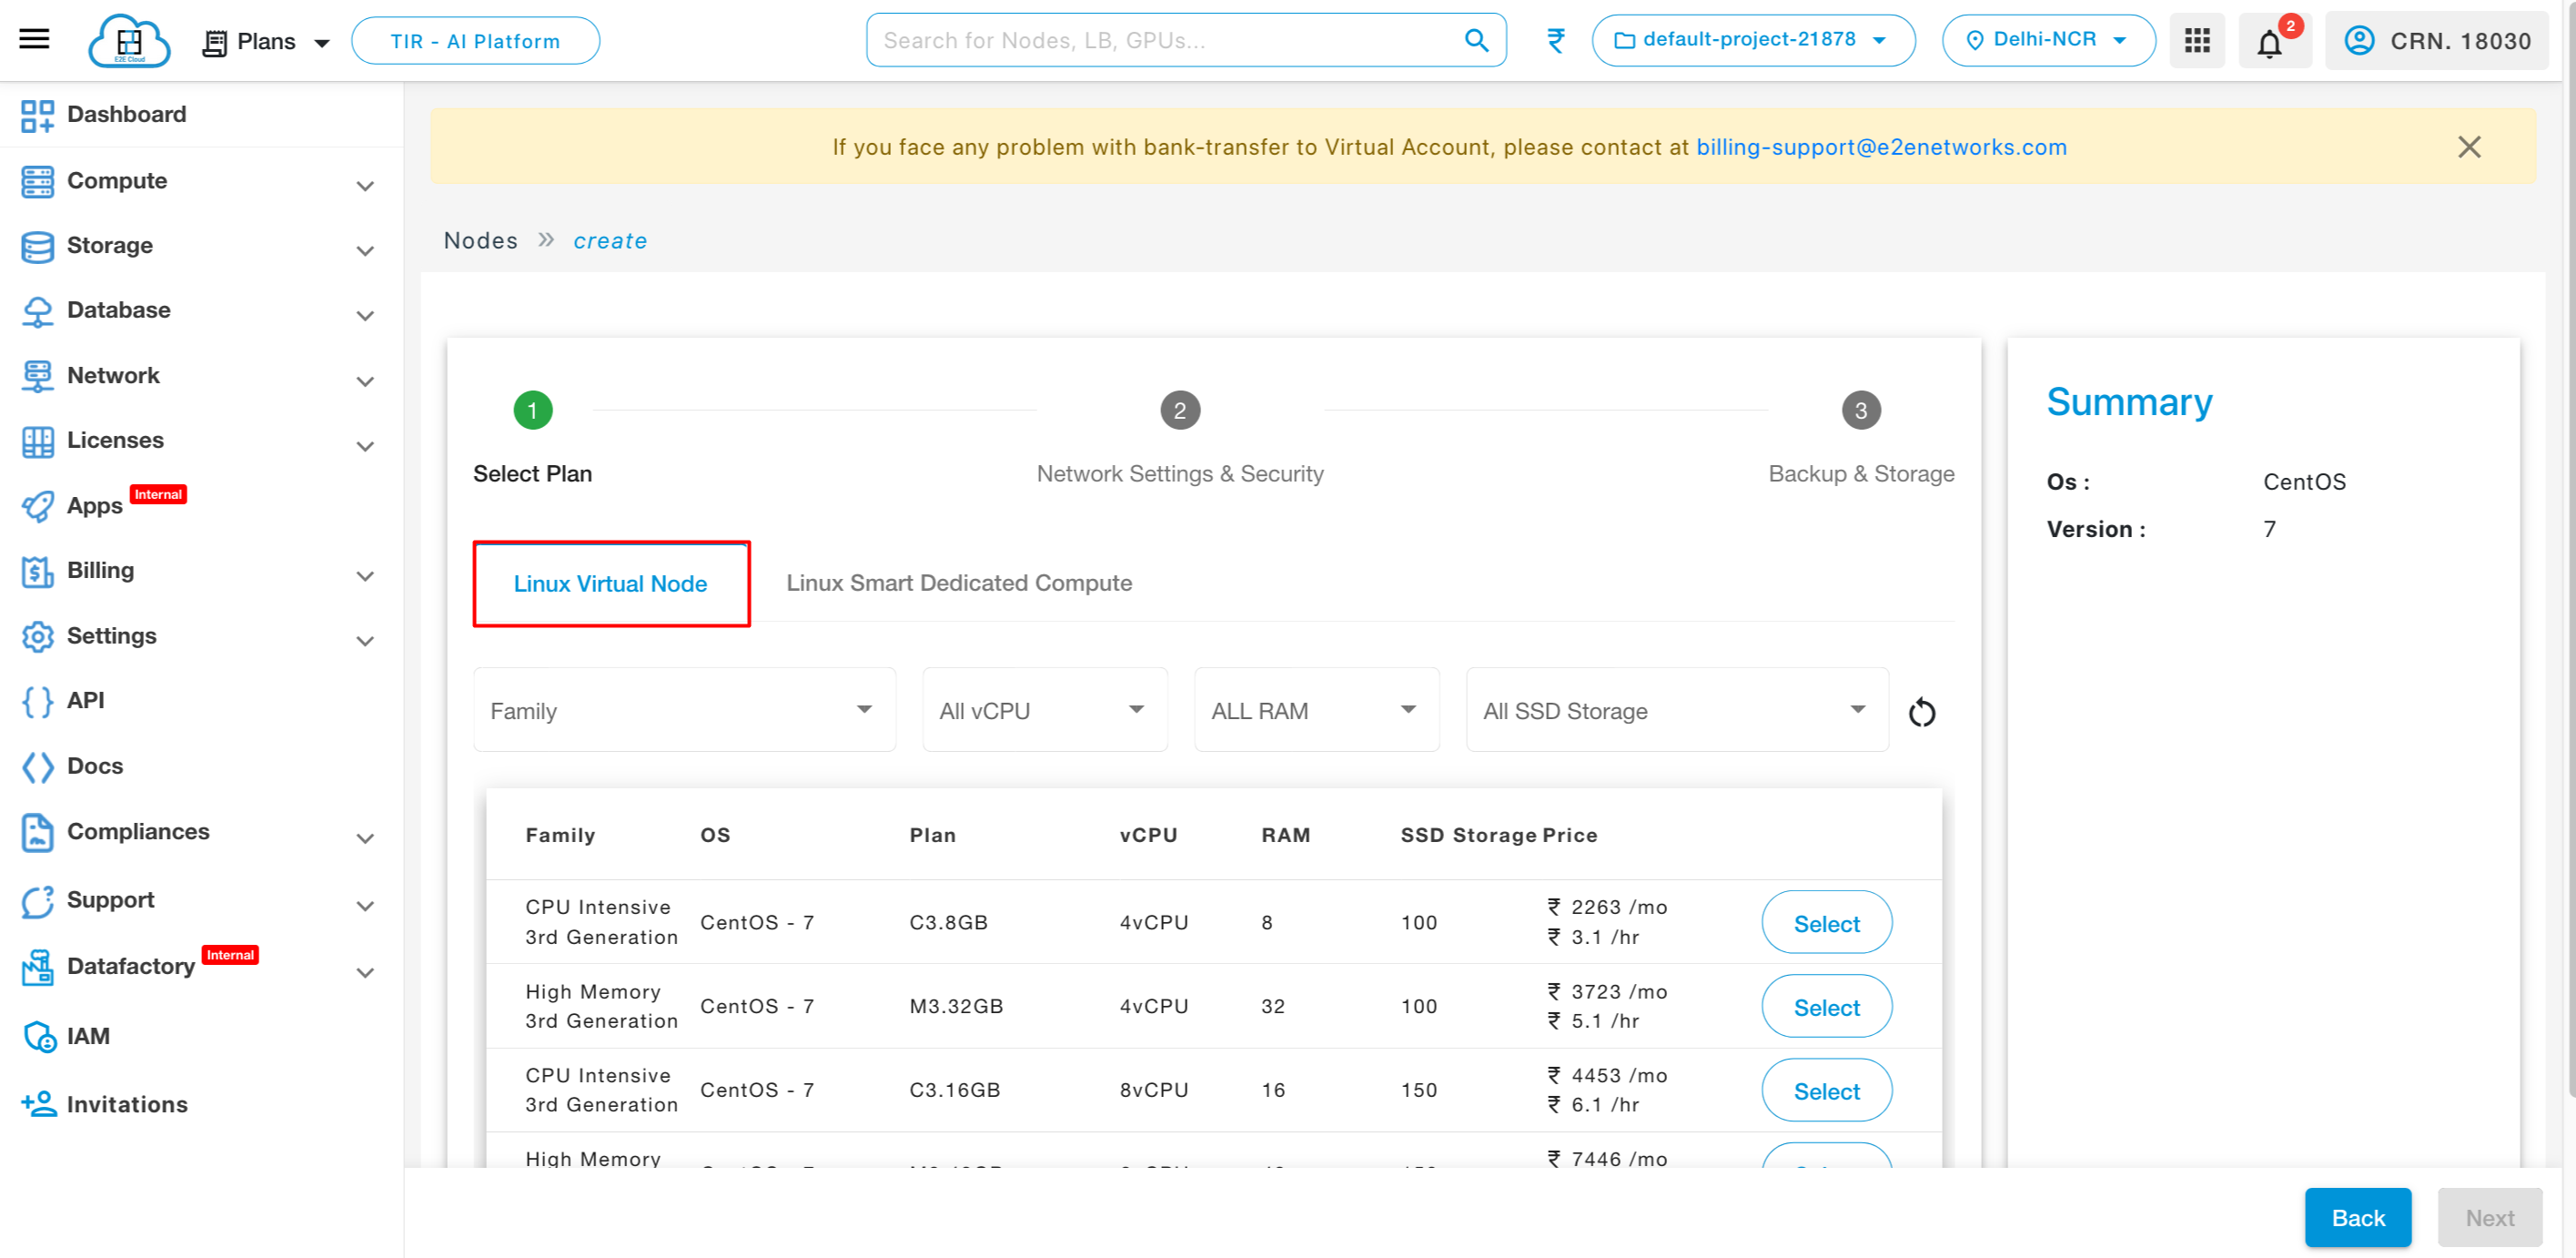
CPU Intensive Cloud
The CPU intensive nodes used the latest generation Intel processors that is C3 series, this offers high-performance compute instances with high IOPS and memory for web-scale applications.
High Memory Cloud
The 2nd generation High Memory Nodes are designed to offer you double the amount of vCPUs and more than triple the amount of RAM at Affordable Pricing with excellent value for money.
CPU Intensive Cloud 3rd Gen
The 3rd generation CPU intensive nodes used the latest generation processors that is C3 series, this offers high-performance and highly available compute instances with high IOPS and memory for web-scale applications.
High Memory Cloud 3rd Gen
The 3rd generation High Memory Nodes are designed to offer you double the amount of vCPUs and more than triple the amount of RAM with high availability nodes at Affordable Pricing with excellent value for money.
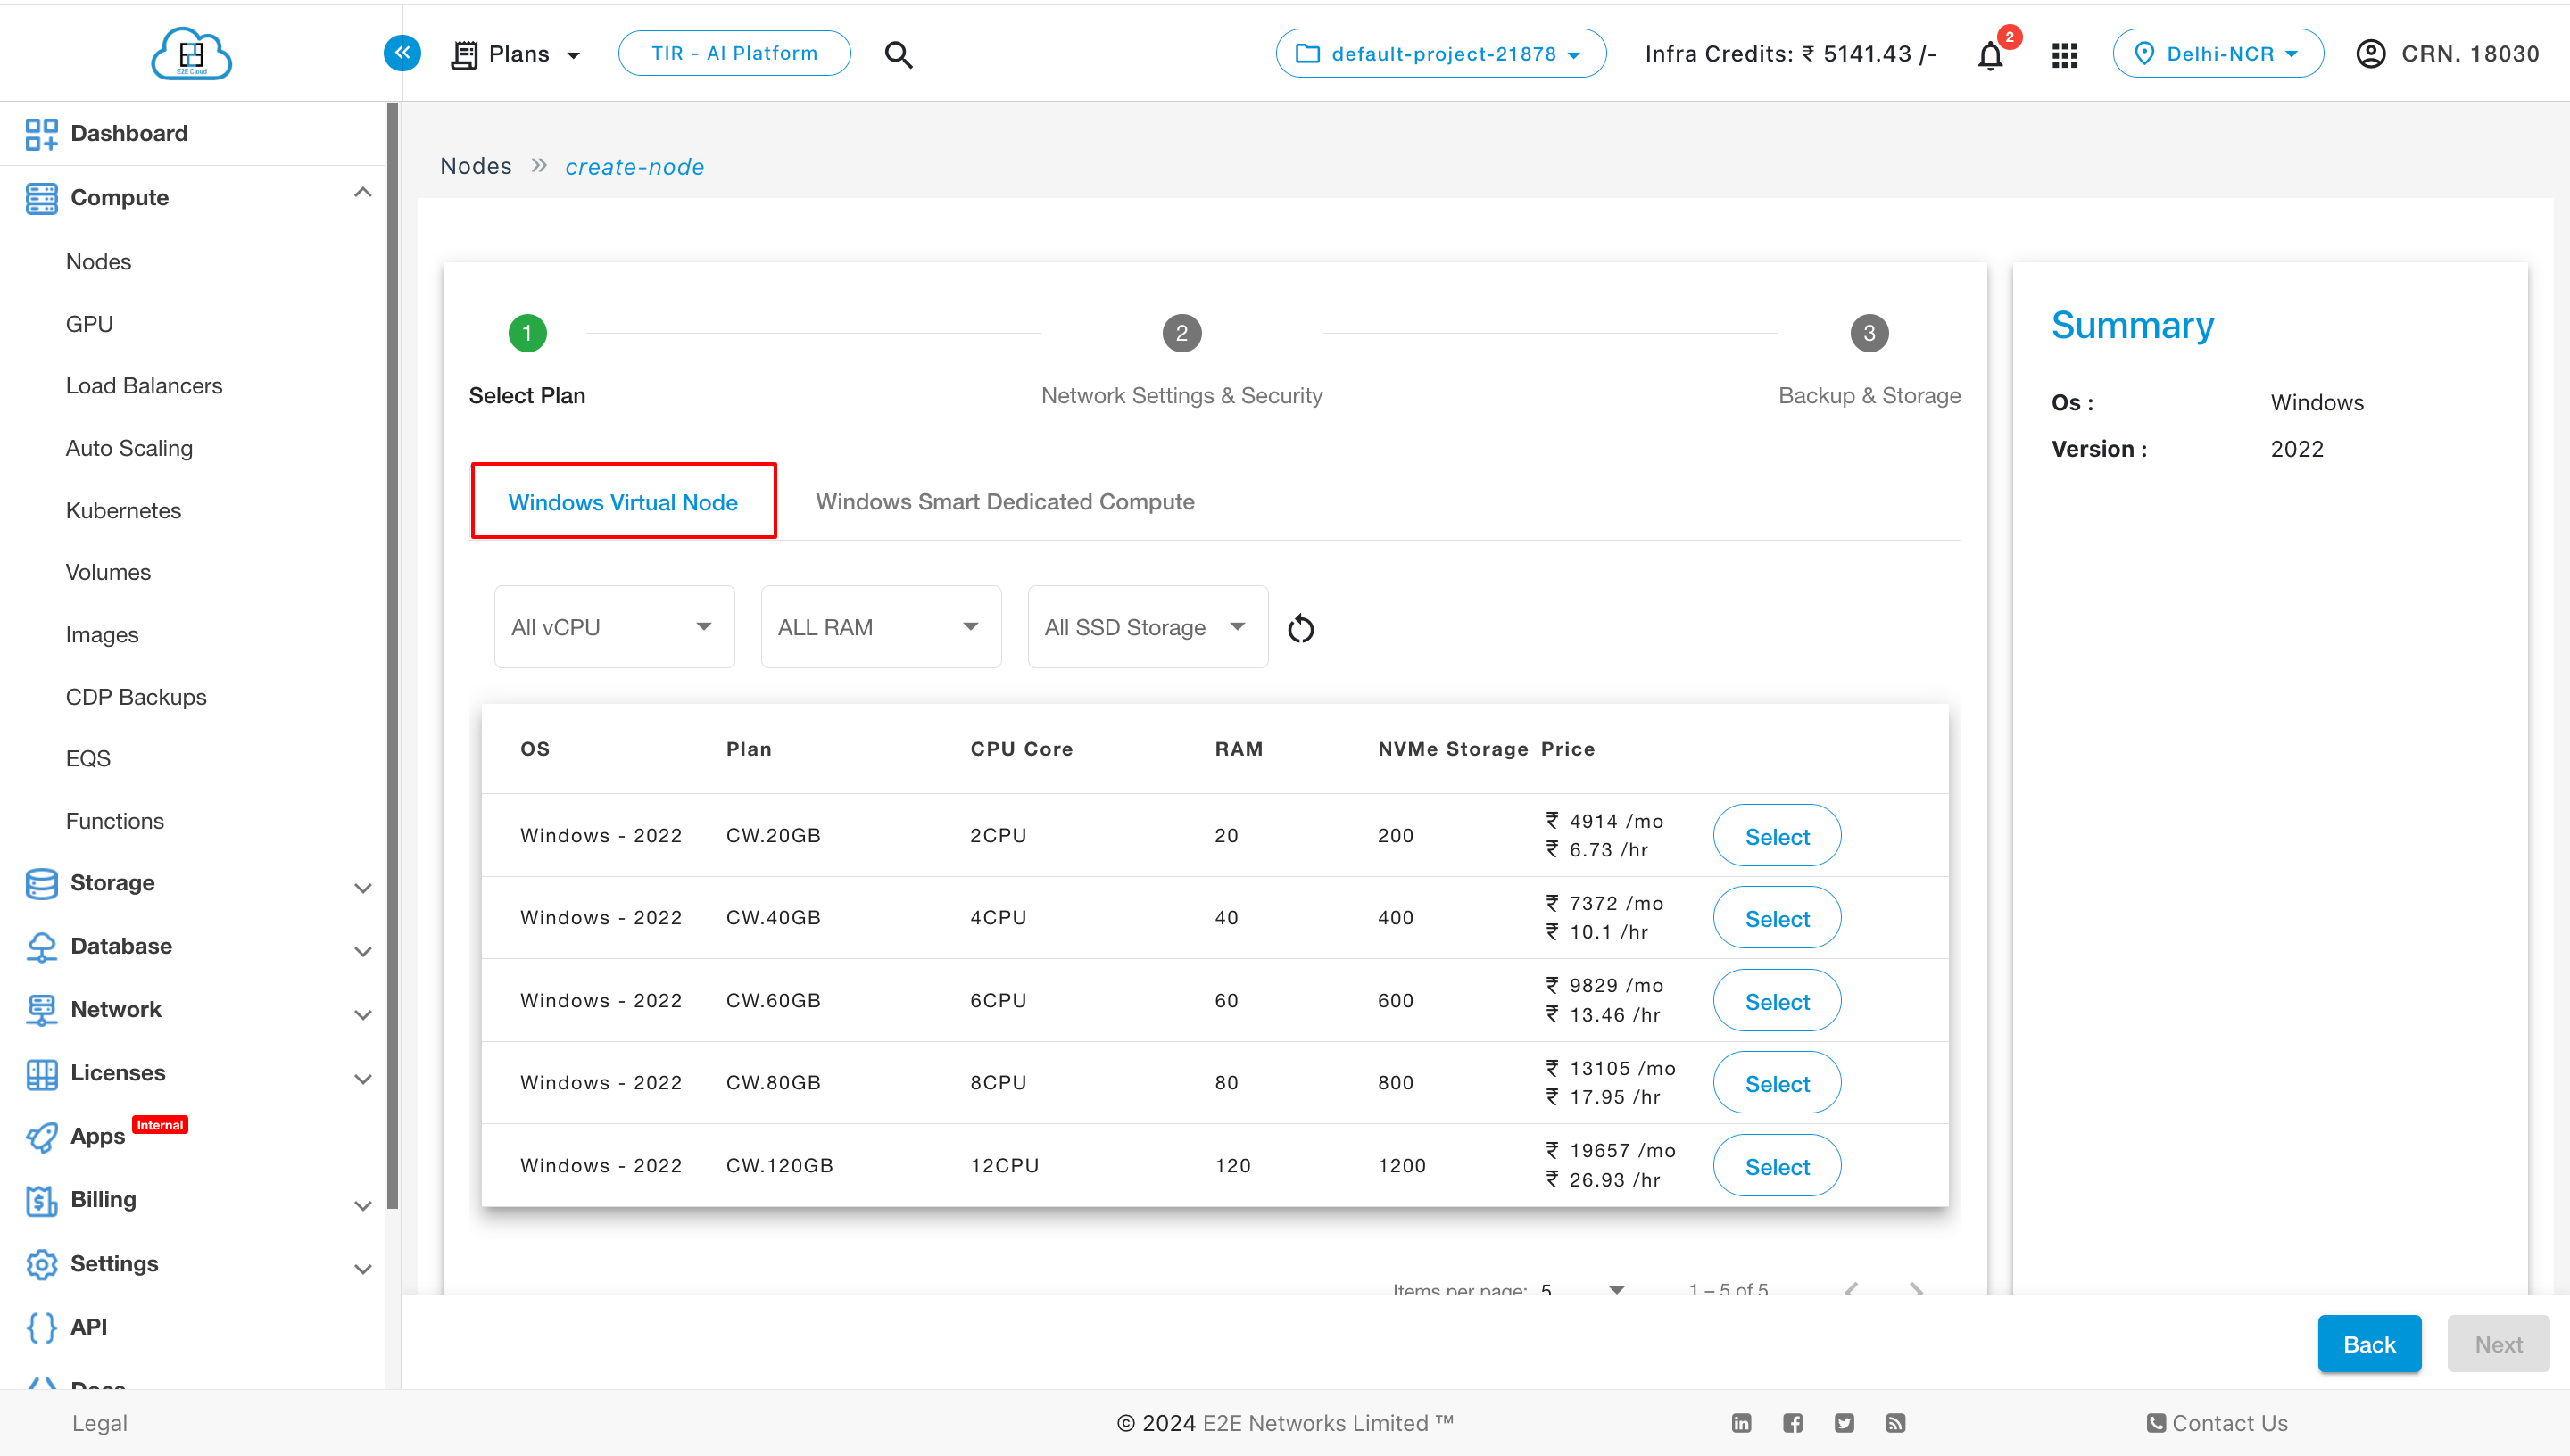
Window Virtual Node
E2E Networks Windows-based SSD Series nodes come with high security, networking, and an excellent price-performance ratio. Also, It supports Microsoft Windows Server 2019, 2016 and 2012 versions as well as MS-SQL Web Edition, MS-SQL Standard Edition and Plesk would be pre-installed on your Windows Compute Node respective to your selected Plan.
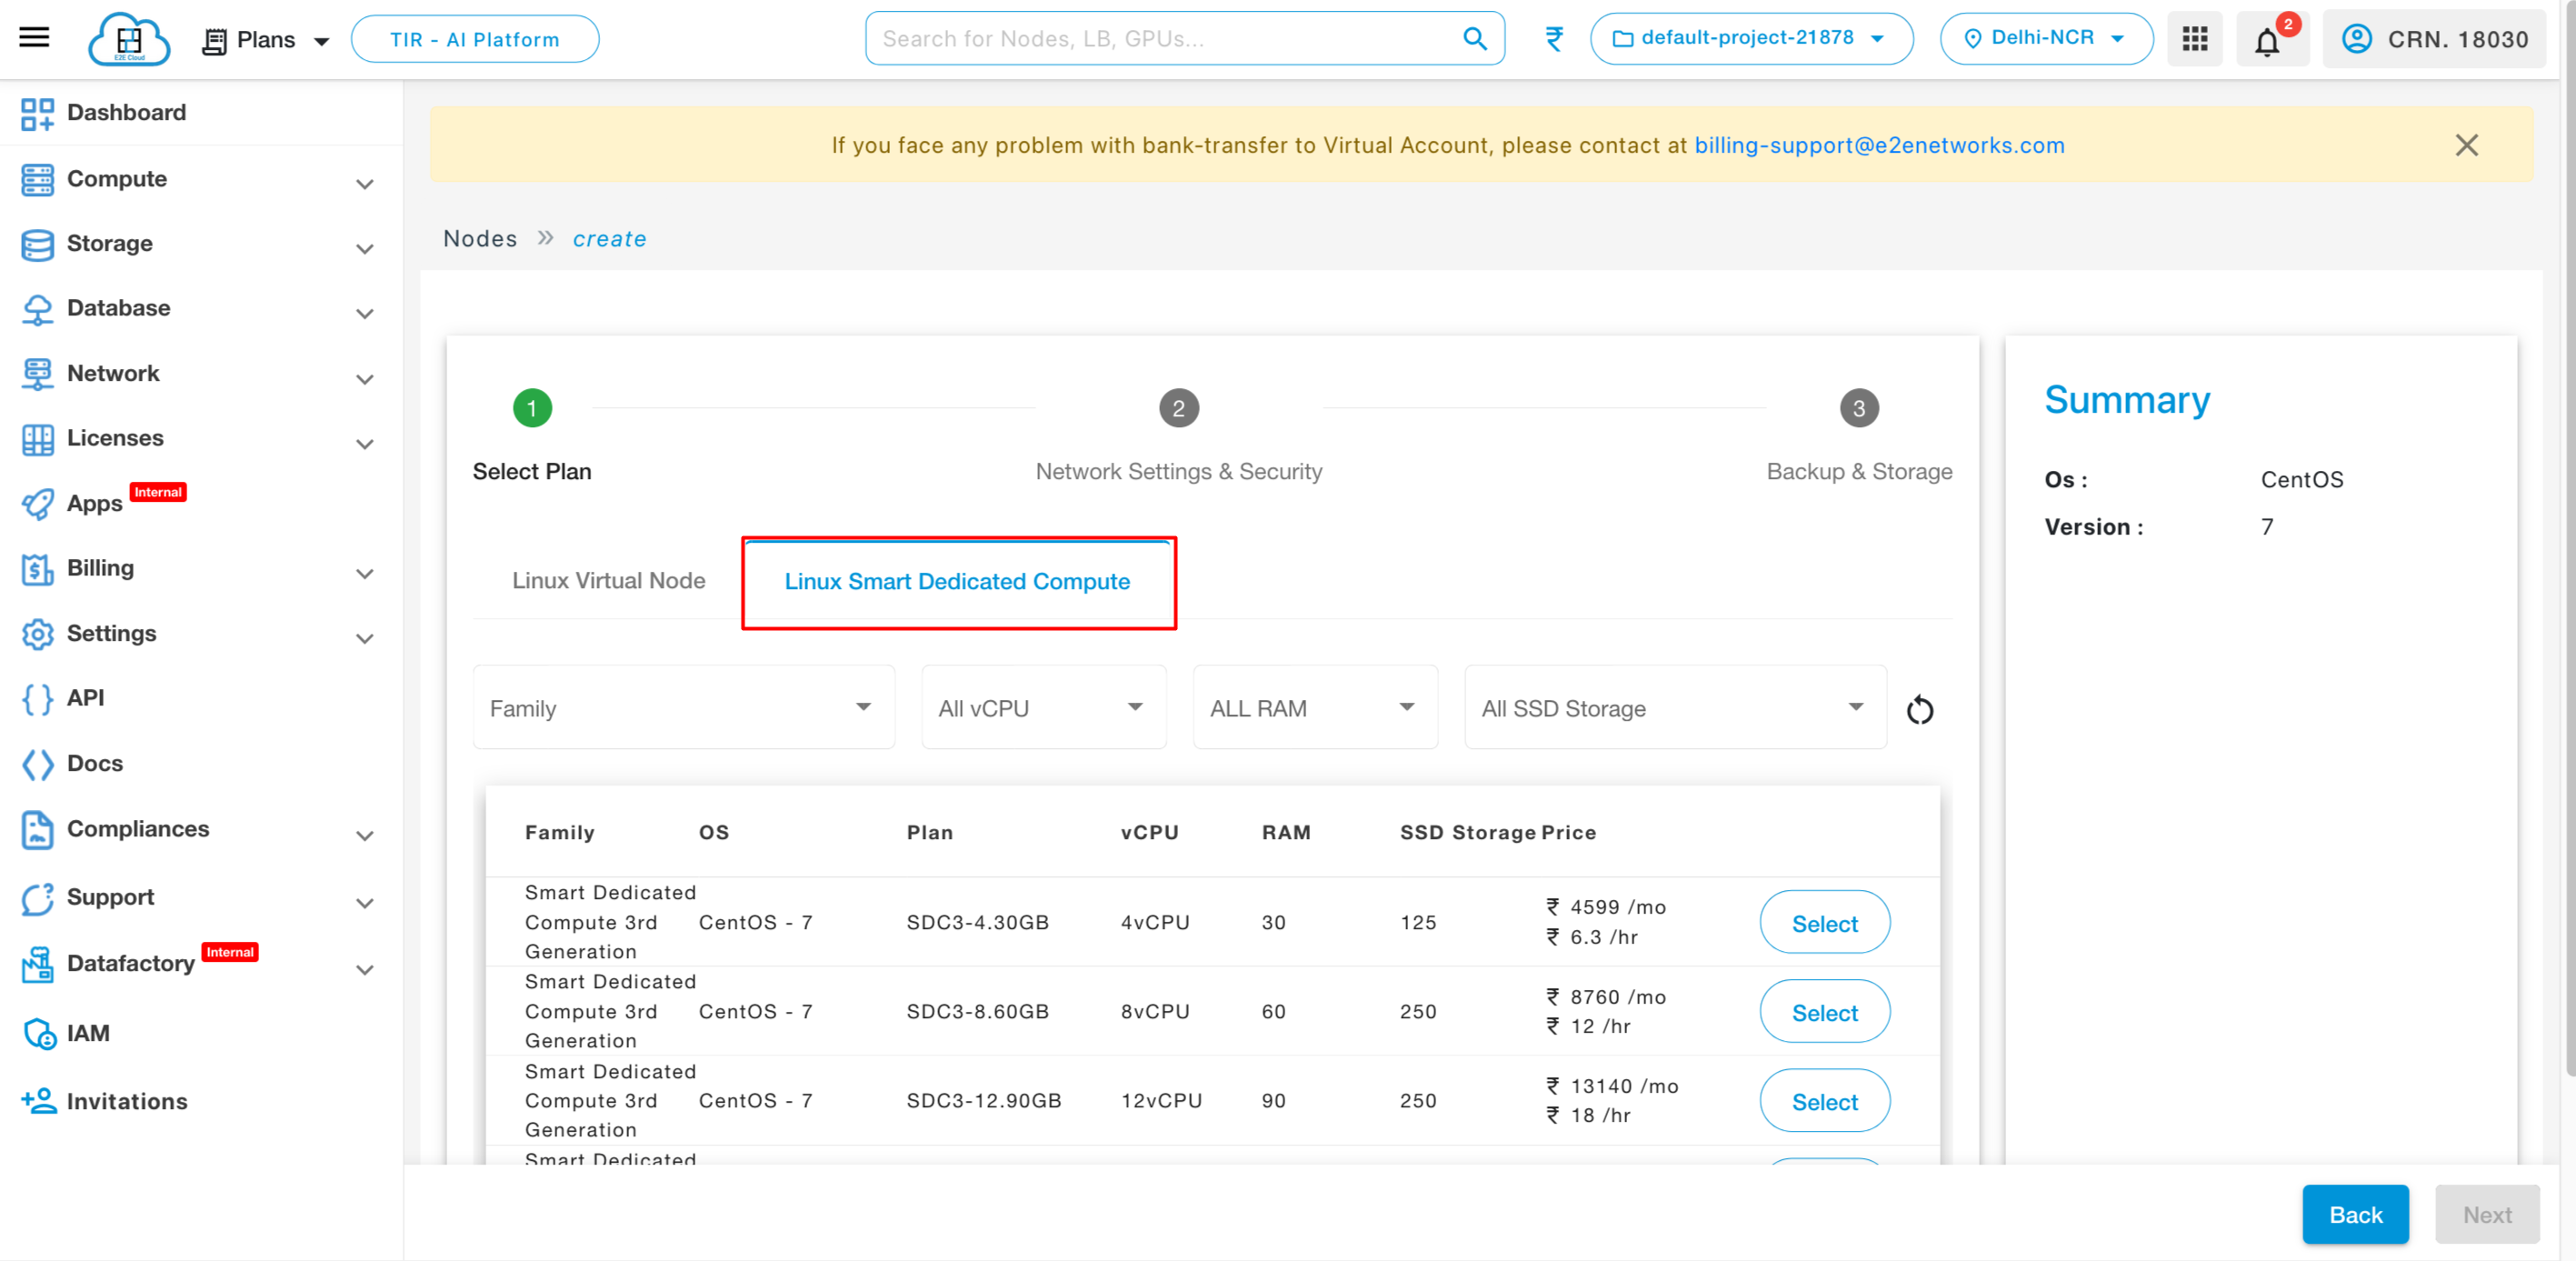
Linux Smart Dedicated Node
The Linux Smart Dedicated Node’s image is based on a different version of operating systems like CentOS, Ubuntu, Debian, cPanel, and Plesk which provides you superior performance with reliability, dedicated network port, and easy regulatory compliance. Also, This has subcategories which are:
High-Frequency Cloud
Large CPU
High-Frequency Double Disk
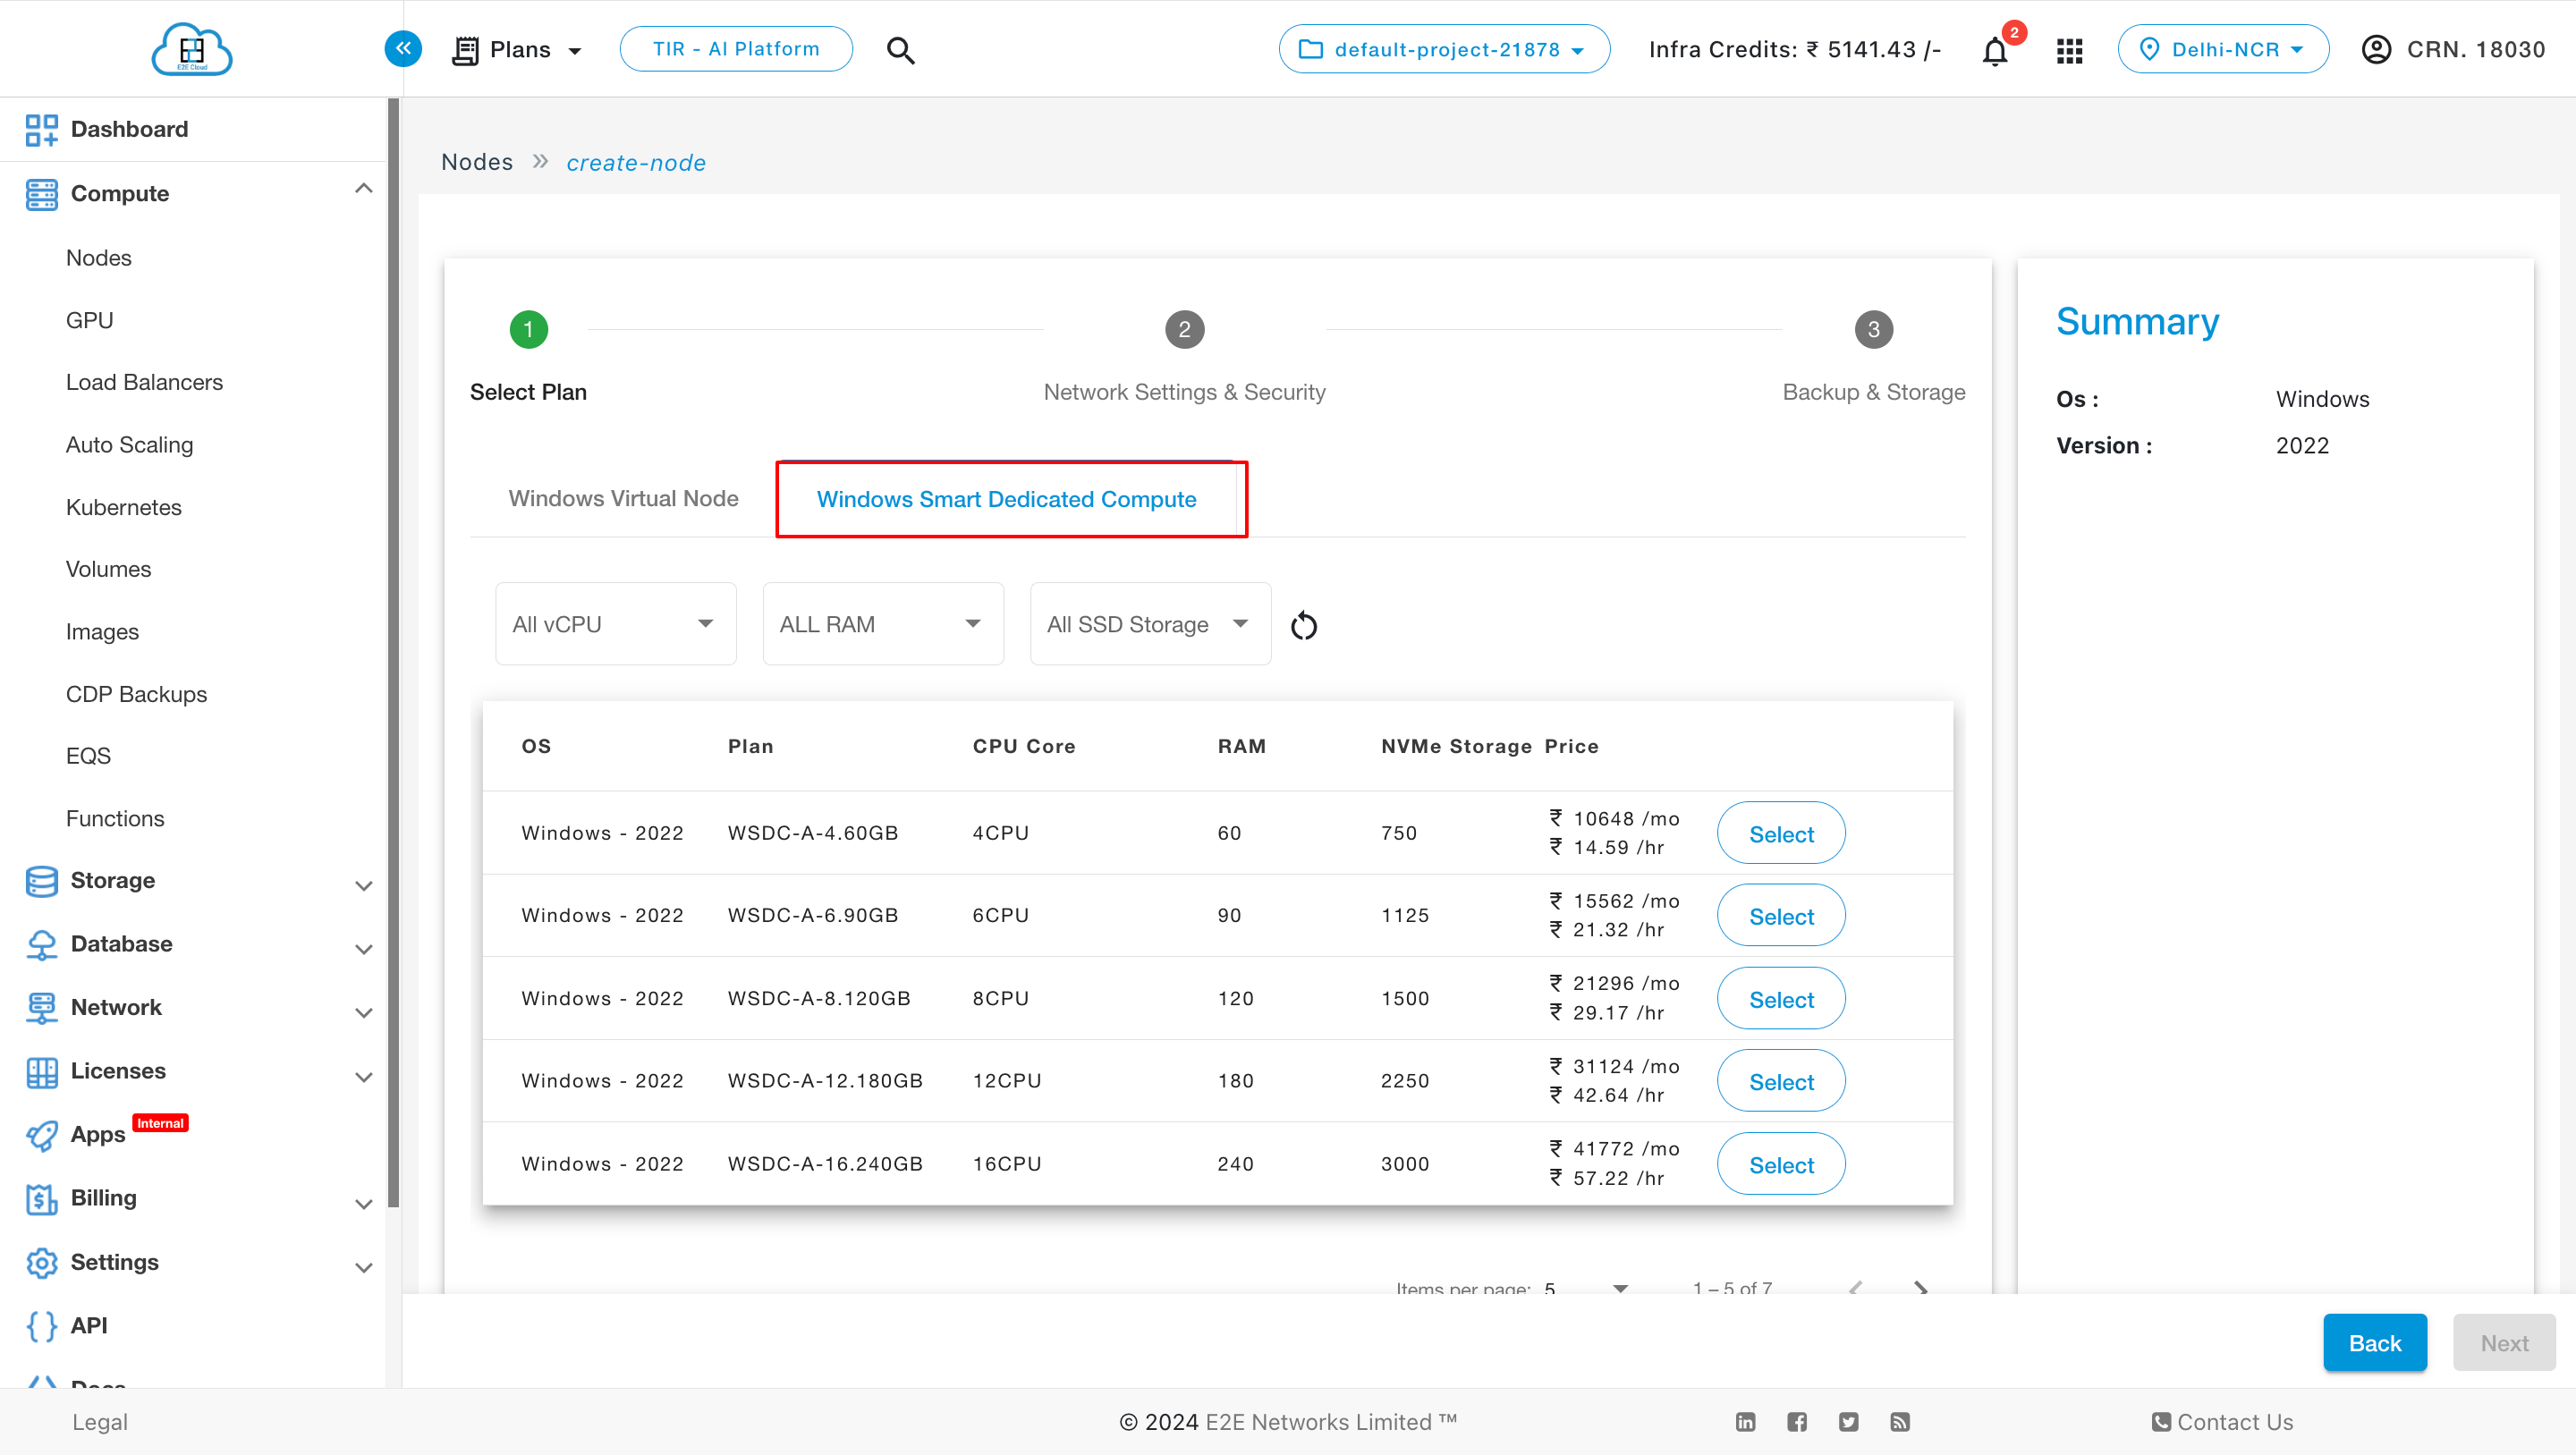
Window Smart Dedicated Compute Node
E2E Networks Windows-based Smart Dedicated nodes which provide you high superior performance with reliability, dedicated network port, and easy regulatory compliance and it support Microsoft Windows Server 2019, 2016 and 2012 versions, as well as Plesk, which would be pre-installed on your Windows-based Smart Dedicated node respective to your selected Plan.
Choosing billing mode
Once you’ve chosen the Node image and plan, click the “Next” button. You’ll be prompted to select the billing mode, either “Hourly Billed” or “365 days committed”. After making your selection, you’ll proceed to the Network Settings & Security step.
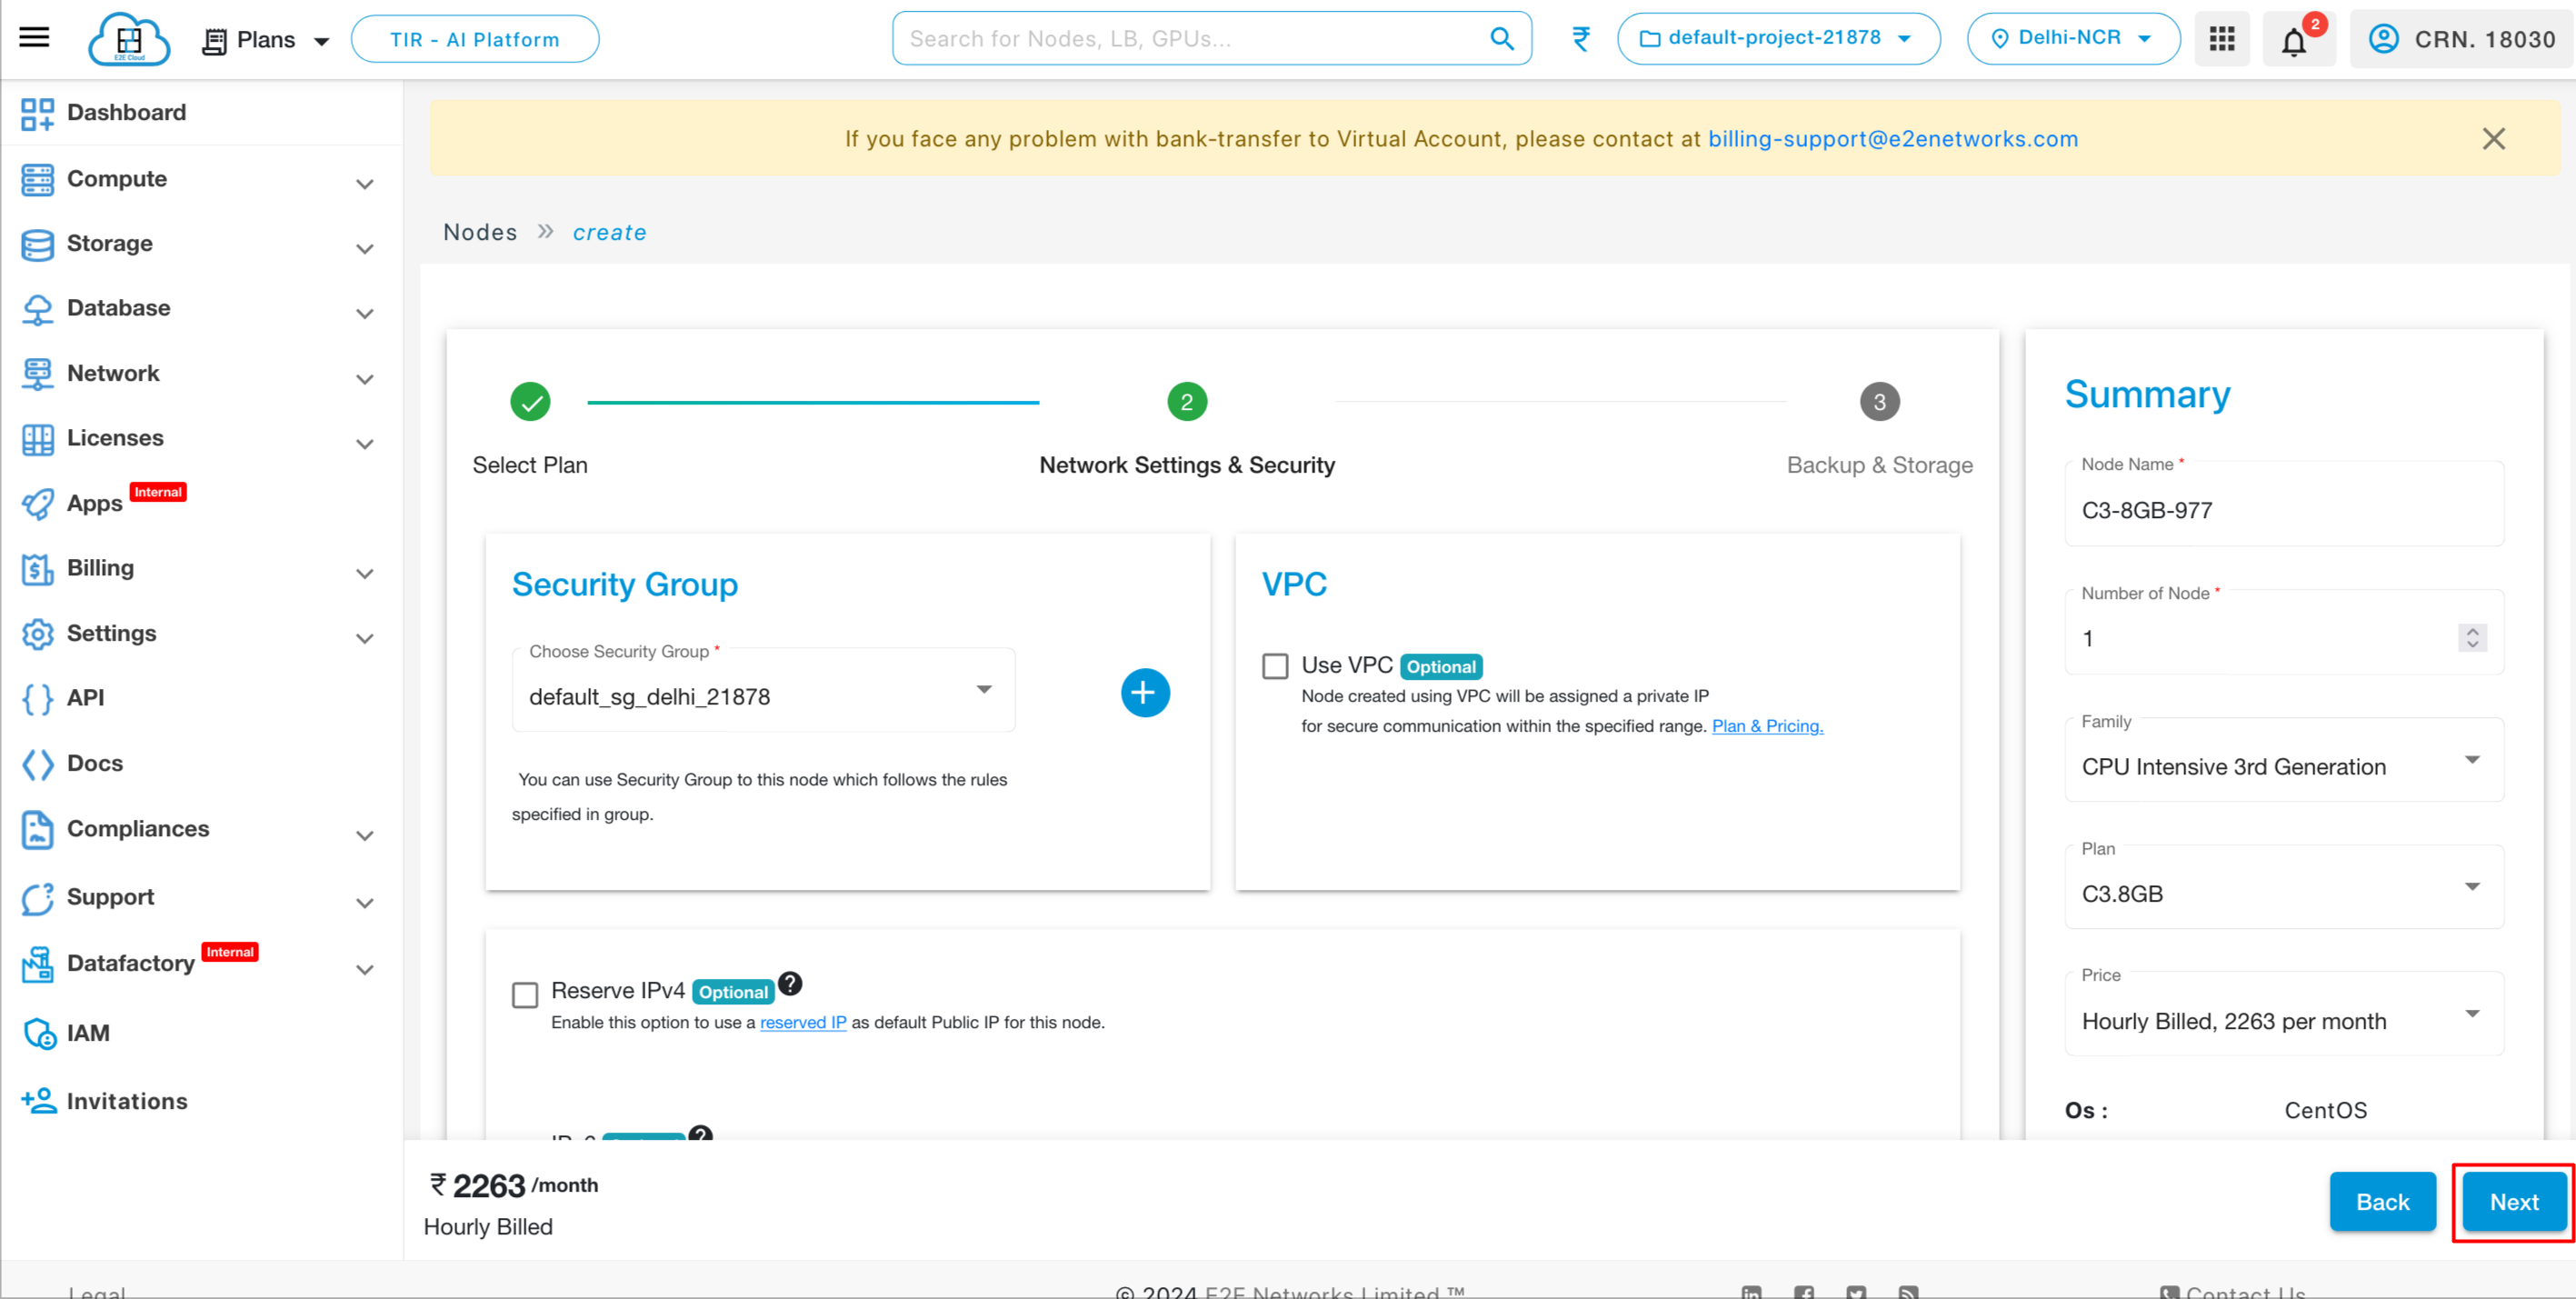
2. Network Settings & security
In this step, you can attach VPCs, reserve IP, security group, SSH keys, and BitNinja according to your requirements.
Select a Security Group Name – by default, the default security group is displayed. However, if you wish to make changes, you can do so by clicking on the dropdown menu and selecting according to your requirements.
Choose VPC - If you wish to attach a VPC to the node, select the VPC checkbox and choose the VPC from the dropdown menu.
SSH keys - It provide more security along with a password. Kindly note that SSH keys based login not applicable for the window compute node.
Disable Password for remote SSH Access - The Only SSH key is required to access your Node remotely. In case, you lose your key, you will not be able to access your node.
One-time password - It is a single-use password shared to you via an auto-generated email by-default and will require you to set a new password.
Reserve IP - If you wish to launch the node with your reserved ip then you can do that by selecting the reserveip checkbox and then selecting the desired reserved ip.
Note
If Number of Nodes >1 then you will not be able to attach reserve ip to all the nodes togethers, you will have to attach reserve ip indivisually after launching multiple nodes together.
Once you have completed the network settings, click the “Next” button, and you will be redirected to the backup & storage step.
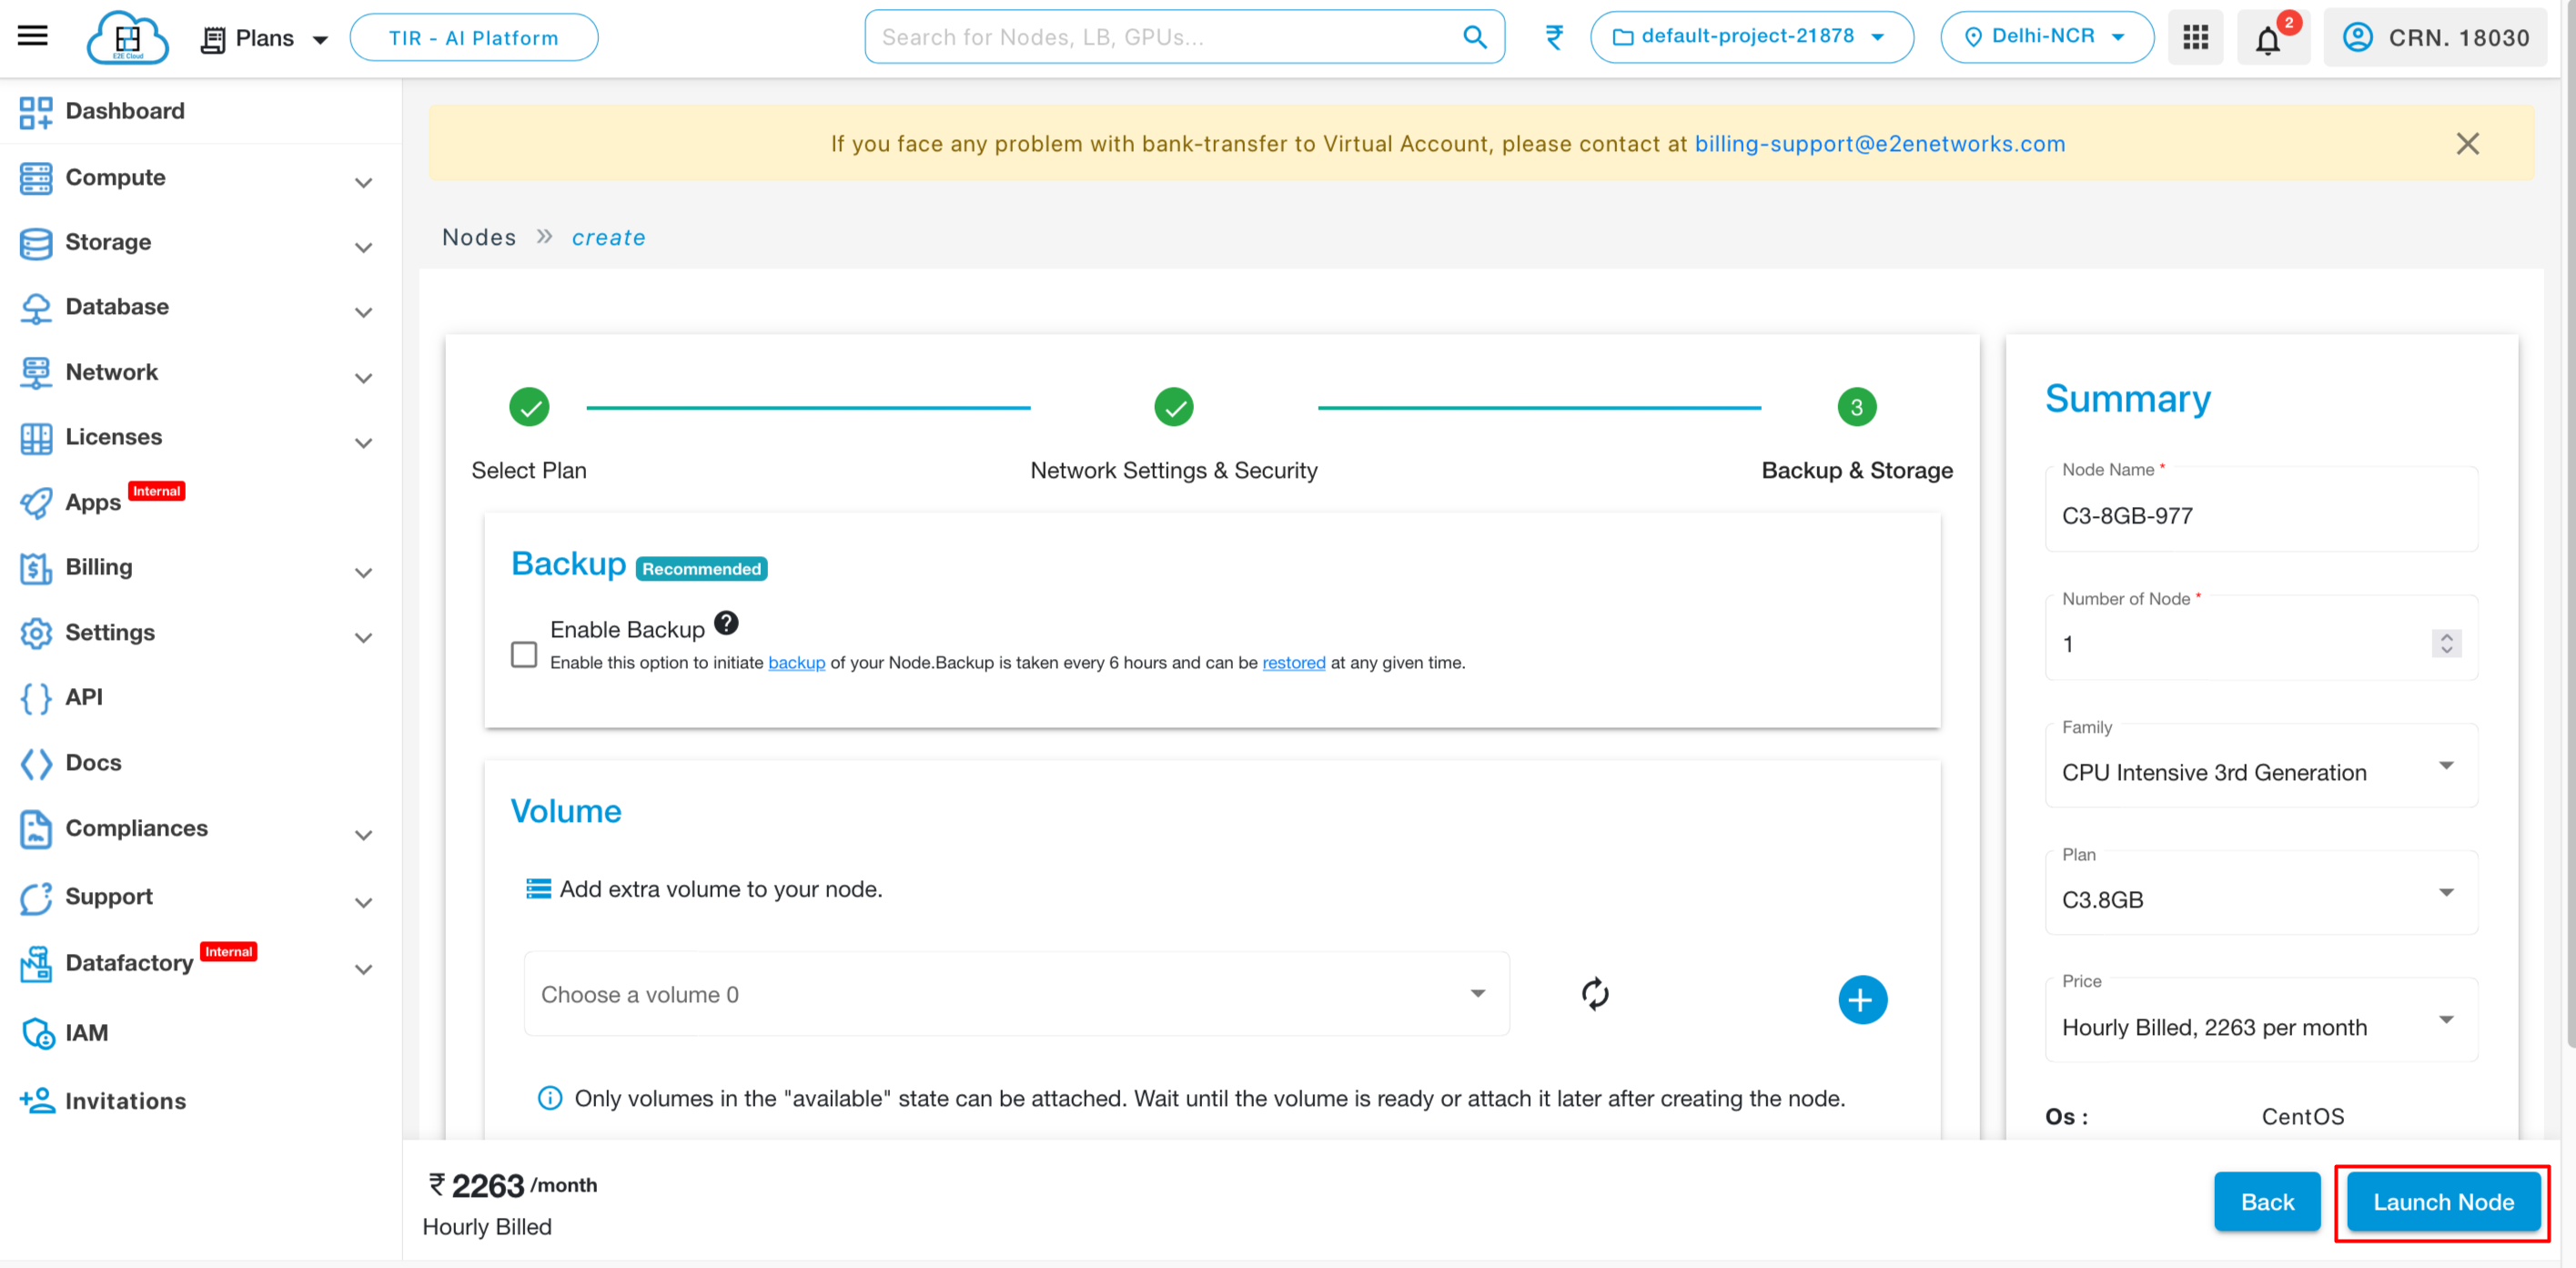
3. Backup & Storage
During this step, you can enable backups, attach volumes, and add scripts to the node according to your specific requirements.
Enable Backup – you can enable automatic backups of the node by ticking the Enable backup checkbox. Kindly note that the Backup option will not available for the Opensuse based Nodes.
Select Volume: If you want to attach a volume to your node, click on the dropdown menu and choose the volume. If the volume is not available, click on the “+” button to create a new volume.
Note
If Number of Nodes >1 then you will not be able to attach volume to all the nodes togethers, you will have to attach volume indivisually after launching multiple nodes together.
Finally, click on the “Launch Node” button to initiate the creation of the node.
Once you have selected your options, click Launch Node. It will take a few minutes to set up the Node and you will take to the ‘Manage Node’ page.

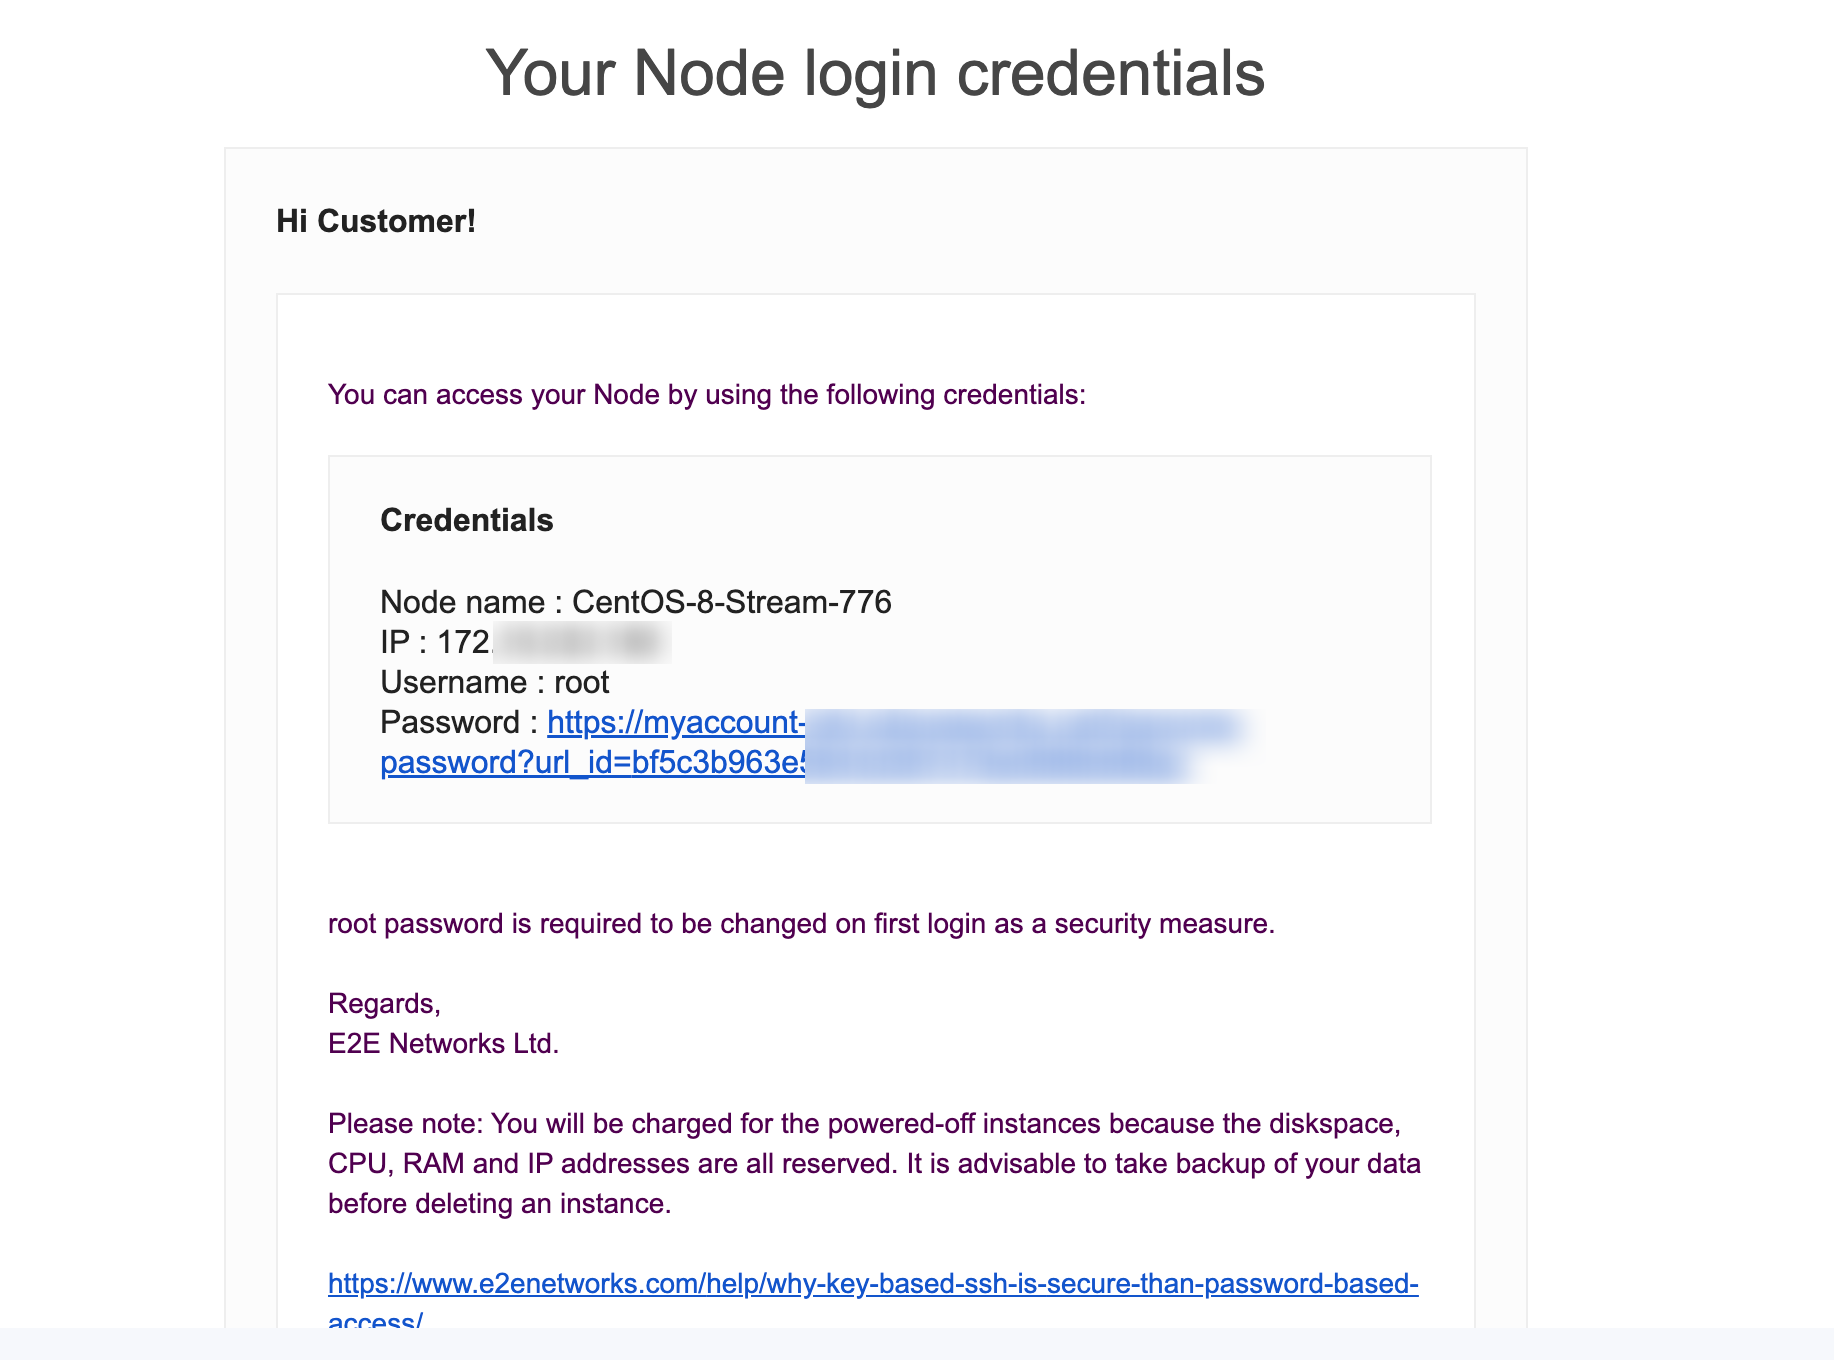
After Created Node then User will redirect to the “Manage Node” page. Also, you will receive a notification email along with your Node login credentials. Now, you can access and manage your nodes from the ‘Manage Node’ page.
You can also create an image of your node that provides the functionality to create the same configuration node or may upgrade to a higher configuration node from saved images.
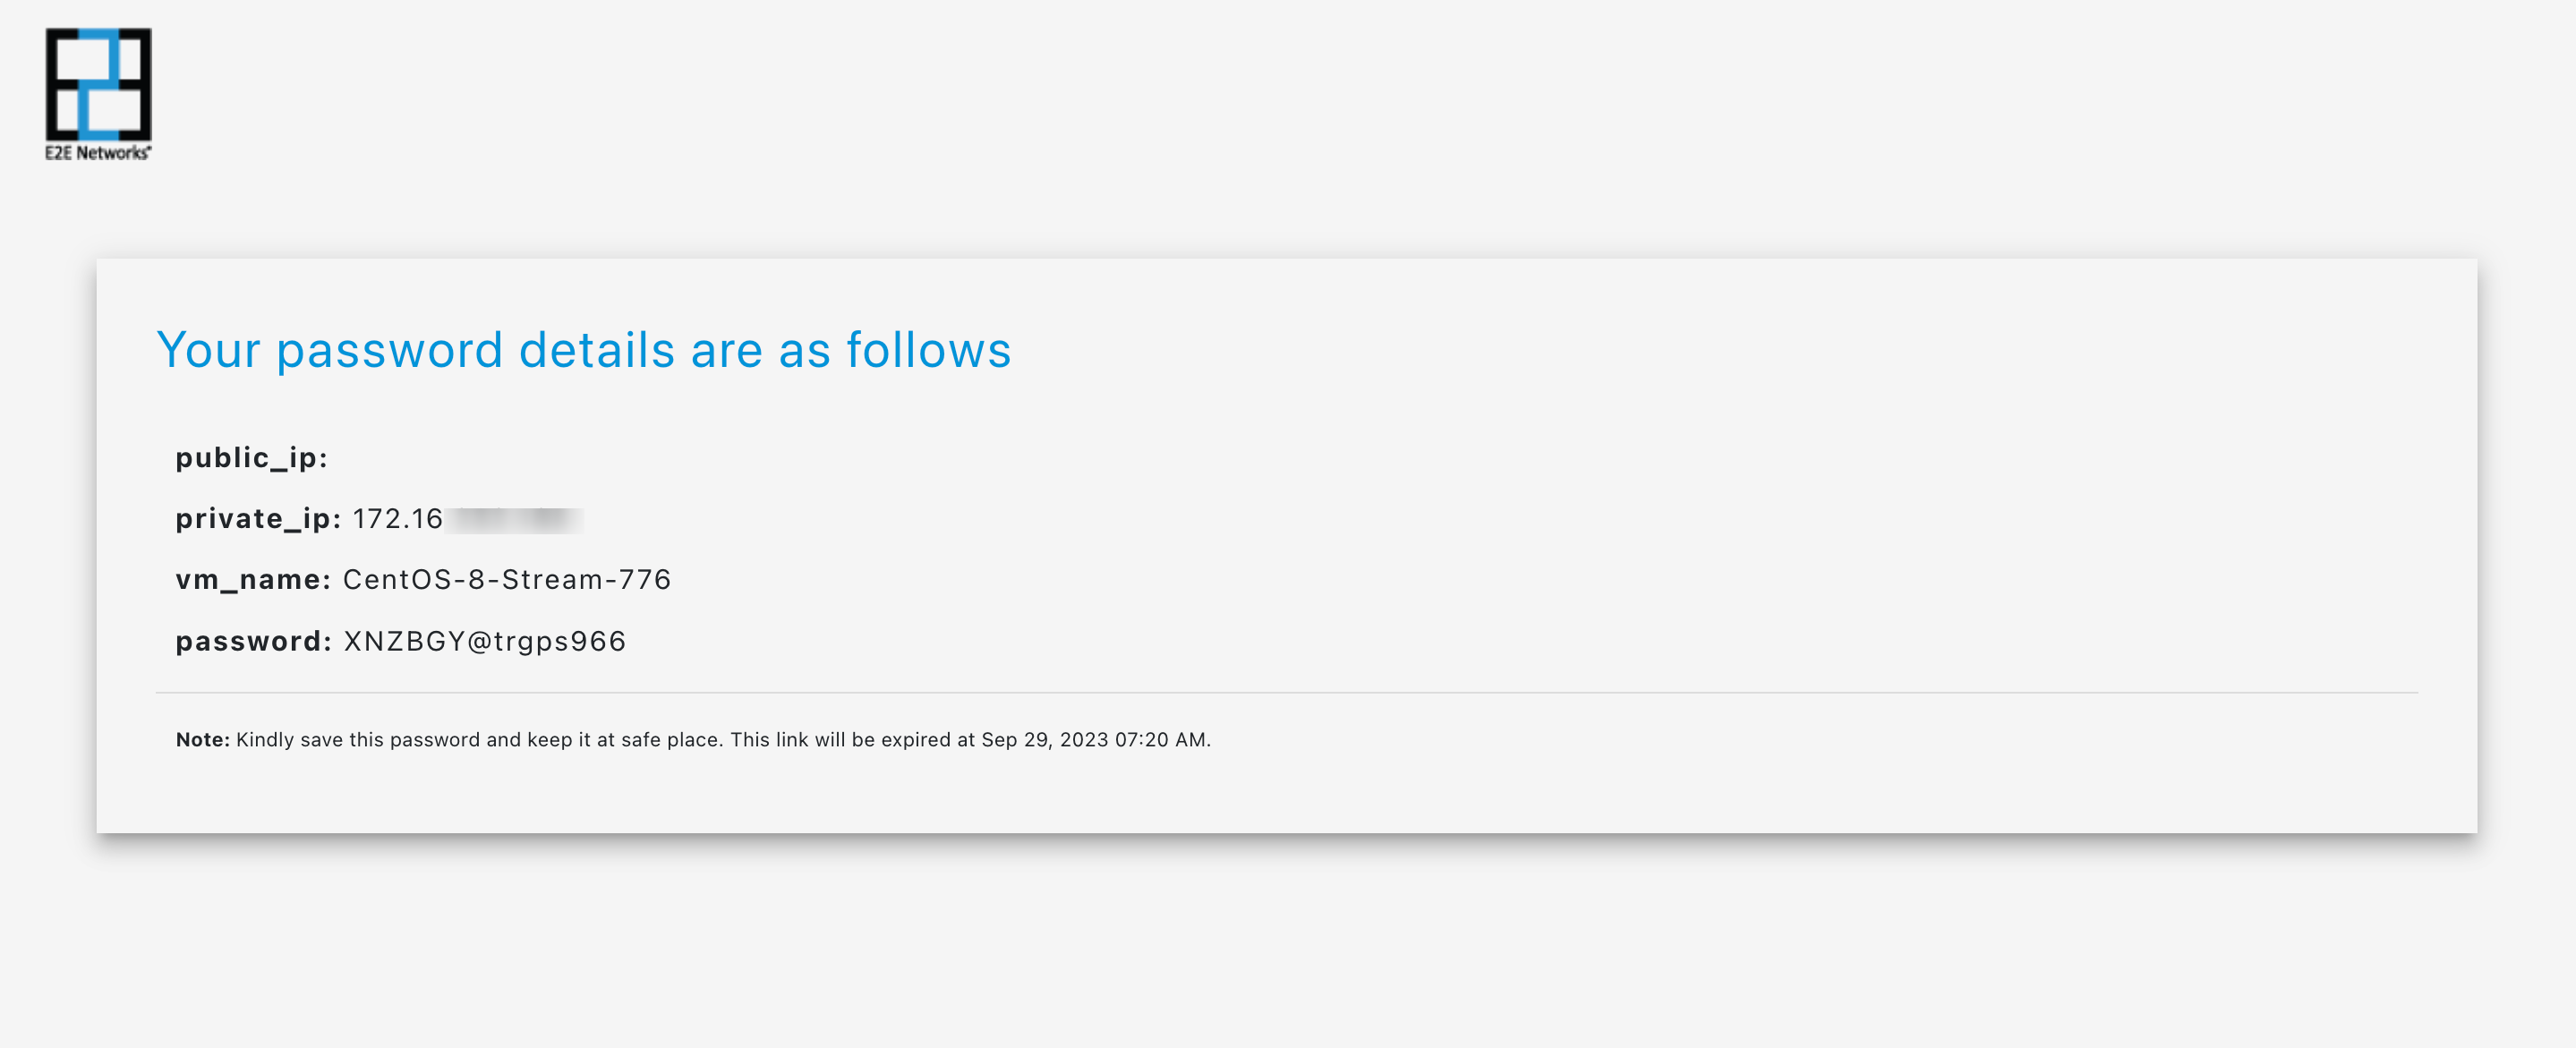
How to get Node password:
After creating your node, we will send you an email containing a secure password retrieval link. To obtain your password, simply click on the provided link. This link will expire in 7 days.