How to run a Jupyter Notebook inside Tensorflow Container for Accelerated Machine Learning E2E GPU Wizard?
Launching an Instance based on Tensorflow container with Jupyter-notebook Running
Using myaccount portal
First sign into the myaccount portal
- Navigate to GPU Wizard
Under the compute menu click on GPU
Then click on GPU Wizard
For NGC Container Tensorflow click on Next under actions column
Choose the card according to requirement, A100 is recommended.
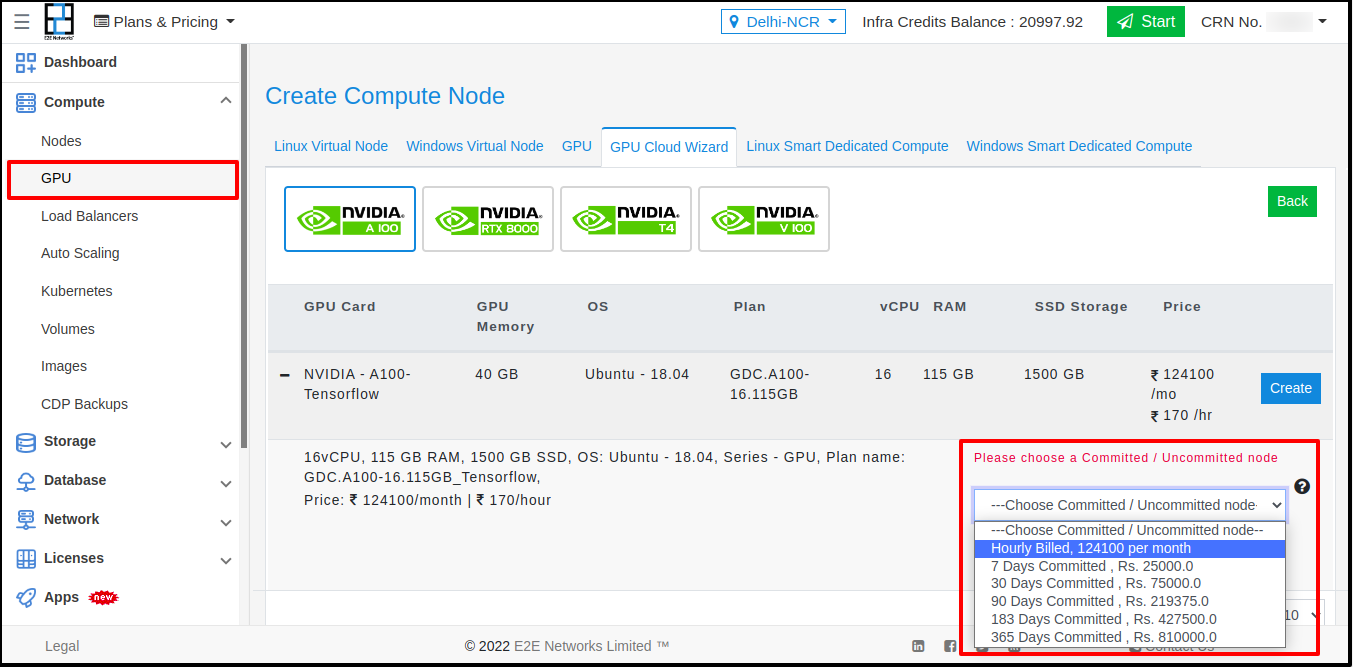
- Choose the plan as per the requirement.
Optionally you can add SSH key (recommended) or subscribe to CDP backup.
Click on “Create my node” .
Wait for few minutes and and confirm that node is in running state

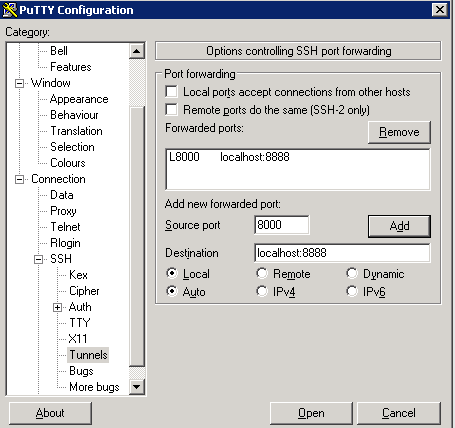
Open terminal on your local PC and type the following command
ssh -NL localhost:1234:localhost:8888 root@<your_node_ip>

The command usually will not show any output which represents the command has run without any error.
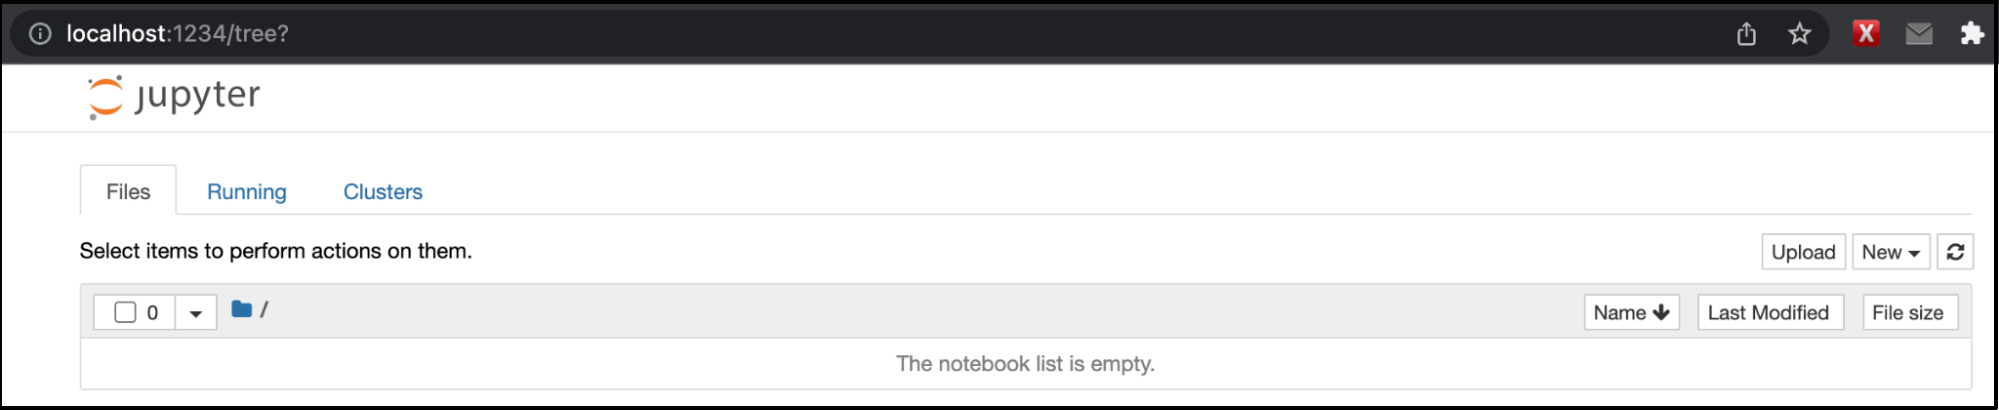
Go to a web browser on your local PC and hit the url :- http://localhost:1234
Congratulations! Now you can run your python code inside this jupyter notebook which has Tensorflow and all the libraries frequently used in machine learning preconfigured.
To get the most out of GPU acceleration use RAPIDS and DALI which are already installed inside this container.
RAPIDS and DALI accelerate the tasks in machine learning apart from the learning also like data loading and preprocessing.
How to Run
MNIST dataset is a kind of “Hello world” implementation in machine learning.
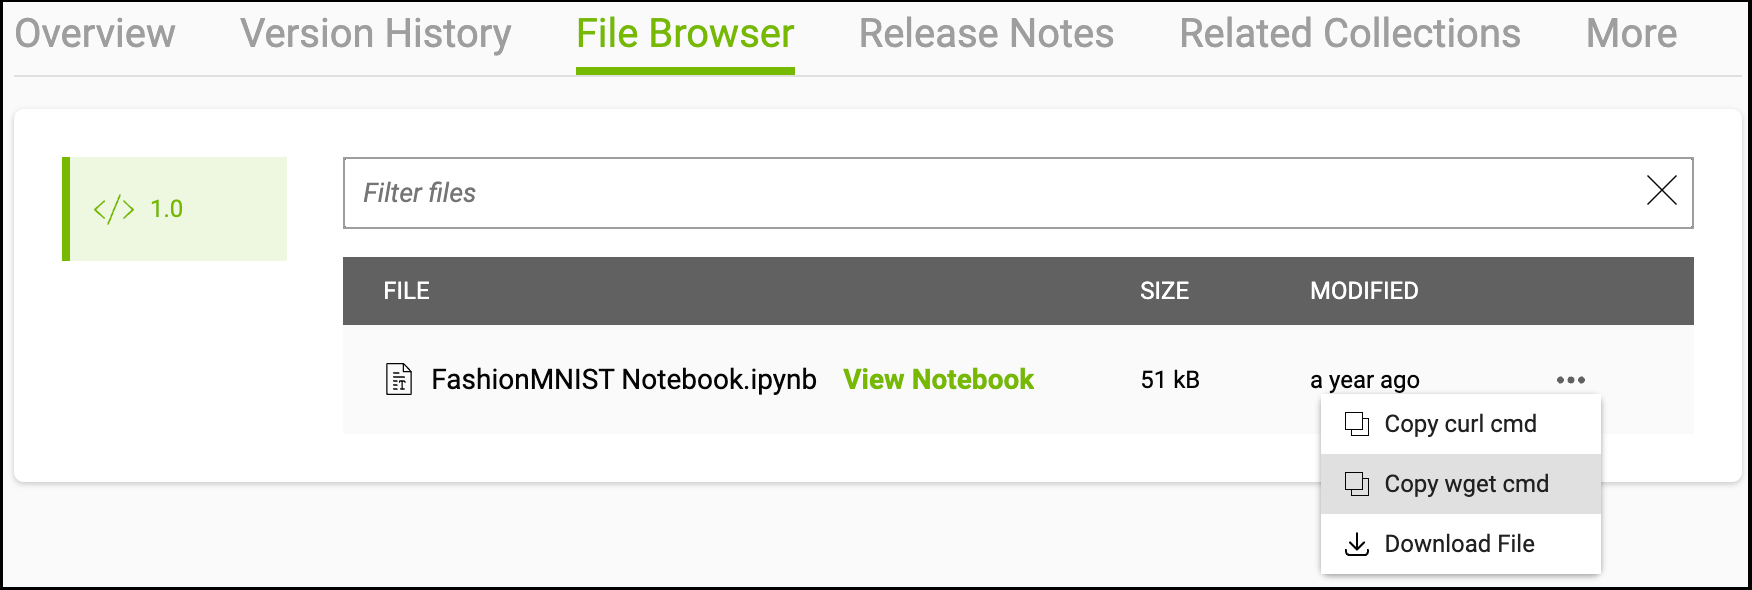
Here we are about to use Fashion MNIST (clothing classification) as given in the NGC link here.
Copy the wget command as given below.
In your Jupyter Notebook UI, create a new notebook
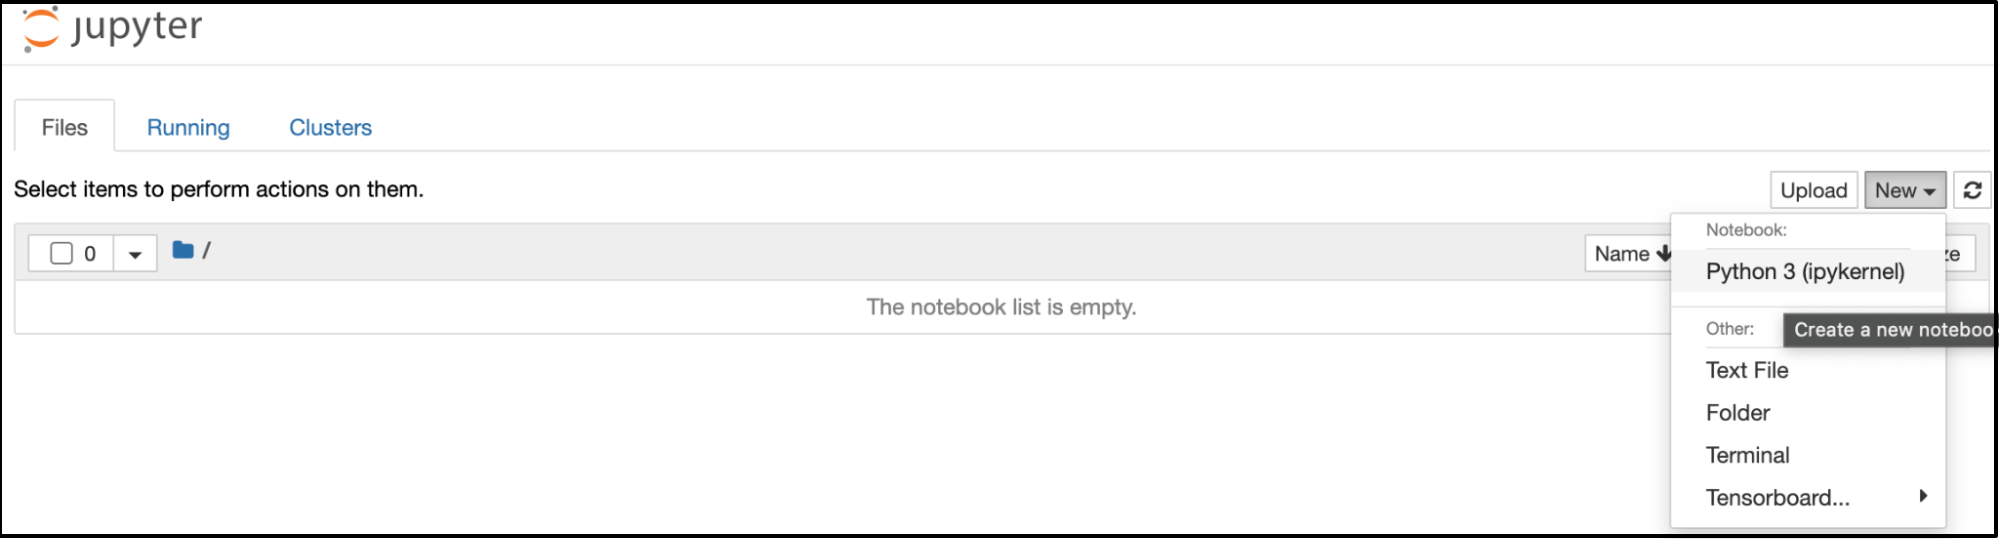
Enter ‘!’ in the cell and paste the wget command.
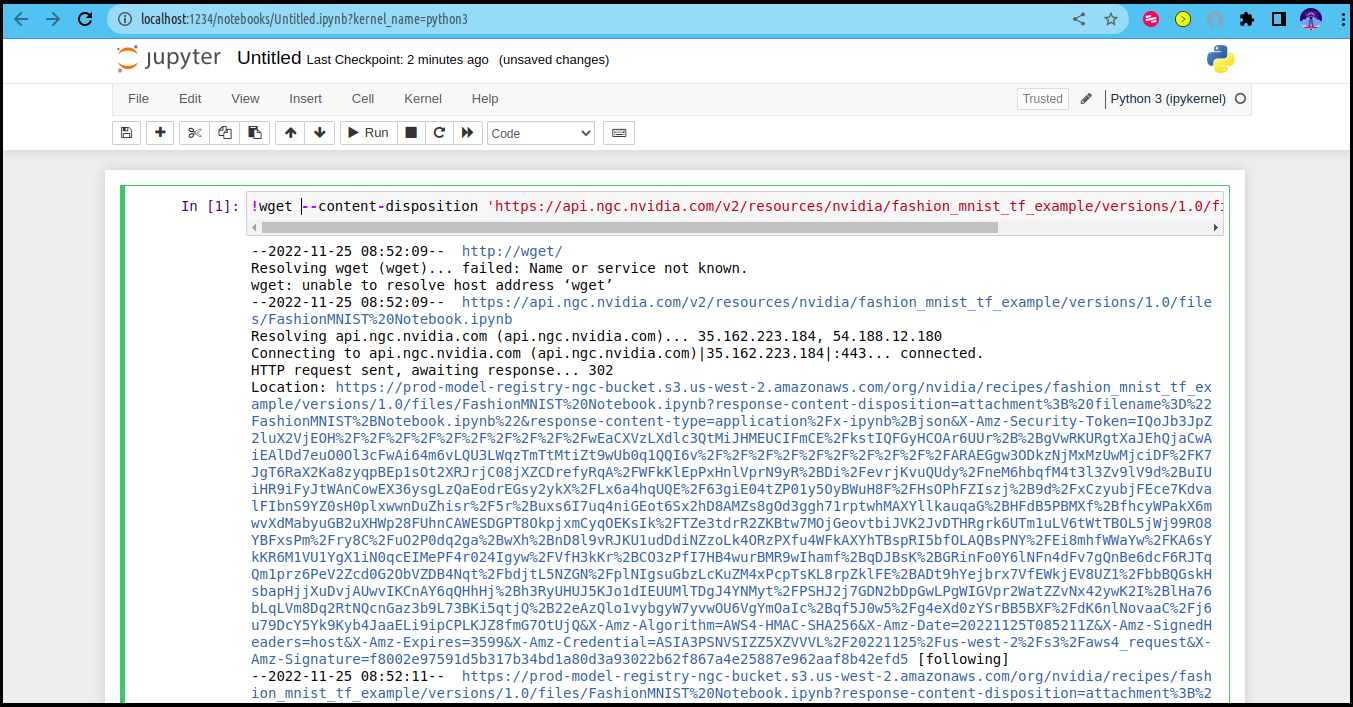
Once you run the command, you can find the downloaded file on Jupyter home page.
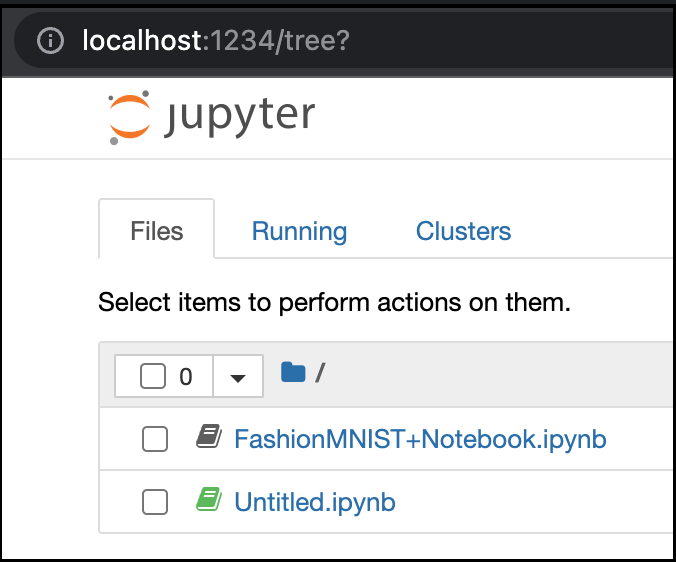
Now open the notebook FashionMNIST+Notebook.ipynb
You can skip up to step 4 (which were already done) and directly goto Step 5.
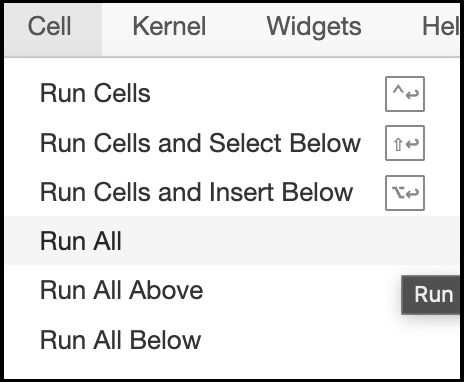
You can Run cell by cell from Step 5 and observe each output or you can go to the menu bar and select “Cell -> Run All” to run all of them.
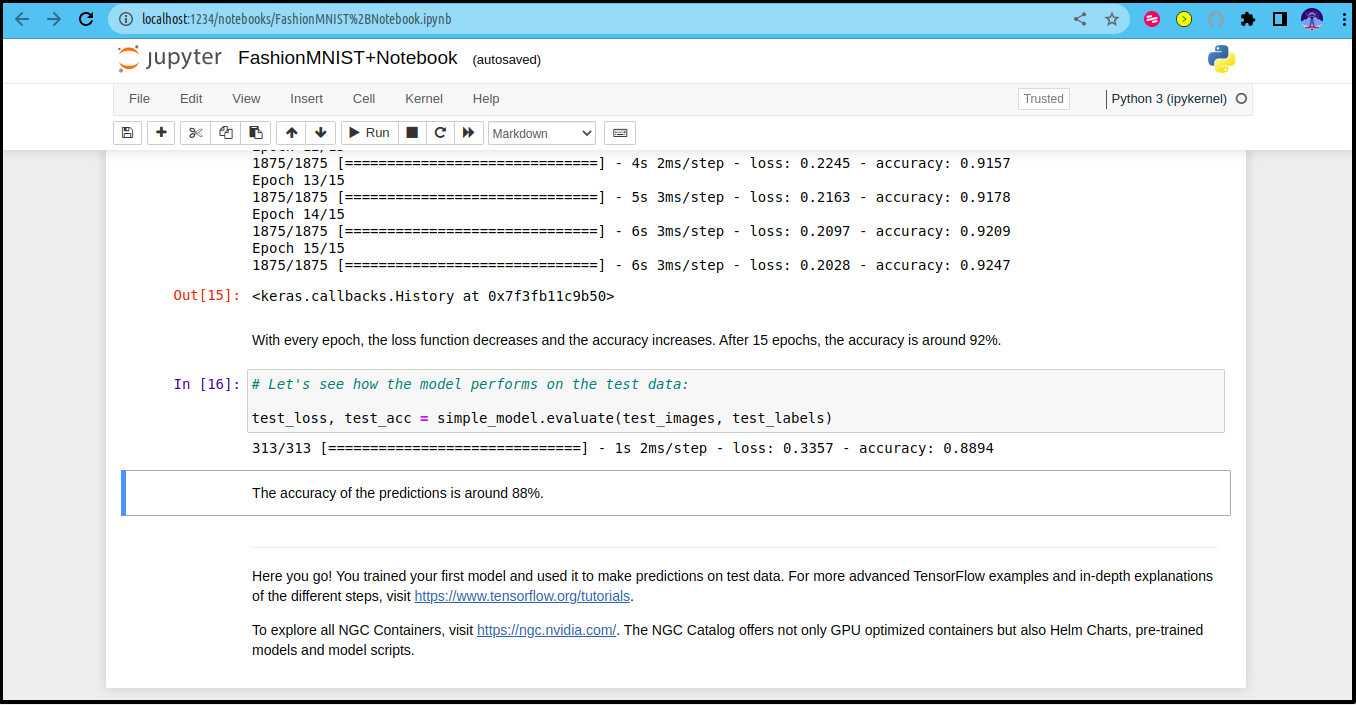
You can see that after 15 epochs the accuracy will be around 92% on training data and 88% on testing data.
How to troubleshoot if notebook isn’t accessible
Do ssh in your node with public ip ssh username@<public-ip>
Check the output of the “docker ps” command.
If it shows a container is running using Tensorflow image then you can use the following in command line
cnid=$(docker ps |grep tensorflow|head -1|awk '{print $1}');/usr/bin/nohup /usr/bin/docker exec $cnid /usr/local/bin/jupyter-notebook --no-browser --port=8888 --allow-root --NotebookApp.token='' --NotebookApp.password='' --NotebookApp.quit_button=False --NotebookApp.notebook_dir=/home/tensorflow &

If docker ps doesn’t list any container running, then we have to start the container first.
Run “docker ps -a”

Now copy the container id for nvcr.io/nvidia/tensorflow:22.11-tf2-py .
Now you can run “docker start <container_id>”

Then to start the jupyter notebook run the following command:
cnid=$(docker ps |grep tensorflow|head -1|awk '{print $1}');/usr/bin/nohup /usr/bin/docker exec $cnid /usr/local/bin/jupyter-notebook --no-browser --port=8888 --allow-root --NotebookApp.token='' --NotebookApp.password='' --NotebookApp.quit_button=False --NotebookApp.notebook_dir=/home/tensorflow &
Now create a ssh tunnel again in your local PC with “ssh -NL localhost:1234:localhost:8888 root@<your_node_ip>” and attempt to access the jupyter notebook.
Why doesn’t my notebook have a password?
The notebook is accessed via a ssh tunnel which creates a secure encrypted connection between node and pc which will be accessible only for those who have SSH access. But still if you want to set the password you can do it the following way.
Stop any existing jupyter notebook processes inside the container.
Edit the field –NotebookApp.password=’Your password’ in the above commands.
In order to set it on the next boot, Open the file /etc/rc.local in your server and set password as shown below.
