Introduction
Policy-Based Access Control (PBAC) is a mechanism for managing user access to individual or multiple systems, where the permissions granted are contingent upon the user’s business responsibilities aligned with predefined policies or custom policies. In contrast to the conventional method of auditing and modifying roles organization-wide, PBAC provides the agility to swiftly adjust access privileges in response to evolving requirements. This ensures that assets remain safeguarded through the enforcement of established rules and policies. PBAC stands out as a versatile authorization solution, capable of accommodating various access points by automating security controls within applications and data.
IAM (Identity and Access Management)
IAM Model Overview:
IAM, which stands for Identity and Access Management, encompasses a structured system for managing user identities and their access privileges within an account. The IAM model comprises various user roles and their corresponding permissions.
Key Concepts:
IAM Entry: Each IAM entry contains mappings with a primary customer and their associated secondary users. Instead of referencing a contact person table, information regarding secondary users is stored within the IAM table.
IAM User Types:
Owner: Represents the primary account holder.
Primary: Users with existing sign-ups on the platform who can access other accounts using the Primary IAM feature, also known as Multi-CRN view.
- Multi CRN
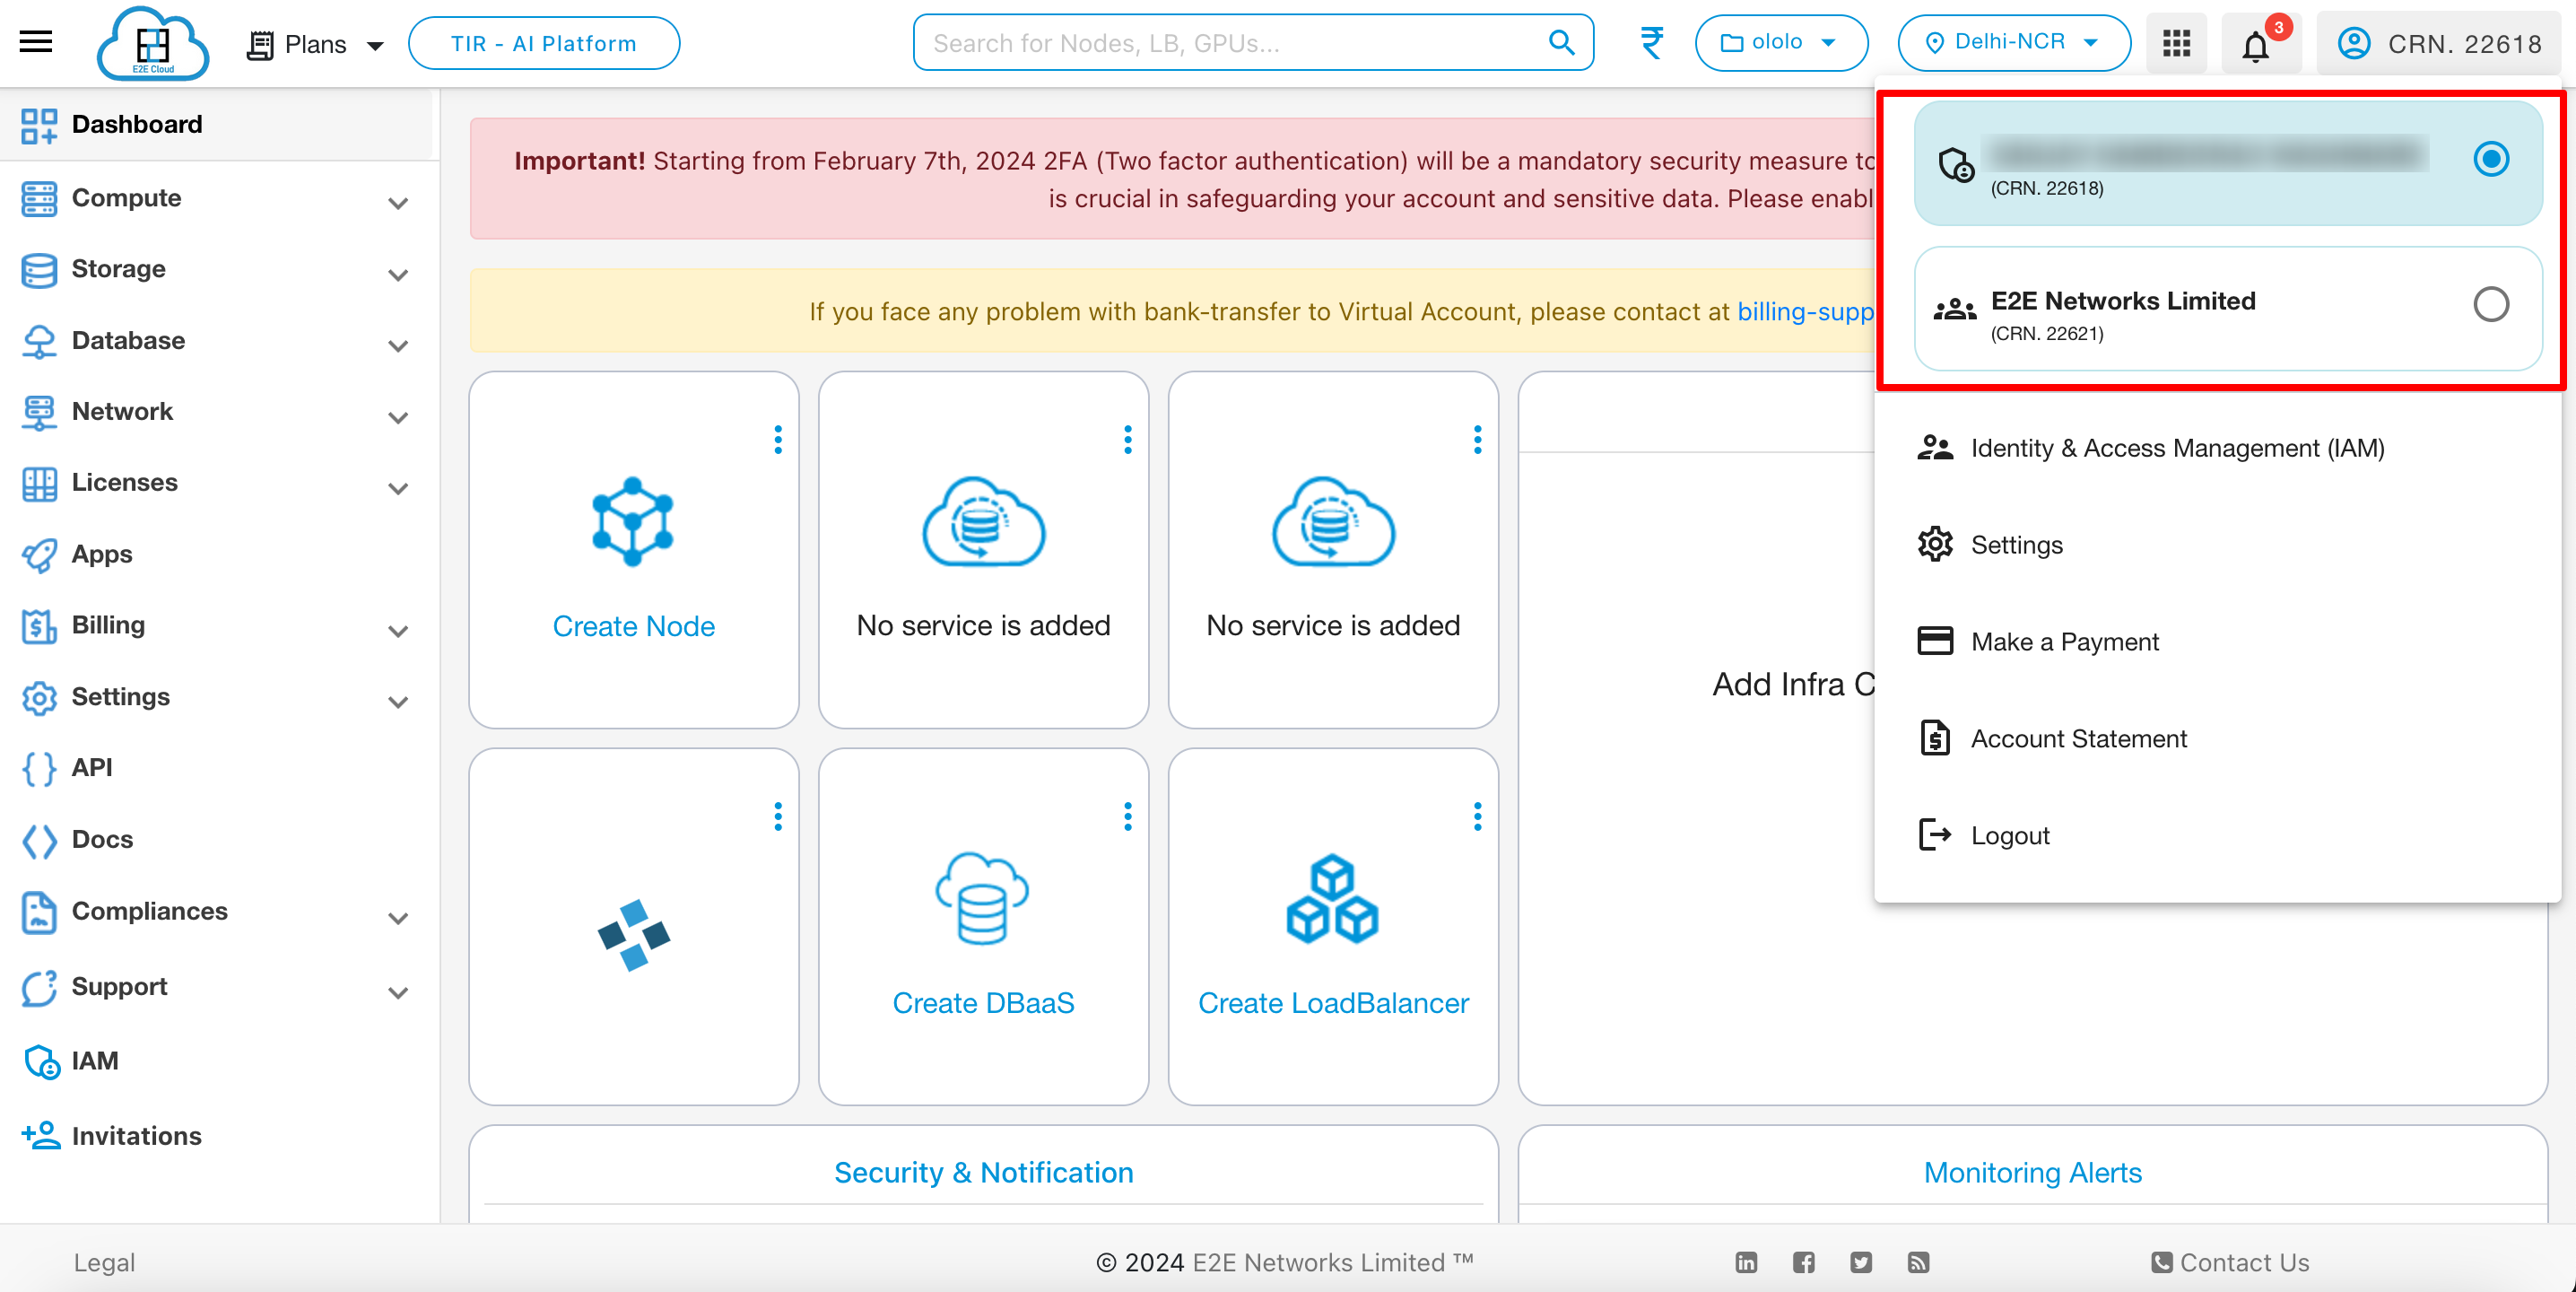
A Multi-CRN perspective offers users the ability to toggle between multiple CRNs (Customer Reference Numbers). This occurs when a customer (Customer A) who is already registered grants access to some of their projects to another customer (Customer B) who is also registered. As a result, Customer B can access Customer A’s projects by switching between their respective CRNs.
Contact: Users without existing sign-ups on the platform.
Roles and Permissions
Roles |
Resource Management |
IAM (User Management) |
Billing Operations (Pay Now, Auto Pay and Account Statement) |
Payment Reminders/Invoice Handling |
|---|---|---|---|---|
Admin |
✓ |
✓ |
✓ |
✓ |
Project Lead |
✓ |
✓(except Admin) |
× |
× |
Billing |
× |
× |
✓ |
✓ |
Member |
Policy base Access |
× |
Policy base Access |
× |
Billing+Member |
Policy base Access |
× |
✓ |
✓ |
Admin: Holds full access rights, including the management of resources and projects, access to the billing dashboard, the handling of invoices, and the ability to add or remove other IAM users. Administrators are essentially co-owners of the account.
Project Lead: Has access to resource allocation and project management, with the authority to add or remove other IAM users (excluding Admins). The Project Lead does not have access to billing.
Billing User: Authorized to manage billing functions such as Pay Now, Auto Pay, and Account Statements, including viewing and paying outstanding balances, accessing invoices, and configuring auto-pay settings.
Member: Users with limited access to the account, with the ability to select services and adhere to established policies that restrict their view within services. Unauthorized attempts to access restricted services or perform restricted actions will redirect them to an unauthorized page.
Billing+Member: Users with restricted service access but unrestricted access to the billing dashboard. They can perform any action within the billing dashboard without restrictions.
The IAM model provides a structured approach to manage user identities, access privileges, and permissions within an account, ensuring effective security and access control.
Note
- To use IAM, you have to follow these steps:
You have to add a IAM user
You have to create a project
You have to create custom policies or you can use predefined policies.
Assign the project and policies to the user.
Add User
To add users then follow these steps:
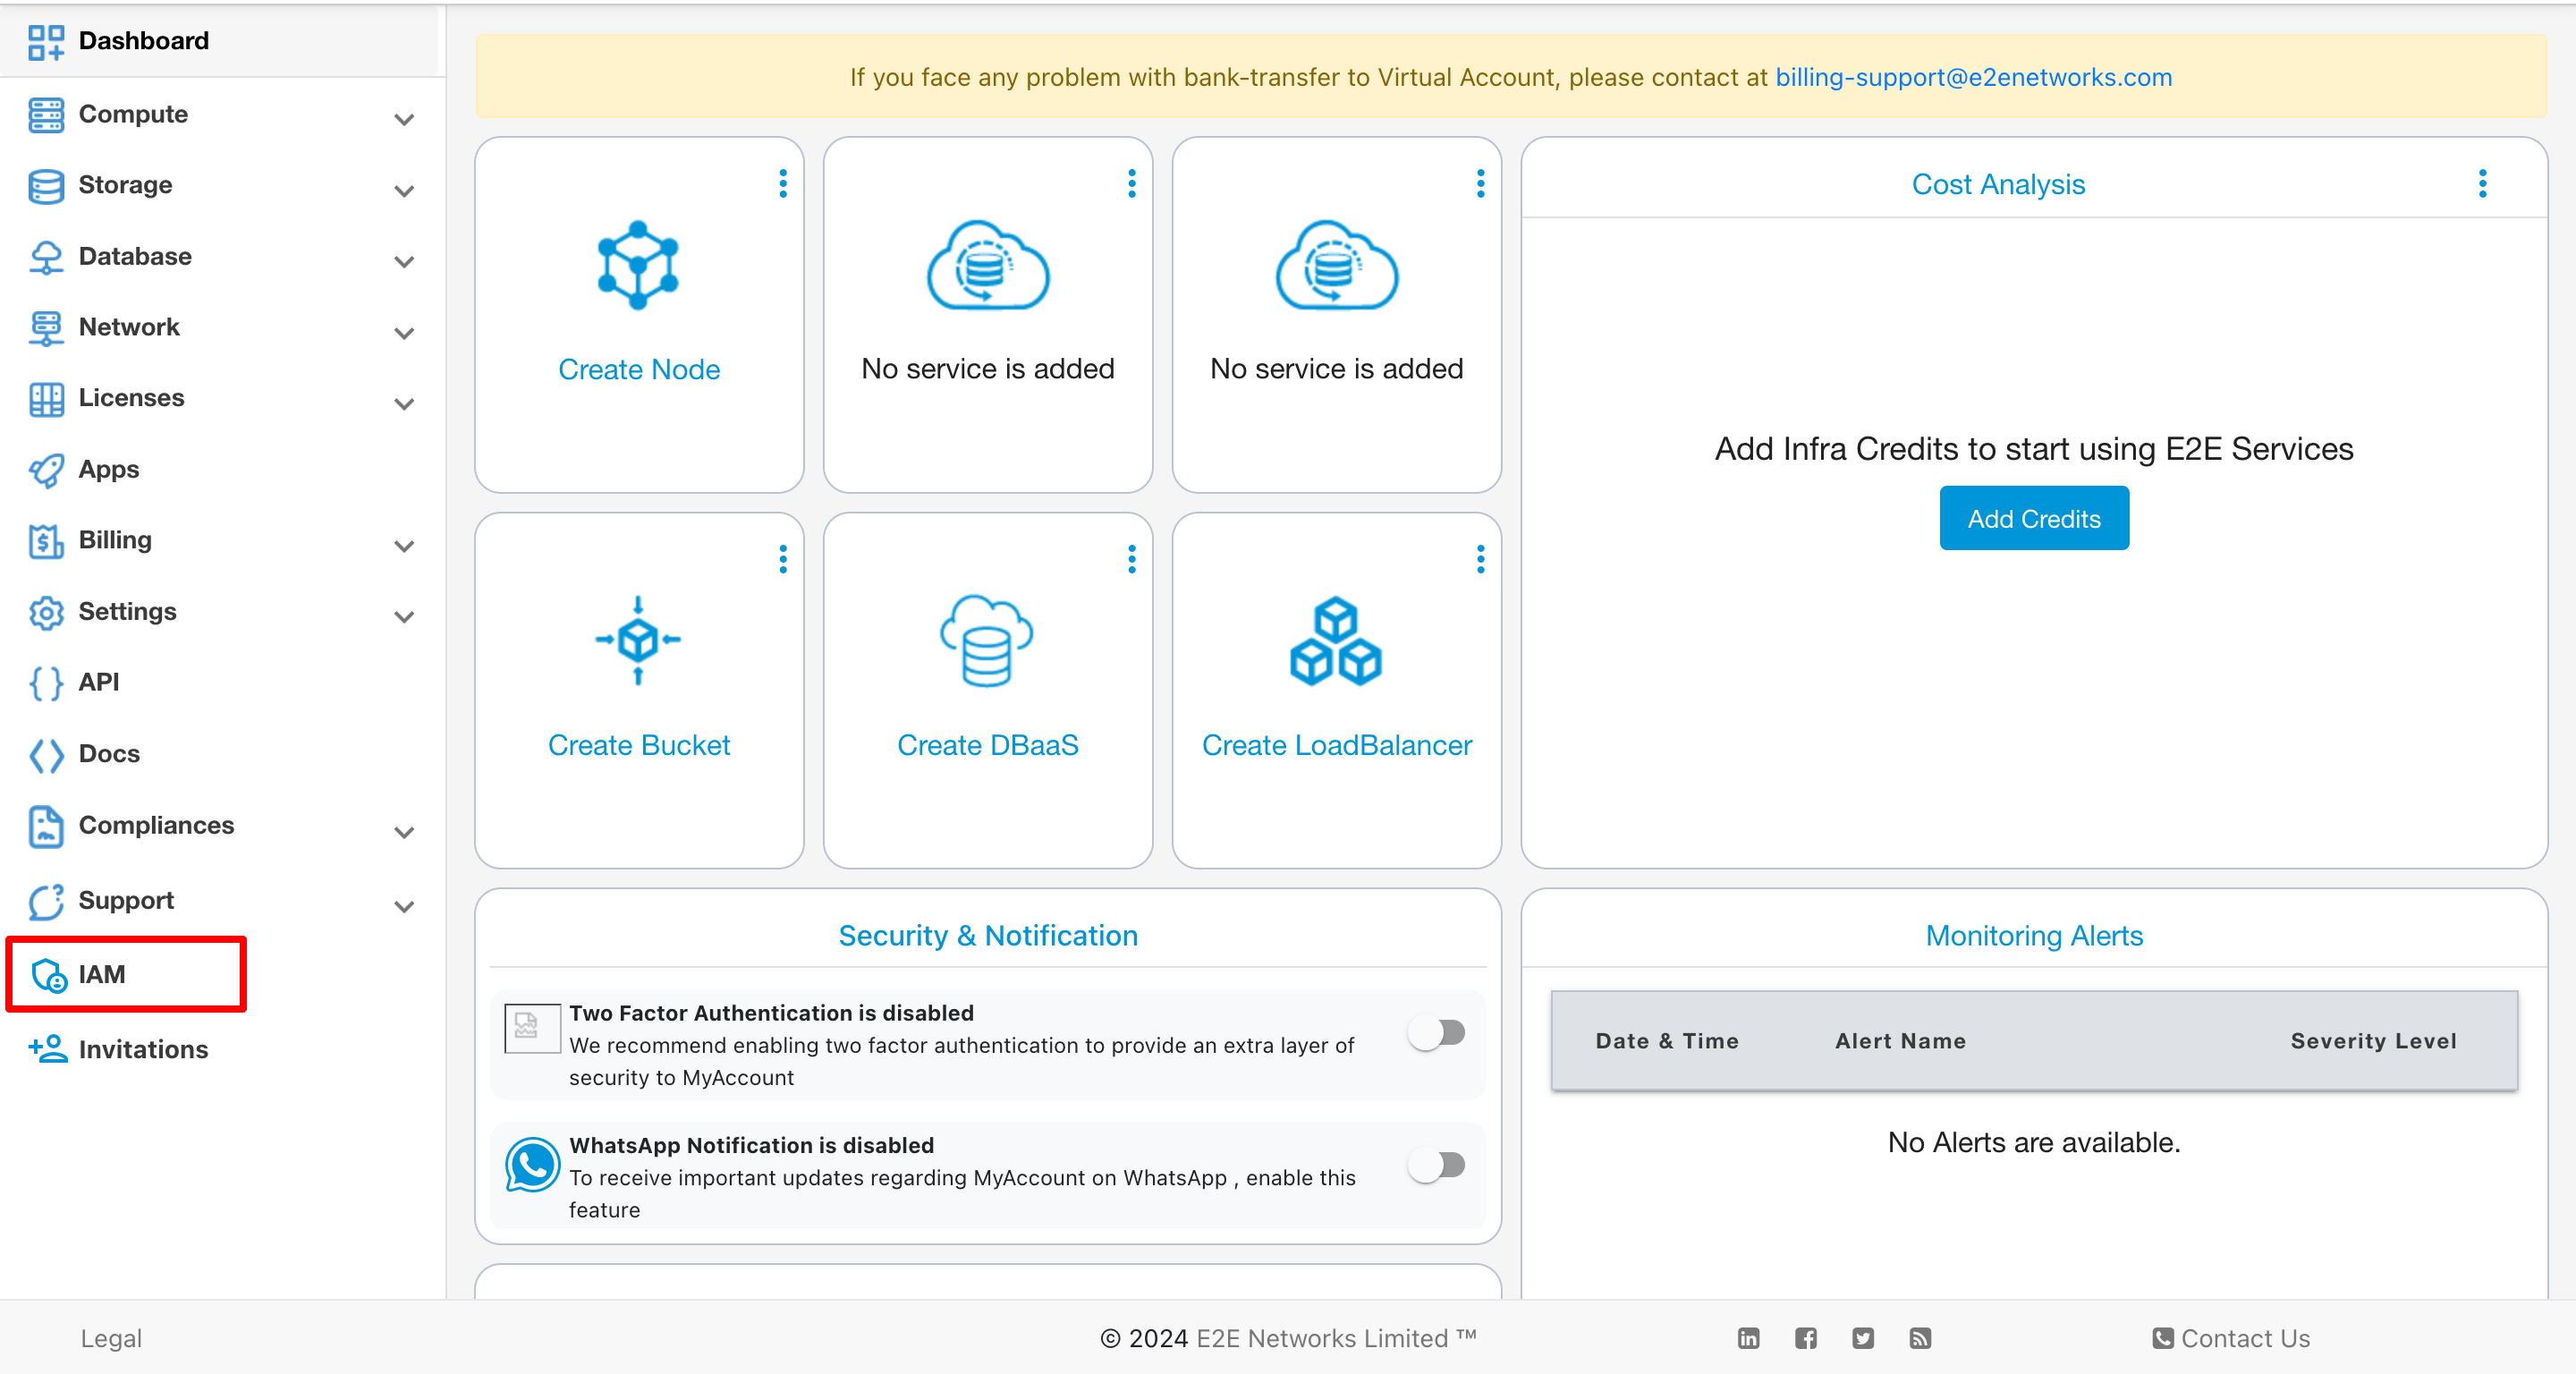
Navigate to the IAM section on the Dashboard
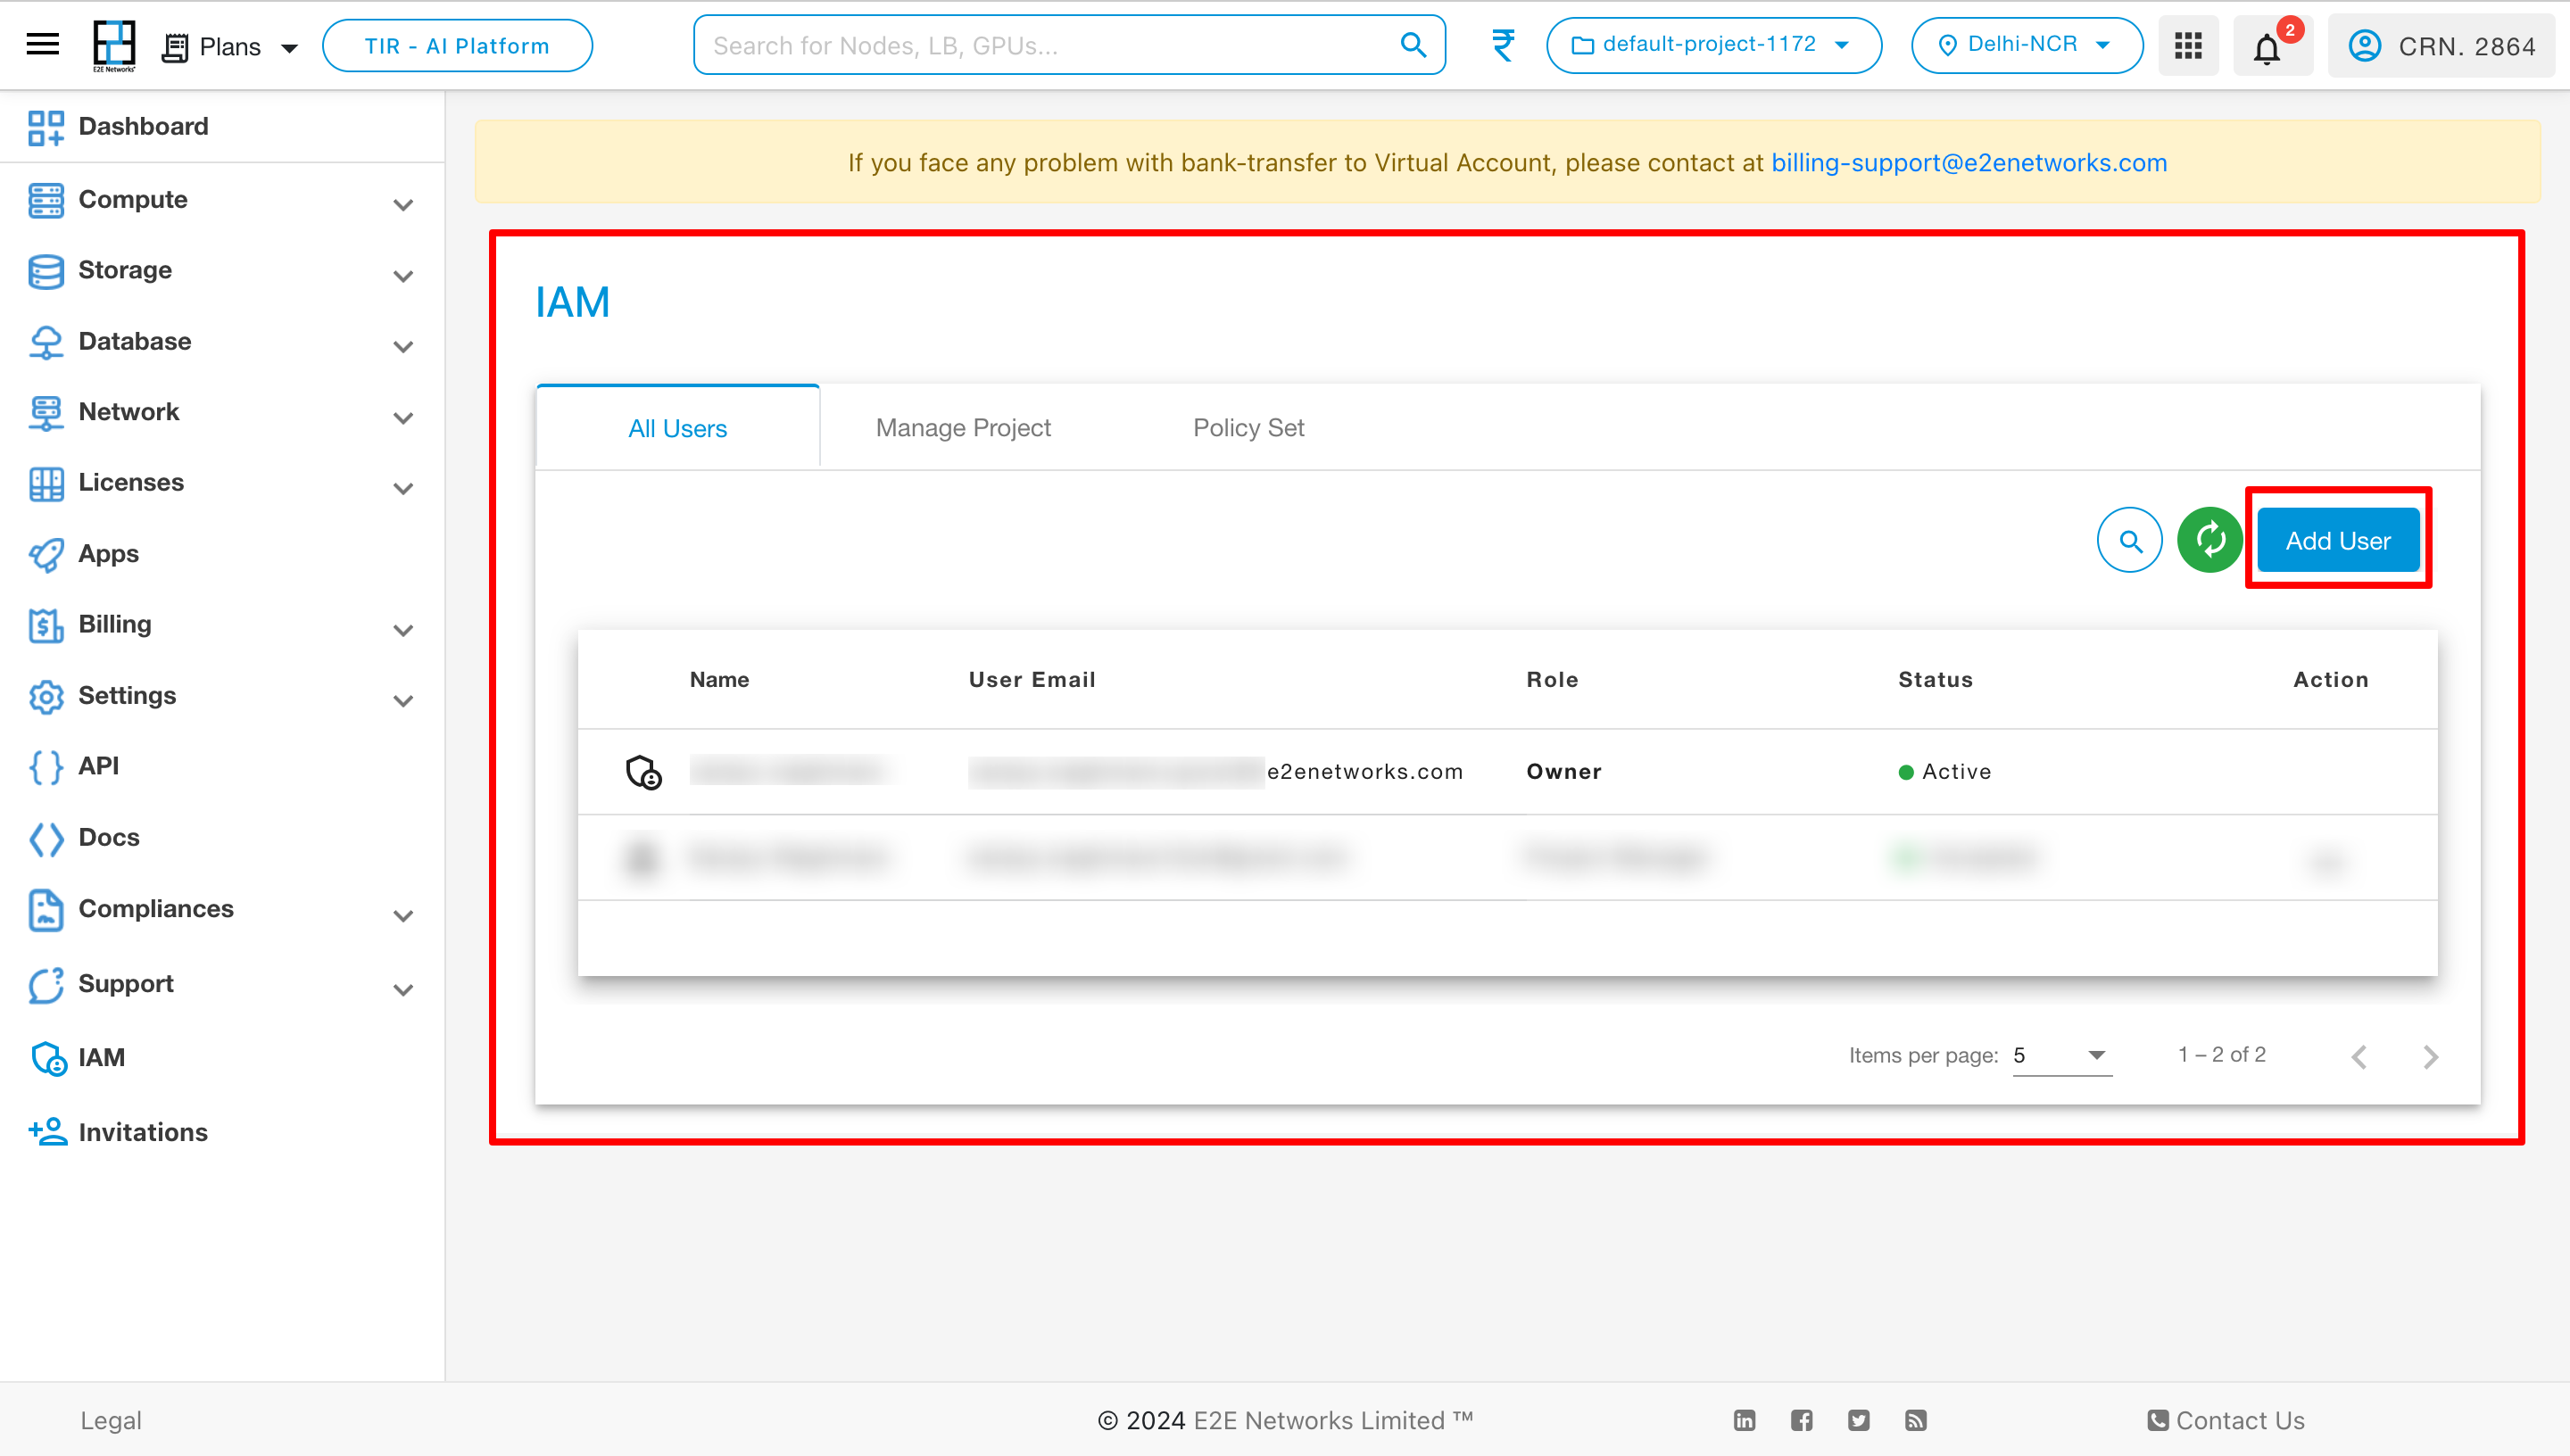
By default, the details of Owner is displayed in the list. To add a new user to the project, simply click on the ‘Add User’ option.
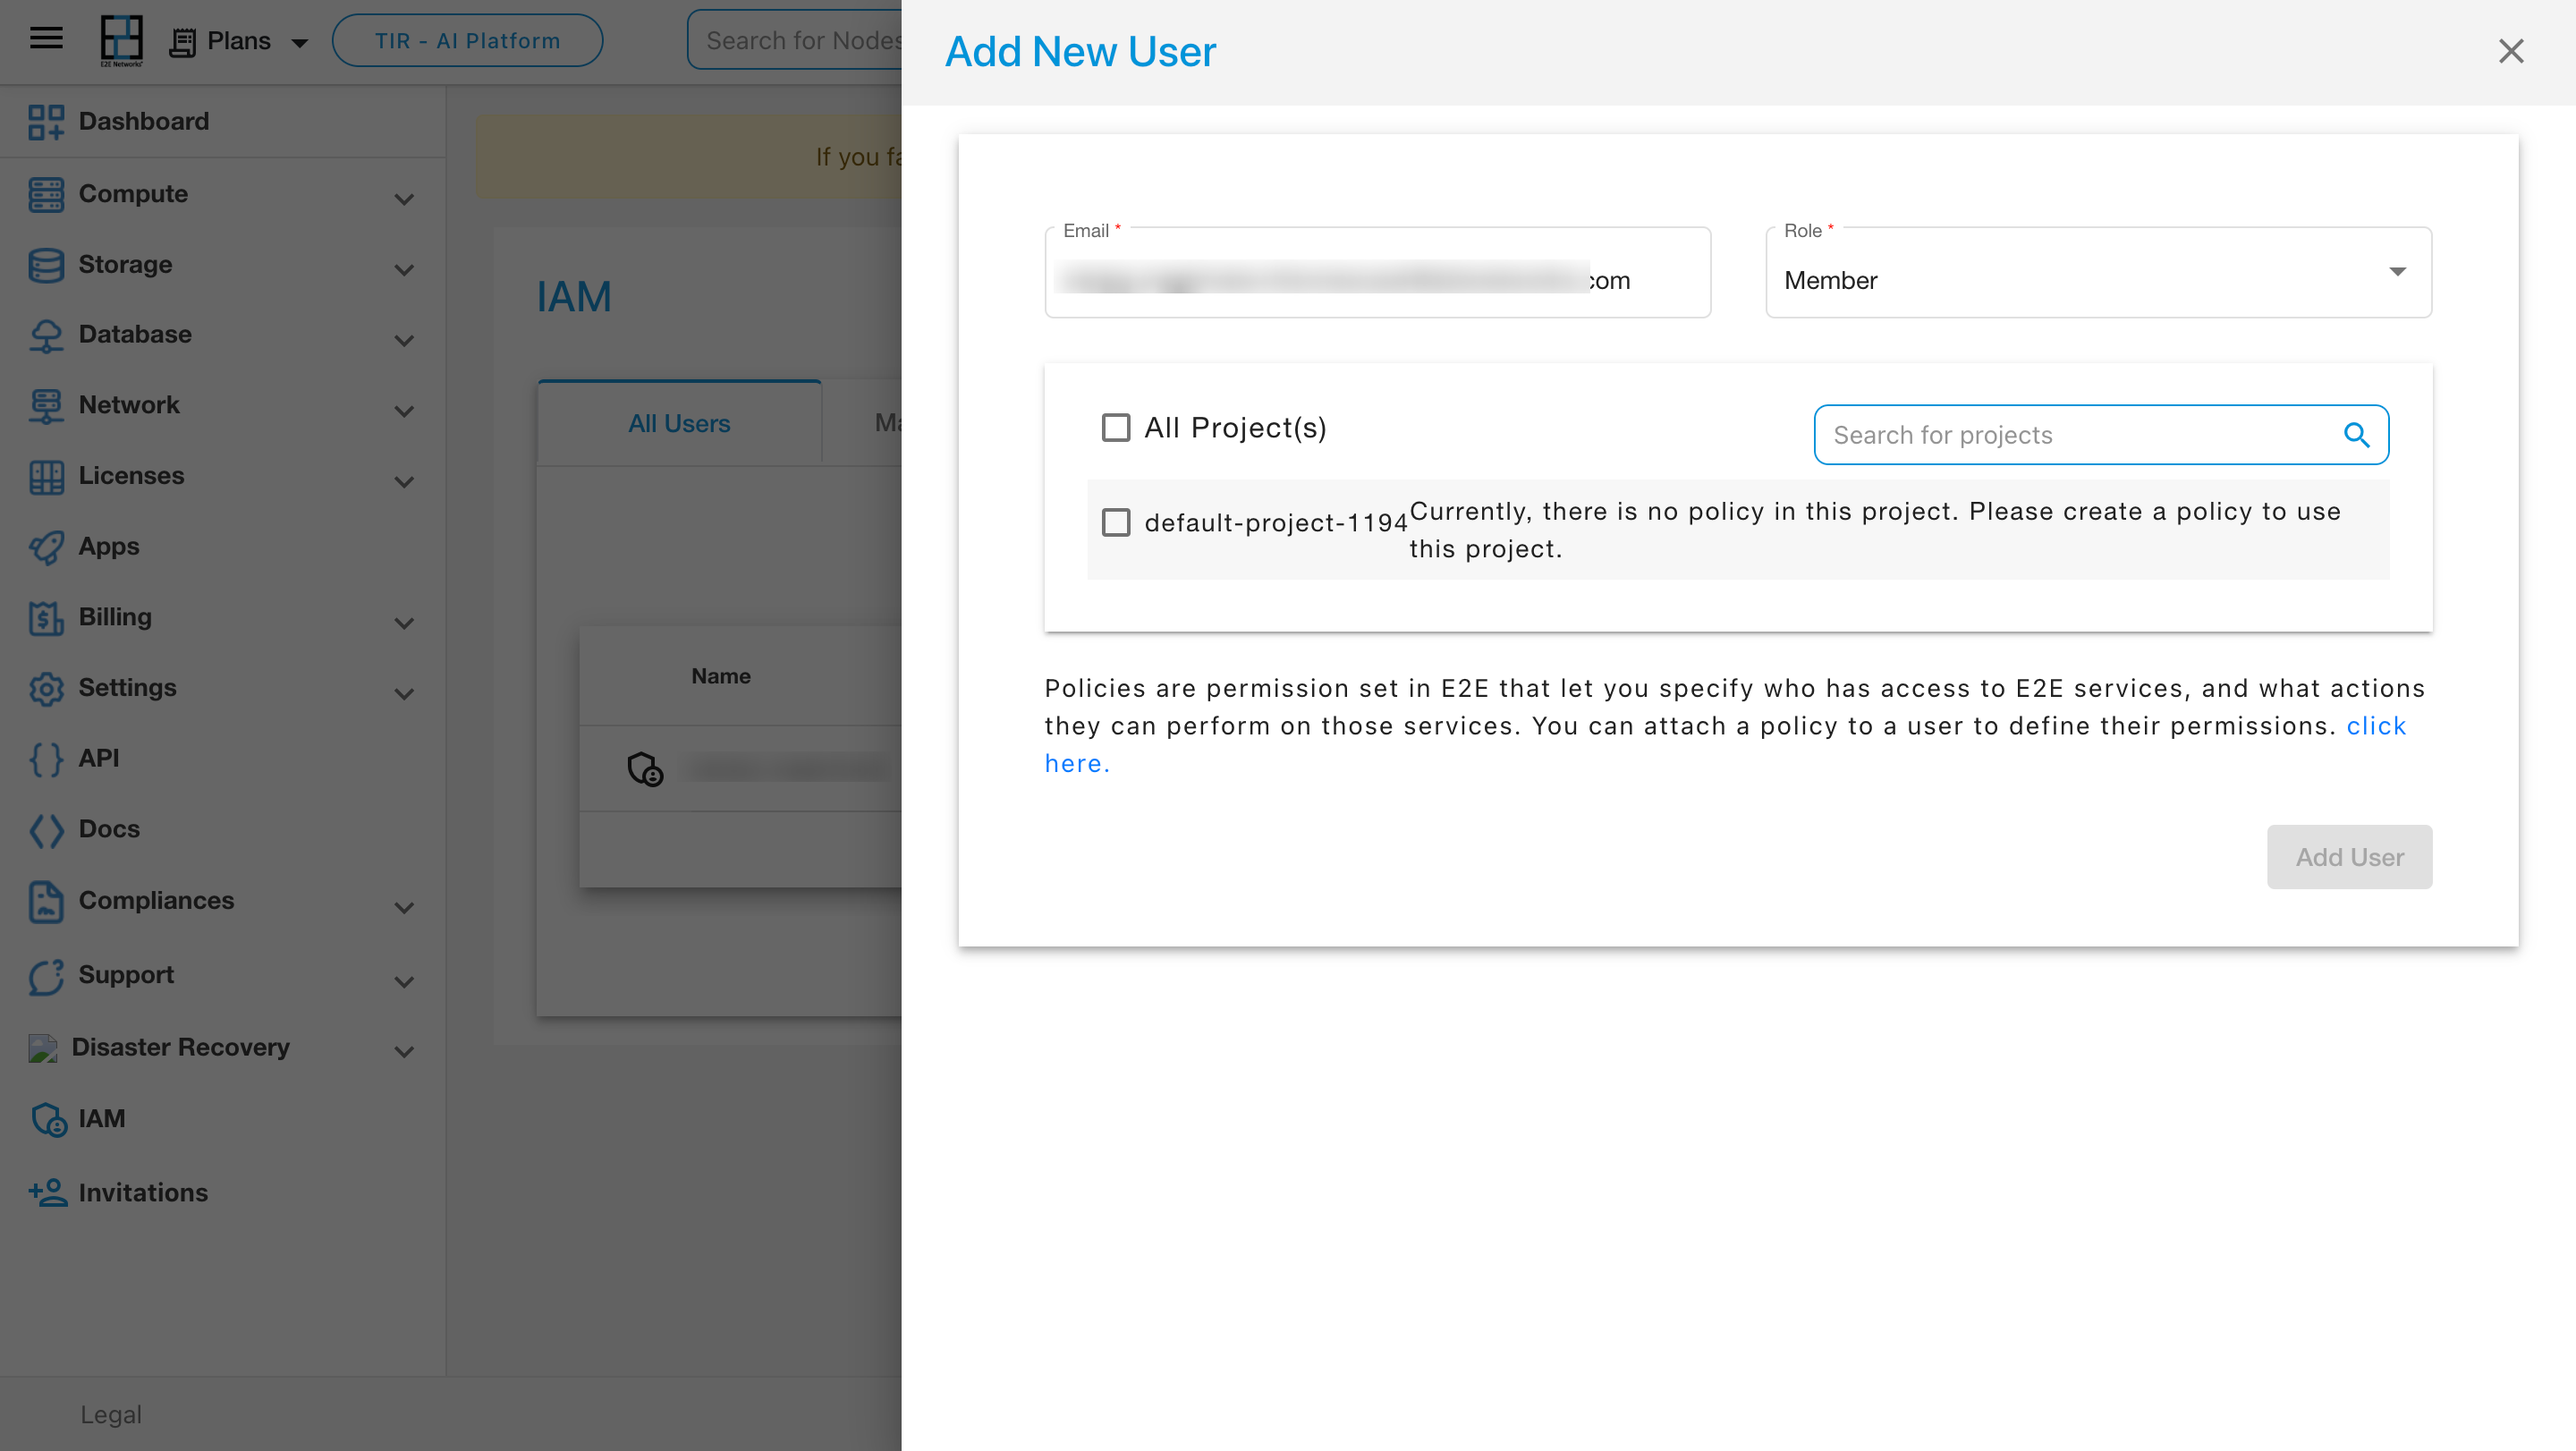
After selecting “Add User,” a new page labeled “Add New User” will open. On this page, you need to enter the user’s email and choose a role from the dropdown menu. The available roles include Member, Billing, Project Manager, Admin, and Billing+ Member.
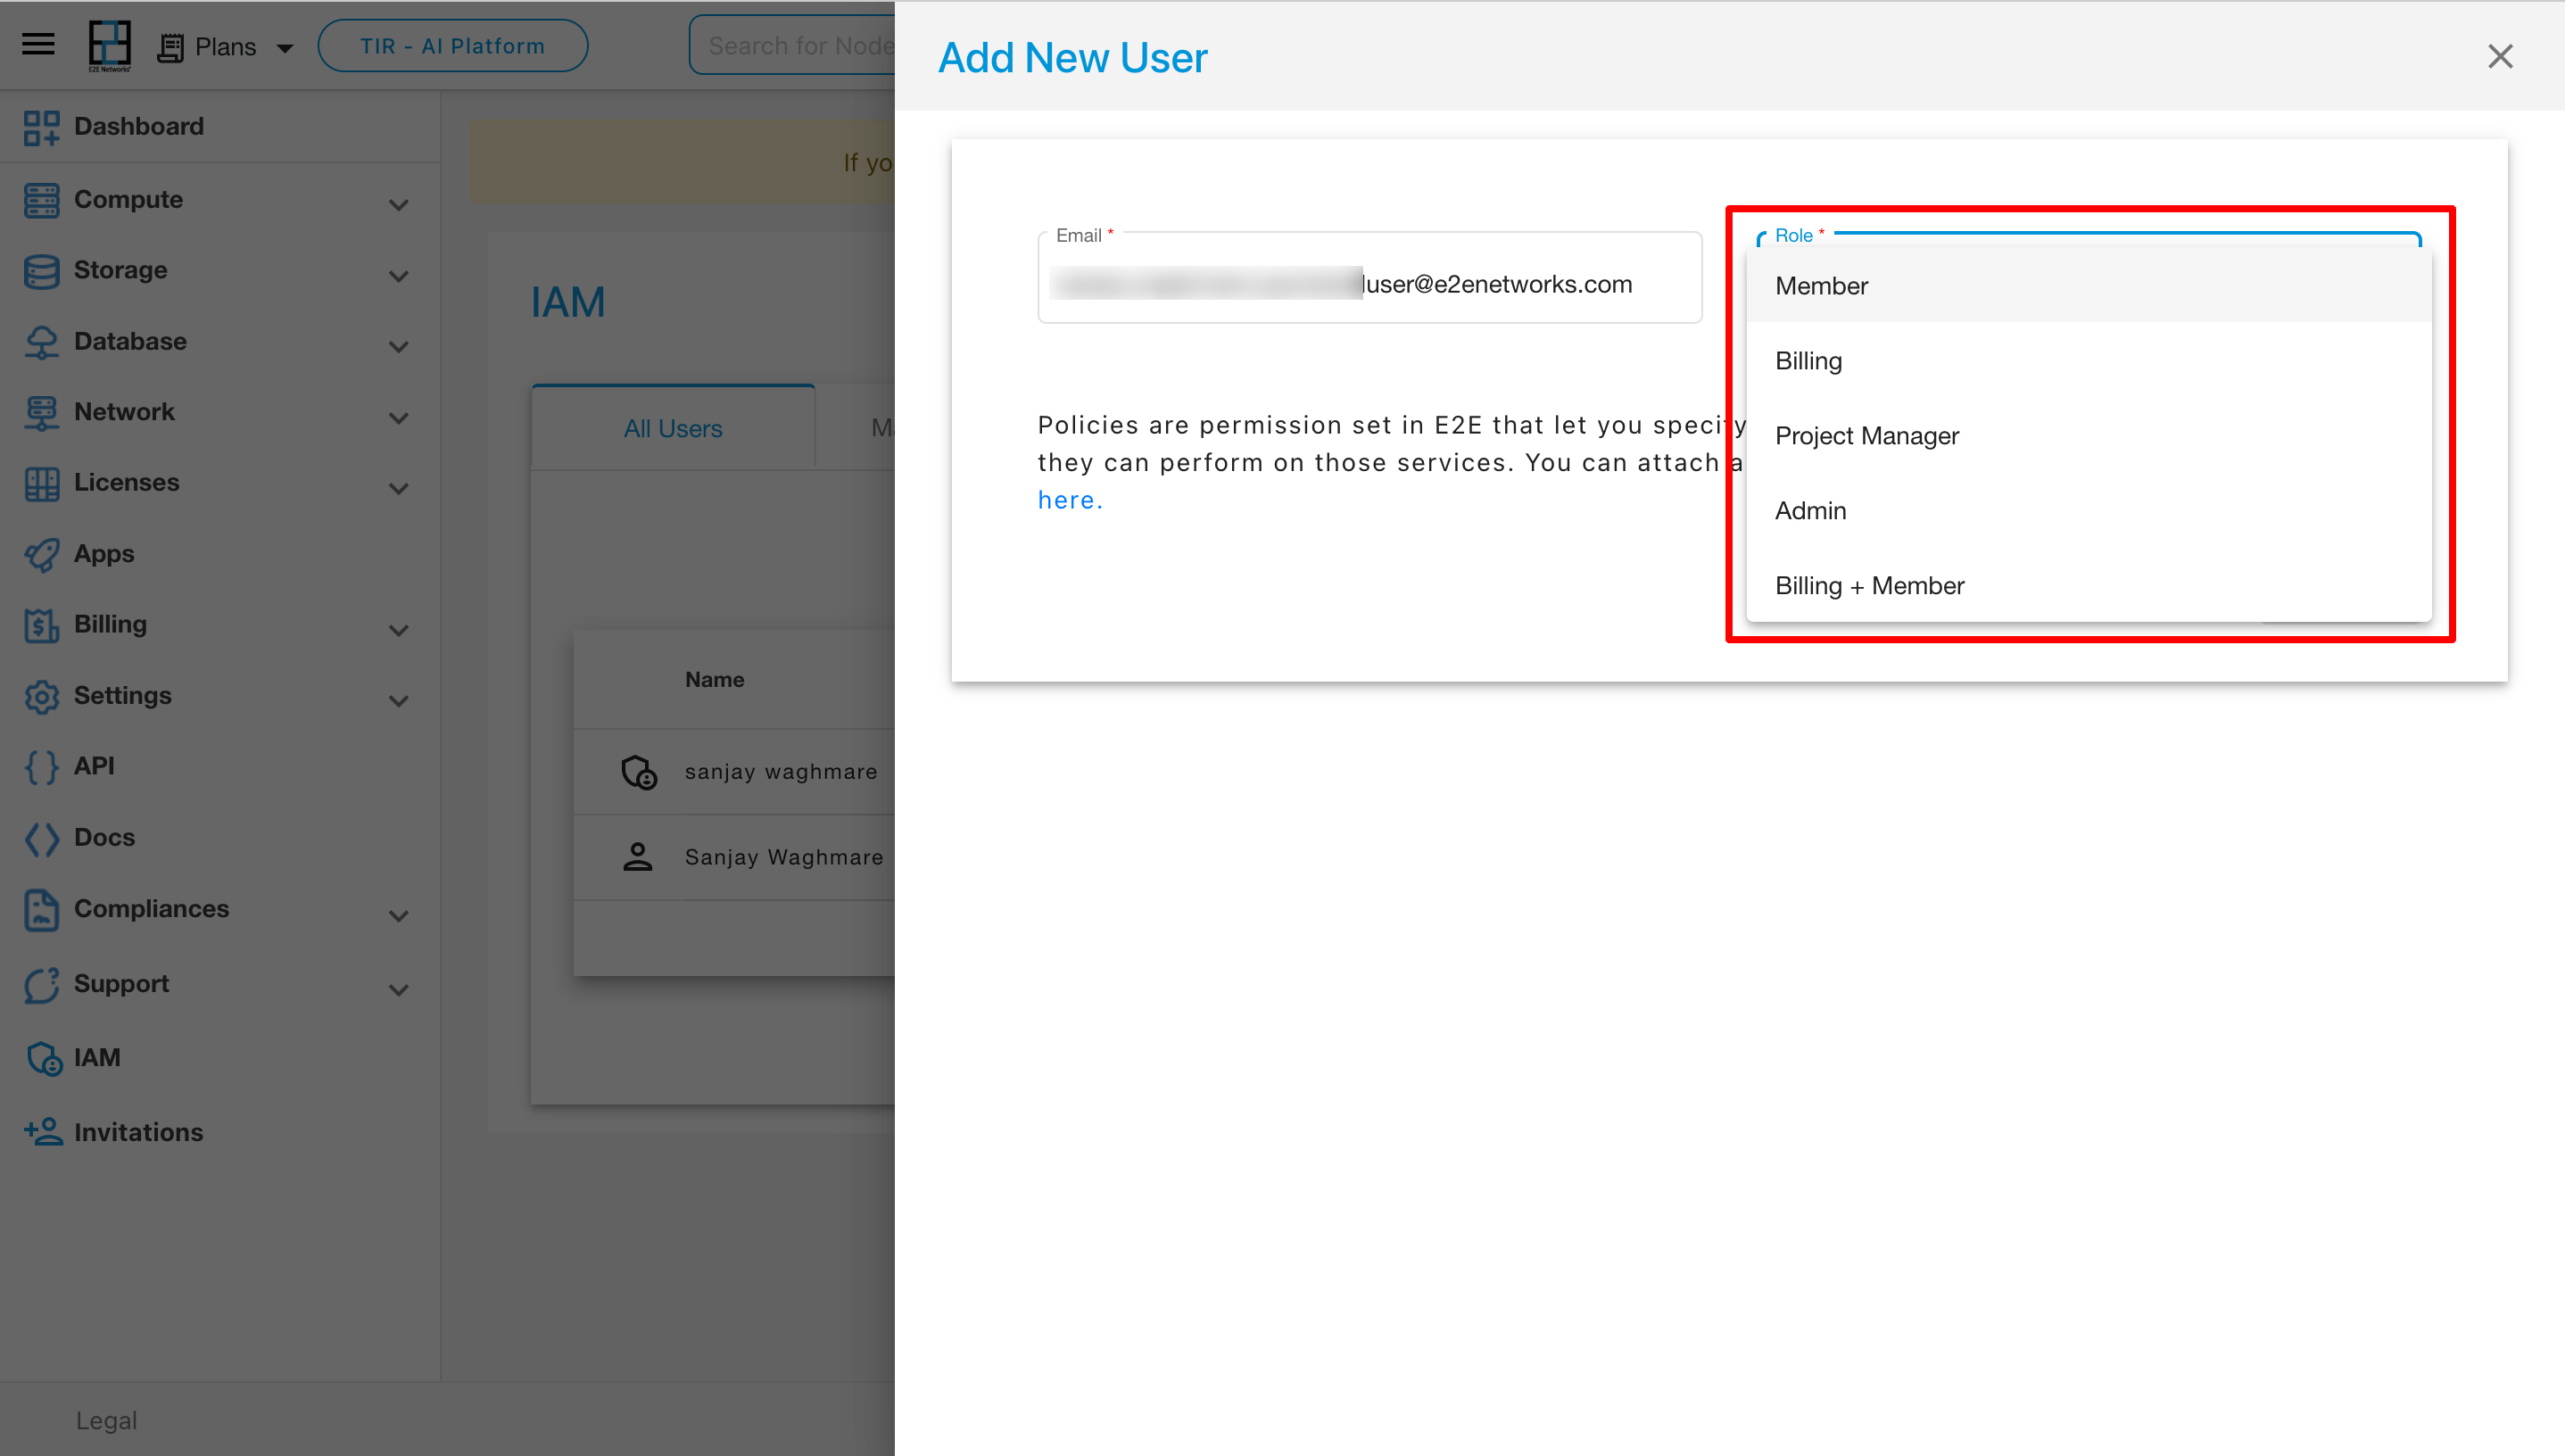
If you choose the role of Admin, Project Manager, or Billing, predefined policies will be applied to the user based on their role.

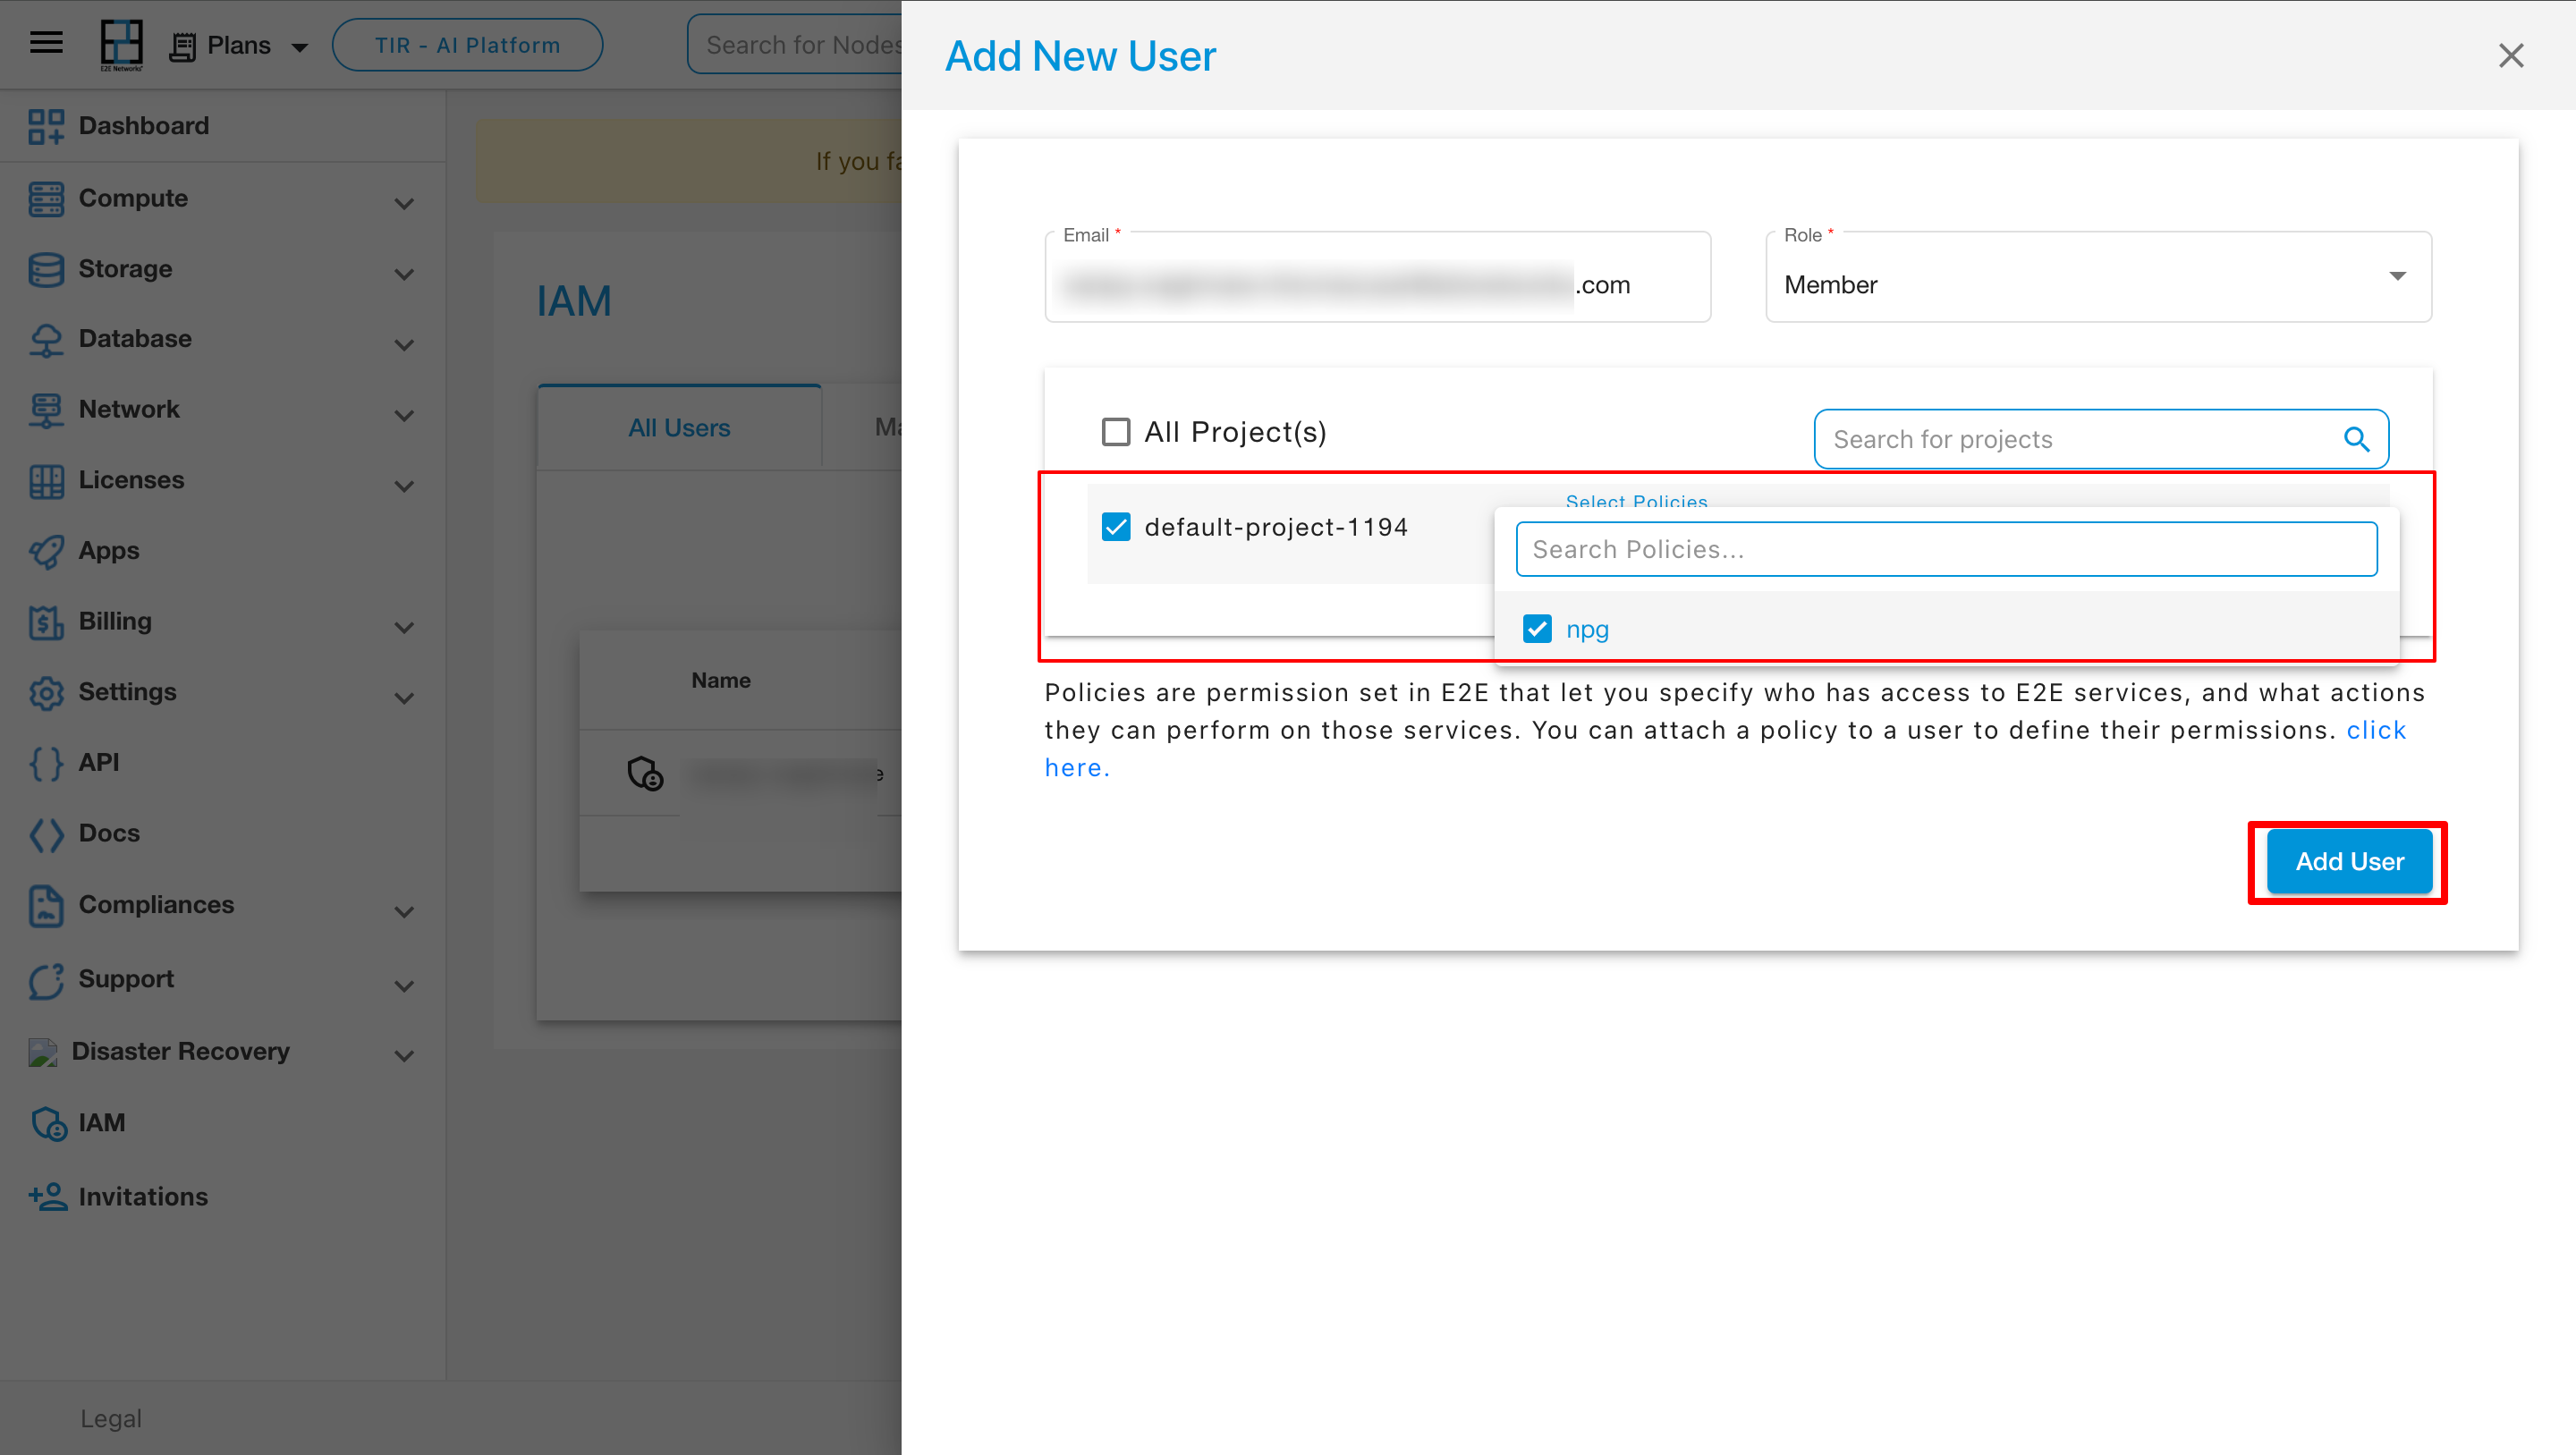
After selecting all the parameters then click on Add User
Note
In the absence of an available policy in the project, you must initially add a custom policy to the project.
If you choose the role of “Member,” all available projects will be displayed below. After selecting a specific project, you can then assign one or more policies to that user
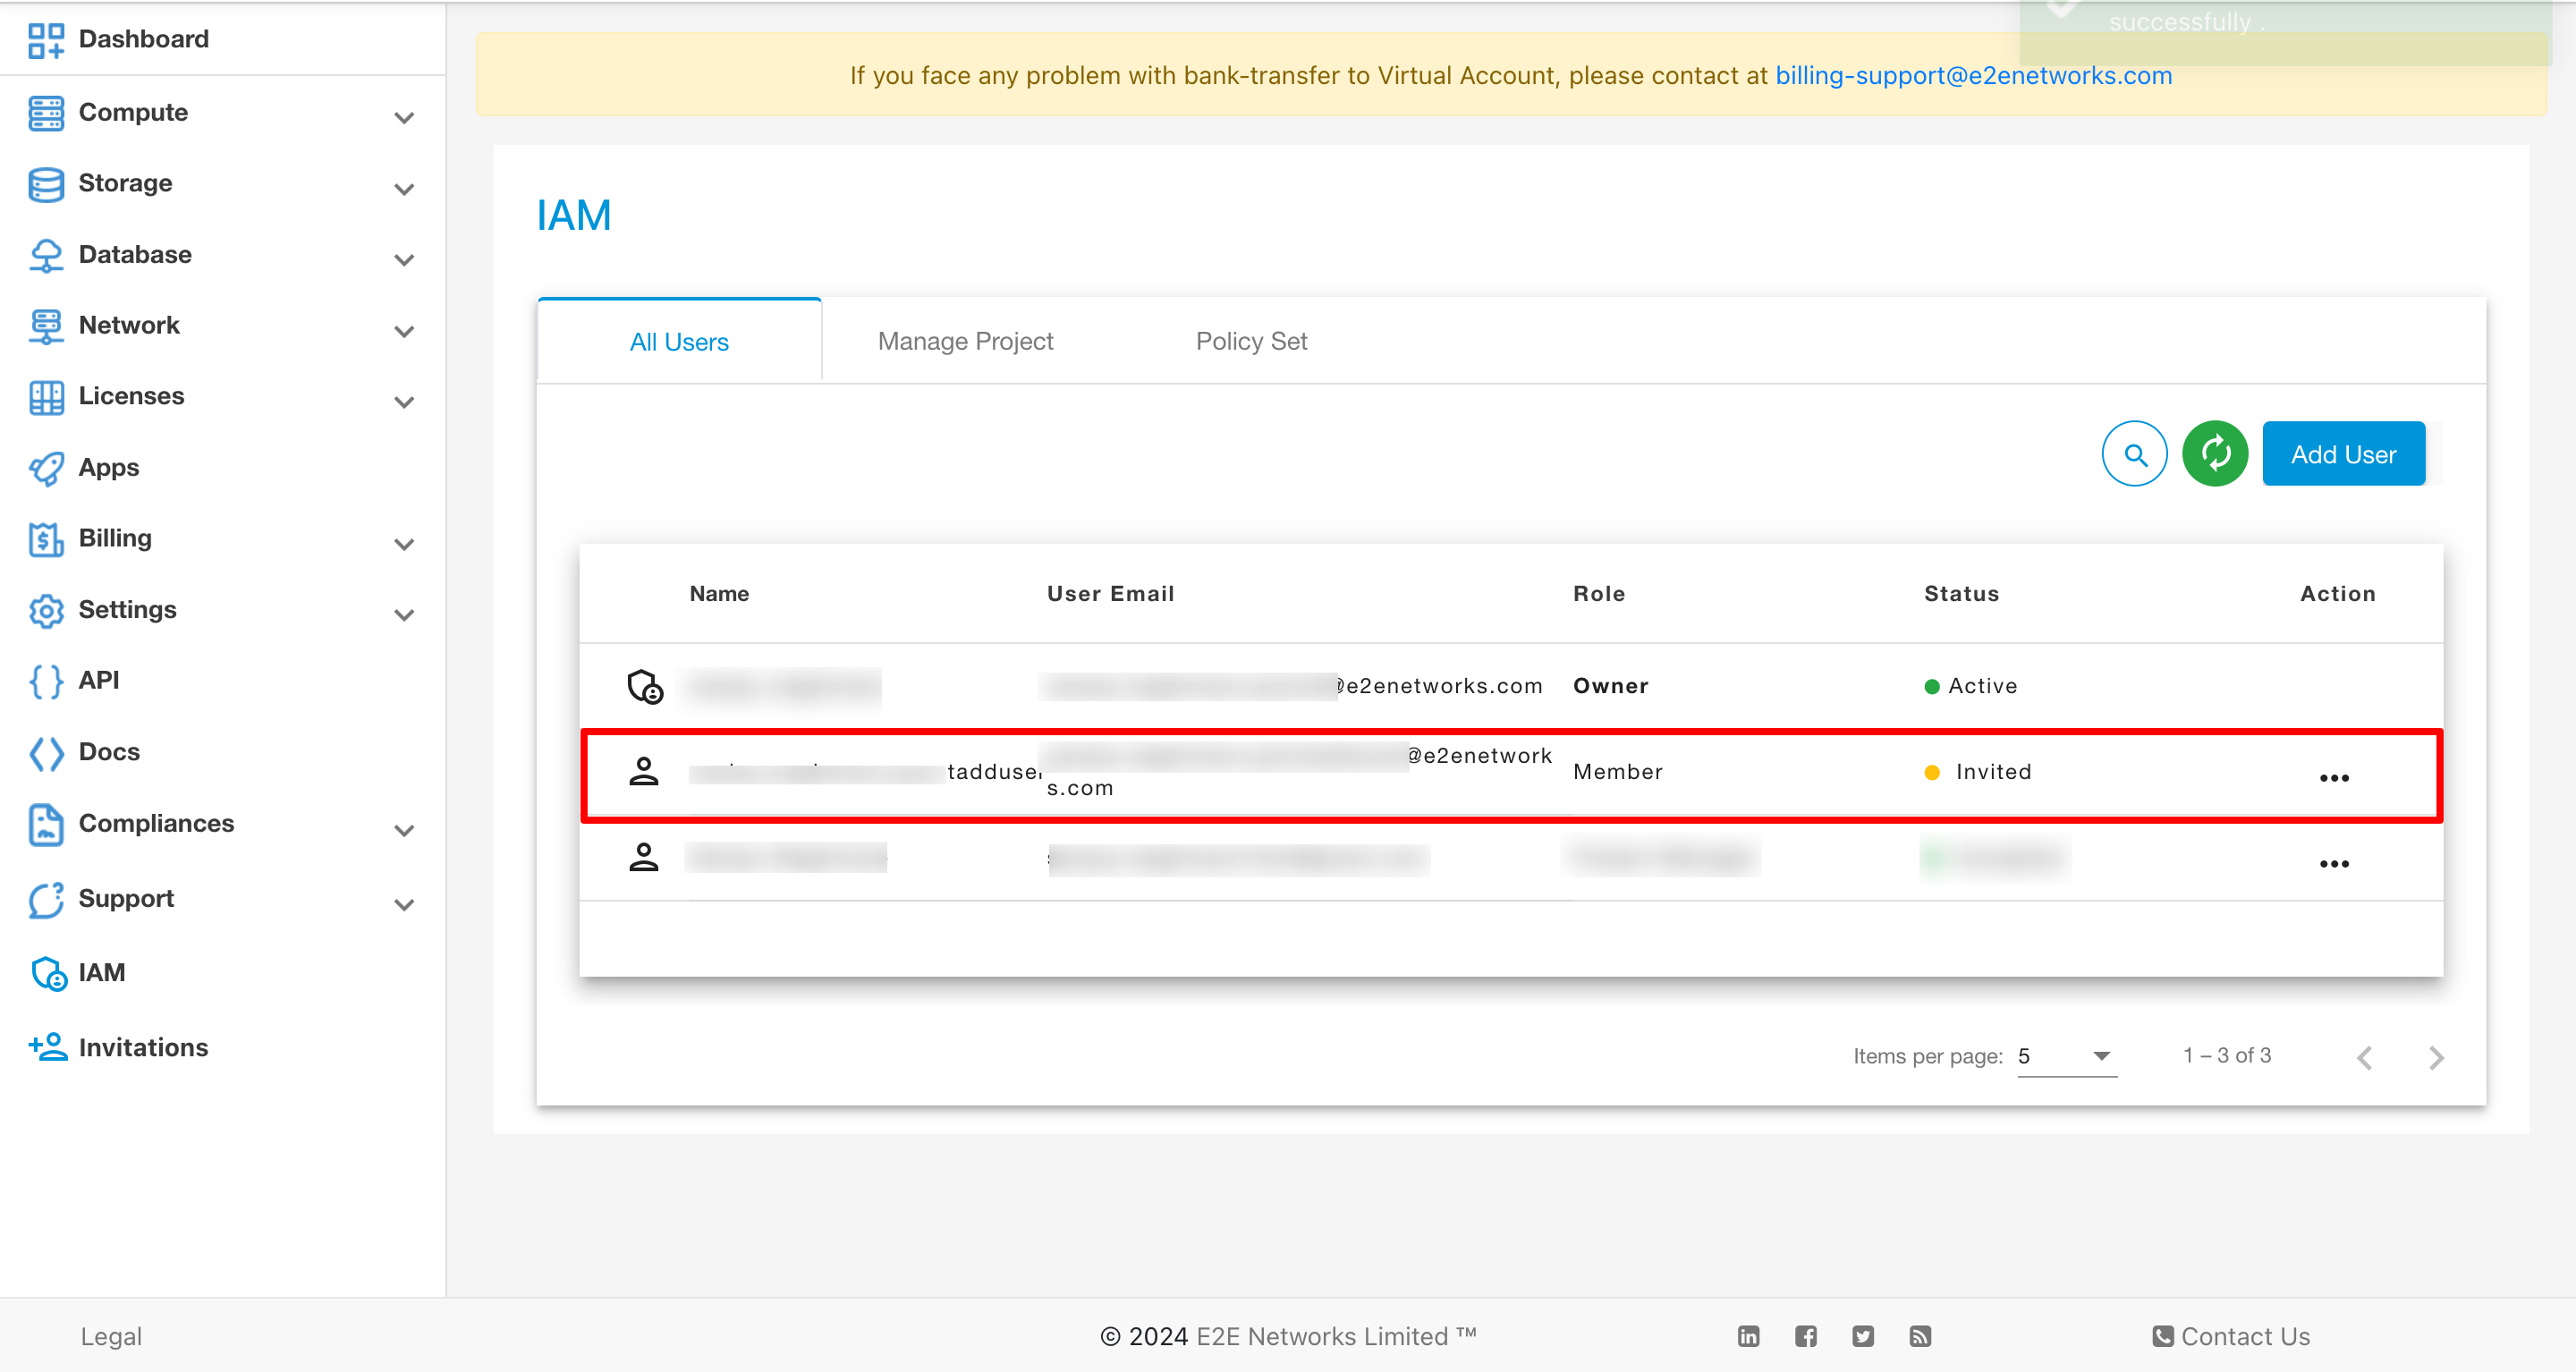
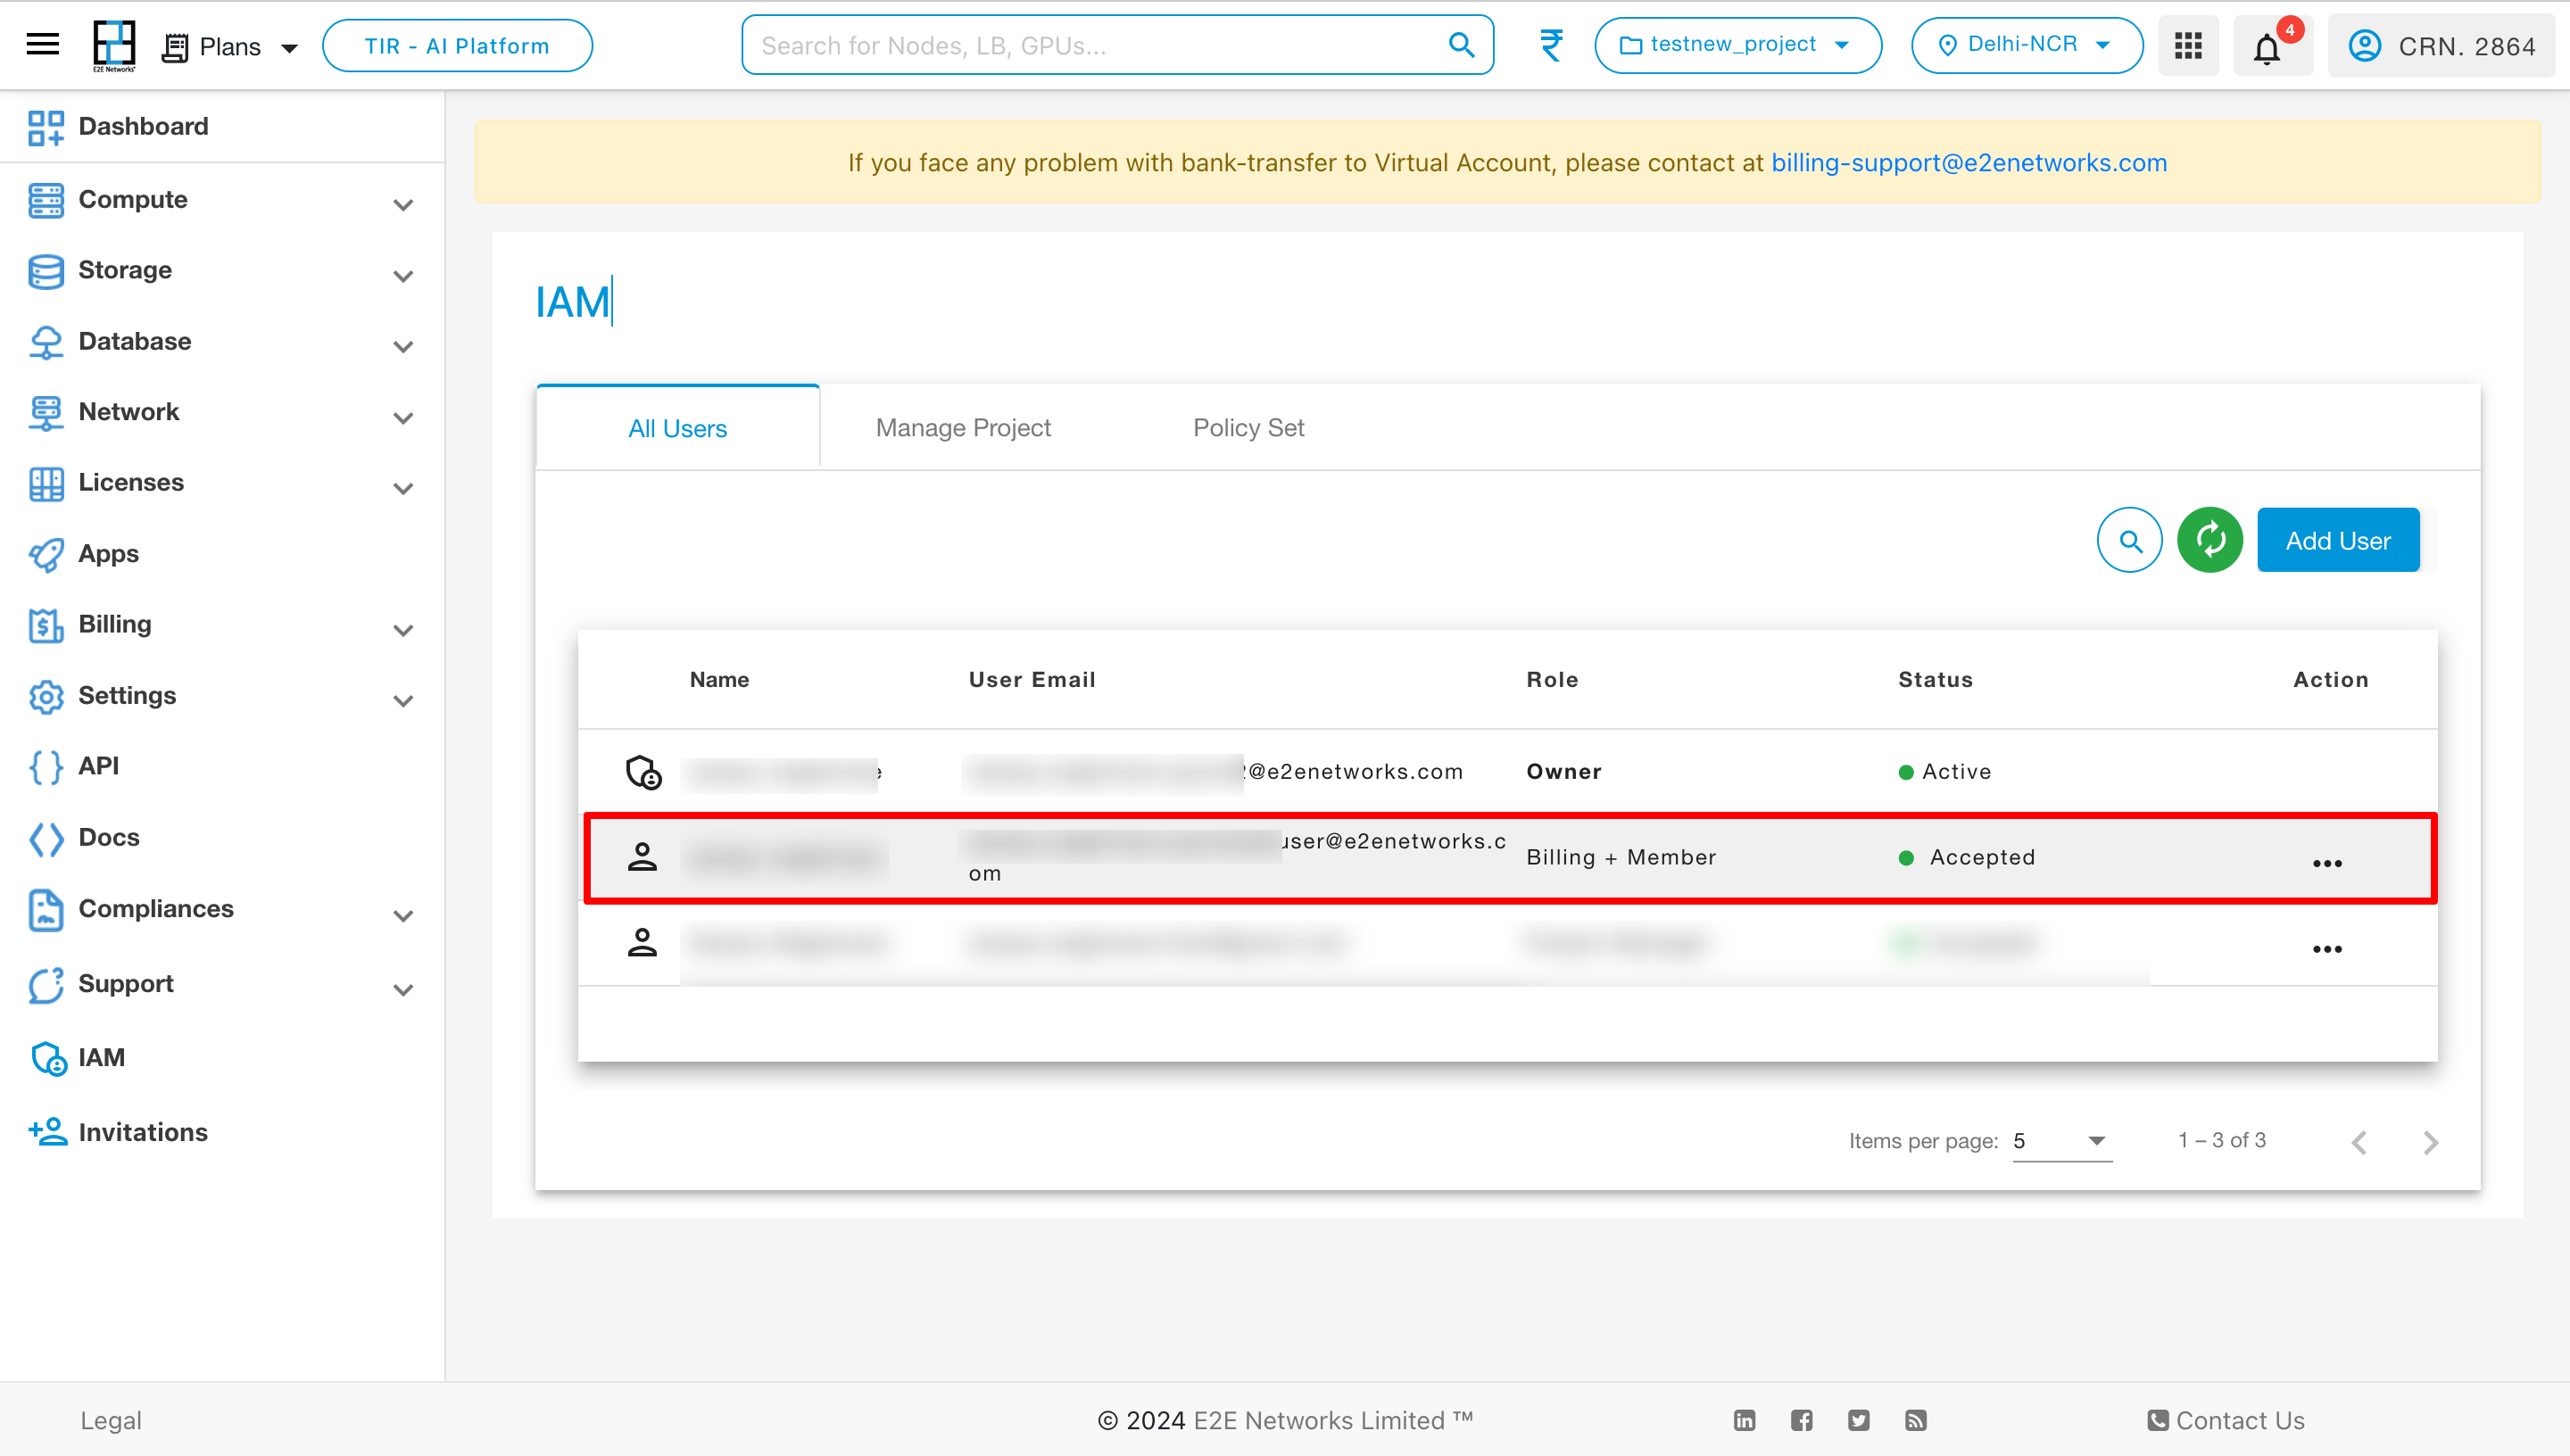
Upon selecting “Add User,” the user will appear in the IAM page under the “All Users” section with the status set as ‘Invited.’ Subsequently, an invitation link will be sent to the user’s email address. Upon clicking the link, a registration form will be presented for completion.
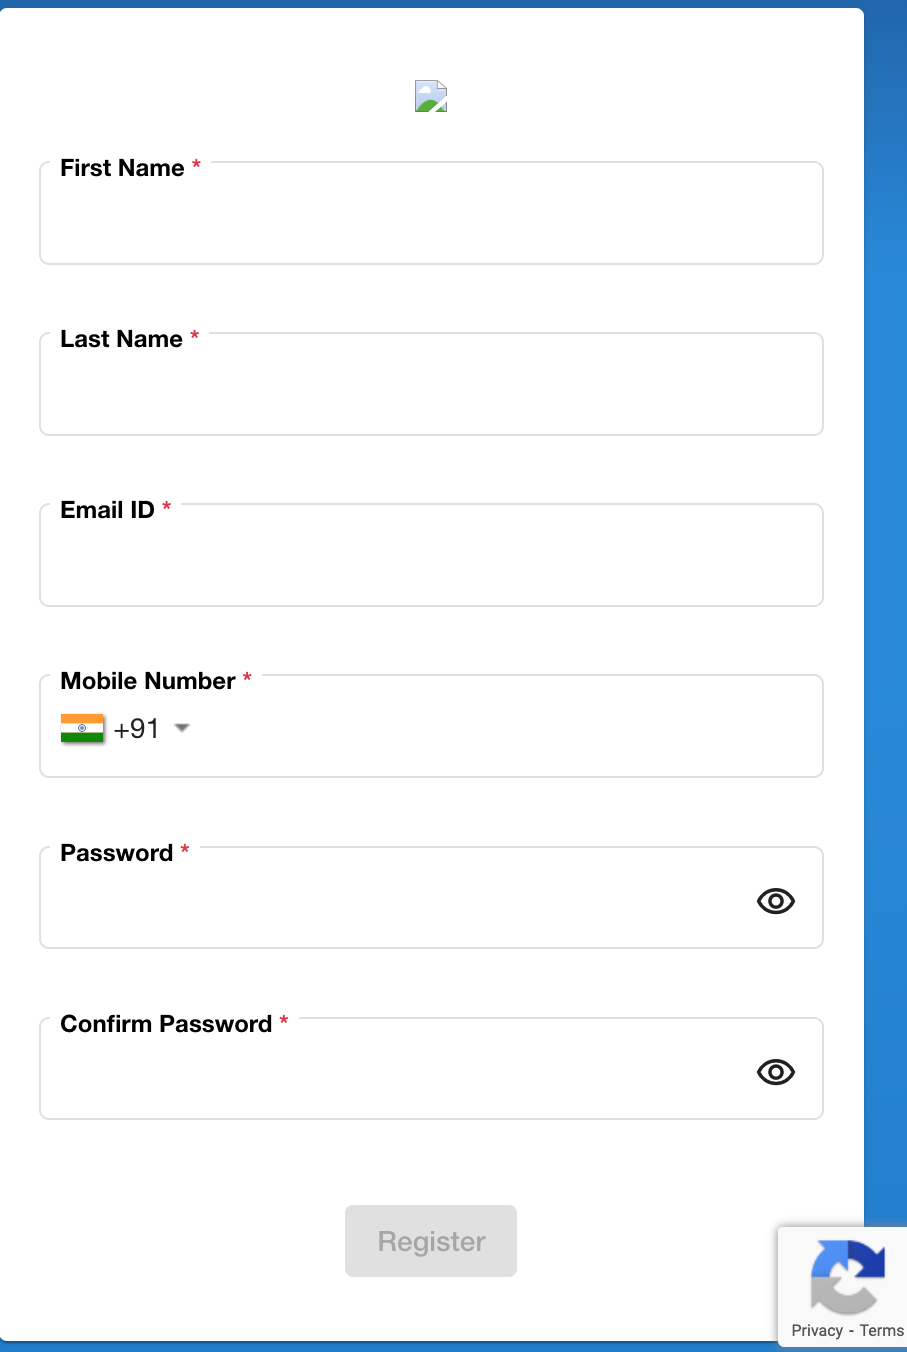
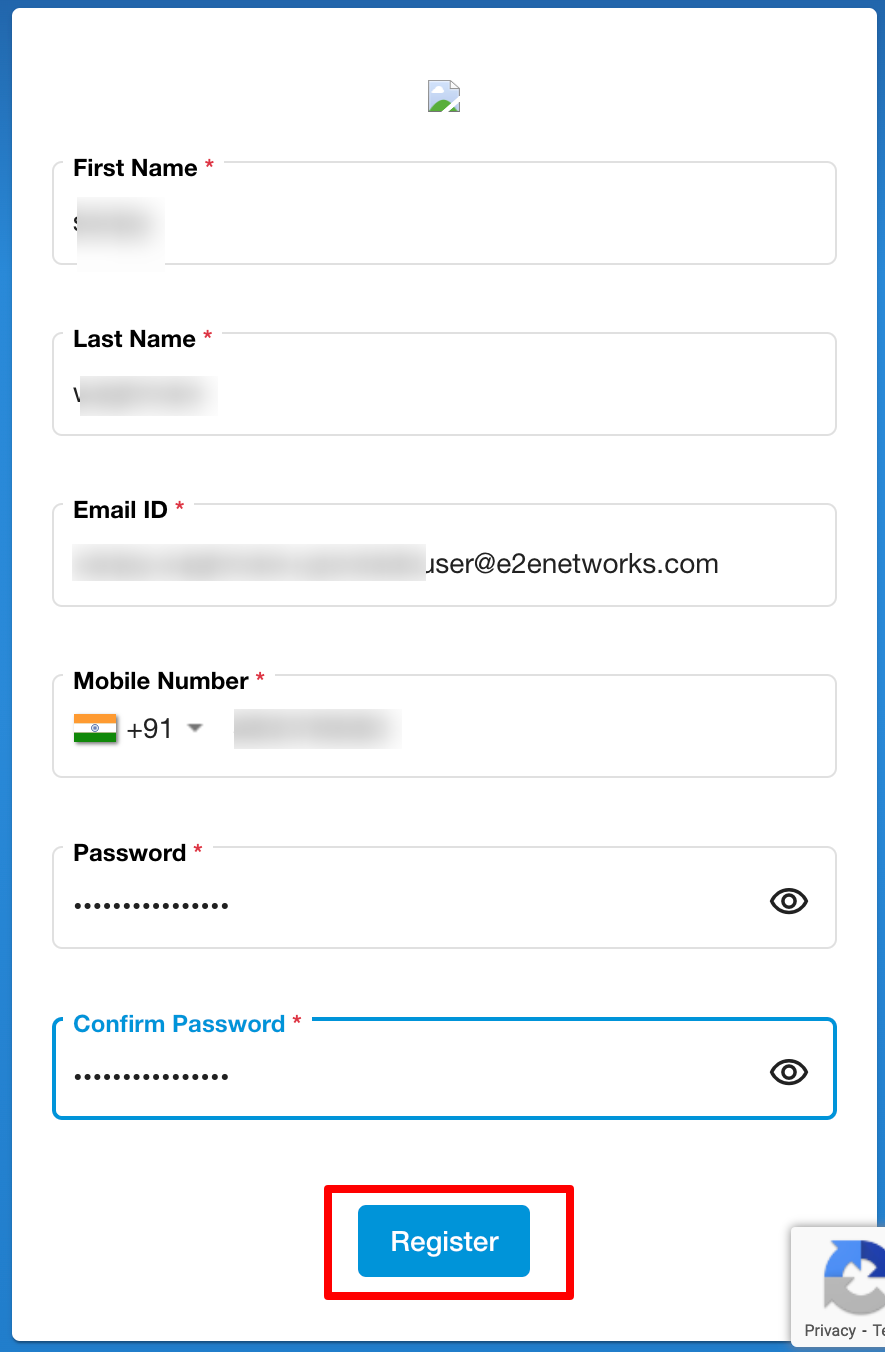
Upon completing all the required details in the registration form, the user will be successfully registered. Following registration, the customer must log in using their provided credentials.
Note
If the customer is an existing user on the E2E platform, they will find the invitation in the Invitation section on the Dashboard.
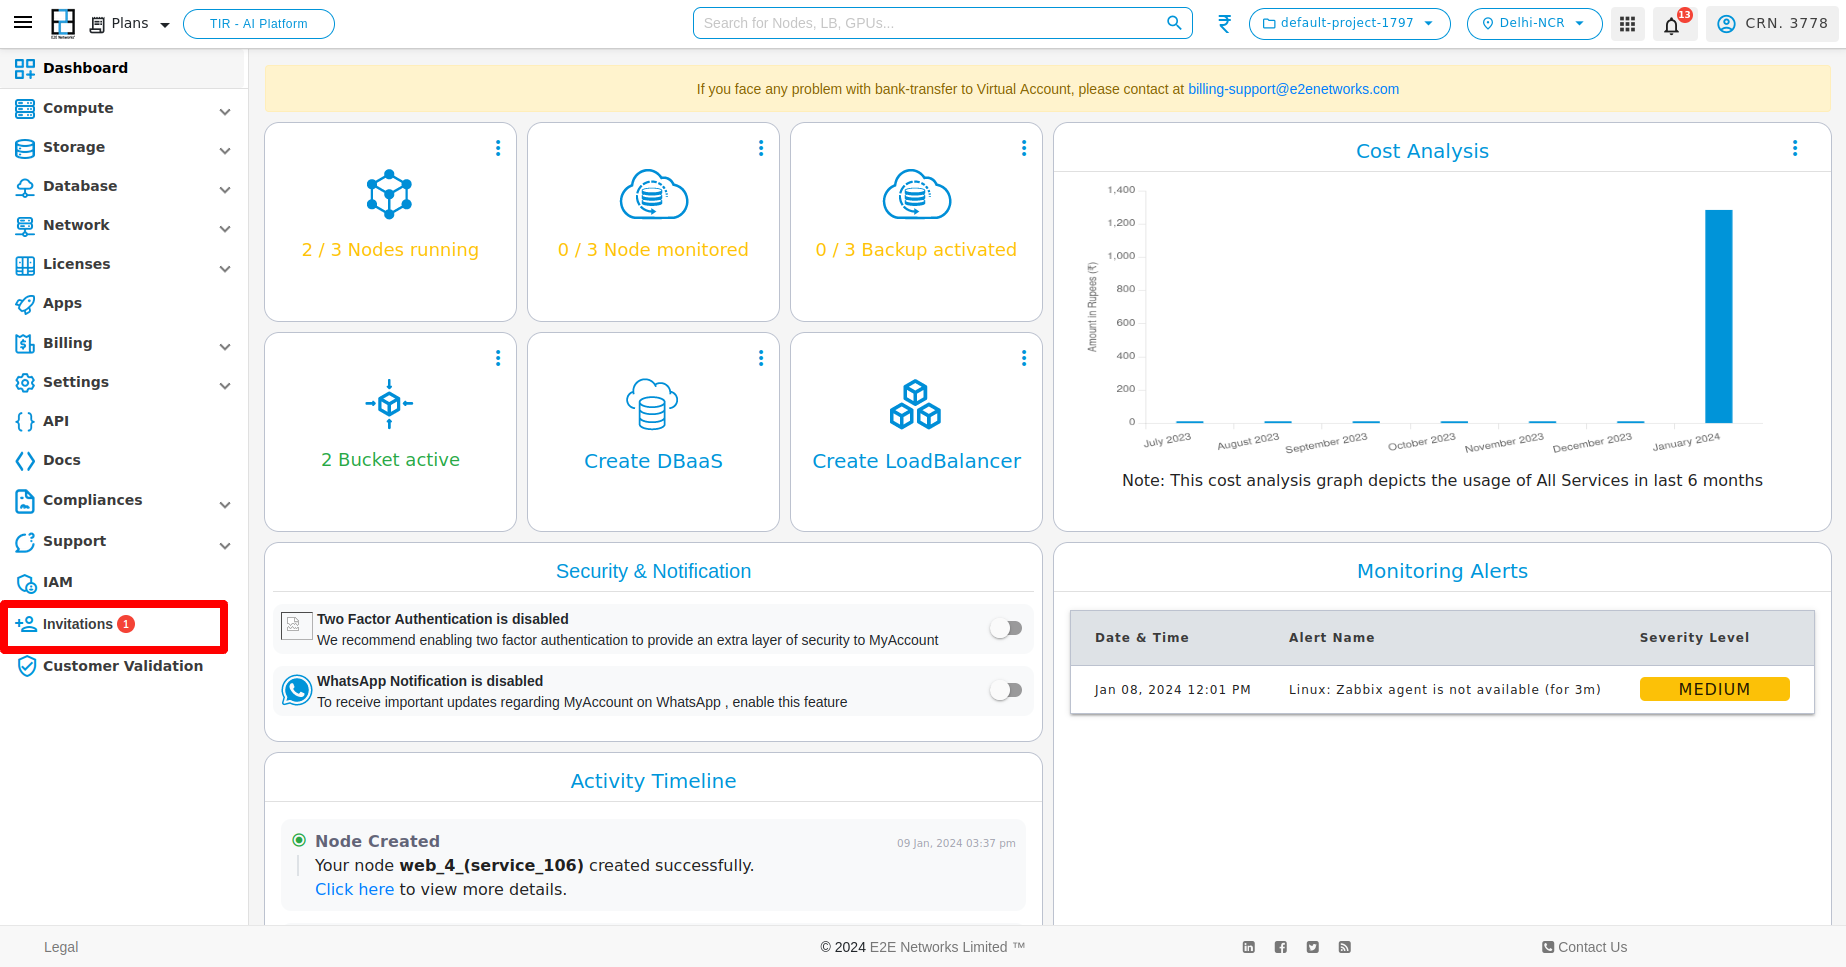
Upon selecting the Invitation button, the Invitation page will be displayed.

On the Manage Invitations page, you can view the invitations received and take actions such as accepting or declining them based on your preference. Upon accepting the invitation, the user will appear in the All User list with their assigned role.
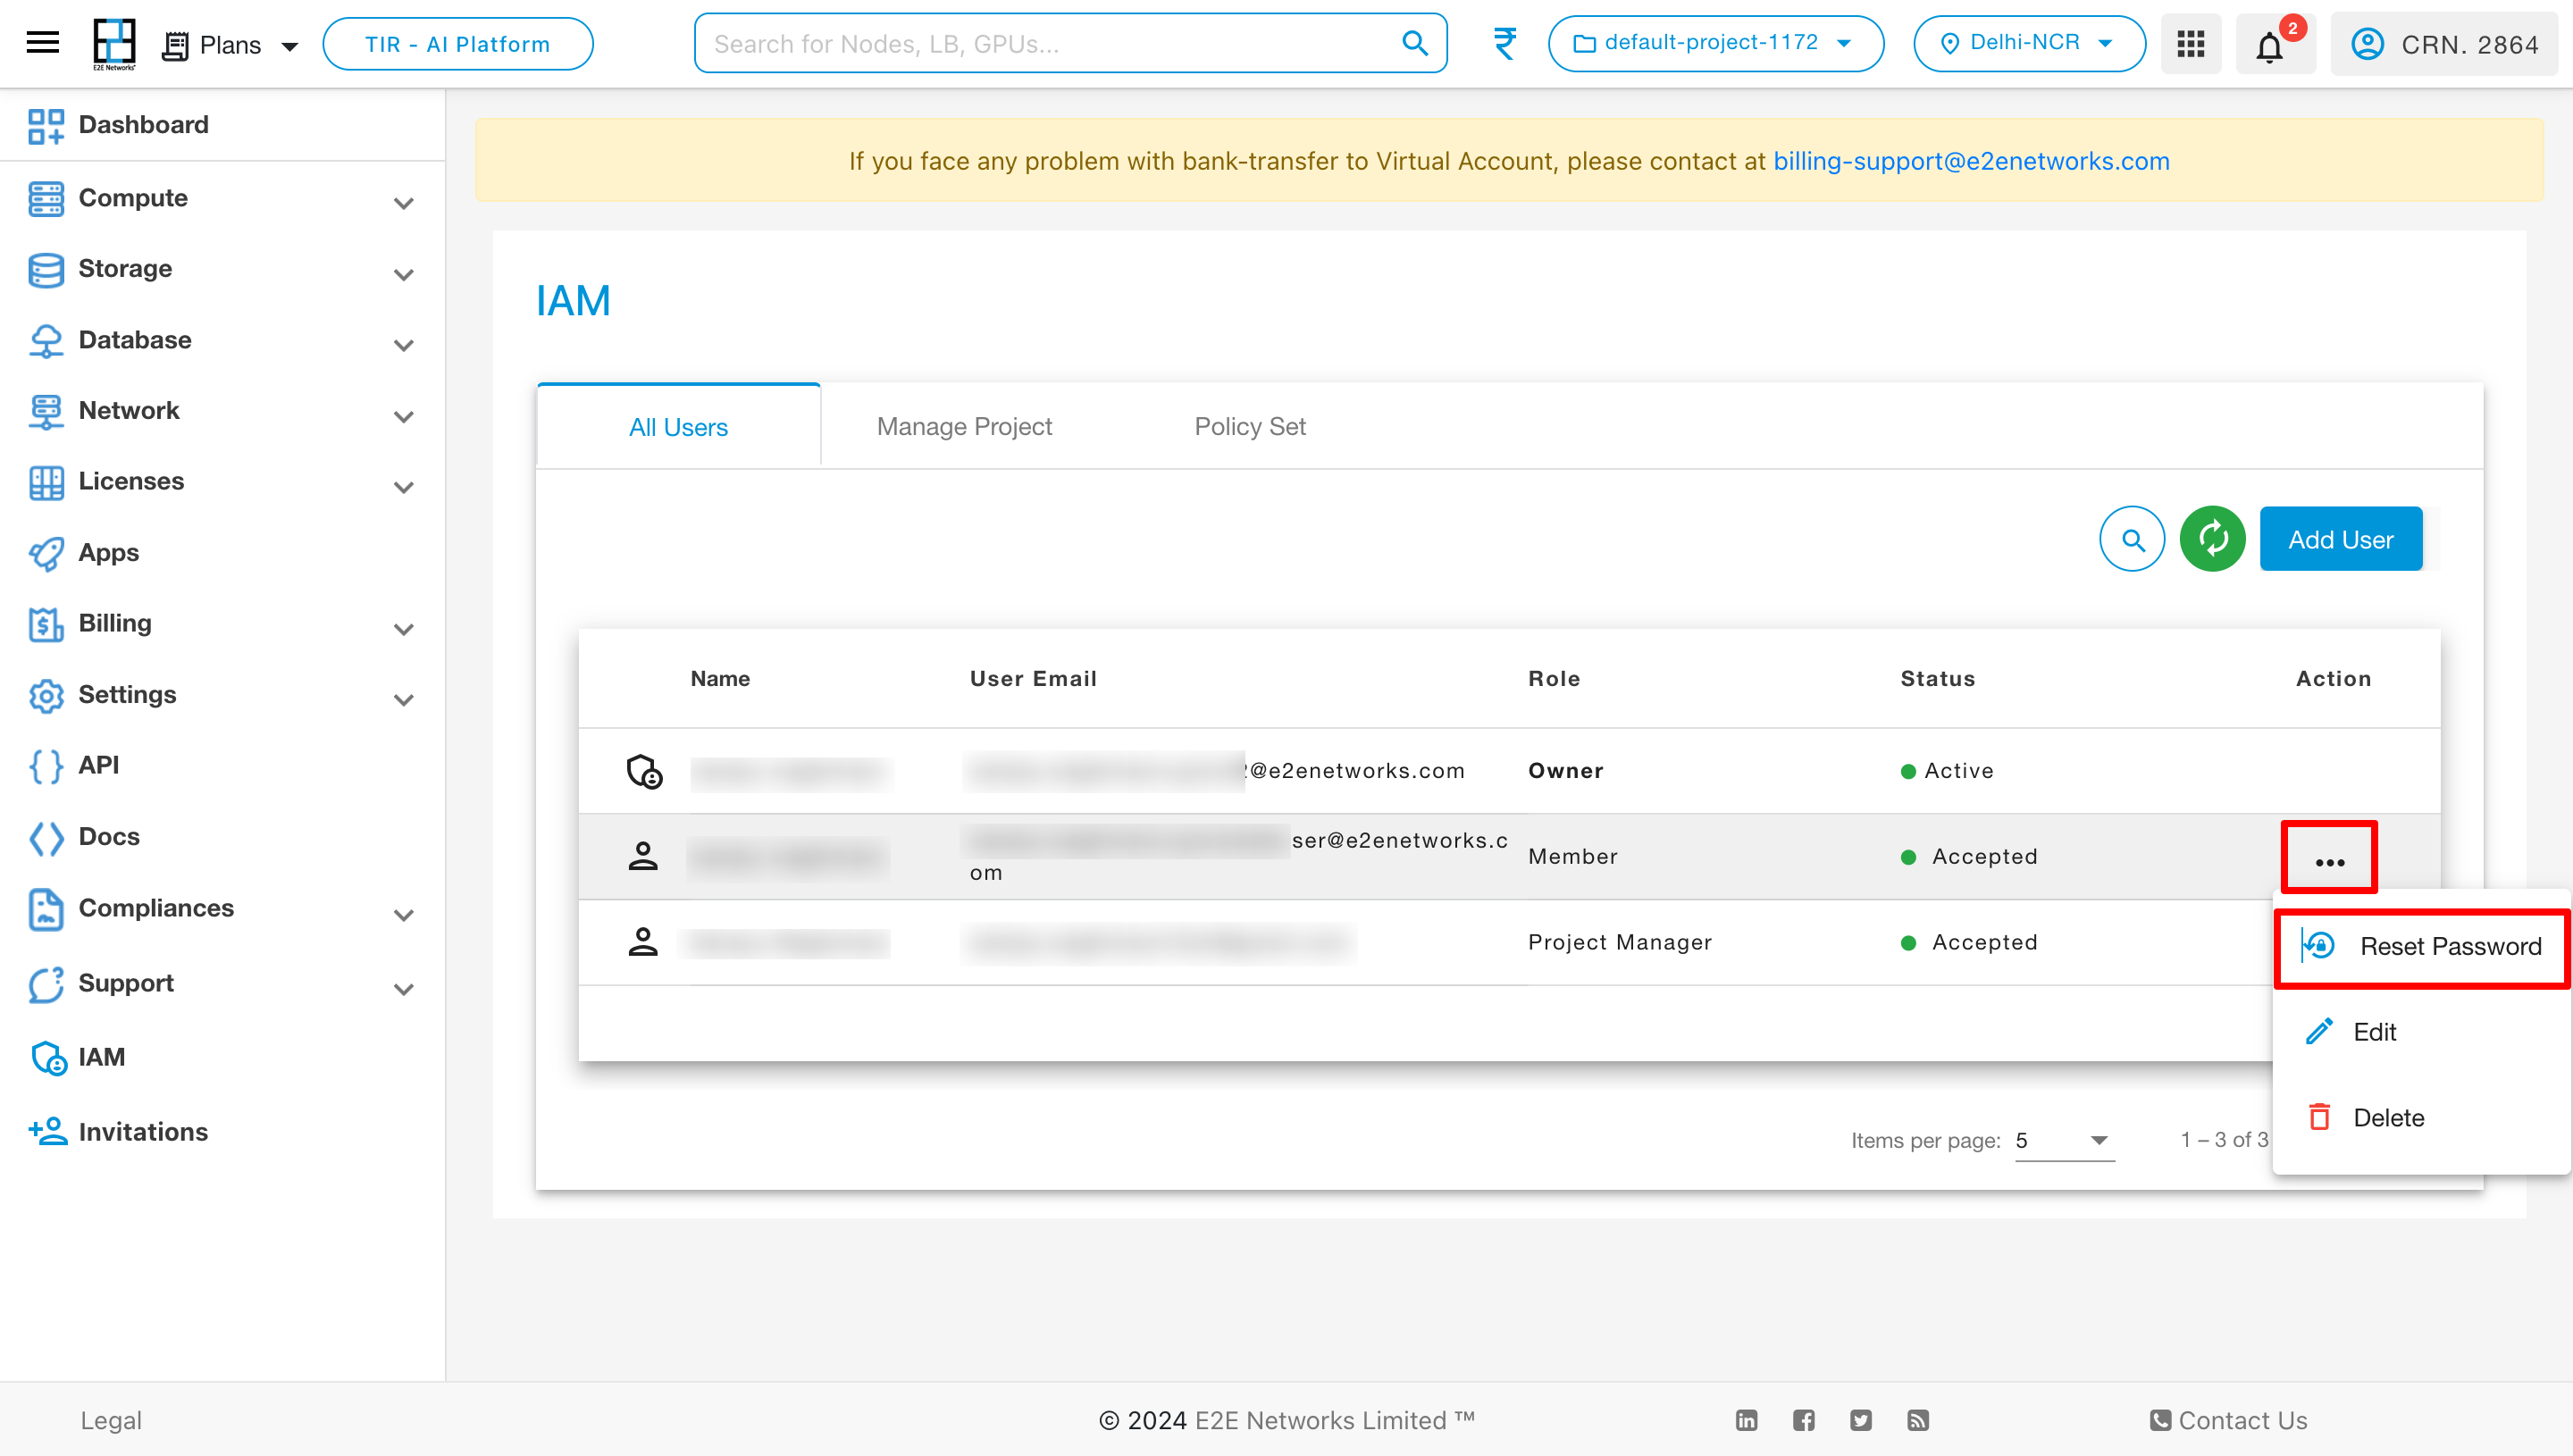
Actions
Reset Password:
Click on the “Reset Password” action to reset a member’s password.
Edit Roles and Policies:
To modify the roles and policies of a member, click on the Edit action.
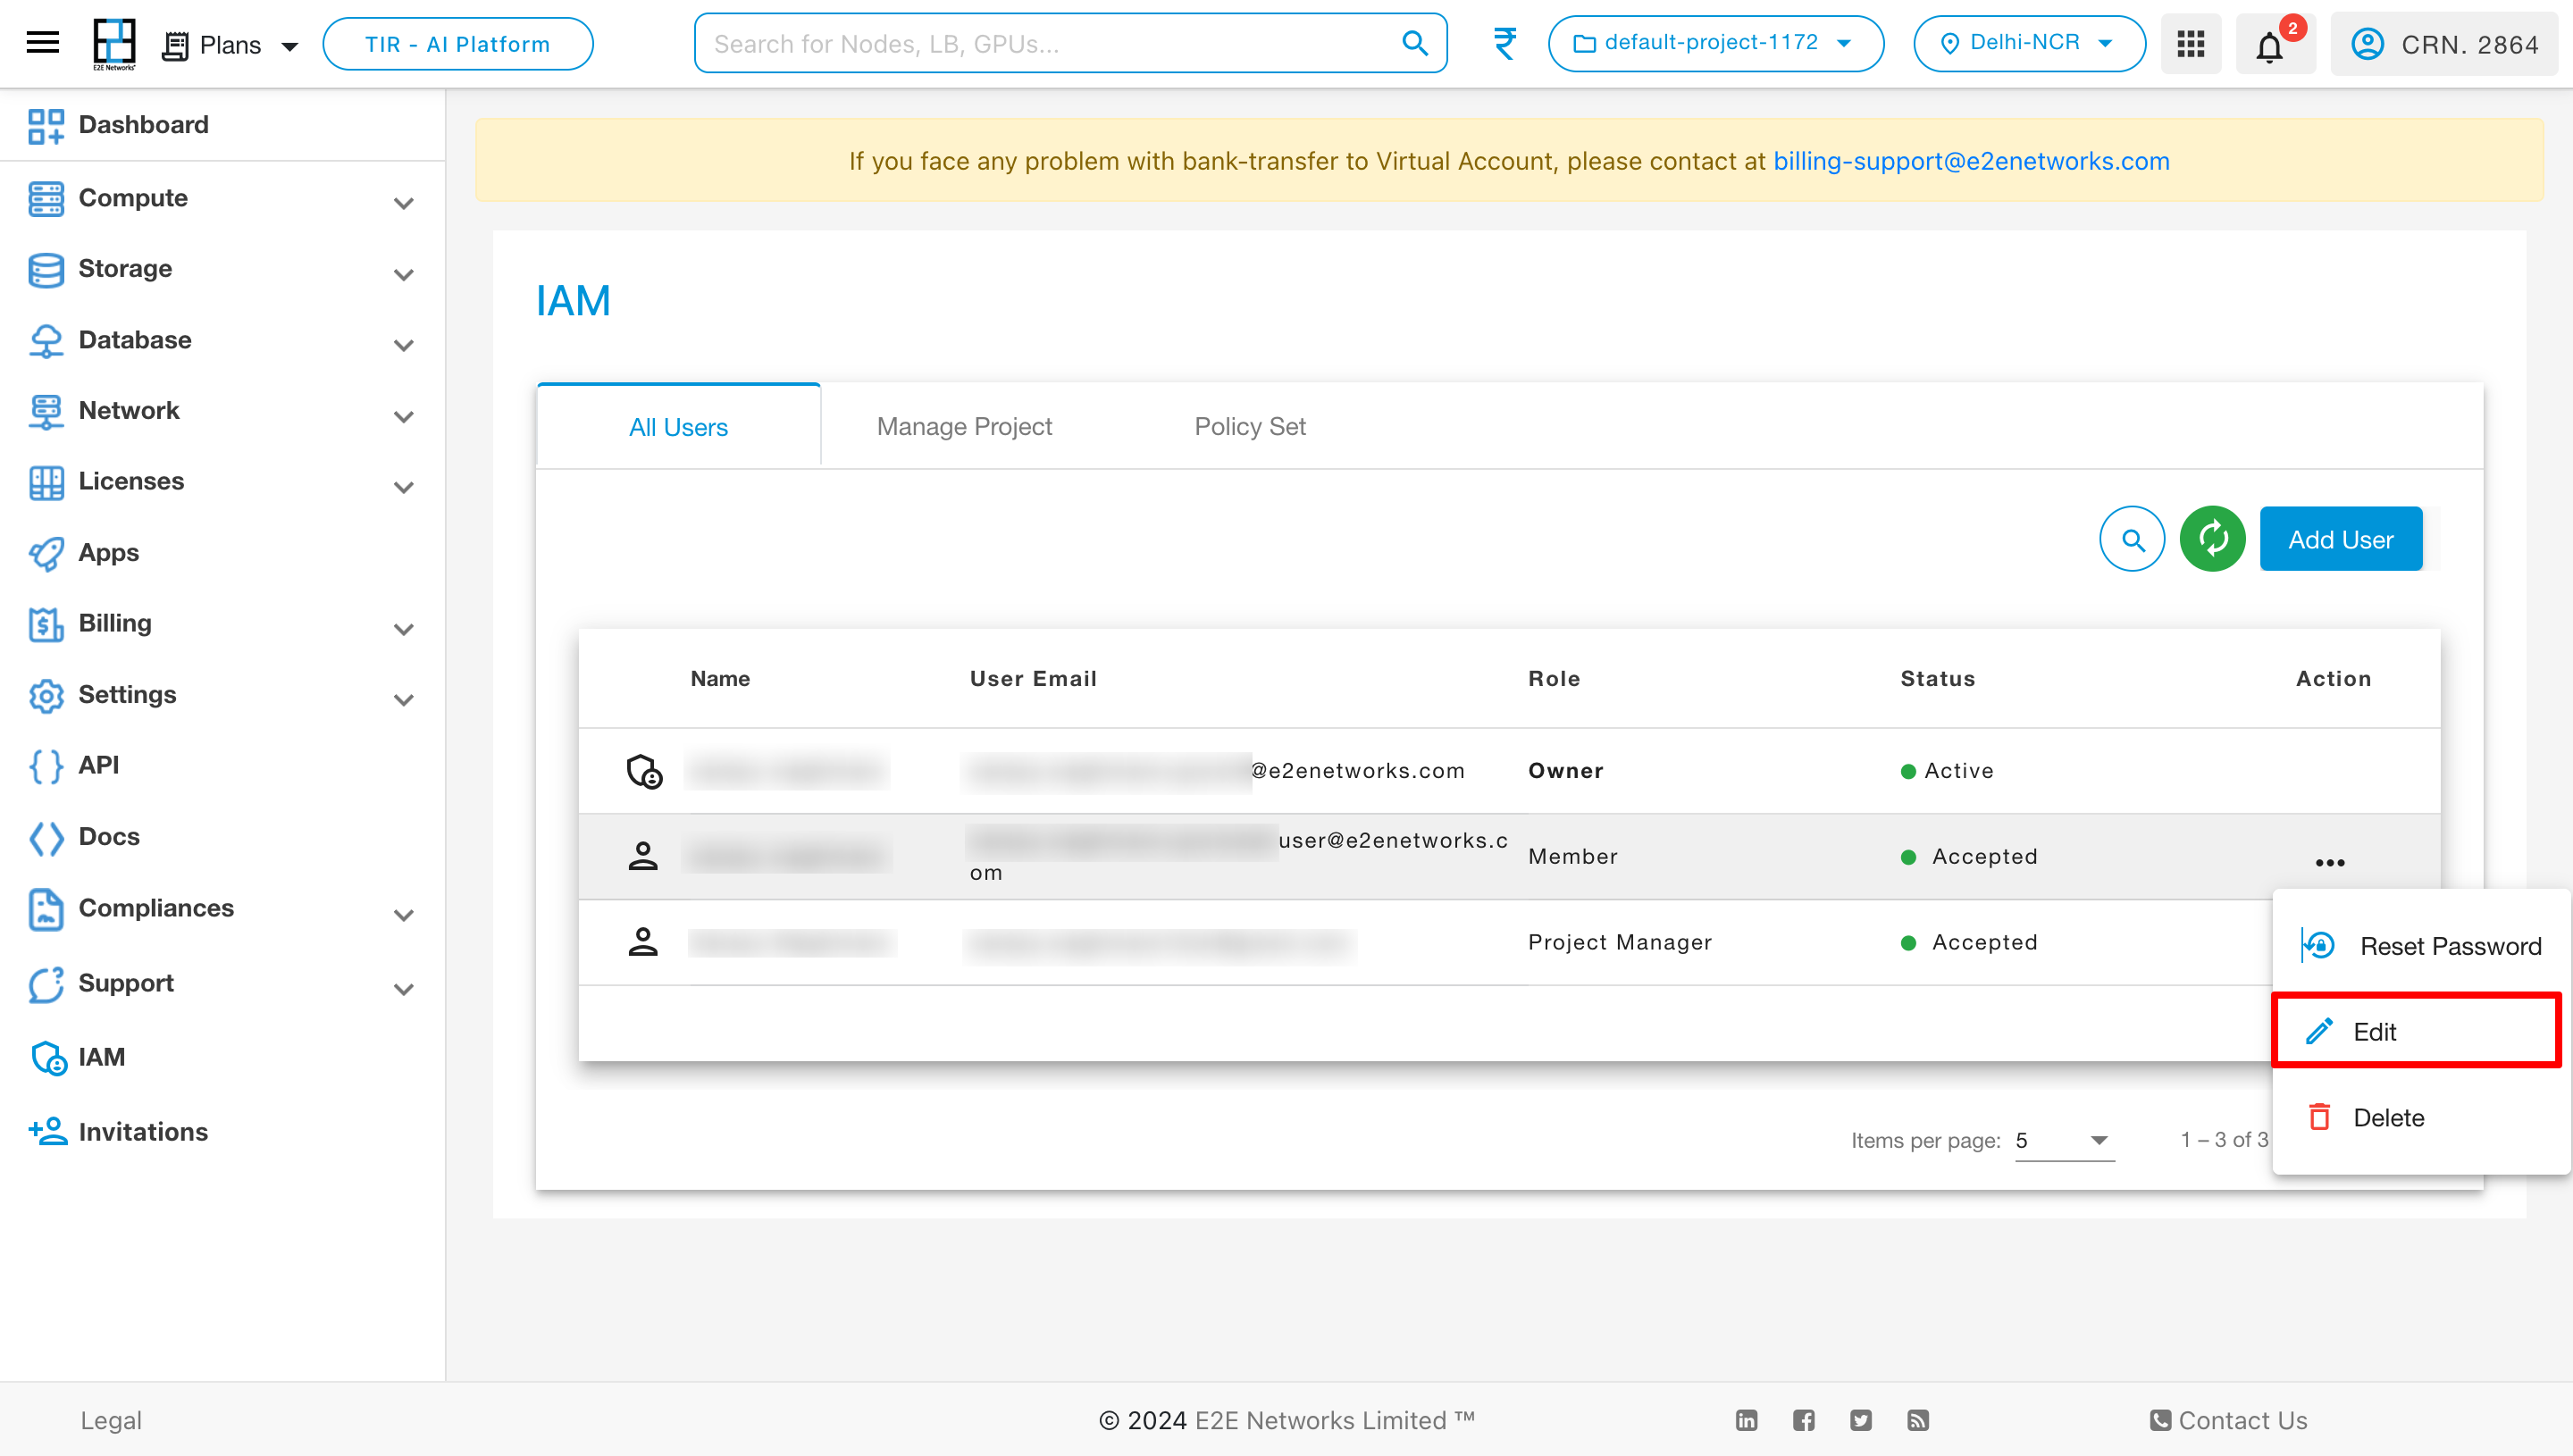
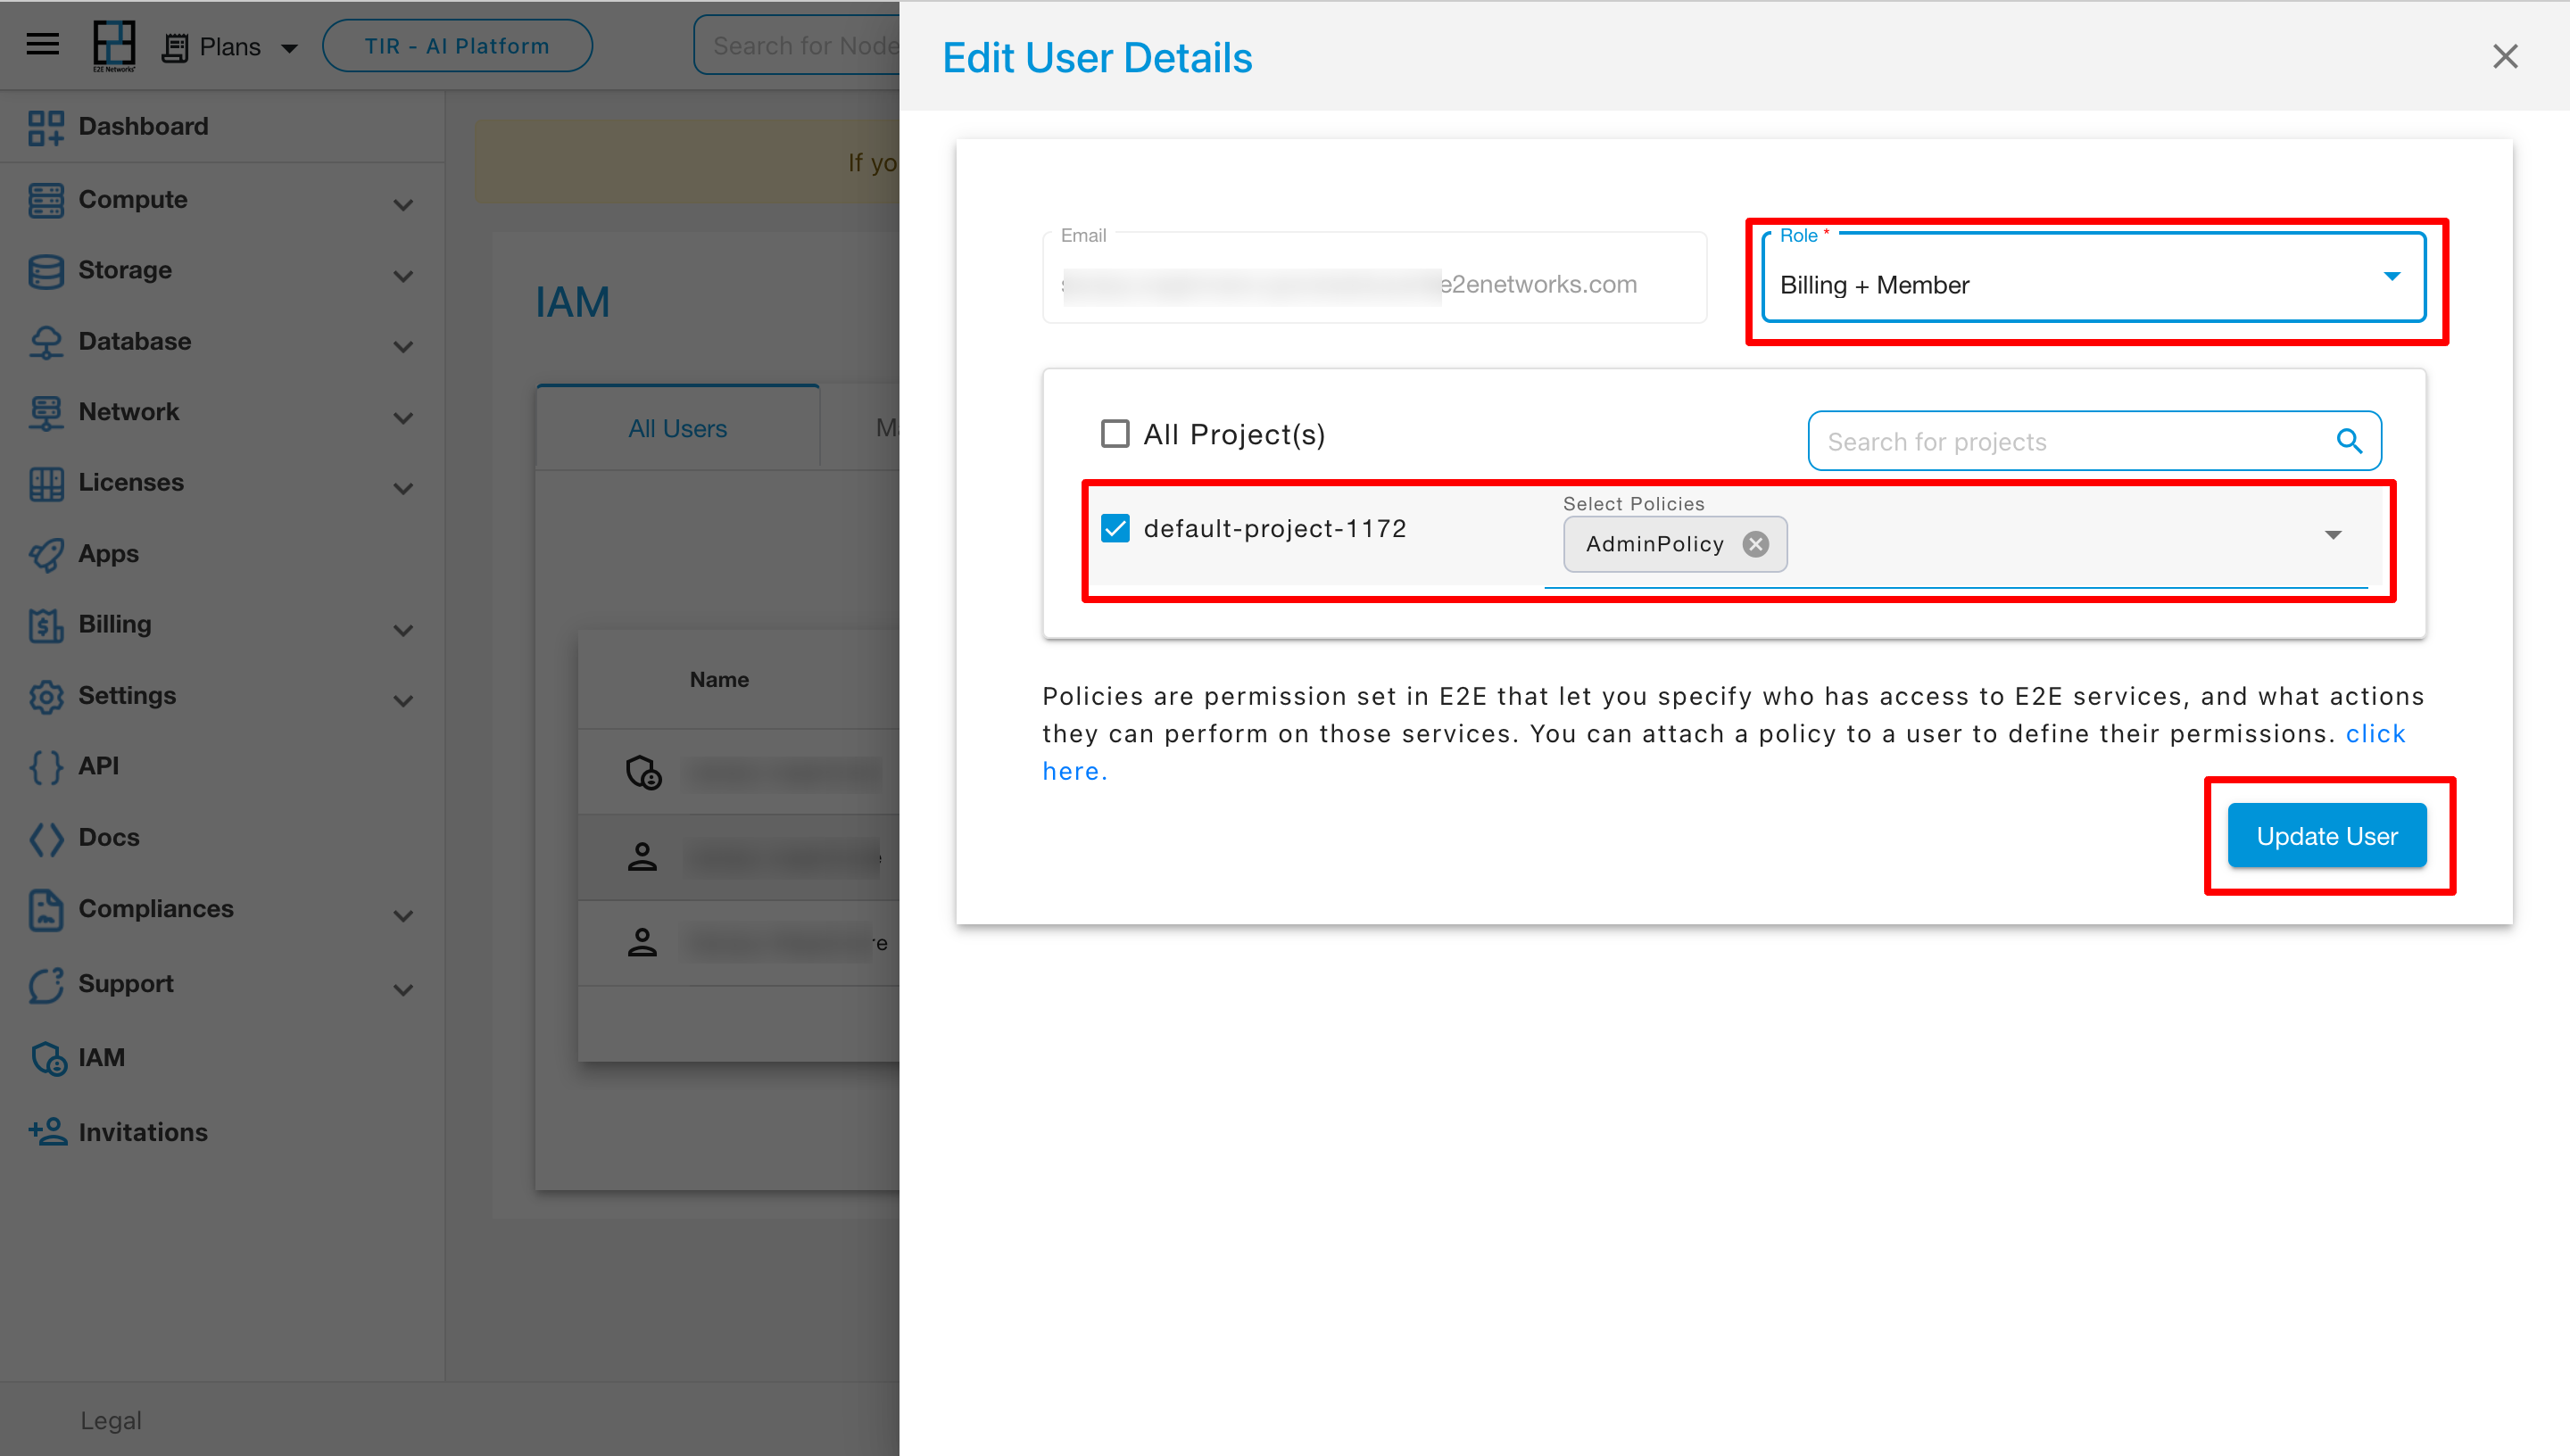
Once you have made the necessary changes, click on the “Update User” button to save the modifications.
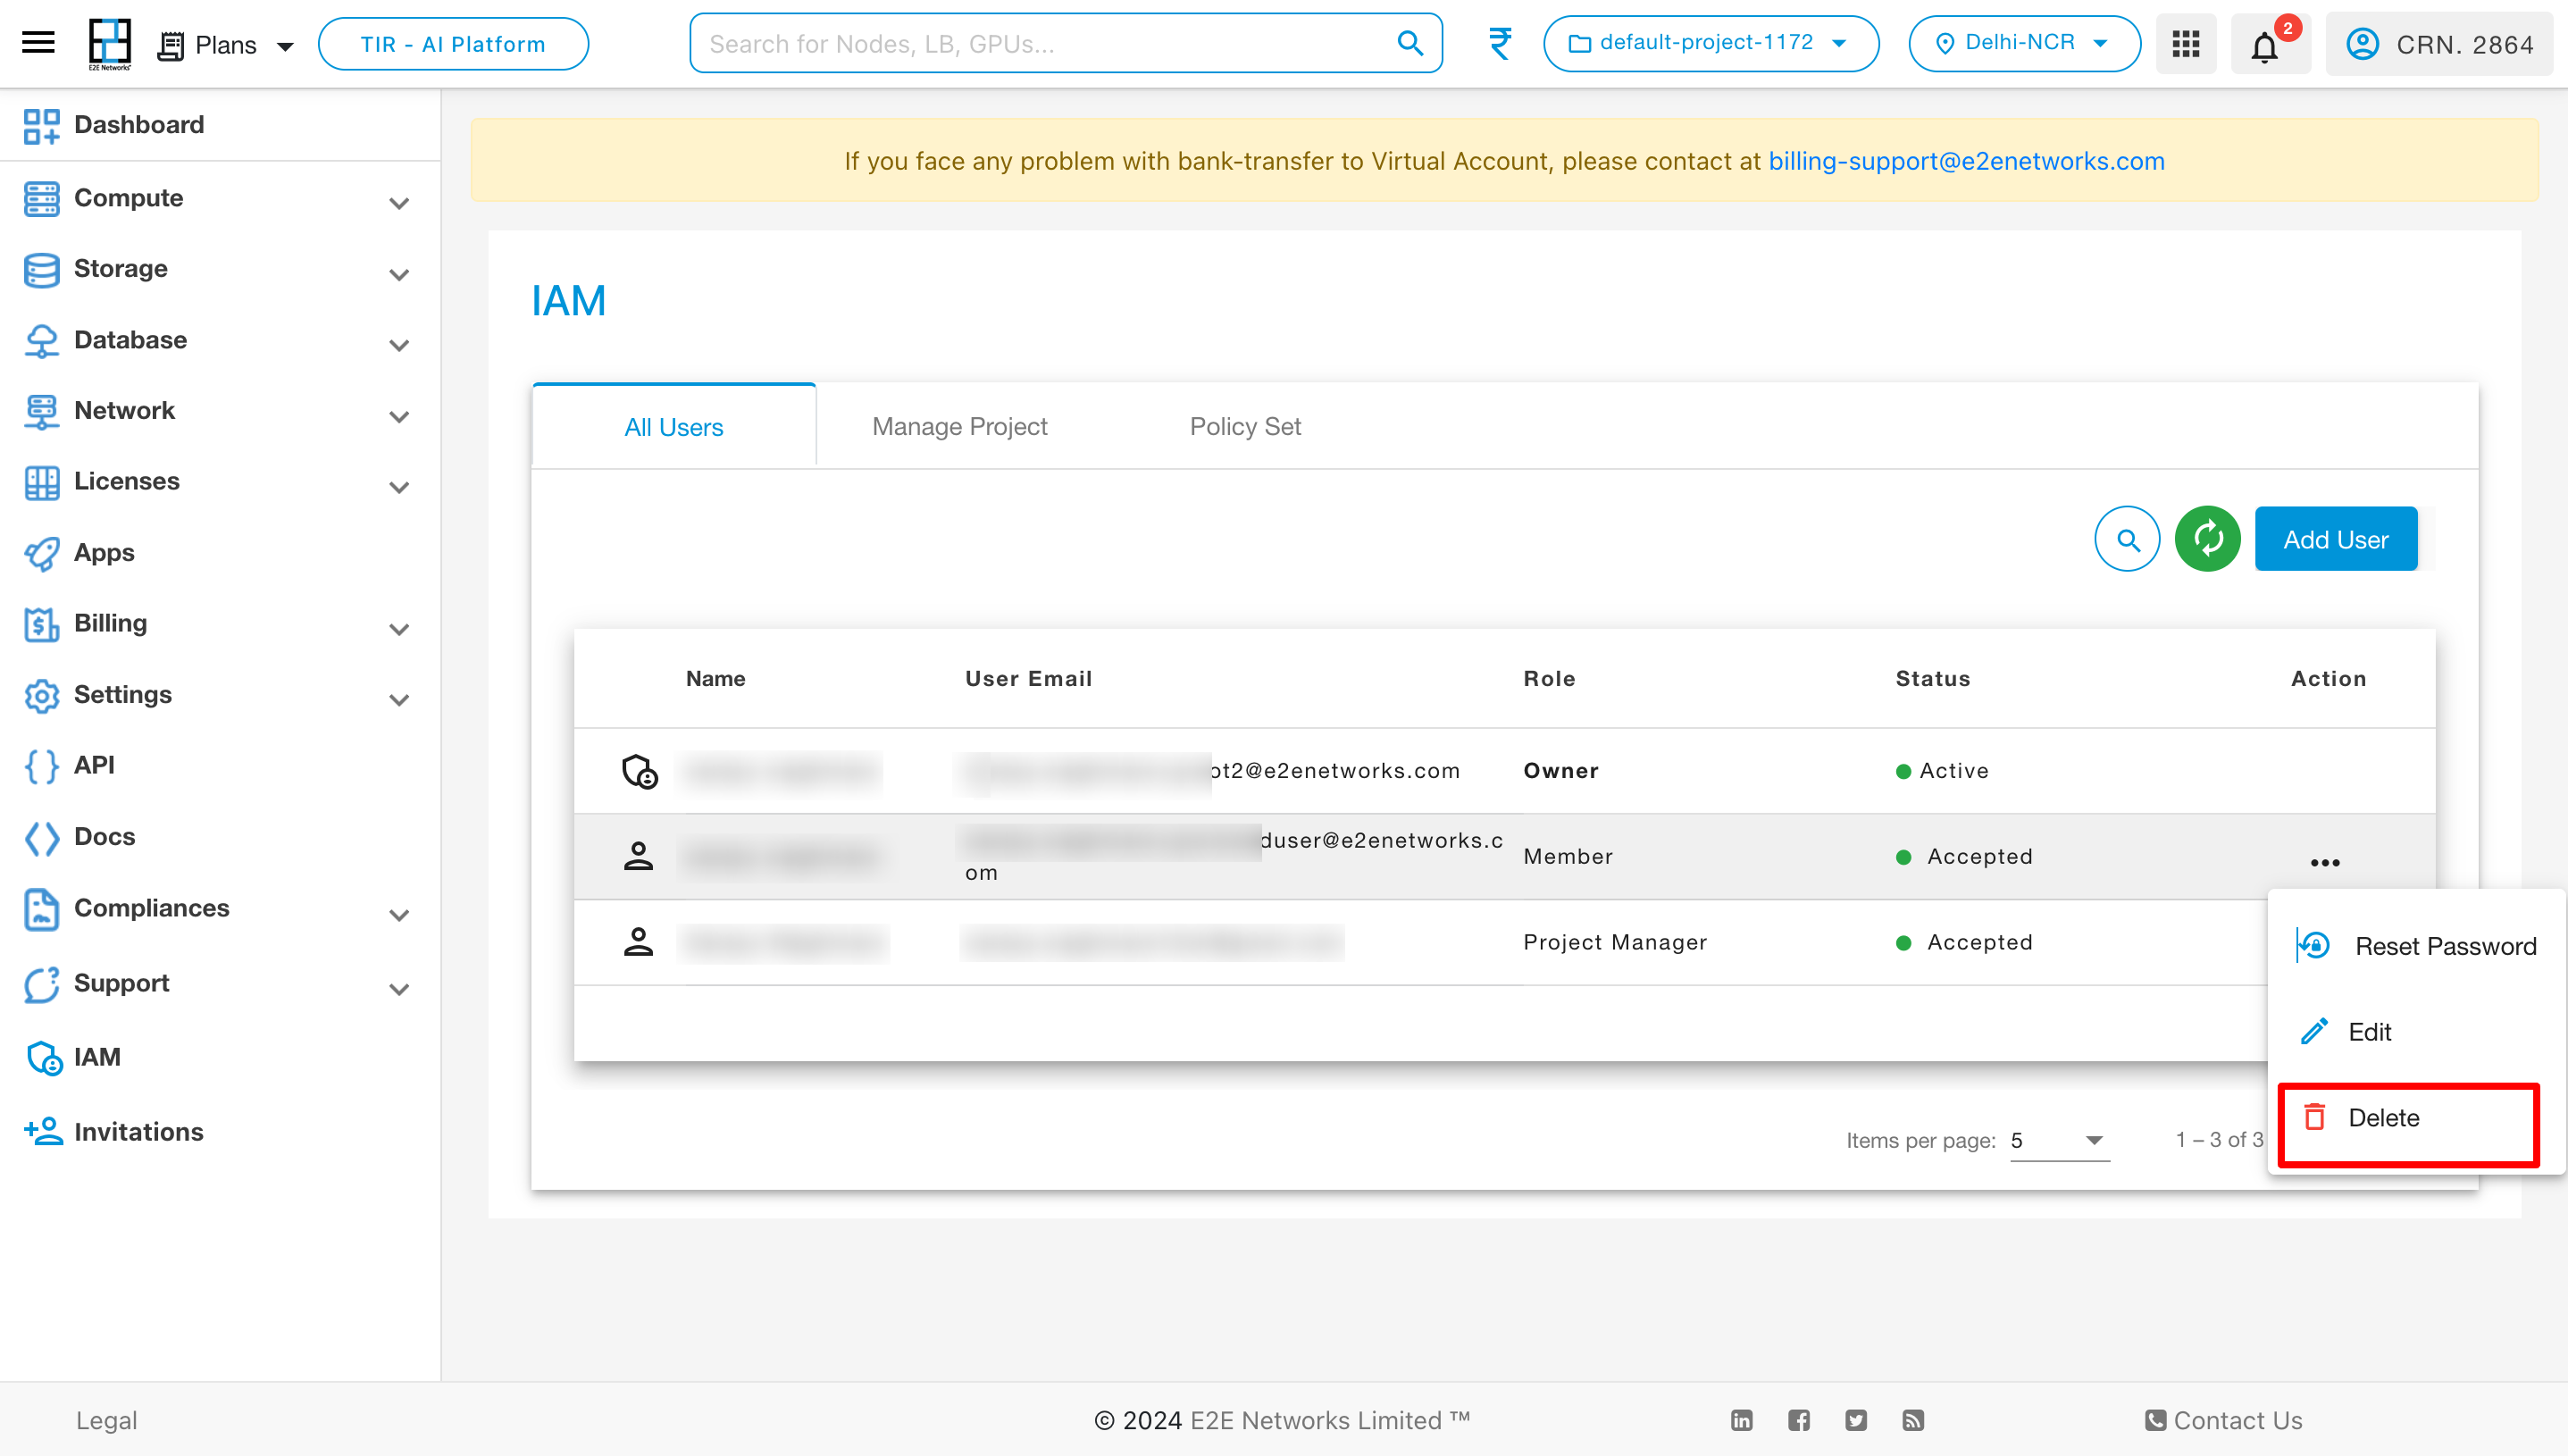
Delete User:
To remove a user, click on the Delete action.
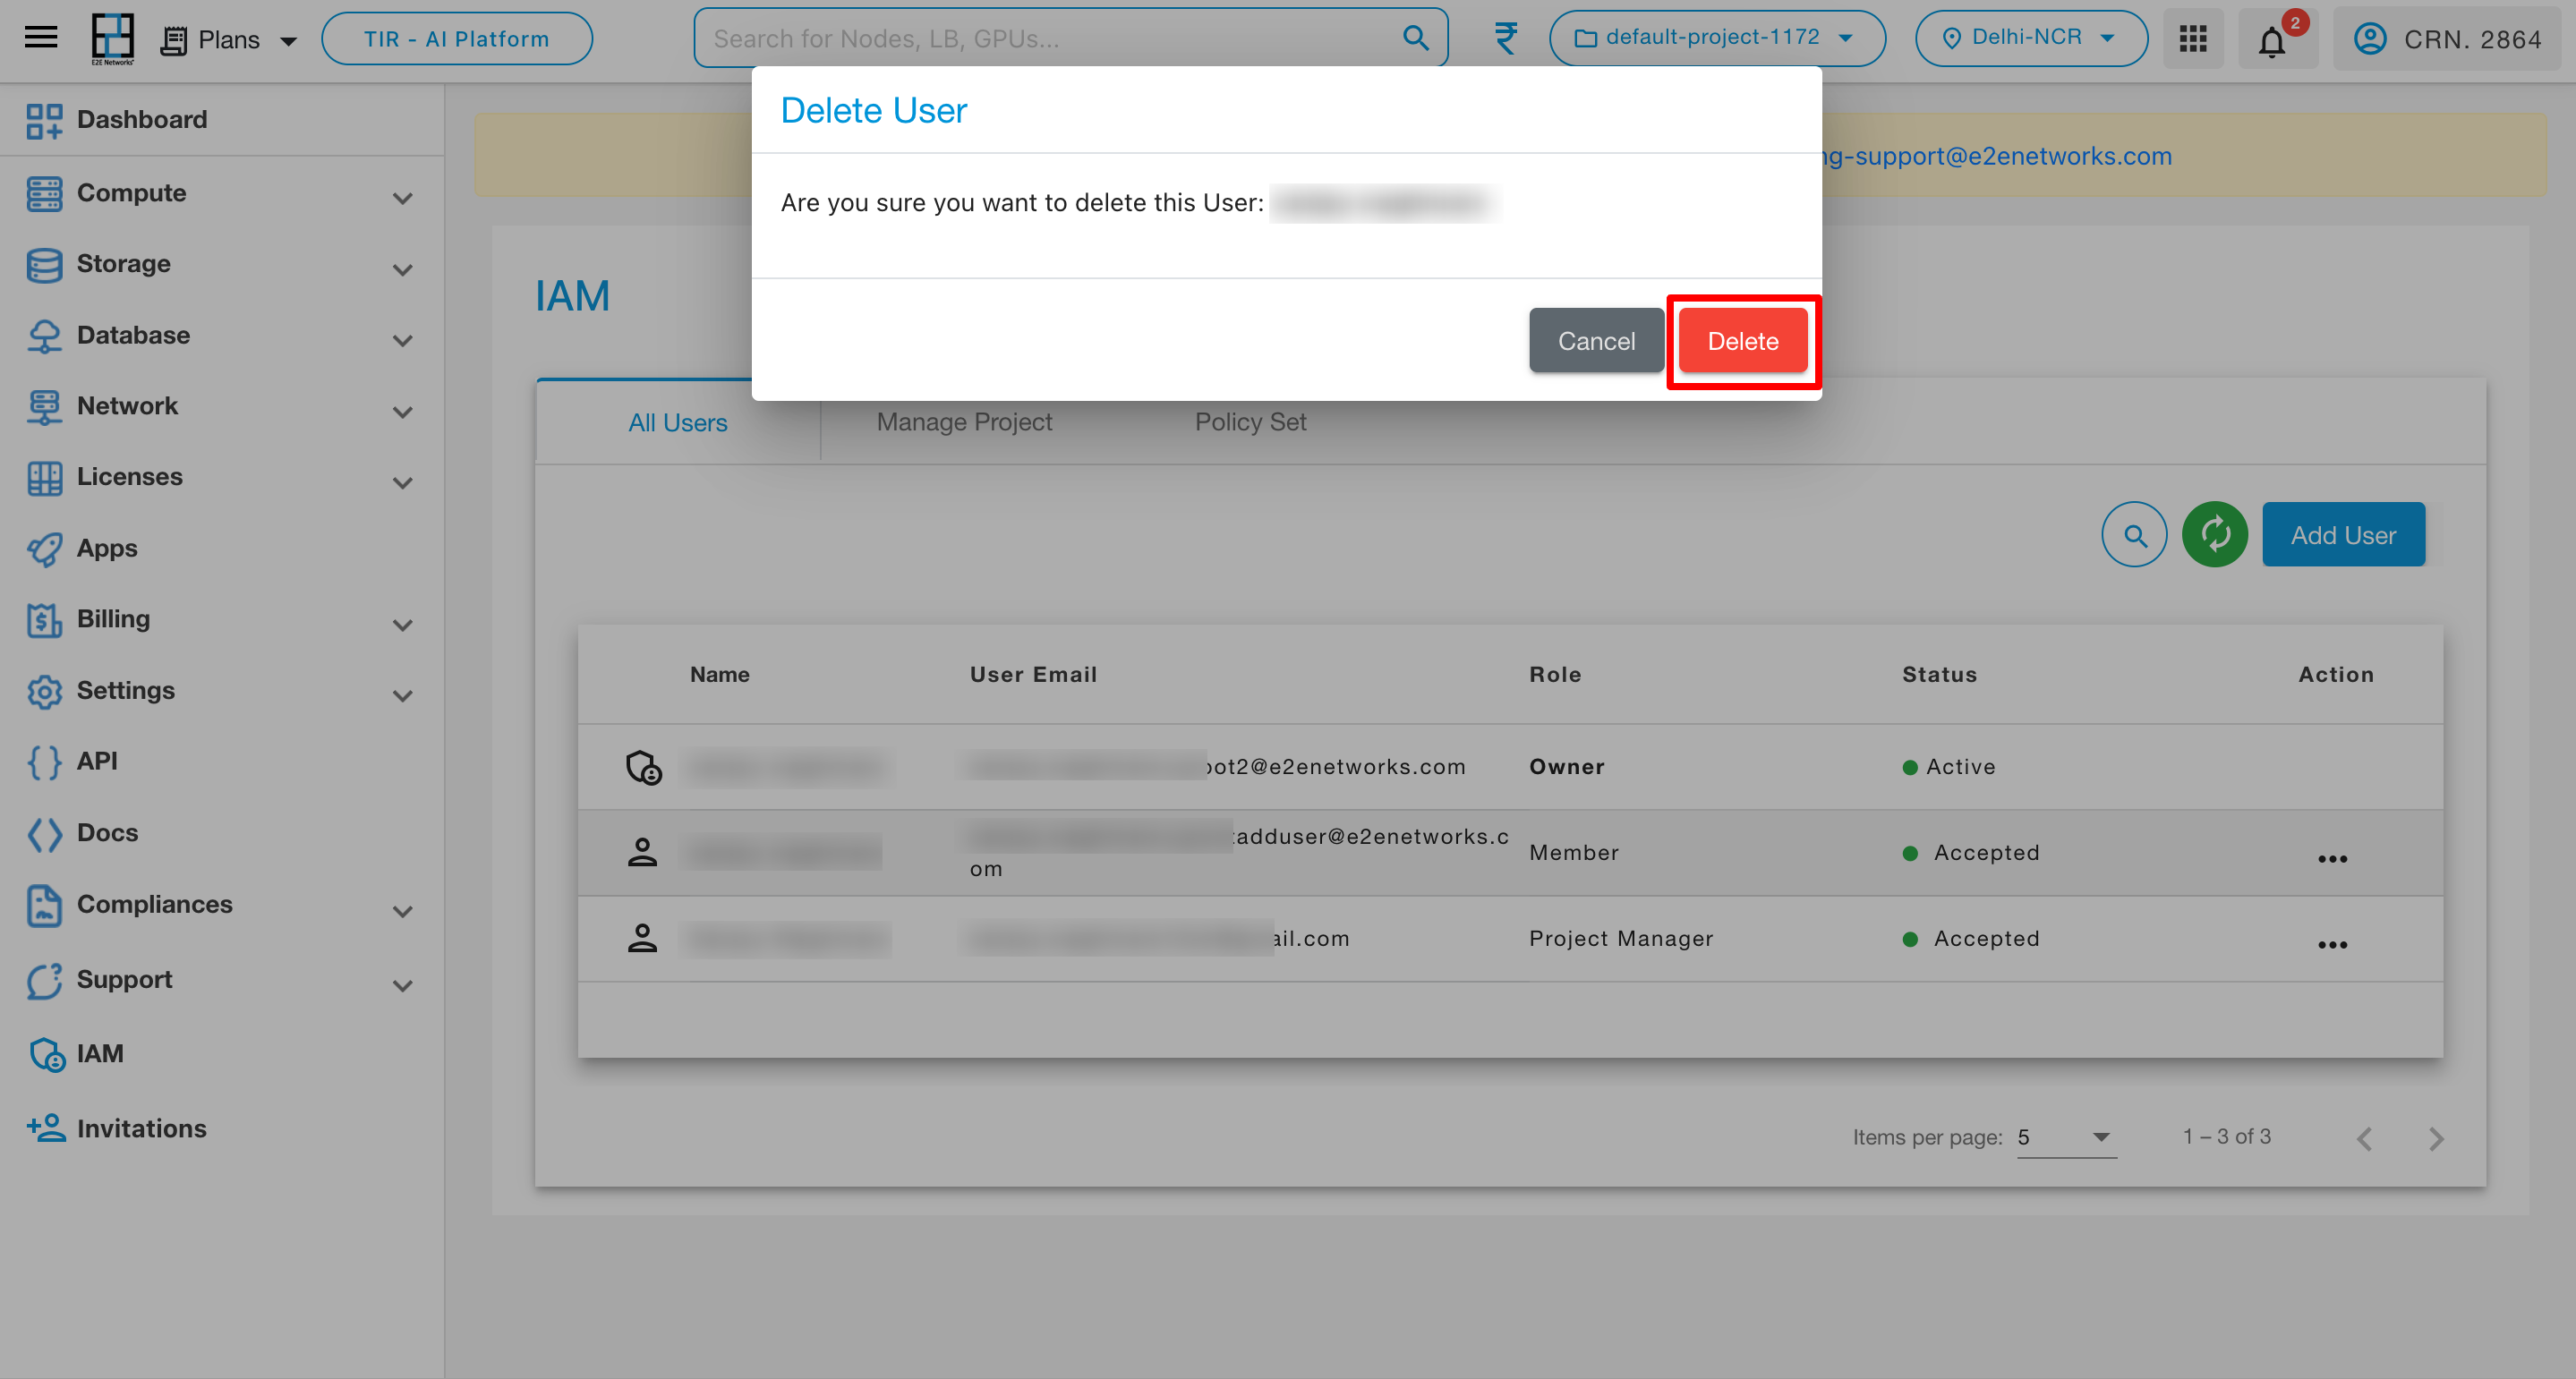
Upon selecting the delete action button, a confirmation pop-up will appear on the page. Click on the delete button within the pop-up to confirm the deletion, and the user will be removed from the user list.
Manage Project
Project Management
To manage projects, navigate to the IAM page and click on the Manage Project tab.
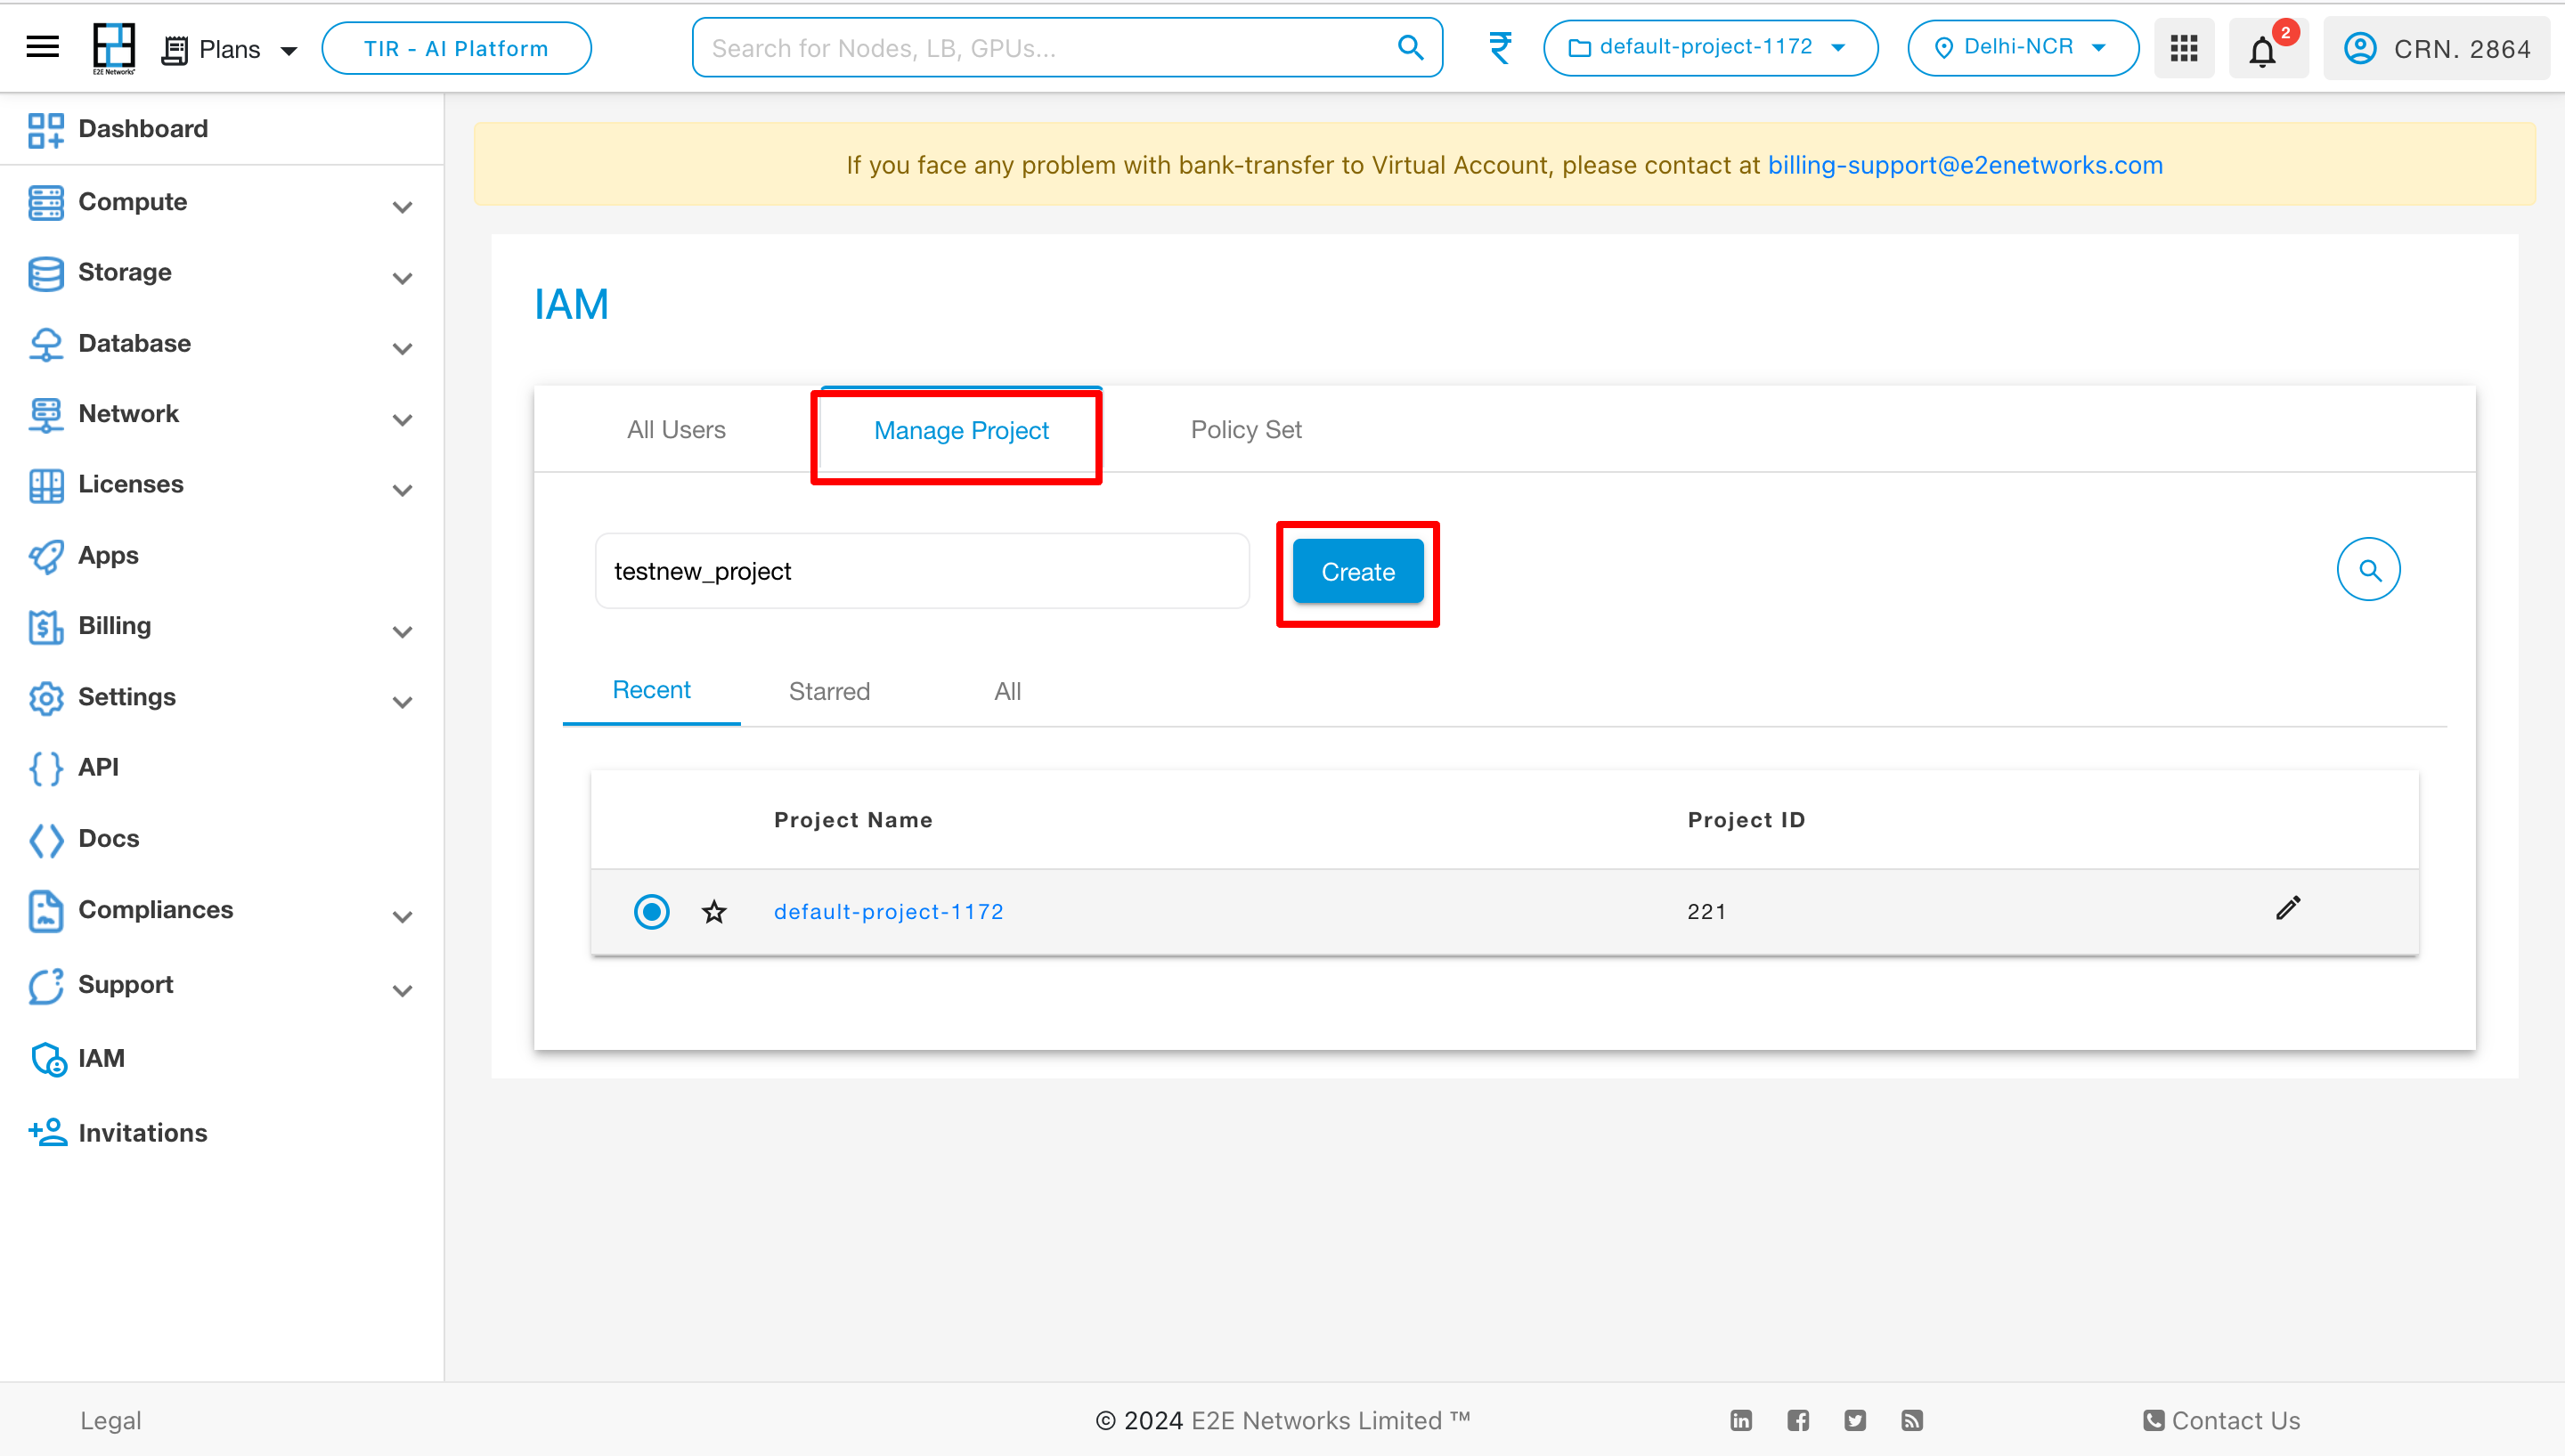
By default, a Default Project will be displayed in the list. To create a new project, provide a name for the project and click on the Create button. Once a project is created, it will be visible in the Recent tab.
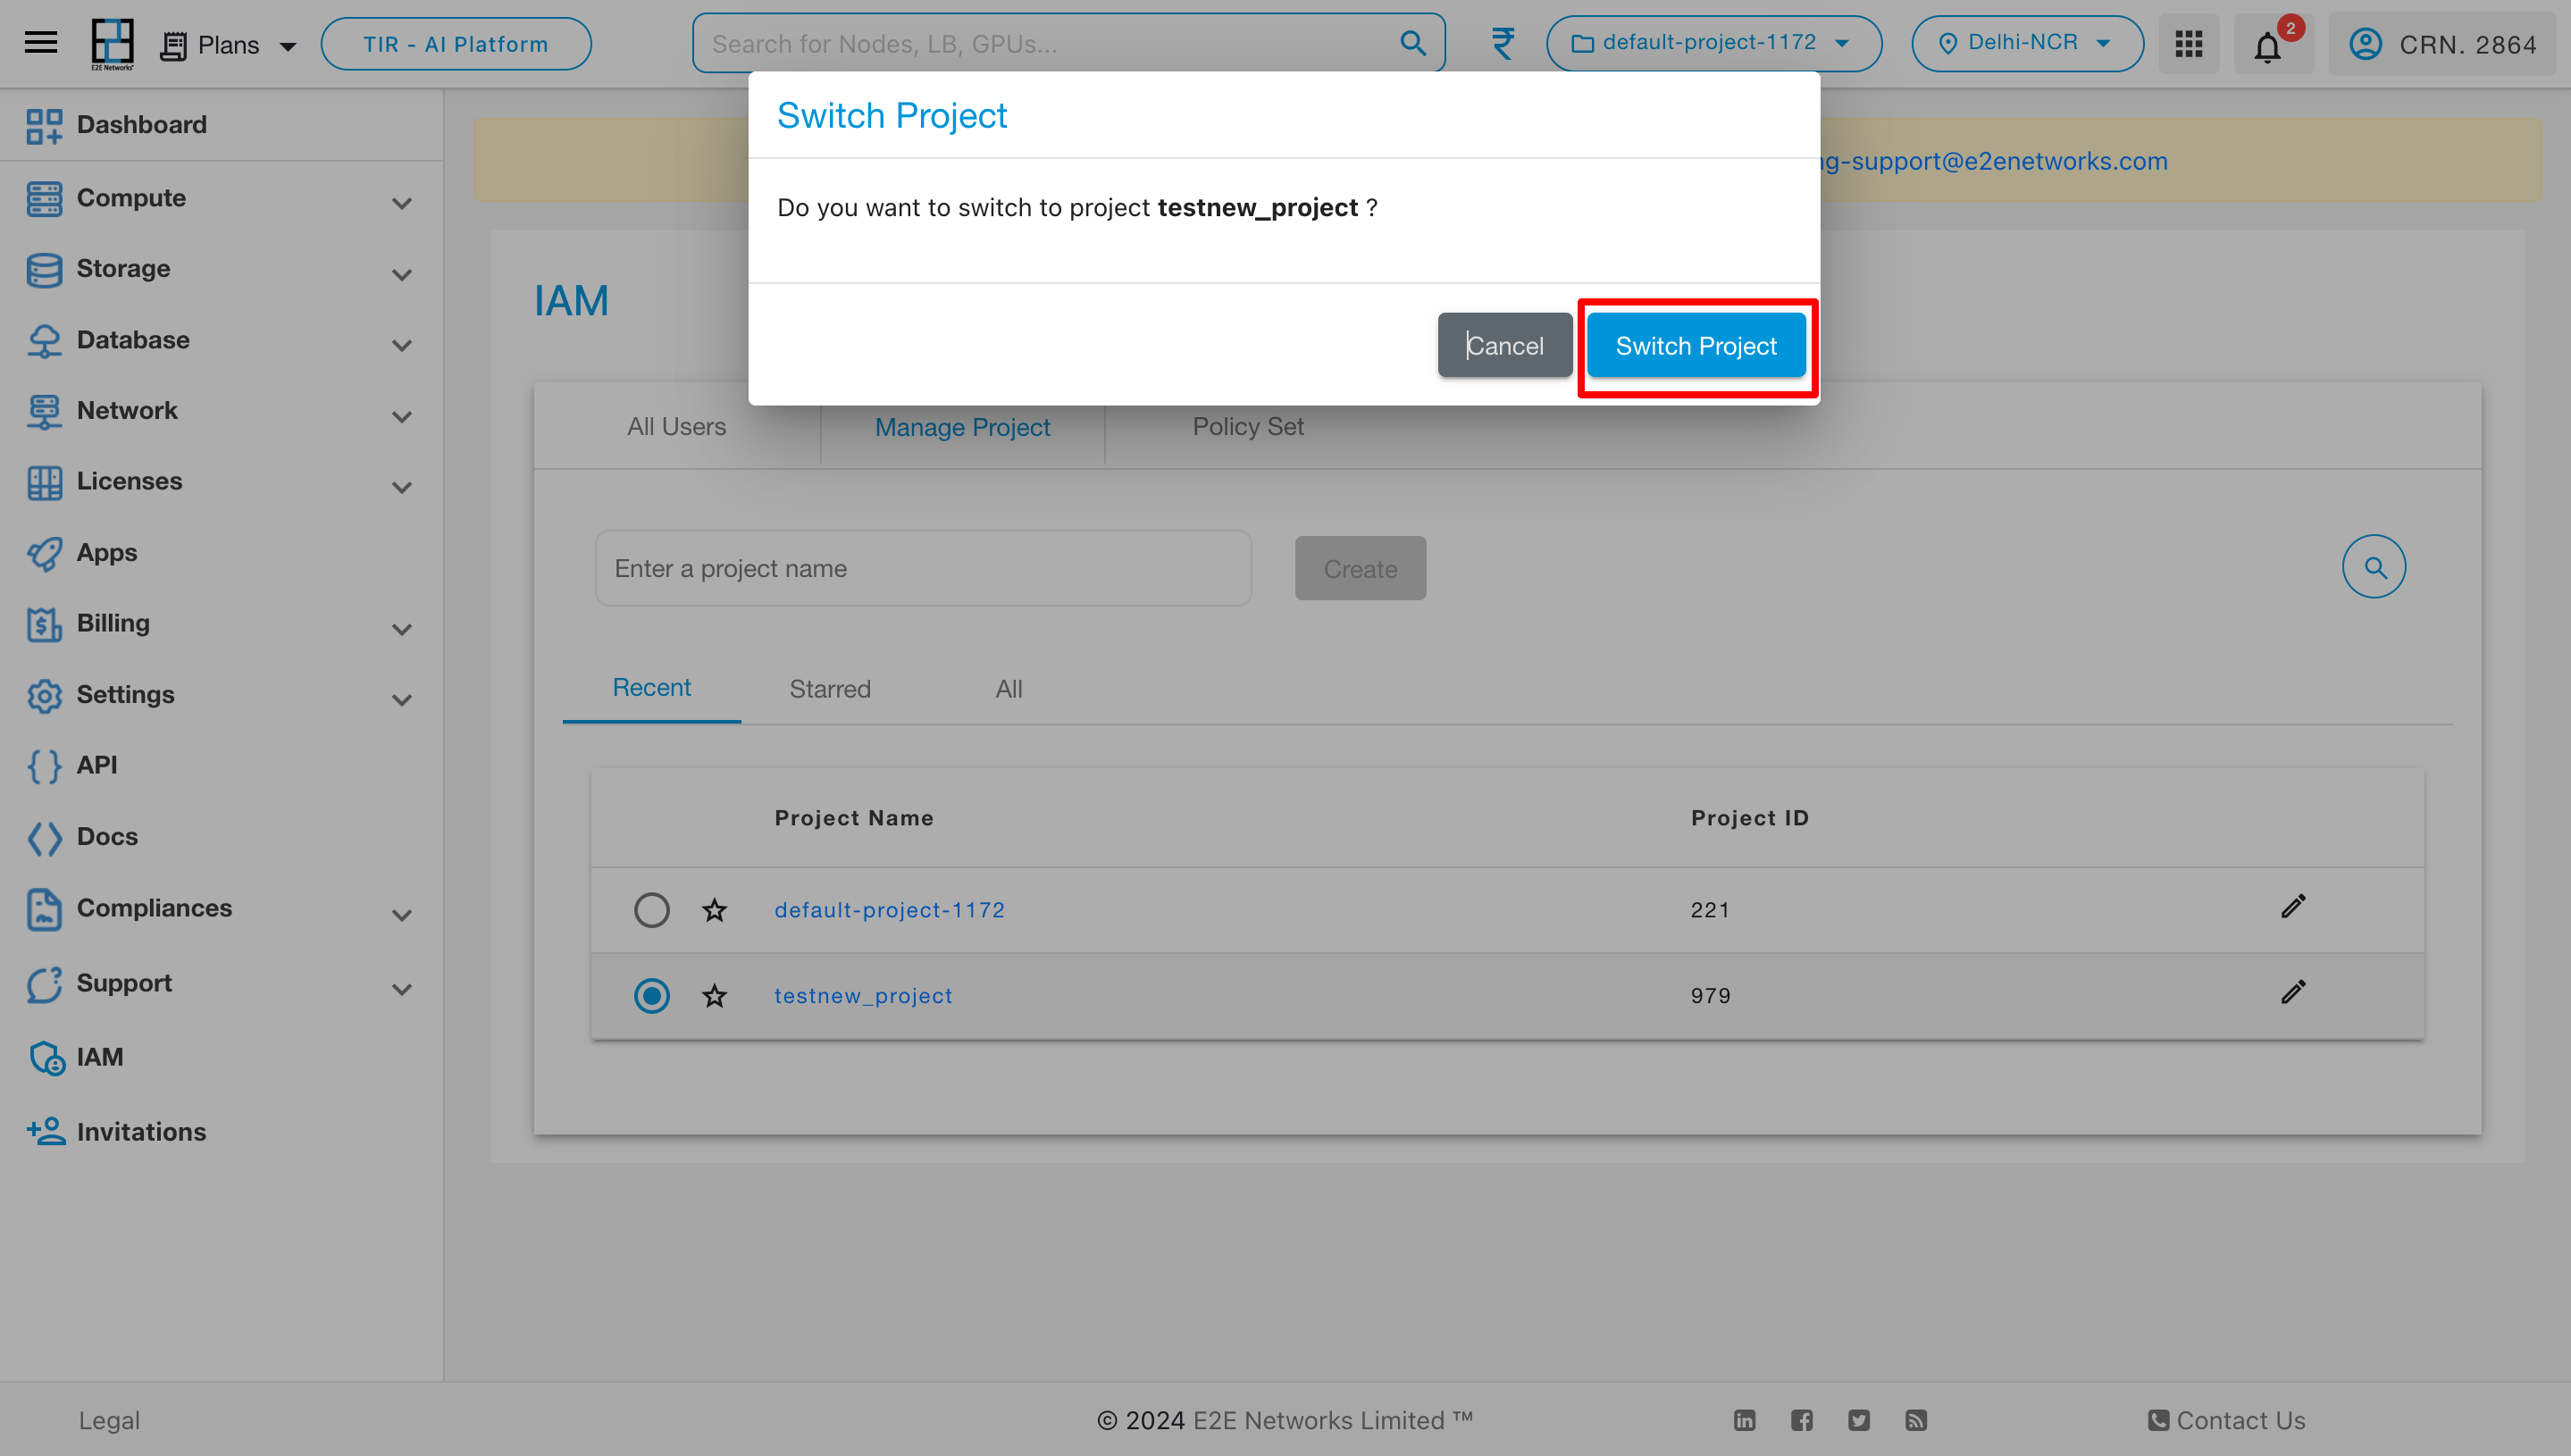
To switch from one project to another, select the desired project by clicking on the radio button. A pop-up will appear, prompting you to click on “Switch Project.” Upon doing so, the switch will be completed, and you’ll be in the selected project.

To designate a project as a starred project, click on the star button located in the Starred section.
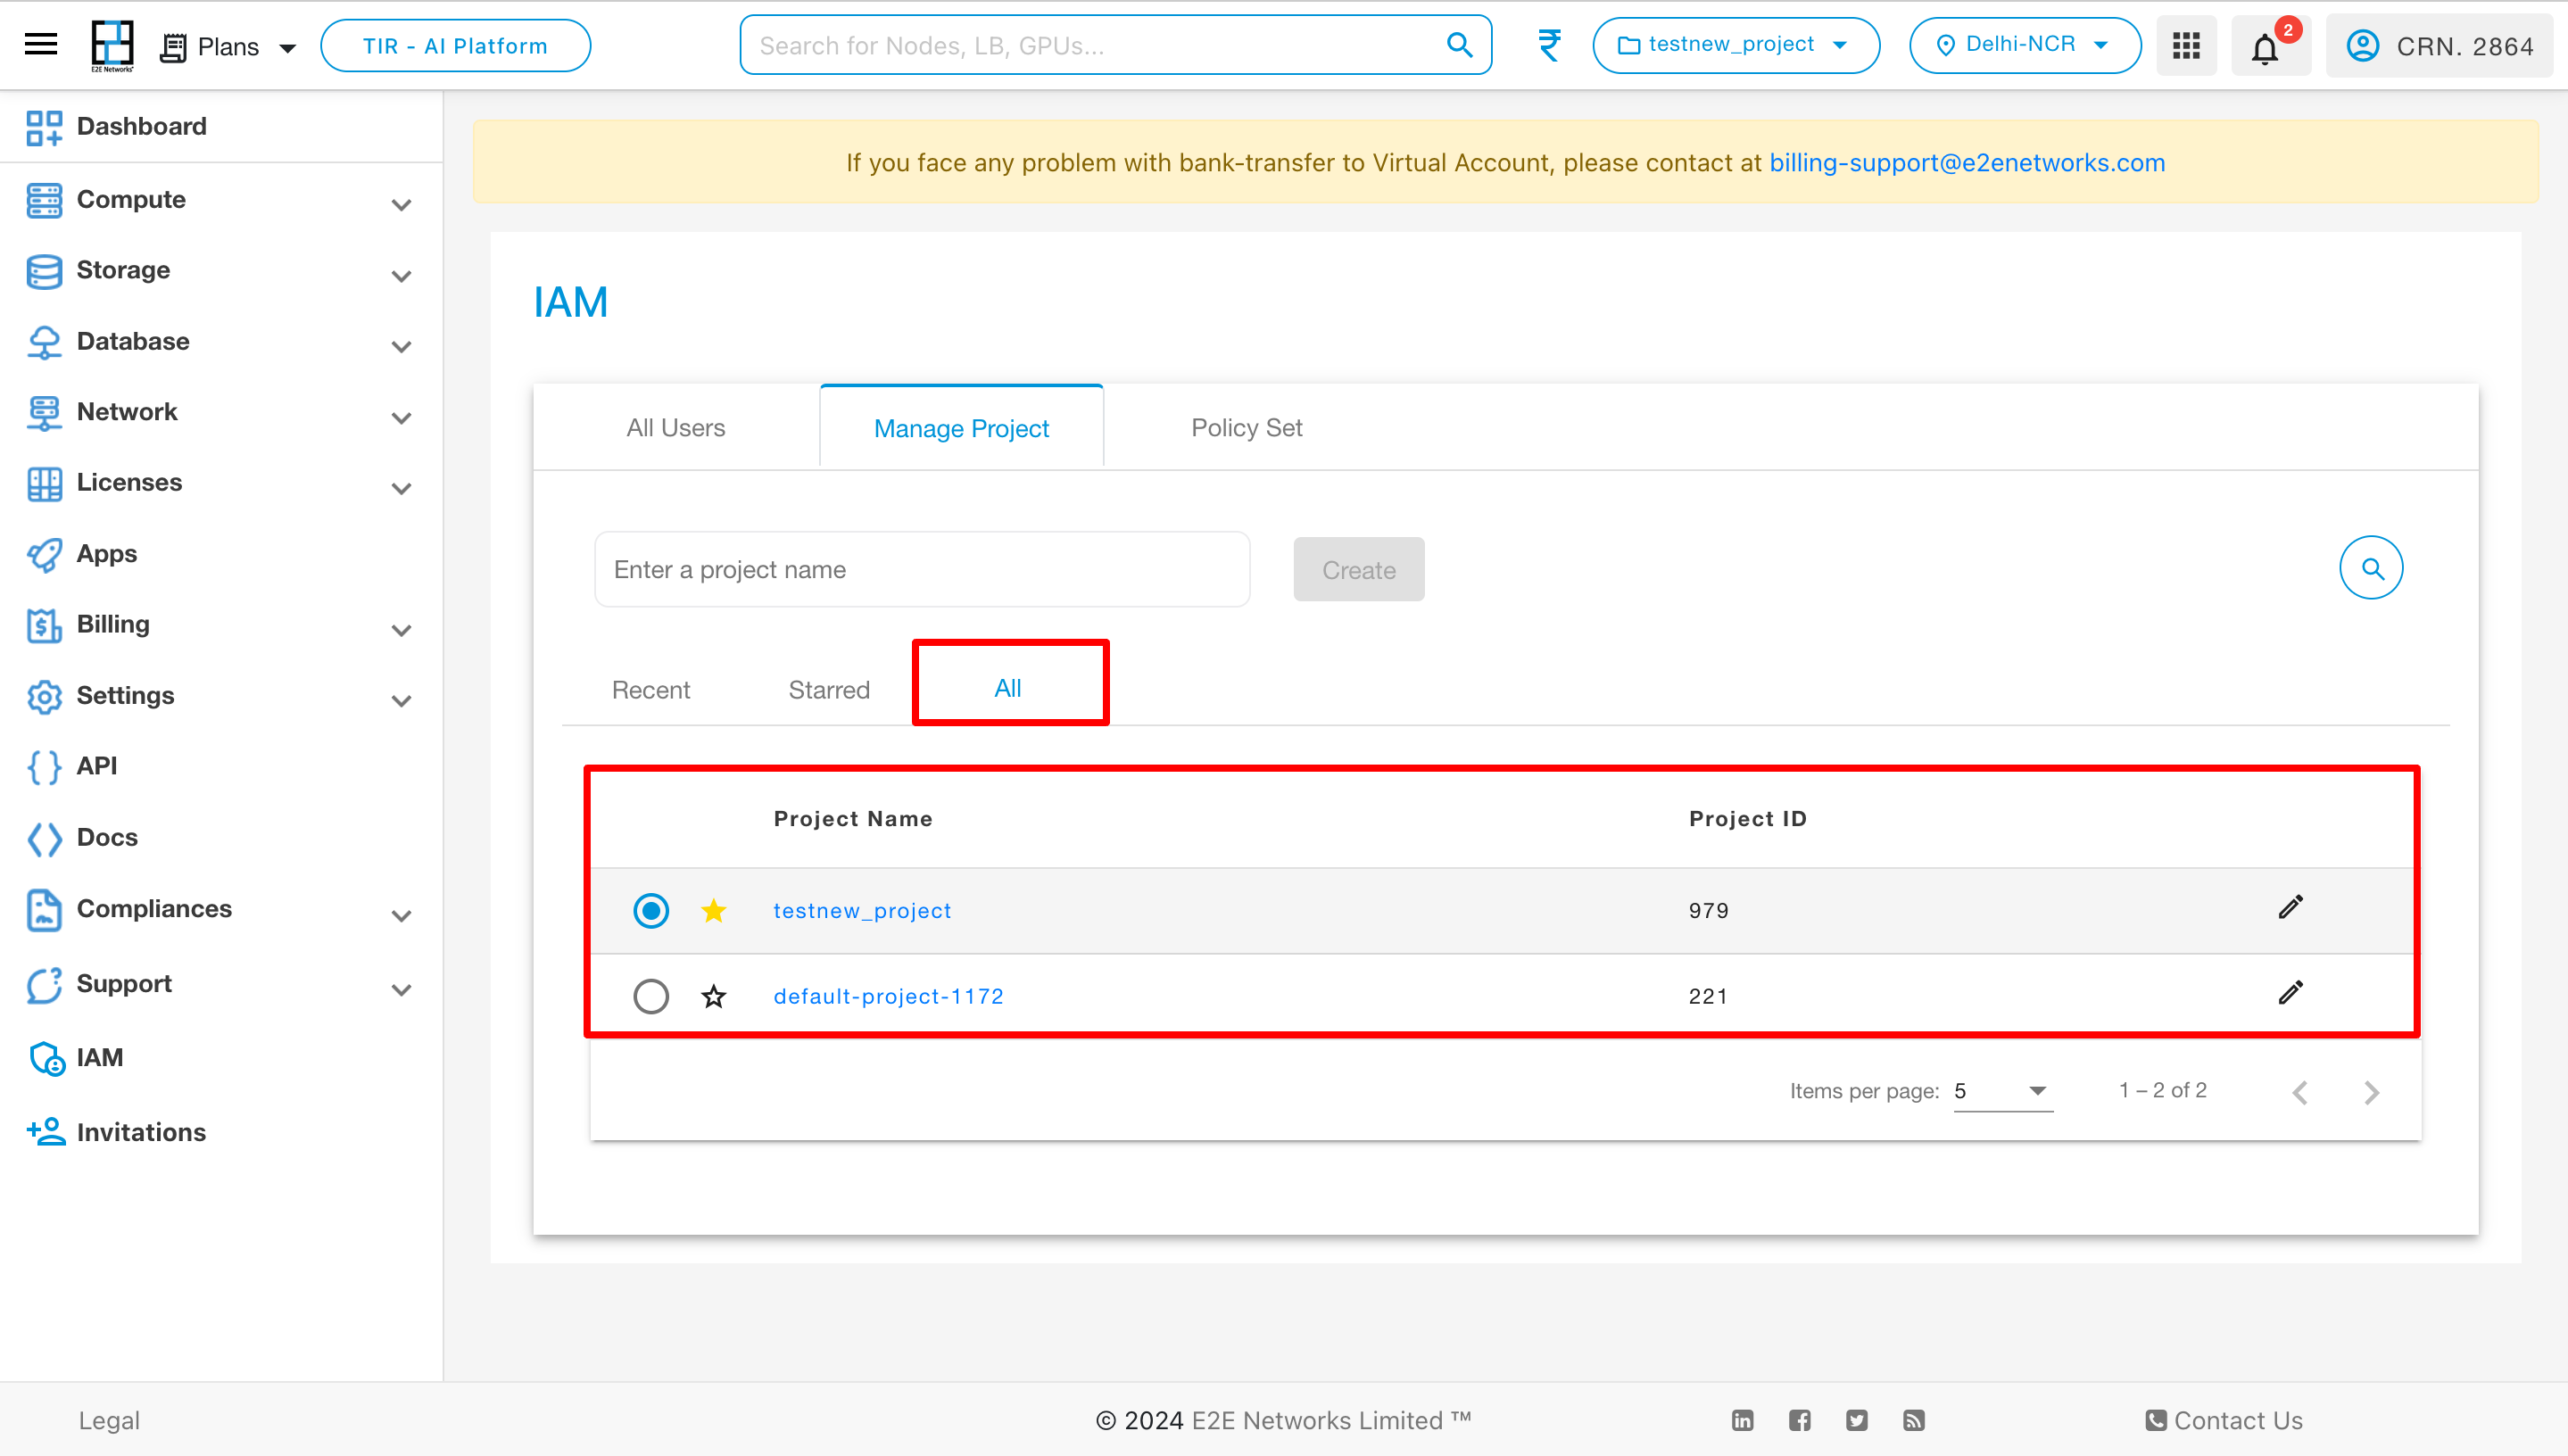
To view all projects, click on the “All” section, where you can see a comprehensive list of all projects associated with that user.
Member Management
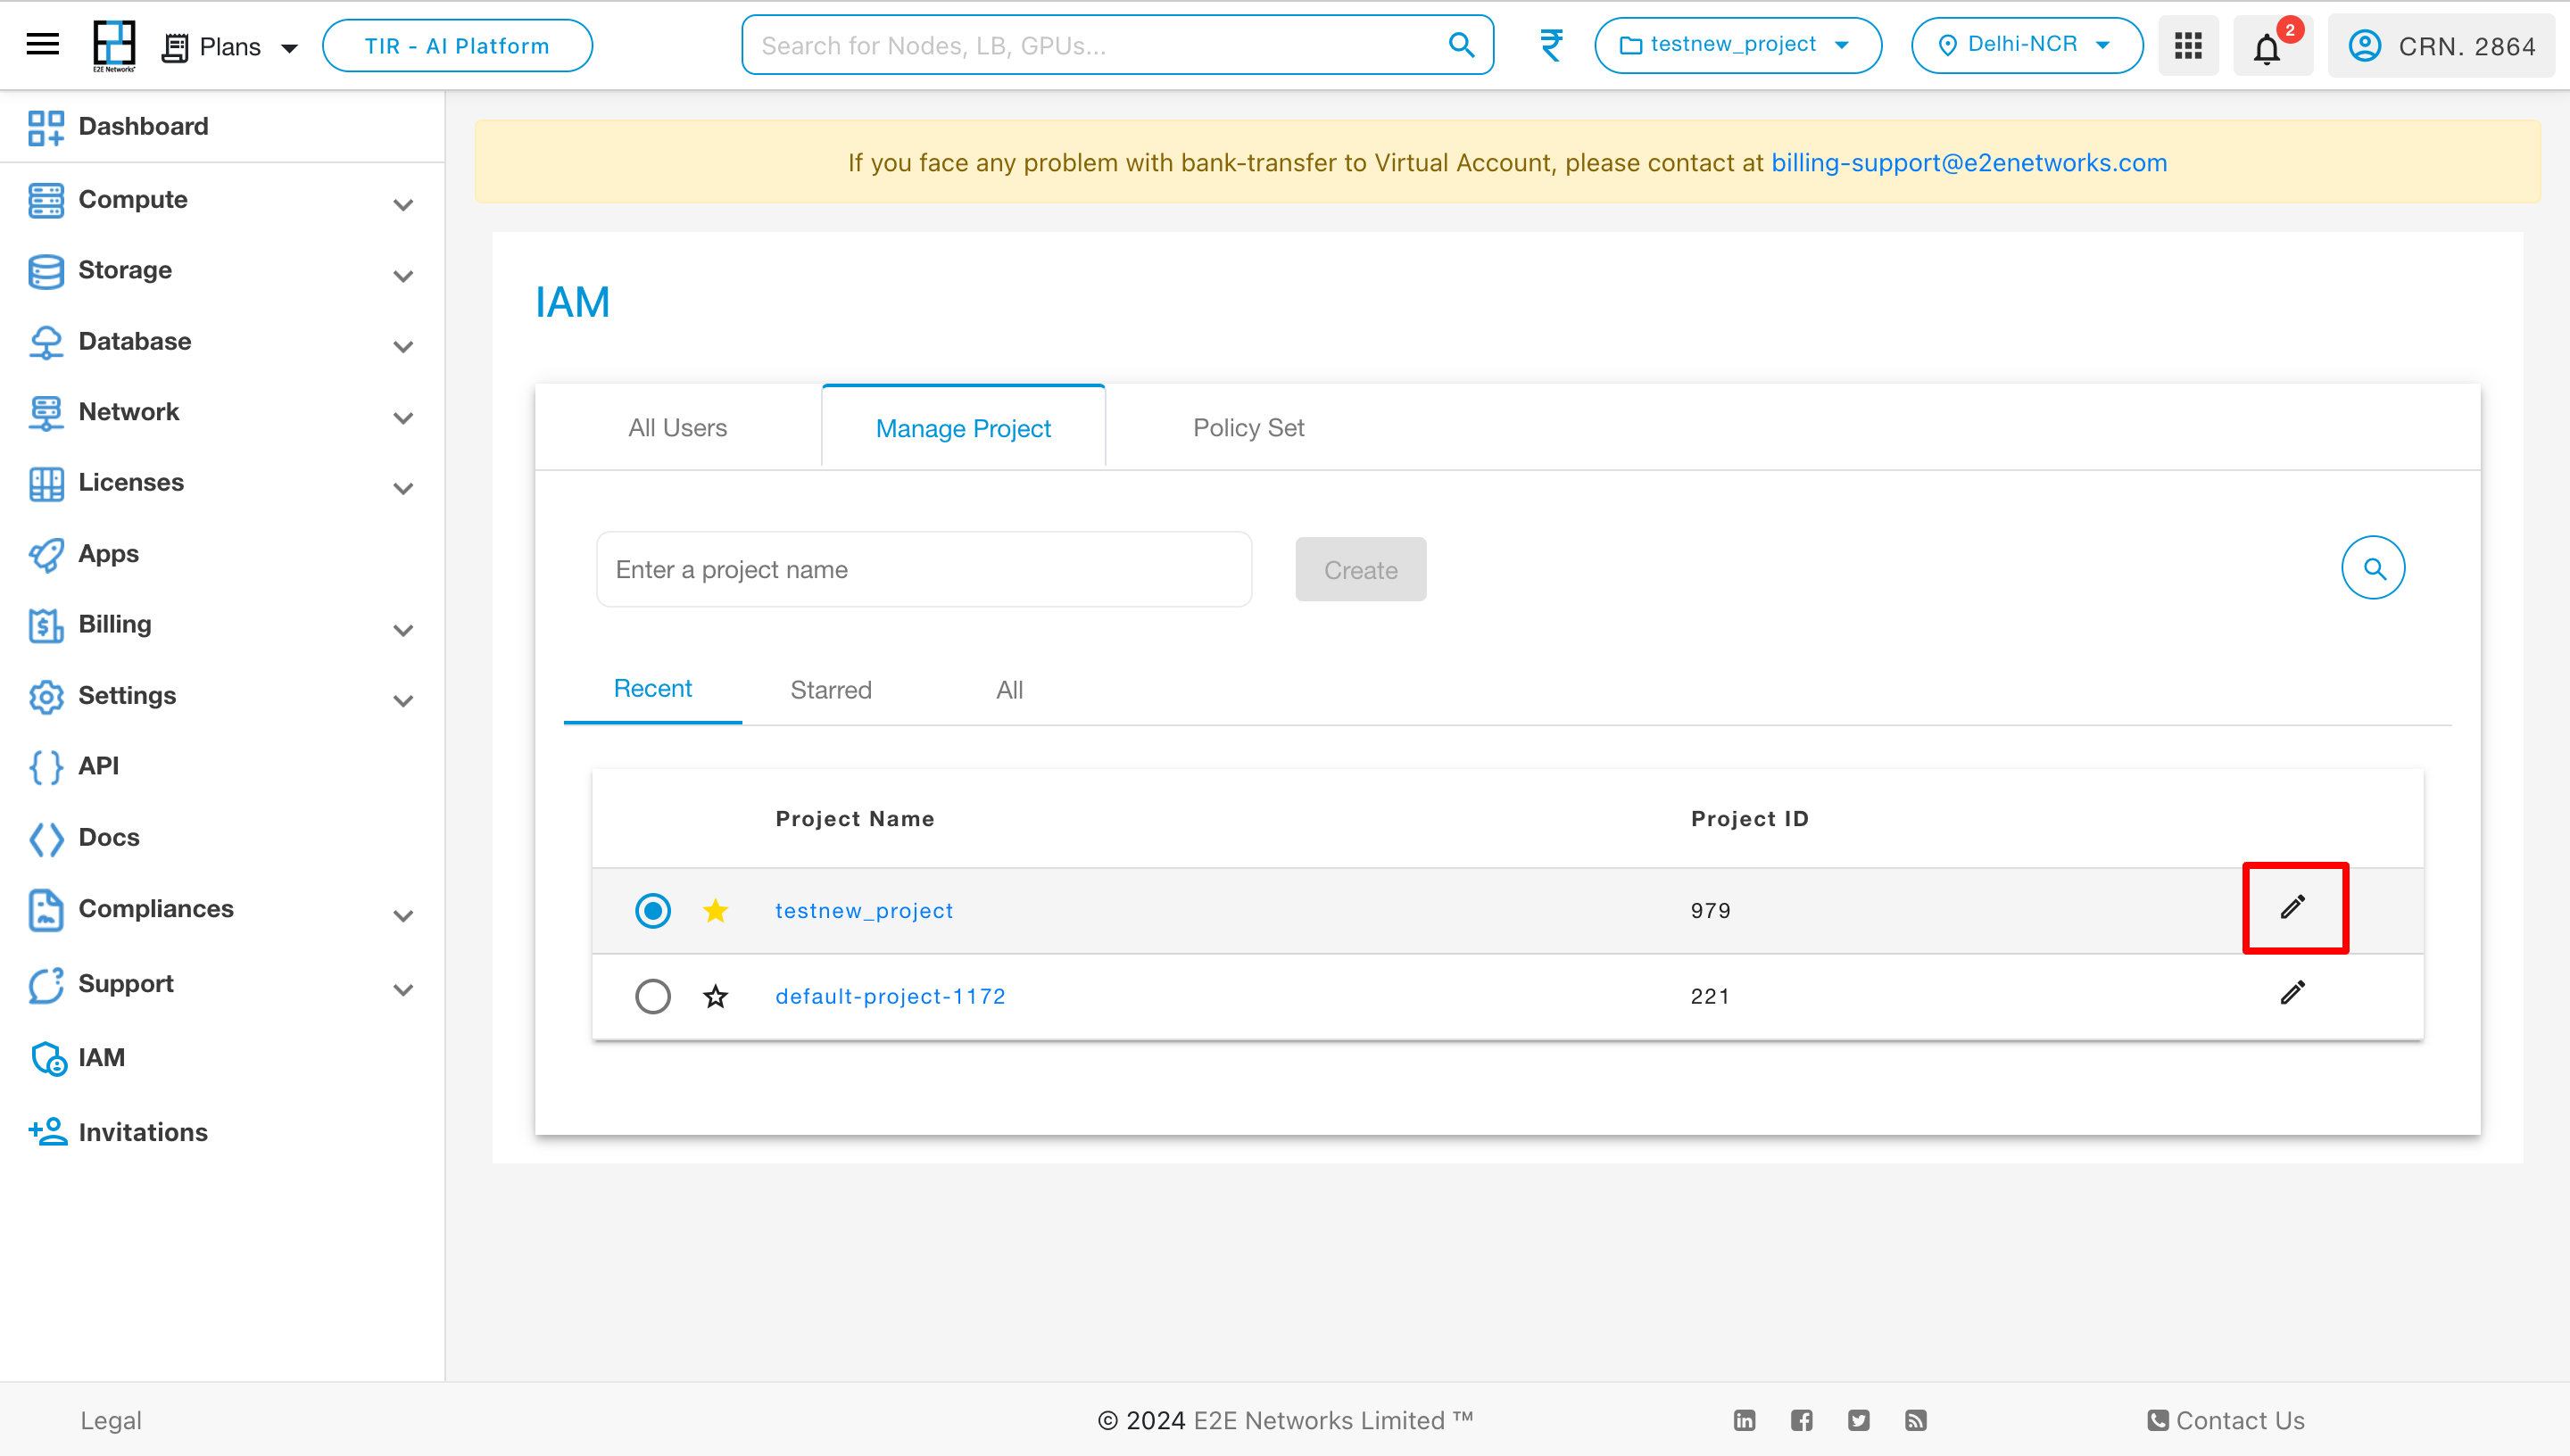
Add Member:
To modify a project and add members, click on the edit button associated with that project.
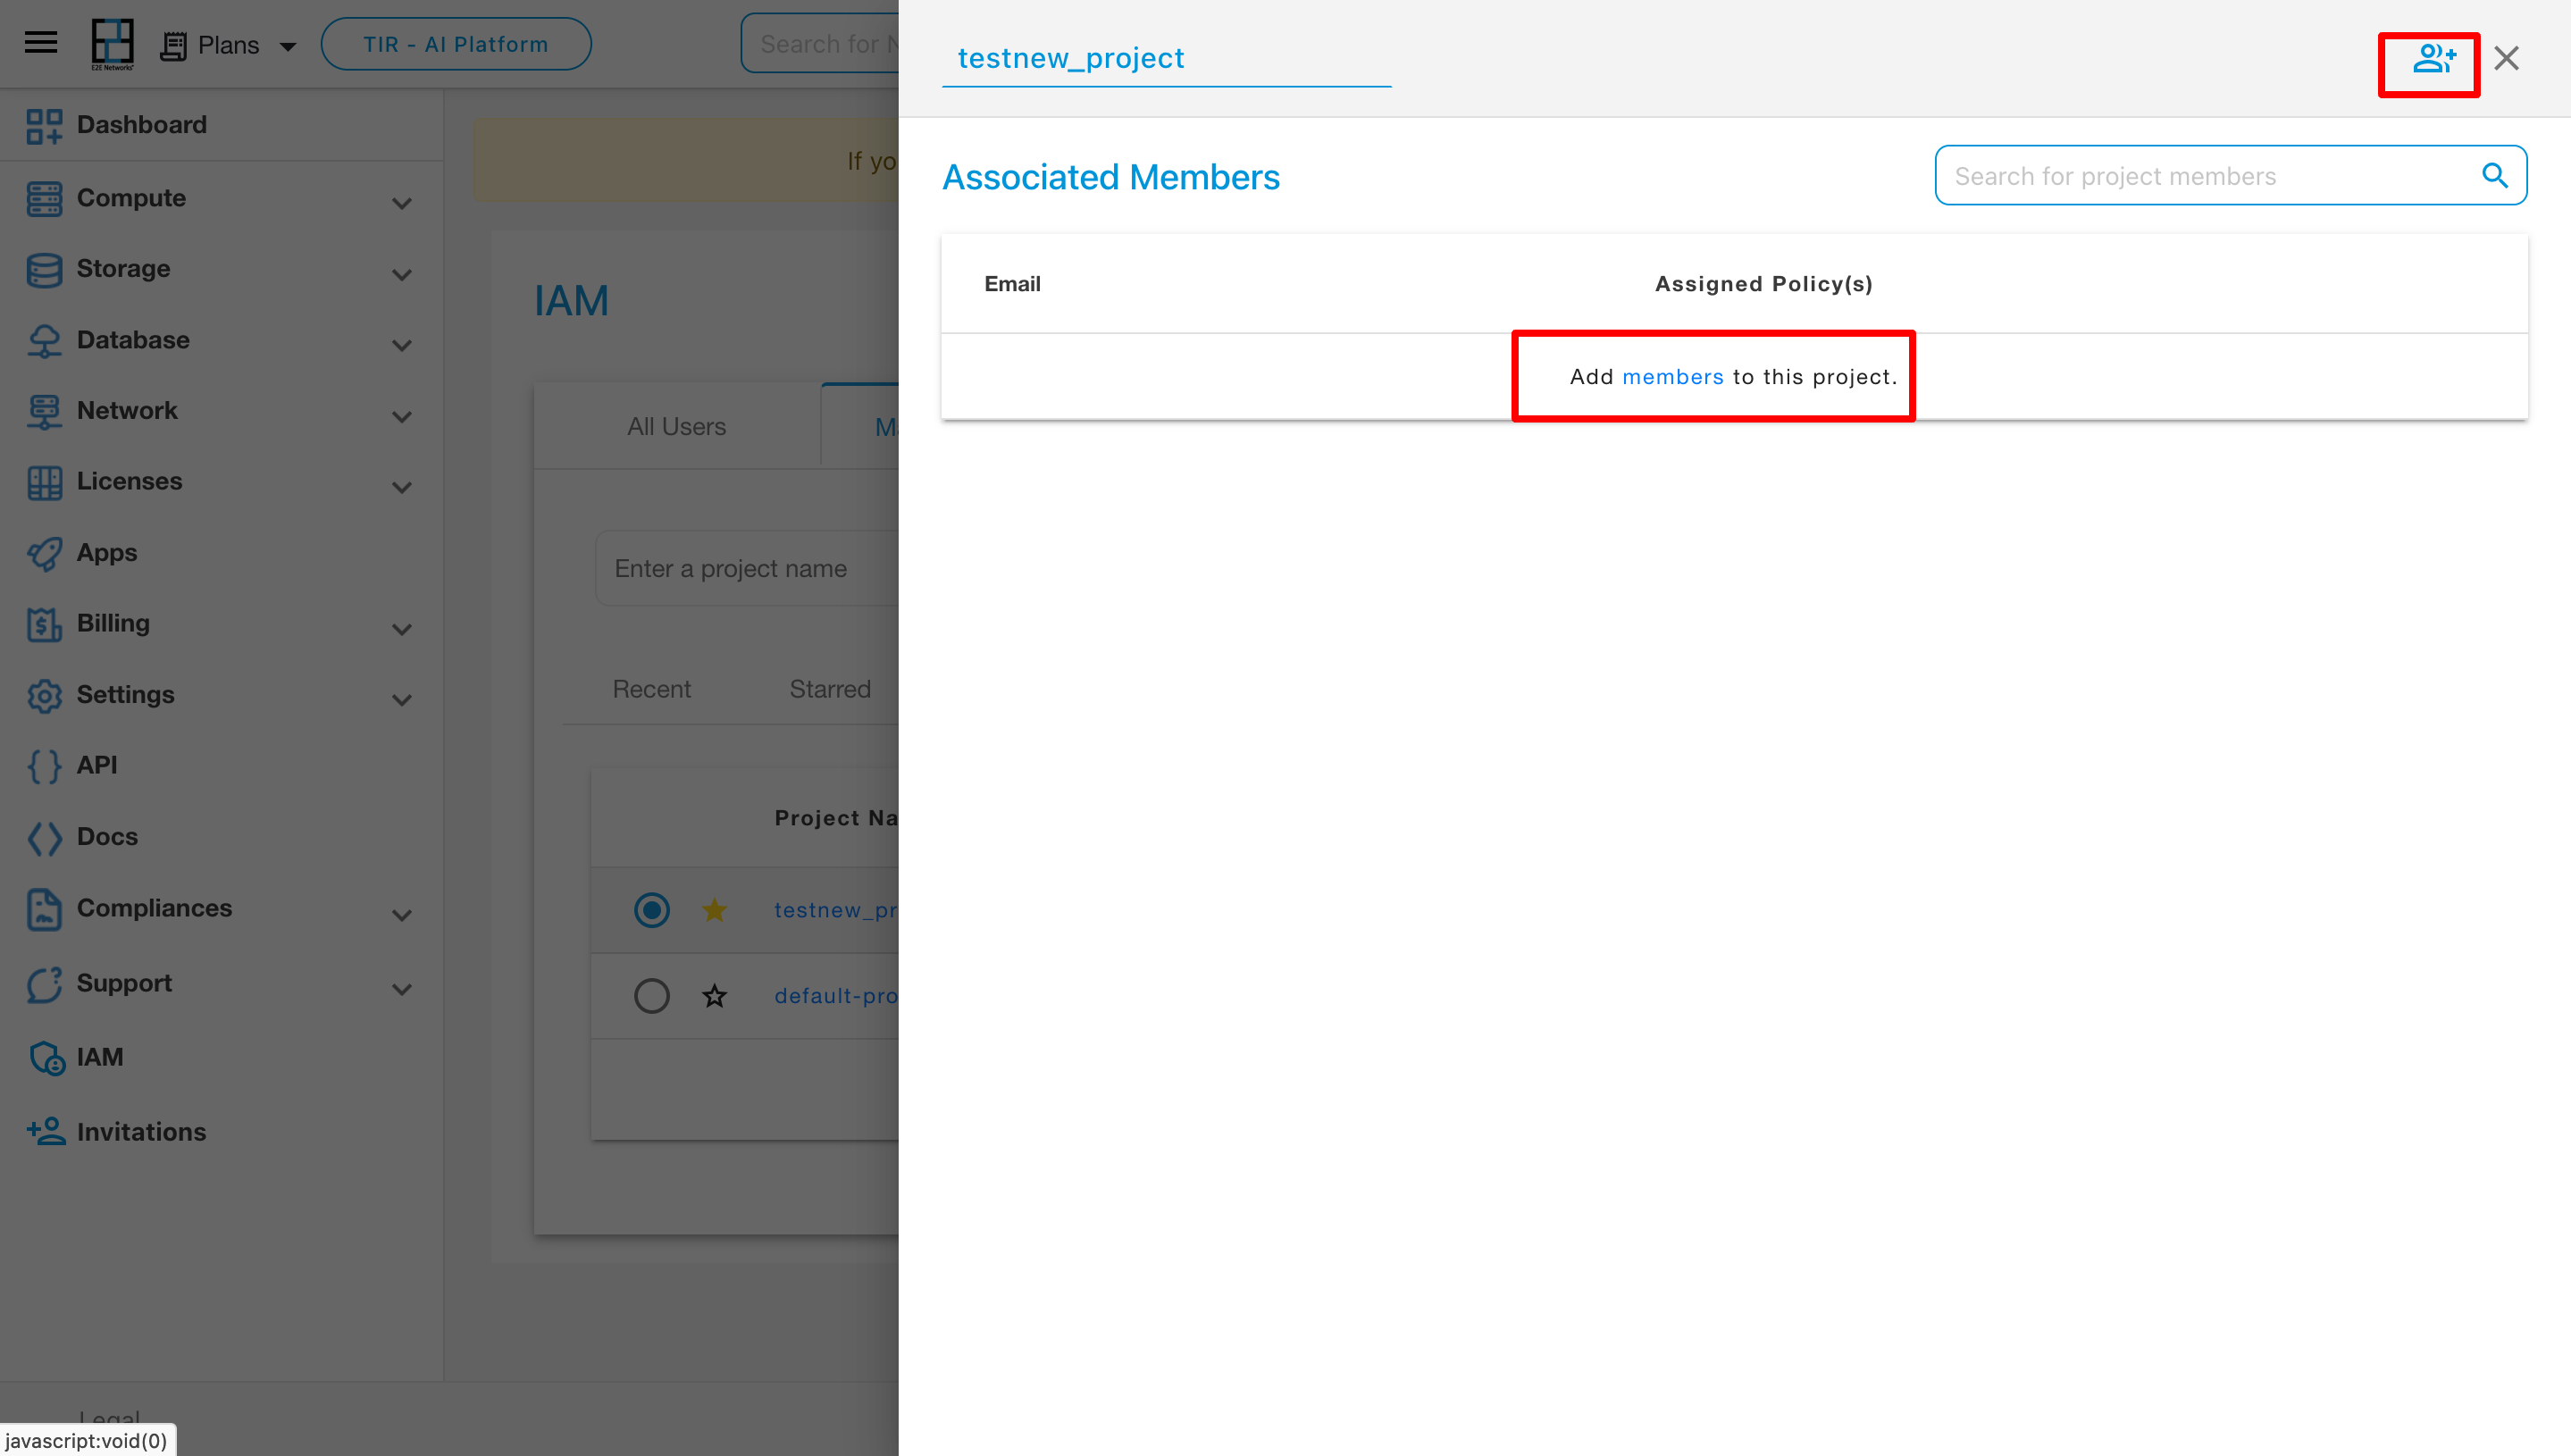
Upon clicking the edit button, you will find the option to add members to the project. Click on it to proceed.
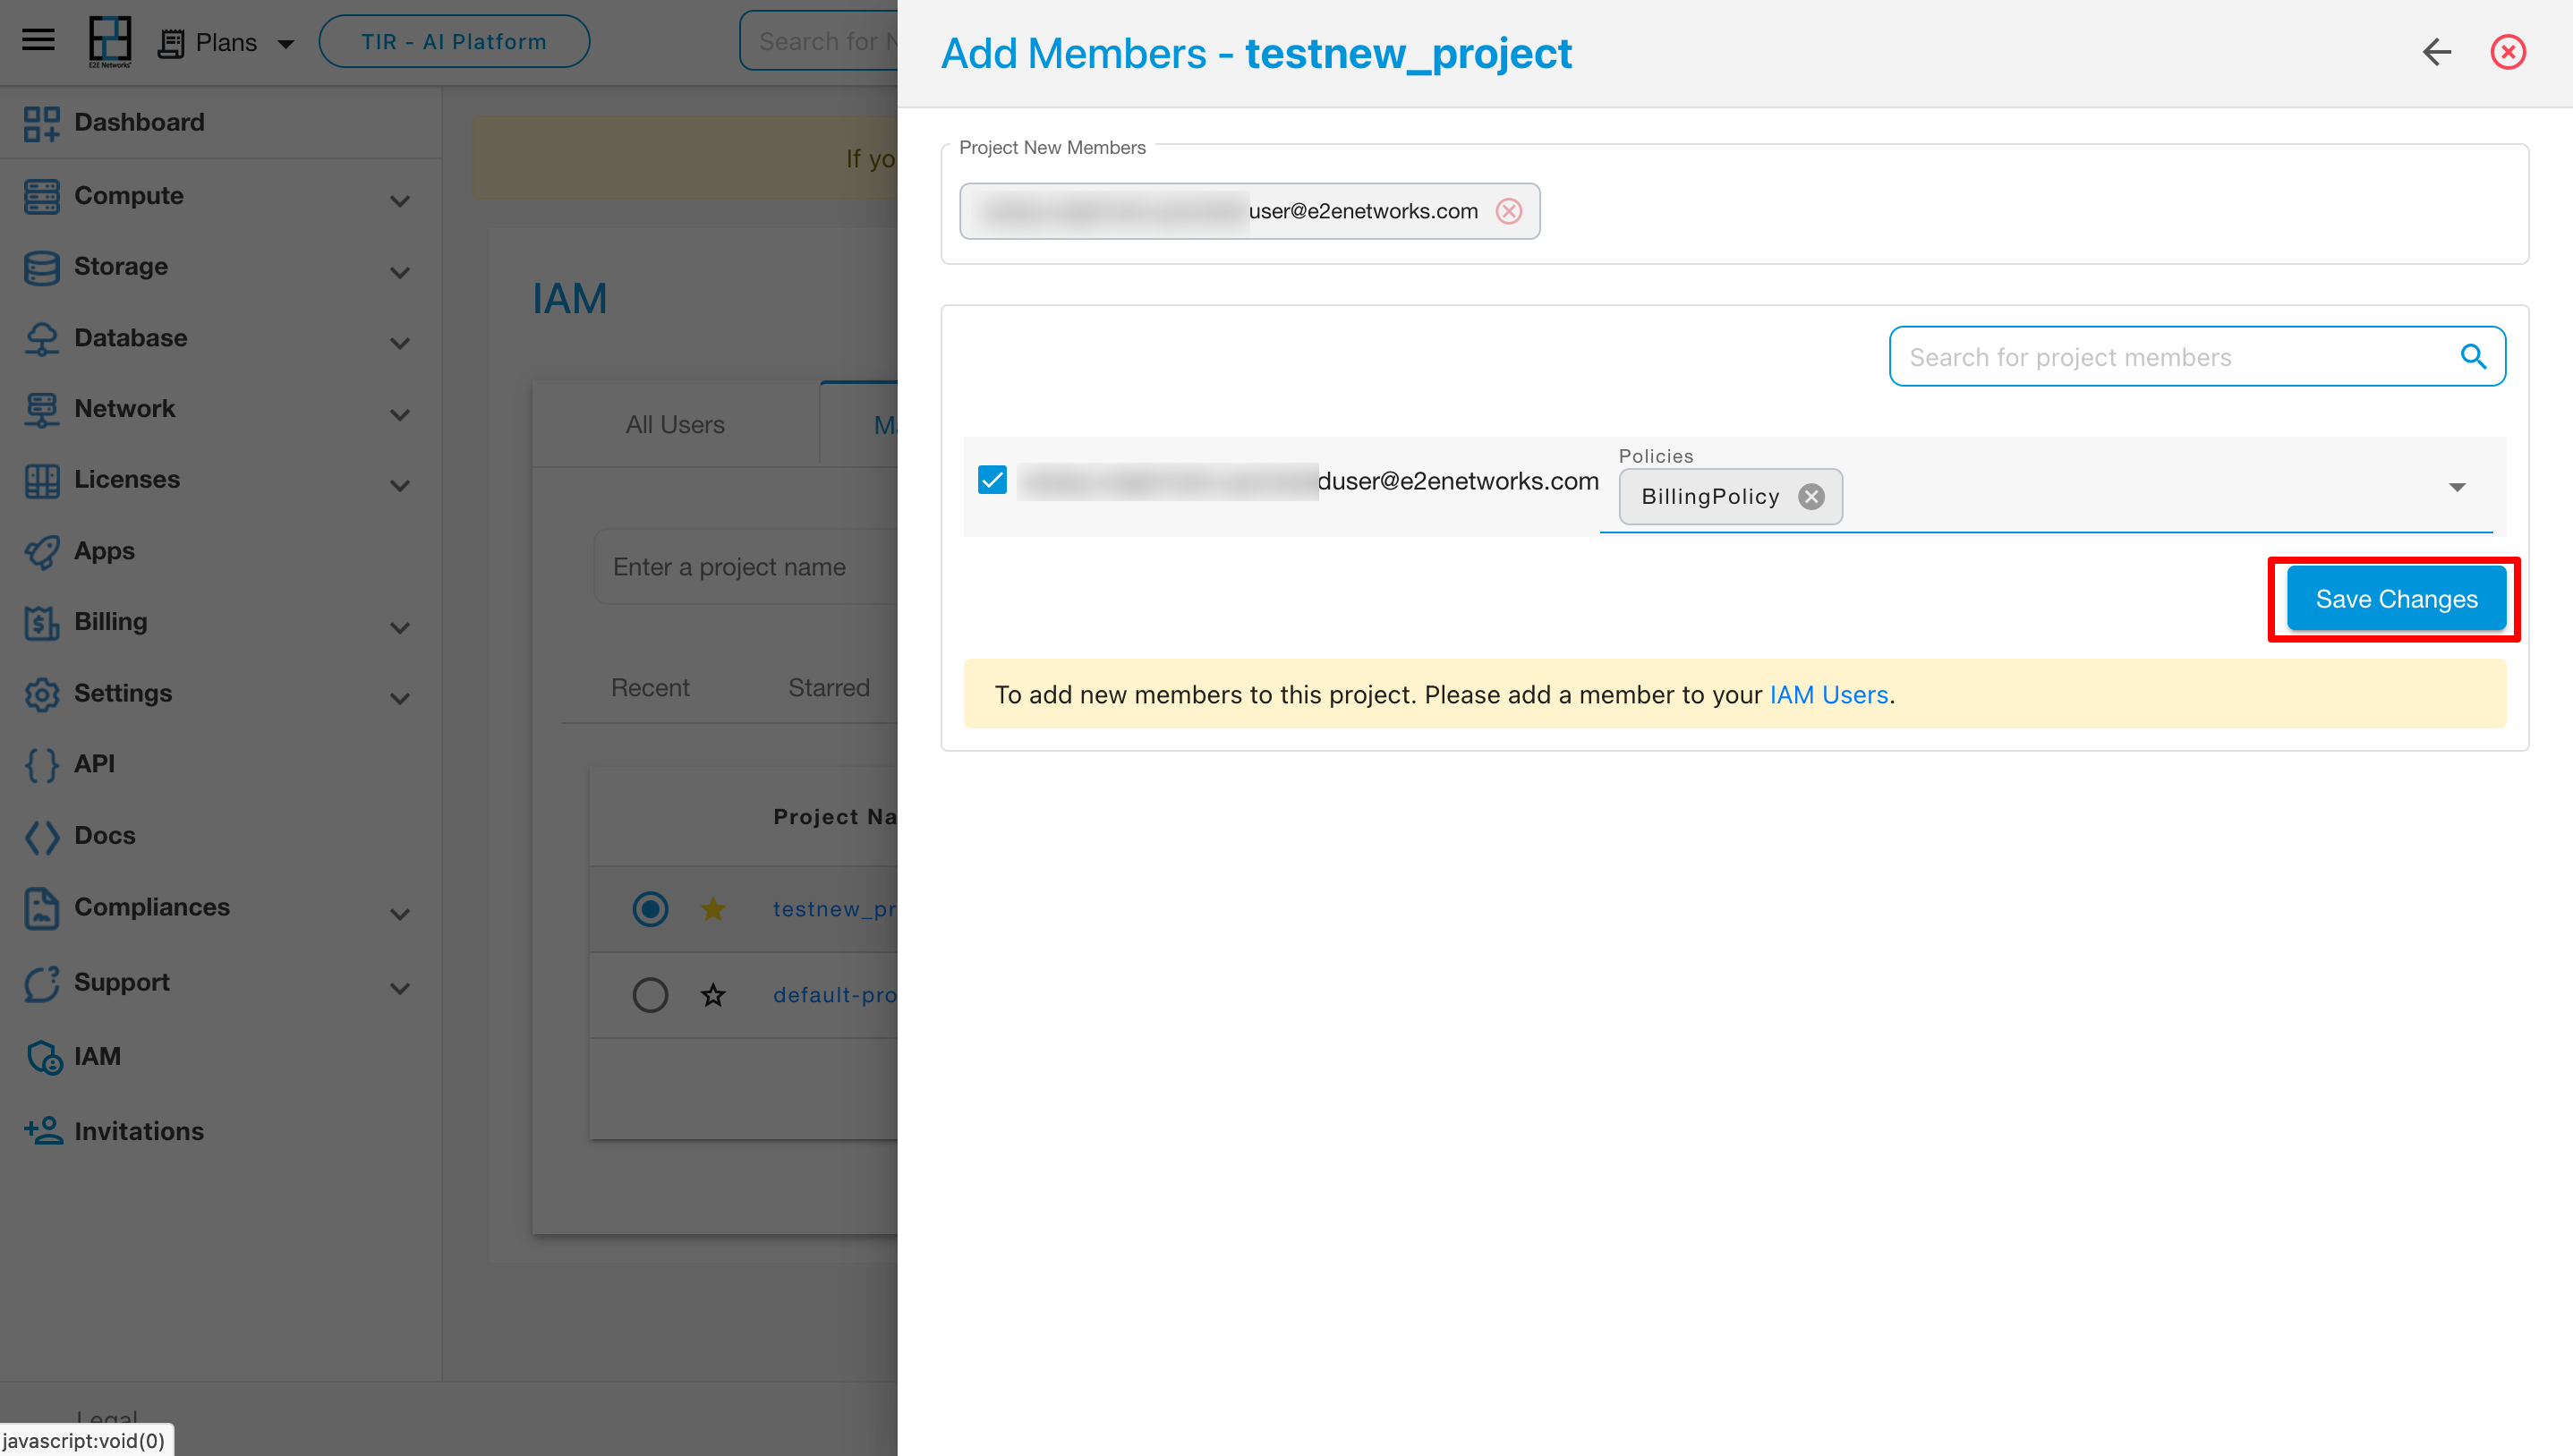
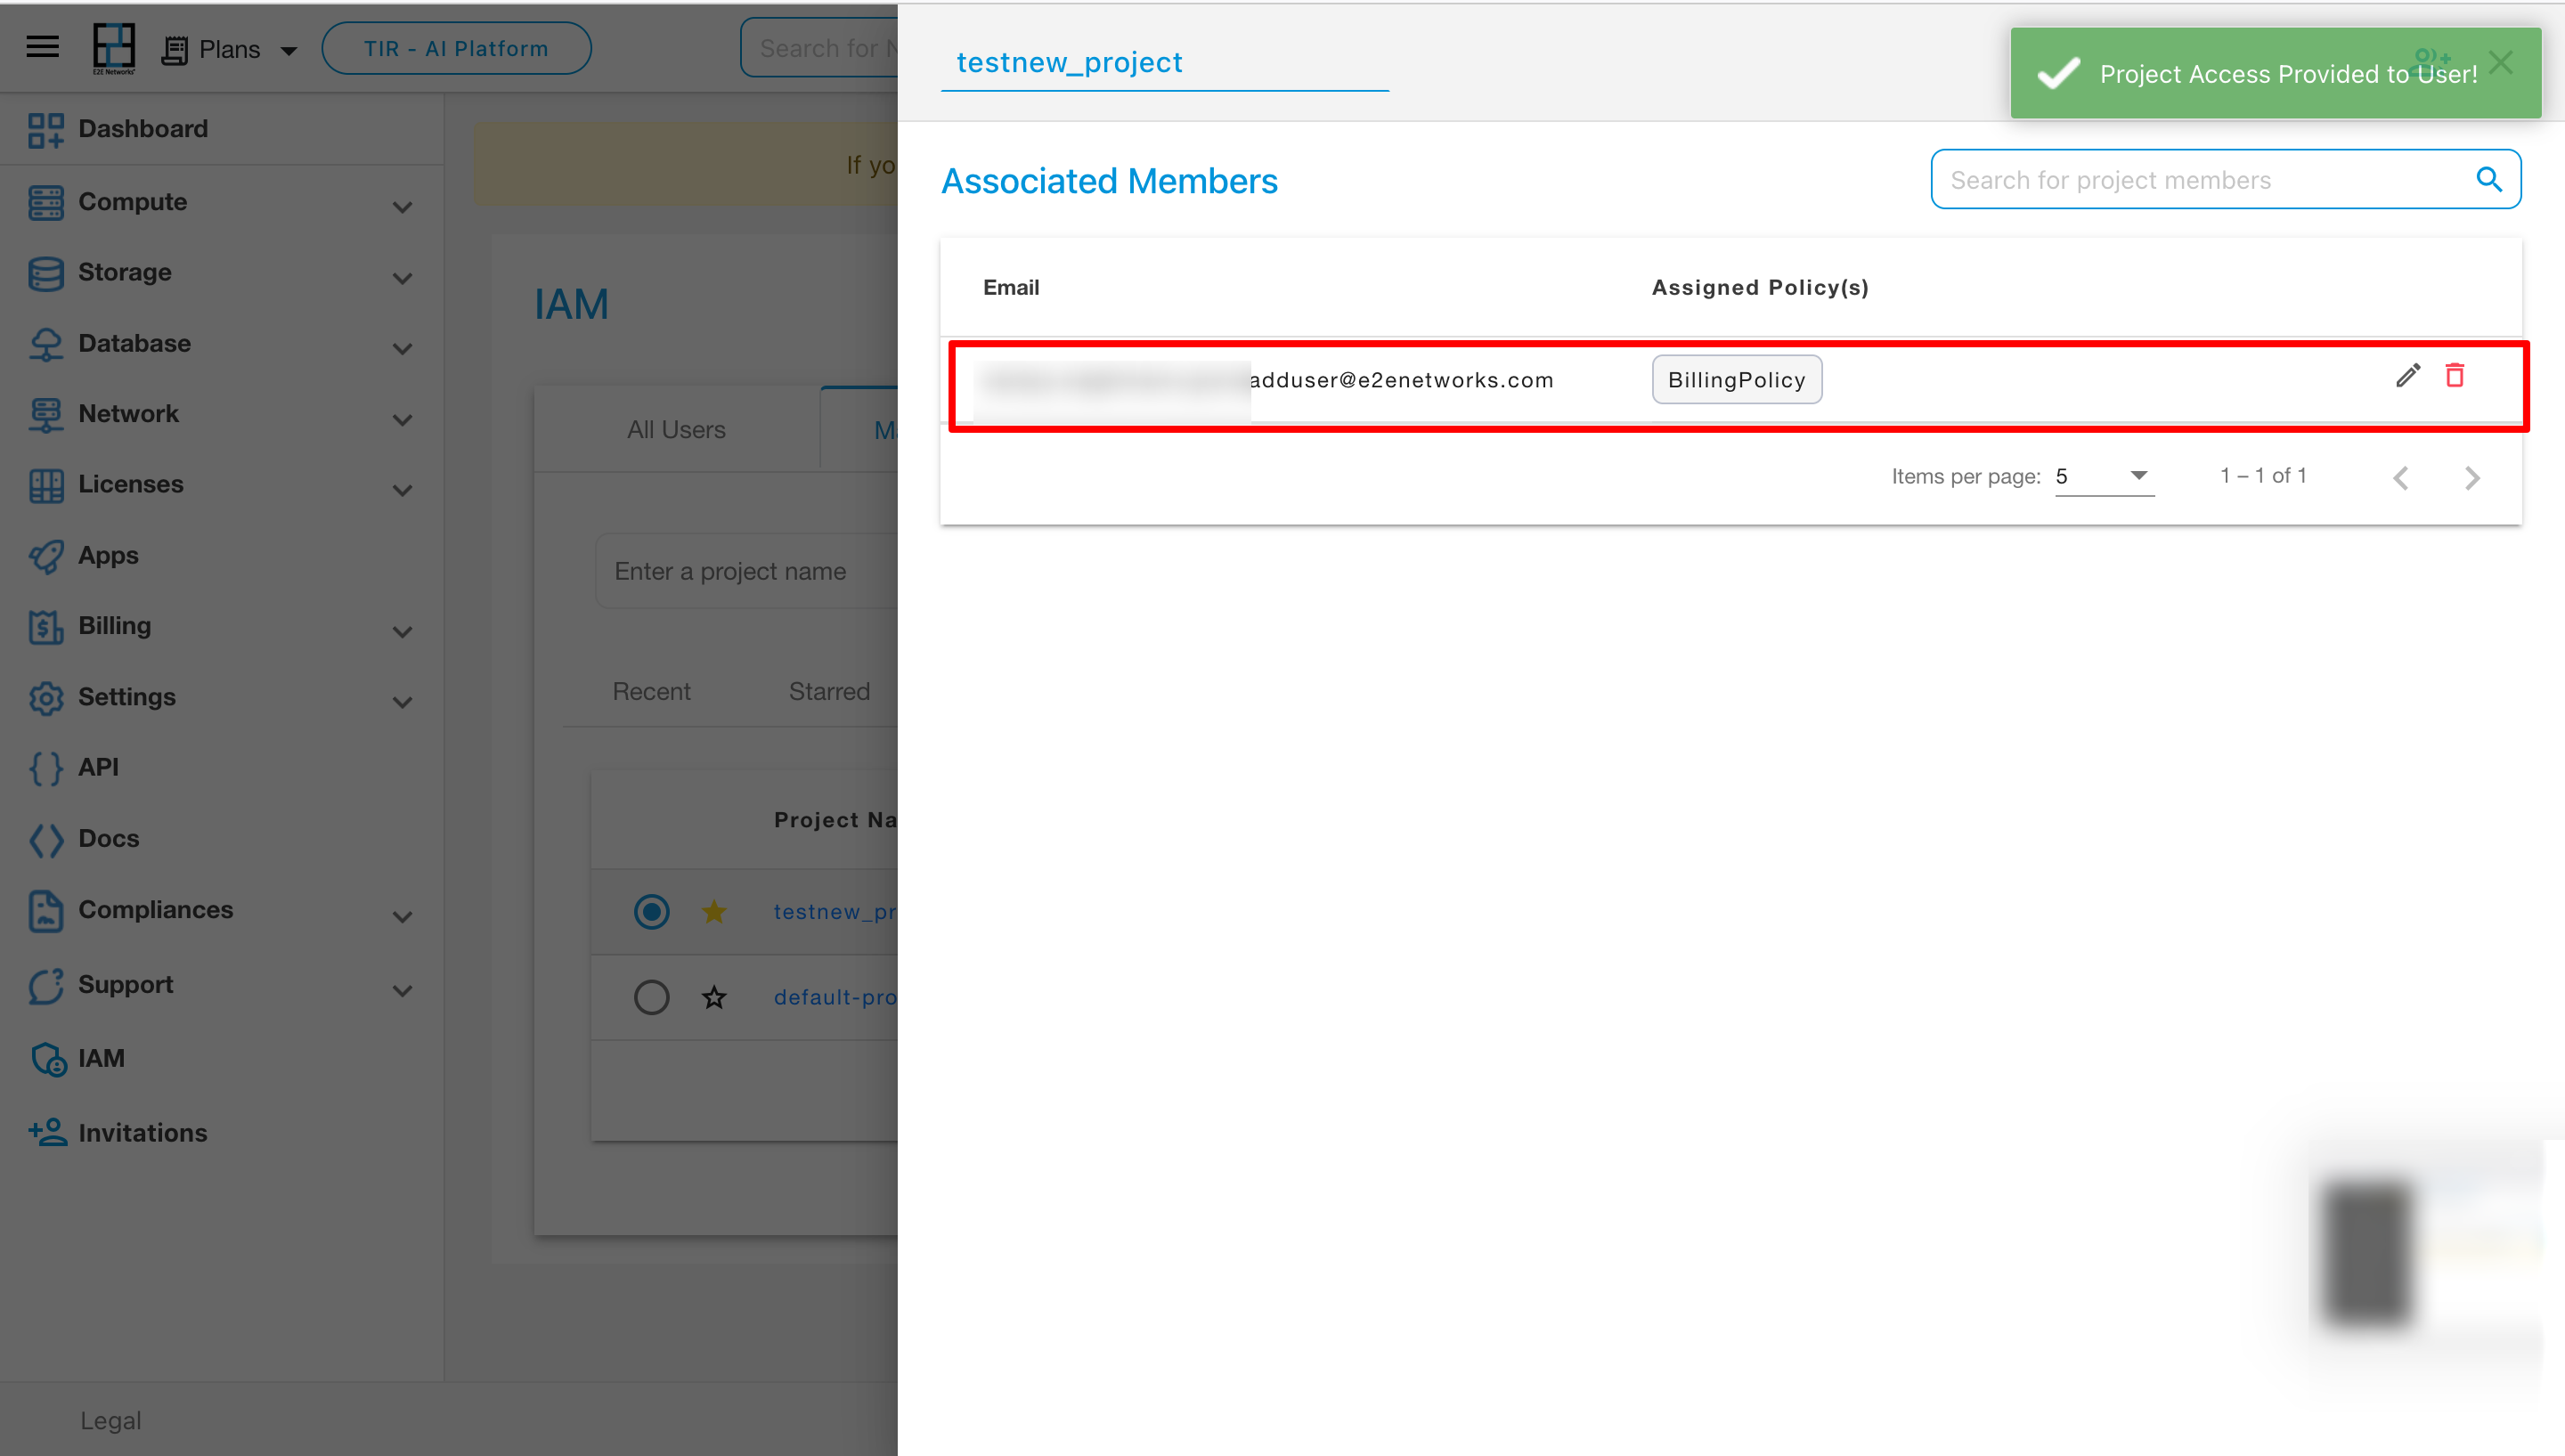
Following the selection of “Add Member,” the Add Member page will open. After entering all the necessary information, such as the new member’s details and policies, click on “Save Changes” to confirm.
Modify User’s Policy:
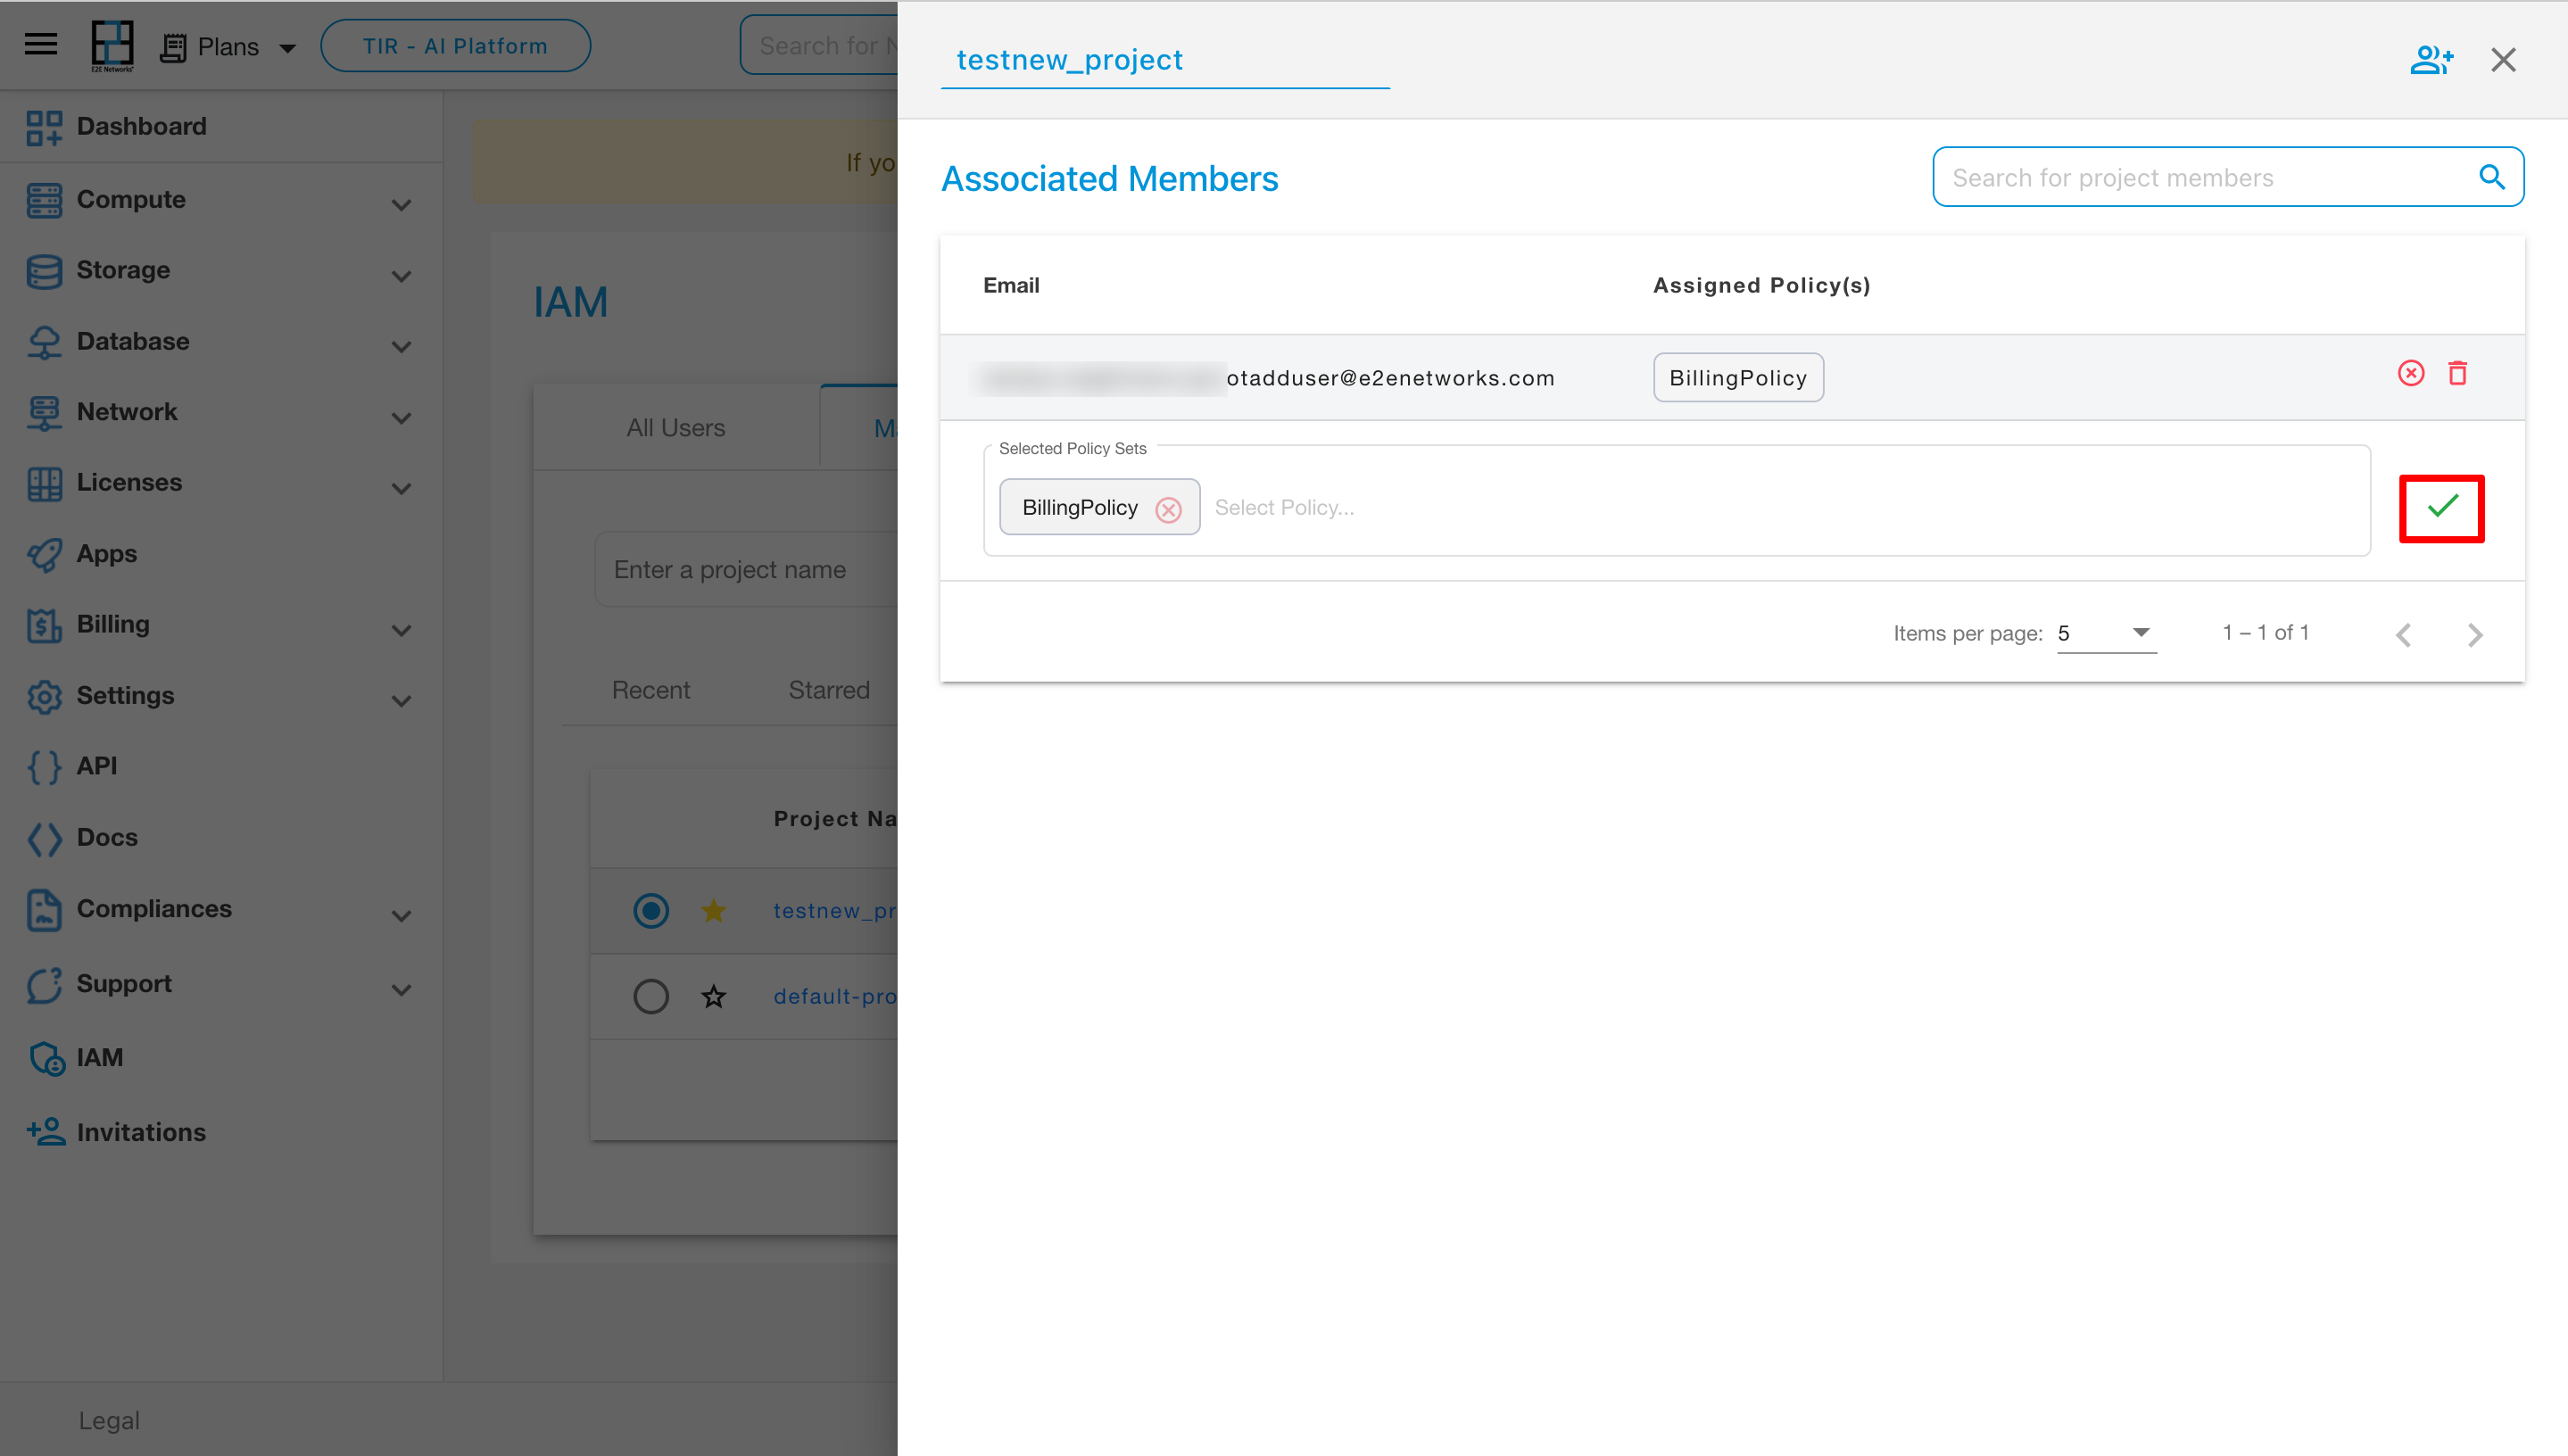
To modify a user’s policy, click on the edit button and then select the appropriate option on the right button.
Remove Member:
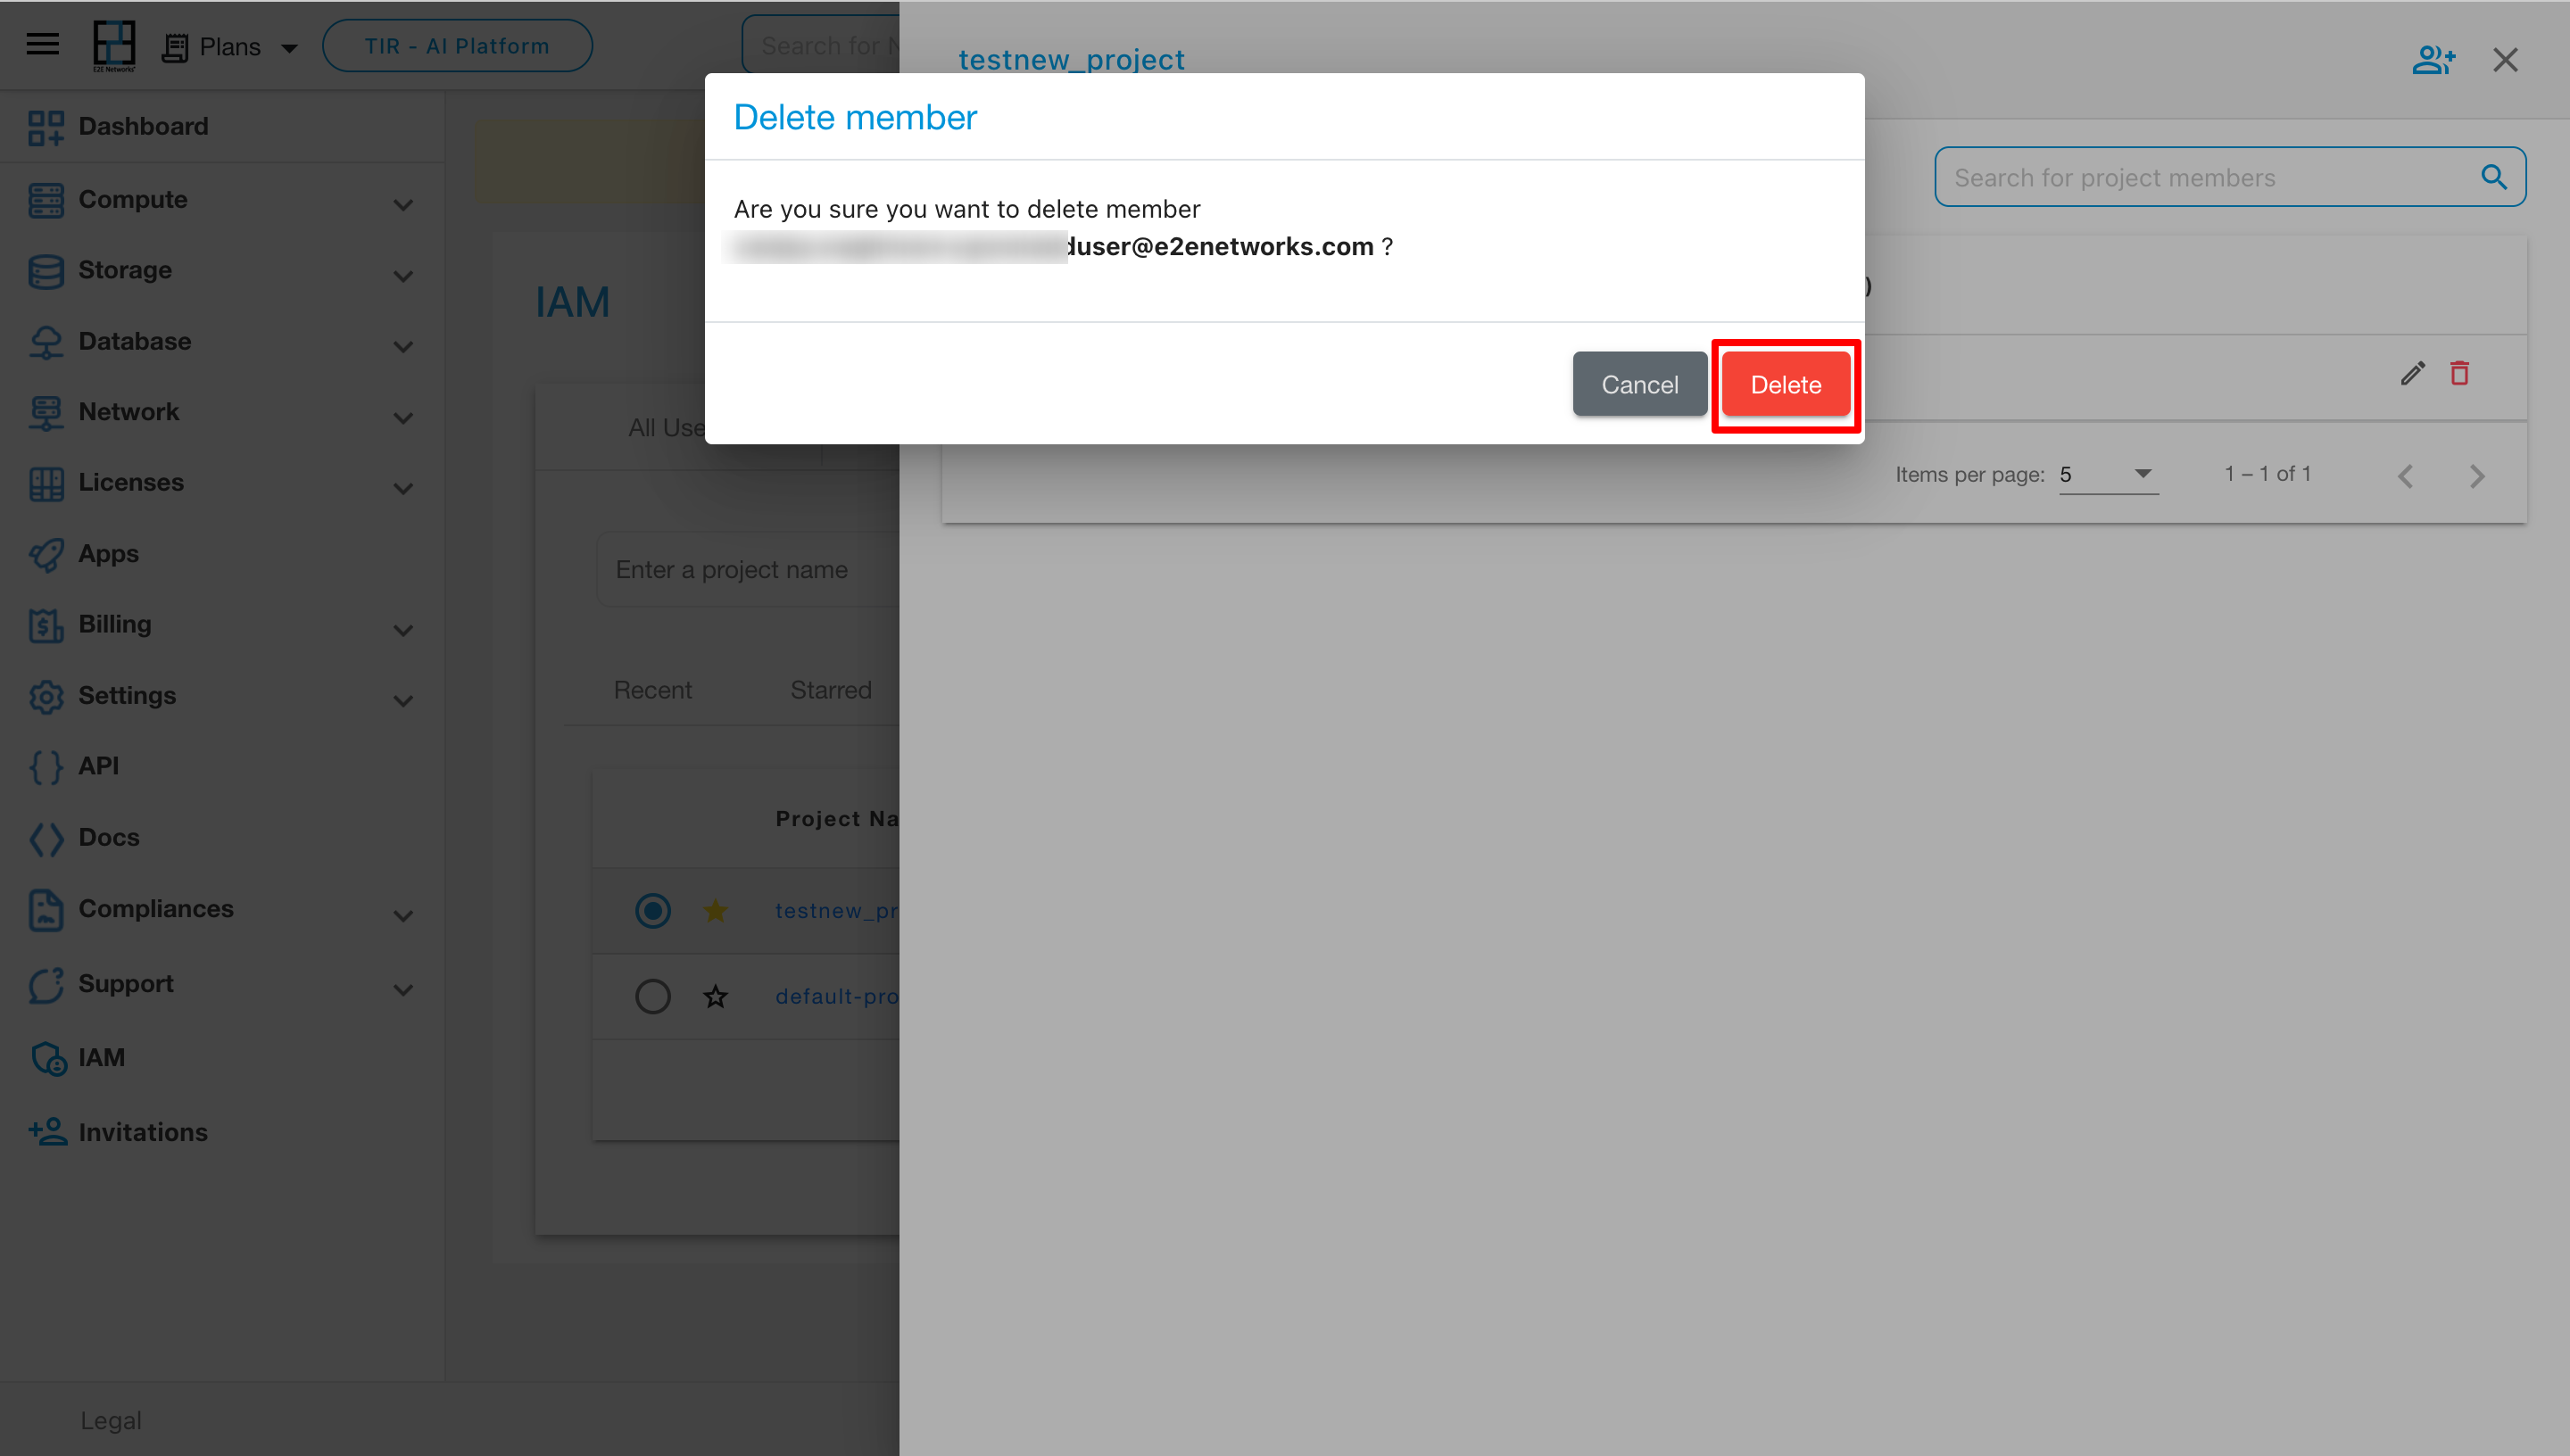
To remove a member from the project, click on the delete button. A popup will appear, and upon confirmation by clicking the Delete button within the popup, the member will be successfully deleted from the project.
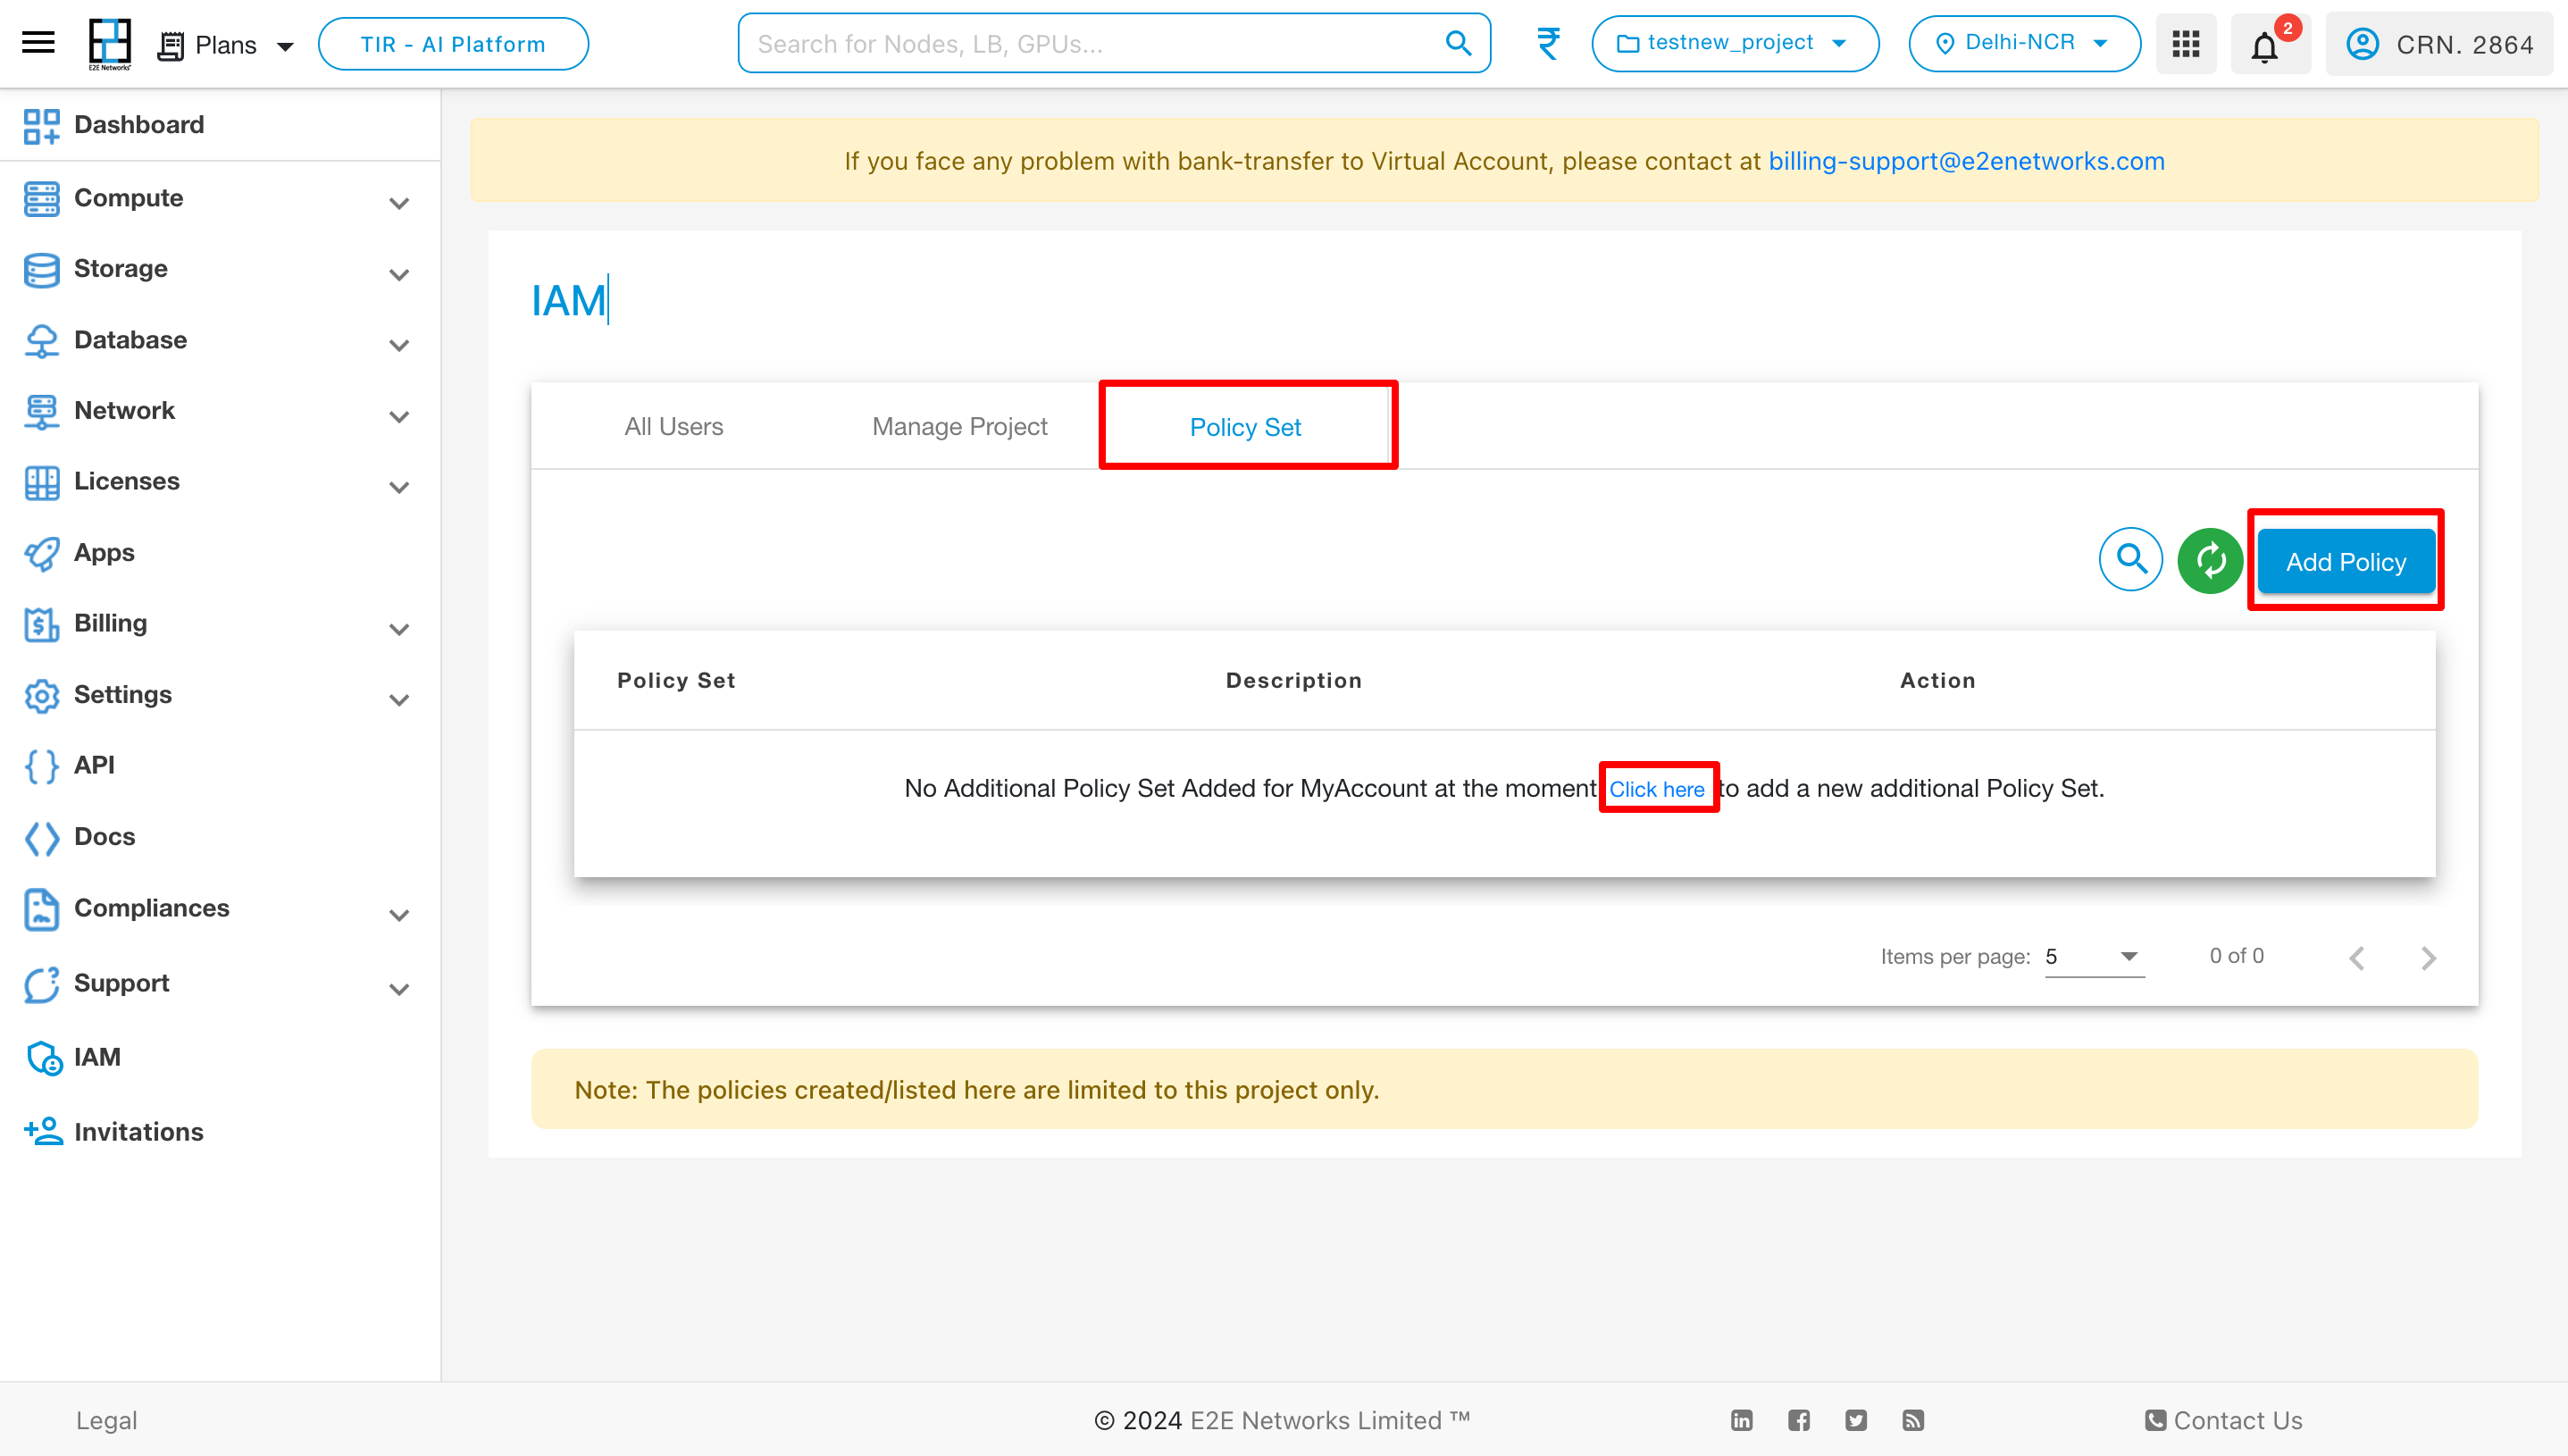
Policy Set
To access established policies, go to the IAM page and select the Policy Set section. If you wish to create a new policy, click on the “Add Policy” button.
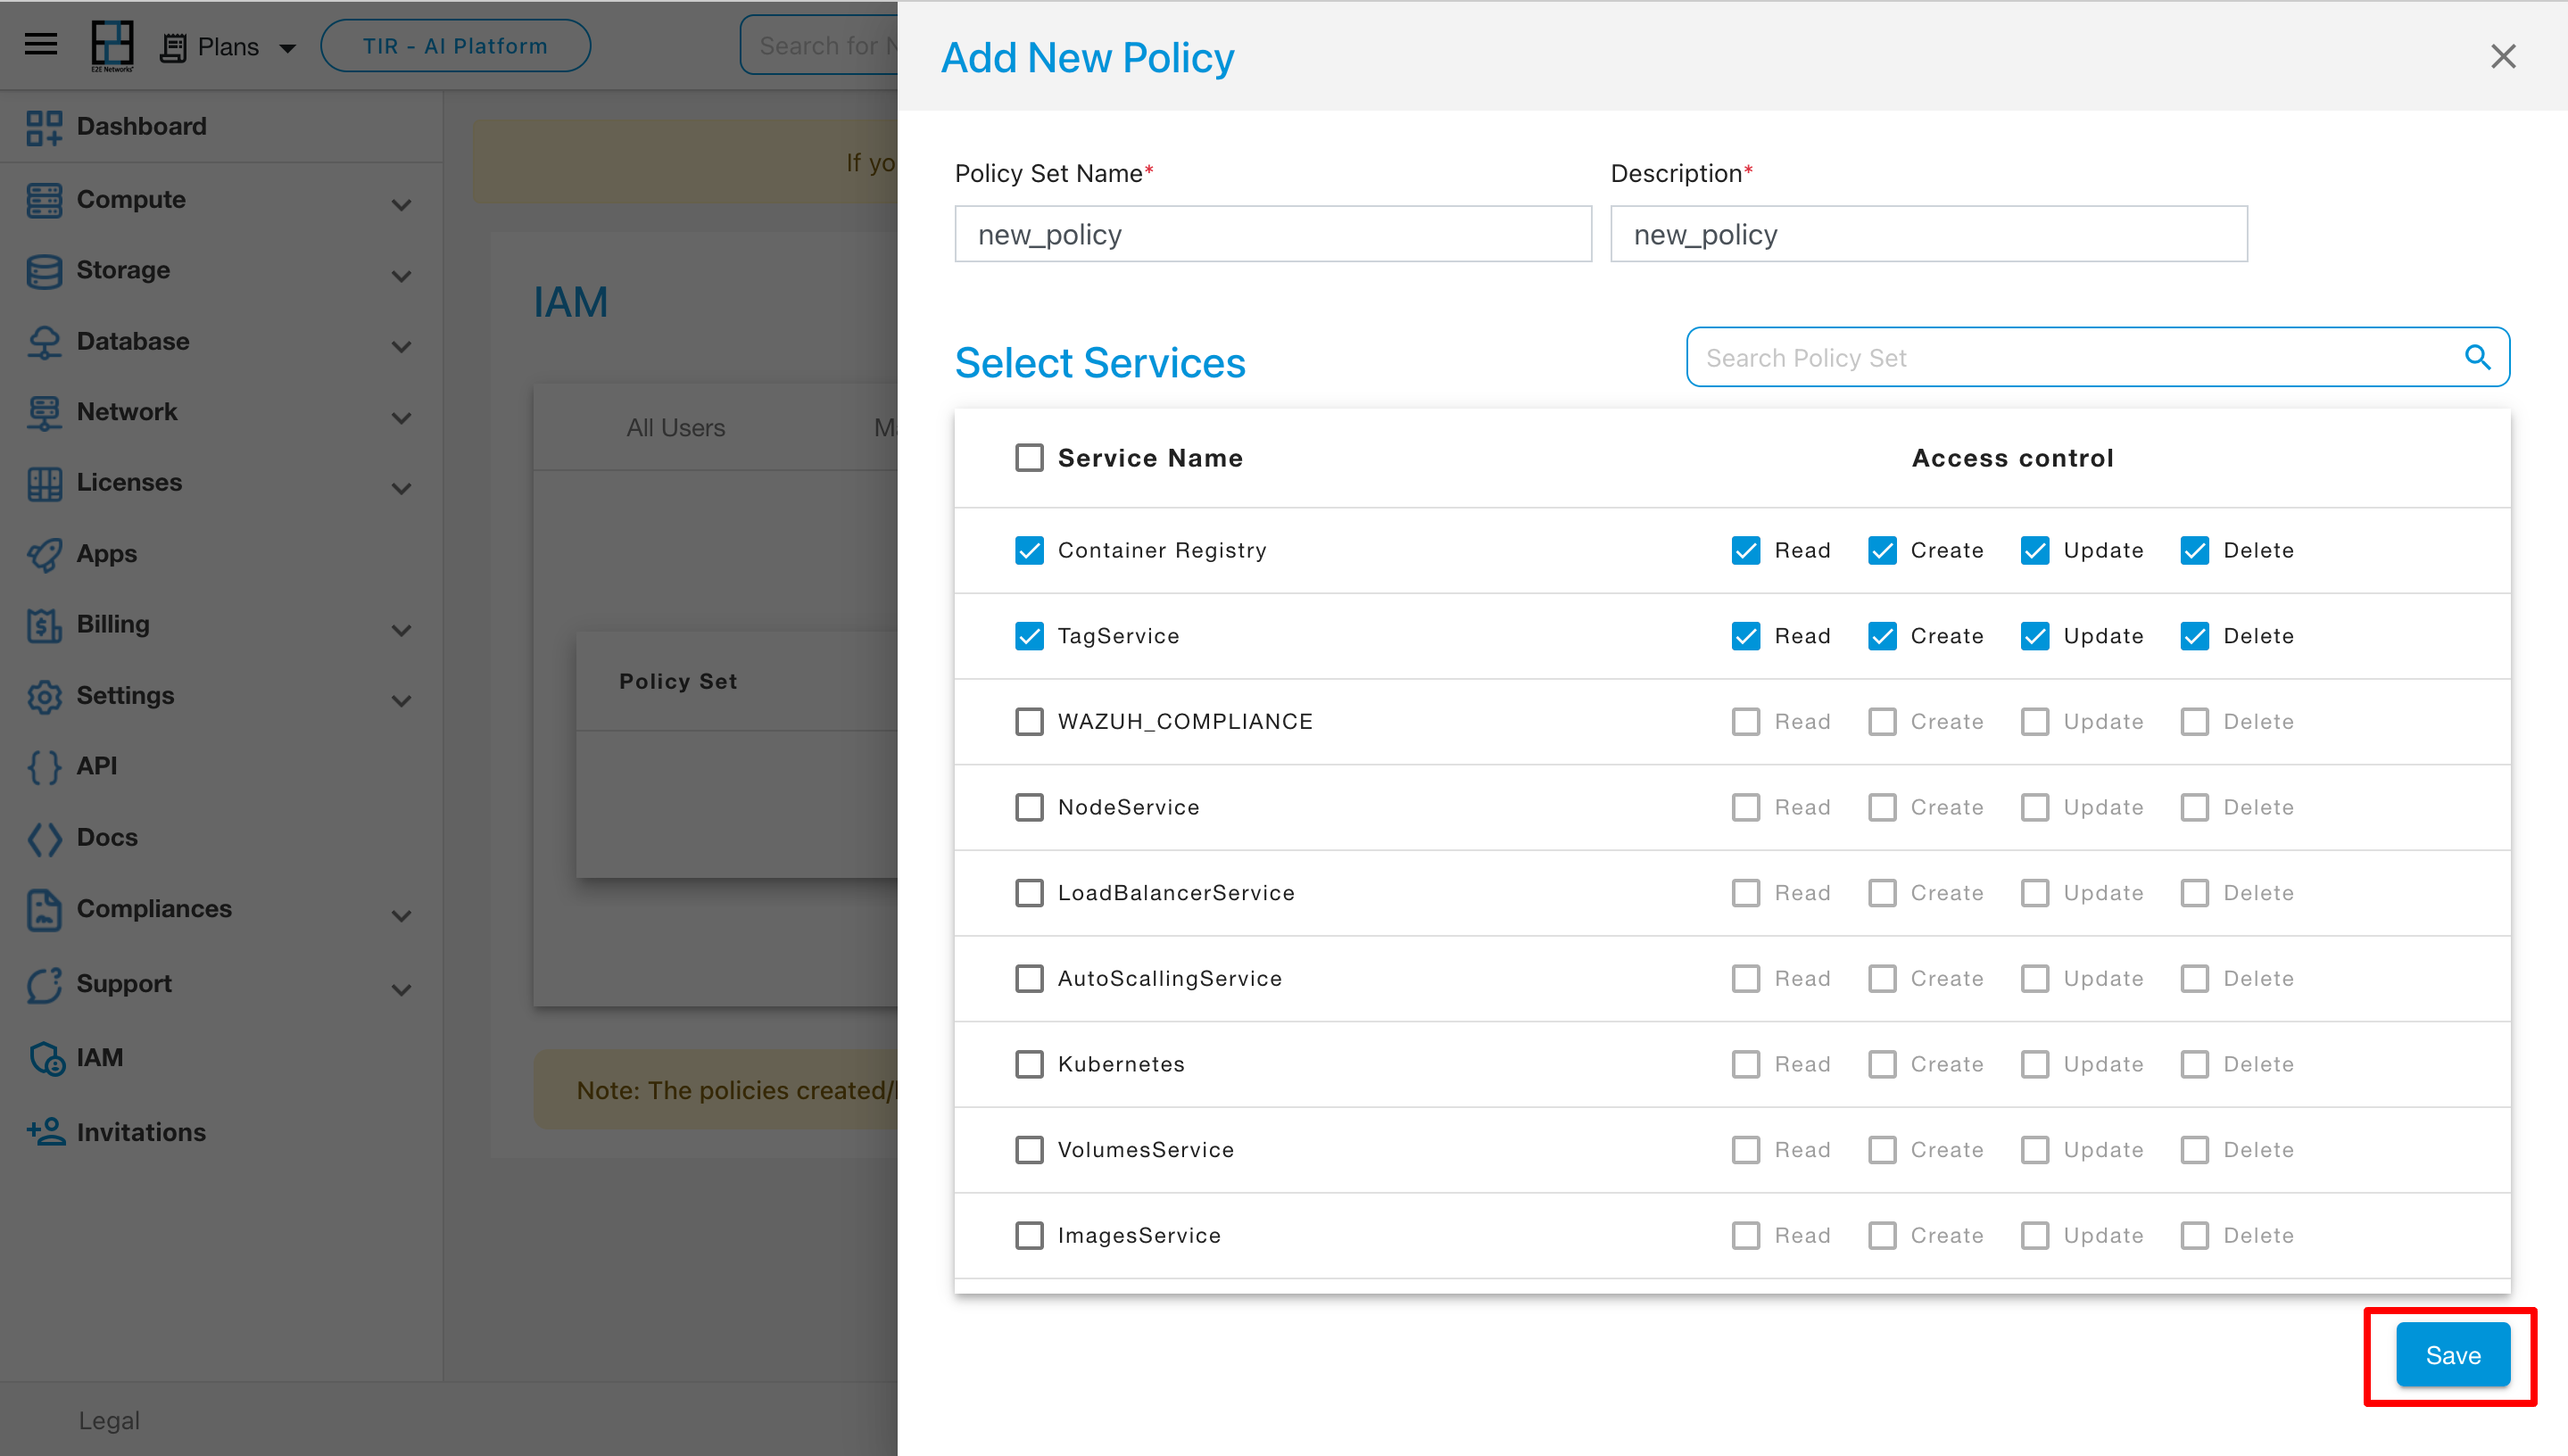
After clicking on Add Policy then Add New Policy page will be appear on that page you have to give policy set name and description and select the services which are to be giving access to in this policy then click on the Save button.
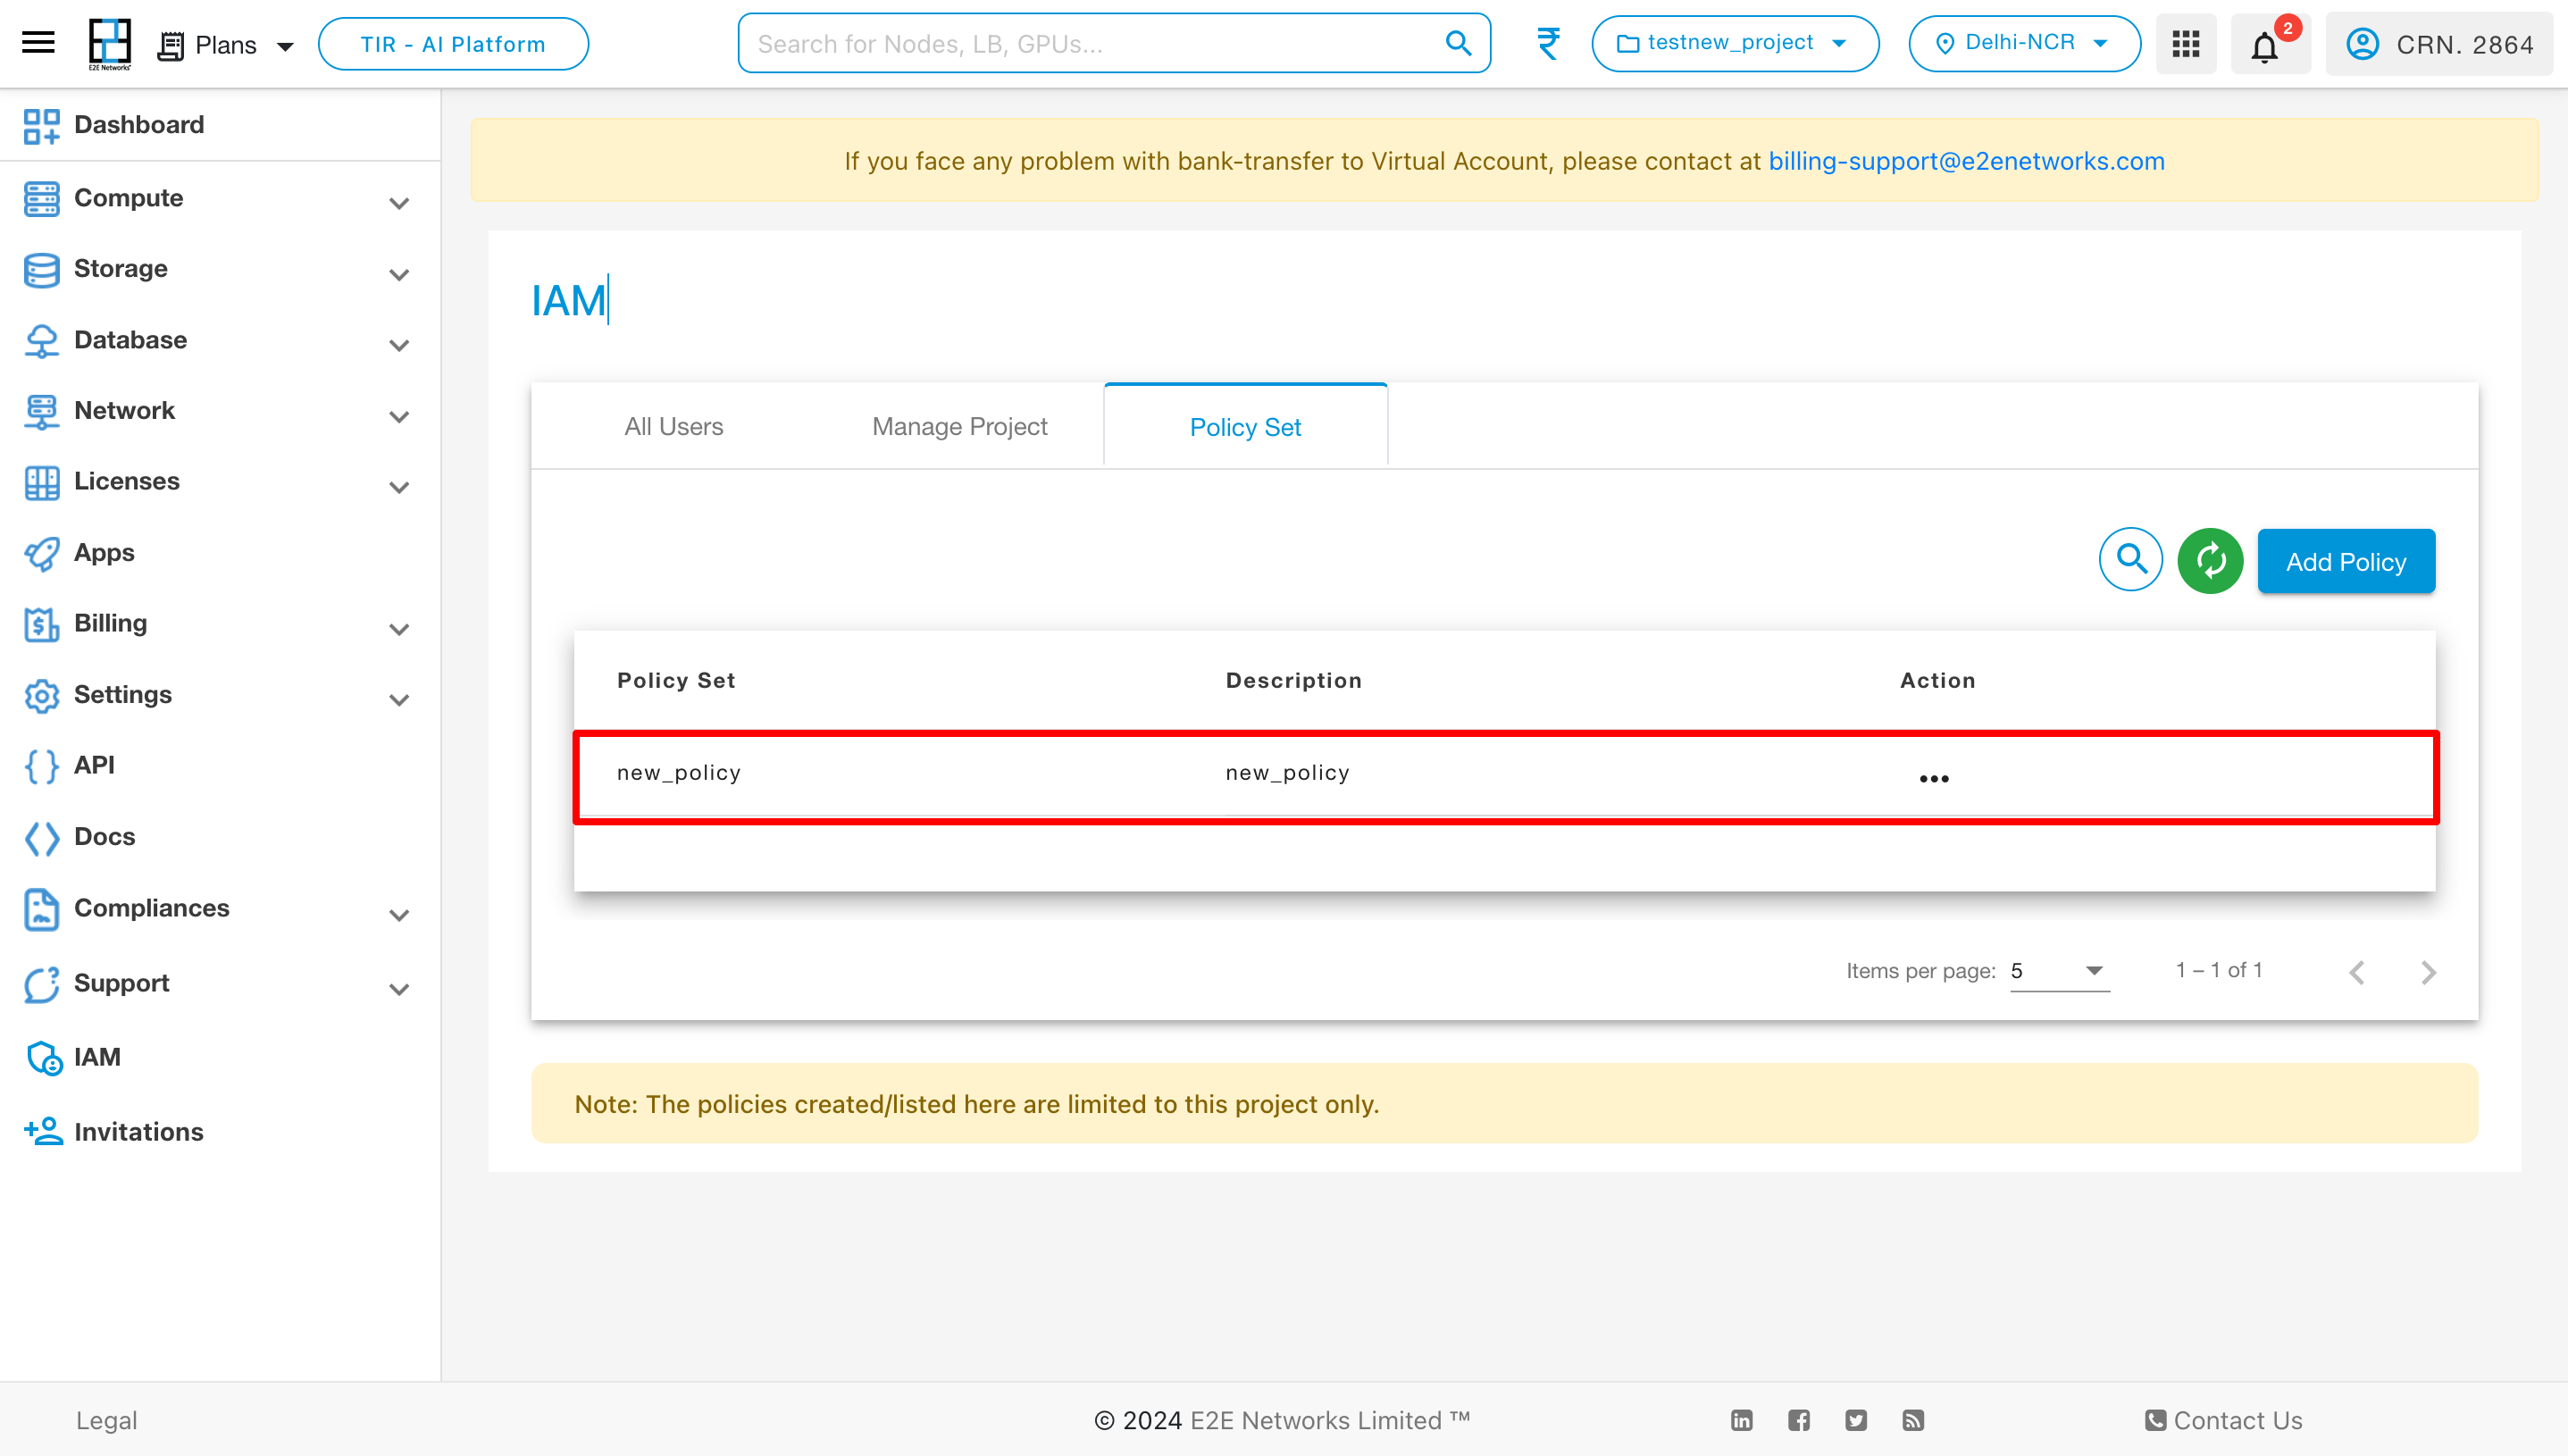
Upon saving the policy, it will be displayed in the Policy Set section on the IAM page.
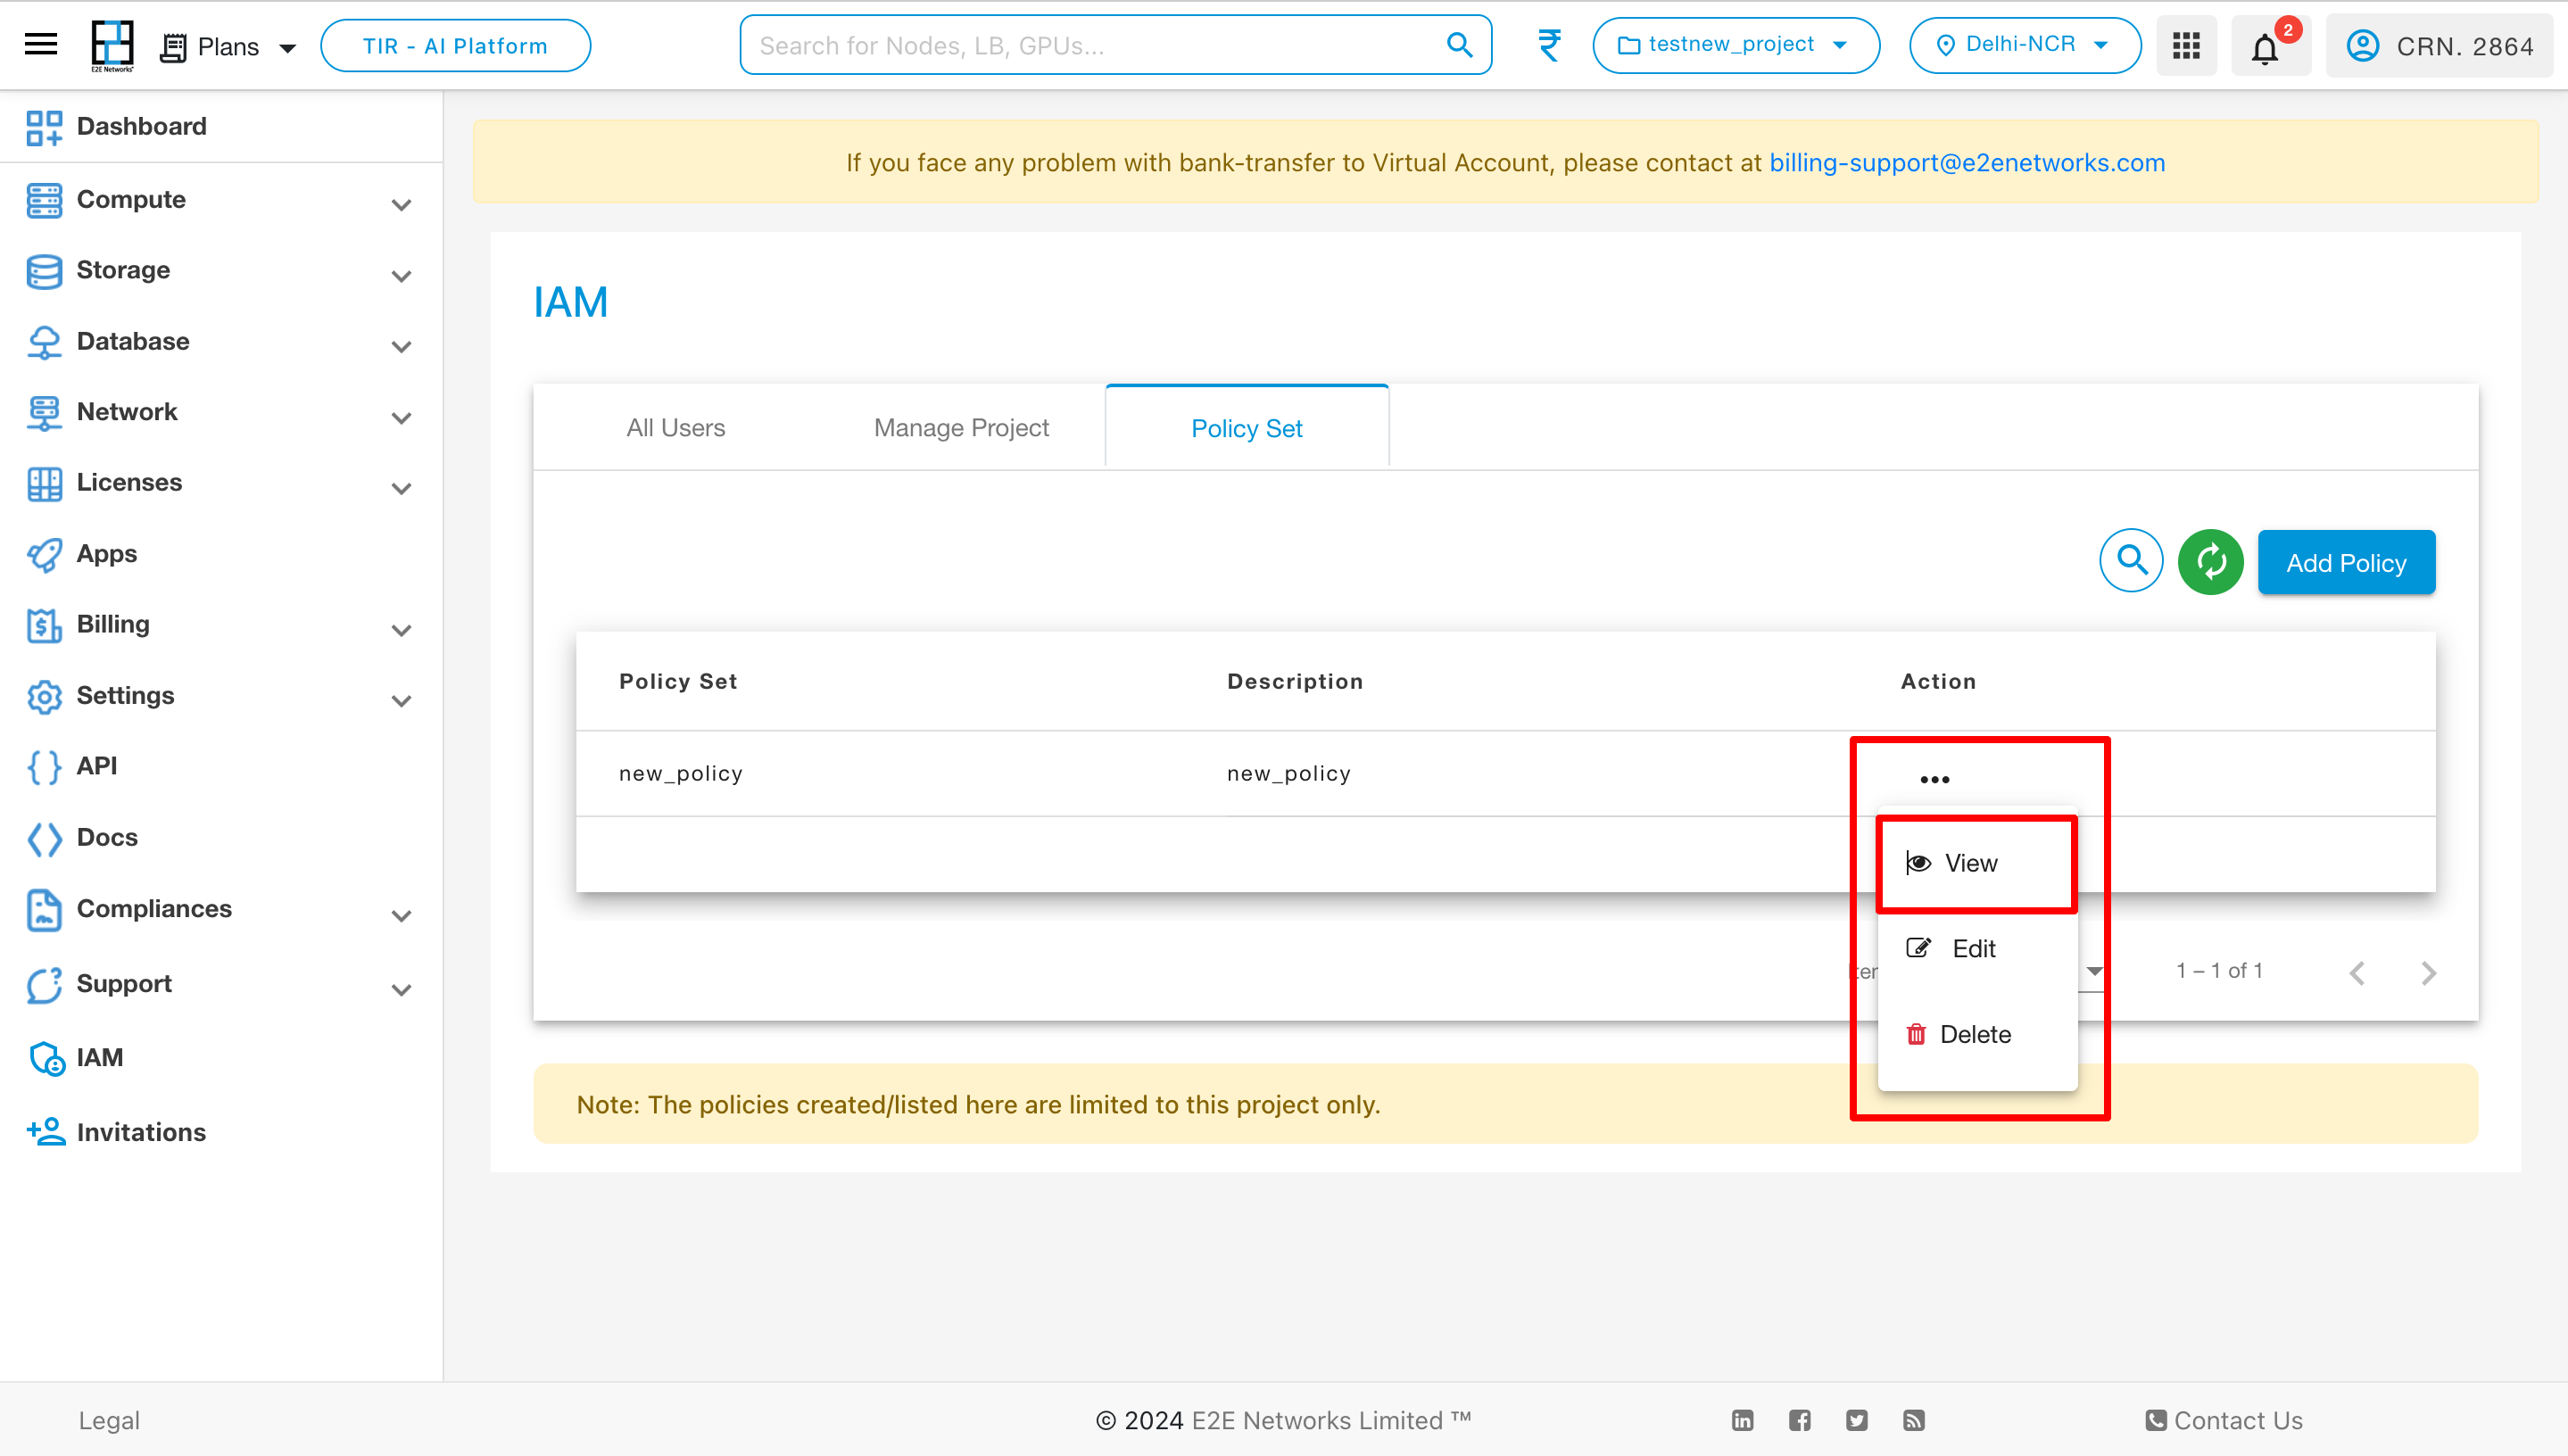
To execute actions on a policy set, click on the three dots, and a menu of actions will appear. To view the policy services, select the “View” action.
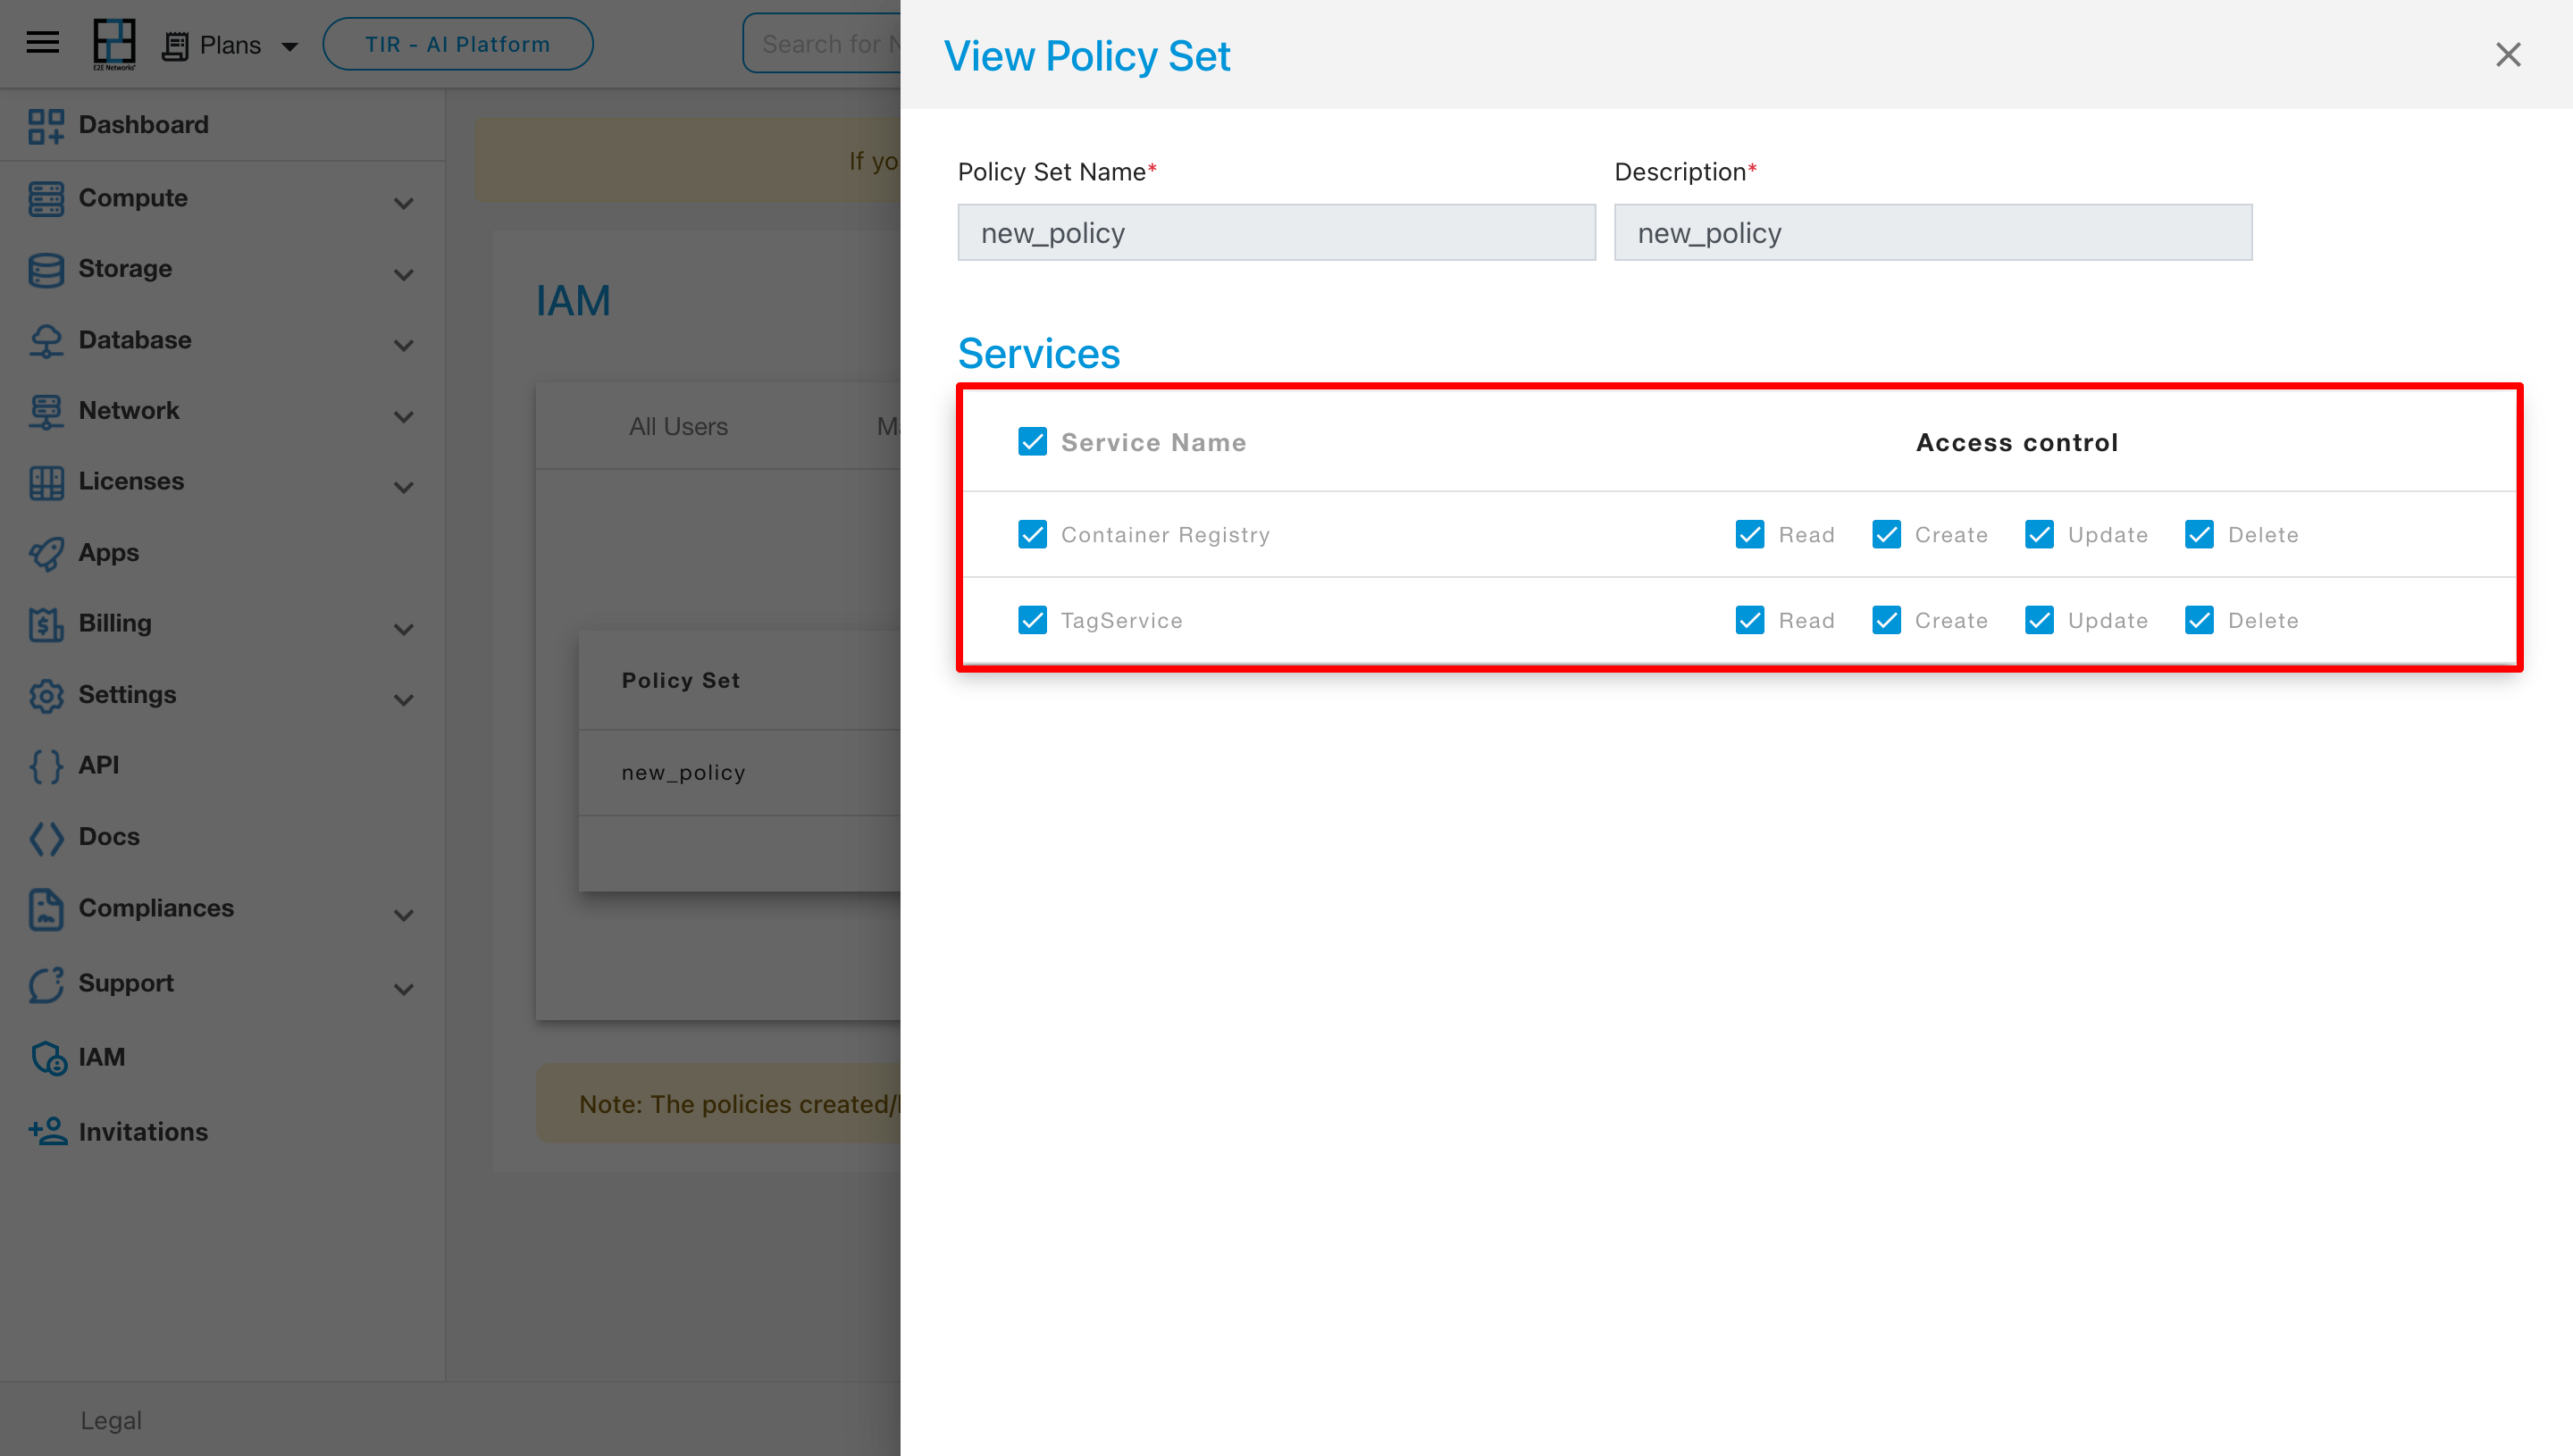
Upon selecting the “View” action, the Services page will open, allowing you to see all the services associated with that policy.

To modify the policy set, click on the “Edit” action.
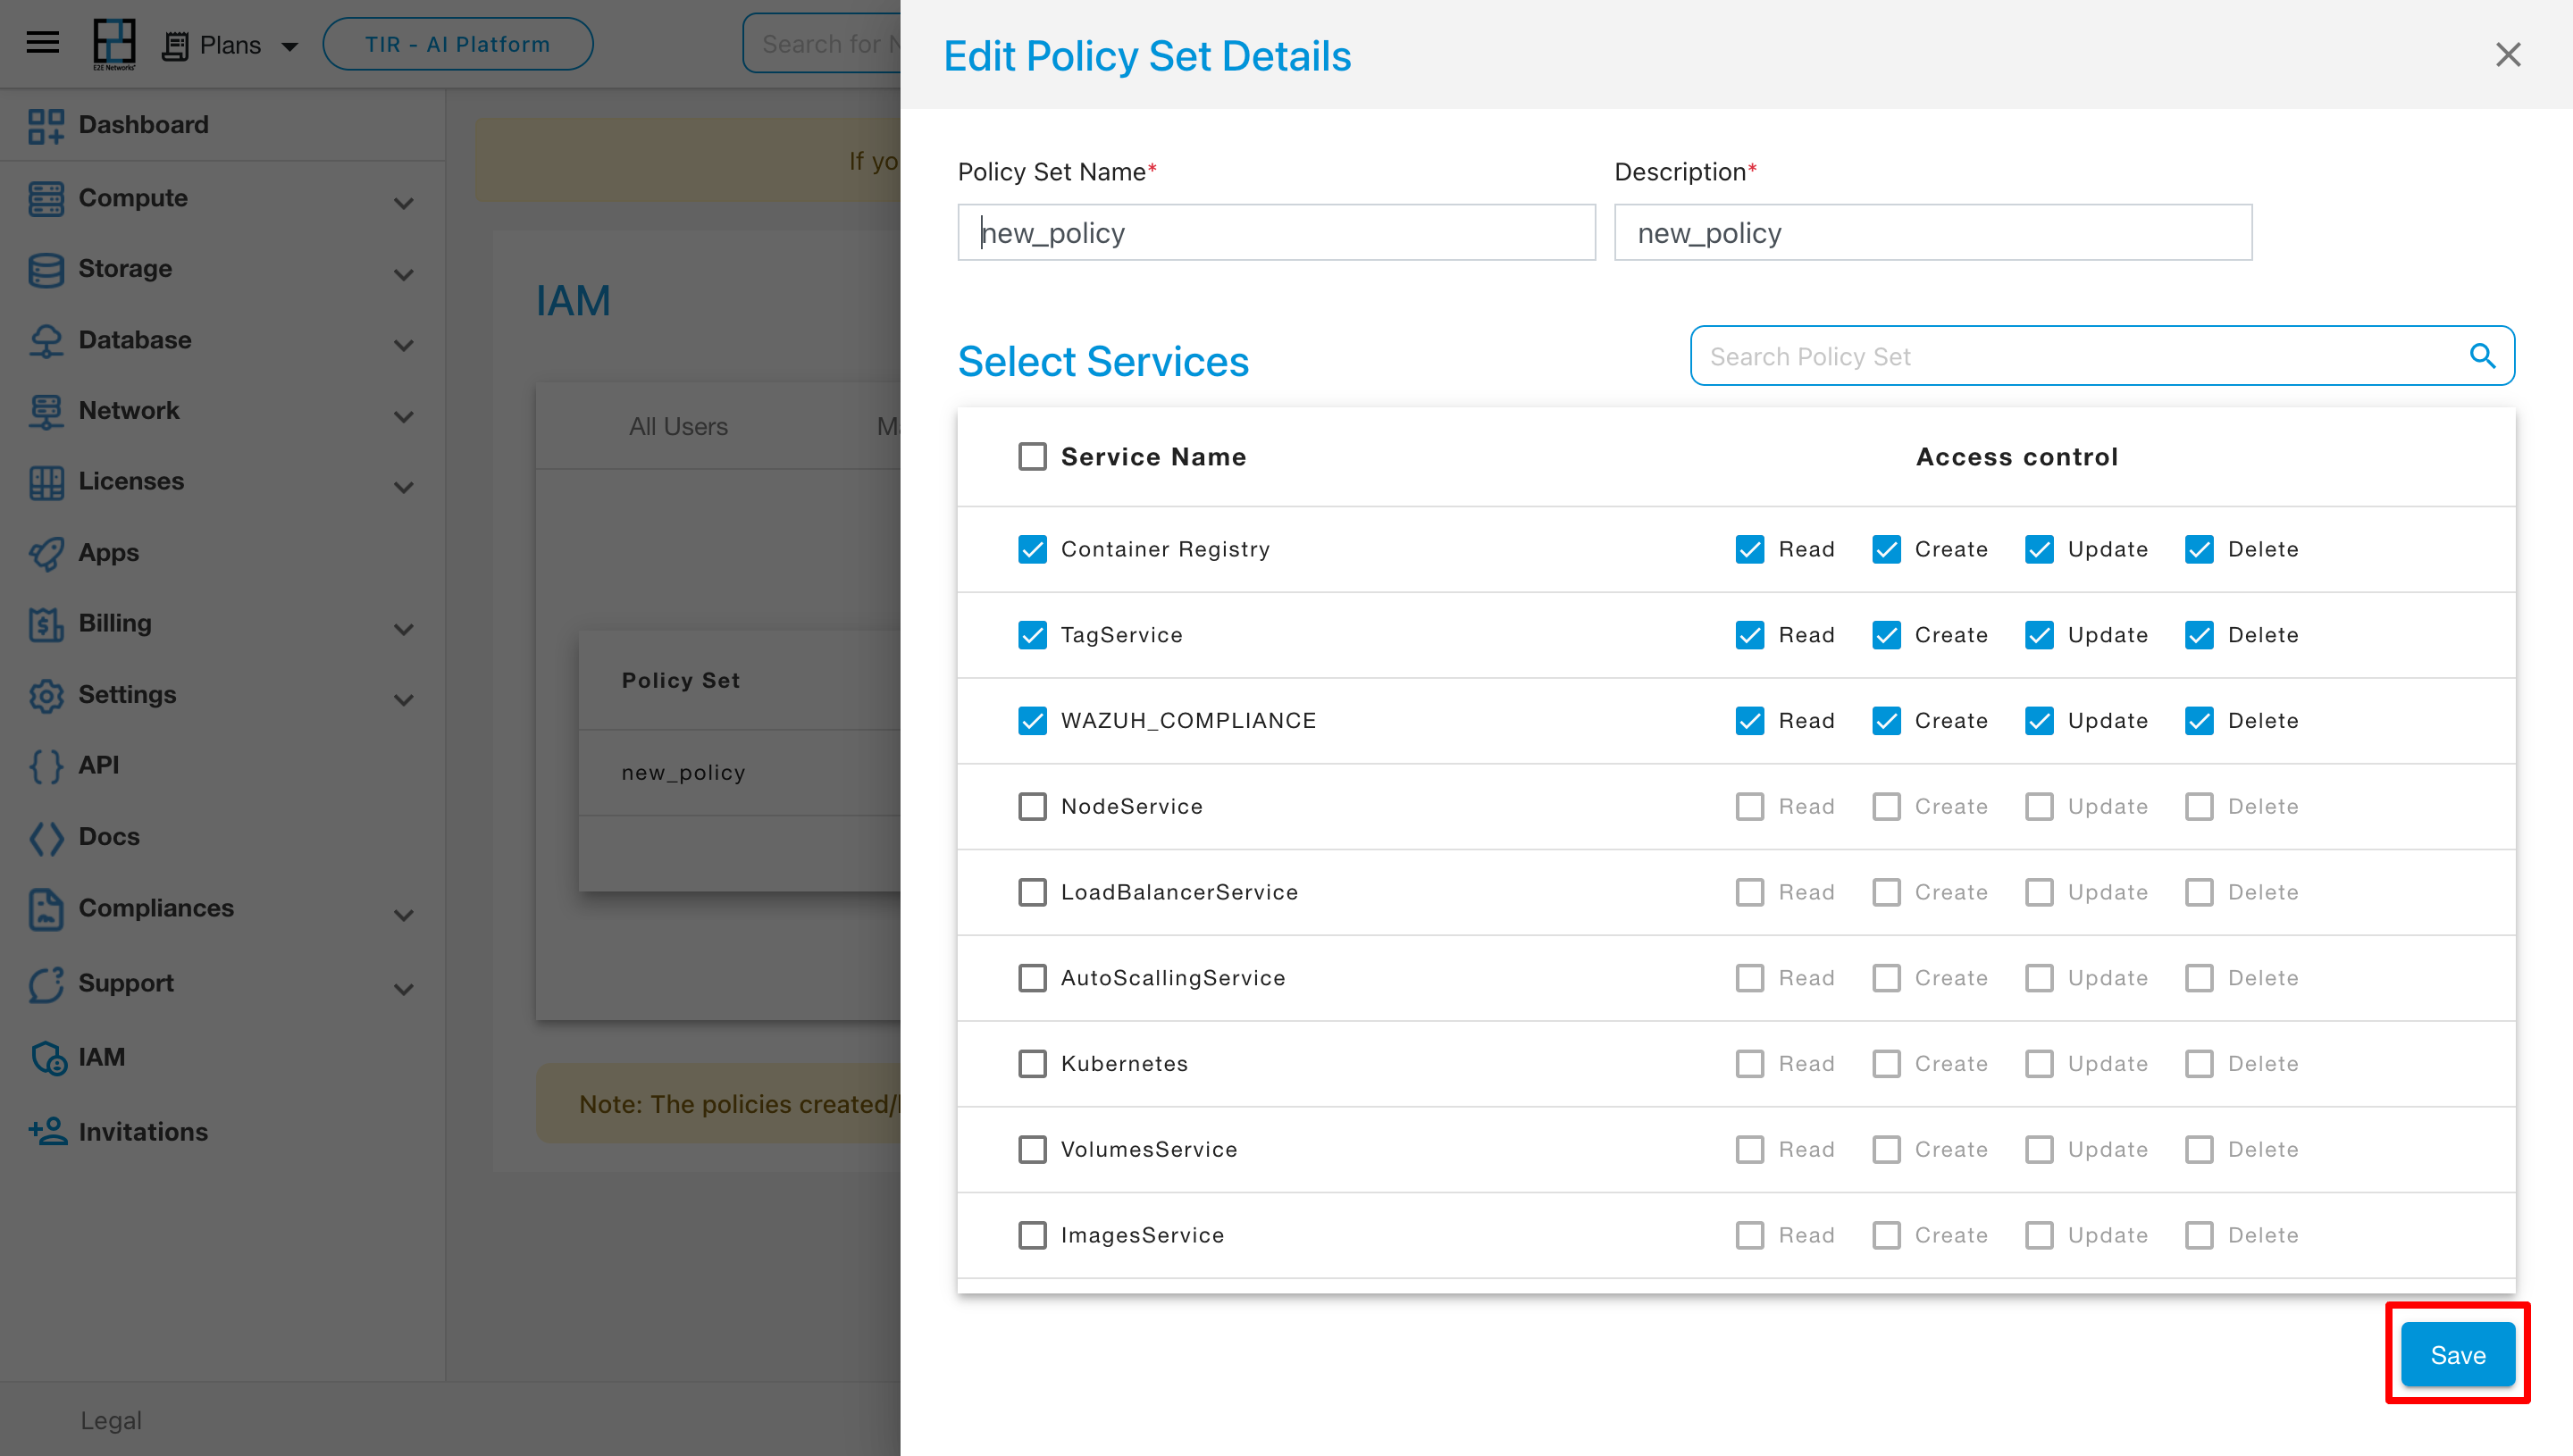
Upon choosing the “Edit” action, the Edit Policy Set Details page will open. On this page, you can add or remove services from the policy set by ticking or unticking the respective options. After making the desired changes, click on the Save button.
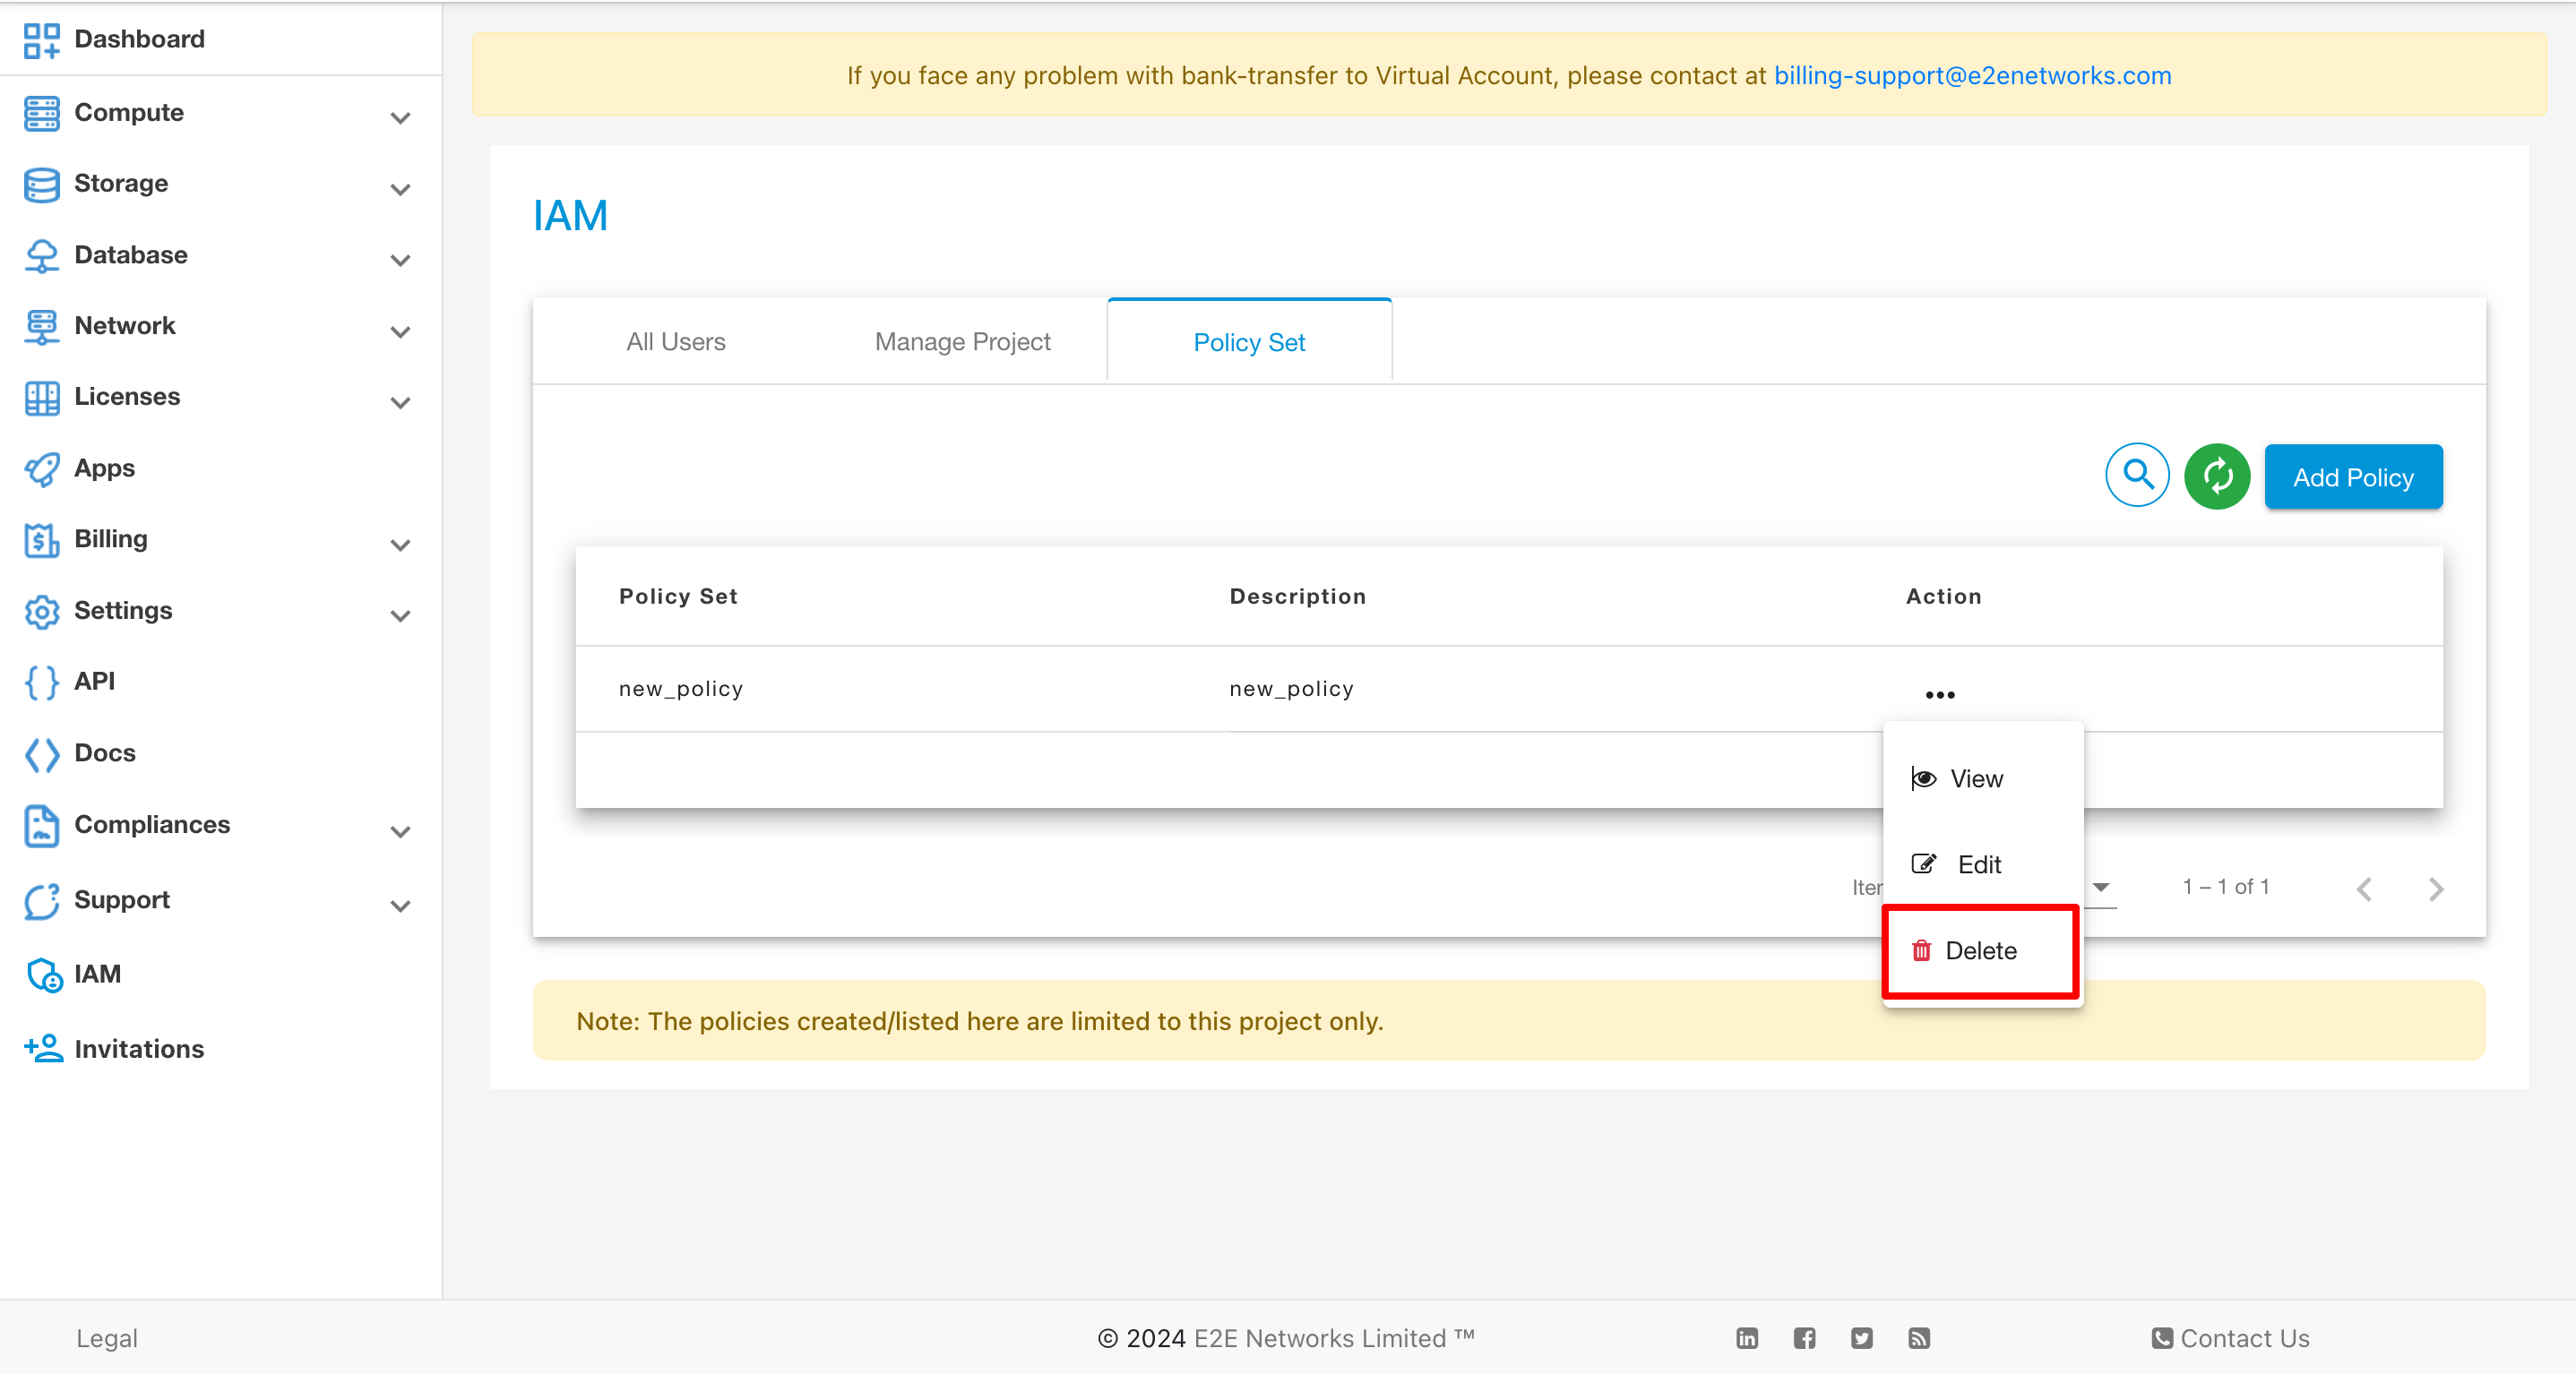
To remove a policy set, click on the “Delete” action.
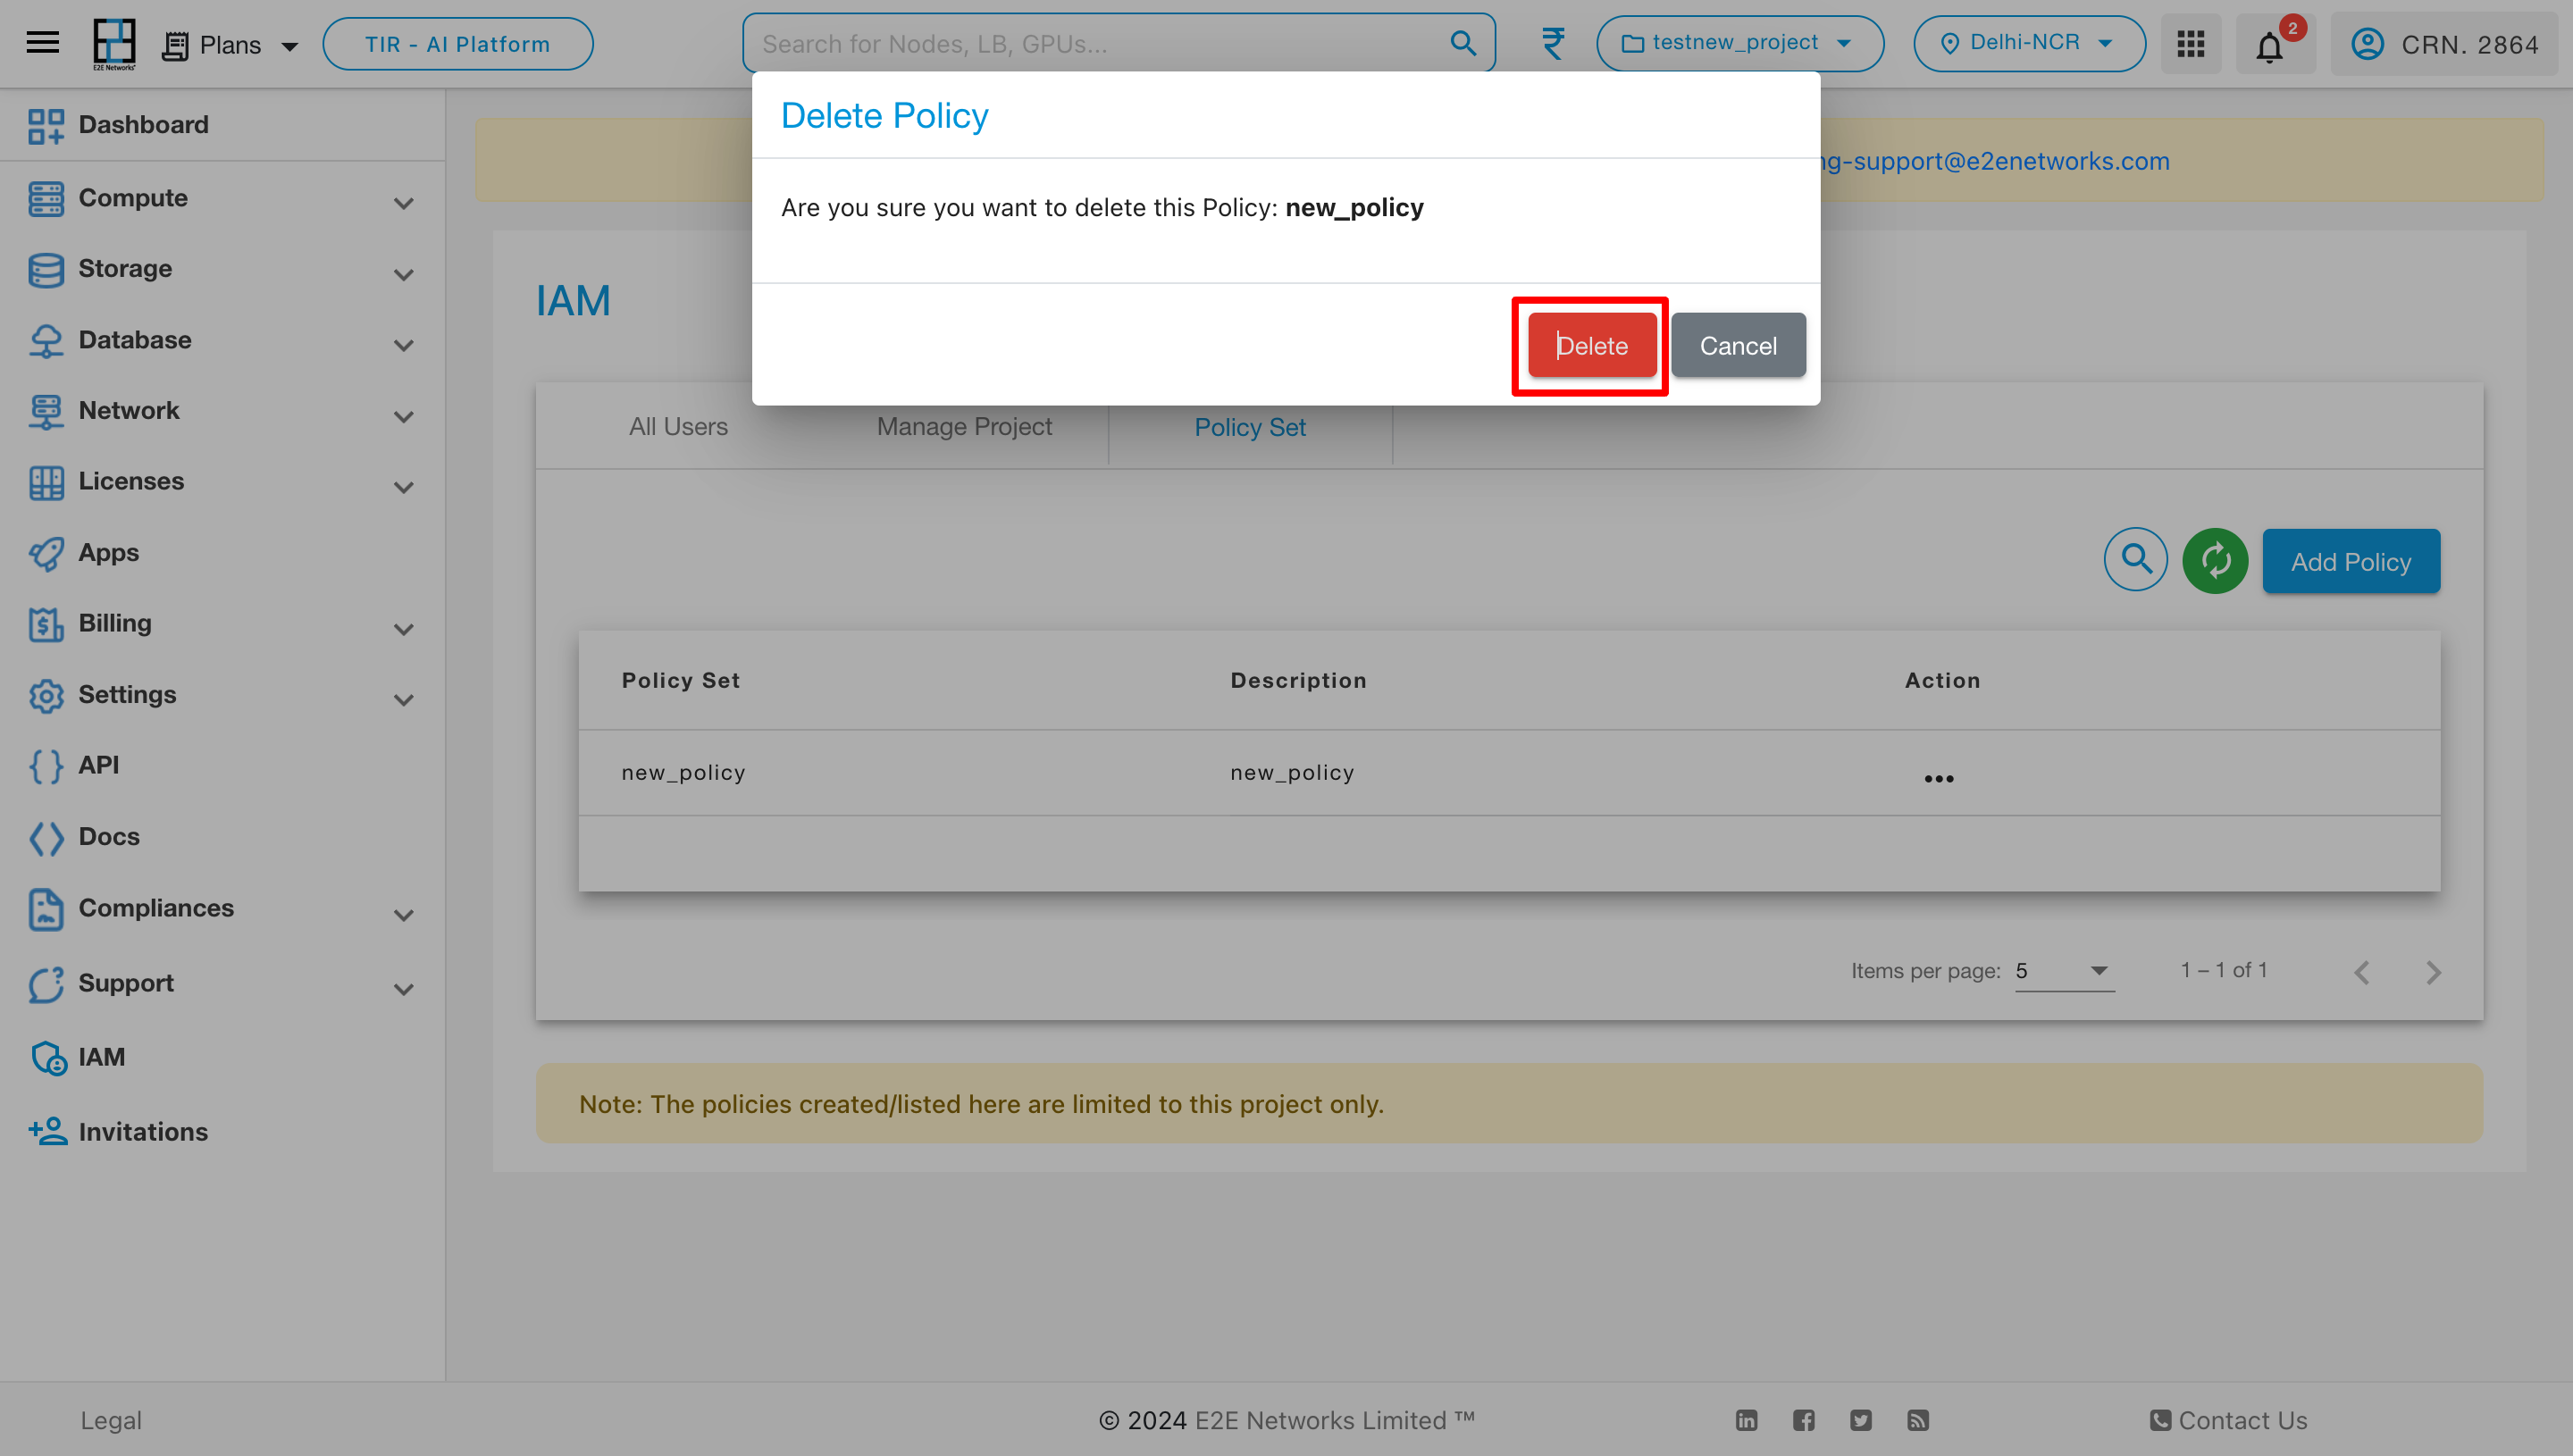
Upon selecting the “Delete” action, a pop-up will appear. Click on “Delete” within the pop-up, and the policy set will be removed from the policy set list.