Introduction
E2E Volume Provides block-level storage volumes to use with our compute nodes. These volumes can be attached to your computing nodes which makes its data and file system available for your nodes. If your node is running on linux, then you can mount this volume filesystem just like mounting any other filesystem.
E2E’s Volume can be useful when your storage needs get increased more than your computing demands, Since these block storage volumes are directly connected to your nodes, their I/O speeds are much faster compared to alternative storage solutions like object storage.
Getting Started
Creating Volume
You can create volume and attach it to any of the supported nodes. Before creating volume, you should consider the storage size. If you are creating a volume for high performance and storage, You should make sure to create volume storage with enough storage and IOPS.
This section will show you how to create volume storage from the Myaccount portal.
Login to MyAccount Portal
Login to Myaccount Portal using your credentials set up at the time of creating and activating the E2E Networks ‘My Account’.
Navigate to Volume
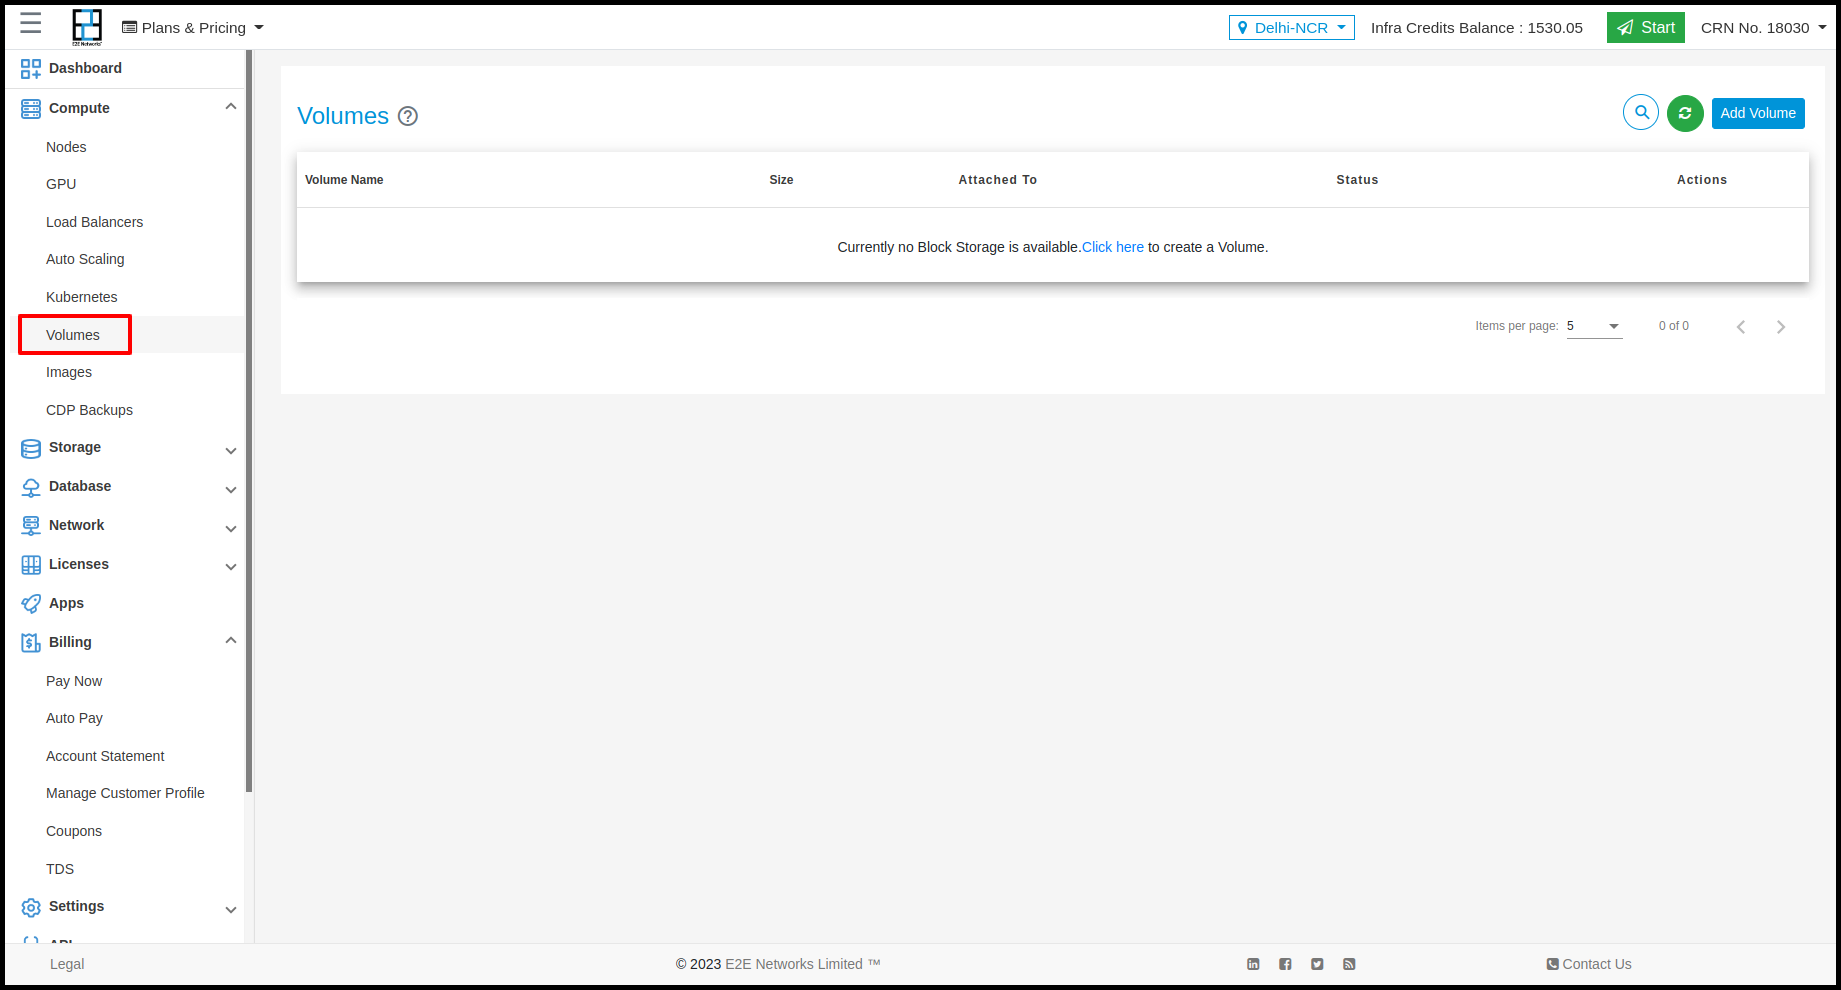
Once you have logged in to Myaccount Portal, You can navigate to the Volume page from the sidebar menu.
Add Volume
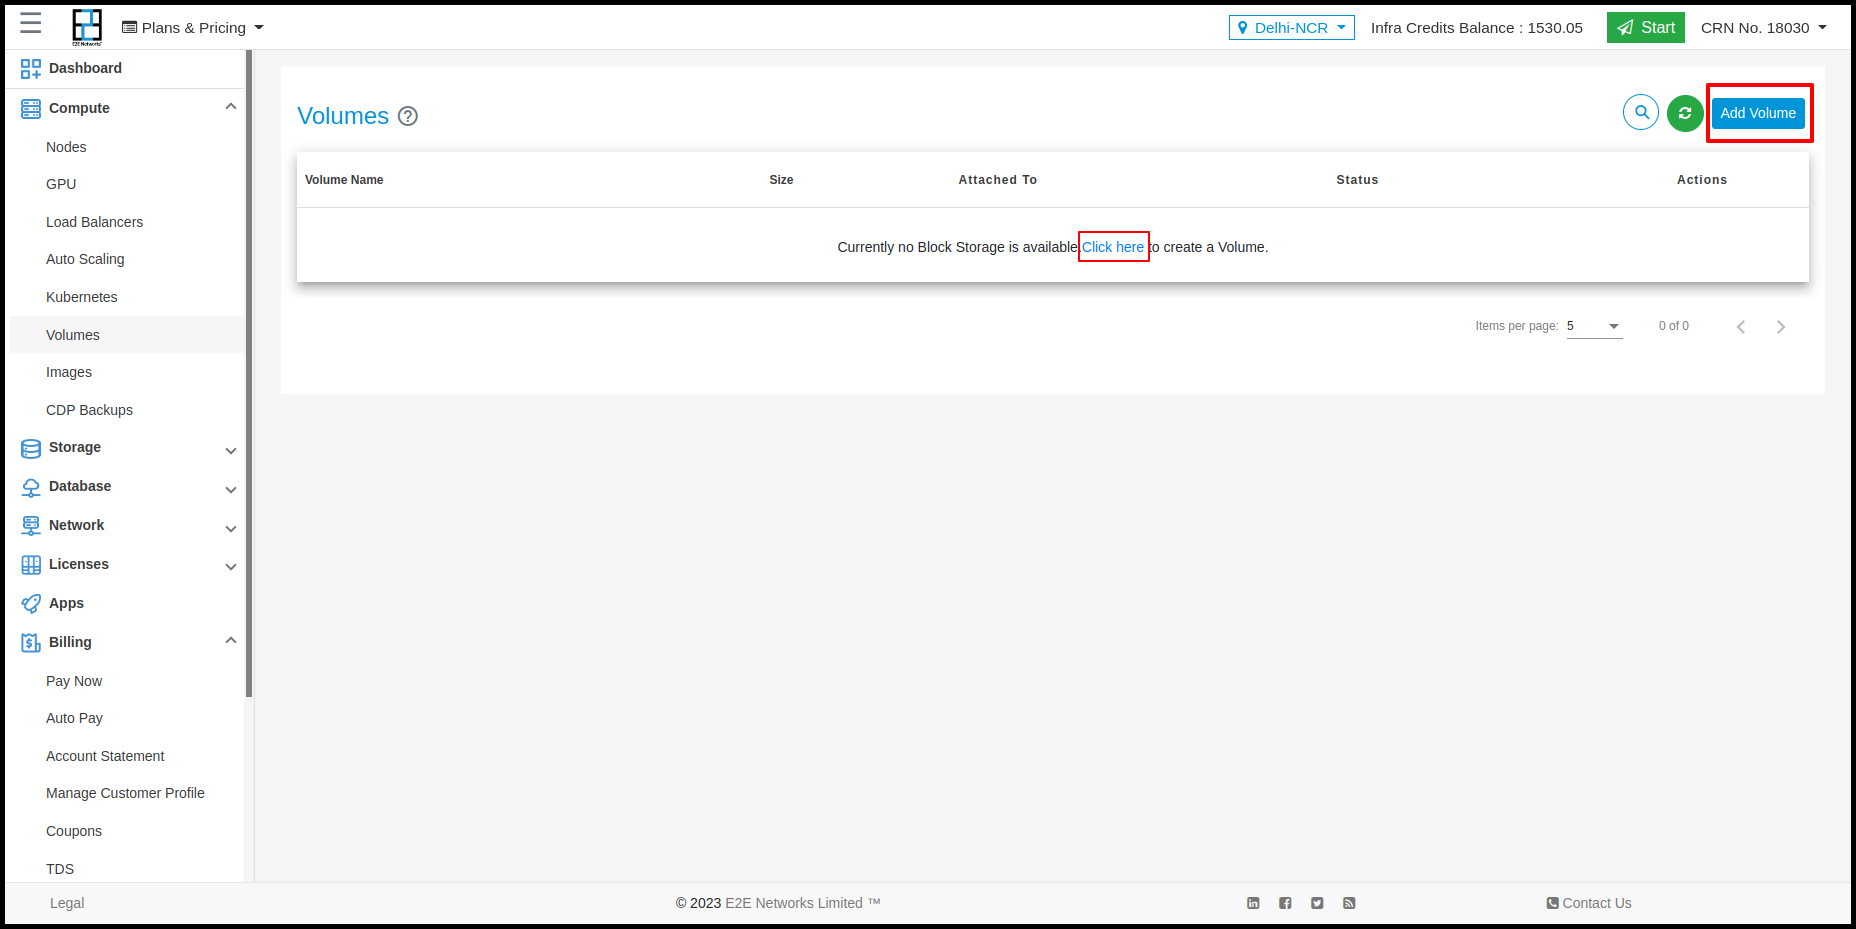
On the top right section of the block storage dashboard, You need to click on the “Add Volume” Button which will prompt you to enter the details for your Block storage volume.
Volume Configurations
You need to select the required configuration for your Block storage volume. The IOPS configuration increases with the size of the Block storage. Below are the plan available currently.
Volume Size - 250 GB for IOPS 3750
Volume Size - 500 GB for IOPS 7500
Volume Size - 1 TB for IOPS 15000
Volume Size - 2 TB for IOPS 30000
Volume Size - 4 TB for IOPS 60000
Volume Size - 8 TB for IOPS 120000
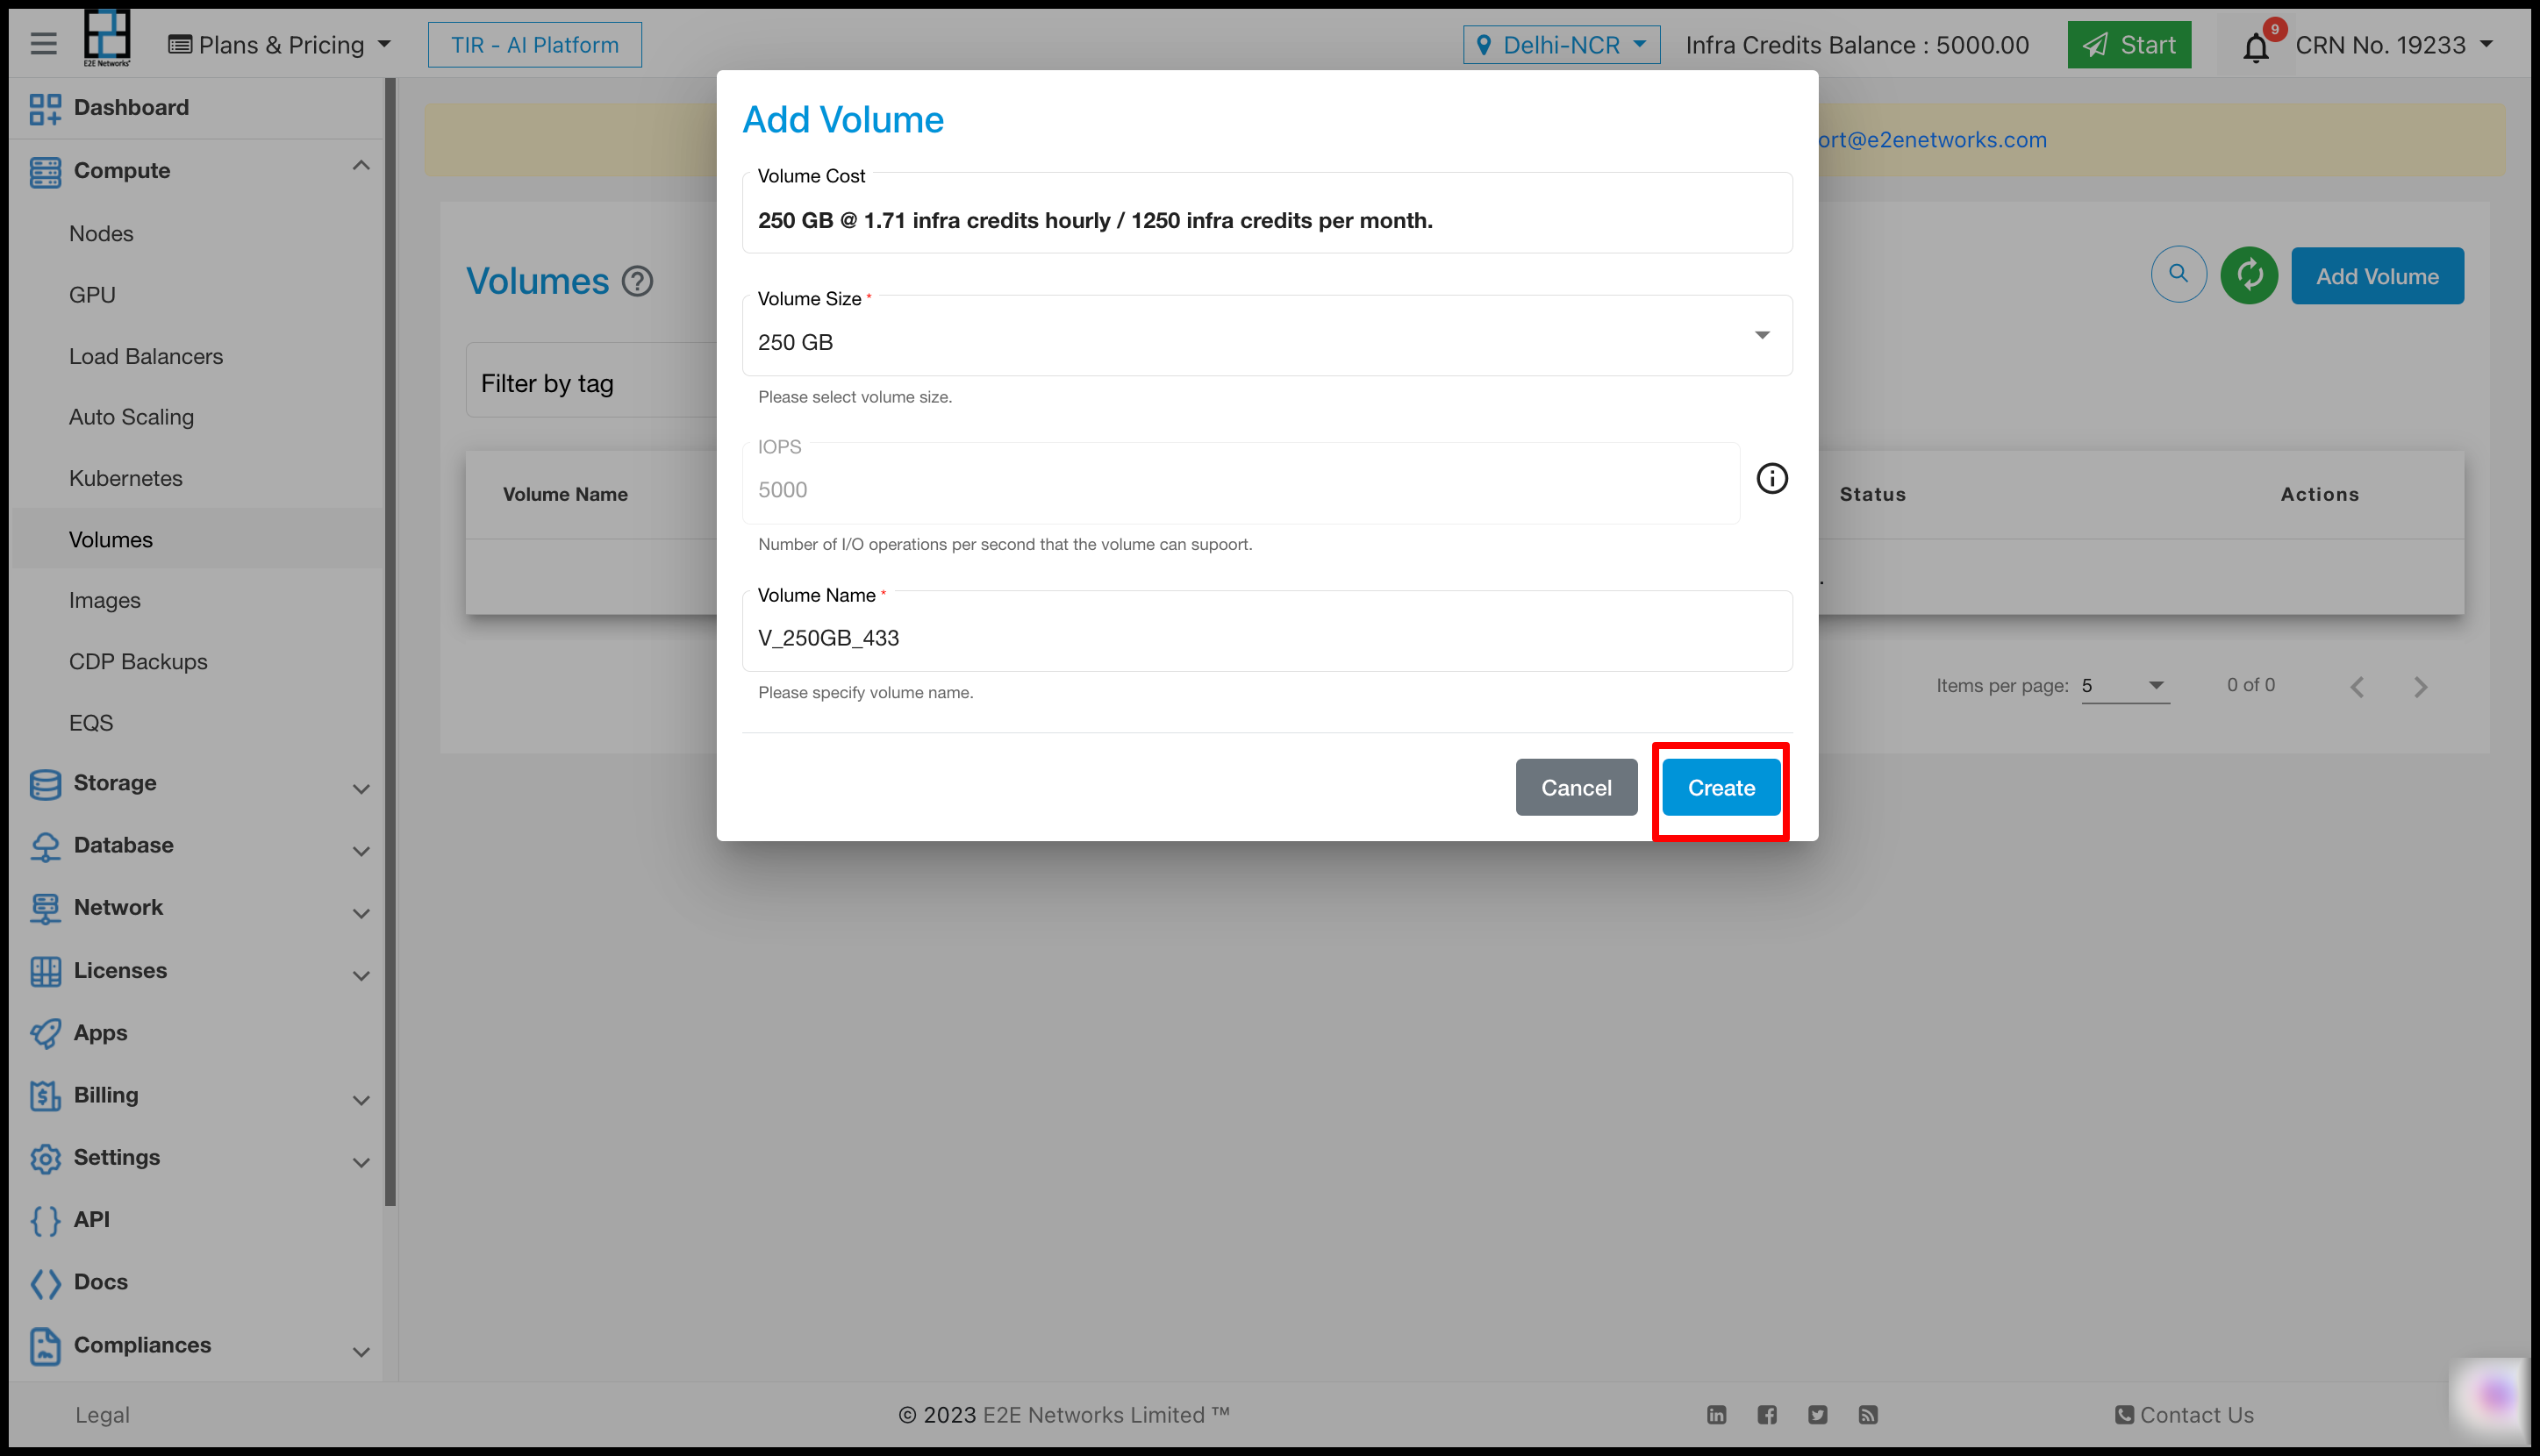
Once the Plan has been selected, enter the Volume name and click on the create button to create volume.Your Volume status is changed to available, You will now be able to attach it to your Nodes.
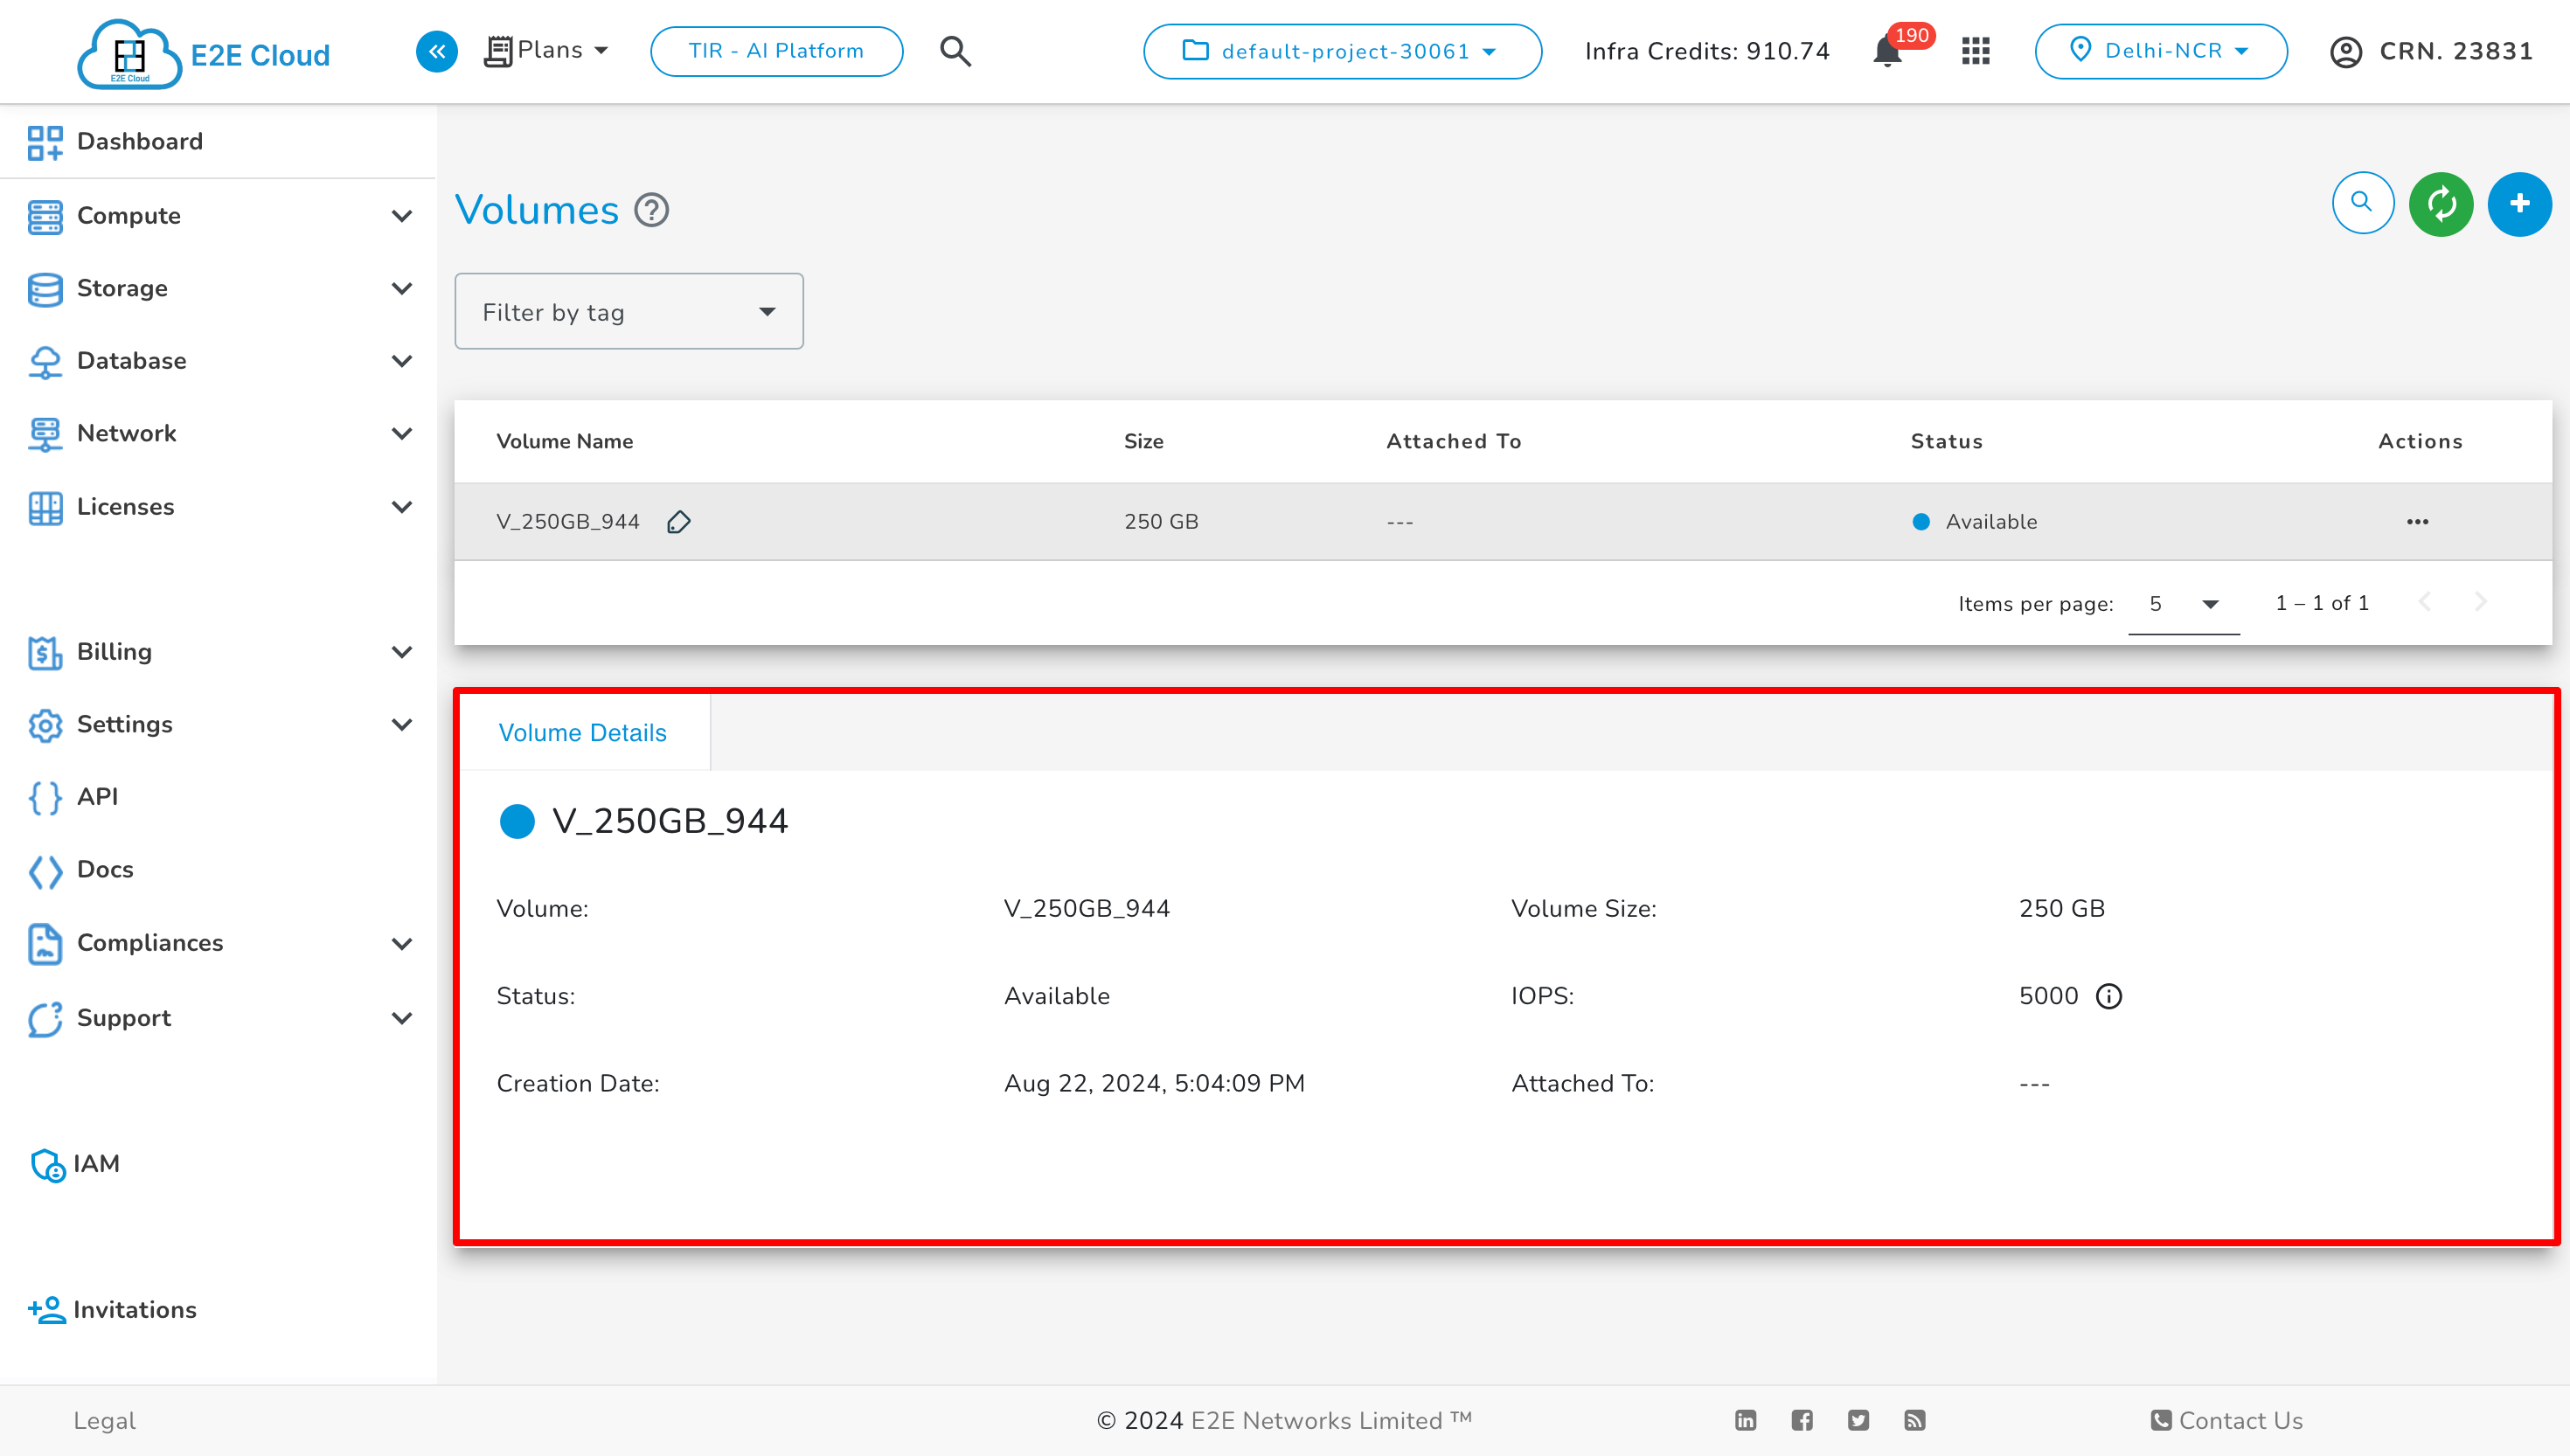
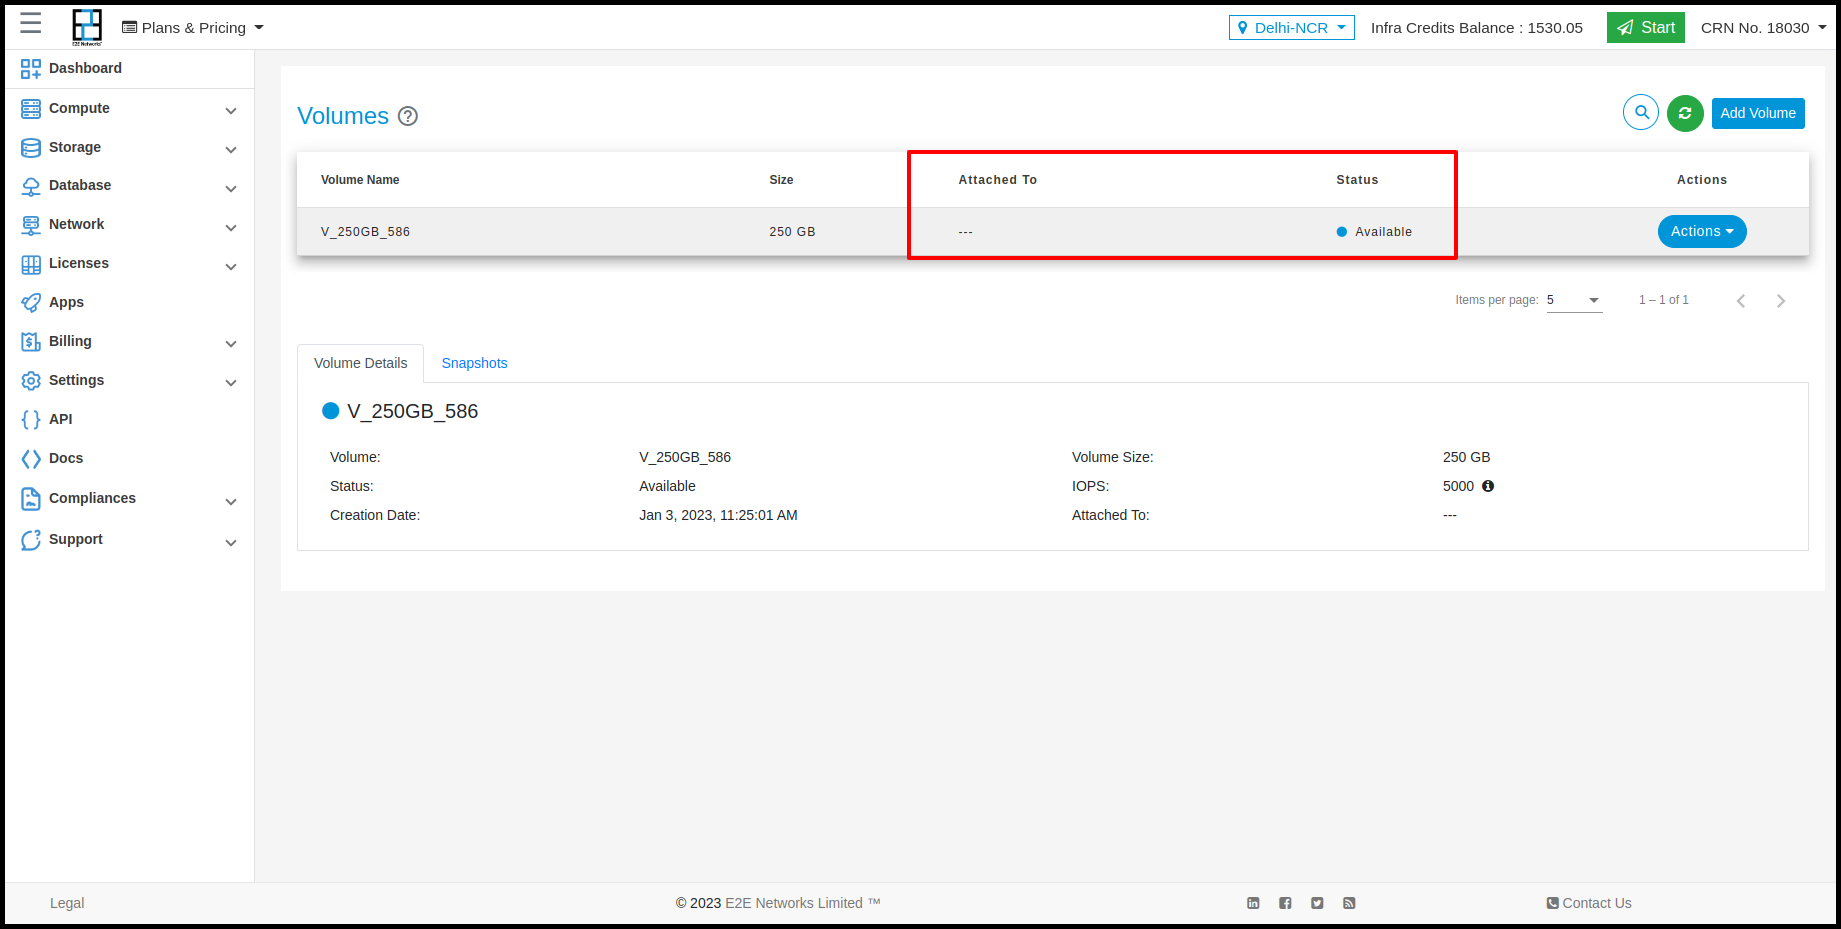
Volume Details
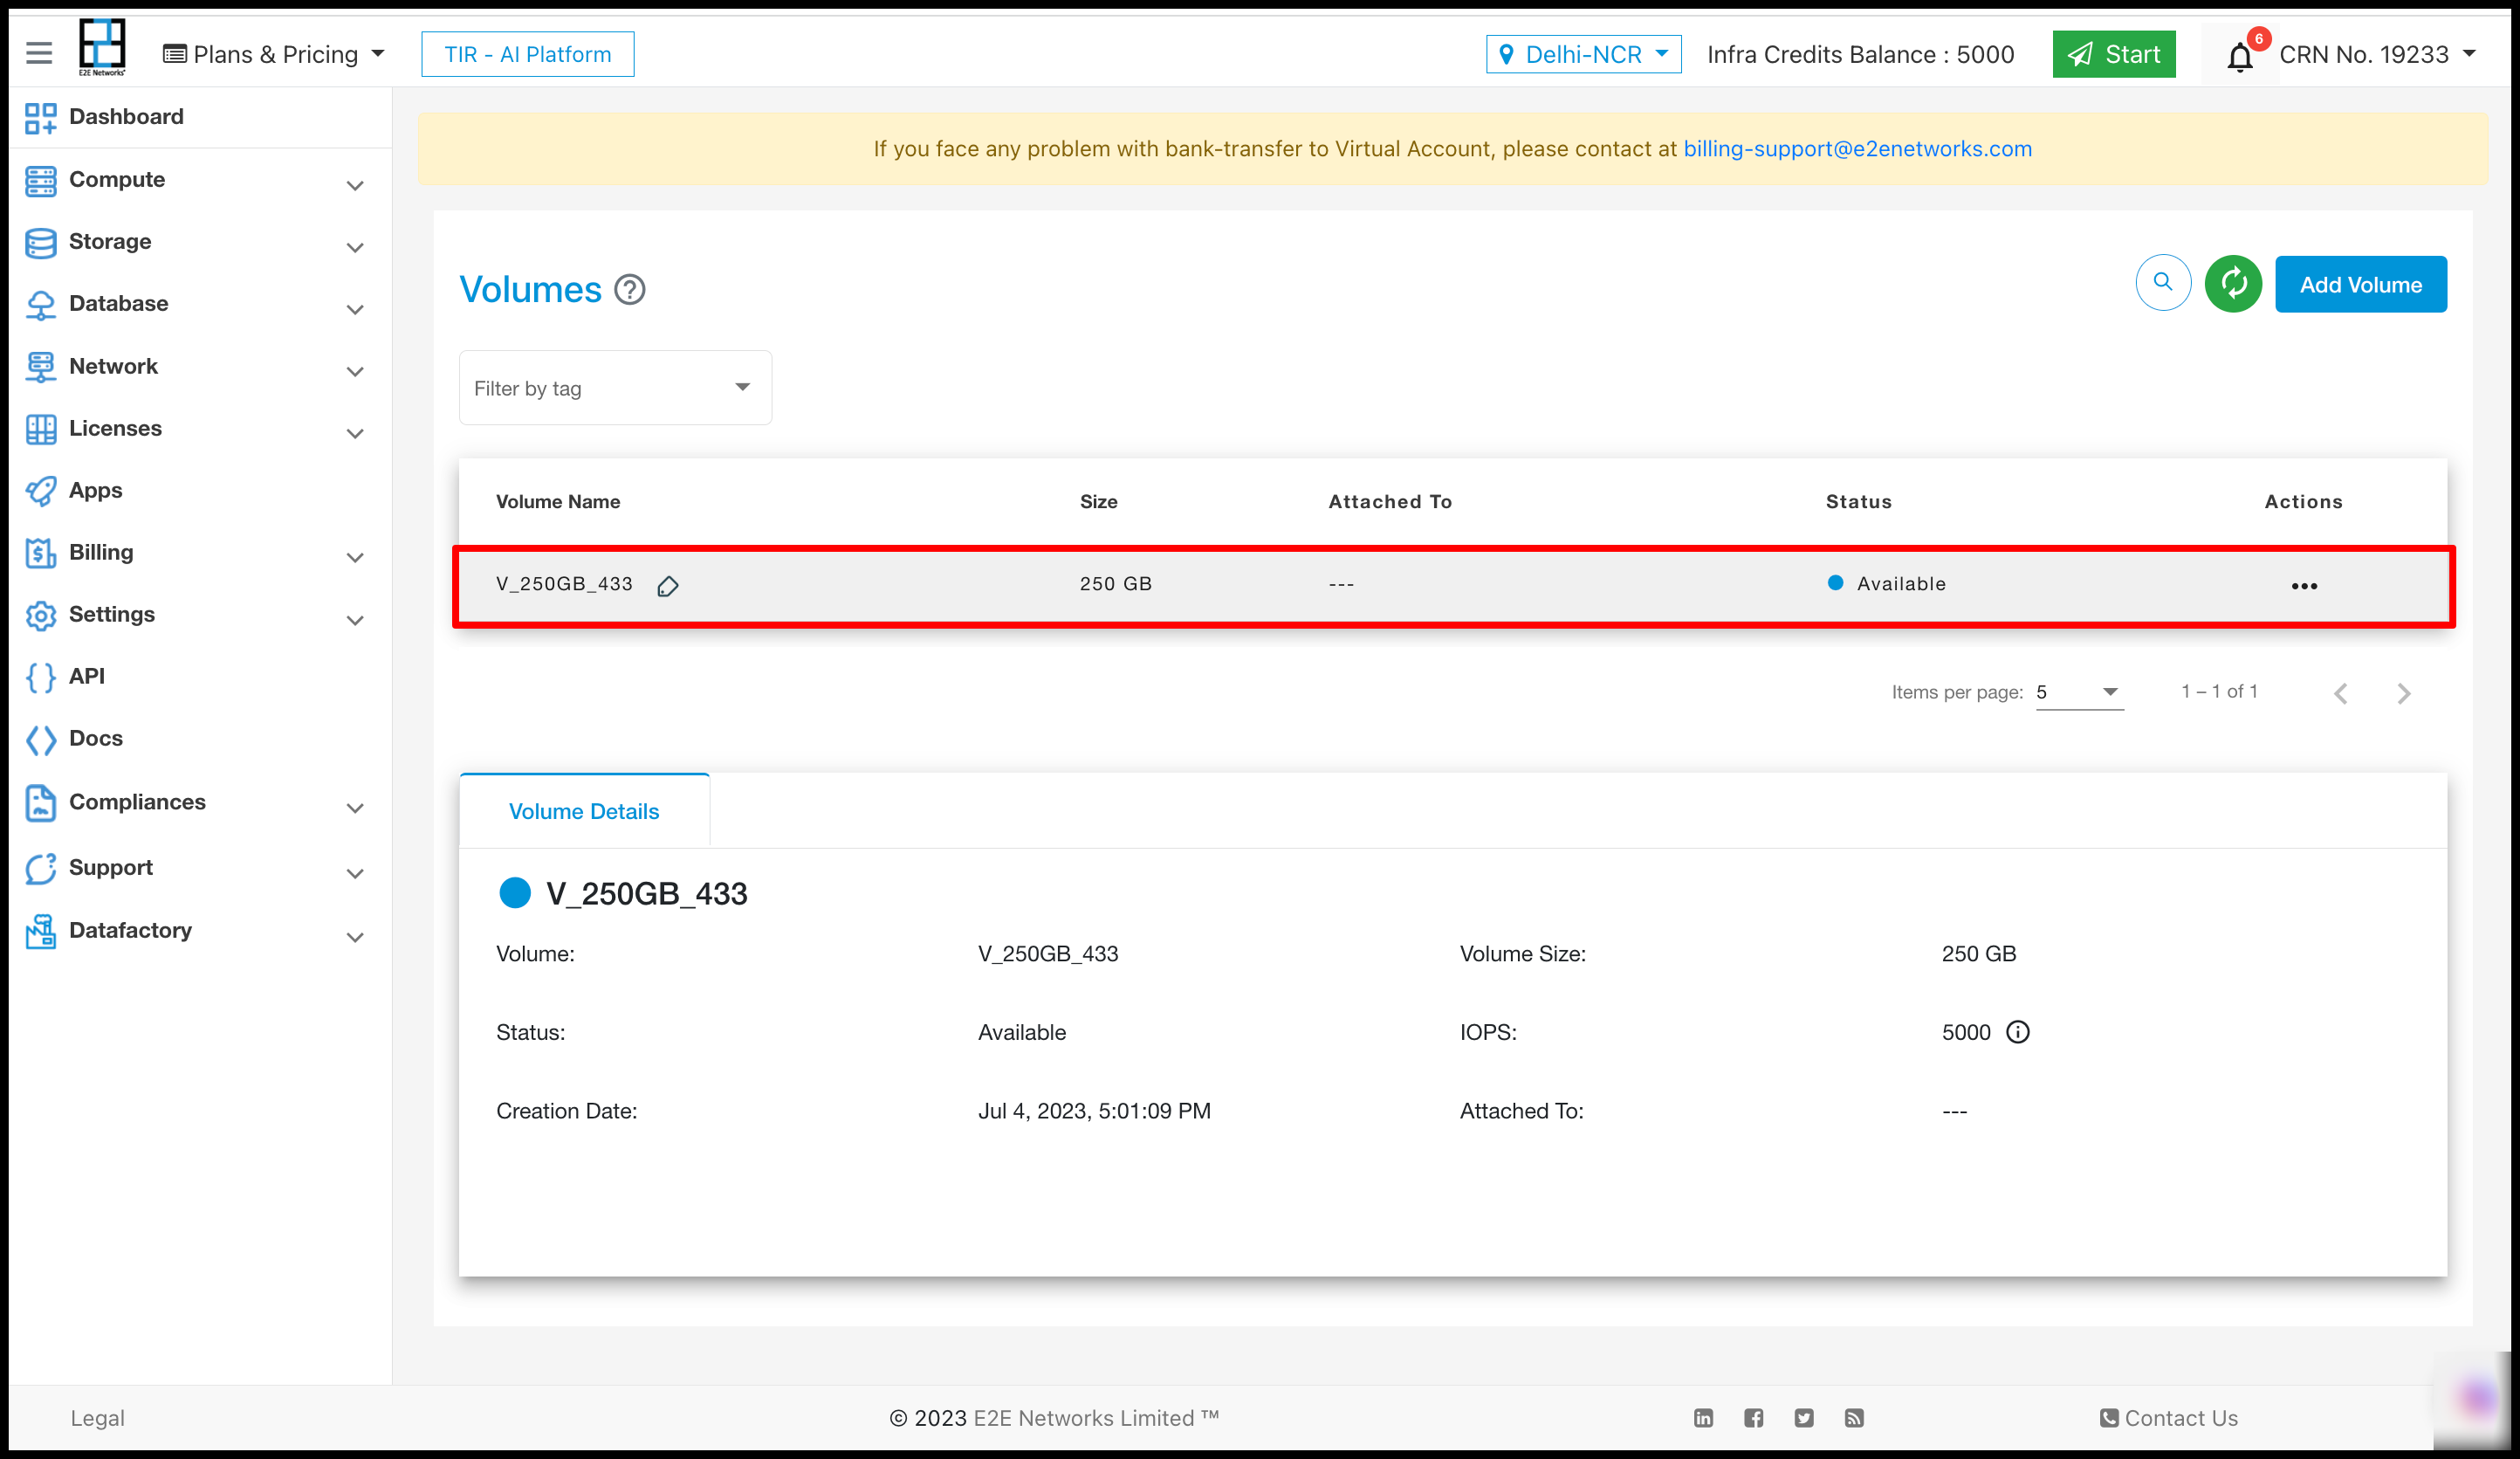
You can view the details of your volume configuration on your dashboard.
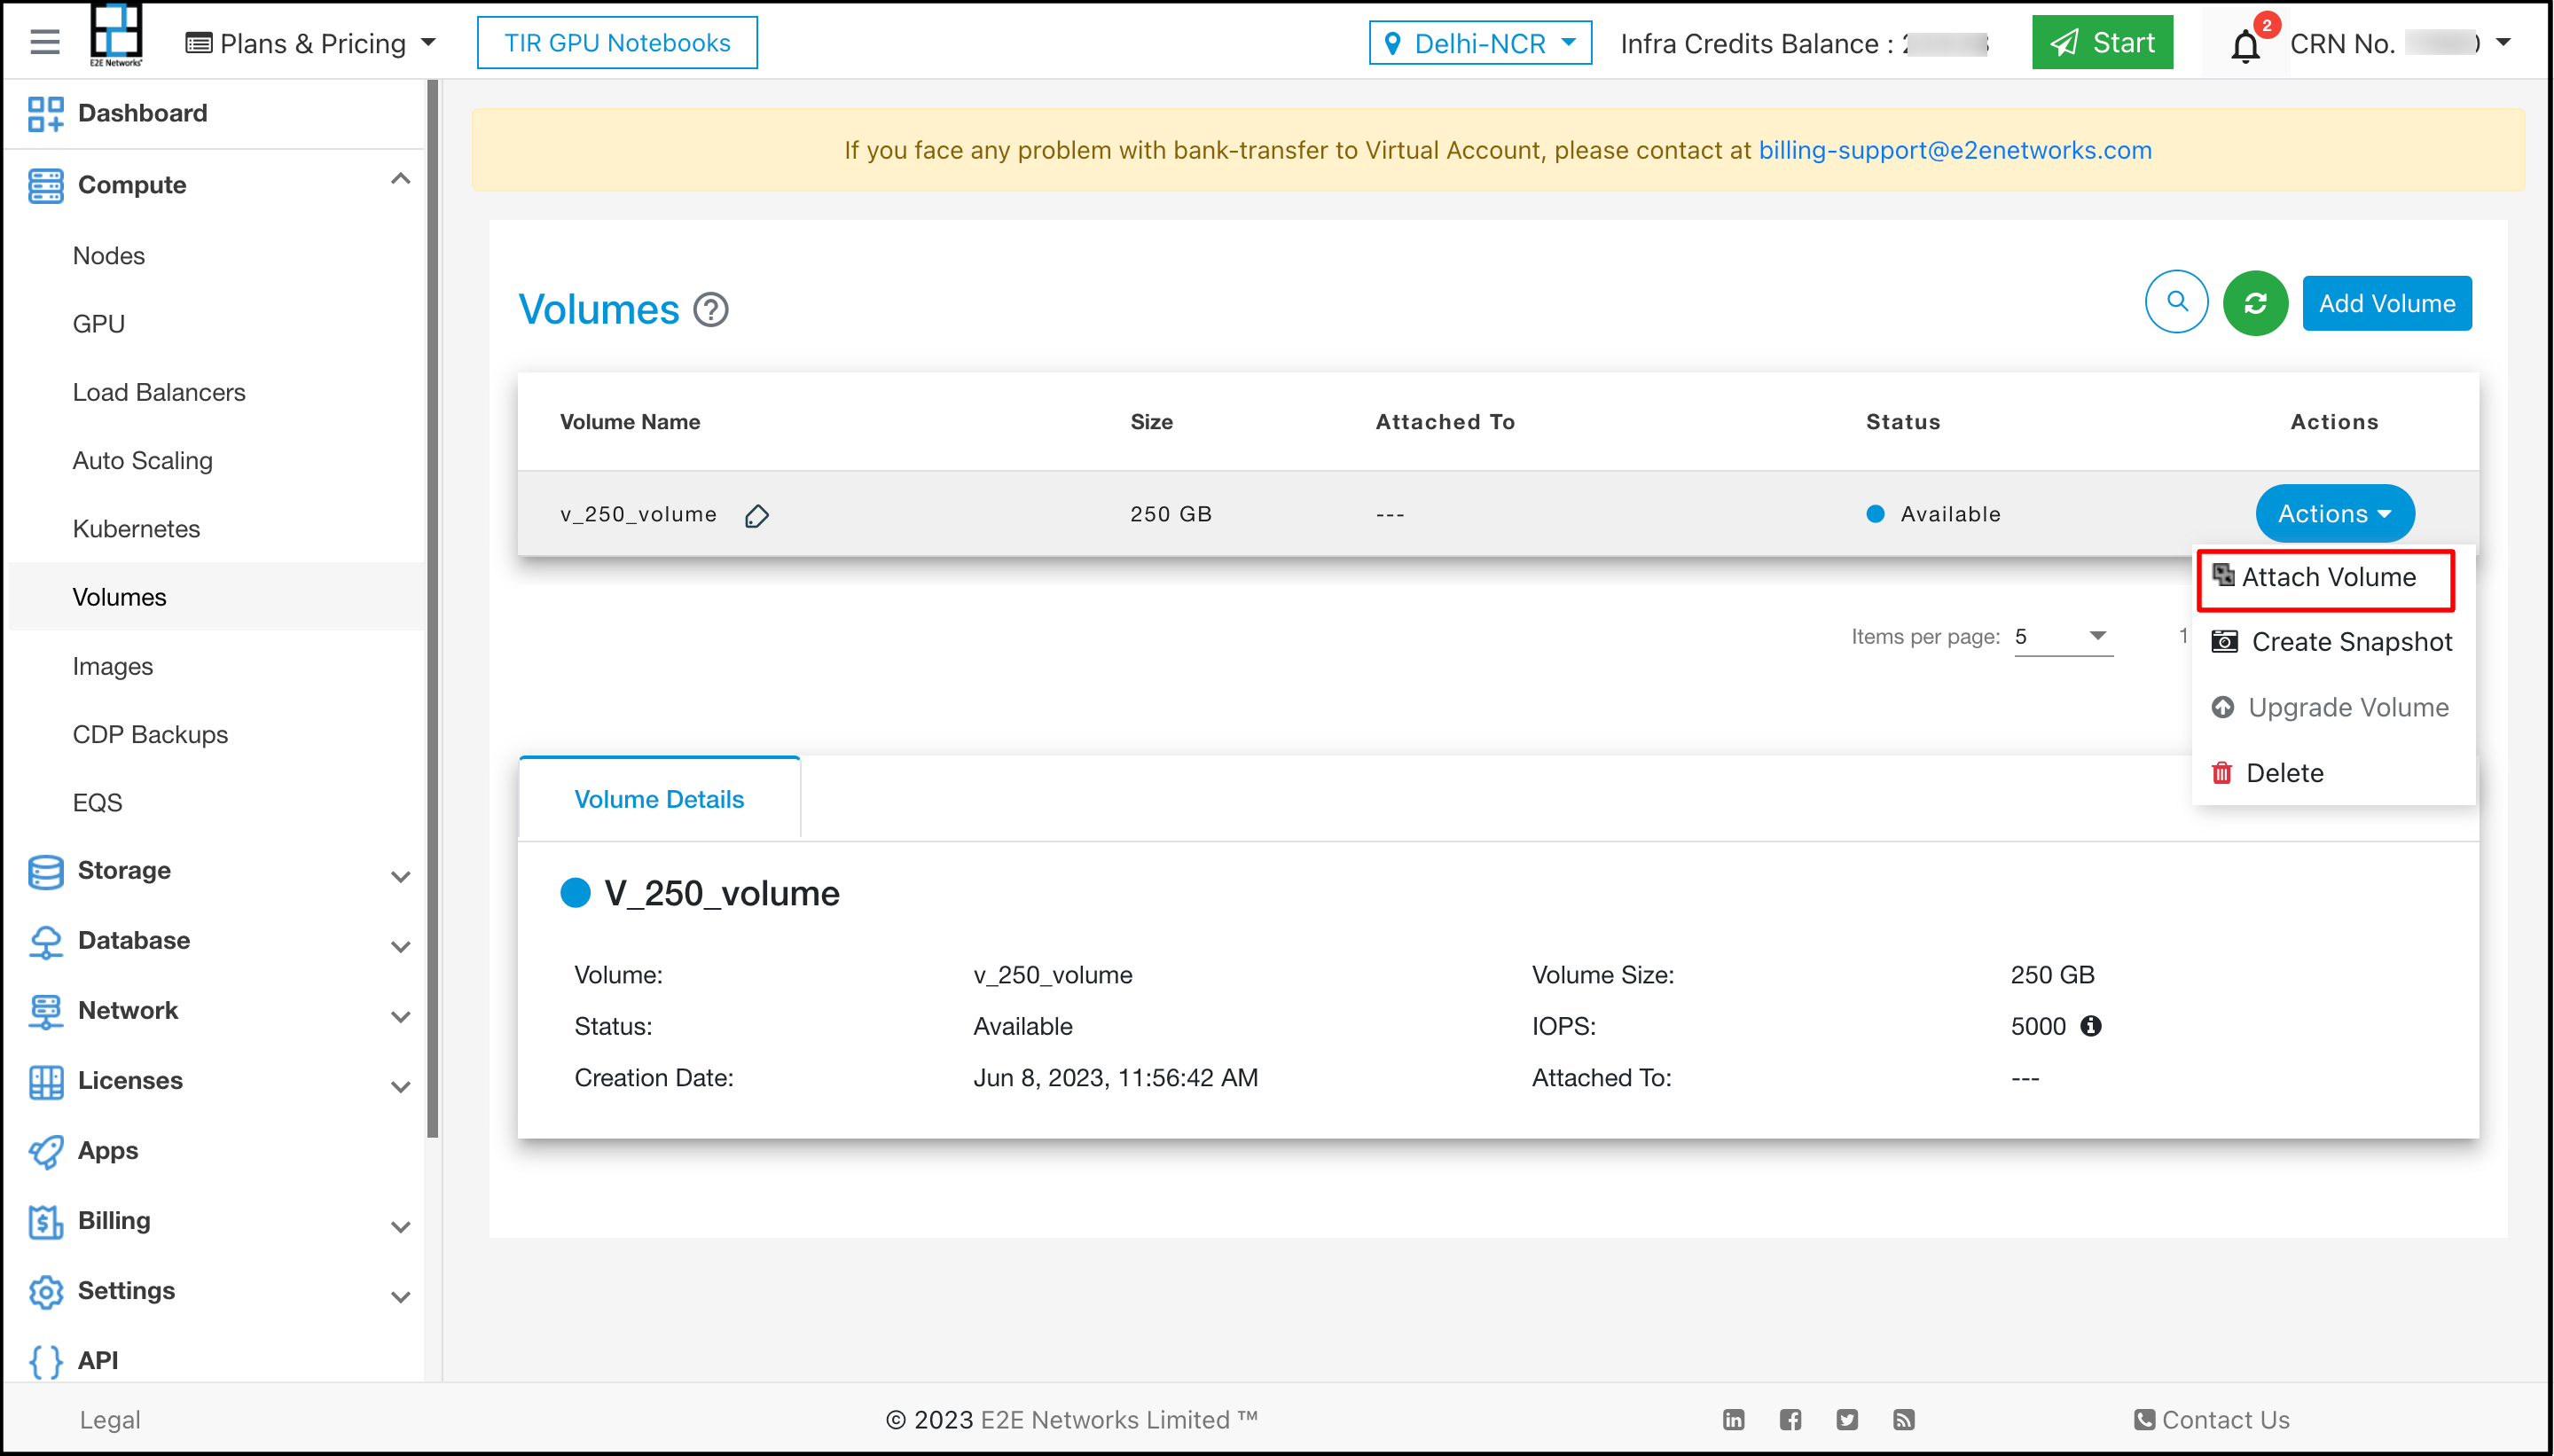
Attaching Volume to your Node
Volume can be attached to your supported compute nodes. Currently, you can attach your node to GPU, vGPU, SDC, SDC3, C3 and all Windows plan (CW & WSDC) nodes only.
To attach the Volume to a node, click on Action and Select Attach Volume.
Select the Node for which you want to attach your EBS using the scroll down option and click on attach.
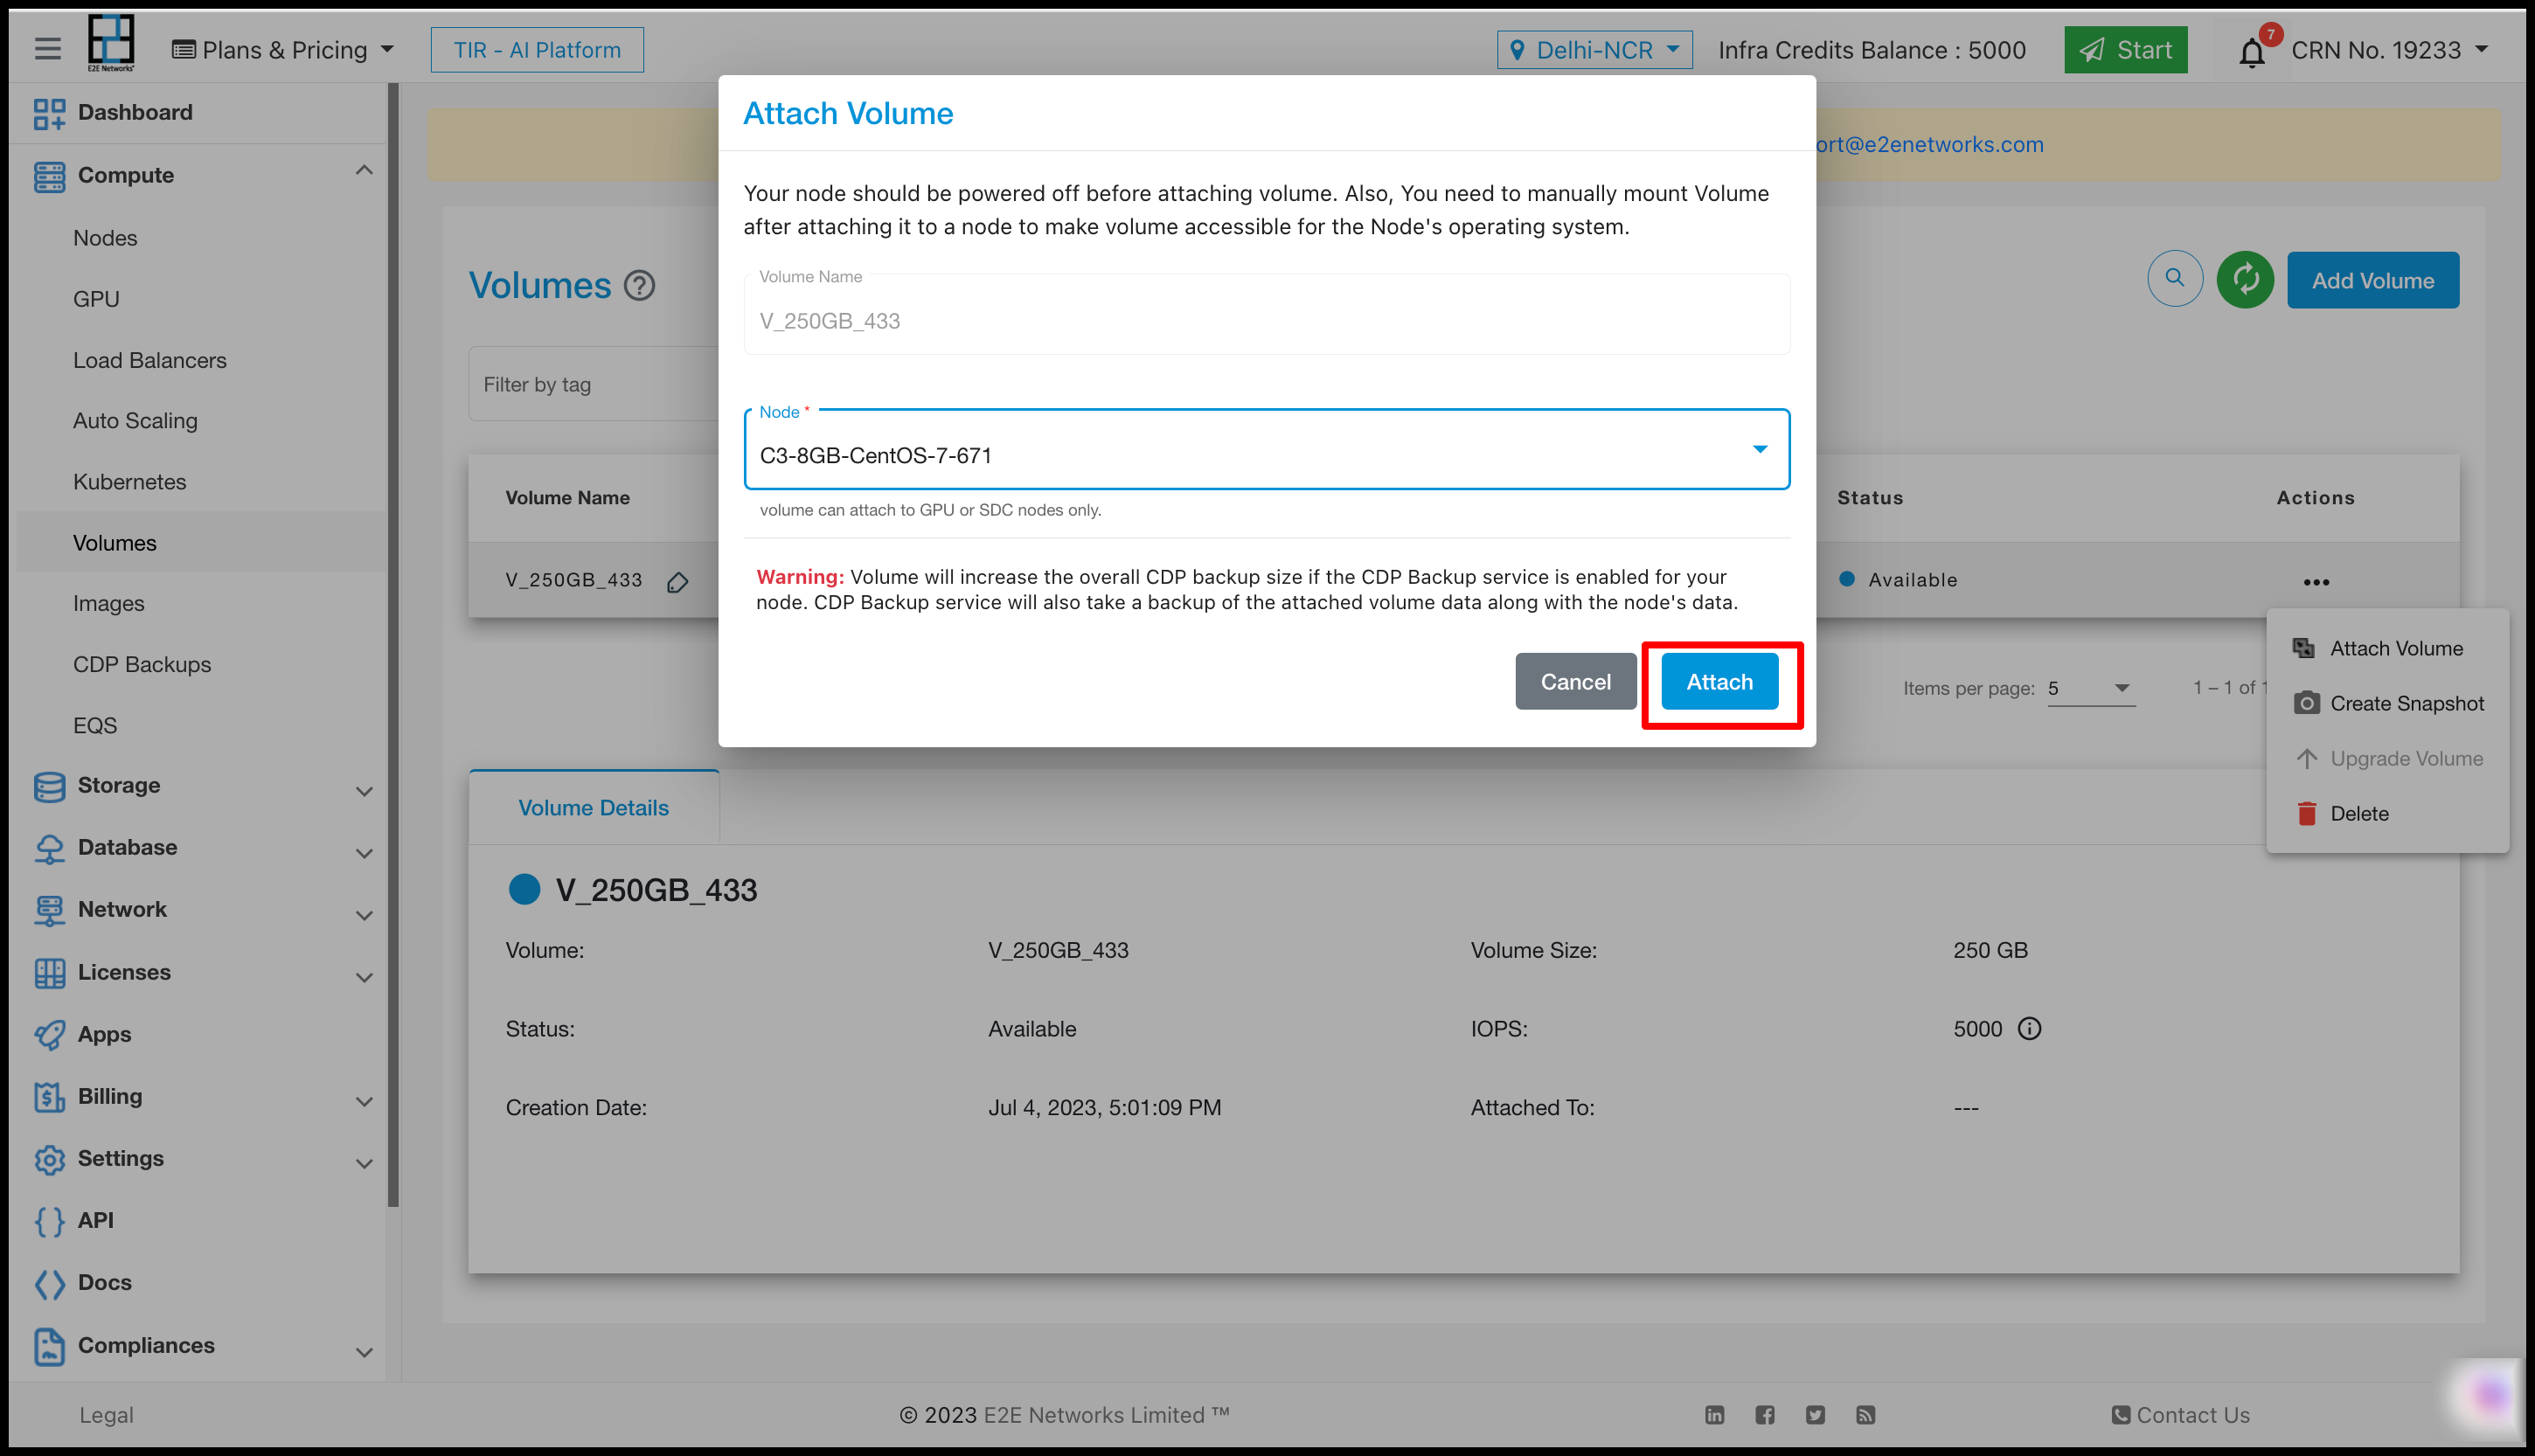
Note
Your node should be powered off before attaching block storage to your nodes
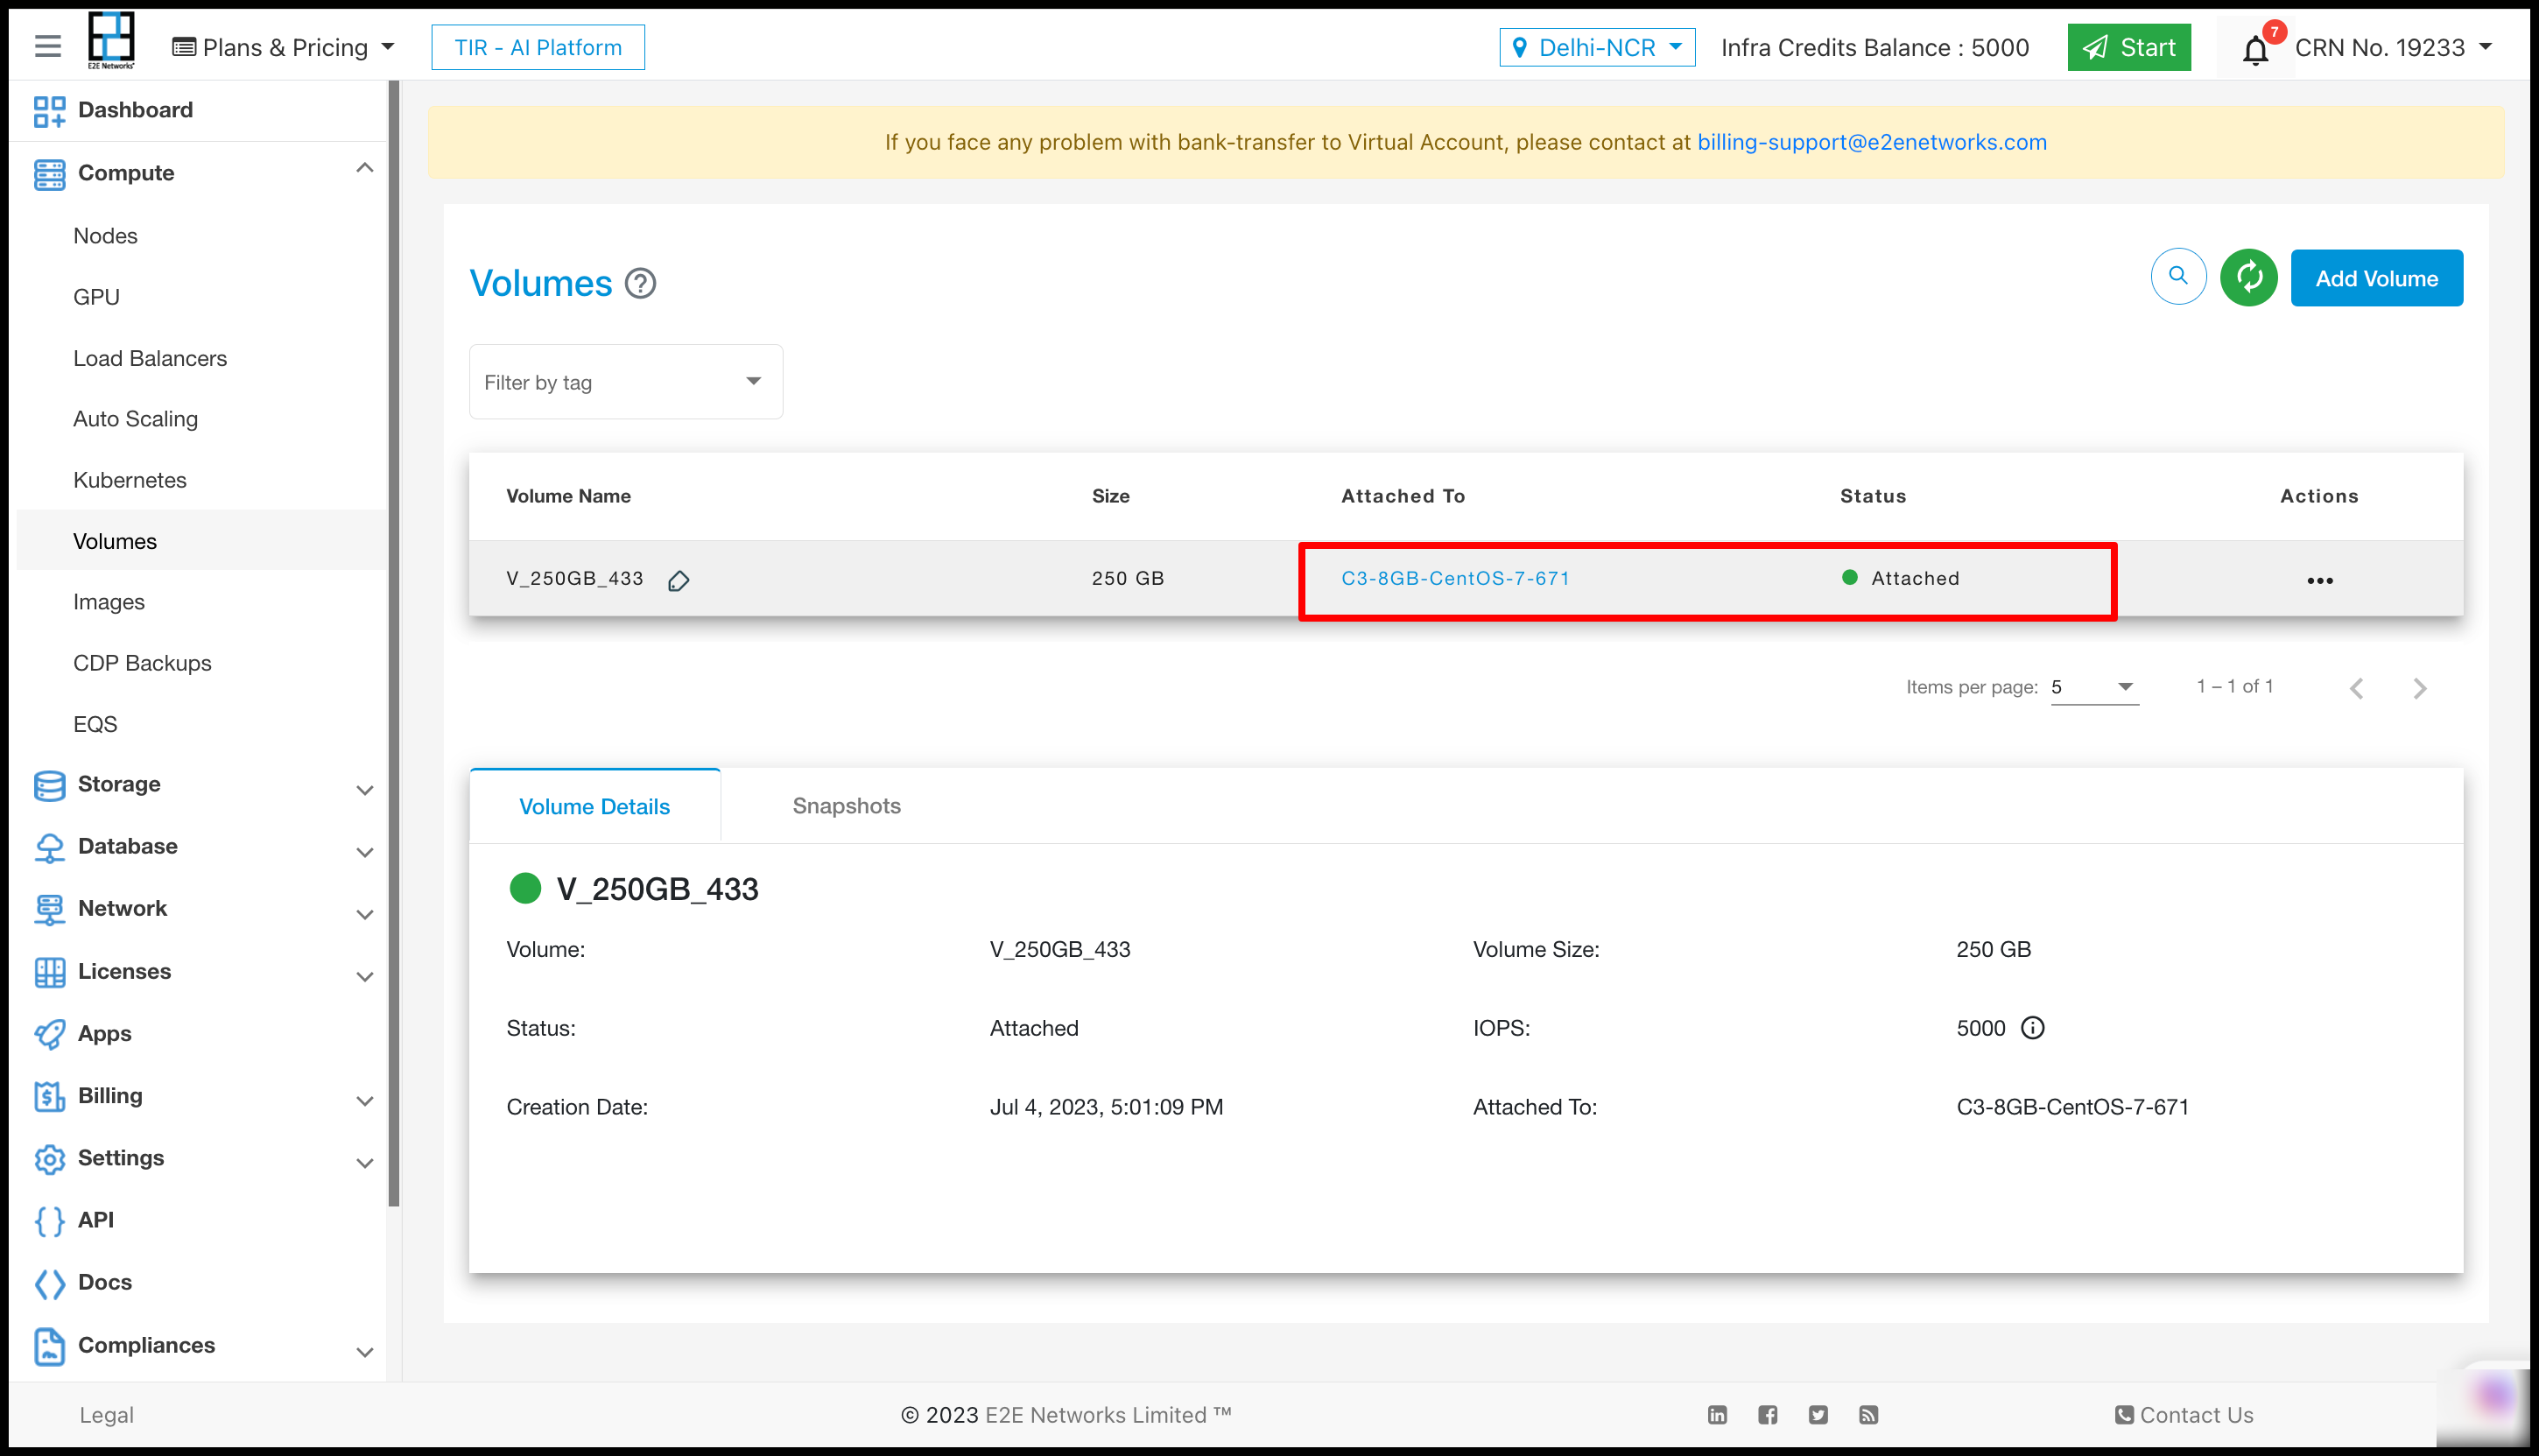
Once you have attached your volume, The status of it will be changed to Attached and you will be able to view the details of your attached node on the dashboard.
Enable Monitoring for your Volume
Volume monitoring refers to the practice of continuously tracking and observing the performance, usage, and read write operations of storage volumes.
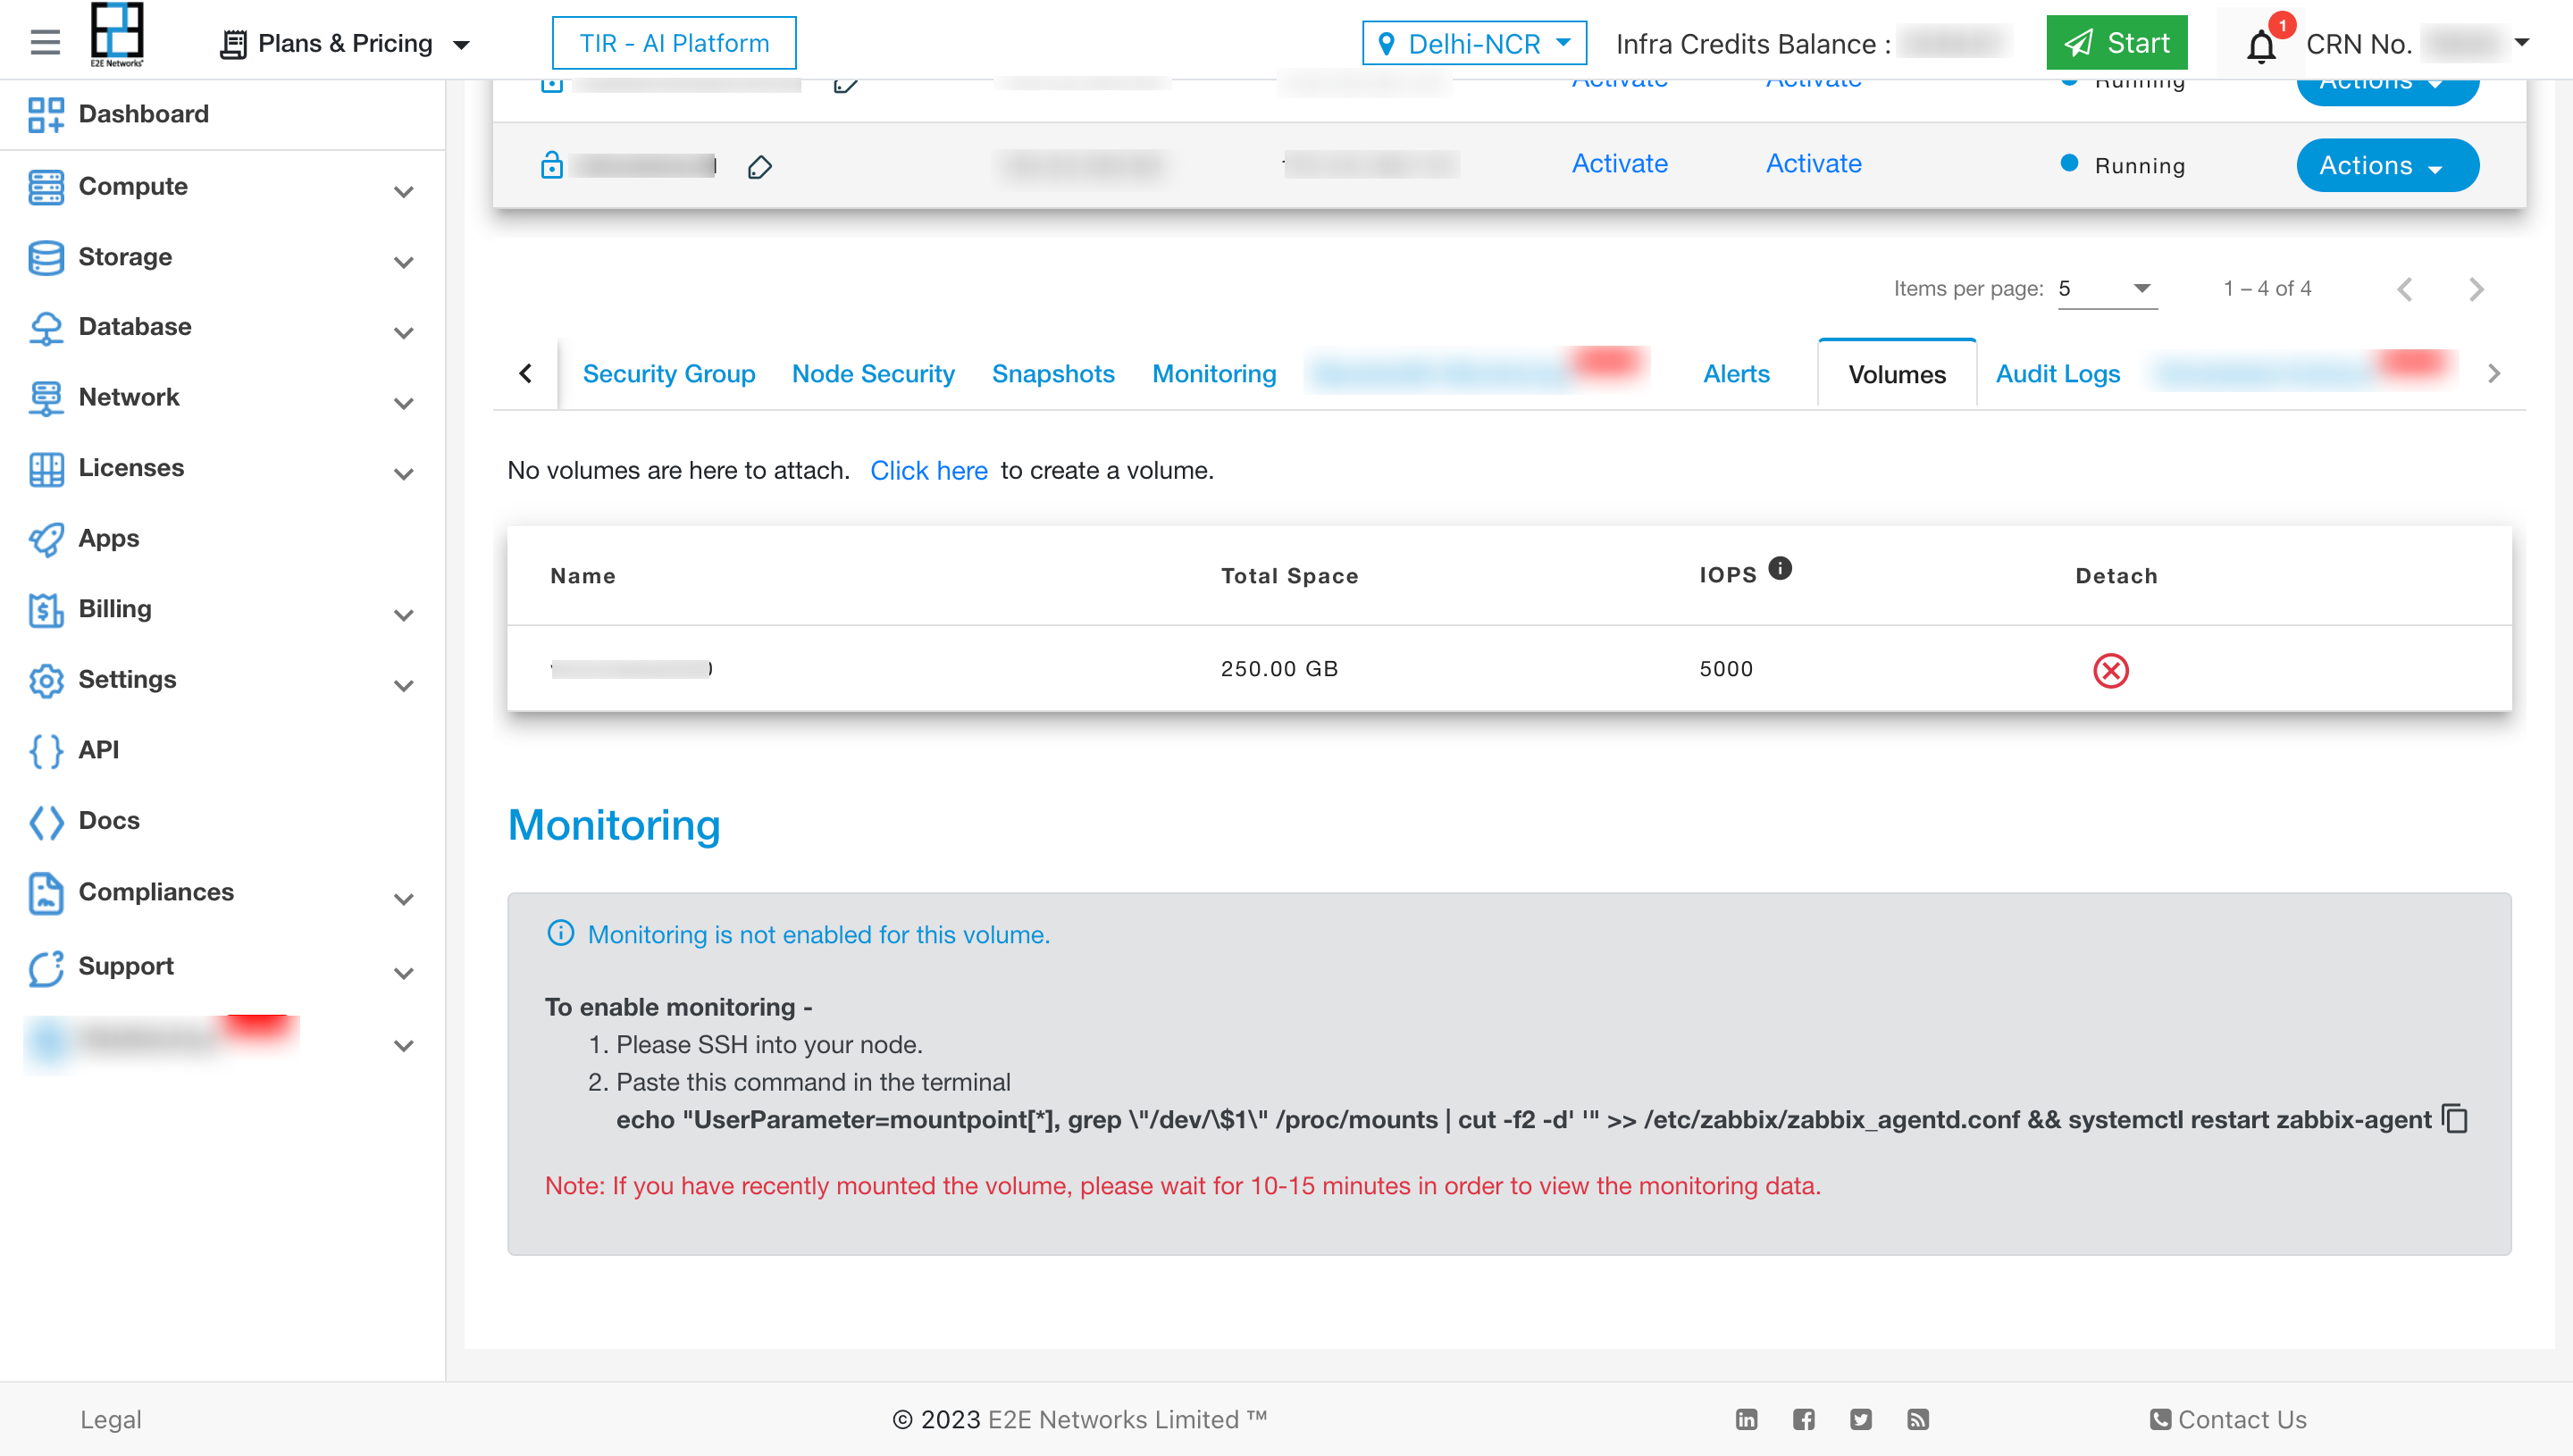
To activate a volume on your node, please proceed with the following steps: 1. SSH into your node. 2. Paste this command in the terminal
echo "UserParameter=mountpoint[*], grep \"/dev/\$1\" /proc/mounts | cut -f2 -d' '" >> /etc/zabbix/zabbix_agentd.conf && systemctl restart zabbix-agent
Note: If you have recently mounted the volume, please wait for 10-15 minutes in order to view the monitoring data.
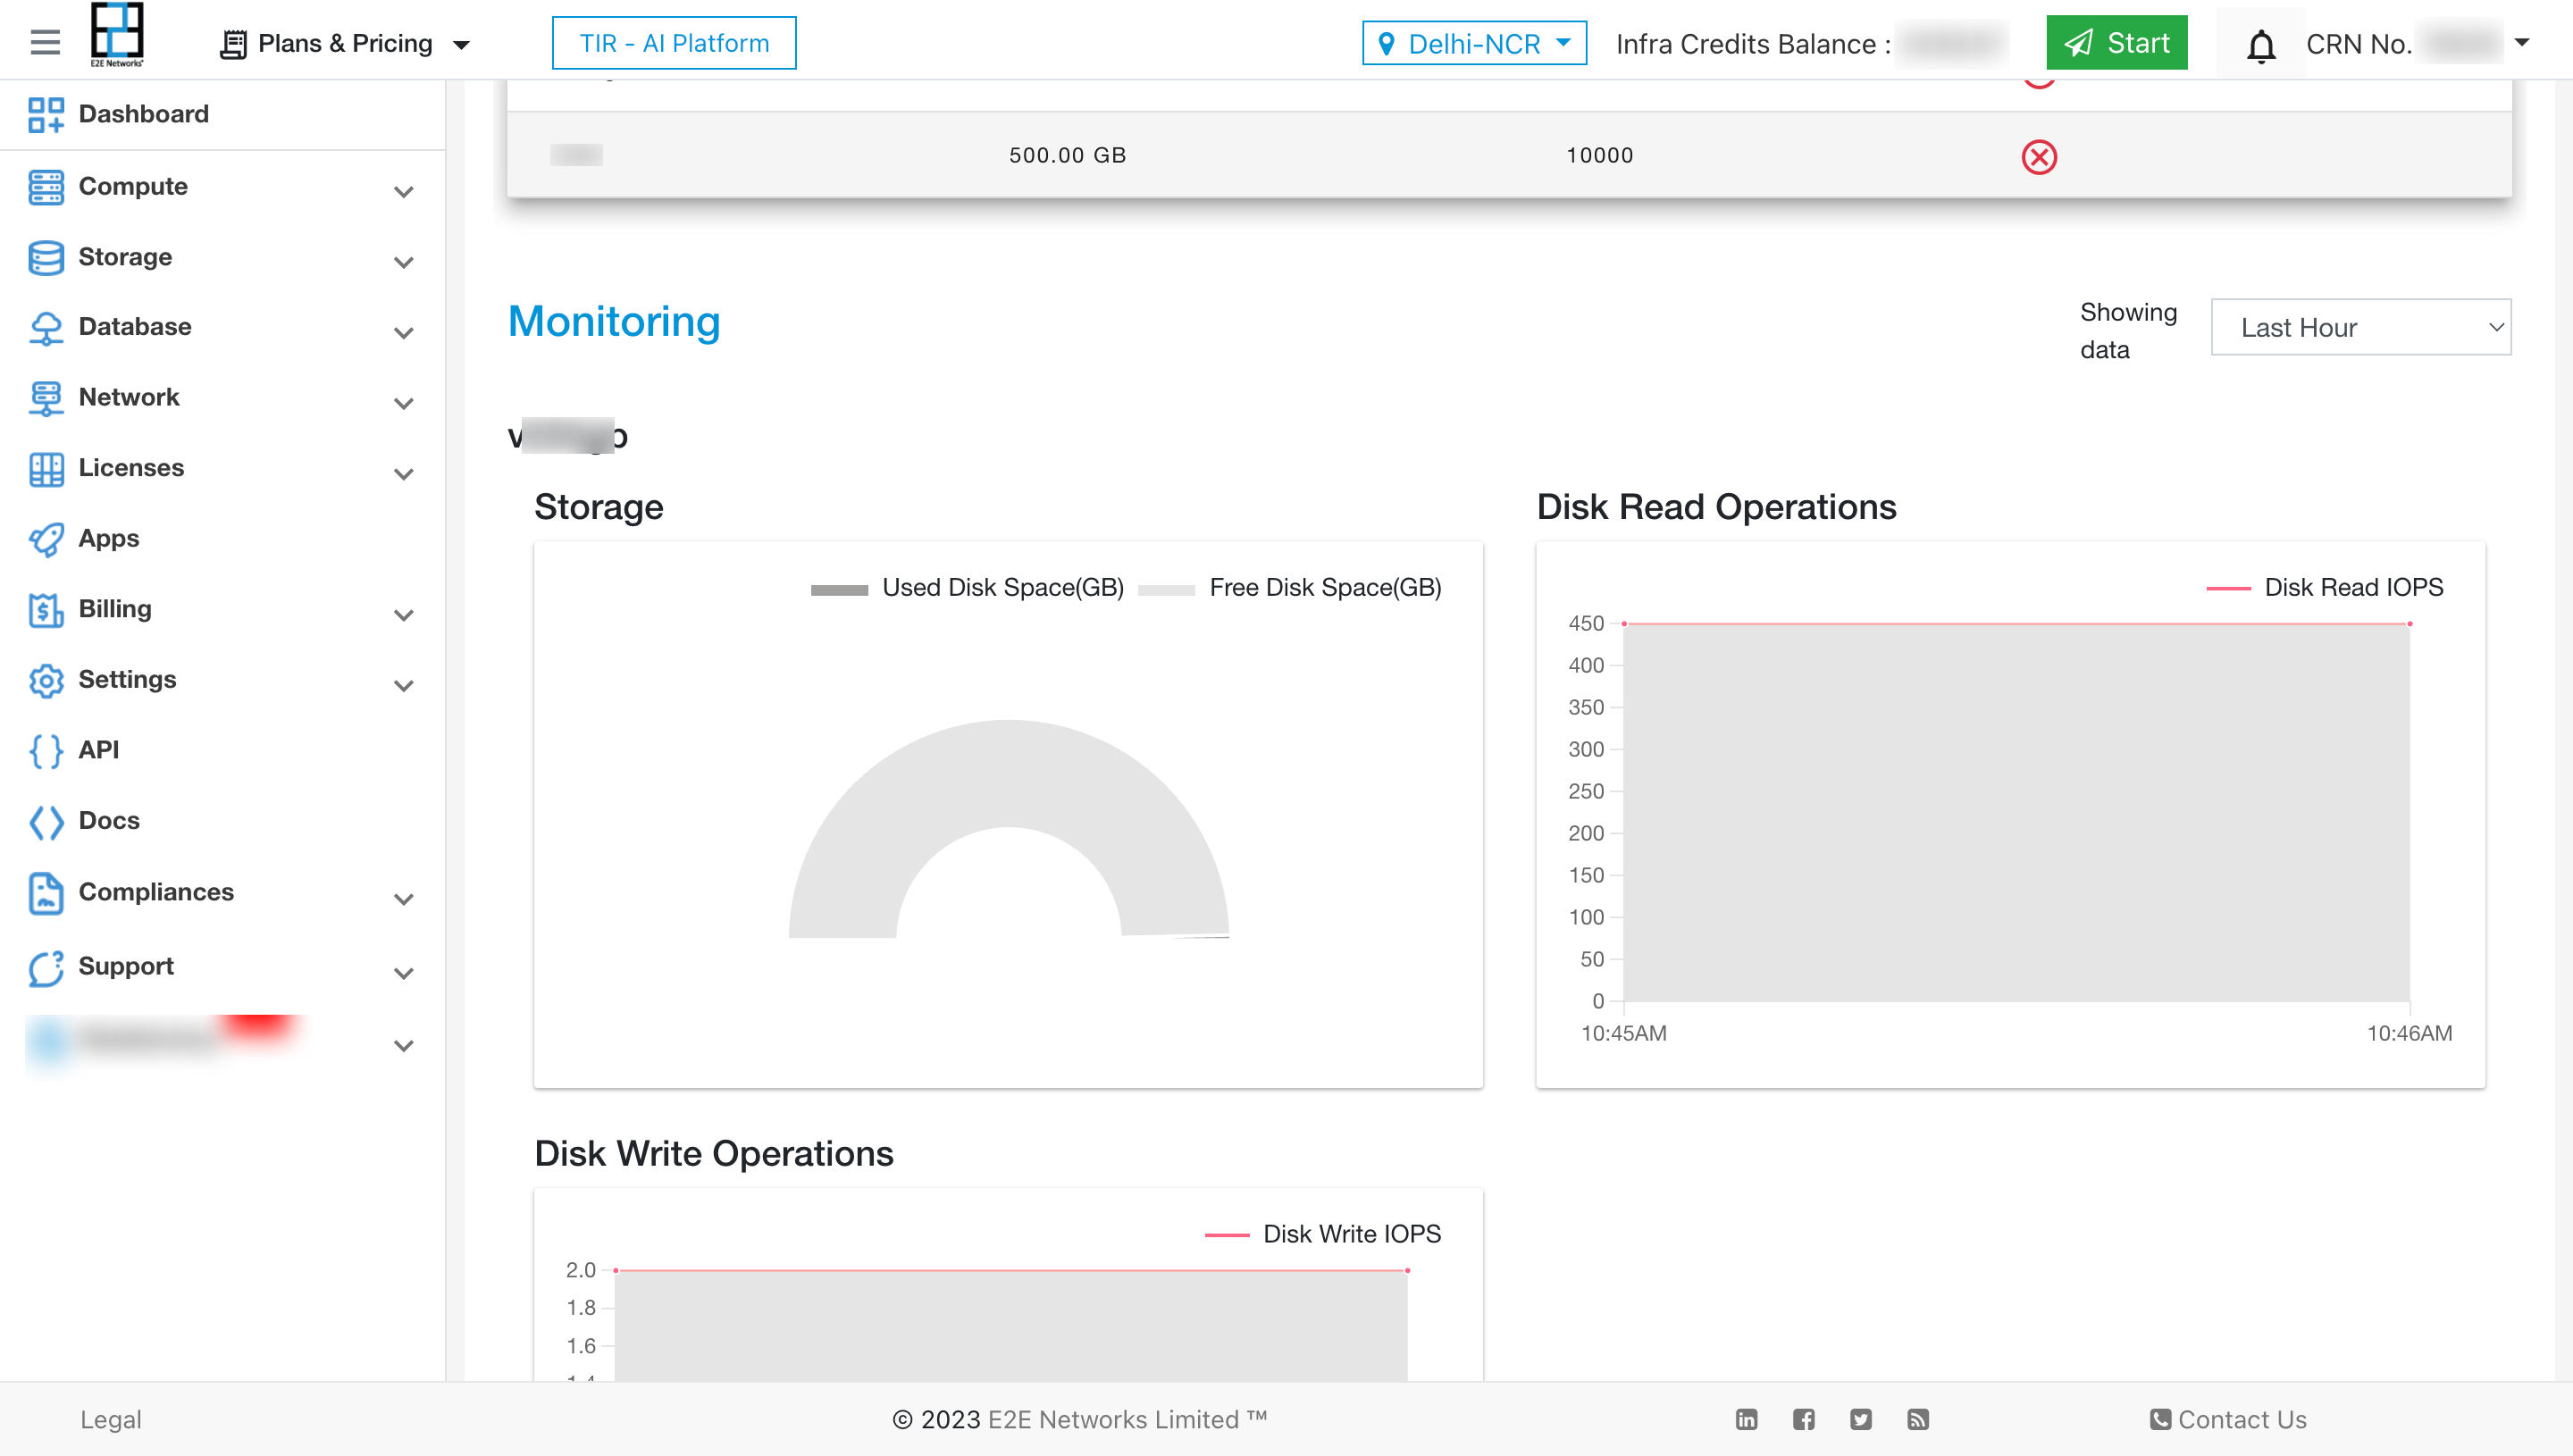
Once monitoring is enabled, and a period of time has passed, a graph like this will be displayed.
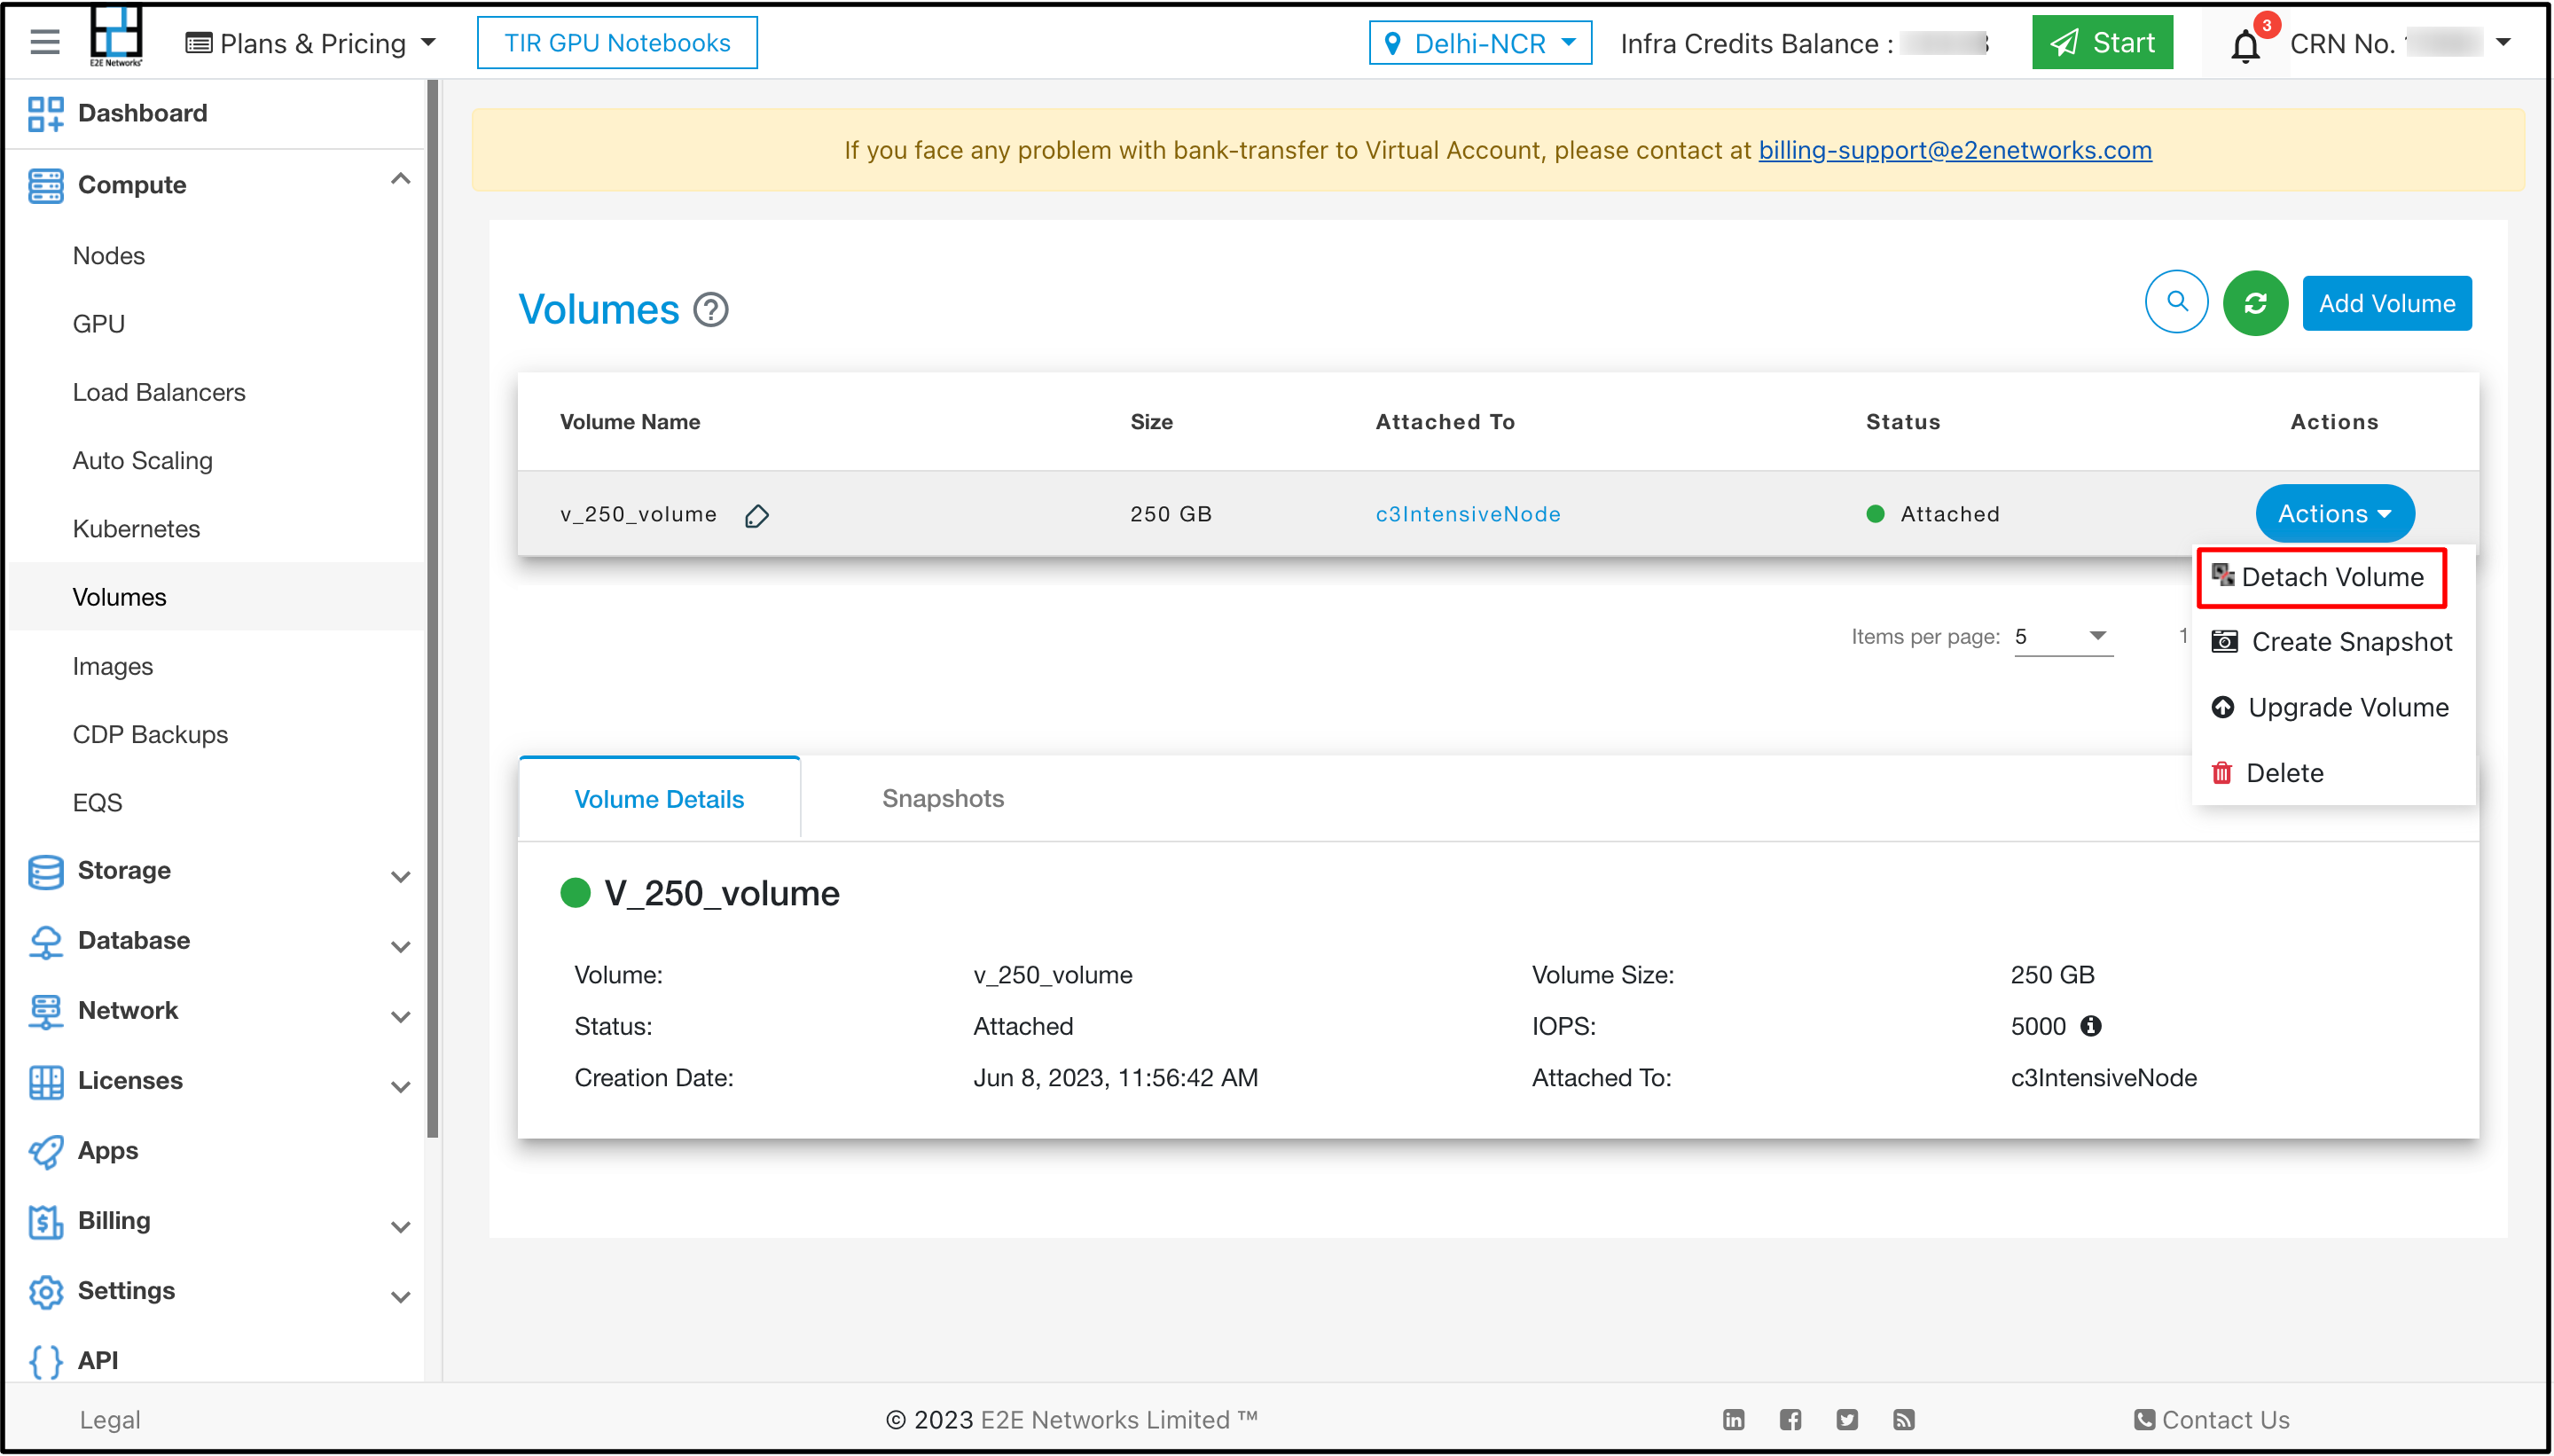
Detaching Volume from your Node
To Detach your Block Storage from your node, You will need to select Action and click on detach volume.
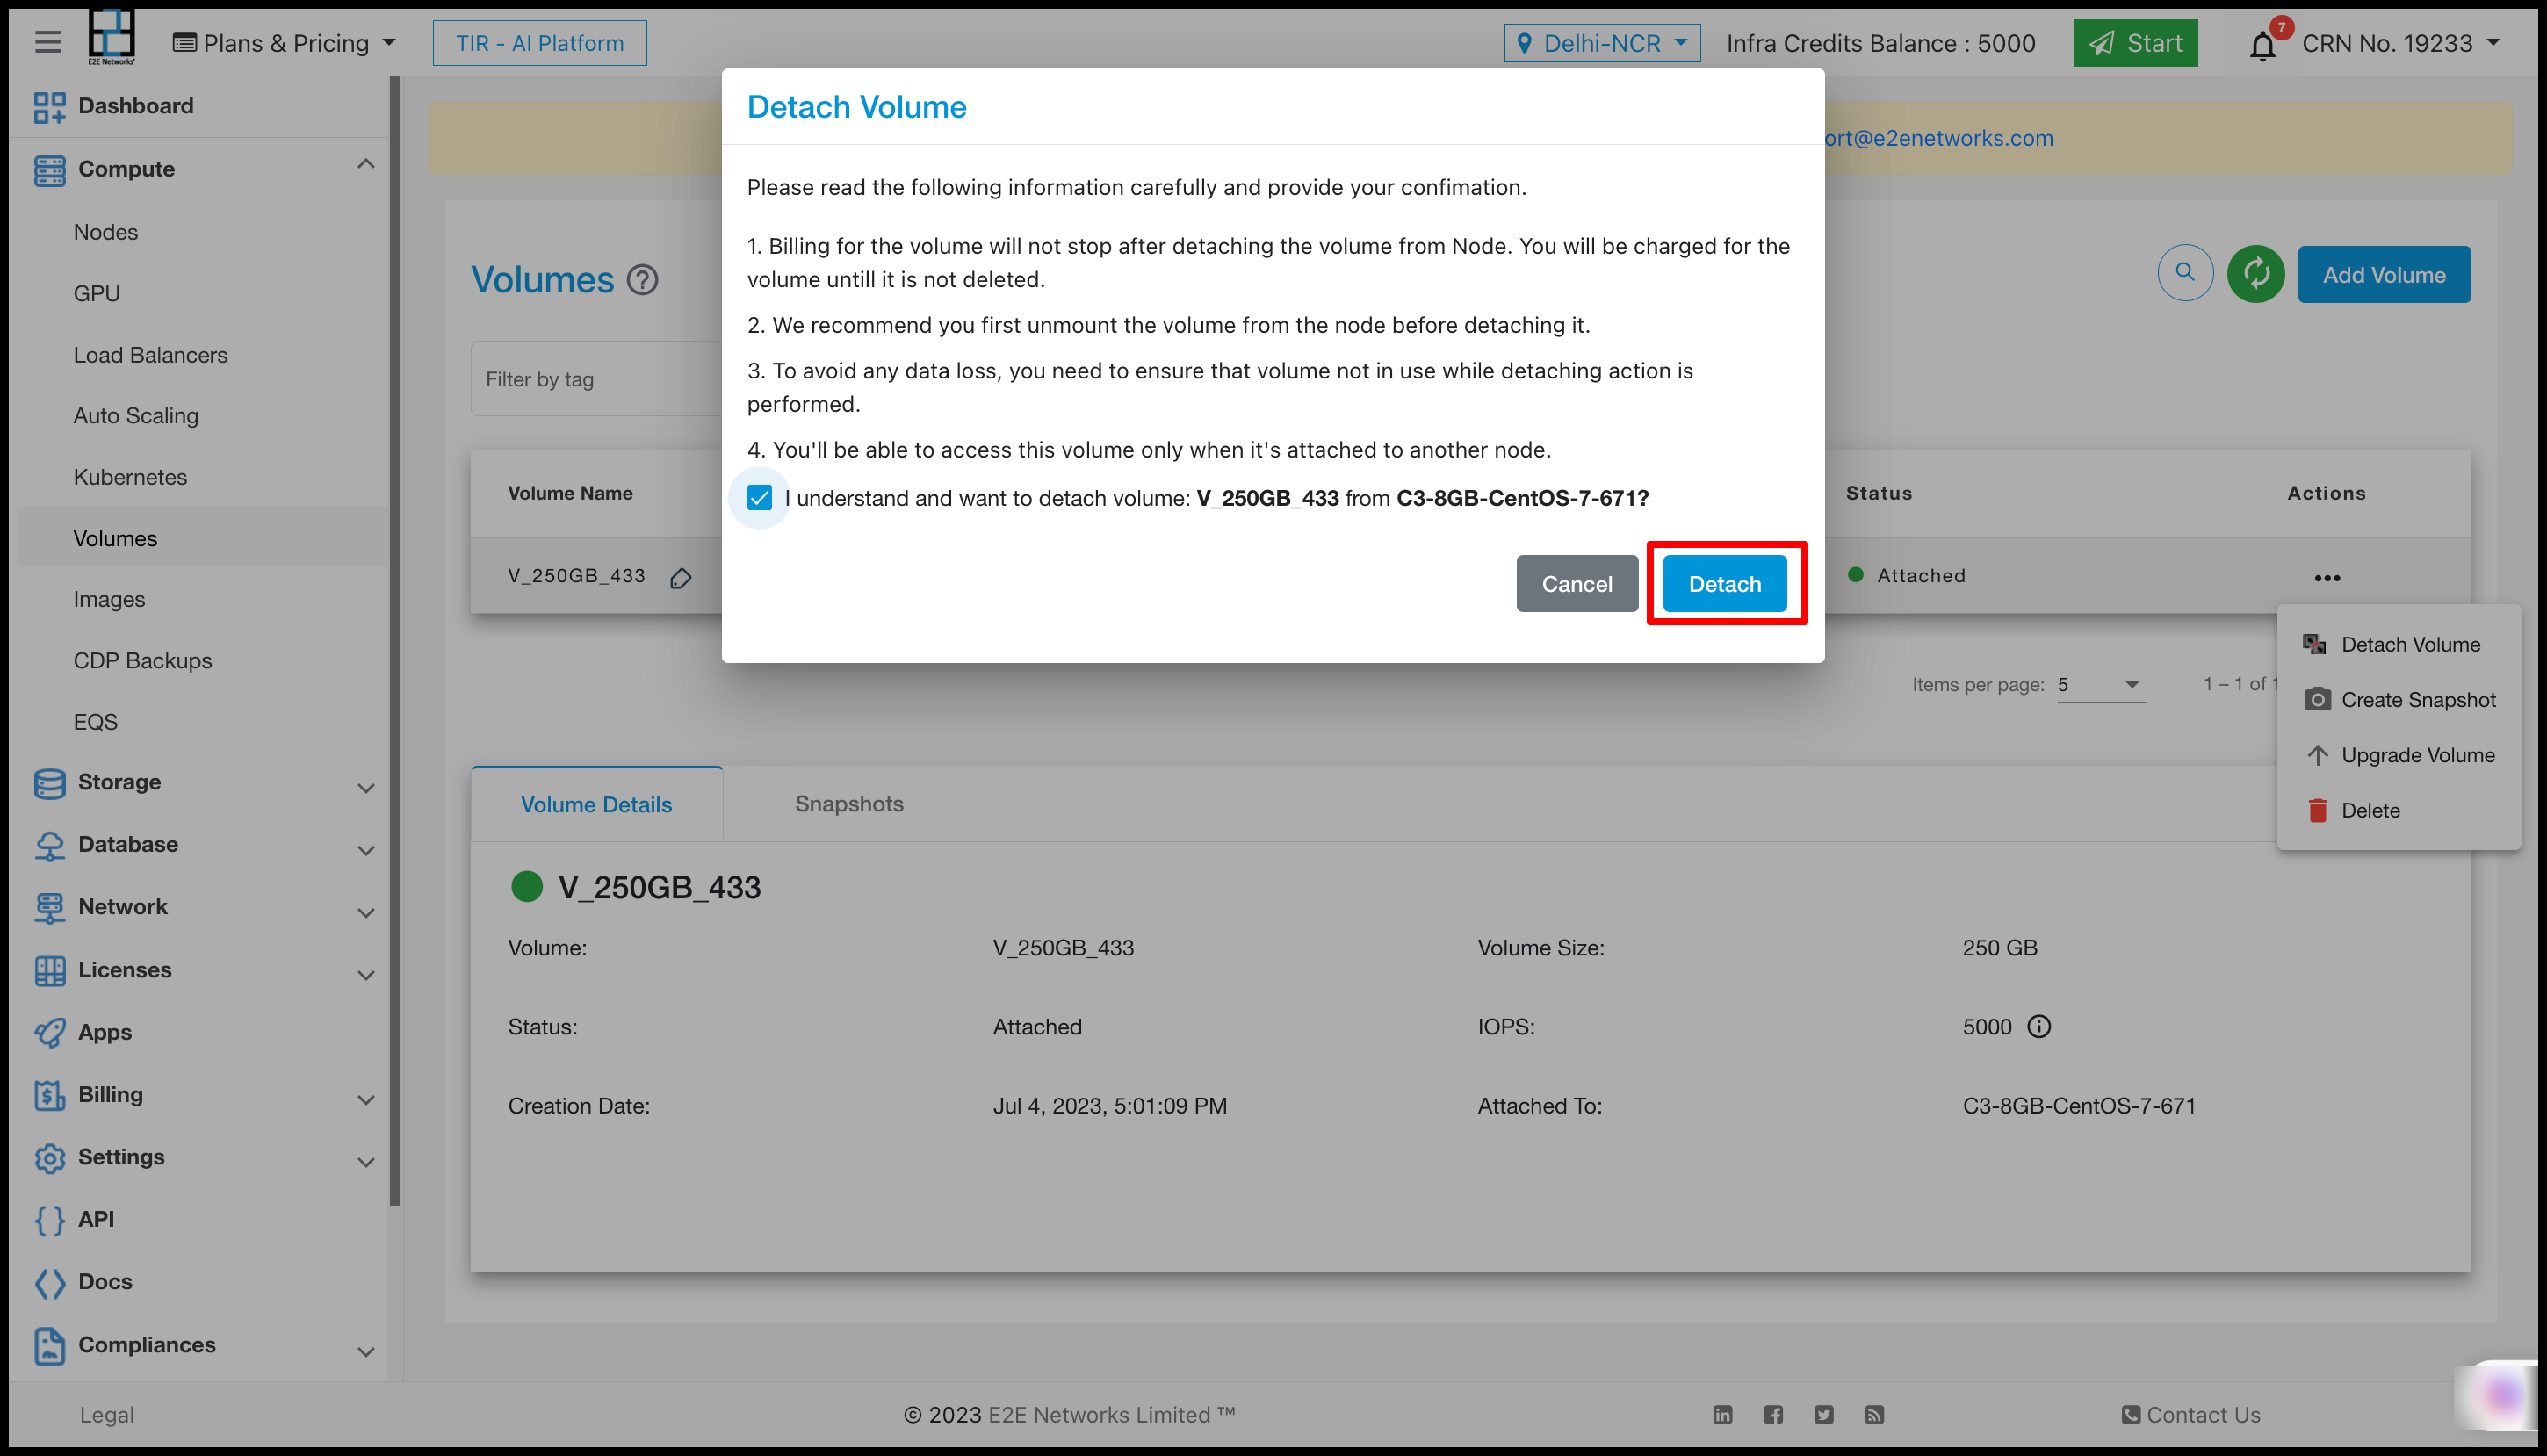
You will be asked for confirmation to detach the volume from your node, Tickmark the option, and detach the node. To avoid any data loss, you need to ensure that volume not -in use while detaching action is performed. We recommend you first unmount the volume from the node before detaching it.
Once the Volume has been detached from your node, The status of it will be changed from Attached to Available again. Further, You can use this volume to attach it on other nodes or delete it.
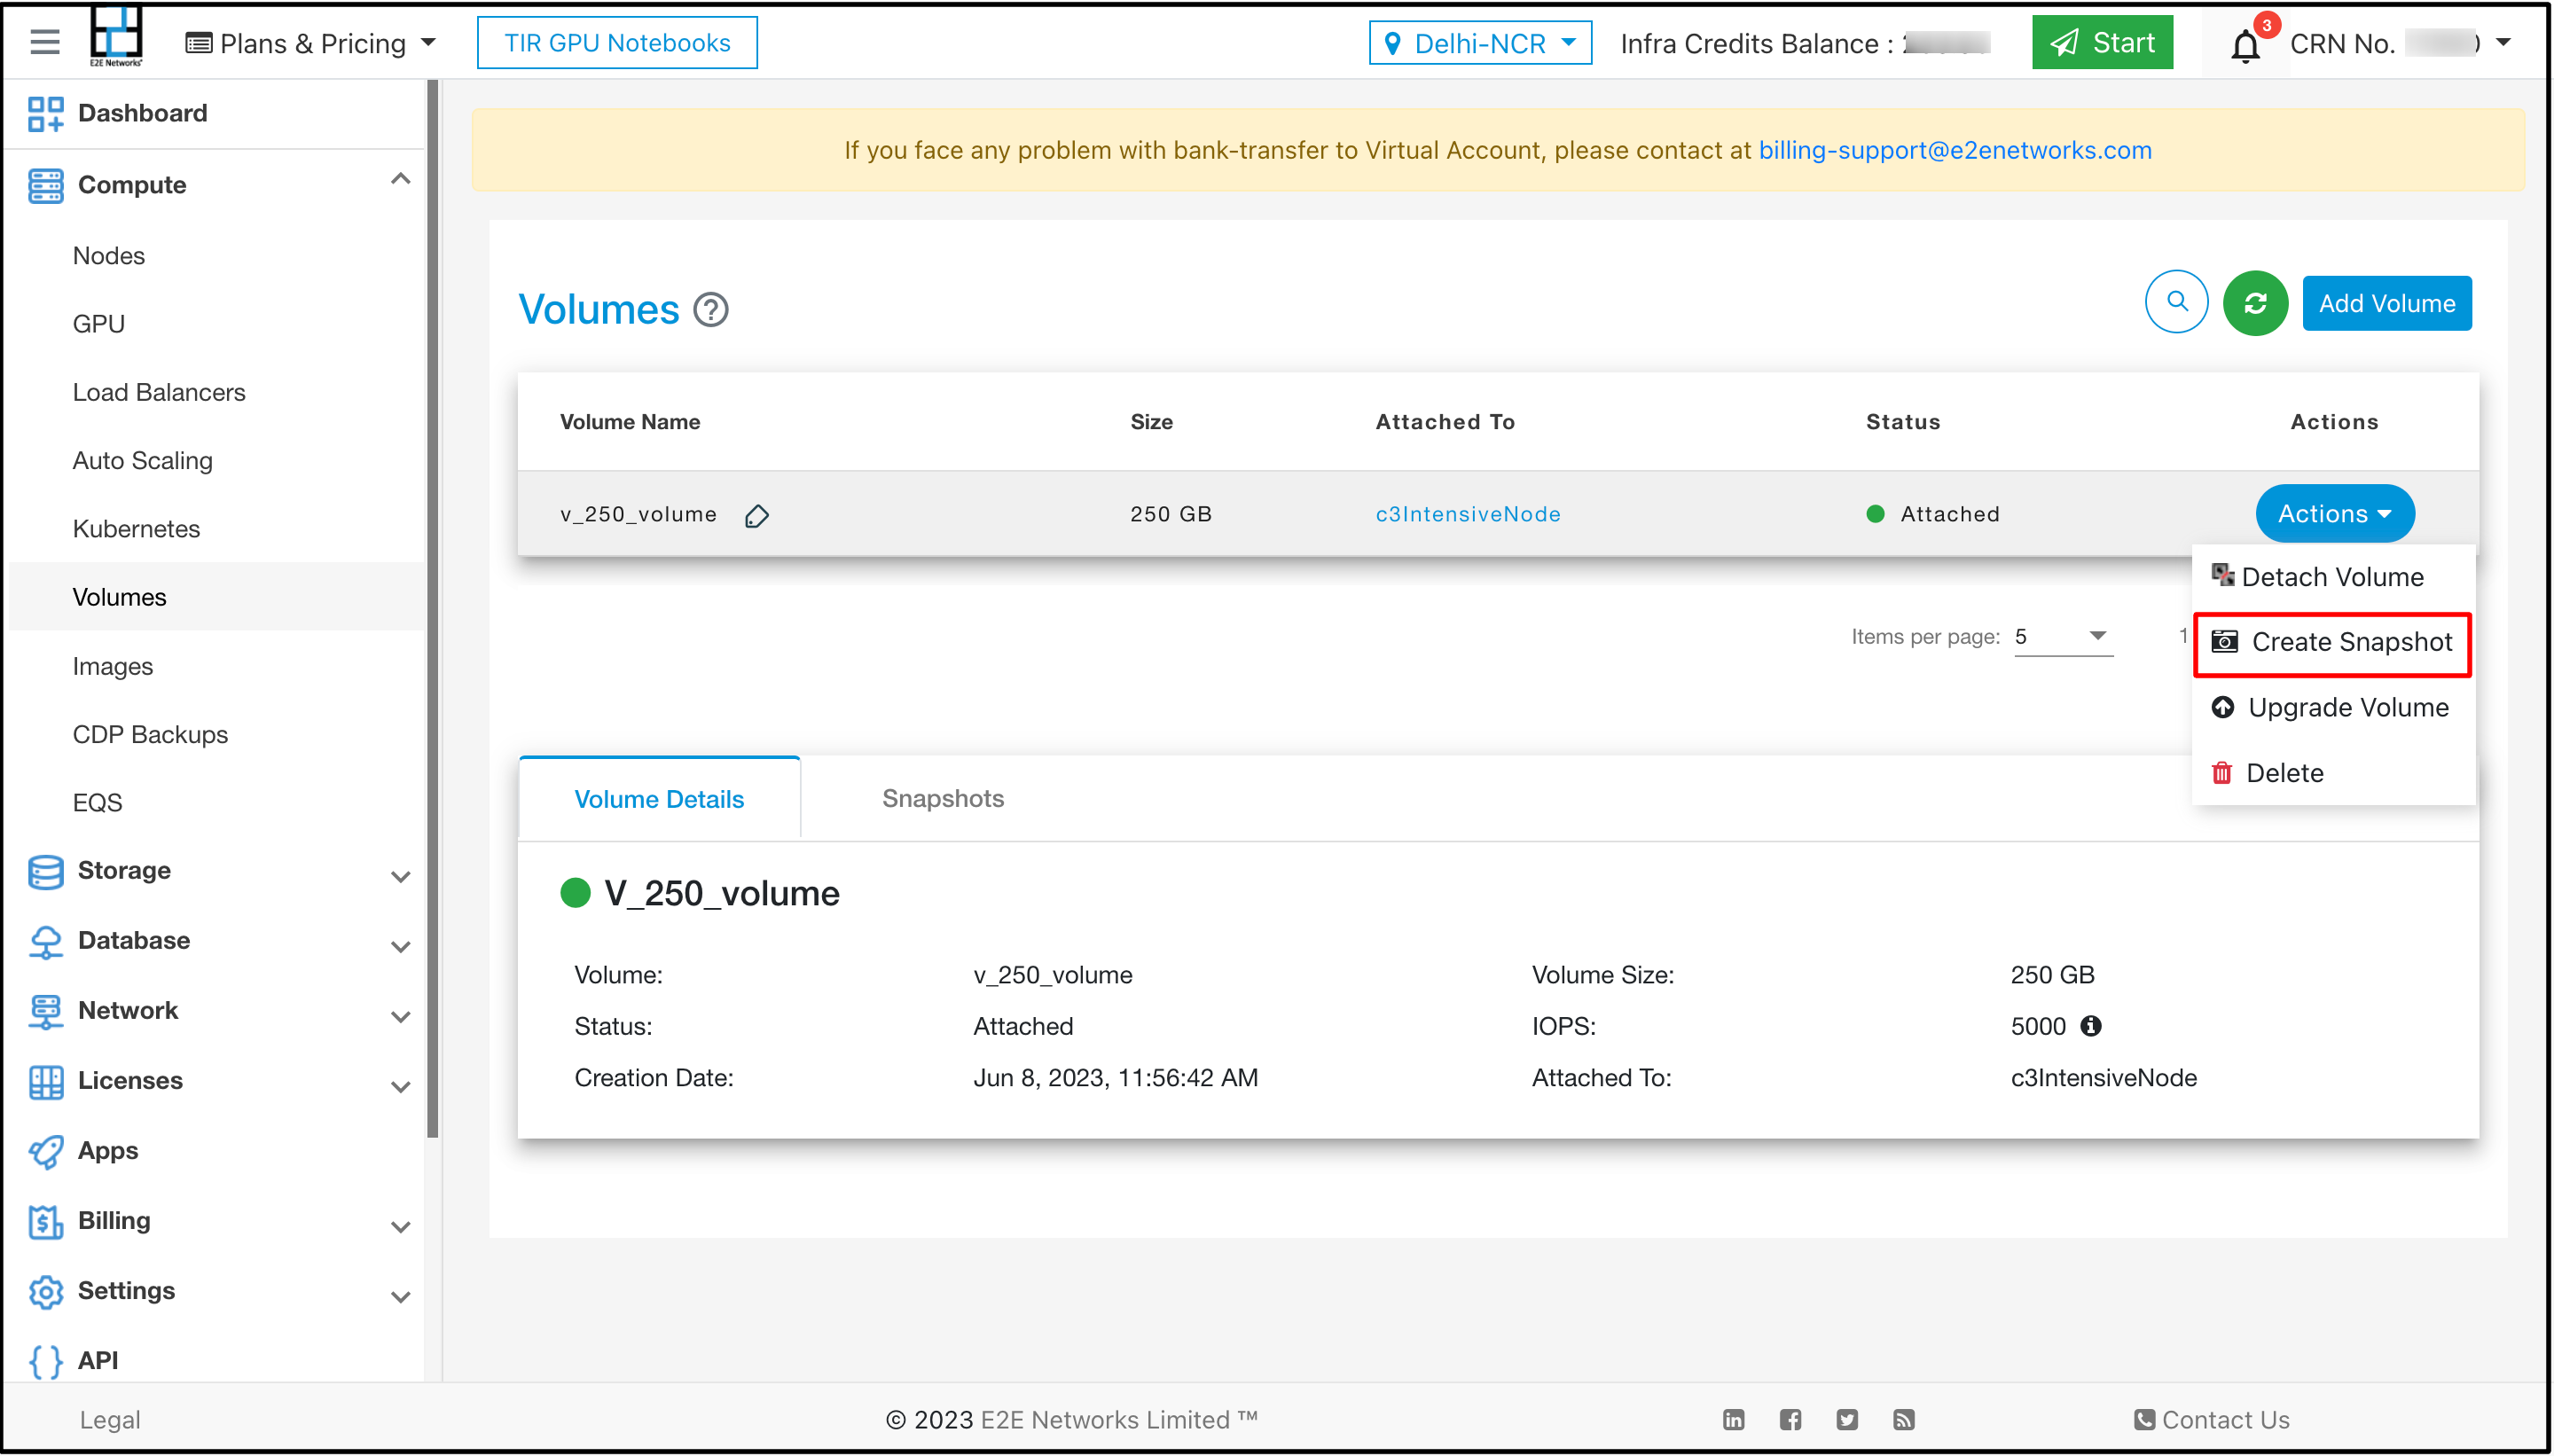
Create a Snapshot
To make volume’s data backup you can create a snapshot, To create a snapshot of your database click on Action and select create snapshot.
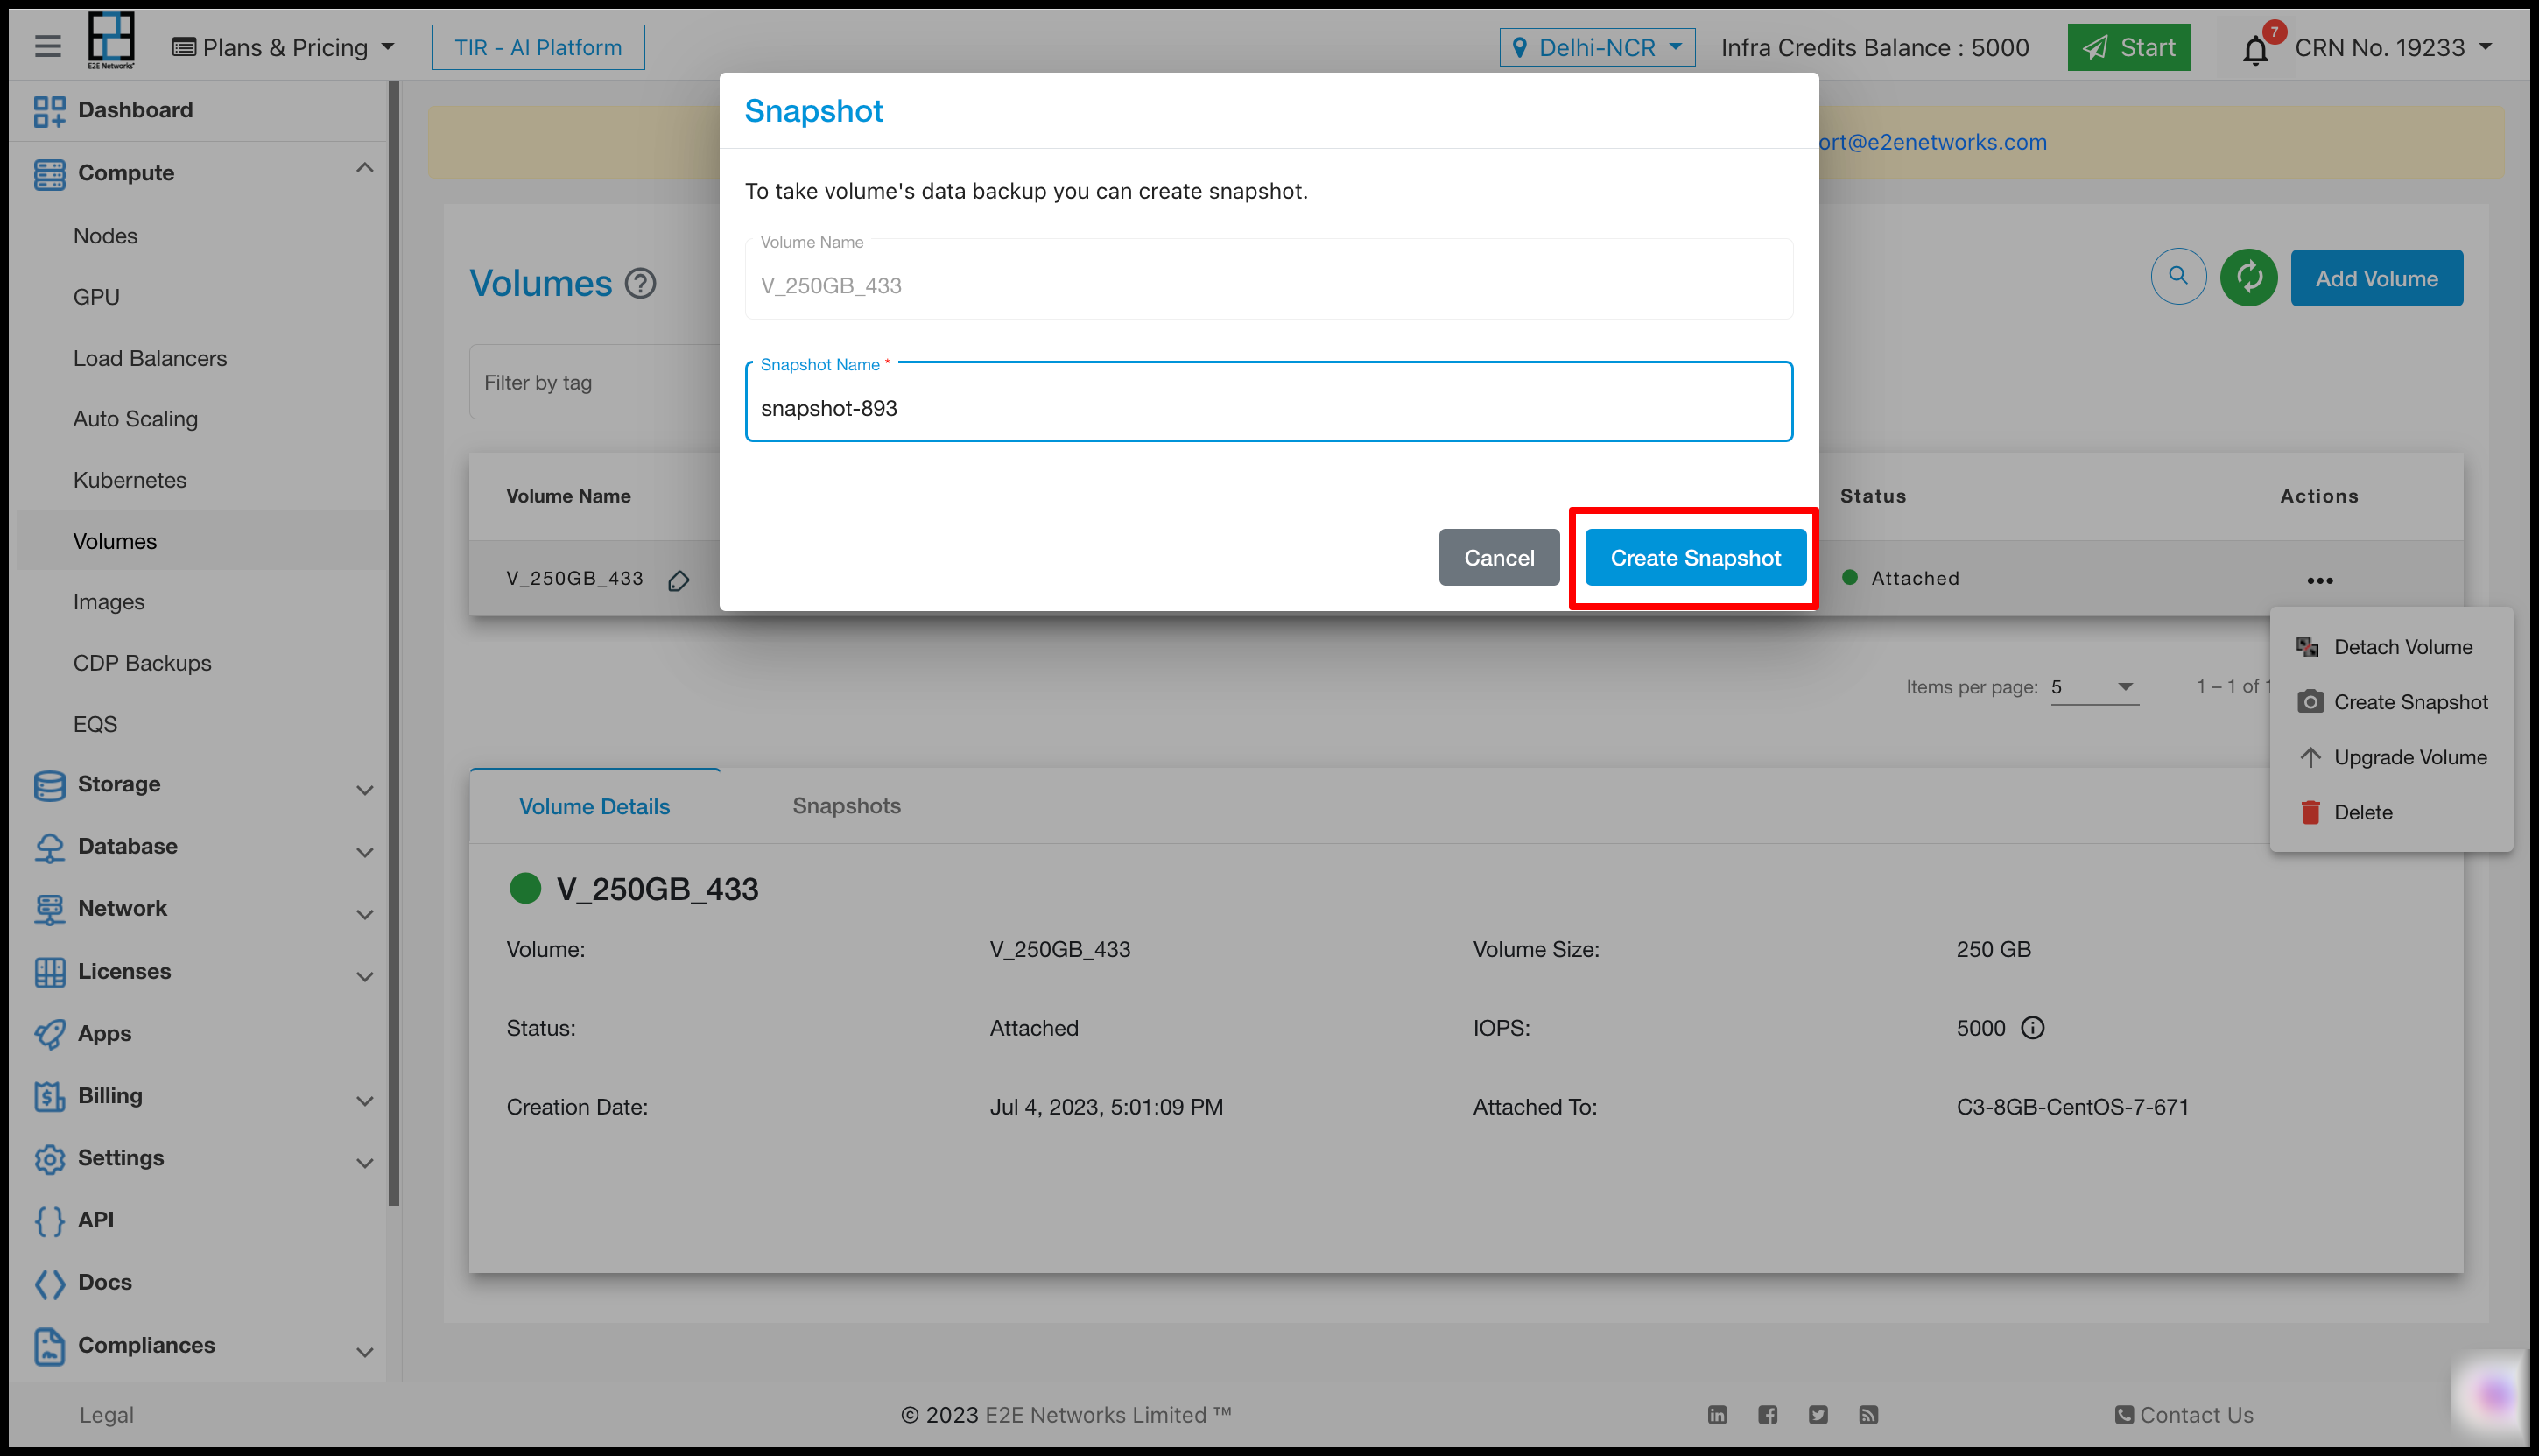
Enter the Snapshot name and click on create snapshot.
The Snapshots will now be available in the snapshot section of your dashboard.
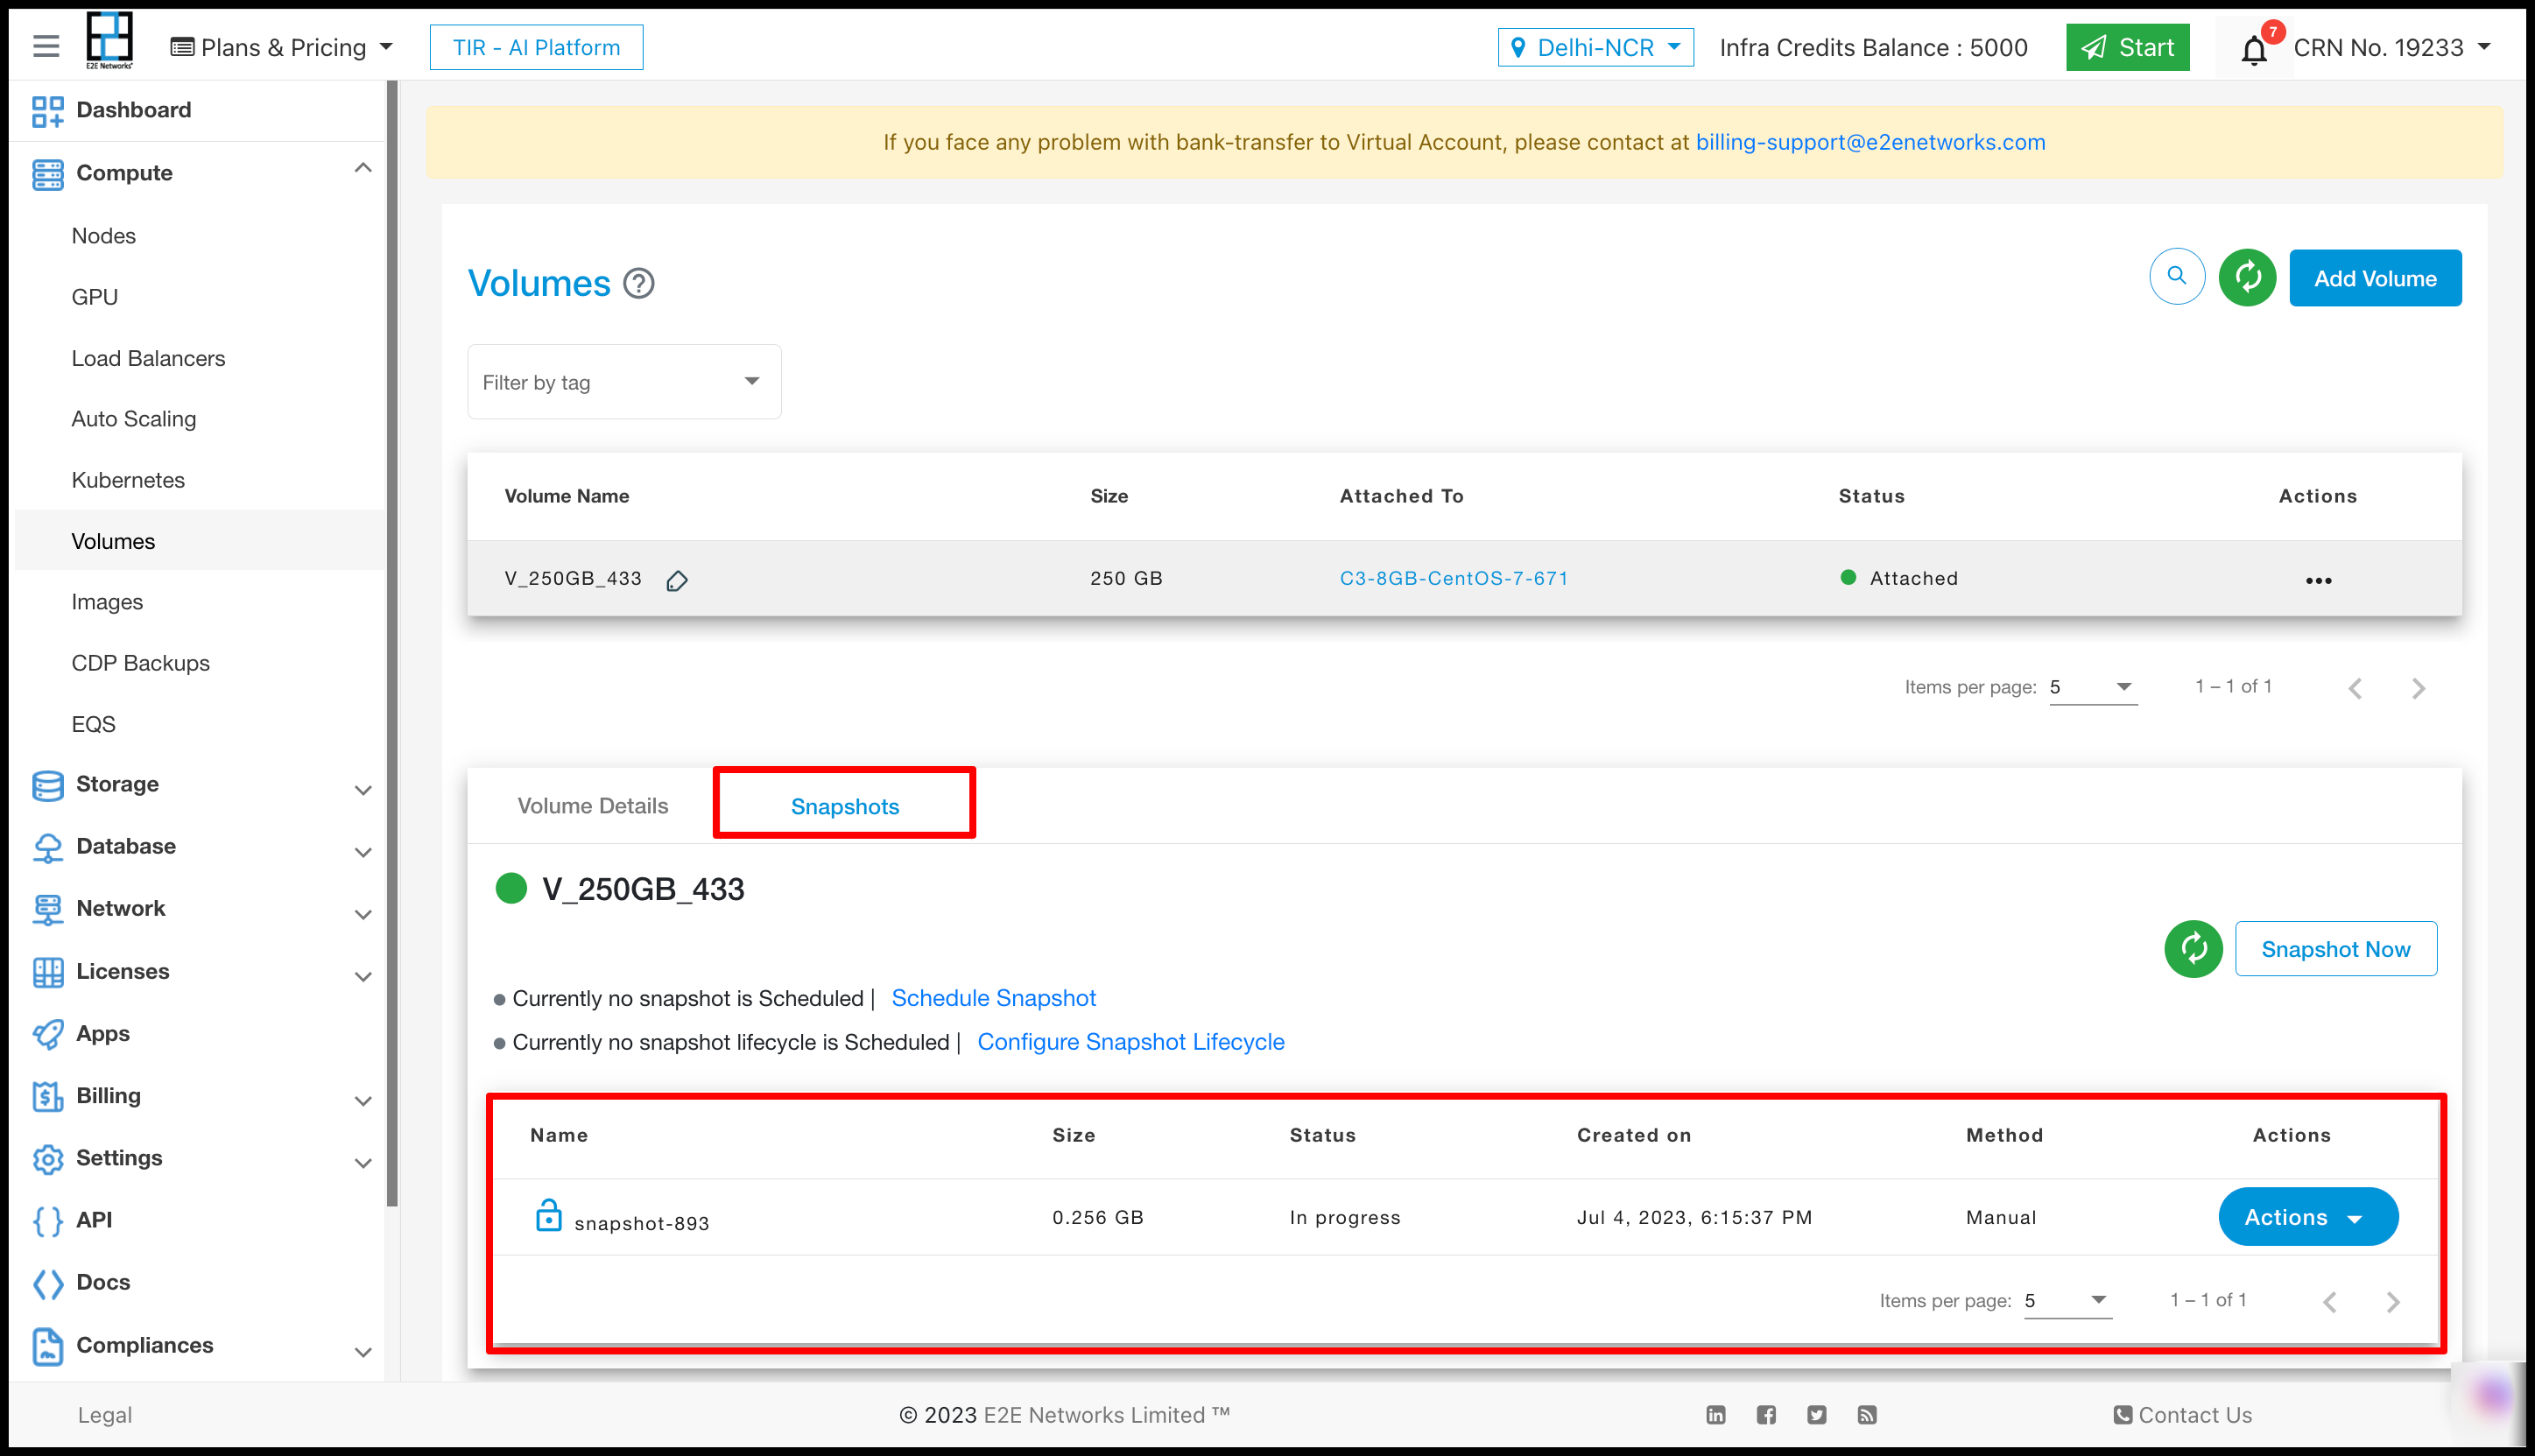
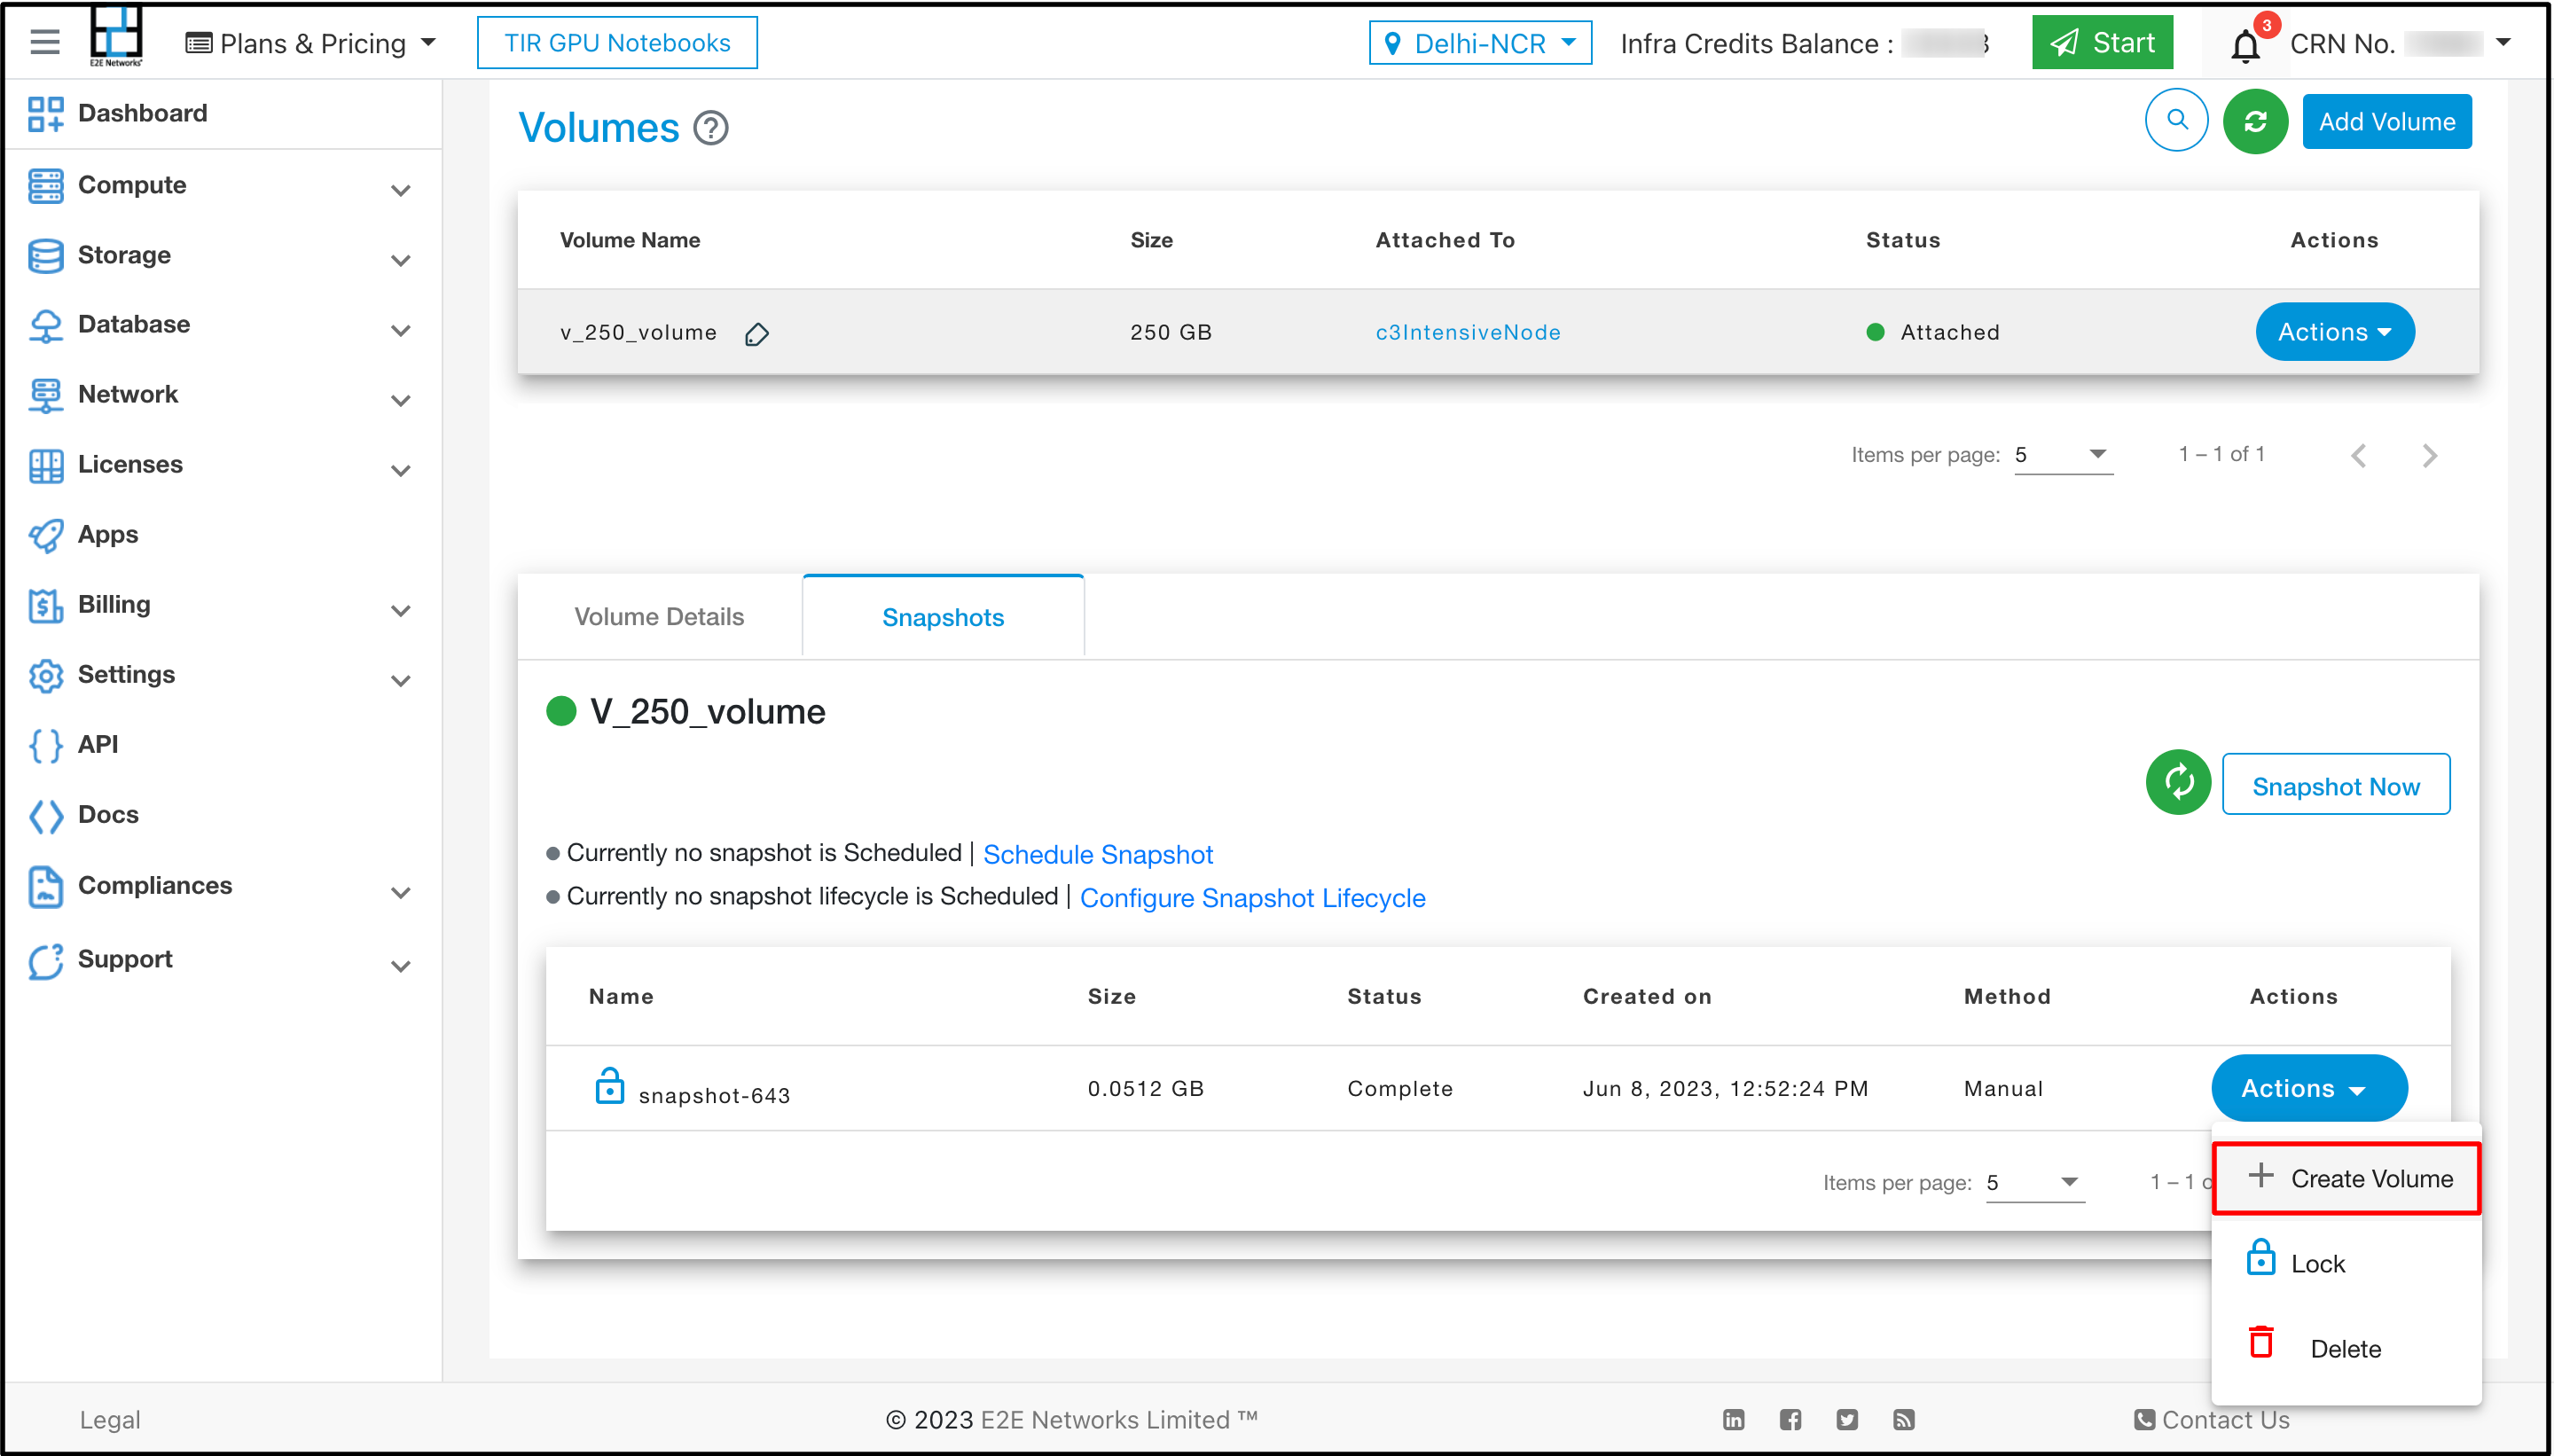
Once the snapshot is created, your data will be backed up and preserved and now you will be able to create new volume storage from the available snapshot.
To create new volume from Snapshot, Select Action and click on create volume.
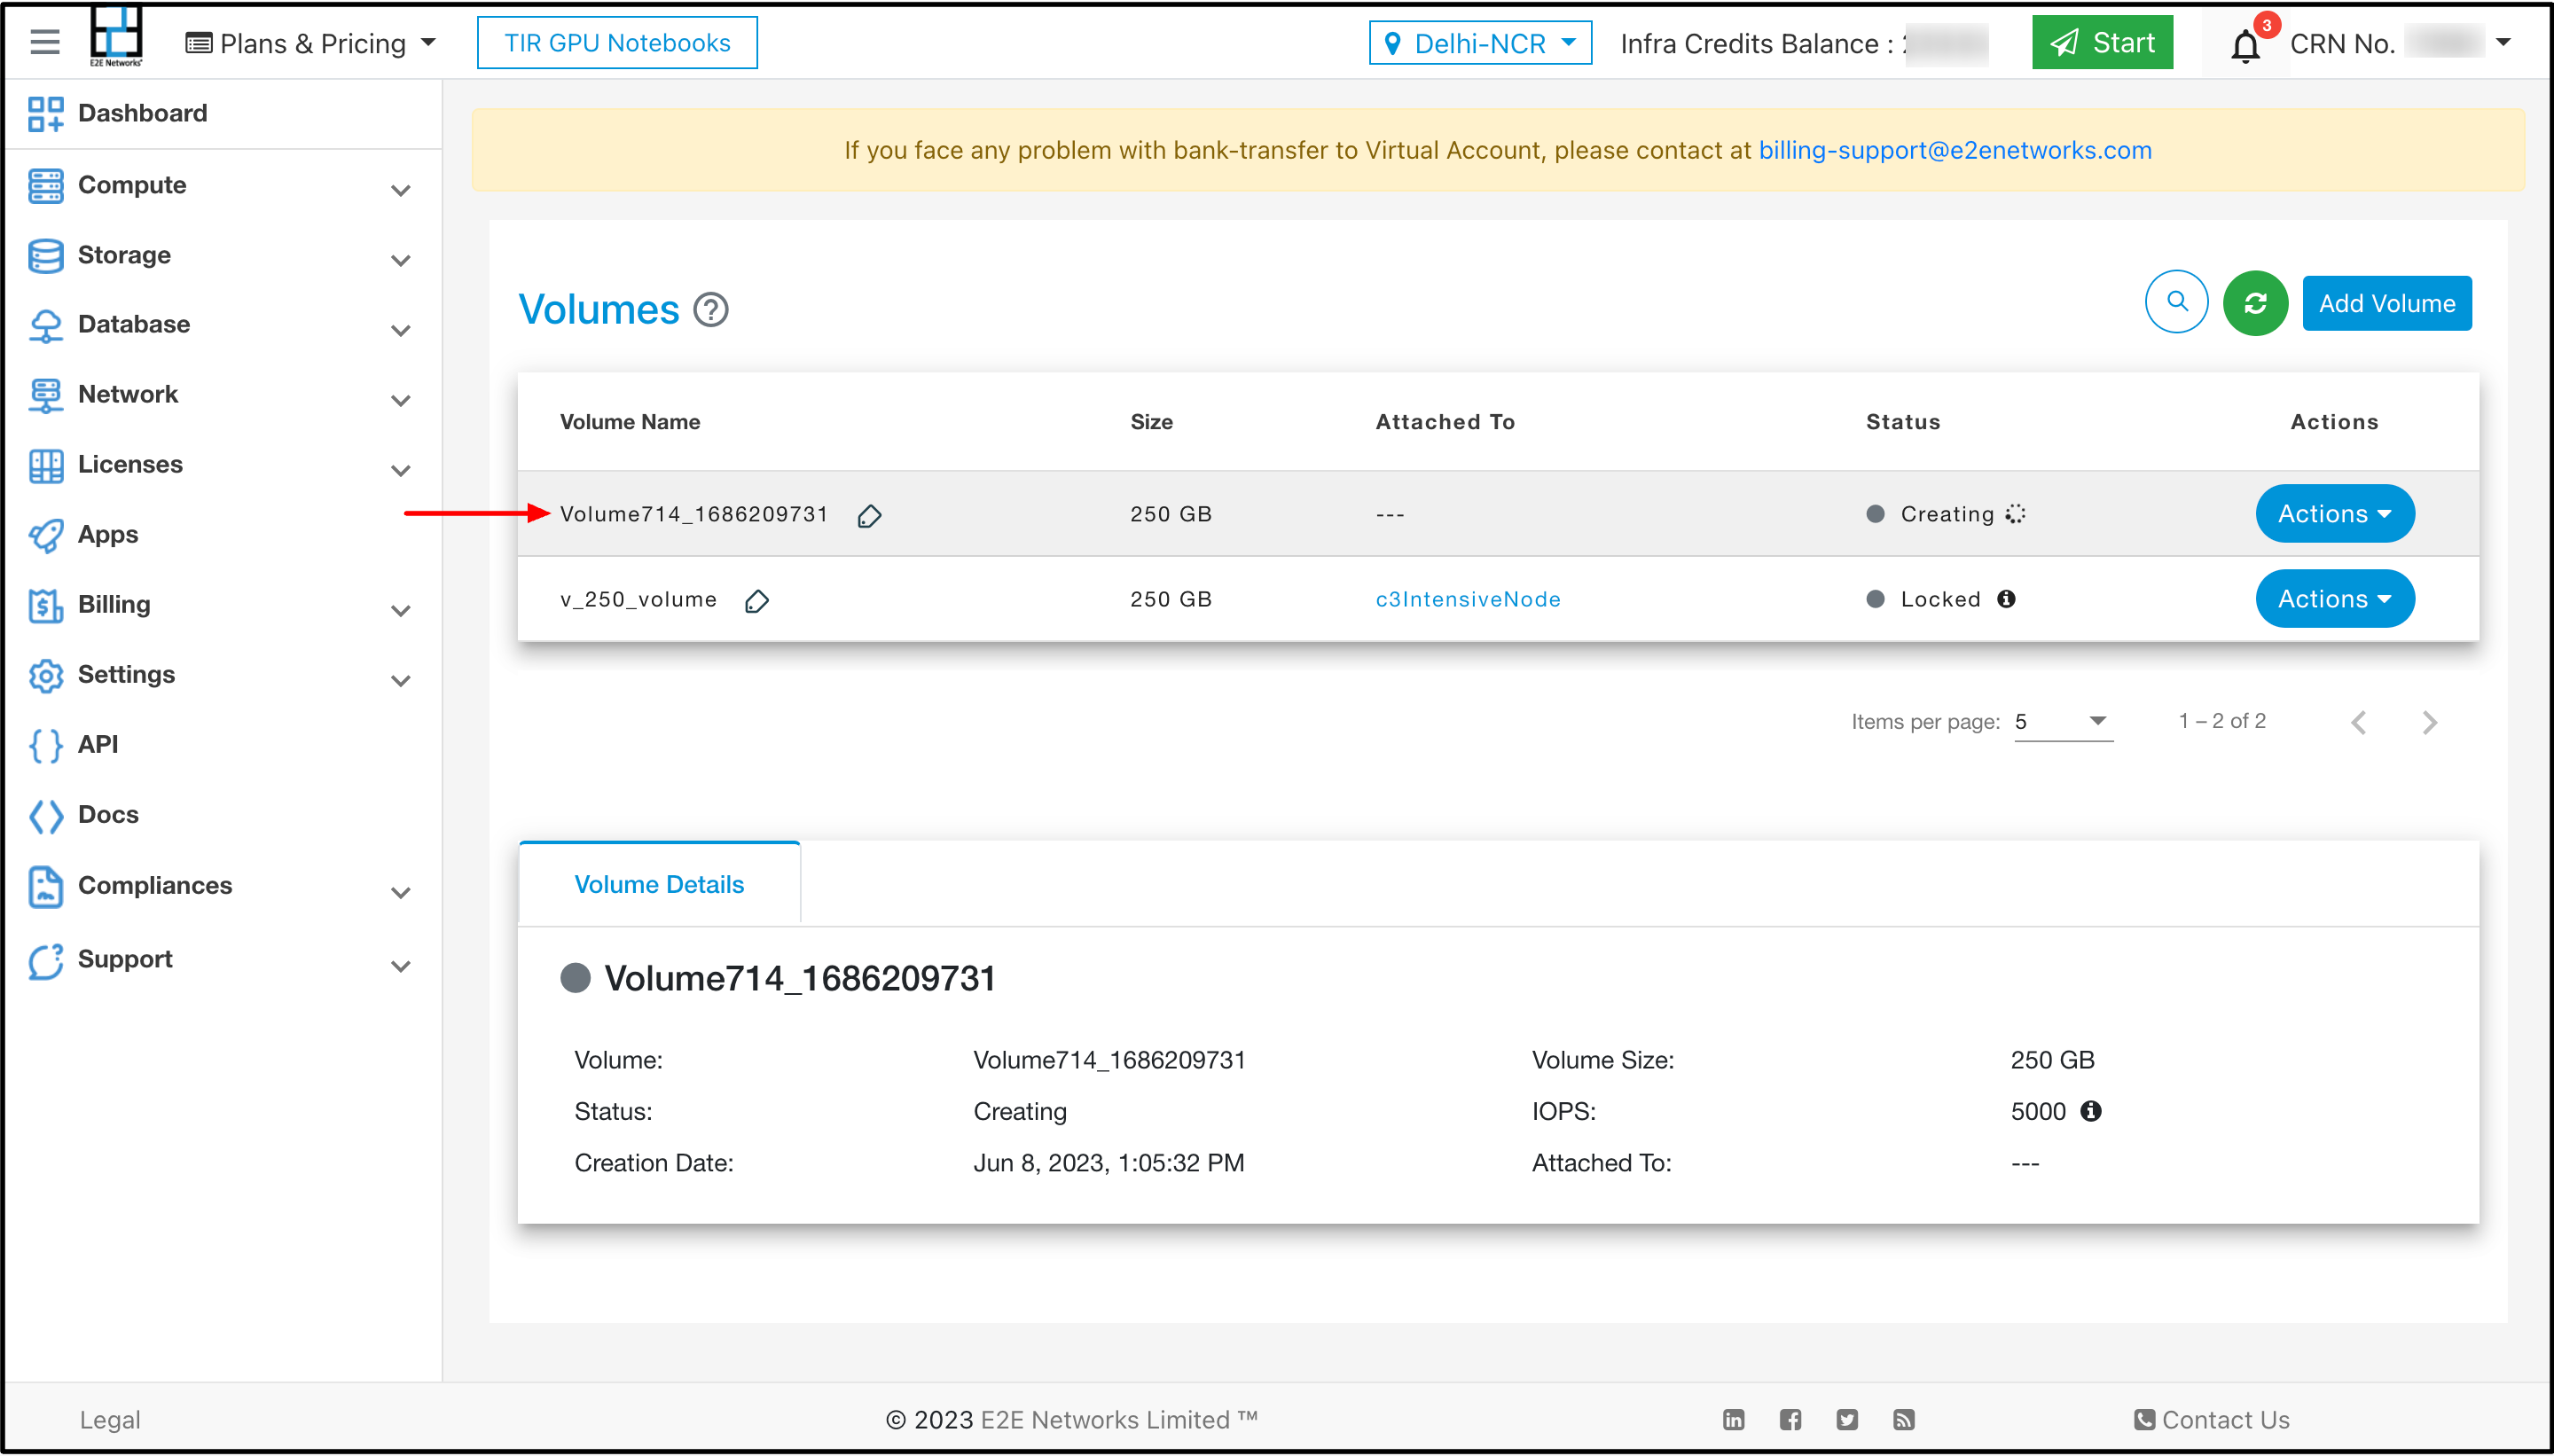
Enter the details of new volume name and click create.
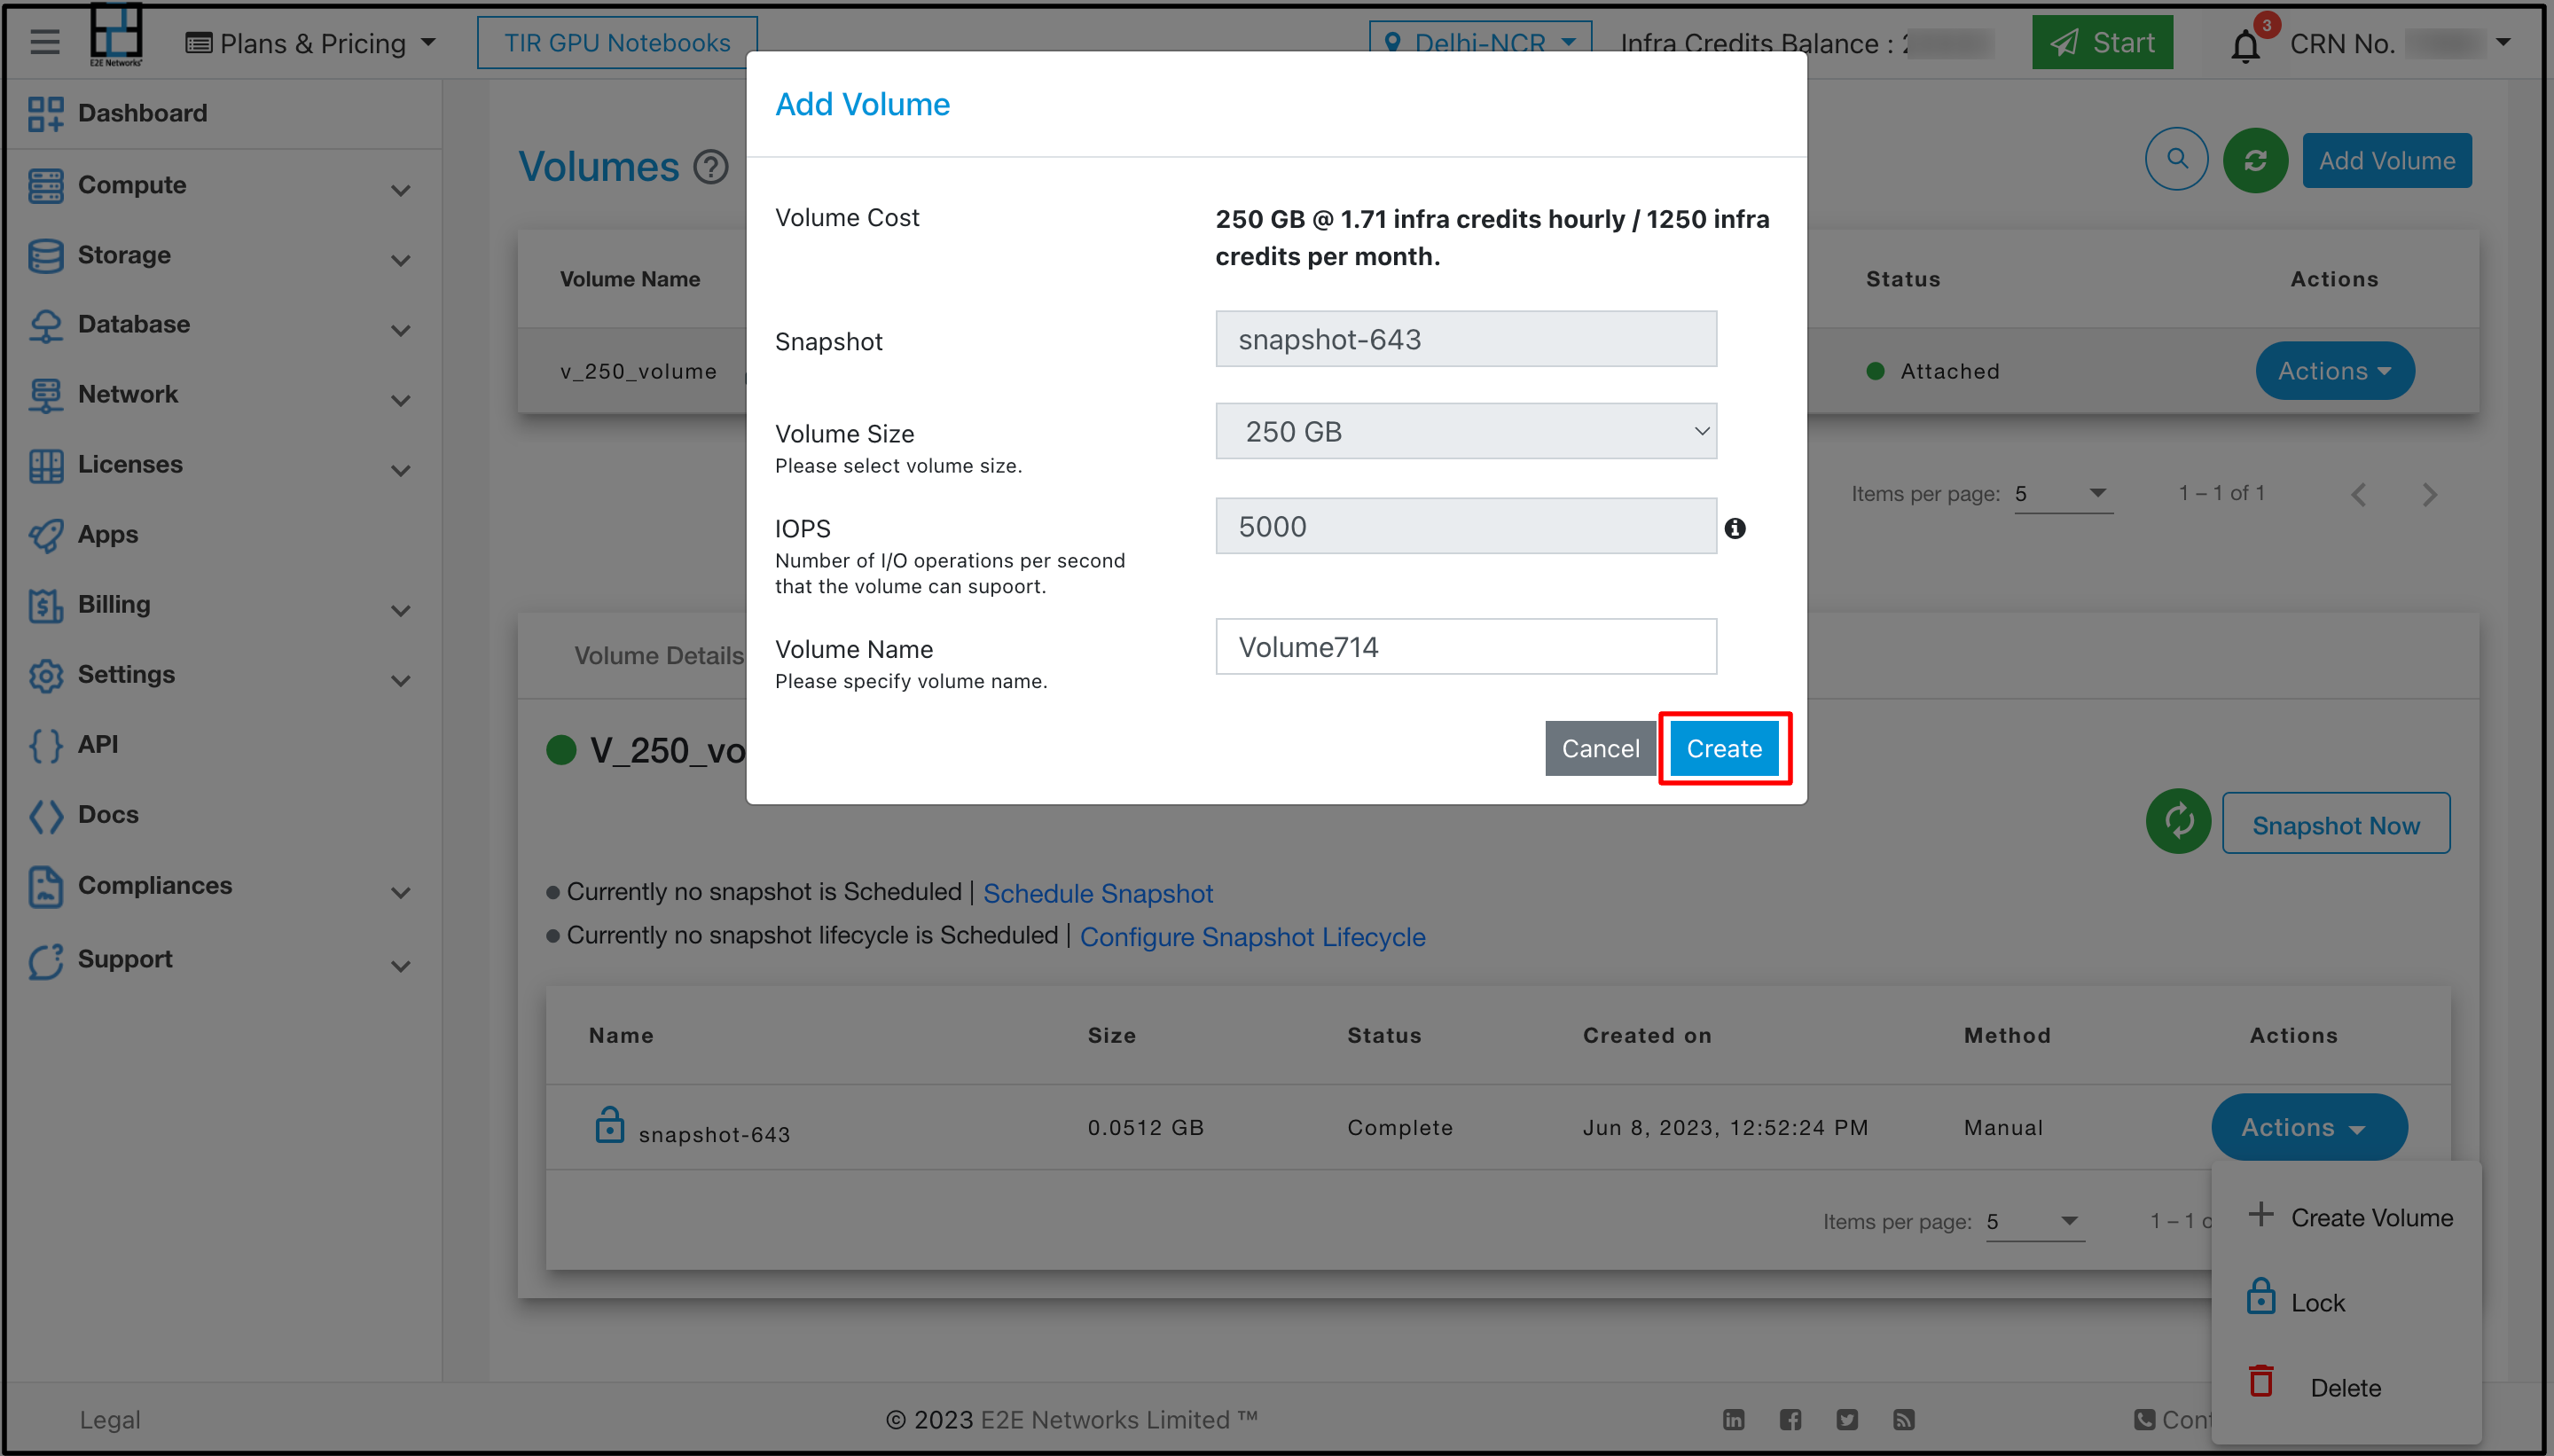
A new volume storage will be created from the snapshot you saved.
Move Volume To Another Project
Using this action you can transfer your volume from volume’s current project to another project within the same CRN. On transferring this volume, Snapshots of volume will also be transferred.
Note
To transfer the volume -
Ensure the volume is not in Attached, Creating, Deleting or Error state.
The volume must not have any Tags attached.
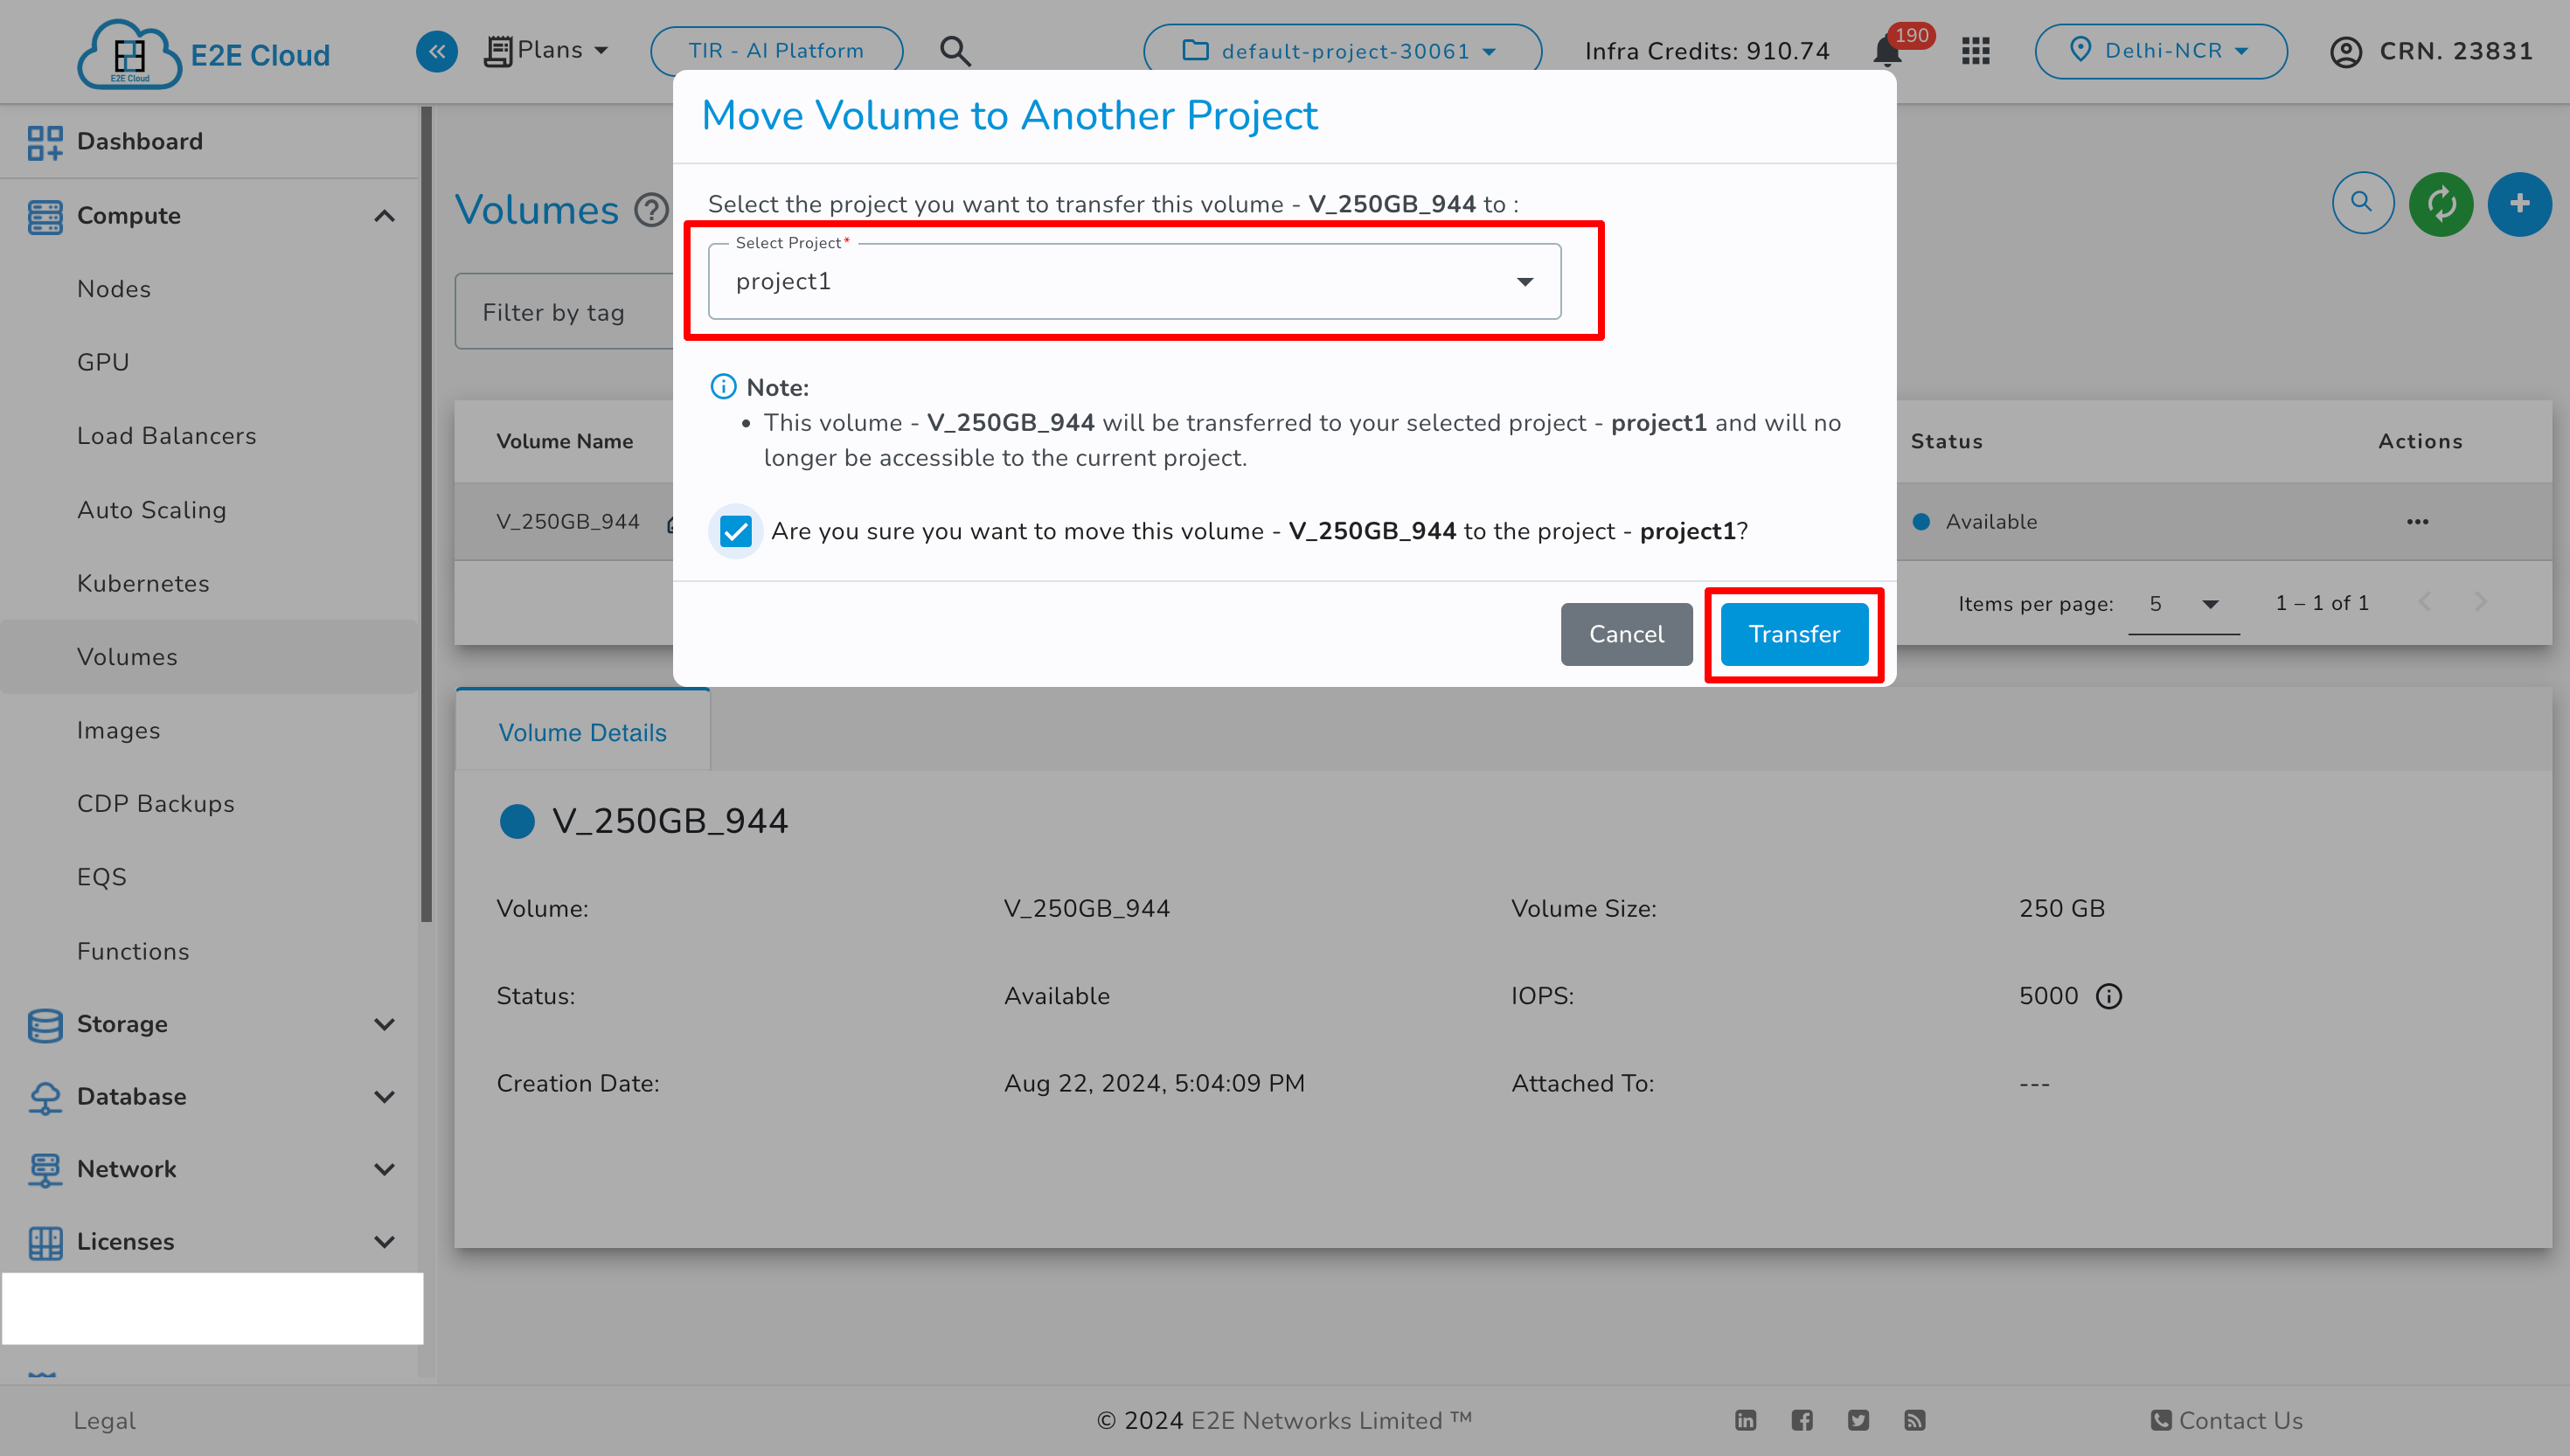
To transfer the volume click on Move To Another Project button in actions.
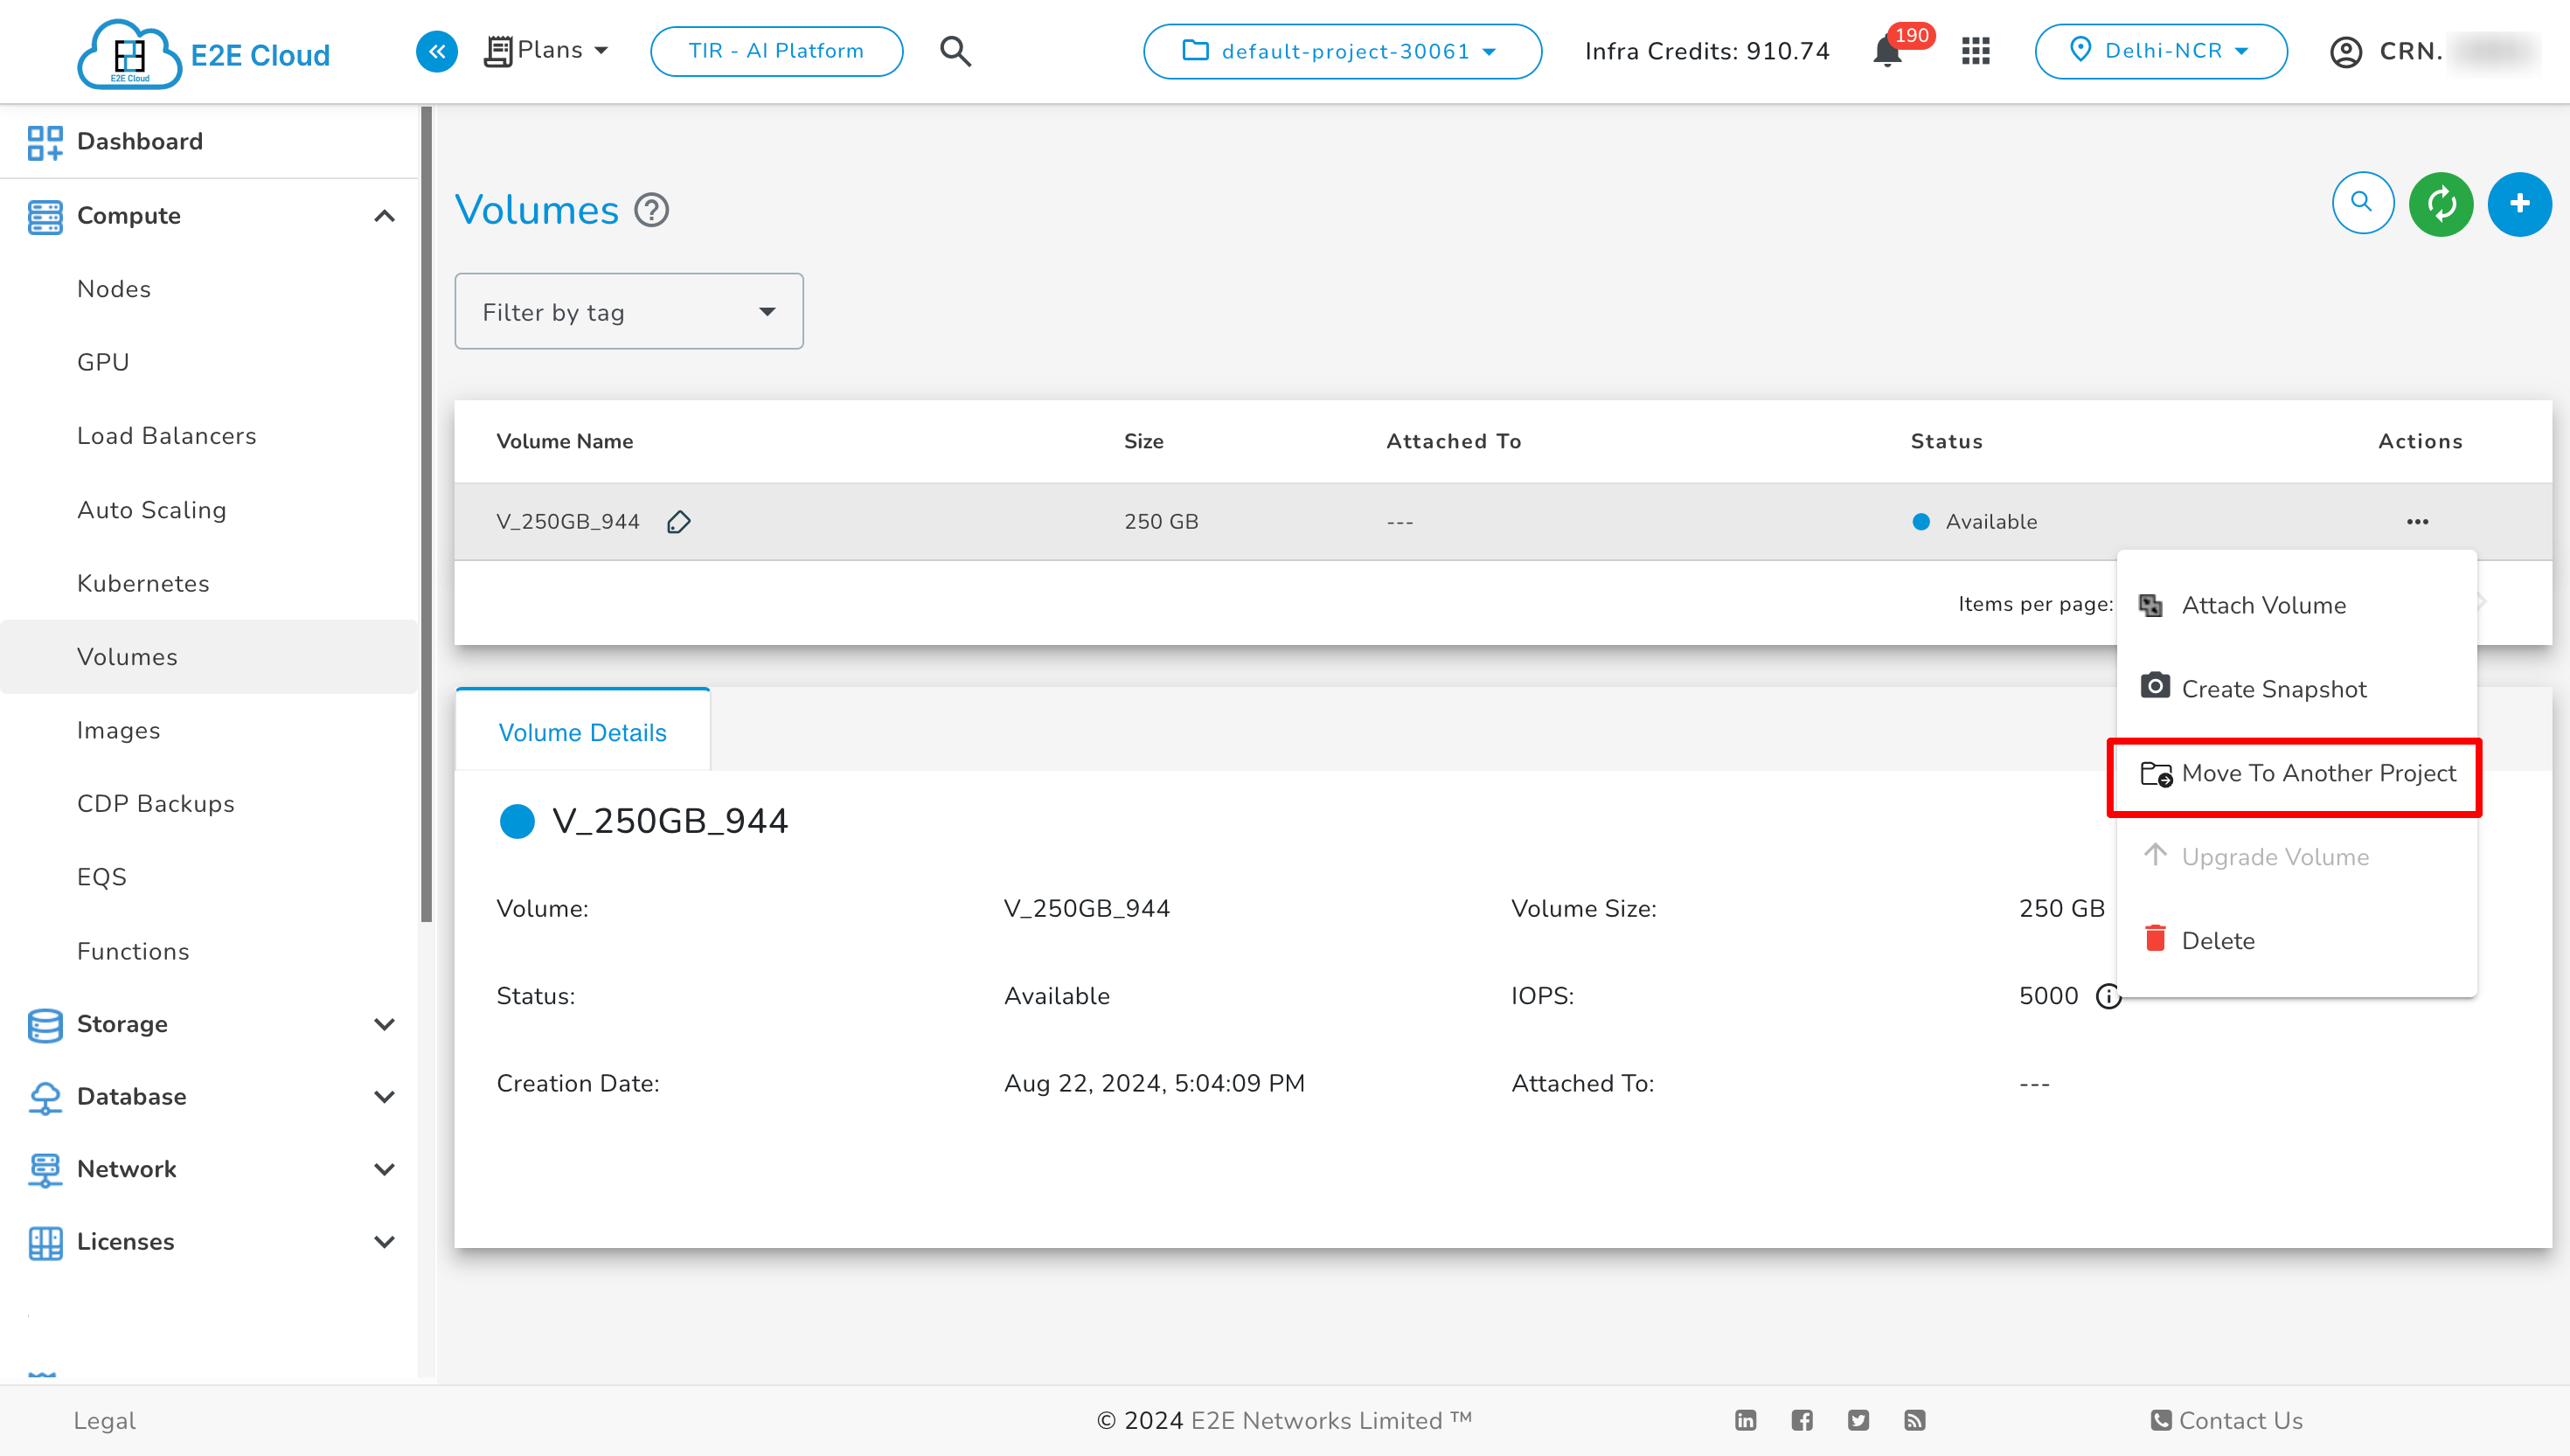
Then click on Move To Another Project from Actions, select the target project, check the checkbox, and click Transfer.
Note
An audit log will be created for the transfer in both the current and target projects during the transfer.
Upgrade Volume
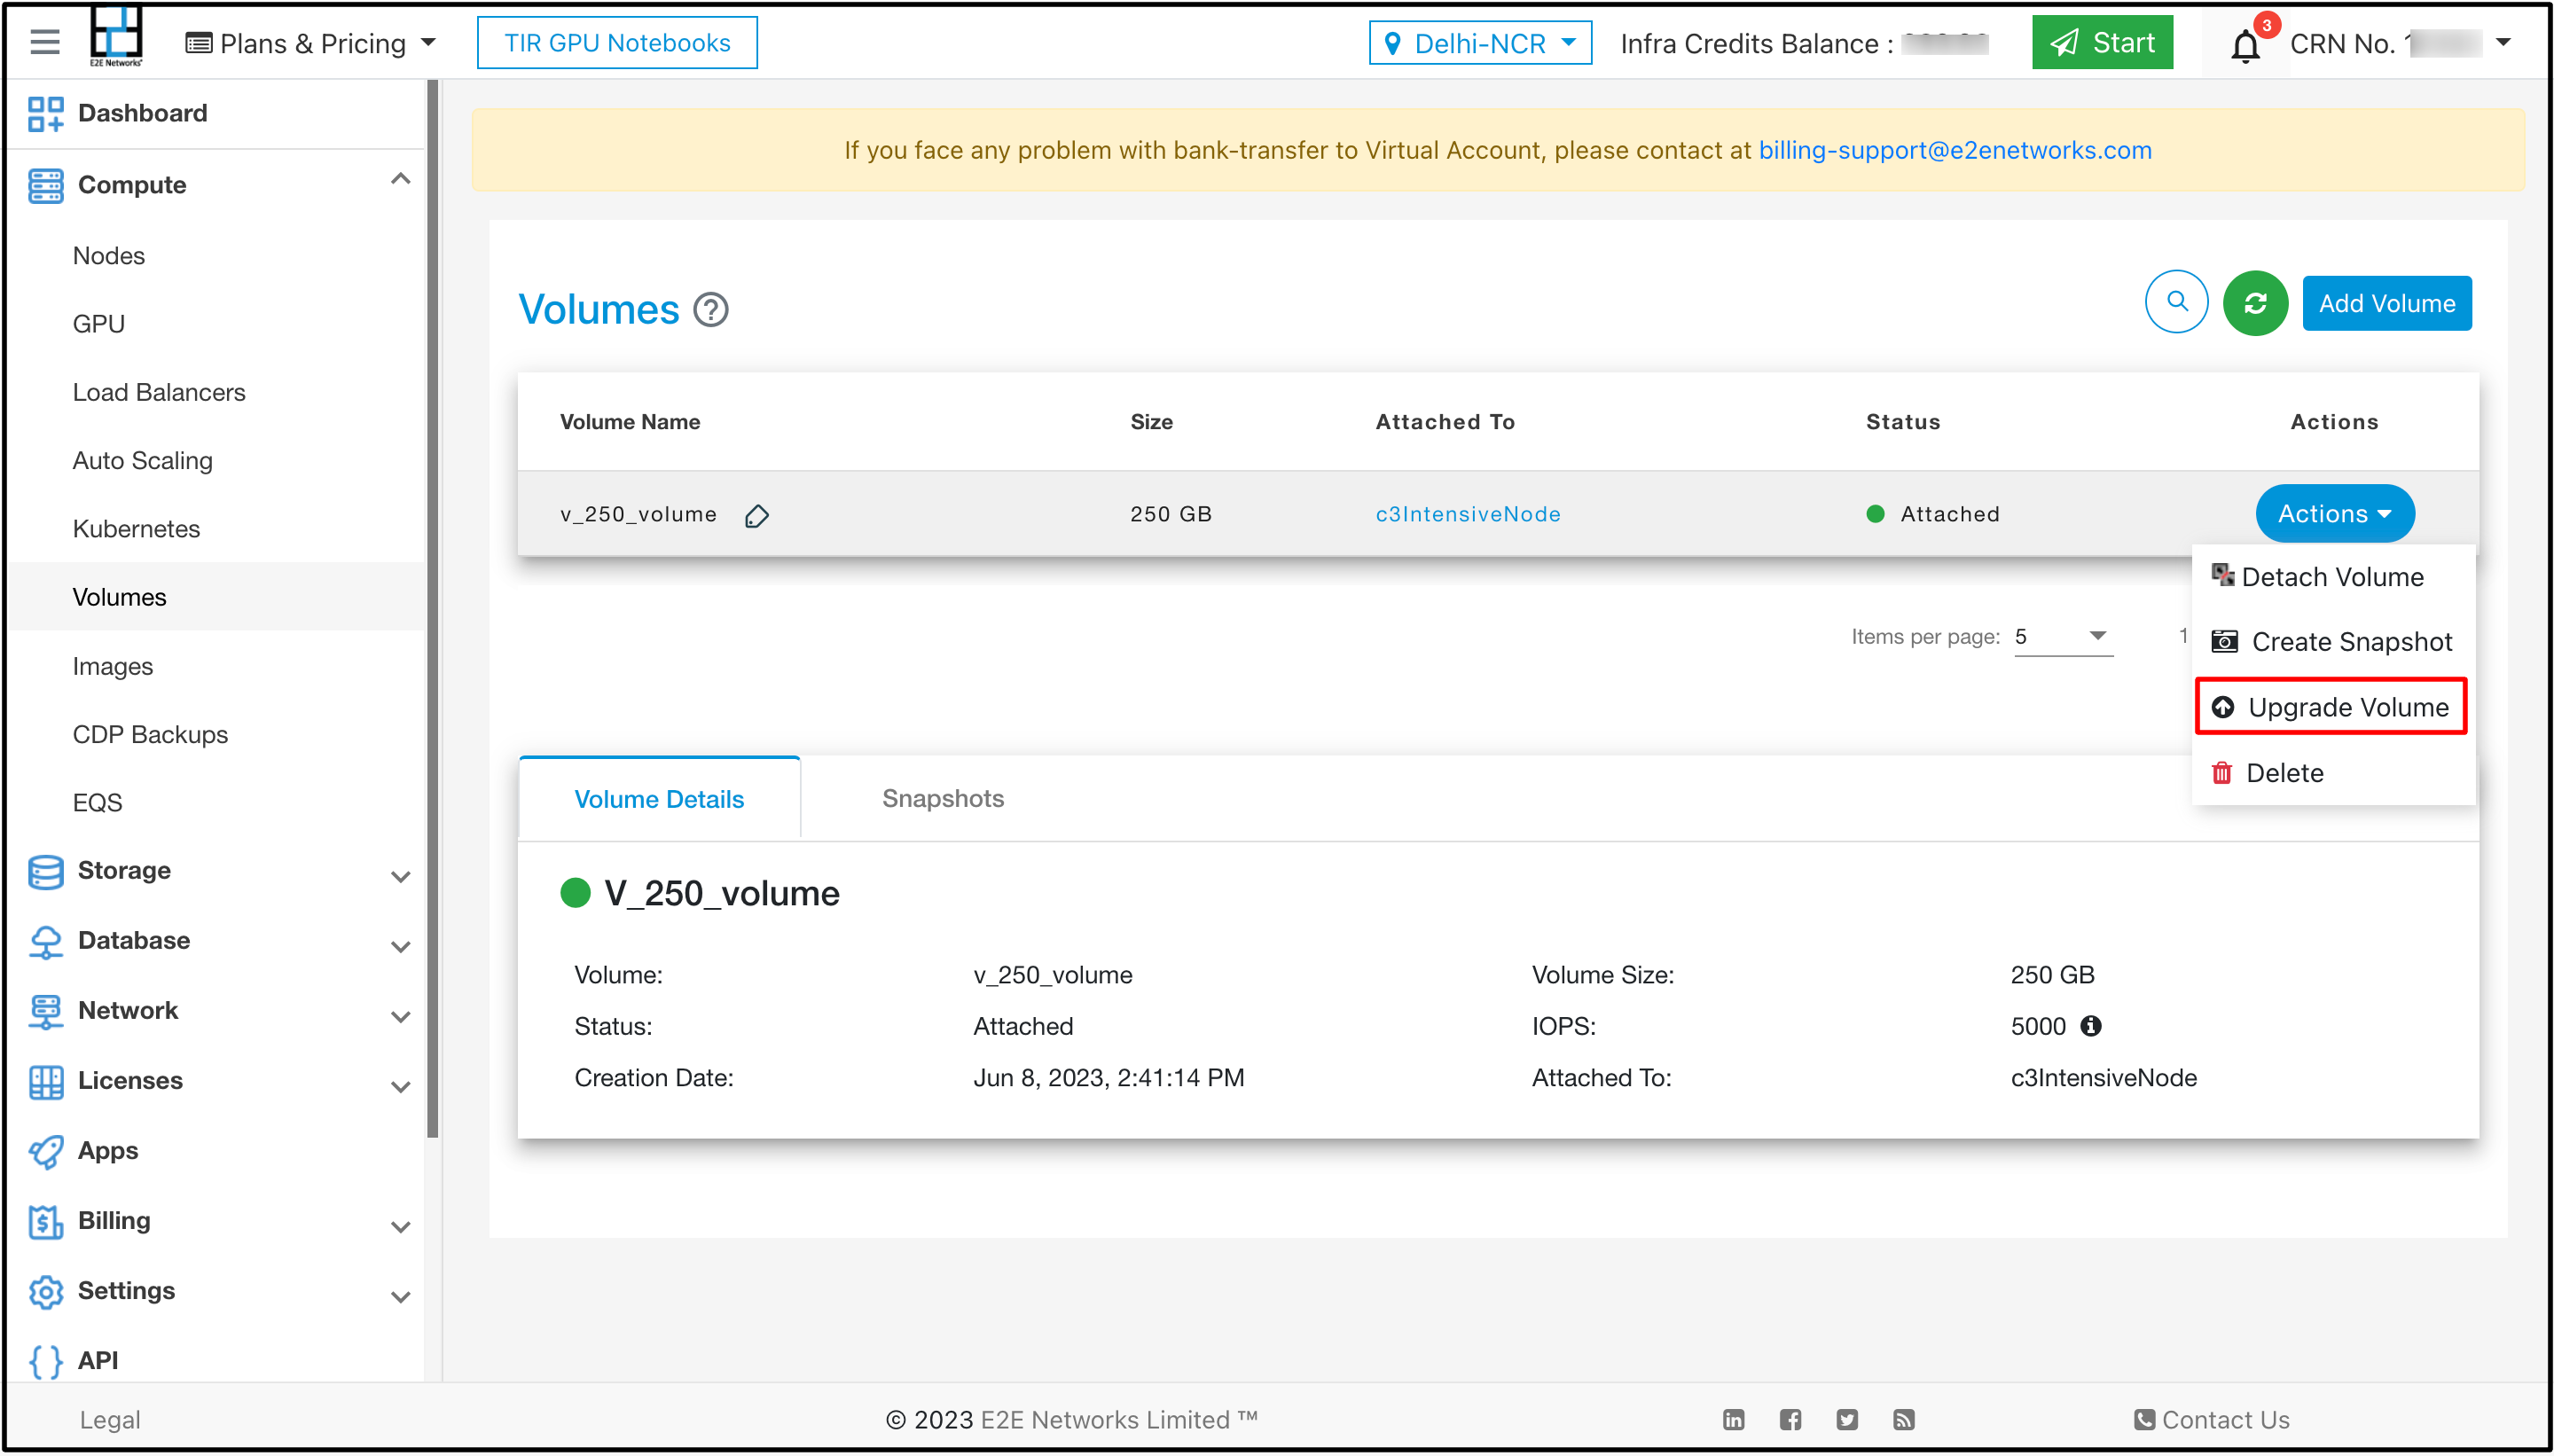
By utilizing the Upgrade volume feature, you have the ability to enhance your volume size by increasing its memory capacity. For upgrade volume you have to click in Upgrade Volume under Action button.
After clicking on Upgrade Volume popup will be open and on that you have to select volume size and click on Upgrade button.
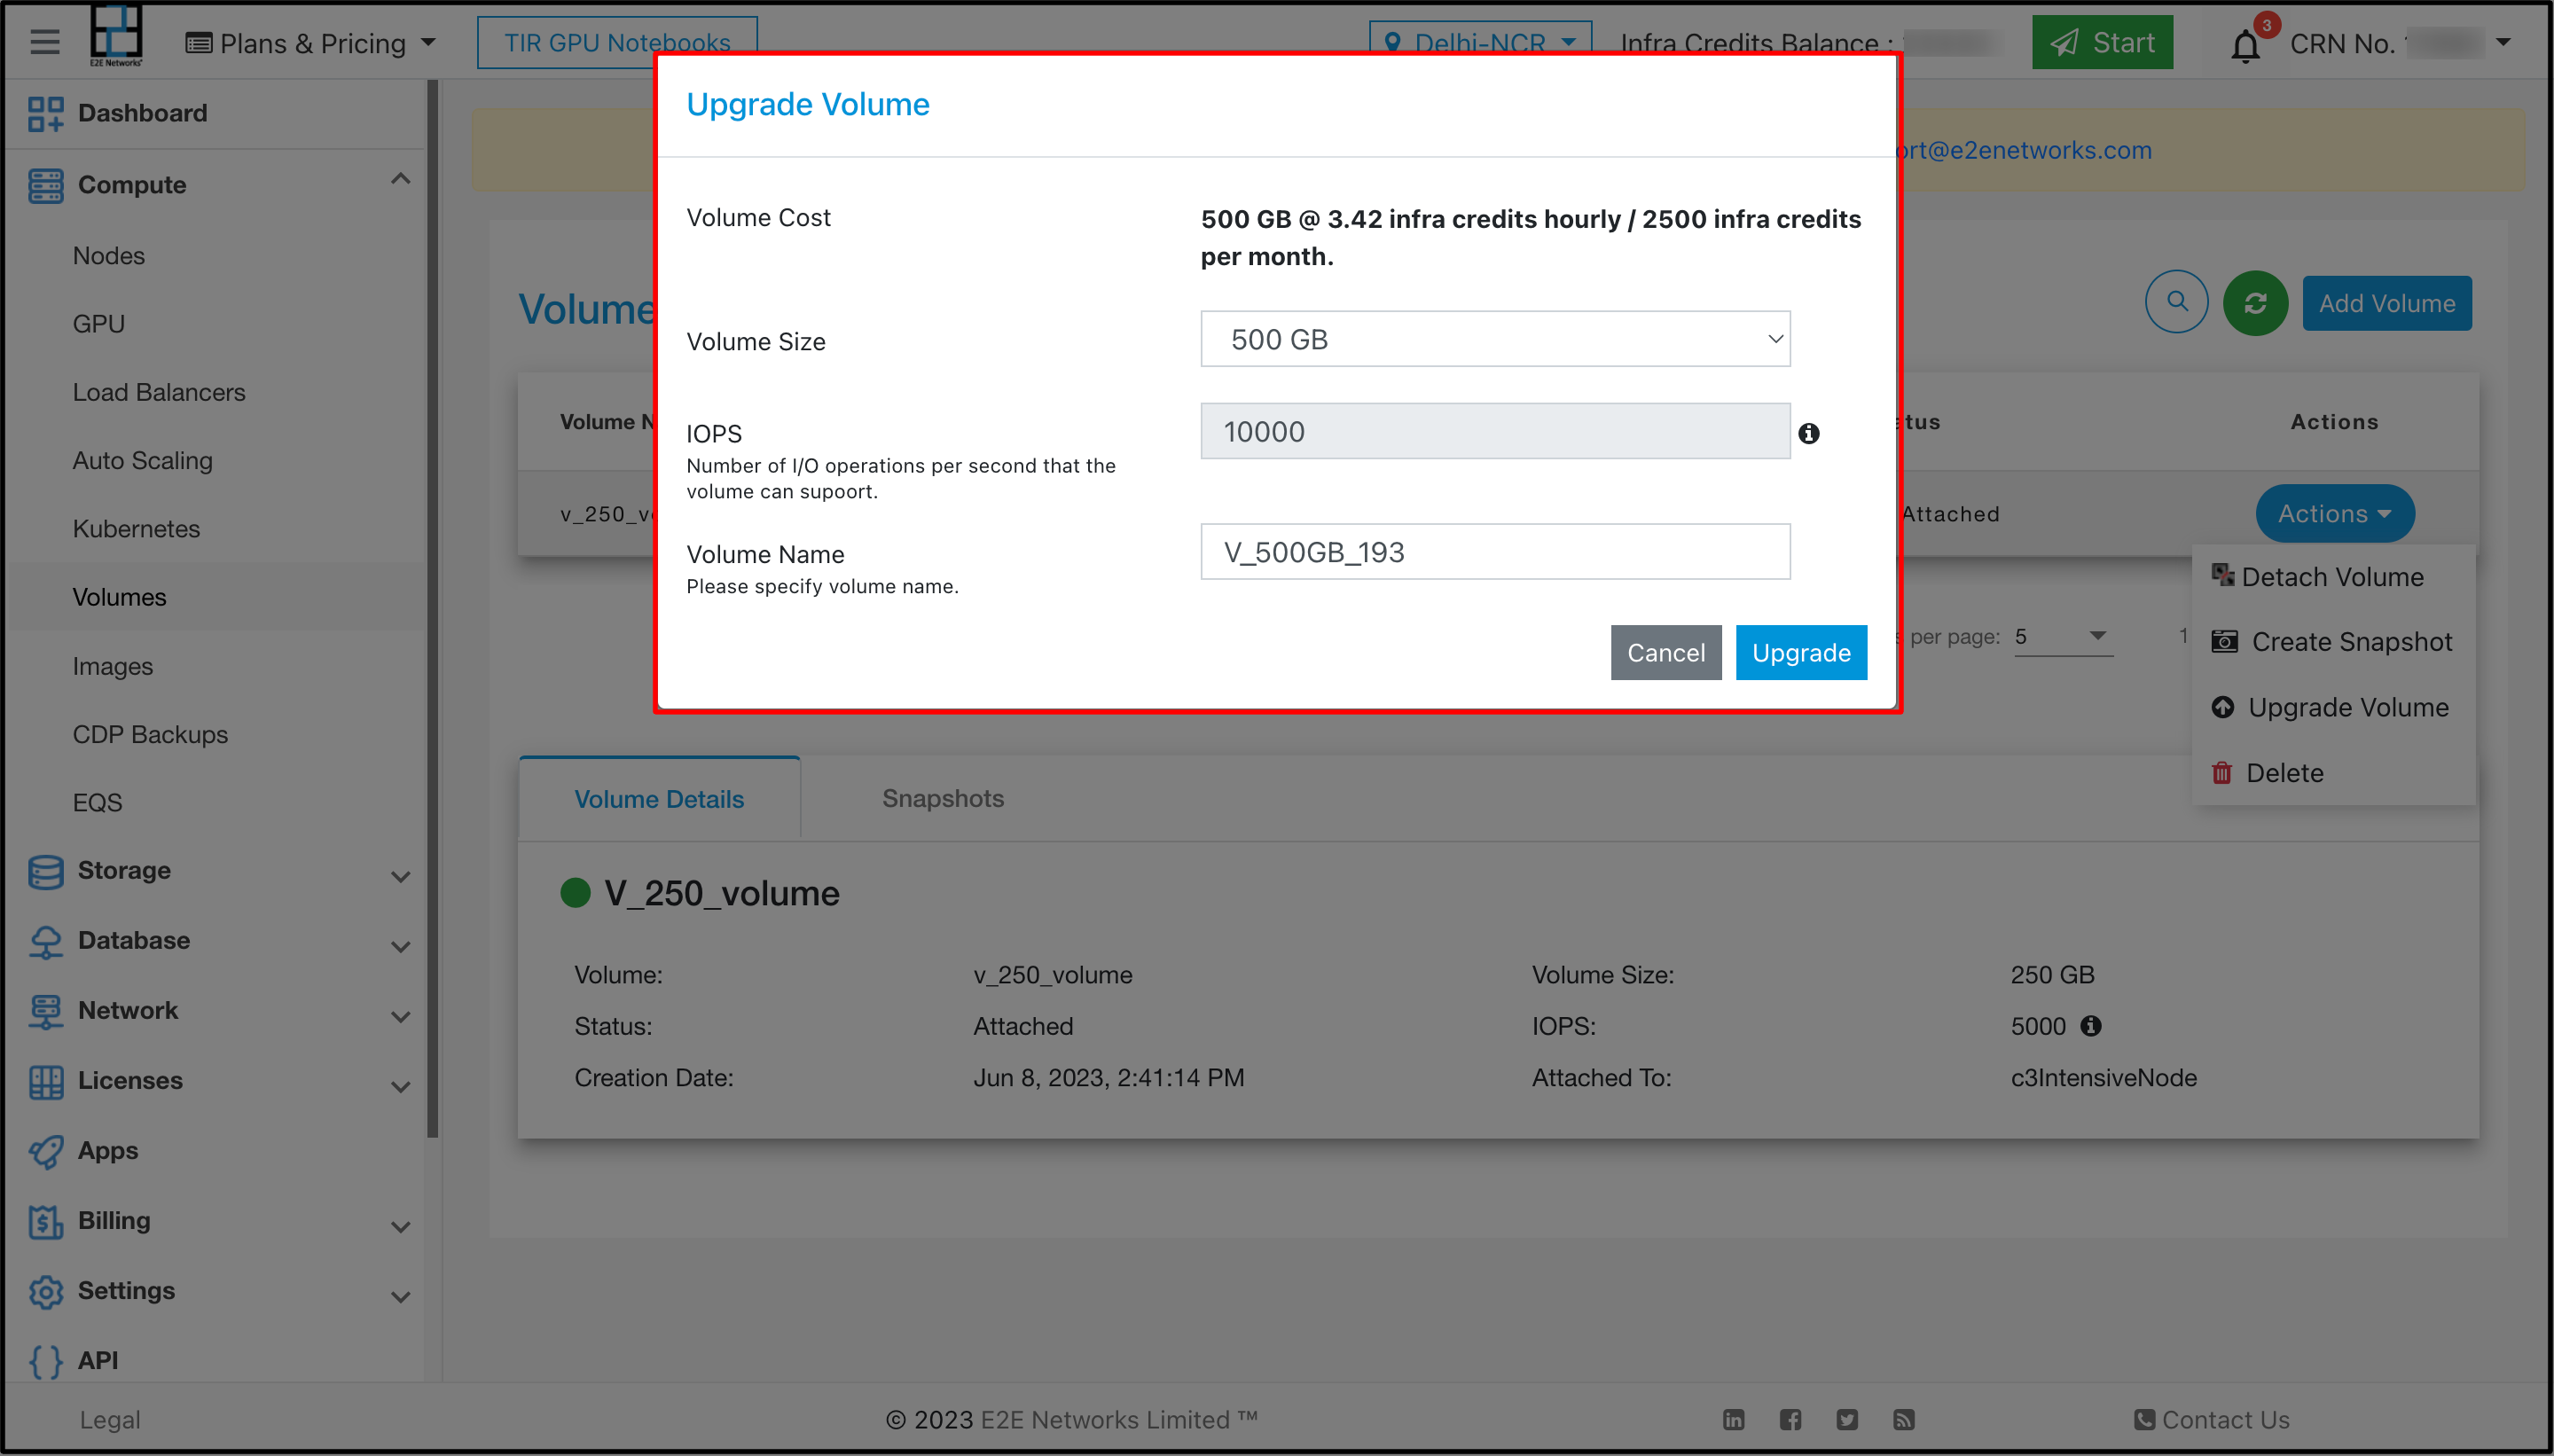
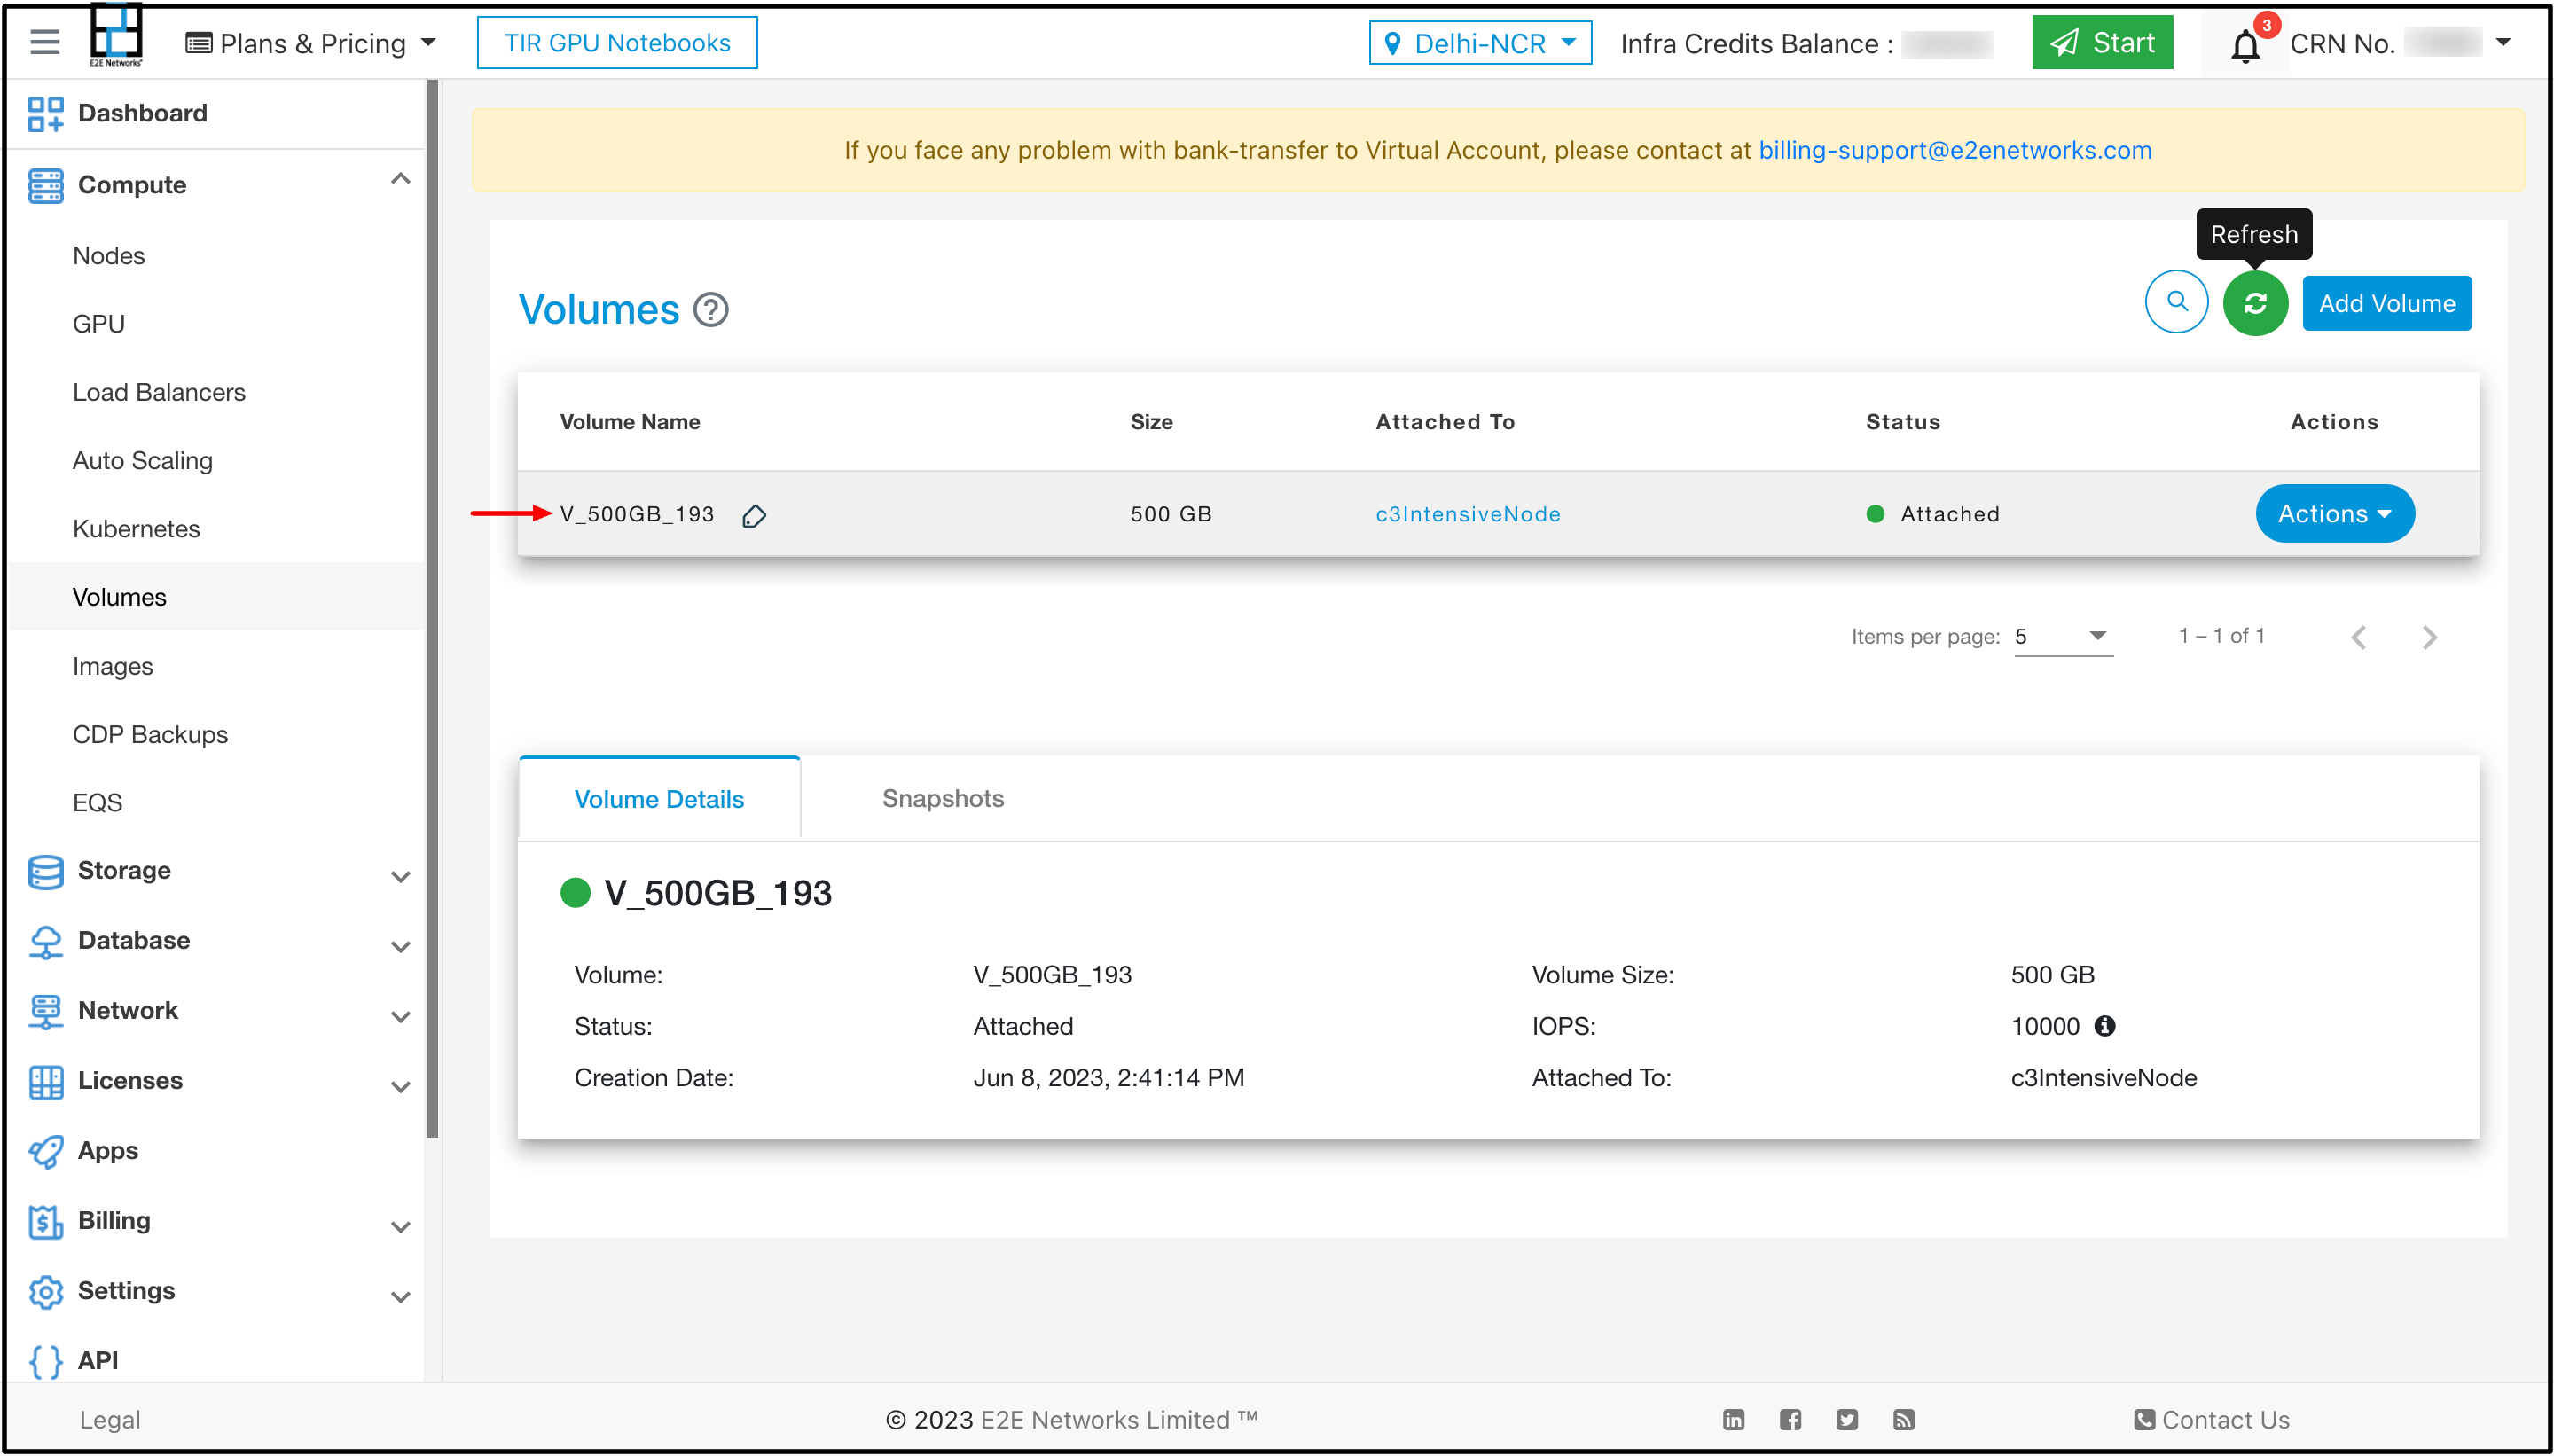
After that Your volume will be upgraded with the new volume size.
Note
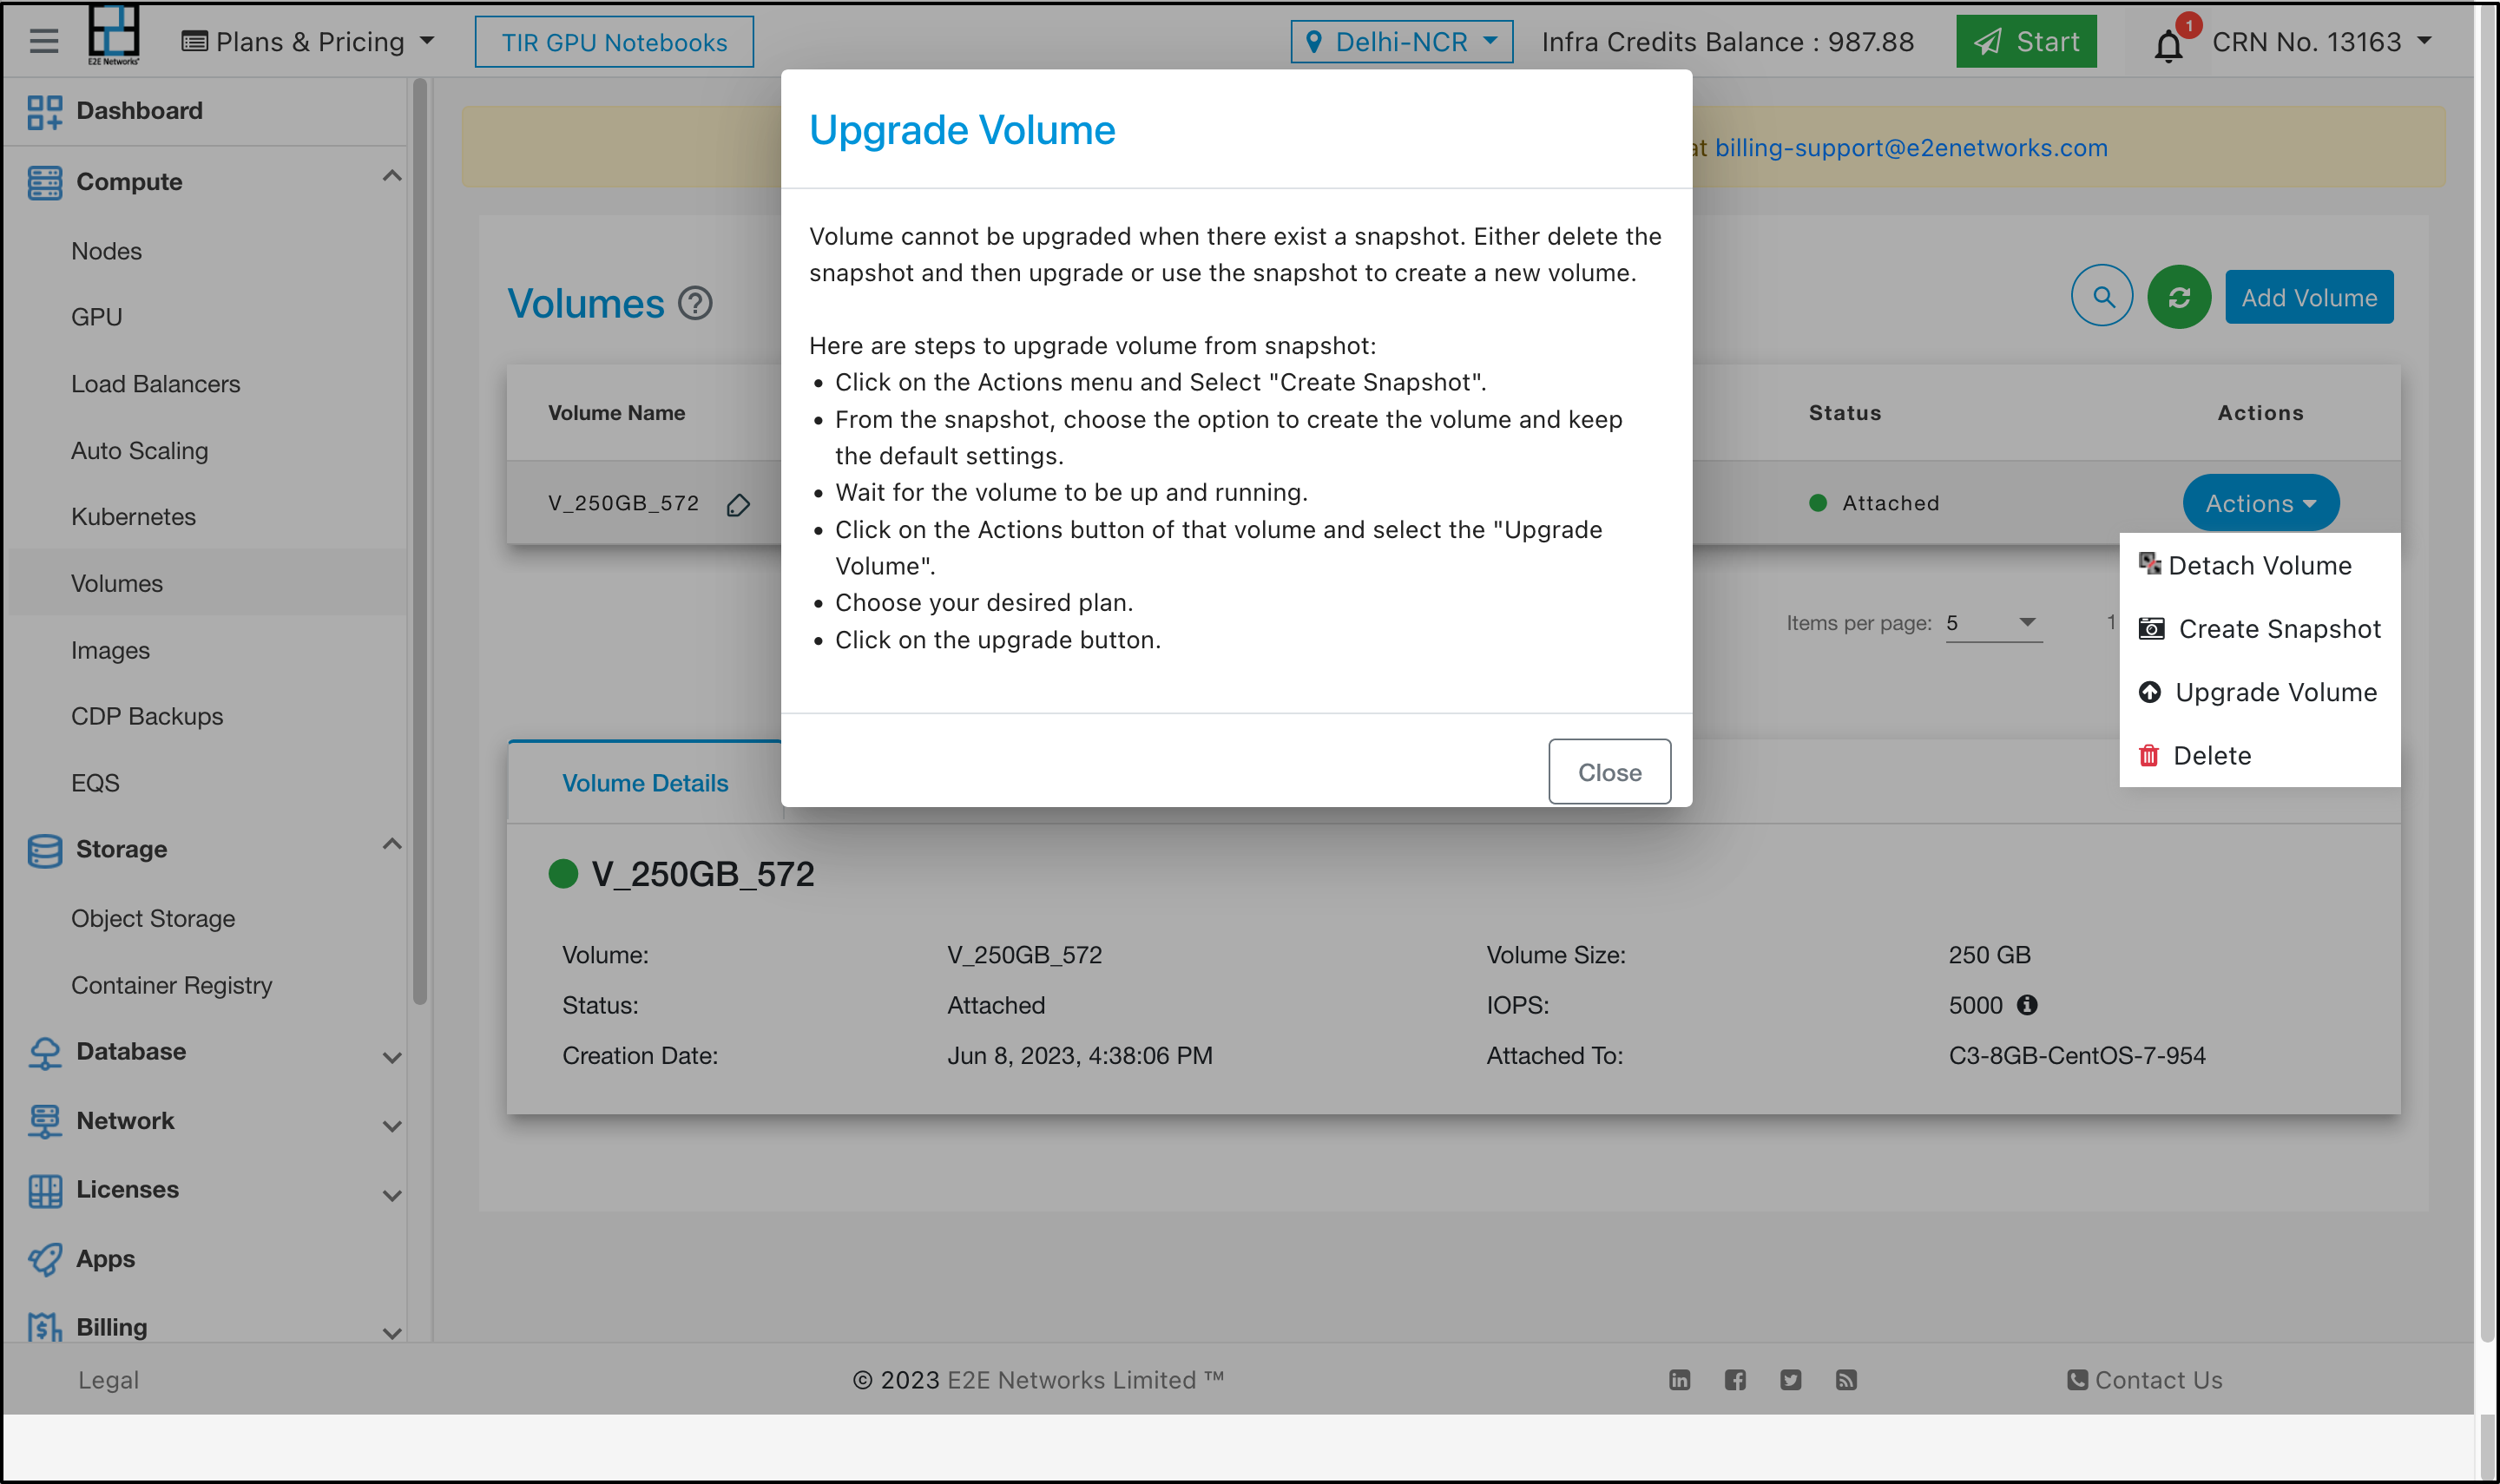
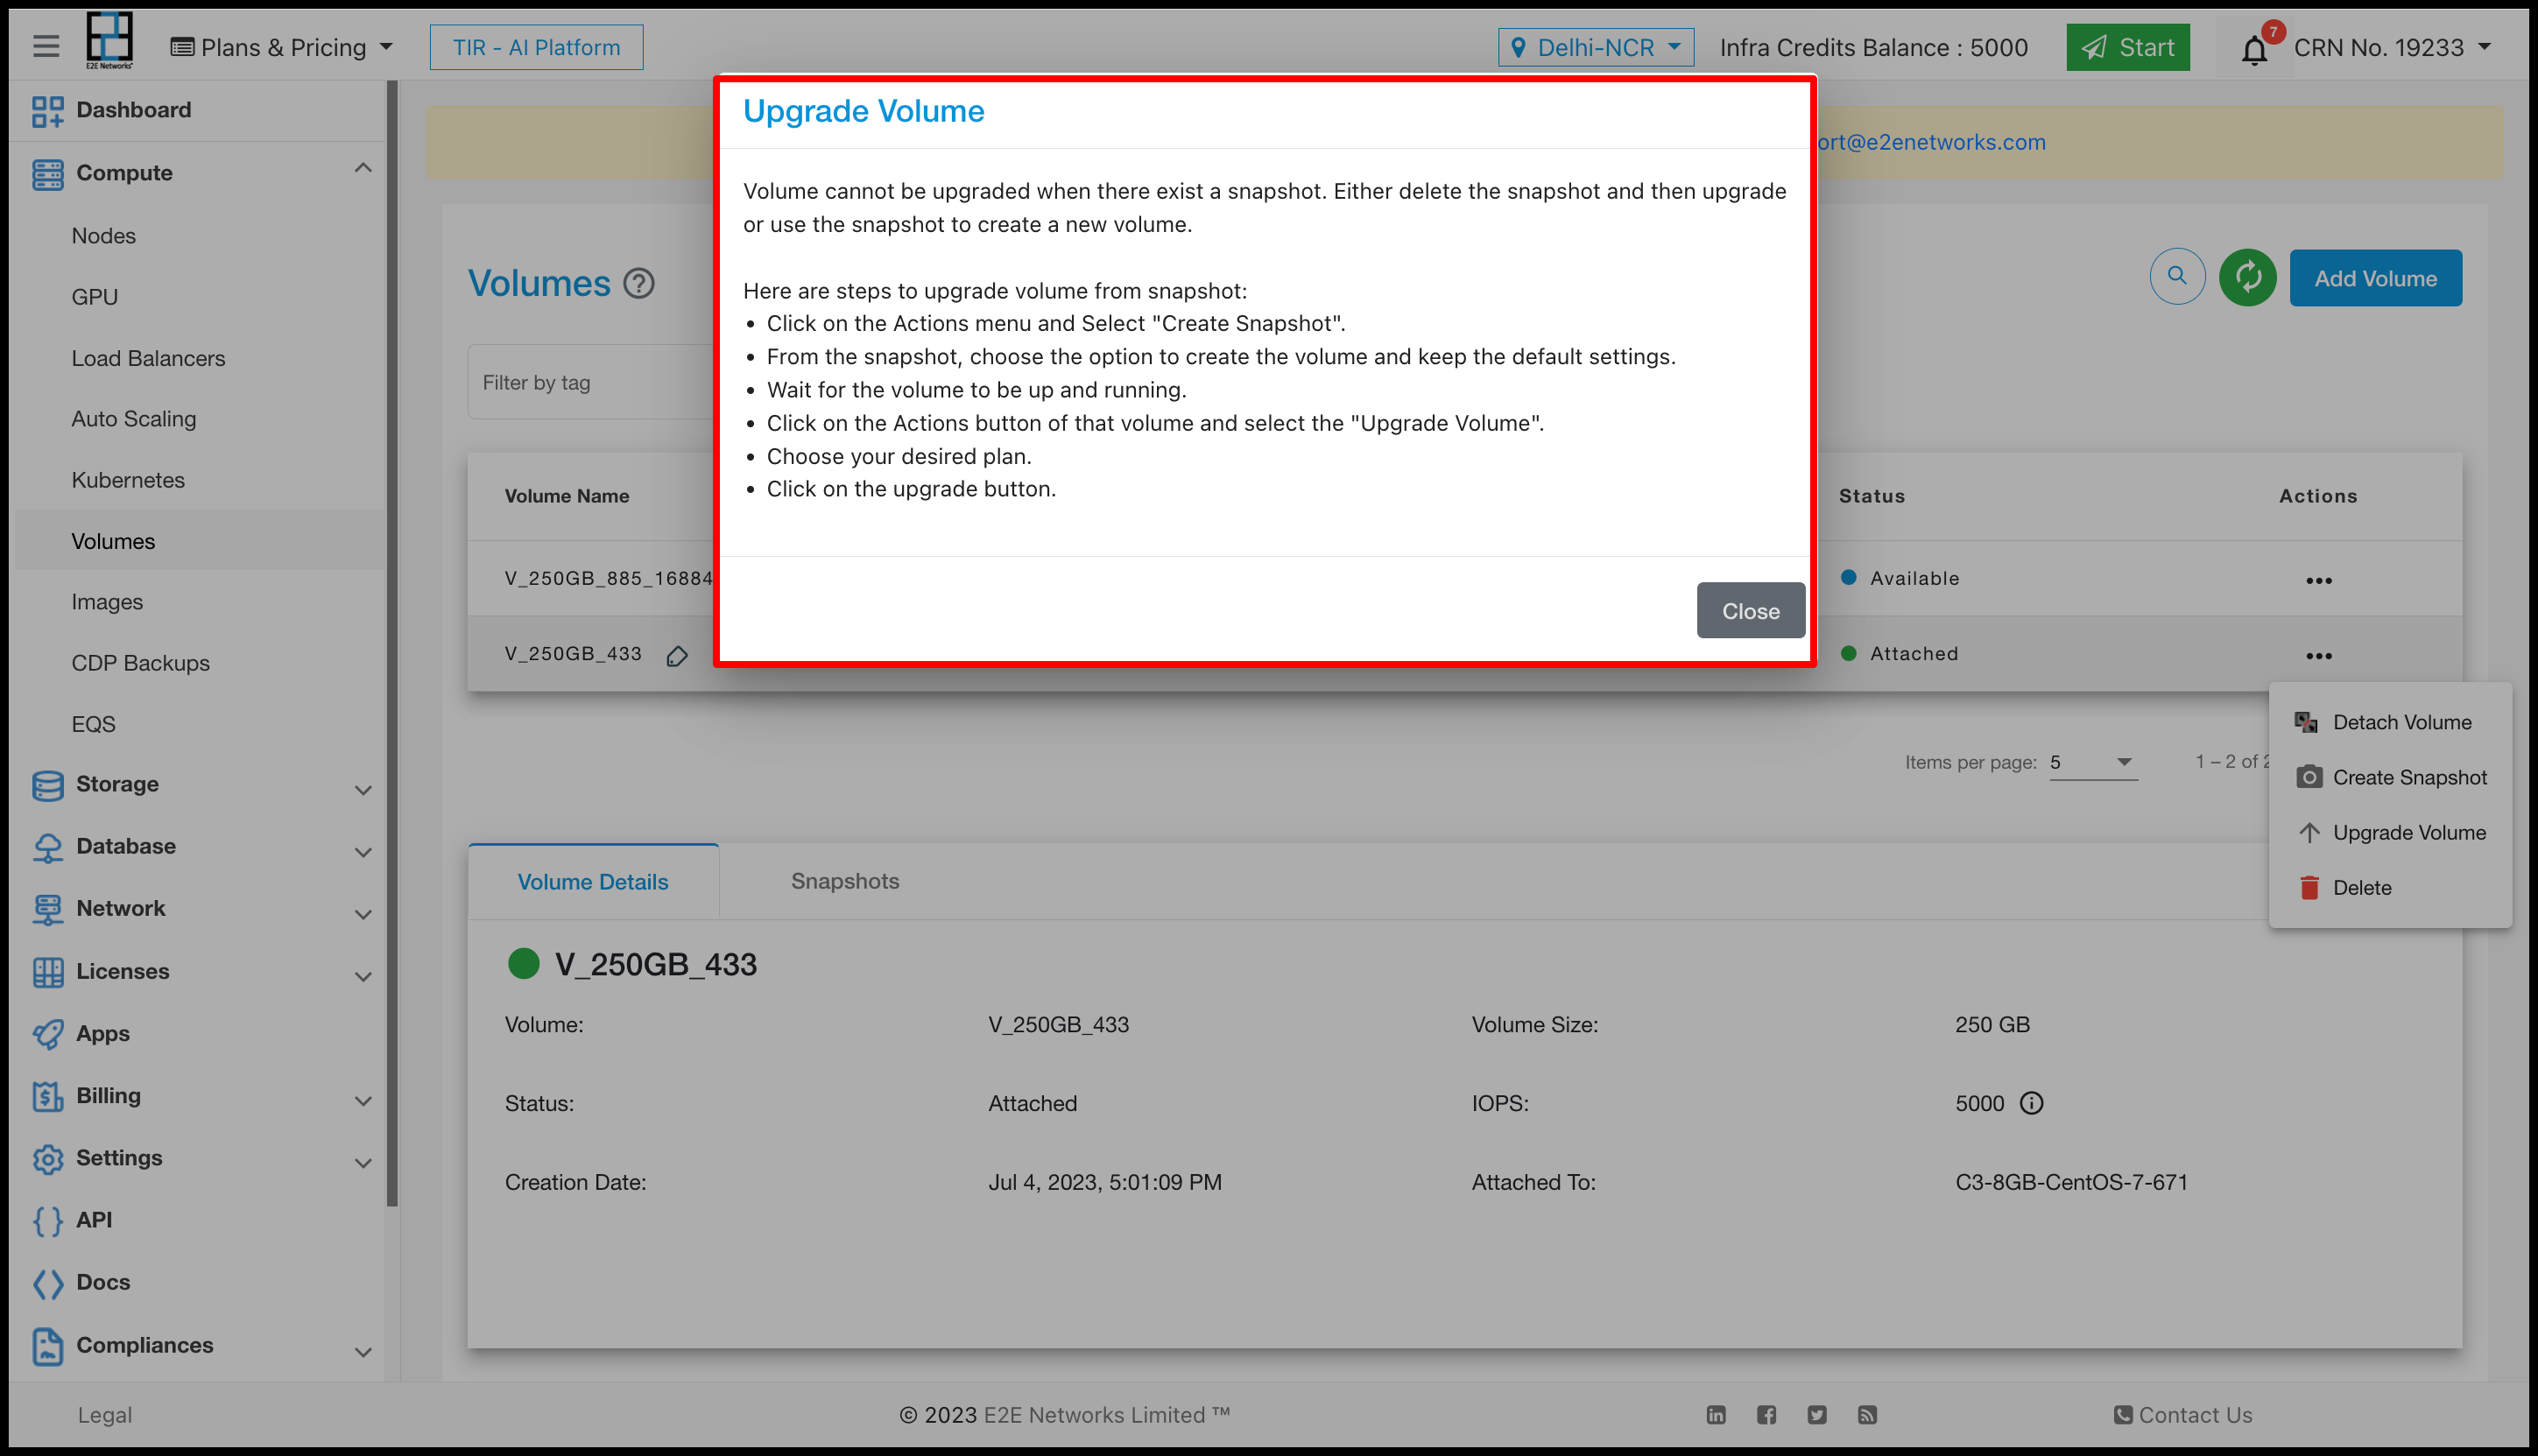
Please note that if a Volume snapshot has been created, upgrading the volume will not be possible. In order to proceed with the upgrade, you will need to either delete the snapshot associated with the volume you wish to upgrade or create a new volume from that snapshot and upgrade the newly created volume.
If a snapshot has been created for the volume, you will encounter an issue when attempting to upgrade the volume.
Note
In order to upgrade the volume, it is necessary for the volume to be attached to the Node.
Delete a Volume
To Delete a Volume Storage, You need to select Action and Click on Delete.
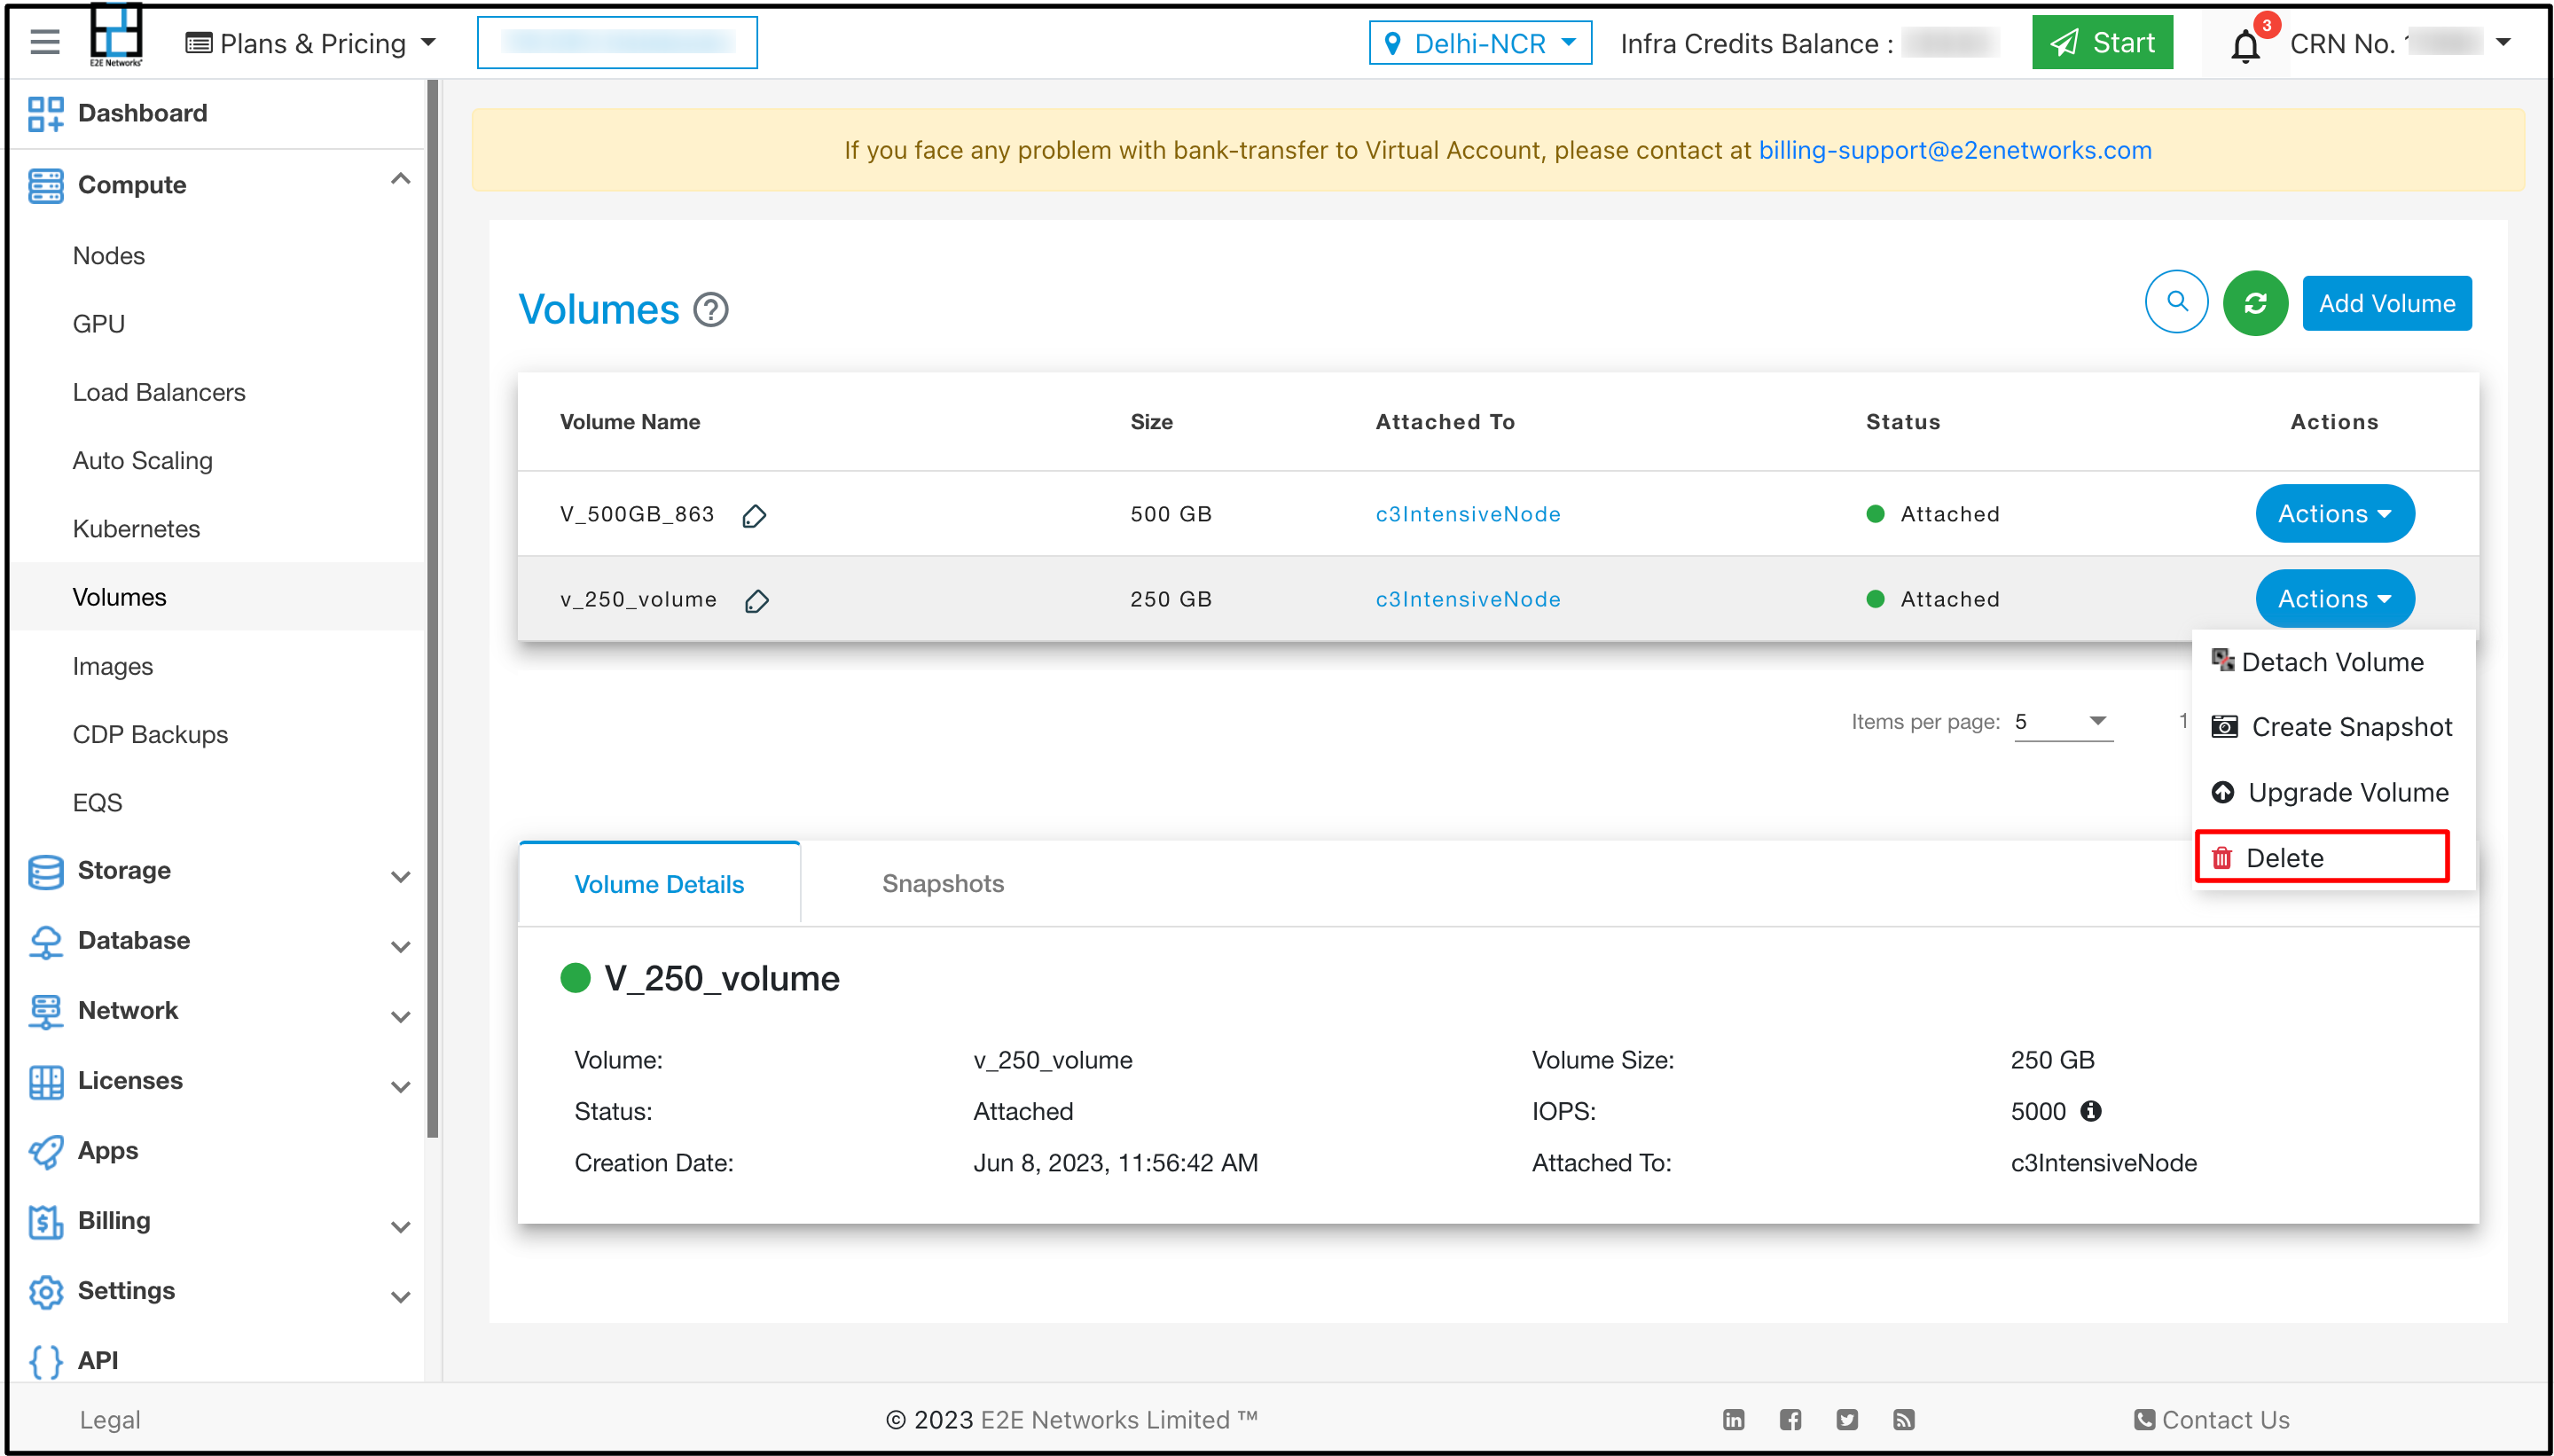
You will get a warning message that you will permanently lose data stored in volume storage and associated snapshot on the deletion of this volume storage. Proceed further and click on Delete to delete your volume.
Note
You will have detach your node from your volume first before deleting.