Introduction
Scalable File System is designed to provide simple, scalable, and highly available file storage for cloud-based applications and services. It allows multiple E2E Node to access the same file system concurrently, enabling shared file storage across instances.
The Scalable File is commonly used for applications that require shared file storage, such as content management systems, web serving, big data analytics, and development environments. It simplifies the management and provisioning of file storage in the cloud, allowing applications to scale seamlessly and reliably.
Create Scalable File System
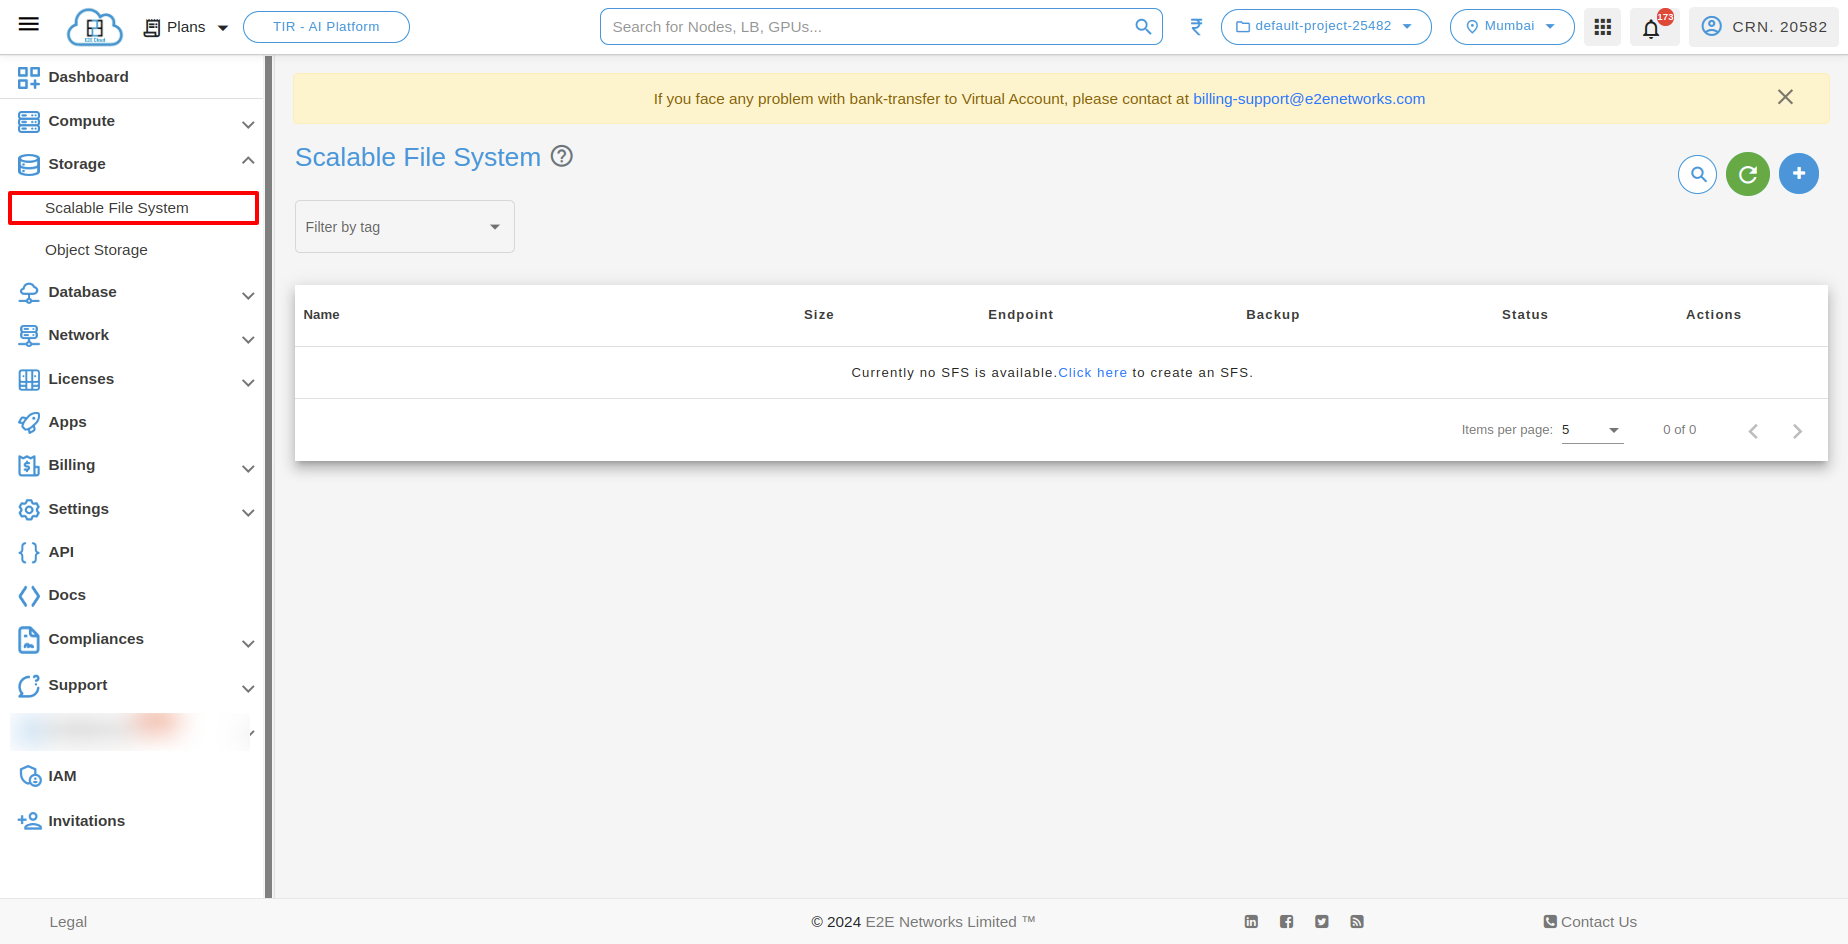
If you want to create an Scalable File System just go to left sidebar under the dashboard section then go to Storage -> Scalable File System
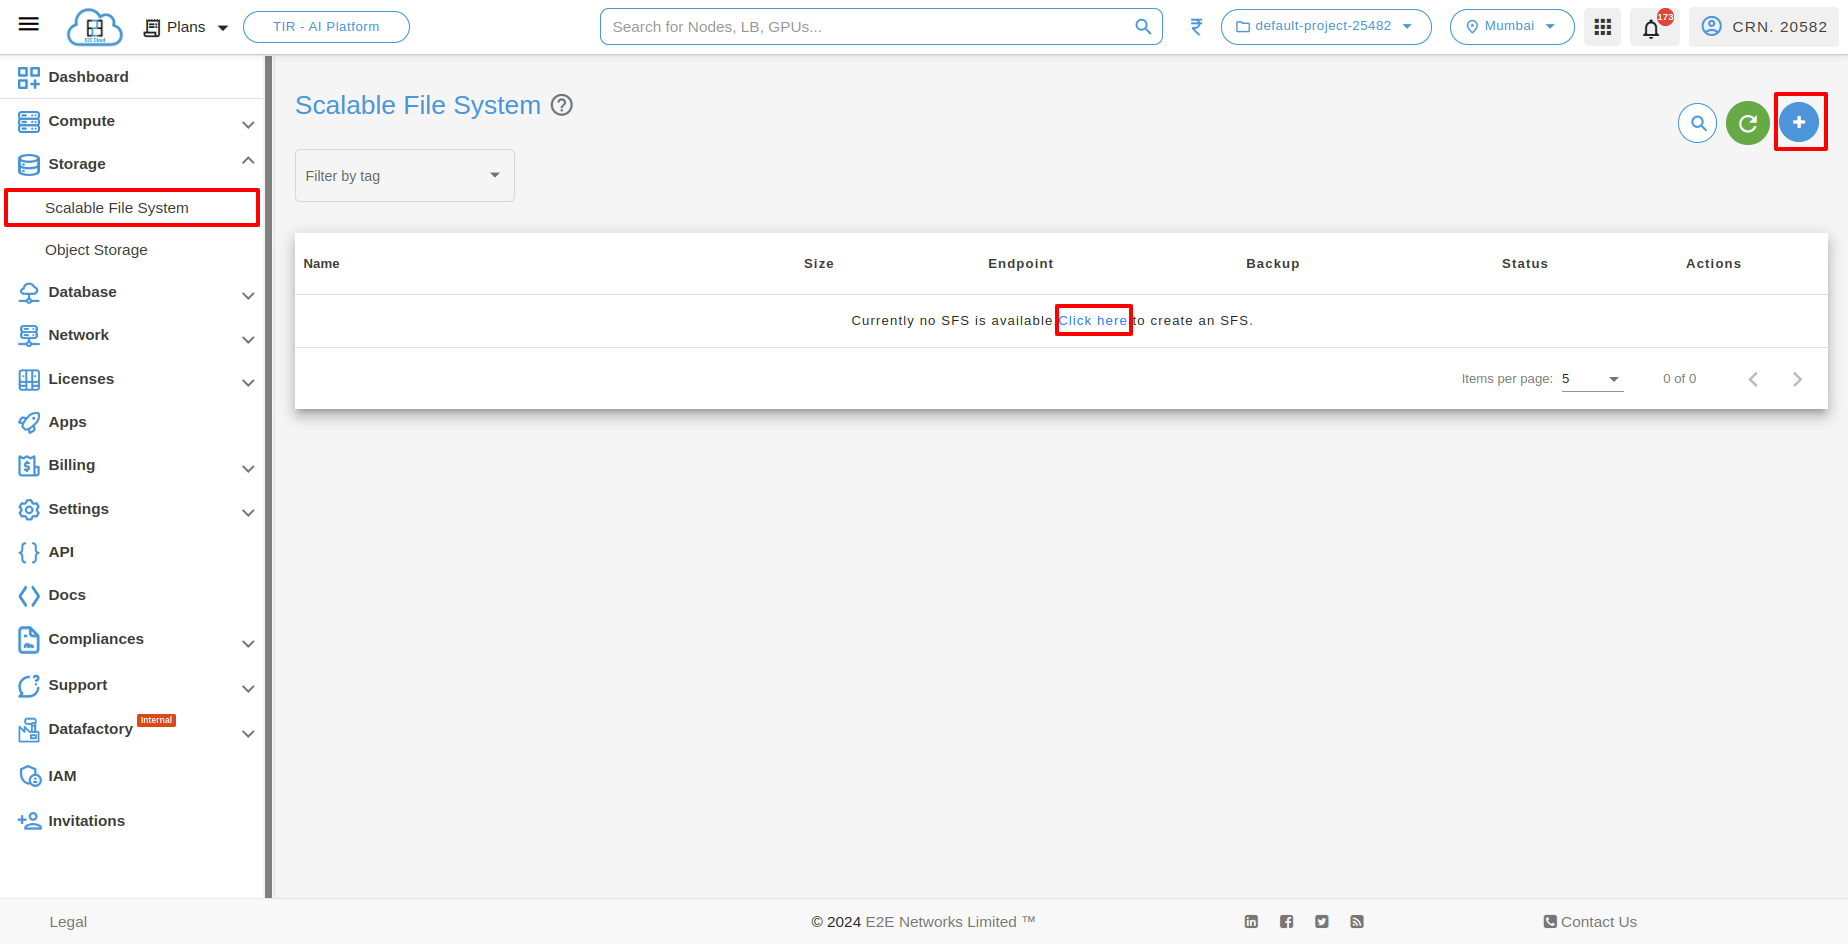
Then click on create button to create an Scalable File System
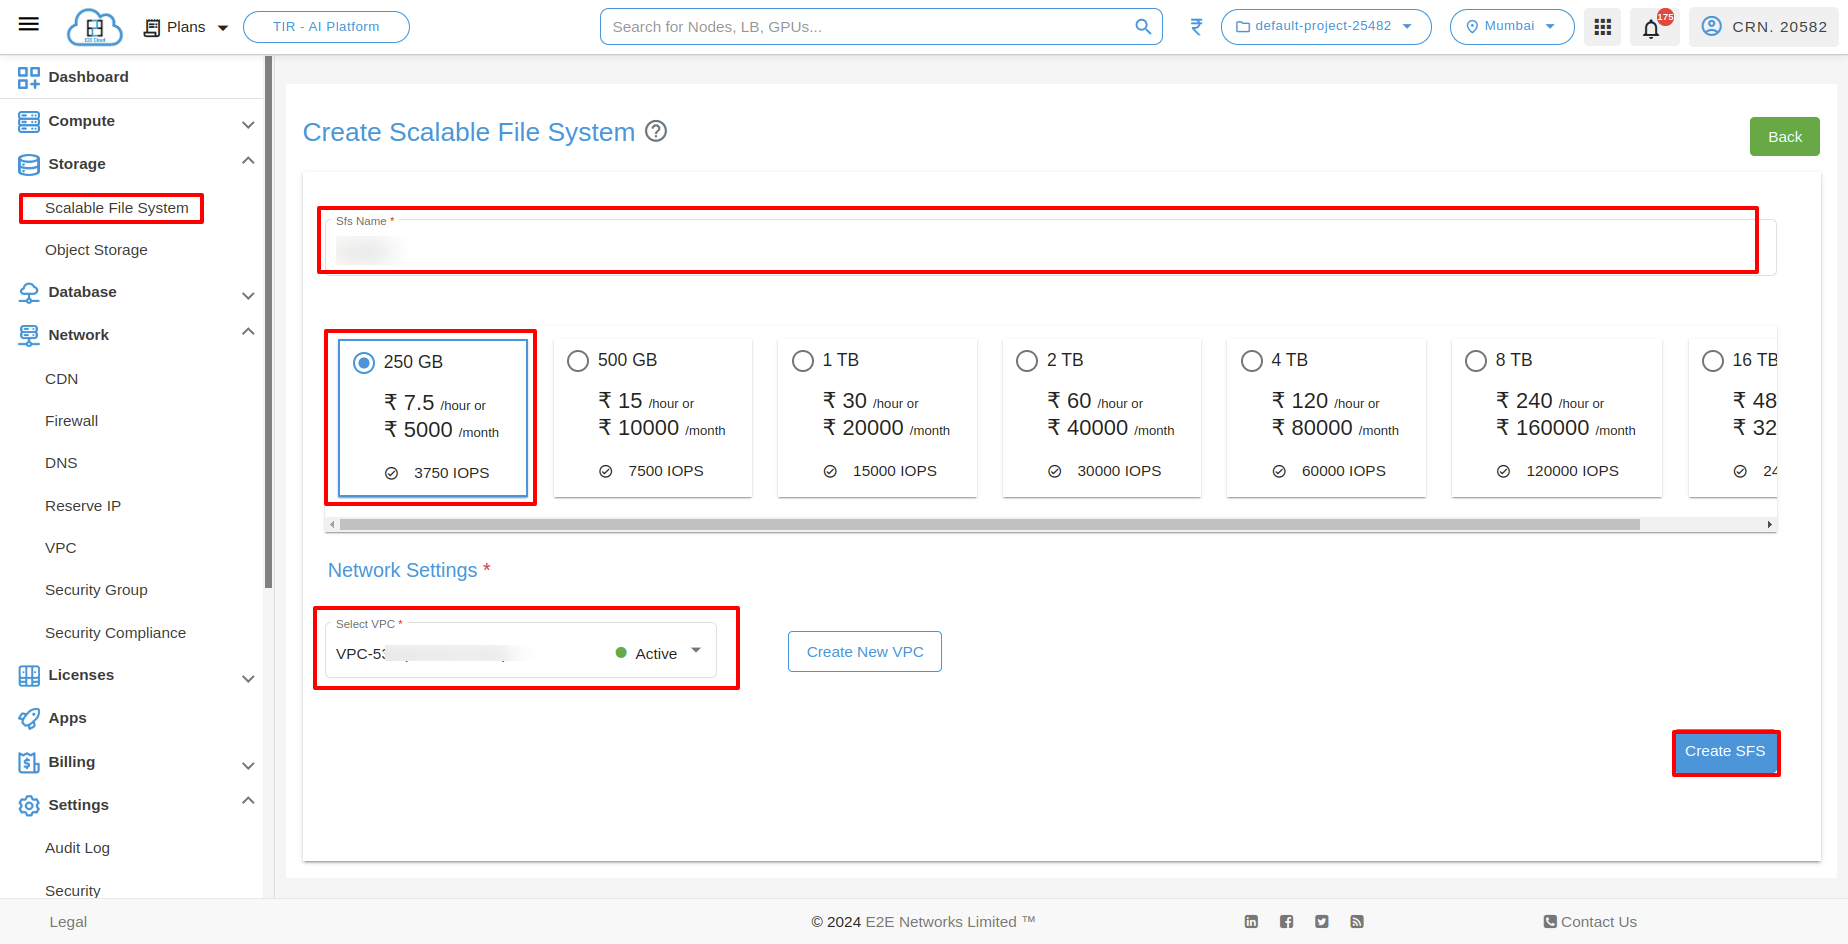
After clicking on create Scalable File System, give a name to your SFS and select the plan and VPC and then click on create SFS button.
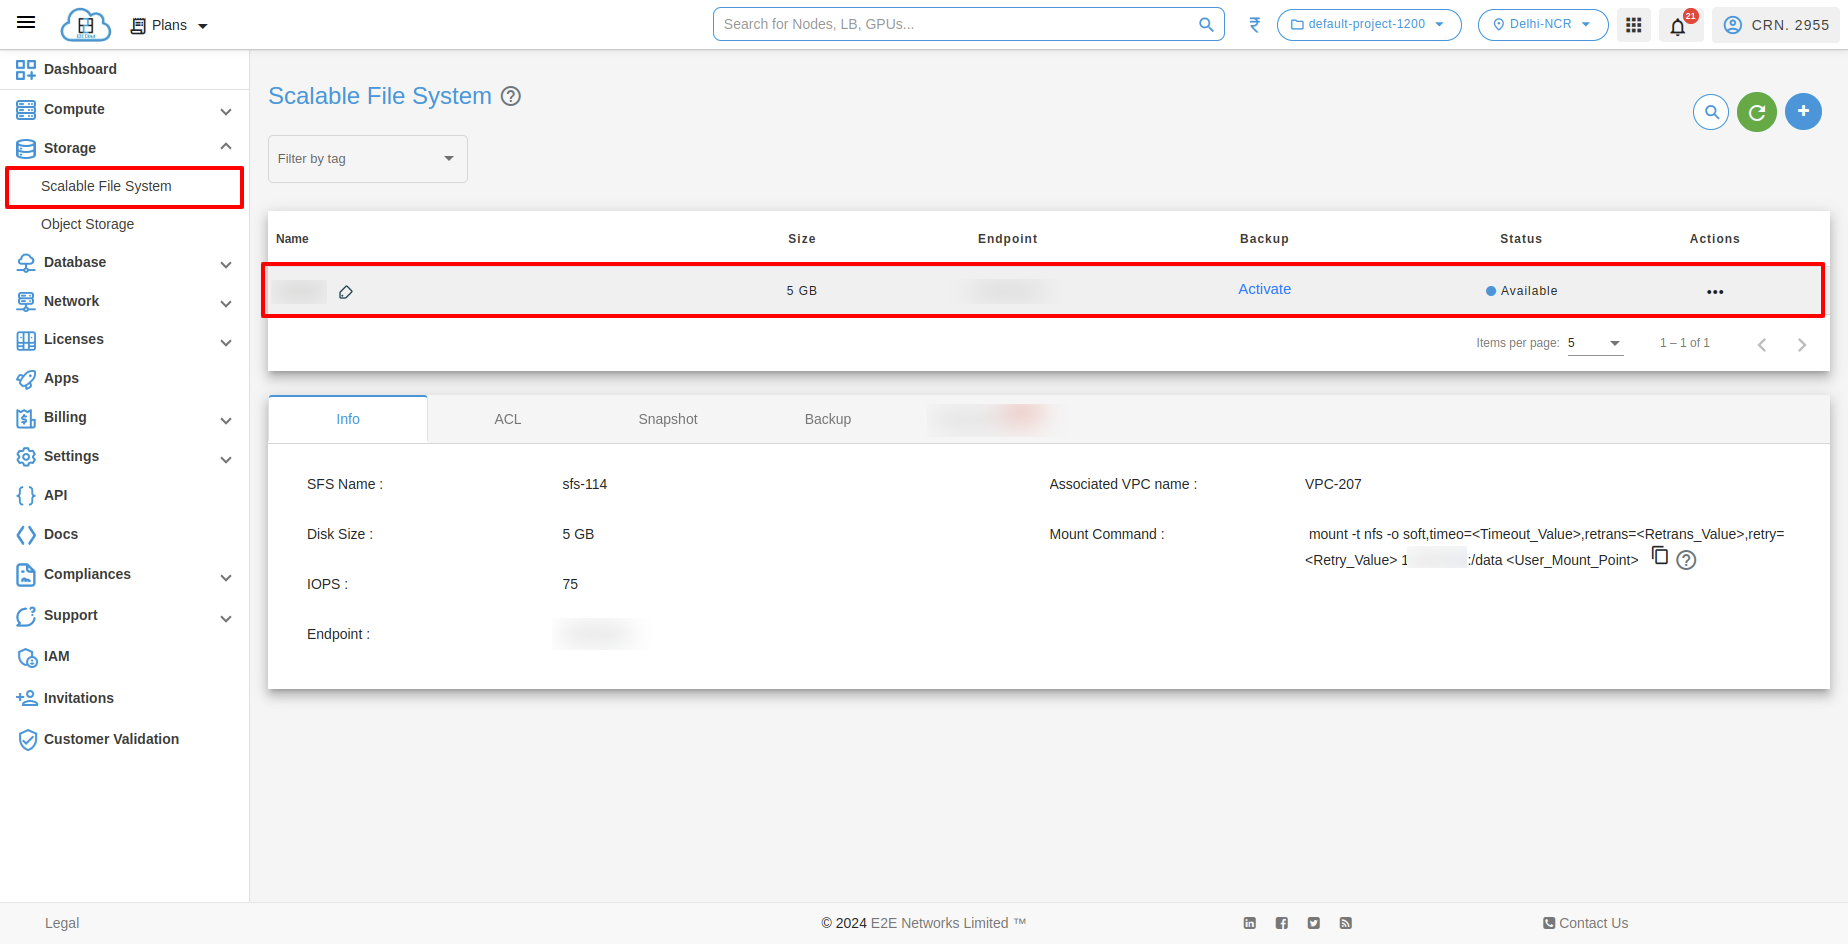
After clicking on Create SFS button your created Scalable File System will be shown like this.
Activate Backup
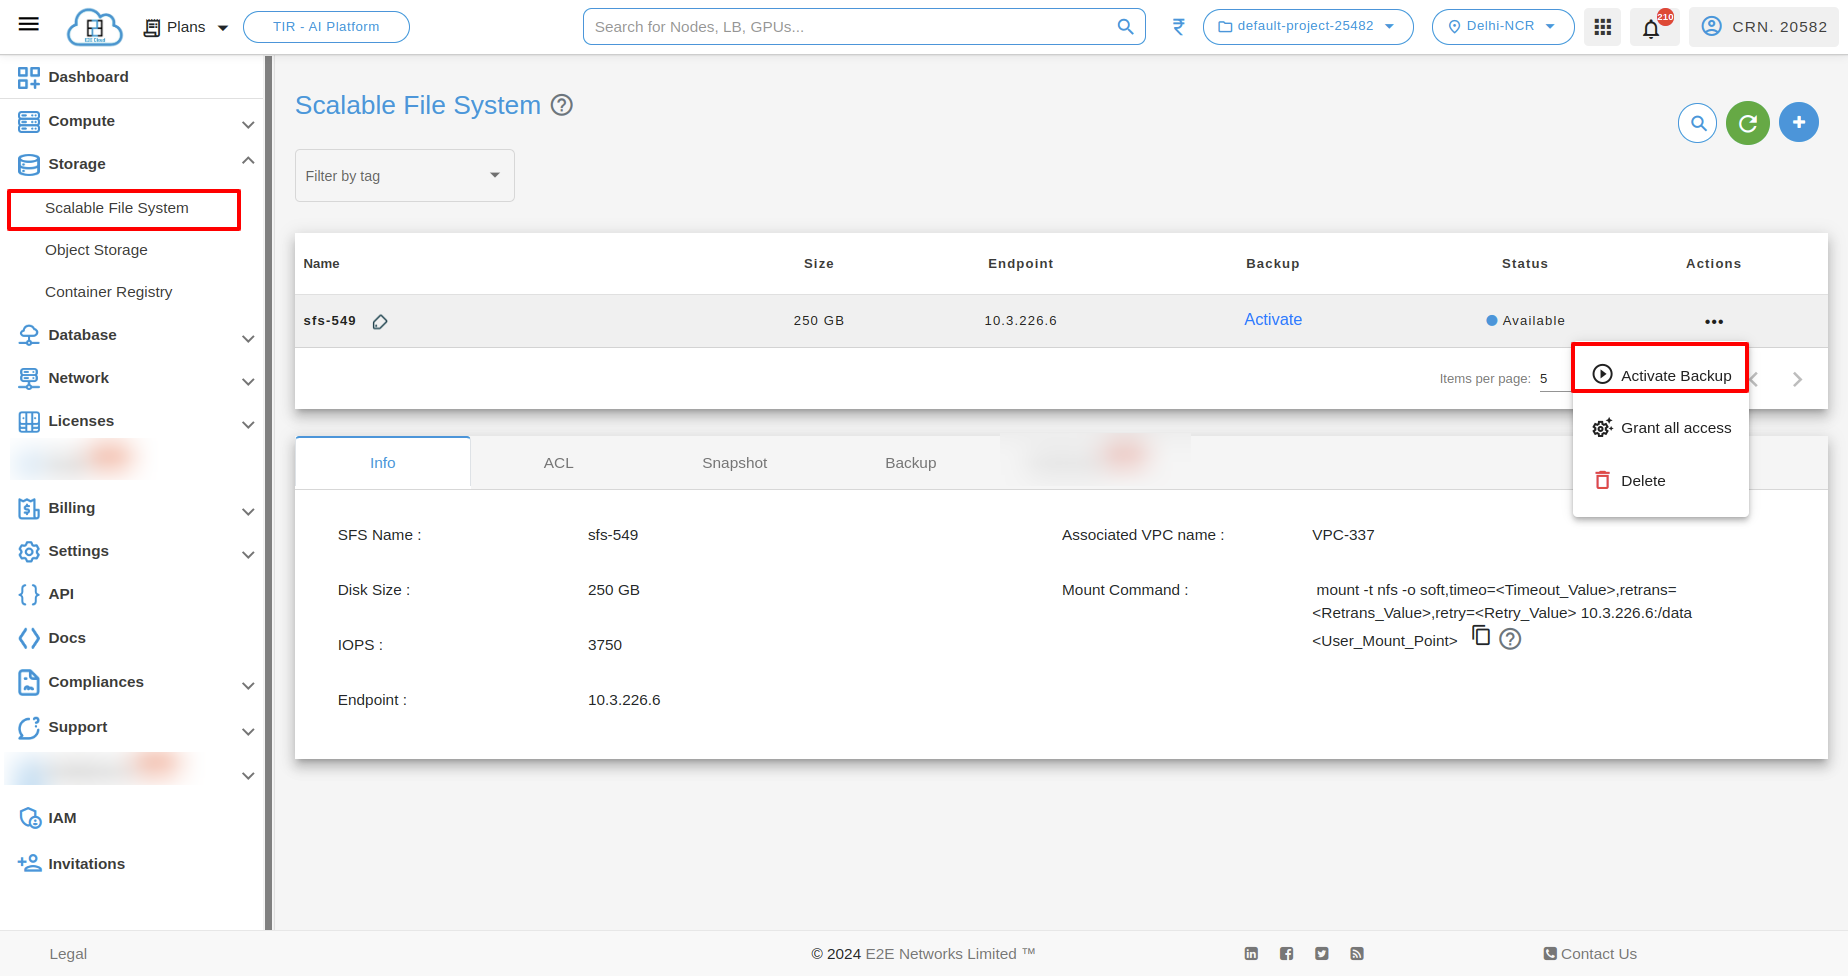
You can click “Activate Backup” under Actions for a particular SFS.
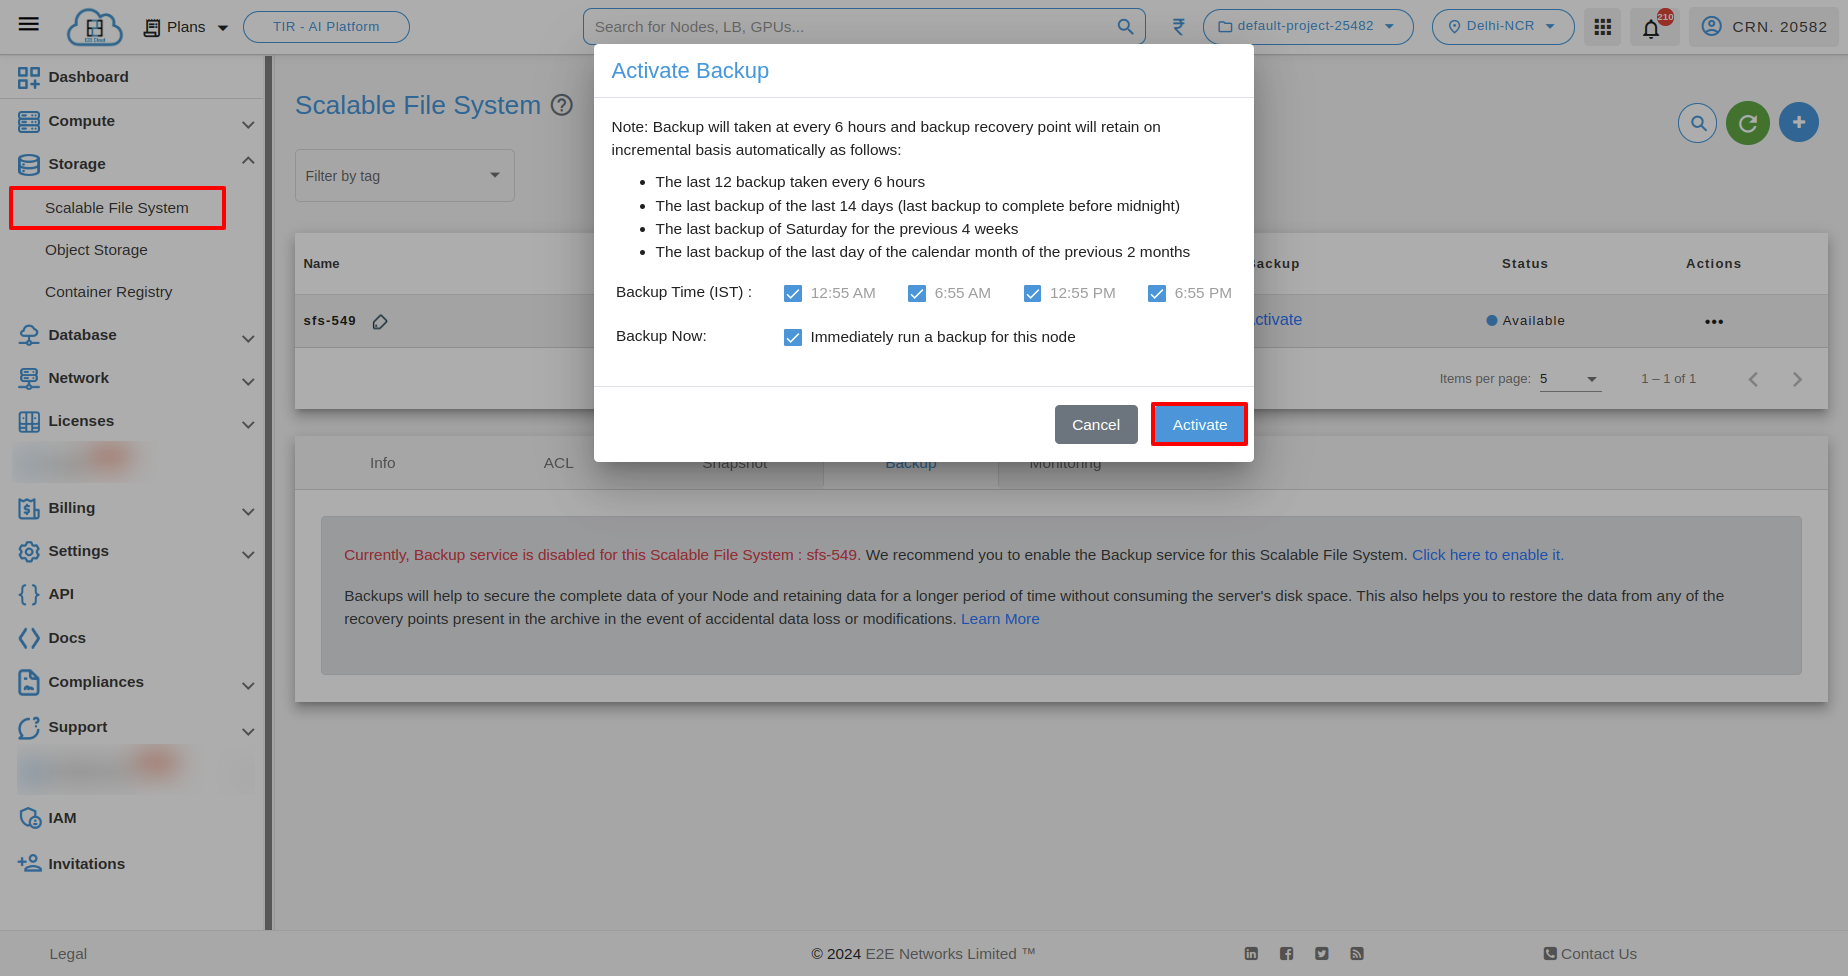
Activate Backup popup will open, you can select a particular backup time and click on “Activate” button.
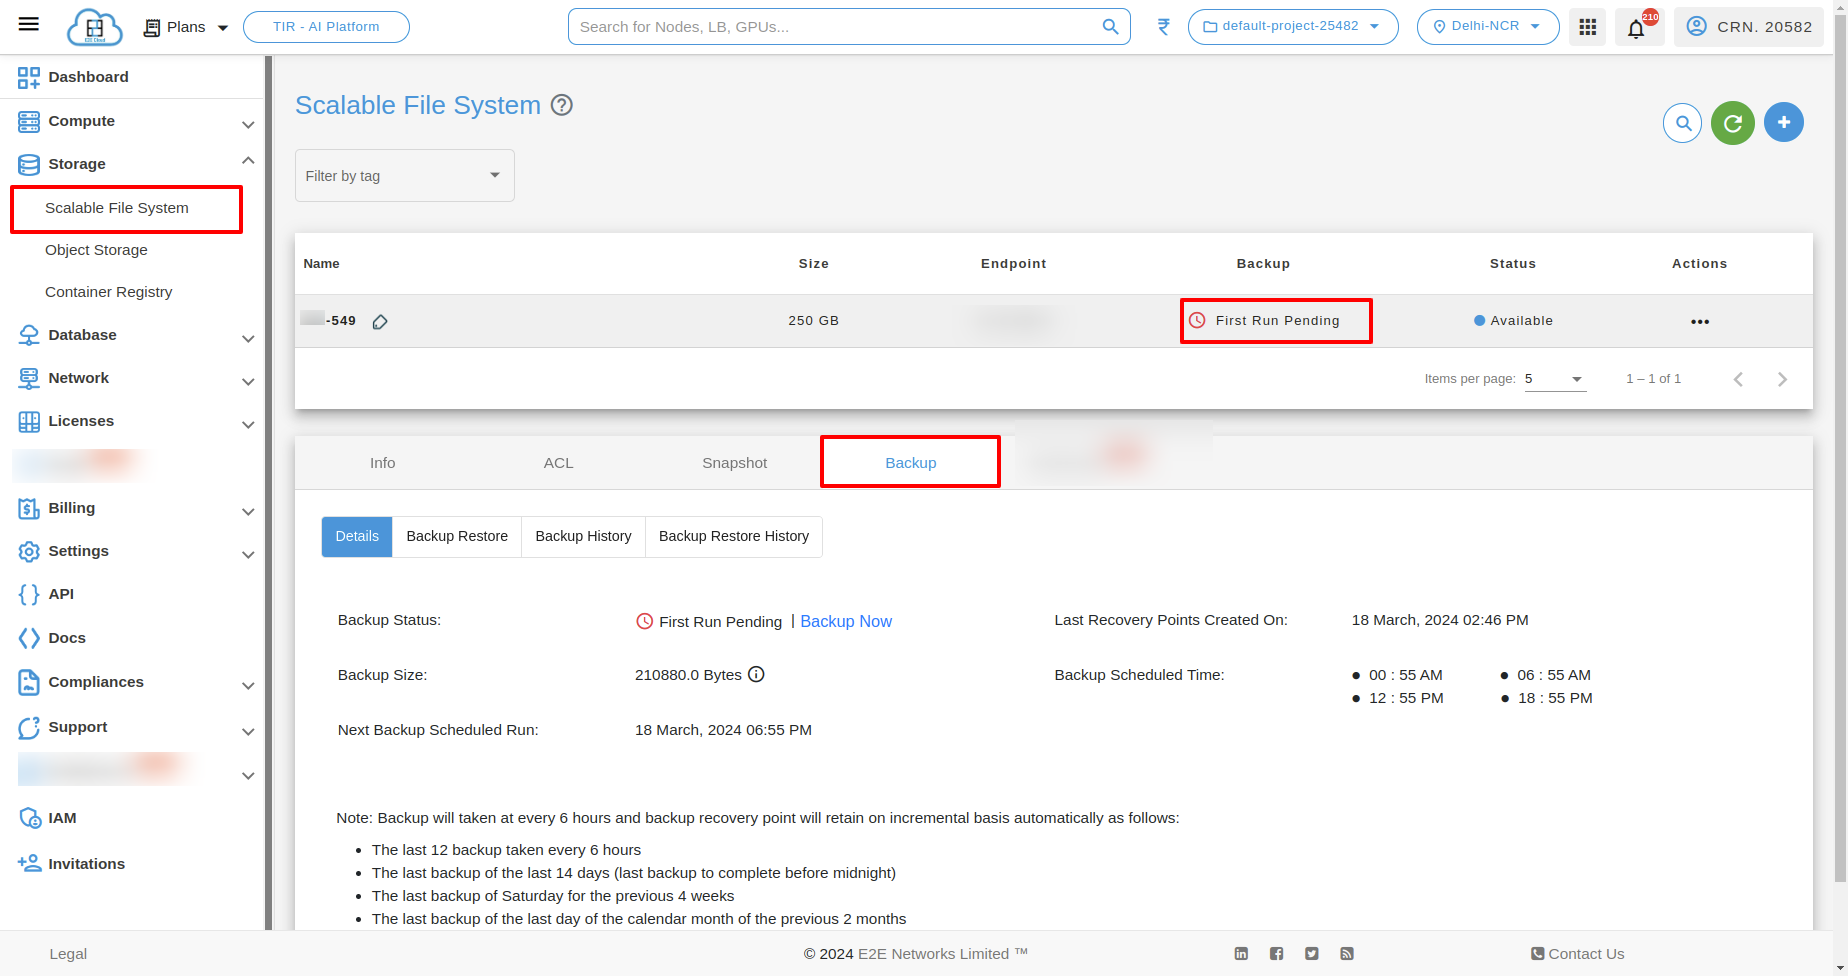
After activating backup, backup status will “First run pending”
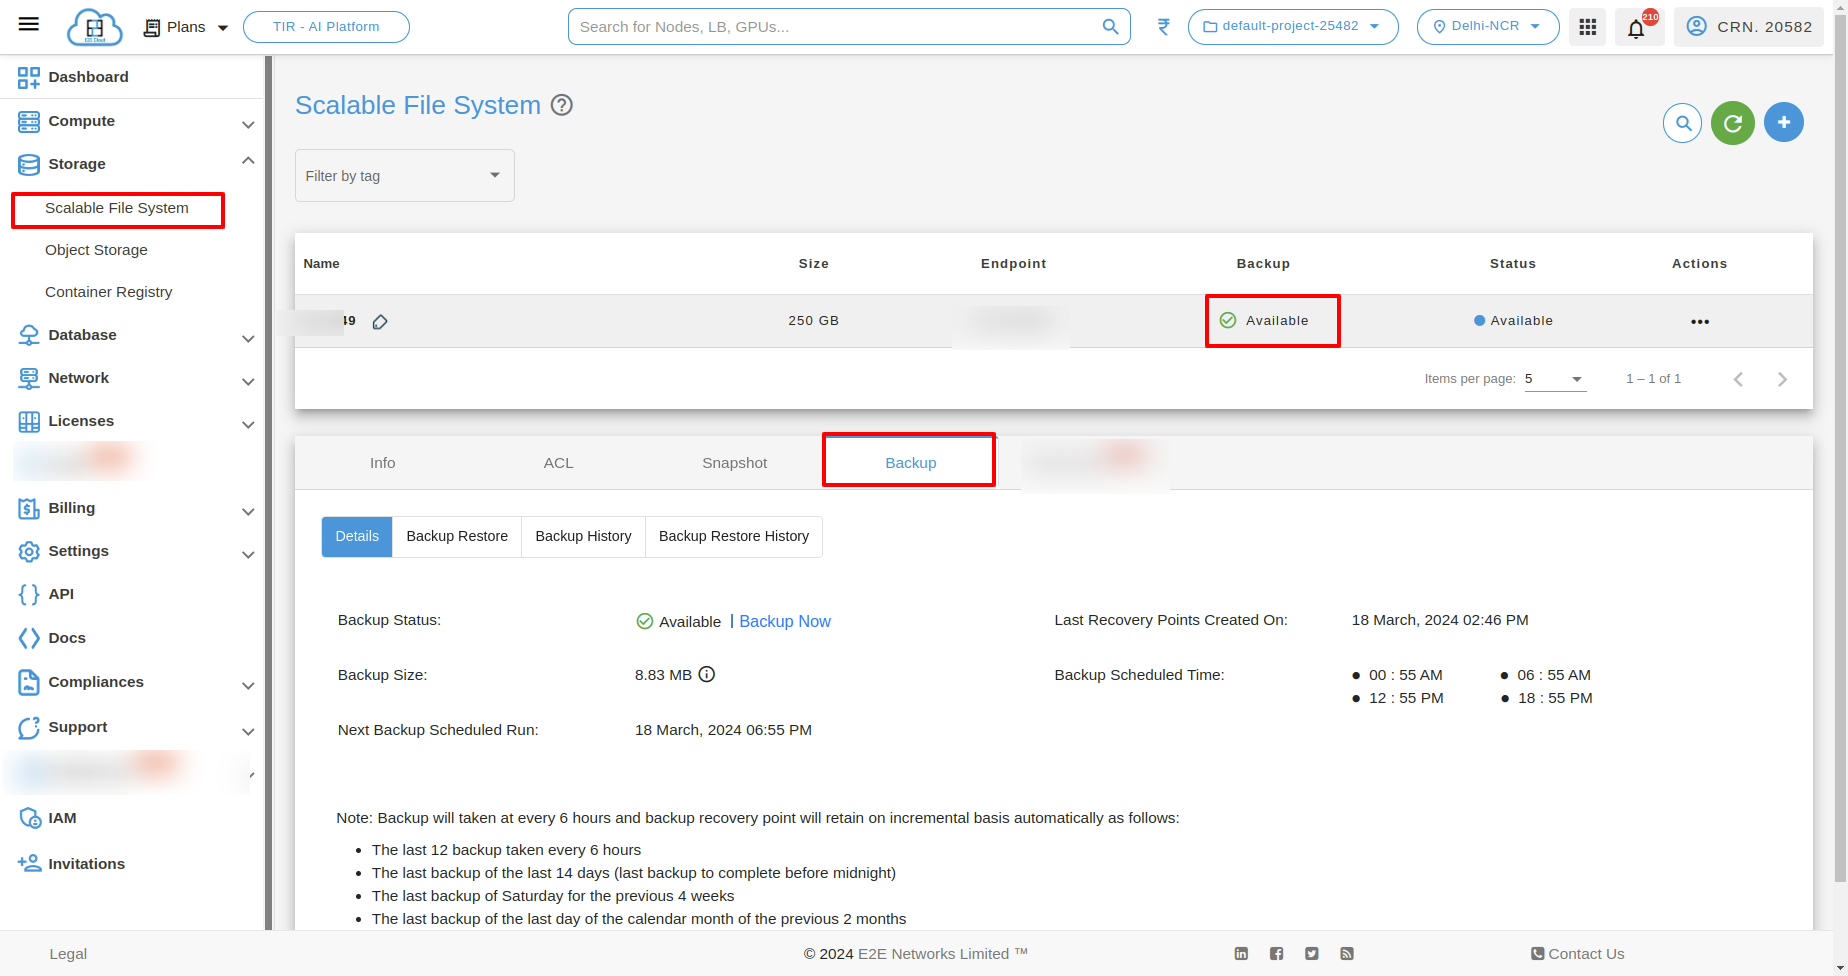
Once the backup service is enabled and status changes from ‘First Run Pending’ to ‘Backup Available’.You can see the backup details under backup tab.
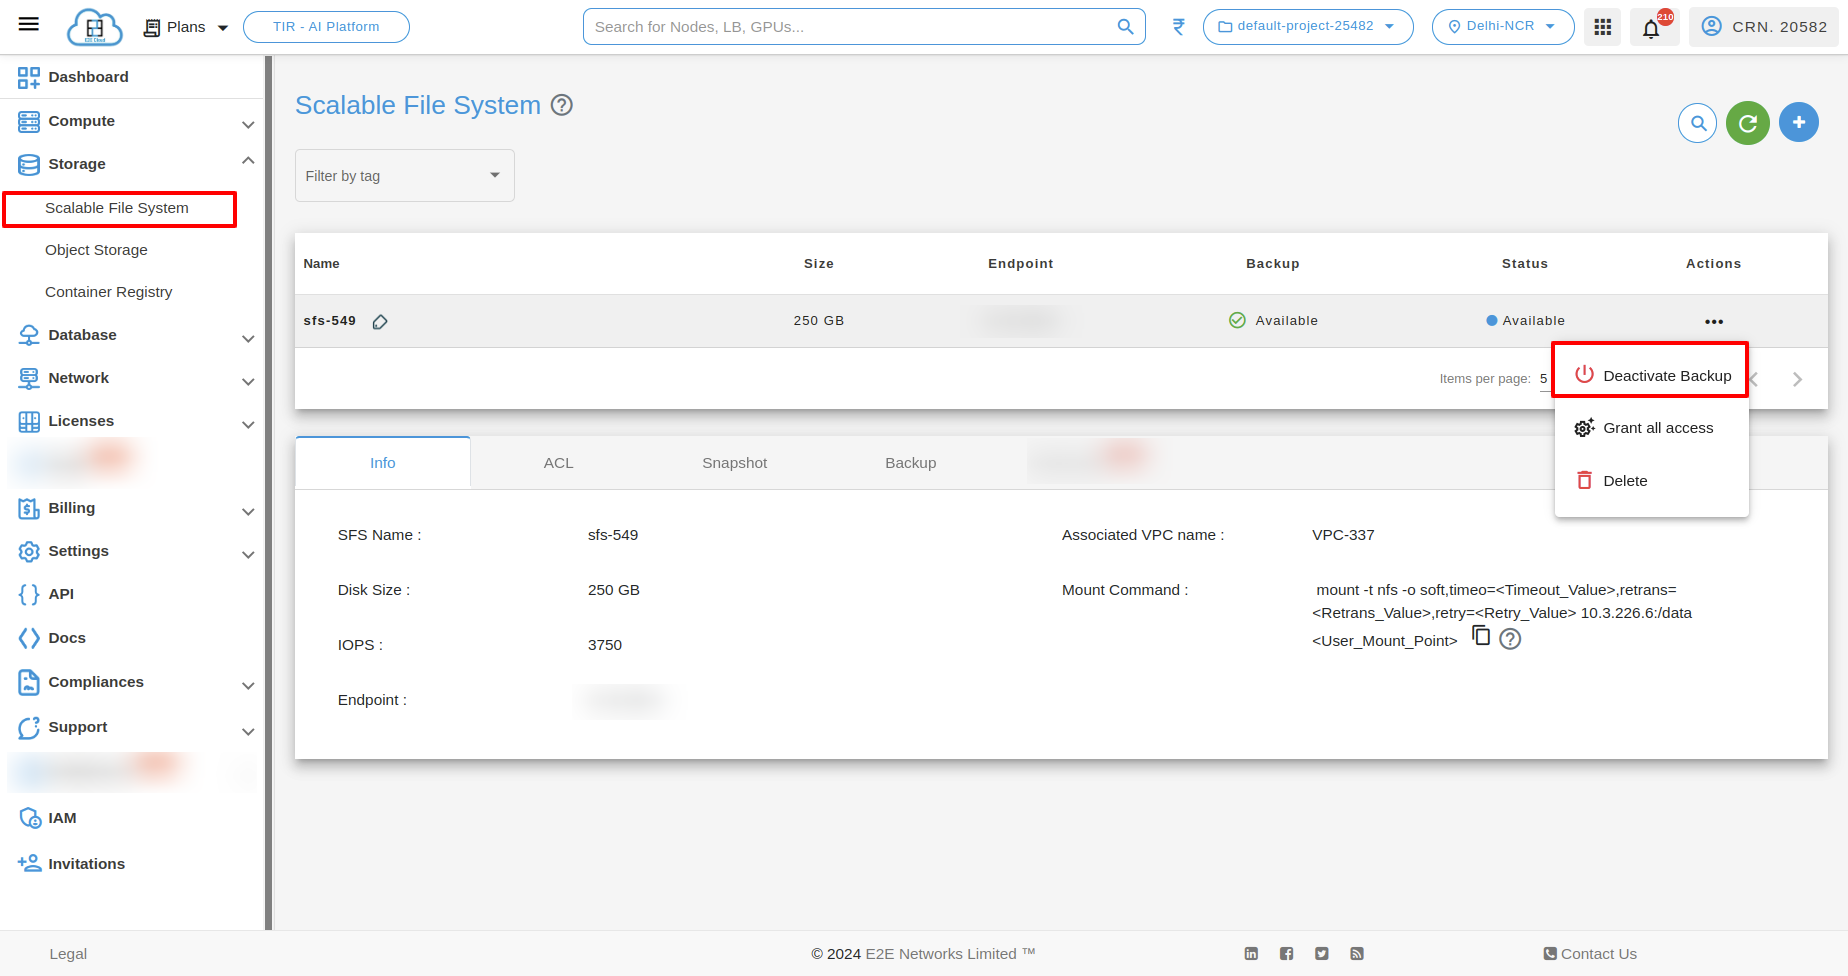
Deactivate Backup
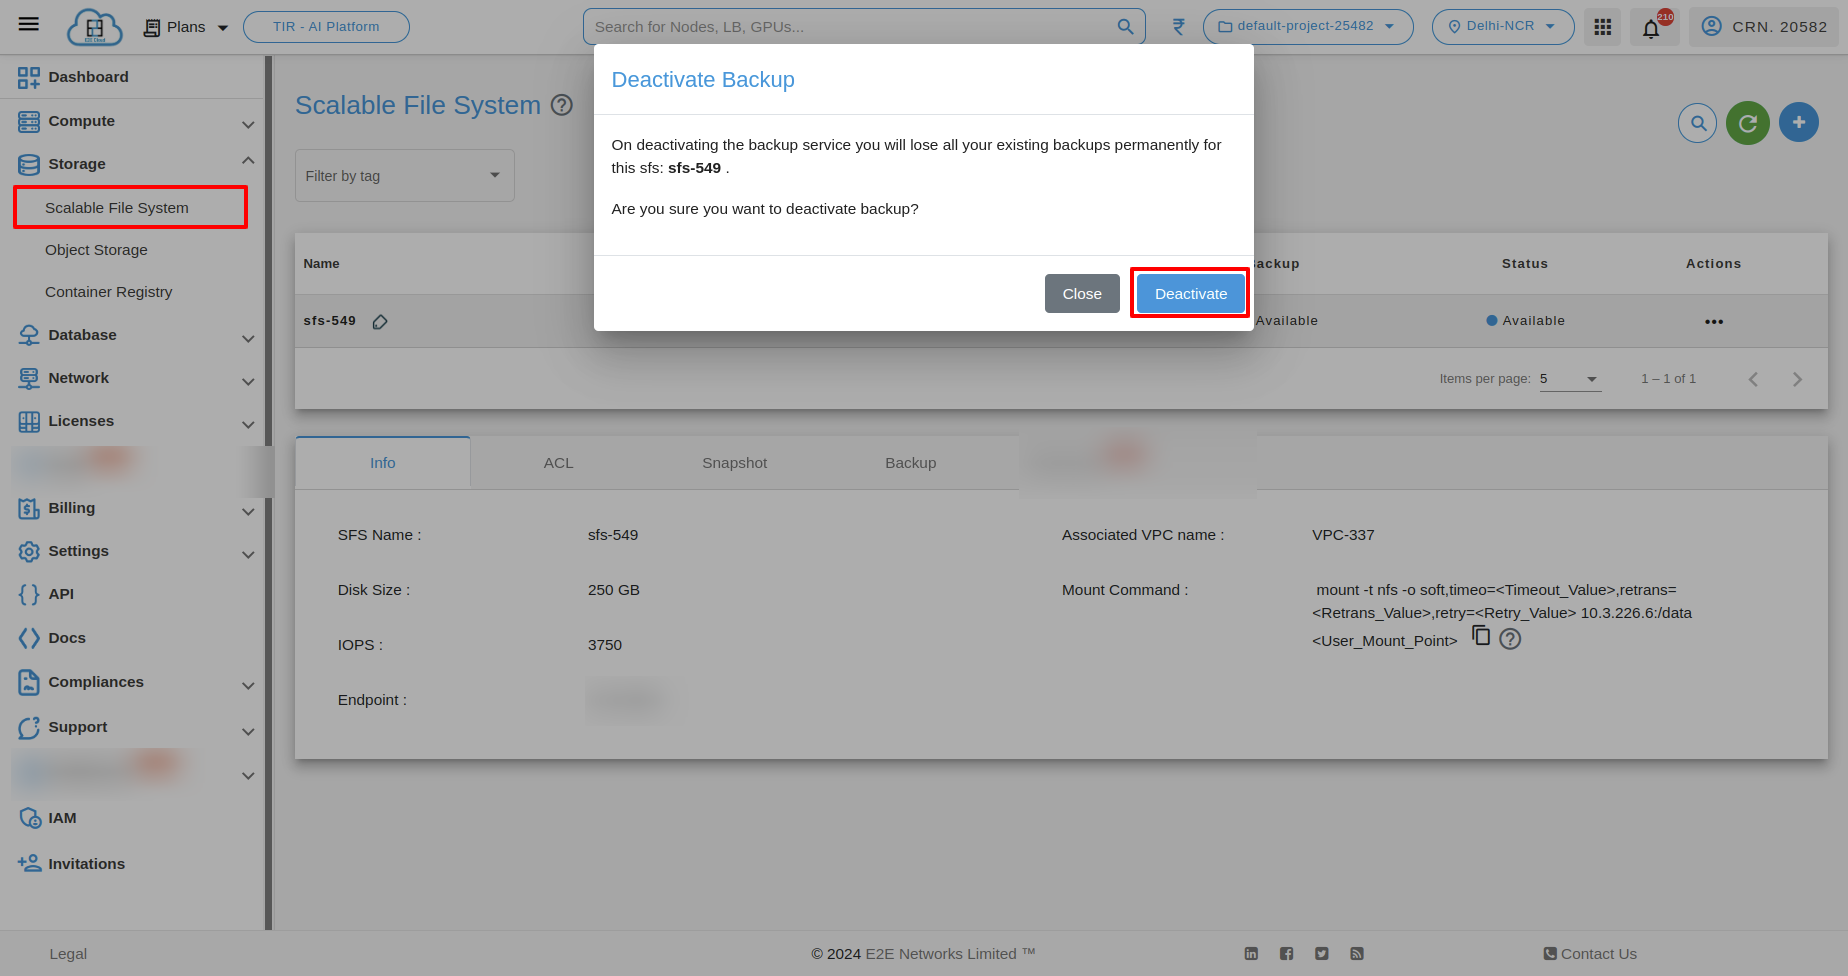
After successfully activated backup, you can deactivate backup by clicking “Deactivate Backup” under actions.
After that a pop up will appeaer, if you click on “Deactivate” button the backup will deactivated successfully.
Grant all access
Note
Note : If you will grant all access, you will not be configure ACl.To configure ACL you have to disable all access.
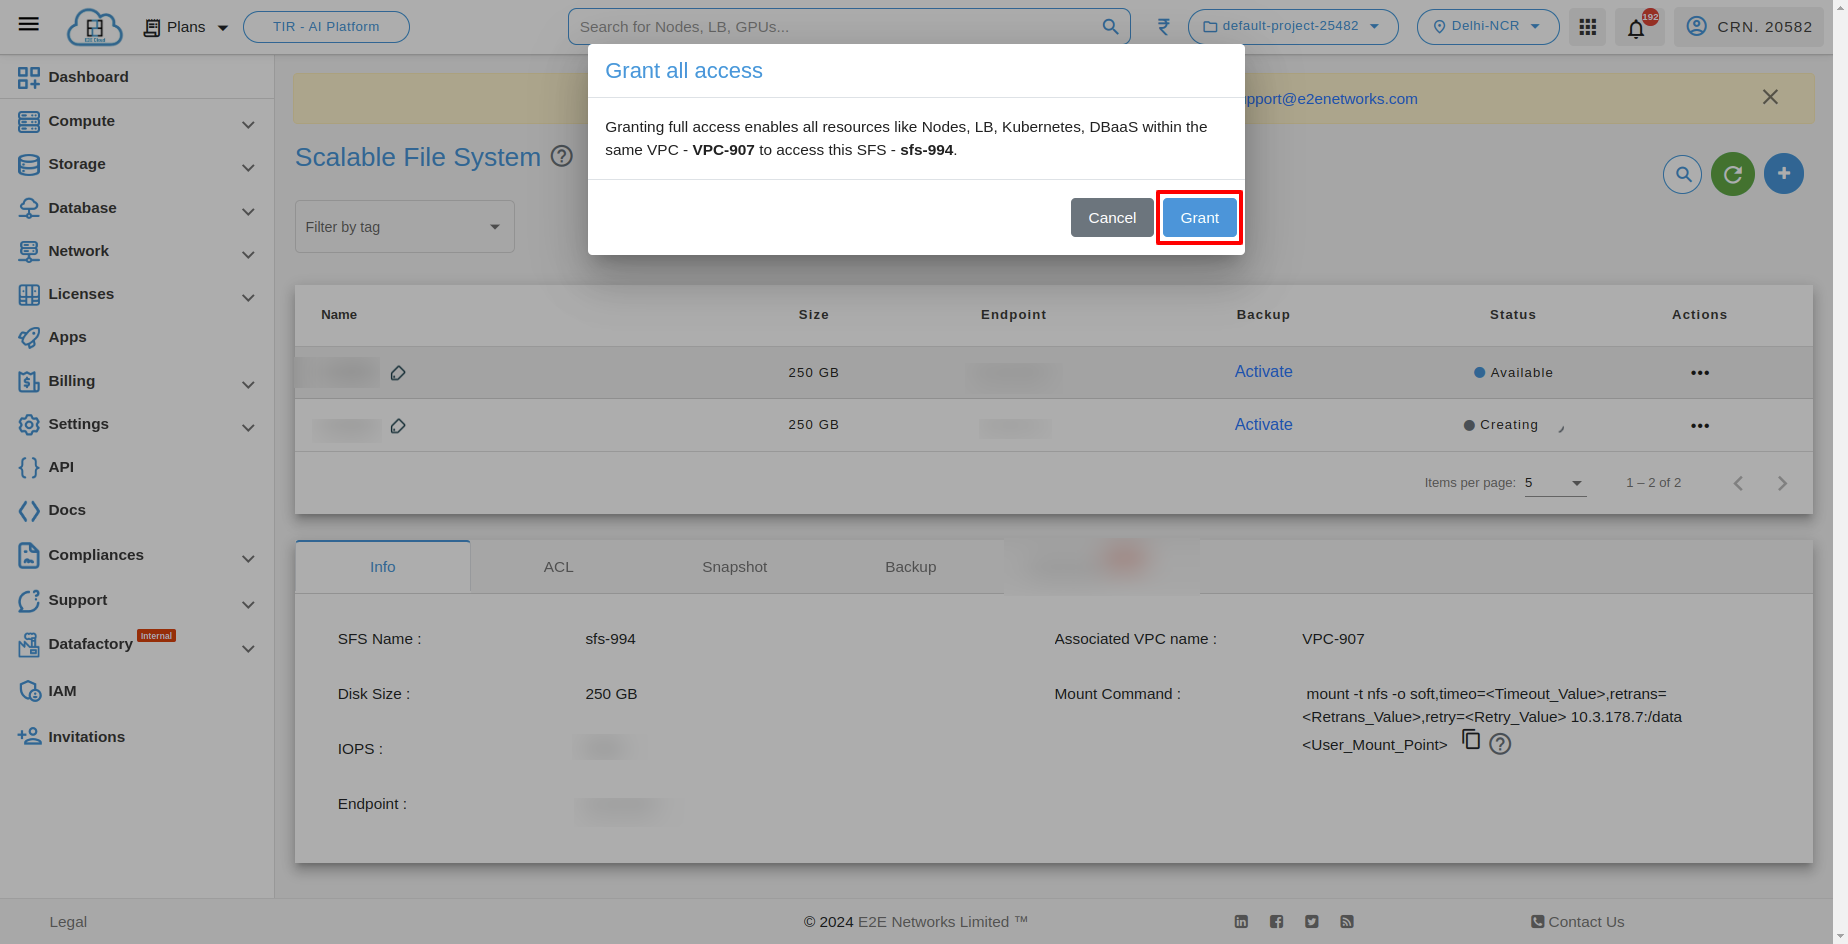
To Grant all access, select a particular SFS(Scalable File System) click on “Grant all access” under actions.

After clicking “Grant all access” action, you can see the below popup.If you click on Grant button it will Granting full access enables all resources like Nodes, LB, Kubernetes, DBaaS within the same VPC to access this SFS.
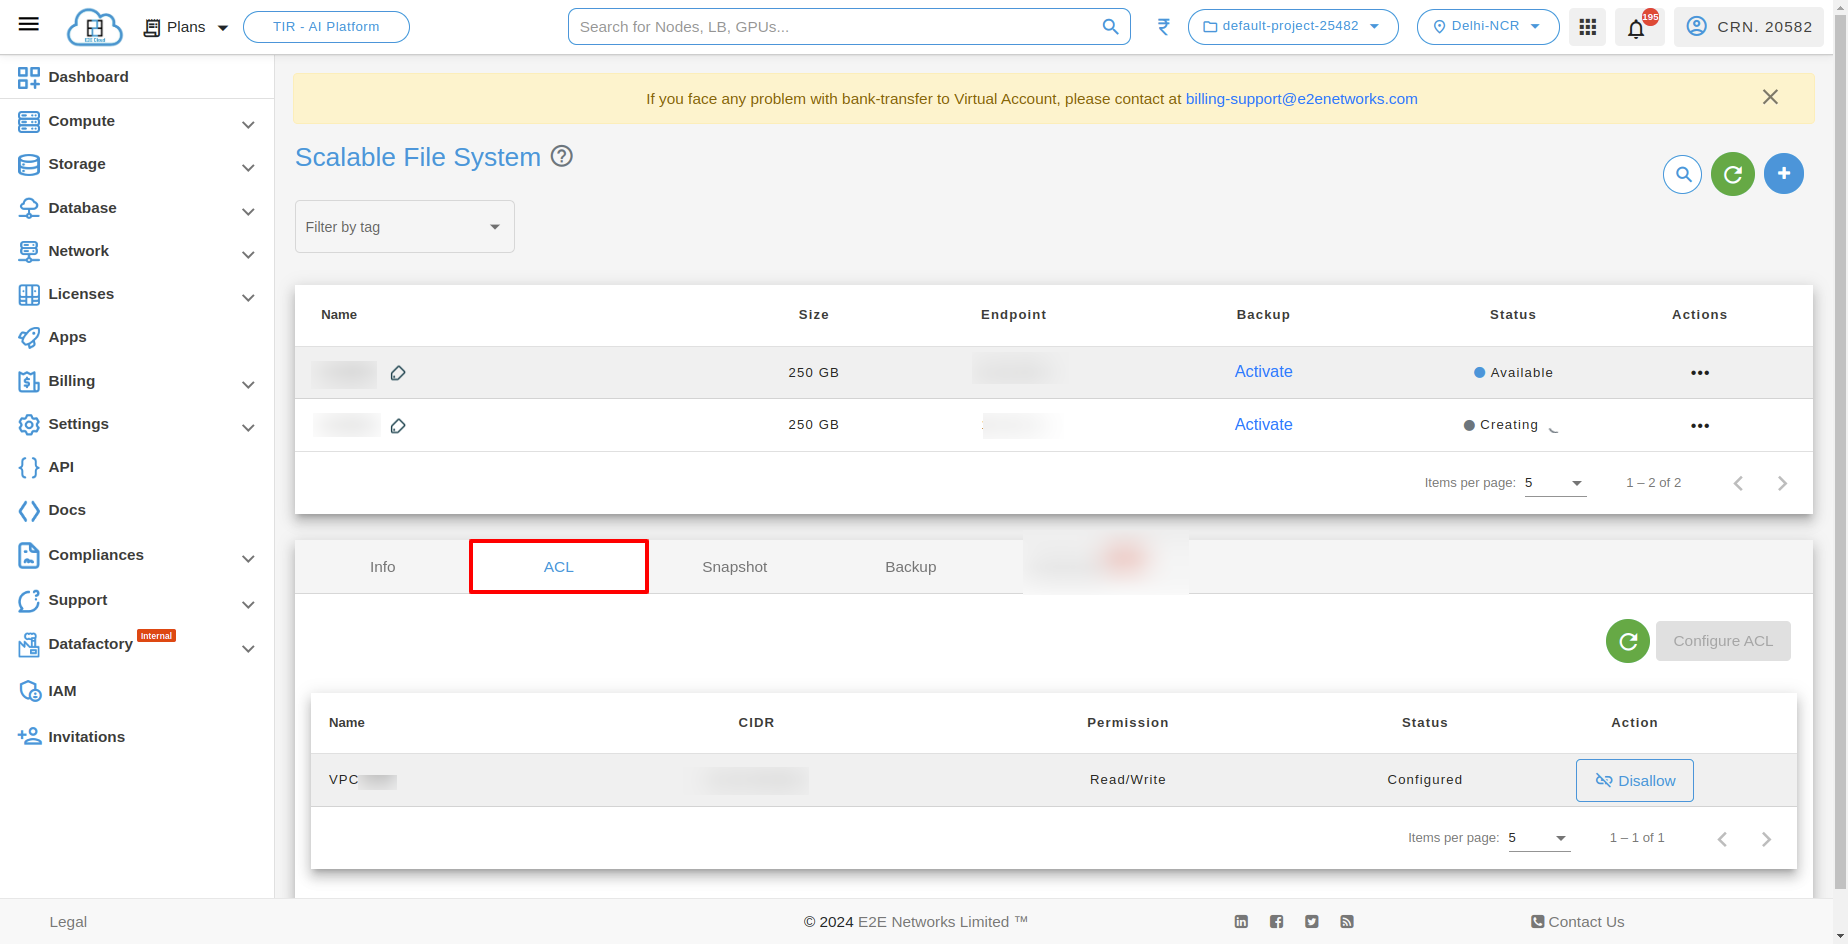
Permission has been granted and the process has started. It should be completed within few minutes. You can view the configured Virtual Private Cloud (VPC) under the ‘ACL’ tab.
Disable all Access
Note
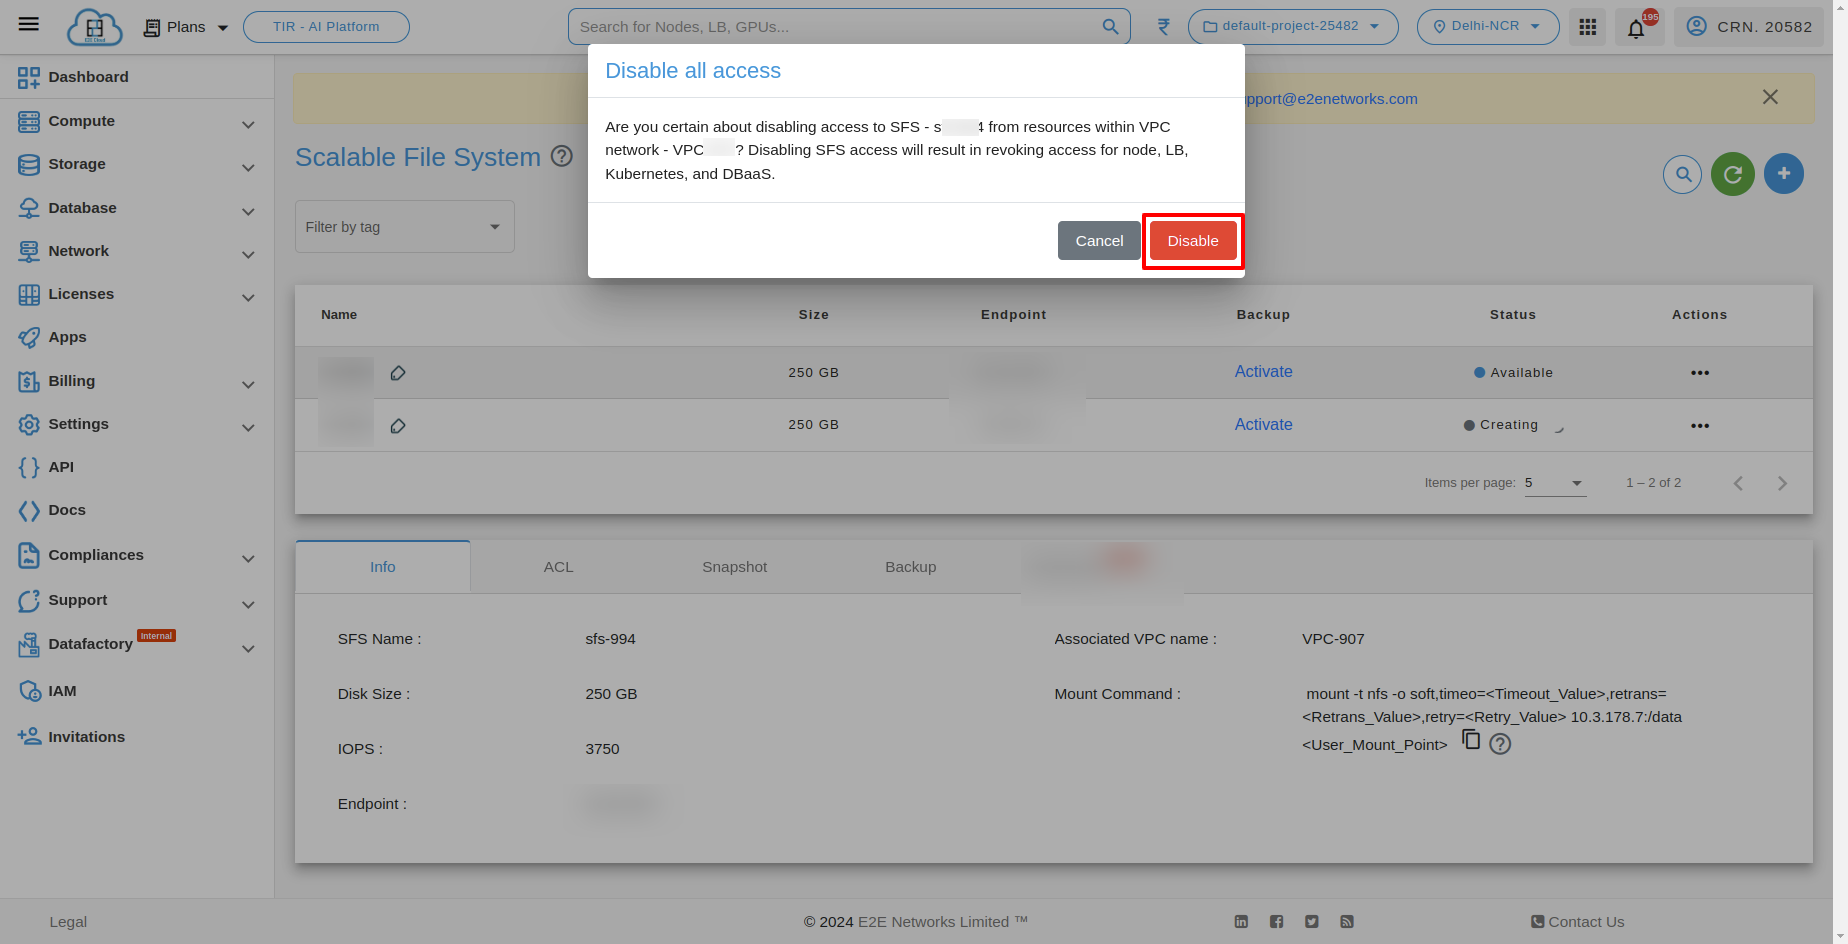
If you disable all access, it will deny full access to all resources such as Nodes, Load Balancers, Kubernetes, and DBaaS within the same VPC from accessing this SFS.
If you want to disable all access from SFS(Scalable File System) then click on Disable all access” under actions.

After clicking “Disable all access” action, you can see the below popup.If you click Disable button, access will be disable from all the services.
Disable access process has started. It should be completed within few minutes. You can view the configured Virtual Private Cloud (VPC) under the ‘ACL’ tab.
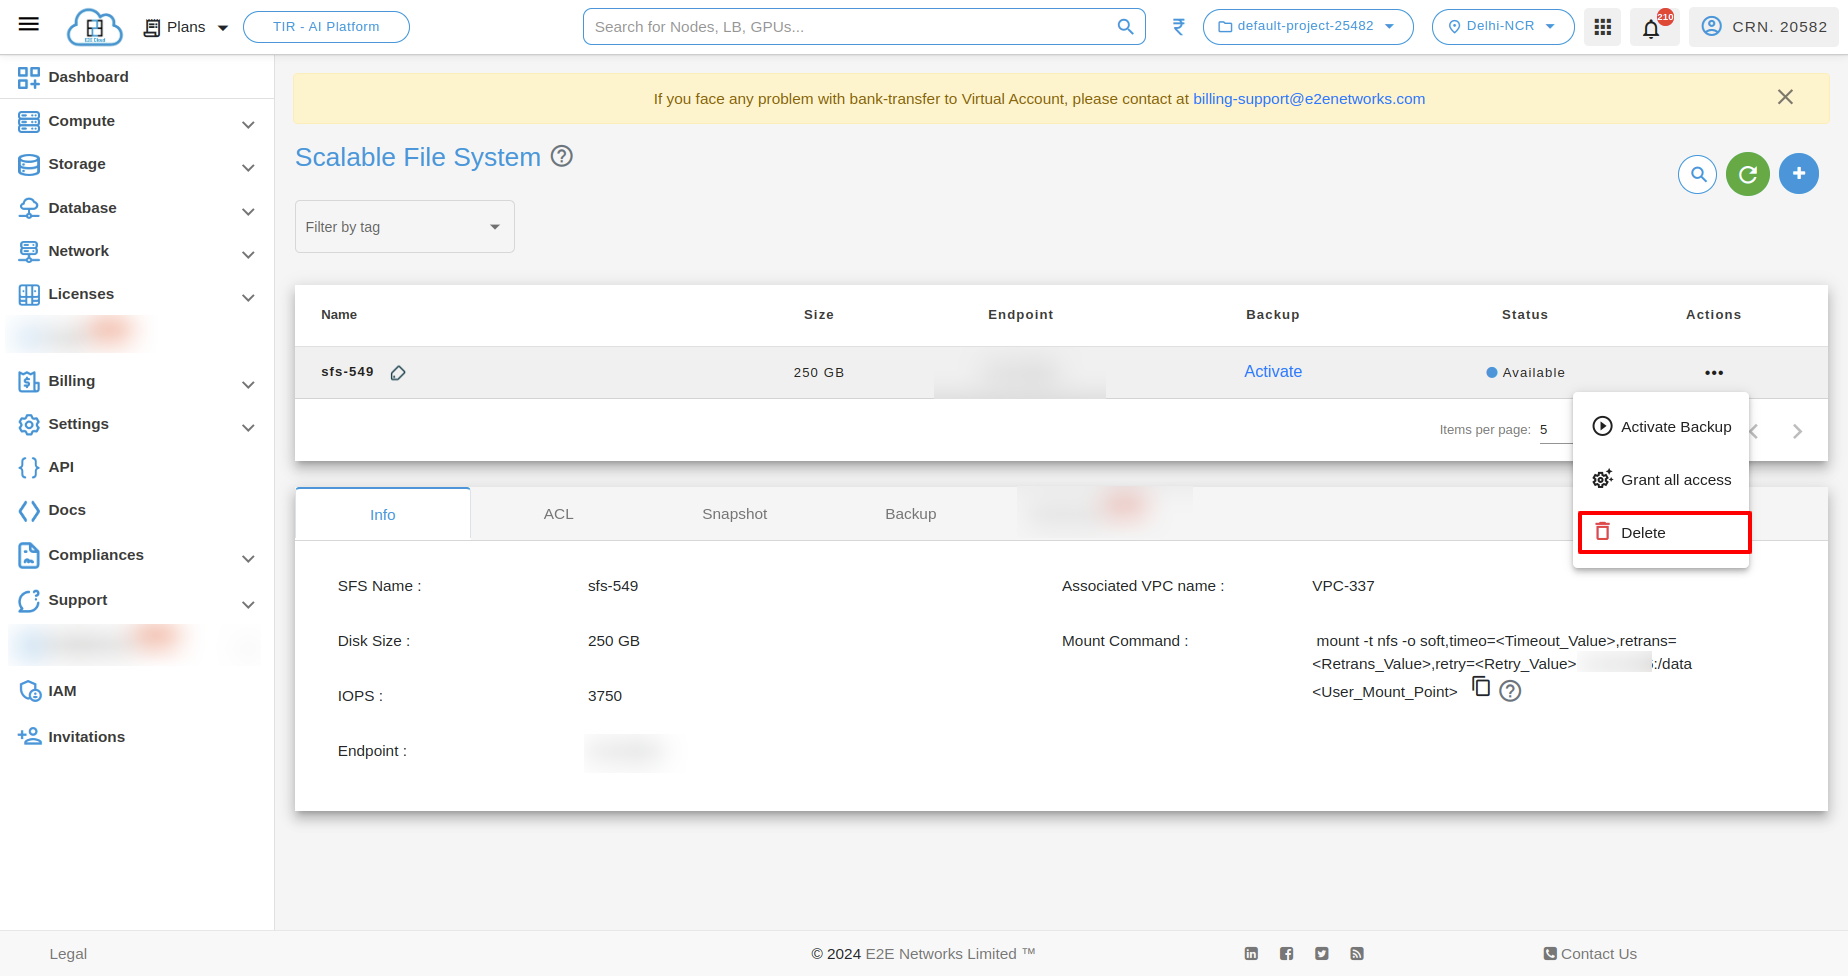
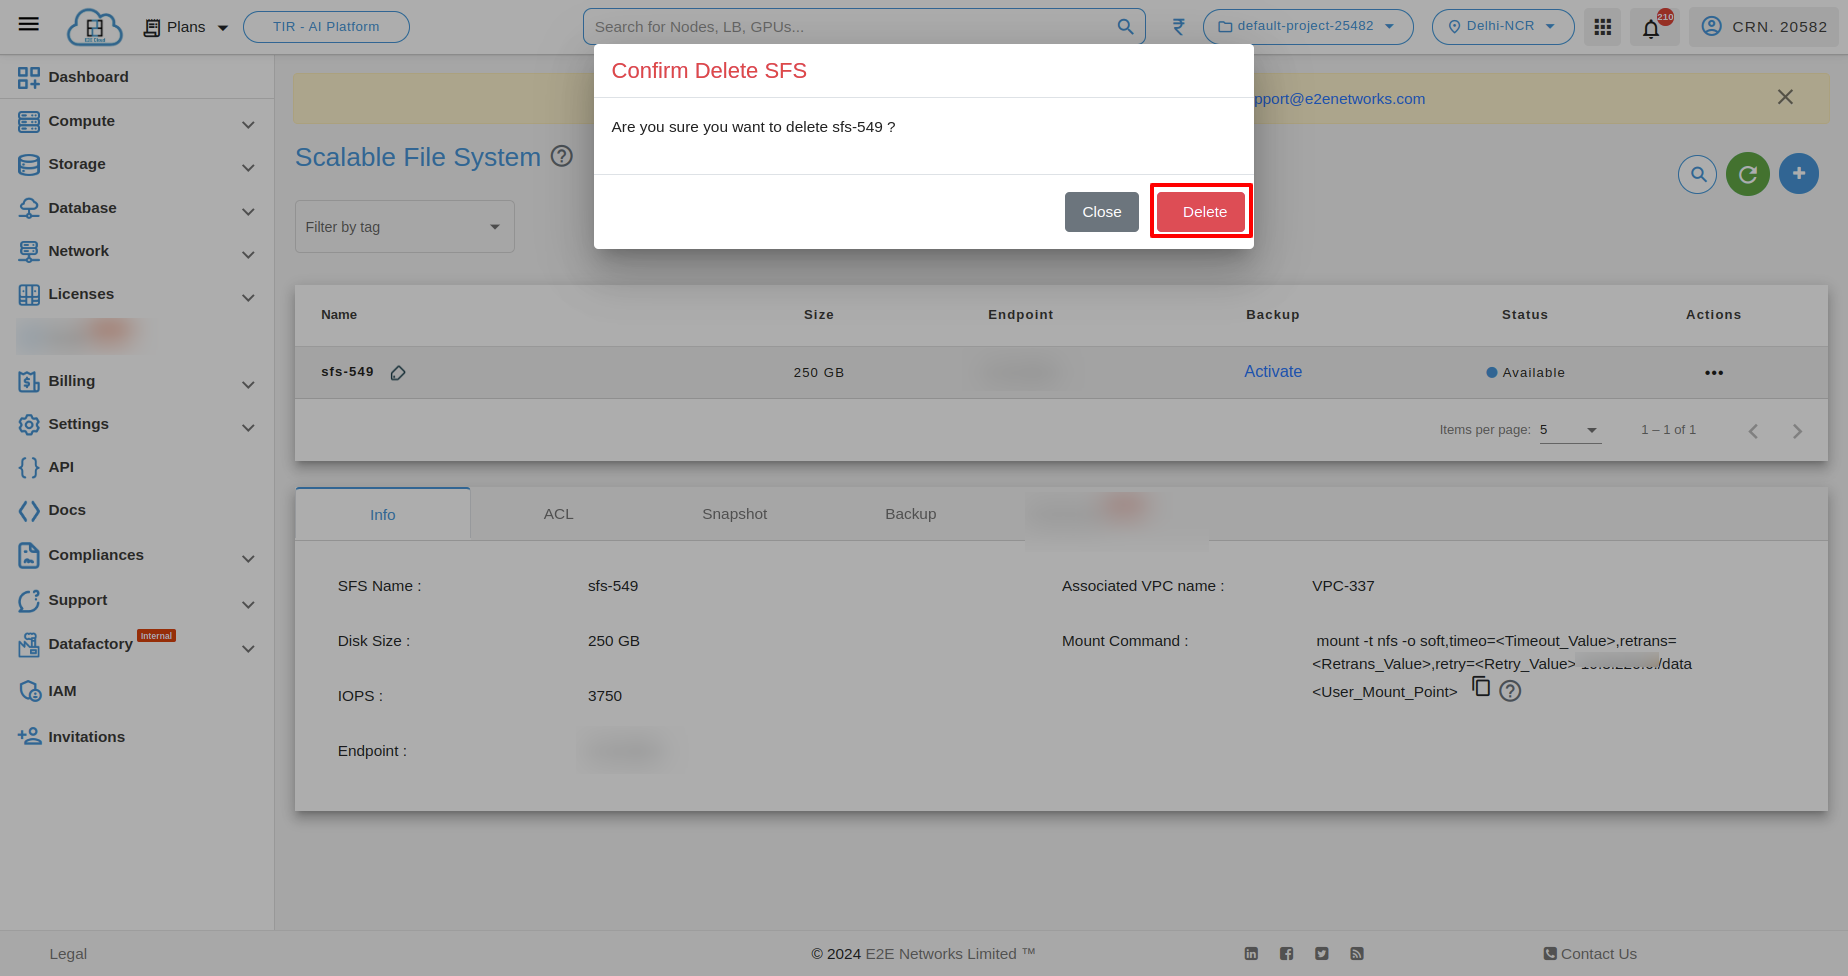
Delete SFS
ACL
Using ACL configuration you can give the permission for allow the Node with the SFS. For configure ACL Now go to ACL tab and click on configure ACL.

After clicking on configure ACL, The nodes which are attached with the same VPC network would be shown. Now select the permission according to your requirement and click on the Allow button to attach Node with SFS.

After clicking on the Allow button, the node will go into Configuring status and after some time it will again come in Available status.

How to Access Scalable File System(SFS)?
You need to connect your machine and follow the following command to mount the SFS.
1) For YUM Package Manager
Step - 1 :- Install nfs-utils on your machine using yum package installer.
# yum update
# yum install nfs-utils
Step-2 :- Make a MOUNT_POINT
# mkdir MOUNT_POINT
Step -3 :- Mount SFS on your machine.
# mount -t nfs -o soft,timeo=n, retrans=n, retry=n, SFS_SERVER_ENDPOINT:/data MOUNT_POINT
soft - When NFS tries to access a soft-mounted directory, it gives up and returns an error message after trying retrans times.
timeo - The timeout, in tenths of a second, for requests (read and write requests to mounted directories). If a request times out, this timeout value is doubled, and the request is retransmitted. Maximum value is 30 sec and the default value is 7sec.
retrans - The number of times a request (a read or write request to a mounted directory) is retransmitted after it times out. If the request does not succeed after n retransmissions, a soft mount returns an error. Default value is 4.
retry - The number of times the client attempts to mount a directory after the first attempt fails. Default value is 1.
2) For APT Package Manager
Step -1 :- Install nfs-common on your machine using apt package installer.
# sudo apt update
# sudo apt install nfs-common
Step -2 :- Make a MOUNT_POINT
# mkdir MOUNT_POINT
Step -3 :- Mount SFS on your machine.
# mount -t nfs -o soft,timeo=n, retrans=n, retry=n, SFS_SERVER_ENDPOINT:/data MOUNT_POINT
soft - When NFS tries to access a soft-mounted directory, it gives up and returns an error message after trying retrans times.
timeo - The timeout, in tenths of a second, for requests (read and write requests to mounted directories). If a request times out, this timeout value is doubled, and the request is retransmitted. Maximum value is 30 sec and the default value is 7sec.
retrans - The number of times a request (a read or write request to a mounted directory) is retransmitted after it times out. If the request does not succeed after n retransmissions, a soft mount returns an error. Default value is 4.
retry - The number of times the client attempts to mount a directory after the first attempt fails. Default value is 1.
3) For Windows Machine
Step -1 :- Make sure you have an NFS Client (Services for NFS) installed from Programs and Features.
Step- 2:- Mount SFS to a drive:
# mount -t nfs -o soft,timeo=n, retrans=n, retry=n, SFS_SERVER_ENDPOINT:/data drive:
soft - When NFS tries to access a soft-mounted directory, it gives up and returns an error message after trying retrans times.
timeo - The timeout, in tenths of a second, for requests (read and write requests to mounted directories). If a request times out, this timeout value is doubled, and the request is retransmitted. Maximum value is 30 sec and the default value is 7sec.
retrans - The number of times a request (a read or write request to a mounted directory) is retransmitted after it times out. If the request does not succeed after n retransmissions, a soft mount returns an error. Default value is 4.
retry - The number of times the client attempts to mount a directory after the first attempt fails. Default value is 1.
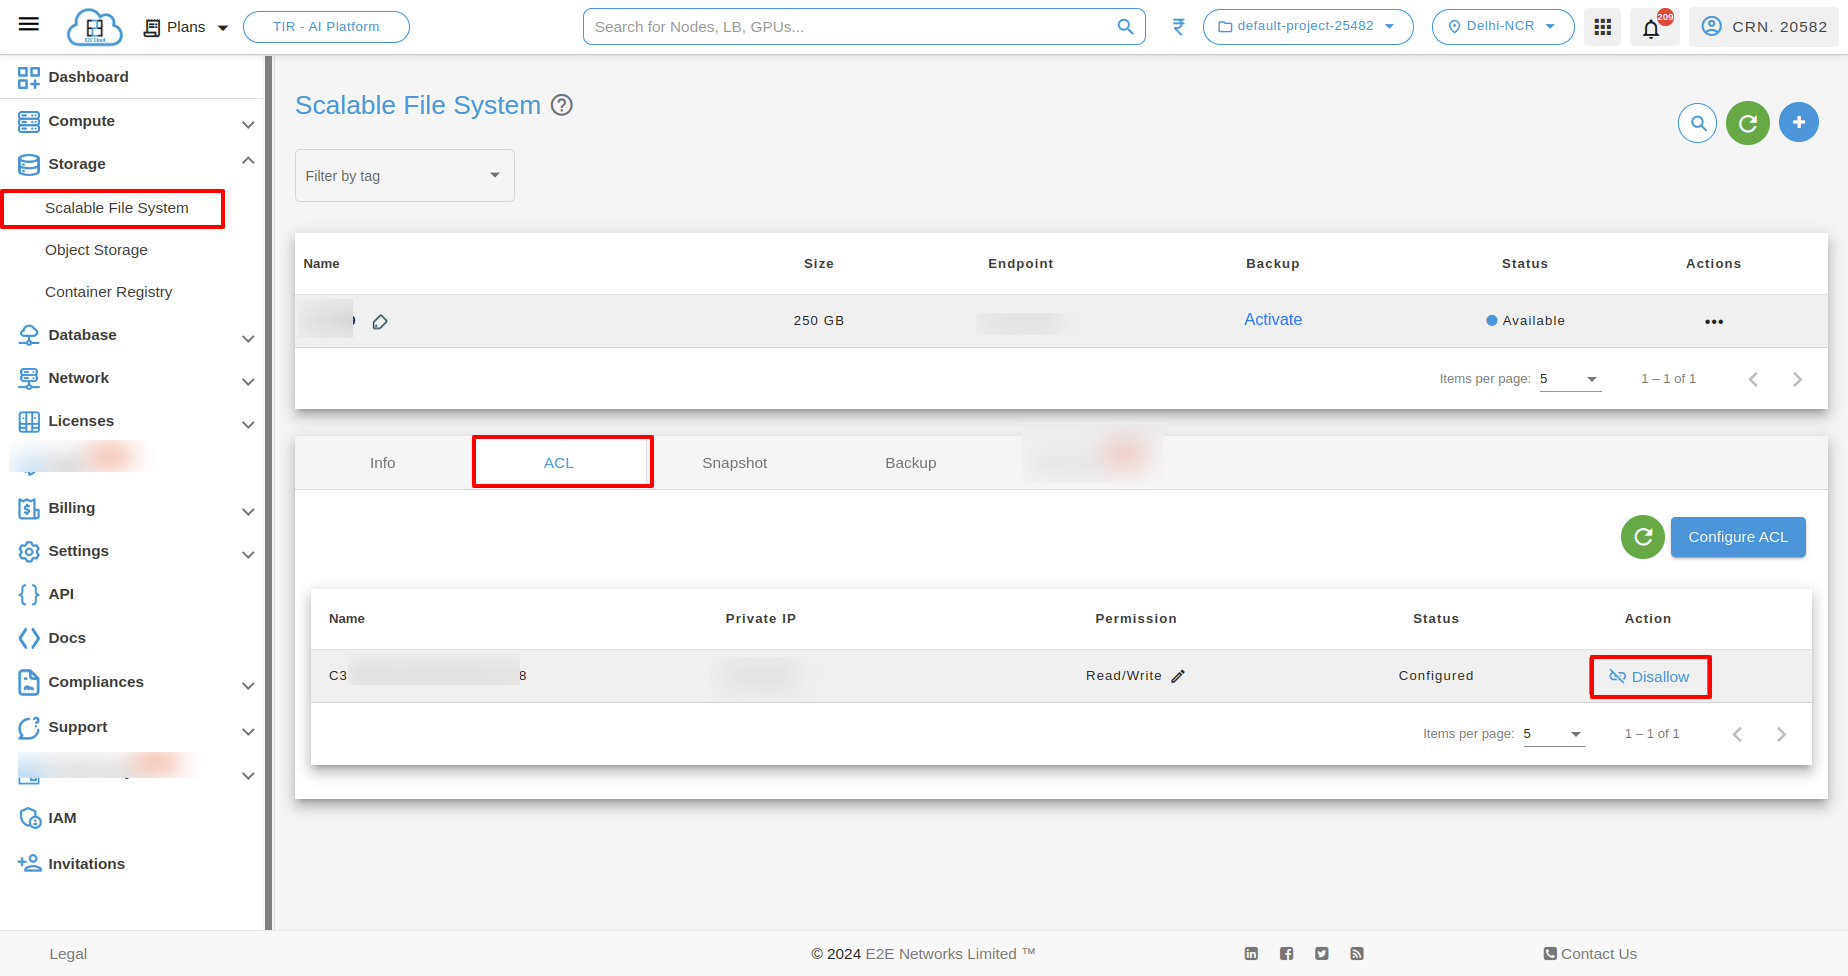
Disallow Node
Now to disallow the node again go to the ACL tab and click on Disallow button to remove the established connection
Snapshot
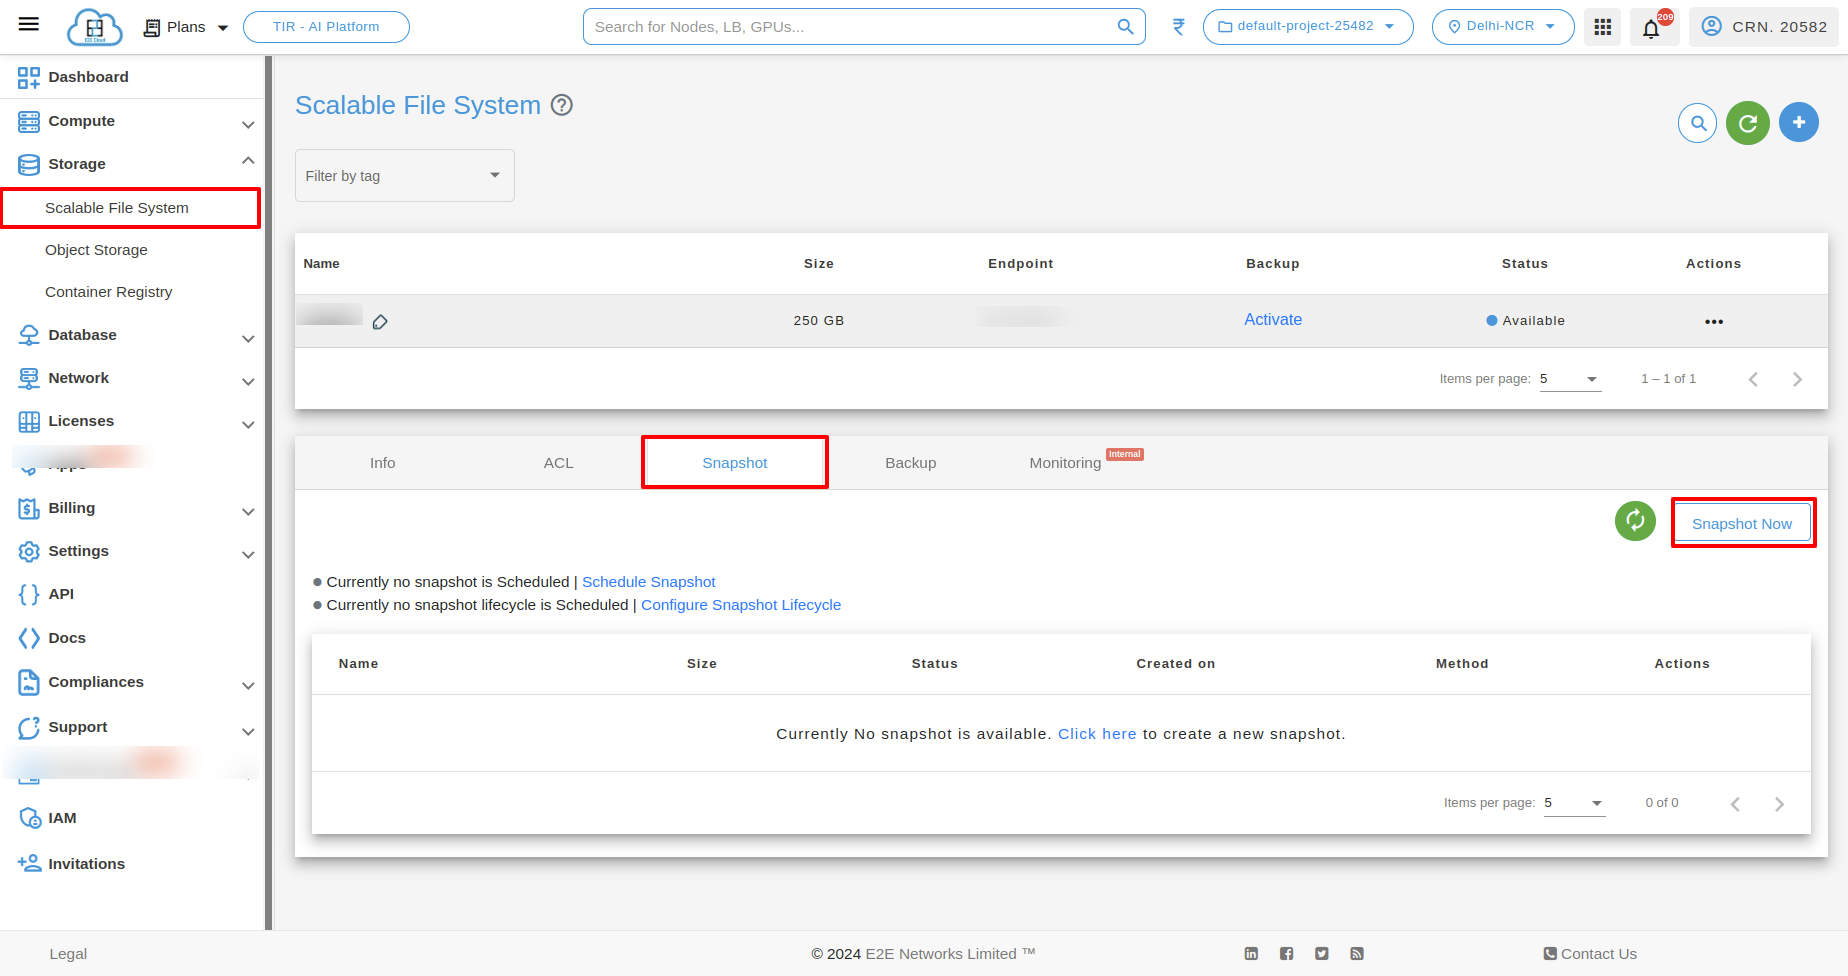
Upon clicking the “Snapshot” tab, the Snapshot page will open, providing options for managing snapshots. These steps to manage snapshots within the SFS (Scalable File System) service. Snapshots play a crucial role in capturing data states at specific points in time, allowing for data recovery, replication, and scheduled snapshot creation.
Creating a Snapshot Manually
To create a snapshot manually, locate the “Snapshot Now” button on the Snapshot page and click on it.
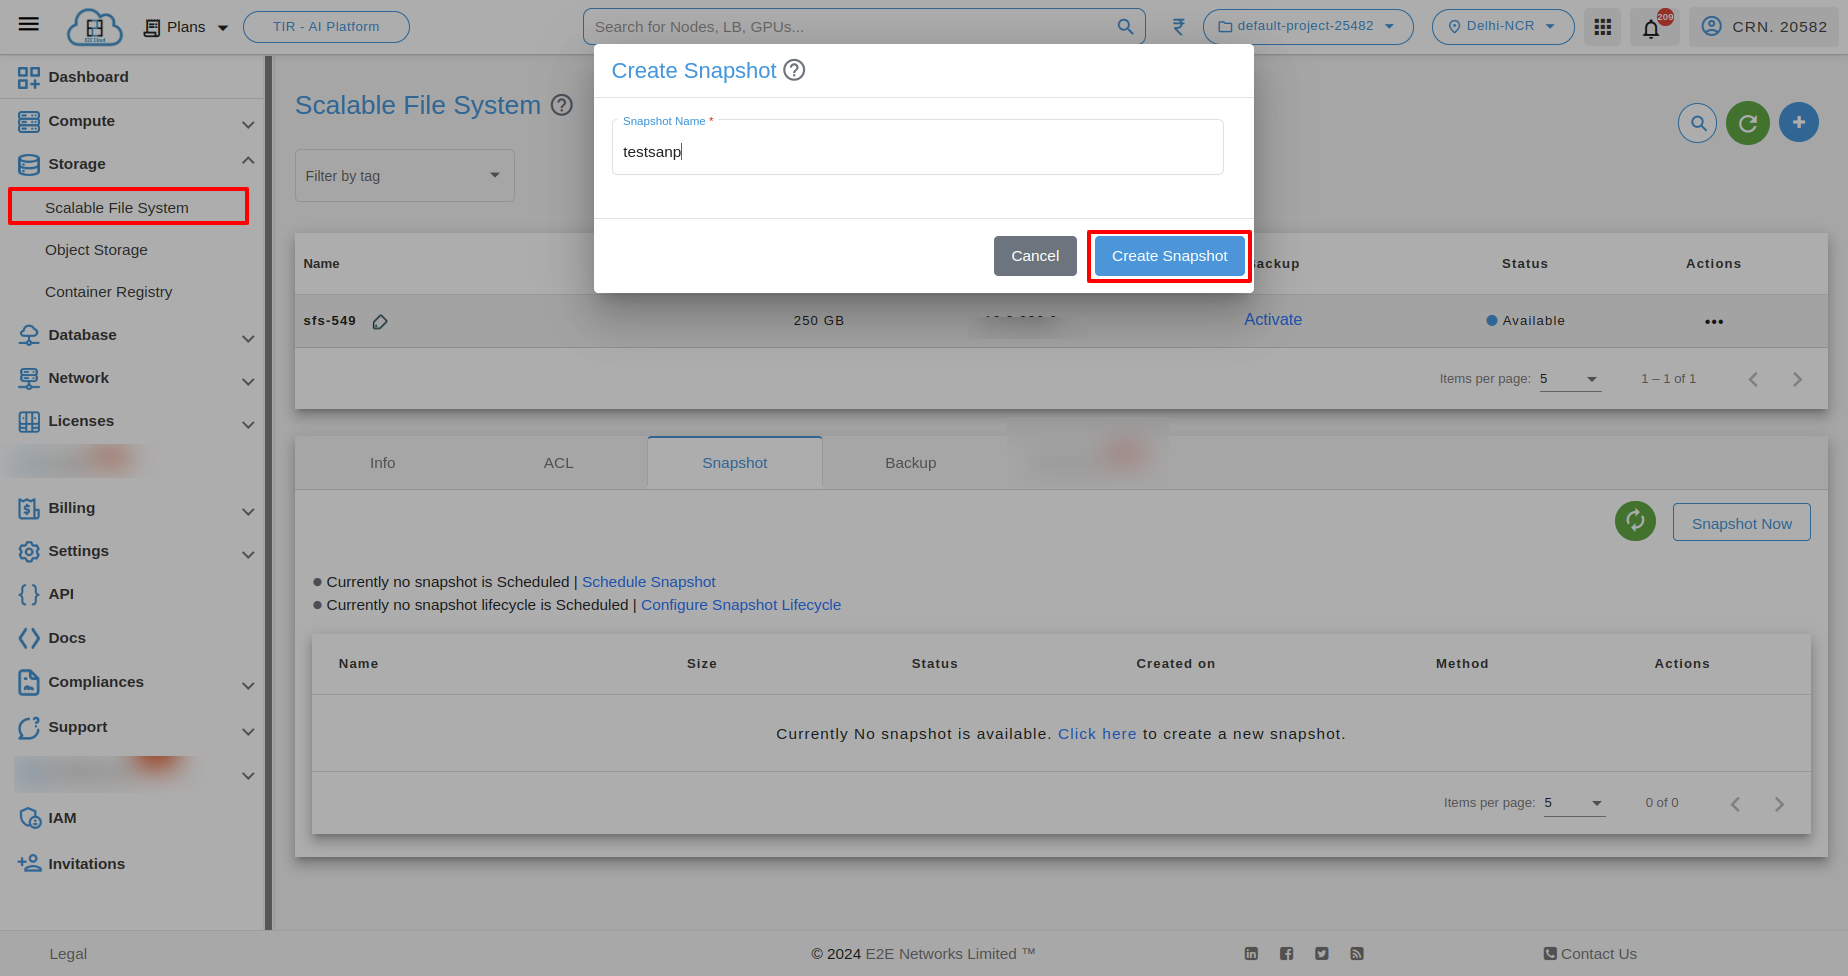
A pop-up will appear click on the “Create Snapshot” button within the pop-up to confirm the snapshot creation.
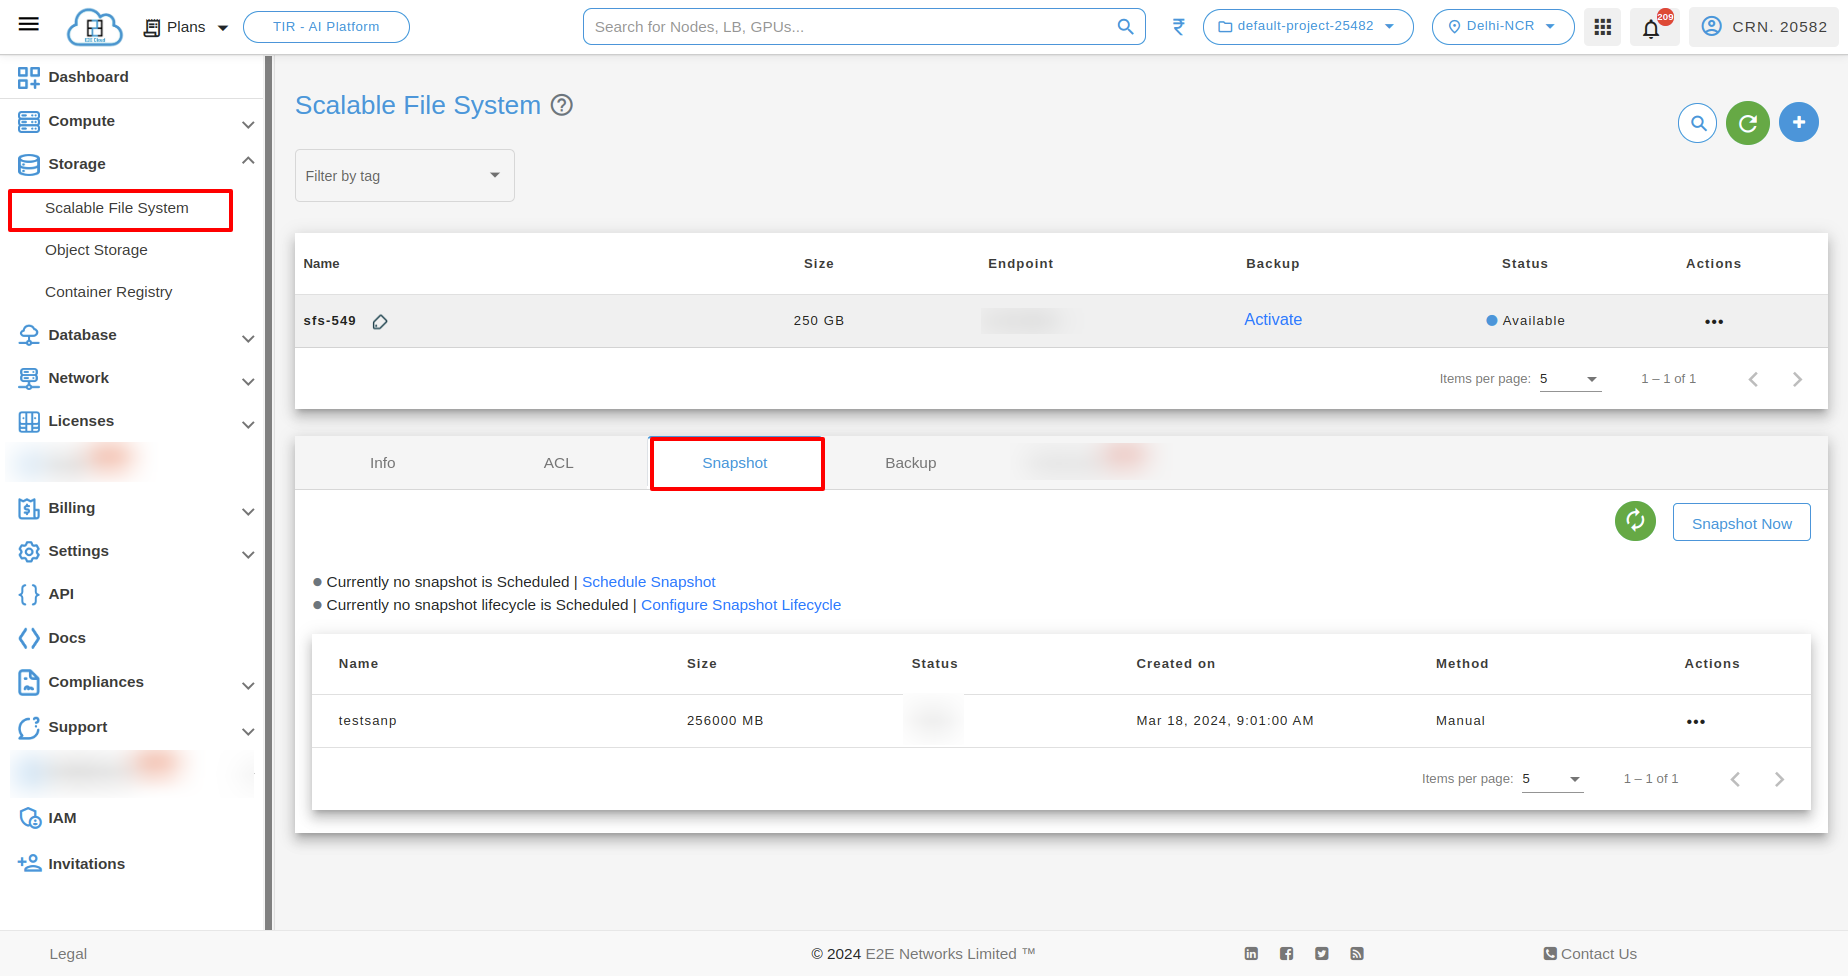
After the snapshot is successfully created, it will be displayed in the snapshot list on the Snapshot page.
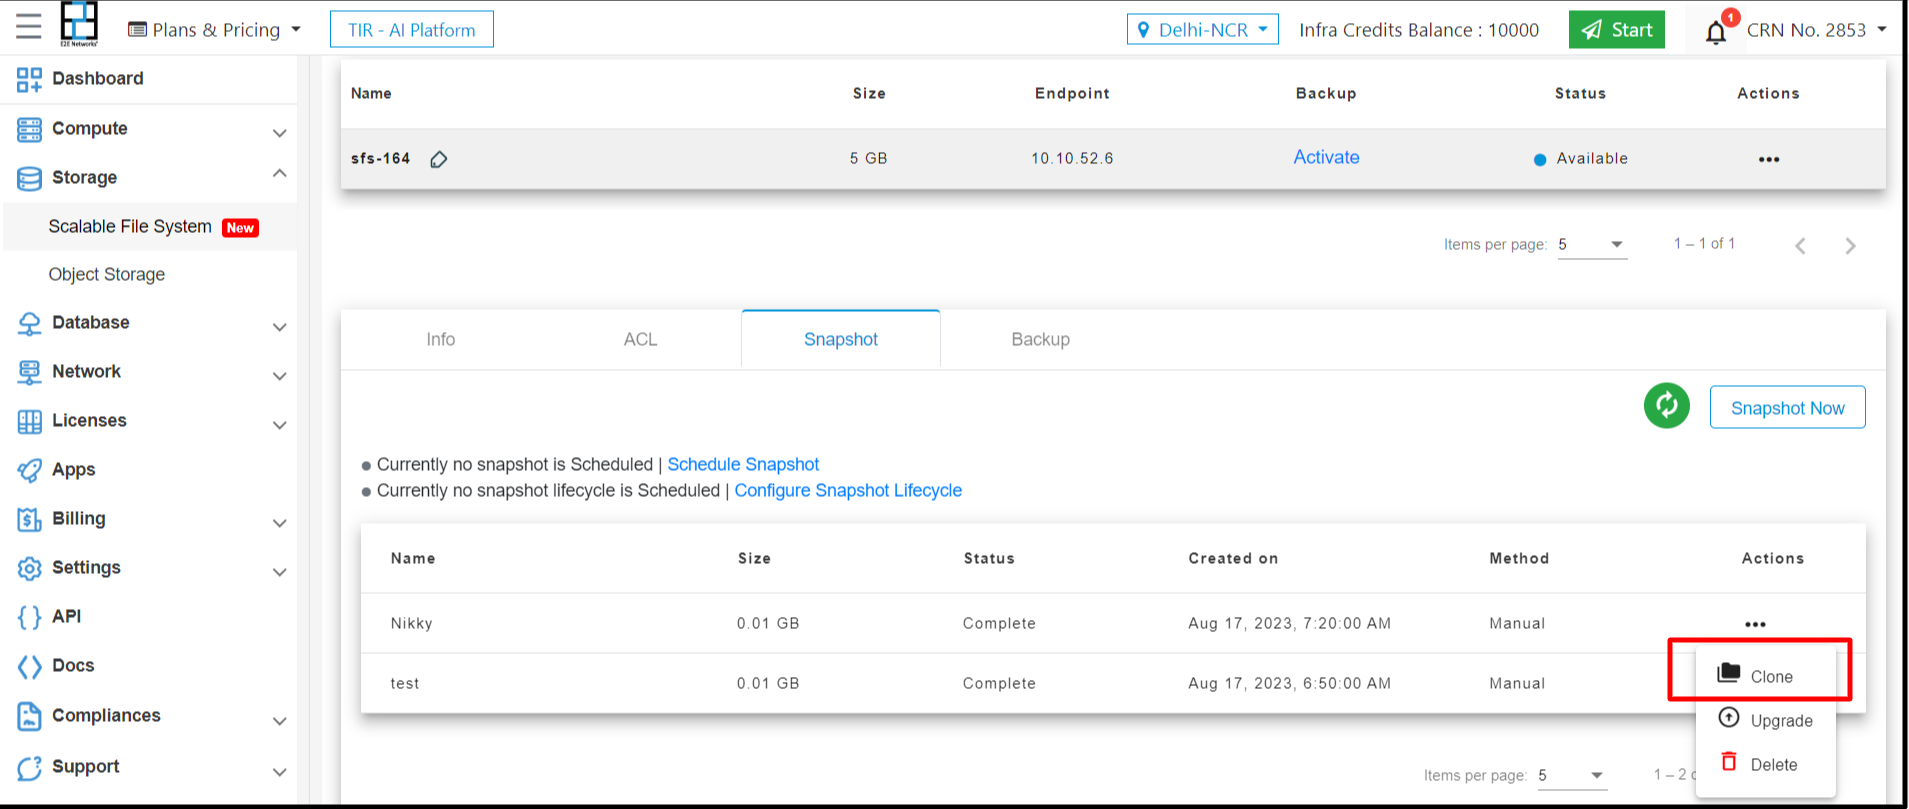
Actions on Snapshots
To perform actions on a snapshot, click on the three-dot “Actions” menu icon for the respective snapshot.
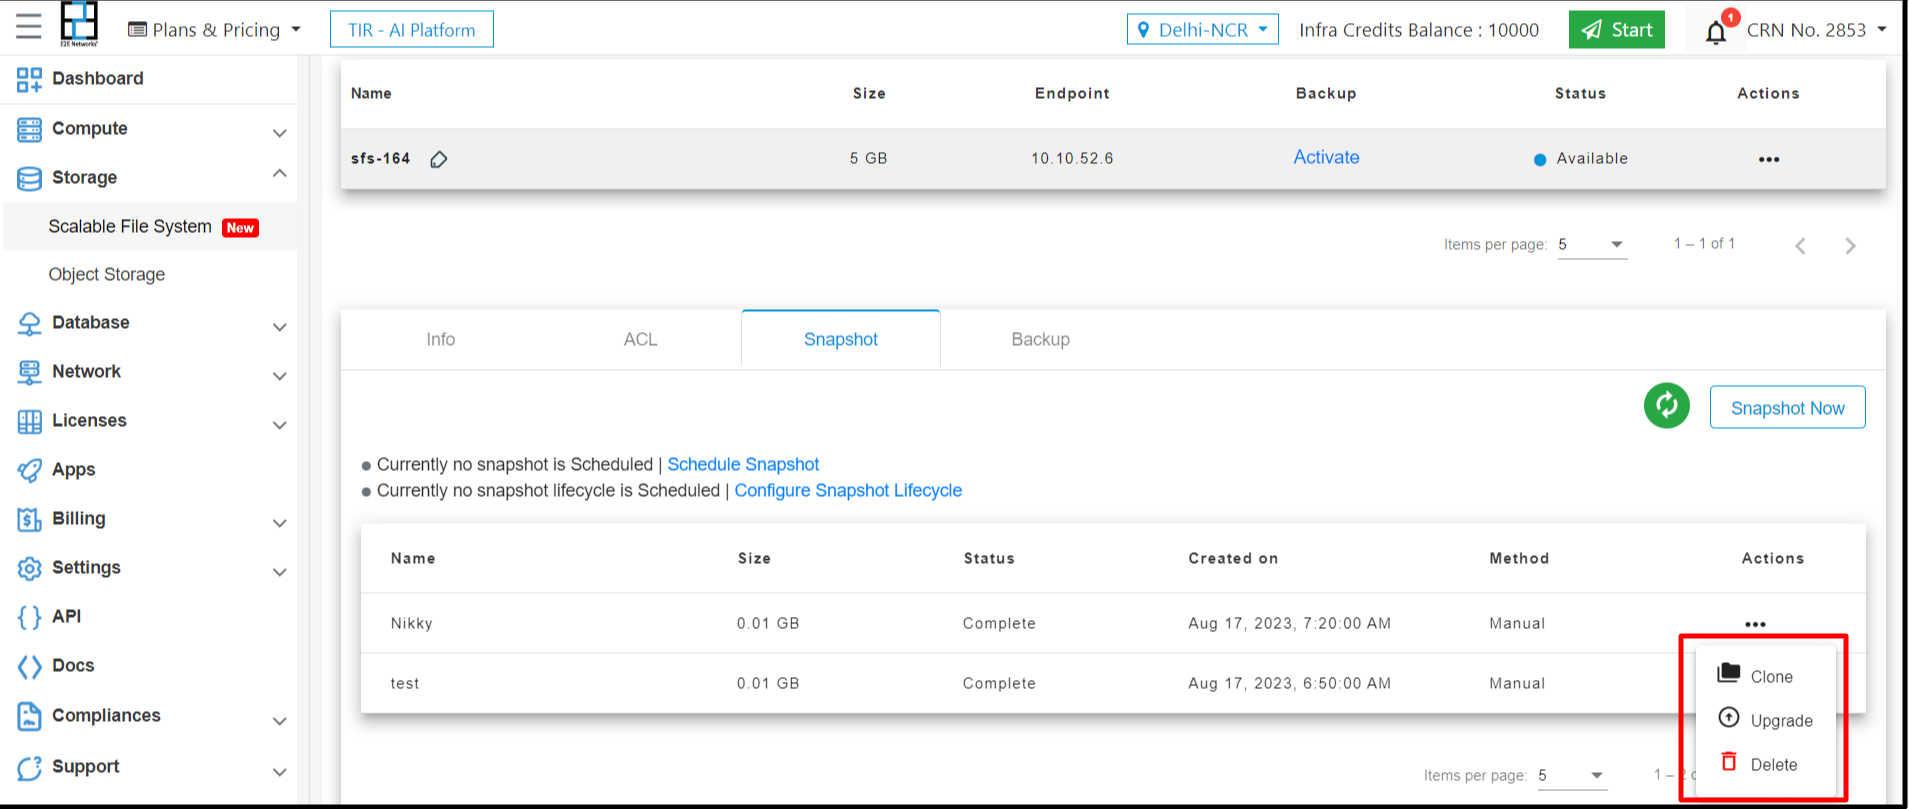
Clone a SFS
Click on the “Clone” option within the “Actions” menu to initiate the cloning process.
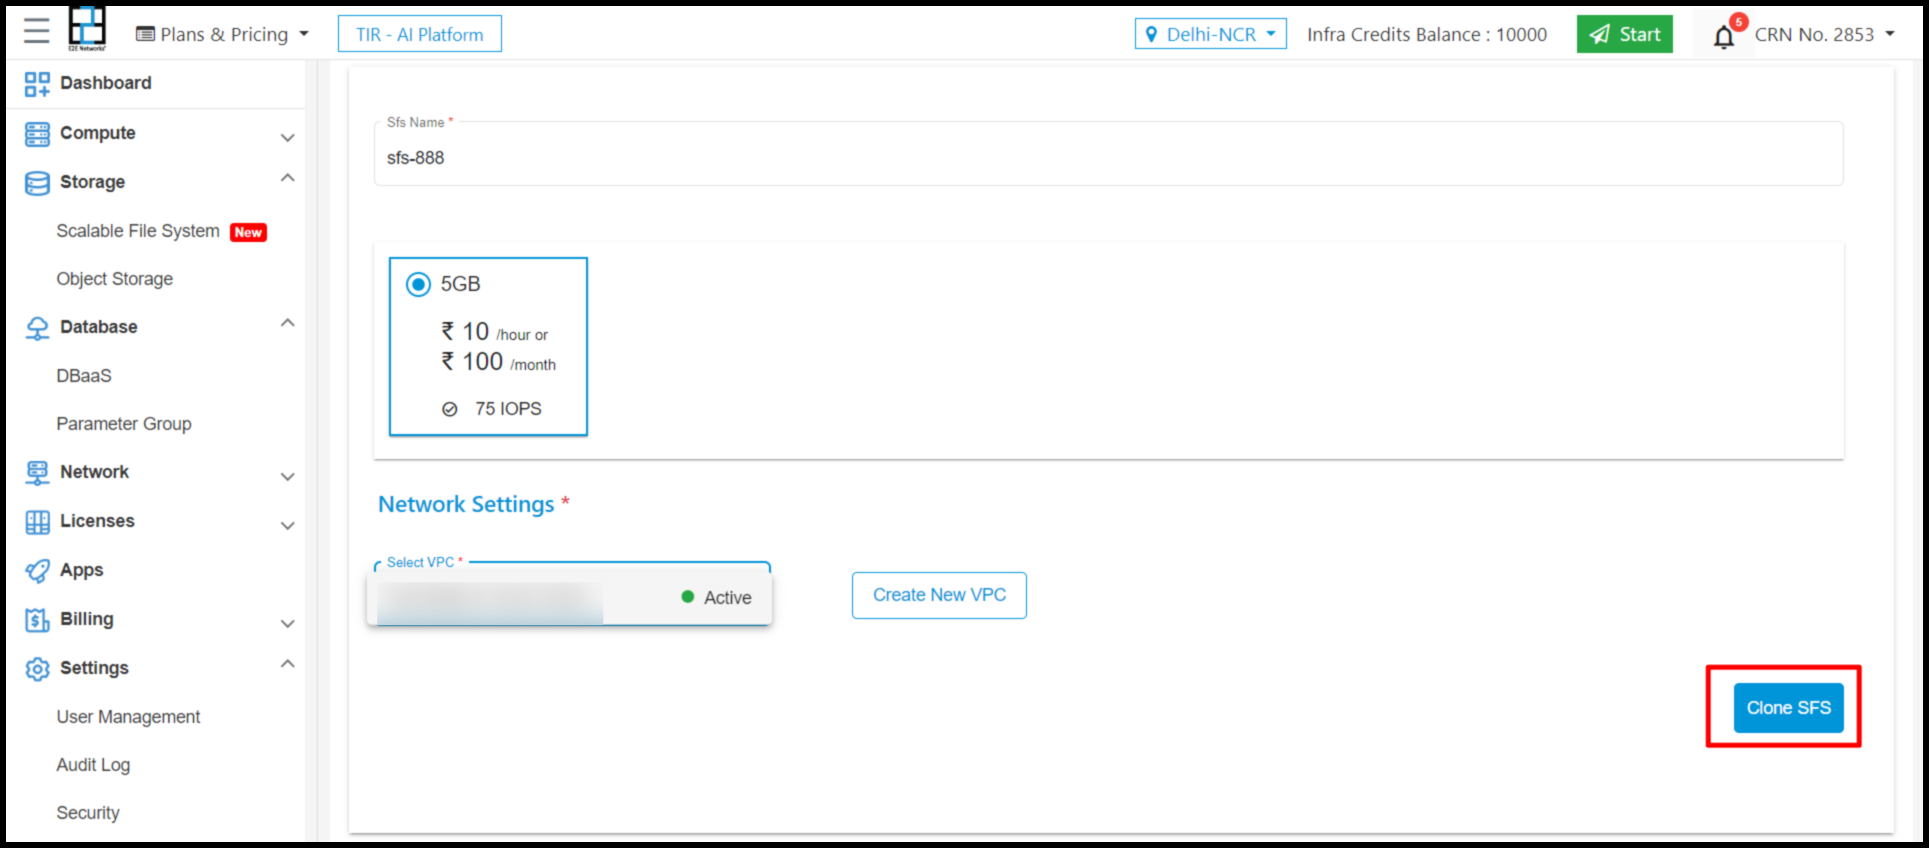
On the “Clone SFS” page, select the desired Virtual Private Cloud (VPC) , then click on “Clone SFS” to proceed.
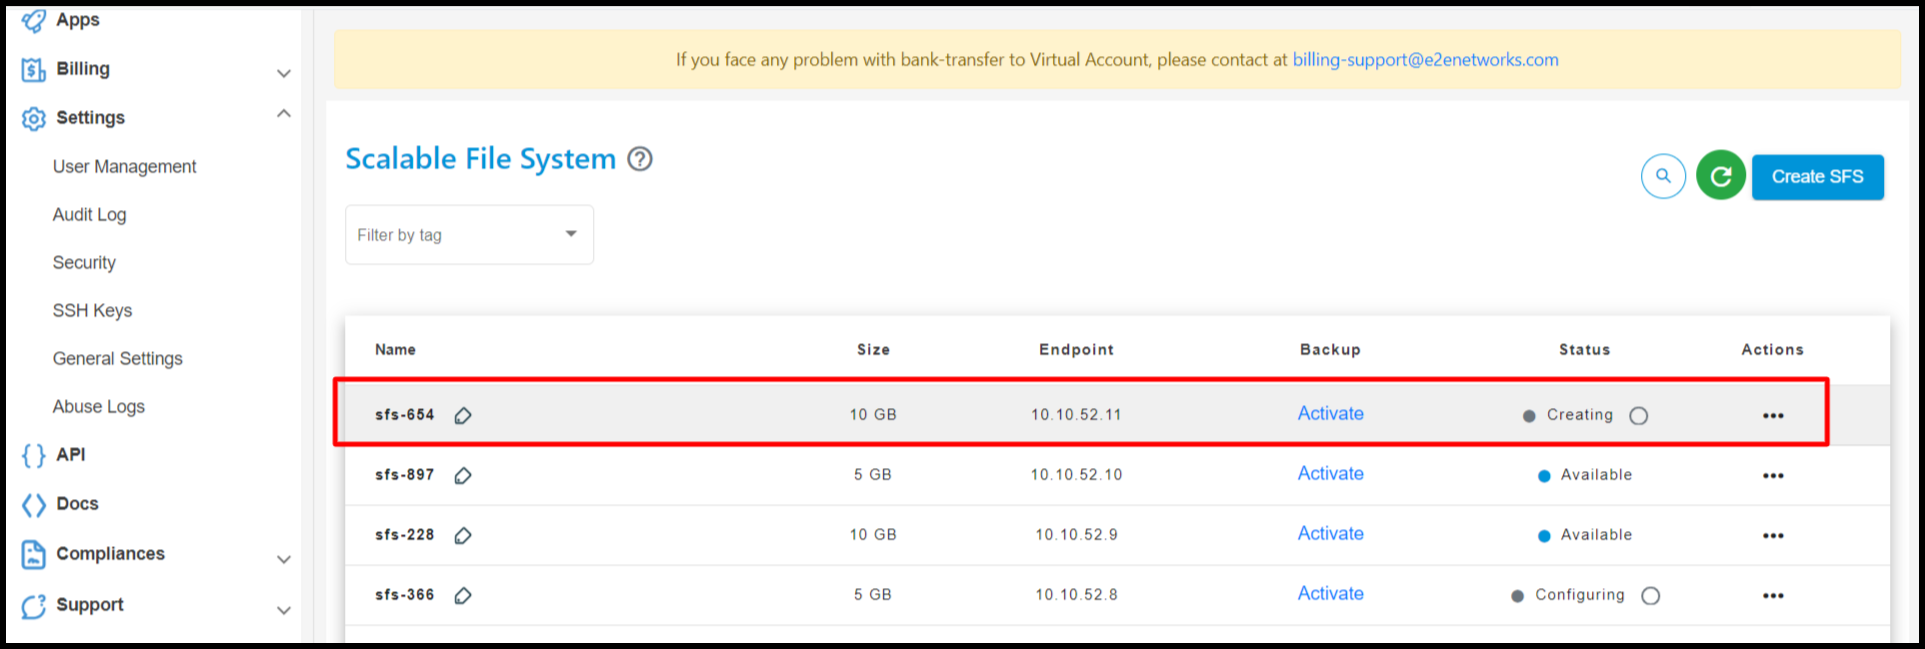
The cloned SFS will be added to the list.
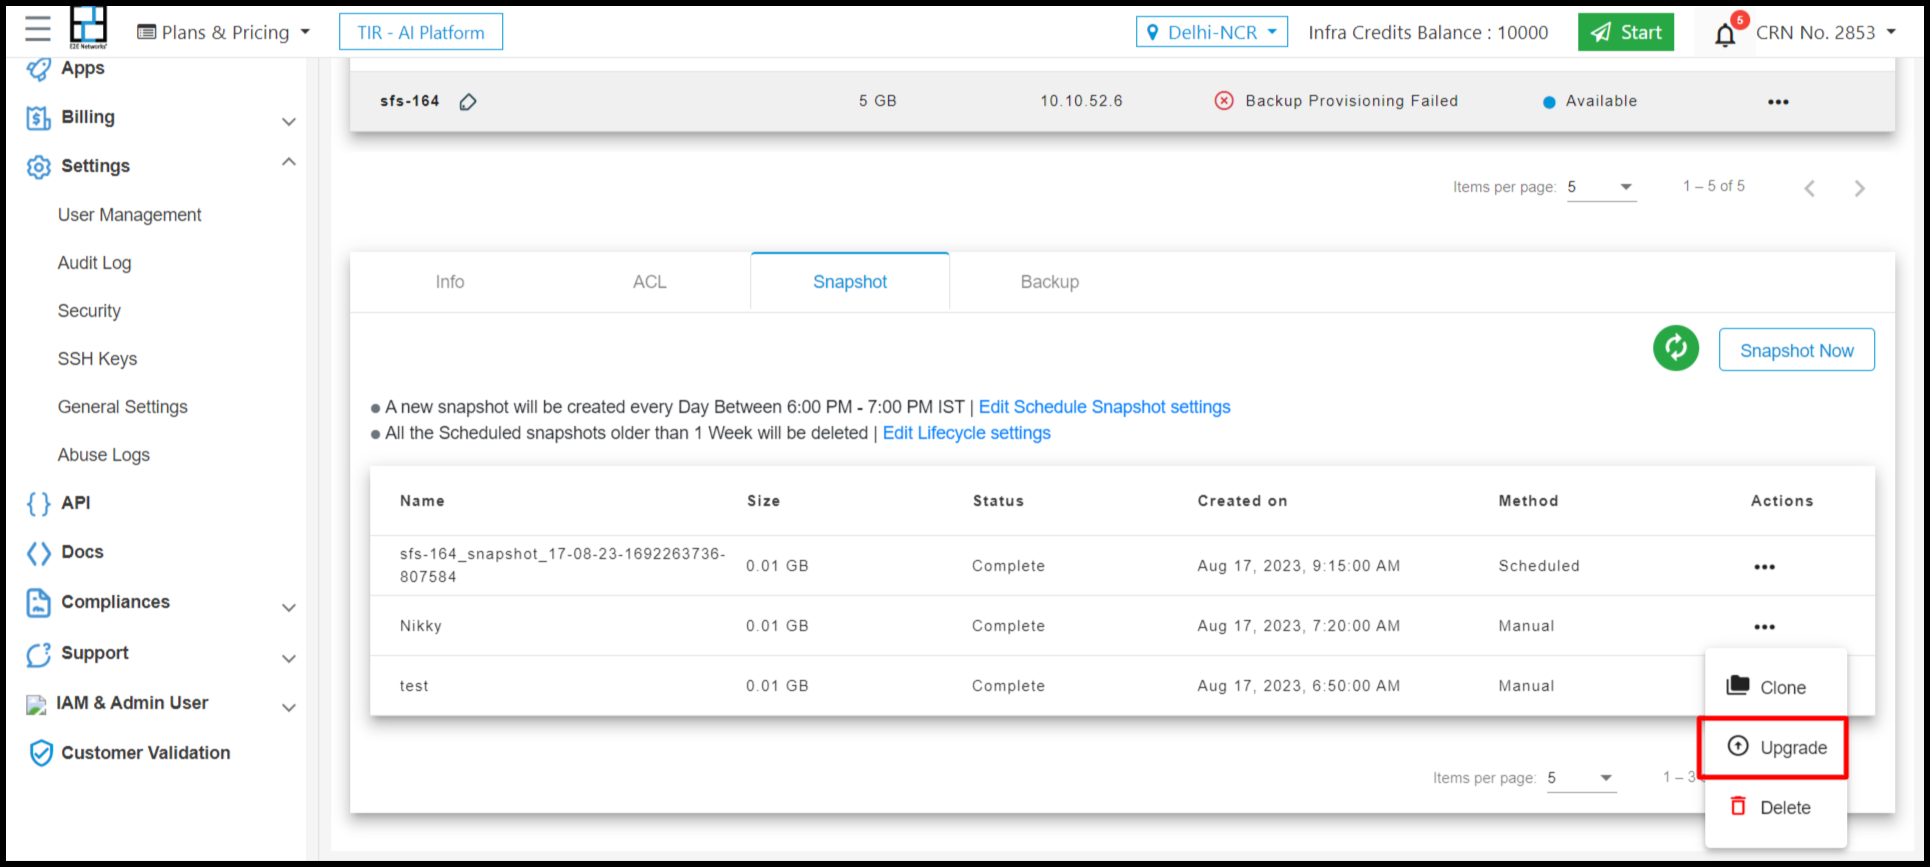
Upgrade SFS
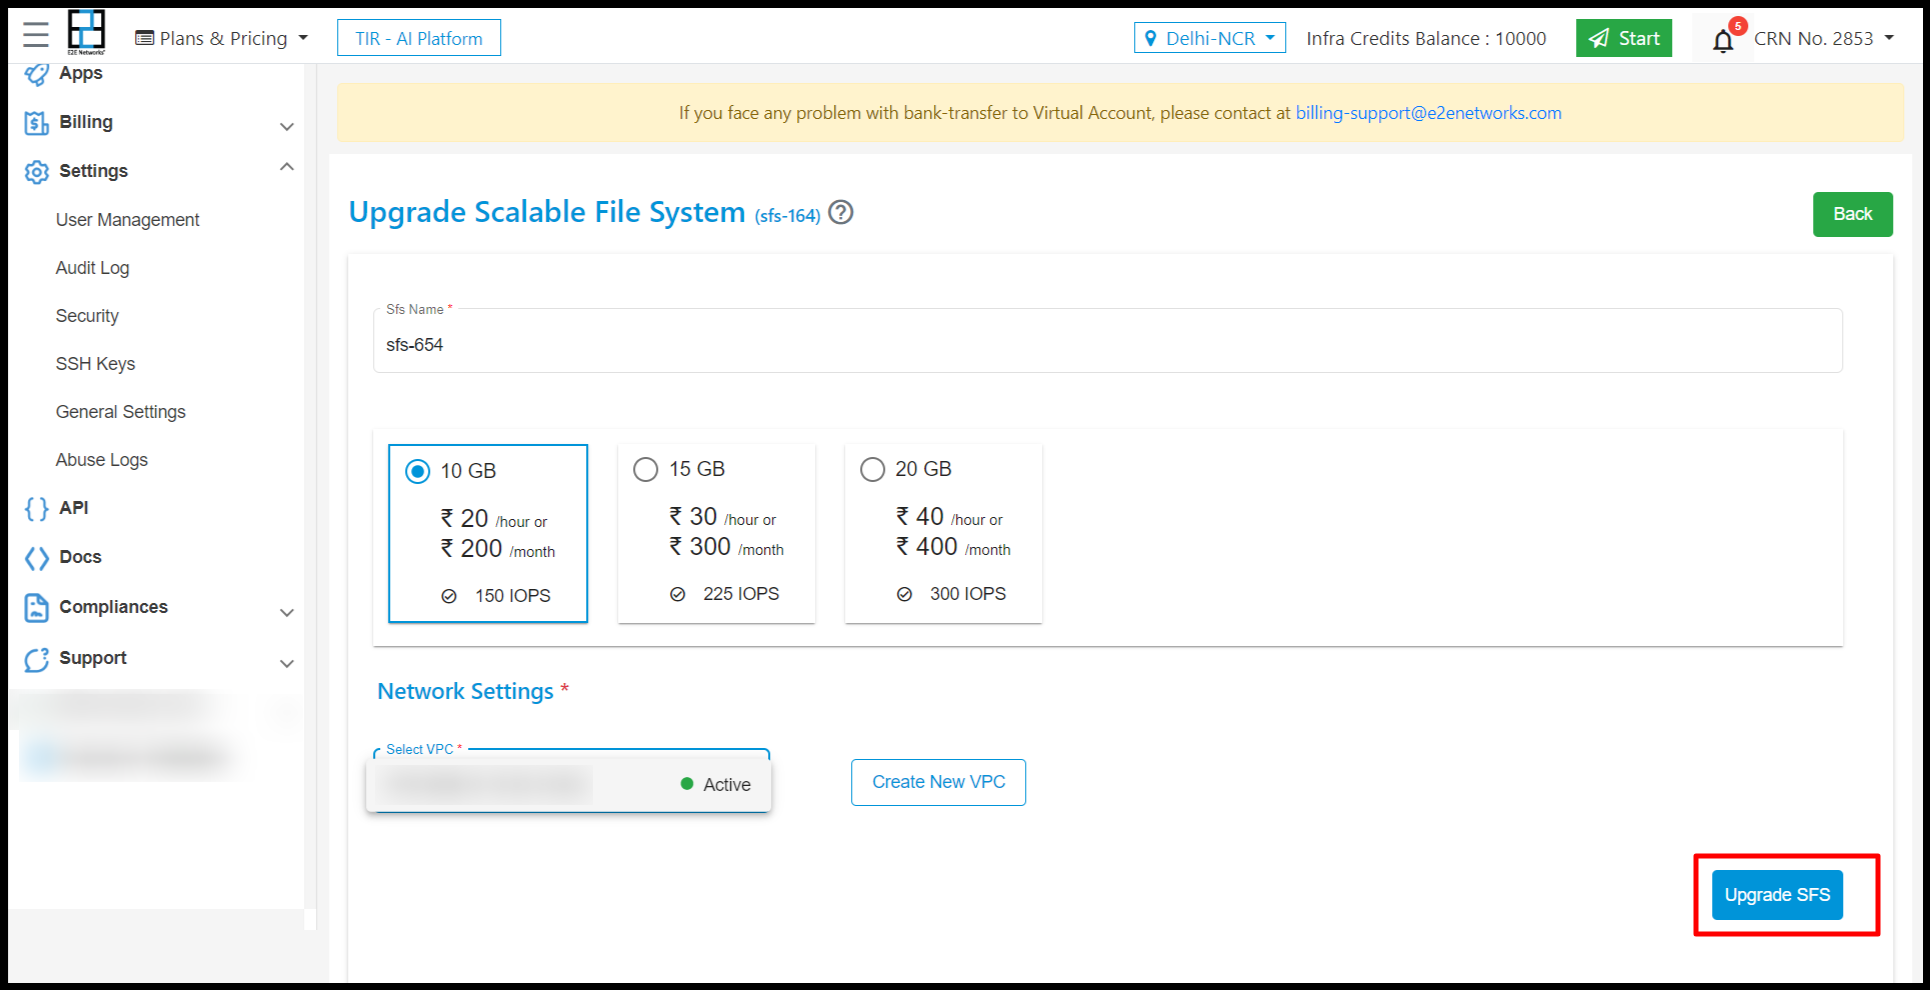
To upgrade the SFS associated with a snapshot, click on the “Upgrade” action for that snapshot.
On the upgrade page, select the desired plan for upgrading the SFS, and then click on the “Upgrade” button.
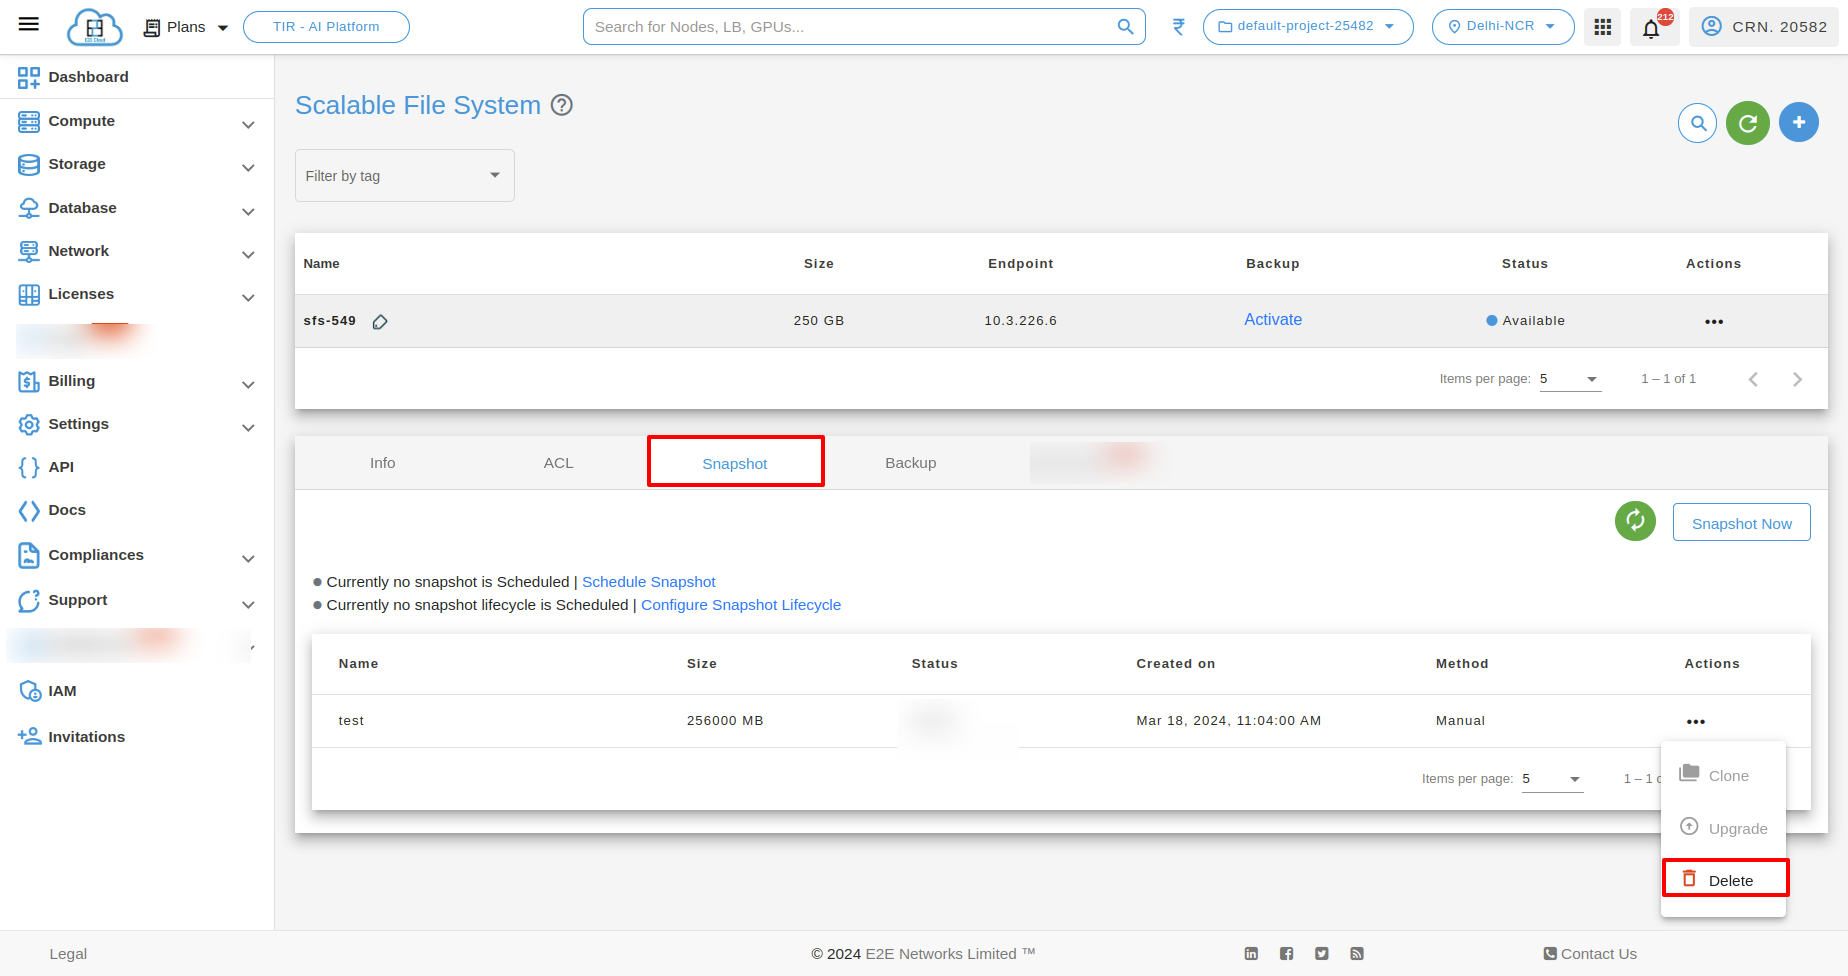
Delete a Snapshot
To delete a snapshot, click on the “Delete” action for the specific snapshot.
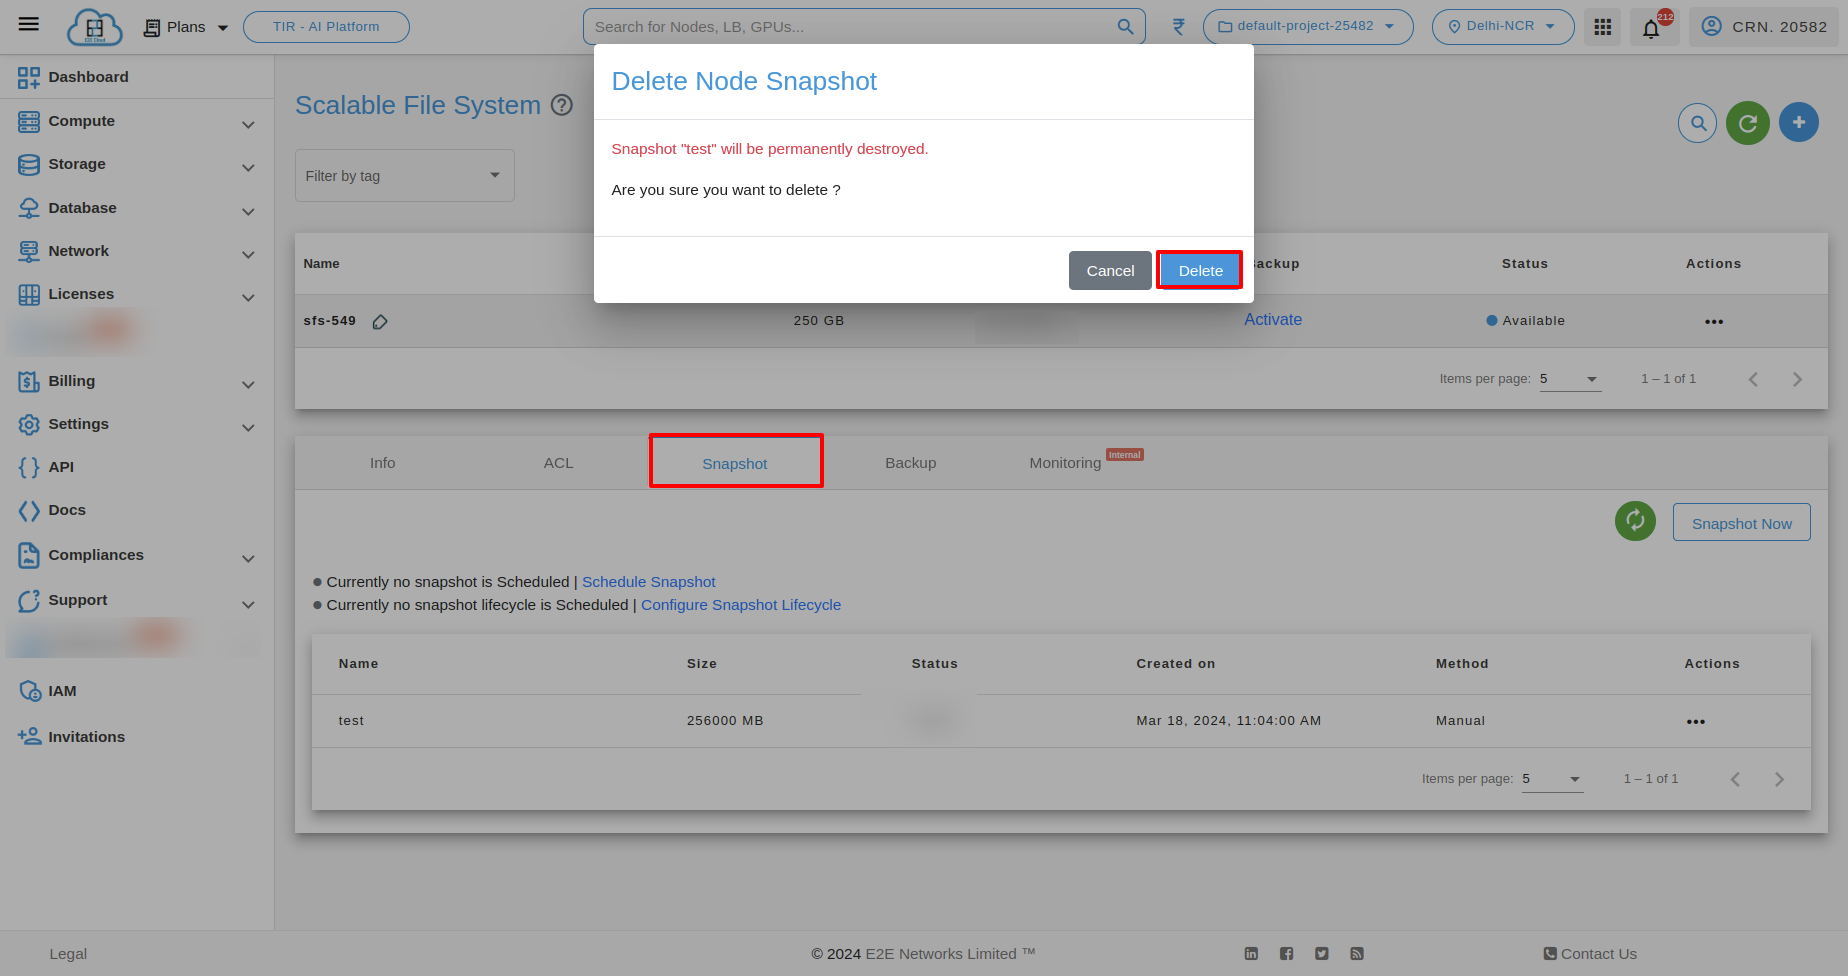
A pop-up will appear; click on the “Confirm Delete” button to permanently delete the snapshot.
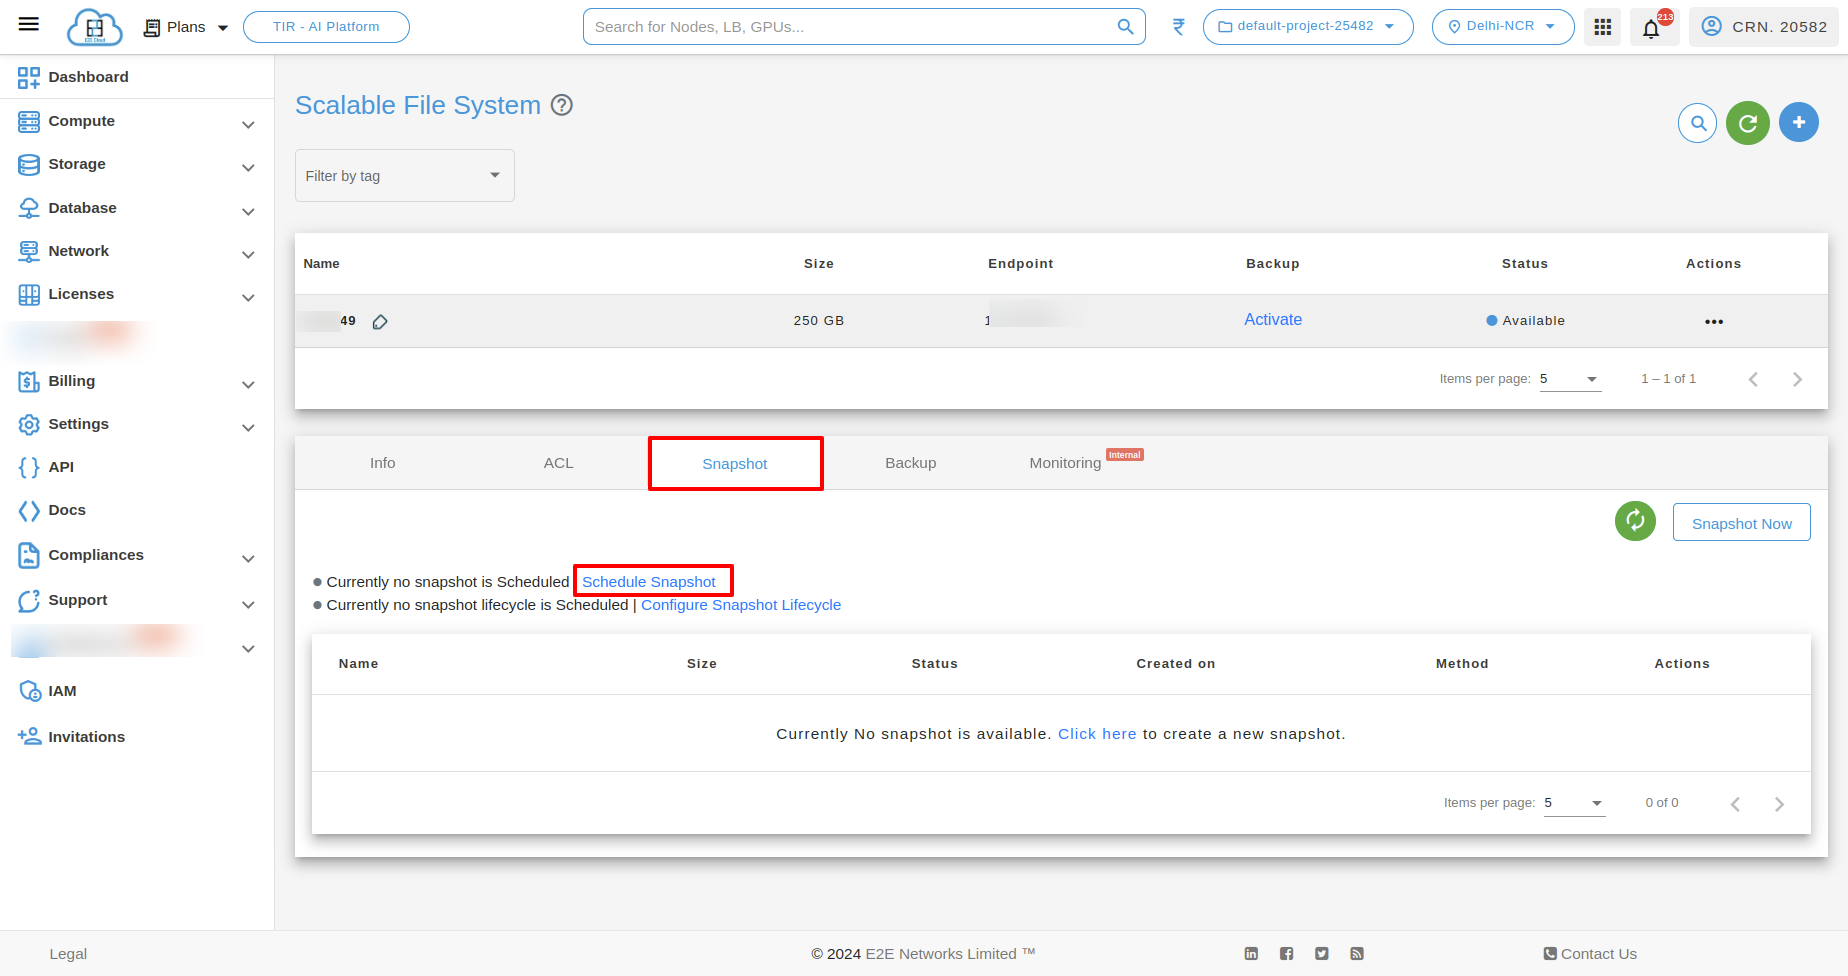
Schedule Snapshot
To schedule snapshots, click on the “Schedule Snapshot” link.
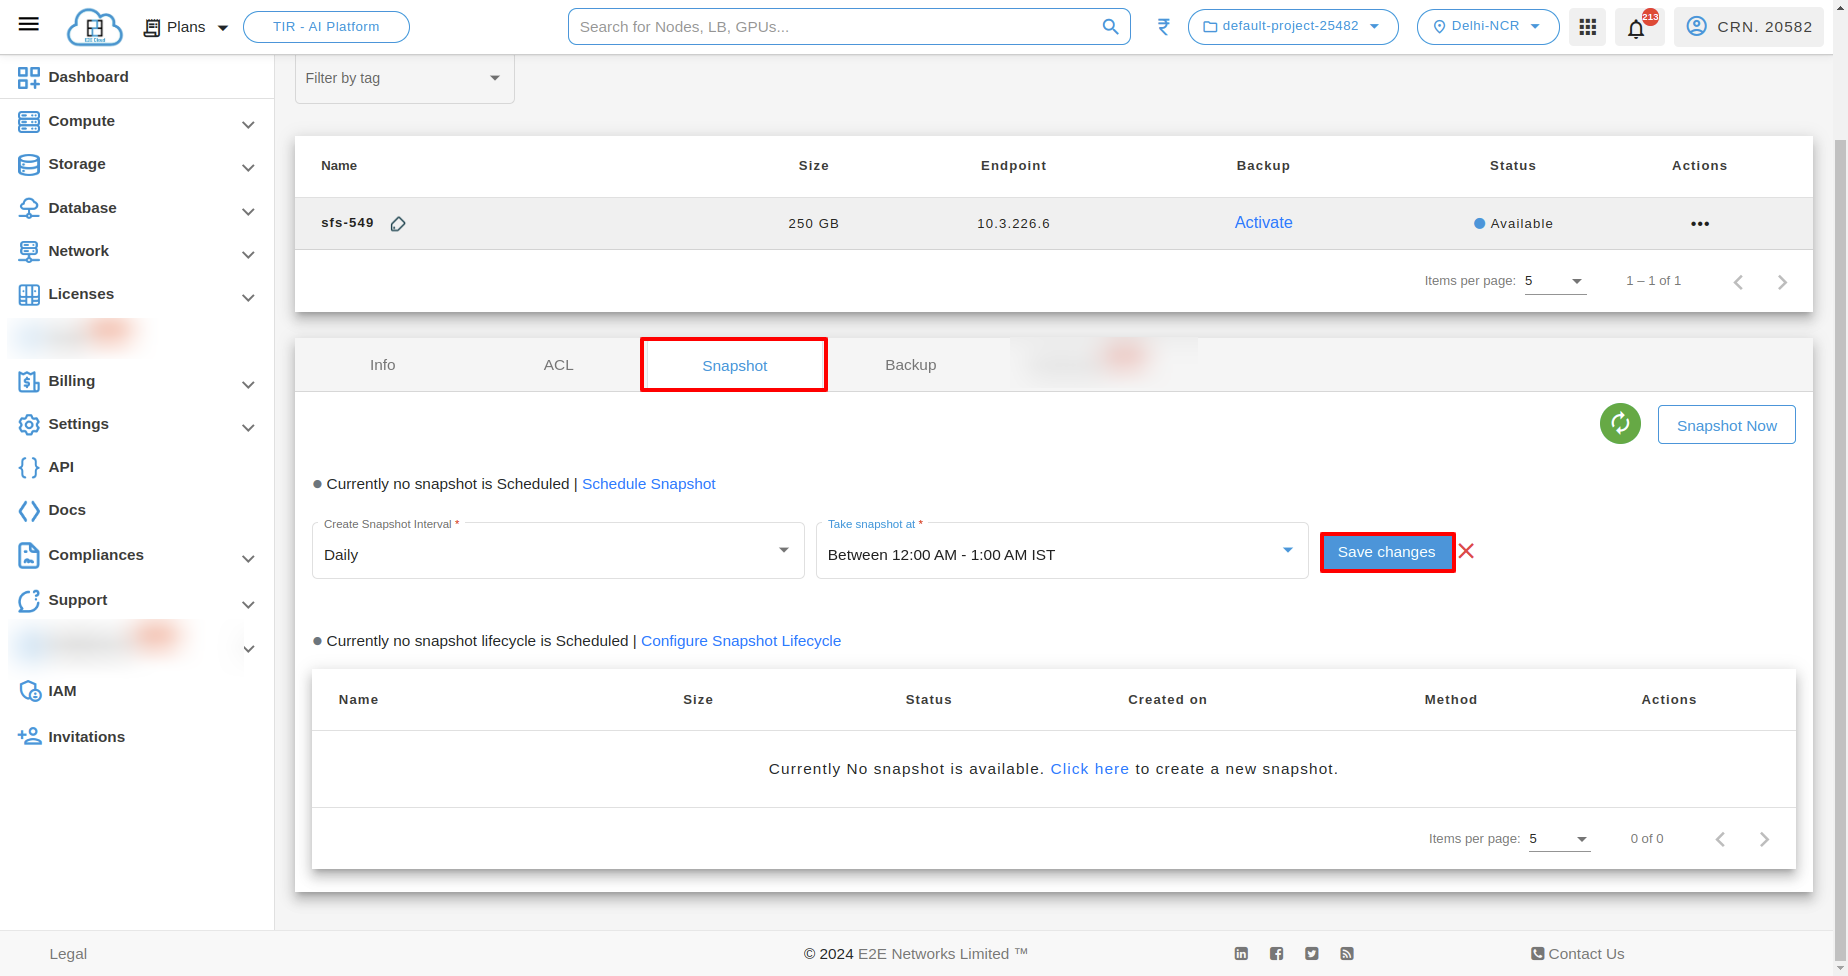
Configure the snapshot interval and specify the time when you want to take scheduled snapshots.
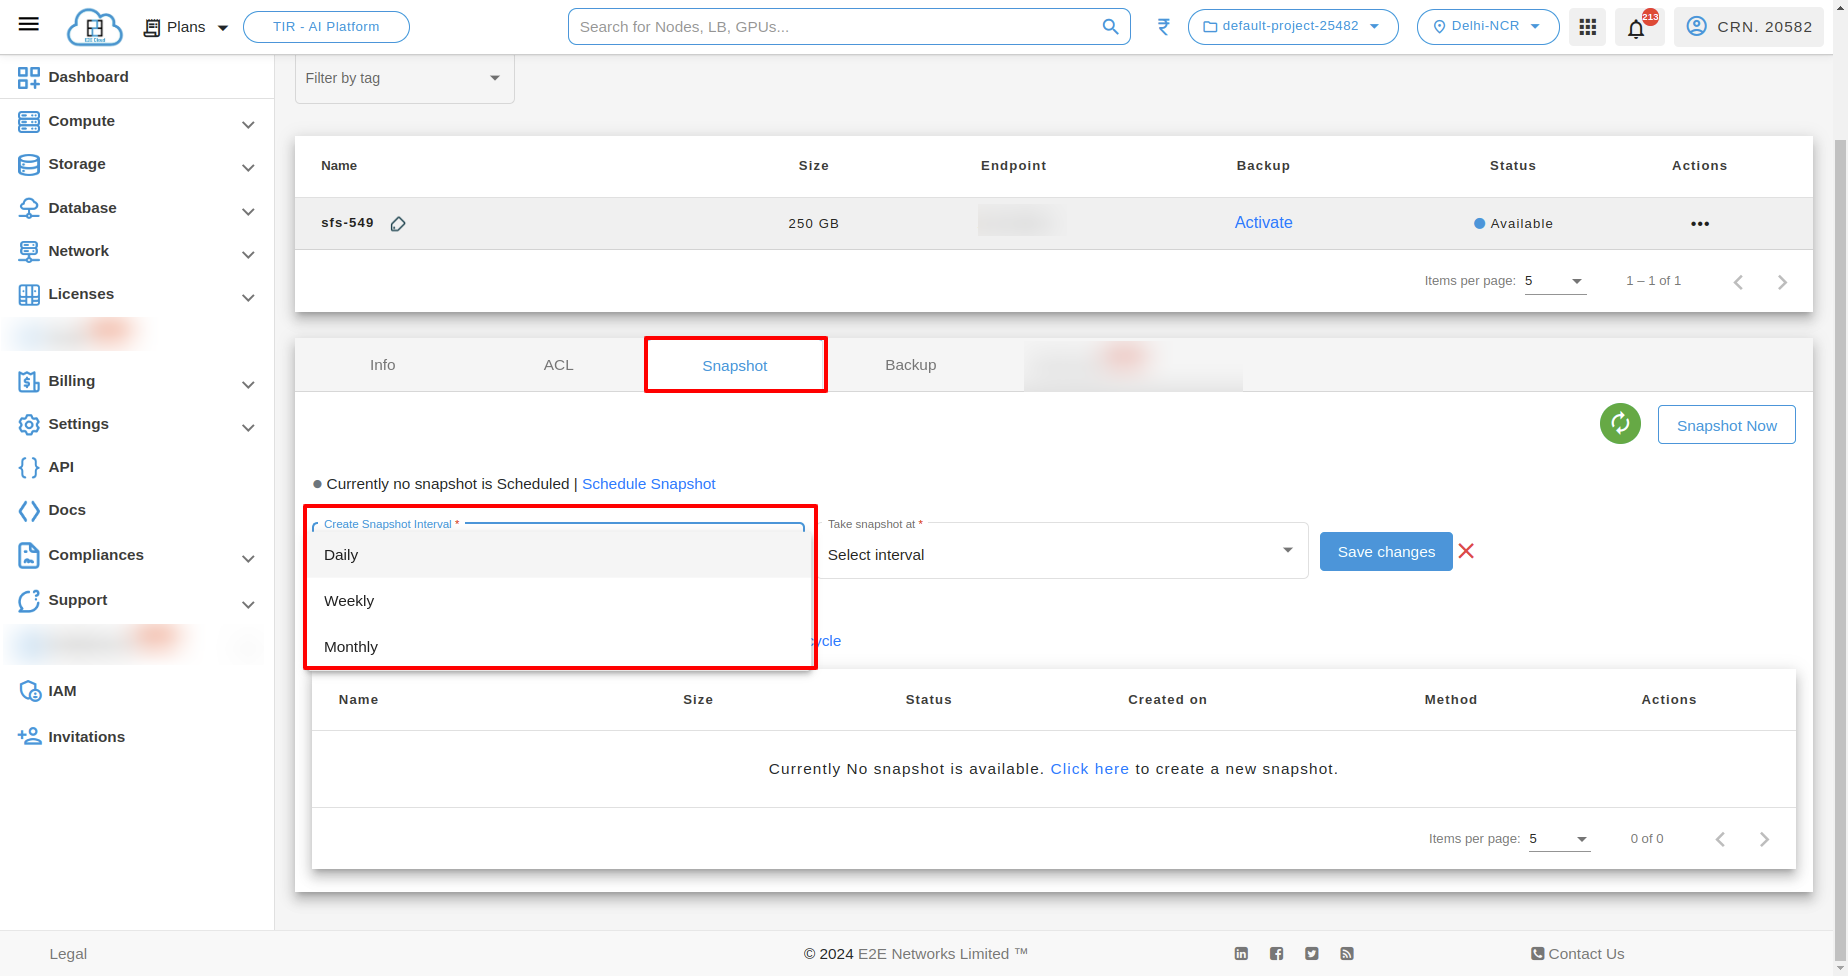
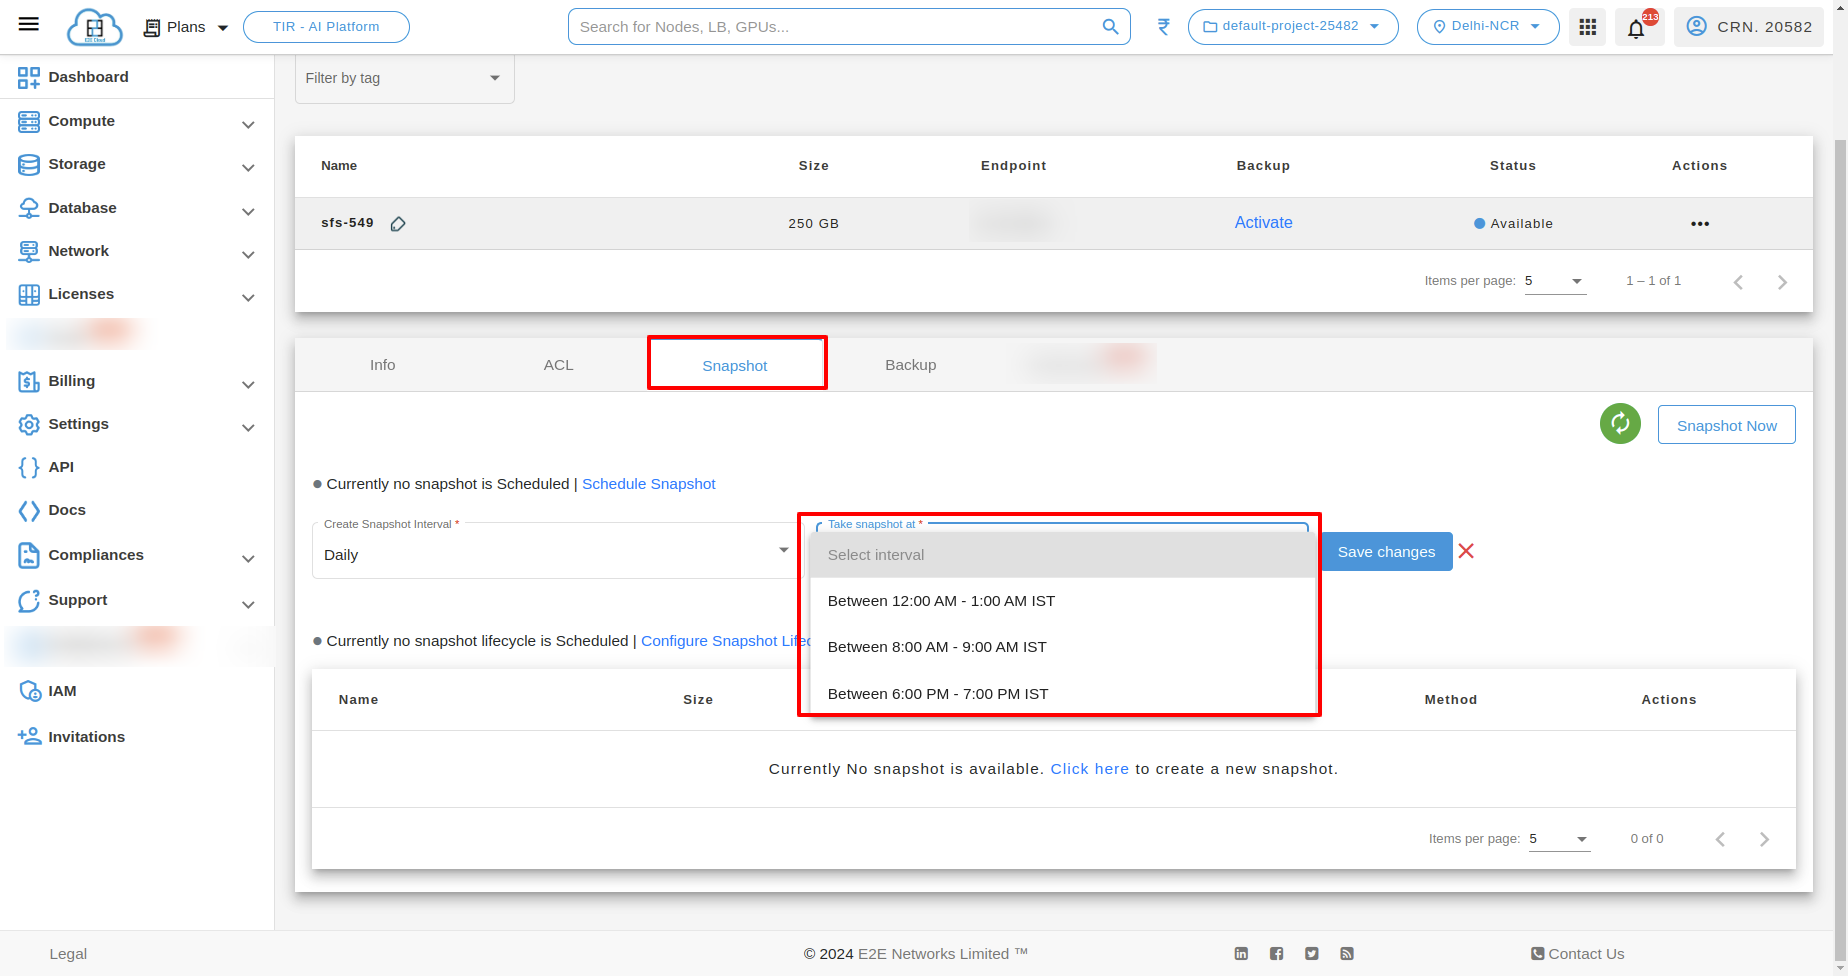
click on “Save Changes” button.
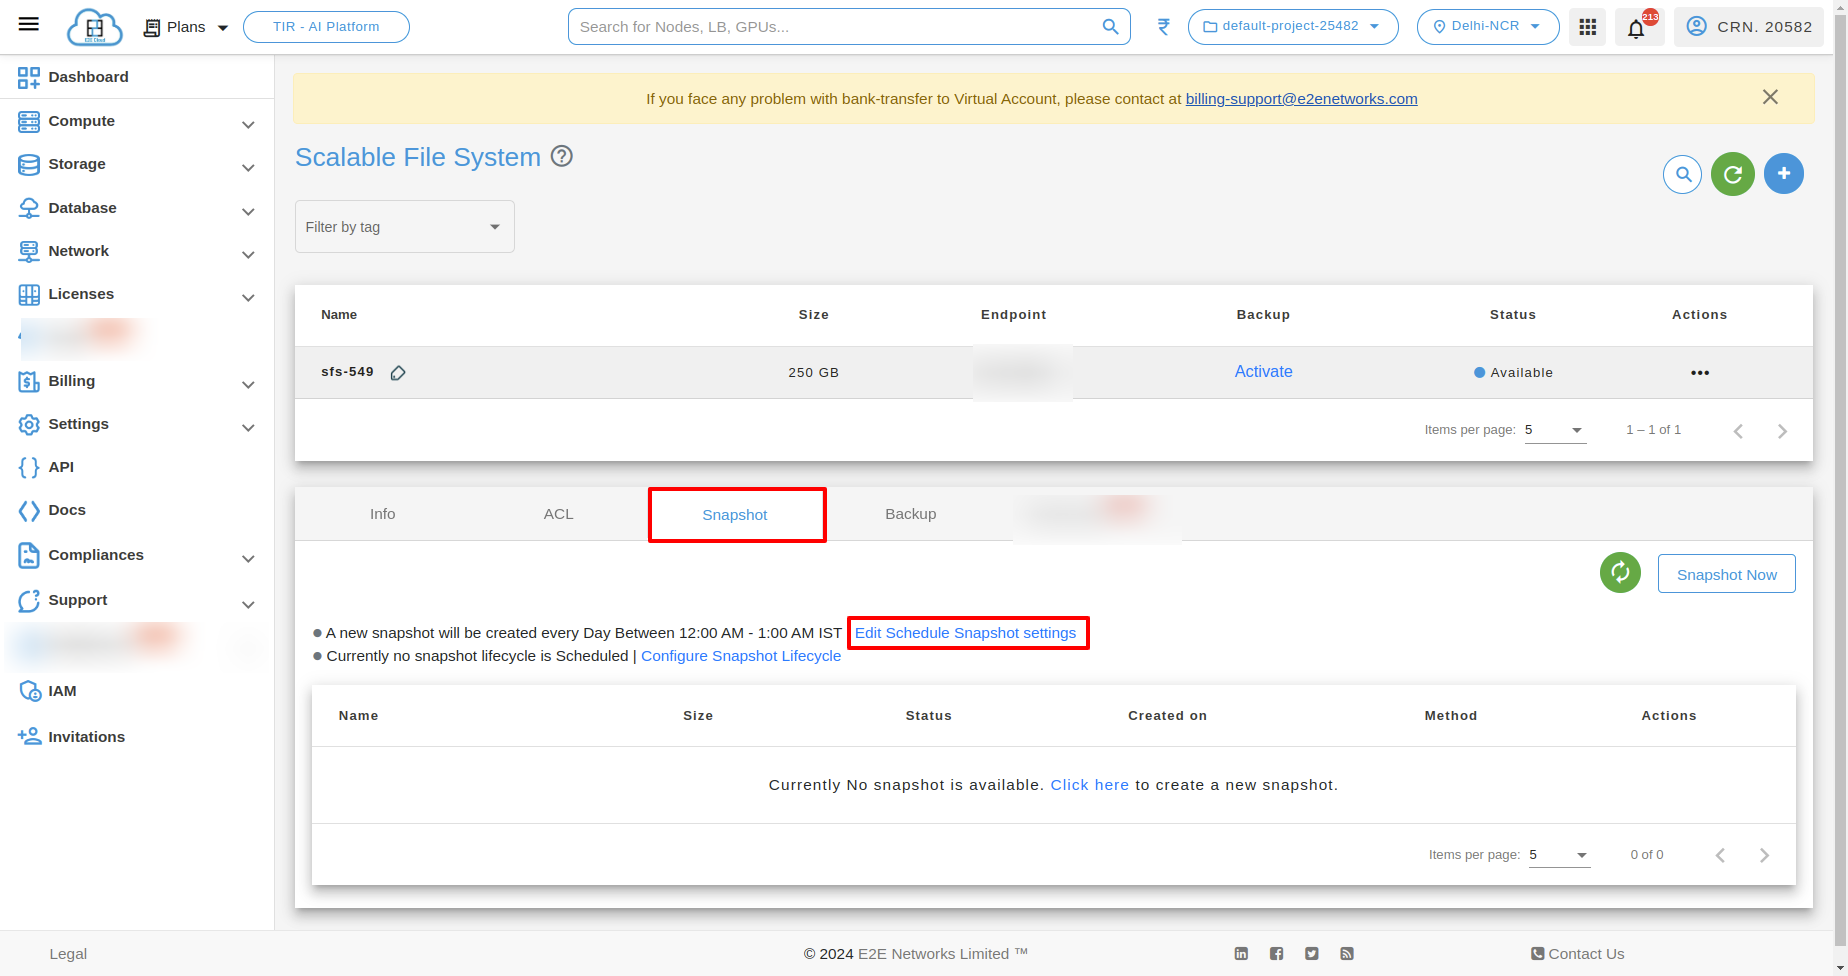
Edit Schedule Snapshot settings
After successfully scheduled snapshot, you can edit that by clicking “Edit schedule snapshot settings”.
Disable Scheduled Snapshots
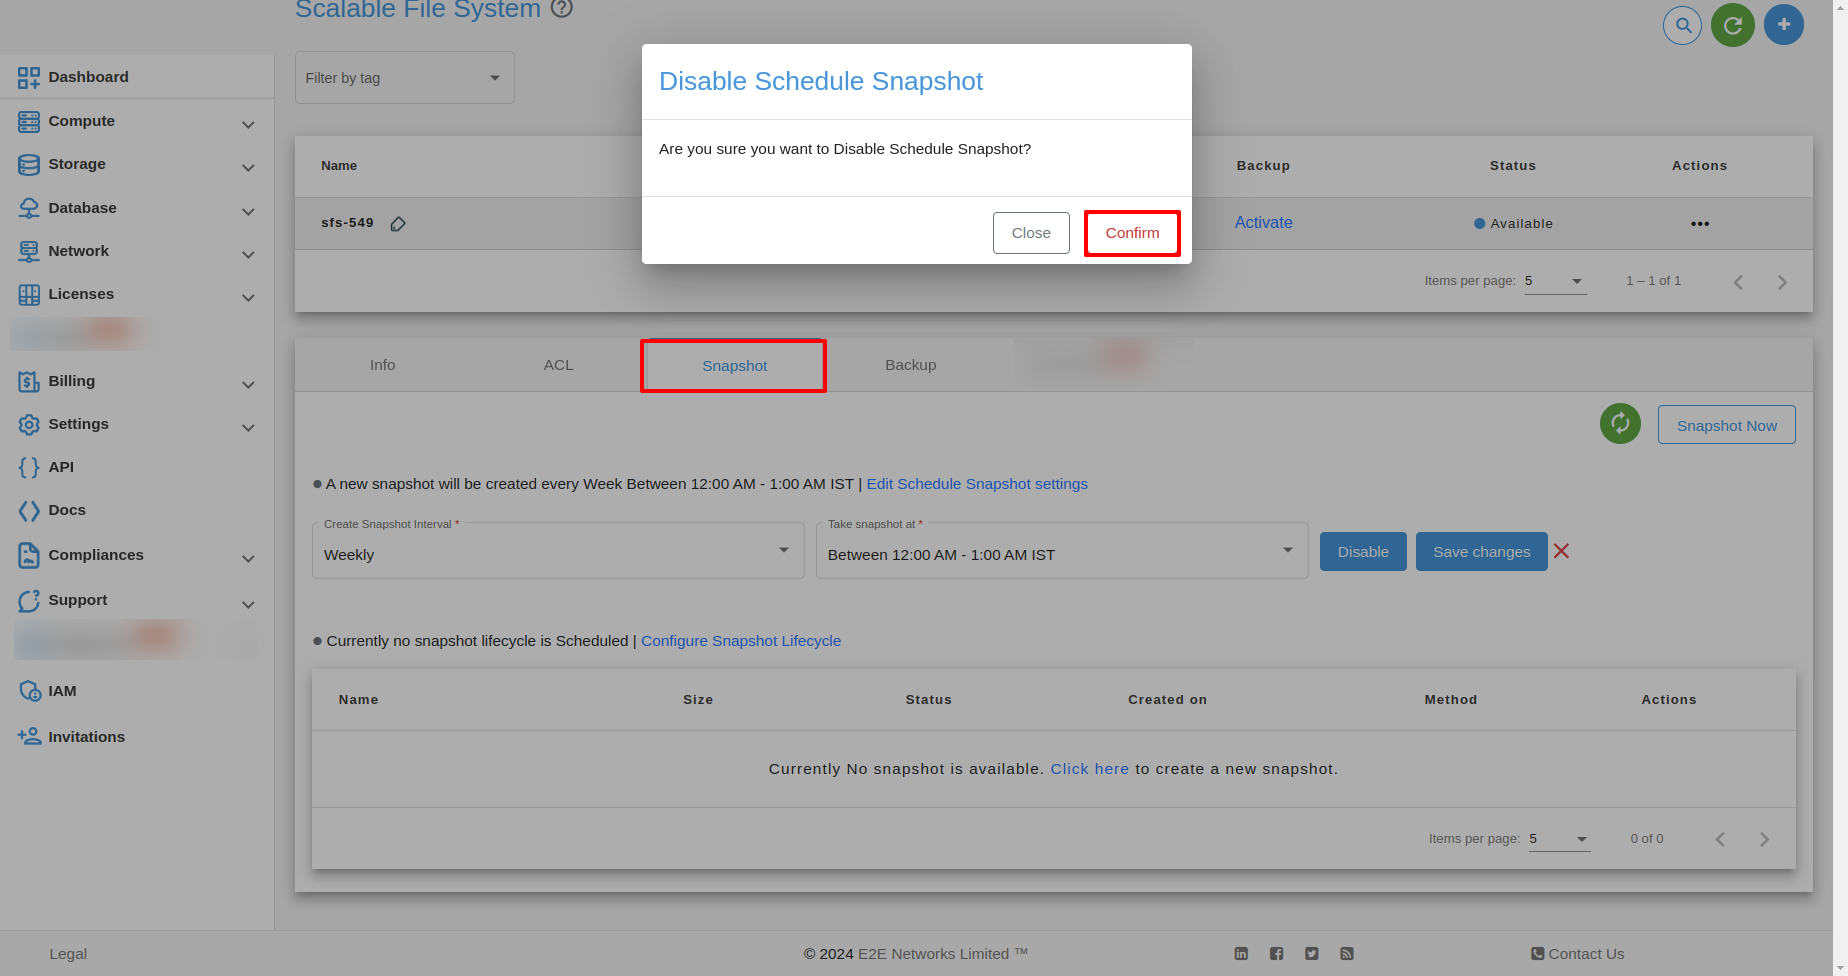
To disable Schedule Snapshot click on “Disable” button after clicking on Edit Schedule Snapshot settings.

After that a popup will appear for Disable Schedule Snapshot then click on Confirm.
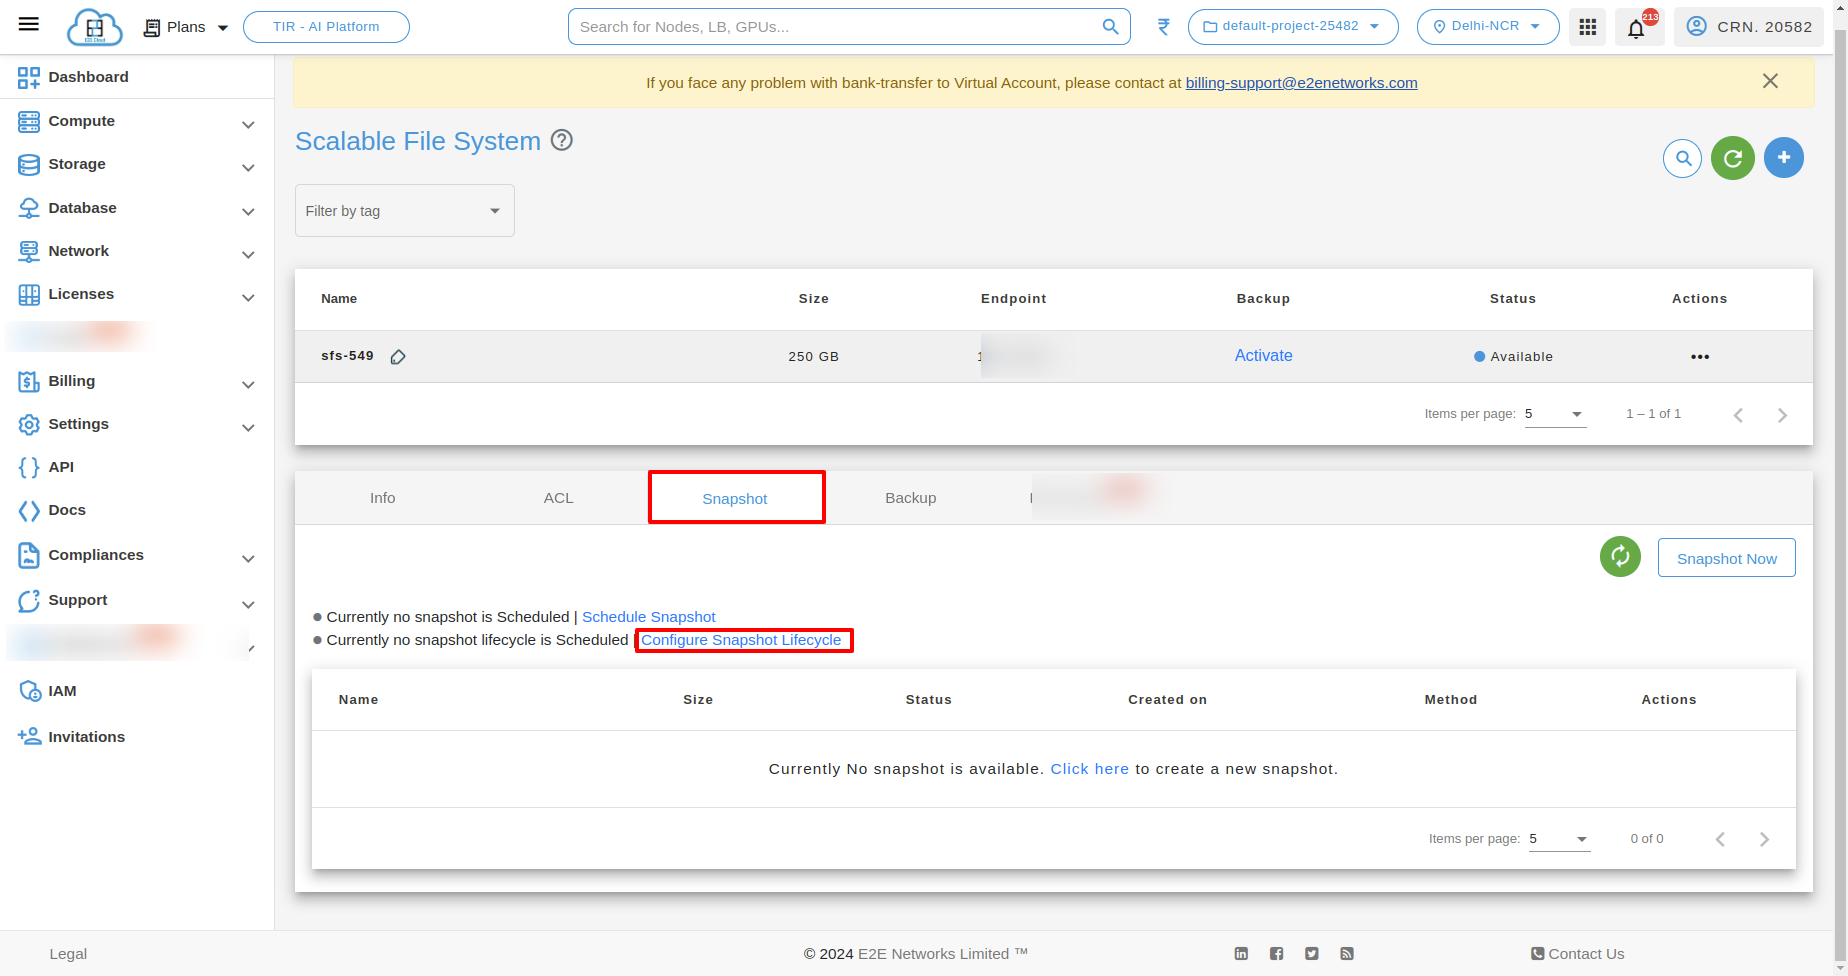
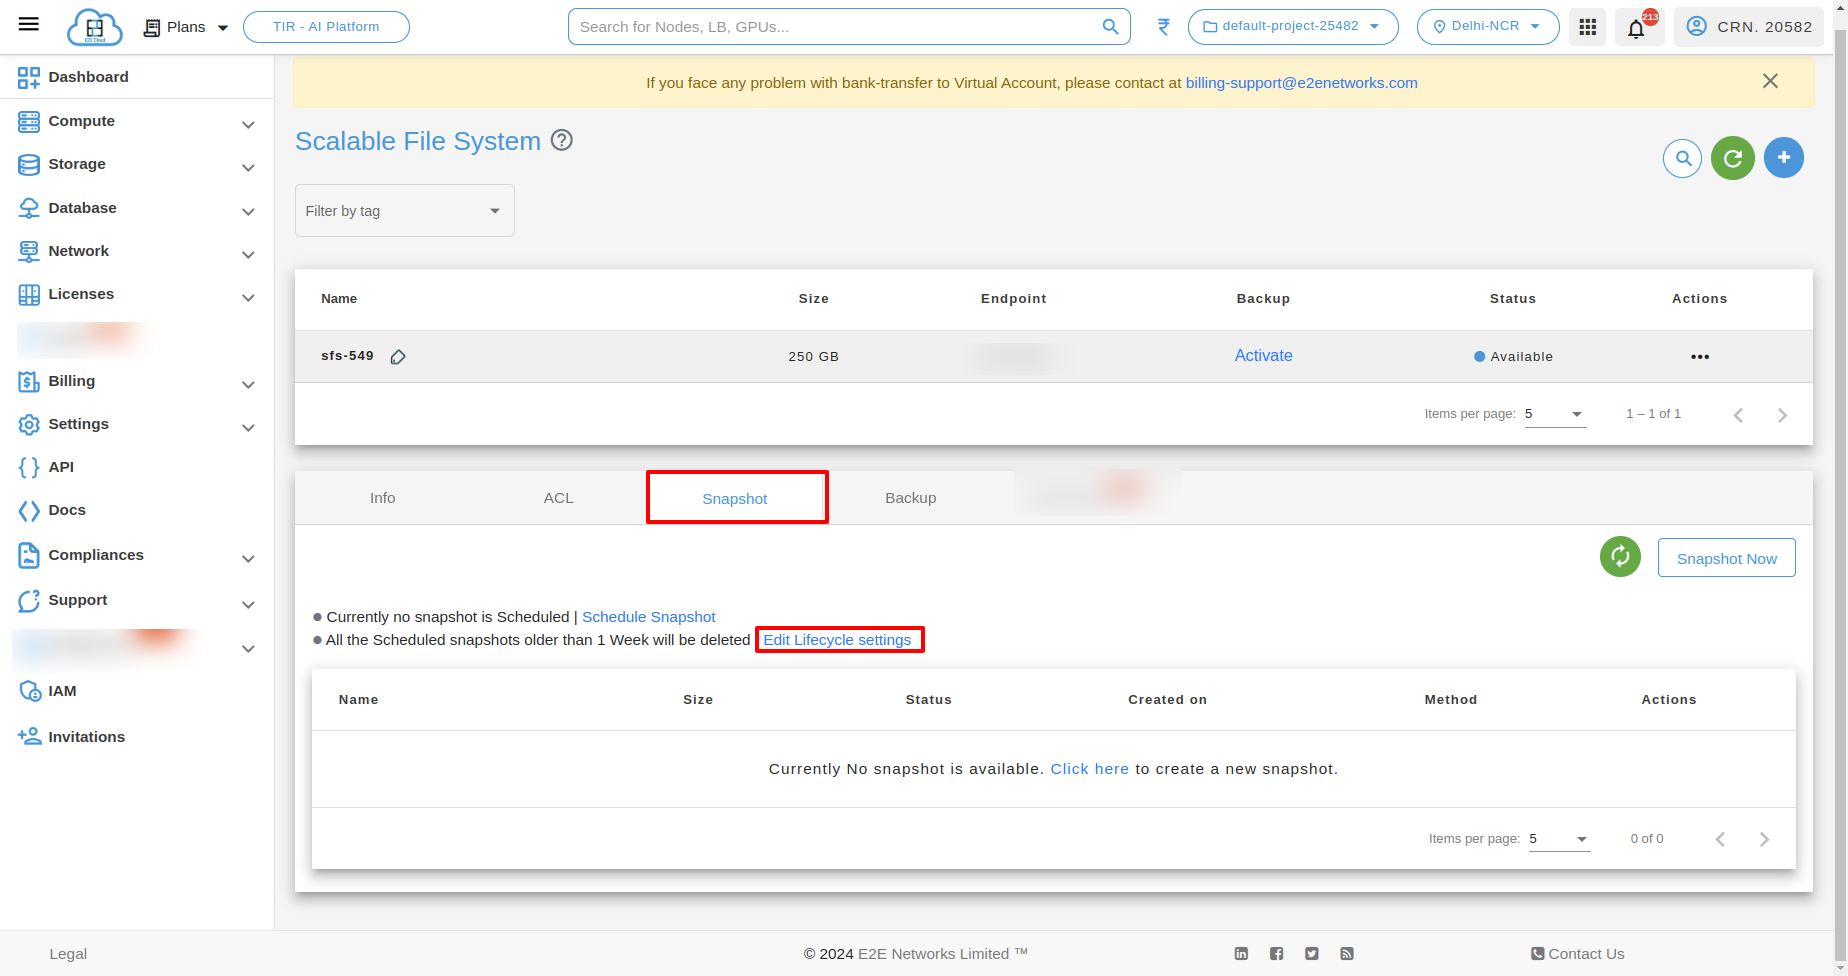
Configure Snapshot Lifecycle
To Configure Snapshot Lifecycle, click on “Configure Snapshot Lifecycle”
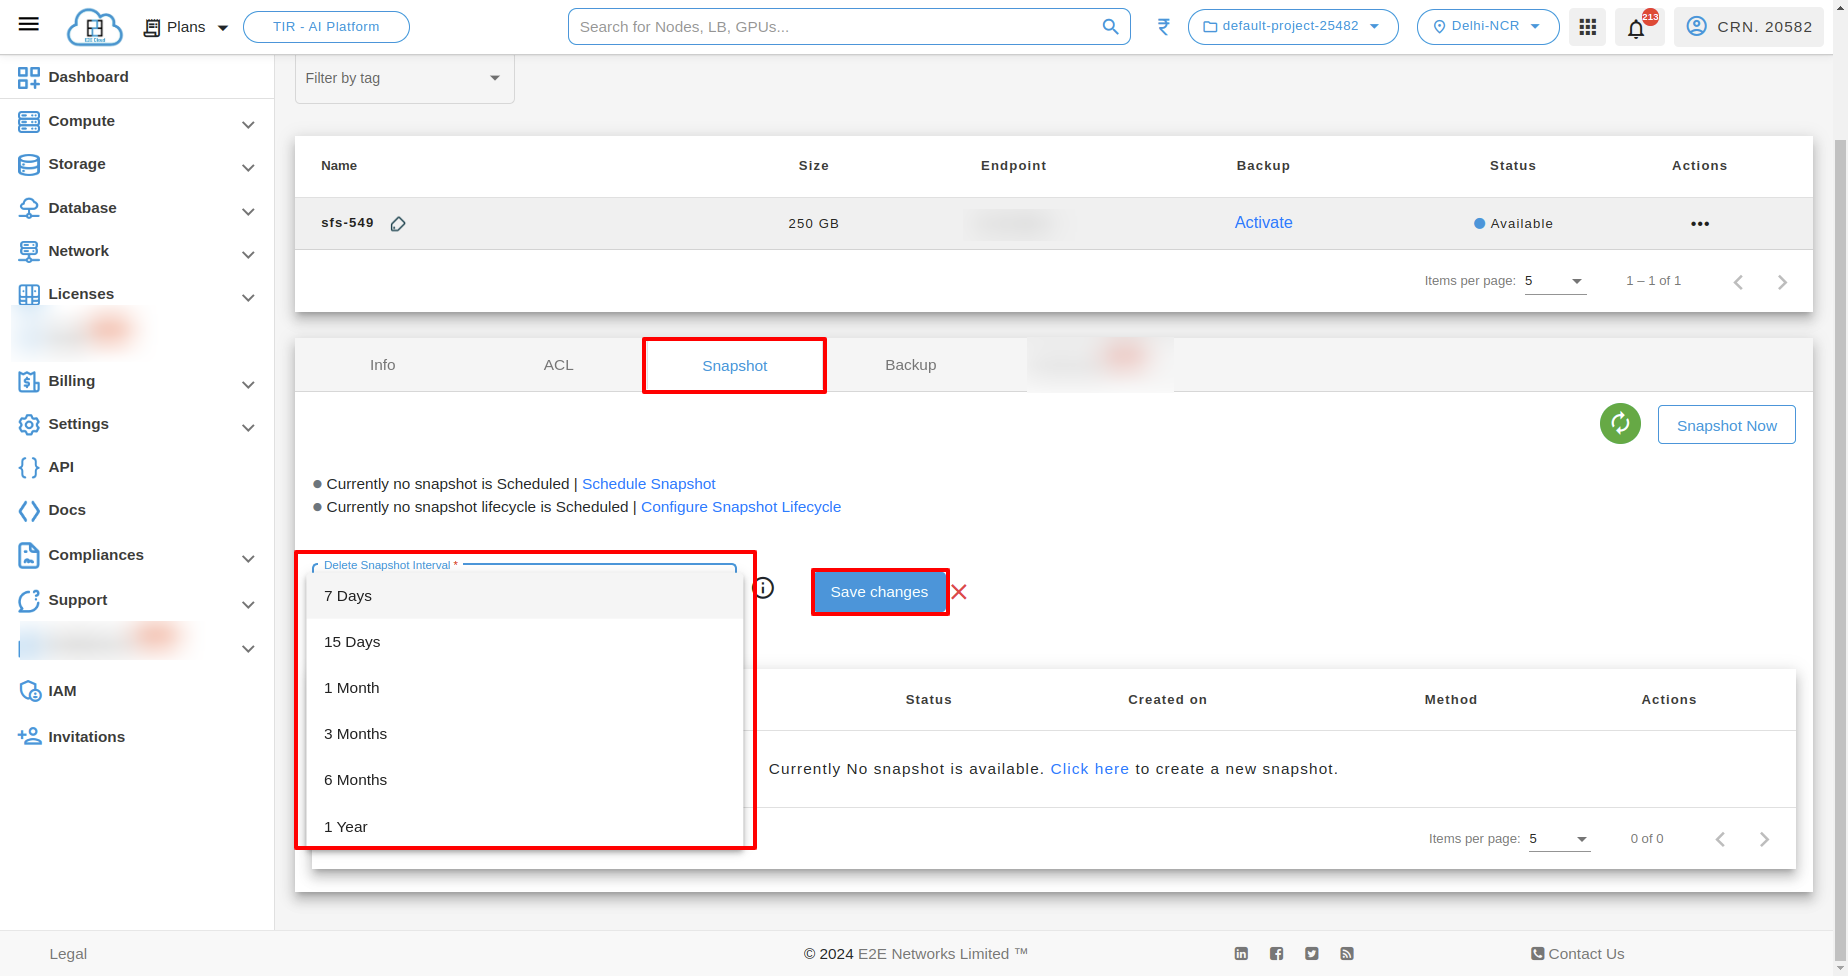
Select the interval after which the scheduled snapshots should be deleted.
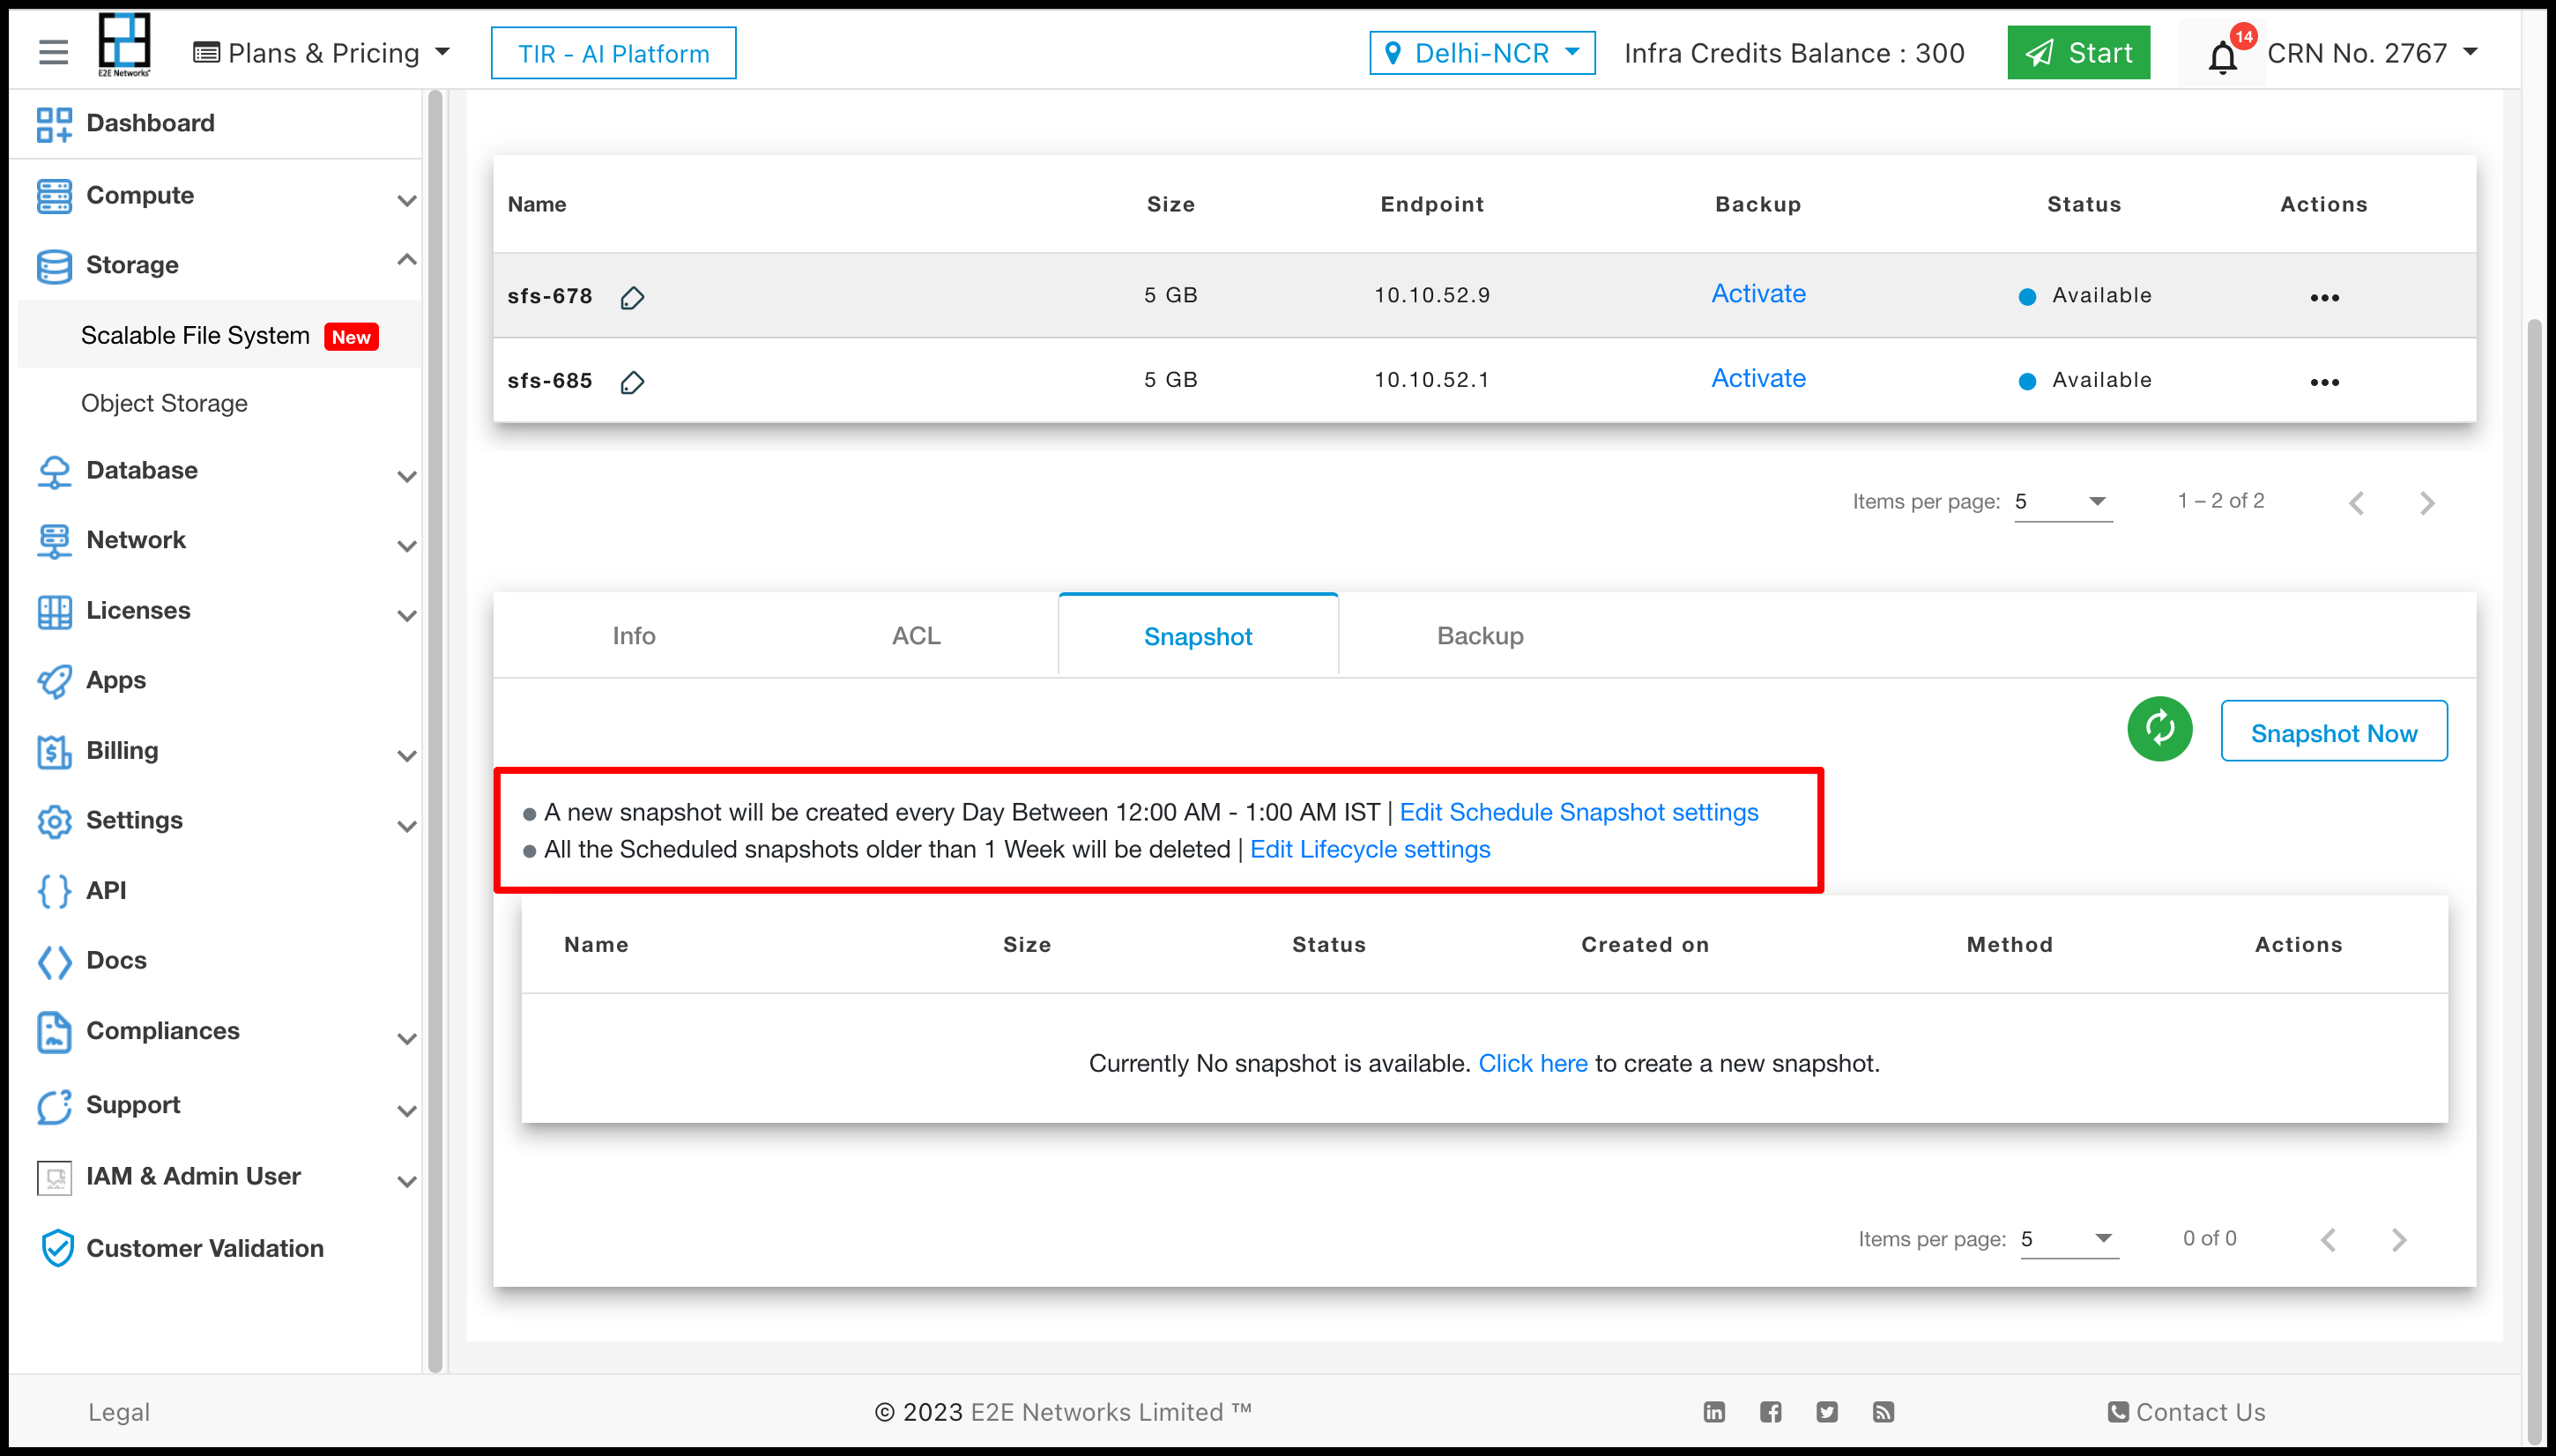
Edit lifecycle settings
After successfully scheduled snapshot, you can edit that by clicking “Edit schedule snapshot settings”.
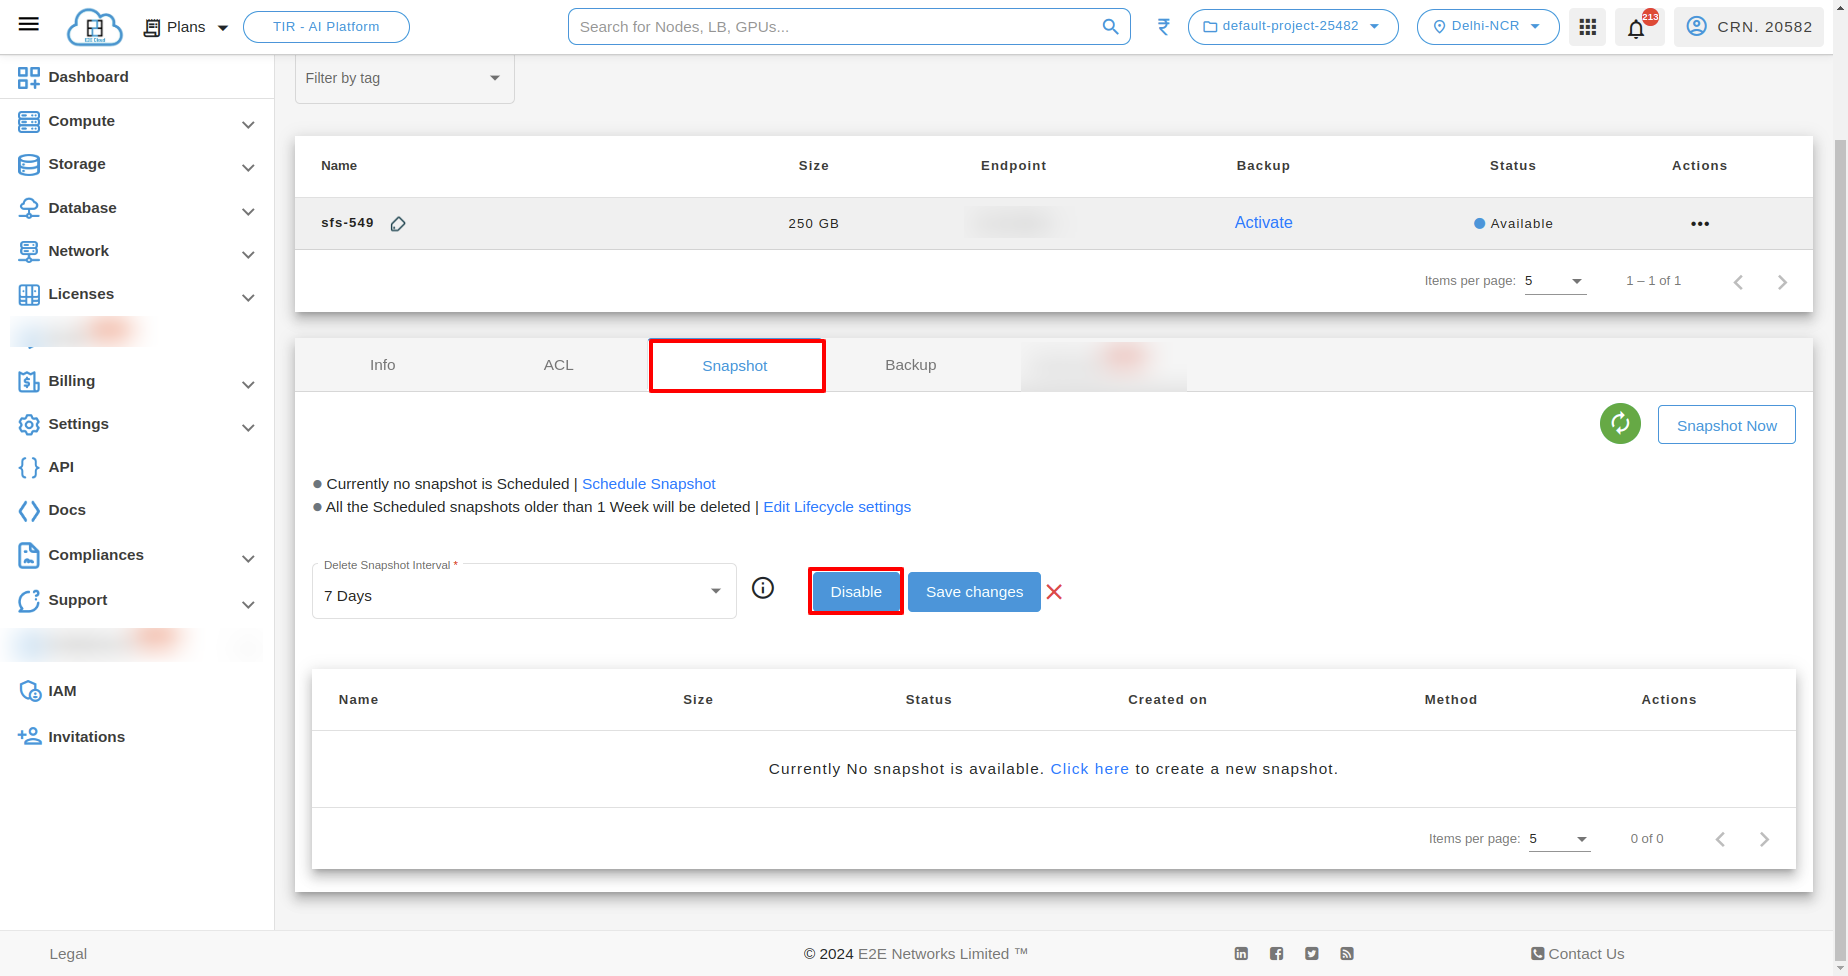
Disable Scheduled Snapshots
To disable Schedule Snapshot click on “Disable” button after clicking on Edit Schedule Snapshot settings.
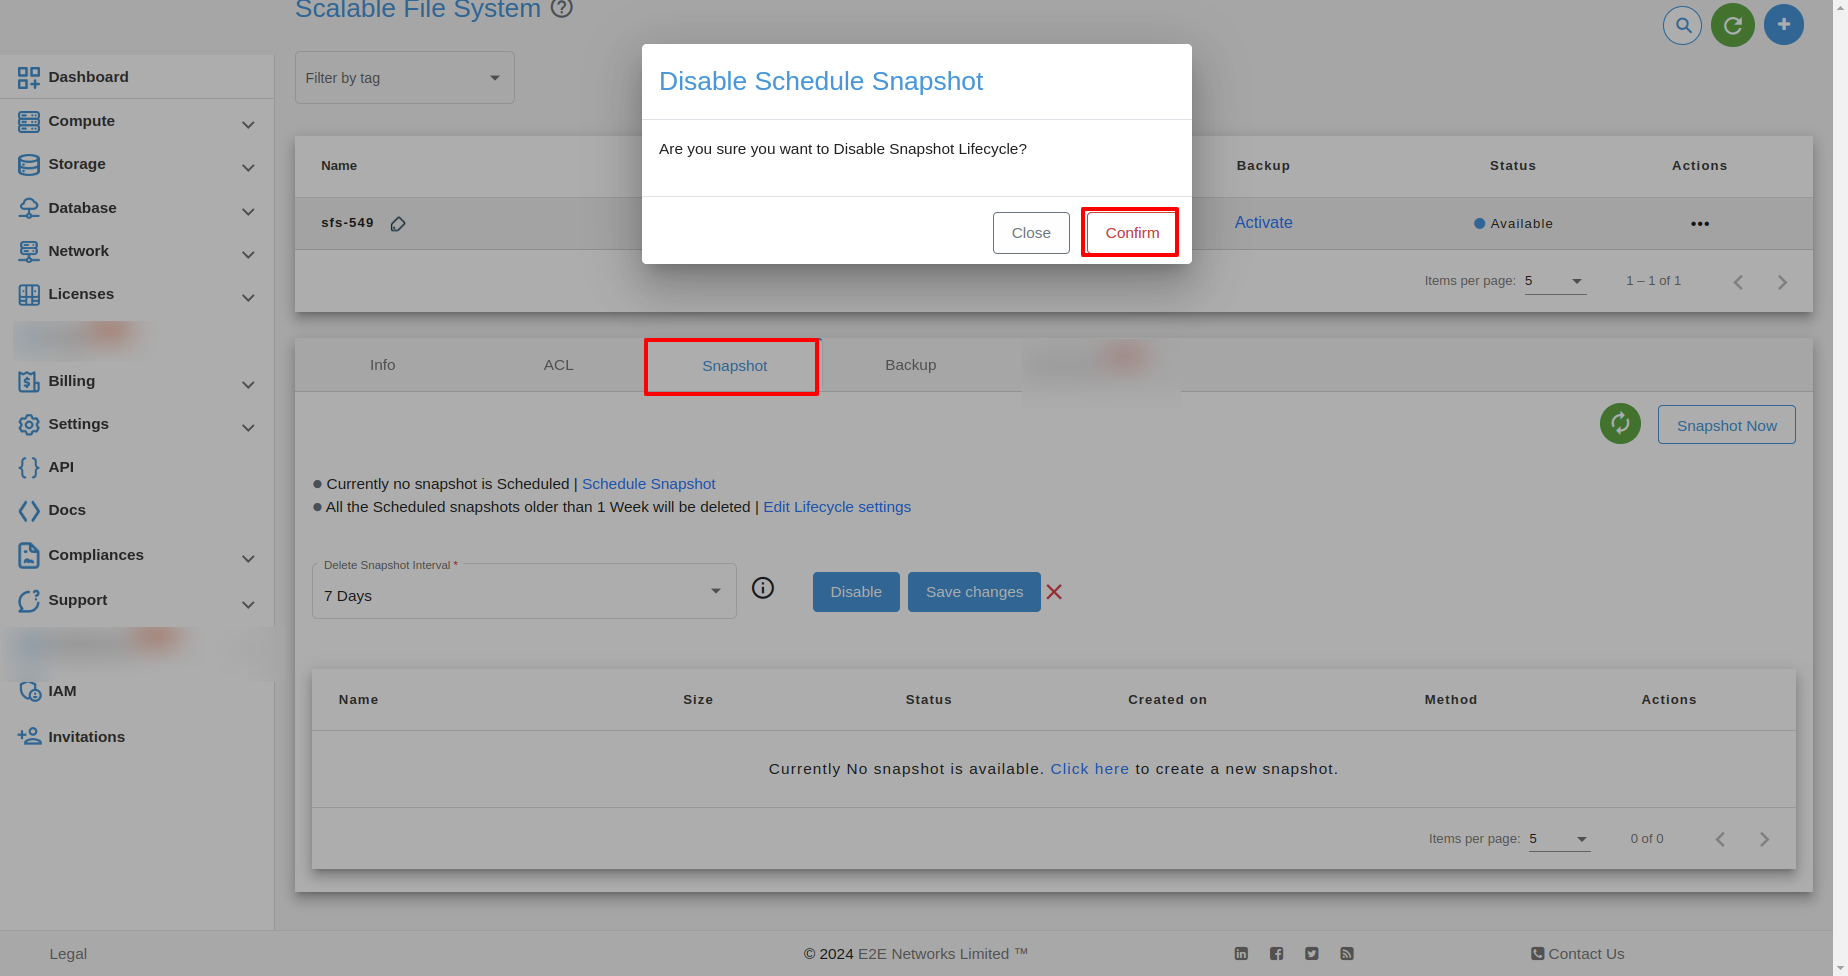
After that a popup will appear for Disable Schedule Snapshot then click on Confirm.
Note
By following these steps, you can effectively manage snapshots, perform various actions, and ensure the data integrity and availability of your files within the SFC service.
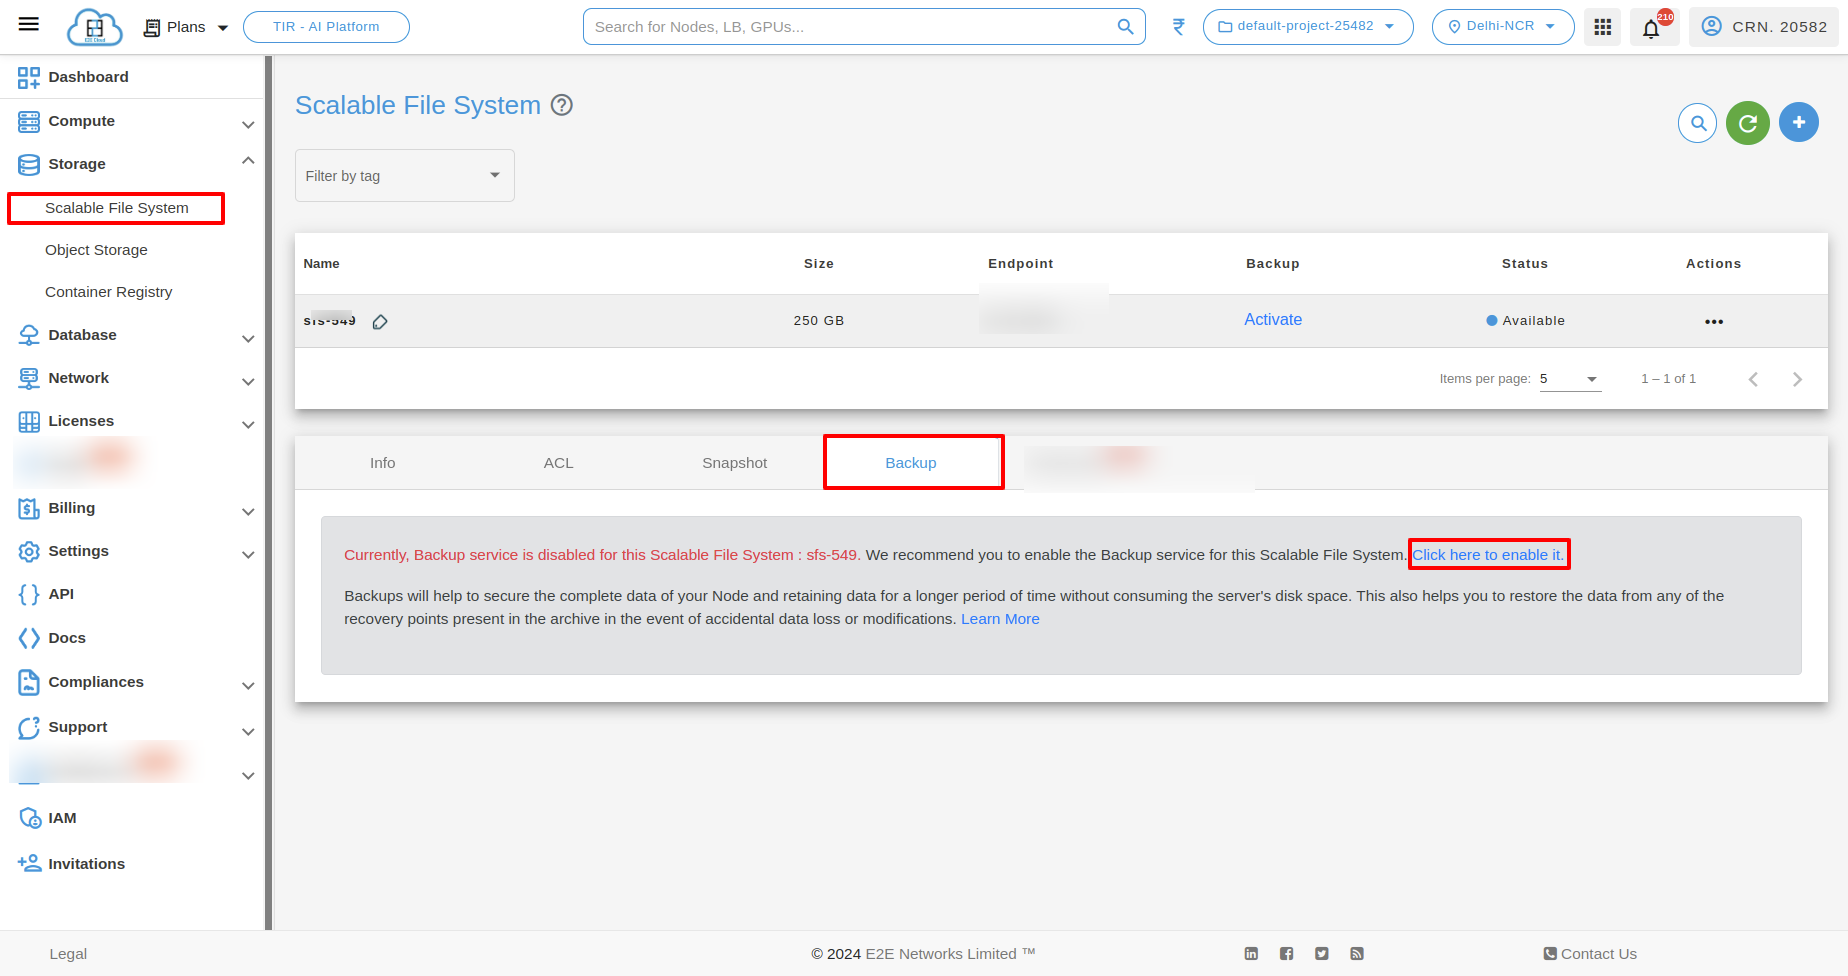
Backup
To enable the backup of any SFS, select a particular SFS, go to the Backup tab, and click on “Click here to enable it.
Activate Backup popup will open, you can select a particular backup time and click on “Activate” button.
Once the backup service is enabled and status changes from ‘First Run Pending’ to ‘Backup Available’.
Backup Now

