Manage GPU with E2E
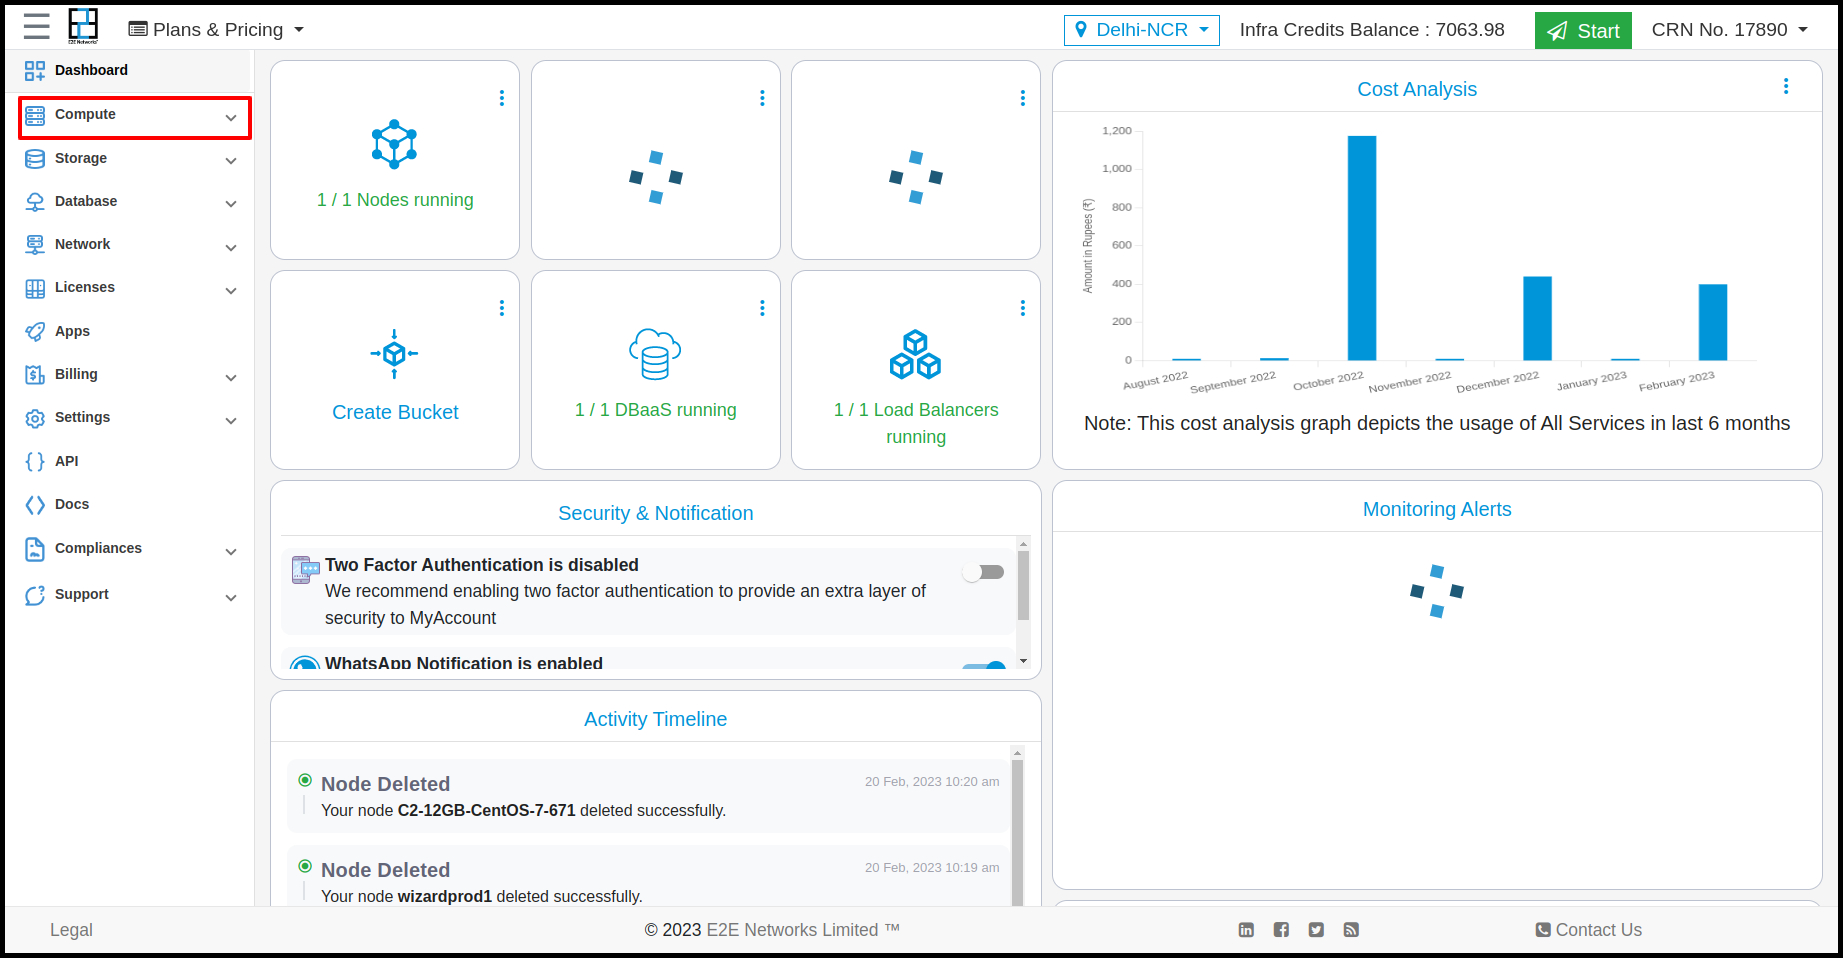
To create a GPU, first click on “Compute,” then select “GPU.”

After clicking on “GPU,” all GPU categories will be displayed. You can then choose the machine that meets your requirements.
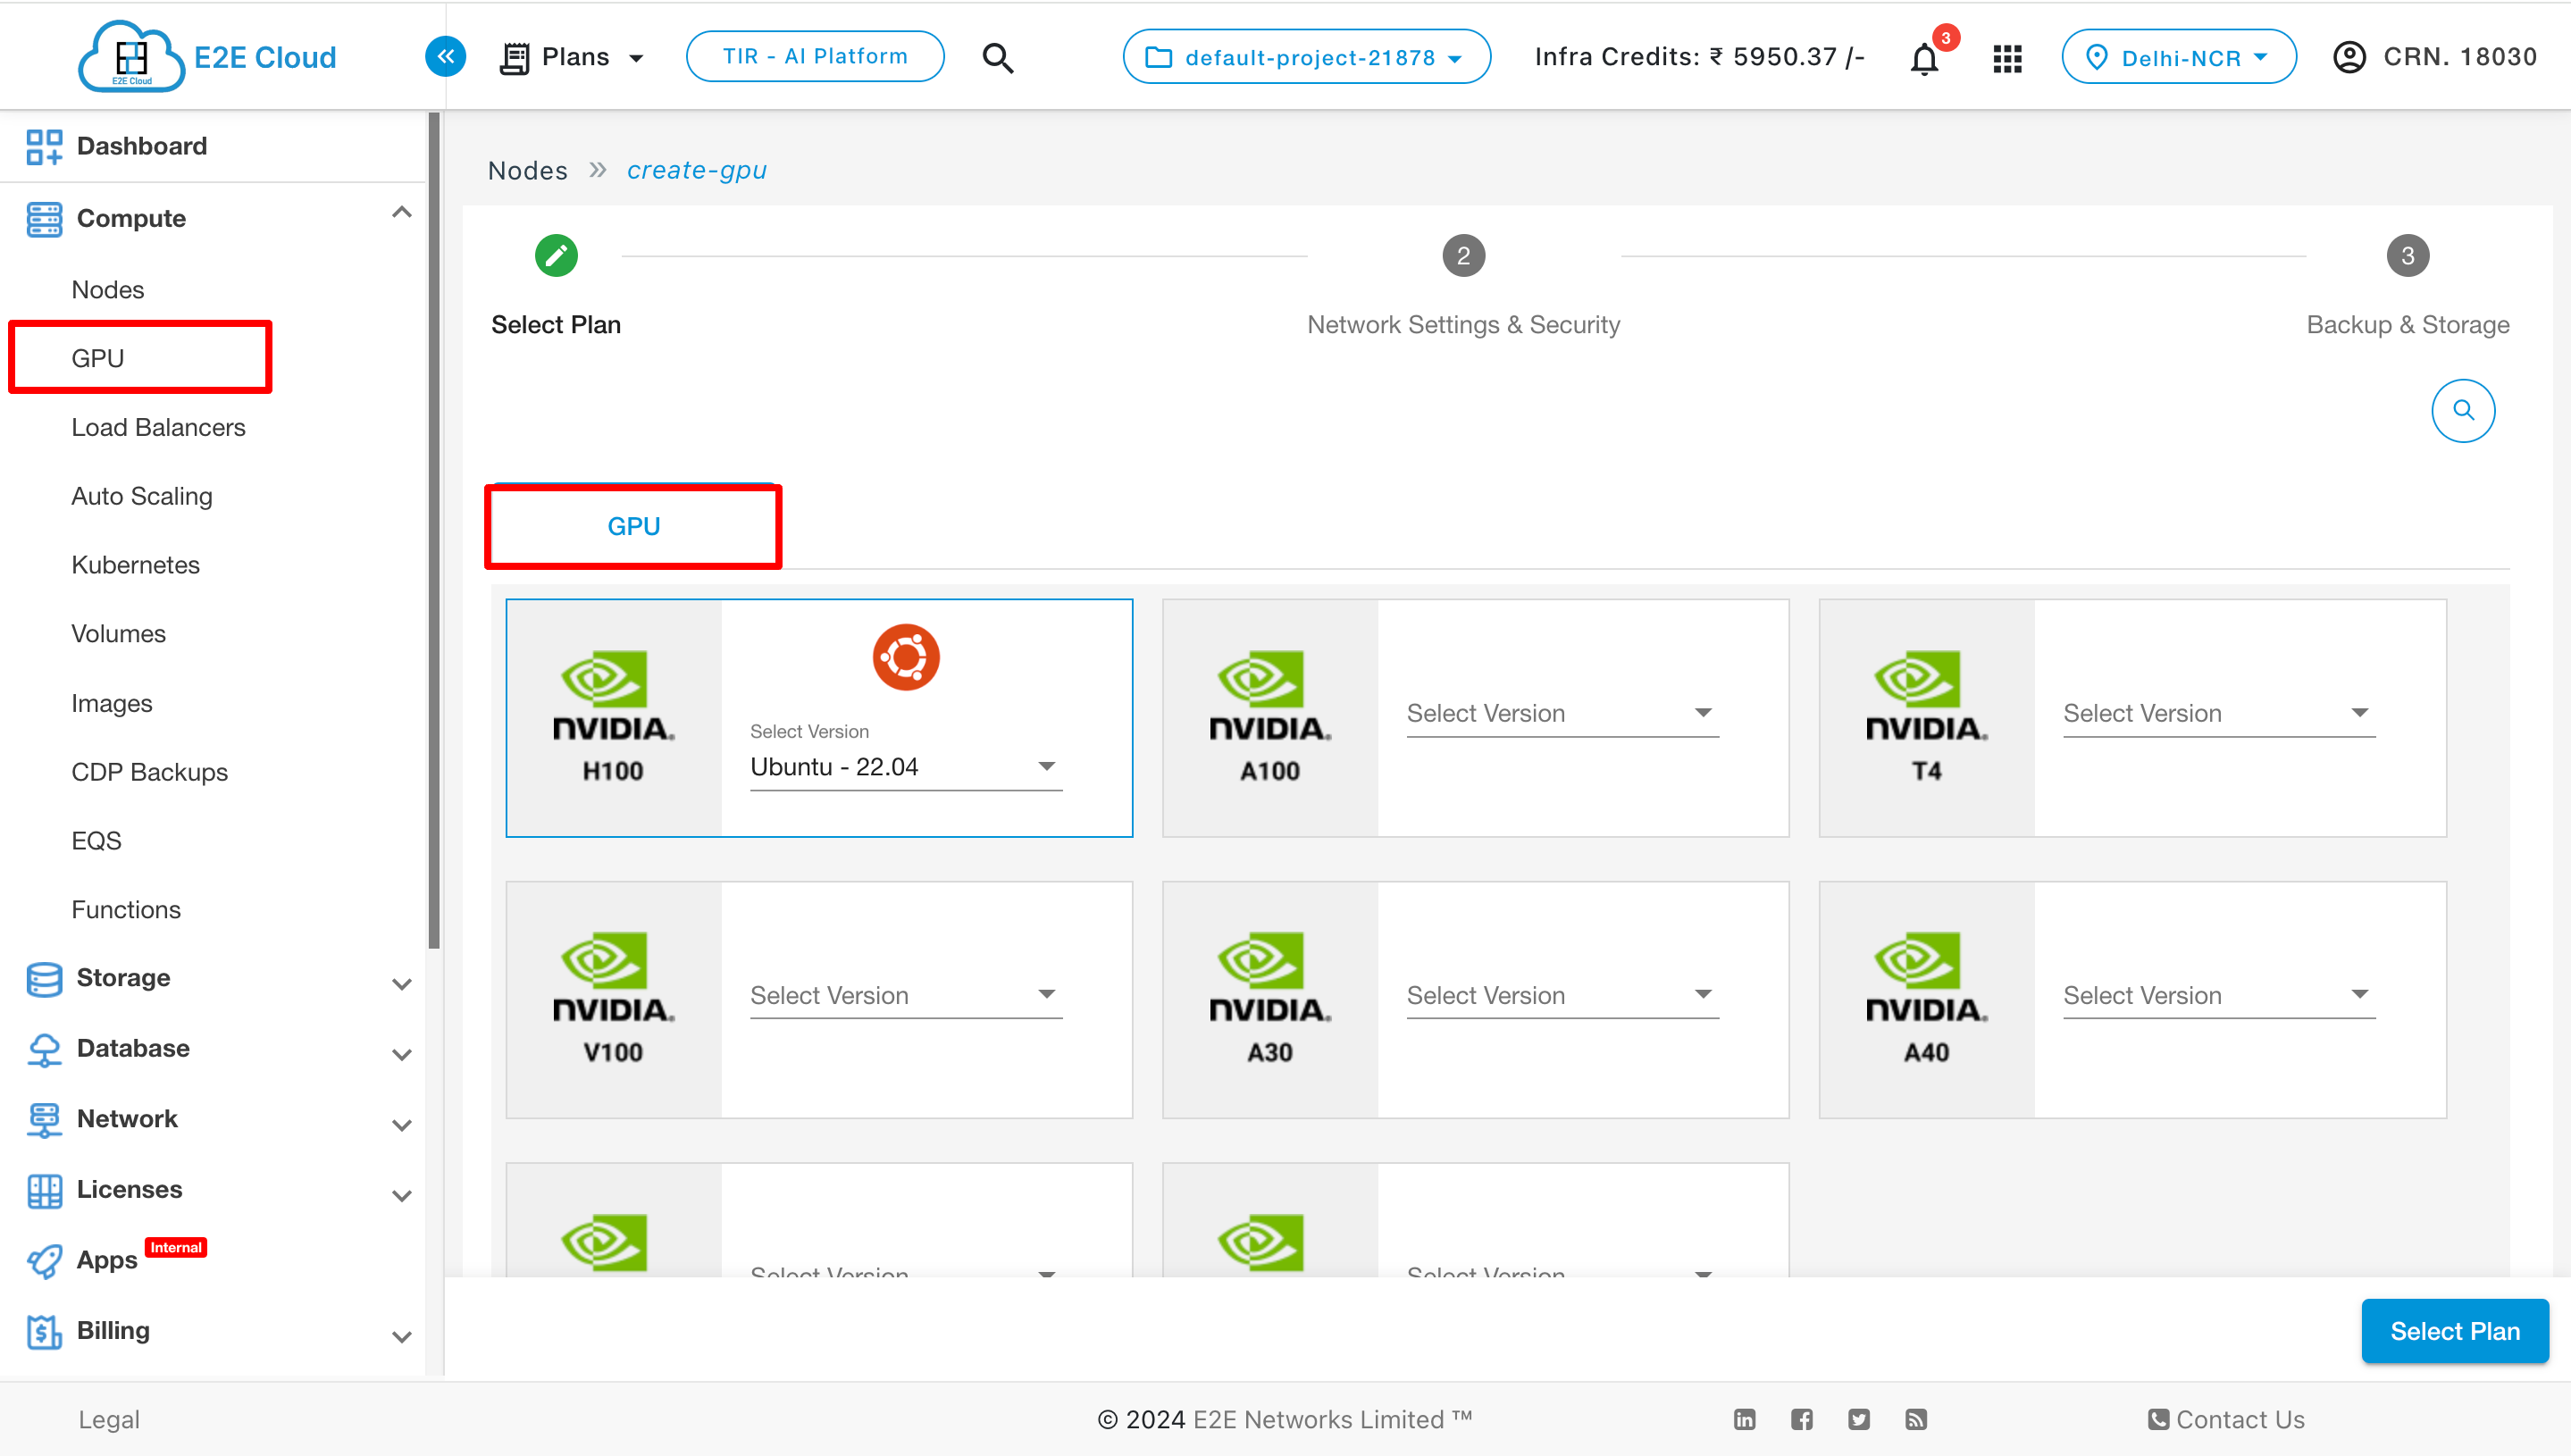
After selecting the GPU, choose the version that meets your requirements.
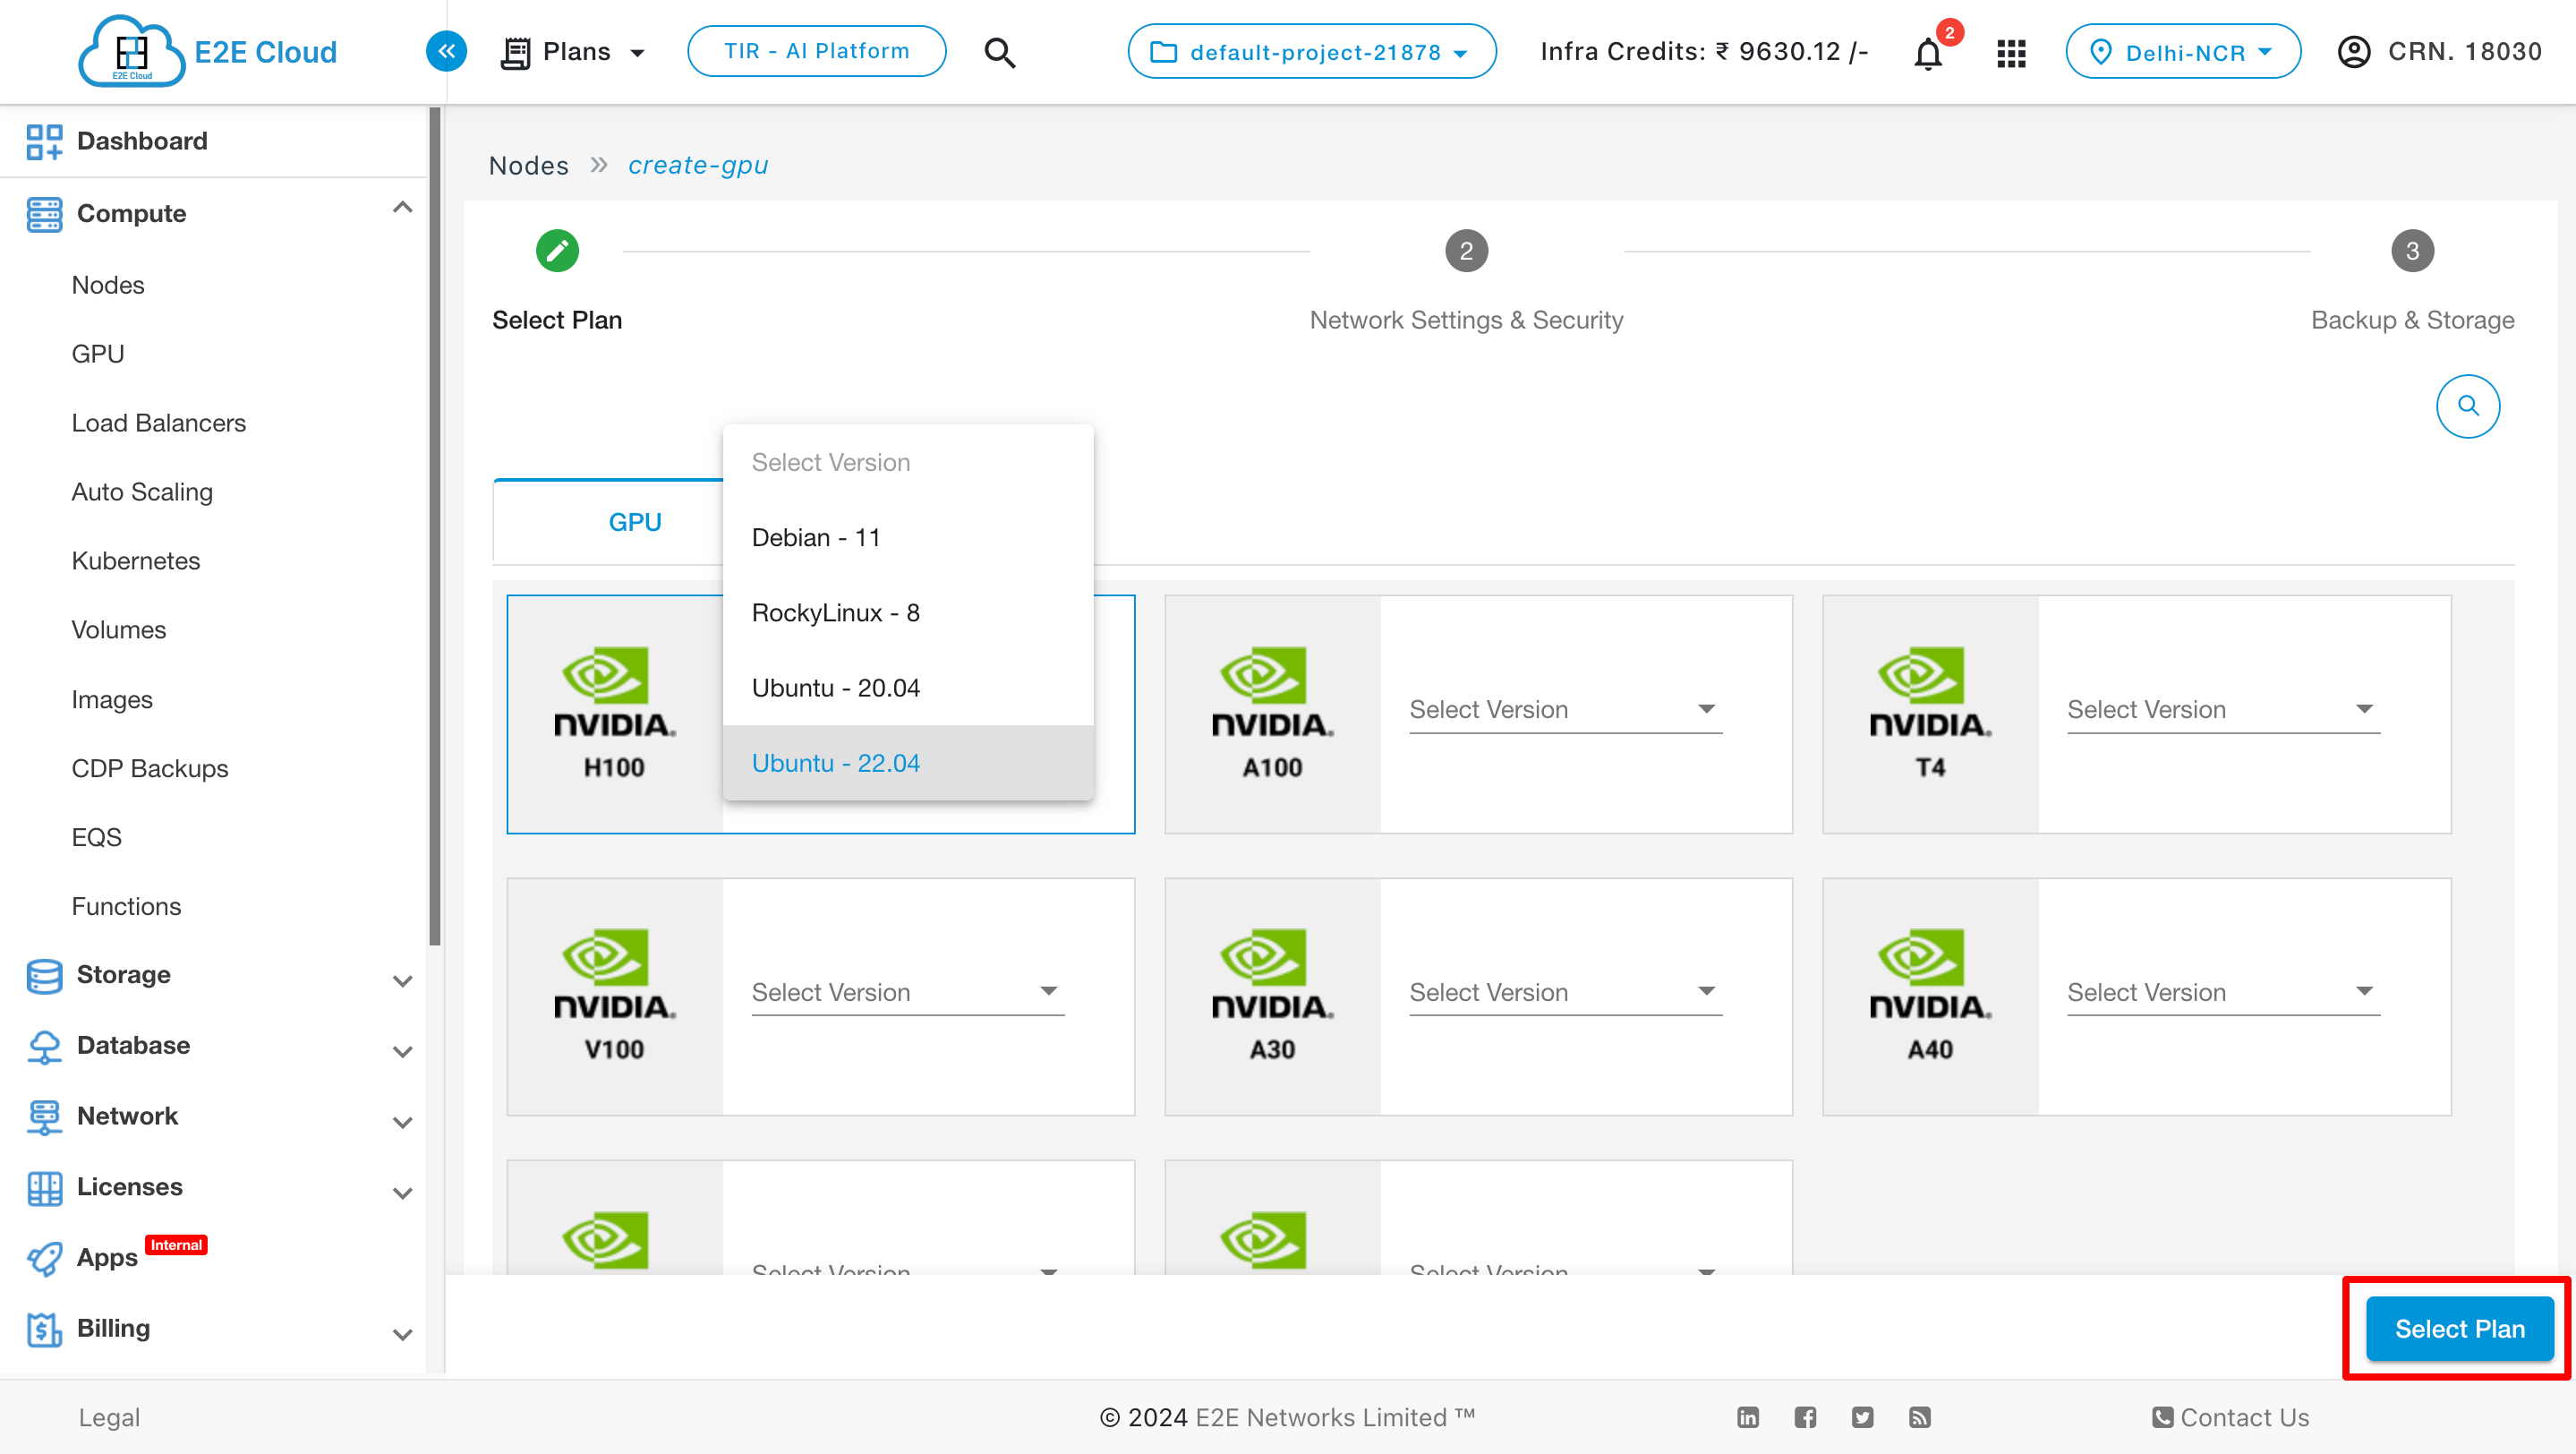
After choosing the desired version, click the “Select Plan” button to pick a plan.

After clicking the “Select Plan” button, the plan page will appear, displaying various plans as shown in the image.
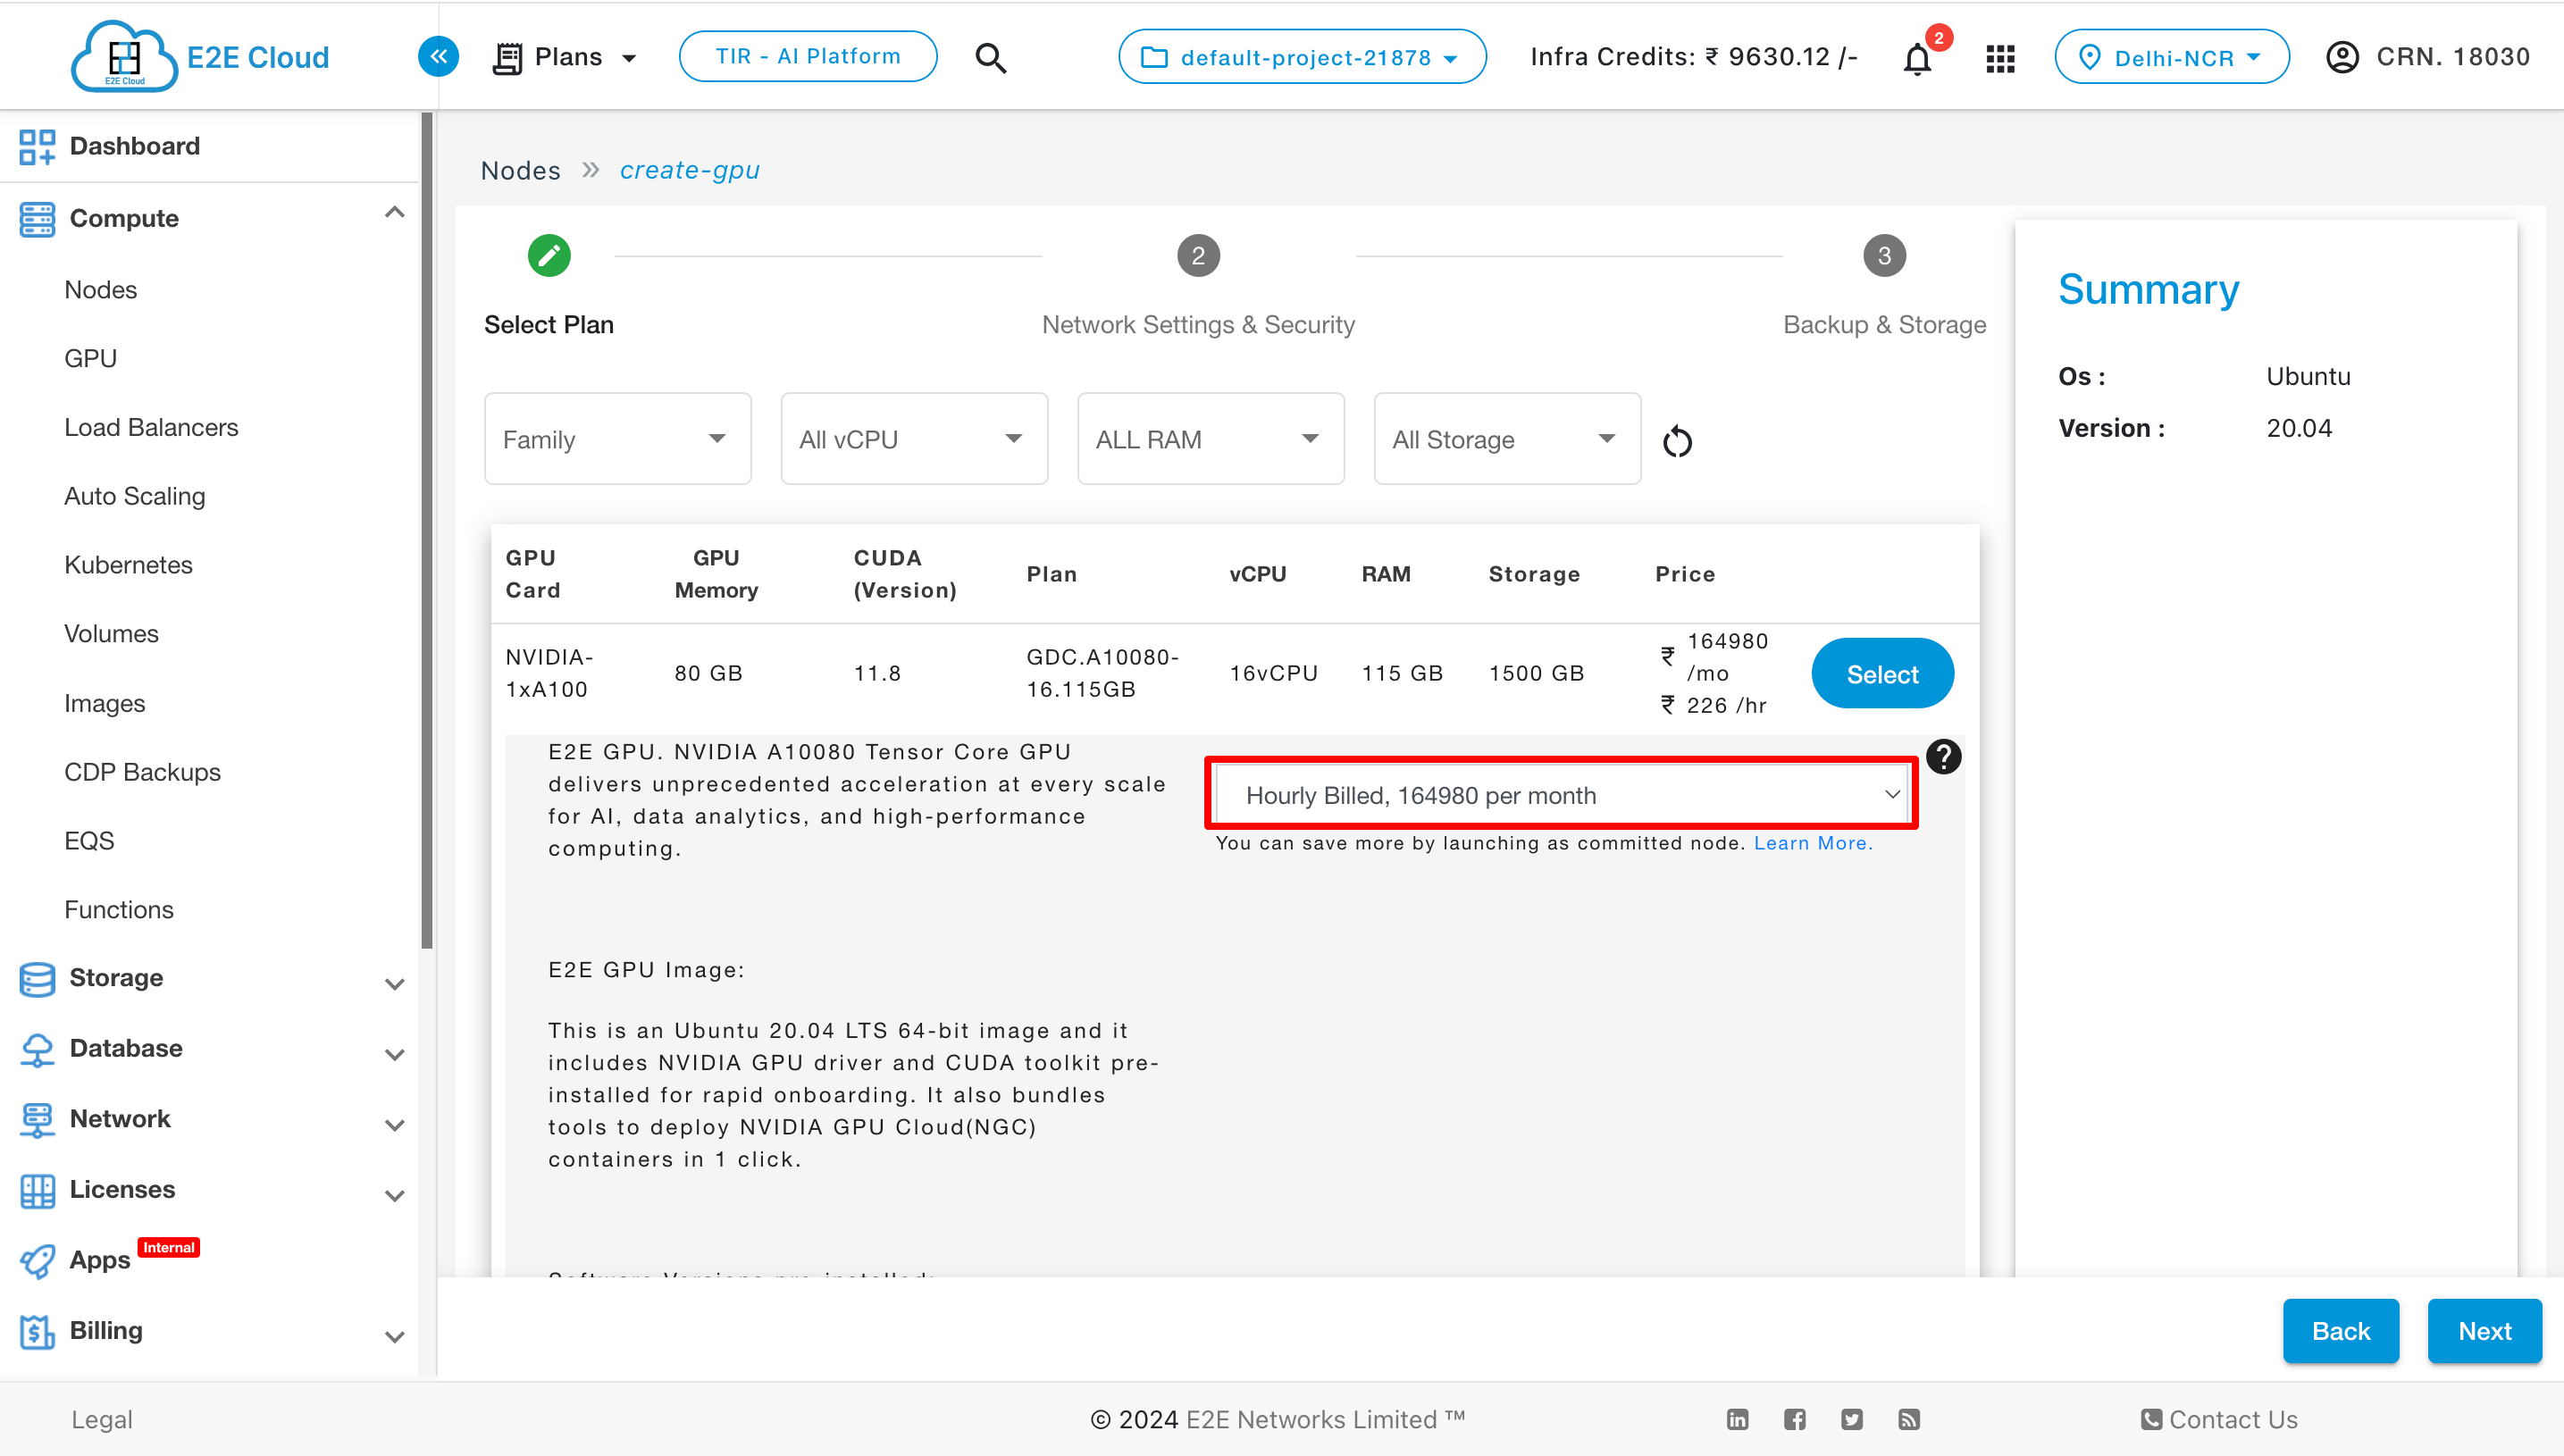
Once you’ve chosen the GPU image and plan, click the “Next” button. You’ll be prompted to select the billing mode, either “Hourly Billed” or “365 days committed”. After making your selection, you’ll proceed to the Network Settings & Security step.
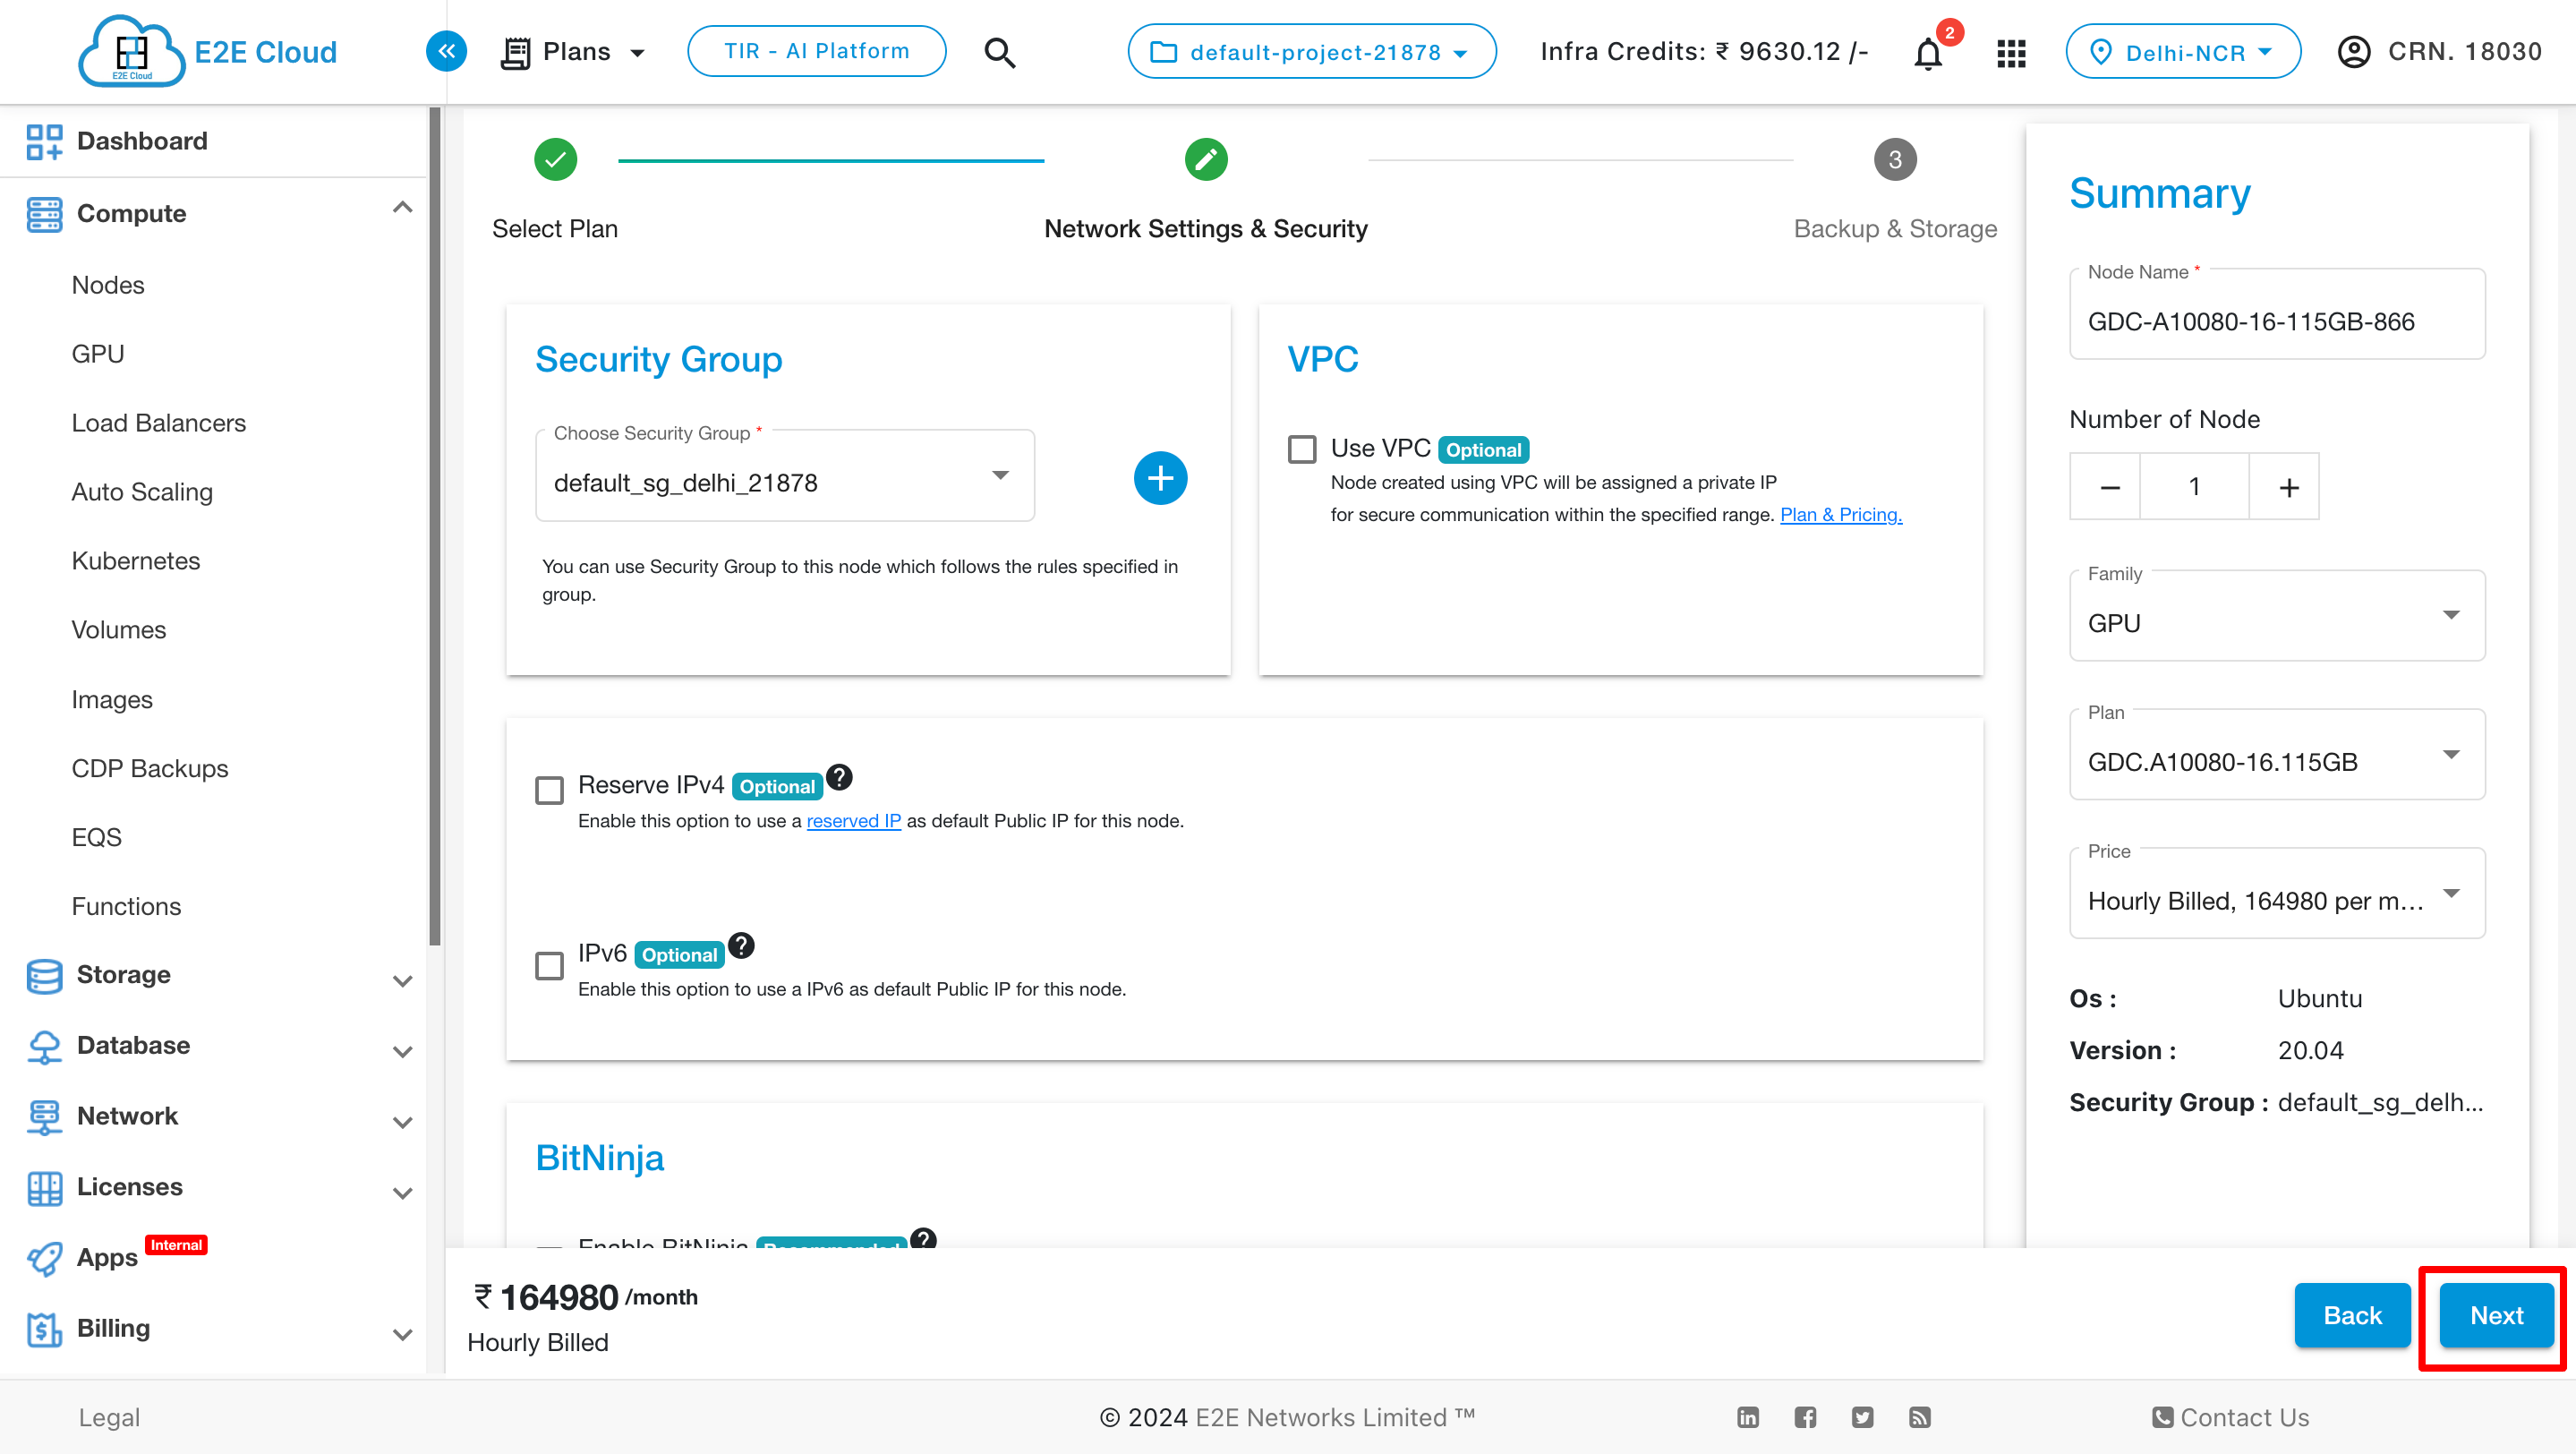
Once you have completed the network settings, click the “Next” button, and you will be redirected to the backup & storage step.
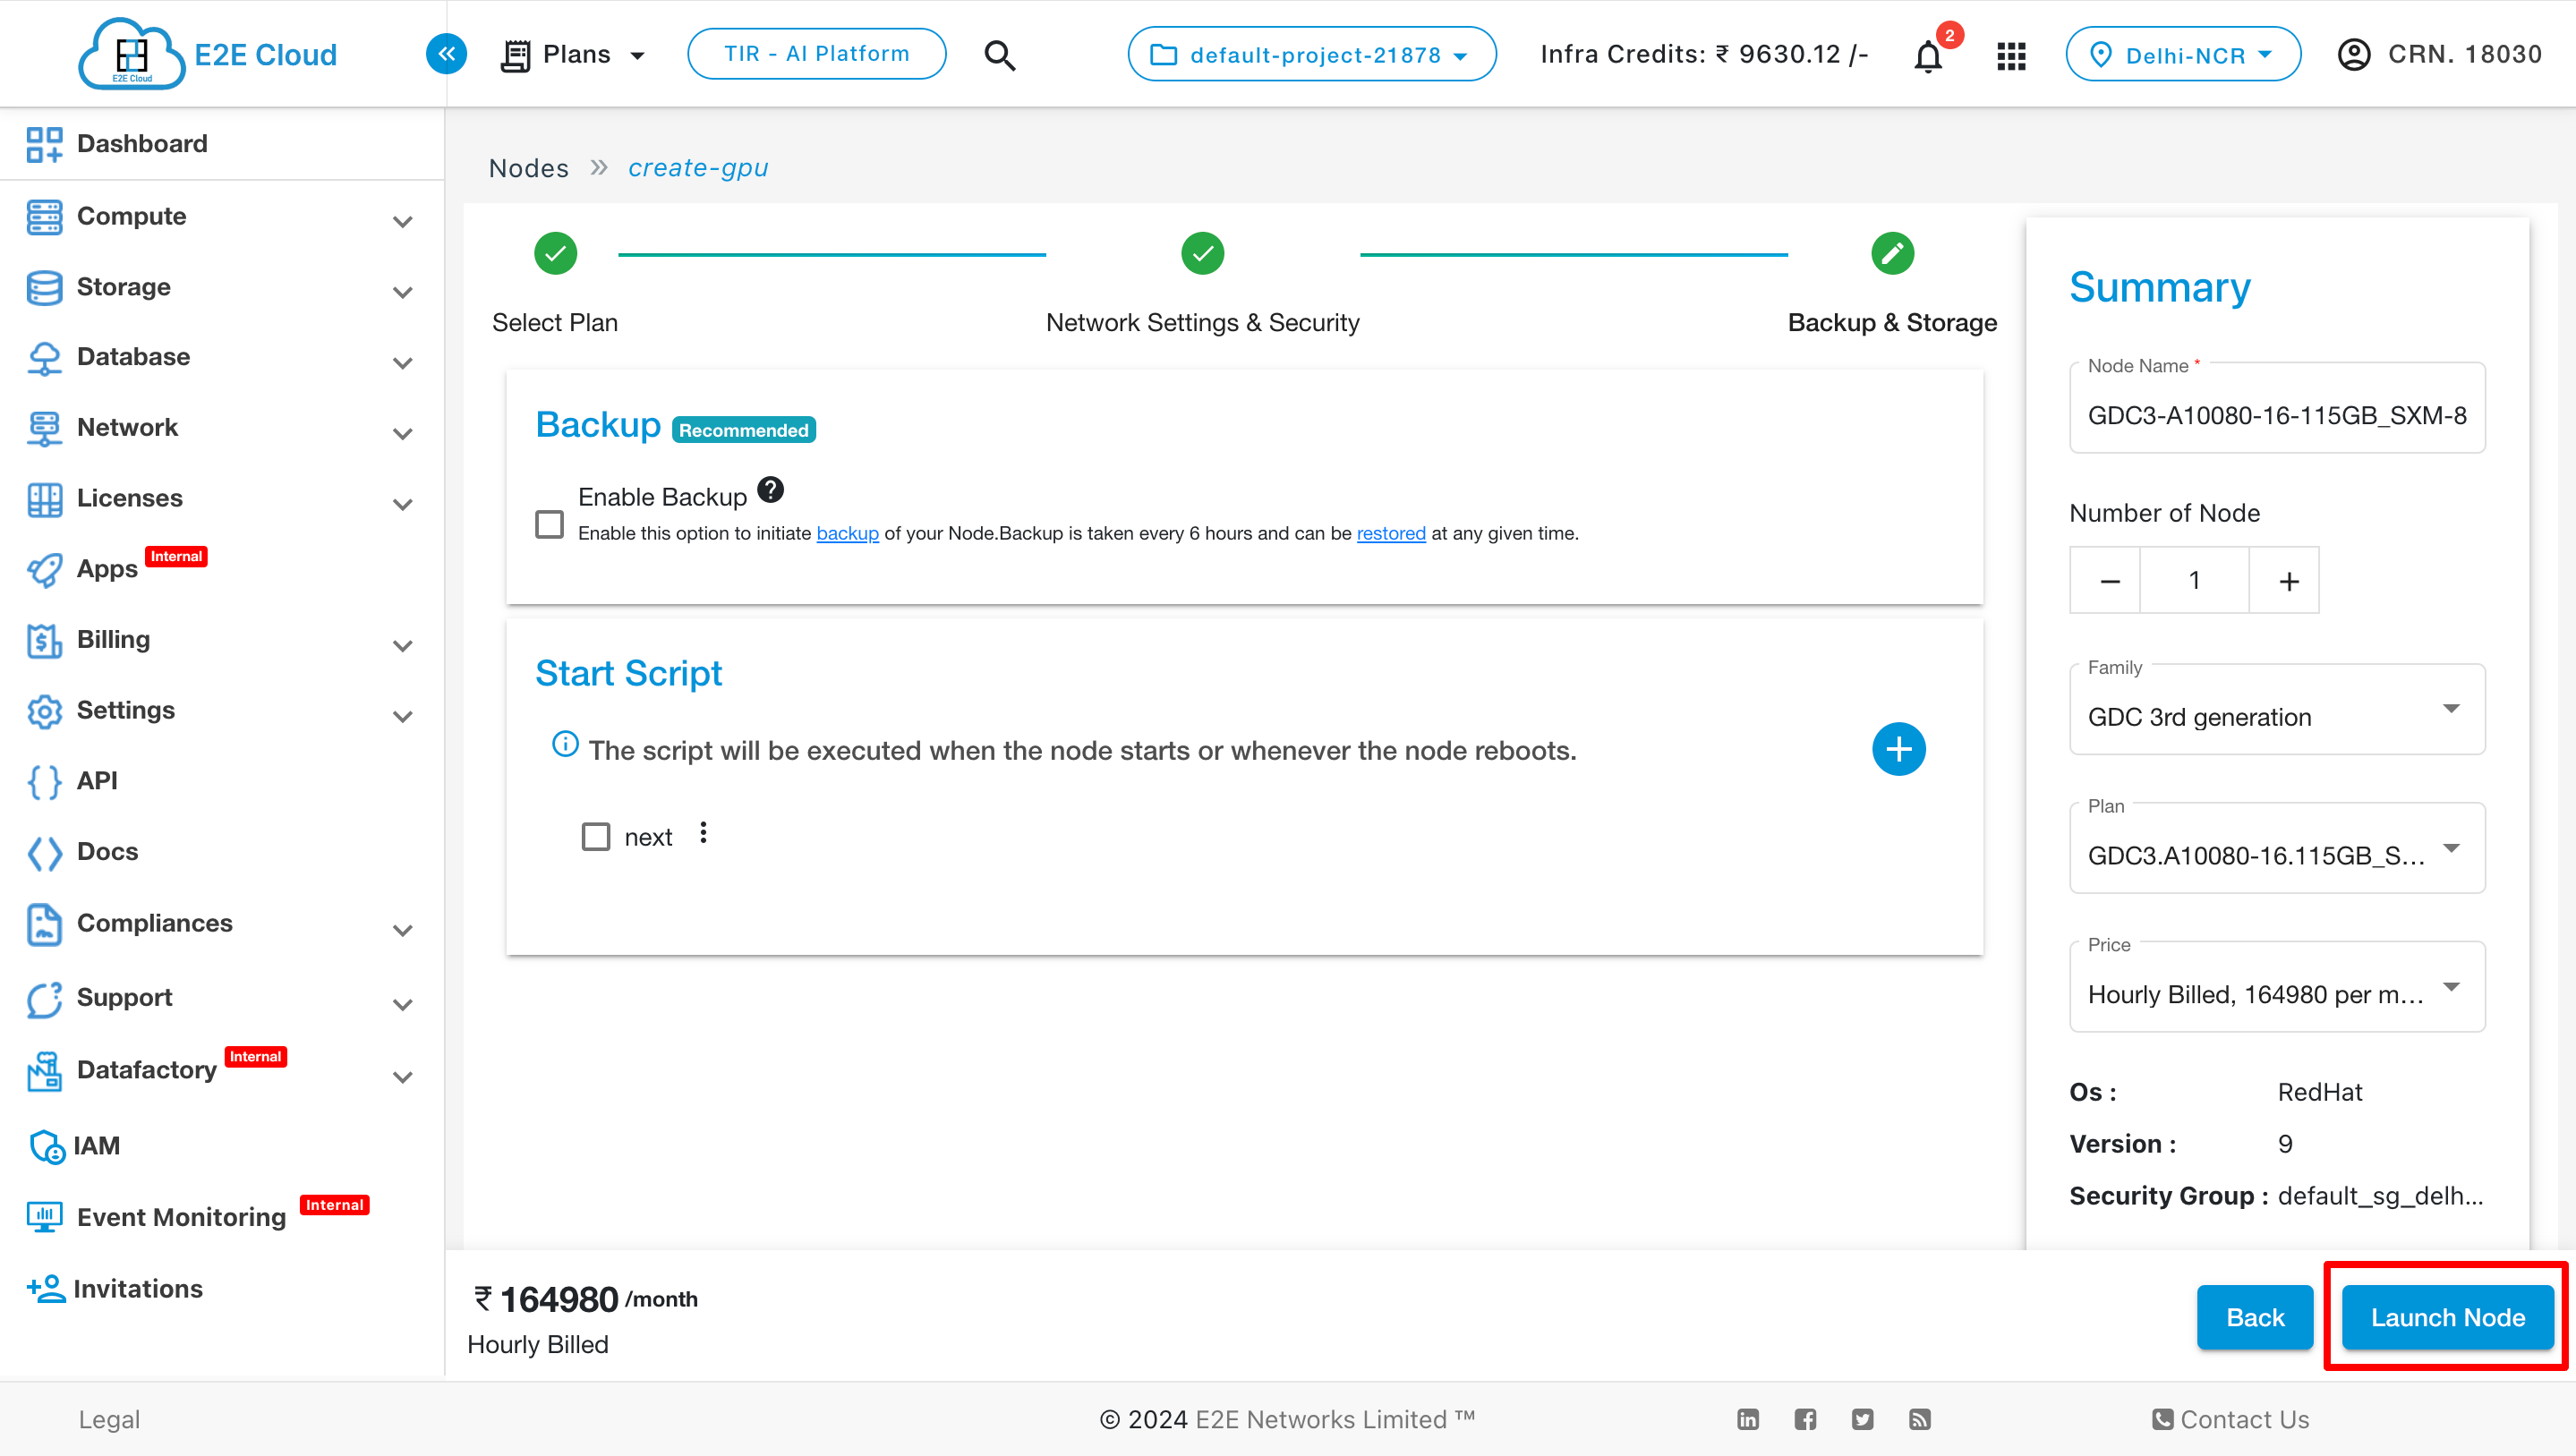
Finally, click on the “Launch Node” button to initiate the creation of the node.
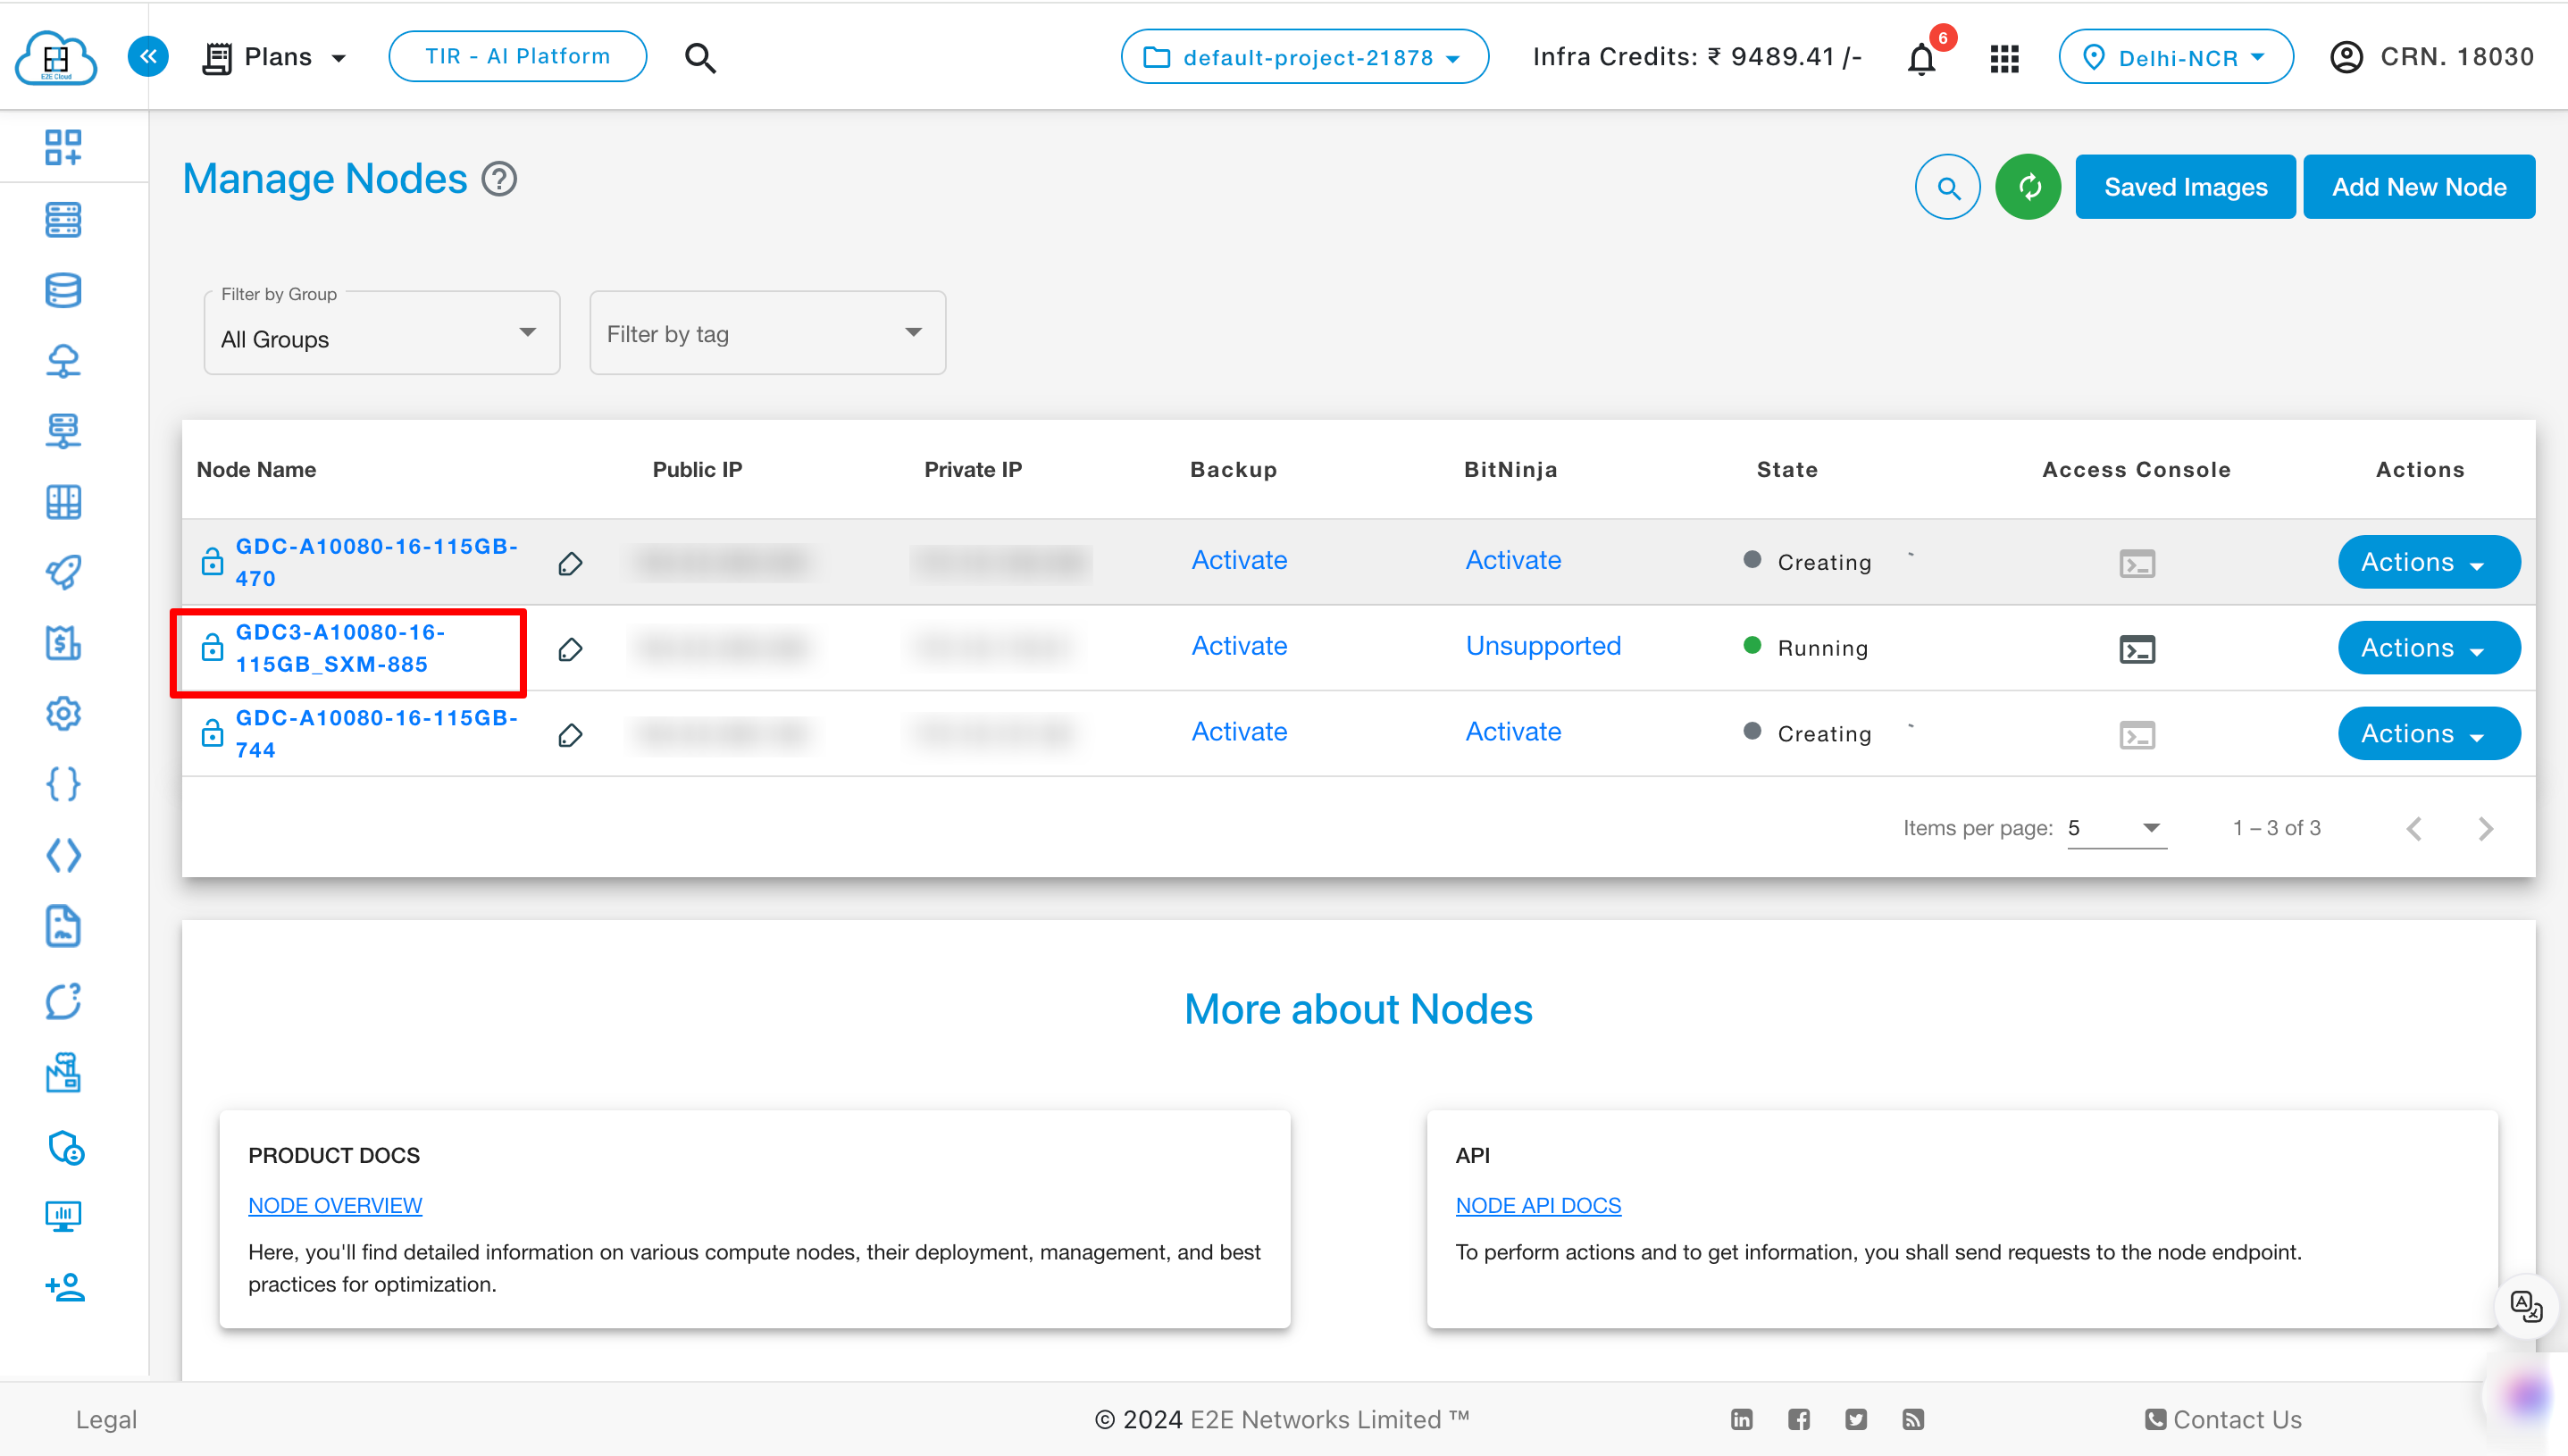
After that your GPU will be created and it will show in the list.
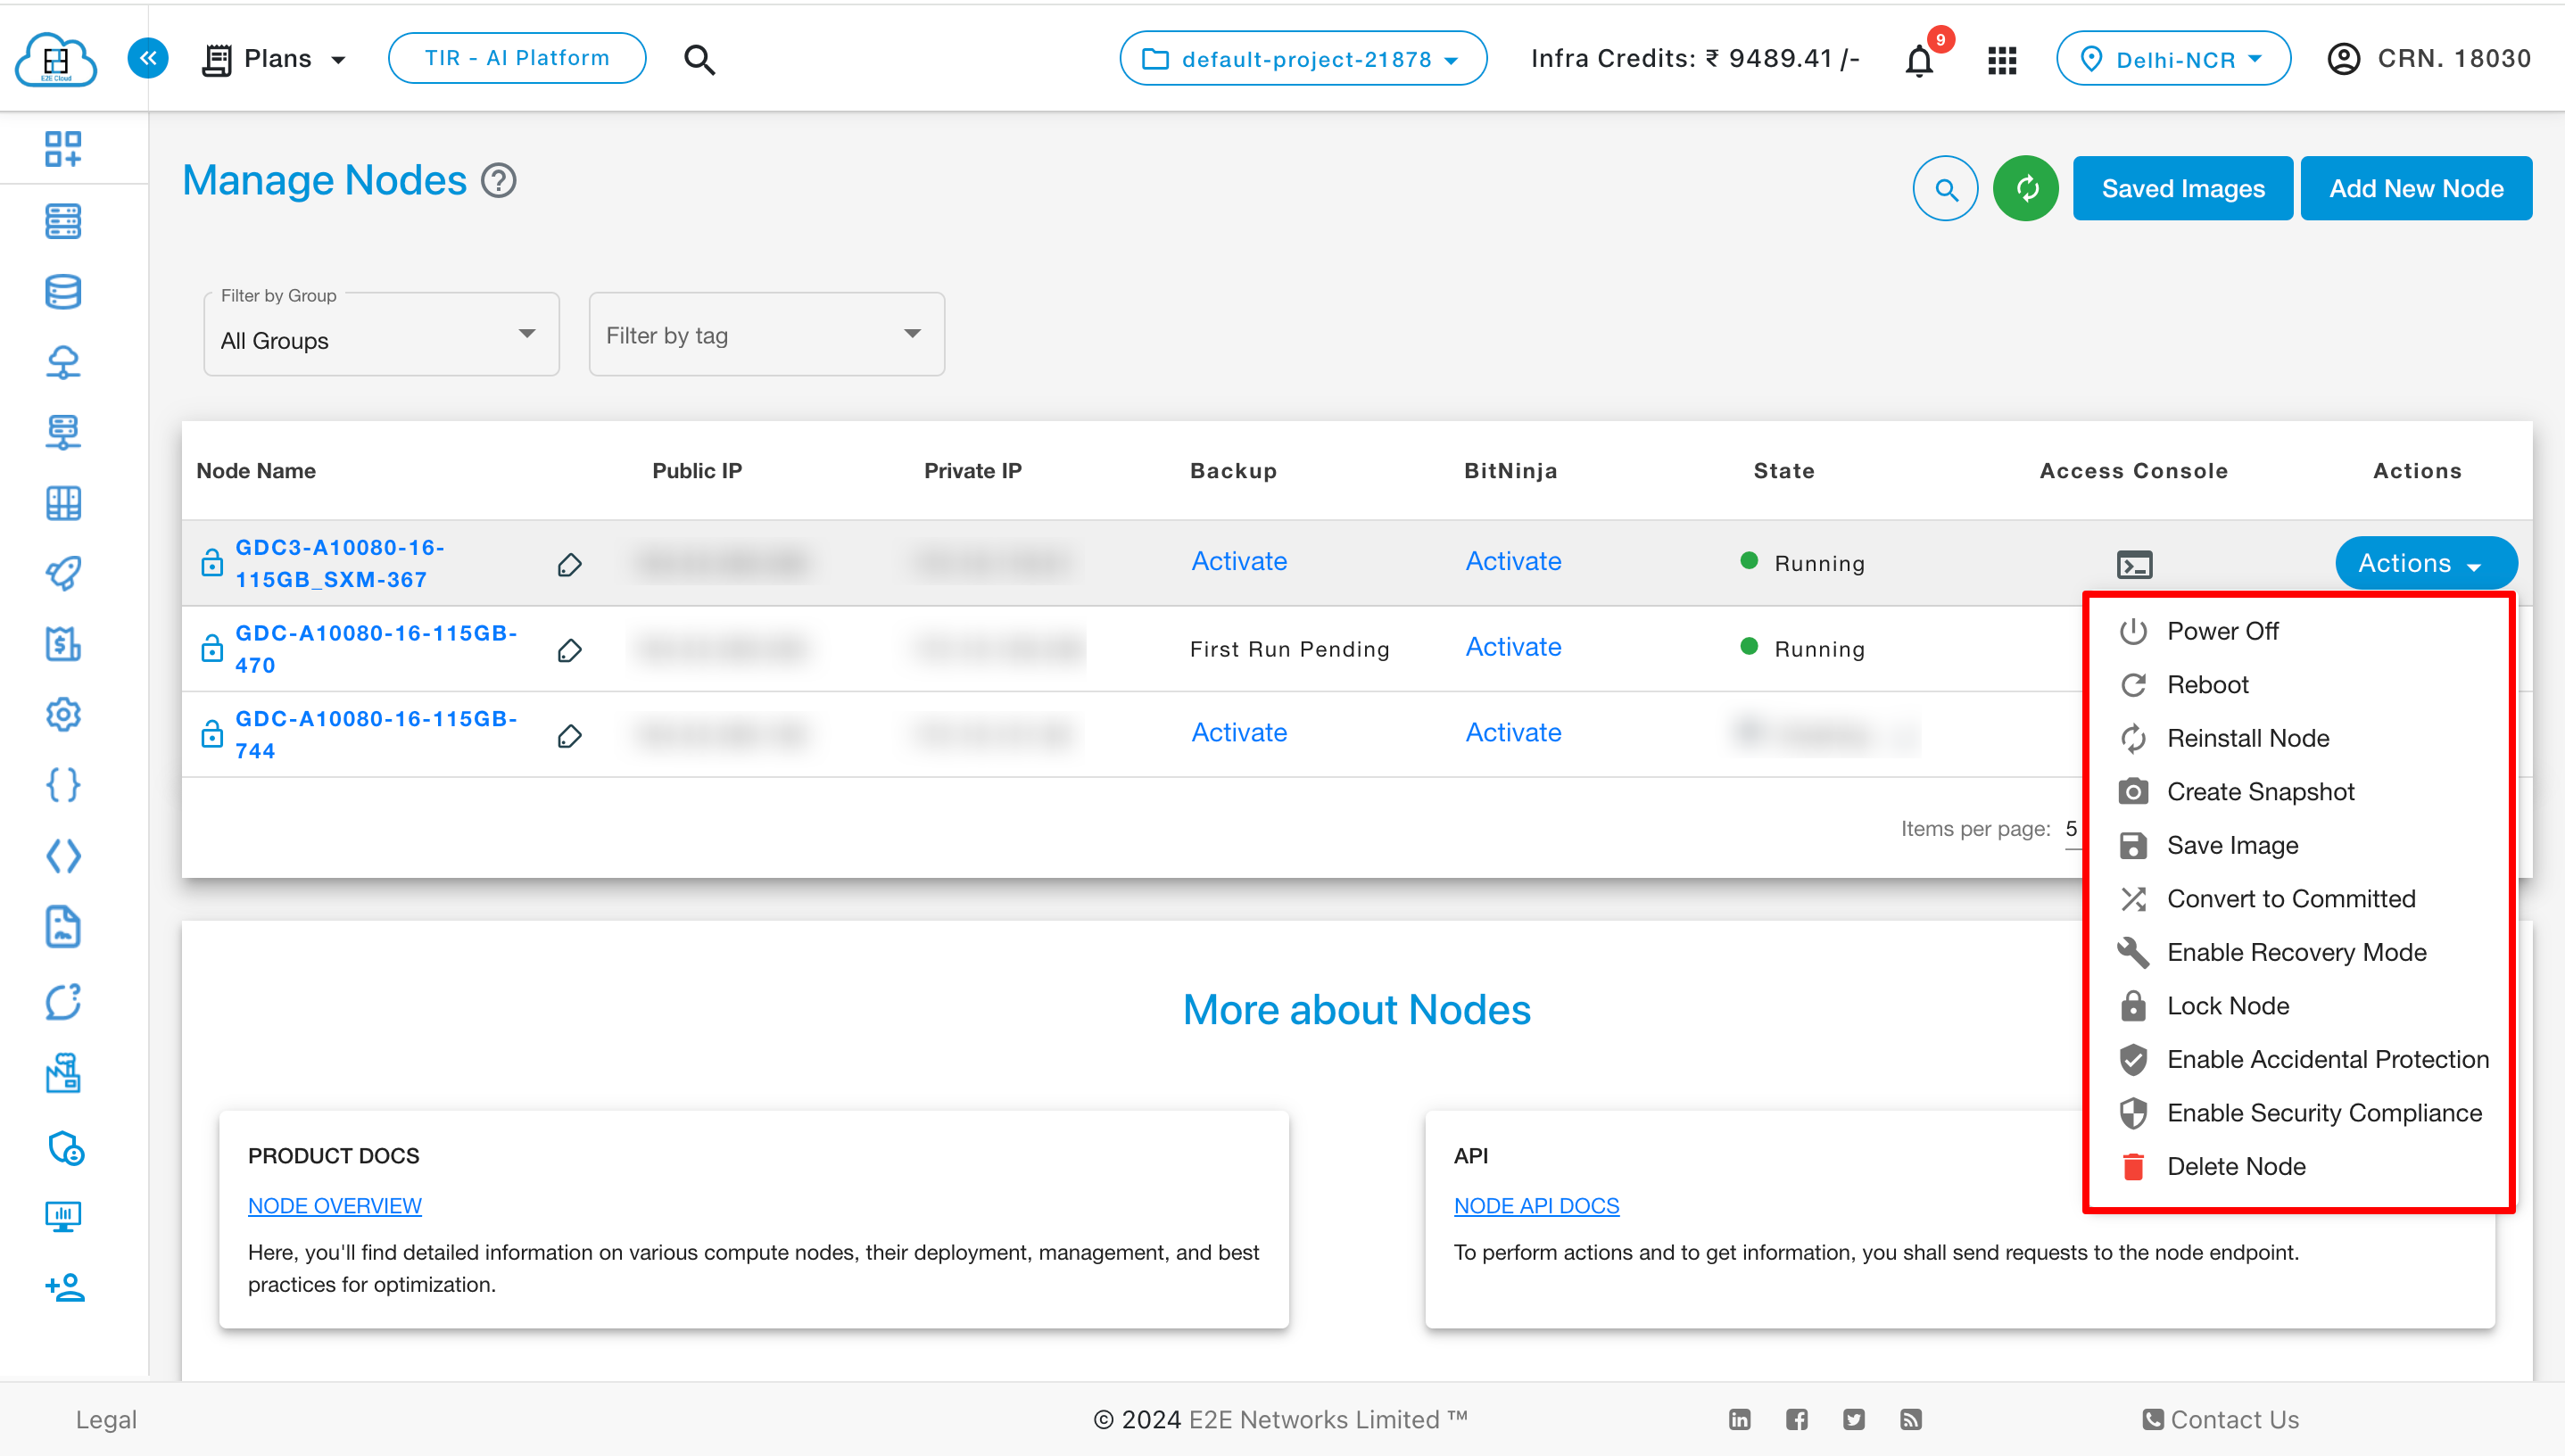
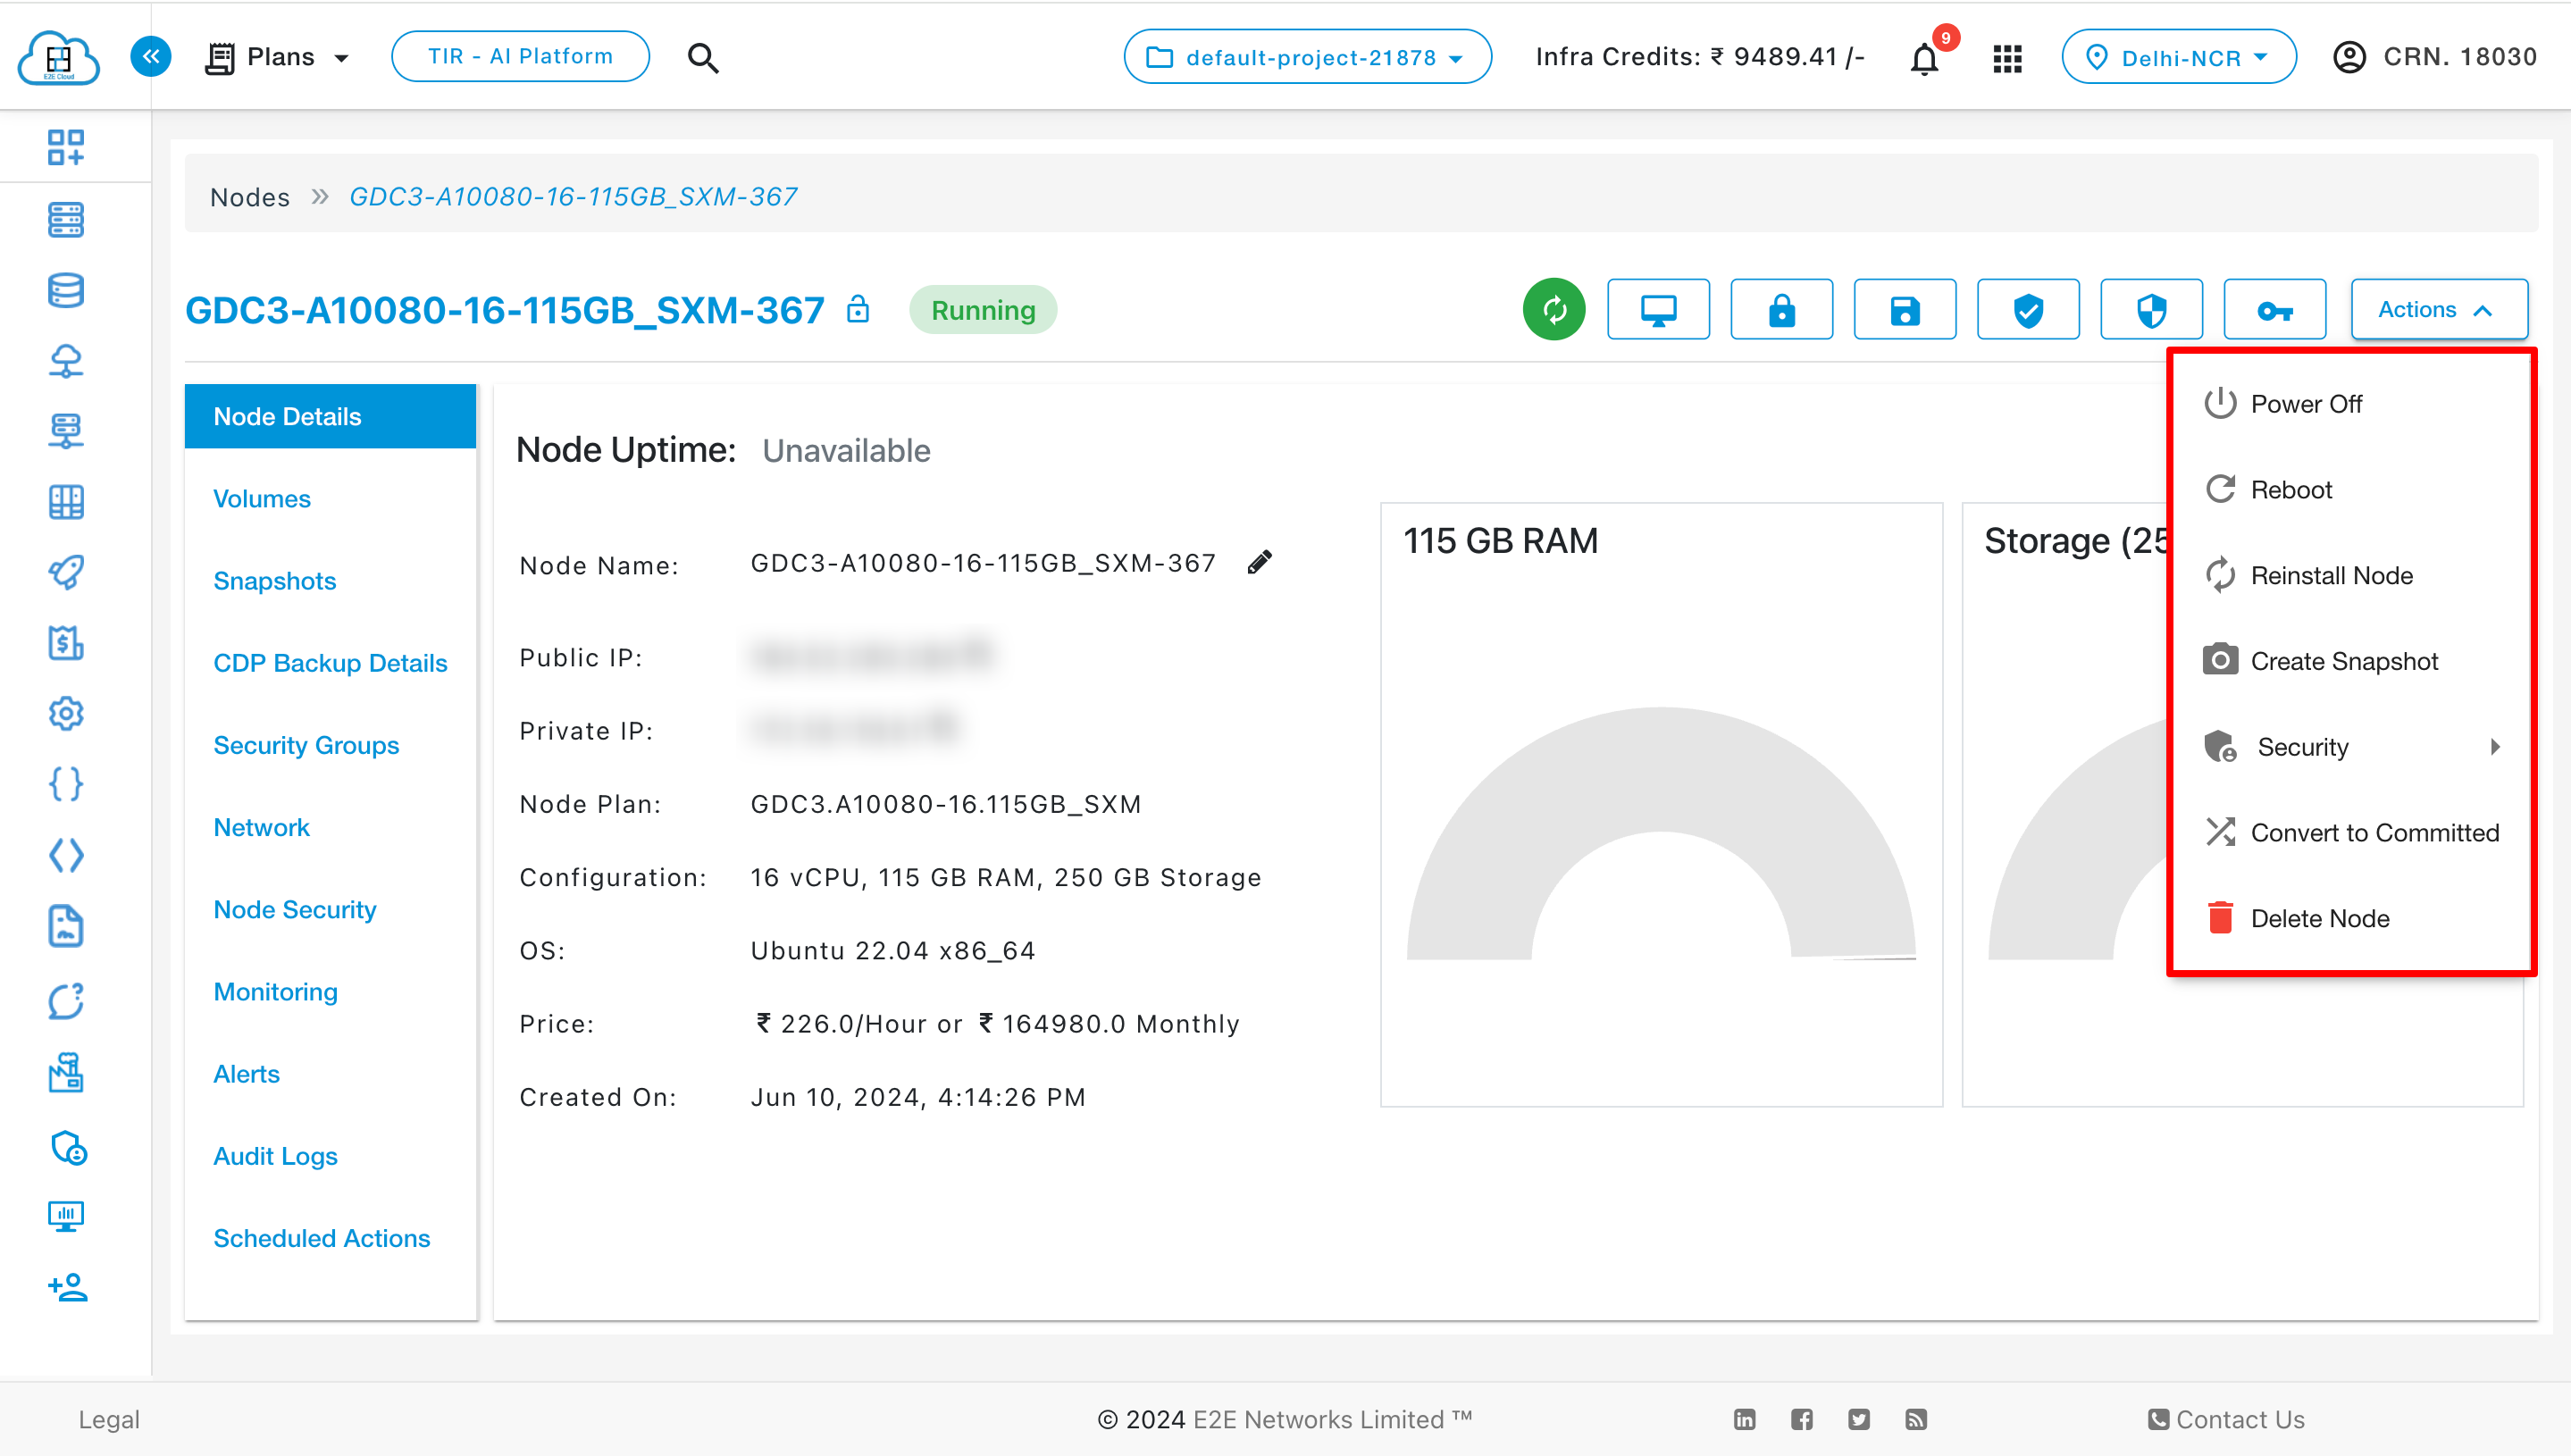
Actions
You can perform the following actions available for the respective nodes
Access Console
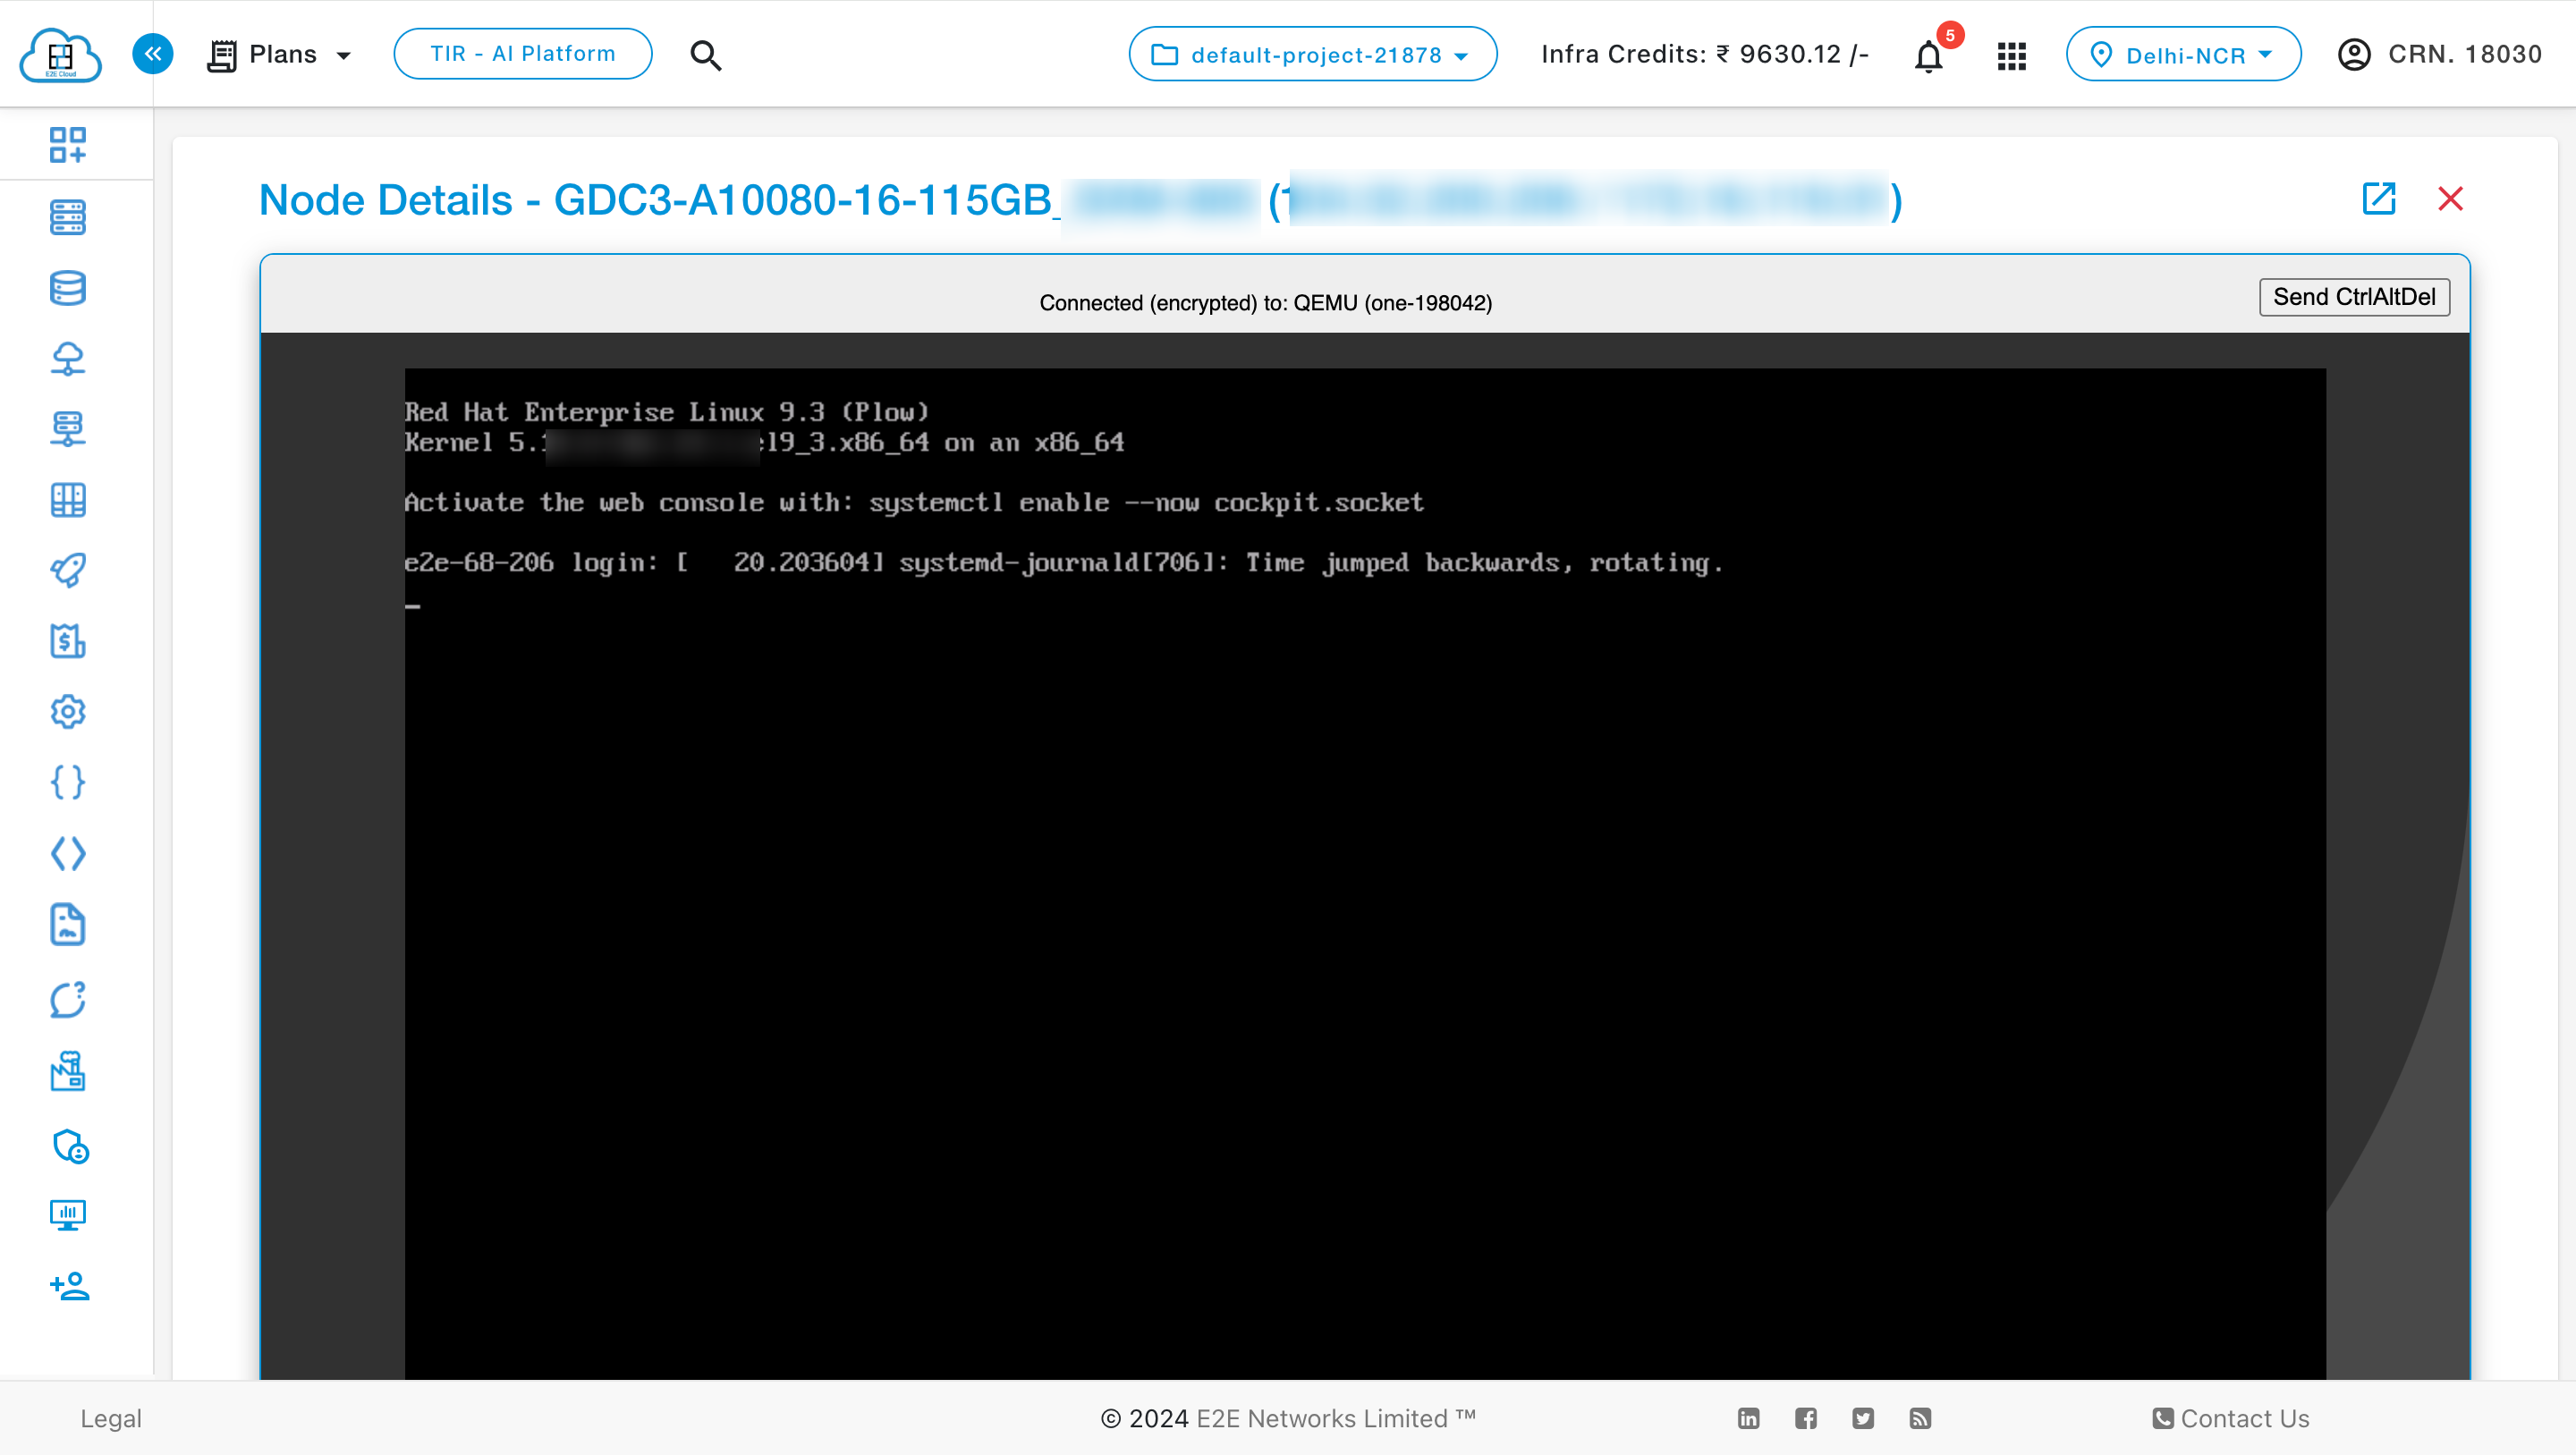
Most of the time you can easily access your node using the ssh command, but if you are not able to access your node, you can use the VNC console to directly access your node. It emulates as if you are directly interacting with an actual server present in front of you. VNC access is typically helpful when you wish to log in to revert some settings or to regain control of your node.
VNC access is typically helpful when you wish to log in to revert some settings or to regain control of your node. Click on the VNC Console button for Console access.
This option loads a viewer in your browser that allows you to access your server. Click on the console screen and press ENTER to ensure that the login prompt has focus. You will be prompted to enter your root login access credentials.
Once you get access you can reset any misbehaving configuration files or services in order to restore access.

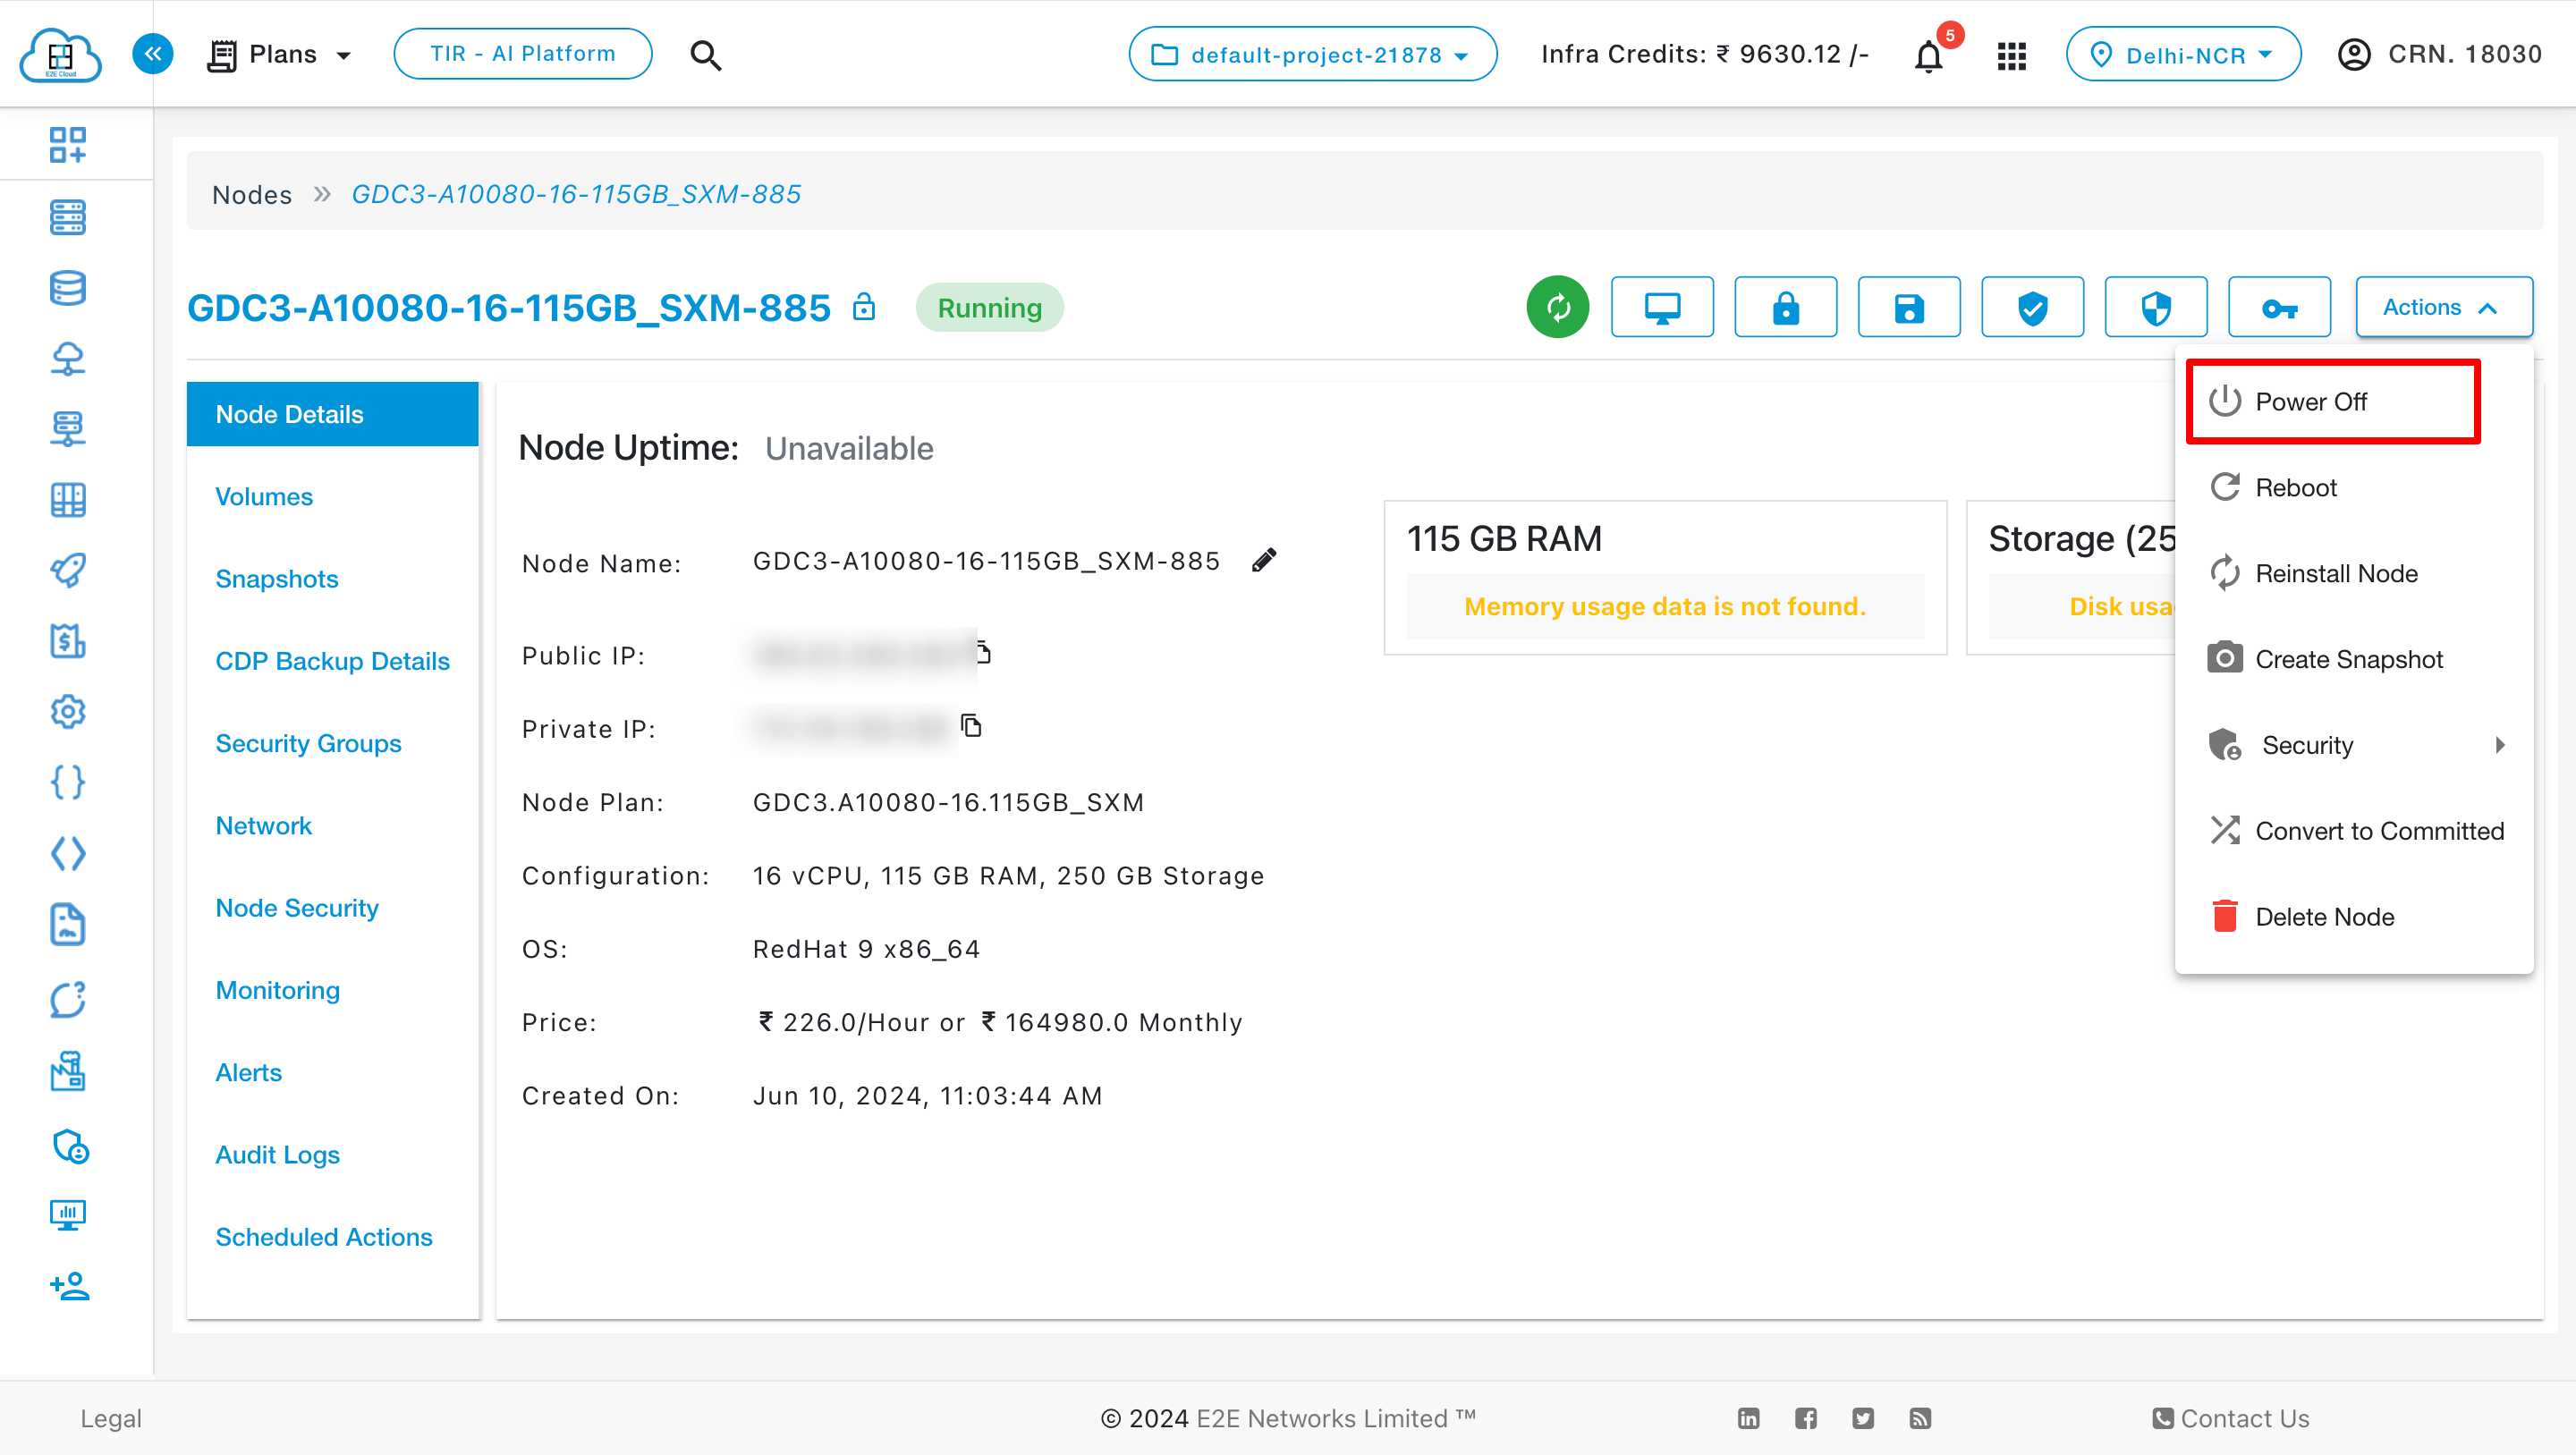
Power Off
Click on the Power Off button to turn Off your node. It will take a couple of minutes to turn Off your node. All the management operations will be disabled on this node till while the function is being performed.
Note
Powering off Node will not stop billing. You will continue to pay for the Node until it is Terminated. If you have an active disk-intensive system running, power off may lead to data corruption and data loss (the best option is to turn off the machine from within OS).
All actions will be disabled except Start, Save Image, Convert to Committed Node, Lock Node and Delete Node action when your node is powered off.
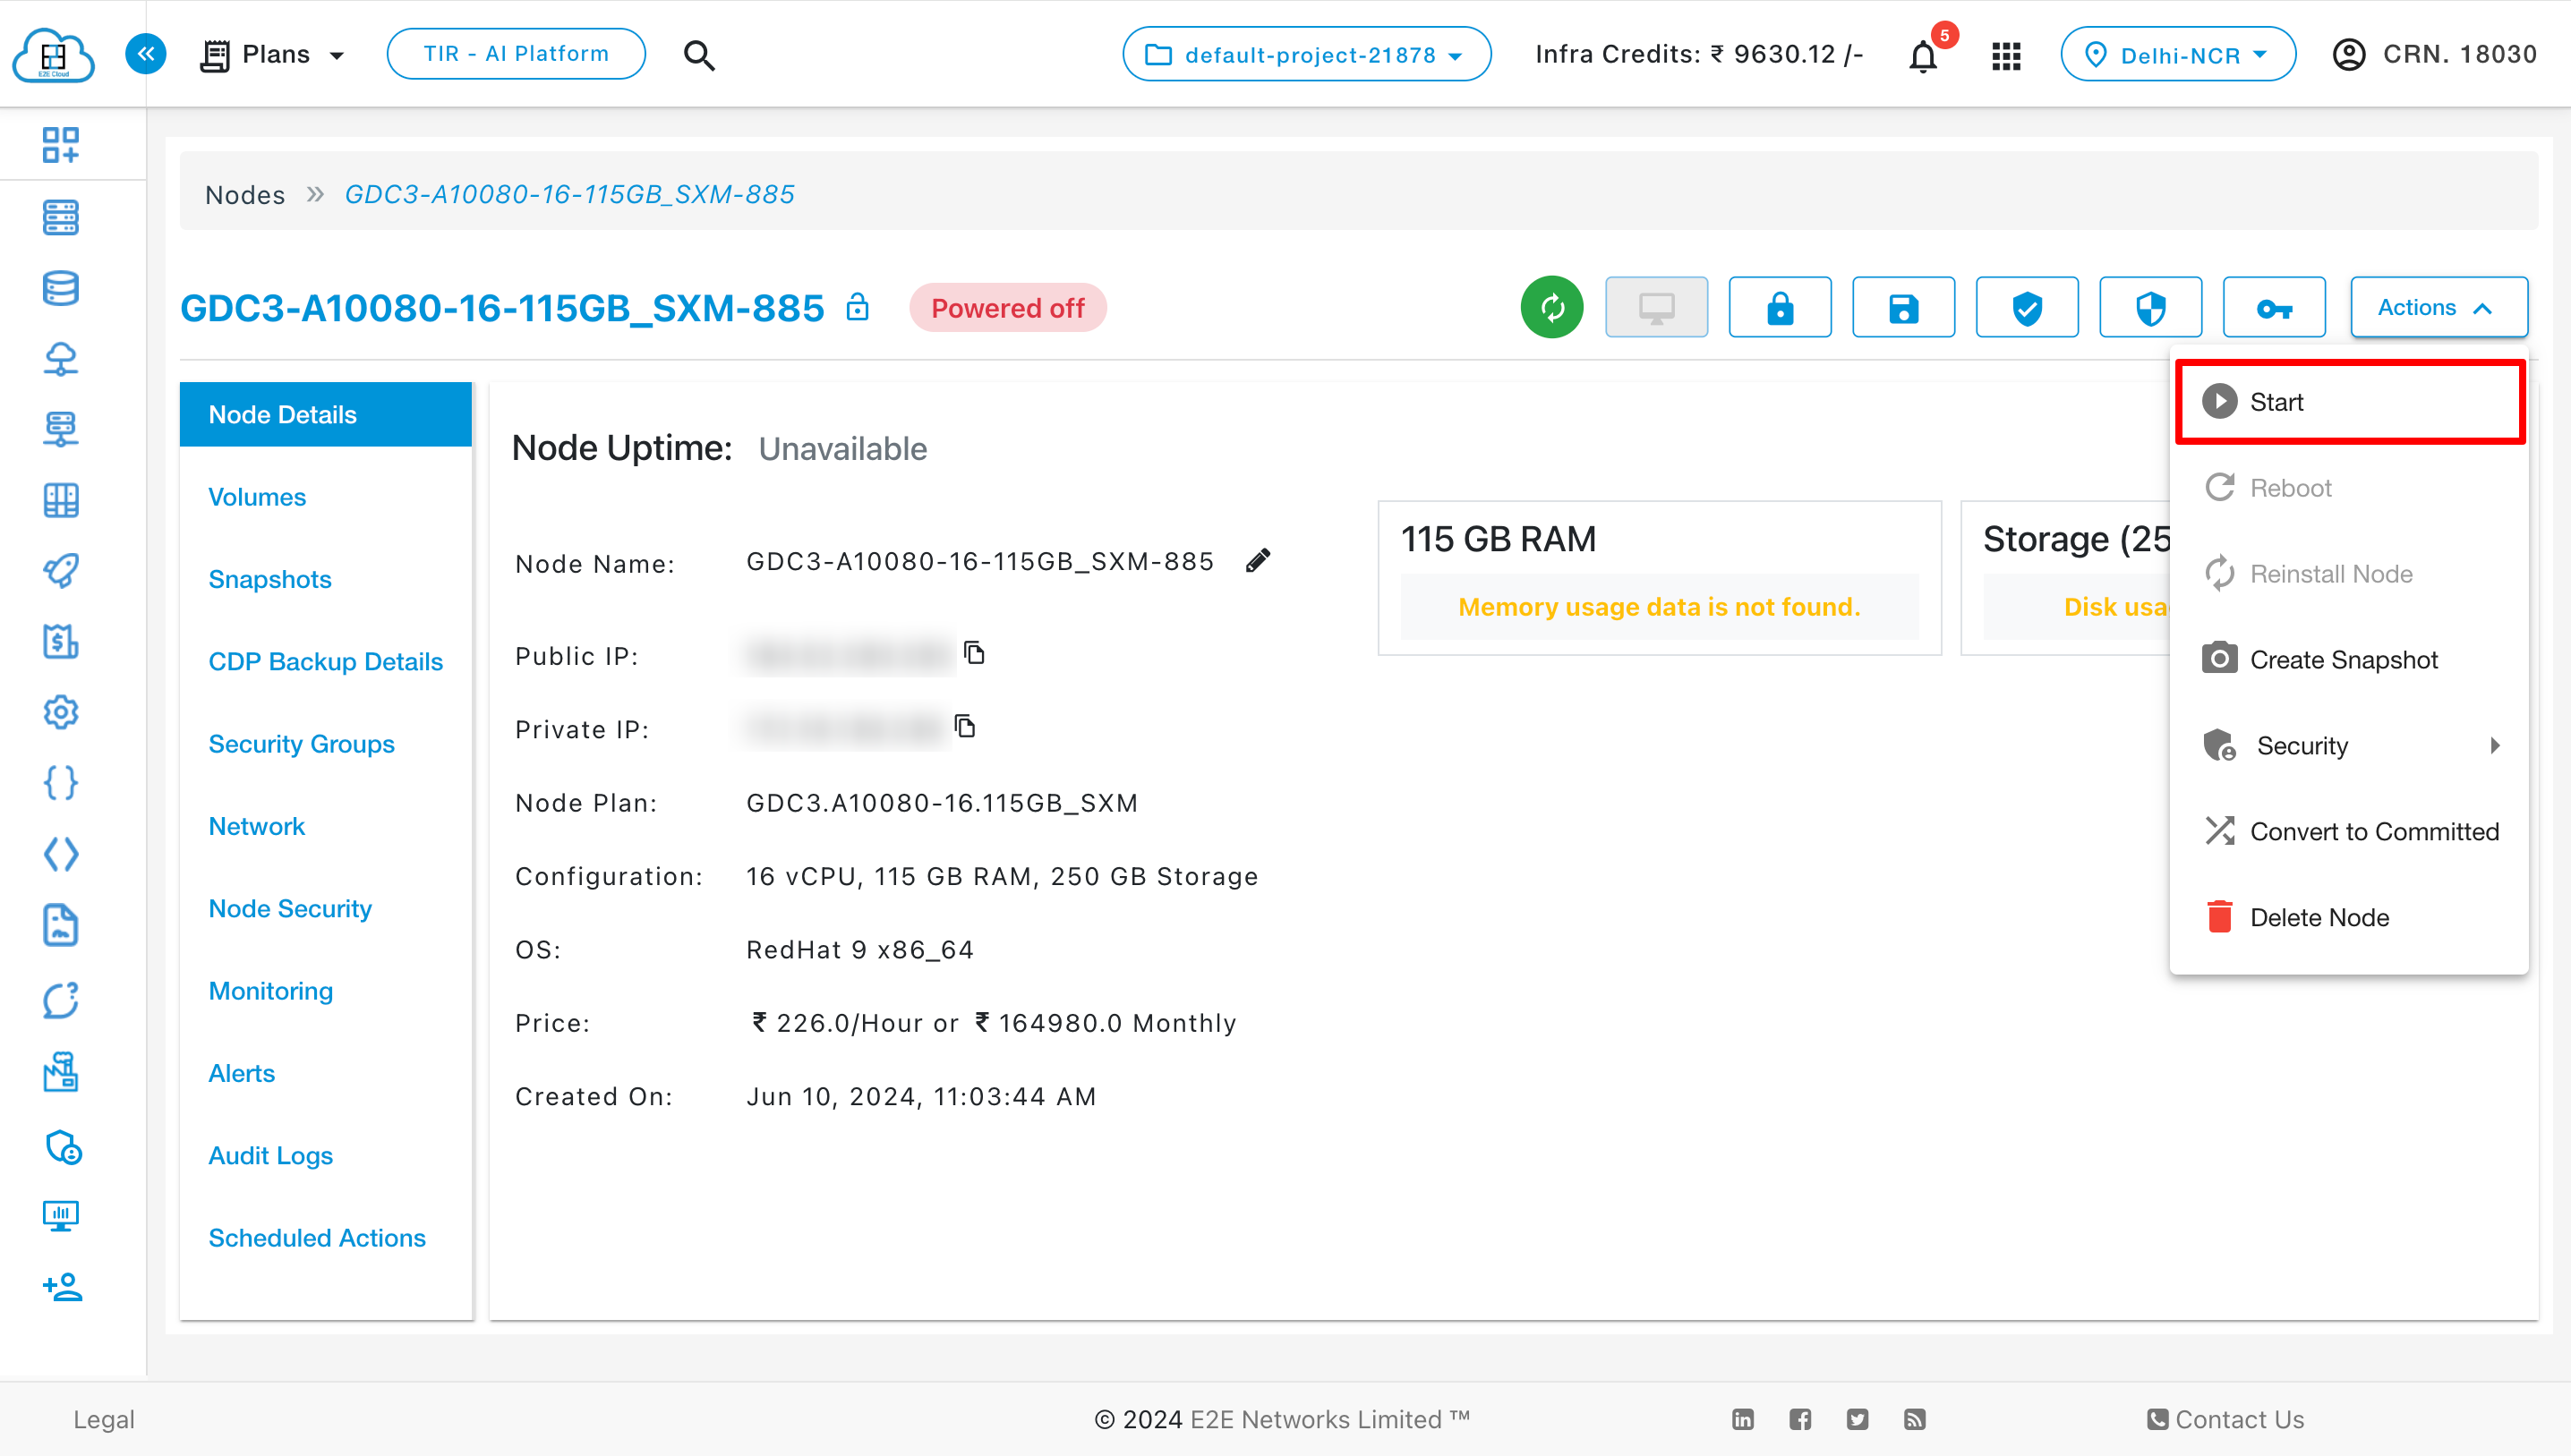
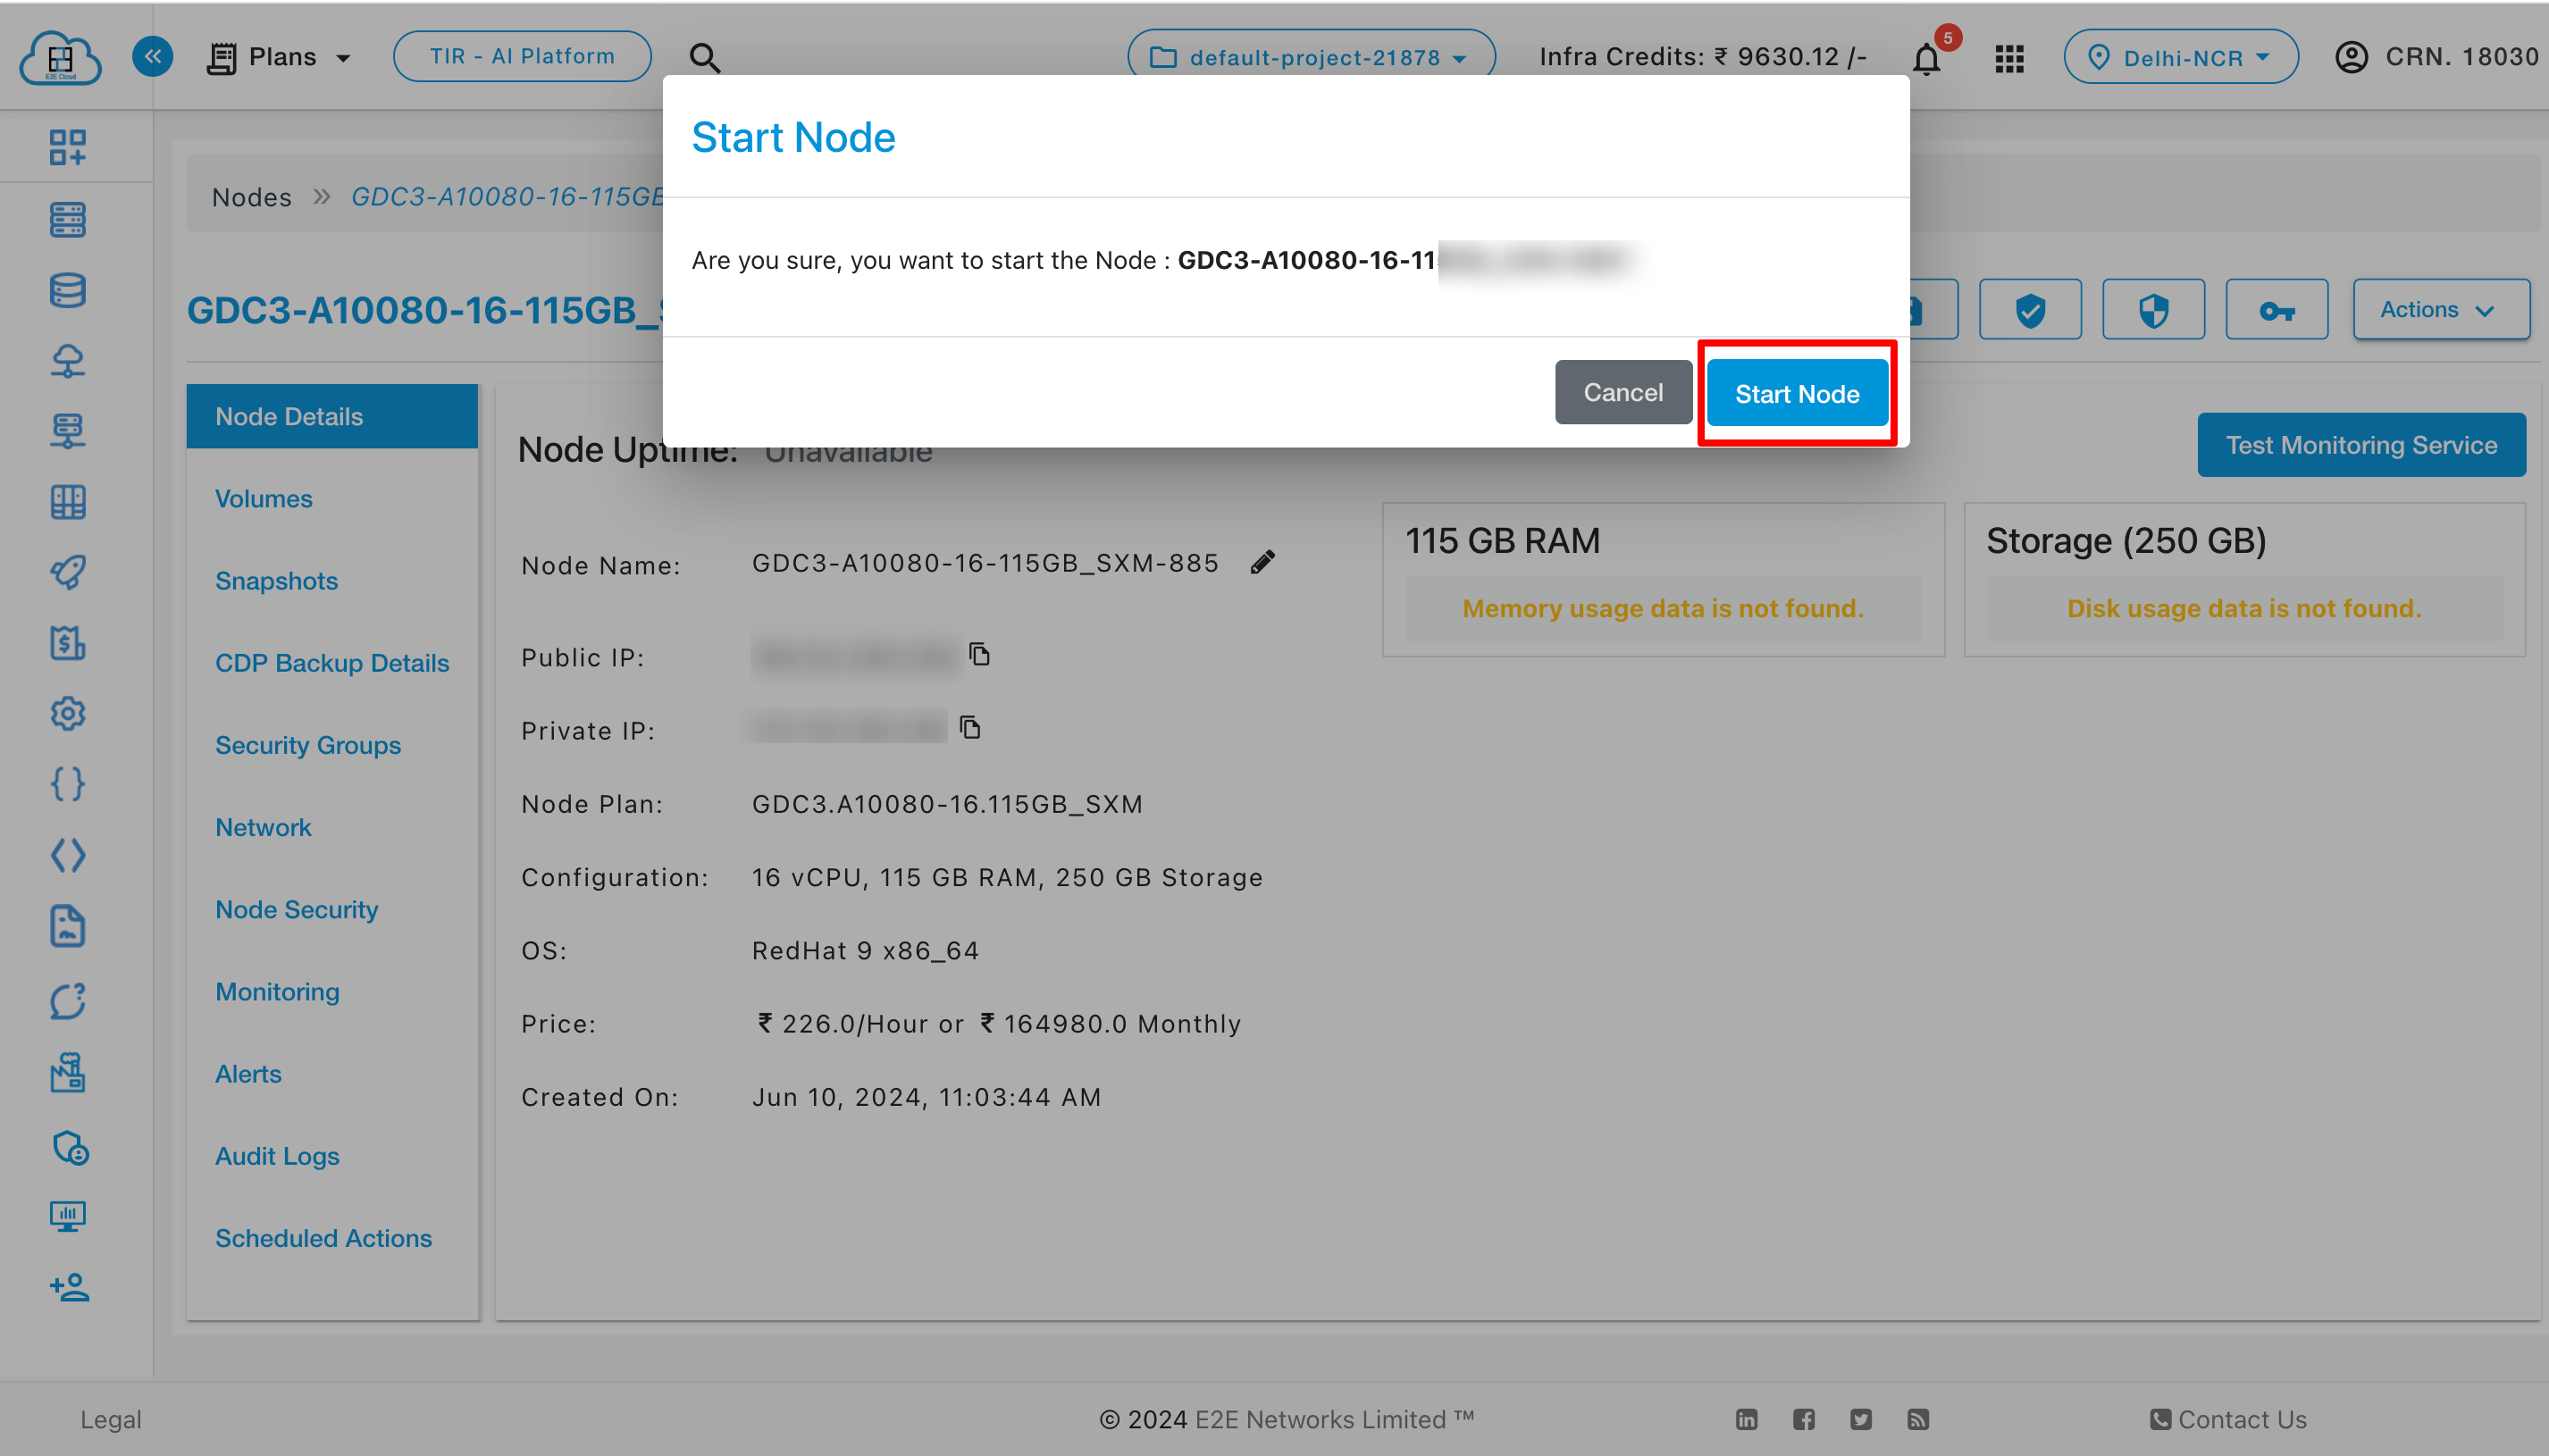
Start
If your server is Powered off, clicking on the Start button will be Power On your Nodes.
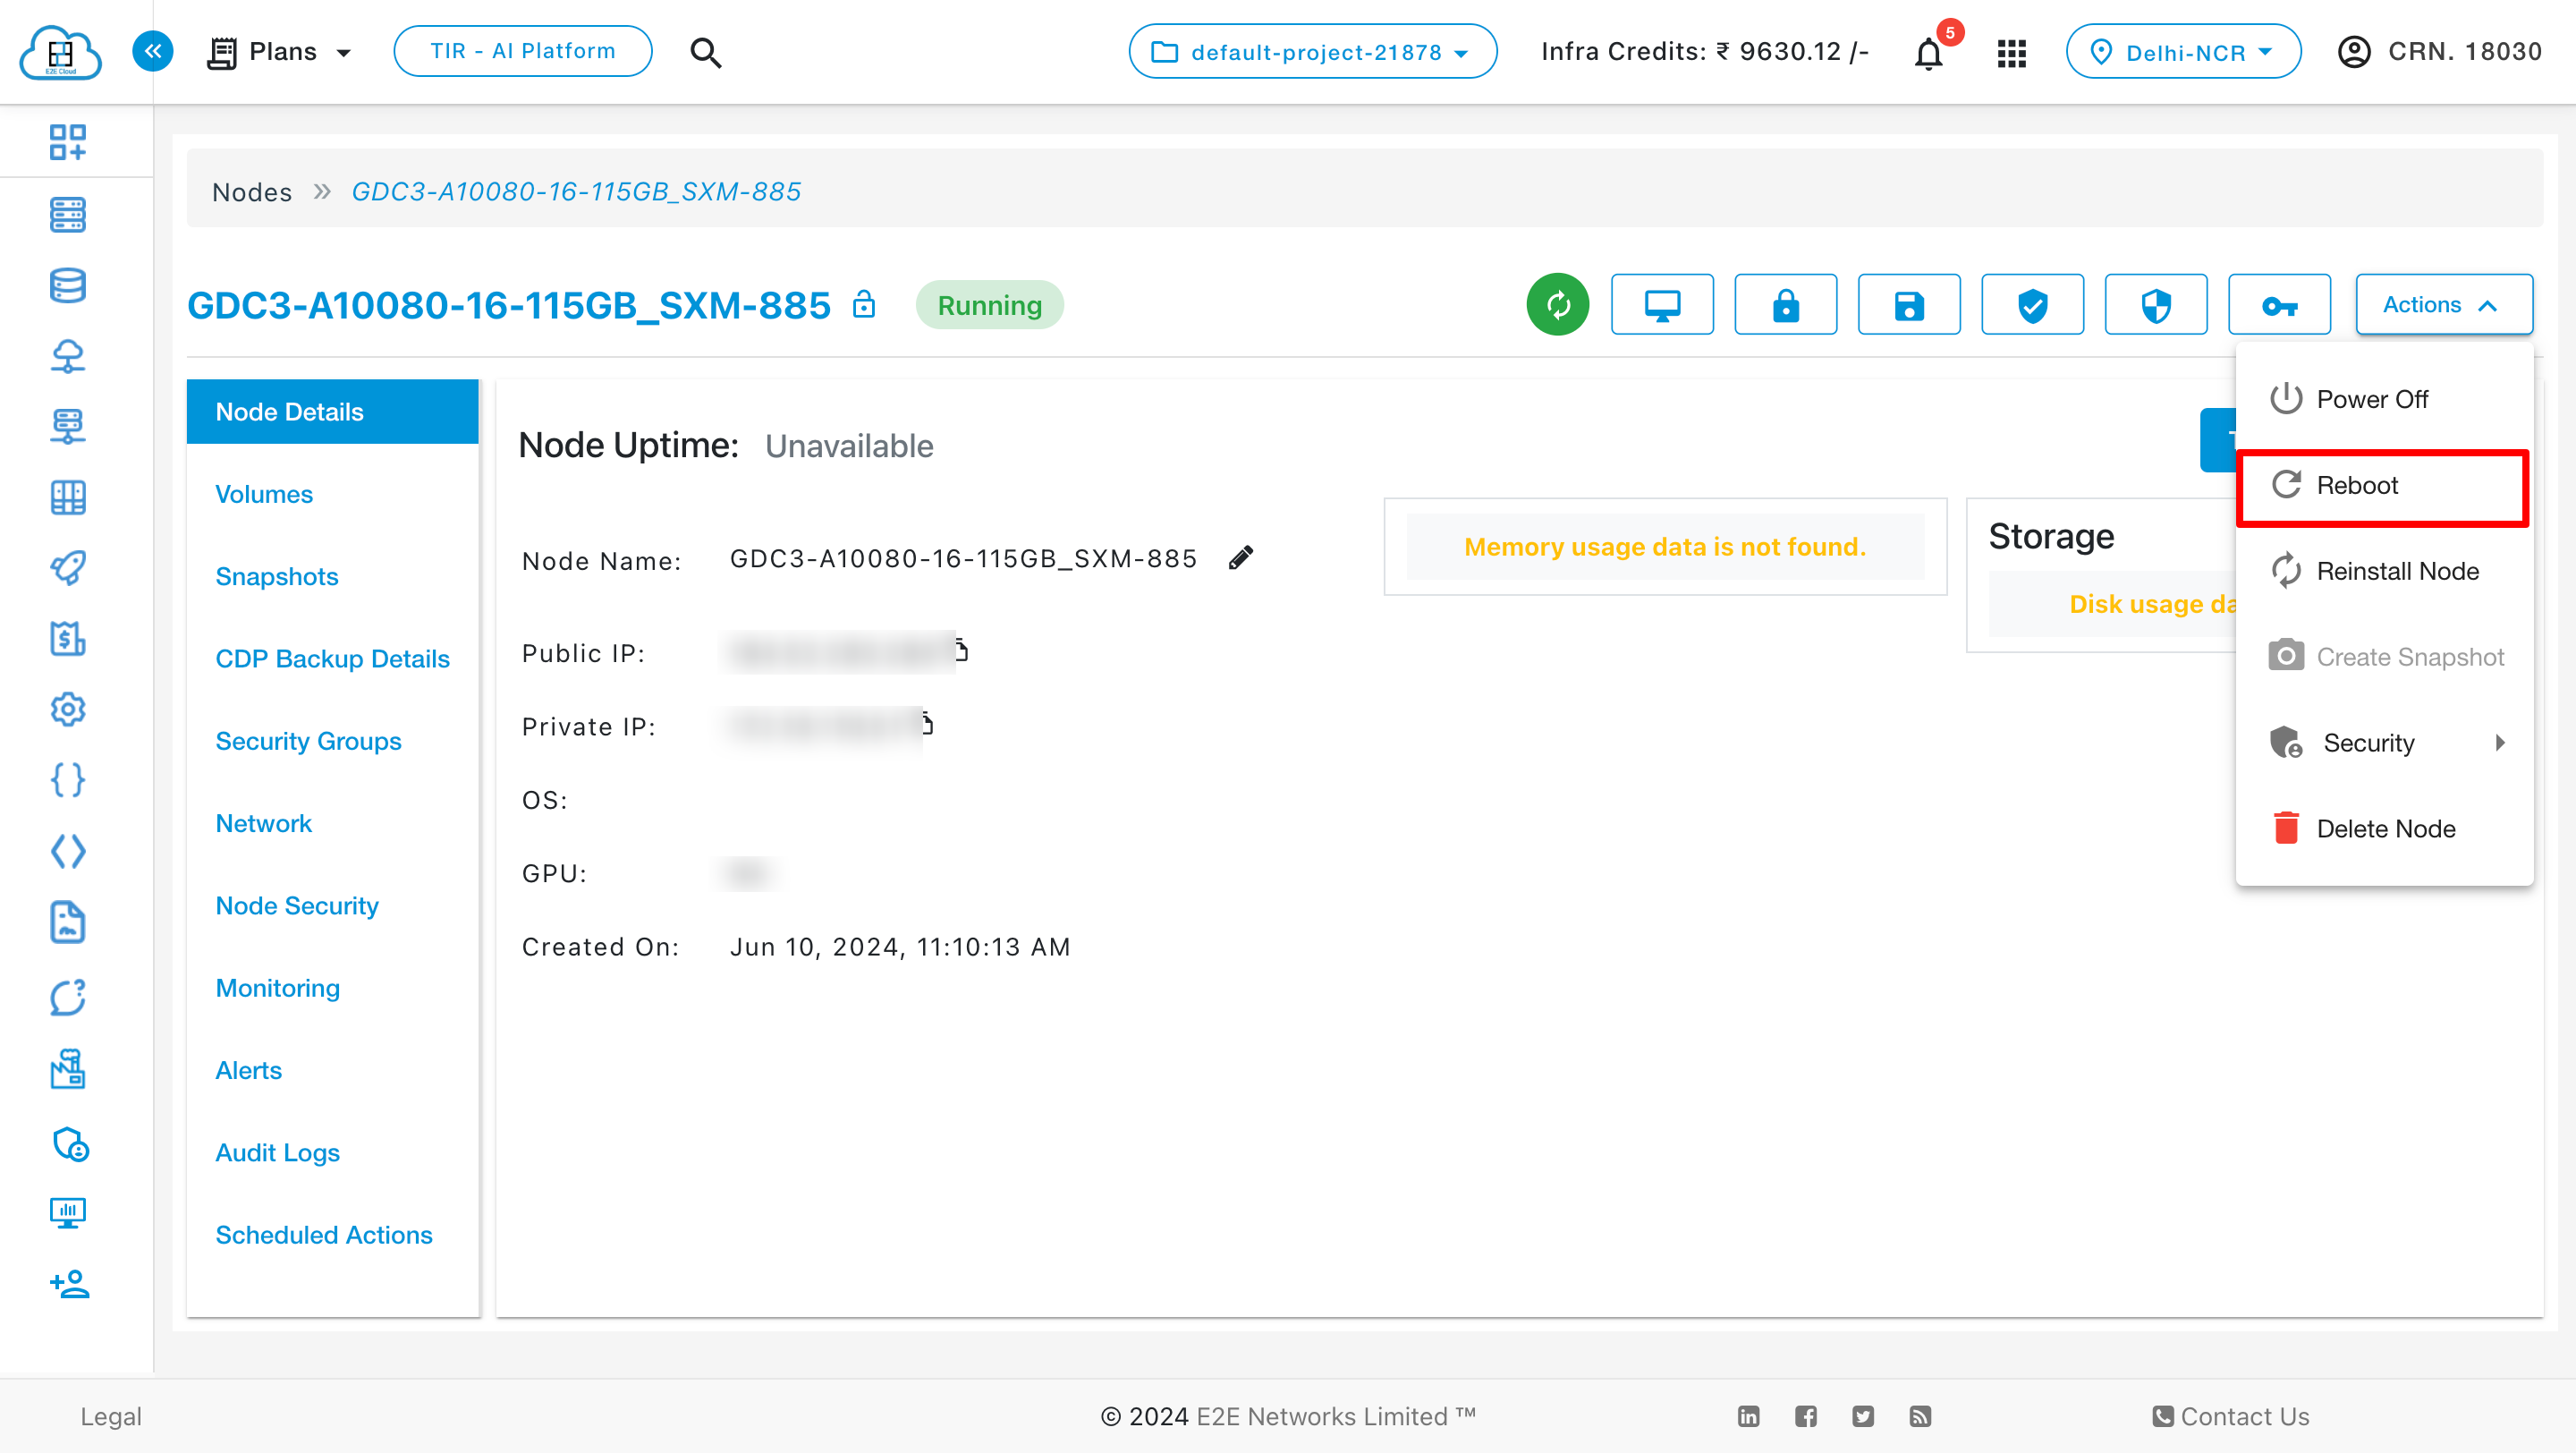
Reboot
Click on the Reboot button to restart your node without re-installing the node image. Reboot operation is just like powering off and then powering on the node. It will take a few minutes to restart your node.
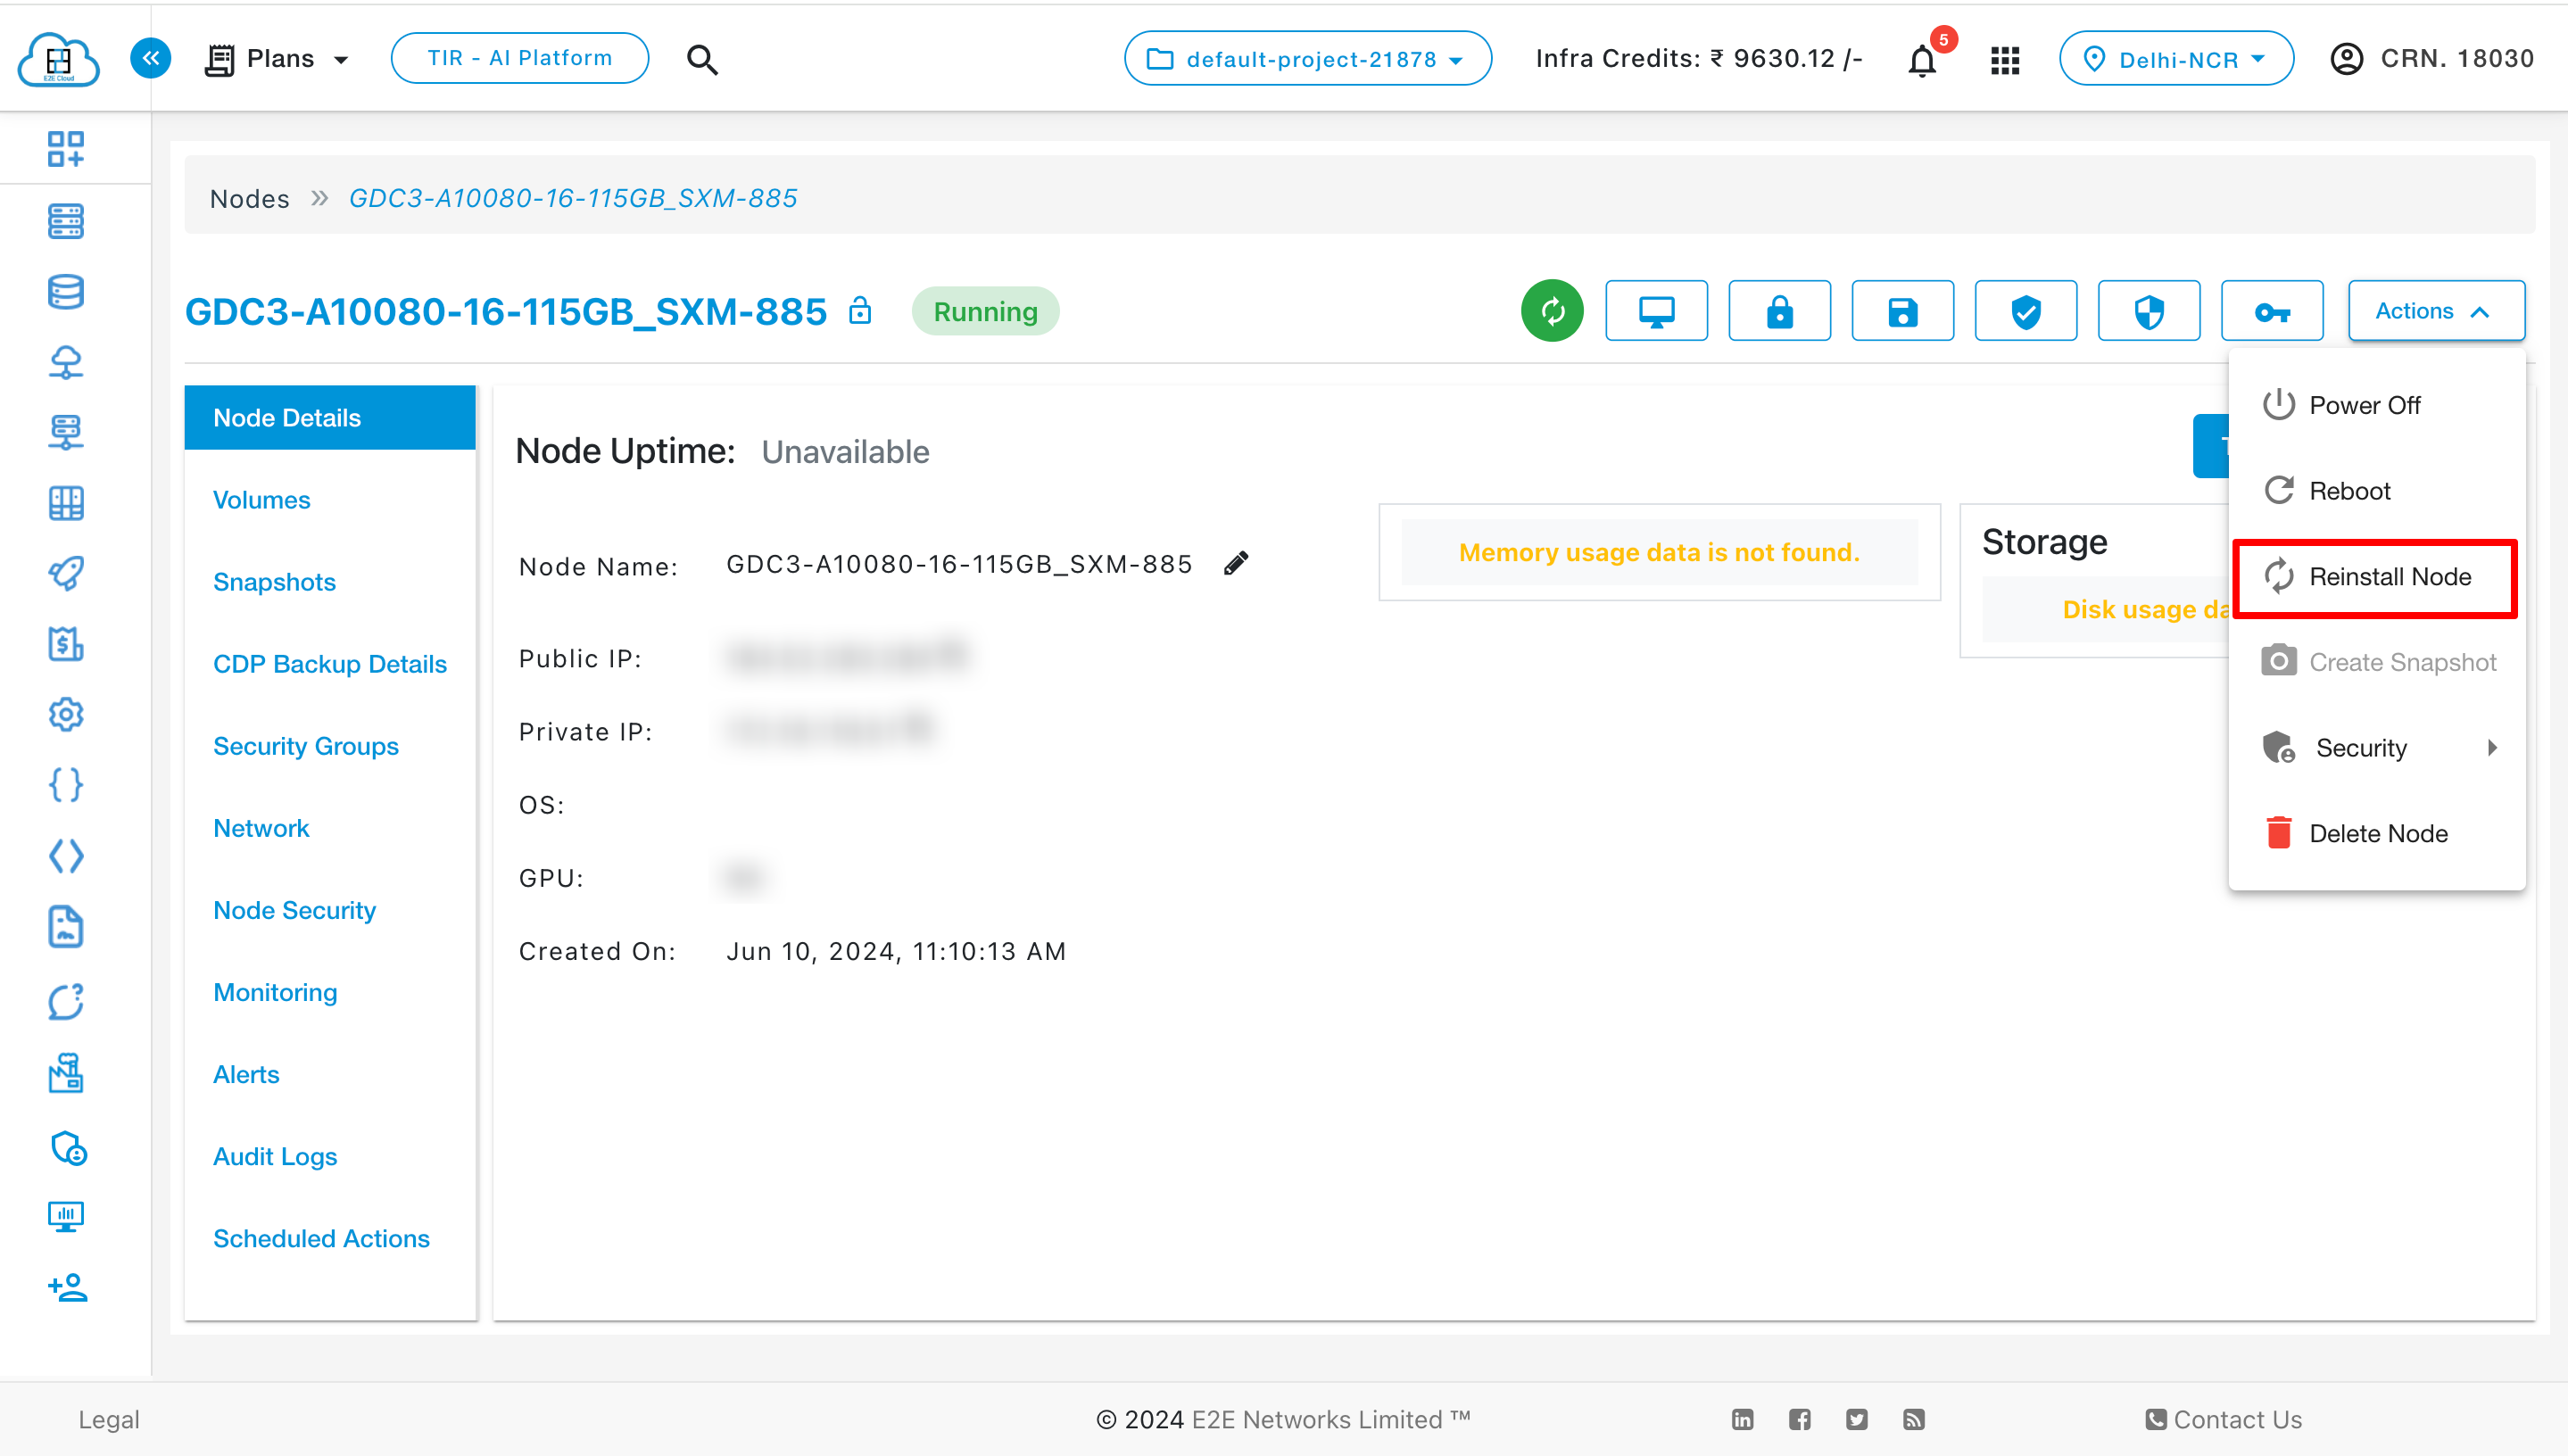
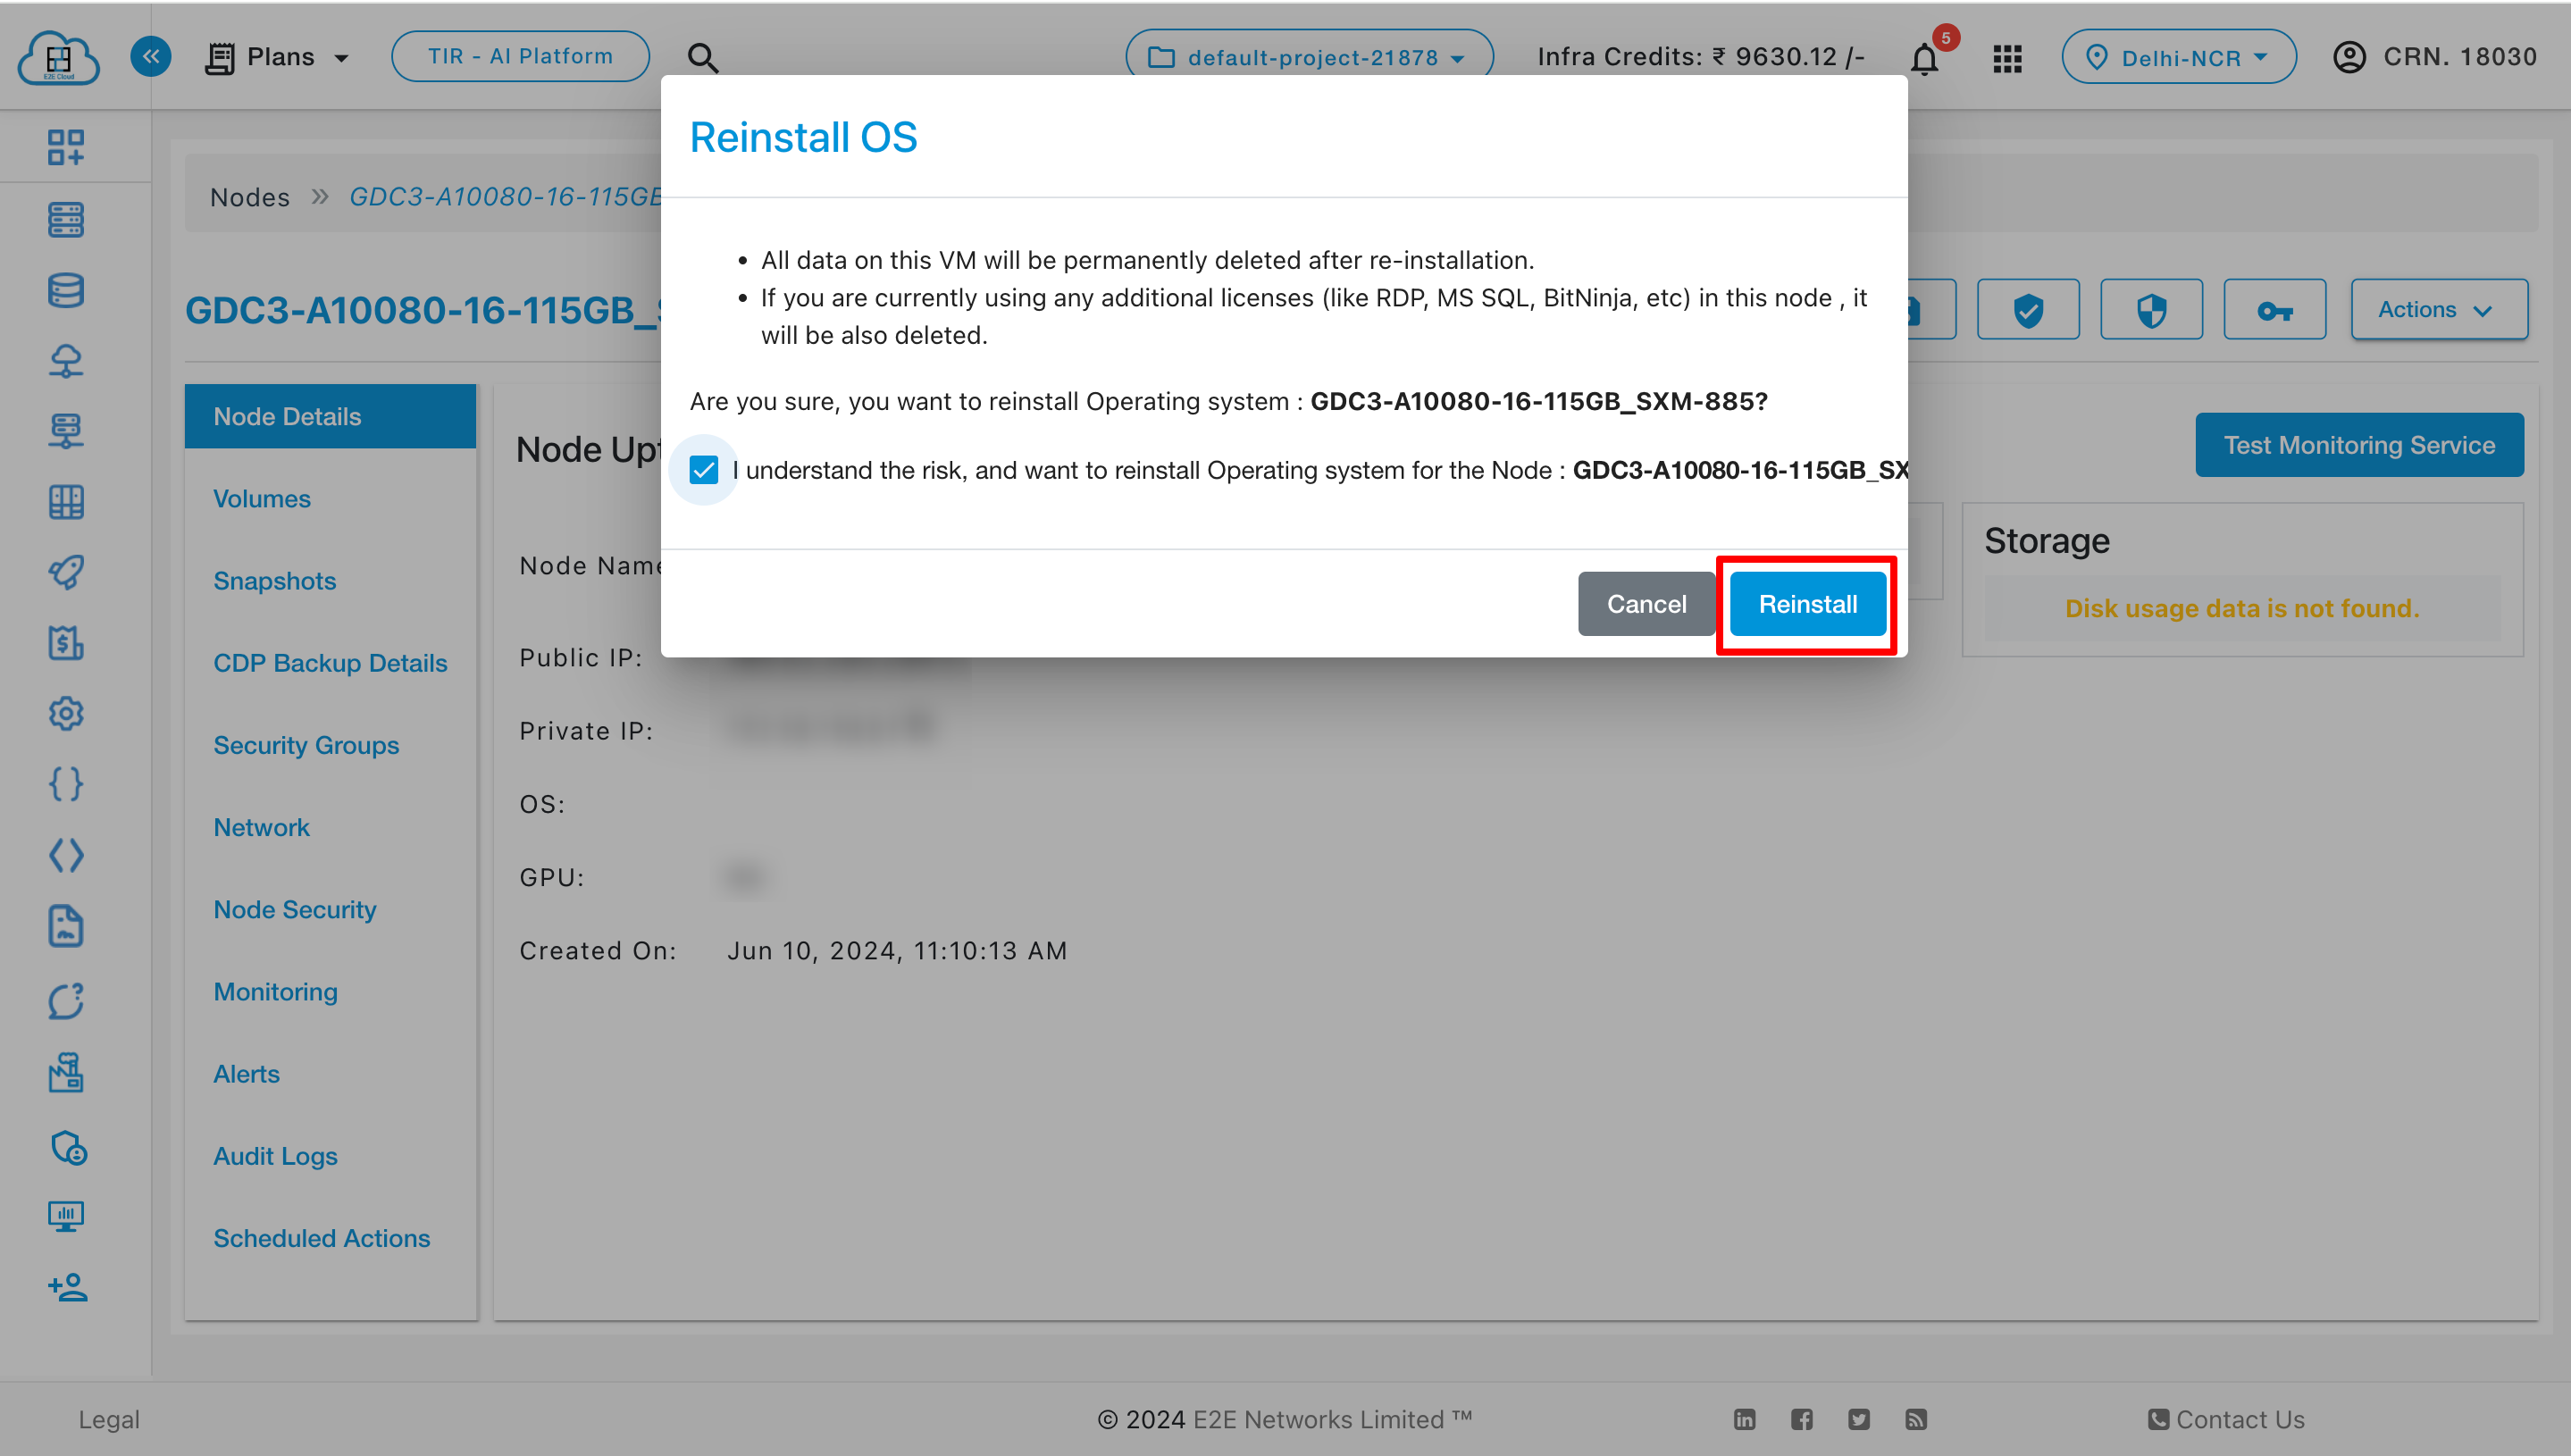
Reinstall
At any time you can clean your server and reinstall a clean OS rather than creating a new node. Click on the reinstall button to place your new, clean node. A confirmation notification will appear ‘Are you sure you want to reinstall OS’. Click Ok to proceed and the state will change to ‘Reinstalling’. After a couple of minutes, your node will be re-installed and ready for use.
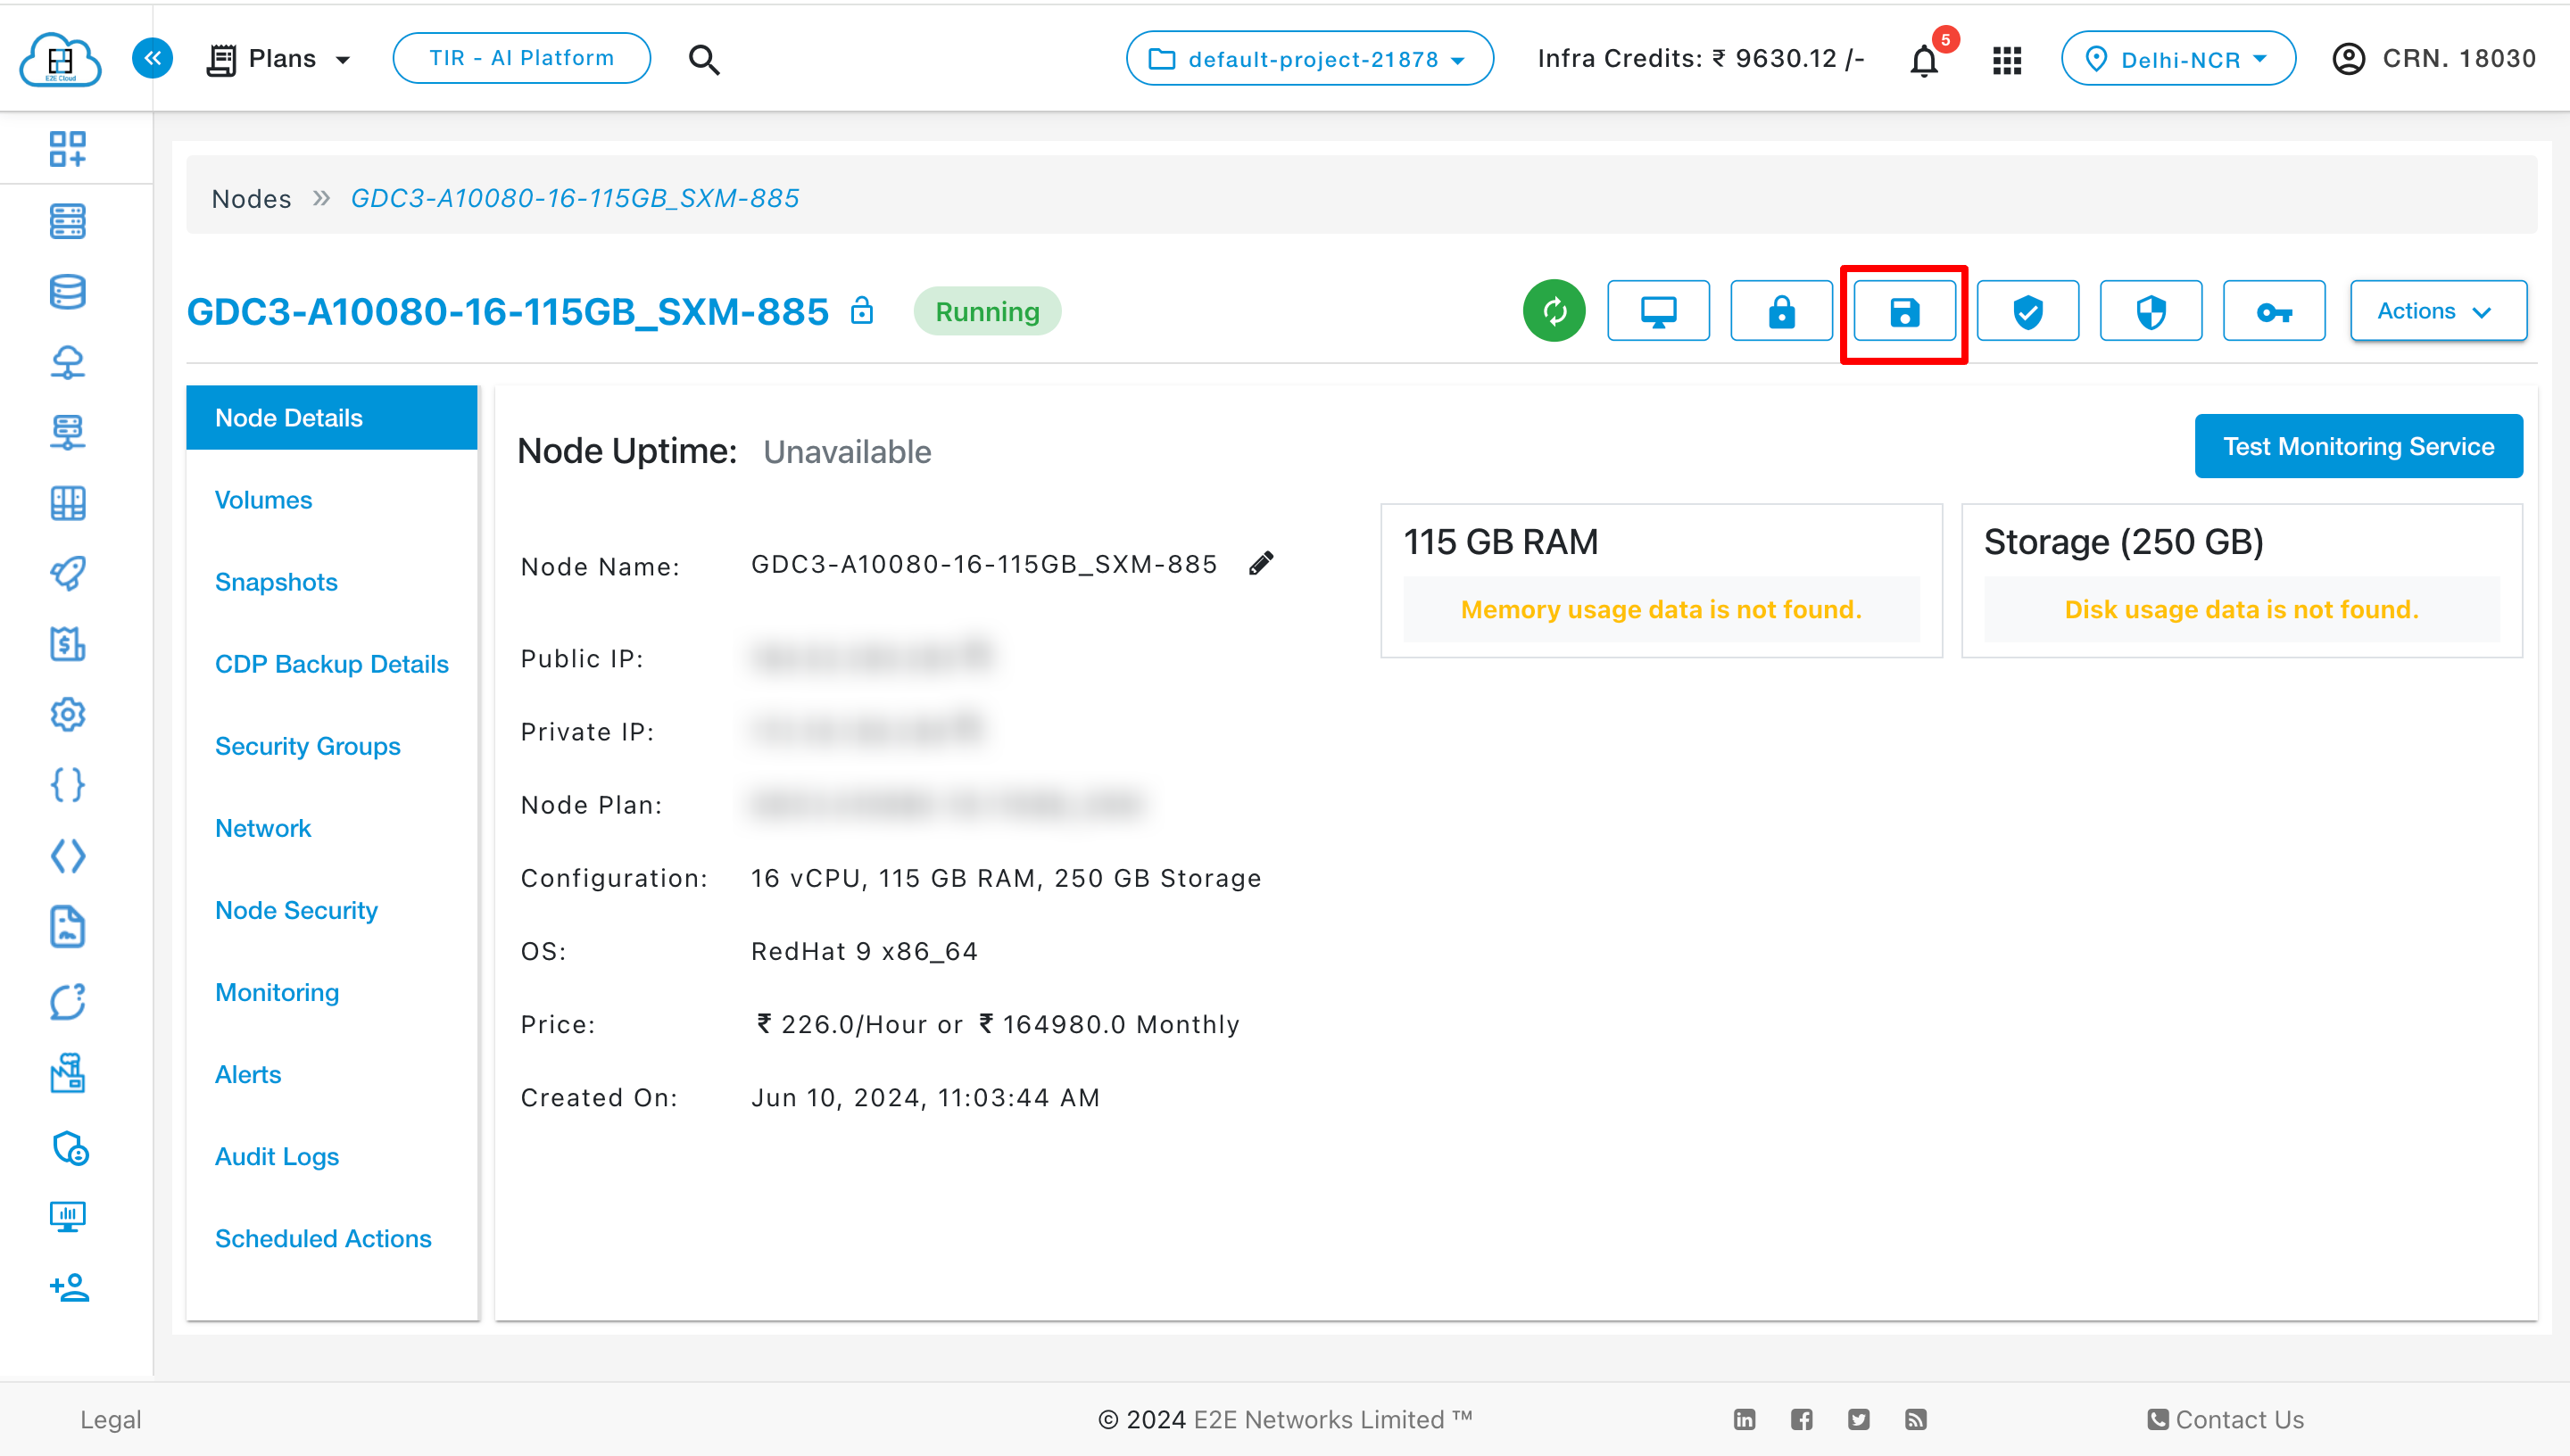
Save Image
To save an image of a node, it must be in a powered-off state. Once the respective node is powered off. Click on the Save Image button and create a name of your node image. The save image creation will take a few minutes. Learn More about saved image
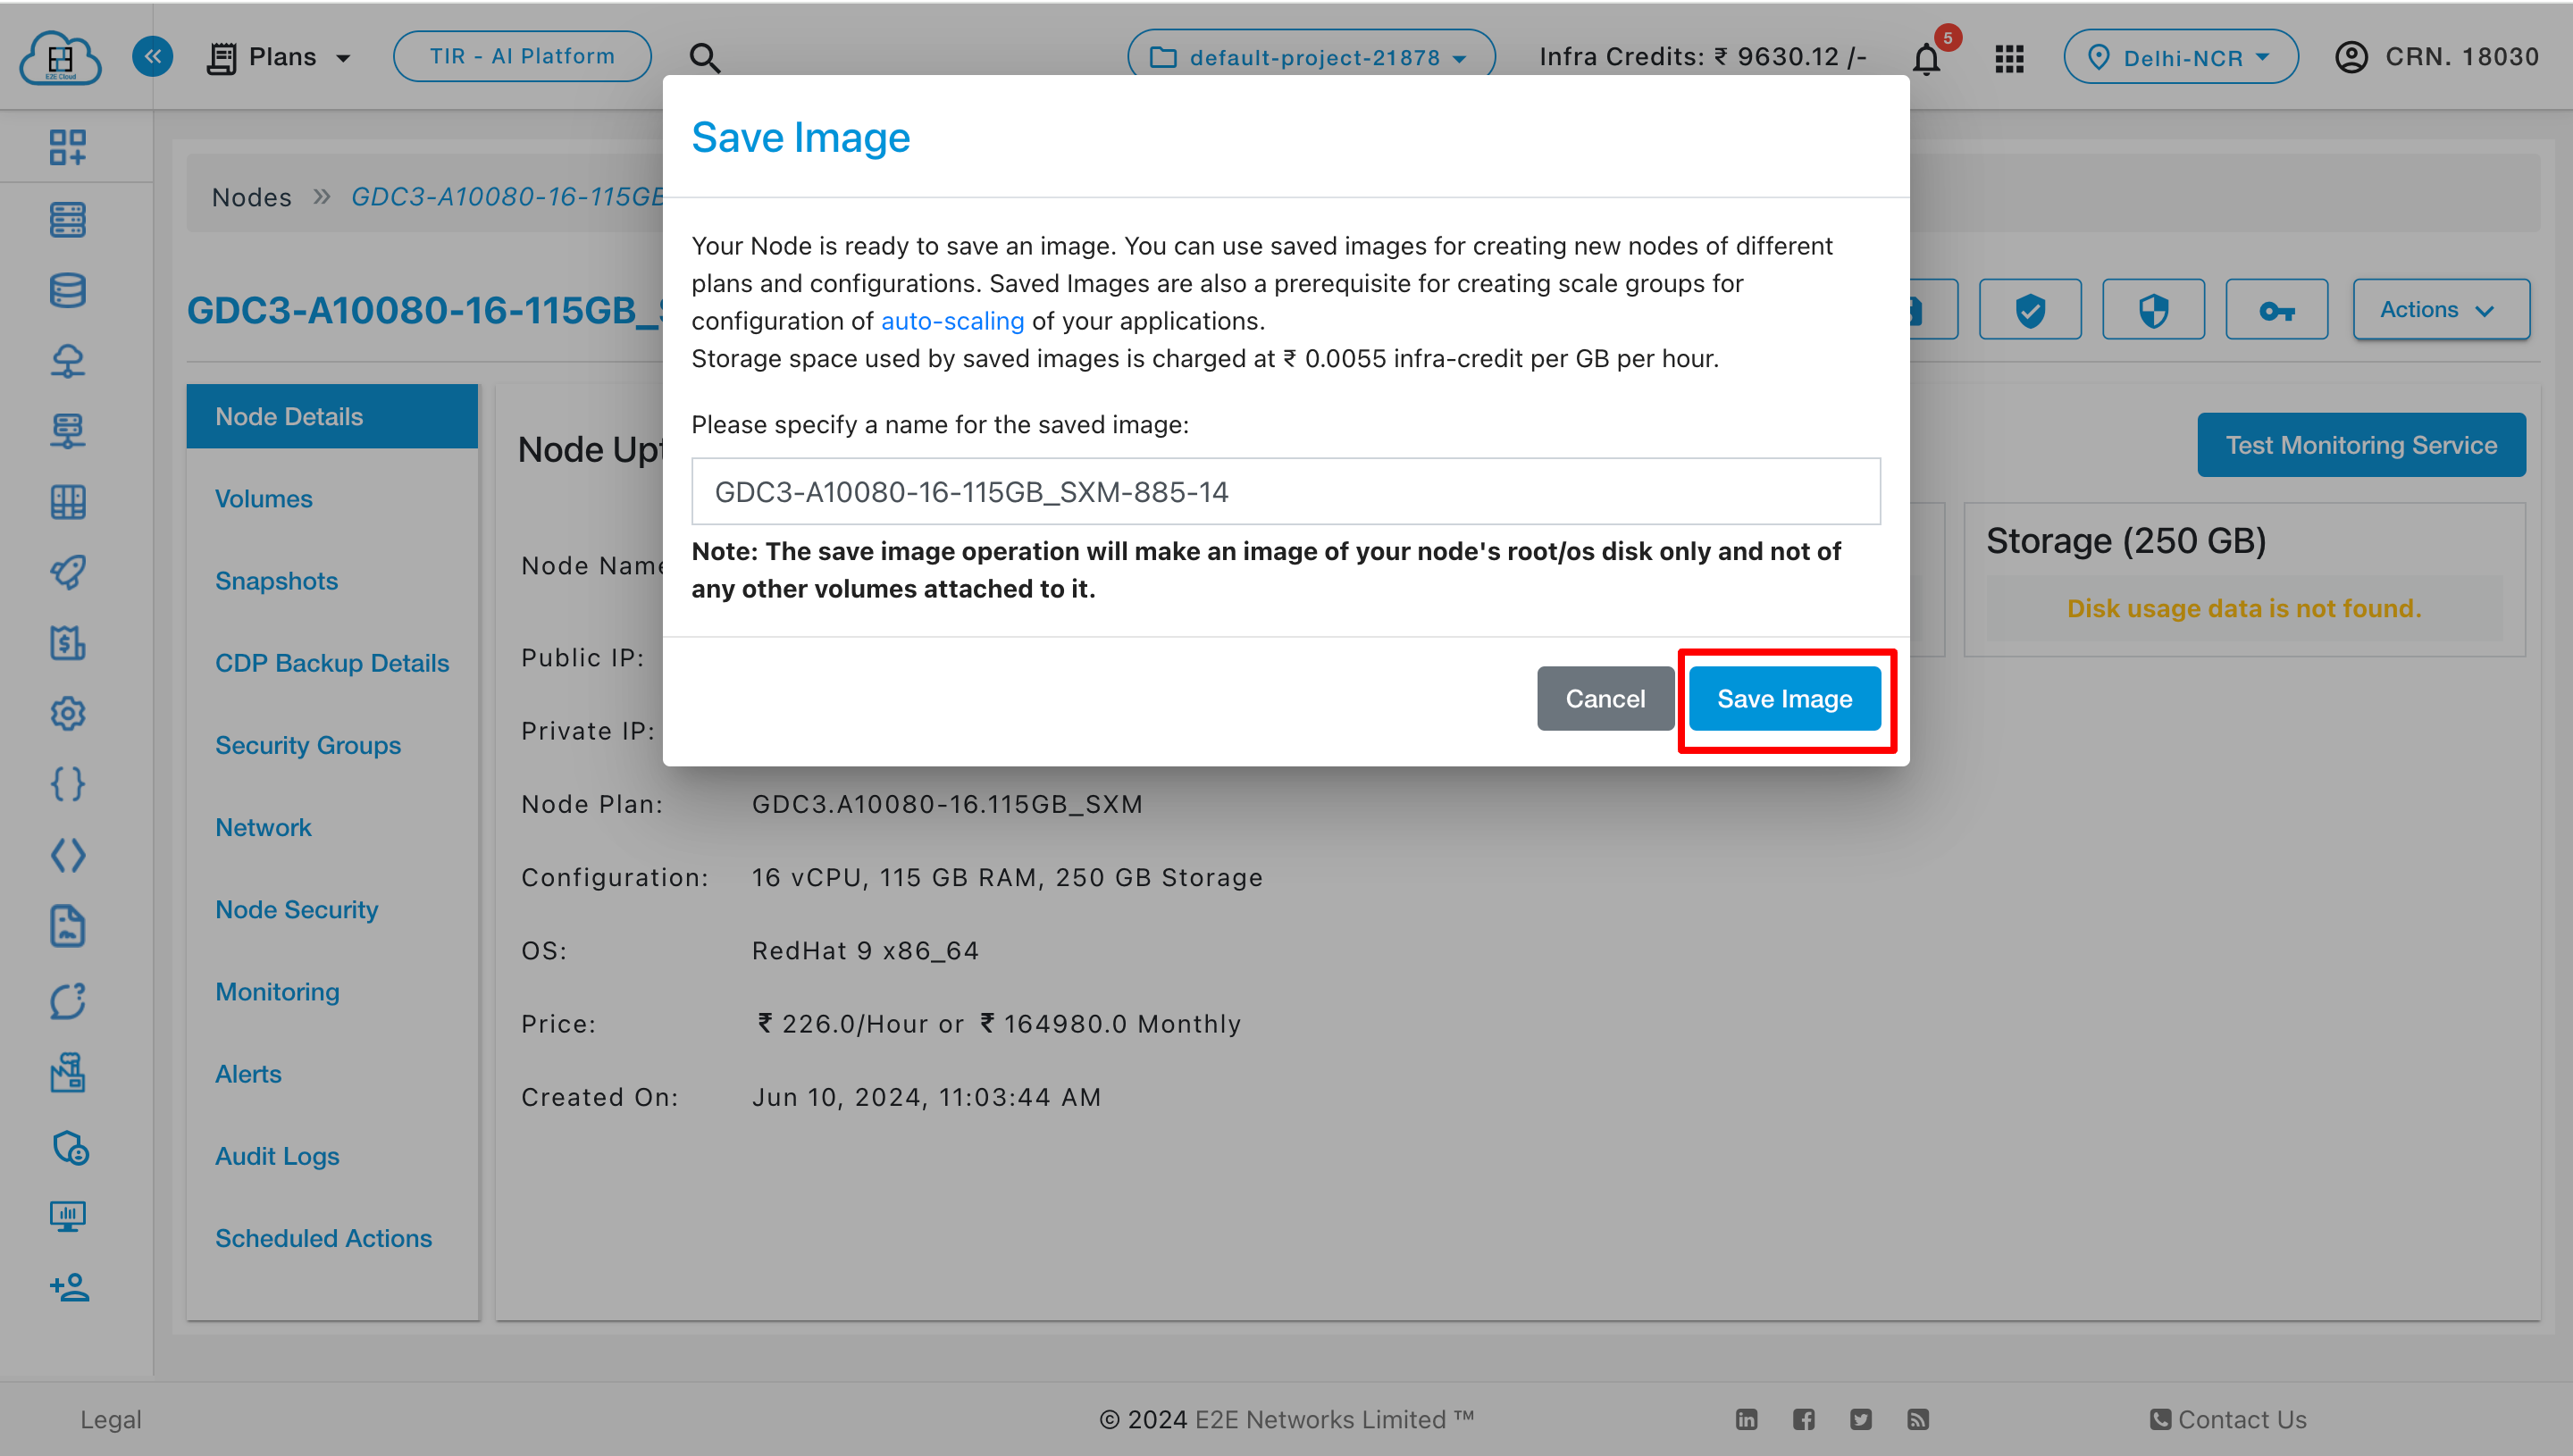
You will see a message ‘Your image is being saved this may take a while’.
Note
All the available actions will be disabled on this node while the saved image is created. To access the saved image click on “Saved Images” button on the top right corner of the node table.
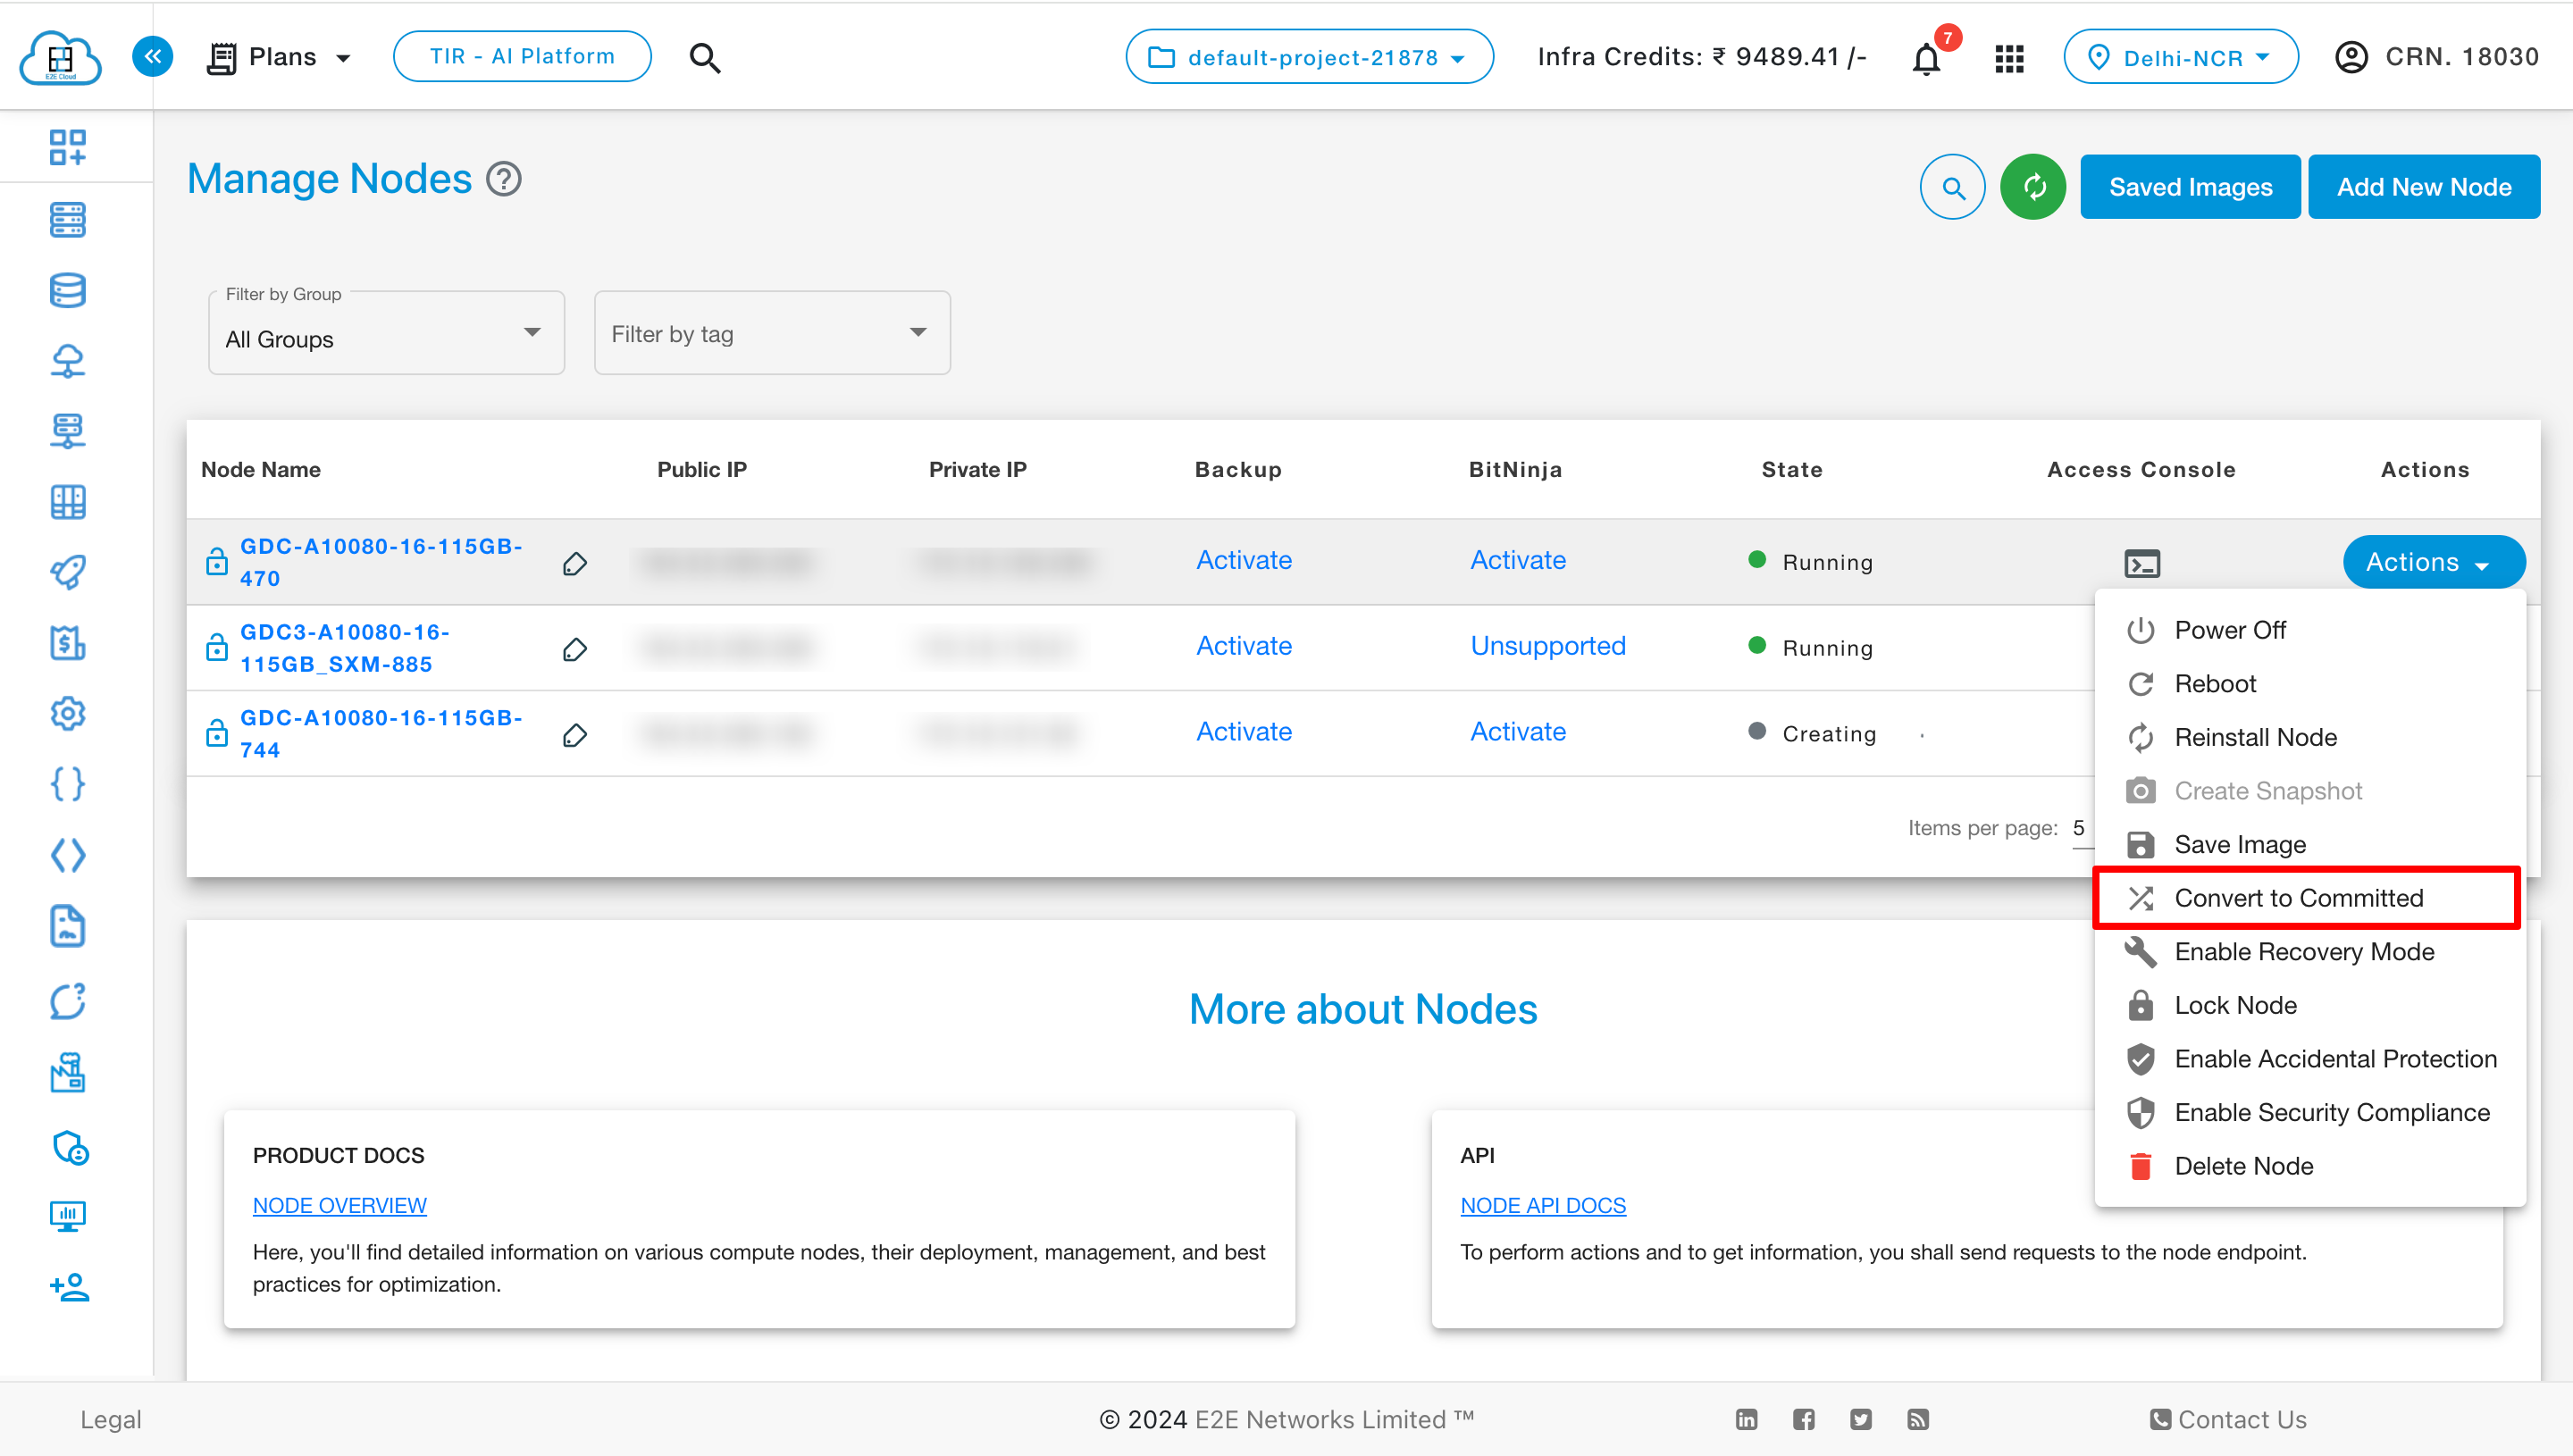
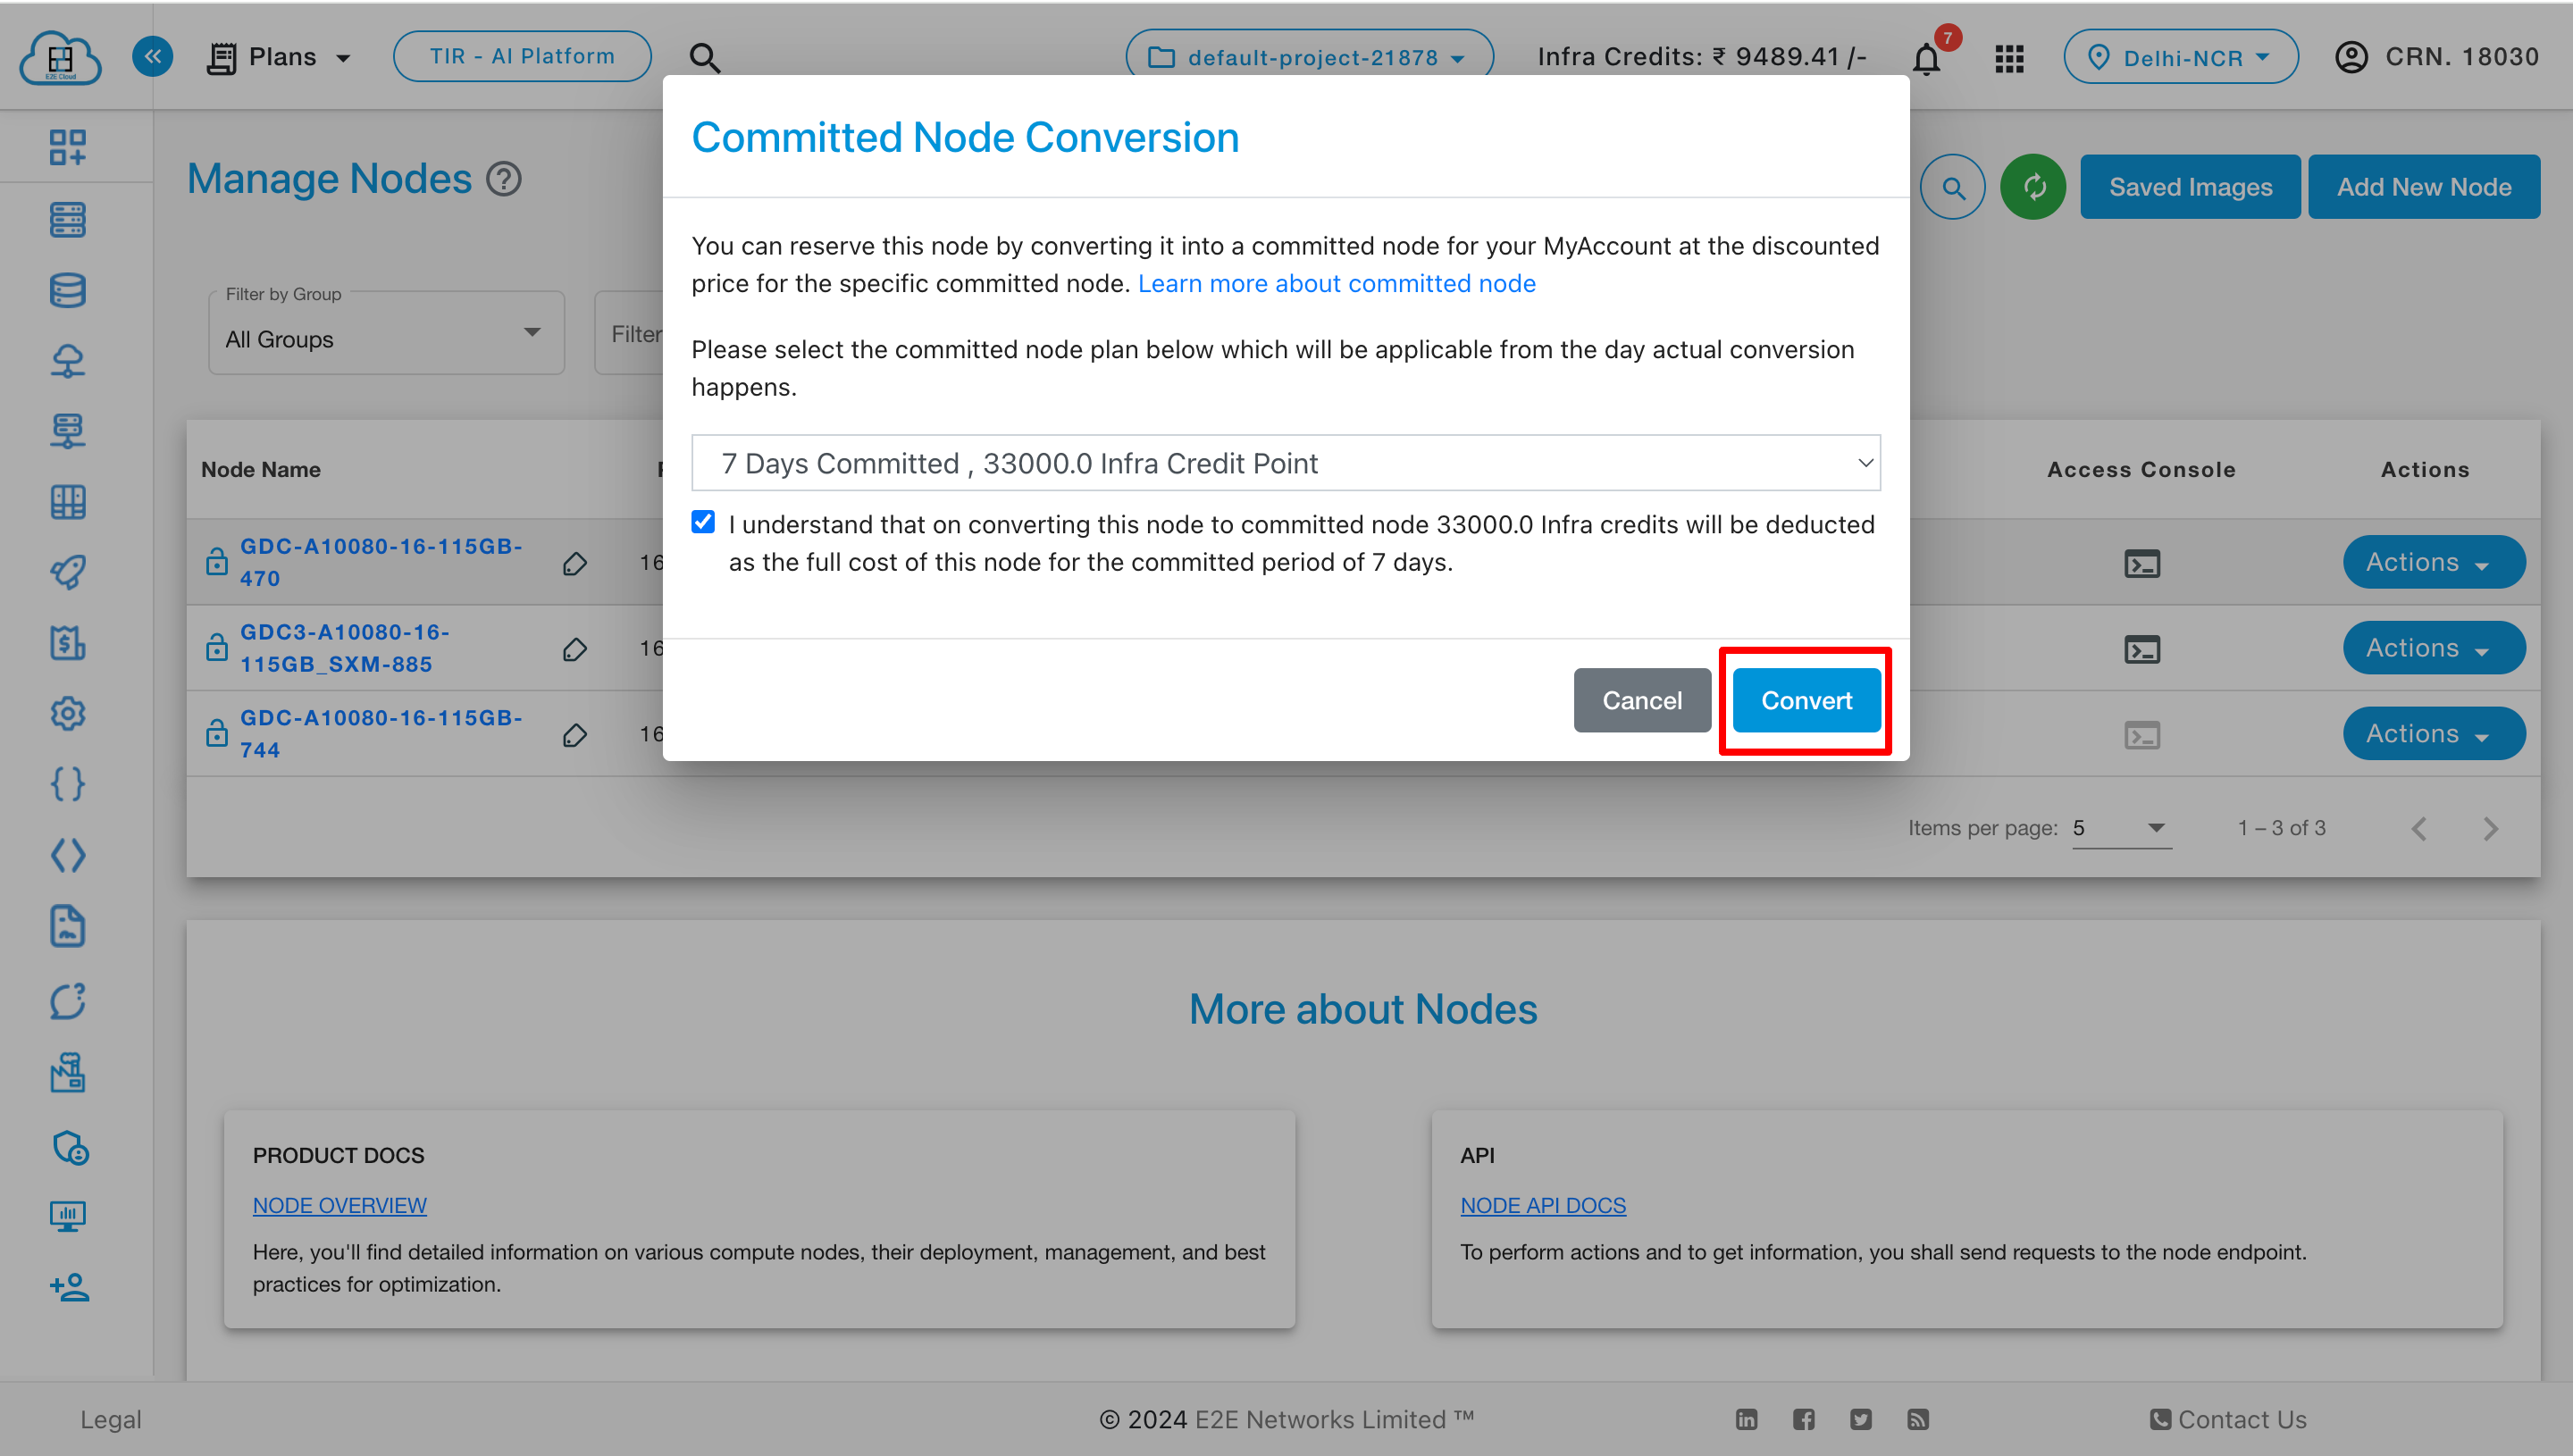
Convert to committed Node
If your node is currently billed on an hourly basis, you may be able to save cost on some of the select plans by converting to “committed plans”. Committed plans have an in-built discount because the total cost of running the node for the committed period is considerably less compared to the cost of the same node if that is billed on an hourly rate for the same committed period. Learn More.
Note
The committed plans are available only for selected nodes family and configuration. Please feel free to contact our sales team if you wish to convert a node to committed plan but committed plans are not available for that node. We may be able to provide committed plans for that node too.
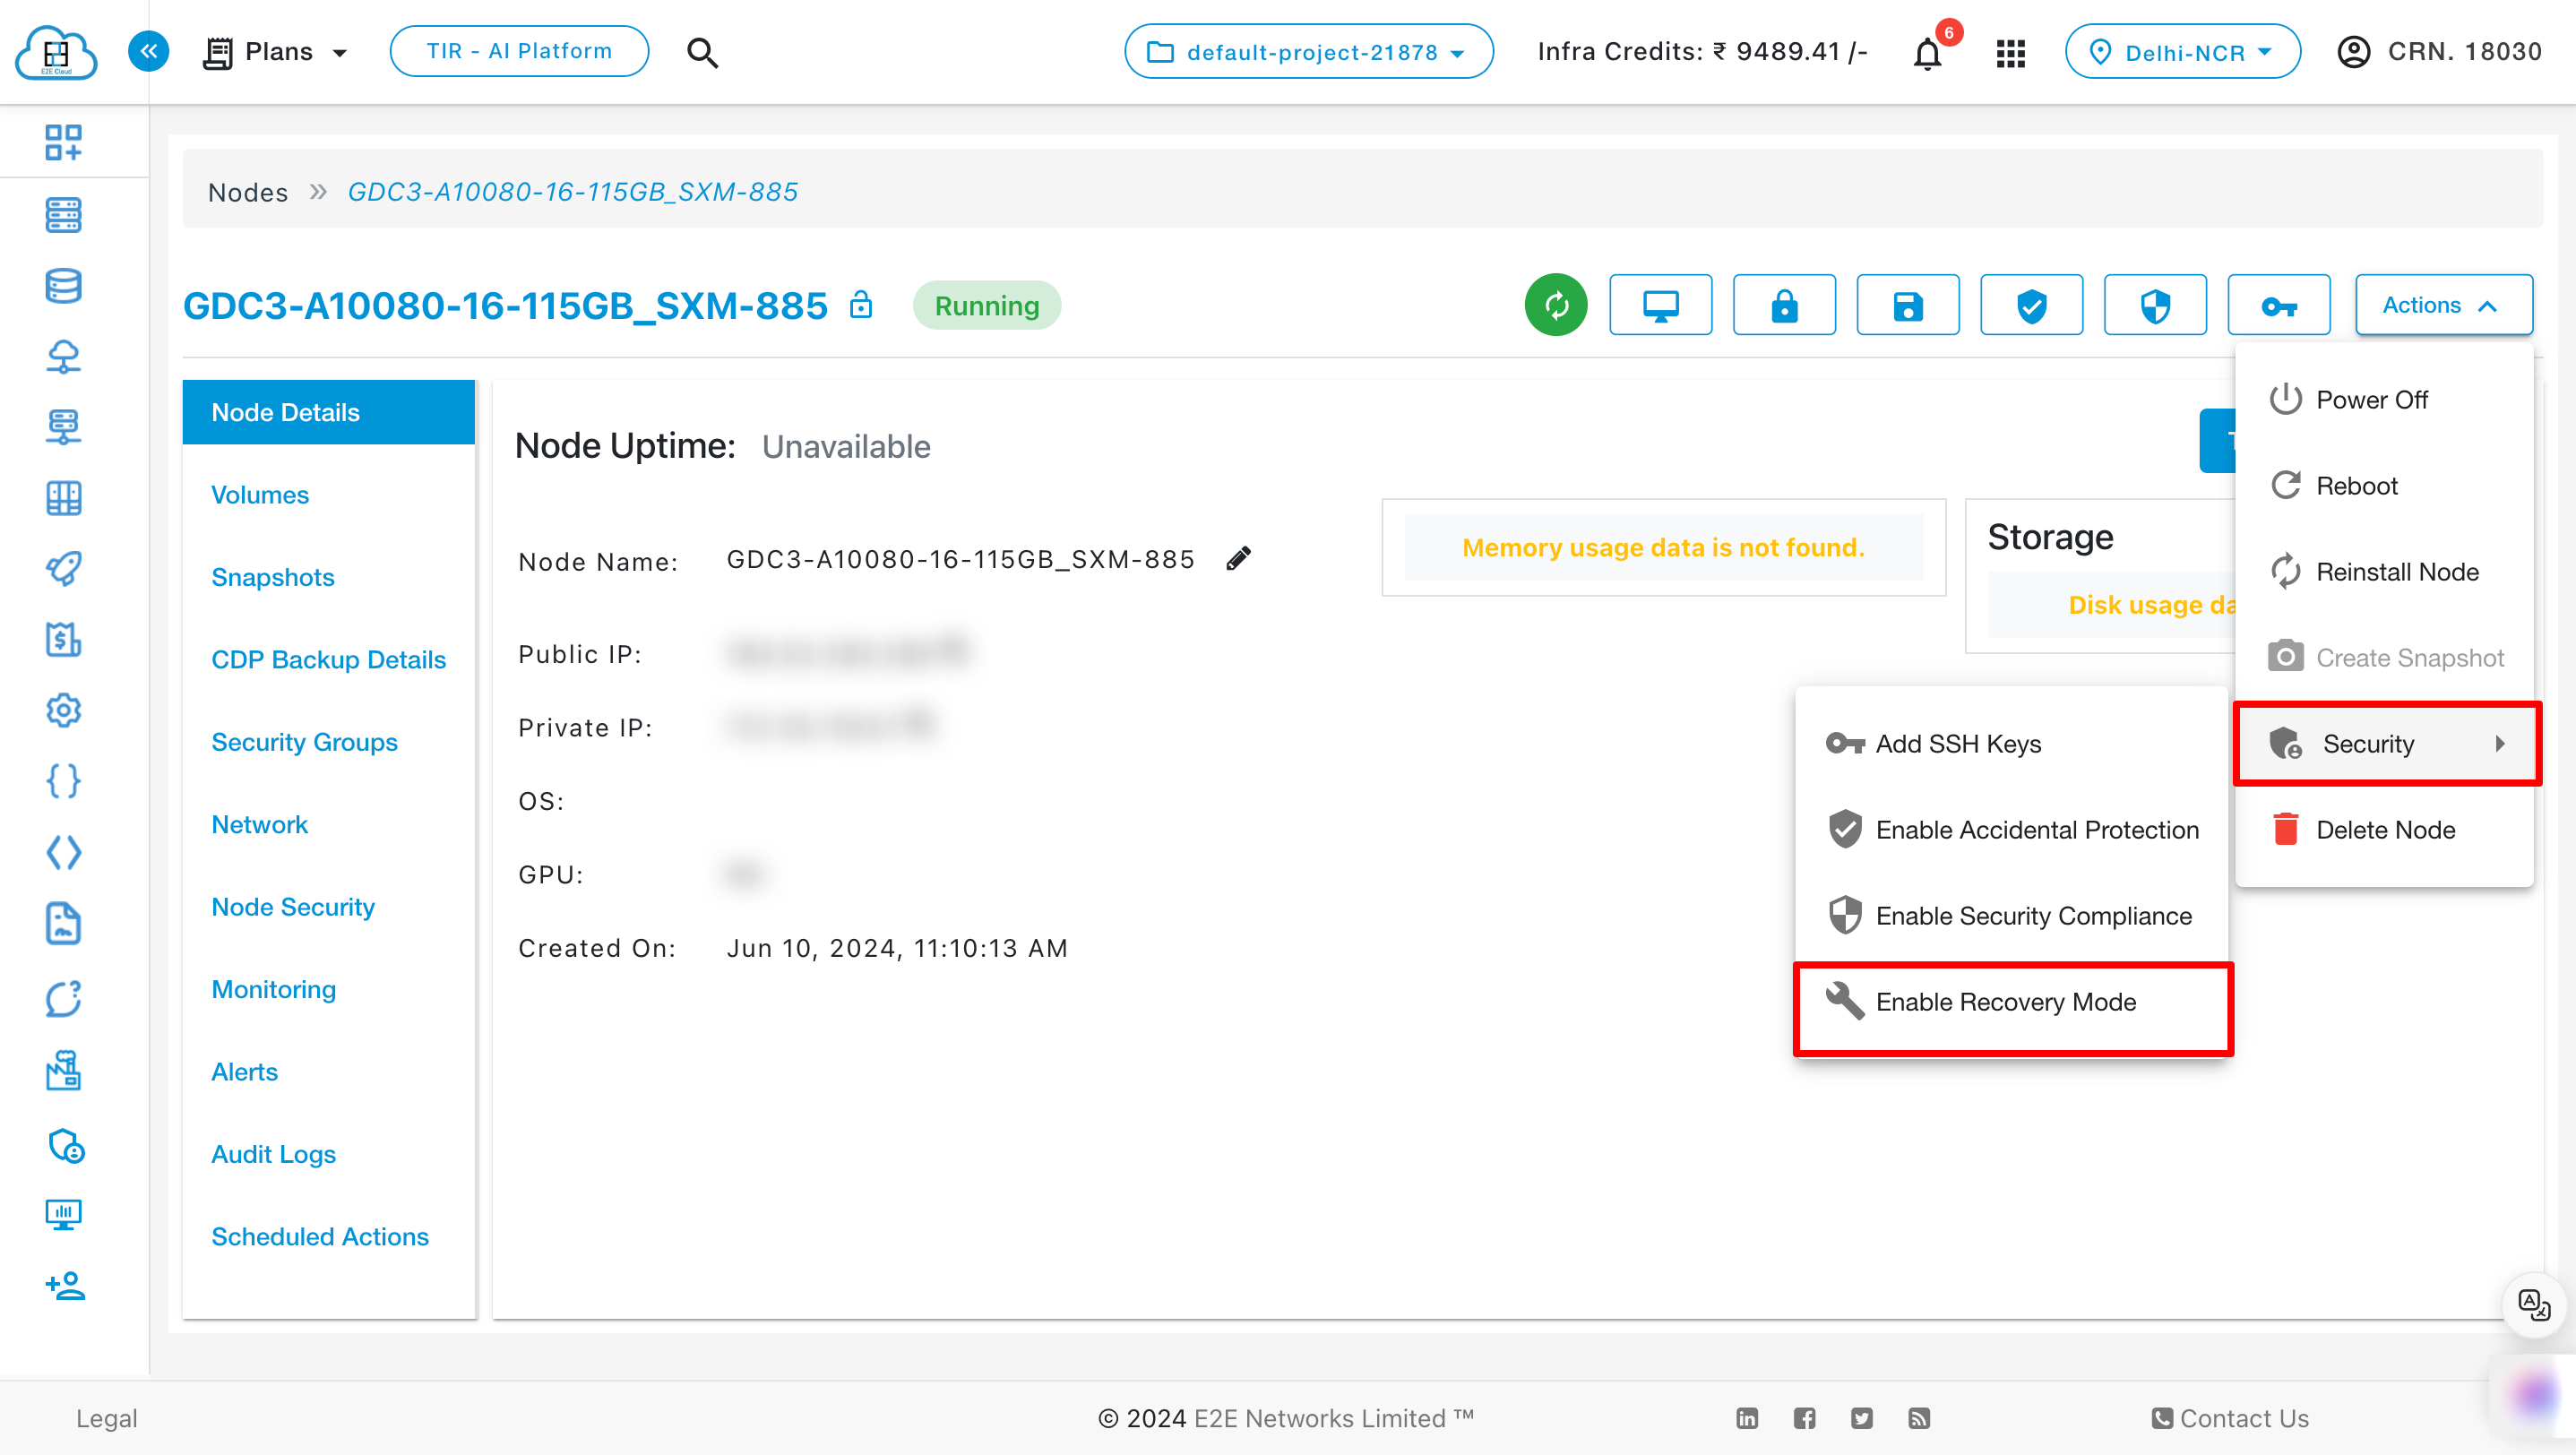
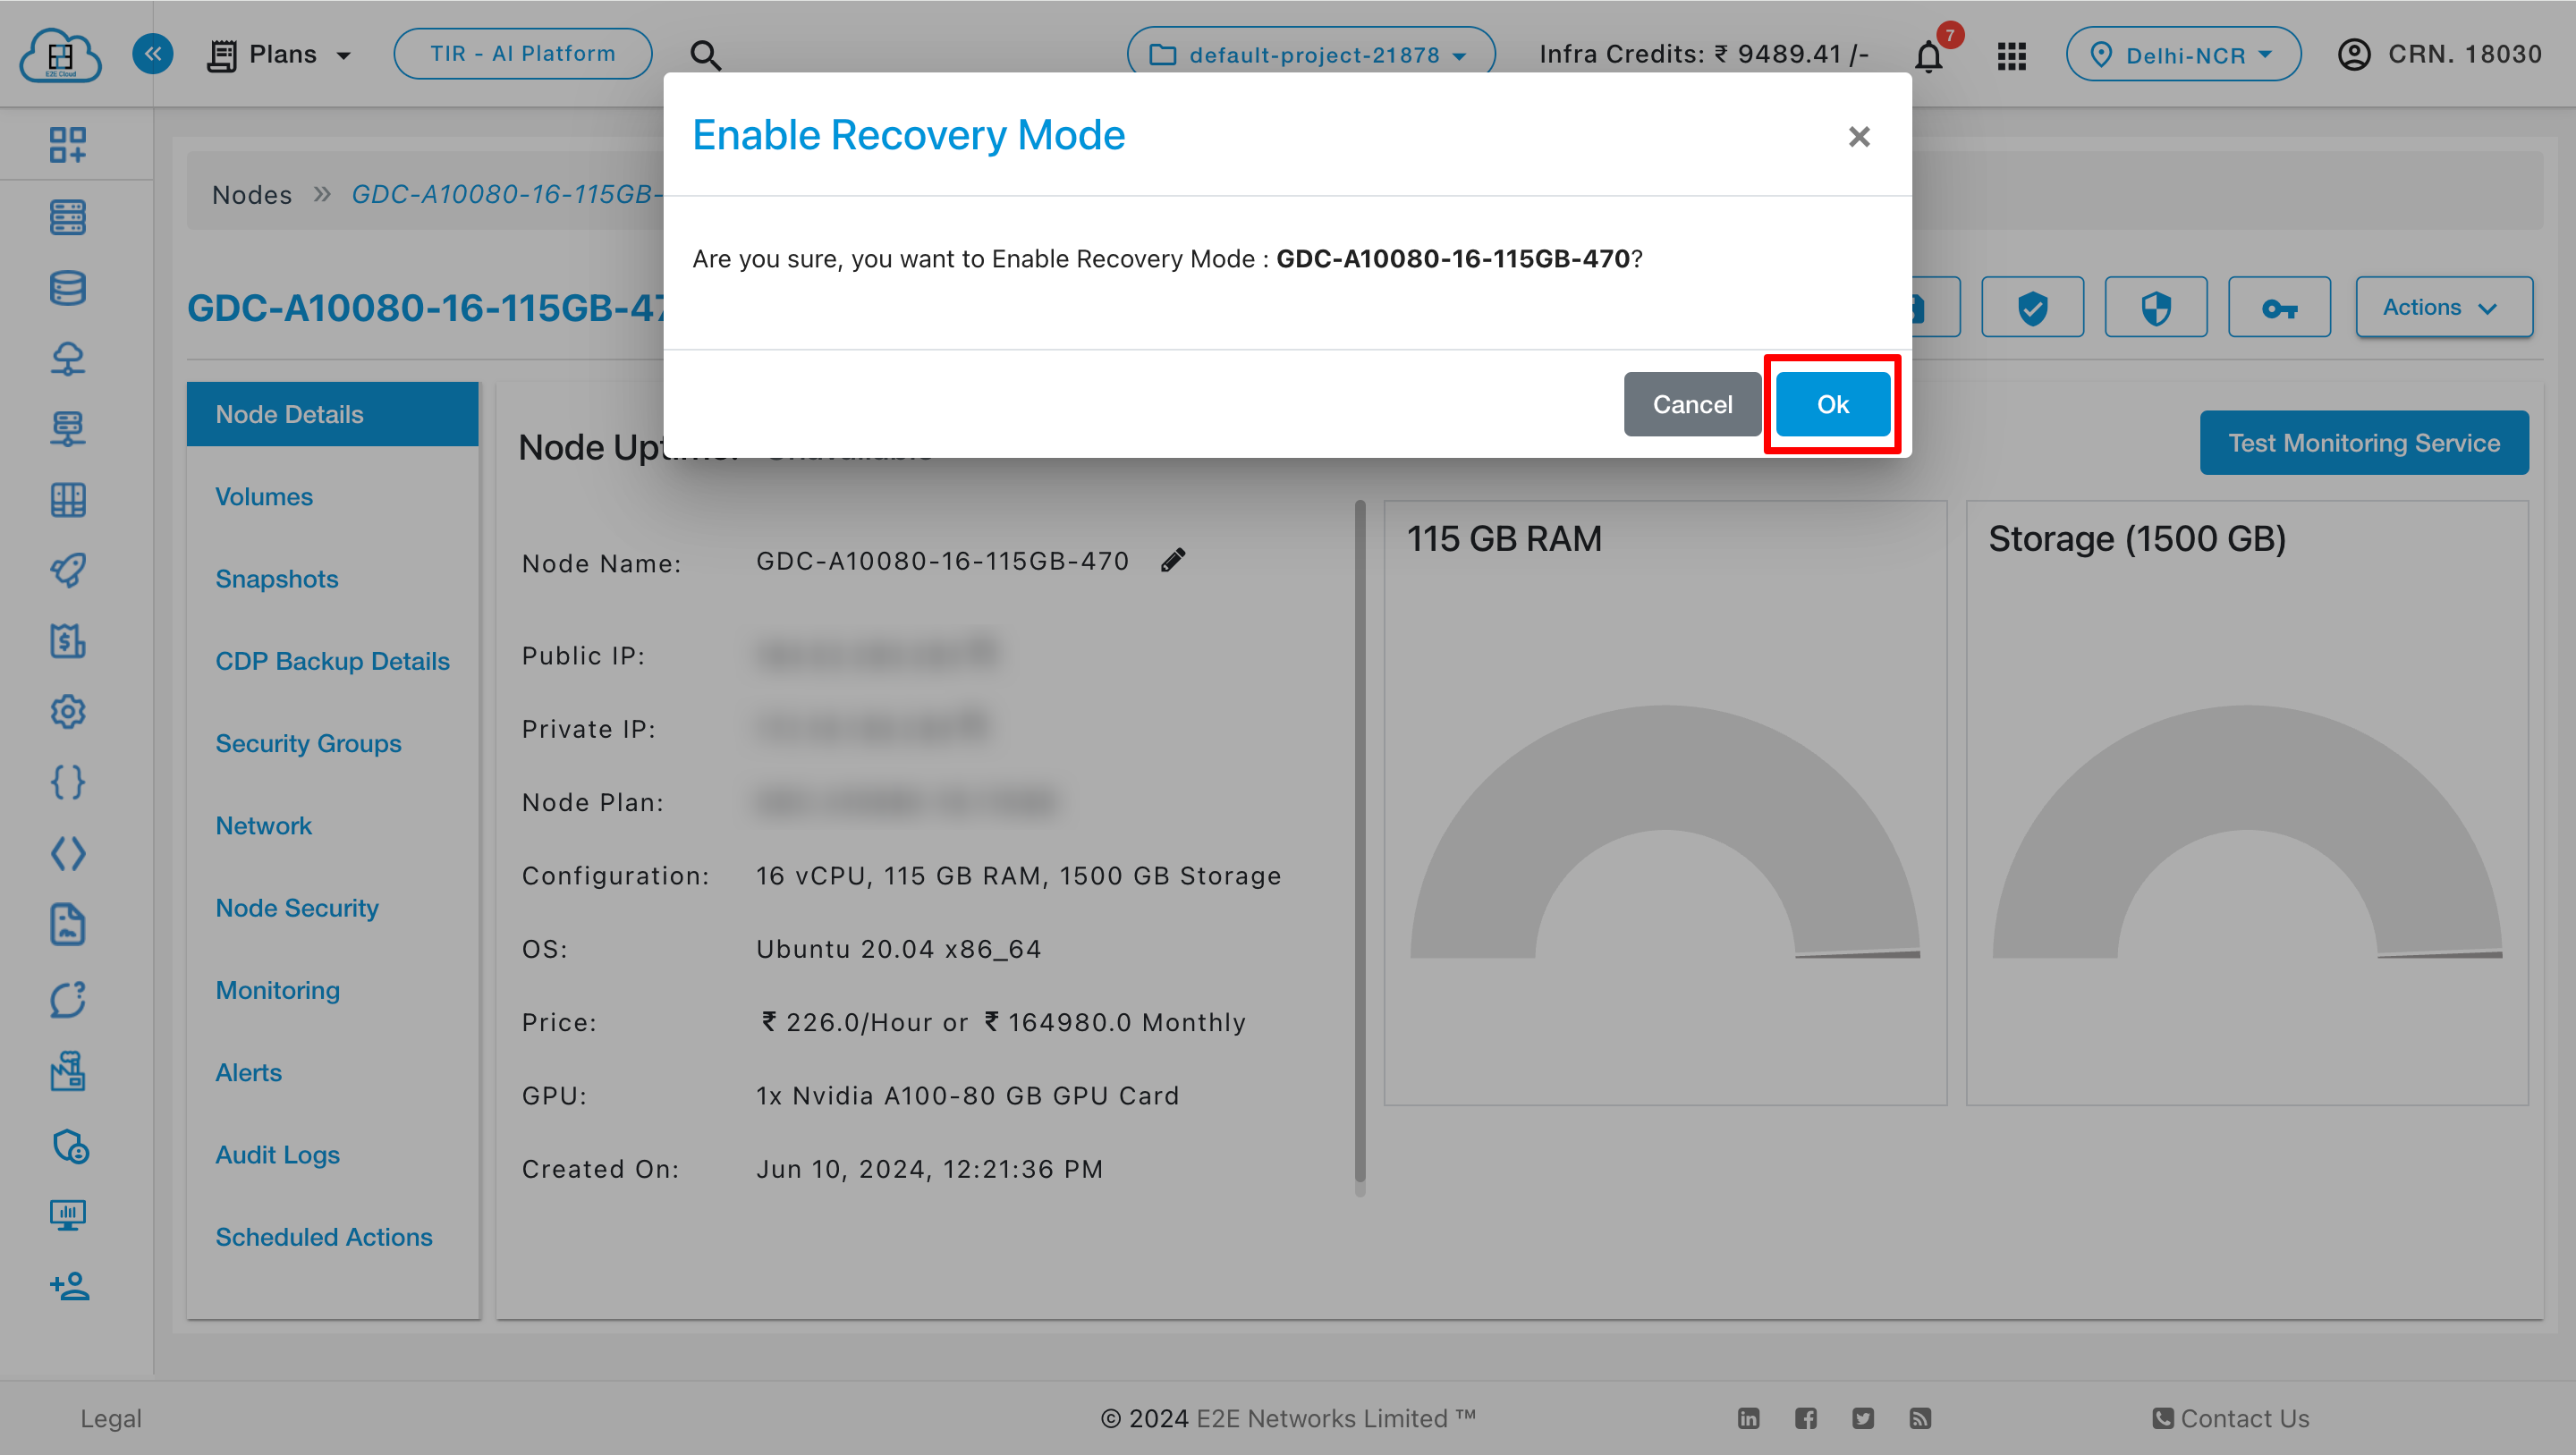
Enable Recovery Node
For Enable Recovery Mode you have to click on Enable Recovery Mode button.
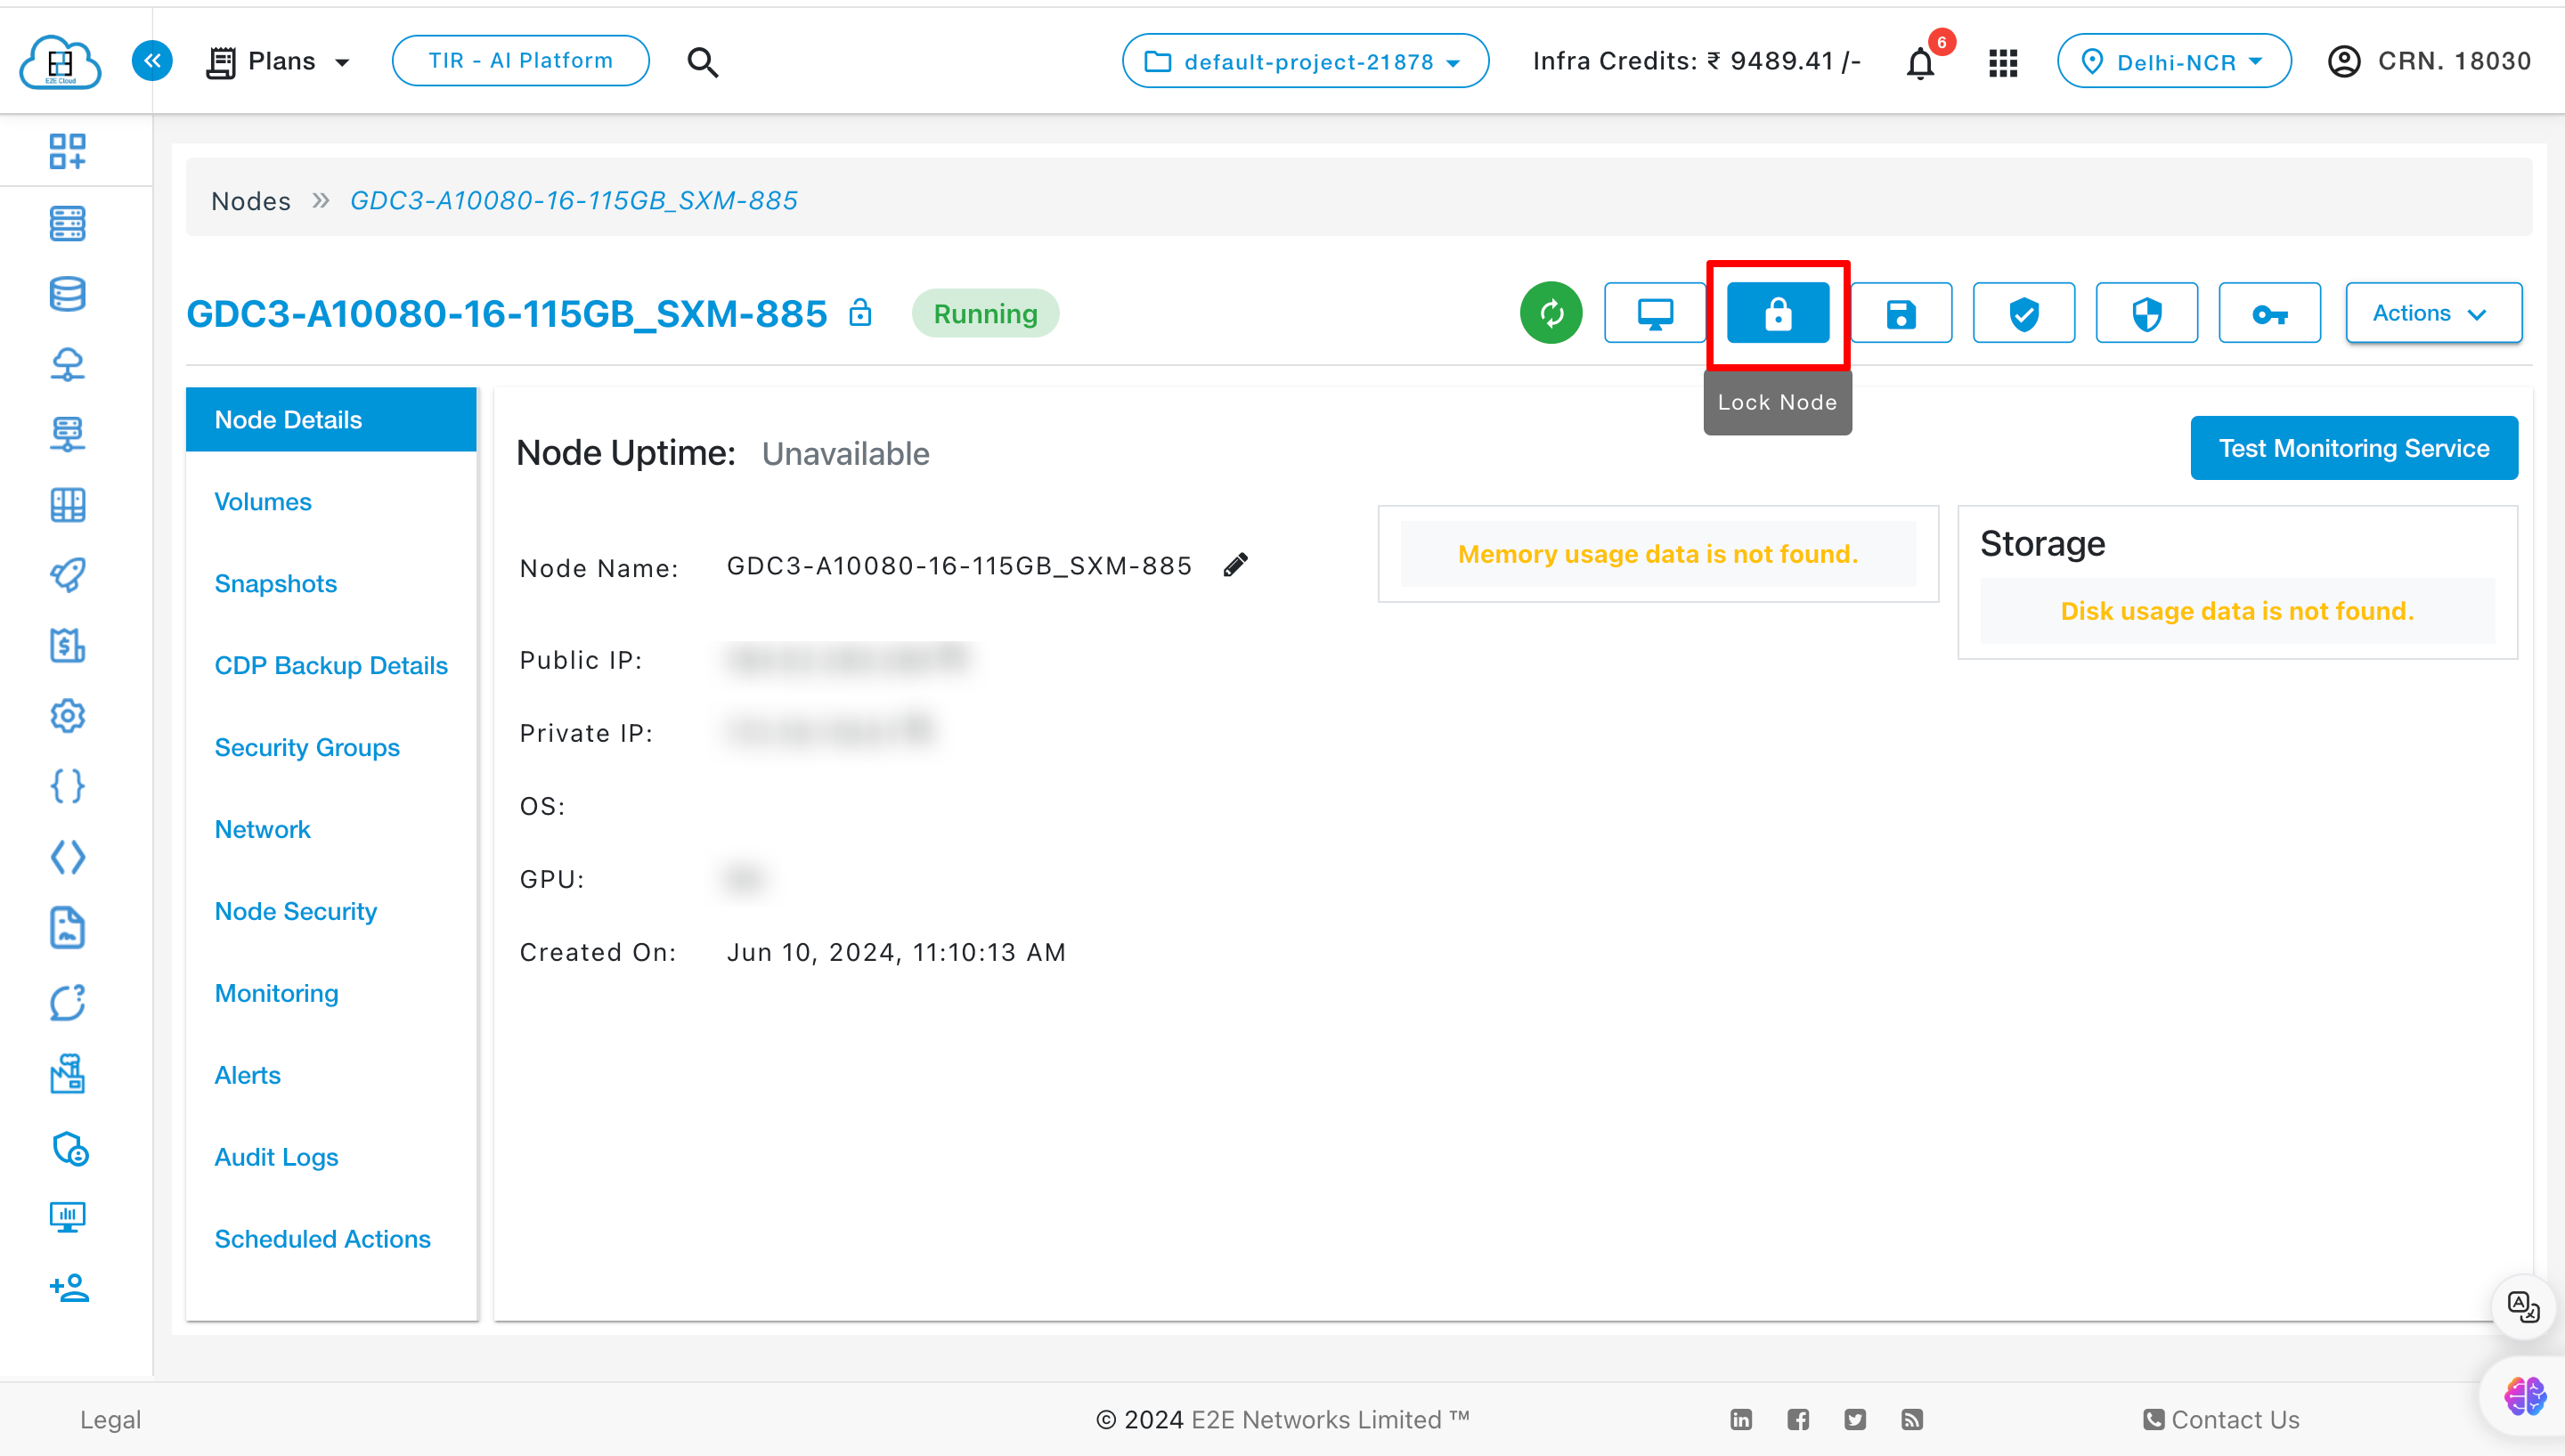
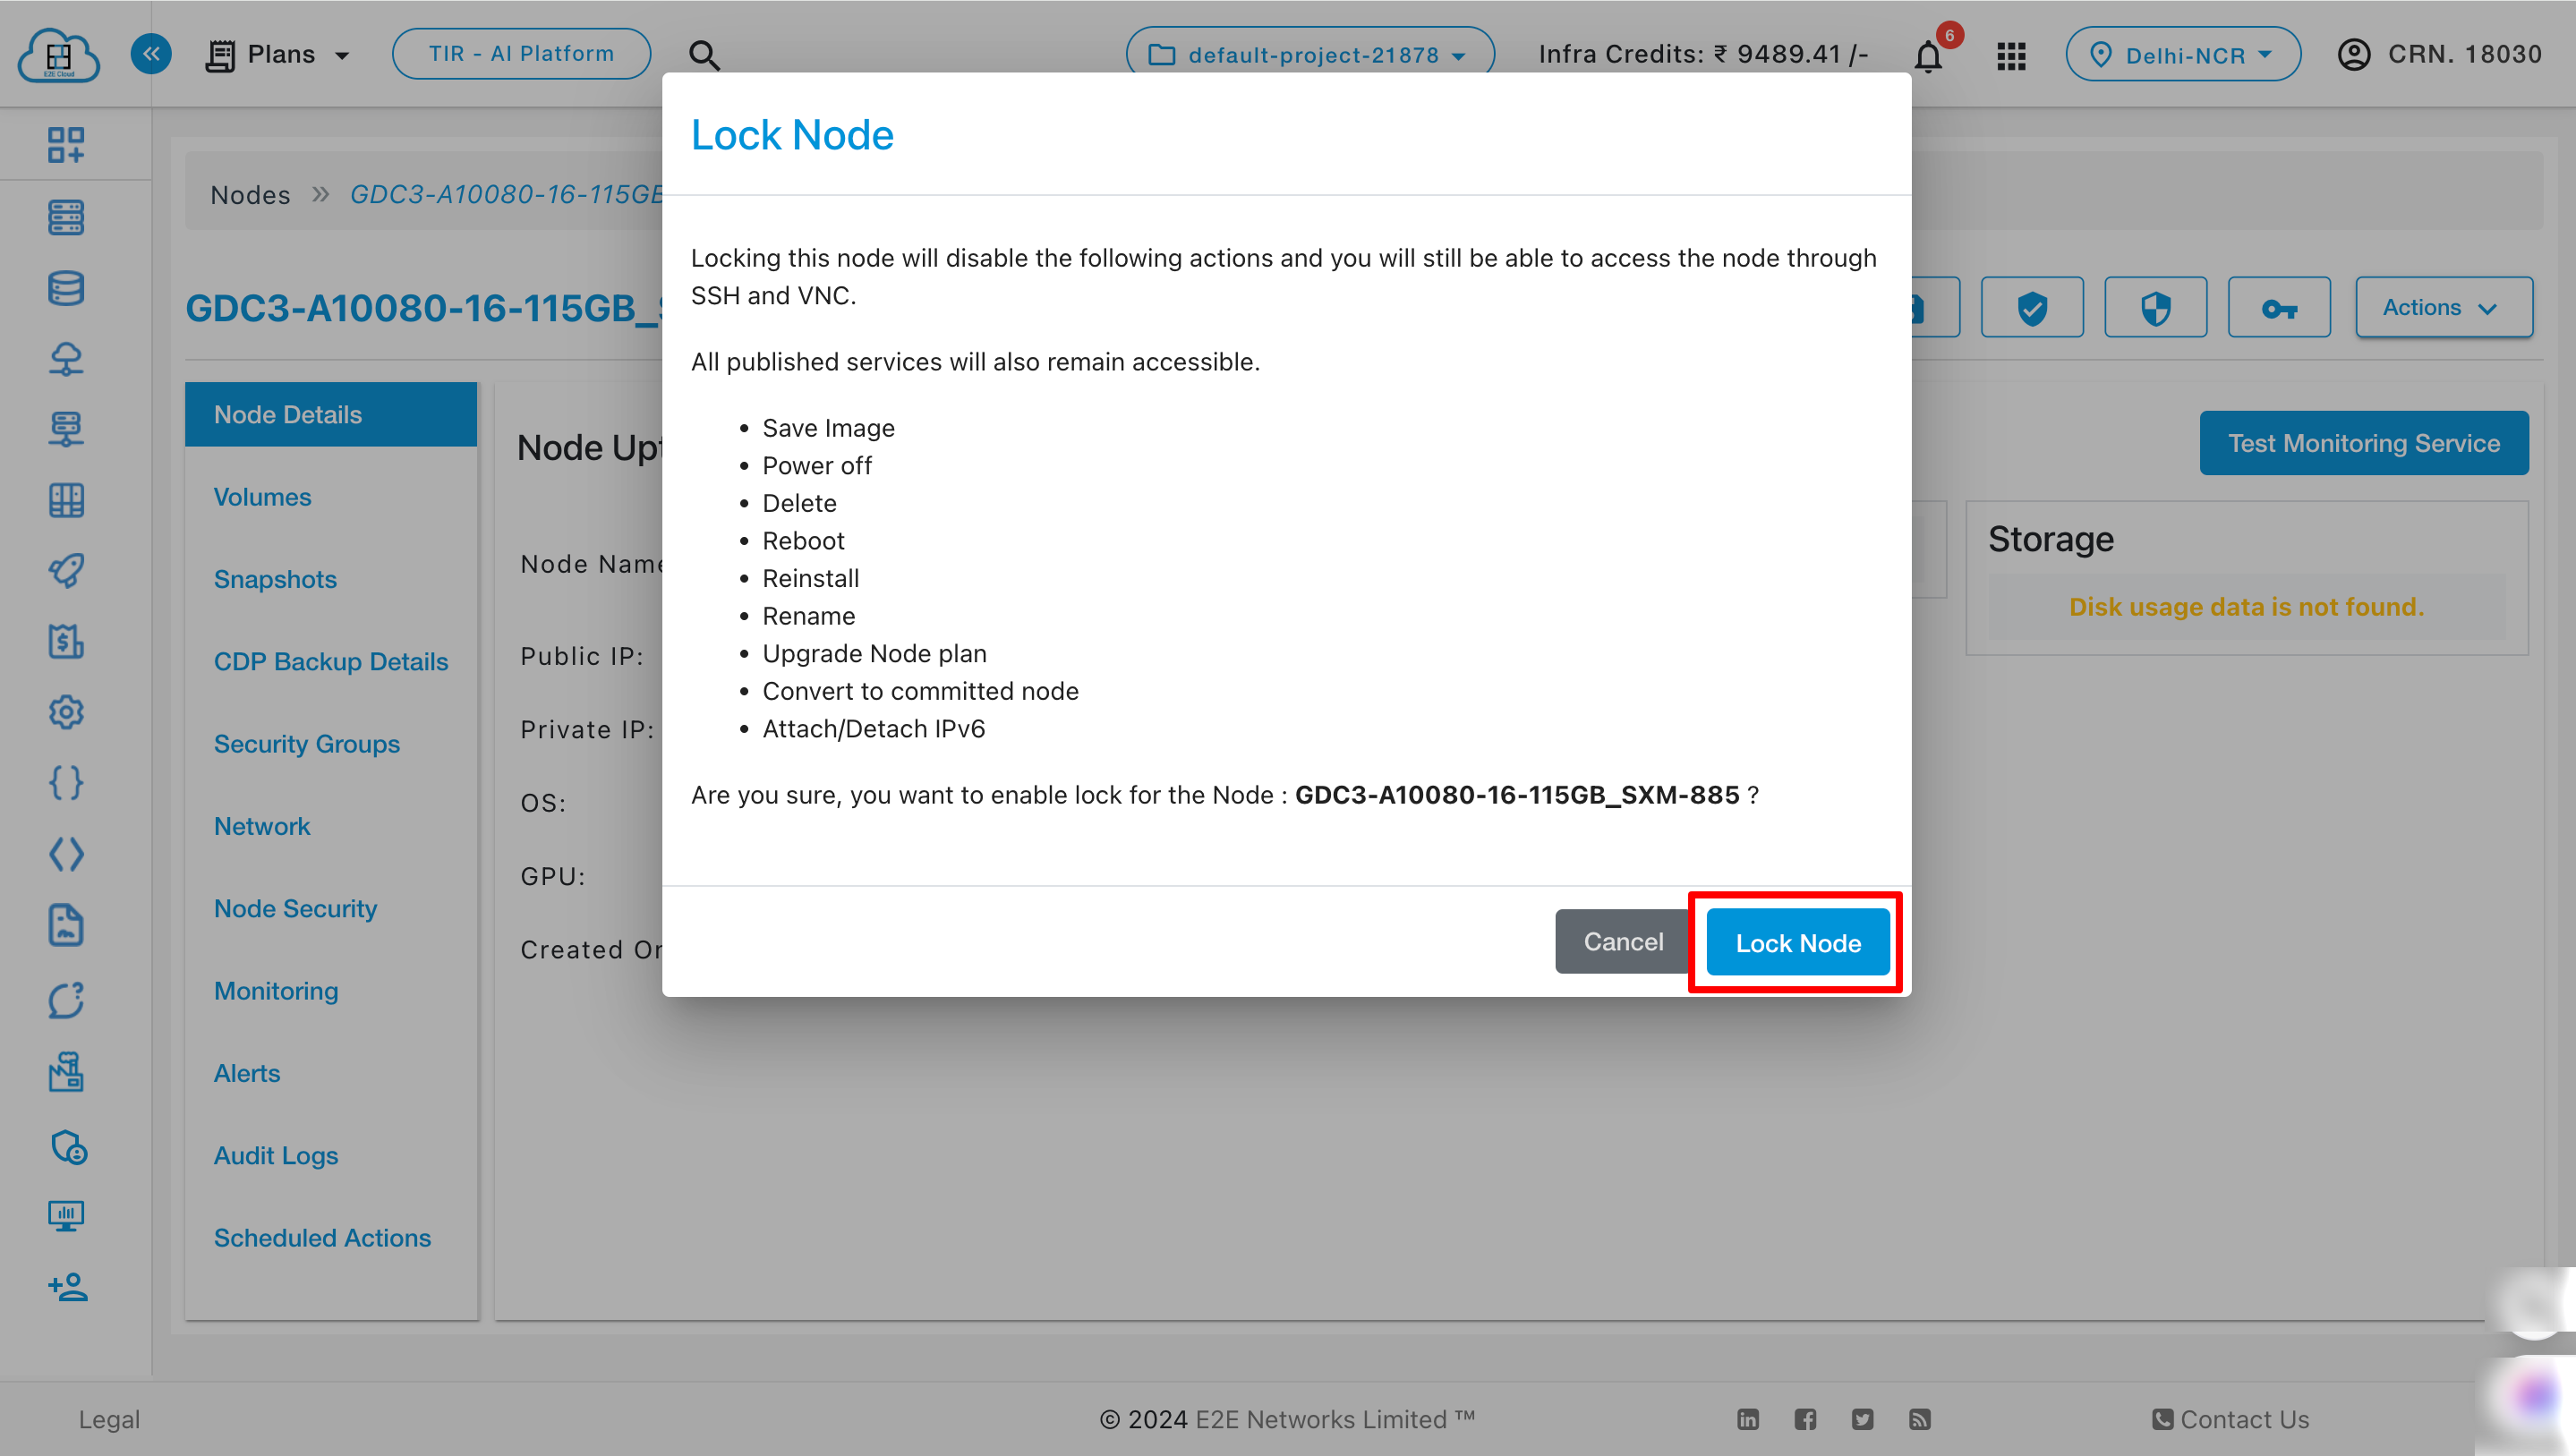
Lock Node
For Locking Node you have to click on Lock Node button under Action button. Locking Node feature will disable all the actions mentioned below for a Node.
Save Image
Power off
Start
Delete
Reboot
Reinstall
Rename
Upgrade Node Plan
Convert to committed node
Committed Node Setting
This would stop accidental destruction or restrict any changes being made for an Important node.
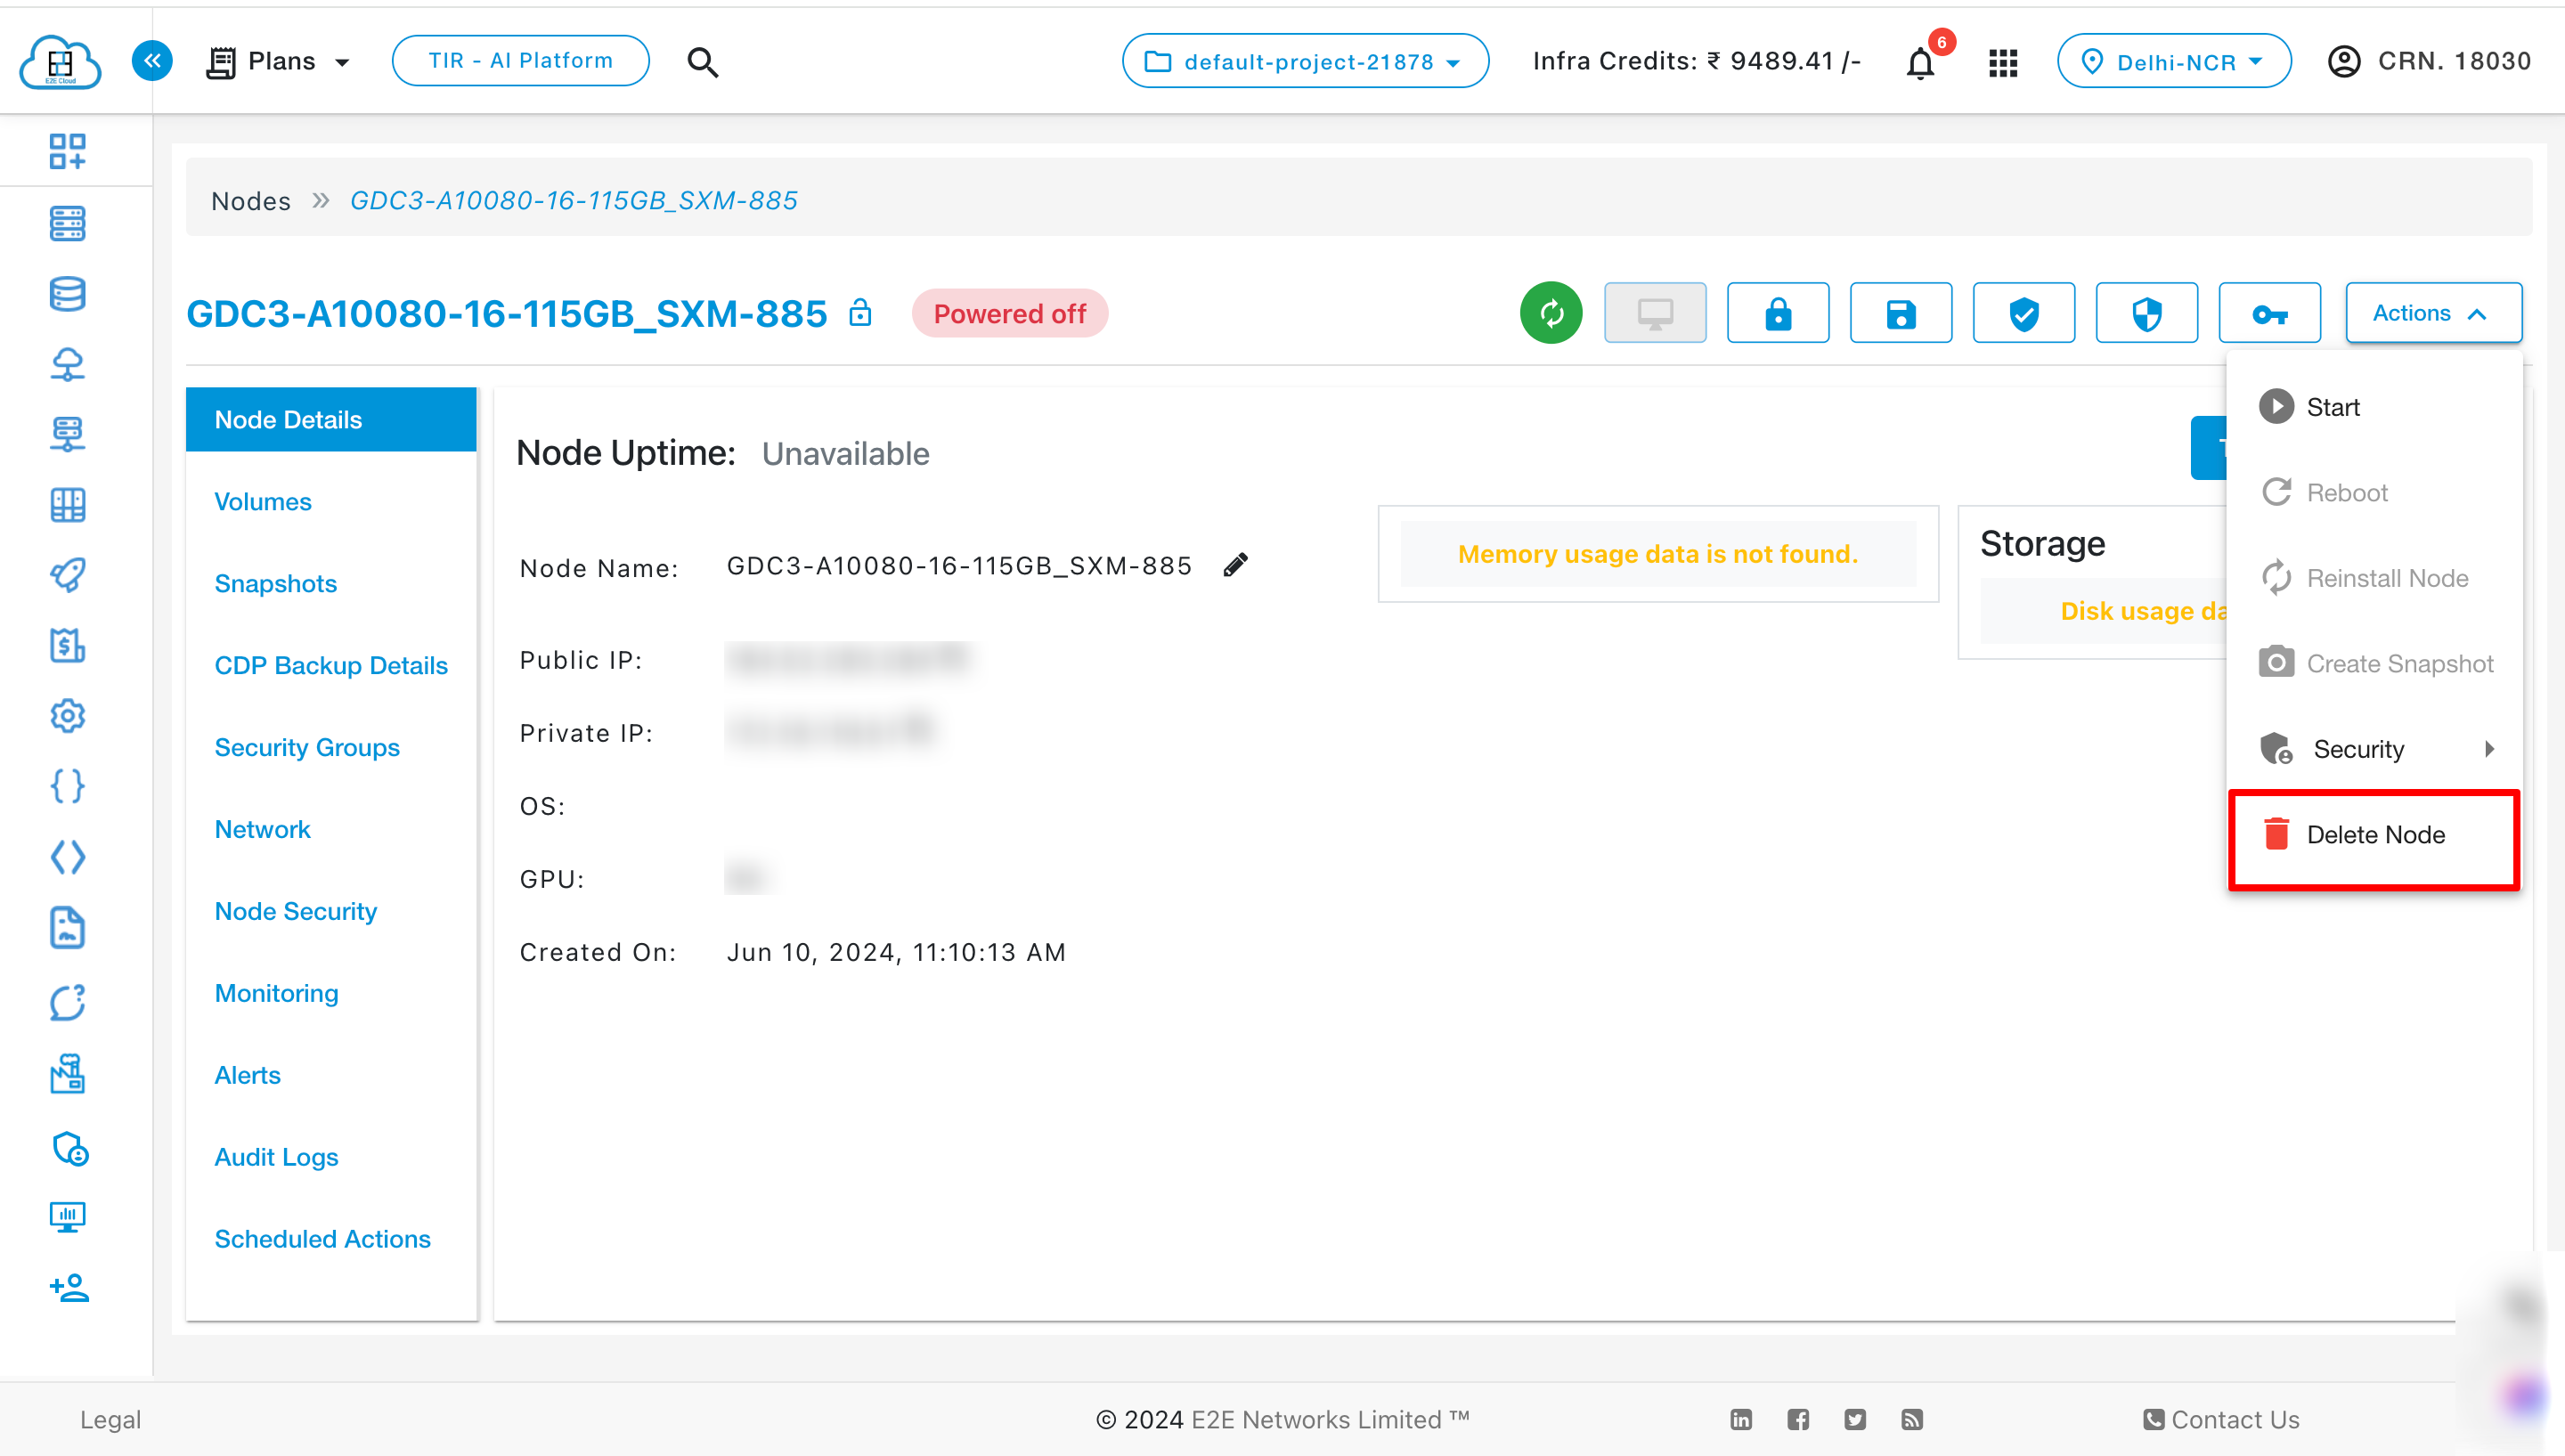
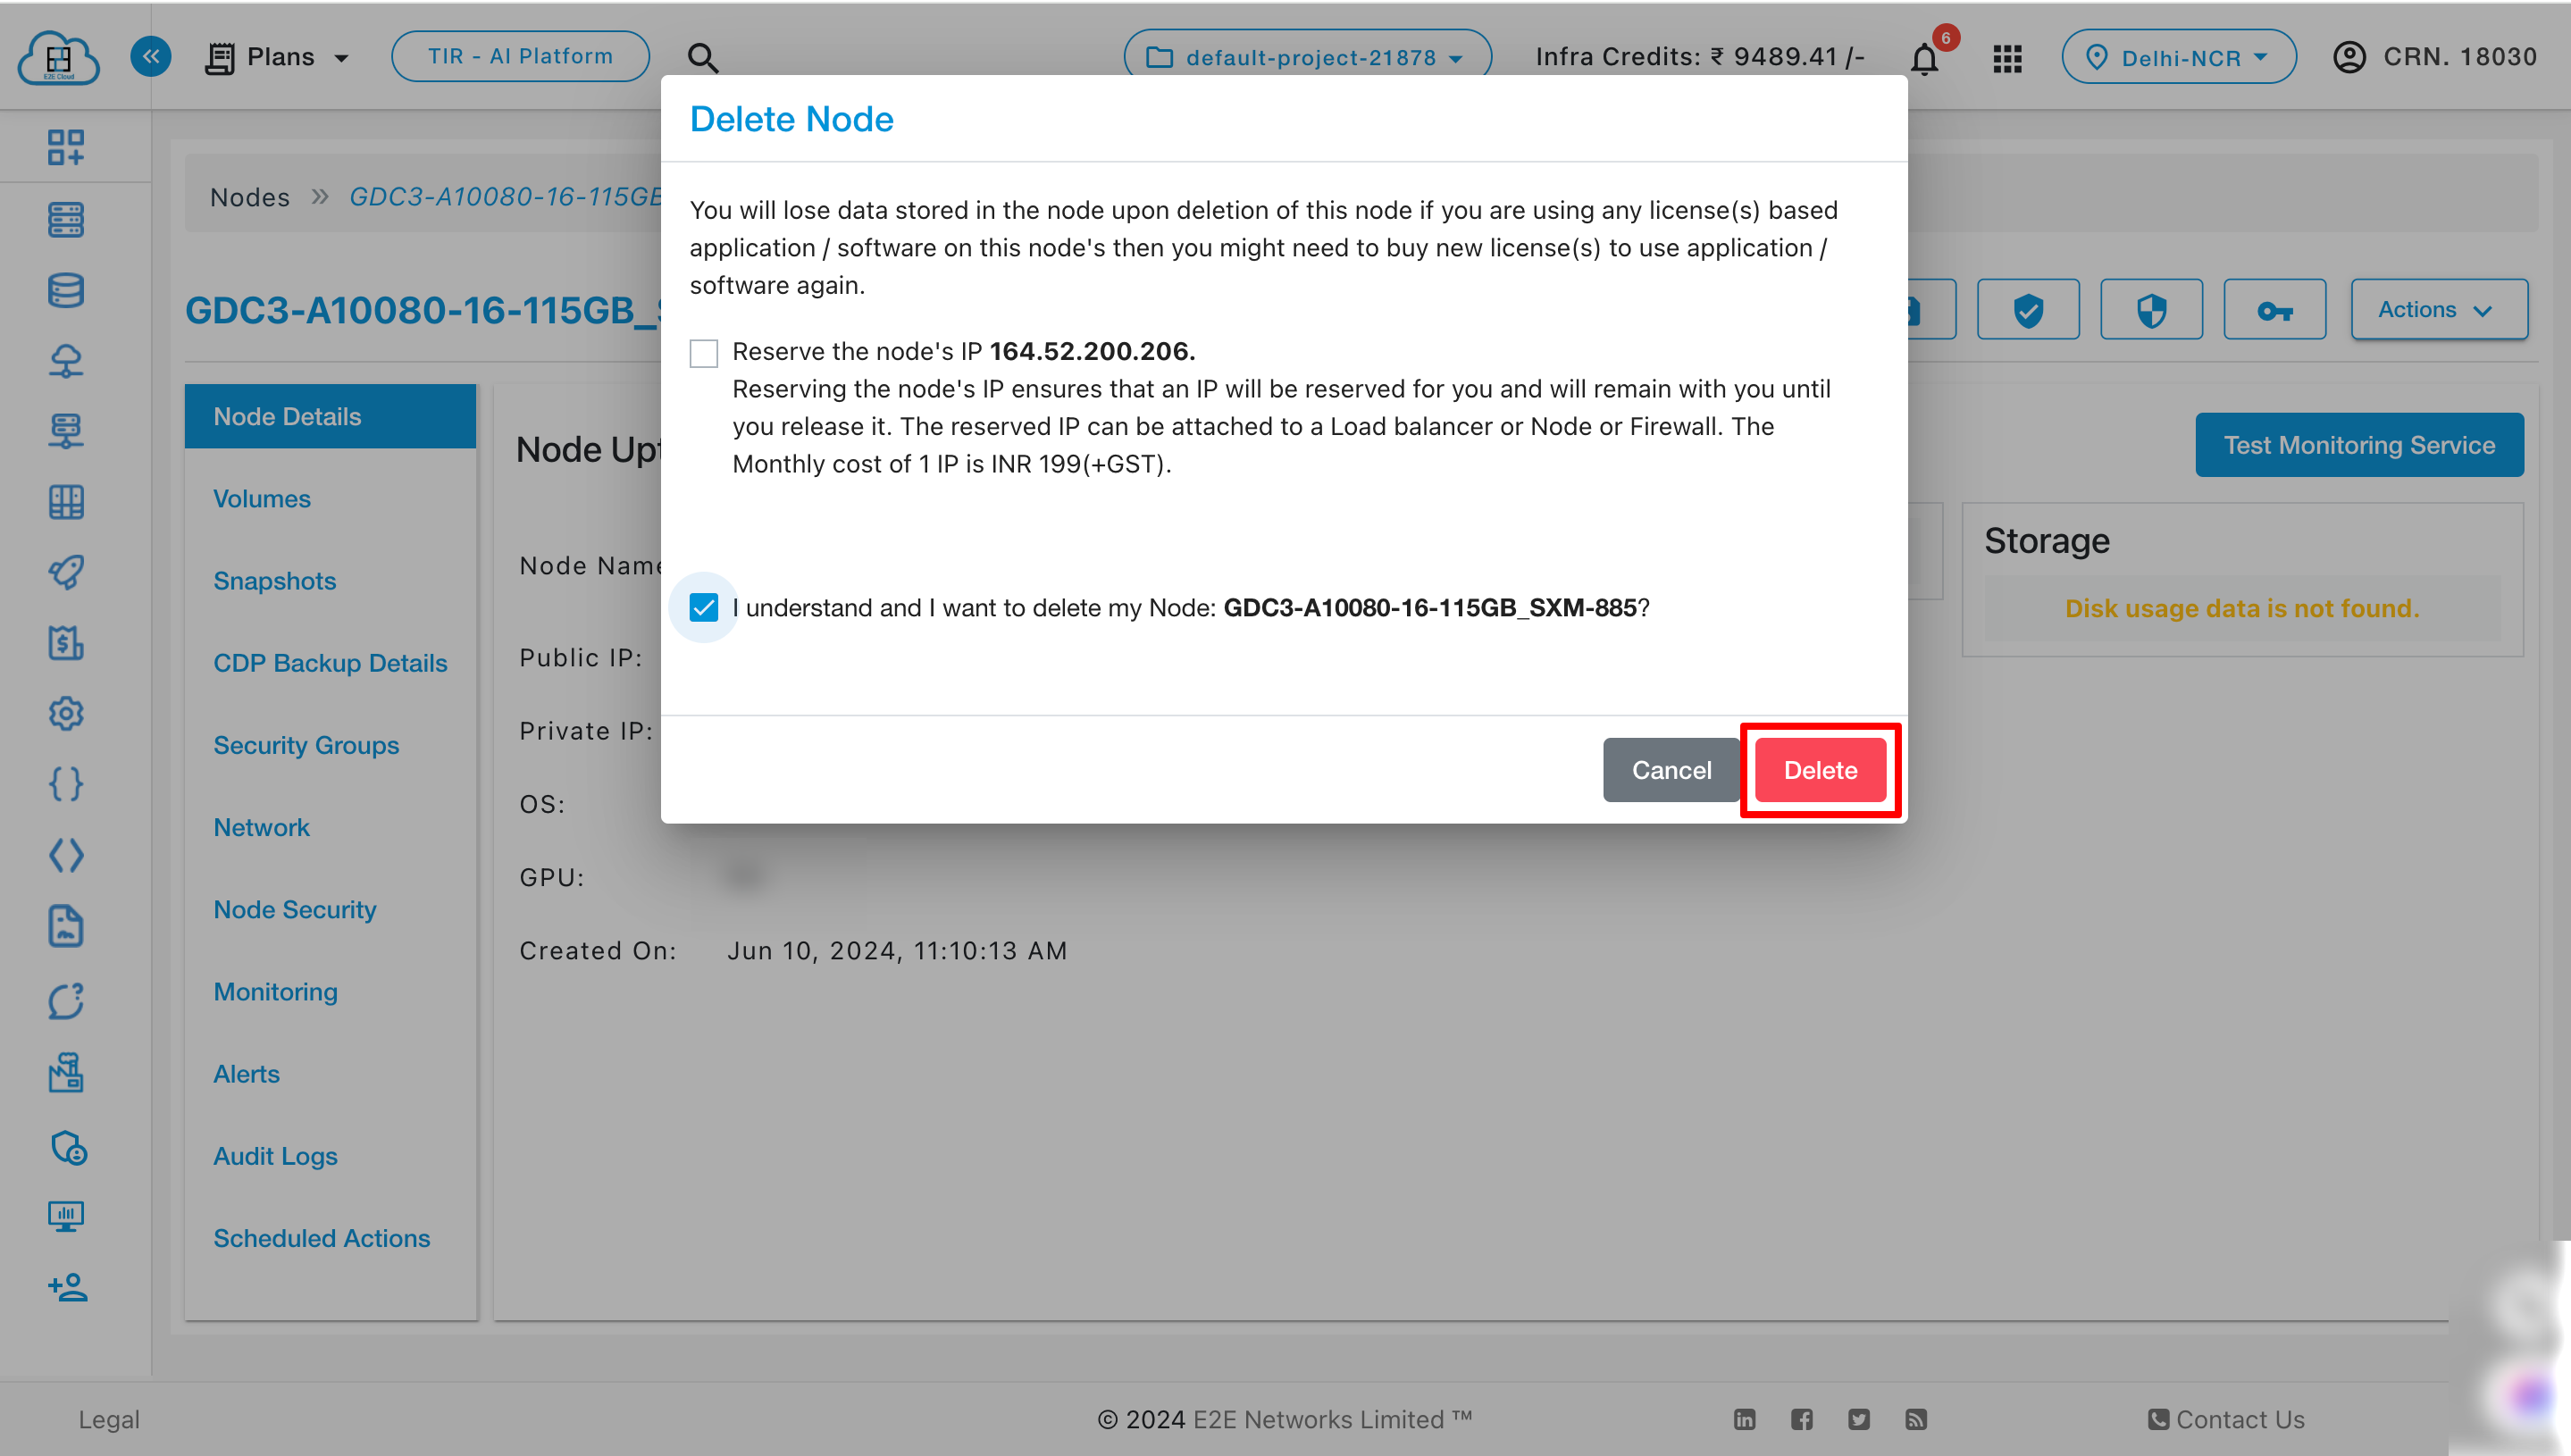
Delete
For deleting Node you have to click on Delete button then confirmaton popup will be open you have to click on Delete. Your node will be delete.