Object Storage
In EOS, data files are organized in form of objects in a bucket. A bucket is container just like folders or directories in your OS and allows separation of concerns. For example, you could create a bucket for a personnel app and another one for accounts app. This will enables you to manage permissions and data separately.
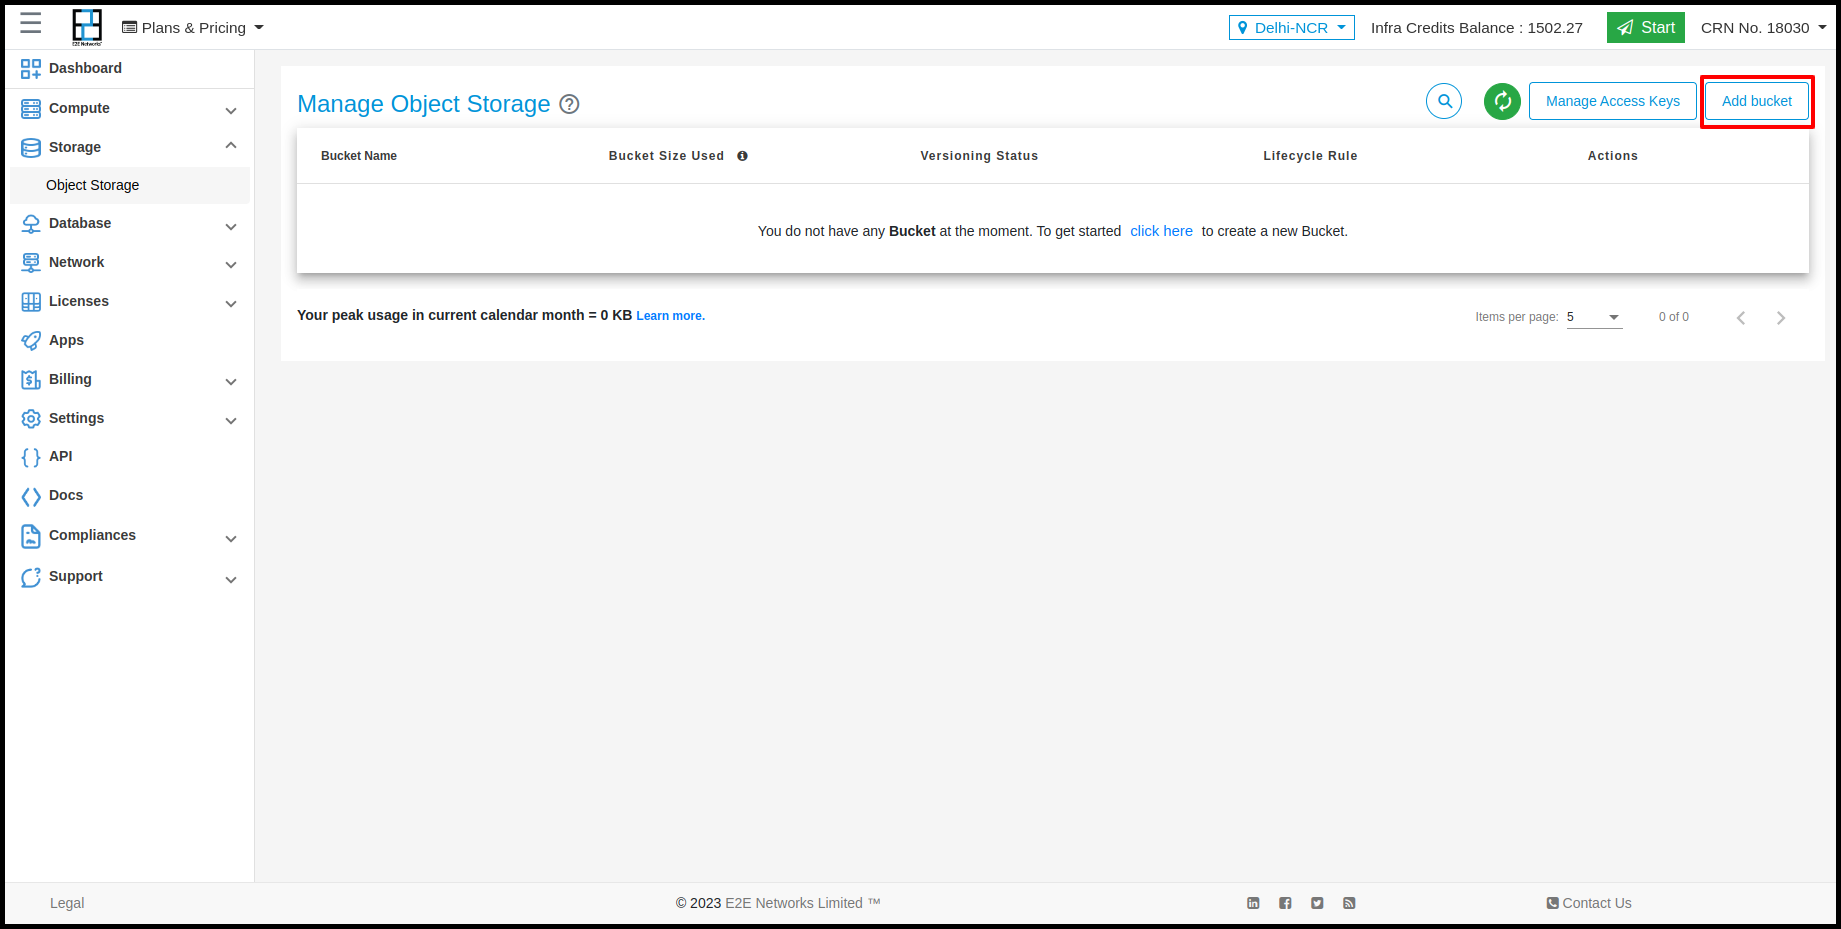
To start using EOS for data storage, you must create a bucket.
Create Bucket
Sign into My Account
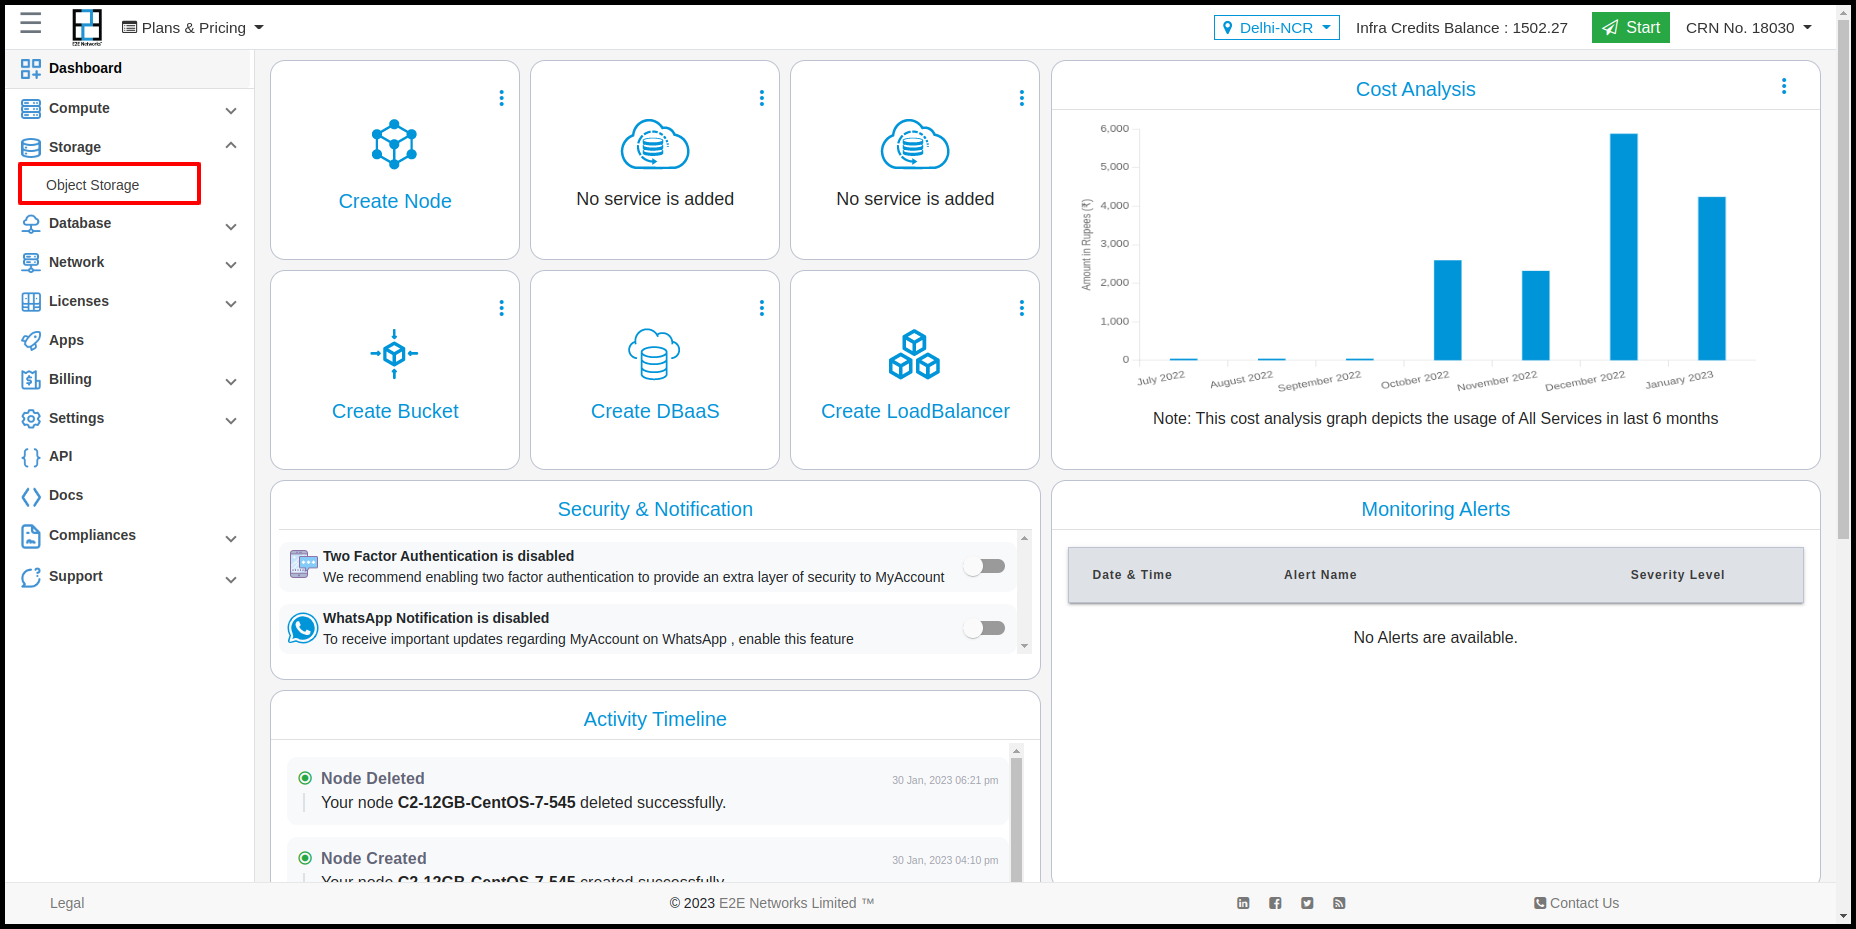
Go to Products > Storage option in sidebar menu
Click on + Add bucket button
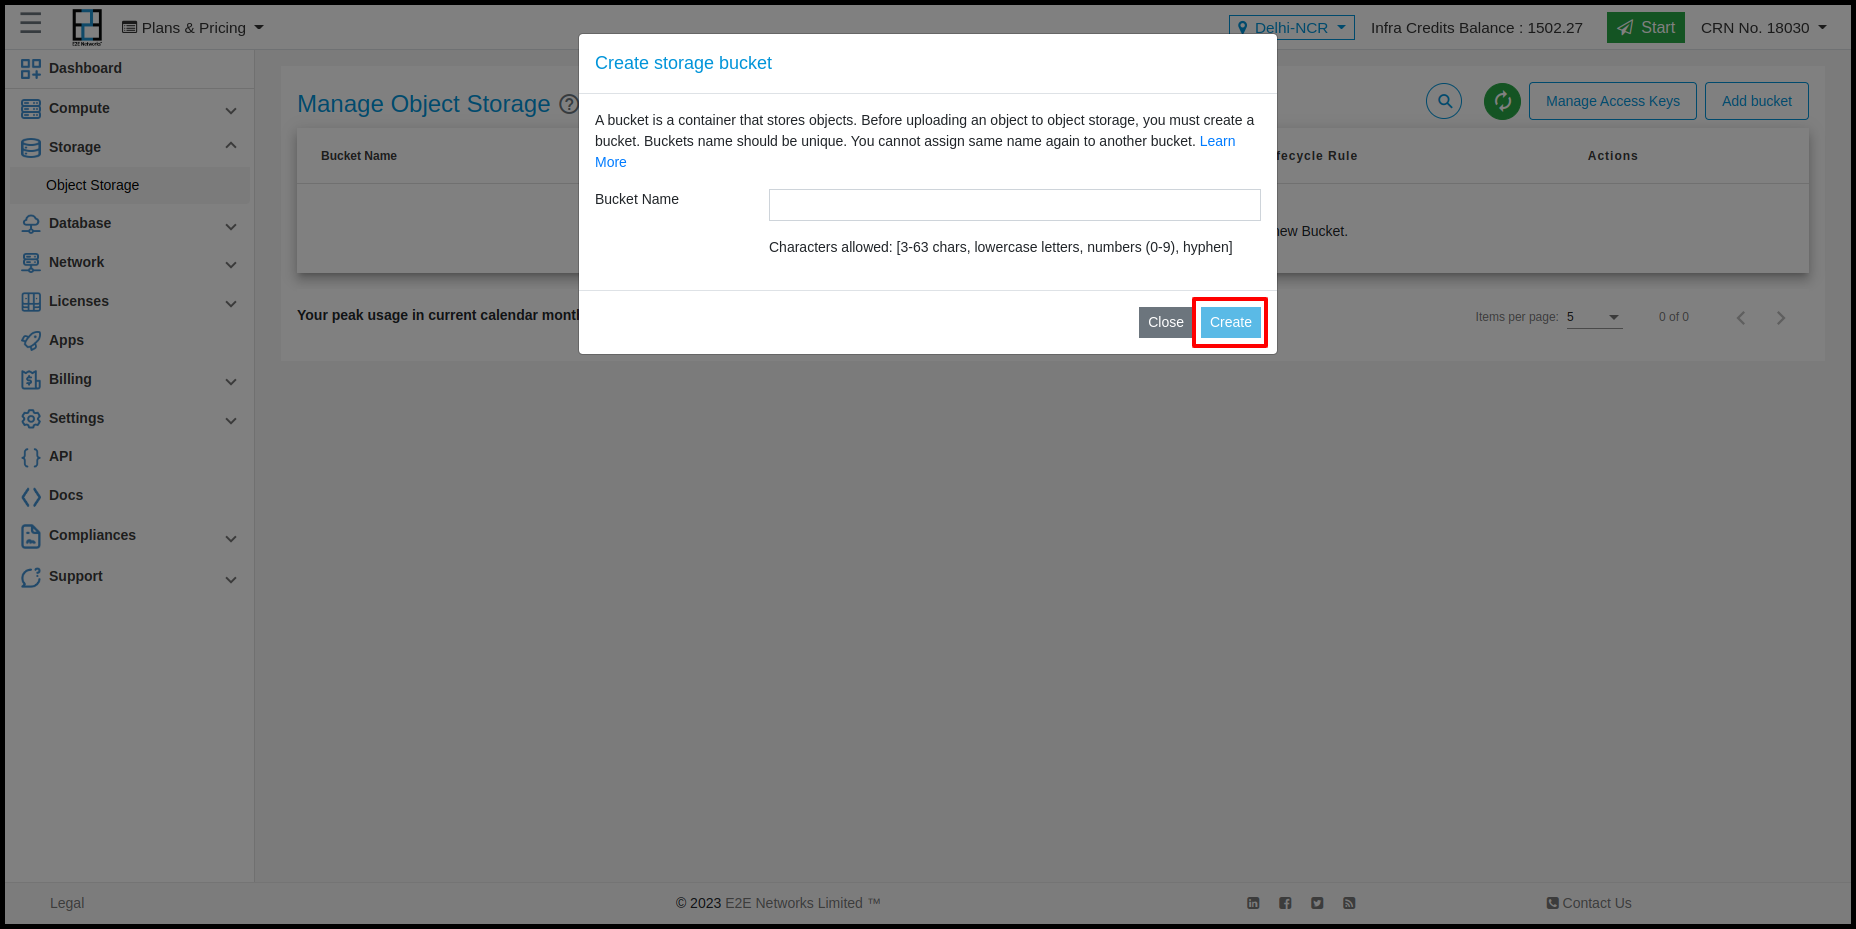
Enter a unique bucket name. You must follow these guidelines when choosing the bucket name:
You must enter a bucket name that is unique across all existing buckets in E2E Object Storage. You can not choose a name that is already in use by another user.
Names can not be changed after creation. So choose wisely.
Bucket name must be atleast 3 and no more than 63 chars long.
Upper case or underscores are not allowed.
Do not format bucket names like ip address (for example, 10.10.10.2).
Click Create
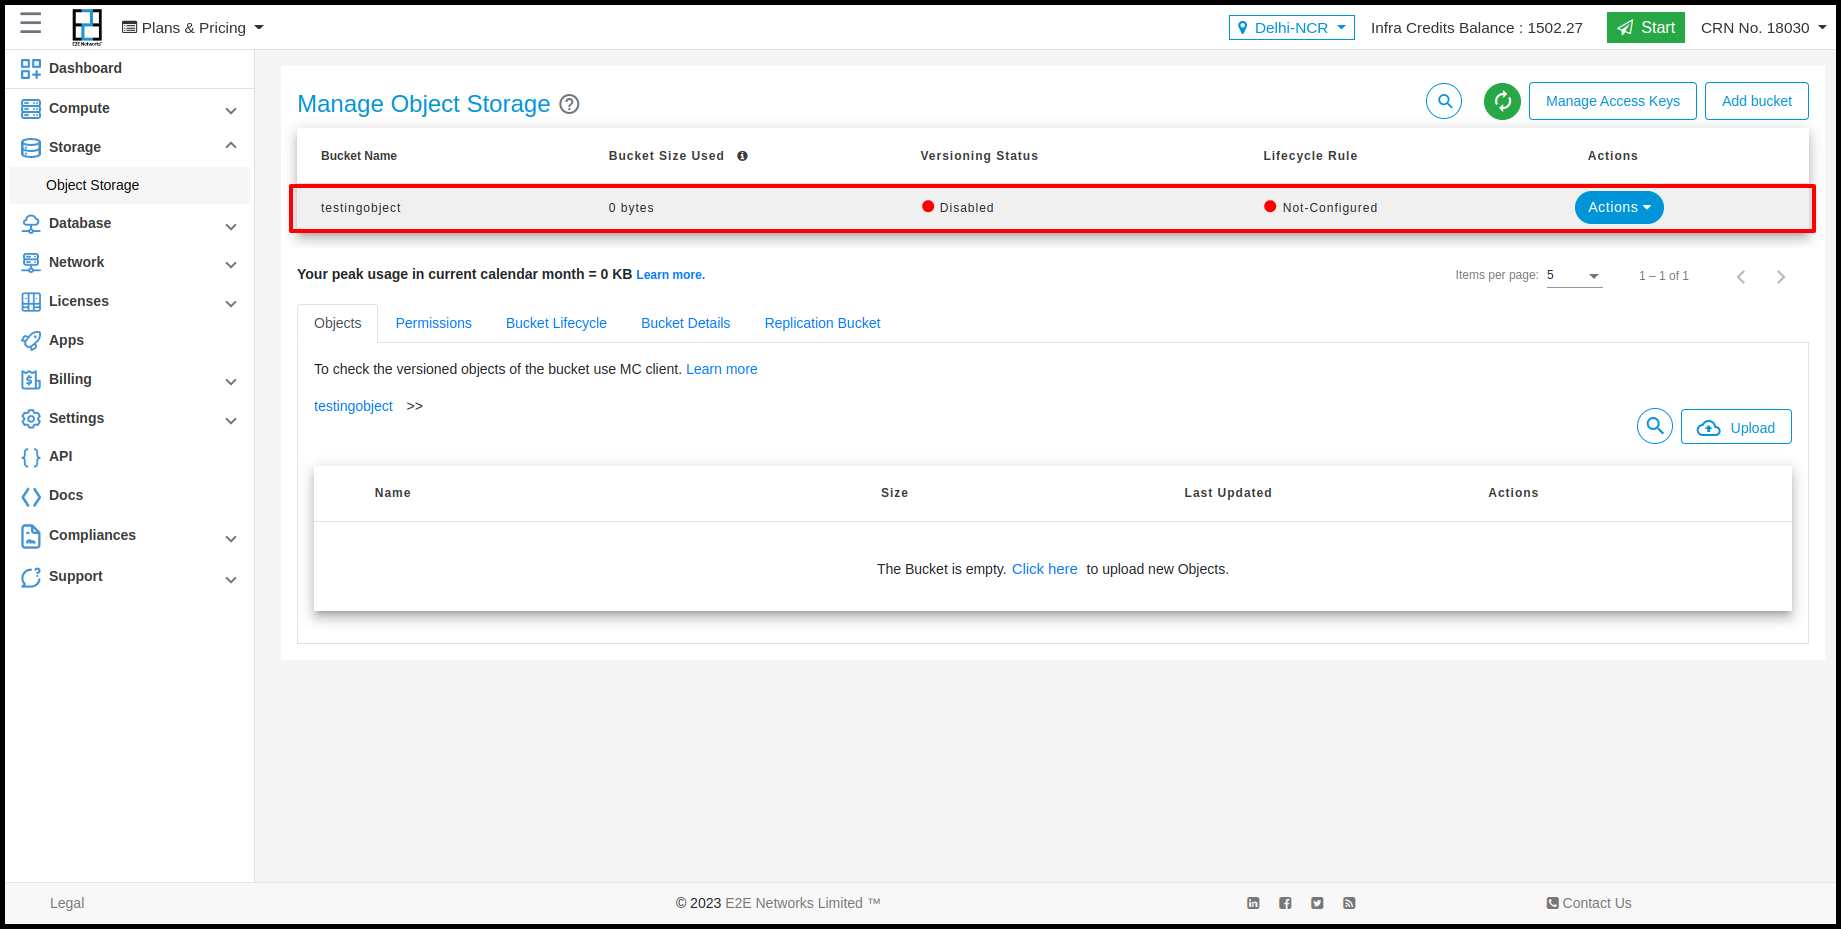
You will be re-directed to object browser.
Hint
You will not be charged for empty buckets.
Now that your bucket is ready, you may choose to Upload files <https://docs.e2enetworks.com/storage/objectstore/object_storage.html#upload-files> through object browser or set bucket permissions to enable CLI access.
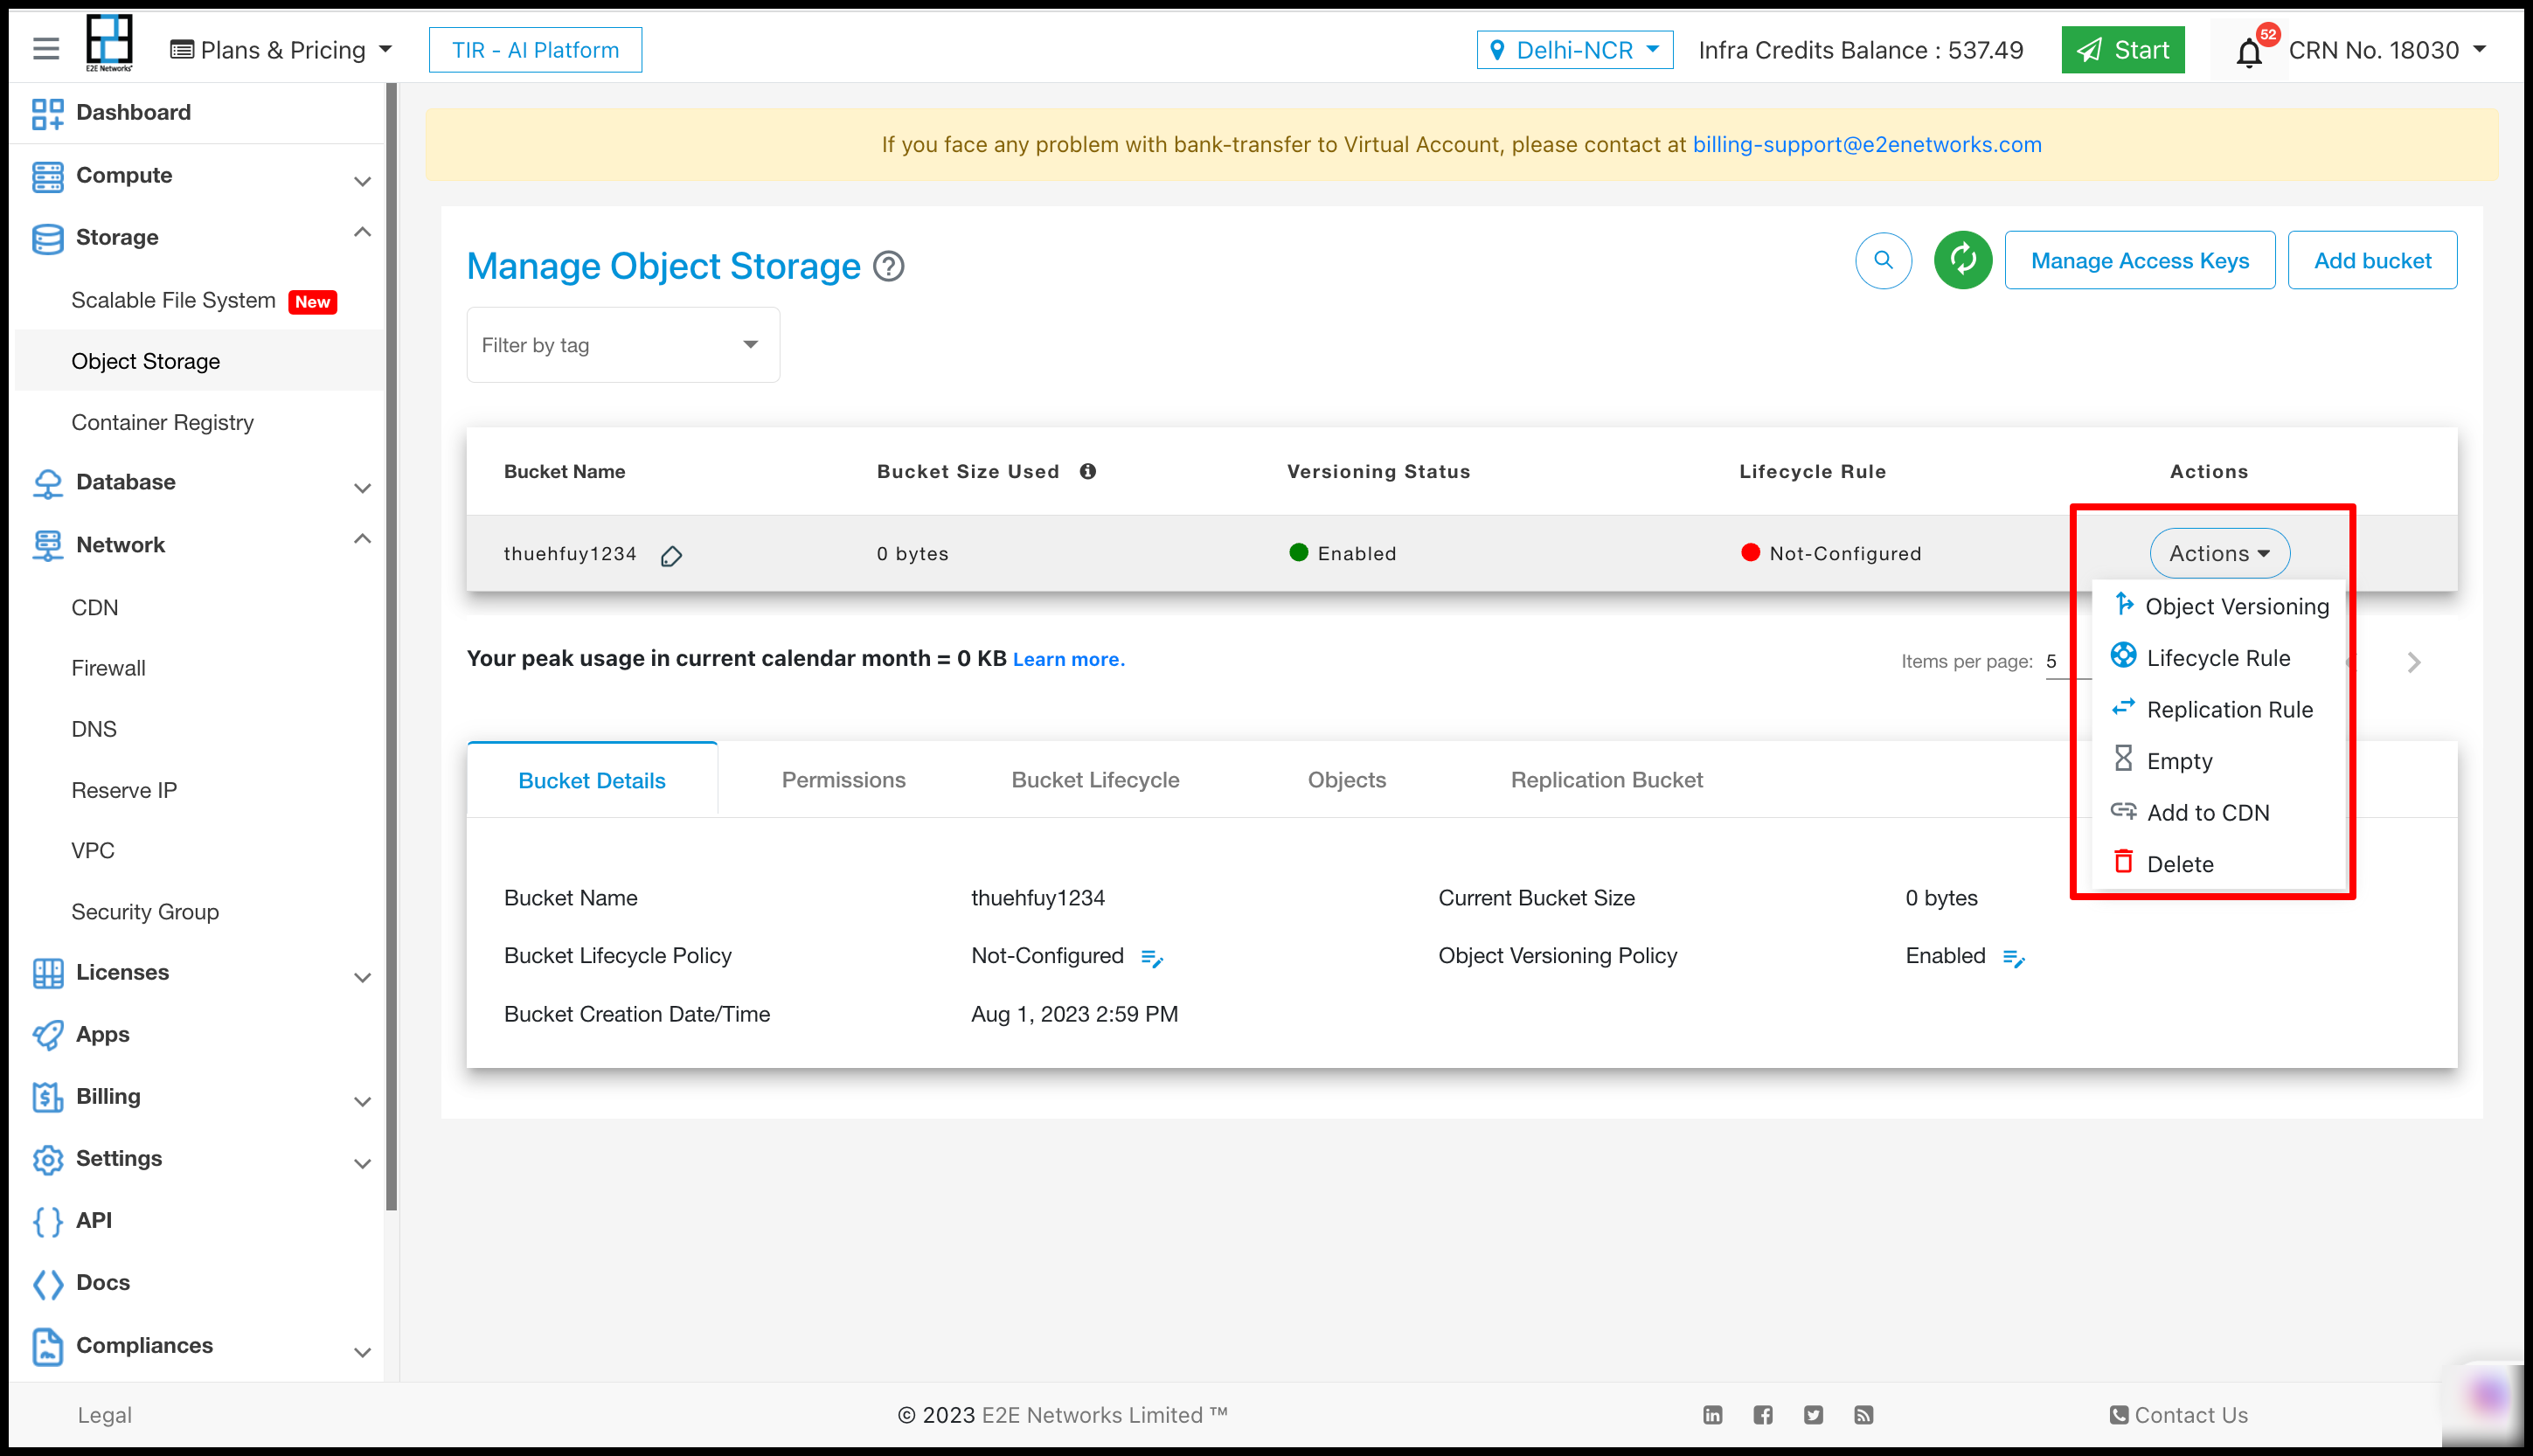
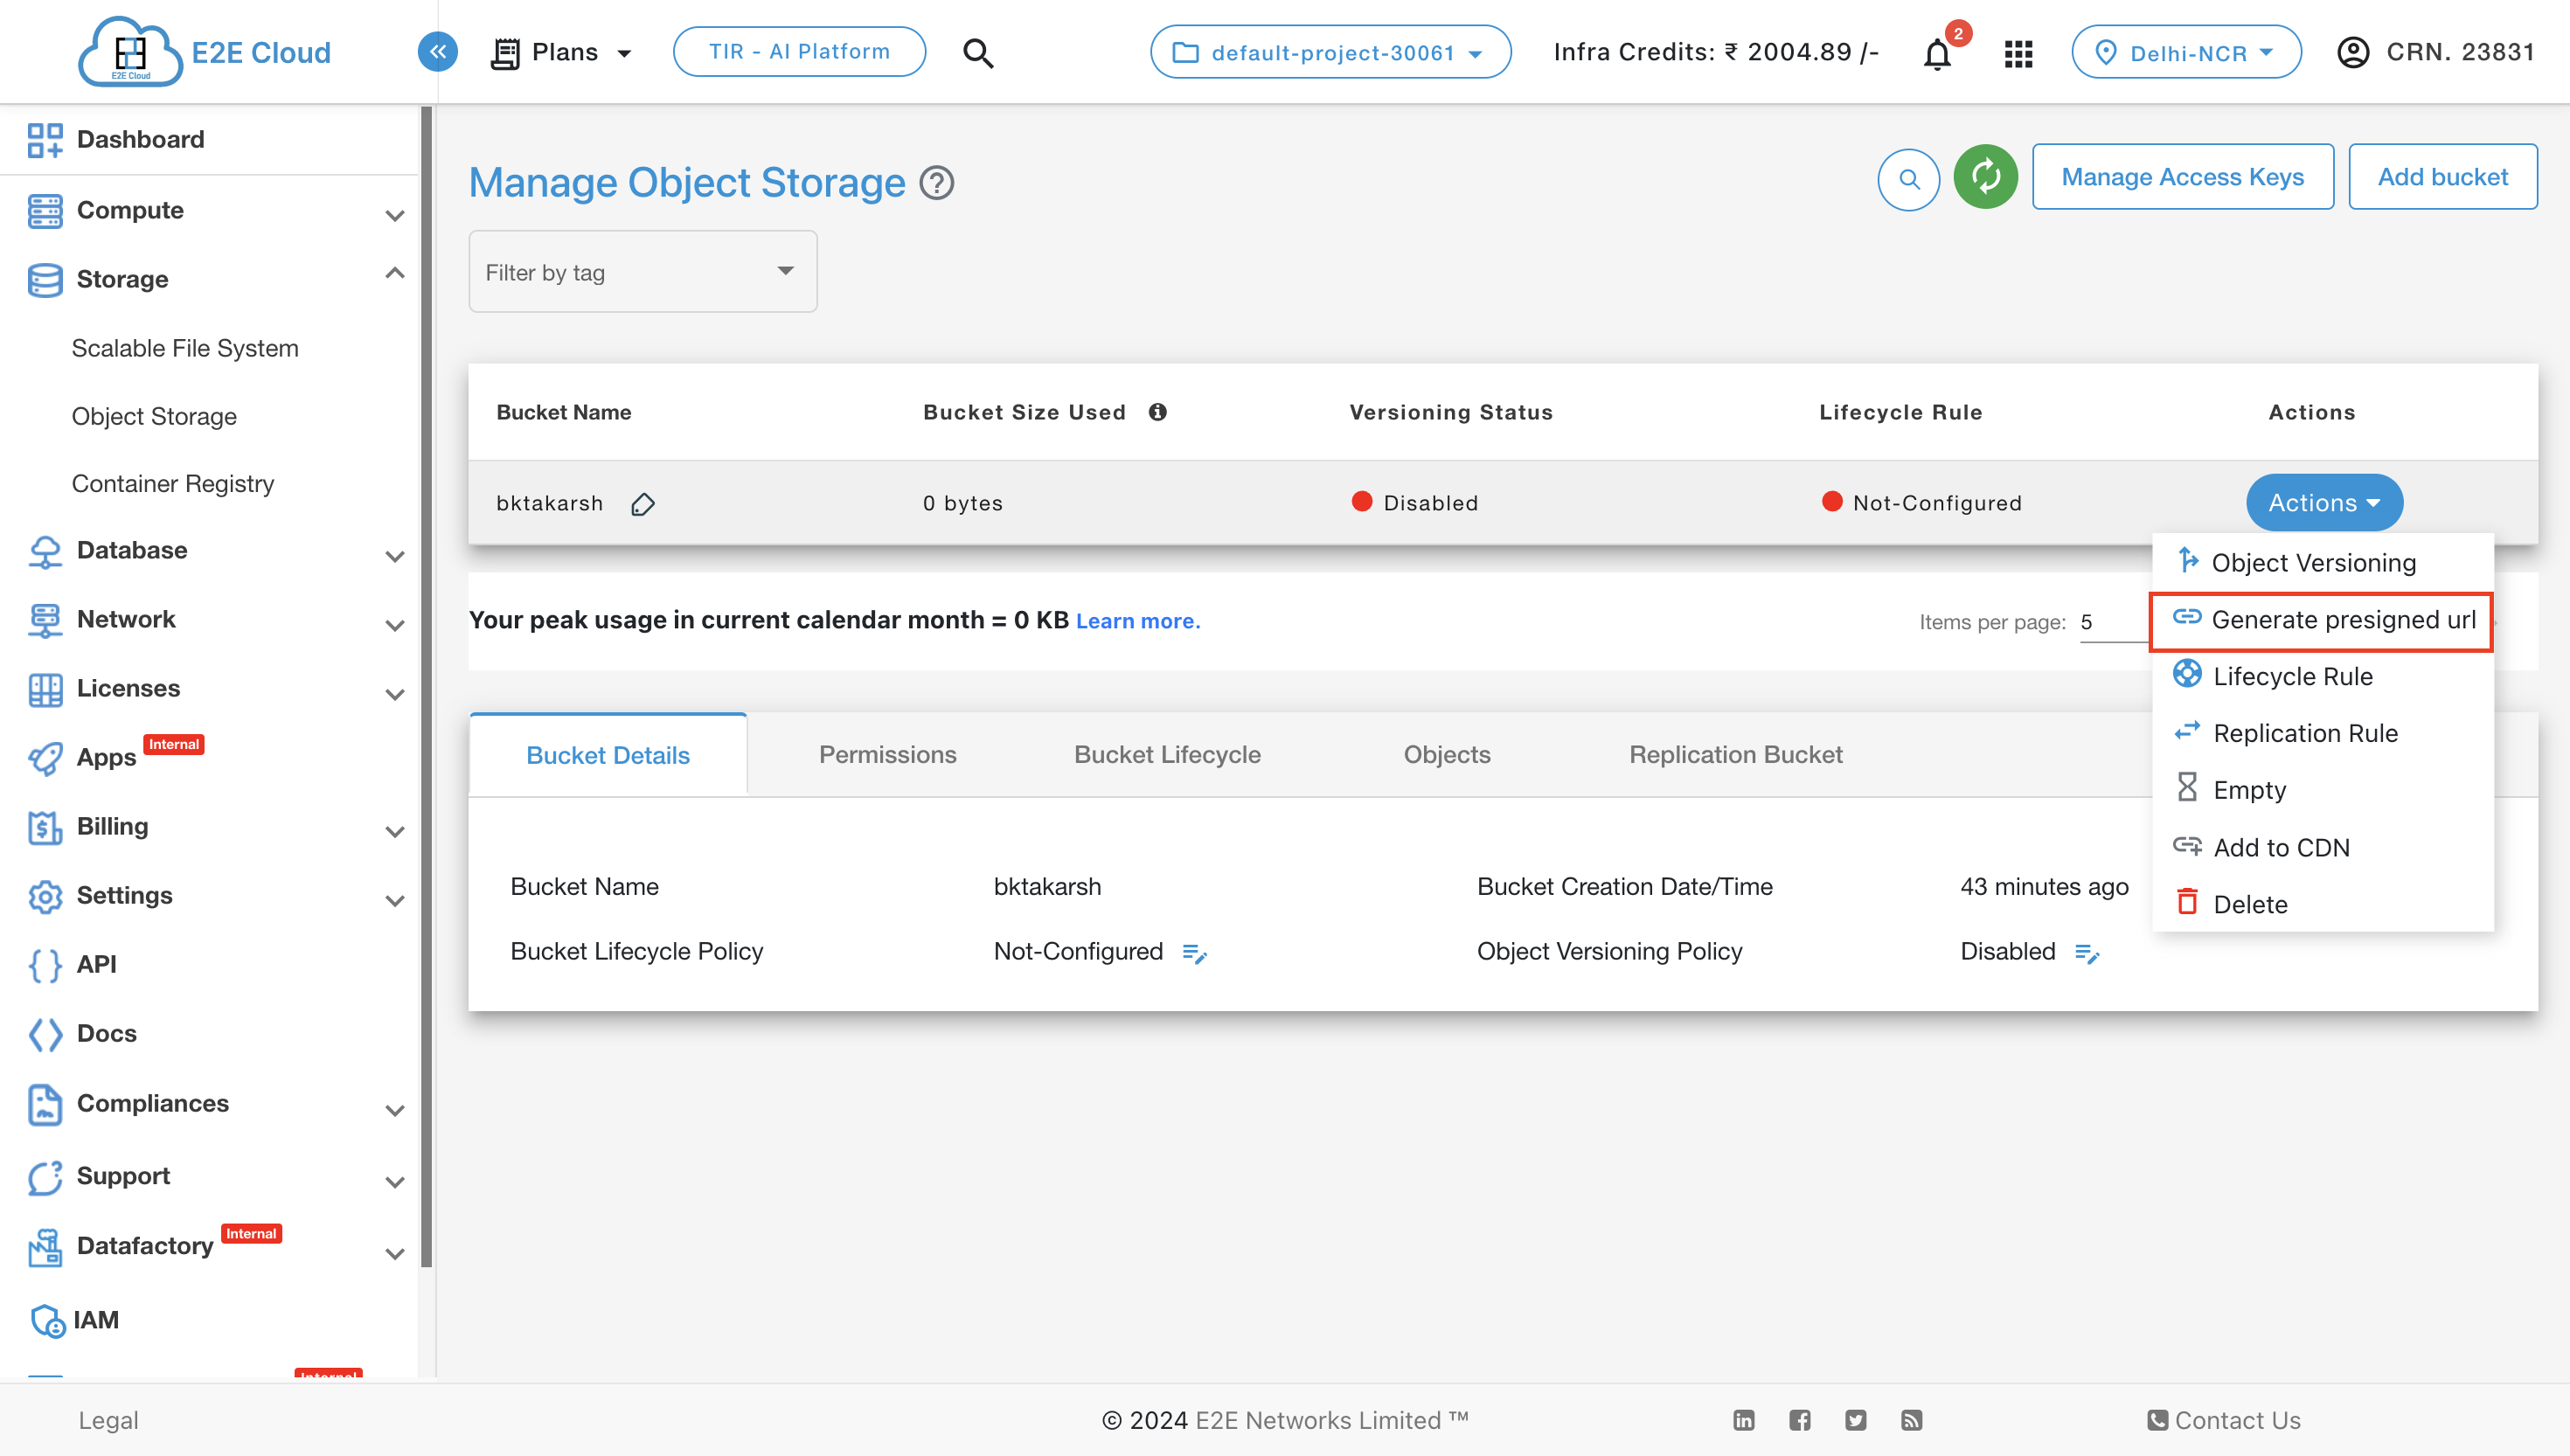
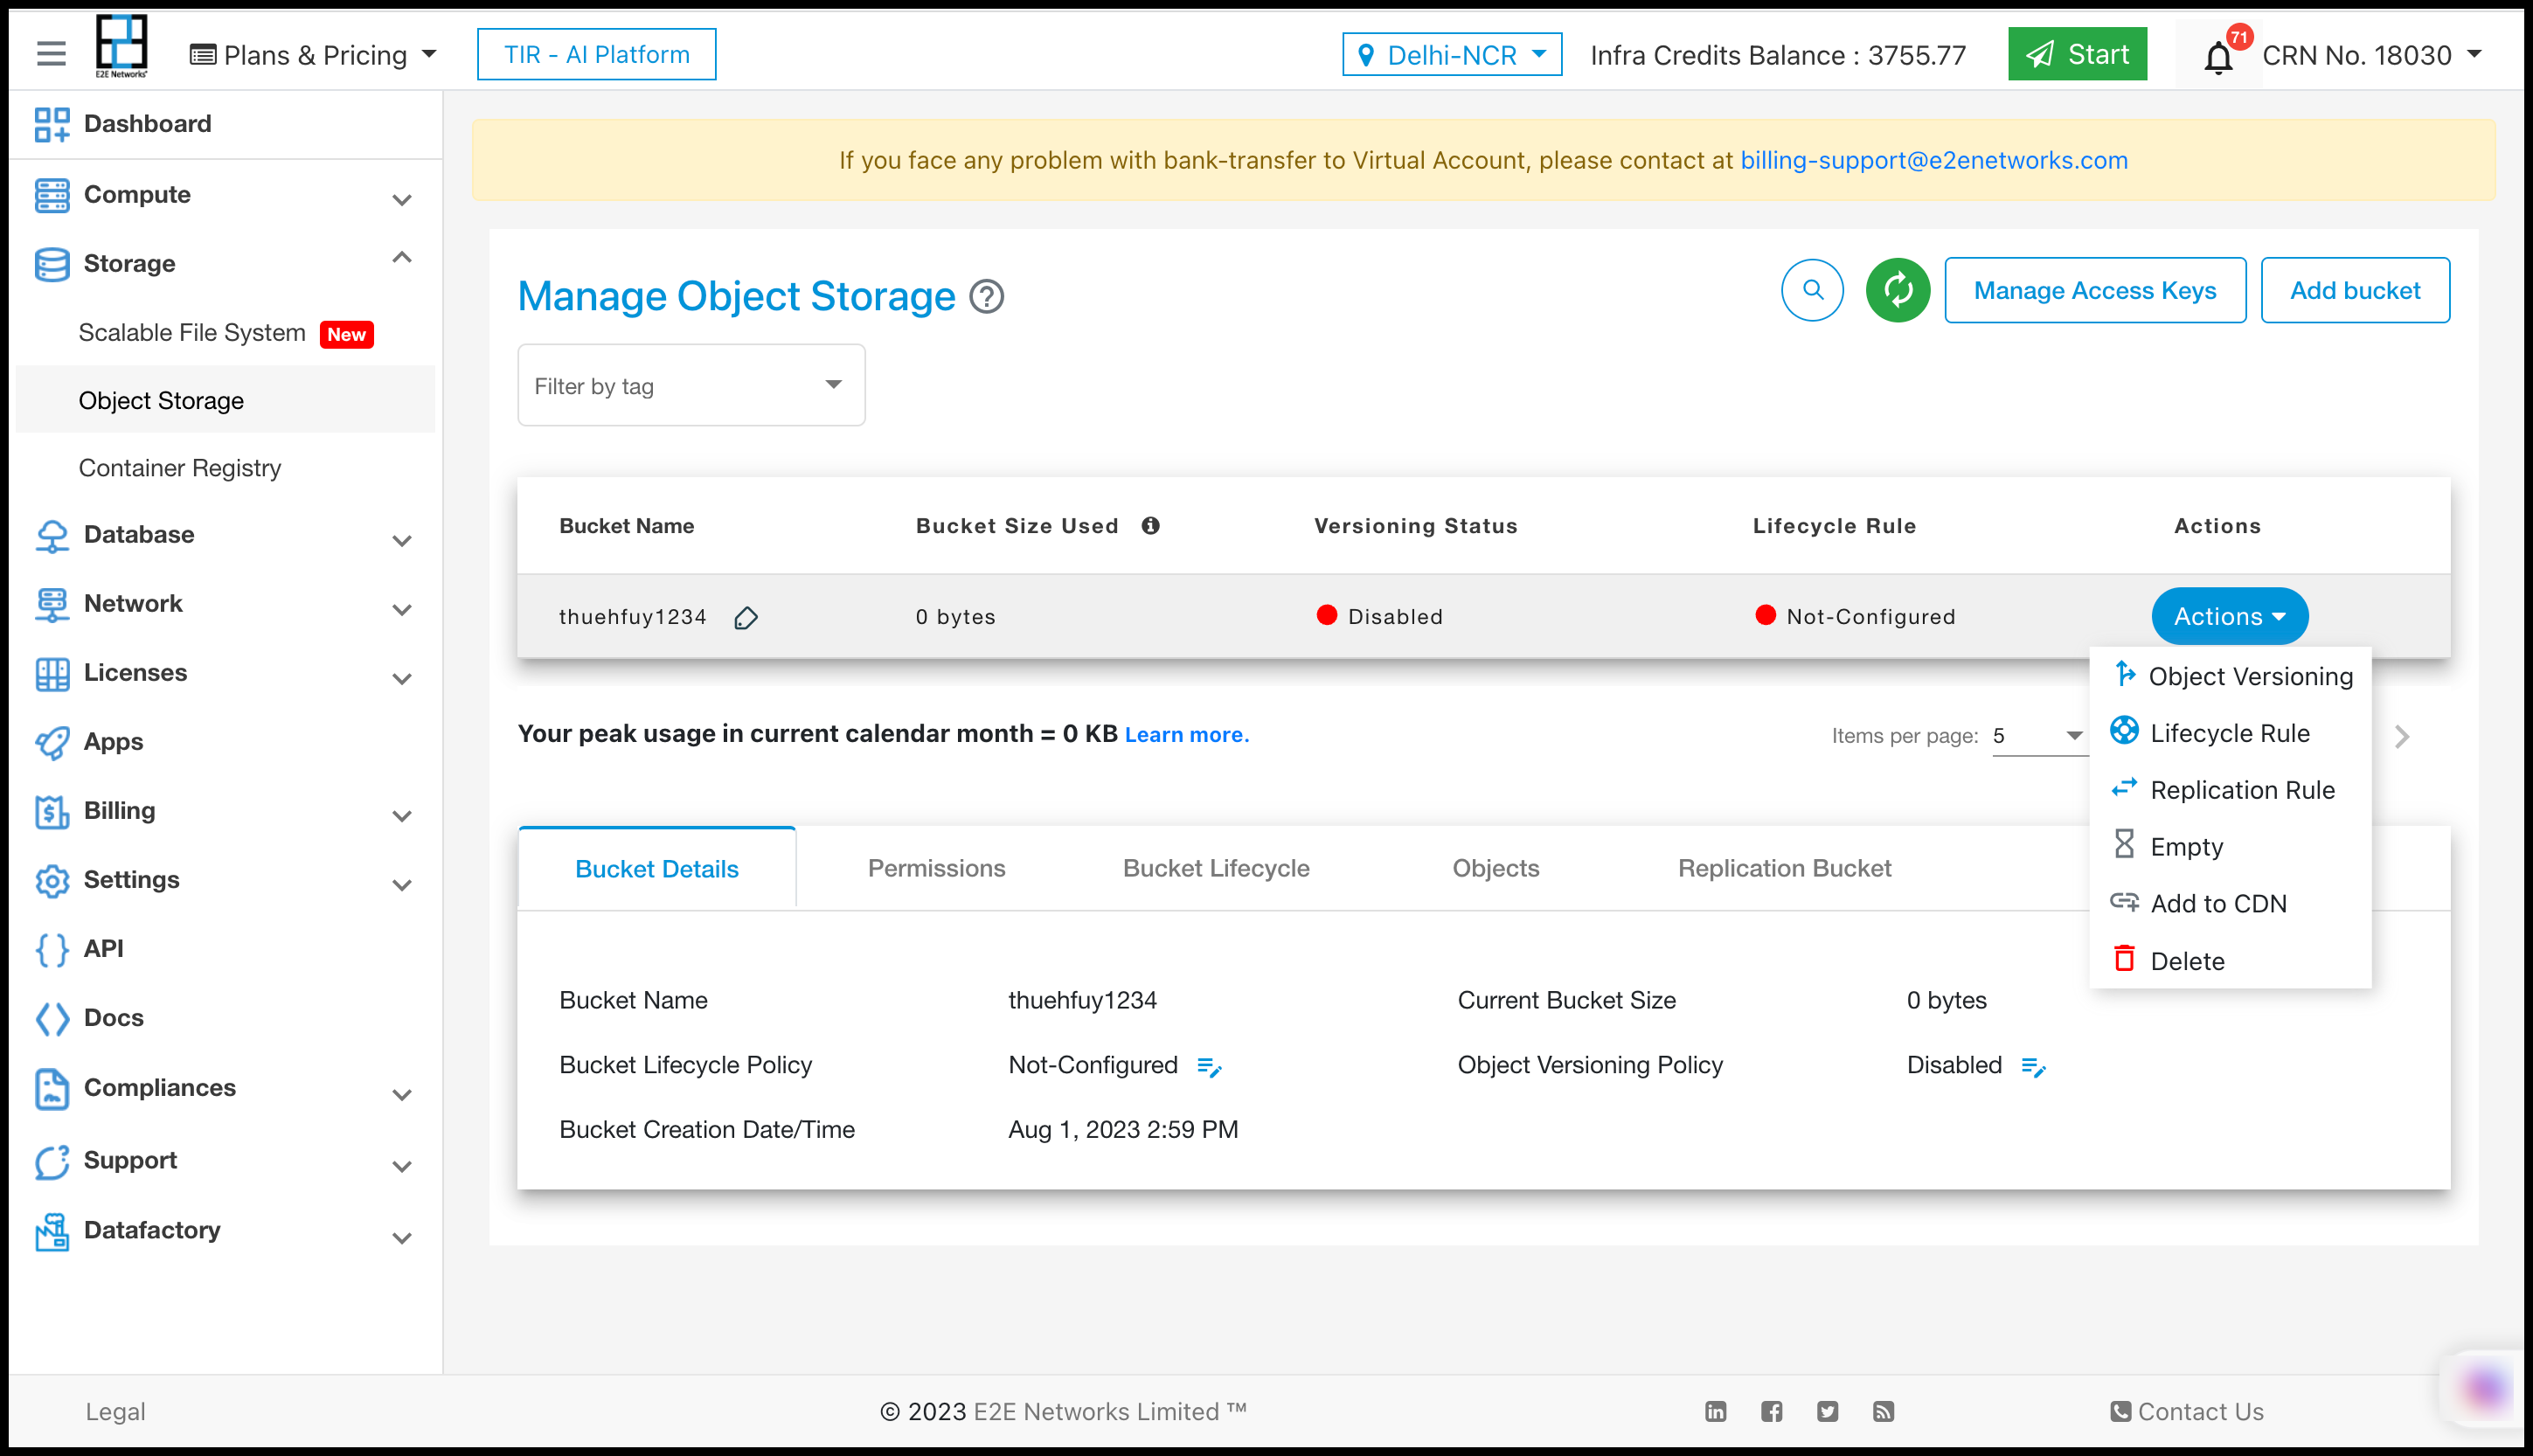
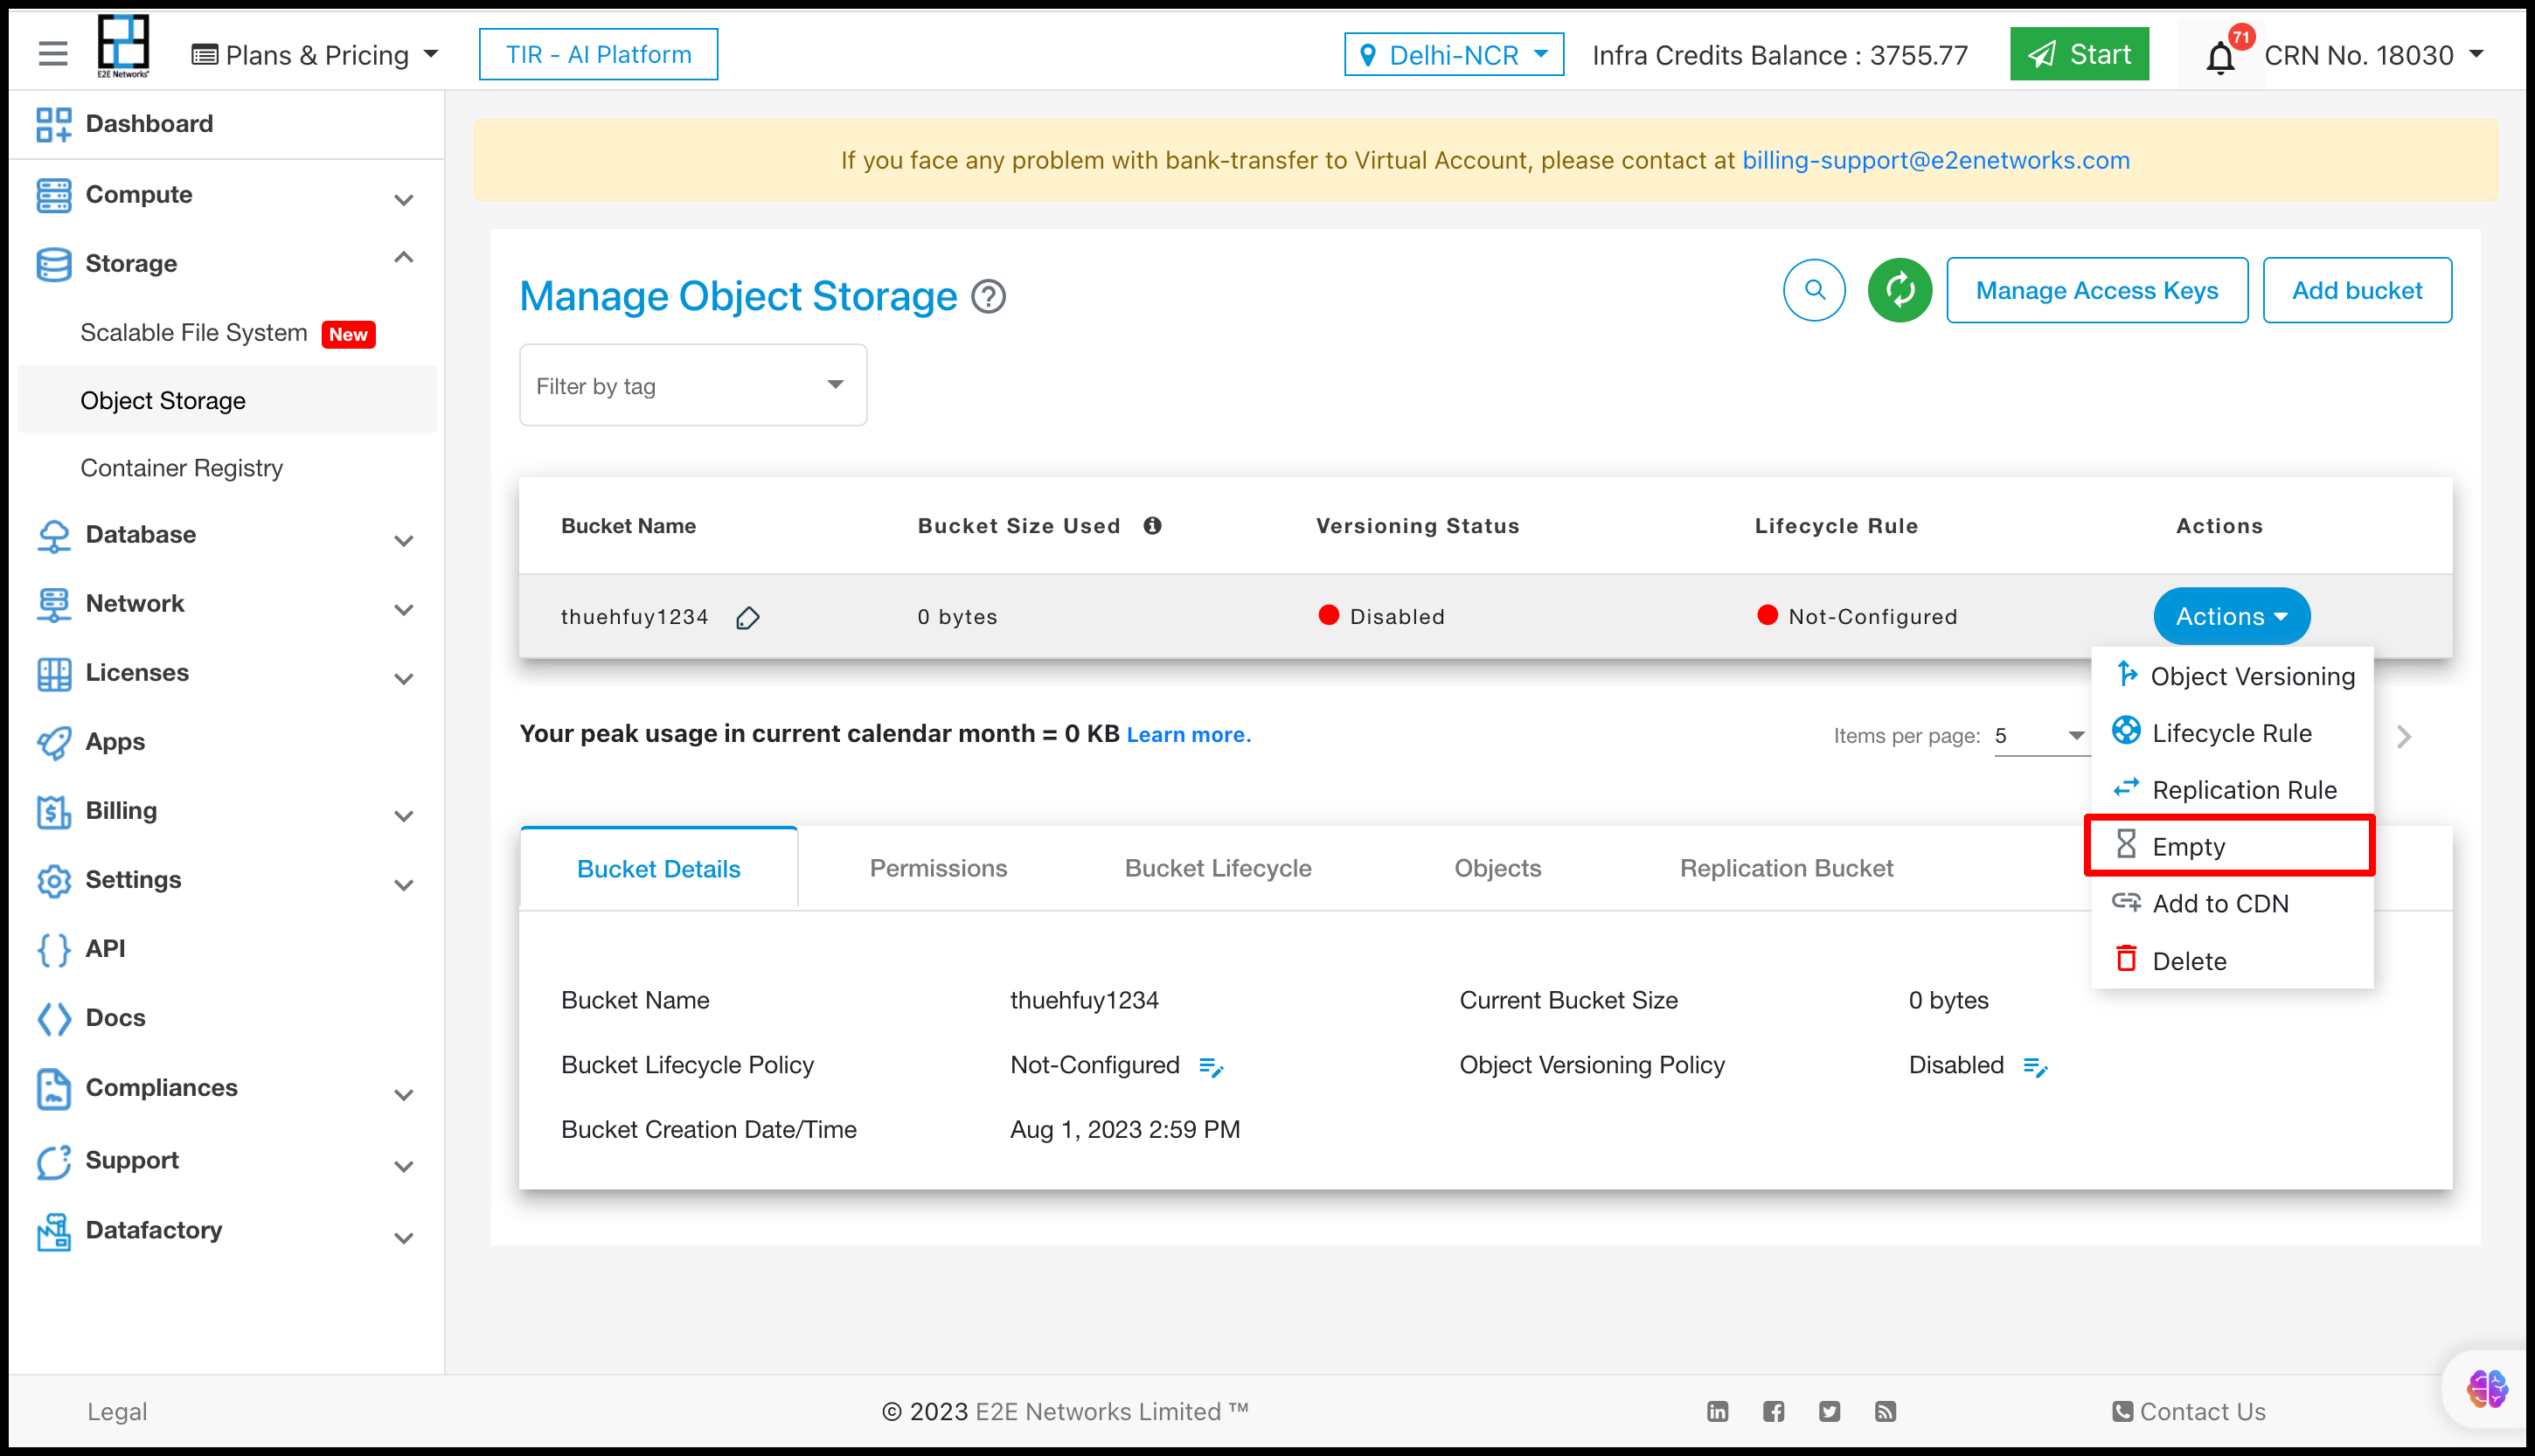
Bucket Actions
There are six actions in Bucket
Object Versioning
Presigned URL
Lifecycle Rule
Replication Rule
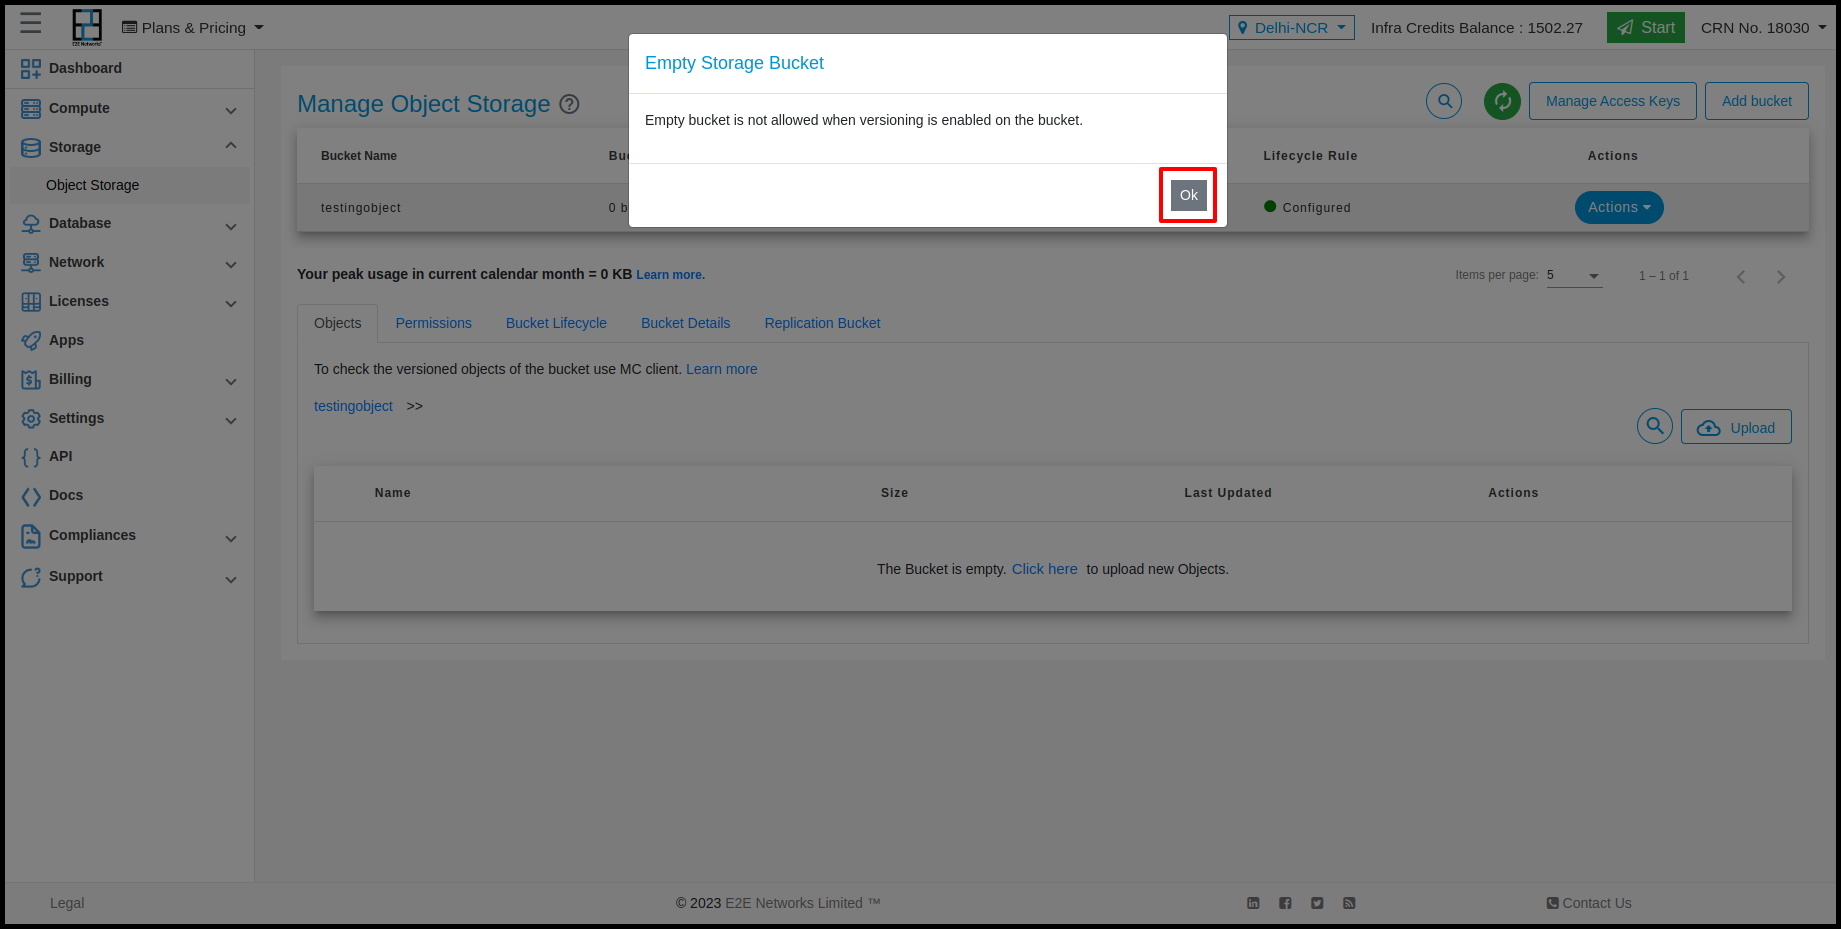
Empty
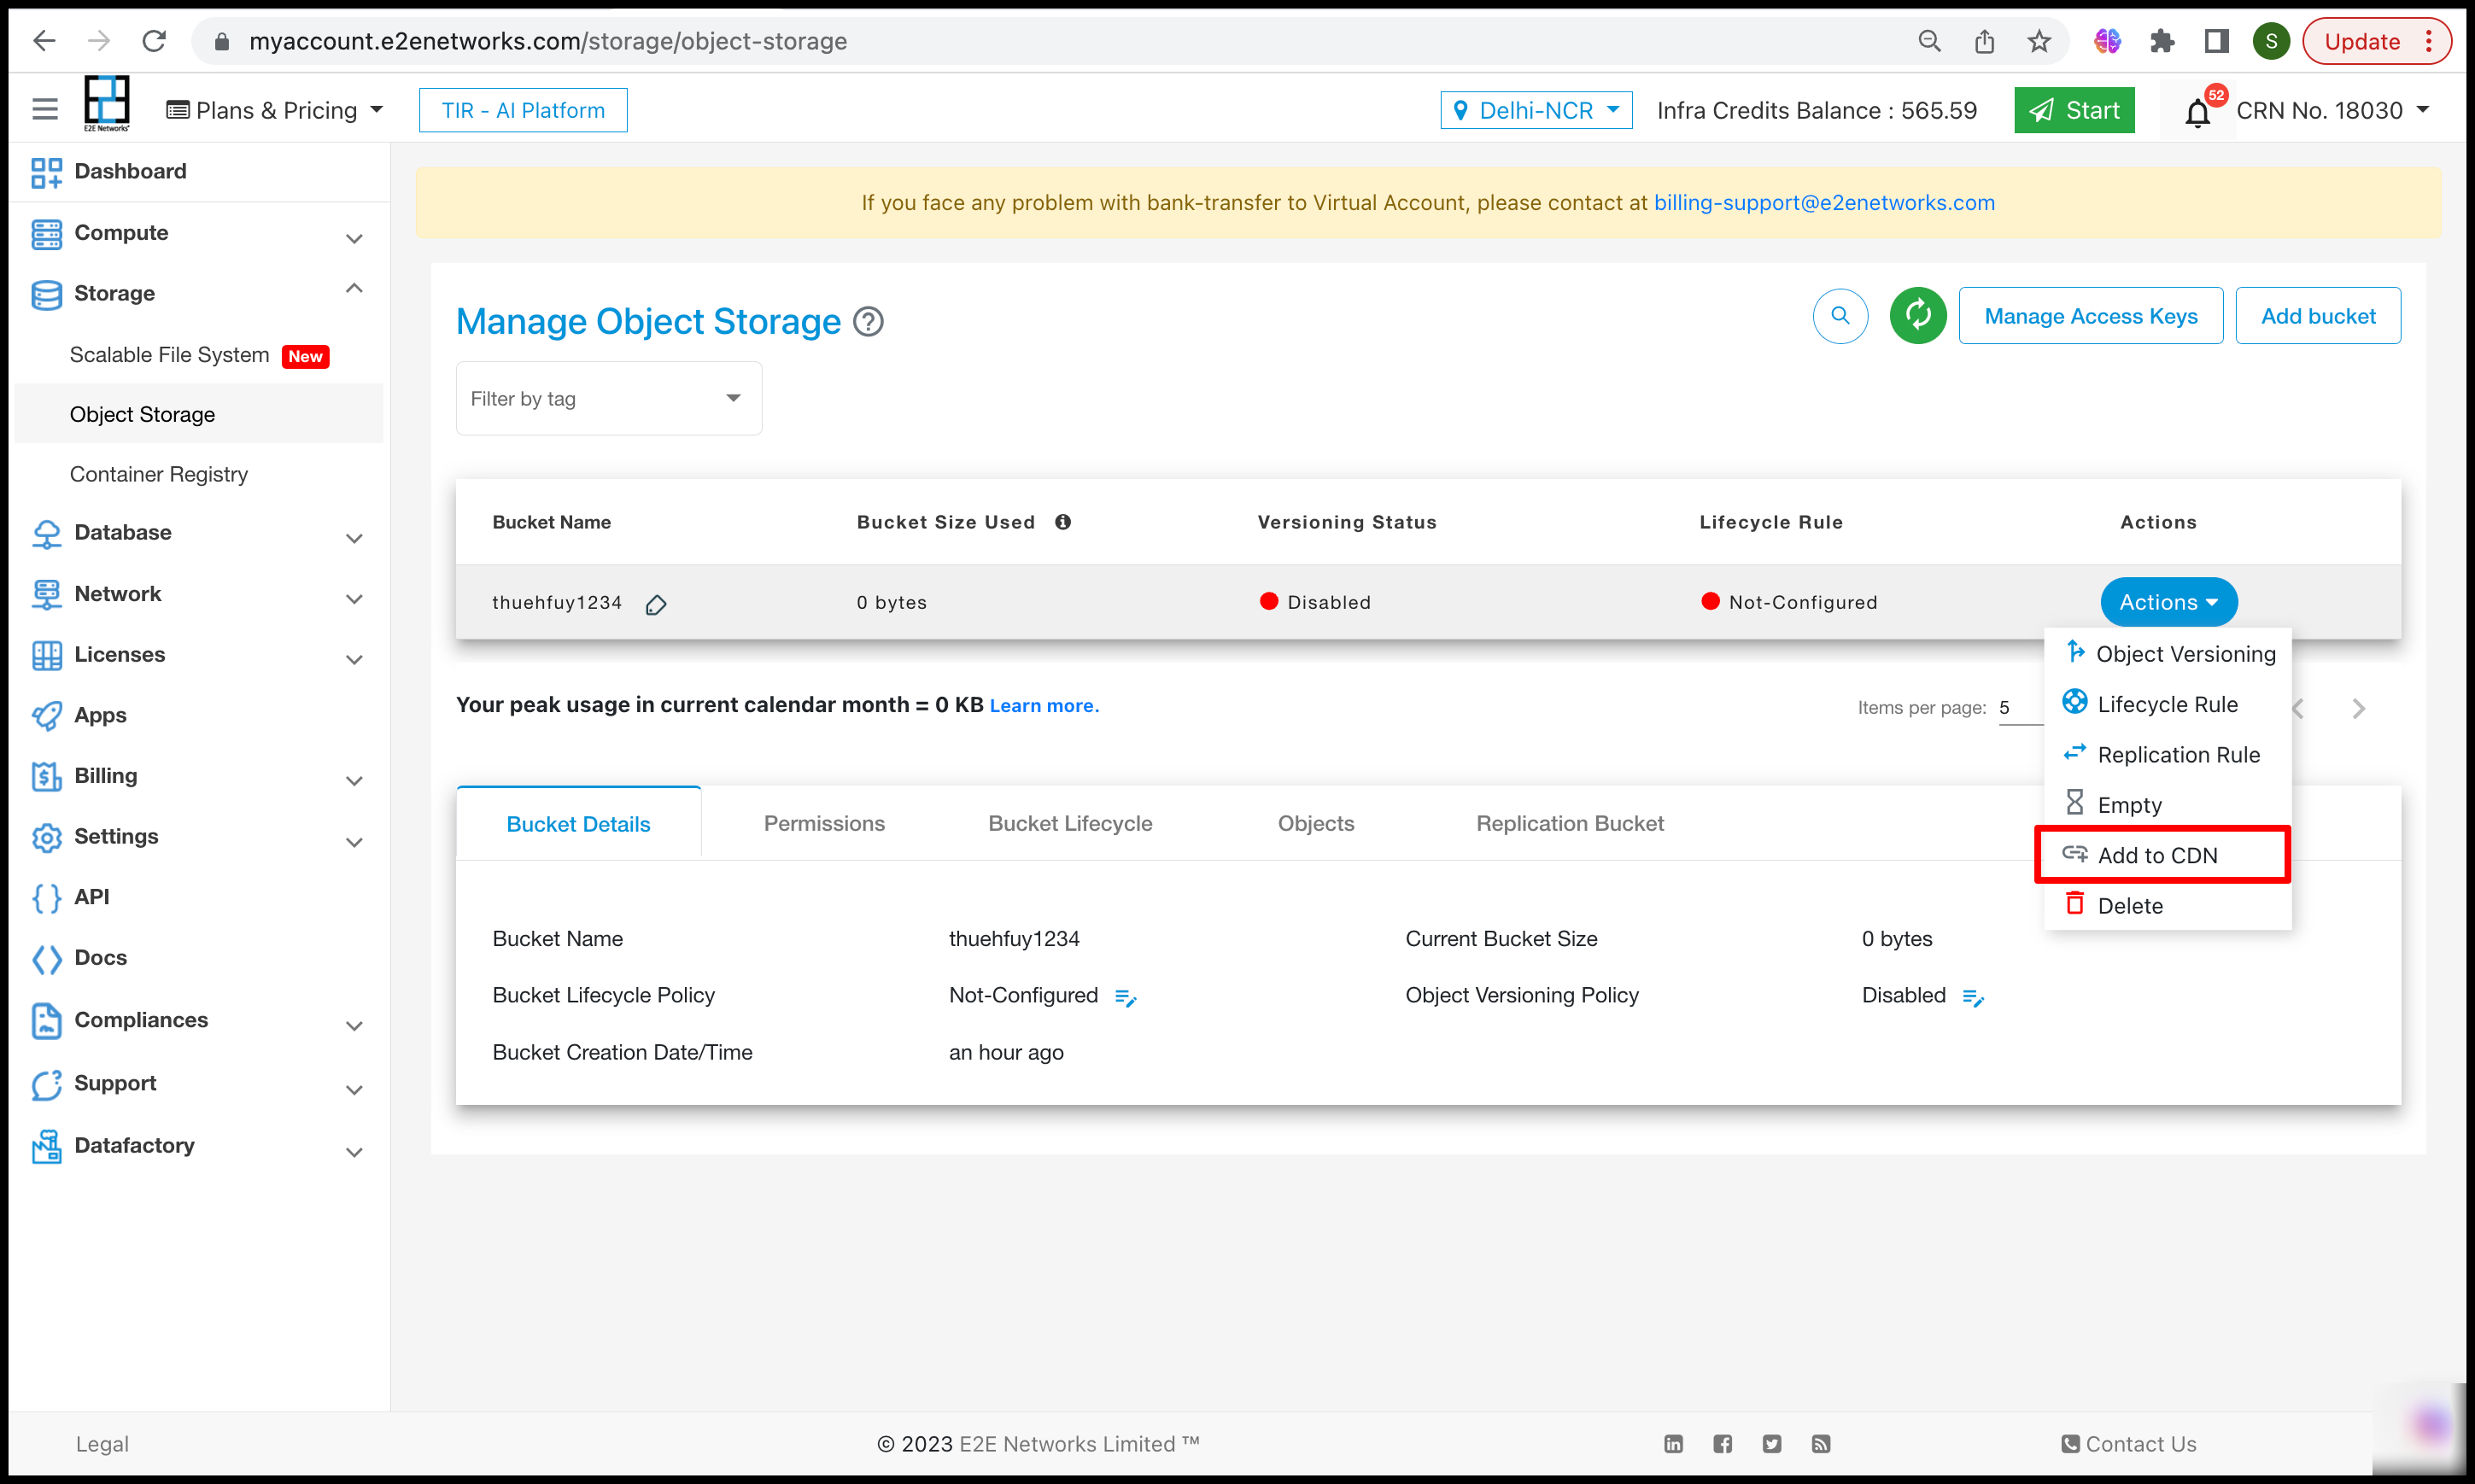
Add to CDN
Delete
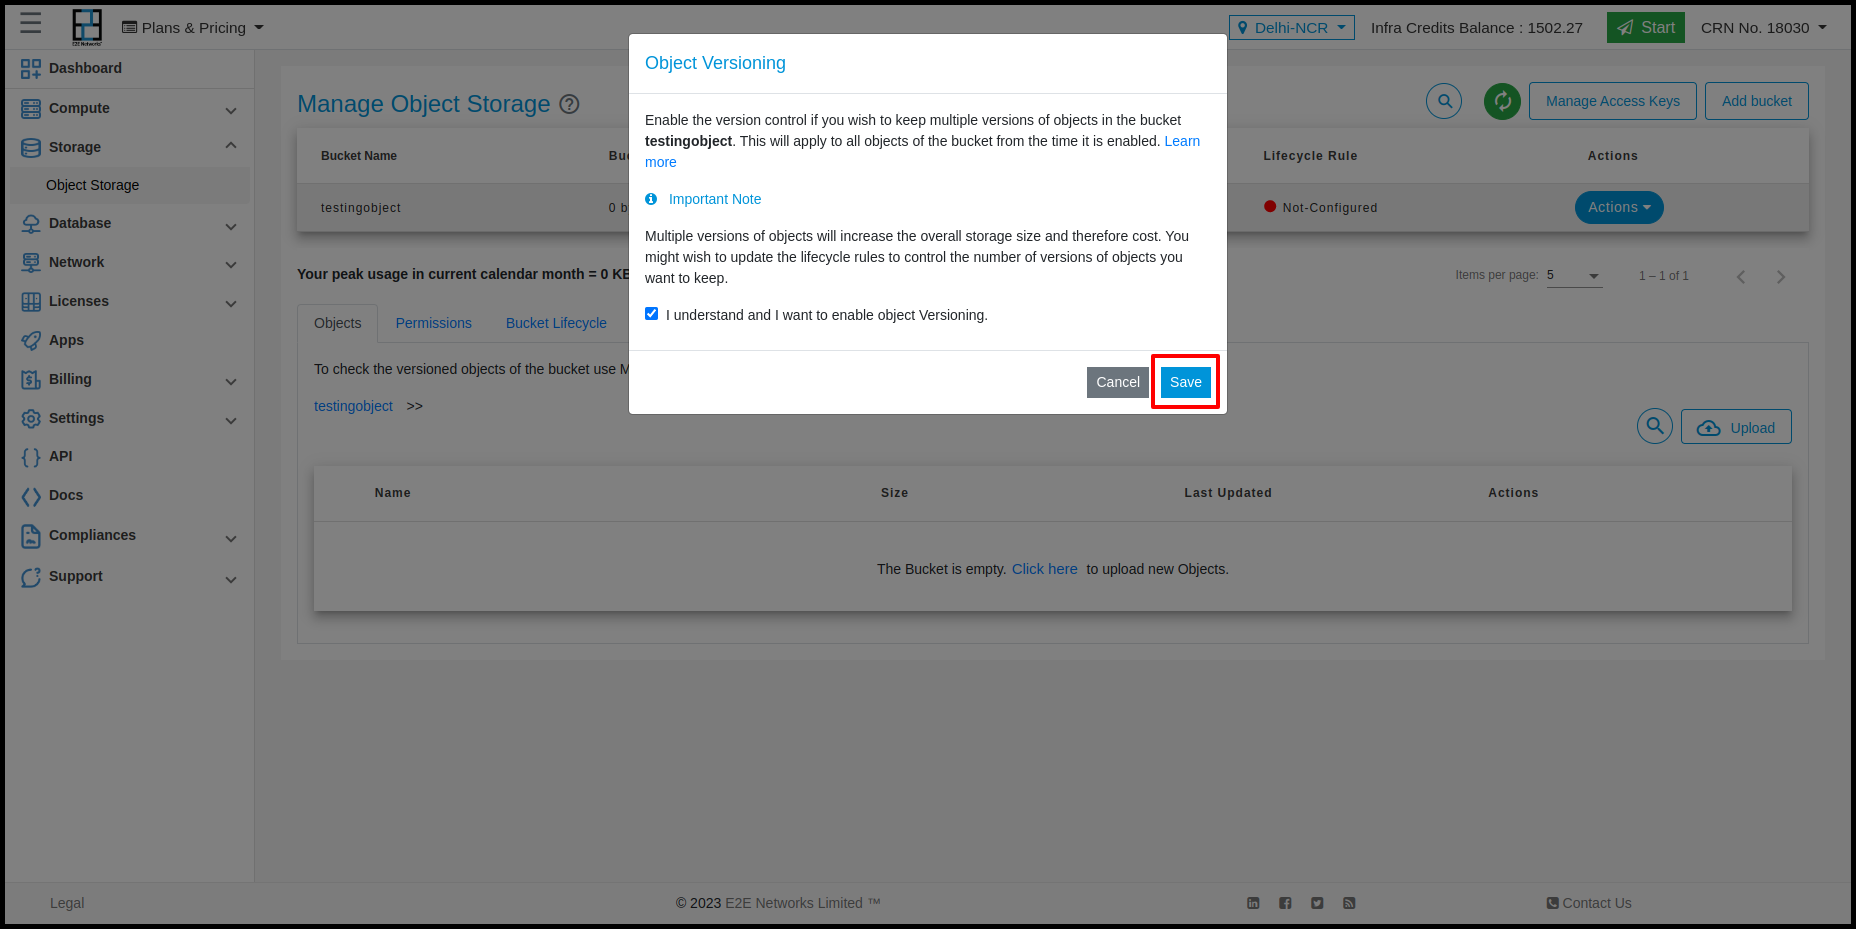
Object Versioning
E2E provide Object Versioning feature in Object storage using this feature users can upload duplicate file which will store in minio side with version. For enabling versioning you need to click on Action button and click on Object versioning.

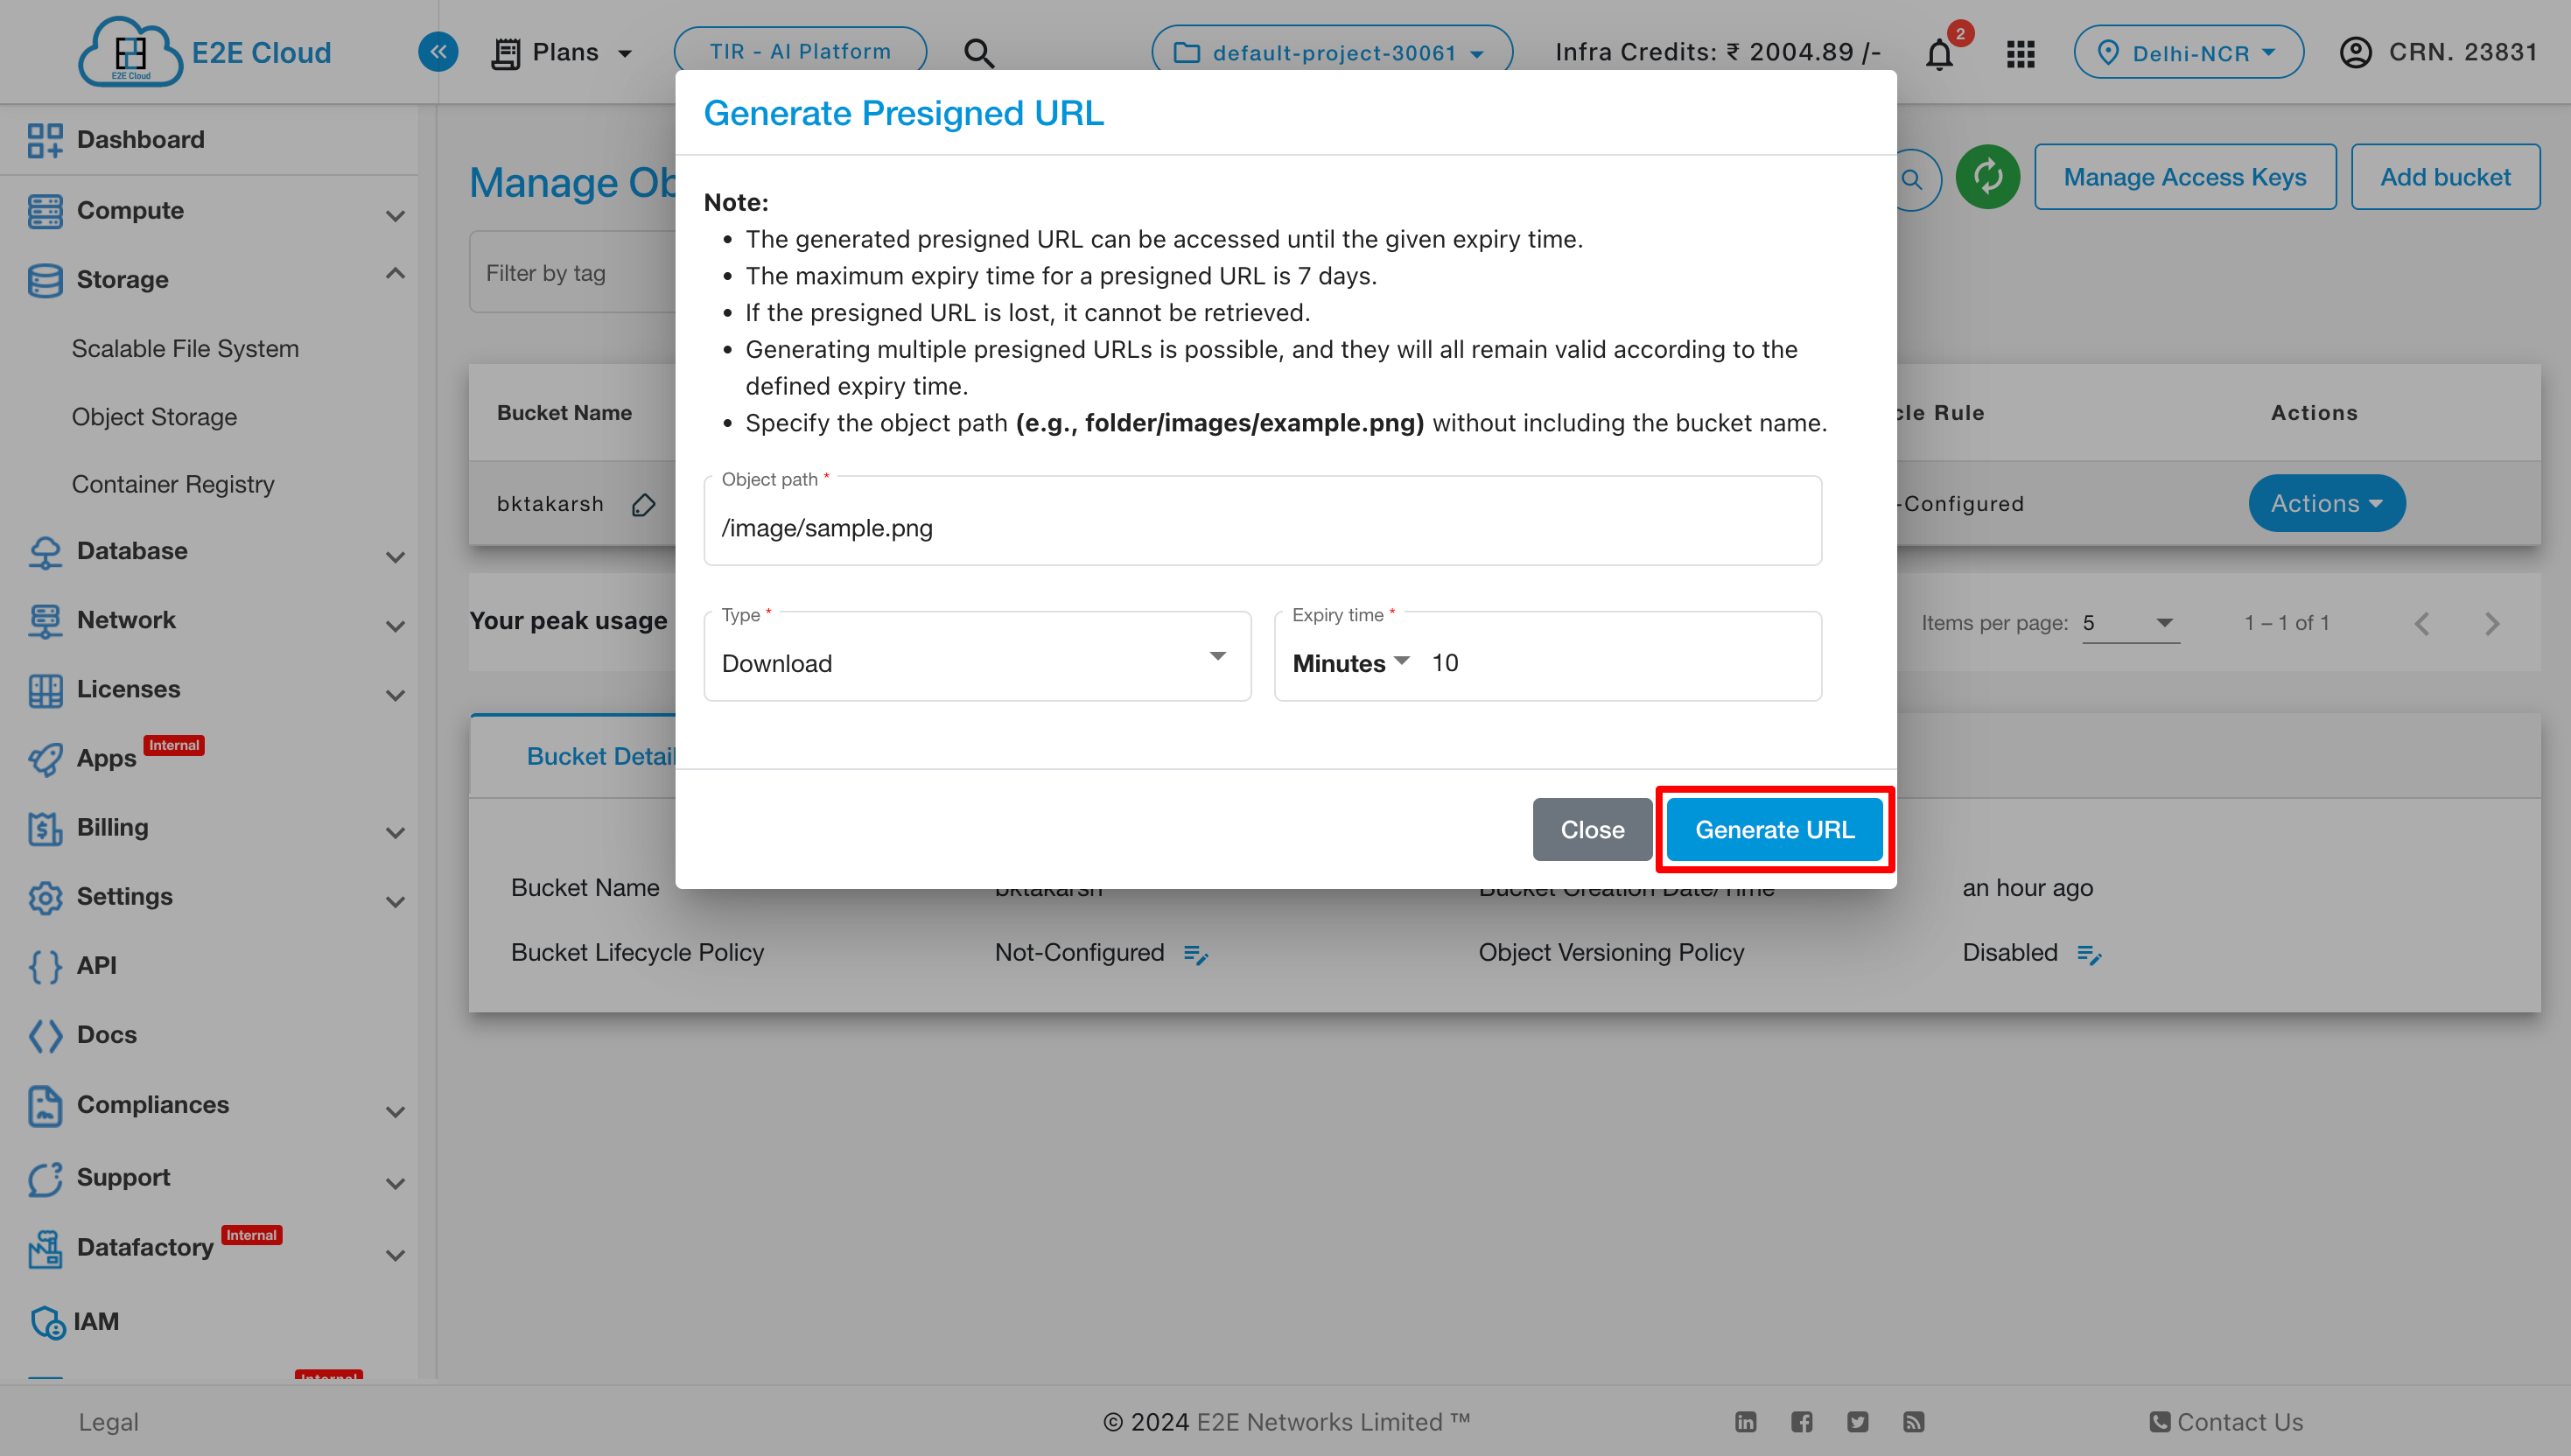
Presigned URL
E2E provide Presigned URL feature in Object Storage. This feature allows users to generate presigned URLs for files in their buckets, enabling direct download or upload of files via these URLs. Users can also easily integrate upload presigned URLs into their code for seamless file uploads.
After clicking on Generate Presigned URL, you have to enter the required details and select the type for the URL as shown below.
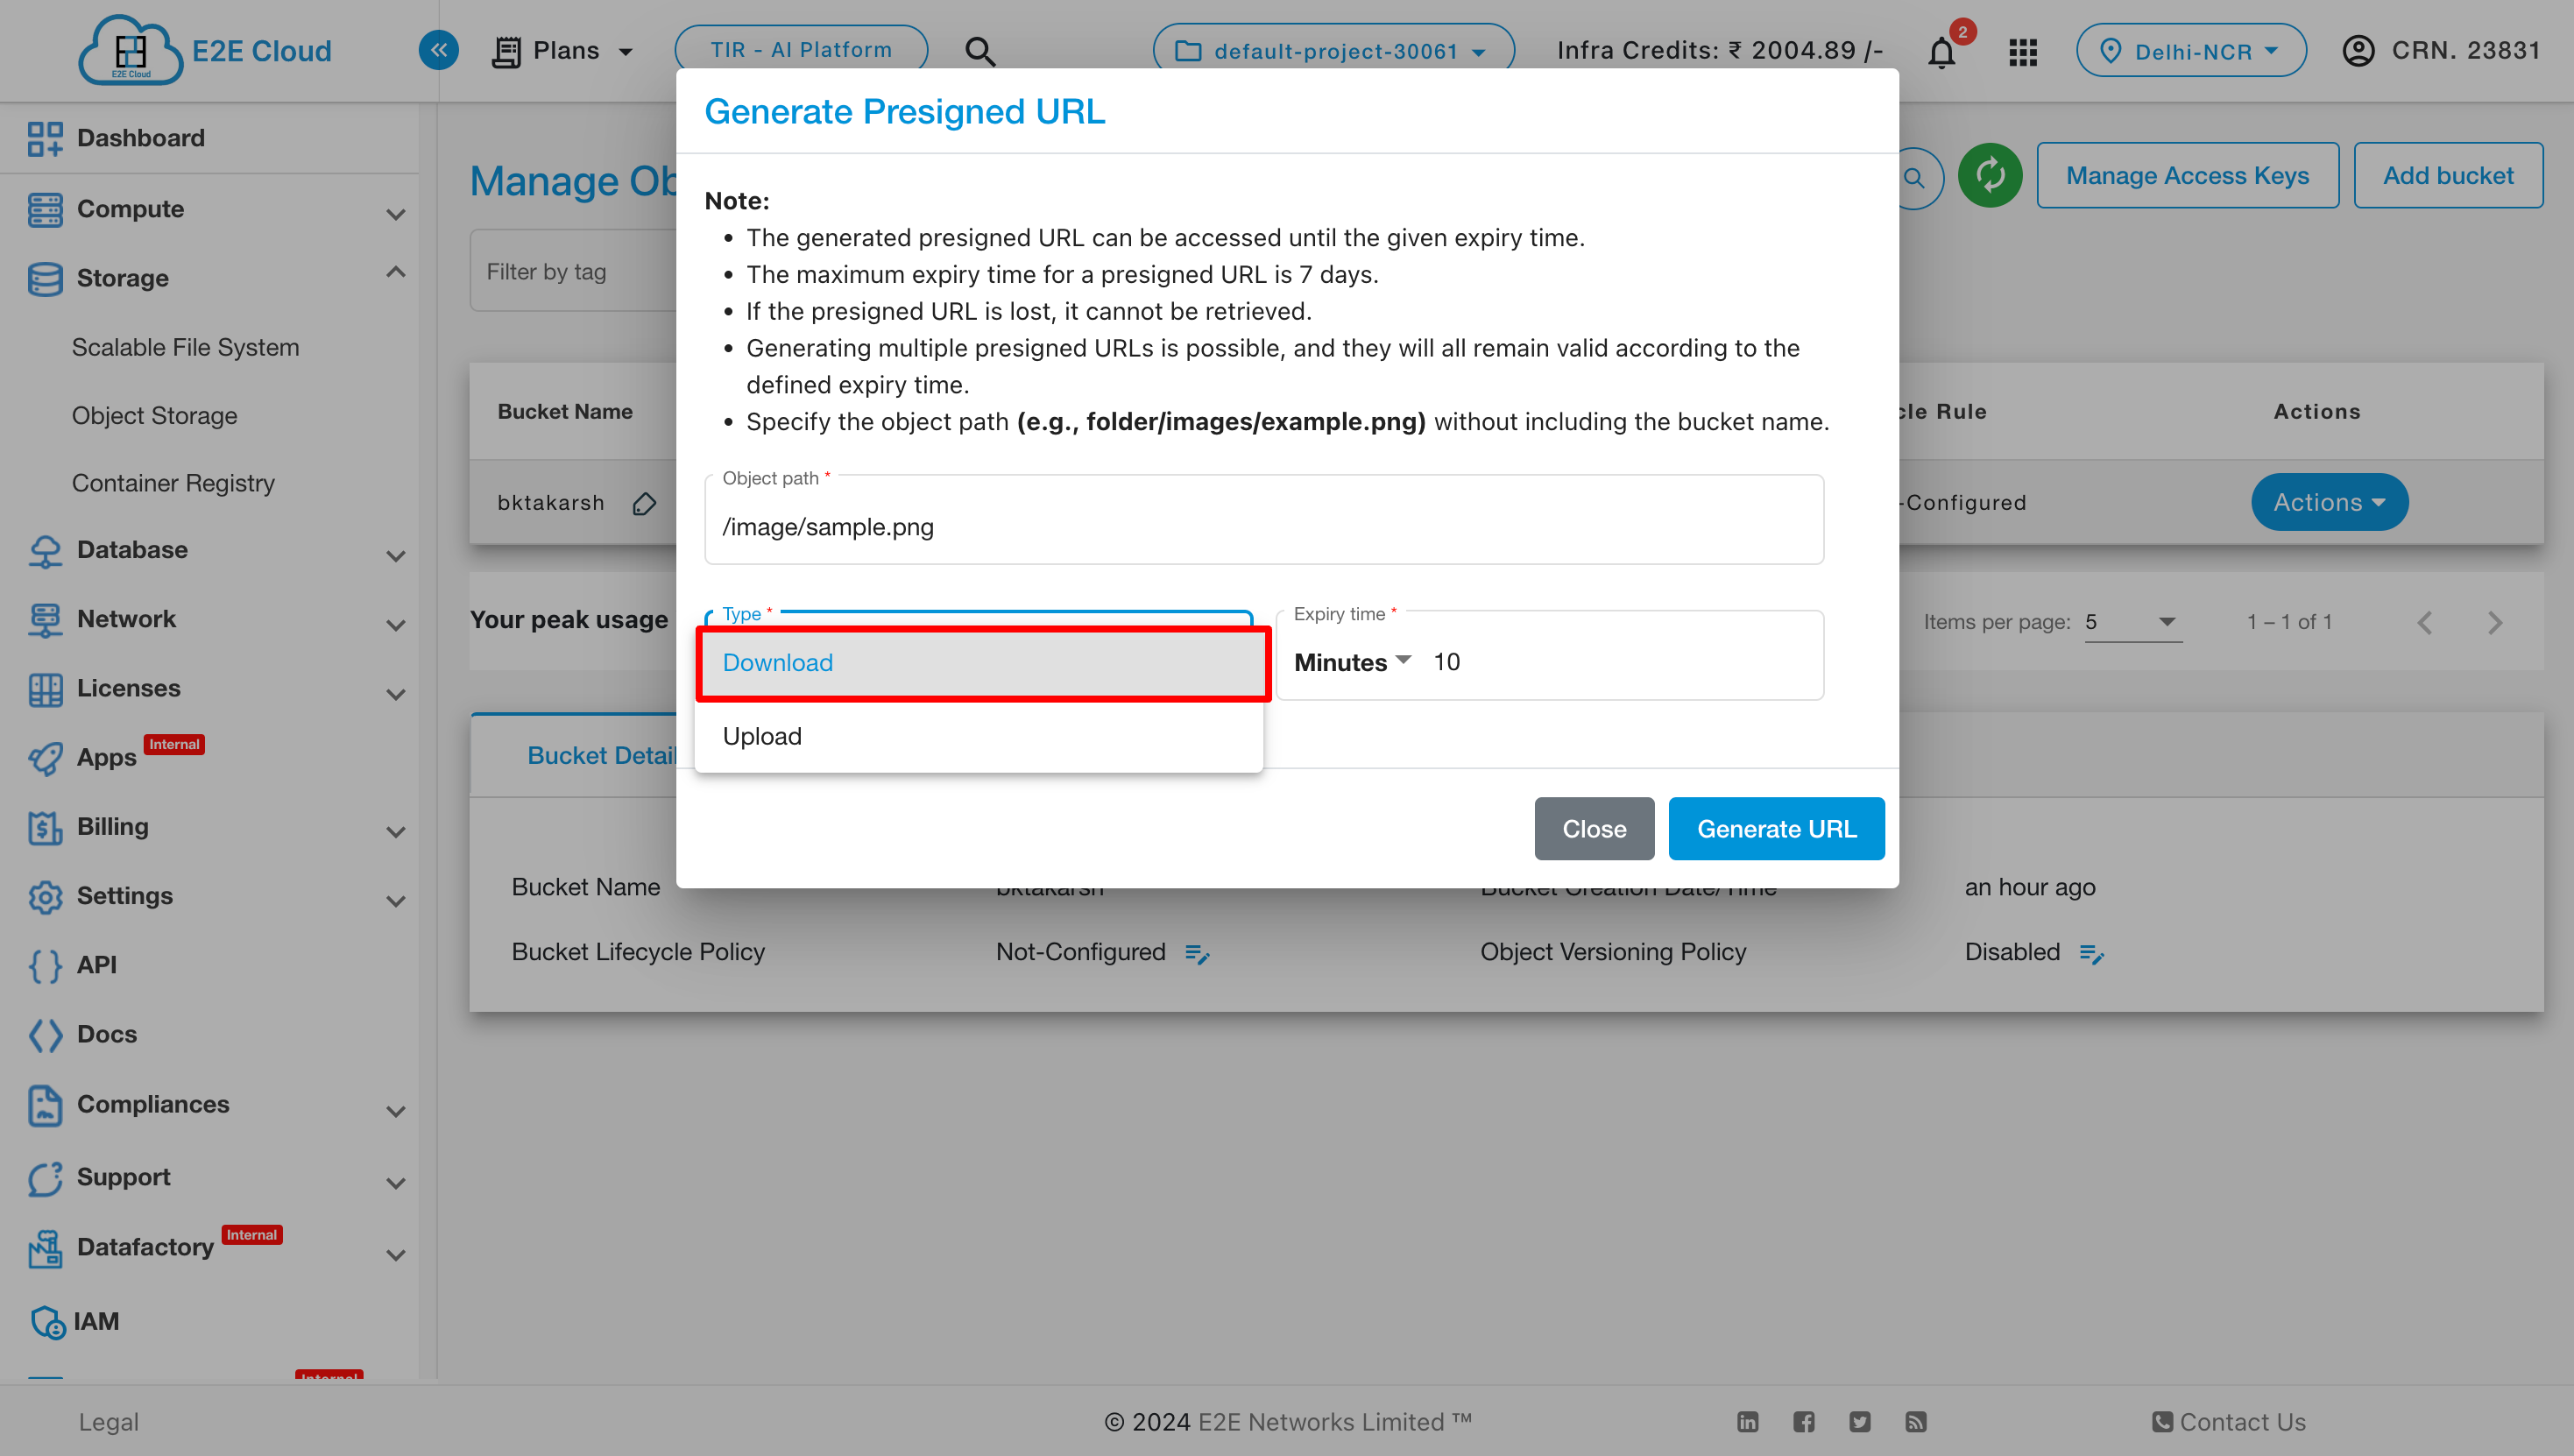
Now click on Generate URL to generate the Presigned URL.
Lifecycle Rule
E2E provide Lifecycle Rule feature in Object storage using this feature users can apply lifecyle rule on bucket after applying this the object will delete as per your set rule. For that users need to click on Action button and click on Lifecycle Rule and enter details and click on save.

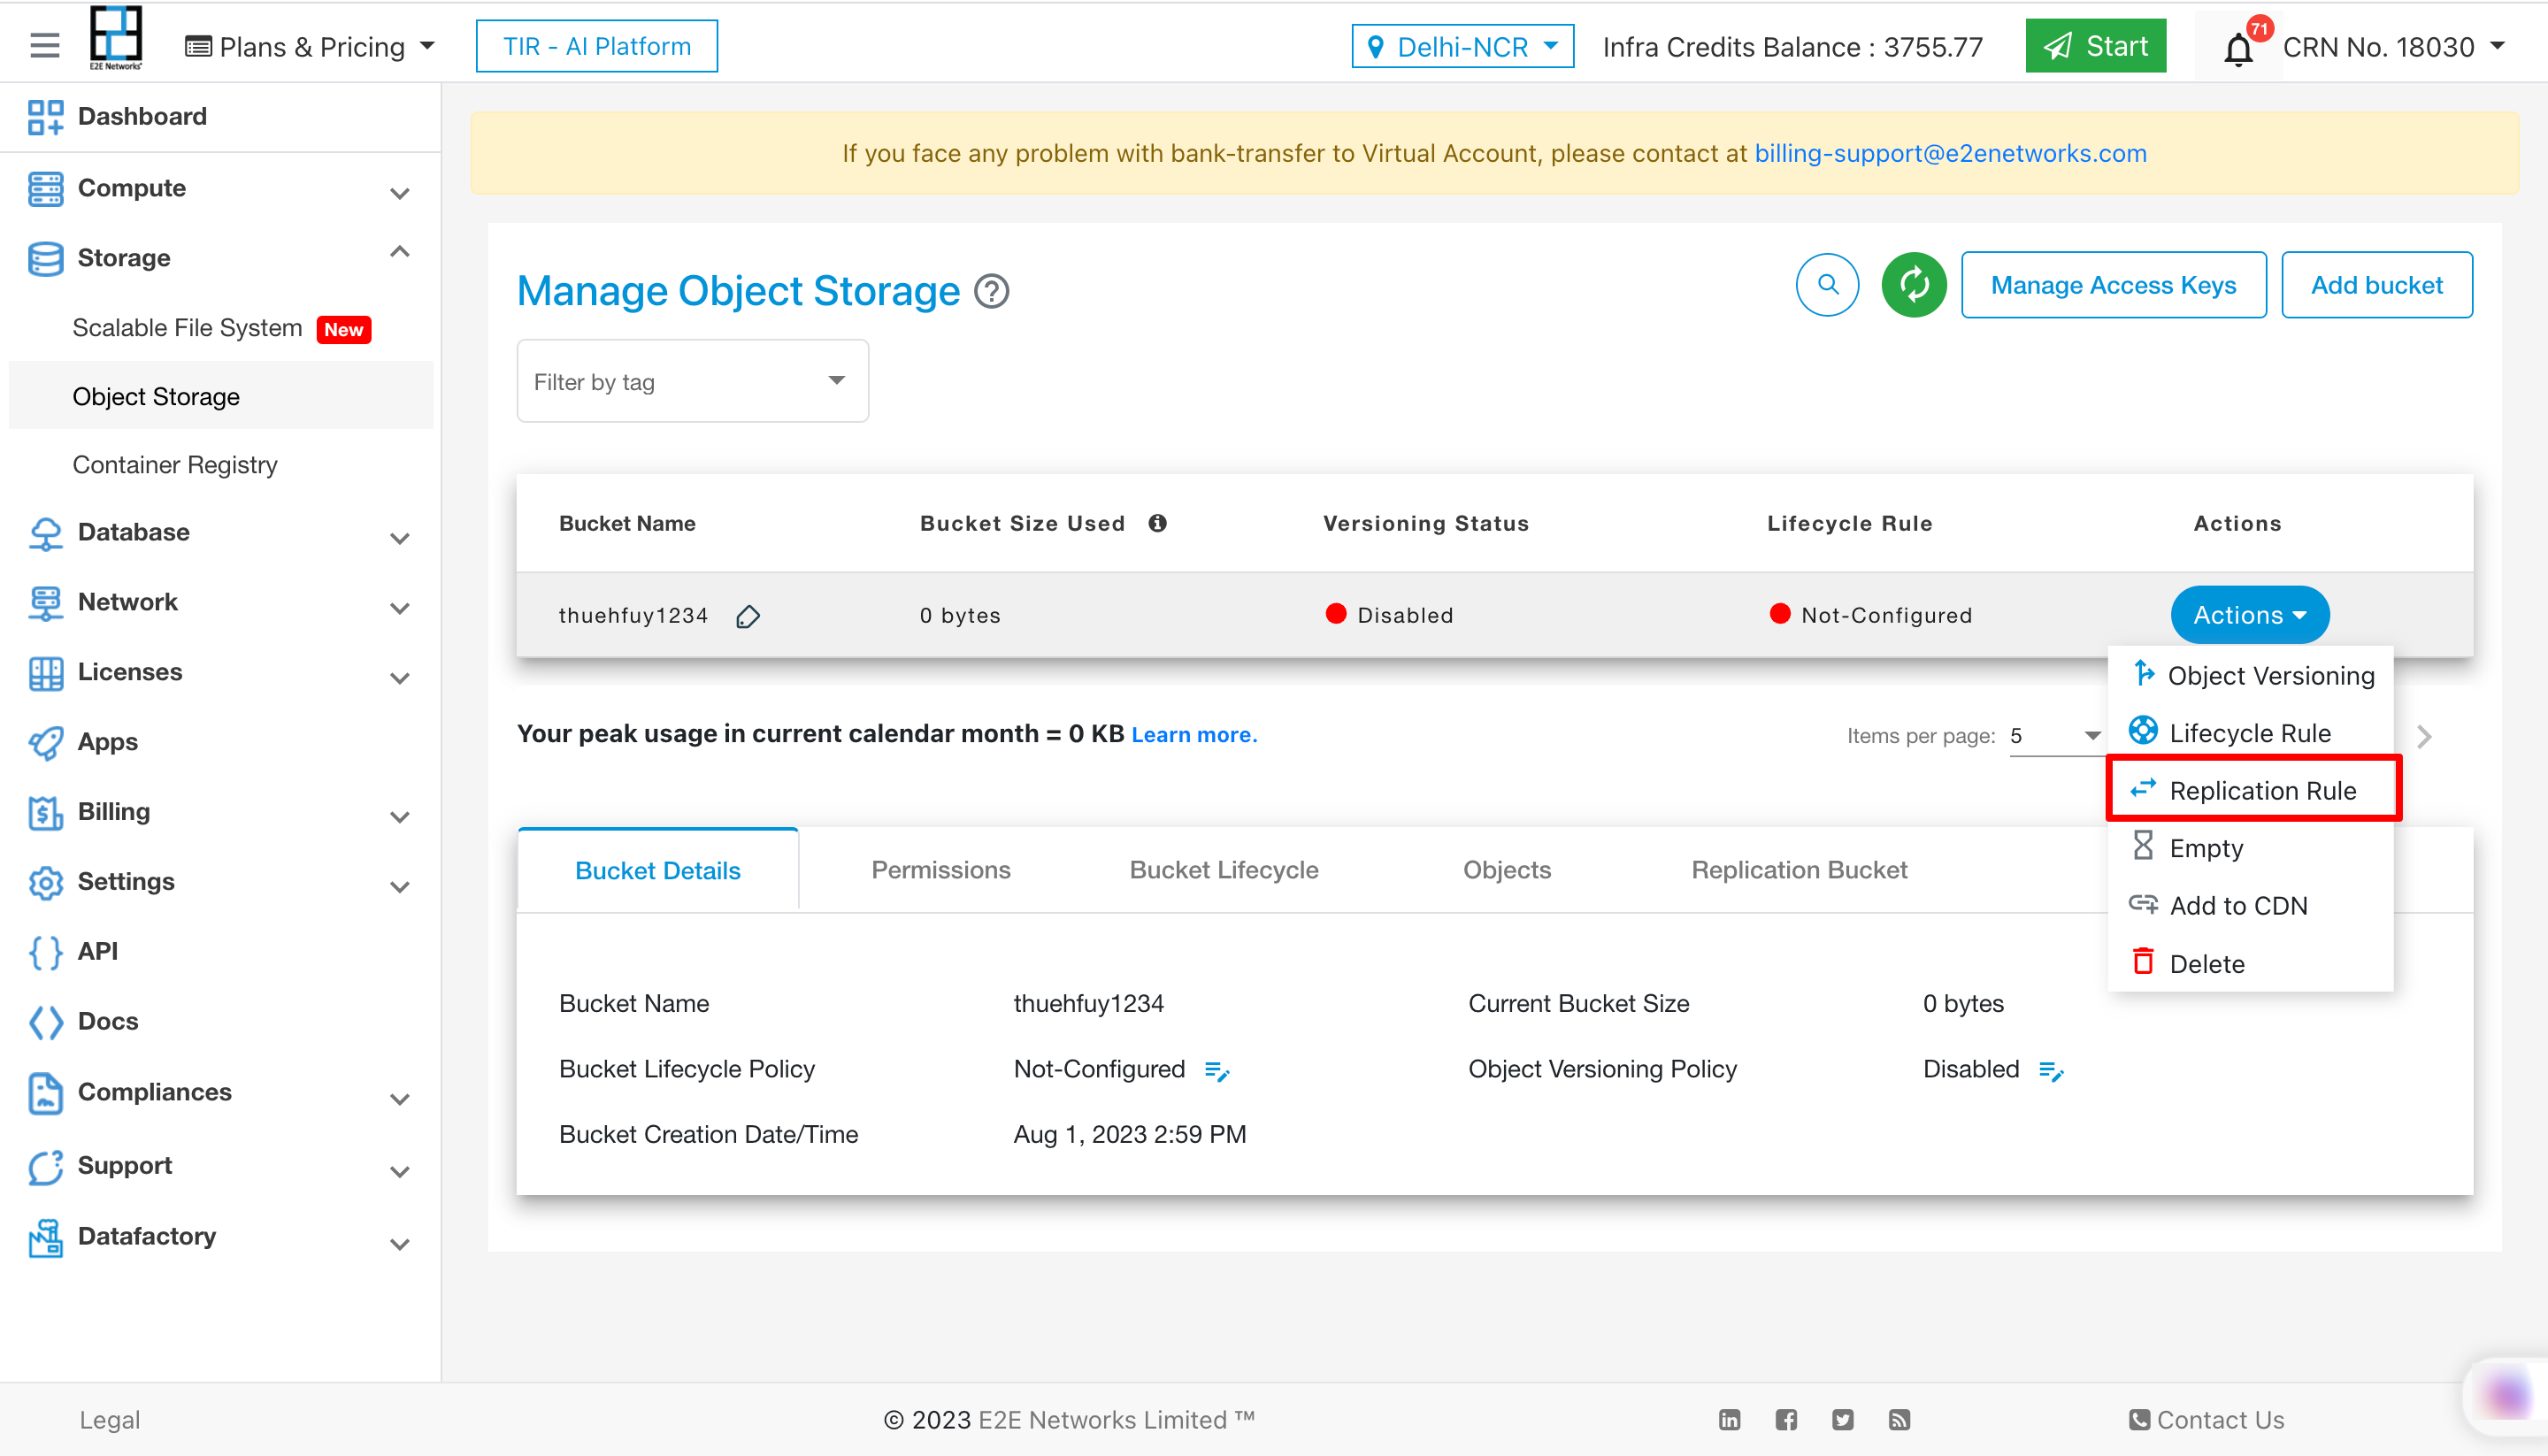
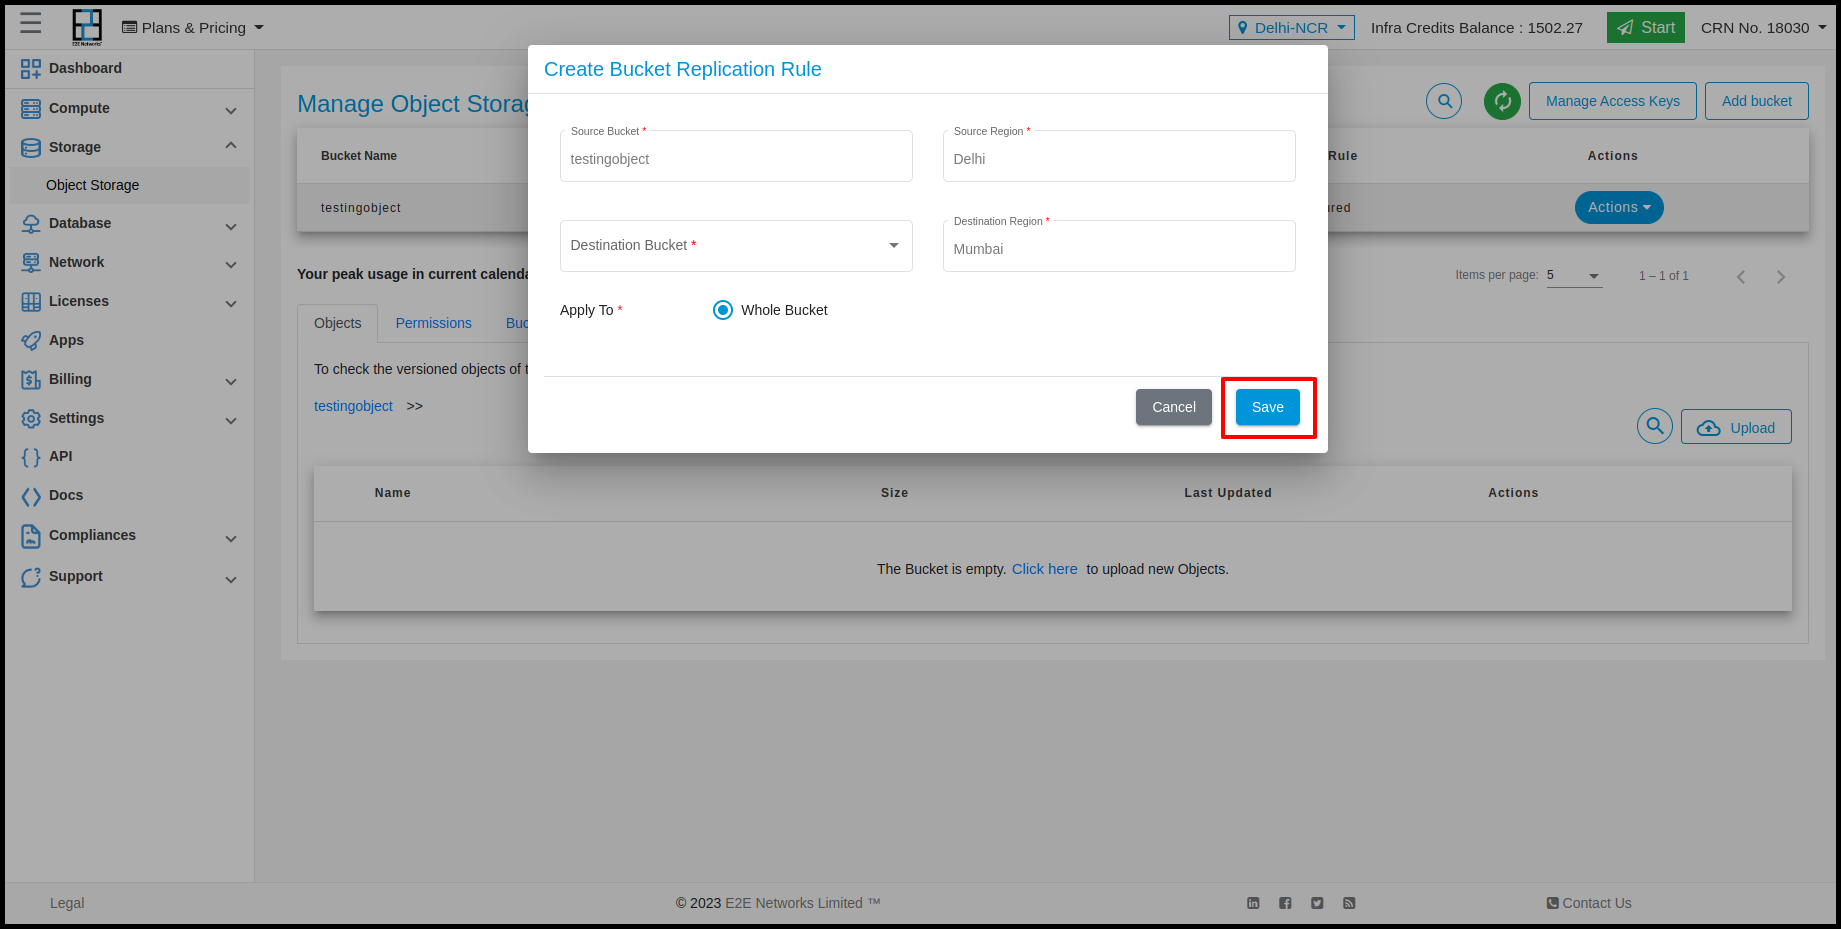
Replication Rule
E2E provide Replication rule feature in Object Storage using this feature users can transfer their Object to one region to other region bucket. For enable replication rule you need to click on Action button and click on Replication rule. And enter required details and click on save button.
Note
For enabling replication rule feature the versioning must be enable for that bucket.
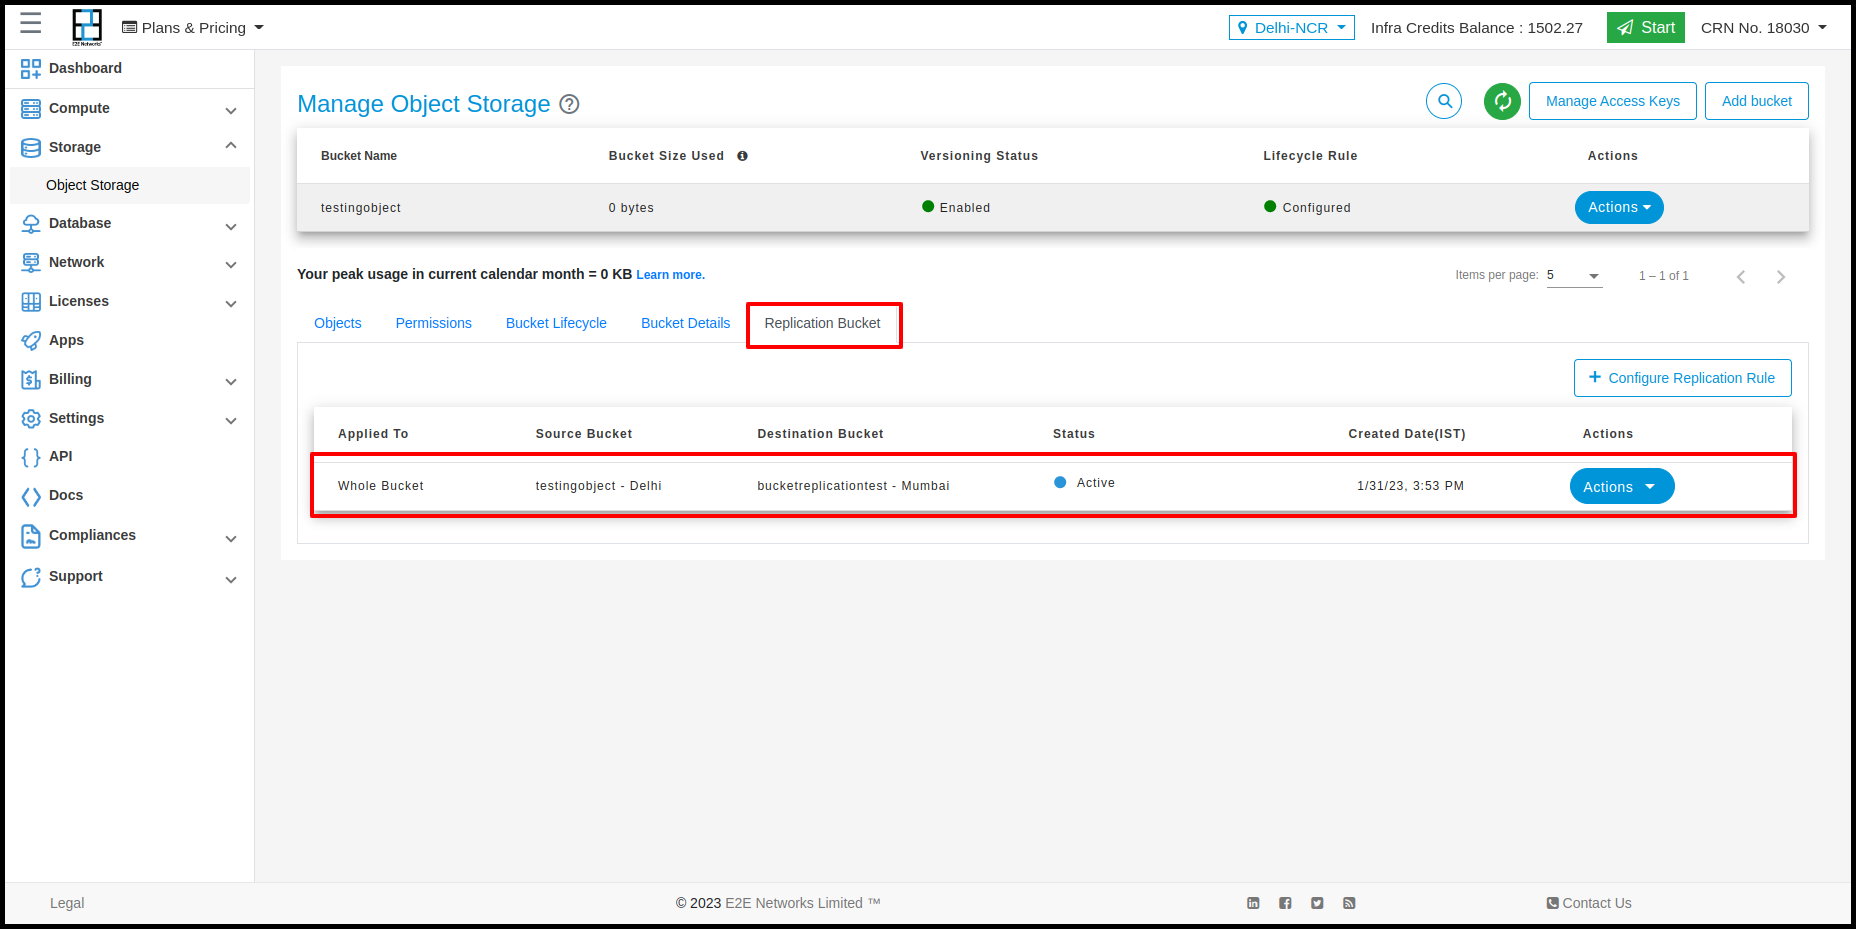
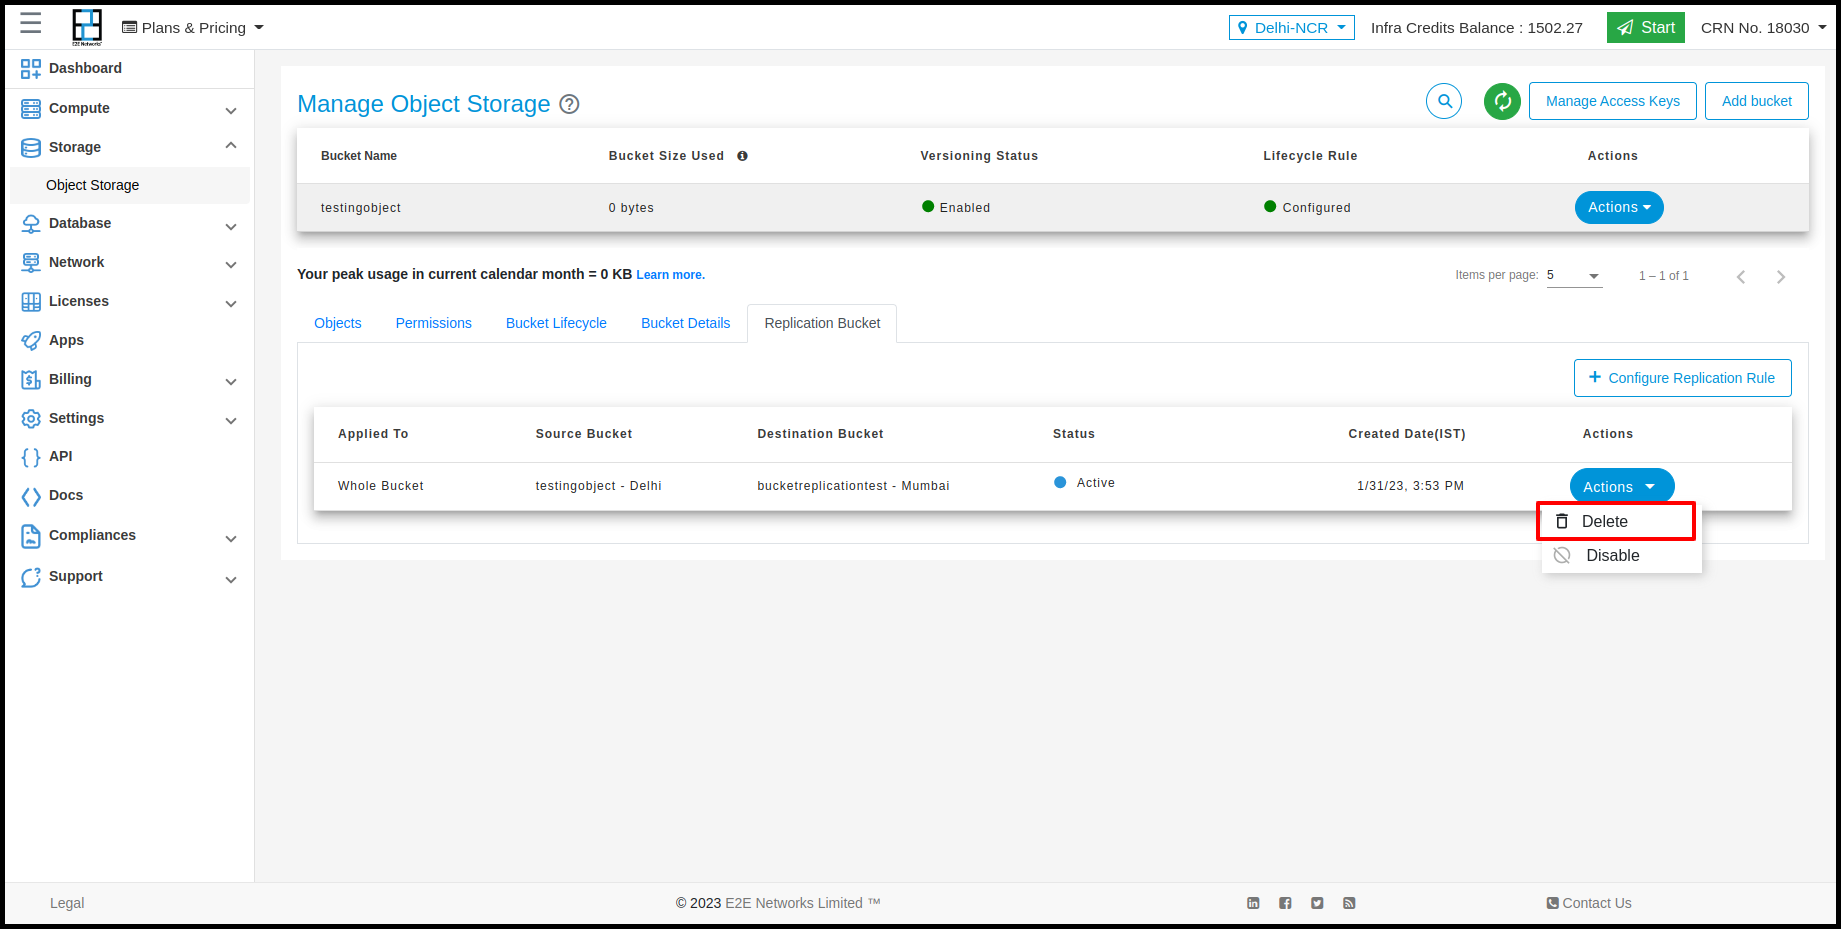
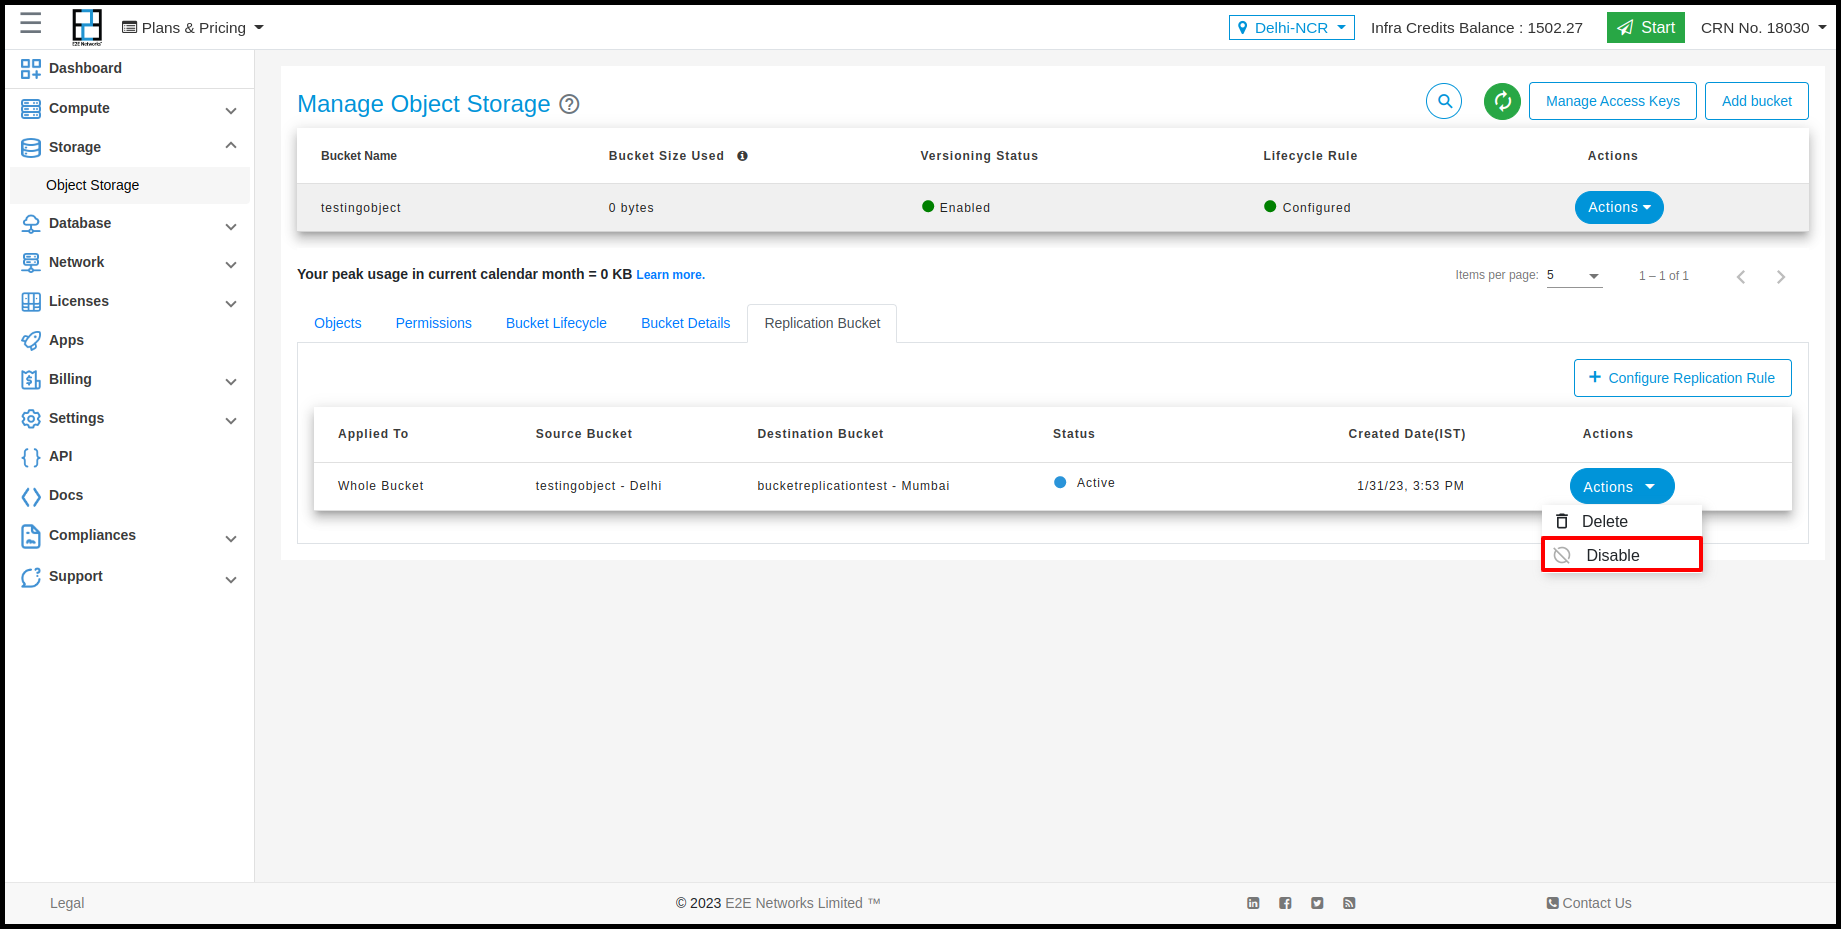
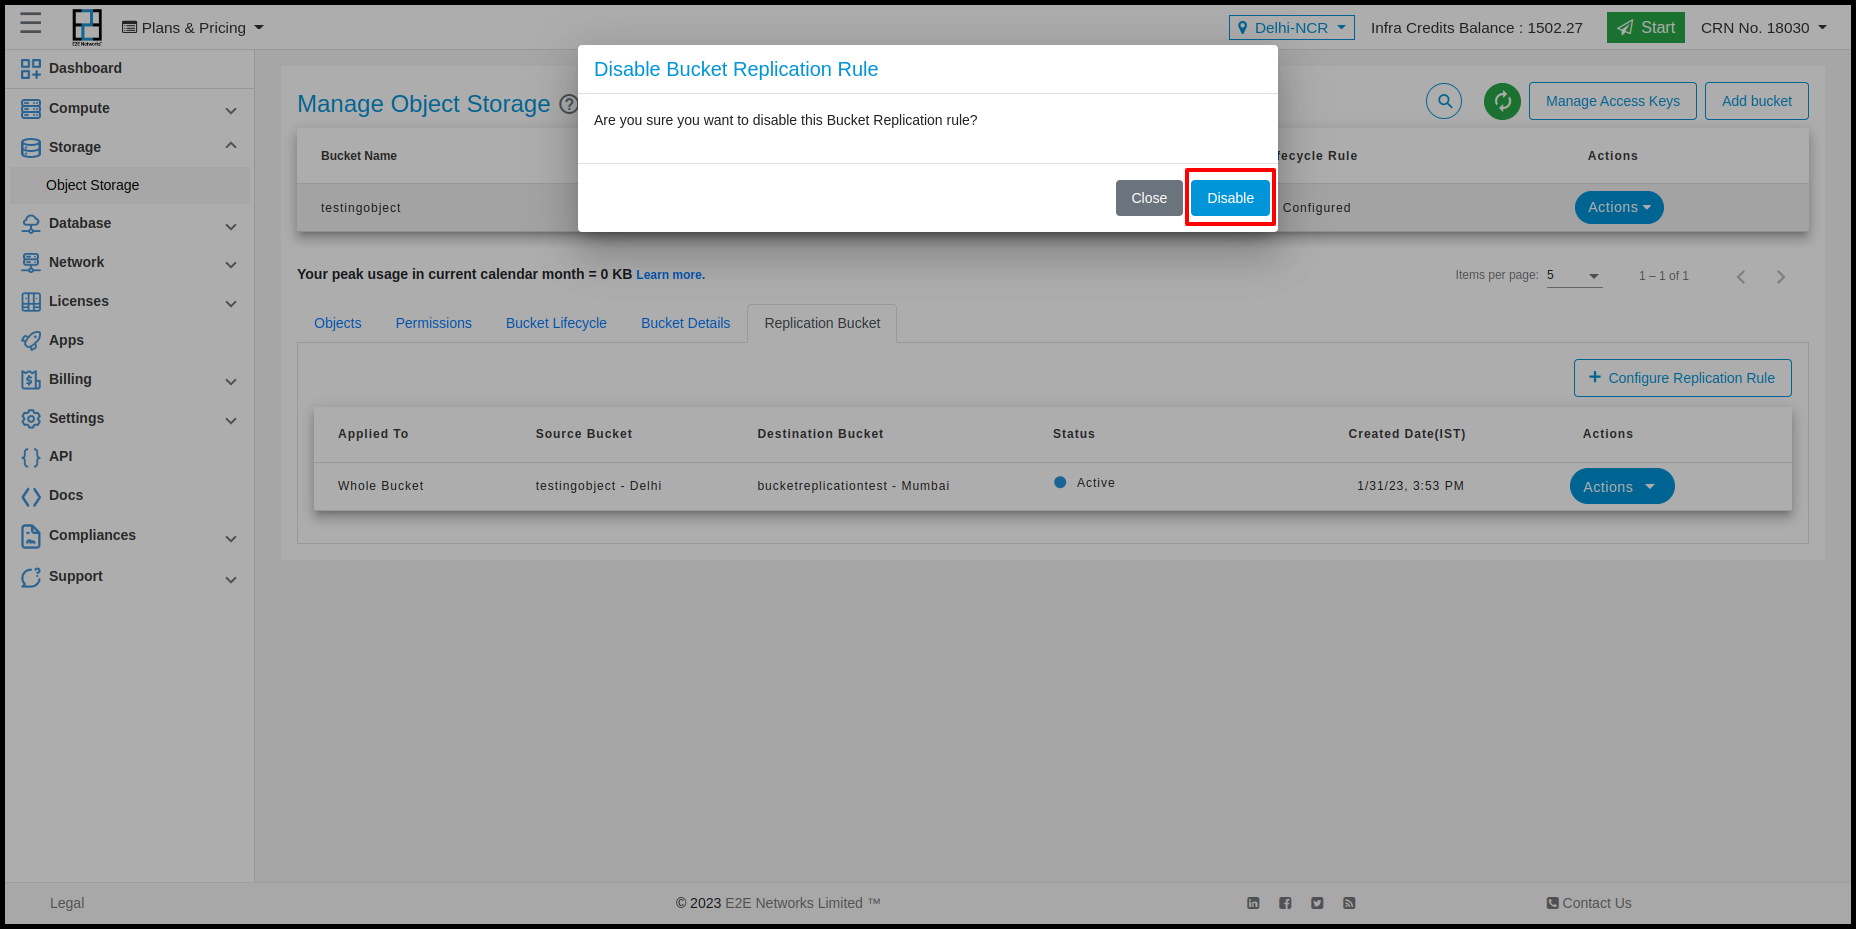
Users can perform actions on Replication bucket by clicking on Action button. The action would be Delete and Disable.

Empty Bucket
Using Empty action user can empty the bucket. The object will delete from the bucket.
Add to CDN
Eos integration with CDN improves the performance, scalability, and reliability of the platform by leveraging the capabilities of a Content Delivery Network.
Users can perform actions on Add on CDN by clicking on Action button.
Note
To Add CDN you need to give public access to your bucket to create CDN
After clicking on Add to CDN you have to click on ‘Create CDN’
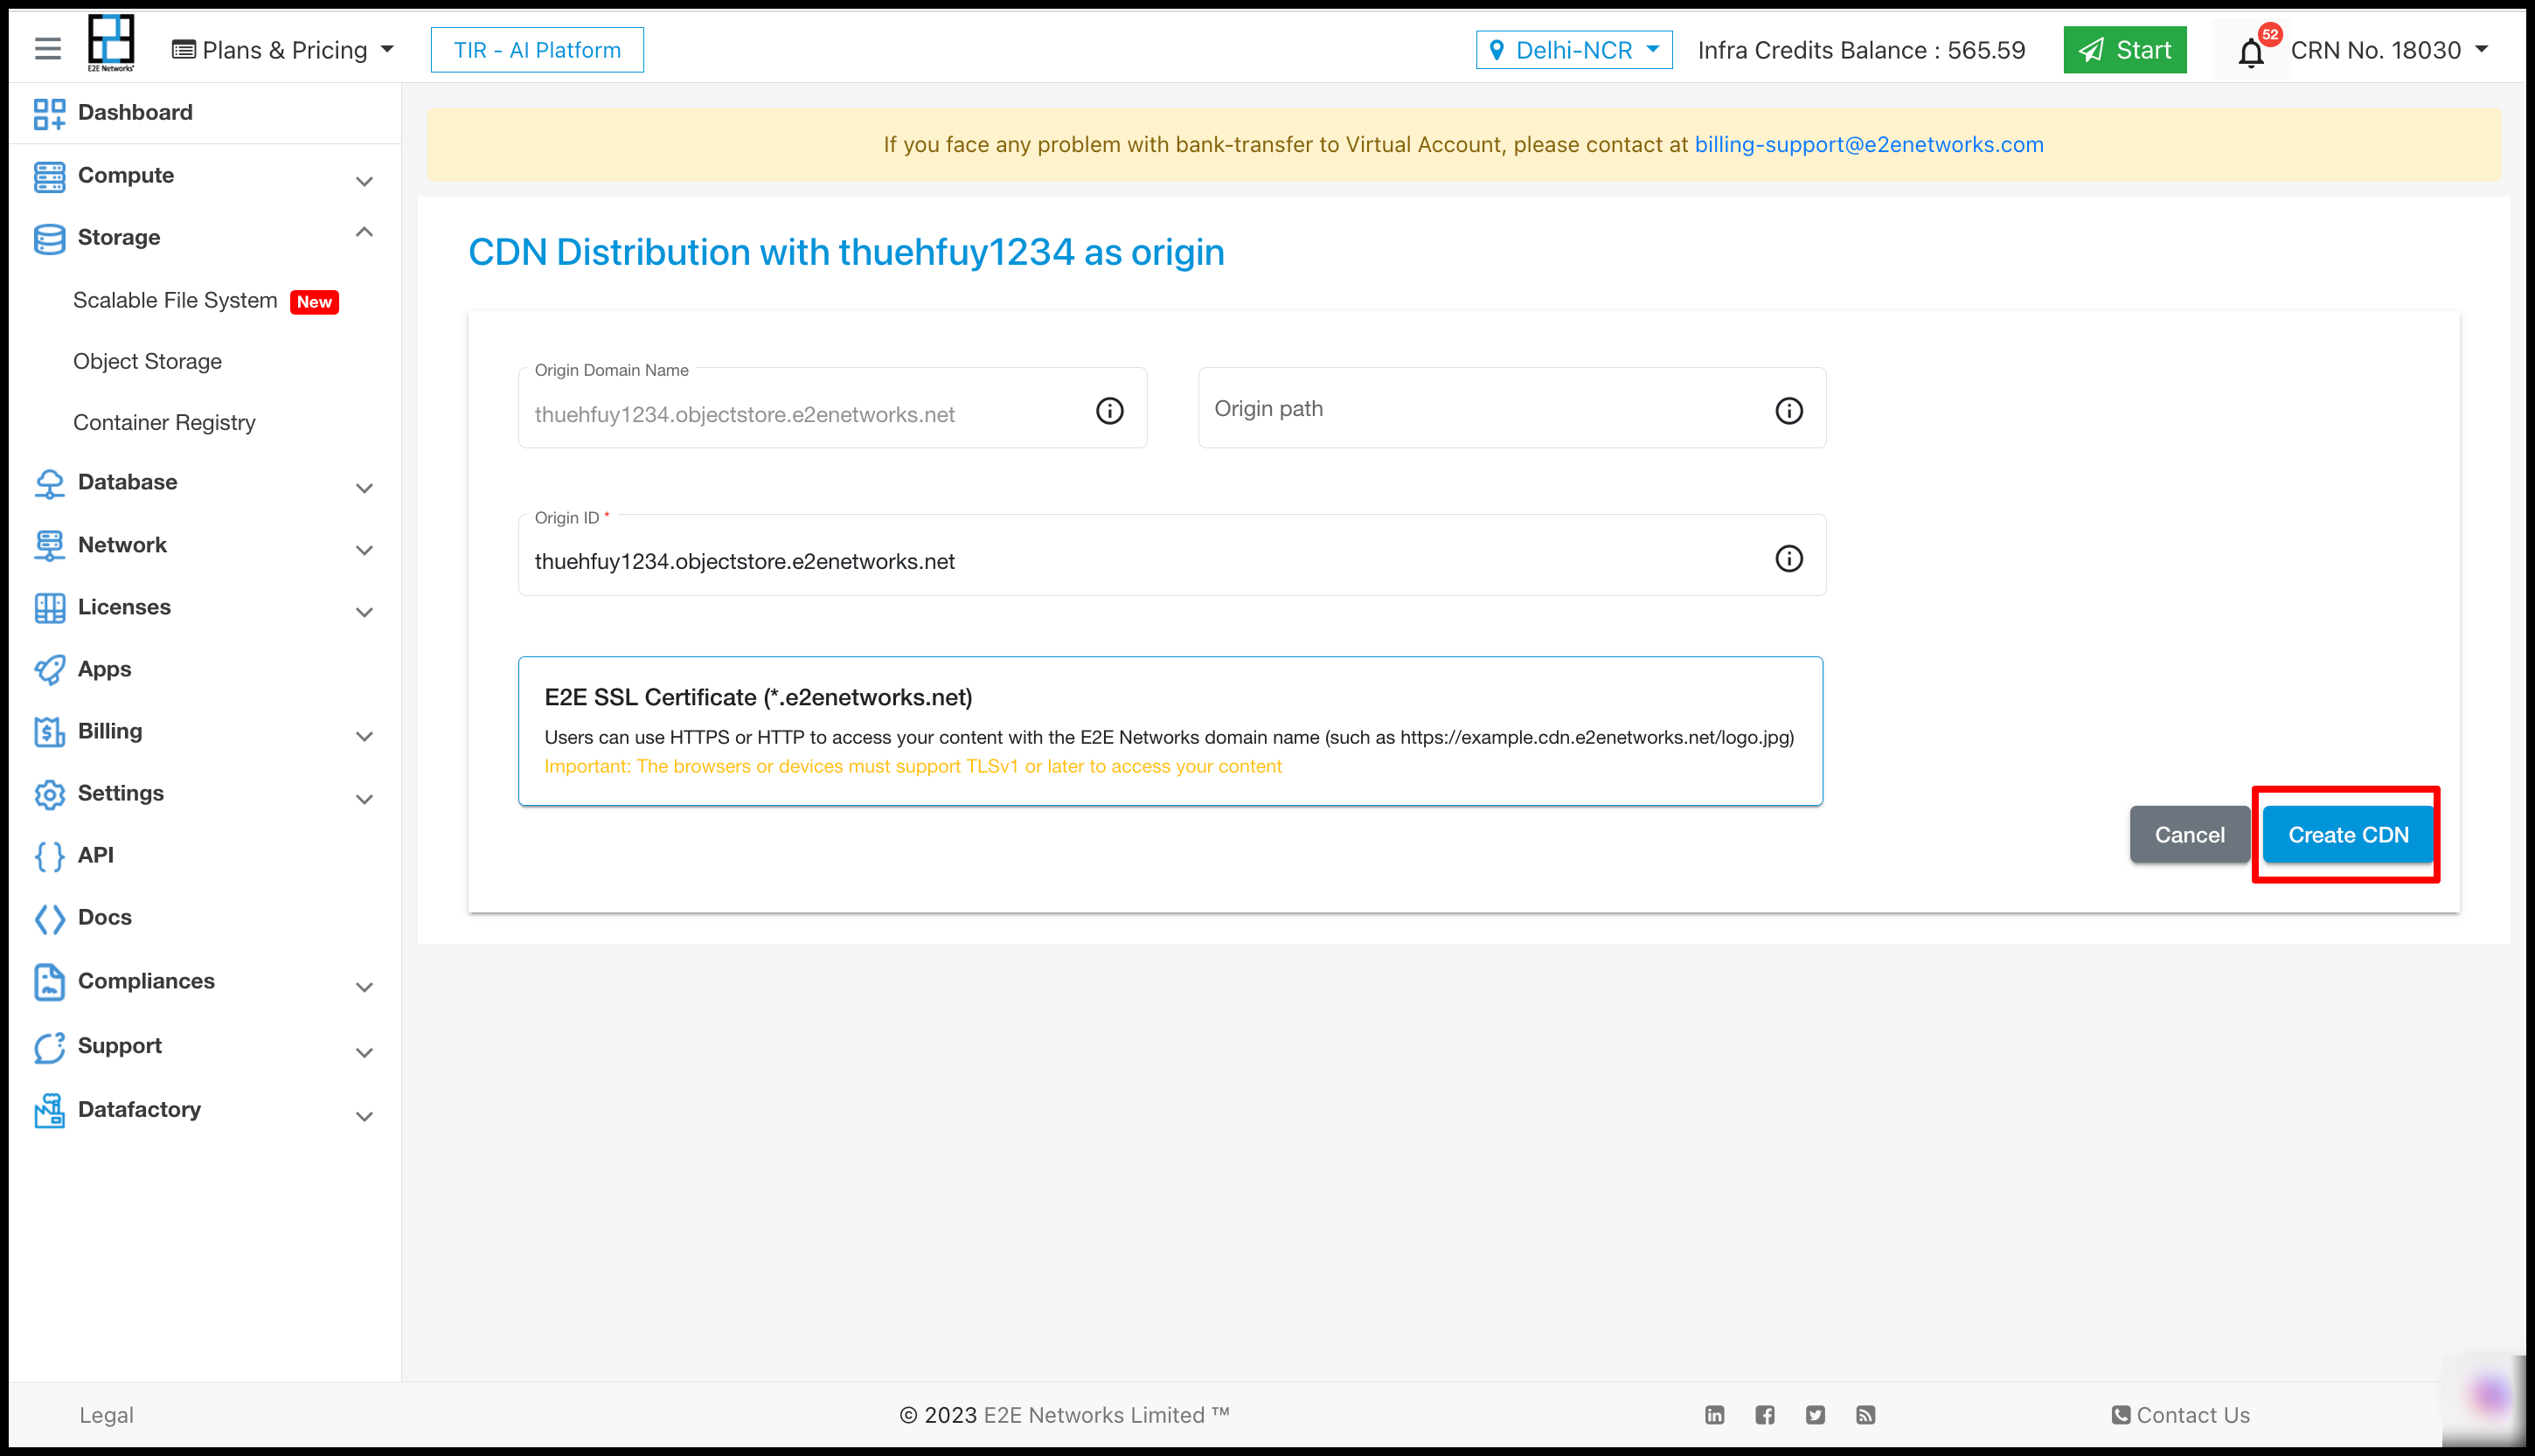
After clicking on the “Create CDN” button, a new section named “Bucket CDN” will be generated in the “Manage Object Storage” interface.
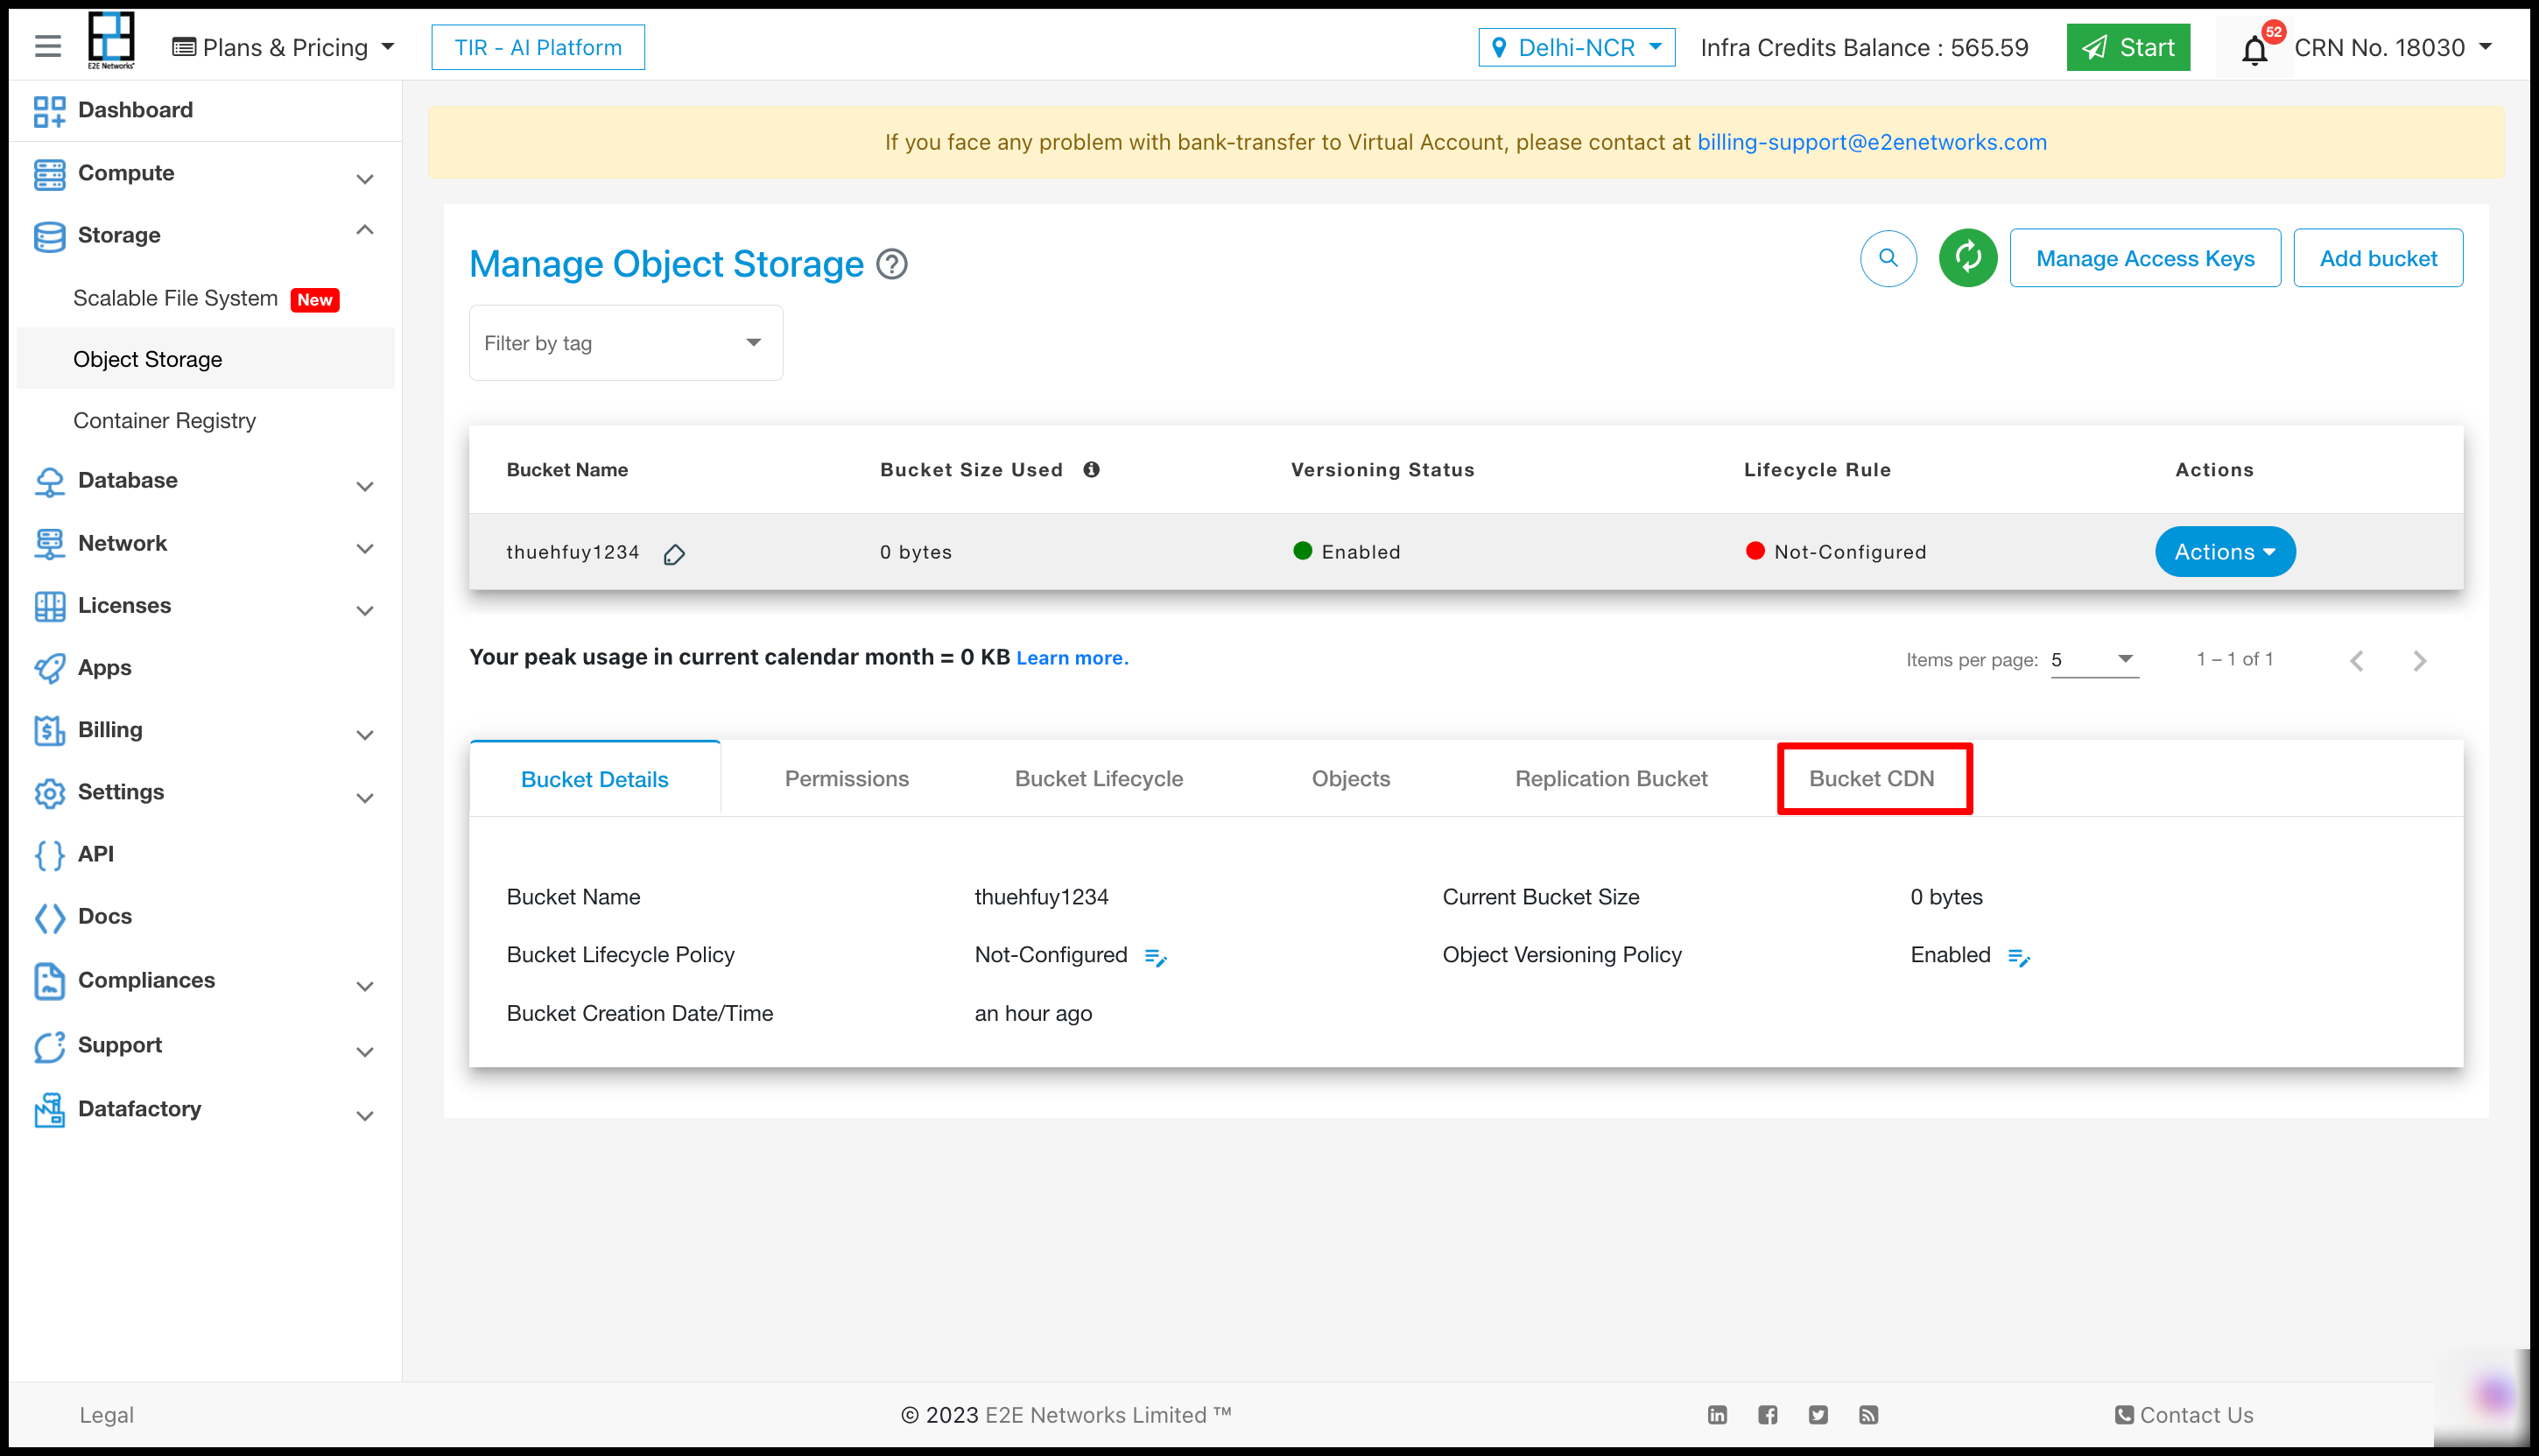
Once you access the ‘Bucket CDN’ section by clicking on it, all the relevant details of the CDN will be displayed within that section.
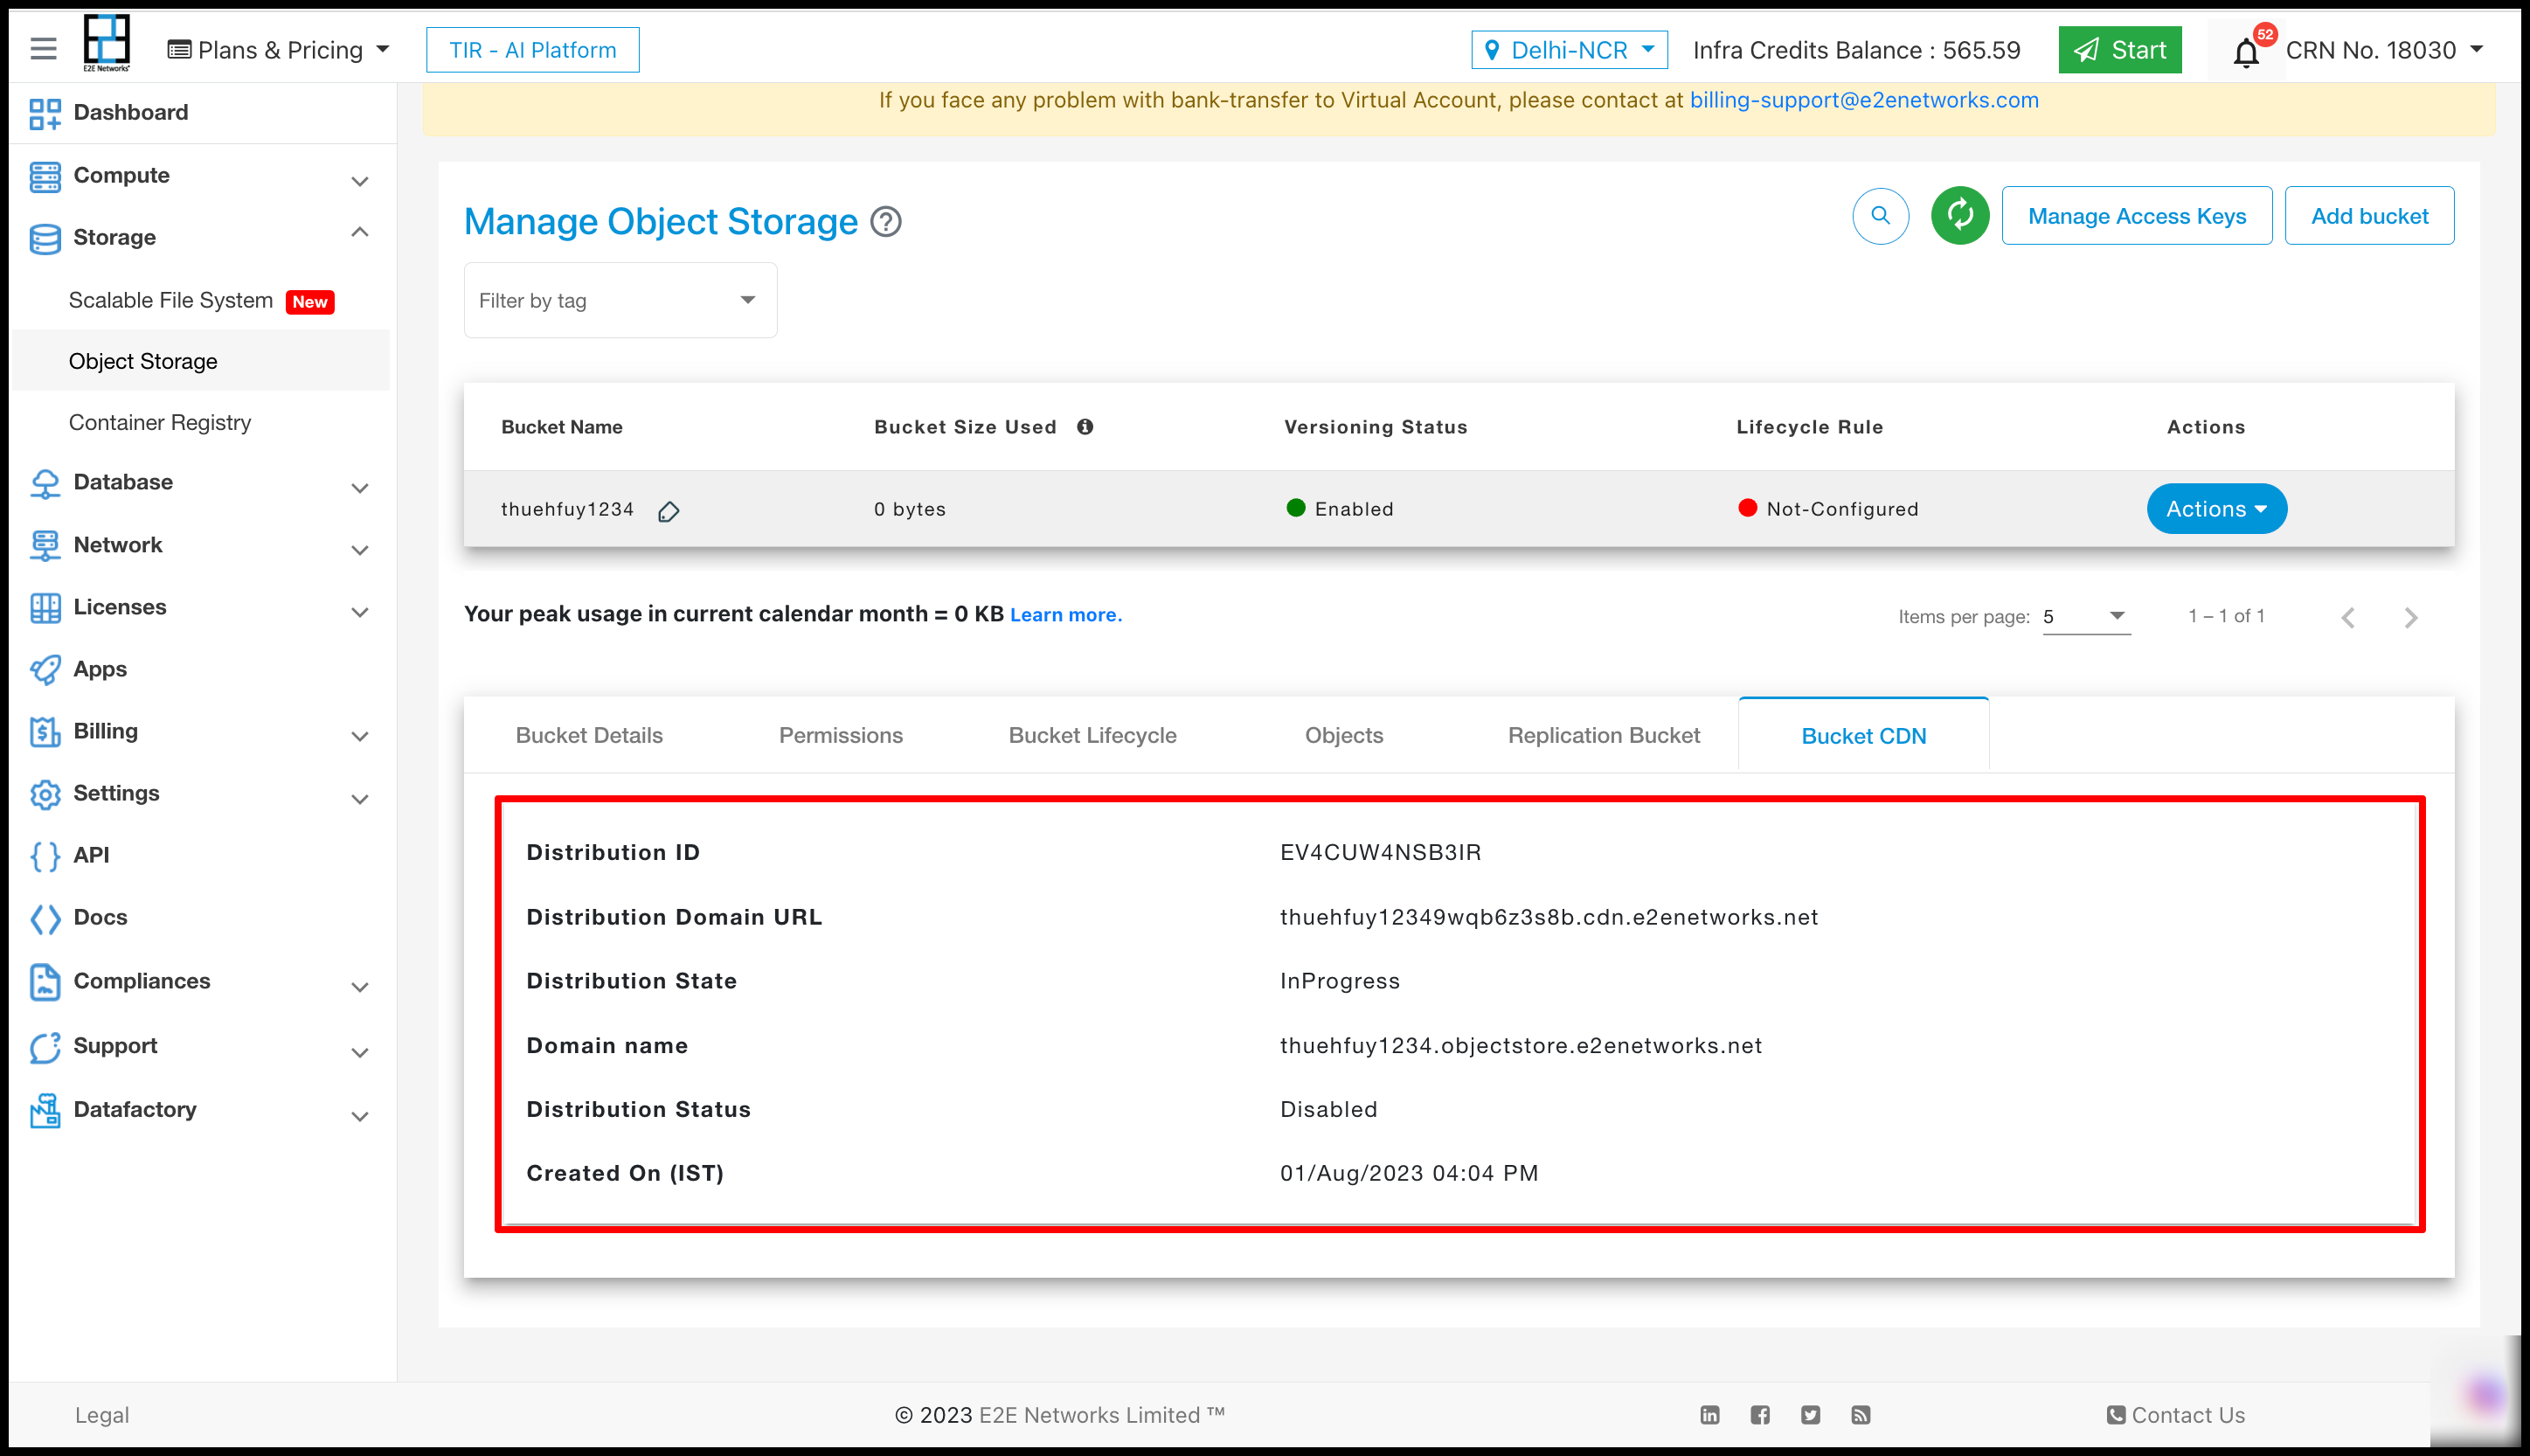

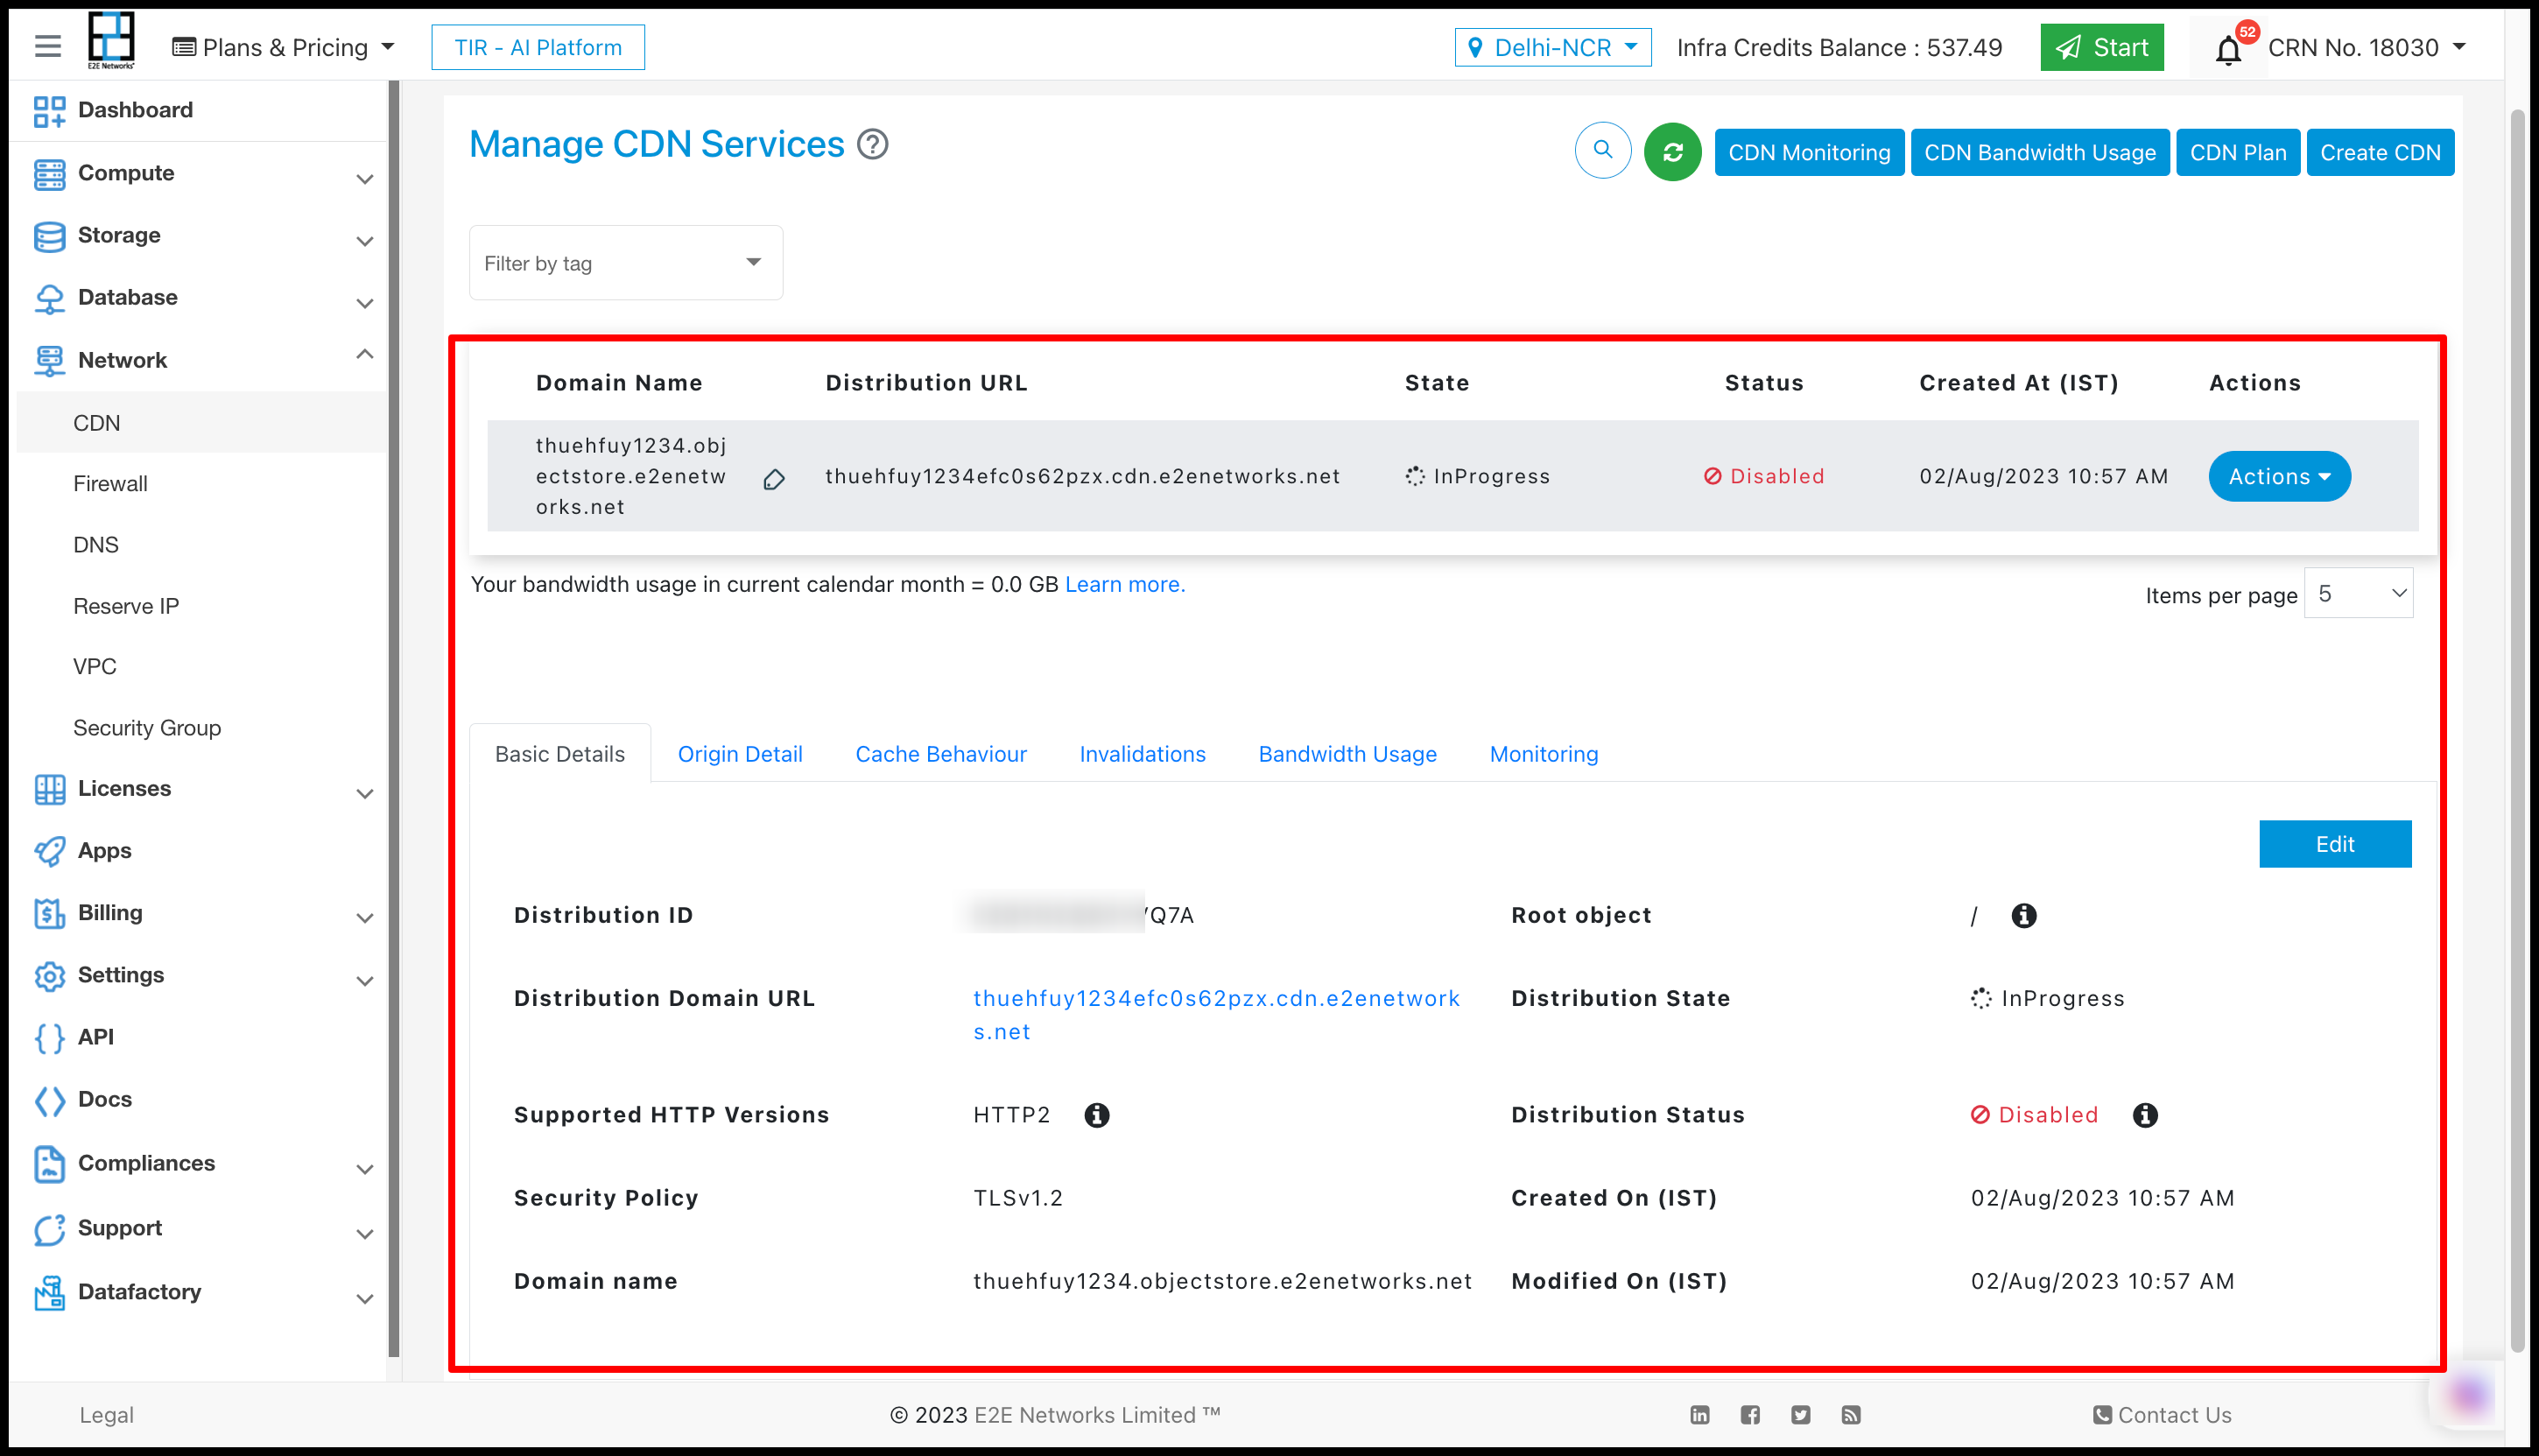
You can access comprehensive details about CDN services and view all their actions in the dedicated CDN section.
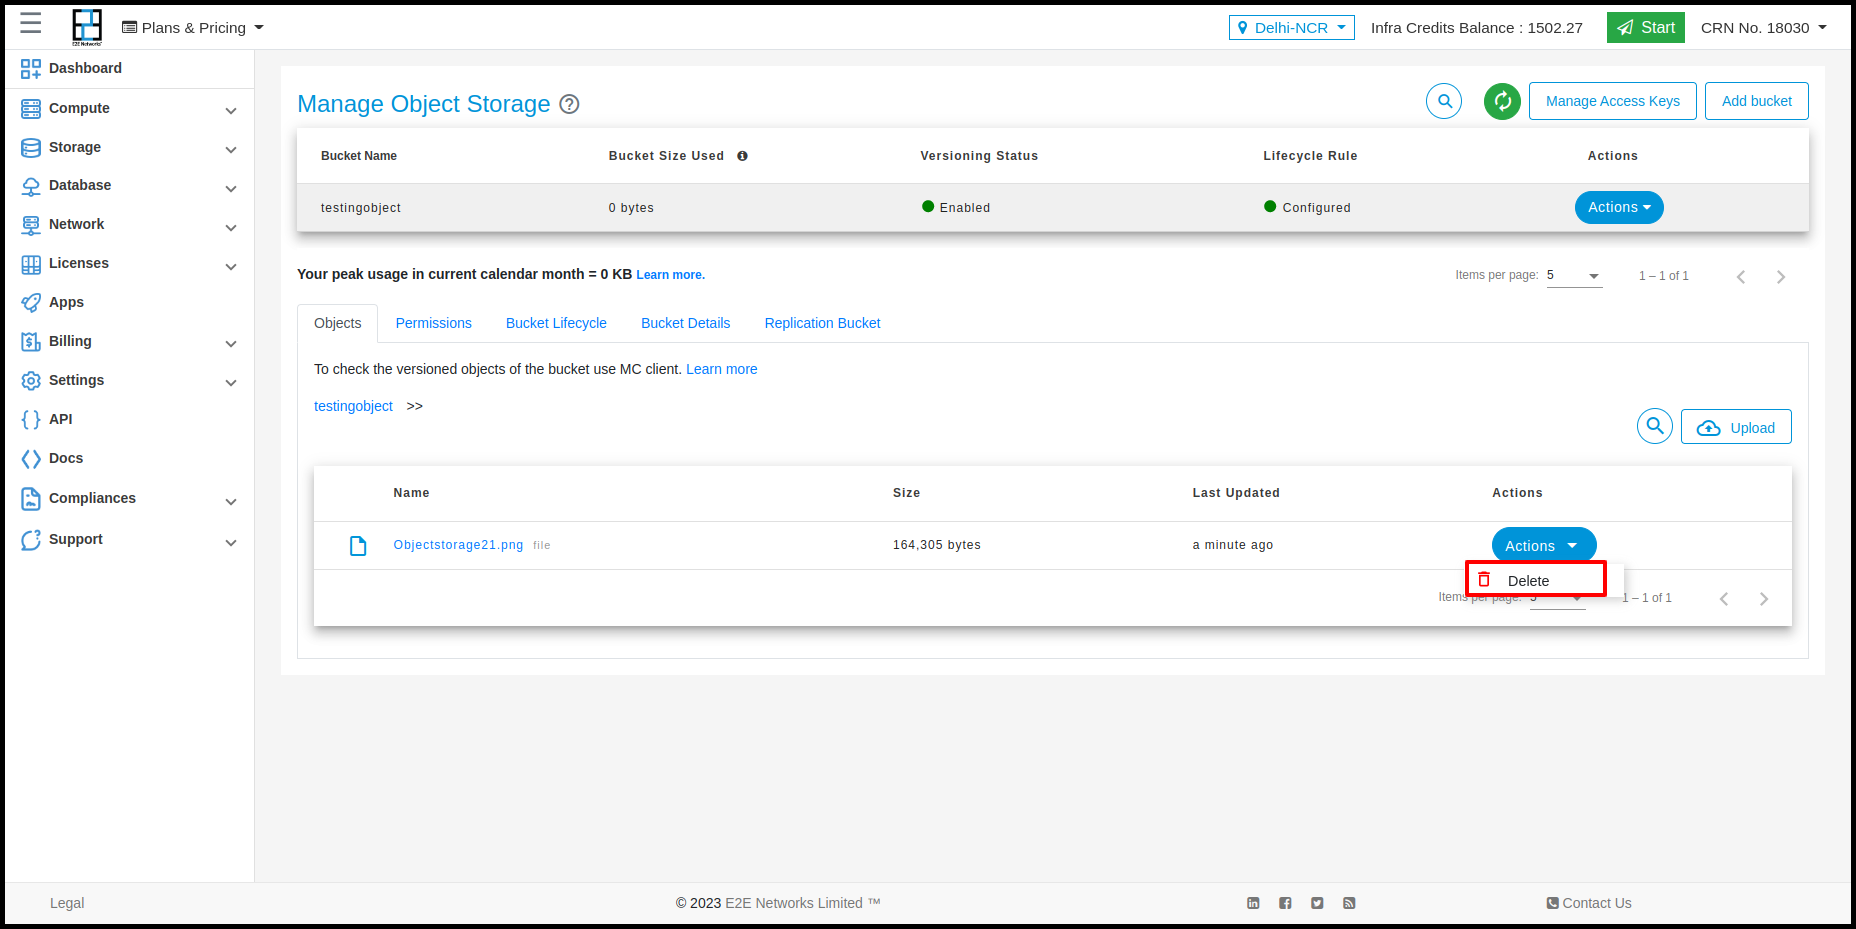
Upload Files


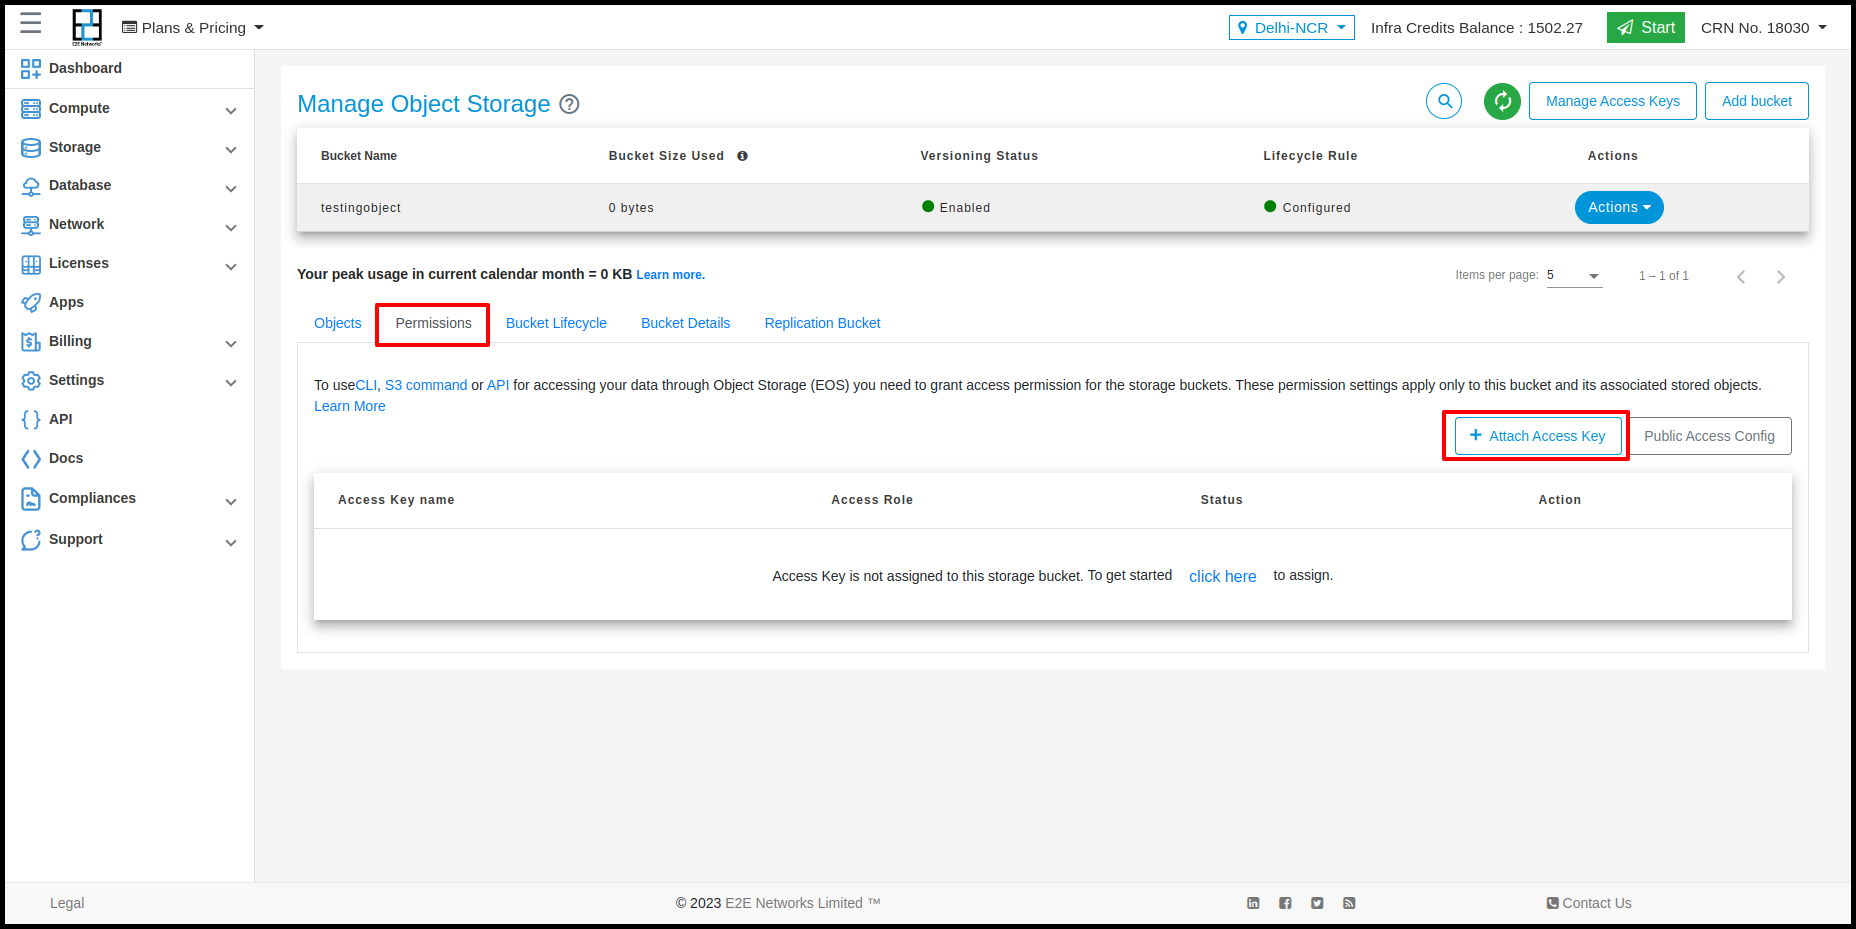
Permissions
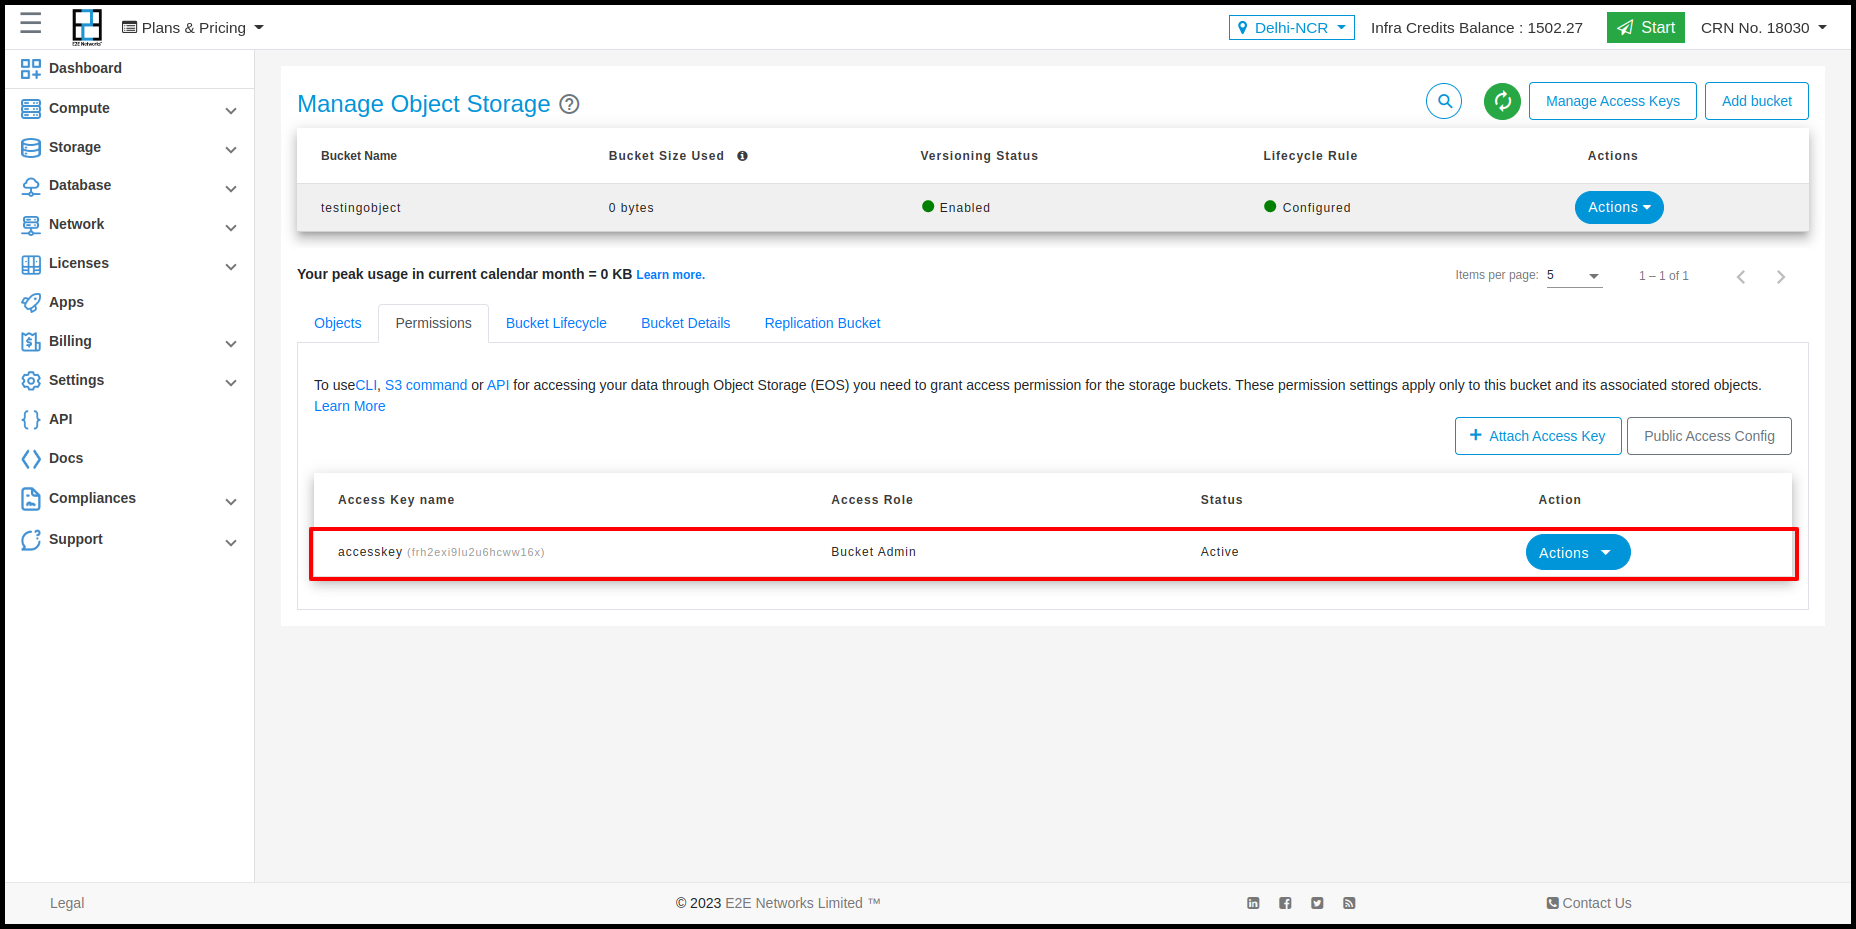
In permissions tab the permission details will show and customers can apply permission on the bucket using access key and perform actions on that.
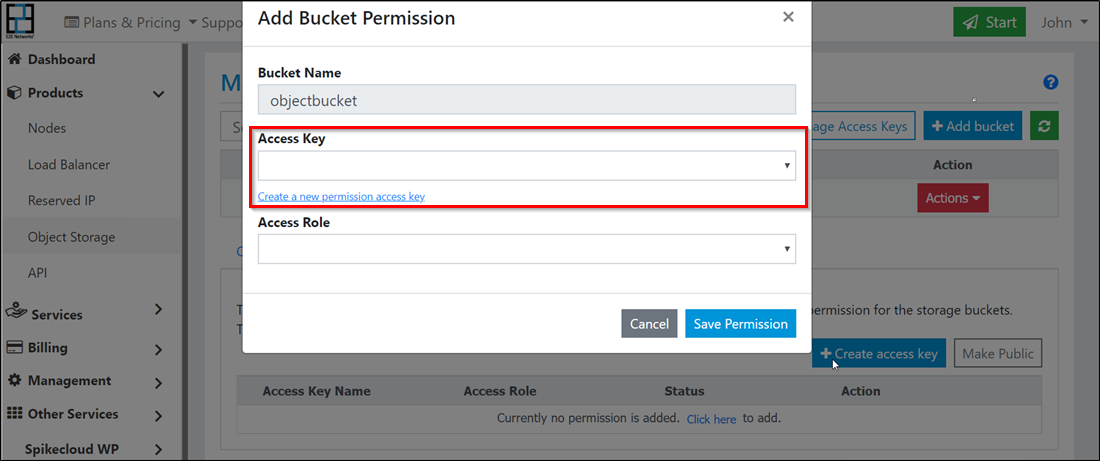
Access Key
If you intend to use CLI or API for accessing your data on EOS then you will need to define bucket permissions.
Customers can create access keys using Manage Access Keys and using Permission tab
Using Manage Access Key
Using Manage access key you need to click on Manage Access Keys button.
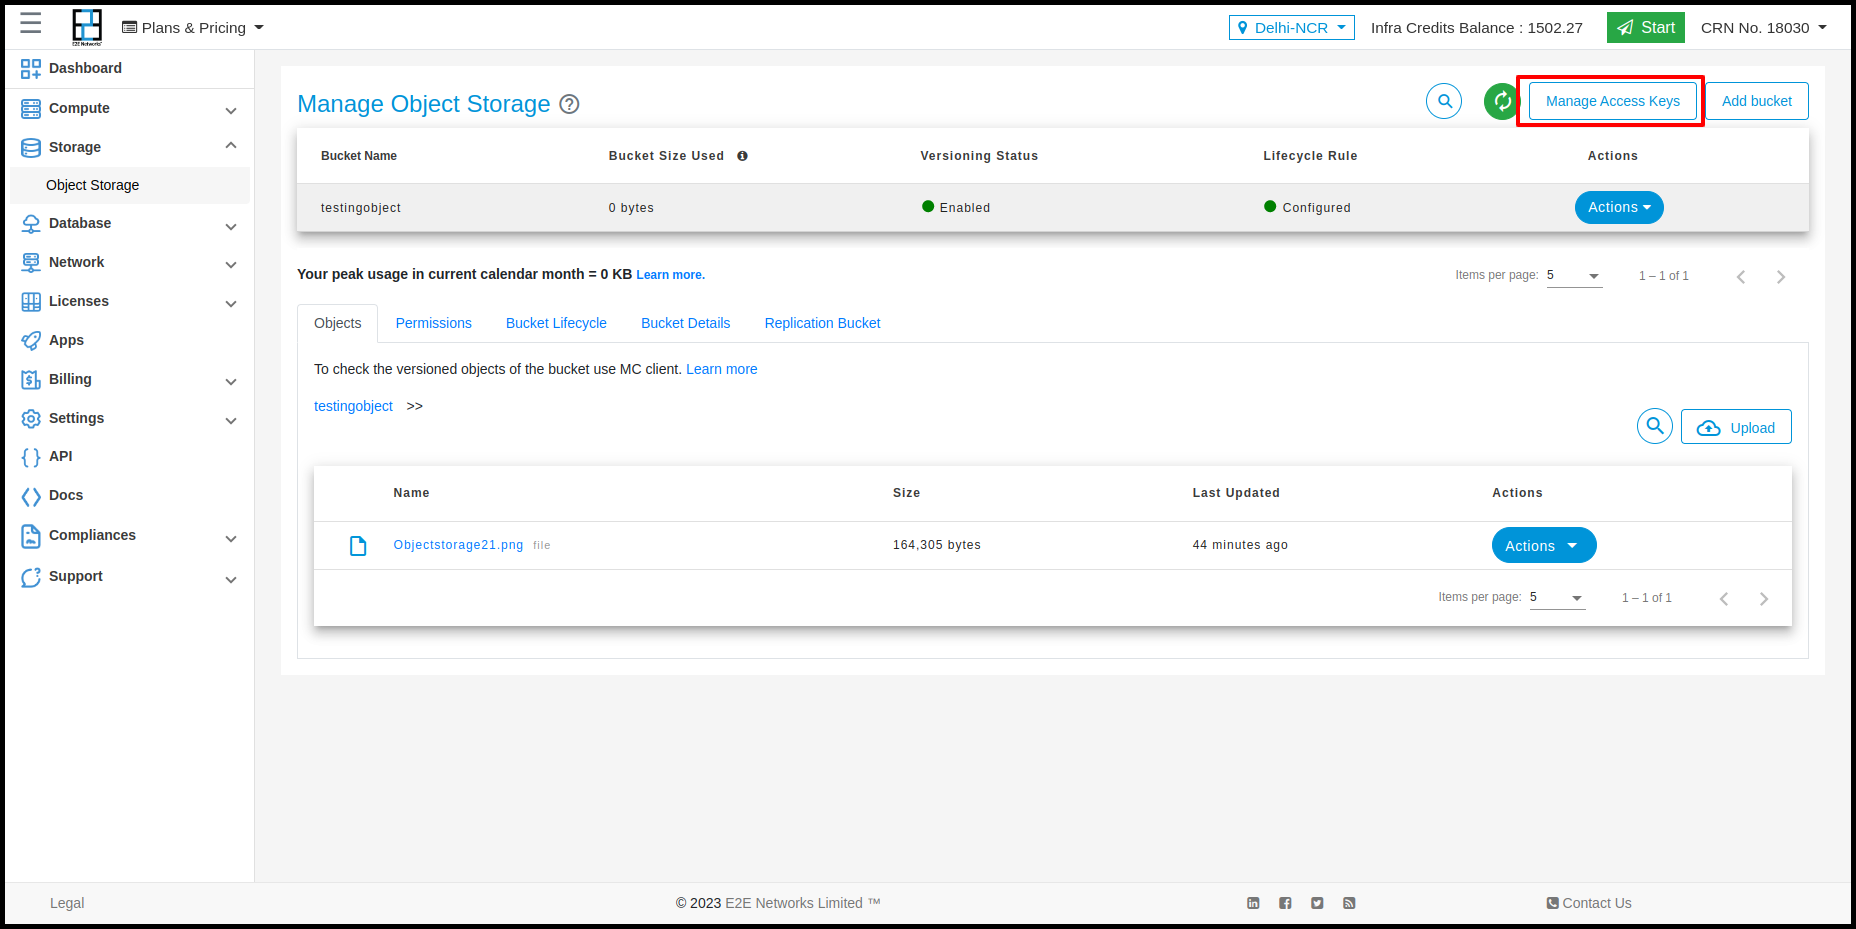


Actions in Manage Access Key
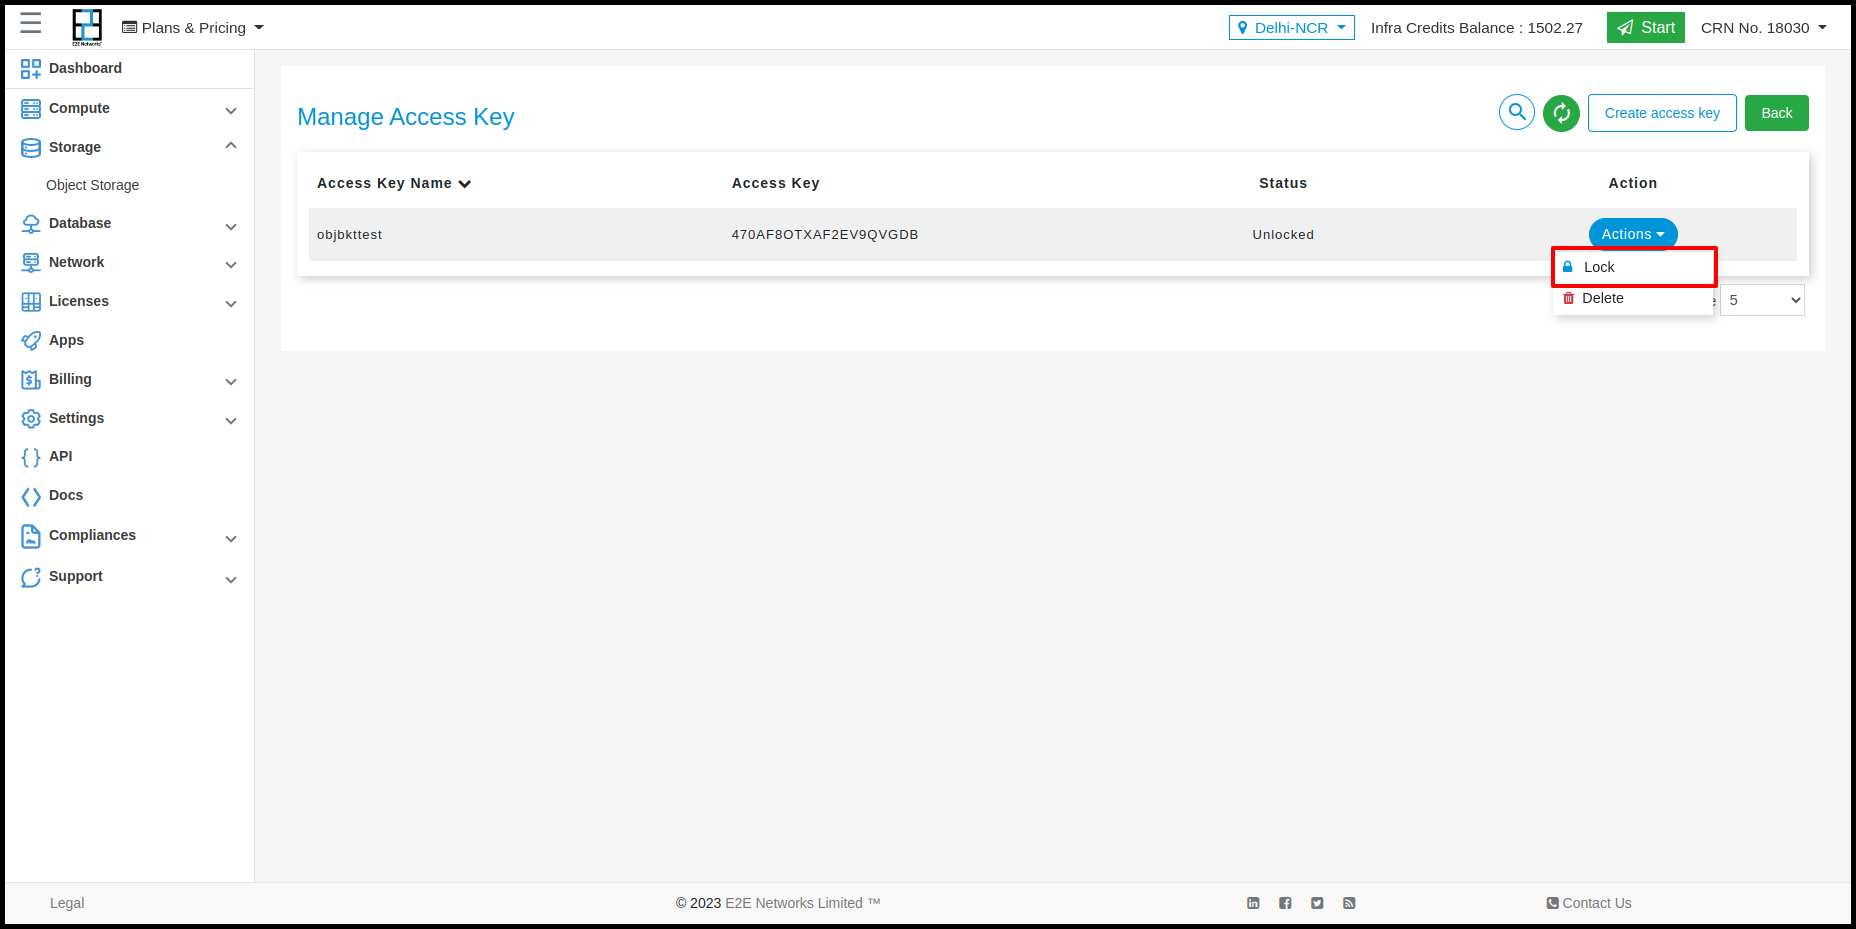
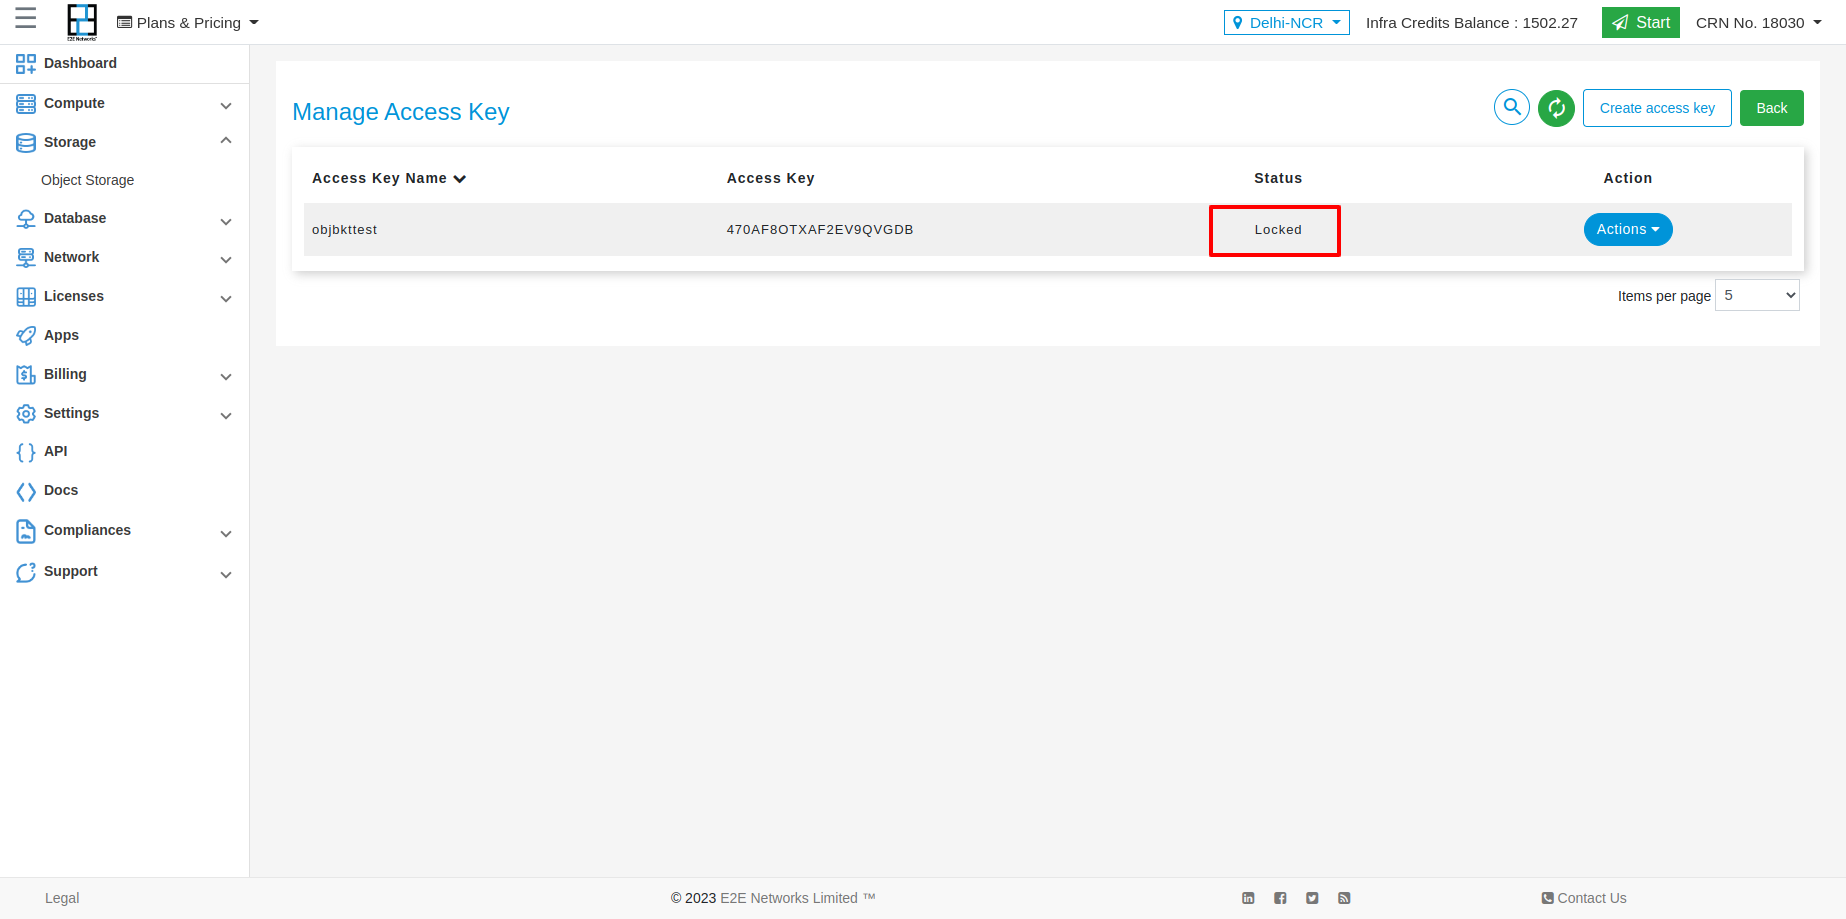
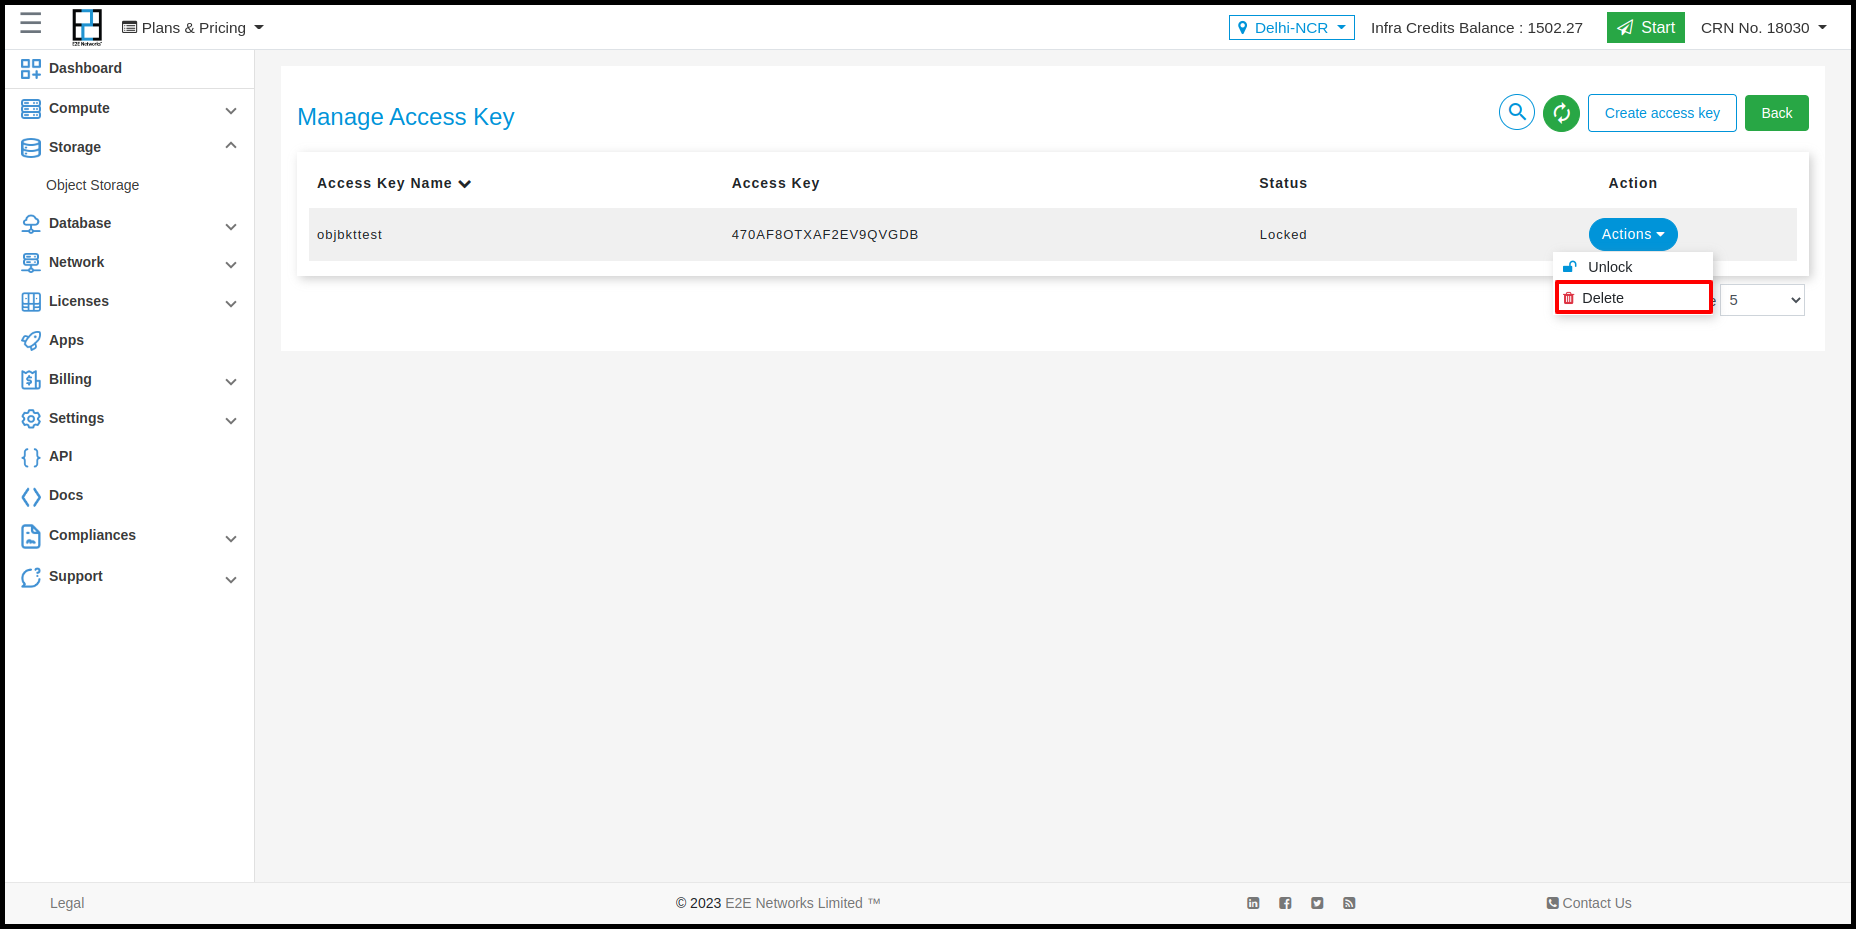
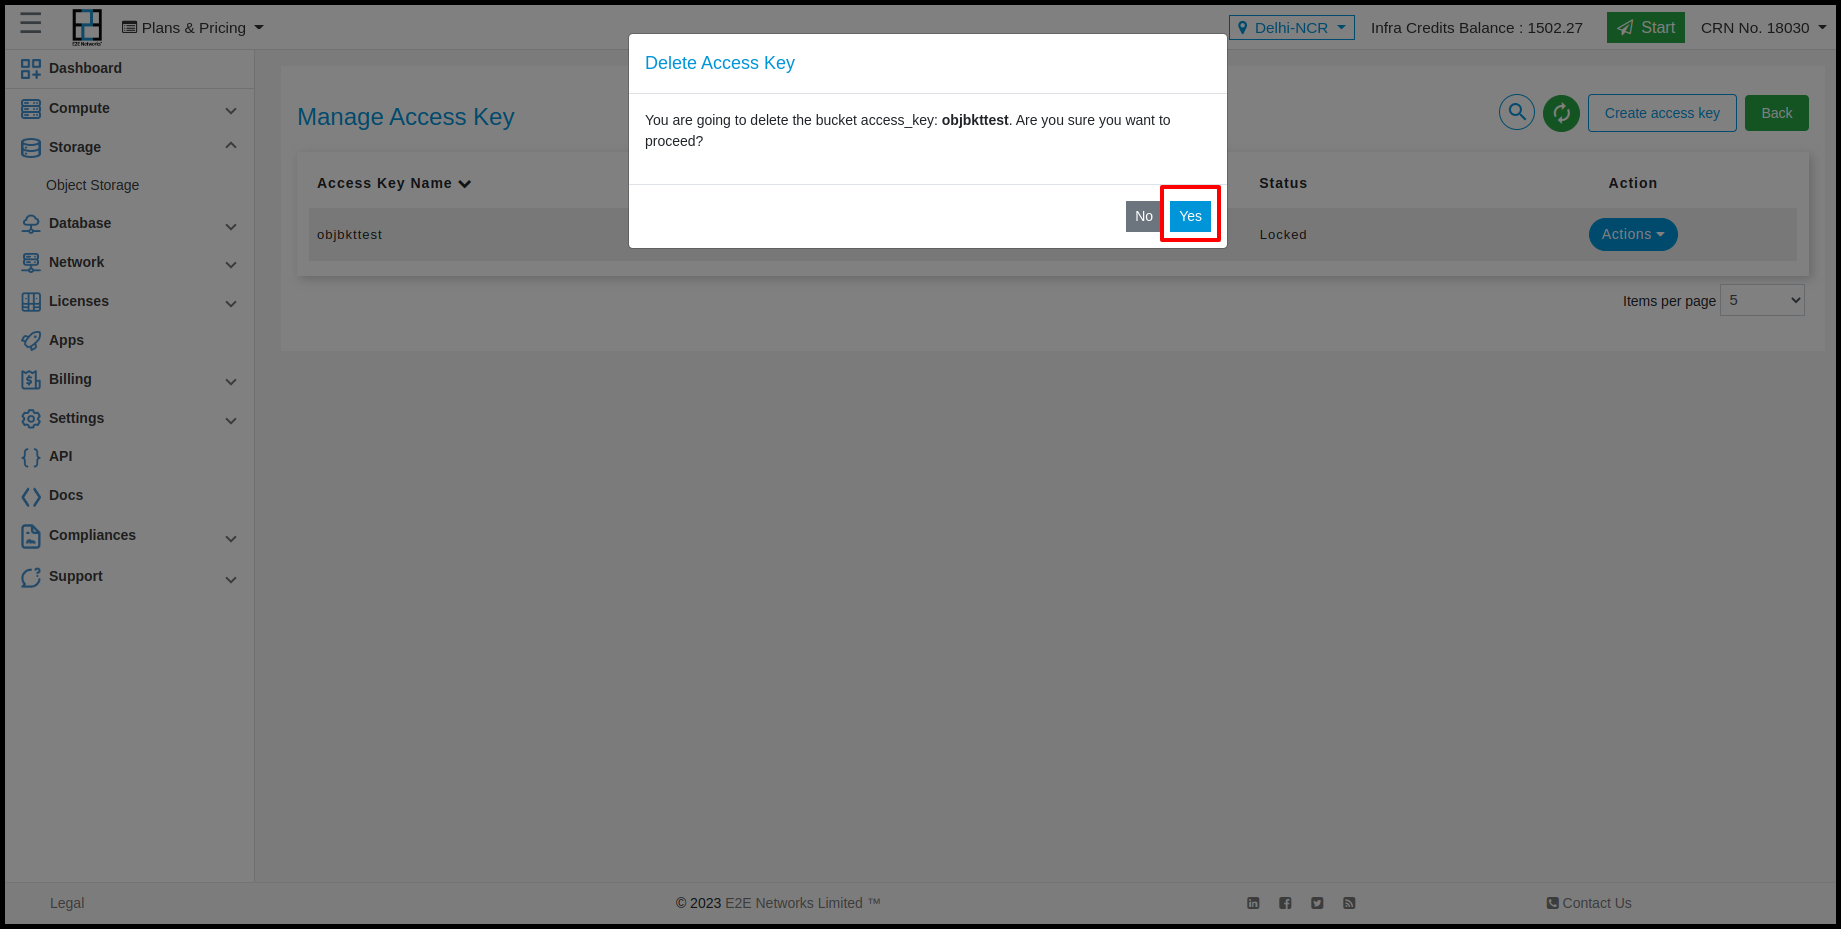
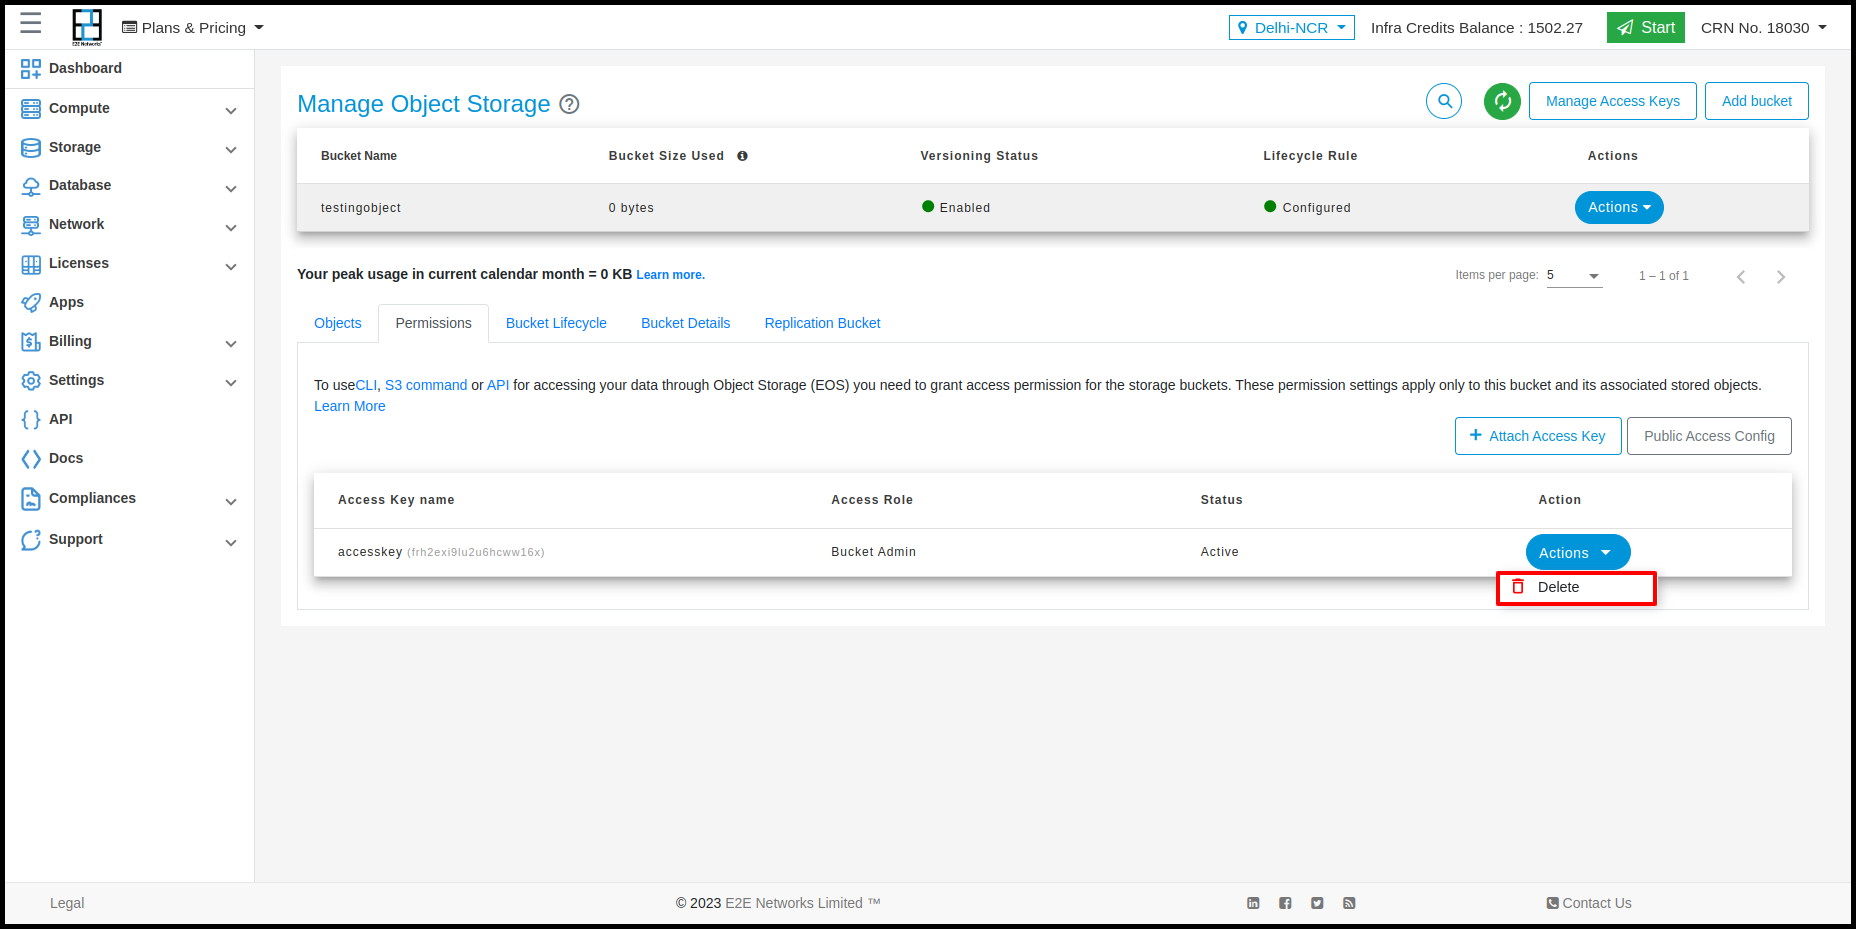
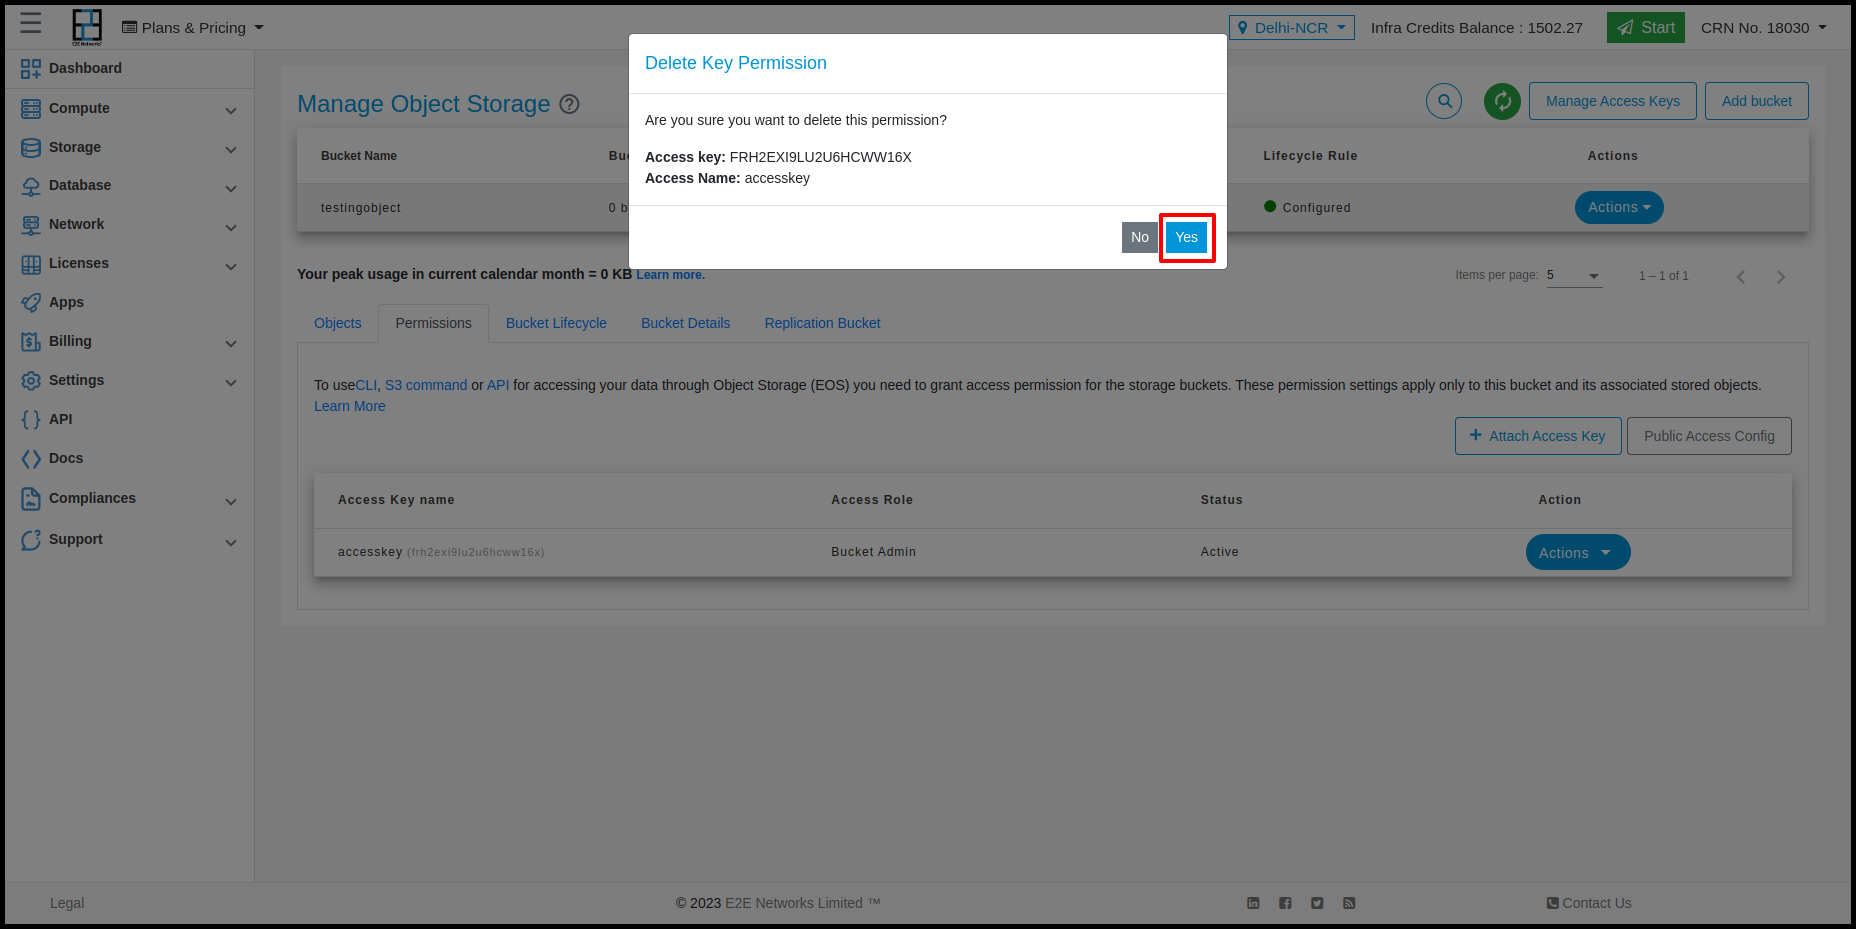
Customers can perform two actions in Access key is Lock, Unlock and Delete
Go to Products > Storage Storage option in the sidebar menu
Choose any bucket or create a new one.
Click the permission tab, it will be opened for the selected bucket.
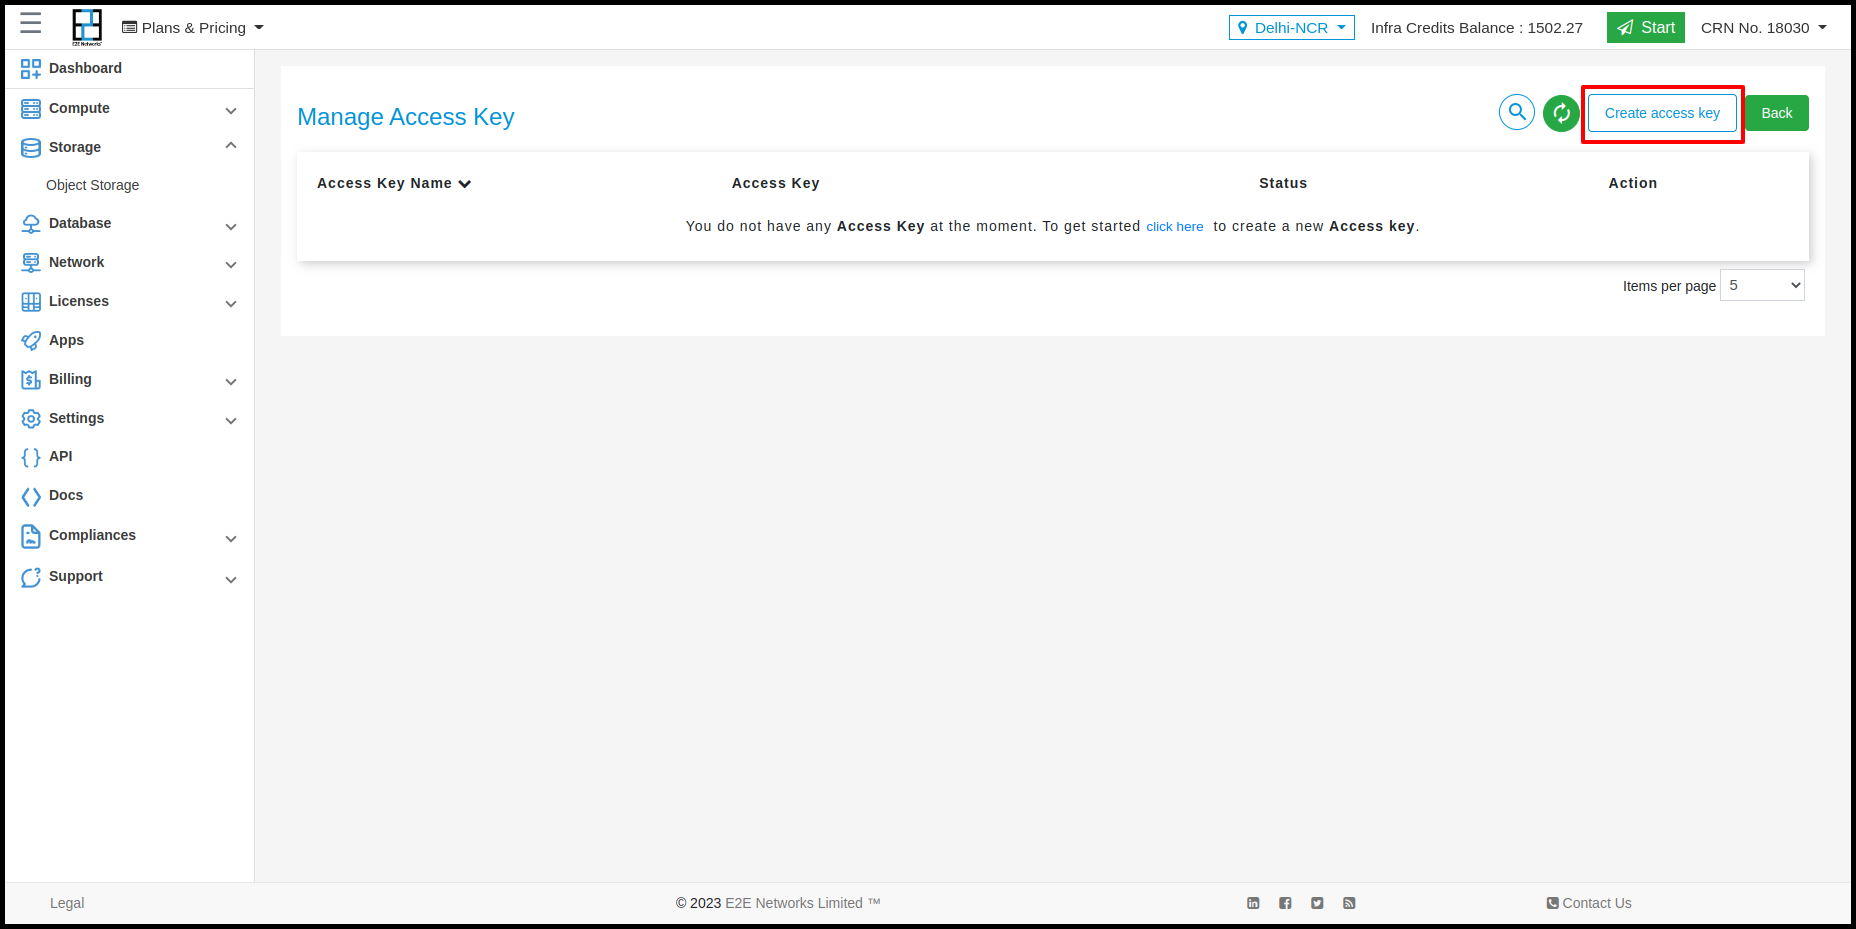
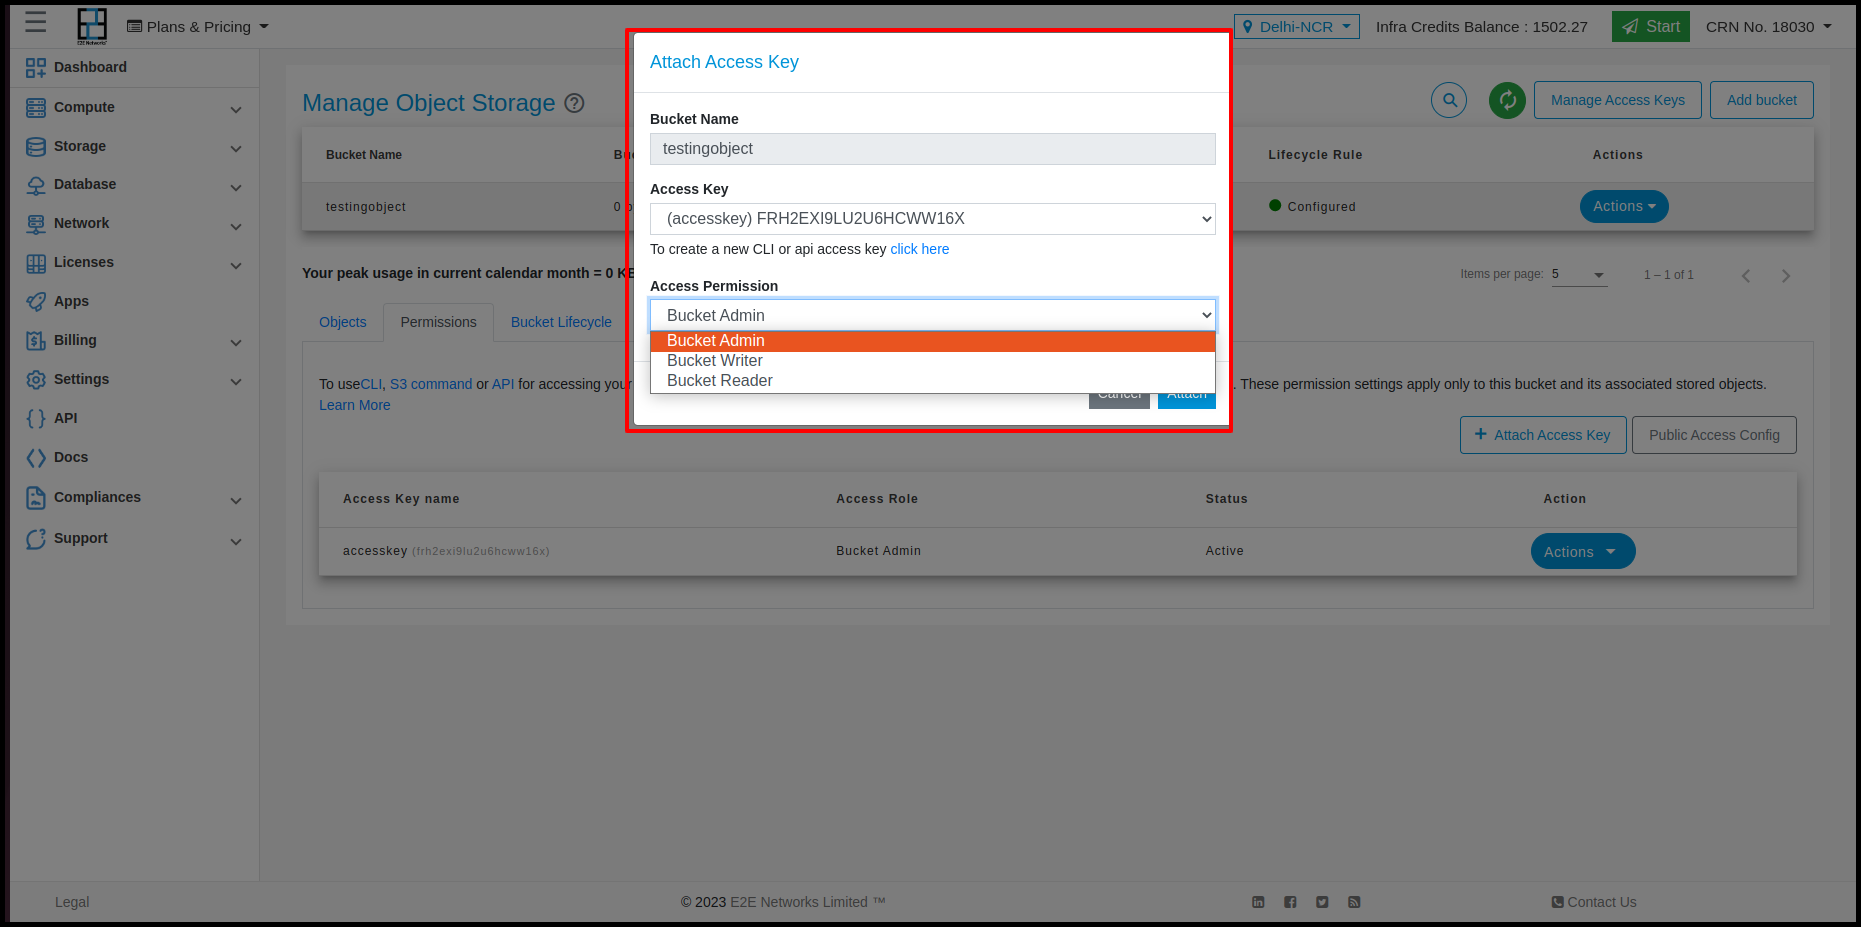
Click the Create access key button.
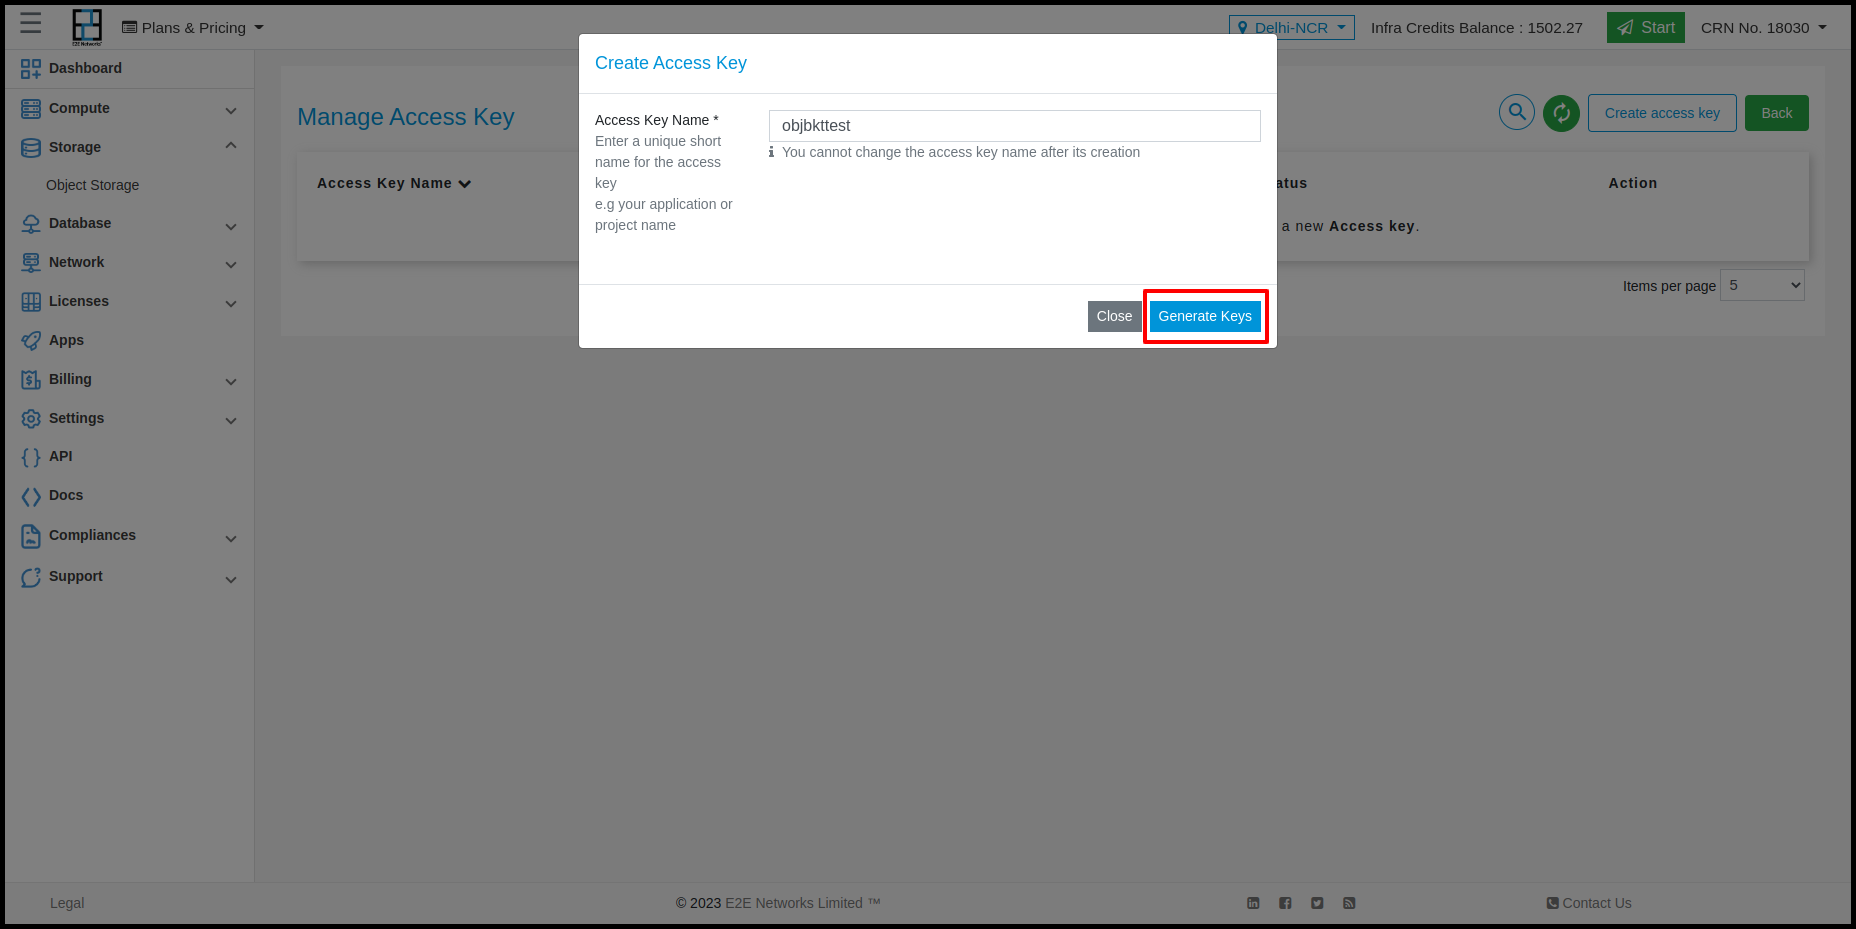
Enter a name for your access key. This can be an application name, project name or a team member name.
Choose an access key or Create access key.
Assign a role:
bucket admin
can read, write, manage
bucket writer
can read, write
bucket reader
can read
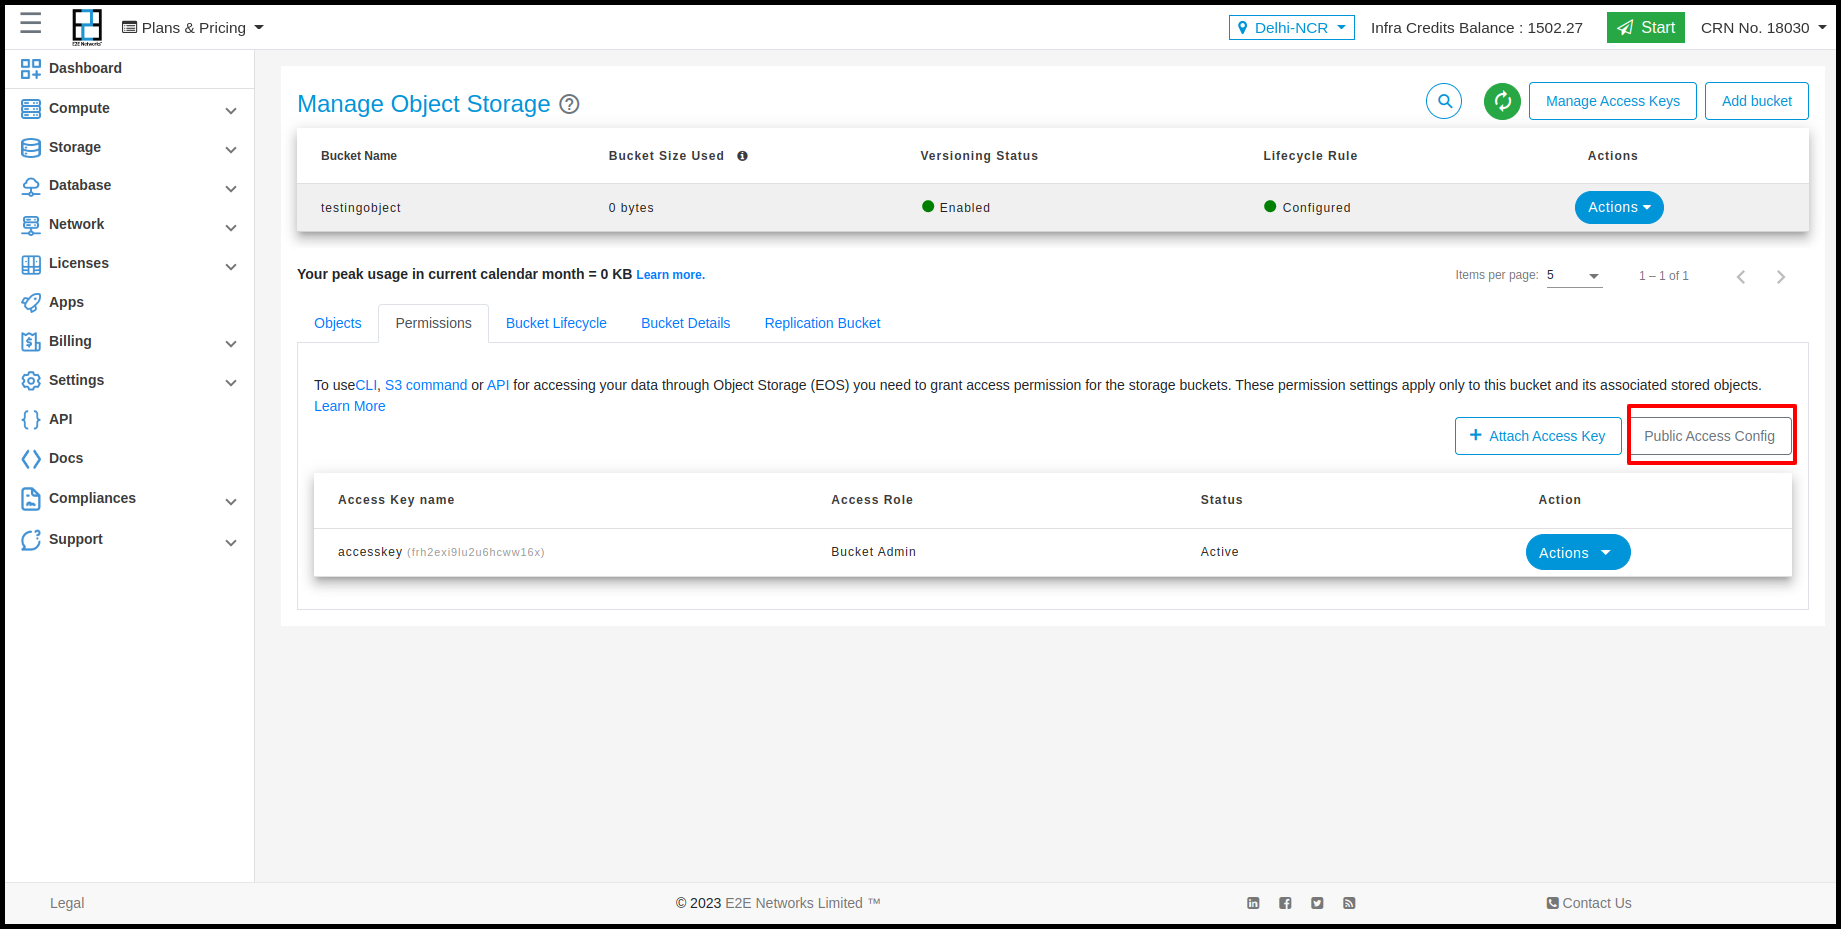
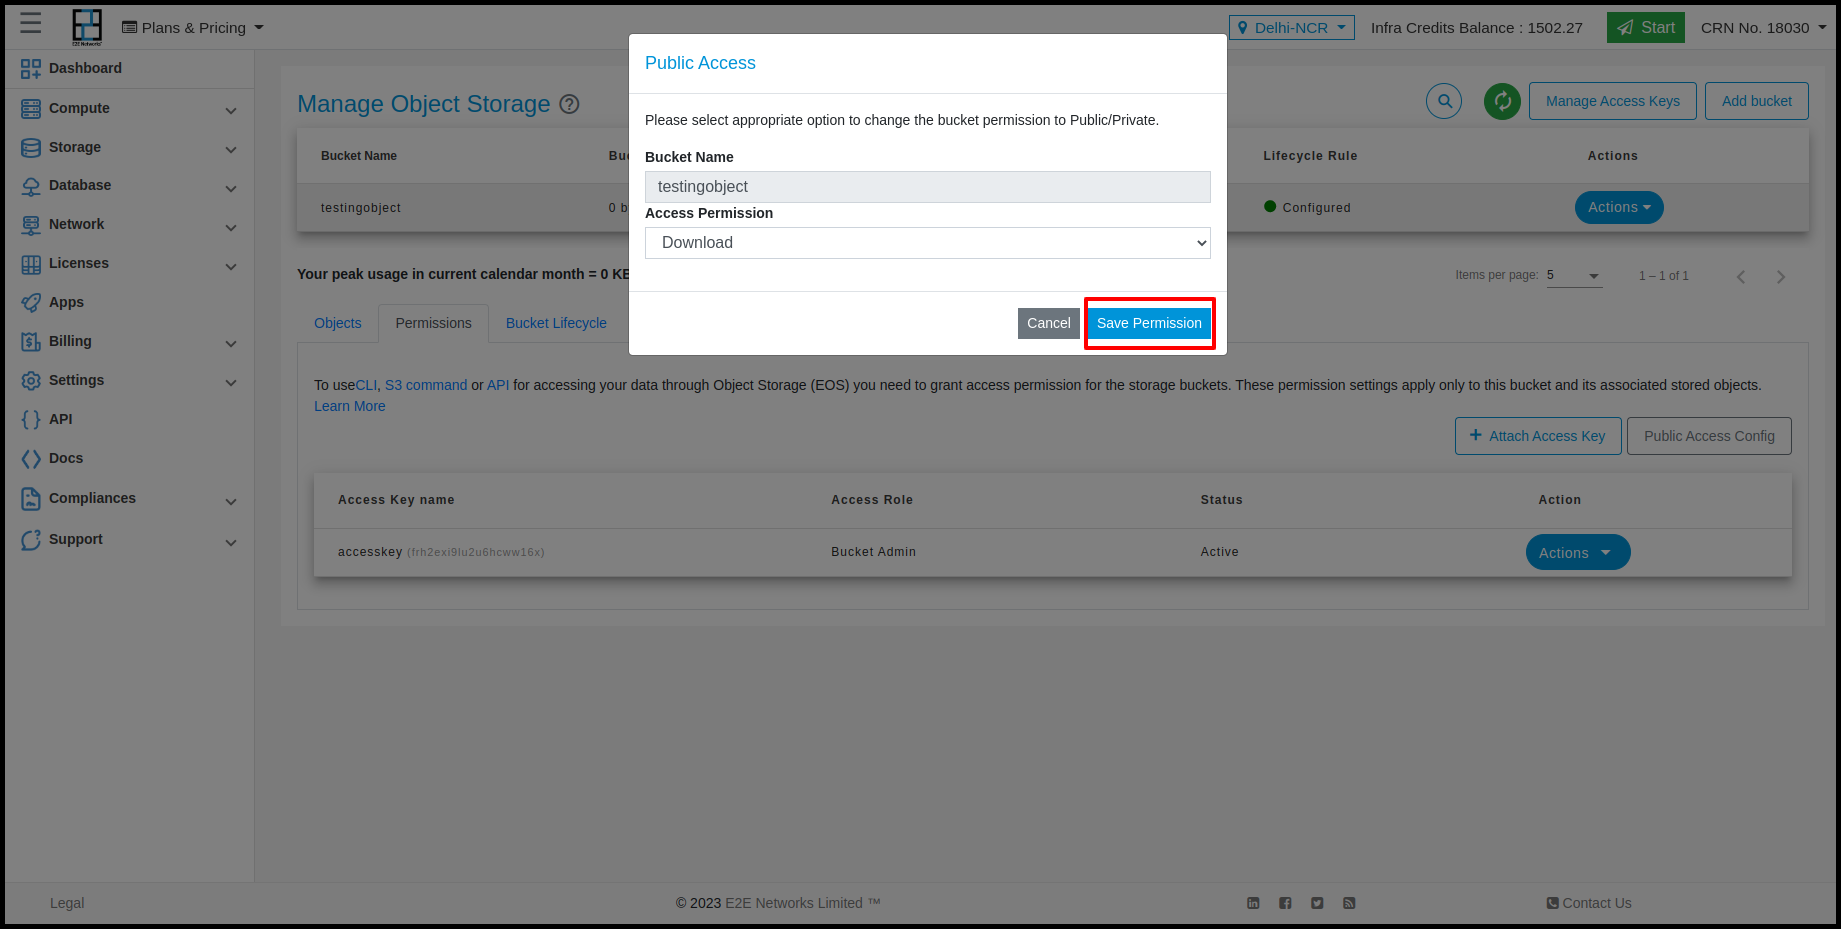
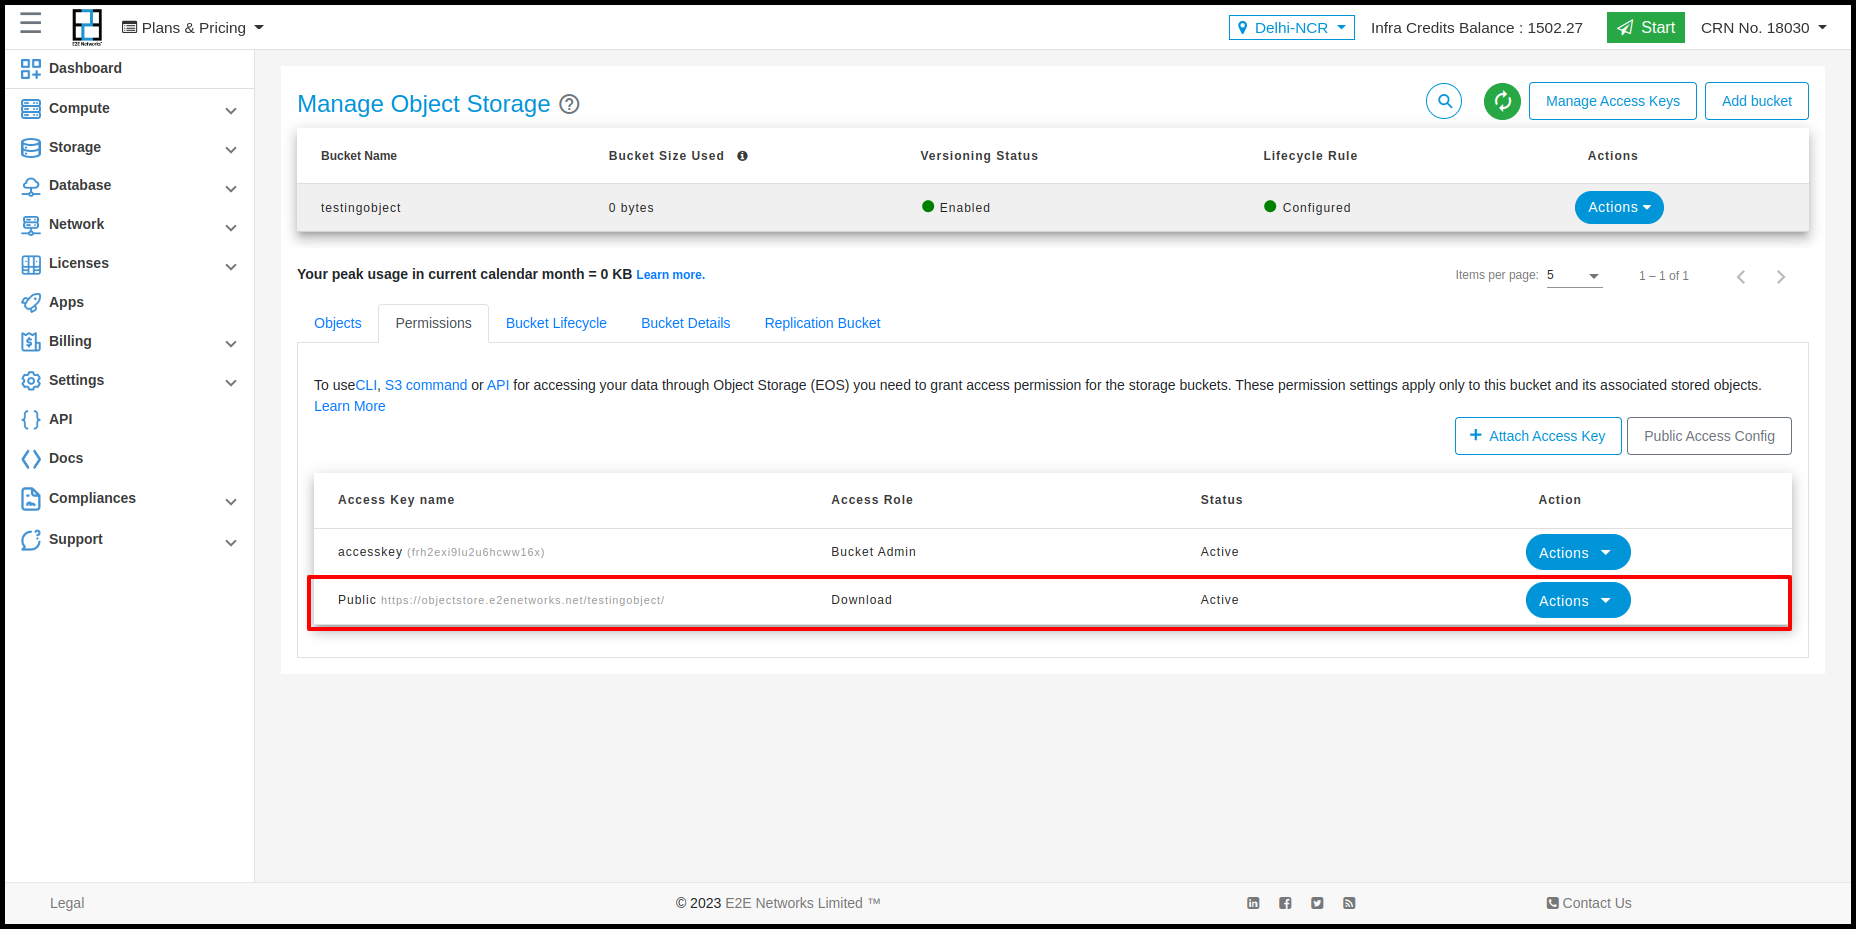
Public Access Config
Usin Public access config we give the permissions of Upload, Download, Upload & Dowload and Private for the objects using URL. For Enable this you need to click on Public Access Config button and select permission which you want give.


Bucket Lifecycle
In this section the lifecycle rule will be show whatever you have created and you can also create and perform action on this.

Bucket Details
In this section the details of bucket will be show.

Bucket Permissions
If you intend to use CLI or API for accessing your data on EOS then you will need to define bucket permissions.
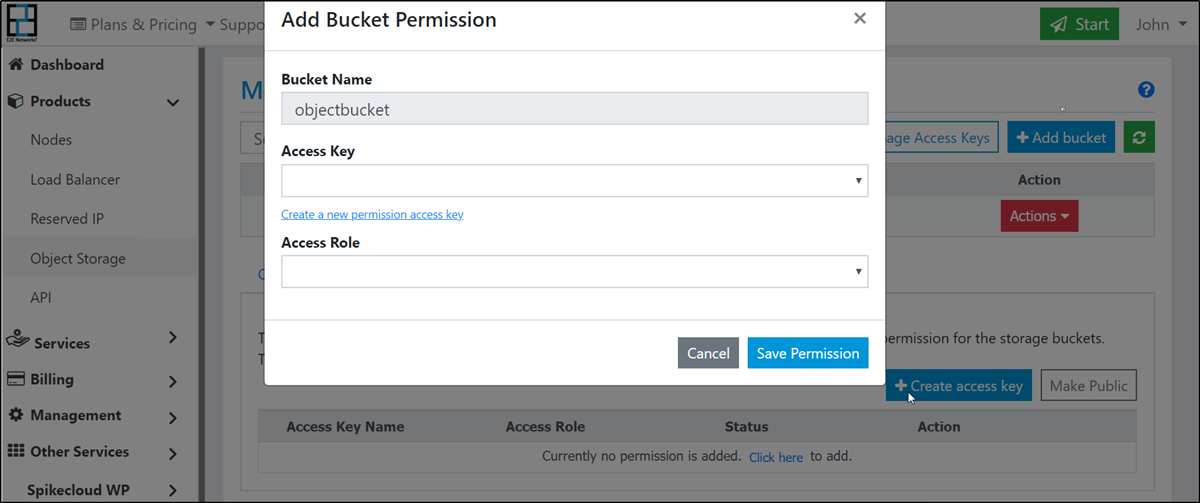
Go to Products > Storage Storage option in the sidebar menu
Choose any bucket or create a new one.
Click the permission tab, it will be opened for the selected bucket.
Click the Create access key button.
Enter a name for your access key. This can be an application name, project name or a team member name.
Choose an access key or Create access key.
Assign a role:
bucket admin
can read, write, manage
bucket writer
can read, write
bucket reader
can read
Save the permission.
Create access key
You can create access key from Permissions tab on Bucket details page or Manage access page.
Enter a name for your access key. This can be an application name, project name or a team member name.
Click Generate Key.
If all goes well, you will see newly generated access and secret keys
Keep a note of both these keys as you will not see them again after you close the modal window.
If you have mc setup then use the given command to configure CLI for this access key.
Hint
Choose a short name for access key as you will be entering this for each command that you type in CLI.
Manage Access
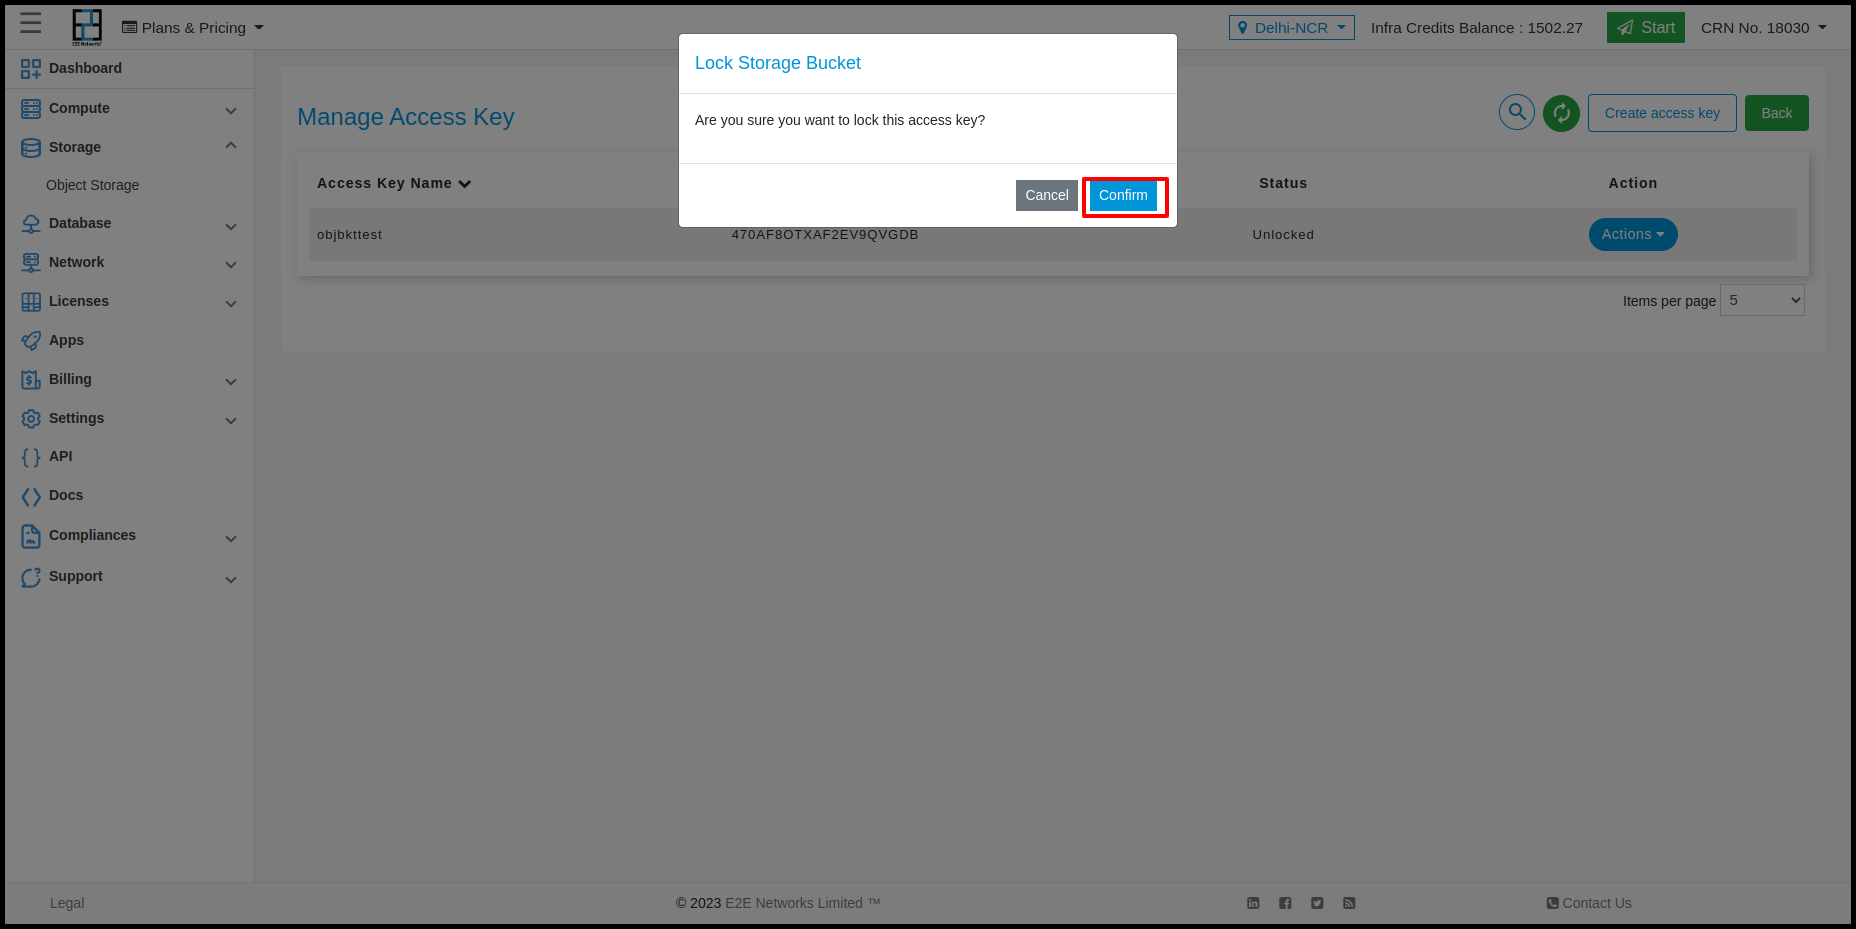
Sometimes you may need to disable access for certain users or target applications. The way to do that is to lock their access key from manage access page.
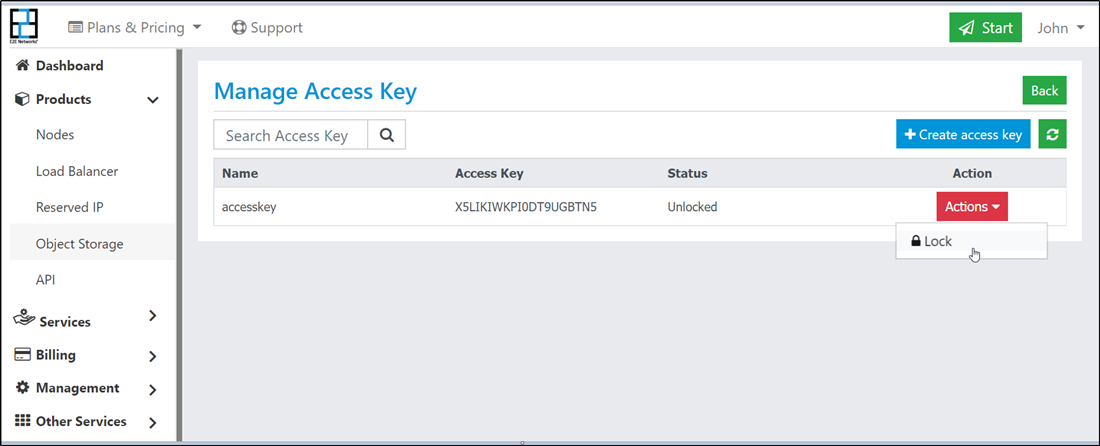
Go to Products > Storage Storage option in the sidebar menu
Click Manage Access Key
Identify the access you want to lock using key name
Click lock icon as desired
To unlock, follow the same steps above except this time you will see an unlock icon instead of lock.
Protect Your Bucket Data With Encryption
Introduction:- The procedure on this page configures and enables Server-Side Encryption with Client-Managed Keys (SSE-C). EOS SSE-C supports client-driven encryption of objects before writing the object to the drive. Clients must specify the correct key to decrypt objects for read operations.
Prerequisite:
mc client is required to encrypt an object (How to install mc client. —> https://docs.e2enetworks.com/storage/objectstore/working_with_cli.html#download-minio-client-mc).
The SSE-C key must be a 256-bit base64-encoded string.
The client application is responsible for the generation and storage of the encryption key.
EOS does not store SSE-C encryption keys and cannot decrypt SSE-C encrypted objects without the client-managed key.
1) Generate the Encryption Key
First of all an encryption key is required. You can generate the encryption using the following command:
cat /dev/urandom | head -c 32 | base64 -
It is important to notice that a 256-bit base64-encoded string should be used.
Save the encryption key for future references.
2) Encrypt And Copy Object into Bucket Using Encryption Key
To encrypt an object using the mc client, refer to the following command
 mc cp ~/source_path/my_object.json ALIAS/BUCKET/my_object.json \
--encrypt-key "ALIAS/BUCKET/=ENCRYPTION_KEY"
Replace ALIAS with the key_name used while configuring the mc client on which you want to write the SSE-C encrypted object.
Replace BUCKET with the full path to the bucket or bucket prefix to which you want to write the SSE-C encrypted object.
Replace ENCRYPTION_KEY with the key generated in the first step.
3) Copy an SSE-C Encrypted Object Between Two Bucket
EOS also supports the copying an SSE-C encrypted object to another S3-compatible service:
 mc cp SOURCE/BUCKET/mydata.json TARGET/BUCKET/mydata.json  \
--encrypt-key \
 "SOURCE/BUCKET/=ENCRYPTION_KEY","TARGET/BUCKET/=ENCRYPTION_KEY"
Replace ALIAS with respecting key_name used while configuring the mc client on which you want to read and write the SSE-C encrypted object.
Replace source and destination BUCKET with the full path to the bucket or bucket prefix on which you want to read and write the SSE-C encrypted object.
Replace ENCRYPTION_KEY with the key generated in the first step.
Considerations:
SSE-C encrypted objects are not compatible with the EOS bucket replication feature.
User manage a mapping of which encryption key was used to encrypt which object. E2E does not store encryption keys. You are responsible for tracking which encryption key you provided for which object.
If your bucket is versioning-enabled, each object version that you upload by using this feature can have its own encryption key. You are responsible for tracking which encryption key was used for which object version.
For downloading an encrypted object encryption key is required, if the user loses the key then he can not download the data, and his data will be lost. In this case E2E is not responsible for the loss of your data.