Storage Browser
Storage browser works as a primary control center for your content. The browser supports bucket creation, permission handling and also upload or download of objects.
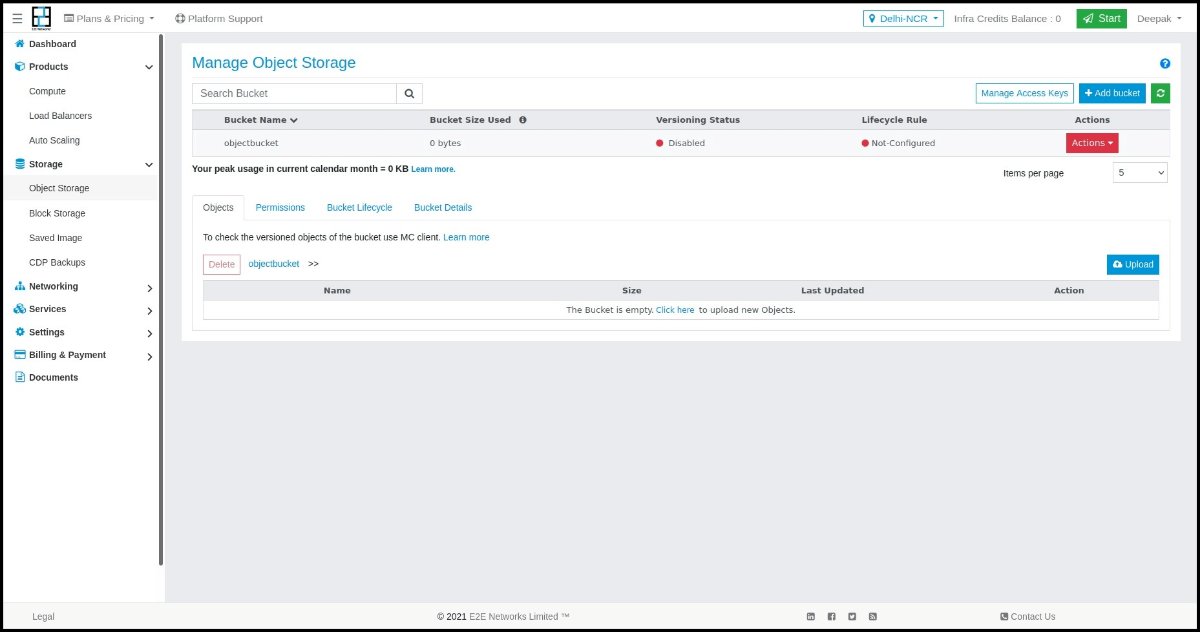
To access storage browser, visit My Account
Bucket Details
You can browse through objects in your bucket or assign permissions using Bucket Details page.
Login to My Account
Go to Products > Storage option in the sidebar menu
Choose any bucket or create a new one.
Click the Object browser tab, it will be opened for the selected bucket.
You can now browse through files and directories or manage permissions for the bucket.
Click the bucket details tab for the selected bucket.
You can now check bucket related information.
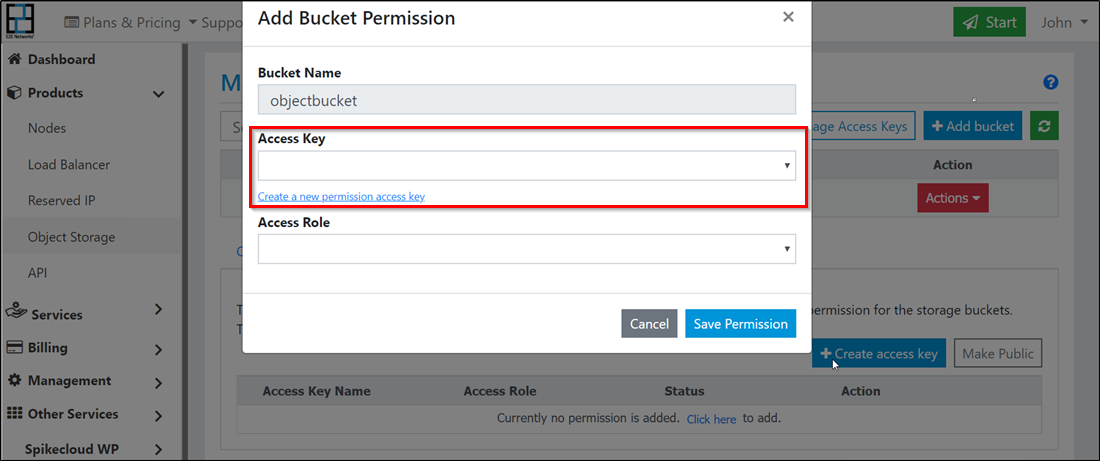
Bucket Permissions
If you intend to use CLI or API for accessing your data on EOS then you will need to define bucket permissions.
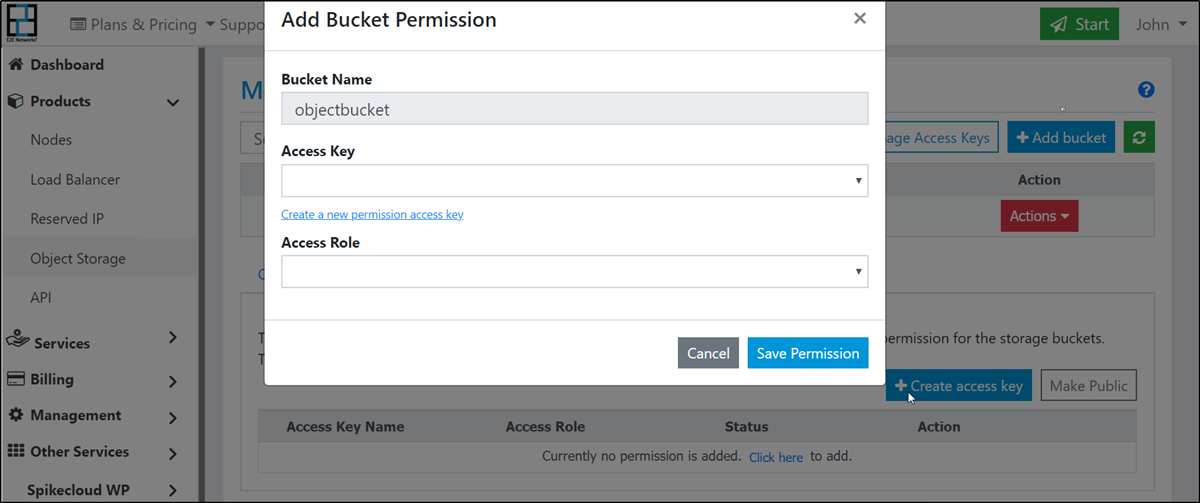
Go to Products > Storage Storage option in the sidebar menu
Choose any bucket or create a new one.
Click the permission tab, it will be opened for the selected bucket.
Click the Create access key button.
Enter a name for your access key. This can be an application name, project name or a team member name.
Choose an access key or Create access key.
Assign a role:
bucket admin
can read, write, manage
bucket writer
can read, write
bucket reader
can read
Save the permission.
Create access key
You can create access key from Permissions tab on Bucket details page or Manage access page.
Enter a name for your access key. This can be an application name, project name or a team member name.
Click Generate Key.
If all goes well, you will see newly generated access and secret keys
Keep a note of both these keys as you will not see them again after you close the modal window.
If you have mc setup then use the given command to configure CLI for this access key.
Hint
Choose a short name for access key as you will be entering this for each command that you type in CLI.
Manage Access
Sometimes you may need to disable access for certain users or target applications. The way to do that is to lock their access key from manage access page.
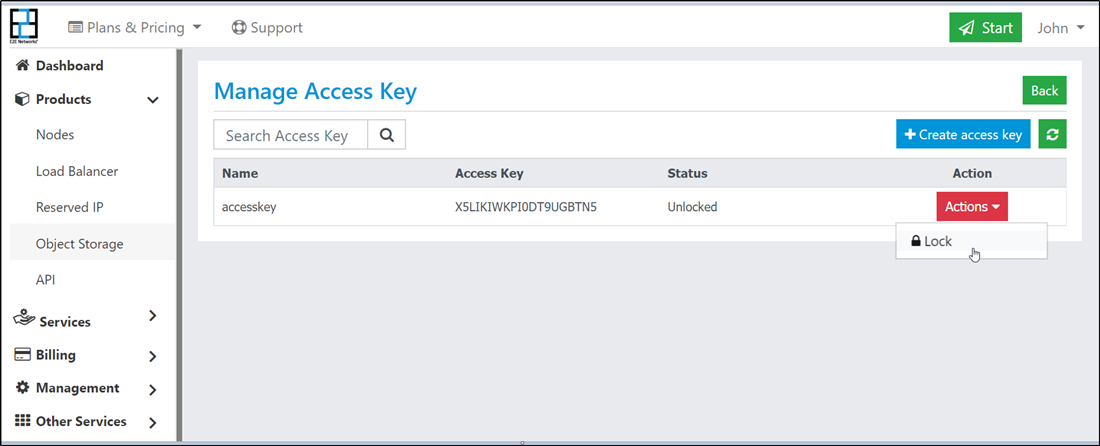
Go to Products > Storage Storage option in the sidebar menu
Click Manage Access Key
Identify the access you want to lock using key name
Click lock icon as desired
To unlock, follow the same steps above except this time you will see an unlock icon instead of lock.