Introduction
Load balancing in simplest terms refers to dynamically distributing application incoming network traffic across a group of backend nodes. It helps to maintain high availability, scalability, fault-tolerance of your application and gives a smooth experience to the application users because applications are serving hundreds of thousands, or millions, of concurrent requests from users or clients and return the correct response as per request. To cost‑effectively scale to meet these high volumes, modern computing best practice generally requires adding more servers.
A load balancer acts as a single point of contact for the application. It helps to manage your application servers and to route users/client requests across all servers capable of fulfilling those requests in a manner that maximises speed and capacity utilization and ensures that no one server is overworked, which could degrade performance. If a single server goes down, the load balancer redirects traffic to the remaining online servers. When a new server is added to the server group, the load balancer automatically starts to send requests to it.
Load distribution decision is based on the configured process and the traffic that is coming to the application. In this process, it checks connection requests type received from clients, using the protocol and port that you configure for front-end (client to load balancer) connections. It forwards requests to one or more registered backend nodes using the protocol and port number that you set for back-end (load balancer to backend nodes) connections.
The following are the essential characteristics of Load balancer:
You have the flexibility to add and remove backend nodes from your load balancer to handle the traffic load based on your requirement changes, and that is possible without interrupting the flow of user’s requests to your application. Registering Nodes add it to your load balancer. The load balancer starts routing requests to nodes as soon as it is registered. Deregistering Nodes removes it from your load balancer. The load balancer stops routing requests to nodes as more quickly as deregistered. A node that deregistered remains running, but no longer receives traffic from the load balancer, and you can register it with the load balancer again when you need it.
E2E Load balancers support different types of load balancing algorithms that meant for various benefits, and the choice depends on your needs.
Monitoring of load balancer health in real-time is a free service that provides insights into resource usage across your infrastructure. There are several different display metrics to help you track the operational health of your infrastructure. The information graphically represented on the MyAccount portal. Learn more about Monitoring
Alerts You have the flexibility to easily configure alert policies, set email notifications to enable you to respond quickly to critical situations when load balancer health alerts are triggered. Learn more about Alerts
You can attach a Reserved IP address either as an add-on IP which is going to associate with the load balancer’s primary network interface and work as an additional IP address. Or attach as a primary public IP which will work as the load balancer’s primary network interface with a load balancer. Learn More about Reserved IP
How to Launch a Load Balancer Appliance?
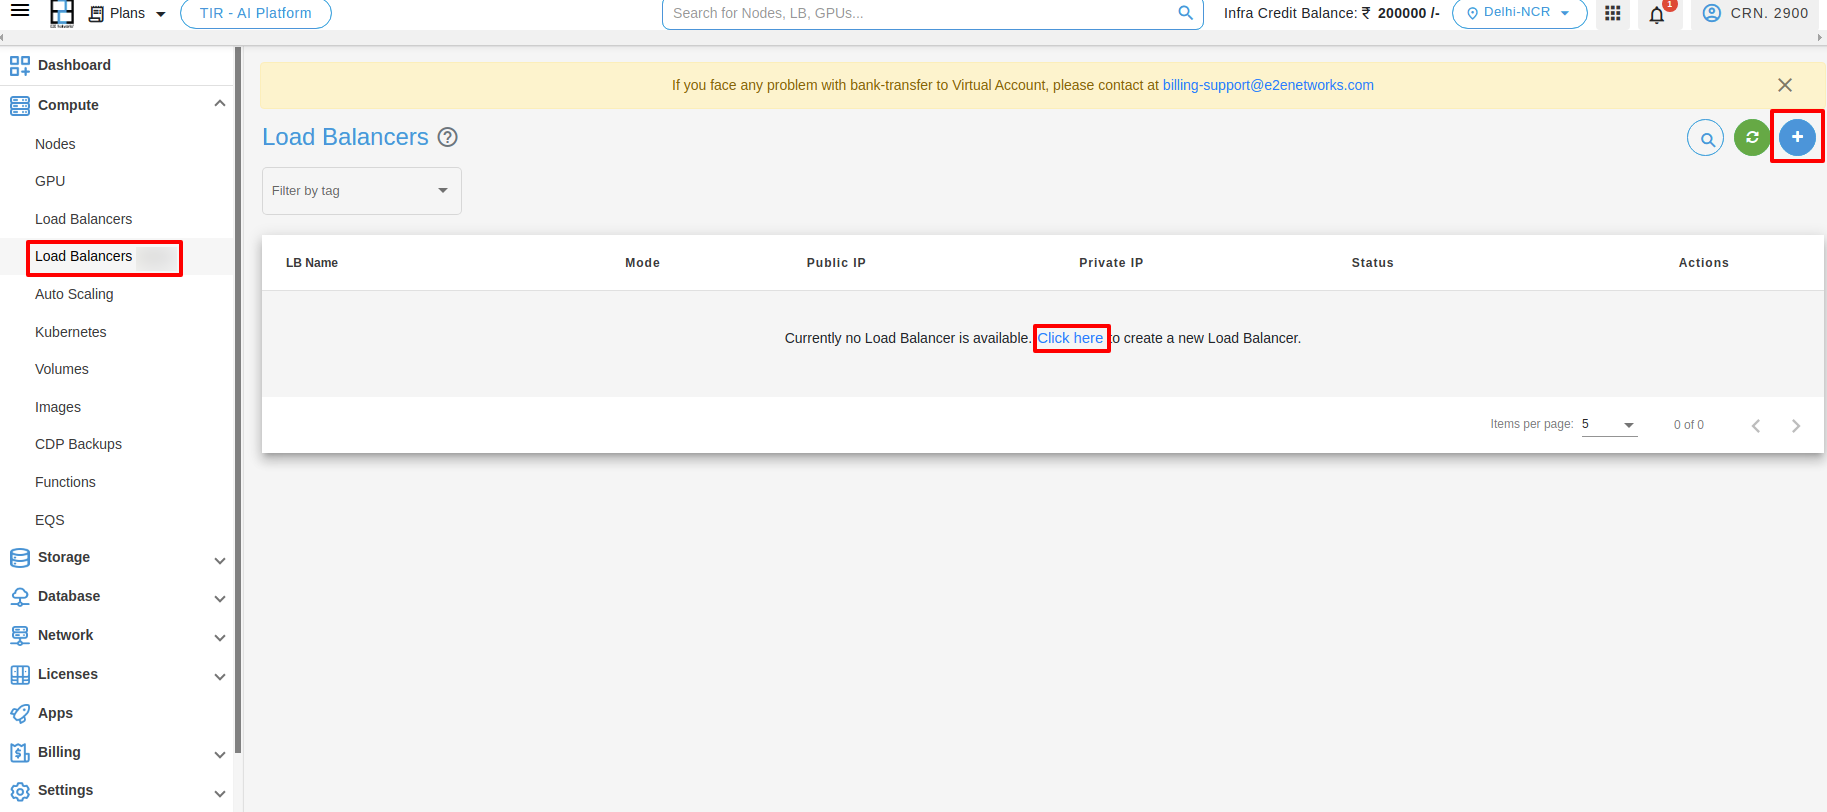
Initiate Load Balancer Creation
Login to MyAccount portal using your credentials set up at the time of creating and activating the E2E Networks My Account.
After you log in to the E2E Networks My Account, you can click on any of the following options.
On the left side of the MyAccount dashboard, click on the Load Balancers.
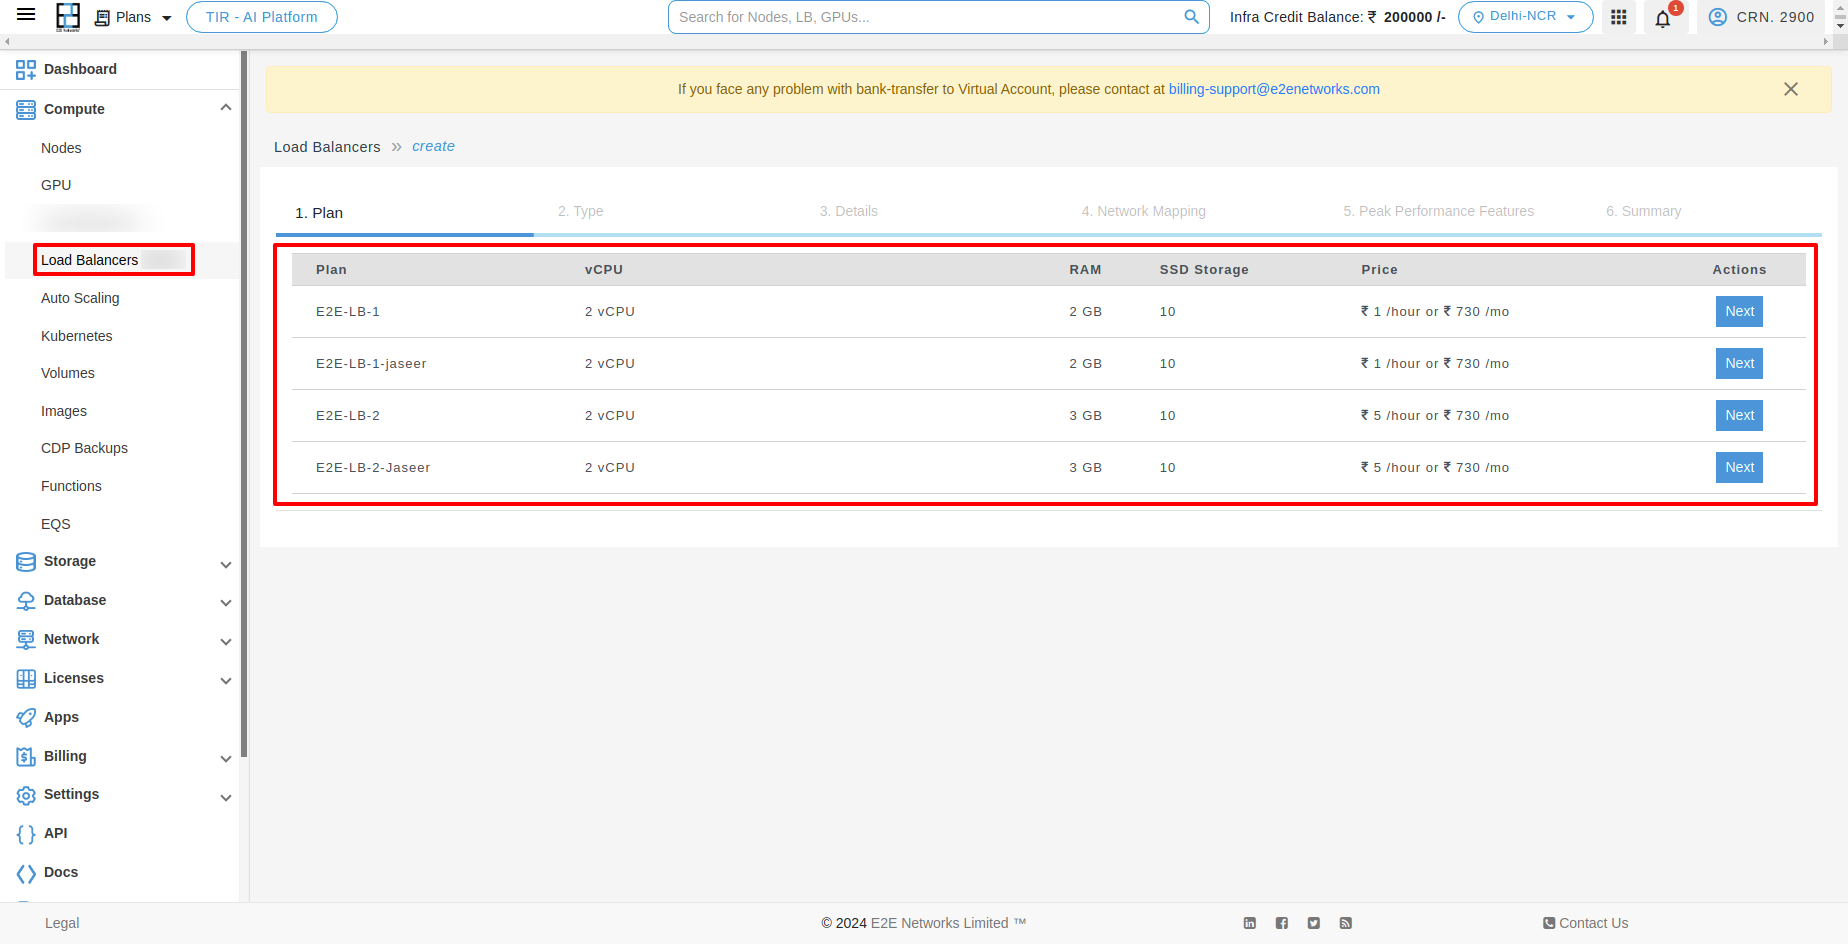
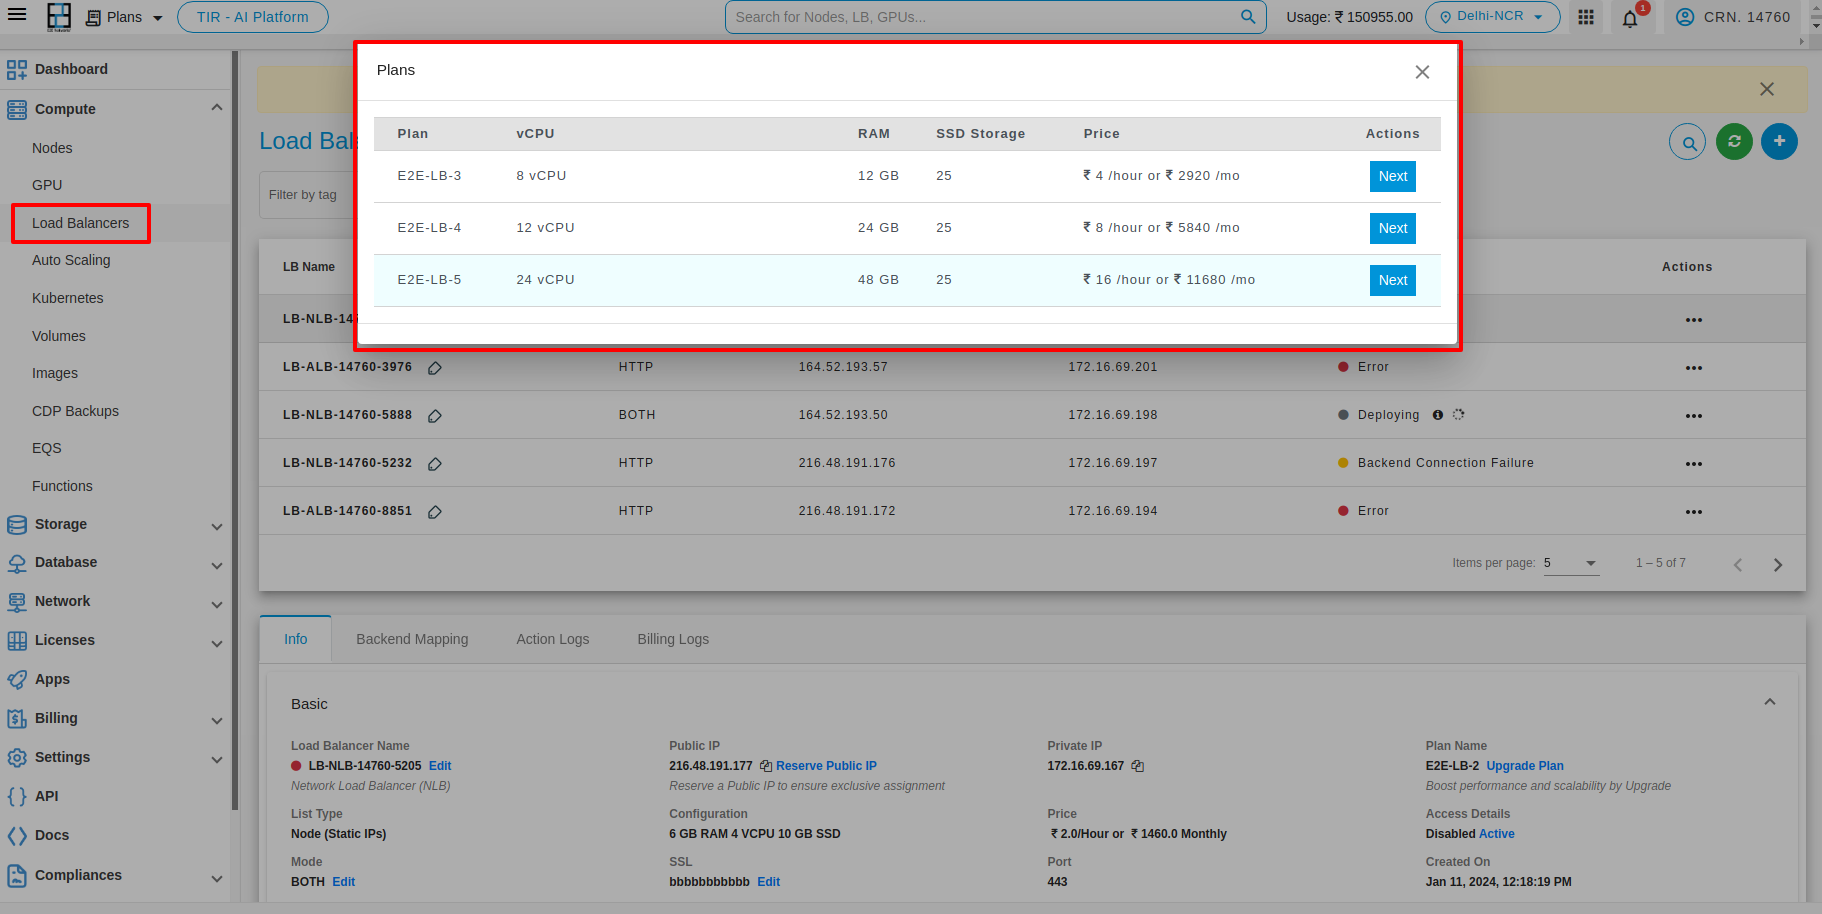
Select your Load Balancer Plan
All the load balancer plans are listed based on different memory, vCPU and storage configuration and price.
Please select a plan you wish to use to create the new load balancer.
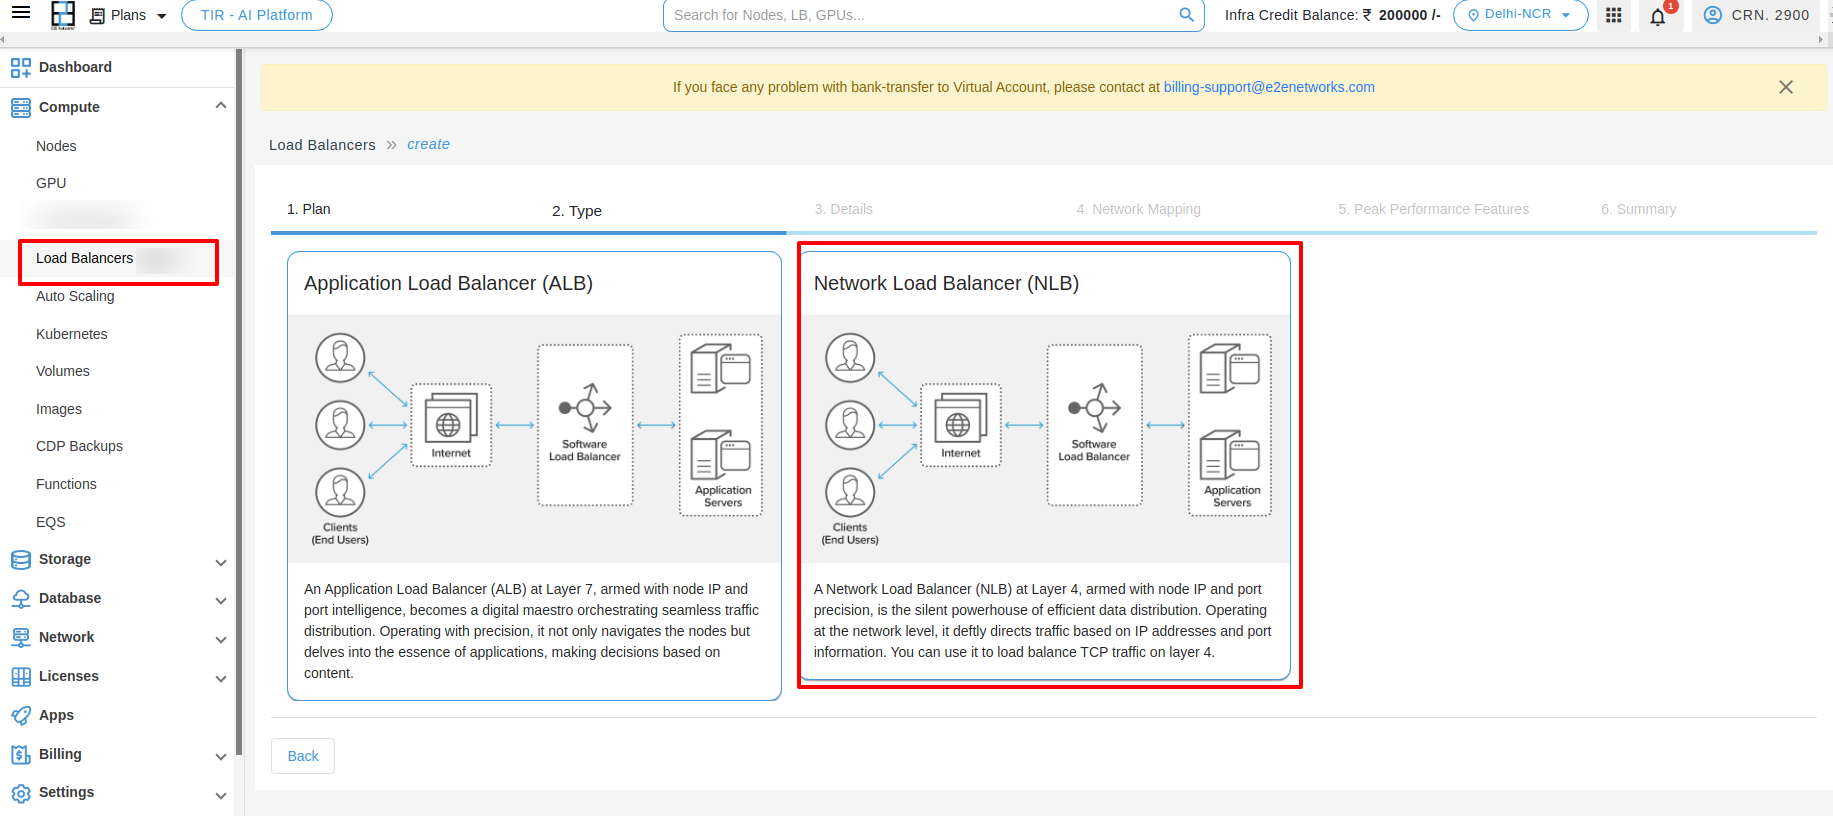
After selecting the plan, you need to choose the Load balancer type. Here two option is available for LoadBlancer.
1. Application Load Balancer (ALB) :- An Application Load Balancer (ALB) at Layer 7, armed with node IP and port intelligence, becomes a digital maestro orchestrating seamless traffic distribution. Operating with precision, it not only navigates the nodes but delves into the essence of applications, making decisions based on content.
2. Network Load Balancer (NLB) :- A Network Load Balancer (NLB) at Layer 4, armed with node IP and port precision, is the silent powerhouse of efficient data distribution. Operating at the network level, it deftly directs traffic based on IP addresses and port information. You can use it to load balance TCP traffic on layer 4.
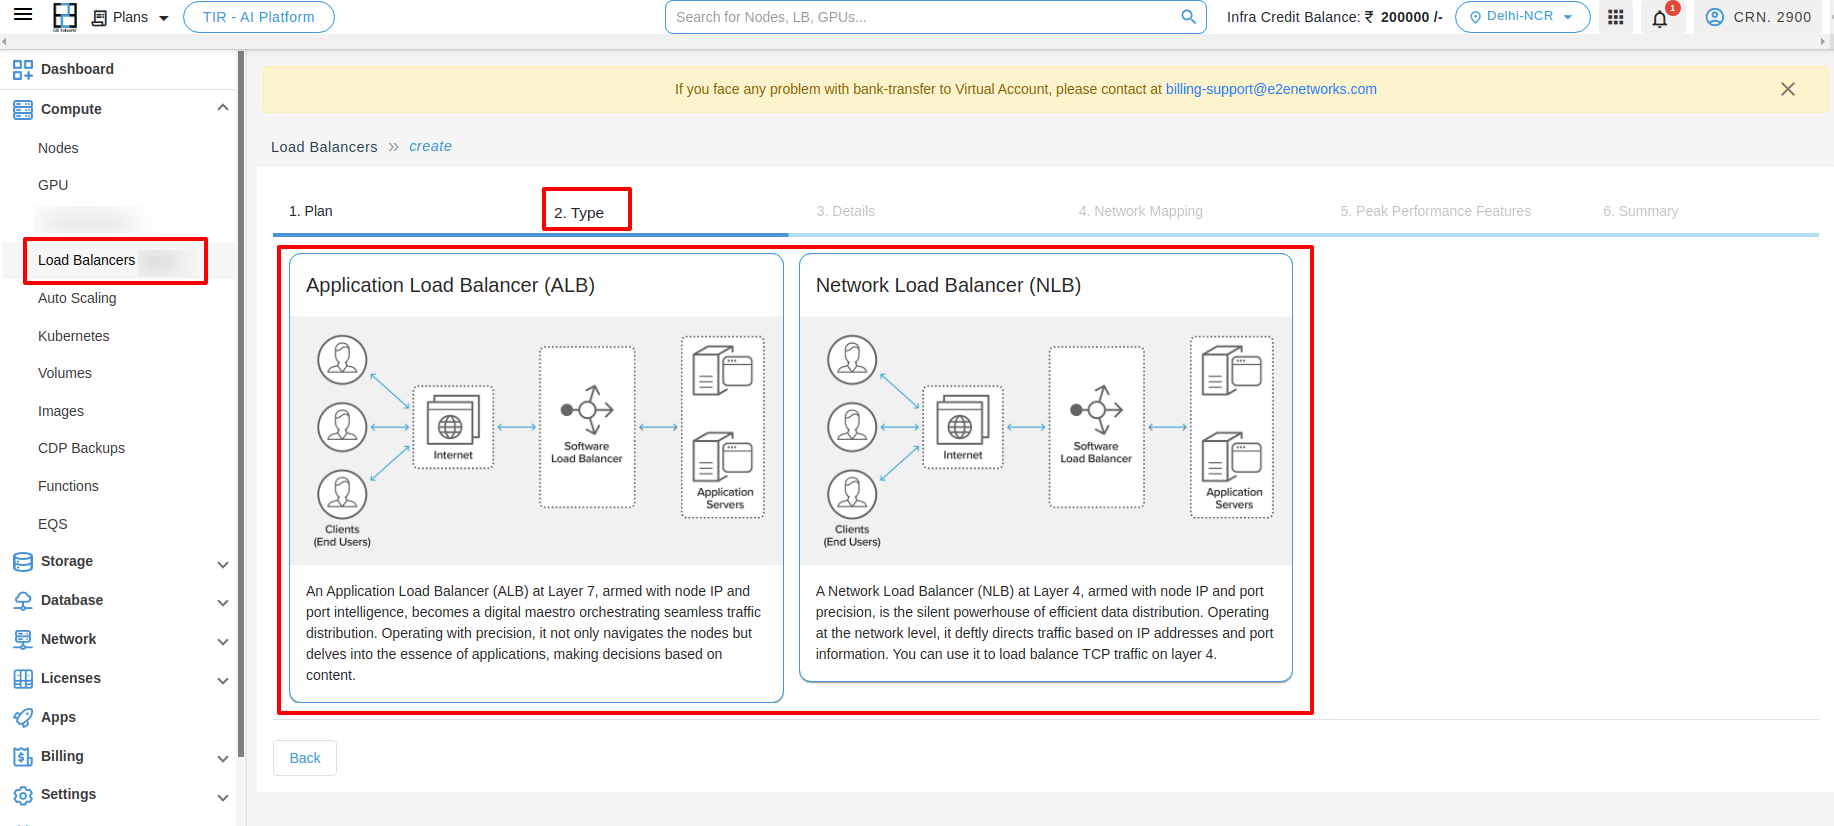
To create Network Load Balancer (NLB), you need to click on the Network Load Balancer (NLB)
You will have to enter various configuration details and preferences (like name, mode, port, list type, SSL certificates, etc.) for front-end (client to load balancer) connections, and back-end (load balancer to nodes) connections and to configure Application Load Balancer, you can click here to refer Application Load Balancer deployment Help.
For Network Load Balancer (NLB)
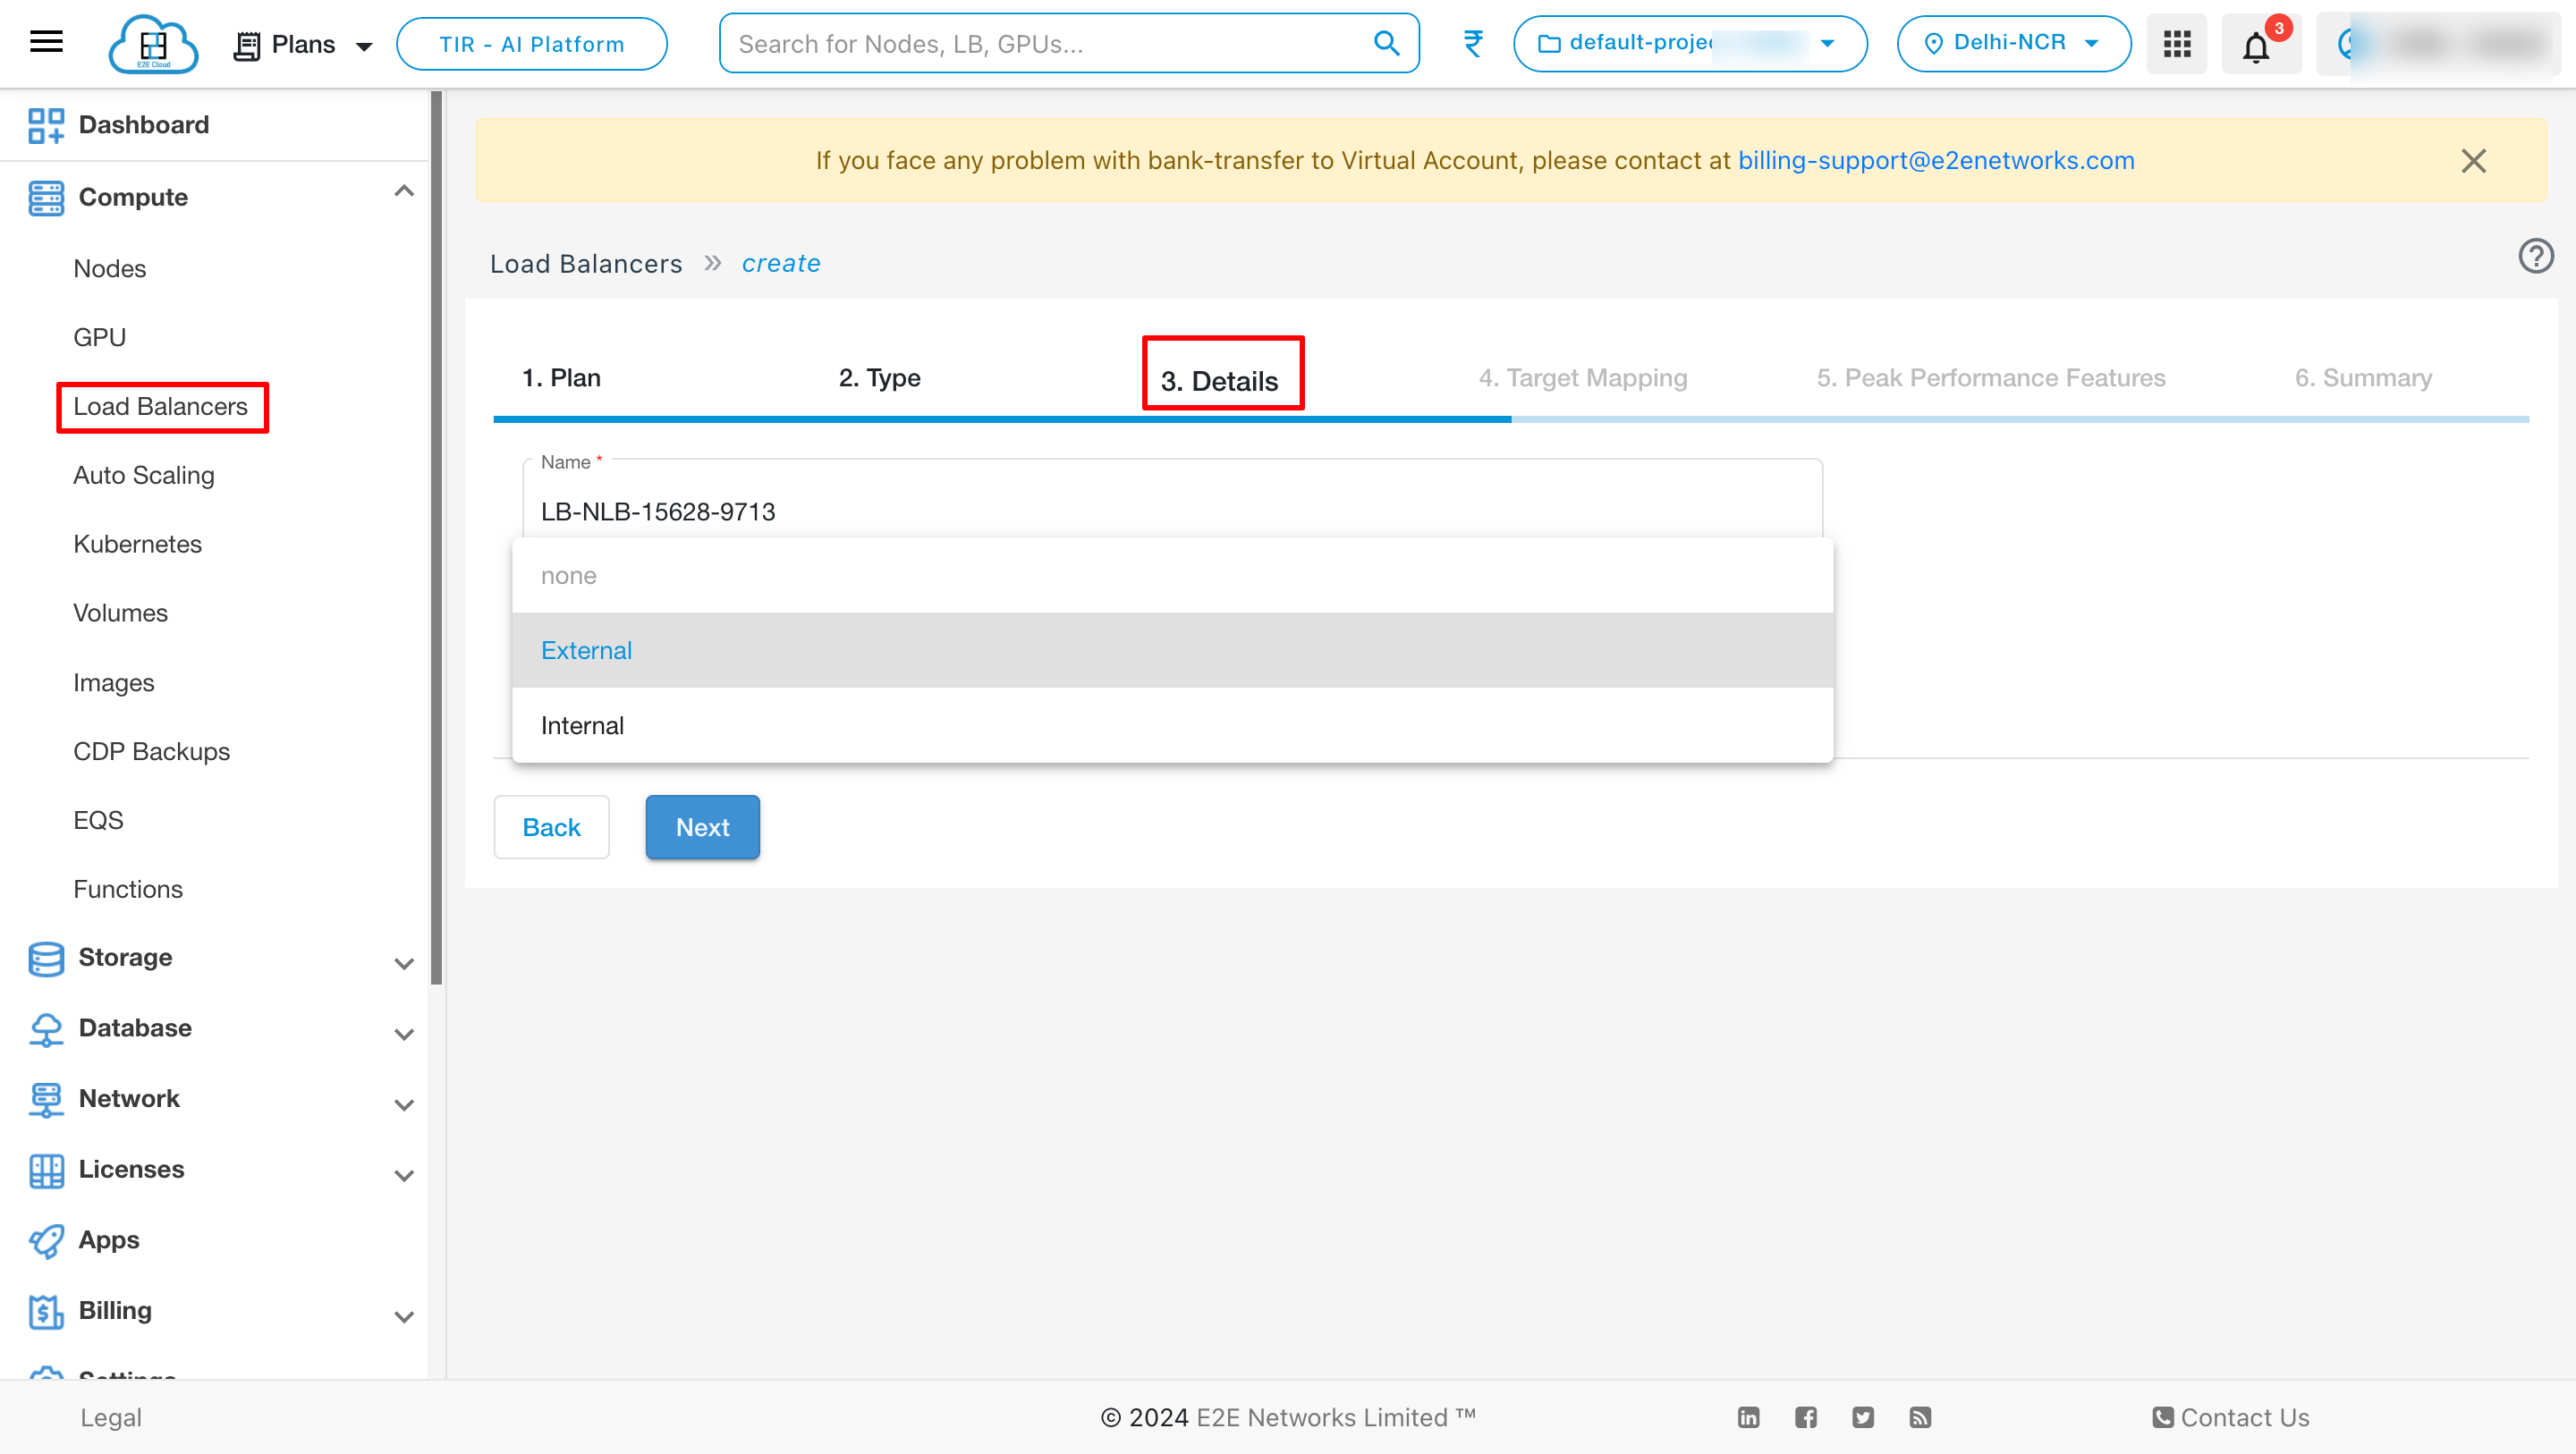
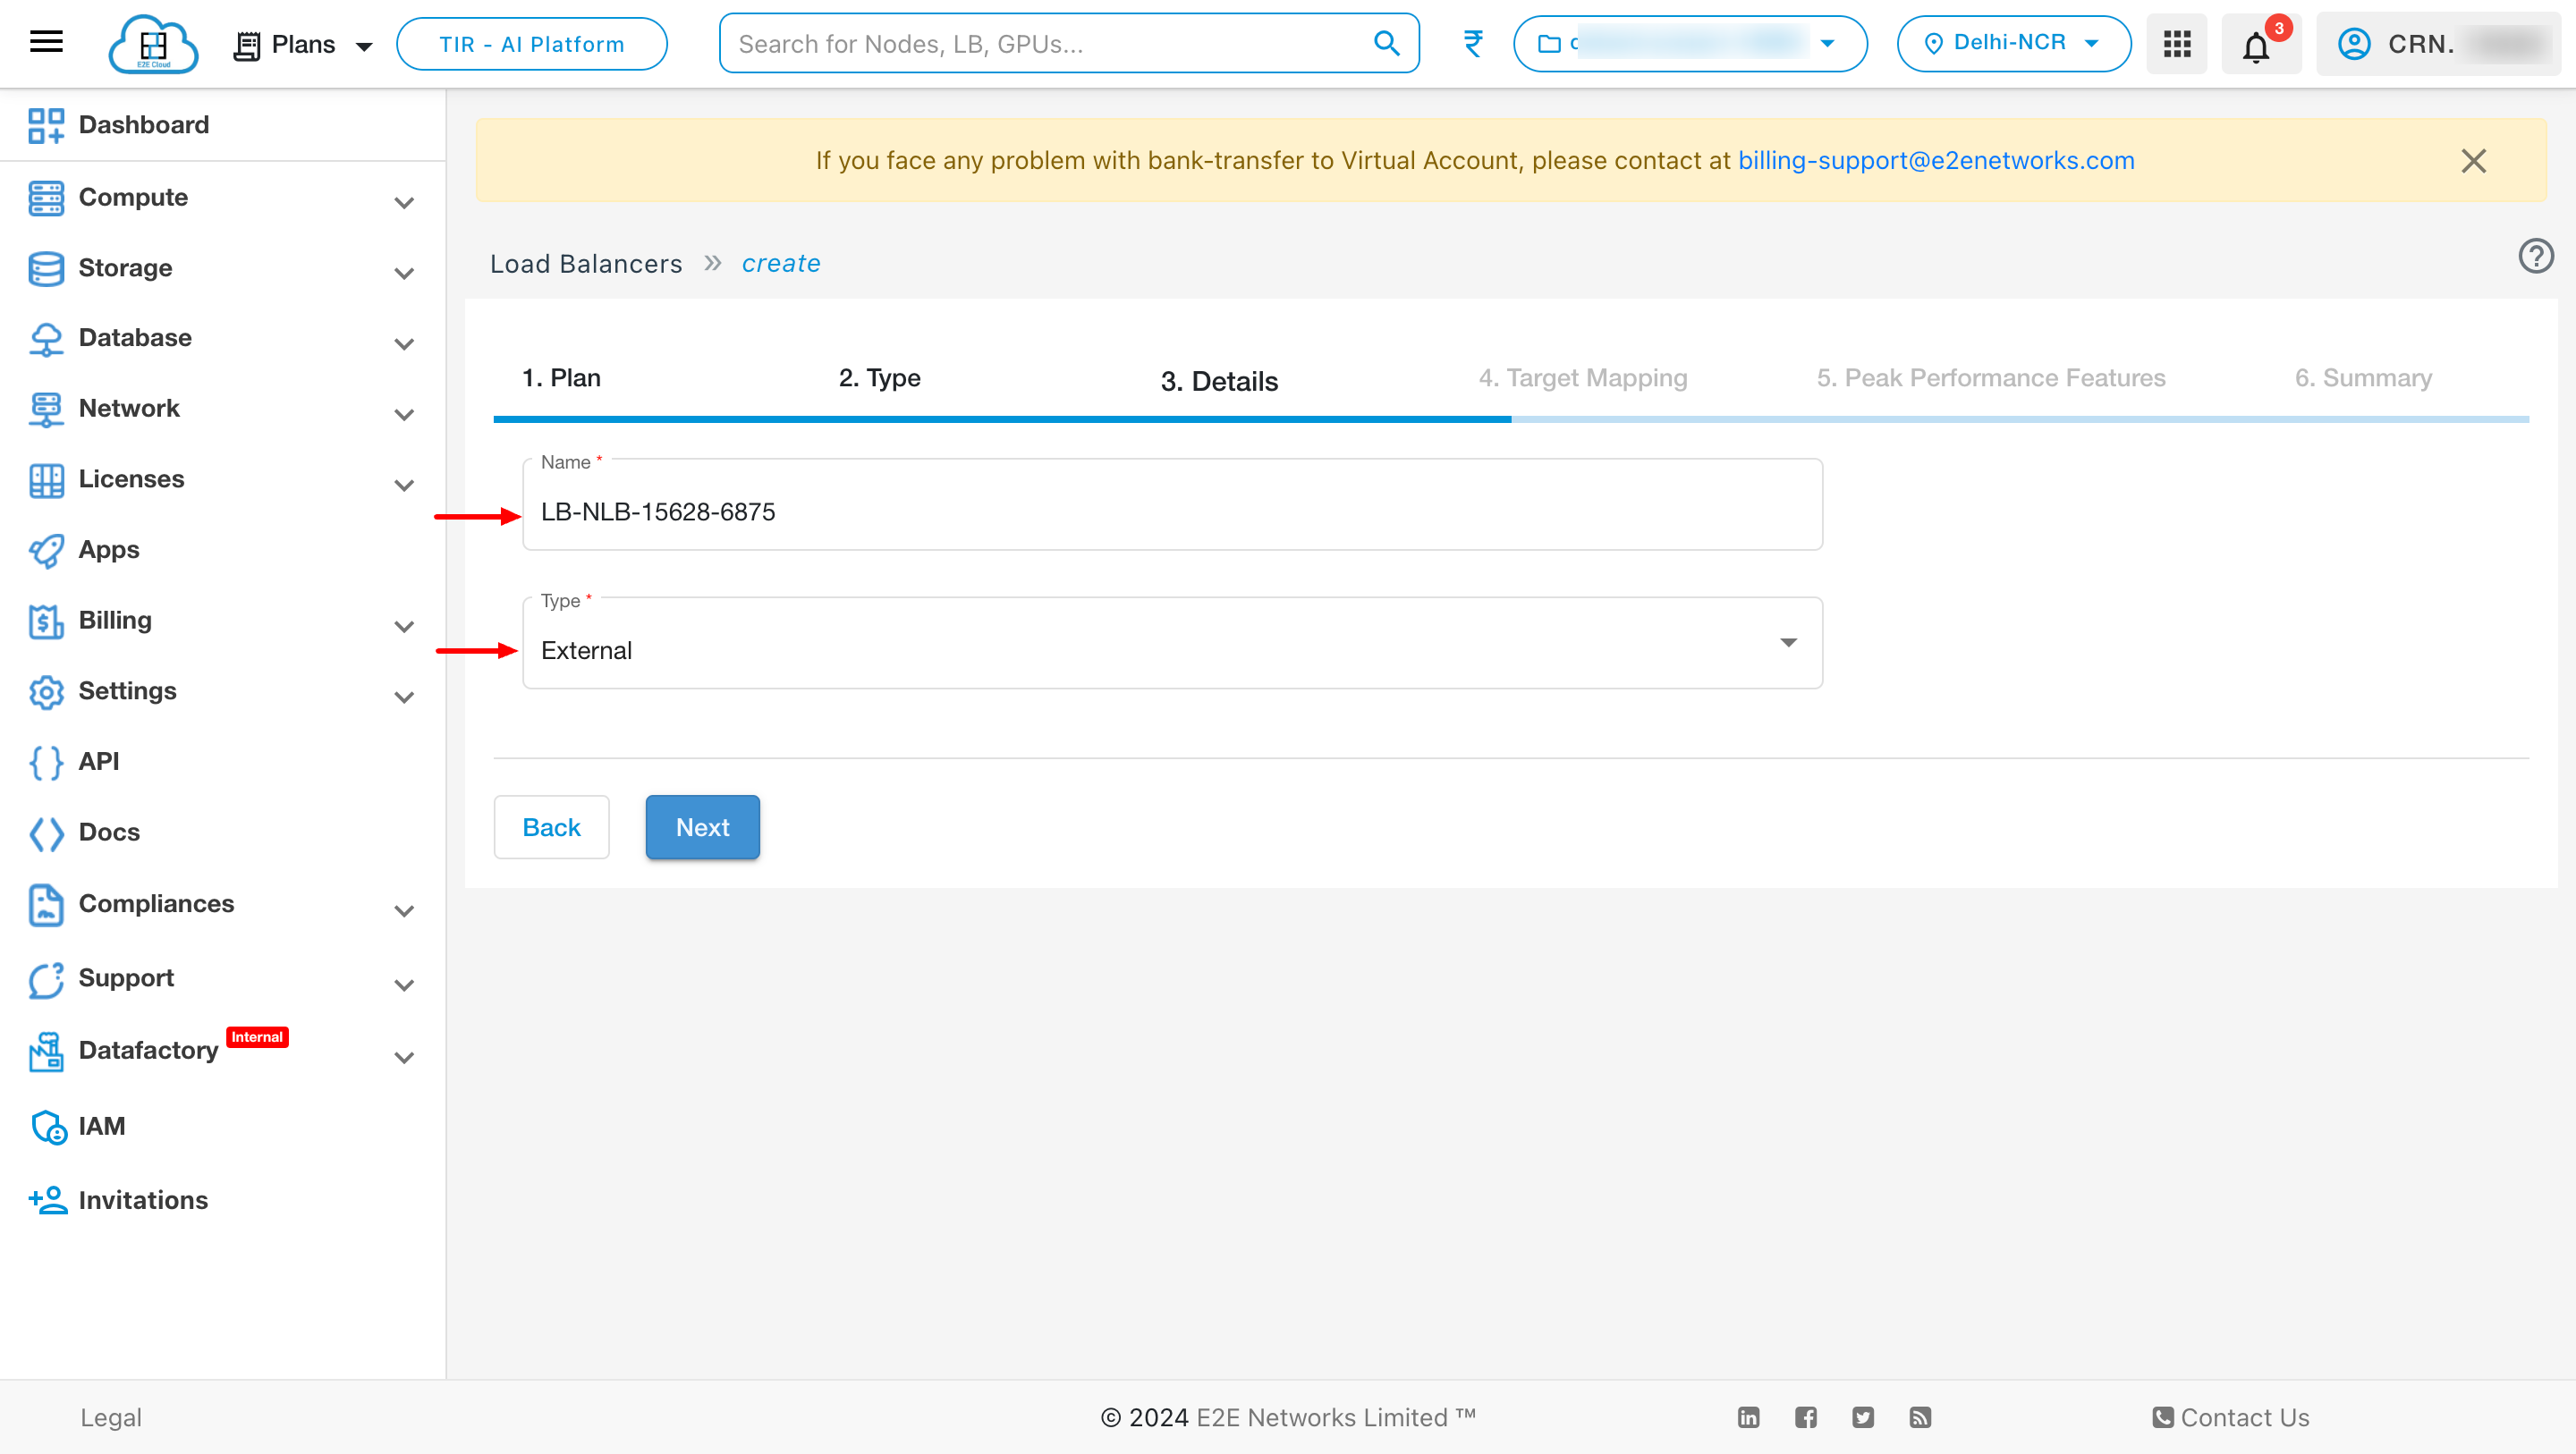
Details
Name - Default name is provided based on the Plan you selected, but you can modify and give a string of characters that you can enter as the name of your Load Balancer Appliance.
Type - Select the type for your load balancer Internal or External according to your requirement.
Target Mapping
Backend Name
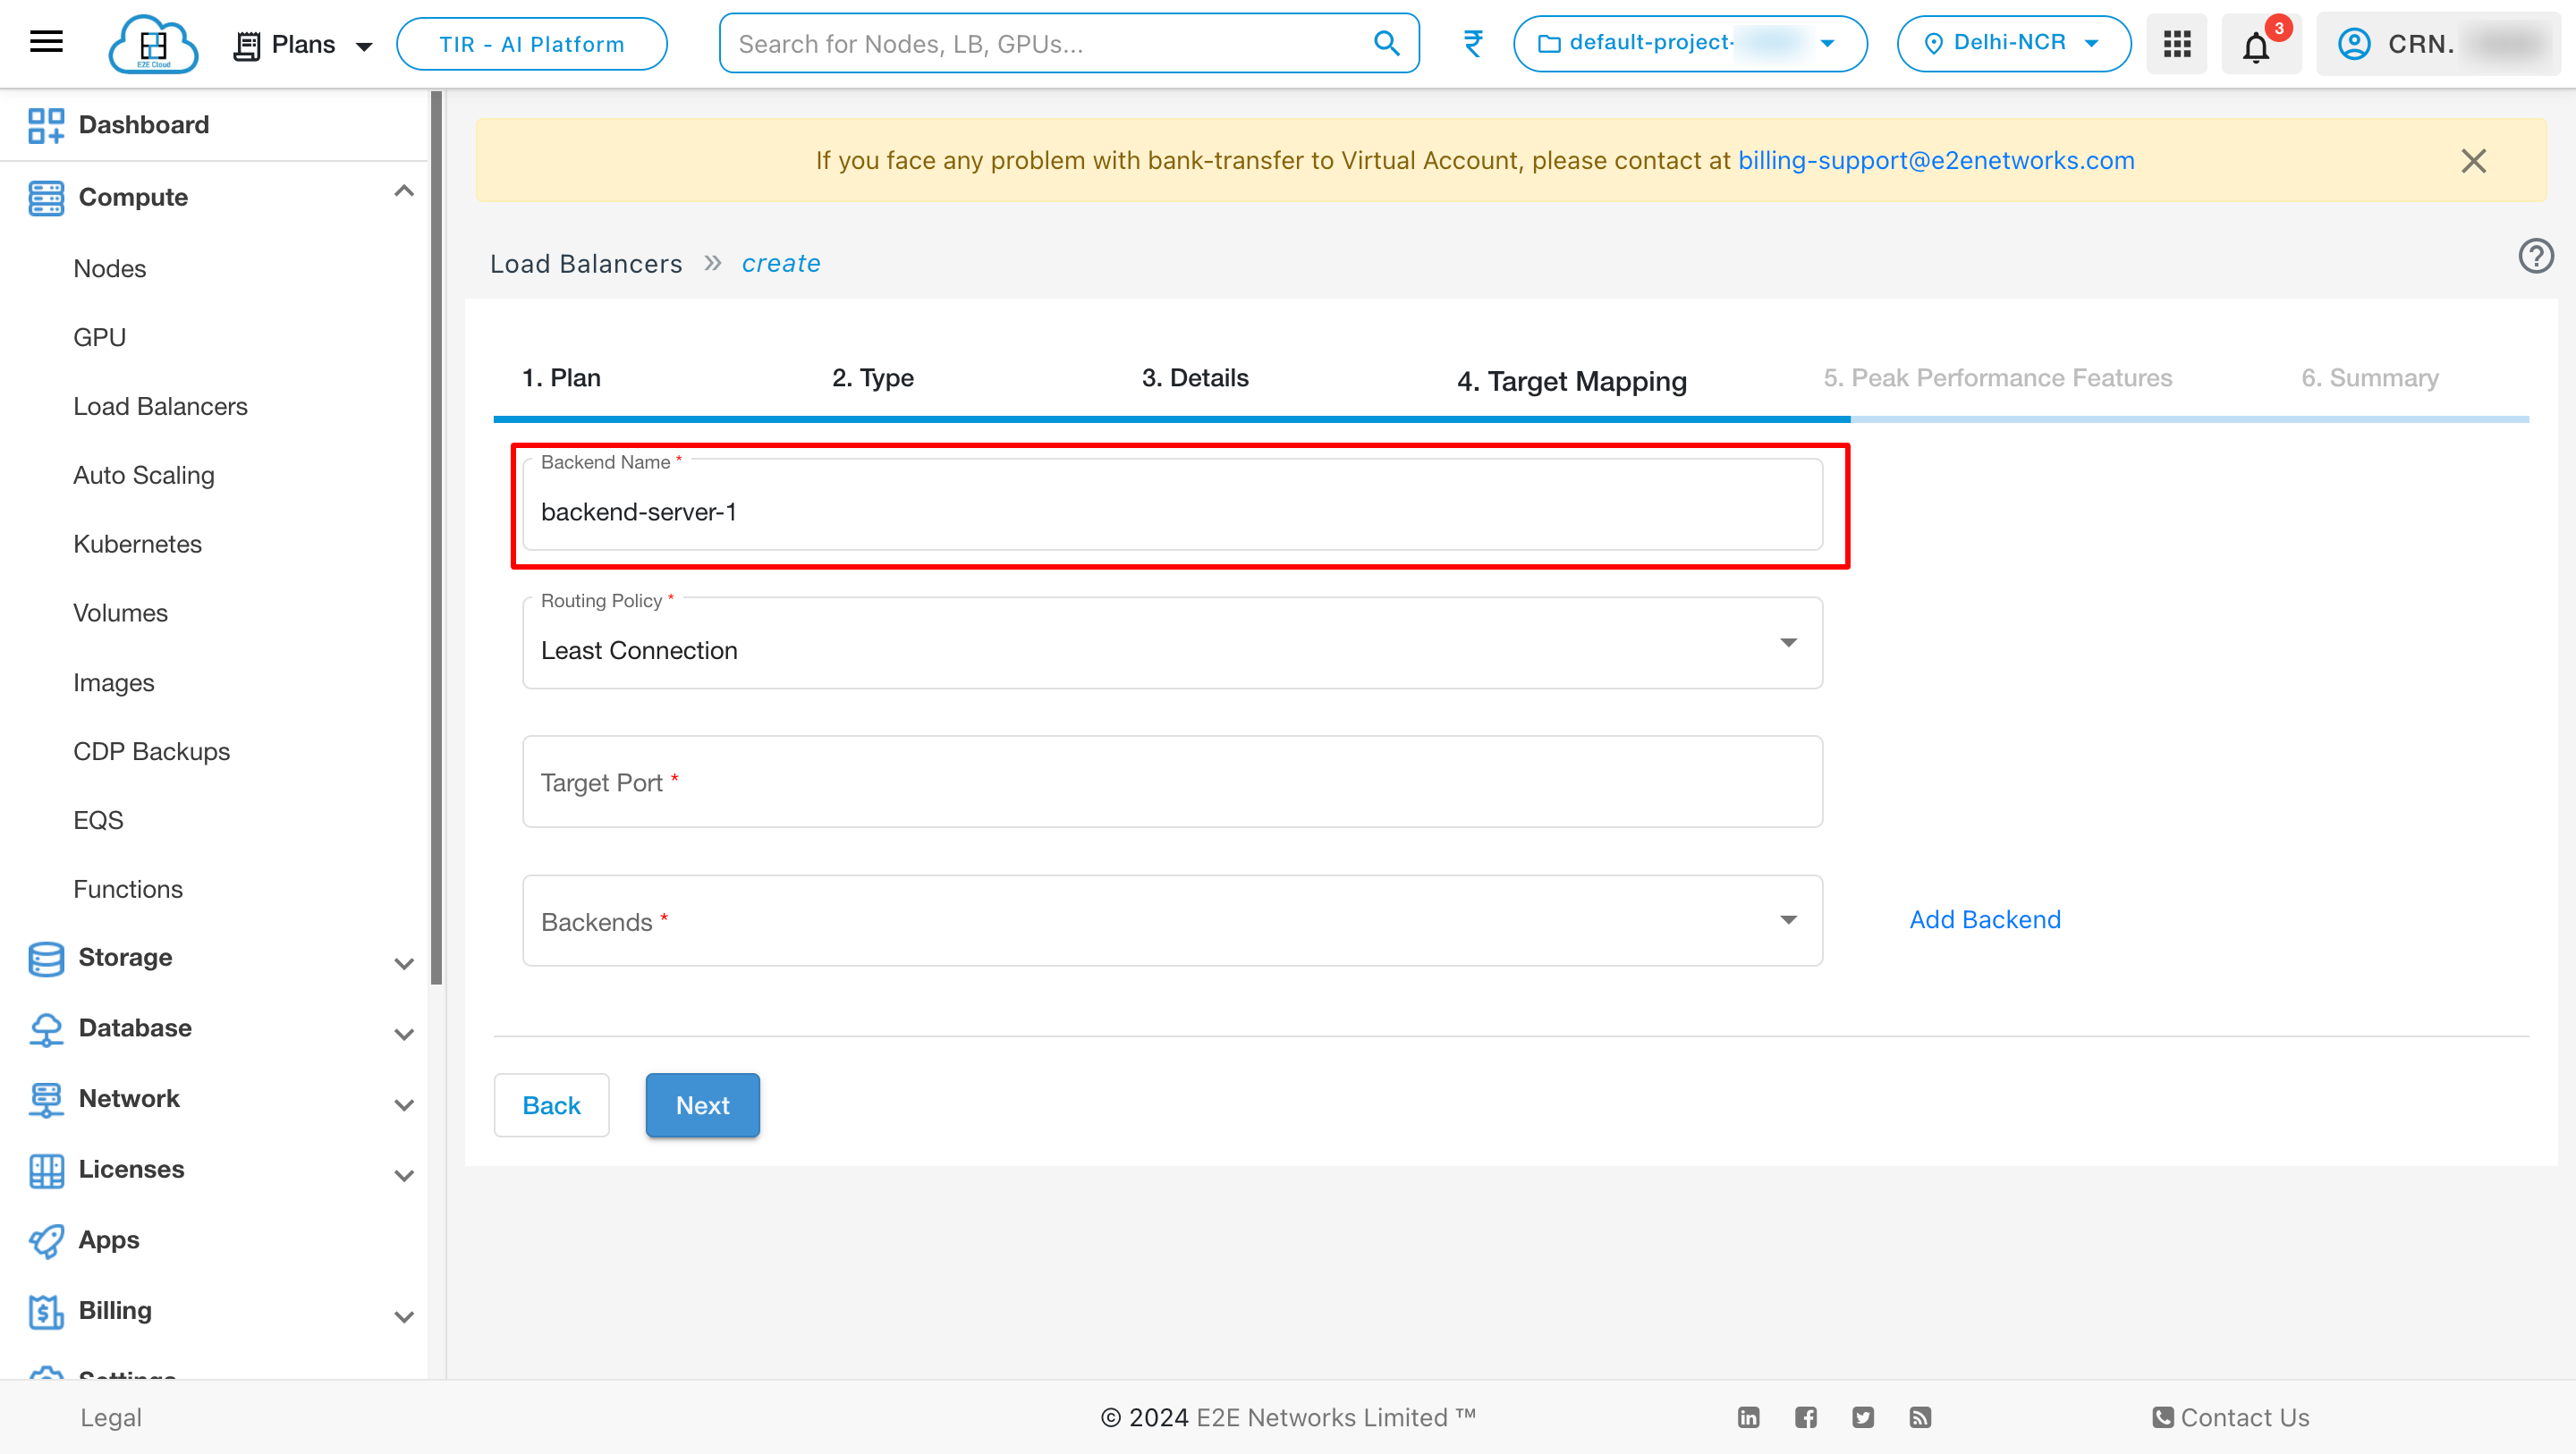
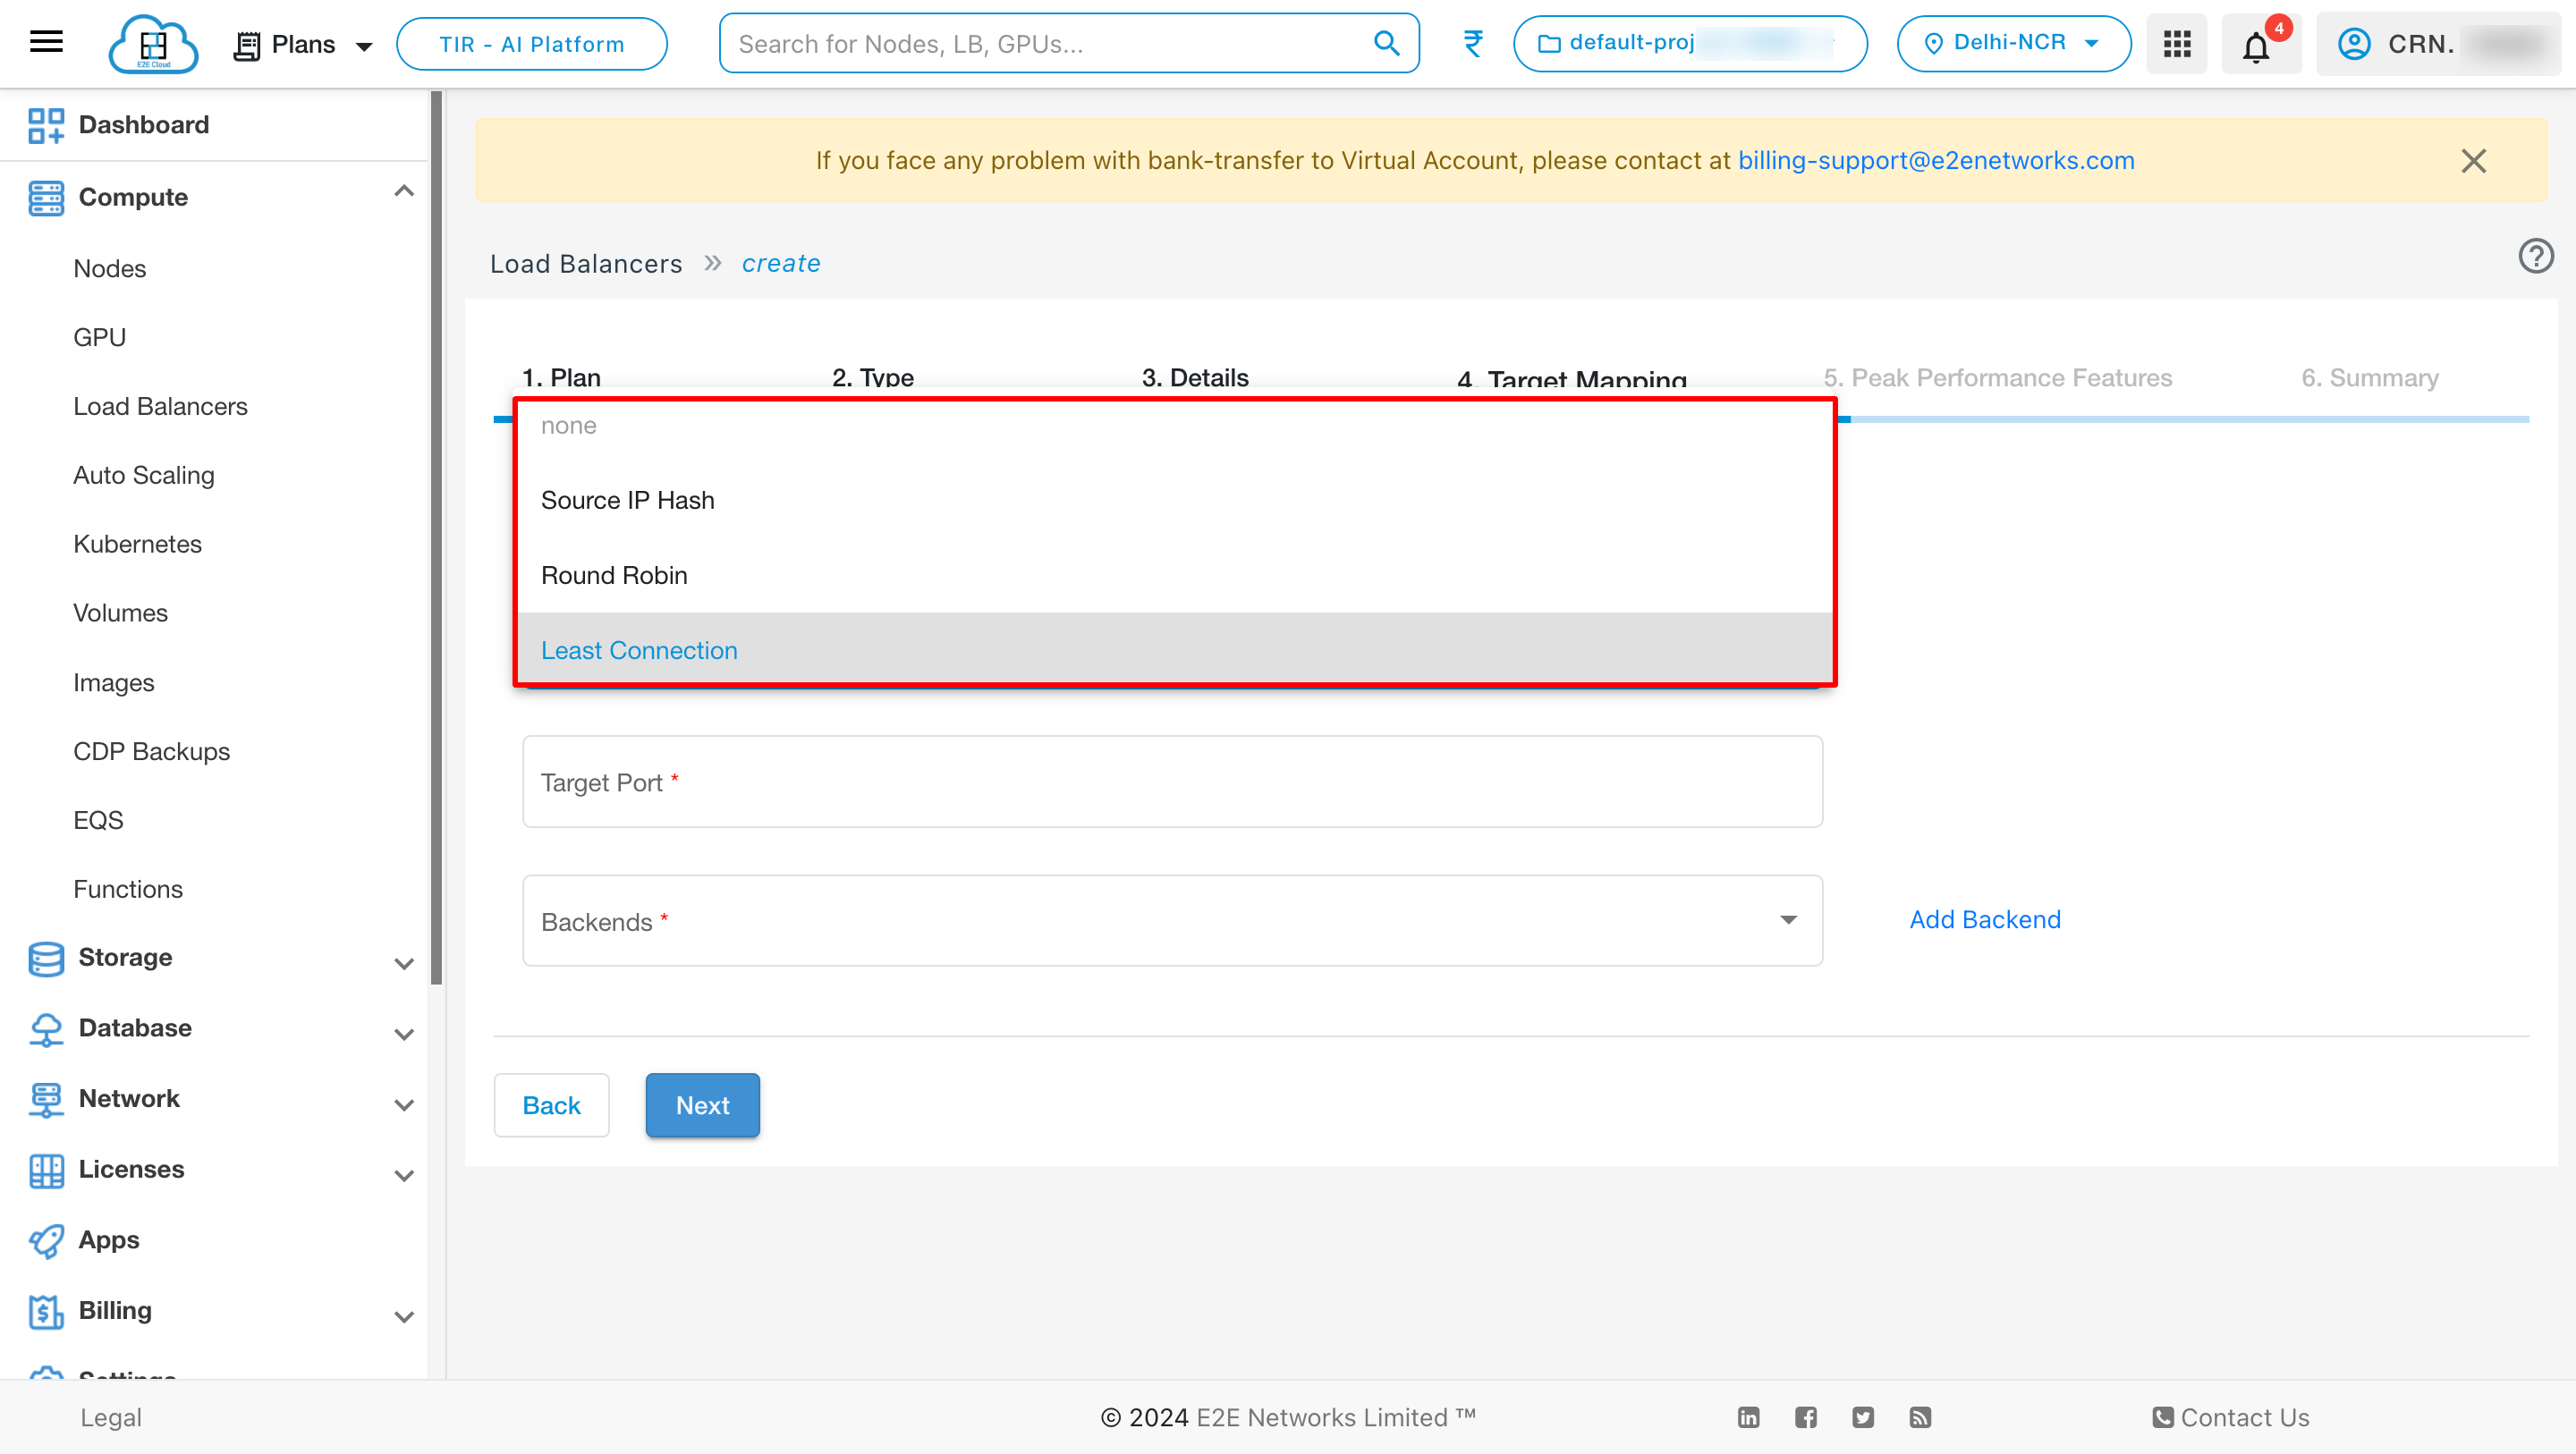
Routing Policy
Choose Balancing Policy - Different load balancing policy algorithms provide different benefits; the choice of load balancing method depends on your needs. Please select the balancing method either “Source IP Hash” or “Round Robin” based on your use case.
Round Robin Method : This method selects the backend servers in turns distributing the connection requests evenly among them.
Source IP Hash : This method selects which backend server to use based on a hash of the source IP, i.e. a user’s IP address, ensuring that a user will connect to the same backend server.
Least Connection : The term “least connection” in the context of load balancers refers to a specific load balancing algorithm used to distribute incoming traffic among available servers. Here’s how it works:
How Least Connection works :
1. The load balancer keeps track of the number of active connections to each server in its pool.
2. When a new connection request arrives, the load balancer selects the server with the least number of active connections at that moment.
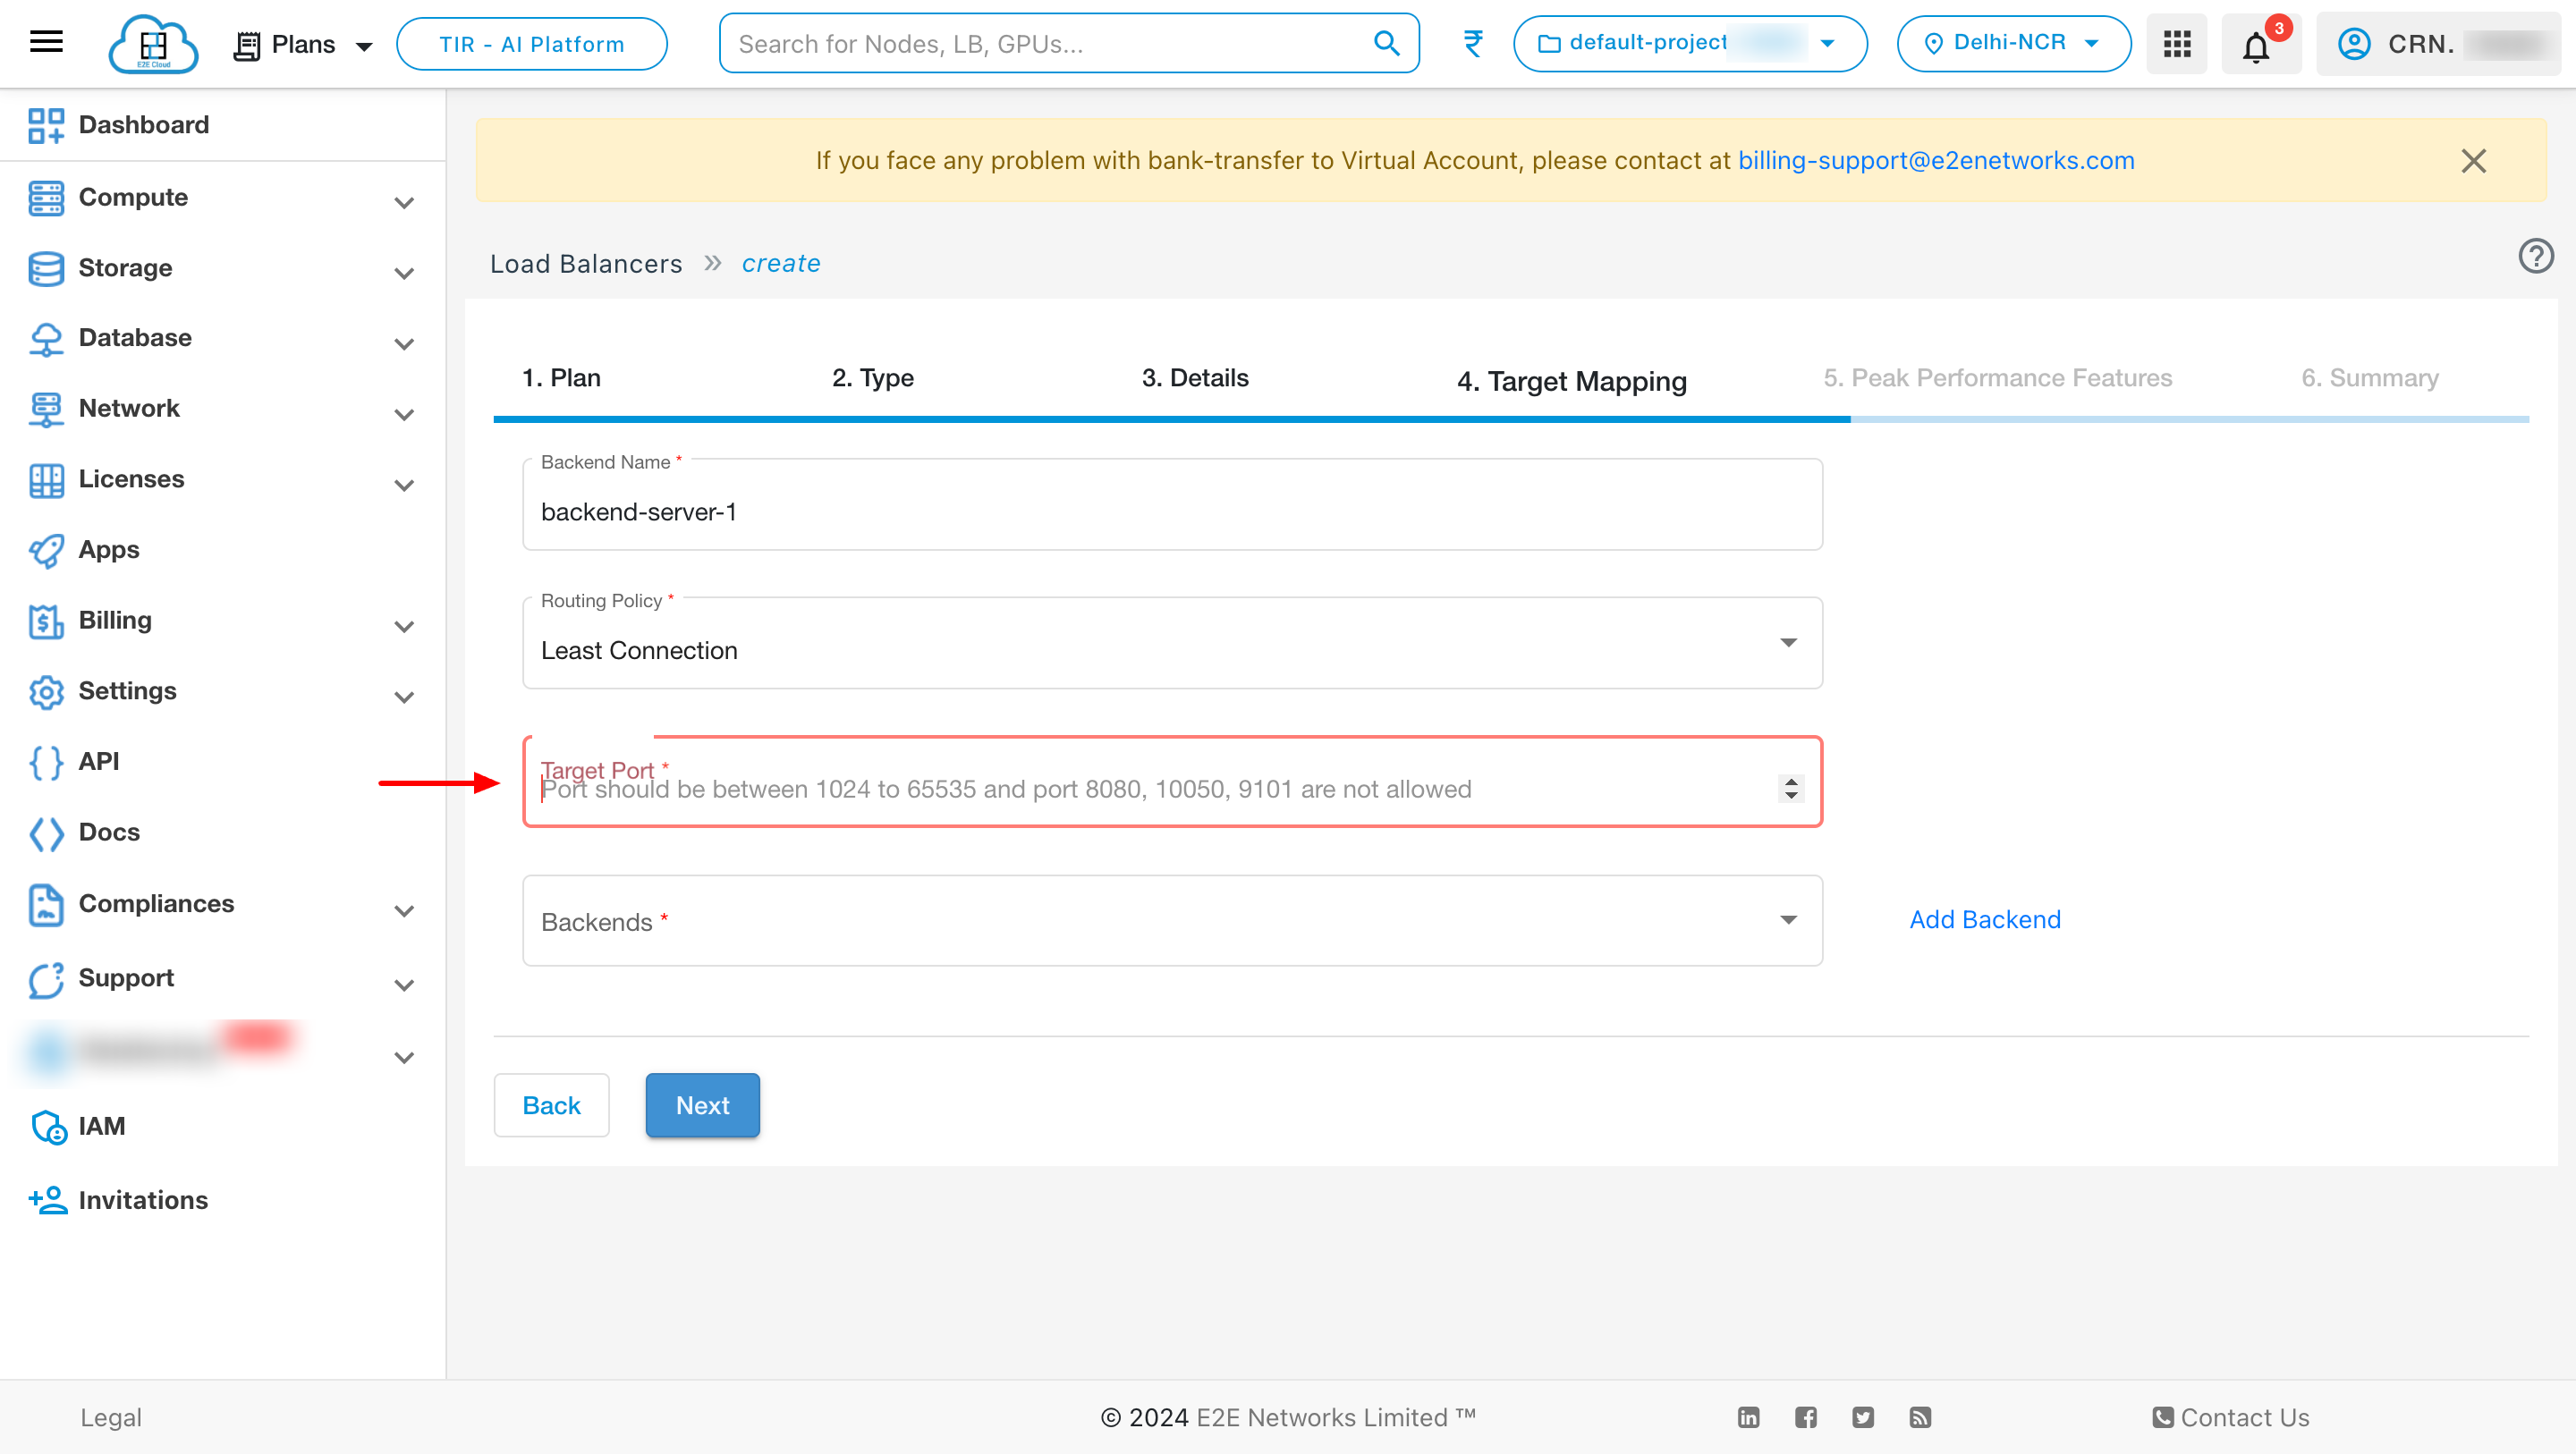
Port
For an NLB port should be between 1024 to 65535 and port 8080 ,10050,9101 are not allowed, and for ALB target port is not required.
Backends
Backend is a mandatory field to create a load balancer.
Add Backend
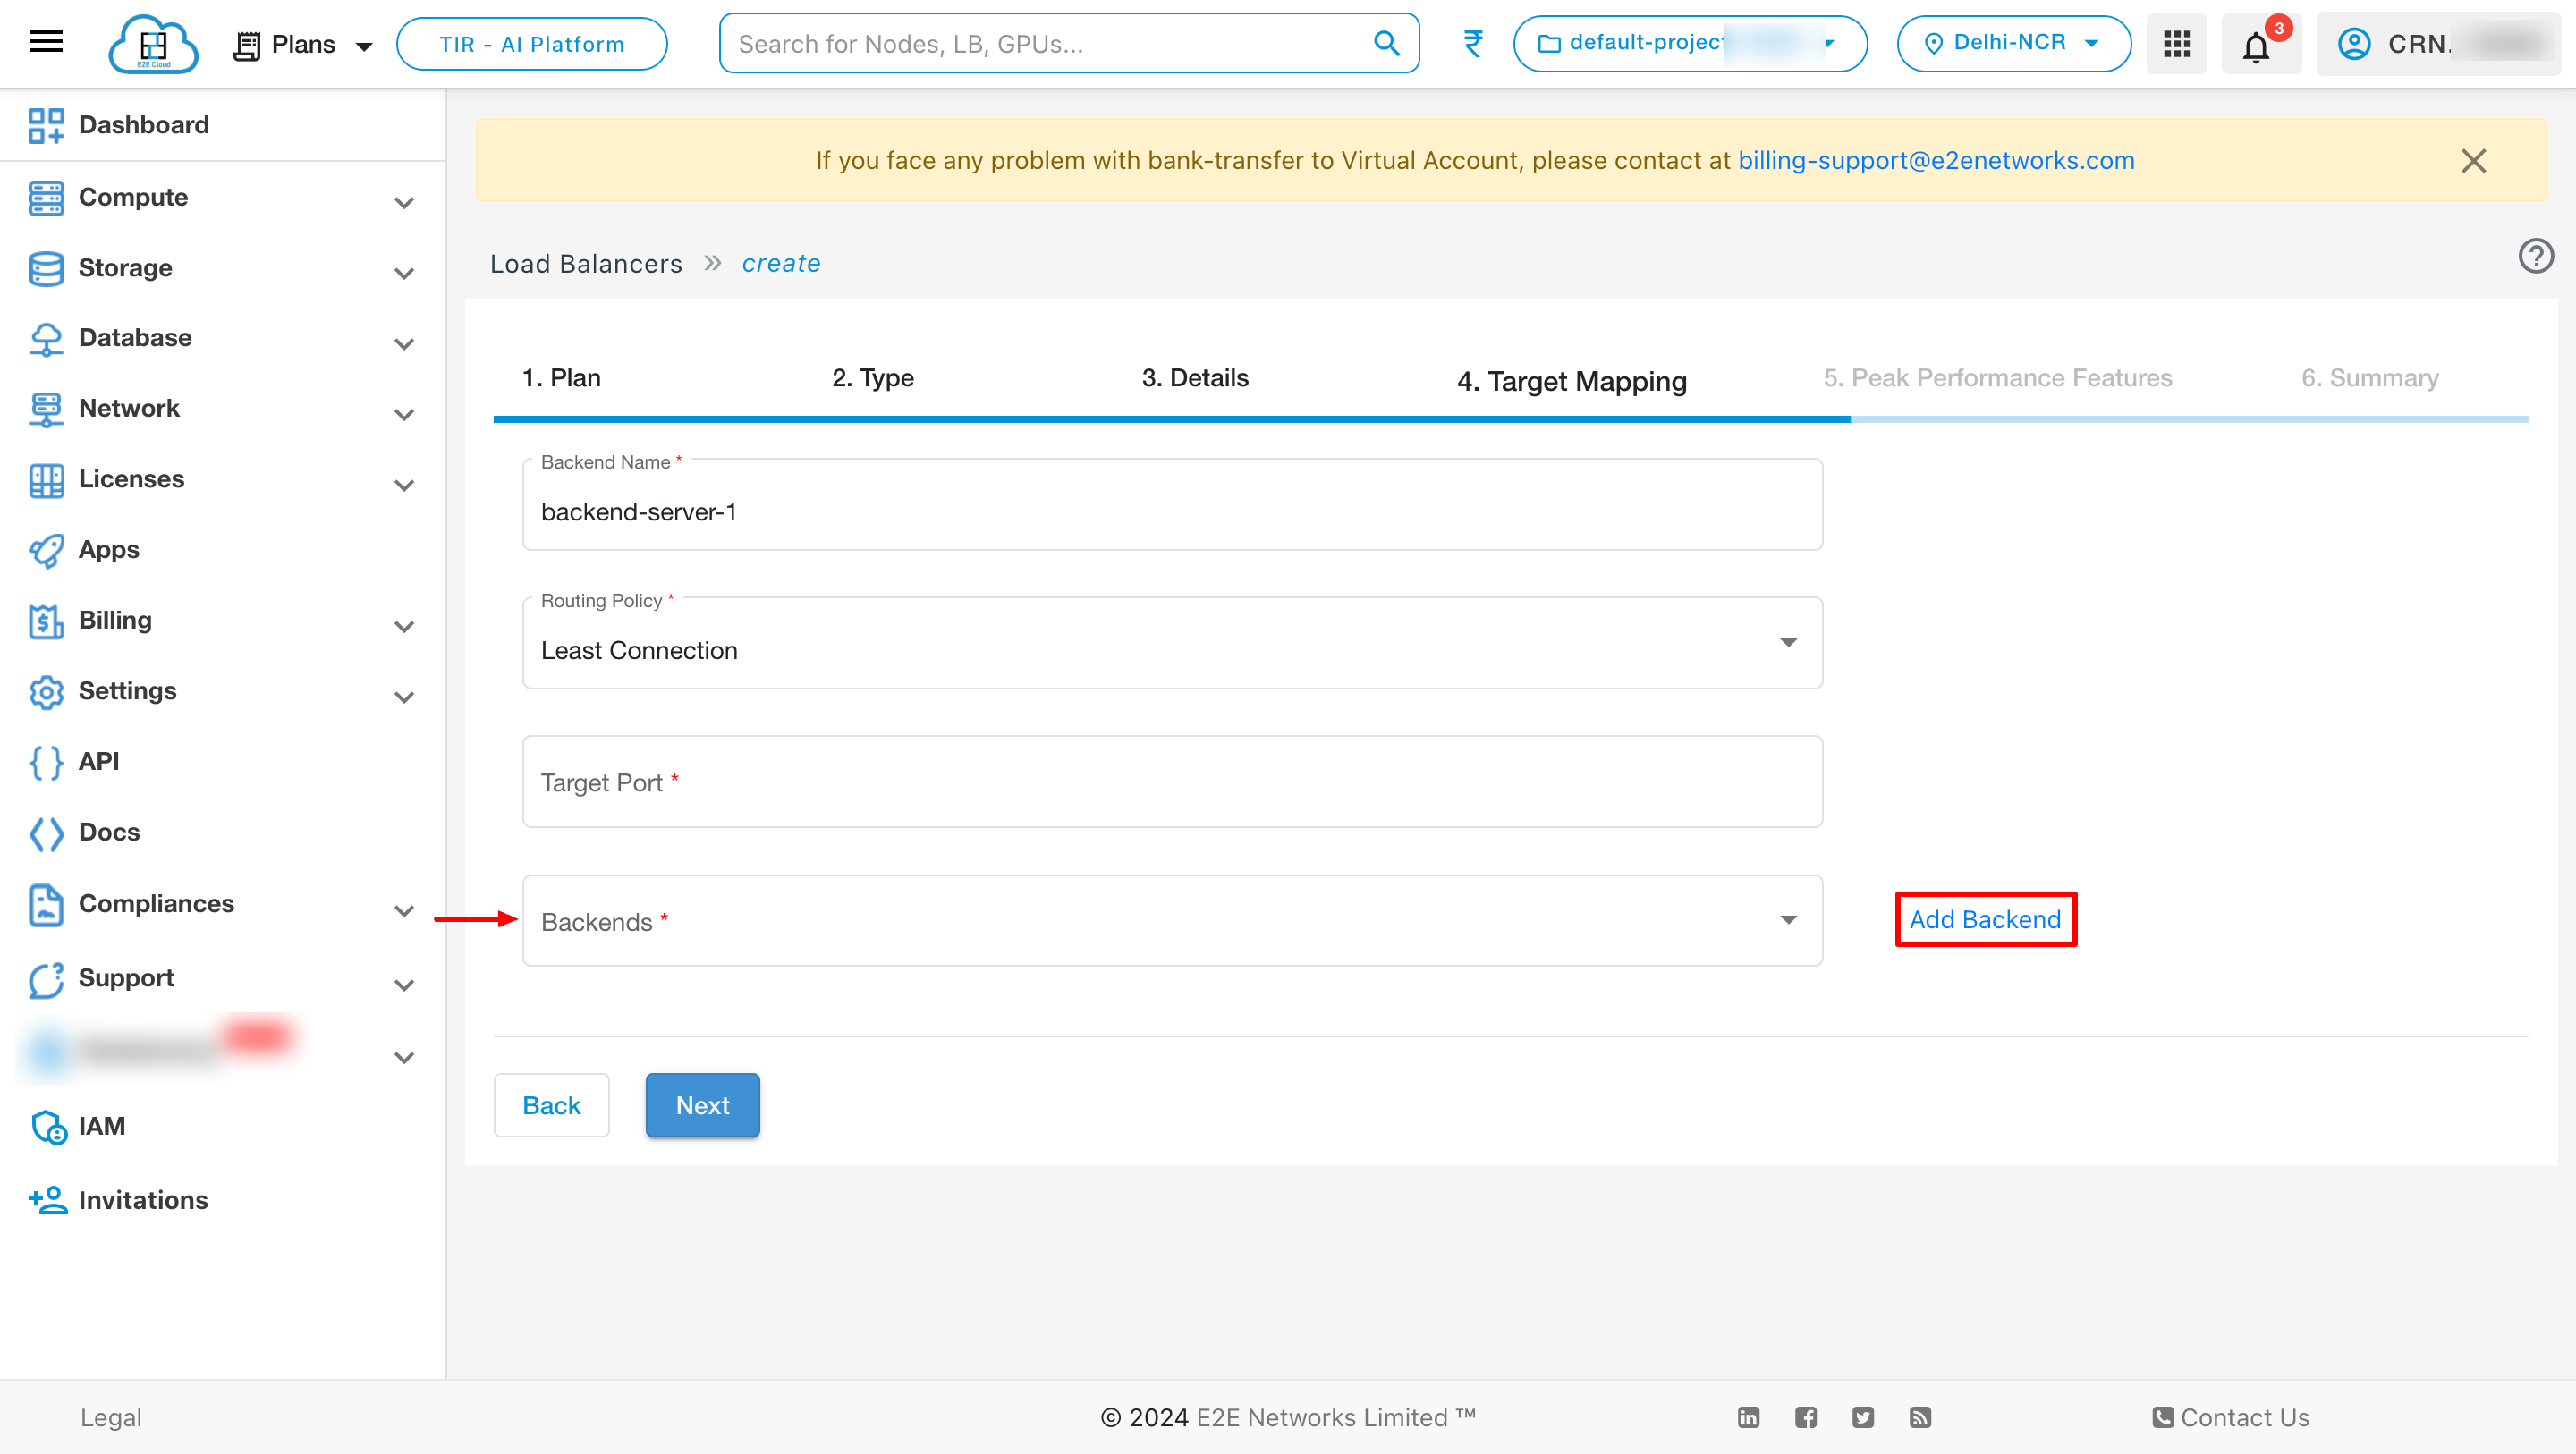
You can add backend by clicking Add Backend button
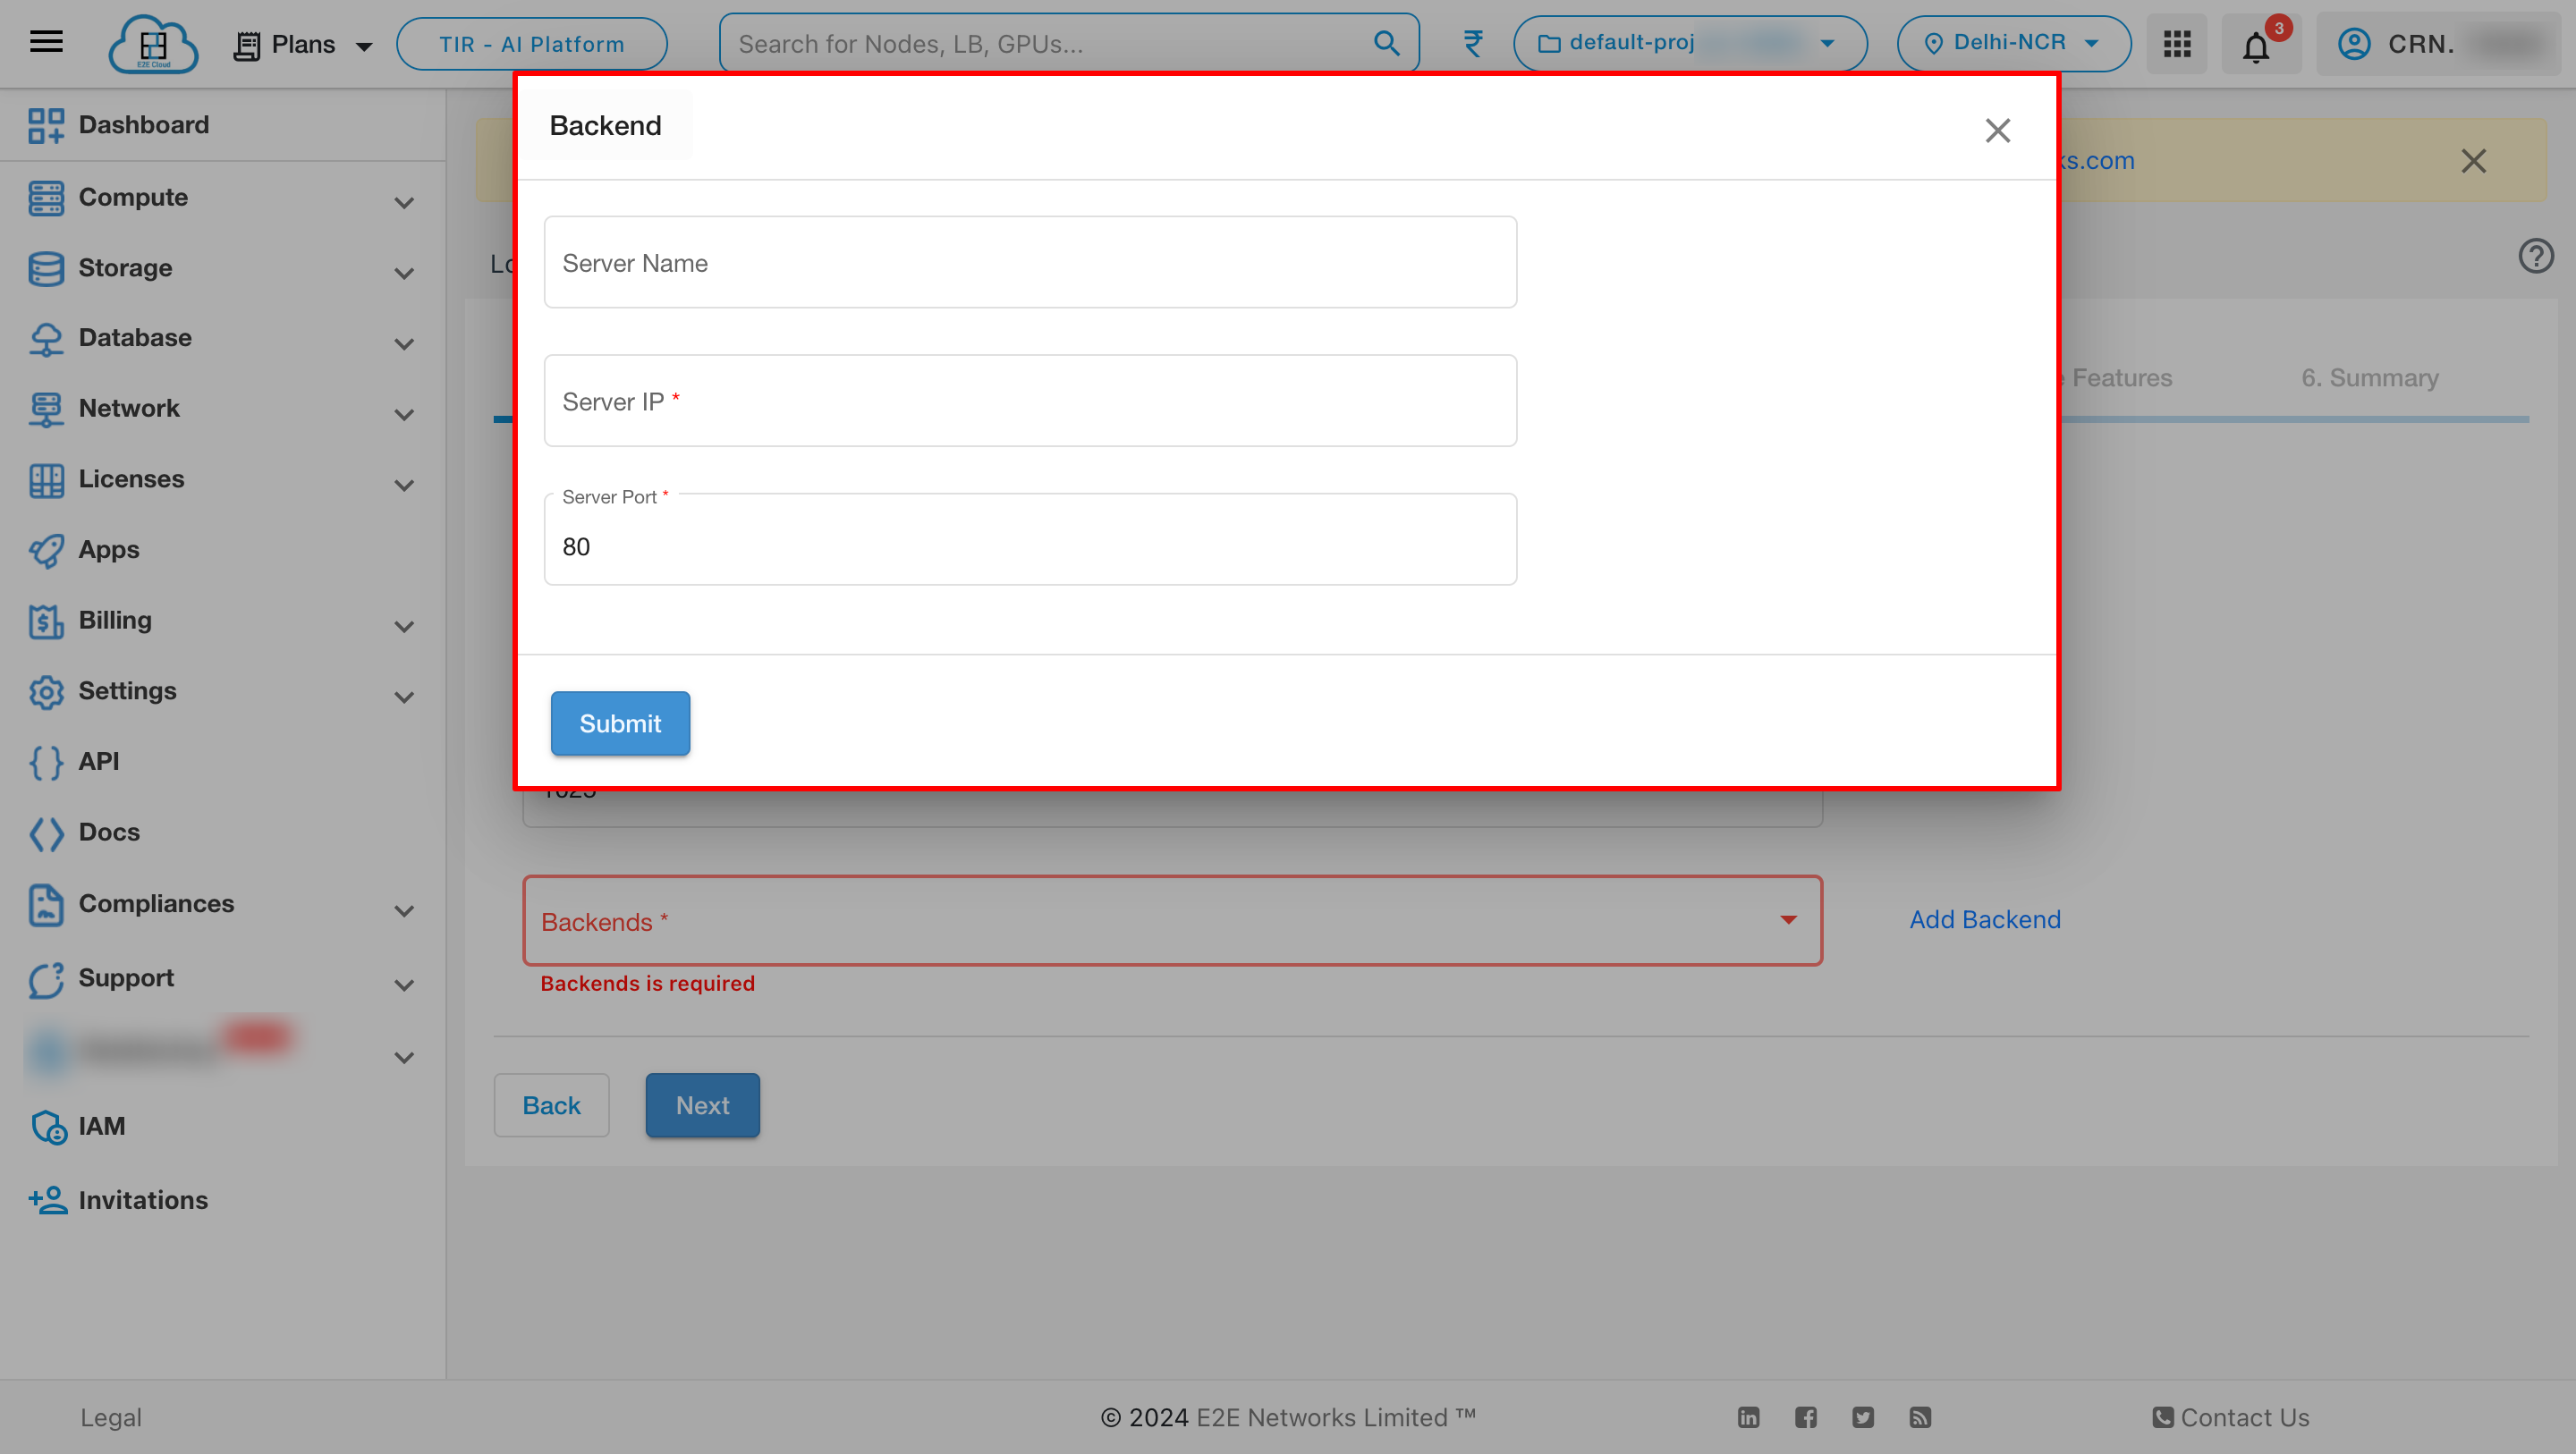
you can see the list of backend by clicking the dropdown.

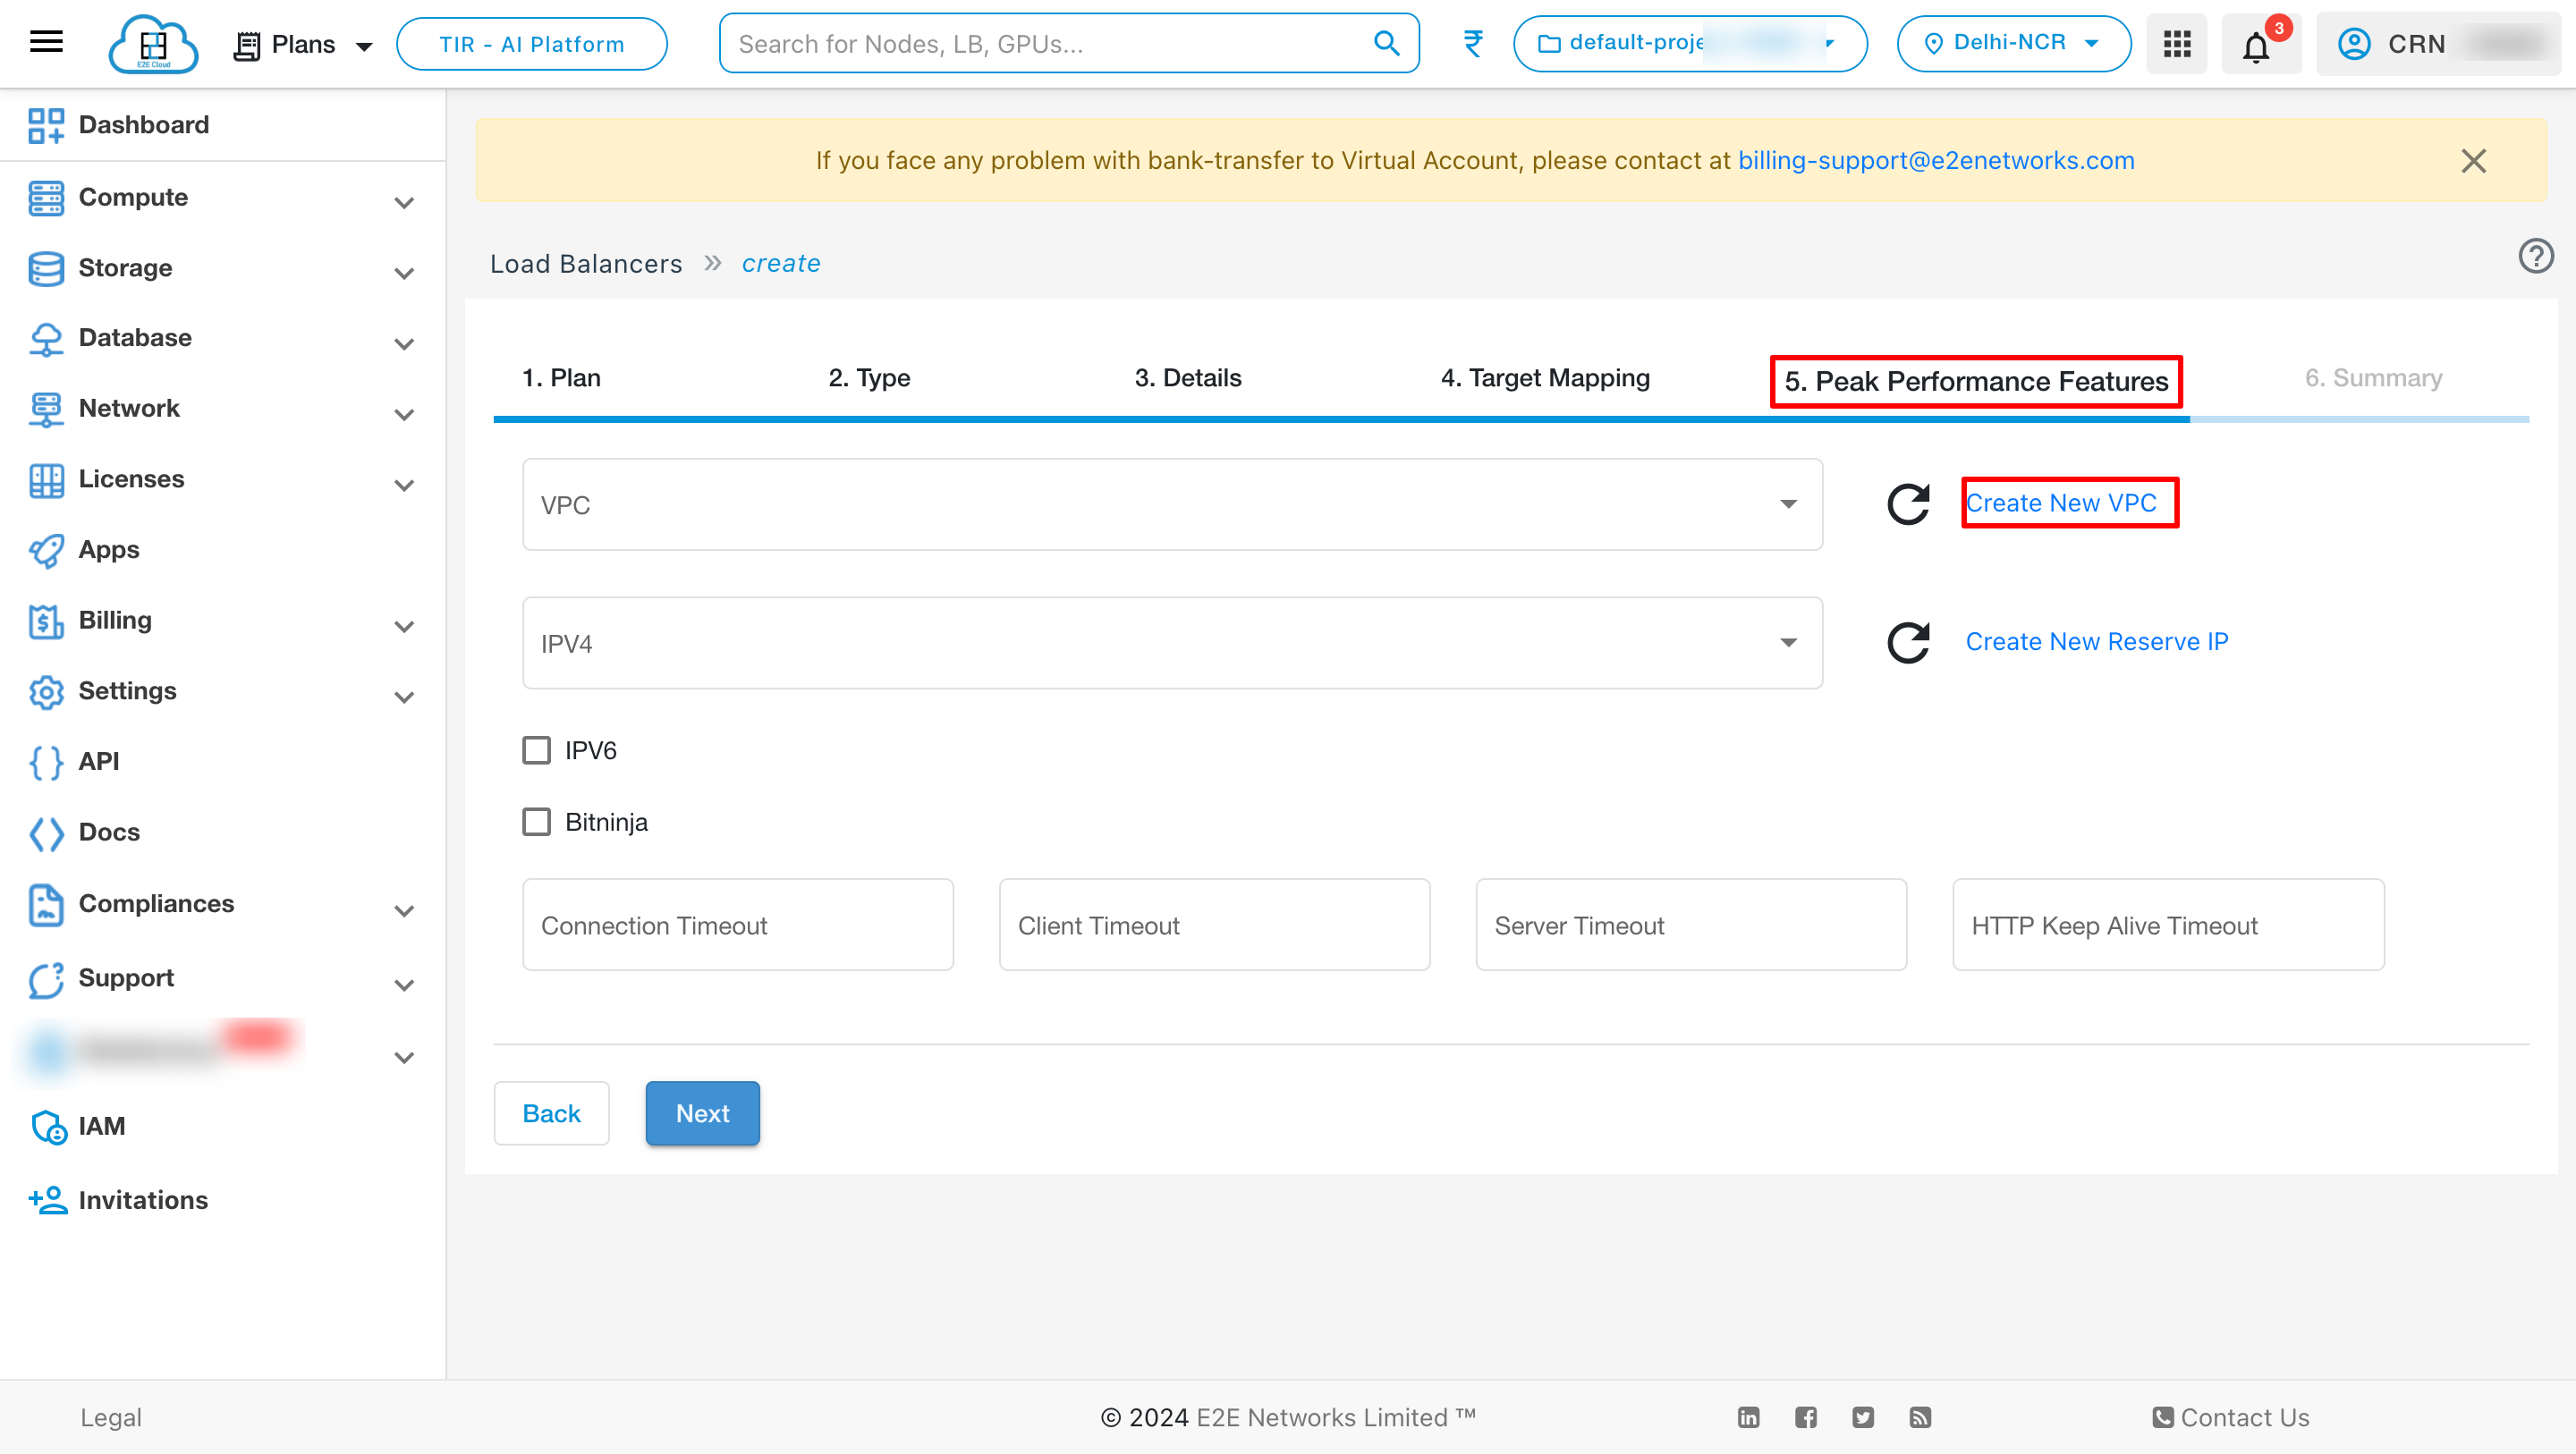
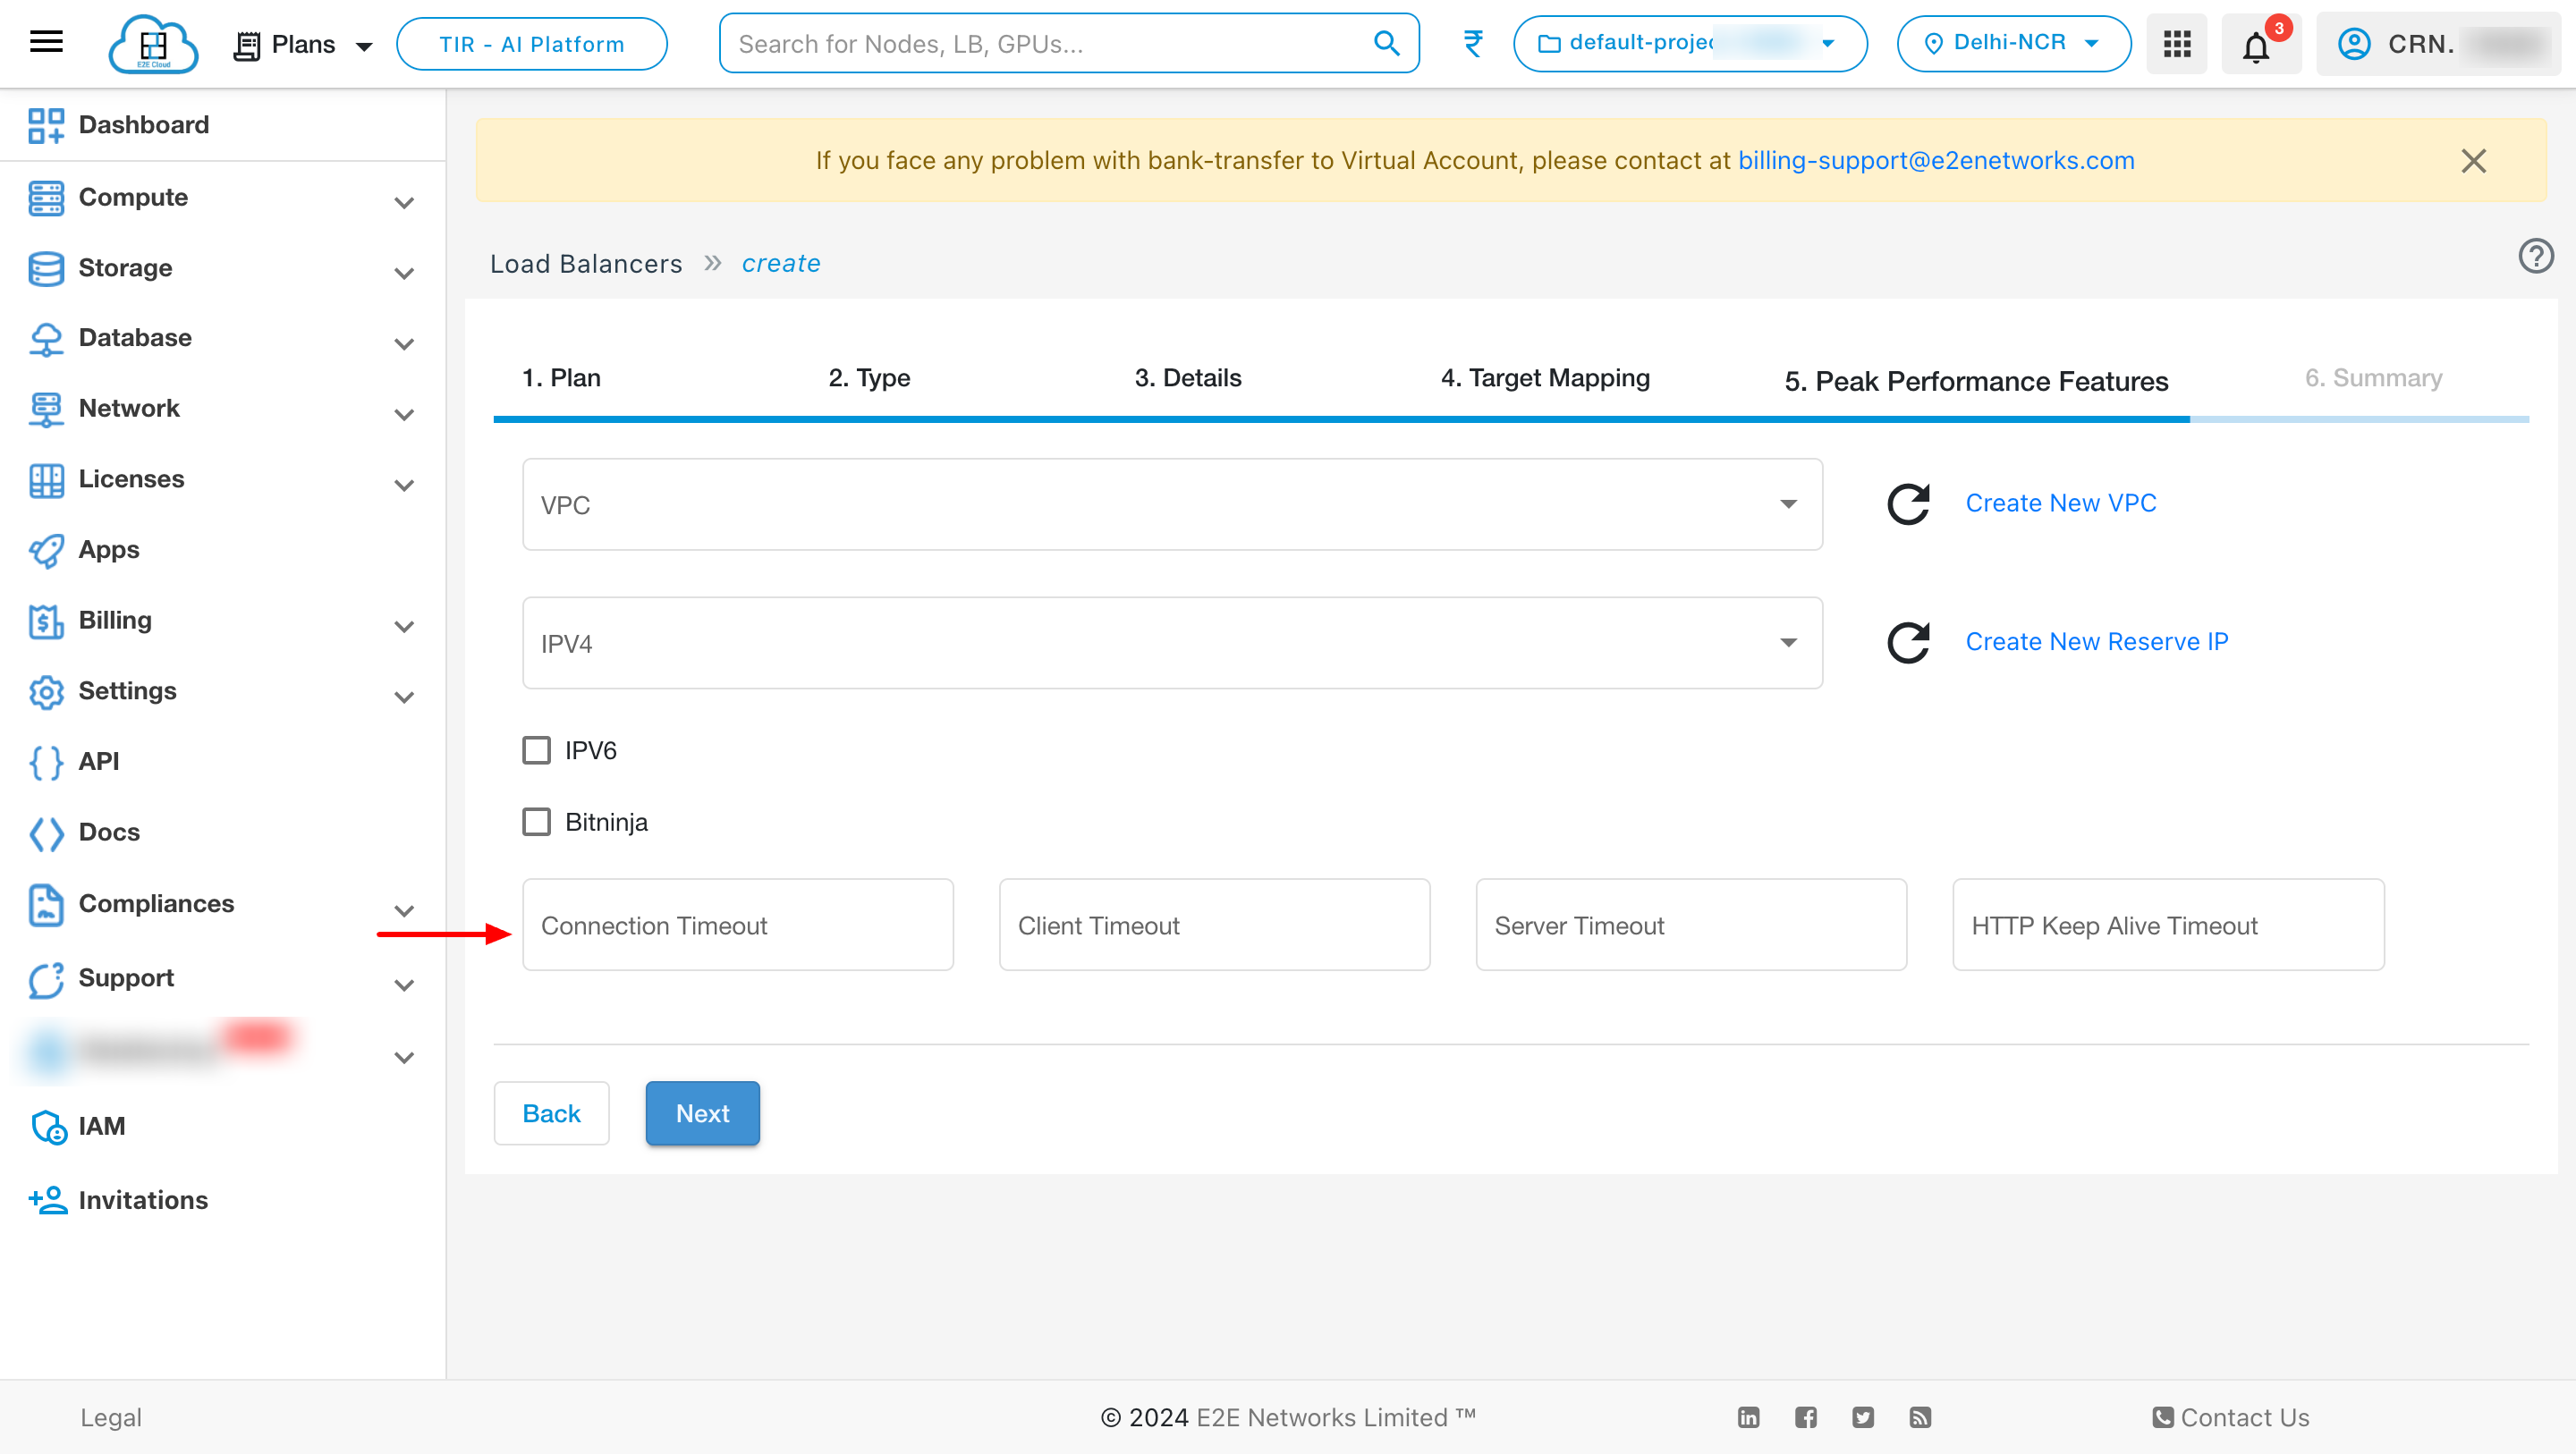
Peak Performance Features
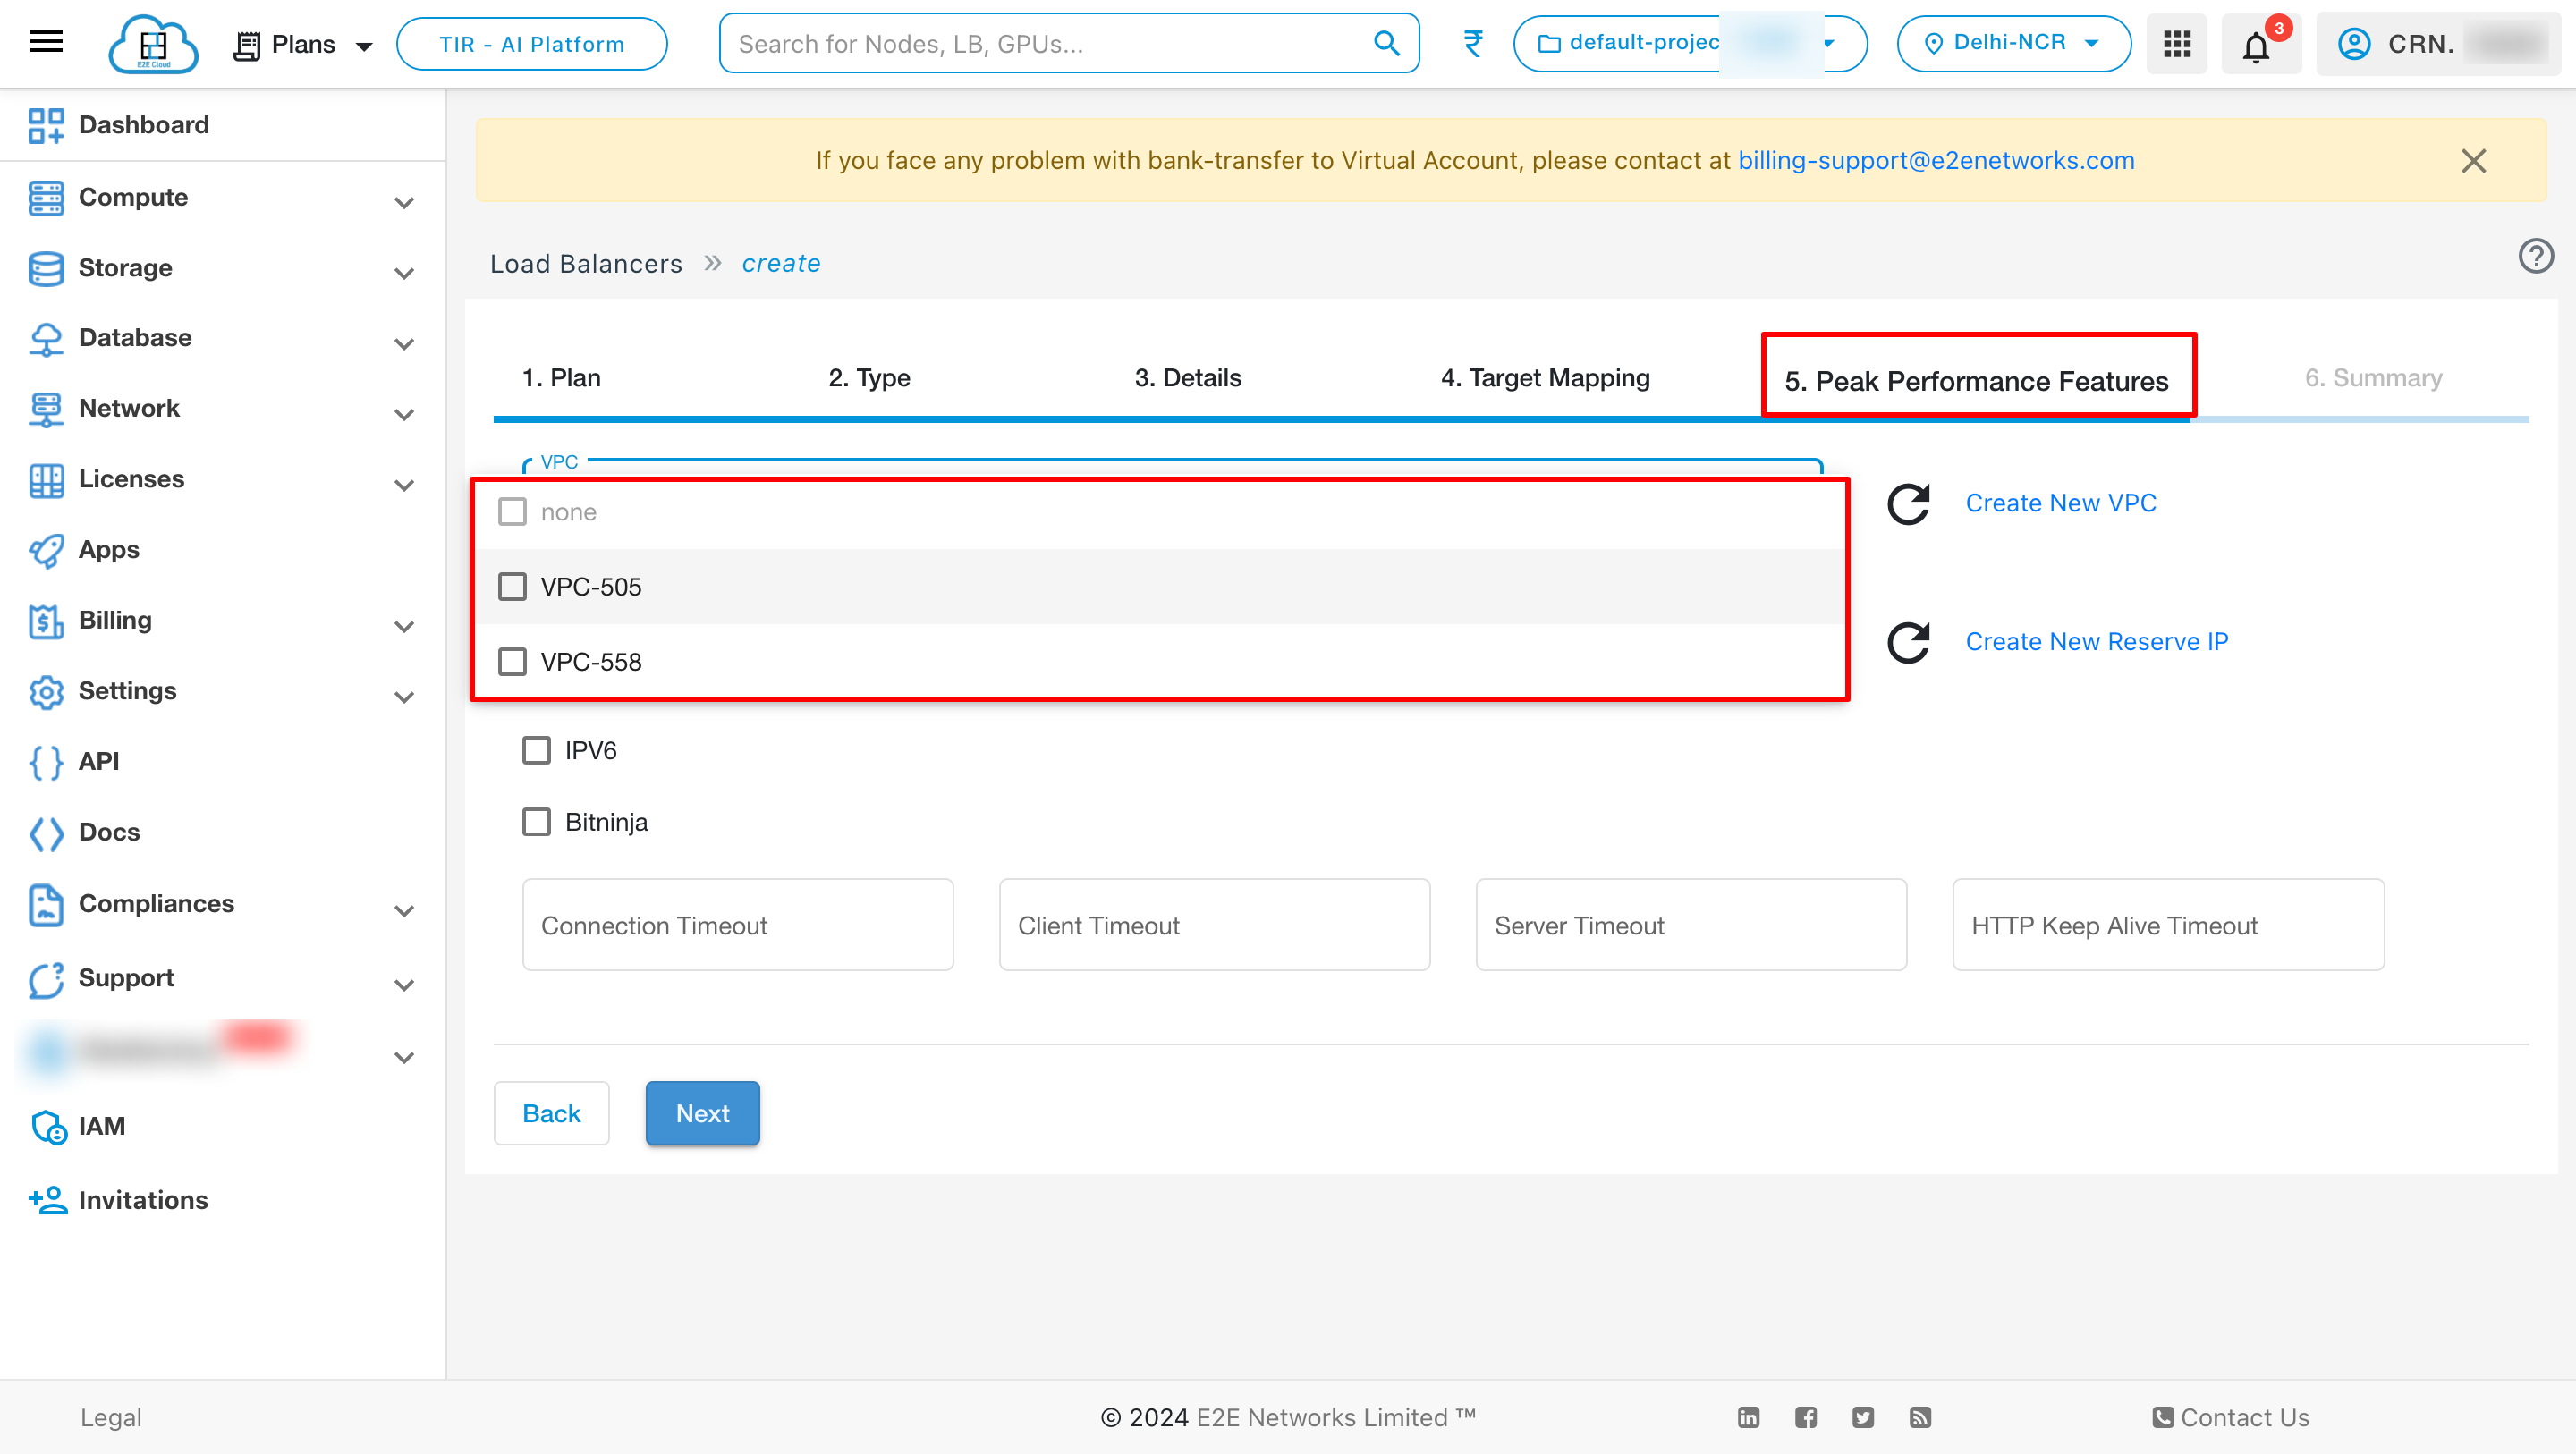
Create New VPC -
Enable this option to use a VPC IP as default VPC IP for your load balancer to connect your LoadBlancer internally.
After creation of VPC you can see the created VPC on dropdown list.
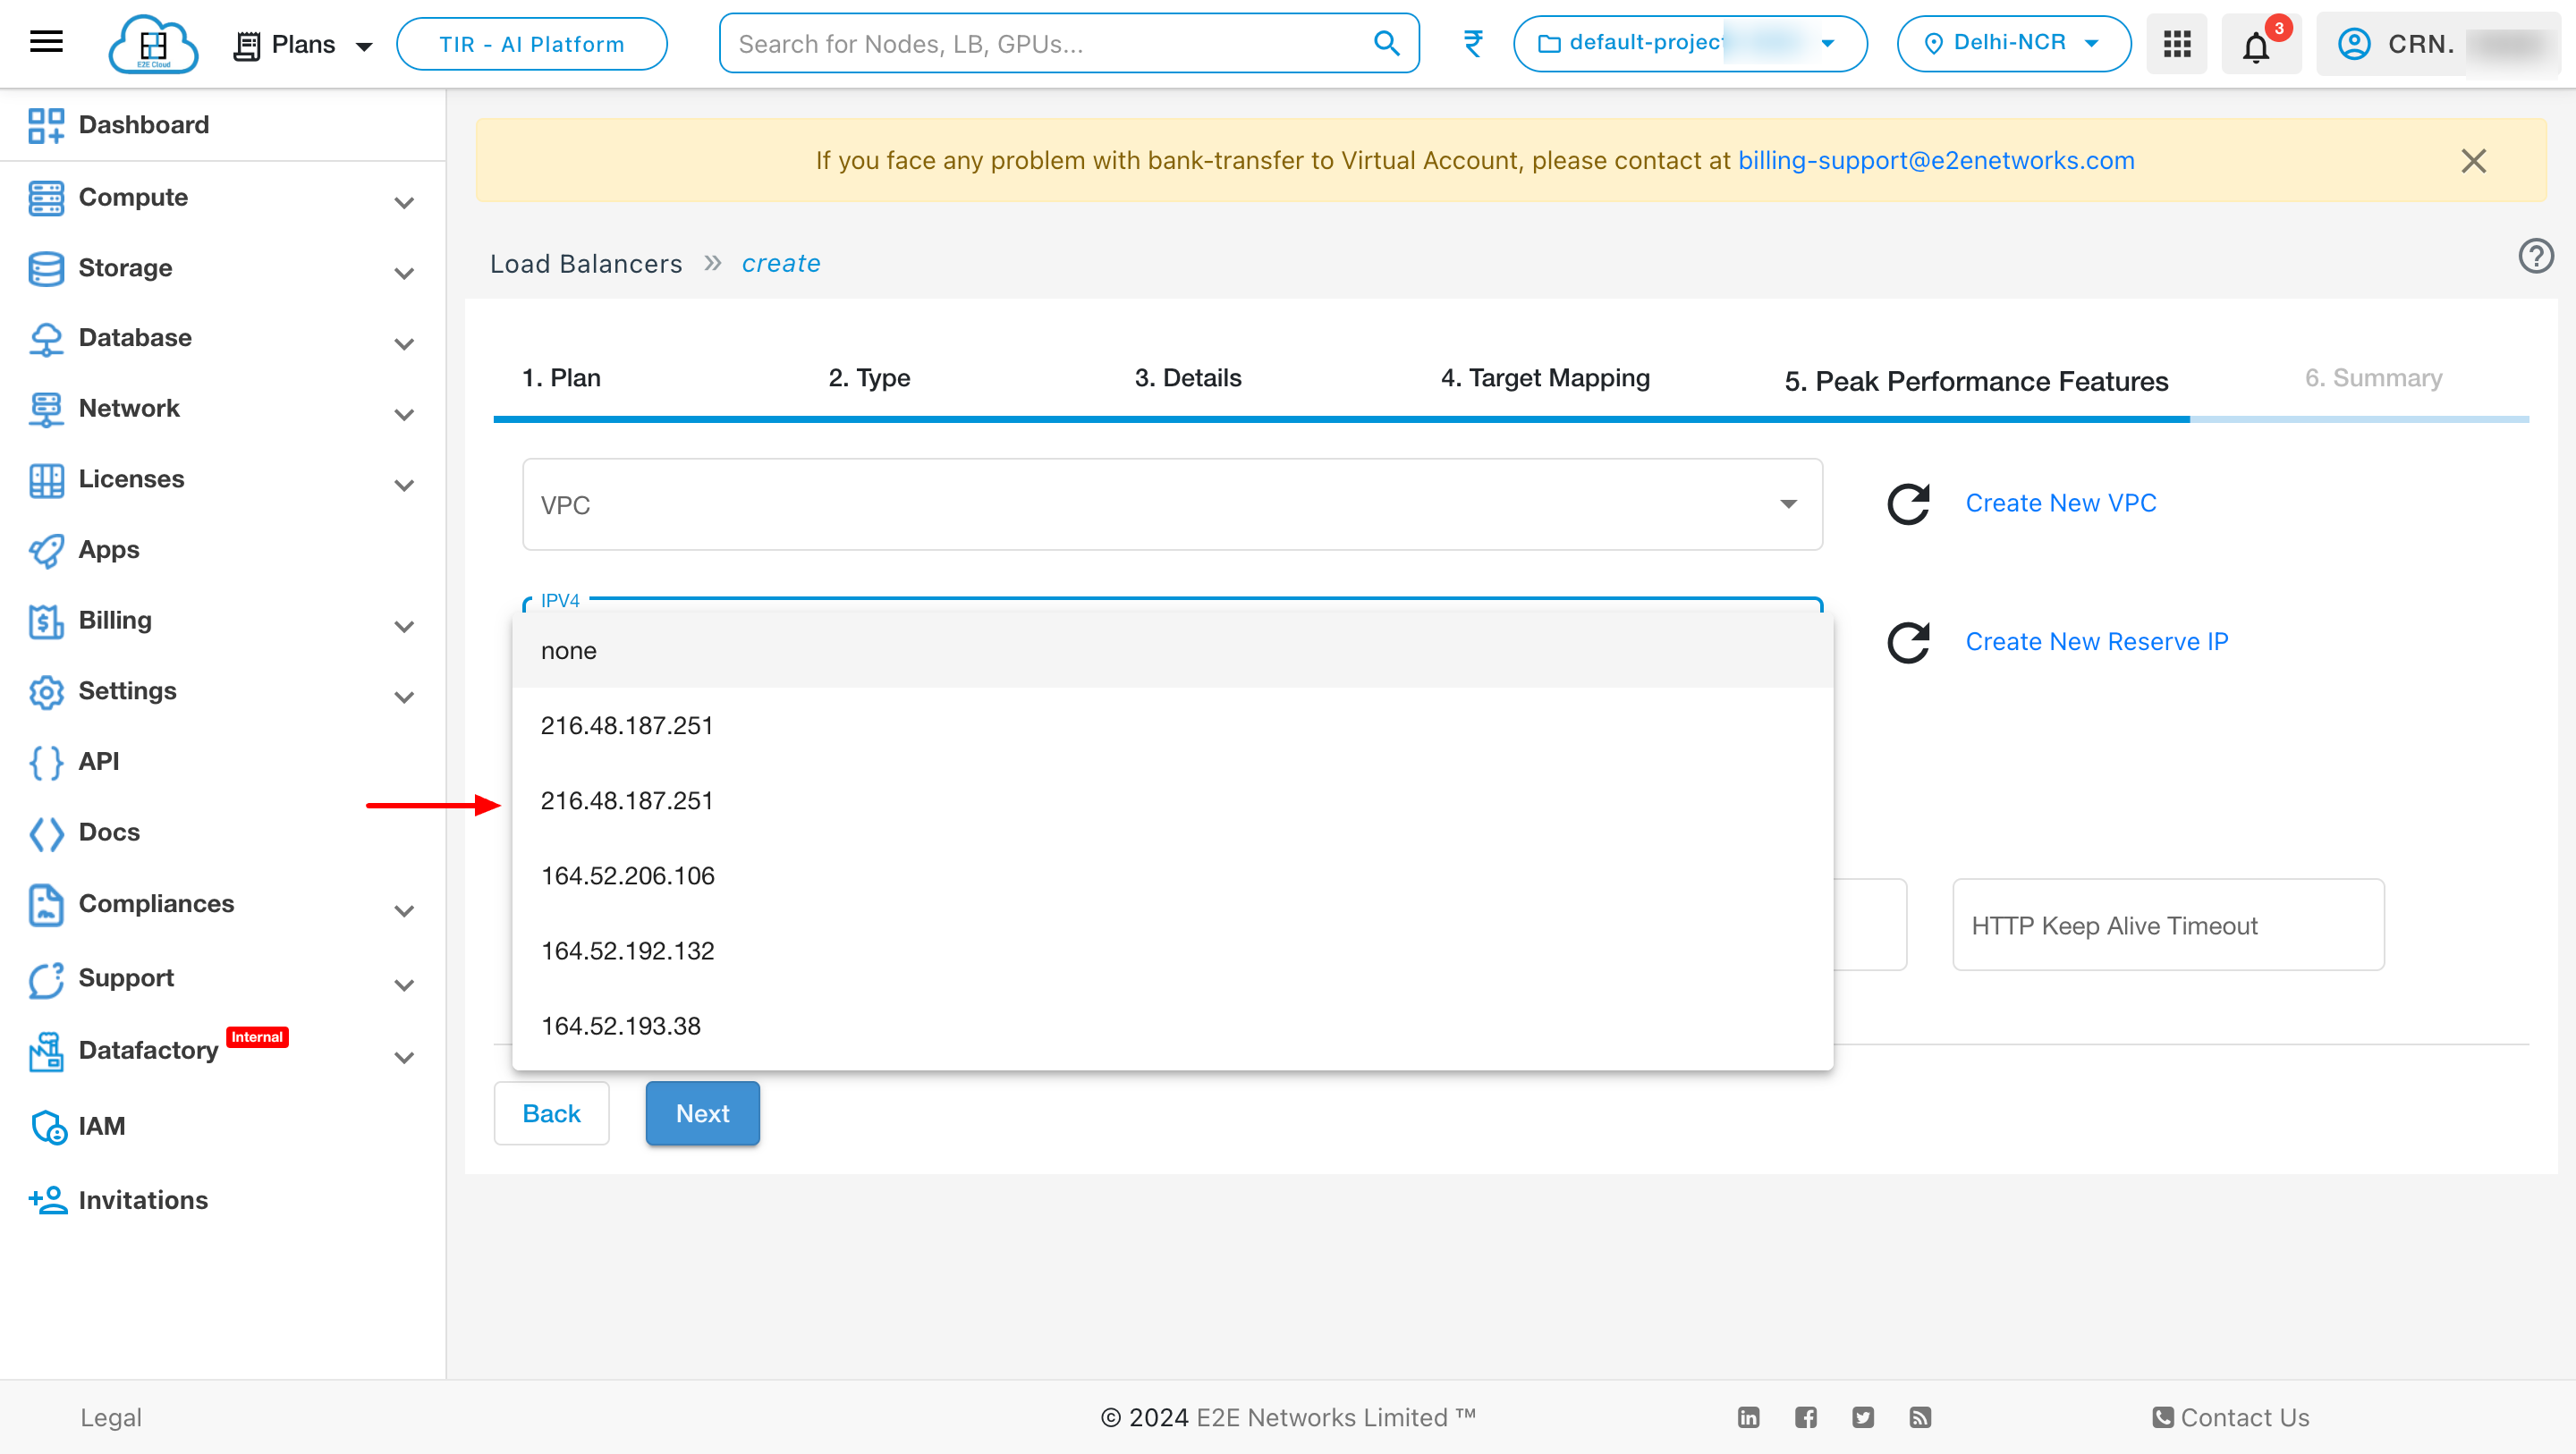
Add New Reserve IP -
Enable this option to use a reserved IP as default Public IP for your load balancer. For example, you can dynamically update the backend resources of your applications and websites by re-assigning the reserved IP address without a downtime.

After creation of IP you can see the created IP on dropdown list.
BitNinja
BitNinja is an easy-to-use server security tool mixing the most powerful defense mechanisms. Every BitNinja protected load balancer learns from every attack and the system applies this information automatically on all BitNinja enabled servers/ load balancer. This way the shield is getting more and more powerful with every single attack. Learn more
Enable Bitninja - Enable this option to use a bitninja security tool for your load balancer. BitNinja has different modules for different aspects of cyberattacks. It is super easy-to-install, requires virtually no maintenance and able to protect any server by providing immediate protection against a wide range of cyberattacks.
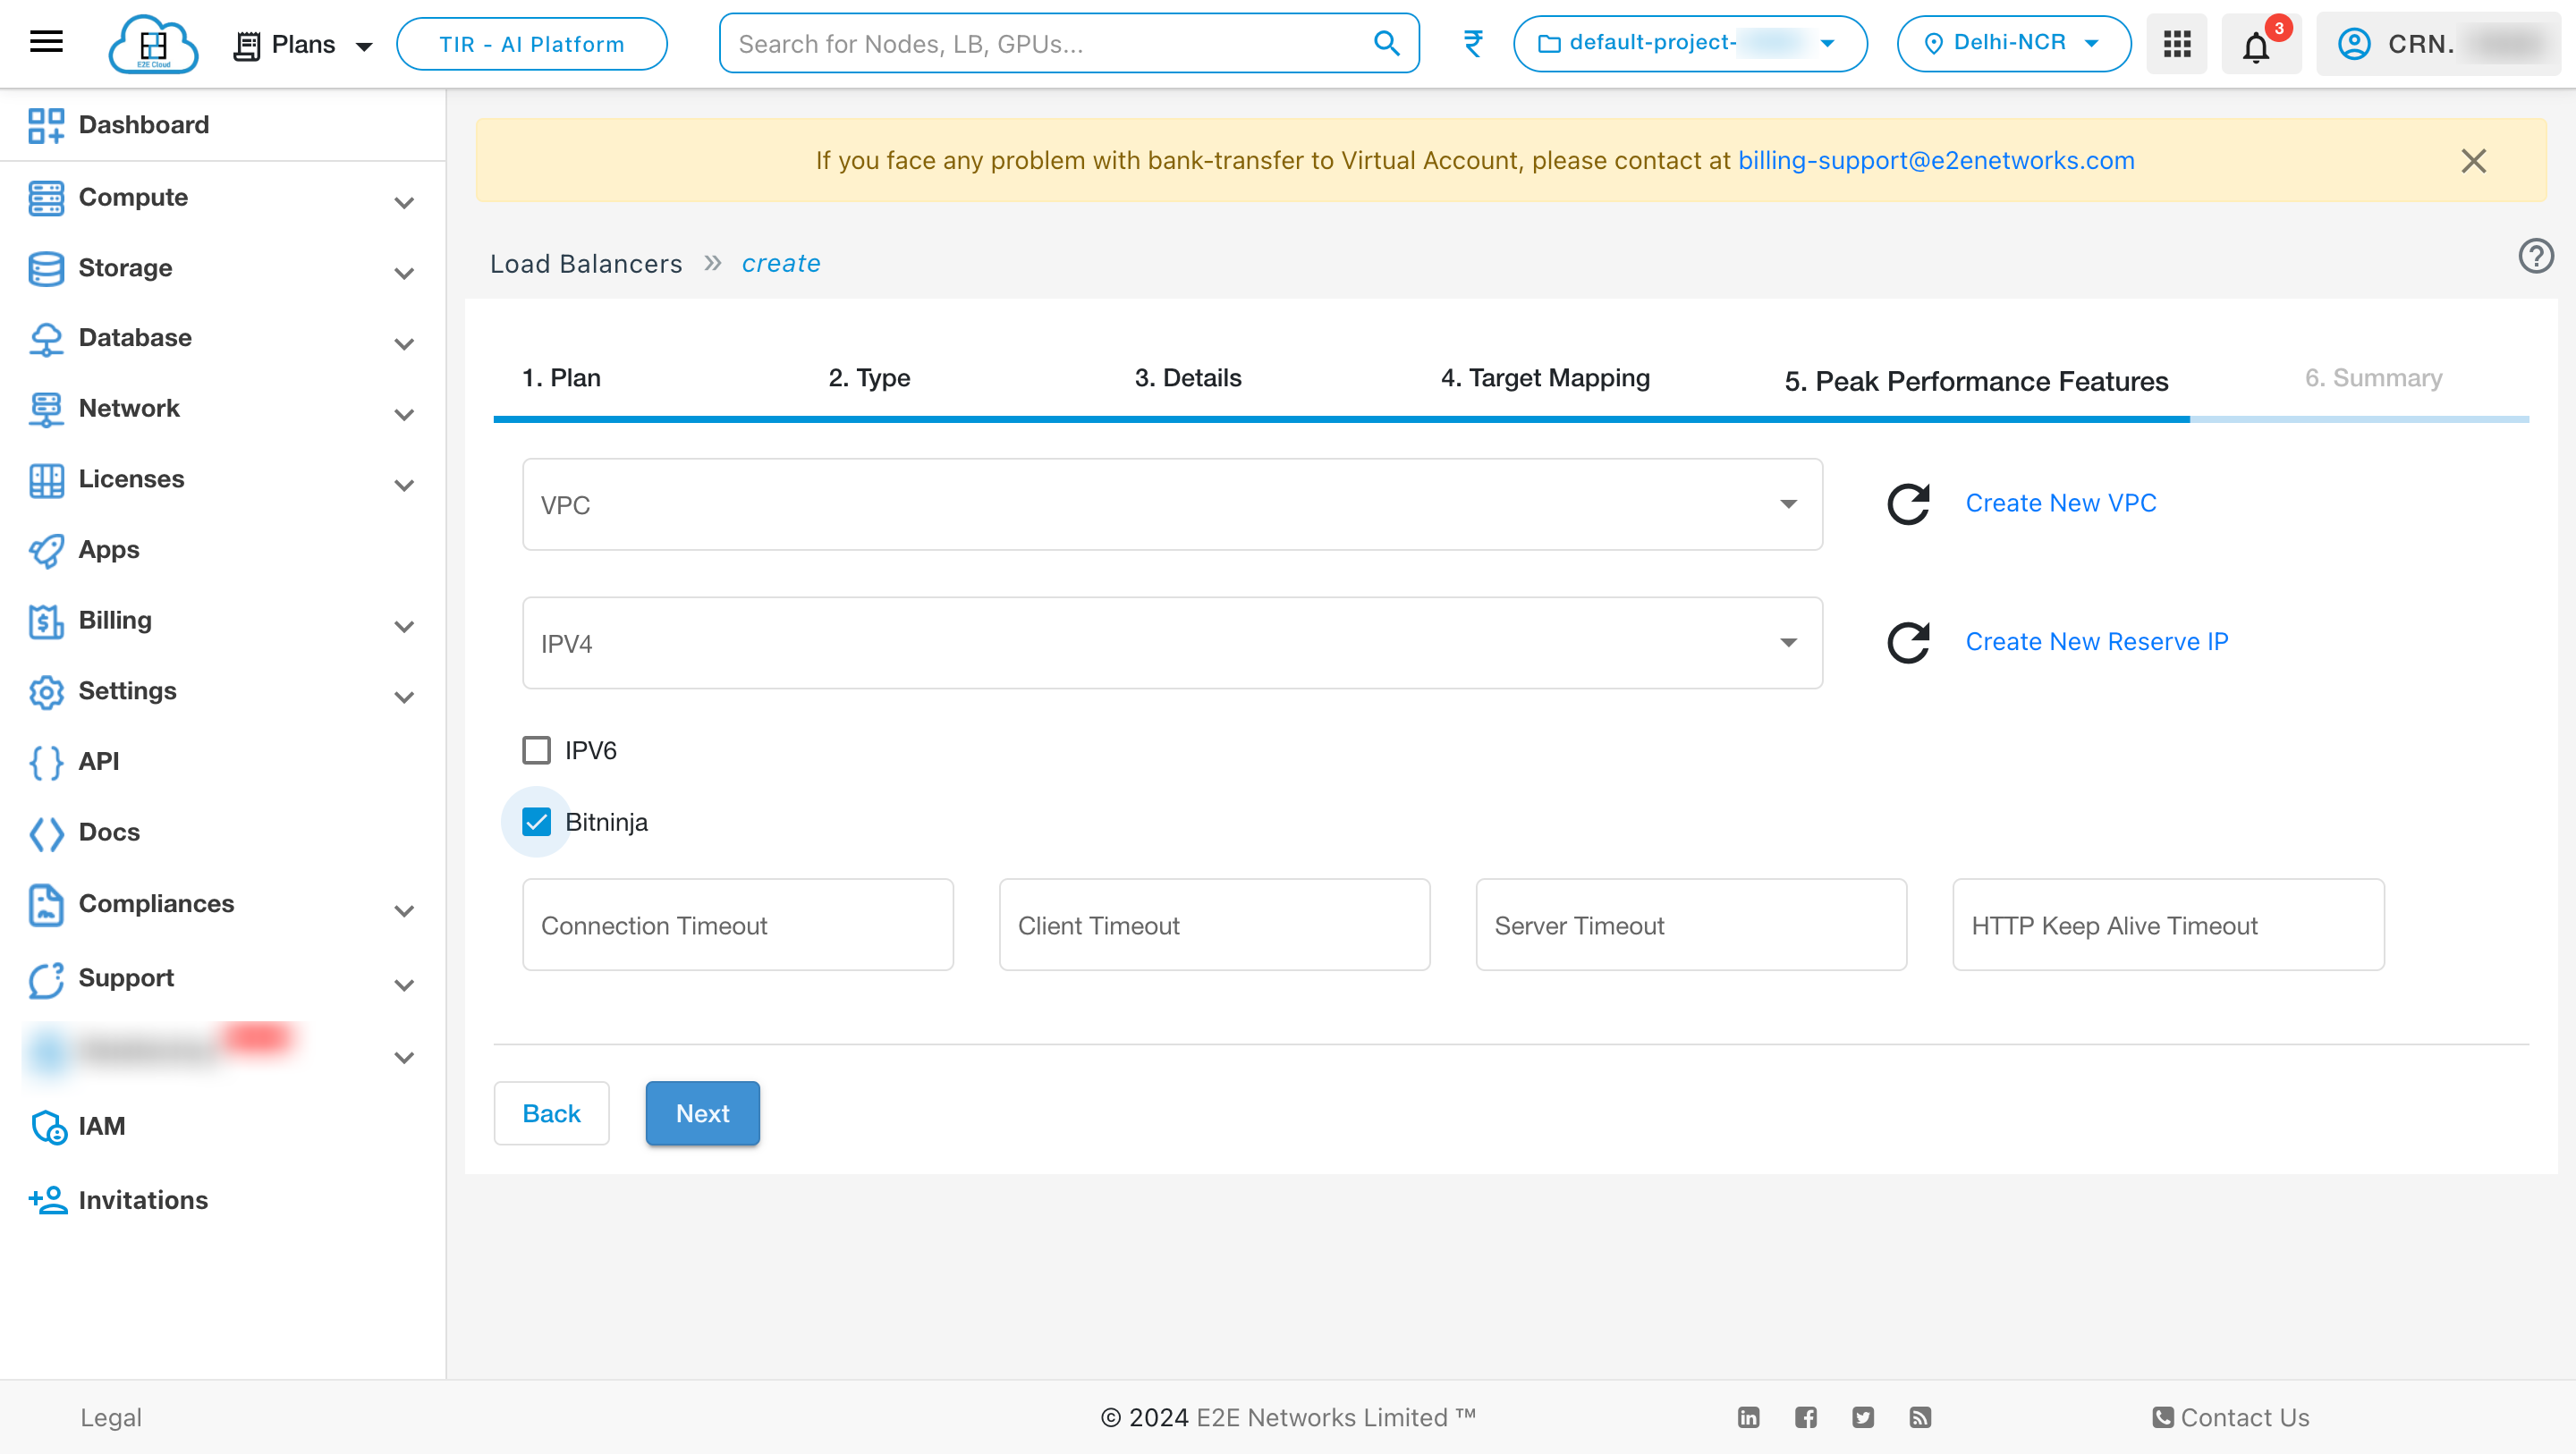
Timeouts
You can also give different timeout values like connection timeout, client timeout, server timeout and HTTP keep alive timeout according to your requirement.
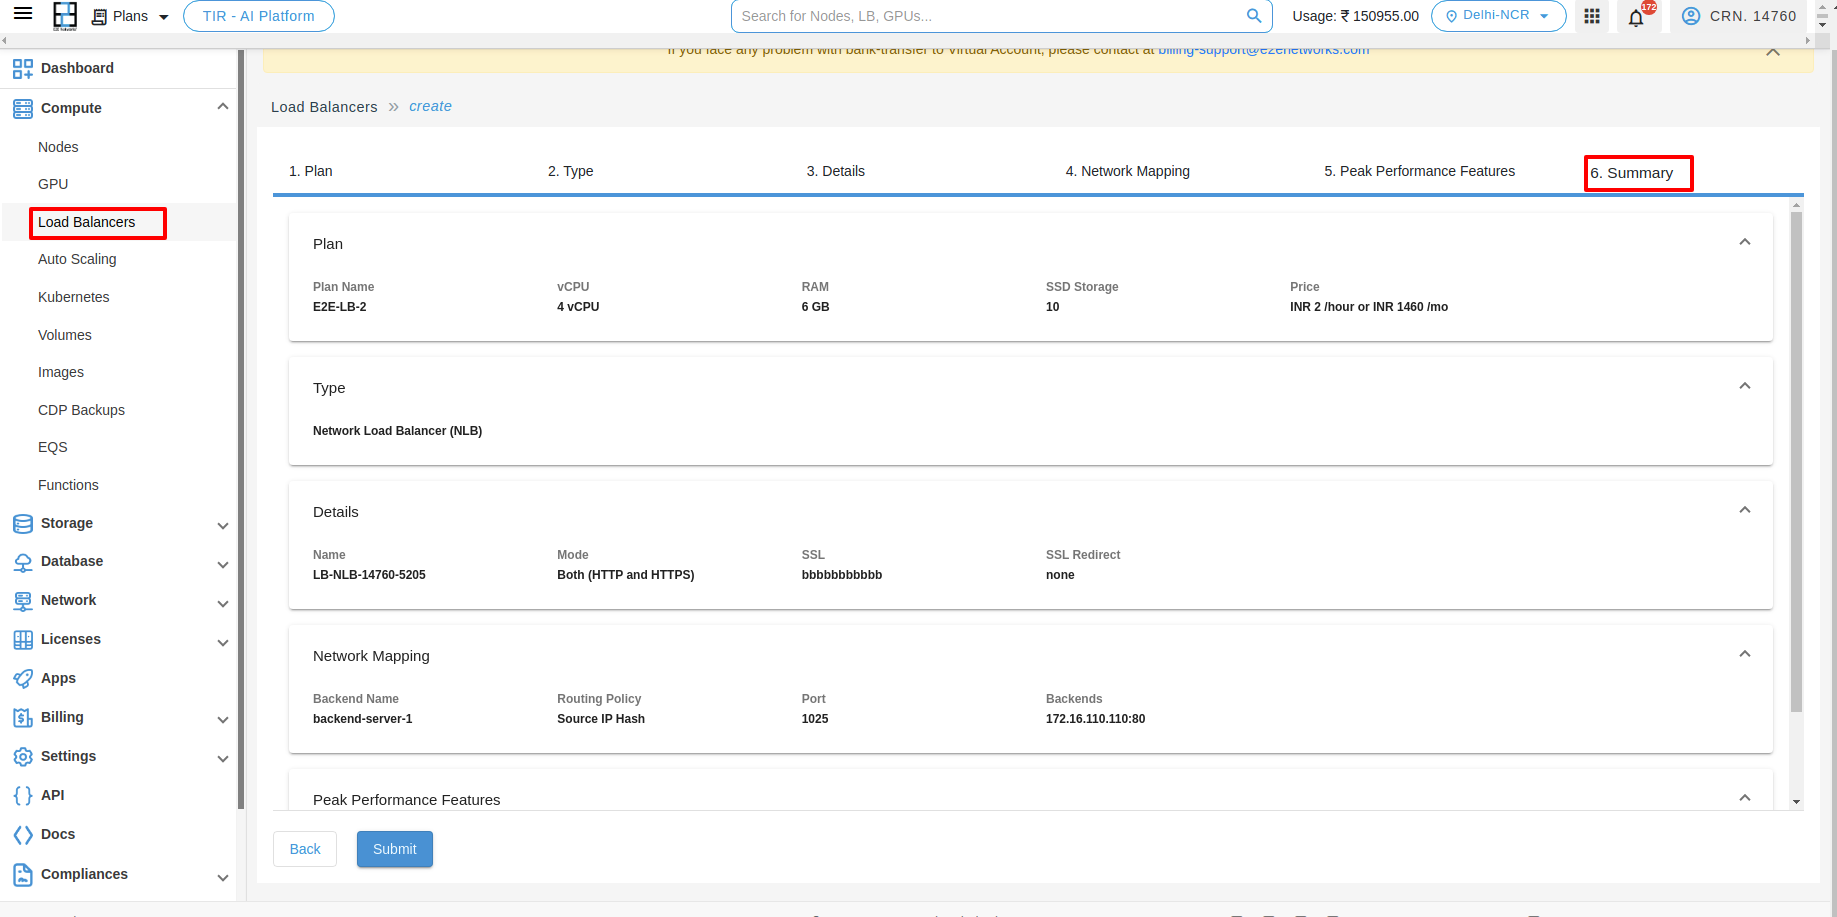
Summary
In that summary section, you can verify your Plan, Type, Details, Network Mapping, Peak Performance Features.
Deploy Load Balancer
After filling all the details successfully, click on the Submit button. It will take a few minutes to set up the scale group and you will take to the ‘Load Balancers’ page.
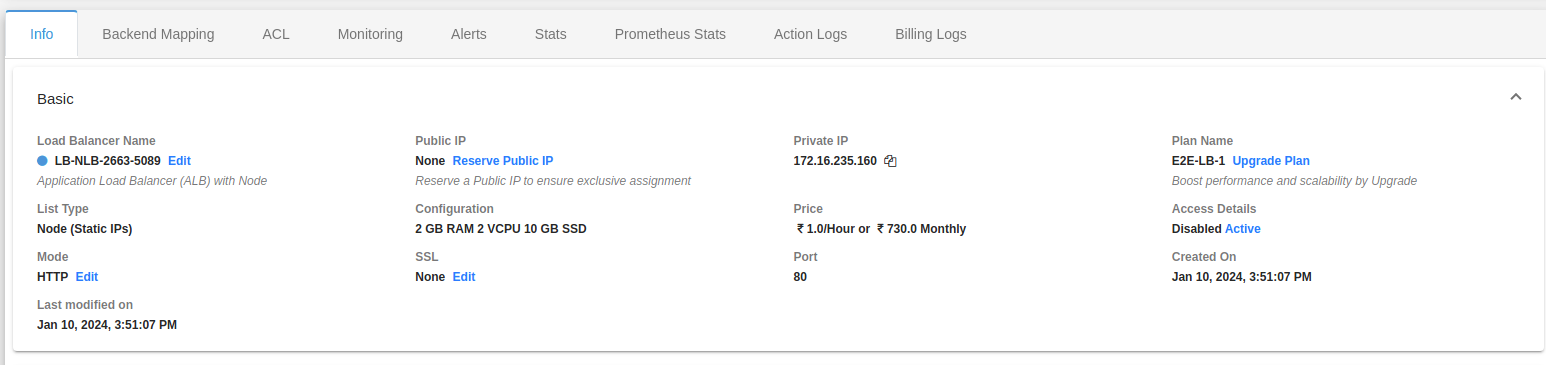
Load Balancer Info
You can check all the basic, security, backend configurations and networks details of your load balancer on the Load balancer info tab.
Backend Mapping
Once you have created your load balancer, you can access and manage load balancer from My Account Portal. Click on installed LoadBlancer instance and below you can see the various options to manage your installed LoadBlancer instance.

To add backend, click on Add Backend button.
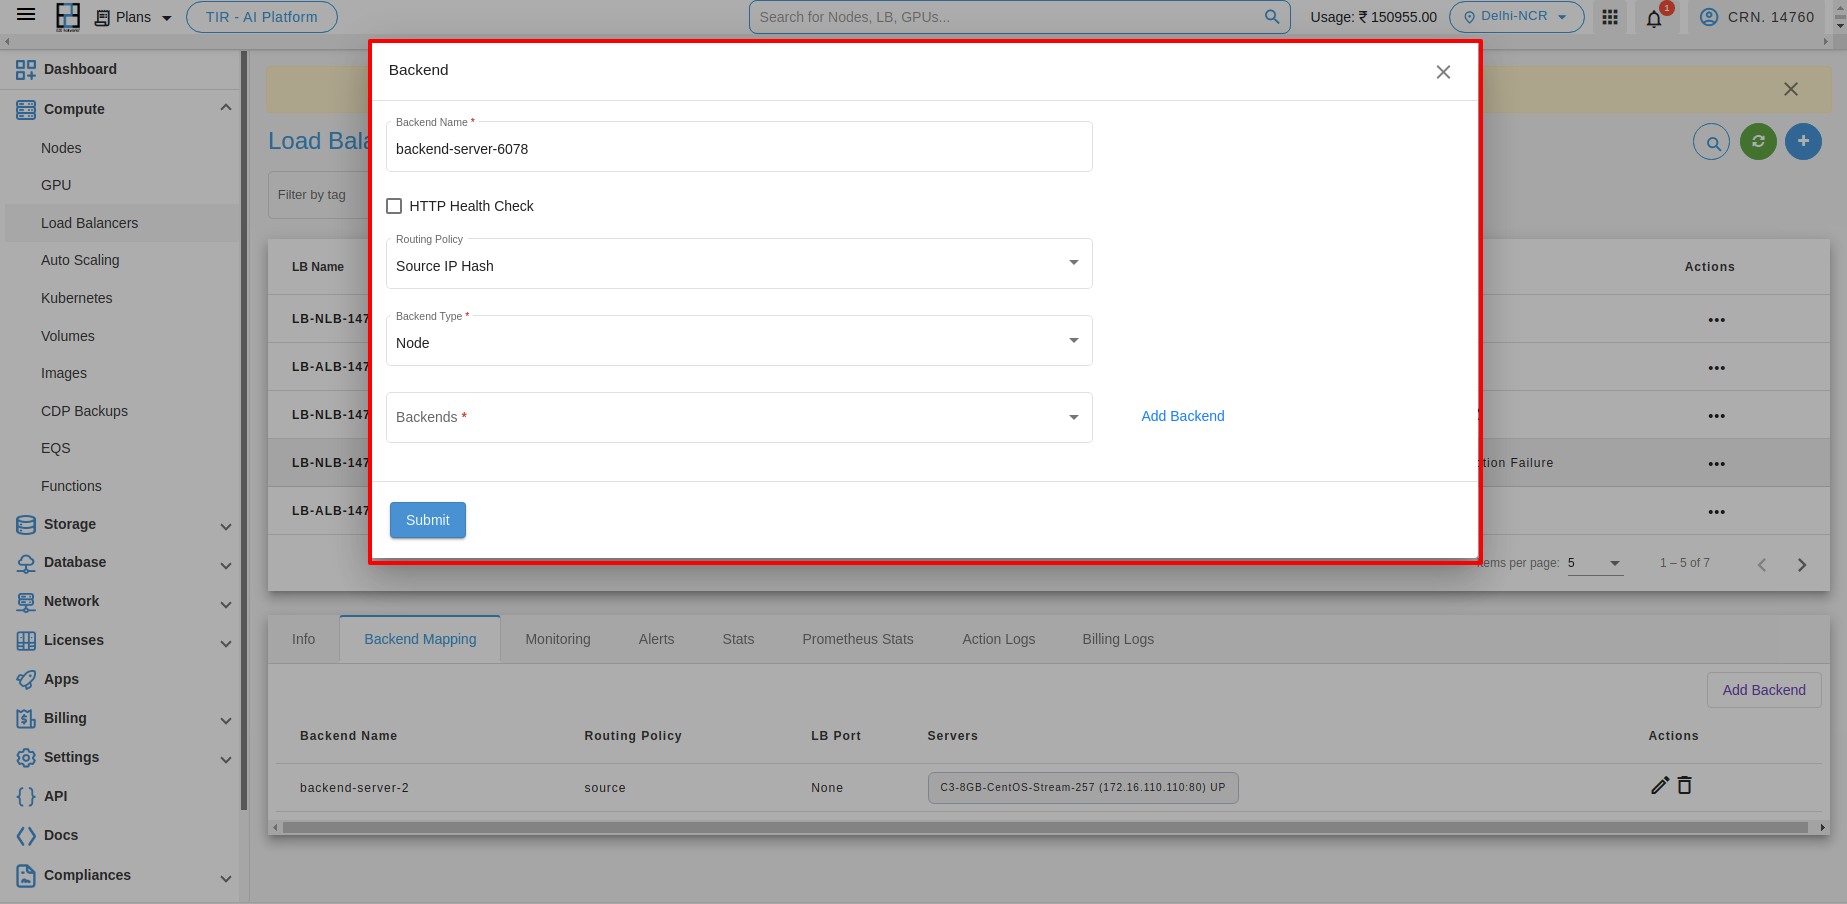
After adding the backend you can see the list below.

You will be redirected to the Edit Load balancer page. You can add/change backend and frontend configuration of your load balancer.

You will be redirected to the Delete Load balancer page. You can delete backend and frontend configuration of your load balancer.

Monitoring
Monitoring is an important part of maintaining the reliability, availability, and performance of your load balancer . You can check the monitoring information for your load balancer on the Monitoring tab. This information is collected from your load balancer and processes raw data into readable graphs. Each graph is based on one of the different metrics. Learn more.

Alerts
Server health alerts are default created for your newly created load balancer using recommended parameters for alert policy. Also, you can set up new alerts by defining trigger parameters as per your use case. The alerting system works by sending automatic response notifications to your defined email list. Learn more
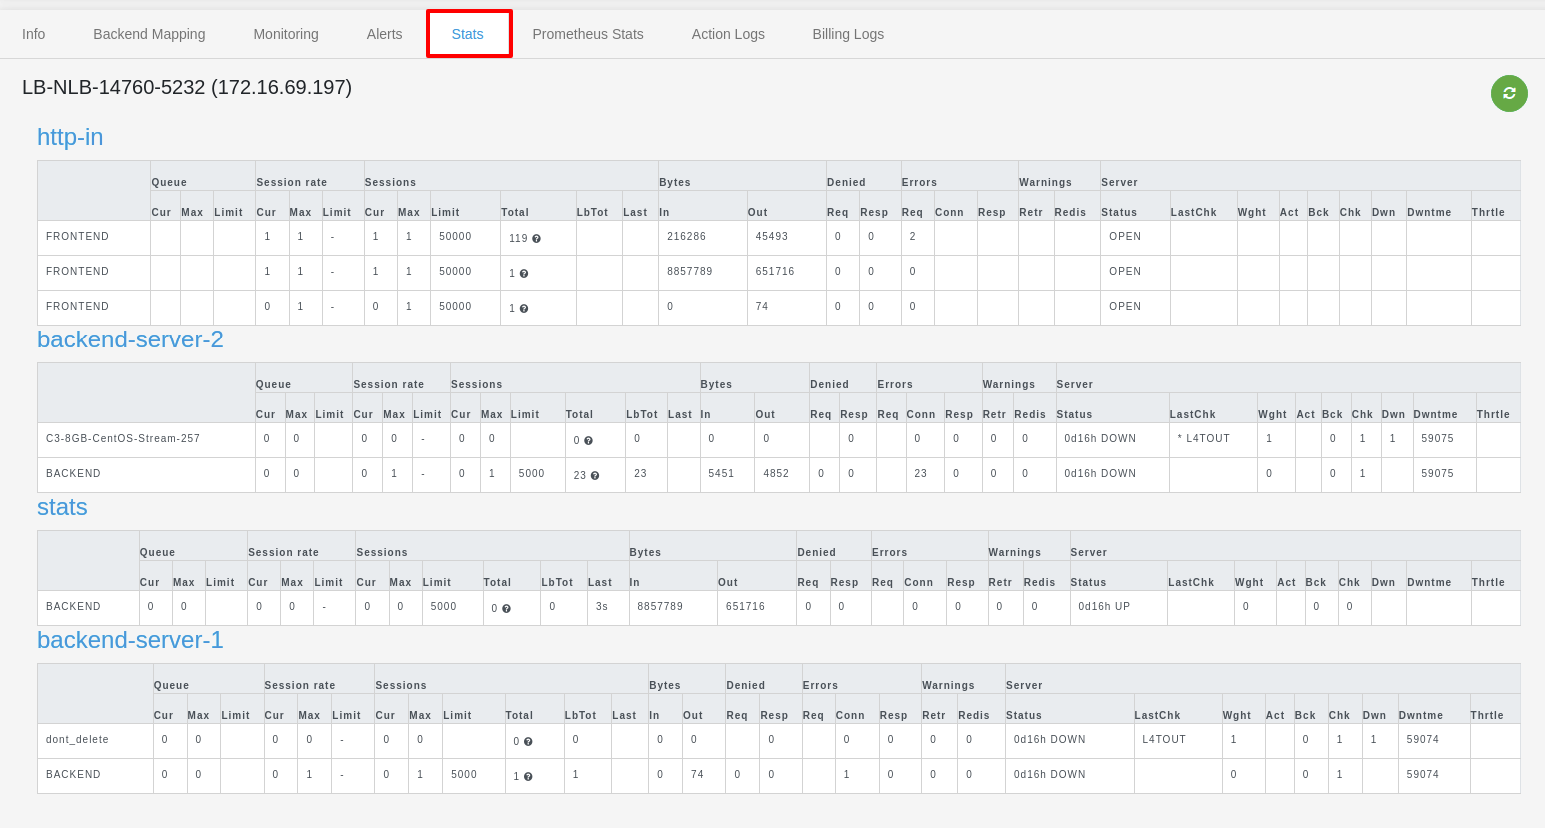
Stats
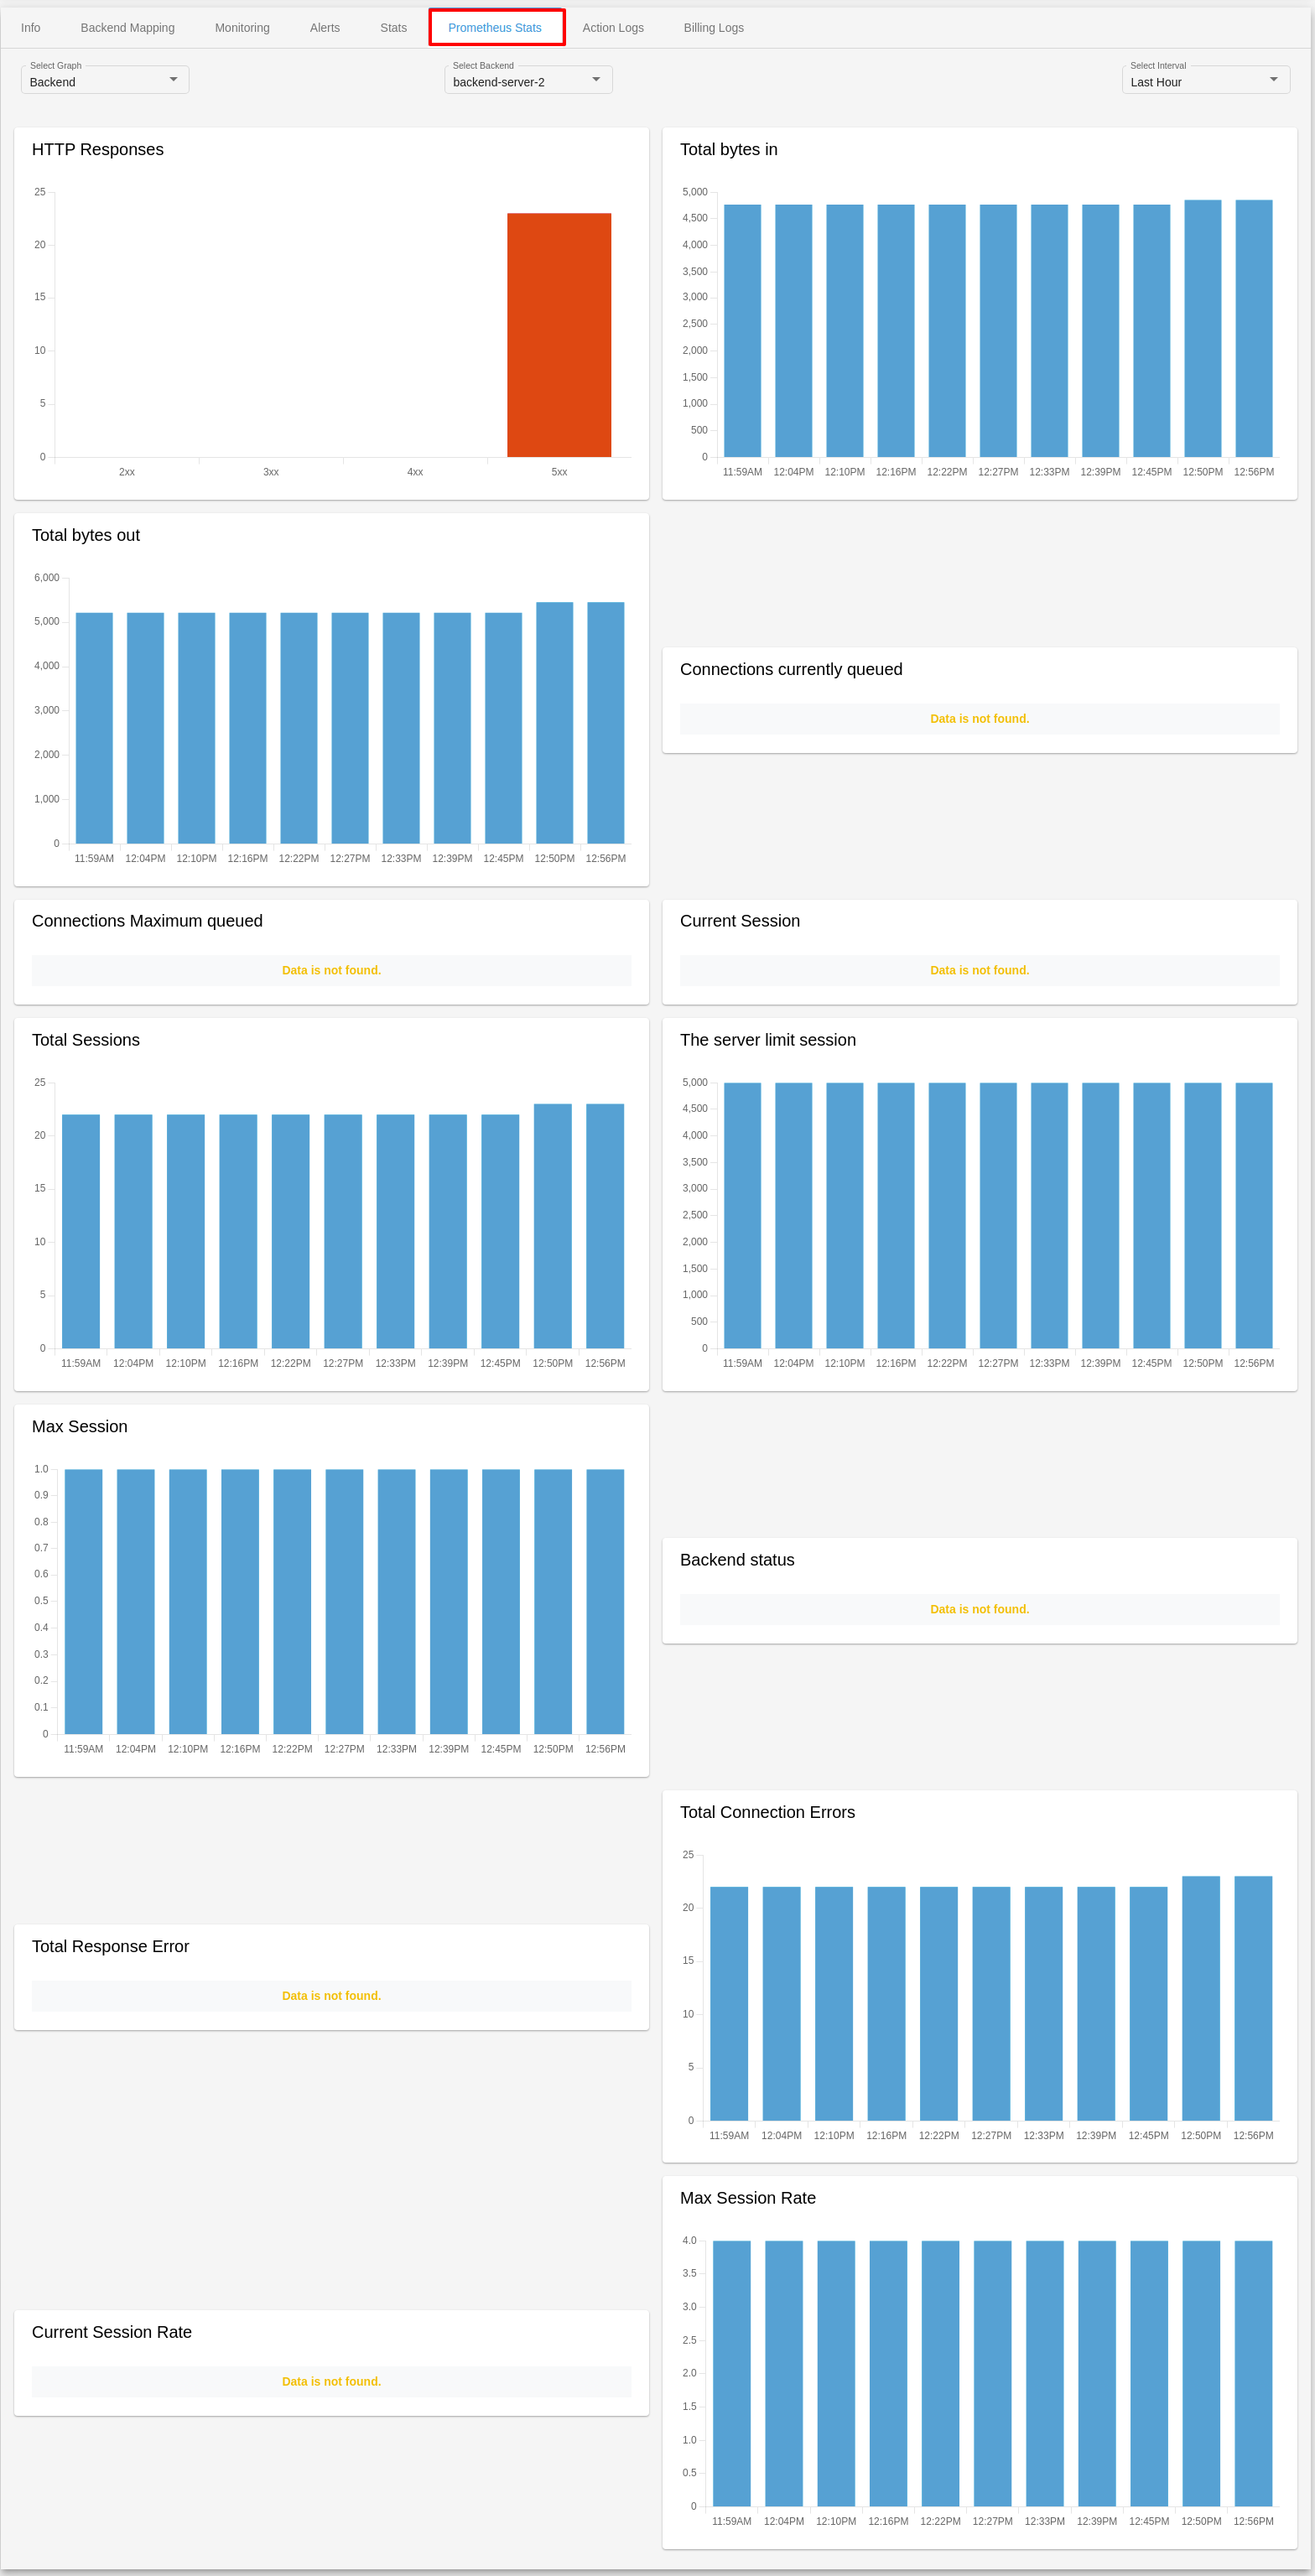
Prometheus Stats
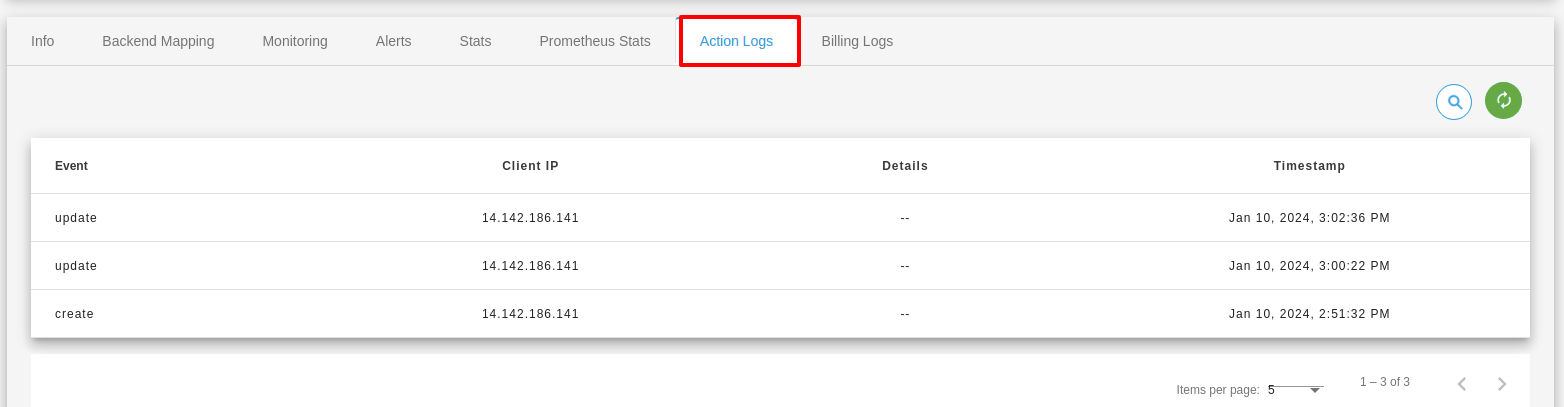
Action Logs
Action logs contain detailed information about requests sent to your load balancer such as the date/time the request was received, client’s IP address, request protocol, request paths, and server responses. These access logs are useful to application incoming network traffic patterns and troubleshoot issues if any arise.
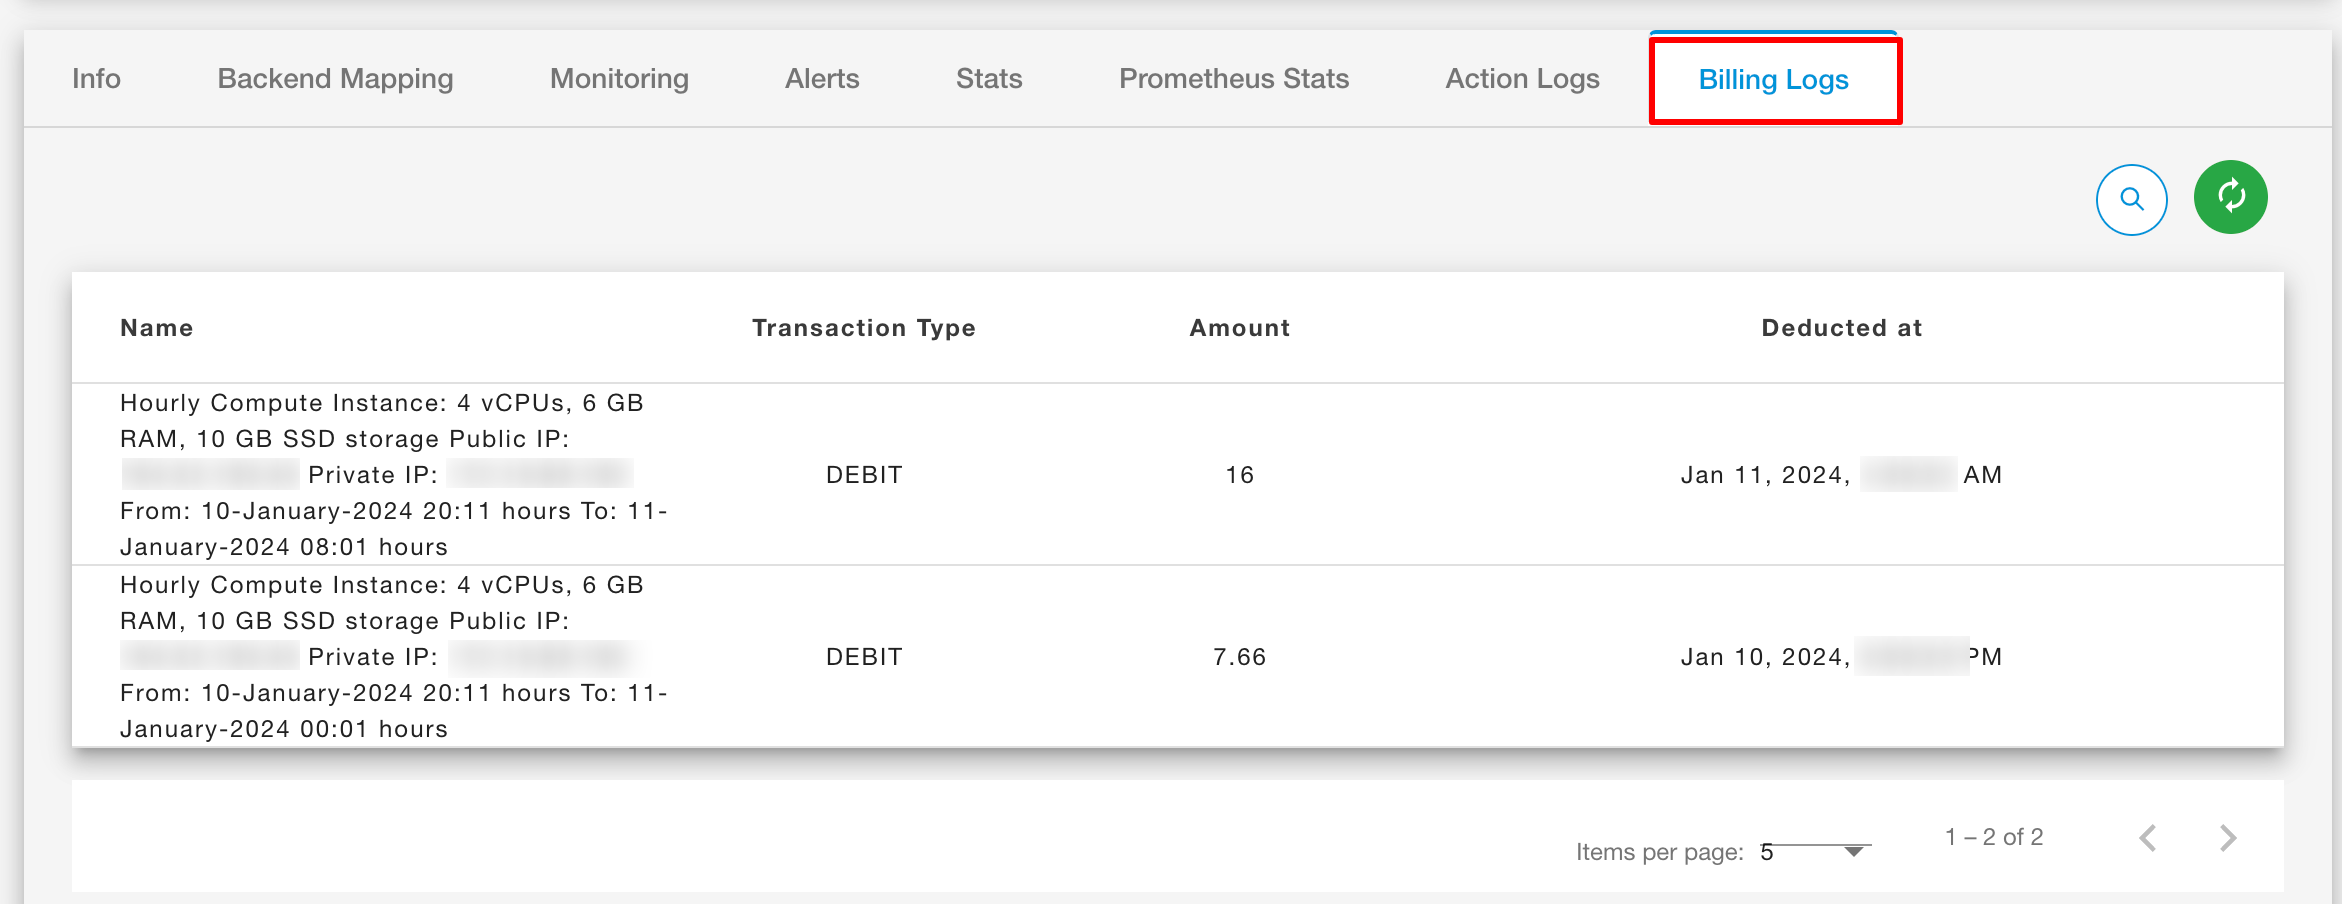
Billing Logs
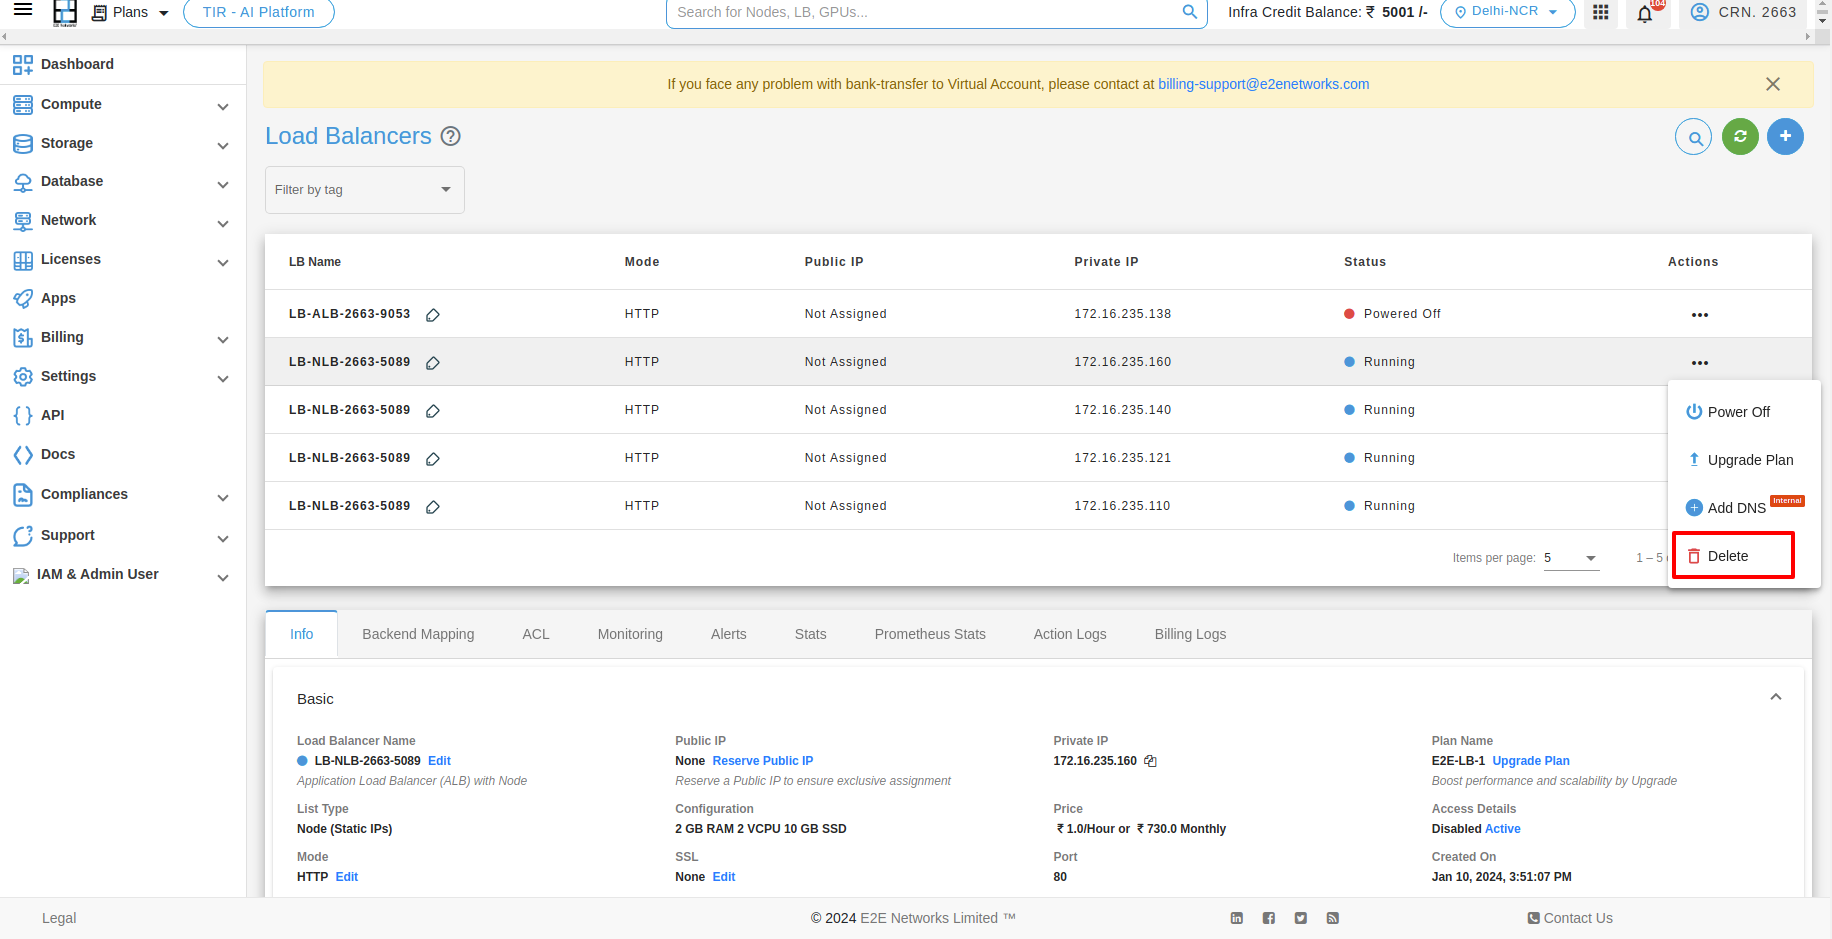
Actions
Types of actions which you can perform with Load Balancer.
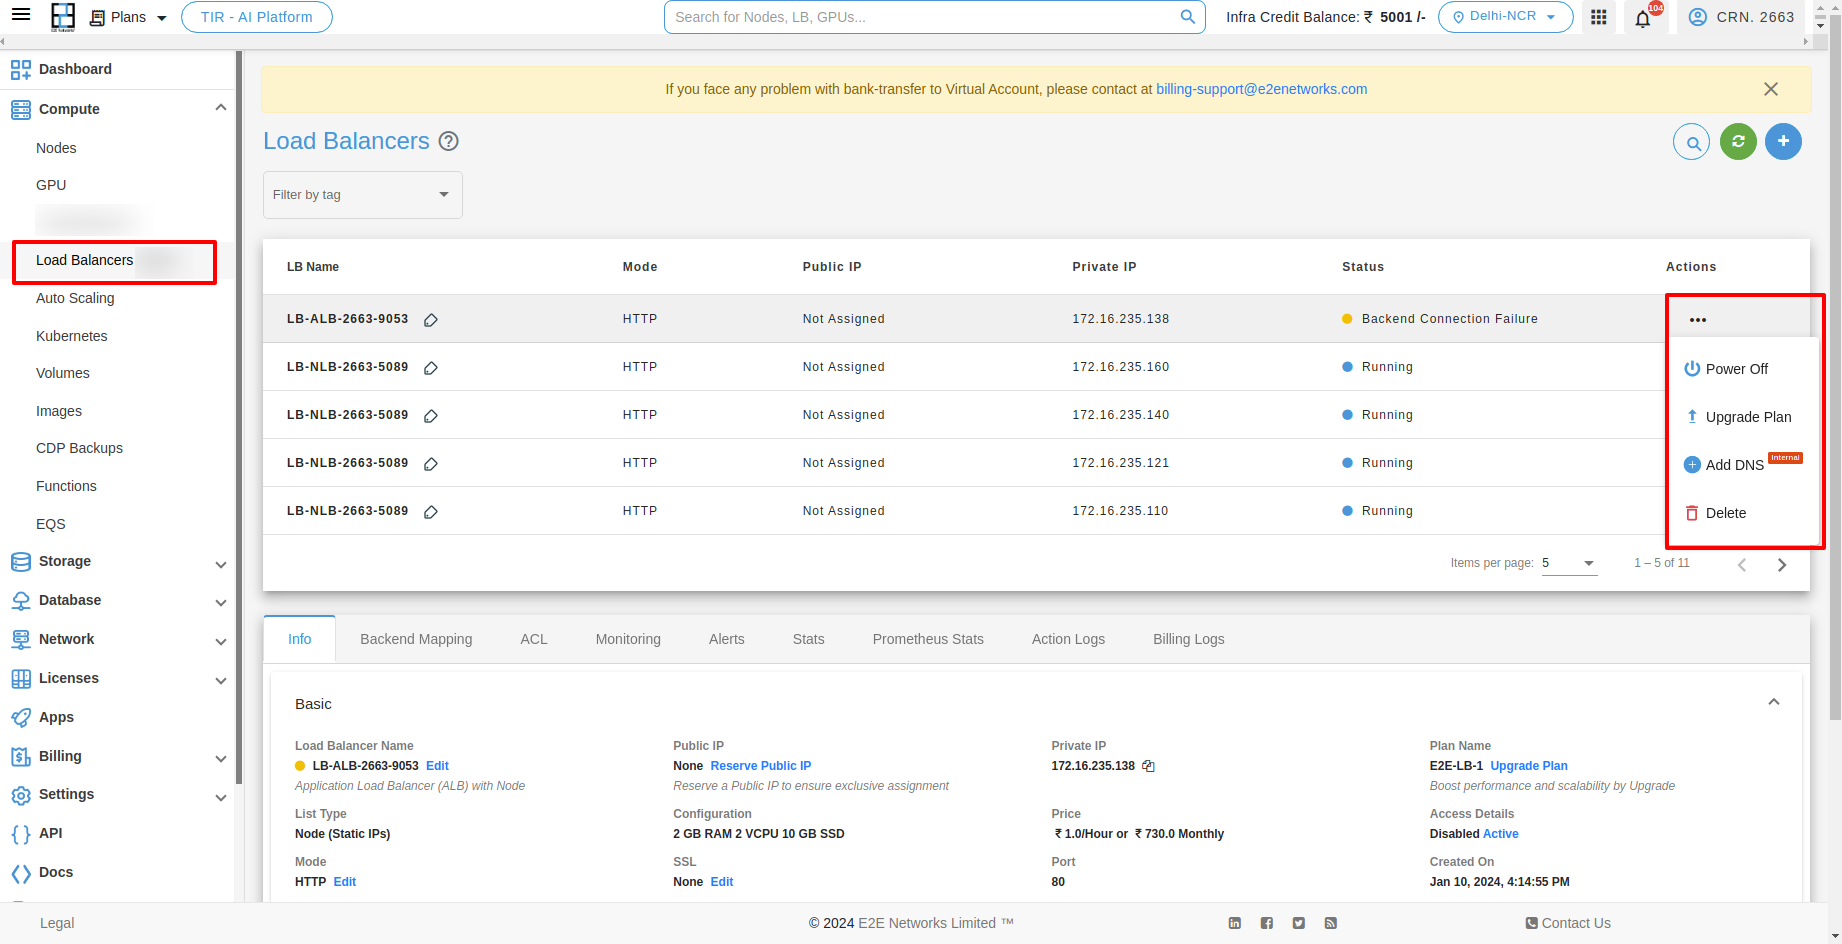
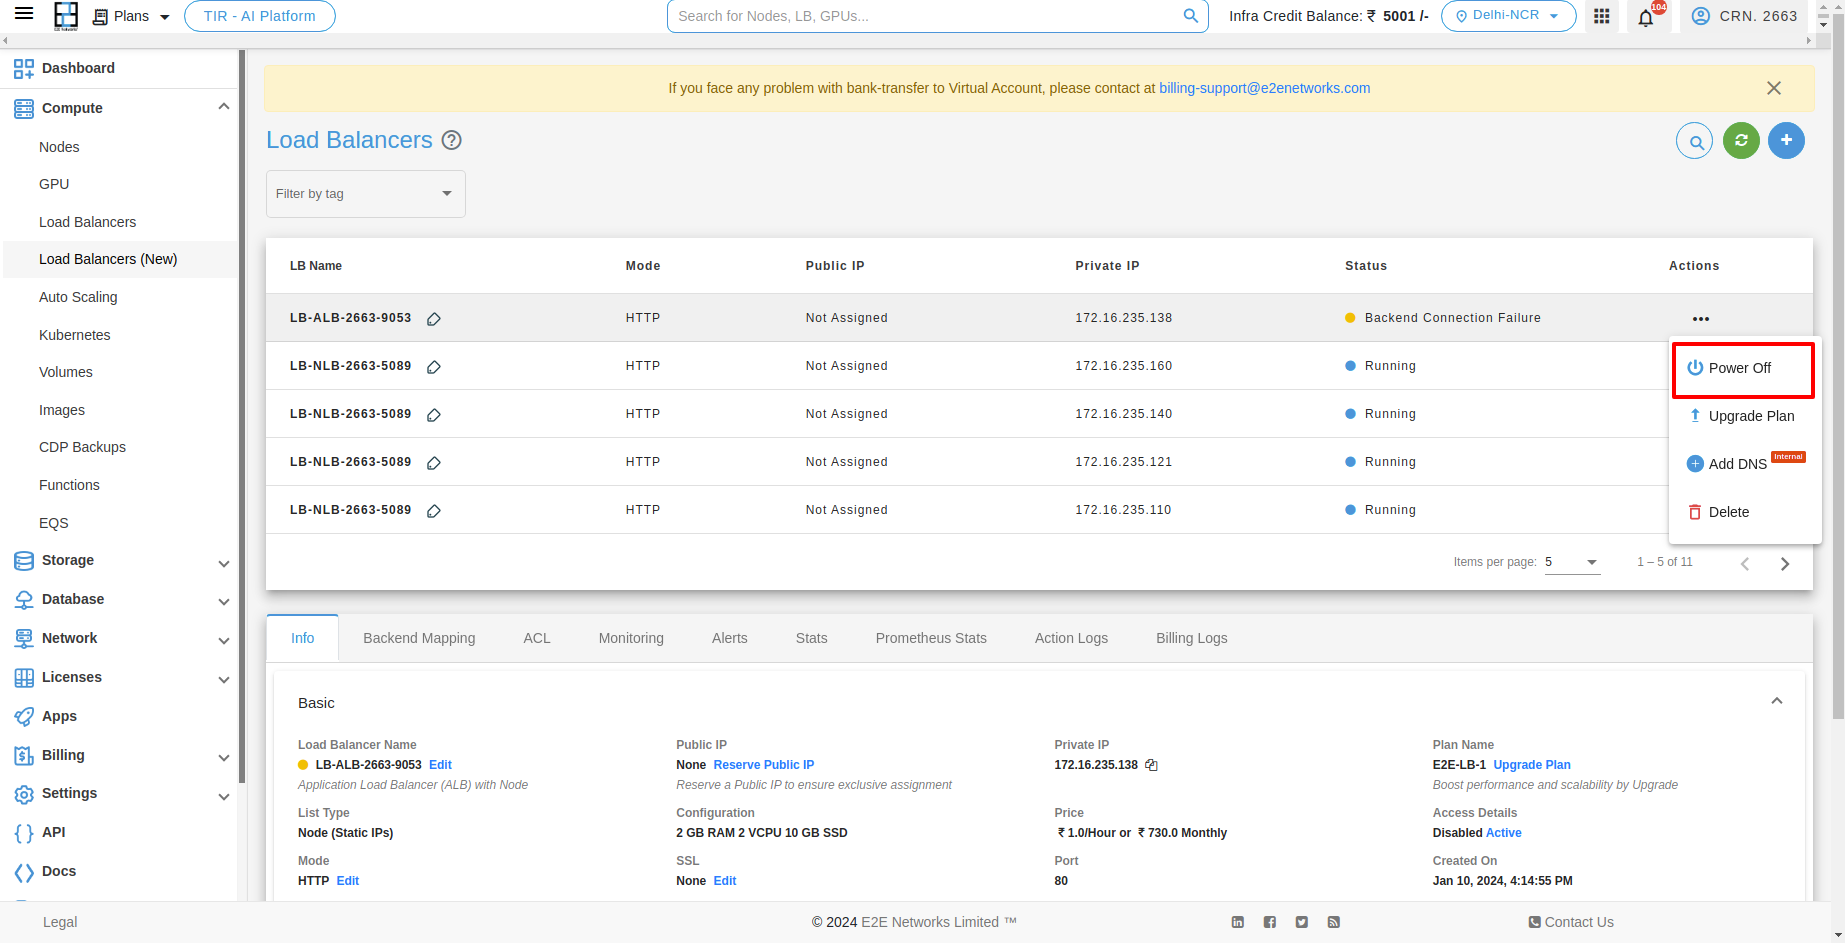
Stopping your Load Balancer
If you want to stop Load Balancer then you have to click on Stop button. And after clicking on that the confirmation popup will be open and you have to click on Power Off button.
Upgrade your Load Balancer
The LB upgrade feature enables customers to easily upgrade their LB plan based on their specific usage requirements. For upgrading your Load Balancer you have to click on Upgrade button under Action button.
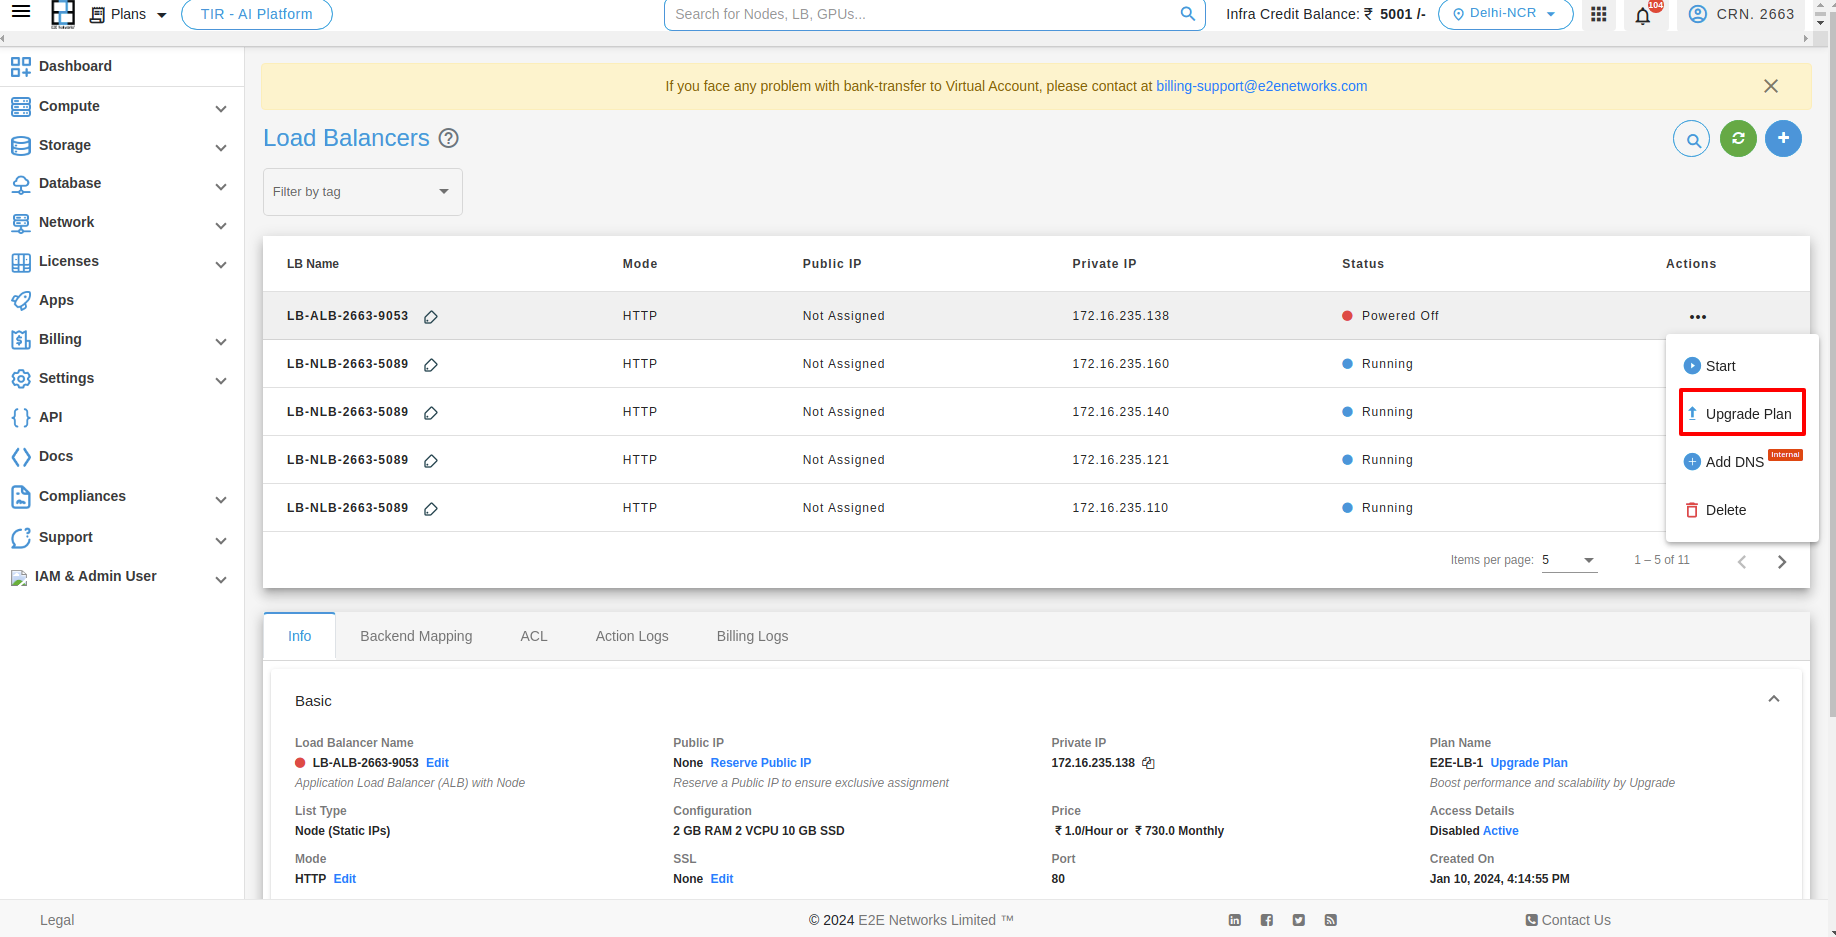
After that you have to click on Apply button with the selected plan. Then the upgrading process will be start.
Note
Please ensure that your load balancer is stopped when performing the upgrade action.

Delete
For Deleting your Load Balancer you have to click on Delete button.